GoldenEye 007 — Nintendo 64 (USA) Complete Campaign Walkthrough
A practical, start-to-finish walkthrough for the original Nintendo 64 (USA) edition of GoldenEye 007 (1997). Covers all 18 main-operation levels in order, then the unlock-dependent bonus missions Aztec Complex and Egyptian Temple, with practical preparation, save and control notes, difficulty-specific objectives, recovery advice, and completion checks.


Find a copy
GoldenEye 007 Nintendo 64
We may earn a commission if you buy through these links, at no extra cost to you. As an Amazon Associate I earn from qualifying purchases.
Opens retailer search results. Check the model, edition, seller, availability and current price before buying.
Before you begin
You are using the original Nintendo 64 (USA) edition of GoldenEye 007 (1997).
This walkthrough covers the 18 main-operation levels from Dam through Antenna Cradle, followed by the unlock-dependent bonus missions Aztec Complex and Egyptian Temple.
Follow chapter order: the mission sequence reaches Jungle after Train, then Control, Caverns, Antenna Cradle, Aztec Complex and Egyptian Temple.
Mission objectives vary by difficulty, and the pause-screen objective list is the authority for the active attempt.
Aztec Complex unlocks after the main levels are completed on Secret Agent or higher. Egyptian Temple unlocks only after the main levels and Aztec Complex are completed on 00 Agent.
The guide focuses on reliable routes, objective order, hazards, recovery from failure and concrete completion checks rather than speedrunning.
For the stated full-completion goal, complete the required preceding levels and Aztec Complex on 00 Agent before attempting Egyptian Temple.
Set yourself up for the run
Platform and edition: Use the original Nintendo 64 cartridge (USA) or a verified dump of that release.
This guide assumes the N64 control layout and the game's original cartridge save behaviour.
Refer to the cartridge/manual if you are using a modern re-release; controls or button mappings may differ.
(See sources.)
Save system: The game saves on the cartridge (on-cartridge EEPROM/flash), so a Controller Pak is not required for mission progress or unlocked cheats.
Back up saves if you use flashcarts or modern hardware where saves can be overwritten.
Do not remove the cartridge while saving/loading.
(See sources.)
Controller and control style: GoldenEye supports multiple control configurations.
Set your preferred Control Style in Options before starting; practise aiming and aiming-mode toggles (aim vs movement) in the first level to get comfortable with the analog stick and C-buttons.
If using an original N64 controller, ensure your C-buttons and Z trigger are responsive.
The manual documents the mappings — review it.
(See sources.)
Rumble Pak and accessories: The N64 Rumble Pak is supported but not required.
Rumble can mask subtle audio cues; if you rely heavily on sound for enemy detection, confirm it helps you rather than distracts.
No Expansion Pak is required for the original game.
Difficulty choice and objectives: Early mission completion on easier difficulties unlocks higher-difficulty variants and cheats.
To advance through the campaign you only need to complete the mission’s primary objectives on any difficulty; optional higher-difficulty objectives grant medals/cheats and are covered in the optional completion chapter.
Save points and failure recovery: The game uses on-cart saves for mission progress, medal records, and cheats.
If you die in-mission, you will restart at the mission start (or checkpoint where provided).
If you fail an objective, re-evaluate the objective list in the pause/options screen and follow the mission chapter route suggested below.
Prepare basic loadouts: While weapon availability changes per mission, learn to prioritise a silenced sidearm (for stealth sections where available), a mid-range automatic for general encounters, and occasional heavy weapons for specific objective tasks.
Use armour pickups only when necessary; there are no health-restoring items — armour provides a secondary buffer.
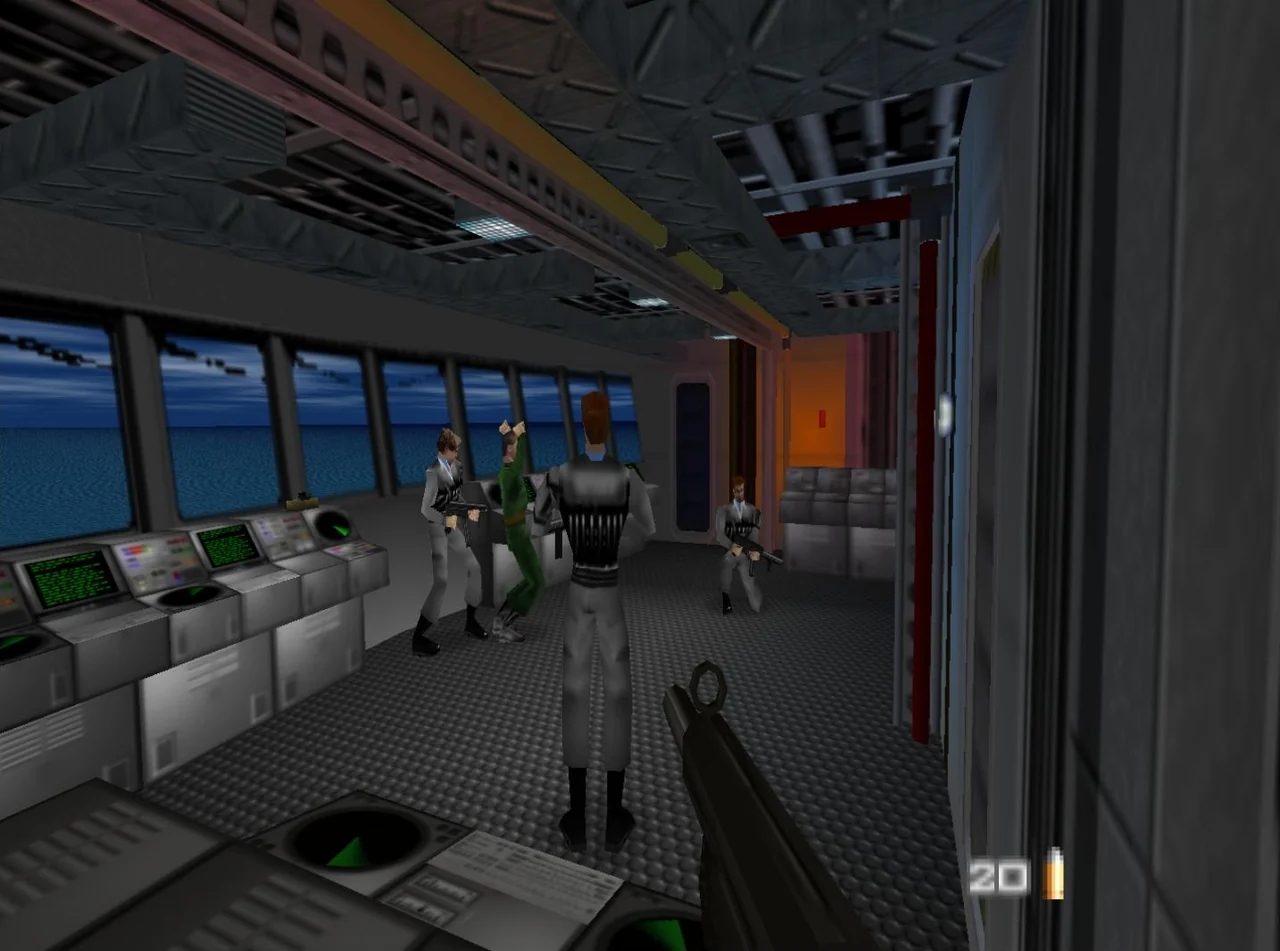
Preparation: Hardware, Controls and Save Hygiene
Prepare the original North American Nintendo 64 release before beginning the campaign. Confirm the edition, create a game file, choose a control style, test aiming and crouching, adjust the Q Watch options, and understand how GoldenEye 007 stores progress on the Game Pak.
Confirm the original edition and create a game file
Use the original Nintendo 64 GoldenEye 007 cartridge or a verified release that reproduces the North American N64 version. Do not apply instructions from the Xbox, Nintendo Switch, Wii, DS, or 2010 versions: those editions use different hardware, menus, button mappings, and in some cases different gameplay.
Insert the Game Pak with the Nintendo 64 powered off. At the title screen, press Start, A, or Z to reach the main menu. Select an empty game-file slot and create your campaign file. The original game provides four game-file slots. Use Copy from the main menu if you want a duplicate before experimenting with difficulty or settings, and use Erase only after confirming that the selected slot is expendable.
The cartridge contains the save memory used by GoldenEye 007. Its EEPROM stores campaign progress, settings, and unlocked content, so a Controller Pak is not required for the single-player save. Leave the cartridge installed while the console is powered on, and do not switch off or remove the Game Pak during a save-related operation or immediately after changing important data.
- The title screen identifies the game as the Nintendo 64 version.
- A game file has been created in one of the four available slots.
- You know which slot contains your active campaign.
- A Controller Pak is not being used as a substitute for the Game Pak save.
Choose a control style from the Q Watch
Start any mission, press Start to open the Q Watch, and move to the Controller Configuration screen. Highlight Control Style and press A to cycle through the four available configurations. The Controller option lets you move the N64 controller and test the currently selected arrangement without firing in a live encounter.
Control Style 1.1, commonly called Honey, is a practical starting point for the original controller. The Control Stick handles walking and turning, the C buttons handle looking and strafing, L or R handles aiming, Z fires, A selects weapons, and B performs the action or reload function. Control Style 1.2 instead uses the Control Stick for looking and the C buttons for forward, backward, and strafing movement. Choose one scheme and use it for several missions before changing it.
Do not assume that a modern shooter layout will feel natural on the N64 pad. Before leaving the configuration screen, test forward and backward movement, turning, strafing, firing, weapon selection, reloading, opening a door, and looking up and down. If a button does not behave as expected, return to the Q Watch rather than learning the wrong command during a difficult objective.
- Control Style has been selected deliberately rather than left untested.
- You can identify the movement, look, fire, action, weapon, and aim inputs for that style.
- You have tested the controller in the Q Watch before attempting a serious mission.
Set aiming, crouching, and view options
Open the General Options screen in the Q Watch. The original game provides settings for Auto-Aim, Aim Control, Look Up/Down, Sight, Look Ahead, and on-screen ammunition. Use Hold or Toggle for Aim Control according to which lets you maintain a stable reticle. If looking vertically feels reversed, change Look Up/Down before starting the campaign rather than compensating inconsistently in combat.
With Control Style 1.1, hold L or R to aim and press C-Down while still aiming to crouch. Hold L or R and press C-Up to stand again. Crouching is useful for lowering Bond's profile, moving carefully, and firing from a low position, but it is not a substitute for cover and does not prevent damage. In Control Styles where Z is the aim input, use that style's aim button with C-Down and C-Up instead.
Test the reticle on a nearby wall or harmless object, then practice entering and leaving aim mode while moving. Auto-Aim can help center shots on an enemy in front of Bond, while manual aiming is more dependable for distant guards, cameras, alarm panels, and specific target locations.
- Aim Control is set to Hold or Toggle intentionally.
- With Control Style 1.1, L or R plus C-Down crouches and L or R plus C-Up stands.
- Look Up/Down is comfortable and the reticle appears when aiming.
- You can switch between normal movement and precise aim without losing orientation.
Use weapons and armor with a mission-first routine
Keep a silenced PP7 or another suppressed weapon ready when the mission rewards quiet eliminations. Use it for isolated guards, cameras, and alarm-related targets when a single controlled shot will avoid unnecessary attention. When several enemies are already alert or occupy a close room, switch to an automatic weapon and fight from a doorway, corner, or other solid cover.
Reserve grenades, mines, rockets, grenade launchers, and other heavy weapons for vehicles, armored targets, groups, or objectives that require them. Do not clear every room automatically. GoldenEye 007 often requires Bond to protect a person, preserve a computer, or interact with a device, and destroying the wrong target can fail the mission.
Armor is a separate protective buffer. Pick it up when it is safe, but do not treat it as invulnerability or as permission to stand in the open. Use armor to survive a necessary crossing or a mistake, then retreat to cover and continue methodically. The Mission Status screen shows Bond's current life, armor, ammunition, and item.
- A quiet weapon is available when stealth is useful.
- An automatic weapon is available for alerted groups and close combat.
- Heavy ammunition is being saved for objectives and dangerous encounters.
- Armor is used to reduce risk, not to justify prolonged exposure.
Recover from failure and protect the save
If a mission becomes unwinnable, press Start and choose Abort Mission rather than continuing to waste lives or ammunition. The game returns you to the mission background screen, where you can review the briefing, Q Branch information, objectives, and equipment before trying a different route. A failed mission also returns you to this retry flow.
At the start of each attempt, read the objective list. The manual specifically warns that GoldenEye 007 is not about destroying every person or object encountered. Identify required targets first, then decide which guards and cameras must be removed for a safe route.
For flash cartridges, cartridge adapters, or emulation, use the device's own documented EEPROM save and backup procedure. Make a backup before changing firmware or hardware, keep the original save untouched, and verify that restoration works with the same device. Do not assume a Controller Pak backup method applies to GoldenEye 007's Game Pak save.
- You know how to abort and retry a mission from the Q Watch.
- You read the mission objectives before committing to combat.
- Your flash hardware or preservation setup has a tested save-backup method.
- You power down only after finishing the current in-game operation.
Before you move on
- The correct original N64 USA edition is confirmed.
- A campaign game file exists and its slot is known.
- A control style has been selected and tested for movement, turning, looking, aiming, firing, weapon selection, actions, reloading, and crouching.
- The player can crouch and stand reliably using the selected style.
- Aim Control, Auto-Aim, Look Up/Down, Sight, and Look Ahead have been reviewed in General Options.
- The player understands that progress and unlocked content use the Game Pak's EEPROM rather than a Controller Pak.
- The player can read objectives, abort a failed mission, and retry from the mission background screen.
- Any flash-hardware save has a verified backup procedure before the campaign begins.
Mission 1 — Dam
The Dam mission takes place at the Byelomorye Dam in Arkhangelsk. Its required objectives depend on difficulty: Agent requires only the bungee jump; Secret Agent also requires neutralizing all alarms; 00 Agent adds installing the covert modem and intercepting the data backup. The level is easiest when you use the starting tunnel and buildings as cover, collect the sniper rifle from the first guard tower, and delay the final jump until every required objective is complete.
1. Leave the tunnel and secure the first guard tower
Start with the silenced PP7 and move out of the tunnel carefully. Keep to cover provided by the road edges, fences and buildings instead of crossing the open approach in a straight line. Guards are positioned around the approach and on elevated structures, so scan the walkways before exposing yourself.
The first guard tower contains a sniper rifle. Clear the nearby soldiers, enter the tower and collect it. The rifle is useful for distant guards and alarm sentries, while the PP7 remains preferable for isolated targets when you are trying to avoid unnecessary attention. On Agent, you can proceed directly toward the bungee platform, but learning the route now makes the higher difficulties much easier.
- Confirm the active objectives on the pause screen.
- Collect the sniper rifle if you want a safer long-range approach.
- Do not rush into the open road while enemies still have clear sightlines.
2. Install the covert modem on 00 Agent
This step is required on 00 Agent, not on Agent or Secret Agent. Continue through the tunnel and courtyard toward the gate area. Open the gates with their nearby controls, then enter the building beside the satellite dish. Before the locked gate, look for the small computer screen mounted on the wall below the dish.
Open the watch inventory, select the covert modem and use it while standing close to that screen. The correct target is the computer below the satellite dish, not the dish itself. The objective message confirms the installation. Clear the guards around the building first if possible, because enemies can interrupt the approach and force you into the open.
- On 00 Agent, the covert modem objective is marked complete.
- Do not destroy the computer or satellite equipment before installing the modem.
- The next gate is opened by shooting its padlock after the modem step.
3. Neutralize every alarm on Secret Agent and 00 Agent
Higher difficulties require all alarms to be destroyed. One is near the modem building and the others are inside the guard towers along the top of the dam. Alarm panels are wall-mounted white units with a red circular face. Shoot each panel until it is destroyed, then verify the objective status before moving onward.
Use the sniper rifle or controlled PP7 shots against guards around the towers. If a guard reaches an alarm, reinforcements can enter the area, so deal with the sentry near each panel before firing at the equipment. Continue checking the pause screen: the alarm objective is not complete until every required panel has been destroyed.
- Every alarm panel required by the objective list is destroyed.
- The alarm objective is marked complete before you leave the dam-top route.
- Keep ammunition for the underground server room on 00 Agent.
4. Intercept the data backup on 00 Agent
On 00 Agent, enter one of the towers on top of the dam and descend the stairs to the underground tunnel. Follow the tunnel toward the server room, using the corridor and doorways to draw soldiers away from the computer equipment. Automatic weapons such as the KF7 are safer than the PP7 when several guards attack at once.
In the server room, clear the soldiers without shooting the computer hardware. Go to the two large mainframes at the back and activate them. A short countdown begins; remain nearby until the data-backup objective completes. If the objective does not register, you likely used the wrong equipment or damaged the servers. Agent and Secret Agent do not require this step.
- On 00 Agent, the data-backup objective displays as complete.
- The mainframes remain intact until the objective registers.
- You have enough health and ammunition to return to the dam-top route.
5. Take the bungee jump and finish the mission
The bungee platform is across the dam near the second tower, reached by following the dam-top walkway. Return through the route you used earlier and use the towers, fences and buildings as cover rather than stopping to fight every distant guard. On Agent, this is the only required objective; on Secret Agent and 00 Agent, do not approach the platform until the alarm and any other listed objectives are complete.
At the platform, walk off the edge onto the jump point. No separate combat action is needed once Bond reaches the correct platform. The bungee sequence ends the level and advances the campaign to Facility, so taking the jump early will prevent completion of unfinished higher-difficulty objectives.
- All objectives shown for the selected difficulty are complete.
- Bond reaches the bungee platform and walks off the jump point.
- The mission results screen appears and Facility becomes available.
Before you move on
- The end-of-mission results screen appears and records Dam as completed.
- Facility is available from the mission-selection screen.
- On Secret Agent, the results confirm the alarm objective and bungee objective.
- On 00 Agent, the results confirm neutralized alarms, installed covert modem, intercepted data backup and completed bungee jump.
- The route and objective list match the original Nintendo 64 release rather than a modern remaster or alternate control layout.
Mission 2 — Facility
Facility is the second mission in Arkhangelsk on the original Nintendo 64 release. On every difficulty, enter the laboratory area, meet Alec Trevelyan (006), destroy all ten bottling-room tanks and keep scientist casualties within the mission limit. Secret Agent and 00 Agent also require you to contact the double agent, Dr. Doak, and use his Door Decoder to open the route to the bottling room.
1. Leave the ventilation shaft and secure the entrance
From the starting ventilation shaft, move forward and turn left until you are above the restroom. Use the silenced PP7 to shoot the guard below, then drop into the stall. Clear the other restroom guards before leaving; check the stalls and the area near the sinks so no one follows you into the facility.
Move onto the balcony and open the double doors. Use the railing and stairwell as firing positions while you eliminate the guards below. Go down the stairs, pass through the next double doors and shoot the guard with his back turned. Pick up his Clearance B Keycard.
Continue through the tiled corridor and use the keycard to open the metallic security door. Inside, activate the console. The console opens the route to the locker room for only a short time, so move through the newly opened doorway immediately. If it closes before you pass, return to the console and activate it again.
- Clear the restroom and entrance guards.
- Collect the Clearance B Keycard.
- Activate the console and pass through the timed security door.
2. Cross the locker rooms without losing control of the fight
Clear the locker room, then use the doorway as cover when you open the next door. Several guards can fire from the room beyond, and scientists may be nearby. Let the guards come toward you rather than charging into the middle of the room. Use the PP7 for controlled shots, switching to the KF7 Soviet when a group is too close or numerous.
Continue through the connected rooms and corridors. Facility loops back through earlier areas, so use the last doorway as a fallback position whenever enemies begin approaching from both directions. Do not fire blindly through a crowd: scientist casualties are an objective on the original mission, including Agent difficulty, and excessive civilian deaths fail the objective.
On Secret Agent and 00 Agent, Dr. Doak is the double agent. He can appear in several possible locations, including laboratory rooms and the route near the gas-storage area. Search the side rooms as you advance. When you find him, walk up to him and allow the conversation to finish; he gives Bond the Door Decoder. Do not shoot him.
- Use doorways and corners to control groups of guards.
- Avoid shooting scientists.
- Find and speak to Dr. Doak on Secret Agent or 00 Agent.
- Receive the Door Decoder before attempting the locked bottling-room door.
3. Open the laboratory route
Proceed through the mechanized doors and clear the guards around the next corridor. You will reach a room containing two computer consoles. Each console opens one of the two corresponding doors. Use the consoles to open the route ahead, checking the adjacent rooms if Dr. Doak has not yet been found.
Continue up the stairs and through the upper laboratory corridors. The area around the central pillar and the nearby laboratories is another possible location for Dr. Doak. On Secret Agent and 00 Agent, do not go to the bottling-room door until you have spoken to him and obtained the decoder.
At the locked mechanical door, open the Q Watch inventory, select the Door Decoder and use it on the door. The decoder is not required on Agent, but the laboratory route and objective order remain the same. Clear the guards around the doorway before descending so you are not trapped between the corridor and the bottling room.
- Use both laboratory consoles as needed.
- Search the upper laboratories if Dr. Doak was not found earlier.
- Use the Door Decoder on Secret Agent or 00 Agent.
4. Rendezvous with 006 and place the mines
Go down into the bottling room and approach Alec Trevelyan, code name 006. Walk close enough for the conversation to begin and let the exchange finish before detonating anything. This completes the rendezvous objective.
Equip the Remote Mines. The room contains ten large tanks arranged as five pairs. Place one mine so its blast covers each pair. The exact throwing angle is less important than making sure every mine is close enough to damage both tanks in its pair. If you have spent mines earlier, remaining tanks can also be damaged with gunfire, but conserving all five mines is the safer method.
Keep Bond and 006 away from the blast areas. After planting the mines, move toward the double-door exit or the conveyor-belt route so you can leave as soon as the destruction objective registers.
- Finish the conversation with 006.
- Plant five Remote Mines across the five tank pairs.
- Move toward an exit before detonation.
5. Destroy the tanks and escape
Detonate the mines after 006 has moved clear of the immediate blast area. Watch for the objective confirmation and verify that all ten tanks have been destroyed. If a tank remains, use another mine if available or shoot the damaged tank until it is destroyed. On higher difficulties, guards may enter during this sequence, so use the machinery, doorways and conveyor area for cover.
When the destruction objective is complete, leave through the double doors beside the bottling room or take the conveyor-belt exit. Facility does not end merely because the tanks explode; Bond must reach the exit trigger alive. If the scientist-casualty objective has failed, Dr. Doak was never contacted when required, or a tank remains intact, restart the mission and repeat the route with more conservative shooting.
- All ten bottling-room tanks are destroyed.
- The scientist-casualty objective remains successful.
- On Secret Agent or 00 Agent, the double-agent objective is complete.
- Reach an exit trigger alive.
Before you move on
- The mission-complete screen appears and the game advances to Runway.
- The objective list confirms laboratory entry, the 006 rendezvous and destruction of all bottling-room tanks.
- On Secret Agent or 00 Agent, the objective list also confirms contact with the double agent.
- The scientist-casualty objective remains complete when the mission results appear.
Mission 3 — Runway
Runway is the third mission in the original Nintendo 64 campaign. Bond must obtain the Plane Ignition Key and escape in the aircraft. Secret Agent also requires destroying the Missile Battery, while 00 Agent requires destroying the Missile Battery and all three Heavy Gun Emplacements. The tank is the safest way to handle the open runway and the required defenses.
1. Leave the loading bay
Runway begins in the loading-bay area of the Chemical Weapons Facility. A box of grenades is beside the starting position, and timed mines can be collected inside the building. These explosives are optional, but they provide alternatives if the tank is damaged or if you want to destroy a gun emplacement without approaching it directly.
Leave through the available exit and move into the exterior service area. The route opens toward the runway, the small building containing the ignition key, and the parked tank. Keep the silenced PP7 ready for the first guards, but do not spend time clearing every enemy in the level.
- Leave the loading bay.
- Collect grenades or timed mines only if you intend to use them.
- Move toward the small key building and the parked tank.
2. Get the Plane Ignition Key
Find the small building near the runway. One guard is outside, and two more are positioned around the corner inside. Deal with the outside guard before entering, then approach the corner carefully. A grenade can clear the corner, but controlled PP7 fire also works if you expose only a small part of Bond at a time.
After the guards are down, enter the room and move around the filing cabinets to the desk. Pick up the Plane Ignition Key. The objective completes as soon as the item is collected. The key is required on all three difficulties, even though the other objectives change with difficulty.
- Clear the guard outside the key building.
- Defeat the two guards around the interior corner.
- Collect the Plane Ignition Key and verify that the objective is complete.
3. Use the tank to cross the runway
Return outside and locate the tank in the open area near the starting building. Walk up to it and use the current action or vehicle-entry control shown by your selected control style. The tank is optional on Agent, but it is strongly recommended on Secret Agent and 00 Agent because its cannon can destroy the runway defenses while its hull absorbs some ordinary gunfire.
Drive toward the runway rather than stopping to fight every pursuing guard. Keep moving, use the cannon against dangerous fixed targets, and avoid remaining in the centre of the open runway longer than necessary. If the tank is destroyed, Bond can continue on foot, but the heavy guns become much harder to handle safely.
- Locate the parked tank.
- Enter the tank using the action control for your current setup.
- Drive toward the runway and keep moving between engagements.
4. Complete the Heavy Gun Emplacements objective on 00 Agent
This objective is required only on 00 Agent. Three heavy gun emplacements line the runway: one is positioned along the runway, while two more are mounted near the far end by the cliff walls. Drive forward and use the tank cannon to destroy each emplacement. Check both sides of the runway instead of following only the centre line.
The first emplacement can be destroyed during the initial advance. Continue toward the aircraft area for the two remaining guns. You may also destroy emplacements with grenades or timed mines, but the tank gives the clearest and safest method. Confirm that all three are destroyed before leaving the area.
- Destroy the first heavy gun emplacement along the runway.
- Destroy the two emplacements near the far end of the runway.
- Verify that Destroy Heavy Gun Emplacements is complete on 00 Agent.
5. Destroy the Missile Battery on Secret Agent or 00 Agent
The Missile Battery is positioned on the building beside the escape aircraft. On Secret Agent and 00 Agent, drive to the far end of the runway and aim the tank cannon at the battery. A direct cannon shot is the simplest approach; an explosive barrel and a nearby guard are also present, but do not rely on the barrel if enemy fire makes the approach unsafe.
Secret Agent requires the Missile Battery objective but not the Heavy Gun Emplacements objective. 00 Agent requires both. If you are playing Agent, this step is not required, and you can proceed to the aircraft after obtaining the key.
- Reach the building beside the escape plane.
- Destroy the Missile Battery on Secret Agent or 00 Agent.
- Confirm every difficulty-specific objective before approaching the plane.
6. Escape in the plane
Drive or walk to the aircraft at the far end of the runway. Leave the tank, approach the plane, and use the game’s action control to board it. The mission ends when Bond enters the aircraft and the results screen appears.
On Agent, the required objectives are Find Plane Ignition Key and Escape in Plane. On Secret Agent, the required list adds Destroy Missile Battery. On 00 Agent, the required list adds Destroy Heavy Gun Emplacements and Destroy Missile Battery. Boarding the aircraft before completing a required objective will not finish the mission.
- Agent: Plane Ignition Key complete.
- Secret Agent: Plane Ignition Key and Missile Battery complete.
- 00 Agent: Plane Ignition Key, Heavy Gun Emplacements, and Missile Battery complete.
- Board the aircraft and wait for the mission results screen.
Before you move on
- The mission results screen appears after Bond boards the aircraft.
- On Agent, the results list shows Find Plane Ignition Key and Escape in Plane as complete.
- On Secret Agent, the results list also shows Destroy Missile Battery as complete.
- On 00 Agent, the results list also shows Destroy Heavy Gun Emplacements and Destroy Missile Battery as complete.
- For the optional DK Mode unlock, finish Runway on Agent in under 5:00. Confirm the unlock in the game’s cheat or options menu after the qualifying mission result is recorded.
Mission 4 — Surface (Surface 1)
Surface 1 takes place at the Severnaya communications base. The mission always requires Bond to power down the communications dish and enter the base through the ventilation tower. Secret Agent and 00 Agent also require the Hut Door Key, Safe Key, and Building Plans. The open snowfield makes long-range fire dangerous, so use trees, snowbanks, buildings, and the carved paths as landmarks and cover.
1. Leave the clearing and reach the first cabins
From the starting clearing, move forward and angle toward the left side of the snowfield. Stay near trees and snowbanks rather than crossing the most exposed ground in a straight line. The carved paths through the snow are useful for navigation, but pause at bends and scan for guards before continuing.
The starting area leads toward a pair of cabins. On Secret Agent and 00 Agent, do not ignore these buildings: one is locked and will later contain the Safe Key. Clear nearby guards with the silenced PP7 or sniper rifle, then continue toward the satellite dish and the cabins farther along the route.
- Use the forest edge and snowbanks to break sightlines.
- Keep the two cabins near the starting area in mind for the return trip.
- Avoid unnecessary open-field firefights.
2. Obtain the Hut Door Key on Secret Agent or 00 Agent
Continue in the general direction of the large satellite dish. Follow the snow paths and use the dish as your main landmark. Before entering the dish building, locate the cabin with a door facing the approach. Guards are positioned inside and around it, including an officer who drops the large Hut Door Key when defeated.
Enter only after clearing the doorway. Collect the Hut Door Key and the grenade launcher with its ammunition if you want the extra firepower. The grenade launcher is optional; the key is required for the additional objectives on Secret Agent and 00 Agent.
- Reach the cabin near the satellite-dish route.
- Defeat the officer and collect the Hut Door Key.
- Collect optional weapons only after the key is secured.
3. Use the Hut Door Key to obtain the Safe Key
Return along the route toward the two cabins near the starting area. Use the Hut Door Key on the previously locked cabin. Take the Safe Key from inside. This is the second objective on Secret Agent and 00 Agent; Agent difficulty does not require this detour.
After taking the key, leave the cabin and retrace your route toward the satellite dish. Keep moving between cover points because guards with long-range weapons can appear in the open area. You do not need to eliminate every soldier.
- Return to the pair of cabins near the starting area.
- Unlock the previously locked cabin.
- Collect the Safe Key on Secret Agent or 00 Agent.
4. Steal the Building Plans
From the dish area, take the route into the fenced compound with two cabins and explosive barrels. The safe is inside the cabin nearest the compound entrance. Enter the cabin, open the safe with the Safe Key, and take the Building Plans.
The compound is optional on Agent because the plans are not part of that difficulty’s objective list. On Secret Agent and 00 Agent, the plans must be collected before the mission can finish. Leave through the same route and avoid lingering near the explosive barrels.
- Locate the fenced compound near the communications building.
- Enter the cabin containing the safe.
- Open the safe and take the Building Plans.
5. Power down the communications dish
Enter the large building beneath the satellite dish through its lower doors. Go up the stairs and use the interior route that leads to the upper control room. The terminal is inside; interact with it to power down the communications dish. Do not shoot the terminal or the dish, because the objective is completed by operating the control equipment.
If you are playing Agent, this is the first required objective after reaching the area. If you are playing Secret Agent or 00 Agent, confirm that the Safe Key and Building Plans objectives are also complete before leaving.
- Reach the upper control room inside the dish building.
- Operate the communications terminal.
- Confirm that the communications-dish objective is marked complete.
6. Enter the base through the ventilation tower
Exit the dish building and follow the outer route while keeping the tree line to your left. Look for the small cylindrical ventilation tower rising from the snow. It has a ladder and a locked hatch at the top.
Climb the ladder and shoot the locks holding the hatch shut. When the hatch opens, drop into the ventilation shaft. This completes the final objective and ends Surface 1. If the level does not finish, pause and check the objective list for the dish, Safe Key, or Building Plans requirement appropriate to your difficulty.
- Find the cylindrical ventilation tower outside the dish building.
- Climb the ladder and destroy the hatch locks.
- Drop through the opened shaft and wait for the mission-complete screen.
Before you move on
- On Agent, the communications-dish and ventilation-tower objectives are complete.
- On Secret Agent or 00 Agent, the Hut Door Key route has produced the Safe Key and the Building Plans objectives are complete.
- The communications terminal has been operated and the dish objective is marked complete.
- Bond has climbed the ventilation tower, opened the locked hatch, and dropped into the shaft.
- The mission-complete result appears and Bunker 1 becomes available in the campaign sequence.
Mission 5 — Bunker (Bunker 1)
Bunker 1 is a short Severnaya infiltration mission with different objectives on each difficulty. Agent requires the GoldenEye key to be copied and discarded and the main video screen photographed. Secret Agent adds the destruction of all four surveillance cameras. 00 Agent adds escorting the programmer to the computer, allowing the computer to be activated, and downloading its data. The safest approach is to work quietly through the opening corridors, prepare the computer room before bringing in the programmer, and leave only after every required objective appears complete.
1. Begin at the ventilation shaft and secure the opening
Bond starts at the bottom of a ventilation shaft inside the bunker. Face the nearby doors and enter the first room carefully. Use the silenced PP7 for isolated guards so that you do not turn the opening into a full bunker alert. Pick up useful ammunition and replace the pistol with a KF7 Soviet when one becomes available, but keep the silenced PP7 for guards standing alone.
Do not rush into the central control room. The first corridors are useful for establishing a retreat route. Open doors from the side, fire from the doorway, and step backward into the previous room if several guards respond at once. On Secret Agent and 00 Agent, cameras are more important than optional kills, so destroy them as you pass them.
- Start from the ventilation shaft inside the bunker.
- Use the silenced PP7 for isolated guards.
- Keep a cleared corridor behind you as a retreat route.
2. Destroy the surveillance cameras on Secret Agent and 00 Agent
There are four surveillance cameras. The first is outside the room reached through the opening door; you can shoot it through the door window. Return toward the starting ventilation shaft and open the other nearby door to find the second camera on the wall behind the start area.
Continue around the connecting passage to the rear hallway. The third camera is around the corner near the dead-end area with guards and crates. The fourth camera is in the main control room, mounted behind the glass in the raised section across from the large video screen. Shoot the camera housing or its glass with controlled fire.
The surveillance objective completes only after all four cameras are destroyed. Check the pause-screen objectives before leaving the bunker, because an alarm or a cleared group of guards does not substitute for destroying a camera.
- Destroy the camera outside the opening room.
- Return to the start area and destroy the second camera.
- Destroy the rear-hallway camera near the dead-end and crates.
- Destroy the camera behind glass in the main control room.
- Confirm the surveillance objective is complete.
3. Reach and control the main room
Follow the corridors toward the large room containing the main video screen. Clear the guards around the entrance before crossing into the open area. Use the doorway, walls, and nearby raised sections as cover rather than standing in the middle of the room. If the room becomes crowded, retreat into the corridor and let guards approach through the doorway.
A guard in the bunker can provide a Computer Room Keycard. On 00 Agent, obtain access to the computer room before escorting the programmer there. Clearing that room first gives the programmer a safer route and prevents the escort from becoming blocked by enemies.
- Clear the approach to the main control room.
- Use the entrance and walls as cover.
- On 00 Agent, obtain access to and clear the computer room before escorting the programmer.
4. Photograph the main video screen
Equip the Camera from the watch inventory and face the large central video screen in the main control room. Stand far enough back to frame the screen, then press the fire button to take the photograph. Wait for the objective confirmation before switching back to a weapon.
This objective is required on Agent, Secret Agent, and 00 Agent. Take the photograph while the room is under control, preferably before starting the computer sequence on 00 Agent. Do not spend time photographing the smaller monitors.
- Equip the Camera.
- Photograph the large main video screen.
- Wait for the objective confirmation.
5. Copy the GoldenEye key and leave the original
Find the GoldenEye key on the table in the main control room. Pick it up, open the watch inventory, and equip the Key Analyzer. Press the fire button to analyze and copy the key. When the analysis finishes, equip the GoldenEye key itself and press the fire button again to throw the original away.
The objective is not complete merely because the key has been analyzed. Bond must leave the original behind. Confirm the objective in the pause screen before moving on. This task is required on all three standard difficulties.
- Pick up the GoldenEye key from the table.
- Use the Key Analyzer until the copying message completes.
- Equip the original key and discard it.
- Confirm the objective is complete.
6. Complete the 00 Agent computer objectives
On 00 Agent, locate the programmer in the main room after the nearby routes and computer room are reasonably clear. Point your weapon at him to make him follow you, then stay close while leading him to the computer room. If he gets too far away, he may run toward an alarm instead of continuing with Bond.
When the programmer reaches the terminal, allow the activation sequence to finish. The alarm that follows is part of this sequence, so do not restart merely because the alarm begins after the computer has been activated. Equip the Datathief, use it on the active computer terminal, and wait for the download objective to register.
Do not shoot the programmer. If he is killed or the escort fails before the computer is activated, the 00 Agent objectives cannot be completed in that attempt.
- Keep the programmer alive.
- Lead him to the cleared computer room.
- Wait for the computer activation objective.
- Use the Datathief on the active terminal.
- Confirm the data-download objective.
7. Leave through the bunker exit
After completing the objectives for the selected difficulty, return to the main room and head for the exit door. The door may require the Security Keycard, which can be obtained from a guard, or it may open when a guard triggers it. If the alarm is active, use the corridors and doorways as cover while waiting for an opening rather than fighting in the center of the room.
Pass through the bunker exit door and continue until the mission-complete transition appears. Completing the objective list inside the bunker is not enough; Bond must leave through the designated exit.
- Verify every required objective on the pause screen.
- Obtain or use the Security Keycard if the exit door remains locked.
- Reach the exit door from the main room.
- Wait for the mission-complete transition.
Before you move on
- On Agent, the main video screen was photographed.
- On Agent, Secret Agent, or 00 Agent, the GoldenEye key was analyzed, copied, and discarded.
- On Secret Agent or 00 Agent, all four surveillance cameras were destroyed.
- On 00 Agent, the programmer activated the computer and the Datathief downloaded the data.
- The pause-screen objective list shows all tasks required by the selected difficulty as complete.
- Bond passes through the exit door and the game displays the mission-complete transition.
Mission 6 — Launch Silo / Silo
Silo is the sixth numbered level and Part I of Mission 3, Kirghizstan, in the original North American Nintendo 64 release. Bond must move through four fuel rooms, photograph the GoldenEye satellite, recover the required satellite circuitry and telemetric data on the higher difficulties, plant four plastiques on 00 Agent, protect the scientists, then escape through the elevator after Ourumov’s ambush. The level has a time limit on Secret Agent and 00 Agent but not on Agent.
1. Enter the silo and secure the opening corridor
Start on the walkway beside the large missile. Open the door ahead to trigger the infiltration message and start the level timer on Secret Agent or 00 Agent. Secret Agent gives 7:30; 00 Agent gives 8:30. Agent has no countdown, but the route and objective requirements still apply.
Fire the silenced PP7 at the guard in the doorway, then step back onto the walkway. Let the next guards come toward you instead of charging into the corridor. Collect the KF7 Soviets they drop, then move through the corridor and up the stairs. At the upper opening, shoot the two guards across the gap while they expose themselves, then enter the first fuel room.
Use the PP7 around scientists and switch to the KF7 only when the surrounding guards have been separated from the civilians. Scientists can be killed by stray bullets and explosions, so avoid firing through them or using explosive weapons in the fuel rooms.
- Open the entry door to start the mission sequence.
- Collect KF7 ammunition from the opening guards.
- Keep the PP7 available for areas containing scientists.
2. Clear the first fuel room
The first fuel room contains one guard near a small pillar on the right. Lean or sidestep around the pillar and eliminate him without firing across the scientists. Move to the corner near the machinery and collect the two circuit boards there.
Search beside the nearby computer or machine for the first keycard, then leave by the stairs. On 00 Agent, plant one plastique in this fuel room before departing. The objective is to plant a bomb in each fuel room; do not leave the room assuming the explosives can be placed later without a dangerous backtrack.
After exiting, use the corridor corners as cover. Deal with the guard near the passage, then take the right-hand route toward the curved walkway. Clear the guard across the walkway before opening the next door. If several soldiers respond, retreat to the walkway and funnel them through the doorway rather than fighting in the open.
- First fuel room: collect two circuit boards.
- First fuel room: collect the keycard.
- 00 Agent: plant the first plastique before leaving.
- Do not shoot through scientists.
3. Cross the second fuel room and reach the third
Continue through the guarded passage until you reach the stairs and the second fuel room. Loud fire can draw a substantial group of guards, so use the doorway and nearby cover to reduce the incoming angles. Clear the room before moving among the scientists and equipment.
The second fuel room contains one circuit board and another keycard near the tall computer. Agent also has body armor in this room. On 00 Agent, plant the second plastique before leaving. Keep the KF7 ready for the next corridor, where guards may approach from more than one direction.
Proceed through the next passage and take the route toward the larger room with guards behind boxes. Open the door from cover, eliminate the nearest targets, then close the door or retreat as needed. Advance up the stairs only after the immediate area is under control. Enter the third fuel room and collect the fourth circuit board, completing the circuitry objective on Secret Agent and 00 Agent.
In the third room, approach the scientist in the right-hand area carefully. He carries the DAT containing the telemetric data; collect it for the Secret Agent and 00 Agent objective. Search the lower-left corner, where the next keycard is in a recess beside the computer equipment. On 00 Agent, plant the third plastique before leaving.
- Second fuel room: collect the circuit board and keycard.
- Agent: collect the second-room body armor if needed.
- Third fuel room: collect the final circuit board.
- Secret Agent and 00 Agent: collect the DAT from the scientist.
- 00 Agent: plant the second and third plastiques.
- Keep total scientist deaths at two or fewer.
4. Use the missile-room armor and complete the fourth fuel room
Leave the third fuel room and clear the next corridor. Guards may approach from both sides, and additional soldiers can enter from the right. Once the passage is safe, take the left-hand door into the missile room and collect the body armor. This armor is available on every difficulty and is one of the safest recovery points in the level.
Exit the missile room through the right-hand door. Continue through the next rooms, using the doors and boxes as cover while eliminating guards. Climb the stairs and enter the fourth and final fuel room.
The GoldenEye satellite is in the center of this room. Equip the camera and photograph it to complete the satellite objective. Agent and Secret Agent also need this photograph; it remains required on 00 Agent. On 00 Agent, plant the fourth and final plastique in this room. If the bomb objective does not complete, check the earlier fuel rooms before committing to the escape route.
Secret Agent and 00 Agent must have the DAT and all four circuit boards. If any of these objective messages are missing, retrace the route now. The timer continues to run, but discovering a missing item after the final ambush is much more dangerous.
- Collect the missile-room body armor if required.
- Photograph the satellite in the fourth fuel room.
- 00 Agent: plant the fourth plastique.
- Secret Agent and 00 Agent: verify the DAT and four circuit boards.
- 00 Agent: confirm the bomb objective has completed.
5. Survive Ourumov’s ambush
Leave the final fuel room to trigger Ourumov’s appearance. When he orders the soldiers to attack, retreat into the fuel room and use the doorway or stair landing as a choke point. Let the soldiers come to you and eliminate them without chasing targets into the corridor.
Once the first wave is under control, move out and fire at Ourumov while strafing. You do not need to kill him; damage causes him to retreat. Follow the retreating route, but do not waste time trying to clear every soldier if the timer is low. If approximately twenty seconds or less remain, prioritize reaching the elevator over optional kills.
If you lose sight of Ourumov, take the left turn at the first major choice in the route and keep moving through the upper walkway and corridors. The elevator is in an alcove along the escape path. Open it and enter as soon as the required objectives are complete.
- Use the final fuel-room doorway to control the ambush.
- Damage Ourumov enough to make him retreat.
- If the timer is near twenty seconds, run instead of clearing every guard.
- Take the left route at the first major turn if you lose the escape path.
6. Enter the elevator and confirm the result
The mission ends when Bond enters the elevator after completing the required objectives. Agent requires the satellite photograph and successful protection of the scientists. Secret Agent adds the DAT and all four circuit boards. 00 Agent adds the four planted plastiques while retaining the photograph, DAT, circuitry, and scientist-casualty requirements.
The scientist objective fails if three or more scientists die. If the mission fails at the elevator despite reaching it, review the objective messages rather than repeating the final escape blindly. A successful 00 Agent completion shows the silo destruction sequence before the campaign continues to Frigate.
- Agent: photograph the satellite and finish with no more than two scientist deaths.
- Secret Agent: also obtain the DAT and four circuit boards.
- 00 Agent: also plant all four plastiques.
- Enter the elevator before the applicable timer expires.
- Confirm the mission-complete transition and the Frigate briefing.
Before you move on
- Agent: the satellite photograph and scientist-casualty objective show as complete, and Bond enters the elevator.
- Secret Agent: the satellite photograph, DAT, four circuit boards and scientist-casualty objective are complete before entering the elevator.
- 00 Agent: all four plastiques, satellite photograph, DAT, four circuit boards and scientist-casualty objective are complete before entering the elevator.
- No more than two scientists have been killed.
- The mission-complete transition appears and the next mission is Frigate.
- On 00 Agent, the post-mission sequence shows the silo being destroyed.
Mission 7 — Frigate
Frigate is the only stage in the Monte Carlo mission and takes place aboard the French frigate La Fayette. Bond must rescue enough hostages and plant a tracker bug on the Pirate helicopter on every difficulty. Secret Agent and 00 Agent add two bomb-defusal objectives. The ship is built around connected decks, stairwells, narrow corridors, and a forward helicopter hangar, so use doorways and corners to control fights instead of trying to clear the entire vessel from exposed decks.
1. Board La Fayette and choose a safe route inside
Bond starts in a small boat alongside the frigate with a PP7, a D5K Silenced, a bomb defuser, and one tracker bug. Climb the gangway onto the main deck, then move along the ship toward one of the interior entrances. The D5K Silenced is the safest general-purpose weapon because it lets you remove guards without immediately drawing every nearby patrol. Keep the PP7 available for deliberate shots at hostage-takers or distant targets.
The ship has several possible entrances, but a reliable route begins by moving toward the bow and entering through the stairs that lead toward the bridge. Clear each doorway from the threshold. Do not sprint through a room merely because the first guard is down; additional Janus Marines may be positioned beyond the next door or around a corner. If you need armor, one set is hidden in a metal crate on Agent, and another is in the radio room near the bridge on Agent and Secret Agent. These are optional pickups, not mission requirements.
- Board the frigate from the starting boat.
- Keep the D5K Silenced ready for controlled engagements.
- Use doorways and stair landings as cover.
- Collect armor only after the surrounding area is safe.
2. Rescue the required hostages
There are six hostages aboard the ship. The required number depends on difficulty: rescue two on Agent, three on Secret Agent, and five on 00 Agent. A hostage is saved when the guard holding that person is killed and the hostage escapes. The hostage objective does not require clearing every enemy on the frigate.
The bridge contains one hostage, and more are held in rooms along the upper and lower interior passages. When you open a hostage room, identify the armed guard before firing. Hostage-takers can execute their captive quickly after seeing Bond, especially on higher difficulties, so enter with the weapon already aimed and shoot the captor first. Avoid grenades, automatic fire through doorways, and shots that can pass through the hostage.
After freeing a hostage, watch the room or corridor briefly until the captive has moved away. If the objective does not update immediately, continue through the ship; escape timing can vary. Use the pause screen to check whether the required count has been reached rather than assuming every hostage must be rescued on Agent.
- Rescue two hostages on Agent, three on Secret Agent, or five on 00 Agent.
- Shoot hostage-takers before they can react.
- Avoid explosive weapons near captives.
- Confirm the hostage objective is complete on the pause screen.
3. Disarm the bridge bomb on Secret Agent and 00 Agent
The bridge is near the forward end of the ship and contains navigation consoles. On Secret Agent and 00 Agent, one of those consoles carries the bridge bomb. The bomb objective is not present on Agent, so do not waste time searching for it on the easiest difficulty.
Approach the bridge from a doorway and eliminate the guards without firing into the computer banks. If the hostage is still present, deal with the hostage-taker first. Once the room is secure, select the Bomb Defuser from the item menu, stand close to the explosive, and press the fire button. Wait for the objective-complete message before leaving. A stray bullet can detonate the bomb and fail the objective, so do not use grenades or uncontrolled automatic fire in this room.
- Search for the bridge bomb only on Secret Agent or 00 Agent.
- Clear the bridge without damaging the computer consoles.
- Equip the Bomb Defuser and activate it directly at the explosive.
- Wait for confirmation that Objective B is complete.
4. Work through the lower decks and disarm the engine-room bomb
From the bridge and upper passages, continue through the interior stairwells toward the lower decks. Search the small rooms along the route for additional hostages, clearing each room before crossing its doorway. The engine room is at the bottom of the ship and is recognizable by its large machinery, catwalks, and lower-level floor.
On Secret Agent and 00 Agent, the engine-room bomb is positioned at the end of a catwalk near the computer equipment. Use the railings and machinery as cover while removing guards. Enemies have difficulty firing through some railings, so you can often clear the lower floor from above before stepping onto the catwalk. Select the Bomb Defuser, approach the explosive, and press the fire button. Do not shoot the bomb or use explosives nearby. On Agent, this bomb objective is absent, although the engine room still contains a hostage and useful combat space.
- Descend to the engine room through the interior stairwells.
- Search lower rooms for hostages before leaving the deck.
- On Secret Agent or 00 Agent, defuse the bomb at the end of the catwalk.
- Keep gunfire and grenades away from the explosive.
5. Reach the forward hangar and plant the tracker
The Pirate helicopter is inside a forward hangar rather than sitting in the open on the upper deck. From the interior passages, follow the route toward the hangar and open the large hangar door. The area around the helicopter has little resistance, but clear the approach first so you do not waste the tracker while under fire.
Equip the Tracker Bug from the item menu, move close to the Pirate, aim at its body, and press the fire button once. Bond carries only one tracker bug. Confirm that the tracking objective is complete before moving away. Do not shoot the helicopter after planting the bug: damaging or destroying the tracked aircraft can invalidate the objective.
- Locate the forward helicopter hangar.
- Equip the Tracker Bug only when close enough to hit the Pirate.
- Plant the bug with one deliberate throw or shot.
- Wait for confirmation before leaving the hangar.
6. Return to the boat and finish the mission
When the pause screen shows every required objective complete, retrace the interior route toward the bow and the starting side of the ship. You do not need to defeat every remaining guard. Reload before entering large rooms, retreat through doors if several enemies converge, and use the ship’s stairs as choke points rather than fighting in the middle of an exposed deck.
Return to the speedboat beside the gangway and step into it. The level ends at the boat extraction trigger; completing the objectives elsewhere on La Fayette is not enough. If the mission does not finish, check the objectives screen first. The usual causes are an insufficient hostage count, an undetonated bomb on Secret Agent or 00 Agent, or a tracker that missed the helicopter.
- Verify the correct hostage count for the selected difficulty.
- Confirm the tracker objective and, when applicable, both bomb objectives.
- Retrace the route to the bow and starting gangway.
- Step into the speedboat and wait for the mission transition.
Before you move on
- On Agent, the hostage-rescue and tracker objectives are complete.
- On Secret Agent or 00 Agent, the required hostage count, bridge bomb, engine-room bomb, and tracker objectives are complete.
- Bond has returned to the speedboat at the starting gangway.
- The game transitions from Frigate to the next campaign stage, confirming mission completion.
Mission 8 — Surface 2
Surface 2 returns to the Severnaya installation at night. The level reuses the Surface 1 setting, but its objectives and item placements are different. Agent requires breaking the communications link and entering the bunker. Secret Agent adds destruction of the Spetznaz support aircraft, while 00 Agent also requires destroying all surveillance equipment.
1. Reach the key cabin
Begin with the silenced PP7 and the single Remote Mine. Follow the visible route through the snow toward the distant cabin in the fenced compound. The area is more densely foggy than Surface 1, so use the road, cabin walls, and snowbanks as cover instead of standing in the open while searching for guards.
The Arctic Commando inside the relevant cabin carries the Communications Room key. Eliminate him and collect the key. On Agent difficulty, this cabin also contains full body armor; another cabin in the fenced compound contains half armor on Agent. These armor pickups are useful but optional, and the key is the required item.
- Arctic Commando defeated.
- Communications Room key collected.
- Armor taken if needed.
2. Enter the communications building
Leave the cabin and follow the route toward the large satellite-dish observatory. Enter the building, climb to the upper level, and watch the catwalk and adjoining rooms for guards. The communications room is accessed with the key collected from the cabin.
Inside, find the desk with the monitor and two radio units. Shoot and destroy both radios to complete Break communications link to bunker. Do not activate the monitor. The monitor is not the objective interaction here; using it instead of destroying the radios will not complete the mission requirement.
- Communications Room entered with the key.
- Both radio units destroyed.
- Break communications link to bunker displayed as complete.
3. Destroy the surveillance equipment on 00 Agent
This objective exists only on 00 Agent. Four CCTV cameras must be destroyed. One is mounted on the cabin associated with the former Surface 1 commandant location, another is beside a cabin in the fenced compound, a third is at the other cabin location used by the installation's patrols, and the fourth watches the catwalk inside the communications building.
Destroy cameras when they come into view, then check the pause-screen objectives before leaving. If Disrupt all surveillance equipment remains incomplete, retrace the cabins and the observatory catwalk rather than searching the open snowfield. Cameras are easy to miss in the red fog, especially when moving quickly between buildings.
- 00 Agent only: all four CCTV cameras destroyed.
- Disrupt all surveillance equipment displayed as complete.
4. Disable the helicopter when required
Secret Agent and 00 Agent require Disable Spetznaz support aircraft. Leave the observatory and continue toward the helipad. Equip the Remote Mine, throw it onto the Hound helicopter, and move away from the blast. The mine functions with a delayed fuse here, so do not remain beside the aircraft waiting for the objective to register.
Agent does not require the helicopter objective. On that difficulty, conserve the mine and proceed after destroying the radios.
- Secret Agent or 00 Agent: Remote Mine attached to the Hound helicopter.
- Support aircraft destroyed and objective confirmed.
5. Enter the bunker
After completing every objective shown for the selected difficulty, go to the helipad area and find the brown security door leading into the bunker. Open the door and walk through it. This is the required exit; the cooling-tower hatch used in Surface 1 is welded shut and cannot serve as the escape route.
Use the installation buildings and terrain as temporary cover while crossing back to the helipad. Guards may pressure you after the radio or helicopter objective, so keep moving and avoid prolonged fights in the open. If the level does not finish, pause and verify that every difficulty-specific objective is complete, then enter the brown bunker door rather than returning to the observatory.
- Agent: communications link and bunker entry complete.
- Secret Agent: communications link, support aircraft, and bunker entry complete.
- 00 Agent: surveillance equipment, communications link, support aircraft, and bunker entry complete.
- Bunker 2 becomes available after the mission-ending transition.
Before you move on
- The pause screen shows all objectives required by the selected difficulty as complete.
- Entering the brown security door at the helipad triggers the mission-ending sequence.
- Bunker 2 is unlocked on the mission-selection screen.
- On 00 Agent, the mission also meets the 4:15 time target required for the Tiny Bond cheat.
Mission 9 — Bunker 2: Complex Interiors
Bunker 2 is the ninth level and the second Severnaya mission. Bond begins imprisoned and unarmed, so the opening is an escape and stealth exercise. Agent requires the CCTV tape and escape with Natalya. Secret Agent adds the Staff and Casualty Lists and destruction of all six security cameras. 00 Agent adds the GoldenEye Operations Manual from the two-key safe. Leaving Natalya confined until the other objectives are finished makes the harder difficulties much safer.
1. Escape the cell and recover the first equipment
Select Watch Magnet Attract from the pause-screen inventory and use it while standing at the front bars of Bond’s cell. Pull the Cell Key from its holder, then wait until the guard turns away before opening the door.
When the guard kneels and begins firing, crouch behind him and use slaps until he is knocked out. Pick up the KF7 Soviet and the second Cell Key. On Agent, you can use that key immediately to release Natalya. On Secret Agent and 00 Agent, leave her locked up for now; she can walk into your shots and knives during the stealth route.
- Pull the Cell Key with Watch Magnet Attract.
- Knock out the guard and collect the KF7 Soviet.
- Collect the second Cell Key.
- Leave Natalya locked up temporarily on Secret Agent and 00 Agent.
2. Get the throwing knives and Keycard A
Use Watch Magnet Attract over the drain near the cell area to pull up six Throwing Knives. They are especially useful on Secret Agent and 00 Agent because quiet kills reduce the chance of drawing additional guards.
Move through the nearby corridors slowly, using the cell block and glass-doored corners as fallback positions. Ambush guards as they approach rather than crossing the open halls. A guard carrying Keycard A patrols the route leading toward the yellow-and-black hazard-striped corridors. Kill him and collect Keycard A; do not confuse it with the Keycard B dropped later by the dual-Klobb guard.
- Pull all six Throwing Knives from the drain.
- Use corners and the cell block as retreat points.
- Find and collect Keycard A from its patrolling guard.
3. Collect the Staff List and clear the drone-gun route
Use Keycard A on the security doors leading toward the hazard-striped section. Take the route to the office containing the Severnaya Staff List and collect it on Secret Agent or 00 Agent.
Three drone guns protect the adjoining corridors. Use the KF7 Soviet from cover, firing single deliberate shots while remaining behind corners or door frames. Do not rush into their firing lanes. Continue through the drone-gun area toward the long hallway and ventilation section.
- Open the Keycard A security doors.
- Collect the Staff List on Secret Agent or 00 Agent.
- Destroy the three drone guns from cover.
4. Recover the CCTV tape and destroy the cameras
There are six security cameras on Secret Agent and 00 Agent. Destroy each by aiming at its lens from a doorway, corner, or other protected angle. The first camera is visible from the long hallway; another is in the ventilation room, and another guards the ventilation-tower route.
After the cooling-tower section, enter the room with the desk and collect the CCTV tape. This objective applies on every difficulty. Check the nearby ventilation route for another camera before leaving. Later cameras cover the mainframe approach, the hallway beyond the next security doors, and a side room beside the main control room. Continue checking the objectives screen until Disable all security cameras registers as complete.
- Destroy all six security cameras on Secret Agent or 00 Agent.
- Collect the CCTV tape on every difficulty.
- Use protected firing positions so cameras do not trigger a dangerous response.
5. Open the safe and recover the 00 Agent manual
Enter the mainframe room and eliminate the guard from outside the doorway or through the glass. Collect Safe Key 1 from him. Return toward the jail-side offices and approach the small room containing the guard behind the table.
Shoot that guard from outside, then retreat around the nearest corner and deal with any responders before entering. Collect Safe Key 2. Use both keys on the safe. On 00 Agent, take the GoldenEye Operations Manual to complete the additional objective. The safe also contains dual Silenced PP7s, which are useful for the remaining guards.
- Collect Safe Key 1 in the mainframe room.
- Collect Safe Key 2 from the guarded office.
- Open the safe with both keys.
- Recover the GoldenEye Operations Manual on 00 Agent.
- Take the dual Silenced PP7s if needed.
6. Collect the Casualty List and Keycard B
Use the opened security route to reach the area beyond the safe room. The guard carrying dual Klobbs drops Keycard B. Collect it and use it on the next security doors.
The room beyond contains the guard carrying the Casualty List. Eliminate him from cover and collect the clipboard. The Staff List and Casualty List are separate items; collecting only the Staff List does not complete the comparison objective. On Secret Agent and 00 Agent, confirm that every camera has also been destroyed before leaving this section.
- Take Keycard B from the dual-Klobb guard.
- Collect the Casualty List.
- Confirm the Staff and Casualty List objective is complete.
- Confirm the six-camera objective is complete on Secret Agent and 00 Agent.
7. Release Natalya and escape
Return to the cell block and use the second Cell Key if Natalya is still confined. Keep her alive while leading her toward the main control room. When she reaches the computer, she examines it and discovers that the GoldenEye satellite is about to fire on Severnaya.
Follow the exit route from the control room through the security door and up the stairs. Continue out of the bunker and follow Natalya toward the helipad. The escape objective completes when the level-end trigger registers; Natalya does not need to remain directly beside Bond at the final doorway, but she must have been released and must survive.
- Release Natalya before the final escape.
- Keep Natalya alive through the control-room route.
- Reach the bunker exit and follow the route toward the helipad.
- Wait for the mission-complete result.
Before you move on
- Agent: Recover the CCTV tape, release Natalya, keep her alive, reach the bunker exit, and receive the mission-complete result.
- Secret Agent: Compare the Staff and Casualty Lists, recover the CCTV tape, destroy all six security cameras, release Natalya, keep her alive, escape, and receive the mission-complete result.
- 00 Agent: Complete the Secret Agent objectives, recover the GoldenEye Operations Manual from the safe, release Natalya, keep her alive, escape, and receive the mission-complete result.
- After completion, Statue becomes available as the next campaign level.
Mission 10 — Statue Park
Statue Park is Mission 10 in the original Nintendo 64 release. Bond must contact Valentin, meet and unmask Janus at Lenin’s statue, locate the stolen helicopter, rescue Natalya, recover the flight recorder, and open the park gate after Mishkin captures Natalya.
1. Move downhill and find Valentin
You begin near the park gate at the top of a hill. Run downhill, using the large stone structures and statues as cover when guards open fire. The first group is positioned around the slope and lower path, so deal with the nearest threats before crossing the open ground. A PP7 is adequate for isolated guards; use the KF7 Soviet when several enemies are close together or firing from different angles.
Follow the main route through the park, using the large letters and containers as landmarks. Continue toward the large gray container, then look for the red container nearby. Valentin is inside the red container. Enter through the opening and face him until the conversation finishes and Contact Valentin registers as complete.
- Start at the top of the hill and move downhill.
- Use statues, blocks, and containers as cover.
- Enter the red container and wait for Contact Valentin to complete.
2. Reach Lenin’s statue and meet Janus
After Valentin’s conversation, leave the container and continue forward through the park. The route passes through concrete blocks and a cluttered area containing a large stone hand. An optional body armor pickup is hidden in an alcove near the hand statue; collect it if you need protection for the return trip, but it is not required for mission completion.
Continue around the rubble and take the open route around the side of the obstruction. You will eventually reach Lenin’s statue at the far end of the park. Approach the statue and remain in the meeting area until Janus and his guards arrive.
When Janus tells Bond to put his weapon away, switch to the unarmed Slapper and do not fire. Stay near the statue while the conversation plays out. The objective completes when Bond identifies Janus as Alec Trevelyan.
- Search near the stone hand for optional body armor.
- Reach Lenin’s statue beyond the rubble.
- Switch to the Slapper and wait for the complete Janus encounter.
- Confirm Confront and Unmask Janus.
3. Escape the ambush and reach the helicopter
Once the Janus objective registers, his guards attack and Janus begins the sequence leading to the helicopter explosion. Do not remain in the open plaza trying to defeat every guard. Use the same route back through the park, moving from one statue or concrete block to the next. Shotgun-equipped Janus operatives are dangerous at close range, so keep moving and fire only when an enemy blocks the route.
Retrace the landmarks in reverse: leave the Lenin statue area, pass the rubble and hand statue, go through the concrete blocks, pass the red and gray containers, follow the large-letter landmark, and climb back toward the starting gate. Reaching the helicopter completes Locate Stolen Helicopter.
- Leave the Lenin statue area immediately after the objective completes.
- Retrace the park route instead of taking an unfamiliar side path.
- Reach the helicopter at the top of the hill.
4. Rescue Natalya and wait for the explosion
Natalya is lying beside the helicopter. Approach her to wake her and trigger Rescue Natalya. She will begin following Bond. Move away from the helicopter and lead her down the hill toward the park area. The helicopter is rigged with an explosive device, so do not remain beside it after Natalya gets up.
Wait at a safe distance for the helicopter to explode. The rescue objective completes as part of this sequence. Afterward, Bond tells Natalya to wait at the gates while he searches for the flight recorder.
- Approach Natalya and wake her.
- Lead her away from the helicopter.
- Wait for the helicopter to explode and confirm Rescue Natalya.
5. Find the flight recorder
After the explosion, search the rubble and maze-like area at the base of the hill. The flight recorder is a small orange box, and its exact position varies within this area. Search near the statue fragments and debris closest to the explosion site rather than wandering far across the park.
If the game reports that the recorder could not have been thrown that far, turn back toward the hill and continue searching nearby. Walk over the box to collect it. Finding it completes Find Flight Recorder and causes additional enemies to appear, so be ready to retreat rather than stopping to clear the entire park.
- Search the rubble at the base of the hill after the explosion.
- Look for the small orange flight recorder.
- Return toward the hill if the game says you searched too far away.
- Collect the recorder and confirm the final objective.
6. Open the gate and finish the mission
Run back up the hill toward the park entrance. Mishkin and several guards will have captured Natalya near the gate. Do not shoot the guards during this confrontation. Approach the gate and press the action button to open it when prompted.
The mission ends after Bond opens the gate and the escape sequence begins. If the gate does not open, check the objectives screen before retrying: all five objectives must be complete, including Find Flight Recorder.
- Return to the park entrance after collecting the recorder.
- Do not attack Mishkin or the guards holding Natalya.
- Open the gate with the action button.
- Wait for the mission-complete transition.
Before you move on
- The objectives screen shows Contact Valentin, Confront and Unmask Janus, Locate Stolen Helicopter, Rescue Natalya, and Find Flight Recorder as complete.
- Natalya has been rescued, the helicopter has exploded, and the orange flight recorder has been collected.
- Mishkin’s hostage sequence has occurred and Bond has opened the park gate.
- The mission-complete transition begins and Mission 11, Military Archives, follows.
Mission 11 — Military Archives
Military Archives begins with Bond unarmed in an interrogation room. Escape, find Natalya, speak with Dmitri Mishkin, recover the helicopter black box on Secret Agent or 00 Agent, and leave through the exterior windows. The level rewards quiet movement: loud gunfire can draw additional guards, while Slappers are useful for the opening room and Natalya’s guards.
Escape the interrogation room
Bond starts with the Watch Magnet, not a usable firearm. The PP7 and its magazine are on the table. You can use the Watch Magnet to pull them toward you, or move around the chair and collect them manually. The PP7 is empty until its magazine is collected, so do not assume picking up the pistol alone gives you ammunition.
For the safest opening, keep the Slappers equipped and rush the two Siberian Guards at close range. Knock them down, collect the door key dropped by one of them, and unlock the exit. If you choose to use the PP7, fire only as much as necessary; sustained noise can bring more guards into the archive. Leaving the interrogation room completes Escape from interrogation room.
- Collect the PP7 and its magazine, or leave them temporarily if using Slappers.
- Defeat the two guards in the starting room.
- Pick up the door key and leave through the locked door.
- Confirm Escape from interrogation room is complete.
Cross the lower floor and reach the upper archive
After leaving the starting room, cross the nearby storage area, using the boxes and pillars as cover. An optional armor pickup is in the room across from the starting room on Agent difficulty; it is not required for progression. Follow the corridor to the stairwell and go upstairs.
The upper level contains offices, bookshelves, a large central room, and several connecting doors. Check each doorway before crossing. Let guards come around corners where possible, then use Slappers on isolated targets or controlled shots with a pistol. Do not spend time clearing every optional room. Your route is toward the large archive areas and the single door leading to Natalya.
- Use the stairwell to reach the upper floor.
- Take the Agent-only armor if you need the extra protection.
- Move from cover to cover and avoid unnecessary gunfire.
- Keep track of the main archive room and the bookshelves as landmarks.
Find Natalya without frightening her
From the upper-floor offices, continue toward the book stacks and large archive room. Open the double doors into the broader stacks, pass the bookshelves and railing, and look for the single door near the double doors at the far side of the room. Natalya is inside with two Siberian Guards.
Opening the door and making contact with Natalya completes Find Natalya. Firearms can cause her to flee, so keep the Slappers equipped and defeat the guards at close range. Do not throw grenades or fire automatic weapons in the room. Once the guards are down, leave Natalya in place while you complete the remaining route.
- Reach the single door beside the archive-room double doors.
- Open it to trigger Find Natalya.
- Defeat both guards without firing across Natalya.
- Avoid grenades and uncontrolled automatic fire.
Reach Mishkin and obtain the Safe Key
Leave Natalya’s room and retrace the route through the upper archive. Follow the corridor toward the doors overlooking the courtyard, then use the connecting stairs to return to the lower level. From the lower hallway, enter the sequence of doors leading to the sunlight-filled corridor.
Take the first appropriate door on the left from that corridor to enter Dmitri Mishkin’s room. Walk up to Mishkin and allow his conversation to finish. He gives Bond the Safe Key. Do not shoot Mishkin; the conversation is required, and attacking him can prevent the safe objective from being completed.
- Leave Natalya’s room and return toward the courtyard-side corridors.
- Use the connecting stairs to reach the lower level.
- Enter Mishkin’s room through the sunlight-filled hallway.
- Wait for Mishkin to finish speaking and receive the Safe Key.
Recover the helicopter black box
On Secret Agent and 00 Agent, the safe behind Mishkin contains the helicopter black box, also called the flight recorder. Walk around Mishkin, use the Safe Key on the gray safe, and collect the small orange box. This completes Recover helicopter black box.
Agent difficulty does not list this as a required objective. You may still collect the recorder if you are practicing the complete route, but it is not necessary for an Agent completion. On higher difficulties, do not attempt the window exit until the recorder has been collected and the pause screen shows the objective as complete.
- Use the Safe Key on the gray safe behind Mishkin.
- Collect the helicopter black box on Secret Agent or 00 Agent.
- Verify the objective is complete before leaving.
- Remember that Agent difficulty does not require the black box.
Escape through the exterior windows
From Mishkin’s room, use the door directly across from the safe. Follow the sunlight-filled hallway around the corner, pass the cardboard box, and continue to the door at the far end. Enter the final room with the bookshelves and exterior windows.
Shoot out one of the large windows and step or jump into the alley outside. The lower-level windows are a valid exit, and the second-floor windows directly above them can also be used. The mission ends only after the game registers the escape, so wait for the mission-complete result before resetting or quitting.
- Complete all objectives required by the selected difficulty.
- Break a large exterior window in the final room.
- Step or jump into the alley.
- Wait for the mission-complete result.
Before you move on
- On Agent, the pause screen shows Escape from interrogation room, Find Natalya, and Escape with Natalya completed.
- On Secret Agent or 00 Agent, the pause screen also shows Recover helicopter black box completed.
- Bond has entered the alley through an exterior window and the mission-complete result has appeared.
- Streets is available as the next mission from the mission-selection screen.
Mission 12 — Streets
Streets is the third St. Petersburg mission. On Agent, complete Pursue Ourumov and Natalya and Minimize Civilian Casualties. Secret Agent and 00-Agent also require Contact Valentin. The safest general route is to reach Valentin, collect nearby supplies if needed, return to the tank, then follow the streets by turning right at each major intersection while avoiding civilians and clearing minefields.
1. Leave the starting alley and reach the tank
Move up the opening alley and deal with the first guard around the corner. Two more soldiers may respond, so use the walls and the alley entrance as cover instead of running straight into the open. Continue out toward the fenced area near the tank and eliminate guards who block the route.
The tank is not technically mandatory, but it is the practical way to complete Streets safely. Enter it before beginning the long pursuit. Its cannon is useful for clearing vehicles, roadblocks, mines and groups of soldiers without exposing Bond to prolonged rifle fire.
- Opening guards defeated or bypassed
- Tank reached and entered
- No civilian has been deliberately hit
2. Contact Valentin when the objective is active
From the tank area, follow the alley leading toward the building where Valentin is waiting. On Secret Agent and 00-Agent, Contact Valentin is a required objective; on Agent, it does not appear in the objective list. Continue through the alley and enter the building at its end to trigger the conversation.
Before or after speaking with Valentin, check the nearby building with the broken windows. Bond can enter through the windows and collect a grenade launcher and body armor. The armor is optional, but it is valuable on the harder difficulties. Do not leave until the objective status confirms that Contact Valentin is complete when applicable.
- Valentin reached
- Contact Valentin completed on Secret Agent or 00-Agent
- Grenade launcher and nearby armor collected if desired
3. Return to the tank and begin the pursuit
Retrace the alley to the tank. You do not need to clear every soldier in the level. Prioritize enemies positioned directly on the route, soldiers using rocket launchers, and guards who can attack the tank from close range.
Once back in the tank, follow the road rather than cutting through courtyards or driving across groups of civilians. At each major intersection, turn right. This consistent route avoids the maze-like layout and leads through the pursuit section.
- Tank recovered
- Pursuit route started
- Right-turn route being followed
4. Handle roadblocks and civilians carefully
Keep the cannon ready for cars, barricades and soldiers blocking the road. Civilians can run into the same streets as enemy troops, so do not fire broadly into crowded areas and avoid driving over people. The casualty objective allows only limited civilian losses; the game warns when casualties become high or critical, and too many deaths fail the objective.
A second armor pickup is located later in the level near the end of the route, in the shadows between buildings. It is optional and may be difficult to reach safely, so take it only if the tank and Bond can approach without abandoning the pursuit.
- Civilian casualties remain within the mission limit
- Roadblocks cleared without indiscriminate fire
- Optional later armor collected only if safe
5. Destroy the minefields before crossing
Blue anti-tank mines appear in the later streets. Stop before the minefield and use the tank cannon to detonate the mines from a distance. Advance only after the visible path is clear. Driving directly over mines can damage or destroy the tank and make the following rocket-launcher section much harder.
Rocket-launcher soldiers are dangerous, but leaving the tank is not always necessary. If the route is open, keep moving and use the cannon while turning through the street. If the tank is already badly damaged, use buildings and corners as cover and remove the most threatening launcher users before continuing.
- Minefields detonated before crossing
- Tank remains operational
- Rocket-launcher threats handled without unnecessary exposure
6. Complete the pursuit and verify the result
Continue through the connected streets using the right-turn rule. Ignore side buildings that do not contain a needed supply or route. The objective is to pursue Ourumov and Natalya, not to eliminate every soldier. Keep the tank moving through the final streets and avoid civilian vehicles and pedestrians.
When the pursuit reaches its end, wait for the mission to register and display the results screen. Confirm every objective shown for the selected difficulty. The next campaign mission is Depot.
- Pursue Ourumov and Natalya complete
- Minimize Civilian Casualties complete on difficulties where listed
- Mission results screen displayed
- Depot becomes available next
Before you move on
- On Agent, the results screen shows Pursue Ourumov and Natalya and Minimize Civilian Casualties complete.
- On Secret Agent or 00-Agent, the results screen also shows Contact Valentin complete.
- Civilian casualties have not reached the failure threshold.
- The game advances to Depot, confirming successful completion of Streets.
Mission 13 — Depot
Depot is the thirteenth campaign level and the fourth part of the St. Petersburg operation. Its required objectives depend on difficulty. On Agent, simply locate Trevelyan’s train. On Secret Agent, also destroy the computer network, obtain the Safe Key, and recover the helicopter blueprints. On 00 Agent, destroy the illegal arms cache as well, for a total of five objectives. The route below handles every objective, so it can be followed on any difficulty.
1. Reach the objective warehouses
From the starting position, go straight, turn right, then turn left and pass through the double gate. Continue forward until the blue wall blocks the route. Turn toward the warehouse area and use the orange shipping container near the opening as your first landmark. Eliminate the nearby guards and take an automatic weapon if one is available.
Pass through the open gate and continue beyond the first three large shutter doors. The weapons warehouse is the second shutter door on the right. The computer-network warehouse is the next relevant shutter door along the route. Depot contains many similar buildings, so do not rely on memory alone; use the gates, warehouses, pipeline, and container stacks to keep your bearings. Guards can begin reappearing around the warehouse areas, so avoid unnecessary backtracking.
- Pass the double gate.
- Use the orange shipping container and blue wall as early landmarks.
- Keep an automatic weapon and conserve explosive ammunition for objectives.
2. Destroy the illegal arms cache on 00 Agent
This objective exists on 00 Agent only. Enter the weapons warehouse, clear the guards, and collect the Rocket Launcher or Proximity Mines if you want to destroy the cache quickly. The target is the group of small brown ammunition crates, not the larger gray or metal storage crates.
Destroy every brown crate. A single explosion can trigger a chain reaction, but inspect the room afterward because one crate may remain intact at an edge or behind a stack. Use the catwalk or a doorway for distance when firing rockets, and step clear of the blast radius. Leave only after the objective changes to complete.
- Enter the weapons warehouse.
- Destroy every brown arms-cache crate.
- Confirm the 00 Agent arms-cache objective is complete.
- Do not waste all explosive ammunition on ordinary guards.
3. Destroy the computer network and take the Safe Key
Leave the weapons warehouse and enter the next objective warehouse. The computer room contains several Janus Marines and a drone gun. Use the metal crates and the doorway for short peeks. The drone gun is mounted high, so aim upward when attacking it; eliminate it before standing in the open to destroy the computers. A Rocket Launcher from the weapons warehouse can help, but it is not mandatory.
Destroy the video screen and both mainframes. All three pieces of equipment are required for the computer-network objective. Before leaving, take the Safe Key from the desk or table in the same warehouse. The key is a separate objective, so verify that both the network and Safe Key objectives have registered before moving on. These objectives apply on Secret Agent and 00 Agent, not Agent.
- Destroy the drone gun or keep it safely out of your firing line.
- Destroy the video screen.
- Destroy both mainframes.
- Take the Safe Key.
- Confirm the applicable objectives are complete.
4. Recover the helicopter blueprints
Exit the computer warehouse and follow the route toward the open area marked by the overhead orange pipeline. Continue through the area with the white gate and graffiti-marked crates. A white or gray building appears on the right near the end of this route; this is the building containing the safe.
Enter the building, climb the stairs, and open the safe with the Safe Key. Take the helicopter blueprints. This completes the blueprint objective on Secret Agent and 00 Agent. If the safe will not open, return to the computer warehouse and confirm that you actually collected the Safe Key rather than merely destroying the network.
- Reach the area beneath the orange pipeline.
- Find the white or gray safe building near the final warehouse route.
- Climb to the upper floor.
- Open the safe and collect the helicopter blueprints.
5. Board Trevelyan’s train
After taking the blueprints, use the nearby upper-floor door to enter the adjoining warehouse. Go down the stairs and continue toward the far garage opening. Open the large door leading to the rail area. Trevelyan’s train is directly ahead; approach the train entrance and use the action button to board it.
Two Janus Marines may be inside the train. Killing neither, one, or both is optional. Reaching the train completes the mission, and the surviving guards determine which outro variation plays. You do not need to clear every warehouse or kill every guard. On Agent, this train objective is the only required task; on Secret Agent and 00 Agent, the higher-difficulty objectives must also be complete before boarding.
- Leave the safe building through the upper route.
- Descend to the loading area.
- Open the garage door to the rail area.
- Board Trevelyan’s train.
- Wait for the mission-complete screen or outro.
Before you move on
- On Agent, the mission objectives show Locate Trevelyan’s train complete and the train outro begins.
- On Secret Agent, the computer network, Safe Key, helicopter blueprints, and train objectives are complete.
- On 00 Agent, the illegal arms cache, computer network, Safe Key, helicopter blueprints, and train objectives are complete.
- Bond has boarded Trevelyan’s train and the mission-complete or outro sequence has started.
- The next campaign level is Train.
Mission 14 — Train
Train is a linear close-quarters mission aboard Trevelyan’s armored missile train. Destroy all six brake units, rescue Natalya, allow her to complete the required computer work for the selected difficulty, then use the Watch Laser to open the floor hatch and escape before the train explodes. Agent requires Destroy brake units, Rescue Natalya, and Escape to safety. Secret Agent adds Locate Janus secret base. 00 Agent requires both Locate Janus secret base and Crack Boris’ password. Completing Train unlocks Jungle, the next campaign mission.
1. Confirm the objectives and prepare your weapons
Pause at the beginning and check the objective list for your difficulty. You begin with a PP7 and the Watch Laser. The train has narrow compartments, explosive wooden crates, and several close-range firefights, so use doorways, corners, and non-explosive metal crates as cover rather than standing in the center of a car.
Collect D5K Deutsche and ZMG ammunition as you advance. On Agent, destroying the crates near the exit of the first car can reveal an RCP-90. On Secret Agent, the same location contains a DD44; it does not provide the RCP-90 on 00 Agent. Keep an automatic weapon ready for the later cars and the escape, but preserve enough ammunition for the hostage sequence.
- Verify the objectives shown for Agent, Secret Agent, or 00 Agent.
- Keep the Watch Laser available for the final hatch.
- Use doorways and corners to funnel guards.
- Avoid standing beside crates that begin darkening before they explode.
2. Clear the cars and destroy the brake units
Move through the first car from cover, eliminating the guards near the crates and collecting their D5K ammunition. The first brake unit is beside the exit door. It is a small gray control box connected to red and yellow pipes; shoot it until it is destroyed, then continue through the train.
Use the next doorway as a fallback position in the second car. Clear guards from behind the crates, staying away from wooden boxes when possible, and destroy the brake unit at the far end. In the passenger car, remain near the entrance while you pick off guards. Check the bathroom and the corners before moving forward, then destroy the brake unit near the front of the car.
The following passenger car has another brake unit near the entrance side. Clear the nearby rooms and watch for guards emerging from timed doors. After destroying the unit, look back into the previous car because enemies can enter from behind.
The short green cars contain better-armed guards, including enemies carrying ZMGs. Move from doorway to doorway, check the bathrooms, and collect ammunition only after the immediate area is safe. Continue until you reach the gray, girded car. Clear the guards near its entrance, then destroy the brake unit to complete Destroy brake units. Do not advance until the objective confirmation appears.
- Destroy all six brake units.
- Use metal crates, bathrooms, and doorways as cover.
- Check behind you after loud gunfire and after destroying a brake unit.
- Collect automatic-weapon ammunition from cleared compartments.
- Confirm Destroy brake units before entering the light-blue section.
3. Get the Train Door Key and rescue Natalya
After the final brake unit is destroyed, continue through the light-blue section. Kill the guards there and take the Train Door Key from one of them. Use it on the door to the final hostage car.
Reload before entering. Approach slowly and keep an accurate weapon equipped. Ourumov is holding Natalya at gunpoint while Xenia and Trevelyan are nearby. Shoot Ourumov first without hitting Natalya. Then damage or eliminate Xenia as quickly as you can. If Xenia remains active, Natalya can be forced to flee during the escape, creating additional danger and reducing the margin for error.
Trevelyan is not a required objective kill. Your priority is to free Natalya, keep her alive, and prevent the hostage scene from turning into an uncontrolled firefight.
- Take the Train Door Key after the final brake unit.
- Reload before entering the hostage car.
- Kill Ourumov without shooting Natalya.
- Damage or eliminate Xenia before beginning the escape preparations.
4. Wait for Natalya’s computer objectives
After the hostage encounter, Natalya moves to the computer. On Agent, there are no computer objectives. On Secret Agent, she must Locate Janus secret base. On 00 Agent, she must Locate Janus secret base and Crack Boris’ password. These objectives are completed by Natalya’s computer work rather than by Bond activating a separate console.
Protect her from the approaches while she works. Stand near the compartment entrances and use the cleared train cars as fallback positions. Watch for the objective messages. On Secret Agent and 00 Agent, do not leave the train before the required messages have appeared; exiting early can leave an objective incomplete.
- Protect Natalya while she works at the computer.
- Wait for Locate Janus secret base on Secret Agent and 00 Agent.
- Wait for Crack Boris’ password on 00 Agent.
- Do not leave through the hatch until Natalya has completed the required work.
5. Open the floor hatch and escape
The escape route is the white hatch in the floor of the hostage car, not a roof hatch. Equip the Watch Laser and melt the small gray locking strips around the hatch one at a time. Remove every strip until the hatch opens. If the laser is depleted, ordinary gunfire may help with a remaining lock, but conserving the laser is safer.
A countdown is active during the final sequence. Once Natalya is ready and the hatch is open, climb out and immediately face the guards waiting outside. Use your automatic weapon to suppress them, but do not stop for optional fights or ammunition. Move toward the far end of the train while keeping enough distance for Natalya to leave the blast area.
Do not sprint so far ahead that Natalya remains beside the train. Give her room to follow, clear the attackers blocking the route, and continue away from the train until the escape trigger is reached. The mission completes when Bond and Natalya survive the explosion and reach safety.
- Melt every gray locking strip with the Watch Laser.
- Leave only after Natalya has completed the required computer objectives.
- Suppress the guards outside instead of stopping to clear every enemy.
- Keep Natalya moving away from the train before the explosion.
- Reach the escape trigger and wait for the results screen.
Before you move on
- On Agent, the results screen confirms Destroy brake units, Rescue Natalya, and Escape to safety.
- On Secret Agent, the results screen also confirms Locate Janus secret base.
- On 00 Agent, the results screen confirms Locate Janus secret base and Crack Boris’ password in addition to the brake, rescue, and escape objectives.
- Natalya survives the explosion and the mission results screen appears.
- Jungle becomes available as the next campaign mission.
Mission 15 — Jungle
Jungle is Mission 15 of the original Nintendo 64 campaign and the first stage of the Cuba operation. Bond begins with Natalya and must destroy the automated drone guns, eliminate Xenia Onatopp and escort Natalya to Janus Base. Secret Agent and 00 Agent also require Bond to blow up the ammunition dump. The safest route is to move from tree to tree, destroy each drone gun before crossing exposed ground, defeat Xenia near the bridge, clear the cave and upper platform, then bring Natalya to the final elevator alive.
1. Secure the opening jungle and obtain an assault rifle
Natalya starts beside Bond and carries a Cougar Magnum. Move into the jungle, use the trees as cover and deal with the first guards from short controlled peeks. Pick up an AR33 Assault Rifle from the early guards as soon as it is safe to do so. Its scope is useful for locating distant soldiers and drone guns through the foliage.
Do not walk straight through the vegetation. Fire from one side of a tree, retreat while enemies or a drone gun are responding, then lean out again after the immediate burst of fire ends. The camouflage and fog can hide soldiers at close range, so sweep both sides of the route before moving forward. Keep Natalya nearby, but do not lead her into an uncleared group of enemies.
- The opening guards are defeated.
- An AR33 Assault Rifle has been collected.
- Natalya is alive and following Bond.
2. Destroy the drone guns before advancing
Use the AR33 scope and muzzle flashes to find the first drone gun ahead. Shoot it from behind a tree, then wait for the responding guards and defeat them from cover. Continue through the jungle and repeat this method when the next drone gun begins firing from the vegetation.
Follow the route toward the large wooden tower. Clear the guards around it before approaching, then destroy the drone gun beneath or beside the tower from a distance. The tower and nearby trees provide useful landmarks: if the bridge is visible but the tower gun is still active, do not cross yet.
Search along the jungle walls and around the trees for body armor when you need a health buffer, but do not remain in the open while looking for it. The objective is to remove the automated defenses, not to clear every hidden corner of the jungle.
- The early drone guns have been destroyed.
- The drone gun near the wooden tower is destroyed.
- The guards around the tower are under control.
3. Cross the bridge and eliminate Xenia
Take the route to the right of the wooden tower toward the hanging bridge. Xenia Onatopp appears as Bond reaches the bridge area. Use the AR33 or another automatic weapon and keep moving while firing. On Secret Agent and 00 Agent, her RCP-90 and grenade launcher make open ground especially dangerous, so use the bridge structure and nearby terrain to break her line of fire.
When Xenia rolls or pauses, continue firing rather than chasing her into a grenade blast. If she launches grenades, retreat from the impact area and re-engage from cover. Natalya can help, but she is vulnerable during this fight; keep enemies and explosive fire away from her.
After Xenia is defeated, collect her RCP-90 or grenade launcher if you need ammunition. Continue across the bridge and immediately look to the left for another drone gun near the trees. Destroy it before following the path toward the cave.
- Xenia has been eliminated.
- The drone gun near the bridge exit is destroyed.
- Natalya remains alive.
4. Clear the cave and reach the upper section
Follow the path into the cave area known as The Cage. Deal with the guards near the entrance, then locate the drone gun in the cave through the fog and vegetation. Use short retreats through the entrance if several guards rush at once; do not stand in the middle of the chamber while the gun is active.
Advance through the ascending cave tunnel and clear guards as the route rises. The upper section has additional soldiers and more automated defenses. Stop at corners, expose only enough of Bond to identify the target and destroy each drone gun before entering the next open area.
When the upper platform comes into view, expect several guards around the drone-gun positions. One gun may fire before the soldiers are fully visible, while another can face back toward the route Bond has just used. Clear the immediate group, turn around to check behind you, and destroy every remaining drone gun in the upper area before moving toward the crates.
- The cave entrance and lower chamber are clear.
- The ascending cave route has been cleared.
- All visible drone guns in the cave and upper platform area are destroyed.
5. Blow up the ammunition dump on Secret Agent or 00 Agent
On Secret Agent and 00 Agent, the ammunition dump objective is the group of crates around the disabled drone-gun positions on the upper platform. Place remote mines on or beside the crate group, then move Bond and Natalya well away from the blast before using the detonator. Wait for the objective to register before leaving.
Natalya must not be standing beside the crates when the mines are triggered. If the explosion kills her, restart the mission rather than trying to continue, because the escort objective cannot be recovered after her death.
On Agent, blowing up the ammunition dump is not part of the required objective list. You can pass the crates without using the mines, preserving them for emergencies.
- Secret Agent or 00 Agent: the ammunition dump objective registers as complete.
- Natalya is outside the explosion area before detonation.
- Agent: the optional ammunition-dump objective has been skipped or completed safely.
6. Escort Natalya to Janus Base
After the ammunition dump, finish clearing the upper platform and the guards along the final route. Use the large crates and rock formations as partial cover, and check behind Bond before advancing because some drone guns or soldiers can face back toward the approach.
Move through the final hallway only after the nearby guards are down. Keep grenades away from Natalya and avoid sprinting so far ahead that she is left fighting alone. If she stops, turn back and clear the enemy that is blocking her path.
Follow the route to the elevator at the end of the level. Natalya must be alive and reach the elevator with Bond. When the mission-complete screen appears, Control is the next stage in the Cuba operation.
- The drone-gun objective is complete.
- Xenia has been eliminated.
- Secret Agent or 00 Agent: the ammunition dump is destroyed.
- Natalya reaches the Janus Base elevator alive.
- The mission-complete screen appears and Control is available next.
Before you move on
- The selected difficulty's objective display shows Destroy drone guns and Eliminate Xenia as complete.
- Secret Agent and 00 Agent also show Blow up ammo dump as complete.
- Natalya is alive and reaches the Janus Base elevator.
- The mission-complete screen appears.
- Control, the next level in the Cuba operation, is available.
Mission 16 — Control
Control is Mission 16 of the original Nintendo 64 campaign and the second Cuba mission. Its three objectives are Protect Natalya, Disable GoldenEye satellite, and Destroy armored mainframes. There are six mainframes in total: five can be destroyed before Natalya begins hacking, while the final one becomes accessible after the satellite objective is complete. Prepare remote mines, clear the route methodically, and keep the main control room defensible during Natalya’s lengthy hack.
1. Clear the elevator room before bringing Natalya forward
Open the starting elevator and clear the large control room. On higher difficulties, deal with the nearby drone guns and guards from cover before crossing the open floor. Do not immediately leave with Natalya. First make the room safe, then return to the elevator and bring her out so she can operate the computer and open the route ahead.
After Natalya opens the passage opposite the computer, move through the corridor carefully. Eliminate the guards at range, then slow down at the junction where several enemies can throw grenades. Go down the short staircase and collect the remote mines before continuing toward the hangar and the main control area.
- The starting control room is clear.
- Natalya has been brought out of the elevator.
- Remote mines have been collected.
- The route toward the hangar is open.
2. Reach the main control room and collect useful armor
Continue through the hangar, clearing its guards before climbing the stairs. Several enemies are positioned around the stair route, so use the doors and corners as cover instead of charging into the upper level. Enter the main control room and identify the large central floor, the upper walkways, the blue staircase, and the brown armored doors.
Before starting Natalya’s sequence, search the upper route for body armor if it is available on your difficulty. Another armor pickup is located along the route toward the exit near the lockers. These are optional supplies, but collecting one before the defense can make the mission considerably safer.
- You have reached the main control room.
- You have identified the upper walkways and exit-side hangar route.
- Body armor has been collected if needed.
- Your remote mines and primary weapon are ready.
3. Destroy the five accessible armored mainframes
There are six armored mainframes in Control. Destroy the five that are accessible before bringing Natalya to the satellite console. Two are on the ground floor near Boris’s position. Two more are on the upper level around the main control room. The fifth is in the room beyond the blue doorway, where drone guns and guards protect the server area.
Place a remote mine beside a mainframe, move behind a wall or through a doorway, and detonate it from safety. Avoid standing beside the cabinet when the mine explodes. In the drone-gun room, enter only far enough to destroy the immediate threats, reach the server rack, and retreat through the doorway if the room becomes dangerous. Check the objectives screen after each group of cabinets so you know which targets have registered.
- Two ground-floor mainframes near Boris are destroyed.
- Two upper-level mainframes are destroyed.
- The mainframe in the drone-gun room is destroyed.
- Five of the six mainframes are confirmed destroyed.
- You still have ammunition for the Natalya defense.
4. Bring Natalya to the satellite console
Return to the upper route and open the brown armored door that leads to Natalya’s path. She will enter the main control room and move to the computer beneath the large GoldenEye display. Make sure the immediate area is as clear as possible before allowing her to begin.
When Natalya starts working, the alarm begins and guards attack from the stairs and from the glass-sided areas around the room. Position yourself near the blue desk or another piece of cover behind Natalya, with a clear view of the main staircase. Do not block her movement and do not leave the room to chase distant enemies.
- Natalya has entered the main control room.
- Natalya is using the satellite computer.
- You are positioned near cover with sight of the main approach.
- The five preliminary mainframes are already destroyed.
5. Protect Natalya until the satellite objective completes
Guard the staircase first, but keep checking both sides of the control room. Enemies can break through the large windows and attack Natalya from an angle that is easy to miss while watching the stairs. Eliminate any guard who has a direct line of fire to her before dealing with enemies farther away.
Use short, controlled bursts and retreat behind a doorway or wall if several guards enter together. Do not use grenades at close range in the compact control room. Armor is only a buffer, not a substitute for cover. Continue defending until the game registers Disable GoldenEye satellite as complete and Natalya begins leaving the room.
- Natalya survives the entire hacking sequence.
- Disable GoldenEye satellite is marked complete.
- No guard is left with a clear shot at Natalya.
- You have a safe route back toward the mainframe rooms.
6. Destroy the final mainframe and leave through the elevator
After the satellite objective completes and Natalya has moved away, return to the brown armored-door area on the left side of the main room. The sixth mainframe is behind the glass in this section and is not safely available during the earlier part of the mission. Place a remote mine beside it, retreat through the doorway, and detonate the mine. Verify that Destroy armored mainframes is complete before heading for the exit.
Once all three objectives are complete, follow the route back across the hangar to Bond’s elevator. Natalya must survive and reach the elevator area for Protect Natalya to register fully. Trevelyan may be visible near another elevator, but he is not the target for this mission and shooting him does not complete the level. Enter Bond’s elevator only after every objective is confirmed.
- The sixth mainframe is destroyed.
- Protect Natalya is complete.
- Disable GoldenEye satellite is complete.
- Destroy armored mainframes is complete.
- Bond reaches the correct elevator and the results screen appears.
Before you move on
- The mission-results screen lists Protect Natalya, Disable GoldenEye satellite, and Destroy armored mainframes as completed.
- All six armored mainframes have been destroyed.
- Natalya survives and reaches the elevator route.
- The campaign advances to Mission 17, Caverns, also known as Water Caverns in some guides.
References for this chapter
Mission 17 — Caverns
Caverns is the third part of Mission 7: Cuba and the seventeenth level of the original Nintendo 64 campaign. It is a dry underground complex, not a swimming level, so there is no oxygen meter or breath-management route. The level combines tight tunnels, a long spiral walkway, catwalks, automated guns, explosive barrels and scientists who must be protected. On Agent, the required objective is to minimize scientist casualties. Secret Agent adds Destroy Inlet Pump Controls, Destroy Outlet Pump Controls and Destroy Master Control Console. 00 Agent requires all of those objectives plus Use Radio to Contact Jack Wade.
1. Clear the elevator landing and collect the opening supplies
Open the starting elevator and deal with the guards immediately outside. More guards can arrive after the first group, so use the elevator doorway or nearby walls as cover instead of sprinting into the open chamber. Collect the ammunition dropped around the landing and switch between the ZMG and any AR33 you obtain so that one weapon does not consume all of its reserve.
Leave the elevator area through the next door and descend the stairs. Guards occupy the walkway, the door approaches and the lower connecting hall. Use the railings, doorframes and corners to expose only one enemy at a time. On Secret Agent and 00 Agent, pick up the AR33 carried by a guard if possible; its scope is useful on the later catwalks.
- Clear the guards around the starting elevator.
- Collect nearby ammunition and an AR33 when available.
- Reach the lower walkway without running past an uncleared flank.
2. Protect the scientists and destroy the inlet pump controls when required
Continue along the walkway, using the doors and railings as cover, until you reach the rooms with scientists and computer equipment. Secret Agent and 00 Agent require the inlet pump controls to be destroyed; Agent does not. Do not fire at the computers until the nearby scientists have moved away from the blast area.
To move a scientist, stand in front of the character with your weapon aimed at them. They will normally raise their hands and retreat. If one remains in place, fire a warning shot near the character rather than into the body. Move through both scientist rooms and keep the scientists away from the consoles before placing timed mines or firing at the computer banks. Destroy all of the equipment associated with the inlet controls, then verify the objective message before leaving.
Use the mines on the machinery rather than wasting automatic-weapon ammunition, but step well away before detonation. Collect the ammunition from the surrounding crates only after the explosions and scientist movement are finished.
- Keep the scientists away from the inlet machinery.
- Destroy the inlet pump controls on Secret Agent or 00 Agent.
- Confirm the inlet objective before opening the route toward the underground lake.
3. Cross the spiral cavern and enter the central combat area
Open the large mechanical doors beyond the inlet rooms. The route winds upward around the cavern in a long spiral. There is no water traversal here: follow the dry walkway and deal with guards positioned along the curve. Enemies with AR33 rifles can punish you across the open space, so stop at bends, use the wall or railing for cover and shoot from distance rather than crossing the middle of the path.
At the top, approach the next chamber carefully. Several guards wait beyond the doors, including heavily armed enemies. Open the first door from cover, draw attention from the edge and retreat if the room becomes crowded. A timed mine at the doorway can thin the first wave, but avoid using explosives if a scientist or vulnerable objective area is within the blast.
- Follow the spiral walkway upward without searching for a submerged route.
- Use the railing and bends as cover against AR33 fire.
- Clear the upper chamber before advancing to the catwalks.
4. Work through the catwalks and collect code cards
Proceed onto the catwalk network and clear the visible guards from the upper and lower levels. Railings can block enemy sightlines, allowing you to use the AR33 scope for controlled shots. Search fallen guards for the code cards needed by the locked doors; Code Cards A, B and C are carried by guards in the later sections. Pick up each card when it appears rather than leaving it behind and having to backtrack.
A side area contains stacked crates with additional ammunition. Use timed mines on the crate groups if you need supplies, then switch back to your most reliable automatic weapon. Continue along the catwalks until you reach the large room containing the outlet pump machinery. This section is a combat route, not an objective-free shortcut, so make sure the doors ahead open before committing to the next platform.
- Clear both levels of the catwalk approach.
- Collect code cards dropped by the relevant guards.
- Stock up on ammunition before entering the outlet pump room.
5. Destroy the outlet pump controls
The outlet room is a large machinery space with multiple guards and an automated gun. Deal with the guards from the doorway or behind structural cover, then destroy the drone gun before standing in the open near the pump. On Secret Agent and 00 Agent, destroy the two computers beside the large pump and the additional computer in the corner. These three pieces of equipment complete the outlet pump objective.
Do not rush to the center while the turret and guards are active. If the room becomes too dangerous, retreat through the door and let enemies approach one at a time. Once the objective confirmation appears, leave by the route back to the catwalks and prepare for the communications section.
- Destroy the outlet pump controls on Secret Agent or 00 Agent.
- Disable the automated gun in the room.
- Verify the outlet objective before continuing.
6. Reach the communications room and contact Jack Wade before destroying the master console
From the outlet area, follow the large doors and the connecting hall toward the communications section. Clear the guards around the approach, then enter the room containing the radio, scientists, gasoline barrels and master control equipment. On 00 Agent, the radio objective must be completed before the radio equipment or nearby explosive scenery is destroyed. Stand directly at the radio and activate it; wait for the objective confirmation.
After using the radio, move the scientists away from the master console and gasoline barrels. Keep automatic fire controlled because shots can pass through targets or strike the explosive surroundings. Once the scientists are clear, destroy the master control equipment on Secret Agent and 00 Agent. Timed mines are effective, but place them only after the scientists have retreated and step back before the detonation. Agent players should still protect the scientists even though the destruction objectives are not listed.
- Use the radio before damaging the communications equipment on 00 Agent.
- Move all nearby scientists away from the explosive machinery.
- Destroy the master control console on Secret Agent or 00 Agent.
- Confirm the radio and master-console objectives before leaving.
7. Escape through the final corridor and enter the elevator
Return through the communications doors to the catwalk route. Expect guards to remain or arrive behind you, so keep moving and use the walls and doorways rather than stopping in the middle of a platform. At the final approach, open the first door, then the next, and retreat slightly so you can target the two ceiling-mounted drone guns from the doorway. Destroy both automated guns before committing to the long corridor.
Once the guns are disabled, advance quickly through the corridor and eliminate only the guards blocking the elevator route. Ammunition and armor are useful, but do not delay in the open while trying to clear every distant enemy. Enter the elevator at the end of the corridor after every displayed objective is complete. The mission ends at the elevator trigger; there is no underwater escape or separate air-management sequence.
- Both final ceiling-mounted drone guns are destroyed or bypassed safely.
- Every objective shown for the selected difficulty is complete.
- No required scientist has been killed.
- Enter the end elevator and wait for the results screen.
Before you move on
- The post-mission results screen appears and the next level, Cradle, becomes available in the Cuba sequence.
- On Agent, the scientist-casualty objective is complete.
- On Secret Agent, the inlet pump, outlet pump and master control objectives are also complete.
- On 00 Agent, the radio objective is complete in addition to all three destruction objectives and minimized scientist casualties.
- If attempting the Caverns time challenge, the original level target listed by specialist N64 references is 9:30 on 00 Agent, which unlocks the two RC-P90 cheat.
Missions 18–20 — Antenna Cradle, Aztec Complex and Egyptian Temple
Antenna Cradle is level 18 and the final mission of the main operation, but it does not complete this route. Aztec Complex becomes available after all 18 main-operation levels are completed on Secret Agent or higher. Egyptian Temple requires every preceding mission, including Aztec Complex, to be completed on 00 Agent. Complete the stages in that order and confirm their objective screens before moving on.
1. Destroy the Antenna Cradle control console
At the start, turn around and collect the body armour if you are preparing for a full-difficulty run. Return to the walkway and advance around the cradle, using the supports, ramps and machinery as cover. Pick up ZMG ammunition from defeated guards, but avoid standing in the open on the main catwalk.
Descend toward the control-console shed. Enter carefully and destroy both sentry guns before dealing with the console. Then destroy the control console to complete the first objective. Do not spend the entire attempt chasing Trevelyan before this objective is marked complete; the console room is the mission’s required first task and is dangerous if approached without cover.
- Opening body armour collected if needed.
- Both sentry guns in the console shed destroyed.
- Destroy control console marked complete.
2. Pursue and defeat Trevelyan
Trevelyan cannot be defeated simply by emptying ammunition into him. Shoot him to trigger his dialogue, allow the line to finish, and then shoot him again when he reappears. After leaving the console shed, use the upper walkways and cross between the two sheds rather than following directly behind him around the cradle.
Avoid dropping down the ramp too early. From the balcony, look down toward the lower cradle and fire when Trevelyan is visible. Move back through the shed and across to the opposite side, collecting the other body armour if it remains available. Repeat the shoot-and-cross routine until Trevelyan delivers his final challenge and retreats to the bottom platform.
Only then descend to the lower cradle. Keep the ramp or machinery between Bond and pursuing guards, stay away from the edge, and use controlled automatic fire on Trevelyan at close range. His defeat completes the mission; there is no separate extraction objective.
- Trevelyan’s dialogue-triggered pursuit completed.
- Opposite shed and balcony routes used for cover.
- Trevelyan defeated on the lower cradle platform.
- Settle the score with Trevelyan marked complete.
3. Unlock Aztec Complex
Return to the mission-select screen. Aztec Complex unlocks only after all 18 main-operation levels, from Dam through Antenna Cradle, have been completed on Secret Agent or higher. A complete 00 Agent run also satisfies the requirement.
Select Aztec Complex under the Teotihuaca’n grouping. If Egyptian Temple is your final goal, use 00 Agent for the campaign and for Aztec Complex, because Egyptian Temple requires all preceding missions on 00 Agent, not merely the 18 main levels.
- Dam through Antenna Cradle all show Secret Agent or 00 Agent completion.
- Aztec Complex is available in mission select.
- The selected difficulty is 00 Agent if continuing toward Egyptian Temple.
4. Reach the shuttle systems in Aztec Complex
Clear the guards around the starting doorway, then open the concealed wall opposite the start. In the next chamber, use the upper route and the concealed door rather than dropping into the central gap. In the dark control room, briefly expose yourself and retreat into the hallway so guards approach through the choke point.
Use the flashing control panel to open the concealed computer route. Follow it through the guarded corridors, then destroy the console that exposes the passage toward the exhaust and shuttle rooms. Collect the armour when safe. Destroy the automatic guns from cover before crossing the larger shuttle room, and eliminate the laser-armed guards behind the crates.
In the shuttle room, climb the ladder and operate the exhaust-bay control. This changes the exhaust-door state and opens the route needed for the Jaws section. Clear the immediate area before leaving the room.
- Starting concealed door and upper route used.
- Computer-room access opened.
- Console destroyed to expose the connecting passage.
- Body armour collected where available.
- Automatic guns near the shuttle room destroyed.
- Exhaust-bay control operated.
5. Defeat Jaws and reprogram shuttle guidance
From the shuttle room, take the opened route to the temple-like long room. Descend the stairs, turn into the passage, and eliminate the guard around the corner. Jaws follows immediately. Fight from the stair approach or narrow passage, where retreat is easier than in the open chamber. The AR-33 is dependable because it fires continuously; the military laser is also useful, but avoid relying on its firing delay at close range.
Keep moving sideways while firing at Jaws, then collect his security smart card and weapon after he falls. Return through the shuttle and exhaust areas to the computer room. Use the smart card to open the glass-enclosed section. Collect the launch protocol DAT from the table on the right, then equip the guidance data and use it on the terminal on the left. This completes Reprogram shuttle guidance.
- Jaws defeated.
- Security smart card collected.
- Glass-enclosed computer section opened.
- Launch protocol DAT collected.
- Guidance data used at the correct terminal.
- Reprogram shuttle guidance marked complete.
6. Launch the shuttle
Return to the mainframe at the far end of the shuttle room and use the launch protocol DAT. The launch countdown begins. Climb the ladder and operate the exhaust-bay control again so the shuttle can complete its launch sequence. Keep moving between cover and the ladder while responding guards attack; do not stand beneath the shuttle or in the exhaust path.
If the countdown does not finish, check the objectives and inventory. The usual missing actions are failing to use the launch protocol DAT at the shuttle-room mainframe or failing to operate the exhaust-bay control after starting the countdown. When the countdown completes, Aztec Complex is finished.
- Launch protocol DAT used at the shuttle-room mainframe.
- Exhaust-bay control operated after the countdown begins.
- Shuttle launch completes.
- Aztec Complex mission-complete message appears.
7. Unlock and enter Egyptian Temple
Egyptian Temple unlocks only after every preceding mission, including Aztec Complex, has been completed on 00 Agent. This means all 18 main-operation levels and Aztec Complex must each show 00 Agent completion. Completing the main operation alone is not sufficient.
Select Egyptian Temple under the al-Saghira grouping. Its objectives are Recover Golden Gun and Eliminate Baron Samedi. The level requires the Golden Gun floor puzzle followed by three separate Baron Samedi encounters.
- All 18 main levels show 00 Agent completion.
- Aztec Complex shows 00 Agent completion.
- Egyptian Temple is available in mission select.
- Recover Golden Gun and Eliminate Baron Samedi appear as objectives.
8. Solve the Golden Gun floor puzzle
From the entrance, pass the blue-glass pool area and deal with the guards. Move through the pillar room to the passage leading to the stairs. Take the stairs, open the gray door, and enter the Golden Gun room. The first tile is the starting square immediately inside the puzzle area; step onto it to activate the glass case.
Use this exact route, counting one tile per full floor-square movement: step onto the first tile; move left two tiles; move forward two tiles toward the case; move right three tiles; move forward two tiles; move left one tile; move forward one tile; move left one tile; move forward two tiles; move right one tile. You should then be directly in front of the case. The glass lowers when the sequence is correct.
Collect the Golden Gun and its ammunition. Exit through the door-wall on the left. If the automatic guns activate because of a wrong step, leave immediately through that left door-wall, return to the stairs, and enter the room again. The guns reset, allowing another attempt.
- Puzzle room entered through the gray door.
- First tile activated.
- Exact floor-square sequence completed.
- Golden Gun and ammunition collected.
- Recover Golden Gun marked complete.
- Automatic guns reset through the left door-wall and stairs if necessary.
9. Defeat Baron Samedi three times
Equip the Golden Gun and leave the puzzle room. Defeat the nearby guard, then continue into the next room for the first Baron Samedi encounter. He uses dual DD44s; one accurate Golden Gun shot defeats him.
Return through the hall toward the starting pool. Samedi appears there for the second encounter with dual ZMGs. Use pillars and corners to limit incoming fire, then land another Golden Gun shot. After this defeat, the temple darkens.
Return toward the Golden Gun stair area and take the concealed door-wall behind the pillar in the shadows, or use the alternate route to the right of the Golden Gun stairs. Follow the passage to the final chamber. Collect the body armour behind the black glass if it is safe, use the central glass structure as cover, and defeat the final Samedi, who carries dual Moonraker lasers. The third defeat completes the second objective and ends the mission.
- First Baron Samedi defeated.
- Second Baron Samedi defeated near the starting pool.
- Darkened temple route located.
- Final chamber reached.
- Final Baron Samedi defeated while carrying Moonraker lasers.
- Eliminate Baron Samedi marked complete.
Before you move on
- Antenna Cradle is complete with Destroy control console and Settle the score with Trevelyan marked complete.
- Aztec Complex is unlocked and complete with Reprogram shuttle guidance and Launch shuttle marked complete.
- Egyptian Temple is complete with Recover Golden Gun and Eliminate Baron Samedi marked complete.
- The third Baron Samedi defeat triggers the Egyptian Temple mission-complete sequence and ending presentation.
- Allow the ending presentation and credits to run. The assigned progression is complete only after Egyptian Temple, not after Antenna Cradle or Aztec Complex.
References for this chapter
- GoldenEye 007 — Guide and Walkthrough — Nintendo 64 — By liukang
- GoldenEye 007 — Aztec Level Walkthrough — Nintendo 64 — By HHuang
- GoldenEye 007 — Egyptian Temple Walkthrough — Nintendo 64 — By Ernest_64
- GoldenEye 007 — Guide and Walkthrough — Nintendo 64 — By Nemesis
- GoldenEye 007 on Nintendo 64 — Agent Mission 8: Teotihuaca’n — Aztec Complex
Finishing up
You have completed all 18 main-operation levels from Dam through Antenna Cradle on 00 Agent, then completed Aztec Complex on 00 Agent and Egyptian Temple on 00 Agent.
The main-operation campaign ends at Antenna Cradle, but this guide's full completion point is the Egyptian Temple ending sequence and end credits.
Aztec Complex is unlocked by completing all 18 main-operation levels on Secret Agent or higher.
Egyptian Temple is unlocked by completing every preceding level, including Aztec Complex, on 00 Agent.
The mission-selection screen records the completed stages and the Game Pak save retains the campaign progress.
All required objectives for the 00 Agent route have been completed in every main-operation level, Aztec Complex and Egyptian Temple. Medals, cheats, multiplayer unlocks and other optional records are separate from this completion check.
Choose your next gameScreenshots & video
Game imagery for reference. Follow the written chapters above for the route and strategies.
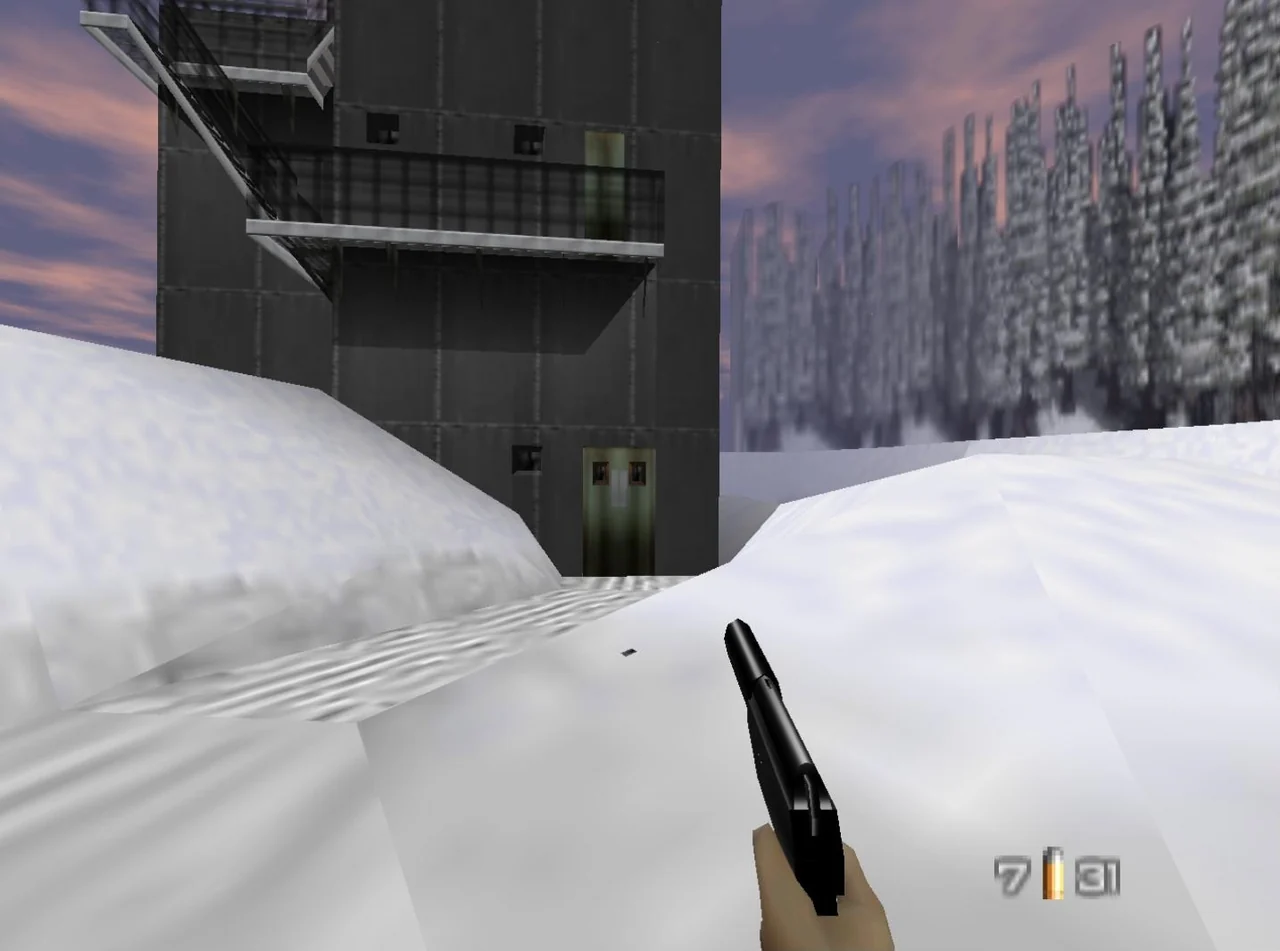
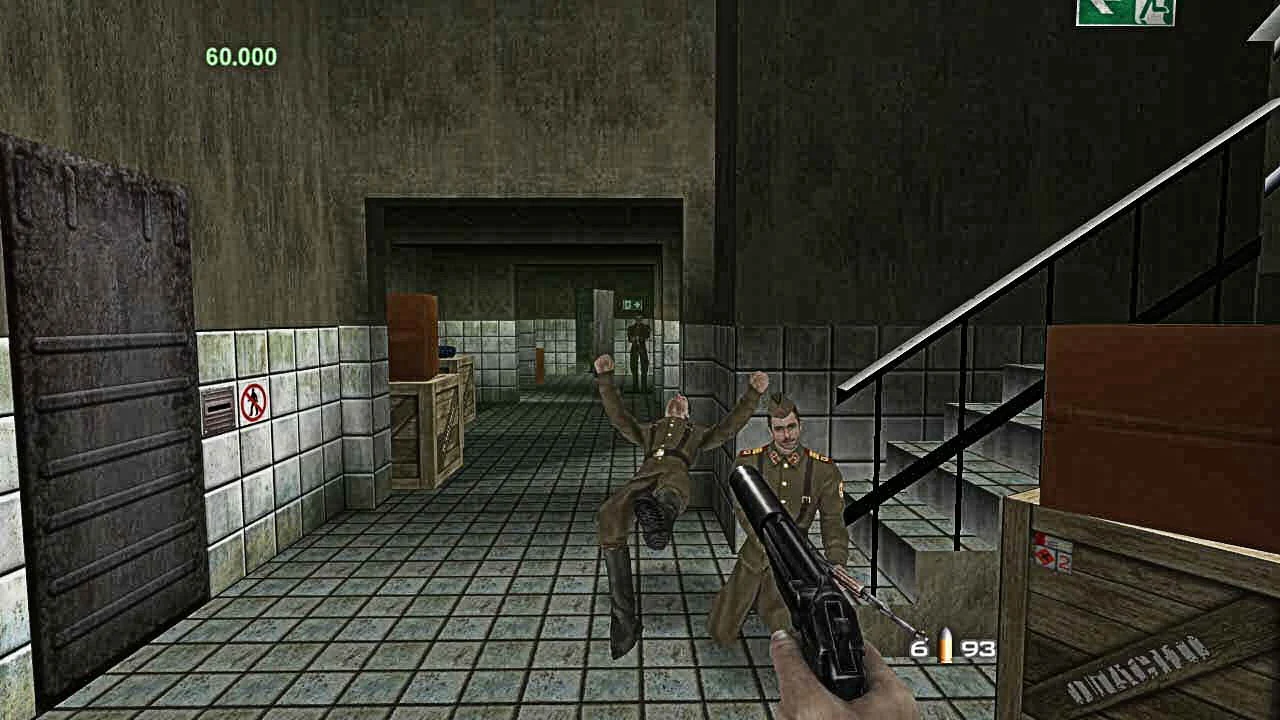
Sources & references
Our original guide draws on the references below. Check the edition at the top of this page before following controls or unlock requirements.
- GoldenEye 007 Instruction Booklet, Nintendo 64
- GoldenEye 007 USA Instruction Booklet
- GoldenEye 007 — Guide and Walkthrough — Nintendo 64 — By Nemesis
- GoldenEye 007 — Controls, StrategyWiki
- GoldenEye 007 — Data Crystal save-type reference
- GoldenEye 007 — Strategy Guide — Nintendo 64 — James007
- GoldenEye 007 — Dam Walkthrough — Pro Game Guides
- GoldenEye 007/Dam — StrategyWiki
- GoldenEye 007 — Objectives — GameFAQs
- GoldenEye 007 — 00 Agent Guide — Nintendo 64 — marshmallow
- GoldenEye 007 — Guide and Walkthrough — Nintendo 64 — IRogers
- GoldenEye 007/Facility — StrategyWiki
- Facility — The GoldenEye Depot
- Runway — The GoldenEye Depot
- Runway guide - GoldenEye 007 — Shacknews
- GoldenEye 007/Runway — StrategyWiki
- Bunker 1 guide — GoldenEye 007
- GoldenEye 007/Bunker 1 — StrategyWiki
- GoldenEye 007/Silo — StrategyWiki
- Frigate — The GoldenEye Depot
- Rare Gamer — GoldenEye 007 Walkthrough 4-1: Frigate
- GoldenEye 007 — Guide and Walkthrough — Nintendo 64 — GameFAQs
- Surface 2 — The GoldenEye Depot
- GoldenEye 007 — Guide and Walkthrough — Nintendo 64 — Outkast
- GoldenEye 007 — Guide and Walkthrough — Nintendo 64 — By liukang
- Bunker 2 — The GoldenEye Depot
- GoldenEye 007/Bunker 2 — StrategyWiki
- GoldenEye 007 — Guide and Walkthrough by FAQ_GOD, Nintendo 64
- GoldenEye 007/Statue — StrategyWiki
- Archives — The GoldenEye Depot
- GoldenEye 007/Streets — StrategyWiki
- Streets — The GoldenEye Depot
- Depot — The GoldenEye Depot
- Rare Gamer — GoldenEye 007 Walkthrough 7-1: Jungle
- GoldenEye 007/Jungle — StrategyWiki
- GoldenEye 007 on Nintendo 64 — Agent Mission 7: Cuba — Part II: Control Centre
- How do I get all the mainframes in Control Center? — GoldenEye 007 Q&A
- Caverns — The GoldenEye Depot
- GoldenEye 007 — Aztec Level Walkthrough — Nintendo 64 — By HHuang
- GoldenEye 007 — Egyptian Temple Walkthrough — Nintendo 64 — By Ernest_64
- GoldenEye 007 on Nintendo 64 — Agent Mission 8: Teotihuaca’n — Aztec Complex
About the game & collecting notes
- Platform
- Nintendo 64
A practical, start-to-finish walkthrough for the original Nintendo 64 (USA) edition of GoldenEye 007 (1997). Covers all 18 main-operation levels in order, then the unlock-dependent bonus missions Aztec Complex and Egyptian Temple, with practical preparation, save and control notes, difficulty-specific objectives, recovery advice, and completion checks.
Darryl Polo
Darryl Polo loves tinkering with emulation and revisiting retro games. He enjoys exploring how old favorites play on different setups and sharing what he learns along the way. At Joking Joystick, he writes about the games, hardware, and small discoveries that keep the hobby fun.
Our editorial standardsFound a step that needs another look? Help us improve this guide.