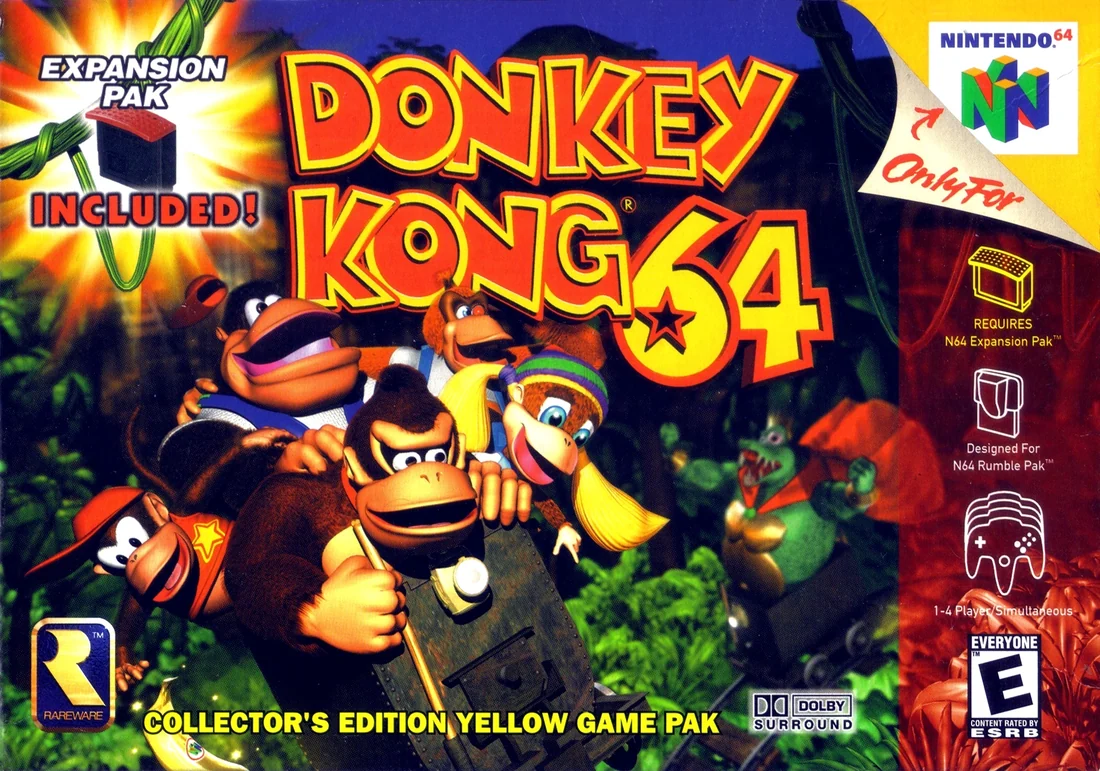
Donkey Kong 64 — Nintendo 64 (USA) Complete Campaign Walkthrough
Step-by-step campaign walkthrough for the original Donkey Kong 64 (Nintendo 64, USA). Covers required hardware, hub navigation, every main world through Hideout Helm and the final King K. Rool confrontation, the progression gates (blueprints, banana medals, boss keys, battle crowns, Rare/Nintendo coins), common failure recoveries and a final completion checklist to confirm the true ending.

Find a copy
Donkey Kong 64 Nintendo 64
We may earn a commission if you buy through these links, at no extra cost to you. As an Amazon Associate I earn from qualifying purchases.
Opens retailer search results. Check the model, edition, seller, availability and current price before buying.
Before you begin
You are about to play the original Donkey Kong 64 for the Nintendo 64 (USA cartridge).
The game requires a Nintendo 64 Expansion Pak; install it before starting.
Expect a large, open hub, DK Isles, leading to seven ordinary worlds, the final world Hideout Helm, and the King K. Rool confrontation.
Progression uses several separate systems: Boss Keys open the hub and Hideout Helm route, Golden Bananas open world lobbies and Hideout Helm itself, blueprints extend the Hideout Helm timer when given to Snide, and the Nintendo Coin, Rareware Coin and Battle Crowns open later doors inside Hideout Helm.
Play with a consistent control setup and frequent saves.
The game swaps playable Kongs heavily: learn the tag barrels and each Kong’s core abilities early, and treat Funky, Candy and Cranky as essential upgrade shops.
Follow the chapter order: clear required world objectives, defeat each world boss, deliver Boss Keys to K. Lumsy, turn in blueprints for additional Hideout Helm time, obtain the two special coins and at least four Battle Crowns, then complete Hideout Helm and the final King K. Rool battle.
Set yourself up for the run
Install and verify the Nintendo 64 Expansion Pak is present — Donkey Kong 64 will not run without it.
(See the official manual.)
Choose a control layout and stick sensitivity you can live with — Kong movement, aiming (sniper mode) and camera feel impact many platforming and shooting tasks.
Bindments are the game defaults on N64; practice aiming in a safe area first.
Learn Kong swapping/tag barrels and the bananaport warp pads on DK Isles; these are used constantly for travel and accessing Kong-specific areas.
Visit Funky, Candy and Cranky early to see upgrade costs and equip a Kong with basic movement/attack upgrades you can afford.
Prioritize at least one ranged option for each Kong so you can reach distant switches and shoot targets in minigames.
Keep track of the shorthand collector sets: blueprints (turn in to Snide), banana medals (one per Kong per level), boss keys (unlock cages / new areas), battle crowns (arena wins), and the Nintendo/Rareware coins (special unlocks).
This walkthrough lists where each is required.
Make use of save slots; keep a separate save slot before entering Hideout Helm and before major boss fights.
Hideout Helm includes a timed section influenced by blueprints turned into Snide; a fresh save prevents catastrophic repeated backtracking.
If you intend 101% or full cleanup, be prepared for extended backtracking: the game is designed with interdependent collectibles.
Use this guide’s checklist chapter to plan a final clean-up run.
Quick Start, Hardware & Controls
Set up the original North American Nintendo 64 release, verify the required Expansion Pak, learn the movement and navigation systems used throughout the campaign, and establish a reliable save routine. These instructions apply to the original Nintendo 64 game, not a later port, remake, or convenience modification.
1. Verify the required Expansion Pak
Turn the Nintendo 64 off before checking the expansion compartment at the front of the console. Donkey Kong 64 requires a Nintendo 64 Expansion Pak inserted in the Control Deck; the standard Jumper Pak is not sufficient for this game. Do not remove or install either memory module while the console is powered on.
Insert the original USA cartridge after confirming that the Expansion Pak is seated. Turn the console on and continue until the game reaches its title or file-selection screen. That successful boot confirms that the required memory expansion is present and being recognized. If the game does not boot, switch the console off completely before reseating the Expansion Pak or cartridge. The official manual also identifies the Rumble Pak as compatible, but it is optional and is not needed to complete the campaign.
- The Expansion Pak is installed in the console rather than a Jumper Pak.
- The cartridge reaches the title or file-selection screen.
- The console is powered off before any cartridge or memory-module adjustment.
2. Practice the essential controls
Use the opening area and the early training opportunities to learn the controls before committing to difficult platforming. The Control Stick moves the active Kong, A jumps, B attacks, Z crouches, and START opens the pause menu. Press R once to center the camera behind the Kong; hold R to keep the camera locked behind the character. The C Buttons rotate the camera or change the zoom level.
Practice a running attack by gaining speed and pressing B. For a jumping attack, press A and then B while airborne. Hold Z and press A for a backflip. For a long jump, run forward, press Z, and immediately press A. These moves are useful for crossing gaps and reaching platforms, but do not use a long jump near an edge until you are comfortable with its distance.
Practice climbing by jumping onto a ladder, pole, tree, or other climbable surface and using the Control Stick. Press A to let go and jump away. In water, normal Control Stick movement handles surface swimming. Hold B to swim faster at the surface, press Z to dive, hold A for faster underwater movement, and use Z underwater as a brake.
- You can center and hold the camera with R.
- You can perform a backflip and long jump without losing control.
- You can climb, dive, swim quickly underwater, and brake underwater.
3. Learn Tag Barrels and Kong selection
Tag Barrels are the normal character-switching points during level exploration. Jump into a Tag Barrel to see the Kongs currently available, then use the displayed selection controls to choose one. Donkey Kong is available at the beginning; each rescued Kong adds that character’s face to Tag Barrels throughout the game.
Tag Barrels also restore the active Kong’s energy, so use one before a hazardous section when one is nearby. Do not assume that every Kong can use every switch or passage. Colored bananas, character-marked pads, special barrels, instruments, and weapons are assigned to particular Kongs. If a route contains a switch or obstacle that does not respond to the current character, look for a nearby Tag Barrel rather than repeatedly attacking it.
Normal Kong swapping is performed at Tag Barrels in the original Nintendo 64 release. Bananaports move a Kong between locations, but they do not change the active character.
- You can enter a Tag Barrel and select Donkey Kong.
- You know that rescued Kongs appear in later Tag Barrel selections.
- You check the required Kong before attempting a character-specific obstacle.
4. Activate and use Bananaport Pads
Bananaport Pads are numbered pairs. A pad does not become useful until both pads with the same number have been activated. When you find one, stand on it and press Z if the game allows activation. Later, stand on either active pad in the pair and press Z to travel to its matching destination.
Activate pads as you encounter them, especially in DK Isles and near level entrances. This creates short routes between areas you have already visited and reduces backtracking when a newly rescued Kong or newly purchased ability opens an earlier route. Remember the distinction between the systems: use a Bananaport to travel to another activated location, and use a Tag Barrel when you need to become a different Kong.
- You activate both pads in a numbered pair before relying on the route.
- You press Z while standing on an active pad to use the linked destination.
- You still visit a Tag Barrel when a puzzle requires another Kong.
5. Establish primary and backup save files
At the file-selection screen, choose one slot as the main campaign file and reserve another for recovery. The pause menu’s Save option writes progress to the current game slot, while Quit Game saves and exits. Save after major milestones such as rescuing a Kong, opening a new area, defeating a boss, collecting a boss key, or purchasing an important upgrade.
A backup slot is especially useful before experimenting with a difficult final sequence. Keep it at a stable milestone rather than overwriting it after every short session. Before entering Hideout Helm much later, preserve a separate save outside the timed sequence with your collected keys, upgrades, and preparation already complete. If the final run fails, reload that file instead of replaying the earlier campaign. Do not overwrite the backup immediately after entering the final area.
- One file is identified as the primary campaign slot.
- A second file is reserved as a recovery or milestone backup.
- A pre-Hideout Helm save is preserved before beginning the final timed sequence.
Before you move on
- The original USA cartridge boots with an Expansion Pak installed and reaches normal gameplay.
- You can move, attack, jump, crouch, center the camera, climb, dive, and swim.
- You can perform a backflip and long jump, even if you still need more practice for precision jumps.
- You can use a Tag Barrel to select an available Kong and understand that it also restores energy.
- You can activate matching Bananaport Pads and use Z to travel between them.
- Your primary and backup save slots are identifiable, and you know which file will be preserved before Hideout Helm.
- You have not entered Hideout Helm prematurely; its keys, blueprints, upgrades, and timed preparation belong to later progression.
DK Isles — Hub, Shops and Movement
DK Isles is the travel hub for the original Nintendo 64 version of Donkey Kong 64. Finish the opening training sequence, activate the Bananaport network, visit K. Lumsy to open Jungle Japes, and learn where the service buildings are located. Snide’s headquarters is also the place to exchange recovered blueprints for Golden Bananas, but Candy’s shop does not appear until Angry Aztec.
1. Finish the training area and open the first hub route
After the opening scene, Donkey begins in the training area. Enter and complete the four training barrels. They teach the basic barrel, Orange, vine-swinging and swimming actions. When all four are complete, return to Cranky Kong’s Lab and receive the Simian Slam potion.
Follow the Way Out sign into the cave and use Simian Slam on the switch. This opens the exit to the outdoor DK Isles area. Do not search for later level entrances before completing this step; the switch is the intended way out of the tutorial section.
- Complete all four training barrels.
- Collect Simian Slam from Cranky.
- Use Simian Slam on the exit switch.
2. Activate the five Bananaport pads
Once outside, walk through the main DK Isles area and step on each of the five numbered Bananaport pads that you can reach. A pad becomes active when you stand on it. Later, matching numbers connect into warp routes, so activating pads early reduces the amount of swimming and climbing required between islands.
Treat every active pad as a travel checkpoint. If a route takes you past a numbered pad, activate it before entering a level lobby or crossing to another island. Some pads become useful only after K. Lumsy removes a barrier, so revisit the hub after each major Boss Key delivery.
- Step on all five currently accessible Bananaport pads.
- Confirm that the pads visibly activate.
- Use the pads to test the fastest route back to the main DK Island area.
3. Visit K. Lumsy and open Jungle Japes
From the outdoor hub, swim west and then north toward the metallic island containing K. Lumsy’s cage. Enter the island and speak to the caged K. Lumsy. During this first visit, he opens the entrance to Jungle Japes.
Return to the main DK Island area and follow the newly opened route to the Jungle Japes lobby. The first level entrance is close to the training-area exit, and the first outdoor Golden Banana is also nearby. If Jungle Japes is still sealed, you have not completed the K. Lumsy conversation or have not returned through the correct hub passage.
- Reach K. Lumsy’s metallic island.
- Speak to K. Lumsy during the opening hub sequence.
- Confirm that the Jungle Japes entrance is open.
4. Find Funky’s Armory and Cranky’s Lab
Funky’s Armory and Cranky’s Lab are available around the DK Island and early-level hub routes. Funky supplies weapons and related ammunition upgrades. Cranky provides potions that unlock Kong abilities, such as moves needed to pull levers, use special pads or reach Kong-specific passages.
The game uses Banana Coins as shop currency. Coins are color-coded for individual Kongs, so a coin collected by one Kong is not automatically spendable by another. If Funky refuses to sell an item, switch to the Kong whose color matches the required coins. In the opening progression, Donkey should collect enough yellow Banana Coins to buy the Coconut Shooter before attempting Coconut Switch puzzles in Jungle Japes.
- Locate Funky’s Armory.
- Locate Cranky’s Lab.
- Record each Kong’s Banana Coin total separately.
- Buy a weapon or potion only when it opens a known route or puzzle.
5. Locate Snide’s HQ and turn in blueprints
The DK Isles Snide’s HQ is on Crocodile Isle, near the route leading toward Frantic Factory. From the approach to Frantic Factory, look for the green vines suspended over the gap. Swing across them and enter the building at the far side. Snide also has headquarters inside the main levels, so you do not need to carry a blueprint all the way back to DK Isles after every pickup.
Blueprints are Kong-specific. Donkey uses yellow, Diddy red, Lanky blue, Tiny purple and Chunky green. A Kasplat’s hair color identifies the blueprint it carries. Defeat the Kasplat with the matching Kong and collect the dropped blueprint with that same Kong; an incorrect Kong cannot claim it. Give the blueprint to Snide while controlling its associated Kong. Snide rewards that Kong with a Golden Banana.
- Reach Snide’s DK Isles headquarters by the vine route near Frantic Factory.
- Record every blueprint by Kong and level.
- Use the matching Kong to collect and deliver each blueprint.
- Check Snide’s counter after every convenient return trip.
6. Find Candy later and use Boss Keys correctly
Candy’s Music Shop is not present in DK Isles or Jungle Japes. Her first shop appears in Angry Aztec, so do not assume the absence of Candy in the starting hub indicates a missing route. Candy provides musical instruments and later health or capacity-related improvements, also purchased with the relevant Kong’s Banana Coins.
Every main-world boss awards a Boss Key. Carry the key to K. Lumsy’s island and place it in the lock on his cage. K. Lumsy’s releases change the hub: barriers disappear, platforms rise or new level routes become accessible. If a world entrance remains closed after a boss, return to K. Lumsy before searching for another path.
As more keys are delivered, the route across Crocodile Isle eventually leads toward the upper approach to Hideout Helm. Do not enter that final area merely because the entrance becomes visible. Before committing to Hideout Helm, return to Snide, check your blueprint tally and make a separate save.
- Visit Candy’s shop after reaching Angry Aztec.
- Deliver every earned Boss Key to K. Lumsy.
- Inspect DK Isles for newly opened routes after each release.
- Keep a pre-Hideout Helm save before beginning the final preparation.
Before you move on
- The four training barrels are complete and Simian Slam has been obtained.
- The five accessible DK Isles Bananaport pads have been activated.
- K. Lumsy has been visited and Jungle Japes is open.
- Funky’s Armory and Cranky’s Lab have been located.
- Snide’s DK Isles headquarters has been reached by the Crocodile Isle vine route.
- Blueprints in the current inventory are recorded by Kong and level.
- All earned Boss Keys have been delivered to K. Lumsy.
- Candy’s shop has been identified as an Angry Aztec service rather than a DK Isles location.
- The Hideout Helm approach is available when the required hub releases are complete, but a dedicated pre-finale save remains available.
Jungle Japes — First Full-Level Run
Jungle Japes is the first full world and the first place where the game teaches the return-and-revisit structure. On the initial visit, Donkey Kong opens the level, rescues Diddy Kong, and completes the available Donkey and Diddy objectives. Lanky, Tiny and Chunky cannot be used here yet in normal progression because they are rescued in later worlds. Return to Jungle Japes after rescuing them if you want all 25 Kong-specific Golden Bananas. The campaign requirement is to open the boss route, defeat Army Dillo and deliver the Boss Key to K. Lumsy.
Open the main Jungle Japes area
Enter the Jungle Japes lobby from DK Isles and proceed into the level. At the beginning, climb the nearby tree and use the vines to reach the switch above the large gate. Step on the switch; a Simian Slam is not required for this particular gate. Go through the short tunnel to reach the large central area, which contains the lake, Funky’s Armory, the routes toward Cranky’s Lab and the Tag Barrel used for Kong changes.
Activate the nearby Bananaport pads whenever you pass them. The paired pads are especially useful for the later timed bananas. Do not worry about closed gates belonging to Lanky, Tiny or Chunky during this first visit. They are return objectives, not signs that the initial route is incomplete.
- Enter Jungle Japes from its DK Isles lobby.
- Open the first large gate by stepping on the overhead switch.
- Reach the central area and activate the Bananaport pads you pass.
Collect Donkey’s first bananas and rescue Diddy
From the central area, swim across the lake and climb the large vine. Swing across the vines and enter the Barrel Blast barrel to reach the ledge above Diddy’s cage. Collect Donkey’s first Golden Banana there, then speak to Diddy through the cage. Three Coconut targets will appear around the lower part of the area.
Return to Funky’s Armory and purchase Donkey’s Coconut Shooter for three Banana Coins if you have not already done so. Use it to shoot all three Coconut targets. Two are on the lower level; the third is across the water and can disappear if you move too far away, so shoot it from the elevated platform near Funky’s Armory. When all three targets are hit, Diddy is released and the Golden Banana inside his cage becomes available. The three main level gates also open.
Donkey’s Coconut Shooter is also needed for later switches. If you are short on Banana Coins, defeat nearby enemies and collect the loose coins before leaving the central area.
- Collect Donkey’s ledge banana.
- Speak to Diddy in his cage.
- Buy Donkey’s Coconut Shooter for three Banana Coins.
- Shoot all three Coconut targets.
- Collect the Golden Banana inside Diddy’s former cage.
Finish Donkey’s Jungle Japes objectives
Go through the right-hand cave from the central area to reach the stormy section containing Cranky’s Lab. Pay Cranky three Banana Coins to learn Baboon Blast. Return to the central area, climb near the boulder and use Donkey’s Pad to enter the Barrel Blast bonus stage. Follow the barrel route carefully until you reach the Golden Banana. If you miss a barrel, use the next attempt to watch its movement before launching rather than trying to rush the entire course.
In the rear part of Cranky’s area, shoot the Coconut Switch above the gate and enter the animal crate to become Rambi. Charge through all four huts. Each destroyed hut reveals a Kong switch. After breaking the huts, return to Donkey, use the Donkey switch and go back to the central area to collect the Golden Banana released by that switch. This reward is not a timed race.
Donkey’s blueprint Kasplat is in the cage on the left side of the central area. Defeat the yellow-haired Kasplat with Donkey, collect the yellow blueprint and take it to Snide’s Headquarters on DK Isles. The blueprint does not count as a completed reward until Snide exchanges it for a Golden Banana.
- Buy Baboon Blast from Cranky.
- Complete Donkey’s Barrel Blast bonus stage.
- Use Rambi to destroy all four huts.
- Activate Donkey’s switch and collect the released banana.
- Defeat the yellow-haired Kasplat and deliver Donkey’s blueprint to Snide.
Complete Diddy’s five objectives
Purchase Diddy’s Peanut Popguns from Funky for three Banana Coins. In the entrance tunnel, shoot the two Peanut Switches beside the large gate. Enter the opened room and collect the Golden Banana inside. This is Diddy’s most direct Jungle Japes reward.
For the mine-cart objective, visit Cranky and purchase Chimpy Charge. At the upper part of the level, shoot the Peanut Switch on the tower to extend a wooden path into the mine area. Proceed through the mine, use Chimpy Charge to break the metal obstruction and hit the green switch marked Low, then use the nearby switch to open the route toward the conveyors. Climb the conveyors and drop into the mine cart. Finish the ride with at least 50 coins to receive Diddy’s Golden Banana. Lean with the control stick to collect coins and avoid hazards; do not deliberately slow down for too long, because a TNT barrel can catch up and cost coins.
Inside the mine area, shoot the Peanut Switch across the gap to complete the wooden bridge. Cross quickly, slam Diddy’s switch and then climb to the upper part of the tower outside to collect the Golden Banana it creates. This action also makes Bananaport 4 available.
Use the Diddy switch revealed among the destroyed huts in Cranky’s area to open the timed cage near Funky’s Armory. Before activating it, position yourself near the route or confirm that Bananaport 4 is active. After slamming the switch, warp with Bananaport 4, jump into the water, swim to the vine, climb up and run past Funky’s Armory to the opened cage. The timer is short, so do not explore after activating the switch.
Diddy’s blueprint Kasplat is in the dark tunnel on the right side of the central area. Defeat the red-haired Kasplat with Diddy and take the red blueprint to Snide for the final Diddy Golden Banana from this level.
- Buy Peanut Popguns and Chimpy Charge.
- Open Diddy’s Peanut Switch gate.
- Finish the mine-cart course with at least 50 coins.
- Activate the mine-area switch and collect the upper banana.
- Use Bananaport 4 for the timed cage banana.
- Defeat the red-haired Kasplat and deliver Diddy’s blueprint to Snide.
Return later for the remaining Kongs
The initial Jungle Japes clear does not include Lanky, Tiny or Chunky because they are rescued later in the campaign. Once each Kong is available, revisit the level through its lobby and use the Tag Barrel to complete that Kong’s five objectives.
Lanky uses Grape Switches, OrangStand routes and bonus barrels, including Mad Maze Maul and Speedy Swing Sortie. Tiny uses Feather Switches, Mini-Monkey passages and the bee-hive and tree-stump areas. Chunky uses his boulder, Primate Punch, Hunky Chunky and Pineapple Switch routes, including the dark secret cave. Each Kong also has a color-matched Kasplat and blueprint. These return trips are optional for opening Angry Aztec and defeating Army Dillo, but they are required if you want Jungle Japes fully cleared.
- Return after rescuing Lanky, Tiny and Chunky.
- Complete their Kong-specific bonus areas and switches.
- Deliver their blue, purple and green blueprints to Snide if pursuing full collection.
Open and defeat the Jungle Japes boss
Collect regular bananas belonging to the Jungle Japes level until Troff ’n’ Scoff accepts 60 of them. Regular bananas are colored for their Kong, but the boss entrance uses the level’s collected regular-banana total. Feed them to Troff ’n’ Scoff at any Jungle Japes portal. The door to the boss opens only for Donkey Kong, so switch to Donkey before entering.
Army Dillo begins by hiding in its metal shell and firing fireballs. Move side to side around the arena instead of standing still. When Army Dillo exposes its head, pick up the TNT barrel in the center and throw it at the head. After being hit, Army Dillo rolls around the arena; keep running and avoid its path until it stops and resumes firing. Repeat the exposed-head and TNT-barrel sequence three times.
After the final hit, collect the Boss Key before leaving the arena. Return to DK Isles, enter K. Lumsy’s area and place the key in his cage. The first seal opens and the route toward Angry Aztec becomes available. Save after the handoff so the completed Jungle Japes state is secured.
- Feed Troff ’n’ Scoff 60 regular Jungle Japes bananas.
- Enter the boss door as Donkey Kong.
- Avoid Army Dillo’s fireballs and rolling attack.
- Throw the center TNT barrel at Army Dillo’s exposed head three times.
- Collect the Jungle Japes Boss Key.
- Give the Boss Key to K. Lumsy and confirm the next hub route opens.
Before you move on
- The Jungle Japes entrance and central area are open.
- Diddy Kong has been rescued and the Golden Banana inside his cage has been collected.
- Donkey’s and Diddy’s required weapon and movement upgrades for the level have been purchased.
- Donkey’s and Diddy’s accessible Jungle Japes Golden Bananas have been collected, or their remaining locations have been recorded for return visits.
- The yellow Donkey blueprint and red Diddy blueprint have been delivered to Snide if those rewards are being pursued.
- Troff ’n’ Scoff has accepted 60 regular Jungle Japes bananas.
- Army Dillo has been defeated and the Jungle Japes Boss Key is in the inventory.
- The Boss Key has been given to K. Lumsy and the Angry Aztec route is visibly open.
Angry Aztec — Desert Puzzles and Races
Angry Aztec is the second main world in the original Nintendo 64 version of Donkey Kong 64. Open it by giving Jungle Japes’ boss key to K. Lumsy, then pass B. Locker with five Golden Bananas. The level introduces the Llama Temple, the four-gong tower, the Scarab race, and Dogadon. Lanky Kong and Tiny Kong are imprisoned here. The boss becomes available after Troff ’n’ Scoff has received 120 regular bananas from the level, and Diddy Kong must defeat Dogadon to obtain the second boss key.
Enter Angry Aztec and open the second desert area
After defeating Army Dillo in Jungle Japes, take the boss key to K. Lumsy. The first lock opens the elevated entrance to Angry Aztec. At the lobby, B. Locker requires five Golden Bananas. Activate the entrance Bananaport before moving deeper into the level; this makes later returns less frustrating.
In the first large desert area, use Diddy Kong to climb a tree and cross the vines to the top of the Llama’s cage. Play Diddy’s guitar on the music pad. This opens the passage into the second large desert area. If you have not bought the relevant instruments and shooters, visit the shops in Angry Aztec before tackling the Kong-specific rooms. The upgrades that matter here include Donkey’s Strong Kong, Lanky’s OrangStand, Tiny’s Mini-Monkey, and Diddy’s Rocketbarrel Boost.
- Jungle Japes’ boss key has been given to K. Lumsy.
- B. Locker has allowed entry with five Golden Bananas.
- The passage to the second large desert area is open.
- The entrance Bananaport is active.
Use Donkey Kong to free the llama and Lanky Kong
In the second desert area, enter the temple with the llama face on its entrance. Stand on Donkey’s pad outside and complete the Barrel Blast course. Follow the linear sequence of barrels and pass through the DK star at the end. The llama’s cage opens, and you can collect Donkey’s Golden Banana from the cage in the first area.
Return to the same llama temple and shoot the coconut switch above the entrance. Inside, go to the right side and play Donkey’s bongos on the Bongo Pad. The llama changes the temple’s lava pool into water. Swim through the opening beneath the dragon-head statue, surface on the far side, and shoot the coconut switch to open Lanky’s cage. Collect the Golden Banana inside the cage and use the tag barrel to begin Lanky’s objectives.
- Donkey’s Llama Temple Barrel Blast has been completed.
- The llama has been freed.
- Lanky Kong’s cage is open and his cage banana has been collected.
- Lanky is available at tag barrels.
Complete Donkey’s remaining Angry Aztec objectives
For Donkey’s sand challenge, enter the llama temple and use the green Donkey switch in the small room on the right. A nearby exterior route opens. Jump into the Donkey Barrel, cross the damaging sand while invincible, and enter the bonus barrel. In Stealthy Snoop, reach the goal without touching the moving light; the Golden Banana is awarded when the course is completed.
Donkey’s maze-temple banana requires Diddy to open that temple first. Once the switches have appeared on the temple, enter through the coconut-marked entrance. Follow the coconut switches through the short route, collect the banana, and leave before the room’s escape timer expires.
- Donkey’s Stealthy Snoop bonus stage is complete if you are collecting his level bananas.
- The maze temple has been opened by Diddy.
- Donkey’s maze-temple banana has been collected or marked for a later return.
Open the tower and free Tiny Kong
Use Diddy in the second desert area. Enter the Diddy Barrel, fly to the top of the temple with five entrances, and slam the green Diddy switch. The central tower begins spinning with its mouth open. Return to the Diddy Barrel, hover in front of the tower’s mouth, and fire peanuts into it until the temple switches appear.
Use Diddy’s guitar on the relevant music pad to activate the four-gong tower sequence. The tower then provides Tiny’s route. Switch to Tiny, enter the nearby Tiny Barrel, run up the tower, and play Tiny’s saxophone on the music pad. Squawks carries Tiny into the Scarab course. The race requires collecting 50 DK coins and finishing ahead of the Scarab. Attack the Scarab immediately at the start to create separation, then prioritize staying on the track through the unguarded sections rather than taking wide, risky lines.
Tiny’s other main banana is in the first desert temple. Enter through the feather switch, use the Tiny Barrel, and swim through the very narrow underwater tunnel. In the multicolored room, defeat the Klaptraps to receive the Golden Banana. In the llama temple, Tiny can also use the small pipe route and her switches to cross the lava-platform room for another banana. Activate the number 2 Bananaport during this visit; Lanky needs it for his blueprint.
- The four-gong tower route is active.
- Tiny Kong has been freed and is playable.
- Tiny’s narrow-tunnel Klaptrap challenge is complete.
- The Scarab race has been won, or its location is marked for another attempt.
- The number 2 Bananaport is active.
Complete Lanky’s puzzles and recover his blueprint
In the first desert temple, enter through the grape switch as Lanky and swim through the underwater passage. Slam the Lanky switch on the small pillar. The head statues open, releasing a bird carrying a Golden Banana. Shoot the bird five times with Lanky’s grapes to make it drop the banana.
For Lanky’s llama-temple challenge, enter the temple as Donkey, use the tag barrel, and switch to Lanky. Shoot the grape switch beside the wooden door, defeat the Kremlings, and slam the green Lanky switch. Match the sounds from the monkey heads by pairing heads of the same color. Completing all pairs awards the Golden Banana.
Play Lanky’s trombone on the pad in the temple to raise the two statues. Use OrangStand to climb the raised route to the bonus barrel, then complete Teetering Turtle Trouble. In the maze temple, take Lanky’s entrance on the upper level, follow the grape switches to the bonus barrel, and complete Big Bug Bash.
For the blue blueprint, first have Tiny activate the number 2 Bananaport in the lava-platform room. Enter the llama temple, switch to Lanky, and use the number 2 Bananaport to reach the blue Kasplat. Defeat it as Lanky, collect the blue blueprint, and take it to Snide’s HQ in the second desert area.
- Lanky’s bird challenge is complete.
- The monkey-head sound puzzle is complete.
- Teetering Turtle Trouble and Big Bug Bash are complete if collecting Lanky’s full set.
- Lanky’s blue blueprint has been delivered to Snide.
Collect the remaining blueprints and optional level bananas
Each Kong has a separate Angry Aztec blueprint. Diddy’s red Kasplat is on top of the temple in the first large area; use his Rocketbarrel to reach it. Donkey’s yellow blueprint is behind the coconut-switch route in the entrance tunnel; use Strong Kong to cross the damaging sand and defeat the Kasplat. Tiny’s purple blueprint is reached through her small-route area after the required switch and tunnel access. Chunky’s green blueprint is in his Kong-specific temple route and requires his pineapple weapon and strength-based moves.
A blueprint can only be picked up by the Kong whose color matches it. Deliver each recovered blueprint to Snide for its Golden Banana reward. Other Angry Aztec bananas come from bonus barrels, ordinary Kong-specific switches, the maze temple, the Llama Temple, and the Scarab route. These collectibles are optional for opening the boss, but they are required if you are completing the level’s full Golden Banana set.
- The blueprint Kasplats have been checked for Donkey, Diddy, Lanky, Tiny, and Chunky.
- Each recovered blueprint has been delivered to Snide by its matching Kong.
- Any unopened Kong-marked switch or crate has been recorded for a later return.
Feed Troff ’n’ Scoff and defeat Dogadon
At the Angry Aztec Troff ’n’ Scoff room, feed regular bananas on the Kong pads until the displayed requirement reaches 120. These are regular colored bananas, not Golden Bananas. When the requirement is met, enter the boss door as Diddy Kong.
Dogadon hovers while launching rapid fireballs. Move continuously, using zigzagging movement to avoid the projectiles. When Dogadon pauses, pick up a TNT barrel and throw it at him. The hit knocks him into the lava. Move away while he recovers, then repeat the same pattern. Three successful TNT hits defeat him.
Collect the second boss key after the fight and return it to K. Lumsy. The opened seal confirms Angry Aztec’s required boss progression and opens the next hub routes, including access toward Frantic Factory and Gloomy Galleon.
- Troff ’n’ Scoff has received 120 regular bananas.
- Dogadon has been fought as Diddy Kong.
- Dogadon has been hit three times with TNT barrels.
- The second boss key has been collected and delivered to K. Lumsy.
- The second K. Lumsy seal has opened.
Before you move on
- Angry Aztec is open and both Lanky Kong and Tiny Kong have been freed.
- The required Angry Aztec Kong routes have been completed, including the Diddy tower sequence and Tiny’s rescue path.
- The matching blueprint Kasplats have been checked and any recovered blueprints have been delivered to Snide.
- Troff ’n’ Scoff has been fed 120 regular bananas.
- Dogadon has been defeated as Diddy Kong and the second boss key has been given to K. Lumsy.
- The second seal has opened, confirming the level’s required progression is complete.
Frantic Factory — Machinery, Minigames and the Arcade
Frantic Factory is a vertical level built around its Production Room, Storage Room, Testing Room and R&D Room. Open the factory’s routes, rescue Chunky, buy the moves needed for the machinery, activate the central machine, complete the Donkey Kong arcade twice for the Nintendo Coin, retrieve the five Kong blueprints, and defeat Mad Jack as Tiny Kong for the Boss Key.
Enter the factory and open the first routes
Enter Frantic Factory from its lobby and activate the nearby Bananaport pads as you pass them. Use the tag barrel frequently because the factory’s rooms are designed around Kong-specific switches, instruments, weapons and movement abilities.
Start with Lanky and use the blue switch in the early factory route to open the valve that lets you enter the deeper rooms. Explore the first Production Room, Storage Room and R&D approaches before committing to a long climb. The factory is easier to navigate when you treat the large rooms as separate landmarks rather than trying to move upward without activating the nearby pads.
- Activate the accessible Bananaport pads near the entrance and in the main rooms.
- Use Lanky to open the early blue switch route.
- Leave unfinished colored switches marked for the Kong that can operate them.
Buy the factory moves and rescue Chunky
Find Cranky’s Lab in the side room of the Production Room. Buy Donkey’s Gorilla Grab first; it is required for several levers, including the arcade lever and the Battle Arena hatch. Also obtain the available upgrades for Diddy, Lanky and Tiny if you have not already bought them: Simian Spring, Baboon Balloon and Ponytail Twirl are used throughout the factory.
Return to the second part of the Production Room with Lanky. Look for the pipe arching above Bananaporter 1. Use OrangStand to climb the pipe, then pound the Lanky Switch at the top. Chunky’s cage drops and breaks open, freeing him. Switch to Chunky at the nearby tag barrel and buy Primate Punch from Cranky. If needed, buy Chunky’s Triangle Trample from Candy and his Pineapple Launcher from Funky in the Testing Room.
- Buy Gorilla Grab before attempting the arcade or lever routes.
- Use Lanky’s OrangStand on the pipe above Bananaporter 1.
- Free Chunky and obtain Primate Punch before tackling his gated rooms.
Activate the central machine
The central machine in the Production Room must be powered before several upper routes can be used. In the R&D Room, find the chute between the instrument-pad hallways and drop through it to the raised platform in the Production Room. As Donkey, shoot the Coconut Switch to enter the High Voltage Building, then use Gorilla Grab on the lever inside.
After the machine starts, the gate near Bananaporter 4 opens. Enter as Donkey with enough Crystal Coconuts, use the DK Barrel, and move through the machine while invincible. Activate the upper Bananaporters as you climb. These routes lead to several Kong switches, balloons, coins and bonus challenges.
- Power the machine through the High Voltage Building.
- Open the gate near Bananaporter 4.
- Activate upper Bananaporters before attempting repeated climbs.
Collect the five Frantic Factory blueprints
Frantic Factory has one blueprint for each Kong. Defeat each matching Kasplat with the Kong represented by its color, then pick up the blueprint and return to Snide’s HQ on DK Isles for the corresponding Golden Banana.
The Kasplats are distributed through the main factory routes. Diddy’s is in the first Production Room near the Lanky Switch and the machine. Lanky’s is in the R&D Room near the hatch that conceals the Battle Arena Pad. Tiny’s is in the room near the pole leading toward the arcade area. Chunky’s is in the Toy Room, and Donkey’s is on the upper machinery route. If a Kasplat is difficult to reach, first check whether the machine has been activated or whether the correct Kong’s weapon or movement upgrade is missing.
Snide’s reward is separate from the ordinary level bananas. Track each Kong’s blueprint independently so you do not leave the level assuming the blueprint banana has already been counted.
- Recover all five Kong-colored blueprints if pursuing full completion.
- Match each Kasplat to the Kong whose blueprint it carries.
- Turn the recovered blueprints in at Snide’s HQ.
Reach the Original Donkey Kong arcade
In the second part of the Production Room, stand on the DK Pad and start the Baboon Blast. Follow the barrel route and pass through the DK Star at the end. This causes the lever to appear beside the arcade machine.
From the Baboon Blast area, continue into the separate room and climb the pole. Follow the upper passage to the room containing the Original Donkey Kong arcade cabinet. Donkey Kong must use Gorilla Grab on the lever to begin the game.
Complete the arcade once to receive Donkey’s Golden Banana. Start it again and complete it a second time to receive the Nintendo Coin. The second run is not a shortcut or a repeat of only one stage: treat it as another complete arcade attempt. Use the D-pad if that gives you more deliberate movement, wait for safe barrel patterns, and prioritize reaching the next ladder or platform over unnecessary point collection.
- Complete the Baboon Blast and pass through the DK Star.
- Use Donkey’s Gorilla Grab on the arcade lever.
- Finish the arcade once for the Golden Banana.
- Finish the arcade a second time for the Nintendo Coin.
Clear the ordinary Kong routes and optional Battle Arena
Use the factory’s active switches to work through the five Kong routes. Donkey’s objectives include the numbered-block challenge, the High Voltage route and his upper-machine tasks. Diddy uses Simian Spring on the block stacks and reaches bonus challenges with his instrument and ropes. Lanky uses Baboon Balloon, OrangStand and his trombone route. Tiny uses her ventilation shaft, the dartboard room and the factory race. Chunky uses Primate Punch on iron gates, his light-switch room and his strength-based bonus areas.
For the Frantic Factory Battle Arena, take Donkey to the R&D Room and enter the hallway across from Bananaporter 2. Pull the lever at the end with Gorilla Grab; this opens the hatch on the elevated portion of the room. Return to the revealed Battle Arena Pad and press Z to enter. Winning the Arena Ambush challenge awards the Battle Crown, but the crown is optional for simply defeating Mad Jack.
- Complete the Kong-specific bonus barrels that you can reach with current upgrades.
- Use Tiny for the factory race and ventilation-shaft route.
- Clear the R&D Battle Arena if pursuing crowns or full completion.
Feed Troff ’n’ Scoff and defeat Mad Jack
Use a Frantic Factory Bananaport to reach the Troff ’n’ Scoff room in the R&D area. Feed the required 200 bananas, then enter the boss door as Tiny Kong. Do not enter with another Kong; Mad Jack’s fight is designed for Tiny’s Ponytail Twirl.
At the start, move to the lit platform. Mad Jack appears and the platforms rise. Jump between the raised platforms while avoiding his jumps and fireballs. When he pauses, two target platforms are indicated, one blue and one white. Watch which color platform Mad Jack occupies, cross with Ponytail Twirl if necessary, and pound the switch matching his color. The correct switch electrocutes him.
Repeat the color-switch attack. In the next phase, the target lights are no longer provided, so identify the blue and white platforms yourself while avoiding faster attacks and lasers. After two more successful electrocutions, Mad Jack becomes invisible. Watch for the flashes and stars when he jumps; the platform he occupies is revealed briefly. Reach and pound the switch matching his platform color one final time.
If Tiny falls, she is returned to the arena on a small platform rather than losing health from the fall. Use that recovery position to rejoin the raised platforms instead of rushing a blind jump. After the final hit, collect the Boss Key and leave the level.
- Feed Troff ’n’ Scoff 200 bananas.
- Enter Mad Jack’s arena as Tiny Kong.
- Match the first two visible target switches to Mad Jack’s platform color.
- Identify the colors yourself during the unlit phase.
- Use the brief platform reveal to defeat the invisible phase.
- Collect the Boss Key after Mad Jack is defeated.
Before you move on
- Mad Jack has been defeated as Tiny Kong and the Frantic Factory Boss Key is in the inventory.
- The Boss Key has been delivered to K. Lumsy on DK Isles if progressing immediately to the next hub lock.
- Donkey Kong has completed the Original Donkey Kong arcade once for its Golden Banana and a second time for the Nintendo Coin.
- The factory machine has been activated through the High Voltage Building.
- Chunky has been freed from his cage.
- The five Frantic Factory blueprints have either been recovered and turned in to Snide or specifically marked for a later cleanup visit.
- The R&D Battle Arena has been cleared if the Battle Crown is being collected; it is not required for the basic Frantic Factory boss completion.
Gloomy Galleon — Water Navigation and Shipwrecks
Gloomy Galleon opens after B. Locker accepts 30 Golden Bananas. Its main routes run through the dry wreck area, the lighthouse lake and the large water area containing the treasure-trove room and sunken ship. The lighthouse pillar changes the water level: touch the up arrow to raise the water and the down arrow to lower it. Complete each Kong’s five Golden Banana objectives, collect the five matching blueprints and exchange them at Snide’s HQ, then feed Troff ’n’ Scoff 250 regular colored bananas before entering the Puftoss fight as Lanky Kong.
Open the level and establish the water routes
Enter Gloomy Galleon from the submerged DK Isles entrance and pass B. Locker with 30 Golden Bananas. Find the first Tag Barrel near the entrance so you can change Kongs without returning to DK Isles. The first major fork leads to the lighthouse lake; the other route leads through the shipyards to the large water area.
In the lighthouse lake, dive beneath the lighthouse and locate the central pillar. Swim into the up arrow to raise the water or the down arrow to lower it. High water is needed for the lighthouse roof, the moving ghost ship and several upper platforms. Low water exposes lower caves, the red Kasplat route and some instrument pads. Activate every Bananaport pad you reach, especially the pads around the lighthouse and the large water area.
- Pass B. Locker with 30 Golden Bananas.
- Find the Tag Barrel and lighthouse water-control pillar.
- Use raised and lowered water as separate route states and activate nearby Bananaport pads.
Complete Donkey Kong’s five Golden Bananas
For Donkey’s first banana, raise the water and enter the lighthouse from the green Donkey switch on the island. Climb the moving platforms to the top and pull the lever to activate the lighthouse. The banana appears there, and the ship enters the lighthouse area afterward.
Return to the Donkey pad on the lighthouse island and complete the Barrel Blast maze. Follow the route through the lower barrel, the left-facing barrel and then the right-facing barrel before passing through the DK target. This frees the seal in the large water area. Visit the seal to receive Donkey’s second banana, then race it for the third. Collect the ten DK Coins while passing the gates; avoid crates because they remove coins and slow you down.
With the water lowered if necessary to reach the cactus, climb onto the cactus near Funky’s Armory and play Donkey’s Bongo pad. A sunken-ship entrance opens on a timer. Reach the ship, enter the cell area and start the shooting bonus barrel. Hit the required banana targets without shooting the Kong decoys to earn Donkey’s fourth banana.
Donkey’s fifth banana is his blueprint reward. After Diddy completes the coin-room bonus, Bananaport 4 becomes available in the large water area. Use it to reach the coin tower, defeat the yellow Kasplat with coconuts, collect the yellow blueprint and take it to Snide’s HQ in the raised-water lighthouse area.
- Activate the lighthouse and collect Donkey’s first banana.
- Free and race the seal for Donkey’s second and third bananas.
- Complete the Bongo-pad sunken-ship challenge for the fourth banana.
- Collect the yellow Kasplat blueprint and exchange it at Snide for the fifth banana.
Complete Diddy Kong’s five Golden Bananas
Raise the water and wait for the ghost ship to circle the lighthouse. Use Diddy’s Rocketbarrel to land on the ship and Simian Slam the Diddy switch. The cannon fires a banana onto the lighthouse roof; use the Rocketbarrel again to collect Diddy’s first banana. This requires Donkey to have activated the lighthouse first.
In the large water area, switch to Lanky and use the Enguarde crate to hit the DK star above the water three times. This opens the coin room. Switch to Diddy, climb the coin tower with his pads and enter the Bonus Barrel. Complete the stealth course by following the safe route and avoiding the guards’ flashlight beams. Winning gives Diddy’s second banana and activates Bananaport 4.
Play Diddy’s Guitar pad at the top of the lighthouse. A mechanical fish appears in the large water area and a timer begins. Enter through its mouth, collect ammunition and shoot the three lights behind the fan, firing only while the fan is still. This earns Diddy’s third banana.
Lower the water, play Diddy’s Guitar pad on the cactus near Funky’s Armory and reach the opened sunken-ship entrance before it closes. Enter the ship’s bonus barrel and collect all eight coins in the swimming challenge for Diddy’s fourth banana.
Diddy’s fifth banana comes from his blueprint. With the water lowered, find the red Kasplat in the small lighthouse-area cave, defeat it with Diddy and carry the red blueprint to Snide’s HQ. Raise the water if needed to reach Snide.
- Use the moving ship and Rocketbarrel for Diddy’s first banana.
- Open the coin room with Enguarde and complete Diddy’s stealth bonus for the second.
- Destroy the mechanical fish’s three lights for the third.
- Complete the sunken-ship coin challenge and turn in the red blueprint.
Complete Lanky Kong’s five Golden Bananas
Use Lanky in the lighthouse lake and enter the Enguarde crate. Charge into the treasure chest at the bottom of the lake to reveal Lanky’s first banana, then transform back to Lanky to collect it.
After Diddy opens the coin room, enter it with Lanky and climb the left coin tower using his pads and Baboon Balloon. Enter the Searchlight Seek barrel and shoot four Klaptraps before time expires for Lanky’s second banana.
Use the Tiny switch in the entrance tunnel to open the timed route to the left-side sunken ship in the large water area. Inside, find the Enguarde crate, break the chests and swim through the newly opened passage to collect Lanky’s third banana.
Go to the cactus near Funky’s Armory, play Lanky’s Trombone pad and reach the opened ship entrance. The banana is inside the ship; collect it before the timed door closes for Lanky’s fourth.
Raise the water and climb the left coin pile in the treasure-trove area. Follow the Lanky pads to the top and enter the bonus barrel. Complete Searchlight Seek by shooting four Klaptraps to earn Lanky’s fifth banana. The blue Kasplat on the raised-water wooden platform is Lanky’s blueprint; defeat it, collect the blue blueprint and exchange it at Snide for the blueprint banana.
- Break the lighthouse chest with Enguarde.
- Complete Lanky’s coin-room Searchlight Seek challenge.
- Clear both sunken-ship routes and the treasure-trove bonus barrel.
- Turn in the blue blueprint at Snide.
Complete Tiny Kong’s five Golden Bananas
Open the coin room first, then use Tiny’s Barrel inside it to become Mini-Monkey. Enter the keyhole of the large treasure chest, collect all five pearls from the clam creatures and leave. In the lighthouse lake, use the Tiny Barrel at the bottom to enter the small opening and return the pearls to the mermonkey for Tiny’s first banana.
Use the Tiny switch in the entrance tunnel to open the timed route to the left-side sunken ship. Enter through the opened door, pass through the hole in the wall and complete the underwater bonus barrel for Tiny’s second banana.
In the large water area, find the submarine periscope near Funky’s Armory. Become Mini-Monkey, enter the small hole and use the bonus barrel behind the control panel. Swat six bugs within the time limit for Tiny’s third banana.
Lower the water, play Tiny’s Saxophone pad on the cactus near Funky’s Armory and reach the opened sunken-ship door. Enter the cell area and collect Tiny’s fourth banana.
Tiny’s purple blueprint is on the wooden route above the shipwrecks. Use the cannon near the entrance to reach the ship’s upper area, swing across the vines and defeat the purple Kasplat, preferably from a distance. Take the purple blueprint to Snide for Tiny’s fifth banana.
- Return all five pearls to the mermonkey.
- Complete Tiny’s two ship routes and the submarine bug challenge.
- Collect the purple blueprint above the shipwrecks and exchange it at Snide.
Complete Chunky Kong’s five Golden Bananas
At the dry wreck area near the entrance, enter the hollow ship on the right. Defeat the barrel enemies, then Primate Punch the three treasure chests. The right chest contains Chunky’s first banana; the other chests contain optional rewards.
At the entrance, hit the two Pineapple Switches to open the cannonball area. Collect the cannonball, load the cannon and hit all three moving targets within 60 seconds for Chunky’s second banana. Aim above and ahead of the targets because the cannonballs are heavy and slow.
Raise the water and wait for the ghost ship to reach the lighthouse island. Jump onto it from the gray block, Simian Slam the floor door and cross the tilting cannonball section. Primate Punch the weak fence and the spinning barrels to release Chunky’s third banana. The controls reverse briefly during the return route, so move carefully.
Lower the water and play Chunky’s Triangle pad in the lighthouse-area cave. Reach the opened sunken-ship entrance and complete the Batty Barrel Bandit challenge, lining up four bananas three times, for Chunky’s fourth banana.
Chunky’s green blueprint is on the cactus near Funky’s Armory in the large water area. Defeat the green Kasplat on top of it, collect the green blueprint and take it to Snide’s HQ for Chunky’s fifth banana.
- Open the dry-wreck chests and collect the right-chest banana.
- Hit all three cannonball targets.
- Clear the ghost-ship hold and the Triangle-pad ship challenge.
- Collect the green blueprint from the cactus Kasplat and exchange it at Snide.
Feed Troff ’n’ Scoff and defeat Puftoss
Collect regular colored bananas throughout the level until Troff ’n’ Scoff has received 250. These are ordinary colored bananas, not Golden Bananas. The level’s Troff ’n’ Scoff portal is reached through the lighthouse-side route toward the boss area. When the counter reaches 250, enter the boss door; the game uses Lanky Kong for the fight.
Puftoss circles the arena in a motorboat. Five DK stars appear in sequence. Drive through every star before the current timer expires to shock Puftoss. After each successful shock, the stars become smaller and the available time decreases. Puftoss also rams the boat and creates damaging shock waves, so keep moving and avoid cutting directly across him.
Repeat the five-star sequence until Puftoss has been shocked five times. The fifth shock defeats him and awards the Boss Key. Collect the key and deliver it to K. Lumsy on DK Isles. If a run fails, continue circling until the next star sequence rather than abandoning the attempt; the fight only ends when the boat is destroyed or the five shocks are completed.
- Feed Troff ’n’ Scoff exactly 250 regular colored bananas before entering.
- Fight Puftoss as Lanky Kong in the motorboat.
- Pass through all five DK stars five separate times.
- Collect the Boss Key and give it to K. Lumsy.
Before you move on
- Donkey, Diddy, Lanky, Tiny and Chunky each show five Gloomy Galleon Golden Bananas.
- All five Gloomy Galleon blueprints have been collected by the matching Kong and exchanged at Snide’s HQ.
- The lighthouse has been activated, the seal has been freed and raced, the coin room has been opened, and the major raised- and lowered-water routes have been checked.
- Troff ’n’ Scoff has received 250 regular colored bananas.
- Puftoss has been shocked five times, the Boss Key has been collected and the key has been delivered to K. Lumsy.
- Any remaining Banana Fairy, colored-banana or Battle Arena work is recorded as optional cleanup rather than treated as required access to the next world.
Fungi Forest — Mushroom Mechanics and Timed Shots
Enter Fungi Forest after opening its DK Isles route and passing the 50 Golden Banana lobby requirement. Use the Cuckoo Clock to switch between day and night, work through the Giant Mushroom with all five Kongs, complete the level’s Kong-specific objectives, recover the blueprint, and defeat Dogadon with Chunky Kong. The boss requires 300 colored bananas at Troff ’n’ Scoff, not 300 Golden Bananas.
Enter Fungi Forest and learn the day-night route
After K. Lumsy opens the Fungi Forest route on DK Isles, enter the forest lobby and pass its B. Locker requirement of 50 Golden Bananas. Once inside, locate the Cuckoo Clock and the nearby Tag Barrel. The clock is the level’s main route switch: some doors, enemies, fences and objectives are available only during the day or only at night.
Use the Warp Pads whenever possible so you can return to the clock without crossing the entire forest. If a building entrance or fenced path appears sealed, change the time before assuming you are missing an upgrade. Keep the Tag Barrel as your staging point and switch Kongs before entering a Kong-colored door or approaching a matching switch.
- Reach the Fungi Forest lobby from DK Isles.
- Pass the 50-Golden-Banana lobby barrier.
- Locate the Cuckoo Clock, Tag Barrel and Warp Pads.
Activate the Giant Mushroom and open its cannon route
The Giant Mushroom is the tallest landmark in the forest. Enter it with the Tag Barrel available and use each Kong to shoot the matching wall switch on the lower interior level. All five switches must be activated; hitting only the switch for the Kong you are currently using does not create the route.
After the five weapon switches have been triggered, switch to Donkey Kong and use the separate Donkey switch inside the mushroom. This makes the launcher barrels appear. Follow the cannon path to the upper levels and use the appropriate Kong for the reward at the end. Some rewards are timed, so activate the Donkey switch only when you are ready to make the climb rather than wandering away first.
Cranky’s Super Simian Slam upgrade is needed for the blue-background switches used in this part of the level. If a switch refuses to react, check both that you have the upgrade and that you are using the Kong shown on the switch.
- Shoot all five matching Kong switches in the Giant Mushroom.
- Use Donkey Kong on the separate Donkey switch.
- Use the newly created launcher barrels to reach the upper mushroom routes.
Complete the mushroom bonus objectives
Tiny’s objective begins inside the Giant Mushroom. Slam the Tiny switch to reveal a high Bonus Barrel, then climb the interior and reach it before the opportunity expires. The barrel starts Speedy Swing Sortie, where you must collect the required DK Coins before time runs out. Missing the route does not remove the objective; return to the switch and try again.
Lanky has a second mushroom-top route. Use his Baboon Balloon to reach the highest area, activate the Lanky switch, and enter the opened room. In the room with the colored mushrooms, follow the Kong order shown on the wall: Donkey, Diddy, Tiny, Chunky, then Lanky. Slam the mushrooms in that sequence to reveal the Bonus Barrel, then complete Krazy Kong Klamour. Aim for the Golden Banana and avoid shooting the Kongs; hitting a Kong adds another target to the challenge.
The Giant Mushroom also contains ordinary banana trails and additional Kong-specific paths. Do not leave after activating the cannon route without checking the upper doors and the mushroom-top Warp Pad.
- Complete Tiny’s Speedy Swing Sortie challenge.
- Use Lanky’s mushroom sequence in the displayed Kong order.
- Finish Krazy Kong Klamour without wasting shots on the Kongs.
Work through the Mill, houses and outdoor paths
Return to the forest’s central buildings and use the day-night cycle to clear the remaining Kong objectives. Donkey Kong’s Mill route uses the Super Simian Slam and a lever puzzle. In the Mill, break the question-mark box, activate the switch behind it, and enter the lever room. Pull the levers in the required sequence shown by the level’s puzzle route; the correct sequence opens Donkey’s Golden Banana.
Diddy’s objectives use his Peanut Shooter, Guitar and Jetbarrel. Check the house and rafters near the rosebushes, then use the Guitar on the music pad when Squawks is called. Another Diddy route uses the Jetbarrel to reach a Bonus Barrel or a raised platform. In the outdoor area near the Fungi Forest lobby, Lanky can activate a Trombone Pad on DK Isles to make a Diddy Barrel appear; this hub reward is separate from the main forest objectives.
Lanky’s forest routes include the mushroom paths, the nighttime Mill section and the rabbit races. His second rabbit race is easier after purchasing the relevant movement upgrade and practicing the approach before committing to the attempt. Tiny uses her Saxophone, Mini-Monkey passages and the planted magic seed: complete the earlier seed objective, then return to the mound near Funky’s area when the plant has grown. Chunky’s objectives use his Primate Punch, Triangle and strength-based switches, including a nighttime route through the forest buildings.
Treat these as separate Kong tasks rather than trying to finish the level with one character. If an inactive plant, switch or Bonus Barrel blocks progress, check the required time of day and return with the Kong whose color is displayed.
- Clear Donkey’s Mill and lever objective.
- Visit the Diddy, Lanky, Tiny and Chunky routes with their required weapons or abilities.
- Recheck the forest at both day and night.
- Use the seed, music pads and Kong-specific switches when their objectives become active.
Recover the Fungi Forest blueprint
The Fungi Forest blueprint is carried by the Kasplat assigned to one Kong. Locate the colored Kasplat, defeat it with the Kong associated with its blueprint color, and pick up the blueprint immediately. A defeated Kasplat is not counted until the blueprint has been collected.
The Fungi Forest blueprint Kasplat is found behind a house in the main outdoor area and is tied to a nighttime route. If the house or surrounding fence is closed, return to the Cuckoo Clock and switch to night before searching again. Once the blueprint is in your inventory, leave through the level exit and take it to Snide’s HQ on DK Isles. Snide exchanges it for that Kong’s Golden Banana. This reward is optional for opening the next ordinary level, but it is useful for later Hideout Helm time and should be claimed before final preparation.
- Find the nighttime Kasplat behind the forest house.
- Defeat it with the correct Kong.
- Collect the blueprint and exchange it at Snide’s HQ.
Prepare the 300-banana boss challenge
The Fungi Forest boss portal is a Troff ’n’ Scoff entrance. Feed the required 300 colored bananas into the portal; these are the regular colored bananas collected by the Kongs, not Golden Bananas. If the portal is not ready, continue collecting the missing color or return later with the appropriate Kong.
The boss is a rematch against Dogadon, and Chunky Kong is required. Before entering, restock Chunky’s Pineapple ammunition, collect health, and confirm that Chunky is active when you enter the boss portal. The fight begins with the same basic pattern as the earlier Dogadon encounter: Dogadon throws fireballs, then lands and pauses. Zigzag around the fireballs, wait for the landing, grab the TNT Barrel in the arena and throw it at him.
Dogadon adds shockwaves and a broad wall-of-fire attack. Keep moving during the fireballs and shockwaves, and use the arena edge to reduce the chance of being caught by the fire wall. The first part ends after three successful TNT hits. Do not stand on the platform’s center after the third hit, because the floor begins sinking.
- Feed 300 colored bananas to Troff ’n’ Scoff.
- Enter the fight as Chunky Kong with health and ammunition restored.
- Land three TNT Barrel hits while avoiding fireballs, shockwaves and the wall of fire.
Finish Dogadon’s sinking-platform phase
After the third TNT hit, the platform starts sinking and a Hunky Chunky Barrel appears after the next successful TNT strike. Throw TNT at Dogadon when he lands, then immediately enter the Hunky Chunky Barrel. As giant Chunky, close the distance and attack Dogadon with rapid punches while the temporary transformation lasts.
When the transformation ends, retreat from Dogadon’s position, avoid the next attack cycle, and repeat the TNT-then-Hunky-Chunky sequence. Do not remain on the unstable platform waiting for the boss; the fight is timed by the sinking arena. If the barrel does not appear, make sure the TNT hit connected and move away from the landing point instead of standing on top of the spawn location.
When Dogadon is defeated, collect the Boss Key from the arena. Return to DK Isles and give the key to K. Lumsy. This is the required campaign reward from Fungi Forest and opens the next hub progression. The remaining Golden Bananas, medals, fairy photographs and bonus challenges can be completed later if you are prioritizing the story.
- Use the Hunky Chunky Barrel after the platform begins sinking.
- Punch Dogadon during each giant-Chunky window.
- Collect the Boss Key after the final attack.
- Return to K. Lumsy and deliver the key.
Before you move on
- Fungi Forest’s 50-Golden-Banana lobby requirement has been passed.
- The five Giant Mushroom weapon switches and Donkey’s separate switch have been activated.
- The required Kong-specific forest routes and the available bonus objectives have been completed or recorded for later cleanup.
- The Fungi Forest blueprint has been collected from its Kasplat and exchanged at Snide’s HQ.
- Troff ’n’ Scoff has received 300 colored bananas and Dogadon has been defeated by Chunky Kong.
- The Fungi Forest Boss Key has been collected and delivered to K. Lumsy.
- The DK Isles hub shows the route opened by the newly delivered Boss Key.
Crystal Caves — Ice, Stalactites and Precision
Reach Crystal Caves after returning the fifth Boss Key to K. Lumsy and meeting the 65-Golden-Banana entrance requirement at B. Locker. Explore the river, cabins, igloo, ice castle, and lava passages with the correct Kong, recover all five blueprints, complete the Kong-specific Golden Banana tasks, then feed 350 regular bananas to Troff ’n’ Scoff and defeat Army Dillo for the sixth Boss Key.
Enter Crystal Caves and establish the route
Crystal Caves is reached from the elevated entrance on DK Isles that becomes available after the Fungi Forest Boss Key is returned to K. Lumsy. At B. Locker, you need 65 Golden Bananas to open the entrance. Once inside, follow the opening path to the central waterway. The river divides the main routes: the right side leads toward the igloo and ice-castle approaches, while the left side passes through the waterfall toward the cabin district, Candy’s shop, and several raised platforms.
Use the Tag Barrel near the starting area whenever you need to change Kongs. Activate any Bananaport pads you pass, especially the pads numbered 4 and 5, because several blueprints depend on linking those pads. Buy ammunition from Funky if necessary, and make sure the Kongs have their current weapon, instrument, and movement upgrades before attempting the bonus rooms. Watch the falling stalactites around the river and ledges; wait for a safe opening rather than jumping through an active drop.
- Confirm that the Crystal Caves entrance requirement has been met.
- Activate nearby Bananaport pads, especially numbers 4 and 5.
- Keep ammunition, oranges, film, and Crystal Coconuts available.
Open the ice castle and igloo routes
Take Lanky to the ice castle entrance and pound his switch to open the interior challenge. Complete the floor-tile contest by claiming more squares than the opponent before the timer expires. Move continuously around the room and avoid spending too long contesting one tile; the objective is to finish with the larger total, not to clear the room completely.
Diddy is needed to open the igloo route. Reach the igloo area and use Diddy’s Rocketbarrel to fly through the DK star above the entrance. Return to the music pad and play Diddy’s guitar. Inside, break the numbered barrels in order from 1 through 6 before the timer ends. Completing this sequence makes the igloo accessible for the other Kongs. If you fail, leave through the entrance and retry after noting the barrel order and the safest path between them.
- Win Lanky’s ice-castle floor-tile challenge.
- Fly Diddy through the DK star above the igloo.
- Open the igloo and complete the numbered barrel sequence.
Complete the Kong-specific Golden Bananas
Each Kong has five Crystal Caves Golden Bananas, including the Golden Banana awarded for turning in that Kong’s blueprint. The following objectives cover the main routes. Donkey uses the revolving ice structure inside the igloo; enter after Diddy has opened it, keep close to the structure’s rotation, and make small corrections rather than trying to cross through moving walls. Donkey also has a lava-route banana that requires his invincibility barrel. Activate the barrel, cross the lava passage promptly, and collect the banana before the protection expires.
Diddy has a Mad Maze Maul challenge reached through his barrel near the waterfall, a guitar-accessed cabin challenge, the igloo barrel sequence, and a Rocketbarrel route for lighting the cabin candles. In enemy rooms, use oranges when several targets are grouped together. Lanky’s tasks include the ice-castle switch contest, the slide race, an igloo challenge, and a cabin sprint. In the sprint, defeat the enemies, activate the switch, enter the speed barrel, and move immediately when the temporary banana appears.
Tiny’s Crystal Caves tasks include the small cave reached through her Tiny Barrel, a cabin challenge involving purple enemies, and an igloo objective involving a large enemy and a shrinking target. Chunky must use his boulder switch near the ice castle to trigger one of his objectives, clear the Searchlight Seek cabin challenge, protect the rabbit from incoming fireballs, and use his Primate Punch and invisibility abilities in the entrance passages. If a room is inaccessible, check for the correct Kong’s music pad, barrel, or switch before assuming the banana is missing.
- Complete five Golden Banana objectives for each Kong if pursuing the full level total.
- Use the correct Kong’s barrel, instrument, and special move for each room.
- Record any failed timed challenge and return after upgrading ammunition or health.
Collect and turn in the five blueprints
Donkey’s yellow Kasplat is reached by crossing the starting river, climbing the higher platforms, and taking the elevated branch at the fork instead of the downward slope. Defeat it with Donkey and take the blueprint. Diddy’s red Kasplat is reached through the number 4 Bananaport route. One number 4 pad is near the igloo, while the other is in a small passage that requires Tiny to enter. Activate both pads, then use Diddy’s pad to warp to the red Kasplat.
Lanky’s blue Kasplat requires Diddy’s Rocketbarrel to reach the high tower and activate the number 5 pad there. Activate the other number 5 pad in the cabin district with Lanky, then use the linked route to reach the Kasplat. Tiny’s purple Kasplat is on a raised platform in the cabin area reached by following the river left through the waterfall. Chunky’s green Kasplat is on top of the large igloo; use the surrounding platforms and backflips to reach the roof.
Snide’s Crystal Caves HQ is behind the transparent ice wall near the entrance. Switch to Chunky, use Primate Punch to break the wall, then enter the opened passage. Bring each blueprint to Snide with its matching Kong and collect the resulting Golden Banana. The blueprint color identifies the required Kong: yellow Donkey, red Diddy, blue Lanky, purple Tiny, and green Chunky.
- Collect the yellow, red, blue, purple, and green Crystal Caves blueprints.
- Break open Snide’s entrance with Chunky.
- Turn in all five blueprints and collect all five Snide-reward bananas.
Check bonus barrels and the Battle Arena
Before leaving the cabin and igloo districts, inspect the Kong-specific bonus barrels. Tiny’s Krazy Kong Klamour requires hitting the target bananas while avoiding the decoy images. Chunky’s Searchlight Seek requires destroying the moving Klaptraps without allowing the searchlights to catch him. Other barrels are reached from the cabin music pads or the Rocketbarrel routes, so revisit a room with the correct Kong if a barrel was visible but unreachable.
A Battle Arena Pad is optional for the ordinary story route, but complete it if you are collecting crowns for later final-area doors or 101 percent completion. Enter only after clearing nearby enemies and identifying the arena entrance. The crown is awarded for surviving and defeating the arena’s waves; if you lose, return after restoring health and ammunition.
- Complete the bonus barrels intended for your completion goal.
- Collect the Crystal Caves Battle Crown if required for the final route.
- Mark any inaccessible barrel or pad for a later cleanup visit.
Feed Troff ’n’ Scoff and defeat Army Dillo
Use any Crystal Caves Troff ’n’ Scoff entrance after the Kongs have contributed 350 regular bananas. The boss door opens for Donkey Kong. In the arena, Army Dillo rolls around the platform and pauses to taunt. During each pause, pick up a TNT barrel and throw it at him. Avoid throwing while he is rolling or attacking because the barrel can be wasted.
After the first three successful hits, jump over the shockwaves created by his ground attacks and keep moving around the arena. In the later phase, Army Dillo hovers and rains fireballs before launching a homing missile. Lead the missile toward a TNT barrel when possible, then use the pause after the attack to throw another TNT barrel. Continue until his shell is destroyed. Collect the Boss Key after the victory and return it to K. Lumsy on DK Isles; this is the sixth Boss Key and opens the next hub progression.
- Feed Troff ’n’ Scoff 350 regular bananas.
- Use TNT barrels only during Army Dillo’s vulnerable pauses.
- Collect the sixth Boss Key and deliver it to K. Lumsy.
Before you move on
- The Crystal Caves totals show 25 Golden Bananas if the level is fully cleared: five for Donkey, five for Diddy, five for Lanky, five for Tiny, and five for Chunky.
- All five Crystal Caves blueprints have been collected by their matching Kongs, handed to Snide, and converted into their Golden Banana rewards.
- The igloo, ice castle, cabin challenges, Kong-specific bonus barrels, and any intended Battle Arena have been completed or recorded for cleanup.
- Army Dillo has been defeated and the sixth Boss Key has been collected or delivered to K. Lumsy.
- The DK Isles hub shows the next progression seal removed after the Boss Key is returned.
Creepy Castle — Ladders, Mazes and Bonus Stages
Creepy Castle is the seventh main world in the original Nintendo 64 release of Donkey Kong 64. Its required progression is spread across the castle exterior, the tree, the underground catacombs, the library, the ballroom, the museum, the greenhouse and several bonus barrels. Complete the five Kong routes, retrieve all five blueprints if you want the associated Snide rewards, then collect at least 400 regular bananas to open the Troff n’ Scoff boss door. King Kut Out is defeated with the courtyard cannons and awards Creepy Castle’s boss key.
1. Open the tree and establish the main route
From the entrance, cross the first bridge and follow the circular path around the castle. Activate the bananaports as you reach them; the castle’s five ports divide the exterior, catacombs, shop floors and upper path into useful return points.
Near the beginning, find the large tree beside Donkey’s pad. Use Donkey’s Barrel Blast course and pass through the DK star at the end. The tree entrance opens permanently. Enter as Donkey, shoot the coconut switch, drop into the water and swim to the floating wood. Shoot the three moving targets on the far wall to raise the water level, then climb to Donkey’s golden banana. This route also places you near Donkey’s yellow Kasplat blueprint.
Do not treat every Cranky upgrade as a prerequisite for entering the level. The abilities that matter here are obtained at different points in the game: Orangstand Sprint comes from Crystal Caves, while Monkeyport and Gorilla Gone are obtained from Cranky in Creepy Castle. Return for the routes that specifically require them.
- Complete Donkey’s Barrel Blast course and open the tree.
- Raise the tree’s water level by shooting all three targets.
- Activate the accessible bananaports before entering the interior rooms.
2. Finish Donkey’s library, mine-cart and blueprint objectives
On the rising circular path, use Donkey at the red Donkey switch near the upper section. The switch opens a timed route back down the path. Reach the cloud and enter the library before the opening closes. Clear the giant-book room until Donkey’s switch appears, slam it, then return through the library and use the Donkey barrel to cross the room of flying books safely. The golden banana is at the far end.
For Donkey’s mine-cart objective, return to the area with the brown wooden stairs and drop into the lower passage instead of climbing. Enter the underground room, open the large skull with the coconut switch, and continue to the room containing six levers. Use the correct lever sequence shown by the level’s clues; pulling an incorrect lever resets the attempt. Complete the mine-cart section to receive Donkey’s banana.
The yellow-haired Kasplat is inside the tree route. Defeat it as Donkey, collect the yellow blueprint and take it to Snide at the top of the castle for a golden banana.
- Complete the library route before leaving the upper path.
- Finish the underground mine-cart objective.
- Turn Donkey’s yellow blueprint in to Snide.
3. Complete Diddy’s roof, ballroom and catacomb routes
At Cranky’s Lab, use Diddy’s barrel to gain the rocketbarrels, then fly to the very top of the castle tower. Enter the bonus barrel and complete Bug Bug Bash. Aim carefully at the moving bugs; missed attacks make the targets move faster temporarily. Winning awards Diddy’s golden banana.
On the circular path, use Diddy at the red Diddy switch outside the ballroom. Clear the enemies inside to make the Diddy barrel appear. Fly over the candles and light every one, then enter the bonus barrel for Minecart Mayhem. In the cart, use Z to accelerate, B to slow down and the control stick at track junctions. Keep away from the TNT cart until the timer ends.
For Diddy’s underground banana, drop from the brown-stair area into the catacombs and enter the large skull using the peanut switch. Continue to the numbered switches and activate them in order from 1 through 4. In another catacomb room, slam Diddy’s switch, stay away from the wall that flips when approached, shoot the distant peanut switch and use the chains that appear to reach the banana.
Diddy’s red blueprint is in the lower catacombs. Defeat the red-haired Kasplat, collect the blueprint and deliver it to Snide.
- Win Bug Bug Bash at the top of the castle.
- Light the ballroom candles and survive Minecart Mayhem.
- Activate the numbered catacomb switches from 1 to 4.
- Recover and turn in Diddy’s red blueprint.
4. Complete Lanky’s upper and lower routes
At the castle roof, slam Lanky’s red switch and enter the tower. Defeat the enemies to reveal Lanky’s pad, then shoot the grape switches high above the room. The floor opens and creates a strong updraft. Use the pad to inflate Lanky, enter the wind and reach the bonus barrel. Beaver Bother requires 15 beavers to be scared into the hole before the timer expires. Use B to scare and A to jump; if one beaver sticks against a wall, redirect another rather than wasting the attempt on the same target.
The greenhouse is on the rising castle path. Slam the Lanky pad, enter the maze and use Orangstand Sprint to cross it quickly. Keep the camera pulled back so the turns are visible, and head for the golden banana at the opposite side.
In the catacombs, open the pillar with the grape switch and stand beneath the Lanky barrel. Shoot the switch, enter the barrel immediately, sprint through the timed tunnel and play the trombone on the music pad. Swing across the vines to the banana.
For Lanky’s lower bonus, enter the catacomb room near the castle entrance, slam his switch and play the trombone on the music pad. Platforms rise from the sludge. Inflate on each Lanky pad and cross to the bonus barrel for Kremling Kosh. Shoot 16 Kremlings within the time limit and reload by shooting the central barrel.
Lanky’s blue blueprint is guarded by the blue-haired Kasplat on the circular path leading upward. Defeat it and take the blueprint to Snide.
- Clear the roof Beaver Bother.
- Cross the greenhouse maze.
- Complete the timed sprint and vine route.
- Win Kremling Kosh and turn in Lanky’s blue blueprint.
5. Complete Tiny’s museum, garbage-can and sludge routes
Diddy must first open the door on the rising path by slamming the red Diddy switch. Switch to Tiny, enter the room and use her pad to Monkeyport to the museum. Become small, enter the small opening and complete the car race. Win while collecting at least 10 coins; missing a limited number of flags is allowed, so use safe shortcuts rather than risking every turn.
Near the small buildings on the circular path, use Tiny’s barrel, bounce from the mushroom to the roof of the round gray structure and drop into the garbage can. Collect the homing ammunition around the room and use it to destroy the flying enemies. The banana appears after they are defeated.
In the lower catacombs, open the pillar with the feather switch and take the right-hand route. Ponytail-whirl across the gap, slam Tiny’s switch and use the rising stone hands as platforms across the sludge. Whirl from hand to hand to reach the golden banana.
From the castle entrance, enter the large crack in the front door and follow the tunnels to the wide gap. Ponytail-whirl to the bonus barrel and play Teetering Turtle Trouble. Feed the turtles with melon shots and reload at the center; alternate between the upper and lower rows until the challenge ends.
Tiny’s purple blueprint is in the lower passage near the brown stairs. Drop down, continue past the narrow section and defeat the purple-haired Kasplat. Give the blueprint to Snide.
- Open the museum route with Diddy, then win Tiny’s car race with at least 10 coins.
- Destroy the garbage-can enemies with homing ammunition.
- Cross the sludge using the moving hands.
- Complete Teetering Turtle Trouble and turn in Tiny’s purple blueprint.
6. Complete Chunky’s tree, shed, museum and blueprint routes
Return to the opened tree as Chunky. Use Primate Punch on the cracked wall and continue to the distant pineapple switch. It retreats when approached, so remain back and shoot it in sniper mode. Enter the bonus barrel and complete the second Beaver Bother, again directing 15 beavers into the hole before time expires.
On the upper circular path, punch through the wooden shed. Break the central box, stand on the Chunky pad to become invisible and shoot the bats with pineapples. Homing ammunition makes this room much easier, but the required action is to defeat every bat while invisible.
Use Chunky at the red Chunky switch marked for the museum. Clear the enemies, stand on the central platform and punch the three shields along the wall. A skull opens and reveals a boulder. Carry the boulder onto the central platform to hold the mechanism down, then collect the golden banana.
Chunky’s coffin bonus is in the underground catacombs. Open the skull with the pineapple switch, continue to the room of coffins and punch them open. Enter the bonus barrel and complete Searchlight Seek by leading your melon shots slightly ahead of the moving target.
Chunky’s green blueprint is in the entrance tunnels beneath the front of the castle. Drop into the moat, enter the crack in the large door and follow the tunnels until you find the green-haired Kasplat. Defeat it and bring the blueprint to Snide.
- Complete the tree Beaver Bother.
- Defeat the invisible bats in the shed.
- Use the boulder to hold the museum mechanism open.
- Win Searchlight Seek and turn in Chunky’s green blueprint.
7. Open Troff n’ Scoff and defeat King Kut Out
After completing the Kong routes, feed regular bananas to Troff n’ Scoff until the counter reaches 400. Enter the boss door as the Kong shown on the door. If the required total is not met, continue collecting colored bananas in Creepy Castle and return to the portal.
King Kut Out is fought in the courtyard with all five Kongs available through the central Tag Barrel. The active cannon is indicated by the lit section of the arena. Wait until the cardboard figure is in the matching position, then jump into that cannon to launch the current Kong into it. Do not fire from an unlit cannon.
A missed launch sends the Kong over the wall and the Tag Barrel supplies another Kong. Avoid the incoming projectiles and clear nearby enemies when they obstruct the arena. During the later circular movement, watch the figure’s position and move to the cannon that lights next instead of following a memorized order.
After enough successful cannon hits, King Kut Out is defeated and Creepy Castle’s boss key appears. Collect it and return to K. Lumsy. Depending on your remaining progression, the Crystal Caves and Creepy Castle keys are the two keys used to open Hideout Helm’s access.
- Troff n’ Scoff shows 400 regular bananas.
- The correct Kong enters the boss door.
- King Kut Out is hit only with the matching lit cannons.
- Collect the boss key and deliver it to K. Lumsy.
Before you move on
- Donkey, Diddy, Lanky, Tiny and Chunky’s five Creepy Castle golden-banana routes are complete or deliberately recorded for cleanup.
- The yellow, red, blue, purple and green Creepy Castle blueprints have been recovered and turned in to Snide.
- Troff n’ Scoff has accepted at least 400 regular bananas.
- King Kut Out is defeated and the Creepy Castle boss key has been collected.
- K. Lumsy has accepted the key, confirming this world’s required boss progression is complete.
Core Collectibles: Blueprints, Kasplats and Snide
Donkey Kong 64 has 40 blueprints. Five are hidden in DK Isles, and five more are found in each of Jungle Japes, Angry Aztec, Frantic Factory, Gloomy Galleon, Fungi Forest, Crystal Caves and Creepy Castle. Hideout Helm has no blueprint Kasplats. Each blueprint is carried by a colored Kasplat and can only be collected by the Kong whose color matches it. Return blueprints to Snide for Golden Bananas and additional time during Hideout Helm’s Blast-o-Matic sequence.
Set up the color key and ledger
Use one checklist with eight area rows and five Kong columns. The Kasplat’s hair and the blueprint it drops identify the required Kong: yellow is Donkey, red is Diddy, blue is Lanky, purple is Tiny and green is Chunky.
Defeat the Kasplat first, then switch to the matching Kong before touching the blueprint. With the wrong Kong active, the blueprint appears as a hologram and cannot be collected. A Kasplat that has already yielded its blueprint turns white, so use that change to confirm the item is gone.
- DK Isles: Donkey, Diddy, Lanky, Tiny, Chunky
- Jungle Japes: Donkey, Diddy, Lanky, Tiny, Chunky
- Angry Aztec: Donkey, Diddy, Lanky, Tiny, Chunky
- Frantic Factory: Donkey, Diddy, Lanky, Tiny, Chunky
- Gloomy Galleon: Donkey, Diddy, Lanky, Tiny, Chunky
- Fungi Forest: Donkey, Diddy, Lanky, Tiny, Chunky
- Crystal Caves: Donkey, Diddy, Lanky, Tiny, Chunky
- Creepy Castle: Donkey, Diddy, Lanky, Tiny, Chunky
Collect the DK Isles blueprints
Donkey’s blueprint is in the Hideout Helm entrance lobby. Shoot the coconut switch across the lava, cross to the opposite landing and defeat the yellow-haired Kasplat.
Diddy’s blueprint is in the Creepy Castle entrance lobby. Use Donkey to shoot the coconut switch on the bars, then switch to Diddy, jump over the acid and defeat the red-haired Kasplat in the opened cage.
Tiny’s blueprint is inside the large question-mark crate in the Frantic Factory entrance area. Use Chunky’s Primate Punch to break the crate, then switch to Tiny to defeat the purple-haired Kasplat.
Lanky’s blueprint is in the Crystal Caves entrance area. Use Chunky to break the transparent ice wall, then switch to Lanky and defeat the blue-haired Kasplat inside.
Chunky’s blueprint is on the raised wall near the Gloomy Galleon entrance. Jump up to the green-haired Kasplat and defeat it.
- Open the Hideout Helm lobby route before attempting Donkey’s blueprint.
- Use Donkey to open Diddy’s Creepy Castle lobby cage.
- Break the Frantic Factory crate with Chunky before switching to Tiny.
- Break the Crystal Caves ice wall with Chunky before switching to Lanky.
- Check the raised wall beside the Gloomy Galleon entrance for Chunky’s Kasplat.
Collect Jungle Japes and Angry Aztec blueprints
In Jungle Japes, Donkey’s yellow Kasplat is in the western tunnel beside the area with the large X and the number 3 pad. Diddy’s red Kasplat is in the other number 3 tunnel across the river, near the beavers. Tiny’s purple Kasplat is farther along Donkey’s tunnel. Lanky’s blue Kasplat is in the tunnel across the small lake; turn left inside to find it. Chunky’s green Kasplat is beneath the large X. Break into the hidden cave, activate the vines by shooting the pineapple switch in the statue’s eyes, then cross to the Kasplat.
In Angry Aztec, Donkey’s yellow Kasplat is across the quicksand bridge near the entrance, requiring Strong Kong. Diddy’s red Kasplat is on top of the Domed Temple; use the Jetpack Barrel on the central island. Tiny’s purple Kasplat is in the tunnel leading toward the second main area, beside a switch. Lanky’s blue Kasplat is in the Llama Temple’s lava section, reached through the number 2 pads. Chunky’s green Kasplat is inside the Maze Temple, in a passage behind Chunky’s door.
- Jungle Japes: confirm the western tunnel before searching for Donkey.
- Jungle Japes: use the hidden cave and statue vines for Chunky.
- Angry Aztec: obtain Strong Kong, the Jetpack route and the relevant pad access first.
- Angry Aztec: open the Maze Temple before searching for Chunky.
Collect Frantic Factory and Gloomy Galleon blueprints
In Frantic Factory, Donkey’s yellow Kasplat is high on the outside of the Production Room machinery, reached through the number 4 pads and moving platforms. Diddy’s red Kasplat is on the ground floor of the Production Room. Tiny’s purple Kasplat is below the pole room in R&D. Lanky’s blue Kasplat is on the higher R&D level. Chunky’s green Kasplat is in the central Testing Area near the toys.
In Gloomy Galleon, Donkey’s yellow Kasplat is in the Treasure Chamber. Open the Enguarde-marked entrance, raise the water, activate the number 4 pads and warp Donkey into the chamber. Diddy’s red Kasplat is in the small cave by the lighthouse, accessible after lowering the water. Tiny’s purple Kasplat is beyond the cannon route and vines in the shipwreck area. Lanky’s blue Kasplat is in the pineapple-gated tunnel near the entrance, reached after raising the water. Chunky’s green Kasplat is on top of the giant cactus near Funky’s Store.
- Use number 4 pads before attempting the high Production Room route.
- Search both R&D levels, not only the pole room.
- For Gloomy Galleon, record whether the water is raised or lowered before changing Kong.
- Check the cactus near Funky’s Store for Chunky’s blueprint.
Collect Fungi Forest, Crystal Caves and Creepy Castle blueprints
In Fungi Forest, Donkey’s yellow Kasplat is in the thorn hedge around the mill building. Diddy’s red Kasplat is inside the Giant Mushroom on the upper vines. Tiny’s purple Kasplat is reached through an upper Giant Mushroom exit. Lanky’s blue Kasplat is inside the giant tree log near the rabbit’s house. Chunky’s green Kasplat is near the top of the Giant Mushroom, across the vines.
In Crystal Caves, Donkey’s yellow Kasplat is on the elevated path after crossing the first river. Diddy’s red Kasplat is in the room reached through the number 4 pad near the Igloo; activate the second number 4 pad through Tiny’s narrow tunnel if necessary. Tiny’s purple Kasplat is on the elevated route past Candy’s Store. Lanky’s blue Kasplat is reached with Diddy’s Jetpack and the number 5 pads, then collected as Lanky. Chunky’s green Kasplat is on top of the Igloo.
In Creepy Castle, Donkey’s yellow Kasplat is inside the tree near the entrance after shooting the coconut switches. Diddy’s red Kasplat is in the tunnel near Funky’s Store, reached by going around the starting river and using the entrance on the far side of the wall. Tiny’s purple Kasplat is across the narrow ledge near the entrance. Lanky’s blue Kasplat is beyond the moving platforms on the castle exterior. Chunky’s green Kasplat is across the river near the entrance, inside the hallway with green bananas.
- Search the Giant Mushroom with Diddy, Tiny and Chunky separately.
- Activate Crystal Caves number 4 and number 5 pads before returning with the required Kong.
- Use the castle exterior route for Lanky.
- Check the hallway across the Creepy Castle entrance river for Chunky.
Turn in blueprints and prepare the Hideout Helm timer
Take collected blueprints to Snide’s headquarters. The game awards one Golden Banana for each returned blueprint, and the reward belongs to the Kong associated with that blueprint. Snide can accept stored blueprints outside the area where they were found, so you can turn in several at once when you return to DK Isles or another available Snide headquarters.
Every blueprint returned adds one minute to the Hideout Helm timer. The default allowance is 10 minutes, while all 40 returned blueprints raise the maximum to 50 minutes. Blueprints are not individually required to finish the normal campaign, but their Snide rewards and extra timer are valuable for the final sequence.
- Record the blueprint immediately after collecting it.
- Verify the Kasplat has turned white.
- Return to Snide before beginning the final Hideout Helm attempt.
- Confirm the completed blueprint total and displayed timer before entering the timed sequence.
- Keep a save made before the final attempt.
Before you move on
- Your ledger contains exactly five blueprints from each of DK Isles, Jungle Japes, Angry Aztec, Frantic Factory, Gloomy Galleon, Fungi Forest, Crystal Caves and Creepy Castle.
- All 40 Kasplats associated with these areas have turned white and no blueprint remains uncollected.
- Snide’s completed total matches the number of blueprints collected.
- Each Snide turn-in has produced the corresponding Kong’s Golden Banana.
- Before starting the timed Hideout Helm sequence, the displayed allowance reflects the number of blueprints returned; with all 40 returned, it should be 50 minutes.
- A pre-Hideout Helm save remains available until the ending has been viewed.
Banana Medals, Colored Bananas and Capacity Goals
Colored bananas belong to one Kong and one level at a time. In each of the seven ordinary worlds, collecting 75 of a Kong’s 100 colored bananas awards that Kong’s Banana Medal automatically. Hideout Helm does not use the ordinary colored-banana system: its five medals are collected during the timed Blast-o-Matic sequence. Banana Fairies are photographed with the Banana Camera, and captured fairies increase the carrying limits for film, oranges and Crystal Coconuts.
Match each banana color to its Kong
Donkey Kong collects yellow bananas, Diddy Kong collects red bananas, Lanky Kong collects blue bananas, Tiny Kong collects purple bananas and Chunky Kong collects green bananas. A banana collected by one Kong never contributes to another Kong’s total. The game tracks the count by both character and level, so record entries as pairs such as Crystal Caves—Tiny: 54. The color assignments and the 75-of-100 medal threshold are documented in the Nintendo 64 manual and established walkthrough data.
Banana bunches are worth five bananas and banana balloons are worth ten. Record their full values rather than counting only visible objects. Collect safe bananas for the Kong currently handling the route, then use a tag barrel when a switch, passage or bonus stage requires another character. Before changing characters, note the current total so you do not merge separate counters in your notes.
- Donkey: yellow bananas
- Diddy: red bananas
- Lanky: blue bananas
- Tiny: purple bananas
- Chunky: green bananas
- Record totals by both Kong and level
Reach 75 for an ordinary-world medal
In Jungle Japes, Angry Aztec, Frantic Factory, Gloomy Galleon, Fungi Forest, Crystal Caves and Creepy Castle, a Kong earns that level’s Banana Medal automatically after collecting 75 of that Kong’s 100 colored bananas there. There is no shop, character or NPC to visit to exchange the medal. The game awards it as soon as the threshold is met.
Do not add different Kongs’ totals together. For example, 40 yellow bananas with Donkey and 35 red bananas with Diddy do not create a medal. If a route is blocked, leave the missing bananas until you obtain the required weapon, instrument, movement ability or Cranky upgrade. There are five ordinary-world medals per world, giving 35 ordinary-world medals across these seven worlds. The remaining five medals come from Hideout Helm.
- Aim for 75 colored bananas for each Kong in each ordinary world
- Treat every Kong’s counter as separate
- Return to blocked rooms after obtaining the required ability
- Remember that seven ordinary worlds use the 75-banana rule
Handle Hideout Helm’s five medals correctly
Do not search Hideout Helm for 100 colored bananas per Kong. Hideout Helm has no ordinary colored-banana collection and no normal five-Golden-Banana set for each Kong. Instead, each Kong completes its assigned timed challenge rooms during the Blast-o-Matic shutdown, then collects the Banana Medal exposed when that Kong’s section is finished.
Collect each medal before completing the Hideout Helm sequence and leaving the level. The original Nintendo 64 version has a known progression risk involving medals that were not picked up before the level was completed, so treat every exposed medal as an immediate objective. These five medals are included in the game’s total of 40 Banana Medals, but they do not follow the ordinary 75-colored-banana rule.
- Do not count Hideout Helm as a normal colored-banana level
- Complete the relevant Kong challenge and physically collect the exposed medal
- Include the five Hideout Helm medals when checking the 40-medal total
- Collect the medals before leaving the completed Hideout Helm sequence
Use the 15-medal milestone
After earning 15 Banana Medals cumulatively, visit Cranky’s Lab. Cranky then allows access to Jetpac from his computer. The medals are not turned in; the game simply checks your cumulative medal total. Medals from different Kongs and different levels can be combined toward the 15-medal requirement.
Play Jetpac until you reach 5,000 points to receive the Rareware Coin. This coin is not the medal reward itself. It is a separate progression item used with the Nintendo Coin at the special door in Hideout Helm, so the 15-medal milestone can matter to a normal campaign route as well as to 101-percent cleanup. The Nintendo Coin comes from beating the Donkey Kong arcade game twice in Frantic Factory, while the Rareware Coin comes from Jetpac.
- Earn 15 total Banana Medals
- Visit Cranky’s Lab after reaching 15
- Play Jetpac and reach 5,000 points for the Rareware Coin
- Keep the Rareware Coin separate from the Banana Medal count
Get the Banana Camera before hunting fairies
Rescue Tiny Kong and buy her Mini-Monkey ability from Cranky. Then travel to Banana Fairy Island on DK Isles and enter the small opening as Tiny while using Mini-Monkey. Speak with the Banana Fairy Queen to receive the Banana Camera. Banana Fairies cannot be captured with ordinary weapons; they must be photographed with the special camera and banana film.
Carry film before beginning a fairy search. When the fairy music starts or a fairy appears, equip the camera, center the fairy in the viewfinder and take the photograph. A successful photograph records that fairy permanently. If a fairy’s room requires another Kong, weapon, instrument or movement ability, mark the location and return with the correct character instead of repeatedly attempting it with the wrong loadout.
- Rescue Tiny Kong
- Buy Mini-Monkey from Cranky
- Enter the small opening on Banana Fairy Island as Tiny
- Carry banana film
- Use the Banana Camera rather than a weapon
Use fairy rewards to prepare for difficult sections
There are 20 Banana Fairies in total: four on DK Isles and two in each of the eight playable levels, including Hideout Helm. Each captured fairy increases the maximum amount of film, oranges and Crystal Coconuts you can carry. Refill those supplies after receiving a capacity increase so the extra space is immediately useful.
Capturing all 20 fairies is part of the 101-percent route. After all 20 are photographed, return to the Banana Fairy Queen for the extra Golden Banana, bringing the game’s Golden Banana total to 201. This reward is separate from Banana Medal progression: medals come from colored-banana thresholds or Hideout Helm challenges, while the 201st Golden Banana comes from the complete fairy sequence.
- Track the four DK Isles fairies separately
- Track two fairies for each of the eight playable levels
- Refill film, oranges and Crystal Coconuts after capacity increases
- Capture all 20 fairies only when pursuing 101 percent and the 201st Golden Banana
Run a focused cleanup route
Finish one Kong’s banana total while you are already visiting that Kong’s rooms. Collect safe bananas on the route, use nearby tag barrels only for necessary character gates and record the counter after each major section. Once the total reaches 75, confirm that the medal was awarded before moving on. Leave the remaining bananas for a later full-collection pass unless you are already positioned to gather them safely.
Before entering Hideout Helm, review three separate lists: your cumulative Banana Medal total, your seven ordinary-world Kong totals and your Banana Fairy locations. Fifteen medals unlock Jetpac; 5,000 Jetpac points provide the Rareware Coin; and all 20 fairies support the 101-percent route and the final fairy reward. Do not treat any of these milestones as interchangeable.
- Check all seven ordinary worlds for five Kong-specific medal opportunities each
- Check the five Hideout Helm medal locations separately
- Reach 15 cumulative medals before attempting the Rareware Coin route
- Maintain a separate list for uncaptured fairies and blocked banana groups
Before you move on
- The collection total shows at least 15 Banana Medals if Jetpac access is required.
- All seven ordinary worlds have been checked for five Kong-specific 75-banana medals if pursuing full completion.
- All five Hideout Helm medals have been collected if pursuing the complete 40-medal total.
- The Banana Camera has been obtained from the Banana Fairy Queen.
- Jetpac has reached 5,000 points if the Rareware Coin is required.
- All 20 Banana Fairies are captured if pursuing 101 percent and the final fairy reward.
- Film, oranges and Crystal Coconuts have been expanded and refilled before difficult minigames or Hideout Helm attempts.
Battle Arenas, Crowns and Minigames
Battle Arena Pads send the active Kong into timed survival challenges. There are ten Battle Arenas in the original Nintendo 64 game: one in each of the eight main levels and two on DK Isles. Surviving an arena awards one permanent Battle Crown. Four crowns are needed for the crown-marked door in Hideout Helm; all ten are useful when completing the game’s full collectible set. The two special coins are also important campaign objectives: the Nintendo Coin comes from completing the Frantic Factory Donkey Kong arcade game twice, and the Rareware Coin comes from scoring 5,000 points in Jetpac after earning 15 Banana Medals.
Understand and clear a Battle Arena
Find a metal pad marked with King K. Rool’s face. Stand on it and press Z to enter the arena. The active Kong is carried into a timed fight against recurring enemy waves. Survive until the timer expires without losing all health or falling from the platform. The goal is survival, not collecting ordinary bananas or reaching an exit.
When the timer ends, a Battle Crown appears in the arena. Jump into the crown to register the reward and return to the level. A crown is not awarded merely for entering the pad. Once collected, it remains in your totals; if you fail, return to the same pad and try again. Before entering, use a Tag Barrel if necessary to choose a Kong with full health and a reliable close-range attack. Stay near the center when possible, watch for enemies approaching from behind, and avoid fighting beside an edge.
- Stand on the K. Rool-marked pad and press Z.
- Survive the entire enemy assault without falling or losing all health.
- Jump into the crown after the timer expires.
Collect the early level crowns
In Jungle Japes, check the area in front of Funky’s Armory. This is one of the simplest pads to reach and is a useful first attempt.
In Angry Aztec, enter the temple near the world entrance. Use Lanky Kong to shoot the vulture with his grape shooter; after the water drains, the exposed Battle Arena Pad can be reached in the temple area.
In Frantic Factory, go to the R&D area near Tiny Kong’s remote-control race. Use Donkey Kong’s Gorilla Grab on the nearby lever to reveal or activate the route to the pad. Do not search only around the race entrance; the lever is the relevant prerequisite.
In Gloomy Galleon, go below Cranky’s Lab and use Chunky Kong’s Primate Punch to break the obstructing gate. The pad is behind that opening.
- Jungle Japes: area in front of Funky’s Armory.
- Angry Aztec: drain the temple water with Lanky’s vulture challenge.
- Frantic Factory: use Donkey’s Gorilla Grab on the R&D lever.
- Gloomy Galleon: break the gate below Cranky’s Lab with Chunky.
Find the remaining level arenas
In Fungi Forest, reach the tall mushroom outside the main forest area. The arena platform is below the mushroom route. Depending on the time-of-day state and the route you use, the opening may be easier to reach at night; Tiny’s Ponytail Twirl can also help her descend to the platform during the day.
In Crystal Caves, enter Donkey Kong’s second cabin near Candy. The pad is on the left side of the rotating cabin structure and is reached by completing the cabin movement puzzle.
In Creepy Castle, enter the Greenhouse Maze as Lanky Kong. Complete the maze and collect Lanky’s Golden Banana. The Battle Arena Pad appears in the center afterward; return there and press Z.
The eighth level arena is in Hideout Helm. After the Blast-o-Matic has been shut down, switch to Diddy Kong, enter his Rocketbarrel, and fly to the top of the Blast-o-Matic generator. Land on the pad to begin the final arena challenge.
- Fungi Forest: tall mushroom platform outside the main area.
- Crystal Caves: Donkey’s second cabin near Candy.
- Creepy Castle: Greenhouse Maze after Lanky’s Golden Banana.
- Hideout Helm: top of the Blast-o-Matic after shutdown, using Diddy.
Clear the two DK Isles arenas
One DK Isles arena is inside King K. Rool’s ship on the route toward the Frantic Factory entrance. Use Chunky Kong to remove the boulder blocking the pad’s area.
The other is near the Fungi Forest entrance. Look up for the red mushroom and shoot it with each Kong when it changes to that Kong’s color. After the colored shots are completed, a Chunky Kong pad appears. Learn Chunky’s Gorilla Gone move from Cranky, activate the pad, and enter the newly opened route to the arena.
These two arenas can be completed at any point after their access requirements are available. If a route seems blocked, use the DK Isles Tag Barrel to select the Kong whose ability activates the obstacle rather than trying to force the path with the wrong character.
- Ship arena: remove the boulder with Chunky.
- Fungi Forest entrance arena: complete the Kong-colored mushroom sequence.
- Use Gorilla Gone on Chunky’s revealed pad.
Unlock Jetpac and earn the Rareware Coin
Collect 15 Banana Medals, then visit Cranky’s Lab. A Banana Medal is earned by collecting 75 of one Kong’s 100 colored bananas in a world, so work toward medals during normal level exploration. The medals are Kong-specific and world-specific; partial totals do not count until a Kong reaches the threshold in that world.
After Jetpac is unlocked, play it through Cranky’s Lab and reach 5,000 points. The Rareware Coin drops during the game after the score requirement is met, so collect it before leaving or ending the attempt. The coin is required for the special door in Hideout Helm.
- Earn at least 15 Banana Medals.
- Unlock Jetpac through Cranky’s Lab.
- Reach 5,000 points and collect the dropped Rareware Coin.
Complete the Donkey Kong arcade game twice
Find the original Donkey Kong arcade machine in Frantic Factory. Complete the game once to receive its Golden Banana. Then start it again and complete the harder second run. The second completion awards the Nintendo Coin; finishing only the first run is not enough.
Treat this as two separate objectives and confirm the coin has appeared before leaving the machine. The Nintendo Coin and Rareware Coin are both needed later in Hideout Helm.
- Complete the arcade game once for its Golden Banana.
- Complete the second, harder run.
- Confirm that the Nintendo Coin is in the totals.
Use the crowns and coins in Hideout Helm
Enter Hideout Helm and complete the Blast-o-Matic shutdown. The crown requirement applies to the later door leading toward K. Rool’s throne room, not to entering the level. Collect at least four Battle Crowns before returning to that door; it then opens and allows the final approach.
At the throne-room end, use the door marked with the Nintendo Coin and Rareware Coin. With both coins collected, it opens to the final Boss Key and two Banana Fairies. Take the Boss Key to complete the final key requirement and continue toward the King K. Rool confrontation.
For the main campaign, four crowns and both company coins are the practical minimum goals for this chapter. For full collectible completion, return through DK Isles and clear all ten Battle Arenas, including the Hideout Helm arena.
- Have at least four Battle Crowns before attempting the crown door.
- Have both the Nintendo Coin and Rareware Coin.
- Open the coin door and collect the final Boss Key.
- Clear all ten arenas only if pursuing the complete collectible set.
Before you move on
- Confirm the Battle Crown total is at least four before the final Hideout Helm approach.
- Confirm all ten crowns if pursuing the full collectible set.
- Confirm the Rareware Coin was collected after reaching 5,000 Jetpac points.
- Confirm the Nintendo Coin was collected after completing the Frantic Factory arcade game twice.
- After the Blast-o-Matic shutdown, verify that the four-crown door opens.
- Verify that the Nintendo-and-Rareware-Coin door opens and that the eighth Boss Key is collected.
Boss Keys, K. Lumsy and Opening Hideout Helm
Defeat the seven bosses in the first seven worlds, return their Boss Keys to K. Lumsy in the correct progression, and enter Hideout Helm through the opened mechanical K. Rool mouth. Inside Hideout Helm, four Battle Crowns and the Nintendo and Rareware Coins open the route to the eighth Boss Key. Return that key to K. Lumsy to unlock the final King K. Rool sequence.
1. Defeat the seven ordinary world bosses
Each of the first seven worlds contains Troff ’n’ Scoff portals. Enter one, feed Scoff the required colored bananas, and use the opened door showing the permitted Kong’s face. Only that Kong can enter the world boss encounter. The seven ordinary bosses are in Jungle Japes, Angry Aztec, Frantic Factory, Gloomy Galleon, Fungi Forest, Crystal Caves, and Creepy Castle.
After each victory, collect the Boss Key that appears in the boss arena before leaving. The key is the actual progression item; defeating the boss and watching the victory scene is not enough by itself. Confirm the key has been added to your totals before returning to DK Isles.
- Jungle Japes Boss Key collected.
- Angry Aztec Boss Key collected.
- Frantic Factory Boss Key collected.
- Gloomy Galleon Boss Key collected.
- Fungi Forest Boss Key collected.
- Crystal Caves Boss Key collected.
- Creepy Castle Boss Key collected.
2. Return Boss Keys to K. Lumsy
K. Lumsy is imprisoned in the cave reached from the DK Isles bananaport route near Crocodile Isle. Enter the cave, approach the next padlock on his cage, and the game will use the next available Boss Key. K. Lumsy celebrates and his shockwaves change the hub environment. The locks open permanently, so you do not need to repeat a completed boss once a key has been handed over.
If a lock does not open, first check your Boss Key total and confirm that you actually picked up the key in the boss arena. Do not search for a hidden switch around the cage: the cage progression is driven by Boss Keys.
- K. Lumsy has reacted to every delivered key.
- The delivered key no longer appears among your unreturned Boss Keys.
- A new hub entrance, barrel, or route has appeared after each release event.
3. Follow the required hub unlock order
The Jungle Japes key opens Angry Aztec. After defeating Angry Aztec’s boss and returning that key, K. Lumsy opens both the Frantic Factory and Gloomy Galleon routes. Frantic Factory is entered from the upper area of K. Rool’s mechanical island, while Gloomy Galleon is reached through the underwater entrance on the side facing the witch-head island.
Return both the Frantic Factory and Gloomy Galleon keys to K. Lumsy. The third key does not create a separate new world entrance, but it is still required for the later progression event. Once both keys have been delivered, K. Lumsy creates a Blast Barrel near the lake that launches you to the upper part of DK Isles, where the log cabin entrance leads to Fungi Forest.
After defeating Fungi Forest’s boss, return its key to K. Lumsy. This opens the Crystal Caves entrance in the ear of the DK statue and creates the large Blast Barrel route to Creepy Castle. Complete both late worlds, then return the Crystal Caves and Creepy Castle keys to K. Lumsy.
- Angry Aztec is open after returning the Jungle Japes key.
- Frantic Factory and Gloomy Galleon are open after returning the Angry Aztec key.
- Fungi Forest is open after returning both the Frantic Factory and Gloomy Galleon keys.
- Crystal Caves and Creepy Castle are open after returning the Fungi Forest key.
- Both late-world keys have been returned before attempting Hideout Helm.
4. Open the Hideout Helm entrance
When both the Crystal Caves and Creepy Castle keys have been returned, K. Lumsy opens the jaw of the large mechanical K. Rool structure on DK Isles. This is the entrance to Hideout Helm; it does not require the Battle Crowns or special coins yet.
Use Tiny to reach the entrance efficiently. Go around the back or lower side of the mechanical island toward the propeller area and find the Tiny Pad. Stand on it and press Z to launch toward the opened jaw. Enter the Hideout Helm portal only after checking that both late-world keys have been delivered.
- The Crystal Caves key has been handed to K. Lumsy.
- The Creepy Castle key has been handed to K. Lumsy.
- The mechanical K. Rool jaw is visibly open.
- The Tiny Pad route to the jaw is available.
5. Obtain the required Battle Crowns and special coins
Hideout Helm contains a passage blocked by a door marked with a Battle Crown and the number 4. You need at least four Battle Crowns to pass it. Crowns are permanent rewards from Battle Arena challenges, and any four successful arenas are enough for this door. You do not need all ten crowns for the main campaign.
You also need the Nintendo Coin and Rareware Coin for the later door in Hideout Helm. In Frantic Factory, complete the Donkey Kong arcade game twice. The first completion provides its earlier reward; the second completion awards the Nintendo Coin. The Rareware Coin requires at least 15 Banana Medals before Cranky allows access to Jetpac. Score 5,000 points in Jetpac to receive the Rareware Coin.
These are special coins, not the ordinary Banana Coins spent at shops. Confirm both special coins are in your totals before making a serious Hideout Helm attempt. Save in a separate slot before entering the timed section, and avoid saving while the Hideout Helm countdown is active because original N64 guides document a risk of leaving the game in a bad progression state.
- At least four Battle Crowns have been won.
- The Nintendo Coin was earned by completing the Frantic Factory arcade twice.
- At least 15 Banana Medals have been collected.
- Jetpac has been unlocked and completed to 5,000 points.
- The Rareware Coin is in your totals.
6. Complete Hideout Helm and collect the eighth Boss Key
Inside Hideout Helm, follow the Kong-specific routes to deactivate the five Blast-o-Matic barriers. This is the timed section. Use the available Tag Barrels to select the Kong needed for each room, complete the required bonus challenge, and collect the Banana Medal reward before leaving each completed section if you are also pursuing 101 percent. Once the Blast-o-Matic has been deactivated, the immediate countdown is no longer the concern and the route toward the control room opens.
Continue through the newly opened corridors until you reach the door requiring four Battle Crowns. After passing it, continue toward the throne and control-room area. The final door displays the Nintendo and Rareware Coin symbols. With both coins in your totals, the door opens and you can collect the eighth Boss Key. The room also contains the final Banana Fairies, but those are optional for the main campaign.
Leave Hideout Helm and return to K. Lumsy with the eighth key. Handing it over completes the cage sequence and opens the route to the final King K. Rool confrontation. The eighth key is the last Boss Key required; do not confuse it with an additional ordinary world boss key.
- The five Blast-o-Matic barrier challenges are complete.
- The four-crown door opens.
- The Nintendo-and-Rareware-Coin door opens.
- The eighth Boss Key has been collected.
- The eighth Boss Key has been handed to K. Lumsy.
- The final King K. Rool route is available.
Before you move on
- Seven ordinary world bosses have been defeated and their Boss Keys have been returned to K. Lumsy.
- The mechanical K. Rool jaw on DK Isles is open and Hideout Helm can be entered.
- At least four Battle Crowns are recorded.
- The Nintendo Coin and Rareware Coin are recorded.
- The five timed Blast-o-Matic barriers have been deactivated.
- The eighth Boss Key has been collected behind the special-coin door.
- The eighth Boss Key has been returned to K. Lumsy.
- K. Lumsy’s final release event has played and the route to the King K. Rool confrontation is open.
Preparing for Hideout Helm — Loadout, Blueprints and Timing
Prepare the original Nintendo 64 USA version of Donkey Kong 64 for its final timed level by opening the route, securing the required coins and Battle Crowns, turning in blueprints, buying the useful upgrades, and creating a clean retry save. You do not need every collectible for the normal ending, but every blueprint returned to Snide adds one minute to the Blast-o-Matic timer.
Confirm the route into Hideout Helm
Finish the first seven main worlds and take their Boss Keys to K. Lumsy as you progress. The immediate route into Hideout Helm is opened when the Crystal Caves and Creepy Castle Boss Keys have been delivered, allowing access to King K. Rool’s ship on DK Isles. For a final preparation visit, it is sensible to have Boss Keys 1 through 7 delivered and the earlier worlds complete, but you do not need to possess the eighth Boss Key before entering. The eighth key is found inside Hideout Helm.
On DK Isles, go to King K. Rool’s ship. Use Tiny Kong’s Tiny Pad on the lower part of the island to reach the upper deck, then walk around to the front and enter through the ship’s mouth. Do not enter yet if either special coin or the Battle Crown requirement is missing.
- Boss Keys from the completed earlier worlds have been delivered to K. Lumsy.
- The ship’s mouth on DK Isles is open.
- You can leave the ship and return to DK Isles before beginning the serious timed attempt.
Obtain the two special coins
The Nintendo Coin is mandatory for the final-key route. In Frantic Factory, use Donkey Kong to play the original Donkey Kong arcade game. The first successful completion awards its normal reward; complete the arcade game a second time to receive the Nintendo Coin. Confirm that the coin appears in your totals before entering Hideout Helm.
The Rareware Coin is obtained through Jetpac in Cranky’s Laboratory. First collect 15 Banana Medals. Then play Jetpac and reach 5,000 points; the Rareware Coin appears as the reward. These two coins open the door in Hideout Helm that leads to the final Boss Key. Without that key, you cannot return to K. Lumsy and trigger the final King K. Rool sequence.
- Nintendo Coin obtained by completing the Frantic Factory arcade game twice.
- At least 15 Banana Medals collected.
- Rareware Coin obtained by reaching 5,000 points in Jetpac.
- Both coins are visible in the status totals.
Reach the four-Crown minimum
Collect at least four Battle Crowns before committing to the final run. Battle Arenas are entered by standing on a Battle Arena Pad marked with King K. Rool’s face and pressing Z. Defeat the enemies before the arena timer expires, then collect the crown that appears.
The four-Crown requirement applies to the door on the route to the final Boss Key after the Blast-o-Matic has been deactivated. It is not the same as owning every Battle Crown. Ten Battle Arenas exist in total, but only four crowns are needed for the standard main-campaign route.
- At least four Battle Crowns are recorded in the totals.
- You know where to find a Battle Arena if you need one more crown.
- You are not mistaking Banana Medals for Battle Crowns.
Turn in blueprints and calculate your time
Visit Snide’s HQ on DK Isles and enter with each Kong who is carrying blueprints. Each Kong can hand over only that Kong’s color: Donkey’s blueprints are yellow, Diddy’s are red, Lanky’s are blue, Tiny’s are purple and Chunky’s are green. Snide gives a Golden Banana for each blueprint returned.
Hideout Helm starts with ten minutes. Every blueprint returned to Snide adds one minute, and the forty available blueprints allow a maximum of fifty minutes. The timer is based on blueprints already returned to Snide, not blueprints merely collected and still being carried. For a first attempt, turn in every blueprint you have rather than saving them for a later visit. If you are short on time, leave Hideout Helm, recover more blueprints, return them to Snide, and enter again.
- Every practical blueprint has been handed to Snide.
- The number of blueprints turned in is recorded.
- Your expected timer is ten minutes plus one minute for each returned blueprint.
- You understand that all forty blueprints produce the fifty-minute maximum.
Finish the useful shop preparation
Visit Funky, Candy and Cranky before entering. Every Kong should have the weapon and major move upgrades required for the normal campaign. Funky supplies the firearms and weapon upgrades, Cranky supplies the Kongs’ special moves, and Candy improves the Kongs’ life capacity and instrument-related equipment.
Refill ammunition and special supplies before the attempt. Homing ammunition is not an absolute requirement, but it can save time in Hideout Helm’s target sections. Make sure the Kong you intend to use has the correct weapon for each switch: Chunky’s Pineapple Launcher, Donkey’s Coconut Shooter, Diddy’s Peanut Popguns, Lanky’s Grape Shooter and Tiny’s Feather Bow. Enter with full health and enough ammunition to avoid leaving a timed room to search for supplies.
- All five Kongs have their required weapons.
- Required Cranky moves are purchased.
- Candy’s life upgrades already needed for the campaign are complete.
- Health, ammunition, oranges and crystal coconuts are replenished.
- Homing ammunition is available if you want the extra time-saving assistance.
Create a clean pre-Helm save
The original game has three game slots. Save on DK Isles after completing the blueprint turn-ins and shop checks, but before entering the ship’s mouth. Keep an earlier general-progress slot intact and use another slot as the dedicated pre-Helm retry point.
Do not save while the Hideout Helm countdown is active. The original Hideout Helm guide warns that saving during this sequence can create a serious progress problem. If the timer expires or the interior route goes badly, reset or quit without overwriting the clean DK Isles slot, then reload that slot and retry with the same or an improved blueprint total.
- A dedicated pre-Helm save exists on DK Isles.
- The save was made after the latest blueprint turn-ins and purchases.
- An earlier progress slot remains available.
- No save has been made during an active Hideout Helm countdown.
Enter with the final checks complete
Enter Hideout Helm only after confirming the timer, coins and crowns. Snide’s opening explanation establishes the available time, and the countdown governs the Blast-o-Matic section. Move directly through the Kong-specific objectives: use Lanky for the steep OrangStand climbs, Chunky for pineapple switches, Tiny for the shrinking route, Donkey for his machine-room task, and Diddy for the Rocketbarrel sections. Use tag barrels with a named purpose instead of changing Kongs at random.
After the Blast-o-Matic is shut down, the pressure of the main timer is no longer the central problem. Continue through the opened route, pass the four-Crown door, use the Nintendo and Rareware Coin door, collect the eighth Boss Key, and return it to K. Lumsy before attempting the final King K. Rool confrontation.
- The displayed time matches ten minutes plus one minute per returned blueprint.
- At least four Battle Crowns are available.
- Nintendo and Rareware Coins are available.
- Boss Keys 1–7 have been delivered to K. Lumsy.
- The clean retry save remains on DK Isles.
Before you move on
- Snide’s record shows every blueprint you intend to use has been turned in, and your expected time is ten minutes plus one minute per returned blueprint.
- The Nintendo Coin and Rareware Coin are present in the status totals.
- At least four Battle Crowns are recorded.
- Boss Keys 1 through 7 have been delivered to K. Lumsy, and the route to King K. Rool’s ship is open.
- All five Kongs have their required weapons and campaign-critical moves.
- Health and ammunition are replenished.
- A dedicated save reloads to DK Isles before entering Hideout Helm, with an earlier progress slot preserved.
- You can enter the ship’s mouth knowing that the eighth Boss Key will be collected inside Hideout Helm rather than before entry.
Hideout Helm — Timed Deactivation and Interior Routes
Hideout Helm has two distinct sections. The entrance lobby is still part of DK Isles and contains optional DK Isles collectibles, including Donkey Kong’s blueprint, a Chunky reward and other lobby items. The timed interior beyond B. Locker has no regular five-Golden-Banana-per-Kong set and no separate Hideout Helm blueprint set. Its required objectives are to disable the Blast-o-Matic, pass the four-Battle-Crown gate, open the Nintendo Coin and Rareware Coin door, collect the final Boss Key and return it to K. Lumsy so the King K. Rool confrontation becomes available.
Finish the entrance lobby before starting the timed interior
Defeat the Army Dillo rematch in Crystal Caves and the Creepy Castle boss, then deliver both Boss Keys to K. Lumsy. The second release opens the mouth on K. Rool’s island. Use Tiny Kong’s Monkeyport pad behind the island to reach the upper platform, go around to the front and enter through the open mouth.
This entrance lobby is not the timed Blast-o-Matic interior. Treat it as a DK Isles cleanup area. It contains lobby-specific collectibles, including Donkey Kong’s blueprint near the right side of the lobby. With Donkey, defeat the Kasplat holding the blueprint, carry it to Snide’s HQ and receive the associated Golden Banana. The lobby also contains other DK Isles rewards, such as a Chunky bonus challenge and a Diddy reward, so do not describe the whole Hideout Helm area as collectible-free.
Use the Tag Barrel to choose Chunky Kong and stand on the Chunky Pad at the edge of the lobby. The vines lead to B. Locker. You need at least 100 Golden Bananas to pass. Activate the lobby Bananaporter before entering the final door, then make a separate save outside the timed interior. If you want a longer timer, leave the lobby and turn in more blueprints to Snide first. The allowance begins at ten minutes and increases by one minute for each blueprint turned in, reaching 50 minutes when all 40 blueprints have been submitted.
Do not save while the Blast-o-Matic countdown is running. Also collect each Banana Medal immediately after its electrical barrier disappears. Original-release walkthroughs warn that leaving the medals behind can make them appear transparent and prevent later collection, which can block a 101 percent file.
- Crystal Caves Boss Key delivered to K. Lumsy
- Creepy Castle Boss Key delivered to K. Lumsy
- Donkey’s Hideout Helm lobby blueprint collected if desired
- Lobby DK Isles rewards reviewed
- At least 100 Golden Bananas
- Additional blueprints turned in if more time is needed
- Lobby Bananaporter activated
- Pre-timer save completed
Reach the Blast-o-Matic room
Enter through B. Locker’s final door and let the opening scene finish. Activate the new Bananaporter, then use the nearby Tag Barrel to select Lanky Kong. Use Orangstand to climb the steep ramps. Return to the Tag Barrel and choose Chunky Kong, then shoot the Pineapple Switch to open the wall.
Cross the lava by swinging across the vines. On the far side, use the Tag Barrel to select Tiny Kong. Enter the nearby Kong Barrel to shrink, then go through the small opening in the pipe. This places you inside the Blast-o-Matic room.
Use the Tag Barrel in the machine room to select Donkey Kong. Circle the machine until you find the lever and its footpad. Pull the lever while standing on the pad to make the DK Stars appear. Move quickly to the Tag Barrel, choose Diddy Kong and enter the Diddy Barrel. Use the Jetpack to fly through every star before the 60-second challenge expires. Controlled taps provide better altitude adjustments than holding the button continuously. Clearing the star route opens the doors around the machine.
- Lanky climbed the ramps
- Chunky’s Pineapple Switch opened the wall
- Tiny passed through the pipe while small
- Donkey pulled the machine lever
- Diddy cleared the DK Star challenge
Open the five Kong chambers
Choose Chunky Kong at the Tag Barrel and use Primate Punch on the four grates blocking the accessible routes. This exposes the music pads and the five Kong-specific chambers. The chambers are completed one Kong at a time; each contains two K. Rool Barrels, and clearing both removes that Kong’s electrical barrier and exposes that Kong’s Banana Medal.
Start with Donkey Kong at the lowest chamber. Play the Bongo Blast on the pad to remove the glass wall. Inside, complete both barrels: one changes Donkey into Rambi, who must defeat the required Kremlings without touching the electrical pylons; the other launches Donkey toward three targets that must be hit before its timer expires. When both are complete, enter the opened dome and collect Donkey’s Banana Medal immediately.
Switch to Chunky and play the Triangle Trample on the next music pad. In one barrel, become Hunky Chunky and punch the boxes until the hidden Kremling is found, then defeat it before time expires. In the other, use Sniper mode to shoot the required moving Kremlings. Homing Ammo helps, but careful positioning still matters. Collect Chunky’s medal as soon as the barrier disappears.
Switch to Tiny and play the Saxophone Slam on her pad. In one barrel, use Ponytail Twirl to pass through the DK Stars without touching the floor and activate the switch at the end. In the other, bounce from the red mushrooms and glide through the stars. Adjust the camera before each mushroom jump so the next landing area is visible. Collect Tiny’s medal immediately.
Switch to Lanky and play the Trombone Tremor on his pad. In the first barrel, enter Lanky’s barrel, reach the blue switch in the maze and then return to the checkered finish before the short timer ends. In the second, shoot the mechanical Zingers with Lanky’s shooter. Stand on a crate when possible, use Sniper mode and conserve Homing Ammo for moving targets. Collect Lanky’s medal.
Finally, use Diddy’s Kong Barrel to Rocketbarrel Boost to the upper area and play the Guitar Gazump on the pad. In one barrel, defeat Kremlings until the activation chime sounds, leave the barrel and Simian Slam the revealed switch. In the other, enter the Diddy Barrel, shoot the four green wall switches, then slam the blue switch revealed when the central cage rises. The fifth barrier disappears and the Blast-o-Matic shuts down. Take Diddy’s Banana Medal before leaving the chamber.
- All four accessible grates punched down
- Donkey’s two barrels completed
- Donkey’s Banana Medal collected
- Chunky’s two barrels completed
- Chunky’s Banana Medal collected
- Tiny’s two barrels completed
- Tiny’s Banana Medal collected
- Lanky’s two barrels completed
- Lanky’s Banana Medal collected
- Diddy’s two barrels completed
- Diddy’s Banana Medal collected
- All five electrical barriers disabled
- Blast-o-Matic timer stopped
Pass the final locks and collect the Boss Key
After the final barrier disappears, the main countdown is over. Take the newly opened K. Rool door and follow the corridors upward. Activate the Bananaporter near the crown door. The door marked with a crown and the number 4 requires at least four Battle Crowns.
Pass through the crown door and watch the scene showing K. Rool abandoning the control area. Continue through the empty control room. At the far end is the special door marked with the Nintendo Coin and Rareware Coin symbols. It opens only when both coins have been earned. The Nintendo Coin comes from completing the Donkey Kong arcade requirement in Frantic Factory. The Rareware Coin comes from meeting the Banana Medal requirement and completing Jetpac at Cranky’s laboratory.
Enter the coin room and collect the final Boss Key. A Banana Fairy can be photographed through the area’s window, but this is an optional 101 percent objective rather than a requirement for reaching King K. Rool. Return through the Bananaporter, leave Hideout Helm and deliver the Boss Key to K. Lumsy. His release triggers the sequence that brings K. Rool’s craft down and opens the route to the final confrontation.
- Four-Battle-Crown door passed
- Nintendo Coin and Rareware Coin door opened
- Final Boss Key collected
- Optional Banana Fairy photographed if pursuing 101 percent
- Boss Key delivered to K. Lumsy
- King K. Rool route opened
Before you move on
- The entrance-lobby DK Isles collectibles you wanted, including Donkey’s blueprint, have been collected or intentionally left for cleanup.
- The Blast-o-Matic is disabled and its main countdown has stopped.
- All five electrical barriers are gone.
- All five Hideout Helm Banana Medals have been collected if pursuing 101 percent.
- The four-Battle-Crown door has been passed.
- The Nintendo Coin and Rareware Coin door has been opened.
- The final Boss Key has been collected and delivered to K. Lumsy.
- The route to the King K. Rool final battle is available.
King K. Rool — Final Battle Strategies
The original Nintendo 64 USA release ends with a boxing match against King Krusha K. Rool. The match allows up to 12 timed rounds, and every round has a three-minute limit. The five Kong sections normally progress in this order: Donkey, Diddy, Lanky, Tiny and Chunky. If a round expires before its objective is completed, the current Kong gets another opportunity in the next round rather than the battle immediately ending. The normal route requires one successful section from each Kong, but the extra rounds provide recovery chances.
Reach the boxing arena
Complete Hideout Helm, collect its eighth Boss Key, and take that key to K. Lumsy on DK Isles. After K. Lumsy is freed, his chase brings down K. Rool’s aircraft. Use the DK Isles Bananaport route to reach the crashed aircraft, then enter through the opening in its roof. The interior is the boxing arena.
Save before entering if you have a suitable pre-Hideout Helm or final-route file. The Nintendo Coin and Rareware Coin are needed to reach the eighth Boss Key inside Hideout Helm; they are not attacks used during the boxing match. You do not need 101% completion to defeat K. Rool or view the main ending.
- Complete Hideout Helm.
- Collect and deliver the eighth Boss Key to K. Lumsy.
- Enter the crashed aircraft through its roof opening.
- Remember that the match has 12 rounds, each limited to three minutes.
Understand the 12-round timer
The announcer presents the fight as 12 three-minute rounds. The five Kong sections are not themselves limited to only one round each. If the timer expires, the current round is lost and the same Kong continues the fight in the following round, with K. Rool’s damage for that attempt reset. Damage taken by the Kong remains relevant, so avoid unnecessary hits even when you still have another round available.
Normally you should finish each section before the next Kong appears: Donkey uses the corner Blast Barrels, Diddy drops spotlights, Lanky makes K. Rool slip, Tiny attacks the toes in his shoe, and Chunky counters his charges. If you reach the twelfth round without defeating K. Rool, the battle must be attempted again from the beginning.
- Treat three minutes as the limit for the current round, not the entire Kong section.
- Use spare rounds as recovery opportunities rather than deliberately wasting them.
- Protect each Kong’s health because damage can carry into another attempt.
Phase 1: Donkey Kong and the Blast Barrels
K. Rool jumps and slams the floor, sending shockwaves across the ring. Jump over the waves and climb a corner turnbuckle when the four Blast Barrels appear. Enter a barrel and watch K. Rool instead of firing immediately.
Launch Donkey when K. Rool genuinely raises his arms toward the crowd. He can fake this gesture, so wait for the real opening. After each successful hit, move to another corner barrel and continue avoiding the shockwaves. The timing becomes stricter as the sequence continues; for the final barrel, use the required delayed bounce timing rather than firing at the first apparent opening. Four successful barrel hits complete Donkey’s section.
- Jump over the shockwaves.
- Enter each corner Blast Barrel.
- Ignore fake crowd gestures.
- Complete four successful hits.
Phase 2: Diddy Kong and the spotlights
K. Rool throws a boxing glove around the ring and the glove returns to him. Keep moving until the Diddy Barrel appears in the centre, then enter it to activate the Rocketbarrels.
Fly to the spotlight directly above K. Rool and shoot both red targets with Diddy’s Peanut Popguns. The spotlight drops onto K. Rool, then the targets move to another light. Repeat this process until four spotlight hits have landed. Use short, controlled flights and avoid landing on surfaces that cancel the Rocketbarrel ability. Staying airborne also helps avoid the returning glove.
- Avoid the glove until the Diddy Barrel appears.
- Shoot both targets on every active spotlight.
- Complete four spotlight drops.
- Do not land where the Rocketbarrel ability is cancelled.
Phase 3: Lanky Kong and the banana peels
A spotlight remains over K. Rool, restricting his view. Four switches rise on towers outside the ring. Use Lanky’s extended arm attack to activate a switch, then collect and throw the revealed barrel into the ring. The broken barrel leaves a banana peel and causes the corner Trombone Pads to appear.
Move to a Trombone Pad and wait until the peel lies between Lanky and K. Rool. Play the Trombone only after the alignment is correct. K. Rool charges toward Lanky and slips on the peel. Repeat the switch, barrel and Trombone setup for all four towers. Each successful slip counts as one hit.
- Activate all four towers with Lanky’s reach.
- Throw each barrel into the ring.
- Place each peel between Lanky and K. Rool.
- Play the Trombone only after K. Rool is lined up.
- Complete four successful slips.
Phase 4: Tiny Kong and K. Rool’s shoe
K. Rool returns to his shockwave attack. Use Tiny’s Ponytail Spin to pass over the waves. When the Tiny Barrel appears in the centre, enter it to become Mini-Tiny, then run to the small opening in K. Rool’s shoe.
Inside the shoe, avoid the moving toes. Wait for a toe to stop and rise, then shoot it with Tiny’s Feather Bow. The first toe requires one shot, the second two, the third three and the fourth four. Leave the shoe when the exterior attack resumes, survive the next shockwave sequence, and return through the Tiny Barrel for the next toe. A toe that turns red is finished.
- Use Ponytail Spin over the shockwaves.
- Enter the shoe only while Mini-Tiny is active.
- Shoot only a raised, stationary toe.
- Finish the toes with the one-, two-, three- and four-shot sequence.
Phase 5: Chunky Kong’s counterpunches
K. Rool bounces from the ropes and becomes invisible, although his shadow remains visible. Avoid the shadow and Simian Slam the Chunky Switch in the centre. Chunky Pads appear at the corners.
Stand on a Chunky Pad and activate Gorilla Gone so K. Rool becomes visible. Return to the centre and enter the Chunky Barrel to become Hunky Chunky. Chunky is placed at the edge of the ring. Hold the defensive input and watch K. Rool’s approach. When he is nearly in front of Chunky, use Primate Punch to counter him.
Repeat the counter four times. The second approach is faster, the third is invisible, and the fourth combines invisibility with lateral movement. Use the shadow, sound and approach direction, but do not punch too early. The fourth successful counter completes the fight.
- Avoid K. Rool’s shadow.
- Slam the centre Chunky Switch.
- Use Gorilla Gone before entering the Chunky Barrel.
- Counter four charges with Primate Punch.
- Delay the final punch until the invisible zigzagging approach is close.
Recovering from failure
If a three-minute round expires, the current Kong continues in the next round. K. Rool’s damage for that attempt is reset, so repeat the complete objective for that section. If a Kong loses all health, or if the fight reaches the end of the 12-round allowance without a victory, reload your reliable save and begin the match again.
A pre-Hideout Helm save lets you retry the final route without replaying the earlier worlds, but you may need to repeat the eighth-key delivery and aircraft sequence. Practise the failed mechanic specifically: delay Donkey’s barrel shot, keep Diddy airborne, place Lanky’s peel before playing, wait for Tiny’s raised toe, and punch Chunky only when K. Rool is within striking distance.
There is no free Kong rotation during the match, no Elephant Bounce attack and no separate projectile-parry phase in the original Nintendo 64 edition.
- If time expires, continue with the same Kong in the next round.
- If the 12-round allowance is exhausted, restart the fight.
- Reload the pre-Hideout Helm save if the final battle must be reset.
- Practise the mechanic that caused the failure instead of changing the whole route.
Before you move on
- Donkey, Diddy, Lanky, Tiny and Chunky have each completed their section in order.
- K. Rool is defeated after Chunky’s fourth successful counter.
- The game proceeds to the main ending sequence and credits.
- View the ending before deleting or overwriting the save used for the final route.
- 101% completion and the optional special ending are not required for the main campaign ending.
Post-boss: Confirming the Ending and Postgame Unlocks
Defeating King K. Rool and viewing the regular ending completes Donkey Kong 64’s main campaign. The extended audition scene is reserved for a file that has reached 101% before the final battle. After the ending, the game leaves the file available for continued cleanup and another attempt at the final sequence.
1. Complete the final battle and let the ending run
Finish every Kong phase of the King K. Rool encounter. The battle is a sequence of separate challenges for the five Kongs rather than one ordinary boss health bar, so a failed attempt means repeating the final sequence from your last suitable save. If you kept a pre-Hideout Helm save, reload it instead of replaying the earlier worlds.
After the final hit, allow the victory scene, credits, and ending material to play without resetting the Nintendo 64 or switching off the console. King K. Rool’s defeat and the regular ending are the completion point for the requested main campaign; you do not need 101% to finish the story.
- King K. Rool has been defeated.
- The victory scene has begun.
- The credits and regular ending have been viewed.
2. Determine whether the extended ending was earned
Donkey Kong 64 has a regular ending and an extended ending. The extended version adds an audition segment after the normal ending, with Cranky involved in the extra material. To see it, the file must have satisfied the 101% requirements before King K. Rool was defeated.
If only the regular ending played, the cartridge and save are not malfunctioning. It means the file did not meet the complete checklist at the time of the battle. Continue cleaning up the file, then defeat King K. Rool again after all required categories are complete.
- The regular ending or extended ending has been identified.
- If the extended scene did not play, the missing completion categories have been recorded.
3. Check the file before cleaning up
After the ending, load the file again. The game returns you to a state from before the final battle rather than opening a separate postgame world, so you can revisit DK Isles, enter the worlds, use Snide’s HQ, and prepare another final attempt.
For the full 101% checklist, verify 201 Golden Bananas, 40 Banana Medals, 20 Banana Fairies, 40 blueprints, all ten Battle Arena Crowns, all eight Boss Keys, the Nintendo Coin, and the Rareware Coin. Ordinary colored bananas and Banana Coins do not replace the corresponding medals or special coins. The game does not require every regular banana merely to obtain the 101% ending.
- The Golden Banana total is checked.
- Banana Medals, blueprints, fairies, and Battle Crowns are checked.
- All eight Boss Keys and both special coins are checked.
4. Rescue the remaining Banana Fairies
If the file has fewer than 20 Banana Fairies, equip the Banana Camera and revisit the locations you have not completed. Photograph a fairy while it is visible through the camera. The normal distribution is four fairies around DK Isles and two in each of the eight main worlds.
The two Hideout Helm fairies are together in the room behind the Nintendo Coin and Rareware Coin door. That room also contains the eighth Boss Key, so both special coins are needed not only for the full fairy total but also for the final boss-key route. Bring enough film and search the room carefully because the fairies move in and out of view.
- All 20 Banana Fairies have been photographed.
- The two Hideout Helm fairies are included in the total.
- The Nintendo Coin and Rareware Coin have opened the Hideout Helm coin door.
5. Collect the 201st Golden Banana
Once all 20 Banana Fairies have been photographed, return to Banana Fairy Island. Use Tiny Kong to enter the small opening at the front of the island. If the camera has not been obtained yet, the Banana Fairy Queen gives it to Tiny during the initial visit; return to the island after the fairy total is complete to receive the ultimate Golden Banana reward.
If the reward is unavailable, do not repeatedly re-enter the island hoping to trigger it. Check the fairy total first. One missing fairy in a bonus room, a Kong-specific area, or Hideout Helm prevents the Queen’s final reward from being granted.
- The fairy total reads 20.
- Tiny Kong has entered the Banana Fairy Queen’s interior after the final fairy was rescued.
- The Golden Banana total has reached 201.
6. Recheck the remaining categories and replay the finale
Turn every recovered blueprint in to Snide, finish any missing Battle Arena for its Crown, and complete the remaining Banana Medals. If a special coin is missing, obtain the Nintendo Coin through the Donkey Kong arcade progression in Frantic Factory or obtain the Rareware Coin through Jetpac at Cranky’s Lab, following the relevant unlock requirements.
Keep the pre-Hideout Helm save until the desired ending has been viewed. When the file shows 201 Golden Bananas, 40 Banana Medals, 20 Fairies, 40 blueprints, ten Crowns, eight Boss Keys, and both special coins, enter Hideout Helm, shut down the Blast-o-Matic, and defeat King K. Rool again. The extended audition segment should then follow the regular ending.
- All 40 blueprints have been turned in to Snide.
- All 40 Banana Medals and ten Battle Crowns are confirmed.
- All eight Boss Keys and both special coins are confirmed.
- The 201st Golden Banana has been collected.
- The extended 101% ending has played, if that was the goal.
Before you move on
- Main campaign complete: King K. Rool is defeated and the regular ending and credits have been viewed.
- 101% checklist complete: 201 Golden Bananas, 40 Banana Medals, 20 Banana Fairies, 40 blueprints, ten Battle Crowns, eight Boss Keys, the Nintendo Coin, and the Rareware Coin are confirmed.
- Extended-ending check complete: after the checklist is complete, King K. Rool has been defeated again and the audition segment has appeared.
Optional Clean-up: 101% and Bonus Collectibles
Use DK Isles, Bananaport pads and a written Kong-by-Kong checklist to finish the original Nintendo 64 release of Donkey Kong 64. The normal campaign can be completed without every collectible, but a 101% file requires the full collectible set: 201 Golden Bananas, 40 Banana Medals, 20 Banana Fairies, 40 blueprints, 10 Battle Crowns, eight Boss Keys, the Nintendo Coin and the Rareware Coin. The 201st Golden Banana is awarded after all 20 Banana Fairies are photographed and the Banana Fairy Queen is visited.
Make a cleanup checklist by world and Kong
Begin from your latest save and record unfinished objectives separately for Jungle Japes, Angry Aztec, Frantic Factory, Gloomy Galleon, Fungi Forest, Crystal Caves, Creepy Castle and Hideout Helm. Use five Kong columns for each world. Under every Kong, track Golden Bananas, colored bananas, the blueprint, bonus-stage rewards and any arena or fairy objective nearby.
Do not combine colored bananas from different worlds when checking medal progress. A Banana Medal is awarded when one Kong collects 75 of that Kong’s colored bananas in one level. You can earn up to five ordinary level medals in a world, one for each Kong. Hideout Helm is different: it has no ordinary colored-banana routes, and its five medals come from completing the Kong-specific Bonus Stages inside the level.
Keep a separate list for the ten Battle Arenas, 20 Banana Fairies, eight Boss Keys and the Nintendo and Rareware Coins. This prevents a nearly complete world from being searched repeatedly when the missing item actually belongs to another Kong or another system.
- Jungle Japes through Creepy Castle have been checked for five Kong blueprints each.
- Each Kong’s colored-banana total is tracked separately for every applicable level.
- The five Hideout Helm Bonus Stages are listed as the source of its five Banana Medals.
- Battle Arenas, Banana Fairies, Boss Keys and both special coins have separate checklist entries.
Use Bananaports and Tag Barrels to group objectives
Activate both ends of a Bananaport route whenever you pass them. On later visits, use the pads to move quickly between the level entrance, major puzzle areas and the exit route instead of crossing the same terrain on foot. Before entering a level, select the Kong with the most unfinished objectives near the planned route, then use Tag Barrels to change characters only when a specific gate or reward requires it.
Group objectives that share a path. Collect colored bananas while travelling toward a blueprint Kasplat, bonus barrel, switch puzzle or fairy location. If a passage requires a move, weapon, instrument or transformation that you do not yet have, write down the location and the missing requirement. Do not assume that an apparently empty room has been cleared until you have checked every Kong-specific entrance.
Blueprint Kasplats are color-coded for the Kong that must defeat them. If the Kasplat’s hair is white, its blueprint has already been collected. Otherwise, return as the matching Kong, defeat the Kasplat, take the blueprint to Snide’s HQ and confirm that Snide awards the related Golden Banana.
- Bananaport pads are used for completed routes instead of repeated overland travel.
- The active Kong is checked before collecting colored bananas or attacking a Kasplat.
- Blocked locations are recorded with the required Kong, move, weapon, instrument or transformation.
Deliver every blueprint and buy only useful upgrades
Each of the eight main worlds contains one blueprint for each Kong, for 40 blueprints total. Turn every recovered blueprint in to Snide’s HQ. Confirm the reward has been added to the correct Kong’s Golden Banana total before leaving. Blueprint turn-ins also extend the time available for Hideout Helm’s timed sequence, so completing this list helps both optional completion and final-area preparation.
Visit Funky, Candy and Cranky during cleanup, but tie every purchase to a known objective. Prioritize ammunition, film, health, instruments, weapons, moves and transformations that open a recorded gate or make a required minigame practical. Avoid spending Banana Coins without checking the next planned objective, especially when a weapon, instrument or capacity upgrade is still needed.
If a reward seems unreachable, first verify the Kong and move required. DK64 frequently places rewards behind character-specific switches, pads, tunnels, instrument targets, weapon switches and Bonus Barrels.
- All 40 blueprints have been collected and delivered to Snide.
- Every required move, weapon, instrument and transformation has been purchased.
- Remaining shop visits are tied to specific unfinished objectives rather than random spending.
Finish Banana Medals and Banana Fairies
For ordinary worlds, work one Kong and one level at a time until that Kong has collected 75 colored bananas there. The medal is then awarded for that Kong and that level; progress from another world does not count toward it. Check the totals before leaving so a nearly complete route can be finished during the same visit.
In Hideout Helm, complete each Kong’s Bonus Stage to receive that Kong’s Banana Medal. These are not earned by collecting 75 colored bananas, because Hideout Helm does not use ordinary level banana routes. Include all five stages in the checklist and confirm each medal immediately after its stage is completed.
Photograph every Banana Fairy with the Banana Camera. There are 20 fairies. After the twentieth capture, return to the Banana Fairy Queen on Banana Fairy Island and collect the special Golden Banana. This is Golden Banana 201 and is required for the 101% result. Banana Fairies also increase carrying capacities, so finding missing fairies can help with late weapon, film, orange or Crystal Coconut challenges.
- All 40 Banana Medals are recorded, including the five earned from Hideout Helm Bonus Stages.
- All 20 Banana Fairies have been photographed.
- The Banana Fairy Queen has been visited and her Golden Banana has been collected.
Clear Battle Arenas and obtain both special coins
Enter each Battle Arena through its Battle Arena pad and survive the required waves. Winning an arena awards one Battle Crown. There are ten crowns in total. Record a crown as soon as it is earned so you do not waste time revisiting a completed arena.
The Nintendo Coin is obtained in Frantic Factory’s Donkey Kong Arcade. The first successful Arcade completion awards its Golden Banana. Return to the Arcade and complete the original Arcade game again; the second completion awards the Nintendo Coin. Do not confuse this with the separate Mystery mode.
The Rareware Coin is obtained from Jetpac in Cranky’s Lab. First collect 15 Banana Medals to unlock access to the Jetpac challenge. Then reach a score of 5,000 points in Jetpac to receive the coin. Both special coins are needed for the coin-marked door in Hideout Helm and are part of the 101% checklist.
- All ten Battle Arena Crowns have been collected.
- The Donkey Kong Arcade has been completed twice and the Nintendo Coin is recorded.
- At least 15 Banana Medals have been collected, Jetpac has been unlocked, and the 5,000-point score has awarded the Rareware Coin.
Verify the file before calling it 101% complete
Use the final checklist rather than relying only on memory. The target totals are 201 Golden Bananas, 40 Banana Medals, 20 Banana Fairies, 40 blueprints, 10 Battle Crowns and eight Boss Keys, plus the Nintendo Coin and Rareware Coin. Also confirm that the Blast-o-Matic sequence in Hideout Helm has been completed and King K. Rool has been defeated.
If the game has already been finished but the percentage is short, reload the completed file and use the missing category to choose the next destination. A missing blueprint points to a colored Kasplat and Snide; a missing medal points to a specific Kong and world; a missing fairy points to a Banana Camera search; a missing crown points to an uncleared Battle Arena; and a missing coin points to Frantic Factory Arcade or Jetpac.
Keep a separate save before difficult Arcade, Jetpac, Battle Arena and Hideout Helm attempts. Do not delete the pre-Hideout Helm save until the desired ending and cleanup status have been confirmed.
- The file reaches 101%.
- The checklist contains 201 Golden Bananas, 40 Banana Medals, 20 Banana Fairies, 40 blueprints and 10 Battle Crowns.
- All eight Boss Keys, the Nintendo Coin and the Rareware Coin are recorded.
- The Banana Fairy Queen reward has been collected.
- The Blast-o-Matic has been shut down and King K. Rool has been defeated.
Before you move on
- The file shows 101% after all collectible categories have been completed.
- All 201 Golden Bananas, 40 Banana Medals, 20 Banana Fairies, 40 blueprints and 10 Battle Crowns are accounted for.
- All eight Boss Keys, the Nintendo Coin and the Rareware Coin are collected.
- The Banana Fairy Queen’s final Golden Banana has been claimed.
- The Hideout Helm sequence and King K. Rool battle have been completed, and the ending has been viewed.
Appendix: Kong Abilities, Upgrades and Quick Recovery Tips
Use the five Kongs’ distinct moves, weapons, instruments, and special barrels to identify blocked routes in the original Nintendo 64 USA release of Donkey Kong 64. When a collectible seems unreachable, match the obstacle to the correct Kong, ability, target color, or nearby tag barrel before attempting a risky jump. Keep Banana Coins available for the Kong family’s shops, activate Bananaport pads as you pass them, and use the pause menu’s Save command after major progress.
Match each Kong to the obstacle
Donkey Kong is the lever and pad specialist. Baboon Blast launches him from a Donkey Pad, Gorilla Grab operates marked levers, and Strong Kong gives temporary invulnerability from a Donkey Barrel while Crystal Coconuts remain available. Use Donkey when a route requires a lever, a Donkey Pad, or an invulnerable passage. The universal Simian Slam is separate from Gorilla Grab: jump and press Z in the air to activate Kong-face switches, including the stronger slam versions learned later.
Diddy Kong handles aerial routes and red weapon targets. Chimpy Charge is performed by holding Z and pressing B, Rocketbarrel Boost is used from a Diddy Barrel, and Simian Spring launches him from a Diddy Pad. His Peanut Popguns activate red targets. If a platform is high or a gap is too wide for a normal jump, look for a Diddy Barrel or Diddy Pad before trying to force the jump.
Lanky Kong handles steep paths and blue weapon targets. OrangStand lets him move up slopes on his hands, Baboon Balloon raises him from a Lanky Pad, and OrangSprint is activated from a Lanky Barrel. His Grape Shooter is the correct weapon for blue targets and blue Kasplats.
- Donkey: levers, Donkey Pads, Strong Kong passages, and yellow bananas or coins.
- Diddy: aerial gaps, Rocketbarrel sections, red weapon targets, and red Kasplats.
- Lanky: steep slopes, Lanky Pads, OrangSprint routes, blue targets, and blue Kasplats.
Use Tiny and Chunky for size and brute-force gates
Tiny Kong’s Mini-Monkey ability shrinks her inside a Tiny Barrel so she can enter small holes and passages. Pony Tail Twirl gives her extended aerial control, which helps with gaps and recovery after a jump. Monkeyport activates from a Tiny Pad and can move her between linked locations. Her Feather Bow fires purple ammunition, so purple weapon targets and purple Kasplats require Tiny.
Chunky Kong is required for oversized obstacles and marked breakable surfaces. Hunky Chunky enlarges him inside a Chunky Barrel, Primate Punch breaks specially marked barriers and objects, and Gorilla Gone makes him invisible from a Chunky Pad. His Pineapple Launcher fires green ammunition for green weapon targets and green Kasplats. If a wall, box, or ice barrier has a punch marking, switch to Chunky rather than spending time attacking it with another Kong.
- Tiny: small passages, Tiny Barrels, Tiny Pads, Pony Tail Twirl, purple targets, and purple Kasplats.
- Chunky: marked barriers, oversized objects, Chunky Barrels, invisible-object puzzles, green targets, and green Kasplats.
Read the color and move correctly
The five regular banana and Banana Coin colors identify their Kong: Donkey is yellow, Diddy is red, Tiny is purple, Lanky is blue, and Chunky is green. This color rule also applies to weapon targets and blueprint Kasplats. A weapon target that does not react is usually being fired at by the wrong Kong, not malfunctioning.
Kong-face switches are different from weapon targets. They are activated with Simian Slam or one of its stronger versions, and any Kong can perform the standard slam. Do not waste ammunition on a face switch. Conversely, do not keep slamming a colored weapon target when the matching shooter is required.
Use a tag barrel whenever the level supplies one. The original N64 version does not allow unrestricted Kong swapping throughout a level. If a puzzle area contains a tag barrel near several Kong-colored doors or targets, that barrel is normally the intended rotation point.
- Match banana, coin, weapon, Kasplat, and blueprint colors to the correct Kong.
- Use Simian Slam on Kong-face switches.
- Use tag barrels for character changes inside levels.
Buy the family upgrades in progression order
Cranky Kong sells the five Kongs’ potions and special moves. The regular price tiers are three, five, and seven Banana Coins, with later abilities becoming available as the adventure reaches additional worlds. Buy the move that resolves the next known gate, then return to Cranky whenever a new world opens. Important progression moves include Donkey’s Baboon Blast and Gorilla Grab, Diddy’s Chimpy Charge, Rocketbarrel Boost, and Simian Spring, Lanky’s OrangStand, Baboon Balloon, and OrangSprint, Tiny’s Mini-Monkey, Pony Tail Twirl, and Monkeyport, and Chunky’s Hunky Chunky, Primate Punch, and Gorilla Gone.
Funky Kong supplies the five shooters: Coconut Cannon for Donkey, Peanut Popguns for Diddy, Feather Bow for Tiny, Grape Shooter for Lanky, and Pineapple Launcher for Chunky. He also refills ammunition and provides later upgrades, including larger ammo belts, homing ammunition, and the sniper sight. The documented ammo-belt increases raise capacity from 50 to 100 and later from 100 to 200. Visit Funky before a timed shooting room or a route that depends on distant targets.
Candy Kong supplies the musical instruments and upgrades their energy. Her instruments activate Music Pads and can clear enemies or open instrument-specific doors. Instrument access begins with the Angry Aztec stage of progression, so return to Candy after entering that world and again when later upgrades become available. Her services also improve the Kongs’ survivability through additional melon capacity.
- Keep three-, five-, and seven-coin Cranky purchases affordable for the next route.
- Buy each rescued Kong’s shooter from Funky before relying on weapon targets.
- Visit Candy after Angry Aztec opens and before instrument-pad bonus rooms.
Handle Banana Fairies and their capacity rewards
Banana Fairies are photographed with the Banana Camera, which is obtained by taking Tiny to Banana Fairy Island and entering the small opening there. Film is collected separately in the levels, so check your film supply before deliberately hunting fairies. To use the camera, hold Z and press C-Down; press B when the fairy is properly framed.
Each captured Banana Fairy increases the maximum carrying capacity for Banana Camera film, oranges, and Crystal Coconuts, and replenishes the relevant supplies. These rewards are separate from Candy Kong’s melon upgrades and from ordinary pickups found in levels. Photographing all 20 fairies leads back to the Head Fairy for the 201st Golden Banana sequence.
- Obtain the Banana Camera with Tiny at Banana Fairy Island.
- Carry enough film before attempting difficult fairy photographs.
- Use the increased film, orange, and Crystal Coconut capacity when preparing for later puzzles and special-move sections.
- Return to the Head Fairy after completing the full 20-fairy collection.
Recover from an apparently blocked collectible
If a Golden Banana or blueprint is visible but unreachable, stop and identify the obstacle. A small hole suggests Tiny’s Mini-Monkey, a marked wall suggests Chunky’s Primate Punch, a steep slope suggests Lanky’s OrangStand, a distant red or blue target suggests Diddy or Lanky, and a lever suggests Donkey’s Gorilla Grab. Check for the nearest tag barrel before attempting a blind jump.
For a weapon target, enter first-person aiming mode and use the matching Kong’s shooter. The manual’s weapon colors are Donkey yellow, Diddy red, Tiny purple, Lanky blue, and Chunky green. If the target remains out of range, search for a higher ledge, Bananaport connection, or nearby barrel instead of repeatedly firing from the wrong position.
If a Kasplat seems to have disappeared, revisit its landmark with the matching Kong. Once the blueprint has been collected, it is no longer necessary to defeat that Kasplat. Check Snide’s Hideout to see whether the blueprint has already been handed in and whether its Golden Banana reward remains unclaimed.
- Name the required Kong, ability, and landmark before backtracking.
- Use first-person aiming for distant weapon targets.
- Check Snide before searching the level again for an already collected blueprint.
Use DK Isles as a deliberate reset point
When a level route becomes confusing, leave through the level lobby and return to DK Isles. Use the hub to visit Cranky, Funky, Candy, or Snide, then re-enter the world with the Kong and equipment required for the specific obstacle. Bananaport pads connect paired locations, so activate both ends whenever you pass them rather than postponing the task.
Write missing objectives in a useful form: “Tiny, Mini-Monkey, purple target, temple room” is actionable, while “search the level” is not. This prevents repeated visits with the wrong Kong. Before entering a bonus room or timed challenge, refill ammunition, Crystal Coconuts, film, and instrument energy when the relevant shop or pickup is nearby.
Use the pause menu’s Save command after buying a major upgrade, turning in several blueprints, or completing a difficult bonus stage. The original game provides three one-player save slots. Keep one slot as a normal working file and reserve another for a reliable pre-final-area state if you want an easy retry of Hideout Helm.
- Activate both ends of Bananaport routes when possible.
- Record every blocked item by Kong, ability, color, and landmark.
- Save through the pause menu after major progress and preserve a recovery slot.
Before you move on
- You can name the correct Kong and move for every common gate: Donkey for levers, Diddy for aerial routes, Lanky for steep slopes, Tiny for small passages, and Chunky for marked heavy barriers.
- You know the shooter colors: yellow Coconut Cannon, red Peanut Popguns, purple Feather Bow, blue Grape Shooter, and green Pineapple Launcher.
- Each rescued Kong has the shooter and currently available Cranky moves needed for the next planned route.
- Candy’s instruments and energy upgrades are available before attempting instrument-pad rooms.
- The Banana Camera has been obtained with Tiny, and each captured fairy has increased the carrying capacity for film, oranges, and Crystal Coconuts.
- Nearby Bananaport pads have been activated, and every unresolved collectible is recorded by Kong, ability, color, and landmark.
- A recent pause-menu save exists in a working slot, with a separate recovery slot preserved before the final sequence.
Finishing up
You have completed Hideout Helm, collected its eighth Boss Key, delivered that key to K. Lumsy, defeated King K. Rool and viewed the ending sequence.
The normal campaign requires the Golden Bananas needed to pass B. Lockers and enter Hideout Helm, the seven ordinary Boss Keys plus the eighth Boss Key from Hideout Helm, the Nintendo Coin, the Rareware Coin and at least four Battle Crowns for the later Hideout Helm gate.
Blueprints are not an entry requirement for Hideout Helm, but each blueprint turned in to Snide adds one minute to the timed Blast-o-Matic sequence, up to the documented maximum.
All five playable Kongs are unlocked and usable for the final run.
For optional 101% completion, confirm the full collectible totals separately: 201 Golden Bananas, 40 Banana Medals, 20 Banana Fairies, 40 blueprints, 10 Battle Crowns, all eight Boss Keys, the Nintendo Coin and the Rareware Coin.
Choose your next gameScreenshots & video
Game imagery for reference. Follow the written chapters above for the route and strategies.
Sources & references
Our original guide draws on the references below. Check the edition at the top of this page before following controls or unlock requirements.
- Donkey Kong 64 Official Nintendo 64 Instruction Manual
- Donkey Kong 64 Guide and Walkthrough — GameFAQs
- Donkey Kong 64 — Save System reference
- Donkey Kong 64 — Official Nintendo Manual
- Donkey Kong 64 — Guide and Walkthrough by VinnyVideo
- Donkey Kong 64 Guide and Walkthrough — GameFAQs
- Donkey Kong 64 — Blueprint FAQ
- Candy’s Music Store — Donkey Kong Wiki
- Donkey Kong 64 — StrategyWiki Table of Contents
- Donkey Kong 64 — StrategyWiki Jungle Japes reference
- Donkey Kong 64 — Guide and Walkthrough by GavLuvsGA
- Rare Gamer — Donkey Kong 64 Walkthrough
- Frantic Factory — Donkey Kong Wiki
- Donkey Kong 64 — Guide and Walkthrough by Kildread
- Donkey Kong 64 — Boss Guide
- Dogadon — Donkey Kong Wiki
- Fungi Forest — Donkey Kong Wiki
- Creepy Castle — Super Mario Wiki
- King Kut-Out — Neoseeker
- Blueprint — Super Mario Wiki
- Donkey Kong 64 — Hideout Helm Guide by MechaMrEd
- Donkey Kong 64 — Banana Fairy Guide by Mojo_
- Hideout Helm — Donkey Kong Wiki
- Donkey Kong 64 — Guide and Walkthrough, Nintendo 64, by KrocTheDoc
- Donkey Kong 64 — Hideout Helm
- Donkey Kong 64 — Guide and Walkthrough, Nintendo 64, by marshmallow
- Donkey Kong 64 — Guide and Walkthrough, Final Route and Bosses
- Donkey Kong 64 — Official Nintendo 64 USA Manual
- Donkey Kong 64 — Guide and Walkthrough by Masvega
- Donkey Kong 64 — Guide and Walkthrough by pinkcow
- Donkey Kong 64 — Super Mario Wiki reference
- Donkey Kong 64 Abilities — StrategyWiki
About the game & collecting notes
- Platform
- Nintendo 64
Step-by-step campaign walkthrough for the original Donkey Kong 64 (Nintendo 64, USA). Covers required hardware, hub navigation, every main world through Hideout Helm and the final King K. Rool confrontation, the progression gates (blueprints, banana medals, boss keys, battle crowns, Rare/Nintendo coins), common failure recoveries and a final completion checklist to confirm the true ending.
Darryl Polo
Darryl Polo loves tinkering with emulation and revisiting retro games. He enjoys exploring how old favorites play on different setups and sharing what he learns along the way. At Joking Joystick, he writes about the games, hardware, and small discoveries that keep the hobby fun.
Our editorial standardsFound a step that needs another look? Help us improve this guide.