Castlevania II: Simon's Quest NES Walkthrough
This walkthrough is built for the original North American Nintendo Entertainment System release of Castlevania II: Simon's Quest. It gives you a full first-clear route from Jova to Dracula's castle, including the five mansion relics, the required Magic Cross, crystal puzzles, ferry routing, optional upgrades, recovery advice after mistakes, and a separate explanation of the three time-based endings.

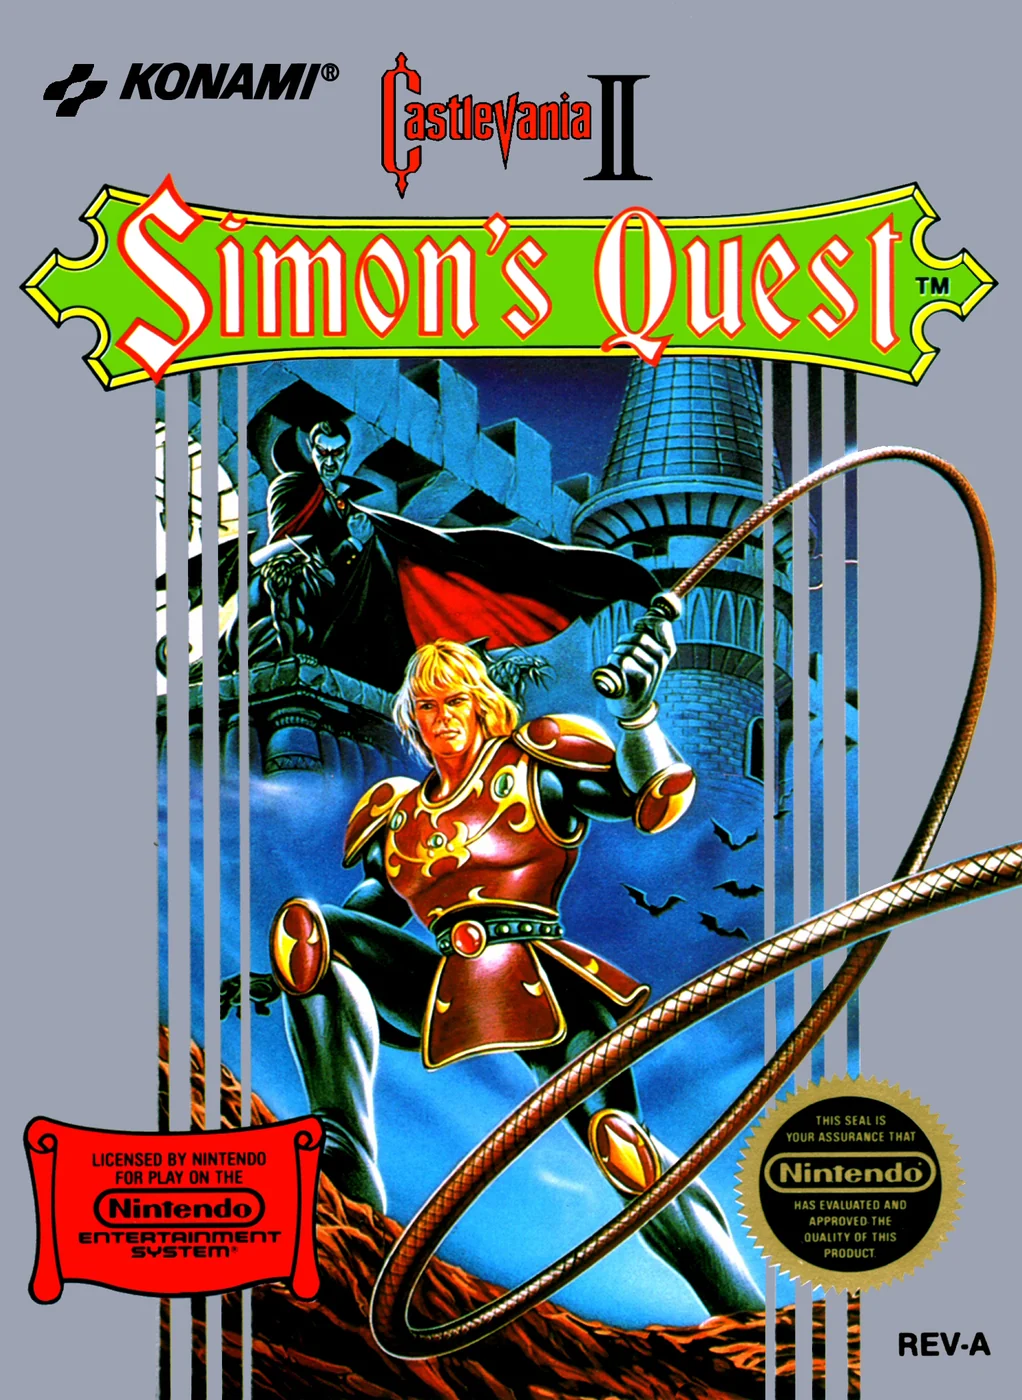
Find a copy
Castlevania II: Simon's Quest Nintendo Entertainment System
We may earn a commission if you buy through these links, at no extra cost to you. As an Amazon Associate I earn from qualifying purchases.
Opens retailer search results. Check the model, edition, seller, availability and current price before buying.
Before you begin
This guide is for the original NES version, where stiff jump arcs, hidden floors, day and night shop hours, and the split inventory all matter. You are not trying to clear every optional secret as fast as possible. You are following a reliable first-completion route that keeps required triggers in the right order, warns you when a crystal or Dracula relic must actually be selected, and explains how to recover if the game sends you to the wrong shore or closes a shop for the night.
Your real campaign goal is larger than collecting five body parts. You must clear Berkeley, Rover, Brahm, Bodley, and Laruba, collect the Magic Cross in Laruba, then reach Castlevania with the right inventory. Along the way you will trade crystals, buy Oak Stakes inside mansions, cross three hidden crystal checkpoints, use Dracula's Heart to alter one ferry trip, and manage Laurels for poison marshes. Optional items are marked so you can choose between a cleaner first clear and a leaner later speedier run.
Set yourself up for the run
Learn the NES controls before leaving Jova. A jumps, B attacks or talks, Start opens the subscreen, and Up plus B uses the currently selected lower-row item such as Holy Water, Garlic, Laurel, or a stake.
Treat the top and bottom inventory rows differently. The upper row holds passive selections such as crystals and Dracula relics, while the lower row holds usable items. A puzzle only works when the needed crystal or Heart is actively selected in the upper row.
Record passwords carefully whenever you stop. The NES cartridge game uses passwords, not an FDS save slot. Continuing after game over keeps your level but resets your current hearts and experience, so do not carry large unspent heart totals carelessly.
Expect shops and churches to be daytime services. If you arrive at night, either farm outside town, move to the next safe area, or wait for dawn instead of assuming every building will work immediately.
Holy Water is your main route-reading tool for much of the game. Use it to test suspicious floors and walls until you earn Dracula's Nail. Even after crystal trades, your lower-row Holy Water remains available if you still own it.
Do not spend your heart total blindly early on. The opening route needs enough money for White Crystal, Holy Water, later whip upgrades, Laurels, and repeated 50-heart Oak Stakes in mansions.
Carry Laurels before long marsh crossings, especially before the Dead River approach, the Bodley to Laruba stretch, and the return toward Doina. A Laurel lasts for limited time only, so movement discipline matters.
Use the Rib deliberately, not constantly. Its shield helps against some projectiles when selected, but swapping to a crystal or the Heart for a trigger removes that protection. Plan your inventory swaps before dangerous screens.
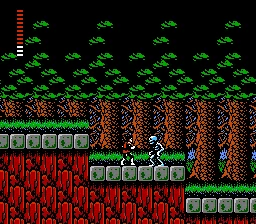
Learn the NES controls and plan the five-mansion quest
This guide is for the original English-language Nintendo Entertainment System version of Castlevania II: Simon's Quest, the password-based cartridge release described in Nintendo's manual. Before leaving Jova, learn how Simon's fixed jump works, how the subscreen separates equipped relics from selected usable items, and how hearts function as both money and item fuel rather than healing. Your long route is Berkeley for Dracula's Rib, Rover for Dracula's Heart, Brahm for Dracula's Eyeball, Bodley for Dracula's Nail, and Laruba for Dracula's Ring, with the Magic Cross collected separately in Laruba before Castlevania will open properly.
Learn the original NES controls first
Use the D-pad to move left and right, crouch with down, and climb stairs by pressing up or down while standing at the stair entrance. Doors also require careful positioning. Stand directly in front of a door and press up to enter. Simon does not magnetically snap onto stairs or through doors, so line him up before you press the direction.
Press A to jump. Simon's jump is committed when you leave the ground, so choose the takeoff spot before you press the button. You can decide whether the jump goes straight up or forward when you launch it, but you do not get the loose midair correction that later action games allow. Near water, poison marsh, moving platforms, and false floors, bad takeoff position is the mistake to fix.
Press B to attack with the whip. In towns, the same button is also used to speak to people when you are facing them. Press Start to display the subscreen and check your health meter, hearts, level, experience, elapsed time, current whip, relics, and usable items. Press Select to pause or resume play.
To use a selected usable item, hold up and press B. Memorize that now. Holy Water, knives, laurels, garlic, and Oak Stakes all depend on that command. Later progression also depends on selecting the correct item before trying to use it.
- Practice stepping onto stairs from level ground without jumping.
- Test one standing jump and one moving jump so Simon's arc feels predictable.
- Open the subscreen and identify the relic area, usable-item area, health meter, hearts, and time display.
- Use Up plus B in a safe area so the command is familiar before a mansion or puzzle demands it.
Understand what the subscreen is really tracking
The subscreen matters because Simon's Quest constantly asks you to manage two different kinds of equipment. The upper relic area holds crystals and Dracula parts. The lower usable-item area holds things such as Holy Water, knives, laurels, garlic, and stakes. Owning the right object is not enough if you forgot to equip or select it in the right place.
Your health meter is your life bar. Hearts are not health recovery in this game. Hearts increase purchasing power, they are consumed by several usable attacks and tools, and they also build experience as you collect them. If you carelessly spend hearts in town, you may arrive at the next required purchase short on money. If you throw expensive weapons too freely, you can sabotage shopping the same way.
The time display is part of normal planning. It shows elapsed in-game days, hours, and minutes. That affects when towns function normally and it also affects which ending scene you receive after Dracula is defeated. For now, treat the clock as a practical route tool rather than something to panic over.
- Do not expect hearts to heal Simon.
- Check both rows on the subscreen whenever a puzzle or trigger seems wrong.
- Treat heart spending as route planning, not as free combat excess.
- Glance at the time display often enough that day and night never surprise you.
Plan around day, night, shops, and churches
Towns behave differently depending on the clock. During the day, merchants' stores and churches are available, and townspeople can be found for clues. At night, townspeople vanish, shops close, churches close, and enemies outside become more dangerous. Night enemies also give better heart and experience rewards, which makes darkness good for farming but poor for buying or healing.
That means you should stop making frustrated laps through town when a needed building is shut. If darkness closes a church or merchant you need, either wait in a safe place or go just outside town and farm until daylight returns. Night can still be productive if you use it to earn the money for the next crystal, whip upgrade, stake, or laurel stock.
Churches restore health, but only while they are open during the day. They are not permanent checkpoints for every problem. When planning a shopping run or a dangerous route segment, try to arrive with enough health and enough hearts that a sudden nightfall does not force a sloppy detour.
- Buy and heal during the day whenever practical.
- Use nighttime mainly for farming, rehearsing jumps, or traveling through ground you already know.
- If a shop closes, wait it out or farm nearby instead of searching every house again.
- Do not enter long hazard sections assuming hearts will substitute for lost health.
Know the full first-clear objective order
The manual's core objective is to recover Dracula's five missing body parts and then proceed to Dracula's castle, but it also warns you to find the Cross before entering. For this guide's clean first-clear route, the body-part sequence is Berkeley Mansion for Dracula's Rib, Rover Mansion for Dracula's Heart, Brahm Mansion for Dracula's Eyeball, Bodley Mansion for Dracula's Nail, and Laruba Mansion for Dracula's Ring.
The Magic Cross is a separate requirement collected later in Laruba. Do not treat it as optional and do not confuse it with Dracula's Ring. When the time comes to enter Castlevania, you need all five body parts plus the Cross. If the gate will not cooperate later, missing the Cross is the first thing to verify.
Every body-part chamber follows the same practical rule. You buy or preserve an Oak Stake, select it on the subscreen, throw it with Up plus B at the orb, and then physically pick up the dropped bag. Breaking the orb is not the same as collecting the relic. Before leaving any mansion, confirm the new body part appears in your inventory.
The route between those mansions matters too. Early progress leads from Jova to Berkeley, then back through Veros for upgrades, onward through Aljiba to Rover, back west to use Dracula's Heart with the ferryman for Brahm, then later across the ordinary ferry branch toward Aldra and the western towns for Bodley and Laruba. After Laruba, the return trip east through Doina and Yomi leads to Castlevania.
- Memorize the mansion order: Berkeley, Rover, Brahm, Bodley, Laruba.
- Treat the Magic Cross as a separate late-game requirement.
- Expect stake management to matter in every mansion body-part room.
- After every relic pickup, pause and verify it is in your inventory before you leave.
Protect your progress with good password habits
This NES version uses passwords, not a built-in save slot. From the title screen, you can start a new game or continue with a password. At the game-over screen, you can also choose Password to receive a code for later use. Nintendo's manual states that passwords preserve collected items, Dracula's missing body parts, and the in-game elapsed time.
Because time is saved along with progress, passwords are part of route management rather than an afterthought. Record them carefully after meaningful progress such as a mansion clear, a major purchase, or arrival at a new hub town. The best habit is to copy the password twice and add a short note like Rib obtained or reached Aljiba so you know what file state you are restoring.
Continue is a different option and comes with a penalty. Nintendo's manual says that choosing Continue restarts you from the point where you lost your last life, but you lose your current experience rating and the hearts you have collected while keeping your level. That means a full game over right before an expensive shop can be far more costly than a single sloppy death during exploration.
Do not confuse losing one life with choosing Continue after the game-over menu. A routine death costs time and position. The bigger resource loss happens when you are out of lives and accept Continue. If you were carrying a large shopping fund, wiping out your current hearts at that moment can force extra grinding.
- Use Password after major milestones instead of trusting memory.
- Write each password twice and label what you had just done.
- Remember that passwords preserve items, Dracula parts, and elapsed time.
- Remember that Continue keeps level but erases current hearts and current experience.
Prepare for a reliable clear before worrying about endings
This chapter's job is to make the rest of the quest readable. Before you chase upgrades or optional detours, make sure you can handle stairs cleanly, use Up plus B on command, read the subscreen correctly, and budget hearts for required purchases. The safest early mindset is to buy only what the route needs next instead of spending freely because you happened to reach a shop first.
The ending scene depends on the displayed in-game day counter when you defeat Dracula. The commonly cited player-facing bands are 0 to 7 days for the best result, 8 to 14 days for the middle result, and 15 days or more for the slowest result. For a first clear, do not promise yourself a specific rank. Clean routing, fewer recovery detours, and fewer wasted nights matter more than panic.
If you later want a faster finish, the easiest time saves come from already knowing the crystal triggers, the two ferry uses, the mansion stake pattern, and which detours are optional. For now, success means leaving Jova with the controls understood, the route memorized, the password system under control, and a clear picture of why hearts are the game's real economy.
- Do not treat this route as a no-death challenge or a speedrun.
- Know the ending day bands, but prioritize steady progress over haste.
- Budget hearts for required tools and stakes before optional purchases.
- Leave Jova only after the controls, item use, route order, and password routine all make sense.
Before you move on
- You can explain the original NES controls from memory: D-pad movement and stairs, A jump, B whip or talk, Start for the subscreen, Select to pause, and Up plus B for the selected usable item.
- You understand that hearts are currency, item fuel, and experience gain, not direct healing, and that churches restore health only during daytime.
- You can name the required route in order: Berkeley Rib, Rover Heart, Brahm Eyeball, Bodley Nail, Laruba Ring, plus the separate Magic Cross before Castlevania.
- You know the difference between Password and Continue on this version: passwords preserve items, Dracula parts, and elapsed time, while Continue keeps level but removes current hearts and experience.
- You are ready to leave Jova with a practical rule set: buy what the route needs next, confirm relic pickups in mansions, and stop at clean milestones when recording passwords.
References for this chapter
- Castlevania II Simon's Quest
- Nintendo Classic Mini NES manuals index
- Castlevania II: Simon's Quest/Walkthrough — StrategyWiki
- Castlevania II: Simon's Quest/Gameplay — StrategyWiki
- Controls - Castlevania II: Simon's Quest Walkthrough & Guide - GameFAQs
- Endings - Castlevania II: Simon's Quest Walkthrough
Jova, South Bridge and the road to Berkeley
Begin the original English-language NES cartridge route in Jova and prepare specifically for Berkeley Mansion, the first relic stop. Simon starts with 50 hearts, and in Simon's Quest those hearts are money as well as experience pickups, so your opening purchases matter. The White Crystal costs 50 hearts and Holy Water costs 50 hearts, which means you can only buy one of them immediately and must earn the second payment outside town. The Thorn Whip sold in Jova is optional and should not delay those two early tools or the 50-heart Oak Stake fund you want for Berkeley. Your travel line for this chapter is Jova, Jova Woods, South Bridge, Veros Woods, then either a brief stop in Veros or the upper path straight to Berkeley. Once you own Holy Water, throwing it does not drain your heart total, so use it freely to test suspicious bricks and floors on the way and in the mansion. The goal is simple: arrive at Berkeley with White Crystal equipped when needed, Holy Water ready, and either 50 hearts already saved for the stake or a deliberate plan to farm the difference inside.
Buy the two early essentials in Jova and skip the expensive comfort item
Simon begins with 50 hearts, so pick one required purchase first instead of trying to shop everywhere at once. Walk to the east side of Jova, go down the stairs, and speak to the outdoor merchant there to buy the White Crystal for 50 hearts. The nearby house in the same section of town contains the Holy Water seller, but you will need another 50 hearts before you can afford that second purchase.
Leave the Thorn Whip alone for now. It costs 100 hearts in Jova and is only a damage upgrade, not a route key. Buying it first delays the White Crystal, delays Holy Water, and also pushes back the 50-heart Oak Stake you will need in Berkeley. For a first clear, your leather whip is enough to reach the first mansion safely if you respect enemy patterns and jumps.
If you took damage while earning money, use Jova's church during the daytime before heading out again. If it is night, do not wait at closed doors. Shops and churches stay shut until morning, so keep fighting just outside town, earn the missing hearts there, and return when the buildings reopen.
- Buy the White Crystal from the east-side outdoor merchant.
- Return for Holy Water as soon as you have another 50 hearts.
- Treat the Thorn Whip as optional and postpone it.
- Use Jova's church only if it is daytime and you need the heal.
Farm Jova Woods until your shopping is done, then decide on your stake budget
After the first purchase, leave Jova through the right-hand exit into Jova Woods. This is a practical early farming loop because the enemies are close to town and the screen can be reset quickly by stepping back and forth. Fight the werewolves and skeletons until you have enough hearts to return and buy whichever item you did not buy first.
Once both the White Crystal and Holy Water are in your inventory, make a second money decision. Berkeley Mansion has a merchant selling the Oak Stake for 50 hearts, and you must buy that stake there before you can collect Dracula's Rib. The smoothest version of this chapter is to leave the Jova area with that extra 50 already saved.
If you do not yet have the stake money, you have two safe choices. Keep farming Jova Woods now, where the enemies are familiar and you can still heal in Jova when the church is open, or accept a slower Berkeley run where you earn the missing amount inside the mansion before touching the relic room. Farming now is usually easier, but going short is not a dead end if you understand the plan.
Holy Water becomes one of your most useful scouting tools as soon as you buy it. In this NES version, buying Holy Water is the only cost; throwing it does not reduce your heart total. Use it on suspicious walls, floor blocks, and odd brick formations. If the bottle breaks a barrier, that spot was meant to be destroyed. If nothing breaks, the trick may instead be a false floor that only opens when Simon steps onto it.
- Finish both Jova purchases before committing to the eastern route.
- Prefer to leave Jova Woods with 50 hearts reserved for Berkeley's Oak Stake.
- If you are still short, decide now whether to keep farming outside or make up the difference in Berkeley.
- Start using Holy Water freely to test suspicious terrain.
Cross South Bridge carefully and do not jump into a fishman attack lane
Head east from Jova Woods until the scenery opens into South Bridge. This is your first demanding crossing because the bridge is broken into separated stone platforms with water below. Simon's jump is committed the moment you press A, so do not run at gaps and hope to steer in midair. Stop on each stone, line up the takeoff, then jump from a settled position near the front edge.
Use the bridge itself as your landmark system. On short breaks, walk to the lip of the platform and make a clean forward jump. On longer breaks, wait until the landing is clear before moving. Skeletons on the stones are usually less dangerous than rushing the gap, so kill them first when there is room.
The real threat is the fishman that leaps from the water, lands on a stone, and spits a fireball across your path. If one rises onto the platform ahead, either whip it as soon as it lands or tag it directly with Holy Water. Do not wait for a nonexistent lingering flame effect from Holy Water here; this item works as a thrown hit and as a terrain breaker, not as the later Sacred Flame wall. If a fireball is already traveling across the gap you need, step back and wait out that cycle before you jump.
If you miss a leap or get clipped and lose a life, do not force the next attempt in bad shape. If the setback leaves you too weak or wipes out the hearts you were saving, turn around, return to Jova, and rebuild. The bridge is short enough that a reset is better than reaching Berkeley underprepared.
- Take every broken span from a deliberate standing position.
- Clear skeletons or fishmen before using a cramped landing stone.
- Use the whip or a direct Holy Water hit on fishmen, not imaginary flame coverage.
- Retreat to Jova if failed bridge attempts wreck your health or your money plan.
Use Veros Woods as the route split and choose between healing or pressing on
After South Bridge, continue into Veros Woods. Keep moving right into the next woods screen and look for the stairs near where Simon enters. Those stairs lead down toward Veros. The upper ground continues east toward Berkeley. That fork is the important navigation point at the end of this chapter.
If it is daytime and you want to reset your condition, go down to Veros. A quick town stop lets you heal at the church and calm the pace before the first mansion. Veros also has later shopping value, but none of that is required for this chapter. Think of it as a recovery branch, not a mandatory detour.
If you already have good health and the 50 hearts for Berkeley's Oak Stake, stay on the upper route and keep moving east. If you are healthy but still short on stake money, you can either farm the woods a little longer or accept that Berkeley itself will become the place where you finish funding the stake. Either approach works if you enter with clear expectations.
Holy Water also gives you a harmless way to learn the environment here. There are suspicious bricks in the woods that can be broken to alter your footing, and testing them costs nothing once the item is yours. Get used to checking terrain now, because Berkeley will ask you to tell the difference between something breakable and somewhere Simon should deliberately drop through.
- Identify the stairs in Veros Woods as the branch down to Veros.
- Recognize the upper route as the direct line to Berkeley.
- Use Veros as an optional healing stop, not a required shop stop.
- Practice free Holy Water terrain checks before the mansion.
Make the final approach to Berkeley with the right items and a clear money plan
Whether you came straight through the woods or dipped into Veros first, finish by returning to the upper route and moving east. The last stretch still includes water and another chance for a fishman to interfere with your landing, so treat it exactly like South Bridge. Pause at the edge, read the enemy cycle, and jump only when the stone ahead is safe.
Do not get careless just because Berkeley is close. The important resource now is not Holy Water ammunition, because Holy Water throws are free after purchase. The real budget is the separate 50 hearts for the Oak Stake merchant inside the mansion. Keep that number in mind as you clear the last enemies and decide whether you are entering fully funded or entering with the intention to farm inside.
Before stepping into Berkeley, confirm three things. First, you own the White Crystal. Second, you still have Holy Water available in the lower-row item slot for testing suspicious surfaces when needed. Third, you understand your stake plan. If the answer to the third point is yes because you are already carrying 50 hearts, great. If the answer is yes because you knowingly intend to earn the rest inside Berkeley before staking the orb, that is also fine.
The chapter is complete when you reach Berkeley's entrance screen ready for the next step, not when you buy every optional item in sight. White Crystal and Holy Water matter now. Thorn Whip can wait. Enter with that priority order fixed in your mind and the first mansion becomes much more manageable.
- Handle the final water approach with the same patience as South Bridge.
- Keep the Oak Stake budget separate from ordinary route cleanup.
- Reach Berkeley with White Crystal owned and Holy Water ready to use.
- Arrive either with 50 hearts saved or with a deliberate plan to farm that amount inside.
Before you move on
- You own the White Crystal and Holy Water.
- You understand that the Thorn Whip in Jova is optional and not part of the required first-mansion setup.
- You have crossed South Bridge and reached Veros Woods safely.
- You can identify the stairs down to Veros and the upper route that continues toward Berkeley.
- You have reached Berkeley Mansion with either 50 hearts reserved for the Oak Stake or a deliberate plan to farm that amount inside before collecting Dracula's Rib.
Berkeley Mansion: find the Oak Stake and Dracula's Rib
This route is for the original English-language Nintendo Entertainment System release of Castlevania II: Simon's Quest. Berkeley Mansion is the first mansion and the first place where the game expects you to use the White Crystal, Holy Water, and an Oak Stake together. Your goal here is simple: reveal the entrance lift, climb to the stake merchant, reach the orb room without falling into the long recovery route, collect Dracula's Rib from the dropped bag, and then use the mansion's fake floor on purpose as your shortcut back out.
Reveal the entrance lift and reach the upper route
Stand at Berkeley's entrance and equip the White Crystal in the upper inventory row, not the lower throwing-item row. If the crystal is not the selected special item, the moving lift in the shaft will stay invisible and the opening looks like a dead end. Once the White Crystal is active, wait for the platform and ride it up from the entrance pit.
Near the top, jump right onto the higher ledge and deal with the knight before you commit to the next gap. This first enemy is dangerous mainly because a bad hit can knock Simon backward into the lower area and force you to wait for the platform again. After the knight, continue right across the hanging-body room, clearing skeletons as needed until you reach the stair section.
When the path offers a lower stair route and an upward stair route, ignore the one leading down for now. Berkeley's merchant and relic both lie along the higher route first. Take the stairs that go up and prepare for tighter footing, because the next stretch mixes short platforms, awkward enemy angles, and one important fake-floor jump.
- White Crystal equipped on the upper row
- Used the moving platform at the entrance
- Ignored the early downward route and reached the first upper staircase
Cross the upper hazards and buy the Oak Stake
On the upper level, move left through the slime and gargoyle section patiently. Slimes are easiest to hit after they land, and the gargoyle's paired fireballs are safer to bait than to rush through. After that enemy cluster, continue onto the small raised platforms on the left, clear the skeleton there, defeat the knight beyond him, and climb the stairs from that ledge.
Now head right on the top path. This is Berkeley's most important navigation trick before the relic room. As you approach the next higher platform, do not land on its left edge beside the background column. The first blocks there are fake. Instead, jump far enough right that Simon lands past the column on the solid part of the platform. If you come up short, you drop into the lower route and have to circle back.
Continue right into the next room, then follow the descending route exactly: go right until the ledge ends, go down one set of stairs, go down the next set as well, then head left. Jump onto the raised platform and climb the stairs there. At the top, go left across the spike gap to the blue-cloaked merchant and buy one Oak Stake for 50 hearts. Once you have it, open the subscreen and confirm the Oak Stake is selected in the lower row so you do not accidentally arrive at the orb with Holy Water still selected.
- Passed the fake upper blocks by landing to the right of the column
- Followed the down, down, left, up route to the merchant
- Bought one Oak Stake and selected it in the lower item row
Descend to the orb and avoid the false floor by the second column
Leave the merchant by going right back over the spikes, then descend the stairs you just climbed. Continue left and go down the next stairs. You will then reach a third staircase directly ahead of you. Take that one down as well. This puts you on the lower approach to the relic chamber.
From that lowest route, start moving right and watch the background columns carefully. The major trap is at the base of the second column. Two floor blocks there are false. If you simply walk forward, Simon falls through and you are forced into a longer corrective loop before you can try for the Rib again. Jump over that weak spot cleanly and land on the safe floor beyond it.
After the false blocks, keep right and climb the stairs on the far side. Continue right to the glowing orb chamber. Jump up onto the ledge with the orb so you have a clean line of attack. Face the orb, keep the Oak Stake selected in the lower row, and use it with Up plus B. If the throw connects, the orb changes and drops a bag. Do not leave the room yet. Walk into the bag to actually collect Dracula's Rib. If you miss the throw, the stake is gone and you must buy another one before trying again.
- Took the third staircase down to the lower approach
- Jumped past the two false floor blocks at the second column
- Used the Oak Stake on the orb and picked up the dropped bag
Understand what Dracula's Rib really does
Once the bag is collected, Dracula's Rib becomes an upper-row special item like the crystals. Equip it there when you want its defense. Its value is not passive just because you own it. Simon only presents the shield when the Rib is the equipped special item, so switching back to a crystal removes that protection until you equip the Rib again.
The shield works in the direction Simon is facing and is meant for many small projectiles such as fireballs and similar shots. It is best used when you are holding your ground, waiting for an opening, or taking a controlled jump through enemy fire. It can save health, but it does not make Simon invulnerable and it does not stop every hazard in the mansion.
Most important, do not trust the shield while walking forward. Simon does not keep the Rib held out as a constant moving barrier. If you want to block a shot, stop and face it or use a deliberate jump. Treat the Rib as a situational projectile guard, not as a replacement for careful positioning.
- Dracula's Rib is now in inventory
- You know it must be equipped on the upper row to work
- You know the shield is not continuously active while walking
Use the false-floor shortcut only after taking the relic
Now that the Rib is safely collected, head left from the orb room and return toward the false-floor trap near the second column. This time, use it on purpose. Instead of jumping over the bad tiles, simply walk onto them and let Simon fall through. This shortcut is exactly why you were careful on the approach. Before the relic it wastes time; after the relic it saves time.
On the lower level where you land, move left until you reach the wall and climb the nearby stairs. From there, continue left toward the mansion's entrance side. You still need to respect enemy patterns and short platform jumps here, especially if your health is already low from the climb in. If you are one hit from death, stop between enemy spawns rather than forcing a rushed jump. Berkeley is short, but a death at the end costs more time than a cautious exit.
To finish the shortcut, drop to the lower platform on the left side, jump to the next platform, and fall through the opening in the floor near the entrance corridor. From there, go left to leave Berkeley Mansion. Outside, you can equip Dracula's Rib and test its shield against projectile enemies before continuing east. If you dislike the shortcut or get turned around after the drop, the slower fallback is simply to retrace the upper route you used on the way in, but the intentional false-floor exit is the faster and cleaner first-clear method.
- Deliberately used the false floor only after securing the Rib
- Reached the entrance side again without redoing the full upper loop
- Exited Berkeley Mansion with Dracula's Rib collected
Before you move on
- You have left Berkeley Mansion alive.
- Dracula's Rib is in your inventory because you picked up the dropped bag after staking the orb.
- You can explain the Rib's real use: equip it on the upper row and face projectiles while standing still or during a controlled jump, not while walking.
- You know the deliberate false-floor drop is Berkeley's exit shortcut after the relic, not the route to use before it.
Upgrade in Veros and uncover the Sacred Flame
After clearing Berkeley Mansion, make a deliberate supply stop in Veros before you continue east. This chapter assumes the original English-language NES cartridge route, with the password-based inventory and the standard town and cave layout from that version. Your main goal is the Chain Whip for 150 hearts. The optional Dagger is available here too, but it must stay secondary. From Veros, climb back through Dabi's Path, claim the Sacred Flame in the second cave screen, and continue east into Aljiba Woods. The Sacred Flame is not required to finish the game, but it is one of the most helpful combat pickups in the NES release because each use costs only 1 heart and can lock down tight approach lanes on stairs and in later boss rooms.
Backtrack from Berkeley to the Veros town branch
Leave Berkeley Mansion to the left. The route back to Veros is not through Denis Woods. Stay with the westbound path you already used before the mansion. On the first outdoor screen, deal with the fishman near the pool before committing to the jump. If it is tossing fireballs at your landing spot, stop on solid ground, whip it as it rises or hit it cleanly with Holy Water, then cross.
On the next screen, keep moving left until you reach the familiar staircase branch. This is the junction that leads down to Veros. Do not stay on the upper outdoor route if your goal is the whip upgrade and heal. Go down the stairs and then continue right into town.
If night falls before you finish shopping, wait safely outside or farm nearby enemies until day returns. Churches and shops are closed at night, and this visit is worth doing properly because Veros gives you both a heal and the next major whip upgrade.
- Leave Berkeley to the left.
- Cross the fishman pool carefully instead of rushing the jump.
- On the next screen, take the staircase branch down to Veros.
- If it is night, wait for daytime before trying to shop or heal.
Buy the Chain Whip first
Check your heart total as soon as you enter Veros. The Chain Whip costs 150 hearts and should be your first purchase in this town. If you are short, farm outside and come back rather than spending hearts on side purchases.
Walk across town to the eastern side. Climb to the upper path and enter the eastern house. Inside, use Holy Water on the floor to open the hidden way down. Drop into the basement area and speak to the hidden merchant to buy the Chain Whip for 150 hearts.
This upgrade matters immediately. It shortens routine fights on the road to Aljiba and makes the next mansion sections more forgiving. Even if you bought the Thorn Whip earlier, replace it now and treat this as the route's expected weapon for the next stretch.
- Save 150 hearts for the Chain Whip.
- Enter the eastern upper house in Veros.
- Break the floor with Holy Water and buy the Chain Whip from the hidden merchant.
- Do not spend your last 150 hearts on optional gear first.
Keep the Dagger optional
There is also a Dagger merchant in Veros, but this is an extra, not a requirement. If you want it and still have spare hearts after buying the Chain Whip, go into the earlier house on the west side of town and test the right wall with Holy Water. The hidden passage leads to the Dagger seller.
The Dagger costs 50 hearts. It can help with straight-line shots, but this route does not assume you bought it. The real reason for this detour is the Chain Whip, and the real hidden prize on the road east is the Sacred Flame.
If money is tight, skip the Dagger without hesitation. You are not missing a gate key, and you will replace your current sub-weapon anyway if you take the Sacred Flame.
- Only shop for the Dagger after the Chain Whip is already purchased.
- Find the Dagger merchant behind a breakable right wall in the western house if you want it.
- Skip the Dagger freely if hearts are low.
Climb east through Dabi's Path from the Veros side
Leave Veros through the eastern exit. You enter Dabi's Path from the lower side, so your first job is to climb back up to the high route. Move right, clear the skeleton on the ledges ahead, and jump carefully because Simon's jumps are committed the moment you press A.
Keep following the rising path. Use the stairs whenever they appear, and stay patient on narrow ledges where eyeballs and bats drift in at awkward heights. The correct route from this side is the long ascent through three stair sets until you are established on the upper passage.
Continue right until the screen changes. The Sacred Flame is not in the first cave screen. Keep climbing and advancing until you enter the second cave screen, then prepare to clear enemies before you start breaking terrain.
- Exit Veros on the east side.
- Use the rising ledges and stair sets to regain the upper route.
- Reach the second cave screen before searching for the Sacred Flame.
Open the Sacred Flame hiding place
In the second cave screen, fight your way right along the upper route until the path drops you downward. Keep descending to the lowest level instead of leaving the room to the right immediately.
At floor level, use Holy Water on the lowest breakable blocks beneath the ledge you came down from. This opens a path back to the left along the bottom of the screen. Walk left on that newly opened lower path until you hit the wall.
Now use Holy Water on the left wall where the low blocks jut out. The hidden pickup behind that wall is the Sacred Flame. Walk into it to claim it. This is a sub-weapon, not a whip upgrade.
When used with Up and B, the Sacred Flame costs 1 heart per throw. It lands ahead of Simon and leaves a short-lived flame that is excellent for enemies approaching through a tight lane, along a stair, or into a boss doorway. That makes it strongly recommended here, but keep its role separate from the later Flame Whip upgrade, which is a different item entirely.
- Drop to the bottom of the second cave screen.
- Break the lower blocks first to open the bottom path left.
- Break the left wall and collect the Sacred Flame.
- Remember that each use costs 1 heart.
Continue to Aljiba Woods and know the reset trick
Once you have the Sacred Flame, resume the eastbound route and leave Dabi's Path to the right. You will emerge in Aljiba Woods. Stay on the main route east and ignore the staircase branch for now. That branch matters later, not on this pass.
If you decide to turn around after breaking the lower blocks, do not assume you trapped yourself. Step out into Aljiba Woods and then re-enter the cave screen. The broken footholds are restored, so you can climb normally again and retrace the route without a special trick.
With the Chain Whip equipped and the Sacred Flame collected, you are set up properly for the next chapter. The whip handles ordinary enemies faster, while the flame gives you a cheap and very practical control tool for later choke points.
- Exit Dabi's Path to the right into Aljiba Woods.
- Ignore the woods staircase on this first pass.
- If you need to retrace your route, leave and re-enter the screen to restore the broken footholds.
- Keep Sacred Flame and Flame Whip mentally separate.
Before you move on
- You left Berkeley by the correct westbound outdoor route and took the staircase branch down to Veros.
- You bought the Chain Whip from the hidden merchant below the breakable floor in the eastern Veros house.
- You understood that the Dagger shop is optional and hidden behind a breakable right wall in another Veros house.
- You climbed through Dabi's Path from the Veros side, reached the second cave screen, broke the lower blocks and then the left wall, and collected the Sacred Flame.
- You know Sacred Flame costs 1 heart per use and is a recommended sub-weapon, not the later Flame Whip.
- You continued east into Aljiba Woods and know that leaving and re-entering the screen restores the broken footholds if you need to backtrack.
References for this chapter
Aljiba: trade for the Blue Crystal and prepare for Yuba Lake
Take the upper route through Aljiba Woods into town, trade the White Crystal for the Blue Crystal, buy the supplies worth carrying, then return to the woods stairs and use the Blue Crystal at Yuba Lake to uncover the route to Rover Mansion. This chapter also covers the optional Camilla Cemetery detour for the Silver Knife and points out the easy mistakes that leave Simon stranded at the lake.
Follow the upper forest path into Aljiba
Leave Dabi's Path and continue into Aljiba Woods. When the woods split into upper and lower routes, stay on the upper road to reach Aljiba. The lower branch is the way toward the cave and Yuba Lake, but you are not ready to use it until after the crystal trade. The staircase linking those two levels is the landmark to remember, because you will come straight back to it after shopping.
Treat the woods with the same careful footwork you used earlier. Simon cannot steer once a jump begins, so choose the takeoff point before pressing A. If a spider web or enemy is hanging over a landing spot, stop and clear it first instead of trying to correct in midair.
When you enter Aljiba, remember that this town has no healing church. If you arrive with low health, do not wander around taking extra hits. Finish your shopping and crystal exchange efficiently, because Aljiba is a supply stop, not a place to restore life.
- Stay on the upper route through Aljiba Woods.
- Notice the staircase that later leads back down toward the cave and lake.
- Do not count on finding a church in Aljiba.
Trade the White Crystal for the Blue Crystal
Go to the upper-left part of Aljiba and speak to the grey-clothed man there. He trades your White Crystal for the Blue Crystal. This exchange is required. The White Crystal has already done its job at Berkeley, and the Blue Crystal is the item that opens the way at Yuba Lake.
After the trade, open the subscreen and confirm that the Blue Crystal is now in your upper inventory row with the other relic-style items. That matters because simply owning it is not enough. At the lake, it must be the item currently equipped when Simon kneels at the shore.
If it is night and the town has turned dangerous, you may need to wait for day or leave and return before you can finish town business safely. The important result is simple: leave Aljiba with the Blue Crystal in your inventory and the White Crystal gone.
- Speak to the grey man in the upper-left section of Aljiba.
- Confirm that the White Crystal has been exchanged for the Blue Crystal.
- Remember that the Blue Crystal must be equipped for the lake puzzle.
Buy hidden supplies before you leave town
Aljiba hides two useful merchants beneath breakable floors. Near the entrance side of town, enter the first house on the left and throw Holy Water on the floor to open the hidden Garlic shop below. Garlic is not required to finish the game, but buying at least one clove now is practical because the next screen east holds the optional Silver Knife event.
On the east side of town, climb the stairs and enter the house at the top. Break the floor there with Holy Water to reveal the Laurel merchant. Laurels are not needed to solve Yuba Lake, but they become extremely important later for poison-marsh travel, so this is a good early chance to carry some.
If your heart total is limited, decide what matters most before leaving. Buy one Garlic if you want the optional Silver Knife. After that, spend remaining hearts on Laurels if you can. Do not waste time looking for a church or other recovery service here, because Aljiba does not provide one.
- Use Holy Water in the left-side house to reveal the Garlic shop.
- Use Holy Water in the east-side upper house to reveal the Laurel shop.
- Leave town with the Blue Crystal first, then any optional supplies you chose to buy.
Optional detour: use Garlic in Camilla Cemetery for the Silver Knife
If you bought Garlic, take Aljiba's right-hand exit into Camilla Cemetery. This detour is optional. It gives you the Silver Knife, which is a longer-range projectile than the basic Dagger and costs one heart each time you throw it, but it is not a requirement for the main route.
Use the Garlic only while Simon is standing on solid ground in the cemetery. Do not toss it into water and do not waste it off a ledge. When used correctly, a cloaked man appears. Speak to him to receive the Silver Knife.
Once you have it, turn around and go back west through Aljiba. If you skip this detour, you are not locked out of progress. The chapter's real goal is still the same: return to the woods stairs, head for Yuba Lake, and open the road to Rover with the Blue Crystal.
- Leave east into Camilla Cemetery only if you want the optional Silver Knife.
- Use Garlic on firm ground, not in water.
- Talk to the man who appears, then head back west through Aljiba.
Return to the woods stairs and take the lower route
Leave Aljiba through the west side and go back into Aljiba Woods. Move left until you reach the staircase between the upper and lower forest roads. Descend those stairs this time, then head right to enter the cave that leads toward Yuba Lake.
Inside the cave, favor secure ledges over risky drops. One practical route is to keep moving right, use the block near the cave's later staircase section to climb back up, then stay on the safer upper footing until you can drop down near the exit. The exact enemy pattern can change with day or night, but the important part is to preserve your footing and avoid careless falls into water.
If you die in the cave, simply continue and retrace this same route. Nothing about the puzzle changes. Before you step out onto the shoreline, pause and make sure the Blue Crystal is the equipped upper-row item so you do not waste time testing the wrong setup at the lake.
- Go west through Aljiba and back into Aljiba Woods.
- Use the remembered staircase to descend to the lower route.
- Cross the cave carefully and equip the Blue Crystal before reaching the shore.
Reveal the path at Yuba Lake and reach Rover Mansion
At the far side of the cave you will arrive at Yuba Lake, which looks like a dead end. Do not jump into the ordinary water. Stand at the shoreline, equip the Blue Crystal, hold Down, and keep Simon kneeling for several seconds. When the puzzle works, the screen shifts and a hidden lower route appears beneath the lake.
This does not require the White Crystal and it does not depend on a particular hour of the day. If nothing happens, the usual problem is that the wrong crystal is equipped or Simon did not kneel long enough. Reopen the subscreen, confirm the Blue Crystal, then try again from the shore.
After the hidden route appears, step down onto it and move right. Ignore the tempting stairs that lead farther down near the bottom, because trying to descend there can drop you into water. Instead, cross along the single blocks and safe right-hand ledges. Stay on that revealed lower road and it will carry you directly to Rover Mansion.
If you plan to stop here, record a password after reaching safety. For route purposes, the chapter is complete once the Blue Crystal has replaced the White Crystal, any optional Silver Knife shopping is finished, and you have uncovered the lake passage and reached Rover's entrance.
- At Yuba Lake, stand at the shore with the Blue Crystal equipped.
- Hold Down until the hidden lower route appears.
- Take the right-hand blocks and ledges to Rover Mansion instead of descending into ordinary water.
Before you move on
- Your inventory now shows the Blue Crystal in place of the White Crystal.
- You know where Aljiba's hidden Garlic and Laurel merchants are, and you did not rely on a nonexistent church.
- If you chose the detour, you used Garlic on solid ground in Camilla Cemetery and received the optional Silver Knife.
- You returned to the woods staircase, took the lower route to Yuba Lake, knelt with the Blue Crystal equipped, revealed the hidden passage, and reached Rover Mansion.
Rover Mansion: the moving wall and Dracula's Heart
Enter Rover Mansion from the revealed passage under Yuba Lake, find the Oak Stake merchant if you need one, climb the mansion's upper side to the relic chamber, and backtrack out to the Aljiba-side forest. This route is for the original English-language North American Nintendo Entertainment System cartridge release of Castlevania II: Simon's Quest. In this edition, Dracula's Heart is a progression relic used later with the ferryman. It does not heal Simon, add a new normal attack, or replace the Rib's shield effect.
Enter the submerged mansion and commit to the lower opening route
From the hidden road beneath Yuba Lake, step into Rover Mansion and move right through the entrance hall. Skeleton soldiers can throw bones that burst into small ground flames, and knights can crowd stair landings with their lances. Clear a lane before you jump. The Chain Whip is already strong enough here, and Holy Water or Sacred Flame can stop an enemy that is standing exactly where you need to land.
The first staircase you reach is not your main path. Go up it, move right onto the first platform, then deliberately walk off the platform's right edge so Simon drops to the blocks below. Do not keep forcing the upper route at the start. The mansion is built to waste your time if you stay high too early.
Face right at the apparent wall ahead and jump through it. This is an illusory wall, not a breakable one. If Simon passes through and lands on the lower blocks beyond it, you are on the correct side of Rover Mansion. If you bounce back or hit a real barrier later, stop assuming every obstruction works the same way. In this mansion you need to recognize both fake walls and dangerous water gaps.
- Enter Rover Mansion from the path under Yuba Lake.
- Use the first staircase only long enough to reach the drop to the lower blocks.
- Jump through the fake wall on the right instead of searching for a breakable block.
- Keep enemy pressure under control before every jump over water.
Reach the Oak Stake merchant through the water corridor
Continue right along the lower passage. Jump the early water gaps cleanly and ignore the staircase you pass for now. That staircase is part of the later climb to the Heart, but your immediate goal is farther right. Keep moving until you reach the long platform with the sliding block stack over water.
Do not try to body-check the moving stack or squeeze past it on foot. Wait until it has moved away enough to give you space, jump onto the platform, then hop over the stack before it returns to shove Simon off. Treat this as a trap, not a race. If a skeleton spawns where you need to stand, kill it first and reset your timing rather than jumping under pressure.
After the moving block stack, finish the short stretch to the right, hop the spikes, and talk to the merchant. Buy an Oak Stake for 50 hearts if you arrived without a spare. If you already brought an unused Oak Stake from an earlier stop, you can skip the purchase, but this is the merchant route the chapter requires if you came in empty.
- Stay on the lower right-hand route until you reach the moving block stack.
- Wait for safe spacing, then jump over the moving stack so it cannot push Simon into water.
- Cross the spikes and speak to the merchant.
- Buy the Oak Stake now unless you already know you still carry an unused one.
Return to the stair junction and climb the upper shaft to the relic side
Turn back left from the merchant. Re-cross the spikes and the moving stack carefully, then go left to the staircase you ignored before. This time, take it up and keep following the available stair flights. Keep climbing until the stair route can no longer carry you higher by itself.
At the top of the stair sequence, the path forces you into the narrow series of alternating ledges. This is the mansion's real execution test. Simon's jumps commit the moment you press A, so do not jump from the middle of a ledge. Stand at the edge, choose the landing block first, then leap. The safest rhythm is one ledge at a time. Do not try to skip an intermediate block unless you are completely certain of the distance.
If you miss and drop below, do not improvise through the mansion's dead half. Recover by using the nearby stairs to return to the base of the ledge climb and repeat it. The layout loops enough to confuse hurried players, so using the same recovery point each time is more reliable than searching for a shortcut after a fall.
When you finally top out, head right and descend the next stairs. Move left to the vertical opening and drop all the way down to the bottom. The relic chamber is to the right from the bottom of that hole.
- Go back left to the earlier staircase after the merchant visit.
- Climb every stair flight until the route changes into alternating ledges.
- Take the ledge climb one jump at a time from the edge of each platform.
- After the top, go right, descend the stairs, then drop the hole to reach the relic side.
Break the orb correctly and collect Dracula's Heart
Walk into the chamber on the right and stop in front of the flashing orb. Open the subscreen, select the Oak Stake in the lower item row, close the menu, and use Up plus B at the orb. Hitting the orb with the whip does not collect the relic, and simply owning the stake is not enough. You must actively use it on the orb.
When the orb breaks, the relic appears as a bag. Touch the bag. Do not leave the room after only shattering the orb. The pickup is the actual completion step. If the chamber looks cleared but the Heart is missing from your inventory, you almost certainly broke the orb and forgot the bag.
After the pickup, verify your relic row before you move on. You should now own Dracula's Rib and Dracula's Heart. Keep the distinction straight: the Rib gives its shield effect only while selected, but the Heart's important function is later. It is used as a ferry key at the Dead River. Equipping it right now will not suddenly improve your fighting ability inside the mansion.
- Stand at the orb and select the Oak Stake.
- Use Up plus B to break the orb.
- Touch the dropped bag to actually receive Dracula's Heart.
- Confirm that both Dracula's Rib and Dracula's Heart are in your inventory.
Backtrack out of Rover Mansion and return beneath Yuba Lake
Leave the relic chamber to the left and climb the same block shaft you just descended. When you reach the top again, go right and climb the stairs you came down a moment ago. Follow the upper route left until you reach the drop that returns you to the lower side of the entrance half of the mansion. Fall down there to continue the exit loop.
From the base of that drop, keep left and jump up the platforms until you reach a staircase at the far end. Go down that staircase, walk off the ledge to the right, and descend the next staircase on the right side. This brings you back toward the merchant corridor and the fake wall section from a different angle. If you want an optional replacement Oak Stake after spending your only one, this is the point where the merchant is nearby on the right. Otherwise keep working toward the exit.
Now head left until the apparent wall blocks your path. This is the same fake wall you crossed earlier, but the jump is trickier from right to left because the landing blocks sit above water. Take a full setup, jump through the wall, and aim for the raised blocks on the left side. Do not rush because a short jump is an instant death in the water.
Once you clear that fake-wall jump, drop down to the left and keep going left to leave Rover Mansion. Outside, stay on the revealed ledges and stairs beneath Yuba Lake to get back toward the Aljiba-side forest. Do not jump into ordinary lake water looking for a shortcut. You are done here once you are safely back on the land route with Rib and Heart in inventory and a clear understanding that the Heart's next real use is with the ferryman, not in combat.
- Climb back out of the relic pit and follow the upper path left to the return drop.
- Use the lower platforms and stair descent to work back toward the fake wall near the entrance side.
- Jump through the fake wall from right to left and land on the raised blocks over water.
- Exit Rover Mansion and return beneath Yuba Lake toward the Aljiba woods route.
Before you move on
- You found the Rover Mansion merchant and bought an Oak Stake if you entered without a spare.
- You climbed the alternating ledges, reached the relic chamber, used the stake on the orb, and picked up the dropped bag.
- Dracula's Heart and Dracula's Rib are both in your inventory.
- You exited Rover Mansion, returned beneath Yuba Lake toward the Aljiba side, and know the Heart's next required use is with the Dead River ferryman.
References for this chapter
Return through Jova and use the Heart at the Dead River
Leave Rover Mansion with Dracula's Rib and Dracula's Heart, climb back out from beneath Yuba Lake, and retrace the safe western route through Aljiba Woods, Dabi's Path, Veros, and Jova. Restock at least one Laurel before Belasco Marsh, use the Rib to blunt the fireball stretch, then equip Dracula's Heart in the upper relic row before speaking to the ferryman so the next landing is Brahm Mansion rather than the ordinary western shore.
Climb out from Rover and return to the upper forest line
From Rover Mansion, go back left through the hidden passage under Yuba Lake instead of trying to climb out through open water. Work across the moving blocks carefully and use full footing before each jump. Simon commits to his leap the instant you press A, so wait until the rising blocks have nearly reached the height you want, then jump cleanly rather than correcting in midair.
When you reach the long staircase at the western end of the under-lake route, climb all the way up. That staircase returns you to Aljiba Woods. As soon as you step back into the woods, orient yourself on the upper path. This is the same upper forest line that connects Aljiba on the right and Dabi's Path on the left.
Open the subscreen before you leave this area for good. Confirm that Dracula's Rib and Dracula's Heart are both in the upper inventory row. The Rib matters immediately for the marsh approach, while the Heart matters only at the ferry. Owning the Heart is not enough by itself; later in this chapter it must be the relic currently selected.
- Climb the long staircase from the Yuba underpass back into Aljiba Woods.
- Stay on the upper forest route after reaching the woods.
- Confirm that both Dracula's Rib and Dracula's Heart are in your relic inventory.
Optional Aljiba stop, then take the correct western route through Dabi's Path
If you are short on Laurels, go right from the woods into Aljiba and buy them now. Carry at least one before you commit to the march back to the Dead River. If you arrive at night and the shop is closed, wait in town for daytime rather than gambling on Belasco Marsh without protection. Aljiba does not have a church, so treat it as a supply stop only.
When you leave Aljiba, return left into Aljiba Woods and stay on the upper route heading west. Do not go down the staircase in Aljiba Woods on this return trip. That staircase leads toward the cave and lake branch you already used for Yuba Lake and Rover, not toward Veros. If you find yourself descending there, turn back immediately and regain the upper woods path.
Keep left until the forest changes into Dabi's Path. You enter the eastern screen of the cave first. Continue left through that screen into the western cave screen. Only in this western half should you take the stairs down to the lower level. At the bottom, continue left and you will emerge in Veros. This is the important correction for the backtrack: upper woods first, western cave second, stairs down last.
- Restock Laurels in Aljiba if needed before leaving this side of the map.
- From Aljiba Woods, continue left on the upper path instead of descending the woods staircase.
- In Dabi's Path, keep left into the western screen, then take the stairs down there to reach Veros.
Use Veros and Jova as recovery points before the marsh
Once you enter Veros, heal at the church if it is daytime and your life bar is already rough from Rover Mansion or the cave. If the church is closed because it is night, decide by your health. A healthy Simon can keep moving and heal in Jova instead. A badly hurt Simon is better off waiting safely in town for morning than entering the marsh section one hit from disaster.
Leave Veros by the left exit when you are ready. Outside, go up the stairs in Veros Woods to return to the upper route, then keep traveling left. This retraces the same landmarks you used earlier in the adventure in reverse order: forest path, the bridge area with fishmen, then Jova Woods, and finally Jova itself. If you somehow reach Dabi's Path again, you turned the wrong way and need to head back west.
Use Jova's church as your last easy heal if Veros was closed or if the trip back cost you too much life. Do not spend your hearts carelessly here. The goals before you leave town are simple: healthy life bar, at least one Laurel still in stock, and enough calm to manage the fireball platforms without rushing.
- Heal in Veros if the church is open and you need it.
- Leave Veros from the left exit, climb the woods stairs, and continue left back toward Jova.
- Use Jova's church if necessary, then depart with at least one Laurel still available.
Cross Belasco Marsh with the Rib equipped, then save the Heart for the ferry
Before you step out Jova's west exit, equip Dracula's Rib in the upper relic row. Belasco Marsh opens with lizardmen that spit fireballs from ahead, and the Rib is the safest answer if you handle it correctly. Stop or crouch to let incoming shots meet the shield, then advance. Do not expect protection while you are walking forward or whipping at the wrong moment. Clear one threat, regain your footing, and only then make the next jump or approach the next ledge.
As you move left, wolves rush at low height from the platforms ahead. Fight them from stable ground instead of at the lip of a jump. After the platform section, you reach the poison marsh itself. Use a Laurel before you step into the damaging ground, then keep moving left. The protection is for crossing, not for a drawn-out fight. If you hesitate, get knocked back, or let the effect wear off in the swamp, retreat if you can and use another Laurel rather than trying to crawl through on slivers of life.
Once you reach solid ground at the Dead River, keep the Rib selected until you are actually ready to board and speak. Then switch the upper-row relic selection to Dracula's Heart. Do not waste time changing your lower-row usable item, because the ferryman does not care about that row. The route split depends on the Heart being the active relic when you talk to him.
- Equip Dracula's Rib before leaving Jova for Belasco Marsh.
- Use the Rib by stopping or crouching for fireballs, not by charging through while attacking.
- Activate a Laurel before entering the poison marsh and switch to Dracula's Heart only when you are ready to board the ferry.
Take the Heart route and verify Brahm Mansion immediately
Walk onto the ferry from the eastern shore of the Dead River and double-check the upper relic row before you speak. Dracula's Heart must be the active selection. Talk to the ferryman only after you see it equipped. If you speak with the Rib or any crystal still selected, you will get the normal trip instead of the mansion route.
During the crossing, focus on position rather than combat. Be ready to move off the raft the moment it reaches land because the ferryman turns around quickly. The ride itself is short, so do not stand indecisively at the middle waiting to see whether the shore looks different. The important test comes after you disembark, not during the crossing.
Jump off at the western landing as soon as the raft reaches the bank. Then walk left one screen. If the Heart was selected correctly, that next screen is Brahm Mansion. If you see a town instead, you took the ordinary western route. Get back on the ferry, return as needed, equip Dracula's Heart in the upper row, and repeat the conversation. Do not continue exploring the town by accident when your goal for this chapter is the mansion entrance.
- Board from the eastern shore and make sure Dracula's Heart is the active upper-row relic before speaking.
- Disembark immediately when the raft reaches the far bank.
- Walk left one screen and confirm that Brahm Mansion is there; if it is a town, return and redo the ferry with Heart selected.
Before you move on
- You climbed out from the hidden route beneath Yuba Lake and returned to Aljiba Woods.
- You used the upper woods path into Dabi's Path, then descended the stairs in Dabi's western screen to reach Veros.
- You returned from Veros by the left exit, climbed the forest stairs, and continued left through the bridge and woods back to Jova.
- You carried at least one Laurel, crossed Belasco Marsh safely, and switched from Dracula's Rib to Dracula's Heart only at the Dead River.
- After talking to the ferryman with Dracula's Heart selected, you disembarked at the special landing and confirmed Brahm Mansion one screen to the left.
References for this chapter
Brahm Mansion: Death, the Gold Knife and Dracula's Eyeball
Enter Brahm Mansion from the Dead River side in the original English-language NES version with Dracula's Rib and Dracula's Heart already secured. Bring at least 50 hearts for the Oak Stake and, if possible, enough extra hearts to spend on Sacred Flame during Death's room. The mansion looks tangled, but the important route is fixed. Cross the spiked entrance hall, climb three stair flights, turn left and climb two more, then turn right for the final ascent to the high-right crossover. In the next screen, descend past the gargoyles and go left on the lower tier to the Oak Stake merchant. From there, drop to the bottom route, pass through the bat corridor, optionally defeat Death for the Gold Knife, then stake the orb in the next room and collect Dracula's Eyeball. On the way out, return to the merchant tier, go right into the adjacent screen, climb back to the upper route, work left, then use the entrance-side pass-through wall and descending path to reach the original stair stack and spike hall again. If you can afford it after claiming the Eyeball, buy one replacement stake before leaving so Bodley Mansion can be shorter later.
Prepare before crossing the spike hall
Come inside with at least 50 hearts that you are willing to spend immediately, because Brahm has its Oak Stake merchant inside like the earlier mansions. More hearts make this chapter smoother because Sacred Flame is the best tool for the recommended Death fight, while the required stake still costs 50 hearts regardless of what else you carry.
If you brought Sacred Flame from Veros, keep it selected on the lower item row for the boss stretch. If you skipped it, Holy Water and careful whip spacing still work, but the fight takes longer and gives the scythes more time to crowd you. Either way, do not spend your last 50 hearts before buying the stake.
Once inside, move right across the long floor of spikes. Take the jumps calmly. Simon's jumps commit as soon as you leave the ground, so set your position before pressing A and do not let enemy contact knock you onto the hazard. Reach the staircase at the far right end of the hall and begin the climb.
- At least 50 hearts reserved for the Oak Stake
- Sacred Flame selected if you have it
- Rib and Heart already collected before starting Brahm
Reach the Oak Stake merchant without looping the upper floors
From the entrance staircase, climb three full flights before making your first major turn. After the third upward run, go left and continue climbing two more stair flights on the mansion's upper-left side. This is not the end of the route. Do not assume the merchant is simply farther left from here.
After those two left-side climbs, turn right and take the remaining upward stairs to the high-right crossover. This upper-right section is marked by gargoyle pressure and a more exposed ledge. Continue right into the next screen rather than turning back.
In the next screen, descend past the gargoyles and keep going down the stairs until you can turn left on the lower tier. That leftward return leads back into the previous screen at a lower height than the route you just used. Follow that lower platform left to the raised perch with the old man. This is the Oak Stake merchant. If you reached a top-left dead end or keep seeing the spike entrance again, you took the wrong turn much earlier and should restart from the three-flights, left-two-flights, right-final-ascent pattern.
- Climb three flights before the first main left turn
- After two more flights on the left side, turn right for the final ascent
- From the right-hand screen, descend and return left on the lower tier to find the merchant
Buy the stake and descend to Death's corridor
Buy one Oak Stake here unless you deliberately entered Brahm already carrying an unused one. In a normal first-clear route, assume this is the stake that will be consumed on Dracula's Eyeball. Do not spend below the 50-heart requirement until that purchase is done.
After the merchant, start working downward toward the mansion's bottom route. You are aiming for the long low corridor on the right side, not for random shortcut falls. Safe stair descent is slower than blind dropping, but it avoids wasting health before the boss room. Use your whip to clear skeletons, slimes, and any knight that blocks a stair exit.
When you reach the bottom, head right into the room with bats. This bat corridor is your landmark that Death is next. If the bats keep clipping your jumps, pause a moment and remove them before pressing forward. There is no benefit to rushing into the boss chamber at half control.
- Buy the Oak Stake before spending more hearts
- Descend all the way to the mansion's bottom route
- Use the bat room as the sign that Death is one chamber ahead
Fight Death for the Gold Knife, or bypass him if you must
Death does not block the relic chamber completely. If you arrive in terrible shape, you can run under him and continue right to finish the mansion without killing him. For a practical first clear, though, defeating him now is strongly recommended because he drops the Gold Knife, which is one of the most useful ranged weapons for the late game.
With Sacred Flame selected, wait for Death to drift low instead of throwing early. Place the flame where he will overlap it near floor level, then add whip hits while the flame burns. His flying scythes are often more dangerous than his body. Swat any scythe that is about to reach you, then return to pressuring Death when he drops again.
If you skipped Sacred Flame, stay patient. Holy Water can still connect when he descends, and plain whip attacks work if you keep your footing and clear the scythes first. Do not chase him recklessly through the room. Whether you win quickly or slowly, walk into the dropped bag afterward to claim the Gold Knife. Beating him is not enough if you leave the reward on the floor.
- Death is optional for progression but recommended for the Gold Knife
- Attack when he dips low instead of wasting throws high
- Collect the dropped Gold Knife bag before leaving the room
Stake the orb and secure Dracula's Eyeball
Go right from Death's chamber into the relic room. Open the inventory if needed and place the Oak Stake on the lower selected item row. Stand close enough to the orb for a clean throw, then press Up plus B to use the stake.
The orb breaks and drops Dracula's Eyeball as a bag. Walk into that bag to complete the pickup. Do not leave the room after only breaking the orb. The mansion objective is not finished until the relic appears in your upper inventory row.
Dracula's Eyeball is not a direct damage or defense boost. Its main practical use is revealing hidden clue books and similar concealed hints when you select it on the upper relic row. Before turning back, confirm that you now carry Dracula's Rib, Dracula's Heart, and Dracula's Eyeball.
- Select Oak Stake on the lower row before the throw
- Use Up plus B on the orb and then touch the relic bag
- Confirm Dracula's Eyeball appears in the upper relic inventory
Use the correct return path and restock if possible
Head left back through Death's room. If you defeated him already, do not assume the room stays safe forever. Treat it as a fresh hazard and pass through cleanly rather than wasting resources trying to prove the fight is over for good.
Return to the merchant tier. If you have enough hearts after spending the first stake, buy one replacement Oak Stake now. This is the best time to do it because Brahm's relic is already secured and a spare stake can shorten Bodley Mansion later. If you cannot afford one, leave anyway; the Eyeball matters more than the convenience purchase.
For the exit, do not climb the wrong stair set and wander into spike drops. From the merchant platform, go right into the adjacent screen, climb there, and work left across the upper route toward the entrance side of the mansion. On that entrance-side upper section, use the pass-through wall by the small foothold to reach the descending route back toward the original stair stack. Follow the stairs down until you return to the long spiked entry hall, then walk out the same Dead River side where you entered.
- Do not assume Death's room is harmless on the return trip
- Buy a replacement Oak Stake only after the Eyeball is secured
- From the merchant tier, go right first, then climb and work left to the entrance-side pass-through exit route
Before you move on
- Dracula's Eyeball is present in your upper relic inventory.
- You either picked up the Gold Knife from Death or intentionally bypassed him while still claiming the Eyeball.
- You returned to the Dead River side entrance instead of drifting into the western Diamond dead end.
- If your heart count allowed it, you bought one fresh Oak Stake after using the first so Bodley Mansion can be shorter later.
Choose the optional Diamond detour and cross to Aldra
Leave Brahm Mansion with Dracula's Eyeball and decide whether you want one optional detour before continuing the main route. The west path only leads to the Diamond, a bouncing throwable item that can help in enclosed rooms but does not open any gate or replace any crystal. When you are done there, return to the ferryman, make sure Dracula's Heart is not the selected upper-row relic, and use the ordinary ferry branch to reach Aldra, called Alba in some references. In town, find the grey trader on the raised platform and exchange the Blue Crystal for the Red Crystal, then confirm the swap before heading farther west.
Step 1: Leave Brahm with the right priorities
Start outside Brahm Mansion after collecting Dracula's Eyeball. The required objective in this chapter is not another mansion or boss. It is the crystal trade in Aldra. Keep that in mind so you do not waste health forcing the optional detour when you are already in rough shape.
The Diamond route is useful only if you want another lower-row throwing item. It ricochets around walls, so it can hit repeatedly in cramped spaces, but it is not a story key. You do not need it for the ferry, for the Red Crystal trade, for Deborah Cliff, or for Bodley Mansion.
Before moving, check the subscreen once. Make sure the Eyeball is safely in your upper inventory, and remember that the Heart changes the ferryman's destination only when it is the currently selected upper-row item. Owning the Heart is not the same as selecting it.
- Required item already in hand: Dracula's Eyeball
- Required destination: Aldra or Alba
- Required trade item: Blue Crystal
- Optional detour reward only: Diamond
Step 2: Take the optional Diamond detour west of Brahm
If you want the Diamond, walk left from Brahm Mansion and stay on the dead-end route instead of turning back toward the ferry. Fight carefully on the flat approach. Knockback is much more dangerous once the path shifts to moving blocks over water.
At the water section, watch the block cycle before you jump. The wider gaps are easiest if you leave from the front edge while the block is rising or just reaching the top of its rise. Simon's jump is committed, so decide the launch point first and do not try to correct in midair.
One pair of blocks sits much closer together than the others. That close pair is the trap. If you use the same big rising jump there, Simon can sail past the next block and drop into the water. Shorten that hop, land cleanly, and then resume using higher rising jumps for the wider spaces beyond.
After the final crossing, continue left to the far dead end and speak to the cloaked man to receive the Diamond. This is the entire point of the branch. Do not expect a hidden passage to Bodley from here. Once you have the item, turn around and retrace the same route back east.
- Wide gaps favor a higher jump from a rising block
- The close pair punishes too much lift
- Talk to the cloaked man at the far-left dead end for the Diamond
- Return east after collecting it because this branch does not connect forward
Step 3: Recover cleanly if the Diamond detour goes badly
A fall into the water costs a life and sends you back nearby, but it does not undo your major progress. Slow down on the retry. The safest habit is to land, re-center Simon, let the block settle into a readable part of its cycle, and only then take the next jump.
If it turns to night and the enemies become more troublesome, remember that nothing important is locked behind the Diamond. You can abandon the detour at any time, go back to the main route, and finish the required ferry and crystal trade first.
If you already picked up the Diamond and are returning east on low health, do not rush the last few platforms just because the ferry is close. Getting back to Brahm's side alive is the only thing that matters. A careful recovery is better than repeating the whole set of jumps.
- A water fall costs a life, not your relic progress
- Skipping the Diamond is always valid
- Reset your footing on each block before retrying a hard jump
Step 4: Use the ordinary ferry branch to reach Aldra
From the Brahm side, walk right to the ferryman. Open the subscreen before you speak to him and switch off Dracula's Heart in the upper row. Select any other available upper-row relic or crystal instead. If the Heart stays selected, he will send you back to the Brahm branch again.
After speaking to him without the Heart selected, board the ferry. Let it carry you to the first shore on the right, but do not get off there. Stay aboard as it turns around and heads back left. When it reaches land on that return trip, jump off promptly before it pushes away again.
The shoreline looks deceptively familiar, so verify the result by walking left one screen. If the ferry setup was correct, that leftward walk leads into Aldra, also called Alba in some maps and walkthroughs. If walking left takes you back toward the secret mansion side instead of into town access, you used the wrong ferry state. Simply return to the ferryman, switch off the Heart again, and repeat the ride.
- Dracula's Heart must not be the selected upper-row item
- Stay on the ferry at the first landing
- Jump off on the return landing to the left
- If the next screen is wrong, ferry back and repeat with Heart deselected
Step 5: Enter Aldra and make the crystal trade
Walk left into Aldra. If you arrived at night, the important townspeople will be absent, so do not assume you missed the trader. Wait for daytime or spend the time fighting safely until the town repopulates.
When the town is active, continue left until you reach the section with the grey trader standing on a raised platform above you. Take the stairs up to him and speak to him while carrying the Blue Crystal. He exchanges your Blue Crystal for the Red Crystal, which is the one required for the tornado at Deborah Cliff and the later red-crystal lake trigger farther west.
This is a trade, not an extra pickup, so confirm the result immediately on the subscreen. Blue should be gone and Red should now occupy its place in the upper inventory. Your Holy Water is unaffected by crystal trades, so you are not giving up your wall-breaking tool by doing this.
Do not leave town assuming Blue is still good enough for the next puzzle. The upcoming cliff event specifically needs the Red Crystal selected when you reach the western dead end in a later chapter.
- Aldra and Alba are the same town for this route
- The trader is the grey man on the upper platform
- Trade Blue Crystal for Red Crystal during daytime
- Confirm that Red replaced Blue in the upper inventory
Step 6: Leave with the chapter fully resolved
Before exiting west, pause for one clean route check. Mandatory progress for this chapter means you still have Dracula's Eyeball from Brahm and now have the Red Crystal from Aldra. The Diamond may or may not be in your lower-row item list depending on whether you chose the detour.
If you made a ferry mistake earlier but corrected it, this is the point to make sure nothing remains half-finished. Do not wander into Sadam Woods until the crystal swap is done, because the Red Crystal is the entire reason for coming here.
Once the inventory is right, continue west from Aldra toward Sadam Woods. The next stretch toward Ondol and Deborah Cliff assumes this exact setup, so a final check here prevents unnecessary backtracking.
- Mandatory state: Dracula's Eyeball plus Red Crystal
- Optional but valid: Diamond collected
- Ready to continue west from Aldra into Sadam Woods
Before you move on
- You left Brahm Mansion with Dracula's Eyeball and did not lose track of that required relic.
- If you chose the detour, you talked to the cloaked man at the far-left dead end and added the Diamond to your usable-item inventory.
- You reached Aldra by ferry only after deselecting Dracula's Heart and using the ordinary branch.
- You spoke to the grey trader on the raised platform and your inventory now shows Red Crystal instead of Blue Crystal.
- You are ready to head west toward Sadam Woods without any need to revisit the ferry for this chapter.
Sadam Woods, Ondol and the Red Crystal at Deborah Cliff
Leave Aldra by the west exit and cross Sadam Woods toward Ondol. You can stay on the upper route for the fastest progress, or take the lower cemetery branch for the optional Silk Bag if you still have Garlic. In Ondol, protect 200 hearts for the Morning Star and restock Laurels without expecting a church or easy healing there. Then head west through the wasteland, use the moving blocks carefully, and trigger the Deborah Cliff tornado by selecting the Red Crystal and crouching continuously at the real western dead end until Simon is carried to Bodley.
Leave Aldra and decide on the optional Silk Bag before pushing west
From Aldra, exit left into Sadam Woods. The first screens here are the main route toward Ondol, and they are also your checkpoint for deciding whether you want the Silk Bag now. If you only care about reaching Bodley as soon as possible, stay on the upper route and keep moving west. If you want more carrying room for later Laurels and Garlic, use the stairway down on the woods route and make the detour now while the path is close at hand.
Do not treat the Silk Bag as a required key item. Nothing in this chapter or the mansion beyond Deborah Cliff demands it. The value is convenience: with more room for consumable supplies, later marsh crossings and puzzle errands are less cramped. If you have no Garlic left, skip the detour for now instead of wandering the lower path for no reward.
Before you jump anywhere in the lower route, remember Simon's jumps are committed. Pick the exact takeoff spot before pressing A. That matters more here than in ordinary woods screens, because several suspicious floor sections hide false blocks over poison marsh.
- Leave Aldra through the west exit into Sadam Woods.
- Choose the stairs down only if you want the optional Silk Bag and still have Garlic.
- Keep the upper route if you want the fastest trip to Ondol.
Take the lower cemetery branch carefully and collect the Silk Bag if you want it
Go down the woods stairs and continue left until you reach the next drop. At that ledge, jump off to the left instead of simply walking. Walking there can dump Simon through the false flooring below into the damaging marsh. After landing safely, keep moving left, but handle the next edge differently: walk off that one instead of making another big leap. The lower path mixes safe ledges and trap tiles, so do not assume every drop uses the same timing.
A little farther left, the platform with marsh below has a short false-floor section in the middle. Treat the center as unsafe. Use Holy Water freely to test questionable ground if you want confirmation, then jump the suspect stretch instead of strolling over it. If you do fall into the marsh, do not panic-jump immediately. First aim for the nearest solid platform, then reset your position and continue. Burning a Laurel to survive a mistake is acceptable if your health is low, but it is better to save them for the larger swamp sections later.
When the path changes into Storigoi Graveyard, keep going all the way left until there is no farther ground to test. Stand on solid floor at the dead end, select Garlic, and place it on the ground. Talk to the man who appears to receive the Silk Bag. Once you have it, reverse the route exactly: head right through the graveyard, retrace the careful jump and walk-off sequence, and climb back up to the upper Sadam Woods path.
- Jump off the first dangerous left ledge on the lower route.
- Walk off the next ledge rather than over-jumping into another trap.
- Use Garlic only at the far-left dead end in Storigoi Graveyard.
- Climb back to the upper Sadam Woods route after collecting the Silk Bag.
Use Sadam Woods as your last easy adjustment point before Ondol
Whether you took the detour or not, the important thing now is to arrive in Ondol with your priorities straight. The next town's main job is selling the Morning Star. Protect 200 hearts for that purchase above everything else. If you are short, it is better to fight nearby enemies and earn the difference before shopping than to spend on side items first and create a longer delay.
Watch your health as you approach town. Ondol does not have a church, so do not count on entering town, praying, and resetting safely there. If you are already in rough shape and daylight is fading, you have two safer recovery choices: wait out the night in a secure place until the merchants reopen, or retreat east to Aldra for church healing before trying the shopping run again. Either option is better than pressing west into the wasteland with bad health and closed stores.
This is also the point to decide how many Laurels you want to carry west. If you skipped the Silk Bag, be more disciplined about using them only on real danger. If you took the bag, you have more margin for later poison crossings, but that still does not make them disposable.
- Keep 200 hearts reserved for the Morning Star.
- Do not expect church healing in Ondol.
- If it turns to night, wait safely or retreat east to Aldra instead of forcing the next area under-equipped.
Buy the Morning Star first, then restock Laurels in Ondol
Continue west into Ondol, also called Oldon in some references. Your first stop should be the Morning Star merchant. From the town entrance side, work upward toward the middle of town. Near the center on the upper or third-level row is the correct house. Enter that house and take the stairway that is already open in the floor down to the merchant. You do not need to break this floor with Holy Water. Buy the Morning Star for 200 hearts as soon as you can afford it.
If you arrived with fewer than 200 hearts, leave town and farm nearby rather than buying anything else first. This whip upgrade is the point of the visit. It improves your reach immediately and is also the prerequisite for the later Flame Whip upgrade. If darkness falls while you are still short on money, stay patient. Hide indoors or on safe ground, then shop when day returns. Since Ondol lacks a church, treat the trip as a controlled shopping run, not a place to recover from repeated mistakes.
After buying the Morning Star, restock Laurels. The Laurel seller is hidden near the entrance side of Ondol, in the upper-right portion of town. Use Holy Water on the concealed walls inside the correct house to reveal the merchant and buy what you can carry. Do this after the whip purchase so you never risk dropping below the 200-heart threshold first.
- Reach the upper middle house near the center of Ondol and go down its already-open stairway.
- Buy the Morning Star for 200 hearts before any lesser purchase.
- Use Holy Water to uncover the Laurel merchant near Ondol's entrance side.
- Leave town with Laurels stocked and the Morning Star equipped.
Cross the wasteland and trigger the Deborah Cliff tornado correctly
Exit Ondol to the west and enter the wasteland leading to Deborah Cliff. The orange moving blocks over water are the main hazard. For the longer gaps, ride a block upward and jump when it is near the top of its movement so Simon gets the extra lift he needs. For shorter gaps, especially if two platforms sit fairly close together, do not automatically take the highest possible jump or you may overshoot. If an enemy crowds you on a block, clear space first with the Morning Star rather than trying to save a bad takeoff.
Keep your rhythm steady from platform to platform. If you get hit, stop on the next safe block, face the enemy problem, and then resume. Panic-jumping is what turns this screen into a drowning chain. Once the ground turns into the apparent dead end at Deborah Cliff, walk all the way to the true western wall before trying the puzzle. Do not test random spots partway through the screen.
Open the subscreen, equip the Red Crystal in the upper item row, kneel at the dead end, and stay crouched continuously for several seconds. Simon must remain crouching long enough for the trigger to work. Standing and waiting does not solve it, and jumping or headbutting the wall does nothing useful. When you have the correct position and crystal equipped, a tornado appears and carries Simon away. Stay there until the screen change is obvious and you are taken to the Bodley side.
- Use high-timed jumps for the longer wasteland block gaps.
- Stabilize after enemy contact instead of chaining panic jumps.
- At Deborah Cliff, equip the Red Crystal and crouch at the true western dead end.
- Wait for the tornado to carry Simon to Bodley before moving on.
Before you move on
- You intentionally skipped the Silk Bag or collected it in Storigoi Graveyard by using Garlic at the far-left dead end.
- You returned to the upper Sadam Woods route and reached Ondol without confusing the optional detour for the main path.
- You bought the Morning Star for 200 hearts from the upper middle house near the center of Ondol by taking the already-open stairs down to the merchant.
- You restocked Laurels after the whip purchase and did not rely on Ondol for church healing.
- You crossed the wasteland west of Ondol, selected the Red Crystal at Deborah Cliff, crouched continuously at the western dead end, and were carried by the tornado to Bodley.
References for this chapter
Bodley Mansion: find Dracula's Nail with or without a spare stake
This chapter covers the original English-language Nintendo Entertainment System cartridge release of Castlevania II: Simon's Quest, the password-based North American version. Bodley Mansion holds Dracula's Nail, the fourth body part in this route. The mansion is much shorter if you arrived with an unused Oak Stake from Brahm, but it is still fully clearable if you did not. The key distinction here is that Bodley uses two different kinds of hidden terrain. False walls and false floors are illusory and Simon passes through them by jumping or falling through the right spot. Other barriers are solid blocks that must be destroyed. Before you collect the Nail, Holy Water is the tool that opens those solid barriers. After you collect it, equipping Dracula's Nail in the upper item row lets the whip destroy the same sort of blocks. Follow the short route if you already saved a stake. Otherwise, take the longer upper loop to the internal merchant, buy the 50-heart Oak Stake, then drop back down to the relic room. After using a stake on the orb, decide whether to leave immediately or deliberately backtrack to Bodley's hidden merchant to buy a replacement so Laruba can be shortened later.
Prepare before stepping inside
Bring Holy Water into Bodley even if you already saved an Oak Stake from Brahm. The short route still crosses a solid block barrier above water, and that barrier must be broken before you reach the relic chamber. If you swapped to a knife or another throwable outside, change back before entering so you do not waste time discovering the wrong sub-weapon in the dangerous water room.
Decide your route before you start fighting through the first hall. If you already hold an unused Oak Stake, you can use the quick entrance-side path and reach the relic room without visiting the merchant first. If you do not have a stake, keep at least 50 hearts reserved for Bodley's trader. Do not spend those hearts freely on repeated item throws inside. In ordinary NES play Simon only carries one Oak Stake at a time, so the moment you use it on the orb, that stake is gone until you buy another one.
- Holy Water is selected in the lower item row before entry
- You know whether you already carry an unused Oak Stake
- You have 50 hearts set aside if you need Bodley's merchant
Short route if you already brought an Oak Stake
From the entrance hall, walk right only a short distance until the wall appears to stop you. This is the first hidden trick in Bodley: the upper part of that wall is false. Jump up through the top of it and continue right into the water room. You will immediately see the low crossing where spikes hang above the path and water waits below. Use Holy Water on the block barrier between the spikes and the water so there is enough room to pass. Do not count on Dracula's Nail here, because you have not collected it yet.
Cross to the right carefully. Where the water ends, jump up onto the higher ledge on the right and continue into the next area. Keep going right until you reach the first staircase. You can descend those stairs or simply drop from the nearby ledge to reach the same lower route, but from there take the next staircase down. Head right through the skeleton soldiers to the remains room. Stand close enough to the orb, equip the Oak Stake, press Up and B, then move into the dropped bag. Touching the bag is the actual collection step. If you only break the orb and walk away, you do not receive Dracula's Nail.
If a bad jump sends Simon into the water, re-enter and repeat the shortcut from the entrance. It is still faster than taking the full merchant loop when you already had the stake.
- Jump through the false entrance wall near the start
- Break the low block barrier above the water with Holy Water
- Use the Oak Stake on the orb and touch the bag to collect Dracula's Nail
Full route if you entered without a stake
From the entrance, go right to the first staircase and climb. At the next landing, clear the skeleton soldier and climb again. Keep working upward through the next flights until you reach the high route. Near the fourth stair area, Bodley begins mixing in false flooring, so slow down and test suspicious ground instead of charging forward into a fall. When you reach the upper stretch with spikes below, stay on the higher route rather than dropping away from it.
Continue right across the raised blocks. Ignore the stairway on that level and keep heading toward the apparent dead end. The upper part of this wall is false, so jump through it. In the next section, follow the path downward until you hit another seeming dead end. This one is different. Use Holy Water here, because this is a real breakable block barrier rather than an illusion. Open it, move through, continue right, and descend at the stair area beyond the hanging skeletons.
When you reach the ledge beside that stair section, jump into the wall on the left. This left wall is false and hides the merchant room. Go left and buy the Oak Stake for 50 hearts. After buying it, walk left of the trader and fall through the false floor there to land back inside the mansion. From that landing, go left, then descend to the bottom route and head right through the corridor to the remains room. Equip the Oak Stake, throw it into the orb with Up and B, and touch the dropped bag to receive Dracula's Nail.
- Climb to the upper route before looking for the merchant
- Jump through the upper false wall at the dead end
- Break the solid wall ahead with Holy Water
- Jump through the hidden left wall to find the Oak Stake trader
- Fall through the false floor by the trader and loop down to the relic room
What Dracula's Nail changes, and what it does not
After the pickup, Dracula's Nail becomes one of Simon's upper-row special items. Equip it there when you want the whip itself to break the same kind of solid block barriers that Holy Water could destroy earlier. This is useful because it lets you keep another lower-row item ready while still handling block walls.
Do not treat the Nail as a universal secret finder. It does not reveal or open false walls, and it does not expose false floors. Bodley still expects you to recognize which barriers are illusions and which are solid breakable blocks. Keep that distinction clear now, because the western route after this chapter still uses both kinds of hidden terrain.
- You understand that the Nail goes in the upper item row
- You know it replaces Holy Water only for breakable block barriers
- You do not confuse breakable blocks with false walls or false floors
Optional restock if you want to skip Laruba's merchant later
If you entered Bodley carrying a spare Oak Stake and just spent it on the relic orb, you can still leave with another one, but only if you deliberately backtrack inside the mansion before exiting. From the remains room, return left to the area with two staircases. Go up the left staircase, then take the next staircase leading upper-left. Work back across the upper route to the section that leads to the hidden merchant side rather than leaving immediately through the entrance wall.
Follow the same upper interior path you would have used on the no-stake route until you reach the hidden trader again. Buy a fresh Oak Stake there, then drop back through the false floor beside him to return to the interior path. This restock is optional, but it matters. Laruba Mansion has its own Oak Stake seller, so you are never locked out if you skip this, yet Bodley's extra purchase can save you the longer Laruba detour later.
- Backtrack inside Bodley only if you want to carry a fresh Oak Stake out
- Revisit the hidden merchant and buy one after using your first stake
- Remember that this restock is optional convenience, not a mandatory chapter objective
Leave through the upper exit and know your next stake plan
To leave Bodley, head back left from the remains room until you reach the room with the two staircases. Take the left staircase upward, then the next staircase that climbs to the upper-left. Hop up the blocks and pass left into the water-side screen near the entrance half of the mansion. From here, continue left toward the final false wall and jump through it to drop back into the starting hallway. Walk left to exit to the overworld.
If you did not perform the deliberate merchant restock after using your stake on Dracula's Nail, say it plainly to yourself before you leave: you are now out of Oak Stakes. That is acceptable, but you must plan to buy the next one in Laruba. If you did restock inside Bodley, you can shorten Laruba later. Either way, preserve hearts on the road west, because they now matter for Laurels, healing detours, and possibly that next stake purchase.
- Use the upward return route rather than searching for a lower escape
- Jump through the final false wall on the far left to reach the entrance hall
- Know whether you are leaving with a fresh Oak Stake or none at all
Before you move on
- You collected Dracula's Nail by staking the orb and touching the bag.
- You can explain whether you used the short spare-stake route or the full merchant loop.
- You know the difference between false walls or floors and solid breakable blocks in Bodley Mansion.
- You either left with a freshly restocked Oak Stake or clearly understand that Laruba's merchant will be your next required purchase point.
Bodley Lake and Uta: upgrade to the Flame Whip
Leave the Bodley region with enough protection for the next poison marsh, open the hidden route under Bodley Lake with the Red Crystal, pass through Uta's lower cave, and claim the free Flame Whip upgrade if you already bought the Morning Star in Ondol. This chapter treats the Flame Whip as strongly recommended rather than mandatory, then points you toward the correct exit for Devious Woods and the westbound approach to Laruba Mansion.
Restock before you commit to the west side
Do not head straight for Laruba as soon as you step out of Bodley Mansion. First check your supplies. You want at least two Laurels before you take the next major road, because Joma Marsh is long enough that one Laurel can expire early if you stop to fight, get knocked backward, or hesitate on the route.
If you do not have at least two Laurels, make the refill trip now while you are still near a dependable town. From Bodley's front entrance, go right through Wicked Ditch to Doina. Heal in Doina's church if needed, then buy Laurels during daytime. If you arrive at night and the doors are closed, wait in or near town until day returns instead of forcing the marsh unprepared. After shopping, return left through Wicked Ditch to Bodley.
Also confirm that you already purchased the Morning Star in Ondol. The hidden man in Uta only upgrades that whip. If you still have the Chain Whip, you can still travel through the area, but you will not receive the Flame Whip from this visit. In that case, either accept that you are only using the cave as a passage or backtrack for the upgrade before you move deeper into the final stretch.
- Carry at least two Laurels before leaving the Bodley area for the marsh route
- Use Doina as the last reliable resupply point before Laruba's side
- Make sure you already own the Morning Star if you want the Flame Whip upgrade
Open the hidden road at Bodley Lake
From the outside of Bodley Mansion, walk left to the lake beside it. This is not Lake Yuba from earlier in the game. The crystal trick here uses the Red Crystal, and the successful result is a hidden lower passage appearing beneath the lake.
Equip the Red Crystal in the upper item row and kneel at the lakeside. Keep holding down until the route appears. Do not jump into ordinary water early. Wait until you can plainly see the way forward below you, then descend onto the newly revealed lower road.
Once you are on the hidden path, keep following it left. Do not climb away from the lower route just because you see other ledges or stairs. The upgrade path begins by staying low and moving into Uta's cave area from this side.
- Use the Red Crystal, not the Blue Crystal, at Bodley Lake
- Keep kneeling until the lower passage is visibly open
- Follow the hidden route left into Uta instead of trying random jumps over water
Take Uta's lower route to the hidden man
Inside Uta, stay on the lower road first. The cave is broad, confusing, and packed with hazards, but most of the upper area is a distraction at this stage. Fight carefully through the first enemies and keep your footing, because falling into water still costs a life even if you are carrying Laurels.
As you move left, you will come to a small solitary block. Jump onto it, then walk off the left side so Simon drops back to the ground-level route instead of climbing upward. This keeps you on the direct line to the upgrade room.
Continue left to the moving blocks over water. Watch their pattern once before you commit. Simon's jump is locked in when you leave the ground, so jump when a block is rising toward you or near the top of its motion. If a floating Skull is drifting into your path, stop and kill it first. Forcing the jump while being crowded is the easiest way to get shoved into the water.
At the far-left wall, open the barrier. Holy Water works here, and so does Dracula's Nail if you equip it and strike with the whip. Go through the opening and talk to the hidden man inside.
- Stay low in Uta instead of climbing into the upper maze too early
- Step off the single block to remain on the lower route
- Break the far-left wall with Holy Water or the equipped Nail
- Speak to the hidden man beyond that wall
Receive the Flame Whip and confirm what it changes
If you already own the Morning Star, the hidden man upgrades it into the Flame Whip for free. This is your strongest whip in the NES version and it makes the remaining woods, marshes, and mansion fights much safer by shortening enemy encounters.
Treat this as a power upgrade, not a gate key. You do not need the Flame Whip to trigger the next map puzzle, buy the next stake, or enter Laruba. It is still worth getting because the west side of the game hits harder and punishes long fights.
Do not confuse this upgrade with the Sacred Flame sub-weapon. The Flame Whip changes your main whip type. Sacred Flame is still a separate usable item on the lower row that spends hearts when thrown. Check the subscreen now so you know the change actually happened. If your whip did not upgrade, the usual reason is arriving without the Morning Star.
- Talk to the hidden man while owning the Morning Star
- Verify that your whip has become the Flame Whip
- Remember that Sacred Flame and Flame Whip are different items
Backtrack to the branch and break the onward wall
After the upgrade, go back right across the same moving blocks. You are now retracing your steps toward the start of the cave, not returning to Bodley Mansion's front door. Once you reach the earlier branching area, start climbing through the platforms to the higher route.
Soon you will reach another blocked wall on the right side of the cave path. Break this wall with Holy Water or the equipped Nail. This is a separate wall from the one that hid the upgrader. Opening it lets you continue through the cave system instead of being forced to reverse all the way back to the lake entrance.
After breaking through, continue left across the cave's upper run. Floating Skulls can drift into your jump line here, so clear them before attempting narrow jumps. Keep working left and down through the safe ledges until you reach the far-left exit. That exit leads outdoors to Devious Woods, which is the correct next area for the Laruba route.
- Return right from the hidden man to the earlier cave branch
- Climb to the higher path on the way back
- Break the second wall that opens the onward route
- Leave Uta by the far-left exit into Devious Woods
Use the upgrade to set up the Laruba push
Once outside in Devious Woods, keep moving left. Expect floating Skulls and stronger enemies to interfere with jumps. The new whip helps, but do not rush as if the cave dangers are over. The moving blocks ahead still need careful timing, and getting knocked off remains more dangerous than trading a normal hit on solid ground.
Save your Laurels for Joma Marsh itself. A Laurel gives temporary protection from enemy attacks and poison damage, but it does not save you from drowning. Use one when you are ready to make a steady crossing, not while you are still hesitating on the last safe ground.
If you lose a life anywhere after collecting the Flame Whip, the upgrade is already yours. Simply reenter the route, reopen any necessary breakable walls, and continue west. Your immediate goal after this chapter is not another detour. It is a controlled push through Devious Woods and across Joma Marsh toward Laruba Mansion.
- Proceed left into Devious Woods after leaving Uta
- Keep Laurels for the poison-marsh crossing rather than the cave
- Remember that the Flame Whip stays yours even if you die on the way out
- Set your next landmark as Laruba Mansion beyond Joma Marsh
Before you move on
- You have at least two Laurels before committing to the westbound marsh route, or you know to resupply in Doina first.
- You opened Bodley Lake with the Red Crystal and used the hidden lower passage rather than guessing at the water.
- You found the hidden man in Uta by staying on the lower route and breaking the far-left wall.
- If you owned the Morning Star, your whip is now the Flame Whip.
- You know the onward route is back through Uta, through the second breakable wall, then out left to Devious Woods and on toward Joma Marsh and Laruba Mansion.
References for this chapter
Cross Devious Woods and Joma Marsh to Laruba
From the Flame Whip upgrade chamber, the route to the final mansion keeps moving west even though you briefly break a wall on the room's right side first. Finish the last Uta cave jumps carefully, then work through the short but dangerous Devious Woods without letting floating Skulls crowd Simon's takeoff points. Before stepping into Joma Marsh, make sure Laurel is selected and that you brought at least two charges. Push left through the poison as efficiently as possible and treat Laruba's doorway as your only goal. Once inside the mansion, follow the opening loop to identify the 50-heart Oak Stake merchant. On a normal first-clear route, assume you need to buy that stake unless you know for certain that, after obtaining Dracula's Nail in Bodley, you went back to Bodley's merchant and repurchased another Oak Stake there.
Leave the Flame Whip room by the forward route
After the hidden man upgrades your Morning Star into the Flame Whip, do not retreat all the way back toward Bodley Lake. The onward route continues from this side of Uta.
Climb back onto the cave blocks and go to the right until you meet the wall that blocks the forward passage. Break that wall with Holy Water, or equip Dracula's Nail in the upper row and strike it with the whip. Go through the opening you just made.
Once you pass that wall, keep following the cave left. This feels backward at first, but it is the correct westbound route out of Uta. Stay on the lower-left progression line when the cave opens upward. The higher space is not needed for Laruba.
Floating Skulls are the real danger here because Simon cannot steer a jump after pressing A. If a Skull drifts onto the place where you need to launch or land, stop and whip it away before you jump. A clean takeoff matters more than rushing.
- Break the right-hand wall from the Flame Whip side to open the forward route.
- After going through that wall, continue left through the cave instead of returning to Bodley Lake.
- Clear floating Skulls off takeoff and landing spots before long jumps.
Finish the last Uta platforms without forcing jumps
The remaining Uta screens mix water, small ledges, and vertical moving blocks. Treat every platform section as a separate obstacle. Jump onto a rising block when it is near the top of its travel, not while it is still low. That gives Simon enough height and enough time to line up the next leap.
When one small moving block leads to safer ground, land first and reset your position. Do not chain the next jump immediately unless the landing is completely clear. Simon's committed jump is much harder to correct here than it is to delay by one platform cycle.
If Skeletons or Skulls are hovering where you need to stand, thin them out first. The cave is short, so spending a few extra seconds on enemy control is better than dropping into the water and repeating the screen.
Your confirmation that you chose the correct exit is the next outdoor area. If you leave Uta and do not enter Devious Woods, turn around and re-enter the cave system from this side, because the Laruba route always leads straight into those woods.
- Board moving blocks near the top of their cycle.
- Use stable ledges as reset points between jumps.
- Confirm that the next outdoor area is Devious Woods.
Cross Devious Woods by controlling space before each jump
Devious Woods is not long, but it is dangerous because the enemies interfere exactly where footing matters. A Firebug throws along the ground while floating Skulls try to crowd Simon's face at jump range. Keep moving left overall, but do not run blindly into the platform section.
As soon as an enemy settles on your next takeoff point or landing point, stop and remove it. Skulls are usually the first target, because they can turn a safe jump into a knockback fall. If the Firebug is pressuring you from the floor, back up half a step, whip through the opening, and then resume lining up the jump.
When you reach the woods' moving platforms, use the same rhythm that worked in Uta. Wait for the block to come close to the top of its path, jump aboard, steady Simon, then make the next leap. If a Skull floats over the next platform, wait out another cycle instead of jumping into it.
Keep pressing west until the scenery changes from forest footing to poison marsh. That transition matters. This is the westbound approach to Laruba, not the later escape route after you clear the mansion.
- Kill Skulls that block jumps before you commit to a leap.
- Use another full platform cycle if the next landing is unsafe.
- Keep going left until the forest gives way to Joma Marsh.
Use Laurel to force a safe crossing of Joma Marsh
Do not enter Joma Marsh unprepared. Before stepping into the poison, open the subscreen, put Laurel in the lower usable slot, and make sure you have at least two charges. This swamp is long enough that you should not trust a single use to cover every mistake or delay.
Activate Laurel while Simon is still on safe ground, then move left through the marsh without stopping to fight unless an enemy completely blocks the path. The point here is distance, not heart farming. Poison drains health constantly, and hesitation is what makes the crossing dangerous.
There is a short rise partway through the swamp, but do not treat it as a reason to relax. Watch your protection and refresh Laurel as soon as the first charge is ending or whenever you lose too much time on enemies. If you brought three or more, the crossing is much more forgiving. With only two, keep the pace steady and do not waste either charge before entering the deepest stretch.
If you somehow arrive here with no Laurel at all, turn back before committing to the marsh and retrace your route to restock. Do not test whether raw health can carry you. The safe target is Laruba's entrance on the far left side of the marsh screen. Once Simon reaches the mansion doorway area, the swamp crossing is done.
- Select Laurel before touching the poison.
- Start the first Laurel use on dry ground, not after wading in.
- Refresh protection if the first charge is ending before you reach Laruba.
Follow Laruba's opening loop to the Oak Stake branch
Inside Laruba Mansion, head right through the opening hall. Fight only what you must, then climb the first staircase you reach. At the top, go left and climb the next staircase. After that second ascent, jump across to the ledge on the right.
Ignore the staircase near that right-side landing and keep following the upper eastbound path. Continue right until you encounter another staircase on this upper route. Ignore that one as well and keep going right into the next room. That upper crossover is the key landmark that keeps the opening loop straight.
In the second room, take the staircase you see there to enter the merchant branch. Follow the platforms and spike-side passage to the cloaked merchant and buy the Oak Stake for 50 hearts if you need one. On the default first-clear route, assume you do need it.
Only skip this detour if you know exactly how you got a spare stake: after collecting Dracula's Nail in Bodley, you would have had to backtrack to Bodley's merchant and buy another Oak Stake there. Simply having owned the Bodley stake earlier does not count, because that stake was spent on Dracula's Nail.
Memorize the route in simple landmarks: entrance hall right, first stair up, left to second stair up, jump right, ignore two upper staircases, continue into the next room, then take that room's staircase to the merchant path. That is the opening sequence you will build on in Laruba's deeper sections.
- From the entrance, go right, up the first stairs, left, and up the second stairs.
- Jump right, ignore the next two upper staircases, and continue into the second room.
- Buy Laruba's 50-heart Oak Stake unless you are certain you repurchased one in Bodley after getting Dracula's Nail.
Before you move on
- You left the Flame Whip chamber by breaking the right-hand wall, then followed the leftward cave route out of Uta.
- You crossed Devious Woods by timing moving-platform jumps near the top of their travel and reached Joma Marsh.
- You used Laurel before entering the poison and refreshed it as needed until Laruba Mansion was in front of you.
- Inside Laruba, you can repeat the opening route to the Oak Stake branch and you either bought the 50-heart stake there or knowingly skipped it only because you had already repurchased a replacement in Bodley after getting Dracula's Nail.
Laruba Mansion: defeat the Mask and collect the Cross and Ring
Enter Laruba through its long opening hall, reach the spike-wall junction, and treat Laruba's own Oak Stake merchant as the standard preparation point. Only skip that purchase if you deliberately bought and saved a spare stake after Bodley. From the lower branch, collect free Laurels, cross the spike trap, defeat the Weeping Mask for the Magic Cross, then use the Oak Stake in the next chamber to claim Dracula's Ring. Leave by the upper floating-block route and spider corridor, and refill Laurels before heading back out toward Joma Marsh. This chapter is for the original English-language Nintendo Entertainment System cartridge release of Castlevania II: Simon's Quest, with ordinary password play rather than the Famicom Disk System version.
Reach the spike-wall junction and decide whether you truly can skip the merchant
From Laruba's entrance, walk right through the long first hall and clear the Skeleton Soldiers and Knights instead of trying to rush through their knockback. At the far side, climb the staircase that leads up and left. Follow that upper path left, then climb the next staircase. At the top, cross the gap to the ledge on the right and continue into the next room, which is the one marked by a spike wall on the right side and a skeleton on the platform below. This room is the key junction for the mansion.
Use this point to make an honest check of your inventory. The safe assumption is that you do not have an Oak Stake anymore and must buy Laruba's 50-heart stake before descending to the boss and Ring chambers. Only skip the merchant if you intentionally bought an extra Oak Stake after collecting Dracula's Nail in Bodley and then protected that spare all the way here. Do not assume the route naturally leaves you carrying one.
If you need Laruba's stake, drop to the skeleton's lower platform, kill it so it cannot interfere with your jump, then use that platform to reach the nearby stairs. Follow the branch left across the short spike-gap platforms to the old man who sells Oak Stakes. Buy one and immediately backtrack to the spike-wall room. Do not spend hearts on anything else here, and do not descend toward the boss until the Oak Stake is already secured.
- You reached the room with the spike wall on the right and the skeleton below.
- You bought Laruba's Oak Stake unless you deliberately preserved a spare from after Bodley.
- You returned to the spike-wall junction with one usable Oak Stake ready for the Ring chamber.
Drop toward the Laurel giver and prepare for the one-way lower route
From the spike-wall junction, start descending through the lower branch. Keep an eye on the tall stone column in the background, because that landmark marks the correct area for the final boss approach. Continue down until moving blocks appear below and to the left. Jump left from those blocks to reach the cloaked man near the spike trap. He is the mansion's free Laurel source, and this is the right time to use him.
Talk to him before the boss attempt. He does not heal Simon, so if your health is low you still need to fight carefully, but he does give you the protection item that makes the next hazard much safer. This is also the moment to sort your subscreen: keep the Oak Stake in mind for the relic room after the boss, and be ready to switch to Dracula's Rib for the fight itself.
To cross the trap to the right, the dependable first-clear method is to activate a Laurel before touching the spike section and run through. There are moving platforms over the floor, but the spikes also shoot upward, so learning that rhythm on a blind attempt can cost far more health than the Laurel is worth. If you insist on saving Laurels, wait for the moving blocks, jump only when their height lines up cleanly, and never drift into the rising spike pattern.
- You spoke to the cloaked man before attempting the spike section.
- You crossed the spike-floor trap without wasting your Oak Stake.
- You reached the boss approach with Laurels still in mind for the trip back out through Joma Marsh later.
Defeat the Weeping Mask and collect the Magic Cross before leaving the room
Enter the room on the right and watch the Weeping Mask's pattern for a cycle before forcing attacks. The dangerous opening is the dripping fire from above. When the drops hit the floor, they burst outward into spreading shots. After that, the Mask lowers and begins moving in a circular path through the room. That lower circular phase is the cleaner attack window.
Use Dracula's Rib during the projectile phase and hold your ground while the spread reaches you. The Rib helps when Simon presents it in place, so shuffling forward carelessly defeats the point. When the Mask dips into a low circular pass, step in and whip it. If you won the Gold Knife in Brahm and still have hearts to spare, you can throw it during clear openings, but do not empty your heart stock in panic. The boss is safer when you alternate calm defense with a few clean hits than when you chase it around the chamber.
If you take a hit and lose position, reset the rhythm instead of trying to force damage immediately. Wait through the next fire-dropping sequence with the Rib, then resume attacking during the next low pass. When the Weeping Mask dies, it drops the Magic Cross. Walk onto that drop at once. Do not leave the room assuming the kill itself was enough. The Magic Cross must be physically collected, and you need it later to enter Dracula's Castle.
- You survived the fire-drop phase by using the Rib defensively rather than advancing into the spread.
- You damaged the Weeping Mask during its lower circular movement with the whip or carefully timed Gold Knife throws.
- You physically picked up the Magic Cross after the boss died.
Use the Oak Stake in the next chamber and verify the full final inventory
Go right into the next room after collecting the Cross. Jump onto the small pillar platform beside the glowing orb and make sure the Oak Stake is still the selected lower-row item. Throw it with Up and B. As in the earlier mansions, hitting the orb is only the trigger. A bag drops out, and Simon does not actually own the relic until he touches that bag.
Jump onto the drop to receive Dracula's Ring. This is the last of Dracula's five body parts for the standard route. Pause and inspect the inventory now, while you are still standing in the chamber and can correct a mistake immediately. You should have Dracula's Rib, Heart, Eyeball, Nail, and Ring, plus the Magic Cross. If any of those are missing, solve that now instead of walking all the way to the castle gate and discovering the problem there.
Do not try to force a simple retreat through the lower approach you used to reach the boss. That descent is not the proper way out after the Ring pickup. Once the Ring is secured, your exit plan changes to an upward climb just outside the boss room.
- You used exactly one Oak Stake on the orb in the Ring chamber.
- You touched the dropped bag and obtained Dracula's Ring.
- Your inventory now shows all five Dracula relics plus the Magic Cross.
Escape by the upper floating blocks, pass the spiders, and restock Laurels before leaving
Head left back into the boss room. The Weeping Mask respawns on the return trip, but you do not need to defeat it again because the Magic Cross remains yours once collected. Ignore the boss, leave to the left, and immediately use the floating blocks outside to climb upward as far as that stack will let you go. This is the correct exit route from the lower one-way section.
At the top of that rise, continue left into the narrow corridor with spiders. Keep moving and whip only what blocks your path, because stopping too long here just invites chip damage. When the route opens upward, keep climbing until you see stairs. Ignore the first staircase you encounter on this ascent and continue left until you find the later set of stairs. Take that later staircase down, then keep moving left through the remaining passages to work your way back toward the mansion's outer rooms and exit.
Before you leave Laruba for good, consider dropping back to the Laurel giver if the boss attempts or spike crossing cost you protection items. The next required travel is the return through Joma Marsh and then the long road east toward Doina and Castlevania. Leaving empty-handed is a needless risk when Laruba itself offers a free restock point.
- You ignored the respawned Weeping Mask and used the floating-block climb outside its room.
- You passed through the spider corridor, ignored the first staircase on the way up, and used the later staircase down.
- You left Laruba with the Magic Cross, Dracula's Ring, and enough Laurels to plan the return through Joma Marsh.
Before you move on
- You reached Laruba's lower boss branch with an Oak Stake secured from Laruba's merchant unless you intentionally preserved a spare after Bodley.
- You defeated the Weeping Mask, collected the Magic Cross, then used the Oak Stake in the next room to obtain Dracula's Ring.
- Your inventory shows Dracula's Rib, Heart, Eyeball, Nail, and Ring, plus the Magic Cross required for Dracula's Castle.
- You exited by the upper floating-block route and left with Laurels available for the return through Joma Marsh.
Travel through Doina and Yomi to Dracula's castle
Leave Laruba only after confirming every required relic and the Magic Cross, then make the full eastbound return through Joma, Devious Woods, Uta and Bodley's region to Doina. Use Doina as your last reliable church and Laurel stop, take the downward staircase in Dora Woods, pass straight through empty Yomi, clear the block barrier at the castle bridge, and open the hidden descent inside Castlevania.
Leave Laruba with the full requirement check done first
Before you walk out of Laruba, open the subscreen and confirm the full set of mandatory remains: Dracula's Rib, Heart, Eyeball, Nail and Ring. Also confirm that you already collected the Magic Cross after defeating the Weeping Mask. The manual states that Simon must find Dracula's five body parts and the Cross before entering Dracula's castle, and the late-game walkthrough sources agree that the Cross is part of the entry requirement, not an optional reward. If the Cross is missing, turn around now and go back through Laruba instead of testing the castle gate later.
Set Laurels as your selected lower-row usable item before leaving the mansion area, but keep track of your equipped upper-row relic as well. If you want the projectile shield from Dracula's Rib on the road, the Rib must be the equipped relic or special item in the upper row. Switching that slot to another body part or a crystal removes the shield until you switch back, while your selected Laurel remains ready for use with Up plus B. Leave with at least two Laurels if possible, because the eastbound retreat across Joma Marsh is long enough that hesitation can burn through one charge.
Exit Laruba to the right and commit to the return route east. Do not wander back into the boss wing or waste health fighting inside the mansion again. The next goal is not another relic room. It is safe resupply in Doina, and the fastest normal route reaches it by crossing Joma Marsh, then Devious Woods, then Uta, then the revealed lake route beside Bodley, and finally Wicked Ditch.
- Confirm Rib, Heart, Eyeball, Nail and Ring in inventory.
- Confirm the Magic Cross before leaving Laruba.
- Carry at least two Laurels if you can afford them.
- Set your direction east, toward Doina, not back deeper into Laruba.
Cross Joma Marsh and retrace Devious Woods and Uta
Use a Laurel as you enter the long poison stretch of Joma Marsh and keep moving right. This crossing is not a place to stop and trade hits with marsh enemies. If you brought three Laurels, the trip is forgiving. With only two, keep your pace steady and be ready to trigger the next one if the first expires before you reach dependable ground. The important recovery rule is simple: if a bad jump or enemy contact stalls you in the swamp, spend the extra Laurel instead of gambling on a near-empty life bar.
After the marsh, continue east through Devious Woods. Wait for the moving blocks to rise before you jump, because Simon's jumps are committed and you cannot steer a bad takeoff back onto the platform. The floating skulls and other airborne threats are most dangerous when they make you rush the launch point. If a platform cycle looks awkward, back away, let the enemy pattern reset, and take the next rise cleanly. This saves more health than trying to force a jump through clutter.
When you reenter Uta, stay on the return line to the right. You already used this hidden lake route to earn the Flame Whip earlier, so do not drift left toward the dead-end upgrade area again. Break any wall that still blocks your path with Holy Water or with the whip while Dracula's Nail is equipped, then keep moving right until the underground passage climbs back toward Bodley Lake. If you fall into the water or miss a platform, calm down, rebuild the setup, and repeat the jump rather than rushing the first ledge after respawning.
- Use Laurels to cross Joma instead of trying to save them for later.
- Wait for rising platforms in Devious Woods before jumping.
- Keep right through Uta on the return trip.
- Use Holy Water or the Nail-equipped whip if a wall still blocks the path.
Pass Bodley and stop deliberately in Doina
Once the secret lake passage lifts you back to the surface, continue east past Bodley Mansion. You do not need to reenter the mansion now unless you somehow failed to collect the Nail earlier. Keep going through Wicked Ditch, where fireball enemies and swooping fliers can chip away at your health on bad jumps, and press on until you reach Doina. This town is your last dependable combination of church and Laurel merchant before the castle run.
In Doina, heal at the church even if you think you can scrape through one more screen. This is the final reliable health reset before Dracula's castle. Then buy Laurels to restore your reserve. If you are short on hearts, step just outside town, farm nearby enemies, and return while it is still day so the shop and church stay available. Do not count on Yomi for help afterward, because the late-game route guides describe Yomi as an abandoned passage town without useful healing service.
Leave Doina only after you are satisfied with both health and supplies. Keep the Rib ready in the upper row for hostile outdoor screens if you like its projectile shield, then head east across the next bridge. This preparation matters more than squeezing out a few extra hearts, because the forest and graveyard ahead are easier if you start them calm, full, and stocked.
- Heal fully in Doina's church.
- Buy fresh Laurels in Doina.
- Farm outside town only if you need more hearts, then come right back.
- Leave Doina heading east across the bridge.
Take the downward staircase in Dora Woods and pass through Yomi
The bridge east of Doina is another fishman bridge. Mermen leap up and fire quickly, so keep moving and use Dracula's Rib if you want help against the fireballs. Avoid reckless edge jumps just to pass an enemy one second sooner. It is safer to keep your footing, let a fishman land where you can read it, and continue east into Dora Woods.
In Dora Woods, continue right until you reach the branch with the staircase leading downward. Take that staircase. This is the critical navigation check in the chapter. The upper route does not lead you forward to the castle; secondary guides describe it as a dead end that runs out in poisonous terrain. If you stay on the top path and find yourself pushing east without descending, stop and backtrack immediately to the stair screen.
After the stairs, keep going right into Yomi. Treat Yomi as a corridor, not a resupply point. The route sources describe it as essentially abandoned, with no useful church stop, so there is no reason to search every house when your real destination is the graveyard beyond. Walk straight through town and exit on the far right.
- Cross the bridge east of Doina without rushing the ledges.
- Take the downward staircase in Dora Woods.
- If you miss the stairs and stay on the upper path, turn back at once.
- Walk straight through Yomi instead of hunting for services there.
Cross the graveyard, break the barrier, and open Castlevania's descent
Beyond Yomi lies the final graveyard approach. Keep moving right over the tombstones and do not let birds, spirits, or mummies trick you into panic jumps. If two threats overlap on a narrow landing, clear one lane with your whip or a knife, then resume forward movement. The graveyard is dangerous mostly because it tries to make you lose rhythm just before the castle bridge. Preserve your footing first and your speed second.
At the screen before the final bridge, break the obstructing blocks with Holy Water or by whipping them while Dracula's Nail is equipped. If the way still seems sealed, do not assume the answer is more attacks. Recheck your inventory. The standard recovery is to return to Laruba if you somehow missed the Magic Cross, because the Cross is the late-game gate condition the manual and walkthroughs point to. Once the obstruction is properly cleared, cross the last bridge and enter Castlevania.
The first room of Castlevania is strangely empty. Move right through the entrance chamber until you reach the concealed obstruction, then use Holy Water or the Nail-equipped whip to break the false blocks hiding the stairway down. That hidden descent is the real entrance to the castle interior. Once you open it and climb down, stop there and prepare for the next chapter's castle descent and Dracula fight.
- Push right from Yomi through the graveyard without losing jump rhythm.
- Break the block barrier before the final bridge.
- If progress fails, go back for the Magic Cross instead of pounding on the gate.
- Enter Castlevania and break the hidden blocks to reveal the stairs down.
Before you move on
- You left Laruba with Dracula's Rib, Heart, Eyeball, Nail, Ring and the Magic Cross confirmed in inventory.
- You returned east through Joma Marsh, Devious Woods, Uta, the lake route, Bodley's region and Wicked Ditch to Doina.
- You healed and restocked Laurels in Doina, crossed the east bridge, and took the downward staircase in Dora Woods to reach Yomi.
- You passed through Yomi, crossed the graveyard, cleared the block barrier before the castle bridge, entered Castlevania, and opened the hidden staircase down into the castle interior.
References for this chapter
Defeat Dracula and understand the three endings
This chapter finishes the original North American Nintendo Entertainment System cartridge version of Castlevania II: Simon's Quest. It covers the last interior route through Castlevania, the automatic altar sequence, reliable ways to defeat Dracula with Sacred Flame, Gold Knife, or only the whip, and the three ending ranges shown by the game’s displayed day counter.
Follow the empty castle to the hidden descent
After you break the bridge barrier outside and enter Castlevania, expect a quiet final area rather than a long combat gauntlet. This stretch is empty of enemies, so slow down and read the room shapes carefully instead of treating it like a rush to the finish. Walk right through the long opening hall until the path ends at a large lattice of stone blocks in the right wall. You should also see a staircase below this obstruction.
Use Holy Water on the blocking stones, or equip Dracula's Nail and break them with your whip if you want to save item throws. Once the opening is clear, drop through and go down the nearby stairs. Keep following the only descending route. If you break a section and then realize you took an awkward jump, nothing here is costly except time, so simply climb back to the last clear staircase and try again from a steadier position.
Before you go much farther, make sure the lower inventory row already has the weapon you actually want for Dracula. Sacred Flame is the easiest fast-kill choice, while Gold Knife is the safest backup if he starts moving freely. Do not wait until the final room to decide, because the best opening happens the moment control returns after the altar sequence.
- Break the first stone barrier with Holy Water or the Nail-whip combination.
- Follow the downward path instead of searching for a hidden side route.
- Enter the deeper castle with Sacred Flame or Gold Knife already selected.
Use the short stairs and make the left wall hop
The important landmark is the room with two stairways near the end of the descent. One staircase climbs higher, and one is the shorter route you want. Take the shorter staircase. When you reach its top ledge, face left and study the low wall below you. Your goal is not to fall straight down beside it. You need to jump left over that wall and land in the passage beyond.
This jump matters because Simon commits to his arc the instant he leaves the ground. Plant yourself at the ledge edge, then jump cleanly left. Do not try to correct halfway through the air. If you miss and drop back into the wrong space, retrace your steps to the short staircase and try again from a calmer takeoff. There are still no enemies here, so accuracy is more important than speed.
After the wall hop, the route becomes simple again. Move right, cross the little stair-shaped rise in the floor, then take the next staircase downward to the bottom level. From there, continue right through the final corridor and into the boss chamber. If you accidentally wandered up the taller staircase instead, back out and return to the short one rather than improvising around the room.
- At the two-stair landmark, choose the shorter staircase.
- Jump left over the low wall from a stable edge position.
- After landing, keep right and descend the next staircase to the bottom corridor.
Let the altar ritual happen on its own
When you enter Dracula's chamber, do not search your menu for a special command. Simon automatically places the five body parts on the altar in the center of the room. You do not equip each relic one by one, and you do not trigger a separate ritual button press. If you were able to enter the bridge barrier earlier, then the necessary collection work was already done: Dracula's Rib, Heart, Eyeball, Nail, Ring, and the Magic Cross were in place.
The animation is brief, and it is your cue to be ready rather than your signal to pause. As soon as control returns, attack the point where Dracula forms. This opening is why preselecting your sub-weapon matters so much. If you open the subscreen now, you waste the best chance to end the fight before his full pattern develops.
Do one last mental check as the sequence plays: enough hearts for repeated item use, the intended sub-weapon selected, and enough room around Simon that you are not crowding yourself into a bad jump. With that done, start attacking immediately.
- Do not look for a manual relic-use command.
- Remember that the Ring is one of the five body parts, not a separate extra trigger.
- Begin offense as soon as control returns after Dracula forms.
Win quickly with Sacred Flame, or control the fight with Gold Knife
Sacred Flame is the simplest way to finish the battle. Stand close to Dracula's formation point and drop the flame at his feet the moment you can act. The lingering fire can hit him repeatedly before he establishes his circular movement. If you have enough hearts, keep placing flames into the same space and add whip strikes whenever you can do so without stepping into him. The goal is to keep pressure on the spawn point, not to chase him around the room.
If your timing is slightly late and Dracula slips into motion, stop forcing the same trap as if it were guaranteed forever. Sacred Flame is strongest at the start, but once he is moving, reset your spacing instead of panicking. His pattern now becomes the real fight: he circles around the room, leaves orbiting images that still hurt on contact, and throws large fang-like projectiles that can catch a reckless jump.
Gold Knife is the better answer once the battle has become mobile. Hold a side of the room or a near-corner position so you do not have to read every angle at once. When Dracula passes through a clean lane, jump-throw the Gold Knife into him, then be ready to follow with a whip hit if he pauses within reach. Measured throws are better than frantic tossing. If a projectile cluster crowds you, make one deliberate repositioning jump, let the pattern clear, and reestablish your lane instead of running back and forth across the whole chamber.
- Use Sacred Flame immediately at Dracula's formation point if that is your chosen plan.
- If he breaks free, stop trying to force permanent stun and switch to spacing.
- With Gold Knife, fight from a room edge and jump-throw on clear lines.
Use the whip fallback and recover correctly after a death
If you skipped both premium options or run out of hearts, the fight is still winnable with the whip alone. Stay patient. Wait for Dracula to pass through a reachable arc, then jump only after you know exactly where you want to land. Take single safe hits instead of trading blows under him. Simon's committed jump is the main danger here, because a desperate leap into orbiting images often causes more damage than simply waiting one extra cycle.
After taking a hit, resist the urge to sprint blindly across the room. Watch Dracula's current side, let the nearest image and projectile line pass, then reclaim a safe edge before resuming offense. The boss becomes much more manageable once you stop treating every opening like your last chance. Pressure is good, but rhythm wins the fight.
If you die, continue and try again with a cleaner setup. On the NES version, continuing keeps your level but costs your current hearts and experience, so do not charge straight back into the chamber empty. Rebuild enough hearts to support Sacred Flame or Gold Knife if that was your plan, reselect the sub-weapon you want, and make the same strong opening count on the next attempt.
- With only the whip, take safe single hits instead of greedy trades.
- After damage, reset to a safe side before attacking again.
- If you continue, rebuild hearts first because your current hearts and experience were lost.
Read the ending by the displayed day counter
Once Dracula falls, the game moves into one of three ending scenes. For this guide, use the player-facing day counter on the subscreen as the reliable benchmark. A finish on day 0 through day 7 gives the fastest ending range. A finish on day 8 through day 14 gives the middle ending range. A finish on day 15 or later gives the slowest ending range.
The three scenes differ in tone and in what they suggest about Simon's condition after the final battle. The fastest range shows Simon surviving the quest and adds a final graveyard sting after the main scene. The middle range presents victory over Dracula but frames Simon as unable to survive his wounds. The slowest range gives the bleakest aftermath and the most subdued presentation.
This walkthrough is built to secure a first clear, not to promise one specific ending rank. If you want a faster result on a later run, trim the clearly optional detours such as the Diamond and Silk Bag, avoid unnecessary wandering when shops are closed, pause while checking notes, and do optional heart or experience farming in safer places only when you actually need it. For a final troubleshooting check, use this short list before blaming the last battle: if the blocks at the bridge never opened earlier, you were still missing the Magic Cross or one of Dracula's five parts; if you reached Dracula but your damage felt poor, confirm you entered with enough hearts and with Sacred Flame or Gold Knife selected rather than merely owned; if you cannot find the castle route again after a failed attempt, remember the sequence is first barrier, descending stairs, two-stair room, short stairs, leftward wall hop, bottom corridor, boss chamber.
- Day 0 to 7 gives the fastest ending range.
- Day 8 to 14 gives the middle ending range.
- Day 15 or more gives the slowest ending range.
Before you move on
- You can navigate Castlevania from the first block barrier to the final chamber without guessing, including the short-stair landmark and leftward wall hop.
- You understand that Simon automatically performs the altar ritual with the five relics and that there is no manual relic-use sequence.
- You have a practical Dracula plan with Sacred Flame, a Gold Knife recovery pattern, and a slower whip-only fallback.
- You know the ending brackets are based on the displayed day counter: 0 to 7, 8 to 14, and 15 or more.
- You know how to recover from failure on the NES version by continuing, rebuilding hearts, reselecting your sub-weapon, and making another attempt.
References for this chapter
Finishing up
You should finish with all five Dracula relics in inventory: Rib, Heart, Eyeball, Nail, and Ring.
You should also have the Magic Cross from Laruba. If the bridge to Castlevania will not open, missing the Cross is the first thing to check.
Your final crystal should be Red Crystal. The standard route trades White to Blue in Aljiba and Blue to Red in Aldra before the Deborah Cliff and Bodley Lake triggers.
If you get stuck before a mansion or lake, confirm that the correct upper-row item is selected: Blue at Yuba Lake, Red at Deborah Cliff, Red again west of Bodley, Heart selected only for the Brahm ferry branch.
If you used a stake on every relic orb and picked up each dropped bag, your relic count should match the mansions you cleared. Do not mistake breaking the orb for collecting the item.
After Dracula falls, compare your displayed day counter with the ending ranges: 0 to 7, 8 to 14, or 15 and above. Use that for your practical result instead of old real-time myths.
Choose your next gameScreenshots & video
Game imagery for reference. Follow the written chapters above for the route and strategies.
Sources & references
Our original guide draws on the references below. Check the edition at the top of this page before following controls or unlock requirements.
- Castlevania II Simon's Quest
- Nintendo Classic Mini NES manuals index
- Castlevania II: Simon's Quest/Walkthrough — StrategyWiki
- Castlevania II: Simon's Quest/Gameplay — StrategyWiki
- Controls - Castlevania II: Simon's Quest Walkthrough & Guide - GameFAQs
- Endings - Castlevania II: Simon's Quest Walkthrough
- From Jova to Berkeley Mansion - Castlevania II: Simon's Quest Walkthrough
- Castlevania II: Simon’s Quest Walkthrough (NES) – RetroMaggedon Gaming
- Weapons - Castlevania II: Simon's Quest Walkthrough & Guide - GameFAQs
- Berkeley Mansion - Castlevania II: Simon's Quest Walkthrough
- Castlevania II: Simon's Quest - Guide and Walkthrough - NES - By CMoriarty - GameFAQs
- Castlevania II: Simon's Quest/Berkeley Mansion — StrategyWiki
- Berkeley Mansion to Aljiba - Castlevania II: Simon's Quest Walkthrough
- RPGClassics.com - Castlevania II: Simon's Quest
- Aljiba to Rover Mansion - Castlevania II: Simon's Quest Walkthrough
- Castlevania II: Simon's Quest - Guide and Walkthrough - NES - By KKalata - GameFAQs
- Rover Mansion - Castlevania II: Simon's Quest Walkthrough
- Rover Mansion – Dracula's Heart - Castlevania II: Simon's Quest Walkthrough & Guide - GameFAQs
- Castlevania II Simon's Quest - Castle 2 Rover Mansion Map
- Rover Mansion to Brahm's Mansion - Castlevania II: Simon's Quest Walkthrough
- Crude ASCII Maps: Castlevania II — Simon's Quest
- Brahm Mansion – Dracula's Eyeball - Castlevania II: Simon's Quest Walkthrough & Guide - GameFAQs
- Castlevania II Simon's Quest - Castle 3 Brahm's Mansion Map
- Thonky: Brahm's Mansion to Bodley Mansion
- Bodley Mansion – Dracula's Nail - Castlevania II: Simon's Quest Walkthrough & Guide - GameFAQs
- Castlevania II: Simon's Quest Town Of Alba
- StrategyWiki: Castlevania II: Simon's Quest/Bodley Mansion
- Bodley Mansion - Castlevania II: Simon's Quest Walkthrough
- Castlevania II: Simon's Quest/Laruba Mansion — StrategyWiki
- Castlevania II: Simon's Quest/Dracula's Castle — StrategyWiki
- Thonky: Bodley Mansion to Laruba Mansion
- Laruba Mansion - Castlevania II: Simon's Quest Walkthrough
- Laruba Mansion – Dracula's Ring - Castlevania II: Simon's Quest Walkthrough & Guide - GameFAQs
- To Castlevania - Castlevania II: Simon's Quest Walkthrough
- Dracula's Castle - Castlevania II: Simon's Quest Walkthrough & Guide - GameFAQs
About the game & collecting notes
- Platform
- Nintendo Entertainment System
This walkthrough is built for the original North American Nintendo Entertainment System release of Castlevania II: Simon's Quest. It gives you a full first-clear route from Jova to Dracula's castle, including the five mansion relics, the required Magic Cross, crystal puzzles, ferry routing, optional upgrades, recovery advice after mistakes, and a separate explanation of the three time-based endings.
Darryl Polo
Darryl Polo loves tinkering with emulation and revisiting retro games. He enjoys exploring how old favorites play on different setups and sharing what he learns along the way. At Joking Joystick, he writes about the games, hardware, and small discoveries that keep the hobby fun.
Our editorial standardsFound a step that needs another look? Help us improve this guide.