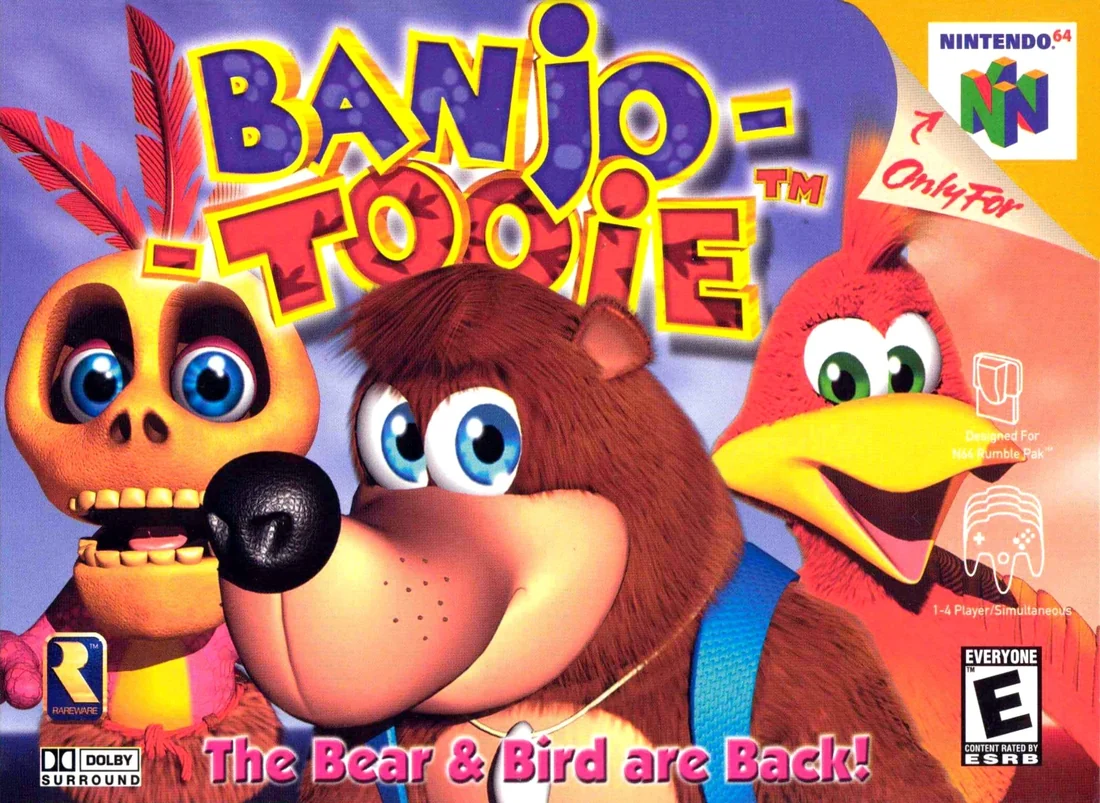
Banjo-Tooie (Nintendo 64, USA) — Complete Campaign Walkthrough
Step-by-step campaign walkthrough for the original Nintendo 64 (USA) release of Banjo-Tooie, covering the opening, all eight regular worlds in their verified progression order, their required revisits, the 55-Jiggy Cauldron Keep route, the Tower of Tragedy, the separate 70-Jiggy final challenge and the HAG 1 ending. Optional collectible cleanup is clearly separated from the main campaign.

Find a copy
Banjo-Tooie Nintendo 64
We may earn a commission if you buy through these links, at no extra cost to you. As an Amazon Associate I earn from qualifying purchases.
Opens retailer search results. Check the model, edition, seller, availability and current price before buying.
Before you begin
This guide follows the original Nintendo 64 (USA) campaign from the ruined Spiral Mountain opening to the HAG 1 ending.
Use the chapters in order, but expect deliberate revisits between worlds. Banjo-Tooie often makes a route available only after a move, transformation, Mumbo spell or train connection is obtained elsewhere.
The required regular-world sequence is Mayahem Temple, Glitter Gulch Mine, Witchyworld, Jolly Roger's Lagoon, Terrydactyland, Grunty Industries, Hailfire Peaks and Cloud Cuckooland, followed by the Cauldron Keep finale. Hailfire Peaks can be entered briefly earlier for a limited hub-related errand, but its main world progression follows Grunty Industries.
Master Jiggywiggy's 55-Jiggy challenge opens Cauldron Keep. After the fortress entrance, final Klungo battle and Tower of Tragedy, the separate 70-Jiggy challenge removes the barrier to HAG 1.
Optional Jinjos, Cheato Pages, notes, Honeycombs and remaining Jiggies are marked separately so they do not obscure the required campaign route.
Set yourself up for the run
Use a well-centred, responsive N64 controller.
Check your controller stick deadzone and re-centre before long sections; platforming precision matters.
Enable Rumble Pak support if available (the N64 version supports it) and test saves.
Back up long play sessions with multiple save slots to recover from mistakes during boss puzzles.
Familiarize yourself with Banjo and Kazooie’s move list early (jump variants, Talon Trot, Talon Torpedo, Beak Barge, etc.).
Many later puzzles require combined moves or switching positions between Banjo and Kazooie.
Keep a running local checklist: Jiggies obtained, worlds unlocked, bosses defeated, new moves learned, and moves still missing.
Banjo-Tooie’s worlds are large; note which areas you can now reach after each new ability.
Have a reference for fast-lookups (the official instruction booklet/manual for the USA release is a compact, authoritative reference).
Use an external guide or the checklist only when stuck—this walkthrough gives practical next steps.
Expect heavy revisits: Banjo-Tooie intentionally forces returning with new abilities.
Do important revisits immediately once you acquire a world-changing ability to avoid missing progress markers.
Adjust session length.
Some later worlds are long and puzzle-dense—plan for at least 60–90 minute blocks when attempting major boss or multi-jiggy objectives.
If aiming for full completion, decide up front whether you will pursue optional minibosses, Jinjos and extra collectibles as you go or after finishing the main story; this affects your route and backtracking.
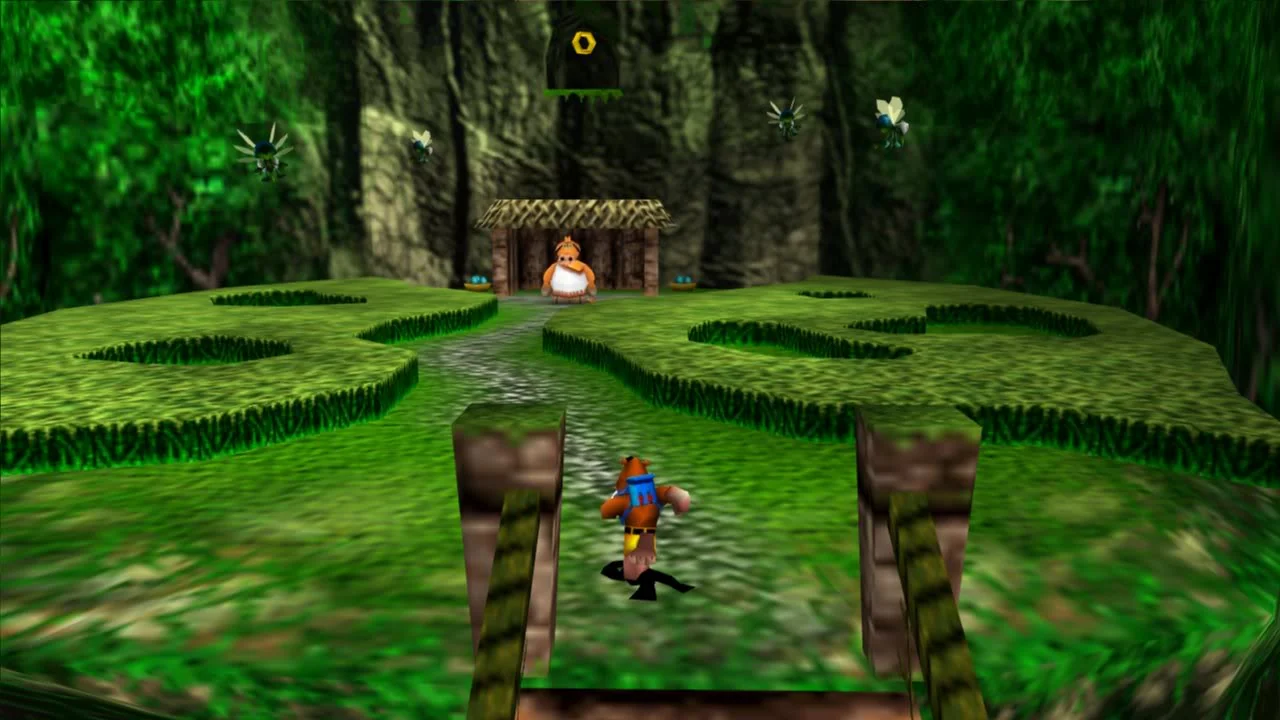
Opening and Isle O'Hags — Spiral Mountain, King Jingaling and the first Jiggywiggy challenge
Complete the original Nintendo 64 opening, defeat the first Klungo encounter, enter Isle O'Hags, visit King Jingaling and use the newly opened passage through Bottles' House. Then reach Wooded Hollow, complete Master Jiggywiggy's first puzzle and open Mayahem Temple. This chapter establishes the early save routine and explains how Jiggy thresholds control access to later worlds.
1. Cross the damaged opening area and defeat Klungo
After the opening scenes, regain control in the damaged version of Spiral Mountain. Follow the visible route toward the remains of Gruntilda's Lair. This section is a short introduction to the movement and attack controls rather than a full exploration area, so do not spend time searching every ledge for late-game collectibles.
Continue through the ruined lair and enter the Digger Tunnel. The first Klungo encounter takes place here. Keep Banjo moving around the arena instead of standing directly in front of Klungo. Avoid his attack, wait until he finishes an action or exposes himself, then close in for a hit before moving away again. If you take damage, use nearby health items and continue circling rather than trading repeated blows.
Once Klungo is defeated, continue through the tunnel and enter Isle O'Hags. The opening boss encounter is complete when you arrive in the Jinjo Village area. Spiral Mountain remains available for later revisits, but its useful routes are not the next campaign objective.
- Reach the damaged Spiral Mountain area.
- Pass through the ruined lair and Digger Tunnel.
- Defeat the first Klungo encounter.
- Enter Isle O'Hags and arrive in Jinjo Village.
2. Establish a reliable N64 save routine
Banjo-Tooie on Nintendo 64 provides three save slots, represented by the three file pictures on the title screen. Use one as the main campaign file and reserve another as a backup. The third can remain unused or serve as a separate experiment file for optional exploration.
To save during play, press Start and select Save and Quit. Confirm the command and let the game return to the title screen. A normal pause does not write progress to the cartridge, and reaching a checkpoint or hub area is not a substitute for saving. After saving, check the title screen and confirm that the expected file picture and progress are present before switching off the N64.
A practical early routine is to save once after entering Isle O'Hags, again after receiving King Jingaling's Jiggy, and again after Mayahem Temple opens. Keep the backup slot at an earlier safe state until you are satisfied that the newer campaign file is correct. This is especially useful during a long N64 session because the game does not provide modern suspend or autosave protection.
If you die in the Digger Tunnel or during an early platforming attempt, allow the game to return you through its normal death and restart sequence. Re-enter the route, recover health where supplies are available and try the obstacle again. If you want to abandon an attempt while preserving the last confirmed state, use Save and Quit rather than deliberately taking damage.
- Use the in-game Save and Quit command.
- Maintain a main file and a backup file among the three available slots.
- Verify the saved file from the title screen.
- Do not mistake a pause or checkpoint for a cartridge save.
3. Visit King Jingaling in Jinjo Village
From the Isle O'Hags arrival point, follow the machine tracks forward through Jinjo Village. The route passes the Jinjo houses and activates the first Jamjars silo shortcut. You may collect obvious health items, notes or a directly reachable Jinjo, but none of those optional pickups is required before visiting the king.
Follow the brown path uphill to the gold palace. Enter through the palace entrance and allow the conversation with King Jingaling to finish. He explains that the digging machine scattered the Jinjos, then gives Banjo and Kazooie the first Jiggy of the campaign.
After the conversation, the game opens a passage through Bottles' House. Leave the palace and follow the route back toward the village. Enter Bottles' House, move through the interior and use the newly available passage at the rear to reach Wooded Hollow. Do not search for an alternate route around the blocked hub paths; the house is the intended connection at this point.
The early hub contains collectibles that appear reachable but are actually tied to later moves, transformations or world connections. If a ledge, barrier or deep route cannot be crossed with the starting abilities, note its landmark and continue. The opening Jiggy is the required progression reward; Jinjo rescues and other hub items are optional for this chapter.
- Follow the machine tracks through Jinjo Village.
- Reach King Jingaling's palace.
- Receive the opening Jiggy.
- Enter Bottles' House through the opened route.
- Use the passage at the rear of the house to reach Wooded Hollow.
4. Reach Jiggywiggy's Temple
When you emerge in Wooded Hollow, continue across the grass toward the large temple. The first Jamjars shortcut silo is connected to the second silo in this area, so activate the visible silo if you want a faster route between the village and temple during later visits.
Approach the temple entrance and speak to the doorman. Because King Jingaling gave you one Jiggy, the first entry requirement is satisfied. Enter the temple and move to the golden puzzle panel beside Master Jiggywiggy's Crystal Jiggy.
Press B at the panel to begin the first challenge. The puzzle uses a Banjo-shaped hand controlled with the Control Stick. Move the hand over a piece and press A to pick it up, then press A again at the matching position. The first challenge contains five pieces and gives you 100 seconds. Place distinctive or outer pieces first, then fill the remaining spaces. If you pick up the wrong piece, use the return command described on-screen and continue; there is no reason to restart immediately.
When all five pieces are placed, the challenge ends successfully. Master Jiggywiggy's Crystal Jiggy projects a beam toward the nearby world entrance outside the temple. Exit the temple only after the completion sequence has finished.
- Enter Jiggywiggy's Temple with one Jiggy.
- Start the first puzzle at the golden panel.
- Complete the five-piece puzzle within the time limit.
- Wait for the Crystal Jiggy beam sequence to finish.
5. Open Mayahem Temple and understand Jiggy thresholds
Leave Jiggywiggy's Temple and descend the outside staircase. Turn left across the grass, climb the next set of stairs and enter the large doorway that has opened. This is Mayahem Temple, the first regular world and the next required campaign destination.
The Jiggywiggy system uses total Jiggy counts as qualification thresholds. The first challenge requires one Jiggy, which is supplied by King Jingaling. The second challenge requires four Jiggies. Jiggies are not spent when a challenge opens a world; your total remains in your collection. When a later temple door is closed, check the total shown in the pause-menu progress display and return to Jiggywiggy's Temple after earning enough additional Jiggies.
Do not attempt to finish every early hub reward before entering Mayahem Temple. Banjo-Tooie deliberately places rewards behind moves, transformations, solo-character abilities and connections between worlds. The correct early order is to open Mayahem Temple, learn its first useful abilities and return later when a blocked landmark visibly matches a newly acquired move.
Before entering the world, make a final save with Mayahem Temple open. If the first world becomes difficult, leave through its entrance, refill in Isle O'Hags, save again and re-enter. The opening Jiggywiggy gate remains open on that save file.
- Confirm that Mayahem Temple's doorway is open.
- Enter Mayahem Temple as the next main objective.
- Remember that one Jiggy opens the first challenge and four Jiggies are needed for the next challenge.
- Save after opening the world.
- Leave later hub obstacles for ability-based revisits.
Before you move on
- The first Klungo encounter in the Digger Tunnel is complete.
- Isle O'Hags and Jinjo Village are accessible.
- King Jingaling has been visited and the first Jiggy is included in the total.
- The passage through Bottles' House is open.
- Wooded Hollow and Jiggywiggy's Temple are accessible.
- The five-piece first Jiggywiggy challenge has been completed.
- The Mayahem Temple entrance is open.
- A confirmed Save and Quit has been made after opening Mayahem Temple, with a backup file preserved.
- The next Jiggywiggy threshold is understood: four total Jiggies are required for the second challenge.
Early hub routing — Mayahem Temple, Glitter Gulch Mine and the first move chain
Use this chapter to establish the first move chain without trying to finish Mayahem Temple. Learn Egg Aim, Breegull Blaster and Grip Grab, collect the early Jiggies needed for the Plateau, then enter Glitter Gulch Mine and learn Bill Drill. Return to Mayahem Temple only to free Dilberta and reunite her with Bullion Bill. Chapter 03 continues the mine route with Bill Drill already learned; Chapter 08 later returns to Mayahem Temple for the Columns Vault and the remaining completion sweep.
Save before starting the first backtracking route
Make a separate save from the Nintendo 64 pause menu before entering Mayahem Temple. Save again after each major Jamjars lesson, after completing a Jiggywiggy challenge and after the Dilberta event. Keep two save files when possible, especially before attempting unfamiliar platforming or a Jiggywiggy puzzle. If an attempt goes badly, use a nearby warp pad or return to the world entrance to recover health and ammunition rather than repeatedly retrying while damaged.
Banjo-Tooie is built around revisiting earlier areas. Do not treat an unreachable ledge, boulder or transformation pad as a failed route. Record the landmark and move on. Later moves open shortcuts and return paths that are intentionally unavailable during this first pass.
- A stable save exists before entering Mayahem Temple.
- The Mayahem Temple warp pad is activated as soon as it is reached.
- Blocked routes are marked for later instead of being forced with risky jumps.
Learn Egg Aim and begin Mayahem Temple
From Wooded Hollow, enter Mayahem Temple and follow the opening path toward Jamjars. Learn Egg Aim for 25 musical notes. Egg Aim adds a crosshair when you use the game's first-person egg-aiming mode, allowing accurate shots at distant switches, statues and enemies. Use the controls shown by the N64 game rather than relying on control layouts from later ports.
Continue toward Bovina's field. The flies attacking Bovina are an early practical use for accurate egg shots. Clear them and collect the reward if you can do so safely. If you run short of eggs, use the nearby refill nests before continuing. This objective is useful early progress, but it is not necessary to search every side path in Mayahem Temple now.
Mark the entrances to Targitzan's Temple, Jade Snake Grove, the Prison Compound and any boulder-blocked route. These landmarks form the return route for later moves and transformations.
- Egg Aim has been learned for 25 notes.
- Bovina's field has been reached and its fly objective is complete or marked for a return.
- The major Mayahem landmarks are familiar.
Learn Breegull Blaster and enter Targitzan's Temple
Collect notes on the temple routes until you can pay Jamjars 30 notes for Breegull Blaster. The hatch is reached from the Mayahem Temple routes near Targitzan's Temple. Breegull Blaster is the technique that lets Banjo and Kazooie enter the game's designated first-person sections, with Kazooie functioning as the weapon. Egg Aim improves accuracy inside those areas; the two moves serve different purposes.
Enter Targitzan's Temple after learning Breegull Blaster. Search its side rooms and upper passages for the green Targitzan statues. The temple uses first-person shooting, narrow passages and targets at different heights, so refill eggs whenever a nest is available. You do not need to fight every enemy if a safe route around it is open.
Collect the accessible statues and take the first chamber reward. Leave difficult or ability-gated objectives for the later Mayahem sweep. The goal here is to learn how the temple works and secure enough early Jiggies for the hub route, not to complete the entire world.
- Breegull Blaster has been learned for 30 notes.
- Targitzan's Temple can be entered and navigated in its first-person sections.
- The accessible statue route and early chamber reward are complete or recorded.
Learn Grip Grab and open the Plateau
Enter Jade Snake Grove and locate Jamjars near the grove entrance. Pay 35 notes to learn Grip Grab. Banjo can now catch suitable ledges, move sideways while hanging and climb up from a secure position. Practice on the short ledges in the grove before attempting the longer hub crossing. If you miss, return to the lower path and use a shorter jump rather than trying to leap from an awkward angle.
Grip Grab is the key movement upgrade for this chapter. It opens the crossing from Wooded Hollow toward the Plateau and also reaches ledges in Mayahem Temple and later worlds. It is not the same as Talon Torpedo, which is learned much later in Jolly Roger's Lagoon. Talon Trot, Beak Barge and the standard Beak Buster are already available and should be used where appropriate.
Collect enough accessible Jiggies to reach four in total, then return to Jiggywiggy's Temple. The temple displays the current requirement on its board. Complete the four-Jiggy challenge and use the newly opened route from Wooded Hollow to reach the Plateau. Activate the Plateau warp pad before continuing.
- Grip Grab has been learned for 35 notes.
- The ledge-grab, sideways movement and climb actions are reliable.
- At least four Jiggies are in the total.
- The four-Jiggy Jiggywiggy challenge is complete.
- The Plateau is accessible and its warp pad is active.
Prepare the Plateau and enter Glitter Gulch Mine
The Plateau is a staging area for the next part of the route. Locate the entrances to Glitter Gulch Mine and Witchyworld, the warp pad and the nearby Jamjars hatch. If you have 45 notes, learn Fire Eggs on the Plateau. Fire Eggs are useful for later switches and optional objectives, but they are not the reason to delay entering Glitter Gulch Mine if you do not yet have enough notes.
Enter Glitter Gulch Mine and activate its warp pad immediately. Explore the entrance, river and raised ore paths until you can identify Bullion Bill's hut, Wumba's Wigwam and Jamjars's hatch. Do not attempt to clear every shaft. The mine contains several routes that only become practical after additional moves, transformations or cross-world events.
Follow the river downstream and climb the raised structure near the water to reach Jamjars. Learn Bill Drill for 85 notes. This move extends the ordinary ground-pound attack and breaks the large round boulders found in Glitter Gulch Mine and earlier areas.
- Fire Eggs have been learned for 45 notes if available.
- Glitter Gulch Mine has been entered and its warp pad activated.
- Bullion Bill's hut, Wumba's Wigwam and the Bill Drill hatch have been located.
- Bill Drill is available or the required 85 notes are being collected.
Use Bill Drill to free Dilberta and set up the next chapter
Return to Mayahem Temple after learning Bill Drill. Go to the Prison Compound and speak to the Stony who provides the current save's switch clue. The sun, moon and star sequence is not safely transferable from another playthrough, so use the clue from this game. Banjo and Kazooie must be together when opening the prison route; do not attempt to solve this section while transformed.
Enter Dilberta's cell and use Bill Drill on the large boulder blocking the tunnel. Follow Dilberta through the opened passage into Glitter Gulch Mine. Do not leave through the ordinary Mayahem entrance if you want the reunion event to resolve correctly. Continue through the tunnel to Bullion Bill's hut and speak with him. Dilberta appears during the conversation, and Bill awards the connected Jiggy after the reunion.
Bill Drill also exposes optional boulder routes in Mayahem Temple, the Plateau and Glitter Gulch Mine. Mark them for later rather than turning this chapter into a full cleanup. The immediate campaign goal is to reach eight Jiggies, return to Jiggywiggy's Temple and complete the challenge that opens Witchyworld. Chapter 03 begins by continuing the Glitter Gulch Mine route with Bill Drill already learned. Chapter 08 later returns to Mayahem Temple for the Columns Vault and the remaining delayed objectives.
- The Stony's current save-specific prison clue has been obtained.
- Dilberta's prison boulder has been destroyed with Bill Drill.
- Dilberta has been followed through the tunnel into Glitter Gulch Mine.
- Bullion Bill has been spoken to after the reunion and has awarded the Jiggy.
- The next progression target is eight Jiggies and the Jiggywiggy challenge for Witchyworld.
Before you move on
- Mayahem Temple has been entered and its warp pad activated.
- Egg Aim, Breegull Blaster and Grip Grab have been learned for 25, 30 and 35 notes.
- At least four Jiggies have been collected and the four-Jiggy challenge has opened the Plateau.
- The Plateau is accessible, and Fire Eggs have been learned for 45 notes if available.
- Glitter Gulch Mine has been entered and its warp pad activated.
- Bill Drill has been learned for 85 notes.
- The current save's Stony clue was used to open Dilberta's prison.
- Dilberta's boulder has been destroyed and she has been followed through the tunnel.
- Bullion Bill has awarded the connected Jiggy.
- The player understands that Chapter 03 continues Glitter Gulch Mine, while Chapter 08 later handles the Mayahem Temple Columns Vault and delayed cleanup.
- The immediate next campaign gate is eight Jiggies and the Jiggywiggy challenge that opens Witchyworld.
References for this chapter
Glitter Gulch Mine — mining caverns, platforming and the first boss
Glitter Gulch Mine is the second regular world in the original Nintendo 64 USA release of Banjo-Tooie. Enter it from the Plateau well after completing Jiggywiggy’s second challenge. Bill Drill was learned during Chapter 02, so this chapter begins with the move already available. The mine’s practical first-visit route teaches Beak Bayonet, opens the Generator Cave and Flooded Caves, processes the Jiggy Boulder, restores Chuffy and ends with the Old King Coal fight. Several rewards require later abilities, so do not attempt to force a full collection sweep before moving on.
Enter the mine and establish safe landmarks
Return to Wooded Hollow and use Jiggywiggy’s Temple once you have at least four Jiggies. Complete the second challenge to open the Plateau. From Wooded Hollow, follow the Grip Grab route into the upper Plateau and drop through the well marked Glitter Gulch Mine.
Activate the entrance Warp Pad immediately. Use the mine entrance, central river, Prospector’s Hut, Fuel Depot, Crushing Shed, Train Station, Mumbo’s Skull and Wumba’s Wigwam as your main orientation points. If a side passage becomes confusing, return to the central cavern and approach it again from a known landmark.
Bill Drill is already available from Chapter 02. Use it on the large boulders around the Prospector’s Hut, Train Station, Mine Entrance 2 and the passages toward the Gloomy Caverns. Do not spend time looking for another Bill Drill lesson here. The move breaks the mine’s circular rocks and exposes shortcuts, Jinjos, notes and routes to later objectives.
- Have at least four Jiggies and complete Jiggywiggy’s second challenge.
- Enter Glitter Gulch Mine through the Plateau well.
- Activate the entrance Warp Pad.
- Use the already-learned Bill Drill to clear the first mine boulders.
Reach the mine’s early rewards
Near the mine entrance, inspect the available crates and nearby paths, but do not confuse the Springy Step Shoes with a move you can use immediately. Their later Glitter Gulch Mine Jiggy requires the Springy Step Shoes lesson from Terrydactyland.
Follow the river and mine tracks toward the waterfall area. The Waterfall Cavern route contains an accessible Jiggy on a ledge. If the jump is awkward, use the surrounding platforms and the cavern walls to line up a controlled jump rather than trying to reach it from the river below.
Use Mine Entrance 1 to reach the Flooded Caves. Enter the water, follow the connected passage through the maze and watch the air meter continuously. The route is commonly described as left, right, then left at the major forks. Avoid exploring side pockets until you have identified the exit path. If your air is low, turn around early; the reward can be attempted again without changing the room.
- Collect the accessible Waterfall Cavern Jiggy.
- Enter the Flooded Caves through Mine Entrance 1.
- Follow the main underwater route while monitoring air.
- Leave and retry if the air meter becomes unsafe.
Learn Beak Bayonet and defuse the TNT
Go to the Ordnance Shed near the Fuel Depot. Jamjars teaches Beak Bayonet there for 95 musical notes. The move is performed in Breegull Blaster first-person mode by pressing B. It does not consume eggs, making it useful for this challenge.
Enter the TNT storage area and defuse all 15 sticks before the 200-second timer expires. Use Beak Bayonet on each explosive. Do not fire eggs at the TNT: egg shots detonate the sticks and waste the attempt. Move in a deliberate loop through the rooms, upper walkways and side passages instead of repeatedly returning to the entrance.
If the timer expires, leave the shed, refill health and eggs if needed, then try again. The route is repeatable. Once every TNT stick has been safely defused, return to the reward location and collect the Ordnance Shed Jiggy.
- Learn Beak Bayonet for 95 notes.
- Enter Breegull Blaster mode before attacking TNT.
- Defuse 15 TNT sticks within 200 seconds.
- Collect the Ordnance Shed Jiggy.
Process the Jiggy Boulder in the Crushing Shed
Find the Glowbo near Mine Entrance 2 and take it to Mumbo’s Skull. Transform into Mumbo, then travel to the Crushing Shed. Stand on the Mumbo Pad beside the large Jiggy Boulder and use Levitate to move the boulder into the shed.
The shed’s conveyor and crusher must be operating for the boulder to be processed. If the belt is inactive, use the nearby shed controls before levitating the boulder. Return to Banjo and Kazooie after the spell and collect the gold pieces that form the Jiggy after the machinery finishes.
This is a good early reward because it is close to the central mine routes. If you are short on health or notes, activate the relevant Warp Pads and return after restocking rather than repeatedly crossing the mine while damaged.
- Collect the Glowbo near Mine Entrance 2.
- Use Mumbo’s Levitate spell on the Jiggy Boulder.
- Ensure the Crushing Shed conveyor is active.
- Collect the Jiggy produced by the crusher.
Light the Generator Cave
From the Mine Entrance 2 and Gloomy Caverns side of the mine, follow the cleared passages toward the Generator Cave. Fire a Fire Egg at each generator to illuminate the next section. The light is temporary, so identify the next ledge or platform before moving.
The route uses narrow ledges, gaps and moving platforms. Watch one complete platform cycle when necessary. Board a platform while it is moving toward the destination, and aim for a lower ledge if a jump goes wrong. Falling does not permanently reset the cave; return through the same route and begin the sequence again.
Continue lighting generators until you reach the final platform. Use the nearby jump route to reach the Generator Cave Jiggy, then descend by the ladder and leave through the cleared passage. The cave is safer when treated as a series of short objectives rather than one continuous blind run.
- Carry Fire Eggs before entering the Generator Cave.
- Light each generator in order.
- Use lower ledges as recovery points after missed jumps.
- Collect the Generator Cave Jiggy.
Restore Chuffy and defeat Old King Coal
Go to the Train Station and use Mumbo’s Levitate spell on the Mumbo Pad to place Chuffy back on the tracks. Return to Banjo and Kazooie, enter the train and activate the green GO pad. Chuffy cannot be used for travel until Old King Coal is defeated in the boiler room.
Before entering the boiler, refill health and Normal Eggs. The fight has a 150-second limit. Old King Coal is reliably defeated with Normal Eggs; the established N64 walkthrough method calls for 50 successful egg hits. Keep your distance and fire while he is exposed.
When Old King Coal roars and heats the boiler, the floor becomes dangerous and the air meter drains. Jump onto one of the raised stone platforms immediately. Stay there only while the floor is hot, then reposition when the hazard ends. As the boss takes damage, he loses body sections and becomes faster, so avoid staying in a corner.
If the fight fails, leave the boiler, refill supplies and try again. The important recovery rule is to prioritize the heated floor over immediate damage. After the final hit, collect the Jiggy and confirm that Chuffy is available for train travel.
- Restore Chuffy with Mumbo’s Levitate spell.
- Refill health and Normal Eggs.
- Defeat Old King Coal within the 150-second limit.
- Use the raised platforms whenever the boiler floor heats.
- Collect the boss Jiggy and confirm Chuffy is usable.
Mark delayed objectives and hand off to Mayahem
Do not delay the campaign for every Glitter Gulch Mine reward. After learning Split Up in Witchyworld, return to Mine Entrance 2 and use the Split Up pads near the Power Hut. Put Banjo in the hut, climb to the attic and stand on the switch to illuminate the basement. Switch to Kazooie, enter the lit basement route and follow the boards to the Jiggy.
After learning Springy Step Shoes in Terrydactyland, return to the Crushing Shed. Break the crate near the waterfall, collect the shoes and quickly cross to the ledge behind the falls for the delayed Jiggy. The Gloomy Caverns jail route requires the Detonator transformation, so mark it for a later return. The Water Tank and Toxic Gas Cave are also better handled as later cleanup unless you are deliberately pursuing optional items.
Leave markers in your notes for the Prospector’s Hut, Power Hut, waterfall, Gloomy Caverns jail, Toxic Gas Cave and Water Tank. Before Witchyworld, return to Mayahem Temple for its delayed completion sweep. Chapter 08 uses the Bill Drill you already learned in Chapter 02 to clear the remaining Mayahem routes, including the Prospector-related objective and other blocked areas. After that handoff, continue to Witchyworld when your total Jiggy count meets its board requirement.
- Mark the Power Hut for a Split Up return.
- Mark the waterfall for the Springy Step Shoes return.
- Leave the jail objective until Detonator is available.
- Record the Toxic Gas Cave and Water Tank for later cleanup.
- Return to Mayahem Temple and use the already-learned Bill Drill in Chapter 08.
- Use total Jiggies, not complete mine collection, to determine when to open Witchyworld.
Before you move on
- The second Jiggywiggy challenge has been completed with at least four Jiggies.
- Glitter Gulch Mine was entered through the Plateau well and its entrance Warp Pad was activated.
- Bill Drill is available from Chapter 02 and Beak Bayonet has been learned in the Ordnance Shed.
- The Waterfall Cavern, Flooded Caves, Ordnance Shed, Crushing Shed and Generator Cave routes have been completed if following the recommended first-visit sweep.
- The TNT challenge has been cleared without detonating the explosives.
- Chuffy has been restored and Old King Coal has been defeated within the boiler’s time limit.
- The player understands that full mine collection is not required before proceeding.
- Delayed locations are marked for Split Up, Springy Step Shoes, Detonator and later underwater access.
- The player has returned to Mayahem Temple for the Chapter 08 completion sweep using the already-learned Bill Drill before proceeding to Witchyworld.
Mayahem Temple — completion sweep, Targitzan and the Bill Drill return
Return to Mayahem Temple after the initial Mayahem and Glitter Gulch Mine route. Egg Aim, Breegull Blaster, Grip Grab and Bill Drill should already be available from the earlier progression. Finish the temple’s remaining Jiggies in an efficient order, use Golden Goliath to open the lower routes, clear Targitzan’s Temple, complete the Jade Snake Grove and Prison Compound objectives, win the Stony Kickball tournament, recover Targitzan’s relic and then return to the Columns Vault for Mayahem’s tenth regular Jiggy.
Return to Mayahem and set up the sweep
Enter Mayahem Temple and activate the entrance Warp Pad if it is not active. Also activate the Prison Compound, Mumbo’s Skull and Humba Wumba’s Wigwam pads as you pass them. These checkpoints make the longer transformation and timed sections easier to retry after a fall or failed attempt.
This chapter assumes that Egg Aim, Breegull Blaster and Grip Grab were learned during the first Mayahem visit, and that Bill Drill was learned in Glitter Gulch Mine during Chapter 02. Do not make a second trip to Jamjars for Bill Drill here. Use the abilities according to the area: Egg Aim opens the Treasure Chamber and handles distant targets, Breegull Blaster is required in Targitzan’s Temple, Grip Grab reaches the Prison Compound boots, and Bill Drill opens the later Columns Vault.
A practical order is Golden Goliath first, followed by the Jade Snake Grove quicksand Jiggy, the temple objectives, Bovina and Ssslumber, then the relic, Kickball and Prison Compound. The Columns Vault should be left until the end because it is the only regular Mayahem Jiggy that requires the Bill Drill return.
- Activate the main Warp Pads.
- Confirm that Egg Aim, Breegull Blaster, Grip Grab and Bill Drill are already learned.
- Leave the Columns Vault for the final return.
Use Golden Goliath to open Jade Snake Grove and the Prison Compound
Collect a Glowbo near Mumbo’s Skull and enter the skull. Stand on the purple Mumbo Pad beside the Golden Goliath statue and activate the spell. As Golden Goliath, break the large boulder near the world entrance. This reveals the Flight Pad and makes the upper routes much easier to reach on later visits.
Use Golden Goliath to open the large lower gate leading into Jade Snake Grove. Continue through the newly opened route and kick open the blocked entrance toward the Prison Compound. These openings remain available after the transformation ends, so concentrate on opening them before the spell expires instead of wandering into unrelated side paths.
In Jade Snake Grove, use Golden Goliath to cross the quicksand route to the isolated mound. The transformation is the intended way to reach this Jiggy; do not attempt to cross the sand as ordinary Banjo and Kazooie. Collect the Jade Snake Grove quicksand Jiggy, then return to Mumbo’s Skull and change back before attempting the narrow Prison Compound route.
If Golden Goliath runs out of time before both gates are open, use the nearest Warp Pad to return to Mumbo’s Skull and repeat the spell. The slow movement is safer than trying to rush through the quicksand and falling into the hazard.
- Break the entrance boulder.
- Reveal the Flight Pad.
- Open the Jade Snake Grove gate.
- Open the Prison Compound route.
- Collect the Golden Goliath quicksand Jiggy.
Clear Targitzan’s Temple and defeat Targitzan
Climb the exterior ramps around Targitzan’s large temple. Go around the entrance rather than entering immediately and continue upward to the roof. Collect the Jiggy at the top; the newly revealed Flight Pad can make this climb easier, but normal platforming is also sufficient.
Enter Targitzan’s Temple with Breegull Blaster active. The interior changes to a first-person shooting section. Search the lobby, side passages, lower rooms and raised platforms for the green Targitzan statues. More than twenty statues are available, so you do not need every statue in the temple. Collect ten to open the Slightly Sacred Chamber and take its Jiggy.
Continue searching until at least twenty statues have been collected. The Really Sacred Chamber then opens. Before entering, refill health and ammunition if necessary and collect the nearby Machine Gun Eggs when available. Enter the chamber to begin the Targitzan fight.
Shoot the exposed target sections on Targitzan’s body and keep moving around the arena. After a section is destroyed, clear the enemies that appear before concentrating on the next target. Later attacks include darts fired from openings in the body, so stay mobile and use the arena’s space rather than standing directly in front of him.
When the fight reaches the final head phase, stop attacking during the self-destruct sequence. Move to the far side of the arena or use a stone obstacle as cover until the blast ends. Collect the boss Jiggy after the arena is safe. These steps provide three Mayahem Jiggies: the temple roof, the ten-statue chamber and Targitzan’s defeat.
- Collect the temple roof Jiggy.
- Collect ten statues and clear the Slightly Sacred Chamber.
- Collect twenty statues and enter the Really Sacred Chamber.
- Defeat Targitzan and collect the boss Jiggy.
Complete Bovina’s field and Ssslumber’s roof
Cross the rope bridge from Targitzan’s hill toward Bovina’s field. Use Egg Aim to defeat the four Globbles attacking the cow. The open field gives you room to circle and line up shots. If an enemy moves behind the hut, reposition rather than firing blindly into the structure. Speak with Bovina after the field is clear to receive her Jiggy.
In Jade Snake Grove, climb the ruined temple or pyramid and approach Ssslumber’s roof. Walk slowly across the roof toward the Jiggy. Avoid unnecessary jumps and large control-stick movements because noise wakes the snake. If Ssslumber swallows the Jiggy, leave the roof, allow the encounter to reset and approach again rather than trying to force the collection.
The snake objective is a movement challenge, not a fight. Small inputs and a deliberate route are more reliable than trying to cross the roof quickly.
- Defeat all four Globbles at Bovina’s field.
- Reach Ssslumber’s roof.
- Collect the snake-guarded Jiggy without waking him.
Recover Targitzan’s relic from Unga Bunga’s Cave
Go to the Treasure Chamber near Mumbo’s Skull. Aim eggs at all six serpent heads above the entrance. Each head must be hit until it retracts; once all six have been triggered, the entrance opens. Speak with Chief Bloatazin inside to begin the relic objective.
Follow the upper ledges toward the cage-marked switch and press it to lower the bars. Continue into Unga Bunga’s Cave. The straw-covered floor makes noise, so use the clear route and move carefully toward the relic. Pick it up, then use the connecting passage on the return trip where possible instead of crossing the noisy area again.
Return the relic to Chief Bloatazin for the Treasure Chamber Jiggy. If you are ejected or the room resets after making too much noise, re-enter and repeat the quiet approach. The relic reward is separate from the Kickball and Columns Vault objectives.
- Open the Treasure Chamber with all six serpent heads.
- Press the cage switch.
- Retrieve Targitzan’s relic from Unga Bunga’s Cave.
- Return the relic to Chief Bloatazin.
Become a Stony and win the Kickball tournament
Collect the Glowbo near Humba Wumba’s Wigwam and enter the Wigwam as Banjo and Kazooie. Transform into a Stony, then enter the Kickball Stadium. Complete the Quarterfinal, Semifinal and Final in that order; the tournament Jiggy is awarded for winning the Final.
Touch a ball to control it, use Z to kick it toward a goal and use B for the Stony’s charge attack to barge opponents or steal the ball. Yellow balls are the safe scoring targets. Red balls reduce a goal’s score, so keep them away from your own goal and use them against the opposing side when practical. Black balls appear in the Final and stun players, so avoid being caught near one when it detonates.
Protect your goal before chasing a scoring opportunity. If opponents cluster around a yellow ball, use the charge attack to clear space, then kick only when the lane is open. Winning all three rounds completes the Kickball Jiggy.
- Transform into a Stony.
- Win the Quarterfinal.
- Win the Semifinal.
- Win the Final and collect the tournament Jiggy.
Use Grip Grab and Wading Boots in the Prison Compound
Enter the Prison Compound through the Golden Goliath-opened route. Climb around the outside of the prison and use Grip Grab along the narrow ledge to reach the Wading Boots. Collect a pair before entering the quicksand.
Put on the boots and cross directly to the isolated block in the quicksand. Collect the Jiggy, then use the second pair of boots on the far side to return to solid ground. The Golden Goliath cannot substitute for this route because the relevant passage is too narrow for the transformation.
If the boots expire or you fall into the sand, return to the prison ledge and collect another pair. Do not count this reward as the Jade Snake Grove Golden Goliath Jiggy; they are separate objectives in separate quicksand areas.
- Reach the Wading Boots with Grip Grab.
- Cross the Prison Compound quicksand while protected.
- Collect the Prison Compound Jiggy.
- Return to solid ground and activate the area’s Warp Pad.
Return to the Columns Vault with Bill Drill
Because Bill Drill was learned in Glitter Gulch Mine during Chapter 02, warp back to Mayahem Temple only after the move is already available. Go to the Prison Compound, enter the water near the compound and swim through the underwater passage to the clearing with the central boulder.
Use Bill Drill on the boulder to reveal the stairs into the Columns Vault. Defeat or avoid the enemies, then use Rat-a-Tat-Rap on the stone columns. The initial objective is to activate all of the columns; successful hits produce the confirmation sound and cause the Jiggy to move to another pillar.
After the initial sequence, the 45-second timer begins. The Jiggy must be moved from the taller pillars down to the shortest accessible pillar and then collected before time expires. Watch which pillar the Jiggy moves to after each successful hit and continue along that route instead of striking randomly. Switch to Talon Trot between hits if it helps you cross the room faster, but prioritize direct movement over extra attacks.
When the Jiggy reaches the final low pillar, climb to it immediately and collect it. If the timer expires, leave the vault and re-enter to reset the attempt. The Dilberta prison-cell rescue is a separate Bill Drill objective: it continues through the Glitter Gulch Mine connection and awards Glitter Gulch Mine progress, not another Mayahem Jiggy.
- Return with Bill Drill already learned.
- Break the Columns Vault boulder.
- Activate the columns with Rat-a-Tat-Rap.
- Move the Jiggy through the pillar sequence.
- Collect it before the 45-second timer expires.
- Keep Dilberta’s separate Glitter Gulch reward distinct.
Before you move on
- The entrance boulder is broken and the Flight Pad is available.
- The Jade Snake Grove gate and Prison Compound route opened through Golden Goliath.
- The Jade Snake Grove quicksand Jiggy is collected.
- The Targitzan Temple roof Jiggy, Slightly Sacred Chamber Jiggy and Targitzan boss Jiggy are collected.
- Bovina’s field and Ssslumber’s roof Jiggies are collected.
- Targitzan’s relic has been returned to Chief Bloatazin.
- The Stony has won the Quarterfinal, Semifinal and Final Kickball matches.
- The Prison Compound quicksand Jiggy is collected with Wading Boots.
- Bill Drill, learned earlier in Glitter Gulch Mine, was used to open the Columns Vault.
- The Columns Vault Jiggy was collected within the 45-second timed phase.
- Mayahem Temple now has all ten regular Jiggies before proceeding to Witchyworld.
- For optional 100% follow-up, revisit Mayahem for its five Jinjos, three Empty Honeycombs and three Cheato Pages, and complete the separate Dilberta connection for Glitter Gulch Mine.
Witchyworld — puzzles, rides and switch-gated progression
Enter Witchyworld from Pine Grove after completing Master Jiggywiggy’s eight-Jiggy challenge. Learn Grenade Eggs before entering, collect the four tickets needed for Conga’s Big Top, learn Split Up and Airborne Egg Aiming, use the Money Van to open the Inferno and Dodgem Dome, then defeat Mr. Patch. Mumbo’s three Power spells activate the park’s major attractions, but the Saucer of Peril has a later cross-world setup and is not required for the first Witchyworld visit or the main campaign.
Travel from Glitter Gulch Mine to Witchyworld
After clearing the required Glitter Gulch Mine objectives, return to Isle O’Hags and go to the Plateau. Use the route leading toward Pine Grove; the entrance to Witchyworld is in Pine Grove, not inside Glitter Gulch Mine. Before entering the park, find Jamjars beside the entrance and learn Grenade Eggs when you have at least 110 notes. This is the key first-visit requirement: Grenade Eggs open the park entrance, damage the slot machines, break cracked barriers and are essential against Mr. Patch.
Fire a Grenade Egg at the electrified gate at the entrance. Once inside, note the Witchyworld entrance warp pad and the zone warp pads as you find them. They provide reliable return points after transformations and Mumbo’s spell sequence, so do not repeatedly cross the entire park on foot when a warp is available.
- Finish the Glitter Gulch Mine objectives needed before leaving that world.
- Reach Pine Grove from the Isle O’Hags Plateau.
- Spend 110 notes to learn Grenade Eggs.
- Open Witchyworld’s electrified entrance gate.
- Locate the entrance warp pad.
Collect the four Big Top tickets
Circle the path around the Big Top and find the four slot-machine enemies. Hit each one with Grenade Eggs. A defeated slot machine leaves one ticket; collect all four. The Money Van can also run over these enemies later, but Grenade Eggs are the dependable method on the first visit.
Do not mistake the food stands for ticket sources. The hamburger stand is opened by reaching the switch on top of its ticket booth with the nearby Shock Spring Pad. The fries stand has its switch behind the building. These stands are useful optional activities and may contribute to Witchyworld completion, but neither replaces a Big Top ticket.
Conga stands at the Big Top entrance. He allows entry after the four tickets are collected. Airborne Egg Aiming is also needed for a practical attempt at the boss, so collect the tickets first, then learn that move before committing to the fight.
- Defeat all four slot-machine enemies.
- Collect four Big Top tickets.
- Open the hamburger stand if pursuing the park’s optional rewards.
- Open the fries stand if pursuing the park’s optional rewards.
- Speak to Conga at the Big Top entrance.
Use Split Up and complete Crazy Castle
Find Jamjars’ hatch near the Crazy Castle and learn Split Up for 160 notes. Stand on the Split Up pads and separate Banjo from Kazooie. Use the character-switch cloud when one character must remain on a pressure switch, and reunite by bringing the two characters back together. If you fail a separated-character sequence, return to the pads and start it again rather than trying to improvise from the wrong side of the attraction.
Open the Crazy Castle pump room by destroying the cracked metal grate with a Grenade Egg. Split Up, send Banjo and Kazooie through the separate openings, and place each character on the matching switch beside the pump. The castle inflates when both switches are held.
As Banjo and Kazooie together, enter the castle’s Balloon Burst game and destroy enough balloons to meet its score target before time expires. Then return to the Split Up pads and enter as Kazooie alone for Hoop Hurry. The two games use different character requirements, so leaving the castle after the first game to reunite or split again is normal. Completing both games produces their roof rewards.
- Learn Split Up with 160 notes.
- Break open the Crazy Castle pump-room grate.
- Put Banjo and Kazooie on the two matching pump switches.
- Complete Balloon Burst as the pair.
- Complete Hoop Hurry as Kazooie alone.
- Collect the two Crazy Castle rewards.
Ring the Cactus of Strength and open the Inferno
At the Cactus of Strength in the Western Zone, activate the target using the Beak Buster, Bill Drill and one Grenade Egg. The Beak Buster and Bill Drill may be used in either order; use the Grenade Egg after the two impact attacks if the bell does not trigger immediately. Climb the cactus structure after the bell rings to collect the Jiggy.
To reach the Inferno and Mumbo, first visit Wumba’s wigwam in the Western Zone and obtain the Money Van transformation by giving Wumba a Glowbo. Drive the Money Van to the pay box beside the Inferno entrance in the Horror or Scary Zone and pay the displayed fee. The Money Van is invulnerable, which makes it useful for crossing dangerous ground and opening Money Van doors, but it is not the form used for the Inferno’s internal platforming.
Return to Banjo and Kazooie inside the Inferno. The area contains Mumbo’s skull and the route toward Witchyworld’s train connection. This is the correct time to obtain Mumbo’s help before attempting the powered Space Zone attractions.
- Use Beak Buster and Bill Drill on the Cactus target.
- Use a Grenade Egg to complete the Cactus of Strength sequence.
- Collect the resulting Jiggy.
- Obtain the Money Van from Wumba.
- Pay the Inferno entrance box.
Learn Airborne Egg Aiming and defeat Mr. Patch
In the Space Zone, find Jamjars’ hatch near the Dodgem Dome and learn Airborne Egg Aiming for 180 notes. This move gives Banjo and Kazooie a crosshair while airborne. Do not enter the Big Top expecting the tickets alone to solve the fight; Mr. Patch is designed around aerial Grenade Egg shots.
Enter the Big Top with the four tickets and begin the Mr. Patch encounter. Fire a Grenade Egg at one of the patches on his body. After the first successful hit, Flight Pads appear and ground-based boxing gloves begin attacking the arena. Use a Flight Pad to become airborne, activate egg aiming and fire Grenade Eggs at the remaining patches.
Mr. Patch shrinks as patches are destroyed. Keep moving in the air because he launches beach balls toward the duo. If ammunition or feathers run low, land near the replenishment nests, collect supplies and use another Flight Pad. Avoid standing beneath him longer than necessary because the ground gloves can strike with little warning. Continue until all twelve patches are burst, then collect the Jiggy left by the deflated boss.
- Learn Airborne Egg Aiming with 180 notes.
- Enter the Big Top after collecting four tickets.
- Burst the first patch to reveal the Flight Pads.
- Destroy all twelve of Mr. Patch’s patches.
- Collect the boss Jiggy.
Power the attractions with Mumbo
Give Mumbo the Glowbo found in the Inferno and use his Power spell at the three Witchyworld generators. Power the generator outside Dodgem Dome, the generator beside Star Spinner and the generator in Area 51. The spell activates the attractions but does not replace the Money Van payments required by some entrances.
For Star Spinner, return as Banjo and Kazooie after Mumbo powers it. Ride the rising star platforms to the metal planet. Kazooie’s higher jump and ability to flap after a fall make her the safer choice, although the pair can also complete the route. When you reach the planet, jump onto the side moving upward and continue toward the top to collect the Jiggy.
Dodgem Dome requires both power and payment. After Mumbo activates it, transform into the Money Van and drive into the entrance pay box. Return as Banjo and Kazooie to play the three bumper-car rounds. Meet the displayed score target in each timed round; the targets are 60 points, then 50, then 40, with 45 seconds for each round. Winning all three awards the Dodgem Dome Jiggy.
- Use Mumbo’s Power spell at Dodgem Dome.
- Use Power at Star Spinner.
- Use Power at Area 51.
- Collect the Star Spinner Jiggy.
- Pay the Dodgem Dome entrance as the Money Van.
- Complete the 60-, 50- and 40-point rounds.
- Collect the Dodgem Dome Jiggy.
Leave optional cross-world work for the proper revisit
The Saucer of Peril is not required to enter the Big Top or defeat Mr. Patch. Mumbo can power the Area 51 generator during this visit, but access to the associated cross-world objective depends on a later task in Glitter Gulch Mine involving the Fuel Depot and the moving container. When that Mine objective is complete, return to Witchyworld, use the connected route and finish the Saucer of Peril challenge.
Other Witchyworld Jinjos, notes, Money Van doors and transformation-dependent rewards can also wait. Before leaving, confirm that Mr. Patch is defeated, the required Witchyworld Jiggy has been collected and the next world is available at Master Jiggywiggy’s Temple. Save before leaving if you are ending the session; if a challenge fails, use the nearby warp pad and re-enter the attraction rather than treating the failed attempt as permanent progress loss.
- Confirm the Mr. Patch Jiggy is collected.
- Record any blocked Money Van, transformation or cross-world routes.
- Leave the Saucer of Peril for the later Glitter Gulch Mine connection if necessary.
- Return to Master Jiggywiggy’s Temple and verify the next world can be opened.
Before you move on
- Witchyworld’s entrance is open and its warp pads are available.
- Grenade Eggs and Split Up are learned.
- The four Big Top tickets are collected.
- The Cactus of Strength and Crazy Castle objectives are complete if pursuing the accessible Witchyworld Jiggies.
- The Inferno is opened with the Money Van and Mumbo is available there.
- Airborne Egg Aiming is learned.
- Mr. Patch is defeated and his Jiggy is collected.
- Dodgem Dome and Star Spinner are completed if pursuing the available attraction Jiggies.
- Any unfinished Saucer of Peril, Jinjo, Money Van or transformation objective is recorded for the later organized revisit.
- The chapter is complete for campaign routing when Master Jiggywiggy’s Temple accepts the next world challenge; full Witchyworld completion is optional at this stage.
Jolly Roger's Lagoon — underwater navigation and air-based puzzles
Jolly Roger's Lagoon is the fourth regular world, reached after Witchyworld through the cliff-top route in Isle O'Hags. Enter it once Master Jiggywiggy's 14-Jiggy challenge has been completed. The next world, Terrydactyland, requires 20 Jiggies overall, so no single lagoon mission is a mandatory story gate. Your practical priorities are to learn the underwater moves, open Atlantis, obtain the submarine, and collect enough Jiggies to reach the next board. Lord Woo Fak Fak and several other lagoon rewards are valuable, but many surface races, minigames and late-return tasks can wait.
1. Continue from Witchyworld and establish the lagoon route
After clearing Witchyworld, return to Isle O'Hags and follow the cliff-top path beyond the Witchyworld entrance. Complete Jiggywiggy's 14-Jiggy challenge if it is still locked, then enter Jolly Roger's Lagoon. The town entrance is your main landmark: the warp pad is near the central monument, Jolly's Inn is on the town side, Pawno's Emporium is nearby, and Captain Blubber's Wave Racer hire is at the harbor.
Save before beginning the first long underwater sweep. The original N64 game returns you to the last save or restart point after a death, so a separate save slot is useful before the boss and before difficult minigames. If you die underwater, do not repeat the entire area blindly; return to the same warp pad and use the town buildings, Atlantis entrance and Sea Bottom passages as fixed navigation markers.
The immediate campaign goal is not to finish every lagoon Jiggy. Terrydactyland opens when your total reaches 20 Jiggies and you complete its Jiggywiggy challenge. Count your overall total at the temple rather than assuming that all ten lagoon Jiggies must be finished first. The lagoon boss, the submarine target challenge, Wave Racer tasks and several cross-world errands can be postponed if you already have enough Jiggies.
- Enter from the Witchyworld-side cliff-top route.
- Activate the town warp pad before making deep dives.
- Check your total at Master Jiggywiggy before deciding whether cleanup is necessary.
- Keep a separate save before the underwater boss route.
2. Remove the ordinary air limit with Mumbo's Sunlight spell
Search Pawno's Emporium for the Glowbo and take it to Mumbo's Skull. Control Mumbo, go to the Mumbo Pad at the front of the lagoon, and cast Sunlight. In the N64 version this oxygenates the lagoon water for Banjo and Kazooie, making the first Atlantis exploration much safer. The spell is a convenience rather than the only way to complete the world; you can still use air bubbles and the surface when needed.
Use the spell to learn the layout instead of immediately following every current. Dive from the main lagoon toward the central hole, then identify the passages leading to Atlantis, Smuggler's Cavern, the sunken ship and the deeper Sea Bottom. When a current carries you into a new chamber, turn around and identify the return tunnel before chasing a collectible. This prevents a low-air retreat from becoming a blind swim through several identical passages.
Do not confuse ordinary underwater exploration with the pressure-locked deep areas. Sunlight does not replace the submarine. If you reach a passage where Banjo and Kazooie cannot proceed, mark it as a later submarine route and return to Atlantis.
- Use the Glowbo from Pawno's Emporium at Mumbo's Skull.
- Cast Sunlight at the lagoon Mumbo Pad.
- Identify the Atlantis and Sea Bottom entrances before attempting deep objectives.
- Use air bubbles or return to the surface rather than following an unknown current with low air.
3. Learn Sub-Aqua Egg Aiming, then Talon Torpedo
Enter Jolly's Inn and speak with Jolly. You can pay two Doubloons to open the bedroom, or blast the bedroom door with a Grenade Egg. Inside, Jamjars teaches Sub-Aqua Egg Aiming when you have collected 275 Notes. While swimming, use the underwater aiming view to fire eggs at switches, enemies and breakable targets. This move is needed for several lagoon Jiggies and makes the boss fight possible without transforming.
From the main lagoon, swim through the central route into Atlantis. Locate the Electric Eels' Lair and follow its passage to Jamjars. With 290 Notes, learn Talon Torpedo. This is Kazooie's underwater attack and is used to break silver Kazooie panels, including the underwater barriers that block later routes. Start attacks from open water so the forward movement does not carry you into a wall or enemy.
The two moves have different jobs. Sub-Aqua Egg Aiming is a stationary targeting tool; Talon Torpedo is a forward attack and barrier-breaking move. Practice switching between them in Atlantis before entering narrow tunnels. Restock Grenade Eggs and Ice Eggs before beginning the UFO, fish and boss objectives.
- Learn Sub-Aqua Egg Aiming with 275 Notes.
- Learn Talon Torpedo with 290 Notes in the Electric Eels' Lair.
- Keep Grenade Eggs and Ice Eggs available.
- Use Sub-Aqua Egg Aiming for targets and Talon Torpedo for silver Kazooie barriers.
4. Clear the early Atlantis and surface objectives
In Atlantis, inspect the large fish temple and use Sub-Aqua Egg Aiming to enter Chris P. Bacon's photography challenge. Follow the symbol order shown above the entrance, then protect Chris by shooting the approaching targets. This Jiggy is optional for the immediate Terrydactyland gate, but it is one of the lagoon's straightforward rewards once the move is learned.
For Jolly's missing partner, speak with Jolly and Captain Blubber, then follow the underwater route through the octopus area toward the Seaweed Sanctum. At the large fish chamber, use aimed Grenade Eggs to break the fish's teeth and enter. Rescue Merry Maggie and return to Jolly for the reward. Treat this as a useful early Jiggy because its route teaches the correct use of underwater aiming and Grenade Eggs.
Find the sunken UFO in the main underwater area. Break its door with Talon Torpedo, stand near the center of the room, and fire Ice Eggs at the four wall targets during the timed sequence. The center position reduces camera adjustment and lets you turn between targets quickly. When the UFO leaves, collect the Jiggy revealed beneath it.
These tasks are good first-pass objectives, but they are not individually required before Terrydactyland. If your total is already sufficient, leave the Wave Racer record, the translucent fish, Smuggler's Cavern's high platform and other difficult detours for the later cleanup sweep.
- Complete Chris P. Bacon's underwater target challenge if pursuing an early Jiggy.
- Rescue Merry Maggie and return to Jolly.
- Power the UFO with four Ice Eggs and collect the Jiggy beneath it.
- Leave races and difficult platforming rewards for later if the next Jiggywiggy gate is already open.
5. Obtain the submarine and open the deep routes
From Atlantis, follow the deeper passage toward the cavern containing Humba Wumba's Wigwam. A Glowbo is on the cavern floor beneath the wigwam. Give it to Humba Wumba and transform into the submarine. The submarine is the intended tool for the pressure-locked Sea Bottom passages and gives you continuous underwater mobility, torpedoes and better control in the deep areas.
As the submarine, activate the Atlantis, Sunken Ship, Big Fish Cavern and Lockers Cavern warp pads when you pass them. Use the named areas as a route map rather than relying on the current direction. The submarine cannot use the ordinary surface route, so return to Humba Wumba when you need to change back into Banjo and Kazooie.
The Sea Bottom submarine target challenge is optional. Enter the deep cavern and shoot the colored mines, prioritizing the higher-value targets while keeping enough room to turn away from hazards. The reward is another Jiggy, but failure does not block the world exit or the boss. Leave it for later if the time limit is consuming health or making you lose track of the route.
- Find the Glowbo beneath Humba Wumba's Wigwam.
- Become the submarine before entering pressure-locked passages.
- Activate the deep-area warp pads.
- Treat the Sea Bottom target challenge as optional campaign cleanup.
6. Defeat Lord Woo Fak Fak in Davy Jones' Locker
In Lockers Cavern, find the locker marked D. Jones and open it with a torpedo as the submarine or with a Grenade Egg as Banjo and Kazooie. The submarine approach is safer because it avoids running out of Grenade Eggs, but the fight can be completed in either form with Sub-Aqua Egg Aiming.
Lord Woo Fak Fak's first phase fires energy shots from his lamp while the teeth around his body create contact hazards. Keep moving in a broad circle and avoid hugging the locker walls. When an energy shot is launched, continue moving across the arena instead of stopping to line up a risky shot.
Watch for the glowing boil on his body and hit it with a Grenade Egg or submarine torpedo. After each successful hit, another boil becomes the target. Six successful boil hits are required. Once all six are destroyed, his eyes open and the fight changes phase.
In the second phase, bubbles add another hazard and the eyes become the targets. Continue circling at medium distance and hit the eyes with six successful shots. Do not leave immediately when the body phase ends; the eye phase is a separate six-hit requirement. After the boss falls, collect the Jiggy from the locker before exiting.
If you fail, warp back through Lockers Cavern, refill supplies at the surface if using Banjo and Kazooie, and return as the submarine. The reliable method is movement first, target identification second, attack third; firing while trapped against the locker wall usually causes more damage than it prevents.
- Open D. Jones' locker.
- Destroy six glowing body boils.
- Avoid the lamp shots and locker-wall contact hazards.
- Hit the six exposed eyes in the second phase.
- Collect Lord Woo Fak Fak's Jiggy after the victory.
Before you move on
- Jolly Roger's Lagoon has been entered after Witchyworld through the cliff-top Isle O'Hags route.
- Sub-Aqua Egg Aiming has been learned with 275 Notes.
- Talon Torpedo has been learned with 290 Notes in the Electric Eels' Lair.
- Sunlight has been cast if you want unlimited ordinary underwater breathing during exploration.
- Merry Maggie has been rescued, the UFO has been powered, or these optional rewards have been deliberately deferred because the overall Jiggy total is already sufficient.
- Humba Wumba's submarine transformation is available and the pressure-locked Sea Bottom routes can be entered.
- Lord Woo Fak Fak has been defeated and his Jiggy has been collected if completing the lagoon's boss objective.
- The overall Jiggy total has reached 20 and Master Jiggywiggy's Terrydactyland challenge has been completed before leaving the lagoon progression.
- For 100 percent cleanup, return later for the remaining lagoon Jiggies, Jinjos, Honeycombs, Cheato Page, races, submarine target challenge, Tiptup errand and cross-world tasks.
References for this chapter
- Banjo-Tooie USA Instruction Booklet
- Banjo-Tooie – Guide and Walkthrough – Nintendo 64 – GameFAQs
- Banjo-Tooie - Guide and Walkthrough - Nintendo 64 - By 3791
- Banjo-Tooie — Guide and Walkthrough — Nintendo 64 — By KrocTheDoc
- Banjo-Tooie/Jolly Roger's Lagoon - StrategyWiki
- Rare Gamer — Chapter 4-1: Jolly Roger's Lagoon
Terrydactyland — vertical traversal, Terry’s nest and the route to Grunty Industries
Terrydactyland is the fifth regular world in the Nintendo 64 USA edition of Banjo-Tooie. Open it by completing Jiggywiggy’s fifth challenge with 20 Jiggies, then travel through Pine Grove, the underwater Talon Torpedo tunnel and the Wasteland. The world is organized around its central mountain, Springy Step Shoes, dinosaur transformations, flight pads, split-up routes and several later cross-world connections. Defeat Terry, hatch his four eggs, collect the key first-pass Jiggies and leave the optional cleanup for later. The next main destination is Grunty Industries, which requires 28 Jiggies and a working Chuffy route; Hailfire Peaks comes later.
Open Terrydactyland and establish the return route
Return to Jiggywiggy’s Temple after the main Jolly Roger’s Lagoon progression. With 20 Jiggies, complete the fifth challenge. The completed puzzle opens the Terrydactyland route but does not transport Banjo and Kazooie directly into the world.
Use the Isle o’ Hags silo to reach Pine Grove. Dive into the pool and locate the underwater boulder bearing Kazooie’s face. Break it with Talon Torpedo and swim through the tunnel. Follow the digger passage until you reach the Klungo encounter, defeat him, and continue into the Wasteland. Follow the Wasteland path to the large dinosaur-head entrance.
Activate the Warp Pad just inside Terrydactyland before exploring. The level loops around a central mountain, and the Warp Pads save considerable time when returning from Terry’s Nest, the caves or the Stomping Plains. Save before attempting long climbs or the Stomping Plains crossing; a fall or defeat returns you to the last activated position rather than preserving your position in a vertical route.
- Collect at least 20 Jiggies.
- Complete Jiggywiggy’s fifth challenge.
- Break the Pine Grove underwater boulder with Talon Torpedo.
- Defeat the Klungo encounter in the digger passage.
- Activate the Terrydactyland entrance Warp Pad.
Learn Springy Step Shoes, Hatch and Clockwork Kazooie Eggs
Explore the lower mountain and its connected caves before committing to the summit. Jamjars teaches Springy Step Shoes when you have 390 musical notes. The move launches Banjo and Kazooie from the marked shoes and is required for the higher ledges leading toward Terry’s Nest. Do not substitute ordinary jumps for the marked Springy Step Shoes; many of the gaps are deliberately beyond normal reach.
In Unga Bunga Cave, locate Jamjars’s Hatch silo and learn Hatch after reaching the 420-note requirement. Hatch is needed for Terry’s egg quest, so there is no benefit in repeatedly attempting to activate the eggs before learning it.
Clockwork Kazooie Eggs are learned from the Wasteland-area Jamjars silo after collecting 315 notes. This move is not needed for the first Terry fight, but it is important for Rocknut enemies and several remote-access rewards. A Clockwork Egg can travel through narrow openings and attack from behind, which is the intended way to defeat armored Rocknuts.
- Learn Springy Step Shoes at 390 notes.
- Learn Hatch at 420 notes.
- Learn Clockwork Kazooie Eggs at 315 notes.
- Mark the entrances to Unga Bunga Cave, Oogle Boogle Cave, the Train Station and the mountain interior.
Reach Terry’s Nest and defeat Terry
From the mountain’s lower routes, use the Springy Step Shoes near the path marked toward Terry’s Nest. The climb includes exposed ledges and enemy attacks, so keep a full supply of honeycombs before starting. When Terry begins dropping purple goo along the approach, change direction rather than running in a straight line. The attack is easier to avoid if you move between the edges of the path instead of stopping beneath Terry.
Enter Terry’s Nest and begin the boss fight. Keep moving around the nest while Terry circles and spits purple goo. Fire eggs when he exposes himself during the flight-around phase. Grenade Eggs are effective, while Fire Eggs and Ice Eggs are reasonable substitutes if your grenade supply is low.
Terry periodically releases green Mucoids. Destroy them before returning to Terry, because allowing several to remain active reduces your safe movement space and can cause a chain of hits. Collect any honeycomb dropped during the fight when it is safe to do so. After Terry is defeated, collect the Jiggy he awards and note the newly activated Flight Pad near the dinosaur cells at the mountain’s base. That pad is required for one of the later egg routes.
- Use Springy Step Shoes to reach the summit route.
- Keep changing direction while Terry attacks from above.
- Attack Terry during his exposed flight phase.
- Clear Mucoids before they surround the nest.
- Collect Terry’s first Jiggy and confirm that the lower Flight Pad is active.
Collect the Nest Jiggy and hatch Terry’s four eggs
After the fight, use Bill Drill on the cracked floor in Terry’s Nest. Drop through the opening and collect the Jiggy in the net below. Use the nearby return route instead of repeating the entire summit climb.
Return to the mountain and search for Terry’s four eggs. One is on the lake island and requires the appropriate running-shoe route. One is in Oogle Boogle Cave, whose guard must be removed through the dinosaur transformation route. Another is inside Unga Bunga Cave beyond its split-up and narrow-wall passage. The final egg is high inside the mountain and requires Kazooie to use the Flight Pad near the dinosaur-cell area.
Hatch each egg as Kazooie after Terry has been defeated and Hatch has been learned. The first three young pterodactyls return to Terry on their own. The last chick is too large to fly. Switch to Banjo, climb to it and use Taxi Pack to carry it back through the connected mountain route. Deliver it to Terry’s Nest to receive the second egg-quest Jiggy.
Do not treat every egg as a first-visit requirement. If one location is difficult to reach because a transformation, flight route or cave connection is not yet open, record its landmark and continue with the main route. Terry’s egg Jiggy is useful, but it is not itself a special prerequisite for opening the next world.
- Drill the cracked floor in Terry’s Nest.
- Collect the Jiggy in the net.
- Defeat Terry before attempting the egg quest.
- Hatch all four eggs.
- Carry the oversized final chick with Taxi Pack and deliver it to Terry.
Use the dinosaur transformations and open the roar-code Jiggy
Use Wumba’s Wigwam to become the Baby T-Rex. Speak to the Stegosaurus to learn the roar. A quick press produces a short roar, while a longer press produces the long roar. The Baby T-Rex can use the dinosaur-door route and can read the sign that provides the roar sequence for the mountainside cage. Read the sign in the game instead of relying on a memorized sequence from another edition or guide.
The Oogle Boogle guard requires the stronger Daddy T-Rex. Use Mumbo’s service to enlarge Wumba’s Wigwam, then return and transform into the Daddy T-Rex. Roar at the Oogle Boogle guard to clear the passage, then return to Banjo and Kazooie and explore the cave normally.
The Rocknut blocking the code-gate route cannot be beaten by ordinary attacks. Send a Clockwork Kazooie Egg through the available opening and detonate it behind the Rocknut, where its armor does not protect it. Once the route is clear, follow the dinosaur passage, read the in-game code sign and perform the indicated short and long roars to open the cage and collect the Jiggy.
- Become the Baby T-Rex and learn the roar.
- Use Mumbo’s enlargement before attempting the Daddy T-Rex route.
- Use the Daddy T-Rex to remove the Oogle Boogle guard.
- Defeat the blocking Rocknut with a Clockwork Kazooie Egg.
- Read and perform the in-game roar code.
Cross the Stomping Plains without wasting attempts
Reach Bonfire Cavern from the upper mountain route. Use Ice Eggs to extinguish the fires long enough to pass through. Activate the Stomping Plains Warp Pad before beginning the crossing so a failed attempt does not force a complete climb from the entrance.
Stomponadon’s foot is the only safe timing reference. The deep footprints provide shelter, but a direct run between them is dangerous. Use Wonderwing to cross exposed ground when controlling the combined pair. Begin moving as soon as the foot lifts, then stop inside the next footprint rather than trying to outrun the entire sequence. Feather nests in the footprints can restore your supply, but collect them only when the foot is safely away.
At the far side, the combined Banjo-and-Kazooie switch opens the main pair Jiggy. The separate Banjo and Kazooie switches lead to additional rewards and can be postponed. If you are defeated, use the far-side return tunnel or the active Warp Pad to retry without repeating every earlier mountain room.
- Use Ice Eggs to pass Bonfire Cavern.
- Activate the Stomping Plains Warp Pad.
- Use Wonderwing for exposed sections of the combined crossing.
- Press the combined-pair switch for the Jiggy.
- Leave the separate-character switches for a later cleanup pass if necessary.
Finish the main Terrydactyland pass and route to Grunty Industries
Open Terrydactyland’s Train Station by activating its train switch near Wumba’s Wigwam. More importantly, ensure that Chuffy is available: Old King Coal in Glitter Gulch Mine must have been defeated, and the train must be activated through the connected stations. Grunty Industries cannot be entered through its exterior door on the normal N64 route; the building is entered by taking Chuffy to the Grunty Industries station.
When you have 28 total Jiggies, return to Jiggywiggy’s Temple and complete the sixth challenge. The completed puzzle opens the Grunty Industries building in Quagmire. Travel from the Wasteland toward Quagmire, follow the raised digger route and reach the Grunty Industries station. Board Chuffy and select Grunty Industries as the destination. If the building appears open but the train cannot enter, check the Old King Coal and Chuffy conditions rather than searching for another front entrance.
Terrydactyland cleanup can continue later. The Styracosaurus family, caveman tasks, remaining Rocknut rewards, the separate Stomping Plains switches and cross-world food or water objectives are not all required before entering Grunty Industries. Hailfire Peaks is also later in the campaign; do not use the 36-Jiggy Hailfire threshold as the handoff from this chapter. After Grunty Industries and its required progression, the campaign returns to Hailfire Peaks.
- Activate the Terrydactyland Train Station.
- Defeat Old King Coal if this has not already been done.
- Confirm that Chuffy can travel between the connected stations.
- Reach 28 total Jiggies.
- Complete Jiggywiggy’s sixth challenge.
- Enter Grunty Industries by train from its Quagmire station.
- Defer Hailfire Peaks and later Terrydactyland cleanup until the correct revisit.
Before you move on
- Terrydactyland was opened with the 20-Jiggy fifth Jiggywiggy challenge.
- The Pine Grove boulder was destroyed with Talon Torpedo and the Wasteland route was completed.
- Springy Step Shoes, Hatch and Clockwork Kazooie Eggs were learned when their note requirements became available.
- Terry was defeated, his Nest floor was drilled and both immediate Nest Jiggies were collected.
- All four Terry eggs were hatched, with the oversized chick carried by Taxi Pack to Terry.
- The Baby T-Rex and Daddy T-Rex routes were used correctly, and the roar-code cage was opened if pursuing that Jiggy.
- The combined Stomping Plains crossing and its main switch Jiggy were completed, or the exact failed route was marked for later retry.
- The Terrydactyland Train Station was activated and Old King Coal was defeated so Chuffy can travel.
- The save file has at least 28 Jiggies before the next Jiggywiggy challenge.
- Jiggywiggy’s sixth challenge has been completed and Grunty Industries is entered by train.
- Hailfire Peaks, the Snooze Pack Stomping Plains task and optional Terrydactyland cleanup remain correctly deferred rather than being treated as prerequisites.
Grunty Industries — factory access, batteries, machinery and Weldar
Enter Grunty Industries after Terrydactyland and before the main Hailfire Peaks visit. The factory is reached by opening its exterior Train Switch and riding Chuffy into the internal station. Progress depends on carrying four batteries to their matching sockets, opening the elevator and fire-exit routes, disabling the wall crushers, using Mumbo's EMP to let Washer Banjo press the electromagnet switch, and defeating Weldar in the Repair Depot. Several Jiggies, Jinjos and worker tasks are late cleanup rather than requirements for moving on to Hailfire Peaks.
Reach the factory and enter by train
After completing the required Terrydactyland route, return to the Quagmire in Isle o' Hags. Grunty Industries is the next regular world in the intended progression; do not wait until after Hailfire Peaks to begin it. Follow the outside of the factory toward the swamp surrounding the building. Climb the ladder above the entrance area, cross the floating toxic-waste barrels and reach the wall on the far side. Climb to the top, then drop onto the rear ledge and press the world's Train Switch. This opens the train-station doors inside the factory.
Leave the area and travel to any active train station. Call Chuffy if necessary, board the train and select Grunty Industries. Chuffy enters the factory's internal station, bypassing the locked exterior entrance. Inside, follow the walkway from the station into the security room. Destroy the security camera with a Grenade Egg before it repeatedly summons Tintops, then continue into the main Floor 1 room.
Use the Split-Up Pad near the main room. Send Banjo and Kazooie to their matching character switches beside the large entrance door. When both have been pressed, the main entrance opens permanently. Reunite and activate the nearby warp pad. This is your dependable return point, so activate every warp pad you find instead of relying on long climbs through the factory.
- Finish the required Terrydactyland route.
- Press the exterior Train Switch in the Quagmire.
- Ride Chuffy into the Grunty Industries station.
- Destroy the first security camera before fighting unnecessary Tintops.
- Press both switches beside the main entrance.
- Activate the Floor 1 warp pad.
Use the first battery and learn the factory moves
Exit through the newly accessible entrance and climb to the top of the gateway outside. A battery patrols this upper ledge. Split up, stun the battery with Banjo's Pack Whack, then use Taxi Pack to carry it inside. Place it in the socket beside the Waste Disposal tank in the main Floor 1 room. The hatch opens, allowing Banjo to enter Waste Disposal and learn Snooze Pack from Jamjars if you have reached the required note total.
Snooze Pack is essential for the Trash Compactor. Send Banjo into the compactor, move through the first crusher to the safe space between the crushers and refill his health. Continue through the second crusher, reach the Banjo Switch at the back, then refill again before returning for the Jiggy. The crushers reduce Banjo to one honeycomb rather than instantly killing him, but do not linger in their cycle.
Near the elevator shaft on Floor 1, collect and use the Claw Clamber Boots on the wall marked with Kazooie's footprints. Follow the catwalk to the ventilation shaft and use its Shock Spring Pad to reach Floor 2. Learn Leg Spring from Jamjars in the toxic-waste section once you have enough notes. This move is needed for high ledges, including the elevated Jinjo above the toxic-waste pipes, and makes later factory movement much less tedious.
- Install the outside battery at the Waste Disposal tank.
- Learn Snooze Pack if the note requirement is met.
- Complete the Trash Compactor Jiggy or mark it for the immediate return.
- Learn Claw Clamber Boots and reach Floor 2.
- Learn Leg Spring when available.
Power the remaining factory sections
The second battery is in the Floor 2 Toxic Waste Area. Use the Split-Up Pad on top of the central tank, send Banjo along the pipe toward the window, drop to the lower ledge and stun the battery. Carry it back across the metal platforms and up the tank ladder. Place it in the socket beside the Electromagnet Chamber door. Enter that chamber and press the wall button with a Beak Barge; this opens another route to the elevator shaft.
The third battery is at the end of the passage leading from the Floor 2 area with the rabbit worker. Use the security-room and Claw Clamber routes to reach it, then carry it to the socket on Floor 4 near the Cable Room. The Cable Room contains exposed electrical cables, so cross by short, deliberate jumps and avoid treating the conveyor route as a safe floor.
The fourth battery is on Floor 3 near Mumbo's skull. Split up, send Banjo to stun and carry it through the Boiler Plant, and place it in the socket that opens the Packing Room. In the Packing Room, collect red, green and blue Twinklies and deposit them on their matching colored pads. Red Twinklies are worth one point, green two and blue three. Turbo Trainers help, but carrying too many at once slows Banjo. Reach 40 points within 60 seconds to win the Jiggy.
Use the Floor 3 route to open the elevator access and the fire-exit connections. The numbered factory floors are not solved in a simple bottom-to-top order: the service elevator, Claw Clamber Boots, Split-Up Pads and outside flight pads gradually create shortcuts. Mark locked doors rather than repeatedly attempting them.
- Install the Toxic Waste Area battery at the Electromagnet Chamber.
- Open the elevator route from the Electromagnet Chamber.
- Carry the passage battery to the Floor 4 Cable Room socket.
- Carry the Floor 3 battery to the Packing Room socket.
- Score 40 points in 60 seconds in the Packing Room.
- Open the Floor 3 elevator and fire-exit connections.
Open the upper floors and stop the crushers
From Floor 3, enter the Boiler Plant and use Bill Drill on the four screws in the floor panel. Removing them drops a Mumbo Pad onto the catwalk inside the Electromagnet Chamber. Do this before attempting the Repair Depot sequence; without that pad, Mumbo cannot disable the magnet.
Reach Floor 4 through the fire-exit stairway. In the security room, destroy the camera and Tintops, then press the floor switch that creates flight pads outside the factory. The upper-floor route also leads to the wall-crusher corridor. A conveyor runs between the crushers, but there is no safe gap while they operate, so do not try to rush through it with ordinary movement.
Break the crate near the Split-Up Pad before the crushers to reveal Mumbo's Pad. Take Mumbo there and cast EMP when you are ready to make the final crossing. The spell temporarily disables the crushers, giving you time to pass through and press the character switch beyond them. Once the permanent shutdown switch has been activated, the corridor is safe for later visits.
The flight pads allow Kazooie to break the high exterior windows with Grenade Eggs. These windows lead to isolated rooms, a dropped crate used by a later Washer route and the roof. The roof contains the access points to Floor 5. Treat the roof, Floor 5 Jiggy, high Tintop platform and Clinker's Cavern as cleanup unless you are pursuing the Jiggy total; they are not needed to reach Weldar.
- Remove the four Boiler Plant screws with Bill Drill.
- Create the outside flight pads from the Floor 4 security room.
- Reveal Mumbo's Pad near the crusher corridor.
- Use EMP to cross the active crushers.
- Press the permanent crusher shutdown switch.
- Open the roof and Floor 5 routes if pursuing optional rewards.
Use Mumbo's EMP and defeat Weldar
Return to Humba's Wigwam on Floor 2 and transform back into Banjo and Kazooie if necessary. Take control of Mumbo through the warp system and return to the Electromagnet Chamber. Walk across the upper catwalk to the Mumbo Pad you created with Bill Drill and cast EMP. The electromagnet is disabled for 90 seconds.
Immediately warp back to Mumbo's skull, return control to Banjo and Kazooie, warp to Humba's Wigwam and transform into the Washer. The Washer cannot use normal warp pads, but it can use the service elevator and mechanical-access doors. Move through the ventilation route back to the Electromagnet Chamber and press the large switch while the EMP is active. This powers the Repair Depot door in the basement Air Conditioning Plant.
Return to Humba and change back before entering the Repair Depot. Weldar can only be damaged when he lowers his head and vacuums. Stay near the outside of the arena while he fires blue flame, circle with Talon Trot and keep him at a distance. When the vacuum begins, face him and fire a Grenade Egg into his open mouth. Six swallowed Grenade Eggs are required.
After hits, Weldar releases nut, bolt and screw enemies. Defeat them without standing on electrified floor sections. After the next attack cycle he jumps; watch his shadow and keep moving with Talon Trot. After three successful hits, the floor grid becomes electrified. Jump between safe sections, prepare your aim before the vacuum starts and avoid unnecessary attacks. Wonderwing is useful for dealing with the small enemies without touching the electrified floor, provided you have enough Gold Feathers.
When Weldar has swallowed six Grenade Eggs, the fight ends. His defeat disables the giant fan in the Air Conditioning Plant and creates a route out of the Repair Depot. The Jiggy is behind that fan and must be collected separately. Weldar does not teach Shack Pack; learn Shack Pack from Jamjars in Hailfire Peaks during a later visit.
- Create the Mumbo Pad by removing the Boiler Plant screws.
- Cast EMP in the Electromagnet Chamber.
- Transform into the Washer before the 90-second timer expires.
- Press the large electromagnet switch.
- Enter the Repair Depot.
- Feed Weldar six Grenade Eggs.
- Use the opened route to collect the Jiggy behind the stopped fan.
Finish late factory cleanup and leave for Hailfire Peaks
After learning Shack Pack in Hailfire Peaks, return to Grunty Industries for the two Waste Disposal Jiggies. In the Air Conditioning Plant, use the stopped-fan route to reach the Waste Disposal section. Split up and send Banjo down through the toxic waste with Shack Pack to collect the Jiggy at the bottom.
For the other Waste Disposal Jiggy, enter the lower Waste Disposal room from the Floor 1 hatch. Raise the waste level with the nearby switch, split up and use Banjo's Sack Pack to hop across the surface of the toxic waste. Press the Banjo Switch on the far side to open the Jiggy case. Sack Pack crosses the surface; Shack Pack descends through the waste. They are separate moves for separate routes.
For optional completion, wash all six rabbit workers with the Washer, finish the Quality Control Jiggy, reach Floor 5 through the roof, collect the high Floor 1 Tintop Jiggy, clear Clinker's Cavern, inspect the chimneys and gather remaining Jinjos, Honeycombs, Cheato Pages and Jiggies. These rewards improve your total but do not need to be completed before the next world.
Once Weldar is defeated and the required factory progress is complete, leave through the main entrance and return to Jiggywiggy's Temple. Open the next world challenge and proceed to the main Hailfire Peaks visit. Do not treat optional factory cleanup as the condition for entering Hailfire Peaks.
- Collect the fan Jiggy after defeating Weldar.
- Return later with Shack Pack for the lower Waste Disposal Jiggy.
- Return with Sack Pack for the surface-crossing Waste Disposal Jiggy.
- Wash all six workers if pursuing the factory Jiggy.
- Clear Clinker's Cavern and optional roof, Floor 5 and upper-platform rewards if pursuing 100 percent.
- Leave Grunty Industries and open Hailfire Peaks through the next Jiggywiggy challenge.
Before you move on
- World-order check: Grunty Industries was entered after Terrydactyland and before the main Hailfire Peaks visit.
- The exterior Train Switch is active, Chuffy can enter the factory station and the main interior entrance opens from both character switches.
- All four batteries have been installed in the Waste Disposal, Electromagnet Chamber, Packing Room and Floor 4 Cable Room routes.
- The service-elevator, fire-exit, upper-floor and crusher routes are available.
- The permanent crusher shutdown switch has been pressed.
- Mumbo's EMP has been used to let Washer Banjo press the electromagnet switch, and the Repair Depot door opens.
- Weldar has been defeated with six swallowed Grenade Eggs, the Air Conditioning Plant fan has stopped and its Jiggy has been collected or marked for return.
- Optional status is recorded separately for the six workers, both Waste Disposal Jiggies, Clinker's Cavern, roof, Floor 5, high Tintop platform and remaining collectibles.
- The next action is to return to Jiggywiggy's Temple and open Hailfire Peaks; optional factory cleanup is not required for that transition.
Hailfire Peaks — Fire Side, Ice Side and the dragon route
Make the main Hailfire Peaks visit after completing the required Grunty Industries progression. An earlier limited-access trip may be useful for the MegaGlowbo route, but it is not the normal world-clear visit. The recommended Hailfire Peaks order is to establish the Fire Side route, defeat Chilli Billi, complete the volcano switch Jiggy, cross to the Ice Side, obtain the Claw Clamber Boots from Biggafoot, defeat Chilly Willy, and then leave the delayed Snowball, Stony and cross-world tasks for cleanup. In this order, Chilli Billi takes six Ice Egg hits and Chilly Willy takes twelve Fire Egg hits.
Enter Hailfire Peaks after Grunty Industries
Open Hailfire Peaks through the Isle o’ Hags route that becomes available after the factory portion of Grunty Industries. Do not treat the earlier MegaGlowbo errand as the main level sequence: that limited visit can be used to reach the special Glowbo area, but the complete Hailfire Peaks route belongs later in the campaign, after the factory and before Cloud Cuckooland.
On the first full visit, explore enough of both sides to identify the lower Fire Side, the volcano entrance, the Ice Side paths, Humba Wumba’s Wigwam and the warp pads. The level is split between heat and ice hazards, so keep filled Honeycomb pieces available and avoid entering long platforming sections after taking unnecessary damage. Save before beginning the dragon route.
- Enter the main level after Grunty Industries.
- Treat the MegaGlowbo visit as an earlier optional revisit only.
- Locate the Fire Side and Ice Side warp pads.
- Save before starting the boss progression.
Reveal the Flight Pad and reach Chilli Billi
On the lower Fire Side, follow the path toward the large stone structure near the base of the volcano. Stand clear of the structure and wait for Chilli Billi’s fireball to strike it. The impact opens the route to a Flight Pad. If you are hit while waiting, retreat to a nearby ledge, recover, and approach again rather than attempting a direct lava-side climb.
Use the newly revealed Flight Pad to fly to the high Fire Side ledge. Enter the cave at the summit only after checking that Ice Eggs are available. The boss route is intended to use the Flight Pad; do not spend health trying to reach the summit with improvised jumps.
- Let Chilli Billi destroy the cracked stone structure.
- Use the revealed Flight Pad.
- Carry Ice Eggs into the summit cave.
Defeat Chilli Billi with six Ice Egg hits
Chilli Billi is the fire dragon on the Fire Side. The arena contains cannons around the central lava opening. Load Ice Eggs and fire them through the cannon openings so the enlarged shots reach the dragon. Normal eggs and other egg types do not replace the required Ice Eggs.
Each cannon can be used for multiple shots. Follow the dragon’s projectile pattern, fire when the cannon gives you a clear line, and move away immediately afterward. His tongue sweep can catch Banjo and Kazooie if you remain directly in front of a cannon, so circle to another firing position instead of waiting in one place. Keep away from the rim of the arena because a knockback into the lava is difficult to recover from.
Following this recommended order, Chilli Billi requires six successful Ice Egg hits. After the fight, leave the summit and use the cleared routes rather than repeatedly crossing the lower Fire Side under active fireball attacks.
- Use Ice Eggs only for the damaging shots.
- Fire through the cannons.
- Move after every attack window.
- Land six successful hits on Chilli Billi.
Complete the volcano switch sequence
Enter the volcano on the Fire Side and prepare for lava, poisonous gas and narrow platforms. Inside, press the Roman-numeral switches in order: I, II, III, IV and V. Each correct switch raises the next bridge or reveals the next part of the route. After switch V, a final bridge appears with a Jiggy switch.
This is one continuous sequence. Do not leave the room after pressing an early switch, and do not waste time fighting enemies on the platforms. Start with full health and a healthy air meter, use the broadest available landing points, and make each jump only after the next platform has fully appeared. If you fall or run low on air, retreat and restart the sequence after recovering; do not assume the partial route will remain useful.
Press the final Jiggy switch after crossing the last bridge. The Jiggy appears on the central platform. This reward is separate from the shared dragon Jiggy.
- Enter with strong health and air reserves.
- Press I, II, III, IV and V in order.
- Finish the sequence without leaving the room.
- Activate the final Jiggy switch.
Reach Biggafoot and obtain the Claw Clamber Boots
Cross to the Ice Side using the cleared paths and warp network. Find Biggafoot near the lower Ice Side route. Do not stand directly in kicking range. Instead, remain nearby while Chilly Willy’s ice projectiles fall. One of the ice balls strikes Biggafoot’s oversized foot, causing him to leave and exposing the Claw Clamber Boots.
Collect the boots and follow the marked footprints up the icy wall. The boots are required for the climb; ordinary jumping is not a substitute. Stop on broad ledges when enemies or falling ice make the next section unsafe. Activate the upper Ice Side warp pad when you reach it, giving you a practical return route after a failed attempt.
- Stay near Biggafoot without entering kicking range.
- Let an ice ball strike his foot.
- Collect the Claw Clamber Boots.
- Use the marked wall route to climb upward.
Defeat Chilly Willy with twelve Fire Egg hits
Enter the Ice Side summit cave after completing the Claw Clamber climb. Chilly Willy is vulnerable to Fire Eggs. Load Fire Eggs into the cannons and fire through their openings. Ice Eggs, ordinary eggs and Grenade Eggs do not damage this dragon.
Use the cannon structures as temporary cover from the ice attacks, but do not remain stationary after a hit. Move around the arena to avoid the tongue sweep and keep a safe distance from the drop. The second dragon in the recommended route has the longer battle: Chilly Willy requires twelve successful Fire Egg hits.
When Chilly Willy falls, return to the reward location after the encounter resolves. The dragon objective awards one shared Jiggy only after both Chilli Billi and Chilly Willy have been defeated. Their defeat also removes the recurring dragon attacks that make later Hailfire Peaks exploration more hazardous.
- Use Fire Eggs against Chilly Willy.
- Change cannon positions after firing.
- Land twelve successful hits.
- Collect the shared dragon Jiggy after both dragons are defeated.
Leave delayed and optional objectives for cleanup
The Stony kickball tournament is optional for immediate campaign progress. Open the relevant Colosseum route with a Grenade Egg, return to Mayahem Temple, use Humba Wumba’s Stony transformation, and then come back through the connected route. In the later Hailfire Peaks match, the lowest score wins, so do not use a normal highest-score strategy.
The Snowball oil-drill Jiggy requires the Snowball transformation. Roll through snow until the Snowball reaches maximum size, then use the upper warp route to cross from the Ice Side toward the Fire Side and reach the oil-drill switch. The Snowball melts quickly in the heat, so keep moving and avoid unnecessary stops. After the drill produces the Jiggy, return as Banjo and use the Shack Pack to enter the connected pipe in Waste Disposal at Grunty Industries. That pickup occurs in the factory but counts as a Hailfire Peaks Jiggy.
The alien-family rescue, Boggy’s fish request, hot-water pool and train-switch objectives are delayed or cross-world tasks. Mark their locations and complete them during the organized revisit sweep rather than weakening the required route with repeated premature attempts.
- Treat the Stony tournament as optional progress.
- Use a maximum-size Snowball for the oil-drill switch.
- Collect the drilled Jiggy through Waste Disposal with the Shack Pack.
- Record delayed alien, fish, hot-water and train objectives for cleanup.
Before you move on
- The main Hailfire Peaks visit was completed after Grunty Industries.
- Chilli Billi was defeated with six Ice Egg hits.
- Chilly Willy was defeated with twelve Fire Egg hits.
- The shared dragon Jiggy was collected.
- The Roman-numeral volcano sequence and final Jiggy switch were completed.
- The Claw Clamber Boots were obtained from the Biggafoot route.
- Both practical warp-pad routes for later Fire Side and Ice Side revisits are active.
- Optional Stony, Snowball, alien-family, Boggy and train objectives are either complete or recorded for the later cleanup sweep.
References for this chapter
- Banjo-Tooie – Speed Guide – Nintendo 64 – By mike89
- Banjo-Tooie — Guide and Walkthrough — Nintendo 64 — By KrocTheDoc
- Banjo-Tooie – Guide and Walkthrough – Nintendo 64 – GameFAQs
- Banjo-Tooie — Jiggy FAQ — Nintendo 64 — By Pelord
- Hailfire Peaks — Banjo-Kazooie Wiki
- Banjo-Tooie USA Instruction Booklet
Cloud Cuckooland and late revisits — final regular world and cross-world cleanup
After the main Grunty Industries route and the main Hailfire Peaks visit, return to Jiggywiggy’s Temple and complete the 45-Jiggy challenge to open Cloud Cuckooland. Use the central cavern as your hub, defeat Mingy Jongo, learn Sack Pack, and organize the world’s optional transformation, minigame, and cross-world objectives. Cloud Cuckooland is the eighth and final regular world. Its most important progression reward is Sack Pack, while many of its Jiggies are optional for reaching the ending. When your total reaches 55 Jiggies, return to Jiggywiggy’s Temple and confirm that the separate 55-Jiggy challenge is available. Stop there: Chapter 13 handles the challenge, Cauldron Keep entrance, fortress switches, barrier, and third Klungo sequence.
1. Open Cloud Cuckooland and establish the central route
Finish the main Hailfire Peaks progression before opening this world. A previous limited-access visit through Glitter Gulch Mine and Hailfire Peaks may already have handled the Mega-Glowbo errand. If not, complete that optional connection before treating the Bee transformation as available.
Return to Jiggywiggy’s Temple in Wooded Hollow and complete the challenge requiring 45 Jiggies. The completed puzzle opens Cloud Cuckooland from the Wasteland entrance near Terrydactyland. This is the eighth and final regular world, not a fortress area.
Enter the world and activate its Warp Pad. Reach the central cavern and activate the internal Warp Pad as soon as possible. Treat this cavern as the routing hub. Identify the split-up pads, Springy Step Shoes, Claw Clamber Boots, Mumbo skulls, Bee hive, Pot o’ Gold, trash can, cheese wedge, Superstash, and the red-walled Jamjars hatch. The flat floor enemies can rise beneath you, so cross the lower cavern promptly instead of standing still.
- The main Hailfire Peaks visit is complete.
- The 45-Jiggy challenge has opened Cloud Cuckooland.
- The world-entry and central-cavern Warp Pads are active.
- The central cavern exits and major landmarks have been identified.
2. Defeat Mingy Jongo
Cloud Cuckooland has two Mumbo skulls. One contains the real Mumbo and the other contains Mingy Jongo, with the impostor’s location determined for the individual save file. Check both skulls and enter the one containing the hostile impostor.
Mingy Jongo runs around the room and fires wand blasts. Ordinary close attacks, eggs, and Wonderwing can damage him. After he is hit once, he begins teleporting and his wand shots become homing projectiles. Keep moving in zigzags, avoid approaching while a shot is tracking you, and attack when he pauses or his wand briefly fails.
Mingy Jongo takes eight successful hits. After the final hit, collect the Jiggy from his chair. If you lose, leave the skull, restore health and ammunition, then return. No special transformation is required, so patient movement is safer than forcing repeated close attacks.
- The impostor’s Mumbo skull has been found.
- Mingy Jongo has been defeated with eight successful hits.
- The Jiggy in his chair has been collected.
3. Learn Sack Pack from Jamjars
Return to the central cavern and split up. Have Kazooie hatch the pinkish egg on the central platform to release a Floatus Floatium. Switch to Banjo and use Taxi Pack to carry the Floatus across the cavern to the ledge beneath the red-tinted wall.
Use Banjo’s Shack Pack to enter the small opening and reach Jamjars. Sack Pack costs 765 notes on the original N64 release. This Banjo-only move lets him hop across hazardous surfaces such as thorns, toxic liquids, and other damaging terrain.
Sack Pack does not remove the need to control jump distance. Narrow ledges and moving platforms can still throw Banjo into danger, so use short hops and retreat to solid ground when the route becomes unstable. The move is essential for several later cleanup tasks, including the cheese wedge and toxic-waste routes, but it is not necessary to defeat Mingy Jongo.
- The Floatus has been hatched and carried with Taxi Pack.
- Sack Pack has been learned with 765 notes.
- The nearby high alcove and Jinjo have been checked or marked as optional.
4. Handle the Bee transformation and Zubba Nest
If the Mega-Glowbo from the Glitter Gulch Mine and Hailfire Peaks connection is available, give it to Humba Wumba in Cloud Cuckooland to become the Bee. The Bee can fly freely and fire stingers, making several high routes much easier. This transformation is optional for the main campaign.
Fly to the mountain summit and locate the large Zubba target above the hive. Hit the target 20 times within 10 seconds to open the nest. Inside, shoot the colored bees while flying around the chamber. Red bees are worth one point, green bees two, and blue bees three. A score of 50 within 60 seconds awards the Jiggy; the associated lower score reward is tracked separately as a Cheato Page objective.
The Bee can also destroy the four Eyeballus plants around the world. Each destroyed plant passes the Jiggy onward until it becomes collectible. Check the plants near Wumba’s Wigwam, the Jello castle, the green pool, and the high mountainside route. Both Bee objectives are optional and should not be confused with the 55-Jiggy fortress threshold.
- The Mega-Glowbo errand is complete if the Bee route is being attempted.
- The Zubba target has been hit 20 times within 10 seconds.
- The Zubba Nest and Eyeballus objectives are complete or marked optional.
5. Use Rain Dance to connect the upper routes
Take control of Mumbo and reach the Mumbo Pad along the purple racetrack route above the central cavern. Cast Rain Dance. The spell creates the rainbow bridge leading to the Pot o’ Gold and causes planted seeds to grow into vines.
Return to Banjo and Kazooie, reach the golden switch below the Pot o’ Gold, and cross the rainbow before the opening closes. If the timing fails, repeat the switch route rather than attempting an improvised jump from the surrounding platforms.
Inside the Pot o’ Gold, fire the blue, fire, grenade, and ice eggs into their matching openings. The golden egg nest then starts the shooting challenge. Hitting 75 Jiggy symbols within 45 seconds awards the Jiggy, while reaching 90 awards the Cheato Page. Treat those targets as separate optional rewards.
- Rain Dance has been cast.
- The rainbow bridge and planted vines are active.
- The Pot o’ Gold challenge has been completed or deferred.
- The 75-point Jiggy and 90-point Cheato Page goals are tracked separately.
6. Clear the vine, cheese wedge, and Mr. Fit routes
Use the grown vines to reach the Jello castle and the cheese wedge. The Jello castle contains an optional Jiggy accessed through a small opening with Shack Pack. The cheese wedge requires the Floatus route and Sack Pack. Enter as Banjo, keep Sack Pack active across the spiked onion platforms, and watch the air meter because the interior contains damaging gas.
If the air meter becomes dangerously low, leave the cheese wedge and re-enter rather than rushing a blind jump. Follow the moving onions to the rear ledge, use Shack Pack through the small opening, and take the fresh-air passage to the reward. This route also contains a Jinjo that can be recorded separately during a fuller sweep.
Mr. Fit has three optional events: the high-bar jump using Springy Step Shoes, the Sack Pack race using the thorny shortcut, and the final footrace using Running Shoes. Complete all three to receive his Jiggy. If a race fails, restart from the event area and use the intended shortcut rather than attempting to outrun the course from its long route.
- The Jello castle route is complete or deferred.
- The cheese-wedge air route and Jiggy are complete or recorded for cleanup.
- Mr. Fit’s three events are complete or individually tracked.
7. Separate optional Cloud Cuckooland rewards from required progress
The Superstash opens after four Clockwork Kazooie switches are pressed around the world. The switches are placed in separated high and enclosed routes, including the green-pool area, central cavern ledges, upper mountain paths, and the trash-can route. Press all four, then return to the safe for its Jiggy.
The trash can contains Guffo’s objective and other optional rewards. Canary Mary’s first Cloud Cuckooland race awards a Jiggy, and the rematch awards a Cheato Page. These races are not required to open the fortress route, so postpone them if the repeated attempts are disrupting the main progression.
The Talon Torpedo boulder in the underwater passage drains the external pool and sends water to Dippy in Terrydactyland. The reward belongs to Terrydactyland, not Cloud Cuckooland. Record it under that world when checking totals.
- The Superstash switches are complete or recorded by landmark.
- Guffo, the trash-can objectives, and Canary Mary are labeled optional.
- The Talon Torpedo connection is complete or listed under Terrydactyland cleanup.
8. Perform a fixed late-game revisit sweep
Begin with Spiral Mountain and the Isle O’ Hags hub. Check cracked surfaces, split-up pads, transformation pads, visible ledges, and NPCs with unfinished requests. Then revisit Mayahem Temple and Glitter Gulch Mine for Bill Drill, underwater, Clockwork Kazooie, and high-ledge targets.
Next sweep Witchyworld and Jolly Roger’s Lagoon. Check separated-character rooms, train access, underwater openings, and paths now suitable for Sack Pack or Talon Torpedo. Continue to Terrydactyland for the drained-pool reward and other cross-world tasks.
After that, revisit Grunty Industries for toxic-waste and upper-floor routes, then Hailfire Peaks for remaining cross-world objectives. Finish with a final Cloud Cuckooland pass for Superstash, Bee tasks, the cheese wedge, Pot o’ Gold, Mr. Fit, Canary Mary, Jinjos, and any deferred Jiggies. Write down the exact landmark and missing prerequisite whenever you postpone something.
- Spiral Mountain and the Isle O’ Hags hub have been checked.
- Mayahem Temple, Glitter Gulch Mine, Witchyworld, and Jolly Roger’s Lagoon have received a late sweep.
- Terrydactyland, Grunty Industries, Hailfire Peaks, and Cloud Cuckooland have been checked in that order.
- Every deferred objective has a named landmark and prerequisite.
9. Confirm the 55-Jiggy handoff without entering Cauldron Keep
When the late cleanup or required Jiggy collection brings the total to 55, return to Jiggywiggy’s Temple. Confirm that Master Jiggywiggy’s separate 55-Jiggy challenge is available. Do not attempt to perform the challenge or follow the fortress entrance route in this chapter.
The 55-Jiggy challenge is the next campaign milestone after Cloud Cuckooland, but its completion and the route through the Quagmire belong to Chapter 13. Chapter 13 also handles the fortress drawbridge, moat switches, exterior barrier, third Klungo battle, and the approach to the Tower of Tragedy.
Save before leaving the temple and keep a second stable N64 save if possible. Record the current Jiggy total and any optional Cloud Cuckooland objectives still outstanding so the next chapter begins with a clear progression state.
- At least 55 Jiggies are recorded.
- Jiggywiggy’s Temple has been revisited.
- The 55-Jiggy challenge is confirmed as available.
- Cauldron Keep has not been entered in this chapter.
- The current save and outstanding optional objectives are recorded for Chapter 13.
Before you move on
- Cloud Cuckooland was opened after the main Grunty Industries and Hailfire Peaks sequence with the 45-Jiggy challenge.
- Mingy Jongo has been defeated and his Jiggy collected.
- Sack Pack has been learned, and the Bee route has been completed or explicitly marked optional.
- Rain Dance has been cast, with the Pot o’ Gold, planted seeds, cheese wedge, and Mr. Fit routes checked or deferred by name.
- The optional Superstash, Zubba Nest, Eyeballus, Canary Mary, Guffo, Jinjo, and cross-world objectives are tracked separately from required progression.
- The late sweep covers Spiral Mountain, the Isle O’ Hags hub, Mayahem Temple, Glitter Gulch Mine, Witchyworld, Jolly Roger’s Lagoon, Terrydactyland, Grunty Industries, Hailfire Peaks, and Cloud Cuckooland.
- At least 55 Jiggies are recorded and Jiggywiggy’s Temple confirms that the 55-Jiggy challenge is available.
- Cloud Cuckooland chapter completion ends before Cauldron Keep is entered; the fortress route is handed off to Chapter 13.
References for this chapter
- Banjo-Tooie - Guide and Walkthrough - Nintendo 64 - By 3791
- Banjo-Tooie — Guide and Walkthrough — Nintendo 64 — By KrocTheDoc
- Banjo-Tooie – Guide and Walkthrough – Nintendo 64 – GameFAQs
- Rare Gamer — Chapter 8-1: Cloud Cuckooland
- Banjo-Tooie – Guide and Walkthrough – Nintendo 64 – By me_frog
- Banjo-Tooie USA Instruction Booklet
Major boss strategies — pattern reading and recovery
Banjo-Tooie's required boss encounters are built around different attack rules. Some are direct aiming tests, while others require a transformation, a special egg type, a cannon or a Clockwork Kazooie Egg. Use the first attempt to learn the arena and the boss's reset pattern, then commit to damage only during the intended opening. The bosses in this chapter are spread across the worlds, the three Klungo encounters and Cauldron Keep. Defeating them all is not by itself the campaign completion check; the campaign ends only after the 70-Jiggy final gate, the Hag 1 battle and the ending sequence.
Prepare before entering an arena
Save before a difficult encounter and keep a second late-game save before entering Cauldron Keep or beginning the Hag 1 route. Refill health and collect the ammunition required by the specific fight. Do not assume Grenade Eggs are correct for every boss: Old King Coal uses Normal Eggs, the Hailfire Peaks dragons use their opposite elemental eggs, and Hag 1 requires Fire Eggs, Grenade Eggs and Clockwork Kazooie Eggs at different points.
Use the first attempt to identify the safe ground, the boss's reset point and the direction of incoming projectiles. In Breegull Blaster sections, keep strafing with the C buttons while aiming. In ordinary platforming sections, avoid standing directly in front of a charging boss. Wonderwing can protect Banjo and Kazooie from many contact attacks, but it consumes Golden Feathers and does not replace a required cannon, transformation, egg type or Clockwork Kazooie Egg.
If an encounter fails repeatedly, leave when the game permits it, refill and return with the required move or transformation. Practice the relevant movement in the approach area, such as strafing, jumping over horizontal hazards, moving between cannon positions or guiding a Clockwork Kazooie Egg. After a death, change one part of the plan instead of repeating the same attack pattern.
- Save before a difficult fight and maintain a second late-game save.
- Refill health and the correct ammunition.
- Identify safe ground and the boss reset point.
- Use the first attempt to observe before attacking aggressively.
Handle the three Klungo encounters
Klungo is fought three times: first in the early Isle o' Hags route, again in the tunnel toward the later hub area, and finally outside Cauldron Keep. Each encounter ends after three successful hits. The victories are separate milestones, so losing a later fight does not undo an earlier one.
When Klungo creates copies, watch which one begins moving last and attack the real Klungo. When the potion makes him invisible, track his shadow and roll into his position. When he grows large, stay away from the jump or crushing attack and strike during the recovery window with Rat-a-Tat Rap. The later encounter gives his attacks better lead, so keep circling rather than retreating in a straight line.
After every successful hit, Klungo shields himself and throws potions. Wait for the shield to end, then resume circling until the next potion effect is clear. Do not force an attack through the shield. Confirm each fight is complete only when Klungo leaves and the route ahead opens.
- Attack the real Klungo rather than the copies.
- Use the shadow to track the invisible version.
- Retreat from the enlarged version and attack after it recovers.
- Wait out the shield-and-potion retaliation.
- Land three successful hits in each encounter.
Defeat Targitzan, Old King Coal and Mr. Patch
Targitzan is fought in Breegull Blaster mode inside Mayahem Temple. Use Normal Eggs against the four targets on each rotating body section. After a section is destroyed, eliminate the Moggies before the next section begins. Later sections add dart-firing faces, so keep moving sideways and use the remaining gray blocks as cover when necessary. After the final section, Targitzan begins the self-destruct sequence. Move behind a surviving gray block or retreat to the far side of the arena until the blast and darts have passed. The Jiggy appears after the fight is over.
Old King Coal is fought in the train boiler room in Glitter Gulch Mine. Stand on the raised, bobbing canisters and fire Normal Eggs at him in Egg Aiming mode. Do not use Grenade Eggs as the standard method for this original N64 encounter. The boiler has a 150-second limit. Coal eventually heats the boiler floor, so remain on the raised canisters and avoid the heated surface while continuing to fire. His arms and head fall away as he takes damage; keep shooting steadily until he gives up before the limit expires. The fight is complete when the timer stops, the boiler cools and the Jiggy appears.
Mr. Patch is in Witchyworld's Big Top. Fire Grenade Eggs at the patches on his body. When he moves into the airborne phase, use the Flying Pad and target the remaining patches from the air. Boxing gloves make the ground unsafe, while beach balls can block shots or cause damage. Wait for a clear line before firing, and do not chase him into a poor position. The encounter ends after all twelve patches are destroyed and the Jiggy appears.
- Use Normal Eggs for Targitzan's targets.
- Use Normal Eggs from the raised canisters against Old King Coal.
- Avoid the heated boiler floor and preserve the 150-second limit.
- Use Grenade Eggs against Mr. Patch.
- Use the Flying Pad for Mr. Patch's airborne patches.
Clear Lord Woo Fak Fak, Terry and Weldar
Lord Woo Fak Fak is in Davy Jones's Locker. The safest practical method is to fight as the submarine, using its torpedoes. Circle the anglerfish until one of the glowing boils is exposed, then fire at it. Keep moving after the firing sound because the electrical shot travels toward your previous position. Destroy all six boils; the eyes then become vulnerable. Continue circling and fire at the eyes while avoiding the bubbles and electrical projectiles. Banjo and Kazooie can also use Grenade Eggs, but the submarine provides effectively unlimited torpedoes and is easier for a first clear.
Terry's battle takes place at the pterodactyl nest. During the opening sequence, run around the nest and change direction just before Terry releases the pink projectiles, because the shots lead your movement. When normal control returns, use Grenade Eggs in Egg Aiming mode. Mucoids enter during later cycles; defeat them with a roll or Rat-a-Tat Rap, then resume firing during the opening. Stay near the outside of the nest without backing into a drop.
Weldar is fought in the Repair Depot of Grunty Industries. When the welding torch opens its intake and tries to pull Banjo toward it, fire a Grenade Egg into the opening. Watch the shadow for the jumping attack, destroy the nuts and bolts it releases and keep moving when electrical lines cross the floor. After a successful hit, do not stand over Weldar; the next suction or landing attack can begin immediately. The fight ends when the Repair Depot sequence concludes and the story reward appears.
- Use the submarine and torpedoes against Lord Woo Fak Fak when possible.
- Destroy all six boils before targeting the eyes.
- Change direction before Terry releases the pink projectiles.
- Use Grenade Eggs against Terry and Weldar.
- Avoid standing still after damaging Weldar.
Defeat Chilli Billi and Chilly Willy
The Hailfire Peaks dragons have fixed elemental requirements. Chilli Billi on the Fire Side requires six successful Ice Egg cannon hits. Chilly Willy on the Ice Side requires twelve successful Fire Egg cannon hits. The weakness is opposite the dragon's environment: Ice Eggs damage the fire dragon, and Fire Eggs damage the ice dragon.
Enter the appropriate summit arena and use the cannon provided there. Load the correct elemental eggs, then fire through the rear opening so the enlarged shot reaches the dragon. Treat the cannon as both your weapon and a useful piece of cover. Move to another cannon when the current angle is no longer useful, and do not attempt to defeat either dragon with close-range attacks.
After a hit, the dragon can sweep its tongue around the platform rim. Use Talon Trot and jump over the sweep instead of trying to outrun it on the narrow edge. Keep the crater and cannon positions in view so a fall does not leave you exposed. Refill health and the appropriate elemental eggs before starting the other summit. Each fight is complete only after the required number of hits has been registered and the local Jiggy appears.
- Use six Ice Egg cannon hits for Chilli Billi.
- Use twelve Fire Egg cannon hits for Chilly Willy.
- Fire through the rear opening of each cannon.
- Jump over the tongue sweep with Talon Trot.
- Refill before beginning the other summit fight.
Fight Mingy Jongo in Cloud Cuckooland
Mingy Jongo appears in the false Mumbo skull in Cloud Cuckooland. Move to medium or long range and strafe sideways while he fires wand projectiles. At distance, the first four shots travel more predictably. Closing in while the wand is active makes the projectiles harder to avoid.
After four shots, the wand fails and Mingy Jongo pauses to restart it. Rush in and use Rat-a-Tat Rap for one hit, then retreat as he relocates. The camera shifts toward his new position, which may be near a window, pillar, chair or corner. After four successful hits, the later fireballs home more strongly and Mingy Jongo teleports between shots. Jump while changing direction and attack only during the next wand-failure opening.
Mingy Jongo requires eight successful hits. After the robot is destroyed, collect the Jiggy from the chair. This completes the Cloud Cuckooland boss objective but does not begin or replace the Cauldron Keep and final Hag 1 sequence.
- Stay back while the wand is active.
- Strafe and jump against the projectiles.
- Use the four-shot wand-failure opening.
- Land eight Rat-a-Tat Rap hits.
- Collect the Jiggy from the chair.
Approach Hag 1 as separate machine phases
The Hag 1 battle begins only after the 70-Jiggy Jiggywiggy challenge has been completed and the final route is open. It is separate from the Tower of Tragedy quiz. Before entering, use Dingpot to replenish supplies if needed and make sure you have Fire Eggs, Grenade Eggs and several Clockwork Kazooie Eggs.
The early phases alternate between arena hazards, a quiz question and Breegull Blaster damage. For the laser phases, stay toward the outside and jump over the rotating beams. When Gruntilda appears with a question, answer promptly; a correct answer produces slower fireballs, while an incorrect answer makes them faster. During the Breegull Blaster openings, strafe with the left and right C buttons while aiming upward and fire the required eggs. Keep moving instead of standing in front of the machine.
The mortar phases replace the lasers with explosive shells. Move around the arena and jump the approaching split fragments. When the drill and front lasers become active, use Talon Trot to reach the back or side of the Hag 1 and avoid the drill. Direct shots do not damage Gruntilda during the battery phases. Wait for the engine stall, then launch a Clockwork Kazooie Egg through the rear exhaust opening. Guide it inside the machine and detonate it beside one battery. Repeat during the later stall for the second battery. The battery sections are mandatory environmental puzzles, not ordinary aiming phases.
After both batteries are destroyed, the Hag 1 loses its powered attack pattern and the battle returns to Breegull Blaster combat. Keep circling while firing at Gruntilda and avoid the minion rather than stopping to fight it unless it blocks your route. During the toxic-gas phase, aim upward and fire promptly while strafing; the gas drains health, so hesitation is dangerous. In the final spell phase, ordinary shots work only while Gruntilda is physically holding the spell. Fire at that opening to make her drop it and destroy the Hag 1. The ending sequence follows the completed final battle.
- Complete the 70-Jiggy challenge before entering the final route.
- Replenish supplies at Dingpot.
- Jump the rotating lasers and mortar debris.
- Reach the rear or side during the drill phases.
- Guide Clockwork Kazooie Eggs through the exhaust opening.
- Destroy both internal batteries.
- Keep moving through the minion and toxic-gas phases.
- Confirm victory when the Hag 1 is destroyed and the ending begins.
Before you move on
- For an individual boss objective, confirm that the boss has disappeared or been defeated and that its Jiggy, train reward, route opening or story result has appeared.
- Old King Coal is complete when the boiler cools, the timer stops and the Jiggy appears after the Normal Egg battle.
- Cloud Cuckooland's boss objective is complete when Mingy Jongo is destroyed and the Jiggy appears in the chair.
- Hailfire Peaks boss progress is complete only after Chilli Billi and Chilly Willy have each been defeated with their required elemental egg and fixed cannon-hit count.
- The campaign is complete only after the 70-Jiggy challenge, the final route, the Hag 1 battle, Gruntilda's defeat and the ending cutscene.
- Optional 100% collection may continue after the ending and is not required to trigger the original Nintendo 64 campaign ending.
Final approach — 55-Jiggy Cauldron Keep opening and the route to the Tower of Tragedy
Complete the 55-Jiggy Jiggywiggy challenge, use the Quagmire cable and Claw Clamber Boots to enter Cauldron Keep, lower the toxic-moat drawbridge, disable the entrance barrier and defeat Klungo’s third rematch. Stop after reaching the Tower of Tragedy. The later quiz, 70-Jiggy challenge and HAG 1 route belong to the following chapters.
Complete the 55-Jiggy Jiggywiggy challenge
Check the totals screen before leaving the Isle o’ Hags. You need at least 55 Jiggies for the challenge that opens Cauldron Keep. Having 55 Jiggies does not open the fortress by itself; you must return to Jiggywiggy’s Temple in Wooded Hollow and complete the corresponding puzzle.
Enter the temple and activate the newly available challenge. Build the picture by identifying the outer edge first, then fill the interior. If a piece seems impossible to place, check whether it belongs on another side of the image rather than forcing it into an almost-correct position. The challenge is timed, so make quick placements and do not spend too long testing one uncertain piece.
When the puzzle is completed, the finished Jiggy triggers the opening effect for the Cauldron Keep route. Leave the temple and travel to Quagmire. If the challenge is not available, verify the Jiggy total at the totals screen; do not search Quagmire for a new entrance before meeting the 55-Jiggy requirement.
- At least 55 Jiggies are recorded.
- The Cauldron Keep Jiggywiggy challenge is available.
- The challenge has been completed rather than merely entered.
- The Quagmire fortress route is active.
Use the Quagmire cable and reach the Secret Exit
In Quagmire, locate the thick gray power cable running through the swamp toward the cliff. Follow it to the end where the Claw Clamber Boots are placed. Put on the boots, then walk back along the top of the cable instead of trying to climb the cliff from the ground.
As you move along the cable, look for the line of footprints climbing upward beside it. Follow those footprints with the Claw Clamber Boots. They lead to a high ledge containing the doorway labelled Cauldron Keep Secret Exit. Enter the doorway to reach the fortress approach.
Before entering, press the nearby switch on the ledge. This creates a Shock Spring Pad below, giving you a much easier way to return to the entrance area without repeating the full Claw Clamber Boots route. This switch is the useful shortcut; the warp pad inside Cauldron Keep is a separate travel point.
If you fall or the boots expire, return to their pickup point and repeat the climb. Do not attempt the marked wall without the boots. Save before beginning the climb if you have only one convenient file, and keep the pre-entry file available until the drawbridge and barrier are open.
- The Claw Clamber Boots have been collected.
- The cable has been followed back along its upper surface.
- The footprints have been climbed to the high ledge.
- The Cauldron Keep Secret Exit has been entered.
- The Shock Spring Pad switch has been activated.
Lower the drawbridge with Banjo and Kazooie
Inside the Cauldron Keep approach, activate the Warp Pad near the starting area, then use the Split-Up Pads. The central tower is surrounded by toxic waste, and two separate switches beside the entrance must be pressed by the correct character.
As Banjo, cross the toxic moat with the Shack Pack. Enter the backpack and hop across the waste to Banjo’s switch. Ordinary Banjo cannot safely make this crossing, so do not try to run or jump over the toxic surface without the move.
Return to the Split-Up Pad and switch to Kazooie. For Kazooie’s route, use Leg Spring first, then Glide at the top of the jump to clear the moat and reach her switch. A normal jump followed by a late glide may not provide enough height or distance, so begin from a position that gives you room to line up the Leg Spring.
Press both character switches, then reunite at the Split-Up Pad. The drawbridge lowers once both switches have been activated. If one character falls, repeat only that character’s crossing; the other switch does not need to be pressed again.
- Banjo has used Shack Pack to cross the toxic moat.
- Banjo’s switch has been pressed.
- Kazooie has used Leg Spring followed by Glide.
- Kazooie’s switch has been pressed.
- The drawbridge is lowered.
- Banjo and Kazooie have been reunited.
Disable the rear barrier and enter Cauldron Keep
After the drawbridge lowers, cross it with the reunited pair and walk around the outside of the tower. The main entrance is still blocked by an electrical barrier, so do not stop when the bridge comes down.
Continue around to the back of the tower. A Minjo is positioned near the Banjo-Kazooie switch. Treat the creature as hostile rather than assuming it is a Jinjo, then defeat it or move past it and activate the Banjo-Kazooie switch. The switch must be pressed while Banjo and Kazooie are together.
Return to the front entrance. The electrical or laser grid should now be gone, allowing you to enter the gatehouse. If the barrier remains, go back around the tower and check the rear alcove; the bridge switches do not replace the rear Banjo-Kazooie switch.
Once inside, use the available health and ammunition pickups before moving farther into the gatehouse. Create a backup save if your setup permits it. Keep another save from before the Quagmire climb or before the Klungo attempt so a failed run does not force you to repeat every preparation step.
- The Minjo at the rear of the tower has been handled.
- The rear Banjo-Kazooie switch has been activated.
- The entrance barrier has disappeared.
- The Cauldron Keep gatehouse has been entered.
- A recovery save is available.
Defeat Klungo’s third and final rematch
Klungo appears in the gatehouse. His third fight uses the one potion pattern that was not used in his first two encounters. The order is not fixed, so watch the potion effect and identify the pattern before committing to an attack.
If Klungo grows large, keep away from his landing point when he jumps and attack during the short recovery period after he lands. If he becomes invisible, keep moving around the arena and avoid attacking blindly; wait for a clear opportunity when his position becomes readable. If he creates clones, observe the group instead of striking the first figure that moves. The real Klungo is the one you must hit, while the false images disappear when attacked.
After a successful hit, Klungo protects himself and throws potion bottles with more accurate aim. Do not attack through the shield. Move in a zigzag or change direction sharply as the bottles are thrown, because running in a predictable circle makes the improved aim much more dangerous. When the shield phase ends, resume watching for the next damage window.
Klungo requires three successful hits in this encounter. After the third hit, he abandons Gruntilda and leaves the gatehouse. If you lose, return through the shortcut or Warp Pad, refill your health and supplies, and treat the next attempt as a pattern-reading exercise rather than rushing directly into attacks.
- The unused Klungo potion pattern has been identified.
- The real Klungo has been located during the clone pattern, if it appears.
- Three successful hits have been delivered.
- Klungo has left the gatehouse.
- The passage toward the Tower of Tragedy is open.
Reach the Tower of Tragedy and stop before the quiz
After Klungo leaves, enter the newly opened passage and follow the linear route to the Tower of Tragedy. Reaching the tower is the completion point for this chapter. Do not begin counting the quiz as finished until its separate rounds have actually been cleared.
Make a final preparation save before entering the quiz if possible, while retaining the earlier pre-Klungo recovery file. If you intend to pursue 100 percent completion after the ending, note any unfinished Jiggies, Jinjos, Cheato Pages, Empty Honeycombs or world tasks now. Those optional items do not prevent you from reaching the Tower.
The Tower of Tragedy is separate from the later 70-Jiggy Jiggywiggy challenge. After the Tower sequence and its story events, the 70-Jiggy challenge opens the route to the final HAG 1 confrontation. Do not describe that later board or boss as completed merely because the Tower entrance has been reached.
- The Tower of Tragedy entrance has been reached.
- The pre-Tower recovery save remains available.
- Optional cleanup targets have been noted if needed.
- The Tower quiz has not been falsely counted as complete.
- The 70-Jiggy challenge and HAG 1 battle remain for later chapters.
Before you move on
- The 55-Jiggy Jiggywiggy challenge has been completed.
- The Quagmire cable and Claw Clamber Boots route has been completed.
- The marked footprints have been climbed to the Cauldron Keep Secret Exit.
- The Shock Spring Pad shortcut has been activated.
- Banjo has crossed the toxic moat with Shack Pack and pressed his switch.
- Kazooie has used Leg Spring followed by Glide and pressed her switch.
- The drawbridge has lowered.
- The rear Banjo-Kazooie switch has removed the entrance barrier.
- The third Klungo rematch has been defeated.
- The Tower of Tragedy entrance has been reached.
- The Tower quiz, 70-Jiggy challenge and HAG 1 battle have not been incorrectly counted as completed.
Cauldron Keep — Tower of Tragedy, post-quiz route and the 70-Jiggy final gate
This chapter begins after the Cauldron Keep entrance has been opened and the third Klungo fight has already been cleared. Enter the Tower of Tragedy, survive its three quiz rounds, follow the story sequence to the B.O.B. gun chamber, refill at Dingpot, and inspect the final tower altar. The separate 70-Jiggy Jiggywiggy challenge then removes the electrical barrier blocking the route to Hag 1. The final boss fight itself belongs to Chapter 14.
1. Enter the Tower of Tragedy and understand the round structure
From the gatehouse, enter the door marked with the large question mark. The Tower of Tragedy is a three-round quiz against Mingella and Blobbelda. This chapter starts here, so do not repeat the already completed Cauldron Keep entrance route or the third Klungo encounter.
Each round lasts three minutes. Gruntilda reads a question with three choices, and the first contestant to buzz in gets to answer. On the original N64 controls, press B to buzz. A correct answer gives two points, while an incorrect answer removes two points. If another contestant answers incorrectly first, you can buzz in and receive one point for a correct answer. Some questions use screenshots or scenes from earlier areas, so identify the location or count the visible objects before committing.
- Enter through the question-mark door.
- Remember that each round lasts three minutes.
- Use B to buzz in.
- Treat picture questions as location or counting questions.
- Do not leave the quiz expecting an external switch to solve it.
2. Clear the first round without finishing last
The first round is an elimination round. Your objective is not necessarily to achieve the highest score; you only need to avoid having the lowest score when the timer ends. Buzz in when the question is clear, but do not repeatedly guess at difficult image questions. A wrong answer costs two points and can turn a safe lead into an elimination.
Pay attention to the choices after buzzing in and answer before the five-second response window expires. If you miss an answer, continue playing rather than treating the round as lost. Other contestants can also answer incorrectly, allowing you to recover a point by answering their missed question correctly. The contestant with the lowest score is removed when the round ends.
- Finish above at least one opponent.
- Avoid unnecessary guesses on obscure questions.
- Answer within the five-second response window.
- Use missed questions by other contestants as recovery opportunities.
- Survive until the first round ends.
3. Win the second round outright
The second round uses the same scoring rules, but only you and one remaining sister compete. Because there are two contestants, a tie is not enough. Finish with a higher score than the remaining sister when the timer expires.
Use a conservative approach if you have a lead. Buzz only when you are reasonably confident, because a wrong answer removes two points and can erase the margin you need. Picture questions may ask where a scene occurred or what detail appeared in it, so study the image before answering. If your opponent answers incorrectly, buzz in for the one-point correction when you know the answer.
- Beat the remaining sister rather than tying her.
- Protect your lead once you move ahead.
- Use B to answer only when confident.
- Take advantage of incorrect answers from the opponent.
- Survive the second-round elimination.
4. Reach more than 15 points in the final round
The third round has no rival contestant. Your score must finish above 15 points, not merely at 15. Answer questions you can identify, and use Z to pass when you are unsure. In this round, the answer choices remain hidden until you buzz in, so do not buzz automatically just to see the choices; an incorrect answer still costs two points.
Once your score is safely above 15, stop answering. Let the timer run out instead of risking a late mistake that drops you back to 15 or below. Winning the round causes Gruntilda to escape in her rocket-powered podium and unlocks the exit from the quiz area. Do not mistake the quiz victory for completion of the campaign; the gun-chamber sequence and final Jiggywiggy challenge still remain.
- Reach a score higher than 15.
- Use Z to pass uncertain questions.
- Stop answering after securing a safe score above 15.
- Wait for the round to end.
- Confirm that Gruntilda has escaped and the exit has opened.
5. Follow the post-quiz route to the gun chamber
After winning, allow the story transition and credits sequence to finish. Banjo and Kazooie then move into the gun chamber. This is automatic story progression rather than a puzzle with a separate item requirement, so do not search the quiz room for another switch or door.
At the B.O.B. controls, Kazooie interferes with the machine. The sequence ultimately aims the B.O.B. correctly and restores King Jingaling and Bottles. Let the scenes play through, including Bottles’ reunion with his family and the celebration setup involving King Jingaling and Klungo. Returning to Jiggywiggy’s Temple before this sequence has finished is unnecessary and can make the route confusing.
- Let the post-quiz transition finish.
- Reach the B.O.B. gun chamber.
- Allow Kazooie’s control-panel sequence to play out.
- Confirm that King Jingaling and Bottles have been restored.
- Continue after the celebration setup rather than backtracking immediately.
6. Refill all supplies at Dingpot
Remain in the gun chamber and locate Dingpot, the cauldron. Jump into Dingpot to restore the life meter and refill the egg and feather supplies. This is the safest supply checkpoint before the final tower route, so use it even if you still have considerable health or ammunition.
Dingpot is also the practical recovery point if you fail the later Hag 1 encounter and return to this section. The final boss is not part of this chapter, and no boss fight should be started here. The potion-based Klungo battle was completed before the chapter begins; this section concerns only the quiz, the restoration scenes, the refill and the 70-Jiggy gate.
- Find Dingpot in the gun chamber.
- Jump into the cauldron.
- Confirm that health is restored.
- Confirm that eggs and feathers are refilled.
- Save before leaving if you want a stable final-area checkpoint.
7. Inspect the final altar and complete the 70-Jiggy challenge
Leave the gun chamber through the opening at the barrel of the B.O.B. Follow the ledge upward to the Warp Pad and the final doorway at the top of the tower. Electricity blocks this doorway. Beside it is another Jiggywiggy altar; read it to check the requirement rather than assuming the quiz victory opened the route.
The altar requires 70 Jiggies for the separate tenth challenge. If you do not have 70, use the available warp and hub routes to return to earlier worlds and collect more required Jiggies. This is distinct from the 55-Jiggy requirement that opened Cauldron Keep. The super-secret Jiggywiggy challenge offered afterward is optional and does not open the Hag 1 route.
- Reach the top-tower doorway.
- Read the altar beside the electrical barrier.
- Verify that you have at least 70 Jiggies.
- Return to earlier worlds if the requirement is not met.
- Do not confuse the tenth challenge with the earlier Cauldron Keep opening.
8. Return to Cauldron Keep after the tenth challenge
When you have 70 Jiggies, read the altar again and accept Jiggywiggy’s teleport to his Temple. Complete the tenth puzzle. When it is finished, the crystal Jiggy disables the electrical barrier at the top of Cauldron Keep.
Jiggywiggy may then offer the super-secret challenge. Skip it unless you are pursuing optional goals; it is not required for the ending. Return to the Quagmire area and use the Shock Spring Pad that was activated before Cauldron Keep was entered. Follow the pipe back to the fortress entrance, then use the Cauldron Keep Warp Pad to reach the upper tower again.
If you want another full refill before the final confrontation, re-enter the gun chamber and use Dingpot once more. Otherwise, proceed through the now-open doorway and begin Chapter 14’s Hag 1 strategy.
- Complete Jiggywiggy’s tenth challenge.
- Confirm that the tower’s electrical barrier is gone.
- Skip the optional super-secret challenge unless desired.
- Use the Quagmire Shock Spring Pad and pipe to return.
- Use the Cauldron Keep Warp Pad to reach the tower top.
- Begin the final boss only after this chapter’s route is complete.
Before you move on
- The Tower of Tragedy first round ends without Banjo and Kazooie placing last.
- The second round is won outright against the remaining sister.
- The final round ends with a score higher than 15.
- Gruntilda escapes and the quiz exit opens.
- The B.O.B. sequence restores King Jingaling and Bottles.
- Dingpot has restored health, eggs and feathers in the gun chamber.
- The altar at the top of Cauldron Keep confirms the 70-Jiggy requirement.
- Jiggywiggy’s tenth challenge has been completed.
- The electrical barrier at the final tower doorway has disappeared.
- The Quagmire return route and Cauldron Keep Warp Pad have brought Banjo and Kazooie back to the tower top.
- Optional follow-up: the super-secret Jiggywiggy challenge may be completed, but it is not needed for the ending.
- The doorway to Hag 1 is open and the final confrontation can begin in Chapter 14.
Final confrontation and ending — finishing the campaign
After completing the separate 70-Jiggy Jiggywiggy challenge, return through Cauldron Keep and reach the rooftop for the HAG 1 battle. Defeat Gruntilda through the laser, mortar, drill, battery, minion and toxic-gas phases, then land the final egg during her last spell attack to trigger the original Nintendo 64 ending presentation.
1. Verify the final prerequisite and prepare for the rooftop battle
Opening Cauldron Keep with 55 Jiggies is not enough to begin the final fight. You must also return to Jiggywiggy’s Temple and complete the separate 70-Jiggy challenge. Once that challenge is finished, follow the opened route back through Cauldron Keep, pass the already completed fortress sequence and climb to the rooftop entrance for the HAG 1 encounter.
Before entering, use Dingpot in Cauldron Keep to refill eggs and feathers. Make sure you have Clockwork Kazooie Eggs available, because ordinary eggs are used during the Breegull Blaster shooting windows but cannot destroy the HAG 1 batteries. Optional health upgrades make the battle safer. Returning the goldfish to the Spiral Mountain pond increases Banjo’s air capacity for the toxic-gas section, but it is not required to unlock or complete the fight.
Create a pre-battle save on a separate cartridge file if possible. Keep another save outside the battle so a successful campaign file is preserved for later collectible cleanup. If you lose, reload this save, refill at Dingpot and retry without having to repeat the entire game.
- The separate 70-Jiggy Jiggywiggy challenge is complete.
- The HAG 1 rooftop route is open.
- Dingpot has been used to refill eggs and feathers.
- Clockwork Kazooie Eggs are available.
- A pre-battle save is preserved.
- The Spiral Mountain air upgrade is treated as optional.
2. Clear the opening laser cycles and first shooting windows
The HAG 1 begins with two rotating laser beams. Stay mobile around the arena and jump over each beam as it approaches. Do not attack during this opening movement section. Gruntilda then appears from the hatch and asks a battle question. A correct answer gives you the easier version of the next attack, but either result can be handled by continuing to move and watching the spell pattern.
When the game changes to Breegull Blaster mode, aim upward at Gruntilda and fire regular eggs. Strafe left and right with the C buttons so Banjo is not standing still while spells cross the arena. Use R for more controlled aiming only when you can keep moving safely. The first shooting window reduces Gruntilda from 100 to 90 hit points. Stop firing once that ten-hit segment is complete, because she cannot be damaged again until the next window. Leave the dropped honeycomb in place unless health is already low.
The next movement section uses four lasers, with beams covering the front and rear of the machine. Jump as the beams approach rather than making long leaps across the arena. After the next question, enter another Breegull Blaster window and reduce Gruntilda from 90 to 80 hit points. Preserve the honeycombs for the later drill, minion and gas phases.
- The opening two-laser pattern is cleared.
- Gruntilda is reduced from 100 to 90 hit points.
- The four-laser movement section is cleared.
- Gruntilda is reduced from 90 to 80 hit points.
- The first honeycombs remain available for recovery.
3. Survive the mortar phases and reach the first battery opportunity
At 80 hit points, the HAG 1 uses one mortar. Stay near the outer part of the arena and watch where the shell lands. Jump just before impact, then use Kazooie’s flap while airborne to avoid the fragments spreading from the impact point. After the next question, use regular eggs during Breegull Blaster mode and reduce Gruntilda from 80 to 70 hit points.
The following movement phase uses two mortars. Track both impact points instead of reacting only to the first shell. Keep circling, jump over each impact and avoid landing in the fragment pattern. After the next question, shoot Gruntilda until she reaches 60 hit points. This is the end of the second mortar damage window and the point at which the first battery sequence becomes available.
The HAG 1 then opens its exhaust and activates the drill with its two front lasers. Use Talon Trot to stay mobile and favor the rear or side of the machine. When the drill points toward Banjo, move away from its tip instead of trying to jump close to it. When the machine stalls after the 60-hit-point window, switch to Clockwork Kazooie Eggs, wait for the exhaust smoke to stop and fire into the rear exhaust. Guide the Clockwork Kazooie through the interior, jump over the wires and move to the right-side battery. Press B beside it to detonate. Avoid the large internal enemies while crossing the chamber.
- The one-mortar phase ends with Gruntilda at 70 hit points.
- The two-mortar phase ends with Gruntilda at 60 hit points.
- The first Clockwork Kazooie attack begins after the 60-hit-point damage window.
- The right-side battery is destroyed.
- Honeycombs are not collected unless health requires them.
4. Clear the four-laser drill phase and destroy the second battery
With one battery destroyed, the HAG 1 restarts with the drill and four lasers. Keep Banjo near the side or rear of the machine, use Talon Trot when space allows and watch the front and rear beams together. If the drill points toward you, run toward the arena edge and remain ready to change direction if the machine turns. Do not reverse into a laser while trying to escape the drill.
When the machine stops and the next question is completed, enter Breegull Blaster mode. This damage window reduces Gruntilda from 60 to 50 hit points. Stop firing when that threshold is reached, immediately return to the rear exhaust and wait for the smoke to stop. Fire a Clockwork Kazooie Egg into the opening and guide it through the interior route to the opposite battery. Jump over the wires, avoid the internal enemies and press B beside the battery.
If the Clockwork Kazooie is destroyed, the damage already dealt remains counted. Survive the next machine cycle and wait for another opening rather than restarting the whole encounter. The second battery is the final mechanical objective; once it is destroyed, the HAG 1 no longer uses the earlier drill-and-laser sequence.
- The four-laser drill phase is survived.
- Gruntilda reaches 50 hit points after the regular-egg window following the first battery.
- The second Clockwork Kazooie enters through the exhaust.
- The opposite battery is destroyed.
- Both batteries are confirmed destroyed.
5. Handle the minion and toxic-gas phases
After the second battery is destroyed, Gruntilda remains exposed for Breegull Blaster attacks while firing spells. Strafe continuously and shoot upward whenever the line of fire is clear. Reduce her to 30 hit points. Controlled bursts are safer than standing still to maintain constant fire.
At 30 hit points, a minion enters the arena. Keep circling the HAG 1 while watching the minion in your peripheral vision. You can eliminate or freeze a minion if it blocks your aim, but another may appear, so do not spend the entire phase chasing one. Continue shooting Gruntilda until she reaches 15 hit points.
At 15 hit points, toxic gas fills the arena and the air meter begins to drain. This is a damage race. Keep moving, aim at Gruntilda whenever she is visible and use a saved honeycomb if health becomes dangerous. Do not stop to clear every minion if Gruntilda is exposed. Finish the shooting sequence before the air meter empties; once the air is gone, Banjo’s health begins to fall rapidly.
- Gruntilda reaches 30 hit points after the battery phases.
- The minion phase is controlled without wasting all recovery items.
- The toxic-gas phase begins at 15 hit points.
- Gruntilda is reduced to 1 hit point before Banjo runs out of air.
6. Land the final hit and confirm completion
At 1 hit point, Gruntilda begins the final powerful spell attack. Keep moving and watch the spell as it forms. Fire an egg at Gruntilda during the final opening while she is still exposed; do not stop moving to line up the shot. The successful hit defeats her and causes the HAG 1 to explode.
After the explosion, allow the ending sequence and credits to play. The required completion condition is the destruction of the HAG 1 followed by the ending presentation. You do not need all Jiggies, Jinjos, Cheato Pages, notes or other optional collectibles to finish the main campaign.
If you fail late in the battle, reload the pre-battle save and change one part of the plan at a time. Preserve the early honeycombs, practice jumping the mortar fragments and four lasers without rushing, and reach the gas phase with both health and air intact. The battery sections can be attempted again without losing the damage progression already achieved during the failed attempt.
- The final egg connects during the last spell phase.
- The HAG 1 explodes.
- The ending sequence and credits play.
- The original Nintendo 64 campaign is recorded as complete.
- A save remains available for optional 100% cleanup.
Before you move on
- The 70-Jiggy Jiggywiggy challenge was completed before the rooftop battle.
- The first HAG 1 battery was destroyed after the 60-hit-point damage window.
- The second HAG 1 battery was destroyed after the 60-to-50 damage window.
- Gruntilda reached 30 hit points during the minion phase.
- Gruntilda reached 15 hit points when toxic gas began filling the arena.
- Gruntilda was reduced to 1 hit point and defeated with the final egg.
- The HAG 1 exploded.
- The ending presentation and credits played on the original Nintendo 64 campaign.
- Optional 100% collection remains separate from main-story completion.
Finishing up
The main campaign is complete when the final Jiggywiggy challenge has been solved with at least 70 Jiggies, the upper Cauldron Keep barrier is open, Hag 1 has been defeated and the ending sequence and credits have played.
Required progression checks are the 55-Jiggy Cauldron Keep challenge, the fortress entrance switches, the third Klungo battle, the Tower of Tragedy, the separate 70-Jiggy challenge and the HAG 1 battle.
Do not treat possession of 55 or 70 Jiggies alone as completion; each corresponding Jiggywiggy board must also be solved.
Optional completion is a separate goal covering Jinjo families, Cheato Pages, Honeycomb Pieces, notes, transformations, cross-world rewards and remaining Jiggies.
Choose your next gameScreenshots & video
Game imagery for reference. Follow the written chapters above for the route and strategies.
Sources & references
Our original guide draws on the references below. Check the edition at the top of this page before following controls or unlock requirements.
- Banjo-Tooie USA Instruction Booklet
- Banjo-Tooie — Guide and Walkthrough — Nintendo 64 — By mayonnaise
- Banjo-Tooie – Guide and Walkthrough – Nintendo 64 – By me_frog
- Banjo-Tooie - Guide and Walkthrough - Nintendo 64 - By 3791
- Banjo-Tooie/Mayahem Temple — StrategyWiki
- Banjo-Tooie — Glitter Gulch Mine — StrategyWiki
- Banjo-Tooie – Guide and Walkthrough – Nintendo 64 – GameFAQs
- Banjo-Tooie — Witchyworld — StrategyWiki
- Banjo-Tooie — Guide and Walkthrough — Nintendo 64 — by whiz_kid
- Banjo-Tooie — Mini-Games FAQ — Nintendo 64 — by Gold_Mage
- Banjo-Tooie — Isle o’ Hags — StrategyWiki
- Banjo-Tooie — Guide and Walkthrough — Nintendo 64 — By KrocTheDoc
- Banjo-Tooie/Jolly Roger's Lagoon - StrategyWiki
- Rare Gamer — Chapter 4-1: Jolly Roger's Lagoon
- Banjo-Tooie — Guide and Walkthrough — Nintendo 64 — GameFAQs
- Rare Gamer — Chapter 5-4: Tying up Terrydactyland
- Banjo-Tooie – Speed Guide – Nintendo 64 – By mike89
- Banjo-Tooie — Jiggy FAQ — Nintendo 64 — By Pelord
- Hailfire Peaks — Banjo-Kazooie Wiki
- Rare Gamer — Chapter 8-1: Cloud Cuckooland
- Banjo-Tooie – Boss Guide – Nintendo 64 – By Icy_Guy
- Banjo-Tooie/Cauldron Keep
- Rare Gamer — Chapter 9-2: Cauldron Keep
- Banjo-Tooie – Gruntilda Guide – Nintendo 64 – GameFAQs
- Rare Gamer – Chapter 9-3: Final Fight
About the game & collecting notes
- Platform
- Nintendo 64
Step-by-step campaign walkthrough for the original Nintendo 64 (USA) release of Banjo-Tooie, covering the opening, all eight regular worlds in their verified progression order, their required revisits, the 55-Jiggy Cauldron Keep route, the Tower of Tragedy, the separate 70-Jiggy final challenge and the HAG 1 ending. Optional collectible cleanup is clearly separated from the main campaign.
Darryl Polo
Darryl Polo loves tinkering with emulation and revisiting retro games. He enjoys exploring how old favorites play on different setups and sharing what he learns along the way. At Joking Joystick, he writes about the games, hardware, and small discoveries that keep the hobby fun.
Our editorial standardsFound a step that needs another look? Help us improve this guide.