Zelda II: The Adventure of Link — NES (Original North America) Complete Walkthrough
Step-by-step campaign walkthrough for the original North American NES release of Zelda II: The Adventure of Link. This guide covers overworld movement, town hints, spell and experience use, every palace (the six palaces and the Great Palace), required palace items, boss approaches, recovery options, and a concrete completion checklist so you can reach the Triforce of Courage and wake Princess Zelda.

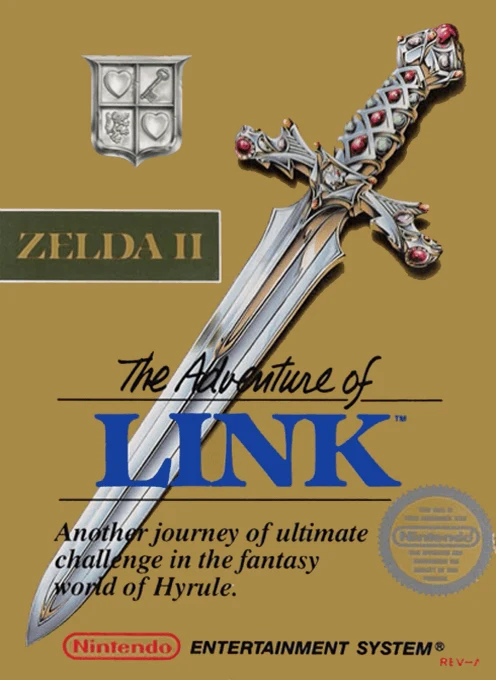
Find a copy
Zelda II: The Adventure of Link Nintendo Entertainment System
We may earn a commission if you buy through these links, at no extra cost to you. As an Amazon Associate I earn from qualifying purchases.
Opens retailer search results. Check the model, edition, seller, availability and current price before buying.
Before you begin
You are playing the original NES release of Zelda II: The Adventure of Link.
The game combines an overhead overworld with side-view action screens and seven palaces: six crystal palaces followed by the Great Palace.
Your main objective is to restore the six crystals, enter and clear the Great Palace, defeat Thunderbird and Shadow Link, obtain the Triforce of Courage, and watch the ending in which Princess Zelda awakens.
This walkthrough covers the required overworld route, towns, spells, progression items, palace objectives, boss methods, recovery after failure, and a concrete completion check for the original North American NES release.
The Magic Key obtained through Spell in New Kasuto is required for the intended progression through Three-Eye Rock Palace. It is not merely a late-game convenience.
Set yourself up for the run
Confirm that you are playing the original North American NES release or a faithful emulation of that edition, with the four NES controller buttons mapped normally.
Learn the original Continue and Save behavior before beginning a long palace attempt. Ordinary Continue resumes at the starting castle, while Continue after a Game Over inside the opened Great Palace resumes at the Great Palace entrance. Save records progress and returns to the title screen.
Prioritize Heart Containers, Magic Containers, sword techniques, and the spells needed for the next route. Obtain Spell and the Magic Key in New Kasuto before attempting Three-Eye Rock Palace.
Before the Great Palace, make sure Thunder is learned and preserve enough Magic to cast it against Thunderbird.
Controls, Saving, and Survival Basics
The original North American NES release alternates between an overhead land map and side-scrolling action screens. The buttons change roles between these views, so learn both layouts before leaving the starting castle. Combat depends on placing Link’s sword and shield at the correct height, while the experience system lets you improve Attack, Magic, or Life. Continue and Save preserve permanent progress but discard unspent experience.
1. Learn the land-map controls
Use the Control Pad to move Link across the land map. Press Start to pause or resume the game. Select has no routine role during ordinary land-map movement.
After you obtain the Hammer, press A when Link is positioned beside an overworld obstacle that the Hammer can destroy. After you obtain the Flute, press B when the current overworld situation requires it. The two items are not interchangeable: A is the Hammer button on the land map, while B is the Flute button.
When Link enters a town, cave, palace, or random battle, the game switches to a side-scrolling action screen. Do not carry the land-map button assumptions into these screens. A jumps there, and B attacks or interacts.
- Move Link with the Control Pad on the land map.
- Press Start to pause and resume.
- Use A for the Hammer after collecting it.
- Use B for the Flute after collecting it.
- Remember that the action-screen controls differ from the land-map controls.
2. Use the side-scrolling controls
In towns, caves, palaces, and enemy encounters, Left and Right move Link. Press Down while standing to crouch. Press A to jump, and press B to swing the sword. B also picks up certain items and talks or interacts when Link is standing in the correct position.
Press Start during an action screen to pause and display the subscreen. The subscreen shows Link’s status and available spells. Use the Control Pad to select a spell, then press Start again to return to play. Press Select to cast the selected spell.
Spell selection is screen-specific. Choose the spell again when entering a new action screen where you need it, because a spell’s effect does not carry through indefinitely between screens. If Link does not have enough Magic, pressing Select will not cast the spell.
- Press A to jump in action screens.
- Press B to swing the sword or interact when appropriate.
- Press Down to crouch and lower Link’s shield.
- Press Start to open and close the subscreen.
- Select a spell with the Control Pad and cast it with Select.
3. Practice standing swings and crouch attacks
A standing sword swing is Link’s normal attack at the higher sword line. Face the enemy, let it approach into range, and press B when the blade can connect. Avoid attacking blindly at the edge of the screen; watch the enemy’s movement and strike when it commits to an approach.
Hold Down to crouch. Link’s shield moves lower while he crouches, allowing him to defend against attacks aimed at his lower body. Press B while crouching to make the low sword attack commonly called the crouch stab.
Change Link’s stance to match the enemy. Use a standing guard against threats arriving high and a crouched guard against low attacks. Crouching is not automatically safer, because some enemies attack above Link’s lowered shield. After each attack, return your attention to the enemy’s position instead of continuing to press B without checking its next move.
Use the first action screens near the starting castle as a training area. Defeat one enemy with a standing swing, then crouch to observe the shield position and practice a low attack. This teaches the timing needed for palace enemies more safely than learning during a boss fight.
- Defeat an enemy with a timed standing sword swing.
- Hold Down and observe Link’s lower shield position.
- Use a crouching sword attack against a low target.
- Change between standing and crouching as the enemy’s attack line changes.
- Watch the enemy after each swing before attacking again.
4. Add jumping and learned thrusts
Press A to jump over enemies, pits, and short obstacles. Press B during the jump for an airborne sword swing. Against a charging enemy, wait until it is close enough that the jump will clear its body, then move over it and attack during the jump or as Link lands. Jumping too early can leave Link exposed before the enemy reaches him; jumping too late causes a collision.
Later, swordsmen teach special thrusts. After learning the upward thrust, press Up while Link is airborne to attack above him. After learning the downward thrust, press Down while airborne to attack below him. These techniques are unavailable at the beginning of the campaign, so pressing the direction before receiving the instruction will not produce the move.
Practice each thrust in a safe action screen after learning it. The upward thrust reaches enemies above Link’s ordinary sword line. The downward thrust can strike targets below him and is especially useful when the enemy’s vulnerable area is beneath Link during a jump.
- Jump over a charging enemy instead of accepting a collision.
- Use an airborne B attack when a standing swing cannot reach.
- Learn the upward and downward thrusts from swordsmen before relying on them.
- Press Up during a jump only after learning the upward thrust.
- Press Down during a jump only after learning the downward thrust.
5. Understand experience and level increases
Defeated enemies award experience points, and some treasure rewards also provide experience. During an action screen, the Next display shows Link’s accumulated experience and the amount needed before an attribute can be raised.
When the level-up prompt appears, use the Control Pad to choose Attack, Magic, or Life, then press Start to confirm. If you prefer to preserve the experience for a later attribute, choose Cancel instead. This lets you continue accumulating experience toward a different threshold.
Attack improves sword damage, Magic increases the amount of spellcasting Link can perform before exhausting his meter, and Life improves his ability to withstand damage. Choose Life when ordinary hits are ending attempts too quickly, Attack when enemies require too many sword strikes, and Magic when useful spells are running out before the end of difficult action screens.
Do not treat unspent experience as permanent progress. A Game Over resets the unspent amount, and saving also sets it to zero. Earned ability levels, special items, spells, and campaign progress remain available.
- Check the Next display before difficult palace sections.
- Choose Attack, Magic, or Life when a level-up prompt appears.
- Use Cancel when you want to preserve experience for another attribute.
- Treat unspent experience as temporary.
- Remember that earned levels and items survive a Game Over or Save.
6. Use Continue and Save safely
Link begins with three lives. Losing all of his Life points costs one life, and losing the final life produces a Game Over. At that point, the game offers Continue or Save.
Outside the Great Palace, Continue returns Link to the starting castle with his permanent campaign progress intact and unspent experience reset to zero. Save returns to the title screen. When that file is loaded later, Link resumes from the starting castle with saved levels, items, spells, and palace progress.
After the Great Palace has been opened, a Game Over inside that palace is the special exception. Choosing Continue returns Link to the Great Palace entrance rather than the starting castle. This is the practical choice when an endgame attempt fails. Choosing Save still returns to the title screen, and a later load resumes from the starting castle rather than directly inside the palace.
On original NES hardware, pause with Start on Controller 1. While the subscreen is displayed, press Up and A together on Controller 2 to open the Continue/Save screen. Use Controller 1 to select Continue or Save. The saved data includes special items and current ability levels, but unspent experience returns to zero.
After choosing Continue, wait until Link has returned to the starting castle, or to the Great Palace entrance when the special endgame exception applies. After choosing Save, wait for the title screen. When turning off an original NES, hold the console’s Reset button while switching off the power, following the manual’s warning, to reduce the chance of interrupting the cartridge’s save process.
- Choose Continue when you want to resume immediately.
- Choose Save when you want to return to the title screen.
- Expect ordinary Continue to return to the starting castle.
- Expect Great Palace Continue to return to the Great Palace entrance after a Game Over there.
- Open the save screen with Up and A on Controller 2 while the subscreen is displayed.
- Wait for the restart location or title screen before powering down.
Before you move on
- You can identify the land-map roles of A and B: Hammer and Flute.
- You can identify the action-screen roles of A, B, Start, and Select.
- You can perform a standing sword swing and a crouching low attack.
- You can lower Link’s shield by crouching and change stance to match an enemy.
- You can jump over a charging enemy and strike during a jump.
- You know that the upward and downward thrusts require instruction from swordsmen.
- You can select Attack, Magic, Life, or Cancel at a level-up prompt.
- You know that Game Over and Save reset unspent experience but preserve earned levels, items, spells, and campaign progress.
- You know that ordinary Continue returns to the starting castle.
- You know that Save returns to the title screen and later loads from the starting castle.
- You know that Continue after a Game Over inside the opened Great Palace returns to the Great Palace entrance.
- You can open the original NES Continue/Save screen with Up and A on Controller 2 while the subscreen is displayed.
References for this chapter
Overworld Navigation and Town Hints
Zelda II’s overworld is built around visible routes, side-view encounter screens, towns, caves and blocked landmarks. Town residents often provide the clue that connects one objective to the next, but the wording can be indirect. Treat every named person, item and obstruction as a route marker. The reliable early campaign order is Parapa Palace; the Trophy and Jump; Bagu, the Mirror and Life; Death Mountain and the Hammer; the Water of Life and Fairy in Mido; Midoro Palace; King’s Tomb; and Island Palace.
Use towns as route markers
Speak with residents whenever you enter a town for the first time. Useful dialogue identifies missing items, names people who can help, describes a blocked road or points toward a palace. Record proper names such as Ruto, Saria, Mido, Nabooru and King’s Tomb. These names are practical directions, not background story.
After a major discovery, revisit the towns connected to that region. The Trophy leads back to Ruto for Jump. Bagu’s location and the river guard in Saria control the bridge. The Mirror leads to the Life spell in Saria. Later, the Water of Life leads to Fairy in Mido, while dialogue in Ruto and Mido points toward the southern route and Island Palace.
Use roads as your normal travel lanes while learning the map. Forests, deserts, swamps, graveyards, bridges and mountain areas can trigger side-view battles or conceal alternate routes. Off-road areas are useful for experience and recovery items, but return to a nearby town before attempting a dangerous cave or long encounter sequence with low Life or Magic.
- Speak with residents in every newly reached town.
- Write down names, items and blocked landmarks.
- Return to towns after major item discoveries.
- Use roads to establish the main route before exploring optional terrain.
Complete the western opening before Death Mountain
Begin with Parapa Palace and obtain the Candle. Afterward, enter the desert cave near Ruto and defeat the Goriya guarding the Trophy. Bring the Trophy back to Ruto and give it to the woman who asks for it. The old man in the basement then teaches Jump.
Next, speak with Bagu in the forest east of the swamp. Return to Saria and talk to the river guard so the bridge becomes available. In Saria, search the empty house and look beneath the table to recover the lost Mirror. Return it to its owner and receive the Life spell from the old man inside.
This establishes the intended order before the mountain trip: Parapa Palace, Trophy, Jump, Bagu, Mirror and Life. Do not treat Midoro Palace as the next required completion just because its entrance can be seen in the swamp. The Hammer route through Death Mountain should be completed first, because the Hammer opens the overworld boulders needed for the Water of Life and later travel.
- Clear Parapa Palace and obtain the Candle.
- Recover the Trophy and trade it in Ruto for Jump.
- Find Bagu and activate the Saria bridge.
- Recover the Mirror in Saria.
- Receive Life before entering Death Mountain.
Take the right-hand route through Death Mountain
After receiving Life in Saria, cross the activated bridge and enter the Death Mountain region. The caves form a branching route. Whenever a fork presents several caves, choose the cave on the right. This is the dependable route toward the Hammer.
When you reach a cave with an up-and-down elevator, leave that elevator alone and continue through the current passage. Keep following the right-hand route until you reach the later cave near the rock outside. In that cave, take the elevator down and travel right through the lower section. Red and Orange Dairas guard the route, and lava gaps punish rushed jumps. Cast Shield before a difficult enemy sequence and use Life only when a failed exchange would otherwise cost the run.
Continue right until Link reaches the Hammer. After taking it, retrace the route to the same elevator, ride back up and travel left through the upper passage until you leave the mountain. The elevator is part of both the entry and exit route; reaching the Hammer does not mean the cave is finished until Link has returned to the overworld.
Immediately outside Death Mountain, use the Hammer on the nearby boulder. Enter the revealed cave and collect the Magic Container if you can safely complete the short encounter section. This container is optional, but it is directly on the route and gives useful Magic capacity for the errands ahead.
- Enter Death Mountain after obtaining Life.
- Choose the right-hand cave at each major branch.
- Ignore the first up-and-down elevator and continue onward.
- Use the later elevator to descend and reach the Hammer.
- Return by the elevator and exit through the upper passage.
- Use the Hammer on the nearby boulder after leaving the mountain.
Collect the Water of Life and Fairy before Midoro Palace
Once outside Death Mountain, follow the route toward the Mido and Midoro region rather than wandering directly into the palace. Use the Hammer on the boulders that block the western and swamp-side paths. One opened cave contains the Water of Life. This is the medicine needed for the next town errand, not a disposable healing item to spend on a random battle.
Bring the Water of Life to the sick child’s mother in Mido. She allows Link into the house, where the old man teaches Fairy. Fairy changes Link into a flying form for the current side-view screen. Link cannot attack in that form, but it is required for crossing the tall wall in the passage below King’s Tomb and is useful for bypassing difficult terrain.
While in Mido, use Jump to reach the upper entrance of the church and speak with the swordsman to learn Downthrust. Also listen to the residents: one points toward the Island Palace and its Raft, while another helps identify the Water of Life errand. With the Hammer, Water of Life, Fairy and Downthrust obtained, enter Midoro Palace and clear it for the Handy Glove. Place the crystal before leaving.
This order is the safest campaign route: Death Mountain and Hammer first, Water of Life and Fairy second, Midoro Palace third. The Hammer is for overworld boulders; the Handy Glove is for designated breakable blocks in side-view areas. They are not interchangeable.
- Open the swamp-side boulder with the Hammer.
- Take the Water of Life from the cave.
- Deliver it to the sick child’s mother in Mido.
- Learn Fairy from the old man in the house.
- Learn Downthrust at Mido’s church.
- Clear Midoro Palace and place its crystal.
Use King’s Tomb to reach Island Palace
After Midoro Palace, return to the graveyard south of Mido. Look for the isolated tombstone standing apart from the main group; this is King’s Tomb. If you spoke with the relevant townspeople, the directions describe the tunnel as being south of the tomb.
Leave King’s Tomb by walking directly south through the graveyard. Link falls into a side-view passage. Be ready to use Downthrust as soon as control returns because Lowders are positioned below the landing area. Continue right until a wall is too high for an ordinary jump. Cast Fairy and fly over it, then continue through the passage until Link emerges on the island south of Mido.
From the island, follow the coastline to Island Palace. The palace’s reward is the Raft. After defeating its guardian, place the crystal in the statue before leaving. Return through the passage to the mainland and step onto the dock near Mido to ride the Raft into the eastern region.
The Raft opens the route to Nabooru and Eastern Hyrule. In Nabooru, continue listening to residents and complete the local spell errands before heading farther east. The Boots come later from Maze Palace and have a different function: they let Link walk across the water route east of Nabooru toward the sea palace. Do not search for the Boots in Island Palace or assume the Raft replaces them.
- Find the isolated tombstone in the graveyard south of Mido.
- Walk due south from King’s Tomb into the hidden passage.
- Use Fairy to cross the tall wall.
- Reach Island Palace and obtain the Raft.
- Place the Island Palace crystal.
- Use the dock near Mido to reach Nabooru and Eastern Hyrule.
Match each obstruction to its correct solution
Use the Candle to illuminate dark caves. Use the Hammer on overworld boulders. Use the Handy Glove to break designated blocks in side-view rooms. Use Fairy for the King’s Tomb passage and other screens with a wall or gap that normal jumping cannot cross.
The Raft carries Link from the Mido-area dock into Eastern Hyrule. The Boots later allow him to walk across the water east of Nabooru. The Flute is used at the River Devil south of Nabooru and at the triangular rock formation to reveal the Hidden Palace. The Cross, obtained in that palace, makes certain invisible enemies visible on the late eastern route.
New Kasuto is hidden in the eastern region. After finding the settlement, use Spell at its dead end to reveal the house containing the Magic Key. The Magic Key is required for the normal sixth-palace route because ordinary keys are not sufficient for its locked doors.
After every palace, place its crystal before leaving. If the Great Palace remains sealed later, verify all six earlier crystals rather than merely counting defeated guardians. Revisit blocked forks only after obtaining the item or spell associated with that obstruction.
- Candle: dark caves.
- Hammer: overworld boulders.
- Handy Glove: designated side-view blocks.
- Fairy: tall walls and difficult passage screens.
- Raft: crossing from the Mido-area dock to Eastern Hyrule.
- Boots: walking over the water east of Nabooru.
- Flute: River Devil and the Hidden Palace reveal.
- Cross: visibility against invisible enemies.
- Magic Key: locked doors in the sixth palace.
Before you move on
- You can use town dialogue to identify people, items, blocked routes and palace directions.
- You have cleared Parapa Palace and obtained the Candle.
- You have obtained Jump from the Trophy, activated the Saria bridge through Bagu, recovered the Mirror and learned Life.
- You have navigated Death Mountain by using the right-hand cave route and collected the Hammer.
- You have opened the swamp-side boulder, collected the Water of Life and learned Fairy in Mido.
- You have learned Downthrust, cleared Midoro Palace and placed its crystal.
- You can find King’s Tomb, cross its tunnel with Fairy and reach Island Palace.
- You have obtained the Raft, placed the Island Palace crystal and used the dock to reach Nabooru and Eastern Hyrule.
- You can distinguish the Candle, Hammer, Handy Glove, Fairy, Raft, Boots, Flute, Cross and Magic Key by their correct uses.
- You know to return to blocked overworld forks after gaining the relevant item or spell.
- You understand that the Great Palace requires all six earlier palace crystals.
References for this chapter
- Zelda II: The Adventure of Link instruction manual — official Nintendo NES manual
- Zelda II: The Adventure of Link — Navigating Death Mountain walkthrough
- Zelda II: The Adventure of Link — Guide and Walkthrough by TConnolly
- Zelda II: The Adventure of Link — Mike’s RPG Center walkthrough
- Zelda II: The Adventure of Link — StrategyWiki walkthrough
Experience, Leveling and Spell Management
Defeat enemies steadily, choose level increases according to the next challenge, and spend magic only when it solves a real problem. Life, Magic, and Attack strengthen different parts of Link’s performance, while the eight spells provide defense, recovery, movement, special attacks, and progression tools. The most important habit is to enter difficult palace rooms with enough magic for the spell that the next obstacle actually requires.
Earn experience during normal travel
Enemies defeated in side-view scenes award experience, and some enemies or objects provide Point Bags worth additional experience. Do not avoid every encounter while traveling. Fighting ordinary enemies gives you practice with sword height, crouching defense, jumps, and enemy timing while also improving Link’s attributes.
Early in the adventure, clear safe overworld and cave encounters around the opening areas instead of rushing directly toward Parapa Palace. Later, palace enemies can serve the same purpose, but do not force a fight in a dangerous room merely for a small amount of experience. If you are struggling to damage enemies or are losing too much health before a palace boss, leave the dangerous area and repeat a safer nearby route.
The NES original displays your current experience and the amount needed for the next available increase. When you reach that requirement, the level-up screen offers the next attribute in the game’s level-up sequence. Accept it when it benefits your immediate needs, or select Cancel if you want to defer that increase and continue building experience for a later opportunity. Cancel does not let you freely choose any attribute; it postpones the offered increase.
If all of Link’s lives are lost, the game enters Game Over. Continuing from the title screen preserves saved special items and ability levels when you save, but accumulated experience is reset. Avoid carrying a large amount of unspent experience into a risky area when you could safely save or spend the available increase first.
- Fight safe enemies during normal travel instead of treating every encounter as wasted time.
- Collect Point Bags only when the route to them is safer than the reward is valuable.
- Use towns or known recovery points to restore Link before repeating a farming loop.
- Accept or defer the offered level increase deliberately rather than cancelling automatically.
- Remember that Game Over clears accumulated experience.
Choose the attribute that solves your current weakness
Life reduces the damage Link takes from enemy attacks. Favor the offered Life increase when contact damage or platforming mistakes are ending attempts too quickly. This is especially useful before a palace whose rooms contain crowded enemy formations or difficult jumps.
Attack increases the damage dealt by Link’s sword. Favor Attack when armored enemies, palace guardians, or other durable targets require too many successful strikes. Shorter fights reduce the amount of time you spend exposed to counterattacks, but Attack is less useful if the main problem is surviving a room rather than damaging its enemies.
Magic lowers the magic-point cost of spells. This becomes increasingly valuable once you are relying on Shield, Jump, Life, Reflect, or other expensive magic during palace runs. Choose Magic when your spell costs prevent you from using a necessary defensive or recovery spell. If you can clear most rooms with swordplay and are repeatedly dying from ordinary hits, Life may help sooner.
Palace completion also grants a substantial experience reward after the crystal is placed. Plan around that reward: do not waste health and magic trying to force unnecessary fights just before the palace statue. Finish the dungeon, place the crystal, and then handle the resulting level-up opportunity before beginning the next dangerous route.
- Favor Life when surviving damage is the immediate weakness.
- Favor Attack when enemies are taking too many sword hits.
- Favor Magic when spell costs prevent you from using essential defensive or recovery magic.
- Place each palace crystal before relying on the palace reward as part of your next level-up plan.
Learn and use the three core early spells
Shield is learned in Rauru. After entering the appropriate house and speaking with the wise man, use Shield to halve the damage Link takes for the current side-view screen. Make it your standard preparation for dangerous rooms and boss encounters, but do not cast it merely to cross an empty or easily controlled screen.
Jump is learned in Ruto after you recover the Trophy from the desert cave and bring it to the person who grants access to the wise man. It doubles Link’s jumping height for the current side-view screen, allowing him to reach ledges and clear gaps that a normal jump cannot handle. Enter the room first, identify the ledge or gap that requires extra height, and then cast Jump. A transition to another action-screen room ends the temporary effect.
Life is learned in Saria after you find the lost Mirror in the apparently empty house and return it to the woman who needs it. Life restores a limited portion of the life meter rather than filling it completely. Move away from active enemies whenever the room gives you space before casting. Using Life while an enemy is already within striking distance can waste both the magic and the recovery opportunity.
These spells are consumptive: each cast spends magic points. Swordplay, blocking, and careful movement cost nothing, so use them first against weak enemies, predictable attacks, and formations that can be bypassed safely.
- Shield: obtain it in Rauru and use it before dangerous rooms.
- Jump: take the Trophy to Ruto and cast the spell after entering the room that requires extra height.
- Life: recover Saria’s Mirror and cast the spell from a safe position.
- Do not assume Shield, Jump, or other temporary effects survive an action-screen transition.
- Use ordinary swordplay whenever it can solve the room safely.
Reserve specialized spells for their specific jobs
Fairy turns Link into a flying fairy for the current side-view screen. Use it when a route requires flight or when normal jumping cannot reach the destination. Fairy is a traversal tool, not a replacement for routine movement, and it cannot simply pass through solid blocks and walls.
Fire causes Link’s sword to launch fireballs for the current side-view screen. Several enemies, especially in East Hyrule, cannot be defeated by ordinary sword strikes and require Fire. Cast it when the enemy’s behavior or the room’s progression makes that requirement clear; do not spend it on opponents that can be handled normally.
Reflect causes Link’s shield to reflect enemy magic while the spell is active. It is especially useful against magical projectiles such as those used by the wizard guardian in Palace 4. Reflect is support magic: it is not needed in every fight, and it does not replace the required attack method for other bosses.
Spell is learned in hidden New Kasuto and has one specific progression use there. At the town’s concealed location, cast Spell to reveal the hidden room containing the Magic Key. The Magic Key is a separate inventory item, not a spell effect; once collected, it opens palace doors without consuming ordinary keys. Do not treat Spell as a general combat spell or as a substitute for the key itself.
Thunder is learned in Old Kasuto. In the Great Palace, Thunder is mandatory for making Thunderbird vulnerable to sword attacks. When Thunderbird appears and the battle begins, cast Thunder promptly. The spell reveals the boss’s vulnerable face; without that effect, Link’s sword cannot damage Thunderbird. Thunder is the required step. Shield, Jump, Reflect, and Life are optional support choices whose value depends on your remaining magic, health, and ability to avoid the falling fireballs.
Before Thunderbird, decide whether your remaining magic is better spent on Shield and Jump for protection and reach, Reflect for projectile defense, or Life for emergency recovery after Thunder. Do not assume there will be enough magic for every support spell. The priority is to enter the battle with enough magic for Thunder, then use sword attacks against the exposed face while avoiding the fireballs. After Thunderbird falls, continue into the next chamber: the game is not finished, because Dark Link remains.
- Use Fairy for specific traversal problems rather than routine movement.
- Use Fire against enemies that require sword-launched flames.
- Use Reflect when magical projectiles are the main danger.
- Use Spell only for its concealed-room function in New Kasuto.
- Treat the Magic Key as a separate inventory item obtained through that hidden-room sequence.
- Cast Thunder when Thunderbird appears; it is mandatory for making the boss vulnerable.
- Choose Shield, Jump, Reflect, or Life only after accounting for the magic needed by Thunder.
- After Thunderbird, proceed to the Dark Link battle instead of expecting the ending immediately.
Before you move on
- You can explain what Life, Magic, and Attack improve and choose among offered increases based on the next section.
- You understand that enemies and Point Bags provide experience and that Game Over resets accumulated experience.
- You have learned Shield, Jump, and Life and know when each is more useful than ordinary swordplay.
- You know that temporary spell effects end when the action-screen room changes.
- You can identify the specialized purposes of Fairy, Fire, Reflect, Spell, and Thunder.
- You understand that Spell reveals the hidden Magic Key room but is not the Magic Key itself.
- Before entering the Great Palace, you have enough magic to cast Thunder when Thunderbird appears and have chosen whether your remaining reserve is better spent on Shield, Jump, Reflect, or Life.
- You can reach Thunderbird’s exposed face with sword attacks and understand that defeating him is followed by the Dark Link battle rather than the immediate ending.
Palace Anatomy and General Dungeon Tactics
The six main palaces in the original North American NES release are side-view platforming dungeons built around elevators, locked doors, small keys, hazardous rooms, palace items, and a guardian at the end. The route is rarely a straight line. Expect to move between floors, return through rooms after finding a key or item, and test suspicious passages when the obvious route ends. The goal is not complete until the guardian is defeated, the dropped key is collected, the statue room is opened, and the crystal is placed.
Read the palace as a connected set of routes
When you enter a palace, first identify the elevator, stairs, doors, platforms, and any vertical shaft in the room. Elevators commonly connect several floors, so remember whether you arrived from above or below and which direction leads back toward the entrance. A room that seems to be a dead end may be a return route, a key room, or a branch that becomes useful only after you obtain the palace item.
Do not assume that every enemy must be defeated. Fight enemies that block a doorway, guard a key, or make a jump unsafe. In other rooms, moving past the enemy is often safer than spending health and magic on a fight that does not advance the route. Palace enemies may return when you re-enter a screen, but your knowledge of the platforms and attack patterns makes a cleared route easier to cross the second time.
The palace item is a major route marker. If a barrier cannot yet be passed, search another elevator branch or locked door rather than repeatedly attacking it. In particular, blocks that require the Handy Glove cannot be cleared before you obtain that item.
- Identify the entrance route and the first elevator before advancing far.
- Remember which floors and branches you have already checked.
- Prioritize keys, palace items, and safe passage over unnecessary battles.
Use small keys on the correct locked doors
Small keys open locked palace doors. When you find one, do not immediately spend it on the first locked door you see if another unexplored branch remains. Search the accessible parts of the floor first and note whether the key is positioned above, below, or beyond an elevator route. Some keys are placed in rooms where the apparent route is blocked by enemies, breakable blocks, or a platforming hazard.
If a locked door stops you, backtrack through rooms you have already visited. Check lower platforms, side ledges, and elevator exits that you may have passed while concentrating on survival. A missing key is usually in an accessible branch rather than behind the door that currently blocks you. Use controlled drops and deliberate jumps when a key is placed below the main walkway; rushing a descent can cost more health than the key is worth.
The palace guardian drops a key when defeated. This is the key needed to continue to the final statue room. Remain in the boss room after the victory, collect the dropped key, and then use it on the locked door leading to the statue. Walking out of the palace without taking this key leaves the palace unfinished.
- Search available branches before using a key.
- Recheck elevator exits and lower platforms when progress stops.
- After the guardian dies, collect the dropped key before leaving the room.
Distinguish false walls from breakable blocks
Some palace routes use false walls or hidden passages. These walls may look ordinary, so a blank dead end or an unusually isolated room is worth testing by walking or jumping into the suspicious section. Do not treat every solid wall as secret, but remember that a route can continue through a wall even when no doorway is visible. This is especially important in later palaces, where a hidden passage may be the intended connection to the next section.
Breakable palace blocks are different. Once Link has obtained the Handy Glove, sword attacks can clear certain blocks that previously formed solid barriers. Use the sword against block formations that seal a key, elevator, treasure bag, or exit. The Handy Glove does not mean that every wall or floor can be destroyed, and it does not replace testing false walls. If a block does not break, look for the correct approach, a different block type, or another route.
Treasure rooms and isolated ledges may contain experience bags, Magic Jars, or other useful rewards. These rooms are often optional, but they can provide the experience or magic needed for a difficult section. Search a suspicious side route when your resources are good; skip a dangerous detour when reaching it would cost the health needed for the guardian.
- Test suspicious dead ends for false walls when the route appears incomplete.
- Use the Handy Glove only on the block formations it can actually break.
- Treat experience bags and recovery items as helpful but not always required.
Manage elevators, falls, and backtracking
Watch an elevator’s movement before stepping off. Some rooms require Link to ride past a ledge and return on a later pass, while others place the useful exit on a different floor from the visible key. If you miss a landing, use the nearest safe platform instead of forcing a second jump while enemies or projectiles are active.
Backtracking is part of the palace design. After finding a key, item, or newly passable block, return through earlier rooms and check doors or branches that were previously inaccessible. Use the shortest known route where possible. You do not need to clear every returning enemy if you can pass safely, but do not run blindly through a room whose hazards can push Link into a pit or onto a damaging obstacle.
Some palace rooms provide a red Magic Jar when a statue is struck, although the result can depend on the statue and room. Treat these as opportunities to restore magic, not guaranteed checkpoints. If the palace entrance is nearby and Link is in poor condition, leave before attempting a guardian. Recover in a town or at a reliable recovery point, then return with enough Life and Magic to survive the final rooms.
- Observe elevator paths before committing to a jump.
- Use known safe routes during backtracking.
- Take advantage of reliable Magic Jars, but do not depend on an unverified statue.
- Leave the palace if a guardian attempt would begin with critically low resources.
Prepare for and finish the guardian
Before entering the guardian room, make sure the Life spell is available for an emergency and reserve enough Magic for the defensive or movement spell that suits the fight. Shield can reduce damage received, Jump can help Link reach or avoid elevated targets, and Life is best saved for a fight that is still recoverable. Do not drain the entire Magic meter on optional treasure rooms immediately before the boss.
Watch the guardian’s opening movement before attacking continuously. Jump over charges when the arena permits it, keep Link on stable ground, and use crouching or the appropriate sword height against attacks aimed at Link’s body. Palace guardians do not all use the same pattern, so the reliable approach is to learn when the boss becomes vulnerable and take safe sword hits instead of chasing every opening.
After the guardian is defeated, collect the key that appears, open the final locked door, and walk to the palace statue. Place the crystal in the statue before returning to the overworld. The crystal placement is the actual palace completion step. The game then awards the palace completion experience and advances Link’s experience-level progression. Confirm the crystal is visibly seated in the statue before leaving.
- Enter the guardian room with usable Life and enough Magic for the planned fight.
- Collect the key dropped after the guardian is defeated.
- Open the statue room and place the crystal.
- Confirm the completion experience occurs before departing.
Before you move on
- The palace’s item has been collected when that item is part of the palace’s required progression.
- The palace guardian has been defeated.
- The dropped boss key has been collected.
- The final locked door has been opened.
- The crystal is visibly placed in the palace statue.
- The game awards the palace-completion experience before Link returns to the overworld.
References for this chapter
- Zelda II - The Adventure of Link instruction booklet — official Nintendo NES manual
- Zelda II: The Adventure of Link - Guide and Walkthrough for NES, GameFAQs
- Zelda II: The Adventure of Link — Guide and Walkthrough
- Zelda II: The Adventure of Link/Parapa Palace, StrategyWiki
- Zelda II: The Adventure of Link/Midoro Palace, StrategyWiki
Parapa Palace (Desert) — Get the Candle
Parapa Palace is the first palace in the original North American NES release of Zelda II: The Adventure of Link. Reach it through the northeastern part of Parapa Desert, collect the palace keys, obtain the Candle from the lower section, defeat Horsehead, and place the first crystal in the statue. The Candle automatically lights dark caves on the overworld, making it an important early objective.
Reach Parapa Palace in the northeastern desert
Before entering, visit Rauru and learn the Shield spell from the Wise Man. Shield is not strictly required to enter the palace, but it greatly reduces the danger from Gumas, Iron Knuckles, and other close-range enemies. If you have reached the desert through the cave northeast of Rauru, follow the narrow route toward the sea and then travel south through the bubble-jumping area. Continue through the desert and head back north after collecting any optional overworld reward you want. Parapa Palace is at the northeastern end of Parapa Desert.
At the palace exterior, walk right to the elevator. Step onto it and press Down to descend into the interior. This outside elevator is the main connection between the entrance and the palace’s lower rooms, so remember its position when the route begins sending you back through previously visited areas.
- Learn Shield in Rauru if you have not already done so.
- Enter Parapa Palace from the northeastern part of Parapa Desert.
- Use the exterior elevator to descend into the palace.
Take the left route and collect the first key
From the first interior elevator, go left. Wosus rush along the floor and can damage Link while also costing experience if they make contact, so defeat them quickly or jump over them when the spacing is unsafe. In the next room, blue Bots occupy the upper ledges. Continue left and prepare for a Red Stalfos. Its shield covers its upper body, so crouch and stab at its legs as it approaches rather than repeatedly using standing swings.
Keep moving left through the connected rooms until you reach the first key. Pick it up, then retrace the entire route to the starting elevator. Do not spend time trying to destroy every Bubble you see; they are difficult to defeat at low Attack strength and can be bypassed while you continue through the palace.
- Defeat or avoid the Wosus without losing experience unnecessarily.
- Use crouching sword thrusts against Red Stalfos.
- Collect the first key at the far-left end of the opening route.
- Return to the first elevator.
Unlock the central route and reach the fairy
From the starting elevator, go right and use the key on the locked door. Continue through the rooms, passing an elevator that you will use later. Red Stalfos, Bots, and Bubbles occupy this stretch. Keep your shield raised against grounded attacks and avoid letting a Bubble trap you against a wall. At the far-right end of this route, you will find a fairy. Touch it to restore Link’s health if necessary.
Beyond the fairy is another elevator. Ride it upward. On the upper floor, go right and collect the next key along the path. Continue right through the room with the Guma. Gumas throw chain weapons in an arc; move inside the arc before attacking, then strike while standing close enough that the weapon passes over Link. After defeating the Guma, collect the key it guards. Strike the nearby statue with your sword to release the red magic jar, which completely refills magic. Save this refill for the Candle route or the boss approach if you can.
- Use the first key on the central locked door.
- Reach the fairy and use it only when you need the health recovery.
- Ride the upper elevator and collect the next key.
- Defeat the Guma and take the red magic jar if you need a full magic refill.
Descend to the Candle room
Return left to the elevator and descend one level. From the floor with the fairy, go left to the next elevator and ride it down. This lower section begins with several Bubbles. Avoid them if possible and continue left to the room with Bots and the collapsing bridge.
The bridge gives way as Link crosses it, so keep moving and do not stop unnecessarily. A 50-point experience bag sits on the bridge, but it is optional and can be skipped if collecting it would make you fall. Continue left into the next room, where a Guma and an Orange Iron Knuckle guard the route. Cast Shield before engaging them if you have enough magic. Against the Iron Knuckle, jump toward it and swing during the descent, then reset your position rather than trading repeated ground blows.
After the enemies are defeated, use the key on the locked door to the left and collect the Candle. The Candle is added automatically; it does not need to be selected from a menu. From this point onward, dark caves on the overworld are illuminated when you enter them.
- Descend through the elevator near the fairy.
- Cross the collapsing bridge without stopping unless you deliberately want the optional experience bag.
- Defeat or carefully bypass the Guma and Orange Iron Knuckle.
- Open the locked door and collect the Candle.
Return to the boss route
Backtrack right through the lower rooms and ride the elevator upward. Return to the main floor and travel right to the elevator beside the fairy. This time, ride that elevator downward. The route beyond it leads toward the boss and does not require another palace item.
Defeat the Iron Knuckle and continue right through the rooms containing Stalfos and other enemies. Use Shield for the close-range fights, but preserve enough magic for the boss if you can. If Link is nearly dead, leave the palace and recover in town before attempting the final route. Re-entering restores access to the fairy and resets enemies, although it also means clearing the route again.
- Return to the elevator beside the fairy.
- Ride it down instead of up.
- Keep enough health and magic for the final enemy rooms and boss.
- Leave and recover if the approach becomes unsafe.
Defeat Horsehead and place the first crystal
Enter the boss room and cast Shield before closing in if your magic allows it. Horsehead is protected across most of his body; his head is the vulnerable target. Approach with a jump and swing at the head, then move or jump away before his mace swing reaches Link. Repeat this approach-and-retreat rhythm rather than standing beside him and trading low attacks. If he pushes Link toward a corner, jump over him and reset the spacing immediately.
When Horsehead is defeated, collect the key that falls into the room. Use it on the door to the right, then continue to the crystal statue. Step onto the statue to place the first crystal. Completing the palace restores Link’s health and magic and grants the palace completion reward. Leave through the passage to the right after confirming the crystal has been inserted.
- Cast Shield before the Horsehead fight if practical.
- Jump and strike Horsehead’s head, then retreat before the mace swing.
- Collect the boss key.
- Open the door beyond the boss room.
- Place the first crystal in the statue.
- Exit only after the crystal has been inserted.
Before you move on
- The Candle is present among Link’s collected palace items and dark overworld caves are illuminated when entered.
- Horsehead is defeated and the boss key has opened the passage beyond the boss room.
- The first crystal is visibly placed in the Parapa Palace statue.
- Link exits the palace with restored health and magic.
- Parapa Palace is shown as completed on the overworld rather than remaining an active palace entrance.
References for this chapter
Midoro Palace (Swamp) — Obtain the Handy Glove
Travel through Midoro Swamp to the second palace, collect its keys, claim the Handy Glove, defeat Helmethead, and place the second crystal. The Handy Glove lets Link destroy the breakable blocks that obstruct the palace’s lower route and several later paths.
Reach Midoro Palace and prepare at the entrance
After completing Parapa Palace and obtaining the Candle, travel through the swamp route toward Midoro Palace. The swamp slows Link on the overworld, so avoid unnecessary battles when your Life is low. If you have reached the palace with the Shield, Jump, and Life spells, you have the main tools needed for the dungeon. Shield reduces the risk from Iron Knuckles and other heavy enemies, Jump helps with raised platforms and the palace’s Magic Jar, and Life provides emergency recovery.
At the palace entrance, strike the Iron Knuckle statue. It can reveal either a Red Magic Jar or a Red Iron Knuckle. If the enemy appears, leave and re-enter if you want to try again for the jar. Once you have a Magic Jar, cast Life first if Link needs healing, then collect the jar to refill your Magic. This is optional, but it is a useful way to begin the palace with full resources. Ride the elevator downward, pass the first level, and get off at the next level, where the rock-spitting enemies are located.
- Have the Candle from Parapa Palace.
- Enter with enough Magic for Shield and Jump, plus Life if possible.
- Use the entrance statue for a refill only if you need it; it is not required for progression.
Collect the first three keys
Go left from the elevator and fight through the rooms containing Anerus, a Bubble, a Bot, and Blue Stalfos. Anerus throws rocks across the room, so crouch and block when a projectile approaches, then counter with low sword swings. Against Blue Stalfos, keep enough distance to react when they jump. The first key is at the far end of this route.
Return to the elevator and go down one level. Travel right past Bots and the energy-shooting statue. Continue through the room with two Mace Demons to claim the second key. Return to the elevator again, then ride it upward to the level with the red dripping ceiling hazards.
From that level, go left through the Blue Stalfos and flying statue heads. Unlock the door and continue across the lava-gap room. Let nearby Bots jump away or fall before attempting the next jump, and cross after the dripping hazard has passed. Defeat the Orange Iron Knuckles and the nearby Bubble, then continue to the room with the elevator and the hidden Red Magic Jar.
- Collect the first key on the upper-left route.
- Collect the second key on the lower-right route.
- Collect the third key across the lava-gap section.
- Use the Shield spell if the Mace Demons or Iron Knuckles are costing too much health.
Use the Magic Jar and reach the Handy Glove
In the room with the Bubbles, strike the wall statue to reveal a Red Magic Jar. If necessary, use Life before collecting it. This room is also a reasonable place to defeat respawning Bubbles for experience, but do not spend so long farming that you risk losing the progress already made.
Take the elevator down and go left through the locked door. The next room contains falling blocks and a Treasure Bag. The blocks can cover the bag and can damage or trap Link, so do not wait beneath them. Move through to the next room and return after obtaining the palace item if the bag is inaccessible.
In the following room, cast Shield if you have sufficient Magic and defeat the Red Iron Knuckle. Continue past the dripping hazard and defeat the second Red Iron Knuckle. The locked door beyond them leads to the Handy Glove. Collect it before attempting the rest of the palace; it is necessary because the route ahead uses breakable blocks.
- Find the Red Magic Jar in the statue room before the Glove section if you need it.
- Do not remain under the falling blocks for the Treasure Bag.
- Defeat both Red Iron Knuckles and collect the Handy Glove beyond the locked door.
Break the blocks and collect the remaining keys
The Handy Glove works automatically. It is not a spell or a separate command: swing Link’s sword against the breakable blocks to destroy them. Return to the falling-block room and clear a safe path. Blocks can still hurt Link while falling, so keep moving rather than standing underneath a stack. Pick up the Treasure Bag if it is safe, but it is optional.
Before leaving the Glove room, cast Jump and leap to the Iron Knuckle statue near the entrance of that room. Strike it to reveal another Red Magic Jar. Refill your Magic if needed, then return to the elevator. Take the elevator downward and continue through the rooms containing Fiery Moa, Orange Iron Knuckles, Blue Stalfos, and energy-shooting statues. Several Blue Stalfos encounters are separated by breakable blocks; destroy the blocks to continue right.
At the next elevator area, continue right instead of stopping at the first elevator. Fight through the Bots and Tinsuits, then defeat the Mace Demon guarding the fourth key. Return to the elevator and ride down. Cross the disappearing bridges over lava, collecting the optional Treasure Bag only if you can reach solid ground safely. Continue right and defeat the Red Iron Knuckle near the end.
- Break palace blocks with ordinary sword swings after obtaining the Glove.
- Use Jump to reach the Glove-room Magic Jar.
- Collect the fourth key after the Tinsuit and Mace Demon section.
- Treat the Treasure Bag over lava as optional.
Reach and defeat Helmethead
From the lava-bridge route, continue into the final combat sequence. Defeat the Blue Stalfos, unlock the door, then fight the Orange Iron Knuckle and the Red Iron Knuckle. This is the last enemy gauntlet before the boss, so use Shield if you have enough Magic and preserve Life for the battle itself.
Helmethead, also called Jermafenser in some references, attacks with energy projectiles from its helmet as it advances. Its vulnerable point is the head. Jump and slash the head, then retreat or reposition instead of repeatedly colliding with the boss. After the first helmet is knocked away, it floats around the room and fires projectiles while a replacement helmet remains on the body. Continue striking the attached head. After the second helmet is removed, both detached helmet pieces remain active while you finish damaging the boss.
Block or avoid the energy shots and use Shield to reduce mistakes. Do not chase the floating helmets across the room; concentrate on the head that remains attached to the body. If Link’s Life becomes critical, use Life during a safe opening rather than at the start of the fight. When Helmethead is defeated, a key falls from above. Collect it and use it on the locked door to the right.
- Reach the boss only after the Blue, Orange, and Red Iron Knuckle encounters.
- Attack Helmethead’s attached head with jump slashes.
- Avoid chasing the floating helmet pieces.
- Collect the key that falls after the boss is defeated.
Place the second crystal and verify completion
Use the boss key to leave the arena and continue right to the palace statue. Walk to the statue and place the second crystal. The placement is the actual completion step for Midoro Palace and awards a substantial experience reward, which may trigger a level increase depending on Link’s current experience.
After the crystal is inserted, exit through the passage beyond the statue. The overworld palace marker will show that Midoro Palace has been cleared. The Handy Glove remains available automatically, allowing Link to destroy breakable blocks encountered on the route beyond the palace and in later dungeons. The next major route leads through Death Mountain toward Island Palace, so refill in a town or safe area before continuing if the palace left Link low on Life or Magic.
- The Handy Glove has been acquired.
- Helmethead has been defeated and the post-boss key has opened the exit.
- The second crystal is visibly placed in Midoro Palace’s statue.
- The palace marker is cleared when Link returns to the overworld.
Before you move on
- Link has collected the Handy Glove from the locked room beyond the two Red Iron Knuckles.
- Link can destroy Midoro Palace’s breakable blocks with normal sword swings.
- Helmethead has been defeated, the key has fallen, and the locked exit has been opened.
- The second crystal has been placed in the palace statue.
- Link has exited to the overworld and can proceed toward Death Mountain and Island Palace.
Island Palace — Claim the Raft and New Routes
Continue from Midoro Palace with Death Mountain, the Hammer, the Water of Life errand, Fairy, and Downward Thrust already completed. From Mido’s southern graveyard, find the isolated King’s Tomb, drop through the concealed passage, use Fairy to cross the high ledge, and reach the Island Palace. Clear the palace, collect the Raft, defeat Rebonack in both phases, place the third crystal, and launch from the dock below Mido to reach Eastern Hyrule and Nabooru.
Confirm the prerequisites and prepare in Mido
This chapter begins after the western route through Death Mountain and Midoro Palace. The Hammer should already be in your inventory, and the Water of Life should already have been taken from the boulder-blocked cave and given to the sick girl’s mother in Mido. The old man inside the opened house teaches Fairy.
Downward Thrust should also be available from the Mido swordsman. It is useful for reaching palace keys beneath breakable blocks, although Fairy is the essential spell for reaching the Island Palace itself. Return to Mido if necessary to restore Life and Magic before entering the graveyard.
Do not repeat the Water of Life or Fairy errands unless you skipped them earlier. Without Fairy, the concealed passage south of King’s Tomb cannot be crossed by the normal route, so leave the graveyard and finish that prerequisite before attempting the palace.
- Death Mountain is complete.
- The Hammer is in Link’s inventory.
- Water of Life was collected and delivered in Mido.
- Fairy has been learned.
- Downward Thrust has been learned.
- Life and Magic are restored before leaving Mido.
Find King’s Tomb and cross the concealed passage
Leave Mido through the southern route and enter the graveyard. Look for the lone tomb separated from the main group of graves. This is King’s Tomb. Stand directly south of it and walk downward. Link will fall through a concealed opening into a side-view passage.
Enemies can attack immediately after the fall. Use Downward Thrust as you land if a Lowder is in range, or move through the room carefully. The passage to the right is too high to reach with an ordinary jump, so open the spell menu, choose Fairy, and cast it. Fly upward and right through the elevated opening.
Continue through the next passage and leave on the right. Link emerges on a small island. Follow the beach around the island until the Island Palace entrance is reached. If Magic is too low to cast Fairy, return to Mido rather than spending lives trying to force the jump.
- Enter Mido’s southern graveyard.
- Locate the isolated King’s Tomb.
- Walk directly south from the tomb.
- Use Fairy to pass the high ledge.
- Exit the passage on the right.
- Follow the island beach to the palace entrance.
Enter the palace and collect the first keys
At the entrance, striking the palace statue may produce a red Magic Jar, but the statue can also awaken an enemy. Take the elevator down and travel right. The early rooms contain Doomknockers, Myus, Red Stalfos, and falling blocks. Move through the falling-block room deliberately: let blocks settle, then use the openings created by the Handy Glove rather than allowing yourself to be boxed in.
In the room reached with Downward Thrust, break through the floor to obtain a required key. A nearby Point Bag is optional. Continue toward the elevator and take the upper route to the exterior section. If the jump to the upper ledge is difficult, defeat the Red Stalfos below, get a running start, and use the small steps to climb.
In the exterior room, collect the key guarded by a Fire Moa and Red Iron Knuckle. This is an important detour before returning to the elevator; do not descend while assuming the palace’s required keys are already secured.
- Use Downward Thrust to reach the first key.
- Treat the nearby Point Bag as optional.
- Reach the exterior room above the elevator.
- Collect the exterior key.
- Return to the elevator after taking the key.
Reach the Raft
Ride the elevator down and unlock the route to the right. Floating statue heads rise, fire, and descend, so watch their firing rhythm and pass during an opening. In the lava room, break through the brick wall and cross the platforms without landing in the lava.
Take the key in the lava room, then continue through the Red Iron Knuckle and Blue Iron Knuckle rooms. The Blue Iron Knuckle can launch sword projectiles after being struck. Shield is useful here if you have enough Magic; otherwise, attack during openings and jump over the projectiles rather than standing in front of the boss-sized knight.
Open the door beyond this sequence and collect the Raft. The Raft is the palace’s main item and is required to reach Eastern Hyrule. It is not freely controlled from every shoreline; its later use is tied to the proper dock.
- Unlock the route after the upper elevator section.
- Collect the lava-room key.
- Pass the Red and Blue Iron Knuckles.
- Open the door beyond them.
- Collect the Raft.
Backtrack for the final key and boss route
After taking the Raft, backtrack past the elevator and defeat or bypass the Red Iron Knuckle guarding the next door. Continue through the rooms with Tinsuits and floating statue heads. In the block-filled room, break through the left side to reach the required key, then leave before the hazards surround you.
Return to the elevator and descend. Unlock the next door and move right through the rooms containing Red Stalfos and Doomknockers. Point Bags on this route are optional. In the final block maze, favor the upper route: climb to the higher level, break through the bricks, and use Downward Thrust on the blocks at the right to reach the boss chamber.
If you are low on Life or Magic, exit and recover in Mido before challenging Rebonack. The Raft and previously collected keys remain secured, so there is no benefit to forcing a boss attempt with poor resources.
- Collect the key in the block-filled room after obtaining the Raft.
- Return to the elevator and descend.
- Use the upper route through the final block maze.
- Keep enough Magic for Shield or Life.
- Recover in Mido if the boss attempt is unsafe.
Defeat Rebonack and place the third crystal
Rebonack begins mounted on a floating horse. Cast Shield before engaging if practical. The mounted guardian charges across the room; jump over the charge and strike downward with Downward Thrust as Link passes over the horse. Repeat the jump-and-stab pattern until the horse disappears.
The knight then continues on foot with a separate health bar. Treat this phase like a Blue Iron Knuckle fight: watch for sword projectiles, jump or block them, and strike the head during openings. Use Life if necessary. Surviving the fight is more important than saving Magic for later.
When Rebonack is defeated, collect the key that appears. Walk to the palace statue and place the third crystal. The palace is not complete until the crystal has been inserted. Then leave through the palace exit.
- Cast Shield if resources allow.
- Jump over the mounted charges.
- Use Downward Thrust against the horse.
- Defeat Rebonack’s foot phase.
- Collect the dropped key.
- Place the third crystal in the statue.
Launch the Raft toward Eastern Hyrule
After leaving the palace, return to Mido to heal and refill resources. Travel to the dock below Mido and step onto its launch point. The Raft carries Link automatically across the water; it is not launched by walking onto an arbitrary beach.
The Raft transports Link to Eastern Hyrule. Enter Nabooru Town after landing to establish the next safe town and continue the route toward the eastern palaces. If the Raft does not launch, return to the shoreline below Mido and search for the designated dock rather than trying other water edges.
From this point, the western section of the campaign is complete and the next progression begins in Eastern Hyrule.
- The third crystal is placed.
- The Raft is in Link’s inventory.
- Link has recovered in Mido if needed.
- The dock below Mido has been reached.
- The Raft has carried Link to Eastern Hyrule.
- Nabooru Town is accessible.
Before you move on
- Death Mountain and Midoro Palace were completed before this chapter.
- The Hammer, Water of Life prerequisite, Fairy, and Downward Thrust are already available.
- The Island Palace has been reached through King’s Tomb and the Fairy passage.
- The Raft has been collected.
- The mounted Rebonack phase has been defeated.
- The foot-phase Rebonack has been defeated.
- The dropped key has been collected.
- The third crystal has been inserted into the Island Palace statue.
- Link has exited the palace.
- The dock below Mido automatically carries Link to Eastern Hyrule.
- Nabooru Town can be entered for the next stage.
Maze Island Palace — Boots and Platforming Challenges
Maze Island Palace is the fourth palace in the original North American Nintendo Entertainment System release. Before attempting it, complete the eastern preparation sequence: learn Fire in Nabooru, rescue Darunia’s kidnapped child, collect the Magic Container on Maze Island, return the child to Darunia, and learn Reflect. The container increases Link’s magic capacity, but collecting it before returning the child is also required for the documented Reflect sequence. Reflect is the important boss preparation because Carock’s attack must be turned back against him. Inside the palace, take the required key branches, collect the Boots, defeat Carock, collect his dropped key, and place the fourth crystal.
Complete the Nabooru and Darunia preparations
After reaching Nabooru in Eastern Hyrule, restore Link’s health and magic if necessary. In the second section of town, speak to the thirsty woman near the fountain. Walk to the fountain and press B to collect the water, then return to her and enter the house. Go downstairs and speak to the Wise Man to learn Fire. Fire is needed for the Zora in the cave north of Nabooru and is also useful against Tektites and other enemies that resist ordinary attacks.
Leave Nabooru and take the northern cave. Use Fire against the Zora at the back of the cave; normal sword attacks will not damage it reliably. After exiting, travel east through the forest to the long bridge leading to Maze Island. Before going toward the palace, follow the island’s roads to the southeastern section and enter the action screen across the river from the palace. Defeat the Orange Geru with jumping sword attacks and collect the kidnapped child.
Do not return directly to Darunia yet. From the child’s area, navigate toward the western side of Maze Island and take the route that drops into an action screen containing the island’s Magic Container. Collect it, then leave the island by the long bridge and travel west through the two forced action scenes toward Darunia. This container is an upgrade, but collect it before returning the child because the documented route uses it as part of the condition for learning Reflect.
In Darunia, first use Jump to reach the chimney route and speak to the knight downstairs to learn Upward Thrust. Then continue to the third section of town. Speak to the old woman near the first house; because the child has been rescued, she will let Link enter. Go downstairs and speak to the Wise Man to learn Reflect. If he does not teach it, confirm that the child was rescued and that the Maze Island Magic Container was collected before returning to town.
- Collect water from the Nabooru fountain.
- Learn Fire from the Nabooru Wise Man.
- Use Fire to defeat the Zora in the northern cave.
- Rescue the kidnapped child on Maze Island.
- Collect the Maze Island Magic Container before returning to Darunia.
- Learn Upward Thrust in Darunia.
- Return the child to Darunia and learn Reflect.
Return across Maze Island and reach the palace
Leave Darunia with full or nearly full health and magic. Travel east through the forest and cross the long bridge to Maze Island. The island’s yellow roads contain hidden action-screen traps, so treat bridges and forks as landmarks and avoid wandering across every branch unnecessarily.
From the bridge, follow the route through the island toward the eastern end. A practical route is to move south, then east to the first northward path; continue north and take the eastern branches when the road divides. Cross the northern bridge, go west until the next north path, then travel north and take the western branches before turning east at later forks. The palace entrance is at the eastern end of the maze.
There is a red magic jar in an optional northern branch near the approach. Take it if Link needs magic, especially if the earlier trip across Maze Island consumed resources. It is not required for palace completion. Enter only after confirming that Reflect is available; the palace can be entered without it, but Carock is designed around the spell.
- Leave Darunia after learning Reflect.
- Cross the long bridge to Maze Island.
- Use bridges and major forks as navigation landmarks.
- Take the optional red magic jar if needed.
- Enter Maze Island Palace with Reflect available.
Take the first key branch and reach the Boots
At the entrance, an Iron Knuckle statue may produce a red magic jar. Take it if available, but do not spend time fighting the statue if it produces an enemy and the battle is unsafe. Use the entrance elevator and move right through the Wizzrobe and armored-enemy rooms. Jump over Wizzrobe projectiles when possible to conserve magic.
Continue down the elevator route and move right through the red armored Stalfos room. Cast Jump before crossing the large crumbling bridge. At its far end, jump right across the gap. If Link misses the jump, do not restart: fall through the lower bridges and continue right through the lava route. This lower route contains floating statue heads, flame-topped blocks, a Doomknocker, and a red Stalfos. Break the blocks where necessary, jump over the flames, and collect the key at the far end.
Return west through the lava section, pass the Bot and Wizzrobes, unlock the door, and use the elevator route to return to the large-gap area. From there, drop through the gap and move right immediately after landing. Follow the lower hallway through Tinsuits and other enemies until a Blue Iron Knuckle guards a locked door. Defeat it with regular and jumping sword attacks, open the door, and collect the Boots.
The Boots let Link walk across designated overworld water areas. They do not increase walking speed, improve jump height, create a dash, or make palace lava safe. Their immediate value is opening the water route around Maze Island and simplifying the approach to the next palace after this one.
- Use the entrance elevator and travel right.
- Cross the first crumbling bridge with Jump.
- If you fall, use the lower lava route to obtain the first key.
- Return to the large-gap area and drop through it.
- Defeat the Blue Iron Knuckle.
- Collect the Boots.
Clear the remaining key branches
After collecting the Boots, return to the large-gap area and drop through again. Move right across the crumbling bridge above the lava. Continue through the floating-head room and the flame-topped blocks, then collect the next key at the far end. Backtrack west through the lava section, pass the Bot and Wizzrobes, and unlock the next door.
In the following room, break the blocks beneath the floating statue heads to expose a key. Return to the elevator and ride it upward to the top floor. Go left past the blue Stalfos and Wizzrobes until you reach the locked-door branch. Defeat the Red Iron Knuckle, then use Upward Thrust to break the blocks above the route and collect the key. Use it on the locked door.
Continue past the elevator into the room with Tinsuits and a Doomknocker. In the next area, take the key beneath the breakable blocks. Use Downward Thrust to reach it, then move back above the blocks before the floating enemies trap Link. Return to the elevator and descend through the route that leads to the final eastern lava branch.
In the last lava section, avoid the flying Dragon Heads, which can knock Link into the pits. Collect the key at the far end and return to the elevator. Take the western route, unlock the remaining door, and descend through the crumbling-bridge room. Use Downward Thrust or careful jumping to pass the Myus, then take the elevator down. Collect the optional 100-point bag if it is safe, defeat the Blue Iron Knuckle or armored Stalfos in the next room, and prepare for the two Red Iron Knuckles before Carock.
The exact enemy clearing is not mandatory in every room. If health or magic becomes dangerous, use a red jar when one appears or retreat before the boss approach and refill in town. The required progression is the set of keys, locked doors, the Boots, and the route to Carock.
- Cross the second lava and crumbling-bridge section.
- Collect the key at the far end and return west.
- Break the blocks beneath the floating heads to obtain another key.
- Use Upward Thrust to reach the upper key.
- Use Downward Thrust to collect the key beneath breakable blocks.
- Collect the final approach key while avoiding Dragon Heads.
- Reach the two Red Iron Knuckles before Carock.
Defeat Carock with Reflect
Enter Carock’s chamber with enough magic to cast Reflect and enough health to survive an accidental close-range hit. Cast Reflect immediately. Move to either side of the room, face inward toward the center, and crouch. Carock’s energy waves will strike Link’s strengthened shield, bounce away, and damage Carock.
Do not chase Carock around the room or waste sword swings trying to reach him. The boss teleports around the chamber and may appear directly on Link’s position. If that happens, move away from the corner, survive the contact if possible, and return to a side position. Resume crouching and facing inward so the reflected waves continue to travel toward Carock.
Use Shield before or during the fight only if sufficient magic remains. Use Life if Link’s health becomes critical, but preserve the magic needed for Reflect. If Link dies, leave the palace, refill in Nabooru or another available town, and return through the water route opened by the Boots. The boss approach can be repeated after farming experience or recovering resources.
- Enter with Reflect and adequate magic.
- Cast Reflect at the start of the battle.
- Stand near a side of the room and face inward.
- Crouch and let the reflected energy waves damage Carock.
- Use Life for emergency recovery.
- Leave and refill if the attempt fails.
Collect the boss key and place the fourth crystal
After Carock is defeated, collect the key that drops from above. Do not leave the room without it. Use the key on the locked door beyond the boss chamber and enter the crystal room.
Place the fourth crystal in the statue. Defeating Carock, collecting the Boots, or merely opening the boss route does not complete Maze Island Palace by itself; the crystal must be inserted. The placement grants the palace completion experience and confirms that this palace is finished.
Exit to the overworld. The Boots now allow Link to use the designated water route from Maze Island, including the easier route back toward Nabooru and onward to the Palace on the Sea. They do not permit crossing every water tile or palace lava, so use the visible shoreline and water paths rather than attempting unrelated barriers. Restore health and magic before beginning the next palace.
- Collect Carock’s dropped key.
- Open the door beyond the boss chamber.
- Enter the crystal room.
- Place the fourth crystal in the statue.
- Use the Boots on the appropriate overworld water route.
- Heal before continuing toward the Palace on the Sea.
Before you move on
- Fire has been learned in Nabooru.
- Darunia’s kidnapped child has been rescued and returned.
- The Maze Island Magic Container has been collected.
- Reflect has been learned in Darunia.
- The Boots are in Link’s inventory.
- Carock has been defeated with Reflect.
- Carock’s dropped key has been collected.
- The door to the crystal chamber has been opened.
- The fourth crystal has been placed in the Maze Island Palace statue.
- The overworld water route opened by the Boots can be used toward the Palace on the Sea.
- Link has been restored before starting the next palace.
References for this chapter
- Zelda II: The Adventure of Link instruction manual — official Nintendo NES manual
- Quick Guide — Zelda II: The Adventure of Link Walkthrough & Guide
- To Eastern Hyrule — Zelda II: The Adventure of Link Walkthrough and Guide
- Darunia Town — Zelda II: The Adventure of Link Walkthrough
- Maze Palace — Zelda II: The Adventure of Link Walkthrough
- The Adventure of Link Walkthrough — Maze Palace
- Zelda II: The Adventure of Link/Maze Palace — StrategyWiki
Palace on the Sea (Ocean Palace) — Flute and Overworld Hazards
After completing Maze Palace, use the Boots to cross the walkable water southeast of Nabooru and reach the fifth palace. The Palace on the Sea is a long dungeon with several elevator changes, lava bridges, falling hazards, powerful Iron Knuckles and a false wall hiding the Flute. Collect the five palace keys, recover the Flute, defeat Gooma, use the dropped sixth key, and place the fifth crystal. The Flute then removes the River Devil blocking the southern route and later reveals Three-Eye Rock Palace.
1. Reach the Palace on the Sea
Before leaving Nabooru, restore your Life and Magic. The entrance statue inside this palace is empty, so you should not plan on receiving an early refill there. Make sure you have the Boots from Maze Palace; they are required for the walkable-water route.
Travel southeast of Nabooru toward the large ocean area. Follow the narrow sandy route into the water and continue across the walkable surface. The palace is on a small island to the east. While crossing, search for the optional Heart Container path if you want it, but do not confuse that side route with the palace entrance. Enter the palace only after your meters are in good shape.
- Have the Boots from Maze Palace.
- Restore Life and Magic in Nabooru or another safe location.
- Use the walkable-water route southeast of Nabooru to reach the island palace.
2. Collect the first two keys
Take the entrance elevator down and move right. Climb past the Ra statue's projectiles and the Ropes or Anerus enemies. In the next room, avoid or defeat the Bubbles, then cast Fairy to fly over the tall wall. This carries you past the first key. Continue into the next room until Link returns to normal, then turn around and collect the key before proceeding.
Continue right across the collapsing bridge above lava. The bridge also contains an optional experience bag, but survival is more important than the reward. In the following room, break through or work around the blocks surrounding the Red Iron Knuckles. Unlock the door and take the elevator down.
At the first lower-floor fork, choose the left route. The right route is mainly a dangerous detour. The left path introduces Magos, which teleport and launch fire. Defeat them with sword attacks when safe, then enter the room where blocks fall from above. Cast Jump and let enough blocks accumulate to form a route to the high platform holding the second key. Watch the Fiery Moa while climbing.
- Use Fairy to pass the tall wall, then return for the first key.
- Cross the lava bridge carefully.
- Take the left route at the first lower-floor fork.
- Use Jump and falling blocks to reach the second key.
3. Reach the false wall and obtain the Flute
After the second-key area, continue through the Orange Iron Knuckle rooms and use nearby statues or Red Magic Jars to recover Magic when available. Optional side passages contain experience and additional refills, but avoid the lava detour if your resources are already adequate. Do not use Downthrust across the lava-block passage; a missed landing can cost more health than the detour is worth.
Follow the elevator route through the lower rooms. Work past the falling liquid, Bubbles, Magos and breakable blocks. Use Jump to reach elevated ledges and collect the third key from the Red Iron Knuckle guarding it.
From the third-key area, enter the long hall containing Bubbles and Magos. At the far end, a Blue Iron Knuckle appears to guard a dead end. It is not a dead end: jump into the wall behind the knight and pass through the false wall.
On the far side, continue through the rooms and take the elevator route leading to the fourth key. The key is beyond rooms containing breakable blocks and Blue Stalfos. Backtrack through the false wall and take the lower elevator route to the room filled with Maus and Magos. Unlock the door, defeat or bypass the Orange and Blue Iron Knuckles, then unlock the next door and take the Flute.
- Collect the third key from the Red Iron Knuckle route.
- Jump through the false wall behind the Blue Iron Knuckle.
- Collect the fourth key from the Blue Stalfos room.
- Unlock the Flute room after passing the Orange and Blue Iron Knuckles.
4. Backtrack and collect the fifth key
The Flute is not near the boss route, so expect a substantial return trip. Use the elevator and false wall landmarks to retrace your path. Search statues for Red Magic Jars when necessary, but do not waste Magic on optional fights if your supply is low.
From the elevator route beyond the false wall, continue through the upper rooms and unlock the next door. Move through the rooms with Bubbles, breakable blocks and a Red Iron Knuckle. Continue to the elevator leading downward.
In the lower room, move left through the Magos and Bubbles. A point bag can be reached with Jump Thrust, but it is optional. Continue to the room containing one Orange, one Red and one Blue Iron Knuckle. Defeat the Blue knight carefully in the cramped area, using Jump Thrust to create room if needed. The fifth key is beyond this encounter.
Return to the elevator and ride it upward through the previously visited floors. The palace's elevator network is easy to confuse, so use the false wall and the rooms with distinctive Iron Knuckle groups as landmarks rather than wandering through every branch again.
- Backtrack from the Flute using the elevator and false-wall landmarks.
- Preserve Magic and collect Red Magic Jars when practical.
- Take the fifth key from the room with the three Iron Knuckles.
5. Defeat Gooma and place the fifth crystal
Ride the elevator to the upper boss approach. A final group of Orange, Blue and Red Iron Knuckles blocks the route. Defeat the Orange knight, then use careful movement or Downthrust to get past the others if your Magic and Life are low. Save enough Magic for Shield and Life in the boss fight.
The North American NES release uses Gooma as the Palace on the Sea boss. Gooma swings a large spiked ball on a chain and wears a helmet that protects his head. Cast Shield before engaging if you have sufficient Magic. Do not attack the helmet or attempt to rely on Downthrust against his head.
Wait for Gooma to finish a swing, move close and thrust into his body below the neck, then retreat immediately. Jump away from the returning weapon when necessary. The reliable rhythm is wait, approach, stab, retreat. Use Life when your health becomes dangerous, but do not spend all Magic before the fight is over.
Gooma drops the sixth key after defeat. Collect it, unlock the door beyond the arena and enter the crystal chamber. Place the fifth crystal in the statue before leaving unless you intentionally want to keep the palace available for another visit.
- Reach the boss with usable Life and Magic reserves.
- Cast Shield if possible before fighting Gooma.
- Strike Gooma's body below the helmet and retreat after each attack.
- Collect the dropped sixth key and place the fifth crystal.
6. Use the Flute on the overworld
Leave the palace and return to the overworld route south of Nabooru. The black River Devil blocks the passage into the final southern region. Select the Flute and use it while standing on the overworld screen near the River Devil. The obstacle disappears, opening the route.
The Flute has another important use later. In the desert area east of visible Kasuto, stand at the correct Three-Eye Rock formation and play the Flute to reveal Three-Eye Rock Palace. Do not assume the item removes every overworld enemy or opens every blocked path. Its verified progression uses are the River Devil and the hidden palace entrance.
After the River Devil disappears, inspect the newly opened southern route and nearby forks. Refill in town before continuing into the late-game areas, and keep the Flute in your inventory for revealing the sixth palace.
- Leave the palace with the Flute in your inventory.
- Play the Flute beside the River Devil south of Nabooru.
- Confirm that the route into the southern final region is open.
- Later, play the Flute at the correct Three-Eye Rock formation to reveal the sixth palace.
Before you move on
- The Flute is in Link's inventory after opening the locked room beyond the Orange and Blue Iron Knuckles.
- Gooma has been defeated and the sixth key from the boss room has been collected.
- The fifth crystal has been placed in the Palace on the Sea statue.
- The River Devil south of Nabooru disappears when the Flute is played on the overworld.
- The southern route is accessible, and the Flute remains available to reveal Three-Eye Rock Palace at the correct rock formation.
References for this chapter
- Palace on the Sea - Zelda II: The Adventure of Link Walkthrough and Guide, GameFAQs
- The Adventure of Link Walkthrough - Ocean Palace, Zelda Dungeon
- Palace on the Sea, Zelda Dungeon Wiki
- Zelda II: The Adventure of Link - Guide and Walkthrough - NES, GameFAQs
- Zelda II: The Adventure of Link instruction manual — official Nintendo NES manual
Optional Towns, Caves and Resource Farming
Optional exploration makes the later palaces safer, but the four Heart Containers and Link Dolls are not required for the main ending. The four extra Magic Containers matter differently: the first three are useful upgrades, the fourth in New Kasuto is needed to unlock Thunder later, and all four are therefore required for the complete campaign because Thunder is necessary against Thunderbird. Before Three-Eye Rock Palace, reach New Kasuto, learn Spell, reveal the Magic Key house, and collect the Magic Key. Only after clearing Three-Eye Rock Palace and obtaining the Cross should you visit Old Kasuto for Thunder.
Complete the spell errands in progression order
Learn Shield from the Wise Man in Rauru. Select a spell with Start, return to the action screen, and press Select to cast it. Shield reduces incoming damage for the current side-view screen, so cast it again when entering a dangerous screen. Use sword attacks whenever magic is not needed, preserving magic for Life, Fairy, Reflect, Spell, and Thunder.
In Tantari Desert, north of North Palace, enter the cave and collect the Trophy. Take it to the woman in the second section of Ruto Town. She allows Link into the house, where the Wise Man teaches Jump. Jump is needed for high ledges, deep gaps, and several later routes.
In Saria, attack beneath the table in the relevant house to reveal the Mirror. Return it to the woman who lost it, then enter the opened house and speak with the basement Wise Man to learn Life. Life restores health at a substantial magic cost, so use it when retreating is unsafe and refill afterward at a town or with a red magic jar.
After obtaining the Hammer, return to the swamp area near Mido. Break the boulder blocking the cave and collect the Water of Life. Bring it to the purple-dressed woman in the third section of Mido Town. The Wise Man downstairs teaches Fairy. Cast Fairy to pass the high ledge on the route toward King's Tomb and Island Palace; leaving the screen changes Link back.
After reaching eastern Hyrule by raft, visit Nabooru. Take water from the fountain beside the thirsty woman and give it to her. Enter the house and learn Fire from the basement Wise Man. Fire is required against several eastern enemies, including Tektites and Scorpions.
In Darunia, rescue the kidnapped child from Maze Island. While on Maze Island, collect its Magic Container before returning. Give the child back in Darunia, then speak with the woman in the third section to gain access to the Wise Man who teaches Reflect. Reflect is the intended defense against Carock's energy waves in Maze Palace.
After the Ocean Palace, travel through the eastern route to New Kasuto before entering Three-Eye Rock Palace. In the second screen of New Kasuto, enter the open-door house and go into the fireplace to find the Wise Man who teaches Spell. Spell is not gated by the fourth Magic Container and does not require the Cross.
Remain in New Kasuto after learning Spell. Go to the town's third section and cast Spell in the empty area indicated by the town layout. A tall building appears; enter it and collect the Magic Key. Obtain this key before Three-Eye Rock Palace because that palace does not contain enough ordinary keys for its normal locked-door route. The Magic Key is required preparation for the palace, while the fourth Magic Container is a separate later objective.
- Learn Shield in Rauru.
- Exchange the Trophy for Jump in Ruto.
- Return the Mirror in Saria to learn Life.
- Exchange the Water of Life in Mido for Fairy.
- Use the Nabooru fountain water to obtain Fire.
- Rescue Darunia's child and collect the Maze Island Magic Container before learning Reflect.
- Reach New Kasuto before Three-Eye Rock Palace.
- Learn Spell from the New Kasuto fireplace Wise Man.
- Cast Spell in New Kasuto and collect the Magic Key before entering Three-Eye Rock Palace.
Collect the four optional Heart Containers
The four overworld Heart Containers permanently expand Link's life meter, but none is required to place the six crystals or enter the Great Palace. Take them when the route is safe; do not spend several lives forcing one pickup.
The first is in the isolated forest patch south of Parapa Palace. Enter the action screen and defeat or bypass the Goriya to claim it.
The second becomes reachable after obtaining the Hammer. Break the boulder south of Rauru Town, continue east, break the boulder blocking the cave, and follow the cave to the container.
The third requires the Boots from Maze Palace. From the Mido region, walk onto the ocean using the shallow-water route and travel toward Ocean Palace. Once the route permits movement north, continue right to the action screen containing the container.
The fourth is on the southeastern desert coast east of Old Kasuto, near the three-rock formation associated with the hidden palace. Walk along that coast until the hidden action screen appears.
- Search the forest south of Parapa Palace.
- Use the Hammer to open the boulder route south of Rauru Town.
- Use the Boots to reach the shallow-water route near Ocean Palace.
- Search the southeastern coast east of Old Kasuto.
Collect the four extra Magic Containers
There are four extra Magic Containers beyond Link's starting meter. The first three improve spell capacity and are useful upgrades. The fourth in New Kasuto is not needed for Spell or the Magic Key, but it is needed before the Old Kasuto Wise Man will teach Thunder. Since Thunder is required to expose Thunderbird's vulnerable state, collect all four for the complete campaign.
The first is in the dark cave south of North Palace. The Candle from Parapa Palace makes the cave practical to explore. The second is in Death Mountain: after taking the Hammer, break the boulder beside the Hammer cave and step onto the exposed spot to fall into the container area.
The third is on Maze Island, off the direct route to the kidnapped child. Collect it before returning to Darunia so the Reflect errand and the container trip are completed together.
The fourth is in New Kasuto. After collecting the other three extra Magic Containers, speak with the old woman in the first town section to gain access to the house containing the final container. If she does not permit entry, verify that all three earlier containers were collected. This fourth container is separate from the Spell and Magic Key sequence, so do not delay Spell while searching for it.
- Collect the dark-cave container south of North Palace.
- Collect the Death Mountain container after obtaining the Hammer.
- Collect the Maze Island container before returning the child to Darunia.
- Collect New Kasuto's fourth container after the other three.
- Confirm that all four extra containers are present before expecting Thunder in Old Kasuto.
Use towns, caves, fairies and magic jars for recovery
Towns restore health and magic and are useful recovery points. If a route leaves Link weak or short on magic, return to the nearest town instead of gambling on another encounter. On the original NES, saving does not create a local town checkpoint; a normal Continue returns Link to North Palace with saved items, spells and levels.
Revisit dark caves after obtaining the Candle, boulder-blocked routes after obtaining the Hammer, and shallow-water routes after obtaining the Boots. Some caves contain quest items, containers, shortcuts, P-Bags or Link Dolls. Others are only travel routes, but they may still be safer than an exposed overworld path.
Fairies in action screens restore health when touched. Red magic jars refill the magic meter, while blue jars restore only part of it. Preserve a nearby fairy or red jar when a route allows it, especially after casting Life, Fairy or Reflect.
The Cross is not part of the New Kasuto preparation. Obtain it inside Three-Eye Rock Palace. Afterward, use it to reveal invisible Moas around Old Kasuto and on the route toward the Great Palace. It reveals invisible enemies, not ordinary hidden walls.
- Refill at a town before retrying a dangerous route.
- Revisit dark caves after obtaining the Candle.
- Revisit blocked paths after obtaining the Hammer and Boots.
- Use fairies for health recovery when safe.
- Use red magic jars after expensive spells.
- Obtain the Cross in Three-Eye Rock Palace before visiting Old Kasuto for Thunder.
Collect Link Dolls only when the detour is safe
Link Dolls grant extra lives and are optional. Some are on the overworld and others are inside later palaces. A collected doll does not simply return on every visit, so do not spend several lives forcing an early pickup. Return after Link's attack, life and magic levels have improved if the route is unreliable.
Before the Great Palace, collect nearby dolls that can be reached consistently, but treat them as a safety reserve rather than a progression requirement. A clean escape route and full resources are more valuable than a difficult doll detour.
- Treat Link Dolls as optional extra-life resources.
- Delay dangerous pickups if they cost lives.
- Revisit safe doll locations before the Great Palace if desired.
Farm experience with a short repeatable loop
Choose an overworld battle screen near a town, palace entrance or reliable recovery route. Defeat the enemies, collect the experience bags and retreat before health becomes critical. Restore at a town and repeat only until the next palace's ordinary rooms are manageable.
A cleared palace section can also serve as a training loop. Re-enter, practice crouch blocks, jump attacks and downthrusts, collect experience, and leave before emergency Life casts consume the available magic. Do not rely on random magic drops as your only recovery plan.
When an attribute reaches its current level threshold, choose Life, Magic or Attack according to the next obstacle. Attack helps against armored enemies, Life improves survival, and Magic gives more room for required spells. Stop once ordinary rooms are reliable and you can reserve magic for the next required action.
- Farm close to a recovery point.
- Collect experience without allowing health to become critical.
- Use sword attacks when magic is not required.
- Return to town before repeating the loop.
- Stop when the next palace is consistently manageable.
Make the final optional-area sweep
Before entering the Great Palace, verify that all six crystals are placed, the Cross was collected in Three-Eye Rock Palace, and the Magic Key was obtained in New Kasuto before entering that palace. Confirm the New Kasuto Spell errand is complete and that all four extra Magic Containers are in the meter.
After clearing Three-Eye Rock Palace, travel to Old Kasuto. The Cross makes the invisible Moas visible. Enter the first house and speak with the Wise Man to learn Thunder, provided all four extra Magic Containers have been collected. The fourth container is therefore required for Thunder, but it is not a prerequisite for Spell or the Magic Key.
Heart Containers and Link Dolls remain optional, although they make the final run safer. Enter the Great Palace with full health and magic, enough experience to clear ordinary rooms, and enough magic remaining for Thunder, Reflect, Shield and emergency Life. If an attempt fails, use the Great Palace Continue state and a short nearby farming loop instead of wandering through eastern Hyrule with depleted resources.
- Place all six crystals.
- Reach New Kasuto before Three-Eye Rock Palace.
- Learn Spell and collect the Magic Key before entering Three-Eye Rock Palace.
- Collect the Cross inside Three-Eye Rock Palace.
- Collect all four extra Magic Containers.
- Visit Old Kasuto after obtaining the Cross and learn Thunder.
- Enter the Great Palace with enough magic for Thunder and defensive spells.
Before you move on
- Shield, Jump, Life, Fairy, Fire, Reflect, Spell and Thunder have been learned.
- Fairy was obtained before the Island Palace route.
- Fire and Reflect were obtained before relying on the eastern route and Maze Palace boss strategy.
- New Kasuto was visited before Three-Eye Rock Palace.
- Spell was learned and the Magic Key was collected before entering Three-Eye Rock Palace.
- The Cross was collected in Three-Eye Rock Palace and used to make the Old Kasuto Moas visible.
- All four extra Magic Containers have been collected, allowing Thunder to be learned in Old Kasuto.
- Optional Heart Containers and Link Dolls were collected only when their routes were safe and useful.
- Link can clear a nearby overworld or palace section, recover at a town or with jars, and enter the Great Palace with enough magic for Thunder and defensive spells.
References for this chapter
- Zelda II: The Adventure of Link instruction manual — official Nintendo NES manual
- Starting the Game — Zelda II: The Adventure of Link Walkthrough
- New Kasuto — Zelda II: The Adventure of Link Walkthrough
- Darunia Town — Zelda II: The Adventure of Link Walkthrough
- Mido Town — Zelda II: The Adventure of Link Walkthrough
- Nabooru Town — Zelda II: The Adventure of Link Walkthrough
- Saria Town — Zelda II: The Adventure of Link Walkthrough
- Maze Palace — Zelda II: The Adventure of Link Walkthrough
- Hidden Palace — Zelda II: The Adventure of Link Walkthrough
- Great Palace — Zelda II: The Adventure of Link Walkthrough
- Heart Container Locations — Zelda II: The Adventure of Link Walkthrough
- Death Mountain — Zelda II: The Adventure of Link Walkthrough
- Island Palace — Zelda II: The Adventure of Link Walkthrough
- Ocean Palace — Zelda II: The Adventure of Link Walkthrough
Common Palace Boss Patterns and Recovery Options
Palace guardians in the original North American NES release are defeated by reading their attack cycles, choosing the correct sword height, and reserving the spell needed for the encounter. Prepare before entering each boss room, attack during a clear opening, and leave enough room to retreat from charges and projectiles. After a guardian falls, collect the dropped key, reach the palace statue, and insert the crystal before treating the palace as cleared. The Great Palace has two separate final fights: Thunder makes Thunderbird vulnerable, and Shadow Link remains afterward.
Prepare before entering a guardian room
Use the final rooms before a boss to check Link’s health and magic. Shield reduces damage from many attacks, but it does not replace correct movement and does not make every projectile harmless. Cast it before Link is trapped against a wall or surrounded.
Keep Life available for an emergency and avoid spending magic on optional enemies immediately before the boss. If the route back to the palace entrance is manageable, leave, refill in a town or other recovery location, and return with a full health bar. Starting a fight already damaged is usually riskier than making one deliberate retreat.
The same preparation applies to the Great Palace, but reserve enough magic for Thunder before entering Thunderbird’s room. If a nearby red Magic Jar is available, use it before the boss rather than spending the restored magic on unnecessary enemies.
- Have enough magic for Shield or the encounter-specific spell.
- Keep Life available whenever possible.
- Do not begin a boss attempt with a nearly empty health bar if retreat is practical.
- Reserve enough magic for Thunder before entering Thunderbird’s room.
Use spacing and sword height
Standing swings attack at normal height, crouching attacks cover low openings, and jumping attacks reach heads and airborne targets. After learning the sword techniques, Upward Thrust and Downward Thrust provide additional attack angles, but no single technique works against every guardian. Watch the boss and strike the exposed part rather than repeating one sword height automatically.
Keep space behind Link. A guardian becomes much harder when it pushes him into a wall because there is no room left to jump over a charge or avoid a weapon. Attack once or twice, move away, and wait for another opening instead of trading hits continuously.
When a boss has a fixed attack cycle, watch one complete cycle before committing to repeated attacks. This is especially useful for Horsehead, Gooma, and Barba, where a premature swing can leave Link in the path of the next weapon or fire attack.
- Watch one attack cycle before committing to a repeated pattern.
- Use jump attacks for high weak points.
- Use crouching attacks or Downward Thrust only when the opening and boss position support it.
- Avoid allowing the boss to corner Link.
Handle Horsehead, Helmethead, and Rebonack
Horsehead in Parapa Palace repeatedly advances and swings his mace. His head is the vulnerable target. Stand far enough away to see the approach, jump as he enters sword range, and strike the head while airborne. Move away immediately so the mace swing does not catch Link. Shield can reduce the cost of a mistake, but spacing and timing are the main defenses.
Helmethead in Midoro Palace exposes its main head while the extra helmet-like heads create additional hazards and launch fireballs. Jump only as high as needed to strike the main head, then reposition before the floating heads trap Link. Shield is useful when the room becomes crowded, and Life should be used rather than attempting to finish the fight at critical health.
Rebonack in Island Palace is a mounted Blue Ironknuckle. Use Downward Thrust against the horse and rider during the mounted phase to force the rider off. Once the Ironknuckle is on foot, let it approach, defend against its sword, and attack after it commits to movement. Do not chase recklessly across the room, because the shield and lance make careless forward attacks costly.
- Horsehead: jump and strike the exposed head, then retreat.
- Helmethead: attack the main head while monitoring the extra heads and fireballs.
- Rebonack: dismount the rider before treating the fight as a normal Ironknuckle battle.
Use Reflect against Carock and control Gooma
Carock in Maze Island Palace is a projectile encounter. Cast Reflect before settling into position, then crouch near a side of the room and allow the reflected magic to damage him. Shield alone is not a substitute for Reflect in this battle. If Carock appears close to Link, move back to a corner and resume crouching rather than trying to pursue him.
Gooma in the Palace on the Sea advances while swinging a large mace. His vulnerable target is the body rather than the head. Wait for the mace swing, jump over the weapon, and land a crouching or low sword strike against his body. Retreat immediately after the hit. Jump can create more room, and Shield reduces damage if the timing goes wrong, but patience matters more than repeated attacks.
- Carock: cast Reflect before relying on the projectile pattern.
- Carock: crouch in a corner or near the room’s edge and let reflected shots do the work.
- Gooma: jump the mace and strike the body, then retreat.
- Use Life when continuing at critical health is more dangerous than spending magic.
Fight Barba without sacrificing the landing
Barba in Three-Eye Rock Palace emerges from one of the lava openings around the arena. Stay on solid ground and watch where the head appears before committing to a jump. Cast Jump if necessary to reach the exposed head, strike during the emergence, and return to a stable platform.
Barba’s fire breath can push Link toward a lava pit, so do not jump blindly across the room. If the dragon appears in an awkward position, wait for the next cycle rather than forcing an attack. Reflect can help defend against fire, while Shield reduces the damage from mistakes. A safe landing is more valuable than an additional sword hit.
- Cast Jump before the fight if the spell is needed for the head’s height.
- Watch the emergence point before moving.
- Strike only the head.
- Prioritize a safe landing over an extra sword hit.
Recover after a failed attempt
If Link is still alive but the route has become too costly, leave the palace, restore Life and Magic, and farm experience in a nearby safe section or overworld area. Improving Attack, Life, or Magic can turn a close fight into a reliable one. Farm only until the boss room is survivable, then return to progression.
If a game over occurs before a palace crystal has been inserted, treat that palace as unfinished and be prepared to work back to the guardian for another attempt. Do not assume that reaching or damaging a boss permanently clears it. The palace is secured by inserting its crystal at the statue after the boss fight.
Inside the Great Palace, a game over after the palace barrier has been removed returns you to the Great Palace entrance when you choose Continue, rather than sending you back to the ordinary overworld starting point. This saves the earlier campaign progress but still requires another trip through the palace.
- Stop repeating attempts with depleted health or magic.
- Restore resources before trying again.
- Confirm that the palace crystal has actually been inserted before considering the palace complete.
- Expect a Great Palace Continue to restart at its entrance after the barrier has been removed.
Collect the key and insert the crystal
After a palace guardian is defeated, a key falls from above. Collect it and use it on the locked door beyond the boss room. Continue to the stone statue and insert the palace crystal. Defeating the guardian alone is not the complete palace objective.
Crystal placement refills Link’s Life and Magic and advances his experience to the next level benefit. Because this recovery is guaranteed, do not waste a Life spell immediately before the statue unless it is necessary to survive the route. Insert the crystal, confirm the refill and experience effect, then leave through the opened route.
The same sequence applies to the six regular palaces: defeat the guardian, take the key, unlock the way to the statue, and insert the crystal. Once all six crystals have been inserted, the binding barrier at the Great Palace is removed.
- Collect the key dropped after the guardian fight.
- Open the locked door beyond the boss room.
- Reach the palace statue.
- Insert the crystal and verify the Life, Magic, and experience effect.
- Confirm that all six crystals are inserted before entering the Great Palace.
Reserve Thunder for Thunderbird
The Great Palace requires a different plan. Thunderbird is invulnerable when the battle begins, so cast Thunder after it appears. Thunder exposes the vulnerable head and changes the battle into its damageable state. Preserve enough magic for this spell; spending the reserve on optional Great Palace enemies can make the fight impossible.
After Thunder, cast Shield for damage reduction and Jump if you need extra height to reach the flying head. Reflect can help block some fireballs if enough magic remains. The recommended damaging attack is a direct jump sword slash against Thunderbird’s exposed head. Do not waste attacks on the invulnerable body.
Thunderbird’s fireball barrage becomes more dangerous as the battle continues. Attack during openings, then return to movement and avoidance when the fireballs intensify. If the room before Thunderbird contains a red Magic Jar, use it before entering the boss room so the required spell sequence does not consume your final reserve.
- Enter with enough magic to cast Thunder.
- Cast Thunder only after Thunderbird appears.
- Use direct jump sword slashes against the exposed head.
- Use Shield and Reflect as defensive support when magic allows.
- Do not waste the Thunder reserve on optional enemies or attacks against the invulnerable body.
Finish with Shadow Link
Thunderbird is only the first Great Palace guardian. After it is defeated, collect the key that drops from above and continue right. The final chamber contains Shadow Link, the last fight before the Triforce of Courage.
Offensive magic does not damage Shadow Link, so save Life and use Shield if magic remains. A reliable original NES tactic is to retreat to the far-left edge, turn toward the center, crouch, and slash whenever Shadow Link approaches. He often runs into the crouching sword. A direct fight is also possible: attack after he commits to a jump or thrust, then avoid staying in front of his sword.
If Link loses after Thunderbird has been defeated, use Continue and work back to the final section according to the session’s Great Palace state. Do not assume the Triforce is awarded merely for defeating Thunderbird; Shadow Link must also be defeated.
- Treat Shadow Link as a separate fight after Thunderbird.
- Collect Thunderbird’s dropped key before continuing right.
- Do not spend offensive magic on Shadow Link.
- Use the far-left crouching position or a deliberate jump-and-strike rhythm.
- After victory, obtain the Triforce of Courage and allow the ending sequence to play.
Before you move on
- The relevant palace guardian has been defeated.
- The dropped key has been collected and used, or the post-boss route has visibly opened.
- The palace crystal has been inserted into the statue before leaving.
- Link receives the associated Life and Magic refill and experience advancement after crystal placement.
- All six regular palace crystals are inserted before entering the Great Palace.
- Thunder has exposed Thunderbird’s vulnerable head.
- Thunderbird has been defeated and its dropped key has been collected.
- Shadow Link has been defeated after Thunderbird.
- The Triforce of Courage is obtained.
- The ending sequence shows Princess Zelda awakening.
References for this chapter
- Zelda II: The Adventure of Link instruction manual — official Nintendo NES manual
- Great Palace — Zelda II: The Adventure of Link Walkthrough and Guide
- Zelda II: The Adventure of Link, Boss Guide
- Zelda II: The Adventure of Link Boss Strategies
- Zelda II: The Adventure of Link/Bosses
- Midoro Palace, Zelda II: The Adventure of Link Walkthrough and Guide
Preparing for the Great Palace (Endgame Checklist)
Before attempting the Great Palace in the original North American NES release, confirm that all six palace crystals have been placed, learn Thunder in Old Kasuto, restore your resources, and prepare for the long route through the Valley of Death. The Cross is strongly helpful because it reveals otherwise invisible Moas, but it is not what opens the Great Palace barrier. The barrier opens only after every earlier palace has been cleared and its crystal installed.
Verify all six crystal placements
Defeating a palace guardian is not enough. After taking the guardian’s key, reach the gray altar at the end of that palace and place the crystal in the statue. The required six placements are Parapa Palace, Midoro Palace, Island Palace, Maze Palace, Palace on the Sea, and Three-Eye Rock Palace.
Use the pause screen as a quick status check. The crystal indicator should show that all six crystals have been placed; the verified walkthrough check describes this as a 0 beside the crystal symbol. If the barrier remains at the Great Palace, leave the area and determine which palace altar was never completed. Neither Thunder, the Cross, the Magical Key, nor additional experience can substitute for a missing crystal.
- Parapa Palace crystal is installed.
- Midoro Palace crystal is installed.
- Island Palace crystal is installed.
- Maze Palace crystal is installed.
- Palace on the Sea crystal is installed.
- Three-Eye Rock Palace crystal is installed.
- The pause screen confirms that all six crystals are placed.
Confirm Thunder and the final inventory
Thunder is the mandatory spell for the final boss sequence because it exposes Thunderbird’s vulnerable head. Learn it from the wise man in the first house of Old Kasuto: enter the house, continue through it, and use the basement entrance to reach him. If he does not teach Thunder, return to the earlier spell and Magic Container progression before attempting the final route.
The Cross should already be in your inventory after clearing Three-Eye Rock Palace. It does not need to be selected or equipped, and it does not open the Great Palace barrier. Its practical benefit is that it makes the Moas around Old Kasuto and along the approach to the Valley of Death visible. Without it, those enemies remain invisible and the route becomes far more hazardous.
The other expected progression items are the Candle, Handy Glove, Raft, Boots, Flute, Hammer, and Magical Key. They are evidence that the main route has been completed, but the barrier itself checks the six crystal placements rather than your inventory.
- Thunder has been learned in Old Kasuto.
- The Cross is in the inventory and makes the approach Moas visible.
- The required progression items are present.
- You understand that the Cross is helpful, not a barrier-opening requirement.
Restore Life, Magic, and lives
Recover before leaving for the final approach. New Kasuto is a convenient healing stop if you are nearby, but any dependable town, fairy, or other recovery point is suitable. The Great Palace entrance should not be treated as a guaranteed refill, so begin the Valley of Death route with Life and Magic restored.
Reserve Magic for genuine hazards. Jump is useful for the Valley’s lava gaps, Shield reduces damage when an enemy cannot be bypassed safely, Fairy can cross dangerous action screens, and Life is best saved for serious emergencies. Thunder consumes a large amount of Magic, so do not spend the entire meter on ordinary overworld enemies.
There is no required numerical Life, Magic, or experience threshold stated here. A practical test is whether you can cross the approach without repeatedly losing most of your health. If the route is consuming your reserves, heal, practice the dangerous screens, and return. Extra lives are valuable because the Great Palace is long and deaths do not preserve your interior position.
- Life is restored before departure.
- Magic is restored, with enough reserved for important spells and Thunder.
- You have several usable lives or safe extra-life resources.
- You can cross the approach without relying on constant damage trades.
Reach Old Kasuto and learn Thunder
From the Hidden Palace or Three-Eye Rock area, travel west across the bridge into Old Kasuto. The bridge contains pits and enemies, so prioritize reaching the town instead of fighting everything. Use the Cross to see the purple Moas that would otherwise be invisible.
Enter the first house on the town screen and proceed through it to the basement. Speak with the wise man to learn Thunder. If the spell is unavailable, do not continue toward the Great Palace assuming it will be taught later. Recheck the earlier spell progression and Magic Container requirements, then return to Old Kasuto.
Leave Old Kasuto to the right when you are ready to begin the final approach.
- You reached Old Kasuto from the Hidden Palace or Three-Eye Rock side.
- The Cross reveals the town’s Moas.
- Thunder was learned from the wise man in the first house.
- You leave Old Kasuto through the right-hand exit.
Follow the route from Old Kasuto
After leaving Old Kasuto, go east across the bridge. Continue north through the desert, then cross west over the next bridge. From there, travel south through the graveyard. These landmarks are more reliable than trying to force a direct route across the surrounding terrain.
After the graveyard, continue toward the narrow mountain passage and enter the action screens leading into the Valley of Death. Moas and other enemies can appear around the path, so avoid unnecessary fights. If an encounter is unavoidable, Shield is safer than repeatedly trading sword hits.
Do not confuse the route with the westward trip used to reach Old Kasuto. The return route to the Great Palace is east from Old Kasuto, north through the desert, west across the next bridge, and south through the graveyard before continuing into the Valley of Death.
- You leave Old Kasuto to the right.
- You cross east over the first bridge.
- You travel north through the desert.
- You cross west over the second bridge.
- You travel south through the graveyard toward the Valley of Death.
Cross the Valley of Death
When the terrain changes to the Valley of Death, check the eastern nook for a hidden action screen containing a Red Magic Jar. This refill is optional. Take it only if you can do so without risking a life, then return to the main route and continue west.
The Valley uses narrow action screens with lava pits, Moas, Lizalfos, Gerus, and other dangerous enemies. Cast Jump for wide lava gaps when an ordinary leap is unreliable. Fairy can bypass some threatening screens, but it consumes Magic that may be needed inside the Great Palace. Keep moving when enemies can be avoided safely.
At the fork near the experience-bag detour, the western branch leads to an optional experience bag. The eastern branch is the route forward. Continue through the required action screens and caves, using Jump for the lava sections. After the final cave and its enemies, the path exits directly at the Great Palace.
- The Red Magic Jar detour was taken only if safe.
- Jump is available for the major lava gaps.
- The optional experience-bag branch was skipped or safely cleared.
- You passed the required caves and reached the Great Palace entrance.
Check the barrier and understand Continue
At the Great Palace, move forward toward the magical barrier. If all six earlier palace crystals are installed, the barrier disappears and you can enter. If it remains, the issue is incomplete palace progress, not a missing Cross or Thunder spell. Return to the palace altars and find the missing placement.
Inside the Great Palace, a game over followed by Continue returns you to the Great Palace entrance. This special behavior prevents you from repeating the Valley of Death after every failed attempt, but it does not preserve interior progress. Collected keys, defeated enemies, opened routes, and your exact position are lost.
Save has different consequences. If you choose Save after a game over, the normal restart point is the North Palace rather than the Great Palace entrance. Treat Continue as the option for learning repeated Great Palace attempts, and use Save only when you accept the longer return route.
- The Great Palace barrier disappears when you approach it.
- You know that Continue after a Great Palace game over returns to the palace entrance.
- You know that Continue does not preserve interior progress.
- You understand that Save returns you to the North Palace rather than creating an interior checkpoint.
Commit to the final attempt
Make your last recovery stop before leaving Old Kasuto. Confirm the six crystal placements, Thunder, the Cross, and the progression items. Restore Life and Magic, then repeat the route: leave Old Kasuto to the right, cross east, travel north through the desert, cross west, travel south through the graveyard, and continue through the Valley of Death.
Once the barrier opens, enter the Great Palace and conserve Magic for major hazards and the final guardians. The preparation stage is complete when Link has crossed the opened barrier. The next stage covers the palace interior, Thunderbird, the dropped key, and Shadow Link.
- All six crystal placements are confirmed.
- Thunder is available for Thunderbird.
- The Cross is in the inventory and the approach Moas are visible.
- Life and Magic were restored.
- The Great Palace barrier opened.
- Link entered the Great Palace.
Before you move on
- The pause screen confirms that all six crystals are placed.
- The Great Palace barrier disappears when Link reaches it.
- Thunder has been learned from the wise man in Old Kasuto.
- The Cross is in the inventory and makes the approach Moas visible.
- The route from Old Kasuto is complete: right exit, east bridge, north desert, west bridge, south graveyard, then the Valley of Death.
- Life and Magic were restored before the final approach.
- After entering the Great Palace, Continue after a game over returns Link to the entrance, while Save returns him to the North Palace.
References for this chapter
- Zelda II: The Adventure of Link instruction manual — official Nintendo NES manual
- Great Palace — Zelda II: The Adventure of Link Walkthrough
- Great Palace — Zelda II: The Adventure of Link Walkthrough and Guide
- Through the Valley of Death — Zelda II: The Adventure of Link Walkthrough
- Zelda II: The Adventure of Link — Guide and Walkthrough
Final Chamber, Final Guardian and Ending Sequence
The Great Palace finale is a consecutive two-battle sequence. Cast Thunder to expose Thunderbird’s head, defeat the exposed head with jump sword strikes, collect the key that falls after the battle, and continue right to the chamber containing the Triforce Keeper. Shadow Link appears as the final test. Defeat him, receive the Triforce of Courage, and let the ending play until Princess Zelda awakens.
1. Prepare for Thunderbird and the final duel
Enter Thunderbird’s chamber with enough Life to withstand mistakes and enough Magic to cast Thunder. Thunder is required to expose the boss’s vulnerable head, so do not spend the Magic needed for that spell on unnecessary attacks during the approach.
Shield can reduce damage during the final battles, and Life is useful if you can create enough room to cast it safely. Do not assume that offensive spells will solve the last duel: Fire, Spell, and Thunder are not the main answer against Shadow Link. Preserve your remaining Magic for defense or recovery after Thunderbird unless the situation demands otherwise.
If you lose all of your lives in the Great Palace after reaching its special restart state, Continue returns you to the Great Palace entrance rather than to Thunderbird’s room. The final approach must therefore be repeated, although a successful Thunderbird victory can make the remaining attempt less costly if you reach the final battle again.
- Thunder is available and enough Magic remains to cast it.
- Life is in a safe condition before entering the boss room.
- Unnecessary spell use has been avoided during the approach.
- You are prepared to fight Shadow Link after Thunderbird without relying on offensive magic.
2. Expose and defeat Thunderbird
Enter the boss room and wait for Thunderbird to appear. Cast Thunder while the boss is present. This removes the protection around Thunderbird’s head; attacking the protected body will not complete the fight.
Once the head is exposed, use ordinary jump sword strikes when it descends within reach. Jump toward the head, strike it, and move away before the next falling fireball reaches Link. Do not use Upward Thrust as the standard solution here; jump attacks are the consistent method for damaging the exposed head.
Stay mobile while watching both the head’s height and the fireballs falling from above. Avoid standing directly under Thunderbird for longer than necessary. A practical rhythm is to remain toward one side, move in when the head lowers, land a sword hit, then retreat and reposition. Shield may reduce damage from mistakes if you have enough Magic, but it does not replace the required Thunder cast.
Continue striking the exposed head until Thunderbird is defeated. When the boss disappears, remain in the room. A key drops from above. Walk into it and collect it before attempting to leave.
- Thunder has been cast while Thunderbird is present.
- The boss’s head is exposed.
- Jump sword strikes are landing on the exposed head.
- Falling fireballs are being avoided or mitigated.
- Thunderbird has been defeated.
- The dropped key has been collected.
3. Continue right to the Triforce Keeper
After collecting Thunderbird’s key, continue right. The key is an item you must pick up after the battle, but it is not necessary to describe the next transition as opening a specific locked door. Follow the passage to the right until you reach the chamber containing the Triforce Keeper.
Do not search for another palace item or turn back after collecting the key. The next chamber is the final trial area. The Triforce Keeper holds the Triforce of Courage, but Link must first pass the test that begins there.
If Thunderbird left Link with very little health, cast Life only when there is enough space to complete the spell. Shield can help during the approach if Magic remains, but avoid spending the last of your resources before the final duel unless recovery is essential.
- The key dropped by Thunderbird has been collected.
- You continued right after picking up the key.
- The chamber with the Triforce Keeper has been reached.
- Link has enough health to begin the final sword fight, or Life has been cast safely.
4. Defeat Shadow Link
The Triforce Keeper’s chamber changes when the final test begins, and Shadow Link appears. This is a sword fight rather than a spell-based battle. Offensive magic is ineffective, so concentrate on positioning, blocking, and sword timing.
The most practical low-risk method is to retreat to the far-left side of the room, face right, and crouch. Keep pressing the sword attack as Shadow Link approaches. He commonly runs into the range of Link’s low stab, allowing you to damage him without chasing him through the center of the room.
If Shadow Link displaces Link from the left edge, regain that position carefully instead of pursuing him across the room. Avoid unnecessary jumps and center-room exchanges, which create more opportunities for contact damage. Shield can reduce damage if you still have Magic, but it does not prevent every mistake.
Continue the crouching sword pattern until Shadow Link disappears. His defeat is not yet the complete ending, so do not reset the game or leave before the Triforce is awarded.
- Shadow Link is fought with the sword rather than offensive magic.
- Link is positioned near the far-left side when possible.
- Crouching attacks are aimed toward Shadow Link’s approach.
- Unnecessary center-room chases and jumps are avoided.
- Shadow Link has disappeared after being defeated.
5. Receive the Triforce and confirm the ending
After Shadow Link is defeated, the final chamber returns to its normal state. Move to the Triforce of Courage and allow the Triforce Keeper to award it to Link. Shadow Link’s defeat alone is not the completion check; Link must receive the missing Triforce piece.
Let the sequence continue. Link returns to North Castle, the three Triforce pieces unite, and the game shows Princess Zelda awakening from her sleeping spell. Do not reset immediately after the duel, because doing so can interrupt the ending sequence before the game displays its conclusion.
For the original North American NES release, completion is confirmed when the ending has shown Link receiving the Triforce of Courage, the Triforce pieces uniting, and Princess Zelda awakening. After the ending returns to the file-selection screen, the completed save displays a Triforce mark beside Link’s file. Selecting that file begins the game’s harder replay state rather than restoring ordinary postgame exploration.
- The Triforce Keeper awarded the Triforce of Courage.
- The ending returned Link to North Castle.
- The three Triforce pieces united.
- Princess Zelda was shown awakening.
- The ending sequence was allowed to finish.
- A Triforce mark appears beside the completed file on the file-selection screen.
Before you move on
- All six palace crystals were placed before entering the Great Palace.
- Thunder was cast while Thunderbird was present.
- Thunderbird’s head was exposed and damaged with jump sword strikes.
- Thunderbird was defeated.
- The key dropped after the battle was collected.
- Link continued right to the chamber containing the Triforce Keeper.
- Shadow Link was defeated.
- The Triforce Keeper awarded the Triforce of Courage.
- The ending showed the Triforce pieces uniting.
- Princess Zelda was shown awakening.
- The completed file displayed a Triforce mark on the file-selection screen.
References for this chapter
- Zelda II - The Adventure of Link instruction booklet — official Nintendo NES manual
- Great Palace — Zelda II: The Adventure of Link Walkthrough and Guide
- RPGClassics Zelda II: The Adventure of Link Walkthrough — Great Palace
- The Adventure of Link Walkthrough - Great Palace - Zelda Dungeon
- Zelda II: The Adventure of Link FAQ/Walkthrough
- Do you get any special logo on your file when you beat it? — Zelda II NES Q&A
Post-Clear Options, Continues and Restarts
The original North American NES campaign is complete only after Link defeats Thunderbird, reaches the final chamber, defeats Shadow Link, receives the Triforce of Courage, and allows the ending to show Princess Zelda awakening. The completed file is marked with a Triforce and can be selected for another campaign. That replay preserves Link’s levels, learned spells, and sword techniques, but the normal progression items, crystals, containers, lives, and palace rewards must be collected again.
1. Confirm that the campaign is complete
Do not stop after defeating Thunderbird. Continue into the next chamber, where the final confrontation begins. Defeat Shadow Link, then proceed to the sage and receive the Triforce of Courage.
Allow the ending sequence to play through until Princess Zelda is shown awakening. This is the practical completion check for the original NES campaign. The game does not place Link in a permanently cleared version of Hyrule for ordinary free-roam play.
After completion, the file entry displays a small Triforce. Select that file to begin another campaign. The mark records that the previous campaign was finished; it does not leave the current world open with every palace and item permanently cleared.
- Thunderbird is defeated.
- Shadow Link is defeated.
- The Triforce of Courage is awarded.
- Princess Zelda is shown awakening.
- A Triforce appears beside the completed file.
2. Understand an ordinary Game Over
Outside the Great Palace, losing all of Link’s lives and choosing Continue returns him to the North Palace, the starting castle. This applies to deaths on the overworld, in the first six palaces, and on the route leading toward the final palace.
Permanent campaign progress remains recorded. Learned spells, sword techniques, attribute levels, progression items, and placed crystals are not erased. Experience accumulated since the most recent level increase is lost, so an unfinished experience total should not be treated as saved progress.
Save records the campaign and returns to the title or file-selection process. It does not preserve Link’s room, elevator, enemy formation, or exact position inside a palace. When the file is selected again, use Continue or the saved file with the expectation that ordinary recovery begins at the North Palace rather than at the room where Link died.
- Ordinary Continue returns Link to the North Palace.
- Unspent experience is lost after a Game Over.
- Save does not preserve an in-palace position.
- Permanent items, spells, levels, and crystals remain recorded.
3. Use the Great Palace recovery rule correctly
Once Link has entered the Great Palace, a Game Over followed by Continue sends him to that palace’s entrance instead of the North Palace. This is an entrance restart, not a room-by-room checkpoint. Link must repeat the palace’s elevators, combat rooms, false routes, platforming sections, and other hazards from the beginning.
The rule has an important final-boss exception. If Link defeats Thunderbird and later dies or reaches a Game Over during the remaining final sequence, Thunderbird stays defeated. Continuing from the Great Palace entrance does not restore that boss. Link must retrace the palace, reach the final chamber, and fight Shadow Link without fighting Thunderbird again.
Before Thunderbird has been defeated, a Great Palace Game Over still means repeating the entire palace from its entrance, including the route to Thunderbird. A Game Over in the Valley of Death before Link enters the Great Palace uses the ordinary restart and sends Continue back to the North Palace.
Treat the Great Palace rule as a recovery point rather than an exploit. It does not preserve the room where Link died, the route already cleared, or the magic and health state from the failed attempt. Plan each new run around the full route from the entrance.
- Link has entered the Great Palace.
- Continue is selected after the Game Over.
- Before Thunderbird, the whole palace must be repeated.
- After Thunderbird, the boss remains defeated.
- The final retraced route ends at Shadow Link, not a second Thunderbird fight.
4. Handle missed palace rewards
A palace is not a normal replayable dungeon after its crystal has been placed. Once Link has obtained the main item, defeated the guardian, and placed the crystal in the statue, the structure becomes a stone palace on the overworld. Treat any uncollected treasure or optional reward inside as missed for that campaign.
Before placing a crystal, search the palace for any Heart Container, Magic Container, Link Doll, Treasure Bag, or other reward you intend to collect. The main ending does not require every optional reward, so do not risk a depleted run merely to obtain a low-value detour.
For overworld cleanup, revisit suspicious dead ends and previously blocked routes after obtaining the Hammer, Raft, Boots, Flute, and Cross. These items open routes or reveal paths that were inaccessible earlier. Refill Life and Magic before optional fights, because a death can send Link back to the North Palace and erase the convenience of the detour.
If a palace has already been sealed, stop searching for a way back in. Make a note of the missed reward and collect it during the replay instead.
- Search palace side rooms before placing the crystal.
- Collect wanted containers and Link Dolls before sealing a palace.
- Revisit overworld barriers after acquiring new progression items.
- Treat missed rewards in sealed palaces as replay objectives.
5. Know what carries into the replay
Selecting the completed file starts a new campaign with Link’s attribute levels, learned spells, and sword techniques preserved. This makes the early palaces easier and gives the replay a useful purpose: collect missed rewards, practice safer routes, and refine boss strategies without beginning at the weakest version of Link.
The replay does not preserve the normal inventory and dungeon state. Lives, small keys, palace crystals, progression items, Heart Containers, Magic Containers, and other collected upgrades must be reacquired. The Candle, Handy Glove, Raft, Boots, Flute, Cross, Hammer, and Magic Key are not available until the new campaign reaches their normal locations.
The six crystals must be placed again before the Great Palace barrier is removed. The Triforce beside the file proves that the earlier campaign was completed; it does not permanently unlock the Great Palace for every future replay.
Use the replay to target specific improvements rather than trying to collect everything automatically. Recover an important missed item, practice a difficult palace route, or attempt a lower-death campaign while relying on the levels and techniques already retained.
- Levels carry over.
- Spells carry over.
- Sword techniques carry over.
- Lives, keys, crystals, items, and containers reset.
- All six crystals must be placed again.
6. Prepare for another Great Palace attempt
Before entering the Great Palace on a replay, restore Life and Magic and confirm that the required spells and progression items have been learned again. Optional containers can improve survivability, but they are not a substitute for learning the palace’s dangerous jumps and enemy placements.
Avoid fighting every enemy. Defeat enemies that block a passage or make a jump unsafe, then bypass threats when the room allows it. Use Shield to reduce damage, Jump or Fairy for difficult movement, Reflect against appropriate projectiles, and Life when recovery is necessary. Reserve enough Magic for the final encounters, especially Thunder against Thunderbird.
If the first attempt ends before Thunderbird, Continue returns Link to the Great Palace entrance and the full route must be repeated. If Thunderbird has already been defeated, the same entrance restart still applies after a Game Over, but the final boss remains cleared. Use that second attempt to conserve resources for Shadow Link rather than preparing to fight Thunderbird again.
For a cleaner or no-death run, treat the first successful clear as route practice. On later attempts, collect only optional resources that materially improve survival, avoid unnecessary overworld detours, and use the known Great Palace entrance restart instead of relying on an unverified checkpoint or save exploit.
- Life and Magic are restored before entry.
- Required spells and items have been reacquired for the replay.
- Magic is reserved for Thunderbird and other necessary uses.
- The pre-Thunderbird and post-Thunderbird Continue rules are distinguished.
- The final attempt begins with a reliable route and resource plan.
Before you move on
- The final sequence awards the Triforce of Courage.
- Princess Zelda is shown awakening.
- The completed file displays a Triforce beside Link’s entry.
- An ordinary Game Over followed by Continue returns Link to the North Palace.
- A Great Palace Game Over followed by Continue returns Link to the Great Palace entrance.
- After Thunderbird is defeated, a later Great Palace restart leads to Shadow Link without refighting Thunderbird.
- Missed palace rewards are treated as replay objectives after that palace is sealed.
- The replay plan distinguishes retained levels, spells, and techniques from items and upgrades that must be reacquired.
References for this chapter
- Zelda II: The Adventure of Link instruction manual — official Nintendo NES manual
- Starting the Game — Zelda II: The Adventure of Link Walkthrough
- Great Palace — Zelda II: The Adventure of Link Walkthrough and Guide
- Zelda II: The Adventure of Link — Guide and Walkthrough
- Do you have to fight Thunderbird again if you lose against Dark Link? — NES Q&A
Finishing up
All six earlier palace guardians have been defeated and a crystal has been placed in each palace statue.
The Great Palace entrance has opened, and Link has crossed its dungeon route to the final chamber.
Thunderbird and Shadow Link have been defeated, Link has received the Triforce of Courage, and the ending shows Princess Zelda awakening.
The completed file displays the game’s completion Triforce mark after the ending sequence. If Link receives a Game Over inside the opened Great Palace, Continue returns him to that palace’s entrance rather than preserving room-by-room progress.
Choose your next gameSources & references
Our original guide draws on the references below. Check the edition at the top of this page before following controls or unlock requirements.
- Zelda II - The Adventure of Link instruction booklet — official Nintendo NES manual
- Starting the Game — Zelda II: The Adventure of Link Walkthrough
- Zelda II: The Adventure of Link Walkthrough and Guide - NES - TheRewster
- Zelda II: The Adventure of Link - Guide and Walkthrough - NES - glass_soul
- Zelda II: The Adventure of Link instruction manual — official Nintendo NES manual
- Zelda II: The Adventure of Link — Navigating Death Mountain walkthrough
- Zelda II: The Adventure of Link — Guide and Walkthrough by TConnolly
- Zelda II: The Adventure of Link — Mike’s RPG Center walkthrough
- Zelda II: The Adventure of Link — StrategyWiki walkthrough
- Zelda II: The Adventure of Link — Guide and Walkthrough by Dev
- Zelda II: The Adventure of Link - Guide and Walkthrough for NES, GameFAQs
- Zelda II: The Adventure of Link — Guide and Walkthrough
- Zelda II: The Adventure of Link/Parapa Palace, StrategyWiki
- Zelda II: The Adventure of Link/Midoro Palace, StrategyWiki
- Parapa Palace — Zelda II: The Adventure of Link Walkthrough and Guide
- The Adventure of Link Walkthrough — Parapa Palace
- Parapa Palace — Zelda Dungeon Wiki
- The Adventure of Link Walkthrough — Midoro Palace
- Midoro Palace, Zelda II: The Adventure of Link Walkthrough and Guide
- Midoro Palace — Zelda II: The Adventure of Link Walkthrough
- Island Palace — Zelda II: The Adventure of Link Walkthrough
- RPGClassics Zelda II walkthrough - Island Palace
- Zelda II: The Adventure of Link/Island Palace, StrategyWiki
- Quick Guide — Zelda II: The Adventure of Link Walkthrough & Guide
- To Eastern Hyrule — Zelda II: The Adventure of Link Walkthrough and Guide
- Darunia Town — Zelda II: The Adventure of Link Walkthrough
- Maze Palace — Zelda II: The Adventure of Link Walkthrough
- The Adventure of Link Walkthrough — Maze Palace
- Zelda II: The Adventure of Link/Maze Palace — StrategyWiki
- Palace on the Sea - Zelda II: The Adventure of Link Walkthrough and Guide, GameFAQs
- The Adventure of Link Walkthrough - Ocean Palace, Zelda Dungeon
- Palace on the Sea, Zelda Dungeon Wiki
- Zelda II: The Adventure of Link - Guide and Walkthrough - NES, GameFAQs
- Three-Eye Rock Palace — Zelda II: The Adventure of Link Walkthrough & Guide
- RPGClassics — Zelda II: The Adventure of Link, Three-Eye Rock walkthrough
- Through the Valley of Death — Zelda II: The Adventure of Link Walkthrough
- New Kasuto — Zelda II: The Adventure of Link Walkthrough
- Mido Town — Zelda II: The Adventure of Link Walkthrough
- Nabooru Town — Zelda II: The Adventure of Link Walkthrough
- Saria Town — Zelda II: The Adventure of Link Walkthrough
- Hidden Palace — Zelda II: The Adventure of Link Walkthrough
- Great Palace — Zelda II: The Adventure of Link Walkthrough
- Heart Container Locations — Zelda II: The Adventure of Link Walkthrough
- Death Mountain — Zelda II: The Adventure of Link Walkthrough
- Ocean Palace — Zelda II: The Adventure of Link Walkthrough
- Great Palace — Zelda II: The Adventure of Link Walkthrough and Guide
- Zelda II: The Adventure of Link, Boss Guide
- Zelda II: The Adventure of Link Boss Strategies
- Zelda II: The Adventure of Link/Bosses
- Zelda II: The Adventure of Link — Guide and Walkthrough
- The Adventure of Link Walkthrough - Great Palace - Zelda Dungeon
- RPGClassics Zelda II: The Adventure of Link Walkthrough — Great Palace
- Zelda II: The Adventure of Link FAQ/Walkthrough
- Do you get any special logo on your file when you beat it? — Zelda II NES Q&A
- Do you have to fight Thunderbird again if you lose against Dark Link? — NES Q&A
About the game & collecting notes
- Platform
- Nintendo Entertainment System
Step-by-step campaign walkthrough for the original North American NES release of Zelda II: The Adventure of Link. This guide covers overworld movement, town hints, spell and experience use, every palace (the six palaces and the Great Palace), required palace items, boss approaches, recovery options, and a concrete completion checklist so you can reach the Triforce of Courage and wake Princess Zelda.
Darryl Polo
Darryl Polo loves tinkering with emulation and revisiting retro games. He enjoys exploring how old favorites play on different setups and sharing what he learns along the way. At Joking Joystick, he writes about the games, hardware, and small discoveries that keep the hobby fun.
Our editorial standardsFound a step that needs another look? Help us improve this guide.