
Wipeout 3 (PlayStation, North American original) — Strategy Guide
Complete, practical strategy for the original North American PlayStation release of Wipeout 3 (SLUS-00865). Learn the controls, craft handling, weapons, braking and Hyperthrust, then progress through the game's four-class Tournament ladder: Vector, Venom, Rapier and Phantom. The guide also separates the required campaign from optional Single Race track and team unlocks, Challenge medals, prototype circuits and multiplayer content.

Find a copy
Wipeout 3 Sony PlayStation
We may earn a commission if you buy through these links, at no extra cost to you. As an Amazon Associate I earn from qualifying purchases.
Opens retailer search results. Check the model, edition, seller, availability and current price before buying.
Before you begin
This guide targets the original North American PlayStation release of Wipeout 3, product code SLUS-00865.
Its required single-player route is the four-class Tournament ladder: Vector, Venom, Rapier and Phantom.
Follow the preparation and driving chapters first, then use the Tournament and unlock chapters to plan race attempts instead of treating every event as a separate final race.
Higher speed classes punish late braking, wall impacts and poor shield management, so practice each difficult circuit in the same class and craft you intend to use in the Tournament.
The guide distinguishes the required Phantom Tournament victory from optional Challenge, secret-team, secret-track and prototype-circuit goals.
Set yourself up for the run
Use a reliable controller and test analog responsiveness before starting; set the control layout you prefer and practice nose-up and nose-down inputs because they affect landings and speed retention.
Reserve a memory-card block before playing Tournament mode and save after major victories or unlocks.
If you plan link play, treat it as optional hardware-dependent content and verify the documented setup and prompts on both systems before attempting it.
Start in Vector and Venom to learn airbrake steering, dual-brake inputs and shield management before attempting Rapier or Phantom.
Pick a forgiving starter team for early tournaments—teams with stronger handling and shield are easier to recover with; avoid high-speed, low-handling teams until cornering is consistent.
Familiarize yourself with weapon pickup icons and the discard button so you can replace unsuitable weapons before dangerous sections.
Test internal, cockpit and external views on the actual circuit being learned; use the view that gives the clearest sight of corners, landings and hazards.
If using the North American disc, do not import controls, tracks, teams or progression rules from Wipeout 3: Special Edition or another regional release.
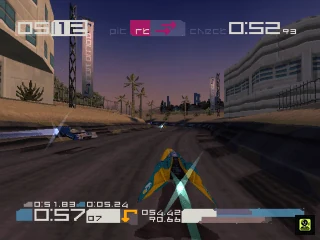
Getting started: menus, modes, controls and HUD
Begin with Single Race to learn circuits, test teams and build the medal results used for ordinary track and craft progression. Gold victories are the clearest sufficient route when you want reliable unlock progress, although the game’s ordinary unlock thresholds are not identical to the separate Challenge requirements. Time Trial removes opponents, weapons and checkpoints so you can refine lines and braking. Challenge has separate Race, Time, Weapon and Combo objectives. Tournament links four races and awards points by finishing position. Before serious attempts, set your controls and camera, then complete a practice lap and save after confirming new progress.
1. Select the correct mode from the main menu
Choose Single Race when you need to learn a circuit, test a team or earn ordinary progression medals. Select the speed class, circuit and team, then check Game Settings before starting. The mode lets you adjust the number of opponents and whether weapons or checkpoints are active. First place gives gold, second gives silver and third gives bronze. These Single Race medal results drive the normal track and team progression. If you want the most reliable route through the unlock grid, aim for gold victories, but do not treat gold as a verified universal minimum for every ordinary unlock threshold.
Choose Time Trial when you want an uncluttered practice run. There are no opponents, weapons or checkpoints, so use it to learn braking points, airbrake timing, speed-pad approaches and the fastest safe line. Your previous best can appear as a non-colliding ghost. Time Trial is useful for improving driving, but its records are separate from the ordinary Single Race medal chain.
Choose Challenge for its independent objectives. Race Challenges ask you to finish in the required position, Time Challenges impose a target time and Weapon Challenges require a stated number of eliminations. After completing the first three Challenge types with at least bronze medals, the Combo Challenge becomes available. Challenge medals do not replace the Single Race results used for ordinary track and team progression.
Tournament strings four races together. The placement values are 10 points for first, 6 for second, 4 for third, 3 for fourth, 2 for fifth, 1 for sixth, and 0 for both seventh and eighth. A seventh- or eighth-place finish gives no points but does not by itself end the Tournament; craft destruction is the separate race failure that prevents a scoring result. Practice the circuits in Single Race before entering a Tournament, then protect a steady points total instead of forcing every pass.
- Use Single Race to learn layouts and build ordinary progression medals.
- Use gold victories as the clearest sufficient unlock route when thresholds are uncertain.
- Use Time Trial to practice without traffic, weapons or checkpoint pressure.
- Use Challenge for separate Race, Time, Weapon and Combo medals.
- Remember that Tournament points and Single Race medals serve different purposes.
2. Memorize the default PlayStation controls
The default mapping is D-pad or left analog stick for steering and nose pitch, X for acceleration, Circle for firing the held weapon, Square for discarding it, Triangle for changing view, R1 for Hyperthrust, L1 for rear view, L2 for the left airbrake and R2 for the right airbrake. Pressing L2 and R2 together applies the regular brake.
The airbrakes are independent. In a left-hand corner, use the left airbrake to help rotate the craft; in a right-hand corner, use the right airbrake. Apply the input briefly and release it as the nose reaches the exit line. Holding both airbrakes is braking, not the standard way to steer. If you remap the controls, keep the two airbrakes on separate, easily reached buttons. A layout that lets you steer, use either airbrake and fire without moving your hand is preferable to one that merely preserves the defaults.
The vertical part of the directional input controls nose pitch. Use nose-up input to help clear or settle a rise and nose-down input to bring the craft level for a landing. Test the pitch response in a low-speed Single Race before attempting a difficult jump at Rapier or Phantom speed.
- Confirm X accelerates and Circle fires before collecting a weapon.
- Confirm Square discards the weapon instead of firing it.
- Test L2 and R2 separately, then together, to distinguish airbrakes from braking.
- Practice nose-up and nose-down input over a jump or crest.
- If you remap the controls, keep independent left and right airbrake access.
3. Choose a readable camera and verify it on track
Press Triangle to cycle through the available internal, cockpit and external views. Internal and cockpit views can make the nose and nearby walls easier to judge, while the external view gives more surrounding track visibility. Choose the view that shows the next corner, track edge and upcoming pickup early enough for you to react; there is no single best view for every circuit.
Run a complete practice lap after selecting a camera. Check one tight corner, one long straight, an elevation change and any jump on the circuit. If a wall reaches you before you can judge the turn, try another view before compensating with excessive braking. When using a NeGcon, select the view through Game Settings rather than relying on an in-race change.
Do not change camera and controls immediately before a medal attempt. Complete at least one clean practice lap with the new layout so that the airbrake, rear-view and discard inputs are automatic.
- Confirm that the next corner is visible before you enter it.
- Check the camera on a tight turn, a fast straight and an elevation change.
- Run a full practice lap after changing the camera or controls.
4. Read the HUD and manage shield energy
The speed display shows current velocity, while the lap counter shows your current lap and remaining race distance. The weapon display identifies the item being held; fire it with Circle or discard it with Square. The proximity warning indicates nearby traffic, and L1 gives a direct rear view when you need to check a pursuer or place a mine behind the craft.
The shield gauge is your damage reserve. Wall impacts, collisions and enemy weapons reduce it. Hyperthrust, activated with R1, diverts shield energy into the engines for a speed burst, so acceleration comes at the cost of survivability. Hyperthrust cannot be activated once shield energy falls below 25 percent. Check the gauge before boosting and leave enough energy to survive a mistake or weapon hit late in the race.
Use Hyperthrust on a clear straight or after a corner when the craft is already aligned. Avoid activating it before a narrow turn, uncertain landing or crowded braking zone. If the shield is low, prioritize a clean line and survival. A pickup is not automatically worth keeping: discard a weapon when it is unsafe for the upcoming section or when carrying it would make you hesitate during a critical turn.
- Check shield energy before using Hyperthrust.
- Identify the held weapon and discard button without looking away from the track.
- Use the lap counter to decide whether to spend energy on a pass or protect a safe finish.
- Respond to a proximity warning with the rear view or a safer defensive line.
- Keep enough shield energy for the final section instead of boosting indiscriminately.
5. Save and verify the setup before progressing
After earning a medal, unlocking a mode or completing a Tournament result, use the game’s save process before leaving the relevant menu or powering down. Confirm that the result remains present after returning to the mode-selection screens. This prevents a successful practice or unlock run from being lost and gives you a reliable starting point for the next speed class.
Keep ordinary Single Race medals, Challenge medals, Tournament victories and Time Trial records as separate goals. For the standard campaign, the required Tournament route is Vector, then Venom, then Rapier and finally Phantom. The chapter’s setup work is complete when you can enter each mode, operate the controls from memory and preserve your progress on the memory card.
- Save after confirming a new medal, unlock or Tournament result.
- Recheck the menu after saving to confirm the result remains recorded.
- Track Single Race, Challenge, Tournament and Time Trial progress separately.
- Use the saved setup as the base for later Vector-to-Phantom practice.
Before you move on
- You can open Single Race, Time Trial, Challenge and Tournament from the main menu.
- You can identify acceleration, fire, discard, camera, rear view, Hyperthrust, left airbrake, right airbrake and combined braking from memory.
- You have completed a practice lap with your chosen controls and camera, including a corner, elevation change and weapon pickup.
- You can distinguish the speed display, lap counter, weapon display, proximity warning and shield gauge.
- You understand that Hyperthrust consumes shield energy and becomes unavailable below 25 percent.
- You understand that Single Race medals drive ordinary track and team progression, with gold victories serving as the clearest sufficient route when you want dependable unlock progress.
- You know that Challenge medals are separate from ordinary Single Race progression.
- You have saved and verified at least one new result before moving on.
- You understand that the required standard Tournament route is Vector, Venom, Rapier and Phantom, not a Challenge or Time Trial sequence.
Teams and ships: pick the right craft for the job
Wipeout 3 gives each craft four displayed attributes: thrust, speed, shield and handling. The original North American PlayStation release begins with FEISAR, Goteki 45, Auricom and Piranha. FEISAR is the safest learning choice because its thrust, shield and handling make mistakes easier to recover from. Goteki 45 adds speed while retaining strong shielding, Auricom is balanced, and Piranha combines useful speed and handling with a weak shield. Use a forgiving team while learning technical circuits, then test faster teams on open tracks and in Time Trial after your cornering is consistent. The selected team determines the craft profile; pilot selection does not replace it. Qirex RD, AG Systems, Assegai and Icaras are optional game-wide Single Race unlocks and are not needed for the standard Vector, Venom, Rapier and Phantom Tournament route.
1. Learn the four starting teams
The original North American release starts with FEISAR, Goteki 45, Auricom and Piranha. At the team-selection screen, compare the four displayed attributes before confirming your craft. Thrust affects acceleration and how quickly you regain pace after a slow corner or impact. Speed represents top-end performance. Shield is your damage margin, while handling affects how readily the craft changes direction and holds a line.
These ratings should guide your choice, but they do not replace practice. A craft with lower top speed can still produce better race results if it exits corners cleanly and avoids wall contact. The selected team determines the craft’s profile. Choosing a different pilot does not substitute another team’s statistics.
- Identify FEISAR, Goteki 45, Auricom and Piranha in the starting roster.
- Read thrust, speed, shield and handling before choosing a craft.
- Judge a team by its complete profile rather than top speed alone.
2. Start with FEISAR, Goteki 45 or Auricom
Choose FEISAR for your first unfamiliar circuits. Its displayed profile is built around strong thrust, shield and handling, with low top speed. That combination gives you more time to learn braking points, airbrake timing, jumps and weapon sections without every mistake becoming immediately fatal. Stay with it for several races so you learn the track instead of constantly adapting to a new craft.
Goteki 45 is a useful alternative when damage is your main problem. It is faster than FEISAR and has equally strong shielding, but its handling is less responsive. Use it when you can complete a circuit reliably but lose time through wall contact or weapon hits. Its extra speed is worthwhile only if you can keep the craft pointed through the next corner.
Auricom is the neutral baseline. Its thrust, speed, shield and handling are evenly balanced, so it has no severe weakness and no standout specialty. Try it after FEISAR when you want to determine whether a poor result comes from your driving line or from a craft’s unusual behavior.
- Use FEISAR while learning unfamiliar layouts.
- Use Goteki 45 when surviving impacts matters more than sharp steering.
- Use Auricom as a balanced comparison craft.
3. Use Piranha for clean technical driving
Piranha has good handling and useful speed, but its shield is weak. It is effective on tight circuits with linked corners or hairpins because its responsive steering helps you hold a line and carry speed through direction changes. Its advantage is corner control, not maximum straight-line speed.
Treat Piranha as a clean-driving craft. Leave room around opponents, avoid repeated wall scrapes and brake before crowded braking zones rather than forcing contact-based passes. If you are losing with Piranha, check your collision count and remaining shield before deciding that the craft lacks speed. A clean Piranha lap can beat a faster craft that repeatedly loses momentum against the walls.
- Choose Piranha when handling matters more than damage tolerance.
- Protect it through crowded sections instead of seeking contact.
- Prioritize a stable corner exit over a late risky overtake.
4. Match the craft to the circuit
For tight or technical circuits, prioritize handling and then shield. FEISAR is the safest learning option, while Piranha is more responsive but less forgiving. The handling advantage matters when a circuit repeatedly demands direction changes, narrow entries or precise wall avoidance. Shield is valuable on the same tracks because one bad impact can compromise the following section.
For open circuits with long straights, speed becomes more valuable. Qirex RD, AG Systems and Icaras can gain time there, but their lower handling or shield ratings make missed corners more expensive. Qirex RD and Icaras are particularly demanding because both have weak handling; AG Systems is easier to steer but still vulnerable to damage. Do not automatically select the craft with the highest speed. A slower craft that exits every corner aligned may finish ahead of a faster craft that spends the next straight correcting a bad entry.
Test any new team in Single Race or Time Trial before using it in a Tournament. Run several warm-up laps on a familiar circuit, keep the same camera and controls, and compare your actual lap consistency rather than the rating screen alone.
- Technical circuit: favor handling, then shield.
- Long straight or Time Trial: test speed-focused craft after cornering is consistent.
- Run warm-up laps whenever you change teams.
5. Recover from collisions through the real attributes
Wipeout 3 displays thrust, speed, shield and handling; it does not provide a separate selectable mass statistic. After contact, make small steering corrections to realign with the track and avoid carrying unnecessary boost into the next bend. Thrust helps regain pace, handling helps point the craft back toward the racing line, and shield determines how much additional punishment you can tolerate.
Do not treat strong shielding as permission to collide deliberately. Goteki 45 can absorb more punishment than most starting craft, but repeated impacts still cost speed and energy. With Piranha, AG Systems, Assegai or Icaras, a small number of impacts can be especially costly because their shield ratings are lower. Stabilize first, then use Hyperthrust only on the next clear straight. If the craft is badly damaged, choose a safe line and preserve a scoring finish rather than attempting an immediate pass.
- After a hit, realign before accelerating aggressively.
- Use shield as recovery margin, not as a reason to collide.
- Base comparisons on the four displayed attributes, not an unlisted mass value.
6. Optional secret-team unlocks
Secret teams are separate from the standard Tournament campaign. Qirex RD becomes available after first-place Single Race finishes on Terminal with FEISAR, Goteki 45, Auricom and Piranha. After that, win on two tracks with Qirex RD to unlock AG Systems, three tracks with AG Systems to unlock Assegai, and four tracks with Assegai to unlock Icaras. These are game-wide Single Race victory counts; they do not require maintaining a separate copy of each ordinary unlock result in Vector, Venom, Rapier and Phantom.
The optional teams are useful for Time Trial work and experimentation, but they are not required to complete the standard Tournament route. Qirex RD and Icaras reward clean, open lines but have poor handling. AG Systems combines high speed with easier steering than Qirex RD while remaining vulnerable to damage. Assegai has the best handling but the weakest shield, so it rewards precise driving and punishes casual contact. Test each unlocked craft on a familiar circuit before taking it into a Tournament.
- Treat Qirex RD, AG Systems, Assegai and Icaras as optional unlocks.
- Track their Single Race victories as game-wide progress, not separate class campaigns.
- Verify each new team in Single Race before using it seriously.
- Do not delay standard Tournament progress solely to collect every secret team.
Before you move on
- You can identify FEISAR, Goteki 45, Auricom and Piranha as the four starting teams.
- You understand what thrust, speed, shield and handling mean in practical driving terms.
- You have selected a dependable starting craft for your current skill level and used it in several practice races.
- You have tested at least one team on a familiar circuit after checking its displayed attributes.
- You can choose between handling, shield and speed according to whether a circuit is technical or open.
- You can recover from a collision by realigning first and boosting only after the craft is stable.
- You understand that Qirex RD, AG Systems, Assegai and Icaras are optional game-wide Single Race unlocks, not requirements for the standard Vector-to-Phantom campaign.
Core driving mechanics: throttling, airbrakes, nose angle and hyperthrust
Wipeout 3 rewards a steady accelerator hand and early corrections. Use the airbrake matching the corner direction to rotate the craft, then release it as the exit comes into line. Pressing both airbrakes together slows the craft and is mainly for severe bends, missed entries, or emergency recovery. Pitch the nose while airborne: raise it to soften a jump landing, lower it over a crest, and raise it again when entering a trough so the craft stays aligned with the track. Hyperthrust gives a large speed increase by consuming shield energy. Use it on clear exits and straights, not immediately before a corner, chicane, weapon-heavy section, or unpredictable landing. Keep enough shield energy to survive contact, because Hyperthrust locks out below 25 percent and the craft is eliminated when its energy reaches zero.
Confirm the original North American control layout
In the default PlayStation layout, X accelerates, Circle fires the weapon, Square drops or discards the weapon, Triangle changes the camera, and L1 activates the rear view. R1 activates Hyperthrust. L2 is the left airbrake and R2 is the right airbrake. The D-pad or left analog stick moves the craft and controls its nose pitch. Start pauses the race. These mappings match the original North American release identified by product code SLUS-00865.
Before entering a tournament, run a Single Race on a familiar circuit. Hold X through a gentle bend, test L2 in a left turn, and test R2 in a right turn. Then press L2 and R2 together briefly on a straight to recognize the stronger slowdown. If you change the configuration, practice again until each airbrake can be reached without releasing the accelerator or losing track of the steering input.
- X is held for normal acceleration.
- L2 is used for left airbrakes and R2 for right airbrakes.
- L2 and R2 together are reserved for heavy slowing or emergency correction.
Take a medium-speed corner with the matching airbrake
Approach a left-hand corner from the outside edge while holding X. Begin steering left before the corner becomes tight, then tap or briefly hold L2 to rotate the craft toward the apex and exit. Release L2 as soon as the nose is lined up with the exit. The airbrake should help initiate the turn; steering should complete the line. For a right-hand corner, reverse the inputs and use R2. The original guidance specifically assigns the left airbrake to sharp left corners and the right airbrake to sharp right corners.
Do not wait until the craft is already aimed at the outside wall. If the approach is too fast, release X for a moment before using the matching airbrake. A short, early correction normally costs less speed than entering too deep and holding both brakes through the bend. Once the exit is visible and the craft is aligned, release the airbrake and return to full acceleration.
- Approach from the outside when the track allows it.
- Start the matching airbrake before the tightest part of the turn.
- Release the airbrake once the exit line is stable.
Use both airbrakes for severe slowing or recovery
Pressing L2 and R2 together slows the craft substantially. Use this for a very sharp corner, a missed braking point, or an imminent wall impact. It is not the default technique for ordinary medium bends. The game’s control guidance distinguishes the directional airbrakes from simultaneous use, which slows the craft rather than helping it rotate toward one side.
If you are running wide, first lift off X and apply the airbrake matching the corner. Use both brakes only when steering and one airbrake cannot prevent contact. As soon as the nose points safely along the track, release the brakes and accelerate. Carrying full braking into the following straight makes recovery slower and leaves you exposed to opponents.
- Lift off briefly before committing to full braking.
- Do not hold both airbrakes through an ordinary bend.
- Resume acceleration as soon as the craft is pointed down the exit.
Control the nose over jumps, crests and dips
Use the vertical direction on the D-pad or analog stick to pitch the nose. When launching from a jump, pull back to raise the nose and soften the landing. Aim to meet the track surface level rather than landing nose-first, which can bounce the craft and cost speed. The specialist guide also notes that raising the nose helps the craft gain speed, while lowering it slows the craft.
When the track rises to a crest and then drops away, push the nose down so the craft follows the descending surface instead of floating nose-high. When entering a trough or rising section, raise the nose to keep the craft level with the track. Make the pitch adjustment while airborne, then ease the input toward neutral as the craft settles. Large steering corrections during a bad landing can turn a small speed loss into a wall strike.
- Raise the nose for a descending jump landing.
- Lower the nose when dropping over a crest.
- Raise the nose when entering a trough or rising section.
Use Hyperthrust on aligned straights
Hold R1 to divert shield energy into the engines for a strong speed burst. Hyperthrust rapidly drains shield energy, and it becomes unavailable once the shield falls below 25 percent. Any collision or weapon impact also reduces the energy available for both survival and boosting.
Activate Hyperthrust after a corner when the craft is already aligned with a clear straight, or during a predictable airborne section where the landing line is known. Release it before a narrow chicane, blind bend, crowded braking zone, or uncertain landing. Short bursts on exits are safer than holding R1 continuously. Do not spend the last usable portion of the shield merely to gain speed: when energy reaches zero, the craft is destroyed, and at 25 percent the boost is locked out.
- Boost only after the craft is aligned with a clear route.
- Release R1 before the next braking point or hazard.
- Preserve shield energy for collisions, weapons, and the final laps.
Recover cleanly after a wall strike or bad landing
After touching a wall, stop making large steering inputs and point the craft back along the track. Use a short matching-side airbrake rather than holding both brakes unless the craft is facing across or against the racing direction. Delay Hyperthrust until the craft is stable and a clear straight is visible.
If a landing goes wrong, correct the nose angle first and then correct the horizontal line. Trying to solve both problems with heavy steering, full braking, and Hyperthrust at the same time often causes a second impact. A controlled recovery that loses some speed is preferable to a spin that drains the shield and leaves the craft misaligned for the next corner.
- Straighten the craft before boosting.
- Correct nose pitch before making large steering inputs.
- Choose a stable exit over an unsafe instant recovery.
Before you move on
- Complete a practice lap while keeping X held through several medium corners and using the matching airbrake to rotate without repeatedly pressing both brakes.
- Land one jump with the nose raised, lower the nose over a crest, and raise it through a trough without bouncing or striking the track.
- Use Hyperthrust on a clear straight, release it before the next corner, and finish the section with Hyperthrust available rather than forcing the shield below the 25 percent lockout.
- Recover from one deliberate light wall touch by straightening the craft, correcting the nose, and rejoining the racing line without using Hyperthrust until the route ahead is clear.
Weapons, pick-ups and defensive driving
Weapon pads give Wipeout 3’s craft offensive, defensive or utility equipment. Learn the complete item roster, read the abbreviation shown in the weapon box, and choose an item according to the next section of track rather than firing automatically. Rockets, Multi-Missiles, Plasma Bolt, Quake Disruptor and Energy Drain are offensive tools; Mines and Force Wall disrupt pursuers; Gravity Shield, Reflector and Cloak protect your position; Autopilot temporarily handles the craft. Speed pads and Hyperthrust are not weapon pickups. Use the rear view before dropping Mines, activate protection before an attack arrives, and discard equipment that would be dangerous through the next corner. After a hit, stabilize the craft and protect shield energy before attempting another overtake.
Read the weapon pads and weapon box
Weapon pads are embedded in the racing surface. Pink or purple pads are associated with offensive weapons, while yellow or orange pads provide defensive or utility equipment. A pad may be empty after another craft has collected it, so do not abandon a safe racing line just to reach a recently used pad. Treat the color as a pickup category, not as a guarantee of a specific item.
The weapon box displays the current item abbreviation and symbol. The original Wipeout 3 roster is Mines (MI), Force Wall (FW), Reflector (RF), Gravity Shield (GS), Rockets (RK), Autopilot (AP), Cloak (CK), Quake Disruptor (QD), Energy Drain (ED), Multi-Missiles (MM) and Plasma Bolt (PB). Speed pads are track features, and Hyperthrust is a control function that consumes shield energy; neither is an additional weapon pickup.
The warning voice means that an opponent has targeted or is preparing an attack. It does not identify the incoming weapon. Respond by checking the next corner, preserving room to dodge, or activating protection before impact rather than waiting to learn which attack was fired.
- Pink or purple pad: offensive category.
- Yellow or orange pad: defensive or utility category.
- A used pad may be empty.
- Use RK for Rockets, QD for Quake Disruptor, GS for Gravity Shield and CK for Cloak.
- Do not confuse speed pads or Hyperthrust with weapon pickups.
Fire offensive weapons from a stable line
Rockets (RK) fire two unguided projectiles straight ahead. Use them when a rival is close and aligned with your nose, especially on a straight or during an attempted pass. They inflict shield damage and slow the target, but firing them through a bend usually wastes the item against the scenery.
Multi-Missiles (MM) can target one or two visible craft. Wait for the target markers and confirm that the marked opponents are actually visible in front of you. If a target is around a corner or hidden behind a wall, the missiles may strike the scenery instead of following the racing route.
The Plasma Bolt (PB) is unguided, charges before firing and can eliminate a craft on impact. Begin charging only when the target is close enough and the track is straight enough to keep your nose aligned. Quake Disruptor (QD) sends a disruptive wave ahead and affects opponents visible on screen, making it most valuable when several rivals are within view. Energy Drain (ED) locks onto a nearby craft, removes shield energy from that opponent and transfers it to you. Use it when the target is close and your own energy needs recovery, but stop attacking if the line is becoming unsafe.
- RK: close, straight target.
- MM: fire only when marked targets are visible.
- PB: align first and allow time for the charge.
- QD: use when several opponents are visible.
- ED: use at close range when shield recovery matters.
Use defensive and disruptive equipment to hold position
Gravity Shield (GS) makes the craft invulnerable for a brief period. Activate it when the warning arrives too late for a clean dodge, before entering a crowded hazard section, or when protecting a tournament lead. You cannot fire another weapon while the shield is active, although you can collect a replacement item. Hyperthrust still consumes shield energy, so do not boost carelessly merely because the shield is active.
Cloak (CK) hides the craft from opponents and prevents ordinary weapon locks. It is not a universal protection effect: Mines and Force Walls can still hit you, and the item does not excuse poor steering. Reflector (RF) sends active attacks such as Rockets, Missiles, Plasma Bolts and Quake Disruptors back toward their source. It must already be active when the attack arrives; activating it after impact is too late. Reflector does not stop collision damage, Mine damage, Force Wall damage or Hyperthrust energy loss.
Force Wall (FW) creates a barrier that your craft can pass through but opponents cannot. Place it immediately before a narrow passage, at the exit of a corner, or where rivals must cross your lane. Autopilot (AP) takes control for a short section and cannot fire weapons while engaged. Discard it before a known Mine field, when a warning sounds, or whenever the automatic line is less safe than your manual route.
- Activate GS before impact or through a dangerous section.
- CK blocks normal locks but not Mines or Force Walls.
- Activate RF before the attack reaches you.
- Place FW where opponents have limited room to avoid it.
- Discard AP when its route or timing is unsafe.
Place Mines with the rear view active
Mines (MI) are the rear-firing weapon. Use the rear-view control before activating them so you can see whether a pursuer is close and choose a location the following craft must cross. Strong locations include the exit of a narrow corner, a landing area after a jump, or the middle of a forced lane. If the track is wide, move gradually across the course while releasing the Mines to cover more of the available route, but leave yourself a clear line past your own hazards.
Mines are difficult to see and are most useful when a rival is already behind you. Do not scatter them on an empty straight merely because you have the item. Rockets and Quake Disruptors can destroy Mines, so use them to deny a corner or protect a braking zone rather than expecting a minefield to remain permanent.
Return to forward view immediately after deployment. A rear-view check is useful for placement, but leaving it active through a bend can cause a missed turn or wall impact.
- Check the rear view before activating MI.
- Use corners, landings and forced lanes.
- Leave a route around your own Mines.
- Expect RK or QD to clear Mines.
- Return to forward view before the next braking point.
Discard unsuitable items and recover from hits
Discarding is part of defensive driving. Throw away AP before a Mine field, PB when the next section offers no straight firing lane, or an offensive item when you are leading and need a safer defensive pickup. Holding a powerful weapon is not automatically better than taking a fresh item that protects shield energy or position.
After a Missile, Rocket or Mine hit, stop contesting the next overtake. Make small steering corrections, straighten the craft and rejoin the racing line before using Hyperthrust. After QD or another slowing effect, let the craft settle before making a sharp turn. If shield energy is low, choose the wider line and accept a lost position rather than adding wall damage.
When the warning sounds during corner entry, release some acceleration or brake earlier and use the wider escape route. If GS, CK or RF is already stored, activate it before the expected impact. Once the threat has passed and the craft is stable, resume attacking only when the next corner and the shield margin are under control.
- Discard equipment that conflicts with the next section.
- Straighten the craft before using Hyperthrust after a hit.
- Use GS, CK or RF before impact, not afterward.
- Protect low shield energy with a wider recovery line.
- Resume attacking only after the craft is stable.
Before you move on
- You can identify MI, FW, RF, GS, RK, AP, CK, QD, ED, MM and PB in the weapon box.
- You can distinguish offensive and defensive pad categories without abandoning a safe racing line.
- You can select RK, MM, PB, QD or ED according to the target and track section.
- You can use GS, CK, RF, FW and AP without confusing their limitations.
- You can place MI with the rear view, recover from a hit and protect a tournament position with clean driving.
Track structure, lap counts and speed classes explained
The original North American PlayStation release of Wipeout 3 has four speed classes: Vector, Venom, Rapier and Phantom. It does not have a separate Flash class; that belongs to other entries and later series terminology. Races run for two, three, four or five laps respectively. Higher classes also reduce the time available between corners and make checkpoint failures, wall impacts and missed speed pads more costly. Learn each circuit at a slower class first, then retest braking landmarks and exits at the target speed. The early circuits teach different skills: Porto Kora and Mega Mall emphasize braking, Sampa Run rewards clean straight-line exits, while Hi-Fumii, Stanza Inter, Manor Top and Terminal demand linked-corner planning and controlled recovery.
1. Use the correct class order and lap counts
The class ladder in this edition is Vector, Venom, Rapier and Phantom. Vector races last two laps, Venom races last three, Rapier races last four and Phantom races last five. The extra laps are only part of the difficulty increase: higher classes also impose stricter checkpoint time limits and give you less distance in which to correct a bad approach.
Phantom is not available as a normal starting option. Progress through the earlier racing classes and their required events before attempting it. Do not look for Flash in the class-selection screen; that name is not part of the original North American Wipeout 3 class list.
- Vector: 2 laps.
- Venom: 3 laps.
- Rapier: 4 laps.
- Phantom: 5 laps.
- Do not apply Flash-class advice to this release.
2. Learn the route before increasing speed
Start in Single Race on Vector. Run the course with opponents enabled if you need to learn traffic, or turn opponents off in the settings when studying the racing line. Identify the visual landmark before every heavy-braking corner, the safest line through narrow sections and the point where the craft should be straight for the next acceleration zone.
Repeat the same track in Venom before moving to Rapier. Do not memorize only a button press or a single brake point. At higher speeds, the same landmark arrives sooner, so prepare earlier and use smaller corrections. A Vector line that depends on late braking may be impossible in Rapier or Phantom.
- Finish a Vector run without repeated wall impacts.
- Repeat the course in Venom while preserving the intended line.
- Move up only after you can recover from a small mistake without losing control.
3. Treat checkpoints and speed pads as part of the route
The track checkpoints are not merely decorative gates. Each class gives you a limited starting time and adds time when you pass checkpoints; falling too far behind can end the race before the lap count is complete. This makes a clean exit more valuable than a reckless entry, especially on a long circuit where one wall strike can consume the time gained from several speed sections.
Blue chevrons are speed pads. Use them confidently on straight sections once your line is stable, but approach corner pads with caution. A pad taken while the craft is still turning can push you wide into a barrier. In early practice, deliberately learn which pads are safe to take and which should be skipped when protecting a tournament position.
- Know where each checkpoint follows a difficult section.
- Use speed pads on clear straights before experimenting with corner pads.
- Restart practice if repeated crashes prevent you from learning the next checkpoint.
4. Practice braking on Porto Kora and Mega Mall
Use Porto Kora and Mega Mall for braking practice. Approach tight turns from the outside, reduce speed before the corner begins and use the airbrake to rotate the craft rather than entering at full speed and correcting violently. Aim to leave the turn pointed toward the next gate or straight.
Run once while concentrating only on clean entries. On the next attempt, concentrate on exit speed. If the craft repeatedly reaches the wall, move the braking landmark earlier in the faster class instead of holding the brake deeper into the turn. The objective is a repeatable line that keeps the craft alive through every lap.
- Brake before the nose reaches the corner.
- Finish each turn aligned with the next section.
- Choose the safer outside line during tournament attempts until the faster line is reliable.
5. Practice straight-line speed on Sampa Run
Sampa Run is useful for learning how much time comes from a clean corner exit. Once the craft is aligned, minimize steering corrections and keep the route as straight as possible. Learn the next braking landmark without hyperthrust first, then add hyperthrust only when you can still slow for the following bend.
A straight section is not automatically safe at Rapier or Phantom. A boost used too close to a corner can turn a fast sector into a wall impact and a missed checkpoint. Reserve the boost for a clear section where the next braking point is visible and your shield energy can absorb the cost.
- Prioritize a straight exit over a fast corner entry.
- Learn the next braking point before adding hyperthrust.
- Do not boost through a section that leaves no recovery space.
6. Link corners on Hi-Fumii and Stanza Inter
Use Hi-Fumii and Stanza Inter to practice linked corners. Do not treat every bend as an isolated turn: the line through the first corner determines your position for the next direction change. Sacrifice a little entry speed if that places the craft correctly for the following bend and lets you accelerate earlier.
If traffic or a weapon forces you off-line, rejoin with small steering inputs. Stabilize the craft before using hyperthrust. A hurried boost while angled toward a wall usually creates a second collision and costs more time than the boost can recover.
- Plan through sequences of corners rather than chasing individual apexes.
- Keep corrections small after contact or weapon hits.
- Use a clean restart when the opening section repeatedly compromises the lap.
7. Save Manor Top and Terminal for deliberate high-speed practice
Manor Top and Terminal should be approached after you understand the earlier circuits. Their combinations of fast approaches, sharp direction changes and limited recovery room punish late braking. Learn the route at Venom, establish the safe side of each difficult entry, then retest it at Rapier before making Phantom attempts.
Do not assume that an inside line, shortcut or speed-pad sequence is automatically best. Test risky routes in Single Race or Time Trial first. During a tournament, use the wider line if the faster option requires a wall skim, a blind landing or a correction with no open track beside you.
- Learn difficult sections below the target class first.
- Test shortcuts outside tournament mode.
- Use the consistent line when a points lead matters more than a small time gain.
Before you move on
- You can state the correct class order and lap counts: Vector 2, Venom 3, Rapier 4 and Phantom 5.
- You know the checkpoint immediately following each major difficult section on the circuits you intend to race.
- You can complete Porto Kora or Mega Mall while braking before the corner and exiting without repeated wall contact.
- You can complete a clean Sampa Run section with a straight exit and controlled hyperthrust use.
- You have practiced linked corners on Hi-Fumii or Stanza Inter and can recover without immediately boosting into a barrier.
- You have tested Manor Top or Terminal below your target class before entering a high-speed tournament.
- You can finish a five-lap Phantom run while recovering from a minor mistake without repeated crashes or checkpoint failure.
Single Race and Time Trial strategy
Use Single Race to learn a circuit under conditions that resemble tournament racing, then use Time Trial to remove opponents, weapons and checkpoint pressure while refining a repeatable line. The original North American Wipeout 3 does not give you a stored turbo at the start of every Time Trial lap. Its controllable speed boost is Hyperthrust, which draws energy from the craft’s shield, while blue speed pads provide fixed track boosts. Practice should therefore balance speed with shield preservation. Learn the route first, establish braking and exit points, then refine airbrake timing, speed-pad positioning and short Hyperthrust bursts. Single Race medals matter for unlocking progress; Time Trial is the controlled environment for improving consistency and lap speed.
Set up the correct practice conditions
Choose Single Race when you do not yet know the circuit. Select the speed class and team you expect to use in the tournament, then begin with weapons disabled and a manageable number of opponents. This lets you study the track surface, braking markers, ramps, blue speed pads, weapon grids, pit-lane entrance and any split route without being repeatedly interrupted.
Once you can finish the course cleanly, switch to Time Trial. In the original PlayStation release, Time Trial removes enemy craft, weapons and checkpoints. It is therefore the best place to isolate steering, airbraking, nose control, speed-pad alignment and Hyperthrust timing. A ghost craft can show the route of a previous best attempt, but it cannot collide with you and should be treated as a diagnostic reference rather than an opponent you must imitate everywhere.
- Use the same speed class and team intended for the next race.
- Start with weapons disabled while learning the route.
- Use Time Trial after you can complete the circuit without frequent impacts.
Learn the circuit before pursuing a record
Run the first lap without Hyperthrust. Identify the final straight before each important turn, the point where you need to begin rotating the craft, and the earliest safe moment to accelerate toward the exit. Wipeout 3 craft continue carrying their direction, so entering too fast and correcting late usually costs more time than taking a controlled approach.
Use the airbrake matching the direction of the corner to help rotate the craft. For a particularly tight turn, briefly pressing both airbrakes slows the ship more decisively. Aim to finish each corner pointed toward the next straight, because exit speed determines how long you benefit from the following acceleration zone or blue speed pad.
Treat ramps as part of the line rather than as isolated obstacles. Align the craft before takeoff, then adjust the nose so the ship meets the track cleanly. A crooked landing or a wall strike can erase the advantage gained by a faster approach.
- Complete one route-learning lap without Hyperthrust.
- Mark the entry, rotation and exit point of each major turn.
- Repeat any section where a wall strike or poor landing interrupts the line.
Use Hyperthrust and speed pads deliberately
Hyperthrust is not a stored lap pickup. Hold its assigned button to divert shield energy into the engines and gain speed. Because use rapidly drains the shield and becomes unavailable when the shield is too low, apply it in short bursts on a clear straight, on a stable corner exit or when the next braking point is far enough away to justify the drain.
Do not activate Hyperthrust while already scraping a wall, entering a narrow chicane or approaching a blind turn. The extra speed can turn a small steering error into a large collision, and the resulting shield loss may prevent another boost later in the lap. If a ramp follows a straight, use only enough boost to remain aligned for the landing; abandon the attempt if the craft is already off line.
Blue speed pads are fixed track boosts rather than inventory items. Approach them with the craft straight and leave enough room to avoid being pushed into the wall. In a record attempt, compare a line that reaches the pad cleanly with a shorter line that clips it at an angle; the clean exit is usually more valuable.
- Use Hyperthrust only when the route ahead is clear.
- Keep enough shield energy for later collisions and required boosts.
- Cross blue speed pads straight whenever the surrounding track allows it.
Refine one variable at a time
After establishing a clean lap, keep the team, camera and control layout fixed. If you change ships, run new warm-up laps because acceleration, steering and shield capacity alter both braking points and the amount of safe Hyperthrust available.
Use the ghost to locate a specific loss. If it pulls away after a corner, improve the exit rather than boosting earlier into the turn. If you gain time through a section and lose it before the next braking point, check whether the Hyperthrust burst was too early or whether the ship became unstable after a speed pad or landing.
A single spectacular lap is less useful than several clean laps close to the same time. Build a repeatable line first, then move the braking point or Hyperthrust burst by a small amount and compare the result.
- Keep the ship, view and controls unchanged during a test sequence.
- Use the ghost to identify one lost section at a time.
- Prefer repeatable clean laps over one high-risk best attempt.
Return to Single Race before entering a tournament
When the Time Trial line is reliable, return to Single Race and restore opponents and weapons. The objective is to preserve the learned braking and exit points while handling blocked speed pads, collisions and incoming attacks. Do not force an overtake into a corner simply because the Time Trial line is faster; take the safer route and recover speed on the exit.
Use Hyperthrust after clearing traffic, on an open straight or after a difficult corner when the craft is aligned. Avoid spending shield energy in a pack where one collision can cancel the gain. If traffic exposes a weakness, return to Time Trial and repair that section instead of repeatedly restarting a tournament.
Remember that Single Race medals are the relevant progress rewards. Time Trial improves preparation and records, but a faster Time Trial lap does not substitute for the Single Race placing or medal required by the game’s unlock path.
- Test the learned line with opponents and weapons enabled.
- Use Hyperthrust only when the route ahead is sufficiently open.
- Earn the required Single Race placing before relying on the circuit in a tournament.
Before you move on
- You can complete the chosen circuit repeatedly without a wall strike, missed ramp or damaging landing.
- You have identified safe Hyperthrust sections and know where shield preservation matters more than speed.
- You can reach important blue speed pads without destabilizing the craft.
- You can return to Single Race, handle traffic and weapons, and preserve the main braking and exit lines.
- Your Single Race medal or placing satisfies the requirement for the next tournament or unlock attempt.
Tournament mode: scoring, elimination risk and safe point accumulation
Tournament mode in the original North American PlayStation release is a four-race points event. Finishing first through sixth awards 10, 6, 4, 3, 2 or 1 point respectively; seventh and eighth award zero. A destroyed craft is eliminated from that race and receives no points. Your objective is the highest total after race four, not necessarily four individual wins. Protect a lead with clean lines and defensive weapon use, and take calculated risks only when the standings require them. Practice difficult circuits in Single Race before beginning another linked Tournament run.
1. Enter Tournament mode and prepare for four linked races
Select Tournament from the main menu and choose the highest available speed class. The original release begins with Vector. Each Tournament contains four consecutive races, with the overall winner determined by the accumulated points after the fourth result.
Treat the event as one connected campaign rather than four unrelated races. You cannot rely on freely restarting a poor individual race as part of normal Tournament play, so practice unfamiliar circuits in Single Race first. Before committing to the event, make sure you know the major corners, weapon-heavy sections and safest recovery lines for the class you are entering.
- Select Tournament rather than Single Race.
- Expect four races in the event.
- Practice unfamiliar tracks before starting the linked run.
2. Use the placement table to manage the standings
Tournament scoring is fixed: first place earns 10 points, second earns 6, third earns 4, fourth earns 3, fifth earns 2 and sixth earns 1. Seventh and eighth both earn zero. A low placing does not by itself end the Tournament; it simply leaves you without points for that race.
The scoring gap makes consistency valuable. A first-place finish followed by fourth is worth 13 points across two races, while a first followed by eighth is worth only 10. After every race, check your total and the nearest rival's total. If you are leading, a safe second or third can be more useful than forcing a dangerous pass for first. If you are behind, calculate the points you need before accepting unnecessary collision risk.
- Memorize the 10-6-4-3-2-1 scoring order.
- Treat seventh and eighth as zero-point finishes, not automatic elimination.
- Review the standings after every race.
3. Distinguish a low finish from craft destruction
Finishing seventh or eighth does not remove you from the Tournament. You remain in the event and can score points in later races. Elimination is different: if your craft is destroyed during a race, you receive no points for that event, even if you had been near a scoring position before the destruction.
When your shield is low, change your objective from overtaking to surviving. Avoid unnecessary wall contact, side-by-side collisions in narrow corners and weapon exchanges that leave you exposed. Take a wider line if it keeps the craft intact, and use a defensive pickup when it lets you cross a dangerous section safely. A completed fifth- or sixth-place result keeps the overall run alive; destruction guarantees a zero-point result for that race.
- Do not treat fourth, fifth or sixth as elimination.
- Do not confuse seventh or eighth place with craft destruction.
- When shield energy is low, prioritize reaching the finish intact.
4. Protect a points lead with low-risk driving
When you lead the standings, race for a secure placing instead of the fastest possible lap. Brake earlier when opponents are clustered, hold a predictable line and avoid following a rival into mines or a weapon-heavy choke point. You do not need to answer every attempted pass if the rival cannot gain enough points to overtake you overall.
Use weapons defensively when appropriate. A mine placed behind you, a shield pickup carried through a hazardous section or an attack that clears the track can protect your position. Do not fire if the maneuver is likely to send your craft into a wall or into the path of your own weapon effect. Hyperthrust is safest on a clear straight with sufficient distance before the next corner; using it while defending a tight turn often creates a larger loss than the speed boost is worth.
- With a points lead, value survival and clean exits.
- Avoid copying an opponent's risky line.
- Use weapons to preserve position or open safe track.
5. Push only when the standings demand it
If you are behind, compare the deficit with the points available in the remaining races. A win is worth four more points than second, so first place may be necessary late in the Tournament. Earlier in the event, a controlled second- or third-place result can keep you within reach without risking a complete collapse.
Make overtakes on corner exits and long straights, where there is room to stabilize afterward. Avoid forcing a pass into a narrow chicane, immediately before a jump or at the entrance to a blind corner. If a weapon safely slows the rival ahead, use it before committing to the pass. Once you have gained the position needed to repair the points deficit, return to a clean line instead of continuing a damaging side-by-side fight.
- Calculate the required points before taking a major risk.
- Pass where the track gives you room to recover.
- Stop attacking once the necessary position is secured.
6. Finish the cup and prepare for the next class
After the fourth race, review the final standings. The pilot with the most points wins the Tournament. If the top score is tied, the documented tie-break sequence compares medal count, then medal value—gold medals count for 3, silver for 2 and bronze for 1—and then the lowest overall racing time across the four Tournament tracks.
Winning the available class unlocks the next class for Tournament play: Vector leads to Venom, Venom leads to Rapier and Rapier leads to Phantom. If you lose, identify the race that caused the largest points deficit, practice that circuit in Single Race, and retry the complete four-race event. Do not assume that one perfect race will compensate for repeated zero-point results caused by low finishes or destruction.
- Complete all four Tournament races.
- Confirm that your final point total exceeds every rival's total, or that you win the documented tie-break sequence.
- Verify that the next speed class becomes available after the victory.
- Practice the worst-performing circuit before retrying a lost Tournament.
Before you move on
- Complete all four races in the Tournament.
- Confirm that your final point total is higher than every rival's total, or that you win the documented tie-break sequence.
- Confirm that no destroyed craft was being counted as a scoring finish.
- Verify that the next speed-class Tournament appears after the victory.
- Repeat the same points-management approach for Vector, Venom, Rapier and Phantom rather than relying on a single perfect race.
Cup progression and unlock chain: Vector to Phantom
The standard campaign in the original North American PlayStation release is a four-class Tournament ladder: Vector, Venom, Rapier and Phantom. Win each Tournament overall in that order; Phantom is the final required campaign class. Tournament victories and Single Race medals are separate records. Tournament results advance the class ladder, while ordinary Single Race victories permanently build the unlock chain for hidden circuits and teams across the game. You do not need to repeat those ordinary results in every speed class. The recommended route uses gold victories for a clear, reliable record: the four opening circuits unlock Hi-Fumii, two different teams on Hi-Fumii unlock P-Mar Project, three different teams on P-Mar Project unlock Manor Top, and the four starting teams on Manor Top unlock Terminal. Secret teams use their own Single Race victory counts. Prototype circuits are optional and are the only unlocks covered here that remain class-specific: LS101/NP62, LS102/MG71, LS103/AW72 and LS104/AW73 each require all 64 gold medals in the corresponding class.
1. Win the Vector Tournament
Enter Tournament mode and select Vector, the only standard class available at the beginning. A Tournament is decided by cumulative points across its races, not by one isolated finish. The scoring is 10 points for first place, 6 for second, 4 for third, 3 for fourth, 2 for fifth, 1 for sixth, and 0 for both seventh and eighth.
A seventh- or eighth-place finish gives you no points, but it does not by itself end the Tournament. Craft destruction is the separate failure state that prevents a scoring result in that race. If you take an early lead, protect it with clean corner exits, controlled airbrakes and conservative weapon use rather than forcing every possible overtake.
Vector uses two laps per race. If a particular circuit repeatedly costs you the cup, practice that circuit in Single Race with the same team and control layout before returning to the Tournament. Finish first in the overall Vector standings to unlock Venom.
- Vector is selected in Tournament mode.
- All Vector Tournament races are completed.
- Vector is won on cumulative points.
- Venom is available after the result is recorded.
2. Clear Venom and Rapier
Select Venom after winning Vector and finish first overall. Venom races use three laps. The extra lap gives you more time to recover from a poor opening, but repeated wall impacts and weapon hits can drain enough shield energy to make the later laps unwinnable. Prioritize stable exits and use Hyperthrust only where you can remain aligned and still brake safely afterward.
After Venom is won, select Rapier and complete that Tournament in first place overall. Rapier uses four laps, so consistency matters more than one spectacular pass. Use Single Race to isolate the corner, jump or tunnel that is costing you points instead of repeatedly restarting the entire Tournament after a single mistake.
The required order is Vector, Venom, then Rapier. Do not import Flash or the Alpha, Beta, Gamma, Delta, Ascension, Descension or Omega league structures from other Wipeout games or from Wipeout 3: Special Edition.
- Venom is won overall.
- Rapier is won overall.
- Phantom becomes available after the Rapier victory.
3. Win Phantom and complete the required campaign
Enter Phantom after completing Rapier. Phantom races use five laps and are the fastest standard events in this release. Use a familiar, controllable team while learning the class; changing teams between attempts can make braking and acceleration behavior harder to judge.
Take conservative lines through narrow corners and preserve shield energy for survival. Use defensive weapons when an opponent is close enough to threaten your position. If the standings require a higher finish, take risks on circuits and overtakes you have already practiced rather than attacking blindly in an unfamiliar section.
Winning Phantom completes the required single-player route: Vector, Venom, Rapier and Phantom. Save after the final result. This campaign victory does not automatically mean that every hidden circuit, secret team, prototype track or Challenge medal is complete.
- Phantom is won overall.
- Vector, Venom, Rapier and Phantom are all complete.
- The final Phantom result is saved.
4. Unlock the hidden circuits through ordinary Single Race progression
The ordinary hidden-track chain is game-wide. You may note the speed class used for your own records, but you do not need to duplicate each ordinary unlock result in Vector, Venom, Rapier and Phantom. Use Single Race and take the recommended gold route so the result is easy to verify.
First, finish first on Porto Kora, Mega Mall, Sampa Run and Stanza Inter with any team. Those four opening-track victories unlock Hi-Fumii. Next, win Hi-Fumii with two different teams to unlock P-Mar Project. Then win P-Mar Project with three different teams to unlock Manor Top. Finally, win Manor Top with Feisar, Goteki 45, Auricom and Piranha, the four starting teams, to unlock Terminal.
Save after each group and confirm the new circuit in the track-selection screen. Do not count a P-Mar Project result unless it was earned with a different team from the other qualifying results. These are ordinary Single Race unlocks, not four separate class-specific campaigns.
- Porto Kora, Mega Mall, Sampa Run and Stanza Inter have qualifying first-place results.
- Hi-Fumii is unlocked.
- Hi-Fumii has qualifying wins with two different teams.
- P-Mar Project has qualifying wins with three different teams.
- Manor Top has qualifying wins with Feisar, Goteki 45, Auricom and Piranha.
- Terminal is visible after saving.
5. Unlock the secret teams separately
The secret-team chain is also ordinary game-wide Single Race progression. Once Terminal is available, win Terminal with Feisar, Goteki 45, Auricom and Piranha to unlock Qirex RD. These are separate victories from the Manor Top results used to open Terminal.
After Qirex RD is available, win any two tracks with Qirex RD to unlock AG Systems. Then win any three tracks with AG Systems to unlock Assegai. Finally, win any four tracks with Assegai to unlock Icaras. The tracks and classes used for these ordinary team victories do not need to be repeated across every speed class.
Keep a written team-and-track record and check the roster after saving each unlock. Tournament victories, Challenge medals and prototype results do not substitute for the required Single Race victories. The secret-team chain is optional and is not needed to unlock Phantom or finish the standard campaign.
- Terminal is won with Feisar, Goteki 45, Auricom and Piranha.
- Qirex RD is unlocked and has two qualifying victories.
- AG Systems is unlocked and has three qualifying victories.
- Assegai is unlocked and has four qualifying victories.
- Icaras is visible if the optional team chain is being completed.
6. Complete prototype grids only for optional full completion
The four prototype circuits are optional. Use the following identifiers for this original North American release: LS101/NP62 for Vector, LS102/MG71 for Venom, LS103/AW72 for Rapier and LS104/AW73 for Phantom.
Each prototype is tied to its own speed class. To unlock LS101/NP62, earn all 64 gold medals in the Vector grid. Do the same for the Venom grid to unlock LS102/MG71, the Rapier grid to unlock LS103/AW72 and the Phantom grid to unlock LS104/AW73. A gold earned in one class does not satisfy the corresponding requirement in another class.
The four starting teams and the eight ordinary circuits produce the 64-result class grid. Complete one class at a time, save, then inspect that class's medal screen and prototype list. Do not treat prototype completion as part of the required campaign. Challenge medals, Time Trial records, Eliminator progress, multiplayer goals and the complete secret-team collection remain separate optional objectives.
- LS101/NP62 is unlocked from the complete Vector 64-gold grid, if pursued.
- LS102/MG71 is unlocked from the complete Venom 64-gold grid, if pursued.
- LS103/AW72 is unlocked from the complete Rapier 64-gold grid, if pursued.
- LS104/AW73 is unlocked from the complete Phantom 64-gold grid, if pursued.
- Each prototype is checked in its own class after saving.
Before you move on
- Vector, Venom, Rapier and Phantom have each been won overall.
- The final Phantom result has been saved.
- Hi-Fumii is unlocked through the four opening-circuit victories if the optional circuit route is intended.
- P-Mar Project has two different-team wins on Hi-Fumii if the optional circuit route is intended.
- Manor Top has three different-team wins on P-Mar Project if the optional circuit route is intended.
- Terminal has Feisar, Goteki 45, Auricom and Piranha victories on Manor Top if the optional circuit route is intended.
- Qirex RD, AG Systems, Assegai and Icaras are unlocked only if the optional secret-team route is intended.
- LS101/NP62, LS102/MG71, LS103/AW72 and LS104/AW73 are unlocked only if the corresponding class-specific 64-gold grids are intended.
- Challenge, Time Trial, Eliminator and multiplayer goals remain separately tracked.
Advanced tactics for Rapier and Phantom classes
The original North American PlayStation release has four speed classes: Vector, Venom, Rapier and Phantom. It does not contain Flash. Rapier uses four-lap races, while Phantom uses five-lap races and is available after the first three classes have been completed. At these speeds, the reliable approach is to preserve a clean line, brake before the turn rather than inside it, and use Hyperthrust only after the craft is aligned with a clear straight. Hyperthrust consumes shield energy and becomes unavailable below 25 percent, so careless boosting can remove both your speed advantage and your ability to survive a collision. Treat weapons as position-management tools: use defensive items before unavoidable traffic or attacks, place Mines with the rear view, and avoid firing large-area weapons while entering narrow corners. In tournaments, consistent podiums are safer than repeated all-or-nothing overtakes.
Confirm the correct high-speed classes and race lengths
From the main menu, choose Single Race or Tournament and select Rapier once it has been unlocked through progression. Rapier races are four laps. Phantom is the final class in this release and uses five laps; it becomes available after the first three racing classes have been completed. Do not spend time searching for Flash in this game. Flash belongs to later Wipeout releases and is not part of the original North American Wipeout 3 class sequence.
Use Single Race first to check a track at the selected class with weapons off, then repeat it with weapons on before entering a tournament. The higher speed leaves less time to correct a poor entry, so a route that feels safe in Venom may require an earlier brake and a wider approach in Rapier or Phantom.
- Rapier is selected only after it is unlocked.
- Phantom is treated as the fourth and fastest class.
- Rapier races are four laps and Phantom races are five laps.
- Flash is not used as a progression target in this edition.
Brake before the corner and finish the turn aligned
Approach hard corners in a straight line. Release Hyperthrust before the braking point, then use the left or right airbrake that matches the direction of the turn. On the default layout, R2 is the right airbrake and L2 is the left airbrake; pressing both slows the craft instead of pivoting it. Use both briefly if you have entered too fast, but do not hold both through the entire bend or you will sacrifice more speed than necessary.
In Rapier, start the turn earlier than your Venom habit suggests. In Phantom, use a wider entry if traffic or a wall leaves little correction room. The priority is to point the nose toward the exit before accelerating again. A clean exit lets the craft build speed down the next straight; hugging the inside too early often produces a wall strike or a second steering correction that costs more time.
- The craft is straight before the braking point.
- The matching airbrake is used to rotate the craft.
- Both airbrakes are reserved for emergency slowing or very tight entries.
- Acceleration resumes only after the nose points toward the exit.
Use Hyperthrust where the track is visible and open
On the default controls, Hyperthrust is R1. Use it after a corner exit when the craft is stable and the next braking zone is clearly visible. Do not activate it while turning or immediately before a chicane, blind bend, ramp, tunnel entrance or narrow traffic section. The extra speed is useful only if you can still reach the next braking point under control.
Hyperthrust rapidly drains shield energy, and the game prevents its use once shield energy falls below 25 percent. After a missile, heavy wall impact or weapon exchange, stop boosting until you have rejoined the racing line and reached a clear straight. A short clean section without Hyperthrust is preferable to a boosted impact that leaves the craft vulnerable or forces a restart.
- Boost begins on a stable straight or clean corner exit.
- The next braking zone is visible before Hyperthrust is activated.
- Hyperthrust is withheld after major damage.
- You avoid spending shield energy merely to defend a small time gain.
Take overtakes that preserve alignment
Attempt passes on straights, after a rival has struck a wall, or when your own corner exit is clearly better. Avoid diving inside a rival at the entry to a tight turn if the move forces you across a weapon pad or toward the barrier. If the pass cannot be completed without losing your line, follow through the corner and use the next straight instead.
When leading during the final laps, stop looking for unnecessary passes. Hold the safest repeatable line and make the opponent take the risk. If you fall behind after a collision, rebuild speed first; do not immediately use Hyperthrust while the craft is still angled or unstable.
- Passes are attempted on straights or from superior exits.
- You do not trade shield energy for a low-probability inside dive.
- A tournament lead is defended with stable lines rather than constant attacks.
Use defensive weapons without creating a second problem
Activate a Gravity Shield when the warning call signals an incoming attack or when traffic is about to compress around a difficult section. Remember that Hyperthrust still consumes shield energy while a Gravity Shield is active. A Reflector must already be active when an attack arrives; activating it after the hit will not protect you. These items are best used before the attack reaches you, not after the craft has already begun spinning.
Mines are the main rearward weapon. Use the rear-view button to check the following lane and drop them where a pursuing craft must choose between slowing or changing line. Place them on a straight or just after an exit, not while you are still trying to complete a narrow corner. If carrying an offensive weapon into a crowded bend, discard it rather than firing without a stable target. A missed shot, wall impact or self-created obstruction is worse than giving up the pickup.
- Gravity Shields are activated before the incoming hit.
- Reflectors are active before the attack reaches the craft.
- Mines are placed with enough room to complete the corner first.
- Weapons are discarded when the firing line is unsafe.
Set conservative targets in Rapier and Phantom tournaments
Plan for first through third place in each race instead of requiring a perfect tournament. The tournament awards 10 points for first, 6 for second and 4 for third, while fourth through sixth receive fewer points and seventh or eighth receive none. A sequence of podium finishes is therefore safer than winning one race and losing the next through a reckless crash.
If you are behind on points, push on tracks whose braking points you have practiced, especially during the opening laps when there is time to recover. If you are leading, take the safe line from the start and use defensive weapons to protect position. If a missile or collision drops you backward, make small steering corrections, regain alignment, and wait for the next clear straight before boosting or attempting a pass.
- Your tournament plan targets repeated podiums.
- Aggressive attempts are reserved for familiar tracks and known passing zones.
- A points lead is protected rather than converted into unnecessary attacks.
- After a hit, alignment and survival come before immediate overtaking.
Before you move on
- You can complete Rapier's four-lap races while keeping the craft aligned through the hardest corners.
- You can complete Phantom's five-lap races without repeated wall impacts or uncontrolled boosts.
- You know that Hyperthrust is unavailable below 25 percent shield energy and can plan around that restriction.
- You can use Gravity Shields and Reflectors before incoming attacks rather than reacting after impact.
- You can place Mines from a stable line using the rear view.
- You can recover from a missile or collision by rejoining the racing line before boosting again.
- You can finish Rapier and Phantom tournaments through consistent first-to-third-place results instead of relying on one exceptional race.
References for this chapter
Track-by-track tactical overview
The North American original contains eight main WipEout League circuits: Porto Kora, Mega Mall, Sampa Run, Stanza Inter, Hi-Fumii, P-Mar Project, Manor Top and Terminal. Learn them by their dominant demands. Porto Kora and Mega Mall reward controlled speed and careful corner entry. Sampa Run, Hi-Fumii and P-Mar Project test jump control and landing preparation. Stanza Inter and Manor Top require airbrake discipline through sharp turns and split routes, while Terminal combines tunnels, fast straights and weapon exposure. Blue speed pads can save time on straights but may make a corner harder to control. Weapon grids are common collision points, so skip one when traffic is concentrated. Pit lanes restore energy over time, but their entrances and exits can cost position. Use them when damage threatens elimination, not automatically on every lap. Track lines also change with speed class: a route that is safe in Vector may be too fast to correct in Rapier or Phantom.
Braking circuits: Porto Kora and Mega Mall
Porto Kora is forgiving if you resist braking for corners that only look severe from a distance. Keep left early to collect the speed pads, then stabilize the craft for the blind jump with the two weapon grids. Prepare for the right turn before leaving the jump rather than steering sharply while airborne. In the descending tunnel, raise the nose slightly so the craft follows the slope smoothly, then level it as the track straightens. A sharper right near the tunnel exit leads into open track; after the following left, the pit lane is on the right. Its rejoin is angled sharply into the main course, so enter only when shield recovery is worth the time loss. If you miss the pit entry, stay on the racing surface instead of making a late correction into the wall.
Mega Mall begins with gentle bends before the green tunnel containing pits that must be jumped. Keep the nose down over that section. After the first pit, move right for the speed pads, but do not let the boost carry you beyond your steering control. After the checkpoint, the descending corkscrew begins. A brief deceleration and a right-side approach can create an overtaking opportunity, but use the middle or left if several craft are fighting for the same line. The short pit lane comes after the corkscrew and is easy to enter, yet the finish is not immediately after its exit; continue through the remaining turns and do not relax early.
- Set braking points by speed class rather than memorizing one universal marker.
- Stabilize the craft before Porto Kora’s blind jump.
- Skip a contested weapon grid if the outside line gives a cleaner exit.
- Remember that Mega Mall continues for a substantial section after the pit exit.
Jump and landing circuits: Sampa Run, Hi-Fumii and P-Mar Project
Sampa Run starts with a severe corner. Approach without building excessive speed, then take the steep ramp into the tunnel with the craft level. Several small jumps and tunnels follow. Use the right wall first for the speed pad and weapon grid, then move left for the next grids only if the line is clear. After the sharp right and the following left, the track splits. The left branch is shorter but rises and drops sharply; reduce speed before its crest so the craft does not strike the scenery. The right branch is slower, easier to read and offers clearer access to its grids. Choose it when protecting a tournament position or recovering from damage. The pit lane appears on the left after another tunnel.
Hi-Fumii’s defining obstacle is the 90-degree turn beneath the safety poster. Approach along the left wall and use a short right-airbrake input. A long hold can rotate the craft too far; if the corner is not yet consistent, use both airbrakes and take the turn slowly rather than crashing. The narrow tunnel afterward is a weapon choke point. Deploy a Force Wall or Mines only when your own line leaves room to avoid the hazard. At the final jump, steer left in the air only when you need the pit lane; otherwise land straight and preserve speed.
P-Mar Project has several gentle bends, smaller jumps and a large jump before a difficult left landing. Keep the craft controlled through the alternating bends and avoid launching from an extreme outer angle. Prepare for the hard left immediately after the large jump, then take the hard right into the tunnel and watch for the pit lane on the left. Treat the jump as a line-management problem, not a confirmed shortcut: practice the landing in Single Race or Time Trial before using it in a tournament.
- Level the craft before blind landings and avoid hyperthrust when the landing line is uncertain.
- Use Sampa Run’s right split when consistency matters more than raw distance.
- Take Hi-Fumii’s poster corner with short airbrake input or both brakes while learning.
- After P-Mar Project’s large jump, prioritize a clean hard-left landing over maximum launch speed.
Split routes and sharp turns: Stanza Inter and Manor Top
Stanza Inter opens with a very sharp left, followed by a hard right and another tightening left. Brake early, then use the airbrake to rotate instead of trying to preserve full speed into the first corner. At the split, the left route is generally easier and straighter, with better access to pads and grids, but attacks are difficult to evade there. Keep a defensive weapon ready when opponents are close. The right route snakes from side to side, loses more speed and has harder-to-read grids, but its bends provide places to hide from attacks and its merge is gentler. Use it to recover from traffic or a missed left-route entry. Two left-curving tunnels follow before the pit lane on the left.
Manor Top repeats sharp, near-90-degree turns. Set up wide, rotate with a brief airbrake tap and straighten immediately for the next corner. Do not hold the brake throughout a sequence; one short correction is often enough, while a long hold leaves the craft slow for the following straight. The later jump leads into a hard right in a tunnel and then another sharp turn toward the finish. The pit lane is on the right. Enter only when the energy recovery justifies the detour, and be ready for the rejoin rather than treating the pit as a free shortcut.
- Use the left Stanza Inter route when leading unless the entry is compromised.
- Use short Manor Top airbrake taps instead of one continuous brake hold.
- After contact with a wall, sacrifice the next corner’s entry speed to regain a straight line.
Terminal and recovery after weapon hits
Terminal begins with an upward-sloping left. Keep left to collect the early pads and grids, then prepare for the right turn into the descending tunnel. Its sharper turns punish excessive entry speed. Once outside, take the hard right with a wide approach and return toward the center for the later tunnel and straights. The pit lane is visible on the right near the end of the lap. Enter only with enough shield damage to justify losing time, and control the rejoin rather than leaving the lane at maximum speed. The long straights are exposed to attacks, so a defensive item can be more valuable there than an offensive weapon held for a marginal pass.
After a missile, mine hit or wall scrape, stop making large steering corrections as soon as the craft points along the circuit. Rejoin the safest visible lane, postpone hyperthrust until a clear straight and use a pit lane if energy is close to failure. If opponents are clustered around a weapon grid, take the outer line or skip the pickup. In a tournament, a stable third-place finish is preferable to a risky shortcut, contested grid or late overtake that causes a second collision.
- Learn each pit entrance and rejoin in Single Race before relying on it during a cup.
- Recover by pointing down the track first; regain speed only after the line is stable.
- Use defensive weapons on exposed straights when holding position.
- Do not attempt an unfamiliar split or jump route during a tournament run.
Before you move on
- You can complete Porto Kora and Mega Mall while keeping control through their blind jump, corkscrew and pit sections.
- You can clear Sampa Run’s split, Hi-Fumii’s poster corner and P-Mar Project’s large jump without repeated wall impacts.
- You can choose between Stanza Inter’s routes according to traffic and tournament risk.
- You can handle Manor Top’s repeated airbrake corners and Terminal’s descending tunnel and exposed straights.
- You can recover from a weapon hit by rejoining the racing line, delaying hyperthrust and using the pit lane only when shield recovery warrants the time loss.
Winning the final tournaments: endgame strategies and recovery
The original North American PlayStation release of Wipeout 3 does not use the Alpha, Beta, Ascension, Descension or Omega league structure found in later games. Its main speed-class route is Vector, Venom, Rapier and finally Phantom. Each tournament contains four races, and the overall winner is determined by accumulated points. Phantom is the final class, with five-lap races in Single Race mode and the tightest recovery margins. Prepare for it by practicing the individual circuits, protecting shield energy, and treating the standings as the real objective. A safe podium is often more valuable than a risky win attempt, especially when a rival is directly behind you in the tournament table.
Confirm the original game's endgame route
Complete the tournaments in order: Vector, then Venom, then Rapier, then Phantom. Only Vector is available at the beginning. Winning the current class tournament unlocks the next class, and completing the first three classes makes Phantom available. Do not search the menus for Alpha, Beta or Ascension events; those are not part of this original PlayStation campaign structure.
The main speed-class campaign is complete when you win the Phantom tournament overall. You do not need every Challenge medal, every team-specific Single Race gold or every prototype track for that tournament victory. Those are optional completion goals. If Phantom is not available, return to the Rapier tournament and verify that its overall results show a win rather than merely one race victory.
- Vector, Venom and Rapier tournament wins are recorded.
- Phantom is available before beginning the final attempt.
- You understand that tournament victory is based on total points, not one individual race.
Prepare the circuits before spending tournament attempts
Use Single Race to practice each Phantom tournament circuit with the same team and control layout you intend to use in the tournament. Focus first on the opening section and the final section of each track, because early wall contact costs speed for several laps while a late mistake can erase a secure placing. Repeat the difficult corners until you can enter without scraping the wall and leave with the craft straight.
Practice two or three deciding circuits more heavily than the tracks you already run cleanly. Learn where the track widens after a difficult bend, where weapon grids tend to create traffic, and which side of the course gives you a recovery lane. A clean practice lap is more useful than a fast lap that depends on a risky shortcut or repeated wall contact.
Phantom Single Race events use five laps. This gives you time to recover from one mistake, but it also means that repeated small collisions compound over the race. Use the first lap to establish a stable line rather than forcing an early pass.
- Every Phantom circuit has been completed cleanly in practice.
- You know the safest line through the two or three worst corners on each deciding track.
- Your chosen craft remains controllable after a wall touch or light collision.
Use the tournament scoring to set race targets
Tournament points are awarded as follows: first place gives 10 points, second gives 6, third gives 4, fourth gives 3, fifth gives 2 and sixth gives 1. Seventh and eighth receive no points. A tournament contains four races, so a run of podium finishes can beat a single win followed by two non-scoring results.
After each race, check the standings and identify the nearest rival rather than trying to defeat the entire field. If you lead that rival by enough points, select the stable line and accept second or third place when necessary. If you are behind, calculate whether a controlled pass is required or whether finishing ahead of the rival is sufficient. Do not throw away a scoring position merely to gain one additional place.
Ties are resolved by medals first, then the value of those medals, with gold worth more than silver and silver worth more than bronze. If the tie remains, the lower combined racing time decides it. Therefore, avoid unnecessary restarts or deliberately slow recovery laps when you can still finish safely.
- You score points in every race whenever possible.
- You know which rival matters most in the current standings.
- You protect a points lead instead of treating every race as an all-or-nothing win attempt.
Push only on clear sections and protect shield energy
When the route is clear and your shield is healthy, use Hyperthrust on a straight after completing the preceding corner. Hyperthrust increases speed but drains shield energy, so using it while angled toward a barrier can turn a speed gain into a knockout. Reserve it for sections where the craft is already straight and there is enough room to react.
When leading, favor defensive weapons and predictable lines. Use a shield-type pickup to survive a dangerous section, and discard a weapon if carrying it would tempt you into an unsafe pass or leave you distracted in a crowded corner. When behind, use offensive weapons before a bend or narrow section, where a slowed rival has fewer options to dodge.
Do not chase an opponent's exact line. Their route may be blocked by a mine or may require a craft with different handling. Keep your own approach line, brake earlier than the opponent if traffic is dense, and pass only after the exit is open.
- Hyperthrust is used only on clear, mostly straight sections.
- You preserve shield energy when a safe tournament placing is available.
- Weapon use is directed toward the nearest scoring rival or immediate survival.
Recover correctly after a missile, spin or collision
After a missile hit or spin, stop making large steering inputs. Release the turn, point the craft toward the open track and use small corrections to rejoin the racing line. The first objective is to regain control, not to recover every lost position immediately.
Do not activate Hyperthrust while the craft is still facing a wall, crossing traffic or sliding across the track. Once the ship is straight, use the next clear section to rebuild speed. If the incident occurs near a corner, take the safer outside route rather than cutting blindly across the apex.
If shield energy is low, prioritize a pit-lane visit when the track provides one and the standings allow the time loss. The pit lane restores energy according to the time spent inside it, so a deliberate recovery can be preferable to remaining on course with a nearly disabled craft. Rejoin cleanly before attempting another pass.
- The craft is straight before Hyperthrust is activated.
- You return to the racing line with small steering corrections.
- You use a pit lane or defensive pickup when survival matters more than immediate speed.
Secure the Phantom victory and verify the save
Treat the fourth race as a standings calculation. If a safe podium guarantees the tournament win, brake early, avoid unnecessary contact and protect that placing. Force a pass only when the current points gap requires it. A rival's mistake may provide a safer opportunity than an aggressive move into the final corner.
After the final results screen, confirm that Phantom is marked as won overall and that the earlier Vector, Venom and Rapier victories remain recorded. Save before entering Challenge mode or attempting prototype-track unlocks. The prototype tracks are optional and require extensive all-gold progress rather than merely winning the Phantom tournament.
For full optional completion, continue by earning all required Single Race golds and completing the Challenge events. These goals extend beyond the main speed-class campaign and should not be used as evidence that the Phantom tournament itself was incomplete.
- The Phantom tournament results show an overall victory.
- Vector, Venom, Rapier and Phantom victories are present after saving.
- Optional Challenge and prototype objectives are treated separately from the main campaign.
Before you move on
- The overall results show a tournament victory in Vector.
- The overall results show a tournament victory in Venom.
- The overall results show a tournament victory in Rapier.
- The overall results show a tournament victory in Phantom.
- The game has been saved after the Phantom results screen.
- Optional Challenge medals and prototype tracks are clearly distinguished from the required tournament campaign.
References for this chapter
Multiplayer, split-screen and link play: competitive basics
The original North American PlayStation release supports two-player split-screen racing, with horizontal and vertical display arrangements. Use split-screen to practise clean passing, defensive positioning and weapon timing while learning how reduced screen space changes braking and recovery decisions. The original game also contains an optional Establish Link function for compatible PlayStation link-cable setups. The documented procedure requires two consoles, two displays, two copies of the game and a link cable. From the Options screen, hold Start and press Circle to reveal Establish Link, then select it on both connected systems. The first system to select it becomes the host and the second becomes the slave. Available player counts and modes depend on what the connected setup presents, so verify the menu before planning a linked event.
Set up two-player split-screen
From the multiplayer menu, select the two-player split-screen option, then choose the available race type, circuit, speed class and teams. The original release provides horizontal and vertical split-screen arrangements. Test both before a serious session. Choose the orientation that gives each player the clearest view of upcoming corners, jump landings and walls; there is no single arrangement that is best for every television or track.
Before racing, both players should confirm acceleration, steering, firing, weapon discard, view change, rear view and airbrake inputs. Run one short race while discarding or ignoring pickups. Use it to check the screen division, camera view, braking points and visibility through tight turns. Do not make a control change for the first time during a competitive tournament.
- Select two-player split-screen.
- Test horizontal and vertical layouts.
- Confirm both players' controls and camera views.
- Complete a practice race before using weapons.
Adapt your driving to the reduced view
Brake slightly earlier than you would in a solo race and use a predictable entry into medium-speed corners. Release the brake as the turn opens instead of trying to rotate at the last possible moment. This preserves exit speed and leaves room for both craft when they enter the corner together.
Defend by taking the useful line early rather than moving repeatedly across the track. A late block can send both craft into a wall, while a centered line through a narrow section normally leaves the safest recovery route. On jumps, choose a stable landing when another racer is nearby instead of making a risky last-second nose adjustment. After contact, make the smallest steering correction needed to rejoin the racing line; do not immediately use Hyperthrust while still aimed at a barrier.
- Brake earlier than on a solo run.
- Use position rather than repeated swerving to defend.
- Prioritize stable landings in traffic.
- Rejoin the racing line before accelerating aggressively.
Practise clean passes without weapons
Choose Single Race and agree that both players will discard or avoid every pickup. The trailing player should identify where the leader loses speed, such as a corner entry, a landing or the exit from a technical section. The leader should drive normally rather than weaving, so both players can tell whether the pass came from a better line.
Swap starting positions after each run. Have the trailing player attempt one pass on a straight and another after a corner exit. If a pass requires forced contact in a narrow section, treat it as unreliable. A repeatable pass normally begins with a better exit and carries speed onto the next straight instead of relying on a last-second lunge.
- Run a no-weapons race with each player starting behind.
- Identify two reliable passing sections.
- Repeat the drill after changing screen orientation or camera if distance is difficult to judge.
Add weapons and defensive play
Once both players can finish consistently, enable normal weapon use. Fire when the target has limited room to evade, such as after a committed corner or during a landing, but avoid blind attacks into a crowded turn. The goal is to create a safe passing opportunity, not to trade a possible hit for a wall impact.
Treat shield-type or other defensive pickups as survival tools. Use one when an incoming attack or narrow section threatens a secure position instead of saving it automatically for the final lap. A trailing player can attack to open a passing opportunity, but should not sacrifice control by firing while entering a corner at an unsafe angle. Discard an unsuitable pickup before a dangerous section if keeping it would interfere with the response you need.
- Run one race focused on defensive-item timing.
- Practise discarding unsuitable pickups before narrow sections.
- Compare immediate defensive use with saving the item for a later lap.
Establish optional LINK play correctly
Linked play is separate from ordinary split-screen. Prepare two PlayStation consoles, two displays, two copies of the original game and a compatible PlayStation link cable. Connect the consoles according to the cable instructions before entering the game menus. Each console needs its own copy and display because the linked setup uses the consoles as separate racing stations.
On each system, open the Options screen. Hold Start and press Circle to reveal the hidden Establish Link option. Select Establish Link on both connected systems. The first system to select it becomes the host, and the second becomes the slave. Follow the prompts shown by the game rather than assuming that both screens will use identical labels or timing.
After the connection succeeds, inspect the available player-count and mode selections. The documented setup describes up to two players per PlayStation, including linked choices such as four-player split-screen or two-player full-screen, but the exact choices should be confirmed on the connected systems. Start with the simplest available linked Single Race and verify that both consoles update correctly before attempting another mode. Do not assume that Tournament, Eliminator or a fixed player count is available in every setup.
The Default Name entry LINK is an optional cheat or alternate access method documented for revealing Establish Link. It is not needed when the Options-screen shortcut works, and it should not replace the required Start-plus-Circle procedure in this guide.
- Prepare two consoles, two displays, two game copies and a compatible link cable.
- Open Options on both systems.
- Hold Start and press Circle to reveal Establish Link.
- Select Establish Link on both systems in sequence.
- Identify the host and slave systems if prompted.
- Confirm the available player count and modes before selecting a race.
- Test a linked Single Race before trying other available modes.
Run focused competitive sessions
Alternate who chooses the circuit and who chooses the team, then discuss one specific issue after each race: late braking, poor landing, unsafe blocking, missed passing zone or wasteful weapon use. Keep feedback tied to a repeatable decision rather than treating every defeat as luck.
For split-screen Tournament practice, finish the event instead of restarting after one ordinary bad race. A player ahead on points should protect clean exits and use defensive items to preserve position. A player behind should attack on straights and corner exits, not force contact in a narrow section. For linked play, use Single Race sessions for line practice and any additional mode only if it is offered by the connected systems.
- Alternate circuit and team selection.
- Review one concrete mistake after every race.
- Complete one split-screen Tournament without restarting after an ordinary bad race.
- If LINK is available, complete a linked Single Race and test another mode only if the menu provides it.
Before you move on
- Both players can finish a split-screen race without repeated wall impacts caused by the reduced view.
- Each player can demonstrate one clean straight-line pass and one defensive corner hold.
- Each player can discard an unsuitable weapon before a dangerous section and use a defensive item without abandoning the racing line.
- A complete split-screen Tournament has been finished without restarting after an ordinary bad race.
- If the documented link hardware is available, both systems reveal Establish Link through Options by holding Start and pressing Circle.
- The connected systems identify host and slave roles and complete a linked Single Race.
- If additional linked modes such as Eliminator are offered, verify and complete one only after confirming that the mode is present in the connected setup.
Challenge mode, secrets and full-unlock routes
Challenge mode is optional and separate from Tournament progression. Race, Time, Weapon and Combo events award their own medals and do not substitute for Single Race medals. The ordinary hidden-track and secret-team unlocks are game-wide Single Race progress, so complete each chain once and verify the new track or team after saving; do not repeat the chain independently in Vector, Venom, Rapier and Phantom. The recommended route uses gold victories on the four starting circuits, then different-team wins on Hi-Fumii and P-Mar Project, followed by wins with the four starting teams on Manor Top and Terminal. Qirex RD, AG Systems, Assegai and Icaras follow from their own victory counts. Prototype circuits remain separate: LS101/NP62, LS102/MG71, LS103/AW72 and LS104/AW73 each require all 64 Single Race golds in the matching speed class. None of these optional goals is required for the four standard Tournament victories.
1. Keep Challenge medals separate from Single Race unlocks
Open Challenge from the single-player menu. The original PlayStation release separates Challenge events into Race, Time and Weapon groups, with Combo as an additional group. Challenge events have their own objectives and medal records; they do not fill the Single Race medal grid.
If you want access to Combo, complete the Race, Time and Weapon groups to at least bronze. Full Challenge completion is optional and is not part of the Vector, Venom, Rapier or Phantom Tournament route. Keep a separate note for Challenge medals so a gold in a Challenge event is not mistaken for a gold Single Race result.
- Record Race, Time, Weapon and Combo Challenge medals separately.
- Earn at least bronze in Race, Time and Weapon if Combo access is wanted.
- Do not use Challenge medals as substitutes for Single Race medals.
2. Unlock the ordinary hidden circuits through one game-wide Single Race chain
Enter Single Race and use any speed class and any starting team that you can control consistently. Win the four opening circuits—Porto Kora, Mega Mall, Sampa Run and Stanza Inter. Gold victories are the safest target because the game records the top Single Race medal and the available references describe gold results as the reliable unlock route.
After those four opening-circuit victories, win Hi-Fumii with two different teams. Then win P-Mar Project with three different teams. Finish the chain by winning Manor Top with the four starting teams: Feisar, Goteki 45, Auricom and Piranha. The different-team conditions matter; repeating one team does not replace a missing team result.
This is ordinary game-wide Single Race progression, not four separate class campaigns. Once the required results are recorded, save to the memory card and inspect the track-selection screen. If Hi-Fumii, P-Mar Project or Manor Top is absent, check the result and team record and repeat only the missing victory. Do not repeat the entire chain in another speed class unless you are separately pursuing that class’s prototype grid.
- Win Porto Kora, Mega Mall, Sampa Run and Stanza Inter.
- Win Hi-Fumii with two different teams.
- Win P-Mar Project with three different teams.
- Win Manor Top with Feisar, Goteki 45, Auricom and Piranha.
- Save and verify that the expected hidden circuits are selectable.
3. Use Terminal to unlock Qirex RD
After Manor Top is available, win a Single Race on Terminal with each starting team: Feisar, Goteki 45, Auricom and Piranha. These four team-specific victories unlock Qirex RD. The victories belong to the same game-wide Single Race record; they do not need to be repeated in every speed class.
Save after the fourth Terminal victory and check the team-selection screen. If Qirex RD is missing, confirm that all four starting teams were used and that each race was completed as a victory rather than merely finishing with a medal.
- Win Terminal with Feisar.
- Win Terminal with Goteki 45.
- Win Terminal with Auricom.
- Win Terminal with Piranha.
- Save and verify Qirex RD.
4. Continue the secret-team victory chain
With Qirex RD available, win two Single Races using Qirex RD to unlock AG Systems. Then win three Single Races with AG Systems to unlock Assegai. Finally, win four Single Races with Assegai to unlock Icaras. These counts are game-wide and may be completed on suitable circuits rather than repeated for Vector, Venom, Rapier and Phantom.
Choose tracks that match the team’s handling. Qirex RD benefits from early braking and wide, controlled corner entries. AG Systems and Assegai should be protected from unnecessary collisions, especially when shield energy is low. After each stage, save and confirm that the next team appears before continuing.
- Win two Single Races with Qirex RD.
- Win three Single Races with AG Systems.
- Win four Single Races with Assegai.
- Save and verify Icaras.
5. Complete the optional class-specific prototype grids
Prototype circuits are independent of the ordinary hidden-track and secret-team chain. Each speed class has a 64-cell Single Race grid: every circuit in that class combined with every available team. A cell counts only when the result is recorded as a gold medal.
The prototype identifiers for this release are LS101/NP62 for Vector, LS102/MG71 for Venom, LS103/AW72 for Rapier and LS104/AW73 for Phantom. Complete the entire grid for one class, save, and check that class’s track list for the matching prototype. Do not replace MG71 with MQ71, and do not use S101, S102, S103 or S104.
Prototype progress is class-specific. A Vector gold does not fill the corresponding Venom, Rapier or Phantom cell. These circuits are optional and are not required for Tournament completion.
- Earn all 64 Vector golds to unlock LS101/NP62.
- Earn all 64 Venom golds to unlock LS102/MG71.
- Earn all 64 Rapier golds to unlock LS103/AW72.
- Earn all 64 Phantom golds to unlock LS104/AW73.
- Save and verify each prototype in its matching class.
6. Verify the intended completion level
For the standard campaign, stop after winning the Vector, Venom, Rapier and Phantom Tournaments overall. The hidden circuits, secret teams, Challenge groups and prototype grids are optional extras. If you are pursuing full optional progress, maintain separate records for game-wide Single Race unlocks, Challenge medals and the four class-specific 64-gold prototype grids.
After the final intended unlock, save again and inspect the track and team menus. Verify that the selected hidden circuits, Qirex RD, AG Systems, Assegai, Icaras and any intended prototype are visible. If something is missing, identify whether the problem is an unrecorded team victory, an incomplete game-wide chain or a non-gold cell in the relevant class grid before replaying anything.
- Do not repeat the ordinary unlock chain separately in each speed class.
- Keep Challenge and Single Race records separate.
- Use LS101/NP62, LS102/MG71, LS103/AW72 and LS104/AW73 consistently.
- Make a final memory-card save after the last intended unlock.
Before you move on
- Race, Time and Weapon Challenge groups have at least bronze if Combo access is intended.
- The Combo Challenge group is complete if full Challenge completion is intended.
- Hi-Fumii, P-Mar Project, Manor Top and Terminal are selectable after the ordinary game-wide Single Race chain.
- Qirex RD, AG Systems, Assegai and Icaras are selectable after their required game-wide victories.
- The intended prototypes are visible: LS101/NP62, LS102/MG71, LS103/AW72 and LS104/AW73.
- Vector, Venom, Rapier and Phantom prototype grids were tracked separately where pursued.
- A final memory-card save has been made after the last intended unlock.
Completion checklist, troubleshooting and post-game extras
For the original North American PlayStation release, the required campaign finish is an overall victory in each Tournament class: Vector, Venom, Rapier and Phantom. Each Tournament is decided by cumulative points across four races, not by winning only its final race. Seventh and eighth place score zero points but do not automatically end a Tournament; craft destruction is the separate race failure. Hidden tracks, secret teams, prototype circuits, Challenge medals, Time Trial records, Eliminator results and multiplayer achievements are optional goals. Ordinary hidden-track and secret-team progress comes from game-wide Single Race results, while prototype progress remains tied to complete 64-gold grids in a particular speed class. Save after major progress and reload the save to confirm the records you intended to preserve.
1. Confirm the required campaign finish
Enter Tournament mode and complete the classes in order. Vector is available first. Win the Vector Tournament overall to unlock Venom, win Venom overall to unlock Rapier, and win Rapier overall to unlock Phantom. The required campaign is complete after an overall victory in the four-race Phantom Tournament. You do not need first place in every race, but your final point total must exceed the other teams’ totals.
Tournament scoring is 10 points for first place, 6 for second, 4 for third, 3 for fourth, 2 for fifth, 1 for sixth, and 0 for both seventh and eighth. A seventh- or eighth-place finish damages your standings but is not automatically a Tournament game over. Craft destruction is the separate race failure: when shield energy is exhausted, the craft is removed and that race does not provide a normal finishing result. If you have a points lead after three races, protect it with clean lines and safe weapon use instead of forcing a risky pass.
- Vector Tournament won overall
- Venom Tournament won overall
- Rapier Tournament won overall
- Phantom Tournament won overall
- The campaign was judged by four Tournament totals rather than one final-race victory
2. Unlock and verify the hidden tracks
Use Single Race for the recommended standard hidden-track route. Earn first-place results, preferably gold medals, on Porto Kora, Mega Mall, Sampa Run and Stanza Inter to open Hi-Fumii. Earn gold on Hi-Fumii with two different starting teams to open P-Mar Project. Earn gold on P-Mar Project with three different teams to open Manor Top. Finally, earn gold on Manor Top with Feisar, Goteki 45, Auricom and Piranha to open Terminal.
This is ordinary game-wide Single Race progression, not four separate class campaigns. Record the track and team used for each qualifying result, but do not repeat every hidden-track result in Vector, Venom, Rapier and Phantom unless you are separately pursuing medals in those classes. If a track remains locked, check which track or team-count condition is missing and complete that Single Race result; do not assume the problem is a missing result from another speed class.
- Gold results recorded on Porto Kora, Mega Mall, Sampa Run and Stanza Inter
- Hi-Fumii unlocked
- Hi-Fumii gold results earned with two different starting teams
- P-Mar Project unlocked
- P-Mar Project gold results earned with three different teams
- Manor Top unlocked
- Manor Top gold results earned with Feisar, Goteki 45, Auricom and Piranha
- Terminal unlocked
3. Unlock the optional secret teams
The four starting teams are Feisar, Goteki 45, Auricom and Piranha. After Terminal is available, finish first on Terminal with each of those four teams to unlock Qirex RD. Then finish first on any two tracks with Qirex RD to unlock AG Systems, any three tracks with AG Systems to unlock Assegai, and any four tracks with Assegai to unlock Icaras.
These are also game-wide Single Race victory requirements. Track the team and circuit used for every qualifying win, but do not treat each ordinary team unlock as a separate class-specific target. After saving, inspect the team roster. If a team is absent, verify the victory count and the team identity before replaying races.
- Qirex RD unlocked through four Terminal victories with the starting teams
- AG Systems unlocked through two Qirex RD victories
- Assegai unlocked through three AG Systems victories
- Icaras unlocked through four Assegai victories
4. Track prototype goals separately
Prototype circuits are optional and use a different requirement from the ordinary hidden tracks. Each prototype requires all 64 Single Race gold medals in its specified speed class: LS101/NP62 for Vector, LS102/MG71 for Venom, LS103/AW72 for Rapier and LS104/AW73 for Phantom.
Record every required circuit-and-team combination in the relevant class. One gold per circuit is not enough if the class grid still contains missing team results. Prototype progress is class-specific: a Venom medal cannot fill a Phantom grid, and winning the Phantom Tournament alone does not unlock LS104/AW73. Check the relevant medal grid after saving before concluding that a prototype requirement is complete.
- All 64 Vector gold medals recorded for LS101/NP62
- All 64 Venom gold medals recorded for LS102/MG71
- All 64 Rapier gold medals recorded for LS103/AW72
- All 64 Phantom gold medals recorded for LS104/AW73
- Each intended prototype appears in the selection menu
5. Recover from failed Tournament attempts
If one circuit repeatedly ruins a Tournament, leave the cup and practice that same class, circuit and team in Single Race. Use practice to identify braking points, airbrake taps, jump landings and safer weapon-pad lines, then return to normal Tournament conditions. Do not judge a route using a cheat or altered setting.
When shield energy is falling, reduce wall impacts before attempting faster lines. Brake earlier, use shorter airbrake inputs and avoid taking a speed pad into a corner unless you can remain aligned afterward. After a missile or other weapon hit, prioritize survival and the next safe straight over an immediate overtake. Change team or camera only after identifying whether the actual problem is visibility, handling, speed or shield capacity.
- The troublesome circuit was practiced outside Tournament mode
- The normal settings were restored before the real attempt
- The selected team can finish without repeated wall impacts
- A recovery line is understood for damage and weapon hits
6. Keep optional modes independent
Challenge mode is separate from Tournament progression. Its Race, Time and Weapon challenge sets award their own medals; completing the required earlier challenge results opens the Combo challenges. Challenge medals do not unlock Venom, Rapier or Phantom.
Eliminator, Time Trial and multiplayer have separate records and objectives. Eliminator is a destruction-and-points mode, Time Trial is against the clock, and multiplayer results do not count as campaign Tournament victories. Keep these records on separate checklists so optional completion is not mistaken for the required Vector-through-Phantom campaign.
- Race Challenge results tracked separately
- Time Challenge results tracked separately
- Weapon Challenge results tracked separately
- Combo Challenge progress tracked separately
- Eliminator, Time Trial and multiplayer goals kept separate from campaign progress
7. Save and verify the final result
After a Tournament victory or an unlock session, save to the PlayStation Memory Card. Reload the saved data if possible and confirm that the intended Tournament classes, tracks, teams and prototypes remain available. This is especially important after completing a long 64-medal prototype grid.
The minimum completed-game result is overall victories in Vector, Venom, Rapier and Phantom. Full ordinary track and team completion additionally includes Hi-Fumii, P-Mar Project, Manor Top, Terminal, Qirex RD, AG Systems, Assegai and Icaras. Prototype circuits, Challenge medals, Time Trial records, Eliminator results and multiplayer achievements remain optional post-game targets.
- The final campaign result was saved
- Reloading confirms access to Vector, Venom, Rapier and Phantom
- Intended hidden tracks remain unlocked
- Intended secret teams remain unlocked
- Intended prototypes remain unlocked
- The Memory Card save was reloaded and verified
Before you move on
- Vector, Venom, Rapier and Phantom Tournaments have each been won overall.
- Seventh- and eighth-place zeroes have not been mistaken for automatic Tournament elimination.
- The recommended game-wide hidden-track route has been completed if that optional goal is intended.
- P-Mar Project includes three qualifying gold victories with three different teams.
- Qirex RD, AG Systems, Assegai and Icaras are unlocked if full team completion is intended.
- Each pursued prototype has its complete 64-gold set in the correct speed class.
- Prototype names are recorded as LS101/NP62, LS102/MG71, LS103/AW72 and LS104/AW73.
- Race, Time, Weapon and Combo Challenge results are tracked separately.
- Time Trial, Eliminator and multiplayer goals are tracked separately.
- The final progress has been saved and reloaded successfully.
Finishing up
Win the Vector, Venom, Rapier and Phantom Tournaments overall, confirming each result after the four-race standings screen.
Save after the Phantom victory and verify that the four-class Tournament route remains recorded.
If pursuing the expanded completion set, use the Single Race medal and team-victory chains to unlock Hi-Fumii, P-Mar Project, Manor Top, Terminal, Qirex RD, AG Systems, Assegai and Icaras. These ordinary track and team unlocks should be recorded as game-wide progression rather than treated as separate mandatory records for every speed class.
Complete Challenge medals and prototype circuits separately if desired. The four prototype circuits are the class-specific optional goals, requiring the appropriate 64-gold grid for Vector, Venom, Rapier or Phantom.
Treat seventh- or eighth-place finishes as zero-point results, not automatic Tournament elimination. Avoid craft destruction because it prevents a scoring result for that race.
Choose your next gameScreenshots & video
Game imagery for reference. Follow the written chapters above for the route and strategies.
Sources & references
Our original guide draws on the references below. Check the edition at the top of this page before following controls or unlock requirements.
- Wipeout 3 - FAQ - PlayStation - By Shiryu
- Wipeout 3 - Guide and Walkthrough - PlayStation - By Bob_Todd
- Wip3out English manual
- WIPEOUT 3 - NTSC-U, SLUS-00865
- Hyperthrust – Wipeout Central Wiki
- WIPEOUT 3 - NTSC-U, SLUS-00865
- Wipeout 3 weapons reference
- Wipeout 3 – Guides and FAQs for PlayStation
- Wipeout 3
- Tournament – Wipeout Central – scoring, elimination and tie-break information
- Wipeout 3 prototype track listing
- Mega Mall – Wipeout Central track reference
- Wipeout 3 Cheats, Codes, and Secrets for PlayStation
- Playing Wipeout 3
- Wipeout 3 | Wipeout Central
- Wipeout 3 (North American release information)
About the game & collecting notes
- Platform
- Sony PlayStation
Complete, practical strategy for the original North American PlayStation release of Wipeout 3 (SLUS-00865). Learn the controls, craft handling, weapons, braking and Hyperthrust, then progress through the game's four-class Tournament ladder: Vector, Venom, Rapier and Phantom. The guide also separates the required campaign from optional Single Race track and team unlocks, Challenge medals, prototype circuits and multiplayer content.
Darryl Polo
Darryl Polo loves tinkering with emulation and revisiting retro games. He enjoys exploring how old favorites play on different setups and sharing what he learns along the way. At Joking Joystick, he writes about the games, hardware, and small discoveries that keep the hobby fun.
Our editorial standardsFound a step that needs another look? Help us improve this guide.