
Uncharted: Drake's Fortune — Complete PS3 Campaign Walkthrough (Original 2007 Release)
Complete the original PlayStation 3 campaign in its actual 22-chapter order, from Ambushed through Showdown. Cover every required chapter, all mandatory traversal and combat sequences, the final Navarro encounter, and optional treasure cleanup without importing mechanics or trophy behavior from The Nathan Drake Collection.

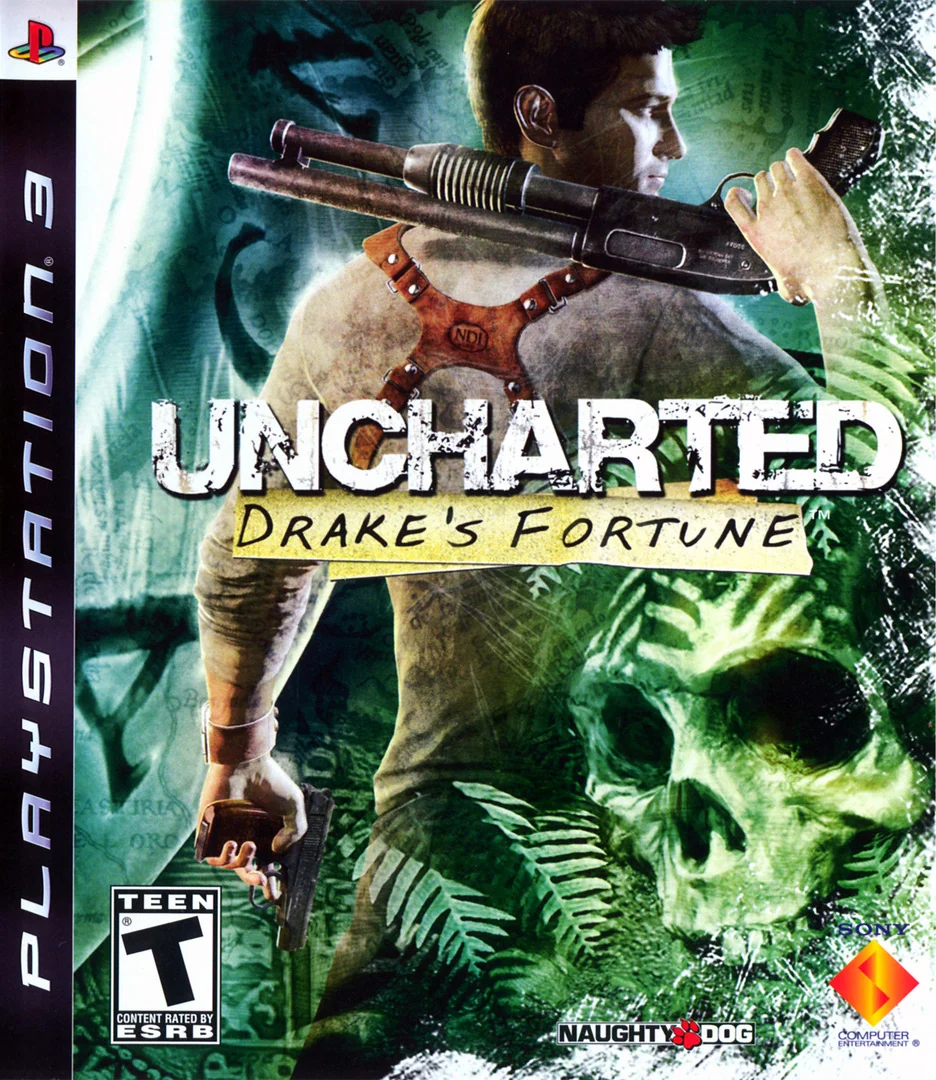
Find a copy
Uncharted: Drake's Fortune PlayStation 3
We may earn a commission if you buy through these links, at no extra cost to you. As an Amazon Associate I earn from qualifying purchases.
Opens retailer search results. Check the model, edition, seller, availability and current price before buying.
Before you begin
This guide follows the original PlayStation 3 campaign in the game's actual 22-chapter order.
It covers required routes, combat arenas, traversal hazards, puzzles, checkpoints, the final Navarro encounter, and the canonical ending.
Treasure instructions are optional unless a step explicitly identifies a route that must be searched before advancing.
Do not use control, trophy, or collectible assumptions from The Nathan Drake Collection; original PS3 SIXAXIS behavior and PS3 trophy requirements are distinct.
Use Chapter Select for targeted collectible cleanup after the story, while preserving the campaign save that contains the relevant progress.
Set yourself up for the run
Confirm that the game is the original PlayStation 3 release of Uncharted: Drake's Fortune, not the PS4 Nathan Drake Collection.
Review the in-game PS3 controls and confirm that the controller has working analog sticks, shoulder buttons, Start, Select, and SIXAXIS motion. A motion-capable PS3 controller is required for the original balance sections and is used for the original grenade-trajectory system.
Enable subtitles or gameplay hints only according to personal preference; neither is required for progression.
Use ordinary PS3 save-copy or backup procedures only as optional precautions. Do not present a specific backup workflow as a gameplay prerequisite.
For a first story run, prioritize cover, controlled movement, and checkpoint recovery. Collectibles can be cleaned up later through Chapter Select.
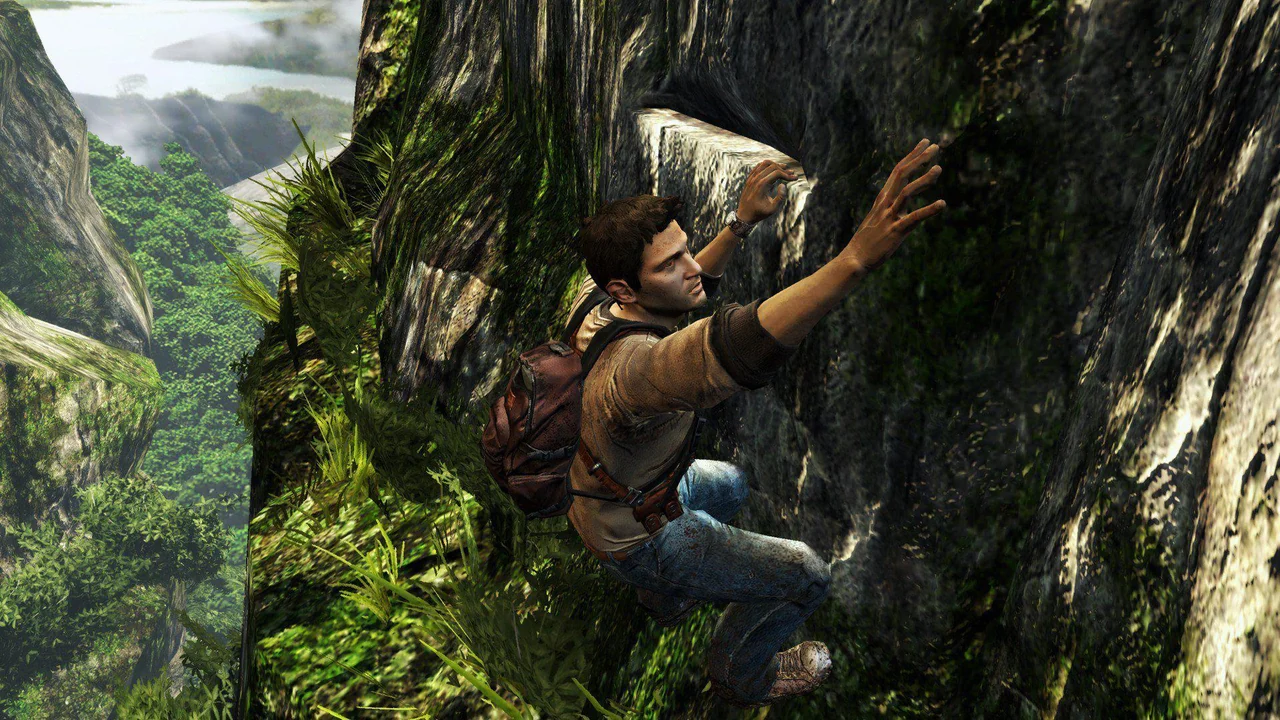
Preparation & First-Time Setup (PS3 specifics)
This chapter covers the original 2007 PlayStation 3 release of Uncharted: Drake’s Fortune, not the later PS4 version in Uncharted: The Nathan Drake Collection. Confirm the standalone PS3 title, review the original button layout, choose subtitle and hint settings, and verify that your controller’s SIXAXIS motion sensing works. The PS3 campaign uses motion input for balance sections and grenade trajectory adjustment, so a working motion-capable controller is required to complete this release. Save backup remains optional: after a valid campaign save exists, you may copy it through the PS3 Saved Data Utility or use the system Backup Utility.
Confirm the original PlayStation 3 release
Launch the game from the PlayStation 3 XMB using the standalone Uncharted: Drake’s Fortune disc or PS3 digital installation. The title should identify itself as Uncharted: Drake’s Fortune. Do not use Uncharted: The Nathan Drake Collection for this guide. That is the later PS4 compilation, and its version of Drake’s Fortune changed the control presentation and replaced the original motion-based grenade handling.
The original PS3 release uses Start for the pause menu and Select for Drake’s journal or map when the relevant prompt appears. It also includes SIXAXIS functions for balancing on narrow beams and adjusting grenade arcs. The standalone title shown in the PS3 XMB, together with the original PS3 disc or installation, is the appropriate edition check. A PS4 or PS5 version is not covered here.
- The game is running on a PlayStation 3.
- The title is Uncharted: Drake’s Fortune, not Uncharted: The Nathan Drake Collection.
- The controller has working analog sticks, face buttons, shoulder buttons, Start, Select, and motion sensing.
Set subtitles and game hints
From the title screen, or by pressing Start during play, open Options. Set subtitles according to your preference. Subtitles do not affect progression, but enabling them can make dialogue easier to follow during combat and traversal sequences.
For a first playthrough, leave Game Hints enabled unless you specifically want to work out routes without contextual guidance. Game Hints are separate from the basic prompts that explain actions such as taking cover, jumping, climbing, and interacting. You can return to Options later if the hints become distracting.
The original game does not use a permanently visible modern HUD for every weapon, ammunition, grenade, and objective detail. Information appears contextually during play. This restrained display is normal for the PS3 version and is not evidence that a required interface setting is missing.
- Options has been opened before starting the campaign.
- Subtitles are set to your preference.
- Game Hints are enabled for a first run, or deliberately disabled.
- You understand that the original display is minimal and contextual.
Learn the original PS3 controls
Move Drake with the left analog stick and adjust the camera with the right analog stick. Press Circle beside a suitable wall, crate, rock, or other object to take cover. While moving, Circle performs a roll; at a ledge, it can drop Drake or help him grab a lower ledge when the route allows it. Press Cross to jump or climb, Square for melee attacks, and Triangle to interact with objects or pick up weapons.
Hold L1 to enter manual aim, then use the right analog stick to place the reticle. Press R1 to fire. When Drake is already in cover, pressing R1 without entering manual aim performs blindfire from that cover position. Blindfire is useful at close range, but use deliberate L1 aiming when you need accurate shots.
Press L3 while manually aiming to switch Drake’s aiming shoulder, and press R3 to reset the camera. Press R2 or Up on the directional pad to reload. Left on the directional pad equips the pistol, Right equips the rifle, and Down selects grenades. Press Start to pause and Select when the journal or map prompt is available.
These are the original PS3 assignments. Do not substitute the later collection’s Options, Touch Pad, L2, or R2 control layout when following instructions for this release.
- Circle enters cover at a nearby usable object.
- L1 plus the right analog stick produces the manual-aim reticle.
- R1 fires and blindfires from cover.
- R2 or Up reloads the current firearm.
- Triangle interacts with objects or picks up weapons.
Verify required SIXAXIS motion input
Before beginning a full campaign, confirm that the controller can register motion. The original PS3 release uses tilt input when Drake crosses narrow beams, logs, and similar balance sections. When Drake begins to wobble, make small, gradual controller movements in the direction needed to bring him back toward the center. Do not make large swings; the game responds best to controlled corrections.
Also verify grenade trajectory adjustment after grenades become available. Select grenades with Down, hold L1, use the right analog stick to set the general horizontal direction, and tilt the controller to adjust the arc and throwing distance. Press R1 while holding L1 to throw. Practice with small tilts and watch the projected arc rather than trying to rotate the controller sharply.
Both functions are part of the original PS3 design. A controller that operates the buttons but lacks working motion sensing is not sufficient for this release’s full campaign progression. If the balance prompt or grenade arc does not respond, stop and replace or repair the controller before proceeding. Do not rely on PS4 or PS5 remaster instructions, which changed or removed these original motion functions.
- A balance prompt responds to gentle SIXAXIS movement.
- Tilting the controller changes the grenade trajectory after grenades are available.
- The controller can perform both required motion functions before the main campaign is continued.
- You are not relying on a controller without working motion input.
Optionally back up the save
Begin a new campaign and allow the first automatic save or checkpoint to finish. Never turn off the PS3 while the saving indicator is active. Once a save exists, return to the XMB and open Game, then Saved Data Utility (PS3). Highlight the Uncharted: Drake’s Fortune save, press Triangle, choose Copy, select a connected USB storage device, and wait for the completion message.
A broader alternative is Settings, System Settings, Backup Utility, then Back Up. This creates a system-storage backup rather than copying only the game save. Both methods are optional precautions. They do not replace the need to complete the campaign on the active account, and a copied save does not award trophies by itself.
- A visible Uncharted: Drake’s Fortune save exists in Saved Data Utility (PS3).
- If desired, the save has been copied to USB or the PS3 Backup Utility has completed.
- The saving indicator was inactive before the system was closed or backed up.
Before you move on
- The PS3 XMB and title screen identify Uncharted: Drake’s Fortune rather than The Nathan Drake Collection.
- Options has been reviewed, subtitles and Game Hints are set, and the contextual display is understood.
- You can take cover with Circle, manually aim with L1 and the right analog stick, blindfire with R1, reload with R2 or Up, and interact with Triangle.
- A balance prompt responds to SIXAXIS movement.
- Grenade trajectory adjustment responds to controller tilt after grenades become available.
- A working motion-capable controller is ready for the original PS3 campaign.
- A first checkpoint or campaign save exists, with an optional USB or system backup completed if desired.
References for this chapter
- Drake's Fortune controls
- Uncharted: Drake's Fortune Controls, StrategyWiki
- Uncharted: The Nathan Drake Collection — PlayStation.Blog
- Uncharted: Drake's Fortune — Sony Computer Entertainment press release
- Naughty Dog interview: Uncharted: Drake's Fortune SIXAXIS features
- PS3: Copying saved data to storage media — PlayStation 3 User's Guide
- PS3: Backup Utility — PlayStation 3 User's Guide
Ambushed — Survive the Boat Attack and Reach the Next Chapter
The original PlayStation 3 campaign begins on Drake and Elena’s boat, not at the plane wreck. Chapter 1, Ambushed, is a short combat tutorial against pirates attacking from small boats and boarding Drake’s deck. Use the opening exchange to practice manual aiming, shooting explosive barrels, taking cover, melee attacks and brutal combos. When the mounted gunboat arrives, do not try to win the exchange in the open. Take cover and remain there until the overflying aircraft triggers the chapter-ending scene. This chapter contains no treasures, so there is no collectible route to search.
Start on the boat and clear the first attacking boat
After the opening scene, Drake is already in combat on the deck. The first small boat approaches from the side with two pirates. Hold L1 to enter manual aim, use the right stick to place the reticle, and press R1 to fire. Keep your shots controlled and aim for exposed heads when the pirates pause in the open. There is no need to leave Drake’s deck or search for a route during this exchange.
Once the first boat is cleared, stay aware of the next approach. The game is introducing aiming and enemy positioning, not asking you to perform a traversal section. If you take damage, move behind the boat’s raised cover or other solid deck structure before re-engaging. Chapter 1 does not contain a plane-wreck or jungle segment; those events belong to the later Plane-wrecked chapter.
- Remain on Drake’s boat after control begins.
- Use L1 and the right stick to aim, then R1 to fire.
- Defeat the two pirates on the first attacking boat.
Use cover and explosive barrels against the second boat
A second boat pulls alongside. When the cover tutorial appears, press Circle near a suitable obstruction to take cover. From cover, lean out and fire with L1 and R1, or use R1 without manual aiming for blind fire when an enemy is very close to the edge of your cover.
Look for the silver-colored barrels on the attacking boat near the pirates. Shoot a barrel when enemies are standing beside it to damage or eliminate several attackers at once. Do not fire randomly at every barrel before the pirates are positioned nearby; the explosion is most useful when it catches the group. If the boat’s occupants spread out, finish the survivors with aimed pistol fire.
- Take cover when the tutorial introduces it.
- Shoot the silver barrel beside the second group when it can catch nearby pirates.
- Clear the second attacking boat before dealing with boarders.
Defeat the pirates who board your deck
After the second boat is dealt with, pirates climb onto Drake’s deck. Close the distance only when an enemy is isolated. Press Square for melee attacks, and continue the prompted melee sequence rather than trying to aim at an opponent standing directly beside Drake. After each takedown, press Triangle near dropped ammunition or weapons to collect it.
More pirates board shortly afterward and the game introduces the brutal combo. Follow the displayed button sequence when you have one enemy separated from the others. A normal melee attack is safer than forcing a combo while two or more pirates can shoot Drake. Use the boat’s cover to break contact, then fight the next boarder when he reaches the deck.
- Use Square for close-range melee attacks.
- Collect useful dropped ammunition with Triangle.
- Practice the brutal combo only when the target is isolated.
Survive the gunboat attack
The final attack comes from a boat carrying a mounted gun and heavier firepower. This is not a target you are expected to destroy during the chapter. Move behind the nearest solid cover as soon as the gunboat begins firing. Keep Drake concealed and do not expose him merely to search for another weapon or attempt a long-range counterattack.
The game eventually provides an on-screen L2 prompt while an aircraft passes overhead. Follow the prompt if necessary, but the essential action is to remain behind cover until the aircraft intervenes. If Drake is badly wounded, stay concealed; the encounter will progress without requiring another offensive push. Dying here reloads the recent combat checkpoint, so repeat the same cover-first approach rather than replaying the entire campaign opening.
- Take cover when the mounted gunboat appears.
- Do not remain exposed trying to defeat the gunboat.
- Stay behind cover until the aircraft sequence begins.
Confirm the chapter transition
After the aircraft passes, a cutscene ends the opening attack and the game advances to the next chapter, The Search for El Dorado. The chapter is complete when control leaves the boat-attack sequence and the next chapter begins. There is no treasure or Strange Relic to collect in Ambushed, so do not waste time searching the deck for a hidden pickup.
For a clean first-time completion, confirm that Drake survived all boarding groups, the gunboat event was triggered, and the next chapter title or scene has appeared. If you are using Chapter Select for cleanup later, this chapter should be replayed only for medals, weapon-related goals or a missed chapter-completion result; it is not part of the treasure route.
- Finish the boarding fights.
- Trigger the aircraft intervention during the gunboat attack.
- Reach the beginning of The Search for El Dorado.
Before you move on
- The first attacking boat and the second barrel-equipped boat have been cleared.
- All pirate boarders on Drake’s deck have been defeated.
- The mounted gunboat encounter has been survived by taking cover.
- The aircraft intervention has triggered the ending scene for Ambushed.
- The next chapter, The Search for El Dorado, has begun.
- No treasure search is required for this chapter.
Chapter 2: The Search for El Dorado — River Ruins and Underground Temple
Follow Sullivan through the jungle, cross the ruined platforms, open the underground temple, restore the water level, escape the collapsing walkway, and reach the U-boat transition. The original PlayStation 3 chapter has six treasures: Silver Mosaic Inca Earring, Jeweled Silver Monkey, Decorated Gold Ring, Silver Llama, Golden Inca Cup and Silver Turtle. The Decorated Gold Ring is correctly part of Chapter 2; it is found in the chasm room before the barrel is shot. The chapter has little direct combat, so prioritize careful jumps, quickly abandoned handholds and the collapsing scaffold sequence. Use Drake’s journal for the four-symbol mechanism and press the switches in the numbered order shown there.
Follow the river and collect the Silver Mosaic Inca Earring
Start by following Sullivan through the jungle along the river. Stay on the left side of the stream as you approach the waterfall and the large rock blocking the route. Climb over the rock and drop down on the far side. Turn back toward the rock wall and collect the Silver Mosaic Inca Earring on the ground near the small drop. Do this before continuing through the narrow passage; the route does not naturally bring you back to this spot.
Continue past the waterfall and through the tight gap between the rocks. In the next clearing, move toward the far-left side and climb the high platform from the lower ledge. Cross the successive platforms and the fallen pillar until you reach the upper ruins. When you find the large boulder, push it onto the weakened floor to break through. Drop into the opening and enter the underground section.
- Silver Mosaic Inca Earring collected beside the early river rocks.
- The waterfall passage and first ruin clearing have been crossed.
- The boulder has broken through the weakened floor.
Cross the unstable pillars and collect the Jeweled Silver Monkey
In the ruin courtyard, take the left-side climbing route toward the stone platforms. After crossing the pillar that shifts beneath Nathan, reach the next platform and look left. A nearby pillar is largely covered by a tree. Jump to the uncovered edge, pull yourself up and search around the far side of the tree for the Jeweled Silver Monkey.
Return to the main route and continue over the remaining pillars. When a platform or handhold begins to give way, keep moving rather than waiting for it to settle. Drop to the lower ledge when prompted, shimmy along the edge and climb toward the boulder entrance. The chapter’s platforming is more reliable when each jump is lined up with the next visible grab point instead of being attempted from the edge of the screen.
- Jeweled Silver Monkey collected around the tree-covered pillar.
- The unstable pillar section is complete.
- Nathan has reached the boulder that opens the ruins.
Enter the temple and collect the Decorated Gold Ring
Push the boulder to open the entrance and proceed through the ruins. After the scene inside, you will reach a chasm with a barrel and a large pillar on the opposite side. Do not shoot the barrel yet. Face the barrel and move left along the near edge, toward the wooden scaffolding. Continue carefully to the far-left corner, between the pillar and the edge of the gap, where the Decorated Gold Ring is lying near the drop.
Once the ring is collected, shoot the barrel across the chasm. The explosion topples the pillar and creates the crossing. Continue to the chain-operated door. Pull the chain, then move the small trolley beneath the doorway so Sullivan can get through and hold the route open.
In the next room, allow Sullivan to light the brazier. Shoot the lit torch above the debris so the falling ember clears the blocked doorway. Traverse the vertical wall using the pale fixtures and vines. Several grips loosen or collapse, so jump promptly and follow the fixtures across rather than stopping on one handhold.
- Decorated Gold Ring collected before the barrel is destroyed.
- The toppled pillar forms the crossing over the chasm.
- The trolley is positioned beneath the chain-operated door.
- The vertical fixture-and-vine climb has been completed.
Use the journal mechanism and collect the Silver Llama
After the next brazier and corridor, enter the room containing four symbol switches. Open Drake’s journal and study the four symbols and their numbered order. Activate the switch marked first, then the switch marked second, then the third, and finally the fourth. The first switch is reached from the upper-right debris and platform. The second is on the central bridge-like column. The third is on the upper-left platform, reached through the small intervening column. The fourth is on the remaining central platform. Do not use fixed labels such as B, D, C and A; the correct order is the numbered sequence shown by the journal in the original PS3 game.
When the mechanism opens the central hole, descend by the ladder and the crumbling ledges. In the lower hall, push the stone block to raise the water level, then drop safely into the pool and swim through. After reaching dry ground, check the small nook on the right side of the large rocky divider for the Silver Llama before climbing out.
- The four journal symbols were activated in numbered order: first, second, third, fourth.
- The central floor has opened.
- The water level has been raised before the descent.
- Silver Llama collected in the nook immediately after the swim.
Cross the collapsing scaffold and collect the Golden Inca Cup
Climb out of the water chamber and clear the next blockage by shooting the barrels. Work with Sullivan at the two-chain door, then cross the long wooden scaffold. When the structure begins collapsing, run toward the camera and jump each broken section as it falls. Do not stop to search during this sequence; the safe route is the forward escape path, and a death reloads the nearby checkpoint.
After the collapse, continue up the staircase until the scene in the chamber beyond. When control returns, turn around instead of following the tracks toward the exit. Search beside the large ceramic jar and the skeleton on the stone slab to collect the Golden Inca Cup. Then return to the tracks and follow the corridor out of the temple.
- The collapsing scaffold has been crossed.
- Golden Inca Cup collected beside the jar and skeleton.
- The tracks leading out of the temple are accessible.
Collect the Silver Turtle and reach the U-boat
After leaving the interior temple route, look to the right for a short, slightly slanted pillar. Climb it and jump across the series of four pillars. The Silver Turtle is on the last pillar, so collect it before dropping down and continuing toward the water.
Follow the marked route through the jungle and down to the waterway. Swim toward the U-boat and use the climbable route at its rear to board it. Enter the hatch and proceed through the short interior sequence. The chapter transition is confirmed when the next story section begins on the U-boat; Chapter 3, A Surprising Find, contains the next two treasures, not the Decorated Gold Ring.
- Silver Turtle collected from the last pillar outside the temple.
- Nathan has boarded the Nazi U-boat.
- The transition into Chapter 3 has begun.
Before you move on
- Chapter Select records six Chapter 2 treasures: Silver Mosaic Inca Earring, Jeweled Silver Monkey, Decorated Gold Ring, Silver Llama, Golden Inca Cup and Silver Turtle.
- The four-symbol mechanism has opened after activating the journal’s numbered sequence.
- Nathan has crossed the collapsing scaffold and boarded the Nazi U-boat.
- Chapter 3, A Surprising Find, has started or its opening scene is available.
- If a treasure is missing, replay Chapter 2 from Chapter Select and confirm the pickup animation or collectible notification before leaving its area.
Chapter 3: A Surprising Find — U-Boat and Ruins Escape
Swim around the rear of the German U-boat and climb the cliff route to its deck. Collect the two optional treasures before entering: Gold Tairona Pendant on the upper ledge above the green-and-orange vine, and Gold and Turquoise Inca Earring at the boat’s bow. Search the U-boat by following its linear corridors, then escape through the rear hatch after the story scene. Fight through the ruins, use the red flares to retrace the route to the front entrance, and reach the red truck at the far-right side to begin Chapter 4, Plane-wrecked. Chapter 3 has two treasures; Decorated Gold Ring belongs to Chapter 2.
1. Swim around the rear of the U-boat
At the start of the chapter, jump into the water and swim toward the waterfall behind the German U-boat. Do not try to board from the boat’s front. Just before the waterfall, look to Nate’s right for a shallow platform where he can climb out of the water.
Climb onto the large rock near the wall, then reach the narrow ledge and jump to the vine. Use the vine to wall-run to the next ledge. Continue along the visible handholds, fissures and vines, using short, controlled jumps rather than leaping before Nate is lined up with the next grab point.
- Swim to the waterfall behind the U-boat.
- Climb out on the platform near the rear of the waterfall.
- Begin the cliff ascent using the first vine.
2. Collect the Gold Tairona Pendant
Continue across the cliff route until you reach the green-and-orange vine. This is the important treasure branch. Instead of swinging immediately, climb up the vine when Nate stops moving and pull onto the ledge at the top. The Gold Tairona Pendant is on that upper platform, to Nate’s left.
After collecting it, return to the vine and continue the intended route. If the camera makes the next jump unclear, use the ledges to reposition Nate before jumping. The path then winds around the cliff, drops through several lower ledges and brings you onto the upper surface of the U-boat.
- Gold Tairona Pendant collected above the green-and-orange vine.
- Pickup animation or treasure registration has appeared before continuing.
- Resume the cliff route toward the top of the submarine.
3. Collect the Gold and Turquoise Inca Earring before entering
When Nate reaches the U-boat, ignore the hatch at first. Walk around the boat toward its front tip, the end hanging over the waterfall. The Gold and Turquoise Inca Earring is on the bow near the very tip. Collect it before entering the submarine; once you proceed inside, the route does not return you to this exterior location during the chapter.
After confirming the pickup, go back to the hatch and climb down. This is the complete Chapter 3 treasure route: two ordinary treasures, with no Decorated Gold Ring in this chapter.
- Gold and Turquoise Inca Earring collected at the bow.
- Both Chapter 3 treasures are registered.
- Do not search for Decorated Gold Ring here; it is a Chapter 2 item.
4. Move through the U-boat
Inside the submarine, follow the usable corridor forward. Open the first hatch, continue through the damaged compartments and swim down the flooded corridor to the ladder at the far end. Climb up and keep moving through the next doorway and hatch as the story scenes occur.
The submarine section is primarily traversal rather than a combat arena. Do not waste time trying to enter sealed side rooms. When the route ends and the story scene gives Nate control outside, immediately drop from the ledge on the right and follow the path around the corner to the left.
- Pass through the flooded corridor and climb the ladder.
- Continue through the interior until the story scene ends.
- Exit through the rear route when Nate regains control.
5. Fight back through the ruins
After dropping from the ledge, defeat the nearby enemy with melee if he reaches you, then keep moving toward the red-lit rear entrance of the ruins. Take cover at the entrance and eliminate the guards before going inside. Use the stone blocks and doorway edges as cover, and avoid standing in the open while enemies are firing from multiple angles.
Once inside, follow the tracks back toward the statue room. Continue through the ruins and deal with enemies as they appear. If the layout becomes confusing, look for the red flares: they mark the route back toward the front entrance. Let enemies approach the doorway or a narrow passage when possible, then retreat behind cover if grenades or crossfire force you out of position.
- Reach the red-lit rear entrance.
- Clear the guards outside and inside the ruins.
- Follow the tracks and red flares back toward the front entrance.
- Keep a retreat route instead of pushing into an open courtyard.
6. Reach the red truck to finish the chapter
Exit through the front entrance and defeat the enemies in the exterior area. The chapter does not end at a jeep or at a separate Elena reunion sequence. Instead, move to the red truck at the far-right corner of the ruins. Following the reporter toward it also leads to the correct destination.
Approaching the red truck triggers the story scene and transitions directly to Chapter 4, Plane-wrecked. If you die during the escape, reload the latest checkpoint and repeat only the current exterior or ruins combat section. The required chapter objective is complete once the transition begins.
- Exit through the front entrance.
- Clear or pass the exterior enemies safely.
- Reach the red truck at the far-right corner.
- Chapter 4, Plane-wrecked, begins.
Before you move on
- Nate has entered and searched the German U-boat.
- The Gold Tairona Pendant and Gold and Turquoise Inca Earring are registered if optional cleanup is being attempted.
- Nate has escaped through the rear route, returned through the ruins and reached the red truck.
- The game transitions into Chapter 4, Plane-wrecked.
- The Chapter 3 collectible total is two ordinary treasures.
References for this chapter
- Uncharted: Drake’s Fortune - Guide and Walkthrough - PlayStation 3 - By Axel7174
- Uncharted: Drake’s Fortune — Treasure Location FAQ — PlayStation 3
- Uncharted: Drake’s Fortune - Walkthrough - PlayStation 3 - By YuGiOhFm2002
- Uncharted 1: A Surprising Find - Chapter 3 walkthrough
- Drake's Fortune treasure locations - Uncharted Wiki
Chapter 4: Plane-wrecked — Jungle, Waterfalls, Plane Wreck and Trap Field
Chapter 4, Plane-wrecked, starts after Nate and Elena are shot down and ends when Nate reaches the fortress after crossing the wooden trap field. Follow the linear route through jungle paths, pirate camps, ruined platforms, waterfalls, the wrecked plane and the final trip-wire area. The chapter contains ten ordinary treasures. The first three are near the opening waterfall and log crossing; Intricate Gold Ring and Patterned Silver Ring are in the central ruins; Golden Jaguar is in the white-tree area; the final four are placed around the route to the plane wreck and the trap field. Collectibles are optional for story completion, but pause before each new combat or traversal section so you do not pass a one-way route.
1. Leave the crash area and reach the first waterfall
When control returns, turn around and face the large tree beneath Nate’s discarded parachute. Walk to the right side of the tree’s base and collect the Silver Inca Figurine. Return to the main route and follow the jungle path to the iron gate. Shoot the lock, kick the gate open and continue until the path drops beside a pool and waterfall.
Immediately after dropping into the waterfall area, turn left and follow the rock wall into the dark nook behind the small vegetation. Collect the Silver Fish Charm, then return to the pool and climb the rocks on the opposite side of the waterfall.
Follow the river route until you reach the first narrow log crossing. Before crossing, drop to the lower ledge on the right side of the log and collect the Gold Frog. Climb back up, cross the log and continue across the next platforms. When pirates attack, use the stone slab, barricade and ruins as cover. Pick up the grenades near the crate, but move to a new obstruction when enemies begin throwing grenades.
- Silver Inca Figurine: right of the parachute tree’s base.
- Silver Fish Charm: dark nook left of the first waterfall.
- Gold Frog: lower ledge beside the first log crossing.
- Use solid cover during the first pirate encounter.
2. Clear the pirate camp and search the central ruins
Follow the ruins upward until you overlook the pirate camp. Drop into the lower area and use the large wall, broken wall and support columns as successive cover. Eliminate enemies on the ground before dealing with pirates on the upper ruins. Powder kegs can break up groups, but shoot them only after moving away from the blast.
After the camp is clear, climb the low column near the large tree, jump to the next column and cross the broken arch toward the gate. Kick the gate open and immediately use the wall ahead as cover. Clear this next ruin section before starting the platform route.
For the Intricate Gold Ring, climb the pillars at the back of the large open combat area and follow the upper pillar to its end. Jump to the platform near the explosive barrel and check the corner beside the small boulder. Collect the ring before leaving the arena.
Continue through the central ruins. After clearing the next group, move to the rear wall and jump to the mounted ledge. Climb onto it and move left to collect the Patterned Silver Ring. Return to the route, climb across the broken wall and jump over the platforms until you are nearly above the lower gate. Jump left to the ledge and drop onto the path beyond it.
- Clear both levels of the pirate camp before climbing onward.
- Intricate Gold Ring: upper platform at the end of the pillars in the large combat area.
- Patterned Silver Ring: rear ledge in the central ruins.
- Use the gate and broken-wall platforms to reach the route toward the waterfalls.
3. Cross the waterfall route and collect the Golden Jaguar
At the waterfall route, do not jump into the lower water. Turn right and jump to the large rock with mounted ledges. Shimmy left across the ledges, jumping between handholds until you land on the lower rock. Turn around, cross the small platforms projecting from the water and reach the broken bridge. Use the bridge remains as cover to defeat the pirates.
The broken bridge is not passable from the break. Face the waterfall, jump to the rock projecting from the water, then jump to the ledge nearest the falling water. Move behind the waterfall and follow the mounted ledge to the right. Climb the platforms on the far side and drop from the next broken bridge section onto the ledge below.
The rock formation begins to collapse as you advance. Jump right to the next handhold, circle the formation and climb to the top. Shoot the powder keg attached to the enemy vehicle. When the vehicle shifts into position, jump across it and continue up the smaller waterfall. Cross the upper lake, collect ammunition from the crate and climb the cliff using the vines.
Clear the pirates in the overgrown ruin area. Afterward, move left toward the large white tree and the smaller pale trees. The Golden Jaguar is on the ground between them. Collect it before following the only open path toward the next waterfall and the plane-wreck area.
- Use the ledges behind the waterfall rather than trying to cross the broken bridge.
- Shoot the vehicle’s powder keg to open the next route.
- Golden Jaguar: between the large white tree and the smaller white trees.
4. Reach the plane wreck and retrieve the map
Continue through the cliff route. Before the jump near the slanted rock and fallen log, look down to the right. The Silver Inca Vessel is below the log at the base of the cliff face. Collect it, then return to the route and use the two vines to reach Sullivan’s plane wreck.
Clear the pirates around the wreck before climbing the rope into the aircraft. Inside, retrieve the Map. Nate then exits and faces several enemy groups on the hill. Advance from cover to cover, using the stone barricade and nearby rocks instead of chasing enemies into the open.
After the hill fight, continue through the gate that opens near the crash area. The Golden Toothpick is immediately outside this section, beside the stone arch and before the first wooden death traps. Pick it up before moving farther along the cliff.
- Silver Inca Vessel: below the slanted log before the plane wreck.
- Clear the plane-wreck combat area.
- Climb into the wreck and retrieve the Map.
- Golden Toothpick: beyond the wreck area and before the first wooden traps.
5. Cross the cliff route and wooden trap field
After collecting the Golden Toothpick, follow the narrow cliff path. Cross the unstable rock section and continue until you reach the next enemy position. Before entering the wooden trap route, check the cliff edge beneath the overhang. The Silver Bird Vessel is tucked under the overhang overlooking the water. Approach slowly because the edge does not provide a reliable recovery grab.
Return to the main route and advance through the wooden stake traps. Watch for thin trip wires and move in short sections rather than sprinting. When the grenade-launcher pirate appears, use the nearby wall and rocks as cover. Defeat him first, then clear the remaining enemies before continuing.
Use the higher ground occupied by the grenade-launcher enemy to fire into the next group. Descend only after the area is quiet. Do not treat the stakes and wires as a normal arena; inspect the ground before every step and use the checkpoint if a trap kills Nate.
- Silver Bird Vessel: under the cliff-edge overhang before the main wooden trap field.
- Defeat the grenade-launcher enemy from cover.
- Advance through the wires and stakes carefully.
6. Collect the final treasure and finish Plane-wrecked
After leaving the main wooden-trap area, continue far enough to identify the open field and fortress route, but do not rush directly ahead. Turn left and loop around the rocks toward the grassy ledge overlooking the trap field. The Silver Inca Earring is lying in the grass on this upper ledge.
Return to the main route and advance toward the fortress. Additional enemies and trip wires remain on the approach, so use rocks and walls to break lines of fire and cross the trap field one safe section at a time. Follow the visible ledges and the intended fortress approach rather than attempting optional jumps.
Chapter 4 ends after Nate completes this approach and the game transitions into Chapter 5, The Fortress. The fortress interior, machine-gun encounter, pulleys and courtyard combat belong to Chapter 5 and should not be included in Plane-wrecked. If you die, reload the latest checkpoint and repeat only the preceding trap or climbing section.
- Silver Inca Earring: grassy ledge overlooking the wooden trap area.
- Reach the fortress transition after the final trap field.
- Confirm that Chapter 5, The Fortress, loads before entering its interior sequence.
Before you move on
- Story completion for Plane-wrecked is registered when Nate reaches the fortress transition and Chapter 5, The Fortress, loads.
- A complete Chapter 4 collectible tally is ten ordinary treasures: Silver Inca Figurine, Silver Fish Charm, Gold Frog, Intricate Gold Ring, Patterned Silver Ring, Golden Jaguar, Silver Inca Vessel, Golden Toothpick, Silver Bird Vessel and Silver Inca Earring.
- The Strange Relic belongs to Chapter 5 and is not required for completing Plane-wrecked.
- If the tally is below ten, use Chapter Select and replay Plane-wrecked while targeting the missing treasure; there is no need to search the fortress interior.
Chapter 5: The Fortress — Reach the Flooded Interior
Chapter 5 covers Drake’s climb into the fortress, the first courtyard firefights, two machine-gun positions, the radio-room escape, and the flooded interior. Its four optional pickups are the Strange Relic, Silver Jaguar, Gold Mosaic Inca Earring, and Golden Spoon. After opening the gate in the flooded chamber and operating both water-control pulleys, climb the central broken stairwell and enter the upper room. That transition begins Chapter 6, Unlocking the Past. The tower keys, prison, final fortress combat, and jeep escape are not part of this chapter.
1. Climb into the fortress and return outside through the upper window
Begin by climbing the fortress wall through the visible fissures. Drop to the small platform, swing around the corner, and climb the vine. Build enough momentum on the vine to jump to the fissure on the right, then continue upward. One of the small handholds crumbles, so move promptly to the next grip instead of waiting on it.
Follow the next vine and ledges around the structure until you reach the open window. Enter the fortress, move through the rooms, and use the next opening to return to the exterior wall. Drop to the lower fissures, swing across the vines, and climb around the corner. Continue upward until you can use the vine at the top to enter the fortress again.
Take the ammunition from the crate before entering the combat room. The exit is on the left. Use the doorway and nearby walls as cover, eliminate the pirates inside and below, then advance to the ramp leading to the upper wall. Do not remain in the doorway once enemies begin firing from multiple elevations.
- Reach the upper window through the fissures and vines.
- Re-enter the fortress after following the exterior wall.
- Clear the first large combat room before climbing the ramp.
2. Collect the Strange Relic and Silver Jaguar
After clearing the first courtyard, stand near the top of the ramp and move toward the surrounding wall. Turn left to find the small rooftop of the broken stone structure in the courtyard you just crossed. Jump from the wall to that roof and search the corner for the Strange Relic. It is an optional collectible and is separate from the 60 ordinary treasures.
Return to the wall and follow it in the opposite direction. Continue past the crates until you reach the large pile of rubble. Climb over the rubble and look for the small white watchtower near the edge of the fortress. Enter the tower and collect the Silver Jaguar from the ground.
These pickups are available before the next drop into the lower fortress section. Collect them now, because the route later moves through combat spaces and does not provide a convenient return path.
- Search the small rooftop after the first courtyard fight for the Strange Relic.
- Climb over the large rubble pile to reach the white watchtower.
- Collect the Silver Jaguar inside the watchtower.
3. Collect the Gold Mosaic Inca Earring before entering the tunnel
Return from the watchtower and drop into the lower area. You should see a large tunnel entrance ahead, with a ramp and staircase leading toward it. Before entering, turn around toward the two similar barred openings in the opposite wall.
The right-hand opening is largely blocked by rubble. Climb over the debris and search beside the gate for the Gold Mosaic Inca Earring. It is in this lower fortress section, before the machine-gun encounter, not in the later ammunition room.
After the pickup registers, return to the tunnel approach. Use the wall and stair landing as cover while defeating the pirates. Shotgun enemies should be handled before they reach close range. Move into the tunnel only after the immediate group is under control.
- Face the two barred openings opposite the large tunnel.
- Climb over the rubble at the right-hand opening.
- Collect the Gold Mosaic Inca Earring before entering the tunnel.
4. Cross the first machine-gun area and reach the radio room
Advance through the tunnel toward the parked truck. Pirates occupy the approach, and a machine-gun operator covers the area from the left. Keep to the tunnel and stone barriers while clearing enemies. The powder kegs near the truck and on the upper walkway can break up groups, but shoot them only when you are not exposed to the blast.
When the machine-gun fire pauses, use the opening to eliminate the operator and the pirate on the wall above. Then climb through the crate-lined opening beside the turret. Follow the stairs and ledges to the ruined tower, climb to its upper window, and enter the radio room.
After the radio exchange, Drake is trapped briefly inside the room. Shoot the lock, kick the door open, and use the elevated position to reduce the pirates below. Take cover behind the white pillar once outside. Enter the large wooden doorway after the area is clear; this leads to the flooded interior.
- Use the tunnel and stone barriers against the first machine gun.
- Reach the ruined tower and enter the radio room.
- Shoot the radio-room lock and clear the area below before entering the wooden doorway.
5. Reach the second machine gun and collect the Golden Spoon
Drop into the water-filled passage and move toward the second machine-gun position, using the low walls and available cover. Before reaching the gunner, look for the ledge on the right and climb into the small side room. From there, attack the gunner from a safer angle rather than crossing the open water directly.
Once the gunner is defeated, search the first side room. A short staircase leads toward the adjacent room; the Golden Spoon is in the corner to the left of that staircase, behind the large rectangular ammunition boxes. Collect it before dropping back into the waterway.
Return to the gunner’s position and shoot the nearby powder keg when it is safe. Climb the rubble to the upper ledge, exit left, and use the stone barricade to defeat the pirates who appear outside. Preserve ammunition for the next flooded chamber.
- Use the right-hand ledge and side room to approach the second gunner.
- Search behind the ammunition boxes beside the short staircase.
- Collect the Golden Spoon before leaving the underground side room.
6. Open the gate in the flooded chamber
From the upper ledge, cross the flooded section by climbing onto the fallen column, then the wooden platform between the columns, and finally the construction column on the right. Jump to the large platform with the gate and operate the mechanism to open it. Drop into the water beyond the gate.
Follow the wall-mounted ledges to the first water-control pulley and operate it. The rising water makes the next route reachable. Swim across to the opposite wall and look slightly left for another set of ledges. Traverse them to the second pulley and operate that one as well.
The room should now contain enough water to reach the broken central stairwell. Climb the stairwell and enter the small upper room. This is the end of Chapter 5. Do not continue by searching for the tower keys: that objective begins in Chapter 6, Unlocking the Past.
- Open the gate from the raised platform.
- Operate the first water-control pulley.
- Operate the second pulley and climb the central broken stairwell.
Before you move on
- The Strange Relic has been collected from the small rooftop after the first courtyard fight, if optional cleanup is desired.
- The Silver Jaguar has been collected from the white watchtower beyond the rubble pile, if optional cleanup is desired.
- The Gold Mosaic Inca Earring has been collected beside the rubble-blocked right-hand barred opening, if optional cleanup is desired.
- The Golden Spoon has been collected from the ammunition side room near the second machine gun, if optional cleanup is desired.
- The gate in the flooded chamber has been opened and both water-control pulleys have been operated.
- Drake has climbed the central broken stairwell and entered the upper room, where Chapter 6, Unlocking the Past, begins.
References for this chapter
- Uncharted: Drake’s Fortune - Guide and Walkthrough - PlayStation 3 - By Axel7174
- Uncharted: Drake’s Fortune — Treasure Location FAQ — PlayStation 3
- Uncharted: Drake's Fortune - Guide and Walkthrough - PlayStation 3
- Uncharted: Drake’s Fortune — Find All the Treasures
- Uncharted: Drake's Fortune/Treasures
Chapter 6: Unlocking the Past — Fortress Tower and Elena’s Rescue
Chapter 6 begins after The Fortress, with Drake following the map clue toward a prominent tower while searching for Elena. Fight through the fortress courtyard, climb the tower to retrieve its keys, use the keys on the symbol-marked door, and survive the large courtyard battle beyond it. The chapter has four optional treasures: Silver Inca Mask, Spanish Silver Coin, Silver Tairona Pendant, and Gold Llama. The required route ends after Drake reaches the tower room and the cutscene with Eddy begins Chapter 7, Out of the Frying Pan.
Leave the starting room and survive the first courtyard ambush
Exit the room through the door leading outside. A cutscene plays, then Drake is attacked in the courtyard. Use the nearby cover and deal with the closest pirates before grenades force you to move. Watch the wall on the right, because an enemy there has a clear angle on your position. After the first attackers fall, another pirate appears farther ahead on the wall.
An alcove behind the initial enemies contains grenades and a Moss-12. Take the shotgun if you expect enemies to rush you, then return outside. Use the ramp beside the jeep to reach the fortress wall. Three more pirates attack from the wall and surrounding positions. Eliminate the most exposed or distant shooter first, then clear the remaining enemies without staying behind the same destructible crate for too long.
- Exit the starting room and trigger the courtyard ambush.
- Use cover against the first group and watch the right-hand wall.
- Climb the ramp beside the jeep after the lower courtyard is clear.
Collect the Silver Inca Mask and open the lower gate
After reaching the wall, look for two large white trees near the side where you came up. Move behind the second tree and follow the narrow ledge overlooking the drop. The Silver Inca Mask is at the end of this short detour. Return to the main wall route after collecting it.
Continue along the wall toward the tower. Turn the crank beside the tower to open the gate below, then drop into the newly accessible area. Enter the passage on the left and inspect the locked door marked with the familiar symbol. Drake’s journal points toward the tower, so do not search the side rooms for another key at this stage.
- Collect the Silver Inca Mask behind the second large white tree.
- Turn the crank beside the tower.
- Inspect the symbol-marked door in the passage below.
Climb the tower and retrieve the crossed keys
Begin the climb from the short, broken column near the entrance to the courtyard. Jump to the next column, move right to the ledge, and continue across the columns until you reach the far wall. Interact with the rope to start the lift sequence. When the suspended stone platform begins to fall, press Circle when prompted to jump clear.
Use the fallen column to reach the next structure, then jump into the opening in the wall. The small ledges ahead crumble quickly, so keep moving across them instead of stopping to line up a perfect camera angle. Climb the white ledges around the tower, drop onto the collapsing platform, and jump to the tower when the platform gives way.
Continue upward until you can enter the tower. Cross the interior gap, climb around the exterior, and enter through the next opening. Drake finds the keys inside. Slide down the rope with them, return to the symbol-marked door, and unlock it. The side rooms in the passage are not required; use the ammunition at the end before opening the door to the next courtyard.
- Cross the column route and activate the rope lift.
- Use Circle during the falling-platform escape.
- Retrieve the keys inside the tower and return to the locked door.
- Unlock the symbol-marked door and restock ammunition.
Clear the courtyard and destroy the turret
Step outside and take cover at the left wall. The courtyard fills with pirates, including enemies who rush from the boxes on the right. Keep the nearest cover between Drake and the turret operator at the far end. Use grenades against clustered enemies, but do not expose yourself while the turret is still active.
Advance to the nearest stack of boxes once the immediate attackers are down. An M79 is available there. Pick it up temporarily and fire a grenade into the turret operator’s position. The resulting explosion removes the turret threat. Return to an assault rifle or another dependable weapon and clear the remaining pirates.
Before leaving, collect the Spanish Silver Coin. From the combat area, face the far gate and look to the left for the debris of a collapsed staircase. Climb onto the debris and search the ledge. The coin is located there.
- Use hard cover against the courtyard attackers and turret.
- Pick up the M79 near the boxes and destroy the turret.
- Collect the Spanish Silver Coin beside the collapsed staircase.
Pass the timed gate and collect the Silver Tairona Pendant
Use the crank in the left passage to open the gate. The gate closes after a short delay, so move through immediately and climb the first stairs. In the long corridor, use the wall and doorway for cover while eliminating the first soldiers. Expect a shotgun enemy to push down the corridor and another enemy on the nearby balcony.
Continue through the corridor and pass the turret position. Follow the route downward until you drop from the broken staircase. Turn right into the small room with crates and a short staircase. The Silver Tairona Pendant is tucked beside the staircase, across from the crate stacks. Turn around after entering the room and check the left side of the stairs rather than the main gate.
- Open the gate with the crank and move through before it closes.
- Clear the long corridor, including the shotgun attacker.
- Collect the Silver Tairona Pendant beside the short staircase.
Reach the tower approach and collect the Gold Llama
Continue through the rooms until you reach the chamber with columns and the helmet on the table. Interact with the table to trigger the scene. A shotgun enemy enters immediately afterward; either shoot him before he closes the distance or use a close-range melee attack. Follow the door he came through, climb the stairs, and prepare for another ambush outside.
Use the pile of rocks as cover rather than the weaker barrier in front of it. Once the enemies are defeated, move forward and turn right at the large broken staircase. At its base, find the white-and-brown pillar beside the stairs. Use the nearby ledge to climb onto the pillar, then jump across to the second pillar.
Do not climb onward immediately. From the second pillar, move left across the vegetation and rubble. Climb over it and search the far corner for the Gold Llama. Return to the second pillar afterward and use the white ledge above to resume the route.
- Interact with the helmet table and defeat the shotgun attacker.
- Use the rock pile as cover during the outside ambush.
- Reach the second pillar beside the broken staircase.
- Collect the Gold Llama in the vegetation and rubble.
Cross the final ruins and trigger Chapter 7
From the second pillar, climb the long white ledge and shimmy across to the small platform. Drop to the far side of the broken staircase. In the next area, jump across the visible pillar tops, dropping to lower ledges where necessary. Follow the sequence around the wall, across the broken pillar, and onto the ledges beneath the window.
Several ledges crumble during this climb. Keep moving, but make each jump only after Drake is aligned with the next handhold. Pull into the window and enter the tower room. A short scene follows, and control briefly returns before another cutscene. The outcome is fixed, so do not waste ammunition trying to change it.
When the scene ends, Chapter 6 is complete and Chapter 7, Out of the Frying Pan, begins. If Drake dies during any combat or climbing section, choose the latest checkpoint or Continue option and repeat only the current section. Missed treasures can be collected later through the original PS3 chapter-selection and treasure-tally screens.
- Cross the pillar-top route and climb beneath the window.
- Enter the tower room and allow the final cutscene to play.
- Confirm that Chapter 7, Out of the Frying Pan, has started.
Before you move on
- The Silver Inca Mask is registered in the Chapter 6 treasure tally if collected.
- The Spanish Silver Coin is registered in the Chapter 6 treasure tally if collected.
- The Silver Tairona Pendant is registered in the Chapter 6 treasure tally if collected.
- The Gold Llama is registered in the Chapter 6 treasure tally if collected.
- The tower keys have been retrieved and used on the symbol-marked door.
- The courtyard turret and remaining pirate waves have been cleared.
- Drake has reached the tower room and the Chapter 7, Out of the Frying Pan, transition has appeared.
References for this chapter
Out of the Frying Pan — Jeep Gunner Escape
Chapter 7 is a short mounted-turret escape in the original PlayStation 3 campaign. It follows Unlocking the Past and begins after Elena breaks Drake out of Eddy Raja’s prison. Elena drives the jeep while Drake operates the rear-mounted turret. Use the mounted machine gun against individual pirates and quad bikes, then use the grenade launcher on pursuing jeeps, the charging truck, and the barrier blocking the tunnel. The camera shifts when enemies attack from the side or when a hazard appears ahead, so respond to Elena’s warnings and aim toward the current view. There is no free-roaming section, puzzle, or treasure in this chapter. Survive the pursuit, clear the tunnel barrier, and continue firing until the scripted jump over the destroyed bridge begins. The ride ends with a cutscene and the game proceeds to Chapter 8, The Drowned City.
1. Begin the jeep turret sequence
After the prison escape and the following cutscene, Elena drives while Drake takes control of the turret mounted at the rear of the jeep. You do not steer the vehicle and cannot leave it during this chapter. Use the left analog stick to aim the turret and press R1 to fire the mounted machine gun. Press L1 to fire the turret’s grenade launcher. These are the original PS3 controls; do not apply the later remaster’s altered grenade or shoulder-button layout.
The jeep follows a fixed route, so concentrate on threats and road hazards rather than searching the scenery. Fire the machine gun at the first pursuers as soon as they enter view. The opening attackers may land a few hits before you eliminate them, but the sequence provides a short recovery opportunity, so do not restart solely because Drake takes damage.
- Remain in the rear turret for the entire playable sequence.
- Aim with the left analog stick.
- Press R1 for the mounted machine gun.
- Press L1 for the grenade launcher.
2. Eliminate the first pursuers and quad bikes
Continue firing at the pirates following from behind. When the chase reaches the jungle, a pirate on a quad bike appears. Track the rider with the machine gun rather than wasting a grenade on the small, fast-moving target. Keep the aim ahead of the quad’s movement when necessary and maintain fire until it falls back or is destroyed.
A second quad bike appears with a pursuing jeep. Keep the machine gun on the quad rider because the rapid-fire weapon is more dependable against the smaller moving target. Switch to the grenade launcher for the jeep when it presents a clear shot. If both vehicles are close together, target the nearer immediate threat first; survival matters more than destroying every vehicle in a particular order.
- Use the machine gun on quad bikes.
- Use grenades on pursuing jeeps.
- Prioritize vehicles close enough to damage or overtake Elena’s jeep.
3. React to the side attack and charging truck
The camera shifts when enemies approach from Drake’s right side. Follow the new view instead of continuing to aim behind the jeep. Use the machine gun to cut down the side attackers, then return your aim toward the rear when the camera centers again. Quad bikes may crowd the route during this portion, so use the machine gun for isolated riders and a grenade when a larger vehicle or tight group gives you a reliable target.
After Elena nearly drives off a cliff, the camera faces forward. A large truck charges directly toward the jeep. Fire a grenade at the truck before it reaches you. Once Elena turns right, several vehicles resume the pursuit. Alternate between machine-gun fire against exposed pirates and quad bikes and grenade shots against the larger jeeps.
- Reorient immediately when the camera changes.
- Shoot the right-side attackers with the machine gun.
- Hit the charging truck with a grenade before the collision.
- Return to the rear view after Elena turns right.
4. Clear the tunnel barrier
The jeep enters a dark tunnel while the pursuit continues. Keep firing at attackers until the camera turns toward the front of the vehicle and Elena calls for help. A barrier blocks the road ahead. Aim at it and fire a grenade as soon as it is clearly visible. The grenade launcher is the reliable way to clear this obstruction; ordinary machine-gun fire is not sufficient for the required escape.
After the barrier breaks, the camera returns to the rear. The route is narrower, so use grenades when jeeps or several enemies bunch together, while reserving the machine gun for individual riders. Do not stop to search the tunnel or attempt to leave the vehicle. Continue firing through the remaining pursuit until the next cutscene begins.
- Watch for the forward-facing tunnel view.
- Destroy the road barrier with a grenade.
- Use the grenade launcher on clustered vehicles in the narrow route.
- Keep firing after the barrier is gone.
5. Finish the escape and confirm the chapter transition
The final stretch is a survival sequence rather than a requirement to destroy every enemy. Keep the turret trained on the closest active threats and fire whichever weapon suits the target. If Drake dies, reload the latest checkpoint and repeat the priority order: machine gun for pirates and quad bikes, grenades for jeeps, the charging truck, and the tunnel barrier.
The chapter ends when Elena reaches the destroyed bridge and the jeep makes its scripted jump. Let the resulting cutscene play; there is no additional playable turret section after the jump. The next chapter is Chapter 8, The Drowned City, where Drake and Elena continue by water. Chapter 7 contains no treasures, so there is no collectible route to recover before moving on.
- Survive the final vehicle pursuit.
- Let the destroyed-bridge jump and escape cutscene play.
- Confirm that Chapter 8, The Drowned City, begins.
- Do not search Chapter 7 for treasures.
Before you move on
- The jeep survives the pursuit and reaches the destroyed bridge.
- The scripted jump and escape cutscene plays.
- The chapter ends without another playable turret section.
- Chapter 8, The Drowned City, loads next.
- The Chapter 7 treasure count remains zero.
References for this chapter
- Uncharted: Drake’s Fortune - Guide and Walkthrough - PlayStation 3 - By Axel7174
- Uncharted: Drake’s Fortune — Treasure Location FAQ — PlayStation 3
- Retro Game Walkthroughs - Uncharted: Drakes Fortune (PS3)
- Drake's Fortune controls
- Uncharted: Drake's Fortune — PlayStation 3 release and vehicle sequence context
The Drowned City — Flooded Ruins and Jet-Ski Route
Chapter 8, The Drowned City, begins when Drake swims to the first ruined landing and joins Elena in a pirate-held settlement. Clear the opening camp, collect the optional Decorated Silver Ring, and turn the chain wheel to open the water route. Pilot the jet ski through flooded streets, shooting enemies and barrels while advancing slowly. After the ramp jump and dock interaction, continue on foot across the bridge and through the ruined buildings. Prioritize the M79 carrier, collect the optional Silver Frog in the rear-right part of the ruined house, then climb through the balconies to open the large gate. Elena returns by jet ski, and the transition into Chapter 9, To the Tower, confirms completion. This chapter contains two of the original PS3 release’s 60 ordinary treasures; neither is required for story progress.
1. Swim to the first ruins and survive the opening fight
At the start of the chapter, swim directly toward the nearest landing and enter the archway. Drake reaches a ruined area occupied by pirates. Move to cover immediately instead of crossing the open ground. The stone columns, walls, and low barriers give you enough protection to deal with the first group in small bursts.
Enemies occupy the approach and the interior ruins, so clear the visible threats before moving toward the far side. Use headshots when the angle is safe, but do not expose yourself too long trying to line up a perfect shot. If a shotgun enemy closes on your position, retreat around the nearest wall and make him approach through a predictable lane. Reposition whenever grenades or concentrated fire make your current cover unsafe.
After the first wave is defeated, search the right side of the opening area before using the mechanism. The Decorated Silver Ring is in the corner around the wall, among the plants and debris. It is an optional treasure and does not affect the route.
- Reach the first ruined landing.
- Use columns, walls, and barriers as cover.
- Clear the opening pirate group.
- Collect the optional Decorated Silver Ring on the right if desired.
2. Turn the chain wheel and begin the jet-ski route
Once the area is clear, cross to the far side and interact with the chain wheel. The mechanism opens the metal gate into the flooded passage. A scene follows, after which Drake and Elena board the jet ski.
Move slowly through the first waterway. The jet ski is vulnerable to gunfire and explosive barrels, so do not hold forward blindly through narrow channels. Shoot barrels that block the route and fire at pirates positioned in doorways, on balconies, or along the banks. Elena provides covering fire, but you still need to keep the craft aligned with the open channel and remove threats that are directly ahead.
The first water section eventually leads to a ramp. Approach it under control and make the jump, then steer toward the small dock on the far-left side of the next area. Interact with the dock to leave the jet ski. This dock interaction is the intended continuation of Chapter 8; do not search for a separate land route at this point.
- Turn the chain wheel at the far side of the ruins.
- Board the jet ski with Elena.
- Shoot obstructing barrels before passing them.
- Advance carefully through the flooded streets.
- Use the ramp and interact with the dock on the far-left side.
3. Cross the bridge and clear the second combat area
After leaving the jet ski, follow the walkway at the top of the short staircase. Continue until you reach a bridge. Take cover before crossing into the next group of pirates, because enemies can fire from multiple elevations and new opponents appear as you advance.
Clear the enemies around the bridge first, then cross when the immediate firing lanes are quiet. More pirates occupy the area beyond the bridge. Use the rock, walls, and nearby crates as cover, and check the surrounding platforms before pushing forward. A rifle is available near the crates and can help with enemies at longer range.
Continue through the next passage until you reach the larger ruined area. An enemy carrying an M79 grenade launcher appears among the pirates. Prioritize him whenever you have a clear shot: his explosive rounds can damage Drake even when he is behind partial cover. If grenades land near you, retreat to the previous wall rather than trying to win the exchange from a compromised position. After defeating the M79 carrier, collect the launcher if you need explosive fire for the remaining group, then finish clearing the area.
- Follow the upper walkway to the bridge.
- Use cover before and after crossing.
- Clear the pirates beyond the bridge.
- Locate and prioritize the M79 carrier.
- Retreat from grenade blasts instead of holding unsafe cover.
4. Collect the Silver Frog and open the final gate
After the main fight, continue through the doorway into the ruined building. Search the rear-right portion of this small sub-area before climbing onward. The Silver Frog is in the dark corner near the rubble and plants. It is the second and final treasure in Chapter 8.
When the building is clear, climb the stairs to the balcony. Follow the visible ledges and platforms across the upper section. Drake must move through the balcony route, jump across to the adjacent structure, and continue along the wall toward the wooden platform. If an enemy blocks the route, defeat him before committing to the next jump. Keep the camera aimed toward the next handhold so that the ledges are visible before you leap.
Reach the wooden platform and interact with the large gate mechanism. The gate opens and Elena arrives by jet ski. This event, rather than a separate crank or customs-house ascent, is the chapter’s endpoint. The game then transitions to Chapter 9, To the Tower.
- Search the rear-right corner of the ruined building.
- Collect the optional Silver Frog.
- Climb from the stairs to the balconies and adjacent wall.
- Reach the wooden platform.
- Open the large gate and wait for Elena’s return.
Before you move on
- The opening ruined settlement has been cleared and the chain wheel has opened the flooded route.
- Drake and Elena have completed the jet-ski passage, including the ramp and dock interaction.
- Drake has crossed the bridge and cleared the second ruined combat area.
- The Silver Frog area is accessible in the rear-right part of the ruined building.
- Drake has climbed to the wooden platform and opened the large gate.
- Elena returns by jet ski and the game transitions to Chapter 9, To the Tower.
Chapter 9: To the Tower — Canal Route, Tower Climb, and Customs House Approach
Chapter 9 begins with Nate and Elena riding the jet ski upriver through pirate fire and explosive barrels. Elena’s M79 is essential for destroying enemies and the chains holding the canal gate. After docking, Nate crosses ruined buildings and a short swimming route before fighting through the plaza outside the tower. The chapter’s only treasure is the Golden Fish Charm, found in the left side of the final plaza before entering the tower. Inside, operate two chain mechanisms, climb the tower’s handholds, defeat the ambushing pirate, and use the zipline to reach the customs house. Shoot the locked door so Elena can enter; this starts Chapter 10, The Customs House. This chapter contains no rotating temple puzzles, cemetery sequence, Treasure Vault route, or chapter-specific multi-treasure cleanup.
1. Start the second jet-ski run and control the canal approach
Chapter 9 begins immediately on the jet ski. Keep the craft moving upriver and use Elena’s mounted M79 to handle threats ahead. On the original PS3 release, aim the vehicle weapon at pirates, boats, and explosive barrels before they reach the jet ski. Do not rely on Drake’s handheld weapons during this section; Elena’s weapon is the intended way to clear the river route.
Use the riverbanks and ruined structures as visual landmarks, but do not stop in front of explosive barrels or enemy positions. Fire early at barrels floating in the channel because their blast can damage the jet ski and leave you exposed to follow-up fire. Continue until the route ends at a heavy gate held by chains. When Nate calls attention to the obstruction, Elena must destroy the chains with the M79. Keep firing at the visible chain points until the gate drops, then drive through before the next wave can surround you.
- Jet ski moving upriver.
- Enemy boats, pirates, and explosive barrels destroyed with Elena’s M79.
- Chains on the canal gate destroyed.
- Jet ski passed through the opened gate.
2. Dock and cross the ruined canal settlement
After the gate, continue to the docking point. Nate and Elena separate, leaving Nate to proceed on foot through the ruins. Use the first walls and broken masonry as cover when pirates appear. Clear enemies before committing to the exposed path toward the far side of the settlement; several attackers can fire from opposite sides of the ruins.
Look for the opening in the wall on the right-hand side of the route. This leads to a water crossing. Swim through the gap to the opposite side rather than searching for a land route. Drake cannot use his firearms while swimming, so enter the water only after nearby enemies have been reduced. Surface behind cover, climb out, and defeat the pirates waiting on the far side.
- Jet ski docked.
- First foot-combat group defeated.
- Opening in the ruined wall located.
- Water crossing completed.
- Opposite-bank enemies defeated.
3. Reach the plaza outside the tower
From the far side of the water, climb the short stairs and follow the broken ledges. A gap near the upper ruins requires a jump to a reachable ledge; use the visible handholds and platforms rather than dropping to the lower level. Continue across the rooftops and broken masonry until you reach the top of the closed gate.
Drop into the next combat area only when ready. Take cover immediately after landing because a close-range pirate carrying a Moss-12 attacks from the front. Another enemy uses an M79 from the right-side opening, making the open center of the plaza dangerous. Eliminate the grenade-launcher carrier as soon as you have a safe angle, then work around the remaining cover and clear the plaza in short advances.
When the fight is over, move toward the large tower entrance but do not enter yet. The Golden Fish Charm is the only Chapter 9 treasure. Search along the left wall of the plaza, near the stone wall and barriers beside the entrance. Collect it before going inside; there are no other Chapter 9 treasures to add to this route.
- Broken ledge route crossed.
- Moss-12 attacker defeated.
- M79 carrier defeated.
- Plaza cleared.
- Golden Fish Charm collected from the left side of the tower entrance, if desired.
4. Operate the tower’s first chain mechanism
Enter the tower after the plaza is clear and defeat the pirates inside. Move to the lever beside the hanging chain and activate it. The mechanism shifts the chain toward Nate’s side of the tower. Climb the chain to the higher level, then move across the handholds and broken platforms.
At the next level, follow the white-marked handholds around the tower. The route bends toward another lever. Do not jump toward the upper platform until the handholds bring you into position; the camera can make the gap appear shorter than it is. Activate the second mechanism to rotate the chain across the tower, then traverse the handholds around the opposite side until you reach the chain’s new position.
- Tower interior cleared.
- First chain lever activated.
- First chain climbed.
- Second set of handholds followed.
- Second chain mechanism activated.
5. Finish the tower climb and use the zipline
Climb the repositioned chain to the next level. As Nate pulls himself up, a pirate attacks from the upper platform. Take cover where possible and defeat him before attempting the final climb. Afterward, circle around to the stairs and climb to the tower summit.
At the top, approach the cable leading toward the customs house. Press Triangle when prompted to slide across the zipline. Nate lands inside the adjacent customs-house structure, where Elena calls for him from the other side of a locked wooden door. Do not search for the cemetery, symbol door, or Treasure Vault here; those belong to much later chapters.
- Upper-platform pirate defeated.
- Tower summit reached.
- Zipline used.
- Nate landed inside the customs house.
6. Open the door for Elena and begin Chapter 10
After the zipline landing, move downstairs toward Elena’s voice. Aim at the lock on the wooden entrance door and shoot it. Approach the damaged door and press Triangle to kick it open. Elena enters, and the chapter ends as the pair begin searching the customs house for a route to the harbor.
The chapter transition confirms that To the Tower is complete. The Jeweled Golden Brooch is associated with the following Customs House section, so do not list it as a second Chapter 9 treasure even though the two areas connect directly.
- Locked customs-house door opened by shooting the lock.
- Door kicked open for Elena.
- Elena reunited with Nate.
- Chapter 10, The Customs House, started.
Before you move on
- The second jet-ski route has been completed and the canal gate chains have been destroyed.
- Nate has crossed the ruined settlement, completed the swimming detour, and cleared the plaza outside the tower.
- The Golden Fish Charm has been collected from the left side of the tower entrance if optional treasure cleanup is being attempted.
- Both tower chain mechanisms have been used, the upper pirate has been defeated, and Nate has crossed the zipline.
- Elena has entered through the unlocked customs-house door and Chapter 10, The Customs House, has begun.
References for this chapter
Chapter 10: The Customs House — Ambushes and Broken Balconies
Chapter 10 begins immediately after the zip-line arrival from To the Tower. Let Elena into the Customs House, collect the Jeweled Golden Brooch near the entrance, and follow her to the ship-manifest room. After the cutscene, clear the large pirate ambush from doorway cover, then take the Silver Belt Buckle from the top of the broken staircase before using the chain wheel. Continue through the balcony sequence: open the locked door, survive the collapsing balcony with the prompted jump, shoot the enemies inside through the windows, cross the remaining balconies, and operate the second chain wheel. Entering the next room starts Chapter 11, Trapped. Chapter 9's Golden Fish Charm is separate; the two Chapter 10 treasures are the Jeweled Golden Brooch and Silver Belt Buckle.
1. Enter the Customs House and collect the Jeweled Golden Brooch
This chapter follows To the Tower. After Drake reaches the port by zip line, shoot the lock on the heavy door and open it so Elena can enter. Follow the stairs upward, then drop into the lower Customs House area and pass through the large wooden doors.
Before following Elena farther, turn back toward the stairs and inspect the left-hand corner of the lower room near the entrance. Pick up the Jeweled Golden Brooch there. It is the first treasure counted for Chapter 10, although it is located immediately after the transition from Chapter 9. The Golden Fish Charm belongs to Chapter 9 and should not be counted here.
Rejoin Elena and continue through the next doorway. Drop from the platform into the adjoining area, then pass through the large doors to trigger the ship-manifest cutscene. The scene establishes that El Dorado passed through the port, but the route continues toward the escape boat.
- Open the heavy door for Elena.
- Collect the Jeweled Golden Brooch in the entrance room.
- Trigger the ship-manifest cutscene.
2. Use the doorway to break the pirate ambush
After the cutscene, climb the stairs into the library area. Stop at the doorway at the top instead of walking directly into the large room. Use the doorway and nearby wall as cover while dealing with the first enemies, including the shotgun pirate on the approach.
Move through the doorway only after the immediate firing lanes are under control. Pirates occupy the staircases, railings and upper positions around the room. Clear the enemies on the stairs first, then work around the room from cover. The grenade-launcher carrier near the upper staircase is especially dangerous: eliminate him when you have a clean shot, or remain behind cover until his firing angle is interrupted.
Do not stay behind one piece of cover after grenades begin landing nearby. Fall back through the doorway, allow the enemies to expose themselves, and advance again once the room is quieter.
- Start the fight from the doorway.
- Clear the staircase and railing positions.
- Deal with the grenade-launcher carrier before using the mechanism.
3. Collect the Silver Belt Buckle before raising the grating
When the room is safe enough to explore, climb the staircase used by the enemies. Continue to the top, where the staircase meets a wooden walkway. Search the corner of this upper wooden section for the Silver Belt Buckle.
Collect the treasure before using the chain wheel. This is the second and final treasure counted for Chapter 10. The chapter's collectible route is therefore the Jeweled Golden Brooch in the lower entrance room followed by the Silver Belt Buckle above the broken staircase; there is no cemetery section or Treasure Vault route in this chapter.
- Climb the enemy staircase.
- Search the wooden walkway at its top.
- Collect the Silver Belt Buckle before operating the chain wheel.
4. Raise the grating and survive the collapsing balcony
Return to the chain wheel near the upper staircase and operate it to raise the grating. Move through the opening promptly; the route closes if you wait too long. Continue to the balcony door and shoot its padlock, then kick the door open.
Step onto the next balcony and jump across when the route requires it. The balcony collapses beneath Drake during this sequence. When he begins to slide, press X as soon as the prompt appears to catch the next section. Missing the recovery input causes a fall, so do not wait for the camera to settle.
- Operate the first chain wheel after collecting the belt buckle.
- Open the locked balcony door.
- Press X when Drake begins sliding after the balcony collapses.
5. Cross the exterior balconies under fire
After recovering from the collapse, use the surviving balcony wall and window frames as cover. Enemies fire from inside the Customs House through the openings, so shoot from cover and move only after the nearest firing positions are suppressed. You can either eliminate the soldiers before advancing or pass them when the route is clear, but crossing the open sections while several enemies have unobstructed aim is risky.
Continue across the connected balcony sections until you reach the rusted door at the far end. Shoot its padlock; the door drops away and exposes the final gap. Jump to the doorway and climb into the next section.
- Use the balcony walls and windows as intermittent cover.
- Suppress the soldiers firing from inside.
- Shoot the final padlock and cross to the doorway.
6. Operate the second chain wheel and begin Trapped
At the far side, use the second chain wheel to raise the gate. Enter through the opening rather than searching for another route. The next room begins Chapter 11, Trapped, and contains a much larger combat encounter.
If you die during the ambush or balcony traversal, restart from the latest checkpoint and repeat only that section. For optional treasure cleanup, confirm that both the Jeweled Golden Brooch and Silver Belt Buckle registered before leaving the Customs House.
- Operate the second chain wheel.
- Enter the next room.
- Confirm that Chapter 11, Trapped, has begun.
Before you move on
- Elena has been admitted through the locked Customs House door.
- The ship-manifest cutscene has played.
- The Jeweled Golden Brooch is registered, if collecting treasures.
- The pirate ambush in the Customs House has been cleared.
- The Silver Belt Buckle is registered, if collecting treasures.
- The first chain wheel has raised the grating.
- Drake has survived the collapsing balcony and crossed the exterior balcony route.
- The second chain wheel has raised the final gate.
- Entering the next room has triggered Chapter 11, Trapped.
Chapter 11: Trapped — Customs House Escape, Rope Bridge, and River Exit
Chapter 11, Trapped, begins immediately after Chapter 10, The Customs House. Drake and Elena escape through a fortified ruin occupied by pirates, then reach the river route that leads into Chapter 12, Heading Upriver. The chapter’s required path is a sequence of large firefights, a turret encounter, two crank mechanisms, a rope bridge, and a final tunnel. The original PlayStation 3 version also uses SIXAXIS motion when aiming certain grenades. Three optional treasures are on the route: Spanish Gold Coin, Silver Spanish Chalice, and Gold Coatimundi. Story completion requires reaching the river exit and triggering the Chapter 12 transition; collecting the treasures is separate.
1. Begin after The Customs House and survive the fortified-room firefight
Trapped follows the final Customs House sequence. After the short transition, move down the staircase and take cover behind the stone barrier. The M4 is available near this opening position; use it selectively because ammunition is limited. The room contains several pirates, including a Wes .44 carrier, an elevated rifleman, enemies around the gold-colored structures, and a mounted turret firing across the area.
Clear the nearest threats before advancing. The Wes .44 carrier can be dangerous if he reaches the barrier, while the elevated rifleman is easier to defeat with repeated controlled shots than with a rushed headshot. Work across the left side from cover and watch for an enemy approaching from the opposite side. Do not expose yourself while the turret is firing; wait for its bursts to stop, then use grenades or rifle fire against enemies near the gold structures.
The turret gunner can be defeated with a grenade thrown toward the elevated platform. On the original PS3 release, adjust the grenade’s trajectory with the SIXAXIS motion controls and the left analog stick before throwing. If the throw is unsafe, keep using cover and attack during firing pauses. Once the turret and the remaining pirates are down, climb the staircase, take control of the turret, and use it against the reinforcements entering from the side of the room you originally used.
- The opening pirate group has been defeated.
- The turret gunner has been eliminated.
- The reinforcement wave has been stopped with the mounted turret.
- You have reached the staircase and crank beyond the opening room.
2. Turn the crank and fight toward the rope bridge
After the combat music ends, go back up the staircase beside the turret and pass the gun emplacement. Turn the crank to open the route. Descend the stairs and drop across the next platforms. When you reach the opening overlooking the boat, a scene confirms the route forward. Move toward the stairs on the right, take cover, and defeat the enemy at the top before advancing with Elena.
At the upper fight, deal with the close M97 or shotgun threat first, then eliminate the enemies positioned on the stairs. Once the path is safe, go up and take the adjacent staircase on the right. Follow it into the small room and turn right just beyond the doorway to collect the optional Spanish Gold Coin. Return to the junction and take the opposite staircase onto the long wooden walkway.
Continue along the walkway and cross the rope bridge. The crossing is deliberately slow, so do not try to sprint or turn around. After the bridge sequence, continue to the far side and prepare for the next descent.
- The first crank has opened the exit route.
- The boat overlook and upper stair enemies are cleared.
- Spanish Gold Coin collected, if desired.
- The rope bridge has been crossed.
3. Search below the bridge and enter the tunnel
After crossing the bridge, turn left to the staircase. Go down the smaller stairs, then turn left again at the base of the main staircase. Search the damaged lower platform near the wall and vegetation for the optional Silver Spanish Chalice. The treasure is easy to miss because rubble and plants partly hide the floor.
Return to the main stairs and climb back up. Go through the doorway, continue through the next opening, and drop into the outside area. Circle around the building rather than searching for a route through its front. The tunnel entrance is around the building and leads into a small cavern. An enemy ahead may be facing away; a stealth melee is optional, but shooting from cover is safer if he turns.
A second enemy occupies the stair area and exposes only part of his body. Use the tunnel walls and stair corners as cover, then advance after the immediate threats are gone.
- The lower platform has been searched.
- Silver Spanish Chalice collected, if desired.
- The route around the building has been followed.
- You have entered the tunnel cavern.
4. Collect the final treasure and trigger Heading Upriver
At the tunnel staircase, look toward the area ahead rather than rushing upward. The optional Gold Coatimundi is in the cavern behind the stack of ammunition crates. Collect it before continuing, because this is the last treasure in Chapter 11.
Advance up the tunnel stairs and clear the pirates at the upper end. Use the stair corners and walls to limit incoming fire. If enemies press forward, retreat down the stairs and let them approach one at a time instead of fighting in the exposed upper section. After the final group is defeated, continue through the exit. The game then transitions to Chapter 12, Heading Upriver, where the jet ski becomes available for the next river sequence.
- Gold Coatimundi collected, if desired.
- The final tunnel enemies are defeated.
- The tunnel exit has been reached.
- Chapter 12, Heading Upriver, begins and the jet ski is available.
Before you move on
- Chapter 10, The Customs House, has already been completed.
- The opening fortified-room firefight is complete, including the hostile turret.
- The first crank has been turned and the player-controlled turret has handled the reinforcements.
- The boat overlook, exterior staircase fight, and rope bridge have been completed.
- The tunnel cavern has been entered and its final enemies have been defeated.
- The game transitions to Chapter 12, Heading Upriver, with the jet ski available.
- Optional chapter collectibles are recorded separately as Spanish Gold Coin, Silver Spanish Chalice, and Gold Coatimundi.
References for this chapter
Chapter 12: Heading Upriver — Jet-Ski Combat and River Ruins
Chapter 12, Heading Upriver, begins after Trapped and is entirely a difficult upriver jet-ski run. Nate steers the craft against a strong current while Elena provides cover with her unlimited-ammunition 92FS. The river contains floating explosive barrels, pirates on banks and platforms, narrow turns, rapids, small waterfalls and a final group near the dam. Move slowly enough to line up shots, destroy barrels before they reach the jet ski, and use the riverbanks or rocks to limit the number of enemies attacking at once. Chapter 12 contains no treasures. Reach the dock at the end, dismount with Triangle and enter the monastery route to trigger Chapter 13, Sanctuary?.
1. Board the jet ski and establish control of the current
At the start of Heading Upriver, move to the jet ski on the far side of the area and board it. Turn toward the upstream route. The current constantly pushes the craft backward, so keep steering into the river’s flow rather than aiming only at the center of the channel. Make small corrections instead of holding a hard turn, because oversteering can send the jet ski into rocks or the bank.
This section uses the original PlayStation 3 vehicle handling. Nate drives while Elena fires her 92FS. R1 fires Elena’s weapon; keep it ready while steering. Her ammunition is not a normal pickup resource during this sequence, so use repeated fire to clear threats without waiting for a reload.
- Board the jet ski and face upstream.
- Keep the nose pointed against the current.
- Use R1 to fire Elena’s pistol while Nate drives.
2. Clear the first rapids and floating barrels
Follow the river through the first rapids and small rises. Do not treat the current as a reason to accelerate blindly. The river carries explosive barrels downstream toward you, and a collision can destroy the jet ski. When a barrel appears, reduce your forward movement if necessary and fire at it from a distance. Destroying the barrel before trying to pass is safer than attempting to weave around it in a narrow channel.
The river bends around rocks and ruined structures. Use the wider side of each bend when it is clear, but keep checking the water ahead because barrels can emerge from behind a bend with little warning. If the jet ski drifts backward while you are firing, correct with short steering inputs, then resume your climb once the path is open.
- Shoot every visible explosive barrel before passing it.
- Use short steering corrections in the rapids.
- Do not rush around blind corners or through narrow gaps.
3. Handle the first enemy positions near the waterfalls
As the route climbs toward the waterfall section, pirates appear on banks and raised platforms. Prioritize explosive barrels positioned near these enemies. A barrel can remove an enemy group and clear the passage at the same time, but do not fire at a nearby barrel while the jet ski is already beside it. Back away or hold position until Elena’s shot reaches it safely.
When an enemy is on a platform to the side, keep the jet ski moving only as much as needed to stay in the channel and fire repeatedly. Elena can continue shooting while Nate maintains the craft. At the small waterfalls, line up with the open channel and push forward against the current. If the jet ski stalls on a rise, straighten the nose, keep applying forward movement and avoid sharp lateral turns until it clears the lip.
- Destroy explosive barrels before concentrating on pirates.
- Keep moving enough to avoid being pinned against a bank.
- Line up straight for each small waterfall.
4. Use the open river area to split enemy fire
After the waterfall stretch, the river opens into a broader combat area with several armed pirates. Do not drive directly through the middle while trying to shoot everything at once. Stay near one bank, preferably the side with the clearest water, and advance in short sections. This limits the number of enemies who can see the jet ski simultaneously and gives Elena a more manageable set of targets.
If barrels are present in the same area, they remain the first priority. Destroy them before moving closer to the bank enemies. Once the immediate waterway is safe, keep firing at the visible pirates while advancing. Do not stop in front of a platform or bridge opening; those positions allow multiple enemies to fire at the jet ski while the current pushes you backward.
- Approach the broad enemy area along one bank.
- Clear barrels before closing on the pirates.
- Advance in short sections instead of stopping in the open center.
5. Pass the bridge and resist the stronger current
The next bend contains more barrels and enemies arranged around a bridge and the riverbanks. Slow down before the bend so the camera has time to reveal the hazards. Clear the lowest visible enemy positions and any barrels blocking the channel, then continue beneath or alongside the bridge as the route allows. Keep Elena firing throughout the approach; her pistol is the only weapon available for this jet-ski section.
Beyond the bridge, the current becomes especially troublesome. Hold the jet ski toward the upstream route and use deliberate movements to avoid being carried into rocks. If the craft begins sliding backward, stop trying to turn across the river. Straighten it toward the opening, fire at the nearest barrel, and push forward again. A checkpoint reload after a collision or destruction is preferable to forcing a damaged approach through the same hazard.
- Reveal the bridge encounter before committing to the bend.
- Destroy barrels around the bridge and riverbanks.
- Straighten the jet ski before pushing through the strongest current.
6. Clear the final ruins and grenade-launcher positions
Near the later ruins, pirates occupy opposite sides of the water and elevated positions. Some carry grenade launchers, making them more dangerous than ordinary riflemen. Keep the jet ski at a distance while Elena fires toward the visible launcher positions. Use the channel’s rocks as temporary line-of-sight breaks, but do not wedge the craft against them. If a barrel is near a launcher or beside the route, shoot the barrel first because the explosion can remove the immediate threat and open the passage.
After the ruins are clear, follow the channel toward the dam opening. Continue watching for a final barrel or enemy who is hidden by the structure. Once the waterway is open, commit to the gap and drive through the tunnel rather than turning around to search the combat area.
- Prioritize grenade-launcher enemies in the final ruins.
- Use rocks only as temporary cover from fire.
- Enter the dam gap once the channel is clear.
7. Reach the dock and begin Sanctuary?
Drive through the tunnel and continue until the jet ski reaches the landing area. When the interaction prompt appears at the dock, press Triangle to dismount. This ends the vehicle section; there are no Chapter 12 treasures to collect, so do not search the river for an optional pickup.
After leaving the jet ski, follow the available monastery entrance route until the game transitions to Chapter 13, Sanctuary?. If Nate dies during the river run, use the checkpoint restart and repeat the nearest segment with a slower approach: destroy barrels at range, use a bank to reduce enemy angles and straighten the jet ski before each waterfall or narrow passage.
- Drive through the final tunnel.
- Dismount at the dock with Triangle.
- Confirm that Chapter 13, Sanctuary?, has begun or its checkpoint is available.
Before you move on
- The entire upriver jet-ski route has been completed.
- The explosive barrels and final enemy positions near the ruins have been cleared or bypassed safely.
- Nate has driven through the dam tunnel and reached the landing dock.
- Nate has dismounted with Triangle.
- Chapter 13, Sanctuary?, has started or its checkpoint is available.
- No Chapter 12 treasure entry is missing, because the original PS3 chapter has zero treasures.
References for this chapter
Chapter 13: Sanctuary? — Ruined Monastery, Waterfalls, and the Library Puzzle
Chapter 13 begins at the monastery outskirts after the upriver jet-ski ride. Follow the ruined path with Elena, clear several escalating pirate encounters, cross the waterwheel bridge, climb through the damaged monastery, and survive the large courtyard and lower-square fights. The chapter’s required puzzle is in the library: use Drake’s journal and the compass design on the floor to turn the four statues toward their correct directions. The correct arrangement is Angel or Matthew north, Eagle or John east, Winged Lion or Mark west, and Goat or Luke south. Enter the opened room, optionally collect Golden Cup and Cover, then turn both wall torches to open the hidden route into Chapter 14, Going Underground. The seven Chapter 13 treasures are optional and should be collected only after each combat area is safe.
1. Enter the monastery outskirts and cross the waterwheel bridge
From the dock, climb the stairs and follow the path to the wooden doors. Kick the doors open, then immediately use the nearby wall or doorway as cover. Eliminate the pirates on the other side before stepping into the open approach. If one enemy is hidden beside the doorway, move only after the visible targets are down and use the outer cover to finish him.
Advance to the bridge over the stream. Before crossing, look for the gap on the left side of the bridge. Drop carefully to the stone ledge beside the waterwheel and collect the Golden Turtle if you are pursuing the optional treasure set. Climb back to the bridge and continue across it.
Kick down the iron gate beyond the bridge and climb the long ruined staircase. The path leads past a dead soldier and a trap. Continue over the broken stairs spanning the stream. The Silver Inca Cup is below these stairs, in the water and rocks beneath the damaged crossing. Drop down only after the immediate route is clear, collect it, and climb back to the stairs.
- Clear the first pirate group before crossing the bridge.
- Optional: collect Golden Turtle beside the waterwheel.
- Optional: collect Silver Inca Cup beneath the broken stairs.
2. Survive the first laser-sight encounter
At the top of the stream crossing, expect a close-range pirate and a soldier using a laser-sighted weapon. Eliminate the ordinary pirate first if he is exposed, then deal with the laser-sight enemy. Rolling sideways is safer than standing still in the open; close the distance only when the shot line is broken, then use melee or a powerful close-range weapon.
Use the short wall and stair landings as cover when two more enemies appear. A further laser-sight soldier joins from higher up, so do not remain in the center of the stairs. Peek from cover, fire a quick burst, and retreat before the red targeting beam settles on Drake.
When the area is quiet, follow Elena up through the ruins. A brief scene reveals soldiers ahead. Continue until Drake drops into the next combat space, where two enemies rush him at close range. Use melee counters or the shotgun rather than trying to retreat through the narrow landing.
- Use rolling and close-range attacks against the first laser-sight soldier.
- Keep cover between Drake and the upper laser-sight enemy.
- Defeat the rushing enemies before entering the statue courtyard.
3. Clear the statue courtyard and open the next gate
In the courtyard with the central statue, move only far enough to trigger the enemy callout, then back into the entry corridor. This retreat gives Drake pillars and walls for cover while enemies arrive from the upper levels, the ground floor, and the arched passage. Do not hold the exposed center of the courtyard.
Prioritize laser-sight enemies and soldiers on elevated positions. Once the first group is defeated, more pirates enter through the arched passage. If ammunition becomes low, circle along the right wall and use defeated enemies’ weapons rather than crossing the courtyard directly.
Follow the stairs through the arched passage until you reach the broken-floor room. Defeat the enemy on the stairs, then cross the damaged floor by using the balcony and columns. Kick down the gate at the far side and return to the upper section of the courtyard. Drop down, turn around, and shoot the explosive barrels blocking the doorway so Elena can pass.
Before using the gate mechanism, search the small alley to the right of the barrels. The Jeweled Silver Cross is near rubble in this side area. Then operate the mechanism with Elena. Drake holds the falling gate while she passes through, opening the route to the next major fight.
- Fall back to the entry corridor when the courtyard ambush begins.
- Defeat elevated laser-sight enemies before clearing the ground level.
- Optional: collect Jeweled Silver Cross beside the explosive barrels.
- Use the gate mechanism with Elena.
4. Win the lower-square battle and inspect its side paths
The next square contains a large enemy wave. At the entrance, take cover along the wall and immediately look for the Dragon Sniper. Use it to eliminate the laser-sight soldier high in the first window, then reserve another round for the second laser-sight enemy across the square. Keep the stone barricade between Drake and the enemy positions while the main group advances.
Enemies will approach from the right stairway and from the far side. Use the sniper rifle for exposed priority targets, then switch to the SAS-12 or another shotgun when soldiers reach the barricade. Two mobile soldiers carrying M79 grenade launchers arrive late in the encounter; do not let them remain behind cover with a clear angle on Drake. Eliminate them as soon as they expose themselves.
After the square is clear, do not go straight to the library. Sweep the surrounding paths while the area is safe. From the entry ramp, move to the stone railing and follow the curved wall to find the Silver Toothpick. Return to the ramp, face into the square, and go left past the other building’s stairs. The Gold Spanish Chalice is in the narrow space between that building and the wall, near debris.
For the third side-area treasure, cross the square toward the arched tunnel where enemies entered. Pass through the tunnel and check the upper-left side of the small overgrown courtyard for the Silver Coatimundi. Return to the main square after all three items register.
- Use the Dragon Sniper on both laser-sight threats when possible.
- Keep the stone barricade between Drake and the main enemy wave.
- Defeat the M79 carriers before crossing the square.
- Optional: collect Silver Toothpick, Gold Spanish Chalice, and Silver Coatimundi.
5. Enter the library and survive the final human combat encounter
Climb toward the library, but do not use the large front door. At the top of the stairs, turn left and follow the side staircase to the breach in the wall. Enter through this side opening to reach the upper interior balcony.
Sully is inside with the pirates, and the fight begins immediately. Stay on the balcony and use its cover. Shoot the upper enemies first, especially laser-sight soldiers, then use grenades against groups on the floor below. Watch the side of the balcony for a flanking enemy and avoid standing at the railing for too long.
The lower floor contains several ordinary soldiers and a heavier weapon user. Once the upper threats are gone, move along the balcony only as far as needed to obtain a better angle. If a shotgun is available, keep it for enemies who reach the stairs. Clear every enemy before approaching Sully and the statue mechanism.
- Enter through the library’s side breach rather than the front door.
- Use balcony cover and prioritize laser-sight enemies.
- Clear the entire library fight before attempting the statue puzzle.
6. Solve the four-statue compass puzzle
After the library fight and scene, inspect Drake’s journal. The floor design in the center of the room is a compass and shows which way is north, south, east, and west. Each statue can be reached through the small grab points on its platform and rotated when Drake interacts with it.
Turn the statues so their faces point in these directions: the Angel, identified in the journal as Matthew, faces north; the Eagle or Bird, identified as John, faces east; the Winged Lion, identified as Mark, faces west; and the Goat, identified as Luke, faces south. The statues’ starting orientations can differ from the direction you need, so use the floor compass rather than the screen’s camera direction.
When all four are correct, the bookcase or hidden opening at floor level opens. Drop down and enter the concealed room with Elena and Sully. If you are collecting treasures, face the painting between the two wall recesses from the stairs, then search the recess to the painting’s right for Golden Cup and Cover.
- Use the floor compass to identify the directions.
- Angel or Matthew: north.
- Eagle or John: east.
- Winged Lion or Mark: west.
- Goat or Luke: south.
- Optional: collect Golden Cup and Cover in the hidden room.
7. Turn the torches and transition to Going Underground
In the hidden room, inspect the wall where Elena is standing and use the journal when prompted. Two torch decorations act as the final mechanism. Interact with both torches; after both have been turned, the hidden passage opens and a scene begins.
Do not search for a combat boss or the descendants here. Chapter 13 ends with the discovery of the route beneath the monastery. The next chapter is Chapter 14, Going Underground, which begins after the torch mechanism and scene.
- Turn both wall torches in the hidden room.
- Allow the following scene to play.
- Confirm the chapter title changes to Going Underground.
Before you move on
- The monastery outskirts, bridge, waterwheel route, and broken stairs have been cleared.
- The statue courtyard, lower square, and library combat encounters are complete.
- The four statues face Angel or Matthew north, Eagle or John east, Winged Lion or Mark west, and Goat or Luke south.
- The bookcase or hidden opening has opened and Drake has entered the concealed room.
- Both wall torches have been turned.
- A scene transitions the campaign into Chapter 14, Going Underground.
Chapter 14: Going Underground — Catacombs, Bells, and the Monastery Route
Going Underground begins after Drake and his allies uncover the entrance to the monastery’s underground catacombs. Drake proceeds alone, crosses a collapsing cavern, fights mercenaries in the church, rings two bells to open a hidden passage, and follows the underground route toward the monastery exit. The chapter contains six optional treasures: Golden Inca Vessel, Golden Skull, Silver Snuff Box, Silver Spanish Goblet, Silver Ingot, and Gold and Ruby Inca Mask. The required route is linear once each combat area is cleared, but several jumps and ledge transfers are easy to miss if the camera is not aligned. Use the ledges around the waterfall rather than trying to jump across the cavern, use cover in the church before approaching the altar, and solve the bell puzzle by ringing one bell and shooting the other. After the final crank opens the door, Drake exits outdoors and Chapter 15, On the Trail of the Treasure, begins.
Descend into the catacombs and collect the Golden Inca Vessel
Go down the first flight of stairs, but stop before reaching the lower floor. Turn right toward the narrow ledge between the stair sections and climb over it to find the Golden Inca Vessel. This is the first of six Chapter 14 treasures and is optional for story progression. If you reach the open ground at the bottom of the second stair section, you have gone too far; climb back toward the first landing.
After collecting it, return to the right side of the room and climb the ledge into the tunnel. Follow the passage until it opens into a cavern with a waterfall on the left. Keep to the right wall and grab the first ledge. Shimmy across, then jump from ledge to ledge around the cavern. Some central surfaces collapse, so do not linger on them. Line up each jump with the next visible handhold instead of trying to cross the open center.
- Collect the Golden Inca Vessel from the ledge between the stair sections.
- Enter the waterfall cavern through the right-side ledge.
- Cross the cavern by shimmying and jumping around its perimeter.
Reach the waterfall platform and clear the first mercenary group
Continue around the cavern until you reach the platform at the foot of the staircase. Before climbing, walk behind the waterfall on the left to collect the Golden Skull. Return to the staircase and climb up.
Take cover behind the boxes at the top. Mercenaries attack from the area ahead, including a shotgun user on the right. Use the boxes as cover, eliminate the nearest attackers first, and keep the shotgun enemy from closing the distance. If you have a shotgun, reserve it for enemies who rush your position; otherwise use the M4 or pistol from cover. Once the room is clear, find the spotlight aimed at the crank. Turn the crank to open the grating at the top of the nearby staircase, then climb through the opening and enter the church through the floor.
- Take the Golden Skull from behind the waterfall.
- Defeat the mercenaries before operating the crank.
- Use the opened grating and floor entrance to reach the church.
Fight through the church and collect the Silver Snuff Box
As soon as Drake enters the church, turn toward the camera and search the small nook near the statue and lit candles. The Silver Snuff Box is there. It is optional, so collect it before committing to the main fight.
Use the large column on the left as your initial cover. Advance through the rows of seats only when the nearest enemies are down. Two enemies at the rear use laser-sighted pistols, so avoid exposing yourself to the entire nave while trying to reach them. Pick off the closer soldiers, then deal with the laser-sighted enemies from cover. Additional mercenaries appear as you approach the altar, so reload and recover before pushing all the way forward.
- Collect the Silver Snuff Box near the church entrance.
- Use the left column and benches as cover.
- Defeat the initial church group and the reinforcements near the altar.
Ring the bells and enter the catacombs
After the church is clear, go to the rounded apse and inspect the two side areas for the bells. Read Drake’s journal when the prompt appears. The bells must sound together, but Drake cannot run between them quickly enough. Stand beside the bell you can interact with, ring it, then immediately aim at and shoot the other bell. This opens the hidden passage near the bell.
Climb down the ladder in the opened passage. Drake drops the final distance near the bottom. Enter the small room ahead and search behind the large sarcophagus on the left for the Silver Spanish Goblet. Continue through the next rooms, using the doorway edges and pillars as cover. Enemies are positioned along the route, so expose yourself briefly, fire, and retreat rather than charging into the next chamber.
- Ring one bell and shoot the other without leaving the first bell.
- Climb down the opened ladder.
- Collect the Silver Spanish Goblet behind the large sarcophagus.
- Clear the connected catacomb rooms before starting the next climbing section.
Cross the underground cavern and collect the Silver Ingot
After the catacomb firefight, climb the ledges at the blown-out wall and enter the dark cavern. Jump to the left platform, cross to the next platform, and use the small wall ledges to reach the broken staircase. Enter the room at the top to trigger the scene involving Roman and Eddy.
When the scene ends, leave through the other doorway and jump the gap. Do not immediately follow the stairs. Continue across the platform and drop over its far side onto the lower platform beside the staircase. The Silver Ingot is on this lower level. Collect it, then return to the stairs and continue through the narrow corridor.
- Use the left platform and wall ledges to reach the broken staircase.
- Trigger the Roman and Eddy scene.
- After the scene, drop to the lower platform beside the stairs.
- Collect the Silver Ingot before continuing.
Operate the final crank and exit to Chapter 15
Follow the corridor into the next small room, then turn left through the short hall to reach the room with the crank. Before operating it, turn left and search the nook beside the doorway for the Gold and Ruby Inca Mask, the sixth and final Chapter 14 treasure.
Return to the crank and operate it to open the exit door. Follow the newly opened passage and go outside. The outdoor transition marks the end of Going Underground and begins Chapter 15, On the Trail of the Treasure. There is no Navarro confrontation or El Dorado creature fight in this chapter.
- Collect the Gold and Ruby Inca Mask beside the crank-room doorway.
- Operate the crank and pass through the opened door.
- Confirm that Chapter 15, On the Trail of the Treasure, has started.
Recover from failure and verify completion
If Drake dies during the cavern jumps, church fight, bell sequence, or final catacomb route, choose the latest checkpoint rather than restarting the chapter. Recheck the nearest optional treasure after the reload because the chapter’s route passes several one-way-looking transitions, especially the waterfall platform, church entrance, and lower platform after the Roman and Eddy scene.
For story completion, the chapter is finished when the crank-operated door opens and Drake exits outdoors into the Chapter 15 transition. For collectible completion, Chapter 14 should show six treasures collected: Golden Inca Vessel, Golden Skull, Silver Snuff Box, Silver Spanish Goblet, Silver Ingot, and Gold and Ruby Inca Mask. These six items are optional and do not block progression.
- Use the latest checkpoint after a death.
- Verify six Chapter 14 treasures only if pursuing collectible completion.
- Reach the outdoor transition into On the Trail of the Treasure.
Before you move on
- Going Underground is marked complete in Chapter Select.
- The crank-operated exit has opened and Drake has reached the outdoors.
- Chapter 15, On the Trail of the Treasure, has begun.
- Optional collectible tracking shows six Chapter 14 treasures if cleanup was performed.
- The chapter contains no boss fight, Navarro confrontation, or El Dorado creature encounter.
Chapter 15: On the Trail of the Treasure — Cemetery, Symbol Door, and Approach to the Vault
Chapter 15 begins as Drake exits the underground ruins and returns to the monastery cemetery. Collect the opening treasure before climbing into the church, cross the broken interior, activate both key mechanisms, and enter the hidden gallery. After opening the heart-emblem stained-glass window, descend into the cemetery and defeat the mercenary groups. Search the cemetery for two more treasures, then enter the mausoleum with Elena and Sully. Use Drake’s journal to set the shell, arrows, and snake symbols to their final orientations; the snake’s head must face left. The opened passage begins Chapter 16, The Treasure Vault. Six treasures are optional in this chapter: Gold Inca Figurine, Golden Bird Vessel, Golden Spanish Goblet, Jeweled Golden Cross, Silver Skull, and Golden Inca Mask.
1. Leave the underground exit and collect the Gold Inca Figurine
When Chapter 15 begins, Drake emerges with a staircase directly ahead. Turn around and search the grassy area to the right of the staircase, near the stonework, for the Gold Inca Figurine. Collect it before climbing because the route quickly moves into the church and the opening area is not part of the main path.
Climb the stairs and follow the broken exterior route. Move across the wall ledges, jump to the opposite handholds, and use the first vine to reach the next ledge. Continue to the second vine, swing across, and climb toward the church window. Enter the tower and descend through the interior ledges. Take cover immediately at the bottom because mercenaries are positioned in the corridor.
- Gold Inca Figurine collected, if pursuing optional treasures.
- Drake has entered the church tower.
- You are behind cover before engaging the corridor enemies.
2. Clear the church corridor and collect the Golden Bird Vessel
Defeat the corridor enemies from cover, then advance by jumping across the broken floor sections. At the end of the passage, do not enter the doorway directly ahead. Turn left and follow the balcony to its far end. The Golden Bird Vessel is near the edge of the balcony, beside the continuation of the route.
Return to the broken-floor room and cross using the remaining platforms. Keep the camera aimed toward the next landing before each jump. Falling sends Drake back to a checkpoint, but it is safer to stop on each stable section rather than attempt long jumps without a clear landing.
- The corridor enemies are defeated.
- Golden Bird Vessel collected, if desired.
- The broken-floor section has been crossed.
3. Re-enter the monastery and activate the two key mechanisms
Continue around the rubble and exterior path until you reach the green vine. Climb it, enter through the next window, and defeat the two enemies inside. After the fight, turn right into the small dark room to collect the Golden Spanish Goblet.
Follow the upper church route until the large interior chamber with the suspended platforms and two key mechanisms. Use the ledges, wooden boards, and hanging light to reach the first mechanism. Hang from it to activate it, then retrace the same route to the central platforms. From there, use the ledges on the opposite side to reach and activate the second mechanism.
After both mechanisms are active, continue around the column, cross the chain, and reach the opened stained-glass window. Enter the hidden gallery through the window and immediately move to the right around the room to collect the Jeweled Golden Cross. Then approach the heart-emblem window and open it. Drake sees the mausoleum below, which becomes the next objective.
- Golden Spanish Goblet collected, if desired.
- Both key mechanisms have been activated.
- Jeweled Golden Cross collected, if desired.
- The heart-emblem stained-glass window has been opened.
4. Descend into the cemetery and defeat the mercenaries
From the opened window, cross the exterior ledges and descend the vine into the cemetery. Take cover near the wall or a stone structure before moving into the square. A sniper rifle is available near the initial cover, and the opposing side includes laser-sighted riflemen and a grenade-launcher carrier.
Prioritize the grenade-launcher carrier when you have a safe shot, then eliminate the laser-sighted enemies before crossing the open ground. Move between cover points when grenades begin landing instead of staying behind one wall. Watch the upper edges and opposite side of the cemetery because enemies can appear after the first group is defeated.
Once the square is clear, move past the large hole and the small stone burial houses. Do not enter the next building until you have searched the lower cemetery for the Silver Skull.
- The first cemetery fight is complete.
- The grenade-launcher carrier and laser-sighted enemies are defeated.
- The lower cemetery is safe for treasure cleanup.
5. Collect the Silver Skull and Golden Inca Mask
If you are facing into the cemetery from the entrance, search behind the second mausoleum on the right. The Silver Skull is in the narrow space between the small stone burial structure and the wall.
Continue up the stairs into the higher cemetery area and defeat the next mercenary group. Before entering the required building, turn right toward the smaller mausoleum and nearby graves. Search behind the tombstones in the corner for the Golden Inca Mask.
Enter the building after collecting both treasures. Drake reunites with Elena and Sully, and the group reaches the symbol mechanism inside the mausoleum.
- Silver Skull collected, if desired.
- Golden Inca Mask collected, if desired.
- All six Chapter 15 treasures are collected if pursuing chapter cleanup.
- Drake has entered the mausoleum and reunited with Elena and Sully.
6. Match the journal symbols and begin Chapter 16
At the mechanism, enter Look Mode and open Drake’s journal. Use the journal’s final diagram to set the shell, arrows, and snake. Do not rely on a fixed number of turns, because the required inputs depend on the symbols’ starting positions. The shell and arrows must match the orientations shown in the journal, and the snake’s head must face left in its final horizontal orientation.
When all three symbols match the journal, the hidden passage opens. Follow the passage with Elena until the game begins Chapter 16, The Treasure Vault. Stop this chapter’s route at that transition; the vault’s numbered paths, water mechanisms, and additional treasures belong to Chapter 16.
- The shell matches its final journal orientation.
- The arrows match their final journal orientation.
- The snake’s head faces left.
- The secret passage opens.
- Chapter 16: The Treasure Vault begins.
Before you move on
- The six optional Chapter 15 treasures are collected if pursuing cleanup: Gold Inca Figurine, Golden Bird Vessel, Golden Spanish Goblet, Jeweled Golden Cross, Silver Skull, and Golden Inca Mask.
- Drake has cleared the cemetery encounters and entered the mausoleum with Elena and Sully.
- The shell, arrows, and snake symbols match Drake’s journal, with the snake’s head facing left.
- The secret passage opens and the game transitions to Chapter 16, The Treasure Vault.
- No Navarro encounter, final rescue, credits, or later vault objectives are required for Chapter 15 completion.
Chapters 16–22: The Treasure Vault through Showdown
Complete the original PlayStation 3 campaign from Chapter 16, The Treasure Vault, through Chapter 22, Showdown. Follow the Roman-numeral route through the vault, survive the Descendants in the Heart of the Vault, cross the bunker and restart its generator, then activate both fuse boxes during Unwelcome Guests. Continue through the container-yard battle, Race to the Rescue, Gold and Bones and the final confrontation with Navarro. During the last Navarro sequence, wait for his firing burst to finish and for his weapon to lower or pause before moving between intact crates; never cross while the laser is tracking Drake. Finish both melee prompts, then watch the rescue, aftermath and credits. Optional cleanup includes the late-game treasures, all 60 ordinary treasures and the separate Strange Relic.
Chapter 16: The Treasure Vault
After entering the vault, open Drake’s journal when prompted. The map shows the route through plates marked II, V and VII. Follow the arrows on those plates rather than choosing symbols at random. The route changes direction several times, so check the next visible plate before stepping forward.
For optional cleanup, find the Silver Cup and Cover by taking the initial V route, passing the II-marked section and following the staircase route. The Jeweled Silver Brooch is near the second swinging torch. At the top of the staircase, look toward the route just crossed and jump to the nearby wooden ledge. The Gold Snuff Box is later in the maze near the VII-marked section. Climb onto one of the short railing posts, jump to the outer ledge and recover the same way if necessary.
Continue through the II, V and VII route until you reach the large lever. Pull it, then cross the chamber using the moving chain, lift and wooden platforms. Watch the swinging spiked lanterns and do not rush jumps after a platform collapses. In the pirate combat area, use low walls and beams for cover. Eliminate grenade-launcher enemies promptly, then climb to the winch and lower the ladder. Follow the final spiral walkway into the large chamber to begin Chapter 17.
- Follow the II, V and VII route shown in Drake’s map.
- Pull the main lever and operate the chain, lift and winch.
- Optional: collect the Silver Cup and Cover, Jeweled Silver Brooch and Gold Snuff Box.
- Reach the Heart of the Vault.
Chapter 17: The Heart of the Vault
Enter the large chamber and inspect the central area. Go beneath the ladder and boost Elena up. Descendants then attack from the surrounding openings. Keep circling the room instead of backing into a wall, and use the shotgun when a creature closes the distance.
Survive the first wave, then continue fighting until Elena lowers the central rope. Reach it quickly and climb. After Elena swings Drake to the upper level, run through the tunnel while firing only when a creature blocks the route. This chapter contains no ordinary treasures, so do not stop to search the arena once the escape path opens.
If a Descendant grabs Drake, follow the original PS3 on-screen SIXAXIS movement prompt. When the tunnel sequence ends, the game transitions directly to Chapter 18.
- Boost Elena to the ladder.
- Use close-range shotgun fire while circling the arena.
- Respond to the original PS3 SIXAXIS grab prompt if it appears.
- Climb Elena’s rope and escape through the tunnel.
Chapter 18: The Bunker
Begin by crossing the bunker’s exterior pipes. Move from the large pipe to the smaller pipes, shimmy around each section and use the hanging chain for the wall-run transfer. Continue across the broken walkways and enter the bunker through the doorway at the end.
Move through the dark corridors and use the side room for ammunition before advancing. When the first Descendants appear, use doorways and narrow corridors to prevent them from surrounding Drake. Continue to the rubble branch near the end of the corridor for the optional Gold Monkey Figurine, then return to the main passage.
Follow the corridor layout to the generator room. At the back, interact with the generator handle. A cutscene plays and the alarm begins. This is the chapter boundary: Chapter 18 ends when the generator is restarted, and Chapter 19 begins with the ensuing Descendant attack. Do not search for fuse boxes or attempt the bunker escape before this transition.
- Cross the pipes, chain and broken walkways.
- Use the corridor side room for ammunition and cover.
- Optional: collect the Gold Monkey Figurine in the rubble branch.
- Restart the generator and let the Chapter 19 transition occur.
Chapter 19: Unwelcome Guests
Chapter 19 begins with Descendants entering from several directions. Cut through the horde and enter the doorway beneath the flashing red light. Follow the corridor, climb to the ledge and activate the white fuse box. Collect the ammunition and grenades, then return to the generator room.
Cross the generator room again and use the other red-lit doorway. Follow the second corridor to its ledge and activate the second white fuse box. Return to the generator room and use the newly opened door. Follow the corridor, operate the wheel door and continue through the bunker.
After the next scene, take cover in the room by the window and defeat the enemies that appear. Descend the stairs, pass the large crates and enter the opening beyond them. At the next staircase, you can let the Descendants and Roman’s soldiers weaken one another before finishing the survivors. At the upper crates, use the available sniper rifle if the open area is too dangerous.
In the container area, clear the closest Descendants first, then eliminate Roman’s men and the laser-sight enemies. The optional Golden Seadragon Pendant is on a crate stack near the left side of the area. Climb the paired crates, jump to the nearby stack and collect it. Continue across the crates, climb to the ledge and use the ladder to reach the surface and Chapter 20.
- Activate both fuse boxes after the generator cutscene.
- Operate the wheel door and follow the bunker escape route.
- Use the crate stacks and sniper rifle to control the container fight.
- Optional: collect the Golden Seadragon Pendant.
- Climb the ladder to Race to the Rescue.
Chapter 20: Race to the Rescue
At the chapter start, turn around and circle the pit Drake has just climbed from. The optional Gold Ingot is beside the rock at the far side of the pit. Continue along the jungle path toward the church courtyard.
Help Sully by using the Dragon Sniper against laser-sight enemies on balconies and in windows. Stay behind pillars while those enemies remain active. Clear ground attackers with the M4, shotgun or grenades, then deal with the M79 enemy on the left balcony before crossing the open area.
Enter the church through the large doors near Sully. Take cover behind the first pillar and eliminate the laser-sight enemies before advancing. Ground troops, including grenade-launcher carriers, push through the interior, so retreat to the previous pillar if the forward cover becomes unsafe. Advance only after the immediate wave is clear.
Move with Sully to the altar at the far side of the church. Interact with it to reveal the opening, then drop through the hole. The descent begins Chapter 21. The Silver Coatimundi mentioned in some treasure lists is an earlier Chapter 13 item, not an additional Chapter 20 treasure.
- Optional: collect the Gold Ingot beside the opening pit.
- Protect Sully by clearing snipers before crossing exposed ground.
- Defeat the church reinforcements.
- Open the route beneath the altar.
Chapter 21: Gold and Bones
Head down the stairs from the altar and follow the catacomb route. In the room with two sarcophagi, search beside the right sarcophagus for the optional Golden Skull Rosary. In the next larger chamber, search behind the central pillar near the rubble for the optional Sapphire and Silver Mask.
Continue down the stairs and follow the catacombs. Descendants appear during the descent. Shoot those blocking the stairs, keep moving and avoid using the water as a shortcut; the intended route uses staircases and ledges.
After the next scene, follow the winding stairs while dealing with enemies in the way. At the upper ledge, jump to the net wrapped around the suspended El Dorado statue when it comes within reach. The following scene begins Chapter 22, Showdown.
- Optional: collect the Golden Skull Rosary.
- Optional: collect the Sapphire and Silver Mask.
- Use the stair route instead of entering the water.
- Jump to the net around the suspended statue.
Chapter 22: Showdown and the ending
Take cover immediately and defeat Navarro’s guards. Do not waste ammunition trying to damage Navarro during the opening gunfights. After each group is defeated, follow him to the next cover section. Use crates and walls to recover before advancing, and move to the next intact position if your current cover is destroyed.
Continue through the outdoor sections and eliminate the guards, prioritizing grenade-launcher enemies and opponents positioned above Drake. Follow the prompted environmental escape sequence, then climb toward the helipad. Chapter 22 has no ordinary treasures.
After the cutscene, Drake is unarmed and Navarro fires from a distance. Stay behind the intact crates. Watch for Navarro to finish his firing burst and lower or pause his weapon. Move only during that opening, rolling or vaulting to the next intact crate. Do not cross while the laser is tracking Drake. Repeat this timing across the cover positions, then advance during the final reload pause and perform the first prompted melee attack.
Complete both prompted melee sequences immediately after Navarro is reached. Follow the on-screen prompts to knock the weapon away, then close in again before Navarro can recover and complete the second sequence. The rescue and aftermath scenes follow. Let the closing sequence and credits play rather than quitting immediately after the final melee.
- Defeat the guards while avoiding Navarro’s shots.
- Use intact cover and move only after Navarro’s firing burst ends and his weapon lowers or pauses.
- Never cross while the laser is tracking Drake.
- Complete both prompted melee sequences.
- Watch the rescue, aftermath and credits.
Optional original PS3 collectible cleanup
Use Chapter Select to target missed items instead of replaying the entire campaign. The original PS3 release contains 60 ordinary treasures and one separate Strange Relic. The Strange Relic is in Chapter 5, The Fortress: after the first pirate courtyard fight, climb the ramp to the upper wall, take the alternate walkway toward the broken structure and jump to the roof. Search the corner of that roof.
The late-game ordinary treasures are three in Chapter 16, none in Chapter 17, one in Chapter 18, one in Chapter 19, one in Chapter 20 and two in Chapter 21. The Gold Monkey Figurine belongs to Chapter 18; the Golden Seadragon Pendant belongs to Chapter 19; the Gold Ingot belongs to Chapter 20; and the Golden Skull Rosary and Sapphire and Silver Mask belong to Chapter 21. Chapter 22 contains no treasures.
Treat the Strange Relic and the 60 ordinary treasures as separate objectives. The original PS3 medal list identifies Master Fortune Hunter as the objective for all 60 ordinary treasures and Relic Finder as the objective for the Strange Relic. After collecting an item, allow the pickup feedback to appear, then check Chapter Select or the medal list before beginning another cleanup run.
- Chapter Select records all 60 ordinary treasures.
- The Strange Relic is collected in Chapter 5.
- Master Fortune Hunter is recorded for the ordinary treasures.
- Relic Finder is recorded separately.
- The complete optional collection contains 60 ordinary treasures plus the Strange Relic.
Before you move on
- Chapter Select or the completed save records progress through Chapter 22, Showdown.
- Navarro’s second prompted melee sequence is complete.
- The rescue and aftermath scenes have played.
- The credits have finished or the game has returned to its post-completion menu.
- Optional: the late-game Chapter Select treasure totals match the collected items.
- Optional: all 60 ordinary treasures are recorded.
- Optional: the Strange Relic and Relic Finder objective are recorded separately.
References for this chapter
- Uncharted: Drake’s Fortune - Walkthrough - PlayStation 3 - By YuGiOhFm2002
- Uncharted: Drake’s Fortune - Guide and Walkthrough - PlayStation 3 - By Axel7174
- Retro Game Walkthroughs - Uncharted: Drakes Fortune (PS3)
- Uncharted 1: Chapters 15, 16, 18, 19, 20, 21 - treasures, collectibles
- Treasure Locations - Uncharted: Drake’s Fortune PS3
Finishing up
Completion is confirmed when Chapter 22, Showdown, is cleared, Navarro is defeated through the final close-range sequences, the rescue and aftermath scenes have played, and the credits begin.
For story completion, do not require a post-epilogue checkpoint or a particular save-slot statistic.
For optional collection completion, verify 60 ordinary treasures and the separate Strange Relic using an original-PS3 treasure list and the game's available chapter or collection information.
For PS3 difficulty trophies, require the relevant full qualifying campaign rather than treating a Chapter Select replay of the finale as sufficient.
Choose your next gameScreenshots & video
Game imagery for reference. Follow the written chapters above for the route and strategies.
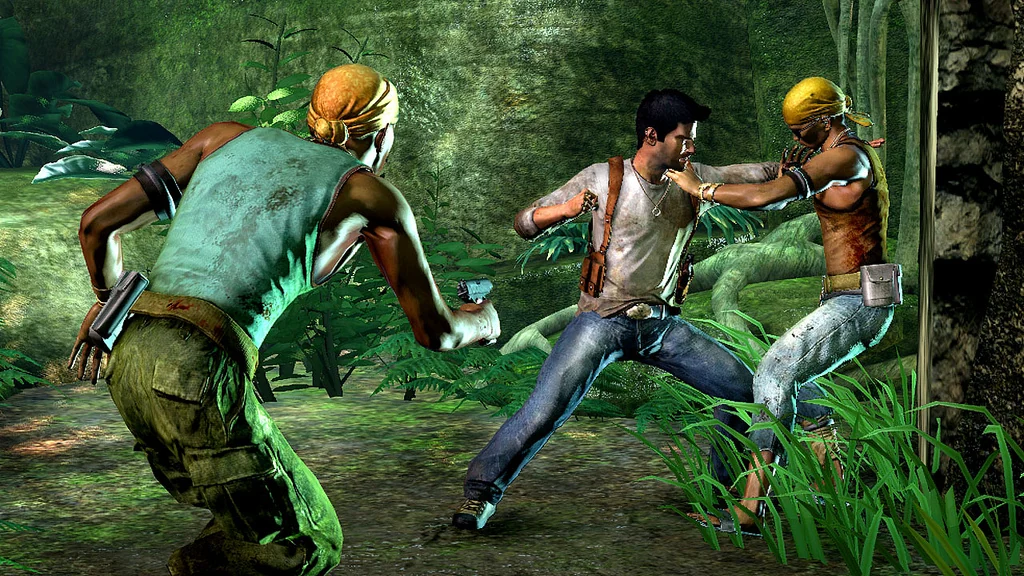
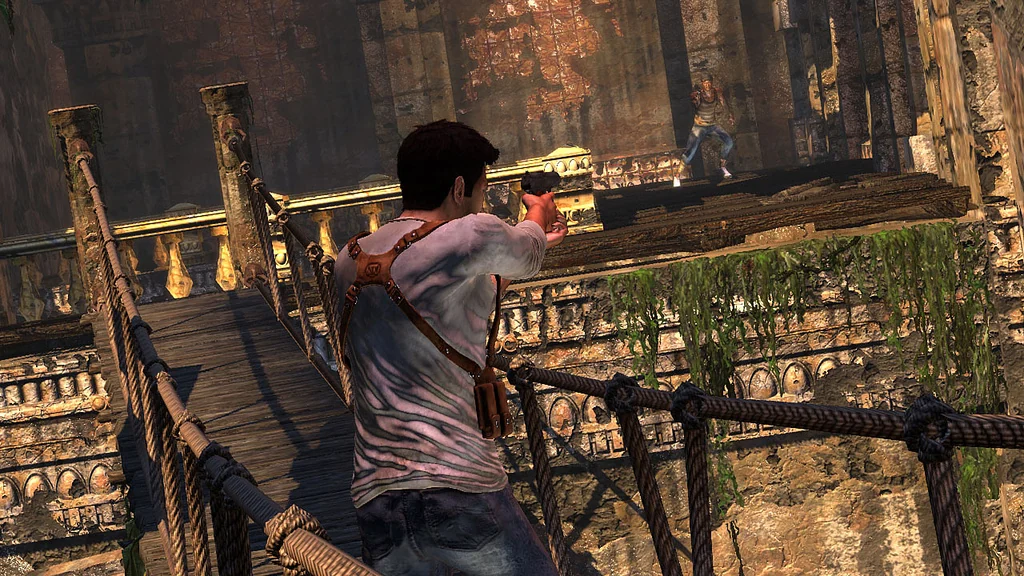
Sources & references
Our original guide draws on the references below. Check the edition at the top of this page before following controls or unlock requirements.
- Drake's Fortune controls
- Uncharted: Drake's Fortune Controls, StrategyWiki
- Uncharted: The Nathan Drake Collection — PlayStation.Blog
- Uncharted: Drake's Fortune — Sony Computer Entertainment press release
- Naughty Dog interview: Uncharted: Drake's Fortune SIXAXIS features
- PS3: Copying saved data to storage media — PlayStation 3 User's Guide
- PS3: Backup Utility — PlayStation 3 User's Guide
- Uncharted: Drake’s Fortune - Guide and Walkthrough - PlayStation 3 - By Axel7174
- Uncharted: Drake's Fortune - Guide and Walkthrough - PlayStation 3
- Treasure Locations - Uncharted: Drake’s Fortune PS3
- Uncharted: Drake's Fortune/Treasures
- Uncharted: Drake’s Fortune — Collectible Guide, original PS3 chapter listing
- Uncharted: Drake’s Fortune — Treasure Location FAQ — PlayStation 3
- Uncharted: Drake’s Fortune - Walkthrough - PlayStation 3 - By YuGiOhFm2002
- Uncharted 1: A Surprising Find - Chapter 3 walkthrough
- Drake's Fortune treasure locations - Uncharted Wiki
- Uncharted 1: Plane-wrecked part 1 - Chapter 4 walkthrough - Gamepressure
- Uncharted: Drake’s Fortune — Find All the Treasures
- Uncharted: Drake's Fortune - Chapter 6 Walkthrough
- Unlocking the Past | Uncharted Wiki
- Retro Game Walkthroughs - Uncharted: Drakes Fortune (PS3)
- Uncharted: Drake's Fortune — PlayStation 3 release and vehicle sequence context
- Uncharted 1: The Drowned City - Chapter 8 walkthrough
- To the Tower — Uncharted Wiki
- Uncharted: Drake's Fortune FAQ/Walkthrough — Neoseeker Walkthroughs
- Uncharted — Drake's Fortune — Walkthrough — Chapter 9 — To the Tower
- Uncharted 1: The Customs House - Chapter 10 walkthrough
- Uncharted 1: Heading Upriver — Chapter 12 walkthrough
- Uncharted 1: Sanctuary - Chapter 13 walkthrough
- Uncharted 1: Going Underground - Chapter 14 walkthrough
- Uncharted 1: On the Trail of the Treasure — Chapter 15 Walkthrough
- Uncharted 1: Chapters 15, 16, 18, 19, 20, 21 - treasures, collectibles
About the game & collecting notes
- Platform
- PlayStation 3
Complete the original PlayStation 3 campaign in its actual 22-chapter order, from Ambushed through Showdown. Cover every required chapter, all mandatory traversal and combat sequences, the final Navarro encounter, and optional treasure cleanup without importing mechanics or trophy behavior from The Nathan Drake Collection.
Darryl Polo
Darryl Polo loves tinkering with emulation and revisiting retro games. He enjoys exploring how old favorites play on different setups and sharing what he learns along the way. At Joking Joystick, he writes about the games, hardware, and small discoveries that keep the hobby fun.
Our editorial standardsFound a step that needs another look? Help us improve this guide.