
Uncharted 3: Drake's Deception — Complete PS3 Campaign Walkthrough (original release)
A chapter-by-chapter walkthrough for the original PlayStation 3 release of Uncharted 3: Drake's Deception. Follow clear objectives for every main-chapter encounter, know where to stop to collect treasures and relics, and reach the story ending while avoiding common progression traps.

Find a copy
Uncharted 3: Drake's Deception PlayStation 3
We may earn a commission if you buy through these links, at no extra cost to you. As an Amazon Associate I earn from qualifying purchases.
Opens retailer search results. Check the model, edition, seller, availability and current price before buying.
Before you begin
You are about to run through Nathan Drake's third mainline story as published on PlayStation 3.
This guide assumes the PS3 original edition (retail/physical and PSN versions released at launch) and focuses solely on single-player campaign progression, setpiece survival, essential puzzles, and optional treasure/relic collection so you can reach the ending reliably.
Each chapter entry below lists concise objectives, the subgoals you must cover to progress, and common pitfalls that cause missed collectibles or softlocks.
Use the Preparation checklist before starting.
If you want a completionist route, follow the 'must cover' treasure notes and the completion checklist at the end.
Set yourself up for the run
Play a short tutorial run: the first chapter introduces close-quarters melee, cover shooting and climbing — learn circle for melee/context actions and R1/R2/aim/shoot for basic combat.
Decide your difficulty: playthrough advice differs by difficulty for combat pacing and ammo conservation; adjust expectations if aiming for Crushing trophies.
Enable checkpoint autosave and keep a spare manual save (if using backup methods) before chapters with long single-direction setpieces (some collectibles can be missed and require chapter restart).
Familiarize yourself with the chapter list (Chapters 1–22).
Chapter-select collects chapter completion stats and shows per-chapter treasure counts.
If you want to collect treasures and the Strange Relic, pause frequently to check for shimmering pickup indicators; some treasures are in alcoves or above progression triggers and will be missed after autosave.
Keep at least one long-range weapon and one close-quarters option where possible.
Use cover and partner AI to create openings; enemies will flank if you stay exposed.
Have patience on environmental sequences (collapsing buildings, moving trains/ships, and desert sequences) — follow the scripted cues and prioritize safety over speed when hunting treasures.
If you plan a completionist playthrough, consult the chapter treasure maps or the guide’s treasure sections before engaging rooms where the game auto-saves immediately after a drop or a forced move.
Chapter 1 — Another Round
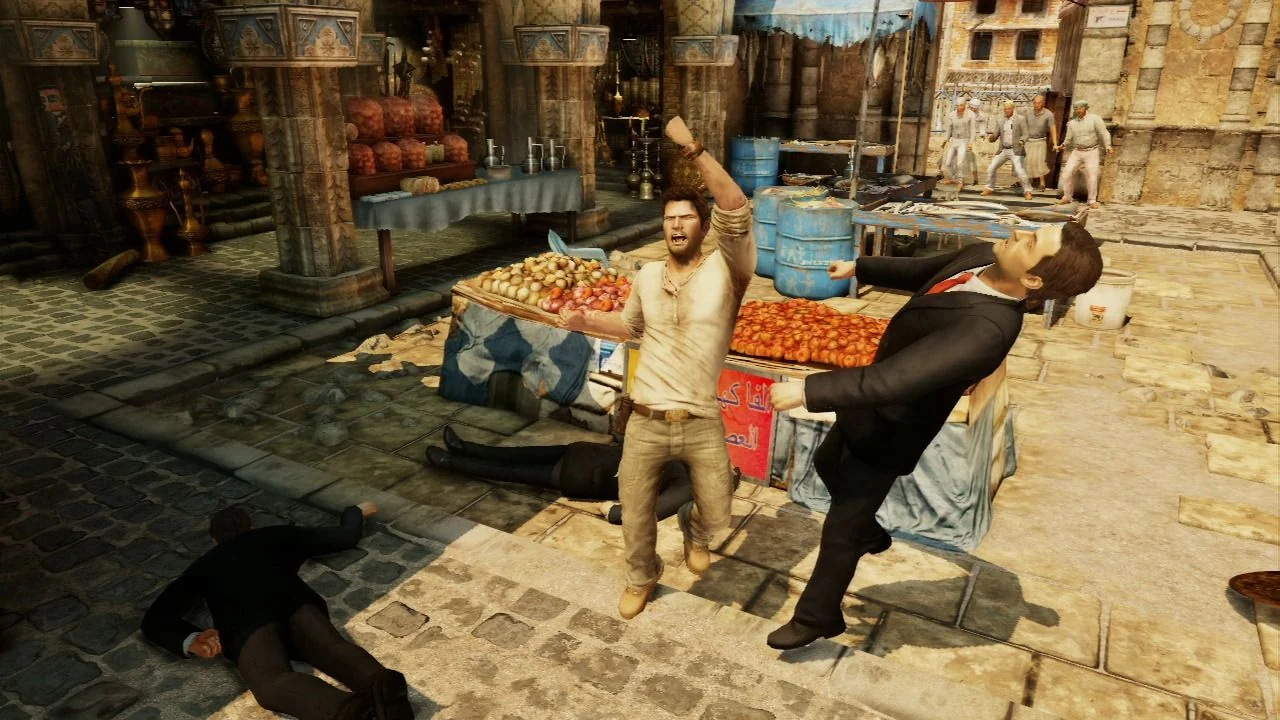
Drake and Sully’s meeting in a London bar becomes a tutorial for melee combat, counters, grapples and basic movement. Fight through the opening brawl, survive the bathroom encounter, then return to the lower bar and collect both treasures before entering the kitchen. The Antique Boxing Medallion is in the coin tray of the Genie’s Lamp arcade machine, while the Brass Vesta Case is behind the bar. Afterward, clear the kitchen fight, leave through the back door and watch the transition cutscene. Chapter 1 is complete when Chapter 2 begins.
1. Complete the opening brawl
Follow Sully through the bar and upstairs until the deal breaks down and control returns to Drake. Use Square for punches and follow the on-screen prompts for counters and grapple escapes. Triangle is used for prompted counters, while Circle is used when the game asks you to break free from a grab. The opening encounters are designed to teach these actions, so react to the prompts instead of repeatedly attacking without watching the other enemies.
When the fight moves downstairs, continue clearing the bar area. Keep enough room to move around the attackers, especially when the larger enemy enters the encounter. Do not try to rush toward the exit; the next sequence forces Drake into the bathroom.
- Complete the opening melee sequence.
- Use the prompted counter and grapple actions.
- Reach the lower bar and bathroom encounter.
2. Survive the bathroom fight
The large enemy drives Drake into the bathroom for a close-quarters fight. Give priority to counters and evasive movement. Wait for the counter prompt rather than standing in front of the enemy and trading punches. If other thugs are present, keep moving around the room so Drake is not pinned between an attacker and the fixtures.
After the bathroom fight ends, Drake returns to the lower bar. This is the safe time to collect both Chapter 1 treasures. Do not enter the kitchen yet, because the route through the kitchen advances the scene and removes access to the bar area.
- Defeat the large enemy in the bathroom.
- Return to the lower bar.
- Do not enter the kitchen until both treasures are collected.
3. Collect the Antique Boxing Medallion
From the lower bar, face the bathroom entrance and search the corner near the front door. The Genie’s Lamp arcade machine is positioned against the wall. Approach its coin tray and collect the Antique Boxing Medallion when the pickup prompt appears.
If enemies are still active, finish enough of the encounter to move freely before attempting the pickup. Drake cannot normally collect a treasure while he is locked into a fistfight, so create space or clear the nearby attackers first. The arcade machine is the important landmark; the treasure is not lying on the floor or on one of the ordinary tables.
- Find the Genie’s Lamp arcade machine.
- Collect the Antique Boxing Medallion from its coin tray.
- Verify that the treasure pickup registers before leaving the lower bar.
4. Collect the Brass Vesta Case
After taking the medallion, move behind the bar counter. Search the shelf or counter surface at the rear of the bar for the Brass Vesta Case. Approach it until the interaction prompt appears, then collect it.
The two treasures are in separate locations: the Antique Boxing Medallion is at the arcade machine, and the Brass Vesta Case is behind the bar. Once both have been collected, Chapter 1’s collectible total is complete. If one is missing, remain in the bar and search these two landmarks again before entering the kitchen.
- Go behind the bar after the bathroom fight.
- Collect the Brass Vesta Case.
- Confirm that both Chapter 1 treasures have been registered if you are tracking collectibles.
5. Clear the kitchen and finish the chapter
Enter the kitchen only after collecting the two treasures. Fight through the enemies among the counters and other furnishings. Use the room’s cover and keep moving between positions instead of remaining exposed in the center. Continue using prompted counters and melee attacks; if a firearm becomes available, use it to reduce the group before returning to close combat.
When the kitchen is clear, follow the route through the back door. The exterior scene and following transition lead directly into Chapter 2, Greatness from Small Beginnings. No additional treasure or puzzle is required after the kitchen encounter.
- Defeat the kitchen enemies.
- Leave through the back door.
- Watch the exterior transition scene.
- Confirm that Chapter 2 begins.
Before you move on
- The Antique Boxing Medallion is collected from the Genie’s Lamp arcade machine.
- The Brass Vesta Case is collected from behind the bar.
- The bathroom and kitchen encounters are complete.
- Drake exits through the back door and the transition into Chapter 2 begins.
References for this chapter
Chapter 2 — Greatness from Small Beginnings
Play as the teenage Nathan Drake in Cartagena, Colombia, beginning inside the maritime museum while searching for Francis Drake’s ring. Inspect the museum freely before examining the target display case, then follow Sully through the streets and market. Seven treasures are available in this chapter: two in the museum, one outside it, two around the market, one on the balcony route, and one inside the Hotel Arrecife sign. Collect the street and market items before entering the meat market, then search the climbing route and sign before dropping back to the square. Finish by following Sully and Katherine through the story sequence that leads to Nate obtaining the key.
1. Search the museum before examining the ring
At the beginning of the chapter, open Nathan’s journal if needed and use it to identify the display case he is seeking. Do not examine that case immediately. Walk through the museum and inspect the available exhibits when the prompt appears; this is also the opportunity to work toward the Quick Study trophy.
For the first treasure, locate the cannon display. From the entrance, check the barrel of the third cannon on the right to collect the Emerald and Diamond Ring. Then go to the staircase leading upstairs and search the small alcove beside it. The Antique Coin Purse is behind a potted plant.
Continue upstairs and inspect the display cases around the gallery. Leave the square central case containing the golden compass and Francis Drake’s ring until last. Examining that case triggers the story sequence and ends the free museum inspection period.
- Emerald and Diamond Ring collected
- Antique Coin Purse collected
- Museum exhibits inspected before the target case
- Optional: Quick Study trophy condition completed
2. Follow Sully outside the museum
After the cutscene throws Nathan out of the museum, follow Sully along the street while keeping enough distance to avoid being noticed. Use the available cover when the game prompts you to do so.
Near the blue car and the red doorway, check the short doorway area beside the street route. The Antique Colombian Soup Ladle is on the ground there. Pick it up before continuing after Sully. Return to the main route and tail him toward the market.
- Antique Colombian Soup Ladle collected
- Sully’s street route resumed without advancing into the market too early
3. Sweep the market before entering the meat market
When you reach the market, stay on the right side near the blue merchant stand. Search the small display with glass jars and bottles to collect the Pottery Chimu Vessel.
Before following Sully into the meat market, turn left into the narrow side route. Turn left again and climb the short staircase near the gate. The Ancient Chupicuaro Figure is at the top of this detour. Return to the market route after collecting it, then follow Sully through the double doors into the meat market.
- Pottery Chimu Vessel collected
- Ancient Chupicuaro Figure collected
- Market detour completed before entering the meat market
4. Climb the building and collect the balcony treasure
Inside the next route, begin climbing from the wall near the grey mailbox. Follow the handholds upward until Nathan reaches the yellow horizontal bar. Traverse across the monkey bars, continue along the balcony windows, and use the column to reach the next section.
After the short scene, continue right across the balcony. Search the balcony route for the Shamanistic Jaguar Head before climbing over the railing and leaving this level. If you pass the railing without collecting it, the normal route does not provide a dependable return.
- Shamanistic Jaguar Head collected
- Yellow bar and monkey-bar sequence completed
- Balcony route checked before leaving
5. Cross to the Hotel Arrecife sign
After crossing the balcony, position Nathan near the large sign and jump backward to the opposite building’s ledge. Stand up, shimmy left, and jump across to the blue building. Cross the rooftop and continue toward the Hotel Arrecife sign.
When Nathan grabs the sign, do not drop immediately to the lower route. Climb around the sign and enter the large letter O. The Antique Colombian Table Knife is inside the letter. Collect it, then descend from the sign and return to the street.
- Hotel Arrecife sign reached
- Antique Colombian Table Knife collected
- All seven chapter treasures collected
6. Complete the story sequence
After dropping from the sign, follow Sully and Katherine through the square and the remaining marked route. Stay with them until the conversation and wallet sequence begins.
The chapter ends after Nathan returns Sully’s wallet and runs away with the key. Once that scene completes and the next chapter loads or the transition begins, the chapter has been cleared. If any treasure was missed, use Chapter Select to replay this chapter rather than continuing with an incomplete collectible total.
- Sully and Katherine followed after the sign sequence
- Wallet-and-key story scene completed
- Chapter transition reached
Before you move on
- The chapter treasure total is seven: Emerald and Diamond Ring, Antique Coin Purse, Antique Colombian Soup Ladle, Pottery Chimu Vessel, Ancient Chupicuaro Figure, Shamanistic Jaguar Head, and Antique Colombian Table Knife.
- Nathan has followed Sully and Katherine after the Hotel Arrecife sign and completed the wallet-and-key scene.
- The next story transition has begun, confirming Chapter 2 is complete.
- For Quick Study, the museum exhibits were inspected before the central Francis Drake display case was examined.
References for this chapter
Chapter 3 — Second-Story Work
Cross the Cartagena rooftops to the maritime museum, but complete the collectible sweep before examining Drake’s exhibit. The Dog-Shaped Incan Whistle is on the exterior balcony below the route into the museum. Inside, collect the Silver Chimu Pendant from the old diving suit and the Seventeenth Century Coin beside the ship controls near the blue-green doors. All three treasures are available before the guards arrive; the subsequent escape does not return to the balcony or museum exhibit. After the scene, follow the rooftop route through balconies, awnings, unstable window platforms, and the blue building. Use the prompted Square and X actions during the chase, keep moving rather than stopping to fight, and continue through the interior rooms and final rooftops until the closing scene advances the game to Chapter 4.
Reach the museum roof and the collectible balcony
After the opening scene, jump to the rope and cross to the opposite building. Climb over the red roof and continue across the rooftops until you reach the section with the hanging light fixtures. Use the fixtures to swing toward the museum’s covered exterior area.
Before climbing through the open museum window, drop from the roof to the balcony below. If the route presents a yellow pipe or a lower ledge, use it to reach the covered balcony safely. Once down, turn away from the window and walk to the far end of the balcony.
- You are on the exterior balcony below the museum entrance.
- You have not interacted with Drake’s exhibit.
Collect the Dog-Shaped Incan Whistle
At the far end of the balcony, check the floor beside the bench and railing. Pick up the Dog-Shaped Incan Whistle. It is easy to pass because the normal route continues upward toward the museum window.
After collecting it, climb or drop back to the rooftop route using the nearby pipe and ledges. Return to the open window, but do not examine the display case after entering until the other two treasures are secured.
- Dog-Shaped Incan Whistle collected.
- The balcony and bench area have been checked before returning to the museum window.
Enter the museum and collect the Silver Chimu Pendant
Climb through the open window into the museum exhibit. Immediately check the old, mostly white diving suit near the entry area. The Silver Chimu Pendant is positioned on the suit; move close to it and use the pickup prompt.
Do not interact with Drake’s ring exhibit yet. The story scene begins when you examine that display, so use the time inside the room to collect both remaining treasures first.
- Silver Chimu Pendant collected from the old diving suit.
- Drake’s ring exhibit has not been examined.
Collect the Seventeenth Century Coin and start the scene
From the diving suit, move across the room toward the ship’s wheel and its controls. Check beside the blue-green doors and the nearby ship-control mechanism. The Seventeenth Century Coin is on the floor beside this display, near the lever and wall.
Once the coin is collected, verify that all three Chapter 3 treasures are registered if you are tracking collectibles. Then approach Drake’s exhibit and interact with it to trigger the cutscene. The guards arrive immediately afterward, and the museum collectible area is no longer available.
- Seventeenth Century Coin collected beside the ship controls.
- All three Chapter 3 treasures are registered.
- The Drake exhibit scene has started only after the collectible sweep.
Escape the museum and cross the first rooftops
When control returns, run up the stairs and climb through the upper window above the doorway. Follow the route toward the roof. When a guard grabs Nate, press Square repeatedly to break free, then continue running rather than engaging every pursuer.
Cross the rooftop and follow the ledges to the next level. Use the ramp and nearby balcony route, then climb over the low wall and use the dumpster or stacked object to reach the higher roof. Jump across to the opposite building and continue over the unstable window platforms; they collapse after Nate crosses them, so keep moving forward.
- You escaped through the upper window.
- You broke free from the guard’s grab.
- You crossed the unstable window platforms and reached the next rooftops.
Follow Sully through the final escape route
Continue across the roofs until a guard attacks Nate at a ledge. Sully intervenes, allowing Nate to climb up. On the red roof, climb the windows of the blue building and jump toward the blue roof ahead.
The apparent fall is scripted. Press X when prompted to leap toward the window. After entering the building, move through the kitchen, hallway, living room, and bedroom, jumping over the bed and exiting through the window. Continue across the final rooftops and garden area, using the available heaters, lamps, ledges, and awnings to cross each gap.
- Sully has helped Nate past the rooftop guard.
- The prompted X jump into the window succeeded.
- Nate has reached the final rooftop route with the chase still progressing.
Finish Second-Story Work
Keep following the linear rooftop route until the final pursuer and scripted traversal sequence. Jump the required railing or gap when the path indicates it, then continue across the last roofs and into the closing scene with Sully.
The chapter is complete when the scene ends and the game advances to Chapter 4, Run to Ground. If a treasure was missed, replay Second-Story Work through Chapter Select; the escape sequence does not provide a practical return route to the early balcony or museum room.
- The closing scene with Sully has played.
- The game has advanced to Chapter 4, Run to Ground.
Before you move on
- Dog-Shaped Incan Whistle collected from the exterior museum balcony.
- Silver Chimu Pendant collected from the old diving suit.
- Seventeenth Century Coin collected beside the ship controls near the blue-green doors.
- Nate completes the museum and rooftop escape with Sully.
- The game advances to Chapter 4, Run to Ground.
Chapter 4 — Run to Ground
Follow Nate, Sully and Cutter through the London alleys, warehouse and underground passages. Chapter 4 has six ordinary treasures and the separate Strange Relic. Four ordinary treasures appear before the large cylindrical shaft, one ordinary treasure is inside the shaft, and the final ordinary treasure is in the room after the shaft. The shaft is the most important missable area: climb upward first for the Strange Relic, then move left along the pipe route for the Fierce Lion Bangle before descending. After the shaft, climb into the next room and search beside the yellow desk for the Pearl, Diamond and Ruby Brooch before using the levers with Sully.
1. Search the alley before entering the warehouse
After the opening conversation, follow Sully and Cutter through the narrow alley. Once you squeeze through and clear the low barrier, turn right into the short dead end instead of continuing after your companions. The Diamond-Studded Horse Brooch is on the ground at the end of this side path.
Return to the main route and continue through the gap. Follow the climbing prompts until you enter the warehouse through the window. This first treasure is close to the route and is easy to miss if you stay directly behind Sully.
- Collect the Diamond-Studded Horse Brooch in the dead-end alley.
- Return to the main path before entering the warehouse.
2. Take the pipe detour inside the warehouse
As soon as you enter the warehouse, jump to the yellow pipe on the wall. Drop to the lower horizontal pipe rather than dropping all the way to the floor, then shimmy right to the small platform at the far end. The Coral Cameo Brooch is against the back wall.
After collecting it, use the warehouse route to descend. Do not leave the pipe section immediately after the first drop; the platform and treasure are on the optional horizontal route.
- Reach the lower pipe without dropping to the warehouse floor.
- Shimmy to the far platform and collect the Coral Cameo Brooch.
3. Climb the crate stack
When you reach the warehouse’s main floor, locate the stack of wooden boxes in the corner. Climb to its highest point to find the Victorian Locket and Chain. Descend after collecting it and continue toward the next encounter.
During the firefight, use the walls, machinery and crates as cover. Clear enemies blocking the route before crossing open sections, and conserve ammunition with controlled shots or melee attacks when an enemy closes in.
- Search the top of the wooden-box stack.
- Collect the Victorian Locket and Chain before leaving the warehouse floor.
4. Search the generator room after the firefight
After the warehouse fight, continue through the route until the group reaches the generator room. Deal with Marlowe’s men, then search the shadowed area around the generators before entering the underground passage.
The Silver Roses Bracelet is in a dark corner of the generator room. Sweep the room after the encounter because the transition into the secret passage moves the chapter into a more restrictive route.
- Clear the generator-room encounter.
- Collect the Silver Roses Bracelet before entering the underground passage.
5. Climb to the top of the cylindrical shaft
Follow the underground walkways until you reach the large cylindrical shaft. Yellow pipes and horizontal bars run around its interior. Do not descend toward the bottom when the route first opens. Jump to the reachable bars and climb upward instead.
Continue across the upper pipe route until you reach the opening in the broken metal grating. The Strange Relic is inside this upper section. Pick it up before beginning the descent. It is a separate bonus collectible and does not replace one of the chapter’s six ordinary treasures.
- Enter the large cylindrical shaft.
- Climb upward before descending.
- Collect the Strange Relic at the upper broken grate.
6. Collect the shaft treasure while descending
After taking the Strange Relic, move left along the pipes rather than dropping straight down. Follow the side route to another broken grate. The Fierce Lion Bangle is behind this grate and is the ordinary treasure in the shaft.
Only after collecting the bangle should you descend through the yellow pipes and bars. Use the lower ledges to reach the bottom safely. If you drop to the bottom before checking the upper route, the following checkpoint may not return you conveniently to the collectibles, so replay Chapter 4 through Chapter Select if necessary.
- Move left from the Strange Relic’s position.
- Collect the Fierce Lion Bangle behind the second grate.
- Descend only after checking the shaft route.
7. Collect the final treasure and finish the chapter
At the bottom of the shaft, continue into the next room and defeat the enemies. Climb the wall pipes to reach the ladder, then enter the upper room. Before using the mechanisms, look for the yellow desk. Use it to climb the wall and shimmy left along the upper ledge.
Drop into the small side area and collect the Pearl, Diamond and Ruby Brooch. This is the sixth ordinary treasure and is easy to miss because the route to the levers lies immediately to the right. Afterward, circle around to Sully and pull the lever with him to open the gate.
Follow the newly opened path, climb and traverse the damaged tunnel, and drop through the collapsed sections. Continue until the next story transition begins. No further Chapter 4 collectible is required after the Pearl, Diamond and Ruby Brooch.
- Use the yellow desk to reach the upper ledge.
- Collect the Pearl, Diamond and Ruby Brooch.
- Pull the lever with Sully and reach the next chapter transition.
Before you move on
- Chapter Select or the collectible record shows six ordinary treasures collected in Chapter 4.
- The Strange Relic has been collected and the relic pickup notification appears.
- The six ordinary treasures are Diamond-Studded Horse Brooch, Coral Cameo Brooch, Victorian Locket and Chain, Silver Roses Bracelet, Fierce Lion Bangle, and Pearl, Diamond and Ruby Brooch.
- Sully’s lever has opened the gate and the next story transition has begun.
Chapter 5 — London Underground
Drake, Sully and Cutter enter an abandoned London Underground station while pursuing Marlowe’s group. The route passes through a concealed library containing two treasures, then returns to the station for a large train-yard firefight. There are four treasures in this chapter: Victorian Copper Penny, Victorian Gold Sovereign, Silver Hunter Pocketwatch and Art Nouveau Flask. Collect the two library treasures before leaving that area. During the station battle, shoot the Silver Hunter Pocketwatch down from above the trains, then collect it from the carriage. Later, find the train marked 126 and search in front of it for the Art Nouveau Flask. The chapter is complete after you continue through the station and the next story cutscene begins.
Cross the opening station section and enter the hidden library
Move forward through the abandoned underground station with Sully and Cutter. When the group reaches the stuck gate, climb using the ladder and surrounding rafters so the companions can work the gate open. Continue across the upper route, using the hanging structures and walls to reach the far side. You can silently eliminate the early guards from above or engage them directly, but staying undetected conserves ammunition.
Follow the route up the stairs and through the concealed entrance to Marlowe’s library. After the scene in the room, two guards appear on the lower level. Clear them before searching for the first treasure. Do not leave the library after the story interaction until both library treasures have been collected.
- Open the first stuck gate by using the upper climbing route.
- Reach Marlowe’s hidden library.
- Defeat or bypass the guards in the library.
- Search the library before following the escape route.
Collect the Victorian Copper Penny
On the library’s lower level, locate the climbable desk or pillar route near the guards. Climb upward and follow the first ledge toward the display area. The Victorian Copper Penny is on this elevated ledge, above the normal walking level. If Drake does not grab the handhold, step back and align him with the climbable surface rather than jumping repeatedly.
Collect the penny before activating the central library interaction. The treasure is part of the route through the room, but it can be missed if you concentrate only on the map or the Golden Hind objective.
- Use the climbable desk or pillar near the lower-level guards.
- Reach the first elevated library ledge.
- Pick up the Victorian Copper Penny.
Return upstairs for the Victorian Gold Sovereign
After examining the central display and completing the ensuing library encounter, climb back through the room toward the upper level. Follow the balcony around to the opposite side instead of immediately taking the exit. Search beneath the standalone display case or stand along the far side of the upper walkway.
The Victorian Gold Sovereign is underneath this display. Move close to the base until the pickup prompt appears. Once you leave the library and return to the station, the room cannot be revisited during the normal chapter route, so collect this treasure before dropping over the railing or moving through the exit.
- Finish the library interaction and survive the ambush.
- Return to the upper library walkway.
- Circle to the far side of the room.
- Collect the Victorian Gold Sovereign beneath the display case.
Fight through the train yard and recover the Silver Hunter Pocketwatch
Return to the underground station and advance through the train-yard firefight. Use the train cars, pillars and other solid cover to break enemy lines of sight. Move between cover after each group is reduced instead of crossing the open floor while enemies still have clear shots. If enemies take elevated positions, clear them before climbing onto the cars.
During the battle, look above the left-side train cars for the Silver Hunter Pocketwatch hanging from an inaccessible ledge near the station clock. Aim at the treasure and shoot it down. After it falls onto the train, climb onto the carriage and collect it. Shooting the treasure is required; reaching the train without knocking it down does not register the pickup.
- Clear the station combat area far enough to move around the trains.
- Locate the pocketwatch above the left train cars.
- Shoot the Silver Hunter Pocketwatch down.
- Climb onto the train and collect it.
Find the Art Nouveau Flask and complete the chapter
Continue through the station, following the climbing route upward after the train-yard fight. You will encounter a train car marked with the number 126. Drake initially reaches the rear of this car; move around to its front and check the ground directly in front of it. The Art Nouveau Flask is located there, beside the front of the train.
Collect the flask before continuing. Then proceed through the remaining station combat and traversal sections, using cover and nearby environmental objects to survive. Follow Sully and Cutter when the game resumes the story route. The chapter ends after the next story cutscene, when Chapter 6 begins; there is no separate final gate interaction required after the flask.
- Reach the train marked 126.
- Move to the front of the train car.
- Collect the Art Nouveau Flask.
- Continue through the station until the Chapter 6 transition.
Before you move on
- The chapter treasure list shows Victorian Copper Penny, Victorian Gold Sovereign, Silver Hunter Pocketwatch and Art Nouveau Flask collected.
- The group has returned from the library and passed through the train-yard encounters.
- The train marked 126 has been searched at its front and the Art Nouveau Flask has registered.
- The next story cutscene finishes and Chapter 6 begins.
- If a treasure was missed, replay Chapter 5 through chapter select rather than expecting a later chapter to make it available.
References for this chapter
- Uncharted 3 Drake's Deception Walkthrough - GameSpot
- Uncharted 3: Drake's Deception — Guide and Walkthrough
- Uncharted 3: Drake’s Deception — Chapter 5 Treasure Hunting Guide
- Uncharted 3: Drake's Deception — Find All the Treasures, Part One — Prima Games
- Chapter 18: The Rub' al Khali Walkthrough - IGN guide PDF mirror
Chapter 6 — The Chateau
Drake and Sully enter a ruined French chateau while following the trail toward the Atlantis of the Sands. The chapter combines jungle traversal, exterior climbing, firefights, a four-knight mechanism, a trapped floor-symbol route and an animal-symbol wall puzzle. Nine treasures are available in the original PlayStation 3 release. Collect them during the listed detours because several routes become one-way after drops, combat transitions or puzzle progression. The required story order is: reach the chateau, cross the interior, solve the knight mechanism, fight through the caves and courtyard, reach the lower puzzle rooms, cross the floor symbols, collect the pendant, operate the cipher disk, solve the animal-symbol wall and escape after the confrontation in the tomb.
1. Follow the stream and search the jungle approach
At the chapter opening, move deeper into the jungle until you reach the shallow stream. Follow the stream to its dead end and enter the teal-tinted cave to collect the Antique Wax Seal Stamp. Return to the main stream route and continue past the waterfall.
After the waterfall, follow the path until the chateau comes into view. Turn left onto the higher side trail and look behind the small moss-covered broken wall for the Gold Inlay Cameo Bangle. Drop to the lower path near the pan-flute statue, then continue along the ledges and cave route toward the chateau.
- Antique Wax Seal Stamp collected in the stream cave.
- Gold Inlay Cameo Bangle collected behind the moss-covered wall.
2. Climb the exterior and search the grand staircase area
When the chateau climb presents an obvious broken opening in the wall, do not enter it. Keep shimmying to the right, climb higher around the tower and enter through the upper broken window. The Diamond and Pearl Bracelet is inside the small room on this detour. Return to the main route afterward.
Inside, help Sully open the way through the ruined library. Use the overturned cabinet, chandeliers and lever to cross the broken interior and reach the kitchen and grand staircase. When you reach the staircase and see the tower route ahead, turn away from the large windows and take the small path to the right. Continue to the dead end for the Louis XVI Louis d’or Coin.
- Diamond and Pearl Bracelet collected from the upper exterior detour.
- Louis XVI Louis d’or Coin collected beside the broken staircases.
3. Reach and solve the four-knight mechanism
Continue through the chateau until you reach the room with four knight statues and a fireplace. Before using the mechanism, enter the alcove on the left and shoot the far-left painting or the hanging cover beside it. Collect the Emerald Cameo Brooch when it falls.
Read Drake’s journal and rotate the statues until their weapons face the correct targets. The shield knight must face the axe knight, the axe knight must face the shield knight, the mace knight must face the shield knight and the sword knight must face the axe knight. The sword statue may already be correctly positioned, depending on the starting state. When the arrangement is correct, the hidden passage opens.
- Emerald Cameo Brooch shot down and collected.
- The four knight statues are aligned and the secret passage opens.
4. Search the caves and courtyard before the grenade fight
After falling through the opened passage, hug the right wall of the cave route to find the Art Nouveau Belt Buckle. Continue through the water and cavern until you emerge near the courtyard. Use stealth around the first guards when possible, then clear the courtyard and the enemies near the truck and building.
Follow the route into the building and complete the grenade tutorial. After the immediate enemies are defeated, drop down and search the back-left corner behind Drake for the Ruby and Diamond Ring. This is the seventh treasure route in the chapter, so do not advance directly toward the next firefight after the tutorial.
- Art Nouveau Belt Buckle collected along the cave wall.
- Ruby and Diamond Ring collected in the back-left corner after the grenade tutorial.
5. Survive the larger firefights and take the upper beam route
Move through the next combat rooms using the crates, walls and raised positions for cover. After the major firefight, Drake and Sully force open the large double doors. When Sully suggests going down, turn right instead and make a U-turn toward the climbable red-stone wall.
Climb to the rafters, cross the beam and follow the upper platform to the Silver Rococo Teapot. Return to the main route, then descend toward the corpse and the ladder leading to the puzzle room. If you drop down before taking the upper route, the treasure may require replaying the chapter from Chapter Select.
- Silver Rococo Teapot collected from the rafters.
- The combat area is cleared and the ladder to the floor-symbol puzzle is reached.
6. Cross the floor-symbol puzzle
At the floor grid, begin on the moon-and-circle starting symbol. Follow the journal’s grouped route exactly: up, left, up, right; up, up, left; down, left, up, up; right, right; then right, up, left and onto the final field.
The groups require four red symbols, followed by three green symbols, four blue symbols, two green symbols and three red symbols before the final tile. If Drake steps on a wrong symbol, the puzzle resets. Wait for the reset and begin again from the moon-and-circle tile rather than trying to continue from the mistake.
- The floor grid is crossed without triggering a reset.
- The hidden passage beyond the grid is open.
7. Collect the pendant, solve the animal wall and finish the chapter
After crossing the floor grid, enter the hidden passage and look up at the vaulted ceiling for the Miniature Portrait Pendant. Shoot it down and collect it before continuing. Proceed to the altar, wait for Sully’s dialogue and use the cipher disk when prompted. Help Sully move the altar aside, then follow the tunnel to the animal-symbol chamber.
The wall puzzle uses Eagle, Horse, Lion and Bull. Using a top-to-bottom, left-to-right 1-based grid description, place Lion in row 2 column 2, Bull in row 3 column 4, Horse in row 4 column 1 and Eagle in row 5 column 3. The game’s journal and the illuminated floor symbols explain these positions; the listed arrangement is the direct solution.
Continue through the opened passage to the tomb and complete the story sequence. After the confrontation and the chateau fire begins, follow Sully through the escape route, climbing and jumping when prompted. The chapter ends when the escape transitions into Chapter 7.
- Miniature Portrait Pendant shot down from the vaulted ceiling.
- Cipher disk sequence completed.
- Lion, Bull, Horse and Eagle placed in the correct wall positions.
- The tomb sequence and burning-chateau escape are complete.
Before you move on
- Chapter Select shows Chapter 6, The Chateau, as completed after the burning-chateau escape transitions onward.
- A complete Chapter 6 treasure sweep contains nine items: Antique Wax Seal Stamp, Gold Inlay Cameo Bangle, Diamond and Pearl Bracelet, Louis XVI Louis d’or Coin, Emerald Cameo Brooch, Art Nouveau Belt Buckle, Ruby and Diamond Ring, Silver Rococo Teapot and Miniature Portrait Pendant.
- The knight mechanism, floor-symbol route, cipher-disk sequence and animal-symbol wall puzzle have all been completed.
- The story has advanced beyond the tomb confrontation and the characters have escaped the burning chateau.
Chapter 7 — Stay in the Light
Chapter 7 is a short escape through the burning chateau after Drake and Sully leave the underground ruins. Follow Sully through the collapsing passages, use the chandelier and lowered-ceiling route to reach the upper floor, then collect the chapter’s only treasure, the Gold and Pearl Stickpin, before rejoining him. The second half is a linear escape involving collapsing stairs, firefights, an attic ladder, and a roof run. Keep moving through the burning building, use cover when Marlowe’s men appear, and make each prompted jump carefully. The chapter ends after Drake slides down the roof and grabs a pipe. The following chapter, “The Citadel,” confirms that the escape is complete.
1. Escape the underground ruins and reach the chateau interior
After the opening scene, follow Sully through the underground passage. When the spider-like creatures begin pursuing Drake and Sully, prioritize the route ahead instead of searching the side passages. Climb through the opening in the wall, then run through the collapsing sections as the camera leads you toward safety.
After reaching the chateau, drop into the next room and move toward the window. The way forward continues outside and upward. Use the visible ledges and climbing surfaces rather than trying to jump toward distant or unmarked walls. The escape route is linear, but pauses during the collapse can cause Drake to be caught by the creatures or miss a required jump.
- Follow Sully through the passage and wall opening.
- Run through the collapsing sections without detouring into dark side areas.
- Drop into the chateau room and continue toward the window.
2. Cross the chandelier and lower the ceiling section
Climb out through the window and jump to the chandelier. Move around the chandelier until Drake can reach the opposite wall, then climb upward. At the upper section, interact with the weakened ceiling or floor area to pull it down. This creates a sloped route that Sully can use to reach the next part of the building.
Do not follow Sully immediately after the ramp is created. The treasure is reached from this upper level, and leaving with Sully too soon can carry you past the only collectible in the chapter.
- Reach the chandelier through the window.
- Climb to the upper wall after crossing the chandelier.
- Pull down the weakened ceiling section to create Sully’s ramp.
- Remain on the upper level instead of following Sully at once.
3. Collect the Gold and Pearl Stickpin
From the upper floor, turn away from the direction Sully takes. Follow the remaining wooden floor around the gap and jump across to the opposite side. Continue around the upper room and enter the small side room with the wooden floor. The Gold and Pearl Stickpin is inside, near the corner of the room.
Pick up the treasure before returning to the ramp. This is Chapter 7’s only treasure on the original PlayStation 3 release. It is not in the lower creature area, and it does not require a separate puzzle or combat encounter.
- Turn away from Sully after the ceiling section drops.
- Cross the gap using the upper wooden route.
- Enter the side room and collect the Gold and Pearl Stickpin.
- Return to the main route only after confirming the pickup.
4. Cross the collapsing stairs and clear the burning rooms
Rejoin Sully and follow the ramp down into the next area. Continue toward the door and the floor gap Sully indicates. After the brief scene, climb the stairs. Drake will be caught during the collapse, so cover Sully while he pulls Drake free and shoot the enemies entering the area.
The stairs collapse again as you continue upward. Jump the gap to the remaining stair section and shimmy across to Sully. When Sully is in danger, move along the ledge and help him up, then continue climbing until you reach the upper room.
Drop from the attic area and take cover behind the bathtub when Marlowe’s men attack. Clear the enemies from cover, then continue through the burning rooms. Watch for the next opening and use the collapsed ceiling route to reach the attic. Climb the ladder to the roof when the path is clear.
- Follow Sully down the ramp and approach the collapsing doorway.
- Cover Sully while he frees Drake.
- Jump the broken stair gap and shimmy to Sully’s position.
- Help Sully up before continuing toward the upper room.
- Use the bathtub and nearby cover during the firefight.
- Reach the attic and climb the ladder to the roof.
5. Run across the roof and finish the chapter
Once Drake reaches the roof, begin the escape immediately. Run across the roof and make the required jumps as the structure breaks apart. Do not stop to search the roof; the chapter treasure was in the upper side room before the staircase sequence.
Near the end, Drake slides down the roof slope. Prepare for the final jump to the pipe and complete the grab. The chapter ends after this escape sequence, and Chapter 8, “The Citadel,” begins. If the treasure was missed, replay Chapter 7 through Chapter Select rather than restarting the campaign.
- Run across the roof as the building collapses.
- Make the final roof jump and grab the pipe.
- Wait for Chapter 8, “The Citadel,” to begin.
- Use Chapter Select if the Gold and Pearl Stickpin was missed.
Before you move on
- Gold and Pearl Stickpin is recorded in the treasure list for Chapter 7.
- Drake completes the burning-building escape, reaches the roof, slides down, and grabs the final pipe.
- Chapter 8, “The Citadel,” begins after the roof escape.
- Chapter Select records Stay in the Light as completed if the chapter was started and finished through its ending transition.
References for this chapter
Chapter 8 — The Citadel
Enter the Syrian citadel with Sully, lower the drawbridge, descend through the well and fight through the fortress interior. The original PlayStation 3 chapter contains seven treasures: Silver Sassanid Coin, Ancient Metal Elephant, Crusader Coin, Enamel Copper Vessel, Marble Double Eye Idol, Medieval Lead Horseman and Byzantine Reliquary Cross. Several are shot down from walls, statues or windows, so inspect overhead areas before moving on. After reuniting with Chloe and Cutter, survive the courtyard fight, examine Polaris through a firearm scope and push the central pillar to open the passage leading to Chapter 9, The Middle Way.
Cross the damaged bridge and collect the Silver Sassanid Coin
Follow Sully through the opening approach and begin climbing toward the next stone bridge. When you reach the damaged section surrounded by a low fence, do not cross directly toward the fortress. Vault over the fence and climb down into the arches on the right side of the bridge.
Traverse along the arches until you reach the lower route beneath the damaged section. The Silver Sassanid Coin is on the lower-left side near the beginning of the second arch. Collect it, then climb back to the main path and continue toward the first enemy position.
Use the walls, corners and raised stonework to approach the guards quietly if you want to conserve ammunition. Once the fight begins, clear the area around the drawbridge mechanism before operating it.
- Silver Sassanid Coin collected from the lower bridge arches.
- Main route recovered after returning from the optional bridge descent.
Lower the drawbridge and search the entrance courtyard
After the first encounter, work with Sully to lower the drawbridge. Cross it and move to the far railing of the next open area. Look up and slightly to the right, toward the broken upper masonry near the locked metal gate. The Ancient Metal Elephant is mounted high on the wall. Shoot it down and pick it up from the ground.
Shoot the lock on the large metal gate and pass through. Immediately turn right to the statue beside the entrance. The Crusader Coin is resting on the statue, so collect it before following Sully deeper into the citadel.
Continue through the courtyard and use cover whenever the guards gain the high ground. Grenades can clear groups near the walls, but retreat through the gate or back toward the drawbridge if the open courtyard becomes too exposed.
- Ancient Metal Elephant shot down and collected.
- Crusader Coin collected from the statue immediately beyond the locked gate.
Descend through the well and collect the Enamel Copper Vessel
Enter the interior route and use the well bucket when Sully lowers it. After reaching the lower level, deal with the nearby guards. Stealth takedowns are useful here because the enclosed area makes a prolonged firefight awkward, but direct combat is also safe if you keep the well structure and walls between you and the enemies.
After clearing the first group, find the wall and climbing route used to leave the well area. Before climbing away, look for the small lamp-lit room beside the route. The Enamel Copper Vessel is on the floor inside this side room, near the wall.
Return to the exit route and continue until Sully shoots open the lock that blocks your way. Do not assume the underground section is complete until you have checked the side room and collected the vessel.
- Enamel Copper Vessel collected from the lamp-lit room after the well descent.
- Sully has opened the exit lock before proceeding to the next courtyard.
Exit the well and shoot down the Marble Double Eye Idol
Once the exit is open, pass through the doorway and immediately turn around. Look upward at the corner of the building above the exit. The Marble Double Eye Idol is a small white figurine attached to the upper wall rather than lying on the ground.
Aim at the figurine and shoot it down. Move back into the previous area and collect the idol after it falls. This pickup is easy to miss because the correct viewpoint is behind you after the game appears to direct you forward.
Continue into the courtyard and clear the next group of guards. Stay near the doorway and stone cover if needed, then follow the route toward the round room and the damaged tower.
- Marble Double Eye Idol shot down from the wall above the well exit.
- Fallen idol collected before advancing toward the tower.
Reach the round room, collect the Medieval Lead Horseman and survive the courtyard
Proceed through the fortress until you reunite with Chloe and Cutter and reach the round room with the large metal gates. After the gates are lifted, move to the far side of the room and inspect the windows. The Medieval Lead Horseman is in the alcove of the third window on the right-side route.
Collect the horseman before leaving the round room. Continue upward and through the damaged fortress sections until Talbot’s men attack. Use stealth if the patrols are spread out; otherwise, fight from cover and prioritize enemies with powerful ranged weapons.
When the route reaches the observation area, stand on the sun symbol and follow the visual direction toward the matching symbol below. The next sequence opens the path toward the final treasure and the Polaris observation.
- Medieval Lead Horseman collected from the round-room window alcove.
- Courtyard and tower enemies defeated or bypassed so the observation route is open.
Collect the Byzantine Reliquary Cross and open the hidden passage
During the final courtyard encounter, Sully destroys the damaged tower to remove the immediate threat and create a large opening. Enter through that opening after the fighting subsides. The Byzantine Reliquary Cross is immediately on the right in the broken interior area. Collect it before climbing onward.
Continue to the observation platform and use a firearm scope to examine Polaris when the game directs Nate to identify the constellation. Merely standing on the sun symbol does not complete this sequence; the constellation must be viewed through the scope.
After the story scene, return to the central pillar with the group. Push the middle pillar when prompted to reveal the concealed route. Enter the passage and allow the transition into Chapter 9, The Middle Way, to complete the chapter.
- Byzantine Reliquary Cross collected from the right side of Sully’s tower opening.
- Polaris examined through a firearm scope.
- Central pillar moved and the passage into The Middle Way entered.
Before you move on
- Chapter Select records seven Chapter 8 treasures: Silver Sassanid Coin, Ancient Metal Elephant, Crusader Coin, Enamel Copper Vessel, Marble Double Eye Idol, Medieval Lead Horseman and Byzantine Reliquary Cross.
- The Polaris observation sequence has completed and the story scene involving Cutter and the central pillar has played.
- The central pillar has moved, Nate enters the concealed passage, and the transition or checkpoint for Chapter 9, The Middle Way, appears.
References for this chapter
Chapter 9 — The Middle Way
After the fight in the catacombs, enter the large chamber containing the stone globe. Collect the King Bohemond III Coin before leaving the lower floor, then light the braziers and cross the spider-filled platforms using thrown torches and hanging chains. Operate both sluice mechanisms to fill the reservoir, collect the Antique Cuff Bracelet from the overhead support, and return to rotate the globe. The opened route leads to an inner tomb containing the Crusader Fleur-de-Lis. After the tomb sequence, escape through the fortress, defeat the enemies around the gate and bridge, and trigger the chapter-ending scene when Chloe reaches the final gate.
1. Enter the globe chamber and collect the King Bohemond III Coin
Follow Cutter through the narrow tunnel into the catacombs. Complete the close-quarters fight, then continue through the passage until you drop into the large chamber with the stone globe in its center.
Before climbing toward the upper mechanisms, walk around the lower floor along the chamber's left-side perimeter. The King Bohemond III Coin is on the floor beside the wall. Collect it before lighting the braziers or advancing through the spider route.
- King Bohemond III Coin collected.
- Lower floor and left-side perimeter checked before advancing.
2. Light the braziers and cross the spider platforms
Move to the upper level and light the braziers behind the statues. Continue into the side passage and light the brazier at the end. Cutter will provide or prepare torches for the next section.
Throw a torch toward the brazier on the separated platform to drive away the spiders, then jump across. For the higher brazier, use the hanging chain and nearby steps rather than attempting a direct jump. Cross the beam, throw another torch to the next brazier, swing across the following chain and reach the final platform near the waterfall. Light the last brazier before dropping toward the sluice mechanism.
- The statue braziers are lit.
- The spider platforms are cleared using the torch and chain route.
- The sluice mechanism is accessible.
3. Fill the reservoir and collect the Antique Cuff Bracelet
Stand at the first sluice mechanism and press Triangle when the interaction prompt appears. Work with Cutter to release the water, then cross to the second mechanism and operate it so the water flows back toward the globe chamber.
Once the reservoir has filled, look up toward the wooden support above the water. The Antique Cuff Bracelet is attached to it. Position yourself in the water directly beneath the treasure, shoot it down, and immediately swim or move underneath it to catch it with Triangle as it falls. Do not shoot it while the water is still low, and do not stand away from the drop point; the bracelet can sink out of reach.
- Both sluice mechanisms have been operated.
- Antique Cuff Bracelet collected from above the filled reservoir.
4. Rotate the globe and enter the inner tomb
Return to the globe chamber and interact with the globe. Rotate its sections until the illuminated shapes from the chamber's mechanisms align with the corresponding landmasses. Use the matching outlines as the visual guide; no separate code or inventory item is required.
When the alignment is correct, the mechanism opens the hidden route. Follow the newly revealed spiral staircase upward. As soon as you reach the tomb area, check the left side near the coffins and skeletons for the Crusader Fleur-de-Lis. Collect it before continuing into the crypt.
- The globe puzzle is solved.
- Crusader Fleur-de-Lis collected at the top of the spiral staircase.
- All three Chapter 9 treasures are registered.
5. Escape the crypt and reach the fortress combat area
Continue through the tomb and follow the story sequence until Nate reaches the exterior. After the escape begins, move down the stairs and take the first available weapon from the fallen enemy if necessary. Use cover while clearing the open area, then aim toward the gate room and the enemies positioned around it.
Prioritize exposed riflemen before moving forward. Riot-shield enemies are safest to attack from the side or after they expose themselves, while the heavy armored enemy requires sustained fire. Use grenades when several enemies gather, but remain behind cover during sniper fire and avoid crossing open ground without a destination.
- The crypt escape sequence is complete.
- The first exterior combat area is cleared.
- The route to the gate is open.
6. Clear the bridge and finish the chapter
Move toward the far gate and help Chloe open the double doors when prompted. A second enemy wave attacks from the bridge and surrounding positions. Retreat to cover if necessary, eliminate the riot-shield carriers from the side, and concentrate fire on the heavy armored enemy once the ordinary soldiers are down.
Continue across the bridge and through the tower entrance. Clear the final attackers, including the shotgun carrier, then approach the last gate. Wait for Chloe to arrive and press Triangle when the prompt appears. The following scene advances the story to Chapter 10, Historical Research.
- The second wave around the bridge is defeated.
- The final attackers inside the tower are defeated.
- Chloe reaches the last gate and the chapter-ending sequence begins.
Before you move on
- Chapter 9's treasure list shows King Bohemond III Coin, Antique Cuff Bracelet and Crusader Fleur-de-Lis collected.
- The globe mechanism has opened the hidden route to the inner tomb.
- The tomb and fortress escape sequences are complete.
- Chloe reaches the final gate, the chapter-ending scene plays and Chapter 10, Historical Research, becomes the next story chapter.
References for this chapter
- Uncharted 3 Drake's Deception Walkthrough - GameSpot
- The Middle Way — Chapter 9 Walkthrough, Uncharted 3: Drake's Deception — Gamer Guides
- Uncharted 3: Drake's Deception — Guide and Walkthrough
- Uncharted 3 Drake's Deception — Chapter 9 Treasures — GamePressure
- Chapter 18: The Rub' al Khali Walkthrough - IGN guide PDF mirror
Chapter 10 — Historical Research
Chapter 10 of the original PlayStation 3 release is Historical Research. Nate, Sully, and Elena search a Yemeni market for clues while Talbot’s men pursue them. The chapter begins as a mostly peaceful market traversal, then shifts into rooftop climbing, a short pursuit, and a large marketplace brawl. Seven treasures are available. Collect the first four while following the route through the market and upper building, then collect the final three immediately after the brawl before following Sully to the chapter exit. The chapter has no required puzzle; progression depends on following the companions, climbing the marked route, entering the building after Talbot, and surviving the marketplace fight.
1. Follow the market route and collect the first two treasures
After the opening conversation, follow Elena and Sully through the narrow market streets. At the bottom of the first stairs, turn left and search beside the first fruit stand for the Antique Cloak Clasp. Do this before passing through the first gate; the item is on the side of the market rather than directly on the route.
Continue through the market until the group reaches another set of stairs. Go down and turn around toward the fountain. The Silver Jambiya Dagger is beside the water pool. Collect it before continuing toward the police roadblock and the next section of the market.
- Antique Cloak Clasp collected beside the first fruit stand.
- Silver Jambiya Dagger collected beside the fountain.
2. Pass the roadblocks and search the abandoned shops
When the police block the route, stay with Elena as she leads the group toward another gate. After the gate opens, enter the abandoned-shop area and search beside the patch of cacti for the Golden Yemeni Bracelet. It is placed off the center of the walkway, so look along the wall and shop fronts instead of running straight ahead.
A second roadblock forces the group to change direction. Use the nearby ladder to reach the red-carpeted building. Climb the stairs to the upper floor, then turn around and search near the far windows for the Traditional Silverbead. This is the fourth treasure and is not in a couch or coffee-table area.
- Golden Yemeni Bracelet collected beside the cacti after the second gate.
- Traditional Silverbead collected upstairs near the far windows.
3. Cross the rooftops and enter the building behind Talbot
Continue through the building and climb to the roof terrace. After the scene overlooking the city, jump to the protruding beams on the opposite side and grab the railing. Shimmy across the exterior, use the metal bars and awning to cross the gap, then move along the building until the route reaches the drainpipe.
Ride the drainpipe down when Talbot leaves through the doorway, then enter the building behind him. The rooftop section is required progression, not an optional treasure detour. If you fall, use the marked ledges and beams to regain the route rather than searching the streets below.
- Roof terrace reached.
- Exterior beams, awning, and drainpipe traversal completed.
- Building behind Talbot entered.
4. Survive the marketplace brawl
The next scene throws Nate into a market with a fish stand and several enemies. Use the stalls and nearby walls to avoid being surrounded. Keep moving around the enclosed area, counter close attacks, and deal with ordinary attackers before concentrating on the heavily protected brute. When more enemies arrive, use the open spaces near the shops and the available dropped weapons to finish the encounter.
After the fight, do not immediately follow Sully through the open gate. Three treasures are placed along the escape route, and the chapter ends soon after the last one. If you pass the final ledge without collecting them, replay the chapter from Chapter Select.
- Marketplace brawl completed.
- The route through the open gate is available.
- The area has been swept before continuing.
5. Collect the three treasures after the fight
Follow the opening route after the brawl, but hug the wall immediately after the crowd to find the Amber and Silver Necklace in a small alcove on the right.
Continue down the stairs. At the bottom, do not go straight through the archway. Turn around and search the ground in front of the blue shop for the Kahraman Amber Necklace.
From that location, climb the nearby ledge to the left. Search behind the three boxes for the Unusual Red Bead Necklace. After collecting it, follow Sully along the remaining route to finish the chapter.
- Amber and Silver Necklace collected in the post-brawl alcove.
- Kahraman Amber Necklace collected at the bottom of the stairs near the blue shop.
- Unusual Red Bead Necklace collected behind the three boxes.
6. Confirm completion
Continue following Sully after the last treasure. The remaining path is linear and ends when the chapter transition completes. Chapter Select should list seven treasures for Historical Research, and the collected-items list should contain Antique Cloak Clasp, Silver Jambiya Dagger, Golden Yemeni Bracelet, Traditional Silverbead, Amber and Silver Necklace, Kahraman Amber Necklace, and Unusual Red Bead Necklace.
If the count is lower, replay the chapter and check the locations in route order: first fruit stand, fountain, cacti, upper-floor windows, post-brawl alcove, blue-shop stairs, and boxes on the ledge.
- Historical Research shows seven treasures collected.
- The final post-brawl transition completes and the next chapter becomes available.
- All seven named treasures are registered.
Before you move on
- Chapter Select identifies the section as Historical Research and reports seven treasures.
- The treasure list includes Antique Cloak Clasp, Silver Jambiya Dagger, Golden Yemeni Bracelet, Traditional Silverbead, Amber and Silver Necklace, Kahraman Amber Necklace, and Unusual Red Bead Necklace.
- Nate completes the market, rooftop, Talbot pursuit, and marketplace-brawl sequence, and the following chapter loads.
References for this chapter
- Uncharted 3 Drake's Deception Walkthrough - GameSpot
- Uncharted 3: Drake's Deception - Treasure Guide — GameFAQs
- Historical Research — Chapter 10 Walkthrough — Gamer Guides
- Uncharted 3: Drake's Deception — Guide and Walkthrough
- Uncharted 3: Drake's Deception — Find All the Treasures, Part One — Prima Games
Chapter 11 — As Above, So Below
Descend through the Yemen well, align the underground map, solve the light-and-shadow and gear mechanisms, escape the spiders, and pursue Talbot through the city. This chapter contains nine treasures. The first is on a ledge around the well shaft, while the next five are in the underground passage and puzzle rooms. The final three are found during the city route after the spider escape, with one more treasure inside a carpet stall near the end of the chase. Complete the chapter when Nate catches Talbot and is knocked unconscious, triggering the transition to Chapter 12.
Enter the well and collect the Silver and Coral Ring
After the opening conversation, climb down the well ladder. When the ladder reaches the broken section near the bottom, do not drop straight down. Move left and follow the rusted metal bar and ledge around the outside of the shaft. Shimmy across the opening to reach the Silver and Coral Ring, then return to the ladder route and descend.
If you miss this item, use Chapter Select to replay Chapter 11 rather than relying on a later pickup opportunity. The treasure counter is the reliable way to confirm that it registered.
- Silver and Coral Ring collected before entering the underground chamber.
Align the underground map and open the passage
Continue through the underground chamber until Sully identifies the markings on the wall. Find the moon symbol on the floor and stand on it. Raise the map and rotate your view until the three pillars represented on the map line up with the actual pillars in the room.
When the alignment is correct, Sully and Elena move to their positions. Pull the nearby lever when prompted. The three characters activate the mechanism together, opening the long passage ahead.
- The map is aligned from the moon-marked position.
- The lever sequence has opened the underground passage.
Take the Silver and Leather Dagger in the hallway
Enter the newly opened passage and keep close to the left wall. Continue past the successive gateways and check the left side just beyond the third pair of statues. The Silver and Leather Dagger is on the floor before you reach the larger room where the gates close.
After collecting it, continue forward and climb toward the two puzzle wings. The wings can be completed in either order, and both routes reconnect.
- Silver and Leather Dagger collected before entering the puzzle wings.
Solve the gear room and collect the Pearl and Emerald Brooch
In the gear-puzzle room, first circle around the lower-right side of the room instead of climbing directly toward the mechanism. The Pearl and Emerald Brooch is behind a column above the entrance area and is easiest to reach from this lower route.
To solve the mechanism, place the available cross-shaped and circular gears so the connected wheels turn in the required alternating pattern. If a gear refuses to rotate, remove it and check that the neighboring gear types alternate correctly. The final large gear is on an upper ledge. Climb around the opposite side of the room to reach it, then install it and activate the mechanism.
- Pearl and Emerald Brooch collected near the gear-room entrance.
- The upper ledge has been searched for the final large gear.
- The completed gear mechanism opens the route onward.
Complete the light-and-shadow room
In the light-and-shadow room, search the left side before working on the projection. The Silver Box Pendant is in the side area near the pillar and can be missed if you go directly to the lamp.
Use the lamp to project the required silhouette onto the wall. Adjust its position and Nate’s viewing angle until the image forms a man wielding a spear and the puzzle registers. If the outline looks nearly correct but does not activate, reposition the lamp or adjust the camera rather than leaving the room.
- Silver Box Pendant collected from the left side of the room.
- The spear-bearing silhouette has activated the puzzle.
Dislodge and collect the Silver Filigree Bracelet
After the shadow puzzle activates, remain in the room. Carry the lamp back toward the central map area and shine it at the right side of the ceiling. The light causes the Silver Filigree Bracelet to fall.
Set the lamp down and search the floor below the impact point. Collect the bracelet before leaving the puzzle room.
- Silver Filigree Bracelet collected from the floor after using the lamp.
Escape the underground chamber
Follow the newly opened route and continue through the spider sequence. Stay with Sully and Elena, move toward the next climb or doorway whenever the path opens, and use weapons only when necessary. The objective is to escape the underground area, not to search for additional side rooms.
After the escape, Nate returns to the city level and becomes separated from Sully and Elena. The remaining treasures are along this city route and the later pursuit of Talbot.
- The spider escape is complete.
- Nate has returned to the city level.
Collect the three fountain-area treasures
When Nate is moving through the city alone, take the right-hand dead-end branch before rejoining the route used by Sully and Elena. Collect the Amazonite and Amber Necklace at the end of this short branch.
Continue to the large fountain. Check the far-right side and collect the Silver Capsule Pendant from the bench. Then move to the left side of the fountain and inspect the ground in the archway and crowd area for the Amazonite and Amber Earring. Pick up both items before approaching the stairs that trigger the next scene.
- Amazonite and Amber Necklace collected from the right-hand dead end.
- Silver Capsule Pendant collected from the bench by the fountain.
- Amazonite and Amber Earring collected on the left side of the fountain.
Take the Silver Yemeni Bangle during the bazaar chase
Continue through the drugged city sequence and follow Talbot through the required climbs, windows, and building route. Near the end of the chase, Talbot disappears into a crowded bazaar. Do not immediately continue after him.
Enter the carpet-stall nook on the right side of the bazaar and collect the Silver Yemeni Bangle among the carpets. Then return to the main route, follow Talbot across the market rooftops and streets, and complete the final hand-to-hand sequence.
- Silver Yemeni Bangle collected from the right-hand carpet stall.
- The Talbot pursuit and final fight are complete.
- Nate is knocked unconscious and the transition to Chapter 12 begins.
Before you move on
- The Chapter Select or treasure counter records all nine Chapter 11 treasures: Silver and Coral Ring, Silver and Leather Dagger, Silver Box Pendant, Silver Filigree Bracelet, Pearl and Emerald Brooch, Amazonite and Amber Necklace, Silver Capsule Pendant, Amazonite and Amber Earring, and Silver Yemeni Bangle.
- The underground map mechanism, gear mechanism, and light-and-shadow puzzle have opened their routes.
- The spider escape and city pursuit are complete.
- The final confrontation with Talbot ends with Nate unconscious and the game transitions to Chapter 12, confirming Chapter 11 is finished.
References for this chapter
- Uncharted 3 Drake's Deception Walkthrough - GameSpot
- Uncharted 3: Drake's Deception - Treasure Guide — GameFAQs
- As Above, So Below — Chapter 11 Walkthrough, Gamer Guides
- Uncharted 3: Drake's Deception — Guide and Walkthrough
- Uncharted 3: Drake's Deception — Find All the Treasures, Part Two — Prima Games
Chapter 12 — Abducted
Drake escapes Rameses’s cargo ship, crosses the ship graveyard and fights through the wreckage toward the pirate ship. Chapter 12 contains seven treasures. Collect the Seahorse Vesta Case after the opening brawl, then the Silver Figa Amulet in the right-hand storage room after Drake recovers his holster. In the open wreckage area, clear or bypass the pirates and turrets before taking the far-right route to the Antique Silver Parrot. The remaining treasures are found around the gutted ship: the Turquoise and Pearl Bracelet near the steel beams, the Unusual Blue Stone Ring above a rope, the Gold Scarab Brooch below the next platform and the Gold Axumite Coin in the control room before the zip line. Take the zip line, survive the final encounters and continue until Chapter 13: Rough Seas begins.
1. Escape the cargo ship and collect the Seahorse Vesta Case
The chapter begins with Drake trapped aboard Rameses’s cargo ship. Fight the pirates in the room, using counters and quick melee attacks to avoid being surrounded. A brute enters near the end of the encounter, so keep moving around the room rather than letting him pin you against a wall.
After the fight, climb the ladder onto the shipping containers. Take the upper route around the side with the tires, not the side blocked by the rum barrels. The Seahorse Vesta Case is in the far corner of this container area. Collect it before continuing.
Return to the route and climb across the canvas-covered crates. Shimmy along the wall, climb the ladder and use the overhead bars. When the bars begin to collapse, move across them quickly, swing from the bar and jump to the metal cable leading to the exit.
- Seahorse Vesta Case collected
- Opening pirate fight completed
- Cargo-ship exit route reached
2. Recover Drake’s holster and search the storage room
Continue through the ship’s traversal route until Drake recovers his empty holster. At the hallway fork, the story path goes left. Turn right instead and enter the small storage room. The Silver Figa Amulet is on the floor among the crates.
Leave the room and follow the main route through the bulkhead. After the exterior cutscene, jump to the rope, swing to the yellow pipe and shimmy across the wreckage. Use the next pipe and anchor point to drop into the ship graveyard.
- Silver Figa Amulet collected
- Holster sequence completed
- Ship graveyard reached
3. Cross the open wreckage and collect the Antique Silver Parrot
Drake enters the open graveyard without a weapon. Stealth-kill the first isolated pirate if possible, then use the wrecks and floating platforms as cover. You can remain quiet for part of this section, but a firefight may begin as you approach the turrets.
Avoid crossing the turret lanes until you can reach an RPG or grenade launcher. From the entrance, work toward the right side of the area. Locate the broken ship hull near the blue container and climb through it. This route provides access to the upper platform and helps you avoid the worst of the turret fire.
After the main group is reduced, return to the right-side route and climb toward the broken platforms. Follow the high path over the gaps to reach the Antique Silver Parrot. Continue toward the mast with the yellow ladder, but first eliminate distant snipers if they have appeared.
- Antique Silver Parrot collected
- Turret danger bypassed or neutralized
- Mast and yellow-ladder route reached
4. Push the metal crate and collect the Turquoise and Pearl Bracelet
Climb the mast and continue over the wire and broken ladder. After crossing the next combat area, defeat the pirates around the yellow crane and the armored enemies. A riot-shield enemy can be disarmed by running over the shield, giving you a useful weapon for the armored fight.
Find the metal crate attached to the yellow crane and push it off the edge. Use the new route to jump across, move left and descend to the next platform. Pull yourself onto the metal walkway, then look for the steel beams rather than following the obvious route forward.
Loop left and drop down from the walkway. Jump across the beams and shimmy through the wreckage to reach the Turquoise and Pearl Bracelet. Return to the walkway after collecting it.
- Turquoise and Pearl Bracelet collected
- Crane-mounted crate pushed into position
- Armored encounter cleared
5. Climb the rope for the Unusual Blue Stone Ring
Continue up the outside of the gutted ship, using the red handholds as cover whenever enemies fire from above. Clear each ledge before climbing farther, especially on higher difficulties, because enemies can attack while Drake is hanging from the handles.
After the upper deck and monkey-bar section, climb the ladder to the next deck. On the opposite side, jump to the rope. Do not swing across immediately. Climb straight up the rope to the window above and enter the small opening to collect the Unusual Blue Stone Ring.
Climb back down to the rope, build enough swing and jump across to the next section. Follow the exterior route toward the control room.
- Unusual Blue Stone Ring collected
- Upper-deck enemies defeated or bypassed
- Rope route completed
6. Drop below the platform for the Gold Scarab Brooch
After swinging across from the rope, climb onto the small deck. Do not enter the next room immediately. Move to the far side and drop over the edge where the route allows it.
Climb down the exterior handholds and inspect the lower platform beneath the deck. The Gold Scarab Brooch is below the main path. Collect it, then climb back up and enter the control room.
- Gold Scarab Brooch collected
- Lower platform searched
- Control room reached
7. Collect the Gold Axumite Coin and finish the chapter
A cutscene takes place in the control room. When it ends, the zip line is available, but do not use it yet. Walk to the far end of the room and check the right-hand corner for the Gold Axumite Coin.
After collecting the coin, take the zip line. Continue through the wreckage and defeat the remaining pirates, including the enemies positioned near the upper platforms. Use cover during the final firefight, then follow the yellow bars, ladders and gaps through the rusted hulls. A close-range attack is effective against the final armored enemy if you can approach from cover.
Continue through the final door and story transition. When the game loads Chapter 13: Rough Seas, Chapter 12 is complete. There is no boss fight in Abducted.
- Gold Axumite Coin collected
- All seven Chapter 12 treasures registered
- Zip-line sequence completed
- Chapter 13: Rough Seas begins
Before you move on
- The game identifies the chapter as Abducted in Chapter Select.
- The Chapter 12 treasure total is seven.
- The treasure list contains the Seahorse Vesta Case, Silver Figa Amulet, Antique Silver Parrot, Turquoise and Pearl Bracelet, Unusual Blue Stone Ring, Gold Scarab Brooch and Gold Axumite Coin.
- The final zip-line and wreckage sequence is complete and Chapter 13: Rough Seas begins.
- If a treasure was missed, replay Chapter 12 through Chapter Select and verify the individual treasure registration after collecting it.
Chapter 13 — Rough Seas
Cross the flooded ship graveyard and reach Rameses’ cruise ship. Chapter 13 contains three treasures, all in the opening wreckage before the green mechanical bridge: the Silver Tribal Bangle in an open yellow shipping container, the Antique Silver Box near the damaged plywood shed, and the Ancient Gold and Coral Bracelet around the same barge. Stealth is possible, but a direct fight also works. After lowering the bridge, survive the collapse, board the escaping boats, use the KAL-7 during the first boat fight, then take the RPG from the right side of the second boat and destroy the pursuing rocket boat. Climb the cruise ship’s ladder to begin Chapter 14.
1. Enter the ship graveyard and secure the opening area
Move across the first improvised platforms into the wreckage. You may silently eliminate the guards or start a gunfight; stealth reduces the pressure, but it is not required for progression. If combat begins, use the crates, containers, and raised wreckage as cover because enemies can approach from several directions.
Do not lower the green mechanical bridge yet. The three treasures are located before that event, and the bridge collapse changes the area into an escape sequence. First cross the early connecting platforms and identify the barge with the yellow container and the damaged plywood shed.
- Reach the first barge area.
- Leave the green mechanical bridge unused.
- Clear or bypass the guards around the treasure route.
2. Collect the Silver Tribal Bangle
From the opening route, follow the platforms toward the crane with the red base. Behind the crane is an open yellow shipping container. Jump across the available gap, enter the container, and collect the Silver Tribal Bangle.
This container is on the opposite side of the early wreckage from the damaged shed. If you are fighting, clear the nearby patrol before making the jump; falling into the water can return you to the current combat checkpoint.
- Silver Tribal Bangle collected from the open yellow container.
- Crane with the red base used as the landmark.
3. Collect the Antique Silver Box
Return across the platforms toward the barge with the damaged plywood shed. Continue to the right side of the wreckage until you reach the shed and the nearby dark blue oil drums. The Antique Silver Box is behind the shed on top of the drums, just off the main route.
The shed and oil drums are the most useful landmarks. Do not confuse this location with the yellow container: the box is on the barge section reached after crossing the connecting platforms, while the bangle is inside the separate yellow container.
- Antique Silver Box collected.
- Damaged plywood shed and dark blue oil drums checked.
4. Circle the barge for the Ancient Gold and Coral Bracelet
From the Antique Silver Box, turn around and follow the barge’s outer edge. Keep hugging the right side and make the successive turns around the wreckage. The Ancient Gold and Coral Bracelet is on the opposite side of this barge, north of the box’s position and away from the direct bridge route.
A guard patrols this side in the normal encounter. Wait for him to separate from the others for a stealth takedown, or use the wooden crates and metal debris as cover. Once this treasure is collected, all three chapter treasures are secured.
- Ancient Gold and Coral Bracelet collected.
- All three Chapter 13 treasures registered before the bridge event.
5. Lower the bridge and survive the collapse
Return to the green mechanical bridge and operate its winch. As Drake starts across, a pirate destroys the mechanism and Drake falls into the water. Climb back onto the remaining floating platforms and prepare for another enemy wave.
Enemies appear from the right. Use the surviving dock sections for cover, eliminate the closest threats, and advance toward the back of the area where the pirates’ boat is waiting. A man with flares can indicate the direction of the boat, although he may already have been killed during the fight.
- Green bridge operated after collecting every treasure.
- Drake has climbed out of the water.
- The post-collapse enemy wave is cleared or bypassed.
6. Board the escaping boats
Move toward the waiting boat and try to board it. Drake is knocked back by the wave, so when control returns, run along the dock and jump onto the boat as it pulls away. Fight the pirates on deck and use the KAL-7 for the close-range enemies. Take cover around the cabin and railings instead of standing in the open.
A second boat pulls alongside and sends more pirates over. Defeat the boarders while watching the first boat; it catches fire and is destroyed. Jump to the neighboring boat when the game provides the opening, then clear the remaining enemies there.
- First escaping boat boarded.
- KAL-7 used or secured during the first boat fight.
- Second boat reached after the first boat catches fire.
7. Destroy the pursuing boat and reach the cruise ship
A separate boat begins firing rockets at your position. Run up the right side of the boat and take the RPG. Fire at the pursuing craft from cover; the launcher receives replenishing ammunition during this encounter, so keep firing until the attacking boat is destroyed. Continue using the boat’s structures for protection from incoming fire.
After the destruction sequence, move to the cruise ship and jump to its ladder. Climb aboard to finish the chapter. The next chapter title, Chapter 14 — Cruisin’ for a Bruisin’, confirms that the story transition has completed.
- Pursuing rocket boat destroyed with the RPG.
- Cruise ship ladder reached.
- Chapter 14 begins.
Before you move on
- The chapter treasure tally records Silver Tribal Bangle, Antique Silver Box, and Ancient Gold and Coral Bracelet.
- Drake has boarded the cruise ship after destroying the pursuing rocket boat.
- The game advances to Chapter 14 — Cruisin’ for a Bruisin’.
Chapter 14 — Cruisin' for a Bruisin'
Drake boards the pirate cruise ship and works through violently rocking decks, a container-filled arena, the pool deck, ballroom and lower hold while trying to reach Sully. Chapter 14 contains nine treasures. The first two are on the opening stern deck, the third is in the container arena, and the remaining six run from the pool through the ballroom exit and into the hold. Search each area before using its obvious exit: several treasures are placed behind containers, beside pool furniture, behind a bar, under stairs and immediately inside the hold. During combat, use containers and railings as cover, remove ordinary pirates before dealing with armored enemies, and use grenades or a grenade launcher against heavy targets. After the final treasure, continue through the cargo-hold encounter until the game advances to Chapter 15, Sink or Swim.
Board the ship and collect the opening treasures
After the opening sequence, climb the ladder onto the pirate ship and follow the deck toward the staircase marked by a star-shaped design. Before climbing those stairs, turn left into the short alcove and collect the Unusual Mask Brooch.
Continue up the stairs and around the stern until you reach the lifeboat. When Drake says he needs to reach the upper deck, do not enter the lifeboat yet. Continue forward around the corner to the rear dead end and pick up the Rose Cut Diamond Pendant near the fire-hose case. Return to the lifeboat and use it to continue. After it breaks away, climb the hanging structure and follow the ropes, beam and ladder to the upper deck.
- Unusual Mask Brooch collected.
- Rose Cut Diamond Pendant collected before entering the lifeboat.
Cross the container arena and take the Emerald and Pearl Necklace
On the upper deck, use the ropes to reach the containers and deal with the first guard. Continue across the containers until the route drops you into the large open arena. The ship rocks during this fight, and new containers fall into position as the waves hit. Stay behind the containers and railings while clearing the ordinary pirates.
An armored pirate and a grenade-launcher enemy appear during the later waves. Keep moving around cover, use grenades when available, or take the grenade launcher from the upper position and use it against the armored target. When the arena is clear, climb onto the yellow container in the area and follow its top into the dead end formed by the surrounding containers. Collect the Emerald and Pearl Necklace before going through the red gate.
- Open-deck encounter completed.
- Emerald and Pearl Necklace collected from the container dead end.
- Armored enemy and grenade-launcher threat cleared.
Search the pool deck before entering the performance hall
Pass through the red gate and enter the pool area. Follow the pool's edge toward the far side, then check the left corner on the pool deck for the Antique Minerva Pendant. Pick it up before using the rotating doors at the end of the deck.
Continue through the doors into the performance hall. The pool is part of the required route, but the treasure is on the deck beside it, not in the water. Do not leave the area until the pickup registers.
- Antique Minerva Pendant collected at the left side of the pool deck.
- Rotating doors to the performance hall reached.
Clear the ballroom and collect the pendant at the exit
The performance hall begins another large firefight. Stay near cover, use the entrance and side walls to break enemy sightlines, and prioritize pirates on balconies or carrying explosive weapons. Armored enemies are safer to handle with grenades or a grenade launcher than with close combat.
When the fight ends and the doors open, leave the hall and turn right rather than immediately following the exterior route. The Ruby and Pearl Pendant is on the floor behind the elevator area. Collect it before continuing outside.
- Performance-hall encounter completed.
- Ruby and Pearl Pendant collected behind the elevator area at the exit.
Sweep the exterior deck, lounge and stairs
From the ballroom exit, follow the exterior deck toward the far end. Pass the unaware guard or take him down, then search beside the stack of blue deck chairs and poolside furniture for the Georgian English Compass.
Turn back toward the ship and enter the lounge area. After dealing with the guard, go behind the small bar to collect the Ruby and Diamond Bracelet. Continue toward the lower level. At the bottom of the stairs, do not go through the door immediately; loop around and search underneath the stairwell for the Amethyst Cufflink.
- Georgian English Compass collected near the blue deck chairs.
- Ruby and Diamond Bracelet collected behind the bar.
- Amethyst Cufflink collected beneath the stairwell.
Enter the hold and finish the chapter
Proceed through the red-lit corridor toward the ship's hold. As soon as you enter the hold, turn left and inspect the dark corner between the crates and the wall for the Golden Amethyst Ring. This is the ninth and final Chapter 14 treasure.
Continue into the cargo bay and fight through the remaining pirates using the containers for cover. Follow the climb prompts when the water and debris change the route; the game directs you toward the closing scene, so do not try to return to earlier deck areas. Complete the encounter and continue until the chapter transition loads Sink or Swim.
- Golden Amethyst Ring collected immediately inside the hold.
- Cargo-bay encounter completed.
- Chapter 15, Sink or Swim, begins.
Before you move on
- Chapter Select shows 9 treasures for Chapter 14, with all nine names collected: Unusual Mask Brooch, Rose Cut Diamond Pendant, Emerald and Pearl Necklace, Antique Minerva Pendant, Ruby and Pearl Pendant, Georgian English Compass, Ruby and Diamond Bracelet, Amethyst Cufflink and Golden Amethyst Ring.
- The cargo-bay sequence is completed and the game advances to Chapter 15, Sink or Swim.
- If a treasure was missed, replay Chapter 14 from Chapter Select and collect it at the verified location; the story campaign can continue normally.
References for this chapter
- Uncharted 3: Drake's Deception — Guide and Walkthrough
- Uncharted 3 Drake's Deception Walkthrough - GameSpot
- Chapter 14 Treasure Hunting Guide - Gamer Guides
- Uncharted 3 Treasures: Chapters 11-14 - GamesRadar+
- Uncharted 3: Drake's Deception — Find All the Treasures, Part Two — Prima Games
- Uncharted 3: Chapter 14 - Cruisin for a Bruisin Walkthrough - GamePressure
Chapter 15 — Sink or Swim
As Rameses’ ship begins to sink, Nathan fights through the flooding hold, escapes an underwater obstruction and climbs through the ship’s rotated interior. Chapter 15 contains one treasure, the Silver Rococo Napkin Ring, located in the bathroom past the room with the bar, before Nathan climbs the bookcase. Afterward, return to the ballroom, use the red rope hanging from the chandelier to cross the broken section, and run through the collapsing ship to finish the chapter. Chapter 16, One Shot at This, follows after the escape sequence.
1. Survive the sinking hold
Chapter 15 begins in the ship’s hold as water rises around Nathan. Take cover and eliminate the armed pirates while the room starts to tilt. The armored enemy moves near an explosive canister; shoot the canister when it is positioned beside him to damage or remove him, then deal with the snipers before they can keep you pinned.
The riot-shield enemy is dangerous at close range. Use cover, explosives or a safe melee opportunity to defeat him, then take the shield if you want extra protection. More enemies arrive after the first group, so keep moving between cover rather than remaining in the open. The encounter ends when the ship rolls over and the room’s orientation changes.
- Clear the enemies in the sinking hold.
- Prioritize the armored enemy, snipers and riot-shield carrier.
- Wait for the ship to flip before searching for the next route.
2. Escape the underwater obstruction
When you reach the stairs, Nathan becomes trapped underwater. Follow the on-screen prompt and tap Triangle repeatedly to push free. After the scene shifts and you regain control underwater, swim toward the vent where bubbles are visible. This is the route forward; do not waste time searching the surrounding flooded rooms.
Continue through the vent and follow the passage until Nathan reaches a climbable section. If you run out of air or become disoriented, orient toward the bubbles and the visible opening rather than swimming back toward the hold.
- Break free at the stairs using the Triangle prompt.
- Swim to the bubbling vent.
- Exit the underwater passage and reach the climbing route.
3. Use the red rope to reach the tilted interior
After leaving the water, turn back toward the gap near the starting landing area. A red rope hangs beside the opening. Jump to it, climb upward and move across the nearby handholds until the route opens into the ship’s rotated interior.
Continue through the tilted corridor by following the reachable ledges and doors. The ship’s walls are now effectively floors and climbing surfaces, so rely on the handholds and the next open doorway rather than the camera’s normal sense of up. Proceed until you enter the room with the bar.
- Find and climb the red rope.
- Traverse the tilted corridor.
- Reach the room with the bar.
4. Collect the Silver Rococo Napkin Ring
From the room with the bar, look for the bathroom before climbing the bookcase. Enter the bathroom and search beside the rusted copper bathtub and toilet area. The Silver Rococo Napkin Ring is the only treasure in Chapter 15 and is easy to miss if you immediately take the bookcase route.
Pick up the treasure before leaving the bathroom. Once collected, return to the climbing route and use the bookcase to continue upward through the ship.
- Enter the bathroom past the bar room.
- Collect the Silver Rococo Napkin Ring near the tub and toilet.
- Climb the bookcase only after collecting the treasure.
5. Return to the ballroom
Continue climbing until the route brings Nathan back toward the ballroom. When you reach the open area, locate the red rope hanging from the middle of the chandelier. Jump to it and swing across to the section of the ship that has broken away.
Use the intended handholds and ledges after landing. Do not make blind jumps toward the open water; the correct route is marked by the rope and the reachable surfaces on the damaged section.
- Reach the ballroom after the bathroom climb.
- Jump to the red chandelier rope.
- Swing to the broken section of the ship.
6. Escape before the ship collapses
After crossing the broken section, continue until the ceiling gives way and the escape sequence begins. Run along the available path and follow the on-screen traversal prompts. Keep moving through the opening instead of stopping to search, because the ship is collapsing and the route is timed by the set piece.
Complete the final escape sequence and allow the cutscene to play. Nathan’s survival and the transition into Chapter 16, One Shot at This, confirm that Sink or Swim is complete. If the treasure was missed, replay the chapter through Chapter Select and collect it during the bathroom climb.
- Follow the route after the chandelier swing.
- Run when the ceiling collapses.
- Watch the chapter-ending sequence and confirm Chapter 16 becomes available.
Before you move on
- Chapter Select records one collected treasure for Sink or Swim: Silver Rococo Napkin Ring.
- Nathan completes the final run through the collapsing ship and survives the escape.
- The story transitions to Chapter 16, One Shot at This.
- If the collectible was missed, replay Chapter 15 and enter the bathroom past the bar room before climbing the bookcase.
References for this chapter
Chapter 16 — One Shot at This
Drake and Elena reach a Yemen airport and fight through hangars, garages and the runway approach to reach the departing cargo plane. Chapter 16 has three treasures: Mosaic Birds Pendant, Song Bird Brooch and Enamel Bird Ring. Collect them in that order before descending from the final airport combat area. The Ancient Alabaster Ibex is not part of this chapter; it appears in Chapter 19, The Settlement. Stealth can reduce the number of enemies, but it is optional. During the last runway sequence, prioritize movement over clearing every opponent, then use Elena’s jeep to jump onto the plane.
Open the first hangar and collect the Mosaic Birds Pendant
After the opening cutscene, follow Elena through the airport approach until you reach the large hangar door. Help her open it, then enter the hangar and climb the uneven stack of boxes. Work upward to the highest point of the pile; the Mosaic Birds Pendant is at the top. Collect it before jumping across the stack or stepping onto the unstable platform that triggers the next scene.
After the scene, push the car toward the window with Elena. Keep pushing until the car reaches the opening, then climb onto it and use it to get through the window before it rolls away down the ramp. Circle around the outside of the building and climb to the roof. Use the open windows to enter the next hangar area.
- Mosaic Birds Pendant collected from the top of the first box pile.
- Car pushed to the window and used as a way out.
- Roof route reached through the exterior of the hangar.
Clear the next hangar and collect the Song Bird Brooch
From the roof, drop through the open windows into the hangar with guards. You can use stealth takedowns, or fight from cover if you are detected. A guard can provide a grenade, but no specific weapon or combat method is required for progression.
Before leaving this hangar, search the corner nearest the area where you entered. The Song Bird Brooch is on top of crates beside the blocked hangar door. Climb the nearby box or crate stack to reach it. Do not shoot open the locked door for Elena until this treasure has been recorded.
- Hangar guards defeated or bypassed.
- Song Bird Brooch collected from the crates by the blocked door.
- Locked hangar door opened only after checking the corner.
Push through the gate and collect the Enamel Bird Ring
Shoot the locks on the lower part of the hangar door to let Elena enter. When the vehicle arrives, push it forward as directed and use cover while the following guards investigate. If enemies are searching, move between containers and low cover rather than standing in the open.
After the car breaks through the gate, enter the next warehouse through the open window on the left. Search behind the green car in the corner, beside the boxes. The Enamel Bird Ring is hidden there. This is the third and final Chapter 16 treasure. The Ancient Alabaster Ibex is not here; it is a Chapter 19 collectible.
- Vehicle pushed through the locked gate.
- Open left-side window entered.
- Enamel Bird Ring collected behind the green car.
Cross the airport combat area
Continue through the warehouse and airport buildings after collecting the Enamel Bird Ring. Stealth is useful because detection can bring additional soldiers, armored enemies and snipers, but you can also clear the encounters with cover, grenades and weapons dropped by enemies. Keep moving toward Elena and the upper building route.
When the path leads upward, climb through the buildings and reach the roof. Follow the roof route to the ladder and climb down. A cutscene follows, and the chapter moves into the open runway escape. There are no further Chapter 16 treasures after this point, so verify the three-item record before descending if you are collecting everything.
- Airport combat route completed.
- Roof and ladder route reached.
- All three Chapter 16 treasures recorded before the runway escape.
Reach Elena’s jeep and board the plane
After the cutscene, run across the open airport area when the route becomes available. A searchlight and turret make stopping dangerous, so use the left-side roof route and take out only the enemies blocking your movement. Continue toward the departing plane rather than trying to eliminate every soldier.
The plane moves too quickly to catch on foot. When Elena arrives in the jeep, move into position behind it and jump onto the vehicle. As the jeep approaches the plane, align Drake with the front wheel or landing gear and take the prompted jump. The departure cutscene confirms completion of Chapter 16 and begins Chapter 17, Stowaway.
- Runway escape started after the airport cutscene.
- Elena’s jeep reached and boarded.
- Drake jumped from the jeep to the plane.
- Chapter 17: Stowaway begins.
Before you move on
- Mosaic Birds Pendant, Song Bird Brooch and Enamel Bird Ring are recorded for Chapter 16.
- Drake reaches the departing plane by jumping from Elena’s jeep to the plane’s front wheel or landing gear.
- The departure cutscene finishes and Chapter 17: Stowaway begins.
Chapter 17 — Stowaway
Chapter 17 is a linear cargo-plane set piece with no treasures on the original PlayStation 3 release. Crawl through the ventilation shaft, defeat the brute at the rear ramp, and release the nearby parachute cargo to escape the falling containers. Climb the cargo net back into the plane, remove the enemy blocking the route, and fight toward the nose while avoiding shifting crates. When the aircraft tears open, guide Drake toward a falling crate and activate its parachute. Landing safely begins Chapter 18, The Rub’ al Khali.
1. Crawl through the ventilation shaft
Move through the narrow maintenance shaft until Drake is pulled into the cargo hold. This section is linear, with no side route or collectible search. Continue crawling until the brute drags Drake onto the open rear loading ramp.
The chapter has no standard treasures on the original PlayStation 3 release, so concentrate on the prompts and the route forward rather than searching the plane.
- Continue through the ventilation shaft.
- Ignore treasure searches; Stowaway has zero treasures.
- Prepare for the brute encounter at the rear ramp.
2. Defeat the brute and release the cargo
Counter the brute's attacks and keep striking when an opening appears. The first knockdown is not the end of the encounter. When he falls and begins recovering, immediately run up the ramp toward the cargo on the left side of the plane.
Use the prompted interaction on the nearby cargo to release its parachute. On the standard PS3 controls this uses Triangle. The cargo is swept out of the plane and takes the brute with it, ending the fight. Do not keep trying to defeat him with ordinary punches after the release opportunity appears.
- Counter and attack until the brute is knocked down.
- Run to the cargo on the left side of the ramp.
- Press Triangle when prompted to release the parachute cargo.
3. Climb the cargo net back into the plane
After the cargo falls away, Drake is left hanging from a safety net outside the aircraft. Climb upward along the netting toward the plane. An armed enemy will obstruct the route; wait for the prompt and press Square to pull him away from the net.
Continue climbing toward the open aircraft door. Once Drake reaches the cargo hold, deal with the enemy inside before advancing. The route is fixed, so follow the visible handholds and do not attempt to jump away from the net.
- Climb the safety net toward the aircraft.
- Press Square when prompted to remove the enemy.
- Enter the cargo hold and defeat the nearby guard.
4. Fight through the cargo hold
More enemies enter from deeper in the hold. Use the cargo and structural supports as cover, collect replacement ammunition from defeated enemies when necessary, and advance toward the front of the plane after each group is under control. This is a combat sequence, not a stealth requirement; stealth takedowns are not needed to complete the chapter.
The aircraft rocks as the fight continues. Watch the large containers as well as the enemies. Stay clear of their travel path and avoid standing between a moving crate and the plane's walls, because the shifting cargo can crush Drake.
- Defeat the guards in the cargo hold.
- Use cover and replace ammunition when needed.
- Advance toward the nose of the aircraft.
- Keep away from moving containers.
5. Survive the aircraft breakup
As fire and structural damage spread through the hold, continue fighting until the scripted explosion tears open the side of the aircraft. Do not try to force a shortcut through the damaged opening. After the blast, move away from the opening and avoid the falling cargo while Drake is pulled out of the plane.
The plane will eventually eject Drake into freefall. This is a required set piece rather than a conventional fight, so focus on positioning instead of searching for another route.
- Finish the immediate cargo-hold encounter.
- Avoid the damaged opening and moving containers.
- Prepare for the freefall sequence after the explosion.
6. Catch a crate and open its parachute
During freefall, steer Drake around the aircraft wreckage toward one of the falling crates fitted with a parachute. Approach the crate until the grab prompt appears; the objective is to reach the crate, not to land independently.
When Drake catches it, press Triangle repeatedly or follow the on-screen prompt to open the attached parachute. The descent carries him safely toward the desert. The chapter is complete once the landing sequence ends and Chapter 18, The Rub’ al Khali, begins.
- Guide Drake into a parachute-equipped crate.
- Grab the crate when the prompt appears.
- Open the parachute with Triangle.
- Confirm that Chapter 18 begins.
Before you move on
- The brute has been removed from the plane by releasing the nearby cargo.
- Drake has climbed the cargo net and re-entered the aircraft.
- The cargo-hold enemies have been cleared and the aircraft has broken apart.
- Drake has caught a parachute-equipped crate and opened its parachute.
- Chapter 18, The Rub’ al Khali, begins.
- The chapter-select treasure total for Stowaway is 0.
References for this chapter
Chapter 18 — The Rub' al Khali
After the plane crash, Drake crosses the Rub' al Khali alone in a scripted desert sequence with no combat encounters. Walk to the wreckage, continue across the dunes, and inspect the dry well when it appears. Before moving on, break the vase or jar beside the well to collect the chapter's only treasure, the Calcite Statue of Female Figure. The game then moves Drake through several mirages and time shifts. Follow the available movement prompt, continue across the sand, use the rock formation as the next landmark, and keep walking when Sully appears. The chapter is complete when the settlement sequence begins and the game transitions to Chapter 19, The Settlement.
1. Reach the crashed plane
After the opening scene gives you control, walk across the desert toward the visible plane wreckage. The route is intentionally slow and has no branching path or enemy encounter. Keep moving toward the wreck until a cutscene plays.
When control returns after the scene, continue walking across the sand. Do not look for weapons, combat arenas, or a hidden route around the wreckage; this section is a scripted traversal sequence.
- Reach the plane wreckage.
- Continue after the cutscene restores control.
2. Cross the dunes toward the well
Walk along the dune route after leaving the wreckage. The screen fades as the desert sequence advances through changing light and time of day. These fades are scripted and do not mean that Drake has taken a wrong turn.
When the scene returns, keep moving forward across the sand until the dry well comes into view. Approach it to trigger the well sequence, but do not leave the area until you have checked beside it for the treasure.
- Continue walking after each desert fade.
- Reach the dry well.
3. Collect the Calcite Statue of Female Figure
Near the dry well is a breakable vase or jar. Move into it or shoot it to smash it, then collect the Calcite Statue of Female Figure that appears. This is the only treasure in Chapter 18.
After taking the treasure, interact with the dry well using the on-screen prompt. Drake checks the well but finds no usable water. The well interaction advances the scene; it does not begin a puzzle or open a new route.
If you missed the vase before leaving, the later desert mirage returns Drake to a well-like location and provides another opportunity to collect the same treasure. Collect it as soon as the mirage puts you back near the well rather than continuing onward.
- Treasure collected: Calcite Statue of Female Figure.
- Dry-well interaction completed.
- If missed, check the later well mirage before continuing.
4. Follow the scripted desert route
Continue walking after the well sequence. Drake will pass through mirages and scene transitions rather than navigating a conventional open desert map. Follow the movement prompt when it appears and keep advancing across the sand.
Use the prominent rock formation as your next landmark. Walk toward it and move into the shaded area beneath or beside the rock when the route brings you there. The scene will then shift again as Drake's condition worsens.
- Advance through the mirage sequence.
- Reach the rock formation and take shelter in its shadow.
5. Follow Sully and trigger Chapter 19
When Sully appears during the desert sequence, move toward him and continue in the direction he indicates. The encounter is part of the scripted progression, so do not turn back to search the earlier dunes unless you are using the later well mirage to recover the missed treasure.
Keep walking through the final desert transitions until the settlement comes into view. The chapter ends when the game loads or displays Chapter 19, The Settlement. The settlement's combat encounters and its eight treasures belong to Chapter 19, not this chapter.
- Reach the Sully sequence.
- Continue toward the settlement.
- Confirm the transition to Chapter 19, The Settlement.
Before you move on
- The Chapter 18 treasure count shows one collected treasure: Calcite Statue of Female Figure.
- Drake has completed the dry-well and desert-mirage sequences.
- Sully has appeared and Drake has continued toward the settlement.
- The game transitions to Chapter 19, The Settlement, confirming that Chapter 18's story objective is complete.
Chapter 19 — The Settlement
The Settlement contains eight treasures and several combat arenas. Sweep each area before using the next exit, especially after the well route and after the support-column collapse. The chapter’s final escape has two separate gate sequences: first, destroy the turret’s supporting columns and use an RPG to open the settlement gate; then survive the rooftop ambush, mount a horse, follow the desert riders, collect a dropped rocket launcher, and destroy the final gate. The eight treasures are Ancient Alabaster Ibex, Coin of the Qataban Kingdom, Antique Silver Linked Bracelet, Antique Agate Wedding Ring, Silver and Cornelian Necklace, Ancient Sabaean Bust, Ancient Kingdom of Sheba Coin, and Antique Bedouin Bracelet.
1. Enter the settlement and collect the first two treasures
At the start, approach the locked wooden entrance. Before climbing toward the alternate route, move to the left side of the gate and pick up the Ancient Alabaster Ibex beside the wall.
Return to the entrance and climb the wooden beams on the right. Cross the roof, jump over the broken wall, and continue across the next roof until Drake falls through it. In the room where you land, face toward the exit and check the right-hand wall between the large piles of jars. Collect the Coin of the Qataban Kingdom before leaving.
- Ancient Alabaster Ibex collected beside the locked entrance.
- Coin of the Qataban Kingdom collected in the first room after the roof fall.
2. Use the wells and turn back for the third treasure
Leave the building and continue to the well. Drop into it, move through the narrow gap, and proceed through the polluted water. When the route forces Drake to climb the wall on the left, follow it upward and exit through the next well.
After climbing out, continue forward until you reach the small stairs. Before going up, turn around and inspect the ground near the broken stonework and doorway behind you. The Antique Silver Linked Bracelet is there. Pick it up before breaking through the wooden door.
- Antique Silver Linked Bracelet collected after exiting the second well.
3. Survive the unarmed opening fight
Break through the wooden door to enter the settlement combat area. Drake begins without a firearm, so let an enemy approach and use a melee takedown to obtain a weapon. Move between the low walls and pillars while clearing the first group, then continue through the square and deal with the reinforcements that enter through the wooden gate.
Do not hurry onward after the first enemies fall. The next treasure is reached after the settlement soldier destroys a supporting pillar and Drake drops into a lower section.
- A firearm recovered from the first enemy group.
- The initial settlement combat area cleared.
4. Collect the fourth and fifth treasures after the collapse
When the pillar is destroyed and Drake lands below, move forward beneath the platform where the attacking soldier was standing. Look near the corner with the partly buried jars and collect the Antique Agate Wedding Ring.
Shoot the red wooden supports on the damaged column to reveal the climbing route out of the pit. Climb up, eliminate the enemy near the stairs, and deal with the sniper above. Once you reach the next level, check behind the pillar on the left side of the route. The Silver and Cornelian Necklace is there.
- Antique Agate Wedding Ring collected in the lower section.
- Silver and Cornelian Necklace collected behind the pillar near the sniper route.
5. Clear the alley and collect the Ancient Sabaean Bust
Continue into the larger alley encounter. Use cover and take the Tau Sniper when it becomes available. Remove the rocket-launcher enemy first if he is exposed, then reduce the remaining attackers from range. Shielded enemies can be handled by retreating into the building behind you if they close the distance.
After the area is clear, cross toward the far side and enter the small alcove on the left. The Ancient Sabaean Bust is inside. Collect it before squeezing through the narrow opening at the rear.
- The rocket-launcher enemy neutralized before advancing.
- Ancient Sabaean Bust collected from the left alcove.
6. Get the sixth treasure before the turret arena
After passing through the gap, jump over the railing. Do not immediately follow the fight to the left. Turn toward the back-right corner and pick up the Ancient Kingdom of Sheba Coin near the wall.
Proceed into the next combat area. An RPG attack closes the route behind Drake, and a mounted turret fires from above. Destroy the red-marked support columns with grenades or other explosive attacks to bring down the vehicle and remove the turret’s elevated position. Watch for the RPG carrier on the vehicle and the heavily armored machine-gun enemies.
- Ancient Kingdom of Sheba Coin collected behind the railing.
- The turret-support columns destroyed.
7. Collect the final treasure and open the first gate
Continue using the collapsed vehicle and nearby walls as cover. Prioritize the RPG carrier and armored machine-gun enemies, then clear the remaining threats around the square. Before leaving, move to the far-right side near the gate and enter the small alcove beyond the other entrance. The Antique Bedouin Bracelet is on an overturned bookcase.
Once the bracelet is collected, take an RPG from the square and destroy the settlement gate if it is still standing. Move through the opening and climb the ladder to the roof. This does not end the chapter; it starts the final escape sequence.
- Antique Bedouin Bracelet collected in the far-right alcove.
- All eight Chapter 19 treasures collected before leaving the square.
- The first settlement gate destroyed with an RPG.
8. Complete the mounted escape
On the roof, Drake is ambushed and pulled down. Take cover until the desert riders arrive and place him on a horse. During the first mounted section, fire at pursuing enemies while staying with the riders. When the horse reaches a blocked gate and the accompanying rider is lost, continue through the quiet alley and mount the horse alone.
Follow the riders through the settlement and keep firing at enemies, giving priority to snipers and other attackers positioned above the route. A rider eventually drops a rocket launcher. Pick it up, aim at the final gate, and fire to open the escape route. Follow the resulting transition into Chapter 20.
- The rooftop ambush survived.
- The mounted escape completed with the desert riders.
- The dropped rocket launcher used to destroy the final gate.
- The transition to Chapter 20 begins.
Before you move on
- Chapter 19 records eight treasures: Ancient Alabaster Ibex, Coin of the Qataban Kingdom, Antique Silver Linked Bracelet, Antique Agate Wedding Ring, Silver and Cornelian Necklace, Ancient Sabaean Bust, Ancient Kingdom of Sheba Coin, and Antique Bedouin Bracelet.
- The turret arena has been cleared and the first settlement gate has been destroyed.
- Drake has completed the mounted escape, used the dropped rocket launcher on the final gate, and reached the Chapter 20 transition.
References for this chapter
- Uncharted 3: Drake's Deception - Treasure Guide - PlayStation 3 - GameFAQs
- Uncharted 3: Drake's Deception - Treasure Guide — GameFAQs
- Uncharted 3 Drake's Deception Walkthrough - GameSpot
- The Settlement — Chapter 19 Walkthrough, Gamer Guides
- Uncharted 3: Chapter 19 — The Settlement Walkthrough, Gamepressure
Chapter 20 — Caravan
Follow Salim through the desert, board the convoy trucks, survive the motorcycle attacks and use the RPGs to destroy the turret trucks. After Sully joins the convoy, continue through the sandstorm, defeat the guards around the Atlantis entrance and use an RPG to clear the final turret vehicles. Three treasures are available in the entrance vestibule before the Chapter 21 title appears. On the original PlayStation 3 release, Chapter Select records them under Chapter 21, The Atlantis of the Sands, so Caravan may display zero treasures while Atlantis displays eight.
1. Follow Salim and board the convoy trucks
Ride behind Salim through the rocky desert until the first truck comes within jumping distance. Board it and take down the guard with melee attacks if the truck is not under heavy fire. Use the truck bed and its sides as cover while dealing with nearby enemies.
Shoot the attackers on motorcycles from cover, then return to Salim's horse when the route opens. Move forward with him and board the next truck. Enemies can approach from behind, so check the rear of the vehicle before jumping back to the horse.
- Stay with Salim through the canyon.
- Board the first truck and clear its guard.
- Shoot motorcycle attackers from cover.
- Return to the horse and reach the next truck.
2. Use the convoy RPGs against the turret trucks
Continue alternating between the horse and the convoy vehicles until you reach the trucks carrying RPGs. Pick up an RPG and fire at the two enemy trucks equipped with mounted turrets. Prioritize the turret vehicles instead of wasting rockets on ordinary riders.
Move quickly after firing because the truck carrying Nate is vulnerable to destruction. Jump back to the horse when prompted or when the vehicle begins to break apart, then concentrate on the motorcycles and follow Salim toward the lead vehicles.
- Reach the RPG-carrying truck.
- Destroy both turret trucks with RPG fire.
- Return to the horse before the convoy vehicle is destroyed.
- Keep moving toward the lead vehicles.
3. Reach Sully and enter the sandstorm
When you see Sully on one of the lead vehicles, jump aboard and help him defeat the nearby brute. Drop back to the horse when the sequence sends Nate away from the truck, then ride into the sandstorm with Salim and Sully.
Inside the storm, use the reduced visibility for stealth when possible. If the enemies detect you, use cover and keep advancing through the encampment rather than trying to search the outer desert. A heavy weapon may help during the fight, but you must eventually reach the RPG on the left-side building.
- Jump onto Sully's truck.
- Defeat the brute and return to the horse.
- Enter the sandstorm with the group.
- Advance through the encampment toward the RPG.
4. Destroy the final turret vehicles and enter Atlantis
Fight through the storm until you reach the enemy turret position. Flank left to the building where the RPG is located. You may need to abandon a heavier weapon to climb up and retrieve it.
Use the RPG to destroy the turret vehicles blocking the route. Clear the remaining guards, then run to the large gate and pass through it. Once the doors close behind the group, turn left immediately for the Carved Sabaean Face on the sand mound.
- Reach the left-side building with the RPG.
- Destroy the turret vehicles.
- Clear the entrance approach.
- Enter through the large gate.
- Collect Carved Sabaean Face on the left.
5. Get the Bronze Sabaean Bull Sculpture
Continue up the stairs into the large entrance vestibule. On the right side, climb the tall ladder beside the mechanism. Before using the lever at the top, walk or drop off the ledge to the right of the ladder onto the lower platform.
The Bronze Sabaean Bull Sculpture is on that lower platform. Pick it up, then climb back to the top of the ladder. Do not descend through the central area until you have checked the platform below the mechanism.
- Climb the right-side ladder.
- Drop to the lower platform beside the mechanism.
- Collect Bronze Sabaean Bull Sculpture.
- Climb back to the upper ledge.
6. Cross the chandelier for The Royal Game of Ur
At the top of the ladder, face the mechanism and use the first lever when the game allows it. Turn around from the lever and jump onto the hanging chandelier. Shimmy around the chandelier to the opposite side and continue onto the ledge.
The Royal Game of Ur is along this route. Collect it before leaving the upper mechanism area, then return to the lever and prepare to use the moving weights and platforms.
- Activate the first lever.
- Jump from the upper ledge to the chandelier.
- Shimmy around to the opposite ledge.
- Collect The Royal Game of Ur.
7. Open the inner gate and finish the chapter
Return to the mechanism and ride the moving weights upward as the route opens. Jump to the higher ledge, then drop to the lower platform on the right and climb the exposed wall to reach the beam above the room.
Walk along the beam and use the chandeliers to cross to the opposite side. Activate the second lever to open the inner gate. From the chandelier route, reach the opened doorway and use the descent inside it. Follow Salim and Sully through the entrance until the sandstorm transition ends and Chapter 21 begins.
- Use the moving weights to reach the upper ledge.
- Climb to the beam above the vestibule.
- Cross the chandeliers to the second lever.
- Activate the second lever.
- Descend through the opened doorway.
- Reach the Chapter 21 transition.
Before you move on
- The convoy and sandstorm encounters are complete.
- The two turret vehicles at the Atlantis entrance have been destroyed.
- Carved Sabaean Face, Bronze Sabaean Bull Sculpture and The Royal Game of Ur are collected.
- The first and second mechanism levers have been activated and the inner gate has opened.
- Nate, Sully and Salim pass through the entrance and the Chapter 21 transition begins.
- Chapter Select may show Caravan with zero treasures and Chapter 21 with eight.
References for this chapter
Chapter 21 — The Atlantis of the Sands
Chapter 21 contains eight treasures, although the first three are found in the approach section before the chapter title appears. Collect them around the entrance mechanism before advancing: the Carved Sabaean Face, The Royal Game of Ur, and Bronze Sabaean Bull Sculpture. After the great door opens, search both staircase branches for the Bronze Man of Nashqum and Sabaean Alabaster Stele. Survive the first Djinn encounters, then enter the building on the right side of the stairs for the Akkadian Statue Head. The hallucination section is linear; follow Talbot, escape through the distorted Cartagena route, and shoot Sully when prompted. After waking near the elevator, turn around for the Sabaean Moon Symbol. Fight through the remaining Djinn, fill the pool and follow the reflection’s route, then collect the Statue of Gudea after waking. Take the spiral staircase down to finish the chapter and advance to Chapter 22.
Collect the three approach treasures before using the mechanism
After the sandstorm sequence, enter the ruin and turn left toward the entrance area. The Carved Sabaean Face is on the floor beside the route into the chamber. Pick it up before following Sully deeper into the ruins.
Climb the ladder on the right side of the chamber. Before activating the mechanism, face the mechanism and jump onto the nearby chandelier. Shimmy around it to reach The Royal Game of Ur, then return to the ladder area.
While Sully operates the mechanism and the lift begins moving, use the rising platforms to descend to the lower platform. The Bronze Sabaean Bull Sculpture is there. Collect it before riding the lift back up and continuing through the opened route.
- Carved Sabaean Face collected.
- The Royal Game of Ur collected from the chandelier.
- Bronze Sabaean Bull Sculpture collected from the lower platform.
Search both branches of the grand staircase
Proceed through the large door and descend the grand staircase. Take the left branch first. At the broken end of the stairs, collect the Bronze Man of Nashqum, then return to the fork.
Take the other staircase downward. Watch the left railing as you descend. At the broken section, jump across into the tower opening to collect the Sabaean Alabaster Stele. Return to the staircase and continue down the main route.
Do not treat the dark elevator shafts and deep drops as exploration areas. The two staircase treasures are reached from the split before the route narrows.
- Bronze Man of Nashqum collected from the left staircase.
- Sabaean Alabaster Stele collected by jumping from the broken railing into the tower.
Clear the first Djinn encounters and collect the statue head
Continue until the story scene triggers and the Djinn attack. Their flaming bodies can teleport and reposition around the arena, so stay near cover and keep moving when one disappears. Use grenades or powerful weapons when available, and avoid standing in the middle of the courtyard where enemies can surround you.
After clearing the encounter, enter the two-story building on the right side of the stairs. Climb to the upper landing and search near the back and left side of the stairs for the Akkadian Statue Head. Collect it before entering the central elevator with Sully.
- The initial Djinn encounter is cleared.
- Akkadian Statue Head collected in the right-side building.
- The elevator is entered only after searching the building.
Escape the hallucination and collect the Moon Symbol
Ride the elevator down and follow Talbot and Katherine. When the hallucination begins, chase Talbot and run through the distorted Cartagena sequence. Follow the obvious route through the streets, vents, lamp-post section and rooftops. When the game presents Sully as a target, shoot him; this is required to break the illusion.
After Nate wakes near the ancient elevator, turn around instead of following the forward route. Check behind the elevator at the base of the statue to collect the Sabaean Moon Symbol. Then turn back toward the gate and continue.
- The hallucination route is completed.
- Sully is shot when the scripted prompt appears.
- Sabaean Moon Symbol collected behind the elevator.
Fight through the Djinn and solve the pool sequence
Move toward the gate and defeat the Djinn blocking the route. Once the gate opens, continue into the next area and clear the second encounter. Use cover, keep distance from fireballs, and use heavy weapons or explosives against groups rather than chasing teleporting enemies into open ground.
Enter the pool room after the fights. Use the lever to fill the pool, then watch the reflection and follow its movement around the pool. Turn the mechanisms in the order indicated by the reflection until the central pool event begins. Nate wakes after the drug effect wears off.
- The Djinn encounters before the pool are cleared.
- The pool is filled with the lever.
- The reflection-guided mechanism sequence is completed.
Collect the final treasure and finish Chapter 21
After waking, leave the pool room through the opening and stay along the left side of the hall. Pass the second statue and look behind it for the Statue of Gudea. Pick it up before taking the spiral staircase down.
Continue through the linear traversal section and follow the on-screen climbing and jumping prompts. There is no separate optional puzzle after the pool sequence. Chapter 21 ends when the game transitions into Chapter 22, The Dreamers of the Day.
- Statue of Gudea collected behind the second statue after the pool.
- All eight Chapter 21 treasures are recorded.
- The transition into Chapter 22 appears.
Before you move on
- The treasure record contains Carved Sabaean Face, The Royal Game of Ur, Bronze Sabaean Bull Sculpture, Bronze Man of Nashqum, Sabaean Alabaster Stele, Akkadian Statue Head, Sabaean Moon Symbol, and Statue of Gudea.
- The pool sequence is complete and the Statue of Gudea has been collected.
- The game advances from Chapter 21 into Chapter 22. If a treasure is missing, replay Chapter 21 from chapter select and collect it before continuing.
Chapter 22 — The Dreamers of the Day
Finish the assault on Ubar, escape the collapsing city, defeat Talbot, and follow the final escape to the story ending. Chapter 22 contains two treasures: Gold Cup from Ur at the beginning and Golden Hittite Goddess after the elevator descent. Use cover during the city fights, prioritize grenade-launcher and rocket-launcher enemies, and stay near the center during the Talbot duel. If either treasure is missed, replay Chapter 22 through Chapter Select. The campaign is complete once the final escape concludes and the epilogue begins.
1. Collect the opening treasure and cross the waterfall gap
When control returns at the start of the chapter, turn around and move underneath the spiral staircase. Go around the central pillar and collect the Gold Cup from Ur from the rubble at its base. This is the first of the chapter’s two treasures.
Return to the route and climb toward the enemies. After jumping beside the waterfall, take cover on the left and deal with the snipers and soldiers above. Cross the gap only after the immediate attackers are under control.
- Gold Cup from Ur collected
- Waterfall gap crossed
2. Cross the towers and activate the lever
Enter the tower and move left toward the bridge. Clear the enemies, cross the first bridge, pass the tower with the lever, and cross the second bridge. Follow Sully toward the next tower, then return to the previous tower when he moves ahead.
Activate the lever inside that tower. The mechanism opens the route down toward the water-pumping machinery. Follow the lowered path beneath the machinery and climb the stairs to the closed gate.
- First tower encounter cleared
- Lever activated
- Route to the water-pumping machinery opened
3. Open the gate and fight through the machinery room
Use both levers beside the closed gate. In the room with the snake statue, drop down to begin several short fights against small groups of enemies. Advance between encounters instead of staying exposed in the center.
Continue across the gear wheels while watching for grenades and sniper laser sights. After reaching the chamber with three carved heads, descend the stairs carefully toward the surface. Do not rush across the machinery if enemies are still firing from protected positions.
- Both gate levers used
- Snake-statue room cleared
- Gear-wheel section crossed
- Three-headed chamber reached
4. Clear the exterior assault and enter the cave
Enemies attack as soon as you emerge. Prioritize the grenade-launcher enemy on the left bridge because his shots can remove cover quickly. If necessary, retreat into the building and eliminate the heavily armored enemy before crossing exposed ground.
From inside the building, shoot the sniper and other enemies across the way. Move between the arches and use cover against the remaining long-range fire. Once the area is clear, go outside, defeat the next group, and climb the stairs into the cave.
- Grenade-launcher enemy defeated
- Armored enemy and sniper removed
- Cave entrance reached
5. Reach the metal trunk and begin the collapse escape
Fight through the cave and approach the metal trunk to trigger the next story sequence. After the cutscene, use the two levers to open the gate, then turn left and cross the wide bridge with the cog wheels.
When Drake regains control during the collapse, take the nearby sniper rifle if it is still available. Use it to kill the rocket-launcher enemy on the tower at the far end of the bridge. Advance from cover to cover while the bridge and surrounding structures break apart.
- Metal trunk reached
- Second pair of levers used
- Rocket-launcher enemy defeated
6. Climb the collapsing tower
Run beneath the tower and activate the elevator. On the upper level, clear the nearby enemies and move right to the ladder. Climb to the next floor, cross to the wall, and use the rising blocks to reach the higher platforms.
Continue across the moving blocks, climb the next ladder, and fight up the stairs. Keep ascending until you reach the room with the spiral staircase. After the story sequence, follow Sully up the winding stairs and across the exterior ledges, jumping between platforms as the city collapses.
- Elevator activated
- Moving-block sections completed
- Upper ladder and stairs reached
- Collapsing exterior ledges crossed
7. Collect the Golden Hittite Goddess
After the elevator descent and the following story sequence, continue until you reunite with Sully near the chasm and large chains. The stairs on the left are the main route, but do not take them yet.
Stay on the lower ground and move right toward the closed doors. The Golden Hittite Goddess is on the ground in front of those doors. Collect it before climbing the stairs. This is the second and final treasure of Chapter 22.
- Golden Hittite Goddess collected
- Both Chapter 22 treasures recorded
8. Defeat Talbot and reach the ending
At the Talbot duel, stay near the middle of the arena. Counter his attacks and break free from his grabs. If Drake falls from the ledge, climb back up while avoiding Talbot’s kicks; fighting close to the edge makes this section more dangerous.
Sully joins the fight, after which Drake falls and must climb toward him. Near the top, Talbot attempts to kill Sully with a boulder. Draw Drake’s weapon and shoot Talbot when the game allows it.
After Talbot is defeated, jump up to Sully and follow the prompted escape route across the collapsing ruins. Continue through the final cutscenes and let the epilogue begin. That confirms completion of the single-player campaign.
- Talbot defeated
- Sully reached
- Final escape completed
- Epilogue begun
Before you move on
- The Gold Cup from Ur and Golden Hittite Goddess are both recorded in the treasure list.
- Talbot has been defeated and the final escape has concluded.
- The closing scenes and epilogue have begun, confirming that the Chapter 22 story objective and single-player campaign are complete.
Finishing up
Finish Chapter 22 (The Dreamers of the Day) and watch the final cutscene and epilogue — this confirms main-campaign completion.
Verify chapter-select shows each chapter as completed.
For completionist runs, verify per-chapter treasure tallies (chapter-select and in-game statistics).
If aiming for all treasures, confirm the Strange Relic and chapter treasures are all collected — some relics are counted separately from standard treasures.
If you missed a treasure or optional conversation, replay the specific chapter via chapter select rather than restarting the entire campaign.
For trophy/achievement checks, consult the in-game statistics and the chapter-select treasure counters after finishing the epilogue; reload chapters to fill any missing items before declaring completion.
Choose your next gameScreenshots & video
Game imagery for reference. Follow the written chapters above for the route and strategies.
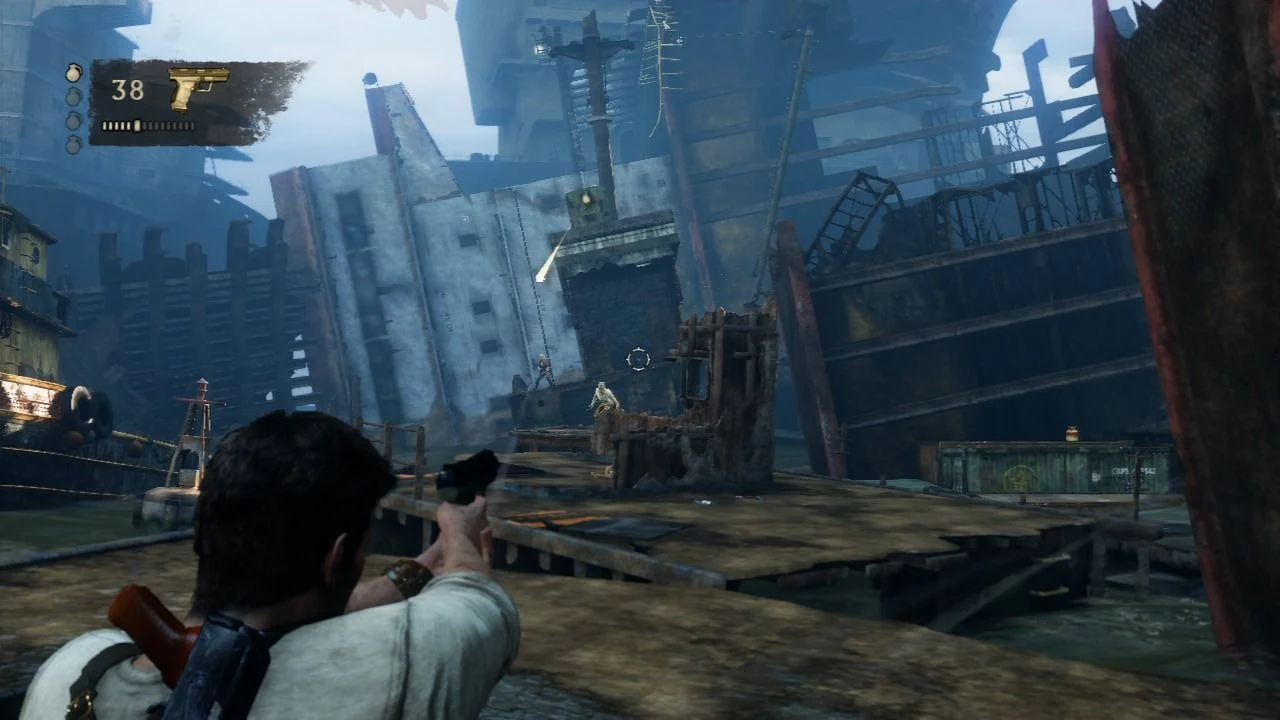
Sources & references
Our original guide draws on the references below. Check the edition at the top of this page before following controls or unlock requirements.
- Uncharted 3 Drake's Deception Walkthrough - GameSpot
- Uncharted 3: Drake's Deception — Guide and Walkthrough
- Uncharted 3: Drake's Deception - Treasure Guide - PlayStation 3 - GameFAQs
- Another Round — Chapter 1 Walkthrough
- Uncharted 3: Drake’s Deception — Official Guide Sample Pages
- Greatness From Small Beginnings - Chapter 2 - Walkthrough | Uncharted 3: Drake's Deception | Gamer Guides
- Uncharted 3: Drake's Deception/Greatness from Small Beginnings — StrategyWiki
- Uncharted 3: Drake’s Deception Walkthrough/Strategy Guide/FAQ for PlayStation 3 — Second-Story Work
- Chapter 3 — Treasure Hunting Guide
- Run to Ground - Chapter 4 - Walkthrough
- Uncharted 3 treasures Chapter 4-6
- Uncharted 3 Treasure Locations
- Uncharted 3: Drake’s Deception — Chapter 5 Treasure Hunting Guide
- Uncharted 3: Drake's Deception — Find All the Treasures, Part One — Prima Games
- Chapter 18: The Rub' al Khali Walkthrough - IGN guide PDF mirror
- Uncharted 3: Drake's Deception - Treasure Guide — GameFAQs
- The Chateau — Chapter 6 Walkthrough
- Uncharted 3: Puzzles in Chapter 6 — How to Solve
- Stay in the Light — Chapter 7 Walkthrough
- Uncharted 3: Chapter 8 Treasures Guide — Gamepressure
- The Citadel — Chapter 8 Walkthrough, Gamer Guides
- The Middle Way — Chapter 9 Walkthrough, Uncharted 3: Drake's Deception — Gamer Guides
- Uncharted 3 Drake's Deception — Chapter 9 Treasures — GamePressure
- Historical Research — Chapter 10 Walkthrough — Gamer Guides
- As Above, So Below — Chapter 11 Walkthrough, Gamer Guides
- Uncharted 3: Drake's Deception — Find All the Treasures, Part Two — Prima Games
- Abducted — Chapter 12 Walkthrough, Uncharted 3: Drake's Deception
- Rough Seas — Chapter 13 Walkthrough, Uncharted 3: Drake's Deception
- Chapter 14 Treasure Hunting Guide - Gamer Guides
- Uncharted 3 Treasures: Chapters 11-14 - GamesRadar+
- Uncharted 3: Chapter 14 - Cruisin for a Bruisin Walkthrough - GamePressure
- Uncharted 3: Drake's Deception - Guide and Walkthrough - PlayStation 3 - GameFAQs
- Sink or Swim — Uncharted Wiki
- One Shot at This — Chapter 16 Walkthrough — Gamer Guides
- Stowaway — Chapter 17 Walkthrough, Gamer Guides
- Uncharted 3: Chapter 17 — Stowaway Walkthrough, Gamepressure
- Uncharted 3: Drake's Deception Official Guide Sample Pages, Piggyback
- The Rub Al Khali - Chapter 18 - Walkthrough - Gamer Guides
- The Settlement — Chapter 19 Walkthrough, Gamer Guides
- Uncharted 3: Chapter 19 — The Settlement Walkthrough, Gamepressure
- Caravan - Chapter 20 - Walkthrough — Gamer Guides
- Uncharted 3: Chapter 20 treasures guide — GamePressure
- The Atlantis of the Sands — Chapter 21 Walkthrough
- Uncharted 3: Chapter 22 - The Dreamers of the Day walkthrough, Talbot boss fight
- Chapter 22 - Treasure Hunting Guide - Treasure Locations
About the game & collecting notes
- Platform
- PlayStation 3
A chapter-by-chapter walkthrough for the original PlayStation 3 release of Uncharted 3: Drake's Deception. Follow clear objectives for every main-chapter encounter, know where to stop to collect treasures and relics, and reach the story ending while avoiding common progression traps.
Darryl Polo
Darryl Polo loves tinkering with emulation and revisiting retro games. He enjoys exploring how old favorites play on different setups and sharing what he learns along the way. At Joking Joystick, he writes about the games, hardware, and small discoveries that keep the hobby fun.
Our editorial standardsFound a step that needs another look? Help us improve this guide.