
Uncharted 2: Among Thieves — Complete Single‑Player Campaign Walkthrough (PlayStation 3, original release)
Step-by-step campaign walkthrough for the original PlayStation 3 release of Uncharted 2: Among Thieves. It covers the 26 numbered single-player chapters from A Rock and a Hard Place through Tree of Life, while separating the opening train flash-forward as the first segment of Chapter 1. It includes required routes, combat priorities, puzzle solutions, recovery tactics and optional treasure notes without making collectibles necessary for the ending.


Find a copy
Uncharted 2: Among Thieves PlayStation 3
We may earn a commission if you buy through these links, at no extra cost to you. As an Amazon Associate I earn from qualifying purchases.
Opens retailer search results. Check the model, edition, seller, availability and current price before buying.
Before you begin
This guide targets the original PlayStation 3 campaign of Uncharted 2: Among Thieves, released in 2009.
The game contains 26 numbered single-player chapters. The opening train escape is a flash-forward within Chapter 1, A Rock and a Hard Place, not a separate Prologue chapter.
Follow the segments in order. The opening Chapter 1 segment flows directly into the wreckage section, then continues through the rest of that chapter before Chapter 2 begins.
Required progression is separated from optional treasures and side exploration.
Use the recovery directions after failed jumps, deaths, missed stealth opportunities or difficult firefights.
Set yourself up for the run
Play on the difficulty you are comfortable with — Normal is balanced for first runs; Crushing is available but alters firefight pacing and enemy durability.
Familiarize yourself with cover movement, blindfire and melee: Uncharted 2 frequently forces close-quarters exchanges where quick use of cover and melee counters matters.
Keep checkpoints in mind: hard combat sequences have intermediate checkpoints but platforming sections often require precise timing — consider a manual save before attempting risky climbs if you plan repeated tries.
Learn to combine stealth and direct combat: many rooms can be cleared quietly or handled with open firefights.
Use stealth when enemies are grouped and combat when you need to move quickly.
Expect mid‑chapter vehicle or set‑piece sequences (jeep, jetski, train).
These frequently transition into on-foot combat — stay aware of the next objective marker.
If you want optional collectibles, pause after each chapter: there are collectible / treasure locations that are accessible with a brief backtrack in most chapters.
Ensure your PS3 has the latest available system and game updates if you want the most stable experience for the original release.
A Rock and a Hard Place — Opening Flash-Forward
The campaign opens in the middle of Chapter 1, A Rock and a Hard Place, with Nathan Drake injured and trapped in a train hanging over a snowy ravine. Follow the tightly staged escape route around the carriage, through the overturned interior and across to the adjoining car. This opening teaches movement, jumping, ledge grabs, climbing and camera control. The train collapses after the final carriage run, then a cutscene returns control to Nate at the snowy wreckage. Chapter 1 continues from there. Push through the wreckage, find the 92FS pistol beside the fallen soldier, open the damaged carriage and shoot the padlock blocking the exit. Stop after leaving that carriage and reaching the next wreckage route; do not replay the opening train climb.
Start Chapter 1 and identify the opening flash-forward
Start a new single-player campaign on the original PlayStation 3 release and let the opening cinematic finish. Nathan Drake is wounded and hanging inside a damaged train carriage above a snowy mountainside. This is a flash-forward within Chapter 1, A Rock and a Hard Place. It is not a separate Prologue chapter or a separate selectable campaign section.
When control begins, move along the visible handholds and keep the camera aimed toward the next climbable surface. The route is linear. If Nate appears to have nowhere to go, look for the next yellow rail, pipe, ledge or opening rather than searching for a switch or jumping toward the ravine.
- New Game has started.
- Control has transferred to Nathan inside the damaged train.
- The opening is being treated as part of Chapter 1, A Rock and a Hard Place.
Climb around the outside of the hanging carriage
Move along the initial handhold toward the left side of the carriage, then continue around the exterior using the yellow-edged rails and other visible handholds. Climb upward after the falling rocks pass. When the rail or pipe gives way and Nate is left hanging, use the swinging section to build momentum and jump back toward the train when the game prompts the move.
Continue around the carriage and climb toward the upper exterior. Keep following the marked handholds instead of dropping down. The intended route eventually places Nate near the top of the hanging carriage, where the next opening leads into the overturned interior.
- Nate has reached the exterior of the carriage.
- The swinging-pipe transition has been completed.
- Nate is climbing toward the upper part of the train.
Cross the overturned carriage interior
From the upper exterior, enter the overturned carriage through the open window or skylight. Use the seats and interior fixtures as a series of steps. Jump from one reachable seat or ledge to the next, then pull upward whenever the route rises.
A scripted shift sends Nate back outside. Grab the next ledges on the right and continue upward. When another section of yellow railing breaks, jump to the open carriage door and use the remaining handholds to reach the top. The path is still linear, so keep climbing toward the yellow ladder leading to the adjoining carriage.
- Nate has entered the overturned carriage.
- The seat-to-seat climb is complete.
- Nate has returned outside and reached the upper route toward the yellow ladder.
Reach the adjoining carriage and escape the collapse
Climb the yellow ladder and enter the adjoining carriage. Run forward through the interior as the train begins sliding farther from the mountainside. Do not stop to search for a combat encounter; this section is a movement sequence.
At the far end, jump toward the snowy ground when the route reaches the broken exit. Nate pulls himself to safety, and the train-collapse cutscene plays. After the cutscene, the game returns to the same Chapter 1 storyline at the wreckage. There is no need to replay the dangling-carriage escape when continuing from this point.
- The yellow ladder has been climbed.
- The adjoining carriage has been crossed.
- Nate has reached the snowy ground and the collapse cutscene has played.
Continue Chapter 1 at the snowy wreckage
When control returns, Nate is beside the wrecked train on a snowy cliff. Move forward through the wreckage and squeeze between the damaged cars. Near a fallen soldier, pick up the 92FS 9mm pistol. This is the first required weapon pickup in the continuation of Chapter 1.
Use the nearby carriage entrance and interact with its damaged door. Inside, move through the short carriage section until the locked exit is visible. Aim at the padlock and shoot it to open the route. Leave the carriage and continue into the wreckage outside. An enemy may be encountered around the next corner; deal with him from cover or keep moving if the scripted explosion removes the immediate threat. The required endpoint for this chapter segment is reaching the opened wreckage route after the padlock, not clearing every enemy in the area.
From here, Chapter 1 continues through more train-wreck traversal and combat. Chapter 15, Train-Wrecked, later returns to this broader train-wreck setting, but it is a different chapter and does not replace this opening continuation.
- Control has returned at the snowy wreckage.
- The 92FS pistol has been collected beside the fallen soldier.
- The damaged carriage door has been opened.
- The padlock has been destroyed.
- Nate has exited into the next wreckage route without restarting the opening climb.
Before you move on
- The opening escape from the hanging train has finished.
- The collapse cutscene has returned control to Nate at the snowy wreckage.
- Nate has reached the fallen soldier and obtained the 92FS pistol.
- Nate has opened the damaged carriage and destroyed the padlock.
- Nate has exited into the next wreckage route, with Chapter 1 continuing from the post-flash-forward checkpoint.
References for this chapter
A Rock and a Hard Place — Wreckage and Chapter Completion
Resume after Drake has already shot open the locked carriage door and exited into the wreckage. The remaining portion of A Rock and a Hard Place is a short, linear traversal section with one immediate enemy encounter, a climb over crates and the side of a damaged carriage, a jump into the next train car, and a final collapse that leads into another brief flashback. When control returns, cross the last broken section by jumping to a pipe, shimmying beneath the wreckage, and climbing into the carriage. Move forward through the snow after the next scene to trigger the chapter-ending cutscene and advance to Chapter 2, Breaking and Entering. The optional treasures in this portion are not needed for campaign completion.
Clear the enemy beyond the locked carriage
Begin outside the carriage whose lock was opened in the preceding section. Turn left and move forward through the wreckage. A soldier appears around the corner and begins firing. Use the nearest wreckage for protection and shoot him with the pistol, or take cover and let the nearby explosion remove him if you do not want to spend ammunition.
Once the immediate danger is over, continue through the next pair of carriage doors. The route is still forward; do not return to the locked carriage or search the earlier pistol area, because those actions belong to the preceding section.
- Start outside the already-unlocked carriage.
- Deal with the soldier around the corner.
- Continue through the next doors.
Climb over the damaged carriage
Follow the short passage until the wreckage blocks the ground-level route. Climb the crates, then use the small handholds and grooves on the red-painted side of the damaged carriage. Keep climbing until Drake reaches the top edge.
At the top, jump across to the next carriage. Drake should land near its entrance. If the jump is missed, the checkpoint will return you to the preceding traversal section; line up the carriage roof before jumping rather than aiming for the distant wreckage.
- Reach the crate pile after the enemy encounter.
- Climb the red-painted carriage side.
- Jump onto the next carriage.
Cross the carriage and reach the roof
Enter the carriage and walk down its aisle. At the far end, climb the box and pull Drake through the opening onto the roof. A scripted scene interrupts the traversal, followed by a flashback. Wait until control returns before moving; the game has not yet finished Chapter 1.
After the flashback, face toward the large opening in the wreckage. The next carriage section is across the gap, with a visible pipe along its side. Jump to the pipe when the camera presents the route, then wait for the view to settle before moving beneath the wreckage.
- Walk to the end of the carriage.
- Climb the box and exit through the roof opening.
- After the flashback, face the large gap and locate the pipe.
Complete the final wreckage traversal
Jump from the broken section to the pipe on the opposite carriage. Shimmy underneath it, then pull Drake up onto the carriage door. From there, move forward through the damaged interior. The route is deliberately narrow and linear, so continue toward the open end rather than trying to return across the gap.
Drake eventually emerges outside and staggers through the snow. Keep moving forward after the scene restores control. No further weapon pickup or puzzle is required in this section; the next story scene triggers when you reach the forward path.
- Grab the pipe across the gap.
- Shimmy underneath and climb onto the carriage door.
- Move through the carriage and continue into the snow.
Confirm the chapter transition
After Drake falls from the final wreckage and gets back on his feet, continue ahead through the snowy debris. The chapter-ending cutscene begins automatically. Let it play until the game advances to the Chapter 2 title, Breaking and Entering.
If you die during the climb or final traversal, reload the checkpoint and repeat only the current wreckage section. The earlier train escape, pistol pickup, and locked-carriage opening do not need to be replayed from this checkpoint.
- Recover from the final fall.
- Reach the forward snowy path.
- See the transition to Chapter 2, Breaking and Entering.
Before you move on
- The soldier beyond the previously locked carriage has been dealt with.
- Drake has climbed over the crates and red-painted carriage side and reached the next train car.
- Drake has crossed the final broken section using the pipe and emerged into the snow.
- The chapter-ending cutscene has played and Chapter 2, Breaking and Entering has begun.
References for this chapter
Breaking and Entering
Infiltrate the Istanbul museum with Harry Flynn, disable its alarms, recover Marco Polo’s lamp and escape through the museum sewers. The chapter teaches stealth takedowns, cover movement, climbing, partner-assisted traversal and the short-range tranquilizer gun. The opening infiltration is intended to remain quiet: if a guard reports Nate, the checkpoint reloads. After the lamp is recovered and Flynn betrays Nate, abandon stealth and concentrate on rolling between cover positions while following the escape route to the sewer exit.
1. Follow Flynn through the sewer and boiler room
Climb out of the water and follow Flynn through the brick passage. Jump across to the right-hand platform, move to the far wall and use the yellow pipe to cross the gap. Continue over the pipes and ledges until you reach the apparent dead end. Look up when prompted, then approach Flynn and use his boost to reach the manhole.
In the boiler room, cross the green pipe and stand beneath the ladder so Flynn can climb first and lower it for you. Climb up, reach the valve and interact with it repeatedly to shut off the steam. Return to the lower level, cross the yellow bar and follow Flynn across the platforms. Drop over the ledge when prompted, move along the lower catwalk and enter the next room. Take cover when the tutorial indicates it and wait for the nearby guard to pass before continuing.
- Use Flynn’s boosts and the boiler-room valve to open the route forward.
- Wait for the guard to pass after the cover tutorial instead of crossing the room immediately.
2. Disable the first museum alarm
Enter the artifact room and approach the large doors with Flynn. The alarm prevents him from opening them. Return toward the room entrance and look for a crate or container beneath a breaker-style junction box. Climb onto the crate and interact with the box to disable the alarm.
Return to Flynn and go through the doors. When the first guard is isolated, approach from cover and perform the prompted stealth takedown. Follow Flynn over the railing and stay behind the planters as you work around the next guard. Move close to him while remaining in cover, then perform another stealth takedown.
Continue to the gate ahead. Climb the gate, jump to the golden ledges on the right and shimmy around the corner. Climb to the second junction box and disable it, then return to the gate and interact with it to open the next courtyard.
- The first junction box is inside the artifact room near the entrance.
- Use the gate and golden ledges to reach the second junction box.
- A guard completing a radio call causes the stealth section to restart from the checkpoint.
3. Cross the courtyard and reach the rooftop entry
After opening the second gate, move toward Flynn’s position and use the corner banister for cover. Drop into the courtyard near the fountain. Approach the reclining guard through cover and use the fountain and surrounding planters to stay hidden. Pull the guard over the banister when the opportunity appears, then wait for the next guard to pass before taking him down from behind.
Follow Flynn to the roof route. Climb onto the window ledge, shimmy around the corner and pull yourself into the upper room. Continue across the roofline and follow Flynn to the next wall. Use the rope he throws to swing across to the metal grating, then climb up and to the right along the yellow handholds.
When you reach the rooftop guard, do not pull yourself up directly into his view. Use the prompted stealth takedown from the ledge. Follow Flynn toward the tower, climb the yellow ladder and cross the protruding bars. From above, deal with the guard below before continuing across the roof. Move around the small tower with vines and flowers, then follow Flynn across the final rooftops to the window entry.
- Use the fountain, planters and banisters as cover in the courtyard.
- Take the rooftop guards down before climbing into their sightlines.
- Follow Flynn to the window that leads into the exhibit area.
4. Use the tranquilizer gun and reach Marco Polo’s lamp
A cutscene gives Nate the tranquilizer gun. It has limited range, so allow the target to come close enough before firing. From behind cover, shoot the guard on the left when he settles near the crate; Flynn handles the other guard. Move to the crates and wait for the next pair to approach. Shoot the guard on the right when he is within range while Flynn deals with the other one.
Move the small cart near Flynn, climb onto it and use the higher platform. Follow Flynn’s grappling rope upward. Cross the small wall handholds and shoot the guard who appears below near the doors. Continue across the rafters, dropping to hang beneath the columns when the direct path is blocked, then climb back up and follow the rafters to the stairs.
Exit through the upper window and follow Flynn across the rooftops. Swing from the next rope to the grating, climb around the building and pull down the guard waiting on the roof. Continue to the tower, cross the bars and use the tranquilizer gun on the guard below. Follow Flynn across the last rooftop section and enter the exhibit room. Interact with Marco Polo’s lamp to trigger the cutscene.
- Keep targets within tranquilizer range before firing.
- Shoot the right-hand guard in the second tranquilizer encounter while Flynn handles the other side.
- Recover Marco Polo’s lamp in the exhibit room.
5. Escape the museum after Flynn’s betrayal
Once the alarm sounds and control returns, stop trying to preserve stealth. Guards with laser sights cover the area, so move immediately toward the red-lit passage and use Circle to roll when a sight settles on Nate. Do not remain in the open or attempt to defeat every guard.
Follow the red-lit passage until a gate drops. Turn back; another gate closes the route behind you. Look for the opening beside the first gate and drop down to the staircase. Descend, jump through the window and enter the next room. Move to the museum manhole and interact with it to enter the sewers.
- Use rolling and solid cover during the alarm escape.
- When the gates close, use the side opening and staircase rather than pushing toward the guards.
- Enter the sewers through the manhole in the room beyond the window.
6. Run through the sewers and finish the chapter
After entering the sewer, run straight through the tunnel. Guards follow from behind, so keep moving and roll when their laser sights reach Nate. In the open sewer chamber, stay toward the left wall and cross the pipes to the tunnel opening in the corner. Do not stop to fight unless the route is blocked.
Continue through the tunnel to the ledge beneath the ladder. Climb the platforms, reach the ladder and climb out through the manhole. The scene at the exit ends the chapter and advances the campaign to Borneo.
- Reach the open sewer chamber without stopping for a prolonged firefight.
- Take the corner tunnel to the ladder rather than returning toward the museum.
- Climb out through the final manhole and let the ending scene play.
Before you move on
- Marco Polo’s lamp has been recovered and Flynn’s betrayal cutscene has played.
- Nate has escaped the museum through the manhole and reached the final sewer ladder.
- The exit cutscene begins after climbing out, and the next chapter, Borneo, starts.
References for this chapter
Borneo
Nathan Drake and Victor Sullivan cross the Borneo jungle to reach Lazarević’s camp. Follow the waterway to Chloe’s first charge, pass the initial patrols, push the boulder aside, and fight through the approach to the first enemy encampment. After clearing the camp, arm four charges on its wooden platforms, boost Sully up the ladder, and follow the upper route to a waterfall. A cutscene starts a close-quarters fight; defeat the mercenaries, climb the rope Sully lowers, and follow the blue hose or wire to trigger the transition into Chapter 4: The Dig. Treasures are optional and are not required for chapter completion.
Reach the first charge and pass the opening patrol
Move forward through the jungle and follow the water. Continue until you see the flashing green charge on the left. Reach it and let the brief interaction or scene complete. Continue along the waterway, veer left, and walk up the fallen log over the rise. Rejoin Sully and cross the stones in front of him.
Follow the trail deeper into the jungle and drop from the ledge into the water. Two guards are ahead: one stands near a log while the other patrols the watercourse. Use the log as cover. When the patrol separates from the stationary guard, stealth-takedown the patrol and then the guard by the log. If stealth fails, stay behind the log and finish the encounter before advancing.
- Reach the flashing green first charge.
- Rejoin Sully after crossing the stones.
- Defeat or bypass the two guards by the water.
Clear the larger patrol area and push the boulder
Continue down the watercourse into the open area. Several soldiers patrol below, and additional enemies can arrive from the cliff. Use the logs and stumps as cover. Deal with the lower enemies first, then the soldiers who drop down, and finish with the enemy positioned on the upper ledge. Do not cross the open ground until the elevated shooter is no longer active.
After the fight, climb the crates beneath the upper ledge, jump to the wooden pole, swing to the stone ledge, and follow it across the log. At the next ledge, press Triangle at the large boulder to push it down and open the route. Cross the newly opened path and prepare for another group of guards.
- Defeat the soldiers in the open patrol area.
- Reach the upper ledge using the crates and pole.
- Push the boulder down with Triangle.
Cross the gate section and enter the first encampment
Follow the jungle path over the log and fight the three guards ahead. Once they are down, reach the gate at the far side of the depression and climb over it. The small side trail to the right is optional; it leads toward a water area and a treasure. For campaign progress, return to the gate route and drop to the ledge beyond it.
Continue forward until you enter the first encampment. This is the main charge objective. Take a moment to identify the huts, wooden platforms and the red generator before starting the fight. The platforms provide the best protected positions for the encounter.
- Defeat the three guards beyond the boulder route.
- Climb over the gate.
- Enter the first encampment.
Win the encampment fight before arming charges
Use the huts and wooden platforms near the entrance as cover. You can stealth-takedown the first nearby guard and possibly another approaching guard, but the encounter normally develops into a gunfight with multiple waves. Stay low, move between cover when grenades or concentrated fire make a position unsafe, and watch the upper ledges.
Shoot the red generator when enemies gather near it; the explosion can remove several soldiers and make the fight safer. Continue until every active enemy is defeated. The green charge markers are much easier to check once the camp is quiet, so do not search the platforms while the waves are still attacking.
- Defeat all enemy waves in the encampment.
- Use huts and wooden platforms as cover.
- Destroy the red generator when it is safe and useful.
Arm the four charges and boost Sully
Search the wooden platforms methodically. Two charges are near the first platform and the area where you entered. A third is on or near the opposite wooden platform, and the fourth is near the central platform or the generator-side section. Each charge has a flashing green light. Use Triangle at each one and keep circling the camp if the objective has not completed.
After all four charges are armed, go to the far end of the camp where Sully waits by the ladder. Stand at the prompt and boost him up. When he lowers the ladder, climb to the upper area. Follow the path through the small empty bivouac with the tent and jeep, then head toward the waterfall.
- Arm all four charges.
- Boost Sully at the ladder.
- Reach the empty bivouac and waterfall route.
Survive the waterfall fight and end the chapter
A cutscene throws Drake into the water near the waterfall. Defeat the mercenaries in the melee encounter. Counter incoming grabs when prompted and use finishers after a successful counter. Three enemies are present initially, with another joining later, so keep space when your health is low and use the surrounding water and cover to avoid being surrounded.
After the final enemy is defeated, climb the rope Sully lowers. At the top, follow the blue hose or wire forward. After a short traversal section, the chapter ends and Chapter 4: The Dig begins. Do not continue searching for the wooden building or records area as part of Borneo; that is not required for this chapter.
- Defeat every enemy in the waterfall melee.
- Climb Sully’s rope.
- Follow the blue hose or wire until Chapter 4: The Dig starts.
Before you move on
- The first flashing green charge has been reached and the opening jungle route is complete.
- The boulder has been pushed aside and the first encampment has been entered.
- All four encampment charges have been armed after the enemy waves are defeated.
- Sully has been boosted up the ladder, and Drake has reached the waterfall.
- The waterfall melee is complete, Drake has climbed the rope and followed the blue hose or wire.
- The game transitions to Chapter 4: The Dig.
References for this chapter
- Uncharted 2: Borneo, chapter 3 walkthrough
- Uncharted 2: Among Thieves/Borneo — StrategyWiki
- Uncharted 2: Among Thieves - Guide and Walkthrough - PlayStation 3 - GameFAQs
- Uncharted 2: Among Thieves – Guide and Walkthrough for PlayStation 3
- Uncharted 2: Among Thieves — Official Strategy Guide sample pages
The Dig
Drake and Sully follow the river to Lazarević’s excavation camp, where a stealth approach leads into a large firefight around the cabin. Use the supplied grenades against clustered soldiers, protect Sully when he is pinned down, and destroy the machine-gun tower by throwing a grenade through its open window. After the camp is cleared, follow the jungle route to the mountain ruins and reunite with Chloe. Inside, light the resin with the torch, follow the blood trail, clear the blocked passage and examine the remains holding the Phurba and map. Flynn then confronts the group. Chloe’s apparent betrayal becomes an escape opportunity, and the chapter ends when Drake and Sully jump from the cliff into the river and Chapter 5 begins.
Reach the excavation camp
At the chapter start, follow the stone path through the jungle and continue downstream. Move across the rocks, pass the waterfall and descend the ledges beside it. The route leads directly to the main excavation camp, where a cutscene places Drake near the first patrols.
Stay on the camp’s west side and use the vegetation, crates and structures to break lines of sight. The first guards can be eliminated with stealth takedowns. Move from one concealed position to the next rather than crossing the central yard. If stealth breaks, retreat to cover and finish the nearby patrols before approaching the cabin at the rear of the camp.
- Follow the river and waterfall route into the main camp.
- Approach from the west side and use stealth against the first patrols.
- Reach the cabin after the nearby guards are down.
Defend the cabin and manage the waves
Approaching the cabin triggers a cutscene and begins the main battle. Drake starts beside a box of Mk-NDI grenades with an effectively unlimited supply during this encounter. Stay near the initial cover and use the grenades against groups hiding behind crates, soldiers carrying shotguns and enemies gathering near the camp structures.
The firefight arrives in several waves. Keep the cabin and nearby low cover between Drake and the attackers, then shift positions when enemies begin approaching from the flanks. Sully provides support with his Dragon sniper rifle, but he can become pinned down; when the battle directs attention toward him, clear the soldiers threatening his position before resuming the wider fight. Do not sprint into the center of the yard after a wave ends, because another group follows quickly.
- Use the grenade box beside the starting cover.
- Prioritize clustered enemies and shotgun carriers.
- Help relieve pressure on Sully when he is pinned down.
- Move between cover instead of holding the open yard.
Destroy the machine-gun tower
After the ground waves, a machine gun in the tower begins firing across the camp. Continue using the surrounding cover and eliminate any soldiers who can attack Drake at close range. When the tower becomes the immediate objective, collect more grenades from the supply box if necessary.
Move toward cover near the broken wreckage below the tower. Aim a grenade through the tower’s open side window rather than trying to throw over the front arch. Adjust the throwing arc until the grenade enters the window, then throw. The blast removes the turret threat and ends the camp battle. Climb over the wreckage and follow the opened route to reunite with Sully.
- Reach cover below the tower without crossing the exposed yard unnecessarily.
- Throw a grenade through the tower’s open window.
- Confirm that the turret is no longer firing before leaving the camp.
Follow the jungle path to the ruins
Once the camp battle is complete, follow Sully through the jungle. The route is primarily traversal: climb the marked ledges, cross the narrow gaps and continue uphill until the group reaches the opening to the mountain temple. Chloe joins Drake and Sully at the ruins.
After entering, drop into the lower passage and move through the chambers containing the expedition’s bodies. From this point onward, the chapter’s progression is exploration and climbing rather than another firefight, so keep following the visible path and the blood trail.
- Regroup with Sully after destroying the tower.
- Continue uphill through the jungle to the temple opening.
- Enter the ruins with Chloe and Sully.
Light the torch and find the Phurba
In the dark ruins, locate the resin container and use the torch to ignite it. Carry the light along the blood trail into the next chambers. When the trail ends at a blocked section, interact with the obstruction to clear the passage and continue into the adjoining room.
Proceed through the chamber until you find the remains of the expedition member holding the Phurba dagger and the map. Examine the remains and allow the following story scene to play out. The dagger and map are required story discoveries; any treasure hunting in the ruins is optional and can be skipped.
- Ignite the resin with the torch.
- Follow the blood trail through the dark chambers.
- Clear the blocked passage.
- Examine the remains, Phurba and map.
Escape the ruins and trigger Chapter 5
After the discovery, follow Chloe back toward the temple exit. Flynn and Lazarević’s soldiers confront the group outside. Chloe appears to side with Flynn, but the scene creates an opportunity for Drake and Sully to escape. When control returns, follow the marked route and keep moving instead of stopping to search the area.
Run, jump and climb along the cliffside path as the soldiers pursue. The route is linear and uses the visible ledges and platforms; if Drake falls, restart from the checkpoint and repeat the same forward path. At the final cliff edge, follow the prompt to make the jump into the river. The subsequent transition loads Chapter 5, Urban Warfare.
- Leave the temple after the Phurba and map scene.
- Follow the escape route without diverting into optional areas.
- Complete the final cliff jump into the river.
- Confirm that Chapter 5, Urban Warfare, begins.
Before you move on
- The excavation camp has been cleared and the machine-gun tower has been destroyed with a grenade.
- Drake, Sully and Chloe have reached the mountain ruins.
- The torch has ignited the resin, the blocked passage has been cleared and the Phurba and map have been examined.
- The Flynn confrontation and cliffside escape have completed, including the jump into the river.
- Chapter 5, Urban Warfare, has loaded.
References for this chapter
- Uncharted 2: Among Thieves - Guide and Walkthrough - PlayStation 3 - GameFAQs
- Uncharted 2: Among Thieves – Guide and Walkthrough for PlayStation 3
- Uncharted 2: Among Thieves/The Dig — StrategyWiki
- The Dig | Uncharted Wiki
- Uncharted 2: Dig Site, chapter 4 walkthrough - Gamepressure.com
- Uncharted 2: Among Thieves — Official Strategy Guide sample pages
Urban Warfare
Urban Warfare moves Drake through Nepal's Old Market after the opening truck attack. First survive the chase, then clear the soldiers near the bus and take the FAL. The blocked street forces a vertical route through a green box, an electric pole, signs, a blue pipe and several damaged buildings. After dropping into the market, use cover and the FAL to survive the main firefight while avoiding grenades. A truck-mounted machine gun blocks the street, but you do not need to destroy it; the story advances after the fight. Follow Chloe to the locked doors, climb around the buildings by the street signs and balcony, then throw an explosive or use a gas canister on the soldiers below. Shoot the chain lock, kick open the door and let Chloe join the battle. After the area is clear, boost Chloe to the fire escape, follow her through the building, shoot the wooden boards blocking the passage and lift the burning debris. Entering the next room starts Chapter 6, Desperate Times. The RPG ambush, town-square battle and hotel route are not part of this chapter.
1. Survive the truck attack and reach the bus
Drake begins in a narrow alley with a military truck pursuing him. Keep running toward the end of the route while firing backward into the truck. Maintain forward movement instead of stopping to fight nearby soldiers. The sequence ends when the truck is destroyed and Drake reaches the street.
After the cutscene, clear the soldiers in the street. Move toward the red bus and search the nearby body for the FAL. The FAL is a scoped machine gun; press the Right Analog Stick while aiming to use its sight. The street ahead is blocked, so do not try to force a ground-level route through it.
- Escape the pursuing truck.
- Clear the soldiers in the street.
- Collect the FAL near the bus.
2. Use the damaged buildings to reach the market
Look for the green box beside the electric pole. Climb onto the structure, reach the blue pipe attached to the house and move around the building by jumping between the signs. Enter the upper room, leave through the back and cross to the next damaged building.
In the ruined living room, climb onto the parked truck, shimmy across the cabinets and jump to the planks leading to the stairs. Climb the table and bookcase, then deal with the guard on the balcony. Drop down by the pipe or the sign on the right and continue into the open market area.
The Strange Relic is optional. If you want it, enter the open manhole near the bicycles in the market area before continuing. It is not required for campaign progress.
- Reach the blue pipe beside the house.
- Cross the damaged buildings and ruined living room.
- Defeat or stealth-takedown the balcony guard.
- Optional: collect the Strange Relic from the manhole near the bicycles.
3. Clear the Old Market firefight
Follow the alley and silently attack the enemy standing in the wall opening if he is still unaware. The next encounter becomes an open firefight. Start from cover near the entrance, clear the closest enemies, then use the FAL to pick off soldiers across the street and on higher positions.
Grenades can force Drake out of cover. Move away from the warning marker immediately, then return to cover after the blast. Refill ammunition from fallen enemies when the area quiets down. A riot-shield soldier may approach; melee him when he reaches cover or shoot exposed legs rather than wasting ammunition on the shield.
Advance down the street only after the nearest firing lines are reduced. A heavily armed truck with a mounted machine gun blocks the route. Use cover and defeat the surrounding troops, but do not spend time trying to destroy the truck or gunner; the next cutscene advances the chapter.
- Use cover throughout the market firefight.
- Prioritize nearby and elevated soldiers.
- Avoid grenade blast zones.
- Survive until the truck encounter triggers the cutscene.
4. Reach the locked doors with Chloe
After the cutscene, follow Chloe to the locked doors. Return to the street and climb the signs attached to the street lantern. Swing across to the opposite building, shimmy around it and climb to the next ledge. Cross the building, walk across the thin bar and jump to the balcony.
As Drake hangs from the signs near the balcony, soldiers appear below. Throw a grenade into the group, or shoot a nearby gas canister if that is safer. Move quickly to the locked door, shoot the chain lock and kick the door open so Chloe can enter the fight.
Clear the remaining soldiers from cover. Do not remain exposed in the street while enemies are active on opposite buildings. Once the route is safe, go to the end of the alley and boost Chloe to the fire-escape walkway. Follow her up the ladder.
- Climb from the street lantern to the opposite building.
- Cross the thin bar and reach the balcony.
- Use a grenade or gas canister on the soldiers below.
- Shoot the chain lock and open the door.
- Boost Chloe to the fire escape.
5. Exit the building and start Chapter 6
Follow Chloe through the building and shoot the three wooden boards blocking the doorway. Continue to the burning debris and hold the interaction prompt to lift the heavy beams so Chloe can pass. Move into the next room after the obstruction is removed.
The chapter ends as the next story transition begins. If you are seeing the RPG-wielding soldier, the large town-square defense or the hotel route, you have already entered Chapter 6, Desperate Times; those sections should not be repeated as part of Urban Warfare.
- Shoot the three boards.
- Lift the burning debris and beams.
- Enter the next room.
- Confirm that Desperate Times begins.
Before you move on
- The truck chase is complete and Drake has reached the Old Market.
- The FAL has been collected near the bus.
- Drake has crossed the damaged buildings and survived the main market firefight.
- Chloe has been reached at the locked doors and the chain has been destroyed.
- Chloe has been boosted to the fire escape.
- The three wooden boards and burning debris have been cleared.
- Drake enters the next room and Chapter 6, Desperate Times, begins.
Desperate Times
Drake and Chloe cross the Nepalese city toward the hotel so they can identify the temple connected to the Phurba. Begin by silently eliminating the RPG soldier and his nearby guard, then survive the plaza battle and use Chloe’s fire escape route to enter the hotel. Inside, fight through ruined rooms, restore power to free Chloe from the elevator, and climb to the rooftop. After the zipline, the helicopter attacks repeatedly: escape its first assault through the collapsing buildings, defeat the rooftop soldiers, then use the M32-Hammer grenade launcher to destroy the helicopter at the far roof edge. Cross the lowered bridge, descend by the wreckage, and continue until the next helicopter arrives and the chapter changes to They’re Coming With Us.
1. Clear the plaza and secure the route to the hotel
After the opening scene, leave the garden room through the exterior door and descend toward the plaza. Stay along the side of the building and use the low wall near the bottom of the steps as cover. Move toward the truck where the RPG soldier is stationed. Approach from behind and perform a silent takedown on him, then remove the nearby guard before the wider fight begins.
Use the RPG if you want to thin groups in the square, but do not treat it as mandatory. Stay behind the truck, walls, or the church-like building while clearing the first wave. When reinforcements arrive, a truck with a mounted heavy machine gun enters from the far side. Shoot the gunner through the opening in the turret armor, use the RPG against the vehicle if you still have ammunition, or wait for a safe angle and eliminate him with regular gunfire. Search fallen enemies for ammunition before moving on.
- Silently eliminate the RPG soldier and the nearby guard.
- Clear the plaza from solid cover.
- Defeat the mounted-gun truck and restock before leaving.
2. Follow Chloe across the hotel exterior
Once the plaza is secure, follow Chloe to the alley and boost her onto the fire escape. Climb the ladder she lowers. At the top, vault over the railing facing the street, jump to the commercial signs, and use the streetlight to swing across to the rooftop. Continue along the roof and enter through the opening when Chloe catches up.
Two enemies enter near the hotel elevator. Use the pillar as cover and prioritize the shotgun carrier before shooting the second soldier. Enter the elevator for the scene, then leave and take the left-hand route. Step onto the collapsed pillar, jump to the flagpole, and cross the poles toward the next room. When one pole falls, climb it like a pipe and continue around the wall.
- Boost Chloe and climb the fire escape.
- Use the signs and streetlight to reach the hotel roof.
- Defeat the shotgun enemy before entering the elevator.
3. Cross the ruined hotel and restore power
Shoot the wooden boards blocking the next passage. Climb onto the collapsed roof section, jump to the overhead bars, and swing across to the window. Enemies may approach the window one at a time; pull them down when possible, otherwise shoot them while hanging. Enter the room, collect ammunition if needed, and advance through the damaged stairwell.
Move through the destroyed room and deal with the soldiers near the dark passage. Continue across the small bridge and climb the stone pillar to the hanging bar. Follow the bars to the next platform, then drop into the lower room and activate the generator. This restores the elevator and allows Chloe to rejoin you. Climb back up, boost Chloe to the high ladder, and follow her to the rooftop.
- Use the overhead bars to reach the window.
- Fight through the ruined rooms and stairwell.
- Activate the generator before boosting Chloe to the rooftop.
4. Reach the zipline and survive the helicopter’s first attack
On the rooftop, you may enter the pool before continuing; this is optional and does not affect progression. Take the staircase, vault over the banister to the lower roof, and climb the protruding bricks to the highest roof. Wait for Chloe, then use the zipline when prompted.
After the zipline scene, climb the yellow handholds along the destroyed corridor. The helicopter attacks and breaks the structure, so do not try to defeat it here. Climb when the route rises, then sprint after Chloe across the wooden platforms. Jump each gap, climb the final ledge, and vault onto the rooftop where enemies are fighting. Take cover and eliminate the soldiers, ignoring the helicopter until the route opens.
- Restore health and ammunition before using the zipline if needed.
- Treat the first helicopter attack as an escape sequence.
- Reach the rooftop and clear the soldiers before continuing.
5. Cross the collapsing building and obtain the grenade launcher
Jump to the next rooftop and drop into the damaged building. Keep moving through the first rooms, using cover when enemies appear. Ignore the elevator and drop to the lower office area. Take cover toward the back of the room, to the right of the stairs, and fight while the helicopter fires missiles into the building.
When the building tilts, maintain your position until the enemies are manageable. As the floor begins sliding toward the neighboring structure, move with it and jump through the opening at the end. Climb the stairs to the kitchen, jump to the nearby roof, and take cover. Enemies on the adjacent roof use grenade launchers, so eliminate them first; shooting a nearby propane tank can help.
Use the crank to lower the bridge. Cross and pick up the M32-Hammer grenade launcher, along with nearby ammunition. Climb to the next roof and use the launcher against enemies below if needed. Preserve enough ammunition for the helicopter encounter on the far roof.
- Use the rear of the office as cover during the missile strikes.
- Jump only when the tilting floor carries you toward the next building.
- Defeat the grenade-launcher enemies and collect the M32-Hammer.
6. Destroy the helicopter and trigger the chapter transition
Drop onto the rooftop where the earlier enemies were positioned. The helicopter returns, and this time it must be destroyed. Run toward the far end of the roof and take the M32-Hammer. If you did not bring the earlier launcher, another grenade launcher is available at the roof edge. Fire repeatedly when the helicopter presents a clear angle, while using nearby cover against soldiers. Continue until the helicopter is destroyed.
Turn the crank to lower the next bridge, cross to the neighboring building, and drop down. Jump to the large billboard, vault over it, and continue across the adjacent roofs. Use the zipline to reach the next building. After the scene, climb the blue pipes near the helicopter wreckage, reach the ladder, then use the signs to descend to street level.
Move forward to the following scene. When another helicopter arrives, the chapter is complete; you do not need to destroy this one in Desperate Times. The next chapter begins as Drake and Chloe continue with the group.
- Destroy the required helicopter with the M32-Hammer or replacement launcher.
- Lower the bridge and cross the billboard route.
- Reach the street and confirm the chapter changes to They’re Coming With Us.
Before you move on
- The helicopter on the far rooftop has been destroyed with the grenade launcher.
- Drake has crossed the lowered bridge, used the zipline, and descended from the helicopter wreckage to street level.
- A new helicopter appears after Drake reaches the group, and the chapter title changes from Desperate Times to They’re Coming With Us.
References for this chapter
- Uncharted 2: Among Thieves – Guide and Walkthrough for PlayStation 3
- Uncharted 2: Among Thieves - Guide and Walkthrough - PlayStation 3 - GameFAQs
- Uncharted 2: Among Thieves/Desperate Times
- Uncharted 2: Desperate Times part 2, chapter 6 walkthrough
- Uncharted 2: Among Thieves Unofficial guide
- Uncharted 2: Among Thieves — Official Strategy Guide sample pages
They're Coming With Us
Nathan, Chloe, Elena and Jeff fight through a Nepalese city plaza, cross a flooded channel using two vehicles, and push through a second militia position defended by a mounted machine gun. The chapter is short but its progression depends on using propane canisters in the correct order and then leaving the turret area through a blue drainpipe. Optional treasures may be collected during the route, but none is required to finish the campaign. The chapter ends when Nathan reaches the temple steps and the next cutscene begins.
1. Clear the opening plaza and open the temple door
At the start of the chapter, stay in the small plaza and use the low walls, crates and broken masonry as cover. Eliminate the soldiers before crossing the open ground. Chloe, Elena and Jeff help draw fire, but do not run ahead of them or leave the plaza until the enemies are down.
When the area is clear, go to the temple door at the rear-left side of the plaza. Approach it with Chloe and follow the interaction prompt to force the door open. Walk through the passage with the group and continue down toward the waterway. This door is the required route forward; there is no useful alternate path around it.
- Defeat the soldiers in the opening plaza.
- Reach the temple door at the rear-left of the courtyard.
- Force the door open with Chloe and follow the group to the water.
2. Move the first vehicle into the water
At the waterway, look toward the small vehicle sitting in the channel. Shoot the nearby propane canister so it explodes beside the vehicle and sends it downstream. This creates the first section of the crossing.
After the first vehicle has moved, turn left and follow the paved path to the broken ladder. Chloe will boost Nathan upward. Climb the boxes she knocks down and reach the upper platform, where more propane canisters are available. Do not try to cross yet; one vehicle is not enough to form the route.
- Shoot the first propane canister beside the vehicle in the channel.
- Follow the paved path to the broken ladder.
- Use Chloe’s boost and climb the boxes to the upper platform.
3. Move the second vehicle and cross
Pick up a propane canister on the upper platform and carry it to the edge overlooking the second vehicle. Throw the canister toward that vehicle, wait until it lands beside it, and shoot it. The explosion moves the second vehicle into the channel beside the first one.
Return to the water’s edge and use the two vehicles as stepping stones. Jump onto the nearer vehicle, cross to the second, and jump to the far bank. If Nathan falls, repeat the vehicle setup from the current checkpoint rather than attempting to swim across. Once on the far side, follow the stairs between the buildings.
- Throw and shoot a second propane canister beside the other vehicle.
- Wait until both vehicles form the crossing.
- Jump across them and reach the stairs on the opposite bank.
4. Flank the mounted gun and clear the courtyard
The next courtyard contains soldiers on higher ground and a mounted machine gun. Take cover immediately and eliminate the enemies closest to the stairs before moving into the yard. The turret has a clear view of the approach, so do not advance directly in front of it.
Use the truck and the blue boards on the side of the courtyard to reach the raised position beside the gunner. From there, attack the turret position from the flank. Once the gunner is dealt with, take control of the mounted gun and use it against the soldiers below and the reinforcements that enter the courtyard. The turret is useful for finishing the encounter, but it is not the route onward.
- Use cover while approaching the second courtyard.
- Reach the raised position through the truck and blue boards.
- Defeat the gunner and use the mounted machine gun against the remaining enemies.
5. Leave the turret area and reach the temple
When the courtyard is clear, climb the blue drainpipe beside the turret position. Shimmy along it and enter the window. Follow the narrow passage above the street. A tank passes below during this traversal, so stay on the handholds and do not drop into the roadway.
Continue through the damaged building, descend the destroyed stairs and pass through the ruined corridor. Exit into the square in front of the temple. Walk up the steps and approach the entrance to trigger the cutscene. The chapter ends there and The City's Secret begins.
- Climb the blue drainpipe beside the turret.
- Cross the overhead passage while the tank moves below.
- Pass through the ruined building and approach the temple entrance.
Before you move on
- The opening plaza and the second courtyard have been cleared.
- The waterway has been crossed using both moved vehicles.
- Nathan has climbed the blue drainpipe, crossed the damaged building and reached the temple square.
- Approaching the temple steps triggers the ending cutscene and advances to The City's Secret.
The City's Secret
Chapter 8 is a puzzle-and-traversal section with no regular enemy encounters. Enter the temple chamber, inspect Drake’s journal and align three movable arms on the large statue. The arm holding the trident is already correct and must not be changed. Reach the arms by climbing the destroyed column, wall ledges, ceiling decorations, suspended beams and balconies. Once the statue is aligned, climb to its center and insert the Phurba to drain the pool and open the underground route. Follow the collapsed passage through the flooded ruins until the floor gives way beneath Drake and Chloe. In the spike-ceiling room, immediately shoot the lower gear or its wooden teeth to stop the trap. The Bronze Altar Spoon near the opening and Bronze Varaha Statue in the spike room are optional and are not needed for campaign progress. Leave the trap room and continue through the corridor to the large underground cavern, which leads into Chapter 9, Path of Light.
Enter the statue chamber and check the optional first treasure
After the opening conversation, move into the temple and enter the large chamber containing the multi-armed statue. Drake opens his journal when the puzzle begins; study the drawing before climbing. The statue has four arms, but only three need to be moved because the trident arm is already in the correct position. Do not alter it.
The Bronze Altar Spoon is optional. From the starting area, turn right through the doorway and climb the broken wall where the former stairs ended. Collect the treasure at the top, then return to the statue chamber. Ignore the left-side dead end if you are following the campaign route only.
- Enter the large statue chamber.
- Open Drake’s journal and study the arm arrangement.
- Leave the trident arm unchanged.
- Collect the Bronze Altar Spoon only if desired.
Reach and align the first movable arm
Begin on the right side of the chamber, beside the destroyed column. Climb the column stump and use the wall handholds to reach the upper level. From the upper ledge, jump toward the shelf near the statue rather than attempting a direct leap across the room.
Continue upward toward the statue’s trident side. Climb the bricks and walk across the horizontal stone decorations near the ceiling. Follow the ledges to the first movable arm and interact with it. Match its position to the drawing in Drake’s journal. If Drake does not grab a handhold, reposition him on the current ledge instead of attempting a longer jump.
- Climb the destroyed column on the right side.
- Reach the upper ledges and ceiling decorations.
- Set the first movable arm to match the journal.
Cross the entrance and align the skull arm
Return to the area around the destroyed column and climb to the shelf beside the wall grate. Face the suspended wooden beams above the temple entrance. Jump to the beams, grab them and swing across to the opposite side of the chamber. Continue along the intact balcony.
Reach the next statue arm and adjust the arm holding the skulls to the position shown in Drake’s journal. After moving it, climb the nearby bricks toward the ceiling. Use the wooden pole or stick as the next handhold and proceed toward the final movable arm. Keep Drake centered on each ledge before jumping across a gap.
- Reach the shelf beside the wall grate.
- Swing across the suspended beams above the entrance.
- Align the skull-holding arm.
- Climb the bricks and wooden pole toward the final arm.
Align the final arm and use the Phurba
Interact with the final movable arm and place it according to the journal drawing. After the mechanism completes, Drake falls back to the floor. Climb to the central section of the statue and interact with the newly exposed triangular socket.
Insert the Phurba dagger. The nearby pool drains, revealing the underground entrance beneath the statue. Follow Chloe into the passage. Move through the ruined corridor, climb over the collapsed sections and pass through the narrow gap when the route becomes blocked.
Continue through the underground area until you pass the carved tree relief and reach the damaged statue in the flooded section. Climb the broken statue to reach the upper route, then proceed along the corridor. The floor eventually collapses beneath Drake and Chloe.
- Align the final movable arm.
- Climb to the statue’s central section.
- Insert the Phurba into the exposed socket.
- Follow the drained pool into the underground passage.
- Continue past the tree relief and broken statue.
Stop the spike ceiling and reach the chapter exit
After falling through the floor, immediately turn your attention to the descending ceiling covered in spikes. Look around the room for the pair of large gears. Use the rifle to destroy the lower gear or the wooden teeth supporting it. The trap stops when the mechanism is disabled, so do not spend time searching for a route or trying to climb while the ceiling is still moving.
The Bronze Varaha Statue is an optional treasure in the spike-trap room, on the floor near the exit area. Collect it only after stopping the mechanism. Then leave through the opening and follow the corridor and stairs. Continue forward into the large underground cavern containing the enormous Phurba replica. Reaching this cavern completes Chapter 8 and begins the transition to Chapter 9, Path of Light.
- Shoot the lower gear or its wooden teeth immediately.
- Confirm that the spike ceiling has stopped.
- Collect the Bronze Varaha Statue only if desired.
- Leave through the opened route.
- Reach the large underground cavern and trigger Chapter 9.
Before you move on
- The statue’s three movable arms match Drake’s journal and the trident arm remains unchanged.
- The Phurba has been inserted into the statue’s triangular socket and the pool has drained.
- Drake and Chloe have passed through the underground corridor and escaped the spike-ceiling room.
- The pair has reached the large cavern with the enormous Phurba replica, triggering the transition into Chapter 9, Path of Light.
References for this chapter
- Uncharted 2: The City's Secret, chapter 8 walkthrough
- Uncharted 2: Among Thieves - Guide and Walkthrough - PlayStation 3 - GameFAQs
- Uncharted 2: Among Thieves/The City's Secret - StrategyWiki
- Uncharted 2: Among Thieves Treasures, StrategyWiki
- Uncharted 2: Chapter 8 Treasures and Secrets - Gamepressure
Path of Light
Path of Light is a no-combat puzzle chapter in the temple beneath Nepal. Drake and Chloe must redirect sunlight through a series of mirrors, hanging lamps and statue faces. Each illuminated statue accepts the Phurba Dagger and lowers one of the three central blades, creating the next climbing route. The second blade breaks during the ascent, but shooting the cracked section of the statue opens the route to the final mirror. After activating the third statue, return to the floor, enter the opening beneath the large central sculpture and place the dagger in the mechanism inside. The resulting map scene completes Chapter 9 and leads into Only One Way Out. Three treasures are available, but none is required for campaign progress.
1. Activate the first statue and climb the first blade
Enter the large chamber and drop to the sun mirror directly ahead. Adjust it until the beam strikes the forehead or upper face of the large statue on the far side of the room. The statue will glow when the alignment is correct.
Cross the chamber to that statue and insert the Phurba Dagger into the illuminated opening. The first central blade descends. Climb its handholds, changing sides when the route requires it, and continue upward. At the top, walk carefully along the narrow extended blade toward the red-faced statue. Jump to its eyelid or eyebrow handholds and climb onto the face. This opens a new light path and reveals ledges leading down to a lower walkway.
- The first mirror is sending light to the far statue.
- The Phurba Dagger has activated the first statue.
- The first central blade has descended.
- The ledges beside the first statue are open.
2. Use the lower mirror to lower the second blade
Follow the newly revealed ledges down to the lower balcony. If you want the optional Copper Lakhe Mask, search the end of the first upper walkway before continuing; its shine marks the pickup.
Reach the mirror on this side of the chamber. Chloe’s mirror redirects light toward it. Turn your mirror so the beam enters the opening of the hanging lamp or mirror cage above the chamber. The redirected beam will illuminate a second statue head.
Go to that statue and insert the Phurba Dagger. A second central blade lowers and a connecting footbridge appears. Cross back toward the central apparatus, then climb the second blade. Use its handholds and switch sides as necessary to reach the upper section.
- The second mirror has been aligned with the hanging lamp or mirror cage.
- The second statue is illuminated and activated with the dagger.
- The second blade and connecting footbridge are available.
3. Recover from the broken-blade sequence
Continue along the upper portion of the second blade toward the next red-faced statue. The blade will partially collapse, leaving Drake hanging from the remaining section. Do not try to make a normal jump from this position.
While hanging, aim at the cracked central section of the statue or mechanism where light is visible through the damage. Shoot it several times until the mechanism opens and the blade shifts. Drake is carried toward a hanging lamp; follow the prompted movement and grab the lamp or its handholds.
From the lamp, jump to the nearby ledge and climb to the walkway containing the final mirror. If you want the optional Carved Jade Figurine, look for its glint on the upper wall near the statue area and shoot it down before leaving this section.
- The cracked light-emitting section has been destroyed.
- Drake has reached the hanging lamp after the blade breaks.
- The final mirror walkway is accessible.
4. Activate the final statue and open the central passage
Turn the final mirror so its beam reaches the remaining hanging lamp or mirror cage. When the light is redirected to the last statue head, cross the walkway to that statue and insert the Phurba Dagger.
The final activation opens the throat or mouth of the large sculpture on the chamber floor and creates the route back toward the lower level. Use the footbridge and surrounding walkways to return to the chamber floor. Do not continue climbing the blades; the required route now leads downward.
- The final mirror is sending light to the last statue.
- The third statue has been activated with the dagger.
- The opening beneath the large central sculpture is accessible.
5. Enter the hidden room and finish Chapter 9
Return to the floor and approach the large sculpture’s open mouth. Enter it and descend into the concealed room beneath the main chamber. The Bronze Ganesh Statue treasure is optional and can be collected by circling the hidden room and checking for its glint.
At the mechanism in the hidden room, insert the Phurba Dagger when prompted. A map is revealed and the concluding story scene plays. When the scene finishes and the game advances to Chapter 10, Only One Way Out, Path of Light is complete.
- Drake has entered the sculpture’s mouth.
- The hidden room has been reached.
- The Phurba Dagger has been inserted into the mechanism.
- The map scene has played and Chapter 10 is available.
Before you move on
- The mechanism in the hidden room has been activated with the Phurba Dagger.
- The map-reveal story scene has played.
- The game has advanced to Chapter 10, Only One Way Out, or Path of Light is marked complete in chapter select.
- No combat encounter or enemy defeat is required in this chapter.
References for this chapter
- Uncharted 2: Path of Light, chapter 9 walkthrough
- Uncharted 2: Among Thieves - Guide and Walkthrough - PlayStation 3 - By AbsoluteSteve
- Uncharted 2: Among Thieves - Guide and Walkthrough - PlayStation 3 - GameFAQs
- Uncharted 2: Among Thieves — Official Strategy Guide sample pages
- Uncharted 2: Among Thieves — Path of Light, StrategyWiki
Only One Way Out
Chapter 10 is a sustained combat retreat from the hidden chamber beneath the temple back to the original courtyard. Nate and Chloe climb out through the statue’s mouth, fight through the room and temple passages, cross the crushing chamber by its newly opened route, and push through a tunnel toward the exterior. The final courtyard contains two dangerous sniper positions along with ordinary soldiers. There is no treasure pickup in this chapter and no separate countdown or collapsing-room escape sequence. Use pillars, doorways and stonework as cover, eliminate elevated threats before advancing, keep a close-range weapon for the tunnel, and save grenades for armored or shield-using enemies. The chapter is complete when the courtyard is secure and Nate reaches Elena and Jeff on the right side.
1. Climb out through the statue’s mouth
At the start of the chapter, climb the ladder and handholds out of the hidden chamber through the statue’s mouth. If the camera makes the first movement unclear, keep Drake climbing upward, then shimmy sideways when the shaft prevents further progress. Continue until you reach the upper room where the guards are searching.
The guards are not immediately aware of you, so move to cover on the left and attempt a stealth takedown on the nearest soldier. The encounter normally becomes a firefight, so do not remain exposed if stealth fails. Use the stone pillars and raised sections of the room as cover.
A sniper or rifleman is positioned on the upper ledge near the stairs. Eliminate that enemy first because the elevated firing angle makes the rest of the room harder to cross. Collect the dropped rifle if you want a useful weapon for the next hall, then clear the remaining soldiers before leaving the room.
- Climb out through the statue’s mouth.
- Use the pillars and raised floor as cover.
- Kill the upper-ledge sniper before advancing.
2. Clear the route back through the temple
Follow the route back toward the temple entrance. Check each doorway and landing before descending because soldiers are positioned along the return path. Fire from cover, then advance only after the immediate group has been defeated.
The long hall gives the sniper rifle a good line of sight for thinning distant enemies. After using it, exchange it for a shotgun or another close-range weapon if one is available. The next sections are tighter, and a close-range weapon is more useful when enemies rush through the corridors.
Continue down the stairs and through the temple passage. Use grenades against groups behind cover, but avoid throwing them at close range. Move forward after each fight rather than waiting indefinitely for enemies to approach.
- Check each landing before descending.
- Use the long hall to remove distant soldiers.
- Carry a close-range weapon into the tighter passages.
3. Cross the crushing chamber and tunnel
Return to the crushing chamber used during the preceding chapter. The route back now continues through a door on the opposite side, so do not try to repeat the earlier puzzle path. Enter the newly accessible passage and prepare for another firefight.
Use the doorway and nearby stonework as cover while the enemies advance. Armored and shield-using soldiers are especially dangerous in the confined passage. Throw grenades when possible; if explosives are scarce, use nearby explosive objects when an armored enemy moves close enough to them.
Continue through the tunnel after the first group is defeated. More enemies wait near the route out, including a heavily armed shotgun soldier above the tunnel exit. Stop short of the opening, use the tunnel mouth as cover, and clear the visible threats before stepping into the courtyard.
- Take the newly opened door across the crushing chamber.
- Prioritize armored and shield-using enemies with grenades or explosive objects.
- Defeat the shotgun soldier and other enemies near the tunnel exit.
4. Secure the exterior courtyard
When you emerge outside, immediately move behind a solid stone object, sculpture or wall. The courtyard is exposed, and remaining enemies can fire from several directions. Do not stand in the doorway or cross the open center without cover.
Find the sniper positions by watching for their red laser sights. One sniper is positioned toward the back of the courtyard and another covers the area from the right. Take both out before concentrating on ordinary soldiers. Peek from cover, fire during safe openings, and retreat if multiple enemies focus on Drake.
After the two snipers are down, clear the soldiers on the left side of the courtyard. Use the available sculptures and walls to advance in short moves. Once the left side is secure, deal with any remaining enemies on the right and keep the route toward Elena open.
- Take cover immediately after leaving the tunnel.
- Eliminate both courtyard snipers first.
- Clear the left side before crossing toward the right.
5. Reach Elena and finish the chapter
After the courtyard firefight ends, move along the right side toward Elena and Jeff, the injured camera operator. There is no treasure pickup in this chapter, so do not delay the advance by searching the courtyard for collectibles.
Approach Elena and Jeff after the immediate enemies have been defeated. The reunion scene begins when Nate reaches them. Let the scene play through; the game then transitions to Chapter 11, Keep Moving.
If you die during any firefight, the checkpoint returns you to the most recent cleared section. Re-establish cover first, repeat the same priority order, and do not treat the chapter as a timed collapse sequence. Its pressure comes from successive combat encounters rather than a countdown.
- Confirm the courtyard firefights are finished.
- Reach Elena and Jeff on the right side.
- Wait for the reunion scene and Chapter 11 transition.
Before you move on
- Nate and Chloe have climbed out through the statue’s mouth and cleared the upper room.
- The temple return route, crushing chamber and tunnel have been traversed.
- The armored or shield-using enemies and the shotgun soldier near the tunnel exit have been defeated.
- Both courtyard snipers and the remaining courtyard soldiers have been cleared.
- Nate has reached Elena and Jeff, the reunion scene has played, and the game has transitioned to Chapter 11, Keep Moving.
Keep Moving
Carry the wounded Jeff through the Nepalese city while Chloe and Elena lead the group toward an escape route. Supporting Jeff restricts Drake to one-handed weapons, so use cover and short advances instead of trying to win every street fight. Follow the group through the first ruined building, rescue Chloe when a soldier grabs her, then move through the purple-walled building and the gate area. Eliminate the rocket-launcher soldier on the balcony, enter the building on the right when the next truck arrives, and climb upstairs. After the cutscene, run through the collapsing escape route, turn into the left alley at the truck, swing from the pipe to the brick wall, and climb to Elena. Pull her up immediately, then follow the final path and jump to the street below. The transition to Chapter 12, A Train to Catch, confirms completion. This chapter contains no treasure pickups.
1. Leave the starting street with Jeff
Drake begins the chapter supporting Jeff, which limits him to one-handed weapons such as the pistol or 9mm Micro. Wait for Chloe to break open the door on the left side of the street, then enter the destroyed building with Chloe and Elena.
Follow the route through the building and out toward the alley. Continue with the group rather than searching side rooms. Elena will help hold the route open, and the next combat begins near the stairs and street beyond.
- Wait for Chloe to open the left-hand door.
- Enter the ruined building and follow the group.
- Keep Jeff supported and use only the available one-handed weapon.
2. Rescue Chloe and continue up the street
A pair of soldiers attacks a short distance from the stairs. Use walls, doorways and other solid cover while firing around Jeff’s restricted movement. Once those enemies are down, a tougher soldier grabs Chloe in a scripted attack.
Aim for the captor’s head and shoot him until Chloe is released. Do not chase enemies away from the route. After the rescue, continue up the street and deal with the additional soldiers who appear, advancing whenever the group moves forward.
- Use cover during the first street fight.
- Shoot the soldier holding Chloe, preferably with headshots.
- Advance up the street after Chloe is freed.
3. Pass the gate and kill the balcony rocket launcher
Continue until you reach the area with the purple-walled building. Enter through the doorway with Elena leading, then proceed to the closed gate. When Elena starts working at the gate, immediately look toward the balcony above the passage.
A soldier carrying a rocket launcher appears on that balcony. Kill him quickly with accurate pistol fire before he can launch another rocket. Keep the doorway or nearby wall between Drake and the other soldiers whenever possible, then move through the route beside the balcony.
- Enter the purple-walled building.
- Watch the balcony above the closed gate.
- Eliminate the rocket-launcher soldier before continuing.
4. Use the right-hand building when the truck arrives
Follow the route into the building with yellow design elements. When you return to the street, turn right and keep moving under fire. Take brief shots from cover only when an enemy blocks the path; Drake’s restricted weapon handling makes prolonged open combat especially dangerous.
A truck carrying more soldiers arrives at the far end of the street. Avoid trying to clear the entire group. Move toward the open door on the right and enter the nearest building. Go upstairs to trigger the cutscene that begins the escape.
- Pass through the yellow-trimmed building.
- Turn right when the route returns to the street.
- Enter the open door on the right when the truck appears.
- Climb the stairs to start the cutscene.
5. Run through the collapsing escape route
When control returns after the cutscene, run away from the gunfire. The camera turns automatically, so keep the left stick pointed along the escape route and press X to jump over obstacles. Do not stop to aim, collect supplies or investigate side paths; the collapsing scenery is intended to force continuous movement.
When a truck blocks the route, turn into the alley on the left. Continue to the pipe, grab it, swing across and jump to the brick wall. Follow the visible handholds upward. If Drake falls, repeat the same route from the checkpoint and keep the escape line moving.
- Run immediately when control returns.
- Jump over obstacles as the camera turns.
- Turn left into the alley at the truck.
- Swing from the pipe and jump to the brick wall.
6. Pull Elena up and trigger Chapter 12
Climb the brick wall to the top and move to the edge where Elena is hanging. Press Triangle repeatedly as soon as the interaction prompt appears. Delaying the rescue can cause Elena to die and force a restart of the sequence.
After Elena reaches safety, follow the remaining path forward. When the route ends, jump down to the street below. The following transition begins Chapter 12, A Train to Catch; that chapter title and the new checkpoint are the practical completion check for Keep Moving.
- Climb to the top of the brick wall.
- Press Triangle repeatedly to rescue Elena promptly.
- Follow the final path and jump to the street.
- Confirm the transition to Chapter 12: A Train to Catch.
Before you move on
- Drake has carried Jeff through the ruined building, street fights and gate area.
- The balcony rocket-launcher soldier has been defeated and Drake has entered the right-hand building.
- Drake has completed the post-cutscene escape run, swung from the pipe and climbed the brick wall.
- Elena has been pulled to safety and Drake has jumped down to the street.
- The game has transitioned to Chapter 12, A Train to Catch, with a new checkpoint.
References for this chapter
- Uncharted 2: Among Thieves - Guide and Walkthrough - PlayStation 3 - By AbsoluteSteve
- Uncharted 2: Among Thieves - Guide and Walkthrough - PlayStation 3 - GameFAQs
- Uncharted 2: Keep Moving, chapter 11 walkthrough - Gamepressure
- Keep Moving - Uncharted 2: Among Thieves Guide and Walkthrough - SuperCheats
- Uncharted 2: Among Thieves — Official Strategy Guide sample pages
A Train to Catch
Drake and Elena pursue Lazarević’s train through the Nepalese city, but Drake begins this chapter without a weapon. Use the rooftops and damaged buildings to approach the first guards quietly, obtain firearms, then follow Elena across the upper route. A blocked gate forces Drake onto a large orange sign, where he must shoot the boards sealing the passage while surviving several enemy waves. After Elena lowers a footbridge, climb to the water-tower area and use the zipline into the train yard. Move the cart blocking the hangar, cross the freight cars and yellow footbridge, then pull the lever at the end of the passenger car. Defend that car while Elena retrieves a vehicle. Snipers eventually appear on both sides, followed by two heavily armored enemies with heavy machine guns. Save grenades for those final attackers. The chapter ends when Elena reaches Drake; the train-roof pursuit and Gatling-gun sequence are in Chapter 13, Locomotion.
1. Leave the building and silently secure the first weapons
After the opening conversation, leave the building and move to the left side of the roof or balcony. Hang from the edge and jump down to the ground instead of entering the street openly. Drake starts with no firearm, so remain crouched and use the ruined structures for concealment.
Move toward the destroyed building and crouch beneath its window. Wait for the nearby guard to turn away, then climb inside and perform the stealth takedown. Stay in the building and move toward the damaged wall on the right to reach the next patrol. Eliminate that guard quietly before exposing yourself.
Two better-equipped enemies remain on the ground. Watch their patrol pattern from the doorway and wait until both are looking away. Run out and take down the nearer target, then immediately close on the second before he turns back. Climb the nearby ladder to the roof and hang from its edge. Approach the last guard from below and pull or throw him over the wall. Collect the dropped firearms and ammunition before continuing.
- Reach the ground without starting a sustained firefight.
- Stealth-eliminate the first patrol and acquire firearms.
- Clear the rooftop guard before joining Elena.
2. Follow Elena to the blocked gate
Wait for Elena to reach you, then boost her up to the higher ledge. She lowers a ladder; climb it, jump over the barrier and continue across the next roof. Follow the obvious rooftop route until you reach the closed gate overlooking the square.
The gate cannot be opened from the ground. Jump from the roof toward the signs in the center of the square and grab the largest orange sign. While hanging there, aim across the gap at the three wooden boards covering the passage. Shoot all three boards to open the route for Elena.
- Use Elena’s boost and lowered ladder to reach the next roof.
- Hang from the large orange sign and destroy all three boards.
3. Survive the sign ambush and cross the footbridge
Destroying the boards triggers an ambush. Drake remains on the sign while enemies attack in three waves, so do not try to retreat along the route you used to arrive. Shift around the sign to keep its structure between you and the shooters, changing sides whenever enemy fire has a clear angle.
Use grenades against groups that gather near the sign or on adjacent ledges, but keep at least two for the final defense in the train car. Clear each wave before attempting the next jump. When the last enemy falls, Elena lowers a footbridge. Cross it, jump to the roof on the right and climb the ladder to the upper platform.
- Survive all three enemy waves on the sign.
- Preserve grenades for the later armored attackers.
- Cross Elena’s lowered footbridge and climb to the upper platform.
4. Take the zipline into the train yard
At the top, a cutscene shows the train yard and the train route ahead. After it ends, move to the rope leading down toward the train cars and press Triangle to use the zipline. Drake lands near the large hangar entrance.
A cart loaded with bags blocks the hangar door. Push the cart away from the entrance, then go inside. Move through the hangar toward the freight car and climb to the large window. Use the cargo inside to reach the train car nearer the center of the building.
- Use the rope or zipline after the train-yard cutscene.
- Move the obstructing cart away from the hangar door.
- Reach the train car near the center of the hangar.
5. Reach the passenger car and start the defense
From the freight car, jump onto the yellow metal footbridge. Cross it and jump to the passenger car on the right when facing into the hangar from the entrance. Travel to the far end of that passenger car and pull the lever.
The lever starts a short scene and draws a large enemy force toward Drake. Take cover inside the car and use the available ammunition and grenades to stop enemies approaching from the front and sides. Move between cover positions instead of standing in the center aisle, and reload only when protected by the car’s interior.
- Cross the yellow footbridge to the passenger car.
- Pull the lever at the far end.
- Begin the train-car defense without wasting all grenades.
6. Eliminate the snipers and finish the chapter
During the defense, red laser sights indicate that snipers have appeared on both sides of the car. Stop concentrating on the closest attackers and deal with the snipers first. A sniper rifle is available inside the car beneath a window. Use its scope for distant targets, but fire from cover and switch back to a normal weapon when enemies close in.
After the sniper threat is removed, a short scene introduces two heavily armored enemies carrying heavy machine guns. Throw grenades to stagger and damage them, using the car’s interior as cover while they advance. Do not spend every grenade during the earlier waves; these two enemies are the final major threat.
Elena arrives with a vehicle after the defense. Her arrival marks the end of Chapter 12. The following train-roof traversal and the mounted Gatling-gun encounter are part of Chapter 13, Locomotion, not this chapter.
- Use the sniper rifle to remove the red-laser threats.
- Defeat both heavily armored machine-gun enemies with cover and grenades.
- Confirm Elena’s arrival and the transition to Chapter 13, Locomotion.
Before you move on
- Drake has started the chapter unarmed and obtained firearms through the opening stealth section.
- Elena has been boosted to the upper route, the three boards on the large orange sign have been destroyed, and the footbridge has been crossed.
- Drake has used the zipline into the train yard, moved the cart from the hangar entrance, crossed the yellow footbridge and pulled the passenger-car lever.
- The train-car defense is complete: the snipers and two armored machine-gun enemies have been defeated.
- Elena arrives with a vehicle and the game transitions to Chapter 13, Locomotion. The Gatling-gun sequence has not been incorrectly counted as part of Chapter 12.
Locomotion
Nate boards Lazarević’s moving train and works forward through passenger, freight and tanker cars while avoiding hazards created by the train’s speed. The route combines close-range firefights, a stationary machine gun, roof traversal and side-hanging sections beneath signal structures. Three optional treasures are available: one in the opening railcar, one on a roof after the first window ambush, and one inside the cargo wagon immediately after the coal car. Near the end, a helicopter attacks the train. Keep moving from cover to cover, pass the locked freight car along its left side, survive the soldiers around the blue-tarp cargo, then enter the final car. Defeat the two soldiers inside, take the grenade launcher at the entrance and hit the helicopter at least once. Open the door at the far end of the car to trigger the completion cutscene and begin Tunnel Vision.
1. Climb into the first railcar and collect the opening treasure
At the start, Nate is hanging from the side of the last train car. Climb upward when the handholds lead to the roof, then enter the first railcar through its window. Do not climb the ladder and leave the car immediately if you want the treasure: move toward the rear of this railcar and search the open hatch area for the first collectible, the Miniature Bronze Stupa.
After collecting it, move forward through the car and climb back onto the roof when the route requires it. The train is already moving, so stay close to the available cover and avoid jumping toward a car until the landing route is clearly visible.
- Climb from the train’s side to the roof.
- Enter the first railcar through its window.
- Search the rear open hatch for the Miniature Bronze Stupa.
2. Cross the tanker and survive the first train-car fight
Move to the tanker car and use the yellow pipe along its side. When the pipe route ends, climb over the vents on top of the tanker and continue to the next car. Pick up weapons before advancing if they are available, because the next section contains several mercenaries and has limited room for evasive movement.
Approach the first exposed enemy carefully; a stealth takedown is possible if you reach him before the others react. The remaining soldiers can be fought from the crates and carriage sides. If they close in, drop to the lower level and fight at short range rather than remaining exposed on the roof.
Enter the passenger car ahead. A soldier bursts through a window and forces a melee encounter. Defeat him, then leave through the window as the route directs. Once outside, climb to the roof and look around the roof structures for the second treasure before continuing forward.
- Use the yellow pipe and tanker vents to reach the next cars.
- Defeat the first group of mercenaries.
- Win the window ambush melee encounter.
- Search the roof after the ambush for the second treasure.
3. Bypass the locked freight car and deal with the machine gun
Continue across the next cars until the route reaches the locked freight car. Do not try to force the door. Stay along the left edge of the train and use the exterior path to get around it. This route also helps you avoid the overhead signal structure; keep Nate hanging from the side or use the indicated handholds whenever a signal bar approaches.
The next passenger section contains more soldiers and a stationary machine gun. Use the roof and side route to get around the gunner instead of pushing directly through his firing lane. Climb onto the roof of the following car and approach the machine gun from behind, or use the roof opening to attack the position from above. Once the gunner is down, use the weapon against the remaining enemies if it is safe to do so.
- Go around the locked freight car on the left side.
- Hang below approaching signal structures instead of standing on the roof.
- Flank the stationary machine gun from the roof or roof opening.
- Clear the remaining enemies before advancing.
4. Find the third treasure after the coal car
After the machine-gun section, cross the coal car while staying low near the left side when overhead structures pass. Continue to the next tanker and use its side pipe and handholds in the same manner as the earlier tanker, but pay attention to the signal lights positioned beside the track.
Immediately after the coal car is a cargo wagon containing the third treasure. To enter it, remain on the left-side exterior route, reach the door and jump onto the footbridge leading inside. Collect the treasure, then continue through the wagon and climb onward. This is the only cargo wagon in the chapter with this collectible route, so it is the most reliable landmark for identifying the location.
- Cross the coal car while avoiding overhead hazards.
- Use the tanker’s side handholds and pipe.
- Enter the cargo wagon immediately after the coal car.
- Collect the third treasure before continuing.
5. Move through the helicopter attack
After the next group of soldiers, a cutscene introduces the helicopter. From this point, prioritize forward movement over clearing every enemy. Use crates, cargo containers and the sides of the train as cover from the helicopter’s machine gun. When you hear the missile attack charging, move to the next car; the missile can destroy the section you are occupying.
Stay on the left side when the route passes the locked freight car and overhead signal equipment. Continue across the blue-tarp cargo and flatbed sections. Soldiers will appear on and around the cars, including close-range attackers with shotguns, so eliminate enemies blocking the route and keep moving rather than holding one exposed position.
- Use cargo and train-car structures as cover from helicopter fire.
- Move when the missile attack is telegraphed by its charging sound.
- Pass the locked freight car along the left side.
- Clear only the enemies preventing forward progress.
6. Hit the helicopter and trigger the chapter ending
When you reach the final train car, enter it and defeat the two soldiers inside. Pick up the grenade launcher lying near the entrance. Aim at the helicopter and hit it at least once. The helicopter pulls away temporarily, giving you the opening needed to reach the far end of the car.
Run to the end door and open it. The following cutscene completes Locomotion and transitions into Tunnel Vision. If you die during the helicopter section, repeat the same sequence from the checkpoint: move between cover, cross the exposed cars quickly, defeat the two soldiers in the final car, use the grenade launcher on the helicopter and open the door.
- Defeat the two soldiers in the final car.
- Pick up the grenade launcher near the entrance.
- Hit the helicopter at least once.
- Open the door at the far end of the car.
- Confirm the completion cutscene and transition to Tunnel Vision.
Before you move on
- Nate has entered the final train car and defeated the two soldiers inside.
- The grenade launcher from the final car has been used to hit the helicopter at least once.
- The door at the far end of the train car has been opened.
- The completion cutscene begins and the game transitions to Chapter 14, Tunnel Vision.
- For optional collection, the Miniature Bronze Stupa in the opening railcar, the roof treasure after the window ambush and the cargo-wagon treasure after the coal car have been collected.
Tunnel Vision
Tunnel Vision continues the train pursuit from Locomotion. Drake crosses the tanker and several freight and passenger cars while avoiding hanging signal lights and fighting Draza’s soldiers. The chapter contains two optional treasures, a locked passenger car, a heavily armored gunner whose position must be brought down by shooting the restraints on a lumber load, and a helicopter attack handled from a tank-mounted gun. After the helicopter is destroyed, Drake fights Draza’s commander in a passenger-car sequence. Defeat him, complete the following scripted scenes, and the game advances to Train-Wrecked.
1. Cross the tanker and reach the first guards
At the start of the chapter, move toward the tanker platform. A Wes-44 is available near the beginning if you want a stronger sidearm. Jump to the next car, move around the right side using the yellow pipe, and continue shimmying until Drake can climb toward the upper platform.
Do not pull up immediately when you reach the top. A heavily armored sentry patrols nearby. Wait for him to approach the edge, then perform the stealth grab when the prompt appears. After climbing up, move into the small fenced weapons area. Pick up a suitable long gun, especially if your current weapon is weak or low on ammunition, then use the fencing and train fixtures for cover while clearing the soldiers ahead.
Continue across the coal car and watch for the hanging signal lights. They can strike Drake when he is standing on the roof, so move to the unobstructed side of each car rather than lingering in the center of the train.
- Reach the tanker platform and use the yellow pipe.
- Stealth-takedown the armored sentry when he reaches the edge.
- Clear the first rooftop guards while avoiding the hanging signals.
2. Fight through the freight and passenger cars
After crossing the coal car, deal with the soldiers on the following cars. When two enemies climb up from the sides, eliminate them before advancing and keep an eye on the tunnel signals. If you want the Gilded Bodhisattva Statue, drop over the side of the appropriate car after the enemies are defeated and enter the opening below to collect it. This treasure is optional and does not affect progression.
Continue to the flatbed carrying jeeps, then jump to the passenger car beyond it. Shoot the padlock on the closed door and enter. The Tibetan Saddle Ring is at the far end of this car, to the left of the exit doors. Collect it if desired, then return toward the locked exit and climb the nearby crates to reach the roof.
The next cars contain several soldiers, including armored enemies. Fight from inside the passenger cars whenever possible. Doorways, seats and interior walls provide better cover than the exposed roof. Advance after each group is defeated rather than remaining beside a single doorway where enemies can attack from both sides.
- Clear the cars around the hanging signals.
- Collect the Gilded Bodhisattva Statue only if you want the optional treasure.
- Shoot the passenger-car padlock and collect the Tibetan Saddle Ring if desired.
- Climb the crates to bypass the locked exit and continue forward.
3. Defeat the heavy gunner and reach the tank
As you move onto the next freight section, prioritize nearby ordinary soldiers before dealing with the heavily armored gunner farther ahead. The gunner can absorb a great deal of damage, so do not waste ammunition trying to defeat him directly.
Use the truck and nearby cover to approach the lumber load. Aim at the metal restraints or chain holding the stacked logs in place and shoot them. Once the restraints break, the lumber rolls away and takes the gunner with it. Jump to the platform where he was standing and continue forward.
A helicopter appears immediately afterward. Do not try to fight it from the open roof. Sprint along the train, using the passenger-car interiors and low cover until you reach the tank-mounted machine gun.
- Defeat the nearby soldiers before exposing yourself to the gunner.
- Shoot the restraints holding the lumber rather than relying on direct gunfire.
- Reach the tank-mounted machine gun after the helicopter appears.
4. Destroy the helicopter
Interact with the tank gun and track the helicopter as it moves around the train. The weapon has unlimited ammunition, so keep firing at the helicopter whenever it is not launching missiles. Perfect accuracy is not necessary, but keep the crosshair moving with the aircraft instead of firing at empty sky.
When the helicopter begins a missile volley, immediately switch your attention to the incoming missiles. Shoot them out of the air before returning fire to the helicopter. The missile barrage is the most dangerous part of the encounter; ignoring it can destroy the tank and force a restart from the checkpoint.
After the helicopter is destroyed, leave the tank and continue through the next passenger car. Take cover inside and clear the soldiers, including the armored guard, before jumping to the following car.
- Operate the tank gun.
- Fire at the helicopter between missile volleys.
- Destroy each incoming missile group before resuming fire on the helicopter.
- Clear the passenger car after the helicopter is destroyed.
5. Defeat Draza and finish the chapter
Proceed to the next car to begin the commander confrontation. Draza is resistant to a straightforward melee exchange, so stay behind cover and damage him with firearms. Move between cover positions whenever his attacks force you out of place, and do not remain in the same position after he throws a grenade.
When the grenade creates an opening, close the distance only when the game permits the melee sequence. Follow the on-screen prompts to dodge or counter his attacks, then continue the prompted strikes until the encounter ends. On higher difficulties, repeat the firearm-and-retreat pattern as needed before the final melee sequence becomes available.
After Draza is defeated, allow the scripted scenes to play. Drake recovers the dagger, Chloe intervenes, and Flynn shoots Drake. Continue through the resulting train escape sequence until the game transitions to Train-Wrecked. That transition, or the availability of the opening Train-Wrecked checkpoint, confirms completion of Tunnel Vision.
- Use firearms and cover during the first part of the Draza encounter.
- Retreat when Draza throws a grenade and re-engage from a better position.
- Complete the prompted melee sequence.
- Let the post-fight scenes play until Train-Wrecked begins.
Before you move on
- The heavy gunner has been removed by cutting the lumber restraints.
- The helicopter has been destroyed with the tank-mounted gun and its missile volleys have been survived.
- Draza has been defeated in the final train-car encounter.
- The recovery, Chloe and Flynn scenes have played.
- The game has advanced to Chapter 15, Train-Wrecked, or its opening checkpoint is available.
References for this chapter
- Uncharted 2: Tunnel Vision, chapter 14 walkthrough
- Uncharted 2: Among Thieves - Guide and Walkthrough - PlayStation 3 - GameFAQs
- Uncharted 2: Among Thieves FAQ PlayStation 3 Guides - MyPS3 Guides
- Uncharted 2: Among Thieves/Tunnel Vision
- Uncharted 2: Among Thieves — Official Strategy Guide sample pages
Train-Wrecked
Chapter 15 revisits the wrecked train from the opening sequence. Nathan climbs over the hanging cars, then the game skips ahead to the crash site where Lazarevic’s soldiers search for him. Begin with a stealth takedown, use the grenade launcher on the opposite train car to control the main firefight, then retreat toward the rear boxes when enemies attack from behind. After the final group is defeated, climb the rocks to the left of the burning train car and reach the stone ledge. That triggers the chapter-ending scene and advances the story to Chapter 16, Where Am I? Three treasures are available in this chapter, but none is required for campaign progress.
1. Climb over the wrecked train
After the opening scene, repeat the hanging-train escape from the beginning of the game. Follow the climbable rails, braces and handholds along the outside of the train, using the visible prompts to jump, pull up and shimmy around damaged sections. Stay close to the train rather than attempting blind jumps toward distant wreckage.
The chapter does not replay every interior portion of the earlier sequence. Continue along the exterior route until Nathan reaches the stone shelf above the crash site. A cutscene then moves the story forward to the area where the soldiers are searching for him. If you fall during the climb, use the checkpoint and repeat the nearest handhold section rather than trying to skip ahead.
- Follow the exterior handholds and rails up the train.
- Use the prompted jumps when damaged sections break away.
- Reach the stone shelf to trigger the transition to the crash site.
2. Start the crash-site encounter quietly
Nathan begins behind a soldier near the wreckage. Move in carefully and perform the stealth takedown before the search party becomes fully alert. Once the takedown is complete, do not run directly into the center of the area. Use the train wreckage and boxes to keep solid cover between Nathan and the soldiers farther ahead.
The crash site has several elevated train sections and scattered cover objects. If the fight becomes chaotic, move toward higher ground instead of remaining in the lowest open area. Nathan is injured during this chapter, so short movements between cover are safer than crossing the arena in one sprint.
- Stealth-kill the nearby soldier if the approach remains undetected.
- Identify the elevated train car and boxes before opening fire.
- Use solid wreckage for cover and retreat uphill if surrounded.
3. Take the grenade launcher from the opposite train car
Face the direction from which the main group is approaching and move around the nearby box car without exposing yourself for long. Climb onto the train car across the crash area. A grenade launcher is available there; collect it before committing to the larger firefight.
From the elevated position, target soldiers gathered in the middle of the crash site. Fire grenades into groups rather than wasting shots on isolated enemies, and avoid detonating rounds against cover immediately beside Nathan. Watch the ladder and the edges of the car because enemies can climb up for a close-range attack.
- Reach the opposite train car using its ladder.
- Pick up the grenade launcher before clearing the main group.
- Watch the ladder for enemies attempting to reach the elevated position.
4. Defend against the wave from the rear
After the central group is reduced, another wave enters from behind the route you used earlier. Do not stay focused on the original approach. Move down toward the boxes at the rear of the area and use them as cover while the new soldiers advance.
The grenade launcher is useful against enemies crossing together, but switch to a rifle or pistol when opponents spread out. If grenades force Nathan away from the boxes, move to the next solid piece of wreckage and let health recover before peeking out again. The objective is to eliminate the wave, not to push into the open.
- Turn toward the rear when the next wave arrives.
- Use the boxes as cover and check both sides of the approach.
- Change to a firearm for separated targets and conserve explosive ammunition.
5. Clear the final group on the left
When the rear wave is defeated, turn left and advance only far enough to draw the final group into view. Keep the nearest train wreckage between Nathan and the soldiers, and use the Desert Eagle or FAL available around the crash site if you need a stronger weapon for the last enemies.
Some soldiers may try to close the distance while others remain behind cover. Deal with the nearest threats first, then reposition before reloading in the open. If Nathan takes damage, fall back to the previous cover point and wait for recovery instead of chasing a wounded enemy.
- Turn left after the rear wave is defeated.
- Use nearby cover while engaging the last group.
- Pick up the Desert Eagle or FAL only when it is safe to do so.
6. Climb beside the burning train car
Once every soldier is down, go to the burning train car. Stand facing it and move to its left side, where a climbable rock route leads upward. Follow the handholds and ledges until Nathan reaches the stone shelf above the battlefield.
Do not attempt to climb the burning train car itself. The required route is the rocks to the left of the burning car. Reaching the stone ledge triggers the next story scene; there is no additional boss fight in this chapter.
- Confirm that the combat encounter has ended before leaving the arena.
- Move to the left side of the burning train car.
- Climb the rocks and reach the stone ledge to finish the chapter.
Before you move on
- Nathan reaches the stone ledge after climbing the rocks beside the burning train car.
- The chapter-ending story scene begins after the crash-site battle.
- The game advances to Chapter 16, Where Am I?
- The campaign can continue without collecting any of Chapter 15’s optional treasures.
Where Am I?
Chapter 16 is a short, non-combat transition in a Tibetan village after the train wreck. Nathan follows Tenzin through the settlement and eventually meets Karl Schäfer. The required route is linear: leave the starting house, pass through the village, follow Tenzin uphill, and enter Schäfer’s house. Three optional treasures can be collected along the way: the Ram’s Head Thogchag, Bronze Buddha Statue, and Singing Bowl. The Tibetan Ritual Blade does not belong to this chapter; it is collected early in Chapter 17, Mountaineering.
1. Leave the starting house and follow Tenzin
After the opening scene, control returns to Nathan inside the Tibetan village. Walk out of the house and follow Tenzin along the main village path. You do not need to draw a weapon, find cover, or prepare for an ambush. This chapter contains no enemy encounters and no mandatory combat.
Use the village buildings, stone walls, livestock, and villagers as route landmarks. If you pause, Tenzin remains nearby or waits farther along the path. The large yak near the beginning can be approached for optional dialogue, but interacting with it is not required.
- Regain control of Nathan.
- Leave the starting house.
- Follow Tenzin along the open village path.
- Optional: approach the yak for extra dialogue.
2. Collect the Ram’s Head Thogchag
At the start of the chapter, circle around the house on the right instead of immediately following Tenzin. Walk past the yak and turn right again toward the rear corner of the building. The Ram’s Head Thogchag is on the ground near the fence in the yak-pen area.
Pick it up before continuing through the village. If you are not collecting treasures, return to the main path and follow Tenzin. This detour does not alter the story route.
- Optional: circle behind the first house on the right.
- Optional: collect the Ram’s Head Thogchag near the fence and yak pen.
- Return to the main route.
3. Pass through the gate and collect the Bronze Buddha Statue
Continue behind Tenzin through the village gate. In the next section, look for the area where two children are playing with a soccer ball. Turn toward the buildings on the right and find the blue ladder. Climb up, cross the roof, and hop over the low wooden or stone wall toward the pair of red doors.
The Bronze Buddha Statue is on the ground in the grassy area beside the red doors. Collect it, then return to the village route. Kicking or passing the ball is optional and has no effect on progression.
- Reach the children’s soccer-ball area.
- Optional: climb the blue ladder on the right.
- Optional: cross to the red doors and collect the Bronze Buddha Statue.
- Return to Tenzin’s route.
4. Collect the Singing Bowl before Schäfer’s house
Follow Tenzin farther uphill until he stops near a house with a blue porch. Do not immediately climb the steps to join him. Instead, search to the left of the house, behind the low stone wall beside the large tree. The Singing Bowl is in the shaded area there.
This is the third and final treasure in Chapter 16. The Tibetan Ritual Blade is not here; it appears in Chapter 17 after Nathan swings across the gap with Tenzin’s rope and descends a ladder.
- Find the house with the blue porch.
- Optional: search behind the low stone wall beside the tree.
- Optional: collect the Singing Bowl.
- Do not search Chapter 16 for the Tibetan Ritual Blade.
5. Enter Schäfer’s house and complete the chapter
After collecting the Singing Bowl, return to Tenzin and climb the small steps to the house. Follow him onto the porch and enter when the game allows it. The ensuing cutscene introduces Karl Schäfer and explains the next stage of the expedition.
There is no boss, combat checkpoint, puzzle solution, or failure sequence to manage in this chapter. Once the scene concludes, the game advances to Chapter 17, Mountaineering. If you missed a treasure, use Chapter Select or replay the chapter rather than expecting the story route to return you to the village.
- Follow Tenzin up the steps.
- Enter Karl Schäfer’s house.
- Watch the story scene.
- Confirm that Chapter 17, Mountaineering, begins.
Before you move on
- Nathan has entered Karl Schäfer’s house and the conversation scene has played.
- The next chapter displayed is Chapter 17, Mountaineering.
- For optional collectible completion, Chapter 16 records the Ram’s Head Thogchag, Bronze Buddha Statue, and Singing Bowl.
- The Tibetan Ritual Blade is reserved for Chapter 17 and is not required for completing Chapter 16.
References for this chapter
Mountaineering
Follow Tenzin through the Himalayan ice caves, crossing rope swings, snowy ledges, narrow tunnels and a flowing stream. The chapter is mostly platforming, with one required fight against a fast mountain creature after you discover the remains of Schäfer’s expedition. Six optional treasures are available: Tibetan Ritual Blade, Clay Deity Head, Bronze Chenrezig Statue, Skull Cap Drum, Silver Needle Case and Bronze Stupa Ornament. None is required for campaign progress. During the creature encounter, keep moving, shoot to draw its attention away from Tenzin, and complete the grab escape prompt when necessary. The chapter ends after the final climb and stone stairway, when the transition to Heart of Ice begins.
Enter the cave and cross the first chasm
Follow Tenzin along the snowy trail and into the cave. Move down the snow-covered stone shelves, using the visible ledges and handholds rather than jumping toward distant platforms. At the first large chasm, wait for Tenzin to attach the rope, then jump onto it and swing across to the opposite side. Climb down the ladder.
Before entering the tunnel at the bottom, search the nearby cliffside area. The Tibetan Ritual Blade is on the route beside the pit. Collect it if desired, then follow Tenzin through the narrow cracks and onward.
- Follow Tenzin into the ice cave.
- Swing across the first chasm.
- Climb down the ladder.
- Optional: collect the Tibetan Ritual Blade.
Cross the campsite and ice shelves
Continue through the narrow passage until you reach the campsite area. Tenzin finds another rope here. Jump onto it, then redirect your swing toward the small ledge to the side of the campsite instead of immediately following Tenzin. The Clay Deity Head is on that ledge. Return to the intended route and use the rope to continue.
After crossing the next ice passage, follow the narrow rock bridges until Tenzin boosts Drake up a broken ladder. From the upper route, move around the ledges and look for the lower shelf near the climbing path. The Bronze Chenrezig Statue is there, shortly before the section where you climb the paired ropes attached to the wall.
- Reach the abandoned campsite.
- Optional: collect the Clay Deity Head from the side ledge.
- Use Tenzin’s boost at the broken ladder.
- Optional: collect the Bronze Chenrezig Statue before climbing the paired ropes.
Reach the stream and waterfall
Climb the ice steps and continue across the ledges until the route opens onto a stream. When you reach the small waterfall, do not immediately climb the main ledges. Follow the water toward the end of the side path and turn right to find the Skull Cap Drum at the dead end.
Return to the waterfall route and climb the wall. Continue upward across the snow-covered platforms. Before dropping to the lower area near the ladder, look for the ledge beside the stream. The Silver Needle Case is positioned along this route and is easy to miss if you jump down too soon. After collecting it, use the ladder and continue through the cave.
- Reach the stream and waterfall.
- Optional: collect the Skull Cap Drum at the right-hand dead end.
- Optional: collect the Silver Needle Case before dropping to the lower area.
- Climb the ladder and continue into the cave.
Investigate the expedition remains
Follow Tenzin through the next tunnel and climb the icy steps. Cross the gap and examine the animal remains when the path opens. Continue toward the darker part of the cave, jumping across the rock platforms until you reach the wall with handholds.
After climbing, the route forces Drake to separate from Tenzin. Drop onto the ice below and turn left through the passage between the dark rocks. Continue along the stream, climb the snow-covered rock, and work around the black obstruction by using the ledges. Climb the handholds on the far side until you reach the small room containing a corpse and a firearm. Take the weapon and shoot the ice blocking the way forward.
- Examine the remains in the cave.
- Drop to the lower ice route when separated from Tenzin.
- Reach the small room with the firearm.
- Shoot through the ice blockage.
Survive the mountain creature attack
A cutscene begins in which a mountain creature attacks Tenzin. Immediately fire at it to draw its attention away from him. The ammunition in this encounter is unlimited, so concentrate on accurate shots while circling the open area and keeping space between Drake and the creature.
The creature is faster than Drake and can leap, climb walls and close distance quickly. Keep moving instead of holding one position. When it charges, dodge away and continue firing. If it grabs Drake, complete the on-screen escape sequence: press Triangle first, then Square. The fight advances through scripted grab phases, so do not stop attacking after the first escape. After enough damage, the creature lifts Drake for another brief shooting opportunity. Continue damaging it until Tenzin intervenes and the creature flees.
- Shoot the creature away from Tenzin.
- Keep moving around the chamber.
- Complete the Triangle-then-Square grab escape prompt.
- Continue the scripted fight until Tenzin drives the creature away.
Climb out and finish the chapter
Return to the small room where you picked up the firearm. Boost Tenzin so he can help you reach the ladder, then follow him across the narrow platforms. When you reach the next large shelf, shoot the chest with the attached rope so it falls into position. Use the rope to swing across the gap, then climb the handholds and nearby ladder.
After passing through the rock opening, continue to the stone steps. Before completing the route, look to the left after the second P08 ammunition pickup and jump across to the concealed platform. The Bronze Stupa Ornament is there. Return to the main path, go around the rock using the ledges, and drop onto the final stairs. The chapter ends as the transition into Heart of Ice begins.
- Boost Tenzin and climb the ladder.
- Shoot the rope chest and swing across.
- Optional: collect the Bronze Stupa Ornament after the creature fight.
- Reach the final stone stairway.
- Trigger the transition into Heart of Ice.
Before you move on
- The mountain creature has fled after the completed scripted encounter.
- Drake and Tenzin have crossed the final ledges and reached the stone stairway.
- The chapter transition or opening sequence for Heart of Ice has begun.
- All six treasures are optional; campaign progress is complete even if none were collected.
References for this chapter
- Uncharted 2: Mountaineering part 1, chapter 17 walkthrough
- Uncharted 2: Mountaineering part 2, chapter 17 walkthrough
- Uncharted 2: Chapter 17 Mountaineering treasures, secrets
- Uncharted 2: Among Thieves - Guide and Walkthrough - PlayStation 3 - By AbsoluteSteve
- Uncharted 2: Among Thieves Treasures, StrategyWiki
- Uncharted 2: Among Thieves — Official Strategy Guide sample pages
Heart of Ice
Nathan Drake and Tenzin enter the ice temple and solve a chain of traversal mechanisms involving pressure switches, retracting wall blocks, rotating cylinders, gears, ropes and weighted moving platforms. The first half contains no conventional enemy encounters, so focus on reading the yellow handholds and moving quickly when mechanisms are timed. After the temple route leads to the chamber holding the remains of Karl Schäfer’s expedition, activate the final lever to summon the guardians. Do not try to defeat them in the arena. Keep moving, avoid thrown boulders and wait for the elevator. During the ascent, shoot the guardian’s head until it releases Drake. The following cutscene completes the chapter and opens Chapter 19, Siege.
Open the temple route and climb the retracting wall blocks
Follow Tenzin into the large temple chamber. Choose either pressure switch on the left or right side of the entrance; both routes serve the same purpose, and Tenzin operates the other switch. Cross the opened passage and climb the snowy rock ledges to the horizontal bar. Pull the bar to activate the wall’s protruding blocks.
The blocks retract after a short interval. Climb immediately, following the yellow-marked handholds to the upper cornice. Shimmy right, use the bars, swing from the second bar to the third, then move toward the wall and drop down. Continue along the cliff path until you reach the staircases.
- Activate one of the entrance pressure switches.
- Pull the bar that extends the wall blocks.
- Reach the upper cornice before the blocks retract.
Lower the cylinders and cross the rotating mechanisms
Take the descending staircase to the lever and pull it. This lowers the large cylinders on Tenzin’s side, after which he lowers the matching route for Drake. Return to the upper platform using the other stairs and jump onto the first cylinder.
Climb across the cylinders as their ledges rotate. Move around each one rather than jumping blindly, then transfer to the next cylinder and finally to the ledge beyond the third. From there, jump to the narrow stone beam, cross to the wall handholds and continue over the crumbling ledges.
Reach the next beam and use the swing bar to land on the gear. Follow its movement, then cross the nearby spinning wheel through its open gap. Touching the wheel kills Drake, so wait for the opening rather than trying to force the jump. Grab the next rotating wheel, move to the protruding blocks and descend through the damaged structures to the snow-covered beam where Tenzin is visible.
- Pull the cylinder-lowering lever.
- Cross all three rotating cylinders.
- Pass through the open section of the fast-spinning wheel.
- Reach the snow-covered beam below Tenzin.
Use the rope and operate the second lever
Turn toward the chamber, jump to the pole and swing to the next gear. From there, grab the hanging rope and swing toward the snow-covered shelf. The shelf is scripted to collapse, so keep controlling Drake as he lands on the large gear below.
Work around the mechanism and follow the attached handholds until you reach the gear that carries Drake upward. Catch it from the side and let it lift you to the ledge on the left. Jump onto the wheel from above, cross to the opposite side, then walk across the brick platform and jump the gap to the lever.
Pull the lever and watch the mechanism change. When control returns, use the nearby ladder to descend to the lower snow-covered shelf.
- Swing from the rope to the snow-covered shelf.
- Ride the lifting gear to the left ledge.
- Cross the brick platform and pull the second lever.
- Use the ladder after the mechanism changes.
Cross the chains, gears and retracting platforms
At the bottom of the ladder, reach the end of the shelf and jump to the chain. Hold on, run along the wall and swing toward the beam in the darker section of the chamber. Drop down twice onto the intact structure.
Move left and grab the golden decorative handholds beside the gear. Use the gear to cross to the other side, then swing from the pole to the mechanism with chains and weights. The weights alternate vertically. Move Drake sideways with the analog stick as the next handhold becomes available; do not try to jump between every weight.
After reaching the upper stone shelf, find the next rope and swing to the wall near the gear. Grab the protruding blocks, descend, then use the gear to reach the lower platform. Go around the earlier wheel and use it again, this time to travel upward. Continue across the next gear, swing from the pole to the snow-covered ledge and take the stairs down into the ancient stairwell.
Stand on the pressure plate to extend the platforms. After the brief scene, descend to them and cross quickly: jump to the first platform, then the pole, the next platform, the second pole and the final platform leading to Tenzin. The platforms retract after a few seconds.
- Wall-run from the chain to the darkened beam.
- Cross the alternating chains and weights by moving sideways.
- Use the rope, gears and pole to reach the stairwell.
- Activate the pressure plate and cross the retracting platforms.
Reach the statue chamber and investigate the expedition remains
After the platform sequence, follow Tenzin across the bridge toward the giant statue. Enter the chamber at the statue and climb the stairs opposite the entrance. Pull the lever at the top. This activates the scene that reveals what happened to Karl Schäfer’s expedition and summons the guardians.
There is no need to search for a normal combat arena strategy before pulling the lever. The next objective is survival and escape, not eliminating the creatures.
- Cross the bridge to the giant statue.
- Enter the chamber and climb the stairs opposite the entrance.
- Pull the final lever and trigger the guardian encounter.
Survive the guardians and escape by elevator
Keep moving around the chamber after the guardians appear. Their attacks include thrown boulders, so circle the arena and avoid standing beneath or directly in front of them. Use your firearm to create space when a creature closes in, but do not waste time attempting to kill them; the encounter advances when the elevator platform arrives.
When Drake notices the elevator, jump onto it and wait for Tenzin. A guardian grabs Drake during the ascent. Aim at its head and keep firing until it releases him and falls away. The ensuing cutscene completes Heart of Ice and the game transitions to Chapter 19, Siege.
- Run continuously while avoiding guardian attacks and boulders.
- Jump onto the elevator when it reaches the chamber.
- Shoot the guardian’s head while it grips Drake.
- Wait for the transition to Chapter 19, Siege.
Before you move on
- The scene in the statue chamber reveals the fate of Karl Schäfer’s expedition.
- Nathan and Tenzin escape the temple using the elevator after the guardian encounter.
- The game transitions to Chapter 19, Siege.
References for this chapter
Siege
Chapter 19 begins as Lazarević’s forces attack the Tibetan village. Drake starts with a crossbow, then fights downhill through the village before reaching a larger square containing a mounted machine gun. After that position is secured, follow the open gate and survive the next courtyard fight, including a rocket-launcher carrier and an armored shotgun enemy. The final and largest battle begins after entering a building and climbing two ladders to the rooftops. Stay above street level, move between roof sections, watch for enemies climbing behind you, and eliminate the grenade-launcher carrier quickly. The chapter ends when Drake reaches and enters Tenzin’s house. Treasures and extra weapons are optional; they are not required for progression.
1. Take the crossbow and clear the opening village approach
At the start of Siege, take the crossbow from the table before leaving the building. Step outside and use it against the enemies on the balcony and down the slope. The crossbow is powerful but has limited ammunition, so replace it with an enemy rifle when the area begins to fill with targets. Keep moving downhill toward the village rather than searching the side paths.
Fight from walls, doorways and low cover as you approach the brick arch. The first group is spread across the slope and village approach, so clear the closest threats before exposing yourself to enemies farther downhill. Collect ammunition and grenades once the immediate area is quiet.
- Collect the crossbow.
- Clear the balcony and downhill enemies.
- Reach the brick arch and restock from defeated enemies.
2. Reach the first turret position
At the brick arch, use the surrounding cover to attack the enemies in the square. The mounted machine gun is on a roof to the left, and several soldiers occupy the building ahead. Do not run directly into the open square. Throw grenades through the openings of the occupied building or shoot its defenders from cover before advancing.
When the route is clear enough, move toward the building containing the turret gunner. On higher difficulties, advance in short movements between cover rather than crossing the square in one sprint. Once you reach the position, defeat the gunner and take control of the mounted machine gun.
- Clear the square around the brick arch.
- Reduce the enemies inside the forward building.
- Defeat the turret gunner and secure the machine gun.
3. Use the mounted machine gun, then push through the gate
Use the mounted machine gun to deal with enemies appearing in the street and on the roof to the left. Fire in controlled bursts and watch for grenades. If the position becomes unsafe, leave the turret and return to nearby cover; surviving is more important than holding the weapon continuously.
When the enemy pressure drops, move through the open gate that the attackers used. Drake is forced into cover during the next encounter. A rocket-launcher carrier is positioned farther away on a roof, so locate and eliminate that enemy before attempting to cross the area. Also prioritize the armored shotgun soldier, because allowing him to close the distance can force you out of cover.
- Use the turret to clear the street and left roof.
- Go through the open gate.
- Kill the rocket-launcher carrier and armored shotgun enemy.
4. Clear the house and climb to the rooftops
Follow Tenzin after the courtyard is cleared. Enter the next building and deal with the shotgun soldier inside. Because the room is small, shoot him from the doorway if you can rather than stepping into his effective range.
Continue to the first ladder. An enemy above throws a grenade when you approach, so move away from the ladder when the grenade lands and wait for the blast. Once the danger passes, climb both ladders to the rooftop. Reaching the top triggers the chapter’s largest combat section.
- Follow Tenzin to the next building.
- Defeat the close-range shotgun enemy.
- Avoid the grenade at the first ladder.
- Climb both ladders to the rooftop.
5. Survive the main rooftop battle
Stay on the rooftops whenever the route permits. Enemies attack from the streets, nearby roofs and windows, while others climb the ladders behind Drake. Move between roof sections instead of remaining at one exposed firing point. Use chimneys, walls and raised roof edges as cover, and check behind you whenever the battle becomes quiet on the far side.
The enemy farther to the right carries a grenade launcher. Kill him as soon as he begins firing or becomes visible. Grenades from that position can flush Drake out of cover and make the riflemen surrounding the roofs much harder to manage. If an enemy reaches the roof by ladder, eliminate that close threat before returning to distant targets.
- Remain above street level.
- Move between roof sections and check the ladders.
- Eliminate the grenade-launcher carrier quickly.
6. Use the blue-trapdoor machine gun and finish at Tenzin’s house
A building with a blue trapdoor contains another mounted machine gun. Use it when enemies gather in the open street or on the roof to the left. Leave the position if grenades land nearby or enemies begin entering the building; the turret is useful for clearing the approach but is not a safe place to remain while flanked.
After the final rooftop resistance is defeated, descend toward the area where the grenade-launcher carrier stood. Follow the open village route rather than trying to bypass the objective across distant roofs. Continue with Tenzin to his house and enter it. The following story sequence confirms completion of Siege and begins the next chapter. Optional treasures and spare weapons do not affect progression.
- Use the blue-trapdoor machine gun when it is safe.
- Clear the final route below the rooftops.
- Follow Tenzin to his house.
- Enter the house and trigger the next story sequence.
Before you move on
- The opening village approach and brick-arch square are cleared.
- The first mounted machine-gun position has been secured and the open gate has been used.
- The rocket-launcher carrier and armored shotgun enemy in the next courtyard are defeated.
- Drake has entered the building, survived the ladder grenade and climbed both ladders.
- The rooftop battle is complete, the route to Tenzin’s house is open, and Drake enters the house to trigger the following story sequence.
Cat and Mouse
Cat and Mouse is a running escape through a Tibetan village while Drake and Tenzin stay ahead of a pursuing tank. Ordinary firearms cannot destroy the vehicle. Follow Tenzin through the village, use buildings and walls to break the tank’s line of fire, and keep moving whenever the tank closes in. After the tank destroys the red bridge, use the house route, debris opening, wall vault, cliffside ledge, and rooftop path to reach the first RPG. Fire at the tank, then cross the rooftops to two more launcher positions. After the third attack, use the zip line to reach the final building and take the remaining RPGs. Four accurate rocket hits destroy the tank; missed shots require extra ammunition. The chapter ends immediately after the tank encounter, when the game advances to Chapter 21, Convoy. Elena’s truck sequence belongs to the next chapter.
1. Follow Tenzin through the first village area
At the start, take cover and eliminate the first two soldiers while Tenzin moves up the path. When the tank begins closing in, follow Tenzin toward the upper-right side of the area and the nearby house. Stay away from the wall on the left; the tank will make that position unsafe as it advances.
Wait for Tenzin to open the house, then go inside, collect any useful ammunition, and jump over the banister. Continue up the stairs behind him. Several soldiers appear on the higher platforms, including one marked by a laser sight. Kill the enemies blocking the route before climbing onward. A Hammer grenade launcher is useful here if you still have it, but it is optional.
- Move toward Tenzin and the upper-right house instead of trying to hold the starting field.
- Enter the house after Tenzin opens it, then jump over the banister and follow the stairs.
- Defeat the soldiers on the raised platforms before continuing.
2. Reach the red bridge and escape after it is destroyed
In the next open area, shoot the soldiers while moving toward the staircase at the far side. Keep progressing quickly; the tank will arrive and make the open ground dangerous. Follow Tenzin up to the red wooden bridge and attempt to cross it. The tank destroys the bridge, so do not remain near the broken crossing.
After the bridge falls, follow Tenzin into the nearby building. Go through the window, climb the ladder, and shoot the soldier in the opposite building. Jump across to that building, continue through the connected structures, and help Tenzin move the wooden beams blocking the way. When the route opens, vault over the wall and jump to the far side.
- Reach the red bridge before the tank closes the area.
- After the bridge is destroyed, use the window, ladder, opposite building, and debris route.
- Help Tenzin clear the wooden obstruction before vaulting over the wall.
3. Run around the tank and traverse the cliffside
The tank breaks through the wall immediately after you clear the debris. Once control returns, run forward. Shoot the soldiers who block the path, then continue down the alley and turn right when the tank appears ahead. Fight only the enemies preventing progress; lingering in the open gives the tank time to line up its cannon.
Go around the tank on the right and drop down to the cliff path. Sidle along the narrow ledge while the tank follows above you. After the tank nearly drives over the cliff, shimmy across, climb up, and turn the corner. Continue over the wooden rooftop platforms and into the courtyard. When the tank appears again, immediately look for the staircase on the left and run up it to rejoin Tenzin.
- Turn right when the tank blocks the alley rather than trying to pass it head-on.
- Use the cliffside ledge and shimmy route to bypass the vehicle.
- Run to the left staircase when the tank reappears in the courtyard.
4. Take the first RPG and hit the tank
An explosion occurs inside the next house and three soldiers enter. Defeat them with the M4 or another suitable firearm, then leave through the left door. Turn around outside and climb the ladder to the roof where a soldier carries an RPG. Take down that soldier, pick up the launcher, and fire at the tank below.
The first launcher contains one usable rocket in this encounter. Do not stay exposed after firing. The tank’s cannon can damage Drake even when he is near rooftop cover, so move toward the next roof as soon as the shot is made.
- Leave the house through the left door and climb the outside ladder.
- Take the RPG from the rooftop soldier.
- Fire at the tank, then move away from the firing position.
5. Cross the rooftops for the second and third RPGs
From the first launcher roof, deal with the soldiers on the nearby rooftops or bypass them if they are not blocking the route. The next RPG carrier is on the roof of the building to the left. Cross to that building, enter it, clear the soldiers inside, then use the rear exit and stairs to reach the roof. Take the RPG and fire at the tank again.
After the second shot, locate the next RPG soldier on a more distant rooftop to the left. Use the FAL or another accurate weapon to remove him from range if possible. Cross the rooftops by jumping the gaps until you reach the narrow alley with a ladder. Climb the ladder, turn around, jump to the roof, and take the third RPG. Fire at the tank, then retreat from the roof edge because additional sentries appear across the street.
- Use the left-hand building for the second launcher.
- Use the ladder in the narrow alley to reach the third launcher.
- Keep the tank’s cannon and the opposite rooftop sentries in view.
6. Use the zip line and destroy the tank
After the third rocket, eliminate the sentries on the opposite building with the FAL or another weapon. Move to the left side of the rooftop and interact with the zip line. It carries Drake across the street to the final building; if the route seems blocked, the zip line is the intended way forward.
Inside the building, collect the remaining RPG ammunition and fire at the tank. Four total rocket hits destroy it when the previous shots connected; if you missed, use the extra rockets available in the final position. Once the tank is destroyed, allow the transition to complete. The next chapter is Convoy, where Elena’s truck sequence begins.
- Clear the opposite rooftop before using the zip line.
- Use the final building’s RPGs to finish the tank.
- Confirm that Chapter 21, Convoy, loads; do not wait for an Elena reunion inside Cat and Mouse.
Before you move on
- Drake has fired the available RPGs and the tank is visibly destroyed.
- The post-battle transition completes without returning Drake to the village chase.
- Chapter 21, Convoy, loads or becomes available in chapter select. Elena’s truck sequence belongs to that next chapter, not Cat and Mouse.
Convoy
Nate and Elena pursue Lazarević’s convoy through the snowy mountains. Nate begins by hanging from a truck, moves between burning vehicles, drops onto a lower truck carrying a mounted grenade launcher and uses it to protect Elena’s vehicle. After the launcher truck is destroyed, Nate jumps back to Elena’s truck, but a rocket from the lead vehicle sends them over the cliff. They climb back to the road, watch the convoy take Schäfer and the Phurba toward the monastery, and then Chapter 21 ends. This original PlayStation 3 chapter has no treasure pickups.
Clear the opening truck
Chapter 21 begins with Nate hanging from the side of a moving truck while Elena drives. When the nearby soldier is within reach, use the melee prompt to pull him from the truck. Climb into the truck bed, take cover behind its side panels and shoot the remaining soldiers. You do not need to eliminate every distant enemy immediately; staying alive until the next transfer is the priority.
Watch the vehicles ahead and behind you. The convoy quickly surrounds Nate’s truck, and enemy fire will eventually set it on fire. Keep your aim ready, but do not remain exposed after each shot. The truck’s sides provide protection while you wait for the next vehicle to come close.
- Pull the first soldier from the truck.
- Climb into the truck bed.
- Use the truck’s side panels as cover while eliminating nearby enemies.
Leave burning trucks quickly
When Nate warns that the truck is on fire, treat that warning as the signal to move immediately. Jump to the next truck when it comes alongside. The transfer is safest when the vehicles are close and the game presents the intended jump opportunity; jumping early can leave Nate short of the target and cause him to fall.
Continue transferring between vehicles and clear enemies near each landing area. Prioritize soldiers who can shoot Nate at close range or knock him from the truck. Do not waste time searching the convoy for collectibles: this chapter has no treasure pickups.
- Move as soon as the current truck catches fire.
- Jump only when the next truck is within reach.
- Clear enemies near each landing point.
Drop to the grenade-launcher truck
After several truck transfers, the route briefly opens and the launcher vehicle may appear to have disappeared. At this point, look toward the right side of the cliff and jump down toward the moving truck on the lower road. Nate lands on the truck carrying the mounted grenade launcher. Push or melee the soldier stationed there, then take control of the launcher.
This is a required route change, not a detour. If you remain on the upper vehicles or wait too long, the convoy continues moving and the burning truck section can kill you. Use the camera to line up the lower truck before committing to the jump.
- Watch for the opening beside the right side of the cliff.
- Jump down to the moving truck below.
- Remove the launcher gunner and take the mounted grenade launcher.
Protect Elena’s vehicle
Elena’s vehicle comes into view after Nate takes the launcher. Fire at enemy trucks and vehicles that surround or pursue her. The launcher is most effective against the vehicles themselves, so aim at the body of a threatening truck rather than spending time shooting individual soldiers.
Keep Elena’s vehicle out of your sights. It is the yellow vehicle carrying Elena, and destroying it prevents the sequence from progressing. Concentrate on nearby vehicles, mounted weapons and trucks that are closing from behind. You do not need to destroy every distant target before the chase advances.
- Destroy the vehicles threatening Elena.
- Prioritize nearby trucks and mounted weapons.
- Avoid firing at Elena’s yellow vehicle.
Return to Elena and survive the rocket attack
The launcher truck eventually takes heavy damage, catches fire and loses the weapon. When the launcher is no longer usable, jump back to Elena’s vehicle as it draws alongside. Wait until the vehicles line up rather than attempting an early leap. Once Nate lands, Elena drives toward the lead vehicle.
A soldier on the lead vehicle fires a rocket at Elena’s truck. This hit is scripted and cannot be prevented. Do not try to stop the rocket or replay the launcher section looking for a different outcome. Let the crash play out, then regain control when Nate and Elena are on the mountainside.
- Leave the launcher truck when it catches fire.
- Jump back to Elena’s vehicle when it comes alongside.
- Allow the scripted rocket strike and cliff crash to occur.
Recover from the crash and finish the chapter
After the crash, follow the visible handholds up the side of the road. Nate reaches the roadway, pulls Elena up and joins her at the overlook. Continue through the short scene in which they look toward the monastery. Nate uses his binoculars to watch soldiers bring Schäfer to Lazarević and hand over the Phurba.
When Nate and Elena finish observing the convoy and stand to continue toward the monastery, Chapter 21 is complete. The next chapter begins with their approach and climb toward the monastery. You do not need to fight or climb through the monastery during Convoy.
- Climb back to the road after the crash.
- Reach the overlook with Elena.
- Watch the monastery scene and confirm the transition to Chapter 22.
Before you move on
- Nate has used the mounted grenade launcher to clear the convoy around Elena.
- The launcher truck has been destroyed and Nate has returned to Elena’s vehicle.
- The lead vehicle’s rocket sends Nate and Elena over the cliff.
- Nate and Elena climb back to the roadway and reach the overlook.
- The binocular scene shows Schäfer being taken to Lazarević with the Phurba, followed by the transition into Chapter 22, The Monastery.
References for this chapter
- Uncharted 2: Among Thieves - Guide and Walkthrough - PlayStation 3 - GameFAQs
- Convoy — Uncharted 2: Among Thieves Guide and Walkthrough, SuperCheats
- Uncharted 2: Among Thieves - Game Script - PlayStation 3 - GameFAQs
- Uncharted 2: Among Thieves Treasures, Neoseeker
- Uncharted 2: Among Thieves — Chapter 21 Convoy Playthrough, GameFAQs Video
The Monastery
Nate and Elena follow Lazarević’s forces into the monastery. The chapter begins with a short stealth approach, expands into a courtyard battle dominated by a mounted turret, then becomes a vertical traversal and long-range firefight across two towers. After the first entrance is opened with Elena, climb through the temple structures, eliminate the RPG carrier and snipers, cross the collapsing bridge, and clear the final interior room. Treasures and optional stealth takedowns are not required. The chapter ends when the last interior door opens and Chapter 23, Reunion, loads.
Reach the first monastery courtyard
Shimmy along the cliff path until you can climb above the isolated guard. Pull him over the edge when the prompt appears, then move uphill and wait for the next guard to approach the corner before using a stealth takedown. Continue using stealth on the following separated guards when possible.
At the top of the steps, the route opens into a large courtyard with many soldiers. Use the wooden platform on the far right as your main firing position. It narrows the enemies’ approach and keeps you away from the center of the courtyard. Let soldiers advance into your firing lanes, then move forward only after the immediate wave is defeated. Shotgunners and enemies on elevated positions should be priority targets.
- Use the cliffside route to enter the monastery grounds.
- Stealth-kill the isolated guards when their patrols separate them.
- Clear the large courtyard from cover before approaching the bridge.
Use the cart to approach the turret
When the courtyard is clear, move toward the opposite side and locate the broken wooden bridge with the mounted turret beyond it. Do not waste time trying to kill the turret gunner from the original courtyard; another soldier can replace him and the firing lane remains dangerous.
Push the wooden cart along the bridge. It provides moving cover while you advance. When the cart can go no farther, drop from the bridge onto the wooden platform below. Follow this lower route around the enemy position, climb back toward the far side, and clear the soldiers occupying the turret’s support area. This flank is safer than crossing the exposed bridge directly.
- Push the cart across the broken bridge as far as it will go.
- Drop onto the lower wooden platform when the cart stops.
- Flank and clear the soldiers supporting the turret.
Secure the turret and open the entrance
After reaching the turret position, expect another wave from the opposite direction. Use the turret when it gives you a clear firing lane, but watch for soldiers approaching from the sides and for enemies positioned above or across the gap. Leave the turret only after the immediate attackers are defeated.
Move to the back of the building and stand with Elena at the paired door mechanisms. Turn the mechanisms together when prompted so the large entrance opens. This is the required way forward; there is no RPG-door breach objective in this chapter. Once the entrance is open, follow Elena inside.
- Survive the reinforcement wave around the turret.
- Regroup with Elena at the paired door mechanisms.
- Open the monastery entrance together.
Climb through the lower temple route
Inside the next area, look over the left side of the platform for the sequence of red handholds. Follow them down to the lower level. Throw the rope up to Elena, cross the gap, and jump to the yellow stone surface. Climb upward, then jump backward to the cliff ledges. At the top, turn around and help Elena up.
Continue with Elena to the statue. Push it together so it can serve as a climbing aid, then work around the ledge and use the rope to reach the higher section of the temple. After the scene, travel around the upper exterior until you reach the locked door. The route is vertical, so inspect nearby pillars and ledges rather than returning to the courtyard.
- Follow the red ledges down from the first interior platform.
- Use the rope, yellow stone, and backward jump to regain the upper cliff.
- Push the statue with Elena and climb to the higher temple section.
Clear the two towers and counter the snipers
From the locked door, jump to the pillar with red ledges, climb it, and use the next pillar to reach the large tower. The guards in this tower can often be eliminated quietly from the upper levels. Work downward until an RPG blast tears open the building and forces the next combat phase.
After the blast, take the Dragunov and immediately use its remaining rounds against the RPG soldier in the upper levels of the opposite structure. Clear the other visible enemies, then cross to the second tower. Defeat the soldiers on its lower level and have Elena lower the ladder. Climb toward the roof, exit on the side facing the other tower, and use the red ledges to reach the roof with the sniper rifle.
Use the sniper rifle to kill the RPG carrier in the central tower first. Then relocate slightly between shots and eliminate the opposing snipers. Once the sniper positions are quiet, use the remaining ammunition against the soldiers rushing across the bridge. Do not step onto the bridge until the immediate wave is under control.
- Reach the first tower through the two-pillar climbing route.
- Use the Dragunov against the RPG carrier across the gap.
- Reach the sniper rifle roof and eliminate the RPG carrier and snipers.
Cross the collapsing bridge and finish the chapter
After the tower assault, move onto the beam leading toward the bridge. The bridge collapses as you cross it. Run forward and jump across the failing section, then climb the broken bridge after it falls against the opposite wall. Enter through the double doors at the top.
The final interior room contains soldiers and snipers. Immediately eliminate the enemy to the left, then climb the nearby rubble to gain a stronger position with more movement and firing angles. After the room is under control, return to the lower area and open the door on the far side. Boost Elena to the ladder, use the box to reach the poles, and cross the gap.
Climb the wall, wait for the nearby enemy to approach, and pull him down when possible. Enter the next room and clear the remaining soldiers; grenades are useful if enemies cluster around the interior cover. Leave through the door on the left. The chapter is complete when this door opens and the game transitions to Chapter 23, Reunion.
- Jump across the collapsing bridge and climb to the double doors.
- Clear the final interior combat area and cross the gap with Elena.
- Open the last door and confirm that Chapter 23, Reunion, begins.
Before you move on
- The first monastery entrance has been opened with Elena using the paired mechanisms.
- Nate has climbed through the temple route, cleared both towers, and crossed the collapsing bridge.
- The final interior soldiers have been defeated and the last door has been opened.
- Chapter 23, Reunion, loads after the final door, confirming completion of Chapter 22.
Reunion
Chapter 23 begins in a small ruined building occupied by Lazarevic’s soldiers. Fight upward through the spiral interior to trigger the reunion scene, then swing across the hanging rope and cross the rooftops. After the courtyard battle, use the upper ledges to reach RPGs and destroy the two armored Gatling gunners. Continue through the ruined building to the stone-weight and symbol puzzle. Once it is solved, cross the next courtyard, activate the stone-circle mechanism and return by zipline and enemy ropes to open the temple door leading to Chapter 24, The Road to Shambhala.
1. Fight up through the opening building
Take cover as soon as the chapter starts. Soldiers attack from the room and higher levels, so move from cover to cover and work upward through the building’s spiral route. Use the weapons dropped by defeated enemies, but avoid crossing the open floor while several soldiers are still active.
Continue climbing until the reunion cutscene begins. After the scene, move to the tower’s edge and jump to the hanging rope. Swing across to the opposite structure, climb onto the roof and prepare for the rooftop stealth section.
- Reach the upper part of the opening building.
- Trigger the reunion cutscene.
- Swing across the hanging rope after the scene.
2. Cross the rooftops and clear the courtyard
Stealth-kill the two guards on the roof if their positions allow it. Find the stairs hanging from the far side of the building and drop onto them. Turn the corner, eliminate the guard ahead and climb to his position. Use the pale stones on his left to climb around to the next area.
Several enemies are visible in the courtyard, but additional soldiers are positioned farther to the left. Move down carefully and use stealth on the nearest guards when possible. Once the fight becomes loud, stay near solid cover and advance around the edge rather than standing in the center.
When the courtyard is clear, climb the stairs at the opposite end and turn right to open the door. The next area contains the two armored Gatling gunners.
- The rooftop guards are defeated.
- The hidden enemies on the left side of the courtyard have been accounted for.
- The door at the far end of the courtyard is open.
3. Destroy the two armored Gatling gunners
Do not fight the Gatling gunners from the lower floor. From the entrance, climb the ladder, move right and jump across the red ledges on the wall. Follow this upper route to an RPG position and take the launcher.
Fire from cover at the armored gunners below. The first RPG gives you an opening, but enemy retaliation begins quickly. If you need more ammunition, drop down near the launcher position to find two additional RPGs. Fire, retreat behind the wall and reload only while protected.
After both Gatling gunners are destroyed, descend the stairs near the RPG position and enter the destroyed building.
- Reach the upper ledge before engaging the armored enemies.
- Use RPGs against both Gatling gunners.
- Confirm that both gunners are defeated before descending.
4. Reach and solve the stone-symbol puzzle
Cross the bottom floor of the ruined building and climb the stairs on the opposite side to reach the roof. At the end, climb the stones and shimmy along the ledge to the far side. Use the poles to reach the windowsill, climb the boxes inside and continue up to the roof. Follow the final handholds into the building to trigger the puzzle scene.
Move the four stone weights onto the scales in front of the statues. Then rotate the symbol blocks until each statue shows the symbol associated with its weight. The required pairings are sphere with dragon, cube with lion, half-sphere with tiger and pyramid with bird.
Use the journal drawings if a symbol is difficult to identify. When all four weights and symbols are correctly matched, activate the switch that opens the route onward.
- Enter the puzzle room through the window route.
- Place the sphere, cube, half-sphere and pyramid weights on the scales.
- Match sphere-dragon, cube-lion, half-sphere-tiger and pyramid-bird.
- Activate the switch after all four matches are correct.
5. Cross the next courtyard and activate the mechanism
Take the zipline down from the puzzle area, jump the gap and climb the stairs on the left. At the top, use the ledges to climb over the wall. Wait until one guard is separated from the other, stealth-kill him and then eliminate the second guard.
Climb the rubble on the right to reach another enemy from behind. Afterward, deal with the larger group to the right. Stealth is possible, but the RPG beside your position is a reliable way to start the firefight. Keep moving between cover and collect useful weapons after each wave.
When the courtyard is clear, approach the stone circle in the middle. Activate it and turn the lever. This opens the temple door in the lower area.
- Cross the wall using the upper ledges.
- Defeat the courtyard enemies, using the nearby RPG if necessary.
- Activate the stone circle and turn its lever.
6. Return to the temple door
Use the nearby zipline to return toward the lower area. Drop to the ledge, descend the ladder and prepare for soldiers rappelling down from the opposite wall. Defeat them before trying to climb; their arrival can interrupt the route and force you back into cover.
After the rappelling enemies are defeated, use their ropes to climb to the upper level beside the newly opened temple door. Enter the passage and open the door. The following transition begins Chapter 24, The Road to Shambhala, confirming that Reunion is complete.
- Defeat the rappelling soldiers.
- Climb using the enemies’ ropes.
- Open the temple door.
- Confirm the transition to Chapter 24, The Road to Shambhala.
Before you move on
- The four-weight puzzle has been solved and the route onward has opened.
- The stone-circle lever has opened the temple door in the lower area.
- The rappelling enemies have been defeated and their ropes have been used to return upward.
- The temple door has been opened and the chapter transition identifies Chapter 24 as The Road to Shambhala.
The Road to Shambhala
Chapter 24 begins beneath the monastery and follows Drake and Flynn through the hidden route toward Shambhala. Solve the opening phurba mechanism, descend the cliffside route, cross the statue ruins with Flynn, and use the journal to solve a second rotating-cylinder puzzle. Three optional treasures are available: Bronze Garuda, Toad Censer, and Eight Emblems Pendant. After the second mechanism opens, survive the attack by three armored guardians until the scripted scene begins. The chapter ends after that scene and the following transition; Chapter 25, Broken Paradise, starts with Drake already inside Shambhala.
Open the hidden entrance and collect the Bronze Garuda
At the beginning of the chapter, search the chamber before activating the mechanism. Look high on the wall, slightly to the right of the blue sphere, for the sparkling Bronze Garuda inside a carved face. Shoot it down and collect it.
Examine the three large phurba, or dagger-shaped, ornaments around the room. Two have their blades pointing upward. Approach each of those two and rotate it until its blade points downward. Leave the third ornament as it is. When the two upward-pointing phurba have been turned down, approach the blue sphere and interact with it to trigger the scene.
If the sphere does not activate, check the ornaments again. The required arrangement is the two originally upward-pointing blades turned downward; the third does not need to be rotated.
- Bronze Garuda collected if desired.
- The two upward-pointing phurba have been turned downward.
- The blue sphere has been activated.
Descend the cliff and find the Toad Censer
After the scene, follow the cliff route downward. Jump to the first isolated platform, then immediately look to the left before continuing toward the next handholds. The Toad Censer is in the dark recess beside this first platform. Collect it before continuing.
Return to the main route and use the ridges along the wall to descend. Drop down through the ledges, shimmy around the corner, and jump to the next platform. Wait for Flynn to reach you and boost him up. He drops a stone that allows you to climb to the higher path.
Follow Flynn across the next gap. Climb along the arm of the large statue, then move onto the upper-left ledge and enter the small cave. Pass through the narrow opening until you reach the fallen statue debris. Try to push it, then wait for Flynn and push it together with him.
- Toad Censer collected if desired.
- Flynn has been boosted to the upper ledge.
- The statue debris has been pushed aside.
Cross the statue ruins and collect the Eight Emblems Pendant
After moving the debris, drop to the lower ridge and follow it to the right. Drop again and sidle along the narrow ledge until you reach the stone cart. Stand on the cart’s right side and push it with Flynn. Climb onto the cart and use it to reach the higher ledges.
Continue around the carved skull statues by climbing and shimmying along the handholds. At the far side, angle Drake toward the ledge behind him and jump across. Follow the platforms until you reach the large staircase.
Do not climb the staircase immediately. Look to the left of its base for a separate ledge containing the Eight Emblems Pendant. Jump over and collect it, then return to the staircase and climb through the doorway at the top.
- The cart has been pushed into position.
- The route around the skull statues has been completed.
- Eight Emblems Pendant collected if desired.
Solve the rotating-cylinder puzzle
Inside the next chamber, open Drake’s journal to the final pages and compare the six symbols shown there with the symbols on the cylinders. The symbols on one side correspond to the opposite journal page, so use the page that matches the side you are facing.
On the first side, leave the left cylinder unchanged. Rotate the center cylinder counterclockwise once and the right cylinder counterclockwise twice. Move to the opposite side, leave its two outer cylinders unchanged, and rotate only the center cylinder counterclockwise once.
When all six symbols match the journal, operate the large crank. The mechanism opens the route and triggers the guardian encounter. If the crank does not respond, recheck the journal alignment rather than rotating cylinders at random.
- The journal is being used to identify the six target symbols.
- First side: left unchanged, center counterclockwise once, right counterclockwise twice.
- Opposite side: outer cylinders unchanged, center counterclockwise once.
- The large crank has been operated.
Survive the guardian encounter
Three armored guardians attack after the mechanism is activated. This is not a normal arena fight with a clearly required final kill. Keep moving around the open area and fire while retreating or repositioning. Avoid being trapped against the walls, and watch both the upper and lower approaches because one guardian can climb in while another enters from a different direction.
Flynn may obstruct your movement, so leave yourself room to circle around the arena. If a guardian tackles Drake, follow the on-screen button prompts immediately to escape. Continue damaging the guardians and staying mobile until the scripted transition begins.
Do not waste time searching for a special weapon or a conventional loot phase. The encounter advances after sustained resistance and the story scene, not after collecting every dropped weapon. If Drake is overwhelmed, restart from the checkpoint and use a wider circuit around the arena instead of holding one corner.
- Drake has escaped any tackle prompts.
- The guardian encounter has advanced to its scripted scene.
- The post-fight story transition has played.
Confirm chapter completion
After the guardian scene and its follow-up transition, the game advances directly toward Chapter 25, Broken Paradise. Chapter 24 does not require an additional free-roaming route through Shambhala after the encounter. The next chapter begins with Drake inside the city and changes the immediate gameplay situation.
Use the chapter title or chapter-select screen to confirm that Broken Paradise has begun. If you are replaying for treasures, verify the chapter’s treasure list separately; collecting the three treasures is optional and is not required to unlock the next chapter.
- The guardian sequence and following transition are complete.
- The game has advanced to Chapter 25, Broken Paradise.
- Optional completion: Bronze Garuda, Toad Censer, and Eight Emblems Pendant are recorded.
Before you move on
- The opening blue-sphere mechanism has been activated.
- Drake and Flynn have crossed the statue ruins and opened the second mechanism.
- The three-guardian encounter has ended in its scripted transition.
- Chapter 25, Broken Paradise, has started.
- Optional completion: Bronze Garuda, Toad Censer, and Eight Emblems Pendant are recorded in the chapter treasure list.
References for this chapter
- Uncharted 2: Among Thieves FAQ PlayStation 3 Guides - MyPS3 Guides
- Uncharted 2: Among Thieves - Guide and Walkthrough - PlayStation 3 - By AbsoluteSteve
- Uncharted 2: Chapter 24 The Road to Shambhala treasures, secrets
- The Road to Shambhala | Uncharted Wiki
- Uncharted 2: Among Thieves — Official Strategy Guide sample pages
Broken Paradise
Chapter 25 begins with Drake, Chloe, and Elena escaping through Shambhala while Lazarević’s soldiers and the city’s guardians fight around them. Run through the opening without stopping, then survive the first guardian and soldier encounters. The route continues through resin-covered ruins, a large courtyard battle, a gate opened by a hanging chain, and a river passage defended by soldiers and shotgun enemies. After climbing to the main temple, endure a prolonged battle between the militia and Shambhala’s tribesmen, then climb the long staircase to the Cintamani Stone. A cutscene reveals the truth behind the stone and leaves Elena injured. Drake must then clear a narrow route around the Tree of Life, using cover, grenades, and available sniper rifles. The chapter ends after this perimeter fight, when the story transitions to Tree of Life. Lazarević’s final boss battle is in Chapter 26, not this chapter.
1. Escape the opening crossfire and reach the first platform
At the start, Drake has no weapon. Move left immediately and keep running through the ruins. Roll when necessary to reduce the chance of being hit by gunfire and guardian crossbows. Drop into the lower channel, jump to the breakable platform, and continue forward as it tears loose and carries Drake and several enemies down the mountainside.
After the crash, a cutscene provides weapons. Take cover behind the far railing on the first platform and eliminate the nearby M32-Hammer user and the laser-scope soldier across the gap. If the remaining soldiers move into the waterway, finish them from behind with the Hammer or another available weapon. Before leaving, look above the platform and shoot the guardian or collectible target in the upper position if it is still active, then reclaim a reliable primary weapon and climb the stones at the end of the stream.
- Run left through the unarmed opening.
- Survive the collapsing platform ride.
- Clear the M32-Hammer and laser-scope threats on the first platform.
- Climb out of the stream after the weapon tutorial.
2. Clear the first courtyard and open the resin route
Drop through the opening in the floor and enter the main courtyard. Soldiers will attack from several positions. Use the stone walls and broken structures as cover, and take advantage of the guardians fighting the militia instead of exposing yourself to both groups at once. The blue resin on the nearby statue can be shot for a damaging explosion; an M32-Hammer is also available in the area if you need a stronger weapon.
Once the courtyard is clear enough to move, climb the wall at the back using the ledges. Traverse the upper platforms until you reach the position occupied by the guardian with the explosive sling. Shoot the blue resin there to reveal the next path. Continue into the following area, jump to the opposite ledge, and shoot the resin vines blocking the route. Use the pole and surrounding ledges to reach the next resin growth, then destroy it to open the way into the wide courtyard.
- Use cover in the first courtyard.
- Shoot the blue resin on the statue or use the available Hammer.
- Climb to the explosive-sling guardian’s position.
- Destroy the resin vines to reach the wide courtyard.
3. Win the wide courtyard fight and open the gate
Enter the wide courtyard and drop to the lower level behind Chloe and Elena’s position. If the nearest guard approaches, stealth-kill him, then deal with the second guard beneath the main platform. From cover, eliminate the patrol along the opposite wall and take the Dragunov if you need a precision weapon.
The lower level on the right side of the entrance gives you useful cover, retreat space, and a view of the enemy spawn area. Hold there while the militia arrives. When Shambhala’s tribesmen join the battle, use the Gatling gun dropped by a soldier if it is available, then pick up a guardian crossbow for the remaining enemies. Do not remain in the open upper area, where enemies can surround you.
After the fight, go to the gate at the rear. Climb the bricks on the left side, cross over the top of the gate, and grab the hanging chain. Drake’s weight serves as the missing counterweight, opening the gate when you hang from it.
- Clear the guards around the girls.
- Use the lower-right cover position for the main firefight.
- Use the Gatling gun and guardian crossbows when available.
- Reach the chain above the rear gate and hang from it.
4. Fight through the river passage and reach the temple
After the gate opens, drop into the water and immediately target the enemy on the raised platform ahead. Preserve your strongest weapons for the shotgun soldiers, because the channel can leave you trapped if they reach close range. Advance only after the first group is down.
A later wave includes a sniper. Move toward the raised platform farther along the river and take the grenade launcher there, using it to break up clustered enemies and the sniper’s position. Once the channel is clear, climb the ledges on the left bank, jump across the platforms, and continue around the corner with your weapon ready for the next guards.
Finish the remaining enemies and climb the stairs to the main temple. The approach is linear; if the route appears blocked, look for the next ledge on the left side of the river rather than returning to the gate.
- Prioritize the raised enemy after entering the water.
- Protect yourself from shotgun enemies at close range.
- Use the grenade launcher against the river ambush and sniper.
- Climb the left-bank ledges and reach the temple stairs.
5. Survive the main temple assault
The temple courtyard becomes a prolonged battle between Lazarević’s soldiers and Shambhala’s tribesmen. Soldiers repeatedly emerge from the door on the left. Concentrate on the soldiers first, allowing the tribesmen to distract them when possible. The tribesmen are hostile, but do not waste time pursuing them while the larger soldier waves are still active.
Use the rubble and nearby stone cover to avoid crossfire. Move when you need ammunition, but do not cross the courtyard without first weakening the enemies covering your route. Grenades are effective against groups gathered near the entrance, while a dropped automatic weapon or crossbow can help when rifle ammunition runs low.
After the soldier waves are defeated, eliminate the remaining tribesmen. A new opening becomes available; enter it and climb the long staircase. A cutscene at the top brings Drake to the Cintamani Stone and changes the situation for the final section of the chapter.
- Prioritize soldiers emerging from the left-side door.
- Use rubble as cover and resupply during safe openings.
- Clear the remaining tribesmen after the soldier waves end.
- Climb the long staircase and trigger the Cintamani Stone cutscene.
6. Clear the route around the Tree of Life
After the cutscene, follow the narrow route around the Tree of Life. Enemies occupy the perimeter and are forced to approach through confined paths. Use the available cover, throw grenades into clustered groups, and take Dragunov rifles from defeated soldiers when you need accurate fire at longer range.
Advance from one safe section to the next rather than standing in the first position. Watch the edges of the path during every movement, because the route is narrow and a careless step can send Drake over the side. If your health is low, retreat behind the previous piece of cover before attempting the next advance.
Continue until the final resistance on the tree’s perimeter is defeated and the forward route is open. This is the actual end of Chapter 25’s combat. The next chapter contains the Lazarević confrontation, so do not expect the boss battle to begin during this section.
- Fight around the Tree of Life after the stone cutscene.
- Use grenades against clustered enemies.
- Take Dragunov rifles when precision fire is useful.
- Advance carefully along the narrow perimeter route.
- Defeat the final perimeter resistance.
7. Confirm the chapter transition
Move forward after the perimeter battle to trigger the next story sequence. The chapter is complete when the game transitions into Chapter 26, Tree of Life. The next chapter begins the final confrontation with Lazarević and is not part of Broken Paradise.
If you die during the last fight, use the checkpoint to repeat the perimeter section. Re-establish cover first, collect a rifle or ammunition from the nearby bodies, and then advance in short stages rather than sprinting through the narrow route.
- Reach the forward trigger after the Tree of Life perimeter fight.
- Confirm that Chapter 26, Tree of Life, begins.
- Do not mistake the upcoming Lazarević boss battle for part of Chapter 25.
Before you move on
- The opening escape, first courtyard, resin-vine route, wide courtyard, gate, and river section are complete.
- Drake has climbed the main temple staircase and triggered the Cintamani Stone cutscene.
- The prolonged temple assault and the perimeter battle around the Tree of Life are complete.
- The game transitions to Chapter 26, Tree of Life, confirming that Chapter 25 is finished.
Tree of Life
Chapter 26 is the final chapter of Uncharted 2: Among Thieves. Descend to the Tree of Life, defeat Lazarević by detonating the glowing resin deposits while he is nearby, then escape across the collapsing bridge. Lazarević cannot be defeated by shooting him normally. Keep moving around the arena, avoid the flaming resin pool and shotgun range, and use the resin bulbs as your only reliable damage source. After the boss falls, cross the collapsing bridge, shoot the Guardian attacking Chloe, and continue through the final cinematics until the ending sequence and credits begin.
Reach the Tree of Life arena
After the preceding combat around the temple perimeter, continue up the long staircase and follow the route toward the Tree of Life. The approach includes a final firefight on a narrow path. Use the available cover, grenades and dropped rifles to clear the enemies, then continue forward until the scene at the top ends and the path to the tree opens.
Descend the stone stairs and drop down the marked ledges. At the bottom, move toward the narrow opening between the roots. Approaching this gap triggers the scene in which Lazarević drinks from the pool of resin and becomes resistant to ordinary gunfire. Once control returns, stay alert for the open route around the arena and the glowing resin deposits hanging from the trees and roots.
- Clear the final perimeter combat before the staircase.
- Descend the ledges to the base of the Tree of Life.
- Enter the narrow gap between the roots to begin the boss encounter.
Use resin to damage Lazarević
Lazarević follows Drake through the arena with a shotgun, so do not stand and trade shots with him. Run around the outer route and keep the flaming resin pool between you and the most dangerous parts of the arena when possible. The pool damages Drake, so do not cut through it as a shortcut.
The glowing resin deposits are the required damage source. Let Lazarević approach one, then shoot the deposit when he is close enough to be caught in the explosion. The blast makes him stagger and damages him. Resume running immediately after firing; standing beside the deposit exposes Drake to both the explosion and Lazarević's close-range attack.
The deposits return after being detonated, allowing you to repeat the same method. If a deposit is too far away, keep moving until Lazarević is positioned beside another one. Do not waste time trying to defeat him with pistol, rifle or shotgun fire alone.
- Keep outside Lazarević's close shotgun range.
- Shoot a glowing resin deposit only when he is beside it.
- Leave the area immediately after each explosion.
- Avoid the flaming resin pool.
Handle the faster pursuit and grenades
As the fight continues, Lazarević becomes faster and closes the distance more quickly. Widen your loop around the arena rather than stopping to aim for too long. When he is not close enough to a resin deposit, prioritize distance and wait for a safer opportunity instead of taking a damaging shot.
Later, Lazarević begins throwing grenades into the route ahead of Drake. Watch the ground while running. If grenades block the next section, change direction or use another part of the perimeter; do not run toward Lazarević to escape the blast. After a grenade volley, continue circling until he is aligned with another resin deposit.
If Lazarević grabs Drake, rapidly press Square to break free, then sprint away before attempting another shot. A death reloads the latest checkpoint, so repeat the same movement pattern rather than trying to force a direct attack. On higher difficulties, survival and clean spacing matter more than quick damage.
- Change direction when grenades block the route.
- Break free with Square if Lazarević grabs Drake.
- Use the checkpoint to repeat the arena strategy after failure.
Cross the collapsing bridge
When the final resin explosions weaken Lazarević, a cutscene shows the Guardians overwhelming him. Control then returns during the collapse of Shambhala. Run forward across the bridge as sections break away, and jump the gaps as they appear. Keep moving toward Chloe and Elena instead of stopping to look for alternate routes.
A large section of the bridge falls away during the escape, requiring a prompt jump from the edge. If Drake falls, retry from the checkpoint and begin the run earlier so you reach the edge before the section collapses. Continue until Drake reaches the others and the bridge tilts.
- Start running as soon as control returns after the boss scene.
- Jump across the bridge gaps and falling sections.
- Reach Chloe and Elena at the far end of the bridge.
Defeat the Guardian and finish the campaign
After Drake reaches Chloe and Elena, a Guardian appears behind Chloe while the bridge collapses. When control returns, aim at the Guardian and shoot it. Continue firing through the brief struggle until Chloe kicks the Guardian away and the immediate danger ends.
The remaining scenes show Drake, Chloe and Elena escaping Shambhala and returning to the Tibetan village. No further combat or exploration is required. Let the closing cinematics continue; campaign completion is confirmed when the ending sequence proceeds into the final credits.
- Shoot the Guardian attacking Chloe.
- Reach the escape outside the collapsing city.
- Allow the closing cinematics and final credits to begin.
Before you move on
- Lazarević has been defeated by repeated resin explosions.
- Drake has crossed the collapsing bridge and shot the Guardian attacking Chloe.
- The final escape cinematics have played.
- The game reaches the ending sequence and credits.
References for this chapter
Finishing up
The final Lazarević encounter in Chapter 26, Tree of Life, has been completed.
The collapsing-bridge escape and final Guardian encounter have been completed.
The closing cinematics have played through the ending sequence and credits.
Optional treasures, difficulty-specific trophies and multiplayer content are not required for campaign completion.
Choose your next gameScreenshots & video
Game imagery for reference. Follow the written chapters above for the route and strategies.
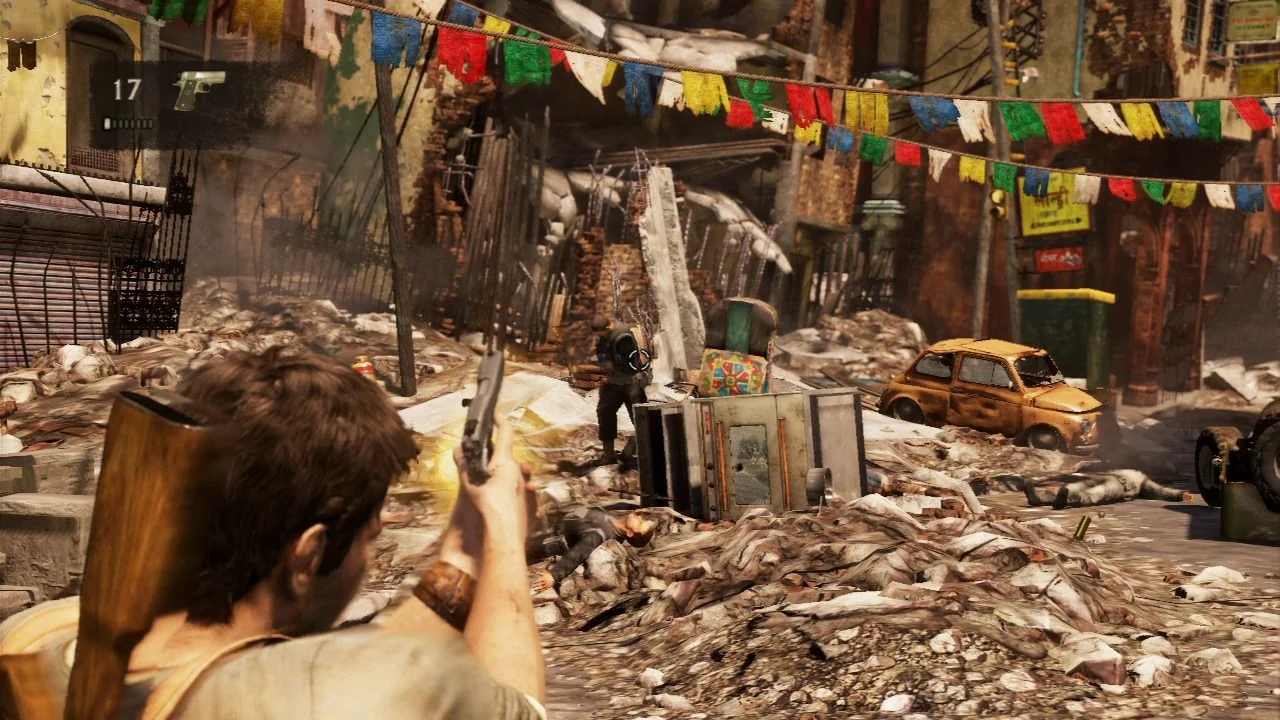
Sources & references
Our original guide draws on the references below. Check the edition at the top of this page before following controls or unlock requirements.
- Uncharted 2: A Rock and a Hard Place, chapter 1 walkthrough
- Uncharted 2: Among Thieves - Guide and Walkthrough - PlayStation 3 - GameFAQs
- Uncharted 2: Among Thieves - Guide and Walkthrough - PlayStation 3 - By AbsoluteSteve
- Uncharted 2: Among Thieves — Official Strategy Guide sample pages
- Uncharted 2: Among Thieves – Guide and Walkthrough for PlayStation 3
- Uncharted 2: Among Thieves/Breaking and Entering - StrategyWiki
- Uncharted 2: Breaking and Entering part 2, chapter 2 walkthrough - Gamepressure
- Uncharted 2: Borneo, chapter 3 walkthrough
- Uncharted 2: Among Thieves/Borneo — StrategyWiki
- Uncharted 2: Among Thieves/The Dig — StrategyWiki
- The Dig | Uncharted Wiki
- Uncharted 2: Dig Site, chapter 4 walkthrough - Gamepressure.com
- Uncharted 2: Among Thieves/Desperate Times
- Uncharted 2: Desperate Times part 2, chapter 6 walkthrough
- Uncharted 2: Among Thieves Unofficial guide
- Uncharted 2: They're Coming With Us, chapter 7 walkthrough - Gamepressure
- They're Coming With Us - Uncharted Wiki
- Uncharted 2: The City's Secret, chapter 8 walkthrough
- Uncharted 2: Among Thieves/The City's Secret - StrategyWiki
- Uncharted 2: Among Thieves Treasures, StrategyWiki
- Uncharted 2: Chapter 8 Treasures and Secrets - Gamepressure
- Uncharted 2: Path of Light, chapter 9 walkthrough
- Uncharted 2: Among Thieves — Path of Light, StrategyWiki
- Only One Way Out - Uncharted 2: Among Thieves Guide and Walkthrough
- Uncharted 2: Only One Way Out, chapter 10 walkthrough
- Uncharted 2: Keep Moving, chapter 11 walkthrough - Gamepressure
- Keep Moving - Uncharted 2: Among Thieves Guide and Walkthrough - SuperCheats
- Uncharted 2: A Train to Catch, chapter 12 walkthrough
- Uncharted 2: Among Thieves/A Train to Catch — StrategyWiki
- Uncharted 2: Locomotion, chapter 13 walkthrough
- Uncharted 2: Chapter 13 Locomotion treasures, secrets
- Uncharted 2: Tunnel Vision, chapter 14 walkthrough
- Uncharted 2: Among Thieves FAQ PlayStation 3 Guides - MyPS3 Guides
- Uncharted 2: Among Thieves/Tunnel Vision
- Uncharted 2: Among Thieves/Train-wrecked, StrategyWiki
- Uncharted 2: Train-wrecked, chapter 15 walkthrough, Gamepressure
- Uncharted 2: Among Thieves - Find All the Treasures, Part Two
- Uncharted 2: Mountaineering part 1, chapter 17 walkthrough
- Uncharted 2: Mountaineering part 2, chapter 17 walkthrough
- Uncharted 2: Chapter 17 Mountaineering treasures, secrets
- Uncharted 2: Heart of Ice part 1, chapter 18 walkthrough
- Uncharted 2: Heart of Ice part 2, chapter 18 walkthrough
- Heart of Ice | Uncharted Wiki
- Uncharted 2: Siege, chapter 19 walkthrough
- Cat and Mouse – Uncharted 2: Among Thieves Guide and Walkthrough
- Uncharted 2: Cat and Mouse Part 2 Walkthrough
- Uncharted 2: Among Thieves FAQs and Guides for PlayStation 3
- Convoy — Uncharted 2: Among Thieves Guide and Walkthrough, SuperCheats
- Uncharted 2: Among Thieves - Game Script - PlayStation 3 - GameFAQs
- Uncharted 2: Among Thieves Treasures, Neoseeker
- Uncharted 2: Among Thieves — Chapter 21 Convoy Playthrough, GameFAQs Video
- Uncharted 2: Among Thieves/The Monastery - StrategyWiki
- Uncharted 2: Among Thieves/Reunion – StrategyWiki
- REUNION – Uncharted 2: Among Thieves Walkthrough – Neoseeker
- Uncharted 2: Chapter 24 The Road to Shambhala treasures, secrets
- The Road to Shambhala | Uncharted Wiki
- Broken Paradise - Uncharted 2: Among Thieves - StrategyWiki
- Broken Paradise, Uncharted Wiki
About the game & collecting notes
- Platform
- PlayStation 3
Step-by-step campaign walkthrough for the original PlayStation 3 release of Uncharted 2: Among Thieves. It covers the 26 numbered single-player chapters from A Rock and a Hard Place through Tree of Life, while separating the opening train flash-forward as the first segment of Chapter 1. It includes required routes, combat priorities, puzzle solutions, recovery tactics and optional treasure notes without making collectibles necessary for the ending.
Darryl Polo
Darryl Polo loves tinkering with emulation and revisiting retro games. He enjoys exploring how old favorites play on different setups and sharing what he learns along the way. At Joking Joystick, he writes about the games, hardware, and small discoveries that keep the hobby fun.
Our editorial standardsFound a step that needs another look? Help us improve this guide.