
Tomb Raider (PlayStation, USA v1.6) — Complete Campaign Walkthrough
Step through the original 1996 PlayStation release of Tomb Raider (Core Design/Eidos) from Caves through The Great Pyramid. This guide covers every main campaign level on the PlayStation edition, practical routing, major hazards, boss patterns, and how to reach the canonical ending without relying on remakes, remasters or modern mechanics. Lara’s Home is optional training and is not part of the required campaign sequence.

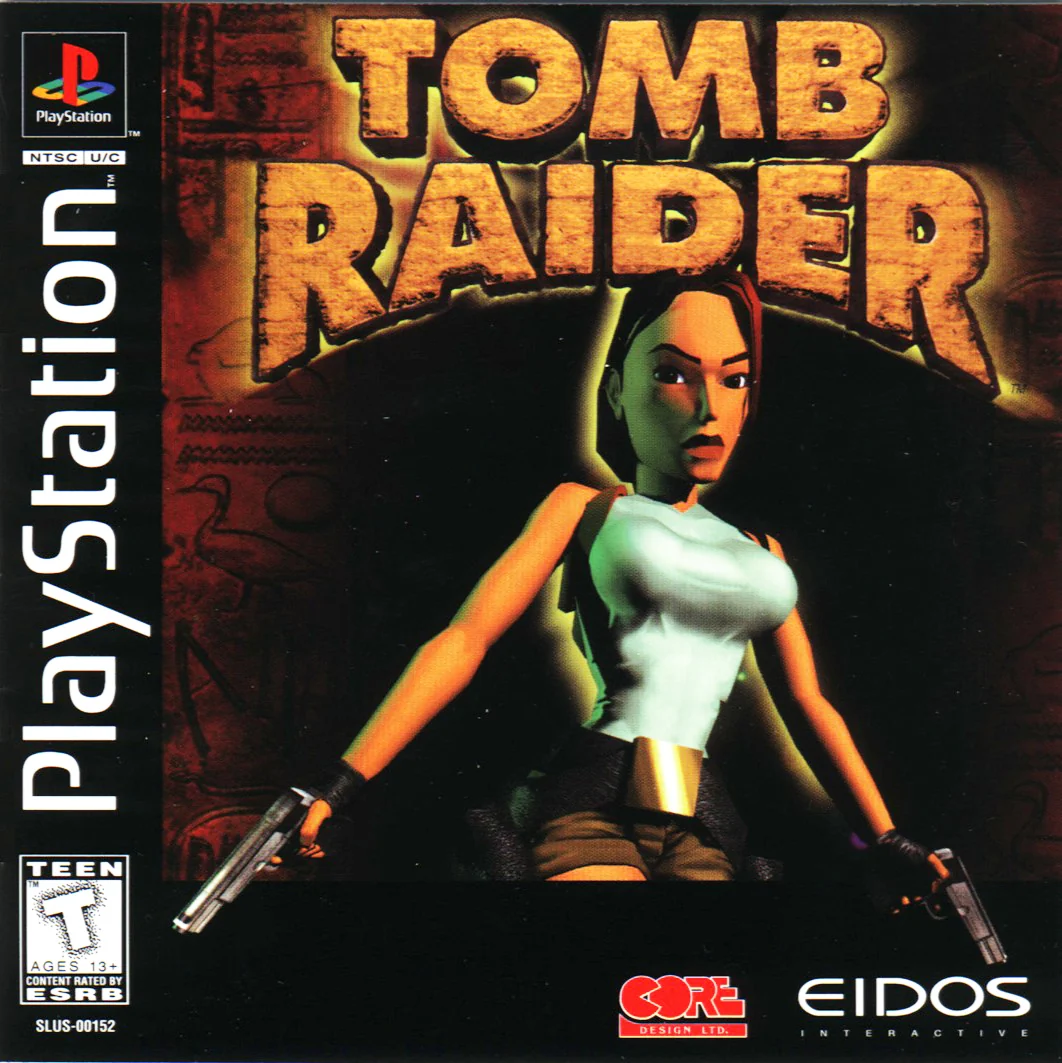
Find a copy
Tomb Raider Sony PlayStation
We may earn a commission if you buy through these links, at no extra cost to you. As an Amazon Associate I earn from qualifying purchases.
Opens retailer search results. Check the model, edition, seller, availability and current price before buying.
Before you begin
This walkthrough is written for the original Sony PlayStation release of Tomb Raider (1996), North American edition as specified by this guide.
Lara’s Home is optional training entered from the title-screen Polaroid; it is not a required campaign level.
During the campaign, PlayStation progress is saved by collecting Save Game Beacons, also called Save Crystals. You need a memory card with free space.
Consult the in-game Menu Rings and the PlayStation manual if you need to confirm button layout before starting.
Follow the guide level by level from Caves through The Great Pyramid.
Each chapter lists practical objectives, landmarks, hazards, recovery advice and a concrete completion check.
Optional secrets and Unfinished Business are described separately. Unfinished Business is not included on the original North American PlayStation release.
Set yourself up for the run
Insert a memory card and confirm that it has free space before powering on the PlayStation.
Use Save Game Beacons, also called Save Crystals, during campaign levels. Do not rely on Lara’s Home as a campaign save area.
Use separate save slots when the game offers them, especially before difficult platforming or boss attempts.
Set controls to the default PlayStation mapping or one of the presets listed in the manual.
Know the core actions: running and jumping, vaulting, hanging and shimmying, pushing and pulling blocks, swimming and diving.
Practice these actions in Lara’s Home if needed, but remember that the manor is optional training.
Pistols have unlimited ammunition. Conserve shotgun, magnum and Uzi ammunition for large enemies and dangerous encounters.
Keep weapons holstered before ledge grabs, switches, blocks and other hand actions.
Use Look to check alignment and landing areas before committing to difficult jumps.
Save at the nearest available Save Crystal before a boss, timed sequence or long trap route.
Optional secrets can provide useful health and ammunition, but none is required for the main ending.
If a route becomes unclear, stop, holster the weapon and recheck the room’s ledges, switches and underwater exits.
The required campaign route is Caves, City of Vilcabamba, Lost Valley, Tomb of Qualopec, the Greece levels, the Egypt levels, Natla’s Mines, Atlantis and The Great Pyramid.
Treat Unfinished Business as separate optional content available only on releases that explicitly include it.
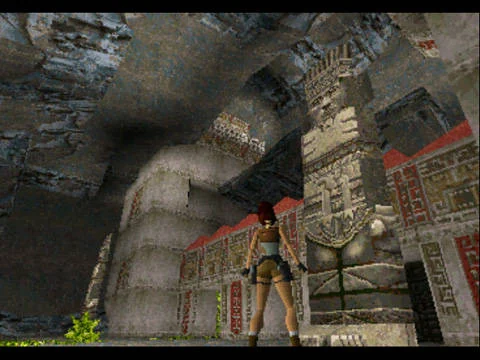
Croft Manor (Training) — Learn the Controls
Lara’s Home is an optional training area accessed from the Polaroid on the original PlayStation title screen. It is not part of the required campaign sequence and contains no story item that must be collected. Use it to learn the tank controls, walking, jumping, ledge grabs, shimmying, safety drops, object handling and swimming. When finished, leave the training area through its menu-ring exit option, return to the title screen, and use the Passport to start a new game at Caves. Insert the memory card before powering on so you can test a real campaign save at the first Save Game Beacon.
Enter Lara’s Home from the title screen
After the introductory movie, the title screen presents several objects. Select the Polaroid to enter Lara’s Home. Do not select the Passport for training: the Passport is used to start a new campaign or load an existing campaign save. Lara’s Home is a separate interactive tutorial area, and the original PlayStation version uses the library, music room, main hall, gym and swimming pool as its accessible training route.
Before beginning, insert the memory card while the console is powered off and make sure it has free space. The game manual warns against inserting or removing the memory card after the console has been switched on. The training area does not need a campaign save, so use it to become comfortable with movement rather than searching for a required objective.
- Choose the Polaroid for Lara’s Home.
- Use the Passport only when you are ready to start or load the campaign.
- Insert the memory card before powering on the PlayStation.
- Remember that Croft Manor is optional and contains no required story item.
Learn the original PlayStation controls
The original version uses tank controls. Up makes Lara run forward relative to the direction she is facing. Left and Right turn her, while Down makes her jump backward. Cross is Action, Circle is Jump, Triangle draws weapons and Square performs a roll. R1 is Walk, L2 and R2 sidestep left and right, L1 activates Look, Start pauses the game and Select opens the menu rings.
Test these commands in the library and music room before attempting the gym exercises. Hold R1 with a direction to walk carefully. Walking prevents Lara from running over an edge, and she stops automatically when she reaches one. Press L1 by itself to recenter the camera behind Lara. Hold L1 with a direction to inspect the surrounding area and check Lara’s facing before a jump.
- Run, turn and back-jump without confusing Lara’s facing direction.
- Test Cross, Circle, Triangle and Square in a safe room.
- Walk with R1 toward an edge and confirm that Lara stops.
- Use L1 to recenter the camera and inspect a landing area.
- Practice L2 and R2 sidesteps before entering narrow spaces.
Practice jumps, vaults and ledge grabs in the gym
Follow the indoor route from the library through the music room and main hall to the gym. The gym teaches movement through marked platforms and obstacles. Use walking to set up jumps: approach the edge with R1 held, align Lara squarely with the landing, and use L1 to check the direction. For a longer running jump, tap Down once to hop backward, then hold Up and press Circle so Lara has a controlled run-up. Do not assume that a longer improvised run makes the jump travel farther; alignment and timing are what matter.
For a ledge grab, jump toward the edge while holding Cross. If Lara catches it, continue holding Cross and press Up to pull onto the upper surface. Press Left or Right while hanging to shimmy. Release Cross only when you intentionally want to drop. Practice both a standing jump and a controlled running jump, then repeat them with a ledge grab.
Walk up to a low obstacle and press Up plus Cross to vault over it. Keep Triangle unused during these exercises. With weapons drawn, Lara cannot perform normal hand actions such as vaulting, grabbing ledges, pulling up, using switches or manipulating objects.
- Complete a standing directional jump.
- Set up and complete a controlled running jump.
- Grab a ledge while holding Cross.
- Shimmy sideways and pull up.
- Vault over a low obstacle with Up plus Cross.
- Holster weapons before attempting movement or object actions.
Learn safety drops, camera checks and block handling
Use the gym’s edges to practice safe drops. Walk to a low ledge, face away from the drop, hold Cross and press Down to step off while hanging. Release Cross only after checking the landing. This is safer than running directly over an edge and is useful throughout Caves and later platforming sections.
Practice the block exercise by standing in front of a movable block and holding Down plus Cross to enter Lara’s ready stance. Press Up to push the block or Down to pull it. Release Cross when you want to stop. The same Action button is used for switches, pickups, puzzle-item receptacles and ledge grabs, so positioning Lara directly in front of an object is important.
For every difficult jump, stop, walk into position, recenter with L1, inspect the landing and then commit. Do not draw weapons during a platforming sequence unless you are deliberately switching to combat.
- Perform a controlled safety drop from a low ledge.
- Push and pull a training block.
- Use Cross on a switch or object while standing directly in front of it.
- Recenter with L1 before a difficult jump.
- Keep weapons holstered during climbing and object manipulation.
Use the pool, leave training and start Caves
Continue through the gym to the swimming pool. Enter the water and practice surface swimming, diving and returning to the edge. Use the configured Jump button to dive below the surface and swim underwater; use the directional buttons to change direction. On the surface, Left and Right turn Lara while Up and Down move her. Cross climbs out when Lara is close enough to an edge. Watch the blue breath bar and return to the surface before it is depleted.
When the exercises are complete, open the menu rings with Select and choose the exit option within the Passport. This leaves Lara’s Home; it is not a campaign save and should not be described as one. After returning to the title screen, select the Passport, open the new-game pages and start the campaign. The first required level is Caves.
Once Caves begins, collect the first Save Game Beacon and use it to verify that the memory card is working. The PlayStation version saves at collected Save Game Beacons and also offers a save prompt after successfully completing a level. If Lara dies, the game presents options to load a previous save, restart the level or quit to the title screen.
- Swim on the surface and climb out with Cross.
- Dive underwater and return to air before the breath bar is exhausted.
- Open the menu rings with Select and use the training-area exit option.
- Return to the title screen rather than treating Lara’s Home as a campaign level.
- Open the Passport and start a new game at Caves.
- Test saving at the first Save Game Beacon in Caves.
Before you move on
- You can enter Lara’s Home from the title-screen Polaroid.
- You can reach the gym from the library through the music room and main hall.
- You can run, walk, turn, sidestep, back-jump, roll and use L1 to check Lara’s alignment.
- You can complete standing and running jumps without relying on improvised run-ups.
- You can grab a ledge with Cross, shimmy with Left or Right, pull up with Up and perform a controlled safety drop.
- You can vault over a low obstacle and push or pull a training block.
- You can surface-swim, dive, monitor the breath bar and climb out of the pool.
- You know that Lara’s Home is optional and has no required campaign item or ordinary campaign Save Game Beacon.
- You can leave training through its menu-ring exit option, return to the title screen and start Caves from the Passport.
- Your memory card was inserted before startup, and the first Save Game Beacon in Caves successfully creates a usable campaign save.
Peru — Caves (Level 1)
Cross the opening dart traps, explore the bat caves for two optional secrets, use the greenery-lined passage to reach the bridge room, then take the bear-pit route to the Save Crystal. After descending past two wolves, use the timed floor tile and the timed exit-door switch to reach the final hallway and leave the level for City of Vilcabamba. The original PlayStation version has three secrets and one Save Crystal.
1. Enter the caves and collect the first secret
After the opening scene, follow the paw prints straight ahead through the large stone entrance. The narrow passage with vertical slits is a dart trap. Keep running through it instead of stopping beside the openings; moving continuously usually limits the damage.
At the next wider area, continue forward rather than immediately climbing toward the route shown by the camera. Enter the rectangular chamber with an angled stone block in the far-left corner. Use the block to reach the opening above it: climb onto the block, slide down its sloped face, then jump and grab the ledge as Lara slides. Pull into the small cave and collect Secret 1, a Small Medi Pack.
Return to the main route and climb through the raised opening where Lara looked toward the higher passage. Draw the pistols before entering the bat area. Three bats attack in the larger cave; keep moving and fire when Lara turns toward them.
- Run through the first dart corridor.
- Collect Secret 1, the Small Medi Pack above the angled block.
- Defeat or pass the three bats in the upper cave.
2. Find the second secret and open the greenery passage
From the bat cave, enter the opening on the left. In the far-right corner, stand on the low snowdrift beneath the high opening. Face the wall, sidestep left as far as possible, then press Action and Forward to grab the ledge. Pull up, deal with the bat, and collect Secret 2, another Small Medi Pack.
Drop back down and return to the larger cave where the first bats appeared. Turn left into the cave lined with greenery. Descend through the opening on the left and follow the passage to the closed door at the bottom. Pull the wall switch beside it, then enter and kill the bat that flies down.
The wooden gate on the right is not the route forward. Climb through the opening in the far-left corner and follow the passage until you reach the room with two wooden bridges.
- Reach the high opening above the snowdrift.
- Collect Secret 2 in the upper bat cave.
- Pull the switch at the bottom of the greenery-lined passage.
- Climb through the far-left opening beyond the switch door.
3. Cross the bridge room and use the bear-pit route
Two wolves are below the upper walkway in the bridge room. Shoot them from above if possible; this is safer than dropping into the middle of the room. Cross the wooden bridges and continue to the far side.
Beyond the bridges, a gap overlooks a lower room containing a bear. You may kill the bear from the upper ledge with the pistols, or safety-drop into the room and fight it while moving and jumping. The lower room has one exit. Follow it through the bat encounters until you reach a Small Medi Pack beside a discolored floor tile.
Pick up the Small Medi Pack, face the nearby door, and step onto the discolored tile. It opens the door only briefly. Run through immediately. This route returns Lara to the bridge room. Climb back up, cross the gap, and continue toward the Save Crystal.
The PlayStation version has one Save Crystal in this level, located after the gap and before the stairs leading down to the next major room. Use it before descending if you want a retry point for the wolves, secret route, and timed exit sequence.
- Defeat the two bridge-room wolves before crossing.
- Handle the bear in the lower room.
- Use the discolored floor tile to open the short-duration door.
- Reach and use the level’s single Save Crystal.
4. Descend past the wolves and collect the third secret
Before going down the stairs beyond the Save Crystal, search behind the columns on the left for another Small Medi Pack. Then descend with the pistols ready. Two wolves attack near the bottom. Keep moving, backflip or sidestep while firing, and avoid letting them pin Lara against the walls.
In the vegetation-covered room, climb onto either the left landing with pillars or the stone ledge on the right. From there, take a running jump to the foliage-covered ledge. Enter the concealed opening and collect Secret 3, a Large Medi Pack. This is optional, but it is the level’s most valuable health pickup.
Drop back to the main floor and move to the opposite side. An alcove beneath the stairs contains another Small Medi Pack. Collect it, then climb the gray stone steps toward the lever and the large carved exit doors.
- Search behind the columns for the Small Medi Pack.
- Defeat the two wolves at the bottom of the stairs.
- Reach the foliage-covered ledge from one of the raised sides.
- Collect Secret 3, the Large Medi Pack.
- Take the Small Medi Pack beneath the stairs.
5. Trigger the timed exit door
The lever on the upper ledge opens the large exit doors for a short time. Stand near the lever and face the route before activating it. Pull the lever, move to the edge, jump onto the low stone below, then continue toward the platform beneath the exit. Pull up and run through the doors before they close. If the direct jumps are uncomfortable, drop to the floor after pulling the lever and circle around to climb the platform from below.
Once through, run up the stairs. The next passage contains another dart trap, so do not pause beside the wall slits. At the top, draw the pistols because a wolf waits in the alcove on the left.
After killing the wolf, step onto the cracked or break-away floor in the center of the room. Lara drops into the long room below. Do not immediately drop again into the hallway: the exit doors at the far end are still closed.
- Activate the timed lever only when positioned to move.
- Pass through the large doors before they shut.
- Run through the upper dart corridor.
- Kill the wolf above the break-away floor.
- Drop into the long room.
6. Open the final doors and leave the Caves
In the long room, move to the far end and take the running jump across the gap. Turn left and approach the Large Medi Pack. A wolf emerges from the passage ahead, so defeat it before collecting the pack.
Enter the alcove where the wolf appeared and pull the switch. This opens the level-exit doors at the end of the hallway. Leave the switch room, turn right, and use the first opening overlooking the hallway. Hop down, slide to the floor, and pass through the large doors.
The level is complete when the game transitions to Peru — City of Vilcabamba. The three secrets and the extra health pickups are optional; the required progression is reaching the final switch and passing through the opened exit doors.
- Jump the final gap in the long room.
- Defeat the wolf before taking the Large Medi Pack.
- Pull the switch in the wolf’s alcove.
- Return to the hallway and pass through the opened exit doors.
- Confirm the transition to City of Vilcabamba.
Before you move on
- All three optional secrets have been collected if pursuing a thorough level clear: two Small Medi Packs in the bat caves and one Large Medi Pack behind the foliage-covered ledge.
- The single PlayStation Save Crystal has been reached and used if a checkpoint was desired.
- The final wolf has been defeated, the switch in its alcove has been pulled, and the large exit doors are open.
- Lara has passed through the exit doors and the game has transitioned to Peru — City of Vilcabamba.
Peru — City of Vilcabamba (Level 2)
Find the Silver Key and Gold Idol in the pool district, use the Silver Key to enter the red-roofed building, activate its switches in left-right-middle order, and place the Gold Idol at the final gate to reach the Lost Valley. The original PlayStation version has two Save Crystals and three optional secrets in this level.
Clear the entrance and reach the pool district
Draw Lara’s pistols before crossing the opened stone doors. Four wolves attack from different sides of the first chamber. Keep moving while firing, use backflips or side jumps to avoid being pinned, and roll to face anything that gets behind Lara. If the pack surrounds you, retreat toward the nearby pool and use the water as temporary space before climbing out to continue the fight.
After the first room is safe, go through the passage on the far right when facing away from the entrance. Kill the next wolf, then follow the passage around until it opens into the pool district. Search the greenery for a Small Medi Pack. Nearby, a bear occupies the stable-like structure beside the pool. Trigger it from a position that lets you climb onto the raised wall or ledge, then shoot from above. A Small Medi Pack is on the structure’s upper section.
- Defeat or bypass the four opening wolves.
- Reach the large pool courtyard.
- Collect the Small Medi Pack near the greenery.
- Deal with the bear beside the pool and collect the pack above it if desired.
Use both underwater switches
Dive into the central pool and follow the underwater tunnel to the T-junction. Take the right branch first. In the pillar room, swim to the far-right corner and pull the underwater switch. This opens the trapdoor directly above it. Surface, but before leaving, swim back down and pull the second switch on the opposite side of the room. That switch opens a separate door used for the second secret.
Climb through the opened trapdoor, take the Small Medi Pack, and use the wall switch to open the door back to the pool area. Return to the pool, dive again, and take the left branch at the T-junction. Surface in the room reached by the second underwater switch, then collect the Small Medi Pack and Magnum Clips. This is optional, but the route confirms both switches were activated.
- Pull the two underwater switches in the pillar room.
- Use the opened trapdoor to return to the pool area.
- Collect the Small Medi Pack and Magnum Clips in the optional underwater-access room.
Reach the Silver Key and Gold Idol
From the pool area, find the wall switch near the wooden trough and use it to open the route up the stairs. Make the running jump across the gap into the opposite opening. Cross the breakaway floor quickly and jump toward the alcove containing the Large Medi Pack. If the jump fails, pull the movable block into the room, climb onto it, and use it to reach the pack instead.
Push the block through the passage until the adjoining room is accessible. Kill the bat, then take the Silver Key from one rear alcove and the Gold Idol from the other. Climb back onto the block and reach the upper ledge. Deal with the bats and collect the Large Medi Pack in the dark corner if you want the extra healing. A PlayStation Save Crystal is located in this upper section; use it before returning to the pool district.
- Cross the breakaway-floor room.
- Push the movable block through the passage.
- Collect the Silver Key.
- Collect the Gold Idol.
- Use the first PlayStation Save Crystal if desired.
Use the Silver Key and open the three doors
Return to the pool district and enter the passage framed by two stone idols. Use the Silver Key at the keyhole. Run or walk through the dart trap without stopping in the firing lanes. Draw the pistols before entering the next area, where several wolves attack. Keep moving forward rather than retreating into the darts, and clear the wolves around the red-roofed building.
Enter the left door first. Climb through the pool room using the ledges, stairs, and jumps until you reach the switch room. Pull the switch, collect the Small Medi Pack, and drop carefully through the side route to the lower area. The switch opens the right door.
Enter the right door and climb around the pool and ledges. Avoid the breakaway tiles where possible by using the solid ledges and standing jumps. Reach the upper switch room, kill the bat, and pull the switch to open the middle door. A second PlayStation Save Crystal is available near this upper section. The required order is left door, right door, then middle door.
- Use the Silver Key at the locked entrance.
- Pass the dart trap and clear the wolves.
- Activate the switch behind the left door.
- Activate the switch behind the right door.
- Use the second Save Crystal if desired.
Cross the blades and reach the final pool
Enter the middle door and proceed through the corridor containing three swinging blades. Watch their movement and run through each opening during a safe gap. At the end, pull the switch. The floor opens and drops Lara into a pool.
Swim forward and slightly to the right through the underwater passage. At the first place where Lara can surface, do not climb out; continue through the opening to the next exit. Climb the stairs, use the switch, and step onto the balcony overlooking the final pool. A bear is below. Shoot it from the balcony while it remains out of reach, then drop down after it is defeated.
There is another switch in the lower area. It stops the swinging blades behind Lara, but it is not required for the level’s main progression. Use it if you want the blades disabled before exploring the optional secret.
- Pass all three swinging blades.
- Pull the switch and enter the pool.
- Take the correct underwater passage to the balcony.
- Defeat or bypass the final bear.
Collect the last secret and exit to Lost Valley
From the balcony area, climb toward the upper level and locate the passage leading down into the recessed side area. Follow it to the bottom and collect the Uzi Clips, which are the third secret. Climb back out and return to the lower pool area. If you skipped the secret, simply return directly to the Gold Idol receptacle.
Place the Gold Idol in the receptacle beside the gate. The door opens into the passage to the Lost Valley. Walk through the opened doorway to complete City of Vilcabamba and trigger the transition to the next level.
- Optional: collect the Uzi Clips secret.
- Place the Gold Idol at the final receptacle.
- Walk through the opened exit and confirm the Lost Valley transition.
Before you move on
- Lara has collected both the Silver Key and Gold Idol.
- The left, right, and middle doors in the red-roofed building have been opened in that order.
- Lara has passed the swinging-blade corridor and reached the final pool.
- The Gold Idol has been placed at the final gate.
- Lara has walked through the opened doorway and the game has transitioned to Lost Valley.
References for this chapter
- Tomb Raider (1996) — Level 2: City of Vilcabamba (Classic), Stella’s Tomb Raider Site
- Tomb Raider Walkthrough and Game Guide — Peru, Level 2: City of Vilcabamba, Tomb Raider Chronicles
- Level 02 — City of Vilcabama, Tomb Raider Walkthrough and Guide, GameFAQs
- Tomb Raider 1 Walkthrough — City of Vilcabamba, Tomb Raider Vault
Peru — The Lost Valley (Level 3)
Cross the dinosaur-haunted valley, collect the three machine cogs, repair the water-diversion mechanism, and use the newly opened passage behind the waterfall to enter the Tomb of Qualopec. The PlayStation version has three Save Crystals in this level. The shotgun is normally collected after the machine is repaired, although an optional early route can reach it before the main objective is complete.
Enter the valley and deal with the opening animals
Follow the passage from the level entrance until it opens above a stream. Drop into the water and let the current carry Lara over the falls into the lower pool. Climb out on the small ledge beside the pool. From this position, Lara can shoot the wolves below while they have difficulty reaching her. You can also descend the stepped rocks and fight them from the lower ground, but the elevated position is safer.
Continue through the rocky passage and climb the tall rocks to reach the main valley. A large medi-pack rests near a skeleton on the upper route. After collecting it, descend toward the open valley with weapons ready. Raptors appear when Lara reaches the lower ground. Back away while firing, using the broad space and nearby slopes to prevent them from getting close enough to trap her.
- Reach the main valley and identify the stream, the waterfalls, and the broken bridge.
- Collect the large medi-pack near the skeleton if you need the health reserve.
- Clear or evade the raptors before attempting the cog routes.
Handle the Tyrannosaurus rex encounter
As Lara advances along the valley, the Tyrannosaurus rex appears. It is not necessary to kill it to finish the level. If you prefer to avoid the fight, run into the small cave opening in the cliff near the waterfall and move farther inside; the entrance itself is not always safe, because the dinosaur can reach partway into it. From the deeper position, continue through the passage and use the higher opening to move around the valley.
If you choose to defeat the Tyrannosaurus, remain in the protected opening and fire when it enters range. Keep Lara away from the mouth of the cave, because the dinosaur can still damage her there. The broken bridge also provides a high position from which the creature can be attacked, but do not sacrifice the bridge route or fall into the valley while trying to reposition.
- Choose whether to bypass or defeat the Tyrannosaurus rex.
- Move beyond the cave entrance before treating it as a safe position.
- Keep the raptors and dinosaur away from narrow ledges and dead ends.
Collect the first cog in the temple
After the dinosaur encounter, go to the building at the far end of the valley. Enter the temple-like structure and use the pool on the right side. Dive down and follow the underwater passage to its end, where the first machine cog rests. Return through the same passage and climb out of the water.
A Save Crystal is inside or near this temple route on the PlayStation version. Use it after collecting the first cog if you want a safe restart before the bridge and climbing sections. From the temple, return to the valley rather than trying to force a route through the current.
- Enter the temple building at the far end of the valley.
- Dive on the right side of the pool and collect machine cog one.
- Return to dry ground and use the nearby Save Crystal if desired.
Cross the broken bridge for the second cog
Leave the temple and look for the lit opening in the valley wall. Climb the low rocks into this opening and follow the passage until it reaches the broken wooden bridge. A PlayStation Save Crystal is placed along this route. The missing section of bridge requires a running jump with a grab: stand back far enough for a full run-up, jump across the gap, and hold the Action button to catch the opposite side. Pull up and collect the second machine cog on the far platform.
Return across the bridge using the same controlled jump. If the landing is awkward, avoid rushing into the gap; realign Lara squarely with the opposite platform and use the full length of the bridge for the run-up. After returning to the valley floor, head toward the waterfall and the cave route used for the third cog.
- Find the lit opening leading to the broken bridge.
- Cross with a running jump and grab.
- Collect machine cog two and return safely to the valley.
Reach the third cog above the waterfall
Near the waterfall, find the cave opening in the rock wall. Proceed carefully because another raptor waits on the lower part of this route. You can shoot it from a higher ledge before dropping down. Continue through the doorway and follow the passage to the waterfall area.
Climb the stone blocks beside the waterfall until you reach the high alcove containing the third machine cog. The climb is a sequence of short pulls and jumps, so stop on each stable ledge and use the Look function to check the next landing. Once the cog is collected, drop through the safe route into the pool below and swim through the underwater passage to return to the valley near the double waterfall. There are no further required enemy encounters after this route.
- Enter the cave near the waterfall and deal with the waiting raptor.
- Climb to the upper alcove and collect machine cog three.
- Swim back through the passage and return to the valley.
Return to the machine and repair the water route
With all three cogs collected, return to the south end of the valley, where Lara entered the open area. Climb back through the rocks and follow the sequence of ledges over the stream. The route requires several jumps between the banks and raised platforms. Use a running jump for the longer gaps, and use a standing jump with a grab where the opposite ledge is higher. If Lara repeatedly strikes the ceiling during one of the jumps, reposition toward the left side of the platform and lower the jump arc by holding Action as needed.
Follow the passage to the wooden bridge and the cog mechanism. A Save Crystal is located near this final approach on the PlayStation version. Cross the bridge and place all three machine cogs into the empty positions on the mechanism. Pull the switch beside it. The machine redirects the stream through a previously dry tunnel and removes the water from the route behind the waterfall.
- Return to the machine at the upper stream.
- Install all three machine cogs.
- Pull the switch and confirm that the water has been diverted.
- Use the final nearby Save Crystal before entering the newly opened route.
Collect the shotgun and enter the Tomb of Qualopec
After activating the machine, enter the redirected-water route. Before completing the level, drop or climb toward the side alcove near the mechanism if you want the large medi-pack secret. Continue into the newly opened tunnel and surface in the next chamber. A walkway beside the water leads to the shotgun resting near a skeleton. This is the normal permanent shotgun pickup for the level; the earlier shotgun route is optional and is not required for progression.
Continue through the long underwater passage. Take a full breath before entering, then swim until the chamber with an opening above the water. Surface there and climb out for the optional ammunition and small medi-pack. From the upper opening, drop carefully into the now-dry streambed. Move past the slope and jump into the pool below. Turn around and locate the opening that was previously hidden behind the waterfall.
Climb into the opening and follow the passage. The door opens as Lara approaches. Continue through it to trigger the transition into the Tomb of Qualopec. The Lost Valley is complete when the next level begins.
- Enter the redirected-water tunnel after repairing the machine.
- Collect the shotgun from the walkway near the skeleton if desired.
- Pass through the long underwater route and reach the chamber above the dry streambed.
- Enter the passage behind the drained waterfall and trigger the Tomb of Qualopec transition.
Before you move on
- Three machine cogs have been collected and installed in the mechanism.
- The switch has been pulled and the river has been diverted, leaving the waterfall route dry.
- Lara has passed through the long underwater route and reached the opening behind the waterfall.
- The game has transitioned to the Tomb of Qualopec level.
References for this chapter
Peru — Tomb of Qualopec (Level 4)
Open the three gates blocking the tomb, reach Qualopec’s chamber and take the Scion fragment. The collapse sequence sends Lara back through the entrance route, after which she must cross the lake and confront Larson. On the original PlayStation version, three Save Crystals are available: one in the raptor room, one after the three gates and one on the return passage near the lake.
Trigger the boulder and open the first route
Follow the passage from the Lost Valley waterfall into the large chamber. The left doorway is blocked by three gates, while the sloped passage straight ahead leads toward the tomb. Walk several steps up the slope to trigger the boulder, then turn around and run back down. Move to either side at the bottom so the boulder passes safely. Do not try to outrun it up the slope.
Return to the chamber and pull the wall switch beside the passage where the boulder rolled. The nearby animal-decorated doorway opens and two raptors charge out. Keep backing toward the larger room while firing. The pistols are sufficient, but the shotgun is useful if you already have it. Enter the raptor room after the fight and use the Save Crystal there.
- Trigger the boulder and avoid it at the bottom of the slope.
- Pull the switch beside the boulder passage.
- Defeat both raptors and use the first Save Crystal.
Open the face-marked gate
From the raptor room, follow the hallway to the four-way intersection. The doors are identified by the pictures above them: face, bird and sun. Take the face-marked route first if you want the simplest order.
In the face room, find the movable block set into the wall. Push it twice, then push the second block to the left once. This exposes the passage to the switch. Run across the breakaway tiles without stopping and pull the switch on the far side. The tiles conceal spikes, so do not pause in the middle. Return to the intersection by jumping over the spike pit from its edge.
- Use the face-marked doorway at the four-way intersection.
- Push the two blocks into the positions that reveal the switch.
- Cross the breakaway floor and activate the first gate switch.
Complete the sun-marked route
Take the sun-marked doorway. At the alcove with the breakaway floor, the wall switch is a decoy; leave it alone. Step onto the floor and immediately hop back so it collapses, then drop into the room below. Three wolves attack, so draw the pistols before dropping or land and move away from the opening while firing.
After the wolves are dead, climb the ramps and locate the movable block in the middle of the wall. Pull it once, then go around to either side and push it aside to reveal the passage behind it. Climb the stairs. A small medipack is in a hole partway up. Continue to the upper switch and pull it to open the second gate. Collect the nearby small medipack, then drop through the opening opposite the switch and return to the four-way intersection.
- Ignore the decoy switch in the sun route.
- Defeat the three wolves below the collapsing floor.
- Move the wall block and activate the second gate switch.
Solve the bird-block route
Enter the bird-marked doorway. In the switch room, leave the switch alone at first and enter the adjacent room containing two tall bird blocks and spikes. Climb the stairs onto bird block 1, then jump and grab the opening above it. Follow the upper passage, drop down twice and descend to bird block 2. A side passage opens as you move through this section.
From bird block 2, jump and grab the upper opening and pull the switch. This moves bird block 1 closer to the spikes. Return to the switch room by the upper route and now pull the switch you left untouched. This moves bird block 2 into its required position.
Use the opened route to reach the raised block. Jump from it to bird block 1, then make the final running jump across the spikes to the doorway. Pull the switch inside to open the third and last gate. Return to the room with the unused switch, deal with the raptor in the passage beyond and go back to the four-way intersection.
- Leave the first bird-room switch untouched until the upper route is completed.
- Use the two bird-block mechanisms to align the crossing.
- Pull the final switch beyond the spike jump.
Pass the three gates and optional secrets
Return to the large entrance chamber and go through the passage now cleared by all three raised gates. A Save Crystal is available on the console version before the dart corridor; use it. Run through the dart traps in committed jumps or short runs. Do not stand directly in front of an emitter.
Before climbing farther, an optional alcove beside the stairs opens when Lara climbs into the statue recess. Cross the breakaway tiles to collect the shotgun shells. If the shotgun was not collected in The Lost Valley, this pickup provides it. A second optional secret contains magnum clips below the ledge near the spikes. Reach it by dropping and grabbing the edge, shimmying across and walking through the spikes; skip it if health is low.
- Use the second Save Crystal before the dart corridor.
- Cross the darts without lingering in an emitter’s line.
- Treat the shotgun and magnum ammunition secrets as optional.
Take the Scion and escape the collapse
Continue up the stairs to Qualopec’s tomb. The mummy beside the pedestal does not attack Lara and is not required to be killed. Walk to the pedestal and take the Scion fragment. The ceiling begins to collapse immediately.
Run toward the gate on the east side of the chamber; it opens as Lara approaches. Continue down the ramp, cross the large entrance room and enter the opposite passage. When the boulder is encountered again, sidestep around it rather than stopping in front of it. Follow the passage toward the lake. A third Save Crystal is located in this return passage on the PlayStation version.
- Reach the Scion pedestal without wasting health on the harmless mummy.
- Collect the Scion fragment and immediately run for the east gate.
- Use the third Save Crystal on the return passage if it is still available.
Cross the lake and confront Larson
At the lake, Larson is visible across the water. Lara can shoot him from the cave opening, but the optional pickup route begins by swimming. Dive down and look to the right for the underwater tunnel. Follow it to the small air pocket, surface and collect the large medipack and magnum clips. This is the third secret.
Return through the tunnel and swim to the opposite side of the lake. Climb out with the pistols drawn. Keep moving sideways in the open area while firing at Larson, and avoid backing against the shoreline or standing still in front of him. If Lara takes heavy damage, retreat toward the cave opening and use a medipack before continuing.
When Larson is brought down, the confrontation changes to the story cutscene: Lara knocks him out after he reaches for his pistol. The scene explains that Pierre DuPont is searching for another Scion fragment. Allow the scene to finish so the game loads St. Francis’ Folly.
- Use the underwater tunnel only if you want the optional large medipack and magnum clips.
- Cross the lake and bring Larson down while maintaining space.
- Let the concluding cutscene finish and confirm the transition to Greece.
Before you move on
- The three gates in the entrance passage have been raised.
- Lara has taken the Scion fragment from Qualopec’s pedestal and survived the collapse route.
- Larson has been brought down at the lake and the concluding cutscene has played.
- The next level, St. Francis’ Folly, has loaded, confirming completion of Tomb of Qualopec.
Greece — St. Francis' Folly (Level 5)
St. Francis' Folly is a tall monastery built around a six-story chamber. First open the route into the main chamber, then use four switches to open the Atlas, Neptune, Thor and Damocles rooms. Each room contains one key. Install all four keys in the exit door on the ground floor to reach the Colosseum. On the original PlayStation version, Save Crystals are the important recovery points, so use them before committing to the most dangerous rooms.
1. Clear the entrance courtyard and open the inner door
Draw the pistols as soon as the level begins. Two lions charge through the entrance courtyard. You can fight while moving backward, but the safer method is to climb onto either low square platform beside the entrance and shoot from there. This gives Lara room to aim without being surrounded.
Cross the courtyard and locate the movable block in the groove. Push it toward the gorilla and switch room until it reaches the position needed for the later climb. Do not leave it in the middle of the courtyard. Push it onto the first omega-marked position, then continue pushing it toward the second marked position and finally toward the taller blocks on the left. The block must remain available as a step for the upper route.
Enter the opened room with weapons ready. Two gorillas are inside. If the entrance closes after Lara steps on the pressure pad, use the switch on the stairs to reopen it after the enemies are dealt with. Pull the lower switch to open the high doorway across the courtyard. A gorilla may be waiting on the upper landing, so check the landing before attempting the next climb.
- Both entrance lions are dead or safely bypassed.
- The movable block has been pushed toward the tall blocks near the later climbing route.
- The gorillas in the first room are no longer blocking the switches.
- The lower switch has opened the high doorway across the courtyard.
2. Reach the drained passage and the main chamber
Return to the block courtyard and climb the movable block. Jump to the taller block, pull up, and make the running jumps across the pillars and ledges toward the high doorway. Use L1 to recenter the view before each jump. Hold R1 when approaching an edge so Lara walks rather than accidentally running off.
Follow the passage until Lara begins sliding. A secret route can be collected here, but it is optional. At the bottom, deal with the crocodile from a ledge if possible. If it reaches the water, lure it toward the edge, pull up, and shoot from safety, or use the shotgun if necessary.
Dive into the water and swim through the tunnel to the opening beneath the switch room. Surface in the ceiling opening to collect the available ammunition if desired, then swim to the switch. Pulling it drains the lower room and opens the gates. Follow the dry passage, climb the stairs, and use the PlayStation Save Crystal at the top before entering the tall chamber.
- The crocodile is dead or no longer blocking the passage.
- The water-control switch has been pulled.
- The lower room is drained and its gates are open.
- The first Save Crystal in the tall chamber has been used.
3. Understand the main chamber and activate its four switches
The main chamber has six levels. The switch and door positions are easy to confuse, so use this layout: the ground floor contains the Atlas switch and the level exit; the first level contains the Neptune switch and Damocles door; the second level contains the Thor door; the third level contains the Damocles switch and Atlas door; the fourth level contains the Thor switch; and the fifth level contains the Neptune door.
Make the running jump to the central structure and kill the bats. Pull the Thor switch on the fourth level. Then descend carefully and pull the Atlas switch on the ground floor. Climb back through the central structure to reach the Neptune switch on the first level, then reach the Damocles switch on the third level. The switches can be handled in another order, but this route keeps the chamber easier to read.
There is an optional secret opened by stepping on a gray pressure tile near the Thor switch. The door below is timed, and reaching it requires controlled drops through several levels. Attempt it only after using the nearby Save Crystal and confirming that Lara has enough health for the falls. The secret is not needed for the level exit.
- Thor switch activated.
- Atlas switch activated.
- Neptune switch activated.
- Damocles switch activated.
- The four corresponding doors are open.
4. Take the Neptune and Atlas keys
Reach the Neptune door at the top of the chamber and enter the pool. The current carries Lara downward. At the lower passage, turn into the opening on the left and pull the underwater lever. This stops the current and opens the gate. Swim through, take the Neptune Key, and return to the surface using the vertical route. Do not linger underwater; the lever must be pulled before attempting the gate and key.
After leaving Neptune, use the Save Crystal on the way down if you have not already done so. Reach the Atlas door on the lower level and kill the gorilla inside. Step on the omega-marked pressure pad to open the gate, then go through it. When Lara reaches the boulder trigger, immediately backflip or roll backward toward the pit, drop into the pit, and hold forward against the near wall. The boulder passes over Lara instead of crushing her.
Once the boulder stops and the gate opens, collect the small medi-pack if needed. Climb back up, use the left-hand alcove and ledges, and take the Atlas Key. Reverse the route to return to the main chamber.
- Neptune Key collected.
- Atlas Key collected.
- The Atlas boulder trap has been passed.
- Lara has returned to the central chamber.
5. Take the Thor Key
Enter the Thor door on the second level. The first room contains lightning strikes and gray floor tiles. Do not assume the ordinary tiles are completely safe. Move promptly toward the right-hand side, line up with the safe landing area, and perform a diving roll across the dangerous tile by holding R1 and pressing Circle plus Up. This is the original PlayStation control combination for the roll used to cross the room.
In the hammer room, step on the omega pressure pad until the cracking sound indicates that the hammer has fallen. Move away before it strikes Lara. The impact drops movable stone blocks into the room. Push the first block toward the right-hand ledge, climb up, and reposition the second block along the ledge so it can be used as a step.
Climb through the upper route, collect the small medi-pack if desired, and make the running jump to the opposite ledge. Enter the alcove and take the Thor Key. Return through the hammer room and repeat the diving roll across the lightning room. If Lara is badly injured, reload the last Save Crystal before trying the return crossing.
- The lightning room has been crossed in both directions.
- The hammer has been triggered without crushing Lara.
- Thor Key collected.
- Lara has returned to the main chamber.
6. Take the Damocles Key and handle Pierre
Enter the Damocles door from the lower central levels. The swords hanging from the ceiling are harmless while Lara approaches the inner chamber. Continue through the room, take the Damocles Key, and collect the nearby supplies if desired.
The swords activate after Lara takes the key. Walk out one careful step at a time. Stop after each step and allow Lara to come fully to rest before moving again. Do not sprint and do not rely entirely on the sword shadows, because the blades may not fall exactly where their shadows suggest. If Lara is struck, reload the Save Crystal rather than trying to force the rest of the room with low health.
After leaving Damocles, Pierre may be active on the ground floor. He is not a conventional boss. Keep to the ledges when possible, use the central pillars and doorways as cover, and fire the pistols while moving. He can be driven off or defeated during this later encounter; conserve shotgun ammunition unless the fight becomes unsafe. Two lions may also be roaming below, so avoid dropping to the ground until you have a clear route.
- Damocles Key collected.
- The active sword section has been crossed safely.
- Pierre has been driven away or defeated.
- All four keys are in Lara's inventory.
7. Use the four keys and leave St. Francis' Folly
Return to the ground floor and locate the exit door beside the Atlas switch. Use the four keyholes in the door: Neptune, Atlas, Damocles and Thor. The keys are required for progress; secrets, spare ammunition and extra medi-packs are optional.
Go through the opened passage and continue forward until the level ends and the next level, Colosseum, begins. The original PlayStation version relies on Save Crystals rather than the PC-style ability to save anywhere. There is no need to wait for a claimed end-of-level completed-list save prompt. If you want a safe recovery point before proceeding, use the final available Save Crystal before the exit, then enter the door.
If Lara dies during a later attempt, reload the most recent Crystal and repeat only the rooms after that point. The most valuable Crystal locations are around the main chamber, after the early switch section, after Neptune, before the later combat, and near the end of the key sequence.
- Neptune, Atlas, Damocles and Thor keys have been inserted into the exit door.
- The exit door opens.
- Lara enters the passage to Colosseum.
- The Colosseum level begins.
Before you move on
- Lara's inventory contains the Neptune, Atlas, Thor and Damocles keys.
- The four keys have been placed in the ground-floor exit door.
- The exit passage opens and Lara leaves St. Francis' Folly.
- Colosseum begins as the next level.
References for this chapter
- Tomb Raider (1996) — Level 5: St. Francis' Folly, Stella's Classic Walkthrough
- Tomb Raider 1 Walkthrough — St. Francis' Folly, Tomb Raider Vault
- Level 05 — St. Francis' Folly, Tomb Raider Walkthrough and Guide, GameFAQs
- Tomb Raider Walkthrough and Game Guide — Greece, Level 5: St. Francis' Folly
- Tomb Raider PlayStation Game Manual
Greece — Colosseum (Level 6)
Cross the flooded approach, enter the Colosseum through the crocodile pit, operate the prison and timed-gate switches, reach the emperor's balcony, collect the Rusty Key, and use it to open the final underwater route to Palace Midas. The original PlayStation version contains four Save Crystals and three optional secrets. The Colosseum does not contain the Thor, Neptune, Damocles, or Atlas key rooms; those belong to St. Francis' Folly.
Cross the flooded approach and reach the cave
The level begins at a pool beneath the Colosseum exterior. Before entering the water, draw Lara's pistols and kill the crocodile from the edge. Then swim across and climb out near the building. A lion attacks outside the pool, and another waits around the left side of the building. Defeat both before beginning the climbing route.
On the left side of the building, climb the blocks to the second-level ledge. Follow it around the front and collect the Large Medi-pack if you need it. Return to the climbing point, use the low block to reach the higher ledge, and follow the exterior path across the gap toward the sloping rocks.
- Kill the crocodile before swimming across.
- Defeat the two lions around the exterior.
- Collect the Large Medi-pack if needed.
Collect the first two secrets and enter the arena
Before dropping into the cave opening beside the sloping rocks, take the optional first secret. From the flat ledge among the slopes, make a running jump to the small platform, then make the diagonal running jump over the slope to the stable slanted platform. Jump into the alcove for Shotgun Shells. If Lara slides down, regain the exterior ledges and repeat the route.
Drop into the cave and kill the two crocodiles in the lower pit from above before collecting the Small Medi-pack. Climb back toward the wall crack and shimmy across it. When the crack widens, pull up into the alcove for the second secret and more Shotgun Shells. Return to the crack, continue to the far side, and drop through the opening into the Colosseum hallway.
The nearby switch opens a return gate but is optional for progression and causes another lion to appear. Go up the steps into the arena instead. Pierre attacks from the left. You cannot kill him here, so use the steps and nearby cover, fire pistols until he withdraws, and avoid standing in the open.
- Take the first two secrets only if you want the extra ammunition.
- Use the crack above the crocodile pit to cross safely.
- Do not waste heavy ammunition trying to kill Pierre.
Open the arena route through the prison room
Clear the two lions and the gorilla in the arena, preferably from the entrance steps or another elevated position. Drop into the arena and head toward the corner opening near the rock formations. Slide down into the prison room and defeat the two lions that emerge from the cells.
Pull the first switch in the prison room to open the gate elsewhere in the arena. Turn around and pull the second switch to open the way back through the Save Crystal pit. In the PlayStation version, use this Save Crystal if you want a checkpoint before the next combat and timed sequence.
Return to the arena and deal with the three lions near the opened route. Then cross toward the opposite corner and kill the additional lion near the rock pillars. Enter the next room, where two timed gates block the switches.
- Operate both prison-room switches.
- Use the Save Crystal in the arena pit if you want a safe retry point.
- Clear the lions before attempting the timed gates.
Complete the timed-gate sequence and reach the booth
In the timed-gate room, climb the steps on the right and stand on the gray pressure tile. The gates open temporarily. First enter the right-hand room to collect the Small Medi-pack, then return to the pressure tile.
For the required run, step on the pressure tile again and immediately cross through the left gate. Pull the switch inside, roll out, and enter the right-hand room through its newly opened gate. Pull the second switch, then return through the timed passage and use the exit door. Follow the passage to the spiked pit room and use the PlayStation Save Crystal there if desired.
Climb the stone blocks out of the spiked pit area and return to the arena rock formations. A Shotgun Shell pickup is available on the rocks. From the extended ledge, make a running jump to the rock structure, then jump and grab the ledge leading to the booth above the arena.
- Use the pressure tile to open both timed gates.
- Pull both switches inside the timed rooms.
- Save in the spiked pit room before continuing if you want to protect the ammunition gained later.
Open the northwest and southwest corners
Two gorillas occupy the booth area. Kill them before moving near the ledges. Pull the movable block on the left wall twice to reveal a switch and a Small Medi-pack. Pull the switch to open the northwest corner door, then return to the arena and climb into that corner room.
Two bats attack in the northwest room. Enter the corridor and approach the boulder trap. When the boulder starts rolling, either jump and grab the lower edge of the ramp or drop into the pit so it passes overhead. Climb up after it has gone and pull the switch at the top. This opens the southwest corner door.
Return toward the arena walkway. Pierre and a lion appear near the route, so keep to the higher walkway, kill the lion, and use pistol fire to make Pierre retreat. Enter the southwest room and defeat the two bats. The third secret is above the pillars: stand on the pressure tile beneath the taller pillar and use the nearby blocks and side jumps to reach the temporarily opened door. The room contains two Large Medi-packs, Uzi Clips, and Magnums. Leave the secret room and pull the switch on the upper ledge to open the southeast route.
- Pull the booth switch.
- Survive the northwest boulder trap.
- Use the southwest pressure tile only if attempting the third secret.
- Drive Pierre away rather than trying to defeat him.
Collect the Rusty Key
Enter the southeast corner and climb through the opening to the switch. Pull it to open the door in the booth area. Drop into the water and swim through the tunnel. Climb out, collect the Small Medi-pack, and push the movable block twice into the next room.
Go around to the block's side and pull it once. This exposes the Rusty Key. Pick it up and return through the underwater tunnel to the arena. A gorilla may still be present, so shoot it from above before crossing the open floor.
Return to the booth by repeating the route through the arena rock formations, timed-gate room, spiked pit passage, and stone blocks. The PlayStation version has another Save Crystal in or near the booth route; use it before the final water section if it remains available.
- Pull the southeast switch.
- Collect the Rusty Key behind the movable block.
- Return to the booth with the key.
Use the Rusty Key and finish the level
From the booth, go down the steps past the column and locate the locked gate. Use the Rusty Key to open it. Drop into the water and swim through the tunnel, but climb out through the opening in the ceiling as soon as possible when the crocodile enters the passage. From the dry ledge, kill the crocodile if you can safely line up the shot.
Use the switch in the upper chamber to open the underwater gate. Jump back into the water, swim through the opened gate, and let the current carry Lara to the end of the level. Palace Midas loads next, confirming that the Colosseum is complete. The three secrets and their ammunition are optional and are not required for the level transition.
- Open the locked gate with the Rusty Key.
- Pull the final underwater-route switch.
- Swim through the opened gate and confirm that Palace Midas loads.
Before you move on
- Lara has collected the Rusty Key from behind the movable block in the southeast water route.
- The Rusty Key has opened the locked booth-area gate.
- The final underwater switch has opened the exit gate.
- Lara has swum through the exit current and Palace Midas has loaded next.
Greece — Palace Midas (Level 7)
Use the five-switch chamber to open three puzzle rooms and collect three Lead Bars. Turn all three into Gold at Midas’s statue, then use the final switch combination to reach the exit room and place the Gold Bars in its three receptacles. The original PlayStation version includes Save Crystals throughout the level, so use them before the timed burner crossing and after the major Lead Bar routes.
1. Reach the five-switch chamber
Swim forward from the level entrance until Lara surfaces in the large pool decorated with dolphin imagery. Climb out and draw a weapon before taking the passage on the side with the underwater entrance gate. A crocodile waits in the hallway near the stairs. Kill it, then return to the stairway and climb to the upper passage.
If you want nearby supplies before beginning the main puzzle route, take the passage near the stairway into the large room with several alcoves. Two lions emerge from the alcoves, and bats occupy the darker end of the room. Fight from the entrance or from a low block where the lions cannot reach Lara. Continue through the rear alcove for additional ammunition, then return to the stairway.
At the top, enter the large room containing five levers and several symbol-marked doors. Treat this as the level hub. Leave weapons holstered whenever a jump requires Lara to grab a ledge, because the drawn-weapon stance prevents ledge grabs. The original PlayStation release places Save Crystals along the routes, including one near the first burner challenge.
- Use the pool, stairway and five-switch room as navigation landmarks.
- Clear the crocodile before committing to the upper route.
- Save before attempting the burner-pillar crossing.
2. Collect Lead Bar 1 from the burner pillars
From left to right, set the five levers to Down, Up, Up, Up, Up. Enter the opened room and descend to the pool to kill the rats before starting the platform sequence. Return to the upper ledge and locate the tile marked by the brown line. Stepping beyond it switches off the burners and starts the timed crossing.
Line Lara up before crossing the trigger point. Run and jump across the first three pillars, keeping the jump input held so she continues jumping. Use directional adjustments in midair to land centrally. At the final pillar, jump toward the far ledge and hold the grab control so Lara catches the edge. Pull up, move past the burner and collect the Lead Bar.
If Lara falls into the water, climb out using the steps and retry from the Save Crystal. On the return trip, a gorilla is active in the route back to the switch chamber, so keep your weapon ready after leaving the burner room. Use the Save Crystal on the far side before returning if you want a safer checkpoint.
- Switch pattern: Down, Up, Up, Up, Up.
- Collect the first Lead Bar beyond the burner pillars.
- Prepare the first jump before crossing the brown-line trigger.
3. Collect Lead Bar 2 from the collapsed-ceiling room
Return to the five levers and set them to Up, Up, Down, Down, Up. This opens the room with the tall central pillar. Go through the doorway, pass through the spike area and enter the ground-level opening on the right. Descend the steps and pull the movable block once. The ceiling collapses, creating the sloped and broken-pillar route needed to climb higher.
Return up the steps and follow the newly available ledges. Use the slopes to reach the broken central pillar, then jump across the platforms and ledges toward the opening above the room. Continue to the aqueduct area and save at the PlayStation Save Crystal if available.
From the aqueduct, deal with the gorillas and bats from a secure ledge before crossing. Jump to the aqueduct and eliminate the crocodiles in the water. Swim through the underwater tunnel, climb out and follow the rocky route upward. Jump across the sloped surfaces to reach the roof of the building, where the second Lead Bar waits. After collecting it, defeat or bypass the enemies below and use the switch in the building to open the garden gate. Save near the garden if you want a checkpoint before the next route.
- Switch pattern: Up, Up, Down, Down, Up.
- Pull the movable block before attempting the upper route.
- The second Lead Bar is on the building roof after the aqueduct and underwater tunnel.
4. Collect Lead Bar 3 from the spikes room
Return to the five-switch chamber and set the levers to Up, Up, Down, Up, Down. This opens the room with the spike floor and movable block. Walk carefully through the initial spikes and enter the opening on the right. Pull the block twice to reveal a passage and a wall switch.
Operate the switch to raise the pillars in the spike room. Return up the ramp and climb the steps to the upper opening overlooking the hazards. Jump to the first raised pillar, then use running jumps across the sequence. At the final pillar, make the jump toward the opening and grab the edge. A gorilla attacks when Lara reaches the opening, so retreat to the pillar if necessary and kill it from a safer position.
Re-enter the opening and collect the third Lead Bar. Jump back to the pillar and leave through the route without spikes. Do not confuse this room with the garden route: the garden was opened from the second Lead Bar area and is visited separately before the Midas statue.
- Switch pattern: Up, Up, Down, Up, Down.
- Pull the movable block twice and use the revealed switch.
- Collect the third Lead Bar from the upper opening.
5. Use the garden and turn the Lead Bars into Gold
Return to the pool room and take the passage leading into the garden. Gorillas attack near the entrance, so keep moving backward while firing. Find the wall switch concealed among the plants and use it to open the garden gate containing an optional secret. The passage has two jaw traps with a crumbling floor between them. Wait for the jaws to open, then jump through; collect the optional supplies and repeat the timing to leave.
From the garden, climb onto the roof of the structure and locate the opening leading to Midas’s statue. A Save Crystal is positioned nearby on the PlayStation version. Save before approaching the statue. Touching the hand kills Lara, so do not jump onto it.
Stand beside the hand and use each Lead Bar from the inventory. Repeat the interaction three times, once for each bar, until all three have become Gold Bars. Leave the statue room, return through the garden and go back to the five-switch chamber.
- Find the garden switch among the plants if you want the optional secret.
- Do not jump onto Midas’s hand.
- Convert all three Lead Bars into Gold Bars.
6. Open the exit and finish Palace Midas
Set the five levers to Down, Up, Up, Up, Down. Enter the newly opened room with a weapon ready because a lion charges inside. Defeat it, then climb the stairs. The small balcony contains optional shotgun shells and a PlayStation Save Crystal.
Return to the lower part of the room and enter the doorway with the three wall receptacles. Stand at each receptacle and use one Gold Bar. Install all three bars. When the final bar is accepted, the exit opens.
Go through the opened doorway and slide down the ramp. Lara finishes Palace Midas and enters The Cistern. If the door remains closed, verify that all three bars were converted at Midas’s hand and that each of the three receptacles has received a Gold Bar.
- Final switch pattern: Down, Up, Up, Up, Down.
- Place one Gold Bar in each of the three receptacles.
- Slide down the opened exit ramp into The Cistern.
Before you move on
- Lara has collected three Lead Bars from the burner, collapsed-ceiling and spikes rooms.
- All three Lead Bars have been converted into Gold Bars at Midas’s statue.
- The three Gold Bars are installed in the receptacles in the final room.
- The exit door opens and Lara slides down the ramp into The Cistern.
Greece — The Cistern (Level 8)
The Cistern is a large flooded complex built around two Rusty Keys, two Silver Keys, and one Gold Key. Complete the first dry-room routes before raising the water. Then use the flooded passages to obtain the second Silver Key and Gold Key, unlock the final rooms, and descend the exit shaft into Tomb of Tihocan. The original PlayStation version contains Save Crystals, including one in the second-Silver-Key area and another near the final Silver-Key doors.
Open the starting route and reach the main cistern
Safety-drop from the starting ledge into the room below and kill the rat. Push the movable block once into the adjoining room. Go around to its side and push it beneath the wall switch. Climb onto the block and pull the switch. This opens the nearby trapdoor and the silver-colored door, releasing two more rats. Shoot them from above before dropping down, then collect the large Medi Pack through the opened door if you want the extra healing item.
Return to the walkway near the entrance and jump to the ledges ahead. Traverse the horizontal crevice, drop onto the lower walkway, and follow the route into the large central chamber. The pool, the east-side ramp, the raised walkways, and the two matching locked doors on the west wall are the main landmarks for this level.
- Open the trapdoor with the starting block and switch.
- Reach the large central cistern room.
- Treat the two matching west-wall doors as separate routes; their order matters.
Collect both Rusty Keys before flooding the cistern
From the central room, use the raised ledges and crevices to reach the upper walkway. Follow the curved walkway toward the eastern side and collect the first Rusty Key from the high platform. Use safe drops or the crevice to return toward the central room rather than jumping directly into a deep fall.
Continue through the upper route near the metal-grating room. Pierre appears in the room with the water-control switch. The shotgun is the quickest way to drive him away, but pistols can work if you keep moving and avoid allowing him to block the exit. Do not pull the water-control switch yet. It floods the cistern, and the dry route to the first Silver Key must be completed first.
From the upper walkways, reach the second Rusty Key on the long L-shaped ledge near the eastern side of the main room. Return to the west-wall doors. Use the first Rusty Key on the left-hand door, the one that leads to the tiered ledges and gorillas. Do not use the right-hand door first: while the cistern is dry, its drop leads to spikes and can leave the level unwinnable.
- Collect the first Rusty Key from the high central-room walkway.
- Collect the second Rusty Key from the L-shaped ledge.
- Leave the water-control switch untouched for now.
- Use a Rusty Key on the left west-wall door, not the right one.
Clear the left Rusty Key route and obtain the first Silver Key
Enter the left Rusty Key door and deal with the gorillas from the doorway ledge or another elevated position. Climb the successive ledges in the tall room. Pierre reappears during this climb; shoot him from a ledge or damage him enough that he retreats. Continue upward, then cross into the slide-and-crocodile area.
Kill the crocodiles from safe ground whenever possible. A block near the save point provides a useful elevated firing position. Climb the ledges above the crocodile room, traverse the wall crevice, and pull the switch in the upper doorway. Move carefully through the spike-lined passage and kill the rats before dropping into the mossy room.
In the first Silver Key room, stay out of the pool. Climb the ledges on the right side, following the staircase and successive jumps until you reach the high alcove switch. Pull it to open the lower door, then descend and take the first Silver Key. Pierre attacks again; retreat to the alcove corner and use the shotgun, or escape through the pool once he withdraws.
- Pass the gorilla and crocodile rooms.
- Pull the upper switch in the first Silver Key section.
- Collect the first Silver Key before flooding the cistern.
- Use the nearby PlayStation Save Crystal if you have reached it safely.
Flood the cistern and collect the second Silver Key
After taking the first Silver Key, swim through the connecting passage to the room associated with the second Silver Key, then return through the southern underwater route to the main pool. Climb out near the eastern ramp and return to the metal-grating room containing the water-control switch. Pull it now to raise the water level.
Return through the underwater route to the second-Silver-Key room. With the cistern flooded, surface in the upper section and collect the available supplies. On PlayStation, a Save Crystal is present in this area. Dive again and pull the underwater lever to open the door below. Swim down and take the second Silver Key; the exit door in that section opens automatically.
Swim back to the main room and climb out near the right-hand west-wall door. The raised water makes the spike shaft safe to traverse. If you flooded the cistern too early, you can still recover: use the water-control switch again to lower the water, obtain the first Silver Key, and then raise it once more for this section.
- Raise the water only after obtaining the first Silver Key.
- Collect the second Silver Key from the flooded room.
- Confirm that the cistern is raised before entering the right-hand Rusty Key door.
Use the second Rusty Key to obtain the Gold Key
Use the second Rusty Key on the right-hand west-wall door. Enter the water and swim down through the formerly dangerous spike shaft. At the spike section, turn left and continue downward into the small room. Follow the opening ahead and to the left to collect the Gold Key and a Medi Pack.
The pickup opens the exit from the underwater room, but a crocodile appears in the tunnel. Swim out promptly, climb onto the nearest ledge in the main room, and kill the crocodile from safety. Before leaving the area, you may push the block beside the northern ornate balcony and use the slope-and-backflip jump to reach the optional third secret containing ammunition and a large Medi Pack.
- Enter the right Rusty Key door only while the cistern is flooded.
- Swim through the spike shaft and collect the Gold Key.
- Escape the crocodile and return to the main room.
Unlock the final rooms and descend into Tomb of Tihocan
Return to the west-side locked doors and use both Silver Keys. In the next room, climb the square pillar and jump to the ledge above the doorway. From there, reach the ledge with the Gold Keyhole. An ape appears; safety-drop away from it, climb back to the ledge, and shoot it from above. Use the Gold Key on the door below, but remain on the ledge until the two lions have emerged and been defeated.
Enter the checkerboard-floor room cautiously. Some broken tiles conceal spikes, so walk around the safer edges. A switch at the far end opens a side door and releases three lions; you may shoot them from the block above the switch or leave them if you do not need the kills. Find the movable block near the switch. Pull it twice, go around its side and pull it farther into the room, then push it once from behind so it can be used as a step to the balcony.
The opening behind the original block position is the level exit. After collecting any optional supplies from the balcony, return to that opening and drop down the long shaft. The transition to Level 9, Tomb of Tihocan, confirms completion of The Cistern.
- Use both Silver Keys on the final locked doors.
- Use the Gold Key after defeating or bypassing the ape safely.
- Cross the checkerboard room and reposition the pushblock.
- Drop down the final shaft and confirm the transition to Tomb of Tihocan.
Before you move on
- Lara has obtained both Rusty Keys, both Silver Keys, and the Gold Key, with the keys used on their corresponding locks.
- The cistern has been raised for the second-Silver-Key and Gold-Key routes.
- The final Silver-Key doors and Gold-Key door have been opened.
- The pushblock in the checkerboard room has been moved away from the exit opening.
- Lara has dropped down the long final shaft and the game has transitioned to Level 9, Tomb of Tihocan.
References for this chapter
Greece — Tomb of Tihocan (Level 9)
Complete Tomb of Tihocan by manipulating the water levels, passing the submerged tunnels, surviving the blade and boulder traps, collecting both Rusty Keys, and opening the route to the temple. The first Gold Key raises blocks in the pool section. After reaching Tihocan’s tomb, defeat Pierre to obtain the second Scion piece and the Gold Key that opens the final exit. The centaur guardians are optional on the original PlayStation version, and Save Crystals are the level’s available save points.
Raise the water and reach the second underwater lever
Swim through the opening channel as far as the route allows. Dive below the silver grate, turn around at the lower section, and continue to the underwater lever. Pull it, then return to the surface and climb onto the ledge. Use the T-shaped switch on dry land to open the nearby door. The order matters: this first lever changes the water route, while the dry-land switch opens the door.
Enter the opened passage and kill the crocodile. In the next chamber, climb around the room without stepping onto the central trigger area unless you are prepared for darts. Use the blocks and ledges to reach the upper alcove and throw the switch. This raises the water and makes the pale square block float.
Dive beneath the floating block and collect the Small Medi Pack if desired. Climb onto the block and continue to the next water opening. Dive to the bottom, pull the second underwater lever, and return to the surface. The altered current carries Lara through the long underwater passage. When you emerge, kill the rat and pull the movable block north once so you can climb to the ledges leading onward.
- Use the underwater lever before the T-shaped dry-land switch.
- Raise the water with the upper switch before using the floating block.
- Pull the second underwater lever to change the current and continue through the long passage.
Survive the first Pierre encounter and reach the first secret room
Climb onto the square ledge and then the long gray ledge. A Save Crystal is nearby on the PlayStation version. Use it before dealing with Pierre if you prefer a shorter retry, although saving after the encounter avoids repeating the fight.
Pierre may appear through the upper opening. Jump or climb into the opening, equip the shotgun if available, and fire when he approaches. This encounter cannot kill Pierre; the goal is to make him retreat. After he withdraws, descend the stairs and pass the swinging blade when it opens.
At the bottom, stop before dropping onto the green block because a crocodile waits below. Shoot it from the higher position, then collect the shotgun shells and Magnum Clips in the lower room. The first secret is optional. To open it, step on the three floor tiles that look different from the surrounding floor. Enter the opened northwest room and use the slopes to reach the Large Medi Pack and shotgun shells. Return to the blade area after collecting or skipping the secret.
- Save at the first PlayStation Save Crystal if you want a retry point before Pierre.
- Do not expect the first Pierre encounter to end in a kill.
- Shoot the crocodile from above before dropping into the lower room.
- Treat the three pressure tiles and their secret as optional.
Flood the next pool and collect the first Gold Key
From the blade area, jump into the side opening containing shotgun shells, then make the angled jump or grab into the next passage. Shimmy to the switch and pull it to flood the room below. Drop into the water, swim to the far end, and climb out on the right. Continue through the next underwater passage.
When you surface, deal with the lion quickly. Use the entrance at the northeast side of the room to reach the switch and throw it. Climb to the ledge with the Save Crystal and eliminate the two gorillas above from a safe position. Pull up to their ledge, then make the next grab and shimmy to the alcove containing the first Gold Key and a Large Medi Pack.
Use the Gold Key in the adjacent pool room. The mechanism raises a line of blocks across the water. Cross with running jumps and a final standing jump to reach the opening and the Small Medi Pack. This Gold Key is not the key Pierre drops later; do not confuse the two.
- Flood the pool with the switch reached after the swinging blade.
- Collect the first Gold Key above the gorilla ledge.
- Use that Gold Key to raise the blocks across the pool.
Open the five-door room and obtain both Rusty Keys
Enter the room with the movable block and four floor tiles. Push the block onto a tile, climb onto it, and deal with whatever creature emerges before collecting the room’s supplies. Repeat until you have opened the overhead room and the northwest room; these two areas contain the required Rusty Keys.
The remaining rooms are optional. One contains a gorilla and ammunition, another contains additional ammunition, and one leads to a boulder trap. If you enter the boulder room, move to the edge without stepping down, hop back, then make successive running jumps into the alcove containing the supplies and Rusty Key. The boulders pass through the central route, so do not linger on the floor.
You only need the two Rusty Keys. Use them on the double lock beside the room to open the next passage. A PlayStation Save Crystal is immediately beyond the locked door. Use it before attempting the ramp and breakaway-floor section.
- Use the movable block to open the overhead and northwest rooms.
- Collect both Rusty Keys before leaving the five-door section.
- Treat the other doors and their ammunition as optional.
- Save at the crystal beyond the Rusty Key door.
Cross the breakaway tiles and reach the temple lake
Before sliding down the long ramp, the second secret can be reached from a ledge on the left side of the descent. It is optional and can be skipped safely. At the bottom, cross the five breakaway tiles with quick jumps. A reliable route is forward, left, forward, forward, right, then forward. Do not stop on the tiles, because they collapse after Lara lands on them.
The optional reward is Uzi Clips and Magnum Clips. Afterward, pull up and slide down to the pool. Swim immediately to the light-colored square ledge and climb out before the crocodile reaches Lara. Kill it from dry ground, then climb the rocky ledges in the cave.
Make a running jump to the square-topped pillar below the switch, climb up, and pull the switch. This opens the underwater gate leading back toward the temple lake. Drop safely, return to the water, and swim through the winding passage until the temple with two centaur statues comes into view.
- Save before the breakaway tiles if you want to retry the optional secret.
- Use quick jumps across the five collapsing tiles.
- Reach the light-colored ledge before fighting the pursuing crocodile.
- Pull the switch on the square-topped pillar.
Open Tihocan’s tomb and bypass or defeat the centaurs
Do not climb out at the first shoreline. From the water, face the right-hand centaur statue and search beneath the temple-side ledge for the nearly invisible tunnel marked by a bluish or pale rock. Swim through it, surface, and pull the switch inside. This opens the temple entrance. A PlayStation Save Crystal is nearby; use it before approaching the statues.
Return through the tunnel and climb out on the left side of the temple, near the crystal. The left centaur activates as Lara approaches. The simplest completion route is to run straight into the temple. The centaurs do not follow Lara inside, so both can be ignored. If you want to defeat them, stay near the doorway, keep moving, and side-flip away from their fireballs while firing between attacks.
Inside, enter the tomb room and prepare for Pierre. The second centaur may activate outside as you move through the area, but it is not required for progression. Keep Pierre in an open part of the room and use the Magnums if available. Side-jump while firing so he cannot pin Lara against the walls or the central structure.
- Find the underwater tunnel beneath the right side of the temple.
- Pull the interior switch to open the temple door.
- Use the nearby Save Crystal before the centaur encounter.
- Run past the centaurs if conserving health and ammunition.
- Defeat Pierre inside the tomb.
Collect Pierre’s items and exit to Egypt
After Pierre falls, immediately collect the Gold Key and the second piece of the Scion. The dropped weapon pickup only adds Magnums if Lara did not already have them. On the original PlayStation game, do not save and reload before collecting the dropped items; they can disappear after a reload, leaving the Gold Key unavailable.
Use the blocks in the tomb room to climb to the upper ledges. Collect the Large Medi Pack and Magnum Clips if desired, then use Pierre’s Gold Key in the lock on the upper level. This opens the exit door below. Drop down safely and enter the newly opened doorway.
The level ends when the Egypt chapter loads and Lara’s scene concerning Tihocan begins. The centaurs, both secrets, and most ammunition are optional. Do not leave until the second Scion piece and Pierre’s Gold Key are in the inventory.
- Collect Pierre’s Gold Key before saving or reloading.
- Confirm that the second Scion piece is in the inventory.
- Use Pierre’s Gold Key in the upper-level lock.
- Enter the opened ground-level exit door.
- Verify that City of Khamoon, the first Egypt level, loads next.
Before you move on
- The opening water route has been changed with both underwater levers, and Lara has passed the long current tunnel.
- The first Gold Key has raised the pool blocks, and both Rusty Keys have opened the double-lock door.
- The temple entrance has been opened with the concealed underwater switch.
- Pierre has been defeated, and Lara has collected his Gold Key and the second Scion piece.
- Pierre’s Gold Key has opened the upper lock, Lara has entered the ground-level exit door, and City of Khamoon loads next.
Egypt — City of Khamoon (Level 10)
City of Khamoon is the first Egypt level in the original 1996 PlayStation campaign. Lara must recover two Sapphire Keys, open the passage behind the sphinx, cross the pool and cat-temple areas, and use the second key at the gold exit doors. The level contains three secrets and four PlayStation Save Crystals. Panther mummies are the main new threat: they move quickly, throw fireballs from range, and explode when killed, so avoid standing close when they die.
1. Escape the starting trench and reach the upper cave
From the starting sandy cave, approach the drop-off and turn around. Drop backward while holding Action to catch the edge, then release and press Action again to grab the narrow crevice below. Traverse right, pull up into the alcove, and throw the switch. This opens the passage in the trench beneath you.
Drop into the trench and move the first carved block so you can reach the opening behind it. Collect the Magnum clips and Small Medi Pack, then return to the trench. Pull the upper movable block into position, climb over the first block, and continue moving the upper block until it sits beside the tall pillar. Climb onto the blocks and pillar, grab the crevice above, traverse right, and pull up.
Stay on the sandy ledge and draw your pistols. Shoot the black panther below from safety. Before dropping down, use the sandy slope and ledges above the entrance to collect the Small Medi Pack and Magnum clips. Then safety-drop toward the sphinx area.
- Throw the starting switch.
- Collect the early Magnum clips and Small Medi Pack.
- Use the blocks, pillar, and crevice to reach the upper cave.
2. Cross the sphinx area and obtain the first Sapphire Key
At the opening overlooking the sphinx, use the low block and wall to reach the top of the central pillar. Take a running jump with grab to collect the Shotgun shells, then return to the ground or water. Swim through the nearby pool to collect two sets of Magnum clips and climb out in the palm-tree area.
Go to the movable block between the sphinx's paws. Climb onto it, pull up onto the sphinx's chest, and walk around behind the head. Climb into the small alcove and collect the Shotgun shells and first Sapphire Key. A PlayStation Save Crystal is beside this pickup; use it before continuing.
Return to the block between the paws and pull it away from the sphinx. Enter the doorway revealed behind it and use the Sapphire Key on the lock. In the corridor, climb onto the raised ledge on the right and shoot the panther from above. Continue with weapons ready because another panther attacks farther along the passage. Follow the route north and then west until you reach the next elevated walkway.
- Collect the first Sapphire Key behind the sphinx's head.
- Use the first Save Crystal.
- Unlock the doorway behind the sphinx.
- Defeat or bypass the two panthers in the passage.
3. Reach the pool room and neutralize the boulder
In the room lined with pharaoh statues, climb onto the first statue base on the right and collect the Small Medi Pack. Move across the next blocks with weapons drawn. A panther emerges from an alcove. Continue through the sloping passage, then prepare for another panther partway along. If necessary, retreat to the statue room or jump back onto a block to fight from safety.
Follow the passage until you overlook a large sandy area containing a pool and cat temple. A Save Crystal is near the drop-off on the PlayStation version. Shoot the crocodile from above, then drop down and enter the long passage beneath the walkway. Collect the Large Medi Pack at its end.
Return to the sandy area and approach the ramp on the right. Climb partway up to trigger the boulder, then side-flip or run away as it rolls down. Do this now because you will later descend from the roof and the boulder can otherwise crush Lara. In the northwest corner, use the sandy slope and pillar to reach Secret 1, containing a Large Medi Pack and Magnum clips.
- Clear the two panthers in the statue passage.
- Shoot the crocodile before dropping into the lower area.
- Trigger the boulder before exploring the high ledges.
- Optional: collect Secret 1.
4. Open the gold ledge and cat-temple route
Go to the pool in the southwest corner and swim through the underwater passage to the lever. Pull it, swim through the opened doorway, and climb out quickly. Kill the crocodile in the water, then pull up to the walkway. Use the PlayStation Save Crystal here before beginning the block sequence.
Find the movable block and pull it east twice toward the steps. Climb onto it and take a standing jump with grab to the overhead ledge. Pull up, climb to the top of the steps, turn around, and pull up into the opening. Throw the switch to extend a gold ledge above the room.
Return to the block. Push it twice toward the steps, go around to its right side, pull it once, then move around and push it once more into position. Climb onto it and take a running jump with grab to the ledge beside the second movable block. Push that block once to reveal the opening behind it. A panther mummy attacks in the room beyond. On PlayStation, hop back and drop to a lower ledge if needed, then climb onto the first block and shoot the mummy from safety.
Enter the room and throw the switch to open the trapdoor above the gold ledge. Return to the first block, push it once more, climb on top, and jump to the extended gold ledge. Pull into the upper room and throw the switch there. This opens the trapdoor around the cat statue.
- Pull the underwater lever.
- Use the third Save Crystal before the mummy encounter.
- Extend the gold ledge.
- Open the cat-temple trapdoor.
5. Cross the high ledges and enter the cat temple
From the upper opening, jump to the L-shaped ledge on the left. Walk to its far end and take a running jump to the sloped ledge beyond. Collect the Magnum clips beside the pillar, then return along the lower part of the ledge and slide down to the flat ledge. Pick up the Small Medi Pack.
Face the building with the circular ornament above its opening. From the ledge, take a running jump to the angled stone overhang, then jump to the blue roof of the cat temple. Shoot the crocodile below while you have the height advantage. Collect the Magnum clips on the roof. From the southern slanted roof block, take a running jump to the eastern ledge for Secret 2, which contains Uzi clips. Safety-drop back to the ramp rather than jumping to the ground.
At the cat statue, drop onto the blue block and then to the floor. Do not step on the orange-and-black sandy tile; it covers a spike trap. Use the other doorway, collect the Magnum clips in the alcove, and drop through the floor opening. Pull the switch in the dark room to open the trapdoor outside and provide light. Drop to the lowest safe ledge and shoot the two panthers below. Collect the Magnum clips in the eastern cubby, then pull up one ledge and throw the switch. Use the fourth Save Crystal before continuing.
- Collect the Small Medi Pack and roof ammunition.
- Optional: collect Secret 2.
- Avoid the orange-and-black spike tile.
- Shoot the two panthers from the ledge.
- Use the fourth Save Crystal.
6. Defeat the last mummy and exit to Obelisk of Khamoon
After the switch, reach the opening on the opposite side of the large room. The reliable route uses the central platform: line up the running jump, turn around, drop and grab the ledge, pull up, roll, and immediately make the running jump with grab onto the platform. This releases more panthers below, but you can ignore them while moving onward.
Enter the zigzag corridor with the Magnums ready. The passage turns left, right, left, left, then right. Do not stop to fight the panther mummy inside the narrow corridor. Keep moving until you reach the open area beyond, then side-jump and fire while maintaining distance. The mummy moves rapidly and explodes on death, so do not stand beside it when it falls. If the fight goes badly, reload the last Save Crystal and try again.
When the mummy is defeated, enter the raised doorway in the southwest corner. Follow the passage to the room containing the second Sapphire Key on a pedestal. Take the key, climb the sand pile, and follow the upper passage back above the pharaoh-statue room. Cross the ledges, collect the Magnum clips if desired, and enter the switch alcove. Throw the switch to open the trapdoor and dump sand into the previous room.
Return across the ledges to the opening above the Sapphire Key room. Safety-drop into the opening and slide down. Turn around and climb the neighboring slope rather than the slope you just descended. At the top, use the second Sapphire Key on the gold doors. Passing through them completes City of Khamoon and begins Obelisk of Khamoon.
- Reach the central platform without falling.
- Fight the final panther mummy in the open area, not the corridor.
- Collect the second Sapphire Key.
- Throw the sand-release switch.
- Use the second key on the gold exit doors.
Before you move on
- The first Sapphire Key has opened the passage behind the sphinx.
- The cat-temple trapdoor has been opened and the fourth Save Crystal has been used.
- The final panther mummy has been defeated or safely bypassed.
- The second Sapphire Key has been removed from its pedestal.
- The sand-release switch has been thrown.
- Lara has climbed the neighboring slope and used the second Sapphire Key on the gold doors.
- The transition into Obelisk of Khamoon begins. Collecting the second key alone does not complete the level.
Egypt — Obelisk of Khamoon (Level 11)
Find the Sapphire Key, lower the four drawbridges in the central obelisk chamber, collect the Eye of Horus, Ankh, Scarab and Seal of Anubis, then take the underwater route to the Sphinx area and place the artifacts in the obelisk to open the exit to Sanctuary of the Scion. On PlayStation, Save Crystals provide mid-level save points.
1. Open the block room and find the Sapphire Key
From the starting area, go right down the sandy steps, climb to the doorway on the left and follow the passage to the room with four movable blocks. The windows provide your main landmark: they overlook the large chamber containing the central column and four raised drawbridges.
For the required route, move the leftmost block to reveal the passage beyond it. You may also move the other blocks for optional ammunition, health and enemy kills. The rightmost passage contains a panther and a small Medi Pack. In another passage, drop through the floor opening carefully; a panther waits below. Shoot from the opening or from a nearby raised block before dropping farther.
Use the switch below to open the upper door. Climb the steps and blocks, jump to the doorway above, collect the Magnum Clips, then drop through the floor opening to return to the block room. Move the remaining required block to reveal the water passage. Swim through it and surface in the next room. Climb out promptly and kill the crocodile before diving again. The Sapphire Key is on an underwater ledge near the structure; Magnum Clips and a small Medi Pack are nearby. Return through the same tunnel.
Use the Sapphire Key in the keyhole outside the block room. This opens the nearby door to the central chamber and the high gold door in the block room. Both routes eventually lead into the same progression area.
- Sapphire Key collected and used.
- Optional: nearby health, ammunition and the PlayStation Save Crystal collected.
- The central chamber and gold-door route are accessible.
2. Lower the Eye of Horus bridge
Use one of the blocks to climb through the high gold door. On PlayStation, a Save Crystal is available near this route. Go upstairs into the sitting room. A mummy awakens in the room on the left. Fight it with the shotgun if you are prepared, or retreat through the doorway and use the ledges and stairs to create distance. You may postpone this fight, but the Eye of Horus bridge must eventually be lowered.
Activate the switch in the left window. This lowers the drawbridge leading to the Eye of Horus. Leave through the right window, enter the central chamber and collect the Eye of Horus from the central column. The vision that follows identifies the underwater door below the column; it is not yet open.
Drop into the pool, collect the ammunition if desired and climb onto the ledge below the column. Take the shotgun shells, then enter the rightmost opening in the south wall and slide into the tall ledge room.
- The Eye of Horus bridge has been lowered.
- The Eye of Horus has been collected.
- The underwater door below the central column remains closed until all four artifacts are obtained.
3. Reach and activate the Ankh switch
In the tall room, climb the blocks and use running jumps to reach the upper ledges. Collect the large Medi Pack on the southeast ledge. The nearby mummy room is optional; if you want the kills, hang from the doorway to awaken the two mummies, pull back up and attack from a safer elevated position.
Continue across the upper ledges toward the northeast corner. Climb the greenish block and follow the platforms upward. At the top, reach the switch overlooking the central chamber and activate it to lower the Ankh drawbridge.
Collect the small Medi Pack and ammunition from the fenced ledge below the switch. Continue to the top of the stairs, where a gold door is still locked. Drop through the floor opening near the windows and slide into the next room.
- The Ankh bridge has been lowered.
- Optional: the two mummies and the first secret have been handled.
- The route to the slide-and-steps rooms is open.
4. Change the slides into steps and lower the Scarab bridge
In the slide room, climb into the raised opening on the right before dealing with the panther in the adjoining room. Shoot from the alcove, then use the switch to turn the slide into steps. Collect the ammunition in the side room if wanted. Climb the new steps, take the shotgun shells from the left ledge and drop onto the pale-blue platform. A PlayStation Save Crystal is available there.
Leave through the doorway on the right and climb the broad stairs. Use the switch at the top to turn the next slide into steps, but do not immediately return. Go through the nearby doorway into the room with the sarcophagi and blocks.
Drop down the blocks, hang from the lowest one and let go to reach the floor. Pull up immediately. Two mummies awaken, but they can be killed from the block or avoided. Traverse beneath the hanging block, climb through the ledges and reach the fenced balcony overlooking the central chamber. Activate the switch to lower the Scarab bridge.
Return through the sarcophagus room and climb out using the opposite blocks. In the central chamber, cross the lowered bridge and collect the Scarab. The Ankh can also be collected now by reaching its lowered bridge; if you already took it, continue with the remaining artifact route.
- The Scarab bridge has been lowered.
- The Scarab has been collected.
- The Ankh has been collected, either during this return route or earlier.
5. Lower the Seal bridge and collect the final artifact
From the central chamber, follow the raised routes back toward the slide rooms and the higher switch room. If you have not yet changed the upper slide into steps, use the switch overlooking the central chamber to do so. Climb the converted steps, cross the narrow crevice and enter the room containing the upper-level switch.
A mummy waits in the room above. Fight it from the doorway or retreat down the steps when it approaches. In the highest room, collect the small Medi Pack and use one switch to lower the drawbridge leading to the Seal of Anubis. Use the other switch to open the nearby gold door.
Optional secrets are reached from the extended ledge near this area. A running jump can reach the top of the obelisk for a small Medi Pack and Uzi Clips. A second jump reaches a lower ledge with a large Medi Pack and more Uzi ammunition. These jumps are not required and can cost health if mistimed.
Return to the central chamber, cross the lowered bridge and collect the Seal of Anubis. If the Eye of Horus was skipped earlier, use the available upper route to reach its switch and collect it before leaving. The underwater door below the central column opens only after all four artifacts have been collected.
- Eye of Horus, Ankh, Scarab and Seal of Anubis are in the inventory.
- The underwater door beneath the central column is open.
- Optional: the second and third secrets have been collected.
6. Swim to the Sphinx area and open the exit
Dive through the underwater door and follow the long tunnel. It contains optional Magnum Clips, shotgun shells and a small Medi Pack. Do not stop for every item if Lara’s breath bar is low; return to the previous pool for air before continuing.
The tunnel ends at a pool with ammunition and a small Medi Pack on the bottom. A mummy patrols the area beyond the pool. Lure it toward one side, swim to the opposite side and climb onto the raised ledge or into the alcove. Fire from safety and retreat into the water if necessary. Afterward, collect the ammunition and the PlayStation Save Crystal if present.
Continue through the doorway. A second mummy can be shot from the entrance to the sandy room. Collect the large Medi Pack, climb the blocks and use the elevated doorway to return to the open Sphinx area from City of Khamoon. The room between the Sphinx’s paws contains optional shotgun shells.
Go to the obelisk or artifact pillar beside the pool and insert the Eye of Horus, Ankh, Scarab and Seal of Anubis into their receptacles. The exit on the far side of the Sphinx opens. Enter it and descend the steps. Sanctuary of the Scion loads, confirming completion of this level.
- The underwater tunnel and pool area have been crossed without drowning.
- The mummy encounters have been defeated or bypassed safely.
- All four artifacts have been inserted into the artifact pillar beside the pool.
- The exit beyond the Sphinx opens and Sanctuary of the Scion loads.
Before you move on
- The Sapphire Key has been used and the four drawbridge routes have been opened.
- The Eye of Horus, Ankh, Scarab and Seal of Anubis are all in Lara’s inventory.
- The underwater door beneath the central column has opened.
- Lara has reached the Sphinx area and inserted all four artifacts into the pillar beside the pool.
- The exit beyond the Sphinx opens and Sanctuary of the Scion loads.
Egypt — Sanctuary of the Scion (Level 12)
Sanctuary of the Scion begins with a large Sphinx courtyard and a long sequence of ledge, switch and underwater puzzles. Find the Gold Key and two Ankhs, place both Ankhs on the Sphinx, drain the statue chamber, retrieve the Scarab, use it to open the final gate, defeat Larson and take the third Scion piece. On the original PlayStation release, use the Save Crystals before the major platforming and combat sections.
Clear the entrance stairs and reach the Sphinx
Go down the opening stairs and collect the Magnum clips from the corners if you need them. As you climb, two Atlantean mutants attack. Backflip down the stairs while firing, or use the shotgun if they close in; avoid being trapped against the walls. At the top, collect the additional ammunition in the dark corner and climb the blocks to the opening above. Pull up to reach the back of the giant Sphinx.
Move around the Sphinx to the sand below, keeping to a ledge when possible. A mutant patrols this area and can throw fireballs. Fight from a position where Lara has room to side-jump, then circle around the Sphinx and collect the nearby ammunition. Do not descend into the open area until you have identified a safe route back to the climbable rocks.
- Defeat or bypass the two mutants on the entrance stairs.
- Reach the back of the Sphinx.
- Clear the first ground-level mutant from a stable position.
Find the Gold Key and the first Ankh
From the Sphinx courtyard, climb the rock formations near its right side. Follow the ledges past the Save Crystal and the jagged-door trap. Jump over or pass the trap, collect the small medi-pack, then cross the gap to the switch. Pull the switch and return along the opened route. A flying mutant may appear after the switch is used, so retreat to a wider section before shooting; its explosion can knock Lara from a ledge.
Continue around the Sphinx toward the passage with the sloped drop and pool. Slide backward so Lara can catch the edge, shimmy across and drop to the lower ledge. Climb through the opening, cross the bridge and use the Gold Key on the lock. Enter the blue room and defeat the centaur from the entrance or another position that leaves room to retreat. Collect the medi-pack and the first Ankh, then use the nearby Save Crystal if available.
- Pull the first switch.
- Collect the Gold Key.
- Use the Gold Key on the bridge-side lock.
- Defeat the centaur and take the first Ankh.
- Save before beginning the second Ankh route.
Use the Gold Key to reach the second Ankh
Return through the water and climb back toward the Sphinx courtyard. Use the route near the opposite paw to reach the second upper section. Follow the blocks and ledges around the cave, using running jumps with grabs only after checking the far edge of each landing. A second Save Crystal is positioned near the switch area; use it before activating the switch.
Pull the switch, then move to a broad block or corner before engaging the flying mutant it releases. Continue across the ledges and through the opened golden-door route. In the next room, use the Gold Key on the lock if the door is not already open, then defeat the second centaur. Step inside and collect the second Ankh. Return through the water and climb back to the Sphinx rather than trying to drop directly from the upper ledges.
- Reach the second switch route.
- Use the Save Crystal near the second switch.
- Defeat the second centaur.
- Collect the second Ankh.
- Return to the Sphinx’s back.
Place both Ankhs and enter the statue chamber
Climb onto the Sphinx from the side near its paw. Use the angled block on its back to reach the broken section of the head. Walk carefully across the top and place one Ankh in the receptacle at the rear. Move around to the other side and place the second Ankh in the remaining receptacle. Save at the nearby crystal before continuing if you have not done so already.
The door between the Sphinx’s paws opens after both Ankhs are installed. Slide or climb down by a controlled route, circle to the front and enter the doorway. Dive into the large pool. The bird statue is on the left and the dog-like statue is on the right when viewed from the entrance. Collect the ammunition on the statue ledges if desired, then dive between the right statue’s feet and pull the ordinary wall lever beside the closed gold door. This begins the water-and-statue route; the decorative gold feature is not the lever you need.
- Place both Ankhs in the Sphinx receptacles.
- Enter through the door between the Sphinx’s paws.
- Use the lever between the right statue’s feet.
- Keep track of the next breathing point before diving.
Drain the statue area and reach the Scarab
After the first lever pulls Lara through, climb out near the pillars and work upward across the statue chamber. Follow the pillars to the stairs and deal with the flying mutant from a stable ledge. Use the Save Crystal before the next descent. Drop carefully toward the right statue, using ledges rather than taking a blind fall, and locate the second lever in the statue area.
Pull this lever to open the door at the feet of the left statue. Return to the water, dive through that doorway and follow the long winding passage upward. Collect the ammunition along the route, then save at the crystal near the top before touching the Scarab. Pick up the Scarab and immediately retreat down the passage. The pickup opens the gate and releases a centaur and two mutants, so do not remain in the open room if you can fight from the corridor.
- Climb through the statue platforms.
- Defeat the flying mutant from stable ground.
- Use the second lever in the statue area.
- Swim through the door at the left statue’s feet.
- Reach and collect the Scarab.
- Use the nearby Save Crystal before the returning enemy group.
Use the Scarab and defeat Larson
After taking the Scarab, retreat down the passage and fight the two mutants from the bend or another position where you can backflip without falling. Once they are defeated, draw the centaur’s attention and keep enough distance to side-jump its fireballs while firing. When the route is clear, return to the room at the bottom and place the Scarab in the lock. This opens the final gate.
Collect the large medi-pack and ammunition beyond the gate, then slide down the slope and climb through the opening. Larson appears in the next room and attacks with his firearm. Keep moving in a circle or with repeated side-jumps, prevent him from getting behind Lara, and avoid backing into a wall or pillar. The shotgun is effective at close range, while magnums or pistols work if you maintain distance. If Lara has taken heavy damage, reload the last Save Crystal and repeat the approach rather than spending all remaining medi-packs.
- Defeat the centaur and both mutants after collecting the Scarab.
- Place the Scarab in the final gate lock.
- Collect the large medi-pack and ammunition.
- Defeat Larson without allowing him to get behind Lara.
Take the third Scion piece and finish the level
After Larson is defeated, climb the stairs to the upper room and take the third piece of the Scion from its pedestal. A cutscene follows, and the game proceeds to Natla’s Mines. No additional puzzle is required in Sanctuary of the Scion after the Scion piece is collected.
- Larson is defeated.
- The third Scion piece is collected.
- The ending cutscene for Sanctuary of the Scion plays.
- Natla’s Mines becomes the next level.
Before you move on
- The Gold Key and both Ankhs have been collected.
- Both Ankhs have been placed on the Sphinx.
- The underwater statue route has been completed using both levers.
- The Scarab has been collected and inserted into the final gate lock.
- The centaur, mutants and Larson have been defeated.
- The third piece of the Scion has been taken and the game advances to Natla’s Mines.
References for this chapter
- Tomb Raider (1996) — Level 12: Sanctuary of the Scion, Stella’s Classic Walkthrough
- Level 12 — Sanctuary of the Scion, Tomb Raider Walkthrough and Guide
- Tomb Raider 1 Walkthrough — Sanctuary of the Scion, Tomb Raider Vault
- Level 12 — Sanctuary of the Scion, Gamer Walkthroughs
- Tomb Raider 1 Controls, Stella’s Tomb Raider Site
Atlantis — Natla's Mines (Level 13)
Lara begins Natla's Mines underwater and without weapons. Open the first two doors, locate three fuses, lower the suspended building to recover the pistols, then defeat Natla's three armed workers to reclaim the magnums, Uzis and shotgun. Finish the block puzzles near the pyramid, obtain the Pyramid Key and unlock the entrance to Atlantis. The PlayStation version has seven Save Crystals and three optional secrets.
1. Open the first two doors and reach the suspended building
Swim forward from the starting tunnel and surface in the underground lake. Swim to the waterfall on the west side, pass underneath it and surface in the passage behind it. Follow the passage until it widens, then use the wall switch on the left. This opens a wooden door in another part of the mine.
Return to the lake and swim to the southeastern landing with the small boat, barrels and crates. Follow the tunnel until a mine cart blocks the route. On the left side of the rock pile, pull the movable crate out, climb over it and enter the passage behind it. Pass through the door opened by the first switch and use the second switch.
Return to the lake and swim behind the waterfall again. Go past the first switch, climb into the raised opening and continue through the newly opened door. From the ledge above the lake, take a running jump to the ledge marked by red-and-white barricades. Follow the twisting tunnel to the cave containing the suspended building and the glassed-in fuse room. Pick up the large medi-pack. The building cannot be lowered yet because all three fuses are still missing.
- Use both early wall switches.
- Reach the cave with the suspended building.
- Pick up the large medi-pack and note the three fuse sockets.
2. Collect Fuse 1 through the first boulder section
Leave the suspended-building cave through the opposite opening. In the cave with boarded-up structures, tires and debris, pull the brown movable crate beneath the ceiling opening. Climb onto it, jump to the roof and drop through the broken section at the back. Follow the tunnel to the switch and use it, then return to the lower cave and follow the tracks through the automatic wooden door.
At the striped barricades, trigger the first boulder, then immediately turn right and grab the higher ledge. Traverse left above the shallow pit before pulling up. Follow the ledge, jump the gap and enter the passage at the far end. Avoid the lava pit and collect Fuse 1. A Save Crystal is beside it on the PlayStation version.
Continue up the passage cautiously. Step forward to trigger a boulder, then retreat. At the next boulder, use a side flip to trigger it and side flip back to safety. Continue to the opening in the floor and drop down. Follow the route back toward the tire-filled cave. The conveyor-belt passage is visible from this area, but its fuse cannot be collected until a later switch is used.
- Move the crate under the ceiling opening.
- Use the upper ledge instead of attempting the barricade jumps unless you prefer the harder route.
- Collect Fuse 1 and save at the nearby crystal if desired.
3. Move the mine cart and collect Fuses 2 and 3
Return to the lake, pass through the suspended-building cave and drop into the water below the red-and-white barricade ledge. Swim across and jump onto the small boat. From the boat, take a running jump to the landing with the wooden boxes and climb over the left box.
Enter the storeroom filled with Natla Technologies crates. Pick up the magnum clips, then identify the slightly darker movable crate. Pull it once, go around it and push it into the alcove where the clips were located. Pull the second movable crate twice, go around it and pull it again to expose the passage and switch. Use the switch to move the mine cart.
Return to the southeastern landing, pass the moved cart and push the Natla crate twice. Go around it and collect Fuse 2 from the widened passage. Do not continue into the next room, because the cowboy is waiting there. Climb onto the crate, pull up into the upper passage and use the switch to open the door near the conveyor belt.
Return through the lake and waterfall route to the tire-filled cave. Take the southern passage to the conveyor belt, go around the belt on the left and pass through the door you opened. Use the switch to activate the belt, which drops Fuse 3. Carry it back to the glassed-in room and install all three fuses. The suspended building lowers, revealing Lara's pistols. Select the pistols manually from the inventory the first time you use them again.
- Move the mine cart before collecting Fuse 2.
- Use the upper switch after collecting Fuse 2.
- Install all three fuses and recover the pistols.
4. Defeat the cowboy and cross the first lava route
After recovering the pistols, climb onto the lowered building and jump to the opening ahead. Follow the passage and take the optional route to Secret 1 if you want the large medi-pack and Uzi clips. The passage eventually leads to a ledge above the lake; use the PlayStation Save Crystal there if needed, drop into the water and return to the southeastern landing.
Pass the mine cart and enter the room where Fuse 2 was found. The cowboy appears from behind the pillars with magnums. Lock onto him and fire while retreating toward the doorway. Keep jumps controlled because lava pits surround the combat area. When he dies, collect the magnums.
In the southwest corner, safety-drop to the small ledge above the lava river. Hang and drop to the lower ledge, grabbing it again immediately, then pull up. Traverse the wall crevices to the right and follow the passage to the lava falls. Jump to the rectangular block, then to the square pillar and the next block downstream. Turn right and jump into the opening.
For Secret 2, push the crate forward as the boulder rolls into the passage. Enter the room, pull the crate aside and climb through the ceiling opening for the optional supplies. Continue along the tracks, squeezing past the boulder on the left side if necessary. Return to the lava river and jump across the square pillars to the doorway leading to the TNT boxes.
- Defeat the cowboy and recover the magnums.
- Use the crevices and lava blocks to reach the TNT-box area.
- Treat Secret 2 as optional; the shotgun found in that route is useful but not required at this point.
5. Detonate the explosives and defeat the skateboarder
In the TNT-box room, pull the darker movable box away from the others. Move it through the doorway and position it below the high opening on the left. Climb through and follow the upper passage to a Save Crystal. Continue to the lava pit with sloping sides.
Do not try to jump directly across the pit. Jump to one of the angled side ledges and wait for the boulder to roll into the pit. Then jump from the ledge to the opposite side. Follow the passage to the upper ledge overlooking the earlier lava river and use the switch to detonate the explosives.
Return by the same route. Cross the sloped lava pit again, then climb over the rubble where the TNT boxes were. This opens the large ramp room. The skateboarder carries Lara's Uzis. Lock onto him and use side jumps or backflips while firing, staying clear of the lava pits. You can also enter the optional water-filled pit and reach the overhead opening, then shoot down into the room from above.
After the skateboarder dies, collect the Uzis. Secret 3 is in the water-filled pit and contains medi-packs and Uzi clips. Exit through the top of the ramps and use the Save Crystal in the passage beyond.
- Use the angled ledges to cross the sloped lava pit.
- Activate the TNT switch.
- Defeat the skateboarder and collect the Uzis.
- Save before leaving the ramp area.
6. Solve the block rooms and obtain the Pyramid Key
After the ramp room, approach the slope with three boulders. Trigger them one at a time and side flip right, left and right to avoid the first three. Walk carefully near the top so the next boulder rolls past, then enter the opening on the left.
In the tall room, climb the low block and make four standing jump-and-grab moves to reach the upper opening. The next rooms contain four movable blocks. Push the first block twice into the next room. Climb through the ceiling opening, pull the second block once, go around it and push it once so it rests beside the floor opening.
Drop through the next floor opening and pull the third block once. Return through the upper route to the first room and push the first block once more. This exposes the alcove with the switch and the first gold door. Use the switch, then return through the ceiling opening and enter the opened gold door.
Go down the steps and push the fourth block once. Ignore the gold door that closes quickly when approached. Use the nearby switch instead; it opens the outer gold door near the first switch. Return through the upper passages and floor openings, then exit through that outer door. A Save Crystal is near the switch on the PlayStation version.
Outside, defeat the bald shotgunner. Keep moving and use side jumps while firing, or use the roofs of the small buildings for temporary height. Collect the shotgun after he falls. Climb the left side of the pyramid to the upper ledge, make the standing jumps to the top and slide down into the cave opening. Use the switch inside, then return to the small buildings.
Enter the right-hand gold door, collect the supplies and take the Pyramid Key. Return to the pyramid entrance and use the key. The next level, Atlantis, loads immediately after Lara enters.
- Clear the four-boulder slope.
- Complete the movable-block sequence and use both required switches.
- Defeat the bald shotgunner.
- Use the pyramid switch and collect the Pyramid Key.
- Unlock the pyramid entrance.
Before you move on
- Lara has recovered the pistols, magnums, Uzis and shotgun, unless the shotgun was obtained from the optional Secret 2 route earlier.
- The cowboy, skateboarder and bald shotgunner are defeated.
- The required block rooms and switches are complete.
- The Pyramid Key is in Lara's inventory.
- The Pyramid Key has been used at the pyramid entrance and the Atlantis level has loaded.
References for this chapter
Atlantis — Atlantis (Level 14)
Atlantis is the fourteenth level of the original PlayStation Tomb Raider. Lara climbs through lava-filled chambers, mutant incubators, timed doors, boulder traps and difficult platforming rooms to reach the completed Scion. The level contains three secrets and seven PlayStation Save Crystals, but none of the secrets or optional mutant encounters is required. The objective is to reach the Scion room, touch the completed Scion and allow the vision and transition to The Great Pyramid to play.
1. Leave the opening incubator chamber
Wait for the lights to come on, then collect the Uzi pickup at the entrance. On the original PlayStation version, this pickup becomes the Uzis if Lara does not already have them. Move cautiously through the chamber. The first incubator on the left releases a spew-spitting mutant; backflip into the entrance and shoot it from safety. Farther ahead, another active egg releases a fireball-throwing mutant. Back away while firing and use side jumps to avoid its projectiles.
Continue to the far end of the chamber and enter the door on the left. Climb into the dark upper room. The transparent floor is solid, but the gaps are open, so walk carefully and use the camera to identify the safe sections. Collect the small medi-pack in the far corner if needed. Cross to the dark alcove and pull the first switch. Enter the newly opened room and pull the second switch. Return across the upper room, descend the stairs and pull the switch there to open the middle door below. Go through that door to the tall room above the lava pool.
- Take the Uzis if they are not already in the inventory.
- Use the doorway as cover against the first mutants.
- Treat the transparent floor as safe only where a solid panel is visible.
- Pull all three switches in the upper area before descending.
2. Reach the broken bridge and the first Save Crystal
In the tall lava room, kill or bypass the flying mutant. It is safer to draw it toward the doorway, because its fireballs can knock Lara from the ledges and its death explosion causes damage at close range. From the starting ledge, hang from the outside edge, drop and grab the lower ledge, then pull up into the tunnel. This is Secret 1 and contains a large medi-pack, Magnum clips and Uzi clips.
Follow the tunnel and drop into the gray-and-gold corridor. Avoid the chomping blades by taking the route away from them. In the room with the transparent bridge, move to the right side and take a standing jump to grab the wall crevice. Drop to the lower doorway, pull up and follow the passage to its switch. Pull it to open the red door across the bridge. Return to the bridge, collect the Uzi clips and make a running jump across the gap. An optional flying mutant hatches below; continue through the doorway if you do not need the kill. Use the Save Crystal in the passage on the PlayStation version.
- Collect Secret 1 only if you want its supplies.
- Do not jump toward the chomping blades when the safer route is available.
- Make the bridge crossing as a running jump with Action held for the far grab.
- Save after reaching the passage beyond the bridge.
3. Cross the exposed pyramid and activate the timed exit
Continue to the room with the pool and the exposed sloping side of the pyramid. Climb onto the square pillar at the pool, then jump to the first flat ledge on the pyramid. Move upward with standing jumps, watching for the boulder that rolls down the slope. Use the higher ledges to avoid its path. At the upper-right area, climb into the passage for Secret 2, which contains a large medi-pack, Magnum clips and Uzi clips. Return to the pyramid and slide down to the ledge by the closed door.
Jump across to the pillar with the large medi-pack, then to the next pillar and into the small alcove. Pull the switch and collect the nearby Uzi clips. Dive into the pool and pull the underwater lever beneath the pillar. This opens a timed door at the base of the pyramid. Swim back, climb out at the pool, reach the pyramid and make the required rapid jumps across the flat ledges. Use the sloped sections to descend toward the red door before it closes. Avoid running onward into the lava after entering the next room.
In the partial-walkway room, jump to the lower side of the walkway and follow it to the doorway. If the room is not filled with lava and the exit route appears blocked, return to the previous pool room and confirm that the switch in the small upper room was pulled. Continue through the passage, jump the spike pit and dive into the next pool. Collect the shotgun shells underwater and pull the lever beside the entrance. Swim through the opened door and climb out.
- Watch for the first boulder before committing to the higher pyramid ledges.
- Pull the underwater lever only when ready to perform the timed run.
- If the lava-slide room is configured incorrectly, return to the previous switch.
- Use the Save Crystal in the passage after the lava-slide section.
4. Open the underwater doors
Collect the Uzi clips beyond the pool and cross to the next ledge. A flying mutant attacks in the tall lava room; fight it from the doorway or continue if you can safely avoid it. Follow the corridor to the room with four underwater pillars. Pick up the small medi-pack behind the first pillar if desired, then surface in the chamber above.
There are five switches and three underwater doors. The required switches are the southeast switch, the south-center switch and the northwest switch when viewed with the room’s compass orientation. The other switches activate additional incubators and are optional. Pull the three required switches, then use the Save Crystal. Dive immediately and swim through the three opened doors. A mutant may fire toward Lara while she is underwater, so keep moving through the passage rather than stopping to fight.
- Use only the southeast, south-center and northwest switches for the shortest route.
- Collect the underwater medi-pack only if the detour is safe.
- Save before diving through the three doors.
- Do not linger underwater after the doors open.
5. Bypass the boulder and solve the pillar room
Follow the dark tunnel and pull the switch near the red area. Collect the Uzi clips and watch the boulder roll into the passage. You do not need to stop it with a movable block. Run to the right of the boulder, angle sharply left and jump past it. Continue to the tall central area, cross to the next platform and deal with the flying mutant from a safe ledge.
In the next room, activate the two flying mutants one at a time if you want to fight them. Otherwise keep to the route and use the Save Crystal after the pair. Continue through the passage, jump across the lava room and reach the switch in the side alcove. Pull it, then return to the main route. In the room with three mutants, draw them toward a corner or doorway and use the Uzis while keeping enough room to retreat.
Cross the red slopes and collect the supplies if needed. In the large lava room, jump across the fleshy bridge without excessive movement, because the sloped surfaces can slide Lara into the lava. Pull the switch on the far side, return across the walkway and pull the movable block in the southeast corner to reveal the opened door. Pass the chomping blades when they separate, then climb to the square-pillar room. Pull the first switch to change the pillar heights, return to the lava room and jump across the pillars to the side doorway. Pull the second switch, return and complete the final pillar jumps to the exit. Use the Save Crystal near this route.
- Bypass the boulder instead of trying to stop it with a block.
- Fight the three-mutant group from a corner only if Lara can avoid being trapped.
- Do not jump repeatedly on the fleshy bridge.
- Pull both pillar switches before attempting the final crossing.
6. Cross the throne section
Enter the fleshy-ramp room with the Uzis ready. Three mutants wait ahead, and the low ceiling makes side jumps unreliable. Run up the ramp, lock onto a mutant and fire while using short sidesteps or healing when necessary. At the bottom of the ramp, step on the floor tile without the gold pattern. This opens the concealed door at the top of the ramp for a limited time. Return quickly, enter the room and collect Secret 3: Uzi clips, shotgun shells and a large medi-pack.
Continue through the red doorway. Do not pull the obvious switch beside the next red door; it releases lava into the hallway. Instead, climb through the ceiling opening and return to the tall lava room. Cross to the next ledge and enter the ramp with darts, blades and a boulder. Approach from the right, vault onto the ramp and immediately hop backward. The boulder rolls down and disables the blades, allowing Lara to climb safely.
In the throne room, use the Save Crystal. Push the seat block of Natla’s throne twice to reach the area behind the thrones. Use either trapdoor, jump over the spike or lava hazard below and follow the lower route to the switch. Pull it to open the red door between the thrones, then climb back up and pass through that door. The alternate throne shortcut exists, but the normal trapdoor route is reliable and does not require a glitch.
- Step on the unpatterned tile before attempting Secret 3.
- Never use the lava-flooding switch when the ceiling route is available.
- Use the boulder to disable the blades.
- Save in the throne room before entering the lower route.
7. Defeat the required enemies and reach the Scion
In the small room with three incubators, collect the Uzi clips near the entrance. Approach the active incubator and defeat the centaur with backflips and side jumps while firing. Pull the switch beside the inactive egg to open the exit. The two upper incubators become active, but their mutants are optional; avoid the low fleshy ramps if you want to leave without triggering them. Use the Save Crystal just beyond the exit.
Before descending the fleshy ramp, restore Lara’s health as much as possible. Two mutants wait in the cave below. Keep moving while firing, or quickly climb onto the nearby block for temporary safety. The red doppelganger mirrors Lara’s movements and cannot be defeated with weapons. Climb the column route to the raised platform, pull the switch to open the hatch over the lava and follow the route across the blocks and pillars. Reach the center of the opposite platform so the doppelganger copies Lara into the hatch. If it becomes stuck after a reload, return to the entrance ramp and jump onto it to restore its movement.
Continue through the sloping passage and defeat the centaur around the bend from the corridor. Draw the next mutant toward the doorway or retreat to the corner if necessary. Follow the U-shaped walkway around the lava room. Do not use the bridge-raising switch first. Reach the switch at the far end and pull it to open the timed exit door. Immediately run around the walkway to the other switch and pull it to raise the bridge. Roll, sprint across the bridge and pass through the open door before either timer expires.
In the Scion room, collect the Uzi clips and walk up the low ramp on the left side of the mechanical altar. Touch the completed Scion. The vision involving Natla, Qualopec and Tihocan plays, followed by the cutscene in which Natla attacks Lara and falls from the platform. Allow the cutscene to finish and proceed into The Great Pyramid, the fifteenth and final level.
- Defeat the centaur before pulling the exit switch.
- Avoid the two optional incubators if health or ammunition is low.
- Do not shoot the doppelganger; lure it into the lava hatch.
- Use the door-opening switch before the bridge-raising switch.
- Touch the Scion and wait for the transition to The Great Pyramid.
Before you move on
- The completed Scion has been touched in the high mechanical altar room.
- The vision involving Natla, Qualopec and Tihocan has played.
- The cutscene showing Natla attacking Lara and falling from the platform has played.
- The game transitions to The Great Pyramid, confirming that Level 14 is complete. Natla’s actual boss fight remains in Level 15.
Atlantis — The Great Pyramid (Level 15 — Final)
The Great Pyramid is the final level of Tomb Raider (1996) on the original Sony PlayStation. Defeat the large legless Atlantean mutant, solve the movable-block route, destroy the Scion, cross the lava and trap gauntlets, defeat both forms of Natla, then climb out of the cavern and slide down the final ramp. The ending movie and final statistics screen confirm completion.
Defeat the legless Atlantean mutant
The level opens on a broad platform above a deadly drop. The first enemy is a large, legless Atlantean mutant, not Natla. Use the Uzis or shotgun while circling through the open space, but keep Lara well away from the platform edge. Avoid unnecessary jumps because the mutant's claws can grab Lara and a fall is fatal.
A practical tactic is to run past one shoulder, turn around and fire while the creature takes time to face you. If you need a slower method, hang from a distant platform edge while the mutant moves away, pull up to fire, then return to the edge before it reaches Lara. The northeast and southeast corners are the most useful hanging positions, but keep moving along the edge if the mutant can reach you.
When the mutant collapses and explodes, the exit opens. Collect the Uzi clips around the platform if needed, then leave through the doorway. The first PlayStation Save Game Crystal is not here; it appears later in the blade hallway.
- The mutant has exploded and the exit door is open.
- Lara has not fallen from the starting platform.
- Heavy ammunition has been used only if needed, with enough resources reserved for Natla.
Solve the movable-block passage
Go forward, turn left and slide down the ramp. Pass the first movable block, continue down the next ramp and reach the second block. Push the second block three times. Go up the right-hand ramp and around to the back of the first block, then push that block once. Move around it, climb onto it and jump to the ledge ahead.
Pull up into the hallway with breakaway tiles over spikes and chomping blades. On the PlayStation version, collect the Save Game Crystal here. Wait for the blades to begin opening, then run through rather than stopping on the breakaway floor.
Do not take the next ramp immediately. Turn right into the gray-and-white corridor and push the movable block at the bottom once. Return through the corridor, take the previously skipped ramp and drop into the area with the red door. The switch is too high to reach directly. Go to the block you just moved, climb over it and push it underneath the switch. Follow the side passage, return to the block and pull the switch to open the red door.
- Both movable blocks have been positioned correctly.
- The first Save Game Crystal has been collected.
- The red door is open before entering the lava-stream room.
Cross the lava stream and reach the Scion
Enter the room with sandy slopes and a lava stream. Use the flat spots on the right slope: two standing jumps followed by a running jump. The running jump must be set up from the small lip, with a hop backward first, or Lara may perform a shorter jump and fall into the lava.
The drawbridge rises after this sequence. Turn around, repeat the slope jumps in reverse and run across the raised bridge before it drops. The cave beyond is an optional secret containing a large medipack, magnum ammunition and shotgun shells. Return to the switch and use it twice to lock part of the bridge in place, then cross back and take the tunnel on the far side of the slope.
In the narrow tunnel, trigger the first boulder and retreat down and right into the doorway. Return up the ramp, take the second boulder slope and retreat as soon as the boulder rolls. Continue to the breakaway tile, step on it, hop back and safety-drop into the Scion chamber. Shoot the Scion. Its destruction opens the opposite doorway, starts the earthquake sequence and counts as a kill in the level statistics. A PlayStation Save Game Crystal is available in this section.
- The drawbridge has been locked in place after using the switch twice.
- The Scion has been destroyed.
- The second Save Game Crystal has been collected if available before leaving the chamber.
Enter the main trap gauntlet
Leave through the doorway opposite the Scion pedestal. Two mutants occupy the walkways near the timed-bridge room; draw them toward the doorway and shoot from relative safety. A third mutant in the fleshy hallway is optional for normal completion. Drop through the opening near the south wall to begin the trap route.
Jump from the black rocks to the horizontal crevice and traverse right. The PlayStation darts cannot be removed by the PC save-and-reload trick, so cross promptly and maintain control when dropping onto the slippery slope. Move through the doorway, collect the Uzi clips and walk down the right side to trigger the boulder. Let it pass, jump beyond the swinging blade as it moves left and walk through the spikes.
At the breakaway-tile section, use a standing jump to the left tile, immediately side flip right to the next tile and jump forward to the ledge. In the following lava room, use the nearly invisible crevice in the left wall to reach the optional secret with three large medipacks and Uzi clips. From there, jump to the sloped block, backflip to the next block and use the crevice to return to the route. The secret is useful but not required.
- The required mutants have been bypassed or defeated.
- The boulder and swinging-blade section has been crossed.
- The optional second secret has not trapped Lara or delayed the main route.
Cross the remaining lava traps and flaming pillars
At the next combined trap, traverse to the right end of the crevice and drop onto the breakaway tiles while holding Jump and Right to clear the spike pit and avoid the boulder. Continue past the blade. At the next boulder slope, run into the right alcove and wait for the boulder before collecting the small medipack. For the following slope, slide backward while holding Action to grab the edge, let the boulder pass overhead, then pull up and backflip to the ledge.
In the lava-flow room, run to the small medipack, make the running jump through the flows and pull the switch. In the next passage, collect the Uzi clips, stop at the edge of the lava pit and wait for the overhead boulder before jumping to the opposite edge. Wait for the next boulder before pulling up.
The flaming-pillar room is safe if approached carefully. Stand at the outside edge of the starting ramp, line Lara up with Look and perform five standing jumps in a row across the pillars. If Lara falls into the water, climb out below the starting ramp and retry. In the red-and-gold structure, jump onto the breakaway section and immediately continue through the opening. The third secret is in the nearby alcove, but it is optional and may fail to register in some original versions. Drop into the small pool, collect the Uzi clips and swim through the underwater passage. After surfacing, collect the ammunition and the final Save Game Crystal before entering the last chamber.
- The boulder, blade and lava-flow traps have been passed.
- The flaming pillars have been crossed without entering the lava.
- The final Save Game Crystal has been collected after the underwater passage.
Defeat both forms of Natla
Enter the large chamber with weapons drawn. Natla flies above the square pillars and fires damaging fireballs. Keep moving with side flips and backflips while firing continuously. Do not back into a wall or the edge of the arena. There is no separate wing or appendage target; the objective is simply to damage Natla until she falls.
Natla rises again after the first defeat. The second encounter is still required. She is grounded and uses different projectiles, so keep distance, continue side-jumping to avoid the shots and fire until she is defeated for good. If ammunition is low, the tunnel near the entrance contains additional Uzi clips, but Natla can follow Lara inside, so it is not a safe hiding place.
If Lara dies, reload the final Save Game Crystal and repeat the fight with a conservative movement pattern. Do not spend time searching for a special weapon or attack point; sustained ranged fire and controlled dodging are the required method.
- The airborne form has been brought down.
- Natla has risen and been defeated a second time.
- The arena is clear before beginning the exit climb.
Climb out and trigger the ending
After Natla's final defeat, go to the northeast rock pile and enter the doorway behind it. Follow the passage upward. Make a running jump to the nearest pillar, another running jump to the pillar on the left and a standing jump to the pillar below the doorway. Pull up into the opening and continue to the floor opening ahead.
Safety-drop onto the higher pillar, turn around and make the running jumps across the next pillars. Use the final grab jump to reach the pillar beneath the upper opening, climb inside and follow the passage. Drop onto the highest pillar, make the running jump to the red-and-gold ledge and climb into the opening above.
Continue forward to the long ramp and slide down it. The slide ends The Great Pyramid and triggers the ending movie showing Lara's escape, Natla's boat and the destruction of the island. Let the movie finish, then check the final statistics screen. The campaign is complete once the final statistics and ending sequence have appeared.
- Lara has reached the northeast exit route rather than returning to the arena floor.
- The pillar climb and final ramp slide have been completed.
- The ending movie and final statistics screen have appeared.
Before you move on
- The legless Atlantean mutant has been defeated.
- The Scion has been destroyed and the route through the pyramid has been completed.
- Both Natla encounters have been won, including the second fight after she rises.
- Lara has completed the final pillar climb and slid down the long ramp.
- The ending movie and final statistics screen have appeared, confirming completion of the original PlayStation campaign.
Optional: Unfinished Business and Post-Game Secrets
The specified 1996 North American Sony PlayStation release contains the original Tomb Raider campaign only. Its required completion point is the end of The Great Pyramid: defeat both Natla encounters, complete the collapsing-pyramid escape climb, view the ending movie and reach the final statistics screen. Unfinished Business is separate bonus content on releases that explicitly include it. Secrets, replay statistics and expansion levels are optional and do not alter completion of the original PlayStation campaign.
Finish and verify the original PlayStation campaign
Continue The Great Pyramid until both required Natla encounters are defeated. After the second fight, follow the available route through the collapsing pyramid instead of treating the boss victory as the end of the game. Complete the escape climb and continue until the ending movie plays.
Let the ending sequence proceed to the final statistics screen. This screen is the definitive end-of-campaign check for the original PlayStation run. The PlayStation manual documents statistics screens at level completion, and the final sequence provides the overall completion result rather than opening a new story chapter.
If you want a retry point before the final battle, preserve the Save Game Beacon immediately before the Natla encounter. This is the useful recovery point for a failed boss attempt or escape section. Do not rely on creating or preserving a new campaign-complete save after the ending; use the pre-fight beacon and the displayed ending results as your record of completion.
- Defeat Natla in the first required encounter.
- Defeat Natla again after she returns for the second phase.
- Complete the collapsing-pyramid escape climb.
- View the ending movie.
- View the final statistics screen.
Confirm which release contains Unfinished Business
Do not search the original North American PlayStation disc for a hidden Unfinished Business menu or an unlock triggered by defeating Natla. The 1996 PlayStation release uses its Passport for the original campaign and memory-card saves; Unfinished Business is separate content rather than a post-ending continuation of that disc.
Use a release that explicitly lists Tomb Raider: Unfinished Business if you want the bonus chapters. Tomb Raider Gold on compatible computer releases contains the expansion, while Tomb Raider I-III Remastered lists Tomb Raider I together with Unfinished Business as a separate included component on modern supported platforms.
The expansion has four bonus levels: Return to Egypt, Temple of the Cat, Atlantean Stronghold and The Hive. Regional packaging may group or label them under the Shadow of the Cat and Unfinished Business chapter names, but they remain optional levels outside the original Peru, Greece, Egypt and Atlantis campaign. Do not attempt to load them through a 1996 PlayStation campaign save.
- Confirm that the title or product description specifically names Unfinished Business.
- Use the expansion's own selection and saving system on the release that contains it.
- Keep expansion progress separate from the original PlayStation campaign objective.
Replay the original levels for missed secrets
Secret hunting is optional. If you want to recover a missed secret, identify the exact original level first, then use the game's available completed-level or saved-game route to start that level again. The original PlayStation version does not use the modern remaster interface, so do not follow remaster menu directions when choosing a replay.
Search the level's optional routes rather than abandoning the required objective. Check high ledges above the main path, underwater alcoves, side chambers, routes behind waterfalls and detours that require an additional jump or switch. Collect the secret, then finish the level so its ordinary end-of-level statistics screen can be reviewed.
A lower secret total does not mean that the story campaign is incomplete. You only need to replay a level when pursuing a personal secret or statistics target. Keep notes of the levels that still need attention, and avoid replacing the final pre-Natla beacon if you may want another attempt at the ending.
- Name the level containing the missed secret before beginning the replay.
- Search upper, lower, underwater and side-route areas around the required path.
- Complete the replay and review its statistics screen.
- Treat the secret total as optional unless pursuing a separate collection goal.
Handle dangerous optional routes safely
Optional detours can cost more health and ammunition than they provide. Clear nearby enemies before attempting a difficult pickup, and do not spend heavy ammunition merely to reach an item that is not needed for level completion. In Egypt and Atlantis especially, inspect the route above and below Lara before committing to a long jump or swim.
Before diving into an optional underwater recess, identify the exit or breathing point. If a Save Game Beacon is nearby, use it before the attempt. If the route leaves Lara badly injured or strands her without a safe return, reload the earlier beacon and leave the secret for a better-prepared replay.
The same rule applies to hazardous platforming: check the landing area with the Look control, line up the jump, and avoid entering a side route while enemies are still able to attack Lara. These precautions improve a secret-hunting run but are not requirements for the original ending.
- Save at the nearest available beacon before a dangerous optional detour.
- Confirm the underwater exit before diving.
- Reload after an unsuccessful attempt if continuing would leave insufficient health or ammunition.
Keep optional goals separate
The original PlayStation campaign is complete when the required final sequence has been seen, not when every secret has been collected. Perfect statistics, all secrets and expansion completion are separate objectives. Record them independently so an unfinished optional replay is not mistaken for a failure to complete the story.
If you later play Unfinished Business, finish Return to Egypt, Temple of the Cat, Atlantean Stronghold and The Hive on the release that contains them. Their completion does not extend or replace the original PlayStation ending, and it does not change the required completion check for the 1996 North American campaign.
- Keep the original campaign completion result separate from secret totals.
- Track Unfinished Business as optional expansion progress.
- Do not require a post-ending save file for any completion claim.
Before you move on
- Original PlayStation campaign completion: both Natla encounters are defeated, the collapsing-pyramid escape climb is completed, the ending movie is viewed and the final statistics screen is displayed.
- Retry preparation: the final pre-Natla Save Game Beacon is retained if another attempt at the boss or escape is desired; no post-ending campaign save is required.
- Optional secret-hunting completion: each intended level has been replayed, its statistics screen has been checked and every personally targeted secret has been collected.
- Optional expansion completion: Return to Egypt, Temple of the Cat, Atlantean Stronghold and The Hive have all been finished on a release that explicitly includes Unfinished Business.
References for this chapter
Finishing up
You have completed every required campaign level from Caves through The Great Pyramid.
You defeated Natla in both required encounters, destroyed the Scion, completed the final escape climb and viewed the ending movie and final statistics screen.
The completion check is the ending sequence after the Great Pyramid escape; Croft Manor, secrets, perfect statistics and Unfinished Business are optional.
If you want a retry point, retain the save made at the final available Save Crystal before the Natla encounters. The guide does not require or establish a post-credits completed-state save.
Unfinished Business is separate bonus content and is not required for completing the original North American PlayStation campaign.
Choose your next gameScreenshots & video
Game imagery for reference. Follow the written chapters above for the route and strategies.
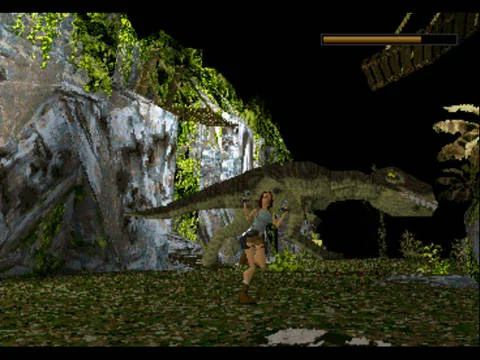
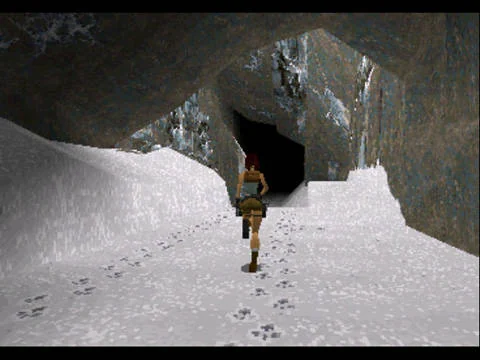
Sources & references
Our original guide draws on the references below. Check the edition at the top of this page before following controls or unlock requirements.
- Tomb Raider PlayStation Game Manual
- Lara’s Home and Level 01—Caves — Tomb Raider Walkthrough and Trophy Guide — GameFAQs
- Lara’s Home (TR1) — Lara Croft Wiki
- Tomb Raider 1 (1996) — Level 1: Caves — Stella’s Classic Tomb Raider Walkthrough
- Tomb Raider (1996) — Level 1: Caves, Stella’s Classic Tomb Raider 1 Walkthrough
- Tomb Raider 1 Walkthrough — Caves, Tomb Raider Vault
- Tomb Raider/Caves, StrategyWiki
- Tomb Raider (1996) — Level 2: City of Vilcabamba (Classic), Stella’s Tomb Raider Site
- Tomb Raider Walkthrough and Game Guide — Peru, Level 2: City of Vilcabamba, Tomb Raider Chronicles
- Level 02 — City of Vilcabama, Tomb Raider Walkthrough and Guide, GameFAQs
- Tomb Raider 1 Walkthrough — City of Vilcabamba, Tomb Raider Vault
- Tomb Raider (1996) — Level 3: Lost Valley, Classic Walkthrough
- Tomb Raider Walkthrough and Game Guide — Level 3: Lost Valley
- Level 03 — Lost Valley, Tomb Raider Walkthrough and Guide
- Tomb Raider — Guide and Walkthrough — PlayStation, GameFAQs
- Tomb Raider 1 Walkthrough — Lost Valley
- Tomb Raider (1996) — Level 4: Tomb of Qualopec — Classic Walkthrough
- Tomb Raider - Guide and Walkthrough - PlayStation - By laracroftrules
- Tomb Raider (1996) — Level 5: St. Francis' Folly, Stella's Classic Walkthrough
- Tomb Raider 1 Walkthrough — St. Francis' Folly, Tomb Raider Vault
- Level 05 — St. Francis' Folly, Tomb Raider Walkthrough and Guide, GameFAQs
- Tomb Raider Walkthrough and Game Guide — Greece, Level 5: St. Francis' Folly
- Tomb Raider Walkthrough and Game Guide: Greece, Level 6: Colosseum
- Tomb Raider — Guide and Walkthrough for PlayStation by CHamlin
- Tomb Raider — Guide and Walkthrough, PlayStation, GameFAQs
- Tomb Raider (1996 Game)/Walkthrough | Lara Croft Wiki
- Tomb Raider (1996) — Level 7: Palace Midas, Stella’s Classic Walkthrough
- Tomb Raider 1 Walkthrough — Palace Midas, Tomb Raider Vault
- Tomb Raider Walkthrough and Game Guide: Greece, Level 7: Palace Midas
- Tomb Raider (1996) — Level 8: The Cistern (Classic), Stella’s Classic Tomb Raider Walkthrough
- Tomb Raider Walkthrough & Guide — PlayStation, Auron402
- Tomb Raider 1 Walkthrough — The Cistern, Tomb Raiders Traveler’s Guide
- Level 09--Tomb of Tihocan - Tomb Raider Walkthrough & Guide - GameFAQs
- Tomb Raider Walkthrough and Game Guide: Greece, Level 9: Tomb of Tihocan
- Tomb Raider 1 Walkthrough | Tomb of Tihocan | Tomb Raider Vault
- Stella's Classic Tomb Raider 1 Walkthrough — Level 10: City of Khamoon
- Tomb Raider Walkthrough and Game Guide — Level 10: City of Khamoon
- GameFAQs — Level 10: City of Khamoon, Tomb Raider Walkthrough and Trophy Guide
- Tomb Raider (1996) — Level 11: Obelisk of Khamoon, Stella’s Classic Tomb Raider Walkthrough
- Tomb Raider Walkthrough and Game Guide: Egypt, Level 11 — Obelisk of Khamoon
- Tomb Raider (1996) — Level 12: Sanctuary of the Scion, Stella’s Classic Walkthrough
- Level 12 — Sanctuary of the Scion, Tomb Raider Walkthrough and Guide
- Tomb Raider 1 Walkthrough — Sanctuary of the Scion, Tomb Raider Vault
- Level 12 — Sanctuary of the Scion, Gamer Walkthroughs
- Tomb Raider 1 Controls, Stella’s Tomb Raider Site
- Tomb Raider (1996) - Level 13: Natla's Mines, Stella's Classic Tomb Raider Walkthrough
- Tomb Raider (1996) - Guide and Walkthrough - Zodiac - By MSmith
- Level 13--Natla's Mines - Tomb Raider Walkthrough & Guide
- Tomb Raider (1996) - Level 14: Atlantis, Stella’s Classic Tomb Raider 1 Walkthrough
- Tomb Raider Walkthrough and Game Guide: Atlantis, Level 14: Atlantis
- Level 14--Atlantis - Tomb Raider Walkthrough & Guide, GameFAQs
- Tomb Raider (1996) — Level 15: The Great Pyramid, Stella's Classic Tomb Raider Walkthrough
- Tomb Raider I-III Remastered Starring Lara Croft
- Aspyr & Crystal Dynamics Reveal Tomb Raider I-III Remastered Starring Lara Croft
- Tomb Raider (1996) Walkthrough: Level 15 — The Great Pyramid
- Tomb Raider Gold: Unfinished Business Walkthrough — The Hive
About the game & collecting notes
- Platform
- Sony PlayStation
Step through the original 1996 PlayStation release of Tomb Raider (Core Design/Eidos) from Caves through The Great Pyramid. This guide covers every main campaign level on the PlayStation edition, practical routing, major hazards, boss patterns, and how to reach the canonical ending without relying on remakes, remasters or modern mechanics. Lara’s Home is optional training and is not part of the required campaign sequence.
Darryl Polo
Darryl Polo loves tinkering with emulation and revisiting retro games. He enjoys exploring how old favorites play on different setups and sharing what he learns along the way. At Joking Joystick, he writes about the games, hardware, and small discoveries that keep the hobby fun.
Our editorial standardsFound a step that needs another look? Help us improve this guide.