
The Witcher: Enhanced Edition (GOG) — Complete Campaign Walkthrough
Step-by-step campaign coverage for The Witcher: Enhanced Edition on GOG. This walkthrough takes you from the Kaer Morhen prologue through Chapters I–V to the official epilogue, explains key choices that change late-game outcomes, and shows how to handle the Striga, ally routes and final confrontation while using the Enhanced Edition fixes.


Find a copy
The Witcher: Enhanced Edition PC (GOG)
We may earn a commission if you buy through these links, at no extra cost to you. As an Amazon Associate I earn from qualifying purchases.
Opens retailer search results. Check the model, edition, seller, availability and current price before buying.
Before you begin
This guide is written for the Enhanced Edition of The Witcher as provided on GOG.
Play at the difficulty you prefer; the walkthrough explains safe approaches to combat encounters, how to manage alchemy and equipment, which choices matter for the ending, and what to do if you want a save that reflects particular long-term consequences.
Follow each chapter in order unless you want to delay an optional quest.
Save often and keep multiple save files: many key choices are irreversible and some late-game outcomes depend on quests you finish (or skip) earlier.
If you bought the GOG edition, it arrives pre-updated to the Enhanced Edition build—check the Preparation notes below before you start.
Set yourself up for the run
Install the GOG copy; the GOG distribution is already updated for normal play, so do not apply the historical retail patch chain.
Choose any difficulty and keep a manual save before major quest decisions, faction commitments, chapter transitions, and the final sequence.
Learn the three sword styles and the Signs, and verify the current keyboard bindings in the controls menu.
Use the steel sword for humans and ordinary animals and the silver sword for monsters once it becomes available in Chapter II.
Keep reliable healing, alcohol for meditation, useful oils, and active-quest ingredients. Swallow is a practical early recovery potion; Thunderbolt is optional rather than a universal requirement.
Sort inventory regularly, sell duplicate equipment and ordinary junk, and retain quest items, trophies, rare ingredients, meteorite pieces, and runes until their uses are settled.
Read monster-lore books before collecting contract materials when the contract requires specific creature knowledge.
For Witcher 2 continuity, record major decisions such as Adda's fate, Thaler's fate, the Alvin guardian choice, and the Order, neutral, or Scoia'tael route.
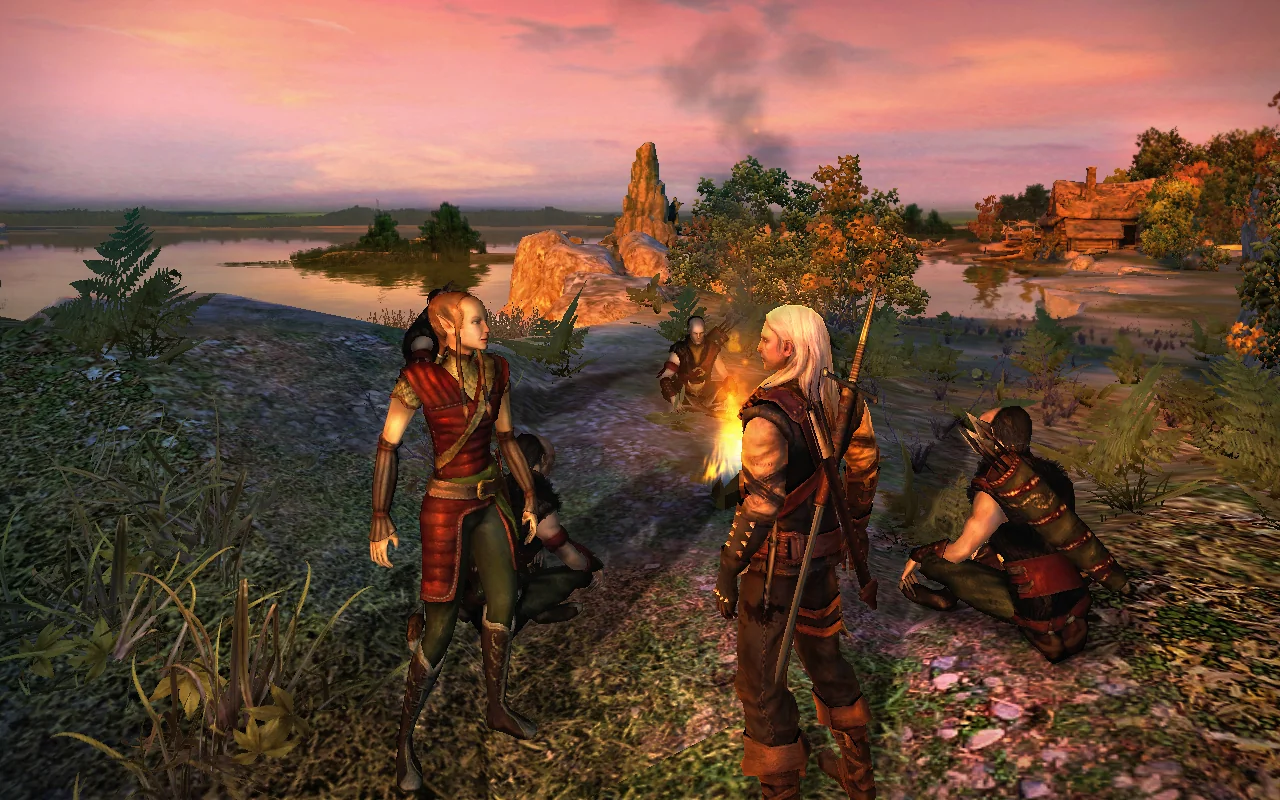
Prologue — Kaer Morhen: recovery and defense
Complete the assault on Kaer Morhen, learn the game’s sword combat and Sign system, meditate to spend your first talents, brew A Potion for Triss, and leave the fortress for Chapter I. The Prologue gives Geralt a steel sword and basic armor, but not a silver sword; you will obtain the silver blade later in the campaign.
1. Follow the opening tutorial and take the rusty sword
Begin by speaking with Vesemir and following the opening conversations until the Salamandra assault starts. When the game leads Geralt toward the training area, take the Rusty Sword from the training dummy and equip it before approaching the nearby attackers. The combat system is built around timed follow-up strikes, so do not repeatedly click as quickly as possible. Click once, wait for the attack cursor to become the flaming sword, then click again to continue the sequence.
During the first fights, stay near Leo and use the keep’s gates, walls and stairs to prevent enemies from surrounding Geralt. The objective is not to search every room during the attack. Follow the active objective, loot only when the immediate area is safe, and keep moving when several bandits close in.
- Speak with Vesemir and follow the attack into the training area.
- Take and equip the Rusty Sword.
- Use timed follow-up attacks instead of rapid button presses.
- Use walls, gates and stairs to avoid being surrounded.
2. Learn the three sword styles and Aard
Use Fast Style against lightly protected human enemies and Strong Style against a tougher isolated target. Group Style is the appropriate response when several enemies are close together, but do not remain in the center of a crowd simply because the style can hit multiple targets. Move along the edge of the group and attack through the nearest opening.
Aard is the first Sign you learn. When the game directs you to the Circle of Whispering Stones, interact with it to unlock Aard. In combat, Aard can stagger or knock down suitable enemies and is most valuable when a group is pressing Geralt or when you need a short opening to finish one target. Igni is available as a tutorial option in the assault, but do not spend all of your Endurance on Signs when sword attacks can solve the encounter. If Geralt is hurt, disengage and reposition rather than trying to win a crowded fight by trading damage.
- Use Fast Style for agile or lightly protected enemies.
- Use Strong Style for tougher isolated opponents.
- Use Group Style when enemies cluster, while attacking from the edge of the group.
- Learn Aard at the Circle of Whispering Stones.
- Use Aard to create space or interrupt an advancing enemy.
3. Choose the assault route and finish the keep defense
After helping clear the first section, the assault branches into two immediate objectives. Geralt can help Vesemir deal with the Frightener outside or help Triss defend the laboratory against the attackers led by Savolla. Both routes lead to the same broad Prologue outcome: the witcher mutagens are stolen, Leo is killed by the Professor, and the party prepares to leave Kaer Morhen.
If you choose the Frightener route, do not attack it carelessly in the open courtyard. The encounter is tied to the fortress equipment and the surrounding fight, so remain mobile and avoid standing directly in front of the monster. If you choose the laboratory route, use Group Style when the Salamandra bandits bunch together and use Aard to interrupt an enemy who reaches Geralt while he is already engaged with another target. Search the courtyard and defeated enemies only after the active fight has ended.
This decision is not the choice that places Geralt on the Order, Neutral or Scoia’tael path. It changes the Prologue battle and contributes to some later details, but faction alignment is determined by later decisions.
- Reach the branch where Vesemir asks Geralt to help outside or help Triss.
- Choose either the Frightener route or the laboratory route.
- Complete the selected combat objective.
- Continue through the laboratory aftermath and Leo’s death.
4. Meditate and collect the first proper equipment
After the assault, speak with Vesemir. The game requires Geralt to meditate before the next stage can proceed. Use this opportunity to open the Character screen and spend the Bronze talents gained during the assault. Broad improvements to attributes and basic combat abilities are safer than investing everything into a narrow tactic. There is no need to create a perfect build in the Prologue because the campaign provides many more talents.
When Vesemir gives Geralt the equipment for the road, collect the Witcher’s Steel Sword and Studded Leather Jacket. The steel sword replaces the Rusty Sword and is the correct weapon for humans and other ordinary flesh-and-blood enemies. The Prologue does not provide Geralt with a silver sword. Do not put a silver blade on the completion checklist and do not assume that the Frightener fight requires one; the first silver sword is obtained in Chapter II.
Vesemir also teaches Geralt how to obtain the monster component needed for Triss’s potion. Follow the objective and use the appropriate interaction on the Frightener’s remains when the game directs you there. If you pursued the alternate laboratory route, follow the quest markers and dialogue instructions rather than searching for a different weapon or trying to force a silver-sword solution.
- Meditate when Vesemir requires it.
- Spend the first Bronze talents.
- Equip the Witcher’s Steel Sword.
- Equip the Studded Leather Jacket.
- Learn the monster-looting or Flaying instruction from Vesemir.
- Do not expect to receive a silver sword in the Prologue.
5. Complete A Potion for Triss in the correct order
Speak with Vesemir to receive A Potion for Triss, then talk to Lambert near the kitchen. Lambert explains that the potion requires White Gull and Calcium Equum. Search the designated crates inside the keep rather than buying substitutes. One crate contains Calcium Equum and two Swallow potions; another contains White Gull potions and additional early supplies. The exact placement is more important than the number of rooms searched, so use the quest map and inspect the containers near the kitchen and hall.
Return to Lambert after obtaining the first ingredients. He directs Geralt to obtain a Frightener’s Claw and speak with Vesemir. Vesemir supplies Celandine and teaches the relevant monster-looting ability. Go to the courtyard, collect the Frightener’s Claw from the remains when prompted, then return to the keep. The completed formula uses Calcium Equum, Celandine, Frightener’s Claw and White Gull.
Meditate at the fireplace or another available meditation point, open the Alchemy screen, select Potion for Triss and mix it. Do not substitute Tawny Owl for the required quest potion. Tawny Owl supports Endurance regeneration and is not a basic damage potion. Swallow is your main early healing reserve, restoring vitality over time, so keep the two available Swallow potions instead of selling them. There is no need to spend early coin trying to manufacture a large stock of oils; the Prologue can be completed with the quest potion, the supplied healing items and sound combat positioning.
- Talk to Lambert after the required meditation.
- Collect Calcium Equum and White Gull from the keep’s supplies.
- Receive Celandine and the Flaying instruction from Vesemir.
- Collect the Frightener’s Claw.
- Keep the two Swallow potions found in the keep.
- Meditate and mix Potion for Triss with the four required ingredients.
6. Heal Triss, finish optional Prologue tasks and leave Kaer Morhen
Take the completed potion to Triss in her room on the upper level and give it to her through the conversation or gift interaction. Her recovery completes the central alchemy objective. Before ending the Prologue, make a final pass through the keep. Kaer Morhen will not remain a normal exploration hub after the funeral, so this is the safe time to speak with Eskel about the introductory fistfight activity, finish any available conversations, inspect remaining containers and review your talents.
You may also speak with Vesemir about the assault and exhaust available conversation topics. Depending on your earlier route and dialogue, he can provide an additional Red Meteorite. Treat this as an optional reward rather than a required upgrade. Meteorite forging requires a suitable blacksmith and additional resources, so do not delay the campaign or sell healing supplies merely to pursue an early sword refinement.
When ready, speak with Triss in her room or Vesemir in the main hall and choose the option to proceed. Make a manual save immediately beforehand. The funeral and departure end the Prologue and move Geralt to the Outskirts of Vizima, beginning Chapter I.
- Give Potion for Triss to Triss.
- Speak with Eskel if you want to start the introductory fistfight activity.
- Review optional conversations and remaining containers before leaving.
- Confirm that the Witcher’s Steel Sword and Studded Leather Jacket are equipped.
- Make a manual save before starting the funeral.
- Proceed to the funeral and verify the transition to Chapter I in the Outskirts of Vizima.
Before you move on
- The Kaer Morhen assault and Leo’s death sequence are complete.
- Aard has been learned at the Circle of Whispering Stones.
- Geralt has the Witcher’s Steel Sword and Studded Leather Jacket equipped or available.
- Geralt has not been incorrectly expected to possess a silver sword yet.
- Potion for Triss has been brewed and delivered to Triss.
- The two early Swallow potions and useful reagents were not sold unnecessarily.
- A manual save exists immediately before the funeral.
- The game transitions from Kaer Morhen to the Outskirts of Vizima and begins Chapter I.
References for this chapter
- The Witcher: Enhanced Edition — GameBanshee Prologue Walkthrough
- The Witcher: Enhanced Edition — A Potion for Triss Walkthrough
- The Witcher: Enhanced Edition — Gameplay Notes and Equipment Progression
- The Witcher: Enhanced Edition — Gamer Guides Prologue Walkthrough
- The Witcher: Enhanced Edition — A Potion for Triss
- The Witcher Manual — Atari PDF
- GOG — The Witcher: Enhanced Edition
Chapter I — Outskirts: contracts and local threats
The Outskirts contracts can be completed while you are earning the trust of the village residents and investigating Salamandra. Read the three notices outside the Country Inn, obtain the required monster knowledge before collecting remains, accept Buried Memories from Mikul, and clear the crypt before the chapter advances into the Beast investigation. These tasks belong to The Witcher, not The Witcher 2: there is no Flotsam chapter or Flotsam transition here. On the GOG Enhanced Edition, the game is already updated, so no separate historical patch installation is normally required.
1. Start at the Country Inn and read the notice board
After arriving in the Outskirts, go to the Country Inn and read the notice board outside. Reading the three notices adds the Barghest Contract, Drowner Contract and Ghoul Contract to your journal. The notices themselves are not needed after they have been read, so you can remove them from your inventory if space is limited.
Use the inn as your travel and resupply point. The antiquary sells books, Kalkstein is staying there, and Abigail is nearby. Repair your swords before difficult trips and avoid spending your early orens on unnecessary equipment until you have bought the monster information needed for the contracts.
Make a manual save before entering the crypt and another before pushing the Reverend’s investigation into its final Beast-related stages. If you want to complete all three contracts in this chapter, do not rely only on autosaves.
- Read the notice board outside the Country Inn.
- Accept the Barghest, Drowner and Ghoul Contracts.
- Locate the antiquary, Abigail, Kalkstein and the nearby repair service.
- Keep a manual save before the crypt and before the final Beast-investigation sequence.
2. Earn the village’s trust and accept Buried Memories
Speak with the Reverend and obtain the Eternal Fire signet ring. Show the ring to Mikul, Haren Brogg and Odo when their dialogue allows it. The ring is a normal way to gain access to their quests, although Mikul can also be persuaded by other means.
Mikul is the guard at the Merchants’ Gate. Accept Buried Memories from him. This quest gives you the legitimate route into the crypt and provides the crypt key. Do not enter the crypt expecting to complete the objective without first taking Mikul’s quest.
Accept Haren’s related drowner task and Odo’s available request while you are working through Of Monsters and Men. These village errands overlap with the investigation and can be completed during the same route. The contract route does not require you to finish every optional Outskirts quest, but the Mikul objective is important if you want reliable access to the crypt.
- Obtain the Eternal Fire signet ring or another valid way to gain Mikul’s trust.
- Show the ring to Mikul, Haren Brogg and Odo.
- Accept Buried Memories from Mikul.
- Obtain the crypt key before attempting to enter.
3. Read the monster information before collecting remains
Read Swamp Monsters before collecting Drowner Brain Tissue. The book can be found free in a peasant house or bought from Abigail or the antiquary. Without the required knowledge, Geralt may kill drowners without being able to harvest the contract material.
Read The Tome of Fear and Loathing, Volume I before hunting for Ghoul Blood. The antiquary can sell it, and it can also be obtained through the drinking game at the inn. Reading it first is the safest order because the crypt is a limited early source of ghouls, and you do not want to clear the area before the game recognizes the remains.
Barghest Skulls do not require a bestiary book for this contract. Keep all Barghest Skulls, Drowner Brain Tissue and Ghoul Blood in your inventory or storage until their contracts have been delivered.
- Read Swamp Monsters before harvesting drowner remains.
- Read The Tome of Fear and Loathing, Volume I before harvesting ghoul blood.
- Do not sell any contract material before turning in its contract.
4. Finish the Barghest Contract
Travel around the village and nearby roads at night. Barghests appear throughout the Outskirts after dark, so make a circuit rather than searching one fixed spawn point. You need ten Barghest Skulls for Abigail.
Use Fast Style against isolated barghests and Group Style when several surround Geralt. Keep moving toward open ground instead of allowing the pack to pin you against a wall or fence. If your health drops, retreat to the road or inn, meditate in safety, and return for another night hunt.
When you have ten skulls, return to Abigail and choose the dialogue option for the Barghest Contract. She provides the contract reward. This is optional for the main story, but it is useful early experience, money and practice with stance changes.
- Hunt barghests after dark.
- Collect ten Barghest Skulls.
- Return the skulls to Abigail and claim the reward.
5. Complete the Drowner Contract at the river
Go to the riverbank near Haren Brogg’s house at night. Drowners appear along the water and nearby paths, generally in groups. You need three Drowner Brain Tissue samples for the Reverend.
Use Fast Style for a small number of targets and Aard to interrupt or separate a group. Circle rather than standing directly in front of several drowners. If the fight becomes crowded, retreat toward the road, recover, and make another attempt instead of spending every healing item at once.
Return the three samples to the Reverend. Haren’s related task may be active at the same time, so check both objectives before moving on. The contract reward is obtained from the Reverend, not Haren.
- Read Swamp Monsters first.
- Hunt drowners near the riverbank at night.
- Collect three Drowner Brain Tissue samples.
- Deliver the samples to the Reverend.
6. Enter the crypt and complete the Ghoul Contract
After accepting Buried Memories and receiving Mikul’s key, enter the crypt. The initial objective is to clear the ghouls for Mikul. The crypt contains roughly six ghouls in the first clearing sequence, including groups encountered as you move toward the larger chamber. You will also find the body and vial connected to the quest investigation.
Use Strong Style against individual ghouls and reposition through doorways or wider spaces when more than one attacks. Aard can create room when Geralt is being surrounded. Do not chase a wounded ghoul into a corner where another can attack from behind.
With The Tome of Fear and Loathing, Volume I read, harvest three Ghoul Blood samples and deliver them to Kalkstein at the Country Inn. Kalkstein rewards the completed contract with orens and Basics of Alchemy.
Return to Mikul after clearing the crypt and report what you found. The quest’s later stage directs you to Mikul again after the Salamandra attack, when he has moved to the Miller’s Gate post. Follow the journal rather than assuming every crypt passage must be reopened immediately.
- Accept Buried Memories before entering.
- Take Mikul’s crypt key.
- Clear the initial ghoul groups and investigate the body and vial.
- Collect three Ghoul Blood samples after reading the ghoul-lore book.
- Deliver the blood to Kalkstein.
- Return to Mikul when the quest journal directs you to report.
7. Close the contract route before the Beast investigation advances
Verify that Abigail has accepted ten Barghest Skulls, the Reverend has accepted three Drowner Brain Tissue samples, and Kalkstein has accepted three Ghoul Blood samples. Repair your steel and silver swords, sell ordinary loot, and keep useful alcohol, ingredients and healing items for the next investigation steps.
Continue the Reverend’s investigation through the local residents and the Salamandra-related objectives. Before entering the sequence that brings Abigail and the Beast into direct focus, make a clean manual save. This is the correct handoff to Chapter I — Outskirts: the Beast investigation and transition to Vizima.
The next route remains in the Outskirts and eventually uses Miller’s Gate to reach Vizima. It does not lead to Flotsam. Flotsam, Thaler and All the King’s Men are The Witcher 2 content and must not be used as directions for this game.
- Deliver all three contracts.
- Finish the desired Mikul, Haren Brogg and Odo investigation steps.
- Repair both swords and restock supplies.
- Create a clean save before the final Beast-investigation stages.
- Continue to Chapter I — Outskirts: the Beast investigation and transition to Vizima.
Before you move on
- The Barghest Contract is complete and ten Barghest Skulls have been delivered to Abigail.
- The Drowner Contract is complete and three Drowner Brain Tissue samples have been delivered to the Reverend.
- The Ghoul Contract is complete and three Ghoul Blood samples have been delivered to Kalkstein.
- Buried Memories has been accepted, the crypt has been cleared for Mikul, and the crypt evidence has been reported as directed by the quest journal.
- The desired early investigation work involving Mikul, Haren Brogg and Odo is complete.
- Both swords are repaired, basic supplies are replenished, and a manual save exists before the Beast investigation’s final stages.
- The next objective is Chapter I — Outskirts: the Beast investigation and transition to Vizima, not Flotsam.
Chapter I — Outskirts: the Beast investigation and transition to Vizima
Chapter I takes place in the Outskirts of Vizima, not Flotsam. Flotsam, Thaler and All the King’s Men belong to The Witcher 2: Assassins of Kings and must not appear in this chapter. Geralt’s main route is to investigate the Beast, gather information from the Reverend and Abigail, eliminate the Salamandra presence, decide Abigail’s fate, recover the Trace of the Beyond, obtain a Letter of Safe Conduct and leave through Miller’s Gate. The Prologue provides Geralt’s steel sword; the silver sword is recovered from Jethro at the beginning of Chapter II.
1. Begin the Beast investigation
After the opening barghest attack at the Country Inn, speak with Shani and then visit the Reverend. The Reverend will not provide useful information immediately. He gives Geralt five holy flames and asks him to light the Eternal Fire shrines scattered through the Outskirts.
The shrine objective can only be completed at night. Wait until the game permits the interaction, then travel between the five shrine locations and place a holy flame at each one. Barghests appear at the shrines, so keep moving and avoid letting several surround Geralt. Fast Style is suitable for an isolated barghest, while Group Style helps create space when multiple enemies close in.
Return to the Reverend after the fifth shrine is lit. This advances the Beast investigation and directs Geralt toward Abigail. The shrine task is required progression, not optional exploration.
- Defeat the opening barghests at the Country Inn.
- Speak with Shani.
- Visit the Reverend.
- Light all five Eternal Fire shrines at night.
- Return to the Reverend after lighting the final shrine.
2. Help Abigail question Alvin
Go to Abigail’s hut and ask about the Beast and Alvin. Abigail explains that she needs five White Myrtle Petals to prepare a potion that will help Alvin provide information. Gather the petals from the Outskirts if Geralt has the necessary plant knowledge, or obtain them from an herbalist or another available source. If the plant cannot be harvested, acquire the Field Plants knowledge before searching for the flowers.
Give Abigail all five petals. Leave the hut and return after the potion is ready. Speak with her again and follow the divination involving Alvin. When the scene concludes, Abigail gives Geralt Berengar’s notes on the Beast.
Do not report the Beast’s origin to the Reverend until you have finished the Country Inn work you want to keep. After that report, activities and services around the Country Inn become unavailable. Complete desired boxing, drinking, dice, shopping, storage, looting and local errands before returning to the Reverend with Abigail’s evidence.
- Visit Abigail after completing the shrine task.
- Obtain five White Myrtle Petals.
- Give the petals to Abigail.
- Leave and return after the potion is prepared.
- Complete the Alvin divination.
- Take Berengar’s notes on the Beast.
- Finish desired Country Inn activities before reporting to the Reverend.
3. Report the evidence and prepare for the Salamandra sequence
Return to the Reverend with the information obtained through Abigail. This moves the investigation into its final phase. Before choosing the dialogue that reports the Beast’s origin, make sure your inventory is organized, your equipment is repaired and any desired Country Inn content is finished.
The next objectives lead Geralt back toward the Country Inn and the Salamandra presence. Follow the active journal entries through the occupied area, defeat the Salamandra members and search the interior for the route into their hideout. The route continues through the hideout and connected cave rather than ending with the first group of enemies.
Use Group Style when several Salamandra fighters or other enemies attack together. Against a single tougher target, Strong Style is generally more effective. Use Aard when the path requires breaking or opening a weak obstruction, and pull enemies toward doorways or narrow passages so that the entire group cannot attack at once.
Before entering the final cave section, meditate if necessary, restore vitality, repair the steel sword and prepare a healing potion such as Swallow. Make a manual save before the final Abigail conversation.
- Report Abigail’s Beast evidence to the Reverend.
- Finish all desired Country Inn activities beforehand.
- Follow the journal to the Salamandra-occupied area.
- Clear the Salamandra hideout and connected cave.
- Repair equipment and prepare healing supplies.
- Make a manual save before the final Abigail dialogue.
4. Speak with Abigail and decide whether to protect her
At the end of the hideout route, speak with Abigail. The villagers, including the Reverend, are waiting outside and intend to punish her. Exhaust the available dialogue and then choose whether Geralt will defend Abigail or leave her to the villagers’ judgment.
This choice has immediate and later consequences. If Geralt protects Abigail, she assists during the Beast fight and can heal him if she remains standing. If Geralt leaves her, Abigail is unavailable during the fight and Geralt receives different support. Abigail’s survival also affects her availability and the way The Heat of the Day develops in Chapter IV.
Make a separate branch save before leaving the cave. That save preserves the Abigail decision without requiring you to replay the investigation. The choice here is separate from the later Order, Neutral or Scoia’tael political alignment; it does not by itself determine Geralt’s final faction path.
- Speak with Abigail in the cave.
- Exhaust the relevant dialogue.
- Make a branch save before leaving.
- Choose whether to defend Abigail.
- Remember that the decision affects the Beast fight and later Chapter IV content.
5. Defeat the Beast
Prepare during meditation before starting the confrontation. Swallow is useful for sustained recovery. Willow can help against the Beast’s stun and pain effects if you have prepared it. Specter Oil is a useful damage option if available, but do not rely on one potion or oil as the only solution. Enter with a repaired steel sword and enough room to move.
The Beast is accompanied by recurring barghest attacks. When several barghests are close, use Group Style to clear space and protect the assisting character. Once the Beast is separated from the pack, switch to Strong Style for direct damage. Aard can occasionally knock the Beast down, but it may require repeated attempts, so continue fighting carefully rather than waiting for one guaranteed Sign result.
Keep the camera on the Beast and reposition whenever Geralt is surrounded. If vitality drops, retreat to open ground, let the assisting character draw attention where possible and resume after recovery. If Abigail is helping, avoid allowing the barghests to overwhelm her; protecting her can make the fight substantially easier.
After the Beast dies, the consequences of the Abigail decision continue. If Geralt defended her, the villagers attack in the aftermath. Clear the hostile group before attempting to leave the area.
- Meditate and drink planned potions before the encounter.
- Use Group Style against clusters of barghests.
- Use Strong Style when attacking an isolated Beast.
- Use Aard only as an opportunity, not as the entire plan.
- Protect Abigail if she is assisting.
- Defeat the Beast and resolve the hostile aftermath.
6. Recover the Trace of the Beyond and Letter of Safe Conduct
Loot the Beast’s body immediately after the fight and take the Trace of the Beyond. The Beast’s death does not place this item in Geralt’s inventory automatically. It is required as quest evidence and remains useful for later alchemy.
The Letter of Safe Conduct depends on the aftermath. If the Reverend survives and remains on Geralt’s side, he gives Geralt the letter. If Geralt protects Abigail and the Reverend becomes hostile, defeat the hostile group and loot the Reverend’s body for the letter. Do not assume that looting random villagers will provide it.
Open the inventory and verify both the Trace of the Beyond and the Letter of Safe Conduct. These are separate checks. If either item is missing, do not leave the Outskirts or create your final Chapter I archive save.
- Loot the Beast’s body.
- Take the Trace of the Beyond.
- Resolve the Reverend and villagers’ aftermath.
- Obtain the Letter of Safe Conduct from the Reverend or his body, according to the branch.
- Verify both items in the inventory.
7. Return to Shani and leave through Miller’s Gate
Return to the Country Inn and speak with Shani. The journal then directs Geralt toward the exit from the Outskirts. Make a final Chapter I save after confirming the quest items and the Abigail outcome.
Travel through the Outskirts toward Miller’s Gate and speak with Mikul. The Letter of Safe Conduct is part of the completed objective chain, but the intended result is still a scripted capture. Geralt is taken into the Vizima Dungeons; this is the normal transition and does not indicate a failed attempt.
Chapter II begins after the capture sequence. Geralt’s silver sword is obtained from Jethro during the Chapter II opening progression when his confiscated equipment is returned. Do not search Chapter I for a silver sword or treat its absence as a missing reward.
- Return to the Country Inn.
- Speak with Shani.
- Confirm the Trace of the Beyond and Letter of Safe Conduct are present.
- Save the completed Chapter I state.
- Travel to Miller’s Gate.
- Speak with Mikul.
- Allow the scripted capture to begin Chapter II.
- Expect the silver sword only during the Chapter II opening sequence.
Before you move on
- All five Eternal Fire shrines have been lit at night.
- Abigail’s divination has been completed.
- Berengar’s notes on the Beast have been obtained.
- The Salamandra hideout and connected cave are complete.
- Abigail’s fate has been chosen and preserved in a branch save.
- The Beast has been defeated.
- The Trace of the Beyond is in the inventory.
- The Letter of Safe Conduct is in the inventory.
Chapter II — Temple Quarter / Entry to Vizima: infiltration and politics
Chapter II begins with Geralt imprisoned in Vizima and develops into the Salamandra investigation known as Vizima Confidential. The required route moves through the prison and sewers, the Temple Quarter, the dike and Swamp Forest, and the old mage’s tower. The investigation can advance through different evidence routes, so follow the current journal phase instead of forcing one fixed suspect order. Before the swamp-tower sequence, finish the optional Temple Quarter, sewer, swamp, faction, romance and Alvin content you want to preserve. The chapter is not complete when you merely meet Raymond at the tower: continue through the confrontation with Azar Javed and the Professor, survive the scripted defeat, and confirm that Geralt wakes at the beginning of Chapter III.
Complete Prison Break and establish the Temple Quarter
Chapter II opens with Geralt in a Viziman prison cell. After the opening conversations and required fistfight, leave the cell and speak with Jethro. He gives Geralt a Witcher’s silver sword, two Cat potions and a Blizzard potion before Geralt is lowered into the sewers. Equip the silver sword immediately; it is the weapon intended for the cockatrice encounter.
In the sewers, Siegfried can assist with the cockatrice. Keep moving, avoid standing directly in front of the monster for long periods, and use Quen before committing to an attack sequence if your health is low. After the fight, take the cockatrice head and return it to Vincent Meis for the related reward. Complete the remaining prison sequence, deal with the Salamandra attack and return to Jethro to recover Geralt’s confiscated equipment.
Once you reach the Temple Quarter, identify the Hairy Bear inn, Raymond Maarloeve’s house, Shani’s hospital, the cloister, the prison, the sewer entrance and the route to the dike. The inn is a useful base for resting, eating, trading and reviewing the journal. Read the notice board and accept contracts selectively; contracts are optional for campaign progression, but they are useful for experience, money and ingredients.
- Complete Prison Break.
- Receive the silver sword and starter potions from Jethro before entering the sewers.
- Defeat the cockatrice and deliver its head to Vincent Meis.
- Recover Geralt’s stored equipment from the prison.
- Locate the inn, Raymond’s house, the hospital, the cloister, the prison and the dike route.
Begin Vizima Confidential and follow the evidence chain
Meet Raymond Maarloeve at his house and accept Vizima Confidential. This investigation spans most of Chapter II and requires repeated conversations with suspects and witnesses. Depending on your decisions and the order in which you obtain evidence, the journal can direct you toward Vincent Meis, Thaler, Ramsmeat, Kalkstein, Leuvaarden, Golan Vivaldi and the Crown Witness.
Speak to the suspect named by the current journal stage, exhaust the available investigation dialogue and return to Raymond after obtaining new testimony, letters, books or other evidence. Some characters provide different information when questioned again later, so a conversation that appears unproductive may become useful after another quest advances.
Do not kill or accuse a suspect simply because Raymond identifies that person as the current lead. Raymond is manipulating the investigation, and the correct route is to gather evidence rather than obey every immediate instruction. Keep one normal progress save, one investigation backup and one save before the final tower sequence. This is enough to recover from a bad conclusion without turning every conversation into a separate save file.
- Accept Vizima Confidential from Raymond.
- Question the suspects currently named in the journal.
- Advance The Crown Witness and What Lies Beneath when they appear.
- Return to Raymond after each major evidence step.
- Keep a save before any suspect-resolution or autopsy decision.
Open travel to the dike and Swamp Forest
Follow the investigation until travel through the dike to the Swamp Forest becomes available. The swamp is part of the central Chapter II route, not merely a contract area. Speak with Vaska and the brickmakers, visit the druids, investigate the ruined tower area and consult Kalkstein about the old tower and its Sephirot stones.
A Mysterious Tower develops through several conversations and exploration objectives. Collect Sephirot stones as the associated quests provide them, then place them in the matching obelisks around the tower. The game does not require every player to obtain the stones in one identical sequence, because sources can depend on quests, conversations, purchases and investigation progress. If one stone is missing, review the current phase of A Mysterious Tower, speak with Kalkstein and revisit unresolved Temple Quarter or swamp objectives instead of assuming the quest is broken.
Carry food, alcohol for meditation and healing supplies before long swamp trips. Use the silver sword against monsters and keep inventory space available for quest items and trophies. Make a manual save before activating the final tower sequence, but do not treat that save as the completion point; the chapter continues through the Azar encounter and the transition into Chapter III.
- Unlock travel through the dike to the Swamp Forest.
- Speak with Vaska, the brickmakers, the druids and Kalkstein.
- Advance A Mysterious Tower and place the required Sephirot stones.
- Recheck Kalkstein, the journal and unresolved swamp objectives if a stone is missing.
- Create a swamp-area save before the final tower sequence.
Use the cemetery and autopsy routes correctly
The cemetery and autopsy are alternate evidence routes within the investigation. Early in Chapter II, the gravedigger normally refuses access. Progress can unlock A Gravedigger’s Gratitude, allowing Geralt to resolve the gravedigger’s problem and gain access. Depending on the route, cemetery access may be delayed, so a locked gate is not proof that the chapter cannot continue.
If the cemetery route opens, search the cemetery and crypt for evidence connected with the real Raymond Maarloeve. Discovering the real Raymond’s body exposes the impostor. The other major route is Anatomy of a Crime: obtain the necessary medical information, speak with Shani, arrange access to the body and perform the autopsy. Read the relevant anatomy or pathology material and select conclusions based on evidence you actually learned.
An incorrect autopsy conclusion can direct the investigation toward the wrong suspect and create additional work. If the cemetery remains closed, continue Vizima Confidential, The Crown Witness, What Lies Beneath and Anatomy of a Crime, then return to the gravedigger after the journal updates. Do not attack the gravedigger or attempt to force the gate.
- Check whether A Gravedigger’s Gratitude is available.
- Use the cemetery route if it opens naturally, but do not treat it as mandatory for every playthrough.
- For the autopsy route, speak with Shani and obtain the relevant medical clues first.
- If the gate remains closed, continue the investigation rather than forcing entry.
- Use the discovered evidence to identify the false Raymond.
Handle Triss, Shani, Alvin and local faction encounters
Visit Triss when the main quest directs Geralt to her house and exhaust her available dialogue. Shani is important at the hospital during the day and at her house at night. Old Friend of Mine and Anatomy of a Crime can overlap, so advance Shani’s dialogue before accepting a time-sensitive invitation or moving the investigation into its final phase.
When Triss and Shani provide competing instructions concerning Alvin, make a manual save before choosing where Geralt will take him. This choice affects later relationships and dialogue, but it does not determine the Order, Neutral or Scoia’tael path by itself. Label the save with the choice so the decision can be tracked during later chapters.
The Temple Quarter contains guards, Order members, criminals, nonhumans and civilians in close quarters. Avoid drawing weapons near authorities unless a quest has clearly started the fight. Against several human enemies, create space and use Group Style; against one armored opponent, Strong Style is generally more reliable. Quen is the safest defensive fallback, while Aard can create an opening in a doorway or narrow alley. If guards join an unnecessary fight, retreat through a doorway or reload rather than trying to defeat endless reinforcements.
- Visit Triss and complete her available Chapter II dialogue.
- Speak with Shani at the hospital and her house when the relevant quests require it.
- Save before the Alvin handoff and label the chosen outcome.
- Avoid unnecessary fights near guards, the cloister and civilians.
- Use Quen and chokepoints when investigation fights become crowded.
Expose the false Raymond and prepare the tower encounter
Continue Vizima Confidential through the evidence route created by your choices. The investigation may involve the suspect quests, The Crown Witness, What Lies Beneath, Anatomy of a Crime and the cemetery or autopsy evidence. Do not rely on Raymond’s suspect list alone. The decisive progression comes from proving what happened to the real Raymond and recognizing that the living investigator is Azar Javed in disguise.
Once the investigation and A Mysterious Tower have reached their required phases, follow the journal to the swamp tower. If you identify Raymond as Azar before the game directs you to the final confrontation, do not attack him immediately. Speak with Kalkstein and complete the preparation route that leads to the tower trap. The tower sequence is designed to resolve the investigation and launch the next chapter, not to be won as a permanent boss kill at this point.
Before entering, finish the Temple Quarter and swamp side content you want to preserve, including contracts, romance scenes, faction conversations, Alvin-related objectives and optional errands. Buy repairs and healing supplies, meditate to prepare potions, and create a separate save immediately before beginning the tower sequence.
- The investigation has exposed or is about to expose the false Raymond.
- A Mysterious Tower has the required information and Sephirot progress.
- Kalkstein has provided the preparation needed for the tower confrontation.
- Desired Triss, Shani, Alvin, faction, contract and swamp content is complete.
- Create a manual save immediately before starting the tower sequence.
Complete the Azar encounter and verify the Chapter III transition
Enter the tower only after the preceding preparation is complete. The meeting with Raymond leads into the confrontation with Azar Javed and the Professor. Fight carefully, use Quen when you are being pressured and reposition instead of allowing Salamandra enemies to surround you. Keep the camera and movement oriented toward escape routes rather than chasing every enemy into a corner.
This is not a permanent victory over Azar. The encounter ends in a scripted defeat in which Geralt is knocked unconscious, while Azar and the Professor escape. Do not reload merely because the fight ends badly; that defeat is the intended story result. The required objective is to survive the sequence far enough to trigger its conclusion.
After the scene, confirm that Geralt wakes at Triss’s house and that the Chapter III journal content has appeared. The opening of Chapter III is the actual completion point for this chapter. If the game has not moved Geralt to the Chapter III opening, reload the save before the tower and verify that the tower meeting and ensuing confrontation were completed rather than leaving immediately after an earlier conversation.
- Begin the tower meeting only after the investigation and desired optional content are complete.
- Fight through the Azar Javed and Professor sequence.
- Allow the scripted defeat and do not expect to kill Azar in this encounter.
- Confirm that Geralt wakes at Triss’s house.
- Confirm that Chapter III quests and the Trade Quarter route are now active.
- Create an archival save after the Chapter III transition as well as the pre-tower backup.
Before you move on
- Prison Break is complete, Geralt has recovered his stored equipment and the cockatrice head has been delivered to Vincent Meis.
- Geralt can travel among the Temple Quarter, dike and Swamp Forest, with the investigation active.
- Vizima Confidential has advanced through the applicable evidence route, including the relevant suspect, witness, cemetery or autopsy objectives.
- A Mysterious Tower has the required investigation progress and Sephirot work for the tower sequence.
- Triss, Shani and Alvin have been handled according to the intended save, and desired optional Chapter II content is complete.
- The swamp-tower meeting and the following Azar Javed and Professor confrontation have been completed.
- Geralt has been knocked unconscious by the scripted encounter and wakes at Triss’s house.
- Chapter III journal entries and Trade Quarter access are active.
References for this chapter
- The Witcher: Enhanced Edition — Chapter II Overview: Temple Quarter
- The Witcher: Enhanced Edition — Prison Break walkthrough
- The Witcher: Enhanced Edition — Chapter II Overview: Dike and Swamp
- Vizima Confidential walkthrough
- Anatomy of a Crime walkthrough
- What Lies Beneath walkthrough
- A Mysterious Tower walkthrough
- Trade Quarter Overview — GameBanshee
- Enhanced Edition patch - how to — The Witcher | Technical Support — CD PROJEKT RED
Chapter III — Trade Quarter: markets, teleport hubs and mid-game pacing
Chapter III begins at Triss Merigold's house in the Trade Quarter. Geralt continues investigating Salamandra, follows the trail to the mysterious Source, and becomes involved in the escalating conflict between the Order of the Flaming Rose and the Scoia'tael. Complete the mutually dependent early quests before attending A Posh Reception, use the four linked travel points to reduce unnecessary crossings of Vizima, resolve Gold Rush, then complete The Viziman Connection, Lock and Key and The Unforgiven. The chapter ends after the Professor encounter and the Kikimore Queen escape, when Geralt is teleported to Lakeside and Chapter IV begins.
1. Begin at Triss's house and protect the early quest sequence
Chapter III opens inside Triss Merigold's house. Speak with Triss and exhaust her available dialogue. She provides the opening Chapter III objectives, including A Posh Reception, All the King's Men, Identity and The Source. She also gives Geralt the Letter of Safe Conduct, which permits access through the Trade Quarter. Treat this as a progression item, but do not assume it completes any of the investigations by itself.
Before going to the New Narakort, make a manual save and read the journal. The important early dependency is the relationship between A Posh Reception, Six Feet Under and Echoes of Yesterday. Starting A Posh Reception too soon can prevent you from completing both of the other quests in the same playthrough. If you want the fullest version of this chapter's early content, delay the reception.
Travel to the Temple Quarter and speak with Siegfried to obtain Six Feet Under. Follow the leads that send you toward Yaevinn and accept Echoes of Yesterday when it becomes available. Complete both quests before finishing A Posh Reception. They may be completed in either order, but the safe rule is simple: do not proceed with the reception while either quest remains unfinished.
When you are ready, go to the upper floor of the New Narakort and complete A Posh Reception. Preserve another save before entering the reception so you can recover if you later discover that an earlier quest was left incomplete.
- Speak with Triss and receive the Letter of Safe Conduct.
- Accept Six Feet Under from Siegfried.
- Accept Echoes of Yesterday from Yaevinn when its lead becomes available.
- Complete both quests before finishing A Posh Reception if you want both rewards and outcomes.
- Keep a manual save before entering the reception.
2. Use the four Chapter III travel points efficiently
Chapter III contains four linked travel points that greatly reduce the time spent crossing Vizima and the swamp. They are the teleportation mirror in Triss's bedroom, Kalkstein's teleporter in his Temple Quarter laboratory, the teleporter in the elven ruins beneath the Trade Quarter sewers, and the teleporter in the Mage's Tower in the swamp. These are travel facilities available in the chapter; do not treat them as a new Enhanced Edition feature or as separate objectives that must be activated through a special quest.
Triss's mirror is the most convenient return point for Trade Quarter business. Kalkstein's laboratory is useful when a quest sends Geralt back toward the Temple Quarter. The elven-ruins teleporter is especially valuable for sewer investigations and Echoes of Yesterday. The Mage's Tower provides the fastest return route for swamp errands, Yaevinn-related objectives and alchemy work around the tower.
The teleporters do not replace local navigation. You still need to travel on foot through the marketplace, New Narakort, City Hall, the bank, the warehouse and the streets surrounding the Trade Quarter. Group errands by district: buy books and ingredients, repair equipment and visit merchants during one marketplace trip; handle bank, Town Hall and inn objectives together; then use a teleporter before beginning a sewer or swamp excursion.
Meditate and restock before entering a dungeon. Teleporting changes Geralt's location but should not be treated as a substitute for preparation, healing or equipment repair.
- Use Triss's mirror for Trade Quarter returns.
- Use Kalkstein's laboratory for Temple Quarter access.
- Use the elven-ruins teleporter for sewer objectives.
- Use the Mage's Tower teleporter for swamp objectives.
- Repair and restock before dungeon trips.
3. Advance the investigations before Gold Rush
Continue All the King's Men, The Source and Identity by following the named contacts in the journal. Chapter III mixes combat with investigation, so speak with the relevant guards, witnesses and quest characters before attacking nearby groups. Some objectives advance through dialogue, delivered evidence or a return visit rather than through clearing every hostile area.
The Source leads Geralt into the investigation of the magical device and the people connected with it. Identity continues the pursuit of the Professor and Azar Javed. After each major conversation, check the journal again. The next step may send Geralt to Triss, Kalkstein, Declan Leuvaarden, the New Narakort or another investigator in a different district.
Gold Rush becomes available after A Posh Reception and one of the faction-linked quests, Six Feet Under or Echoes of Yesterday. If you complete both faction-linked quests before the reception, the reception can be followed by the Gold Rush sequence. If the messenger does not approach Geralt immediately, enter or approach the Trade Quarter or Temple Quarter and check the area around the bank.
The Scoia'tael occupy Vivaldi's bank and take hostages. Speak with Velerad outside and choose how to enter. Possible routes involve the warehouse, Town Hall, Siegfried and the Order, or cooperation with Yaevinn. The decision determines the immediate faction response and affects later access, dialogue and recruitment. It is a major alignment choice, but it does not by itself finalize Geralt's ultimate Order, Neutral or Scoia'tael path.
If you intend to recruit the Order or the Scoia'tael for The Unforgiven, remember which faction you supported during Gold Rush. The faction you choose for the later recruitment must match the side selected during Gold Rush; the other faction will not provide the same assistance.
- Follow named contacts instead of clearing areas at random.
- Advance The Source and Identity through dialogue and evidence.
- Complete A Posh Reception and at least one of Six Feet Under or Echoes of Yesterday before Gold Rush can begin.
- Save before entering the bank.
- Record which faction you support during Gold Rush.
4. Shop, repair and preserve useful components
The Trade Quarter marketplace contains an alchemist, antiquary, blacksmith and other merchants. Use the marketplace to buy missing alchemical knowledge, ingredients, food and repair services. Speak through the merchants' available dialogue because some books, exchanges and crafting opportunities are offered during conversation rather than appearing as obvious quest rewards.
Repair both swords before beginning the final Salamandra operation. Keep useful oils, healing potions, food and alcohol available. The chapter contains human enemies, monsters and dungeon fights, so a single preparation is not ideal for every encounter. Carry ingredients for your preferred healing and defensive potions, and do not enter the finale with badly damaged equipment.
Meteorite ore and rune stones are crafting materials. Keep them until you decide whether you want a sword upgrade or another use. The marketplace alchemist can offer the Zerrikanian Alchemy scroll in exchange for Red Meteorite; this is optional and is most relevant if you intend to use bombs. Do not spend a meteorite automatically if you are reserving it for equipment.
Sell duplicate weapons, low-value rings and excess equipment, but retain active contract items, monster trophies, quest objects and rare crafting materials. If a current objective names an item, keep it until the quest is turned in.
- Repair steel and silver swords before The Unforgiven.
- Restock healing items, oils and alcohol.
- Keep meteorite ore, rune stones, trophies and active quest items.
- Buy only the books and alchemy materials that support your build.
- Do not exchange Red Meteorite until you have decided whether you need it for equipment.
5. Survive Gold Rush and other faction battles
Gold Rush can place Geralt in narrow streets, buildings and bank corridors against groups of human opponents. Do not stand in the center of a crowd. Pull enemies toward doorways, stairs or narrow passages so fewer opponents can attack simultaneously. Group Style is appropriate against several human enemies, Fast Style is useful against a mobile single target, and Strong Style is better when a slower opponent can be isolated.
Cast Quen before entering a room where combat may begin immediately. If the shield breaks while Geralt is surrounded, retreat through the doorway rather than continuing to trade blows. Reapply Quen after creating distance. Use food or Swallow between encounters instead of waiting until Geralt is almost dead.
Different entry routes through the bank produce different fights. Follow the route associated with your chosen faction and search the area after combat for quest items and useful loot. If a fight becomes unmanageable, leave the room, reposition and return after recovery when the quest permits it. There is no benefit to remaining in the middle of a hostile group merely to preserve a few seconds of travel.
Gold Rush is important, but it is not the final faction commitment of the campaign. Keep neutral investigations active and preserve a save before the decision if you want to test the alternate response.
- Use doorways, stairs and alleys as chokepoints.
- Switch between Group, Fast and Strong Styles according to the encounter.
- Cast Quen before dangerous entries.
- Retreat and reapply defensive Signs after creating distance.
- Preserve a save before making the bank decision.
6. Complete The Viziman Connection, Lock and Key and The Unforgiven
Finish the remaining investigation steps and the main quests that lead toward The Unforgiven. This includes the objectives surrounding The Viziman Connection and Lock and Key. Complete contracts and optional errands that you want before accepting the final Salamandra operation, because the closing sequence moves Geralt through several connected areas and eventually removes normal access to the city.
Before starting The Unforgiven, repair both swords, prepare healing items and oils, meditate if necessary, and make a final manual save. Speak with Declan Leuvaarden when the quest directs you to organize support. If you seek help from a faction, select the same side you supported during Gold Rush. The Order and the Scoia'tael are not interchangeable at this point.
Follow the operation through the Salamandra areas. The finale is tightly scripted, so advance the objective rather than wandering away from the route. Search important bodies and containers after major encounters, but do not delay indefinitely when the journal directs Geralt to open a gate or continue to the next area.
The closing section brings Geralt into confrontation with the Professor. Afterward he falls into a Kikimore Queen's lair. Do not attempt to defeat the Queen by standing in melee range. Run through the lair, use Aard on the supports or blocked structures indicated by the route, and trigger the cave collapse in the large chamber. The collapse kills the Queen and opens the escape route.
After leaving the lair, the scripted confrontation outside leads into Triss's intervention and Geralt's removal from Vizima. The chapter is complete when Geralt arrives in Lakeside and the Chapter IV journal entries appear. Save again immediately after the transition.
- Finish desired contracts and optional quests before The Unforgiven.
- Complete The Viziman Connection and Lock and Key as their objectives become available.
- Choose the same faction for The Unforgiven that you supported during Gold Rush.
- Repair weapons and prepare healing items, oils and alcohol.
- Make a final save before entering the Salamandra operation.
- Use Aard on the lair supports and escape rather than duel the Kikimore Queen.
- Confirm Geralt arrives in Lakeside and Chapter IV begins.
Before you move on
- Triss's opening Chapter III objectives and the Letter of Safe Conduct have been received.
- Six Feet Under and Echoes of Yesterday are both complete if the player wanted the full early-quest sequence.
- A Posh Reception and Gold Rush have been resolved.
- The Gold Rush faction decision has been recorded for the later Unforgiven recruitment choice.
- The desired investigations, contracts, repairs and purchases are complete before The Unforgiven.
- The Professor sequence and Kikimore Queen escape are complete.
- Geralt has been transported to Lakeside and Chapter IV journal entries are present.
Chapter IV — Lakeside and outlying zones: allies, traps and the turning point
Chapter IV ends with the required sequence of The Heat of the Day, Ripples, The Paths of Destiny, Aerondight and Free Elves. Complete the local work you want before finishing Ripples, because the Country Inn becomes unavailable afterward. Resolve the Dagon dispute, complete the Berengar and Lady of the Lake objectives, receive Aerondight, then enter Free Elves and make the Order, Scoia’tael or neutral political commitment. Aerondight is required for the normal main-story transition into Free Elves; the five-virtues rule is not part of The Witcher: Enhanced Edition.
1. Establish Lakeside and protect your recovery point
Chapter IV begins on the Lakeside after the Chapter III transition. Use the village, Country Inn, Fisher King’s hut, Fields, Lakeside crypt and Black Tern Island as your main travel circuit. Dandelion, the Fisher King, the Lady of the Lake, Berengar, Julian, the vodyanoi priest, Alvin and the villagers involved in The Heat of the Day all become relevant during this chapter.
Create a manual save before committing to the late Chapter IV sequence. Repair both swords, meditate when needed and carry healing supplies, strong alcohol for meditation and oils suited to the monsters in the Fields and crypt. Keep quest objects and unusual equipment until their associated journal entries are complete.
Finish Country Inn business before finalizing Ripples. Shop, sell unwanted loot, collect stored equipment, gamble if desired, speak with available characters and turn in quests that require the inn or Julian. After Ripples concludes, the Country Inn is no longer available for normal Chapter IV business. If you want to preserve the silver sword you currently use, store it before completing the transition that awards Aerondight.
- Create a manual save at the beginning of Chapter IV.
- Repair the steel and silver swords.
- Prepare healing items, meditation alcohol and appropriate oils.
- Finish Country Inn shopping, storage, gambling and conversations.
- Store the current silver sword if you want to retain it as a backup after receiving Aerondight.
2. Complete The Heat of the Day and clear optional Lakeside work
Follow the Alina and Celina investigation through the Fields, the village and the nearby ruins. Search the locations identified by the journal, speak with the relevant villagers and follow the mirror-shard objectives as the characters move. Complete The Heat of the Day before attempting the final Chapter IV transition.
Use this period to finish optional contracts, Fields encounters, armor-related work and Alvin conversations that you want to preserve. The optional content can provide experience, money, monster materials and additional narrative context, but it is not a substitute for the required Heat of the Day, Ripples and The Paths of Destiny sequence.
Complete side activities before finalizing Ripples whenever possible. The game allows some overlap between quests, but the safest route is to clear desired local content first, complete The Heat of the Day, then resolve Ripples and The Paths of Destiny only when you are ready to leave Lakeside.
- Advance The Heat of the Day through its final journal objectives.
- Search the Fields and nearby ruins for active quest locations.
- Complete desired contracts and armor-related tasks.
- Speak with Alvin when new Chapter IV dialogue becomes available.
- Do not finalize Ripples while important Country Inn business remains.
3. Resolve Ripples and defeat Dagon
Ripples can begin through the vodyanoi priest, the Fisher King or the Lady of the Lake. The quest concerns the conflict between the humans of Murky Waters and the vodyanoi. Berengar was originally involved in the investigation; finding him in the Lakeside crypt transfers the practical work to Geralt and connects Ripples with the later Berengar objectives.
There are three solution routes. Julian’s human route involves the Dagon temple and the human side of the dispute. The vodyanoi route requires the requested food and the prize-winning cow, with the needed supplies obtained through the local quest chain. The Lady of the Lake’s compromise route requires collecting the specified gifts from Julian and the vodyanoi priest, taking them to the Lady on Black Tern Island and placing the ruby she gives Geralt at Dagon’s altar. Follow the journal wording for the active route, since the required item delivery differs by choice.
Dagon is not defeated by treating him as a conventional sword-fighting boss. When the encounter starts, target and kill the Dagon worshippers around the temple. Each defeated worshipper damages Dagon, and eliminating the group kills him. Use the Silver Sword and an appropriate monster oil. Quen can protect the approach, but it disappears when Geralt attacks, so retreat and recast it during a recovery window rather than expecting it to remain through the entire assault.
After Dagon dies, return to the quest giver associated with your chosen solution and collect the route-specific reward. Ripples does not award Aerondight. Its reward may be a diamond, the Ceremonial Sword of Deithwen or a Silver Talent, depending on the route. Confirm that the Country Inn work is finished before completing the final Ripples dialogue.
- Choose one Ripples solution and obtain its required item.
- Use the Silver Sword and prepare Quen before entering the temple.
- Kill the Dagon worshippers instead of relying on direct attacks against Dagon.
- Collect the reward from the correct quest giver.
- Confirm that the Country Inn is no longer needed before finalizing Ripples.
4. Complete The Paths of Destiny and receive Aerondight
After The Heat of the Day and Ripples have advanced, continue the Berengar and Lady of the Lake objectives. Speak with Berengar in the Lakeside crypt and exhaust the available dialogue. Follow the journal instructions for reporting his intentions and return to the Lady of the Lake when directed. If the next phase does not appear, revisit Berengar, the Fisher King and the Lady of the Lake and exhaust any newly available conversations before changing zones.
The Paths of Destiny leads to the Lady of the Lake’s final Chapter IV sequence. Complete the required objectives, return to her when the journal requests it and receive her knighthood and the silver sword Aerondight. This reward is not optional if you are following the normal main-story route: Free Elves becomes available after Geralt receives Aerondight, and Free Elves is the quest that carries the campaign out of Lakeside toward Chapter V.
The original Witcher campaign does not use the five-chivalric-virtues requirement associated with Aerondight in The Witcher 3: Blood and Wine. Do not search Chapter IV for that checklist or delay the story waiting for five virtues. Here, the required route is the completion of the relevant Chapter IV objectives and the Lady of the Lake’s Aerondight sequence.
Keep a save before the final Berengar-related dialogue and another immediately after receiving Aerondight. Berengar’s fate can affect later support during the final campaign, while the post-Aerondight save gives you a clean recovery point before the faction confrontation.
- Advance Berengar’s investigation in the Lakeside crypt.
- Complete The Heat of the Day and Ripples.
- Follow the Lady of the Lake’s instructions for The Paths of Destiny.
- Receive Aerondight from the Lady of the Lake.
- Do not apply the Witcher 3 five-virtues requirement.
- Keep a save before and after the Aerondight sequence.
5. Enter Free Elves and choose the political route
Once Aerondight has been awarded, return toward Lakeside and begin Free Elves. White Rayla and the Order are dealing with Scoia’tael control of Murky Waters. Dandelion explains that Alvin is among the hostages and waits near the village while Geralt approaches the elves. Enter Murky Waters, speak with Toruviel and Alvin, then return to Dandelion when the quest directs you to decide what Geralt will do.
Free Elves contains the final Chapter IV faction commitment. Earlier choices, particularly Force Recon in Chapter II and Gold Rush in Chapter III, influence which faction options are available. Depending on the prior flags, Geralt may be able to support the Order, support the Scoia’tael or remain neutral by taking Alvin and leaving the opposing groups to fight. Do not assume every save displays all three choices.
Create a manual save immediately before the decisive conversation with Dandelion. Select the Order option for the Order route, the elven option for the Scoia’tael route when available or the neutral option to take Alvin and leave. Adda’s fate, romances, Alvin’s later guardian context and other independent flags do not replace this political choice.
After the decision, the Order and Scoia’tael battle begins and Alvin teleports away. Follow the active objective instead of searching every building for him. Reach the Fisher King’s boat, speak with Dandelion and board the boat. This completes Free Elves and begins Chapter V. If the available dialogue is not the intended route, reload the pre-decision save before boarding.
- Receive Aerondight before attempting the normal Free Elves transition.
- Speak with Toruviel and Alvin in Murky Waters.
- Save immediately before the final Dandelion decision.
- Choose the intended Order, Scoia’tael or neutral option when available.
- Reach the Fisher King’s boat and board it with Dandelion.
- Create a new save after Chapter V begins.
Before you move on
- The Heat of the Day is complete.
- All desired Country Inn business was finished before Ripples was finalized.
- Ripples is complete through the selected Dagon solution and its route-specific reward has been collected.
- The Dagon worshippers are dead and Dagon has been defeated.
- The Paths of Destiny is complete through the Berengar and Lady of the Lake objectives.
- Aerondight has been received from the Lady of the Lake before Free Elves is attempted.
- No five-virtues checklist was applied to the Enhanced Edition route.
- Desired Alvin, armor, contract, Fields and other optional content is complete or deliberately abandoned.
Chapter V — Old Vizima: city in flames and decisive acts
Chapter V begins at the Vizima Dike. Prepare your equipment and storage there, leave through the Old Vizima gate, witness Foltest’s rescue, and complete the castle conversations. After Foltest assigns Her Highness the Striga, travel to Old Vizima, complete the faction-specific battle objectives, defend the field hospital, investigate the false striga report, and resolve Adda’s curse in the Swamp Cemetery. Then defeat Count de Wett, push through the Old Manor and its catacombs, defeat Koschey and Azar Javed, inspect the laboratory mirror, return to the Old Manor landing, and take the boat back to Vizima. The chapter is complete only after the Epilogue journal entries become active.
Prepare at the Vizima Dike and leave through Old Vizima
Chapter V opens at the Vizima Dike with Dandelion nearby. Before leaving, use him to access storage, reorganize quest items, repair both swords, and prepare potions. The Dike is your last reliable preparation point before the castle and Old Vizima sequence, so make sure you have healing, defensive, and combat supplies ready.
Zoltan can update the faction-specific objective according to your route: Under a Fiery Sky for the neutral Witcher path, Hope Burns Bright for the Scoia’tael path, or The Flame that Cleanses for the Order path. These are different versions of the Old Vizima battle sequence rather than three quests that must all be completed.
Head toward the Old Vizima gate. Order and Scoia’tael forces are fighting in the area. Most soldiers can be ignored; kill only those blocking the route or an interaction. The battle continues until you reach the gate, where a scene shows Foltest being attacked and Jacques de Aldersberg intervening. Geralt then travels with Foltest to the castle.
- Use Dandelion to access storage before leaving the Dike.
- Repair both swords and prepare healing, Sign-supporting, and combat potions.
- Speak with Zoltan if you need the current faction objective.
- Leave through the Old Vizima gate and watch Foltest’s rescue scene.
Complete the castle stage before returning to Old Vizima
At the castle, speak with Triss Merigold, Count de Wett, and Velerad before reporting to Foltest. These conversations provide context for Adda’s renewed curse and are required before the king’s next summons. Other available court conversations and preparation activities should also be handled now because the castle is not a normal return hub after the Chamberlain sends Geralt onward.
Meet Foltest in his chamber to receive Her Highness the Striga. The king explains that Adda has transformed into a striga again and asks Geralt to remove the curse if possible, with killing her as the alternative. Keep the silver sword ready for the monster encounters ahead and the steel sword for human, mutant, and Salamandra enemies. Quen is a dependable defensive Sign for crowded fights; Swallow and Tawny Owl are useful if you have the ingredients and formulas.
After the king’s conversation, speak with the Chamberlain and accept transport to Old Vizima. This is a one-way transition from the castle, so do not postpone desired castle dialogue, repairs, or inventory organization.
- Speak with Triss, Count de Wett, and Velerad.
- Receive Her Highness the Striga from Foltest.
- Complete desired castle conversations and preparation.
- Use the Chamberlain to travel to Old Vizima only when ready.
Follow the faction-specific Old Vizima objective
Old Vizima begins amid fighting between Order and Scoia’tael forces. Follow the objective for your route instead of trying to clear the entire district. The neutral Witcher path begins with nurses who must be escorted to the field hospital during Under a Fiery Sky. The Scoia’tael path advances Hope Burns Bright, while the Order path advances The Flame that Cleanses.
Stay close to the NPCs involved in the current objective and eliminate enemies threatening the escort or rescue. Quen helps when crossing contested streets. Retreat toward doorways or open ground if Geralt becomes surrounded rather than continuing to trade blows in a narrow passage.
The faction objectives eventually direct you to the field hospital. Defend the wounded and concentrate on enemies attacking the hospital. Fast Style is useful against individual human enemies, Group Style helps against clusters of lightly protected opponents, and Strong Style is better for tougher targets. Follow the quest’s barricade instructions and use Aard when the route requires a barricade to be cleared.
- Reach the contact for the active faction objective.
- Complete the escort, rescue, or battle tasks for the Order, Scoia’tael, or neutral Witcher path.
- Defend the field hospital.
- Clear required barricades with Aard when instructed.
- Confirm that the faction quest has advanced before pursuing the tower investigation.
Investigate the false striga and reach the Swamp Cemetery
After the Old Vizima objectives advance, follow the report of a striga sighting near the tower. The creature at the tower is a mutant, not Adda. Defeat it and speak with Kalkstein. His information redirects Geralt to the chapel in the Swamp Cemetery and advances Her Highness the Striga, Sweet Revenge, and the active faction quest.
Use Old Vizima for repairs, alchemy, contracts, and other optional work before entering the chapel. The chapter contains optional quests such as A Gnomish Device, A Magic Formula, Mud and Velvet, Saint Gregory’s Litany, and trophy contracts. Complete any of these that you still want before committing to the crypt sequence, especially if you need their rewards or ingredients.
Travel through the route from Old Vizima to the Swamp Cemetery and go to the chapel near the center of the area. Speak with Velerad outside. Save manually before following him inside, because the crypt sequence prevents ordinary restocking until Adda’s fate has been resolved.
- Defeat the mutant at the tower.
- Speak with Kalkstein afterward.
- Reach the chapel in the Swamp Cemetery.
- Complete desired Old Vizima and swamp side content first.
- Make a manual save before entering the crypt with Velerad.
Recover Ostrit’s Journal and resolve Adda’s curse
Inside the chapel crypt, find Adda’s sarcophagus and loot it to obtain Ostrit’s Journal. The journal explains how the renewed curse was prepared and advances the investigation, but it does not finish Her Highness the Striga by itself.
To attempt the cure, remain in the crypt and survive beside the sarcophagus until the candles burn out and dawn arrives. Keep moving, use the sarcophagus as cover when possible, and avoid standing directly in front of Adda while she attacks. Quen can protect you from a mistake, but movement and positioning are more important than repeatedly trading hits.
To take the lethal route, fight Adda with the silver sword. Strong Style is suitable for the striga’s durability, while Quen can absorb a dangerous attack and give you time to reposition. After Adda dies, inspect the corpse and take the Striga Heart if you want the component for alchemy.
When the encounter is resolved, leave the crypt and speak with Velerad. This confirms the outcome and directs Geralt toward the Old Manor.
- Loot Ostrit’s Journal from Adda’s sarcophagus.
- For the cure, remain in the crypt until the candles burn out and dawn arrives.
- For the lethal route, defeat Adda with the silver sword.
- Take the Striga Heart from Adda’s corpse if she is killed.
- Speak with Velerad after leaving the crypt.
Defeat Count de Wett and reach the Old Manor landing
Return toward the Old Manor after resolving Adda’s curse. Count de Wett and his men no longer block the route. De Wett reveals his connection to the renewed curse and attacks. Defeat him, then loot his corpse for the Salamander Brooch and Experiment Notes. Keep both items as quest evidence rather than selling them.
Continue through the Old Manor approach. Mutants, greater mutants, armored hounds, and other Salamandra-related enemies guard the route. Azar Javed appears with Mutant Rayla, speaks briefly, and leaves Rayla to fight. Defeat her, using Igni if it is developed or relying on the appropriate sword and stance if it is not.
At the Old Manor landing, clear the enemies attacking the allied forces. The supporting character depends on your political route: Siegfried for the Order, Yaevinn for the Scoia’tael, or Triss for the neutral Witcher path. Speak with the appropriate ally to reveal the available catacomb entrance. Make a separate save before entering.
- Defeat Count de Wett after resolving Adda’s fate.
- Loot the Salamander Brooch and Experiment Notes.
- Defeat Mutant Rayla after Azar Javed withdraws.
- Clear the Old Manor landing battle.
- Speak with Siegfried, Yaevinn, or Triss according to your path.
- Create a separate save before entering the catacombs.
Enter the catacombs and defeat Koschey
Use the entrance revealed by the ally at the Old Manor landing. Siegfried, Triss, and Yaevinn provide different access routes, and the catacomb layout varies by political path. Follow the route that opens after the conversation rather than searching for an interchangeable entrance.
Fight through the mutants and other creatures in the catacombs. Azar Javed appears during the approach and retreats after sending enemies against Geralt. The route may contain blocked passages or one-way sections depending on your alignment, so continue through the available path instead of trying to force a different faction’s route.
Koschey is the major encounter in this section. It can knock Geralt down and inflict pain, so avoid standing in front of it for the whole fight. Use the silver sword and Strong Style, attack after its swing, then move away before the next exchange. Quen helps absorb a mistake, while Aard can create breathing room if the fight becomes unstable. Loot the Koschey Heart after victory.
- Use the catacomb entrance opened by the appropriate ally.
- Follow the faction-dependent route through the catacombs.
- Defeat Koschey with the silver sword and Strong Style.
- Use Quen or Aard to recover from dangerous exchanges.
- Loot the Koschey Heart.
Defeat the Greater Brothers and Azar Javed
Continue from Koschey through the remaining catacombs. The next major combat sequence includes two Greater Brothers. Prepare before entering the encounter because the following progression leads directly toward Azar Javed’s laboratory. Strong Steel Style is effective against the brothers; avoid Group Style if it leaves Geralt exposed to both targets at once.
After the Greater Brothers, Geralt reaches Azar Javed. Use the steel sword and Strong Style against him. Javed can knock Geralt down and cause pain or blinding, so attack during openings and move away rather than remaining in front of his flaming weapons. Igni can help if it is developed, while Quen provides protection during repositioning.
If Berengar survived the earlier events, he can appear to assist Geralt. If he died and Geralt took his amulet, the amulet can provide an effect during the battle. Defeat Javed and loot his body. The combat victory completes the main battle objective of Sweet Revenge, but the chapter is not finished yet.
- Prepare before the Greater Brothers encounter.
- Defeat both Greater Brothers.
- Defeat Azar Javed with the steel sword and suitable Sign support.
- Loot Azar Javed’s body after the fight.
- Do not treat Javed’s defeat as the end of Chapter V.
Inspect the laboratory mirror and return to Vizima
After defeating Azar Javed, inspect the mirror in his laboratory. This interaction reveals Jacques de Aldersberg’s involvement and triggers the required story scene. Killing Javed without examining the mirror does not complete the final progression.
The scene returns Geralt to the area outside the catacombs near the Old Manor landing. Go back to the landing and speak with the ally who supported your route: Siegfried for the Order, Yaevinn for the Scoia’tael, or Triss for the neutral Witcher path. The ally provides access to a boat that can take Geralt back to Vizima.
Before taking the boat, complete any remaining optional Chapter V quests, contracts, trophy hunts, or equipment preparation that you still want. Leaving by boat ends Chapter V and removes access to the chapter’s normal areas. When ready, accept the boat trip.
After the journey, confirm that Geralt has returned to Vizima and that the journal now contains the Epilogue entries, including The Ashes of Vizima. The active Epilogue journal entries are the practical confirmation that Chapter V has ended. Preserve your pre-catacomb save if you want to replay the final battles or compare the Order, Scoia’tael, or neutral Witcher path.
- Inspect the laboratory mirror after defeating Azar Javed.
- Return to the Old Manor landing.
- Speak with Siegfried, Yaevinn, or Triss according to your path.
- Complete desired optional Chapter V content before departing.
- Take the boat back to Vizima.
- Confirm that Geralt has returned to Vizima.
- Open the journal and verify that the Epilogue entries, including The Ashes of Vizima, are active.
- Keep the pre-catacomb save if you want to test another final-path outcome.
Before you move on
- Geralt has left the Vizima Dike through the Old Vizima gate and witnessed Foltest’s rescue.
- The castle stage is complete, Foltest has assigned Her Highness the Striga, and the Chamberlain has transported Geralt to Old Vizima.
- The faction-specific quest for the Order, Scoia’tael, or neutral Witcher path has advanced.
- The field hospital objective has been completed.
- The mutant at the tower has been defeated and Kalkstein has directed Geralt to the Swamp Cemetery.
- Ostrit’s Journal has been recovered from Adda’s sarcophagus.
- Her Highness the Striga records either Adda’s death or the lifting of her curse, and Velerad has been spoken to afterward.
- Count de Wett has been defeated and the Salamander Brooch and Experiment Notes have been secured.
References for this chapter
- The Witcher: Enhanced Edition — Chapter V Castle walkthrough
- The Witcher: Enhanced Edition — Chapter V Old Vizima walkthrough
- The Witcher: Enhanced Edition — Chapter V Old Manor and Catacombs walkthrough
- Her Highness the Striga — GameBanshee Enhanced Edition Walkthrough
- The Witcher: Enhanced Edition — Sweet Revenge walkthrough
- The Witcher: Enhanced Edition — Sweet Revenge chapter guide
- The Witcher: Enhanced Edition — Sweet Revenge reference
Special: Her Highness the Striga — preparations, options and consequences
In The Witcher: Enhanced Edition on GOG, Chapter V begins at the Vizima Dike rather than in Foltest’s castle. Push through the opening Dike and Old Vizima sequence first, then reach the castle and receive the Striga assignment from Foltest. The investigation leads through the Old Vizima hospital, a tower occupied by a mutant, Kalkstein’s examination, and the Swamp Cemetery. At the chapel, you can either kill Adda in her Striga form with the silver sword or lift the curse by surviving beside her sarcophagus until all five candles go out. Adda’s fate is a separate decision from Geralt’s Order, Neutral, or Scoia’tael alignment, although it is one of the major choices recorded in the completed save and relevant to later import data.
Begin Chapter V at the Vizima Dike
Chapter V opens at the Vizima Dike. Speak with the companions and contacts present there, then follow the available route toward the gate to Old Vizima. This opening sequence is part of the chapter’s civil-conflict setup; do not search for Foltest’s castle immediately, because the castle consultations occur later.
Enter Old Vizima and move through the active battle toward the field hospital. Enemy groups can continue appearing in the district, so fighting every soldier or nonhuman is unnecessary and wastes healing items. Keep Quen available, avoid getting surrounded, and prioritize reaching the hospital and the next story trigger.
After the Old Vizima sequence advances, Geralt is taken to the castle. This is the correct point to begin the Striga investigation. Make a manual save before starting the castle consultations if you want a clean Chapter V backup.
- Start Chapter V at the Vizima Dike.
- Travel through the Dike route into Old Vizima.
- Reach the field-hospital area and advance the opening Old Vizima events.
- Continue to Foltest’s castle instead of looking for the castle before the Dike sequence.
- Create a manual save before the castle consultations.
Receive Foltest’s assignment at the castle
At the castle, speak with King Foltest. He explains that Princess Adda has become a Striga again and asks Geralt to remove the curse if possible. Foltest permits Geralt to kill her only if there is no practical way to restore her humanity.
After the initial conversation, speak with Triss Merigold, Velerad, and Count De Wett in the throne-room area. Their accounts establish the three relevant leads: someone may have deliberately renewed the curse, Adda’s family history is politically sensitive, and the Striga has been seen in Old Vizima.
When those conversations are complete, the chamberlain summons Geralt. Follow him through the available route to Foltest’s private chamber and speak with the king again. Foltest confirms the assignment and the acceptable outcomes. When ready to return to the city, speak with the chamberlain. This sends Geralt back to Old Vizima and starts the investigation phase.
- Speak with Foltest in the castle.
- Consult Triss, Velerad, and Count De Wett.
- Follow the chamberlain to Foltest’s private chamber.
- Confirm Foltest’s instructions before returning to Old Vizima.
- Save before leaving the castle if you want a second fallback point.
Investigate the hospital and the tower
Return to Old Vizima and go to the field hospital. Speak with the available people there until a soldier reports that a Striga has been sighted near a tower. Follow the soldier rather than trying to clear the entire district.
The creature at the tower is not Adda. It is a mutant that must be defeated before the investigation can continue. Use the silver sword only if the enemy type requires it; otherwise, follow your normal combat setup and avoid spending your strongest consumables on this relatively short encounter.
After the mutant is dead, speak with Kalkstein. His examination redirects the investigation to the chapel in the Swamp Cemetery. The tower fight and Kalkstein’s conversation are required steps, not optional clues. If the quest does not advance, check that you have spoken with Kalkstein after the mutant encounter.
- Return to the field hospital in Old Vizima.
- Follow the soldier to the tower.
- Defeat the mutant at the tower.
- Speak with Kalkstein after the fight.
- Accept the lead pointing toward the Swamp Cemetery chapel.
Prepare outside the Swamp Cemetery chapel
Travel to the Swamp Cemetery and follow the route to the chapel. Near the approach, speak with the desperate father. He confirms that the Striga is using the crypt and that she hunts at night.
Velerad waits outside the chapel. Speak with him before entering. He explains that he was sent to check on Geralt and reminds him to look for evidence concerning the renewed curse. Make a manual save before following Velerad inside. Once Geralt enters the crypt, the exit remains unavailable until the Striga problem has been resolved.
Prepare before crossing the threshold. Repair the silver sword if you may choose the lethal route, restore vitality, and meditate to select the potions you want active. Swallow is useful for recovery, Tawny Owl supports sustained Sign use, and Cat can help with visibility if needed. Drink planned potions before the active encounter begins, preferably during meditation. Do not depend on starting new preparation after the fight has already begun.
Quen is the safest general defensive Sign for either resolution. Keep enough vitality and stamina for repeated repositioning. The crypt is confined, so leave yourself room to circle the sarcophagus instead of entering while pinned against a wall.
- Reach the chapel in the Swamp Cemetery.
- Speak with the desperate father.
- Speak with Velerad outside the chapel.
- Make a manual save before entering.
- Repair the silver sword if considering the lethal route.
- Meditate and drink planned potions before the encounter.
Take Ostrit’s Journal and trigger the night encounter
Inside the crypt, find Adda’s sarcophagus in the large chamber on the southern side. Loot it to obtain Ostrit’s Journal. This is the central evidence item for the renewed-curse investigation and should be collected regardless of which resolution you intend to use.
The Striga appears during the night phase. If she is not present, use the nearby campfire to meditate until dusk or night and return to the sarcophagus chamber. Do not leave the crypt to reset the quest; the interior is designed to remain closed until the encounter has been resolved.
The journal and the Striga encounter are separate objectives. Taking the journal does not complete the quest, and defeating the Striga without searching the sarcophagus leaves the investigation incomplete. Confirm both actions before choosing a resolution.
- Reach the southern chamber.
- Loot Ostrit’s Journal from the sarcophagus.
- Use the nearby campfire if the encounter is not in the night phase.
- Return to the sarcophagus chamber after meditation.
- Confirm that both the journal and the Striga encounter are active.
Lift Adda’s curse with the five-candle route
To attempt the nonlethal resolution, remain in the sarcophagus chamber and survive while the candles burn down. The objective is not to defeat Adda. Continue moving until all five candles have gone out, at which point the curse is lifted and Adda returns to human form.
The simplest method is to circle the sarcophagus. Keep the obstacle between Geralt and Adda whenever possible, change direction before she cuts off the route, and avoid backing into a wall. Cast Quen before committing to the movement pattern. If Quen breaks, create distance before recasting it.
Aard can sometimes interrupt or push Adda when it connects, but it is not required for the route. Brief attacks are possible, but do not turn the objective into a damage race. The safest priorities are movement, open space, and survival. When the fifth candle goes out and Adda changes back, approach her to trigger the next part of the sequence and stop attacking.
- Remain in the chamber until all five candles go out.
- Use the sarcophagus as a movement barrier.
- Cast Quen before close contact and recast it after creating distance.
- Use Aard only as an optional interruption.
- Approach Adda after the transformation.
Kill the Striga on the lethal route
If you decide that the curse cannot be lifted, attack Adda with the silver sword. Strong style is the reliable damage choice for clear openings; fast style can help when you need shorter attacks while repositioning. Do not remain in front of her after a completed attack sequence, because knockdowns and confined-space collisions are the main dangers.
Quen provides a dependable buffer while learning the encounter. Igni or Aard may help depending on your build, but neither is mandatory. Keep the fight controlled: wait for an opening, land a limited sequence, then move away and reset your position.
This is a single direct encounter, not a multi-wave battle. If Geralt dies, reload the save made outside the chapel, repair the sword, restore vitality, and change the preparation rather than entering the crypt again without a plan.
After Adda dies, search the corpse and take the Striga Heart. The heart is an optional alchemy component used for Striga’s Urge, but it is the distinctive loot from the lethal resolution and should be collected before leaving.
- Use the silver sword against Adda.
- Favor strong-style attacks during safe openings.
- Keep room to retreat and reposition.
- Use Quen if you need additional protection.
- Loot the corpse and take the Striga Heart.
Leave the crypt and continue the Chapter V investigation
After either resolution, leave the crypt and speak with Velerad. If Adda was saved, Velerad provides the associated reward, including the D’yaebl steel sword according to the established quest route. If Adda was killed, the reward sequence differs, but the campaign remains playable and Foltest does not treat the lethal choice as a failure when you report it.
Velerad also points Geralt toward the Old Manor and the continuing Salamandra investigation. Follow that lead when ready. At the Old Manor, Count De Wett’s role in renewing Adda’s curse is exposed. Defeat him during the confrontation and search the body for the quest evidence, including the materials connected with the Salamandra investigation.
The Striga quest is not formally closed at the chapel. Its final journal completion occurs when Geralt reports the outcome and the related investigation to Foltest during the Epilogue. Keep a post-crypt save and do not overwrite the pre-chapel save if you want to preserve both Adda outcomes.
- Speak with Velerad outside the crypt.
- Take the available reward and Foltest’s continuing lead.
- Investigate the Old Manor when ready.
- Defeat Count De Wett and collect the relevant evidence.
- Keep pre-chapel and post-resolution saves separately.
Before you move on
- Chapter V was entered at the Vizima Dike and the Old Vizima opening sequence was completed.
- Geralt reached Foltest’s castle after the Dike and Old Vizima sequence.
- Foltest, Triss, Velerad, and Count De Wett were consulted in the correct castle order.
- The Old Vizima hospital report, tower mutant, and Kalkstein conversation were completed.
- Geralt reached the Swamp Cemetery chapel and spoke with the desperate father and Velerad.
- Ostrit’s Journal was taken from Adda’s sarcophagus.
- For the nonlethal route, all five candles went out and Adda returned to human form.
- For the lethal route, Adda was killed with the silver sword and the Striga Heart was taken from the corpse.
Choices that matter — ally paths, flags and preparing the epilogue
The Witcher: Enhanced Edition does not use one universal morality meter. Its major political outcomes are built from several linked faction decisions, while other choices are recorded as separate narrative or import flags. Force Recon affects early faction relationships, Gold Rush determines which aligned faction remains available later, and Free Elves is the final political decision between the Order, the Scoia’tael and the neutral Witcher route. Adda’s fate, the Count de Wett and Thaler confrontation, Alvin’s guardian, romances and character survival must be tracked separately. Use manual saves before each checkpoint so you can recover a route without replaying the entire campaign.
1. Establish a save system before the faction checkpoints
Create a manual save before beginning Force Recon in Chapter II. The quest takes place at the Golem burial ground in the Swamp and can be approached through Siegfried’s Order forces or Yaevinn’s Scoia’tael group. Keep this save even if you intend to remain neutral, because it is the cleanest recovery point for the early faction relationship and the associated later dialogue.
Create a second manual save before Gold Rush in Chapter III. The quest begins after the relevant Trade Quarter events and the banquet sequence, when Geralt is informed that Vivaldi’s bank is under attack. Save before entering the warehouse, Town Hall or bank route rather than relying on an autosave inside the sequence.
Before leaving the New Narakort after A Posh Reception, create another save for All the King’s Men. This is the point at which the Count de Wett and Thaler confrontation becomes available. Keep a separate save before the confrontation itself if you want to test both results.
When Chapter III presents the choice of where Alvin will stay, save before speaking to the person who finalizes the handoff. Preserve one file before choosing Triss or Shani, then record the result separately from political alignment.
At the start of Chapter IV, maintain a normal progression file and create a dedicated pre-Free Elves save before entering the decisive Murky Waters sequence. Keep a late Chapter V or epilogue save as well. A useful archive therefore contains at least pre-Force Recon, pre-Gold Rush, pre-All the King’s Men, pre-Alvin handoff, pre-Free Elves and an import-ready epilogue file.
- Save before Force Recon.
- Save before Gold Rush.
- Save before the Count de Wett and Thaler confrontation.
- Save before choosing Alvin’s guardian.
- Save before Free Elves.
- Keep a late Chapter V or epilogue save.
- Never overwrite a branch save while testing a route.
2. Resolve Force Recon as an early faction decision
Force Recon is connected to the conflict at the Golem Cemetery in the Swamp. Speak with Siegfried near the Order’s position or with Yaevinn in the Scoia’tael camp. If you accept Siegfried’s request, Order scouts accompany Geralt. If you accept Yaevinn’s request, elves and dwarves accompany him. Proceed to the Golem burial ground and complete the resulting battle with the allied group you selected.
Supporting Siegfried is the clearest early Order-leaning choice. Supporting Yaevinn is the clearest early Scoia’tael-leaning choice. Refusing both requests or avoiding the quest preserves a neutral approach, although it also means giving up the quest’s combat experience and some faction-specific consequences.
Do not treat Force Recon as the permanent final alignment lock. It changes faction attitudes, available assistance and some later interactions, but the final political result is decided later. Force Recon also has practical consequences for faction merchants and related Chapter II content, so record what you did even if your only goal is to preserve a later neutral route.
Before taking a side, finish any related dialogue or faction errands that you specifically want. In particular, do not assume you can freely undo the decision by visiting the other faction afterward. If you want to test both outcomes, reload the pre-quest save rather than trying to repair the result through later conversations.
- Choose Siegfried for an early Order-leaning result.
- Choose Yaevinn for an early Scoia’tael-leaning result.
- Refuse both requests to preserve a neutral approach.
- Record which faction accompanied Geralt.
- Do not call Force Recon the final political lock.
3. Complete All the King’s Men and record the Thaler result separately
All the King’s Men begins in Chapter III after Triss explains the martial-law situation. Its decisive confrontation occurs outside the New Narakort after A Posh Reception. Count de Wett presents an alleged royal edict removing Thaler from his position, while Thaler argues that the document is false.
Create a manual save before speaking during this confrontation. If you support Thaler, de Wett and his men leave, Thaler survives, and Geralt can later examine the real royal edict and continue investigating the forged orders. If you support de Wett, Thaler becomes hostile and Geralt must kill him. The choice is important for the quest and for later continuity, but it is not the same as choosing the Order or Scoia’tael political path.
Record the result in your save notes as either Thaler defended or Thaler killed. Do not use it as a substitute for recording faction alignment. Available evidence indicates that the immediate choice does not permanently determine the Order, Scoia’tael or neutral Witcher ending, although it can affect later dialogue, the quest outcome and imported continuity.
If you want the cleanest route for later Thaler references, defend him and inspect the genuine edict after the confrontation. If you prefer the alternate result, use the pre-confrontation save and record it independently. Do not overwrite this save with your Gold Rush or Free Elves branch file.
- Save before the Count de Wett and Thaler confrontation.
- Defend Thaler to keep him alive and investigate the forged edict.
- Support de Wett to kill Thaler.
- Record Thaler’s fate separately from faction alignment.
- Keep the pre-confrontation save.
4. Decide where Alvin goes and record Triss or Shani independently
During Chapter III, the campaign reaches a point where Geralt must decide whether Alvin will remain in Triss’s care or go to Shani. The choice is presented through the relevant Chapter III conversations and should be treated as a permanent narrative checkpoint.
Save before the conversation that finalizes the handoff. Choose Triss if you want Alvin’s later scenes and continuity to follow the Triss branch. Choose Shani if you want the Shani branch. After the handoff, verify the result by checking where Alvin is staying and by noting the corresponding journal or conversation changes.
This decision is not a political alignment choice. It does not select the Order, Scoia’tael or neutral Witcher route, and it should not be used as evidence that Geralt has joined or rejected a faction. Record it separately as Alvin with Triss or Alvin with Shani. The choice may also interact with romance and later character scenes, so keeping the pre-handoff save is useful even if you do not intend to replay the entire chapter.
Finish this decision before relying on a late Chapter III save as your only archive. If you overwrite the pre-handoff file, the practical way to change Alvin’s guardian is to replay from an earlier Chapter III save.
- Save immediately before the Alvin handoff.
- Choose Triss or Shani deliberately.
- Verify where Alvin stays afterward.
- Record Alvin’s guardian separately from political alignment.
- Keep the pre-handoff save.
5. Resolve Gold Rush without confusing faction alignment and neutrality
Gold Rush begins in the Trade Quarter when Geralt is summoned to the robbery at Vivaldi’s bank. Follow the available route through the warehouse, Town Hall, bank and sewers. The exact sequence can differ according to earlier faction decisions and how Geralt approaches the robbery, but the important checkpoint is which side Geralt supports during the escape.
If you want the Scoia’tael route to remain available in Free Elves, do not attack them during Gold Rush. Follow Yaevinn’s escape route and help the Scoia’tael leave when the opportunity appears. If you want the Order route to remain available, support Siegfried and accept the confrontation with the elves. Fighting a faction during this quest can prevent Geralt from later supporting that same faction in Free Elves.
Gold Rush determines which aligned faction remains available for the later political decision. It does not remove the neutral Witcher route. After completing the bank and sewer sequence, create a fresh manual save and write down whether the Order or Scoia’tael route remains available. If an expected option is missing later, reload the pre-Gold Rush save and change the bank sequence rather than trying to correct the result through unrelated Chapter IV dialogue.
Repair weapons and prepare healing before entering the robbery sequence. The connected combat areas can be left and revisited in some circumstances, so do not treat a difficult encounter as a reason to abandon the quest or overwrite your branch save.
- Save before Gold Rush.
- Do not attack the Scoia’tael if you want their aligned route.
- Support Siegfried for the clearest Order route.
- Help Yaevinn for the clearest Scoia’tael route.
- Remember that neutrality remains available later.
- Record the faction route available after Gold Rush.
6. Make the final political decision during Free Elves
Free Elves is the decisive political quest of Chapter IV. After the Lakeside events direct Geralt toward Murky Waters, follow the conflict involving the Order, the Scoia’tael and the hostages near Celina’s House. The faction available for an aligned choice normally reflects the side preserved during Gold Rush, while Force Recon influences how some characters react.
Continue through the village and locate the relevant faction representatives. Alvin is among the hostages, and his conversation supplies separate character and dialogue information. Speak with Toruviel as the situation requires, then find Dandelion near the northern side of Celina’s House. Continue until the game presents the political choice.
Choose the Order option to support the Order. Choose the Scoia’tael option to support the elves. To take the neutral Witcher route, refuse to join either faction and take Alvin away. Neutrality is not a peace ending: both factions may become hostile, and the Chapter V objectives and encounters can differ from those on an aligned route.
Create a new manual save immediately after the decision, using a different slot from the pre-Free Elves file. Record the result as Order, Scoia’tael or neutral Witcher. Do not label the result according to Adda’s fate, Alvin’s guardian, romance, Thaler’s survival or any other separate choice.
- Reach Murky Waters and the conflict near Celina’s House.
- Speak with the relevant faction representatives.
- Locate Dandelion near Celina’s House.
- Choose Order for the Order route.
- Choose Scoia’tael for the Scoia’tael route.
- Take Alvin and leave for the neutral Witcher route.
- Save again after the decision.
7. Track independent narrative and import flags
During Her Highness the Striga in Chapter V, record whether Geralt lifts Adda’s curse or kills the Striga. This affects later references and imported continuity but does not select the political faction route. Keep Adda’s outcome in a separate note from the Free Elves result.
Record Thaler’s fate from All the King’s Men, Alvin’s guardian from Chapter III, romance results, Vincent’s fate, Berengar’s fate and other major character survivals separately. These decisions can change scenes, journal entries, quest availability or imported details without functioning as alternate names for Order, Scoia’tael or neutral Witcher alignment.
The Enhanced Edition is the original Witcher campaign with interface, gameplay and technical improvements; it does not replace the campaign with a new morality meter or a separate alignment system. Treat the political route and the independent narrative flags as different records.
- Record Adda’s Striga outcome separately.
- Record Thaler’s fate separately.
- Record Alvin with Triss or Shani.
- Record romance results.
- Record major character survival choices.
- Do not treat any of these as the political route.
8. Finish the campaign and preserve an import-ready save
Complete Chapter V, the final confrontation and the official epilogue. Keep a late Chapter V save for recovery, but create a separate manual save during the epilogue. For Witcher 2 import, use a save created in the Ice Plains or Order of the Flaming Rose Cloister portions of the epilogue. These are the recognized locations for first-game save detection.
Keep the completed campaign file as an archive in addition to the import candidate. If the sequel does not detect the save, verify that it remains in the original Witcher save directory and create another manual save in one of the recognized epilogue locations. Non-English installations may also require attention to language settings if detection fails.
Copy the import candidate and completed archive to a local backup folder. Label each file with the political route, Alvin’s guardian, Adda’s outcome, Thaler’s fate, romance result and backup date. Do not depend only on GOG cloud storage if you want to preserve alternate outcomes. Keep the pre-Free Elves save until you have confirmed the desired route and import file.
- Complete Chapter V and the final confrontation.
- Reach the official epilogue.
- Create an import candidate in the Ice Plains or Order of the Flaming Rose Cloister.
- Keep a separate completed-campaign archive.
- Copy the saves to a local backup folder.
- Verify that the Witcher 2 import menu detects the intended file.
- Do not delete the pre-Free Elves save until satisfied with the result.
Before you move on
- A manual save remains before Force Recon.
- A manual save remains before Gold Rush.
- A manual save remains before the Count de Wett and Thaler confrontation.
- A manual save remains before the Alvin handoff.
- A manual save remains before Free Elves.
- The campaign reaches the official epilogue.
- The final political result is recorded as Order, Scoia’tael or neutral Witcher.
- Alvin’s guardian is recorded separately as Triss or Shani.
References for this chapter
- The Witcher: Enhanced Edition on GOG.com
- Enhanced Edition patch - how to — The Witcher | Technical Support — CD PROJEKT RED
- Force Recon — Witcher Wiki
- Gold Rush — Witcher Wiki
- Free Elves — Witcher Wiki
- All the King's Men — GameBanshee
- Trade Quarter Overview — GameBanshee
- GameFAQs — The Witcher: Enhanced Edition Guide and Walkthrough
- The Witcher: Enhanced Edition — Walkthrough — GameFAQs
- Saved game import — Witcher Wiki
- The Witcher 2 for PC Technical FAQ — CD PROJEKT RED Forums
Combat and Signs — stance use, sign layering and encounter tactics
The Witcher: Enhanced Edition is built around timed sword chains, three combat styles, automatic defensive reactions, Signs, alchemy, and positioning. Choose the correct sword, select a style that matches the enemy, continue attacks only when the chain prompt appears, and move before opponents surround Geralt. Quen is a temporary protective Sign that ends when Geralt begins an attack or performs another hostile action, so use it to create a safe pause, drink a potion, change equipment, or reposition rather than trying to attack through it.
1. Choose the correct sword and combat style
Use the steel sword against humans, bandits, soldiers, and ordinary animals. Use the silver sword against monsters. Geralt can carry both swords, but only the selected weapon affects the current attack. If damage is unexpectedly low, check the weapon before changing styles or assuming that the enemy has unusually high resistance.
Fast style is generally the best starting choice against agile opponents. Strong style is intended for slower, tougher, or armored targets. Group style uses broad attacks and is useful when several suitable enemies are close to Geralt. These are practical matchups rather than absolute rules: enemy defenses, Geralt's talents, and the number of attackers still matter.
The commonly documented default PC bindings are Z for Strong style, X for Fast style, and C for Group style. GOG installations can be remapped, so open the controls menu and confirm the actual bindings before relying on those keys. Change styles when the enemy type or formation changes, but remember that changing style interrupts an attack chain.
- Select steel for humans and ordinary animals.
- Select silver for monsters.
- Use Fast against agile targets.
- Use Strong against slow or armored targets.
- Use Group against suitable clusters.
- Confirm the current style bindings before combat.
2. Continue attack chains by timing the follow-up
Start a sword attack against the selected target, then watch for the follow-up prompt or the appropriate change in Geralt's attack animation. Click again during the permitted timing window to continue the chain. A successful sequence produces stronger follow-up blows and can eventually create opportunities for a finishing move.
Do not click continuously without watching the rhythm. Repeated untimed clicks can interrupt the sequence or fail to extend it. Stop the chain when the target moves out of range, begins a dangerous attack, blocks or dodges repeatedly, or another enemy reaches Geralt's flank.
The original Enhanced Edition does not use The Witcher 3's manual-parry system. Defensive outcomes are influenced by Geralt's attributes, talents, combat style, enemy attacks, and position. Keep the active opponent in front of Geralt, avoid fighting with enemies at his back, and disengage when the formation becomes unsafe.
- Begin the attack against the intended target.
- Click again only during the follow-up window.
- Stop attacking when the target leaves range or starts a dangerous action.
- Do not wait for a later-game manual-parry prompt.
- Disengage before enemies reach Geralt's back.
3. Evade according to the selected camera mode
The game has more than one camera and control arrangement, so do not treat one dodge input as universal. In an isometric camera mode, double-clicking a suitable area of ground can make Geralt dodge toward that location. In third-person play, a double-tapped movement direction is used for the corresponding evasive movement. The precise keys may differ after remapping.
Before a difficult fight, test the current movement input in a safe area. Choose a destination that is clear of enemies instead of clicking blindly. Dodging through a crowded group can place Geralt beside another attacker or inside an unexplored encounter.
Use evasion to leave the path of a slow committed strike, move behind a target, or escape when enemies box Geralt in. Normal walking and running are also important; against many attacks, leaving the attack range is safer than forcing another sword chain. Retreat toward open ground, a cleared doorway, or a chokepoint where enemies cannot attack from every direction.
- Check the current camera mode before using a dodge technique.
- Verify the movement binding in the controls menu.
- Use ground-targeted dodging only in the appropriate isometric mode.
- Use a double-tapped movement direction in third-person mode when that is the active control scheme.
- Retreat toward open space or a cleared doorway.
4. Use each Sign for a defined purpose
Quen creates a temporary protective field around Geralt. Its practical uses are defensive: cast it before approaching a dangerous enemy, use the protected interval to drink a potion or change equipment, or reposition while an enemy's attack is committed. In the Enhanced Edition, Quen is dismissed when Geralt begins an attack, and other hostile actions can also end it. Do not cast Quen and then expect its protection to remain through a sword chain.
Aard is useful for interrupting, separating, knocking down, or creating a finishing opportunity against susceptible targets. Use it when a group blocks a doorway or when one dangerous opponent must be isolated. Igni supplies direct offensive pressure and can be effective against enemies vulnerable to fire, but its results vary. Yrden is most useful when enemies must pass through a confined area or remain near a predictable location. Axii can influence suitable targets and may redirect attention temporarily.
Signs consume Endurance. Cast the Sign that solves the immediate problem, then return to swordplay while the resource recovers. Avoid exhausting Endurance at the beginning of a fight that may contain another wave or phase. Preserve enough for a second Quen, Aard, or other control cast when the encounter is likely to continue.
- Use Quen for a protected pause, potion, equipment change, or reposition.
- Expect Quen to end when Geralt begins an attack.
- Use Aard to interrupt, separate, or knock down susceptible enemies.
- Use Igni when the target is vulnerable to fire.
- Use Yrden to control a predictable approach.
- Use Axii only when the target can be influenced.
- Reserve Endurance for later phases.
5. Match styles to enemy groups
Against bandits and soldiers, use the steel sword. Fast style is usually more reliable against agile humans, while Strong style is better against slow or heavily armored fighters. Group style can remove several weaker opponents quickly, but switch away from it when one dangerous enemy remains or when powerful opponents are too spread out to be struck safely.
Against undead and other monsters, use silver. Group style is useful against several weaker creatures within Geralt's attack range, but do not remain surrounded merely because Group style is selected. Move through a doorway, around an obstacle, or into open ground so enemies approach from one direction.
Fast beasts and agile monsters can evade Strong attacks repeatedly. Start with Fast style, keep an escape route open, and use Quen before a dangerous approach if you need a protected pause. Larger, durable monsters may be better targets for Strong style once their movement and attack rhythm are understood.
Against resistant or armored targets, apply an appropriate weapon oil before entering the encounter when possible. A control Sign can create a safer opening than another unprotected chain. If an attack repeatedly misses, check both the selected sword and the combat style.
- Use steel against humans and ordinary animals.
- Use silver against monsters.
- Use Fast against agile enemies.
- Use Strong against slow or armored enemies.
- Use Group against suitable clusters rather than every large group.
- Apply an appropriate oil against durable or resistant targets.
6. Prepare alchemy before major encounters
Drink Swallow before a prolonged engagement when you have prepared it and expect sustained damage. Its regeneration works over time, so it is more useful before the fight or during a genuinely safe pause than when Geralt is already near death. Carry another healing option when available, especially before a multi-stage encounter.
Apply the relevant weapon oil before crossing the encounter trigger. Oils improve the selected weapon against appropriate enemy categories and are particularly valuable against difficult monsters or named opponents. Do not waste rare supplies on trivial enemies immediately before a major fight, but do not enter an important battle with every useful consumable unused.
When the location allows meditation, restore health and Endurance, confirm the selected sword, check the active Sign and quick items, and apply preparations before starting the encounter. On higher difficulties, begin with a full health bar and enough Endurance for at least one defensive or control Sign.
- Use Swallow before prolonged fights when available.
- Apply the relevant oil before combat.
- Carry an emergency healing option.
- Confirm sword, style, Sign, and quick items.
- Meditate before a planned difficult encounter when possible.
- Begin major fights with restored health and Endurance.
7. Recover when the first plan fails
If Geralt loses health quickly, stop extending the chain and move away. Retreat toward a cleared area, doorway, or open ground rather than backing into an unexplored room. A change of position can split enemies and give Endurance time to recover.
If Quen ends, do not immediately recast it while standing in the same attack pattern. Move first, wait for a safe casting interval, and then cast it again if protection is still necessary. If Swallow is active, avoid further damage while its regeneration works instead of standing still and trying to trade blows.
If attacks miss or deal poor damage, check the sword and style. The wrong weapon or style may be the real problem. If the group is too dense for swordplay, use Aard or another suitable Sign to interrupt the front enemy, then withdraw through a chokepoint. Re-engage only after the enemies are separated or the appropriate style is selected.
- Stop attacking when health drops rapidly.
- Retreat to a cleared or open area.
- Move before recasting Quen.
- Let Swallow work while avoiding additional damage.
- Check the selected sword and style when attacks fail.
- Use a chokepoint to split a dense group.
8. Adjust for bosses and multi-wave fights
Do not use one universal style or Sign against every boss. Begin with the style suggested by the target's size, armor, and movement, then observe whether attacks connect normally. Keep Quen available for a dangerous approach or recovery pause, but remember that beginning an attack dismisses it. Use Aard, Igni, Yrden, or Axii only when the target is susceptible or the Sign solves a specific positioning problem.
In a multi-wave fight, remove the weakest exposed enemy when doing so reduces the number of attacks reaching Geralt. Group style is useful while opponents are suitably clustered, but change to Fast or Strong when the remaining target is better handled by a single-target style. During a safe transition, recover, confirm the selected weapon, and reapply preparations if the game permits it.
If an ally or objective must be protected, hold a controllable approach instead of chasing enemies into an unsafe area. Interrupt enemies that break through, keep an escape route open, and reposition before the next wave surrounds Geralt or the protected character.
- Test a boss's reactions instead of assuming every Sign works.
- Keep Endurance available for a defensive or control cast.
- Use Group for suitable clusters, then change style as the formation changes.
- Recover and reapply preparations during safe transitions.
- Control the approach when an ally or objective must be protected.
Before you move on
- You can identify whether a target requires the steel or silver sword before starting the attack.
- You can switch between Fast, Strong, and Group styles while preserving the attack rhythm.
- You understand that defense depends on automatic combat reactions, attributes, positioning, and camera-appropriate movement rather than a later-game manual-parry button.
- You can distinguish isometric ground-targeted dodging from third-person directional evasion and verify the active binding.
- You can use Quen as a temporary protected pause and know that beginning an attack dismisses it.
- You can use Aard, Igni, Yrden, or Axii for a specific purpose without exhausting Endurance unnecessarily.
- You can prepare Swallow and an appropriate oil before a major encounter.
- When an attack plan fails, you can retreat, split the enemies, check the sword and style, restore your position, and re-engage with a revised tactic.
Equipment, crafting and economy — how to keep Geralt outfitted
The original Enhanced Edition does not use the later games’ Witcher-school crafting system. Geralt’s equipment plan is simpler: maintain one effective steel sword, one effective silver sword, a useful armor set, and enough money for repairs, books, alchemy bases and essential purchases. Most weapons and armor found in chests or on enemies are temporary upgrades or sale goods. Spend rare meteorite pieces and runes only after comparing the available reforged weapon with the unique blades and quest rewards you can obtain later.
1. Maintain a compact working inventory
Keep one dependable steel sword for humans, bandits, soldiers and other ordinary targets, and one dependable silver sword for monsters. The game’s weapon slots are limited, so do not carry a collection of ordinary blades merely because they have different names. When you find a weapon, compare its damage and chance effects with the sword you already use. A weapon that adds bleeding, stun, pain or another useful effect can be preferable to a small damage increase.
Keep your current armor until a replacement offers a clear defensive improvement. Armor in this edition is not built from diagrams and interchangeable Witcher-school pieces. Geralt receives or purchases a small number of meaningful armor upgrades, so there is little benefit in buying every minor clothing item. Store or sell obsolete equipment after checking that it is not required for an active quest.
- Keep one steel sword and one silver sword that you actually intend to use.
- Compare damage and special effects before replacing a weapon.
- Sell duplicate weapons and armor after checking quest requirements.
2. Reforge steel and silver swords only when the result is worthwhile
A blacksmith’s forge is used differently from crafting in later Witcher games. To reforge a steel sword, you need any three pieces of meteorite. To reforge a silver sword, you need any three runes. The forge presents the resulting sword as a new item, and the materials are consumed in the transaction. A previous meteorite or rune enhancement is not a layer that can be repeatedly stacked onto the same blade, so do not spend rare materials on a minor improvement that you expect to replace immediately.
Meteorite colors and rune combinations produce different effects. Read the displayed bonuses before confirming the purchase and consider whether the result is better than your current sword, a quest reward or a unique weapon available in a later chapter. If you have only three materials, wait until you can inspect the available combination and still afford the associated cost. Reforging is optional; completing the campaign does not require a meteorite sword or a rune-forged silver sword.
The Trade Quarter’s swordsmith can reforge weapons when you have access to his services, while other blacksmiths serve the same general purpose in earlier and later areas. The Enhanced Edition may allow both faction-linked blacksmiths in the Temple Quarter to deal with Geralt depending on the relevant quest state, so a temporarily unavailable smith does not mean the system is broken.
- Use three meteorite pieces for a reforged steel sword or three runes for a reforged silver sword.
- Preview the complete weapon before spending the materials.
- Do not assume a reforged weapon is automatically better than a later unique sword.
3. Handle armor purchases by milestone
The Studded Leather Jacket from the Prologue remains serviceable for the opening chapters. The Excellent Leather Jacket becomes available from merchants in Chapter II and costs 5,000 orens. It provides more damage reduction, two potion slots and additional resistances, making it the main purchased armor upgrade for the middle of the campaign. Buy it when you can afford it without sacrificing repairs, essential books or alchemy supplies; do not sell rare ingredients simply to reach the price faster.
The Excellent Leather Jacket is useful, but it is not the final armor goal. The Armor quest in Chapter IV can lead to one of the Raven’s Armor variants, with the result determined by the path and choices that govern the quest. Because that later armor is obtained through quest progression, players who are short on money may reasonably keep the Studded Leather Jacket until they can buy the Excellent Leather Jacket without crippling their other preparations.
Do not apply The Witcher 2 or The Witcher 3 rules here. There are no multi-stage Griffin, Cat, Ursine or Wolven armor diagrams in this campaign. Armor is mainly acquired through the Prologue reward, merchant purchases and the Raven’s Armor quest.
- Treat the Excellent Leather Jacket as a major Chapter II purchase, not mandatory opening equipment.
- Keep enough money for repairs and alchemy before spending 5,000 orens.
- Expect the Chapter IV Armor quest to provide the next major armor milestone.
4. Use each merchant for the correct purpose
Visit a blacksmith or armorer after reaching a new hub and before entering a long dungeon. These merchants can sell equipment, provide forging services and offer repair-related goods. The dwarven blacksmith outside the Outskirts inn is an early service point. In the Temple Quarter, access to the nonhuman or Order blacksmith can depend on earlier faction-related events. In the Trade Quarter, the marketplace gathers several useful vendors, including a swordsmith, alchemist, bookseller and Zerrikanian trader.
Use the bookseller or antiquarian when you need monster or plant knowledge for a contract, but do not purchase every reference automatically. Buy books that unlock information for an active investigation or a recipe you plan to use. The alchemist and herbal or Zerrikanian merchants are more useful for alchemy bases, ingredients and related supplies. Before a major expedition, repair both swords and armor, restock the alcohol, oil or powder bases required by your recipes, and purchase a repair kit if you expect to remain away from a settlement.
- Use the Outskirts, Temple Quarter and Trade Quarter merchants as chapter-based service points.
- Buy books for active contracts or useful recipes rather than collecting every title.
- Repair both weapons and armor before a dungeon or major story battle.
5. Gather alchemy materials without destroying your future options
Loot plants, monster remains and containers during normal exploration. Ingredients are identified by their alchemical substances, including Aether, Hydragenum, Quebrith, Rebis, Vermilion and Vitriol, as well as secondary substances used for enhanced results. Keep unusual ingredients until you have checked your known formulas. Common surplus can be sold later, but rare components are harder to replace when a contract or recipe specifically requires them.
Monster contracts are an efficient way to obtain both money and relevant components. Read the contract, learn the required creature information if necessary, then keep the parts named by the objective until the contract is complete. Do not assume every monster part is safe to sell simply because it has no obvious equipment use. If you are uncertain, store it at an inn or leave it in your inventory until the associated quest is resolved.
Common bases such as alcohol, grease and powder are generally safer purchases than experimenting with rare ingredients. Prepare Swallow and any combat potions or oils you already understand before leaving a hub. Meditation is the normal point for brewing and replenishing preparations, provided you have the necessary base and ingredients.
- Keep unusual ingredients until active quests and known formulas no longer need them.
- Loot contract targets and retain named quest components until turn-in.
- Buy ordinary alchemy bases instead of wasting rare materials through blind experimentation.
6. Earn and preserve money through disciplined selling
Sell weapons to weapon merchants or blacksmiths and armor to merchants who handle armor and equipment. Dispose of duplicate blades, obsolete armor, ordinary junk and duplicate books after checking active quest requirements. This keeps the inventory readable and makes genuine upgrades easier to identify. If you need emergency money, sell replaceable equipment before selling meteorite, runes, gems, rare monster parts or unusual alchemical ingredients.
Contracts, monster hunts, dice poker and fistfights all provide income, but contracts are especially efficient because they combine experience, contract rewards and useful creature materials. The Murky Waters and Trade Quarter areas also provide profitable opportunities through quest rewards and combat loot. Do not postpone the main campaign indefinitely to fund a perfect inventory; a serviceable sword, repaired armor and a few reliable potions are enough to continue.
Gwalhir is a notable purchased steel sword, but it is not a Trade Quarter purchase. It is sold by the blacksmith’s son beside the blacksmith’s shop in Murky Waters during Chapter IV. Treat it as a late-campaign shopping option and compare it with your current weapon and any quest rewards before spending the money.
- Sell ordinary duplicates regularly so rare materials remain easy to identify.
- Keep meteorite pieces, runes, gems and unusual monster parts until their uses are settled.
- Remember that Gwalhir is a Murky Waters Chapter IV purchase, not a Trade Quarter item.
Before you move on
- Geralt has one usable steel sword and one usable silver sword, with no damaged weapon entering the next major dungeon.
- Armor is repaired and suitable for the current chapter; the Excellent Leather Jacket has been purchased only if its cost does not compromise essential supplies.
- At least three meteorite pieces or three runes are being saved for a deliberate forging decision rather than spent automatically.
- Active contracts have been checked for required monster parts before ingredients are sold.
- The inventory contains enough money for repairs, common alchemy bases and the next known quest expense.
- You know the nearest available blacksmith, armorer, alchemist or bookseller before leaving the current hub.
References for this chapter
- GameFAQs — The Witcher: Enhanced Edition Guide and Walkthrough
- The Witcher: Enhanced Edition — Alchemy/Recipe List, GameFAQs
- The Witcher Manual — Atari PDF
- Blacksmith — Witcher Wiki
- Blacksmith’s son — Witcher Wiki
- Getting Started in the Temple Quarter — Gamer Guides
- Witcher armor types — Gamepressure
Sidequests and optional rewards — what to do, what to skip
The Witcher: Enhanced Edition does not require every contract or minigame for campaign completion. Prioritize sidequests that provide access, evidence, named-character outcomes, faction assistance, important experience, or useful equipment. Contracts are mainly a source of money, monster materials and experience, while character quests are more likely to disappear when a chapter advances. Use a manual save before each major regional transition and do not assume that an earlier map will remain accessible.
1. Read every notice board, then choose contracts by route
Read the notice board when you first reach a chapter hub. Reading a notice starts the associated contract; the physical notice can then be discarded if inventory space is needed. Do not treat every posted contract as mandatory. Take the contracts whose targets are on your current route or whose reward will solve an immediate problem such as repairs, books, formulas or alchemy ingredients.
In Chapter I, the three contracts are especially efficient because their targets overlap the Outskirts. The Barghest Contract asks for 10 Barghest Skulls for Abigail. Barghests appear around the village at night, and their skulls can be collected without first learning monster lore. The Drowner Contract asks for three Drowner Brain Tissues for the Reverend. Before collecting valid tissues, read Swamp Monsters or obtain equivalent information from an appropriate villager. The Ghoul Contract asks for three Ghoul Blood samples for Kalkstein; read The Tome of Fear and Loathing, Volume I, or obtain equivalent information before hunting ghouls in the crypt or around the village at night.
Turn contracts in to the named recipient rather than selling the requested material first. After a contract is completed, spare monster parts can normally be sold or used in alchemy. Keep one manual save before handing in a valuable trophy contract if you want to compare the reward or preserve a clean fallback.
- Read the local notice board at the start of each chapter.
- Obtain monster-lore information before collecting Drowner Brain Tissue or Ghoul Blood.
- Complete only the contracts that fit your route, level, supplies and money needs.
- Save before turning in a trophy contract or selling rare monster materials.
2. Complete the Outskirts character quests before the chapter closes
The Outskirts are easiest to clear by grouping errands by time and location. Handle village conversations during the day, then use night travel for Barghests, Drowners and other nocturnal targets. This lets you combine the Barghest and Drowner Contracts with travel between Abigail, the Reverend, the riverbank and the mill instead of making separate trips.
Prioritize Vesna Hood’s quest, She's No Early Bird, if you want its reward and follow-up content. Speak with Vesna at the inn, accept the quest when it becomes available, and meet her at the required evening time. Escort her along the marked route and stay with the encounter until it concludes. A later named drowner encounter at the mill is tied to completing this quest and visiting the area at night, so do not assume that simply talking to Vesna finishes the entire opportunity.
Resolve the Abigail, Reverend and Odo-related conversations that are available before beginning the final Salamandra investigation sequence. Visit Abigail again after major quest updates because her dialogue and services can change. Complete the Barghest and Drowner Contracts if you need early orens, and complete the Ghoul Contract if you already have reliable access to the crypt and the required lore. None of these contracts is required to finish the campaign.
Do not spend the entire chapter farming low-level monsters. Once Geralt has repaired weapons, basic healing, appropriate oils and enough money for essential books or food, advance the main investigation. The key risk is not missing a contract reward; it is entering the chapter transition while a time- or character-dependent quest is still active.
- Finish Vesna’s escort quest before committing to the Outskirts endgame sequence.
- Return to Abigail after important quest updates.
- Turn in useful contracts before the recipient or region becomes unavailable.
- Keep a pre-transition save before entering the final Chapter I sequence.
3. In Chapter II, protect access to Coleman and finish regional investigations
Chapter II spreads side content across the Temple Quarter, the Hairy Bear Inn, the hospital, the cemetery, the sewers, the dike and the Swamps. At the start of the chapter, read the Temple Quarter notice board and then speak with the named characters relevant to your current investigation, including Shani, Thaler, Vivaldi, Kalkstein, Vincent Meis, Leuvaarden and Zoltan. Revisit them after major evidence is found because some dialogue options and errands unlock in stages.
Give special attention to Coleman at the Hairy Bear Inn. The Rat and Hot Potato quests depend on his continued availability and on the state of the Chapter II investigation. If you want to attempt both, speak with Coleman early, follow his available dialogue, and resolve his related errands before making a faction or investigation decision that can remove him. Do not enter a major evidence hand-in or faction resolution merely because the main quest marker is ready; first check the inn and the current journal for Coleman-related tasks.
The Gravedigger’s Gratitude and related cemetery access are useful priorities because they open routes through the cemetery and crypt while also supporting the broader investigation. Complete hospital, cemetery, crypt and sewer errands when they share the same route. The Swamps contain additional contracts and investigation steps; handle them before the chapter’s final political resolution if you want the widest selection of evidence, rewards and dialogue.
Some Chapter II quests can continue after a transition, but availability is not uniform. Use a manual save before the chapter-ending sequence, especially if The Rat, Hot Potato, A Mysterious Tower, Anatomy of a Crime, or other named-character investigations remain active.
- Check Coleman at the Hairy Bear Inn before major investigation decisions.
- Complete The Rat and Hot Potato while Coleman remains available if those quests are part of your route.
- Resolve cemetery, crypt, hospital and sewer errands while access is convenient.
- Save before the Chapter II political and regional transition.
4. In Chapter III, prioritize named-character quests over routine contracts
At the start of Chapter III, read the Trade Quarter notice board and visit the quarter’s merchants, booksellers, armorers, blacksmiths and alchemists. Buy formulas or schematics that match your build rather than purchasing every item offered. Sell duplicate weapons and ordinary loot unless a quest or upgrade specifically requires them.
Complete Beauty and the Beast after speaking with Carmen and gaining access to the relevant swamp route. Follow the quest investigation, collect the information it requests, and keep a manual save before its final resolution. It provides experience and a significant character-driven outcome, but its exact rewards depend on how the curse is handled. Do not describe it as a simple monster hunt or assume that every reward is identical across resolutions.
Give priority to quests involving Triss, Shani, Dandelion, Carmen, Zoltan, Vivaldi and the Order or Scoia'tael contacts. These quests can provide dialogue, evidence, faction context and access to later content. Complete Dandelion’s Lute and other named-character errands before the city’s main conflict advances. Contracts are worth taking when their targets overlap the current region or when Geralt needs money for repairs and books.
Before completing a major Chapter III story resolution, review the journal for active quests involving named characters, political factions or investigations. Ordinary contracts can usually be abandoned without preventing campaign completion, but a named-character quest should be treated as a priority until its availability is confirmed.
- Complete Beauty and the Beast before leaving its swamp-related route.
- Resolve available quests for Triss, Shani, Dandelion, Carmen, Zoltan and Vivaldi.
- Buy only useful formulas, books and equipment; sell duplicate weapons.
- Create a save before the chapter’s major political confrontation.
5. Finish the high-value Lakeside content before returning to Vizima
Chapter IV is the best time to clear optional content that improves Geralt’s experience, equipment and late-game readiness. Work through the Lakeside, Murky Waters and Fields in route groups rather than repeatedly crossing the region. Speak with Dandelion, Carmen, Berengar, the villagers and the Lady of the Lake as their quests become available, then complete the associated conversations before the final return sequence.
Treat Troll Trouble as a priority when it appears. Follow the investigation, speak with the relevant villagers, and make a manual save before deciding the troll’s fate. The choice affects the quest outcome and reward route; do not kill or spare the troll solely because one option seems faster if you are preserving a particular role-playing or faction direction.
Complete contracts that overlap your current travel path or that provide the experience needed for Chapter V. Leave low-value hunts for later if they require a dangerous detour, consume scarce potions or offer no useful reward for your build. Before the final Chapter IV transition, carry repaired weapons, healing potions, the oils suited to the enemies you expect, and enough coin for repairs.
The chapter transition can change access to Lakeside and its surrounding areas. If Dandelion, Carmen, Berengar, the Lady of the Lake, Troll Trouble or a major village quest is still active, finish it or preserve a pre-transition save before advancing.
- Complete Troll Trouble before the Chapter IV return sequence.
- Finish available Lakeside quests involving Dandelion, Carmen, Berengar and the Lady of the Lake.
- Complete practical contracts if you need experience, money or materials.
- Make a clean save before returning to Vizima and beginning the final chapter preparation.
6. Perform a final sidequest audit before Chapter V’s irreversible sections
Before committing to the Chapter V endgame, return to the current hub, read the available notice board and review the journal by location. Finish active quests involving named allies, faction leaders, investigators, merchants, major monster contracts or important political figures. Give priority to quests involving Thaler, Shani, Triss, Dandelion, Zoltan, Yaevinn, Siegfried, Vivaldi, Kalkstein, Berengar, Alvin and the Lady of the Lake when they remain available in your route.
Do not assume that a quest listed as active will remain completable after the next loading transition. When a quest points to an older region, visit that region now or reload the pre-transition save. This is particularly important for quests connected to Coleman, faction contacts, character rewards and the Chapter IV return to Vizima.
Keep three practical saves: one before a major faction decision, one before the Chapter IV return to Vizima, and one before the Chapter V final sequence. A separate save before the Chapter V transition lets you replay side content and late-game choices without repeating the whole campaign. After each chapter-ending cutscene, verify that the journal updated and that the current hub still contains the characters you need.
The goal is not a completely empty journal. The goal is to enter the final sequence with no unresolved high-impact quest, no missing named-character reward you intended to claim, and enough resources to complete the remaining mandatory fights.
- Named-character and faction quests are resolved or deliberately preserved in a backup save.
- Coleman-related content, Beauty and the Beast, Troll Trouble and major Lakeside quests are complete when available.
- Weapons are repaired and healing, oils, food and repair funds are stocked.
- A separate pre-Chapter V save is preserved before the final sequence begins.
Before you move on
- The Chapter I notice board has been reviewed, and the Barghest, Drowner and Ghoul Contracts were completed when their rewards or materials were useful.
- Vesna’s escort and other intended Outskirts character quests are resolved before the Chapter I transition.
- Coleman was checked before major Chapter II investigation decisions, and The Rat or Hot Potato was completed if that route was desired.
- Beauty and the Beast was resolved before leaving its Chapter III route, with its final choice preserved in a manual save if needed.
- Troll Trouble and the major available Lakeside character quests were completed before the Chapter IV return to Vizima.
- A pre-faction-decision save, a pre-Chapter IV-transition save and a pre-Chapter V endgame save are preserved.
- The final preparation includes repaired weapons, usable healing, relevant oils, sufficient repair funds and no unresolved high-impact sidequest that the player intended to complete.
Enhanced Edition notes, patches and community content
The GOG release is the original PC Enhanced Edition of The Witcher and is fully updated when installed, so GOG users should not apply the historical retail patch chain. Older retail installations use the official 1.4 Enhanced Edition upgrade before patch 1.5, with a matching language pack. The Enhanced Edition improves dialogue, cutscenes, inventory organization, stability and loading, and includes two additional adventures that are separate from the main campaign.
Confirm the edition before starting
This chapter applies to the PC version of The Witcher: Enhanced Edition, the upgraded edition of the original game. It does not apply to The Witcher 2, The Witcher 3, an unofficial overhaul, or the upcoming remake. The main campaign remains the original Prologue, Chapters I through V and the Epilogue, with the Enhanced Edition improvements layered onto that campaign.
The GOG product page identifies the game as The Witcher: Enhanced Edition by CD PROJEKT RED and lists the edition’s separate alchemy-ingredient storage, sorting and stacking functions, revised dialogue and cutscenes, reduced loading times, improved stability, faster inventory loading and optional autosave control. These are the systems this walkthrough assumes.
- The installed product is The Witcher: Enhanced Edition.
- The game is installed from GOG or from an officially updated older PC release.
- No unofficial overhaul is active while you establish the clean baseline.
Understand what the Enhanced Edition changes
The most useful change during ordinary play is the inventory layout. Alchemy ingredients are kept in a separate sack, and the inventory provides sorting and stacking functions. Use these tools whenever you return to a town or inn. Keeping herbs, monster parts and other components organized makes it easier to brew potions and prevents important quest items from being buried among weapons, food and miscellaneous loot.
The Enhanced Edition also revises the presentation of conversations. The GOG product information describes more than 5,000 rewritten or re-recorded English dialogue lines, a fully redone German version and more than 200 additional gesture animations. These changes improve clarity and presentation but do not add a new chapter route or replace the original quest structure.
Technical improvements include reduced loading times, improved stability, faster inventory loading, more responsive combat and an option to turn autosaving on or off. The edition also adds more visual variety to some monsters and non-player characters. Do not treat these improvements as new mechanics: Geralt still uses the original steel and silver weapons, combat styles, Signs, potions, oils and chapter progression.
- Sort and stack alchemy materials before leaving a hub.
- Use the separate alchemy storage area to keep ingredients distinct from equipment.
- Do not import systems from The Witcher 2, The Witcher 3 or a remake.
GOG installation: do not apply the historical retail patch chain
CD PROJEKT RED’s support page states that the GOG version is fully updated from the moment it is installed and does not need to be patched. This applies whether you install through GOG Galaxy or use the GOG offline installer. Install the game, launch it, create a temporary save and confirm that the campaign loads before adding optional modifications.
Do not run the old Enhanced Edition 1.4 installer or the retail 1.5 patch over the GOG build. Those files belong to the older retail-upgrade process. Applying them to an already updated GOG installation can create version conflicts or unnecessary errors without adding campaign content.
The GOG product page also records later distribution maintenance, including compatibility and stability work. Those updates are part of the current GOG distribution and do not turn the game into a remake or modern sequel.
- Install the GOG release without manually applying retail patches.
- Create and load a temporary test save.
- Back up the save directory before installing any mod, language change or optional file.
Older retail installations: use the official 1.4 then 1.5 process
If you are using an older retail installation rather than the GOG release, follow CD PROJEKT RED’s official Enhanced Edition patch instructions. The documented order is the Enhanced Edition upgrade identified as patch 1.4, followed by patch 1.5. A compatible language pack is also required for the upgrade process.
Place the official upgrade executable and the matching language pack in the location specified by the support instructions, then run the updater. CD PROJEKT RED warns that the upgrade can take several hours, so do not interrupt it simply because the installer appears inactive. After the 1.4 upgrade finishes, apply patch 1.5 as directed by the same official support page.
The support instructions specifically identify The Price of Neutrality and Side Effects as premium modules whose files may also need updating during the older-version process. Do not download replacement patch files from random mirrors. If a patch asks you to register the game, the support page indicates that you are using an old patch package and should obtain the current files from the official support links instead.
If an updater reports that it cannot identify the installed version, do not immediately force another installation. CD PROJEKT RED states that this message commonly means the game is already fully upgraded. Version 1.4.5.1304 is identified by support as the latest combined state containing the 1.4 and 1.5 updates, but the exact way a distribution displays its version can vary. Check the installed release and support guidance before repeating the process.
- Use the official CD PROJEKT RED support downloads.
- Install 1.4 before 1.5 on an older retail copy.
- Use the language pack that matches the installation.
- Treat a version-identification error as a reason to check the current state, not to force-patch immediately.
Handle the bonus adventures separately
The Enhanced Edition includes two additional adventures offering roughly five hours of extra content according to the GOG product page. CD PROJEKT RED’s patch instructions name them as The Price of Neutrality and Side Effects. They are separate scenarios, not missing chapters of the main campaign.
You do not need either adventure to complete the Prologue, Chapters I through V, the Epilogue, the Striga quest or the main ending paths. If you play them, organize their saves separately from the primary campaign. Starting a bonus adventure should not replace your latest main-campaign save.
The Enhanced Edition also includes the D’jinni Adventure Editor. Treat any separately installed adventure or editor project as optional content. Do not assume that an adventure module changes the main campaign’s faction flags, romances, ending paths or Witcher 2 import state.
- Keep bonus-adventure saves separate from campaign saves.
- Do not delay the main campaign expecting bonus modules to unlock required quests.
- Use the D’jinni editor and unrelated modules only after the clean game has been tested.
Avoid mod and patch conflicts
Before installing a mod, copy the save directory and record whether the base installation is GOG or an older retail build. Add modifications one at a time. Script, interface and balance changes can affect quest triggers or save behavior even when their descriptions emphasize graphics or convenience.
If the game becomes unstable, remove the newest optional change and test the untouched Enhanced Edition. Do not overwrite your only campaign save while troubleshooting. A clean backup is especially important before Chapter V, when the campaign’s final sequence and faction consequences become difficult to revisit.
- Keep a local backup of campaign saves.
- Add optional files one at a time.
- Test the unmodified Enhanced Edition before diagnosing a quest problem.
Completion check before beginning the walkthrough
You are ready to begin the campaign guide when the game launches, a new game can be started, a temporary save can be created and loaded, and the inventory’s Enhanced Edition organization is available. GOG users should reach this state without manual patching.
For older retail installations, confirm that the official update process completed successfully. If the updater cannot identify the installed version, compare the installation against CD PROJEKT RED’s support guidance rather than assuming the game is broken. Keep a clean Prologue save and a local copy of the save folder before installing optional content.
Once these checks pass, proceed through the original campaign order: Prologue, Chapters I through V and the Epilogue. The Enhanced Edition’s purpose is to improve the original game’s presentation, usability and stability; it does not require a different story route.
- The game launches without a patch or registration error.
- A temporary save can be created, loaded and deleted normally.
- Alchemy ingredients can be stored, sorted and stacked.
- A clean Prologue save exists.
- The local save folder is backed up.
- GOG users have not applied the historical retail patch chain.
Before you move on
- The installation is The Witcher: Enhanced Edition for PC, not a sequel, remake or unrelated mod package.
- GOG users have left the fully updated GOG installation unpatched.
- Older retail users have followed the official 1.4 then 1.5 sequence when required.
- The Enhanced Edition inventory and alchemy organization are available.
- A clean Prologue save and local save backup exist before optional content is installed.
- The two bonus adventures are understood as optional content separate from the main campaign.
Final sequence and epilogue — step-by-step to the ending
Complete The Ashes of Vizima, cross the burning Temple Quarter and sewer, enter the Order Cloister, defeat the Zeugl and the Grand Master, resolve the King of the Wild Hunt encounter, and finish the official epilogue. Preserve separate Chapter V, Ice Plains, and Order Cloister saves so you can recover the endgame or import a valid save into The Witcher 2.
1. Make a final Chapter V backup before starting the epilogue
Finish the Chapter V quests, faction decisions, romances, contracts, and character resolutions you want before beginning the final sequence. Once The Ashes of Vizima starts, the game becomes largely linear and normal exploration does not reopen. Create a manual save before triggering that transition and label it Chapter V Before Epilogue. Keep it untouched.
Repair both swords and your armor, spend unused talents, and prepare your final inventory. Bring a reliable healing option such as Swallow or White Raffard’s Decoction, plus offensive or defensive potions suited to your build. Tawny Owl helps Sign-focused characters, while Blizzard, Full Moon, Wolverine, or other combat potions can help melee builds. Keep inventory space available for quest items and late-game loot.
Do not rely on the epilogue to provide a full restock. There are useful supplies along the route, but missing a late Chapter V objective cannot normally be repaired after the transition. Reload the Chapter V backup if you discover that a required character, quest, or faction decision was left unresolved.
- Finish the Chapter V content you want to preserve.
- Create and protect a Chapter V Before Epilogue save.
- Repair the steel sword, silver sword, and armor.
- Spend all unassigned talents.
- Prepare healing, combat, and Sign-support potions.
2. Start The Ashes of Vizima and use Dandelion’s final storage opportunity
The Ashes of Vizima begins in the Temple Quarter. Speak with King Foltest at the opening location, then follow the quest route toward the Order Cloister. The streets are damaged and blocked by debris, so do not try to clear every visible district. Progress through the buildings and underground passages that connect the route.
Dandelion appears early in the sequence and gives you one final opportunity to access your storage. Use it to retrieve potions, oils, bombs, weapons, quest items, or other supplies that you deliberately left behind. After moving beyond this point, the route offers no normal return to the earlier storage network.
The ally who accompanies Geralt is determined by previous faction and story choices. Depending on the campaign state, the companion can be Triss, Siegfried, or Yaevinn. This is not a new faction-selection screen. Your Order, Scoia’tael, or neutral direction was established earlier, especially through the major Chapter IV and Chapter V faction decisions.
Follow the objective route through the burning streets and houses. Some encounters change according to which characters survived and which faction Geralt supported. Treat those encounters as consequences of earlier decisions rather than opportunities to change the campaign path.
- Speak with Foltest when The Ashes of Vizima begins.
- Use Dandelion’s final storage access.
- Retrieve all supplies needed for the endgame.
- Stay with the assigned ally.
- Follow the connected buildings and underground passages.
3. Cross the sewer and defeat the Zeugl
Continue until a wounded knight provides access to the sewer route. Enter the sewer and speak with the character encountered there if the dialogue is available. The Zeugl is nearby and blocks the passage to the far side of the Temple Quarter.
Use the silver sword and Strong Style against the Zeugl. At first, only its tentacles are exposed. Destroy several tentacles, then immediately attack the head when it rises. The head remains vulnerable only briefly, so return to the tentacles when it submerges and repeat the process until the creature dies.
Keep moving around the arena instead of standing beside a single tentacle. Reposition when poison or other ground hazards make your current position unsafe. Quen can protect an approach or give you a recovery window, but do not depend on it to remain active while attacking. If the fight becomes unstable, retreat from the immediate tentacle threat, heal, and resume the cycle.
Loot the corpse for Zeugl Venom if you want the material or its associated alchemy use. Leave through the far side of the sewer. A campfire and supplies near the exit provide a useful recovery point before the final approach to the Cloister.
- Use the silver sword against the Zeugl.
- Destroy tentacles until the head surfaces.
- Attack the exposed head with Strong Style.
- Avoid poison and ground hazards.
- Loot Zeugl Venom if desired and recover at the exit.
4. Enter the Order Cloister and create an Ice Plains save
Continue through the Temple Quarter until the Order Cloister entrance. Your previous ally leaves when Geralt enters the Cloister, so prepare to complete the immediate section alone. Defeat the hostile knights at the entrance and search their bodies for the key to the Grand Master’s chamber.
Use the key to enter the chamber and allow the conversation with Jacques de Aldersberg to play. The confrontation sends Geralt and Jacques to the Ice Plains and begins Frozen Reflections.
As soon as manual saving becomes available in the Ice Plains, create a separate save labeled Ice Plains Final Route. This is a valid recovery point for the final sequence and one of the locations from which The Witcher 2 can recognize an imported Witcher save. Reaching the Ice Plains is not campaign completion; continue through Frozen Reflections.
- Defeat the knights at the Cloister entrance.
- Take the key to the Grand Master’s chamber.
- Trigger the conversation with Jacques.
- Create and preserve an Ice Plains Final Route save.
- Do not mistake reaching the Ice Plains for finishing the game.
5. Follow Frozen Reflections through the Ice Plains
The Ice Plains route is linear. Move forward from one Grand Master encounter to the next, defeating Skullheads, wraiths, mutants, and other groups that block the path. There is no need to search every corner for ordinary exploration rewards, so preserve time and supplies for the final fight.
Several returning characters appear according to earlier choices. Triss or Shani can appear depending on the Chapter III relationship decision. Abigail, Adda, Alvin, Celina, Toruviel, White Rayla, Siegfried, Yaevinn, Vincent Meis, and other figures can also appear or be absent according to previous actions, faction alignment, and survival outcomes.
Some encounters offer a temporary combat buff or the option for an ally to accompany Geralt for part of the route. If offered a choice between a temporary buff and assistance, the buff is generally more useful because companions leave before the final arena while the buff remains active. These scenes do not alter the broad political path.
Use the correct sword for the enemy group, switch styles when the number or durability of enemies changes, and avoid wasting potions on minor encounters. Continue uphill and through the caves until you reach the final group before Jacques’s temple.
- Follow the Ice Plains route forward.
- Defeat each enemy group blocking the path.
- Treat returning characters as consequences of earlier decisions.
- Take useful temporary buffs when available.
- Conserve resources for the final arena.
6. Use the automatic meditation point before Jacques
Near the end of the Ice Plains, Geralt faces two Order commanders and Greater Brothers. Defeat this group before crossing farther toward the Grand Master’s temple. After the fight, the game provides an automatic meditation opportunity even though there is no ordinary campfire at the location.
Use the meditation point to heal, drink planned potions, and prepare your weapon oil. This is the safest preparation point for the final arena. A melee build can favor Strong Style, healing, and damage support. A Sign-focused build can use Tawny Owl or Petri’s Philter if available, but retain enough vitality recovery for the entire confrontation.
Potion effects are not necessarily preserved through every transition in the final battle sequence, so treat this meditation as the last reliable preparation window. Create another manual save if you want a second endgame recovery point, while keeping the earlier Chapter V and Ice Plains saves separate.
- Defeat the Order commanders and Greater Brothers.
- Use the automatic meditation opportunity.
- Heal before proceeding.
- Drink planned potions and apply the appropriate oil.
- Create an additional recovery save if desired.
7. Defeat the mutants, Jacques, and the King of the Wild Hunt
The final arena opens with a group of mutants. Use the steel sword and Group Style to control them when they surround Geralt. Igni can also help if your build supports it, but do not let the mutants pin you against the arena boundary.
When Jacques enters the fight, continue with the steel sword and Strong Style. Focus primarily on Jacques rather than chasing every Omen of Fire. The Omens gradually constrict the arena and can cause knockdown, so reposition when the safe space disappears. If they become the immediate threat, clear enough of them to reopen room, then return to Jacques.
After Jacques has taken enough damage, the King of the Wild Hunt appears and claims Jacques’s soul. Accepting the offer avoids a separate battle. Refusing starts a fight with the King. If you fight him, switch to the silver sword and Strong Style, ignore most summoned wraiths, and concentrate on the King while moving away from encirclement.
After the Wild Hunt encounter, Geralt finishes Jacques with the silver sword. The final Wild Hunt choice changes the immediate confrontation but does not choose the Order, Scoia’tael, or neutral Witcher outcome. That political result was determined earlier.
- Use steel and Group Style against the opening mutants.
- Use steel and Strong Style against Jacques’s main phase.
- Ignore or manage Omens of Fire without losing arena space.
- Choose whether to surrender Jacques’s soul.
- If fighting the King, use silver and Strong Style.
- Allow the silver-sword conclusion against Jacques to occur.
8. Finish the official epilogue and preserve the import save
After the final confrontation, Geralt returns to the Order of the Flaming Rose Cloister. Dandelion is there to explain the immediate outcome. Loot Jacques’s body for the Secrets Stolen from Kaer Morhen and the Dimeritium Amulet if the game allows you to do so before leaving the area. Recovering the Secrets Stolen from Kaer Morhen also completes the long-running Witchers’ Secrets quest.
Go to the Cloister exit and complete the conversation with Dandelion. Answer the closing question as you prefer; it does not replace the earlier faction decisions. Let the ending cutscene and the final cinematic that sets up The Witcher 2 play without skipping away from the sequence.
Create a separate manual save in the Order Cloister after returning from the Ice Plains, preferably after Geralt has defeated Jacques and Dandelion is available. Label it Order Cloister Epilogue. This save, like the Ice Plains save, is a recognized location for Witcher 2 import. Preserve the original save folder and do not rely only on cloud synchronization if you want to retain alternate outcomes.
The campaign is complete when the final confrontation is over, Geralt has returned to the Cloister, Dandelion’s concluding conversation is finished, and the official ending cinematic has played.
- Return to the Order Cloister.
- Loot Jacques’s body if possible.
- Recover the Secrets Stolen from Kaer Morhen.
- Speak with Dandelion at the Cloister exit.
- Allow the ending cutscene and sequel-setting cinematic to finish.
- Create and preserve an Order Cloister Epilogue save.
- Keep the Chapter V and Ice Plains saves separately.
Before you move on
- The Ashes of Vizima has been completed from the Temple Quarter through the sewer route and Order Cloister.
- The Zeugl has been defeated with Geralt progressing through the sewer exit.
- Geralt has entered the Ice Plains and completed Frozen Reflections.
- The opening mutant group and Jacques de Aldersberg have been defeated.
- The King of the Wild Hunt encounter has been resolved by acceptance or combat.
- Geralt has returned to the Order Cloister.
- The Secrets Stolen from Kaer Morhen has been recovered if the body was looted successfully.
- Geralt has completed the concluding Dandelion conversation.
References for this chapter
Postgame and preparing a save for Witcher 2 import
Finish the Enhanced Edition epilogue, create a save in a location recognized by The Witcher 2, record the major decisions represented by that save, and preserve the files outside the active GOG installation. The sequel imports selected decisions, certain named equipment and a small amount of money; it does not reproduce the complete Witcher 1 inventory or every journal entry.
1. Create a qualifying import save
Complete the final confrontation and continue into the official Epilogue. A Chapter V save from before the last sequence is valuable as a recovery point, but it is not the safest import candidate. Allow Geralt to reach an Epilogue area before making the save you intend to transfer.
The Witcher 2 technical FAQ identifies two Witcher 1 locations for automatic import detection: the Ice Plains and the Order of the Flaming Rose Cloister. When Geralt reaches either location, make a manual save and keep it separate from your pre-final save. If your political route sends you through the cloister, use the cloister save; otherwise, the Ice Plains save is the straightforward candidate.
Keep playing after that point only if you want a separate record of the completed epilogue. A later epilogue archive is useful for documenting that the campaign was finished, but do not overwrite the Ice Plains or cloister candidate merely because the later file has a newer timestamp.
If the save does not appear in The Witcher 2, first create another manual save in one of those two locations. Non-English installations can occasionally have detection problems; creating the qualifying save with English language settings is a documented troubleshooting step.
- The final confrontation is complete.
- The official Epilogue has begun.
- A manual save exists in the Ice Plains or Order of the Flaming Rose Cloister.
- The qualifying save is separate from the pre-final recovery save.
- A later completed-epilogue archive is kept separately when desired.
2. Record the decisions that matter
Before closing the game, write down the political route represented by the candidate: Order, Scoia'tael or neutral Witcher. Also record Adda's fate and whether the Striga curse was lifted or Adda was killed. These are useful labels for comparing saves and correspond to continuity information used by the sequel, but they do not represent every choice made during the campaign.
Record the Chapter III decision involving Thaler and Count de Wett. This is a Witcher 1 choice resolved during the confrontation between the two characters; it is not the Witcher 2 quest All the King's Men. If Thaler was saved, The Witcher 2 can provide a message and package from him in Flotsam. Do not describe that later delivery as a quest that must be completed in The Witcher 1.
You may also note the fate of Siegfried, the Shani romance outcome and other major ally results. These are continuity references, not proof that the entire Witcher 1 journal is exported. Minor conversations, ordinary sidequest completion, most common items and every romance detail do not transfer as a complete record.
While still in The Witcher 1, use the journal and character entries to review the decisions you can verify directly. After importing into The Witcher 2, check for the Thaler message and package, Foltest's references to Adda and the early inventory to confirm that the intended candidate was used.
- The political route is recorded.
- Adda's fate is recorded.
- The Striga resolution is recorded.
- The Thaler and Count de Wett outcome is recorded correctly.
- Major ally or romance outcomes are noted for reference.
- The journal is not treated as a complete export of every choice.
3. Preserve only relevant Enhanced Edition equipment
If you want named equipment to be considered during import, retain it before creating the Ice Plains or cloister save. The commonly documented importable equipment includes D'yaebl, G'valchir and Gwalhir as steel swords; Aerondight and Moon Blade as silver swords; and Raven's Armor.
Do not list Ard'aenye as a normal obtainable Enhanced Edition import item. In the patched Enhanced Edition, the Chapter V location associated with the sword uses a replacement weapon. Ard'aenye can appear in information about original-release saves or modified and unusual save files, but it should not be part of a standard GOG Enhanced Edition equipment plan.
Do not sell a named sword or Raven's Armor that you want considered before making the qualifying save. Conversely, do not preserve common ingredients, duplicate weapons, ordinary potions or the full treasury solely for transfer purposes. The Witcher 2 reads a limited set of equipment and only a small amount of money from the Witcher 1 save.
Make the qualifying save after the desired equipment is in Geralt's possession. Keep the pre-final save separate if you want to change equipment or create a different route later.
- D'yaebl, G'valchir or Gwalhir is retained if desired.
- Aerondight or Moon Blade is retained if desired.
- Raven's Armor is retained if desired.
- Ard'aenye is not counted as standard Enhanced Edition equipment.
- Common materials and duplicate equipment are not being archived solely for import.
- The qualifying save is made after the desired equipment is retained.
4. Back up the GOG save folder
Close The Witcher before copying files. On a standard Windows installation, the usual location is Documents\The Witcher\saves. Older Windows systems may display Documents as My Documents. If Documents is redirected to OneDrive or another location, use the folder that actually contains the saves produced by your installation.
Copy the entire saves folder to a location outside the game directory. Use a dated archive folder on another drive when possible, and make a second copy on separate storage for an important campaign. Preserve the original save filenames and extensions. Put descriptive information in the containing-folder name or in a text file beside the copied files rather than renaming the individual saves.
Useful labels include the edition, platform, route and major outcomes, such as Witcher1_Enhanced_GOG_Neutral_AddaSaved_ThalerHelped. The label is for your own archive; it does not change what the game can read.
GOG cloud synchronization may be convenient, but it should not be the only archive for alternate endings. Keep the local copy until you have opened the intended candidate in The Witcher 2 and confirmed that the imported state is correct.
- The game is closed before copying.
- The entire active saves folder is backed up.
- The backup is outside the installation directory.
- Original filenames and extensions are preserved.
- Route information is stored in a containing-folder name or text file.
- A second backup exists when the campaign is important to retain.
5. Keep a compact archive
Five or fewer save sets are enough for most players: one pre-final recovery set, one preferred Ice Plains or cloister import candidate, one later completed-epilogue archive and up to two alternate-route candidates. This preserves the practical replay points without creating an unmanageable collection.
Keep every route candidate in its own containing folder. Include the Enhanced Edition GOG label, political route, Adda's fate, Striga resolution and Thaler outcome. Never overwrite the only pre-final recovery point after testing another ending.
If you create an alternate ending, begin by copying the pre-final save set or its backup. After reaching the recognized epilogue location, copy that candidate into a new archive folder before continuing. This prevents a later completed-epilogue file from replacing the file you planned to import.
- A pre-final recovery set is preserved.
- A preferred Ice Plains or cloister candidate is preserved.
- A completed-epilogue archive is preserved when useful.
- Alternate routes have separate archive folders.
- Each archive identifies the Enhanced Edition GOG version.
6. Test the import in The Witcher 2
When The Witcher 2 is installed, place a copy of the chosen candidate in the active Witcher 1 save directory, normally Documents\The Witcher\saves or its redirected equivalent. Start The Witcher 2, begin a new game and choose the Witcher 1 save import option.
If multiple saves are detected, select the candidate whose route label matches your intended playthrough. Keep the original archive untouched while testing. Check the opening inventory for retained named equipment and watch for the expected continuity references, including the Adda discussion and any Thaler correspondence that applies to your Witcher 1 decision.
If no save appears, close both games and check the directory, filename, extension and save location. Confirm that the file was created in the Ice Plains or Order of the Flaming Rose Cloister. If the installation uses a redirected Documents folder, check that actual folder rather than creating a second empty The Witcher directory.
If the wrong equipment or route appears, quit without altering the backup and test another labeled candidate. Do not edit the save file or change its extension to force detection. If The Witcher 2 is not installed yet, no test is required; preserve the qualifying candidate and perform the check later.
- The chosen candidate is in the active Witcher 1 saves directory.
- The candidate was created in the Ice Plains or Order of the Flaming Rose Cloister.
- The correct Witcher 1 save is selected in The Witcher 2.
- Imported equipment and continuity references are checked.
- The original backup remains unchanged after testing.
Before you move on
- The final confrontation and official Epilogue are complete.
- A manual save exists in the Ice Plains or Order of the Flaming Rose Cloister.
- A later completed-epilogue archive is preserved separately when useful.
- Adda's fate and the Striga resolution are recorded.
- The Order, Scoia'tael or neutral Witcher route is recorded.
- The Chapter III Thaler and Count de Wett outcome is recorded accurately.
- Any intended Enhanced Edition import equipment is present in the qualifying candidate.
- Ard'aenye has not been counted as a standard Enhanced Edition import item.
Finishing up
Reached and completed the official Epilogue cinematic sequence after Chapter V, including The Ashes of Vizima, Frozen Reflections, Jacques de Aldersberg’s defeat, the Wild Hunt resolution, the return to the Order Cloister and the final cinematic.
Resolved Her Highness the Striga either by lifting Adda’s curse or killing the Striga, and preserved the corresponding save outcome.
Completed the final city and Epilogue sequences rather than stopping at the end of Chapter V or at a late-game checkpoint.
Recorded the independent major outcomes: Order, Scoia’tael or neutral Witcher political route; Adda’s fate; Thaler’s fate; Alvin’s guardian; and any other desired character or romance flags.
Preserved a completed-campaign archive and, separately, at least one manual save created in the Ice Plains or Order of the Flaming Rose Cloister if the save is intended for The Witcher 2 import.
Confirmed that all desired Chapter V sidequests and chapter-critical objectives were completed before entering the irreversible Epilogue route.
Choose your next gameScreenshots & video
Game imagery for reference. Follow the written chapters above for the route and strategies.
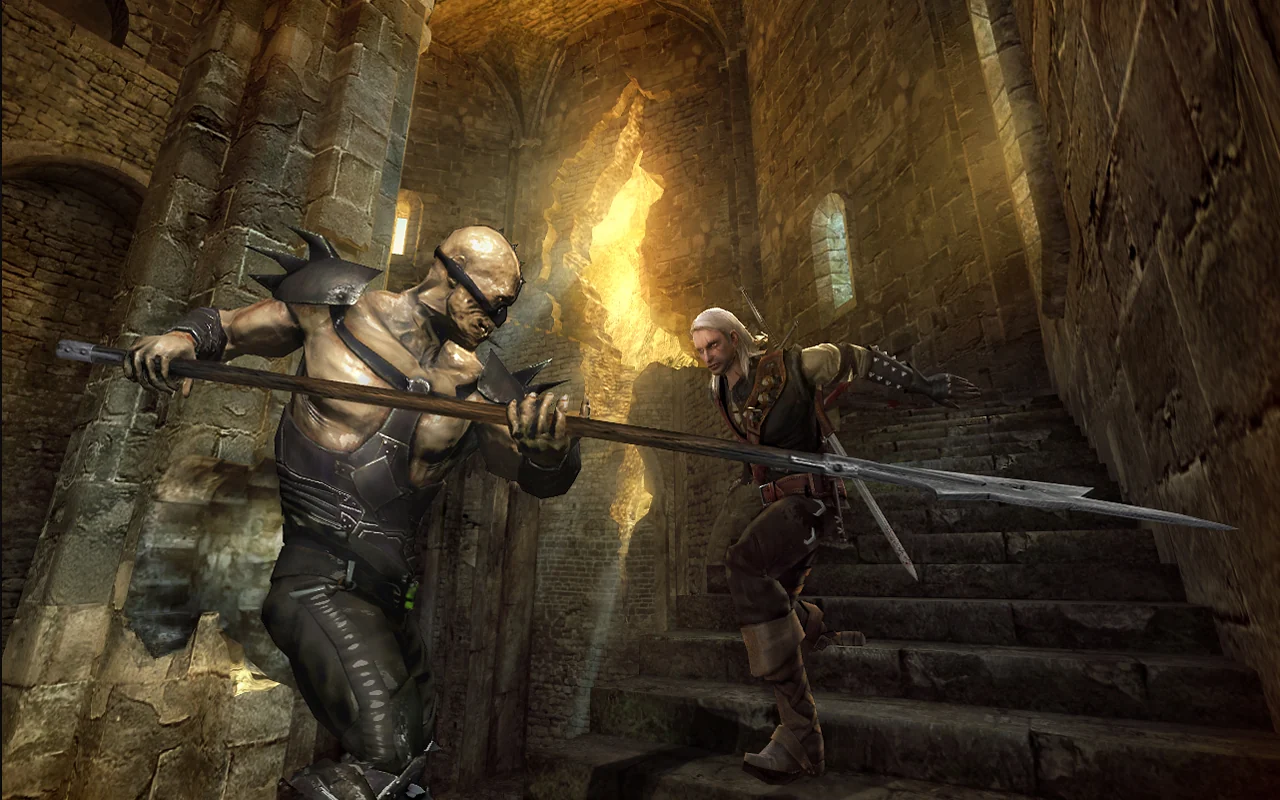
Sources & references
Our original guide draws on the references below. Check the edition at the top of this page before following controls or unlock requirements.
- The Witcher: Enhanced Edition — GameBanshee Prologue Walkthrough
- The Witcher: Enhanced Edition — A Potion for Triss Walkthrough
- The Witcher: Enhanced Edition — Gameplay Notes and Equipment Progression
- The Witcher: Enhanced Edition — Gamer Guides Prologue Walkthrough
- The Witcher: Enhanced Edition — A Potion for Triss
- The Witcher Manual — Atari PDF
- GOG — The Witcher: Enhanced Edition
- GameBanshee — Chapter I Contracts
- The Official Witcher Wiki — Buried Memories
- Enhanced Edition patch - how to — The Witcher | Technical Support — CD PROJEKT RED
- Of Monsters and Men - Chapter 1: The Outskirts of Vizima — Gamer Guides
- Of Monsters and Men — Gamer Walkthroughs
- Of Monsters and Men — GameBanshee
- The Witcher: Chapter I — StrategyWiki
- The Witcher: Enhanced Edition — Chapter II Overview: Temple Quarter
- The Witcher: Enhanced Edition — Prison Break walkthrough
- The Witcher: Enhanced Edition — Chapter II Overview: Dike and Swamp
- Vizima Confidential walkthrough
- Anatomy of a Crime walkthrough
- What Lies Beneath walkthrough
- A Mysterious Tower walkthrough
- Trade Quarter Overview — GameBanshee
- Gold Rush — Gamer Walkthroughs
- Chapter 3 — Gamer Walkthroughs
- The Unforgiven — GameBanshee
- Teleporter — The Official Witcher Wiki
- Gold Rush — Witcher Wiki
- Maximizing Experience Points — The Official Witcher Wiki
- Gamer Walkthroughs — Free Elves
- Gamer Walkthroughs — The Paths of Destiny
- Gamer Walkthroughs — Ripples
- GameFAQs — The Witcher: Enhanced Edition Guide and Walkthrough
- The Witcher: Enhanced Edition — Walkthrough — GameFAQs
- Mike’s RPG Center — The Witcher Walkthrough
- The Witcher: Enhanced Edition — Chapter V Castle walkthrough
- The Witcher: Enhanced Edition — Chapter V Old Vizima walkthrough
- The Witcher: Enhanced Edition — Chapter V Old Manor and Catacombs walkthrough
- Her Highness the Striga — GameBanshee Enhanced Edition Walkthrough
- The Witcher: Enhanced Edition — Sweet Revenge walkthrough
- The Witcher: Enhanced Edition — Sweet Revenge chapter guide
- The Witcher: Enhanced Edition — Sweet Revenge reference
- The Witcher: Main Quests Chapter 5 — Gamepressure
- The Witcher: Enhanced Edition on GOG.com
- Force Recon — Witcher Wiki
- Free Elves — Witcher Wiki
- All the King's Men — GameBanshee
- Saved game import — Witcher Wiki
- The Witcher 2 for PC Technical FAQ — CD PROJEKT RED Forums
- Quen — Official Witcher Wiki
- Quen Sign — GameBanshee
- The Witcher — Wikipedia overview of combat styles and camera modes
- The Witcher: Enhanced Edition — Alchemy/Recipe List, GameFAQs
- Blacksmith — Witcher Wiki
- Blacksmith’s son — Witcher Wiki
- Getting Started in the Temple Quarter — Gamer Guides
- Witcher armor types — Gamepressure
- GameBanshee — The Witcher Enhanced Edition Walkthrough
- GameBanshee — Chapter I Outskirts Overview
- CD PROJEKT RED Support — Unable to Complete or Progress in a Quest
- Cannot identify the installed version — The Witcher | Technical Support — CD PROJEKT RED
- The Witcher: Enhanced Edition — The Ashes of Vizima walkthrough
- The Witcher: Enhanced Edition — Frozen Reflections walkthrough
- The Time of the White Frost and the White Light — Epilogue walkthrough
- Which quests from the first Witcher games matter in the second? — Arqade
- The Witcher — PCGamingWiki
About the game & collecting notes
- Platform
- PC (GOG)
Step-by-step campaign coverage for The Witcher: Enhanced Edition on GOG. This walkthrough takes you from the Kaer Morhen prologue through Chapters I–V to the official epilogue, explains key choices that change late-game outcomes, and shows how to handle the Striga, ally routes and final confrontation while using the Enhanced Edition fixes.
Darryl Polo
Darryl Polo loves tinkering with emulation and revisiting retro games. He enjoys exploring how old favorites play on different setups and sharing what he learns along the way. At Joking Joystick, he writes about the games, hardware, and small discoveries that keep the hobby fun.
Our editorial standardsFound a step that needs another look? Help us improve this guide.