
The Witcher 2: Assassins of Kings — Enhanced Edition (GOG) Full Campaign Walkthrough
The Iorveth Act II route begins with Prelude to War: Aedirn and The War Council, then follows the cure and curse objectives: Subterranean Life, Hunting Magic, Where is Triss Merigold?, Royal Blood, A Matter of Life and Death, Hatred Symbolized, Death Symbolized, The Eternal Battle and Vergen Besieged. Suspect: Thorak and The Walls Have Ears are optional, order-sensitive Royal Blood evidence investigations that can affect the Stennis judgment and additional rewards, but they are not prerequisites for delivering Saskia’s cure or finishing the main campaign. The timed Iorveth-sword decision in Act I changes the immediate Flotsam consequences; the later At a Crossroads: Vernon Roche or At a Crossroads: Scoia’tael commitment determines whether Act II follows Roche or Iorveth. The chapter must distinguish required progression from optional Vergen investigations and identify the pre-siege cutoff.


Find a copy
The Witcher 2: Assassins of Kings: Enhanced Edition PC (GOG)
We may earn a commission if you buy through these links, at no extra cost to you. As an Amazon Associate I earn from qualifying purchases.
Opens retailer search results. Check the model, edition, seller, availability and current price before buying.
Before you begin
This walkthrough is written for The Witcher 2: Assassins of Kings Enhanced Edition installed from GOG on PC.
It assumes a single-player playthrough where you want clear directions for progressing through the campaign, preserving major choices and reaching an ending in Loc Muinne.
Enhanced Edition additions are identified where they affect the campaign, while Arena Mode and optional route-specific quests are kept separate from required story progress.
Follow the chapters in order, then use the Roche or Iorveth Act II chapter selected by completing the corresponding At a Crossroads quest in Act I.
Save before the timed Iorveth-sword scene if you want to replay its local Flotsam consequences, before committing to either At a Crossroads quest if you want the opposite major campaign, before the Act III rescue branch and before the final Letho conversation.
The guide covers both routes, but one campaign follows only one route. Restore a save from before the At a Crossroads commitment to replay the other major campaign; restore a pre-sword save only to compare the earlier Act I branch.
Set yourself up for the run
Install or launch the GOG PC Enhanced Edition and confirm that its tutorial, Arena Mode and Dark Mode content is available.
Create several manual saves before the end of Act I. Keep a separate save before the timed Iorveth-sword scene for its local Flotsam consequences, and keep the primary alternate-campaign backup immediately before completing either At a Crossroads: Vernon Roche or At a Crossroads: Scoia’tael.
The timed Iorveth-sword scene changes the immediate Act I outcome. Completing the later At a Crossroads: Vernon Roche or At a Crossroads: Scoia’tael quest commits the major Roche or Iorveth Act II campaign.
Choose a broad combat preference early, but retain enough flexibility to use Quen, dodging, Signs and alchemy in difficult encounters.
Keep quest documents, route-related items and rare crafting materials until the journal confirms that their associated objectives are complete.
If you want both Act II routes, preserve a save immediately before the At a Crossroads commitment, then use separate copies for Roche and Iorveth. Preserve a separate pre-sword save only if you also want to compare the different Act I consequences.
Getting Started: EE Installation, Options and Controls
Set up the GOG PC version of The Witcher 2: Assassins of Kings Enhanced Edition, verify the tutorial and optional modes, test the controls, learn the Books, journal, crafting, alchemy and storage interfaces, and create reliable backups before the Act I decisions. The timed Iorveth-sword scene changes the immediate Flotsam branch. The later At a Crossroads commitment determines whether the rest of the campaign follows Roche or Iorveth.
Install and verify the GOG Enhanced Edition
Install The Witcher 2: Assassins of Kings Enhanced Edition from your GOG library or its matching GOG offline installer. Let GOG Galaxy finish any listed updates before launching, or apply the updates included with the offline installer. The GOG product is the PC Enhanced Edition, not the original unpatched release.
From the main menu, check that Arena Mode is available separately from the story campaign. When beginning a new game, confirm that the Enhanced Edition tutorial is offered. Enhanced Edition additions such as the tutorial, Arena, Dark Mode, added cinematics, interface improvements and additional campaign material are optional for reaching the ordinary campaign ending. They are useful for testing the installation but are not extra completion requirements.
- The installed GOG product is The Witcher 2: Assassins of Kings Enhanced Edition.
- The game reaches its main menu without errors.
- Arena Mode is visible as a separate option.
- The Enhanced Edition tutorial is offered when starting a new campaign.
- Dark Mode is available if you want the additional difficulty challenge.
Complete or test the tutorial and controls
Run the tutorial before beginning the campaign if you are unfamiliar with The Witcher 2’s PC controls. Test movement, camera movement, weapon drawing, quick and strong attacks, blocking, dodging, rolling, Sign selection and Sign casting. Also test the quickslot item command and the pause or menu command used by your keyboard, mouse or controller profile.
Use Options to inspect the bindings actually assigned by your installation. Do not copy a control layout from another platform or assume that a controller profile uses the same commands as the keyboard-and-mouse layout. After changing a binding, return to gameplay and test it immediately.
Use the tutorial to establish a defensive rhythm. Quen gives Geralt a temporary protective buffer, but it does not replace movement. Dodge or roll out of attack lines, avoid being surrounded, and use the open space around enemies rather than standing in front of several attackers. During the first campaign fights, learn how much stamina your chosen Signs consume and how quickly Geralt can recover between casts.
If you skip the tutorial, perform these checks during the opening sequence and make a manual save once movement and combat controls are reliable. This is a control-test save, not the important route backup.
- Movement and camera control respond correctly.
- Quick attacks, strong attacks, blocking, dodging and rolling work.
- A Sign can be selected and cast.
- A quickslot item can be selected and used.
- The active control layout has been tested in gameplay.
- A manual control-test save exists.
Locate the Books, journal, crafting and alchemy interfaces
Open the inventory once the story gives Geralt normal access to his equipment. The patched Enhanced Edition PC interface includes a Books tab for books and notes. The journal organizes quests and provides sections for characters, locations, monsters, tutorials, crafting information, alchemy information and glossary material. Read important documents instead of leaving them unopened; investigation quests can depend on information learned from notes or books.
Open any formula or crafting diagram and inspect its requirements. Patch 1.07 added the Books tab and a pinning feature for formulas and diagrams. Use the command shown by your installation to pin an entry, then visit a merchant and inspect the Shop panel. Components and ingredients required by the pinned entry should be highlighted there.
Pinning is a tracking and shopping aid only. It does not purchase ingredients, create the item, gather components, or guarantee that the current merchant stocks every highlighted requirement. Compare the highlighted items with the complete formula, buy what is available, and obtain missing components from another merchant, from loot, by gathering, or by dismantling suitable equipment. If your interface does not show a pin command, inspect the formula manually and continue; do not assume the formula itself is unavailable.
Test inventory sorting while reviewing the Books and crafting sections. Sorting helps separate weapons, armor, quest items, formulas and raw materials, but it does not identify every item that is safe to sell. Keep quest documents, unusual components and items whose descriptions mention a named investigation until the journal confirms that they are no longer needed.
- The Books tab is visible in the inventory.
- Quest, crafting and alchemy journal sections are accessible.
- A formula and a diagram have been opened and inspected.
- Pinning has been tested, or requirements have been verified manually.
- The merchant panel has been checked after pinning.
- You understand that pinning does not buy ingredients or guarantee merchant stock.
- Inventory sorting has been tested.
Find and test persistent storage
Ordinary containers in the world are not Geralt’s personal storage. Use a documented storage provider instead. In Chapter I, use the storage chest in the lower level of the Flotsam inn, in the southwest part of that level near the route toward the brothel. The innkeeper, Dyson Beaver, also provides storage, but using the chest directly is the safer choice if you want to avoid an old PC storage issue associated with first accessing storage through Dyson.
On Roche’s Chapter II route, go to the Camp Followers’ Encampment south of the Kaedweni Camp and use the storage point beside or near Raymond Gessler. The Kaedweni camp canteen is not the storage location. On Iorveth’s Chapter II route, storage is available through the innkeeper or the chest in Geralt’s room at the Cauldron in Vergen. In Chapter III, use the storage chest near innkeeper Dalum in the ruined inn area around Loc Muinne’s central square.
These valid storage providers share the same stored inventory. You do not need to recover an item from the exact chest where you deposited it. Nevertheless, access the provider available on your current route rather than searching for a location belonging to the other Chapter II branch.
Deposit an inexpensive, non-quest item, close the storage interface, reopen it and retrieve the item. Once that test works, use storage for excess crafting materials, spare equipment and diagrams. Keep quest-critical items until the journal confirms that their objective is complete.
- You know that random loot containers are not persistent personal storage.
- The Flotsam inn storage chest has been found and tested.
- The Roche Chapter II storage point near Raymond Gessler is known.
- The Iorveth Chapter II Cauldron storage point is known.
- The Loc Muinne storage point near Dalum is known.
- A test item has been deposited and retrieved.
- You understand that valid storage providers share one stored inventory.
Create the local-branch and alternate-campaign backups
Make an optional manual save immediately before the timed scene in The Assassins of Kings where Geralt can return Iorveth’s sword or help Roche. Label it PRE-SWORD. This save is for replaying the immediate Act I consequences, such as the opening version of the following sequence and related dialogue. It is not the primary backup for changing the major campaign route.
Continue until the two mutually exclusive quests, At a Crossroads: Vernon Roche and At a Crossroads: Scoia’tael, are available. Before completing either one, make a manual save and label it PRE-AT-A-CROSSROADS. This is the primary alternate-campaign save. Completing the Roche quest commits the remainder of the campaign to Roche’s route; completing the Scoia’tael quest commits it to Iorveth’s route.
The sword decision can influence the immediate Flotsam events and which route-related objectives are emphasized, but it does not permanently remove the later major choice. Conversely, once one At a Crossroads quest is completed, a later dialogue choice cannot convert that campaign into the opposite Act II route. To play the other major campaign, restore PRE-AT-A-CROSSROADS and replay the route commitment from there.
For the GOG Windows version, the usual save directory is %USERPROFILE%\Documents\Witcher 2\gamesaves. Close the game before copying it. Make an external copy of the complete gamesaves folder and name the backup according to its purpose, such as BEFORE_IORVETH_SWORD or BEFORE_AT_A_CROSSROADS. Do not rename individual save files or change their extensions.
To verify the backup, restore a copy of the folder to the normal gamesaves location, launch the game and confirm that the intended manual save appears under Load Game. If cloud synchronization offers to replace local files, stop and choose the copy containing the desired decision state. Cloud storage is an additional copy, not a substitute for a manually identified local backup.
- A PRE-SWORD save exists before the timed Iorveth-sword scene.
- A separate PRE-AT-A-CROSSROADS save exists before completing either route-commitment quest.
- The complete Windows gamesaves folder has been copied externally.
- Backup folders are clearly named by purpose.
- Individual save filenames and extensions remain unchanged.
- A restored backup appears in Load Game.
- You understand that PRE-SWORD replays local Act I consequences, while PRE-AT-A-CROSSROADS accesses the alternate major campaign.
Before you move on
- The GOG installation launches The Witcher 2: Assassins of Kings Enhanced Edition.
- Arena Mode and the Enhanced Edition tutorial are visible, and their optional status is understood.
- Dark Mode is recognized as an optional difficulty choice.
- Movement, attacks, blocking, dodging, Signs and quickslot-item use have been tested.
- The Books tab and journal sections have been located.
- A formula and diagram have been inspected.
- Pinning has been tested, or formula requirements have been checked manually.
- Inventory sorting has been tested.
- The Flotsam storage chest has been found and a test item has been deposited and retrieved.
- The Roche, Iorveth and Loc Muinne storage landmarks are known.
- PRE-SWORD exists for replaying the immediate Act I branch.
- PRE-AT-A-CROSSROADS exists before completing either major route-commitment quest.
- The complete GOG PC gamesaves folder has been copied externally.
- The backup preserves original filenames and can be restored successfully.
- You understand that the sword scene affects local Act I consequences, while the later At a Crossroads commitment determines the Roche or Iorveth campaign.
Basic Combat and Survival in Act I
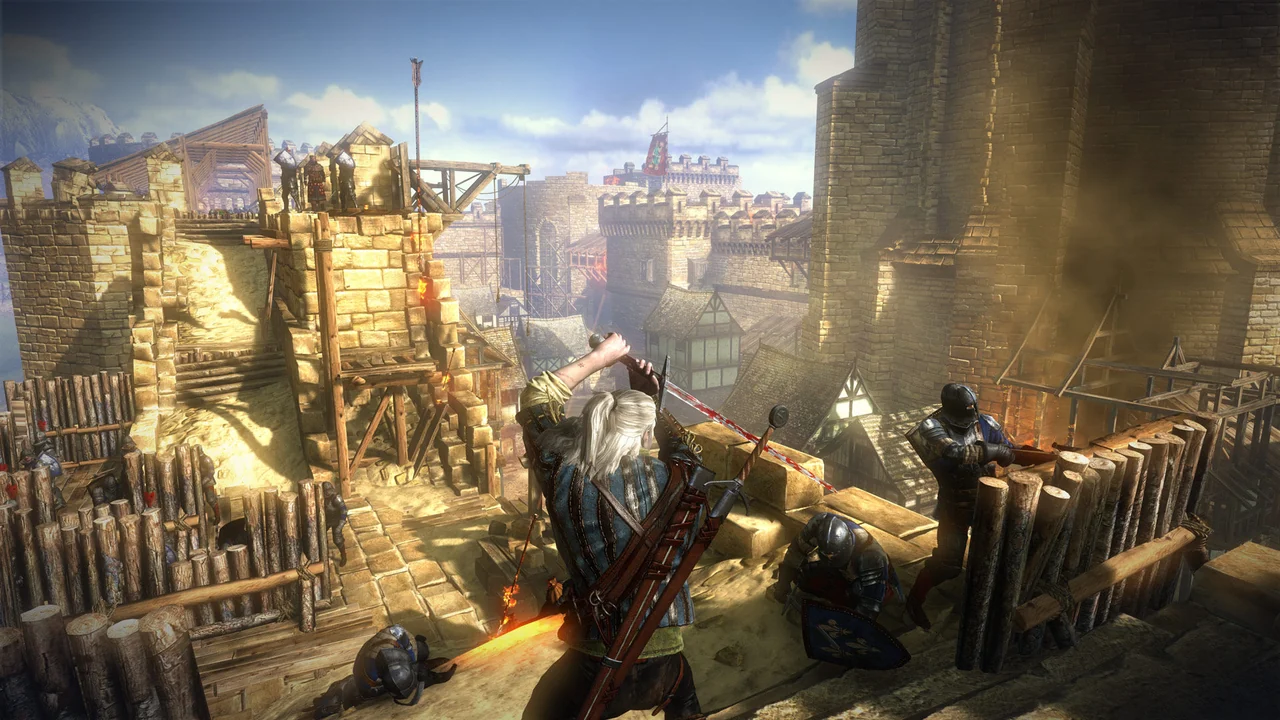
The Prologue is a mostly linear training route through the La Valette assault. It teaches sword selection, Signs, blocking, dodging, quick-slot items, meditation and early equipment management before Geralt reaches Flotsam. Follow the ordered objectives below. The surrender-or-kill decision involving Aryan La Valette changes later scenes and rewards but is not required for campaign completion.
Begin the interrogation and choose the assault account
The game opens with Geralt imprisoned in the La Valette dungeons and questioned by Vernon Roche. When Roche asks what happened, select the account that begins with the king summoning Geralt that morning. This starts the assault-day sequence and places Geralt with Triss Merigold near the Temerian encampment.
Before approaching King Foltest, use the area as a safe tutorial space. Open the Controls menu and confirm the bindings shown for quick attacks, strong attacks, blocking, dodging, Signs, sword selection, the medallion and quick-slot items. Keyboard-and-mouse and controller prompts differ, and the bindings can be changed, so use the controls displayed by your PC installation rather than assuming a universal key.
- Start the account about the morning of the assault.
- Confirm the displayed PC controls.
- Practice movement, attacks, blocking, dodging and Sign casting before entering the siege.
Prepare at Foltest’s camp and follow the king
Walk through the camp and collect nearby loot and herbs if you wish. The Witcher medallion highlights interactable objects when activated. The training area contains tutorial activities, including practice dummies and optional introductions to arm wrestling and dice poker. These activities are not required for the story.
Speak with King Foltest near the siege equipment to begin the required sequence. Follow the instructions for the initial siege weapon and use the displayed aiming and firing prompts. The result advances the story even if the first shot does not produce the outcome you expected. After the scene, follow Foltest and the soldiers into the moving siege tower.
Inside the tower, stay with Foltest and climb the ladders when the group advances. The tower reaches the castle walls, completing the initial king-led section and beginning the assault at the battlements.
- Speak to Foltest to begin the assault.
- Follow the soldiers into the siege tower.
- Climb with Foltest until the tower reaches the castle wall.
Leave the siege tower and operate the ballista
When the siege tower opens, fight the La Valette soldiers on the battlements. Foltest and his troops provide support, so use this encounter to practice short attack sequences rather than holding strong attacks continuously. Aard can interrupt an enemy or knock a soldier away from a dangerous edge, while Quen gives you a temporary defensive buffer before you enter a crowded exchange.
The forward route is blocked by defenders and a barricade. Follow the objective marker down into the courtyard instead of trying to force the barricade from the front. Defeat the guards around the ballista, keeping the group in front of Geralt. Use Quen if you are still learning the timing of parries and dodges, but move away when the shield breaks.
Approach the ballista and use the displayed interaction prompt. The loading sequence may be interrupted by additional soldiers, so complete the interaction after clearing the immediate attackers. Once the ballista fires and the barricade is destroyed, search nearby bodies and objects if you want early loot, then return toward Foltest.
- Descend to the courtyard rather than attacking the barricade directly.
- Use the ballista after clearing or controlling its guards.
- Keep enemies in front of Geralt and retreat when Quen breaks.
- Return to Foltest after the barricade is destroyed.
Reach Aryan La Valette and make the optional choice
Cross the opened route with Foltest’s forces and fight through the next groups of soldiers. Proceed up the ramps and across the battlements until you reach Aryan La Valette, who is defending the tower with his troops.
The conversation gives you three practical outcomes. You can persuade Aryan to surrender, challenge him to a duel, or attack him together with his soldiers. The choice is not a campaign requirement: all three outcomes allow the Prologue to continue. Sparing Aryan changes the later dungeon scene and can provide an additional reward if you help him escape. Killing him causes his mother, Mary Louisa La Valette, to appear in the corresponding dungeon sequence instead.
If combat begins, do not stay locked onto one target while other soldiers surround Geralt. Cast Quen before approaching, use Aard to interrupt a dangerous attacker, strike briefly and dodge out before the group closes in.
- Climb to Aryan’s position after operating the ballista.
- Choose surrender, duel or a full assault according to the outcome you want.
- Treat the Aryan decision as optional progress context, not a required route lock.
Survive the dragon attack and reach the monastery route
After the Aryan sequence, continue with Foltest’s forces through the castle. A dragon attacks and sets sections of the route on fire. Follow the path along the wall and under the wooden structures, defeating the small groups of soldiers while watching for the dragon’s fire. Do not stand in a burning area simply to finish an attack; wait for the flames to pass or move along the safe side of the route.
When Triss reaches the blocked passage, allow her to clear the debris. Continue across the wooden bridge toward the next platform. The dragon is driven away by ballista fire, and the story returns to Roche’s interrogation. Select the account concerning the group splitting up at the monastery when prompted, then continue into the town-side escape sequence.
- Stay beneath the safer side of the wall while avoiding dragon fire.
- Let Triss clear the blocked passage.
- Cross the bridge and reach the next platform.
- Continue the interrogation until the monastery escape section begins.
Open the route to the inner courtyard
The next section begins outside a blocked gate. Move toward the nearby civilians and soldiers. The confrontation can start the optional Woe to the Vanquished quest, but intervening is not required to reach the ending. If you help the civilians, resolve the commander encounter through dialogue or the resulting fight, then continue toward the sealed route.
Advance to the wooden obstruction near the alley and destroy it with Aard. Fight through the soldiers near the well, then enter the sewers through the opening below the well. Use the silver sword against drowners and collect the nearby Place of Power if you want its temporary vitality benefit.
Break the second wooden barrier with Aard and continue through the sewer route. Climb out through the ladder, fight through the enemies in the tower and follow the path to the outside of the castle. Enter the courtyard from the far side, defeat the guards and loot the large soldier for the key. Return to the locked interior door and use the winch to open the gate.
- Choose whether to intervene in the civilian confrontation.
- Use Aard on the wooden barriers.
- Enter the sewers through the well.
- Use the silver sword against drowners.
- Take the courtyard key and operate the winch.
Complete the solar sequence and return to the dungeon
After opening the gate, meet Foltest in the courtyard and continue through the church and royal areas. During the conversation about the royal children, use the displayed dialogue options and Sign prompt when the game requests them. Search nearby chests if you want crafting materials, diagrams or books before leaving the area.
Follow Foltest toward the bridge. The dragon attacks again and starts a short escape sequence. Watch the on-screen quick-time prompts and respond with the displayed control rather than relying on a fixed keyboard instruction. Keep moving backward or along the indicated route, then complete the final prompt when Geralt uses his silver sword to escape the immediate danger.
Continue into the solar. The following assassination scene is story-controlled: Geralt cannot prevent Foltest’s death. After the assassin escapes and the guards discover Geralt beside the king, the game returns to Roche’s interrogation. Continue the conversation until Geralt is back in the La Valette dungeons.
- Follow Foltest through the church and royal areas.
- Complete the dragon escape prompts using the controls shown on screen.
- Reach the solar and finish the assassination cutscene.
- Continue Roche’s interrogation into the dungeon escape.
Escape the La Valette dungeons
Geralt begins the escape in a cell. You can provoke a guard and draw him into the cell, or free yourself immediately and fight the guards together. The first method is safer for a new player because it separates the enemies. Use fists for the initial guard encounter, then search bodies for keys.
The dungeon supports either a direct combat route or a stealth route. In stealth, extinguish torches where the game permits and approach guards from behind to perform the takedown prompt. In combat, use narrow corridors to prevent several guards from reaching Geralt at once.
Search the side route associated with Aryan’s outcome. If Aryan survived, you can find and help him escape. If he died, Mary Louisa occupies the corresponding scene. Clear the guards as required, follow the escape instructions and proceed toward the oil room and docks. You do not need to complete every dungeon room to finish the Prologue.
At the docks, search crates and speak with any available character connected to earlier choices. Then follow the pier to Triss Merigold and Vernon Roche. Board the boat to complete the Prologue and arrive at Flotsam.
- Separate the first guards if possible.
- Use stealth or combat according to your preferred approach.
- Resolve the Aryan or Mary Louisa dungeon scene.
- Reach the docks and board the boat with Triss and Roche.
Begin Act I in Flotsam
The boat reaches the area outside Flotsam, where a river monster prevents a normal approach to the harbor. Follow Triss’s protective shield during the opening attack and stay close to the group while moving through the shoreline route. This begins A Rough Landing.
After entering town, the next required objective is the rescue of Zoltan Chivay and Dandelion from the execution setup. Follow the route into Flotsam and complete By the Gods—Stringing Up Sods. Afterward, meet your companions in the tavern and speak with them to establish the Act I quest flow.
A monster attack then introduces The Kayran. From this point, Flotsam, Lobinden and the surrounding forest open for exploration. You can begin contracts, crafting tasks and side quests before committing to the later Act I route decision. Do not rush into the route-closing main objectives if you want to finish optional content.
- Stay within Triss’s protective shield during the arrival sequence.
- Reach Flotsam and rescue Zoltan and Dandelion.
- Speak with the companions in the tavern.
- Begin The Kayran and inspect the journal before choosing the next major objective.
Use the Prologue to establish survival habits
Select the steel sword for humans and ordinary animals, and the silver sword for monsters once it becomes available. The early game rewards short exchanges: cast Quen before a dangerous approach, attack once or twice, dodge away from committed swings and let vigor recover before casting another Sign. Aard is useful for interruption and space; Igni is useful for pressuring groups, but neither Sign should replace positioning.
Prepare potions, bombs and oils during meditation before a difficult fight. Combat potions must be consumed before combat, so do not wait until Geralt is already under attack. Carry food for recovery between encounters and preserve stronger mixtures for monsters, elite soldiers or extended sequences.
After reaching Flotsam, visit the town’s merchants and crafters, then check Lobinden. Keep quest items, useful diagrams and rare crafting materials. Sell obsolete weapons and duplicate junk, and use storage for equipment you want to retain. The early silver-sword diagram and optional Act I upgrades are worthwhile if you find them, but no optional weapon, contract or crafting target is required to leave Act I.
- Use the correct sword for the enemy type.
- Prepare and consume potions before combat.
- Keep food and a usable sword set available.
- Check Flotsam and Lobinden merchants before spending all your money.
- Store or sell equipment without discarding quest items or rare materials.
Before you move on
- You have completed the interrogation account, followed Foltest through the assault and entered the siege tower.
- You operated the courtyard ballista and reached Aryan La Valette.
- You made an optional Aryan outcome choice and continued through the dragon and monastery sequences.
- You opened the inner courtyard route through the sewers, operated the winch and completed the solar sequence.
- You escaped the La Valette dungeons, reached the docks and boarded the boat with Triss and Roche.
- You arrived in Flotsam, completed the opening arrival sequence, rescued Zoltan and Dandelion and started the Act I quest flow.
- You can use Quen, Aard, Igni, blocking and dodging without exhausting all vigor.
- You know how to meditate, prepare alchemy, select the correct sword and manage early equipment without selling quest items.
References for this chapter
- The Witcher 2: Assassins of Kings Enhanced Edition — GOG.com
- The Witcher 2: Enhanced Edition Game Manual, CD PROJEKT RED
- The Witcher 2 Walkthrough: Prologue Story Part 1
- The Witcher 2 Walkthrough: Prologue Story Part 2
- The Witcher 2 Walkthrough: Prologue Story Part 3
- The Witcher 2 Walkthrough: Prologue Story Part 4
- Dungeon of the La Valettes Walkthrough
- The Witcher 2 Chapter 1 Walkthrough
Act I — Flotsam: Main Objectives and Key Side Targets
Complete Act I’s Flotsam investigation from the arrival at the harbor through the Kayran, the Rose of Remembrance, the kingslayer investigation, Letho’s confrontation, Where is Triss Merigold? and the route-specific At a Crossroads quest. Use the open portion of the chapter to finish worthwhile side content, preserve documents connected to later investigations and create the correct route backup before leaving Flotsam.
1. Enter Flotsam and establish the main landmarks
After the Prologue, follow Triss and Vernon Roche from the boat toward Flotsam. The opening route passes through the forest and leads to the town gate. Stay near Triss during the shield sequence while Roche escorts her through the Scoia’tael attack; leaving the protective field exposes Geralt to arrows and unnecessary damage.
At the town square, complete By the Gods—Stringing Up Sods by rescuing Zoltan and Dandelion from the execution platform. The quest then directs you to the inn, which becomes the main return point for conversations with Zoltan, Dandelion and Triss. The inn also provides access to several optional activities, including dice poker, fistfights and other local errands.
Use the inn, town square, harbor, Loredo’s compound, the craftsmen’s district, Lobinden and the forest road as your primary navigation landmarks. The harbor and prison-barge dock are important for the main investigation, while Lobinden and the forest contain Cedric, monster contracts and several quest locations. Create a manual save before beginning the main investigation in earnest.
- Reach Flotsam with Triss and Roche.
- Rescue Zoltan and Dandelion during By the Gods—Stringing Up Sods.
- Speak with the main party at the inn.
- Create a manual Act I save.
2. Begin The Kayran and prepare for the monster fight
Go to the harbor and speak with Triss and Síle de Tansarville. The Kayran investigation sends Geralt toward Lobinden and Cedric. Follow the journal markers through the town and forest rather than trying to force the boss encounter before completing the investigation objectives.
Cedric provides information about the Kayran and its poison. Continue the quest until the trap option becomes available. The Kayran trap is not mandatory for campaign completion, but using it can disable a tentacle and make the encounter safer. Obtain the diagram or components only if you intend to use the trap.
Before entering the fight, meditate and prepare the supplies already available to you. Quen is useful when approaching a tentacle or crossing an exposed section of the battlefield. Watch for sweeping tentacle attacks, avoid standing in the impact zones and follow the escape prompts when the arena changes. After the Kayran is defeated, speak with Síle and collect the trophy and other rewards before leaving the area.
- Speak with Síle and investigate the Kayran’s attacks.
- Find Cedric in Lobinden and advance the investigation.
- Obtain the Kayran trap diagram if you want the optional trap advantage.
- Defeat the Kayran and collect its trophy and components.
3. Use the open middle of Act I for useful optional content
Once the early Kayran objectives have opened Flotsam and its surrounding areas, pause the main story. Read the notice board and speak with merchants, craftsmen and quest-givers at the inn, town square, harbor, Lobinden and the forest entrances. The Witcher’s Contract: Nekkers and The Endrega Contract are useful early objectives because they provide experience, money and monster components.
Troll Trouble is optional but has a longer investigation than a simple monster contract. If you want its later rewards, follow the investigation through the troll’s location, Sendler’s information and the attackers’ trail instead of killing the troll immediately. Dice poker, fistfighting, arm-wrestling and the haunted-house storyline are also optional and are not required to reach Act II.
Inspect merchant inventories after major quest advances. Prioritize a serviceable silver sword, armor improvements, bombs and diagrams that match your available materials. When a formula or diagram is pinned, the merchant interface can highlight required ingredients. Pinning does not purchase anything and does not prove that the current merchant stocks every component. Check the recipe manually before selling rare monster parts, ores or unusual alchemical ingredients.
- Read the notice board and accept desired contracts.
- Complete desired monster contracts before the final Flotsam departure.
- Decide whether to pursue Troll Trouble and other optional activities.
- Inspect diagrams and materials manually even when a recipe is pinned.
4. Complete The Rose of Remembrance and review forest quests
Continue the main story until Triss asks Geralt to help recover the rose of remembrance. Follow her toward the elven ruins outside Flotsam. The forest route contains nekkers, drowners and other monsters in narrow paths, so cast Quen before entering groups and avoid allowing enemies to surround you against rocks or ruined walls.
At the elven ruins, investigate the marked area and obtain the rose when the quest directs you to it. Return to Triss and finish the required dialogue. The quest advances Geralt’s memory investigation and affects later conversations, but it does not select the Roche or Iorveth campaign.
Before starting the closing kingslayer sequence, return to Flotsam and Lobinden. Check the journal for unfinished forest objectives, contract stages and NPC conversations. Some multi-stage side quests become unavailable during the final assault and departure, so do not assume that an active journal entry guarantees continued access.
- Reach the elven ruins with Triss.
- Retrieve the rose of remembrance.
- Return to Triss and complete the quest dialogue.
- Review active forest, Lobinden and Loredo-related objectives.
5. Advance The Assassins of Kings and retain relevant documents
Continue The Assassins of Kings by questioning witnesses, following the clues around Flotsam and the forest and returning to Cedric when the journal directs you there. The investigation eventually connects Triss, Iorveth and Letho. Use the active journal objective and Witcher senses or the medallion when appropriate rather than bypassing investigation scenes.
If you obtain the captain’s log and captain’s report, keep them available until you have checked the requirements for Mystic River. These documents are connected to a later investigation that can continue beyond Act I. Read documents from the Books or quest-related inventory interface when the game requests it, but do not assume every quest item must remain in your inventory after its associated objective is complete.
The Sword of Kaer Morhen, Queen Endrega’s pheromones and similar special objectives are optional. Pursue them for their own rewards, achievements or crafting goals, not because they are needed to defeat the Kayran, complete the kingslayer investigation or enter Act II.
- Follow The Assassins of Kings through its Flotsam and forest investigations.
- Return to Cedric when the quest requires his information.
- Retain the captain’s log and captain’s report if acquired until Mystic River has been checked.
- Treat rare weapons, pheromones and special components as optional targets.
6. Complete Letho’s sequence and finish Where is Triss Merigold?
The late Act I investigation leads to Iorveth and then to Letho at the elven ruins. Make a manual save before beginning the timed confrontation if you want to replay the immediate encounter and the local Flotsam aftermath. Giving Iorveth his sword or refusing to do so changes the confrontation, later reactions and parts of the closing Act I sequence.
After the Letho confrontation, follow Where is Triss Merigold? through its investigation objectives. Review the clues and conversations the journal provides, then return to the appropriate contacts as directed. This quest carries the main investigation from the Letho encounter toward the final choice of allies; it is not a replacement for the route commitment itself.
The sword decision changes local Act I consequences but is not the permanent Roche-or-Iorveth campaign selection. Keep a pre-sword save only for replaying this earlier local branch.
- Create a pre-sword save if you want to replay the local confrontation.
- Finish the Letho confrontation and immediate aftermath.
- Complete the available Where is Triss Merigold? objectives.
- Do not confuse the sword decision with the later major route commitment.
7. Create the primary route backup before At a Crossroads
After the Letho aftermath and the Where is Triss Merigold? investigation, the journal presents the mutually exclusive At a Crossroads quests. This is the point at which you should create the primary alternate-campaign save. Save before completing either quest, and keep this file separate from the earlier pre-sword save.
The pre-At-a-Crossroads save preserves access to both major Act II campaigns while retaining the earlier sword decision and its local consequences. A save made after completing one At a Crossroads quest cannot be converted into the opposing campaign through a later dialogue choice. To play the other campaign, restore the pre-route save.
- Reach the mutually exclusive At a Crossroads quests.
- Create a manual save before completing either one.
- Label or otherwise separate this pre-route save from the pre-sword save.
- Do not overwrite the pre-route backup after selecting a campaign.
8. Complete the selected At a Crossroads route
For At a Crossroads: Vernon Roche, follow the journal to Roche’s meeting point and agree to help the Blue Stripes pursue the kingslayer investigation. The quest proceeds through the closing Flotsam crisis and the departure that begins Roche’s Act II campaign. The Scoia’tael alternative becomes unavailable once this route is selected.
For At a Crossroads: Scoia’tael, travel to the elven ruins and meet Iorveth, or meet Zoltan there if the earlier confrontation left Iorveth captured. Agree to aid the Scoia’tael plan and continue through the prison-barge operation. The exact approach depends on the earlier sword decision, but completing this quest commits the campaign to Iorveth’s Act II route.
The sword scene can alter who is present, how characters react and how the local crisis unfolds. It does not override the later choice. The campaign identity is established by which At a Crossroads quest you complete.
- Complete either At a Crossroads: Vernon Roche or At a Crossroads: Scoia’tael.
- Follow the selected quest through its departure objective.
- Confirm that the opposing At a Crossroads quest has failed or become unavailable.
- Restore the pre-route save to replay the alternate Act II campaign.
9. Confirm the Act I completion state before leaving Flotsam
Act I is complete when the selected At a Crossroads quest resolves and Geralt leaves Flotsam for the next campaign area. Before that departure, finish desired contracts, crafting, shopping, document collection and local side quests. The transition closes or fails a number of Flotsam activities.
Maintain three useful saves if possible: a pre-sword save for replaying the local confrontation, a pre-At-a-Crossroads save for accessing the alternate major campaign and a final Act I save after the selected route has begun. Only the pre-route save is needed to switch between Roche and Iorveth without replaying the entire Prologue and Act I.
- The Kayran has been defeated.
- The Rose of Remembrance is complete.
- The Assassins of Kings and Where is Triss Merigold? are complete.
- The Letho confrontation and immediate Flotsam aftermath are finished.
- One At a Crossroads quest has been completed.
- A final Act I save and a separate pre-route save exist.
- Desired Flotsam contracts, crafting and side quests are finished before departure.
- Any retained captain’s log or captain’s report has been preserved until its Mystic River relevance is resolved.
Before you move on
- The Kayran, The Rose of Remembrance, The Assassins of Kings and Where is Triss Merigold? are complete.
- The Letho confrontation and immediate Flotsam aftermath are finished.
- The player has completed either At a Crossroads: Vernon Roche or At a Crossroads: Scoia’tael.
- The final Act I save records the chosen Roche or Iorveth campaign transition.
- A pre-At-a-Crossroads save remains available for replaying the alternate Act II campaign.
- A separate pre-sword save is retained only if the player wants to replay the earlier local Act I consequences.
- Any retained captain’s log or captain’s report has been preserved until its Mystic River relevance is resolved.
References for this chapter
- The Witcher 2: Assassins of Kings Enhanced Edition on GOG
- The Witcher 2 Enhanced Edition official quest handbook
- At a Crossroads: Scoia’tael — The Official Witcher Wiki
- The Witcher 2: Assassins of Kings Guide and Walkthrough
- At a Crossroads: Scoia’tael — Gamer Walkthroughs
- The Witcher 2 Mystic River Quest Walkthrough
Preparing for the Act I Route Commitment: Saves and Consequences
Act I contains two choices that are easy to confuse. During The Assassins of Kings, a timed decision lets Geralt give Iorveth his sword or help Vernon Roche restrain him. That decision changes the immediate Flotsam sequence and some later dialogue, but it does not permanently select the Roche or Iorveth campaign. The major route commitment comes later, when Geralt completes either At a Crossroads: Vernon Roche or At a Crossroads: Scoia’tael. Keep a pre-sword save for replaying the local Act I branch and a separate pre-commitment save for accessing the opposite Act II and Act III campaign.
Finish the Flotsam content you want before the route sequence
Before starting the late Act I chain, complete the Flotsam side quests, contracts, crafting, shopping and exploration that you want to keep. Several local opportunities become unavailable as the chapter closes, so do not treat the route backup as a substitute for a general Act I completion save.
The late sequence begins after the investigation surrounding Triss and Cedric has advanced and leads toward the confrontation with Letho. Make a manual save before the timed Iorveth-sword scene, not during the conversation itself. Use a clear name such as ACT I - BEFORE IORVETH SWORD.
This save is for comparing the immediate Act I consequences. It is not the save you need to switch between the major campaigns. You may give Iorveth his sword, allowing him to fight, or help Roche capture him. Either choice changes what happens in the following Flotsam objectives, including portions of Where is Triss Merigold?, but neither choice alone fixes Geralt to Act II’s Roche or Iorveth path.
- Complete desired Flotsam content before the closing sequence.
- Create a manual save before the timed sword decision.
- Use a label that identifies the save as the local Act I replay point.
- Keep this save separate from the later major-route backup.
Identify the actual major campaign commitment
After the events involving Cedric and the continuing search for Triss, the journal presents two competing objectives: At a Crossroads: Vernon Roche and At a Crossroads: Scoia’tael. These quests are mutually exclusive. You can speak with both sides and hear their proposals before deciding, but completing one commits the campaign branch.
For the Roche route, go to Vernon Roche at the Blue Stripes headquarters in Flotsam and agree to assist him. Follow the resulting objectives through the assault connected to Loredo and the departure from Flotsam. This sends Geralt into the Roche version of Act II, centered on the Kaedweni camp.
For the Scoia’tael route, meet Zoltan and Iorveth at the elven ruins. Depending on the earlier sword choice, the immediate objective may involve freeing Iorveth or arranging the route toward the prisoners and Vergen. Complete the Scoia’tael commitment and continue into The Floating Prison. This sends Geralt into the Iorveth version of Act II, centered on Vergen.
The two campaigns use different locations, investigations, allies and main quests. Their Act III objectives also diverge. Once one At a Crossroads quest has been completed, a later dialogue option cannot convert that save into the opposite campaign.
- Wait until the two At a Crossroads objectives are available.
- Hear both proposals if you want to compare the immediate objectives.
- Treat completion of either quest as the major route commitment.
- Do not confuse the sword decision with the later campaign selection.
Create and verify the two manual saves
Use the in-game Save Game command rather than relying on autosaves or quicksaves. On the standard PC control layout, F5 creates a quicksave, but for route planning use a named manual save through the save menu so the thumbnail, location and timestamp are easy to identify.
Keep one untouched save before the timed sword decision and another untouched save immediately before completing either At a Crossroads quest. A practical naming scheme is ACT I - BEFORE IORVETH SWORD and ACT I - BEFORE MAJOR ROUTE.
Load both saves once before continuing. The first should place Geralt before the confrontation where the sword decision occurs. The second should place him at the point where the Roche and Scoia’tael objectives are available but neither commitment has been completed. If a save loads after the decision, do not trust its label; replace it with a genuinely earlier save.
After selecting a route, create a separate working save such as ACT II - ROCHE START or ACT II - IORVETH START. Never overwrite the untouched pre-commitment slot with route progress.
- Keep a pre-sword manual save.
- Keep a pre-At-a-Crossroads manual save.
- Load both saves once to verify their positions.
- Create a new route-labeled working save after committing.
Back up the GOG PC save folder
Exit The Witcher 2 before copying save data. The standard Windows PC location identified by CD PROJEKT RED support is Documents\Witcher 2\gamesaves. In File Explorer, you can reach it through %userprofile%\Documents\Witcher 2\gamesaves. If Windows redirects Documents to OneDrive or another location, use the active redirected Documents folder instead.
Copy the entire gamesaves folder to a location outside the active Witcher 2 save directory. Name the archive clearly, for example TW2 EE - BEFORE MAJOR ROUTE. Copying the complete folder is safer than selecting individual files because it preserves every save entry and avoids mixing files from different playthroughs.
Keep separate archives for the pre-sword and pre-route states. The pre-sword archive is useful for replaying the immediate Iorveth-versus-Roche scene. The pre-route archive is the important one for accessing the alternate major campaign without replaying the whole first chapter. Do not replace either archive with later progress.
- Close the game before copying files.
- Back up the complete gamesaves folder.
- Store the archive outside the active save directory.
- Keep pre-sword and pre-route archives separate.
Restore the pre-commitment backup for the alternate campaign
Close The Witcher 2 and the GOG launcher before restoring files. First copy the current gamesaves folder to a temporary archive, such as TW2 EE - CURRENT ROCHE RUN. This preserves your finished or active campaign before any files are replaced.
Next, rename or move the active gamesaves folder and copy the preserved pre-At-a-Crossroads gamesaves folder into the location the game reads. Restore the complete folder rather than combining selected files from different backups.
Launch the game and open Load Game. Confirm that the pre-commitment save appears and that its location and journal place Geralt before the route decision. If it does not appear, close the game and check the active Documents\Witcher 2\gamesaves path, including any redirected Documents location. Do not delete the external backup while troubleshooting.
Load the verified pre-commitment save and complete the opposite At a Crossroads quest. Immediately create a new manual save with a different route label. The original archive remains untouched and can be restored again later.
A pre-sword save can replay only the earlier local branch. A save made after At a Crossroads has been completed cannot be converted into the opposite Act II campaign by selecting a later line of dialogue. The alternate campaign requires restoring a save from before the major route commitment.
- Archive the current gamesaves folder before restoring anything.
- Restore a complete known-good pre-commitment folder.
- Verify the journal and location after launching.
- Choose the opposite route only after confirming the save state.
- Create a new working save without overwriting the backup.
Recover from a missing save or failed transition
If a quest does not advance correctly, load a save from before the problem and repeat the relevant conversation or objective. For recurring technical problems, verify the installation through the platform’s support procedure before deleting or modifying save files.
If a restored save is missing, close the game and inspect the active Documents\Witcher 2\gamesaves directory. Check whether Documents has been redirected and confirm that the backup was copied into the folder used by the game. Keep the original external archive unchanged while testing.
After a successful restore, make a fresh manual save with a new name. This gives you a clean working point while preserving the original pre-sword and pre-route states for future comparisons.
- Retry from an earlier clean save.
- Check the active save path if a restored entry is missing.
- Avoid combining files from unrelated backups.
- Keep the original external archive untouched.
- Create a new working save after recovery.
Before you move on
- You completed the Flotsam content you wanted before the closing Act I sequence.
- You created and verified a manual save before the timed Iorveth-sword decision.
- You created and verified a separate manual save before completing either At a Crossroads quest.
- You copied the complete GOG PC gamesaves folder to an external backup location.
- You understand that the sword scene changes local consequences, while At a Crossroads commits the major campaign.
- You created a separate route-labeled working save after choosing Roche or Scoia’tael.
- If you intend to play both campaigns, the untouched pre-At-a-Crossroads backup remains outside the active save directory.
- You retained the pre-sword save if you want to compare the alternate immediate Flotsam outcome.
References for this chapter
- The Witcher 2: Assassins of Kings — PC Game Manual
- The Witcher 2 Enhanced Edition official quest handbook
- Game crashes — The Witcher 2: Assassins of Kings Technical Support
- At a Crossroads: Scoia’tael — Gamer Walkthroughs
- Chapter 1: Flotsam — Prima Games
- The Witcher 2 Assassins of Kings: At a Crossroads Vernon Roche — Gamepressure
Act II — Roche Path: Objectives and Landmarks
Roche’s Act II takes place around the Kaedweni camp outside Vergen. Geralt must investigate Sabrina Glevissig’s blood curse, uncover the kingslayer conspiracy, recover four battlefield artifacts and cross the mist to Vergen before the siege can proceed. The main quests overlap, so the journal may list several objectives at once. A reliable progression is to open Conspiracy Theory, investigate Sabrina’s curse, complete The Path to Visionary, cross the mist for Death Symbolized, Hatred Symbolized and The Spear of Destiny, then perform the Sabrina’s Pyre ritual. After the curse is lifted, Geralt completes the assassination investigation, receives Henselt’s Medallion, finishes Faith Symbolized and only then begins The Eternal Battle. When the battlefield curse is resolved, finish the remaining Conspiracy Theory objectives, complete Mystic River if desired and make a final pre-siege save before The Siege of Vergen.
1. Reach the Kaedweni camp and establish the hub
Complete Prelude to War: Kaedwen by following the opening battle sequence toward the Kaedweni camp. Once Geralt reaches the camp, speak with King Henselt, Dethmold, Vernon Roche and Zyvik. These conversations open the main Act II investigations and establish the camp as the return point between excursions.
Speak with Dethmold to open Conspiracy Theory and The Blood Curse. Ask Zyvik about the magical artifacts to begin the symbolic-object investigations, including Faith Symbolized. Roche provides the political and conspiracy leads. Make a manual save as soon as the camp becomes available.
The camp also contains optional contracts, gambling, fistfights, arena-related content and side quests such as Against the Blue Stripes, Lost Lambs, Little Sisters, In Cervisia Veritas and The Butcher of Cidaris. These are not required for campaign completion, but ordinary camp activities become difficult or unavailable once the final siege operation begins. Complete desired optional content before starting The Siege of Vergen.
- Complete Prelude to War: Kaedwen.
- Speak with Henselt, Dethmold, Roche and Zyvik.
- Open Conspiracy Theory and The Blood Curse.
- Create a camp-start save.
- Review optional camp quests before committing to the siege.
2. Open Conspiracy Theory and complete Courage Symbolized
Advance Conspiracy Theory through its early investigation. Examine the square coins and follow the leads through Dethmold, Roche and the suspicious camp personnel. The quest is intentionally left unfinished while the curse and battlefield investigations continue.
Progress Courage Symbolized through the conspiracy leads until Geralt confronts Vinson Traut. Defeat Vinson and take Seltkirk’s Armor. This is the artifact required for the courage portion of the battlefield curse investigation. Keep Conspiracy Theory active afterward; its final objectives are gated behind later main-quest progress.
Do not treat ordinary equipment, diagrams or optional camp rewards as substitutes for Seltkirk’s Armor. The armor is obtained through the Vinson sequence and is one of the four objects required before The Eternal Battle can begin.
- Investigate the square-coin conspiracy.
- Complete Courage Symbolized.
- Defeat Vinson Traut.
- Secure Seltkirk’s Armor.
- Leave the remaining Conspiracy Theory objectives for later.
3. Investigate The Blood Curse and complete The Path to Visionary
Begin The Blood Curse through Dethmold and Henselt, then travel to Sabrina’s Pyre. Examine the pyre and the surrounding evidence, including the letter, nail and other objects connected with Sabrina’s execution. Speak with the relic peddler in the cantina to learn more about the spear and the curse. Keep quest evidence in Geralt’s inventory until the journal confirms that the relevant investigation is complete.
Follow The Path to Visionary, sometimes labelled The Path to Vision in walkthroughs. Travel through the ravine, help the soldiers fighting rotfiends and continue to the Visionary’s hut. Deal with the harpies, speak with the Visionary and complete his required vision sequence. Follow the journal instructions carefully and inspect the notes around the hut.
Return to the relic peddler after learning the spear’s history. The investigation reveals that the spearhead passed through Iorveth’s hands and is now on the Vergen side of the mist. This creates the reason to cross into Vergen and leads into The Spear of Destiny.
- Inspect Sabrina’s Pyre.
- Collect and review the curse evidence.
- Complete The Path to Visionary.
- Speak with the Visionary and complete the vision sequence.
- Learn that the spearhead is on the Vergen side.
4. Cross the mist and recover the Vergen-side artifacts
Return to Dethmold after completing the Visionary investigation. Obtain the amulet required to cross the battlefield mist safely. Do not attempt the mist route before receiving this objective and its associated protection. Zoltan accompanies Geralt toward Vergen.
Cross the mist by moving between the visible safe areas and avoiding unnecessary fights with the specters. Keep Quen available for the crossing and continue toward Vergen. On the far side, use the gates and nearby settlement landmarks to orient yourself. Speak with the Vergen-side characters as the journal directs.
Complete Death Symbolized in the dwarven catacombs. Investigate the ghosts and battlefield remnants, deal with Ekhart Hennesy as the quest requires and recover the Standard of the Dun Banner. This is the death artifact needed for the later battlefield ritual.
Complete Hatred Symbolized through the Vergen-side investigation involving Saskia, Zoltan and the tunnels. Recover Vandergrift’s Sword, the hatred artifact. The tunnel route is also a useful landmark for later returns between the Vergen side and the mist.
For The Spear of Destiny, follow the investigation concerning Iorveth’s lost spearhead. Challenge Skalen Burdon at dice poker and continue until you win the spearhead. Any additional poker rewards are optional; the spearhead is the required item.
- Obtain Dethmold’s mist-crossing amulet.
- Cross the mist with Zoltan.
- Complete Death Symbolized.
- Recover the Standard of the Dun Banner.
- Complete Hatred Symbolized.
- Recover Vandergrift’s Sword.
- Win the spearhead from Skalen for The Spear of Destiny.
5. Perform the Blood Curse ritual before obtaining the medallion
After recovering the spearhead and completing the relevant investigation, return through the mist and continue The Blood Curse. Meet Roche at the required point and travel with him to Sabrina’s Pyre. The spearhead is one of the clues needed to complete this investigation; it is not a replacement for the full ritual.
At Sabrina’s Pyre, follow the instructions from Dethmold’s grimoire and guide Henselt through the ritual sequence. Place or direct the ritual powder according to the indicated pattern, ignite the completed symbol with Igni and defend the area until the ritual concludes. The Blood Curse is not complete merely because the pyre has been investigated; wait for the journal to confirm that the curse has been lifted.
Only after the Sabrina’s Pyre ritual is complete can Geralt obtain Henselt’s Medallion. The medallion is the fourth battlefield artifact and is required for Faith Symbolized. The correct order is therefore: recover the spearhead, complete the Blood Curse ritual, resolve the assassination threat, receive the medallion and finish Faith Symbolized.
- Return from the Vergen side with the spearhead.
- Meet Roche at the required Blood Curse objective.
- Complete the Sabrina’s Pyre ritual.
- Confirm that The Blood Curse is complete.
- Do not begin The Eternal Battle yet.
6. Complete The Assassins of Kings and Faith Symbolized
After the curse ritual, Henselt’s sequence advances and an assassin attacks in or near the king’s tent. Use Aard to force the attacker outside, then fight the two assassins. Control one opponent with Yrden or another disabling Sign while concentrating on the other. One assassin escapes and becomes the subject of The Assassins of Kings.
Meet Dethmold at the medical tent and enter the investigation sequence. Follow the visions through the guards and the assassin’s route. Move carefully during stealth sections and restart the vision if necessary. Continue to the assassin’s hideout, defeat the hostile creatures and investigate Serrit’s body and the evidence left behind.
Return to Dethmold after the assassination investigation. Henselt can now surrender the medallion. Take Henselt’s Medallion and complete Faith Symbolized. At this point Geralt should have all four artifacts: Seltkirk’s Armor for Courage, the Standard of the Dun Banner for Death, Vandergrift’s Sword for Hatred and Henselt’s Medallion for Faith.
- Defend Henselt from the assassins.
- Follow Dethmold to the medical tent.
- Complete The Assassins of Kings through the hideout and Serrit’s evidence.
- Obtain Henselt’s Medallion.
- Complete Faith Symbolized.
- Verify that all four battlefield artifacts are available.
7. Complete The Eternal Battle and return from the mist
Begin The Eternal Battle only after all four symbolic artifacts are secured and Faith Symbolized is complete. Speak with the appropriate camp contact and enter the mist with the objects required for the battlefield visions.
Work through the sequence of battlefield memories and symbolic encounters. The Draug is the major combat at the end of this operation. Keep moving when it prepares its meteor or arrow attacks, avoid the marked impact areas and do not remain directly in front of it during the swirling attack. After its charge, attack from the rear during the recovery window, then retreat before it turns back toward Geralt.
Complete the escape and return to the Kaedweni camp. The Eternal Battle resolves the battlefield curse that prevents Henselt’s army from advancing. It should not be started earlier merely because some of its component quests have appeared in the journal.
- Confirm possession of all four artifacts.
- Start The Eternal Battle after Faith Symbolized.
- Complete the battlefield visions.
- Defeat the Draug.
- Return safely to the camp.
- Confirm that the battlefield curse has been resolved.
8. Finish Where is Triss Merigold? and the remaining Conspiracy Theory objectives
Advance Where is Triss Merigold? when Roche directs Geralt toward the Nilfgaardian camp. Follow the route behind or beyond the Kaedweni encampment, search the accessible area and collect the documents that identify the lead concerning Triss. This Act II objective does not rescue Triss; it carries the investigation forward into Loc Muinne.
Return to Conspiracy Theory after the Blood Curse, the assassination investigation and The Eternal Battle have advanced far enough. Follow the journal through the remaining camp and cliffside leads. The final stage exposes the danger to Roche’s men and triggers the operation that leads to Vergen.
Quest availability can vary slightly depending on which objective Geralt completed first, so use the active journal rather than waiting for every quest to appear in a fixed sequence. The essential requirement is that the curse ritual, assassination investigation, four artifacts and battlefield curse are complete before the final transition.
- Advance Where is Triss Merigold? through the Nilfgaardian camp.
- Collect the relevant documents.
- Complete the remaining Conspiracy Theory objectives.
- Create a final camp save before the siege begins.
9. Complete Mystic River if desired, then start The Siege of Vergen
If Mystic River is active, search the shipwreck near the route toward the Vergen tunnels and take the Journal of Eyla Tarn. This optional Roche-route objective can be completed before continuing through the tunnel route. It is not required to reach Loc Muinne.
The Siege of Vergen begins after the final Conspiracy Theory objectives. From the cantina, follow Roche through the ravines and toward the Tunnel of the Founders. The route includes encounters with soldiers, mercenaries, rotfiends, Adam Pangratt and Dethmold. It is a linear siege operation rather than the open Vergen hub available on Iorveth’s path.
Continue through the tunnels toward Vergen. At the later approach, use Yrden against the golem by placing the Sign beneath or in front of it and attacking during its recovery. Proceed to Philippa Eilhart’s house, where the siege sequence reaches its political confrontation.
Before entering the siege, finish desired camp shopping, crafting, contracts, gambling, arena activities and optional investigations. Starting The Siege of Vergen closes the practical opportunity for ordinary Kaedweni-camp cleanup.
- Complete Mystic River if desired and active.
- Make a pre-siege manual save.
- Follow Roche through the ravines and Tunnel of the Founders.
- Defeat the tunnel encounters.
- Use Yrden against the golem.
- Reach Philippa’s house.
10. Resolve Henselt’s fate and begin Act III
At Philippa’s house, defeat Henselt’s guards in the confined area. Quen helps absorb mistakes, while Yrden or another control Sign can create space between Geralt and the shield-bearing opponents. Keep moving around the room instead of allowing the guards to surround Geralt.
After the confrontation, Roche asks whether Henselt should live. You may spare Henselt or allow Roche to kill him. The choice changes later political scenes and who represents Kaedwen, but it does not prevent completion of the Roche campaign.
Once the scene ends, the game transitions to Loc Muinne. Make a separate BEGIN ACT III save after loading into Act III. Lilies and Vipers is not an Act II camp quest; it belongs to Roche’s Act III content and depends on the appropriate Crown Witness progression.
- Defeat Henselt’s guards.
- Choose whether Henselt is spared or killed.
- Create a save before the political choice if you want to compare outcomes.
- Reach Loc Muinne.
- Create a BEGIN ACT III save.
- Leave Lilies and Vipers for Act III.
Before you move on
- Prelude to War: Kaedwen is complete and Geralt has reached the Kaedweni camp.
- Conspiracy Theory has been opened and its early investigation completed.
- Courage Symbolized is complete and Seltkirk’s Armor is secured.
- The Blood Curse investigation has reached the Visionary and relic-peddler stages.
- The Path to Visionary is complete.
- Dethmold’s mist-crossing amulet has been obtained.
- Death Symbolized is complete and the Standard of the Dun Banner is secured.
- Hatred Symbolized is complete and Vandergrift’s Sword is secured.
- The Spear of Destiny objective is complete and the spearhead has been won from Skalen.
- The Sabrina’s Pyre ritual has been completed and The Blood Curse is confirmed complete.
- The Assassins of Kings is complete through the assassin’s hideout and Serrit’s evidence.
- Henselt’s Medallion has been obtained.
- Faith Symbolized is complete.
- All four required artifacts are available before The Eternal Battle begins.
- The Eternal Battle is complete, including the battlefield visions and Draug encounter.
- Where is Triss Merigold? has been advanced through the Nilfgaardian camp and its documents collected.
- The remaining Conspiracy Theory objectives are complete.
- Mystic River has been completed if desired and active.
- Desired Kaedweni-camp side quests, contracts, arena activities, gambling and crafting are complete before the siege.
- The Siege of Vergen is complete through the tunnel route and Philippa’s house confrontation, including the Henselt decision and transition to Loc Muinne.
References for this chapter
- The Witcher 2 Enhanced Edition official quest handbook
- Chapter 2 — Roche Path walkthrough
- The Blood Curse — Roche Path
- The Path to Visionary — Roche Path
- Courage Symbolized — Roche Path
- Death Symbolized — Roche Path
- Faith Symbolized — Roche Path
- The Assassins of Kings — Roche Path
- The Eternal Battle — Roche Path
- The Spear of Destiny — Roche Path
- Where is Triss Merigold? — Roche Path
- The Siege of Vergen — GameBanshee
- Act II Introduction: Roche — GameBanshee
Act II — Iorveth Path: Objectives and Landmarks
The Iorveth route through Act II is centered on Vergen, Saskia’s poisoning, the search for Triss and the curse covering the battlefield. After Prelude to War: Aedirn and The War Council, the main objectives can be pursued in a flexible order, but several journal states overlap. The practical route is to obtain Immortelle through Subterranean Life, the magical crystal through Hunting Magic, royal blood through Royal Blood and the rose of remembrance through Where is Triss Merigold? Deliver all four materials to Philippa in A Matter of Life and Death. Suspect: Thorak and The Walls Have Ears are optional investigations connected to the Stennis judgment. They are order-sensitive and should be treated as best-effort content, not as cure prerequisites. After Saskia recovers, obtain the hatred and death symbols, receive the courage and faith symbols from Philippa, lift the battlefield curse through The Eternal Battle and then complete Vergen Besieged. Beginning the siege closes ordinary Vergen activities, so make a final pre-siege save first.
1. Complete Prelude to War: Aedirn and The War Council
Act II begins with Prelude to War: Aedirn. The opening section temporarily places you in control of Prince Stennis before returning control to Geralt. Follow the opening events until the curse spreads across the battlefield. When Philippa creates a protective aura, remain inside it while crossing the mist. Fight the wraiths and draugir that block the route, but do not leave the protected area to explore.
Once Geralt reaches Vergen, follow the conversations that establish the town as your base. Go to the tavern and speak with the assembled dwarves, then attend the town-hall meeting. This completes The War Council and leads to Saskia’s poisoning. Speak with Philippa after the meeting. She explains that the cure needs four rare materials: Immortelle, royal blood, a rose of remembrance and a magical crystal containing the dragon’s dream.
Create a manual save after The War Council. The cure-related quests now form the main Act II investigation. Their objectives overlap, so use the journal and return to Philippa whenever a quest tells you to do so.
- Complete Prelude to War: Aedirn.
- Stay inside Philippa’s protective aura during the opening mist crossing.
- Reach Vergen.
- Attend the town-hall meeting.
- Speak with Philippa after Saskia is poisoned.
- Create a post-War Council save.
2. Obtain Immortelle in Subterranean Life
Speak with Zoltan in the Vergen tavern and ask about Immortelle. His conversation with the other dwarves starts Subterranean Life and points you toward the closed mine. Before entering, prepare or buy three Grapeshot bombs if you want to complete the optional Hey, Work’s on in the Mines! during the same visit.
Speak with Cecil to open the mine shaft. The mine is divided into three sections by locked doors. Search the bodies in sequence for the Upper Shaft Key, Middle Shaft Key and Lower Shaft Key, using each key to open the next section. Expect rotfiends throughout the tunnels and search side passages for the warehouse key and optional materials.
At the deepest section, Geralt and the dwarves face a bullvore near the Immortelle bushes. Use Yrden to restrict the bullvore’s movement, keep the rotfiends away from Geralt where possible and collect Immortelle after the fight. Collecting the plant completes the essential part of Subterranean Life. You can also collapse the rotfiend tunnels with Grapeshot and later report to Cecil for the optional mine quest.
The mine becomes unavailable or much less useful once Vergen Besieged begins. Finish the mine content you want before starting the siege.
- Start Subterranean Life with Zoltan.
- Speak with Cecil and enter the mine.
- Collect the three shaft keys in order.
- Reach the bullvore chamber.
- Take Immortelle.
- Collapse the rotfiend tunnels only if pursuing the optional mine quest.
- Return to Vergen.
3. Obtain the magical crystal in Hunting Magic
Speak with Philippa about the magical crystal, then question the Vergen residents indicated by the active objective. Cecil, Skalen and the innkeeper can provide information about the magical sites and the harpy area. Follow the route outside Vergen toward the quarry and ruined tower.
The first crystal you find is not sufficient for the cure. Report back to Philippa, then obtain access to the harpy lair and continue into the quarry. Use the projection ring inside the lair to view the available dreams. The crystal containing the dragon’s dream is the one required for A Matter of Life and Death.
The lair and surrounding quarry also contain optional dream crystals and materials. Baltimore’s dream starts Baltimore’s Nightmare, while Iorveth’s dream and other crystals support optional content. The Harpy Contract, The Queen Harpy Contract and A Sackful of Fluff are optional. Do not delay the cure route while searching every optional chamber.
- Ask Philippa about the magical crystal.
- Question the Vergen residents named by the journal.
- Reach the ruined tower and first magical site.
- Return to Philippa when the first crystal proves insufficient.
- Enter the harpy lair.
- Use the projection ring and take the dragon’s-dream crystal.
- Start Baltimore’s Nightmare only if pursuing the optional investigation.
4. Advance Where is Triss Merigold? and recover the rose
Where is Triss Merigold? is tied to the political investigation in Vergen. Depending on the current journal state, it may not advance immediately after Hunting Magic. If Philippa does not give the next objective, continue Royal Blood and the available evidence steps rather than repeatedly searching the ravines.
When the quest opens, speak with Philippa, then question the drunkard in the tavern. His account leads to the ravines and the male troll who encountered Triss. Follow the quest marker through the troll-related sequence and cross the mist only when Philippa’s protection is active.
The investigation eventually takes Geralt through the Kaedweni side of the valley and into the Nilfgaardian lead. You may reach the relevant area through the stealth route across the Kaedweni camp or through the cave route connected with the brothel. Both routes lead to the Nilfgaardian camp and the revelation that Triss was compressed into a figurine.
After returning to Vergen, speak with Philippa. Cynthia has left behind Triss’s rose of remembrance, which Philippa accepts as one of the four cure materials. Complete desired side content before crossing the mist if the journal warns that quests may fail.
- Advance Royal Blood and the available Vergen investigation if Triss’s quest is paused.
- Speak with Philippa.
- Question the tavern drunkard.
- Visit the troll in the ravines.
- Cross the mist inside the protective aura.
- Investigate the Kaedweni and Nilfgaardian leads.
- Return to Vergen and give Philippa the rose of remembrance.
5. Resolve Royal Blood and attempt the optional evidence quests
Begin Royal Blood by asking Stennis for royal blood in the town hall. He refuses, which creates suspicion around him. Later, after the Triss investigation reaches its required political stage, a riot breaks out and the townspeople accuse Stennis of poisoning Saskia. The questioning period is limited, so create a save before entering the riot sequence if you want to pursue both optional investigations.
Suspect: Thorak and The Walls Have Ears are optional. They concern the poisoned goblet, the dead priest Olcan and the evidence presented during Stennis’s judgment. They are not prerequisites for A Matter of Life and Death, Saskia’s cure, The Eternal Battle or Act II completion.
The safest documented attempt is best-effort rather than guaranteed. During the riot, question only the peasants and dwarves needed to open the two investigations. Advance The Walls Have Ears until its journal tells you to wait for events. Advance Suspect: Thorak to its own waiting stage. Then pursue Baltimore’s Nightmare: inspect Baltimore’s workshop, use Aard on the concealed wall, follow the directions to the hidden workshop and confront Thorak. Loot Thorak’s key, open the chest in his house and take Olcan’s receipt. This sequence gives the best chance of completing both investigations, but the quests can still fail or become unavailable if the journal state was advanced differently.
Resolve the Stennis judgment when the investigation stage is complete. If Stennis is lynched, Geralt can take royal blood from his body. If Stennis receives a fair trial, the later Henselt sequence provides another opportunity to obtain royal blood. The cure requires royal blood, not one specific political outcome.
- Ask Stennis for royal blood.
- Create a save before the riot if attempting optional evidence.
- Question the peasants and dwarves needed to open the investigations.
- Advance The Walls Have Ears only to its waiting stage.
- Advance Suspect: Thorak only to its waiting stage.
- Complete the relevant Baltimore’s Nightmare objectives and confront Thorak.
- Loot Thorak’s key and open the chest in his house.
- Take Olcan’s receipt if the chest is available.
- Resolve the Stennis judgment.
- Obtain royal blood from Stennis or Henselt.
6. Deliver the four cure materials
A Matter of Life and Death is completed by delivering four materials to Philippa: the dragon’s-dream magical crystal from Hunting Magic, Immortelle from Subterranean Life, royal blood from Royal Blood and the rose of remembrance from the Triss investigation. The two evidence quests are not part of this required delivery.
Return to Philippa’s house and hand over the materials. The cure sequence follows immediately. After Saskia recovers, speak with her and ask for Vandergrift’s sword. The sword is the hatred symbol needed for the separate battlefield-curse quest.
Once the game accepts an item for a quest objective, it does not need to remain in Geralt’s inventory as an unused object. Keep an item only when the active journal still requests it.
- Have the dragon’s-dream magical crystal.
- Have Immortelle.
- Have royal blood.
- Have the rose of remembrance.
- Deliver all four items to Philippa.
- Confirm Saskia’s recovery.
- Take Vandergrift’s sword.
7. Complete Hatred Symbolized, Death Symbolized and The Eternal Battle
Hatred Symbolized completes when Saskia gives Geralt Vandergrift’s sword after the cure. For Death Symbolized, ask the dwarves near the Vergen gate about the Dun Banner. Enter the tunnel leading to the dwarven catacombs and search the rooms until you reach the ghost of Ekhart Henessy.
You can answer Ekhart’s questions correctly or fight him. Either resolution allows Geralt to open the nearby sarcophagus and take the Dun Banner standard. The standard represents death; Vandergrift’s sword represents hatred. Philippa supplies the remaining courage and faith symbols after the connected objectives are complete.
Return to Philippa before entering the mist. Start The Eternal Battle at the mist entrance and follow each possession sequence. Geralt must capture a standard, cross the arrow-filled battlefield while using rocks and barricades for cover, and then fight the Draug.
During the Draug fight, dodge its charges and avoid the marked areas for meteor strikes. When it calls down arrows, move behind cover. During the swirling attack, keep a solid rock between Geralt and the Draug. Quen is useful for surviving mistakes, and Yrden can create an opening, although the trap may take several attempts to hold the boss. Attack from behind after the Draug’s vulnerable moments, then follow the escape sequence after its defeat.
- Obtain Vandergrift’s sword.
- Enter the dwarven catacombs.
- Reach Ekhart Henessy.
- Answer Ekhart correctly or defeat him.
- Take the Dun Banner standard.
- Receive the courage and faith symbols from Philippa.
- Enter the mist for The Eternal Battle.
- Complete the possession sequences.
- Defeat the Draug.
- Escape the battlefield and return to Philippa.
8. Finish Vergen Besieged and leave for Loc Muinne
After The Eternal Battle, speak with Philippa to begin Vergen Besieged. This is the major Act II cutoff for ordinary Vergen activities. Finish desired contracts, evidence work, gambling, challenges, shopping and crafting first. Make a final pre-siege save.
Meet Zoltan at the main gate. During the first defense, fight to the oil winch and operate it to pour burning oil onto the Kaedweni soldiers below. Return to Zoltan and follow the defense objectives through the town and into the tunnels.
In the tunnel section, fight through Dethmold’s soldiers and reach Dethmold’s encounter. His shield, teleportation, fireballs and lightning make the area dangerous. Use Quen before crossing exposed ground and attack the soldiers when they separate. Geralt does not defeat Dethmold on this route: after his forces are overcome, Dethmold strikes Geralt with a fireball. Saskia transforms into a dragon and drives Dethmold away, revealing her true nature.
Return to the surface with Saskia, help organize the next defense and follow the gate objectives. Iorveth joins the battle, and Geralt helps Zoltan close the main gate, trapping Henselt and his remaining forces. Henselt surrenders. Saskia demands Dethmold’s death, although her behavior is already being influenced by Philippa’s spell.
Follow Saskia and Philippa to the teleportation scene. After they leave for Loc Muinne, search Philippa’s house with Iorveth and inspect the evidence there. Then speak with Zoltan and Dandelion before departing. Leaving Vergen with Iorveth completes Act II and begins the Iorveth Act III route.
- Complete The Eternal Battle.
- Finish desired Vergen side content and purchases.
- Create a final pre-siege save.
- Speak with Philippa to begin Vergen Besieged.
- Meet Zoltan at the main gate.
- Operate the oil winch.
- Fight through the town and tunnel defenses.
- Survive the Dethmold encounter.
- Witness Saskia’s dragon transformation.
- Help close the main gate.
- Complete the surrender and post-battle conversations.
- Search Philippa’s house with Iorveth.
- Speak with Zoltan and Dandelion.
- Depart for Loc Muinne.
Before you move on
- Prelude to War: Aedirn is complete.
- The War Council is complete and Vergen is established as the base.
- Subterranean Life is complete and Immortelle was obtained.
- Hunting Magic is complete and the dragon’s-dream magical crystal was obtained.
- Where is Triss Merigold? advanced through the Vergen and Kaedweni-side objectives and produced the rose of remembrance.
- Royal Blood is complete and royal blood was obtained from Stennis or Henselt.
- A Matter of Life and Death is complete after all four materials were delivered to Philippa.
- Saskia recovered from the poisoning.
- Hatred Symbolized is complete and Vandergrift’s sword was obtained.
- Death Symbolized is complete and the Dun Banner standard was recovered.
- The Eternal Battle is complete and the Draug was defeated.
- The optional evidence quests were attempted in the best-effort order, or the campaign continued after one became unavailable.
- Desired Vergen side content, crafting and shopping were completed before the siege.
- Vergen Besieged is complete, including the oil defense, tunnel battles, Dethmold encounter, Saskia’s transformation, gate defense and surrender sequence.
- Saskia and Philippa departed through the portal to Loc Muinne.
- Geralt searched Philippa’s house with Iorveth, spoke with Zoltan and Dandelion, and left Vergen.
References for this chapter
- The Witcher 2 Enhanced Edition official quest handbook
- Act II Introduction: Iorveth — GameBanshee
- GameBanshee: Prelude to War: Aedirn — Iorveth’s Path
- GameBanshee: The War Council — Iorveth’s Path
- GameBanshee: Subterranean Life — Iorveth’s Path
- GameBanshee: Hunting Magic — Iorveth’s Path
- Royal Blood — GameBanshee
- Where Is Triss Merigold? — GameBanshee
- GameBanshee: A Matter of Life and Death — Iorveth’s Path
- GameBanshee: The Walls Have Ears — Iorveth’s Path
- GameBanshee: Baltimore’s Nightmare — Iorveth’s Path
- GameBanshee: Hatred Symbolized — Iorveth’s Path
- GameBanshee: The Eternal Battle — Iorveth’s Path
- Vergen Besieged — GameBanshee
- Gamer Walkthroughs: The Walls Have Ears — Iorveth’s Path
Mid-Game: Crafting, Alchemy and Inventory Management
The Enhanced Edition adds practical inventory improvements, including sorting controls, ownership indicators, clearer crafting quantities and a pinning function for formulas and diagrams. Pinning a recipe displays its required ingredients or components in the merchant panel, making shopping easier, but it does not buy anything and does not guarantee that a merchant stocks every required item. Use the shared storage network to protect rare materials and finished equipment, then complete your main equipment and alchemy preparation near the end of Act II and again before entering Loc Muinne.
1. Organize the inventory before shopping
Open the inventory and use its separate categories for weapons, armor, upgrades, bombs, books, alchemical ingredients, crafting components, diagrams, formulae, quest items and junk. The Books category helps you review documents, while the Journal records the formulae and diagrams Geralt has learned. Do not sell unfamiliar monster parts automatically: many are crafting components or provide alchemical substances.
The Enhanced Edition PC interface includes sorting controls for equipment, trade and storage. Sort by name, acquisition time, total weight or total price when clearing space. Crafting displays the quantity you own against the quantity required. A component shown as 24/6 means Geralt owns 24 and the selected recipe needs 6. Use this display before spending orens on materials.
When trading, books, formulae and crafting diagrams Geralt already owns receive an ownership checkmark. This prevents many duplicate purchases, but it is not a complete shopping list. Keep rare monster parts, meteorite materials, processed leather, robust cloth, twine and unusual metals until you have checked the equipment and alchemy projects you intend to complete.
- Sell junk and obsolete equipment before selling crafting or alchemical materials.
- Use the quantity display to separate shortages from surplus components.
- Check ownership marks before buying books, formulae or diagrams.
- Keep quest items until the related quest has clearly ended.
2. Pin and inspect formulas or diagrams before shopping
Alchemy formulae create potions, oils and bombs. Crafting diagrams create weapons, armor, upgrades or components. Read a formula or diagram to learn it, then open the relevant entry in the Journal or crafting interface. For alchemy, Geralt must meditate before opening the Alchemy panel. For equipment, take the learned diagram and its components to a blacksmith or armorer through the crafting dialogue.
Use the pin command on the selected formula or diagram. After it is pinned, the game displays the required ingredients or components in the merchant panel when you open a shop. This is a tracking aid: it highlights what the recipe needs, but it does not purchase the item, reserve it, or prove that the current merchant carries it. If a required component is absent, check another merchant, loot containers, dismantle suitable equipment where appropriate, or craft the component yourself if you know its diagram.
Still inspect the recipe itself before buying. A formula may require a particular base and substance combination rather than one exact herb or monster part. Different ingredients can provide the same alchemical substance. Crafting diagrams list the specific components and quantities, so compare those requirements with your inventory quantity display. If the merchant panel does not show a needed item, do not assume the pin failed; the merchant may simply lack that stock.
- Pin the formula or diagram you are actively preparing to craft.
- Confirm the displayed merchant requirements against the recipe itself.
- Remember that pinning does not buy ingredients or guarantee merchant stock.
- Check alternate merchants and your storage before purchasing rare materials.
- Compare the finished item’s damage, armor, bonuses and enhancement slots with current equipment.
3. Brew potions before dangerous encounters
Potions are prepared and consumed through Meditation rather than used as ordinary combat healing items. Choose Drink Potions before opening a dangerous door, entering a hostile courtyard or beginning a boss encounter. Three potions can normally be active at once; the Taster talent allows a fourth, but the selected combination must remain within the displayed toxicity limit.
Swallow is a general vitality-regeneration choice. Tawny Owl supports vigor regeneration, Thunderbolt improves offensive damage and Golden Oriole is useful when poison or toxic hazards are expected. These are examples rather than a fixed loadout. Choose according to the next fight, your difficulty setting and your talent build.
Brewing and drinking are separate actions. First create the potion in the Alchemy panel, then use Meditation’s Drink Potions option to activate it. Keep strong alcohol available for meditation-based replenishment. Avoid entering a major fight with unnecessary toxicity if you may need to change preparations later.
- Meditate and drink potions before combat begins.
- Keep selected potion toxicity within the displayed limit.
- Use Taster only when you deliberately want a fourth active potion.
- Reserve situational preparations for encounters where their effects matter.
4. Unlock and use oils and bombs correctly
Owning an oil or bomb formula and its ingredients is not enough to use every preparation. Oil Preparation is required before Geralt can make oils, and Bomb Preparation is required before he can make bombs. These abilities belong to the Alchemy development path and have prerequisites, so check the Character panel before gathering materials for a preparation you cannot yet create.
Apply an oil to the sword you will actually use. Necrophage Oil is intended for necrophages, Specter Oil for specters and Hanged Man’s Venom for human opponents. The available formula list depends on what Geralt has learned, so use the Journal rather than assuming every preparation is available.
Bombs are situational tools. Samum can disrupt groups, while Devil’s Puffball and Dancing Star provide area effects when their formulae and ingredients are available. Carry them when their effects suit the next encounter, but do not spend rare components on bombs you rarely use.
- Confirm Oil Preparation or Bomb Preparation before gathering materials.
- Apply oil to the sword intended for the encounter.
- Check the formula’s base, substance and component requirements.
- Use bombs for a specific tactical purpose instead of carrying every type.
5. Use the correct storage access point
The storage locations change by chapter and route, but valid storage access points use the same stored inventory. On Roche’s path in Act II, speak with Raymond Gessler in the Camp Followers’ Encampment, south of the Kaedweni camp, and use the nearby chest. The Kaedweni camp canteen is not the relevant storage location for this route.
On Iorveth’s path, access storage through the chest in Geralt’s room at the Cauldron inn in Vergen. You may encounter other storage access points while crossing the battlefield or mist, but do not treat them as a separate inventory. Items placed in a valid storage location should be available through the other valid storage locations. Because the game has had storage-related bugs and access restrictions in some situations, close and reopen the storage interface to confirm that important items appear before relying on them.
In Act III, use Dalum’s storage at the makeshift inn, in the ruined building southwest of the Loc Muinne notice board. This is the convenient storage point after arrival. Store spare weapons, duplicate components, heavy junk and equipment you do not need for the next fight, but keep immediate combat supplies in Geralt’s inventory.
- Roche route: find Raymond Gessler in the Camp Followers’ Encampment and use the nearby chest.
- Iorveth route: use the storage chest in Geralt’s room at the Cauldron.
- Loc Muinne: access storage through Dalum at the makeshift inn near the notice board.
- Confirm that stored items are visible after closing and reopening the storage panel.
- Treat valid storage access points as one shared stored inventory, not separate route-only caches.
6. Prioritize durable armor and weapon upgrades
Do not craft every new item. Compare armor rating, sword damage, bonuses, enhancement slots and total cost. Common leather, cloth, twine and metals can support routine upgrades, but preserve expensive processed materials, rare monster parts, meteorite ore and unique components until you have selected equipment intended to last.
On Roche’s path, Lasota in the Kaedweni camp sells the Draug armor diagram. Buy it before resolving The Eternal Battle if you want to craft it later; the required late-quest component becomes available later than the diagram. On Iorveth’s path, Mael in Vergen can also sell the diagram, so the armor is not universally exclusive to Roche’s route, although the merchant and timing differ.
The Mystic River questline can lead to the Vran armor diagram in Loc Muinne. Loot the quest-related chest in the sewers, then bring the diagram and required materials to Bras of Ban Ard. Crafting Vran armor is optional, but it is a strong late-game target and a good reason to preserve rare materials and orens. Armor of Ysgith is a separate item from the same general questline; compare its sign bonuses and other statistics with Vran armor before replacing it.
Enhancements are effectively permanent once applied because removing one destroys the upgrade. Use runes and armor enhancements only on equipment you expect to keep through the end of the campaign.
- Buy the Draug armor diagram before resolving The Eternal Battle if you want it.
- Save enough orens for crafting fees as well as diagrams and components.
- Reserve rare materials for a chosen armor or sword instead of several minor sidegrades.
- Apply permanent enhancements only after deciding which equipment will reach Act III.
7. Make a final Act III preparation save
Before traveling to Loc Muinne, visit the appropriate craftsman, repair or replace both swords, inspect your armor and pin any final formulae or diagrams you are preparing. Use the merchant panel to identify required materials, then verify shortages manually because the pin does not guarantee that the current merchant has everything.
A practical general setup includes a healing potion, a vigor or damage potion, an appropriate blade oil and several bombs for groups. The exact selection should follow your talents, difficulty and the enemies expected on your route. Apply oils to the intended weapon and place bombs in accessible quick slots before beginning the next sequence.
After shopping and crafting, make a manual save before the Act III transition. This gives you a clean restoration point if you spend rare materials on the wrong item or want to change an enhancement. Once you reach Loc Muinne, use Dalum’s storage to unload spare equipment and confirm that active formulas, quest items and combat supplies remain accessible.
- Have a usable steel sword, silver sword and armor set before entering Loc Muinne.
- Check the pinned requirements and manually verify any remaining shortages.
- Brew preparations through Meditation before the first planned fight.
- Apply oils to the intended weapon and assign bombs to usable quick slots.
- Create a labeled manual save after final crafting and before the Act III transition.
Before you move on
- You can open the Journal or inventory, select a formula or diagram, pin it and see its requirements in a merchant panel.
- You understand that pinning is a tracking aid and does not purchase ingredients or guarantee merchant stock.
- You can use Enhanced Edition inventory, trade and storage sorting, ingredient quantity displays and ownership checkmarks on the GOG PC build.
- You have tested the storage access point on your current route and verified that important items are visible in the shared stored inventory.
- You have unlocked the talent prerequisites for every oil or bomb you plan to use.
- You have chosen durable armor or weapon upgrades instead of spending rare materials on several minor sidegrades.
- You have completed a final crafting and alchemy pass and created a manual pre-Act III save.
Combat Tactics and Talent Paths
The Witcher 2 rewards controlled positioning more than button-mashing. Keep the correct sword equipped, preserve Vigor for the action you need next, use Signs to create an opening rather than to replace swordplay, and fight from terrain that limits the number of enemies who can reach Geralt. Choose one principal talent path after the required Training investment instead of spreading points across every tree.
1. Establish the basic combat loop
Use the steel sword against sentient enemies and the silver sword against monsters. Before engaging, check that Geralt has drawn the appropriate weapon and that the camera gives you room to see attackers approaching from the sides or rear. The manual distinguishes swift attacks from strong attacks: swift attacks are faster and suit agile, lightly protected opponents, while strong attacks take longer but are more effective against slower enemies with armor or shields.
Begin an encounter from outside immediate weapon range. Cast one useful Sign if it will improve your position, close on an isolated target, deliver a short attack sequence, then move away before the surrounding enemies can answer. Do not remain committed to a long animation in the center of a group. If the formation closes around Geralt, stop attacking and create space first.
Vigor is a combat resource, not merely a Sign meter. Signs cost Vigor, blocking consumes Vigor, and the amount of Vigor available also affects sword damage and the amount of damage blocked. Entering every exchange with an empty Vigor bar makes both offense and defense weaker, so avoid spending it all on repeated Signs or prolonged blocking.
- Use the steel sword for sentient enemies and the silver sword for monsters.
- Use swift attacks against agile targets and strong attacks against slower armored targets.
- Keep enough Vigor for the next Sign, block or attack sequence.
- Attack briefly, then reposition before the group surrounds Geralt.
2. Use Quen as a temporary opening, not permanent armor
Cast Quen immediately before approaching a dangerous group, an elite opponent or an unfamiliar monster. The shield absorbs incoming damage, but Enhanced Edition balance changes mean it can wear off after only one or two hits. Treat it as a short window to cross danger, make one attack, or escape a bad position rather than as permission to stand in a crowd.
Quen has another cost that is easy to overlook: while it is active, Geralt cannot regenerate Vigor. If the shield is still active but your Vigor is empty, continuing to cast Signs or block can leave you unable to use your preferred response. After Quen has served its purpose, disengage, let Vigor recover, and re-enter on better terms.
When the shield breaks, roll or dodge toward open ground instead of trying to trade hits. If enemies are approaching through a doorway, stairway or narrow passage, move to the far side of that approach and make them arrive in a line. Recast Quen only after reaching a position where the casting animation will not leave Geralt trapped.
- Cast Quen before entering danger, not after Geralt is already surrounded.
- Expect the shield to disappear quickly under sustained attacks.
- Remember that active Quen prevents Vigor regeneration.
- Recast from a safe position after creating distance.
3. Match each Sign to a tactical job
Use Aard to interrupt, push back, knock down or stun when the target is vulnerable. A successful stun can permit an instant finisher, but the result is not guaranteed against every enemy. If Aard fails to stagger the target, do not stand still repeating it; return to movement and sword range.
Use Yrden to control a location rather than to chase an enemy. Place it on the ground before a dangerous opponent reaches the chosen space, especially in a doorway or narrow approach. It can wound and immobilize targets, and upgraded Yrden can create a more substantial barrier. This is particularly useful when you need to prevent several enemies from reaching Geralt at once.
Use Igni when several opponents are grouped or when approaching the target is unsafe. Use Axii when a susceptible opponent can be temporarily turned into an ally, reducing the number of enemies attacking Geralt. Use Quen for the initial defensive window. A practical sequence is Quen before contact, Yrden or Aard to disrupt the first threat, then swift or strong sword attacks selected according to the target’s mobility and protection.
Every Sign costs one point of Vigor. Do not use a Sign automatically at the beginning of every exchange if the same result can be achieved by moving around an obstacle or waiting for an enemy to overextend.
- Use Aard for interruption or a possible stun.
- Use Yrden to control ground and narrow approaches.
- Use Igni for pressure against grouped enemies.
- Use Axii to remove a susceptible opponent from the immediate fight.
- Reserve Quen for survival, entry and repositioning rather than passive damage soaking.
4. Dodge, roll and use terrain to reduce enemy numbers
A short dodge should be the normal response to one visible attack. Move diagonally past the attacker or toward his flank instead of retreating in a straight line. Straight-line retreats often leave Geralt within the reach of a second enemy. Once the swing has finished, deliver a brief counterattack and move again.
Use a roll when several enemies attack together, when an area effect makes the current ground unsafe, or when Geralt must cross the formation to reach cover. A roll is most valuable when it changes the geometry of the encounter: crossing a doorway, passing around a pillar, or moving behind a wall can prevent some enemies from attacking at the same time.
The Footwork talent increases dodge distance and is useful for a mobility-focused build, but longer movement does not replace camera control. Keep the battlefield visible, especially in open courtyards and siege areas. If an enemy disappears off-screen, stop attacking until you know where that enemy is.
Narrow spaces are useful only if Geralt enters them deliberately. Retreat through the approach used to enter, then face the enemies as they pass through the choke point. Do not retreat into an unexplored room or across a ledge simply because the ground behind Geralt looks open.
- Dodge diagonally around isolated attacks.
- Roll to cross a formation or escape an area effect.
- Use doorways, stairs, pillars and walls to restrict enemy access.
- Check the camera before committing to another attack.
5. Build around a principal talent path
The Training tree is the gateway to the other development paths. Spend six talents in Training before investing in Swordsmanship, Magic or Alchemy. Because talent points are limited, a complete playthrough cannot fully master every major path. Read each ability’s prerequisite and effect before buying it, and keep a clear purpose for the next several points.
For a melee or fast-attack build, continue into Swordsmanship after taking the Training abilities that improve survivability, Vigor or general defense. Swift attacks, damage bonuses, critical effects, Footwork and later Swordsmanship abilities support a mobile style. Riposte is worthwhile only if you are prepared to hold a block, watch for the counter indicator, and respond during its brief opening; it is not a replacement for dodging against groups.
For a Sign-centered build, enter Magic after the six-point Training requirement and concentrate on Quen plus one offensive or control Sign. Enhanced Quen can improve its duration and add damage reflection, but the Enhanced Edition’s short-lived shield still requires movement. Aard, Igni and Yrden each solve different positioning problems, so choose the one that addresses the encounters causing repeated failures. Keep sword damage available for moments when Vigor is low.
For an alchemy build, invest in Alchemy only after Geralt has enough defense or mobility to survive while preparing mixtures. Potions and oils must be prepared before combat, and the manual identifies them as temporary effects that improve damage, regeneration or critical-effect chances. Bombs are particularly useful against groups. This path becomes stronger when ingredients and formulas are collected consistently, but it is less forgiving if Geralt enters a difficult fight without preparation.
- Spend six talents in Training before opening another major tree.
- Choose one principal path and one supporting purpose.
- Take Riposte only if you intend to learn its block-and-counter timing.
- Keep a sword-based fallback even in a Magic or Alchemy build.
- Read prerequisites before spending each talent.
6. Adapt to enemy categories
Against ordinary human groups, prevent encirclement first. Use Quen to cross into a favorable position, Aard or Igni to disrupt the front, and a doorway or obstacle to make enemies approach from one direction. If a ranged attacker is exposed, remove that threat when doing so does not force Geralt into the center of the melee.
Against armored or shielded humans, prefer strong attacks when there is time to commit, or use blocking and repositioning until the opponent exposes an opening. Against agile opponents, swift attacks are safer because their shorter commitment makes it easier to recover and move away. Do not assume a single attack style works equally well against both groups.
Against monsters, read the bestiary and quest notes, equip the appropriate sword, and prepare oils, potions or bombs before entering the encounter. Watch for poison, fire and other area effects. Large monsters are safest when Geralt circles in open ground and attacks after their committed movement or recovery rather than during the beginning of the animation.
Bosses and elite opponents frequently punish long attack strings. Bait an attack, evade to the side, strike once or twice, and reset the distance. If a Sign repeatedly fails to control the target, stop spending Vigor on it and return to movement.
- Separate human groups before trying to finish one target.
- Use strong attacks for slower armored targets and swift attacks for agile targets.
- Prepare monster-specific equipment before known contracts or boss fights.
- Punish recovery windows instead of attacking through enemy animations.
7. Practice deliberately in arenas and large battle spaces
In an arena-like campaign fight, work from clear pockets of space instead of running continuously around the outer edge. Uncontrolled movement can draw more enemies into the encounter or expose Geralt to ranged attacks. Move between safe pockets, eliminate isolated threats, and keep an escape route visible.
During siege encounters, gates, stairs, courtyards and doorways can reduce the number of enemies able to attack simultaneously. Cast Quen before crossing an exposed section, roll to cover, and recover Vigor before beginning the next exchange. If the fight becomes crowded, retreat through the entrance rather than pushing deeper into an unknown group.
The separate Arena mode is optional. It can be used to practice Sign selection, dodge distance, blocking and attack recovery without risking campaign quest progress, but its rewards and score are not required to complete the main story. Test a new talent path there only as a practice exercise; campaign progression still depends on preparing the correct equipment and learning the actual encounter space.
- Fight from clear pockets instead of the center of a crowd.
- Use terrain to create one-on-one or small-group engagements.
- Cross exposed ground under Quen, then recover Vigor behind cover.
- Treat Arena mode as optional practice, not campaign progression.
Before you move on
- You can identify whether an encounter calls for the steel sword or silver sword before attacking.
- You can enter a mixed human encounter, use Quen for a short opening, move through a doorway or obstacle, and defeat enemies without remaining surrounded.
- You understand that Vigor affects Signs, blocking and sword damage, and you can preserve it for the next required action.
- You can explain when to use Aard, Yrden, Igni, Axii and Quen, including the drawback of active Quen preventing Vigor regeneration.
- You have spent six talents in Training and selected a principal development path instead of distributing points randomly.
- You can survive a large fight by using a choke point, recovering behind cover and re-engaging rather than relying on uncontrolled rolling.
- You have practiced your preferred Sign, dodge pattern or Riposte timing in a low-risk encounter before depending on it during a major story battle.
Monsters, Contracts and the Bestiary
Use the Journal and inventory Books tab to learn a monster’s weaknesses before accepting a contract. Contracts are optional, but several provide useful money, equipment, abilities or materials that are difficult to replace later. Their availability changes by act and route, so complete each contract before its campaign transition if you want its reward or future crafting components.
Read monster information and prepare the hunt
Open the Journal and check the Monsters tab before starting a contract. Books and notes are kept in the inventory Books tab; reading the appropriate volume can add monster knowledge, while some enemies also provide knowledge after Geralt has fought enough of them. Track the contract in the Quests tab so its current objective and completion status remain visible.
Open the Crafting or Alchemy tab and inspect formulas manually before shopping. You can also pin a formula or diagram so its required items appear in the merchant panel while you browse. Pinning is only a shopping aid: it does not purchase ingredients, create the item, or guarantee that the merchant has every required component. Check the actual inventory and revisit another merchant if necessary.
Use the silver sword against monsters and the steel sword against human enemies. Before leaving town, carry the appropriate oil, bomb or trap and keep a defensive Sign ready. Quen gives a safe opening against dangerous targets, Yrden can restrain suitable enemies, Aard can interrupt exposed creatures and Igni can pressure groups or vulnerable targets. Potions must be prepared during meditation before combat, so do not wait until a contract fight has already started.
- Read the relevant entry in the Journal Monsters tab or inventory Books tab.
- Inspect formulas manually or pin a formula to display requirements at a merchant.
- Carry the correct sword, oil, bomb or trap and a defensive Sign.
Use monster-specific tactics
Endrega are insectoid monsters. Insectoid Oil is the appropriate coating for the silver sword. Fight warriors and queens in short attacks, then reposition rather than remaining in a long combo. Yrden can create an opening against a queen, while Quen protects Geralt during a close approach. Keep open ground behind you and retreat beyond the queen’s active area if you need to recover.
Nekkers become dangerous when several surround Geralt. Cast Quen before approaching a nest, then use Aard or a bomb to interrupt the group long enough to reach the objective. Do not spend every bomb on ordinary enemies: the Nekker Contract specifically requires Grapeshot Bombs for the nests.
Rotfiends are necrophages. Necrophage Oil is useful, but their death explosion is the main danger. Stop attacking and move away when one begins its death sequence; do not stand beside the body to loot immediately. Harpies are mobile and attack from several directions, so fight where there is room to roll and use Quen or Aard when they close in. Gargoyles hit hard and should be engaged with Quen, controlled attacks and deliberate repositioning.
- Use Insectoid Oil against Endrega.
- Use Necrophage Oil against Rotfiends and retreat from their death explosions.
- Save bombs for required objectives as well as combat emergencies.
Complete The Nekker Contract in Act I
Read The Nekker Contract from the notice board outside the Flotsam inn. If you lack monster knowledge, buy a nekker book from Einar Gausel or gain the information by fighting nekkers. Cedric can sell Grapeshot Bombs and the Formula: Grapeshot, allowing you to craft the required explosives after learning the formula.
Travel to the swamp south of Flotsam. The contract has four nests: three around the northern edge of the swamp and one farther south. Place Grapeshot Bombs in a quickslot before entering the area. When nekkers emerge, either clear enough space to interact safely or use the bomb immediately on the nest. The nest is destroyed by the bomb; throwing Grapeshot at nearby enemies without targeting the nest does not advance the objective.
Loot the bodies for Warrior Nekker Blood and keep it. It is needed later for An Encrypted Manuscript in Act III. Return to Louise Merse after all four nests are destroyed for the contract reward. Completing this contract and The Endrega Contract before leaving Act I also qualifies you for the Diagram: Witcher’s Superb Silver Sword.
- Carry Grapeshot Bombs before entering the swamp.
- Destroy all four nests with Grapeshot Bombs.
- Keep Warrior Nekker Blood for later Act III requirements.
- Return to Louise Merse after the four nests are destroyed.
Finish The Endrega Contract before leaving Flotsam
Accept The Endrega Contract from the same notice board and read Three Years Among the Endregas if the Journal does not yet contain enough information. Travel into the forest and find the two cocoon areas. Each area contains three cocoons. Destroy all three in one area to spawn an Endrega Queen, then repeat at the second area.
Use Insectoid Oil on the silver sword. Lay traps before destroying the final cocoon if you need extra control, and use Yrden to hold the queen briefly. Quen protects Geralt during the approach. Keep moving around roots and open ground, and retreat outside the queen’s active range when you need to heal or reset the fight.
Loot both queens carefully. Queen Endrega’s Pheromones are important for An Encrypted Manuscript in Act III, so do not sell them or consume them in alchemy. Return to Louise Merse after both queens are dead. If The Nekker Contract is also complete, she provides the additional silver-sword diagram.
- Destroy six cocoons in total, three at each location.
- Use Insectoid Oil and keep moving during both queen fights.
- Keep Queen Endrega’s Pheromones.
- Return to Louise Merse after killing both queens.
Complete the contract for your Act II route
The Act II contract differs by route. On Iorveth’s path, Vergen offers The Harpy Contract. On Roche’s path, the Kaedweni camp offers The Rotfiend Contract. These contracts are route-specific and are not all available in one campaign.
For The Harpy Contract, read about harpies from Felicia Cori and buy at least seven Harpy Traps from Earso. Travel to the quarry outside Vergen and place a trap where a harpy can pick it up. The harpy carries the trap to an undestroyed nest. Four nests are in the quarry. The remaining three are in the Harpy Lair, which becomes accessible during Hunting Magic when Cecil Burdon provides the key. Destroying all seven nests grants the Birdman ability, then return to Cecil for the reward.
The Queen Harpy Contract is triggered during Hunting Magic. After entering the Harpy Lair, proceed to the Projection Ring and take the relevant crystal. The Harpy Queen and other harpies attack. Defeat the queen and loot the Harpy Silver Sword, then return to Cecil. This is an optional route-specific reward, not a separate notice-board job.
For The Rotfiend Contract, read the notice board in front of the Kaedweni camp cantina. If necessary, speak with Sambor to learn about rotfiends. Burn the three groups of corpses around the camp and ravine; each group contains three bodies. Rotfiends guard some of the locations, so ignite the corpses, retreat from exploding enemies and return to Proximo for the reward.
- Iorveth: carry seven Harpy Traps and complete the quarry and lair nests if desired.
- Iorveth: begin The Queen Harpy Contract through Hunting Magic.
- Roche: burn all three groups of corpses for The Rotfiend Contract.
- Treat Birdman, the Harpy Silver Sword and contract rewards as optional.
Solve The Gargoyle Contract in Act III
Take The Gargoyle Contract from the Loc Muinne notice board. If the Journal lacks gargoyle knowledge, speak with Bras of Ban Ard and read the relevant book. Before entering the rune rooms, read Runes of Power I, II, III and IV. These books explain the four rune categories: Animal, Sky, Art and Time.
Enter the three underground rune locations. Each location contains two seal puzzles, for six puzzles in total. Read the clue in each room and translate its imagery into the four categories, then activate the runes in the order described by that clue. Do not rely on one memorized sequence because the clue can differ between puzzle sites.
A completed site unlocks its chest. Search the chests for equipment and quest items, including the material needed to continue An Encrypted Manuscript. The manuscript requires Queen Endrega’s Pheromones, Warrior Nekker Blood, a Bullvore Brain and either a Harpy Egg or Rotfiend Tongue. Bras of Ban Ard can explain the manuscript, after which the required components lead to the Caerme steel-sword reward. Return to Bras after all six seals are deactivated to finish The Gargoyle Contract.
- Read the gargoyle information and all four Runes of Power books.
- Deactivate two seals at each of the three locations.
- Keep Queen Endrega’s Pheromones and Warrior Nekker Blood.
- Retain a Bullvore Brain and either a Harpy Egg or Rotfiend Tongue if pursuing Caerme.
Protect contract materials and recover from failure
Inspect item descriptions before selling monster parts. Quest items are often marked clearly, but rare alchemical ingredients can also be needed later. In particular, keep Queen Endrega’s Pheromones and Warrior Nekker Blood. Also retain a Bullvore Brain and either a Harpy Egg or Rotfiend Tongue if you want to complete An Encrypted Manuscript and obtain Caerme.
Save before each Endrega Queen, the Harpy Queen, the Rotfiend corpse areas and every Gargoyle Contract rune site. If a fight goes badly, retreat through a doorway or narrow passage, eat food between encounters when safe and recast Quen before re-entering. If a nest, corpse or rune interaction is missed, check the quest objective first; if the state does not update, reload the pre-hunt save rather than selling or discarding the required item.
- Keep quest-marked and rare monster components in inventory or storage.
- Make manual saves before contract bosses and rune puzzles.
- Reload a pre-hunt save if an objective fails to update.
Before you move on
- The Nekker Contract and The Endrega Contract are complete before leaving Flotsam if the additional silver-sword diagram is desired.
- The route-appropriate Act II contract is complete or deliberately skipped.
- Queen Endrega’s Pheromones and Warrior Nekker Blood remain available for Act III.
- The seven Harpy nests and Queen Harpy are complete on Iorveth’s path if those optional rewards are desired.
- The three Gargoyle Contract locations and all six seals are complete if the optional Act III rewards are desired.
- The Gargoyle Contract materials are retained if An Encrypted Manuscript and Caerme are intended.
- The Journal Monsters, Crafting and Alchemy tabs, plus the inventory Books tab, have been checked before the next major hunt.
- The next contract area has the correct sword, oil, bomb or trap prepared.
References for this chapter
- The Witcher 2: Enhanced Edition Game Manual, CD PROJEKT RED
- The Witcher 2 Enhanced Edition official quest handbook
- The Nekker Contract — Gamer Walkthroughs
- The Endrega Contract — Gamer Walkthroughs
- The Harpy Contract — Gamer Walkthroughs
- The Queen Harpy Contract — Gamer Walkthroughs
- Hunting Magic — Gamer Walkthroughs
- The Rotfiend Contract — GameBanshee
- The Gargoyle Contract — Gamer Walkthroughs
- An Encrypted Manuscript — Gamer Walkthroughs
Side Quests That Matter: Which To Finish and When
Optional quests in The Witcher 2 provide equipment, diagrams, crafting materials, political evidence, route-specific allies and additional Enhanced Edition story content. They are not all required for the ending, but many can fail when Geralt begins an assault, siege, rescue or final political sequence. Review the journal after every major objective, keep quest documents until their current objective is complete, and maintain separate saves for local consequences and the major Roche or Iorveth campaign split.
Use the journal and create cutoff saves
Review the journal after every major story update. Separate main quests, secondary quests, witcher contracts, challenges and investigations so you know whether a new objective is part of the critical path or an optional activity. Check notice boards, speak with named NPCs and inspect newly opened areas; the minimap does not provide a complete list of available side content.
Create a manual save before beginning an assault, siege, escort, rescue, political hearing or final summit sequence. Also save before accepting one of two mutually exclusive objectives. The game does not provide a warning for every side quest that can become unavailable, so use the journal and quest stage as your cutoff guide.
Read manuscripts, letters, diagrams and quest notes before selling them. Keep named quest items and political evidence until the journal confirms that the current objective is complete. Ordinary crafting materials can be stored, but do not assume that a quest item will remain available from a merchant after it has been sold.
- Review unfinished local quests before every major combat operation or act transition.
- Read new manuscripts and letters before selling them.
- Create separate saves before mutually exclusive choices and end-of-act quests.
- Keep active quest documents and named components until their journal objective is complete.
Flotsam: finish desired content before the major route commitment
Before leaving Flotsam, complete the optional activities you want from the town, Lobinden and the surrounding forest. Useful examples include The Endrega Contract, The Nekker Contract, Troll Trouble, Malena, In the Claws of Madness, Hung Over, Little Shop of Dreams, The Scent of Incense, Poker Face: Flotsam, Bring It On: Flotsam, One on One: Flotsam and Fight Club. These are optional, but they can provide experience, money, ingredients, diagrams, equipment and additional character scenes.
Start Mystic River if you want its later stages. Follow its journal instructions and retain the documents recovered from shipwreck locations. Its later progression depends on having started the earlier investigation, so do not wait until Loc Muinne to look for the opening stage.
During The Assassins of Kings, the timed decision involving Iorveth’s sword changes the immediate Flotsam aftermath. It affects whether Iorveth escapes or is captured and changes later scenes and dialogue in the local branch. It is not the permanent Roche-or-Iorveth campaign lock.
After the late Flotsam main-quest developments, create a primary backup before completing either At a Crossroads: Vernon Roche or At a Crossroads: Scoia’tael. These mutually exclusive quests commit the major Act II campaign. Completing Roche’s quest sends Geralt to the Kaedweni camp; completing the Scoia’tael quest sends him to Vergen with Iorveth. To play the alternate campaign, restore the save made before completing either quest. A save made after that commitment cannot be converted by a later dialogue choice.
If you also want to compare only the immediate Flotsam consequences of the sword scene, keep an earlier local backup before that timed decision. That earlier save is separate from the primary alternate-campaign save.
- Complete desired Flotsam and Lobinden contracts, investigations, challenges and optional quests.
- Start Mystic River if you want its continuing stages.
- Keep a save immediately before the At a Crossroads commitment.
- Keep an earlier pre-sword save only for replaying the local Flotsam consequences.
- Do not describe the sword scene as the sole major route lock.
Roche route: complete Kaedweni camp content before The Siege of Vergen
Roche’s Act II side content is concentrated in the Kaedweni camp, the gullies and the route toward Vergen. Optional quests include Against the Blue Stripes, Little Sisters, Lost Lambs, From a Bygone Era, Poker Face: Kaedweni Camp, Bring It On: Kaedweni Camp and The Rotfiend Contract. Complete the quests you want before beginning The Siege of Vergen, because that operation moves Geralt through the tunnels and into the Act III transition.
Treat Lost Lambs as an escort quest. After Zyvik asks Geralt to locate the missing soldiers, find them near Sabrina’s pyre and agree to escort them back. If you leave them to travel alone, they can die and the quest can fail. Protect them from monsters, return them to the camp and report to Zyvik.
Little Sisters is an investigation. Follow the witness accounts and inspect the relevant hut, basement and ghost-related locations before resolving the confrontation. Do not rush directly to the final encounter if you want the full investigation and its evidence.
Complete Against the Blue Stripes if you want its later Loc Muinne rematch, A Score to Settle. It is optional and does not affect the main campaign ending. Advance Mystic River when its Roche-side shipwreck stage becomes accessible. If From a Bygone Era is active, keep Malget’s notes and follow its journal stages into Act III rather than selling them.
Make a final Roche Act II save before The Siege of Vergen. Once that operation begins, ordinary camp activity and several optional objectives are no longer safely available.
- Finish Little Sisters, Lost Lambs, desired contracts and camp challenges.
- Complete Against the Blue Stripes if you want A Score to Settle later.
- Advance Mystic River and From a Bygone Era if those quest lines are active.
- Create a final Roche Act II save before The Siege of Vergen.
Iorveth route: complete Vergen content before Vergen Besieged
Iorveth’s optional content is centered on Vergen, the quarry, the mines and the surrounding valleys. Useful quests include Baltimore’s Nightmare, Hey, Work’s in the Mines, With Flickering Heart, The Harpy Contract, The Queen Harpy Contract, Poker Face: Vergen, Bring It On: Vergen and One on One: Vergen. Complete desired shopping, crafting, contracts and challenges before Vergen Besieged.
Baltimore’s Nightmare begins from the investigation surrounding Hunting Magic. Follow the projection and workshop clues, search the hidden locations and complete its journal sequence before moving on. It is optional, but it can provide valuable equipment and also affects the evidence available for Suspect: Thorak.
Suspect: Thorak and The Walls Have Ears are optional investigations tied to the poisoned-goblet evidence and the judgment concerning Stennis. They are not prerequisites for A Matter of Life and Death or for collecting the four materials needed for Saskia’s cure. Their order matters. A safe approach is to advance The Walls Have Ears only to its waiting stage, then complete the Thorak and Baltimore evidence that the journal makes available before returning to finish the goblet investigation. If the chain has already advanced differently, one quest may fail; do not promise that both can always be recovered.
The royal blood required for A Matter of Life and Death can depend on the judgment and related story choices. The important requirement is that Geralt obtains royal blood and delivers it with the magical crystal, Immortelle and rose of remembrance to Philippa. The optional evidence quests are not all required for that delivery.
Make a final Iorveth Act II save before Vergen Besieged. The siege begins the closing operation in Vergen and changes access to ordinary city content.
- Complete Baltimore’s Nightmare if you want its equipment and evidence consequences.
- Treat Suspect: Thorak and The Walls Have Ears as optional and order-sensitive.
- Finish desired Vergen contracts, challenges, shopping and crafting.
- Deliver the required Saskia-cure materials before the siege sequence.
- Create a final Iorveth Act II save before Vergen Besieged.
Loc Muinne: accept optional quests early and delay the final chain
Act III is shorter and its side content can become unavailable once Geralt commits to the final rescue, summit or endgame sequence. Accept available optional quests early. Depending on the route and earlier progress, these may include Bring It On: Loc Muinne, Poker Face: Loc Muinne, The Gargoyle Contract, An Encrypted Manuscript, From a Bygone Era, the continuation of Mystic River, A Score to Settle, Lilies and Vipers and The Secrets of Loc Muinne.
Lilies and Vipers is Enhanced Edition content on Roche’s path. It begins through the Temerian political material connected with For Temeria! Follow its document trail, speak with the relevant scribe and witnesses, and complete the investigation before starting the final rescue route if you want its evidence and story scenes.
The Secrets of Loc Muinne is route-specific Iorveth content. Find the two scholars from the earlier Flotsam storyline and follow their investigation into the city’s hidden passages and laboratory. Complete it before committing to the final endgame chain if you want the full quest.
For The Gargoyle Contract, read the rune-related material and inspect each marked site carefully. Return the recovered material to the quest contact and confirm the journal update before selling unusual manuscripts or components. Finding a diagram or manuscript does not craft the item or supply missing materials.
A Score to Settle is an optional rematch whose setup depends on earlier route-specific challenge progress. It is not a required political objective or a condition for reaching an ending.
- Accept available Loc Muinne side quests as soon as they appear.
- Complete route-specific investigations before the final rescue or summit sequence.
- Finish desired contracts, challenges and manuscript investigations.
- Create a final Act III save before beginning an irreversible endgame objective.
Use formula and diagram pinning as a shopping aid
Inspect formulas and diagrams directly through the inventory interface. A formula lists an alchemical result and its ingredients. A diagram lists the equipment requirements, materials, crafting fee and the craftsman needed to produce the item. Review the individual entry instead of relying only on the merchant screen.
Pin a formula or diagram when you intend to shop for it. The pinned requirements appear in the merchant interface and make it easier to identify relevant materials while browsing. Pinning is only a tracking feature: it does not buy ingredients, transfer them from storage, craft the result, loot missing components or guarantee that the current merchant stocks every requirement.
Compare the pinned requirements with Geralt’s carried materials and the merchant’s actual stock. If something is missing, check other vendors, loot containers, dismantle suitable equipment or return after advancing the act. Inspect named quest components manually because they may not behave like ordinary crafting materials.
Prioritize diagrams and consumables that match the build you are using. Weapon runes, armor enhancements, oils, bombs, resistance potions and late Act II armor can be worthwhile before Act III. Dark Mode equipment, Arena rewards and other Enhanced Edition additions are optional and are not required to finish the campaign.
- Read each formula or diagram before buying materials.
- Pin useful recipes while shopping, then verify real stock and carried materials.
- Do not assume pinning buys, transfers, crafts or guarantees anything.
- Keep active quest documents and named components until their objectives are complete.
- Spend rare materials on equipment and consumables you actually intend to use.
Before you move on
- Before completing At a Crossroads, desired Flotsam and Lobinden content is resolved, Mystic River has been started if wanted, and a pre-commitment route save exists.
- A separate pre-sword save exists only if you want to replay the earlier Flotsam consequences.
- On Roche’s route, desired camp quests, Little Sisters, Lost Lambs, contracts, challenges, Mystic River progress and From a Bygone Era’s early setup are complete before The Siege of Vergen.
- On Iorveth’s route, desired Vergen quests, Baltimore’s Nightmare, contracts, challenges, Mystic River progress and any evidence investigations are complete before Vergen Besieged.
- In Loc Muinne, desired shared content and the correct route-specific investigation are complete before the final rescue or summit commitment.
- Useful diagrams, armor components, oils, bombs, potions and rare ingredients are secured, and a manual save exists immediately before the final Act III chain.
- At least one completed Roche or Iorveth campaign reaches the Loc Muinne ending sequence; optional side content is not required for main-campaign completion.
References for this chapter
- The Witcher 2: Assassins of Kings Enhanced Edition — GOG.com
- The Witcher 2: Assassins of Kings Enhanced Edition on GOG
- The Witcher 2 Enhanced Edition official quest handbook
- The Witcher 2 Walkthrough — GameBanshee
- Act II Introduction: Iorveth — GameBanshee
- Act II Introduction: Roche — GameBanshee
- The Siege of Vergen — GameBanshee
- Suspect: Thorak — GameBanshee
- Royal Blood — GameBanshee
- Vergen City — GameBanshee
- Vergen Besieged — GameBanshee
- Where Is Triss Merigold? — GameBanshee
- Lost Lambs — GameBanshee
- Lilies and Vipers — Witcher Wiki
- Chapter 1: Flotsam — Prima Games
- Chapter 3: Loc Muinne (Roche) walkthrough
Enhanced Edition Additions: New Areas, Quests and Arena Mode
The GOG PC release is The Witcher 2: Assassins of Kings Enhanced Edition. It includes the original campaign, earlier downloadable content and patches, a new introduction, additional cinematics, an extensive tutorial, Arena Mode, Dark Mode, interface improvements and roughly four hours of additional story content. The added campaign quests are integrated into Chapter III and are route-specific: Roche receives Lilies and Vipers, while Iorveth receives The Secrets of Loc Muinne. Both quests are optional for reaching the ending, but they are required if you want the expanded Enhanced Edition campaign on that route. Arena Mode is separate from the campaign and is useful for practice, but no Arena score, wave count or reward is needed to complete Acts I through III.
Confirm the GOG Enhanced Edition build
Open the GOG library entry and verify that the installed product is titled The Witcher 2: Assassins of Kings Enhanced Edition. The GOG PC listing identifies the April 17, 2012 release and describes Arena Mode, the tutorial, Dark Mode, additional story content and gameplay improvements. The normal GOG installation already represents the completed digital edition; do not apply the old disc Enhanced Edition patch to it.
If you are using an old retail disc rather than the GOG product, CD PROJEKT RED provides a separate manual Enhanced Edition update process. That process is not needed for a standard GOG installation. The practical checks are the product title, the new introduction or tutorial availability and the presence of the standalone Arena option.
- The installed product title includes Enhanced Edition.
- The game offers the Enhanced Edition introduction and tutorial features.
- Arena Mode is available from the separate game-mode selection.
- Do not apply the historical disc patch to a normal GOG installation.
Complete the tutorial before judging the campaign controls
The Enhanced Edition tutorial teaches movement, sword attacks, Signs, defensive actions, bombs and other core systems. Complete it on a first playthrough, particularly if you are unfamiliar with The Witcher 2’s combat. It is a training feature rather than an additional story act, so completing or skipping it does not select Roche, Iorveth or any ending route.
Use the tutorial to test movement, targeting, dodging, blocking and Sign casting. Then enter the campaign and create a manual save. The tutorial does not replace the opening campaign save and has no effect on the later route commitment.
- Test movement and combat in the tutorial.
- Practice casting Signs and using defensive actions.
- Create a clearly identifiable campaign save after entering the main story.
Use the final inventory, Books tab and inn storage
The completed Enhanced Edition interface separates books, trophies, mutagens, alchemical ingredients, crafting components, diagrams and formulae, quest items, bombs and other equipment into recognizable categories. Read books and notes when you obtain them because they can add bestiary or quest information. Do not sell a document merely because it is placed in the Books category.
Storage is accessed through innkeepers. It is included in the final Enhanced Edition but was introduced through earlier Witcher 2 updates rather than being entirely new to the April 17, 2012 release. Store spare weapons, old armor, excess crafting components and duplicate junk when your carried inventory becomes crowded. Keep active swords, armor, quest items and the consumables you intend to use before leaving an area.
Enhanced Edition PC builds also provide a formula-pinning function. In the alchemy or crafting interface, select the formula or diagram and use the displayed pin command. When you open a merchant’s shop, the pinned requirements are shown for reference, helping you identify ingredients or components still needed. Pinning does not buy the items, guarantee that a merchant stocks them or replace the need to loot and gather materials. If the interface does not show the command, inspect the on-screen control prompt rather than assuming a fixed keyboard key.
- Use the Books category to review collected reading material.
- Use an innkeeper’s storage to reduce carried inventory.
- Keep current equipment and active quest items with Geralt.
- Pin a formula or diagram from the alchemy or crafting interface.
- Check the merchant panel and gather anything the merchant does not sell.
Complete Lilies and Vipers on Roche’s route
Lilies and Vipers is the Roche-route Enhanced Edition quest in Chapter III. It follows Crown Witness and concerns Brigida Papebrock, the royal children and the political conspiracy surrounding Boussy’s death. When Brigida’s investigation becomes available, speak with her and follow the journal entry into the Temerian quarter. Make a manual Loc Muinne save before beginning its evidence chain.
Take the letter to Baron Kimbolt. For the fuller version of the quest, have the scribe examine it rather than immediately reporting Kimbolt to John Natalis. The scribe is drunk, so search his chamber for the notes needed to test the letter. The formula puzzle requires adding burnt lime, then water, then cormorant guano, followed by heating the flask, capturing the vapors and dousing them with water.
After the letter is exposed as false, continue through The Messenger and Pacta Sunt Servanda. Each branch provides evidence concerning one of the barons. Return to Constable Natalis after gathering the evidence and accuse both barons if you want the most complete resolution and reward. Reporting Kimbolt immediately ends the investigation early and prevents the connected quests from being completed.
This quest is optional for reaching the campaign ending. It is part of the expanded Roche campaign and should be completed before you trigger the final Chapter III transitions if you want its story, evidence and reward.
- Roche route: finish Crown Witness first.
- Speak with Brigida and preserve a Chapter III save.
- Investigate Kimbolt’s letter through the scribe.
- Complete The Messenger and Pacta Sunt Servanda if you want the full investigation.
- Return to Natalis with the evidence.
- Do not expect Lilies and Vipers on an Iorveth playthrough.
Complete The Secrets of Loc Muinne on Iorveth’s route
The Secrets of Loc Muinne begins with the two scientists first encountered in Flotsam. On Iorveth’s route, find them in Loc Muinne’s main square and accept their request concerning Dearhenna’s laboratory. They direct you to an entrance below the tower. Make a save before entering because the quest contains several combat encounters and puzzles.
Inside the tower, use Aard and Igni on the resonating crystals. Two crystals respond to Aard and two respond to Igni; activate all four to open the magically locked door. Continue through the lower area and defeat the guardian of the Forgotten Vran Sword. The guardian teleports to ledges during the fight and summons wraiths, so clear the summoned enemies before concentrating on the guardian again.
Meet Cynthia and her party upstairs. Cooperate with the expedition if you want to continue the quest; attacking her group fails the quest. Fight through the greater rotfiend ambush and the endrega queen, then follow the party to Dearhenna’s laboratory. The first riddle answer is Fate. In the later three-part riddle, answer The Dragon Constellation, The Full Moon and The Mine Entrance in the Mountainside.
Collect the glowing quest books in the laboratory. When the talking golem appears, avoid asking for its name-word and do not use Axii if you want the peaceful resolution. Exhaust the non-hostile questions, state that you know enough, then create the paradox by identifying yourself as a guest who came to discuss lies and delusions and affirming that only the golem’s and its master’s will exist. Search the laboratory for all five pieces of Dearhenna’s notes. The quest then resolves after the megascope sequence.
The Secrets of Loc Muinne is optional for reaching the ending, but it is the route-specific Enhanced Edition story on Iorveth’s path. It also leads into related journal material and should be completed before the final Chapter III sequence if you want the complete expanded route.
- Iorveth route: locate the scientists in Loc Muinne’s main square.
- Activate the four resonating crystals with the correct Signs.
- Defeat the laboratory guardian and summoned wraiths.
- Cooperate with Cynthia’s expedition.
- Answer the riddles correctly.
- Use the peaceful golem dialogue solution if desired.
- Collect all five pieces of Dearhenna’s notes.
- Do not expect this quest on Roche’s route.
Use Arena Mode and Dark Mode as optional challenges
Arena Mode is selected from the standalone game-mode menu rather than from an active campaign save. It sends Geralt against successive enemy waves and is suitable for practicing dodging, Quen use, Sign selection, bombs and crowd control. Arena play does not alter campaign quest states or route decisions, so return to the campaign when you have finished practicing.
No Arena wave total, score, reward or ranking is required to complete the Prologue, Acts I through III, the Roche route, the Iorveth route or either ending sequence. Treat Arena as a separate optional activity, not as a hidden campaign chapter.
Dark Mode is an optional high-difficulty setting associated with unique dark-themed equipment. It emphasizes preparation, defensive movement and opportunistic attacks. It does not unlock required story content, and choosing another difficulty does not remove access to the Enhanced Edition quests.
- Launch Arena from the standalone mode selection.
- Use Arena to practice without risking campaign progress.
- Do not grind Arena for a campaign requirement.
- Choose Dark Mode only when you want its higher difficulty and equipment.
Before you move on
- The GOG installation is identified as The Witcher 2: Assassins of Kings Enhanced Edition.
- The tutorial, Books category, inventory categories and Arena Mode are available.
- You have accessed inn storage and understand that it is not a separate campaign requirement.
- You have used or verified formula pinning and understand that it does not automatically supply ingredients.
- On Roche’s route, Lilies and Vipers is completed if you want the route-specific Enhanced Edition story.
- On Iorveth’s route, The Secrets of Loc Muinne is completed if you want the route-specific Enhanced Edition story.
- Arena Mode and Dark Mode have been treated as optional.
- You can continue to the Chapter III ending without completing Arena or either route-specific Enhanced Edition quest.
References for this chapter
- The Witcher 2: Assassins of Kings Enhanced Edition on GOG
- The Witcher 2: Enhanced Edition Game Manual, CD PROJEKT RED
- The Witcher 2 - Manual Installation/Update, CD PROJEKT RED Support
- The Witcher 2 - Patch 3.2 - UI Improvements
- Lilies and Vipers walkthrough, GameBanshee
- The Secrets of Loc Muinne walkthrough, GameBanshee
Preparing For Act III: Last-Minute Checks
Act II closes with Geralt traveling to Loc Muinne on the major campaign route selected by completing At a Crossroads: Vernon Roche or At a Crossroads: Scoia’tael in Act I. The timed Iorveth-sword scene changes the immediate Flotsam sequence and later details, but it does not itself select the full Roche or Iorveth campaign. Before beginning the final Act II operation, finish the optional work you care about, prepare route-specific supplies, make separate replay saves, and back up the GOG PC save folder. A pre-At-a-Crossroads save is the important backup for accessing the opposite major campaign; a pre-sword save is only for replaying the earlier Act I consequences.
Finish desired Act II content before the final departure
Do not begin the final Act II departure as soon as the closing main objective appears. First review the Journal and complete any optional work you want to preserve. Act II contains route-exclusive quests, contracts, challenges, crafting opportunities, political investigations, and exploration that may no longer be available after the transition to Loc Muinne.
On Roche’s path, review the Kaedweni camp quests involving Henselt, Dethmold, the battlefield curse, the kingslayer investigation, and the siege of Vergen. On Iorveth’s path, review the Vergen objectives involving Saskia, Philippa, the mist, the curse, and the optional evidence quests connected with Stennis and Thorak. The Suspect: Thorak and The Walls Have Ears investigations are optional, but if you want them, resolve their order-sensitive objectives before beginning Vergen Besieged.
Complete desired contracts, challenges, fistfights, dice poker, shopping, exploration, and crafting before the final Act II operation. These activities are not required to reach the ending. Treat this as a cutoff review rather than a claim that every open quest must be completed. Create a manual save before starting the final operation so you can retry the transition if a quest consequence is not what you wanted.
- Review every open Act II entry in the Journal.
- Complete desired Roche, Iorveth, Vergen, camp, battlefield, and mist content.
- Finish optional contracts and challenges that you do not want to abandon.
- Create a manual save before starting the final Act II departure.
Check route-specific quests and conditional items
When Act III begins, the opening quest identifies the route already selected. Roche players receive For Temeria!, while Iorveth players receive For a Higher Cause!. These quests confirm the campaign route; they do not provide a new opportunity to switch it. A Loc Muinne save cannot be converted into the opposite Act II campaign.
Check whether conditional Act III content is active in the Journal. Roche-route players may have Lilies and Vipers and its connected Crown Witness, The Messenger, and Pacta Sunt Servanda objectives, depending on earlier choices and evidence. Iorveth-route players may have The Secrets of Loc Muinne, Dearhenna’s Journal, or A Tome Truly Rare when their prerequisites were met. These quests are optional and are not available in identical form on both routes.
If Malget’s notes and their earlier requirements are present, From a Bygone Era may be available. It is optional. Retain unresolved manuscripts, letters, keys, notes, and documents until their linked Journal objectives are complete, but do not keep every quest item forever: once the game has consumed an item or the related objective is closed, it is no longer a required preparation item.
- Confirm whether Malget’s notes and From a Bygone Era are active.
- Check for route-specific Act III quests before leaving Act II.
- Keep unresolved documents and quest items until their linked objectives are complete.
- Do not assume that Roche and Iorveth have identical Act III quest lists.
Repair, upgrade, and organize equipment
Repair both swords and your equipped armor before leaving Act II. Sell ordinary junk, store surplus materials, and leave several inventory spaces open for quest rewards and Act III loot. No single named sword, armor set, diagram, potion, or bomb is universally required for campaign completion, so do not postpone the transition indefinitely for an optional perfect loadout.
Prioritize a dependable steel sword, a usable silver sword, and armor that matches your talent build. If you completed Mystic River or have another worthwhile late-Act-II diagram, craft it before departure if you can afford the materials. Roche players may later obtain the forgotten vran sword during Of His Blood and Bone, but that is a route-specific Act III reward rather than a prerequisite for entering Loc Muinne.
Bring recovery and defensive supplies you know how to use. Food, Swallow, or another healing option helps between encounters. Quen is a reliable emergency defense, while Aard, Yrden, Igni, bombs, and traps depend on your build and the enemies you expect to face. Carry Antidotes if you have a useful formula and expect poison hazards, but do not invent a fixed quantity requirement. Grapeshot and Samum can assist against groups, but only carry stockpiles you have tested and can replace.
- Repair both swords and equipped armor.
- Craft or buy practical upgrades for the current talent build.
- Carry healing and defensive supplies you understand.
- Keep enough orens for repairs, diagrams, and consumables.
- Clear inventory space for Act III rewards and quest items.
Create route and branch saves
At the last safe point before beginning the final Act II travel sequence, create an Act II final save with the route in its name, such as ACT II FINAL ROCHE or ACT II FINAL IORVETH. After Act III loads and you regain control in Loc Muinne, create a second save named BEGIN ACT III ROCHE or BEGIN ACT III IORVETH. Verify both entries in the Load Game menu.
The Act II final save is for replaying the transition and the closing Act II consequences. The Begin Act III save preserves the route already chosen and is useful for replaying Loc Muinne. Neither save provides access to the opposite major campaign. To play the other major route, restore a save from before completing At a Crossroads: Vernon Roche or At a Crossroads: Scoia’tael and replay the route-specific Act II and Act III content.
Create another manual save before the major Act III objective choice. On Roche’s path, this preserves the choice between pursuing Triss and helping Roche rescue Anaïs. On Iorveth’s path, it preserves the choice between pursuing Triss and helping Philippa. These are same-route Act III branch saves, not substitutes for the pre-At-a-Crossroads backup.
- Create and verify an ACT II FINAL save with the route named.
- Create and verify a BEGIN ACT III save with the route named.
- Keep a separate pre-At-a-Crossroads save for the opposite major campaign.
- Create a pre-branch Act III save before choosing the Triss or route-objective path.
- Keep the earlier pre-sword save separately if you want to replay Act I consequences.
Back up the GOG PC save folder
Exit the game after making the manual saves and copy the complete GOG PC save directory to another drive or folder. The standard GOG Windows location is Documents\/Witcher 2\/gamesaves, although a redirected Documents folder or unusual Windows profile can change the visible path. Confirm the location by checking that it contains the manual and autosave files you just created.
Label the backup with the route and act, such as Witcher 2 Roche Act II Final or Witcher 2 Iorveth Begin Act III. Keep the pre-At-a-Crossroads backup distinct from the pre-sword Act I backup. Do not overwrite the only route-switching backup with a later Act II or Act III copy.
To restore a backup, close the game, move the current active gamesaves folder to a temporary location, copy the desired backup into the active location, and launch the game. Check the Load Game menu before continuing. This restores an earlier state; it does not merge decisions or transform a Roche save into an Iorveth save.
- Copy the complete active GOG PC gamesaves folder.
- Verify that the copied folder contains the named manual saves.
- Label backups by route and act.
- Keep pre-At-a-Crossroads and pre-sword backups separate.
- Test restoration only with a duplicate copy, never the sole backup.
Before you move on
- Desired Act II quests, contracts, investigations, crafting, and exploration are resolved before the final departure.
- The Journal has been checked for conditional items and route-specific Act III objectives.
- Both swords and equipped armor are repaired, practical supplies are ready, and inventory space is available.
- An ACT II FINAL save and a BEGIN ACT III save exist for the selected route.
- A separate pre-branch Act III save exists if same-route choices will be replayed.
- The complete GOG PC save directory has been copied and labeled externally.
- After the transition, Roche players begin with For Temeria! and Iorveth players begin with For a Higher Cause!.
- The selected route is understood to have been committed by At a Crossroads: Vernon Roche or At a Crossroads: Scoia’tael.
- If the opposite major campaign is planned, the original pre-At-a-Crossroads save remains available.
- If earlier Act I consequences are being compared, the pre-sword save remains available separately.
- The player understands that accessing the alternate major campaign requires restoring the pre-At-a-Crossroads save and replaying Acts II and III.
Act III — Loc Muinne: Arrival and Exploration
Act III continues the major campaign selected in Act I by completing At a Crossroads: Vernon Roche or At a Crossroads: Scoia’tael. The earlier timed choice involving Iorveth’s sword changes local consequences and later dialogue, but it does not select the Roche or Iorveth campaign. Enter Loc Muinne through the appropriate opening quest, establish a manual save, explore the city, complete desired route-specific and Enhanced Edition side content, then save again before choosing the rescue branch that leads toward A Summit of Mages.
1. Enter Loc Muinne on the already-selected route
Roche’s campaign begins with For Temeria!. Follow Vernon Roche through the forest and stop at the overlook if you want to identify Loc Muinne’s major towers and ruined districts. Continue to the Knights of the Flaming Rose camp, speak with Roche and proceed through the city entrance. Once inside, Roche waits near the main square and directs you toward the Redanian Quarter. Speak with King Radovid there to advance the opening objectives and unlock the Roche-route rescue decision.
Iorveth’s campaign begins with For a Higher Cause!. Follow Iorveth down the mountain path and fight the harpies along the descent. When the Knights of the Flaming Rose camp comes into view, an imported Witcher 1 history in which Siegfried remains friendly with Geralt can allow passage through the camp. Otherwise, retreat with Iorveth and use the secret cave. Fight the arachas and endrega inside, leave through the far exit, climb over the wall and follow the route into Loc Muinne.
After entering the city, create a manual arrival save. The city square, inn, merchants and amphitheater are useful navigation landmarks. This save is for replaying Act III within the same major route. It cannot be used to convert Roche’s campaign into Iorveth’s or the reverse.
- Confirm that the opening quest is For Temeria! or For a Higher Cause!.
- Create a manual save after entering Loc Muinne.
- On Iorveth’s route, use the Order camp only if the imported history permits friendly passage.
- Use the city square, inn and amphitheater as return landmarks.
2. Establish a safe exploration circuit
Start in the city square and visit the inn, merchants and notice board. Repair both swords and your armor, sell ordinary loot and restock food, healing items, bombs and useful potions. Keep letters, notes, keys, evidence and unusual quest objects until their related journal objectives are finished. Loc Muinne contains late-game merchants, diagrams, crafting materials and optional encounters, so this is the safest point to organize equipment before the final sequence.
Explore the accessible streets around the square and amphitheater, but do not charge into hostile guard positions. The city contains narrow routes, harpies, gargoyles and guarded compounds that can trigger combat with little warning. Save before entering the sewers, the Crypt of Mages, a gargoyle courtyard or another unfamiliar ruin. These saves are especially useful if an optional quest requires a particular underground location.
On Roche’s route, return to Roche after exploring when you are ready to begin the Redanian negotiations. On Iorveth’s route, continue through the opening quest and check the areas around Philippa’s imprisonment when they become accessible. The central rescue decision is not the same as the Act I route commitment: it determines which Act III branch you follow within the route already selected.
- Visit the notice board and merchants.
- Repair equipment and restock consumables.
- Create a save before entering underground areas.
- Retain quest documents, keys and special items.
3. Check conditional and route-specific content
On Iorveth’s route, check whether The Secrets of Loc Muinne has activated. This Enhanced Edition quest depends on earlier conditions and does not appear in every playthrough. If it is available, follow its investigation into the Crypt of Mages and Dearhenna’s laboratory, collect the relevant notes and continue according to the active journal entries. Finding the laboratory is not necessarily the end of every linked objective, so check the journal before leaving the area.
On Roche’s route, speak with Brigida after the Radovid negotiations if Crown Witness is available. This Enhanced Edition quest can lead into The Messenger and later Roche-route content, including Lilies and Vipers and Pacta Sunt Servanda, depending on earlier circumstances. These quests are conditional rather than guaranteed. If an expected NPC or quest does not appear, continue with the content available in the current save instead of treating the absence as a progression failure.
Other optional Loc Muinne activities include The Gargoyle Contract, From a Bygone Era, Mystic River, An Encrypted Manuscript, Poker Face: Loc Muinne, Bring it On: Loc Muinne and A Score to Settle. Complete them while their journal entries are active and before the summit if you want their rewards or story scenes. Deithwen, an optional silver sword found in the ravine near the Iorveth approach, can also be collected if it remains useful for your build. None of these activities is required to reach the campaign ending.
- Check for The Secrets of Loc Muinne on Iorveth’s route.
- On Roche’s route, speak with Brigida and check for Crown Witness.
- Complete desired contracts, challenges, investigations and crafting objectives.
- Collect Deithwen if it remains useful and available.
4. Save before the route-specific rescue choice
On Roche’s route, speak with Radovid to receive the choice between rescuing Triss and helping Roche rescue Anaïs. Create a manual save before selecting either objective. Choosing Anaïs begins Of His Blood and Bone. Follow Roche through the sewer route into the Kaedweni-held area, fight through the guards and reach Dethmold’s tower. After Anaïs is secured, Roche’s later decision about delivering her to Radovid or John Natalis affects subsequent political scenes, so retain the pre-rescue save if you want to compare those outcomes.
Choosing Triss begins Where is Triss Merigold?. Follow the Nilfgaardian investigation through the relevant camp and dungeon areas, defeat the guards and search bodies or containers for required keys and documents. Do not sell or discard quest evidence while the objective remains active. The Triss and Anaïs objectives are mutually exclusive in one Roche-route playthrough.
On Iorveth’s route, the comparable choice is rescuing Triss or helping Philippa break Saskia’s enchantment. Choosing Philippa begins The Spellbreaker. Enter the prison area through the available route, escape with Philippa and continue through the sewers. At Philippa’s house, defeat the gargoyles, search for her notes and use those notes to solve the candle arrangement at the sealed chest. Defeat the golem and recover the enchanted dagger. Choosing Triss instead begins Where is Triss Merigold? and prevents The Spellbreaker branch in that playthrough.
- Create a save immediately before selecting the rescue objective.
- Roche route: choose between Triss and Anaïs.
- Iorveth route: choose between Triss and Philippa.
- Keep keys, notes, evidence and the enchanted dagger while their objectives remain active.
5. Finish the city phase before A Summit of Mages
After completing Where is Triss Merigold?, Of His Blood and Bone or The Spellbreaker, inspect the journal for unfinished content. Complete the optional Loc Muinne quests you want before entering the amphitheater and beginning A Summit of Mages. Starting the summit leads directly into connected story events and can cause ordinary exploration opportunities or optional objectives to fail or disappear.
Make a final pre-summit save. Equip reliable steel and silver swords, repair all equipment and carry healing items, bombs and useful potions. The city phase is complete when you have entered Loc Muinne, resolved the selected rescue objective, completed the desired conditional and route-specific quests, checked the merchants and created a save immediately before A Summit of Mages.
Keep this pre-summit save separate from the Act I route backup. It can compare Triss, Anaïs or Philippa branches only within the same Roche or Iorveth campaign. To play the alternate major campaign, restore a save from before completing At a Crossroads: Vernon Roche or At a Crossroads: Scoia’tael. A save made before the timed Iorveth-sword scene is useful for replaying local Act I consequences, but it is not the required route-switch backup unless it also predates the later At a Crossroads commitment.
- Complete the selected Triss, Anaïs or Philippa objective.
- Finish desired political investigations and route-specific side quests.
- Repair equipment and restock consumables.
- Create a separate save immediately before A Summit of Mages.
- Retain a save from before the Act I At a Crossroads commitment for the alternate major campaign.
Before you move on
- Loc Muinne has been entered through For Temeria! or For a Higher Cause!.
- The Roche or Iorveth campaign is understood as a continuation of the earlier At a Crossroads commitment, not a new Act III route choice.
- The city square, inn, merchants, notice board and desired accessible areas have been checked.
- Conditional Enhanced Edition and route-specific quests have been completed where they activated and were desired.
- The intended rescue objective has been selected: Triss or Anaïs on Roche’s route, or Triss or Philippa on Iorveth’s route.
- A manual save exists before the rescue choice and another immediately before A Summit of Mages.
- A save from before the Act I At a Crossroads commitment has been retained if the alternate major campaign is planned.
References for this chapter
- The Witcher 2 Enhanced Edition official quest handbook
- Chapter 3 — Gamer Walkthroughs
- For Temeria! — Gamer Walkthroughs
- For a Higher Cause! — Gamer Walkthroughs
- A Summit of Mages, Gamer Walkthroughs
- Chapter 3: Loc Muinne — Iorveth Path, Prima Games
- Chapter 3: Loc Muinne (Roche) walkthrough
- Crown Witness — Witcher Wiki
- Crown Witness — Gamer Walkthroughs
- For Temeria! — Witcher Wiki
Act III — The Summit, Major Choices and Consequences
Act III’s summit and final sequence are determined by the major campaign route selected in Act I and by the rescue choice made in Loc Muinne. Roche’s route offers a choice between rescuing Triss and saving Anaïs. Iorveth’s route offers a choice between rescuing Triss and helping Philippa recover the enchanted dagger that can cure Saskia. After the summit, Geralt follows Síle to her tower, resolves the megascope choice, fights the route-specific dragon, returns through Loc Muinne and meets Letho. Make separate saves for same-route Act III replays and for access to the alternate major campaign.
Create the correct backup saves
Before starting A Summit of Mages, finish any Loc Muinne side quests, purchases, crafting and conversations you want to preserve. Repair your swords and armor and prepare healing items, bombs and other consumables. Create a manual save immediately before entering the summit sequence.
This save lets you replay the same Act III route with different rescue, Síle, dragon and Letho outcomes. It cannot turn a Roche campaign into an Iorveth campaign or reverse the major route selection. To play the alternate campaign, restore a save from before the Act I quest At a Crossroads: Vernon Roche or At a Crossroads: Scoia’tael and replay Acts II and III.
The earlier timed decision involving Iorveth’s sword is not the permanent universal route lock. Giving Iorveth his sword or helping Roche changes the immediate Flotsam sequence and can alter later dialogue and quest setup. The major campaign commitment occurs when Geralt completes the Roche or Iorveth version of At a Crossroads. Keep a pre-commitment save if you want access to both full Act II branches.
- Create a manual save before A Summit of Mages.
- Keep a pre-summit save for same-route Act III replays.
- Keep a pre-At a Crossroads save for the alternate major campaign.
- Confirm whether the current route is Roche or Iorveth.
- Confirm whether Triss, Anaïs or Philippa was the rescue objective.
Reach the amphitheatre
Follow the objective marker to the Amphitheatre Entrance. The companion waiting there depends on the route and on the rescue decision. If Triss was rescued, she joins the approach. If Roche’s Anaïs objective was completed, Roche accompanies Geralt. If Iorveth’s Philippa objective was completed, Iorveth accompanies Geralt.
Defeat the soldiers blocking the approach and continue to the amphitheatre. Entering the amphitheatre begins the summit sequence and removes the normal freedom to finish unrelated Loc Muinne errands, so complete desired optional content before crossing the entrance.
- Follow the marker to the Amphitheatre Entrance.
- Stay with the route-specific companion who appears.
- Finish optional Loc Muinne work before entering the amphitheatre.
Follow the summit revelation
If Triss was rescued, she reaches the summit and exposes Síle’s involvement in the conspiracy. This revelation occurs on both major campaign routes. The branch is already determined by the earlier rescue decision and cannot be changed by a later conversation.
If Triss was not rescued, the summit proceeds through Shilard Fitz-Oesterlen’s presentation involving Letho and the kingslayer investigation. The political outcome differs from the Triss branch, but the revelation is still established before the final confrontation with Letho.
On Roche’s route, choosing Anaïs rather than Triss leads into the Temerian succession storyline. On Iorveth’s route, choosing Philippa rather than Triss leads into The Spellbreaker and the search for the enchanted dagger. Choosing Triss on Iorveth’s route saves her but does not provide the dagger needed to cure Saskia later.
- If Triss was rescued, allow her summit revelation to play out.
- If Triss was not rescued, follow Shilard’s presentation involving Letho.
- Remember that the rescue decision controls this branch, not the final Letho conversation.
Follow Síle to the tower
When the summit is attacked, follow Síle through the damaged route toward her tower. Keep moving up the stairs and across the collapsing sections. The dragon’s attacks make the ascent dangerous, but the immediate objective is to reach the tower rather than stop and clear every enemy.
At the top, Síle attempts to escape through her megascope. One diamond is flawed. Interact with the megascope and remove the flawed diamond to save Síle. If you leave it in place, the unstable device explodes and kills her.
This is a separate local choice. It does not determine the major route, the earlier rescue decision or the identity of the route-specific dragon. Make another manual save before interacting with the megascope if you want to compare both outcomes.
- Reach the tower during the pursuit.
- Remove the flawed diamond to save Síle.
- Leave the diamond in place only if you want the alternate Síle outcome.
- Make a separate save before the megascope interaction if comparing results.
Resolve the route-specific dragon encounter
On Roche’s route, Geralt faces the final dragon encountered during that route’s Act III sequence. Roche players do not receive Philippa’s enchanted dagger and do not receive a Saskia-cure objective. After the fight and the following interaction, choose whether to kill the dragon or leave it alive.
On Iorveth’s route, the dragon is Saskia. If you chose Philippa rather than Triss and completed The Spellbreaker, Philippa provides the enchanted dagger. During the post-fight interaction, use the dagger when the game presents the opportunity to break the spell and restore Saskia’s human form.
If you chose Triss on Iorveth’s route, the dagger is unavailable for this sequence. Follow the available choice to kill Saskia or leave her alive under the spell. Do not search Roche’s route for a Saskia cure prompt, and do not expect the later Letho decision to create one.
During the fight, cast Quen before closing in, dodge the dragon’s melee attacks and fire, and strike after its committed attacks. When the dragon retreats and damages the tower, follow the rooftop route. Move away from its breath path and complete the prompted interactive actions when Geralt jumps onto the dragon or the combat transitions.
- Roche route: resolve the final dragon by killing or sparing it.
- Iorveth-Philippa route: use the enchanted dagger to cure Saskia.
- Iorveth-Triss route: kill Saskia or leave her alive under the spell.
- Use Quen, dodge fire and complete the rooftop prompts.
Return through Loc Muinne and meet Letho
After the dragon sequence, follow the objective back through Loc Muinne. The enemies, surviving companions and precise return route can vary according to the route and earlier decisions. Clear the soldiers blocking the way and continue to the designated meeting point instead of returning to ordinary exploration.
Geralt eventually meets Letho. Listen to his explanation of the kingslaying operation and the plan to destabilize the Northern Kingdoms. The final player-controlled decision is whether to spare Letho or fight him.
If you fight, keep Quen active when possible, avoid his strongest frontal attacks and strike after he finishes an attack. Sparing Letho ends the confrontation without a duel. This decision occurs after the summit, Síle and dragon outcomes. It cannot change the rescue branch, Síle’s fate, the dragon’s identity or Saskia’s cure status.
- Follow the post-dragon objective through Loc Muinne.
- Reach Letho and hear his explanation.
- Spare Letho or defeat him in the final duel.
- Do not expect this decision to rewrite earlier Act III results.
Verify the ending and preserve replay saves
Allow the post-Letho scenes and epilogue to finish before loading another save. The conclusion reflects the rescue choice, the summit revelation, Síle’s fate, the route-specific dragon result and Letho’s fate.
For Roche, verify that the route’s final dragon was resolved by killing or sparing it. For Iorveth, verify whether Saskia was cured with the dagger, killed or left alive under the spell. Then verify whether Letho was spared or defeated.
Keep the pre-summit save for same-route comparisons. It can replay the summit, Síle, dragon and Letho sequences, but it cannot open the alternate Act II campaign. To play the other major route, restore the pre-At a Crossroads save and replay the route commitment, Act II and Act III.
- Watch the complete post-Letho sequence.
- Confirm the summit revelation matches the rescue decision.
- Confirm Síle’s fate.
- Confirm the correct Roche or Iorveth dragon outcome.
- Confirm Letho’s fate.
- Keep both the pre-summit and pre-At a Crossroads saves when available.
Before you move on
- The summit concluded with the conspiracy exposed through Triss or through Shilard’s presentation involving Letho.
- Geralt reached Síle’s tower and either removed the flawed diamond or allowed the megascope to kill Síle.
- On Roche’s route, the final dragon was killed or spared.
- On Iorveth’s route, Saskia was cured with the dagger, killed or left alive under the spell according to the branch.
- Geralt returned through Loc Muinne and reached Letho.
- Letho was spared or defeated.
- The post-Letho epilogue and final title or credits sequence played.
Final Confrontations: Letho and Post-Summit Resolution
After the summit and Síle’s tower sequence, Geralt must resolve the route-specific dragon encounter, return through Loc Muinne, defeat the hostile group blocking the way, and meet Letho in the Temerian quarters. Roche-route players face the ordinary dragon. Iorveth-route players face Saskia, who can be cured only after the Philippa branch, The Spellbreaker and recovery of Philippa’s enchanted dagger. The final conversation with Letho allows Geralt to spare him or begin a duel. This late decision does not change the earlier rescue, Síle or dragon branch.
Resolve the route-specific dragon encounter
Continue the active objective after the summit until Geralt reaches Síle’s tower and the dragon encounter. Before proceeding, make a separate manual save if the game permits one. Equip the silver sword, your preferred armor and the consumables you use reliably in difficult fights. Keep Quen available for mistakes, but do not rely on it instead of dodging or repositioning.
On the Roche route, the enemy is the ordinary dragon. Fight with the silver sword and avoid standing directly in front of it while it is facing Geralt. Close in after a committed attack, deliver a short attack sequence, then retreat before the dragon turns or answers with fire, a sweeping strike or a knockdown. Roll away from fire and large body movements rather than trying to block them. When the encounter reaches its decision point, follow the available option to kill the dragon or leave it alive. Roche-route players do not receive a Saskia-cure interaction and cannot use Philippa’s dagger here.
On the Iorveth route, the dragon is Saskia under magical control. The cure is available only if Geralt followed Philippa rather than Triss in Act III, completed The Spellbreaker and obtained Philippa’s enchanted dagger. When the game presents the relevant interaction after the fight, use the dagger to break the spell. If Geralt followed Triss, or if the dagger was not obtained, the cure interaction is unavailable. Choose the available option to kill Saskia or leave her alive. The later Letho conversation cannot create a missing cure prompt.
- Reach Síle’s tower through the summit aftermath.
- Use the silver sword for the dragon encounter.
- On Roche’s route, resolve the ordinary dragon through the available kill-or-leave choice.
- On Iorveth’s route, use the enchanted dagger only if the Philippa branch provided it.
- Without the dagger, choose the available Saskia outcome instead of searching for an unavailable cure.
Return to the Loc Muinne ruins
After the dragon sequence, Geralt returns to the ruined entrance of Loc Muinne and must climb back into the city. The companion waiting there depends on the route and Act III choices. On the Roche route, Geralt meets either Roche or Triss. On the Iorveth route, he meets either Iorveth or Triss. These scenes are not interchangeable, so do not assume that the same companion appears in every playthrough.
Speak with the companion and discuss the dragon and Philippa’s involvement. The conversation then points Geralt toward Letho, who is waiting in the Temerian quarters. This is an aftermath sequence, not a new major-route decision: the dragon’s identity, Síle’s fate, rescue result and Saskia’s fate have already been determined.
Before leaving the ruins, prepare for human enemies. Equip the steel sword, check your armor, place Quen and healing items on accessible quickslots, and carry bombs if they are part of your normal combat plan. If a manual save is available, keep one before the hostile encounter so the return fight can be repeated without replaying the dragon.
- Meet the route-dependent companion at the ruined entrance.
- Discuss the dragon and Philippa.
- Confirm that Letho is waiting in the Temerian quarters.
- Switch to the steel sword for the soldiers ahead.
- Save before the return encounter when possible.
Defeat the hostile soldiers on the route to Letho
Follow the route toward the Temerian quarters. A hostile group blocks the way. Its identity and circumstances vary with earlier political and rescue choices. On Roche-route outcomes, the soldiers can be connected to the aftermath involving Henselt, Anaïs and the Temerian command. If Geralt chose Triss rather than Anaïs earlier, Roche may be found wounded near soldiers who captured him. On Iorveth-route outcomes, the soldiers are encountered while attacking sorceress apprentices.
Cast Quen before entering the group and approach from the edge of the area instead of running into its center. Prioritize ranged attackers and any enemy who can interrupt Geralt from a distance. Use Aard to interrupt a dangerous opponent, Yrden to restrict movement and Igni to pressure clustered targets when the situation allows. Keep attack strings short, roll away from counterattacks and reposition so the group cannot surround Geralt.
The route normally advances after the active enemies are defeated. If the objective does not update, search the nearby ruins and side passages for a surviving soldier, including the area behind Geralt. Do not simply run through the encounter while enemies remain active; they can attack from behind and delay the transition.
- Cast Quen before entering the hostile group.
- Prioritize ranged or especially dangerous enemies.
- Use Signs to interrupt, slow or separate opponents.
- Defeat every active hostile before continuing.
- Search nearby ruins if the objective fails to update.
Reach Letho in the Temerian quarters
Continue through the cleared ruins to the Temerian quarters or camp. Letho is waiting there. Depending on the route and earlier rescue choices, Triss may already be present or may arrive during the scene. Her presence is not guaranteed because it depends on the Act III branch and the events surrounding the summit.
Speak with Letho and work through the available questions about the kingslayings, the sorceresses, the Nilfgaardian connection and Geralt’s lost memories. Continue through the conversation before selecting the final response if you want the full explanation. Letho explains his motives and the connection between the two witchers.
At the end of the conversation, Geralt can accept Letho’s explanation and let him leave, or select the hostile response and begin the duel. If you intend to spare him, do not attack before the conversation reaches its final response. A save made before entering the quarters or before the final response allows you to compare the two outcomes without replaying the dragon and soldier encounter.
- Enter the Temerian quarters or camp.
- Question Letho about the kingslayings and his motives.
- Complete the available dialogue before choosing the final response.
- Choose either to let Letho leave or to begin the duel.
- Reload the pre-Letho save to compare the outcomes.
Fight Letho if the duel begins
If Geralt chooses the hostile response, the final duel takes place in a comparatively open area. Keep Quen active while closing distance and avoid long attack strings. Wait for Letho to finish a committed move, roll away from the retaliation and counter while he is recovering.
Yrden can restrict Letho when he remains inside its area, while Igni can apply pressure from short range if there is a safe opening. Strong attacks are most reliable after he misses or completes a long animation. If Quen breaks, create distance before recasting it rather than trying to activate the Sign while Letho is attacking at close range.
When Letho’s health is depleted, the duel ends and the closing dialogue and departure scenes follow. There is no additional mandatory boss phase after this fight. Continue through the remaining scenes instead of searching Loc Muinne for another required opponent or final loot objective.
- Refresh Quen before re-entering melee range.
- Attack after Letho completes a committed move.
- Use Yrden or Igni only when they create a safe opening.
- Retreat before recasting Quen if the shield breaks.
- Continue to the closing scenes after the duel ends.
Confirm completion and preserve alternate outcomes
The campaign-ending sequence is complete after Geralt has resolved the route-specific dragon, cleared the return encounter, reached Letho and completed the final conversation or duel. The departure scenes and ending narration then reflect the Roche or Iorveth route, the dragon result, the rescue choices and other Act III flags.
To compare Letho outcomes, reload the save made before the final conversation and choose the other response. To compare dragon, Saskia or rescue results, restore an earlier Act III save from before the relevant branch. A post-Letho save cannot create an unavailable Saskia cure or change the earlier route decisions.
To play the alternate major campaign, restore the primary save made before completing At a Crossroads: Vernon Roche or At a Crossroads: Scoia’tael and replay the later acts. A save from before the timed Iorveth-sword scene is useful only for comparing the earlier Act I consequences. It is not a replacement for the pre-At-a-Crossroads save and should not be described as the major Roche-or-Iorveth route backup.
Keep the completed save if you want to preserve the selected campaign route and Letho result. The final completion check is satisfied when the ending departure scene, narration or credits have appeared.
- The ordinary dragon has been resolved on Roche’s route, or Saskia has been killed, left alive or cured on Iorveth’s route according to the available branch.
- The return through Loc Muinne is complete.
- The route-dependent soldiers are defeated.
- Geralt has entered the Temerian quarters or camp and spoken with Letho.
- Letho has been spared or defeated.
- The final departure scene, ending narration or credits have appeared.
- The pre-At-a-Crossroads save is retained if the alternate major campaign is still desired.
Before you move on
- The ordinary dragon has been resolved on Roche’s route, or Saskia has been killed, left alive or cured on Iorveth’s route according to the available branch.
- The return through Loc Muinne is complete and the route-dependent hostile soldiers are defeated.
- Geralt has entered the Temerian quarters or camp and spoken with Letho.
- Letho has been spared or defeated.
- The final departure scene, ending narration or credits have appeared.
- A pre-At-a-Crossroads save remains available if the alternate Roche or Iorveth campaign is required.
After the Credits: What You Keep and Alternate-Ending Access
One completed Roche or Iorveth campaign satisfies the main-campaign completion goal. After the route-specific dragon sequence, the return encounter and the meeting with Letho, the game proceeds to its closing narration and does not reopen Loc Muinne as a free-roam post-game area. The GOG PC Enhanced Edition does not provide an official New Game Plus mode. Use named manual saves and external backups to compare branches. A pre-Letho save compares Letho outcomes, a pre-rescue save compares the major Act III branch on the same route, and a save from before the Act I At a Crossroads commitment is required to access the opposite major campaign. The earlier timed Iorveth-sword decision changes immediate Flotsam consequences, but it is not the permanent Roche-or-Iorveth campaign switch. The GOG listing identifies this edition as The Witcher 2: Assassins of Kings Enhanced Edition for PC, released April 17, 2012, with additional campaign content, Arena Mode, tutorial improvements and Dark Mode.
Finish one campaign and preserve the final branch points
Complete the route-specific Act III objectives, the summit, the Síle sequence, the dragon encounter and the return through Loc Muinne. On Roche’s route, the major rescue choice is between helping Roche recover Anaïs and going after Triss. On Iorveth’s route, the corresponding choice is between pursuing Philippa and going after Triss.
Roche-route players face the ordinary dragon. Resolve that encounter using the choices available after the fight: Geralt can kill the dragon or allow it to live. Roche players do not receive a Saskia-cure objective, and no later Letho decision changes this result.
Iorveth-route players encounter Saskia in dragon form. If you pursued Philippa and completed The Spellbreaker, Geralt has the enchanted dagger needed to break Saskia’s spell after the fight. If you pursued Triss instead, the dagger is unavailable and the cure cannot be performed; follow the available choice to kill Saskia or leave her alive. The official quest handbook describes the dagger as conditional on freeing Philippa rather than Triss, and the ending guidance likewise separates Saskia’s cure from the other Act III branches.
After the dragon sequence, clear the route-dependent return encounter and continue to the meeting with Letho. Create a manual save immediately before speaking to him, using a label such as BEFORE LETHO ROCHE or BEFORE LETHO IORVETH. Fighting Letho or letting him go changes his fate, but it cannot rewrite the earlier rescue choice, Síle’s outcome or the dragon result.
Allow the final conversation, cinematic and epilogue to finish. The concrete completion check is reaching the closing narration or credits after the Letho sequence. The completed file does not become a new Loc Muinne chapter and does not provide an ending-selection screen for changing earlier decisions.
- Complete the chosen route’s Act III objectives.
- Resolve the correct route-specific dragon encounter.
- On Iorveth’s route, use the enchanted dagger only if Philippa’s branch and The Spellbreaker were completed.
- Finish the return encounter and Letho sequence.
- Create and retain a manual save before speaking to Letho.
- Allow the closing narration or credits to play.
Compare late outcomes on the same major route
Use the pre-Letho save to compare sparing Letho with fighting him. This is the shortest replay because it preserves the preceding rescue, summit, Síle and dragon decisions.
Use a pre-rescue save to compare the major Act III branch on the same route. Roche players can compare the Anaïs and Triss objectives. Iorveth players can compare the Philippa and Triss objectives. Only the Iorveth Philippa branch supplies the enchanted dagger and therefore the possibility of curing Saskia.
A late Roche save cannot be changed into an Iorveth Saskia storyline by altering the Letho decision. An Iorveth save cannot be converted into Roche’s Anaïs storyline through a late dialogue choice. The major route was selected earlier in Act I, and the Act III rescue branch is already fixed when the late epilogue begins.
For earlier political outcomes, restore an Act II save made before the relevant choice. A completed Roche save contains Roche-route events such as the Kaedweni and Henselt outcomes. A completed Iorveth save contains the Vergen and Stennis outcomes associated with that campaign. Keep branch copies separate so a replay does not overwrite the only version of a useful state.
- Use a pre-Letho save for Letho comparisons.
- Use a pre-rescue save for same-route Act III comparisons.
- Use an Iorveth Philippa-branch save if you want to compare Saskia cured versus not cured.
- Use an earlier Act II save for Henselt, Stennis or other political comparisons.
- Never overwrite the only copy of a branch save.
Back up the GOG PC save directory
Exit the game before copying or replacing save files. The PC save directory is Documents\Witcher 2\gamesaves. CD PROJEKT RED’s technical-support instructions identify this folder as the location for Witcher 2 saves and also recommend managing excessive save files if crashes occur.
Copy the complete gamesaves folder to a location outside the active Witcher 2 directory. Use descriptive backup folders such as BEFORE SWORD DECISION, BEFORE CROSSROADS ROCHE, BEFORE CROSSROADS IORVETH, ROCHE COMPLETE and IORVETH COMPLETE. Record the major route, the sword decision, the Act III rescue choice, whether Saskia was cured and Letho’s fate.
If using GOG Galaxy cloud saves, do not replace local files while the game or Galaxy is synchronizing. Close the game, allow synchronization to finish, then copy or restore the folder. GOG lists Cloud Saves support for the Enhanced Edition, so treat the local folder and synchronized copy as separate recovery points.
After restoring files, launch the game and inspect Load Game before continuing. If the expected save is missing, close the game and restore the previous active folder rather than creating new saves over an unverified state.
- Close the game before handling files.
- Back up Documents\Witcher 2\gamesaves.
- Store the backup outside the active Witcher 2 folder.
- Label backups by route and decision state.
- Wait for GOG Galaxy synchronization to finish before replacing files.
- Verify the restored save in Load Game.
Restore the opposite major campaign
The permanent Roche-or-Iorveth campaign choice occurs in Act I when the two mutually exclusive quests At a Crossroads: Vernon Roche and At a Crossroads: Scoia’tael become available. Completing the Roche quest leads to Roche’s Act II campaign; completing the Scoia’tael quest leads to Iorveth’s Act II campaign. These quests are the major route commitment, not merely late confirmations of a decision already fixed by the sword scene.
The earlier timed encounter during The Assassins of Kings asks whether Geralt returns Iorveth’s sword or helps Roche capture him. Create a save before that scene if you want to replay its immediate Act I consequences, including the local Flotsam branch and later dialogue. However, either sword result still leaves the later At a Crossroads commitment available. A pre-sword save is useful for local comparison, but it is not the backup needed to access both complete Act II campaigns.
Before restoring anything, copy the current active gamesaves folder to a temporary location. Close the game, replace the active gamesaves folder with the backup containing a save from before the At a Crossroads commitment, launch the game and confirm that the expected file appears in Load Game.
Load the pre-commitment save and make a new manual save before selecting a faction. Choose At a Crossroads: Vernon Roche for Roche’s campaign or At a Crossroads: Scoia’tael for Iorveth’s campaign. The two campaigns then diverge substantially through Act II before returning to Loc Muinne for different route-specific Act III content.
Replay the selected campaign through Act II, the transition to Loc Muinne and the Act III conclusion. Make new saves at the start of Act III, before the rescue decision and immediately before Letho. One completed route is enough to satisfy the campaign goal; the alternate route is optional replay content.
- Preserve the completed route before restoring anything.
- Keep a separate pre-sword save for Act I consequence comparisons.
- Restore a save from before the At a Crossroads commitment to access the opposite major campaign.
- Verify the restored file in Load Game.
- Choose the opposite faction when the two Crossroads quests are available.
- Create new Act III, rescue-branch and pre-Letho saves.
- Replay Acts II and III for the alternate route.
Do not look for New Game Plus
The Enhanced Edition includes additional campaign content, revised introductory material and cinematics, Arena Mode, a tutorial system and Dark Mode. Arena Mode is a separate combat activity for practicing fights and earning its own rewards; it does not turn a completed campaign into a new story run with Geralt’s existing talents, equipment and inventory.
No official New Game Plus mode is established for this GOG Enhanced Edition. Start a fresh campaign when you want a clean decision history, a different build or a new difficulty run. Geralt’s progression must be rebuilt from the beginning.
Restore the pre-At-a-Crossroads backup when you want the opposite major route. Use the pre-sword save only when you want to compare its Act I consequences or preserve a particular later dialogue state. Use pre-rescue and pre-Letho saves for efficient ending comparisons. Do not use the final campaign save as a substitute for either earlier backup.
- Start a new campaign for fresh progression.
- Restore a pre-At-a-Crossroads save for the opposite major route.
- Use a pre-sword save for the earlier Act I choice and its consequences.
- Use pre-rescue and pre-Letho saves for late branch comparisons.
- Do not confuse Arena Mode or Dark Mode with New Game Plus.
Before you move on
- At least one completed Roche or Iorveth route reaches the final Letho sequence and closing epilogue.
- A separate pre-Letho save is preserved.
- A pre-rescue save exists for same-route Act III comparisons.
- A pre-At-a-Crossroads backup exists for the alternate major route.
- A separate pre-sword save exists if Act I consequences are to be compared.
- The active gamesaves folder has been copied outside Documents\Witcher 2.
- A restored backup appears in Load Game before the alternate route is started.
- Roche’s ordinary-dragon outcome is recorded separately from Iorveth’s Saskia outcome.
- If comparing Saskia outcomes, the backup identifies whether Philippa’s branch, The Spellbreaker and the enchanted dagger were obtained.
- No official New Game Plus option is available in the Enhanced Edition.
- Backup labels identify the route and relevant outcomes, including the Act III rescue and Letho’s fate.
Finishing up
At least one complete campaign route has been finished through the Act III ending sequence in Loc Muinne, with the final narration or credits reached.
The chosen Roche or Iorveth Act II route has been selected by completing the corresponding At a Crossroads quest in Act I and completed, followed by its Act III summit, route-specific rescue branch, dragon sequence and Letho confrontation.
On Roche’s route, the final ordinary-dragon encounter has been resolved and the campaign epilogue has played. On Iorveth’s route, Saskia has been cured only if the Philippa branch was chosen and the enchanted dagger was obtained; otherwise the available outcome is to kill Saskia or leave her alive.
Optional Enhanced Edition campaign quests may be completed separately if desired; Arena Mode and Dark Mode are not required for main-campaign completion.
A backup exists before the At a Crossroads route commitment and, preferably, before the timed sword scene, Act III rescue choice and final Letho conversation. The alternate major route requires restoring the pre-At-a-Crossroads save and replaying Acts II and III.
Choose your next gameScreenshots & video
Game imagery for reference. Follow the written chapters above for the route and strategies.
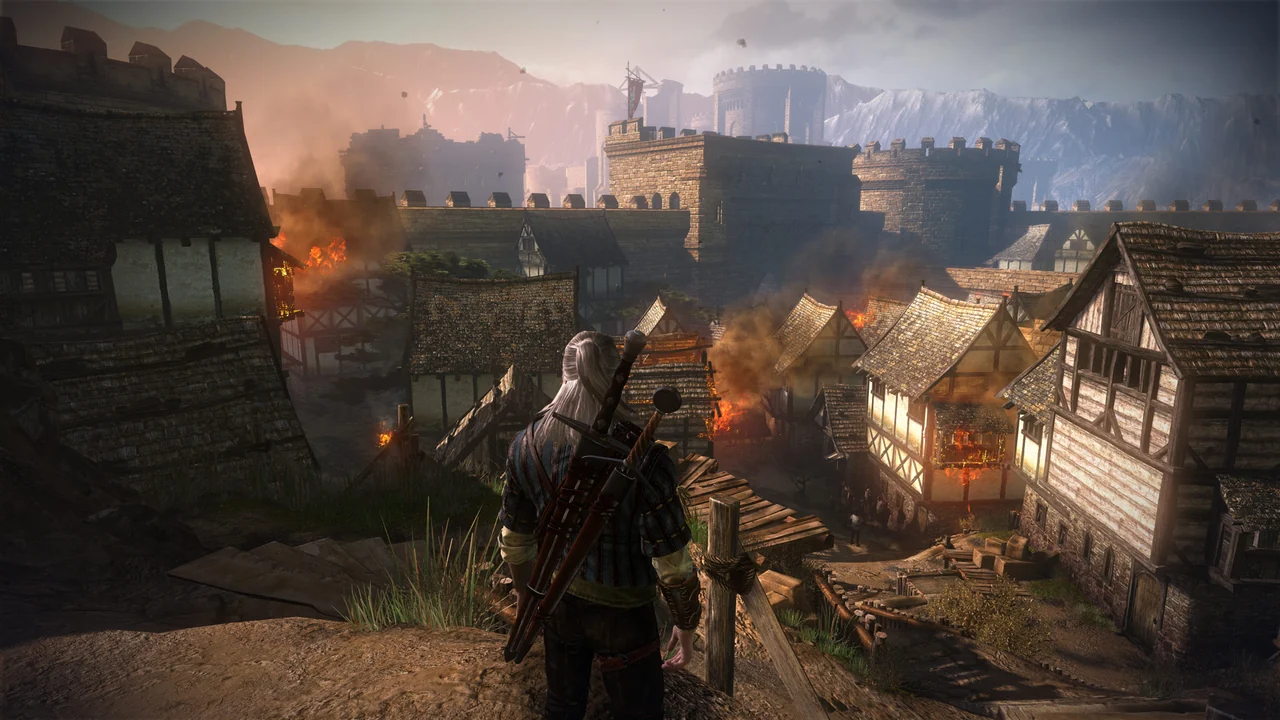
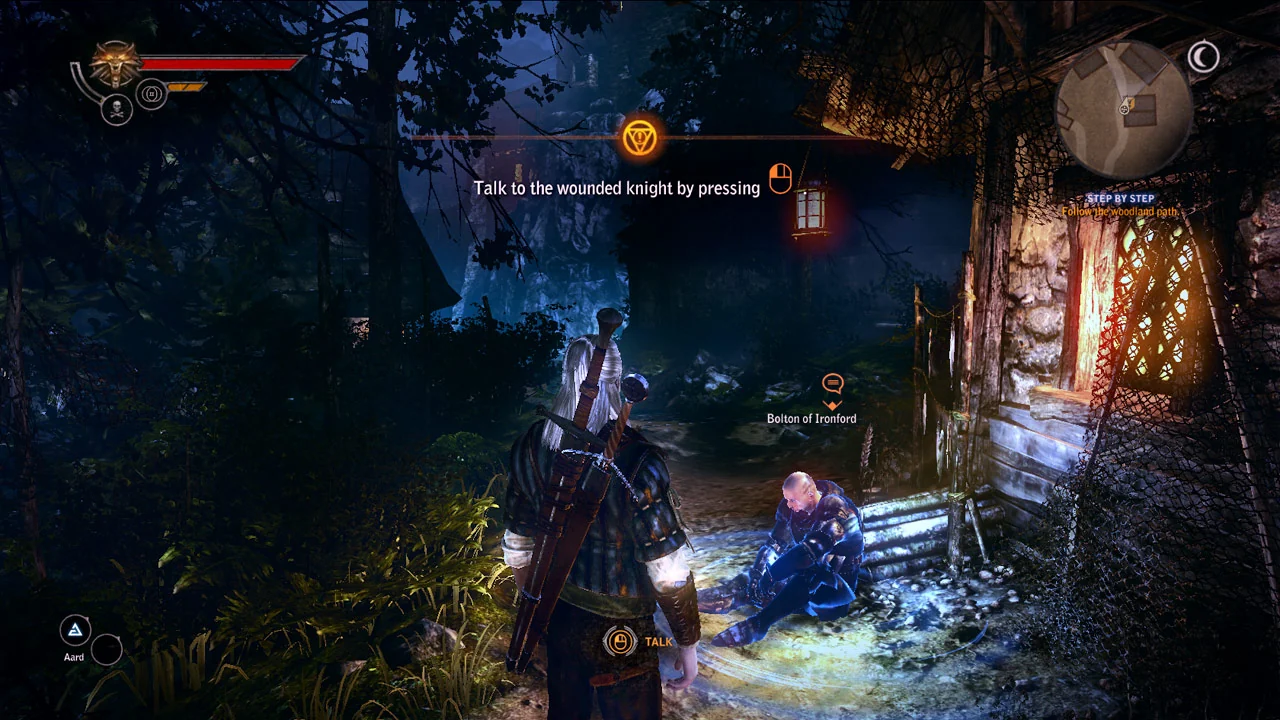
Sources & references
Our original guide draws on the references below. Check the edition at the top of this page before following controls or unlock requirements.
- The Witcher 2: Assassins of Kings Enhanced Edition on GOG
- The Witcher 2 storage
- The Witcher 2 FAQ: GOG save location
- The Witcher 2: Assassins of Kings save game data location
- At a Crossroads: Scoia’tael — The Official Witcher Wiki
- At a Crossroads: Scoia'tael
- The Witcher 2: Assassins of Kings Enhanced Edition — GOG.com
- The Witcher 2: Enhanced Edition Game Manual, CD PROJEKT RED
- The Witcher 2 Walkthrough: Prologue Story Part 1
- The Witcher 2 Walkthrough: Prologue Story Part 2
- The Witcher 2 Walkthrough: Prologue Story Part 3
- The Witcher 2 Walkthrough: Prologue Story Part 4
- Dungeon of the La Valettes Walkthrough
- The Witcher 2 Chapter 1 Walkthrough
- The Witcher 2 Enhanced Edition official quest handbook
- The Witcher 2: Assassins of Kings Guide and Walkthrough
- At a Crossroads: Scoia’tael — Gamer Walkthroughs
- The Witcher 2 Mystic River Quest Walkthrough
- The Witcher 2: Assassins of Kings — PC Game Manual
- Game crashes — The Witcher 2: Assassins of Kings Technical Support
- Chapter 1: Flotsam — Prima Games
- The Witcher 2 Assassins of Kings: At a Crossroads Vernon Roche — Gamepressure
- Chapter 2 — Roche Path walkthrough
- The Blood Curse — Roche Path
- The Path to Visionary — Roche Path
- Courage Symbolized — Roche Path
- Death Symbolized — Roche Path
- Faith Symbolized — Roche Path
- The Assassins of Kings — Roche Path
- The Eternal Battle — Roche Path
- The Spear of Destiny — Roche Path
- Where is Triss Merigold? — Roche Path
- The Siege of Vergen — GameBanshee
- Act II Introduction: Roche — GameBanshee
- Act II Introduction: Iorveth — GameBanshee
- GameBanshee: Prelude to War: Aedirn — Iorveth’s Path
- GameBanshee: The War Council — Iorveth’s Path
- GameBanshee: Subterranean Life — Iorveth’s Path
- GameBanshee: Hunting Magic — Iorveth’s Path
- Royal Blood — GameBanshee
- Where Is Triss Merigold? — GameBanshee
- GameBanshee: A Matter of Life and Death — Iorveth’s Path
- GameBanshee: The Walls Have Ears — Iorveth’s Path
- GameBanshee: Baltimore’s Nightmare — Iorveth’s Path
- GameBanshee: Hatred Symbolized — Iorveth’s Path
- GameBanshee: The Eternal Battle — Iorveth’s Path
- Vergen Besieged — GameBanshee
- Gamer Walkthroughs: The Walls Have Ears — Iorveth’s Path
- Formulae and formula pinning reference
- The Witcher 2 - Patch 3.2 - UI Improvements
- Chapter II: The Kaedweni Camp, Roche path
- Chapter 3: Loc Muinne (Roche) walkthrough
- Loc Muinne overview and Vran armor quest information
- The Witcher 2 Skills — The Official Witcher Wiki
- The Witcher 2: Enhanced Edition — The Official Witcher Wiki
- The Witcher 2 - Manual Installation/Update, CD PROJEKT RED Support
- The Nekker Contract — Gamer Walkthroughs
- The Endrega Contract — Gamer Walkthroughs
- The Harpy Contract — Gamer Walkthroughs
- The Queen Harpy Contract — Gamer Walkthroughs
- Hunting Magic — Gamer Walkthroughs
- The Rotfiend Contract — GameBanshee
- The Gargoyle Contract — Gamer Walkthroughs
- An Encrypted Manuscript — Gamer Walkthroughs
- The Witcher 2 Walkthrough — GameBanshee
- Suspect: Thorak — GameBanshee
- Vergen City — GameBanshee
- Lost Lambs — GameBanshee
- Lilies and Vipers — Witcher Wiki
- Lilies and Vipers walkthrough, GameBanshee
- The Secrets of Loc Muinne walkthrough, GameBanshee
- For Temeria!
- Chapter 3: Loc Muinne — Iorveth Path, Prima Games
- Chapter 3 — Gamer Walkthroughs
- For Temeria! — Gamer Walkthroughs
- For a Higher Cause! — Gamer Walkthroughs
- A Summit of Mages, Gamer Walkthroughs
- Crown Witness — Witcher Wiki
- Crown Witness — Gamer Walkthroughs
- For Temeria! — Witcher Wiki
- Enter the Dragon, Gamer Walkthroughs
- The Spellbreaker walkthrough
- A Summit of Mages, GameBanshee
- The Witcher 2 decision checklist, Witcher Wiki
- Epilogue - Roche Path walkthrough
- Epilogue - Iorveth Path walkthrough
- The Witcher 2 decision checklist
- The Witcher 2 ending
About the game & collecting notes
- Platform
- PC (GOG)
The Iorveth Act II route begins with Prelude to War: Aedirn and The War Council, then follows the cure and curse objectives: Subterranean Life, Hunting Magic, Where is Triss Merigold?, Royal Blood, A Matter of Life and Death, Hatred Symbolized, Death Symbolized, The Eternal Battle and Vergen Besieged. Suspect: Thorak and The Walls Have Ears are optional, order-sensitive Royal Blood evidence investigations that can affect the Stennis judgment and additional rewards, but they are not prerequisites for delivering Saskia’s cure or finishing the main campaign. The timed Iorveth-sword decision in Act I changes the immediate Flotsam consequences; the later At a Crossroads: Vernon Roche or At a Crossroads: Scoia’tael commitment determines whether Act II follows Roche or Iorveth. The chapter must distinguish required progression from optional Vergen investigations and identify the pre-siege cutoff.
Darryl Polo
Darryl Polo loves tinkering with emulation and revisiting retro games. He enjoys exploring how old favorites play on different setups and sharing what he learns along the way. At Joking Joystick, he writes about the games, hardware, and small discoveries that keep the hobby fun.
Our editorial standardsFound a step that needs another look? Help us improve this guide.