The Legend of Zelda — Complete Walkthrough (Original NES, North America)
Step-by-step walkthrough for the original Nintendo Entertainment System release of The Legend of Zelda (North America). Covers safe starting progression, overworld routing, each Underworld dungeon through the final showdown with Ganon, required items (including Silver Arrows), and optional completion targets and the unlocked Second Quest.

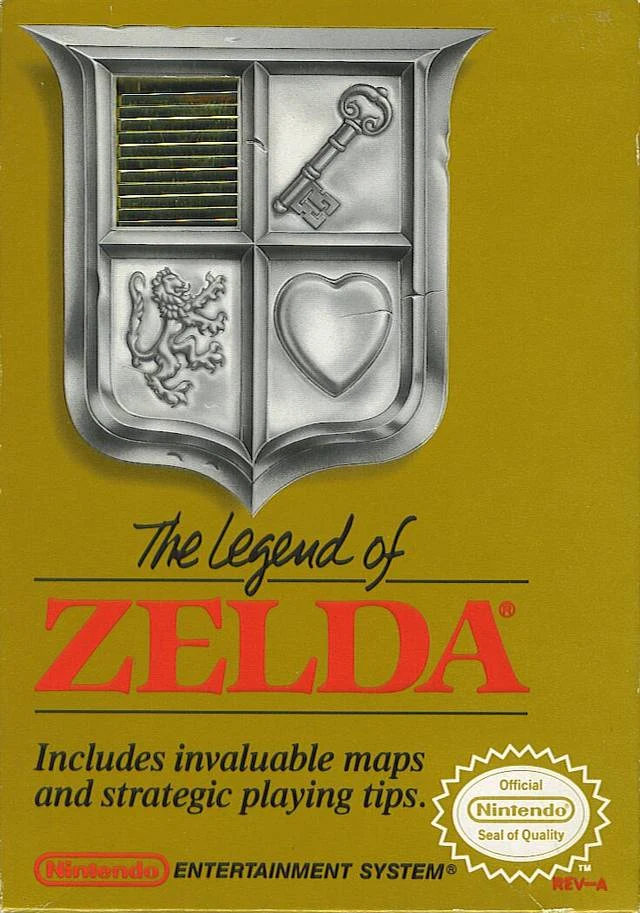
Find a copy
The Legend of Zelda Nintendo Entertainment System
We may earn a commission if you buy through these links, at no extra cost to you. As an Amazon Associate I earn from qualifying purchases.
Opens retailer search results. Check the model, edition, seller, availability and current price before buying.
Before you begin
You are holding an open-ended overhead-action adventure: the original Legend of Zelda for the Nintendo Entertainment System.
This guide assumes the original North American cartridge release and walks you from the opening cave and Wooden Sword to the final confrontation at Death Mountain.
Follow the sections in order if you prefer a safe, item-driven route; use the optional chapters for first-quest upgrades and the Second Quest after the ending.
You do not need to memorize the entire world at once — use the overworld routing chapter and dungeon chapters in sequence.
Each dungeon chapter identifies the required route, dungeon item, boss method, recovery options, and the progress check needed before moving on.
The guide distinguishes required progress from optional rewards, including the Red Ring, Magical Sword, Heart Containers, shops, and bomb-capacity upgrades.
Set yourself up for the run
Know the NES controls and save behaviour: A and B are the action buttons, Start opens the equipment screen, Select pauses and resumes active play, and normal cartridge saving is handled through the Game Over menu.
Read the instruction booklet and map insert if available; they contain the original control, item, and overworld information.
Aim to get the Wooden Sword, then gather Heart Containers and supplies before committing to harder dungeons.
Buy bombs early and preserve rupees for arrows after obtaining the Bow, food when a Goriya obstacle requires it, and potions when a difficult route justifies them.
The White Sword requires five total Heart Containers. The Magical Sword requires twelve total Heart Containers. Both are optional for completion.
Sword beams are available only at full health. Use bombs for suspected bombable walls, the Boomerang to stun or retrieve drops, and the Recorder later for its verified first-quest functions and dungeon warp.
Keep the Silver Arrows as a mandatory Dungeon 9 objective. The Red Ring is optional defensive preparation, not a completion prerequisite.
Starting Out: Controls, Save, and the First Cave
Begin the original North American NES first quest by learning the controller, taking the Wooden Sword from the opening cave, understanding the starting Shield, and establishing a safe routine for health, rupees, and supplies. The first cave gives Link the sword only; the stronger Magic Shield, also called the Big Shield, must be purchased later.
Learn the NES controller before leaving the starting screen
Use the Control Pad to move Link through the overworld and labyrinth rooms. Press A to swing the sword. Press B to use the gadget currently selected in the item display, such as bombs, the boomerang, or a candle. Press Start to switch between the main play screen and the subscreen. On the subscreen, move left or right with the Control Pad to select the item that B will use.
Press Select to pause active play. Press Select again to resume. Do not confuse Select with Start: Start opens and closes the equipment subscreen, while Select handles pausing during normal play. Link begins with three hearts, a basic Shield, and no sword.
The starting Shield is passive. When Link is not attacking, it can block certain attacks coming from the front, including the rocks thrown by Octoroks and the spears thrown by Moblins. It does not stop every projectile or enemy attack, so do not stand still and assume that all damage will be blocked.
- Confirm that A swings the sword after you obtain it.
- Confirm that B uses the item shown in the B-item display.
- Use Start to open and close the subscreen.
- Use Select to pause and resume active play.
- Identify the basic Shield separately from the later Magic Shield.
Enter the cave directly north of the starting position
At the beginning of the first quest, Link stands on the opening overworld screen with a cave immediately ahead, to the north. Walk straight into that cave. An Old Man offers the Wooden Sword; move Link into the sword to take it. This is the required opening pickup and does not require a fight, rupees, or a dungeon item.
Leave the cave only after checking the subscreen and confirming that the Wooden Sword is displayed. Press A once on the overworld to test the forward sword attack. The sword is Link's primary attack and is more dependable than trying to use gadgets before you have learned the first area's enemy patterns.
Link's starting Shield is already present when the game begins. The opening cave does not provide the larger Magic Shield. That upgrade is obtained later by paying for it at a shop, so do not search the starting cave for a second shield.
- The Wooden Sword appears in the equipment display.
- A produces a sword attack on the overworld.
- The starting Shield is visible before you begin exploring.
- Do not confuse the starting Shield with the later Magic Shield.
Use a cautious combat and recovery loop
Fight from the edge of your sword's reach whenever possible. Face an enemy, make one controlled attack, then step away or reposition instead of trading contact damage. Octoroks and Tektites near the opening area are useful practice, but avoid chasing an enemy into another enemy or toward the edge of the screen. New screens can place enemies close to Link, so enter with the sword facing the direction of travel when practical.
The life meter at the top of the screen shows Link's remaining health. A red heart means available life; a white heart represents lost life. Enemy drops can include hearts, and Fairy Springs restore the life meter, but neither result is guaranteed after every fight. If a screen becomes too dangerous, retreat through the previous screen, recover what you can, and approach again rather than repeatedly accepting the same damage.
When every heart is red, a sword attack also sends a sword beam across the screen. The beam is available only at full health. Use it to begin fights against distant enemies or to soften a dangerous screen before closing in. Taking even a small amount of damage removes this ability until the lost health is restored.
- Attack from a safe distance and retreat after a sword strike.
- Leave a crowded screen instead of forcing a losing fight.
- Restore all hearts when you want to use sword beams.
- Use sword beams to begin fights against distant targets.
Understand the original cartridge save and continue system
The North American NES cartridge uses battery-backed memory, but it does not provide a normal save command from the subscreen during ordinary play. When Link's power reaches zero, the Game Over menu offers Continue, Save, and Retry. Use Select to move the heart cursor to an option, then press Start to confirm it.
Continue preserves Link's possessions and restores three hearts. If the Game Over occurred inside a labyrinth, Continue returns Link to that labyrinth's entrance; otherwise it returns him to the beginning of the adventure. Save stores the game's information in the cartridge memory for later play. Retry discards the current unsaved game information and returns to the character-selection menu, so do not choose it accidentally.
For a normal session, make meaningful progress before deliberately taking a Game Over if you need to record it. The manual also warns that, after saving, you should keep the console's RESET switch pressed while turning off the power. This is the original cartridge procedure and is different from modern games that save instantly from a pause menu.
- Know that Select moves the Game Over cursor and Start confirms the highlighted option.
- Use Continue to resume with possessions and three hearts.
- Use Save when you want to store the current game for later play.
- Use Retry only when you intend to discard the current unsaved state.
- Hold RESET while powering off after saving, as instructed by the manual.
Prepare for the first overworld trip
Before moving north into the overworld, check that the Wooden Sword is equipped, the Shield is present, and the life meter is as full as possible. The first quest allows early exploration in several directions, but some enemies and routes are safer after you have collected more rupees, hearts, or equipment. If a screen costs several hearts, retreat and return later instead of repeating the same approach.
Collect rupees when they are safe to reach. Rupees are used for shop purchases, and the cartridge can hold up to 255. Do not assume every shop has the same inventory or price. Early purchases should support a specific need rather than consume all of your money immediately.
Bombs are both weapons and exploration tools. Once you obtain them, reserve part of your supply for suspicious wall sections in the overworld and labyrinths. The original game often gives no obvious visual crack, so test likely dead-end wall sections or locations suggested by dungeon layout and clues rather than bombing every wall at random.
- Leave the starting screen with the Wooden Sword and Shield confirmed.
- Keep enough health to survive a projectile or contact hit.
- Collect safe rupees without entering unnecessary fights.
- Preserve bombs for exploration and required dungeon passages.
Buy Food and arrows only when their purpose is clear
Food, also called Enemy Bait, is not a healing item. It is used to lure certain enemies and can be required to pass specific dungeon rooms. Buy it when you are preparing for a known bait requirement, not as an emergency substitute for hearts or Water of Life.
Arrows are ammunition, and each shot costs one rupee. Link cannot use arrows until he owns the Bow, so buying arrows before obtaining the Bow is generally wasted preparation. After you have the Bow, purchase arrows when you expect to use them against bow-dependent enemies or want a ranged option for a dungeon. Keep enough rupees available to fire them.
The Magic Shield is a later shop purchase. It is larger than the starting Shield and can defend against additional attacks, including magical projectiles that the basic Shield cannot stop. It is useful when affordable, but it is not required to leave the opening area and should not be mistaken for an opening-cave reward.
- Treat Food or Enemy Bait as a dungeon utility item, not healing.
- Wait to buy arrows until you own the Bow or have a specific planned use.
- Remember that each arrow shot consumes one rupee.
- Buy the Magic Shield later when its price fits your route and budget.
Before you move on
- Link has the Wooden Sword equipped and can attack with A.
- The starting Shield is visible in the equipment display, and its limitations are understood.
- Start opens the subscreen, the Control Pad selects the B-button item there, and B uses that item during play.
- Select pauses and resumes active play.
- You understand the Game Over choices: Select moves between Continue, Save, and Retry, while Start confirms the highlighted choice.
- Continue resumes with possessions and three hearts, Save records the game, and Retry discards the unsaved state.
- You have a recovery plan based on enemy drops, Fairy Springs, retreating from dangerous screens, and conserving bombs.
- You know when Food and arrows are useful and why neither should be treated as general healing.
Overworld Navigation and Secrets
Hyrule is divided into separate screens connected as a large grid. Learn to use the map marker, major landmarks, and written notes to build reliable routes. Bomb suspicious walls, burn selected trees and bushes after buying a Candle, revisit caves and shops deliberately, and use Fairy Fountains as recovery points. The Recorder becomes a later travel shortcut and has a specific first-quest use for revealing Level 7.
Read Hyrule as connected screens
The overworld is not one continuously scrolling field. It is a grid of individual screens, and Link crosses into a neighboring screen whenever he reaches an edge. The small marker on the overworld map shows your current position. Treat each screen transition as one step and record routes by direction: for example, two screens north from a lake, then one screen west to a cave.
Use landmarks instead of trying to memorize the entire map at once. The starting area, the large lakes, the graveyard, the Lost Woods, the Lost Hills, the desert, the town entrances, and Death Mountain are dependable reference points. Spectacle Rock is in the mountain region and is associated with the entrance to Level 9, so mark it clearly but do not enter that final dungeon before you are ready.
The supplied map and a simple notebook are useful because many screens look similar. Write down dungeon entrances, shops, Fairy Fountains, bomb-tested walls, and burned objects. When lost, return to a landmark you recognize and search outward one screen at a time rather than wandering randomly.
- Use the overworld marker to confirm your current screen.
- Count screen transitions when recording a route.
- Mark lakes, towns, graveyards, mountain passes, dungeons, caves, and Fairy Fountains.
Search walls methodically with bombs
Bombs can open hidden passages in rock faces and cliff walls. In the original NES first quest, a wall does not need to display an obvious crack, so visual inspection alone is not enough. Test likely dead ends, unusually empty stretches of wall, and routes where a hidden shop, heart container, rupee cave, or shortcut would be useful.
Place the bomb directly beside the wall and wait for the blast to finish. A successful opening produces the secret-revealed sound and leaves a cave-sized passage. If nothing opens, mark that wall as tested and move on. Do not spend your entire supply bombing every wall when you still need bombs for dungeon progression.
There is no need to assume that a screen containing a visible cave or dungeon entrance has no other secret. Use your notes and a dedicated first-quest map when you want complete coverage, but search only a few likely walls at a time during normal play so you retain supplies for required passages.
- Carry several bombs before beginning a deliberate overworld search.
- Test wall sections in a consistent order and record failures.
- Return to successful bomb caves when you need rupees, equipment, or a route shortcut.
Buy a Candle before searching vegetation
After obtaining a Candle, equip it in the item menu and face the tree or bush you want to test. Press the assigned item button to create a flame in the direction Link is facing. Only selected vegetation conceals stairs or rewards, and the correct object may look identical to nearby trees or bushes, so record every successful location.
The Blue Candle creates one flame per overworld screen. After using it, you must leave that screen before creating another flame. This makes a complete search slow, so start with suspicious screens and known map locations rather than burning every object immediately. The Red Candle, obtained much later, allows another flame on the same screen and is better for revisiting areas with several possible targets.
Burning is separate from bombing. Use the Candle on vegetation; use bombs on rock walls. If an object does not react, move on and mark it rather than repeatedly wasting the Candle attempt on the same target.
- Face the target before using the Candle.
- Leave the screen after using the Blue Candle if you need another flame.
- Keep first-quest burn locations separate from Second Quest notes.
Enter ordinary caves and town buildings
Not every cave is a shop. Hidden rooms may contain an Old Man, a one-time heart container, rupees, a hint, a passage, or an exchange involving an item. Enter caves even when their entrances are not marked on the map, and listen to what the occupant says before spending rupees.
Town screens are useful staging areas for purchases and route planning. Check their buildings and entrances for shops and potion-related characters. The medicine woman will not sell a potion until you have shown her the Letter, so finding her before obtaining that item does not complete the purchase. Keep the Letter once you find it; it remains useful for unlocking the medicine transaction.
Food is not general healing. It is an item used for specific obstacles involving Goriya enemies, so buy it when you know you need it rather than treating it as a substitute for a Fairy Fountain or potion.
- Enter unmarked caves and note what each one contains.
- Keep the Letter after finding it.
- Buy Food for a known Goriya-related obstacle, not routine recovery.
Build a safe rupee and supply route
Enemies can drop rupees, bombs, arrows, and other useful supplies. For early income, choose an open screen near a landmark, defeat the enemies safely, leave, and return if you need another clearing. A screen where you can keep distance from enemies is better than a dangerous area with potentially higher risk.
Secret rupee caves and one-time overworld rewards can fund important purchases, but record them so you can return later. Before buying optional equipment, preserve enough rupees for bombs and other supplies. Once you own the Bow, purchase arrows before relying on it in combat; the Bow alone does not provide ammunition.
The Blue Candle is a useful early purchase for exploration, and bombs should remain a priority whenever you plan to search walls or enter a dungeon with bombable rooms. A strong route alternates between enemy screens, known shops, and a nearby healing point instead of making one long trip with a nearly empty purse and low health.
- Farm on open screens near a familiar landmark.
- Restock bombs before a large secret search.
- Buy arrows after obtaining the Bow and preserve rupees for required supplies.
Use Fairy Fountains as recovery checkpoints
Fairy Fountains contain fairies that restore Link’s hearts when he touches them. Memorize at least one fountain near the region you are exploring and use it before entering a dangerous cave, searching a hostile screen, or starting a dungeon approach with low health.
Healing also preserves sword beams, which are available while Link is at full health and can make overworld combat safer. Do not continue through several screens with only a few hearts when a known fountain is nearby. Return to the fountain, refill, and resume the route from a stable landmark.
A Fairy Fountain does not replace a written route. If you die, the game’s continue behavior may return you to the overworld rather than the exact place where you fell, so use fountains and towns to prepare before attempting the same dangerous route again.
- Identify a Fairy Fountain in each region you visit regularly.
- Heal before difficult caves, dungeon entrances, and secret searches.
- Use full health to preserve sword-beam attacks when traveling through open areas.
Add the Recorder to later travel
The Recorder is found in Dungeon 5, so it is not part of the opening overworld routine. After obtaining it, playing it on the overworld summons a whirlwind that transports Link to the entrance of a dungeon he has already completed. This greatly reduces backtracking, but it is a convenience rather than a requirement for completing the first quest.
In the first quest, the Recorder also has a specific overworld function: play it at the correct lake location to drain the water and reveal the entrance to Level 7. This is different from ordinary dungeon travel. Mark the location after discovering it so you do not confuse the revealed entrance with a normal cave or a later-quest secret.
Do not import Second Quest locations into this first-quest route. The Recorder is obtained in a different dungeon in the Second Quest, and its overworld interactions and dungeon layout are not interchangeable with the North American first quest.
- Obtain the Recorder from Dungeon 5 before planning Recorder travel.
- Mark completed dungeon entrances for efficient return trips.
- Use the Recorder at the first-quest lake location to reveal Level 7.
- Keep separate notes for First Quest and Second Quest secrets.
Before you move on
- You can return to the starting area, a town, a Fairy Fountain, and at least one dungeon entrance using landmarks and written screen counts.
- Your notes identify tested bomb walls, successful burns, useful caves, shops, rupee locations, and healing fountains.
- You have a repeatable route for earning rupees and restocking bombs before entering the next dungeon.
- You know that the Blue Candle is limited to one flame per screen and that the Red Candle is a later upgrade.
- You understand that the Recorder is obtained later, warps through completed dungeons, and reveals Level 7 at its first-quest lake location.
- Your notes clearly distinguish the North American First Quest from the Second Quest.
References for this chapter
- The Legend of Zelda — Official Nintendo Instruction Manual PDF
- The Legend of Zelda — Overworld Quest 1 — StrategyWiki
- The Legend of Zelda/Walkthrough — StrategyWiki
- Overworld Map & Secrets — The Legend of Zelda (NES), Hyrule Archive
- The Legend of Zelda — Labeled Maps, NESMaps
- Recorder — Zelda Dungeon Wiki
Early Upgrades and Mid-Game Preparation
Build Link’s health and supplies before tackling the first four dungeons. The two earliest overworld Heart Containers are at M3 and L8 and can be reached with bombs. Together with the three starting containers, they let Link claim the White Sword at K1. The remaining overworld containers require the Blue Candle, Raft, and Stepladder. Follow the recommended progression of Boomerang and Bow, Magical Boomerang, Raft, then Stepladder while preserving Rupees for arrows, bombs, potions, and later bomb-capacity upgrades. The optional Magical Sword is in the northeast, or top-right, cemetery group at B3 and requires twelve total Heart Containers.
Collect the two early bomb-accessible Heart Containers
Link begins the First Quest with three Heart Containers. Five additional permanent Heart Containers are hidden in the overworld, while dungeon bosses provide the remaining containers needed for a full sixteen-heart life meter. Four of the five overworld containers are offered by an Old Man as a choice between the container and a potion. Take the Heart Container unless you deliberately prefer the potion; choosing the potion permanently gives up that container on the current save.
Start with the Heart Container at map section M3. Find the screen with the large circular rock formation in the central-eastern part of Hyrule. Place a bomb at the southeast corner of the large rock. Enter the revealed cave and take the Heart Container from the Old Man. This is a bombable secret inside the large rock, not a general search of the surrounding eastern screens.
Next, travel to map section L8 in the mountainous northern area. Locate the screen with the passage leading north. Place a bomb on the mountain wall to the left of that northbound passage. Enter the opening and take the Heart Container inside. These M3 and L8 containers can be collected before the Candle, Raft, or Stepladder.
Count permanent containers in the life meter, not currently filled hearts. The three starting containers plus M3 and L8 give Link five total containers, which is enough to claim the White Sword.
- Bomb the southeast corner of the large rock at M3.
- Bomb the mountain wall left of the north path at L8.
- Choose an offered Heart Container instead of the potion unless you intentionally want the potion.
- Count maximum Heart Containers, including empty ones, rather than the number currently filled.
Claim the White Sword at K1
Once Link has five total Heart Containers, travel to map section K1 in the northern mountain region. Enter the cave beside the small pond above the waterfall route. The Old Man inside gives Link the White Sword when the requirement is met.
If the Old Man refuses to give the sword, leave and check the maximum life meter again. Four containers are not enough, and partially empty containers still count only if they have been permanently collected.
The White Sword is a major improvement over the Wooden Sword. It also fires a sword beam when Link is at full health. Use a Fairy or another healing method before relying on beams. Taking damage removes the beam until Link’s health is restored, so use sword beams mainly against isolated enemies rather than treating them as a replacement for close combat in crowded rooms.
- Reach five total Heart Containers.
- Enter the cave at K1 beside the pond above the waterfall route.
- Take the White Sword and heal before depending on sword beams.
Plan for the optional Magical Sword
The Magical Sword is the strongest sword in the original NES First Quest. It requires twelve total Heart Containers and is optional for completing the game. Its First Quest location is map section B3, in the northeast or top-right cemetery group. Search that cemetery group for the movable tombstone marked by its position among the graves. Push the correct tombstone to reveal a staircase, then enter the passage and take the sword once the twelve-container requirement is satisfied.
A practical way to reach twelve is to claim the White Sword, defeat the first four dungeon bosses, and collect the later overworld containers as their required items become available. The Candle container at H5, the Raft container at P3, and the Stepladder container at P6 all contribute to the requirement. Dungeon boss Heart Containers also count.
Do not confuse this location with a western or northwestern cemetery. For the First Quest, use the northeast or top-right cemetery group at B3 and search for the movable tombstone there. The sword remains unavailable until Link has twelve permanent Heart Containers. The Magical Sword is useful against later enemies, but it is not required for the first four dungeons or for the First Quest ending.
- Reach twelve total Heart Containers.
- Travel to the northeast or top-right cemetery group at B3.
- Push the correct movable tombstone to reveal the staircase.
- Take the Magical Sword only after the twelve-container requirement is met.
Use the remaining Heart Container route consistently
The Candle-gated container is at H5. Buy the Blue Candle from a shop, travel to H5, and burn the fifth bush from the right. Enter the revealed cave and take the Heart Container when the Old Man offers the choice. This secret is separate from the bomb locations at M3 and L8.
The Raft-gated container is at P3. From the dock at P4, use the Raft and travel north to reach the island entrance at P3. Enter the cave and take the Heart Container.
The final overworld container is at P6. Use the Stepladder to cross the small water gap and reach the platform holding the container. It is not another bomb secret. Revisit H5 after buying the Candle, and revisit P3 and P6 after obtaining the Raft and Stepladder. Recording the five First Quest locations as M3, L8, H5, P3, and P6 prevents confusion when planning the route.
- H5: burn the fifth bush from the right with the Blue Candle.
- P3: use the Raft from the dock at P4 and travel north.
- P6: use the Stepladder to cross the water gap to the container.
- Treat these three containers as optional until the required traversal item is available.
Spend Rupees on bombs, arrows, and bomb capacity
Prioritize bombs during the opening section. They reveal the M3 and L8 Heart Containers, open some dungeon shortcuts, and can be necessary for progressing through particular dungeon rooms. Avoid spending the entire supply on routine combat when a bomb may be needed to open a wall.
The Blue Candle is a useful early purchase after basic bomb needs are covered. It burns one bush or tree per screen and is required for the H5 Heart Container. It cannot open bombable walls, so keep bombs even after obtaining the Candle.
The Bow is found in Dungeon 1, but arrows must be purchased before the Bow can be used normally. In the original First Quest, arrows are purchased ammunition: firing one consumes one Rupee. Keep a Rupee reserve for important ranged attacks and restocking. There is no permanent First Quest arrow-capacity upgrade comparable to the bomb upgrades.
Two bomb-capacity upgrades are available later. The upgrade in Level 5 raises the maximum from eight bombs to twelve for 100 Rupees. The upgrade in Level 7 raises the maximum from twelve to sixteen for another 100 Rupees. Save money for these Old Man rooms rather than entering them short of the required payment.
- Buy bombs before optional equipment.
- Purchase the Blue Candle once basic bomb needs are covered.
- Buy arrows before relying on the Bow.
- Keep Rupees available for arrows and the two 100-Rupee bomb upgrades.
- Do not search for a permanent First Quest arrow-capacity upgrade.
Farm Rupees and recover safely
Use short overworld loops near familiar routes to earn Rupees. Defeat weak enemies, collect their drops, leave the screen, and return after the enemies repopulate. Once Link has the White Sword and full health, sword beams can clear isolated enemies without contact damage.
Use Fairy ponds whenever a route passes near one. They restore missing health without consuming a potion and allow Link to begin a dungeon with sword beams available. Save bombs for secret entrances, required passages, and dangerous enemy groups instead of using them on every ordinary target.
Before entering a dungeon, carry as many bombs as practical, maintain a Rupee reserve after obtaining the Bow, and avoid beginning a long trip with no way to restock. If Link dies, return to a familiar shop or Fairy, refill health and supplies, and then retry rather than re-entering with the same depleted inventory.
- Farm Rupees on repeatable overworld screens.
- Heal at a Fairy before a long dungeon trip.
- Preserve bombs for secrets and difficult encounters.
- Restock bombs, arrows, and health after dying.
Follow the practical Dungeon 1 through Dungeon 4 order
Make Dungeon 1 the first major target. Collect the Boomerang and Bow during the dungeon, then defeat Aquamentus to receive the first dungeon Heart Container and Triforce fragment. The Boomerang can stun many ordinary enemies, while the Bow provides the ranged option needed later.
Enter Dungeon 2 next and obtain the Magical Boomerang. It travels farther and moves faster than the Wooden Boomerang, making it more useful for stunning enemies and retrieving distant drops.
Clear Dungeon 3 for the Raft. It opens specific docks and water routes, including the route to the P3 Heart Container. Clear Dungeon 4 for the Stepladder, which crosses one-tile gaps and reaches the P6 Heart Container. After obtaining these items, revisit H5, P3, and P6 if the extra health is part of the preparation plan.
The game permits detours, so this is a recommended order rather than a strict lock. It expands Link’s combat and movement options while limiting backtracking: Boomerang and Bow, then Magical Boomerang, then Raft, then Stepladder.
- Dungeon 1: collect the Boomerang and Bow, then defeat Aquamentus.
- Dungeon 2: collect the Magical Boomerang.
- Dungeon 3: collect the Raft.
- Dungeon 4: collect the Stepladder.
- Revisit H5, P3, and P6 after gaining their required items.
Before you move on
- Link has at least five total Heart Containers and has claimed the White Sword at K1.
- The M3 and L8 bomb-accessible Heart Containers have been collected or deliberately marked for later retrieval.
- The five First Quest overworld Heart Container landmarks are recorded correctly: M3, L8, H5, P3, and P6.
- The H5 Candle route, P3 Raft route, and P6 Stepladder route are understood.
- Dungeon 1’s Boomerang and Bow, Dungeon 2’s Magical Boomerang, Dungeon 3’s Raft, and Dungeon 4’s Stepladder are collected.
- Bombs are stocked before the next dungeon, and Rupees are reserved for arrows and later purchases.
- The northeast or top-right cemetery group at B3 and the twelve-container requirement for the Magical Sword are recorded.
- The Level 5 and Level 7 bomb-capacity upgrades are recognized as later 100-Rupee objectives.
- The original First Quest is not being treated as having a permanent arrow-capacity upgrade.
References for this chapter
- The Legend of Zelda — Official Nintendo Instruction Manual PDF
- The Legend of Zelda — Heart Containers — GameFAQs NES Guide
- The Legend of Zelda — Get the Magical Sword — Thonky
- The Legend of Zelda — Overworld Quest 1 — StrategyWiki
- Bomb Upgrades — The Legend of Zelda NES Guide
- Zelda 1 — All Heart Containers in the First Quest
Dungeon 1 (The Eagle) — Boomerang, Bow and Aquamentus
Level 1, The Eagle, is the first dungeon in the original North American Nintendo Entertainment System first quest. It is located on the northeast island in the central lake. Clear the dungeon to obtain the Dungeon Map, Compass, Bow, and Wooden Boomerang, then defeat Aquamentus and collect the first Triforce fragment.
Reach Level 1 from the starting screen
From the opening screen, walk one screen to the right, then four screens north. You will reach a lake with a long bridge extending westward. Cross the bridge to the left. The enclosed island contains a large tree trunk with an open mouth; enter it to begin Level 1, The Eagle.
The route does not require the Raft or any other special item. The Wooden Sword is sufficient for the dungeon, although entering with several full hearts makes the early Stalfos and Goriya rooms much safer. If you have already bought a Magical Shield, it can help block the boomerangs thrown by Red Goriyas and the fireballs used by Aquamentus. The Bow is found inside the dungeon, but arrows must be purchased separately before the Bow can be used effectively.
- Wooden Sword obtained and equipped.
- Level 1 reached by crossing the bridge to the tree-trunk island.
- Several hearts available before entering, if possible.
Collect the first two keys and open the northern route
The entrance room has three exits: the north door is locked, while the west and east doors are open. Take the west door first and defeat the three Keese to reveal the first Small Key. Return to the entrance and take the east door. Defeat the Stalfos there, including the one carrying the second Small Key.
Return to the entrance and spend one key on the locked north door. Continue north through the Stalfos rooms. Defeat the enemies in the next northern room to reveal another Small Key. The north wall in this room is bombable. Place a bomb against the middle of that wall and enter the passage when it opens.
The passage leads to a room containing several Gels and the Dungeon Map. Defeat or move past the Gels and collect the Map. The blue layout on the status display shows the Eagle-shaped dungeon, but it only fills in rooms and connections as you explore them.
- Two starting-room keys collected.
- Northern locked door opened.
- Third Small Key collected in the northern Stalfos room.
- Dungeon Map collected through the bombable north wall.
Take the Compass and reach the Bow
From the Map room, go north through the Stalfos rooms. Defeat the Stalfos carrying the next key, then use that key on the northern locked door. The following room contains three Red Goriyas. Defeat all three and collect the key they reveal.
Use the western door from the Red Goriya room. This room contains Blade Traps. Move into the room far enough to activate their movement, then retreat and let them slide back toward their starting positions. Circle around the central blocks while the traps are moving away, push the western block downward, and enter the staircase.
The staircase leads to a short underground passage containing the Bow. Walk over the item to collect it, then return through the staircase. The Bow is not immediately useful if you have not bought arrows. Do not assume the dungeon is incomplete because you cannot yet make practical use of it; arrows are an overworld shop purchase, not a Level 1 reward.
On the way back through the Blade Trap room, avoid crossing while the traps are charging. Trigger them, step out of their line, and cross after they have passed and are sliding back.
- Key from the upper Stalfos route collected.
- Red Goriya room cleared.
- Bow collected from the staircase passage.
- Blade Traps crossed without rushing into their paths.
Collect the Compass and Wooden Boomerang
Return to the room below the Map route and take the eastern door that you skipped earlier. Defeat or evade the Keese and collect the Compass. The Compass marks the location of the Triforce room on the dungeon map; it does not replace the Map and does not open doors.
From the Compass room, bomb the north wall. Enter the newly opened room and defeat all three Red Goriyas. Their boomerangs can interrupt Link, so attack from a favorable angle and use the shield to block frontal throws if you have the Magical Shield. After the room is cleared, the Wooden Boomerang appears in the upper part of the room.
Equip the Wooden Boomerang after collecting it. It can stun many larger enemies, destroy weak enemies such as Keese and Gels, and retrieve distant drops. It is immediately usable, unlike the Bow before you have purchased arrows.
- Compass collected from the eastern Keese room.
- North wall bombed from the Compass route.
- Three Red Goriyas defeated.
- Wooden Boomerang collected and assigned to an item button.
Open the boss route
Continue east from the Boomerang room. The next room contains Wallmasters, disembodied hands that emerge from the walls. If one catches Link, it sends him back to the dungeon entrance. Destroy the Wallmasters quickly or keep moving around the room edges so you are not standing still in their approach lanes.
When the room is safe, collect the Small Key and unlock the northern door. The roar heard near this part of the dungeon indicates that the boss room is close. Make sure your hearts are as full as possible before entering. If you have full health, sword beams provide a safe ranged option. If not, prepare for a closer sword fight and leave yourself room to retreat from the fireballs.
- Wallmaster room cleared or crossed safely.
- Final route key collected.
- Boss-room hearts restored as much as possible.
Defeat Aquamentus and claim the first Triforce fragment
Aquamentus moves around the eastern side of the room and repeatedly fires three fireballs in a spread. With full hearts, stand at a safe distance and fire sword beams toward its head, repositioning to avoid the spread. If you own the Magical Shield, it can block these fireballs; otherwise, dodge them by moving vertically or horizontally out of their path.
If you must fight at close range, approach from below or from the side, strike Aquamentus's head with the sword, and retreat when the fireballs are released. Avoid touching the boss. The original Sword requires repeated hits, so do not stay in contact with Aquamentus after each attack. Do not rely on an invulnerability glitch or any other exploit.
After Aquamentus is defeated, collect the Heart Container left in the boss room. The eastern door then opens. Enter the next room and pick up the first Triforce fragment. Collecting it completes Level 1 and returns Link to the overworld automatically.
- Aquamentus defeated through sword attacks or full-health sword beams.
- Heart Container collected from the boss room.
- Eastern reward room entered.
- First Triforce fragment collected.
Before you move on
- Link has returned to the overworld after collecting the Level 1 reward.
- The inventory contains the Bow and Wooden Boomerang.
- The Compass and Dungeon Map were collected if following the complete item route.
- The maximum-heart total increased by one from Aquamentus's Heart Container.
- The Triforce display shows the first fragment.
Dungeon 2 (Dodongo’s Cavern) — Magical Boomerang and Dodongo
In the original North American NES First Quest, Level 2 is in the northeastern forest at overworld grid square M-4. From the Level 1 entrance, use the verified screen route to reach the dungeon: east, south twice, east, north, east to the arrow shop at K-5 if you want arrows; from there go east, south, east twice, north, west, then north. Enter the forest clearing from the south. Inside, collect the first two keys, reach the Compass branch, bomb north twice to find the Map and Magical Boomerang, then backtrack through the northern route to gather the remaining keys and bomb pickups. Defeat Dodongo with two successful bomb hits, take the Heart Container, and move west to collect the second Triforce fragment.
Reach Level 2 from a known landmark
Use the entrance to Level 1 as your starting landmark. If you are standing at the Level 1 entrance, travel east, south, south, east, north, then east. This places you at the K-5 shop, one of the First Quest shops that sells Arrows. Buying Arrows is optional for Level 2, but they are useful against Goriya enemies and will be important for later bosses. Each arrow costs one Rupee when fired, so do not spend your entire supply if you still need bombs or other purchases.
From the K-5 shop, go east, south, east, east, north, west, then north. The final northward screen leads to the forest area containing Level 2 at grid square M-4. Approach the dungeon entrance from the south and enter. No overworld item is required to open this dungeon, so Level 2 can be attempted immediately after Level 1.
If you are not at Level 1, use the grid landmark instead: Level 2 is in the northeastern forest region, at M-4, and its entrance is reached from the southern side of the clearing. Do not confuse this First Quest location with the Second Quest dungeon, whose interior and item progression are different.
- Level 1 entrance used as the route landmark, or overworld grid square M-4 identified
- Optional Arrow purchase made at K-5
- Several bombs available before entering
- At least half a health bar, with more preferred
- Level 2 entrance approached from the south
Prepare for Level 2
Bring as many bombs as you can reasonably spare. Dodongo is defeated with bombs, and the dungeon route uses bombable north walls before the boss path. The dungeon provides additional bomb pickups, but you should not assume that every missed pickup will be available after leaving and returning.
Arrows are optional rather than a requirement for the dungeon. They can safely attack some Goriya enemies, but they consume Rupees when fired. The ordinary Boomerang from Level 1 is more important for stunning enemies and makes the Magical Boomerang room safer.
Enter with at least half a health bar, preferably more. Ropes, Gels, Goriya enemies, Moldorms, Stone Statues, and Blade Traps can all punish careless movement. If your health or bombs are low, leave Level 2 before committing to the northern route. Use an overworld fairy pond, a potion, a bomb shop, or an enemy-farming route to recover, then return to the M-4 entrance.
Do not bring Monster Bait specifically for this dungeon. The Hungry Goriya passage associated with some walkthroughs belongs to the Second Quest arrangement, not the original First Quest Level 2 layout.
- Ordinary Boomerang from Level 1 equipped or available
- Several bombs reserved for the northern walls and Dodongo
- Arrows stocked only if you want the ranged option
- Health restored before entry
- No Monster Bait requirement for First Quest Level 2
Collect the first two keys and reach the Compass branch
Enter the dungeon and take the east exit from the entrance room. Defeat the five Ropes in the next room; when the room is cleared, Key 1 appears. Take it, return west to the entrance room, and go north.
Defeat the Ropes in the next room to open the west door. Go west and defeat the enemies there to reveal Key 2. Take the key, then return east and continue along the eastern branch. Use the first key on the locked door encountered along this route.
Continue east until you reach the room where Gels guard the Compass. The Compass is optional, but it is useful because it marks the Triforce room. If you skip it, continue following the same eastern route and use the bombable north walls as your positional landmarks.
From the Compass room, place a bomb against the north wall. The opening leads to a room containing Gels and the Map branch. The Map is also optional, but this is the correct First Quest route toward the Magical Boomerang.
- Key 1 collected from the first Rope room
- Key 2 collected from the west Rope room
- Compass collected or intentionally skipped
- First northern bomb passage opened from the Compass branch
Find the Map and Magical Boomerang
After bombing north from the Compass room, clear the Gels in the next room if you want the Map. Bomb the north wall of that room as well. The next room contains three Blue Goriyas and Stone Statues in the corners that fire projectiles across the room.
Keep moving around the room instead of standing in front of a Statue. Use the ordinary Boomerang to stun a Goriya before closing in with the sword, or use Arrows from a distance if you have enough Rupees. Defeat all three Blue Goriyas. Once the room is cleared, collect the Magical Boomerang.
The Magical Boomerang travels across the full screen and moves faster than the ordinary Boomerang. It is not a separate weapon that must be purchased or manually combined with the old one; collecting it upgrades the Boomerang item automatically. Its longer range makes it useful for stunning enemies, retrieving dropped items, and controlling Goriya rooms without immediately entering sword range.
- Map collected if desired
- Second northern bomb passage opened
- Three Blue Goriyas defeated
- Magical Boomerang collected and confirmed in the item inventory
Use the remaining route to reach Dodongo
From the Magical Boomerang room, bomb the north wall. In the next room, defeat or avoid the Keese and Blade Traps, then place another bomb on the north wall before collecting the four Bombs on the floor. This bomb cache is valuable, so collect it after opening the next passage.
Go south to take the Bombs, then return north. Defeat the Gels in the next room to reveal the Rupees, and continue north to the old man who hints that Dodongo dislikes smoke. The west wall in this room can be bombed to make a shortcut, but the shortcut is not required for completion.
At this stage, return south to the Compass area, then go west and north. Proceed north through the Red Goriya room. Continue north into the Rope room and defeat the Ropes to reveal Key 3. The east door from this area is optional; keep moving north for the required route.
The next northern room contains Moldorms. Defeat them to reveal Key 4. Continue north through the Rope room, defeat the enemies to open the northern door, then clear the Red Goriyas in the final approach room. Four Bombs appear after the room is cleared. Collect them before entering the boss room.
- Bomb cache near the Magical Boomerang route collected
- Key 3 collected from the Rope room
- Key 4 collected from the Moldorm room
- Four-bomb pickup before Dodongo collected
- Health and bomb supply checked before entering the boss room
Defeat Dodongo and claim the second Triforce fragment
Dodongo patrols the boss room and is not damaged by the sword, Boomerang, Bow, or ordinary arrows. The standard method is to place a bomb directly in front of Dodongo so it walks into the bomb and eats it. The explosion damages Dodongo from inside. Repeat this successfully twice to defeat the boss.
After placing a bomb, move away from Dodongo’s path so the blast does not trap you against a wall. If Dodongo turns away or misses the bomb, keep moving around the room and wait for another safe approach. Do not stand directly in its route while waiting for the fuse to finish.
A second method is to place a bomb so its blast catches Dodongo without being eaten. A successful blast stuns the boss, allowing one sword strike. This can work when positioning the bomb for an eating attack is awkward, but it is less forgiving. Do not treat the sword as a replacement for the required bomb damage.
After Dodongo is defeated, collect the Heart Container in the boss room. Then go west through the opened passage and collect the second Triforce fragment. The dungeon is complete when the Heart Container has been taken and the second Triforce piece appears in the Triforce display.
- Dodongo damaged twice with bombs, or with a bomb stun followed by a sword strike as an alternate hit
- Heart Container collected
- Second Triforce fragment collected
- Level 2 can be exited without a required item or reward left behind
Before you move on
- Level 2 was entered from the southern approach at overworld grid square M-4.
- The Magical Boomerang is present in the inventory and visibly travels farther than the ordinary Boomerang.
- The Heart Container from Dodongo’s boss room has been collected.
- The second Triforce fragment is visible in the completed Triforce display.
- The Level 2 entrance can be left with no required key, dungeon item, boss reward, or Triforce fragment still missing.
Dungeon 3 and 4 (Raft and Stepladder) — Expanding the Map
Clear Level 3, The Manji, to obtain the Raft and defeat Manhandla for the third Triforce fragment. Use the Raft from the correct central-lake dock to reach Level 4, The Snake. Take the Stepladder, defeat the two-headed Gleeok, and then decide whether to collect the newly accessible optional Heart Containers before continuing.
Prepare for Level 3
Level 3, The Manji, is close to the starting area. From the starting screen, go north one screen, west four screens, south one screen, and east one screen to reach the dungeon entrance. The Raft is not needed for this trip; you will obtain it inside Level 3.
Bring a nearly full life meter and several bombs. A potion is useful because the dungeon introduces Darknuts and includes a difficult boss room, but it is not mandatory. The White Sword, Magical Shield, Magical Boomerang, Blue Ring, and Blue Candle can improve safety, but none is required for the dungeon's required progress.
- Reach Level 3 by going north, west four, south, then east from the starting screen.
- Enter with as much health and as many bombs as practical.
- Do not attempt to reach Level 3 with the Raft; the dungeon is accessible on foot.
Collect the Raft in The Manji
Leave the entrance room through the west door. Defeat the Zols to receive a key, then return to the entrance and go north. Clear the next Zol room for another key and continue north to the first Darknut area.
Darknuts block attacks from the front, so attack from the side or rear and retreat after each strike. If the room becomes unsafe, use bombs to create space. Follow the dungeon's western and northern branches, opening only the doors needed to reach the central section. The map, compass, and bomb rewards are useful but not all are required.
Eventually, clear or bypass the large Red Darknut room and reach the staircase. Go down and collect the Raft. This is the required dungeon item. Make sure you take it before pursuing the boss so a failed attempt does not force you to repeat the item branch.
- Collect the keys from the early Zol rooms.
- Use side or rear attacks against Darknuts and conserve bombs for dangerous rooms or walls.
- Go down the staircase and take the Raft before committing to the boss route.
Defeat Manhandla
After collecting the Raft, backtrack through the dungeon toward the eastern boss approach. Clear the Darknut room and then defeat the Zols and Keese in the room beyond while avoiding the flashing Bubbles. The northern door opens when the room is cleared, leading to Manhandla.
Manhandla has four heads, moves around the room, and fires projectiles. Sword strikes work when a head comes within reach, but the boss becomes faster as heads are removed. Bombs are the safest efficient option: place one near the cluster of heads and immediately move away. A single blast can destroy several heads, although multiple bombs or sword attacks may be needed.
Do not stand still after damaging the boss. The remaining heads become harder to track, and the fireballs cannot be relied upon to be blocked by the Magical Shield. When all four heads are gone, collect the Heart Container and go north to take the third Triforce fragment.
- Reach Manhandla through the eastern route after taking the Raft.
- Use bombs for clustered heads or sword strikes when a head approaches.
- Collect the dungeon Heart Container and the third Triforce fragment.
Optional Raft Heart Container
The Raft has a second First Quest use that is optional. From the starting screen, travel east across the overworld to the far eastern coastline, then go north to the distant dock. Step onto that dock and the Raft carries Link to a small island. Enter the cave and choose the Heart Container rather than the alternative potion reward if you want maximum health or need progress toward the White Sword or Magical Sword requirements.
This is not the dock used for Level 4. Treat the two trips as separate objectives: the distant eastern dock leads to the optional heart, while the central-lake dock below Level 4 leads to The Snake. The Raft works only from designated docks and follows a fixed automatic route; it cannot be launched from an ordinary shoreline or steered freely.
The optional heart is valuable, but it is not required to enter Level 4, obtain the Stepladder, or continue the main quest.
- Use the distant eastern dock only if pursuing the optional Raft Heart Container.
- Choose the Heart Container or the alternate potion according to your needs.
- Remember that this dock is separate from the dock used to reach Level 4.
Reach Level 4 from the starting screen
After obtaining the Raft, return to the starting screen. From there, go north one screen, then continue west until you reach the river. Go north to the dock. Step onto the dock and allow the Raft to carry Link across the water to the island containing Level 4, The Snake, at F5.
This is the required First Quest route to Level 4. Do not use the earlier E8-to-D8-to-D7-to-E7-to-F7-to-F6 route. The entrance is on the island in the central lake, and the Raft automatically delivers Link to the dungeon entrance when launched from the dock below it.
Heal and restock before entering. A potion is helpful against Vires, Like Likes, and Gleeok, while bombs remain useful for optional walls and shortcuts. The Raft remains available for the optional eastern-island heart trip and future overworld travel.
- Return to the starting screen before routing to Level 4.
- Go north one screen, west until the river, then north to the dock.
- Step onto the dock and ride the Raft to the Level 4 entrance at F5.
- Do not confuse this dock with the separate dock used for the optional Raft Heart Container.
Find the Stepladder in The Snake
From the Level 4 entrance, leave through the west door and defeat the Keese for the first key. Return to the entrance, go north, and deal with the Vires. Unlock the east door and pass through the dark room; a Blue Candle makes navigation easier, but the candle is not required for the dungeon's critical path.
Continue through the upper rooms to collect the keys needed for the eastern branch. When water blocks the northern route, unlock the east door rather than spending a key on the unnecessary north side room. Defeat the Vires and the Keese in the next rooms to open the eastern passage.
The following room contains Like Likes, Zols, and Bubbles. Keep your distance from Like Likes because they can swallow Link and remove the Magical Shield if they hold him long enough. Clear the required enemies, push the indicated block, and enter the revealed staircase. Take the Stepladder in the room below.
The Stepladder crosses one-tile-wide water gaps. It is required to finish Level 4 and later opens several overworld paths, including access to an optional Heart Container.
- Collect the keys needed for the eastern branch.
- Avoid spending a key on the unnecessary north side room before obtaining the Stepladder.
- Protect the Magical Shield from Like Likes.
- Push the block after clearing the required enemies and take the Stepladder.
Defeat the two-headed Gleeok
After taking the Stepladder, backtrack to the room where the narrow water gap blocked the north route. Walk across the gap with the Stepladder and continue through the remaining dungeon rooms. Collect the map if desired, and use bombs on marked or suspicious walls only when you have enough remaining for later needs.
Level 4's boss is a two-headed Gleeok. In the original NES First Quest, bombs and arrows do not damage this boss. Use the sword at close range, or use sword beams while Link has full health. Keep moving around the room to avoid the fireballs, which cannot be safely treated as shield-blockable projectiles.
When a head is severed, it continues moving around the room as a separate hazard. It is not harmless and does not regrow, so attack the remaining attached head while watching the detached head's path. Once both heads are defeated, collect the Heart Container and go north to claim the fourth Triforce fragment.
- Use the Stepladder to cross the blocked water gap.
- Fight Gleeok with the sword or full-health sword beams, not bombs or arrows.
- Avoid both the attached head and the detached head hazards.
- Collect the boss Heart Container and the fourth Triforce fragment.
Use the new overworld access
The Raft crosses large bodies of water only from designated docks. The Stepladder crosses short, one-tile gaps directly. Together they open optional overworld routes, including the distant Raft Heart Container and a later Stepladder-accessible Heart Container. These rewards are optional and are not required merely to enter Level 5.
Heart Containers gained from the dungeons and overworld contribute toward the five-heart White Sword requirement and the twelve-heart Magical Sword requirement. You do not need every optional heart to continue the game, but collecting them can make Darknuts, Vires, Like Likes, Gleeoks, and later bosses more forgiving.
Before beginning Level 5, heal fully and restock bombs. A potion is worthwhile if you are still learning the new enemy patterns. The Recorder is not yet available, so plan the return trip manually rather than expecting a dungeon warp.
- Confirm that the inventory contains both the Raft and the Stepladder.
- Treat the Raft and Stepladder Heart Containers as optional rewards.
- Heal and restock before proceeding to Level 5.
- Remember that the Recorder is not yet available for backtracking.
Before you move on
- The inventory contains the Raft and the Stepladder.
- Manhandla has been defeated, its Heart Container has been collected, and the third Triforce fragment is present.
- The two-headed Gleeok has been defeated, its Heart Container has been collected, and the fourth Triforce fragment is present.
- The Level 4 route is understood: from the starting screen, go north one screen, west until the river, north to the dock, then ride the Raft to the F5 entrance.
- The optional Raft Heart Container has been collected if desired, using the separate eastern dock.
- The optional Stepladder-accessible Heart Container has been collected if desired.
- Link is healed and supplied before beginning Level 5.
References for this chapter
- The Legend of Zelda — Official Nintendo Instruction Manual PDF
- The Legend of Zelda Walkthrough – Level 3: The Manji
- The Legend of Zelda Walkthrough – Level 4: The Snake
- Level 3: Manji – The Legend of Zelda Walkthrough and Guide for NES
- The Legend of Zelda Guide – First Quest Walkthrough: Dungeon 3
- Raft – Zelda Dungeon Wiki
Mid-Game Shops, Rings and the Recorder (Dungeon 5 onward)
Dungeon 5 marks the point where preparation becomes as important as exploration. The Recorder is both a required Dungeon 5 tool and an optional overworld travel aid. The Blue Ring is the practical defensive upgrade for the middle of the First Quest, while the Red Ring is a late-game treasure found inside Dungeon 9. Keep enough rupees for ammunition and recovery items, but prioritize purchases that reduce the number of forced retreats.
1. Prepare before entering Dungeon 5
Enter Dungeon 5 with a useful reserve of bombs, arrows, and health. Bombs are valuable for opening routes and for emergencies, while arrows let you handle dangerous enemies without always standing beside them. Do not spend every rupee before entering; later shops, ammunition, and potions can save a long return trip.
Dungeon 5 contains the Recorder, its principal treasure. The route branches away from the dungeon’s most obvious path. On the southwestern side of the dungeon, look for the branch involving a room crowded with Darknuts. A bomb may be needed to open the approach. After clearing the enemies and following the passage, continue through the rooms with locked doors; the route to the Recorder leads through a room where defeating the enemies and pushing the correct block reveals stairs to the treasure.
The Recorder is not merely a convenience in this dungeon. Digdogger, Dungeon 5’s boss, must first be reduced by playing the Recorder in the boss room. After it shrinks, finish it with the sword or another suitable attack. If you reach Digdogger without the Recorder, leave the dungeon, recover the item, and return rather than wasting supplies on attacks that cannot defeat the full-sized boss.
- Carry bombs for both combat and possible wall openings.
- Search Dungeon 5’s southwestern branch for the Recorder.
- Use the Recorder against Digdogger before attempting to finish the boss.
2. Use the Recorder to reveal Dungeon 7
The Recorder has a second First Quest use that is important for progression. In western Hyrule, find the fairy pond that has no fairy present. Stand on that overworld screen and play the Recorder. The pond drains and reveals the entrance to Dungeon 7, The Demon. This is not the same as using the Recorder for ordinary dungeon travel, so do not assume Dungeon 7 will appear simply because you have acquired the item.
The First Quest Recorder placement is Dungeon 5. In the Second Quest, the Recorder is moved to Dungeon 2, and its overworld uses differ because dungeon locations and secrets are rearranged. Do not apply the Second Quest route to this North American NES First Quest guide.
- Find the empty fairy pond in western Hyrule after obtaining the Recorder.
- Play the Recorder on that screen to reveal Dungeon 7.
- Remember that Recorder placement and overworld secrets change in the Second Quest.
3. Warp between completed dungeons
On the overworld, equip the Recorder and press its assigned button. It transports Link toward the entrance of a dungeon he has already completed, meaning a dungeon whose Triforce fragment has been collected. It does not take Link directly to an uncleared dungeon and it is not a free teleport to every location in Hyrule.
The destination depends on Link’s facing direction and the completed-dungeon sequence. Facing upward or to the right advances through eligible completed dungeons in numerical order; facing downward or to the left moves backward through that sequence. If some dungeon numbers have been skipped, the Recorder skips them as well. Use this behavior deliberately: face the direction that moves toward the cleared dungeon nearest your next objective, and play again when another step in the sequence is useful.
The Recorder can therefore shorten trips to earlier dungeons for missed treasures, recovery routes, or unfinished exploration. It is especially useful after buying supplies in a distant shop or visiting a fairy pond. It is not mandatory for completing the First Quest, and manual overworld travel remains available if you prefer to walk.
- Use the Recorder only on the overworld for dungeon warping.
- Face right or up to advance through completed-dungeon destinations.
- Face left or down to move backward through those destinations.
- Do not expect it to warp to a dungeon whose Triforce fragment you have not collected.
4. Buy the Blue Ring when supplies allow
The Blue Ring is sold in a concealed First Quest overworld shop for 250 rupees. Its defensive effect halves the damage Link receives from enemy attacks. The shop is hidden beneath an overworld landmark, so use a reliable First Quest map and investigate the marked location rather than spending bombs randomly across every screen.
The Blue Ring is optional, but it is the most useful general defensive purchase before Dungeons 6 through 8. Darknuts, Wizzrobes, Like Likes, and crowded projectile rooms become less punishing when each successful enemy hit removes fewer hearts. The ring does not prevent damage, stop knockback, or make difficult rooms safe by themselves.
If you are close to 250 rupees, avoid spending money on minor purchases until the ring is affordable. Farm enemies in an open overworld screen, collect dropped rupees, and return to the shop. Keep some money afterward for arrows, bombs, or a potion; buying the ring and then entering a dungeon with no ammunition can create a different problem.
- Reserve 250 rupees for the Blue Ring if you want the mid-game defense upgrade.
- Use a verified First Quest map to locate the concealed shop.
- Keep enough rupees afterward for ammunition or recovery.
5. Plan around the Red Ring and later supplies
The Red Ring is not an overworld purchase in the First Quest. It is found inside Dungeon 9. The NES manual states that the Blue Ring halves incoming damage and the Red Ring reduces it to one quarter, so the Red Ring is the stronger defensive upgrade. Because of its location, however, it cannot protect Link during Dungeons 6, 7, or 8.
Buy the Blue Ring for earlier survivability if you can afford it, then search for the Red Ring during your Dungeon 9 exploration. The Red Ring is optional for entering Dungeon 9 and for defeating Ganon, but it can make the final dungeon’s enemy rooms and repeated attempts substantially more forgiving.
Keep arrows in reserve once the Bow is available. Buy bombs whenever your supply becomes low, because later dungeons use them for both combat and hidden passages. Potions are useful for long learning attempts: a Blue Potion restores health once, while a Red Potion provides two uses. A potion is a recovery tool, not a replacement for restocking and learning a safe route.
- Use the Blue Ring for mid-game protection if desired.
- Expect the Red Ring inside First Quest Dungeon 9.
- Maintain a reserve of arrows and bombs before difficult dungeon pushes.
- Carry a potion when a fairy pond is inconvenient or repeated attempts are likely.
Before you move on
- Dungeon 5 has been explored far enough to collect the Recorder.
- Digdogger has been reduced with the Recorder and Dungeon 5’s Triforce fragment has been collected.
- The empty fairy pond in western Hyrule has been opened with the Recorder, revealing Dungeon 7.
- The Recorder successfully reaches a previously completed dungeon when used on the overworld and directed with Link’s facing.
- The Blue Ring has been purchased if earlier damage reduction is wanted, or its cost has intentionally been reserved for supplies.
- Before entering Dungeon 9, you understand that the Red Ring is an optional treasure inside the final dungeon, not a prerequisite for entry.
References for this chapter
Dungeon 5 and 6 — Recorder, Magic Wand, and Digdogger/Gohma Fights
Clear Level 5, The Lizard, in the Lost Hills to obtain the Recorder, defeat Digdogger, and claim the fifth Triforce fragment. Then enter Level 6, The Dragon, from the cemetery area with the Ladder, Bow, arrows, bombs, and healing ready. Obtain the Magic Wand, defeat First Quest Gohma with an arrow through its open eye, and claim the sixth Triforce fragment.
Prepare for Level 5 and find the entrance
Level 5 is in the Lost Hills at the northern end of Hyrule. The Lost Hills screen loops when you travel north, south, or east, so the entrance is not found by ordinary exploration. You need the Ladder before entering because Level 5 contains narrow lava gaps. Carry several bombs, and bring a potion if you have one. Blue Darknuts and Gibdos make this dungeon substantially more dangerous than the first four.
From the starting screen, travel right four screens, up five screens, right one screen, up one screen, and left one screen. This places you at the Lost Hills. From that screen, go north four consecutive times. The screens repeat during the climb, but the fourth northward transition brings you to the Level 5 entrance. This is the First Quest route; do not substitute the Second Quest lake entrance.
The Recorder is a permanent inventory item. Changing the selected B-button item does not remove it, and leaving the dungeon after collecting it does not erase it. However, collecting the Recorder alone does not award the Triforce fragment; Digdogger must still be defeated.
- Have the Ladder before entering Level 5.
- From the starting screen, use the four-right, five-up, right, up, left route to reach Lost Hills.
- Go north four times in Lost Hills to reveal the Level 5 entrance.
- Carry bombs and, if available, a potion.
Reach the Recorder in Level 5
Enter Level 5 and go north. In the next room, bomb the west wall and pass through. In the following room, bomb the west wall again. This shortcut leads toward the southwest side of the dungeon and avoids an unnecessary tour of the upper rooms.
Continue to the Blue Darknut room. Clear every Darknut before attempting to push a block. After the room is clear, push the leftmost block to reveal a staircase. Descend and cross the underground passage. When you emerge, use the left locked door. The lower locked door leads to the optional bomb-capacity purchase, not the Recorder.
In the next room, defeat all of the Blue Darknuts. When the room is clear, push the leftmost block to reveal another staircase. Descend and collect the Recorder. If the Darknuts crowd you, stay near the room edge, attack from the side or rear, and use the doorway to reset your position. Bombs can help, but preserve enough for the dungeon’s required wall openings.
- Go north from the Level 5 entrance.
- Bomb the west wall, then bomb the west wall in the next room.
- Clear the first Blue Darknut room and push its leftmost block.
- Cross the underground passage and use the left locked door.
- Clear the second Blue Darknut room and push its leftmost block.
- Descend the staircase and collect the Recorder.
Reach and defeat Digdogger
After taking the Recorder, return through the underground passage to the earlier dungeon branch. Work back through the Gibdo and Pols Voice rooms, collecting keys as needed. The direct boss route is generally described as two rooms north from the entrance, one room east, three rooms north, then three rooms west, although hidden passages and one-way connections can make the return trip feel less direct. Use the dungeon map if you collected it, but do not spend bombs on optional rooms before confirming the boss route.
Digdogger is invulnerable while large. Select the Recorder and use it once in the boss room. The sound shrinks Digdogger, allowing sword attacks to damage it. Circle around the smaller form while avoiding the four statue firing lines. Strike when Digdogger approaches, then move away before it can collide with Link. Bombs can also contribute damage, but shrinking the boss with the Recorder is the required first action.
When Digdogger is defeated, collect the Heart Container. Go north through the opened passage and take the fifth Triforce fragment.
- Return through the underground passage after collecting the Recorder.
- Follow the key route toward the western boss section.
- Use the Recorder once while Digdogger is large.
- Defeat the shrunken Digdogger with sword attacks or other available damage.
- Collect the Heart Container and the fifth Triforce fragment.
Use the Recorder between dungeons
On the overworld, select the Recorder and press B. A tornado carries Link to the entrance of a previously completed dungeon. The destination follows the game’s cleared-dungeon warp sequence; the Recorder does not open a menu of freely selectable entrances.
Use it to shorten travel between completed dungeons and nearby shops, fairy ponds, or supply routes. It is optional and is not needed to finish the game. If the tornado leaves you at an inconvenient dungeon entrance, walk from that location or play the Recorder again when the game permits another warp. Select the sword, bombs, or another combat item before entering an enemy-heavy screen.
- Select the Recorder before pressing B on the overworld.
- Expect the tornado to follow the cleared-dungeon sequence.
- Use it as a routing shortcut, not as a free-choice teleport menu.
Prepare for Level 6 and reach its entrance
Level 6 is just east of the cemetery in the northwest portion of Hyrule. The Ladder is required for the intended route, and the Bow with arrows is essential for Gohma. Bring bombs and enter with as much health as possible. A potion or a healing stop is worthwhile because Level 6 contains Wizzrobes, Like-Likes, Bubbles, traps, and cramped rooms where damage is difficult to avoid.
From the starting screen, go right one screen into the forest. Go north, then continue west along the route toward the Level 5 area until you reach the river where it meets the lake. Use the Ladder to cross west. Continue west until the path stops, then go south. Move a short distance west and go north up the stairs. Continue one screen west, then keep going west until you can go no farther. Descend the stairs into the darker mountain passage, then go one more screen west. You will be in the screen immediately east of the cemetery, with Lynels near the lower steps. Go up the steps to the Level 6 entrance and enter. Avoid fighting the Lynel unless it blocks your path.
There is also an alternate entrance beneath the northwesternmost statue in the nearby area, but the cemetery-side entrance is the straightforward route. If you reach the cemetery and cannot find the dungeon, stand on the screen immediately east of it and look for the stairs leading upward.
- Have the Ladder, Bow, and arrows before entering Level 6.
- From the starting screen, cross the river west with the Ladder while following the route toward Level 5.
- Use the mountain stairs and continue west until you reach the screen east of the cemetery.
- Go up the steps and enter Level 6.
- Carry bombs and at least one healing option if available.
Reach the Magic Wand in Level 6
From the entrance, go east and clear the Red Wizzrobes. Take the key that appears. You may use it on the north door to hear the Old Man’s warning to aim at Gohma’s eyes, then return to the entrance.
From the entrance, go west twice and north. Defeat the Zols and take the Compass. Go north and collect the next key after clearing the Keese. Continue north through the trap room, then clear the Wizzrobes and Like-Likes in the following room. Push the leftmost block after the room is clear to open the northern route.
Do not go north unless you want to fight the three-headed Gleeok. Instead, bomb the middle of the east wall and pass through. Use the Blue Candle if the room is dark, take the key, and go north through the locked door. Defeat the Zols and Like-Likes if you want the Map; the Map is optional.
From the Map area, go north through the locked door. Defeat all Wizzrobes, then push the leftmost block to reveal a staircase. Descend and collect the Magic Wand. It fires a straight beam without consuming arrows and is useful against several dungeon enemies, but it does not replace the Bow for the Gohma fight.
- Clear the Red Wizzrobes east of the entrance and take the key.
- Visit the Old Man if you want the Gohma hint.
- Go west twice and north to collect the Compass.
- Take the key beyond the Keese and pass the trap room.
- Clear the Wizzrobe and Like-Like room and push the leftmost block.
- Bomb east to bypass the three-headed Gleeok, then take the key.
- Collect the optional Map if desired.
- Clear the Wizzrobes north of the Map and descend for the Magic Wand.
Reach Gohma and claim the sixth fragment
Return to the Map area and take the key in the room immediately east if you have not already collected it. From the Map area, go south and take the key in the lower route. Continue south and clear the Vires. Go east into the Wizzrobe and Like-Like room, defeat the enemies, and push the single block to reveal a staircase. Cross the underground passage to the upper-right section of the dungeon.
After emerging, go south and collect the key. Go west, then take the northern route toward the boss. The southern branch is an optional dead end containing additional enemies. Unlock the northern door and enter Gohma’s room.
Gohma moves across the room and fires projectiles while its eye is closed. Equip the Bow and arrows before entering. Stay near the doorway or another safe edge, keep moving to avoid the projectiles, and wait for the eye to open. Fire an arrow directly into the exposed eye. In First Quest, one successful arrow hit defeats this Gohma. If you miss, do not waste arrows against the closed shell; continue moving and wait for the next opening.
After Gohma falls, collect the Heart Container and go north to take the sixth Triforce fragment. The Magic Book in Level 8 later adds fire to the Magic Wand’s beam. It is an optional enhancement and is not required for Level 6, Gohma, or the First Quest ending.
- Take the key east of the Map area.
- Return south, collect the lower key, and clear the Vire room.
- Clear the Wizzrobe and Like-Like room and push its single block.
- Cross the staircase passage and take the key in the upper-right section.
- Go west and use the northern route to Gohma.
- Shoot Gohma’s open eye with an arrow.
- Collect the Heart Container and sixth Triforce fragment.
Before you move on
- The Recorder is visible in the inventory after being collected in Level 5.
- Digdogger has been defeated, its Heart Container has been collected, and the fifth Triforce fragment is displayed.
- Using the Recorder on the overworld produces its tornado and follows the completed-dungeon warp sequence.
- The Magic Wand is visible in the inventory after being collected in Level 6.
- Gohma has been defeated with an arrow through its open eye, its Heart Container has been collected, and the sixth Triforce fragment is displayed.
- The Bow, arrows, bombs, and Ladder remain available for later dungeons.
- The Level 5 entrance was reached through the First Quest Lost Hills route, and the Level 6 entrance was reached from the cemetery-side mountain steps.
- The Magic Book is understood to be an optional Level 8 enhancement rather than a requirement for Level 6 or the First Quest ending.
Dungeon 7 and 8 — Red Candle, Magical Key and Gleeok
Clear Level 7, The Demon, to obtain the Red Candle and the seventh Triforce fragment. Then travel to the verified First Quest Level 8 entrance at overworld screen N-7, burn the lone tree blocking the narrow path, and enter The Lion. Collect the Magic Book and Magical Key, defeat the four-headed Gleeok, and take the eighth Triforce fragment. The Recorder is the item name used for the whistle-like instrument in the original North American NES release.
Prepare for Level 7
Before entering Level 7, obtain the Recorder, Stepladder, and Monster Bait. Food is required for the hungry Goriya obstruction inside this dungeon. Carry as many bombs as practical, because several bombable walls are part of the normal route rather than optional shortcuts. Enter with most of your health restored and a potion available if possible.
Level 7 is hidden at the lone Fairy fountain that contains no Fairy. From the nearby forest route, reach the empty fountain and play the Recorder. The water drains and reveals the dungeon entrance. If a normal whirlwind appears elsewhere, you are at the wrong fountain. A Fairy fountain one screen east can be used for recovery before entering.
- Recorder obtained
- Stepladder obtained
- Monster Bait carried
- Bombs and healing prepared
- Empty Fairy fountain identified
Reach the Red Candle in Level 7
From the Level 7 entrance, take the eastern route and continue through the early rooms. Use bombs on required walls instead of assuming that every blank wall is decorative. Clear enemy rooms when their doors remain closed, but do not spend health pursuing optional rupees or regular keys if you already have enough supplies.
A Digdogger appears on the route toward the upper section. Play the Recorder to split it, then defeat the smaller forms or pass through if the room allows it. Later, a hungry Goriya blocks a required passage. Assign Monster Bait to an item button and use it in the room. The Goriya moves aside, allowing you to continue. If you entered without Bait, leave the dungeon, buy it from an overworld shop, and return.
Continue through the bombable and enemy-locked passages until you reach the room with three Red Goriyas and three Blue Goriyas. Clear the room, push the western block, and descend the revealed staircase to collect the Red Candle. Level 7 can also contain a bomb-capacity increase; treat that reward as optional, although extra bombs are useful for the remaining route.
- Required Digdogger encounter handled
- Required bombable passages opened
- Hungry Goriya fed with Monster Bait
- Red Candle collected
- Optional bomb-capacity upgrade collected if desired
Use the Red Candle and defeat Aquamentus
The Red Candle creates a flame like the Blue Candle, but it can be used repeatedly on the same overworld screen after the first flame disappears. This makes it practical for searching several bushes or trees without leaving and re-entering the screen. It does not reveal cracked dungeon walls and cannot replace bombs for bombable passages.
Finish the remaining Level 7 route and enter the Aquamentus room. Aquamentus moves horizontally and periodically sends three fireballs across the room. Keep moving, attack from a safe angle, and avoid standing in the fireball paths. Sword beams are useful while Link has full health; direct sword strikes are also reliable when you can approach without being trapped.
After Aquamentus falls, collect the Heart Container and enter the next room to take the seventh Triforce fragment. Confirm that the fragment is displayed before leaving Level 7.
- Red Candle tested successfully
- Aquamentus defeated
- Heart Container collected
- Seventh Triforce fragment collected
Reach Level 8 at overworld screen N-7
Level 8 is not in an unspecified eastern forest area. Its verified First Quest entrance is at overworld screen N-7, at the east end of Hyrule. Starting from the opening screen, travel right four screens, up two screens, right one screen, down one screen, and right one screen. You will arrive at a wooded dead end where a lone tree blocks a narrow path.
Equip the Blue Candle or Red Candle and burn that lone tree. The staircase to Level 8 appears beneath it. The Blue Candle is sufficient; the Red Candle is not required for this entrance. If you reach a different forest screen or do not see the blocked path, retrace the route using the screen sequence rather than searching random trees.
Before entering, restock bombs and healing. A stronger sword, Magical Shield, Blue Ring, or Red Ring improves survivability but is not required to open the dungeon. The Magical Book and Magical Key are inside Level 8, so do not leave after obtaining only the first item.
- N-7 reached
- Lone tree blocking the narrow path located
- Blue Candle or Red Candle equipped
- Level 8 entrance revealed
- Bombs and healing prepared
Collect the Magic Book
From the Level 8 entrance, go left. Defeat the Manhandla in the first required room; a bomb can shorten the fight if one is available. Continue into the room containing Gibdos and Darknuts. Use blocks for cover against the Darknuts and clear the entire room so the passage opens.
Push the block on the left side of the cleared room to reveal a staircase. Descend and collect the Magic Book. This item upgrades the Magic Wand so that its beam creates fire when it reaches the far side of the screen or strikes an obstacle. The Book is useful for lighting rooms and attacking selected enemies, but it is not required to defeat Gleeok.
The Compass, Dungeon Map, and several regular keys are useful but optional once you understand the layout. Do not spend health on every detour if your goal is to reach the Magical Key and boss.
- Manhandla defeated
- Darknuts and Gibdos cleared
- Left block pushed
- Magic Book collected
- Magic Wand available if you want the fire effect
Collect the Magical Key
Return to the entrance and go north. Defeat or bypass the Manhandla, then bomb the north wall to reach the Blue Darknut room. This room contains five Blue Darknuts and Stone Statues that fire across the room. Defeat all five Blue Darknuts; the key reward and the opened route depend on clearing this room.
Continue through the next rooms and collect regular keys only if needed. The Compass and other key rooms are optional. Follow the route back toward the Map branch, then pass through the Blue Gohma room. The Blue Gohma must be defeated to open the northern door on this route; strike its open eye with arrows, using three successful hits to defeat it.
From the Blue Gohma area, enter the room containing two Red Darknuts, two Pols Voices, and a Blue Darknut. Defeat every enemy, then push the leftmost block to reveal the staircase. Descend and collect the Magical Key. It opens ordinary locked dungeon doors without being consumed, and the key display changes to A. Enemy-locked doors and block mechanisms still require their normal actions.
The Magical Key is strongly recommended for Level 9 but is not mandatory for completing the game. If you already have enough ordinary keys and choose to skip it, you can still finish Level 8 and the First Quest, but later locked-door management becomes more restrictive.
- Blue Darknut gate cleared
- Required Blue Gohma defeated
- Required enemy room cleared
- Leftmost block pushed
- Magical Key collected
- Key display changed to A
Defeat the four-headed Gleeok
After collecting the Magical Key, return to the central route and clear the Blue Darknut room so the eastern door opens. Use the underground passage to reach the western side of Level 8. The room with Pols Voices and the regular key is optional when the Magical Key is in your inventory.
From the western section, bomb the wall leading toward the boss route. Clear any enemy room that prevents the next door from opening. The final passage leads to the four-headed Gleeok. You do not need to defeat every optional enemy room or collect every regular key to reach the boss.
Attack the heads that remain attached to Gleeok with the sword. Sword beams help when Link has full health, but close sword attacks are the dependable method when the boss is already pressuring the room. Keep moving so fireballs and detached heads do not pin Link against a wall.
Each severed head detaches and continues moving as an active hazard. Detached heads do not regrow, but they remain dangerous and can fire while you attack the remaining attached heads. Do not stop moving after cutting off a head. When all four heads have been removed, collect the Heart Container, go north, and take the eighth Triforce fragment.
- Required boss route opened
- Four-headed Gleeok defeated
- Detached heads avoided while attacking attached heads
- Heart Container collected
- Eighth Triforce fragment collected
Before you move on
- The Red Candle is in the inventory and can create repeated flames on the same overworld screen.
- Aquamentus is defeated, the Heart Container is collected, and the seventh Triforce fragment is present.
- The Level 8 entrance was opened by burning the lone tree at overworld screen N-7.
- The Magic Book and Magical Key have been collected from Level 8, and the key indicator shows A.
- The four-headed Gleeok is defeated, the Heart Container is collected, and the eighth Triforce fragment is present.
- All eight Triforce fragments are displayed in the inventory, confirming completion of the first eight First Quest dungeons and readiness to prepare for Level 9 at Spectacle Rock.
References for this chapter
- The Legend of Zelda — Official Nintendo Instruction Manual PDF
- The Legend of Zelda/Underworld/Quest 1/Dungeon 7 — StrategyWiki
- The Legend of Zelda/Underworld/Quest 1/Dungeon 8 — StrategyWiki
- Level 7: Demon — The Legend of Zelda Guide and Walkthrough
- Level 8: Lion — The Legend of Zelda Guide and Walkthrough
- The Legend of Zelda Walkthrough — Level 8: The Lion
Preparing for Death Mountain (Pre-Final Checklist)
Before entering Dungeon 9 in the original North American Nintendo Entertainment System First Quest, verify that you possess all eight Triforce pieces, refill health and supplies, and travel to the correct Spectacle Rock entrance. The Red Ring and Silver Arrows are found inside Dungeon 9, so neither is required before entry. The Red Ring is an optional defensive upgrade, but the Silver Arrows are required to finish Ganon.
1. Confirm the eight Triforce pieces
Open the subscreen on the overworld and verify that all eight Triforce pieces are displayed. One piece comes from each of Dungeons 1 through 8. Dungeon 9 can be entered before the collection is complete, but the Old Man in the opening route will block further progress and tell you to find the remaining pieces.
If one piece is missing, leave Death Mountain and identify the unfinished dungeon before making another final-dungeon attempt. Defeating a dungeon boss is not enough by itself; Link must enter the reward room and collect the Triforce piece. Revisit the dungeon whose reward is absent from the subscreen.
Optional equipment cannot bypass this requirement. The Magical Sword, Blue Ring, extra Heart Containers, Magical Key, and potions can make the final dungeon safer, but none replaces a missing Triforce piece.
- The subscreen displays all eight Triforce pieces.
- Dungeons 1 through 8 have each yielded their reward.
- You are not relying on optional equipment to pass the Dungeon 9 access check.
2. Restock bombs, arrows, and healing
Carry a useful supply of bombs before entering Dungeon 9. The labyrinth contains required bomb passages as well as optional bombable branches, and running out before reaching the Silver Arrows can force a retreat. Do not spend your last bombs casually on enemy damage if you are still following an unfamiliar route.
Bring the Bow and ordinary arrows if available. They are useful for ranged attacks and may be needed against enemies encountered on the way to Ganon, but ordinary arrows are not the finishing weapon for the final battle. The Silver Arrows are a separate item located inside Dungeon 9.
A Red Potion is a strong preparation choice because it restores the full life meter and provides another recovery after its first use. If you do not have medicine, decide where you will heal before entering, such as the medicine shop west of Spectacle Rock or a dependable fairy location reached on your approach. Enter with full health rather than expecting random heart drops to sustain the expedition.
- Bombs are stocked instead of nearly empty.
- The Bow and ordinary arrows are available when possible.
- A Red Potion or dependable healing stop is prepared.
- Enough rupees remain to replace supplies after a failed attempt.
3. Check defensive equipment
Equip the Blue Ring if you own it and have not yet obtained the Red Ring. The Red Ring is inside Dungeon 9, so it cannot be equipped before the first expedition. Once you reach its branch, collecting it early is worthwhile because it reduces damage and makes the remaining enemy rooms more forgiving.
The Magical Sword is recommended because it improves close-range damage and allows sword beams while Link is at full health, but it is not required for entry or completion. The White Sword can still complete the game if you compensate with careful movement, adequate hearts, bombs, and healing.
Make sure the Magical Shield is still in your inventory if you depend on it for projectile protection. Like Likes can consume shields, and replacing a lost shield before the final dungeon may be sensible. The shield can help against some attacks, but it does not remove the need to evade Wizzrobes, Patras, fireballs, and other hazards.
- The strongest practical sword is equipped.
- The Blue Ring is equipped if the Red Ring has not yet been found.
- The Magical Shield is available if you rely on it.
- Link’s life meter is full before departure.
4. Travel to Spectacle Rock
From the starting screen, go right one screen. Then go up five screens, left one screen, up two screens, and left two screens. This sequence reaches the pair of large rock formations called Spectacle Rock in the First Quest.
The Dungeon 9 entrance is hidden in the western, or left-hand, rock. Stand against the south side of that left rock and place a bomb. When the opening appears, enter the cave and proceed into Death Mountain.
If you need medicine before entering, go west from Spectacle Rock to the medicine shop, make your purchase, then return east to the twin rocks. Heal and restock before bombing the entrance rather than beginning the dungeon with a damaged life meter.
- You followed the route right one, up five, left one, up two, then left two.
- You reached the two-rock Spectacle Rock landmark.
- You bombed the south side of the western or left-hand rock.
- Link is fully healed before entering Dungeon 9.
5. Set priorities inside Dungeon 9
Proceed through the opening passage and confirm that the Old Man allows you to continue. If he blocks the route, leave and recover the missing Triforce piece before trying again. The eight-piece Triforce requirement is the necessary access condition for the inner dungeon.
On the first expedition, prioritize the required route to the Silver Arrows and consider collecting the Red Ring before pushing toward Ganon. The Red Ring is optional, but its defensive benefit is substantial in the remaining Wizzrobe, Patra, and other enemy rooms.
The Silver Arrows are mandatory for the final victory. Ordinary arrows, sword beams, bombs, and the Magic Wand cannot replace the required Silver Arrow shot after Ganon becomes visible and vulnerable. Do not enter Ganon’s room unless you have confirmed the Silver Arrows in the inventory.
The Dungeon Map, Compass, rupee rooms, and other detours can be skipped when supplies are limited. The Magical Key makes ordinary locked-door management easier, but it is not required. Preserve bombs for required walls and passages, and avoid spending healing on optional branches until the main route is secure.
- The Old Man permits passage beyond the entrance.
- The Red Ring is treated as an optional defensive objective.
- The Silver Arrows are treated as mandatory.
- You will not attempt Ganon before confirming the Silver Arrows.
6. Recover after death or retreat
If Link dies or you retreat, do not immediately re-enter with low health and depleted supplies. Return to the medicine shop or another dependable supply point, restore your hearts, refill bombs and arrows, and approach Spectacle Rock again. A failed Dungeon 9 attempt does not require replaying the first eight dungeons.
If the subscreen shows a missing Triforce piece, revisit the corresponding lower-numbered dungeon. Dungeons 1 through 4 are usually straightforward revisits when you already possess their items: Dungeon 1 contains the Boomerang and Bow, Dungeon 2 contains the Magical Boomerang, Dungeon 3 contains the Raft, and Dungeon 4 contains the Stepladder. The immediate objective is the missing Triforce reward, not another complete equipment sweep.
If you reach Ganon without the Silver Arrows, retreat and search the remaining Dungeon 9 branches. Continuing to attack without the required item will not complete the final encounter. The Recorder can help return you to cleared dungeon entrances and reduce travel between attempts, but it is only a convenience.
- You have a restocking plan after death or retreat.
- Any missing Triforce piece will be recovered before another final-dungeon attempt.
- You will search Dungeon 9 for the Silver Arrows before fighting Ganon.
- You can return with full health and renewed bombs, arrows, and medicine.
Before you move on
- The subscreen shows all eight Triforce pieces.
- Spectacle Rock has been reached by going right one screen, up five screens, left one screen, up two screens, then left two screens from the starting screen.
- The Dungeon 9 entrance has been opened by bombing the south side of the western or left-hand rock.
- Link enters with full health, stocked bombs, ordinary arrows if available, and a dependable healing option.
- The strongest practical sword is equipped, with the Blue Ring equipped if the Red Ring has not yet been found.
- The Dungeon 9 plan prioritizes the Silver Arrows and treats the Red Ring as an optional but valuable defensive upgrade.
- Ganon will not be challenged until the Silver Arrows are confirmed in the inventory.
References for this chapter
- The Legend of Zelda — Official Nintendo Instruction Manual PDF
- Level 9: Death Mountain - Zelda Universe
- Dungeon 9: Death Mountain — The Legend of Zelda Walkthrough, Thonky
- Level 9: Death Mountain — The Legend of Zelda Walkthrough, Zelda Dungeon Wiki
- Level 9: Death Mountain — The Legend of Zelda Walkthrough, Zelda Central
Dungeon 9 (Spectacle Rock / Death Mountain) — Finding the Silver Arrows and Red Ring
Level 9 is the final First Quest dungeon in the original North American NES release. You need all eight Triforce fragments to pass the entrance barrier and must obtain the Silver Arrows before Ganon can be defeated. The Red Ring, Compass, Dungeon Map, rupee rooms, and most enemy encounters are optional. The first Patra encountered can be bypassed; the later Patra on the Silver Arrow route and the final Patra before Ganon must be defeated. The Magical Key makes locked-door management easier but is not required.
Prepare outside and open Level 9
Collect all eight Triforce fragments before entering. In the Death Mountain area, find the two large rock formations known as Spectacle Rock. Place a bomb against the south side of the western, left-hand rock. The eastern rock is not the First Quest entrance.
Bring the Bow and arrows, several bombs, and a healing option. A potion is useful for the Wizzrobe and Patra rooms, but the Red Ring is optional and the dungeon can be completed without it. The Magical Key is a convenience rather than a requirement; ordinary small keys can still open the necessary doors.
- All eight Triforce fragments collected.
- The western Spectacle Rock formation bombed.
- Bow and arrows available.
- Several bombs carried.
- A potion or nearby healing plan prepared.
- Magical Key available only if desired.
Reach the first Patra room
Enter the dungeon and go north. With all eight Triforce pieces, the entrance barrier no longer blocks the northern route. Continue through the opening rooms until you reach the room with the two Red Lanmolas. If a wall blocks the route, bomb the west wall from the preceding enemy room.
Defeat both Red Lanmolas. Attack their moving segments and finish each head; both enemies must be gone before the west block can be pushed. Push the block and descend through the underground passage.
On the far side, cross the Like Like room and unlock the eastern door with a small key or the Magical Key. Continue through the Blue Wizzrobe room toward the first Patra room. The first Patra does not have to be defeated. Traverse the room and use the available southern route. Fighting it is optional and should not be listed as a completion requirement.
- Entrance barrier passed.
- Opening west wall bombed where necessary.
- Both Red Lanmolas defeated.
- West block pushed.
- First underground passage crossed.
- Eastern locked door opened.
- First Patra room traversed without requiring a Patra defeat.
Optional Compass, Map, and Red Ring
From the first Patra room, go south. In the Gel room, bomb the east wall if you want the optional Map branch. The Patra in that side room can be defeated to reveal the Dungeon Map, but the fight and map are optional.
For the Red Ring, continue through the north-wall bomb opening and then bomb the north wall of the next room. Enter the Wizzrobe room and defeat the required Red and Blue Wizzrobes. After the room is clear, push the west block and descend the staircase through the underground passage. The Red Ring is on the other side. It reduces the damage Link takes and is an optional defense upgrade.
The Compass is another optional detour near the early Blue Wizzrobe route. Skip it, the Map Patra, and the Dungeon Map if your health or bombs are low. After collecting the Red Ring, return through the passage and backtrack to the first Patra room.
- Map branch skipped or completed as desired.
- Two north-wall bomb openings made for the Red Ring route.
- Required Red and Blue Wizzrobes defeated in the Red Ring room.
- West block pushed.
- Red Ring collected if desired.
- Returned to the first Patra room.
- Optional Patra fights not mistaken for required progression.
Reach the Silver Arrows
From the first Patra room, go north through the locked door. Use the Magical Key or spend a small key. The next room contains an Old Man; bomb the west wall as instructed by the route.
In the following Wizzrobe room, defeat all required Wizzrobes. When the room is clear, push the west block and descend through the next underground passage.
You emerge in a southern room with Zols. Defeat or avoid them, then use the west door. Cross the Keese room; its rupees are optional. Continue west into the next Patra room. This Patra is route-blocking: defeat it, then push the west block and descend through the underground passage.
In the next section, reach the room below the bombable north wall. Bomb that north wall. The following room contains Wizzrobes and Bubbles. Defeat all Wizzrobes, then push the center block on the eastern side of the room. The staircase appears beneath it. Descend and collect the Silver Arrows.
Do not spend bombs on optional walls before obtaining the arrows if your supply is limited. The Silver Arrows are required to finish Ganon.
- Old Man room reached.
- West wall bombed.
- First required Wizzrobe room cleared.
- West block pushed.
- Underground passage crossed.
- Zol room crossed.
- Keese room crossed; rupees skipped or collected.
- Second Patra defeated.
- Second west block pushed.
- Next underground passage crossed.
- North wall bombed.
- Final required Wizzrobe room cleared.
- Eastern center block pushed.
- Silver Arrows collected.
Return and open the path to Ganon
After collecting the Silver Arrows, return through the underground passage. Clear the Wizzrobes in the room before the staircase so the block can be pushed again, then return to the room containing the route-blocking Patra. From there, go north through the opened route.
The next room contains six Like Likes. Avoid them or defeat them, then continue north. Cross the Blade Trap and Like Like room without wasting health. In the next room, containing Wizzrobes, Like Likes, and a Bubble, bomb the west wall; the enemies there do not need to be cleared for this opening.
The following room contains Wizzrobes and Blade Traps. Defeat all required Wizzrobes, then push the west block. The staircase is beneath a Blade Trap. Walk into the trap's path to activate it, then move quickly onto the staircase before it resets and descend through the underground passage.
On the far side, cross the next Wizzrobe and Blade Trap room and bomb the west wall. In the room beyond, defeat the Like Likes and Zols so the west block can be pushed. Descend through the final underground passage.
The passage leads to the final Patra room. Defeat this Patra to open the northern door, then go north into Ganon's chamber.
- Silver Arrows retained.
- Return-side Wizzrobe room cleared when necessary.
- Six Like Likes crossed.
- Blade Trap room crossed.
- First final-route west wall bombed.
- Required Wizzrobes defeated.
- West block pushed beneath the Blade Trap.
- Underground passage crossed.
- Second west wall bombed.
- Like Likes and Zols defeated in the final block room.
- Final west block pushed.
- Final underground passage crossed.
- Last Patra defeated.
- Northern door to Ganon opened.
Recovery and supply management
If you die before collecting the Silver Arrows, continue from the overworld, restore your health, and restock bombs and arrows before returning. The Recorder can shorten the trip if you have it, but it is only a routing convenience. If you die after collecting the Silver Arrows, the item remains in your inventory when you continue, so heal and re-enter rather than searching for it again.
Like Likes can consume the Magical Shield. Avoid contact in narrow rooms, especially around the entrance and on the final route. Losing the shield does not prevent completion. If you run out of bombs, leave Death Mountain and restock before continuing.
When supplies are poor, prioritize the mandatory opening wall, the Old Man route, the north-wall opening before the Silver Arrows, and the final west-wall openings. Skip the Compass, Map branch, Dungeon Map, rupee rooms, and Red Ring detour if necessary.
- Health restored after death.
- Bombs and arrows restocked.
- Silver Arrows confirmed before entering Ganon's chamber.
- Optional detours skipped when necessary.
- Magical Key treated as a convenience rather than a requirement.
- A potion reserved for a dangerous Wizzrobe or Patra room.
Before you move on
- All eight Triforce fragments were collected before entry.
- Level 9 was entered through the western Spectacle Rock formation.
- The entrance barrier was passed.
- The Silver Arrows are present in the inventory.
- The Red Ring was collected only if desired.
- Both opening Lanmolas were defeated.
- The first Patra was bypassed or defeated; its defeat is not required.
- The later Patra guarding the Silver Arrow route was defeated.
- All staircase-opening Wizzrobe rooms were cleared.
- All required bomb walls were opened.
- All required blocks were pushed.
- The final Patra was defeated and the northern door to Ganon was opened.
- During the Ganon fight, strike his invisible position with the sword by watching where the fireballs originate. Continue until Ganon becomes visible and brown, then immediately fire a Silver Arrow through the Bow.
- After Ganon is defeated, collect the Triforce of Power, leave through the northern door, extinguish the blue flames with the sword, reach Princess Zelda, and trigger the First Quest ending.
Final Confrontation with Ganon — Patterns and How to Use the Silver Arrows
Enter Ganon’s room only after collecting the Silver Arrows in Level 9. Select the Bow as Link’s B-button item; the Silver Arrows are ammunition fired through the Bow and are not a separate selectable weapon. Ganon becomes invisible and attacks with fireballs. Use the fireballs’ starting points to judge his position and strike him with the sword until the required threshold is reached: four successful hits with the Magical Sword, eight with the White Sword, or sixteen with the Wooden Sword. Ganon then becomes brown and vulnerable. Fire a Silver Arrow immediately during that opening, collect the Triforce of Power, leave through the northern exit, clear the blue flames, and reach Princess Zelda to trigger the First Quest ending. The sword-hit requirements and Silver Arrow weakness are consistent with established NES references.
Prepare before entering Ganon’s room
Do not enter the final boss room until you have collected the Silver Arrows in Level 9. Ordinary arrows cannot replace them for the finishing blow. If you reach Ganon without the Silver Arrows, leave the boss approach and search the unexplored branches of the dungeon before attempting the fight.
Restore your hearts before entering. The Red Ring is optional, but it reduces damage and makes contact with Ganon or his fireballs less punishing. A potion is useful if you have one, especially after clearing the difficult rooms near the end of Level 9. The Magical Sword is also optional; it reduces the number of sword strikes needed to create the opening, but the battle can be completed with the White Sword or Wooden Sword if you avoid damage and remain patient.
Open the subscreen and select the Bow for the B button. The Silver Arrows are an upgrade used through the Bow after collection; do not look for a separate Silver Arrows item to equip. Confirm that the Bow is selected before entering. Bombs cannot damage Ganon, so keep them selected only if you still need them for unfinished passages in Level 9.
- All eight Triforce fragments collected
- Silver Arrows collected in Level 9
- Bow selected for the B button
- Hearts restored before entering
- Potion available if you are carrying one
- Red Ring and Magical Sword equipped if available
Read Ganon’s invisible movement
When Link enters the room, Ganon appears briefly and then becomes invisible. While hidden, he moves around the room and releases fireballs from his current position. The points where the fireballs begin are your best indication of where he is moving.
Watch each fireball’s starting point instead of running continuously around the room. Ganon can shift position quickly, so do not assume that one movement pattern will continue indefinitely. Move only far enough to avoid an approaching fireball, then turn your attention to the next place an attack begins.
Stay near the center or along one side of the room when possible. Short, deliberate movements make it easier to avoid the fireballs and place Link’s sword across Ganon’s path. Running across the entire room increases the chance of colliding with the invisible boss or walking into a fireball that appeared behind you.
The sword is the weapon used to build toward Ganon’s vulnerable state. Sword beams are not a substitute for close sword strikes, and bombs, arrows, and the Magic Wand do not replace the required sword attacks.
- Watch where the fireballs begin
- Use short movements to avoid them
- Keep Link ready to cover Ganon’s likely path
- Avoid contact with both Ganon and the fireballs
- Use the sword rather than arrows or bombs to advance the fight
Strike the invisible Ganon until he becomes vulnerable
Swing the sword across the position where Ganon is about to pass. A successful hit may briefly reveal him, but he then disappears and resumes the attack. Continue watching the fireball origins and striking the likely path rather than swinging continuously while moving without a plan.
The number of successful sword hits required depends on the sword Link is carrying. With the Magical Sword, land four successful hits. With the White Sword, land eight successful hits. With the Wooden Sword, land sixteen successful hits. Ganon remains invisible while these hits accumulate; he does not become brown after a universal four-hit sequence.
Count only confirmed sword hits. A swing that does not connect does not advance the fight toward the finishing opening. If you are uncertain whether a strike landed, continue the pattern rather than assuming the threshold has been reached.
After the applicable threshold is met, Ganon appears brown and vulnerable. This is the finishing opening. Keep the Bow assigned to B while you work through the sword phase so you do not lose time changing equipment once the opening appears.
Keep your health in mind while working toward the threshold. Use a potion if the fight becomes unsafe rather than forcing another swing. The objective of this phase is to create the brown opening for the Silver Arrow, not to defeat Ganon with sword damage alone.
- Sword strikes connect with Ganon’s hidden position
- Four successful hits with the Magical Sword, eight with the White Sword, or sixteen with the Wooden Sword have been made
- Ganon appears brown and vulnerable
- The Bow remains selected for the B button
Fire the Silver Arrow immediately
As soon as Ganon becomes brown after the sword-dependent threshold, press B to fire the Silver Arrow through the selected Bow. Treat this as a short opening. Do not wait for another attack cycle or attempt to continue the sword phase first.
If the shot misses or the opening closes, resume avoiding fireballs and use the sword to create another brown opening. Ordinary arrows cannot substitute for the Silver Arrow, and the Silver Arrow is not fired by selecting a separate item on the subscreen. The Bow is the item Link must have assigned to B.
A successful Silver Arrow destroys Ganon and leaves the Triforce of Power in the room. Walk over the Triforce and collect it; defeating Ganon alone does not complete the sequence.
- The correct sword-dependent hit threshold has been reached
- Ganon is brown and vulnerable
- The Bow is selected for the B button
- B is pressed immediately during the brown opening
- Ganon is destroyed
- The Triforce of Power is collected
Leave the dungeon and reach Zelda
After collecting the Triforce of Power, go through the northern exit of Ganon’s room. The next room contains blue flames blocking the route to Princess Zelda.
Use the sword to slash the blue flames until they disappear. Then walk to Princess Zelda. Reaching her triggers the First Quest ending sequence, so do not treat the boss-room victory as the final completion check.
The required order is: strike the invisible Ganon until the threshold for Link’s sword is reached, fire a Silver Arrow from the Bow while he is brown, collect the Triforce of Power, leave through the northern exit, clear the blue flames, and reach Zelda. Do not reset or power off before completing that sequence.
- Ganon is destroyed with a Silver Arrow fired from the Bow
- Triforce of Power is collected
- Northern exit is used
- Blue flames are cleared with the sword
- Princess Zelda is reached
- First Quest ending sequence appears
Recover after dying
If Link dies inside Level 9, choose Continue for an immediate retry. Continue preserves the possessions Link had at death and returns Link to the dungeon entrance with three life hearts rather than preserving his exact room position.
Choose Save when you want to record the current progress to the cartridge and return to the file-selection screen. Loading the saved game gives Link three hearts and places him in the overworld, so travel back to Death Mountain before attempting the final route again. Restock at a shop or restore your health at a fairy pond before re-entering if necessary.
After a failed attempt, confirm that the Bow is still available and that the Silver Arrows were collected before returning to Ganon. If you used Continue, the current run’s possessions remain available. If you used Save and reloaded, verify the inventory on the subscreen before making another trip through Level 9.
If you reach Ganon and discover that you never collected the Silver Arrows, do not waste ordinary arrows attacking him. Leave the approach and search the remaining branches of Level 9. Return to the boss only after the Silver Arrows are in the inventory and the Bow is selected for the B button.
- Choose Continue for an immediate retry with the current run’s possessions
- Choose Save to write progress to the cartridge
- Expect three hearts after Continue or after loading a saved game
- Restore hearts before returning to Level 9
- Confirm the Bow is available after reloading
- Confirm the Silver Arrows were collected in Level 9
- Do not re-enter Ganon’s room without the Silver Arrows
Before you move on
- All eight Triforce fragments were collected before entering Level 9.
- The Silver Arrows were collected inside Level 9.
- The Bow was selected for the B button before the final shot.
- Ganon remained invisible while sword hits accumulated.
- Ganon was struck successfully four times with the Magical Sword, eight times with the White Sword, or sixteen times with the Wooden Sword.
- Ganon became brown and vulnerable.
- B was pressed immediately to fire a Silver Arrow from the Bow during that opening.
- The Triforce of Power was collected from the boss room.
- The northern room was entered and its blue flames were extinguished with the sword.
- Princess Zelda was reached and the First Quest ending sequence appeared.
References for this chapter
Aftermath: Rescue, Ending, and the Second Quest
Finish the original NES First Quest by striking invisible Ganon with the sword until he becomes brown and vulnerable, then fire a Silver Arrow through the Bow. The required sword total is four hits with the Magical Sword, eight with the White Sword, or sixteen with the Wooden Sword. Collect the Triforce of Power, pass through the northern exit, remove the blue flames, and reach Princess Zelda. After the ending presentation, the completed file is marked for the rearranged Second Quest.
Defeat Ganon and collect the Triforce of Power
Enter Ganon’s chamber only after obtaining the Silver Arrows in Dungeon 9. The Bow is the item used to fire them; the Silver Arrows are ammunition for the Bow rather than a separately equipped weapon. Make sure you have enough rupees to fire arrows, because the original NES game charges one rupee for each shot.
Ganon is invisible for most of the battle. He moves around the room and attacks with fireballs, so keep moving rather than waiting in one position. Use the fireballs and Ganon’s movement as clues to his location, then thrust the sword through the area where he is likely to be. Sword beams are not the reliable method here; the required damage comes from direct sword strikes against his invisible form.
Each successful sword hit makes Ganon visible briefly before he disappears again. Continue locating and stabbing him until the required threshold is reached. With the Magical Sword, he requires four sword hits. With the White Sword, he requires eight. With the Wooden Sword, he requires sixteen. When the threshold is reached, Ganon turns brownish-red and remains visible as the finishing opportunity opens.
Immediately fire a Silver Arrow through the Bow while Ganon is in that brown vulnerable state. Do not fire before the sword threshold, because the arrow will not finish the battle while Ganon is still in his normal invisible phase. If the opening closes, resume striking the invisible Ganon until he becomes vulnerable again, then fire another Silver Arrow.
A successful Silver Arrow destroys Ganon and leaves the Triforce of Power in the room. Walk over the Triforce to collect it before using the exit. The Triforce is part of the required victory sequence, not an optional reward.
- The Silver Arrows were collected in Dungeon 9.
- The Bow is being used to fire the Silver Arrows.
- Ganon was struck four times with the Magical Sword, eight times with the White Sword, or sixteen times with the Wooden Sword.
- Ganon turned brownish-red and became visible before the finishing shot.
- A Silver Arrow destroyed Ganon.
- The Triforce of Power appeared and was collected.
Reach Princess Zelda and trigger the ending
After collecting the Triforce of Power, leave Ganon’s chamber through the northern passage. This route leads directly toward Princess Zelda; there is no normal return to the overworld between the boss victory and the rescue sequence.
The next room contains Zelda behind blue flames. Use the sword to strike the flames until they disappear. Move carefully while doing this, because walking into the flames can still damage Link. Once the barrier is gone, walk up to Princess Zelda.
Approaching Zelda triggers the rescue message and the First Quest ending presentation. The required order is Ganon’s defeat with a Silver Arrow, collection of the Triforce of Power, use of the northern exit, removal of the blue flames, and contact with Zelda.
Let the ending presentation finish before resetting or powering off the NES. The game does not return Link to a normal post-battle First Quest position where skipped items can be collected, so optional cleanup should be completed before the final battle or preserved on a separate unfinished file.
- The northern passage from Ganon’s room was entered.
- The Triforce of Power was collected before leaving the boss room.
- The blue flames were removed with the sword.
- Link reached Princess Zelda.
- The rescue message and ending presentation appeared.
- The console was not reset before the ending sequence finished.
Understand the completed First Quest file
After the rescue sequence, the completed file is marked on the file-selection screen with the sword indicator associated with the Second Quest. This marker does not represent a save positioned beside Zelda, and it does not provide a post-battle continuation of the ordinary First Quest.
Selecting the marked file begins the rearranged Second Quest with the early-game state. The First Quest inventory and final-dungeon equipment are not carried forward as a normal advantage, so expect to begin again by obtaining the Wooden Sword and rebuilding Link’s equipment.
If you still want the Magical Sword, additional Heart Containers, the Blue Ring, the Red Ring, bomb-capacity upgrades, potions, arrows, or other shop purchases, obtain them before defeating Ganon on an unfinished file. The Red Ring and Magical Sword make later combat easier but are not required for the First Quest ending. The White Sword and Wooden Sword can also complete the sword portion of the Ganon battle when paired with the Silver Arrows, although they require more hits.
Do not overwrite your only unfinished First Quest file if optional completion matters to you. Finish the desired upgrades first, or keep a separate file available for cleanup before completing the rescue.
- The ending presentation has finished.
- The file-selection screen shows the completed-file sword marker.
- The completed file is understood to be a Second Quest unlock rather than a post-battle First Quest save.
- Optional First Quest cleanup was completed beforehand or preserved on another unfinished file.
- The Red Ring and Magical Sword are treated as optional improvements, not required ending items.
Start and plan the Second Quest
Select the completed file to begin the Second Quest. The overworld remains recognizable, but dungeon entrances, dungeon layouts, item placements, secret passages, and enemy arrangements are changed. Do not assume that a familiar entrance leads to the same dungeon or that a First Quest item route still works.
The Second Quest retains the same broad objective: obtain the Wooden Sword, locate the dungeons, collect their items and Triforce fragments, assemble all eight fragments, enter Dungeon 9, obtain the Silver Arrows, defeat Ganon, and rescue Zelda. The altered placement means that First Quest knowledge is most useful for recognizing secret-search methods rather than for following an unchanged route.
Search suspicious overworld locations again. Check bombable walls, burnable bushes, pushable blocks, hidden staircases, old men, merchants, and dungeon entrances even if those locations were empty or different during the First Quest. Record discoveries as you go so that you do not repeatedly test the same screens.
The cartridge also allows the Second Quest to be selected immediately when a new file is created with the name ZELDA. Completing the First Quest first is the normal progression and leaves a completed file visibly marked for the alternate quest. Starting the Second Quest immediately is useful for a fresh challenge, while delaying it allows you to finish optional First Quest equipment without losing your route.
- The completed First Quest file has been selected, or the alternate file-name method was intentionally used.
- The new run begins with early-game equipment rather than the First Quest inventory.
- Dungeon entrances, layouts, item locations, and secrets are being treated as rearranged.
- A separate unfinished First Quest file has been preserved if optional cleanup remains.
Final completion check
The required original NES First Quest completion sequence is complete when all eight Triforce fragments have been collected, Ganon has been exposed with the correct sword threshold, a Silver Arrow has destroyed him, the Triforce of Power has been collected, the northern passage has been entered, the blue flames have been removed, and Link has reached Princess Zelda.
For the sword threshold, verify the weapon actually equipped during the battle: four hits with the Magical Sword, eight with the White Sword, or sixteen with the Wooden Sword. The Silver Arrow is then fired through the Bow during Ganon’s visible brown vulnerable state.
Optional completion is separate from rescuing Zelda. If desired, finish with all available Heart Containers, the White Sword, the Magical Sword, the Blue Ring or Red Ring, both bomb-capacity upgrades, potions, arrows, and other shop purchases. These improve survival or convenience but are not required to obtain the Triforce of Power or trigger the ending.
Once the required ending has been completed, select the marked file only when ready for a fresh rearranged adventure. First Quest assumptions about dungeon locations, item placements, and secrets will not reliably apply to the Second Quest.
- All eight Triforce fragments were collected.
- Ganon was exposed with four Magical Sword hits, eight White Sword hits, or sixteen Wooden Sword hits.
- Ganon was destroyed with a Silver Arrow fired through the Bow.
- The Triforce of Power was collected from Ganon’s room.
- The northern passage to Zelda was entered.
- The blue flames were removed.
- Link approached Zelda and the rescue message appeared.
- The First Quest ending presentation finished.
- The completed file received the Second Quest sword marker.
- Selecting that completed file begins the rearranged Second Quest.
- Any desired First Quest optional cleanup was completed before the finale or preserved on another unfinished file.
Before you move on
- All eight Triforce fragments were collected.
- Ganon was exposed with four Magical Sword hits, eight White Sword hits, or sixteen Wooden Sword hits.
- Ganon was destroyed with a Silver Arrow fired through the Bow.
- The Triforce of Power was collected from Ganon’s room.
- The northern passage to Zelda was entered.
- The blue flames were removed.
- Link approached Zelda and the rescue message appeared.
- The First Quest ending presentation finished.
- The completed file shows the Second Quest sword marker.
- A new game from that completed file begins the rearranged Second Quest.
- Any desired Magical Sword, Heart Container, ring, bomb-capacity upgrade, potion, or shop-item cleanup was completed before the finale or preserved on another unfinished file.
Optional First-Quest Completion: Heart Containers, Magical Sword and Equipment
This optional First Quest sweep collects all five overworld Heart Containers, raises Link to the maximum sixteen Heart Containers, obtains the White Sword and Magical Sword, and covers the Blue Ring, Red Ring, Magical Shield, bomb-capacity upgrades, arrows, bombs, and potions. None of these objectives is required to enter Level 9 or defeat Ganon, although the extra health, stronger swords, and defensive rings make the late game safer. The directions below apply to the original North American Nintendo Entertainment System cartridge release, not the Second Quest or a later port.
1. Track the heart total before collecting optional equipment
Link begins the First Quest with three Heart Containers. Each of the eight ordinary dungeons awards one after its boss, and five additional containers are hidden in the overworld. That produces a maximum of sixteen Heart Containers.
Four of the hidden overworld containers are in caves where an Old Man offers a choice between a Heart Container and a potion. Take the Heart Container in each of those caves if you want the maximum total. The fifth overworld container is visible on the P6 Stepladder platform and is not an Old Man choice. Count containers owned, not the number of hearts currently filled.
- Three starting Heart Containers are recorded.
- Dungeon rewards are tracked separately from overworld containers.
- Every potion-or-heart choice is being taken as a Heart Container.
2. Collect the five First Quest overworld Heart Containers
M3 large central rock: travel to the screen marked M3 on a First Quest overworld map. Clear nearby enemies if necessary, then place a bomb at the bottom-right portion of the large central rock. Enter the revealed cave and take the Heart Container offered by the Old Man.
L8 mountain wall left of the north path: on the L8 screen, identify the flat mountain wall on the left side of the northward passage. Place a bomb along that left wall to reveal the cave. Enter and choose the Heart Container instead of the potion.
H5 fifth bush from the right: reach H5 with the Blue Candle or Red Candle. Face the row of bushes and burn the fifth bush from the right. The revealed staircase leads to an Old Man’s cave; take the Heart Container.
P4 dock to P3 by Raft: reach the dock on P4 after obtaining the Raft from Level 3. Step onto the dock and ride north to P3. Enter the cave on the destination screen and take the Heart Container from the Old Man.
P6 Stepladder platform: after obtaining the Stepladder from Level 4, travel to P6. Walk across the short water gap or plank route with the Stepladder and collect the Heart Container sitting in the open. This container does not require a cave or an Old Man choice.
- The M3 large central rock Heart Container is collected.
- The L8 mountain wall left of the north path Heart Container is collected.
- The H5 fifth bush from the right Heart Container is collected.
- The P4 dock to P3 by Raft Heart Container is collected.
- The P6 Stepladder platform Heart Container is collected.
3. Claim the White Sword at five containers
The White Sword is in the Old Man’s cave beside the northern waterfall. Reach the waterfall area and enter the cave. The requirement is five total Heart Containers, whether those containers came from dungeons or the overworld. Partially filled health does not satisfy a missing-container requirement.
The White Sword is optional, but it deals more damage than the Wooden Sword. Sword beams still require Link’s health meter to be completely full, so refill at a fairy or with another healing method before relying on beams.
- At least five total Heart Containers are owned.
- The White Sword has been collected from the waterfall cave.
- Link is fully healed when testing sword beams.
4. Claim the Magical Sword from the cemetery
The Magical Sword requires twelve total Heart Containers. After reaching twelve, travel through the Lost Woods to the First Quest cemetery. Use the northeast or top-right cemetery square, not the northwest group. In that four-by-three tombstone arrangement, stand behind and push the middle-row, third-from-left tombstone. The staircase appears when the correct tombstone is moved.
Enter the staircase and take the Magical Sword from the Old Man. It is the strongest sword in the original NES game. It is optional and is not required for Level 9, the Silver Arrows, Ganon, or the ending.
- Twelve total Heart Containers are present.
- The northeast or top-right cemetery group has been identified.
- The middle-row, third-from-left tombstone has been pushed.
- The Magical Sword has been collected.
5. Buy optional defense and prepare supplies
The Blue Ring is sold in a hidden shop reached by moving the correct Armos statue. It costs 250 rupees and reduces damage taken. Buy it if you want stronger protection before Levels 6 through 8; skip it if you prefer to reserve rupees and intend to obtain the Red Ring in Level 9.
The Red Ring is stronger but cannot be collected until Level 9. Neither ring is required for the First Quest ending. The Magical Shield is a separate shop purchase and blocks more projectile types than the Small Shield. Like Likes can swallow it, so replace it if necessary before the final dungeon.
Keep arrows available for Gohma and other ranged requirements. Replenish bombs before revisiting dungeons with bombable passages, and carry a potion or plan a reliable fairy stop before difficult late-game sections.
- The Blue Ring is purchased or deliberately skipped.
- The Magical Shield is owned if desired.
- Arrows and bombs are replenished.
- A potion or dependable fairy route is available.
6. Purchase both bomb-capacity upgrades
Link begins with a maximum capacity of eight bombs. The First Quest has two permanent upgrades, each adding four bombs and each costing 100 rupees. Carry the required rupees before entering the Old Man’s room.
The first upgrade is inside Level 5. In the room with six Keese, defeat the enemies to obtain the key, then bomb the right-hand wall and enter the revealed passage. The Old Man sells the upgrade, raising capacity from eight to twelve.
The second upgrade is inside Level 7. Find the room with three Dodongos, then unlock the door to the north. The Old Man there sells the second upgrade for 100 rupees, raising capacity from twelve to sixteen. These are purchases, not free dungeon rewards.
- The Level 5 bomb upgrade has been purchased for 100 rupees.
- The Level 7 bomb upgrade has been purchased for 100 rupees.
- Maximum bomb capacity is sixteen.
- No permanent First Quest arrow-capacity upgrade is being counted.
7. Use the Recorder as a routing shortcut
After obtaining the Recorder in Level 5, use it on the overworld to warp among cleared dungeon locations. It does not open a destination menu. The target follows a fixed dungeon sequence, while Link’s facing direction determines whether the sequence advances or reverses. The game also skips dungeon locations that have not yet been cleared.
Use the Recorder to reduce long walks between optional hearts, shops, and dungeons, but do not expect one use to select any dungeon freely. The item also remains necessary for opening the Level 7 entrance, so do not confuse its overworld warp function with its puzzle use.
- The Recorder has been collected in Level 5.
- Cleared dungeons are being used to plan Recorder travel.
- Recorder warps are treated as fixed routing assistance, not free destination selection.
8. Final optional-equipment check
A complete optional First Quest equipment file has sixteen Heart Containers, the White Sword, the Magical Sword, the Blue Ring if desired, the Red Ring from Level 9, both bomb upgrades, the Magical Shield, and practical supplies of arrows, bombs, and potions. The Red Ring is naturally the last of these major defensive goals because it is inside Level 9.
Keep optional completion separate from the actual ending requirements. To finish the First Quest, Link must collect all eight Triforce fragments, enter Level 9, obtain the Silver Arrows, defeat Ganon, take the Triforce of Power, and reach Princess Zelda.
- Sixteen total Heart Containers are displayed.
- The White Sword and Magical Sword are owned.
- The Blue Ring is owned if maximum pre-Level-9 defense is desired.
- The Red Ring has been collected from Level 9 if maximum defense is desired.
- Both bomb upgrades are owned, giving a sixteen-bomb maximum.
- The Magical Shield, arrows, bombs, and a healing option are available.
- The eight Triforce fragments and the First Quest ending are tracked separately from optional equipment goals.
Before you move on
- Sixteen total Heart Containers are displayed: three starting containers, eight dungeon rewards, and five overworld containers.
- The five overworld containers came from the M3 large central rock, L8 mountain wall left of the north path, H5 fifth bush from the right, P4 dock to P3 by Raft, and P6 Stepladder platform.
- The White Sword was collected after reaching five total Heart Containers.
- The Magical Sword was collected after reaching twelve total Heart Containers by pushing the northeast or top-right cemetery group’s middle-row, third-from-left tombstone.
- The Blue Ring is owned if desired.
- The Red Ring was collected from Level 9 if maximum defense is desired.
- The Level 5 and Level 7 bomb upgrades were purchased for 100 rupees each, raising maximum capacity to sixteen.
- The Magical Shield, arrows, bombs, and at least one life-restoring option are available.
- All eight Triforce fragments and the First Quest ending remain the actual game-completion requirements.
References for this chapter
- The Legend of Zelda — Guide and Walkthrough — NES
- Zelda 1 — All Heart Containers in the First Quest
- Legend of Zelda Heart Locations
- Which grave stone do I move to obtain magical sword from cemetery?
- Bomb Upgrades — The Legend of Zelda NES Guide
- The Legend of Zelda — Official Nintendo Instruction Manual PDF
Troubleshooting, Recovery and Speeding Up Your Next Run
Recover efficiently after deaths, restock the supplies required for difficult encounters, use the Recorder to reduce overworld travel, and verify that the complete First Quest ending has been triggered on the original North American NES cartridge.
Choose the correct option after a death
When Link’s life power reaches zero, the original NES release displays Continue, Save, and Retry. Choose Continue when you want to keep playing with the possessions and progress held when Link died. Continue restores Link with three hearts. If the death occurred inside a labyrinth, Link resumes at that labyrinth’s entrance. If the death occurred in the overworld, he resumes at the starting area south of the opening cave.
Choose Save when you want to write the current game information to the cartridge’s battery-backed memory and return to the file-selection display. Saving is not a room-level or dungeon-room checkpoint. When you later load that file, Link begins from the overworld starting area with three hearts, so plan to restock and travel again. Choose Retry only when you deliberately want to discard unsaved progress since the most recent save.
On original NES hardware, keep the Reset switch held while turning off the console after saving. The instruction manual warns that releasing the switch during this procedure can risk the stored data. If the cartridge battery or save memory is unreliable, avoid unnecessary power cycling and treat the file as vulnerable until the hardware is serviced.
- Use Continue to resume with current possessions after a death.
- Expect three hearts after Continue or after loading a saved file.
- Expect a labyrinth entrance only when death occurred inside that labyrinth.
- Use Save to preserve the file before stopping or abandoning a difficult push.
- Use Retry only when discarding unsaved progress is intentional.
- After loading a saved file, plan to restock and travel from the starting area.
Recover safely before returning to a dungeon
After Continue or after loading a saved file, refill Link’s life before attempting another dangerous route. A Fairy pond provides immediate healing, while a medicine shop supplies a potion for a longer expedition. For a Level 9 attempt, heal first, then spend remaining rupees on the supplies your planned route actually needs.
Check the inventory before assuming an item has disappeared. Dungeon treasures, swords, the Recorder, and traversal items remain part of Link’s possessions after a death. A Like Like can consume Link’s shield, however. If that happens, buy a replacement shield before returning to rooms where blocking projectiles matters. Do not confuse a lost shield with a lost dungeon treasure.
Carry ordinary arrows when the planned encounter depends on the Bow. Gohma’s exposed eye is the relevant target in its dungeon encounter, and entering without arrows creates an avoidable problem. For the final battle, select the Bow in the B-button item slot. Once the Silver Arrows have been obtained in Level 9, the Bow automatically fires them instead of ordinary arrows. The Silver Arrows are not a separately selected item.
- Heal at a Fairy pond or prepare a potion before re-entry.
- Replace a shield consumed by a Like Like.
- Confirm that the Bow and ordinary arrows are available before a Bow-dependent encounter.
- Confirm that the Silver Arrows have been obtained before attempting to finish Ganon.
- Keep a recovery item or a known healing stop in the route plan.
Fix the three common preparation mistakes
If you entered a Bow-dependent encounter without ordinary arrows, leave the dangerous route if necessary and purchase arrows before trying again. If the Bow itself has not been obtained, revisit the labyrinth that contains it and claim the dungeon treasure. Restocking is safer than repeatedly entering a fight without the intended tool.
If you reached Ganon without the Silver Arrows, stop attempting to finish the battle. Return through Level 9, explore its branches and hidden passages, and collect the Silver Arrows before making another serious boss attempt. After collecting them, select the Bow before entering Ganon’s room. Do not look for a separate Silver Arrow icon.
The Red Ring is recommended because it reduces incoming damage, but it is optional. The Silver Arrows are the required finishing ammunition; the Red Ring is a survivability upgrade. If you are short on bombs, retreat before committing to a deep dungeon run. Buy bombs where available or defeat enemies in safer overworld and dungeon rooms until your supply is restored. Reserve enough bombs for required openings and suspicious walls that may be part of the route.
- Restock ordinary arrows before Bow-dependent encounters.
- Obtain the Bow if the intended encounter requires it.
- Collect the Silver Arrows before attempting to finish Ganon.
- Select the Bow for the final shot; do not try to select Silver Arrows separately.
- Carry enough bombs for required openings and critical branches.
- Bring a healing item or plan a Fairy stop before re-entering.
Use the Recorder to shorten repeat routes
After obtaining the Recorder, play it on an ordinary overworld screen to call a whirlwind that can carry Link to the entrance of a previously completed labyrinth. The destination cycle follows the completed labyrinths in numerical order rather than offering a free-choice destination menu. Facing up or right advances through the available destinations; facing down or left moves backward. Labyrinths that have not been completed are skipped.
The Recorder also has fixed secret-related uses. In the First Quest, playing it at the appropriate dry Fairy pond reveals the Level 7 entrance, and it is required to shrink Digdogger in Level 5. These uses are different from ordinary overworld transportation, so do not assume every Recorder activation will create a useful warp. Move to an ordinary screen when you want the dungeon-destination effect.
For repeat runs, decide the destination before pressing the button. Face Link in the direction that moves toward the desired completed labyrinth, and remember that the cycle changes as more Triforce fragments are collected. This prevents wasted activations and makes it easier to chain dungeon runs without manually crossing the entire overworld.
- Use the Recorder on an ordinary overworld screen for normal dungeon warping.
- Face up or right to advance through completed-labyrinth destinations.
- Face down or left to move backward through the destination cycle.
- Remember that incomplete labyrinths are skipped.
- Use direct travel when it is faster than setting up a warp.
- Remember the fixed Level 7 and Level 5 uses.
Build a faster First Quest route
For a replay focused on reducing backtracking, claim the Wooden Sword immediately and prioritize the early dungeon treasures that expand combat and movement options. A practical order is the Boomerang and Bow in Level 1, the Magical Boomerang in Level 2, the Raft in Level 3, and the Stepladder in Level 4. This order is not mandatory for every successful run, but it provides useful combat tools and opens additional overworld routes early.
Keep a rupee reserve for arrows, bombs, and potions. Avoid clearing every enemy on every crossing when the objective is simply to reach the next labyrinth. Learn the locations of nearby shops, Fairy ponds, labyrinth entrances, and safe screen transitions around the landmarks you use most often. A short route with deliberate healing is more reliable than an apparently direct route that leaves Link low on hearts.
After obtaining the Recorder, complete a labyrinth, leave with its Triforce fragment, and use the completed-labyrinth warp cycle to stage the next portion of the run. The Recorder’s destination order depends on completed labyrinths and Link’s facing direction, so use it deliberately rather than repeatedly playing it at random. Keep optional Heart Containers, sword upgrades, rings, and distant purchases for a detour that genuinely improves the next dungeon.
- Prioritize required dungeon treasures over distant optional detours.
- Reserve rupees for arrows, bombs, and recovery.
- Memorize the shops, Fairy ponds, and labyrinth entrances on common routes.
- Use the Recorder with a planned destination and the correct facing direction.
- Take nearby upgrades when they significantly improve the next dungeon.
Confirm the complete First Quest ending
Before entering Level 9, confirm that all eight Triforce fragments have been collected. Inside Level 9, obtain the Silver Arrows before committing to the branch leading to Ganon. The First Quest Silver Arrows are found inside Level 9; they are not bought in a shop. The Red Ring improves survivability but is not required.
Before entering Ganon’s room, select the Bow in the B-button item slot. Once the Silver Arrows have been collected, the Bow uses them automatically. There is no separate Silver Arrow selection step.
During the battle, Ganon moves invisibly and fires projectiles that reveal his approximate position. Use the sword to intercept him at likely reveal points. Each successful sword hit briefly makes him visible. The required threshold before the finishing opening depends on the sword: four successful hits with the Magical Sword, eight with the White Sword, or sixteen with the Wooden Sword. On the final required hit, Ganon becomes visible and changes to a brownish or reddish vulnerable appearance. Press B immediately with the Bow selected to fire a Silver Arrow. If he disappears before the shot connects, repeat the sword-interception process until the required threshold is reached again.
After Ganon is defeated, do not stop at the ashes. Collect the Triforce of Power that appears in the room. Continue into the northern room and strike the flames blocking the way with the sword, then reach Princess Zelda. The rescue scene and ending must appear. Merely reaching Ganon’s room, making him visible, or seeing his ashes is not the completion condition.
Once the First Quest ending has been displayed, the cartridge offers the next quest. If you continue into it, the same cartridge begins the rearranged Second Quest state. Complete any optional First Quest goals you want associated with that run, such as remaining Heart Containers, sword upgrades, rings, and shop purchases, before proceeding beyond the ending sequence.
- All eight Triforce fragments are collected.
- The Silver Arrows are collected inside Level 9.
- The Bow is selected before the final shot.
- Ganon has been struck four times with the Magical Sword, eight times with the White Sword, or sixteen times with the Wooden Sword.
- Ganon has become visible and brownish or reddish before the immediate Silver Arrow shot.
- Ganon is finished by pressing B with the Bow selected, firing a Silver Arrow.
- The Triforce of Power is collected from Ganon’s ashes.
- Princess Zelda is reached after clearing the flames.
- The First Quest ending sequence is displayed.
- Desired optional First Quest upgrades are collected before beginning the Second Quest.
Before you move on
- All eight Triforce fragments are in the inventory before entering Level 9.
- The Silver Arrows have been obtained inside Level 9.
- The Bow is selected before the final attack.
- Ganon has been struck four times with the Magical Sword, eight times with the White Sword, or sixteen times with the Wooden Sword.
- Ganon has become visible and brownish or reddish before the immediate Silver Arrow shot.
- Ganon has been finished by pressing B with the Bow selected, firing a Silver Arrow.
- The Triforce of Power has been collected from Ganon’s ashes.
- Link has reached Princess Zelda after clearing the flames.
- The First Quest ending sequence has appeared.
- Any desired optional First Quest upgrades have been collected before proceeding to the Second Quest.
References for this chapter
- The Legend of Zelda — Official Nintendo Instruction Manual PDF
- The Legend of Zelda — NES Instruction Manual transcription
- The Legend of Zelda/Underworld/Quest 1/Dungeon 9 — StrategyWiki
- Ganon — Zelda Dungeon Wiki
- Guide:How Does the Recorder Work in The Legend of Zelda? — Zelda Dungeon Wiki
- The Legend of Zelda — Guide and Walkthrough — GameFAQs
Finishing up
You have collected the eight Triforce fragments from Dungeons 1 through 8.
You have entered Dungeon 9, obtained the Silver Arrows, defeated Ganon with a Silver Arrow, collected the Triforce of Power, left through the northern exit, cleared the blue flames, reached Princess Zelda, and triggered the First Quest ending.
Optional First Quest targets include all sixteen Heart Containers, the White Sword and Magical Sword, the Blue and Red Rings, the Magical Shield, both bomb-capacity upgrades, and desired shop and potion purchases. Complete these before the finale if you want them on that file, or preserve an uncompleted First Quest file for later cleanup before starting the Second Quest.
Choose your next gameSources & references
Our original guide draws on the references below. Check the edition at the top of this page before following controls or unlock requirements.
- The Legend of Zelda — Official Nintendo Instruction Manual PDF
- The Legend of Zelda — NES Instruction Manual transcription
- The Legend of Zelda — NES Controls
- The Legend of Zelda/Walkthrough — StrategyWiki
- The Legend of Zelda — Overworld Quest 1 — StrategyWiki
- Overworld Map & Secrets — The Legend of Zelda (NES), Hyrule Archive
- The Legend of Zelda — Labeled Maps, NESMaps
- Recorder — Zelda Dungeon Wiki
- The Legend of Zelda — Heart Containers — GameFAQs NES Guide
- The Legend of Zelda — Get the Magical Sword — Thonky
- Bomb Upgrades — The Legend of Zelda NES Guide
- Zelda 1 — All Heart Containers in the First Quest
- Level 1: Eagle — The Legend of Zelda Walkthrough & Guide for NES
- Level 1: The Eagle — Zelda Dungeon Wiki
- Zelda 1 — Walkthrough of Dungeon 1 of Quest 1: The Eagle
- The Legend of Zelda — Level 2: Moon walkthrough — GameFAQs
- The Legend of Zelda — World Maps for NES — GameFAQs
- The Legend of Zelda/Underworld/Quest 1/Dungeon 2 — StrategyWiki
- The Legend of Zelda Walkthrough – Level 3: The Manji
- The Legend of Zelda Walkthrough – Level 4: The Snake
- Level 3: Manji – The Legend of Zelda Walkthrough and Guide for NES
- The Legend of Zelda Guide – First Quest Walkthrough: Dungeon 3
- Raft – Zelda Dungeon Wiki
- Guide: How Does the Recorder Work in The Legend of Zelda? — Zelda Dungeon Wiki
- The Legend of Zelda — Complete Strategy Guide, Hyrule Archive
- Where do I find the recorder in level five? — GameFAQs
- The Legend of Zelda Instruction Booklet
- The Legend of Zelda — Guide and Walkthrough for NES
- The Legend of Zelda NES Walkthrough
- Dungeon 6: Dragon — The Legend of Zelda Walkthrough
- The Legend of Zelda/Underworld/Quest 1/Dungeon 6
- Level 5 — Zelda Wiki
- The Legend of Zelda/Underworld/Quest 1/Dungeon 7 — StrategyWiki
- The Legend of Zelda/Underworld/Quest 1/Dungeon 8 — StrategyWiki
- Level 7: Demon — The Legend of Zelda Guide and Walkthrough
- Level 8: Lion — The Legend of Zelda Guide and Walkthrough
- The Legend of Zelda Walkthrough — Level 8: The Lion
- Level 9: Death Mountain - Zelda Universe
- Dungeon 9: Death Mountain — The Legend of Zelda Walkthrough, Thonky
- Level 9: Death Mountain — The Legend of Zelda Walkthrough, Zelda Dungeon Wiki
- Level 9: Death Mountain — The Legend of Zelda Walkthrough, Zelda Central
- Level 9: Death Mountain - The Legend of Zelda Walkthrough & Guide
- The Legend of Zelda Walkthrough - Level 9: Death Mountain
- The Legend of Zelda/Underworld/Quest 1/Dungeon 9 — StrategyWiki
- Ganon — Zelda Dungeon Wiki
- The Legend of Zelda — Guide and Walkthrough — NES — CMoriarty, GameFAQs
- The Legend of Zelda — Guide and Walkthrough — NES
- The Legend of Zelda Walkthrough — Dungeon 9 Quest 1 and Ending
- The Legend of Zelda — Second Quest Translation and File Marker Overview
- Legend of Zelda Heart Locations
- Which grave stone do I move to obtain magical sword from cemetery?
- Guide:How Does the Recorder Work in The Legend of Zelda? — Zelda Dungeon Wiki
- The Legend of Zelda — Guide and Walkthrough — GameFAQs
About the game & collecting notes
- Platform
- Nintendo Entertainment System
Step-by-step walkthrough for the original Nintendo Entertainment System release of The Legend of Zelda (North America). Covers safe starting progression, overworld routing, each Underworld dungeon through the final showdown with Ganon, required items (including Silver Arrows), and optional completion targets and the unlocked Second Quest.
Darryl Polo
Darryl Polo loves tinkering with emulation and revisiting retro games. He enjoys exploring how old favorites play on different setups and sharing what he learns along the way. At Joking Joystick, he writes about the games, hardware, and small discoveries that keep the hobby fun.
Our editorial standardsFound a step that needs another look? Help us improve this guide.