
The Legend of Zelda: The Minish Cap — Complete North American (USA) GBA Walkthrough
Step-by-step campaign walkthrough for the original North American Game Boy Advance release of The Legend of Zelda: The Minish Cap. Covers the required overworld transitions, five main dungeons, the Royal Crypt mini-dungeon, Dark Hyrule Castle, all four dungeon Elements, sword-forging stages, boss strategies, key item acquisitions, Kinstone guidance, and a concrete ending-and-credits completion check.

Find a copy
The Legend of Zelda: The Minish Cap Game Boy Advance
We may earn a commission if you buy through these links, at no extra cost to you. As an Amazon Associate I earn from qualifying purchases.
Opens retailer search results. Check the model, edition, seller, availability and current price before buying.
Before you begin
This guide is written for the North American Game Boy Advance cartridge (USA release) of The Legend of Zelda: The Minish Cap.
It gives clear, practical directions for progressing through the main campaign from the opening scenes in Hyrule Town to the final confrontation in Dark Hyrule Castle.
Follow the ordered chapters to avoid missing required items or story triggers.
You do not need to complete every optional side activity to finish the story, but many optional tasks (kinstone fusions, heart pieces, Picori-side paths) make specific dungeons and boss fights easier.
Save frequently, learn the shrinking mechanic with Ezlo, and consult the chapter checklist at the end to confirm you reached the real ending.
Set yourself up for the run
Play the original North American Game Boy Advance release or an accurately configured GBA emulator running that edition.
Read the in-game manual and controls. A and B are assigned item buttons; Start opens the subscreens; Select calls Ezlo’s advice; L begins Kinstone Fusion beside an eligible target; R performs contextual actions and rolling when appropriate.
Learn shrinking, Minish Portals, Four Sword clone formations, Wind Crests, and the difference between normal-size and Minish traversal.
Carry bombs, arrows, bottles, and healing supplies when the next route calls for them. Assign the sword and the required dungeon tool to A and B for quick switching.
Expect five main dungeon areas before the finale: Deepwood Shrine, Cave of Flames, Fortress of Winds, Temple of Droplets, and Palace of Winds. Royal Crypt is a required mini-dungeon, and Dark Hyrule Castle is the final dungeon.
Do not search for Iron Boots: they are not part of the original North American Game Boy Advance release.
Start, Controls and Menu — Learn Ezlo and Shrinking
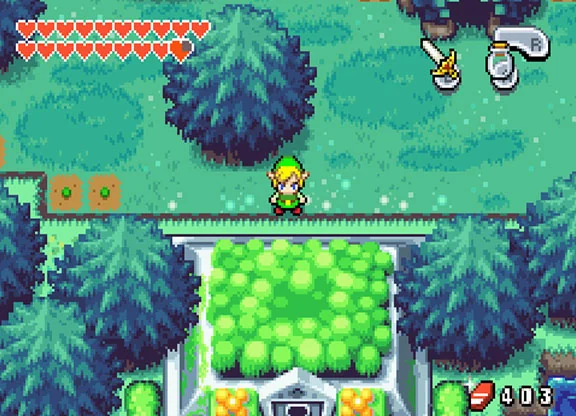
Complete the opening festival, recover Smith's Sword, and receive the Broken Picori Blade from King Daltus. Travel south from Hyrule Castle through Hyrule Field and Lon Lon Ranch, then enter Minish Woods. Rescue Ezlo from two Octoroks and use the sparkling tree stump south of that clearing to shrink. Cross the pond on a lilypad, enter Minish Village, and learn the next required objective from Festari and Elder Gentari. This chapter also establishes the GBA controls, item assignment, menu screens, Ezlo's Select-button advice, and L-button Kinstone Fusion.
1. Finish the opening and receive both swords
Start a new file and complete the opening scenes at Link's house, the Picori Festival, and Hyrule Castle. When you regain control after the festival events, follow the story prompts rather than trying to leave immediately. Vaati breaks the Picori Blade and releases the monsters sealed inside the chest, then Princess Zelda is turned to stone.
Return to the castle and speak to the king and the other characters involved in the scene. King Daltus gives Link the Broken Picori Blade and sends him to find the Minish, also called the Picori, because only they can restore it. Smith's Sword is also available as Link's usable weapon. Do not treat the Broken Picori Blade as your active sword at this point; it is the quest item that must eventually be reforged.
- The festival and Vaati scenes are complete.
- King Daltus has entrusted Link with the Broken Picori Blade.
- Smith's Sword is available for normal combat.
2. Learn the field controls and reach Minish Woods
Use the Control Pad to move Link, push suitable objects, and jump down clear ledges. The R Button performs the contextual action shown at the upper-right of the screen. Depending on your position, R can speak, read, open a chest or door, lift an object, roll, grab an object, or activate a Minish Portal. Rolling is performed by pressing R while moving, so do not expect R to be a permanently equipped tool.
Leave the castle area by heading south. When the road is blocked, go east and cut down the short trees blocking the route. Continue through Lon Lon Ranch, travel south as far as the route allows, then go east into Minish Woods. Defeat or avoid the early enemies as needed, and use grass or nearby enemies for occasional heart drops if your health is low.
The two item buttons are A and B. Open the Items subscreen with Start, highlight an available item, and press A or B to assign it to that button. The item icons shown on the game screen indicate the current assignments. Keep the sword assigned when exploring dangerous rooms and use the other button for a tool when a puzzle requires one.
- You can identify the R-button action displayed on screen.
- You can assign an item to A or B from the Items subscreen.
- You have reached Minish Woods through Lon Lon Ranch.
3. Rescue Ezlo and unlock his advice
Follow the main path through Minish Woods until you hear a cry for help. Before crossing back to the source, a Piece of Heart is available in a clearing to the west of the path; it is optional and can be collected now or left for later. Return to the clearing with the cry and defeat the two Octoroks attacking the strange green cap.
After the rescue scene, walk around briefly until Ezlo hops onto Link's head and joins the adventure. Let this dialogue finish. From this point onward, press Select to ask Ezlo for contextual advice. Select is not the menu button and does not change item assignments; it calls Ezlo's hint conversation.
- The two Octoroks near Ezlo are defeated.
- Ezlo is traveling on Link's head.
- Select produces Ezlo's advice.
4. Use the first Minish Portal
From the Octorok clearing, walk south toward the sparkling tree stump you passed while entering the woods. Ezlo explains that this stump is a Minish Portal. Stand on top of it and press R. Link shrinks to Minish size after the explanation sequence.
To return to normal size, stand beside a sparkling portal and press R. Normal-size Link can use ordinary paths, cut normal grass, fight regular enemies, and interact with human-sized objects. Minish-sized Link can enter tiny openings and logs, speak with animals, and travel through routes hidden from normal-size Link. At this stage, a small puddle is deep water to Minish Link, tall grass blocks movement, and larger drops or ordinary obstacles may stop the route.
- You used the sparkling tree stump south of the Octorok clearing.
- Link has successfully become Minish-sized.
- You can grow again beside a sparkling portal.
5. Cross the pond and enter Minish Village
While small, go west through the hollow log. On the far side, the pond cannot be crossed on foot because Minish Link cannot swim yet. Wait beside the water for a lilypad to float close, step onto it, and ride it across. Step off at the northern bank; walking into the pond instead of using the lilypad causes damage and can return you to the previous area.
Continue north along the route with oversized leaves, acorns, and grass. Follow the path until you enter Minish Village. The first village conversation is not the complete objective, so do not leave immediately. The next required steps take place inside the village.
- You crossed the pond on a moving lilypad.
- You followed the oversized-leaf and acorn path north.
- You entered Minish Village while still at Minish size.
6. Complete the first Minish Village objective
Go to the northern part of Minish Village and find Festari's blue-roofed building. Speak with Festari; he is the Minish who can communicate with Link. He explains that Link needs a Jabber Nut to understand the other Minish.
Leave the building and go to the barrel-shaped house in the southeast part of the village. Enter it, move to the lower room, and push the southernmost crate left or right to clear the route. Walk northwest to the Jabber Nut and press R when prompted. Link eats it and can then understand Minish speech.
Return to the village and speak with Elder Gentari in the house at the northwest side. Gentari explains that the four Elements are needed to reforge the Broken Picori Blade. The Earth Element is in Deepwood Shrine. Return to Festari's building and speak with him again; he opens the route to the shrine. You are then ready for the next chapter.
- Festari has directed you to the Jabber Nut.
- Link has eaten the Jabber Nut and understands Minish speech.
- Elder Gentari has explained the four Elements.
- Festari has opened the route to Deepwood Shrine.
7. Use the menu and attempt Kinstone Fusion
Press Start during play to open the subscreens. The Items screen assigns equipment to A and B. Use L or R to switch among the Items, Quest Status, and Map screens; the save option is also available from the subscreen interface. Quest Status displays quest-related items, Pieces of Heart, sword techniques, and the Kinstone Bag. On the Map screen, select a visited region and press A to view its closer map when available.
When a person or object displays a thought bubble containing a question mark, stand nearby and press L to attempt Kinstone Fusion. If the target can fuse and you have a compatible piece, select the matching Kinstone and confirm. A successful fusion changes something in the world, such as creating a chest or opening a path, but fusions are generally optional during this opening route. Do not press L at random and expect a fusion screen; the target must be eligible.
- Start opens the subscreens.
- L or R switches between the available menu screens.
- L begins Kinstone Fusion only beside an eligible target.
- You can identify the Quest Status and Map screens.
Before you move on
- The Broken Picori Blade is in Link's quest inventory and Smith's Sword is available for combat.
- Ezlo is on Link's head and Select opens his advice.
- Link has used the sparkling tree stump portal and crossed the pond on a lilypad.
- Link has entered Minish Village, eaten the Jabber Nut, spoken with Elder Gentari, and had Festari open the route to Deepwood Shrine.
- Start opens the menu, A and B can receive assigned items, L can attempt Kinstone Fusion near an eligible target, and the Map and Quest Status screens are accessible.
References for this chapter
- The Legend of Zelda: The Minish Cap — Official Instruction Booklet for Game Boy Advance
- Journey to the Minish Woods — The Minish Cap Walkthrough, Thonky
- The Minish Cap Walkthrough: Picori Festival & Minish Woods, Zelda Central
- The Legend of Zelda: The Minish Cap — Guide and Walkthrough by Phoenix_1911
Deepwood Shrine — Dungeon 1 (Gust Jar)
Deepwood Shrine is entered from Minish Village after Link obtains the Jabber Nut and receives permission from Festari. The opening rooms teach statue pushing, floor switches, torches, water crossings and the stretching mushrooms. The Gust Jar is obtained after defeating the Madderpillar miniboss. Use it to clear spider webs and sand, stun Puffstools, pull mushrooms and propel the lily pad. The dungeon’s required route then leads through the flooded lower rooms to the Compass, another Small Key and the Big Key. The boss is Big Green ChuChu, not Mazaal: vacuum its base until it loses balance, then slash its head while it is down. The reward is the Earth Element and a Heart Container.
1. Enter Deepwood Shrine and get the first Small Key
Enter the shrine from the passage north of Festari’s building in Minish Village. Link is Minish-sized when he enters, so the dungeon’s ordinary enemies appear unusually large. In the entrance room, push the central statue to the left and go north.
In the next room, defeat the Sluggulas or move around them, then step on all four floor switches. Each switch lights one of the room’s torches. When all four torches are lit, a chest appears. Open it to obtain the first Small Key, then go through the northern door.
In the following room, defeat the Sluggulas that fall from above and pull the wall handle in the upper-right area. Keep pulling until the bridge extends over the water. Cross it, grab the nearby stretching mushroom and hold the directional pad to pull it back. Release the directional input while still holding the mushroom to launch Link across the gap. Continue north.
- Four torches lit
- First Small Key collected
- Bridge extended with the wall handle
- Stretching mushroom used to cross the water
2. Rotate the barrel and reach the Dungeon Map
The next room contains a Puffstool and the large central barrel. You cannot defeat the Puffstool or remove the shrine’s spider webs yet, so avoid wasting time on them. Climb the ladder on the right and step on the switch to burn the vines attached to the barrel.
Go down and enter the barrel. In the adjacent section, push the statue onto its switch and activate the other switch so the remaining vines burn. Re-enter the barrel and walk along its interior ramp to rotate it. Turn it until the lower-left exit is aligned, then leave through that opening.
In the next room, defeat or avoid the Red Mulldozer and use the stretching mushroom on the left. Pull it back fully and launch Link upward to the upper ledge. Open the large chest there for the Dungeon Map. Drop down and use the mushroom again to leave the room.
- Barrel vines burned
- Barrel rotated to the lower-left exit
- Dungeon Map collected
3. Get the second Small Key and reach the miniboss
Continue through the room with two statues and two floor switches. Push the left statue onto its switch. For the right statue, pull it out far enough to walk around it, then pull it onto the second switch from the inside. A chest appears in the center; open it for another Small Key.
Return to the barrel room, enter the barrel and rotate it until the upper-right exit lines up. Use the Small Key on the locked door to the right. In the next room, use the stretching mushroom to cross the water, land on the central platform and step on the switch to extend the bridge. Use the second mushroom to reach the southern side, then continue right.
Defeat the Sluggulas in the next room. Move the nearby statue past its switch, circle around the room and push the other statue onto its switch. Go through the opened northern door. Defeat the three Mulldozers in the following room; a Small Key drops from above. Take it, backtrack left and upward, then use the key on the locked door near the room containing several Puffstools. Step on the floor switch there if you want the shortcut back toward earlier rooms, then enter the miniboss room.
- Second Small Key collected
- Third Small Key obtained from the Mulldozer room
- Shortcut switch activated
- Locked miniboss door opened
4. Defeat Madderpillar and obtain the Gust Jar
Madderpillar crawls around the arena. Strike its nose with the sword. This briefly exposes the heart-shaped weak point at the end of its tail. Move around the body and slash the exposed heart repeatedly before it closes. After taking enough damage, Madderpillar turns red and moves faster, but the same nose-then-tail pattern continues.
When the miniboss is defeated, open the large chest to obtain the Gust Jar. Assign it to A or B through the Start menu. Holding the assigned button vacuums air and objects toward Link; releasing the button produces a short gust. The vacuum removes spider webs and sand, pulls stretching mushrooms, and can stun Puffstools by removing the mushroom from their backs. A released gust can push the lily pad later in the dungeon.
- Madderpillar defeated
- Gust Jar collected and assigned
- Vacuum and released-gust functions understood
5. Use the Gust Jar to open the upper routes
Clear the spider web on the southern door near the Gust Jar and go through to collect the Piece of Heart. Return to the previous room, remove the web on the eastern door and enter. Vacuum the sand in the western area to reveal two switches. Activate them to make two chests appear; these contain Mysterious Shells and are optional.
Vacuum the sand in the southern part of that room to reveal another switch. Activate it to create a blue warp tile, though its associated optional reward is collected later. Go east, clear the sand near the torches and activate the switch to reveal another Mysterious Shells chest.
Return west and south to the barrel room. Enter the barrel and rotate it until the web-covered opening is centered in the floor. Remove the web with the Gust Jar and drop through. In the water-filled room below, vacuum the lily pad toward Link and step onto it. Face opposite the direction you want to travel and tap the Gust Jar to propel the lily pad. Ride it down the waterfall, then take the eastern branch.
- Optional Piece of Heart collected if desired
- Upper webbed routes opened
- Sand switches activated
- Lily pad reached
6. Get the Compass, the next Small Key and the Big Key
Guide the lily pad to the staircase on the eastern side. Go up, lift or move pots as needed, and push one pot onto the floor switch to lower the gate. Return to the lily pad and pass through the opened route to the next flooded room.
In this room, push blocks aside in the upper-right area and open the large chest for the Compass. In the upper-left area, place a pot on the floor switch to reveal a chest. Use the lily pad to reach it and collect the next Small Key.
Ride the lily pad back down and left, then take it to the upper-left route. Use the Small Key on the locked door. In the next room, pull the stretching mushroom to reach the upper-left section. From there, use the Gust Jar on the mushroom to the right and launch across the water. Repeat this with the mushrooms along the route until you reach the large chest. Open it for the Big Key.
Activate the nearby switch and take the red warp tile back to the entrance. If you activated the earlier blue warp, use it to reach the optional Piece of Heart on the ledge, then return through the warp. You can also clear the remaining entrance webs, use the revealed stairs and collect the optional rupee chest before going to the boss.
- Compass collected
- Required Small Key collected from the lily-pad room
- Big Key collected
- Optional warp rewards retrieved if wanted
7. Defeat Big Green ChuChu and claim the Earth Element
From the entrance, remove the web on the eastern route and use the mushrooms to reach the lower passage and the locked boss door. Lift the pots near the door for recovery hearts if needed. Use the Big Key to enter the arena.
The boss is Big Green ChuChu. When it is far from Link, it jumps around the room and attempts to land on him, so keep moving and step aside when it jumps. When it is close enough, hold the Gust Jar button and vacuum the base beneath the ChuChu. The base shrinks, causing the boss to wobble and fall over.
While Big Green ChuChu is lying on the ground, attack its head with the sword. After a short time it stands again, so retreat and repeat the vacuum-then-slash cycle. Later in the battle it jumps more frequently, but its vulnerability is unchanged. Do not try to sword-fight it while it is upright; the falling body can damage Link.
After the boss is defeated, collect the Earth Element and the Heart Container. Step into the green warp tile to leave the shrine. Return south to Minish Village and speak with the Elder in the northwest house to receive the next main-story direction toward Mount Crenel.
- Big Green ChuChu’s base vacuumed until it fell
- Boss head struck while it was down
- Earth Element collected
- Heart Container collected
- Shrine exited through the green warp
Before you move on
- The Gust Jar is in Link’s inventory and can remove Deepwood Shrine’s webs and sand.
- The Dungeon Map, Compass and Big Key have been obtained, unless optional chests were deliberately skipped.
- Big Green ChuChu has been defeated.
- The Earth Element and post-boss Heart Container have been collected.
- The green warp has returned Link from Deepwood Shrine, and the Minish Village Elder can direct him toward Mount Crenel.
Minish Villages, Minish Paths and Remote Bombs
After Deepwood Shrine, return to Minish Village and speak with Gentari in the northwest house. He opens the western exit toward Mount Crenel. Follow that route while Link is Minish-sized, enter the orange house west of the village, and speak with Belari to receive the required Bomb Bag and regular bombs. Use the nearby portal to return to normal size, then bomb the cracked stones through Minish Woods and continue to Hyrule Town. The Hurdy-Gurdy Man’s Kinstone Bag and fusion tutorial belong to the next chapter. The gravestone symbol, Mysterious Shells cave, and other Minish Woods rewards are optional. After the Temple of Droplets, obtain Remote Bombs in the required order: fuse with the Forest Minish in the house west of Minish Village, return to fuse with Gentari, then go back to the Forest Minish at Belari’s house. Belari then provides Remote Bombs and can switch Link back to regular bombs later.
Return to Minish Village and speak with Gentari
Begin after defeating the Deepwood Shrine boss and taking the Earth Element. Leave the shrine and travel south through Minish Woods until you reach Minish Village again. Enter the northwest house and speak with Gentari, the Minish elder. This conversation acknowledges the Earth Element and reveals the passage on the left side of the house. That opening is the required route toward Mount Crenel and Melari.
If the passage is not open, confirm that the Earth Element was collected and speak with Gentari again. The opening is created by the conversation; it is not activated by a Kinstone fusion. Do not leave the village searching for Belari before triggering this event.
- Collect the Earth Element from Deepwood Shrine.
- Return to Minish Village.
- Speak with Gentari in the northwest house.
- Confirm that the passage on the left side of the house is open.
Follow the new passage and receive the standard Bomb Bag
Go through the opening Gentari revealed and continue west through the log. Remain Minish-sized while following the route. Ignore the nearby sparkling portal for the moment and enter the small orange house north of the path. Speak with Belari, the Forest Minish inventor, to receive the standard Bomb Bag and a supply of regular bombs. This is the required early bomb acquisition; it does not require a Kinstone fusion or a purchase.
Leave the house and go south to the nearby sparkling portal or tree stump. Stand beside it and press R to return to normal size. The symbol revealed from the nearby gravestone is optional and cannot yet be used for travel. It is worth exposing if convenient, but it is not a story objective.
- Enter the orange house west of Minish Village while Minish-sized.
- Speak with Belari.
- Receive the standard Bomb Bag and regular bombs.
- Use the nearby portal or stump to return to normal size.
- Treat the gravestone symbol as optional.
Use the bombs to cross Minish Woods
From the size-changing point, travel west through Minish Woods. Cross the bridge and go south from its western side. Three cracked stones block the route; place bombs beside them and clear the passage. Continue south and leave that section of the forest. Water north of the portal and several Minish doors lead to later content, so do not treat those blocked routes as progression failures.
On the next route, go north and look for the unusual section of wall. Bomb it to open a cave containing Mysterious Shells. This cave is an optional reward stop, not a required objective. Leave the cave, go west, then north up the stairs. Continue east and north into the next area, where another set of cracked stones blocks the route. Destroy them, then go west and north to enter Hyrule Town.
Keep regular bombs assigned to A or B while crossing this route. The bombs are needed for the cracked stones and will also be important on the approach to Mount Crenel.
- Cross the bridge after returning to normal size.
- Bomb the three cracked stones south of the bridge.
- Open the Mysterious Shells cave only if desired.
- Bomb the remaining cracked stones on the northern approach.
- Reach Hyrule Town.
Stop at the Hyrule Town handoff
When Link enters Hyrule Town through the northern approach from Minish Woods, the Hurdy-Gurdy Man gives him the Kinstone Bag and explains Kinstone fusion. He also provides the initial Kinstone piece. That event belongs to the next chapter, Hyrule Town, Shops and Kinstone Basics, so this chapter should end its required route at the town entrance.
Do not repeat the Kinstone Bag tutorial here or count the first Hurdy-Gurdy Man fusion as a Minish Village objective. The next chapter handles the fusion interface, town shops, early rewards, Swiftblade’s training, and the northern exit toward Mount Crenel. Reaching Hyrule Town with regular bombs is the only required handoff for this chapter.
- Enter Hyrule Town from Minish Woods.
- Leave the Hurdy-Gurdy Man’s Kinstone tutorial for the next chapter.
- Keep regular bombs available for the Mount Crenel route.
- Do not delay the main journey for optional Minish Woods rewards.
Obtain Remote Bombs after the Temple of Droplets
Remote Bombs are optional and become available only after completing the Temple of Droplets. Return to Minish Woods using the Ocarina of Wind or by traveling there normally. First, enter the Forest Minish’s small house west of Minish Village and fuse with that Forest Minish. This is the first required fusion in the sequence; do not begin with Gentari.
Next, enter Minish Village and speak with Gentari in the northwest house. Fuse with him using the matching Kinstone shown by the fusion interface. The game’s displayed match should determine which piece you select; do not rely on a remembered color or shape. Gentari’s fusion alone does not give Link Remote Bombs.
After Gentari’s fusion succeeds, leave Minish Village and return to the Forest Minish in the house west of the village, the Minish associated with Belari’s bomb workshop. Speak with him again to receive access to Remote Bombs. Speak with the same Minish whenever you want to switch between Remote Bombs and regular bombs. Remote Bombs are planted with the assigned bomb button and detonate when that button is pressed again. Only one Remote Bomb can be active at a time.
- Complete the Temple of Droplets.
- Fuse first with the Forest Minish in the house west of Minish Village.
- Fuse next with Gentari in Minish Village.
- Return to the Forest Minish at Belari’s house.
- Receive or switch to Remote Bombs.
- Remember that only one Remote Bomb can be active at once.
Separate required progress from optional Minish rewards
The required objectives are Gentari’s post-Deepwood conversation, the opening of the western village route, Belari’s standard Bomb Bag, clearing the bombable path through Minish Woods, and reaching Hyrule Town. The optional objectives include the gravestone symbol, the Mysterious Shells cave, extra Minish conversations, Kinstone rewards, and the later Remote Bomb sequence.
When checking an area, inspect both size states around portals, stumps, houses, bridges, and exits. Minish passages may connect to normal-size routes, while normal-size areas can conceal portals or bombable walls. If a path is blocked by water, a high ledge, or an item Link has not obtained, mark it for later rather than repeatedly attempting it.
After reaching Hyrule Town, continue with the next chapter’s Kinstone tutorial and town progression. Return to this chapter only after the Temple of Droplets if you want the optional Remote Bomb upgrade.
- Carry regular bombs into the Mount Crenel route.
- Record water- and height-blocked paths for later.
- Do not mistake optional caves or symbols for story gates.
- Complete the Forest Minish, Gentari, Forest Minish order for Remote Bombs.
- Use Belari’s workshop to switch bomb types when needed.
Before you move on
- The Earth Element has been collected from Deepwood Shrine.
- Gentari’s post-dungeon conversation has been completed.
- The passage on the left side of Gentari’s house is open.
- Belari has provided the standard Bomb Bag and regular bombs.
- Link has returned to normal size after leaving Belari’s house.
- The cracked stones blocking the route through Minish Woods have been destroyed.
- Link has reached Hyrule Town.
- The Hurdy-Gurdy Man’s Kinstone Bag tutorial has been left for the next chapter.
- For the optional Remote Bomb upgrade, Link has first fused with the Forest Minish in the house west of Minish Village.
- Link has then fused with Gentari in Minish Village.
- Link has returned to the Forest Minish at Belari’s house and received or enabled Remote Bombs.
- Belari’s Forest Minish can switch Link between regular bombs and Remote Bombs.
- Optional caves, gravestone symbols, Kinstone rewards, and item-gated passages have been marked for later instead of confused with required progress.
References for this chapter
- After the First Dungeon - The Legend of Zelda: The Minish Cap Walkthrough
- To Find a Ghost - The Legend of Zelda: The Minish Cap Walkthrough
- The Minish Cap Walkthrough — Cave of Flames
- The Legend of Zelda: The Minish Cap - Guide and Walkthrough - Game Boy Advance - By Kirby021591
- The Legend of Zelda: The Minish Cap Game Manual
Hyrule Town, Shops and Kinstone Basics
After clearing Deepwood Shrine, return to Hyrule Town through the southern entrance. The Hurdy-Gurdy Man gives Link the Kinstone Bag and demonstrates Kinstone Fusion. Complete this tutorial fusion, then inspect the opened tree southeast of Smith’s House in South Hyrule Field; it contains a Piece of Heart. In town, characters with thought bubbles can accept matching Kinstone pieces when Link presses L. Successful fusions may create chests, open routes, alter terrain or trigger events elsewhere, so check the affected landmark rather than searching only near the NPC. Stockwell’s shop is the building with the Rupee symbol on its roof. The Big Wallet costs 80 Rupees and increases the carrying limit from 100 to 300, making it the best early purchase, but it is optional for story progress. Revisit Hyrule Town after dungeons and major discoveries because additional fusion targets, shop stock and conversations become available over time.
Return to Hyrule Town and meet the Hurdy-Gurdy Man
After completing Deepwood Shrine, leave the dungeon and travel back toward Hyrule Town. Enter through the southern entrance from South Hyrule Field. The Hurdy-Gurdy Man approaches and introduces Kinstone Fusion, then gives Link the Kinstone Bag and a Kinstone piece for the tutorial.
Stand beside him and press L when the fusion prompt appears. The fusion screen shows Link’s available pieces and the piece offered by the other character. Select the matching piece and press A to complete the fusion. A successful fusion consumes the two pieces and produces a change somewhere in Hyrule.
- Deepwood Shrine is complete.
- The Hurdy-Gurdy Man has given you the Kinstone Bag.
- You can open the fusion screen with L when a compatible character is nearby.
Inspect the first fusion result in South Hyrule Field
Leave Hyrule Town through the southern gate and enter South Hyrule Field. Go to the southeastern part of the area, near Smith’s House, and look for the tree affected by the Hurdy-Gurdy Man’s fusion. A hole has opened in the tree.
Enter the tree and collect the Piece of Heart inside. This reward is optional and is not needed to reach the next dungeon, but it is the clearest demonstration that fusion results can occur away from the character who initiated them. If the tree still appears closed, return to the Hurdy-Gurdy Man and complete the tutorial fusion rather than attempting to interact with the tree repeatedly.
- The tree southeast of Smith’s House is open.
- The Piece of Heart inside the tree has been collected.
- You understand that fusion rewards can be placed in another region.
Find compatible fusion targets around town
A character ready to fuse has a thought bubble above their head. Stand close and press L. If Link has a matching Kinstone piece, select it from the bag and complete the fusion. If no matching piece is available, the fusion cannot be completed at that time, and the piece in Link’s bag is not consumed.
Walk through the central square, the residential streets, and the routes near the town entrances. Several early fusion targets are ordinary town residents rather than one fixed list of named characters, so check anyone displaying the thought bubble. Later story events add more possible targets, including characters and Minish encountered in other regions.
After every successful fusion, watch the result message and note its landmark. The game can create a treasure chest, open a passage, change a tree or plant, drain an area, summon a character, or otherwise modify the overworld. Check the map for a marked result when the game provides one. Do not assume the reward is inside Hyrule Town.
- Search for thought bubbles instead of trying to fuse with every NPC.
- Only matching pieces are consumed by a completed fusion.
- Record the location mentioned or suggested by each fusion result.
Buy the Big Wallet from Stockwell
Stockwell’s shop is the building with the large Rupee symbol on its roof in the southern part of Hyrule Town. If you have at least 80 Rupees, buy the Big Wallet. The upgrade raises Link’s maximum from 100 Rupees to 300, preventing money found in the field from being lost when the smaller wallet is full.
The Big Wallet is optional and does not unlock the main campaign. It is still a high-value early purchase because later shop items and some optional upgrades cost more than the original wallet can hold. If you are below 80 Rupees, cut grass, defeat enemies, open available chests and collect nearby field rewards rather than spending money on low-priority merchandise.
After buying the Big Wallet, Stockwell’s inventory changes and the Boomerang becomes available for 300 Rupees. That purchase is also optional at this stage. Do not spend all of your money on it if doing so leaves you unable to afford a later required purchase or useful supply.
- Stockwell’s shop has been identified by its Rupee sign.
- The Big Wallet has been purchased for 80 Rupees, if you are following the recommended economy route.
- The wallet limit is now 300 Rupees.
Use Hyrule Town as a navigation and preparation hub
Hyrule Town is a useful place to revisit after each dungeon, but it is not the only place where you can save. Open the Items or Quest Status subscreen with START and select Save when you want to record progress. Use the town as a hub because its residents, shop inventory and available conversations change as the campaign advances.
Before leaving, speak with residents who have new thought bubbles, check Stockwell’s current stock, and review the map for newly marked fusion results. The central square and the surrounding houses are the most practical places to sweep early in the game. Optional training and collectible activities also exist in town, but they are not required for the main campaign.
Carry a practical supply of bombs and healing items when your current route calls for them, but do not buy every optional item immediately. The Big Wallet is the main early quality-of-life purchase; most other spending can wait until Link has better access to rupees and new areas.
- Save from the subscreen before beginning an unfamiliar route.
- Recheck town residents after completing dungeons or major story events.
- Keep enough money and supplies for the next objective instead of buying every optional item.
Return after new tools and story events
Kinstone Fusion is an ongoing system rather than a one-time tutorial. More pieces and more fusion partners become available as Link explores Hyrule and advances the story. If a resident has no matching piece, leave the area and return later after collecting more Kinstones or progressing through the next objective.
When a fusion result is inaccessible, note its landmark and wait for the tool or size state required to reach it. A chest behind a blocked path may require a later item, while a change in a distant field may simply require traveling there through the overworld. Continue accepting useful matching fusions, especially when the result clearly opens a shortcut or treasure location.
Do not treat optional fusions as prerequisites for the next dungeon unless the game’s story directs you to them. The required campaign route continues through the normal dungeon and overworld objectives, while fusions provide rewards, shortcuts and upgrades that make later exploration easier.
- Revisit Hyrule Town after each dungeon.
- Track inaccessible fusion results for later backtracking.
- Distinguish optional fusion rewards from mandatory story objectives.
Before you move on
- The Hurdy-Gurdy Man has been met after Deepwood Shrine.
- The Kinstone Bag has been received and the tutorial fusion has been completed.
- The tree southeast of Smith’s House in South Hyrule Field is open and its Piece of Heart has been collected, if taking the recommended optional reward.
- Stockwell’s shop has been checked, and the Big Wallet has been purchased for 80 Rupees if following the recommended economy route.
- The player can identify thought bubbles, press L to attempt a fusion, and inspect the map or nearby landmark after a successful result.
- The player has returned to Hyrule Town after the initial fusion and understands which rewards are optional rather than required for the next dungeon.
References for this chapter
- The Legend of Zelda: The Minish Cap Game Manual
- After the First Dungeon - The Legend of Zelda: The Minish Cap Walkthrough
- Kinstone Fusion Guide - The Legend of Zelda: The Minish Cap Walkthrough
- The Legend of Zelda: The Minish Cap - Guide and Walkthrough - Game Boy Advance - By Kirby021591
- The Legend of Zelda: The Minish Cap — Guide and Walkthrough by Phoenix_1911
Cave of Flames — Dungeon 2: Cane of Pacci
Leave Hyrule Town after completing its initial Kinstone tutorial and travel west toward Trilby Highlands and Mt. Crenel. Obtain the Empty Bottle from the Business Scrub, fill it with Mt. Crenel Mineral Water, grow the green bean vine, buy the Grip Ring and climb Crenel Wall. Reach Melari’s Mines in Minish form, speak with Melari, then enter the Cave of Flames. Inside, use bombs, the Gust Jar, Minish passages, mine carts and the Cane of Pacci to collect the Compass, Dungeon Map, two Small Keys and Big Key. Defeat Gleerok by flipping its shell with the Cane and striking the crystal on its back. After taking the Fire Element, return to Melari for the White Sword, infuse it with the Earth and Fire Elements in the Elemental Sanctuary, then begin the required Castor Wilds route through Rem’s Wake-Up Mushroom, the Pegasus Boots and the Bow.
Travel from Hyrule Town to Trilby Highlands
Begin this chapter after the Hurdy-Gurdy Man’s Kinstone Bag tutorial and the initial Hyrule Town fusion sequence are complete. Do not return to Minish Village to repeat those events. Leave Hyrule Town through the western route and continue toward Trilby Highlands.
In Trilby Highlands, follow the path south and climb down the ladder. Bomb the cracked wall on the right to reveal a Business Scrub. Raise the Small Shield to reflect the seed it spits. After it retreats, speak with the Scrub and buy the Empty Bottle for 20 Rupees. This is the bottle needed for the Mt. Crenel route; the purchase is required, while any nearby fairy cave or shell reward is optional.
- Finish the earlier Hyrule Town tutorial before starting this chapter.
- Reach Trilby Highlands from Hyrule Town.
- Bomb the Business Scrub’s cave.
- Reflect its seed with the Small Shield.
- Buy the Empty Bottle for 20 Rupees.
Fill the bottle and grow the Mt. Crenel vine
Continue west from Trilby Highlands into Mt. Crenel Base. Near the lower part of the area, use the Empty Bottle on the green water to collect Mt. Crenel Mineral Water. Defeat or avoid the Mulldozers while reaching the water; the bottle must contain this water for the required route.
Pour the Mineral Water onto the dry green bean at the mountain base. The bean grows into a vine. Before watering it, Link must use the nearby Minish portal and carry the bean through the small passage to the hole beside the wall. If the bean is not present in the correct position, shrink and check the nearby Minish route rather than searching for another bottle.
Climb the new vine and continue into the higher Mt. Crenel area. Bombable caves containing fairies, rupees, shells or Kinstones are optional. A Business Scrub in the area can sell additional bombs if your supply is low.
- Collect Mt. Crenel Mineral Water.
- Use the Minish route to move the green bean into its hole.
- Water the bean and climb the resulting vine.
- Restock bombs if necessary.
Buy the Grip Ring and climb Crenel Wall
From the upper Mt. Crenel route, cross the bridge and bomb the wall on the far side. Defeat the enemies inside, then solve the block section and leave through the lower exit. Use the whirlwinds to cross the gap, climb the ladder and move to the right side of the area.
Bomb the cracked wall at the right edge to reveal another Business Scrub. Reflect its seed with the Small Shield, then buy the Grip Ring for 40 Rupees. This purchase is required; the Grip Ring allows Link to climb the rough vertical surface called Crenel Wall.
Exit the cave and return west. Descend the ladder and drop from the ledge near the Crenel Wall sign. Climb the wall with the Grip Ring while avoiding the falling boulders. The bomb cave beside the wall contains a Piece of Heart and fairies, but it is optional. Higher on the wall, the fairy pond can award the Big Bomb Bag if you honestly answer that you threw neither a gold nor silver bomb; this upgrade is helpful but not required.
- Reach the upper Mt. Crenel Business Scrub.
- Reflect its seed with the Small Shield.
- Buy the Grip Ring for 40 Rupees.
- Climb Crenel Wall.
- Treat the Piece of Heart and Big Bomb Bag as optional rewards.
Reach Melari’s Mines and enter the dungeon
Continue over the mountain after climbing Crenel Wall. Use the mushroom to cross the gap, then follow the upper route to the rainy section. Shrink at the nearby portal and move through the Minish passage. At Minish size, watch the shadows of falling raindrops and cross when the path is clear. Use the next portal to return to normal size.
Continue through the mountain until you reach the route to Melari’s Mines. If a rock blocks the path, use the nearby pushable object and surrounding ledges to open the passage. Enter the mines while shrunken and speak with Melari. He explains that he can reforge the Broken Picori Blade after Link obtains the Fire Element. This conversation establishes the next objective but does not repair the sword yet.
Return to normal size outside the mines and enter the Cave of Flames at the top of Mt. Crenel. Flippers are not needed for this dungeon. The required prerequisites are the Empty Bottle, Mineral Water, Grip Ring, access through Crenel Wall and the conversation with Melari.
- Cross the rainy Minish passage.
- Reach Melari’s Mines in Minish form.
- Speak with Melari about the Broken Picori Blade.
- Enter the Cave of Flames.
Collect the Compass and Dungeon Map
In the first dungeon room, move right and slash a Bob-omb once. When it stops, strike it again, then lift and throw it at the cracked wall. In the next room, flip the Spiny Beetles with the Small Shield and slash their exposed bodies. Open the chest for the Compass.
Continue through the Rupee Like room and the mine-cart route. Ride the cart to the left-hand room and bomb the cracked wall. Defeat the four Helmasaurs to reveal a Minish portal. Shrink and follow the narrow passage to the right, avoiding Keese and Spiny Beetles. Drop from the ledge and use the portal to return to normal size.
Cut through the flames and open the raised chest for the Dungeon Map. Step on the nearby switch to open the southern door. Cross the falling platforms; the Gust Jar is useful for clearing pots that obstruct the route.
- Use a stopped Bob-omb or bomb to open the first wall.
- Flip and defeat the Spiny Beetles.
- Collect the Compass.
- Use the Minish route after defeating the Helmasaurs.
- Collect the Dungeon Map and activate the southern switch.
Obtain the Cane of Pacci
Cross the lava room on the moving platform. Slash Rollobites so they curl into balls, then move or lift the balls into the required holes. Use the whirlwinds to reach the northeastern switch. Push the chest platform into its hole and open the chest for the first Small Key.
Return to the mine-cart room, unlock the door and strike the track lever with your sword. Ride the cart on the changed route. A bombable wall near the spike corridor leads to an optional Piece of Heart; collect it only if desired.
Continue upward and drop into the room with eight Spiny ChuChus. Keep the Small Shield ready and attack when their spikes retract. Bombs can stun them if the room becomes crowded. Once all eight are defeated, open the large chest to obtain the Cane of Pacci.
Use the Cane on the spiked lava platform, then use it on the hole to launch Link to the higher ledge. Activate the switch to create the blue warp and open the shortcut.
- Solve the Rollobite and hole puzzle.
- Collect the first Small Key.
- Change the mine-cart track.
- Defeat the eight Spiny ChuChus.
- Collect the Cane of Pacci.
Collect the second Small Key and reach the Big Key
Use the shortcut and flip the overturned mine cart with the Cane of Pacci. Ride it along the track, move the chest platform into the hole and open the chest for the second Small Key. Ride back, unlock the upper door and descend the stairs.
Shrink at the portal and cross the Minish spike passage. Resize at the far end, then return through the maze after the Chasers activate. Use the safe spaces between their paths instead of trying to outrun them.
Flip the next overturned cart and ride it back. Strike the track lever, then ride to the room with four Rollobites. Turn each into a ball and place the four balls in the row of holes. Pull the nearby platform into the remaining hole and strike the lever to lower the bars.
In the large lava chamber, flip overturned platforms with the Cane and use holes and whirlwinds to cross. Work around the upper and lower ledges until you reach the central large chest. Open it for the Big Key, activate the warp switch and unlock the boss-door route.
- Flip the overturned cart.
- Collect the second Small Key.
- Complete the Minish maze and Chaser return route.
- Solve the four-Rollobite room.
- Collect the Big Key and unlock the boss door.
Defeat Gleerok and claim the Fire Element
Before dropping into the arena, break the pots in the preparation room for recovery items. In the arena, keep moving around the outer area to avoid Gleerok’s fireballs. When the shell on Gleerok’s back is exposed, use the Cane of Pacci to flip it. The shell stuns Gleerok and creates the opening for the attack.
Run across Gleerok’s lowered neck and slash the crystal on its back. Leave the neck promptly when Gleerok begins sinking into the lava. During the recovery phase, stay near the arena edge and move around the falling boulders until Gleerok resurfaces.
Later phases add wider ground-fire waves and more frequent fireballs, but the method remains the same: keep moving, find a clear angle, flip the shell, cross the neck and strike the crystal. Repeat until the crystal is destroyed. Collect the Heart Container and Fire Element, then use the green portal to leave the dungeon.
- Keep moving to avoid fireballs.
- Flip Gleerok’s shell with the Cane of Pacci.
- Cross the neck and strike the crystal.
- Avoid falling boulders and expanding lava.
- Collect the Heart Container and Fire Element.
Receive the White Sword and infuse it
After defeating Gleerok, shrink and return to Melari’s Mines. Speak with Melari again to receive the repaired White Sword. If he does not provide it, confirm that the Fire Element was collected and talk to him again inside the mines.
Travel to Hyrule Castle and enter the Elemental Sanctuary through the castle grounds. Place the White Sword in the pedestal. The Earth and Fire Elements infuse it, giving Link the ability to create two sword copies.
Near the sanctuary exit, stand on one glowing tile and charge the sword. While holding the sword button, move onto the second glowing tile so the copies occupy both positions at once. This opens the exit and begins the next required story route.
- Return to Melari after the Fire Element is collected.
- Receive the White Sword.
- Place it in the Elemental Sanctuary pedestal.
- Infuse it with the Earth and Fire Elements.
- Use the two-copy ability to leave the sanctuary.
Begin the Castor Wilds setup
After leaving Hyrule Castle, complete the Moblin event in North Hyrule Field. Return to Hyrule Town and enter Rem’s Shoe Shop. Shrink inside the shop, climb onto the desk and speak with the Minish there to learn how to wake Rem.
Go to Syrup’s Hut in the northeastern Minish Woods and buy the Wake-Up Mushroom for 60 Rupees. Return to Rem’s Shoe Shop, stand beside the sleeping Rem and use the mushroom. Rem wakes and gives Link the Pegasus Boots. Assign them to a button and hold the button while moving to dash.
Return to Castor Wilds and use the Pegasus Boots to cross the swamp. Keep dashing between safe ground patches rather than walking through the mud. At the tree stump, shrink and follow the Minish route to the lily pad. Use the Gust Jar to propel the lily pad across the water, enter the cave and open the large chest for the Bow.
Return to normal size and cross the swamp again with the Pegasus Boots. Use the Bow on the eye switches to open the route toward the three Mysterious Statues and the Fortress of Winds approach. The Golden Kinstone events and Bow are required for the next chapter; Cave of Flames Kinstone chests, the dungeon Piece of Heart and the Big Bomb Bag are optional.
- Complete the North Hyrule Field Moblin event.
- Speak with the Minish on Rem’s desk.
- Buy Syrup’s Wake-Up Mushroom for 60 Rupees.
- Wake Rem and receive the Pegasus Boots.
- Collect the Bow in the Minish Castor Wilds route.
- Begin the Golden Kinstone and Fortress of Winds progression.
Before you move on
- The chapter began after the Hyrule Town Kinstone Bag tutorial and did not repeat the Belari or Gentari sequences.
- The Empty Bottle was bought in Trilby Highlands and filled with Mt. Crenel Mineral Water.
- The green bean was moved through the Minish route, watered and climbed.
- The Grip Ring was bought for 40 Rupees and used to climb Crenel Wall.
- Link reached Melari’s Mines in Minish form and spoke with Melari.
- The Cave of Flames Compass, Dungeon Map, two Small Keys, Cane of Pacci and Big Key were collected or used.
- Gleerok was defeated and the Heart Container and Fire Element were collected.
- Melari gave Link the White Sword after the Fire Element was obtained.
- The White Sword was infused with the Earth and Fire Elements in the Elemental Sanctuary.
- The North Hyrule Field Moblin event was completed.
- Rem was awakened with Syrup’s Wake-Up Mushroom and the Pegasus Boots were received.
- The Bow was collected in Castor Wilds and Link is ready for the Golden Kinstone events and Fortress of Winds.
Fortress of Winds — Dungeon 3 and the Mole Mitts
Begin this chapter only after Chapter 05 has completed the White Sword infusion, Rem’s Wake-Up Mushroom sequence, Pegasus Boots, Bow acquisition and all three Castor Wilds Golden Kinstone statue fusions. Enter Fortress of Winds through the opened Wind Ruins route. Follow the dungeon’s outer rooms and clone puzzles to reach the concealed Mole Mitts chest, then use the mitts to open the remaining passages and reach the Big Key. Defeat Mazaal by shooting the eyes in its hands, striking the disabled hands, entering the head while Minish-sized and digging through the later interior phases. The fortress provides a Heart Container and the Ocarina of Wind, not an Element.
Verify the prerequisites and enter Fortress of Winds
Before leaving Castor Wilds, confirm that the White Sword has been reforged and infused with the Earth and Fire Elements, Rem has given Link the Pegasus Boots, the Bow is in the inventory, and all three Mysterious Statues have been opened with Golden Kinstone fusions. These events are the approach to this dungeon, not tasks to repeat here.
Travel through the opened Wind Ruins route and enter Fortress of Winds. Flippers are not needed for this dungeon. Keep the Bow available for eye switches and Mazaal’s hands, and be prepared to use the Four Sword’s clone formations, shrinking portals and the Pegasus Boots during the dungeon’s puzzles.
- White Sword infused with the Earth and Fire Elements
- Pegasus Boots obtained from Rem
- Bow obtained in Castor Wilds
- Three Mysterious Statues fused with Golden Kinstones
- Wind Ruins opened
- Fortress of Winds entered
Take the first route through the fortress
The entrance room has four initially accessible doors. Take the far-left door. Defeat the Blue Stalfos or move around its jumps, then climb the stairs and continue through the upper rooms. Use the Bow on the red eye switch when the path requires it. Continue through the moving-platform and clone rooms, using the glowing floor tiles to create the duplicate Links needed for switches and barriers.
Work through the lever and block rooms to obtain the early Small Keys. When a Wallmaster’s shadow appears beneath Link, move away immediately; being caught sends Link back to the dungeon entrance. In the rooms with Armos statues, activate the statue and use the outer glowing tiles to create the required clones. Continue until the route leads to the Red Darknut and the rotating spike-trap room.
- Far-left entrance route taken
- Red eye switch activated with the Bow
- Early clone puzzles completed
- Early Small Keys collected
- Wallmaster shadows avoided
- Red Darknut defeated or bypassed safely
Find the concealed Mole Mitts room
After defeating the Red Darknut, a blue warp appears. Use the southern exit and enter the room with the rotating spike traps. The traps move counter-clockwise, so travel in the same direction around the room instead of crossing their paths. Step on the floor switch, make another circuit if necessary, and go through the opened door to the right.
In the corridor beyond, look for the section of wall marked by three tiles near the middle. This marking identifies a bombable wall. Place a bomb between the skulls to open the hidden passage, then enter and open the chest for the Mole Mitts. Use them immediately on the nearby soft dirt wall to reach the optional rupee chest, then leave the room. The dungeon item is concealed behind this bombable wall rather than placed along the obvious central route.
- Blue warp reached after the Darknut encounter
- Spike traps crossed counter-clockwise
- Floor switch activated
- Three-tile wall identified
- Bomb placed between the skulls
- Mole Mitts collected
Use the Mole Mitts to open the middle dungeon routes
Return toward the entrance room and use the Mole Mitts on the soft dirt walls in the first large area. Dig all the way to the right for a rupee chest, then dig toward the far-left side to reach a new door and another chest. In the next room, defeat the Green Wizzrobes; their straight-line beams and the room’s torches make it safer to keep moving rather than stand in the center.
Revisit the upper routes that were blocked by diggable material. Use the mitts to reach switches, chests and the next locked doors. When a statue must be moved onto a switch, dig around it so Link can approach from the correct side. Keep the Bow equipped when eye switches appear, because obtaining the Mole Mitts does not replace the Bow requirement.
- Entrance-room dirt walls dug through
- Green Wizzrobes defeated
- New doors opened with the Mole Mitts
- Statue-and-switch routes completed
- Bow retained for eye switches
Solve the clone room and collect the Big Key
Take the right-side route from the entrance and continue upward through the Stalfos and Spark rooms. Pull the lever to create a chest, then proceed through the digging area and climb the ladder. Continue to the room with the Armos statue and the glowing floor tiles. Defeat or disable the statue, then use the two outside tiles to create the necessary Four Sword clones and place the Links on the switches.
In the four-switch room, first move the statues onto the upper-left and lower-right switches. Charge the Four Sword on the bottom glowing tile, then move to the upper glowing tile to create the clones. Guide the Links through the narrow passage without letting them collide with the walls. Place them on the two remaining switches to make a Small Key appear.
Use the key on the lower locked door. Defeat the Blue Wallmasters in the next section to reveal a shrinking portal, but do not use it immediately. Continue to the right, navigate the rolling spike hazards by using the floor openings for cover, and reach the upper-right route. Shrink when the small opening requires it, grow again for normal-size switches, and follow the upper path. Drop through the right-hand opening to reach the Big Key chest.
- Right-side upper route completed
- Lever chest opened
- Armos clone room cleared
- Statues placed on the correct switches
- Four Sword clones positioned safely
- Small Key obtained
- Shrinking portal and small opening used
- Big Key collected
Defeat Mazaal and receive the Ocarina of Wind
From the Big Key route, return to the central upper area and continue to the boss-door approach. Push the protruding block to reveal the red warp tile, then use the Big Key on the boss door. In the preparation room, break skulls for possible hearts and arrows. If you have a Boomerang, it can also help with the orbs and may produce fairies, but it is not required for the fight.
Mazaal has a head and two hands. Keep moving to avoid the hands’ punches and sweeping grabs. Each hand has a pink eye. Shoot an eye with an arrow to make that hand vulnerable, then approach and strike the exposed eye with the sword until the hand is disabled. Repeat this on the other hand. When both hands are down, the head lowers. Use a corner shrinking portal, become Minish-sized and enter the opening in Mazaal’s head. Strike the eye inside until the pincer ejects Link.
Grow back to normal size and repeat the hand sequence. During the next phase, Mazaal can pound with both hands, causing beetles to fall from above. Remove them if they interfere with movement, but keep the hands as your priority. After both hands are disabled, shrink and enter the head again. This interior has diggable material, so use the Mole Mitts to search for the eye-bearing pillar and attack it.
In the final phase, watch for the shrinking ray from Mazaal’s head. Stay outside its short-range circular path, disable both hands again and enter the head while Minish-sized. Dig through the interior to find the final eye-bearing pillar and destroy it. Collect the Heart Container after the battle.
Climb the opened stairs and read the stone tablet. The tablet explains that the Wind Tribe has gone to the heavens. Pick up the Ocarina of Wind that appears afterward. This unlocks travel between discovered Wind Crests and advances the story toward the next Element. Fortress of Winds does not award an Element.
- Boss door opened with the Big Key
- Both hand eyes shot with the Bow
- Disabled hands struck with the sword
- First head interior cleared
- Mole Mitts used in the later head interior
- Shrinking ray avoided
- Mazaal defeated
- Heart Container collected
- Stone tablet read
- Ocarina of Wind received
Before you move on
- Fortress of Winds was entered through the opened Wind Ruins route.
- The Mole Mitts are in Link’s inventory.
- The Big Key was collected and used on Mazaal’s door.
- Mazaal’s hand eyes and all later interior eye targets were destroyed.
- The Heart Container was collected after the boss fight.
- The stone tablet beyond the boss was read.
- The Ocarina of Wind was received.
- Wind Crest travel is available, and the story directs Link toward the next Element rather than awarding one inside Fortress of Winds.
Temple of Droplets — Dungeon 4 (Flame Lantern)
After the Fortress of Winds, speak with the Minish in Lake Hylia to open the Royal Hyrule Library. Retrieve the three overdue books in order: A Hyrulean Bestiary from Julietta’s house near Anju, Legend of the Picori from Dr. Left’s house after collecting the required Power Bracelets, and A History of Masks from Mayor Hagen’s Lakeside Cabin. Return the books to the library, speak with Elder Librari, and clear the underwater passage to obtain the Flippers. Then shrink on the ice structure in Lake Hylia and enter the Temple of Droplets. The dungeon requires swimming, diving, lily-pad travel, slippery-floor movement, sunlight puzzles, Four Sword duplication, bombs, and the Flame Lantern. Defeat Big Blue ChuChu with the Gust Jar, then use the Flame Lantern to reach the frozen Water Element. Defeat Big Octorok by reflecting its boulders and burning the dried flower on its back during its frozen phases. Collect the Water Element and Heart Container, then leave through the entrance.
Open the library and start the book quest
Warp to Lake Hylia and shrink at the tree stump near the small Minish building. Enter and speak with the Minish inside. He explains that Elder Librari in Hyrule Town knows how to reach the Temple of Droplets. This conversation opens the Royal Hyrule Library. Return to normal size, warp to Hyrule Town, and enter the library in the northwest part of town.
Go upstairs, exit through the rooftop door, flip the nearby jar with the Cane of Pacci, shrink, and reenter through the Minish entrance. Speak with the Minish at the upper-left of the second floor. He explains that checked-out books are blocking the route to Elder Librari. Return to normal size and speak with the librarian downstairs to begin retrieving the books.
- The Minish in Lake Hylia has been questioned.
- The Royal Hyrule Library is open.
- The library Minish has explained that books are blocking Elder Librari.
- The librarian has started the overdue-book quest.
Retrieve A Hyrulean Bestiary from Julietta
The librarian identifies A Hyrulean Bestiary as the first missing book. The holder is Julietta, who lives near Anju’s house in Hyrule Town. First enter the nearby blue-roofed house with the cat. The note inside points to the girl next door, and the book can be seen above the shelf.
Leave and enter the adjacent purple-roofed house. Speak with Julietta, then leave town briefly to fill an empty bottle with water from the river. Return and pour the water onto the fireplace. Use the pot to shrink and enter the extinguished fireplace. Cross the Minish passage and enter the blue-roofed house from the small entrance. Push the book down from the shelf.
Return through the fireplace, resize, and enter the blue-roofed house normally. Pick up A Hyrulean Bestiary and take it back to the librarian. The next book is Legend of the Picori, held by Dr. Left.
- Julietta has been identified as the book holder.
- The adjacent fireplace has been extinguished with bottled water.
- A Hyrulean Bestiary has been pushed down and collected at normal size.
- The first book has been returned to the librarian.
Get the Power Bracelets and retrieve Legend of the Picori
Before retrieving Dr. Left’s book, make sure the southwest route is available. If necessary, shrink in Mama’s Café, cross the narrow plank, and speak with the dog so it moves out of the way. Return to normal size and enter Dr. Left’s house in the southwest part of town. Speak with him, then extinguish his fireplace with bottled water.
Use the Minish route through the carpenter’s house to reach the large yellow-roofed building. Enter through the small Minish opening, leave through the upper exit, cross the bridge, pass the cats, and enter the small cave near the fountain. Defeat the Sluggula, use the Cane of Pacci to reach the upper ledge, defeat the four Blue Mulldozers, and open the large chest for the Power Bracelets. These are required for the next part of the book route.
Return to Dr. Left’s house and use the Power Bracelets to push both large cabinets aside. Shrink and enter the upper Minish passage. Clear the dust with the Gust Jar, stand on the duplication tiles, and make a vertical Four Sword formation. Position the duplicate beside the book so the added weight knocks Legend of the Picori down. Exit, resize, collect the book, and return it to the library.
- The Power Bracelets have been collected.
- The cabinets in Dr. Left’s house have been moved.
- Legend of the Picori has been knocked down from the upper shelf.
- Legend of the Picori has been returned to the librarian before the final book is pursued.
Retrieve A History of Masks and obtain the Flippers
After returning Legend of the Picori, the librarian sends you after A History of Masks, which Mayor Hagen checked out. Enter Mayor Hagen’s house in Hyrule Town and speak with him. Knock the masks from the north wall with the Pegasus Boots, flip the pot with the Cane of Pacci, and shrink. Use the Minish opening to speak with the Minish, who explains that Hagen took the book to his Lakeside Cabin.
Travel to Lake Hylia. Ram the shiny tree north of the cabin with the Pegasus Boots to reveal a stump, then shrink. Follow the rear Minish path into the cabin, ride the lily pad across the water, push the shelf, and knock A History of Masks down. Return to the stump, resize, reenter the cabin, collect the book, and bring it to the library.
Once all three books are returned, Sturgeon restores them to the shelves. Shrink inside the library, climb the books, and enter the Minish door in the book to reach Elder Librari. Speak with him and he opens the hidden floor panel. Push through the blocks, defeat the Sluggula, use the Gust Jar to cross with the mushroom, and defeat the Scissors Beetles. Open the large chest to obtain the Flippers.
- A History of Masks has been collected from Mayor Hagen’s cabin.
- All three books have been returned to the library.
- The Power Bracelets were obtained before the final books were completed.
- Elder Librari’s hidden passage has been cleared.
- The Flippers have been obtained.
Enter the Temple of Droplets and collect the Big Key
Return to Lake Hylia and swim to the ice structure near the Wind Crest. Jump onto the ice and shrink at the portal. Enter the hole in the center; Link remains Minish-sized throughout the dungeon. The dungeon floors are slippery, so use short directional taps and avoid overshooting corners.
Push the opening ice blocks aside and proceed to the room with the Red Mulldozers. Descend the stairs and pull the lever to open the ceiling. Return upstairs, fall through the central hole, and push the ice block beneath the sunlight until it melts. Take the Small Key.
Use the Small Key on the locked door to the left. Defeat the Blue Mulldozers and fall through the hole. In the lower room, route the ice block containing the key beneath the sunlight. The other blocks must be moved out of its path first. When the block melts, collect the Big Key. Pull the lever again to close the ceiling, return to the entrance area, and use the Big Key on the southern door. The Water Element is visible there but remains frozen.
- The Temple of Droplets has been entered while Minish-sized.
- The first Small Key has been collected.
- The Big Key has been collected.
- The frozen Water Element chamber has been reached.
Get the Dungeon Map, Compass, and the route to Big Blue ChuChu
From the Water Element chamber, take the western route to the Dungeon Map chest. Continue through the water rooms, waiting for Spiked Rollers to move before diving underneath them. Use the Gust Jar on mushrooms to cross gaps and activate switches that lower barriers.
Dive beneath the pot-like structure in the water to find another Small Key. Return to the upper level and unlock the western door. Step on the switch, board the lily pad, and propel it with the Gust Jar through the waterway and down the waterfall. When a Spiked Roller approaches, jump into the water and dive beneath it, then remount the lily pad when the path is clear.
Continue east, activate the switch, and defeat the Madderpillar by striking its nose and then its tail after it turns. Open the chest beyond it for the Compass. From there, take the northern water route, push the upper ice block through the indicated sequence onto the floor switch, and ride the lily pad into the dark room. Defeat the Sluggulas and Scissors Beetles, then use the duplication tiles to pull the large lever and redirect sunlight.
- The Dungeon Map has been collected.
- The second Small Key has been found beneath the water structure.
- The lily-pad route is open.
- The Madderpillar has been defeated.
- The Compass has been collected.
Defeat Big Blue ChuChu and obtain the Flame Lantern
After the Scissors Beetles, use the lever and sunlight to melt the nearby ice. Cross the following rooms, avoiding Green Blade Traps, and manipulate the levers so sunlight reaches the frozen chest. Collect the Small Key, return to the locked door, and pull the lever inside to begin the Big Blue ChuChu battle.
Big Blue ChuChu is electrically charged while upright. Do not attack it directly in that state. Equip the Gust Jar and vacuum the base until the ChuChu falls over. While it is down, slash the exposed body with the sword. Repeat the vacuum-and-strike cycle until it is defeated.
Open the chest for the Flame Lantern. Assign it to an item button. It lights dark rooms and melts the marked ice blocks needed for the rest of the dungeon.
- The sunlight lever route has been completed.
- The Small Key before the miniboss has been collected.
- Big Blue ChuChu has been defeated.
- The Flame Lantern is in the inventory.
Use the Flame Lantern to reach the Water Element
Melt the ice near the miniboss room and continue through the dark rooms. Defeat the Scissors Beetles, light the required torches, and use a bomb on the cracked wall indicated by the dungeon layout. Defeat the Mulldozers beyond it to make a Small Key appear.
Return to the torch maze, light the remaining required torches, and use the Small Key on the locked door. Avoid the Winder, which sets Link on fire on contact. Continue over the ice and through the block rooms. Push the large blocks into position, use the Four Sword duplication tiles to clear obstructions, and stand on the required switches with duplicate Links.
In the nine-torch room, light all nine torches before they extinguish. Working across a row or column at a time reduces backtracking. Dive beneath the rolling spikes in the next water room, activate the floor switch, and bomb the wall indicated by the large arrow. Defeat or avoid the Madderpillars, climb back upward, and return to the chamber holding the frozen Water Element.
Use the duplication tiles to create the required Four Sword formation and pull the large lever. Sunlight melts the large ice block. Big Octorok emerges, absorbs the Water Element, and retreats to the boss room below.
- The Flame Lantern has opened the dark-room routes.
- The torch maze has been cleared.
- The Small Key from the Mulldozer room has been used.
- The block-and-switch rooms are complete.
- The nine-torch room has been solved.
- The large ice block has melted and Big Octorok has escaped to the boss room.
Defeat Big Octorok and leave the dungeon
Before the boss, optional frozen chests can be melted for minor rewards, including Kinstone pieces and Mysterious Shells. They are not required. When ready, use the blue warp tile or return through the entrance route and go south to the boss room.
In the first phase, stand in front of Big Octorok and slash its boulders back toward it. Reflect three boulders. Avoid letting them strike walls, because they break into dangerous fragments. The boss then freezes itself and the floor, and the flower on its back dries out. Keep moving to avoid the freezing breath, equip the Flame Lantern, and burn the dried flower.
After the boss thaws, it repeats the boulder attack and adds suction that can pull Link toward its mouth. Move laterally when the suction begins, then reflect three boulders. When the boss freezes again, circle it and burn the dried flower a second time. In the final phase, repeat the boulder-reflection method. If Big Octorok creates a smokescreen, use the Flame Lantern to restore visibility.
When Big Octorok falls, collect the Water Element and Heart Container. Step into the green warp portal, then walk into the sunlight above the entrance to leave the Temple of Droplets.
- Three boulders have been reflected in each attack phase.
- The dried flower has been burned during both frozen phases.
- Suction and freezing breath have been avoided.
- Big Octorok has been defeated.
- The Water Element and Heart Container have been collected.
- The temple has been exited through the entrance.
Use the Flippers for optional overworld rewards
The Flippers now open water routes that were previously inaccessible. In Lake Hylia, swim and dive around the cabin and central lake paths to reach new shorelines and the area containing the Waveblade dojo and a Piece of Heart. In Hyrule Town, the Minish route through the southwest houses and fountain cave now permits swimming across the water to a Piece of Heart.
The Flippers also open the previously unreachable Piece of Heart in Veil Falls, reached from the northeast route of North Hyrule Field after the boulders are cleared. These rewards are optional and do not affect the four-Element campaign. The Big Wallet is separate overworld content and is not a Temple of Droplets reward.
- New Lake Hylia water routes have been checked if optional rewards are desired.
- The southwest Hyrule Town fountain-cave water route has been checked.
- The Veil Falls Piece of Heart has been collected or deliberately left for later.
- Optional rewards have not been confused with the dungeon’s required progression.
Before you move on
- The Flippers and Flame Lantern are in the inventory.
- The Power Bracelets were obtained during the library quest.
- The Temple of Droplets was entered and cleared while Minish-sized.
- Big Blue ChuChu was defeated with the Gust Jar knockdown method.
- Big Octorok was defeated through boulder reflection and Flame Lantern attacks.
- The Water Element and Heart Container were collected.
- Link exited through the temple entrance and can swim and dive in Lake Hylia.
Royal Crypt, Veil Falls and Cloud Tops
After completing the Temple of Droplets, return to the Elemental Sanctuary and place the Water Element into the White Sword alongside the Earth and Fire Elements. This unlocks the three-Link formation needed in the Royal Valley graveyard and Royal Crypt. Follow the Lost Woods route to Dampé, recover the Graveyard Key from the crow, open the royal tomb, and clear the Royal Crypt mini-dungeon. King Gustaf rewards you with a Gold Kinstone Piece. Fuse it with the Source of the Flow at Veil Falls, reveal the Wind Crest, and climb to Cloud Tops. There, collect the required Gold Kinstone Pieces and fuse them with the Mysterious Clouds to activate the pinwheels and open the route to the Wind Tribe house. The Palace of Winds is the next actual main dungeon. The Wind Element is obtained there, not in the Royal Crypt or Cloud Tops.
1. Add the Water Element and unlock three Links
After defeating the Big Octorok and taking the Water Element from the Temple of Droplets, leave the dungeon and follow the story prompt toward Royal Valley. Before entering the graveyard route, return to Hyrule Castle and enter the Elemental Sanctuary. Place the White Sword in the pedestal. Because the sword already contains the Earth and Fire Elements, the Water Element is added to them.
This does not complete the Four Sword. The Wind Element is still missing and will be obtained after the Palace of Winds. The sanctuary now lets Link create three copies at the glowing clone panels. Charge the sword, stand on the panels, and use the resulting formation for the switches and blocks that obstruct the exit. Keep the Flame Lantern and Pegasus Boots accessible for the next area.
- The White Sword contains the Earth, Fire, and Water Elements.
- Link can create three Links.
- The Flame Lantern and Pegasus Boots are available.
2. Cross Royal Valley and recover the Graveyard Key
Enter Royal Valley from North Hyrule Field and keep the Flame Lantern equipped or ready. Ghosts and crows inhabit the dark approach. Continue through the Lost Woods section by following the directions on the signs. The commonly documented route is Up, Left, Left, Up, Right, Up; signs that refer to an earlier direction must be interpreted from the route you already followed.
At the far side, go to Dampé’s house and speak with him. He gives Link the Graveyard Key, but a crow immediately steals it outside. Do not chase too close to the tree, because the crow can move again. Equip the Pegasus Boots, locate the tree holding the key, and dash into it. Pick up the fallen key, then return to Dampé at the graveyard gate. He opens the gate after Link has recovered it.
- Dampé has given Link the Graveyard Key.
- The crow has dropped the key from a tree.
- Dampé has opened the graveyard gate.
3. Open the Royal Crypt
Enter the graveyard and push the tombstone directly ahead upward to clear the route. In the lower-right portion of the graveyard, destroy the rocks covering the glowing clone panels. Charge the White Sword and create three Links.
Walk left through the opening made by the moved tombstone, then go around the flowers and approach the three floor switches from the right. Place one Link on each switch. When all three remain pressed, the large royal tombstone moves and exposes the stairs into the Royal Crypt.
A separate tombstone in the graveyard can be pushed to reach an optional Piece of Heart route. That reward is useful but is not needed to open the Royal Crypt.
- The clone panels are exposed.
- Three Links are standing on the graveyard switches.
- The entrance to the Royal Crypt is open.
4. Get the first Small Key and cross the mushroom room
The first crypt room contains two Gibdos. Defeat them with the sword, or use the Flame Lantern to burn away their wrappings and turn them into less dangerous Stalfos before finishing them. One of the Gibdos provides the first Small Key. Avoid being grabbed, since a Gibdo’s hold causes heavy damage.
In the next room, pull the left mushroom across the gap and use it to fling Link to the opposite side. The doors beyond the gap include Door Mimics. Use the middle door for the documented route; the side doors can harm Link rather than providing a useful shortcut. Continue into the room containing the two remaining keys.
- The first Small Key has been collected.
- The left mushroom has carried Link across the gap.
- The middle door has been used.
5. Solve both clone puzzles for the remaining keys
The next room has two side challenges. Take the right-hand route first, charge the sword, and create three Links on the glowing tiles. Move the formation around the long block arrangement and avoid the Blade Trap. Step on all three switches to make one Small Key appear.
Return to the central area and take the lower-left route. Wait until the moving platform is positioned usefully, then create three Links and board the platform. Ride it across while avoiding the blocks and Blade Trap. Reach the switches at the far side to produce the second Small Key.
Bring both keys back to the central passage and use them on the two locked blocks. This opens the corridor to the final crypt rooms. If a formation breaks, return to the glowing tiles, recharge the sword, and try again rather than attacking the blocks.
- The first clone-switch puzzle is complete.
- The first additional Small Key has been collected.
- The moving-platform puzzle is complete.
- The second additional Small Key has been collected.
- Both locked blocks are open.
6. Reach King Gustaf and claim the Gold Kinstone Piece
Defeat the Ropes in the opened corridor and continue north. In the next room, light all four torches with the Flame Lantern. The torches fire projectiles, and two Gibdos appear. Keep moving between attacks, burn their wrappings when possible, and finish the resulting Stalfos.
After both Gibdos are defeated, the northern door opens. Step onto the raised platform in the final room and speak with King Gustaf’s spirit. He gives Link the Gold Kinstone Piece needed for the Source of the Flow at Veil Falls. The Royal Crypt has no map, compass, Big Key, boss fight, Element, or main dungeon item; it is a short required mini-dungeon.
- All four torches are lit.
- The summoned Gibdos are defeated.
- King Gustaf has awarded the Gold Kinstone Piece.
7. Open the Source of the Flow and reach Cloud Tops
Leave Royal Valley and travel to the northeastern exit of North Hyrule Field. Continue into Veil Falls and cross the bridge to the sealed stone doorway beside the large waterfall. Fuse King Gustaf’s Gold Kinstone Piece with the Source of the Flow. An ordinary Kinstone Piece cannot open this story passage.
Enter the opened cave, light the dark rooms with the Flame Lantern, and use the Boomerang against the fiery skull enemy. Bomb the cracked wall between the blocks, then push the required blocks and use three Links where the formation is needed. Exit, climb the rock face, and inspect the tombstone at the top to reveal the Veil Falls Wind Crest.
Continue through the northern cave route, using bombs, block puzzles, and the available clone formation. Climb to the large whirlwind above the falls and enter it to reach Cloud Tops. Optional caves, rupees, shells, and heart-piece routes in Veil Falls do not replace the Source of the Flow objective.
- The Source of the Flow has opened.
- The Veil Falls Wind Crest is active.
- The upper Veil Falls route is accessible.
- The whirlwind to Cloud Tops has been used.
8. Activate the Cloud Tops pinwheels and open the Palace route
Speak with the Wind Tribe residents near the Cloud Tops entrance, then use the red whirlwinds to reach higher cloud platforms. Use the Mole Mitts to dig through thick cloud banks. Search the clouds as you go because several Gold Kinstone Pieces are placed along the route, and some are obtained by defeating cloud enemies.
Drop through the marked holes to reach the lower cloud islands. Fuse the Gold Kinstone Pieces with the required Mysterious Clouds. The documented route requires five separate Mysterious Cloud fusions; each successful fusion activates another pinwheel near the Cloud Tops entrance. Use red whirlwinds for vertical movement and white whirlwinds to float across open gaps. If Link falls, use the lower whirlwinds and cloud platforms to return to the active section.
After all required pinwheels are spinning, the central cloud opens and reveals the large whirlwind upward. Ride it to the Wind Tribe house and activate the Wind Crest on the upper platform for easier returns. Speak with the residents and proceed through the house to open the route toward the Palace of Winds. The Palace of Winds is the next actual main dungeon, and the Wind Element is obtained only after completing it.
- All five required Mysterious Cloud fusions are complete.
- The Cloud Tops pinwheels are spinning.
- The central cloud has opened.
- The upper whirlwind is available.
- The Wind Tribe house and Palace of Winds route are accessible.
Before you move on
- The White Sword contains the Earth, Fire, and Water Elements.
- Link can create three Links.
- Dampé has opened the graveyard gate.
- The Royal Crypt is cleared.
- King Gustaf has awarded the Gold Kinstone Piece.
- The Source of the Flow at Veil Falls is open.
- The Veil Falls Wind Crest and upper whirlwind are available.
- The five required Cloud Tops Mysterious Cloud fusions are complete.
- The Wind Tribe house and route to the Palace of Winds are accessible.
- The Wind Element and completed Four Sword have not yet been claimed; those belong to the next dungeon and its follow-up sequence.
References for this chapter
- The Royal Crypt - The Legend of Zelda: The Minish Cap Walkthrough
- The Source of the Flow - The Legend of Zelda: The Minish Cap Walkthrough
- The Minish Cap walkthrough - Royal Valley, Veil Falls and Cloud Tops
- Chapter 9: The Royal Crypt - Zelda Universe
- The Royal Crypt - Zelda Dungeon Wiki
- The Minish Cap Walkthrough – Palace of Winds
- Nintendo GameCube and Game Boy Advance Manuals
Palace of Winds — Dungeon 5 (Roc's Cape)
After completing the Cloud Tops route, speak with Siroc in the Wind Tribe area, then talk to Hailey at the stairway and climb the Tower of Winds. Enter the vortex at the summit to reach the Palace of Winds. The dungeon combines crystal-switch bridges, clone panels, cloud platforms, fans, moving platforms, Bombarossas, dark rooms and several vertical routes. Obtain Roc’s Cape from the large chest after clearing the first major enemy section. Use short jumps for precise landings and hold the item button to glide across wide gaps or ride wind currents. The Big Key is reached through the dark interior after defeating the Red Darknut and collecting the required Small Keys. The final boss is the Gyorg Pair. Begin on the blue Gyorg, jump to the red Gyorg, use clone formations to strike its opened eyes, then move between the two creatures with Roc’s Cape. Defeat every phase to receive the Wind Element, the fourth Element required to reforge the Four Sword.
Reach the Palace of Winds
The Palace cannot be entered immediately after arriving at the Tower of Winds. In the Wind Tribe area, speak with Siroc, the elder who directs Link to the tower roof. Return to the stairway and talk to Hailey, the Wind Tribe member blocking the route. Once she moves, climb to the top of the tower and enter the large vortex to reach the Palace of Winds.
Before entering, assign Roc’s Cape when it becomes available later in the dungeon, and keep the Lantern, Cane of Pacci and a projectile weapon accessible through the item screen. The dungeon repeatedly asks you to switch between these tools, so do not leave the item menu configured around only the sword and shield.
- Siroc has directed you to the tower roof.
- Hailey has moved from the stairway.
- You entered the vortex at the Tower of Winds summit.
Cross the opening bridges and obtain Roc’s Cape
In the first Palace room, defeat or avoid the Peahats and use the crystal switches to extend the bridges. Cross the available bridges, then use the Bow or Boomerang to hit the distant switch that extends the northern bridge. Push the block on the left downward so the distant switch can be reached, then cross and defeat the Stalfos near the clone tiles.
Use the clone tiles to create the number of Links required by the floor switches. Push the large block north and continue to the moving platform. Ride it upward while avoiding Bombarossas and stationary blocks. In the next area, cross the cracked floor quickly and use a projectile, bomb or Magical Boomerang to operate switches across the gaps. Some switches must be activated again after a bridge is crossed; a bomb can be left behind so its explosion changes the switch after Link reaches the other side.
Clear the waves of Green Wizzrobes in the large room. When they are defeated, open the large chest to obtain Roc’s Cape. A normal press makes Link jump; holding the item button keeps him airborne longer and produces the glide needed for wide gaps. Use short presses when a platform is close, because holding the button can carry Link past the landing point.
- The opening crystal-switch bridges are extended.
- The Green Wizzrobes are defeated.
- Roc’s Cape is in the inventory.
Use Roc’s Cape, fans and clone formations
After obtaining Roc’s Cape, jump right to the nearby platform, then return to the earlier grating to collect the chest that was previously unreachable. Continue west and use the Cape to climb the cloud platforms. Several rooms contain four floor switches below clone tiles. Clear the skulls, use the indicated tiles to multiply Link, then stand between the switches and swing the sword so the clones activate them together.
In rooms with propellers, wait for the wind to stop before crossing exposed flooring. When a gap is aligned with a fan, activate the Cane of Pacci on the marked hole, then run into the launched position when the airflow permits. The Cane launches Link upward; it does not replace Roc’s Cape for long horizontal gaps. Use panels by jumping onto them with Roc’s Cape so they flip and drop Link to a lower level or onto a moving platform.
For moving-platform sections, watch the platform’s route before committing to a jump. Stay to the side that avoids blocks, and use a deliberate fall to a lower safe platform if the timing is missed. Later, push the three blocks downward and use a sequence of Roc’s Cape jumps between descending platforms. Avoid trying to glide through every obstacle; several passages require a short jump followed by a controlled landing.
- A fan-assisted gap has been crossed with Roc’s Cape.
- The Cane of Pacci has been used on a launch hole.
- The required clone switches and moving-platform sections are cleared.
Reach the Big Key through the upper interior
Continue upward until a Red Darknut blocks the route. Wait for its attack, jump over it with a short Roc’s Cape press, and slash its back while it recovers. Do not hold the button for a long glide here; the extra airtime makes it harder to land behind the Darknut safely. Defeating it extends the bridge and opens the way into a dark interior section.
Equip the Lantern in the dark rooms. Take the right staircase to the Compass, then descend and follow the route to the chest containing a Small Key. Return to the upper route, clear the Peahats and use the far-left, middle and far-right clone tiles to activate the four switches below. The opened passage leads to rolling spikes; jump over them with Roc’s Cape and collect another Small Key.
Use the whirlwinds below to travel northeast. Land on the safe platforms rather than steering into Bombarossas. The Dungeon Map is obtained by defeating the three Fire Wizzrobes in the large chest room. Continue through the lever-operated door and return to the upper floors. Bomb cracked walls when they are marked, and use Bombarossas against cracked blocks only when the enemy is positioned beside them.
Follow the later Bombarossa route carefully: avoid touching the chain of enemies until the required door and blocks are dealt with, then collect the Small Key from the chest beyond them. Return through the cracked floor to the locked route, use the key, and work through the large maze. Push blocks into the abyss, climb the clouds, and follow the upper passage back toward the Big Key room. After using the final Small Key, open the large chest to obtain the Big Key.
- The Red Darknut is defeated.
- The Lantern has been used in the dark interior.
- The Compass, Dungeon Map and required Small Keys are collected.
- The Big Key is in your inventory.
Open the final door and prepare for the Gyorg Pair
From the Big Key room, backtrack to the large locked door. Use the Big Key, break the skulls beyond it for recovery hearts, and follow the arrow-marked drop to the sky platform. Defeat the Red Darknut there with short Roc’s Cape jumps and sword strikes. The resulting bridge and warp make later movement through the Palace easier.
Continue through the dark and upper rooms, using Lantern, bombs, projectile switches, cloud platforms and Roc’s Cape as required. If you pass the optional Piece of Heart route in the upper-left section, return for it only if you want the reward; it is not needed for the Wind Element. Before the final door, break the nearby skulls and refill health. Save outside the boss entrance if possible, then enter the large vortex with Roc’s Cape assigned.
- The Big Key opened the large final door.
- The second Red Darknut has been passed or defeated.
- Health has been restored before the boss vortex.
- Roc’s Cape is assigned to A or B.
Defeat the Gyorg Pair
The battle begins with Link on the smaller blue Gyorg. When the red Gyorg passes beneath or alongside you, jump onto its back with Roc’s Cape. Three of the red Gyorg’s eyes open first. Use the clone tiles to create two additional Links, matching the three open eyes, then strike all three eyes in the same attack. Once the eyes open fully, slash repeatedly until the red Gyorg withdraws.
When the blue Gyorg becomes available, jump onto it and attack the single eye whenever it opens. After each successful hit, prepare for the tail sweep and jump over it with Roc’s Cape. Repeat the blue-Gyorg eye attacks until it retreats and the red Gyorg returns.
The later red-Gyorg rounds use a side view and add fireballs from the blue Gyorg. Create the required clones before rushing toward the eyes, and move around the red Gyorg’s back to avoid the projectile line. In the later blue-Gyorg rounds, green mini-Gyorgs cross the arena. Slash them if they approach your landing area, or jump away if avoiding them is safer. Continue alternating between the red Gyorg’s clone-assisted eye attacks and the blue Gyorg’s single-eye attacks until the pair is defeated.
The fight ends after the final blue and red phases. The Wind Element is collected automatically. Take the Heart Container, then enter the green warp to return to the Tower of Winds. Use the Ocarina of Wind to leave the area and begin the post-Palace Four Sword progression.
- The red Gyorg’s opened eyes are struck with the correct clone formation.
- The blue Gyorg’s exposed eye is attacked and its tail sweep is avoided.
- The fireball and green mini-Gyorg rounds are cleared.
- The Gyorg Pair is defeated.
- The Wind Element and Heart Container are collected.
Before you move on
- Roc’s Cape has been obtained and used across the Palace’s major gaps and wind sections.
- The Big Key has been collected and used on the large door before the final vortex.
- The Gyorg Pair has been defeated through its red-Gyorg clone phases and blue-Gyorg eye phases.
- The Wind Element has been collected automatically after the boss fight.
- The Heart Container has been taken and the green warp has returned Link to the Tower of Winds.
- All four Elements are now in Link’s possession, allowing the next main objective: reforge the Four Sword in the Elemental Sanctuary.
References for this chapter
Final Dungeon — Dark Hyrule Castle (Four Sword & Vaati)
After collecting the Earth, Fire, Water, and Wind Elements, return to the Elemental Sanctuary through the western side of Hyrule Castle Garden. Place the White Sword on the sanctuary pedestal and infuse it with the Wind Element to transform it into the Four Sword. Complete the clone-and-switch room, restore the petrified castle figures, and enter Dark Hyrule Castle. The dungeon requires Minish traversal, clone formations, cannon deflections, blue-tile paths, whirlwinds, combat rooms, and five Small Keys in total. King Daltus gives the first key during the prison sequence. Four later keys come from the blade-trap switch room, the first Ghini route, the Fire Wizzrobe switch route, and the later Ghini route. Those four later keys open the four lock blocks guarding the Big Key. After the timed approach, defeat Vaati Reborn, Vaati Transfigured, and Vaati’s Wrath, then restore Zelda and watch the ending.
Infuse the White Sword and open Dark Hyrule Castle
Confirm that the Earth, Fire, Water, and Wind Elements are present in your Quest Status. Return to Hyrule Town, enter Hyrule Castle Garden, and use the western route to reach the hidden entrance to the Elemental Sanctuary. Place the White Sword on the sanctuary pedestal and infuse it with the Wind Element. The White Sword transforms into the Four Sword.
Enter the newly revealed room and inspect the stained-glass history. Return to the previous room, charge the Four Sword, and use the floor panels to create the required Links. Position the Links on the switches so the lower exit opens.
Outside the sanctuary, Hyrule Castle has changed and several figures have been turned to stone. Charge the Four Sword and release a beam at each petrified figure. Restoring them opens the way south into Dark Hyrule Castle. Before continuing, assign the Gust Jar, Cane of Pacci, Flame Lantern, Bow, Roc’s Cape, and bombs so they are easy to reach. The southern supply room contains optional recovery items, bombs, and arrows.
- All four Elements are collected.
- The White Sword is infused with the Wind Element and becomes the Four Sword.
- The stained-glass history has been inspected.
- The clone-and-switch exit is open.
- The petrified castle figures have been restored.
Restore King Daltus and collect the first Small Key
From the Dark Hyrule Castle entrance, go west and north past the Guruguru Bar. Bomb the wall on the right to reveal a Minish portal. Shrink, return left and down, and drop through the large hole. Avoid the spark, enter the small Minish opening, and use the size changer to return to normal size.
Step on the switch to open the prison doors. Enter the right-hand cell and fire a charged Four Sword beam at the petrified King Daltus. Speak with him after he is restored. King Daltus gives you the first Small Key of Dark Hyrule Castle.
Return west and climb the stairs. The locked-looking door in this room is fake, so do not use the key there. Go south, create clones on the panels, push the block aside, and continue to the actual southern door. Use King Daltus’s Small Key on that door. In the next area, pass the staircase temporarily and climb to the chest containing the Dungeon Map. Return to the staircase and go up.
- The Minish prison route is complete.
- King Daltus has been restored.
- King Daltus’s first Small Key is collected.
- The first Small Key has opened the real southern door.
- The Dungeon Map is collected.
Reach the Compass and collect the first later Small Key
Follow the route to the room with four cannon launchers. Use the floor panels to create four Links and position them so their sword swings reflect the cannon shots back into the launchers. Destroy all four launchers to open the route upward.
In the blue-tile room, step on every tile in one continuous route. If you step incorrectly, use the reset switch and try again. A workable route is right three, up one, left two, up one, right two, up one, left three, up two, right one, down one, right one, up one, right one, down one, then right to the exit.
Continue down to the blade-trap room. Create the clones when the moving blade trap is near the top, run ahead of it, and work around the blocks to reach the four switches. Activating all four switches creates a chest containing the first of the four later Small Keys. This key is separate from King Daltus’s key.
Return to the entrance, climb the right staircase, and use the blade-trap key on the locked door. Continue through the Stalfos route and solve the next cannon-reflection room. Defeat the Keatons, bomb the left wall, and climb to the Red Darknut. After defeating it, push the throne aside to reveal the hidden stairs. The chest to the right contains the Compass. Use the hidden staircase and Flame Lantern to return to the upper floor.
- The first cannon room is cleared.
- The blue-tile route is complete.
- The blade-trap switch chest has yielded the first later Small Key.
- The Compass is collected.
Cross the whirlwinds and activate the dungeon warps
Continue right and climb to the second floor. Exit through the outside doorway and use the whirlwinds to reach the southern platforms. Defeat or bypass the Bow Moblin, then travel toward the southwest and reenter the castle.
Use the four clone panels when the Guruguru Bar is moving away from the route. Run left and down, wait for the flames to clear, push the large block downward, and exit right. Follow the next whirlwind section downward while avoiding the projectiles.
At the gap, strike the distant switch with a projectile to extend the bridge. The Bow or Boomerang can perform this job. Reenter the castle and solve the four-switch clone puzzle using the lower-left, lower-right, and inward upper panels. Strike all four switches, then defeat both Ball and Chain Soldiers. Clearing the room creates a red warp portal.
In the bombite room, use a bomb or the Gust Jar to deal with the cracked blocks without falling from the moving platform. Ride the platform north, jump onto the gate, and strike the two upper switches. Continue upward and defeat the Black Darknut to activate the blue warp portal.
- The outside whirlwind route is complete.
- The distant bridge switch has been activated with a projectile.
- The red warp portal is active.
- The Black Darknut has been defeated and the blue portal is available.
Collect the remaining three later Small Keys
From the Black Darknut area, defeat the pair of Darknuts and enter the fire-bar room. Light the torches with the Flame Lantern while moving around the fire wheel. Continue into the first Ghini room and defeat the main Ghini. It is the one that remains solid when struck; the other Ghinis briefly disappear when hit. After the room is cleared, go outside and use the outside-tower stairs to reach the chest containing the second later Small Key.
Return through the castle route to the Red Darknut and the four-switch room. Activate all four switches, then enter the Fire Wizzrobe room. Defeat the enemies or avoid them long enough to press the switch that reveals the stairs. Climb those stairs and open the chest for the third later Small Key. The lower route leads only to enemies and is not needed for the key.
Continue through the castle until you reach the later blue-tile maze. Follow the available path across every blue tile, using the reset switch if you break the route. Continue through the later Ghini room and go outside. Reenter through the left-side entrance and climb the outside-tower stairs to collect the fourth and final later Small Key.
Your key total should now be five: King Daltus’s first Small Key plus four later Small Keys. The four later keys are the keys required for the four lock blocks before the Big Key. Do not search for a second early key or a sixth key.
- The first Ghini route and its outside-tower stairs are complete.
- The second later Small Key is collected.
- The Fire Wizzrobe and switch route is complete.
- The third later Small Key is collected.
- The later Ghini route and its outside-tower stairs are complete.
- The fourth and final later Small Key is collected.
- The dungeon total is one key from King Daltus plus four later keys.
Use the four later keys to obtain the Big Key
Return to the route near the Black Darknut and proceed to the room with the four lock blocks. Use the four later Small Keys on those blocks. Do not use King Daltus’s key for this section; it has already opened the earlier locked door.
Break the pots in the upper-right area to reveal the clone panels. Create four Links, push the large block to the left, and open the chest for the Big Key. The four lock blocks are opened by the four later keys collected from the blade-trap switch room, the first Ghini route, the Fire Wizzrobe switch route, and the later Ghini route.
Use the blue warp and then the red warp to return near the boss-door route. Before entering the Big Key door, use the southern supply route if you need hearts, bombs, arrows, or bottled fairies. The boss approach is a timed sequence, so prepare before committing to it.
- All four later Small Keys are in your possession.
- The four lock blocks have been opened with the four later keys.
- The Big Key is collected.
- The warp route to the boss door is available.
- Health and supplies have been restored if needed.
Pass the timed rooms and defeat Vaati Reborn
Use the Big Key on the boss-door route. The first timed room contains a Ball and Chain Soldier on a narrow walkway. Bait its attack, retreat from the swinging ball, then move in to strike. Continue north after it is defeated.
In the Keaton room, create four Links and activate the four switches. Move quickly because the sequence is timed. Continue to the room with three Darknuts, including a Black Darknut. Roc’s Cape is useful for jumping over attacks and reaching an enemy’s back, but avoid holding the button long enough to glide into danger.
Vaati Reborn begins with fireballs and two orbiting eyes. After the fireball pattern, destroy the eyes with the sword. If the eyes withdraw, avoid the slow dark energy ball that follows Link until it disappears. When Vaati’s central eye opens, attack his exposed body.
Later, four eyes appear and fire downward beams. Stay to the side and attack the eyes during safe openings. When the eyes are covered by dark shields, use the Gust Jar to remove the coverings before striking them. Keep moving because Vaati teleports and can appear close to Link. Repeat the eye attacks and central-body openings until Vaati Reborn is defeated.
- The timed Ball and Chain room is cleared.
- The four Keaton-room switches are activated.
- The three-Darknut room is cleared.
- Vaati Reborn’s eyes and exposed body have been defeated.
Defeat Vaati Transfigured and restore Zelda
Vaati Transfigured appears as a central eye surrounded by smaller eyes. Use arrows on the surrounding eyes to reveal the vulnerable targets. Four vulnerable eyes will form a horizontal or vertical alignment. Stand on the matching clone panels, create four Links, and strike so all four Links hit the aligned eyes at the same time.
After the four eyes disappear, attack Vaati’s central body with the sword. Avoid the electric attacks, falling debris, and spiky projectiles while choosing targets. If arrows run low, break the surrounding spiky obstacles for replacements. Repeat the arrow, alignment, clone, and sword sequence until this form is defeated.
After the transformation, Link reaches the altar where Zelda is petrified. Do not perform a spin attack immediately. Wait until Ezlo speaks and gives the contextual instruction, then perform the spin attack at the altar. Zelda is restored and the collapsing castle returns Link to the entrance area.
- Arrows have revealed the vulnerable eyes.
- The clone formation matches the eye alignment.
- Vaati Transfigured is defeated.
- Ezlo has spoken at the altar.
- Zelda has been restored with the instructed spin attack.
Defeat Vaati’s Wrath
After Zelda is restored, follow the route toward the sanctuary. Before entering the final courtyard, use the southern supply route to refill health, bombs, and arrows. Vaati’s Wrath begins with fast electrical projectiles, so avoid creating clones while projectiles are crossing the arena.
When one of Vaati’s hands emerges from the floor, strike it with the Cane of Pacci to flip it over. Use the nearby Minish portal and enter the opening on the underside of the flipped hand. Inside, destroy the eye with the moving pupil, then leave and return to normal size. Repeat the process for the other hand. Use the Flame Lantern inside the dark hand if visibility is poor.
After both hands are destroyed, Vaati uses the four eyes in front of him. Wait for the fast-moving energy-ball cue, then create four Links on the Four Sword panels and line them up with the four eyes. When the eyes fire their energy balls, swing so each projectile is reflected back toward the eye that launched it. Correct reflections remove the eyes and expose Vaati’s body. Run forward and strike him. Repeat the reflection cycle until Vaati’s Wrath is defeated.
- Both hands have been flipped and cleared from inside.
- The moving-pupil eyes have been destroyed.
- The fast energy-ball cue has been recognized.
- Each final projectile has been reflected toward its matching eye.
- Vaati’s Wrath has been defeated.
Confirm main-campaign completion
Allow the ending sequence and credits to play after Vaati falls. The North American Game Boy Advance campaign is complete when the four Elements have been collected, the White Sword has been infused with the Wind Element and transformed into the Four Sword, Dark Hyrule Castle has been cleared, Zelda has been restored, and all three Vaati forms have been defeated.
Save after the ending. The completed save can be used for optional cleanup, including remaining Kinstone fusions, Heart Pieces, figurines, sword techniques, bottles, and other side content. None of those activities is required for the main ending.
- All four Elements were collected.
- The White Sword was infused with the Wind Element and became the Four Sword.
- The stained-glass room and clone-and-switch exit were completed.
- The petrified castle figures were restored.
- King Daltus supplied the first Small Key.
- Four later Small Keys were collected: blade-trap switch room, first Ghini route, Fire Wizzrobe route, and later Ghini route.
- The four later keys opened the four lock blocks.
- The Big Key was collected and used.
- Vaati Reborn, Vaati Transfigured, and Vaati’s Wrath were defeated.
- Ezlo spoke at the altar and Zelda was restored.
- The ending sequence and credits played.
- A completed save is available for optional cleanup.
Before you move on
- All four Elements have been collected and the White Sword has become the Four Sword through Wind Element infusion.
- The stained-glass room and clone-and-switch exit have been completed.
- The petrified castle figures have been restored.
- King Daltus’s first Small Key opened the initial locked route.
- Four later Small Keys have been collected from the blade-trap, first Ghini, Fire Wizzrobe, and later Ghini routes.
- The four later keys have opened the four lock blocks.
- The Big Key has been collected and used.
- Vaati Reborn, Vaati Transfigured, and Vaati’s Wrath have been defeated.
- Ezlo has spoken at the altar and Zelda has been restored.
- The ending sequence and credits have played.
- The completed save is available for optional post-game activities.
References for this chapter
- Dark Hyrule Castle – The Legend of Zelda: The Minish Cap Walkthrough, Thonky
- Final Boss: Vaati – The Legend of Zelda: The Minish Cap Walkthrough, Thonky
- Completing the Sword - The Legend of Zelda: The Minish Cap Walkthrough
- The Minish Cap Walkthrough – Dark Hyrule Castle, Zelda Dungeon
- White Sword - Zelda Wiki
Item Progression and Where to Use Each Major Tool
The Minish Cap’s major tools arrive in a fixed progression, and each one unlocks a distinct type of obstacle. The Gust Jar and Bombs begin the route toward Mount Crenel; the Grip Ring and Cane of Pacci complete the Cave of Flames sequence. After the Earth and Fire Elements, Melari reforges the Picori Blade into the White Sword and the Elemental Sanctuary grants Link his first duplication ability. Pegasus Boots and the Bow open Castor Wilds and Fortress of Winds, where the Mole Mitts and Ocarina of Wind continue the campaign. During the Hyrule Town library book quest, Link obtains the Power Bracelets, which are required to retrieve the book hidden in Dr. Left’s house, and later receives the Flippers. The Temple of Droplets provides the Flame Lantern and Water Element, while Roc’s Cape and the final sword infusion complete the main tool progression. Bomb capacity, wallets, bottles, Remote Bombs, quiver upgrades, and the Mirror Shield are optional. Iron Boots are absent from the original North American Game Boy Advance release.
Use the first tools in the correct order
The Gust Jar is the first dungeon tool, obtained in Deepwood Shrine. Hold its assigned item button to draw in dust, loose objects, and certain enemies, then release the button to blow them away. Its required uses include clearing dust from switches and openings, moving lightweight objects, and exposing routes hidden under debris. After leaving Deepwood Shrine, revisit earlier rooms and overworld corners where dust visibly blocked a path. The Gust Jar remains useful later for moving lily pads and mushrooms, including the Minish route that leads to the Bow in Castor Wilds.
Bombs become available from Belari after the early Deepwood Shrine sequence. Use them on cracked walls, bombable rocks, bombable blocks, and enemies that can be stunned by explosions. Bombs are required for several routes toward Mount Crenel and the Cave of Flames, but expanded bomb capacity is optional. If a suspicious wall has no visible crack, test it only when the room design or surrounding clues suggest a hidden passage; do not assume every blank wall is bombable.
The Grip Ring is purchased from a Business Scrub in a bomb-opened cave at the base of Mount Crenel. It costs 40 rupees. Open the Scrub’s cave with a Bomb and use the Small Shield to stun him with his own projectile. Once the Grip Ring is obtained, climb the rocky Crenel Wall to reach Melari’s Mines and the Cave of Flames entrance. If Link cannot climb the wall, return to the Mount Crenel base caves and locate this Business Scrub.
- Gust Jar obtained in Deepwood Shrine.
- Bomb Bag received from Belari and bombs available for the Mount Crenel route.
- Grip Ring purchased before attempting to climb Crenel Wall.
Complete the Cave of Flames and reforge the blade
The Cane of Pacci is the main item in the Cave of Flames. Use it on marked holes and launch panels to flip objects, turn mine carts, and expose routes. It is also essential against Gleerok: wait for a safe opening, use the Cane to flip the boss’s shell, then climb onto the exposed back and attack the vulnerable crystal. The Cane is mandatory because several dungeon rooms and the boss encounter cannot be completed with the sword alone.
After defeating Gleerok and collecting the Fire Element, return to Melari’s Mines on Mount Crenel. Melari reforges the Broken Picori Blade into the White Sword. Take the White Sword to the Elemental Sanctuary and place it in the pedestal to infuse it with the Earth and Fire Elements. This creates the first duplicate-Link ability used by later story puzzles. The sword is improved in stages, so do not treat the White Sword or Four Sword as ordinary chest equipment.
The Cane of Pacci also opens optional overworld rewards. Revisit visible holes, launch panels, and objects that could not previously be flipped, but keep notes of areas that still require another item. The Cane does not replace the Grip Ring, Mole Mitts, Flippers, or Pegasus Boots; each tool interacts with a different obstacle type.
- Cane of Pacci obtained and used on marked holes and launch panels.
- Gleerok defeated by flipping the shell and striking the exposed crystal.
- Picori Blade reforged at Melari’s forge and infused with Earth and Fire.
Get Pegasus Boots and the Bow before the Fortress of Winds
When Castor Wilds first blocks Link with swamp terrain, return to Rem’s Shoe Shop in Hyrule Town. Shrink through the Minish portal in the shop and speak with the Minish on Rem’s desk. Follow the resulting lead to Syrup’s hut in northeast Minish Woods and obtain the Wake-Up Mushroom. Return it to Rem and speak with him after he wakes. Rem then gives Link the Pegasus Boots. The Boots let Link dash across swamp without sinking and activate dash-sensitive routes and obstacles.
Use the Pegasus Boots to cross Castor Wilds, avoiding spikes and sinking ground. At the northwest portion of the swamp, shrink at the tree stump and follow the Minish route through the log. Ride the lily pad with the Gust Jar, enter the small room, defeat the blue Mulldozers, and open the revealed chest to obtain the Bow. The Bow is mandatory for activating Eyegore statues and clearing enemies and switches that block the Fortress route.
After receiving the Bow, return to normal size and shoot the eye statues in Castor Wilds. Collect the three Golden Kinstone pieces in the area and fuse them with the three Mysterious Statues. The opened route leads through Wind Ruins to the Fortress of Winds. Pegasus Boots and the Bow are required progression tools; later quiver upgrades are optional.
- Wake Rem with Syrup’s Wake-Up Mushroom and receive Pegasus Boots.
- Use Pegasus Boots to cross Castor Wilds swamp.
- Obtain the Bow through the Minish lily-pad route and use it on Eyegore statues.
- Complete the three Golden Kinstone fusions to open the Fortress route.
Complete the Fortress of Winds and use the Ocarina of Wind
The Mole Mitts are the main item in the Fortress of Winds. They let Link dig through soft, patterned earth and sand barriers. Use them whenever a dirt wall blocks a corridor, chest, switch, or stairway. Outside the dungeon, revisit marked diggable areas in Mount Crenel, Wind Ruins, and connected overworld passages. Do not attack ordinary stone walls expecting them to open; the Mole Mitts work only on the game’s soft digging surfaces.
Defeat Mazaal at the end of the Fortress of Winds. The dungeon does not award an Element. After the boss, collect the Heart Container and take the Ocarina of Wind from the tablet area. The Ocarina calls Zeffa and allows travel to Wind Crests that Link has activated by examining them. Before relying on fast travel, inspect Wind Crest markers in regions you have already visited.
The Ocarina becomes an important route tool for the later campaign because it connects distant areas, including Lake Hylia and the Palace of Winds approach. It does not provide access to every location automatically: Link must first activate the relevant Wind Crest.
- Mole Mitts obtained and used on marked soft earth.
- Mazaal defeated without expecting an Element reward.
- Ocarina of Wind collected and Wind Crests activated for later travel.
Obtain the Power Bracelets and Flippers through the library quest
After the Fortress of Winds, begin the Royal Hyrule Library book quest. The Power Bracelets are a mandatory progression item within this quest, not an optional upgrade. They are found in a small cave reached through the fountain area while Link is Minish-sized. Their purpose is to let tiny Link push objects that are too heavy for him normally.
First, enter the library and speak with the librarian to learn about the missing books. Follow the clue to the book held in the house near the cats. Use a bottle of water to extinguish the fireplace in the neighboring house, then shrink and travel through the newly opened fireplace route to reach the book. Return it to the library and speak with the librarian again to receive the next clue, which leads to Dr. Left.
For the Dr. Left portion, shrink and follow the Minish route through the town fountain. Clear the enemies in the cave and open the chest to obtain the Power Bracelets. Return to Dr. Left’s house while still able to shrink. Use the Power Bracelets to push the bookcases aside and reach the upper hole. In the upper room, clear the dust with the Gust Jar to reveal the clone tiles. Create the required duplicate and place Link or the clone on the book until its combined weight makes it fall. Retrieve the book, then return it to the library.
Continue the remaining book clues until all three books are returned. The restored library route leads to Elder Librari and the underground trial. Complete that trial to receive the Flippers. This makes the order important: the Power Bracelets are obtained during the book quest and are required to retrieve the Dr. Left book, while the Flippers are the later reward that opens underwater travel.
- Library book quest started after the Fortress of Winds.
- Power Bracelets obtained from the Minish-accessible fountain cave.
- Power Bracelets used to push the bookcases in Dr. Left’s house.
- Book in Dr. Left’s house retrieved and returned to the library.
- All missing books returned and Flippers received through Librari’s route.
Clear the Temple of Droplets and finish the sword
With the Flippers equipped, swim and dive through the water routes leading to the Temple of Droplets. Swimming does not remove size requirements: shrink at the appropriate portal whenever a narrow Minish passage or small entrance is involved. Inside the dungeon, use the Flippers to navigate water, dive beneath hazards, and ride lily pads through blocked routes.
The Temple’s dungeon item is the Flame Lantern, not the Flippers. Obtain it after the Blue ChuChu encounter. Equip it to light dark rooms, ignite torches, burn suitable dry obstacles, and melt ice barriers. Defeat Big Octorok afterward and collect the Water Element.
After the Water Element, return to the Elemental Sanctuary and infuse the White Sword again. The Water Element grants the next duplication ability, allowing Link to create three copies on the appropriate glowing tiles. Continue the required story route through Royal Valley, the Royal Crypt, Veil Falls, and Cloud Tops until the Palace of Winds becomes accessible.
Roc’s Cape is obtained inside the Palace of Winds. It lets Link jump across wide gaps, glide briefly, and use wind currents to reach moving platforms. Watch platform movement before jumping, and use stable ledges to line up each leap. Complete the Palace of Winds and defeat the Gyorg Pair. Collect the Wind Element, then return to the Elemental Sanctuary and infuse the White Sword with the final Element. This transforms it into the Four Sword, which is required for the final duplication puzzles and for opening the route to Dark Hyrule Castle.
- Flippers used for swimming and diving while still observing Minish-size requirements.
- Flame Lantern obtained inside the Temple of Droplets.
- Big Octorok defeated and Water Element collected.
- Roc’s Cape obtained in the Palace of Winds.
- Gyorg Pair defeated and Wind Element collected.
- White Sword infused with all four Elements to create the Four Sword.
Optional upgrades and systematic backtracking
Optional secondary upgrades include larger Bomb Bags, larger quivers, wallet expansions, Empty Bottles, Remote Bombs, and the Mirror Shield. Bomb Bag upgrades increase carrying capacity but are not required for the ending. Wallet expansions increase the amount of rupees Link can carry but do not refill his money. Bottles are useful for fairies, water, and other stored items, but extra bottles are not needed for the main campaign.
After the Temple of Droplets, the Remote Bomb sequence begins with the Forest Minish in the small house west of Minish Village. Fuse Kinstones with that Minish, then return to Minish Village and fuse Kinstones with Gentari, the Minish Elder. Return to the Forest Minish after both fusions. Belari then allows Link to exchange regular Bombs for Remote Bombs and can switch them back later. Remote Bombs remain in place until triggered and are useful for delayed switches or distant targets, but they are not required for campaign completion.
The Mirror Shield is a post-game reward. Complete the Goron sequence, perform the required fusion with the Goron on the far right, and visit Biggoron at the top of Veil Falls after defeating Vaati. Give him the shield and return later to receive the Mirror Shield. It is optional and is not needed to reforge the sword or defeat Vaati.
Backtrack by item rather than wandering. Recheck Hyrule Town and South Hyrule Field with bombs and Minish routes; Mount Crenel with the Grip Ring, Cane, and Mole Mitts; Lake Hylia with Flippers; Castor Wilds with Pegasus Boots and the Bow; Wind Ruins with Mole Mitts and the Ocarina; and Royal Valley with late-game tools. At each location, check both normal and Minish size. Most optional chests, Heart Pieces, and Kinstone rewards remain available later, but record any blocked door, crack, hole, or ledge with the tool it needs.
Iron Boots are absent from the original North American Game Boy Advance release. They are not a usable item and are not part of this campaign’s progression.
- Optional bomb, quiver, wallet, bottle, Remote Bomb, and Mirror Shield upgrades identified separately from mandatory tools.
- Power Bracelets retained as a mandatory library-quest item, not an optional reward.
- Forest Minish fusion west of Minish Village completed first for the Remote Bomb sequence.
- Gentari fusion completed second, followed by a return to the Forest Minish for the bomb exchange.
- Earlier regions revisited after Flippers, Mole Mitts, Pegasus Boots, Roc’s Cape, and the Four Sword.
- No Iron Boots expected in the original North American GBA version.
Before you move on
- You have the Gust Jar, Bombs, Grip Ring, Cane of Pacci, Pegasus Boots, Bow, Mole Mitts, Ocarina of Wind, Power Bracelets, Flippers, Flame Lantern, and Roc’s Cape.
- You obtained the Power Bracelets during the Hyrule Town library book quest and used them to retrieve the book in Dr. Left’s house.
- You obtained the Flippers through the Royal Hyrule Library and Librari’s underground route.
- You obtained Pegasus Boots from Rem after delivering Syrup’s Wake-Up Mushroom.
- You completed the mandatory dungeon sequence through the four Elements and defeated the required bosses.
- You reforged the Picori Blade at Melari’s forge and completed the Elemental Sanctuary infusions.
- The Wind Element transformed the White Sword into the Four Sword.
- You understand that bomb upgrades, wallets, bottles, Remote Bombs, quiver upgrades, and the Mirror Shield are optional.
- You know that Iron Boots are not present in the original North American GBA release.
- You have revisited earlier regions by obstacle type and checked both normal-size and Minish routes for missed rewards.
References for this chapter
- Items and Equipment — The Legend of Zelda: The Minish Cap Walkthrough
- The Water Element — The Legend of Zelda: The Minish Cap Walkthrough
- To Find a Ghost - The Legend of Zelda: The Minish Cap Walkthrough
- Journey to Mt. Crenel — The Legend of Zelda: The Minish Cap Walkthrough
- The Minish Cap Items — Zelda Dungeon Wiki
- Remote Bomb (The Minish Cap) - Zelda Dungeon Wiki
- The Legend of Zelda: The Minish Cap — Item Guide, Game Boy Advance
Kinstone Fusion — Practical Tactics and Notable Fusions
Kinstone Fusion begins when the Hurdy-Gurdy Man in Hyrule Town gives Link the Kinstone Bag. When a person, Minish, animal, statue, wall or cloud has a thought bubble, press L and match Link’s piece by both color and broken-edge shape. A successful match consumes both pieces and creates an effect somewhere in Hyrule. The effect may be a chest, cave, staircase, new character, enemy, rupee reward or Piece of Heart, so check the map and travel to the marked area. Most green, blue and red fusions are optional, but three golden statue fusions in Castor Wilds and five golden cloud fusions in Cloud Tops are required for the main campaign. The Source of the Flow fusion at Veil Falls is also part of the route to Cloud Tops. For optional rewards, complete the Remote Bomb sequence, the Goron cave chain and the four Tingle-family fusions when their prerequisites are available.
Learn how Kinstone Fusion works
After Deepwood Shrine, return to Hyrule Town and speak with the Hurdy-Gurdy Man. He gives Link the Kinstone Bag and explains the basic process. From then on, a compatible partner displays a thought bubble when Link stands nearby. Press L to open the fusion screen, then choose a piece whose color and jagged edge both match the other half. A color match with the wrong shape will not complete the fusion.
A failed selection does not consume the chosen piece. A successful fusion consumes both halves and briefly shows that something has changed elsewhere in Hyrule. The partner’s icon usually hints at the result: a heart suggests a Piece of Heart, a rupee indicates money, and a question mark represents another effect. Fusions can be performed with Hylians, Minish, animals and objects, including certain statues, mysterious walls and clouds. The fusion system and L-button interaction are described in the North American instruction manual and specialist reference guides.
- Return to Hyrule Town after Deepwood Shrine and receive the Kinstone Bag.
- Press L when the fusion thought bubble is visible.
- Match both the color and the broken-edge shape.
- Visit the result shown or marked on the map after a successful fusion.
Use ordinary fusions without delaying the story
Most green, blue and red Kinstone fusions are optional. Their effects can include rupees, additional Kinstone pieces, caves, staircases, trees, beanstalks, new characters, special enemies and Pieces of Heart. These rewards can make exploration easier, but they do not substitute for the Elements, the sword-forging sequence or the dungeon objectives. Fuse when a useful match is available, then continue the main route rather than searching for every ordinary partner immediately.
If a fusion creates a chest or path behind water, soft soil, a high ledge or a narrow Minish route, record the landmark and return after obtaining the needed item. Story progress can also make previously inactive partners available. Recheck important NPCs after a dungeon, a sword event or a major area opening instead of assuming that an inactive partner is permanently unavailable. A completed fusion is not the same as collecting its reward: follow the map marker and inspect the changed location.
- Prioritize route openings, Pieces of Heart and useful capacity upgrades.
- Record inaccessible results for later backtracking.
- Revisit important partners after major story milestones.
- Keep optional rewards separate from dungeon progression.
Complete the golden fusions required for progression
When the main route reaches Castor Wilds, find the three large Mysterious Statues in the southwest portion of the area. Fuse the required golden Kinstone with each statue. The completed statue events remove the obstruction leading toward the Wind Ruins and Fortress of Winds. If a statue does not accept a piece, search the surrounding progression route for the missing golden Kinstone rather than trying an ordinary colored piece.
After the Royal Crypt sequence, take the golden Kinstone piece obtained from King Gustaf’s route to the Source of the Flow at Veil Falls. Complete the fusion there to open the way onward through Veil Falls and toward Cloud Tops. This object fusion is required even though the partner is not a person.
In Cloud Tops, locate the five required Mysterious Clouds on the lower cloud islands and fuse the appropriate golden pieces with them. Search the cloud area thoroughly, including chests and places that require the Mole Mitts, because the five fusions depend on collecting the necessary pieces. Once all five are complete, the route through the upper Cloud Tops opens and the Palace of Winds becomes accessible. These golden fusions are the story-critical Kinstone events; ordinary green, red and blue fusions are not needed for the ending. Completing the broader fusion collection is a separate optional goal associated with Tingle’s reward.
- Complete all three Mysterious Statue fusions in Castor Wilds.
- Fuse the required golden piece with the Source of the Flow at Veil Falls.
- Complete all five Mysterious Cloud fusions in Cloud Tops.
- Do not substitute ordinary Kinstones for the golden story fusions.
Obtain Remote Bombs as an optional upgrade
The Remote Bomb sequence is optional and becomes available after the Temple of Droplets. First travel to Minish Woods and enter the small house west of Minish Village, where the Forest Minish who supplied the regular Bomb Bag lives. Fuse Kinstones with that Forest Minish. Then enter Minish Village and fuse with Gentari, the Minish elder. Finally, return to the Forest Minish in Belari’s house. He will let Link switch between regular Bombs and Remote Bombs.
Remote Bombs can be planted and detonated manually with the bomb item button, but only one can be active at a time. Return to Belari whenever you want to change back to regular Bombs. Do not use the Remote Bomb quest as a progression requirement: the campaign can be completed with ordinary Bombs. The required order is Forest Minish in Belari’s house, Gentari, then Belari again.
- Wait until after the Temple of Droplets.
- Fuse with the Forest Minish in Belari’s house west of Minish Village.
- Fuse with Gentari in Minish Village.
- Return to Belari to receive or switch to Remote Bombs.
Finish the optional Goron cave chain
Begin this sidequest by reaching the Goron in the southwest part of Lon Lon Ranch, using the wind vortices to access him, and completing his fusion. Then go to Eastern Hills and fuse with Eenie, the upper farmer of the pair. These events allow the Goron to begin clearing the cave at the southwest side of Lon Lon Ranch.
After obtaining the Mole Mitts, fuse with the five Mysterious Walls in underground areas. Their locations are the cave near Eenie and Meenie in Eastern Hills, a cave in Minish Woods near the stairs to Syrup’s Hut, a cave in Trilby Highlands north of the Mt. Crenel entrance, a cave near the Hermit at the top of Mt. Crenel, and the northern Lake Hylia cave reached with the Roc’s Cape from the dock near Stockwell’s House.
Return to the Lon Lon Ranch Goron Cave after all five wall fusions. The opened route contains rupees and an Empty Bottle. Speak with the Gorons at the back and complete the final fusion to awaken Biggoron at Veil Falls. Giving Biggoron Link’s shield later can lead to the optional Mirror Shield. None of these rewards is required to defeat Vaati.
- Fuse with the Lon Lon Ranch Goron, then Eenie.
- Wait until Link has the Mole Mitts before searching for Mysterious Walls.
- Complete five Mysterious Wall fusions.
- Return to the Goron Cave for the Empty Bottle and final Goron fusion.
Unlock the Magical Boomerang
After obtaining the Cane of Pacci, reach Tingle in South Hyrule Field near the Eastern Hills exit. Use the Cane of Pacci to reach his ledge and fuse with him. Talk to Tingle again afterward; this follow-up conversation is needed for his other siblings to appear. The fusion opens one of the four trees in North Hyrule Field.
Find Ankle in the Lon Lon Ranch pasture. Enter the nearby cave, split Link using the powered sword, move the blocks and climb to Ankle’s position. Fuse with him to open a second tree. Find Knuckle in Trilby Highlands near the Mt. Crenel approach. Use the Mole Mitts to pass through the soft wall and reach the ladder leading to him, then complete the fusion. Find David Jr. near Stockwell’s House in Lake Hylia and complete the fourth fusion.
Visit all four opened trees in North Hyrule Field. Enter each one, open the available chest if desired and step on its switch. After all four switches are activated, a ladder appears in the central area between the trees. Descend and open the large chest to obtain the Magical Boomerang. This is an optional weapon upgrade and is not required for the campaign.
- Fuse with Tingle after obtaining the Cane of Pacci.
- Speak with Tingle again before searching for the other three.
- Fuse with Ankle, Knuckle and David Jr. at their locations.
- Activate all four tree switches and collect the Magical Boomerang.
Sweep Kinstone results during backtracking
For optional cleanup, use a fixed route instead of wandering: Hyrule Town and its outskirts, Eastern Hills and Lon Lon Ranch, Minish Woods and Minish Village, Mt. Crenel and Trilby Highlands, Castor Wilds, Lake Hylia, Veil Falls and Royal Valley. After receiving the Mole Mitts, Flippers or Roc’s Cape, revisit areas containing soft walls, water, high ledges and narrow Minish paths. These items often turn an earlier fusion result from an inaccessible landmark into a reachable reward.
After every successful fusion, check the map and visit the changed location. If the result remains inaccessible, write down the landmark and the item needed. Do not attempt to complete every ordinary fusion before entering the next dungeon. For the main campaign, confirm the three Castor Wilds statue fusions, the Source of the Flow event, and the five Cloud Tops fusions; then continue with the Elements, sword reforging and final dungeon.
- Visit the map-marked result after every successful fusion.
- Recheck blocked results after receiving Mole Mitts, Flippers or Roc’s Cape.
- Treat ordinary fusion cleanup as optional.
- Confirm each story obstruction has opened before leaving its region.
Before you move on
- The Hurdy-Gurdy Man has given Link the Kinstone Bag.
- Link can match compatible Kinstone colors and shapes with a thought-bubble partner.
- The three Castor Wilds Mysterious Statue fusions are complete.
- The Source of the Flow at Veil Falls has opened.
- All five required Cloud Tops Mysterious Cloud fusions are complete when Palace of Winds access is needed.
- The optional Remote Bomb sequence, if desired, was completed in the order Forest Minish in Belari’s house, Gentari, then Belari.
- The optional Goron chain, if desired, contains five Mysterious Wall fusions and leads to the Empty Bottle.
- The optional Magical Boomerang quest, if desired, includes Tingle, Ankle, Knuckle, David Jr. and all four tree switches.
- Optional fusion cleanup remains separate from the four Elements, Picori Blade reforging and Vaati objectives.
References for this chapter
- Kinstone Fusion - Zelda Dungeon Wiki
- Remote Bomb (The Minish Cap) - Zelda Dungeon Wiki
- Goron Sidequest - The Legend of Zelda: The Minish Cap Walkthrough
- To Find a Ghost - The Legend of Zelda: The Minish Cap Walkthrough
- Magic Boomerang - The Legend of Zelda: The Minish Cap Walkthrough
- Magical Boomerang Kinstones - Zelda Dungeon Wiki
- The Source of the Flow - The Legend of Zelda: The Minish Cap Walkthrough
- The Legend of Zelda: The Minish Cap Game Manual
Optional Content: Heart Pieces, Secrets and Sidequests
Sweep optional content by region after each new traversal item instead of wandering across the entire map. Check every area at normal and Minish size, mark blocked routes by the item they require, and use Wind Crests to shorten return trips. Prioritize convenient Pieces of Heart, wallet upgrades and Gregal’s rescue if you want Light Arrows. Remote Bombs are optional and become available after the Temple of Droplets. The Goron Quest is a longer optional chain: fuse with the Goron at the southwest side of Lon Lon Ranch, fuse with Eenie in Eastern Hills, then use the Mole Mitts to reach five Mysterious Walls. They are in the Eastern Hills cave near Eenie and Meenie, the Minish Woods cave near the stairs to Syrup’s Hut, the Trilby Highlands cave reached by going north instead of entering Mt. Crenel, the Mt. Crenel cave beside the Hermit’s cave, and the northern Lake Hylia cave reached with Roc’s Cape from the dock near Stockwell’s House. Each fusion summons another Goron to Goron Cave; after all five, the reward is the fourth Bottle. Figurines and broad Kinstone cleanup can wait until after Vaati.
Sweep each region after gaining a new item
Use the map and Ocarina of Wind to search one region at a time. A practical sweep order is Hyrule Town and South Hyrule Field, Minish Woods, Mt. Crenel, Castor Wilds, Lake Hylia, Royal Valley, Lon Lon Ranch and Veil Falls. In each region, first explore at normal size. Inspect suspicious walls, isolated ledges, bomb cracks, holes, water edges, blocked stairs and paths that seem to end just short of a reachable platform.
Repeat the same route while shrunken. Check Minish doors, tiny tunnels, stumps, narrow bridges and exits that place Link on a different side of the screen. If a passage ends at deep water, loose soil, a high ledge or a wide gap, record the location and the likely required item instead of repeatedly testing it. Return after obtaining the Flippers, Mole Mitts, Pegasus Boots, Cane of Pacci or Roc’s Cape. Recheck important NPCs after dungeons and major story events because new Kinstone fusions can become available.
- Search both normal-size and Minish-size routes.
- Record blocked paths by the item they require.
- Use Wind Crests and the Ocarina of Wind to reduce backtracking.
- Revisit Kinstone NPCs after dungeons and major overworld events.
Collect accessible Pieces of Heart during regional sweeps
Take visible Pieces of Heart whenever their routes are open, but do not interrupt the main campaign for distant rewards. Early opportunities include side paths in Minish Woods and Minish Village. The Kinstone fusion with the Hurdy-Gurdy Man after receiving the Kinstone Bag also opens a South Hyrule Field reward. In Hyrule Town, later tools open additional routes around the dog house, fountains, holes and ledges.
Use dungeon visits efficiently. Search side rooms after acquiring the dungeon’s main item, because tools such as the Gust Jar, Cane of Pacci and later traversal equipment can reveal optional paths. Outside dungeons, return to bomb cracks, digging spots, water routes and high ledges after obtaining Bombs, Mole Mitts, Flippers and Roc’s Cape. Four Pieces of Heart combine into one Heart Container, so write down partial collections rather than assuming every reward grants a complete container.
A good sweep does not require memorizing every location in advance. Clear one region, check its map, mark anything still blocked, and revisit that list after the next major item. This prevents repeated searching and keeps optional collecting from obscuring the campaign route.
- Take Pieces of Heart when their routes are already open.
- Search dungeon side rooms after obtaining the required dungeon item.
- Revisit bomb cracks, water routes, digging spots and high ledges.
- Track partial heart-piece groups separately from complete Heart Containers.
Buy the wallet upgrades when convenient
After the relevant early story point, Stockwell’s Shop sells a larger wallet for 80 rupees, raising the capacity to 300. Buy it when you can afford it without sacrificing Bombs, healing supplies or another immediate purchase.
After obtaining the Cane of Pacci, use it on the hole leading to the Great Butterfly Fairy’s fountain in Eastern Hills. Agree to give up the rupees when prompted to receive the next wallet upgrade, which raises the capacity to 500. A later fusion with Mayor Hagen opens the drained pond at Lon Lon Ranch and reveals the final wallet upgrade, raising the capacity to 999.
These upgrades are optional for the ending. They become more useful when buying Bombs, arrows, the Boomerang and other supplies, or when spending large amounts of Mysterious Shells at Carlov’s Figurine Gallery. Do not empty the wallet on figurines while you still need campaign supplies.
- Visit Stockwell after the larger wallet becomes available.
- Keep enough rupees for Bombs and useful supplies.
- Use the Cane of Pacci to reach the Great Butterfly Fairy.
- Fuse with Mayor Hagen and search the drained Lon Lon Ranch pond.
Unlock Remote Bombs after the Temple of Droplets
Remote Bombs are optional and require ordinary Bombs first. After completing the Temple of Droplets, fuse Kinstones with the Forest Minish in the small house west of Minish Village. Then return to Minish Village and fuse with Gentari, the Minish Elder. Once both fusions are complete, go back to the first Minish and speak with him again.
Belari will then let Link switch between ordinary Bombs and Remote Bombs. A Remote Bomb is placed with the assigned item button and detonated by pressing that same button again. Only one can be placed at a time. This is useful when Link needs to plant an explosive, move away from an enemy or stand on the safe side of a puzzle before triggering the blast. Remote Bombs are not required for Dark Hyrule Castle or Vaati.
- Have the standard Bombs before starting.
- Fuse with the Forest Minish in Belari’s house first.
- Fuse with Gentari second.
- Return to Belari last to switch bomb types.
Rescue Gregal before reaching the Cloud Tops
In Hyrule Town, fuse Kinstones with the Stranger in the house south of the Post Office. This creates a portal near Link’s home. Enter it, reach Gregal’s Wind Tribe residence and use the Gust Jar to remove the ghost circling him. Complete this before reaching the Cloud Tops through the main story route toward the Palace of Winds.
After Gregal has been saved and Link later reaches the Cloud Tops, speak with Gregal again to receive the Light Arrows. They are optional and are not needed to defeat Vaati, but the reward is missable if the ghost is left untreated until the Cloud Tops event. Treat this as the highest-priority optional task once the Gust Jar and the required Kinstone fusion are available.
- Fuse with the Stranger before entering the Cloud Tops route.
- Use the Gust Jar on Gregal’s ghost before reaching the Cloud Tops.
- Speak with Gregal again after reaching the Cloud Tops.
- Confirm the Light Arrows are in the inventory if pursuing extensive completion.
Complete the Goron Quest for the fourth Bottle
Begin at the Goron digging near the southwest side of Lon Lon Ranch. Fuse Kinstones with him first. This starts the excavation but does not open the complete passage. Next, go to Eastern Hills and fuse Kinstones with Eenie, the farmer at the upper side of the farm. These are separate required fusions, and both must be complete before the five Mysterious Wall fusions can finish the route.
After obtaining the Mole Mitts, visit the five Mysterious Walls. In Eastern Hills, enter the cave near Eenie and Meenie and dig through it to the wall. In Minish Woods, enter the cave near the stairs leading to Syrup’s Hut and dig to the wall. In Trilby Highlands, go north instead of entering the Mt. Crenel area to find the cave containing the wall. On Mt. Crenel, climb all the way to the top and enter the cave beside the Hermit’s cave. In Lake Hylia, use Roc’s Cape to jump from the dock near Stockwell’s House across the islands to the northern cave, then dig through it to the wall.
Fuse a Blue Kinstone with each wall. Every successful fusion causes another Goron to appear in Goron Cave at Lon Lon Ranch and help with the excavation. After the Lon Lon Ranch Goron fusion, the Eenie fusion and all five wall fusions are complete, six Gorons will have assembled. Return to Goron Cave in the southwest of Lon Lon Ranch, follow the newly cleared passage and open the rear chest to receive the fourth Empty Bottle. The quest is entirely optional for the main campaign, so postpone it until after the Mole Mitts and, if desired, Roc’s Cape to reduce repeated travel.
- Fuse with the Goron at southwest Lon Lon Ranch first.
- Fuse with Eenie in Eastern Hills second.
- Obtain the Mole Mitts before attempting the five walls.
- Fuse with the Eastern Hills wall in the cave near Eenie and Meenie.
- Fuse with the Minish Woods wall in the cave near the stairs to Syrup’s Hut.
- Fuse with the Trilby Highlands wall by going north instead of entering Mt. Crenel.
- Fuse with the Mt. Crenel wall in the cave beside the Hermit’s cave.
- Use Roc’s Cape to reach the northern Lake Hylia cave from the dock near Stockwell’s House.
- Return to Goron Cave for the fourth Empty Bottle after all five walls have summoned their Gorons.
Finish the later Biggoron and Mirror Shield sequence
After completing the Goron Quest and defeating Vaati, use the completed save file for the post-game sequence. Return to Goron Cave and perform the required Kinstone fusion with the Goron on the far right. This awakens Biggoron at the top of Veil Falls. The fusion that awakens Biggoron is separate from the earlier Lon Lon Ranch Goron, Eenie and five Mysterious Wall fusions that opened the fourth-Bottle route.
Travel to Biggoron while carrying the regular Shield and agree to give it to him. Leave the area and complete other optional work while he chews it. Return later and he will return the transformed Mirror Shield. The Mirror Shield is optional, is not required for Vaati and should not be counted as part of the main campaign completion check.
- Complete the fourth-Bottle Goron route first.
- Defeat Vaati before beginning the post-game Mirror Shield exchange.
- Perform the final Goron Cave fusion with the far-right Goron.
- Give the regular Shield to Biggoron at Veil Falls.
- Leave and return later for the Mirror Shield.
Leave figurines and broad Kinstone cleanup for later
Fuse Kinstones with willing NPCs during normal travel, especially after each dungeon or major overworld event. A fusion can reveal a chest, open a path, create a beanstalk or begin an optional reward, so revisit Hyrule Town, Minish Village, Lon Lon Ranch and areas containing Mysterious Walls during later sweeps.
Carlov’s Figurine Gallery is a long collection activity using Mysterious Shells. Exchange shells periodically if pursuing the gallery, but do not let it delay the story or consume money needed for supplies. Additional Pieces of Heart, minigames, sword-training rewards, the Mirror Shield and remaining Kinstone fusions can all be handled after Vaati.
- Keep campaign progression ahead of figurine collecting.
- Spend Mysterious Shells periodically if pursuing the gallery.
- Revisit NPCs after acquiring new items.
- Use the completed save for remaining optional cleanup.
Before you move on
- For a basic cleanup, inspect each region at normal and Minish size and revisit every location marked for a later item.
- For recommended side content, confirm the desired wallet upgrades, useful Pieces of Heart and Remote Bomb access through the complete Belari and Gentari sequence.
- For the missable reward, verify that Gregal was cured before reaching the Cloud Tops and that the Light Arrows were received afterward.
- For the fourth Bottle, verify the initial Lon Lon Ranch Goron fusion, the Eenie fusion, the Eastern Hills wall near Eenie and Meenie, the Minish Woods wall near the stairs to Syrup’s Hut, the Trilby Highlands wall reached by going north instead of entering Mt. Crenel, the Mt. Crenel wall in the cave beside the Hermit’s cave, and the northern Lake Hylia wall reached with Roc’s Cape from the dock near Stockwell’s House. Then confirm that all five additional Gorons appeared and that the rear chest in Goron Cave opened.
- For the later Biggoron reward, verify the post-game far-right Goron fusion, the Shield handoff at Veil Falls and the eventual Mirror Shield return.
- For extensive completion, revisit Kinstone NPCs, Carlov’s Gallery, minigames, sword-training rooms and remaining Pieces of Heart after the campaign.
References for this chapter
- Goron Sidequest - The Legend of Zelda: The Minish Cap Walkthrough
- The Minish Cap Goron Quest - Zelda Dungeon Wiki
- Mysterious Wall - Zelda Dungeon Wiki
- Gear Upgrades - The Legend of Zelda: The Minish Cap Walkthrough
- To Find a Ghost - The Legend of Zelda: The Minish Cap Walkthrough
- Mirror Shield - Zelda Dungeon Wiki
- The Minish Cap Walkthrough – Dark Hyrule Castle, Zelda Dungeon
Boss Patterns, Recovery and Healing Strategies
The Minish Cap’s bosses test the dungeon item, sword positioning, shrinking, or Four Sword cloning rather than simple repeated attacks. Prepare by assigning the required tool, keeping the sword immediately available, and entering with enough health to survive a mistake. Big Green Chuchu and Gleerok expose their weak points with the Gust Jar and Cane of Pacci. Mazaal requires arrows, size changes and the Mole Mitts. Big Octorok is defeated with reflected boulders and the Flame Lantern, while Gyorg Pair requires simultaneous Four Sword strikes. Vaati’s three forms add the Gust Jar, arrows, Four Sword formations, the Cane of Pacci and the Flame Lantern. If an attempt fails, reload the latest save, use dungeon recovery items, and only leave to gather health or supplies when preparation—not execution—is the problem.
Prepare before entering a boss room
Assign the dungeon item or weapon required for the fight to A or B, with the sword on the other button whenever possible. The game does not use one universal boss weakness: some bosses require a dungeon item, while others require arrows, the Flame Lantern, or Four Sword techniques. Verify the correct tool before crossing the final doorway.
Use any available save point before the boss route, but do not assume every boss entrance provides a dedicated save. Break skulls, pots and other containers on the approach when they provide hearts, arrows or other useful refills. Carry bombs for dungeon progression, but do not postpone a boss merely to reach a particular rupee total. Health, correct equipment and recognizing the attack pattern are more important.
- Required weapon or dungeon item assigned.
- Sword immediately available.
- Latest practical save made.
- Enough health to survive a mistake.
- Arrows or other needed ammunition replenished when possible.
Deepwood Shrine: Big Green Chuchu
Remain at Minish size for the entire fight. The Chuchu advances slowly, but it can also jump directly toward Link. Move away when it rises for a jump, then approach from the side rather than standing beneath it when it lands.
Equip the Gust Jar and aim at the Chuchu’s foot. Continue sucking until the boss begins to sway and falls toward Link’s side of the room. Once it is down, move to its head and slash with the sword. Retreat before it stands up and regrows its foot, then repeat the Gust Jar and sword sequence. The boss jumps more often near the end, but the method does not change. After the final sword attacks, collect the Earth Element and Heart Container before using the warp tile.
- Stay Minish-sized.
- Suck up the foot with the Gust Jar.
- Attack the head only after the Chuchu falls.
- Move away before the next jump or landing.
Cave of Flames: Gleerok
Circle the outside of the lava pit while watching Gleerok’s fireballs and continuous flame attacks. When the shell on its back is exposed, use the Cane of Pacci to flip it. The shell breaks over Gleerok and stuns it, creating a path up its neck.
Run across Gleerok’s neck and slash the crystal on its back. Do not remain there after the crystal stops taking hits. Return to the surrounding platform before Gleerok sinks into the lava, because falling rocks and rising lava follow. The safe strip around the arena becomes narrower during later cycles, and Gleerok’s flames cover more of the room, so prioritize reaching solid ground over one extra strike.
Repeat the Cane of Pacci, neck crossing and crystal attack until Gleerok is defeated. Collect the Fire Element and Heart Container after the lava hardens, then take the warp tile.
- Circle the arena to avoid fireballs.
- Flip the shell with the Cane of Pacci.
- Slash the back crystal from the neck path.
- Leave Gleerok before it sinks or the lava rises.
Fortress of Winds: Mazaal
Mazaal’s hands must be disabled before Link can enter the head. When one hand prepares to crush the arena, move toward the other hand. Shoot that hand’s pink eye with arrows until it drops, then slash the exposed eye with the sword. Repeat for the second hand while avoiding grabs and slams.
When the head falls, use the nearby size changer to become Minish-sized and enter through the small opening beneath the head. Inside, six pillars are present, but only one glows. Slash the glowing pillar. A crane removes Link from the head, after which he must return to normal size and repeat the hand sequence.
During the next interior phase, dirt fills the room. Equip the Mole Mitts and dig through the dirt until you reach the glowing pillar, then destroy it. In the final cycle, Mazaal adds a shrink ray that changes Link’s size and disrupts positioning. Resize at the corner when necessary, disable both hands again, and use the Mole Mitts to reach the final glowing pillar. Once Mazaal explodes, collect the Heart Container and leave through the opened door.
- Use arrows on the pink hand eyes.
- Slash each exposed hand eye after it falls.
- Shrink only after both hands are disabled.
- Destroy the glowing pillar inside the head.
- Use Mole Mitts during the dirt-filled interior phases.
- Watch for the shrink ray in the final cycle.
Temple of Droplets: Big Octorok
Big Octorok fires boulders that must be deflected with the sword. Return three boulders to the boss. It then freezes itself and lowers the dry flower on its back. The floor freezes as well, so use deliberate movement rather than sharp direction changes.
Equip the Flame Lantern and light the dry flower. The flame travels along the stem and burns Big Octorok, causing it to ram the walls while blocks fall from above. Avoid the falling blocks until the ice thaws. In the next cycle, the boss inhales before firing, so stay out of the suction path while still positioning yourself to reflect three boulders.
During the final cycle, Big Octorok can create a dark smokescreen. Use the Flame Lantern to clear or ignite the obscured area, continue avoiding suction, and reflect the required boulders. After the final successful sequence, collect the Water Element and Heart Container. The Flippers are not the tool used to defeat this boss.
- Reflect three boulders with the sword.
- Use the Flame Lantern on the dry flower.
- Avoid suction during the later cycle.
- Watch for falling blocks while the boss rams the walls.
- Use the Flame Lantern when the smokescreen appears.
Palace of Winds: Gyorg Pair
The fight takes place on the backs of flying Gyorgs, so falling is a greater danger than ordinary contact damage. Keep Link near the center of the current platform and use Roc’s Cape to cross safely when the battle shifts. While Link stands on the Big Gyorg, the Small or Blue Gyorg attacks with fireballs and may later dive toward him.
The vulnerable eyes must be struck simultaneously. Use the Four Sword to create the required Link clones, then move them onto the open eyes and slash so every vulnerable eye is hit at once. A Spin Attack or Down Thrust can also help damage the eyes, but ordinary single-target sword swings are not the main solution.
After enough successful eye attacks, the battle shifts to the Small Gyorg. Its tail sweeps around the platform, so jump over the sweep and avoid the additional flying enemies. One eye opens at a time during this section; strike it, then use Roc’s Cape to return to the Big Gyorg when the transition occurs. Repeat the clone formation and platform sequence until the pair is defeated, then collect the Wind Element and Heart Container.
- Stay near the middle of each Gyorg platform.
- Use Roc’s Cape for controlled platform changes.
- Create clones to strike all open eyes at once.
- Jump over the Small Gyorg’s tail sweep.
- Prepare for the return to the Big Gyorg.
Dark Hyrule Castle: Vaati Reborn
At the start of the fight, two small eyes orbit Vaati. Destroy them with the sword to open the large eye on his body, then attack that central eye. Later cycles use four orbiting eyes, which may pause to fire beams down the room. Keep moving and avoid fireballs, teleportation and the dark clouds that pursue Link.
The Gust Jar can pull in or remove the dark clouds, making it safer than simply trying to outrun every one. After Vaati’s central eye closes, he is temporarily invulnerable while the next orbiting-eye pattern forms. Repeat the process until this form is defeated.
- Destroy the orbiting eyes first.
- Attack the central eye only after it opens.
- Use the Gust Jar on pursuing dark clouds.
- Keep moving when the eyes fire beams.
Vaati Transfigured
Use arrows to target Vaati’s eight surrounding eyes. Purple spikes, falling rocks and electric orbs make the arena hazardous, but destroying spikes can provide occasional hearts or arrows. After four eyes turn reddish-orange, identify their positions before using the Four Sword.
Create clones in the same pattern as the four vulnerable eyes. Move the formation toward Vaati while avoiding dark ground spikes and other hazards. Slash when the clones are aligned so all four vulnerable eyes are struck simultaneously. Vaati then falls and exposes his central eye; attack that eye with the sword until he rises and the pattern resets.
The pattern changes through several cycles and Vaati becomes more aggressive. The procedure remains the same: arrows reveal four vulnerable eyes, clones reproduce their arrangement, all four are struck together, and the fallen body is attacked at the center.
- Use arrows to reveal the vulnerable eyes.
- Read the four-eye pattern before cloning.
- Strike all four eyes simultaneously.
- Attack Vaati’s central eye only after he falls.
- Collect hearts or arrows from destroyed spikes when safe.
Vaati’s Wrath
Vaati’s final form begins with a large body and two arms. Avoid the electric attacks and watch where an arm enters the ground. Move away before it erupts, then strike the arm with the Cane of Pacci to reveal an opening. Use the size changer behind Vaati to become Minish-sized and enter the arm.
Inside the arm are ten bladed objects with eyes. Most are invulnerable; destroy the one with the brighter eye. Exit after it breaks, return to normal size and avoid the exploding arm. Repeat the same process for the second arm, but use the Flame Lantern inside it to reveal the correct target. Do not leave the arm until the correct object has been destroyed.
Vaati then grows wings and uses his eyes to fire beams and electric orbs. Create Four Sword clones and reflect each eye beam back to the eye that fired it. Time the sword swings instead of attacking repeatedly; an electric orb that strikes Link or a clone removes the formation. Returning all four beams stuns Vaati, causing the eyes to disappear and the boss to fall. Attack the exposed body, then repeat the beam-reflection sequence until the final defeat.
- Avoid the arm’s underground emergence.
- Flip each arm with the Cane of Pacci.
- Destroy the bright-eyed object inside the first arm.
- Use the Flame Lantern to find the correct object in the second arm.
- Reflect all four eye beams with Four Sword clones.
- Attack only after Vaati is stunned and falls.
Recover after a failed attempt
After a defeat, reload the latest save and reassign the required equipment before retracing the route. If the approach is draining health, break containers, defeat enemies selectively and avoid unnecessary loops. In some dungeons, the room immediately before the boss contains skulls or pots that can provide hearts, arrows or other refills; use those resources before entering.
Leave the dungeon only when the problem is preparation. Return to an accessible town or overworld area if you need heart pieces, potion supplies, bombs, arrows or practice with a required item. Grinding rupees alone is rarely the solution. If you can reach the boss with adequate health and consistently expose its weak point, continue attempting the fight and focus on the tell that precedes the damaging attack.
- Reload after a failed attempt.
- Reassign the correct item before returning.
- Use dungeon containers for recovery.
- Leave only when health, supplies or practice are genuinely needed.
- Do not grind for an arbitrary rupee total.
Before you move on
- Big Green Chuchu, Gleerok, Mazaal, Big Octorok and Gyorg Pair have each been defeated.
- The Heart Container has been collected after each dungeon boss.
- The Earth, Fire, Water and Wind Elements have been obtained.
- The White Sword has been reforged into the Four Sword.
- Vaati Reborn, Vaati Transfigured and Vaati’s Wrath have all been defeated.
- The ending sequence begins after the final battle, confirming completion of the main campaign.
Common Progression Blockers and How to Fix Them
The Minish Cap rarely traps a save permanently. Most apparent dead ends are caused by a missing dungeon item, an unfinished story conversation, an overlooked Minish route, or a required golden Kinstone event. Check Quest Status and the item screen first, then retrace the last objective in its proper order. Remember that Fortress of Winds does not award an Element: it gives the Mole Mitts and Ocarina of Wind, after which the library and overdue-book sequence leads to the Flippers and Temple of Droplets. Ordinary green, blue, and red Kinstone fusions are optional, but certain golden Kinstones are required to open the Wind Ruins and Cloud Tops routes. If a scene fails to activate, reload the latest save and repeat the relevant conversation before wandering elsewhere.
1. Match the obstruction to the item or story stage
When a door, path, or NPC appears to be blocking progress, first identify the type of obstruction. A cracked wall normally needs a bomb, deep water needs the Flippers, soft earth needs the Mole Mitts, a raised ledge or wide gap may need Roc’s Cape, and a dark passage may require the Flame Lantern. A small hole, jar, stump, or leaf may be a Minish portal rather than scenery. Check both normal and Minish size before deciding that a route is inaccessible.
Open Quest Status and confirm the last major objective. The main progression tools relevant to common blockers are the Gust Jar from Deepwood Shrine, Cane of Pacci from Cave of Flames, Pegasus Boots, Mole Mitts and Ocarina of Wind from the Fortress of Winds sequence, Flippers from the library’s secret passage, and Roc’s Cape from Palace of Winds. Do not search for a missing Element after Fortress of Winds: that dungeon supplies the Ocarina, not the Wind Element.
- Check Quest Status for the most recent Element or story objective.
- Check the item screen for the tool that matches the obstruction.
- Inspect nearby portals, holes, stumps, jars, cracked walls, and small entrances at both sizes.
- Confirm that the last dungeon was actually completed and that its reward was collected.
2. Follow the correct sequence after each major dungeon
After Deepwood Shrine, return to the Minish Village and speak with the elder. The next destination is Mount Crenel, where Melari reforges the broken Picori Blade while Link enters Cave of Flames for the Fire Element. After Cave of Flames, return to Melari and then enter the Elemental Sanctuary in Hyrule Castle to infuse the reforged blade with the Earth and Fire Elements. If the sanctuary scene has not occurred, the next overworld route will not behave as expected.
After Fortress of Winds, use the Ocarina of Wind to reach Lake Hylia and shrink near the Minish house. Speak with the Forest Minish there to learn that Librari knows how to enter the Temple of Droplets. Then visit the Royal Hyrule Library in Hyrule Town. If the library seems closed, return to Lake Hylia and speak with that Minish first; the library sequence depends on that conversation.
The library route is not solved by finding a dungeon entrance in the overworld. Shrink on the library roof using the Cane of Pacci, enter the Minish passage, and speak with the library Minish. Talk to the librarian’s assistant downstairs to receive the clues for the three missing books. Return the book from the cat owner’s house, the book connected to Dr. Left, and the book left at Mayor Hagen’s lakeside cabin. The routes require shrinking, a bottle of water to extinguish a stove, the Cane of Pacci, and the Mole Mitts. When all three books are returned, the new book staircase lets Link reach Librari, who sends him through the short grotto for the Flippers.
- Earth and Fire Elements have been infused at the Elemental Sanctuary after Cave of Flames.
- The Lake Hylia Minish has been spoken to after obtaining the Ocarina of Wind.
- All three overdue books have been returned before searching for Librari.
- The Flippers have been collected before attempting the Temple of Droplets.
3. Distinguish optional Kinstone fusions from required golden events
Most Kinstone fusions are optional. Green, blue, and red fusions commonly create chests, rupees, Heart Pieces, enemy encounters, figurine opportunities, or shortcuts. If an ordinary NPC refuses to fuse, or if you lack a matching piece, this normally does not mean the main story is blocked. Revisit such NPCs after a dungeon if you want side rewards, but do not perform a complete fusion sweep just to reach Vaati.
The story-critical Kinstone events are the golden ones. In Castor Wilds, collect the golden Kinstone pieces available in the area and fuse the matching pieces with the three large Mysterious Statues in the lower-left portion of the wilds. The opened route leads to the Wind Ruins and Fortress of Winds. If the rock or passage has not opened, check every statue rather than searching for a key.
After Temple of Droplets, leave the dungeon and follow King Gustaf’s ghost to the Royal Crypt in Royal Valley. Clear the crypt, defeat the Gibdos and solve the clone-and-switch rooms until Gustaf gives Link a golden Kinstone. Take it to the mysterious wall at the source of the waterfall in Veil Falls and fuse it there. The wall opens a portal to Cloud Tops. Ordinary fusions elsewhere cannot substitute for this golden piece.
- Do not treat every fusion-capable NPC as a main-story requirement.
- Fuse all three golden Kinstones with the Castor Wilds statues to open the Wind Ruins route.
- Clear Royal Crypt and obtain King Gustaf’s golden Kinstone.
- Fuse Gustaf’s piece with the mysterious wall at the Veil Falls waterfall.
4. Clear the Cloud Tops gate in the proper order
Cloud Tops is not opened by simply reaching the large vortex above Veil Falls. After entering the clouds, collect the golden Kinstone pieces found through the vortexes, holes, snow-covered passages, and enemy areas. Each golden piece belongs to a Mysterious Cloud. Fuse with the clouds as you encounter them, then use the newly activated red whirlwinds to reach the next layer.
If the large vortex or final route does not activate, return to the cloud areas and check for an unfused Mysterious Cloud. The required sequence uses five cloud fusions. Ordinary red, blue, and green pieces found in the same region are useful but are not the pieces that activate the story route. Once the five cloud fusions are complete, the large vortex opens and leads to the Wind Tribe’s tower and then Palace of Winds.
Before advancing through Veil Falls and Cloud Tops, complete the Gregal event if it is still available. Fuse with the Stranger in the western part of Hyrule Town, use the warp that appears near Link’s house, and use the Gust Jar to remove the ghost haunting Gregal. This preserves access to a later Wind Tribe reward. The main campaign can continue without that reward, but it cannot be recovered in the same way after the relevant point.
- The Veil Falls portal was opened with King Gustaf’s golden Kinstone.
- All five required Mysterious Cloud fusions have been completed.
- The large Cloud Tops vortex has appeared.
- Gregal was healed before proceeding through the cloud route if his event was still available.
5. Recover when a conversation or cutscene fails to trigger
If an NPC remains silent, a door stays shut, or an expected scene does not begin, reload the latest save. Return directly to the last NPC or room associated with the objective and exhaust every line of dialogue. Leave the screen and re-enter it if the game has not visibly updated the character, door, map route, or item state.
For the library, repeat the Lake Hylia Minish conversation before returning to the library. For the Temple of Droplets, confirm that Librari gave Link the Flippers route rather than merely visiting the library roof. For Cloud Tops, return to the Royal Crypt and verify that Gustaf actually handed over the golden Kinstone before attempting the Veil Falls wall. For the final sequence, confirm that all four Elements have been infused into the White Sword at the Elemental Sanctuary before trying to enter Dark Hyrule Castle.
Save only after the correct event visibly occurs. A new save made before a required conversation is repeated can make troubleshooting harder, although it does not normally create a permanent story lock.
- Reload the most recent save instead of immediately searching the entire map.
- Repeat the last required conversation and exhaust its dialogue.
- Leave and re-enter the area after the dialogue.
- Confirm the route, NPC, item, or cutscene visibly changed before saving again.
6. Use a fixed backtracking circuit
When the next objective is unclear, search in a fixed order rather than wandering randomly. Start in Hyrule Town and the Royal Hyrule Library, then check Hyrule Castle and the Elemental Sanctuary, Minish Woods and Minish Village, the latest dungeon region, Lake Hylia, Royal Valley, Veil Falls, and the most recently opened sky route. At every stop, check the map, nearby portals, cracked walls, fusion-capable characters, and obstacles matching the newest item.
Keep required progress separate from optional cleanup. A Heart Piece, figurine, rupee chest, Great Fairy upgrade, or ordinary Kinstone reward can wait. A missing Element, golden Kinstone, book, story conversation, or major item cannot. Once the main route moves again, make a second pass for optional rewards using the same region-by-region circuit.
- Search Hyrule Town and the library before revisiting every remote area.
- Check the newest dungeon region and the area named by the latest NPC objective.
- Use the map to track unopened routes and Wind Crests.
- Postpone ordinary collectibles until the main story gate is identified.
Before you move on
- The current story objective is stated by an NPC, dungeon event, or clearly opened route.
- The required item is present in the inventory and matches the physical obstacle.
- After Fortress of Winds, the Ocarina of Wind, library sequence, Power Bracelets, and Flippers have been obtained in the correct order.
- The Castor Wilds statue route, Royal Crypt golden Kinstone route, and Cloud Tops cloud-fusion route have been completed when those stages are reached.
- After Palace of Winds, all four Elements are infused into the White Sword at the Elemental Sanctuary, creating the Four Sword.
- The entrance into Dark Hyrule Castle is active, confirming that the final story prerequisites have been met.
References for this chapter
Final Checklist, Ending and Post-Game Options
The North American Game Boy Advance campaign is complete after Link obtains the Earth, Fire, Water, and Wind Elements, reforges the Picori Blade into the Four Sword, clears Dark Hyrule Castle, defeats Vaati in all three phases, restores Zelda, and watches the ending and credits. The Light Force is part of the finale’s story and is not a fifth dungeon Element. After the credits, save when prompted; reloading that file returns Link to the pre-final-battle state, allowing optional cleanup. The first 130 Carlov figurines can unlock Herb’s robot-topped house before the ending. Six additional figurines become available after the first completion, bringing the total to 136; Carlov awards the Carlov Medal after the complete collection. The Mirror Shield, figurines, Carlov Medal, final Piece of Heart, remaining Kinstone Fusions, sword techniques, bottles, and capacity upgrades are optional.
1. Verify the mandatory Element and sword progression
Before entering the final sequence, confirm that Link has obtained the Earth, Fire, Water, and Wind Elements. After the Earth and Fire Elements, Melari repairs the Picori Blade into the White Sword. Take it to the Elemental Sanctuary and infuse it with those two Elements to unlock two-Link formations.
After obtaining the Water Element, return to the Elemental Sanctuary when the story directs you. The additional infusion enables three-Link formations. These formations are required for later puzzles and are part of the main progression even though the White Sword does not yet become the final Four Sword.
After recovering the Wind Element from the Palace of Winds, return to the Elemental Sanctuary in Hyrule Castle. Place the White Sword on the pedestal and complete the final infusion. The sword becomes the Four Sword, allowing four Links to be created. The Light Force is involved in the final story events, but it is not a fifth Element and does not need to be collected as a separate dungeon reward.
- Earth Element obtained
- Fire Element obtained
- White Sword created after the Earth and Fire Elements
- Water Element added for three-Link formations
- Wind Element obtained
- Four Sword created at the Elemental Sanctuary
2. Enter Dark Hyrule Castle
Go to Hyrule Castle Garden and use the western route past the guards to reach the hidden ladder. Enter the Elemental Sanctuary and complete the Four Sword scene. Leave through the changed castle route and approach the petrified figures blocking the way.
Charge the Four Sword and release a sword beam at the petrified figures. Restoring them opens the route into Dark Hyrule Castle. Optional Heart Pieces, Kinstone Fusions, figurines, the Mirror Shield, and capacity upgrades are not required to enter the final dungeon.
- Four Sword infused with all four Elements
- Elemental Sanctuary scene completed
- Petrified castle figures restored with the charged sword beam
- Dark Hyrule Castle entered
3. Reach the Big Key and prepare for Vaati
In the opening area of Dark Hyrule Castle, inspect the right side for the cracked wall and the shrinking route. Use the nearby portal to become Minish-sized, return through the narrow passage, and fall through the large opening in the central room. Continue through the lower route, restore normal size at the next portal, and activate the switch.
The switch opens the prison route. Restore the petrified King of Hyrule with a charged Four Sword beam to obtain a Small Key. Use the genuine locked door and continue through the clone formations, blue-floor puzzles, cannon rooms, Darknut encounters, outdoor whirlwind route, and torch rooms. The castle includes misleading doors and reset switches, so if a blue-floor arrangement fails, use its reset switch and try the pattern again rather than leaving the area.
Collect the remaining Small Keys and the Big Key, then use the blue warp to return to the entrance. Before opening the final door, visit the southern supply room to recover health and replenish bombs and arrows. Use the Big Key on the final door to begin the boss sequence.
- King of Hyrule restored with the charged Four Sword beam
- Small Keys collected
- Clone puzzles completed
- Blue-floor maze cleared
- Big Key obtained
- Health and ammunition replenished
4. Defeat Vaati Reborn
Vaati Reborn surrounds himself with orbiting eyes and fires projectiles toward Link. Destroy the orbiting eyes first. When the central eye in Vaati’s body opens, move in and strike it with the sword before it closes. Later cycles add four eyes that fire downward beams. Attack them from the side, avoid the beams, and wait for the central opening before committing to a sword attack.
After repeated damage, Vaati protects the eyes with large coverings. Equip the Gust Jar and pull the coverings away, then repeat the eye-destruction and central-eye attack pattern. A dark energy ball may pursue Link; keep moving and roll away from it instead of trying to trade hits. Defeating this form starts the next phase immediately, so do not treat the first victory animation as the end of the battle.
- Orbiting eyes destroyed
- Central eye attacked during its openings
- Four-eye phase survived
- Protective coverings removed with the Gust Jar
- Vaati Reborn defeated
5. Defeat Vaati Transfigured and restore Zelda
Vaati Transfigured is surrounded by eight smaller orbs. Use the Bow to shoot the orbs and reveal their eyes. Continue until four adjacent orbs display red eyes in a straight horizontal or vertical arrangement.
Move to the Four Sword tiles at the south of the arena and split Link into four copies. Arrange the copies so they stand in the same formation as the four revealed red eyes, then attack so all four targets are struck together. The orbs disappear and Vaati becomes vulnerable on the ground. Attack him with the Four Sword, then repeat the Bow, eye-reveal, four-Link formation, and sword-attack cycle until the form is defeated.
After the battle, approach the altar where Princess Zelda is held. Wait until Ezlo speaks. Once his line has finished, perform a spin attack at the altar to restore Zelda. Do not try to trigger this scene with a charged sword beam, and do not perform the spin attack before Ezlo speaks, because the game will not advance until the correct dialogue and attack sequence occurs. Once Zelda is free, the castle begins to collapse and the game moves Link and Zelda toward the final courtyard.
- Eight surrounding orbs shot with the Bow
- Four adjacent red eyes identified
- Four Links arranged in the matching formation
- Vaati Transfigured defeated
- Altar approached after the battle
- Ezlo’s dialogue completed
- Spin attack performed at the altar
- Zelda restored
6. Defeat Vaati’s Wrath
Follow the escape route toward the Elemental Sanctuary. Before entering the final courtyard, use the southern side route to recover hearts and replenish bombs and arrows. Vaati’s Wrath uses electric attacks and can destroy active clones, so create four Links only when the attack pattern gives you enough space.
Vaati’s Wrath has two large hands. When one hand rises from the floor, use the Cane of Pacci to flip it over. Shrink at the nearby Minish portal and enter the opening in the hand. Inside, several eyes are present, but only the eye with the moving pupil is vulnerable. Attack that eye until the hand is defeated, then leave and return to normal size.
Repeat the process for the second hand. The interior of the second hand is dark, so equip and use the Flame Lantern to see the eyes clearly. After both hands are destroyed, Vaati exposes four small eyes and launches attacks. When four energy balls travel toward Link in a line, stand on the Four Sword tiles, split into four, and reflect the projectiles back simultaneously. Vaati becomes stunned after a successful reflection; close in and attack with the sword. Repeat the reflection and attack cycle until Vaati is defeated.
- First hand flipped with the Cane of Pacci
- Moving eye inside the first hand destroyed
- Second hand flipped and entered
- Second moving eye located with the Flame Lantern
- Four projectiles reflected with four Links
- Vaati’s Wrath defeated
7. Watch the ending and save
After the final hit, continue through the ending scenes. Zelda is restored, Hyrule is repaired, and Ezlo’s story concludes. Watch through the credits and use the post-ending save opportunity.
Reloading that save normally returns Link to the state before the final battle. This is expected behavior for the original Game Boy Advance release; it does not undo the completed ending. The saved file leaves the overworld available for optional figurines, Heart Pieces, Kinstone Fusions, upgrades, and side quests. The save file’s completion indication and the post-ending figurine unlocks confirm that the ending was recorded.
- Zelda restored at the altar with the spin attack
- Hyrule restoration sequence completed
- Ezlo’s departure seen
- Ending and credits watched
- Post-ending save created
8. Handle the figurine and robot-house rewards in the correct order
Carlov’s Figurine Gallery has 136 figurines in total. The first 130 can be collected before the ending once their individual unlock conditions are satisfied. After collecting those first 130, go to Herb, the man sitting outside Mama’s Café in Hyrule Town. Speak with him, and he opens the east side of the nearby house with the robot on its roof. Enter through the newly available door to collect the Heart Piece, rupees, and phonograph. This house access is a separate 130-figurine reward and does not require the Carlov Medal.
After defeating Vaati and saving after the credits, return to Carlov’s gallery. Six additional figurines become available, including figures for the final Vaati forms. Collect all six to reach 136 total figurines. Carlov then awards the Carlov Medal. The medal is an optional collection reward; it is not the condition that originally opens Herb’s house when the 130-figurine requirement has already been met.
If Herb has not opened the house, verify that every one of the first 130 figurines has been collected and that the game has been saved after the relevant progression. Once the door is open, the house contents remain optional and are not required for the campaign ending.
- First 130 figurines collected, if pursuing the early house reward
- Herb spoken to outside Mama’s Café
- Robot-topped house opened
- Heart Piece and house rewards collected, if desired
- Post-ending save loaded
- Six additional figurines collected
- 136 total figurines completed
- Carlov Medal received
9. Sweep remaining optional content
Use the map and inventory to revisit areas opened by the Cane of Pacci, Mole Mitts, Flippers, Roc’s Cape, Four Sword, bombs, and Kinstone effects. Check Minish entrances, bombable walls, submerged passages, digging routes, elevated ledges, clone panels, and newly opened paths.
Optional cleanup can include remaining Kinstone Fusions, sword techniques, bottles, Heart Pieces, full Heart Containers, wallet expansions, bomb-bag upgrades, Remote Bombs, the Mirror Shield, and the complete figurine collection. The Mirror Shield comes from the Goron Cave and Biggoron sequence and is not needed for Dark Hyrule Castle or any Vaati phase.
Track figurines and Kinstone Fusions separately. Figurines are a shell-based collection with a 136-item maximum, while fusions can produce rupees, chests, paths, beanstalks, enemies, and other world changes. None of these optional rewards changes the campaign completion standard.
- Remaining Heart Pieces reviewed
- Outstanding Kinstone Fusions checked
- Sword techniques and bottles reviewed
- Wallet and bomb upgrades checked
- Remote Bombs and Mirror Shield reviewed
- Optional overworld rewards completed as desired
Before you move on
- Earth Element obtained.
- Fire Element obtained.
- White Sword reforged after Earth and Fire.
- Water Element added and three-Link capability obtained.
- Wind Element obtained.
- Four Sword created at the Elemental Sanctuary.
- Dark Hyrule Castle cleared and its Big Key used.
- Vaati Reborn defeated.
- Vaati Transfigured defeated.
- Zelda restored by approaching the altar, waiting for Ezlo to speak, and performing a spin attack.
- Vaati’s Wrath defeated.
- Ending sequence and credits watched.
- Post-ending save created.
- Optional: first 130 figurines collected and Herb’s house opened.
- Optional: six post-ending figurines collected for 136 total.
- Optional: Carlov Medal received from Carlov.
- Optional: Mirror Shield obtained, final Piece of Heart collected, and remaining Heart Pieces and Kinstone Fusions reviewed.
References for this chapter
- The Minish Cap Walkthrough – Dark Hyrule Castle, Zelda Dungeon
- Final Boss: Vaati – The Legend of Zelda: The Minish Cap Walkthrough, Thonky
- Dark Hyrule Castle – The Legend of Zelda: The Minish Cap Walkthrough, Thonky
- The Legend of Zelda: The Minish Cap Walkthrough, GameSpot
- Carlov’s Figurines – The Legend of Zelda: The Minish Cap Walkthrough, Thonky
- Carlov Medal, Zelda Dungeon Wiki
- Phonograph Room and Sound Test – The Legend of Zelda: The Minish Cap Walkthrough, Thonky
- The Legend of Zelda: The Minish Cap Game Manual
Finishing up
You have obtained the Earth, Fire, Water, and Wind Elements.
After the Earth and Fire Elements, Melari has reforged the Broken Picori Blade into the White Sword. The Water Element then enables the three-Link stage, and the Wind Element completes the Four Sword at the Elemental Sanctuary.
You have cleared Dark Hyrule Castle, defeated Vaati Reborn, Vaati Transfigured, and Vaati’s Wrath, and watched the ending sequence and credits.
Zelda has been restored and the completed save has been made if the game offers the post-credits save.
Optional completion may include wallet and bomb-bag upgrades, Remote Bombs, extra bottles, Kinstone rewards, Heart Pieces, the Mirror Shield, figurines and other sidequest rewards. Iron Boots are not an item in this edition.
Choose your next gameScreenshots & video
Game imagery for reference. Follow the written chapters above for the route and strategies.

Sources & references
Our original guide draws on the references below. Check the edition at the top of this page before following controls or unlock requirements.
- The Legend of Zelda: The Minish Cap — Official Instruction Booklet for Game Boy Advance
- Journey to the Minish Woods — The Minish Cap Walkthrough, Thonky
- The Minish Cap Walkthrough: Picori Festival & Minish Woods, Zelda Central
- The Legend of Zelda: The Minish Cap — Guide and Walkthrough by Phoenix_1911
- Dungeon 1: Deepwood Shrine - The Legend of Zelda: The Minish Cap Walkthrough
- The Minish Cap Walkthrough - Deepwood Shrine
- Deepwood Shrine - Zelda Dungeon Wiki
- Nintendo GameCube and Game Boy Advance Manuals
- After the First Dungeon - The Legend of Zelda: The Minish Cap Walkthrough
- To Find a Ghost - The Legend of Zelda: The Minish Cap Walkthrough
- The Minish Cap Walkthrough — Cave of Flames
- The Legend of Zelda: The Minish Cap - Guide and Walkthrough - Game Boy Advance - By Kirby021591
- The Legend of Zelda: The Minish Cap Game Manual
- Kinstone Fusion Guide - The Legend of Zelda: The Minish Cap Walkthrough
- The Legend of Zelda: The Minish Cap — Guide and Walkthrough by Dev
- The Minish Cap Walkthrough — Fortress of Winds
- The Fortress of Winds — The Legend of Zelda: The Minish Cap Walkthrough
- Castor Wilds — The Legend of Zelda: The Minish Cap Walkthrough
- The Minish Cap Walkthrough – Temple of Droplets
- Temple of Droplets – Zelda Dungeon Wiki
- Part 7: Getting the Flippers – The Minish Cap Walkthrough
- The Legend of Zelda: The Minish Cap – Guide and Walkthrough
- The Royal Crypt - The Legend of Zelda: The Minish Cap Walkthrough
- The Source of the Flow - The Legend of Zelda: The Minish Cap Walkthrough
- The Minish Cap walkthrough - Royal Valley, Veil Falls and Cloud Tops
- Chapter 9: The Royal Crypt - Zelda Universe
- The Royal Crypt - Zelda Dungeon Wiki
- The Minish Cap Walkthrough – Palace of Winds
- Palace of Winds (The Minish Cap) – Zelda Dungeon Wiki
- The Legend of Zelda: The Minish Cap – Guide and Walkthrough by Super_Slash
- Dark Hyrule Castle – The Legend of Zelda: The Minish Cap Walkthrough, Thonky
- Final Boss: Vaati – The Legend of Zelda: The Minish Cap Walkthrough, Thonky
- Completing the Sword - The Legend of Zelda: The Minish Cap Walkthrough
- The Minish Cap Walkthrough – Dark Hyrule Castle, Zelda Dungeon
- White Sword - Zelda Wiki
- Items and Equipment — The Legend of Zelda: The Minish Cap Walkthrough
- The Water Element — The Legend of Zelda: The Minish Cap Walkthrough
- Journey to Mt. Crenel — The Legend of Zelda: The Minish Cap Walkthrough
- The Minish Cap Items — Zelda Dungeon Wiki
- Remote Bomb (The Minish Cap) - Zelda Dungeon Wiki
- The Legend of Zelda: The Minish Cap — Item Guide, Game Boy Advance
- Kinstone Fusion - Zelda Dungeon Wiki
- Goron Sidequest - The Legend of Zelda: The Minish Cap Walkthrough
- Magic Boomerang - The Legend of Zelda: The Minish Cap Walkthrough
- Magical Boomerang Kinstones - Zelda Dungeon Wiki
- The Minish Cap Goron Quest - Zelda Dungeon Wiki
- Mysterious Wall - Zelda Dungeon Wiki
- Gear Upgrades - The Legend of Zelda: The Minish Cap Walkthrough
- Mirror Shield - Zelda Dungeon Wiki
- The Minish Cap Bosses
- Mazaal
- The Legend of Zelda: The Minish Cap — Guide and Walkthrough
- The Minish Cap Story — Zelda Dungeon Wiki
- The Legend of Zelda: The Minish Cap — North American Instruction Manual
- The Legend of Zelda: The Minish Cap Walkthrough, GameSpot
- Carlov’s Figurines – The Legend of Zelda: The Minish Cap Walkthrough, Thonky
- Carlov Medal, Zelda Dungeon Wiki
- Phonograph Room and Sound Test – The Legend of Zelda: The Minish Cap Walkthrough, Thonky
About the game & collecting notes
- Platform
- Game Boy Advance
Step-by-step campaign walkthrough for the original North American Game Boy Advance release of The Legend of Zelda: The Minish Cap. Covers the required overworld transitions, five main dungeons, the Royal Crypt mini-dungeon, Dark Hyrule Castle, all four dungeon Elements, sword-forging stages, boss strategies, key item acquisitions, Kinstone guidance, and a concrete ending-and-credits completion check.
Darryl Polo
Darryl Polo loves tinkering with emulation and revisiting retro games. He enjoys exploring how old favorites play on different setups and sharing what he learns along the way. At Joking Joystick, he writes about the games, hardware, and small discoveries that keep the hobby fun.
Our editorial standardsFound a step that needs another look? Help us improve this guide.