
The Legend of Zelda: Spirit Tracks — Complete Campaign Walkthrough (Nintendo DS, USA edition)
Step-by-step campaign coverage for the original Nintendo DS edition of The Legend of Zelda: Spirit Tracks (USA, EN/FR/ES). This guide prepares you, explains the train and Zelda-possession mechanics, walks every required realm and temple to obtain the Bow/Compass/Lokomo Sword, and gives concrete checks and recovery tips to reach and beat the final Malladus encounters and watch the ending.

Find a copy
The Legend of Zelda: Spirit Tracks Nintendo DS
We may earn a commission if you buy through these links, at no extra cost to you. As an Amazon Associate I earn from qualifying purchases.
Opens retailer search results. Check the model, edition, seller, availability and current price before buying.
Before you begin
This guide is written for the original Nintendo DS release of The Legend of Zelda: Spirit Tracks, using the North American edition.
It assumes you are starting the main campaign and want a practical route through every required realm, temple, late-game Tower section, Dark Realm train battle, and Malladus encounter.
The guide explains the train, Zelda's Phantom possession, required quest items, temple objectives, boss patterns, failure recovery, and the save behavior used after the ending.
Play on a charged Nintendo DS or Nintendo DSi with a working stylus and a functioning microphone.
Keep two save slots when possible: one current progression file and one backup before major temples or endgame sequences.
Optional rabbits, Force Gems, stamps, train parts, minigames, and secret stations are separated from the main-story route. They are not required to reach the ending.
Set yourself up for the run
Know the controls: the game uses the touch screen for most actions (train routing, Sword strands, the Spirit Flute, and inventory).
Practice basic stylus strokes (draw train routes, slide for Spirit Flute notes) in a safe area before major boss fights.
Make at least two save files.
Keep one 'checkpoint' save before you enter each temple and another 'overworld' save after repairing Spirit Tracks in a realm.
That minimizes backtracking if you miss a collectible or die in a boss fight.
Master train handling: learn to draw a safe route, change speed, stop and reverse, and use the Whistle to clear small obstacles.
The overworld routing is mandatory to reach new stations and hidden track branches.
Learn Zelda-possession basics early: Zelda’s spirit can enter certain enemies and devices to solve puzzles and operate switches.
Practice entering and exiting possessions without leaving Link vulnerable.
Stock up on healing items and arrows when available.
Some boss encounters require sustained protection of Zelda or covering long escort sequences where regeneration can be slow.
Read the in-game manual/tutorial sections once to see how the Spirit Flute interface and Lokomo songs work; many puzzle solutions require playing specific flute notes with reasonable accuracy.
If you prefer, follow the game's map annotations: make notes with the stylus on your printed/onscreen map for track junctions, hidden tracks and narrow desert tracks — it reduces navigation errors in later chapters.
Expect repeated use of a limited set of quest items: the Spirit Flute, Bow of Light, Compass of Light and (late game) the Lokomo Sword.
This guide will mark which item is required or optional for each chapter.
Starting Hyrule: Opening Scenes, Train Basics and First Steps
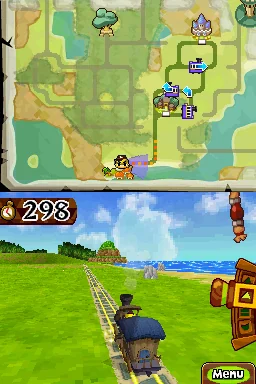
Begin in Aboda Village, complete Link’s conductor examination, and take Alfonzo’s train to Hyrule Castle Town. The opening run teaches route drawing, speed control, braking, reversing, railroad switches, and the whistle. After arriving, enter Hyrule Castle, complete the ceremony, read Zelda’s letter, and guide her through the castle so the story can proceed to the Tower of Spirits. Save through the game’s own SAVE command rather than the Nintendo DS system menu. Spirit Tracks provides two save slots, so keep one file before the train exam and another after Zelda’s spirit has joined Link.
Leave Aboda Village and prepare for the examination
After the opening scenes, Link begins in Niko’s house in Aboda Village. Walk outside and follow the village path north toward the train platform. You may explore the village, cut grass, break objects, and speak with residents, but none of those activities is required for the main story. When ready, speak with Alfonzo at the platform and accept the trip to Hyrule Castle Town.
Before starting the examination, open the in-game menu and touch SAVE. Do not use the Nintendo DS system menu as a substitute; Spirit Tracks saves through its own SAVE command or through SAVE AND QUIT on the pause menu. There are only two save slots. A useful arrangement is one file before speaking with Alfonzo and the other after arriving in Castle Town or finishing the early Zelda sequence.
- Reach the train platform north of Niko’s house.
- Save before beginning the train examination.
- Keep one of the two save slots available for later progress.
Draw the route before departure
When the Rail Screen appears, touch the quill and trace the available rails from Aboda Village toward Hyrule Castle Town. Follow the track connections shown on the map rather than drawing across empty terrain. Lift the stylus when the route is complete, then touch GO to begin. If the line is wrong, touch CANCEL and redraw it before departing.
The drawn route supplies the train’s normal path, but it does not remove the need to watch the journey. The upper screen shows the surrounding area and approaching trains. At a junction, a railroad-switch control appears on the lower screen; use it before the train reaches the fork if you need to take another branch. This is especially important when another train is using the planned route.
- Trace only connected rails with the quill.
- Touch GO to depart or CANCEL to redraw.
- Watch for the railroad-switch control at every junction.
Use the gearbox, brake, reverse control, and whistle
The train controls are on the lower screen. The gearbox provides the forward speed settings. Use the highest setting for clear stretches, then move to the slower setting when approaching a junction, another train, or the destination station. The Brake setting slows the train. The Reverse/Emergency Brake setting moves the train backward and can stop an imminent overshoot more quickly than ordinary braking.
The whistle is the pull-cord near the upper-right of the train screen. Slide it downward when an animal is on the track. The whistle is primarily for frightening animals away; it is not a replacement for slowing down when an obstacle does not clear immediately. If another train blocks the planned route, slow down and follow it safely, switch branches when the control appears, or reverse to the previous junction if you have already missed the branch.
- Use high speed only on unobstructed track.
- Brake or slow down before junctions and stations.
- Use Reverse/Emergency Brake if you overshoot or need to retreat.
- Pull the whistle when an animal blocks the rails.
Complete the timed run to Hyrule Castle Town
The examination allows 300 seconds to reach the castle. Start in the highest forward setting, then monitor the top-screen map for other trains. Their positions and travel directions indicate which branches may intersect. If a train is ahead on your route, do not chase it at full speed. Reduce speed and trail it, or use a switch-track to take a clear branch.
As Castle Town approaches, select the slower setting and then Brake so the train enters the station under control. The train does not automatically stop at the destination. If you pass the stopping area, use Reverse/Emergency Brake and back toward the station rather than restarting the examination. Once Link arrives, leave the platform and save through the in-game menu.
- Reach Castle Town within the examination time limit.
- Avoid collisions by reading the upper-screen train positions.
- Brake before entering the station.
- Save after arriving in Castle Town.
Enter Hyrule Castle and complete the ceremony
From the station, walk north through Castle Town. Continue through the northern passage and approach Hyrule Castle. At the entrance, speak with the guard on the left and answer his questions to gain access. Inside, speak with the guard blocking the stairs ahead so Link can reach the ceremony.
After the ceremony, open the Collections screen and read the letter Zelda gives Link. The letter explains that she wants to meet privately in her bedroom and shows the route needed to reach her. Mark the route on your map if you want a reminder. Leave the ceremony area by going south, then follow the castle’s exterior walkway and upper-floor access route described by the letter.
- Enter Castle Town from the station.
- Gain entry to Hyrule Castle through the guards.
- Complete the ceremony.
- Read Zelda’s letter in the Collections screen.
Escort Zelda through the castle
Reach Zelda’s bedroom by following the route shown in her letter. After Link meets her, the pair must leave the castle without allowing the guards to catch Zelda. Guard positions and their cone-shaped fields of vision appear on the map. Link can move through their view without being caught, but Zelda must remain outside the visible cones.
Draw attention away from Zelda when necessary, wait for a guard to move, and guide her through the safe portions of the route. If a guard catches Zelda, the escape sequence restarts; use the map to plan the next attempt rather than rushing. Continue downward through the castle until the escape route reaches the train area.
- Reach Zelda’s bedroom using the letter’s route.
- Keep Zelda outside the guards’ vision cones.
- Use the map to time movements through the castle.
- Restart the escape sequence calmly if Zelda is spotted.
Finish the opening story and establish Zelda’s spirit
After Link and Zelda leave the castle, follow the story’s instructions toward the Tower of Spirits. The train is attacked before they can safely complete the trip, and Zelda’s body is taken while her spirit remains behind. The following scenes establish Zelda’s spirit as Link’s companion and begin the next chapter’s possession and Spirit Flute mechanics.
When normal control returns after the opening attack and dialogue, use SAVE from the in-game menu. Keep the earlier pre-examination file intact if possible. Do not attempt advanced flute songs or possession puzzles in this chapter; those mechanics are introduced after the opening sequence and are not needed to complete the train examination or castle escape.
- Complete the attack on the train and the associated cutscenes.
- Reach the point where Zelda’s spirit accompanies Link.
- Save after normal control returns.
- Preserve a separate pre-examination save if you want an opening retry point.
Before you move on
- The train examination is complete and Link has reached Hyrule Castle Town.
- Link has entered Hyrule Castle and completed the introductory ceremony.
- Zelda’s letter has been read and the castle escape has been completed.
- The train attack has occurred and Zelda’s spirit is now accompanying Link.
- A save exists after the opening story, with a separate pre-examination save preserved if desired.
Zelda's Spirit and the Spirit Flute: Possession, Control and Safety
After Chancellor Cole removes Zelda’s body, her spirit remains visible to Link and becomes an essential partner. Zelda cannot possess ordinary enemies at will; her main host is Phantom armor in the Tower of Spirits. To obtain a Phantom, collect three Tears of Light, strike the Phantom from behind with the powered sword, and tap the stunned armor so Zelda enters it. Phantom-Zelda can follow Link, receive a separate stylus-drawn route, activate switches, push doors, cross floor spikes and withstand fire-based obstacles that block Link. Use viewpoint switching and the Call command to keep both characters under control. The game’s flute is selected from the menu as Spirit Pipes. Slide the pipes horizontally to choose each note, then blow into the Nintendo DS microphone. Practice songs away from combat and use the manual’s microphone test if detection is unreliable.
Meet Zelda’s spirit and learn the two-character setup
Complete the opening visit to Hyrule Castle and follow the story until Chancellor Cole removes Zelda’s body. After the castle sequence, Zelda’s spirit travels with Link and can be directed separately during the escape. Move Link by touching a destination on the Touch Screen, then draw a short route around guards or obstacles when direct movement would expose him.
During the escape, use the character-control or viewpoint icon to switch attention between Link and Zelda. Zelda can move along her own path while Link distracts or avoids guards. The Call command makes Zelda return to Link and follow him, which is safer than leaving her on an unexamined route. This castle section teaches the same separation principle later used for Phantom-Zelda in the Tower of Spirits.
- Finish the castle scene in which Zelda’s spirit joins Link.
- Practice switching focus between Link and Zelda before leaving the castle.
- Use Call whenever Zelda is no longer needed at a remote position.
Collect Tears of Light before attempting possession
In the Tower of Spirits, Phantoms are invulnerable to Link’s ordinary sword attacks. Do not approach one openly. Stay out of its line of sight, use safe zones when available, and collect the three Tears of Light placed on the floor. The Tears temporarily empower Link’s sword; they are the prerequisite for stunning a Phantom.
Once all three Tears are collected, wait until a Phantom’s back is turned. Move behind it and strike its back with Link’s powered sword. A successful hit freezes or stuns the Phantom. Tap the stunned Phantom, and Zelda’s spirit will enter the armor. If the Phantom spots Link before the attack, retreat rather than trying to fight it head-on. Being hit returns Link to the entrance of the current floor and costs health.
- Collect all three Tears of Light on the current Phantom floor.
- Attack only from behind after the sword has been powered.
- Use line-of-sight breaks and safe zones if a Phantom detects Link.
Direct Phantom-Zelda with the stylus
After possession, Phantom-Zelda normally follows Link, but she can be sent independently. Touch the control point at the Phantom’s feet until it becomes active, then drag the stylus to draw the route. Lift the stylus to issue the path. Touch the control point again while she is moving to stop her. The Phantom follows the drawn line as long as obstacles do not block it, so use short routes around corners and stop her before an unchecked enemy or hazard.
Switch viewpoint to watch Phantom-Zelda when she is away from Link. This prevents accidental movement of the wrong character and lets you confirm that she reached a switch or target. Link should remain in a safe area while Zelda crosses the room. Do not send her through a long unexplored route merely because the destination is visible; inspect the map and divide the command into safe sections.
- Touch the Phantom’s route control before drawing a path.
- Use viewpoint switching to monitor Link and Phantom-Zelda separately.
- Stop the Phantom after each important switch, door or hazard crossing.
Use Phantom-Zelda for the Tower’s cooperation puzzles
The first possession puzzles demonstrate the main uses of the armor. At the large sealed door, position Link against one side, then draw Phantom-Zelda to the opposite side. When both characters are placed correctly, they push the door open together. If Link is not aligned with his half, tap the correct side of the door and reposition him before moving Zelda.
Phantom-Zelda can cross floor spikes that damage Link. In the early Tower route, send her across the spikes to the switch on the far side; the switch lowers the spikes or opens the next route for Link. She can also pass through fire-based obstacles that block Link, allowing her to stand between Link and a hazard, activate a remote mechanism, or create a safe route. These advantages do not remove the need to watch enemy attacks, moving hazards or the Phantom’s position.
A Phantom may also attack or distract other enemies. Use this to create an opening for Link, but do not assume every enemy will be harmless. If the puzzle requires a particular Phantom ability, look for another stunned Phantom and transfer Zelda into it when the game permits.
- For a two-sided door, place Link first and then route Zelda to the opposite side.
- Use Phantom-Zelda to cross spikes and activate switches beyond them.
- Transfer to another Phantom if the current armor lacks the ability needed for the room.
Call Zelda back and recover from failure
Use the Call icon when a remote task is complete or when Zelda’s route has become unsafe. Calling her back makes the Phantom return toward Link and resume following him. This is especially useful before entering a new room, crossing a narrow passage or dealing with an ordinary enemy near the route.
If Phantom-Zelda is struck or the possession attempt fails, move Link into a safe zone and clear nearby ordinary enemies before trying again. A Phantom hit sends Link back to the current floor’s entrance, so repeat the Tears-of-Light approach rather than rushing into the patrol’s path. If the Life Gauge is emptied, choose CONTINUE to retry the area when offered. Choose SAVE AND QUIT only when you are prepared to resume from the last saved position.
- Call Phantom-Zelda back before changing rooms or entering an unchecked hazard.
- If Link is returned to the floor entrance, repeat the stealth approach instead of attacking directly.
- Use CONTINUE after a defeat when you want to retry the current area immediately.
Open the Spirit Pipes and practice the Spirit Flute
When the story or a Lokomo teaches a song, open the menu and select Spirit Pipes. The instrument appears on the Touch Screen. Slide the pipes left or right until the required colored pipe and note are selected, then blow into the Nintendo DS microphone. For a multi-note song, continue sliding to the next pipe while maintaining the required rhythm and breath.
Practice in a safe area before attempting a song during a puzzle or combat sequence. The game’s Options menu includes a microphone test; use it if the DS is not registering breaths. Keep the microphone unobstructed and adjust the system’s distance from your face according to the test. Do not substitute random movement for the displayed melody: the song must be played in the shown note order and timing.
- Select Spirit Pipes from the menu rather than treating the instrument as a normal combat item.
- Slide horizontally to choose each note, then blow into the microphone.
- Run the microphone test if notes fail to register consistently.
- Practice songs before beginning a dangerous Tower puzzle or combat sequence.
Before you move on
- You can collect three Tears of Light, strike a Phantom from behind with the powered sword and tap it so Zelda takes control.
- You can switch viewpoint between Link and Phantom-Zelda, draw a separate route for the Phantom and stop it before a hazard.
- You can use Phantom-Zelda to push the opposite side of a large door and cross floor spikes to activate a remote switch.
- You can call Phantom-Zelda back to Link after a remote task.
- You can open Spirit Pipes, select notes by sliding the pipes and make the Nintendo DS microphone register a note.
- You know to use CONTINUE after a defeat when you want to retry the current area and to use a safe zone when a Phantom patrol detects Link.
Tower of Spirits — First Visit and the Game’s Central Threat
The first Tower of Spirits visit introduces Anjean, Malladus’s seal, Phantom enemies, and Zelda’s ability to possess Phantom armor. Reach the Tower through the tunnel behind Hyrule Castle, learn how purple safe zones hide Link from Phantoms, collect three Tears of Light, and strike the first Phantom from behind. Zelda then controls the armor, letting her cross spikes, stand on switches, block hazards, and help Link open the route to the third floor. Take the Forest Rail Map from its pedestal, use the blue warp to return to the lobby, and speak with Anjean again. The map restores the first major section of Spirit Tracks and grants access to the Spirit Train. There is no boss fight during this visit, but the Tower is not finished: later visits open higher floors, and the altar area becomes essential to obtaining the Compass of Light.
1. Prepare at Hyrule Castle and use the tunnel to reach the Tower
Before leaving Hyrule Castle, save through the game’s menu so you have a current file before the first Phantom section. If the back entrance is still locked, visit the guard-training room on the castle’s first floor, speak with the captain, and complete the sword tutorial. Return to the back entrance, defeat the Spinuts outside, and bomb the large wall near the top-center of the area to reveal the tunnel.
In the tunnel, defeat the Keese and Red ChuChu, then move the block onto the floor switch on the right side. Open the revealed chest for the Small Key and use it on the locked door. On the next floor, read the stone tablets before touching the four switches. Their clues give the order Right, Top, Bottom, Left. Use Bomb Flowers to clear the northern obstruction, defeat the Spinuts, strike the switches in that order, and climb to the third floor. Defeat the two Rats there, then follow the passage outside to the Tower of Spirits.
- Save before entering the Tower.
- Recruit’s Sword obtained and the sword tutorial completed.
- Tunnel switch order recorded as Right, Top, Bottom, Left.
- Two Rats defeated on the tunnel’s third floor.
2. Meet Anjean and retreat from the first Phantom
Enter the Tower and speak with Anjean in the lobby. She explains that the Spirit Tracks restrain Malladus and that the missing tracks threaten the seal. The rail maps inside the Tower must be recovered so the tracks can be restored and the temples reached. Anjean also explains that Zelda must accompany Link as a spirit because ordinary exploration of the Tower is impossible alone.
Go north from the lobby, climb the stairs, follow the rounded staircase, and enter the upper room. A Phantom appears immediately. Do not attack it or attempt to pass it. Run back through the doorway and return to Anjean. She explains that Link must collect three Tears of Light before he can stun a Phantom from behind.
When you return to the Phantom floor, note the purple glowing areas. These are safe zones: Phantoms cannot enter them, and Link is hidden while he remains inside. Use the dungeon map to watch the Phantom’s patrol and move between safe zones rather than crossing open floor at random.
- Anjean’s explanation of the Tower and Malladus completed.
- First Phantom encounter triggered.
- Link has returned to Anjean after retreating.
- Purple safe zones identified on the map.
3. Collect the three Tears of Light
Re-enter the Phantom room after Anjean’s instructions. Take the left-side route to the first Tear of Light, using the purple safe zones whenever the Phantom approaches. After collecting it, move through the protected route toward the top of the room and take the second Tear.
From the second Tear, go right to the sword switch. Strike it to create a temporary bridge. The bridge does not remain active for long, so move through the inner route immediately and cross to the final Tear on the right side. If the Phantom’s patrol makes the crossing unsafe, return to a safe zone and wait for it to move before activating the switch.
With all three Tears collected, Link’s sword is charged. Follow behind the Phantom instead of approaching its front. Strike its back once when you are close enough. A frontal attack will not stun it and can leave Link exposed to the Phantom’s sword. Zelda then enters the armor and takes control of the Phantom.
- First Tear collected from the left side.
- Second Tear collected from the upper section.
- Third Tear collected after activating the temporary bridge switch.
- Phantom struck from behind with the charged sword.
- Zelda has possessed the Phantom.
4. Use Phantom Zelda to open the central route
After Zelda takes control, tap her and draw a short route toward one side of the large central door. Then move Link to the opposite side and push the door while Zelda pushes from her side. Once the passage opens, climb the stairs to the next floor.
The Phantom can walk across spikes, so switch control to Zelda and draw a route over the spike field toward the switch beyond it. When she activates the switch, the spikes lower and Link can cross. Avoid giving Zelda unnecessarily long routes; short paths make it easier to correct her position if she stops at an obstacle.
Continue to the lower-right portion of the floor and defeat the two Spinuts. A locked passage has two floor switches. Place Phantom Zelda on one and Link on the other at the same time to open the door. If Zelda does not remain on her switch, cancel her route and draw a new path that ends directly on the panel.
- Central door opened with Link and Phantom Zelda working together.
- Spike field lowered by Phantom Zelda.
- Two Spinuts defeated in the lower-right area.
- Two-panel door opened with Link and Zelda standing on both switches.
5. Control the Rats and pass the guarded Phantom
After the two-switch door, keep Phantom Zelda close as you proceed. A group of Rats can surround her, and she will refuse to advance while they remain nearby. Defeat the Rats with Link’s sword. A small hole continues producing more Rats, so push the nearby block over the hole to stop the stream before trying to move Zelda onward.
A Phantom guards the upper-left route. Send Zelda across the spikes to the switch beyond the guard; this lowers the spikes so Link can follow. Next, use Zelda’s position to make the guarding Phantom face north. Switch back to Link, circle behind the guard, and strike its back with the charged sword. Move quickly into the safe zone after the hit, then take the stairs with Phantom Zelda.
If Link is detected, retreat into a safe zone instead of trying to outrun the Phantom across open ground. Reposition Zelda first, then wait for the guard to turn away before attempting the back attack again. There is no boss or mini-boss on this visit, so the guarded Phantom and the Rat room are the important failure points.
- Rats defeated around Phantom Zelda.
- Rat hole blocked with the nearby block.
- Spike switch beyond the upper-left Phantom activated.
- Guarding Phantom turned away and stunned from behind.
- Stairs to the third floor reached.
6. Take the Forest Rail Map and return to Anjean
On the third floor, Zelda leaves the Phantom’s armor and the Phantom disappears. Link’s charged-sword effect also ends, confirming that this section is complete. Continue up the stairs and take the Forest Rail Map from the central pedestal. A scene shows Spirit Tracks returning in the Forest Realm.
Use the blue warp near the map pedestal to return to the Tower lobby instead of retracing the completed floors. Speak with Anjean after arriving. She explains that the Lokomo use sacred instruments to restore the tracks and directs Link and Zelda toward the Forest Realm and its Lokomo sage. Anjean then grants access to the Spirit Train.
Save again after speaking with Anjean. Before leaving, mark the lobby, the rounded staircase, the first Phantom room, the spike-and-switch floor, and the blue warp on your map. These notes are useful when later rail maps open new Tower sections. The altar and deeper floors are not accessible during this first visit, so do not spend time searching for the Compass of Light now.
- Forest Rail Map taken from the third-floor pedestal.
- Spirit Tracks restored in the Forest Realm.
- Blue warp used to return to the lobby.
- Anjean spoken to after returning.
- Spirit Train made available.
- Next objective points toward the Forest Realm and its Lokomo sage.
Before you move on
- The Forest Rail Map is in Link’s collection and the Forest Realm tracks have visibly reappeared.
- Zelda has left the Phantom armor and Link no longer has the charged sword effect.
- The blue warp has returned Link to Anjean’s lobby.
- Anjean has been spoken to after the warp and the Spirit Train is available.
- The next objective is travel to the Forest Realm and its Lokomo sage.
- A save has been made after the Tower sequence, while an earlier pre-Tower save remains available for retrying the Phantom floors.
Restoring the Spirit Tracks: Overworld Strategy and Force Gems
Missing Spirit Tracks are restored by story events, Rail Maps, Lokomo songs and selected Force Gems. The required route advances through the Forest, Snow, Ocean and Fire regions before the Tower of Spirits opens the Sand Realm. Optional Force Gems create shortcuts, warp connections and side areas, but they are not needed for every temple route. Read the full Rail Map before departing, draw routes in sections, slow down near switches, and save at stations before difficult deliveries or hazardous train journeys. When a new route does not appear, finish the nearby dialogue or song, leave and re-enter the relevant area if necessary, then inspect the map again. The route to the Sand Realm is the major late-game checkpoint: it is created by the story after the Fire Temple and the subsequent Tower visit, not by completing optional deliveries.
1. Use the Rail Map as a route-planning tool
Open the Rail Map whenever you leave a station or receive a new map. Mark the intended destination, the last usable station before it, every junction, and any warp gate you have activated. The train follows the rail network; drawing a line does not make a missing section usable and does not override a junction's available branch.
Draw long journeys in readable sections. Before a fork, reduce speed and confirm which branch the train is approaching. If an enemy train, rock, boulder or animal blocks the line, use the cannon or whistle as appropriate, then continue only after the track is clear. Reverse or stop rather than committing to a branch that leads away from the objective. A safe station is a better recovery point than an ambitious uninterrupted route.
- Mark the destination and nearest safe station.
- Circle junctions, dead ends and warp gates.
- Leave room on the map for route notes about hazards and blocked branches.
2. Restore the Forest route and reach the Forest Temple
During the early Tower of Spirits visit, collect the Forest Rail Map on Floor 3. After returning to the tower lobby, speak with Anjean and use the train to leave the tower. The map restores the first usable Forest Realm connections and marks the Forest Temple. Travel to the Forest Sanctuary and complete the Lokomo music event there; the resulting tracks open the practical approach to the temple.
From the Forest Sanctuary, draw the route to the Forest Temple rather than assuming every nearby branch is active. Skulltulas may hang over the rails on the approach; use the train whistle to clear them. After completing the Forest Temple, follow the next story objective and inspect the map again. Do not spend this stage pursuing village deliveries unless you specifically want optional shortcuts.
- The Forest Rail Map has been collected from the Tower.
- The Forest Sanctuary song event is complete.
- The Forest Temple is marked and reachable on the Rail Map.
3. Cross the Snow Realm blizzard with Ferrus's directions
After the Forest Temple sequence, the story opens the Snow Realm route. At Anouki Village, speak with Honcho about the blizzard and then search the Snow Realm tracks for Ferrus. Stop beside him when you find him. Ferrus provides the correct route through the blizzard; copy that route onto your own map before driving toward the Snow Temple.
Follow Ferrus's marked path exactly. The blizzard makes nearby rails look deceptively similar, so do not improvise at a fork or rely on a direct line to the temple. If you lose the route, return to Ferrus and inspect the map again. Reaching the Snow Temple completes the required Snow progression; Force Gems earned from deliveries around Anouki Village, Wellspring Station or the Forest Realm are optional shortcuts at this point.
- Ferrus has shown the correct blizzard route.
- The copied route reaches the Snow Temple without crossing an unmarked branch.
- Optional Snow Realm deliveries are postponed unless you deliberately want them.
4. Open the Ocean Temple route from the Ocean Sanctuary
After the Snow Temple, continue the story until the Ocean Sanctuary sequence is available. Speak with Carben and read the letter he provides. It identifies three numbered locations; mark all three on your map before returning to the train. Follow those locations in the order indicated by the letter so the Ocean Realm route and its underwater approach become usable.
When the ocean-floor tracks open, draw a route toward the Ocean Temple in the eastern part of the region. Dark trains patrol the approach. If one appears ahead, take the longer track behind the temple instead of trying to force through it. Recheck the map as the patrols move and route around them. The Ocean Temple is the required destination; passenger errands and other Force Gem tasks that become available afterward can wait.
- Carben's letter has been read and its three locations are marked.
- The Ocean Sanctuary event has finished.
- The Ocean Temple approach is open and the dark-train detour is understood.
5. Restore the Fire Realm tracks through the sanctuary event
After clearing the Ocean Temple, follow the main story to the Fire Realm. Enter the Fire Sanctuary and complete the Lokomo duet. When the song succeeds, the tracks surrounding the Fire Temple appear. Exit the sanctuary, return to the train and inspect the newly restored network before attempting the temple approach.
In Goron Village, speak with the villagers and learn the Fire Temple gate requirement. On the approach, three flying enemies carry the keys. Face each one as it comes toward the train, sound the whistle with the required short-then-long pattern, and fire the cannon while it is stunned. Recover all three keys to open the gate. This is story progress, not an optional Force Gem task.
- The Fire Sanctuary duet has restored the Fire Temple tracks.
- The three gate keys have been recovered.
- The Fire Temple gate is open before you leave the Fire Realm.
6. Reach the Sand Realm after the Fire Temple Tower sequence
After completing the Fire Temple, return to the Tower of Spirits when the story directs you. Progress through the Tower and complete the required scenes, including the encounter with Byrne. Anjean then provides the story-required Force Gem that opens the northern Ocean Realm tracks leading to the Sand Realm. This is the critical Sand access trigger; do not search optional villages for a replacement if the route is not yet present.
Once the Sand Realm tracks appear, travel through the Ocean Realm connection to the Sand Sanctuary and speak with Rael. Complete the Lokomo song to restore the Sand Realm network. The resulting tracks lead to the desert trials and eventually the Sand Temple. Mark the sanctuary, every visible junction and any warp connection before beginning the desert route, because the narrow rails and hazards make blind redrawing costly.
- The post-Fire Temple Tower sequence is complete.
- Anjean has provided the story-required access to the Sand Realm.
- Rael's Sand Sanctuary song has restored the desert tracks.
- The Sand Temple route is visible before you begin the desert trials.
7. Treat optional Force Gems as shortcuts, not progression requirements
Many Force Gems come from transporting villagers, cargo, fish, iron, Mega Ice, Cuccos or other passengers. Their rewards can restore side rails, open warp gates, reach extra stations or create shortcuts between realms. Complete these tasks when you want convenience, but do not confuse them with the story events that open the temples. The story-critical rail triggers are tied to the Tower maps, sanctuary songs, Ferrus's directions, Carben's letter and the post-Fire Temple Tower sequence.
When a delivery becomes available, save at the departure station and inspect the destination route first. Protect cargo or passengers from attacks, avoid unnecessary detours and use a newly opened warp gate only after confirming both endpoints. If a reward does not appear, finish the recipient's dialogue and leave the area normally before checking the map again; do not assume the task failed solely because the new rail was not visible during the conversation.
- You know whether each new Force Gem route is required or optional.
- You save before difficult passenger or cargo deliveries.
- You inspect the Rail Map after each reward and record what changed.
Before you move on
- The Forest Rail Map was collected from the Tower and the Forest Temple was completed.
- Ferrus's blizzard route was used to reach and complete the Snow Temple.
- Carben's Ocean Sanctuary instructions were followed and the Ocean Temple was completed.
- The Fire Sanctuary song restored the Fire Temple network, the three gate keys were obtained, and the Fire Temple was completed.
- The post-Fire Temple Tower sequence was completed, Anjean opened the Sand Realm route, and Rael's song restored the desert tracks.
- The Sand Temple route is available without depending on optional passenger, cargo or collectible errands.
- A recent save exists at a safe station before beginning the next Tower sequence.
References for this chapter
- The Legend of Zelda: Spirit Tracks Instruction Booklet — Nintendo
- The Legend of Zelda: Spirit Tracks — Guide and Walkthrough — GameFAQs, by Dev
- The Legend of Zelda: Spirit Tracks — Guide and Walkthrough
- Spirit Tracks Walkthrough — The Fire Realm — Zelda Dungeon
- Spirit Tracks Walkthrough – The Sand Realm
Forest Temple: Entering the First Major Temple (puzzle focus)
After Gage and Link restore the Forest Realm tracks with the Song of Restoration, ride the Spirit Train north to the Forest Temple. Learn the Song of Healing outside the entrance, then clear the temple by using chestnuts to activate switches, acquiring the Whirlwind, removing poison fog, reflecting Mothula's Bubble, and converting Blastworms into movable explosives. Follow the marked Boss Key route to avoid Key Masters, activate the blue return portal, and defeat Stagnox by blowing away the poison covering its rear. Collect the Heart Container after the battle and return by portal before taking the train toward the Tower of Spirits.
Open the Forest Temple route and prepare outside
First complete Gage's Song of Restoration at the Forest Sanctuary. When the new Forest Realm tracks appear, return to the Spirit Train and draw a route north to the Forest Temple. Skulltulas can drop over the rails during the trip; hold the train whistle to scare them away before continuing.
At the temple entrance, walk north to the rocket-shaped musical statue. Tap it and play the three notes it displays, using the Spirit Flute. This summons the healing fairy and teaches the Song of Healing. The song can restore Link's health inside a dungeon, but its healing use is limited to once in this temple. Enter the temple after checking your hearts and saving your game if you have not done so recently.
- Gage's Song of Restoration has restored the Forest Realm tracks.
- The train has reached the Forest Temple station.
- The Song of Healing has been learned outside the dungeon.
Cross the first floor and obtain the Whirlwind
On Floor 1, the door directly ahead is locked, so take the route around the room. Find the two chestnuts growing from the ground, lift one, and carry it to the right side of the room. Stand beside the gap and throw the chestnut at the purple switch across it. The bridge extends; cross it and continue to the southeast battle room.
The door closes and three enemies appear: two yellow blobs and a Green Spinut. Defeat all three to reopen the doors and make the 100-rupee chest appear. Then climb the stairs to Floor 2.
Avoid the poison gas on Floor 2 and travel to the northeast corner. Four Vengas appear in the enclosed room. Defeat them with sword strikes while staying clear of the poison clouds they leave behind. Open the chest that appears to obtain the Whirlwind. Equip it from the item menu or use a shoulder button, aim with the stylus, and blow into the Nintendo DS microphone. The gust clears poison fog, stuns certain enemies, turns wind devices, activates switches, and moves objects.
- The first-floor battle has been cleared.
- The Whirlwind has been collected from the northeast room on Floor 2.
- You can aim and activate the Whirlwind reliably.
Use the Whirlwind to reach the first Small Key
Use the Whirlwind on the nearby wind device to open the route to the left. Clear the poison fog blocking the passage. In the southeast portion of Floor 2, remove the fog around the optional chest if you want the treasure, then return toward the upper-left route and clear the remaining fog.
Use the Whirlwind to turn the key across the gap and send it to a ledge Link can reach. Walk around and collect the Small Key. Step on the nearby floor switch to open the door, then return toward the temple entrance on Floor 1.
Before using the key, clear the enemies in the route if they are blocking your return. Unlock the central door and enter the lower-left battle room. Several Bubbles appear. Blow the fog away from each Bubble with the Whirlwind, then strike it with the sword while it is exposed. Once the room is clear, climb the stairs.
- The first Small Key has been blown across the gap and collected.
- The central locked door has been opened.
- The Bubbles have been exposed with the Whirlwind before sword attacks.
Get the second Small Key and defeat Mothula
On Floor 3, defeat the Vengas and climb the stairs on the left. Find the chestnut beside the gap, stand below it, and use the Whirlwind to blow it upward into the purple switch. The revealed chest contains the second Small Key. Return to Floor 2 and use it on the locked door near the bottom of the room.
This begins the Mothula battle. Do not blow the Whirlwind directly at Mothula while it is not attacking, because the gust can be reflected back and leave Link vulnerable. Wait until Mothula launches a Bubble toward Link. Aim the Whirlwind at the incoming Bubble and send it back into Mothula. The impact stuns the mini-boss; run in and slash it with the sword. Repeat the Bubble counter and sword attack until Mothula is defeated, then climb the stairs that open.
- The second Small Key has been collected from the Floor 3 chest.
- Mothula has been stunned with a reflected Bubble.
- The stairs to the upper floor are open.
Break the Blastworm barriers and open the Boss Key room
On Floor 3, go to the southern route and find the Blastworm. Strike it once with the sword to make it curl into a spiked explosive. Aim the Whirlwind at the curled Blastworm and blow it toward the blocks on the right. The explosion clears the barrier.
Continue to the southeast portion of the floor, clear the poison gas, and step on the revealed switch. The chest there is optional treasure. Activate the nearby switch to open the route toward the lower-left area.
In that area, curl both Blastworms with sword strikes. Use the Whirlwind to send them across the gap and destroy the blocks. Then use another curled Blastworm to hit the purple switch. The door in the upper-right opens, giving access to the Boss Key.
- The first Blastworm barrier has been destroyed.
- The lower-left Blastworm puzzle has been solved.
- The Boss Key room has opened.
Carry the Boss Key safely and activate the return portal
Before picking up the Boss Key, examine the map displayed beside it. The map shows the route Link must follow while carrying the key. Pick up the Boss Key and stay on that marked route, avoiding the skull-marked danger areas. If Link leaves the permitted path, Key Masters appear, take the key, and return it to its original location.
Carry the key to the large lock and throw it into the lock to open the boss route. Climb to the next floor. Break the nearby pots to restore hearts, then touch the stone tablet to activate the blue warp portal. This portal links the boss preparation room with the temple entrance, so use it if you need to recover or save before the fight. Enter the northern door only when Link is ready.
- The Boss Key has been carried along the route shown on the map.
- The large lock has been opened.
- The blue entrance portal has been activated.
Defeat Stagnox, Armored Colossus
During the first phase, run around the outer edge of the circular arena and keep away from Stagnox's horn and front legs. When it turns and makes a slow horn thrust, move aside so the charge misses. Run behind Stagnox, aim the Whirlwind at the poison gas covering its purple rear, and blow the gas away. The gust stuns Stagnox and exposes its weak point. Slash the purple rear repeatedly, then retreat and repeat the pattern after it recovers.
In the second phase, Stagnox flies around the arena and drops three Blastworms. Strike the Blastworms so they curl into spiked explosives. Leave one in position while watching Stagnox's flight path. When Stagnox dives toward Link, stand so the curled Blastworm is between Link and the boss, then use the Whirlwind to push the explosive into Stagnox. The impact stuns it and exposes the purple rear again. Run behind it and attack with the sword. Repeat the Blastworm counter until Stagnox is defeated.
- Stagnox's poison-covered rear has been exposed with the Whirlwind.
- A curled Blastworm has been pushed into Stagnox during the flying phase.
- The Heart Container chest appears after the boss fight.
Collect the Heart Container and continue the story
Open the large chest in the boss room and collect the Heart Container. Step into the blue portal to return to the temple entrance instead of walking back through the dungeon. Board the Spirit Train and set a route toward the Tower of Spirits. After Stagnox's defeat, the Forest Realm's source is restored and the next Tower objective becomes available. Save again after leaving the temple so the completed dungeon state is recorded.
- The Heart Container has been collected.
- The blue portal has returned Link to the temple entrance.
- The Forest Realm source has been restored and the Tower of Spirits objective is available.
Before you move on
- The Whirlwind is in Link's inventory and the Forest Temple Heart Container has been collected.
- Stagnox is defeated, the Forest Realm source-restoration scene has played, and the blue exit portal has been used.
- The train can leave the Forest Temple and travel toward the Tower of Spirits for the next main-story objective.
Snow Temple: Cold Puzzles and Mobility Challenges
Reach the Snow Temple by finding Ferrus near Wellspring Station and copying his safe route through the blizzard. Inside, slippery floors make every movement continue after the stylus is lifted, so use walls and corners as stopping points. The temple’s required item is the Boomerang, found in Basement 1 after the Whirlwind-and-boat section. Use it with fire and ice torches to melt obstacles, freeze water into temporary bridges, stun enemies and solve the bell and torch puzzles. Zelda remains with Link during this dungeon, but the temple does not require Phantom possession or a Spirit Flute sequence. Before Fraaz, activate the blue entrance warp and refill hearts from pots. Fraaz alternates fire and ice forms, then splits into two elemental halves. Counter each form with the opposite element, using the remains of his attacks after he destroys the torches. Defeat him, collect the Heart Container and leave through the blue portal to restore the Snow Realm’s story-critical tracks.
Find Ferrus and cross the blizzard
After the Snow Realm story has opened the route toward the temple, travel east from Anouki Village through the available Snow Realm tracks. If the blizzard pushes the train back, return to Anouki Village and follow the advice to look for Ferrus rather than repeatedly attempting the storm. Continue to Wellspring Station and enter the hut beside the station. The map inside marks three possible locations for Ferrus; copy those locations onto the Rail Map, then visit them one at a time until you find the photographer beside the tracks.
Stop the train in front of Ferrus and speak with him. He gives Link a dusty map. Blow into the Nintendo DS microphone to clear the dust and reveal the safe route. Copy that route onto the Rail Map, then draw the train’s path through the blizzard exactly as shown. Snowmen can throw snowballs at the train, so use the cannon to shoot the projectiles and their bodies when necessary. Follow the safe route to the Snow Temple station.
- Check the hut at Wellspring Station.
- Find Ferrus at one of the marked track locations.
- Clear Ferrus’s map with the microphone and copy the route.
- Use the cannon against snowmen while crossing the storm.
Enter the temple and open the first route
At the entrance, break the pots for possible heart refills, then go north into the main room. The ice causes Link to slide after movement stops. Use short stylus strokes and aim toward walls, corners or clear edges where Link can safely come to rest. Avoid trying to make sharp corrections in the middle of a slide.
Defeat the Keese and approach the bell on the movable block. Push the block north into its floor slot, read the sign behind it, and strike the bell twice with the sword. The southeast door opens. In the next room, push the movable block right, down, left, up, right and up so it forms a platform. Cross it from the stairs and continue south toward the Octives.
- Use short movements on ice.
- Push the first bell into its marked slot.
- Strike the first bell twice.
- Move the platform block through the required route.
Use the Whirlwind boats and obtain the Boomerang
When an Octive launches a bomb toward the crystal switch, use the Whirlwind to deflect the bomb into the switch. Cross the bridge and descend to Basement 1. Push the first block into the water and stand on it. Use the Whirlwind to propel the floating block across the water and activate the windmill. Watch for Octive bombs and blow them back toward the enemies when you need to clear a path.
Push the next block into the water and ride it through the room. Continue north, then go west into the room where the door closes for a Keese fight. Stun the Keese with the Whirlwind and finish them with the sword. The large chest contains the Boomerang. Return east and draw one Boomerang path that strikes both crystal switches across the gap; the bridge appears when both are activated.
- Deflect an Octive bomb into the first crystal switch.
- Use the Whirlwind to propel the floating blocks.
- Defeat the Keese in the closed room.
- Collect the Boomerang from the large chest.
Complete the bell, torch and ice-bridge puzzles
Use the Boomerang on the Ice Keese and crystal switches in the northeast section. Push the second bell down and left into the main room, then move it up, left, down, right, down, left and south into its slot. Use the Boomerang to strike the center bell once, the other bell twice and the center bell once again. This opens the southwest route.
In the torch room, melt the snow covering the floor markings with the Boomerang. Light the four torches in this order: northeast, southeast, northwest, southwest. Break the glass plants with the sword and continue. In the next water section, carry the ice element with the Boomerang to create a temporary ice bridge. Move quickly because the ice is slippery and disappears. Use the bridge to reach the Small Key and unlock the nearby door.
The next room contains Octoroks with icy shells. Send the Boomerang through the fire torch and into them to melt the shells, then defeat the exposed enemies. Melt the ice blocking the windmill, create an ice bridge to it and activate it with the Whirlwind. Continue through the northeast rooms, making short ice bridges from one torch to the next. Use the Boomerang to defeat Octives and reveal the route forward.
- Use the Boomerang to complete the second bell pattern.
- Light the four torches northeast, southeast, northwest, southwest.
- Collect the Small Key across the temporary ice bridge.
- Melt the Octoroks’ shells with fire.
- Activate the windmill with the Whirlwind.
Reach the Boss Key and activate the recovery warp
Follow the upper route and use the signs and floor markings to identify the final torch sequence. In the large torch room, make one efficient Boomerang throw through the listed torches: ice torch, upper-middle torch, upper-right torch, lower-middle torch, fire torch, upper-left torch, lower-left torch and lower-right torch. The door opens when the torches remain lit in that order.
Enter the White Wolfos room and defeat all four enemies with sword strikes or a spin attack. In the next room, step on the floor switch and use the Whirlwind to dislodge the Boss Key. Carry it across the bridge to the large lock. Before going upstairs, use the Boomerang to break reachable pots for hearts and read the nearby inscription to create the blue warp point to the entrance. This is the safest recovery point before Fraaz.
- Solve the final torch sequence in one efficient throw.
- Defeat all four White Wolfos.
- Use the Whirlwind to obtain the Boss Key.
- Unlock the boss door.
- Activate the blue entrance warp and refill hearts.
Defeat Fraaz, Master of Icy Fire
Enter with the Boomerang selected. Fraaz’s current element is shown by his color: blue indicates ice and red indicates fire. Keep moving to avoid his ice balls or fireballs. If Fraaz is blue, route the Boomerang through the fire torch before it hits him. If Fraaz is red, route it through the ice torch. The opposite element shrinks and stuns him, giving Link time to slash with the sword. Repeat until Fraaz splits.
The two smaller Fraaz forms are one fire and one ice. Use a single Boomerang route that passes through the ice torch and hits the fire form, then passes through the fire torch and hits the ice form, or reverse the order. They continue attacking while you aim, so stay mobile and make the throw promptly. Both halves must be hit before they can recover and reunite.
After recombining, Fraaz destroys the torches. Do not wait for them to return. Instead, use the fire and ice remnants left by his attacks on the floor as temporary elemental sources. In later split phases, use those remnants to strike the opposite-colored half. When Fraaz recombines for the final phase, repeat the opposite-element counter and sword attack; later forms may require multiple hits from the same elemental source before he becomes vulnerable. If Link is defeated, reload the most recent save or use the blue warp before the boss to restore hearts and retry without replaying the entire temple.
- Counter blue Fraaz with fire and red Fraaz with ice.
- Slash only after the opposite element stuns him.
- Hit both split forms with the correct elemental chain.
- Use the remnants of Fraaz’s attacks after the torches are destroyed.
- Collect the Heart Container after victory.
Before you move on
- Ferrus’s blizzard route has been used to reach the Snow Temple.
- The Boomerang has been collected from the Basement 1 chest.
- The Boss Key has opened the boss door and the blue entrance warp is active.
- Fraaz, Master of Icy Fire, is defeated.
- The Heart Container has been collected.
- The post-boss scene has completed and the Snow Realm tracks have been restored or visibly expanded on the Rail Map.
- A save has been made after leaving the temple or returning to the overworld.
References for this chapter
Ocean Realm & Ocean Temple: Water Routing and Hidden Tracks
After Carben reaches the Ocean Sanctuary, play his blue, orange, purple Lokomo song to restore the Ocean Realm tracks. Use his letter to visit the three marked locations in numerical order and sound the train whistle near each red orb. The third orb raises a giant fish statue, allowing the Spirit Train to descend to the underwater rail network. Reach the Ocean Temple while avoiding the pursuing Dark Trains, then clear the dungeon with the Boomerang and newly acquired Whip. The temple’s main puzzles use switch order, moving platforms, boulder routing, Whip swings, fish-statue swords and sword-placement memory. Defeat Snapper to obtain the Whip, defeat Phytops by removing the covering from its eye with thorns, and strike the exposed eye with Link’s sword. The victory restores additional Spirit Tracks and a route toward the Tower of Spirits. Zelda possession is not needed for this chapter’s required puzzles. Northern desert tracks and later Ocean Realm Force Gems are optional or unlocked by later story events, so they are not prerequisites for the Ocean Temple.
1. Restore the Ocean Realm tracks at the Ocean Sanctuary
After the preceding story events place Carben at the Ocean Sanctuary, enter the inner sanctuary and speak with him. Practice the Lokomo song, then perform it properly with the Spirit Flute. The required note sequence is blue, orange, purple. The melody skips the yellow note between orange and purple, so move directly from orange to purple when Carben’s performance reaches that part. Do not play ahead of Carben’s notes.
When the song succeeds, the missing Ocean Realm tracks are restored. Carben gives you a letter showing three locations marked with numbers. Open the letter and copy those numbers onto the Rail Map before leaving. The letter is the progression clue for opening the underwater route, not an optional hint.
- The Ocean Lokomo song has restored the Ocean Realm tracks.
- Carben’s letter has been opened and the three numbered locations are marked on the Rail Map.
- A shield is available before entering the temple. A shield is strongly recommended for the early arrow-trap and moving-platform rooms, but it is not a story prerequisite.
2. Activate the three numbered orbs in order
Draw a train route that passes the marked locations in the exact order shown in Carben’s letter: number 1, then number 2, then number 3. The first location is on the eastern side of the newly restored Ocean Realm tracks. The second is on the upper island area. The third is not on the nearby western island; it is at the junction southwest of the second location.
As the train passes each location, sound the whistle when the nearby red orb is within range. Keep sounding it until the orb turns blue. If the sequence is performed incorrectly, the orbs reset, so return to the first numbered location and repeat the entire order. When the third orb activates, a large fish statue rises from the water near the junction.
- The first, second and third orbs have been activated in Carben’s order.
- All three orbs remain blue at the same time.
- The giant fish statue has risen beside the underwater junction.
3. Enter the underwater tracks and reach the Ocean Temple
Ride into the open mouth of the giant fish statue. The Spirit Train descends to the ocean floor and enters a separate underwater rail area. Set a course for the Ocean Temple, the major building on the eastern side of the underwater map.
Underwater Octoroks can fire ink that obscures the view. Keep moving and fire the torpedo launcher when an enemy blocks the line. Near the temple, an armored Dark Train begins pursuing you and can turn around to continue the chase. Use the rail junctions to loop away from it rather than stopping on a short dead-end branch. Cannon fire can slow a train that is directly obstructing your path. A second enemy train may appear near the approach, so maintain speed and enter the Ocean Temple station as soon as the route is clear.
- The Spirit Train has reached the Ocean Temple station.
- The underwater route is marked on the Rail Map if you want a reliable return path.
- Health is restored and a shield is equipped before entering the dungeon.
4. Solve the opening floors and reach Snapper
From the station, go north and take the western branch. Read the stone tablets and defeat the Electric ChuChus safely. While an Electric ChuChu is charged, do not slash it with the sword; stun it with the Boomerang or shield-bash it, then attack after the electricity fades.
Continue north past the arrow traps and climb to the second floor. Ride the moving platform across the first gap while keeping Link on its northern side so the wall arrows do not knock him off. At the next platform, use the Boomerang on the four switches in the order given by the tablets: third, first, second, fourth. The switches are arranged like this: third at the top, first on the left, second on the right and fourth at the bottom.
Enter the opened eastern hallway. Do not touch the nearby crystal switch directly. Stand near the entrance and curve the Boomerang around to strike it from a distance. This changes the boulder drop into the safe configuration. Return toward the entrance, take the newly opened eastern branch on the first floor, climb through the second floor and reach the third-floor room where Snapper waits.
- The four moving-platform switches were struck in the order third, first, second, fourth.
- The crystal switch was activated from a safe distance with the Boomerang.
- Snapper’s room has been reached and nearby pots have been used for health if needed.
5. Defeat Snapper and obtain the Whip
Snapper immediately catches Link with his Whip and pulls him toward his body. Do not rush toward him while free. When Snapper begins pulling Link in for a punch, slash with the sword just before Link reaches Snapper. This interrupts the attack and releases Link. Retreat while Snapper swings the Whip, then repeat the counter when he catches Link again. The Boomerang can also stun him, creating a safer opening.
After Snapper disappears, open the large chest to obtain the Whip. Return toward the temple entrance and use the Whip on the wooden beams to cross the first major gaps. Pull the tongue or handle from the fish statue when the route requires it. On the fourth floor, read the tablet about three handles and pull the handle farthest from Link, the rightmost handle in the three-handle room. This creates the bridge leading back down to the third floor.
- Snapper has been defeated.
- The Whip is in Link’s inventory.
- The farthest handle has been pulled and the bridge back toward the third floor is available.
6. Use the Whip to reach the upper floors
On the lower third floor, go west to the two fish statues. Use the Whip to pull the sword from the statue that has one, then tap the other statue to place the sword into its mouth. A chest appears; open it to obtain the Small Key. Cross the nearby gaps with the Whip, return to the locked route and use the key to reach the fourth floor.
Cross the three consecutive beams by tapping the next beam before Link’s swing ends. When you meet Helmet ChuChus, use the Whip to remove their helmets, then strike the exposed enemies or throw the helmets back at them. Continue to the fifth floor, defeat the Snapper enemies and pull the propeller handle so Link can ride it to the next section.
The upper floors contain sword statues, Blue ChuChus and a memory puzzle. Blue ChuChus cannot be safely handled with the ordinary Whip or Boomerang; pull a sword from a fish statue and use the sword attached to the Whip to defeat them. On the sixth floor, note which fish statues contain swords. Return to the fifth floor and reproduce that exact arrangement in the corresponding group of statues. When the arrangement is correct, the route to the Small Key and locked door opens.
Carry the Small Key through the opened route, climb to the sixth floor and pull the propeller handle. Ride it to the moving platform, activate the bridge switch and collect the Boss Key. Defeat or avoid the Floor Masters while reaching the large lock, then climb to the seventh floor. Clear the vines, activate the blue warp portal to the entrance and save before taking the stairs to Phytops.
- The Small Key from the fish-statue sword puzzle has been used.
- The sword arrangement on the fifth floor matches the arrangement recorded on the sixth floor.
- The Boss Key has been collected.
- The blue warp portal is active and the game has been saved before Phytops.
7. Defeat Phytops, Barbed Menace
At the start of the boss battle, use the Whip to pull a thorn from one of Phytops’s tentacles and throw it at the boss. The first two successful thorn hits remove the purple covering from the eye; they do not yet create the sword opening. After the covering has been cleared, pull another thorn and throw it directly into the exposed eye. Phytops falls, allowing Link to run in and slash the eye with the sword.
Repeat the same sequence during later cycles: remove the covering when it returns, then land a thorn on the exposed eye before attacking with the sword. Phytops fires dark gunk and later adds more tentacle swings, so stay near the edges of the arena without trapping Link against a wall. Pull thorns only when a tentacle is safely reachable, and prioritize avoiding the sweeping attacks over forcing a grab.
Phytops may rotate, changing which tentacle is easiest to reach. Adjust Link’s position and wait for the tentacle to extend. If Link is defeated, reload the save made before the boss stairs; the dungeon route does not need to be repeated. After the final sword attacks, Phytops is defeated and a blue Force Gem appears. Collect it, take the Heart Container from the large chest and enter the blue portal to return to the temple entrance.
- Phytops’s covering has been cleared with the first two thorn hits.
- A third thorn has struck the exposed eye and Link has attacked the stunned boss with the sword.
- Phytops is defeated.
- The blue Force Gem and Heart Container have been collected.
- The portal has returned Link to the Ocean Temple entrance.
8. Confirm the required Ocean Realm progress
Leave the Ocean Temple by train. The victory restores more Spirit Tracks and repairs a route leading from the Ocean Temple toward the Tower of Spirits. Follow the next story objective at the Tower rather than searching the northern desert immediately.
The northern Ocean Realm desert tracks are not required for entering or clearing the Ocean Temple. Later story progress and additional Force Gems open routes to desert stations and optional Ocean Realm branches. When those tracks become available, use the Rail Map and the intervening stations or warp gates to break long trips into manageable segments; none of those optional routes should be treated as a prerequisite for this chapter. Zelda possession is also not part of the Ocean Temple’s required puzzles. The essential dungeon tools are the Boomerang, shield, sword and Whip.
- The route toward the Tower of Spirits is restored on the Rail Map.
- The Ocean Temple has been cleared without confusing later desert routes with required Ocean Realm progress.
- The next objective is the Tower of Spirits sequence unlocked by Phytops’s defeat.
Before you move on
- Carben’s Ocean Lokomo song has restored the Ocean Realm tracks.
- The three numbered orb locations were activated in the correct order and the giant fish route was opened.
- The underwater rail route was completed and the Ocean Temple was reached.
- Snapper was defeated and the Whip was obtained.
- The Small Key and Boss Key routes were completed, including the sword-placement puzzle.
- Phytops was defeated using the two-covering-thorns and exposed-eye sequence.
- The blue Force Gem and Heart Container were collected.
- A restored Spirit Track route toward the Tower of Spirits is visible on the Rail Map.
Fire Realm & Fire Temple: Timing, Heat Hazards and Resistance
After restoring the Fire Realm tracks and completing the Fire Restoration Song, return to Goron Village and learn that three monsters have stolen the keys sealing the Fire Temple. Chase each monster by approaching head-on, stun it with a short whistle followed by a long whistle, and use the train cannon to recover its key. Inside the temple, record trapdoor and eye-switch clues on the map, collect two Small Keys, defeat Heatoise to obtain the Bow and Arrows, then use redirected arrows, lava platforms, mine carts and timed switches to reach the Big Key. Cragma is defeated with the Bow during his lower-body and mine-cart phases, followed by sword strikes against his exposed head. The victory restores the Fire Realm route toward the Tower of Spirits.
1. Restore the Fire Realm tracks and prepare the train route
Travel to the Fire Sanctuary after opening the Fire Realm. In the sanctuary, solve the statue clue and stand between the two indicated statues before playing the Song of Light. Then speak with Embrose and reproduce the Fire Restoration Song shown during his performance. The newly revealed rails allow you to return to Goron Village and approach the Fire Temple area.
Before leaving Goron Village, speak with the villagers. One explains that the key-holding monsters dislike a particular whistle pattern, while another advises meeting them head-on rather than chasing from behind. These clues are required for the train encounter. Confirm that the train cannon is usable, and leave room in your route for repeated passes around the Fire Temple tracks.
- Complete the Fire Restoration Song with Embrose.
- Speak with the Goron villagers for the whistle and approach clues.
- Confirm that the train cannon is ready before entering the Fire Temple area.
2. Recover the three keys from the train monsters
When a flying monster carrying a key appears on the tracks, draw a route that meets it head-on. Do not approach from behind, because it will flee. As the monster circles the train, use the whistle once with a short blast and immediately follow it with a long blast. The correct sequence stuns the creature.
While it is stunned, fire the train cannon at it to make it drop its key. Repeat the process for all three monsters. The creatures continue to harass the train after their keys are recovered, so use another short-then-long whistle sequence to create space when necessary. Once all three keys are secured, the locks on the Fire Temple open. The monsters cannot be permanently removed from the route, so do not waste time trying to destroy them after the keys are collected.
- Approach each monster head-on.
- Use a short whistle followed by a long whistle.
- Hit each stunned monster with the train cannon and collect all three keys.
3. Mark the Fire Temple’s trapdoors and obtain the first Small Key
Enter the Fire Temple and follow the only open route toward the left side of the first floor. Defeat the Fire Keese, then continue through the room containing spikes and rotating flames. Move between safe spaces rather than crossing the entire room in one attempt. In the western room, defeat the three Stalfos; bombs are effective, but the sword also works by knocking each skeleton down before striking its exposed skull.
Go through the southern exit into the trapdoor room. A sign explains that the trapdoor pattern is mirrored. Walk through the room carefully and mark each wooden trapdoor on the map, then transfer the pattern to the matching side. Take the staircase at the far side to Floor 2, enter the mine cart and ride it to the chest containing a Small Key. Return by cart and stairs to the first floor.
- Defeat the three Stalfos in the western room.
- Record the trapdoor pattern before crossing the mirrored room.
- Collect the first Small Key from the Floor 2 mine-cart route.
4. Cross the fire barrier and collect the second Small Key
Back on the first floor, stand on the ledge beside the crystal switch and strike it with the Boomerang. A round platform drops from above. Pick it up, carry it to the nearby fire spout, and throw it onto the spout so you can cross the gap.
Use the movable block as a shield against the fire jet. Pull it down twice, push it right once, then push it upward twice. Stand on its left side and push it through the flames. Continue through the mirrored trapdoor room, using the safe spaces you marked earlier, and take the staircase to Floor 2.
Ride the mine cart and strike the track switches with your sword at the appropriate moments so the cart avoids the pit and reaches the chest with the second Small Key. Return to the first floor. Use both keys on the two locked doors, stand between the exposed crystal switches, and hit them rapidly with the Boomerang. This lowers the central gate and opens the route to the mini-boss.
- Use the round platform to cross the first lava gap.
- Move the block through the fire jet in the correct sequence.
- Collect the second Small Key and open both first-floor locked doors.
5. Defeat Heatoise and use the Bow to open the lower temple
In the mini-boss room, wait for Heatoise to retract into its shell and roll toward Link. Position yourself so it collides with one of the electrified Winders circling the room. The shock stuns Heatoise; move in and slash its exposed head. Repeat the lure-and-strike pattern until it is defeated. The chest that appears contains the Bow and Arrows.
Use the new Bow immediately on the eye switch along the northern wall to create a bridge. In the following rooms, shoot arrow-launchers so they redirect arrows into eye switches. Rotate the arrow-launchers with the sword or Boomerang, then place them on the indicated platforms before firing. The resulting bridges lead back across the first floor and down to Basement 1.
The Fire Temple’s required route does not depend on Zelda possession. Keep Zelda out of the flame and lava puzzles rather than sending her through them. If a room becomes unsafe, clear it with Link’s weapons and use the temple’s normal route; there is no need to force a Phantom maneuver here.
- Defeat Heatoise by making it collide with an electrified Winder.
- Collect the Bow and Arrows.
- Use redirected arrows to activate the eye switches and reach Basement 1.
6. Solve the basement arrow and lava-platform puzzles
In Basement 2, defeat the four Stalfos with arrows from safe ground. If your ammunition is low, destroy the replenishing plant. Shoot the arrow-launcher on the left so it redirects an arrow into the switch above, temporarily disabling the fire jets. Cross the beams, then ride the floating platforms across the lava pool. Use the Whip on the high beams when the route requires it; the Whip is an earlier item, not the Fire Temple’s dungeon reward.
In the next basement section, defeat the two Heatoises with arrows and read all four slates. They reveal the firing order for the four eye switches used later. Mark the order on the map. Move the arrow-launchers and the round platforms onto the fire spouts so their arrows can reach both eye switches within the short activation window. Open the resulting chest for the next Small Key.
Return to Basement 1 and use that key on the western door. Ride the circular mine-cart track and strike the four eye switches in this order: second from the left, first from the left, far right, then third from the left. The track changes and leads to the staircase for Basement 3.
- Use arrows to defeat the basement Stalfos and Heatoises.
- Record the four-slate eye-switch order.
- Fire the two eye switches within the same timed sequence.
- Use the order second, first, far right, third on the circular mine-cart route.
7. Carry the Big Key by mine cart and activate the boss warp
In Basement 3, read the wall map and mark the switches that must be hit from the mine cart. Use a bomb on the large boulder to reveal a round platform, place it on the nearby fire spout, and ride it to the cart. During the ride, hit the marked switches; the initial route uses the first and third switches according to the room’s map clue.
The cart leaves Link beside the Big Key. Before moving it, explore the nearby lower route with the Whip if you want the optional treasure chest. Then use the Whirlwind to blow the Big Key into the adjacent cart. Board the upper cart and equip the Bow. Hit the first two required switches and then the distant fourth switch with an arrow. If the switches are activated correctly, Link and the Big Key arrive together at the locked door.
Use the Big Key on the boss door and descend to Basement 4. Read the sign to create the warp back to the entrance. Activate this warp before entering Cragma’s room; it provides the fastest recovery route if you need to restock or retry.
- Mark the Basement 3 cart switches before boarding.
- Move the Big Key into the second cart with the Whirlwind.
- Open the boss door and activate the Basement 4 entrance warp.
8. Defeat Cragma and confirm the Fire Realm objective
Cragma begins by raising a fist and smashing the ground. Run to either side of the impact, and fire an arrow at the glowing lower-body section exposed while the fist is raised. After taking the hit, Cragma brings both hands together and pounds the ground, causing a large boulder to fall onto the platform.
Lead Cragma’s fist into the boulder so it breaks and reveals a round platform. Pick up the platform and throw it onto either fire spout at the upper-right side of the arena. Use it to reach the mine cart. During the cart ride, shoot the glowing yellow sections on Cragma’s body as they appear. Missing too many targets sends Link back to the lower platform, so conserve arrows and wait for clear shots.
When the cart reaches the upper route, shoot Cragma’s eye. He falls and exposes the weak point on his head. Run in and strike the head with the sword, then retreat and repeat the lower-body, cart, eye and sword sequence until he is defeated. Collect the Heart Container after the battle. Leave the temple and take the newly restored rail route toward the Tower of Spirits.
- Shoot Cragma’s glowing lower-body target during the fist attack.
- Use the revealed platform to reach the mine cart.
- Shoot the body targets, then the eye, and slash the exposed head.
- Collect the Heart Container and verify that the Fire Realm rail route toward the Tower is restored.
Before you move on
- The three Fire Temple keys were recovered from the train monsters.
- Heatoise was defeated and the Bow and Arrows were collected.
- The Big Key was carried by mine cart to the boss door.
- Cragma was defeated and the Heart Container was collected.
- The post-boss route toward the restored Tower of Spirits is available on the train map.
Sand Realm & Sand Temple: Bow of Light and Desert Tracks
Enter the Sand Realm through the Ocean Realm and use the giant statues' lines of sight to locate the hidden entrance beneath the Sand Sanctuary. Meet Rael, perform the Sand Lokomo Song, and restore the tracks leading to the temple. The route then requires three trials: defeat the enhanced Rocktite in the cave, solve the short reverse-and-turn rail maze in the Forgotten Tunnels, and destroy the Sand Temple's exterior cannons. Inside the Sand Temple, obtain the Sand Wand and use it to raise temporary sand walls, stop rolling hazards, cross quicksand, stun Gerunes and Ergtoroks, and manipulate boulders. Defeat Skeldritch by returning his boulders with the temple catapults, then collect the Heart Container and the Bow of Light. The new bow opens the exit route. After the return scene, Anjean gives Link the Lokomo Sword and the story sends the party back toward the Tower of Spirits. The desert tracks are restored before the temple trials by Rael's song; do not wait for a nonexistent post-temple Force Gem.
1. Reach the Sand Sanctuary and reveal Rael's chamber
Select the Ocean Realm on the rail map, then draw a route into the desert and toward the dead-end track near the center of the Sand Realm. Sand Gyorgs can attack from beneath the ground. Blow the train whistle to make them surface, then hit each exposed creature with the cannon rather than stopping beside it.
The large statues around the desert point in different directions. Mark each gaze on the rail map. Return to the Sand Sanctuary and reproduce the same layout on its miniature map. The useful intersection is in the upper-right part of the lowest complete rectangular section of the sanctuary map. Place a bomb or use a nearby Bomb Flower at that intersection to reveal the staircase. Go below and speak with Rael.
Rael teaches the Sand Lokomo Song. Practice the duet before playing it for real; the sequence is the difficult six-note pattern green, white, blue, white, blue, green. When the duet succeeds, the tracks leading toward the Sand Temple appear. Save before leaving the sanctuary.
- Enter the Sand Realm from the Ocean Realm rail map.
- Mark the statue gazes before bombing the sanctuary floor.
- Play Rael's Lokomo Song and confirm that the temple approach tracks appear.
- Save at the Sand Sanctuary before beginning the trials.
2. Pass the three trials on the way to the temple
Draw a route north along the newly restored tracks toward the Fire Realm. The first trial begins inside a cave and is an upgraded Rocktite encounter. Fire the train cannon into its eye repeatedly. When the eye closes during a charge, detonate one of the explosive barrels as the Rocktite passes over it; this exposes the eye so the cannon can damage it again. Keep the train moving and complete every damage cycle before exiting the cave.
The second trial is the Forgotten Tunnels rail maze. Immediately reverse when you enter the first tunnel area. After the train backs into the next area, reverse again. At the next junction, turn right to leave the maze. This is not a loop that should be explored freely; using the reverse sequence is the reliable route.
The third trial surrounds the Sand Temple with defensive cannons. Circle the temple and destroy the cannons with the train cannon. When a cannon fires, shoot the incoming cannonball first if you cannot safely destroy the cannon before impact. Once the defenses are cleared, the temple entrance opens.
- Defeat the Rocktite rather than trying to outrun it.
- Use reverse, reverse, then right in the Forgotten Tunnels.
- Destroy all temple cannons and intercept dangerous cannonballs.
- Enter the temple with adequate hearts and arrows.
3. Obtain the Sand Wand and open the temple's main route
On the first floor, move through the rolling-boulder corridor on the east side. Use the bow to hit the eye switch through a gap in the boulders, then enter the opened room. Defeat the Stalfos quickly enough that they stop emerging and a chest appears; the chest contains the Small Key. Return through the boulder corridor and use the key on the locked door.
Follow the stairs and rolling-spike rooms until you reach the room with three Stalfos. Defeat them to open the western door, then take the chest containing the Sand Wand. The wand raises a temporary section of sand into a wall or pillar. Use short sections instead of drawing one long bridge, because the raised sand disappears.
Use the wand to lift Link onto ledges, stop rolling spikes and boulders, cross quicksand, and freeze Gerunes into solid forms. A frozen Gerune can be attacked or carried onto a floor switch, depending on the room's objective. Keep the wand ready whenever the floor contains sand; it is the temple's main movement and puzzle tool.
- Collect the Small Key from the Stalfos room.
- Obtain the Sand Wand before attempting the deeper puzzles.
- Use short temporary sand sections across quicksand.
- Carry, rather than destroy, Gerunes when they are needed on switches.
4. Work through the boulder, switch and quicksand puzzles
Return to the temple's first-floor areas and take the western route. Use the Sand Wand to move a rolling stone block into the opening, raise Link to the upper ledges, and activate the three wall switches. Hit the two elevated switches first, then the lower switch after the sand drops so all three activate within the required window.
Continue manipulating the stone blocks to cross the staggered ramps. In the room with Ergtoroks, raise each enemy from beneath the sand, then climb to its level and slash it while stunned. Afterward, uncover the Small Key by raising the sand at the marked location. Place a nearby boulder on the launcher and activate the switch to destroy the wall, opening the route to Basement 1.
Use the Small Key on the basement door. In the next room, freeze both Gerunes and throw them onto the two floor switches. Cross the quicksand toward the east side, using small sand platforms and blocking arrows with the shield when necessary. Optional treasure and the temple stamp station can be collected here, but neither is required for the story.
- Activate the three wall switches in one timing sequence.
- Uncover the Small Key beneath the sand.
- Use a boulder launcher to destroy the cracked wall.
- Open the basement shortcut before continuing toward the boss key.
5. Solve the basement blocks and retrieve the Boss Key
At the first basement block puzzle, use the Sand Wand to move the diamond block into its matching floor socket. One valid movement sequence is down, right, down, right, up, left. In the following boulder room, stop a boulder with raised sand, place it on the launcher, and use the floor switch and boomerang-triggered crystal to send it into the cracked wall.
The next block puzzle has red circles and blue diamonds. Move the blocks aside as needed so each symbol can be aligned with its matching socket. Do not force the first block permanently into place before positioning the second; the blocks obstruct one another until the correct order is used.
Continue north through the Ergtorok room. Raise all of the sand to uncover the Boss Key, then return to the two-block puzzle and set both red-circle blocks into their sockets. Use the Sand Wand across the quicksand, pick up the Boss Key, and cross quickly to the lock. Open it and descend to Basement 2.
In the rest room, break the pots for recovery hearts and touch the stone tablet to create the blue warp point. This gives you a return route to the entrance if you need to restock or retry the boss.
- Complete both symbol-block puzzles.
- Reveal the Boss Key by sweeping the sand.
- Use the blue tablet warp before entering the boss room.
- Take the recovery hearts if Link is missing health.
6. Defeat Skeldritch, Ancient Demon
Skeldritch launches boulders from the lower part of its spine. Use the Sand Wand to stop and reposition a boulder onto one of the arena's catapults, then activate the catapult so the boulder strikes the exposed section of the boss. The first hit removes one body segment.
For the next segment, load a boulder and move to Link's left while Skeldritch faces him. Shoot the crystal switch on the opposite side so the catapult strikes the boss's vulnerable right side. In the following phase, red boulders move faster and the exposed section is vulnerable from behind; load another catapult, run to the opposite side, and trigger it with an arrow.
The final spine target sits at an awkward side-and-rear angle. Use a bomb beside the switch or a carefully guided boomerang to activate the catapult, then avoid the boss's faster boulder volley. When the skull separates, raise a broad sand wall around it. The wall prevents it from turning freely. Quickly raise Link to the boss's height, move behind the skull, and slash the purple weak point. Repeat the enclosure-and-attack pattern until Skeldritch falls.
- Use the Sand Wand to control every boss boulder.
- Match each catapult strike to the currently exposed side.
- Avoid lasers and the faster red-boulder volleys.
- Surround the detached skull before attacking its purple rear weak point.
7. Claim the Bow of Light and continue toward the finale
After Skeldritch is defeated, a staircase appears. Open the first chest for the Heart Container, then descend and follow the lower path to the second chest. That chest contains the Bow of Light. It replaces the ordinary bow and is required for the final story sequence, so confirm that it is in Link's inventory before leaving.
Use the charged light arrow on the eye switch across the gap. Hold the shot until it becomes a light arrow, then hit the switch to extend the bridge. Enter the blue warp to return to the temple entrance and speak with Zelda before boarding the train.
The story scene with Anjean explains the next objective at the Tower of Spirits. Anjean then gives Link the Lokomo Sword. The Compass of Light and the Dark Realm come later; there is no new Force Gem awarded merely for defeating Skeldritch. The tracks used to reach this temple were restored earlier by Rael's song. Treat any remaining Force Gems as separate optional or side-progression objectives unless the game explicitly presents one.
- Open both post-boss chests and obtain the Bow of Light.
- Use a charged light arrow to activate the exit eye switch.
- Return through the blue warp and board the train.
- Receive the Lokomo Sword from Anjean.
- Confirm the story has advanced to the Tower of Spirits objective.
Before you move on
- Rael's Lokomo Song has restored the tracks leading to the Sand Temple.
- The Rocktite, Forgotten Tunnels trial and exterior cannon trial are complete.
- Skeldritch is defeated and the Heart Container has been collected.
- The Bow of Light is visible in Link's inventory and its charged arrow has activated the exit bridge.
- Anjean has given Link the Lokomo Sword and the next objective points back to the Tower of Spirits.
Return to the Tower: Compass of Light and Lokomo Sword
After the Bow of Light sequence, Anjean gives Link the Lokomo Sword. Return to the Tower of Spirits, use the blue portal at the summit to reach Floor 23, and shoot both altar eyes with charged Light Arrows. The staircase beneath the altar leads through the final Tower section, descending from Floor 30 to Floor 24. The Lokomo Sword is permanently charged here, so Link can stun Phantoms without collecting Tears of Light, but Zelda must still possess the correct Phantom type. Work through the normal, Torch, Warp and Wrecker Phantom routes, collect Small Keys 1, 2 and 3, and open the three Floor 28 doors. Clear all three Floor 27 branches, survive Floor 26’s exact enemy waves, then solve the Floor 25 Phantom-and-switch puzzle. The Compass of Light is in the Floor 24 chest. It reveals the tracks leading toward the Dark Realm, after which a blue portal returns Link to the train.
1. Receive the Lokomo Sword and save before returning to the Tower
After obtaining the Bow of Light in the Sand Realm, finish the following conversation aboard the Spirit Train. Anjean offers Link the Lokomo Sword; accept it before setting out. This is a story reward, not an item hidden in the Tower. The sword is required for this visit because it lets Link stun Phantoms without first collecting Tears of Light. Zelda must still possess the stunned Phantom, and each Phantom type provides a different ability.
Save after receiving the sword. Spirit Tracks supports two save files, and the manual allows saving from the menu at any point, although loading may return Link to a temple entrance rather than the exact position where he saved. Keep one file before the Tower visit and use the other for progress through the final floors.
- The Bow of Light is in Link’s inventory.
- Anjean has given Link the Lokomo Sword.
- A pre-Tower save is preserved.
2. Use the summit portal and open the altar staircase
Travel to the Tower of Spirits and climb the spiral staircase to the summit. Enter the blue portal at the top to reach Floor 23. Go through the upper passage and the room where Link previously fought Byrne, then continue outside and climb the exterior stairs to the top of the Tower. Do not begin searching the lower floors yet; the altar route is opened from this summit area.
At the altar, equip the Bow of Light and charge an arrow. Shoot both blue eye switches in front of the altar. Regular arrows will not open this route. A staircase rises from the central platform. Descend to the rest area, break the recovery objects to refill hearts and replenish bombs and arrows, then take the northern stairs down to Floor 30. The required route now runs downward through Floors 30, 29, 28, 27, 26, 25 and 24.
- The blue portal has taken Link to Floor 23.
- Both altar eyes have been hit with charged Light Arrows.
- Link has used the recovery area before entering Floor 30.
3. Obtain the normal and Torch Phantoms
Floor 30 initially offers no useful route, so go north and descend to Floor 29. This floor is dark. Use the map and the torchlight to avoid detection, then strike an accessible normal Phantom from behind with the Lokomo Sword. Zelda can possess it immediately. Return to Floor 30 and send the normal Phantom across the spikes to the right. Have it stand on the floor switch so the spikes lower, then use the Phantom’s shield to carry Link across the lava.
Near the far side, use the Boomerang to turn the two crystal switches on in quick succession. With the route open, return to Floor 29. In the upper-right area, use the Whirlwind to extinguish all the torches indicated by the tablet. This opens the western door and exposes the Torch Phantom. Stun it from behind and let Zelda possess it. Return to Floor 30, cross the lava while Link rides on the Phantom’s shield, then use the Torch Phantom to light the two torches in the upper-left Floor 29 route. The opened path leads down to Floor 28.
- Zelda controls a normal Phantom.
- The Floor 30 spike switch is active.
- The two timed crystal switches have been triggered.
- The Torch Phantom has been obtained.
4. Collect Small Key 1 from the Floor 28 sand room
On Floor 28, use the Sand Wand to raise temporary platforms so the Torch Phantom can reach the two torches in the sand section. Lighting both torches reveals two chests. One contains optional treasure; the other contains Small Key 1. Use the raised sand and the Torch Phantom’s shield to carry Link to the chests, then take the key and return to Floor 29. Do not leave after opening only the optional chest.
After returning to Floor 29, switch Zelda to the Warp Phantom. Use the nearby eye switch and light-arrow mechanism as required to open the next route. If the Warp Phantom is difficult to approach, use a tablet, wall or safe corner to draw it away before circling behind it. The goal is to reach the upper-left passage leading back to Floor 30, not to clear every optional treasure room.
- Both Floor 28 torches are lit.
- Small Key 1 is in Link’s inventory.
- Zelda has been changed to the Warp Phantom.
5. Use the Warp and Wrecker Phantoms to obtain Small Keys 2 and 3
With Zelda in the Warp Phantom, speak to the nearby Phantoms if necessary to identify the weak section of the upper-left wall. Place a bomb against that wall and enter the opened passage. In the upper-left part of Floor 30, bomb the blocks, use the Sand Wand to raise Link onto the sand, and jump onto Zelda’s shield to reach the switch. This reveals a Warp Phantom and Phantom Eyes. Use the eye and red-circle positions to move Zelda across the spikes, then use a Light Arrow on the required eye switch. Redirect the arrow launcher with the Boomerang when the shot is blocked.
Descend through the newly opened route to Floor 29. Change Zelda to the Wrecker Phantom. Light the torch on the left with the Boomerang, shoot the eye switch with a Light Arrow and open the revealed chest for Small Key 2. Before leaving, clear any optional torch puzzle only if desired. Return upstairs, then send the Wrecker Phantom through the blocks and statues beside the Floor 30 stairs. The cleared obstacles reveal Small Key 3.
- The bombable upper-left wall has been opened.
- The Warp Phantom eye-and-triangle route is complete.
- Small Key 2 has been collected.
- The Wrecker Phantom has revealed Small Key 3.
6. Open the three Floor 28 doors and clear their Floor 27 branches
Return to Floor 28 and use Small Keys 1, 2 and 3 on the three locked doors. Start with the easternmost door while Zelda is a Wrecker Phantom. On Floor 27, send her through the boulder corridor and strike the crystal switch to stop the boulders. Continue through the blocks and statues. Read the tablet: the four torches must be lit in this order—undefended flame, flame surrounded by sand, flame surrounded by the abyss, then guarded flame. This first branch mainly establishes the route and clue.
Go back up and change Zelda to a non-Wrecker Phantom before entering the leftmost Floor 28 door. On its Floor 27 branch, use the switch to create the bridge, raise sand with the Sand Wand, use the shield and Whip to cross the room, and move the blue arrow launcher into position. Fire a Light Arrow through it to hit the wall eye, then use the red-circle tiles and Phantom Eye to place Link and Zelda on the required switches. Return to Floor 29 and change Zelda into a Torch Phantom.
Open the middle Floor 28 door and enter the remaining Floor 27 branch. Follow the tablet’s torch order exactly. Zelda lights the undefended torch and the guarded torch; use the Boomerang for the torch surrounded by sand and the one beside the abyss. When all four are lit, shoot the final eye switch with a Light Arrow and descend to Floor 26.
- All three Floor 28 doors are unlocked.
- The eastern Wrecker branch is complete.
- The left Warp Phantom branch is complete.
- The middle Torch Phantom branch is complete.
- The route to Floor 26 is open.
7. Survive the exact Floor 26 enemy gauntlet
Floor 26 locks Link and Zelda into three required enemy waves. The first wave is eight Dark Electric ChuChus. Let Zelda’s Phantom handle them while Link stays clear of their electric bodies and supports only when it is safe. The second wave is five Stalfos Warriors followed by four Stalfos. Bombs are the safest way to remove the Stalfos, while Zelda can help occupy enemies and create openings. The final wave is three Mighty Zora Warriors. Use the Whip to strip away their shields, then attack with the sword or bombs. Hide behind Zelda or use the room’s layout to avoid their fire attacks.
Do not fall into any of the four chasms during the battle. If Link is defeated, choose Continue to retry the area, or reload the preserved save rather than overwriting the pre-Tower file. The doors open only after all eight Dark Electric ChuChus, all five Stalfos Warriors, all four Stalfos and all three Mighty Zora Warriors are defeated. Descend to Floor 25 when the route unlocks.
- Eight Dark Electric ChuChus are defeated.
- Five Stalfos Warriors and four Stalfos are defeated.
- Three Mighty Zora Warriors are defeated.
- Link has not fallen into a chasm.
- The stairs to Floor 25 are open.
8. Solve Floor 25 and collect the Compass of Light
On Floor 25, take control of the Torch Phantom and light the two torches beside the lower door. A Phantom Eye appears. Move Link near a safe area, allow the eye to detect him, and lead it across the sand so the other Phantoms cannot trap him. When the Warp Phantom is available, strike it from behind and have Zelda possess it. Use the Phantom Eye to position Zelda beside the two switches, then place Link and Zelda on both switches at the same time. The central doors open.
Change Zelda to the Wrecker Phantom. Roll through the statues in the central area, then roll into the normal and Warp Phantoms to stun them. While they are stunned, move Link through the safe route. Bring Zelda alongside him and operate the two door controls together. The next room is Floor 24. Zelda leaves the Phantom body there, and the chest on the steps contains the Compass of Light.
The Compass reveals the rail connections leading toward the Dark Realm on the Forest Rail Map. Its power comes from the Spirits of Good, which is why Malladus and Cole cannot touch it; the item had remained hidden in the Tower. After the acquisition message, enter the blue glowing portal to return to the train. Save after returning and retain the earlier backup until the Dark Realm sequence is safely started.
- The Torch, Warp and Wrecker Phantom tasks on Floor 25 are complete.
- The paired door controls have been opened.
- The Compass of Light is visible in Link’s inventory.
- The Forest Rail Map shows the newly revealed route toward the Dark Realm.
- Link has exited through the blue portal and saved.
Before you move on
- Anjean gave Link the Lokomo Sword after the Bow of Light sequence.
- The altar staircase was opened by hitting both blue eyes with charged Light Arrows.
- The normal, Torch, Warp and Wrecker Phantom routes were completed.
- Small Keys 1, 2 and 3 were collected and all three Floor 28 doors were opened.
- The eastern, left and middle Floor 27 branches were cleared.
- Eight Dark Electric ChuChus, five Stalfos Warriors, four Stalfos and three Mighty Zora Warriors were defeated on Floor 26.
- The Floor 25 paired-switch and double-door puzzle was completed.
- The Compass of Light is visible in Link’s inventory.
- The Forest Rail Map displays the newly revealed tracks toward the Dark Realm.
- Link returned through the blue portal and saved after leaving the Tower.
Preparing for the Dark Realm: Final Resource and Route Checks
Begin after the final Tower of Spirits visit, with the Bow of Light, Compass of Light, and Lokomo Sword obtained. The Compass reveals a short track west of Aboda Village. Follow it through the cave to the island containing the Dark Realm portal. Heal, check useful supplies, preserve a pre-entry backup, and review the Spirit Train’s cannon, speed, braking, reversing, whistle, and rail-switch controls. Inside the Dark Realm, destroy six Armored Trains by charging the train with Tears of Light. Then defeat the Demon Train in three cannon phases: its five explosive rear compartments, four laser cannons, and rotating engine crystals. The game offers a save opportunity after the Demon Train is defeated and before the rooftop Zelda-and-Cole sequence. Use it: failure afterward lets you retry the rooftop and Malladus sections without necessarily repeating the earlier train battles.
Confirm the required items
Start this chapter only after completing the final Tower of Spirits objective. Open the Collection screen and verify that the Bow of Light, Compass of Light, and Lokomo Sword are present. If one is missing, do not search the Dark Realm yet; return to the preceding story objective and finish the Tower sequence first.
The Compass of Light is the item that reveals the final entrance. The Bow of Light is used on the rooftop to separate Malladus from Zelda’s body and is also central to the later Malladus battle. It is not the weapon for the train-versus-train encounter. The Demon Train must be damaged with the Spirit Train’s cannon. The Lokomo Sword is used during the opening defense in the final arena.
- The Bow of Light is present in the Collection screen.
- The Compass of Light is present in the Collection screen.
- The Lokomo Sword is present in the Collection screen.
Reach the Dark Realm portal
Leave the Tower of Spirits and select the Forest Realm. On the Forest rail map, locate the short new track west of Aboda Village. This is the track revealed by the Compass of Light. Do not repeat the Tower route or search the Snow, Ocean, Fire, or Sand Realms for another entrance.
Follow the new rail west from Aboda Village and continue into the cave. Mini Rocktites can appear along the route, so keep the cannon ready and use the whistle when an obstacle needs to be cleared. Continue through the cave until the rails reach the small island containing the portal.
Stop before entering the portal. The portal begins the Dark Realm sequence and takes you into the Armored Train challenge rather than to an ordinary station. Use the pause before entry as your final overworld preparation point.
- The Compass-revealed track west of Aboda Village is visible.
- The train has entered the cave beyond the new track.
- The cave has been crossed without losing the train.
- The small island and Dark Realm portal are visible.
Heal, check supplies, and rehearse the train controls
Visit a town or station before entering if Link needs healing or if you want to refill bottles. The game does not require a verified fixed minimum number of potions, arrows, or bombs, so do not delay for an invented quantity. Carry whatever healing and ammunition your file already provides, with healing being especially useful because the Dark Realm leads directly into the final land battles.
Check arrows and bombs in the Collection display. Arrows are important for the rooftop and Malladus sequences. Bombs may help with ordinary hazards, but they do not damage the Demon Train. The Demon Train encounter is handled with the Spirit Train cannon.
Review the controls you will use under pressure: changing speed, stopping, braking, reversing, blowing the whistle, aiming the cannon, firing the cannon, and switching rails at junctions. If you want a quick rehearsal, fire the cannon once in a safe overworld location and practice stopping before a junction. The Dark Realm rewards controlled routing more than reckless acceleration.
- Link’s hearts have been restored as needed.
- Potion bottles and healing items have been checked.
- Arrow and bomb stocks have been checked.
- The cannon, whistle, braking, reversing, and rail-switch controls are familiar.
Preserve a pre-entry backup
Save immediately before entering the portal. Spirit Tracks provides two save files, so keep one as an untouched late-game backup and use the other for the active attempt. The backup is useful if you want to restart the entire final sequence with full preparation rather than relying on a damaged or poorly supplied run.
Once inside the Dark Realm, continue through the opening scene and the Armored Train objective. Do not assume that every transition is a manual save point. Instead, use the pre-entry file as protection until the game explicitly offers a save after the Demon Train battle.
After the Demon Train is defeated, the game presents a save opportunity before the rooftop Zelda-and-Cole sequence. Save in the active slot at that point. This is the important late-game checkpoint: if you fail during the rooftop sequence or the Malladus battle, you can retry those sections without necessarily repeating the six Armored Trains and the Demon Train encounter. Keep the separate pre-entry file until the ending has been seen if you want a second fallback.
- A fresh save exists immediately before entering the portal.
- The other save file remains an earlier late-game backup.
- The post-Demon-Train save opportunity is used before beginning the rooftop sequence.
- The pre-entry backup is retained until the final attempt is complete.
Destroy the six Armored Trains
The first Dark Realm objective is to destroy six Armored Trains. Tears of Light are scattered across the rail network. Drive through a Tear to surround the Spirit Train with a golden aura. While charged, the train is protected and can destroy an Armored Train by collision. Blowing the whistle while charged gives the train a major speed boost, which is useful when a target reverses or retreats.
Never intentionally ram an Armored Train while the Spirit Train is uncharged. If the aura is absent, avoid the target and route toward the nearest Tear instead. Tears reappear after collection, so they are a charging method rather than a fixed collectible requirement. The goal is to eliminate all six Armored Trains, not to collect every Tear.
Use the portal symbols at the edges of the map to move between separated sections. A practical route is to clear accessible trains in the lower and central areas first, then use the portals to reach the upper-left and upper-right sections. The upper-right area is awkward because multiple trains may share limited track space. Charge on an isolated section, reverse through the portal if necessary, then use the whistle boost to reach the target before the aura expires.
When only one Armored Train remains, it can use the portals and is no longer confined to one section. Charge at a safe Tear, watch the upper-screen map, and use portals to intercept it rather than following blindly. If the train damages you while you are uncharged, the section must be retried; preserve careful positioning instead of forcing a collision.
- The Spirit Train is charged before every Armored Train collision.
- The whistle boost is used while charged to catch reversing targets.
- Portals are used to reach separated rail sections.
- All six Armored Trains have been destroyed.
Defeat the Demon Train with the Spirit Train cannon
After the Armored Trains are gone, four tracks appear and the Demon Train begins its pursuit. Watch both the upper-screen progress display and the Demon Train’s position. If it moves into your line, brake and reverse rather than staying directly behind it. At rail forks, switch tracks to avoid being trapped. The Bow of Light has no role in this train battle.
The first phase targets the rear car. Five compartments open one at a time, each exposing an explosive barrel. Fire the cannon while the barrel is still inside its compartment. A successful shot destroys that compartment. If a barrel falls onto the rails, shoot it before it reaches the Spirit Train. Continue changing tracks and avoiding the Demon Train until all five compartments are destroyed and the rear car breaks away.
The second phase exposes four laser cannons. Each cannon requires two cannon hits. Maintain enough distance to react when the Demon Train changes rails or fires horizontally. Shoot each cannon during its opening, then brake or switch tracks when the Demon Train crosses toward you. When all four laser cannons are destroyed, the next car breaks away and the fight moves through another portal.
The final phase leaves the engine. Rotating gears or crystals expose blue light-producing targets. Fire at the exposed targets as the mechanism turns. When all of the targets in the opening are hit, the Demon Train is stunned and slows. Accelerate past it, turn the cannon toward its face, and fire repeatedly. Repeat the rotating-target attack followed by face shots until the Demon Train is destroyed.
After the Demon Train falls, save when the game offers the opportunity. This is a real recovery point for the remaining finale. Saving here does not require you to repeat the Armored Train section or the Demon Train battle if the rooftop or Malladus encounter defeats you.
- All five explosive rear compartments have been destroyed.
- All four laser cannons have been destroyed with two hits each.
- The rotating engine targets have been hit during their openings.
- The Demon Train’s face has been hit during its vulnerable periods.
- The Demon Train has been defeated.
- The post-Demon-Train save has been completed.
Complete the rooftop transition
After saving, the story moves onto the Demon Train’s roof. Anjean creates a Phantom shell for Zelda, and Link must guide Phantom Zelda toward Zelda’s possessed body near the front of the train.
Cole sends magical rats toward the Phantom. Defeat them before they reach Zelda whenever possible. If a rat reaches her and Cole controls the Phantom with strings, equip the Boomerang and trace across the strings to cut them. Stay near the Phantom rather than running far ahead; this keeps the escort under control and limits Link’s exposure to the rooftop attacks.
Continue forward while protecting the Phantom from the rats and from the attacks fired by Puppet Zelda. When Phantom Zelda reaches Puppet Zelda, trace the command that makes the Phantom pick her up. Move to the front edge of the train, equip the Bow of Light, and fire a Light Arrow into Puppet Zelda. This separates Malladus from Zelda’s body and leads to the crash and the final circular arena.
- Phantom Zelda is moving toward the front of the train.
- Magical rats are defeated before reaching the Phantom whenever possible.
- The Boomerang is ready to cut Cole’s control strings.
- Phantom Zelda has picked up Puppet Zelda.
- A Light Arrow has been fired into Puppet Zelda.
Begin the Malladus arena
After the crash, the train portion ends and the final land battle begins. Malladus possesses Cole and takes his large final form while Zelda returns to her body. Do not use the Spirit Train cannon here.
The opening section is defensive. Malladus launches fireballs toward Zelda while she prepares the Spirits’ power. Equip the Lokomo Sword and intercept the fireballs before they reach her. The first attacks travel directly, but later shots can curve around from the side, so watch their approach and swing early enough to meet them. Keep Link mobile and stay positioned between Malladus’s attacks and Zelda.
When Zelda completes her preparation, the encounter changes to its direct attack pattern. That full sequence belongs in the next chapter. For this chapter, completion means reaching the circular Malladus arena, using the Lokomo Sword during the opening defense, and being ready to continue after Zelda finishes preparing.
- The Demon Train has crashed and the circular arena has loaded.
- The Lokomo Sword is equipped for the opening defense.
- Zelda’s preparation phase is underway.
- The post-Demon-Train save is available if the battle must be retried.
- Zelda has completed the opening preparation and the full Malladus fight can begin.
Before you move on
- The Bow of Light, Compass of Light, and Lokomo Sword were confirmed before departure.
- The short new track west of Aboda Village was visible.
- The cave was crossed and the small portal island was reached.
- Health, bottles, arrows, bombs, and cannon controls were checked.
- A pre-Dark-Realm save and a separate late-game backup were preserved.
- All six Armored Trains were destroyed.
- All five Demon Train rear compartments were destroyed.
- All four Demon Train laser cannons were destroyed with two hits each.
- The rotating engine targets were hit and the Demon Train’s face was damaged during its vulnerable periods.
- The Demon Train was defeated.
- The post-Demon-Train save opportunity was used.
- The rooftop Phantom Zelda sequence was completed with a Light Arrow.
- The circular Malladus arena began and Zelda’s opening preparation phase was defended with the Lokomo Sword.
- Zelda completed her preparation, marking the handoff to the full Malladus battle in the next chapter.
References for this chapter
Demon Train: Confrontation Across the Tracks
After defeating the six Armored Trains in the Dark Realm, Link enters a timed battle across four parallel rails against the Demon Train. The Spirit Train’s cannon is the only weapon needed. First destroy the five explosive-barrel compartments by shooting each barrel while it is exposed and before it leaves its compartment. Next destroy four laser cannons, with two cannon hits required for each one. In the final phase, fire on the rotating laser mechanisms from alongside the engine, then use the stun window to pass in front and attack its face. Brake, use reverse to slow rapidly, and change rails at junctions whenever the Demon Train moves across your path. The battle is followed by the rooftop encounter with Cole and Possessed Zelda. The game provides a save opportunity after the Demon Train’s destruction and before that rooftop sequence, so use it when available. Keep an earlier pre-Dark-Realm backup as well if you want to replay the entire finale from the beginning.
Enter the four-rail arena and control your position
After the six Armored Trains have been defeated, follow the story transition until four parallel rails appear and the Demon Train enters the arena. The fight has a limited length of track, so you must damage each section before the Spirit Train reaches the end. The Demon Train occupies two rails and moves between the available lines, while dark fire can obstruct the route.
Watch the rail map on the upper screen instead of staring only at the cannon view. If the Demon Train moves toward your line, brake immediately and use reverse to slow down quickly. At a junction, change to a clear rail rather than trying to pass through the Demon Train. Do not sit directly behind it: that position leaves little room to react when it changes rails or stops. Once you have created a safe angle, accelerate and resume the attack rather than spending the whole section fleeing.
The reverse control does not provide a useful escape by carrying you far backward; its main value here is rapid deceleration. Use it when the Demon Train announces or begins a rail change, then choose a different line as soon as a junction appears.
- Enter the arena after all six Armored Trains are defeated.
- Keep the upper-screen rail map visible while driving.
- Brake and use reverse when the Demon Train approaches your line.
- Change rails at junctions instead of following directly behind the Demon Train.
Destroy the five explosive-barrel compartments
The first phase targets the rearmost car. Five separate compartments open along its side, and each one presents an explosive barrel. The barrel must be hit while it is still exposed in the compartment and before it leaves the compartment. Do not wait for it to roll onto the track; a barrel destroyed after launch does not damage the car in the required way.
Ride alongside the Demon Train and keep the cannon aimed toward the currently open compartment. Fire as soon as the barrel is visible, then immediately check the rail map. The Demon Train may change tracks after a shot, so brake or move to another rail before trying to line up the next compartment. Treat each opening as a separate target and continue until all five compartments have been successfully cleared.
If the Demon Train begins to occupy your rail, survival takes priority over an awkward shot. Slow down, use the next junction, and then return to an attacking position. The section is complete when the rear car detaches and the game sends the Spirit Train through the portal into the next track section.
- Target all five explosive-barrel compartments.
- Shoot each barrel while it is exposed and still inside its compartment.
- Avoid chasing a missed barrel onto the track.
- Confirm that the rear car detaches before moving to phase two.
Destroy the four laser cannons
The second phase begins with one remaining car behind the engine. Four compartments contain laser cannons. Ride beside the car and fire at an exposed cannon. Each laser cannon requires two successful cannon hits to be destroyed, so keep the target selected long enough to land the second shot unless the Demon Train forces you to reposition.
The laser fire and rail changes make this phase more dangerous than the barrel section. Maintain enough distance to see the incoming attack, and check the upper map whenever the Demon Train starts moving laterally. If it blocks your line, brake first, switch rails at the next fork, and accelerate only after the route is clear. Resume firing once you are alongside the cannon car; do not sacrifice the Spirit Train by forcing a shot from a blocked lane.
After all four laser cannons have taken their two hits and been destroyed, the car separates and another portal transition begins. The Bow of Light is not used here. Every attack in this train battle comes from the Spirit Train’s cannon.
- Locate all four laser-cannon compartments.
- Hit each laser cannon twice.
- Avoid laser fire and rail changes while lining up shots.
- Wait for the cannon car to detach before beginning the engine phase.
Disable the rotating mechanisms and attack the engine
The final phase leaves the Demon Train’s engine. Ride alongside it and fire at the rotating mechanisms that produce the layered laser attacks. Their rotation changes the angle of the vulnerable targets, so keep the Spirit Train moving beside the engine and fire when the mechanisms turn into a reachable position. You can continue attacking from one side rather than trying to cross directly in front of the engine.
When the active mechanisms have been destroyed, the Demon Train is stunned and slows sharply. Accelerate past it and move in front of the engine. Turn the cannon toward its face and fire during this opening. After the attack, return to the map view and prepare for the engine to move again.
Repeat the side attack, stun, pass, and face-shot sequence until the destruction scene begins. The exact number of cannon shots can vary with missed or successful attacks, so rely on the visible destruction of the rotating mechanisms and the engine’s stun window rather than a fixed shot count.
- Fire on the rotating laser mechanisms from alongside the engine.
- Use the stun window to pass in front of the Demon Train.
- Shoot the engine’s face while it is slowed and vulnerable.
- Repeat the cycle until the destruction scene plays.
Use the post-battle save and continue to the rooftop encounter
After the Demon Train is destroyed, allow the story transition to finish. When control returns, the game provides a save opportunity before the rooftop sequence with Cole and Possessed Zelda. Use that checkpoint. It is the practical retry point for the remaining endgame because a failed rooftop or Malladus attempt can be retried without automatically repeating the entire Demon Train battle.
Keep an earlier pre-Dark-Realm save in the other file slot if you want the option to replay the complete finale, including the Armored Trains and Demon Train. The Nintendo DS version supports two save files, so do not overwrite both useful positions with the same late-game checkpoint. If you fail during the train battle itself, reload the earlier file and restart the approach; if you fail after the post-battle save becomes available, reload that newer checkpoint instead.
The next section is no longer train routing. Link and Zelda climb onto the Demon Train, Zelda uses a Phantom body, and the goal is to advance toward Possessed Zelda while dealing with Cole’s rats and traps. The Bow of Light becomes relevant during the later rooftop encounter and the Malladus battle, not during the Demon Train chase.
- Wait for the Demon Train destruction transition to finish.
- Save at the checkpoint offered before the rooftop sequence.
- Retain an earlier pre-Dark-Realm backup if you want to replay the whole finale.
- Confirm that the rooftop Cole and Possessed Zelda sequence has begun.
Before you move on
- All five explosive-barrel compartments have been cleared by shooting their exposed barrels before launch.
- The rear car has detached and the first portal transition has occurred.
- All four laser cannons have been hit twice and destroyed.
- The second car has detached and the second portal transition has occurred.
- The rotating laser mechanisms on the engine have been disabled.
- The Spirit Train has passed the slowed engine and cannon fire has struck its face during the vulnerability window.
- The Demon Train destruction scene has played.
- A save opportunity after the train battle and before the rooftop sequence has been used or preserved.
- The story has transitioned to the rooftop encounter with Cole and Possessed Zelda.
Malladus — Final Fight: Phases, Weak Spots and Coordinated Actions
After the Demon Train battle, the final encounter has three gameplay sections. First, guide Phantom Zelda toward her possessed body while destroying Cole’s ghost rats and staying behind the Phantom so her armor blocks Malladus’s beam. When Phantom Zelda restrains the possessed body, shoot the physical Zelda body with the Bow of Light. Next, protect Zelda while she charges her sacred power by cutting down Malladus’s flaming projectiles, then complete the Spirit Flute duet using the notes shown on the screen. The final section is the demon-form battle. Link must turn Malladus away from Zelda so she can fire Light Arrows at the glowing back target. The first two horn cycles each require three successful arrows before Malladus collapses; break one horn after the first collapse and the second horn after the next. After the second horn is destroyed, survive the ensuing attack pattern and wait for the later single-arrow opening. When Malladus falls, stab the forehead crystal with the Lokomo Sword and rub the stylus rapidly. Victory is confirmed by the final scenes and credits, not by a permanent defeated-boss save flag.
1. Escort Phantom Zelda across the Demon Train
After the Demon Train sequence and its story scenes, Link and Phantom Zelda fight on the roof of the moving train. Zelda’s physical body is at the far end, where Malladus is controlling it. Touch Phantom Zelda and draw a route toward the body. Use short route segments instead of one long line, because the train cars shift and a route that was safe earlier can become unusable after the formation changes.
Link’s main task is protection. Stay behind or slightly to the side of Phantom Zelda while she advances. Malladus’s red beam travels along the train, and the Phantom’s armor protects Link when he remains behind her. If Phantom Zelda stops, look for ghost rats before drawing the next route. Do not move ahead to attack Cole while Zelda is exposed.
- Draw Phantom Zelda’s route toward the possessed body at the far end of the train.
- Advance in short sections as the train cars shift.
- Remain behind Phantom Zelda when Malladus’s red beam is active.
2. Destroy the ghost rats and free Zelda if Cole takes control
Cole repeatedly sends ghost rats toward Phantom Zelda. Slash or tap each rat before it reaches her, then resume directing Zelda. Keep Link close enough to defend her, but do not chase Cole across the train and leave the Phantom unattended. If a rat reaches Zelda, she becomes frightened and Cole takes control of the Phantom.
When Cole controls Phantom Zelda, retreat from her attacks and use the Boomerang or an arrow to cut the control strings. Once she is free, draw her route toward the physical body again and return to a guarding position. Near the front of the train, watch the rats and the moving cars together; you may need to redraw the route after the formation changes.
When Phantom Zelda reaches the possessed body and restrains it, equip the Bow of Light. Shoot the physical Zelda body being controlled. Do not aim at Phantom Zelda. The following scenes mark the end of this escort section.
- Destroy ghost rats before they touch Phantom Zelda.
- Cut the control strings if Cole possesses the Phantom.
- Shoot the possessed physical body with the Bow of Light, not Phantom Zelda.
3. Protect Zelda while she charges sacred power
Malladus then appears in demon form while Zelda stands in the arena and charges her sacred power. Link must defend her from flaming projectiles. Stay between Malladus and Zelda and slash each projectile before it reaches her. The attacks become harder to handle as the section continues, so prioritize the nearest projectile rather than trying to damage Malladus.
When several projectiles arrive together, use a timed spin attack to clear them as a group. If a projectile reaches Zelda, her charge is interrupted and this defensive section must be repeated. Keep Link close enough to intercept attacks aimed from the side or behind; moving too far away to collect a dropped heart can allow the next projectile through.
Continue defending until Zelda announces that her power is ready. This section is not completed by damaging Malladus. Its objective is to keep Zelda’s charge uninterrupted.
- Stand between Malladus and Zelda.
- Slash flaming projectiles before they reach her.
- Use a timed spin attack when several arrive together.
- Repeat the charge section if Zelda is struck.
4. Complete the final Spirit Flute duet
When Zelda finishes charging, the game begins the final Spirit Flute duet. Follow the notes displayed on the Touch Screen, including the required jumps between notes. Do not rely on a memorized color list if the note display is difficult to read; watch the prompt and reproduce each note in order. If the performance fails, repeat it until the duet succeeds.
A successful duet brings the Lokomo guardians into the performance and reveals a glowing target on Malladus’s back. The target is the opening for Zelda’s Bow of Light. From this point onward, Link’s job is to distract Malladus and make him expose his back to Zelda.
- Play the duet after Zelda completes her charge.
- Follow the displayed note sequence accurately.
- Confirm that the glowing target appears on Malladus’s back.
5. Complete the first three-arrow horn cycle
Run around Malladus and slash his front legs or forelegs to draw his attention toward Link. The goal is to make his back face Zelda. Keep Zelda away from his immediate attack path, but do not move so far that Malladus turns back toward her.
Watch the upper screen for Zelda’s view of the target. When the target turns yellow and Zelda has a clear line of fire, tap the bow command on the lower screen. Zelda fires one Light Arrow. Do not activate the command merely because the target is visible; wait for the yellow opening.
Repeat the distraction and yellow-target shot two more times. The first horn cycle requires three successful Light Arrow hits. Malladus then collapses. Run to his exposed head and slash the forehead area until the first horn breaks. Do not continue attacking the head while he is standing.
- Strike Malladus’s front legs to turn him away from Zelda.
- Fire only when the back target is yellow and Zelda has a clear shot.
- Land three Light Arrow hits.
- Slash the exposed head after Malladus collapses and break the first horn.
6. Complete the second three-arrow horn cycle
Malladus rises and becomes more aggressive. Resume the same basic pattern: evade his swipes, charges and flaming attacks, then strike the front legs to make him face away from Zelda. Keep checking the upper screen rather than firing as soon as the back target appears.
When the target turns yellow, activate Zelda’s bow command. Repeat this successful opening until three more Light Arrows have struck Malladus. The second horn cycle also requires three arrows before the next knockdown.
After the third arrow of this cycle, Malladus collapses again. Move to the exposed head and slash until the second horn breaks. This is the end of the two repeated horn cycles. Do not treat the next phase as another complete three-arrow horn cycle.
- Repeat the distraction pattern after Malladus rises.
- Land three additional Light Arrow hits.
- Break the second horn only during the resulting knockdown.
- Prepare for a different final opening after the second horn.
7. Survive the final opening and use the Lokomo Sword
Once the second horn is broken, Malladus begins a separate final attack pattern. Survive this exchange instead of immediately repeating the earlier three-arrow routine. Keep Link moving, avoid Malladus’s attacks, and protect Zelda from being caught in the attack path.
After the attack pattern, a later single Light Arrow opening becomes available. Distract Malladus as before and wait until Zelda’s back-target cursor turns yellow. Activate the bow command once to make Malladus fall. This final opening is not another three-arrow horn cycle, because both horns are already gone.
When Malladus is down, run to the forehead crystal and strike it with the Lokomo Sword. Link will drive the sword into the crystal and the game will display a rapid stylus-rubbing prompt. Rub back and forth continuously until Zelda reaches Link and helps complete the finishing blow. If you stop during the transition or fail to rub quickly enough, follow the on-screen prompt and continue the final action rather than treating the fight as complete.
- Survive the attack pattern after the second horn breaks.
- Use the later single Light Arrow opening to knock Malladus down.
- Stab the forehead crystal with the Lokomo Sword.
- Rub rapidly during the finishing prompt.
Before you move on
- Phantom Zelda has reached and restrained the possessed body, and the Bow of Light transition has occurred.
- Zelda’s charge-defense section and the final Spirit Flute duet are complete.
- The first three-arrow cycle has ended with the first horn destroyed.
- The second three-arrow cycle has ended with the second horn destroyed.
- The separate post-second-horn attack pattern has been survived and the later single Light Arrow has made Malladus fall.
- The Lokomo Sword has pierced the forehead crystal, the rapid-rubbing sequence has succeeded, and the final victory scenes begin.
- The credits and ending scenes play. The file should be treated as a pre-finale continuation point rather than a permanently defeated-boss save.
References for this chapter
- The Legend of Zelda: Spirit Tracks — Boss Guide — ZeldaDungeon/GameFAQs
- Malladus Final Boss Strategy — Thonky
- The Legend of Zelda: Spirit Tracks — Guide and Walkthrough — WishingTikal/GameFAQs
- The Legend of Zelda: Spirit Tracks — Guide and Walkthrough, GameFAQs
- The Legend of Zelda: Spirit Tracks Instruction Booklet — Nintendo
Ending and Aftermath: Post-Boss Steps and Saving Your Completed Game
Defeat Malladus through the complete finale, then watch the victory scenes, credits, and post-credits epilogue. The final conversation before the confrontation asks what Link wants to do after the crisis; choosing Engineer, Warrior, or the uncertain response changes only the short epilogue presentation, not the boss sequence or saved world. Spirit Tracks does not create a permanent post-ending overworld or New Game Plus file. Loading after the ending returns to the latest saved playable state. The safest full-finale backup is made before entering the Dark Realm, but the game also provides a valid save opportunity after the Demon Train is defeated. That later save lets you retry the rooftop Zelda sequence and Malladus without repeating the train battle. Keep separate save copies when possible, and record completion only after the final scenes, credits, and post-credits epilogue have played.
1. Finish every required part of the finale
Continue through the entire Dark Realm sequence in order. Complete the Armored Train section, defeat the Demon Train, proceed through the transition involving Zelda and Cole, and finish the final Malladus battle. Defeating the Demon Train is not the end of the story: the rooftop sequence and Malladus confrontation still have to be completed.
After Malladus is defeated, do not reset the Nintendo DS or close the software if you want to verify the complete ending. Allow the farewell scenes to play. These scenes resolve the fate of Zelda, Link, Anjean, Byrne, Cole, Malladus, and the Lokomos before the credits begin.
- The Armored Train section is complete.
- The Demon Train has been defeated.
- The rooftop Zelda-and-Cole sequence is complete.
- Malladus has been defeated.
- The victory and farewell scenes have played.
- The credits have begun.
2. Watch the credits and the post-credits epilogue
Let the credits finish. Spirit Tracks then presents an additional epilogue centered on Zelda, which is the final story presentation of the original Nintendo DS campaign. Treat the epilogue as part of the ending rather than stopping after the first victory scene.
The answer chosen when Zelda asks about Link's future affects this final presentation. Engineer shows Zelda reacting to the Spirit Train, Warrior shows Link training with a sword, and the uncertain response gives the more undecided version. These are small presentation differences. They do not create separate campaigns, change the final boss, alter the items obtained, or unlock a different post-game world.
- The credits have finished.
- The post-credits epilogue has appeared.
- The selected answer has been recorded if you want to view another variation later.
- You understand that the three answers do not change the main story route.
3. Make the safest full-finale backup before entering the Dark Realm
Before entering the Dark Realm, save in a normal playable area where the Save command is available. This is the safest recovery point because it preserves the complete late-game overworld and lets you repeat the Armored Train section, Demon Train battle, rooftop sequence, and Malladus fight if necessary.
Spirit Tracks supports two adventure save files. After saving, use the file-selection screen's COPY function to duplicate the file into the other slot if you want an additional backup. Inspect the destination carefully: copying into an occupied slot erases that slot's existing data and cannot be undone. Keep one copy untouched and use the other for attempts or optional cleanup.
This pre-Dark-Realm backup is preferable when you want to practice the entire finale or recover from a difficult train-battle failure. It is not the only useful save opportunity, however. A later checkpoint becomes available after the Demon Train is defeated.
- A save exists before entering the Dark Realm.
- A second slot contains a backup if desired.
- The protected slot will not be overwritten accidentally.
- The destination is checked before using COPY.
4. Use the post-Demon-Train save for the final ground battle
After the Demon Train has been defeated and the train has stopped, the game offers a save opportunity before the final Malladus sequence. Take this save if you want a shorter retry route. It places you after the train confrontation, allowing you to repeat the rooftop Zelda-and-Cole transition and the Malladus battle without replaying the Armored Train and Demon Train sections.
Use this later save as a practical boss-practice checkpoint, especially when learning the first Malladus phase. During that phase, protect Zelda while she charges power by striking down Malladus's fireballs. Once the final Lokomo Song has been performed, distract Malladus from the lower screen so Zelda can line up Light Arrow shots against the glowing target on his back. After the required hits expose the finishing opportunity, use the Lokomo Sword to deliver the final blow.
The post-Demon-Train save is valuable, but it is not a replacement for the pre-Dark-Realm backup if you want to retry the complete finale. Keep both when possible: the earlier file protects the whole approach, while the later file reduces repetition during rooftop and Malladus attempts.
- The Demon Train has been defeated.
- The post-Demon-Train save prompt has been accepted if you want the later checkpoint.
- The earlier pre-Dark-Realm backup remains protected.
- You can retry Malladus without repeating the train battle.
- You know that the final blow requires the Lokomo Sword after the opening is created.
5. Understand the saved state after the ending
Spirit Tracks does not create a normal playable post-credits chapter in which Malladus remains permanently defeated. It also does not provide a New Game Plus mode or a completed-boss overworld save. After the ending has played, loading the game returns to the latest saved playable state rather than creating a new file marked as permanently beyond the final battle.
The exact return point depends on which save you last used. If you saved before entering the Dark Realm and did not use the later checkpoint, loading returns to that earlier late-game state. If you accepted the save after the Demon Train, loading can return to the post-Demon-Train position instead. This is normal and does not erase the fact that you completed the story.
- The loaded file returns to the latest saved playable state.
- You do not expect a permanent defeated-Malladus overworld.
- You do not search for a New Game Plus mode that the original game does not provide.
- You know which save slot contains the earlier and later recovery points.
6. Continue optional activities and record completion
Use the restored pre-ending save for unfinished optional work. Available activities include Force Gem deliveries, train-part collection, heart pieces and additional containers, rabbit searches, stamp stations, treasure, shops, and remaining sidequests. These objectives are separate from the main-story requirement and are not needed to trigger the credits or epilogue.
If you made two copies, use the unprotected file for cleanup or repeated final-battle attempts. Preserve the protected pre-Dark-Realm file if you want a dependable route into the complete finale. Preserve the post-Demon-Train file as a shorter practice route when possible.
Record the main story as complete only after Malladus has been defeated and the full victory scenes, credits, and post-credits epilogue have played. Returning to a pre-ending save afterward does not invalidate completion; it is the original game's method of keeping the overworld playable and allowing optional activities or another finale attempt.
- Malladus has been defeated through the complete final sequence.
- The farewell scenes have played.
- The credits have finished.
- The post-credits epilogue has appeared.
- A pre-Dark-Realm backup remains available when possible.
- A post-Demon-Train checkpoint is preserved when possible.
- Optional completion is tracked separately from main-story completion.
Before you move on
- Malladus has been defeated through the complete final sequence.
- The victory and farewell scenes have played.
- The credits have finished.
- The post-credits epilogue has appeared.
- A protected save from before entering the Dark Realm remains available when possible.
- A post-Demon-Train save has been used or preserved if a shorter final-battle retry route is wanted.
- The player understands that loading after the ending returns to the latest saved playable state.
- Optional activities can be continued separately from the completed main story.
Optional Completion: Sidequests, Lokomo Restorations and Collectibles
After the main story, Spirit Tracks leaves its side content available for cleanup. The game contains 20 Force Gems, but only two are mandatory for the story; the rest open optional rails, secret stations, rabbits, treasure and shortcuts. A reliable completion route is to collect the Rabbit Net, sweep Force Gem errands by realm, gather Heart Containers and equipment rewards, then finish stamps, train parts and optional stations. Rabbitland Rescue gives a Heart Container for five rabbits and a Swordsman's Scroll for all 50. The Stamp Book gives three rewards at 10, 15 and 20 stamps. Save before expensive or difficult challenges, preserve a post-story cleanup file, and verify every new rail or reward before starting the next task.
1. Separate mandatory rails from optional Force Gems
Do not treat every Force Gem as a story objective. Spirit Tracks contains 20 Force Gems, but only two are required to finish the main adventure. The remaining gems restore optional branches, shortcuts, warp connections, secret stations and routes to collectibles. If the main story is already complete, every remaining Force Gem is cleanup content rather than a prerequisite for the ending.
Use the Rail Map to identify what each new branch reaches. A rail leading to a village errand, a remote station, a rabbit, treasure or a mini-dungeon is optional. Record the destination beside the branch on your map instead of relying only on the gem's number. This prevents unnecessary backtracking and keeps story restoration separate from the completionist sweep.
- Treat only the two story-required Force Gems as mandatory.
- Mark each restored rail by destination and reward.
- Finish the main story before attempting a full optional sweep.
2. Obtain the Rabbit Net and work through Rabbitland Rescue
Visit Rabbitland Rescue in the Forest Realm and speak with Bunnio. He gives Link the Rabbit Net, which is required before any rabbit can be collected. Rabbits hide near Spirit Tracks, usually behind rocks or inside floating barrels. While driving, use the train whistle to make a hidden rabbit reveal itself, then fire the train's cannon at the obstacle. Stop close to the exposed rabbit, leave the train and catch it with the net before it escapes.
There are 50 rabbits in total, ten in each realm. Force Gems open many of the rails needed to reach them, so do not assume an apparently missing rabbit is permanently lost. Note the realm and nearby junction for every inaccessible location, then return after the relevant branch appears.
Return to Bunnio after catching five rabbits for a Heart Container. Continue until all 50 have been delivered to receive the Swordsman's Scroll that grants the Sword Beam. These rewards are optional, but the extra health is useful before difficult challenge rooms.
- Rabbit Net obtained from Bunnio.
- Five rabbits delivered for the Heart Container.
- All 50 rabbits delivered for the Sword Beam scroll.
- Blocked rabbit locations marked for later access.
3. Sweep Force Gem errands in a low-backtracking order
A practical cleanup order is Forest Realm and Castle Town first, followed by the Snow Realm, Ocean Realm, Fire Realm and Sand Realm. Complete errands that begin and end in the same region before making a long cross-map delivery. When two tasks use the same station, group them together and check whether one newly restored branch opens the destination for another.
Passenger and cargo quests often depend on earlier story events, a freight car, a shop purchase or a prior delivery. If an expected character does not offer the task, do not repeatedly revisit the same location. Check the mailbox, confirm that the required item or vehicle feature has been obtained, then return when the prerequisite is satisfied.
For cargo, draw routes with as few crossings and hostile-train encounters as possible. Stop at a station whenever the quest allows it, especially before entering a region with narrow junctions. After each delivery, confirm both the reward and the newly glowing rail map before accepting another job.
- Forest Realm and Castle Town errands.
- Snow Realm and Mega Ice-related cleanup.
- Ocean Realm passenger and cargo quests.
- Fire Realm and Sand Realm branch restoration.
- Reward and rail map checked after every delivery.
4. Prioritize Heart Containers and useful upgrades
Collect permanent health rewards before spending time on cosmetic train customization. Rabbitland Rescue awards one Heart Container for five rabbits. Castle Town's Take 'Em All On challenge provides another after its required level is cleared. Other optional Heart Containers can be obtained through activities such as the Snow Sanctuary purchase, the Hyrule Castle guard challenge, Ends of the Earth Station and Beedle's Gold membership reward.
Save immediately before Take 'Em All On, the guard challenge and any score-based activity. Bring potions when the challenge permits them, and do not assume recovery hearts will appear between rooms. If a reward depends on a score, confirm the reward screen or NPC response before overwriting the pre-attempt save.
Pursue quiver, Bomb Bag and other equipment improvements through the specific shops and mini-games that offer them. Check the prize description before spending rupees or committing to a high-score attempt. Optional equipment is helpful for cleanup, but none of these rewards is needed to defeat Malladus.
- Rabbitland Rescue Heart Container collected.
- Take 'Em All On attempted with a backup save.
- Snow Sanctuary and Hyrule Castle rewards checked.
- Beedle membership progress recorded.
- Equipment upgrade requirements verified before spending resources.
5. Complete stamps, train parts and optional stations
Carry Niko's Stamp Book during every regional sweep. There are 20 Stamp Stations. Niko rewards 10 stamps with the Shield of Antiquity, 15 with the Engineer's Clothes and all 20 with a Swordsman's Scroll that grants the Great Spin Attack. Several stations require items or songs obtained during the story, so revisit missed locations after collecting the Whirlwind, Boomerang, Whip, Bow, Sand Wand or Cuccos as appropriate.
Use Linebeck's Trading Post to exchange treasure for train parts. Train parts are customization rewards, not story requirements. Preserve a save before spending rare treasure if you are pursuing a particular set, and avoid selling an item needed for a delivery or trade.
The optional station challenges have different rewards. Snowdrift Station contains a timed ice-and-switch puzzle leading to an Alchemy Stone. Disorientation Station is a Fire Realm maze that rewards another Alchemy Stone and treasure. Lost at Sea Station is a five-floor Phantom challenge whose final reward is a Regal Ring. Save and restock before entering each one; leaving and returning is preferable to risking a large cleanup loss.
- 10, 15 and 20 stamp rewards claimed from Niko.
- Desired train parts obtained through Linebeck's Trading Post.
- Snowdrift Station completed.
- Disorientation Station completed.
- Lost at Sea Station completed.
6. Use a safe completionist save routine
Keep one file from immediately before the final approach and one separate file for post-story cleanup. The main ending does not require every Force Gem, rabbit, stamp, train part or optional station, so do not overwrite the safest pre-boss file while experimenting with side content.
Before an escort, cargo delivery, combat challenge or optional station, save at the nearest practical station. Afterward, verify the new item, rail, stamp or reward and update a written checklist. If a delivery fails or a mini-game score is missed, reload the local challenge save rather than rebuilding the entire route from an early file.
Finish with a map review. Check every intended Force Gem branch, rabbit marker, Stamp Station, secret station, Heart Container, equipment reward and optional dungeon. Leave unresolved entries written down instead of assuming an unexplored rail is empty.
- Pre-final save preserved.
- Separate cleanup save maintained.
- Every reward verified after acquisition.
- Rail Map and written checklist agree.
- Remaining optional tasks explicitly recorded.
Before you move on
- The desired Force Gem branches and secret stations are checked on the Rail Map.
- Rabbitland Rescue has been visited, with five-rabbit and 50-rabbit rewards claimed if pursuing full optional completion.
- Heart Containers, equipment upgrades and selected mini-game rewards are recorded as obtained.
- All 20 Stamp Stations and Niko's applicable rewards are complete if pursuing collectible completion.
- Train-part trades and optional stations have been reviewed, with Snowdrift Station, Disorientation Station and Lost at Sea Station completed if desired.
- A dedicated cleanup save and a separate pre-final save remain available.
References for this chapter
- The Legend of Zelda: Spirit Tracks Instruction Booklet — Nintendo
- Spirit Tracks Walkthrough — Zelda Dungeon
- Spirit Tracks Force Gems — Zelda Dungeon Wiki
- Spirit Tracks Rabbits — Zelda Dungeon Wiki
- Rabbitland Rescue — Zelda Dungeon Wiki
- Spirit Tracks Heart Containers — Zelda Dungeon Wiki
- Spirit Tracks Stamp Stations — Zelda Dungeon Wiki
- Snowdrift Station — Zelda Dungeon Wiki
- Disorientation Station — Zelda Dungeon Wiki
- Lost at Sea Station — Zelda Dungeon Wiki
- The Legend of Zelda: Spirit Tracks FAQs and Guides — GameFAQs
Troubleshooting, Recovery and Speed-friendly Tips
Use the newest reliable save while preserving a separate backup before the Dark Realm. Spirit Tracks provides a save opportunity after the Demon Train and before the rooftop Zelda-and-Cole section, so failures in the rooftop sequence or Malladus battle can be retried from that checkpoint. Keep the pre-Dark-Realm save only if you want to replay the entire final approach. If Zelda loses control of a Phantom, call the Phantom back, clear the area, and attempt possession again from a safer angle. For train mistakes, stop at the next safe station and redraw the route rather than forcing a dangerous reverse. The Demon Train has three sections: five exposed explosive barrels, four laser cannons requiring two hits each, and five rotating engine-light targets. In the Malladus battle, protect Zelda during her charge, complete the Spirit Flute duet, land three Light Arrow hits in each of the first two cycles, use the final single-arrow opening, then drive the Lokomo Sword into the forehead crystal.
Recover Zelda when a possession attempt fails
When Zelda is knocked out of a Phantom, stop treating that Phantom as an active partner. Move Link away from immediate danger, then touch the Call icon in the lower corner of the Touch Screen to call the controlled Phantom back to Link. If Link and Zelda are separated, use the viewpoint-switch command to check both positions before drawing another path. This prevents Zelda from being sent into a hazard while Link is still dealing with an enemy.
After Zelda returns, clear nearby enemies before attempting possession again. In the Tower of Spirits, gather the required Tears of Light, stun a Phantom from behind, and let Zelda enter it. Approach from the rear or side, then draw a short route with a clear retreat path toward Link. Do not retry immediately if another Phantom, eye, flame, or moving hazard can still reach Zelda.
If a switch or movable object remains in an unusable state, stop interacting with it while Zelda is exposed. Move Link and Zelda to a safe section of the room and re-enter the puzzle area if the room resets its mechanism. If the mechanism does not reset, reload the newest suitable save rather than abandoning the entire chapter. Use the closest dependable restart point and repeat only the room or approach that actually failed.
- Touch Call to bring the controlled Phantom back to Link.
- Switch viewpoints when Link and Zelda are separated.
- Clear enemies before another possession attempt.
- Draw a short route with a visible retreat path.
- Reload the newest suitable save if the puzzle state will not reset.
Rebuild a train route after a mistake
Open the Rail Map before leaving a station and trace the complete route from your current position. Check every junction, including branches affected by another train, a Dark Train, or a newly restored track. A drawn line controls junction choices, but it cannot create rails that have not been unlocked. If a station or branch is absent from the map, continue the story, obtain the needed Rail Map section, or complete the Force Gem event that opens it.
During travel, reduce speed early when approaching an obstacle, enemy train, or passenger station. Use Stop when there is enough distance to halt safely. Reverse is useful for escaping a bad approach, but it should not be your normal station-braking method. Use the whistle only against hazards that the whistle can clear; it does not replace changing tracks or avoiding a Dark Train.
If you miss a junction, stop as soon as the route is safe instead of continuing at full speed and hoping the next branch repairs the mistake. If there is room, reverse away from the danger and redraw. If reversing would place you in another hazard, continue to the next station, stop correctly, and create a new route there. A station is the safest recovery point because the map can be inspected while the train is no longer moving toward the mistake.
- Redraw from the current station or the next safe station.
- Confirm every junction before departing.
- Slow down early for passenger platforms.
- Use Reverse only when there is room to retreat safely.
- Do not try to draw branches that story progress has not unlocked.
Use the two save files as a progression ladder
The original game allows a maximum of two save files. Keep one current progression file and one earlier safety file whenever possible. Save after a temple, major quest item, restored rail region, or major story checkpoint, but retain the earlier file until the newer section is secure. Before the finale, make the earlier file your pre-Dark-Realm backup if you want the option to replay the entire final approach.
After the Demon Train is defeated, the game offers a save before the rooftop Zelda-and-Cole sequence and the Malladus arena battle. Use that checkpoint for repeated practice of the later sections. A failure there does not require repeating the Armored Train run and Demon Train if you saved at the offered checkpoint. Keep the pre-Dark-Realm file untouched separately, because it is the file that lets you rehearse the complete endgame route from the beginning.
The manual explains that loading a save can return Link to a safer location rather than the exact position where he stopped. If Link’s Life Gauge is depleted, Continue is useful for an immediate retry when the current area is still worth attempting; Save and Quit is for preserving progress deliberately. Before a long optional delivery or unfamiliar train route, preserve the safer file first. Never overwrite both files with the same late-stage state.
- Maintain one current file and one earlier backup.
- Preserve a pre-Dark-Realm file if you want to replay the complete final approach.
- Save after the Demon Train when the game offers the checkpoint.
- Use the post-Demon-Train save to practice the rooftop and Malladus sections.
- Do not overwrite both files with the same late-stage state.
- Remember that loading can return Link to a nearby safe area rather than the exact quit position.
Practice the Dark Realm and Demon Train without losing the backup
Before entering the Dark Realm, confirm that the Compass of Light has revealed the route and that the Bow of Light is available for the final battle. During the Dark Realm train run, collect Tears of Light when the track is safe. The powered-up Spirit Train can destroy Armored Trains, but turning toward a Tear at the wrong moment can place you in another train’s path. Read the map before committing to each portal and keep an escape direction in mind.
The first Demon Train section contains five compartments with exposed explosive barrels. Watch the rear car and shoot all five barrels while they are still exposed and before they leave their compartments. Do not assume that a single shot will always settle the section; focus on hitting every barrel that appears and keep enough distance to react when the Demon Train changes tracks. Brake or use a junction when necessary instead of staying directly behind it at unsafe speed.
The next section exposes four laser cannons one at a time. Each cannon requires two cannon hits. Maintain enough distance to avoid the horizontal laser, fire while the cannon is exposed, and use the diagonal junctions when the Demon Train changes sides. In the engine section, hit all five rotating laser lights with the cannon. When the engine is disabled, accelerate past it and fire at its face. Repeat the light-target and face attacks until the engine is defeated. Save when the game offers the post-Demon-Train checkpoint, then keep the pre-Dark-Realm file intact for full-route practice.
- Collect Tears of Light only when the route remains safe.
- Shoot all five exposed explosive barrels before they leave their compartments.
- Hit each of the four laser cannons twice.
- Disable all five rotating engine lights.
- Accelerate past the disabled engine and attack its face.
- Save at the post-Demon-Train checkpoint.
- Keep the pre-Dark-Realm save untouched.
Recover during the Zelda-and-Cole sequence
On the Demon Train roof, draw a long route for Phantom Zelda toward Malladus while Link protects her from Cole’s magical rats. Destroy the rats before they touch Zelda. If one reaches her, Cole controls the Phantom and makes her move toward Link. Stay out of her sword range, approach Cole from a safe angle, and use the Boomerang to cut the puppet strings. Once Zelda is free, clear the next rat group before sending her forward again.
As the pair reaches the front of the train, the compartments shift and Malladus fires a red beam. Keep Link behind Phantom Zelda; her armor blocks the beam, while Link can be hurt if he steps in front of her. Continue removing rats and maintain a safe position rather than rushing ahead of Zelda. When she reaches Malladus, draw a line to target him, then fire a Light Arrow when the shot is presented. This ends the rooftop possession phase and leads to the arena.
If this section fails, reload the save made after the Demon Train. Do not return to the pre-Dark-Realm file unless you specifically want to practice the complete final route.
- Keep magical rats away from Phantom Zelda.
- Use the Boomerang to sever Cole’s puppet strings.
- Stay behind Zelda when Malladus fires the red beam.
- Clear each new rat group before extending Zelda’s route.
- Target Malladus when Zelda reaches him and fire the Light Arrow.
- Reload the post-Demon-Train checkpoint after a failure.
Recover during the Malladus battle
At the start of the arena, Zelda charges her sacred power while Malladus sends fireballs toward her. Deflect the straight shots by tapping them with Link’s sword. Watch for fireballs that travel away from Zelda before curving back; turn toward the side they approach from and intercept them. When Malladus launches a broad four-fireball volley, stand close to Zelda and time a spin attack to catch the group. If a fireball hits Zelda, her charge sequence restarts, so defensive accuracy matters more than attacking Malladus.
When Zelda finishes charging, play the Spirit Flute duet when prompted. Follow the notes shown on the Touch Screen and play Link’s section when the game shifts focus to him. A successful duet reveals Malladus’s back and gives Zelda the Bow of Light. Distract Malladus with Link until the target mark on his back turns yellow. Tap the Bow of Light command only when Zelda has a clear shot; an early arrow misses and does not advance the cycle.
The first horn cycle requires three successful Light Arrow hits. Malladus collapses after the third, allowing Link to slash his head until the first horn breaks. Protect Zelda through the renewed attacks, then repeat the distraction and yellow-target process for three more Light Arrows. Slash Malladus’s head again to break the second horn. After that, Malladus exposes one final opening: distract him until the target is yellow and have Zelda fire the single Light Arrow.
When Malladus falls, run to his head and slash the forehead crystal until Link’s Lokomo Sword lodges in it. Rub the stylus rapidly back and forth as instructed to hold the sword in place while Zelda joins Link. If Link falls during this fight, reload the post-Demon-Train save and retry the arena without repeating the earlier train battles. Use the pre-Dark-Realm file only when practicing the entire final sequence from its beginning.
- Deflect every fireball before it reaches Zelda.
- Use a timed spin attack against the broad four-fireball volleys.
- Complete the Spirit Flute duet.
- Land three Light Arrows in the first horn cycle.
- Break the first horn, then land three more Light Arrows.
- Use the later single-arrow opening after the second horn breaks.
- Slash the forehead crystal after the sword is lodged.
- Reload the post-Demon-Train checkpoint after an arena failure.
Before you move on
- You can call a controlled Phantom back to Link, clear the room, and retry possession from a safe approach.
- You can stop or retreat after a missed train junction and redraw a route from a safe station.
- You have preserved a pre-Dark-Realm save in a separate slot if you want to replay the complete final approach.
- You have used the save offered after the Demon Train for rooftop and Malladus retries.
- You can free Zelda from Cole’s control, protect her from the red beam, and complete the rooftop Light Arrow shot.
- You can defend Zelda through the charging phase and complete the Spirit Flute duet.
- You can land both three-arrow horn cycles, land the later single Light Arrow, and drive the Lokomo Sword into the forehead crystal.
- The final victory scenes and credits begin after Malladus is defeated; keep the post-Demon-Train or pre-Dark-Realm save if you want to replay the finale.
Finishing up
You have defeated Malladus and watched the complete victory scenes, credits, and post-credits scene.
You have obtained the Bow of Light, Compass of Light, and Lokomo Sword and used the Compass to reveal the Dark Realm route.
All mandatory Spirit Track restorations and required temple visits are complete, including the final Tower of Spirits section and the Dark Realm finale.
The final victory is verified by the ending and credits, not by a persistent defeated-boss flag in the save file.
A pre-finale save remains available so you can replay the Demon Train and Malladus encounters or continue optional content.
Choose your next gameScreenshots & video
Game imagery for reference. Follow the written chapters above for the route and strategies.
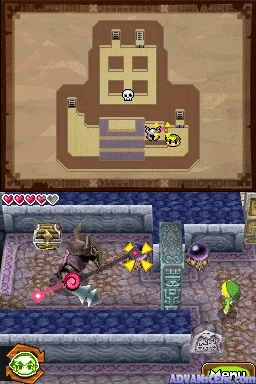
Sources & references
Our original guide draws on the references below. Check the edition at the top of this page before following controls or unlock requirements.
- The Legend of Zelda: Spirit Tracks Instruction Booklet — Nintendo
- Legend of Zelda: Spirit Tracks Walkthrough - GameSpot
- The Legend of Zelda: Spirit Tracks — In the Beginning — StrategyWiki
- Link’s First Train Ride — Thonky
- Spirit Tracks Walkthrough — The Beginning
- The Legend of Zelda: Spirit Tracks — Controls — StrategyWiki
- Spirit Tracks Walkthrough — Tower of Spirits
- The Legend of Zelda: Spirit Tracks — Guide and Walkthrough — WishingTikal/GameFAQs
- The Legend of Zelda: Spirit Tracks — Guide and Walkthrough — GameFAQs, by Dev
- The Legend of Zelda: Spirit Tracks — Guide and Walkthrough
- Spirit Tracks Walkthrough — The Fire Realm — Zelda Dungeon
- Spirit Tracks Walkthrough – The Sand Realm
- Spirit Tracks Walkthrough — The Forest Realm — Zelda Dungeon
- Chapter 2: The Forest Realm — Zelda Universe
- The Legend of Zelda: Spirit Tracks — Guide and Walkthrough — GameFAQs
- The Legend of Zelda: Spirit Tracks — Guide and Walkthrough, Ocean Temple sections
- Snow Temple — The Legend of Zelda: Spirit Tracks walkthrough
- Spirit Tracks Walkthrough — The Snow Realm
- Snow Temple — Zelda Dungeon Wiki
- Chapter 6: The Ocean Realm — Zelda Universe walkthrough
- Spirit Tracks Walkthrough — The Ocean Realm
- Fire Temple - The Legend of Zelda: Spirit Tracks walkthrough
- Fire Temple (Spirit Tracks) - Zelda Dungeon Wiki
- Chapter 10: The Sand Realm
- Sand Temple - Zelda Dungeon Wiki
- Chapter 11: The Compass of Light — Zelda Universe
- Compass of Light - The Legend of Zelda: Spirit Tracks walkthrough
- Spirit Tracks Walkthrough - Tower of Spirits 6
- Chapter 12: The Dark Realm — Zelda Universe
- Spirit Tracks Walkthrough — The Dark Realm
- Dark Realm — Thonky
- The Legend of Zelda: Spirit Tracks — Charging into Darkness — StrategyWiki
- Demon Train — Zelda Dungeon Wiki
- The Legend of Zelda: Spirit Tracks FAQ/Walkthrough
- The Legend of Zelda: Spirit Tracks — Boss Guide — ZeldaDungeon/GameFAQs
- Malladus Final Boss Strategy — Thonky
- The Legend of Zelda: Spirit Tracks — Guide and Walkthrough, GameFAQs
- The Legend of Zelda: Spirit Tracks Instruction Booklet Gameplay Guide
- Walkthrough: The Legend of Zelda: Spirit Tracks Part 22
- The Legend of Zelda: Spirit Tracks — Zelda Wiki
- Spirit Tracks Walkthrough — Zelda Dungeon
- Spirit Tracks Force Gems — Zelda Dungeon Wiki
- Spirit Tracks Rabbits — Zelda Dungeon Wiki
- Rabbitland Rescue — Zelda Dungeon Wiki
- Spirit Tracks Heart Containers — Zelda Dungeon Wiki
- Spirit Tracks Stamp Stations — Zelda Dungeon Wiki
- Snowdrift Station — Zelda Dungeon Wiki
- Disorientation Station — Zelda Dungeon Wiki
- Lost at Sea Station — Zelda Dungeon Wiki
- The Legend of Zelda: Spirit Tracks FAQs and Guides — GameFAQs
About the game & collecting notes
- Platform
- Nintendo DS
Step-by-step campaign coverage for the original Nintendo DS edition of The Legend of Zelda: Spirit Tracks (USA, EN/FR/ES). This guide prepares you, explains the train and Zelda-possession mechanics, walks every required realm and temple to obtain the Bow/Compass/Lokomo Sword, and gives concrete checks and recovery tips to reach and beat the final Malladus encounters and watch the ending.
Darryl Polo
Darryl Polo loves tinkering with emulation and revisiting retro games. He enjoys exploring how old favorites play on different setups and sharing what he learns along the way. At Joking Joystick, he writes about the games, hardware, and small discoveries that keep the hobby fun.
Our editorial standardsFound a step that needs another look? Help us improve this guide.