
The Legend of Zelda: Phantom Hourglass — Complete (USA, Nintendo DS) Walkthrough
A step‑by‑step campaign walkthrough for the original North American Nintendo DS release of The Legend of Zelda: Phantom Hourglass. Covers movement and touchscreen controls, every main dungeon and boss, sea navigation and salvage, forging the Phantom Sword, final Temple runs and the ending — plus recovery tactics when the Hourglass runs low.

Find a copy
The Legend of Zelda: Phantom Hourglass Nintendo DS
We may earn a commission if you buy through these links, at no extra cost to you. As an Amazon Associate I earn from qualifying purchases.
Opens retailer search results. Check the model, edition, seller, availability and current price before buying.
Before you begin
This walkthrough gets you through the full Adventure Mode of The Legend of Zelda: Phantom Hourglass for the Nintendo DS (North American edition).
It assumes you are playing the cartridge/ROM for the original DS release and will guide you from the opening cutscenes through every required dungeon, boss and the final confrontation with Bellum.
Follow the step directions in order for a clean progression; optional tasks and post‑game goals are marked clearly so you can skip them if you only want the main ending.
You will rely on the DS touchscreen heavily: movement, combat inputs, drawing ship routes and item use all center on the stylus.
Read the Preparation checklist before you start, then follow each chapter for the campaign route and boss approaches.
Each chapter lists concrete objectives, must‑cover actions and common pitfalls to avoid so you can recover quickly if something goes wrong.
Set yourself up for the run
Use a comfortable stylus.
Most movement, combat, item use, map interaction, ship routing, and menu selection are performed on the Nintendo DS Touch Screen. Use the physical buttons only where the game or manual specifies them.
Learn the basic touchscreen gestures: tap or slide near Link to move, swipe to slash, draw a circle around Link for a Spin Attack, trace Boomerang paths, and draw ship routes on the Sea Chart.
The Temple of the Ocean King uses the Phantom Hourglass and Sand of Hours. Natural purple Safe Zones stop the timer and protect Link from ordinary Phantoms.
Save from the game's actual save command before long voyages, temple entries, and major boss attempts. Do not rely on an assumed Y-button menu shortcut.
Keep enough rupees for required equipment and supplies, especially the Salvage Arm and dungeon consumables.
Ship parts, treasure maps, fishing, and most salvage rewards are optional for the main ending.
Draw sea routes around visible islands, reefs, and hazards. The ship follows the route automatically, but cannon fire, jumps, stops, and route revisions may still be necessary.
On original hardware, keep the Nintendo DS charged and ensure the microphone works for required windmill, candle, and dialogue inputs.
Prologue and Mercay Island — obtain Oshus’s Sword, the first Sea Chart, and reach the Isle of Ember
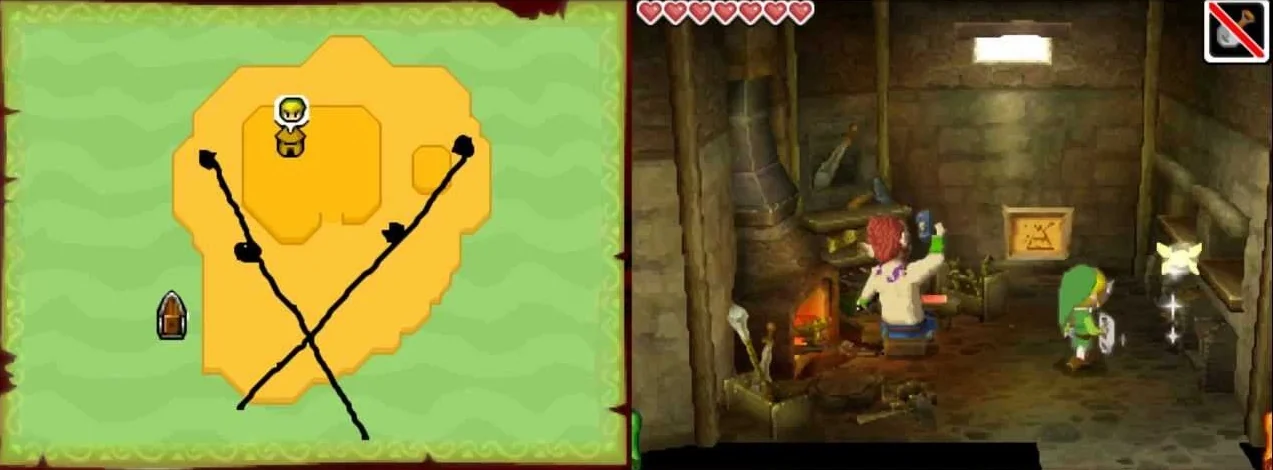
The adventure begins on Mercay Island. Meet Oshus, trigger the collapsed bridge event, enter his storehouse, write 7 on the sign, and take Oshus’s Sword. Complete the sword lesson, cross the northern route and Mercay Tunnel, then ask about Linebeck at the port and Milk Bar. The first visit to the Temple of the Ocean King is mandatory. Free Linebeck, use the two upper crystal switches after the release switch, and take the Southwestern Sea Chart. Return to Mercay Port, rub the southeastern portion of the chart to reveal the Isle of Ember, draw a one-stroke route with the quill, and depart aboard Linebeck’s ship. Boomerang use belongs to a later chapter; this opening section establishes movement, sword gestures, safe-zone awareness, map marking, and sailing controls.
Reach Oshus and trigger the blocked-port sequence
After the opening scenes, Link wakes on the beach with Ciela. Touch the lower screen near Link to walk in that direction. Touch farther away and continue dragging to make him run. Move northeast and enter the first house, then speak with Oshus. He tells Link to look for Linebeck on the eastern side of Mercay Island.
Leave the house and walk east. The bridge toward the eastern side collapses as Link approaches it. Speak with the nearby resident, then return to Oshus’s house and talk to him again. Leave once more and travel toward the northwest passage. Enter the upper area and approach the Red ChuChus. Link cannot defeat them yet, so retreat and return to Oshus. This second conversation is required before the storehouse route opens.
- Speak with Oshus after gaining control of Link.
- Trigger the bridge collapse on the eastern route.
- Speak with the resident near the broken bridge.
- Approach the northwestern Red ChuChus and retreat.
- Return to Oshus for the required conversation.
Open Oshus’s storehouse and obtain the sword
From Oshus’s house, travel east toward the storage cave near the beach. A barrel blocks the entrance. Touch the barrel, then drag in the direction where you want Link to throw it. Enter the cave and walk north until you reach the sealed door and its sign.
The sign asks for the number of palm trees on this side of Mercay Island. The correct answer is 7. Tap the sign and write a clear number 7 on the Touch Screen. If the input is rejected, tap Rewrite and draw the number again with a simple single-stroke shape. Once the door opens, cross the short bridge and open the chest to receive Oshus’s Sword. Read the nearby book for the basic attack instructions, then leave through the entrance.
- Enter Oshus’s storage cave.
- Move the blocking barrel.
- Write 7 on the sealed-door sign.
- Open the chest containing Oshus’s Sword.
- Read the sword-use instructions if the gestures are unfamiliar.
Complete Oshus’s sword training
Oshus meets Link outside the storehouse and takes him back to his house for training. Speak with Oshus to begin. For a targeted attack, tap a training log or enemy directly. Link turns toward the target and strikes it. For a side slash, slide the stylus across the Touch Screen between Link and the target. The direction of the stroke determines the direction of the cut; repeated short strokes can produce several slashes.
For the spin attack, draw a circle around Link in one continuous motion. Make the circle large enough to surround him. Oshus requires the demonstrated attacks to be used on the training targets before the lesson ends. Link can become dizzy if spin attacks or somersaults are repeated excessively, so use the spin only when it is requested or useful. The lesson establishes the core combat gestures needed for the northern route and the first temple.
- Destroy the first targets with direct taps.
- Use side-slash strokes on the required targets.
- Perform the circular spin attack.
- Finish the training conversation with Oshus.
- Leave the house with the sword available for normal use.
Cross the northern route and clear Mercay Tunnel
Leave Oshus’s house and take the western passage into the northern section of the island. Defeat the Red ChuChus with targeted attacks or ordinary slashes. Cut through the thin trees blocking the route. Somersaults are optional for progress, but the gesture is performed by drawing very small circles at the edge of the Touch Screen while Link is moving toward that edge. Use them sparingly because repeated rolls can make Link dizzy.
Enter Mercay Tunnel and move northeast, shifting the rocks that block the first passage. Continue east and defeat the ChuChus that emerge from the ground. Open the chest on the raised platform to obtain a Small Key. Return to the locked door near the entrance and tap it to use the key.
In the larger room, inspect the nearby signs for the lever order. Pull the four levers from left to right in this sequence: second, first, fourth, third. A key appears after the correct sequence. Take it and open the northern door to reach the stairs.
On the second floor, watch the rats and identify the one carrying a key. Push the nearby block in front of the western rat hole so the key-carrying rat is forced through the other opening. Intercept it when it turns and defeat it with the sword. Take the dropped key, unlock the remaining door, and follow the passage to Mercay Village and the port.
- Reach the northern section after sword training.
- Enter Mercay Tunnel.
- Take the first Small Key from the chest.
- Pull the four levers in the second-first-fourth-third order.
- Defeat the key-carrying rat and obtain the second key.
- Reach the port area.
Ask about Linebeck and enter the first Temple of the Ocean King visit
At the port, speak with the person near Linebeck’s ship. You learn that Linebeck is at the Milk Bar. Go to the Milk Bar in Mercay Village and speak with the bartender. The bartender directs Link to the Temple of the Ocean King at the northern end of the island.
A Wooden Shield can be purchased from the village shop if you have enough rupees, but it is optional for this chapter. Leave the village through the northern passage and follow the route to the temple. Enter the Temple of the Ocean King and proceed through the entrance room to the first floor.
Purple checkerboard areas are Safe Zones. They protect Link from the temple’s damaging fog. Move quickly between them when crossing ordinary floor, and break pots inside safe areas if you need recovery hearts. On the first floor, strike the crystal switch in the northwestern portion of the room. This lowers the spikes trapping Linebeck. Return to Linebeck and speak with him. He gives Link a Small Key and asks him to find the temple object connected to the Ghost Ship.
Use the Small Key on the locked door in the northwestern area. Continue to the upper part of the floor. Activate the first upper crystal switch, then cross to the northeastern side and activate the second upper crystal switch. Their effects are temporary, so move directly between objectives and avoid unnecessary detours. When both switches are active, the northern obstruction opens. Reach the large chest and take the Southwestern Sea Chart. Leave through the temple entrance.
- Ask the port resident where Linebeck went.
- Speak with the Milk Bar bartender.
- Enter the Temple of the Ocean King.
- Activate the release switch and speak with Linebeck.
- Use Linebeck’s Small Key on the northwestern door.
- Activate the two upper crystal switches.
- Open the chest containing the Southwestern Sea Chart.
Reveal the Isle of Ember and sail from Mercay
Linebeck waits outside the temple after the first visit. Speak with him, then return toward Mercay Village and the port. At Mercay Port, Oshus and Linebeck examine the Sea Chart. Oshus directs Link to rub the chart’s concealed southeastern portion. Use the stylus over the green, covered area in the southeastern corner until the hidden marking appears. This reveals the Isle of Ember as the next destination.
Board Linebeck’s ship and open the Sea Chart. Select the quill or feather-pen icon and draw the route in one continuous stroke from the ship’s position to the Isle of Ember port marker. Touch GO to begin sailing. The ship follows the drawn route automatically, but the trip still requires attention. If a rock or other obstacle blocks the line, touch STOP and redraw the route around it. If an enemy appears, use the jump icon to avoid it. Do not assume the cannon is available during this opening voyage; the cannon-related progression occurs later.
The chapter ends when the Southwestern Sea Chart has been collected, the Isle of Ember is visible on the chart, and Linebeck’s ship has departed Mercay Island toward the Isle of Ember. The next chapter begins after docking there and finding Astrid.
- Leave the temple with the Southwestern Sea Chart.
- Return to Mercay Port.
- Rub the southeastern covered portion of the Sea Chart.
- Reveal the Isle of Ember marking.
- Draw a one-stroke route with the quill icon.
- Touch GO and depart Mercay Island.
Before you move on
- Oshus’s Sword is in Link’s inventory.
- The sword lesson covering targeted attacks, side slashes, and spin attacks is complete.
- Link has crossed Mercay Tunnel and reached the port.
- Linebeck has been found through the Milk Bar and first Temple visit.
- The Southwestern Sea Chart has been taken from the Temple of the Ocean King.
- The Isle of Ember marking is visible on the Sea Chart.
- Linebeck’s ship is sailing away from Mercay Island toward the Isle of Ember.
Isle of Ember and the Temple of Fire — first dungeon (Blaaz)
After the opening Temple of the Ocean King sequence, sail from Mercay Island to the Isle of Ember. Free Astrid by defeating the Octoroks in her basement, calling through the sealed door, and marking the three torch locations shown by Kayo’s clues. Confirm that Link still intends to rescue Tetra so Astrid opens the mountain route. Enter the Temple of Fire by extinguishing its two entrance candles, then solve the trap-floor, crystal-switch, Boomerang, torch, and Boss Key puzzles. Defeat Blaaz by striking his split forms in one-horn, two-horn, three-horn order with the Boomerang, then stun and attack the merged boss with the sword. Leaf joins Link as the Spirit of Power, and the boss room contains a Heart Container. After speaking with Astrid, collect her Power Gem and sail back to Mercay Island. The Temple of Fire does not provide a new Sea Chart; the next required objective is the second Temple of the Ocean King visit, where Link obtains the Phantom Hourglass.
Sail from Mercay Island to the Isle of Ember
Begin this chapter at Mercay Island after completing the opening Temple of the Ocean King sequence and receiving the marked Sea Chart route. Go to Linebeck’s ship at the dock. On the Sea Chart, tap the feather-pen icon, draw a route from the ship to the Isle of Ember’s anchor, and release the stylus. The ship follows the route automatically.
A barrier can rise from the water during the voyage. Tap the upward arrow at the bottom of the sailing screen to make the ship jump over it. Cannon Island can be visited on this trip, but it has no required objective yet. Continue to the Isle of Ember and disembark. Linebeck stays with the ship while Link explores.
- The first Temple of the Ocean King sequence is complete.
- The voyage begins from Mercay Island, not Southern Island.
- The ship reaches the Isle of Ember.
- Any underwater barrier on the route is cleared.
Free Astrid and mark the three torches
From the dock, travel east and go up the stairs near the fortune-teller sign. Enter Astrid’s decorated house, then descend into the basement. Link is trapped there and Octoroks appear. Defeat all of them with the sword. Examine the sign beside the sealed exit. Ciela explains that Link must call out so the person behind the door can hear him. Speak toward the Nintendo DS microphone. If voice detection is unreliable, blowing into the microphone is another way to trigger the response on original DS hardware.
Astrid explains that her assistant Kayo knows how to open the door and that the three torches on the island must be marked. Leave the house and go southeast to Kayo’s house. Tap the book inside and mark the torch in that house. Then travel east along the coast to Kayo’s skeleton and spirit. Kayo reveals the torch nearby; mark that location. From there, go counterclockwise around the island toward the northern area and mark the third torch.
Return to Astrid’s basement and tap the map. Mark the torch in Kayo’s house, the torch in the eastern area beside Kayo’s spirit, and the torch in the northern area. When the marks are correct, Astrid leaves the sealed room and tells Link’s fortune. Continue through the questions until she asks whether Link still intends to rescue Tetra. Answer yes. Speak with Astrid again afterward. She opens the route to the Temple of Fire.
- The Octoroks in Astrid’s basement are defeated.
- The microphone call has opened communication with Astrid.
- The torch in Kayo’s house is marked.
- The eastern torch beside Kayo’s spirit is marked.
- The northern torch is marked.
- Link confirms that he still intends to rescue Tetra.
- Astrid has opened the mountain route.
Climb the volcano and open the Temple of Fire
Leave Astrid’s house and travel east to the stone door. Tap the door to open it, then follow the mountain path upward. The volcano erupts while you climb. Dark shadows on the ground mark where falling rocks will land, so move away from those spots before impact. Fight only when necessary and continue to the temple entrance.
Two candles stand beside the sealed entrance. Face each candle and blow into the microphone until its flame goes out. Both candles must be extinguished before the door opens. Enter the Temple of Fire. Any rupee chest on the mountain route is optional and is not needed for dungeon progression.
- The mountain gate is open.
- The volcano route has been climbed.
- Both entrance candles are extinguished.
- The Temple of Fire has been entered.
Temple of Fire first floor and the Boomerang
On the first floor, go north while avoiding the spinning fire bar. Follow its movement to the room on the right. Defeat the ChuChu, climb to the upper part of the room, and run right so Link automatically jumps across the gaps. Examine the sign near the northeastern trap-floor section and copy its safe path onto your map.
Go south from the sign. Keese trap Link in a room; defeat them and open the chest for a Small Key. Return to the locked door near the ledge, unlock it, and follow the safe route copied from the sign. At the end, stand among the four crystal switches and draw a large circle around Link to perform a Spin Attack that activates them together.
Return to the spinning fire-bar room and follow the bar until the stairs on the north wall are accessible. On the second floor, cross the colored-block area and strike the red crystal switch to change which blocks are raised. Continue to the room containing the green Gels. Defeat every Gel to make the dungeon-item chest appear. If a small Gel clings to Link, rub the stylus across Link to remove it. Open the chest to obtain the Boomerang.
Equip the Boomerang and draw its flight path on the Touch Screen. Hit the crystal switch on the right side of the room to remove the flames on the left. In the next room, draw one route that strikes both crystal switches before the Boomerang returns. The flames disappear and the stairs become usable.
- The first-floor safe route is copied onto the map.
- The first Small Key is obtained and used.
- The four first-floor crystal switches are activated.
- The Boomerang is obtained.
- The first flame barriers are removed.
- The stairs to the lower section are open.
Lower sections: Fire Bubbles, levers, and the rat’s Small Key
In the lower first-floor section, use the Boomerang on the crystal switch beside the red blocks. Do not strike that switch with the sword from the wrong position, because the blocks can trap Link. Continue south and use the Boomerang on the next distant switch to remove the nearby flames. In the room with Fire Bubbles, strike each Bubble with the Boomerang to extinguish its flames, then defeat the exposed skull with the sword. Climb the stairs in the southwest corner.
On the next section, use the Boomerang to defeat the Fire Keese. Pull the wall lever on the eastern side, cross the upper route near the large spinning fire bar, and pull the second lever on the southern side. The western door opens. Stand just outside that doorway so the rat carrying a Small Key runs between the wall openings. Draw the Boomerang across its path to hit the rat and collect the key.
Travel to the southeast section, where red blocks obstruct the route. Strike the lower crystal switch with the Boomerang, move into the area between the red and blue blocks, and strike the switch again from that position. The route changes, allowing Link to reach the eastern locked door. Use the rat’s Small Key there and climb the stairs to the third floor.
- The lower crystal switches are activated with the Boomerang.
- The Fire Bubbles are stripped of their flames before sword attacks.
- Both wall levers are pulled.
- The rat carrying the Small Key is hit with the Boomerang.
- The eastern locked door is opened.
- The stairs to the third floor are reached.
Third floor: switch order, torches, and the Boss Key
From the third-floor entrance, go south past the spinning fire bar and inspect the sign. Copy the four-switch order shown there onto the map. Go north through the Gel area to the two candles and blow both out with the microphone. Continue north to the four-switch room. Stand on the central tile and draw a Boomerang path through the switches in the exact order shown by the sign. A Small Key appears; retrieve it with the Boomerang and use it on the southern locked door.
The next room contains Fire Keese, electric ChuChus, and a fire-spitting torch. Use the Boomerang to defeat the Fire Keese. Hit the electric ChuChus with the Boomerang to stun them, then finish them with the sword while they are stunned. In the following room, remove the Fire Bubbles’ flames with the Boomerang and defeat them with the sword. The northern flames disappear.
Read the sign in the next area. Step on the floor switch to light one torch, then draw a Boomerang path through that flame and into the two unlit torches. When all three torches are lit, the flames in the northeast section vanish. Go southeast toward the spinning fire bar and hit the nearby crystal switch with the Boomerang. This opens the route to the large chest containing the Boss Key.
Carry the Boss Key back to the locked barrier in the southern part of the floor. Tap the barrier to insert the key, then climb the stairs. On the fourth-floor landing, inspect the tablet in the upper-left area to create a blue warp point. Use it to return to the entrance if Link needs health or supplies. The matching entrance warp returns him to the landing.
- The four-switch order is copied from the sign.
- The two third-floor candles are extinguished.
- The third-floor Small Key is collected and used.
- The three torches are lit.
- The Boss Key is collected.
- The Boss Key opens the southern barrier.
- The blue entrance warp is activated.
Defeat Blaaz, Master of Fire
Climb the stairs from the fourth-floor landing to enter Blaaz’s room. The door locks and Blaaz splits into three invulnerable forms. Check their horn counts on the upper-screen map: one form has one horn, one has two horns, and one has three horns. Equip the Boomerang and draw one route that strikes the one-horn form first, the two-horn form second, and the three-horn form third. The order is required to make the forms recombine.
When Blaaz reforms, use the Boomerang to stun him and attack the merged boss with the sword. Watch the upper screen when he disappears so you can move toward his new position. Keep Link moving around the room and avoid the dark shadows on the floor, which warn of incoming eruptions. Blaaz can push Link backward during the sword attack, but that shove does not remove hearts.
After taking damage, Blaaz splits again. Repeat the same Boomerang sequence: one horn, then two horns, then three horns. When he recombines, stun him with the Boomerang and resume sword attacks. Continue through the repeated cycles until Blaaz is defeated. If Link takes damage, break perimeter pots when possible to look for recovery hearts.
- The one-horn form is struck first.
- The two-horn form is struck second.
- The three-horn form is struck third.
- The merged Blaaz is stunned and attacked with the sword.
- The eruption shadows are avoided.
- Blaaz is defeated.
Collect the rewards and return to Mercay Island
After the victory scene, Leaf joins Link as the Spirit of Power. Open the chest in the boss room to collect the Heart Container, then step into the blue light to leave the temple. Return to Astrid’s house and speak with her. She explains that the Spirits of Wisdom and Courage still need to be rescued and gives Link a Power Gem.
Go back to the dock, speak with Linebeck, and draw a route to Mercay Island. A golden frog encountered during the voyage is optional and can be ignored. When Link reaches Mercay Island, do not search the Temple of Fire for another Sea Chart: this dungeon does not provide one.
The next mandatory objective is the second visit to the Temple of the Ocean King. Enter the temple and follow Oshus’s instructions to reach the altar and obtain the Phantom Hourglass. That visit begins the next chapter’s timed Safe Zone and Phantom-routing progression.
- Leaf, the Spirit of Power, has joined Link.
- The Heart Container is collected.
- Astrid has awarded the Power Gem.
- Linebeck is sailing back to Mercay Island.
- The Temple of Fire is complete.
- No new Sea Chart is expected from the Temple of Fire.
- The next destination is the second Temple of the Ocean King visit.
- The Phantom Hourglass is the next required story objective.
Before you move on
- Astrid is free and has unlocked the mountain route.
- The Boomerang is in Link’s inventory.
- The first-floor safe route and third-floor switch order have been completed.
- The Boss Key has opened the route to Blaaz.
- Blaaz is defeated.
- Leaf, the Spirit of Power, has joined Link.
- The Heart Container has been collected.
- Astrid has given Link the Power Gem.
- Link and Linebeck are returning to Mercay Island.
- The next mandatory objective is the second Temple of the Ocean King visit and the Phantom Hourglass.
References for this chapter
- The Legend of Zelda: Phantom Hourglass Instruction Booklet
- Isle of Ember — The Legend of Zelda: Phantom Hourglass Walkthrough
- Temple of Fire — The Legend of Zelda: Phantom Hourglass Walkthrough
- The Legend of Zelda: Phantom Hourglass/The Temple of Fire — StrategyWiki
- The Legend of Zelda: Phantom Hourglass — Walkthrough — DS — GameFAQs
Temple of the Ocean King — second visit, the Phantom Hourglass, and safe-zone routing
After defeating Blaaz and returning to Mercay Island, go back to the Temple of the Ocean King. Oshus and Linebeck will be waiting outside the entrance. Oshus sends Link to the altar, where touching the floating hourglass grants the Phantom Hourglass. Its Sand of Hours protects Link from the temple’s life-draining curse while sand remains. Purple Safe Zones pause the timer and hide Link from ordinary Phantoms. Red pots create temporary small Safe Zones, but Phantoms can cross them, so they are useful for concealment rather than permanent protection. The second visit continues through floors B1, B2, and B3. Avoid Phantoms, solve the torch and switch puzzles, carry three Force Gems to their pedestals, and collect the Northwestern Sea Chart. The blue warp returns Link to the entrance, leaving the next objective as the northwestern sea route and the Isle of Gust.
1. Return to Mercay and trigger the second temple entry
After the Temple of Fire is complete and the Spirit of Power has joined Link, sail back to Mercay Island. Save before leaving the ship, then travel north to the Temple of the Ocean King. This is the second visit; do not repeat the earlier Linebeck rescue or search for the Southwestern Sea Chart.
Enter the temple and allow the conversation with Linebeck and Oshus to finish. Oshus explains that the altar above the entrance holds a way to survive the temple’s curse. Walk up either side staircase to the altar and touch the floating hourglass when the interaction prompt appears. The Phantom Hourglass is added to Link’s inventory, and its Sand of Hours is filled for the initial run.
- Return to Mercay after the Temple of Fire.
- Enter the temple with Oshus and Linebeck present.
- Climb to the altar.
- Touch the hourglass and confirm that the Phantom Hourglass is in the inventory.
2. Enter the timed route and learn Safe Zones
Go back down to the entrance level and pass through the door marked with the Spirit of Power symbol. In the next room, Ciela explains that the remaining Sand of Hours is shown on the upper screen. Continue north and tap the stone door to open it, then go down the stairs to B1.
While Link is outside a Safe Zone, Sand of Hours drains and protects him from the temple’s curse. Standing on the purple Safe Zone tiles pauses the drain. Natural purple Safe Zones also hide Link from ordinary Phantoms: a Phantom cannot see, attack, or enter one. Use every natural Safe Zone as a checkpoint. The Hourglass does not stop a Phantom from seeing Link in exposed areas, and it does not make Link safe after the sand has run out.
The normal way to restore the full supply is to leave the temple and expose the Phantom Hourglass to the outside light. Some later temple runs also contain collectible time or sand sources, but do not leave this route to search for optional bonuses. If the timer becomes too low for the next crossing, retreat to the entrance and reset it outside.
- Pass through the Spirit of Power door.
- Watch the Sand of Hours on the upper screen.
- Use purple tiles to pause the drain and break Phantom pursuit.
- Remember that the Hourglass does not replace Phantom avoidance.
3. B1 — light the torches and obtain the small key
On B1, moving south from the entrance causes two Phantoms to appear. Their viewing cones are shown on the map. Do not attack them with the basic sword. Move east to the skeleton for the hint, then reach the northeast corner and strike the crystal switch. One torch in the southern part of the room lights for a limited time.
Return toward the southern Safe Zone while the Phantom’s viewing cone is pointed away. From the Safe Zone, use the Boomerang to ignite the other torch. You need both torches lit before the temporary flame barrier disappears. If the timing fails, return to the northeast crystal switch and repeat the sequence.
Move through the opened southwest route and use the Safe Zones to cross the room. When the Phantom patrol has moved away, reach the skeleton who explains the red pots. Strike a red pot to create a small temporary Safe Zone, then use the nearby switch to open the northwest door. Red-pot zones conceal Link temporarily, but ordinary Phantoms can pass through them, so do not treat them like purple floor zones.
When the Phantom’s route is clear, enter the northwest section and take the small key. Carry it east to the locked door and go down the stairs to B2.
- Avoid the two B1 Phantoms.
- Light both southern torches.
- Use natural purple Safe Zones as checkpoints.
- Use a red pot only as temporary concealment.
- Collect the B1 small key and unlock the east-side door.
4. B2 — remove the flames and open the route to B3
On B2, a Phantom blocks access to a lever. Lure it away by striking a nearby crystal switch, then move behind it and pull the lever. The flames near the lever disappear. Next, stand southwest of the Phantom and use one Boomerang throw to strike both crystal switches near it. They must be activated within their limited window; hitting both with one throw is the safest method.
Go southwest through the space where the flames were and break the red pot to create a temporary Safe Zone. From there, use the Boomerang on the crystal switch below the remaining flame barrier, then move into the southern Safe Zone. Wait for the Phantom’s patrol to pass before heading east and north.
Do not strike the eastern crystal switch immediately. First wait until the Phantom has moved west, then go east, break the red pot, and use the temporary zone to reach the floor switch. Stand on that switch while using the Boomerang to collect the key it exposes; stepping away causes the spikes to rise again.
Return to the blue-tile area, go north, and activate the switch that lowers the red blocks. Take the key west to the locked door and descend to B3.
- Lure the B2 Phantom away from the lever.
- Pull the lever to remove the nearby flames.
- Activate the two timed crystal switches.
- Use the floor switch while retrieving the key.
- Lower the red blocks and unlock the B3 staircase.
5. B3 — place the three Force Gems
On B3, reach the southwest corner and pull the lever. This removes the flames blocking the southeast platform. Go to that platform, break the red pot, and use its temporary zone while watching the Phantom patrols. The nearby switches control the trap door. Open it when the Phantom is positioned over the opening so the route is safe.
Move north when the spikes lower and take the small key. Continue to the southeast chest and collect the first Force Gem. A cutscene shows the three pedestals where the gems must be placed. Carry the gem west, then north, then east to the pedestals. Force Gems slow Link while carried, so do not attempt to cross raised spikes with one in hand. Tap a pedestal while holding the gem to place it.
Use the small key on the locked door in the southwest area and take the second Force Gem inside. Carry it to a pedestal by the same route. Then reach the northwest corner and open the chest for the third Force Gem. Bring it to the final pedestal. When all three are placed, the northern door opens.
- Pull the southwest lever.
- Use the southeast red pot as temporary cover.
- Collect the first Force Gem from the southeast chest.
- Unlock the southwest room and collect the second Force Gem.
- Take the third Force Gem from the northwest chest.
- Place all three Force Gems on the pedestals.
6. Collect the Northwestern Sea Chart and leave
Go through the northern door into the next room. The northern door in this room is not available during this visit, so do not spend time trying to open it. Move west with Ciela until the game confirms that the Hourglass has stopped; this is a natural Safe Zone.
Open the chest in the northwest corner to obtain the Northwestern Sea Chart. A blue warp appears on the east side of the room. Step onto it to return to the temple entrance. Leave the temple and speak with Linebeck as needed, then use the newly revealed northwestern sea route as the next story objective. The Isle of Gust is the next required destination.
- Enter the room beyond B3.
- Reach the natural Safe Zone where the Hourglass stops.
- Open the northwest chest.
- Confirm that the Northwestern Sea Chart was collected.
- Use the blue warp and leave the temple.
Before you move on
- The Phantom Hourglass appears in Link’s inventory after the altar scene.
- Link has entered B1 and learned to read Phantom viewing cones.
- The B1 torch puzzle is complete and the small key has been used on the B2 staircase door.
- The B2 lever, timed crystal switches, floor switch, and red-block route are complete.
- All three Force Gems on B3 have been placed on their pedestals.
- The Northwestern Sea Chart has been collected from the northwest chest beyond B3.
- The blue warp has returned Link to the temple entrance, and the next objective is sailing toward the Isle of Gust.
Isle of Gust and the Temple of Wind (Cyclok)
After clearing the fog route into the Northwestern Sea, sail to the Isle of Gust and activate its three sacred windmills. The opened gates lead to the Temple of Wind, where bomb flowers, wind jars, vents, geysers and the Bomb Bag control the dungeon route. Cyclok is defeated by throwing bombs into the active floor cyclones when his shadow passes over them, then attacking while he is grounded. The victory releases Neri, adds two minutes to the Phantom Hourglass, and provides a Heart Container. Leave through the temple warp and continue the main quest by returning to the Temple of the Ocean King.
Reach the Isle of Gust through the Northwestern Sea
From the previous Temple of the Ocean King visit, follow the chart clue and sail north into the Northwestern Sea. Trace the route through the fog exactly as shown on your Sea Chart. Watch for explosive barrels and sea hazards while following the safe passage. Once the fog route is cleared, the Isle of Gust is the large island near the center of the Northwestern Sea. Dock there and save before beginning the land route.
The island is built around strong horizontal gusts. Move in short strokes and wait for an opening before crossing exposed ledges. Gusts can push Link into pits, but they also provide access to higher ground through wind vents. Defeat only the enemies blocking your route and use the island’s windmills, vents and ledges as landmarks. When you reach a cracked wall, take a bomb from a nearby bomb flower and throw it at the crack to open the passage.
Inside the cave beyond the cracked wall, inspect the chart and read the journal if desired. The marked information explains the route and nearby optional locations. Leave the cave through the wind vent, then continue toward the sandy northern section. Treasure Maps and gems found on this approach are optional; the required objective is reaching the windmill area.
- Clear the fog route into the Northwestern Sea.
- Dock at the Isle of Gust and save.
- Open the cracked wall with a bomb flower.
- Reach the sandy area containing the sacred windmills.
Activate the three sacred windmills
In the sandy area, use the map tablet or plaque to identify the three sacred windmill locations. They are positioned around the area rather than placed together in one line: two are on the western side and one is toward the southeast. Mark them on the lower-screen map if needed before crossing the sand.
Sand Worms patrol this section. Their movement is sensitive to Link’s motion, so avoid wandering near them unnecessarily. Walk carefully across open sand, use higher ledges when available, and throw a bomb flower at a Sand Worm if it blocks the required route. Dig up covered wind vents with the Shovel when a vent is needed to reach a raised platform.
Stand directly in front of each sacred windmill and blow into the Nintendo DS microphone when the game prompts you. If the windmill does not activate, reposition Link so he is facing the front rather than the side. Activate all three. The result is that the previously sealed gates near the center of the sandy area open, allowing access to the Temple of Wind approach. The wind around the island is not removed; ordinary gusts and vents remain hazards inside the approach and dungeon.
Use either opened gate, drop from the ledge, and enter the Temple of Wind. Check your health before entering. The optional chest in the sandy area and nearby gems are not needed for the dungeon or the story.
- Identify the three windmill locations from the island clue.
- Activate the two western windmills and the southeastern windmill.
- Use the opened gates to reach the Temple of Wind.
- Do not treat optional gems or treasure maps as required objectives.
Cross the entrance floor and open the first route
At the Temple of Wind entrance, move north through the gusts by timing each crossing. At the bomb flower, pick it up and throw it north across the gap so it lands on the central marked tile between the rows of bomb flowers. The resulting chain reaction activates both switches and extends the bridges across the gap.
Cross the new bridges and defeat or avoid the nearby ChuChus. Push the block to the right until it blocks the wind vent, then circle around and strike the switch beyond it. This disables the nearby gusts long enough to use the stairs and bridges safely.
Go through the opened route and follow the stairs toward the lower floors. The early route uses wind jars, vents and geysers in sequence. When a wind jar is blocking or redirecting airflow, push it along the floor rather than trying to fight the current. On B1, move the first wind jar left twice so its airflow lines up with the windmill. Return to the lower route afterward.
On B2, take the northern passage and use a bomb flower to destroy the cracked blocks that obstruct the stairs. Return to B1, cross the bridge and move the second wind jar left twice to align the second windmill. When both windmills are spinning, a small key drops. Collect it, then use the geysers to reach the southeastern stairs and return to B2.
Use the small key on the northeastern locked door. Climb the stairs and open the chest to obtain the Bomb Bag. From this point onward, Link can carry bombs instead of depending only on nearby bomb flowers.
- Trigger the two switches with the entrance bomb-flower chain reaction.
- Block the first wind vent and strike the switch.
- Align both wind jars with their windmills.
- Collect the small key.
- Open the chest containing the Bomb Bag.
Use bombs, vents and geysers to reach the boss door
With the Bomb Bag, return through the dungeon route and use bombs on cracked blocks and locked bombable obstacles. Some bombs must be thrown into airflow so a vent carries them to a distant target. Do not throw bombs randomly into gusts; first identify the cracked block, switch or bombable object that the airflow is meant to reach.
Continue through the lower and upper passages until you reach the room containing the Boss Key. In the vent room, destroy the cracked blocks that obstruct the geyser route. Use the geyser to rise, collect the Boss Key, and carry or throw it through the opened route toward the boss door. If the key is pushed or carried into an awkward position, return to the nearby safe floor and approach it again rather than trying to fight enemies while holding it.
Near the upper route, read the tablet. This creates a blue warp portal back to the entrance. Use the portal if you need to leave, refill supplies, or save before the boss; it does not complete the dungeon, so returning later requires retracing the route from the entrance. Before climbing to Cyclok, break the nearby pots to collect hearts and bomb supplies. Enter the boss room only after confirming that the Bomb Bag has ammunition.
- Use the Bomb Bag on cracked blocks and bomb targets.
- Reach and collect the Boss Key.
- Read the tablet to create the blue entrance warp.
- Refill hearts and bombs before entering Cyclok’s arena.
Defeat Cyclok, Stirrer of Winds
Cyclok remains above the arena and sends cyclones down toward Link. Watch the shadows on the floor and keep moving around the outer part of the room. Cyclok also descends and charges across the floor, so do not stand directly beneath him or wait in the center after throwing a bomb.
Several cyclone vents appear on the arena floor. When a vent is active, throw a bomb into it. The airflow carries the bomb upward, but the bomb will hit Cyclok only when his shadow is positioned above that vent. Wait for the alignment instead of wasting bombs on inactive vents. A successful hit stuns Cyclok and brings him down to the floor.
Run to the grounded boss and slash him repeatedly. Retreat as soon as he begins to recover, then resume circling the arena and watching the shadows. The pattern is consistent: align the bomb with the active cyclone, stun Cyclok, attack while grounded, and withdraw before his next charge.
As the fight continues, Cyclok sends down more cyclones at once and moves somewhat faster. The arena perimeter contains bomb flowers, allowing you to replenish bombs if the Bomb Bag runs empty. Collecting them is safest immediately after Cyclok has been stunned or while he is on the opposite side of the room. Do not chase him through falling cyclones; surviving until the next bomb opportunity is more important than forcing an attack.
- Keep moving around the arena and watch cyclone shadows.
- Throw a bomb into the active floor cyclone when Cyclok is aligned above it.
- Slash Cyclok while he is grounded.
- Use the arena bomb flowers if the Bomb Bag is empty.
- Repeat the stun-and-attack cycle until Cyclok is defeated.
Collect the rewards and resume the main quest
After Cyclok is defeated, the game releases Neri, the Spirit of Wisdom. The Phantom Hourglass receives two additional minutes of sand. Open the treasure chest in the boss room to collect the Heart Container, then step into the blue warp portal to return to the temple entrance.
Leave the Temple of Wind and return to Linebeck’s ship. Save at the dock before sailing. The temple victory advances the story toward another visit to the Temple of the Ocean King. If the next objective does not appear immediately, check the Sea Chart and speak with the relevant characters at the ship or the next story location rather than searching the Isle of Gust for another required item.
The Isle of Gust’s treasure chests, gems and other rewards can be collected during later visits. They are optional and do not replace the required rewards from Cyclok. The chapter is complete once Neri has been released, the extra sand and Heart Container have been obtained, and the next Temple of the Ocean King objective is available.
- Confirm that Neri, Spirit of Wisdom, appears.
- Receive two additional minutes of Phantom Hourglass sand.
- Collect the Heart Container from the boss-room chest.
- Warp out, return to the ship and save.
- Confirm that the next Temple of the Ocean King objective is active.
Before you move on
- The Temple of Wind has been entered and completed.
- Cyclok has been defeated.
- Neri, the Spirit of Wisdom, appears after the battle.
- The Phantom Hourglass gains two minutes of sand.
- The Heart Container in the boss room has been collected.
- Link leaves through the blue warp and the next Temple of the Ocean King objective is available.
References for this chapter
Third Temple of the Ocean King visit, Salvage Arm, Sun Key, and the Temple of Courage route
After defeating Cyclok in the Temple of Wind, return to the Temple of the Ocean King for the third required visit. Bomb shortcuts now reduce the early-floor detours. Progress through 1F and B1-B6, collect the three Force Gems on B3, defeat or avoid Phantom Eyes on B4, and solve the governing crest puzzle on B6. Transfer the sun-shaped crest to the Southwestern Sea chart and use the blue portal to leave. The mailbox outside then carries Eddo’s letter, sending you to Cannon Island to buy the Salvage Arm. Use it at the newly revealed green crest in the Southwestern Sea to recover the Sun Key. Return to Molida Island, defeat the Giant Eye Plant, enter the Old Wayfarer’s hideaway through the previously discovered hole, unlock the Sun Door, and follow the northern route toward the Temple of Courage. Optional salvage and ship customization can wait.
Return to Mercay Island and enter the third Temple of the Ocean King visit
When you leave the Temple of Wind on the Isle of Gust, speak with Linebeck and sail directly to the Southwestern Sea, then plot a course to Mercay Island. Land at Mercay and walk north to the Temple of the Ocean King. Save before entering if you want a safe restart point for the timed route.
The first three floors repeat familiar layouts, but bombs create important shortcuts. On 1F, go straight to the stairs and descend to B1. On B1, move toward the northeast corner. Bomb the cracked blocks to the left, step on the floor switch to open the door, take the small key, and use it on the locked northeast door. This avoids much of the old route.
- Leave the Isle of Gust after the Temple of Wind is complete.
- Return to Mercay Island and enter the Temple of the Ocean King.
- Carry bombs and save before beginning the timed run.
- Use the bomb shortcut on B1.
Cross B2 and complete the Force Gem route on B3
On B2, wait until the Phantom is looking away, then move south and bomb the cracked wall. Use the revealed shortcut and retreat to the northeast safe zone if the Phantoms become alerted. Hit both crystal switches near the northeast side so the small key drops. From the eastern safe zone, step on the floor switch and use the Boomerang to collect the key without exposing yourself unnecessarily. Cross the lowered blocks, strike the switch that changes which blocks are lowered, and unlock the western door to B3.
B3 requires three Force Gems in the slots at the upper-right portion of the floor. Take the first gem from the northwest chest and return it to its slot. Bomb the blocks near the northeast side for a time bonus if needed. Take the second gem from the southeast chest and return it. Near the southeast flames, dig the soft soil to reveal a wind geyser. Ride it upward, activate the floor switch to trap the Phantom, and take the small key it leaves behind. Use the key on the southwest locked door, carry the third Force Gem to the slots, and proceed through the Door of Wisdom. Neri opens the way; collect the nearby time bonus before descending to B4.
- Bomb the B2 shortcut and use safe zones when Phantoms react.
- Collect and place all three B3 Force Gems.
- Use the shovel to reveal the B3 wind geyser.
- Trap the Phantom, take its small key, and open the southwest door.
- Let Neri open the Door of Wisdom.
Clear B4 and reach B5
B4 introduces Phantom Eyes. A Phantom Eye does not directly attack, but if it sees Link it alerts the Phantoms and slows movement. From the eastern side, use the Boomerang through the gust of wind to hit the crystal switch and stun the nearby Phantom Eye. Defeat that Eye with the sword once the wind stops.
Move through the safe zones while watching Phantom patrols. Use the Boomerang around corners to stun the other Phantom Eyes before striking them. After the Eyes are defeated, use the soft-soil patch in the southwest to reveal a wind geyser. Ride it upward and hit the switch that lowers the eastern spikes. Bomb the cracked wall near the west side, take the key from the opened area, and use it on the southern locked door. The Power Gem chest on this floor is optional; do not risk the timed route for it if your sand is low.
- Stun Phantom Eyes with the Boomerang before attacking.
- Use safe zones to wait out Phantom patrols.
- Reveal the southwest wind geyser with the shovel.
- Bomb the wall, take the small key, and unlock the southern door.
Cross B5 and solve the governing crest on B6
On B5, wait for the spikes on the western side to lower, then move across and use the Boomerang on the crystal switch beyond them. This lowers the eastern spikes and lets you collect the time and health supplies. Return west, go north, and defeat the Gold ChuChus. Continue into the next room and defeat the Miniblins. Use the Boomerang on the switch to stop the wind, then open the appearing chest if you need the Red Potion. Descend to B6.
B6 contains the four tablets that describe the order of the governing crest. You can read them and mark the sequence on your map, but the required order is first point at the upper-left, second at the upper-right, third at the lower-left, and fourth at the lower-right, with the line returning to the upper-left. Use the switches and safe zones to cross the room, deactivate the gust jars, and reach the tablets. In the northwest section, dig up the wind geyser and place a bomb on it to destroy the cracked blocks; ride the geyser to the switch that lowers the remaining spikes. Bomb the southwest blocks to reach the final tablet. At the central red door, draw the crest in one continuous stroke: upper-left to upper-right, down to lower-left, across to lower-right, then back to upper-left.
- Use the B5 switches before crossing the spike fields.
- Defeat the Gold ChuChus and Miniblins to open the route.
- Read or record the four B6 tablet positions.
- Draw the crest in the required single continuous stroke.
Transfer the sun crest and trigger Eddo’s letter
After the red door opens, climb the stairs and examine the sun symbol. Press the displayed crest onto the Sea Chart, select the Southwestern Sea quadrant, and close the Nintendo DS system so the crest transfers to the map. On original Nintendo DS hardware, physically close the system; this is the game’s required map-transfer action.
Step into the blue portal to return to the temple entrance, then leave the temple. As you walk toward Linebeck, the mailbox will be shaking. Examine it and read Eddo’s letter explaining that the Salvage Arm is ready on Cannon Island. This letter and the new green crest are the story transition from the third temple visit to the salvage sequence.
- Transfer the sun crest to the Southwestern Sea chart.
- Use the blue portal to exit the temple.
- Read Eddo’s letter at the shaking mailbox.
- Confirm that the green salvage crest is visible on the Southwestern Sea chart.
Buy the Salvage Arm on Cannon Island
Sail to Cannon Island and enter Eddo’s Garage. Speak with Eddo and respond enthusiastically when he asks how badly you want the Salvage Arm. The Nintendo DS microphone is used during this exchange; shouting or blowing into it can reduce the purchase price. The price can range from 200 to 1,000 rupees, so make sure you have enough money before starting.
Return to Linebeck’s ship after the purchase. The Salvage command now appears in the ship’s menu when the boat is positioned over a salvage marker. Do not spend money on optional ship parts before securing the arm and paying for any needed repairs.
- Sail to Cannon Island after reading Eddo’s letter.
- Enter Eddo’s Garage and purchase the Salvage Arm.
- Use the microphone response to seek the lower price.
- Confirm that Salvage appears in the ship menu.
Salvage the Sun Key from the green crest
Plot a course to the green crest in the Southwestern Sea, located near the middle of the revealed quadrant. Stop directly over it, open the ship menu, and choose Salvage. The arm has its own durability display. Move it horizontally with the Touch Screen controls and adjust the descent speed so you can slow down near walls, ledges, and Octomines. Moving Octomines can push the arm sideways, so correct the drift before it reaches another obstacle.
At the bottom, position the arm over the chest and attach to it. Bring the arm back to the surface carefully, again slowing near mines and walls. The chest contains the Sun Key. If the arm is damaged, dock at an island and enter the dockyard building beside the dock to pay for repairs. The required chest is the green-crest objective; other red X locations are optional at this stage.
- Reach the green crest in the Southwestern Sea.
- Use Salvage from the ship menu.
- Avoid Octomines and underwater walls on the descent and ascent.
- Recover the chest containing the Sun Key.
- Repair the Salvage Arm at a dockyard if necessary.
Defeat the Giant Eye Plant and open Molida Island’s northern route
Sail to Molida Island with the Sun Key. The Giant Eye Plant rises from the water and blocks the dock. Draw a route that carries the ship back and forth in front of it, then fire the cannon at its exposed eye. When it closes the eye and launches green spiked projectiles, shoot those projectiles with cannon fire before they hit the ship. Resume firing at the eye whenever it opens. Once the plant is defeated, the sky clears and you can dock.
On Molida Island, return to the hole beneath the palm tree at the intersection you identified during the earlier island visit. Enter the hideaway and travel north to the Sun Door. Tap the door and use the Sun Key. Continue through the opened passage and exit at the northern side of the island. The Temple of Courage is ahead, but its entrance remains sealed until the surrounding light-gazing statues are aligned. Read the nearby tablet, rotate the statues so their light focuses on the temple door, and activate the entrance. Stop here before entering the temple if this chapter is only covering the route setup; the dungeon itself belongs to the next chapter.
- Defeat the Giant Eye Plant with cannon fire.
- Shoot its green projectiles before they strike the ship.
- Dock at Molida Island after the plant disappears.
- Use the previously discovered hole to reach the Sun Door.
- Unlock the Sun Door with the Sun Key.
- Open the northern route and activate the Temple of Courage entrance.
Before you move on
- The third Temple of the Ocean King visit is complete through B6.
- The sun crest has been transferred to the Southwestern Sea chart.
- The blue portal has returned Link to the temple entrance and Eddo’s letter is available at the mailbox.
- The Salvage Arm has been purchased from Eddo on Cannon Island.
- The Sun Key has been recovered from the green crest salvage point.
- The Giant Eye Plant has been defeated and Molida Island is accessible.
- The Sun Door on Molida Island has been opened.
- The northern route is open and the Temple of Courage entrance has been activated.
References for this chapter
- The Legend of Zelda: Phantom Hourglass Instruction Booklet
- Phantom Hourglass Walkthrough — Ocean King Part III
- Phantom Hourglass Walkthrough — Temple of Courage
- Salvage the Sun — The Legend of Zelda: Phantom Hourglass Walkthrough
- Temple of the Ocean King III
- The Legend of Zelda: Phantom Hourglass — Guide and Walkthrough — DS — By Dark_Link_13
Temple of Courage — Crayk and the Spirit of Courage
Enter the already-open Temple of Courage on Molida Island and work through its spike traps, Moldorms, moving platforms, invisible floor, crystal pedestals, arrow orbs, torch puzzle, and map-guided platform routes. Record the temple order as Up, Down, Right, Left, then use it for the lever puzzle and the four-eye platform puzzle. Move the square crystal first to the northern pedestal and later to the southwest pedestal. Cross the invisible B1 route to obtain the Bow, then use arrows and Boomerang-directed shots to open the remaining floors and collect the Boss Key. At the top of the dungeon, activate the blue return portal and prepare for Crayk. Interrupt Crayk’s invisible charge with an arrow. While he is enclosed in his shell, throw Bombs at him until the shell breaks. Afterward, use arrows or attacks on his claws to make him guard, circle behind him, and strike the blue tail. Collect the two-minute Sand of Hours increase and Heart Container, return to the ship, and let Oshus restore Ciela’s Spirit of Courage. The completed shipboard scene begins the Ghost Ship objective.
Enter the dungeon and collect the first Small Key
Start at the opened Temple of Courage entrance on Molida Island. The Sun Key, Giant Eye Plant, statue-beam puzzle, and northern-island preparations belong to the preceding chapter and should already be complete. Move north around the rolling spike bars, use the safe alcoves, and pass the blade trap by triggering it and running through the opening it leaves behind.
Step on the floor switch to open the shortcut, climb to the chest, and collect the Small Key. Drop from the ledge, return to the northern locked door, and unlock it. In the next room, defeat both Moldorms by striking the red segment at the rear of each body. Keep your distance so they do not charge before you can reach their weak points. When both are defeated, descend the stairs to B1.
- Temple of Courage entered from the already-open entrance
- First Small Key collected
- Shortcut switch activated
- Both Moldorms defeated
- Northern locked door opened
Reach the tablets and record the temple order
On B1, ride the moving platforms toward the left side. Knock the Shell Beast off the platform instead of trying to defeat it with ordinary sword attacks. Hit the crystal switch when you pass it so it changes to blue, then use the stairs to return to 1F.
Avoid the electric Winders and continue north to the two tablets. Read the right tablet and record the order Up, Down, Right, Left. Bomb the wall beside the other tablet, enter the hidden room, and copy or memorize the route shown for the invisible B1 floor. The map must be viewed on the B1 level, not only on the 1F display.
Return toward the southern platform, bomb the cracked blocks, and stun the Green ChuChu with the Boomerang before attacking it. A Pols Voice then appears. Blow into the Nintendo DS microphone to stun it, defeat it with the sword, and take the Small Key it drops. Step on the nearby switch to open the shortcut, then unlock the door above.
- First crystal switch changed to blue
- Up, Down, Right, Left order recorded
- Invisible-floor route copied or memorized
- Green ChuChu defeated
- Pols Voice stunned with microphone input and defeated
- Second Small Key collected
Solve the lever puzzle and move the square crystal
On 2F, avoid the Winders and Beamos while pulling the four levers in the recorded order: upper, lower, right, then left. A chest appears after the correct sequence. Open it to obtain the square crystal.
Carry the crystal downstairs to 1F and place it on the square pedestal near the stairs. This opens the route back down to B1. Carrying the crystal slows Link, so take it directly to the pedestal and avoid unnecessary contact with enemies.
- Four levers pulled in Up, Down, Right, Left order
- Square crystal obtained
- Square crystal placed on the first pedestal
- B1 route opened
Cross the invisible floor and obtain the Bow
Return to B1 and follow the route shown by the tablet-room map. The floor itself is invisible, so use the map constantly and move carefully around the Shell Beasts. Knock them off hidden platforms when possible; if one blocks a narrow section, a straight sword thrust can push it away without sending Link off the path.
At the northwest end, open the large chest to obtain the Bow and Arrows. Shoot the blue eye in the north wall to extend the bridge. Cross it and defeat the Moldorm by striking its red rear segment with an arrow or sword.
Near the stairs, strike the arrow orb until it points east, then shoot it. The redirected arrow hits the crystal switch and changes the block state. Return to 1F, defeat the two Moldorms in the southern area, and shoot the eye on the east wall. Go back to the first pedestal, retrieve the square crystal, carry it to the southwest pedestal, and place it there. The next route opens only after the crystal has been moved to this second pedestal.
- Invisible-floor route completed
- Bow and Arrows collected
- Bridge extended with the Bow
- Moldorm defeated
- East eye target activated
- Square crystal moved from the first pedestal to the southwest pedestal
Open the Boss Key route
On 2F, defeat the Octoroks on both sides of the gap. Use the Bow for enemies across the distance. Once they are all defeated, cross the bridge and ride the moving platforms through the eastern section. Optional chests can be ignored while following the required route.
Use the Beamos area’s side path and bomb the cracked stone. Push the movable block downward and then right when the blade trap is clear, opening the path to the stairs. Descend to B1 and ride the moving platform to the torch section.
Use the Boomerang to carry flame from the lit torch to the unlit torches until all six are burning. The spikes ahead retract. Knock the Shell Beasts away, turn the arrow orb west with the Boomerang, and fire an arrow through it. The redirected shot changes the crystal switch and lowers the red blocks, allowing you to return upstairs.
In the corridor on 1F, defeat the second Pols Voice by blowing into the microphone, then take its Small Key and open the nearby door. On 2F, step onto the blue moving block and draw its route on the map so it passes beneath the four eye targets. Shoot the eyes in the order Up, Down, Right, Left. If the block becomes misaligned, erase the route and draw it again without sending the platform into the pillars. The chest that appears contains the Boss Key. Ride the block to the southwest, unlock the Boss Key door, and climb to 3F.
- Required Octoroks defeated
- Beamos and movable-block route completed
- Six torches lit
- Second Pols Voice defeated
- Third Small Key collected
- Four eye targets activated in the correct order
- Boss Key collected
- Boss Key door opened
Prepare for and defeat Crayk
On 3F, read the tablet to activate the blue warp portal to the entrance. Break nearby pots for arrows, Bombs, and hearts. Before climbing the stairs, bomb the cracked north wall if you want the optional Courage Gem. Make sure Bombs and arrows are equipped or readily selectable before starting the fight.
Crayk is invisible during the first phase. His viewpoint appears on the top screen while Link is shown on the lower screen. Watch for Crayk approaching. Turn Link until the top-screen view shows Link facing directly toward Crayk, then fire an arrow. This interrupts the charge. If Crayk grabs Link, rub the stylus rapidly from side to side on the lower screen to escape.
After the arrow connects, Crayk encloses himself in his shell. Do not attack the shell’s purple protrusions with the sword or Bow. Throw Bombs at the enclosed Crayk instead. Continue bombing him while avoiding the shell and the smaller Crayklings until the shell breaks. Defeat Crayklings when you need arrows or hearts.
Once the shell is gone, Crayk exposes the large blue tail. Use arrows or strike his claws with the sword to make him guard. While he is guarding, circle behind him and slash the blue tail. Repeat the claw or arrow feint, the repositioning maneuver, and the tail attack until Crayk is defeated.
- Crayk’s invisible charge interrupted with an arrow
- Grab escaped if necessary
- Bombs used against Crayk while he is enclosed
- Shell broken
- Arrows or claw attacks used to make Crayk guard
- Blue tail struck from behind
- Crayk defeated
Collect the rewards and begin the Ghost Ship objective
After Crayk is defeated, two minutes are added to the Phantom Hourglass. The Spirit of Courage appears, then a chest becomes available. Open it to collect the Heart Container and step into the blue warp portal to return to the entrance. Leave the Temple of Courage through the main entrance.
Return to Linebeck’s ship. Oshus is aboard with Linebeck, and the required scene explains the Spirit of Courage’s connection to Ciela. Let the full shipboard conversation play until Oshus reunites Ciela with the Spirit of Courage. Defeating Crayk alone is not enough to complete this chapter.
After the restoration scene, Linebeck directs the ship toward the fog in the Northwestern Sea. Set a route toward that fog. Jolene’s interception and the Ghost Ship pursuit follow from this transition, so do not treat the next chapter as active until the shipboard scene has finished.
- Two minutes added to the Phantom Hourglass
- Spirit of Courage encountered
- Heart Container collected
- Blue return portal used
- Temple exited
- Oshus and Ciela shipboard scene completed
- Ciela reunited with the Spirit of Courage
- Next objective points toward the Ghost Ship and Northwestern Sea
Before you move on
- The Temple of Courage has been completed from its already-open entrance.
- The Bow and Arrows and Boss Key have been obtained.
- Crayk has been defeated using the viewpoint-and-arrow opening, Bombs during the shell phase, and tail attacks after the shell breaks.
- The Phantom Hourglass has received the two-minute Sand of Hours increase.
- The Heart Container has been collected.
- The blue dungeon return portal was activated and used.
- Oshus has reunited Ciela with the Spirit of Courage aboard Linebeck’s ship.
- The next story objective points toward the Ghost Ship in the Northwestern Sea.
The Ghost Ship — Cubus Sisters, Tetra’s condition, and the Zauz transition
After Ciela’s Spirit of Courage awakens, the three restored Spirits of Power, Wisdom, and Courage guide Linebeck’s ship through the Northwestern Sea to the Ghost Ship. Board the ship and work through B1, B2, and B3 to reunite the four Cubus Sisters. The ship is not a Temple of the Ocean King visit, so its Reaplings and safe zones are hazards rather than part of the Phantom Hourglass countdown. Use the triangle and round crystals to open routes, avoid unnecessary Reaplings, solve the B3 lever order, and escort the final sister back to B1. Defeat the Diabolical Cubus Sisters by reflecting only the solid energy balls, then take the Ghost Key and optional Heart Container. Use the key on the eastern lock on B2. The scene beyond reveals that Tetra has been turned to stone; it does not rescue her. Sail to the island north of the Isle of Gust and west of Bannan Island, visit Zauz, record the drawing in his house, and return to Mercay Island for the next Temple of the Ocean King visit.
Restore the three Spirits and locate the Ghost Ship
This sequence begins only after the story has restored the Spirits of Power, Wisdom, and Courage. The four Cubus Sisters inside the ship are a separate group and do not satisfy this requirement. After the Temple of Courage events restore Ciela’s Spirit of Courage, return to Linebeck’s ship and sail into the Northwestern Sea toward the fog at the western side of the quadrant.
When the fog stops the ship, Linebeck remains below deck while the three Spirits guide Link. The ship continues moving forward automatically, so steer left or right while watching the Spirits. They flutter more actively when the ship is pointed toward the Ghost Ship. Turn until they react strongly, then keep the bow aimed in that direction. The Ghost Ship is moving, so make small heading adjustments instead of assuming it will remain stationary. When Linebeck catches it, the boarding scene begins.
The Ghost Ship has a deck and basement floors B1, B2, and B3. It is not a Temple of the Ocean King run and does not use the normal Phantom Hourglass countdown. Save before boarding if you want an easier retry of the sister escort route.
- The Spirits of Power, Wisdom, and Courage have been restored.
- The Ghost Ship has been located in the Northwestern Sea.
- Link has boarded and reached the entrance to B1.
Find the first two Cubus Sisters on B1
From the deck, take the entrance on the left to descend to B1. Walk west until the door closes, then defeat the three Poes. Once they are gone, continue west and speak with the first Cubus Sister. She asks Link to find her three remaining sisters.
Go north and deal with the Skulltulas as they drop from the ceiling. Use the Boomerang on the crystal switch above the route to lower the first spike barrier. Continue east past the spinning blue flames, then strike the next crystal switch north of the rising and falling spikes to stop that obstruction.
Continue around the route until flames block the upper path. Jump across the gap to the lower section, travel south and east, and hit the nearby crystal switch to lower the floor spikes. Open the chest there and take the triangle crystal. Carry it back across the gap, then place it on the triangle pedestal near the flames.
Go north to the next Cubus Sister and speak with her so she follows. Escort her west toward the first sister. If a Skulltula drops nearby, the sister stops in fear; defeat the spider, return to her, and speak to resume the escort. After the two sisters are together, use the stairs at the southeastern side of B1 to reach B2.
- The first sister has assigned the search for the others.
- The triangle crystal is on its pedestal.
- The second sister has been escorted back to the first.
- The southeastern stairs to B2 are open.
Rescue the yellow sister and carry the round crystal
On B2, move east from the stairs. A Reapling appears and patrols the floor like a Phantom. Use the safe zones because Reaplings cannot enter them, and avoid crossing their sight lines. If one detects Link, retreat to a safe zone or strike it to stun it briefly, then continue once the route is clear.
Travel east, north, and northwest past the spike sections, using the northern route to reach the western side. Find the yellow Cubus Sister and strike the nearby crystal switch. Speak with her, but do not follow her instruction to open the left chest. It contains a Rupoor that removes rupees and causes another Reapling to appear. The right chest contains a Yellow Potion and avoids that extra hazard.
Return toward the center of B2. The switch has lowered the obstruction, so open the newly accessible chest and take the round crystal. Carry it toward the B1 stairs. If the sister falls behind, leave the crystal inside a safe zone near the stairs, go back for her, and then bring both upstairs.
On B1, place the round crystal on the circular pedestal north of the stairs. The flames to the west disappear, opening a shortcut. Escort the yellow sister west and reunite her with the other two. Then return to B2 and take the stairs in the southwestern corner to reach B3.
- The yellow sister has been found and spoken to.
- The right chest has been opened if the Yellow Potion is wanted.
- The round crystal has been collected.
- The round crystal is installed on the B1 circular pedestal.
- The yellow sister has joined the other two sisters.
Solve the B3 levers and find the final sister
On B3, go east until the door closes, then defeat the five Skulltulas that drop from the ceiling. Do not hit the nearby crystal switch on the left. It lowers spikes toward the steel-drum area but also summons a Reapling and does not provide the correct route.
Go north past that switch and take the first path on the left to find the stone tablet. The tablet displays the sequence 2, 4, 5, 1, 3. Return to the lever area and pull the five levers from left to right in the corresponding order: fourth, first, fifth, second, third. Solving the sequence lowers the spikes above the steel-drum room.
Enter the steel-drum room from the north. Move or throw the barrels blocking the western side, then step on the concealed floor switch. The flames on the western route disappear. Travel through the northeast section, then go west, south, west, and north. Open the chest on the way if you want the Purple Potion.
At the northwest end, one barrel shakes. Lift it to reveal the final, green Cubus Sister and speak with her. Escort her back to the B2 stairs, then continue up to B1. Take her west to the other sisters. Clear Skulltulas and avoid any Reapling along the way; if the sister stops, speak with her again after the hazard is gone.
- The five Skulltulas in the southeastern room are defeated.
- The tablet’s 24513 sequence has been read.
- The levers were pulled in the order 4, 1, 5, 2, 3 from left to right.
- The hidden floor switch has removed the western flames.
- The final sister has been found under the shaking barrel and returned to B1.
Defeat the Diabolical Cubus Sisters
After the four sisters are together, the scene changes to the Diabolical Cubus Sisters battle. Stay near the southern part of the arena so the incoming attacks remain visible. Three sisters fire lasers while one throws the normal, solid energy ball. Stand in the ball’s path and slash it back toward the active sister. Two successful returns defeat that sister.
As the number of sisters decreases, the remaining sisters volley the normal ball between themselves before sending it back. Track the ball and slash only when it returns toward Link. Some attacks look like a cluster of smaller balls; those are false balls and cannot be reflected. Avoid them. When a false ball hits a wall, its fragments spread through the arena, so keep moving while waiting for the solid ball.
When only one sister remains, she throws three balls at once. Only one is solid. Avoid the two false balls, reflect the solid ball, and repeat the exchange until the final sister has been hit twice. Collect the Ghost Key after the battle. A chest appears containing a Heart Container; it is optional for story completion. Step into the blue portal when you are ready to leave the arena.
- Only normal solid energy balls are reflected.
- False balls and their wall fragments are avoided.
- All four Cubus Sisters are defeated.
- The Ghost Key has been collected.
- The optional Heart Container has been taken if desired.
Use the Ghost Key and discover Tetra’s condition
The blue portal returns Link to the ship. Descend to B2 and travel to the eastern side of the floor, then use the Ghost Key on the locked door in the northeastern area. Go through the door and climb the stairs. The scene beyond the lock is mandatory; defeating the Cubus Sisters alone does not complete this chapter.
The cutscene reveals that Tetra has been turned to stone and explains that Link must seek help from Zauz. Tetra is not rescued during the Ghost Ship sequence. When control returns, sail toward the island north of the Isle of Gust. Do not stop at Bannan Island: the required island is west of Bannan Island and north of the Isle of Gust. As the ship approaches, Ciela marks it on the Sea Chart.
Land on Zauz’s Island and enter Zauz’s house. Speak with Zauz to trigger the next story scene. Examine the drawing on the wall and record its continuous stylus path, beginning at the top; it is needed for the later forging sequence. After the conversation, sail south to the Southwestern Sea, return to Mercay Island, and go back to the Temple of the Ocean King for the next mandatory visit.
- The northeastern B2 lock has been opened with the Ghost Key.
- The scene revealing Tetra’s petrified condition has played.
- Zauz’s Island has been marked on the Sea Chart.
- Zauz has been visited in his house.
- Link has returned to Mercay Island and can continue to the Temple of the Ocean King.
Before you move on
- The three story Spirits of Power, Wisdom, and Courage were restored before the Ghost Ship pursuit.
- All four Cubus Sisters were reunited and defeated.
- The Ghost Key was collected.
- The optional Heart Container was collected if desired.
- The eastern northeastern lock on B2 was opened with the Ghost Key.
- The scene revealing that Tetra has been turned to stone played.
- Ciela marked the island north of the Isle of Gust and west of Bannan Island on the Sea Chart.
- Zauz was visited in his house and his wall drawing was recorded.
- Link returned to Mercay Island and can begin the next Temple of the Ocean King visit.
References for this chapter
Fourth Temple of the Ocean King visit and Goron Temple — Dongorongo and Crimsonine
After the Ghost Ship sequence, visit Zauz’s Island and speak with Zauz about the three Pure Metals. Return to the Temple of the Ocean King and complete the required route through 1F and B1-B6 before opening the Triforce door. Use the midway warp, then clear B7-B9 by following the invisible bridge, retrieving the Round, Triangle, and Square Crystals, and placing them in the northern pedestals. Collect the Southeastern Sea Chart and leave through the blue warp. Sail into the southeastern sea, defeat the Massive Eye, and dock at Goron Island. Speak with the Gorons, use the microphone to extend the bridge, pass Biggoron’s quiz, and follow Gongoron to Goron Temple. Obtain the Bombchu Bag, solve the Bombchu and Armos puzzles, activate the boss warp, and defeat Dongorongo in both phases. Gongoron exposes the boss so Link can send Bombchus into its mouth; afterward, Link uses bombs to expose and strike the blue weak point on its back. Collect the Heart Container and Crimsonine, then speak with the Goron Elder. The next mandatory objective is the fifth Temple of the Ocean King visit, followed by the Isle of the Dead and Isle of Ruins route.
1. Return to the Temple and clear 1F through B3
After the Ghost Ship sequence, visit Zauz’s Island and speak with Zauz. He explains that the Phantom Sword requires Crimsonine, Azurine, and Aquanine, and tells Link that the Temple of the Ocean King contains another route. Save before returning to Mercay Island, then enter the temple. The fourth visit does not begin at B6: Link must repeat the approach through 1F and B1-B6, using newly available shortcuts and the Bow where appropriate.
On 1F, go north directly to the stairs. On B1, avoid the Phantoms and head toward the northeast corner. Bomb the cracked rocks or blocks, step on the nearby switch, then move to the northwest corner and collect the small key. Return to the northeast locked door and descend. Swift Phantoms appear during this visit, so use safe zones and shoot a Phantom’s back with the Bow if you need a brief opening.
On B2, move southwest of the stationary Phantom and use the Boomerang to strike the two crystal switches near the northeast section. A small key appears. Bomb the cracked wall south of the stairs to create the shortcut, then enter the opened passage, step on the floor switch, and use the Boomerang to pull the key toward Link before the spikes rise again. Use the key on the locked door, cross the blue tiles, hit the crystal switch to lower the red blocks, and descend to B3.
On B3, dig the soft soil in the southeast portion to create an air vent. Ride the vent to the raised switches. Use the floor switches to drop the Phantom into the pit and collect the small key. The Bow can also stun the Phantom from behind, allowing you to take the key without completing the full trap-door timing. Bring the three Force Gems to the pedestals in the northeast: one is in the southeast area, one is behind the locked door near the southwest, and one is in the northwest. When all three are placed, the northern door opens. Enter the safe room, collect the available time from the gold pot if needed, and descend to B4.
- Speak with Zauz before returning to the temple.
- Travel through 1F, B1, B2, and B3.
- Collect the B1 and B2 small keys.
- Use the B3 air vent or Bow route to obtain the key.
- Place all three B3 Force Gems.
- Descend to B4.
2. Complete B4-B6 and open the Triforce door
On B4, go to the northeast corner and shoot the eye switch. This turns off the wind gusts throughout the room. Move to the enclosed area on the middle-left side and bomb the southern wall. Enter the passage and hit the crystal switch to lower the spikes around the key. Take the key, return to the southern part of the room, unlock the door, and descend to B5.
On B5, shoot the eye switch near the entrance to lower the nearby spikes. Move east to the gold pot if you need more Sand of Hours, then return west and go north. The door locks and Fire Bubbles attack. Use the Boomerang to stun them, then finish them with sword strikes; defeating the group opens the doors. Continue east into the Moldorm room and defeat every Moldorm to open the exits. Use arrows when convenient, since the Bow can defeat them quickly.
After clearing the Moldorm room, go north and strike the crystal switch in the northeast. This reveals a chest containing rupees and turns off the gusts in the area. Continue west and descend the stairs to B6. If you need additional time, the storage area near the B5 entrance can replenish hearts, bombs, arrows, and Sand of Hours.
On B6, ignore optional chests unless you have ample time. Go to the large red door in the southern part of the room and step on the nearby switch to stop the wind blocking the approach. Tap the door and draw the Triforce in one continuous stroke. The exact shape must be completed without lifting the stylus. In the room beyond, speak with the skeleton to activate the yellow midway warp. Entering that light returns Link to the temple entrance, and the matching light at the entrance brings him back to this room. This is the required exit-and-return point for the deeper part of the fourth visit. When ready, tap the rear door and descend to B7.
- Turn off the B4 wind gusts.
- Collect the B4 key and unlock the southern door.
- Defeat the B5 Fire Bubbles and Moldorms.
- Reach B6 through the required stairs.
- Open the red door by drawing the Triforce in one stroke.
- Activate the yellow midway warp.
- Descend to B7.
3. Reach the Round Crystal on B7 and B8
On B7, use the moving platforms to travel north while facing west so Link’s shield blocks the arrows. Cross to the western side and enter the safe zone. The blue floor makes a sound when crossed quickly, so walk slowly while a Phantom is nearby. Follow the western edge south to the staircase and descend to B8.
On B8, wait in the safe zone and watch the red Phantom’s route. It crosses an invisible bridge over the gap. Mark the path on the map, then cross at a safe moment. Do not step into the apparent safe area along the middle-right wall; it is a trap door. Take the southeast stairs back to B7.
In the revisited B7 area, use the red pot to create a temporary safe zone near the Phantoms. From that protection, strike the crystal switch in the southeast with the Boomerang or Bow. The central flames go out temporarily. Reach the moving platform, ride it north, and step onto the platform at the left. Open the chest to obtain the Round Crystal.
Carry the Round Crystal east to the nearby safe area. While carrying a crystal, Link does not trigger the noisy blue floor, so move quickly when the Phantom route allows it. Return to the southeast staircase and descend to B8 with the Round Crystal.
- Cross B7’s moving platforms.
- Walk slowly over the noisy floor.
- Map and cross B8’s invisible bridge.
- Avoid the false safe zone that is a trap door.
- Use the red pot and crystal switch on the second B7 visit.
- Collect and carry the Round Crystal to B8.
4. Retrieve the Triangle and Square Crystals
On B8, carry the Round Crystal across the invisible bridge to the west side and place it in the pedestal in the central or northwest section. The nearby spikes lower. Step on the floor switch to activate the air vent, then use the stairs near the switch to reach B9. The gold pot reached by the vent is optional but can restore Sand of Hours.
On B9, open the nearby chest to obtain the Triangle Crystal. The route forward is blocked, so carry the Triangle Crystal back to B8. Cross the invisible bridge again and take the crystal to the northeast safe zone. Do not step on the apparent safe zone along the east wall; it is another trap door.
Use the red pot near the northeast section to make a temporary safe zone beside the cracked blocks. Bomb the cracked block, retreat into the temporary zone when the Phantom approaches, and then return for the Triangle Crystal. Place it in the revealed pedestal. The spikes lower and a crystal switch becomes reachable. Hit the switch to open the route to the stairs, then carry the Triangle Crystal back toward B9.
On the second B9 visit, invisible Wizzrobes appear as skull markers on the map. They pursue Link when he turns away outside a Safe Zone. Let one approach from behind, turn, and attack when it becomes visible. Defeating them is optional, but it can restore time and makes the room safer. At the south side, use the arrow mechanism to hit the eye switch while keeping the eye open. This lowers the southwest spikes and opens the route to the Phantom holding the Square Crystal.
Use the floor switch to create the Phantom’s trap door, then wait until the Phantom is positioned over it and activate the switch. The Phantom falls and drops the Square Crystal. Take the Square Crystal to the northwest pedestal to extinguish the flames, then use the northwest stairs to return to B8. On B8, take the Round Crystal from its earlier pedestal, use the air vent to reach the higher ledge, and carry the Round Crystal back up to B9.
- Place the Round Crystal in its B8 pedestal.
- Collect the Triangle Crystal from B9.
- Place the Triangle Crystal in the revealed B8 pedestal.
- Lower the B9 southwest spikes.
- Drop the Phantom and recover the Square Crystal.
- Place the Square Crystal in the northwest pedestal.
- Return the Round Crystal to B9.
5. Place the three crystals and claim the Southeastern Sea Chart
On the final B9 section, carry the Round Crystal to the northern center and place it in the round pedestal. Return to the northeast section, retrieve the Triangle Crystal, and place it in the triangle pedestal. Finally, take the Square Crystal from the northwest pedestal and place it in the remaining northern pedestal. When all three crystals are correctly placed, the northern door opens.
Enter the safe room beyond the door. The hourglass does not drain there. Open the chest to obtain the Southeastern Sea Chart, then step into the blue warp to return to the temple entrance. The route beyond the chart room can lead to another chart, but that continuation is optional for this chapter and is not required to reach Goron Island. Save after leaving the temple.
- Place the Round Crystal in the northern round pedestal.
- Place the Triangle Crystal in the northern triangle pedestal.
- Place the Square Crystal in the final northern pedestal.
- Collect the Southeastern Sea Chart.
- Leave through the blue warp.
- Save before sailing onward.
6. Sail to Goron Island and pass Biggoron’s quiz
Use the Southeastern Sea Chart to sail toward the island in the southeastern sea. The Massive Eye attacks before Link can dock. Fire the cannon at the yellow eyes on its sides. When the eyes turn pink, continue targeting them until they close. Shoot the yellow energy balls and small Eyeball Monsters with the cannon so they do not overwhelm the ship. After all of the eyes close, the Massive Eye is defeated and Link can dock at Goron Island.
Speak with the Gorons throughout the settlement, including the Gorons inside houses. Near the sign, use the Nintendo DS microphone by shouting or blowing toward it. The Goron across the gap extends the bridge. Before crossing, optionally help the Goron near the cliff by digging the sand pile, riding the air vent, and shooting the Yellow ChuChus from the ledge; the resulting Treasure Map is optional. Speak with the Goron blocking the eastern route so he moves aside.
Enter the Elder’s house, speak with the Elder’s son, then speak with the Elder. If the island conversations are complete, pay the quiz fee and answer the questions. Verified answers include 14 Gorons on the island, 6 homes, 7 Gorons outside, 4 adult Gorons outside, 6 children, 3 rocks in the house, a ship being watched, yellow cliff creatures, and a chest at the indicated location. The question asking for the question number must be answered from the prompt; the rupee question uses the amount shown by the quiz. Passing the quiz gives the route to Gongoron.
Speak with Gongoron outside. Follow him west, then east after he runs away. The Goron who previously blocked the path has moved aside. In the next area, bomb the cracked walls, use the opened routes and switches, and defeat the Like-Like near the western exit. Enter the temple after the spikes lower and the shortcut switch is activated.
- Defeat the Massive Eye before docking.
- Speak with the Gorons around the island.
- Use the microphone to extend the bridge.
- Pass Biggoron’s quiz.
- Follow Gongoron through the island maze.
- Enter Goron Temple.
7. Obtain the Bombchu Bag and open the boss route
On 1F, move through the Armos statue puzzle. Place the statues on floor switches, use bombs to stop active Armos, and ride the wind geyser created by digging the soft soil. Cross the bridge and use the eye switch to open the route. Bomb the hidden passage between the columns and descend to B1.
On B1, defeat the Fire Bubbles and continue to Gongoron. Defeat the Eye Brute with arrows and sword attacks. Switch between Link and Gongoron using the character icon. Control Gongoron to destroy the Rock ChuChus below the rock pile, then switch to Link and stand on Link’s floor switch. Roll Gongoron across the gap so he lands on the second switch. Open the large chest to obtain the Bombchu Bag.
Use Bombchus to activate switches through the remaining floors. On B1, send Bombchus through the small holes to hit crystal switches and create the bridge shortcut. On B2, bomb the cracked wall, expose the Bombchu hole, and activate the paired switches together so the spikes lower. On B3, change the red crystal switch, route a Bombchu through the hole, then strike the blue switch after the Bombchu passes the red blocks. In the northeast, stop the four Armos with bombs and place them on the floor switches.
Return to B2, defeat the two Eye Brutes, and activate the timed switch with a Bombchu so Link can cross the spikes. In the northwest, route Bombchus across the quicksand to the crystal switches and open the Boss Key chest. Take the Boss Key to the southern stairs, descend to B3, and unlock the boss door. Before entering, read the tablet in the preparation room to activate the blue boss warp. Use the pots and acorn to restore supplies.
- Solve the Armos and wind-geyser puzzles.
- Defeat the Eye Brute.
- Place Link and Gongoron on the B1 switches.
- Collect the Bombchu Bag.
- Open the B2 and B3 Bombchu routes.
- Collect the Boss Key.
- Activate the blue boss warp.
8. Defeat Dongorongo and collect Crimsonine
In the first phase, control Gongoron. Roll around Dongorongo and attack its side after it spits fire or charges into a wall. Tap the boss repeatedly from the side until Gongoron knocks it over. Switch to Link and draw a Bombchu path into Dongorongo’s open mouth. Repeat the side attack and Bombchu sequence until three Bombchus have detonated inside the mouth. Defeat small enemies near Link when necessary, switching characters with the icon.
A bridge appears after the third successful Bombchu, but the fight is not over. Cross the bridge as Link. Dongorongo revives on the far side and attacks alone. When it inhales, throw an ordinary bomb into its mouth. The explosion stuns the boss and exposes the blue weak point on its back. Circle around while avoiding its fireballs, slash the blue point, and retreat before Dongorongo recovers. Repeat the bomb-and-back-attack cycle until the boss falls.
Open the chest for the Heart Container. Continue north, speak with Gongoron, and proceed to the next room to collect Crimsonine. Crimsonine is one of the three Pure Metals required for the Phantom Sword. Step into the blue warp to leave the temple, return to the Goron settlement, and speak with the Goron Elder in the eastern house for the post-temple rupee reward. Optional Treasure Maps, Power Gems, and shop upgrades can be completed later.
The chapter is complete when the Southeastern Sea Chart is obtained, Goron Temple is cleared, Dongorongo is defeated in both phases, the Heart Container and Crimsonine are collected, and the Goron Elder has been visited. The next mandatory objective is the fifth Temple of the Ocean King visit. Do not sail to the Temple of Ice yet; the Temple of Ice comes later, after the fifth Temple visit and Mutoh’s Temple.
- Use Gongoron to knock Dongorongo onto its side.
- Send three Bombchus into Dongorongo’s mouth.
- Cross the bridge after the first phase.
- Throw bombs into the revived boss while it inhales.
- Strike the blue weak point on its back.
- Collect the Heart Container.
- Speak with Gongoron.
- Collect Crimsonine.
- Speak with the Goron Elder.
- Begin the fifth Temple of the Ocean King route next.
Before you move on
- Zauz has been consulted after the Ghost Ship sequence.
- The fourth Temple visit was completed through 1F and B1-B6.
- The Triforce door on B6 was opened and the yellow midway warp was activated.
- The B7-B9 Round, Triangle, and Square Crystal route was completed.
- The Southeastern Sea Chart is in Link’s inventory.
- The temple was exited through the blue warp.
- The Massive Eye outside Goron Island was defeated.
- Biggoron’s quiz was passed.
- Gongoron led Link to Goron Temple.
- The Bombchu Bag is in Link’s inventory.
- The Goron Temple Boss Key was obtained and the boss warp was activated.
- Dongorongo was defeated in both phases.
- The Heart Container was collected.
- Crimsonine is in Link’s quest inventory.
- The Goron Elder was visited for the post-temple reward.
- The next objective is the fifth Temple of the Ocean King, followed by the Isle of the Dead and Isle of Ruins route.
References for this chapter
- The Legend of Zelda: Phantom Hourglass Instruction Booklet
- Temple of the Ocean King, Fourth Visit - The Legend of Zelda: Phantom Hourglass Walkthrough
- Phantom Hourglass Walkthrough - Ocean King Part IV
- Goron Temple - The Legend of Zelda: Phantom Hourglass Walkthrough
- Phantom Hourglass Walkthrough - Goron Temple
Fifth Temple of the Ocean King visit, Isle of the Dead, Mutoh’s Temple, and Aquanine
After Goron Temple, return to the Temple of the Ocean King and use the golden warp to begin at B6. This fifth visit is not a straight run from B7 to B9: first clear the initial B7 moving-platform and Phantom section, cross B8’s invisible bridge, return to B7 for the Round Crystal, then carry it through the second B8 route and down to B9. There, recover the Triangle Crystal, take the Square Crystal from a Phantom, place Square on the northwest pedestal, and complete the central Square-Round-Triangle placement. Continue through B10’s Bombchu switches and boulder key, B11’s four-switch route, B12’s three Force Gems, and B13’s Northeastern Sea Chart. Sail to the Isle of the Dead, follow the king-shaped island clues, speak with Brant, and take the Regal Necklace. Use it to reach the Isle of Ruins, visit Bremeur and Doylan, return the King’s Key to Bremeur, and drain the island. Enter Mutoh’s Temple, obtain the Hammer, solve the water and tile sections, defeat Eox, and collect Aquanine from King Mutoh. Leave the island and continue to the Isle of Frost and Temple of Ice.
Begin the fifth Temple visit at B6
After completing Goron Temple, sail to Mercay Island and return to the Temple of the Ocean King. At the entrance, step on the golden warp to reach B6. This is the required starting point for the fifth visit; do not treat the following B7 and B8 sections as leftovers from an earlier visit.
From B6, go north and descend to B7. Save before entering if you want a clean retry. Keep the Phantom Hourglass route in mind, and use Safe Zones whenever you need to wait for a patrol rather than crossing an exposed floor while a Phantom is nearby.
- Goron Temple is complete.
- The golden warp at the Temple entrance was used.
- Link arrived at B6 for the fifth visit.
- The B7 route is the next objective.
Clear the initial B7 and B8 route
On B7, ride the moving platforms toward the northern part of the floor. Move carefully across the blue floor and use the Safe Zone in the northwest as cover. From there, go south to the stairs in the southwest corner and descend to B8. This first B7 section is a route-clearing step; do not expect the Round Crystal yet.
On B8, go to the northwest corner if you need the gold pot that restores Hourglass time. Then cross the invisible bridge and climb the stairs in the southeast portion of the floor. This returns Link to another part of B7. The invisible bridge is mandatory for the fifth-visit route and must be completed before the Round Crystal can be taken.
On returning to B7, shoot the southeast Phantom from behind with an arrow, then hit the nearby crystal switch. The flames will lower. Time the moving platform so you can cross safely without alerting the Swift Phantom. Reach the Safe Zone and open the chest to obtain the Round Crystal.
- The initial B7 moving-platform route was crossed.
- B8’s invisible bridge was crossed.
- Link returned to the second B7 section.
- The crystal switch lowered the flames.
- The Round Crystal was collected from the B7 chest.
Carry the Round Crystal through the second B8 route
Carry the Round Crystal east to the Safe Zone, then take it southeast toward the stairs. If a Phantom takes it, shoot that Phantom from behind and pick the crystal up again. Descend to B8 while carrying the Round Crystal.
On B8, cross the invisible bridge to the northwest side and place the Round Crystal on the crystal pedestal. The spikes lower and a floor switch activates an air vent. Use the vent to reach the nearby gold pot if you need additional time, then return to the stairs near the switch and descend to B9.
On B9, open the nearby chest to obtain the Triangle Crystal. The route is blocked, so carry the Triangle Crystal back upstairs to B8. Cross the invisible bridge again. From the Safe Zone below the southeast stairs, send a Bombchu through the wall opening to strike the crystal switch. This opens the route that lets you carry the Triangle Crystal back down to B9.
- The Round Crystal was placed on the B8 pedestal.
- The B8 spikes were lowered.
- The Triangle Crystal was collected from B9.
- The Bombchu struck the B8 crystal switch.
- The Triangle Crystal reached the B9 route.
Recover the Square Crystal and open B10
On B9, bring the Triangle Crystal to the large Safe Zone in the northern part of the room and set it down temporarily. Use the Boomerang to defeat the invisible Wizzrobes that block the side routes. Open the path toward the southern Safe Zone, then bomb the barrier near the middle of the room.
Wait in safety for the Phantom carrying the Square Crystal. Shoot it from behind with the Bow, pick up the Square Crystal, and move it into a Safe Zone. If the Phantom is difficult to approach, use the nearby trap-door route after activating the required eye switch and floor switch.
Carry the Square Crystal to the northwest pedestal, not the central three-crystal pedestals. Placing it there removes the flames and opens the northwest route. Use the air vent to reach the stairs, retrieve the Round Crystal, and carry it back to the central area.
Place the three crystals in this order: Square, Round, Triangle. The placement causes a tremor. Go north through the opened door, then return south as directed by the floor transition; Link will be lowered into the new B10 section.
- The Square Crystal was taken from the Phantom.
- The Square Crystal was placed on the northwest pedestal.
- The Round Crystal was recovered for the central sequence.
- The central order was Square, Round, Triangle.
- The tremor and B10 transition occurred.
Use B10’s Bombchu switches and obtain the Small Key
On B10, send a Bombchu through the nearby wall opening to hit the crystal switch. This lowers the spikes in the northwest. Reach the northwest Safe Zone with the boulder and wait until the Gold Phantom is in the boulder’s path. Stand behind the boulder and push it downward so it crushes the Phantom. Pick up the Small Key that it drops.
Carry the key south toward the southwest side of the room. Use the second Bombchu opening to activate the next crystal switch, lowering the eastern spikes. Follow the route clockwise to the southeast Safe Zone and strike the nearby switch to stop the remaining spikes. A gold pot can restore Hourglass time if necessary.
Bomb the lighter-colored wall in the southwest and pass through. Go north and east to the Safe Zone beyond the lowered spikes. Stun the Phantom Eye with the Boomerang and defeat it with the sword. Return to the locked southern door and use the Small Key to descend to B11.
- The first B10 Bombchu switch was activated.
- The Gold Phantom was crushed by the boulder.
- The Small Key was collected.
- The second B10 Bombchu switch was activated.
- The southern locked door was opened.
Complete B11’s four-switch route
On B11, defeat Phantom Eyes when practical so the floor is safer to cross. Pull the levers in the northwest and northeast areas to create bridges. Find the sand pile near the northern platforms and dig it up with the Shovel. Ride the wind vent to the upper ledges and activate the switches there.
Use the southern wind vent to reach the lower ledges. Cross the eastern bridge and activate the switch. From that ledge, send a Bombchu to the southeast crystal switch. Start moving west before the Bombchu reaches the switch so you are close to the temporary bridge when it appears.
Cross the temporary bridge and activate the final ledge switch. All four required ledge switches must be active before the western door opens. Enter that door and descend to B12. Optional treasure on B11 is not required for the Northeastern Sea Chart.
- The northwest and northeast levers were pulled.
- The northern sand pile revealed a wind vent.
- The upper ledge switches were activated.
- The southern vent and eastern bridge were used.
- The Bombchu activated the southeast crystal switch.
- All four required switches are active.
- The western door to B12 opened.
Deliver the three Force Gems on B12
On B12, use the Boomerang on the nearby gold pot if you need more time, then pull the switch to lower the spikes. Move south past the spikes, defeat the Phantom Eye, and use the western Safe Zone as your staging area.
Open the chest in the northern Safe Zone to obtain the first Force Gem. Carry it east to the large Safe Zone pedestals. A Phantom or invisible Wizzrobe may become active during this route, so retreat into a Safe Zone whenever a patrol blocks the path rather than risking the gem.
Go to the southwest section and step on the switch that lowers the spikes around the large Phantom. Shoot the large Phantom from behind and take the Force Gem it drops to the pedestals. Then clear the Phantom Eye in the southeast area if it blocks the final route.
Open the chest in the northeast section for the third Force Gem. A Swift Phantom begins patrolling after the chest is opened. Carry the gem east and south around the spike barriers and place it with the others. When all three Force Gems are delivered, the northern door opens. Descend to B13.
- The northern chest Force Gem was delivered.
- The large Phantom’s Force Gem was delivered.
- The northeast chest Force Gem was delivered.
- The three Force Gems were placed on the large Safe Zone pedestals.
- The door to B13 opened.
Collect the Northeastern Sea Chart on B13
On B13, go southwest from the stairs and jump down the ledge. Dig the sand near the air vent so the upper route remains available if you need to retreat. From the vent, travel southeast and open the large chest to obtain the Northeastern Sea Chart.
A blue light appears in the northwest corner. Step into it to return to the Temple entrance. Return to Linebeck’s ship and sail into the Northeastern Sea. The next required destination is the Isle of the Dead; optional salvage can wait.
- The Northeastern Sea Chart was collected.
- The B13 blue warp was used.
- The ship can enter the Northeastern Sea.
- The Isle of the Dead is the next destination.
Find Brant on the Isle of the Dead
Dock at the Isle of the Dead and enter the cave on the island. Read the books for the island clues, then exit through the western passage. The island is shaped like a king. Follow the clue to the sacred tree near the king’s chin: from the tree, walk west 13 spaces and north 7 spaces, then dig at the marked location to uncover the hidden passage.
Continue through the underground route and bomb the cracked wall when necessary. Near the king’s eye, stand at the small gap on the raised ground and fire the Bow westward at the hidden crystal switch. This opens the gate to the graveyard in the northwest.
Read the gravestones to learn the route through the Phantom Corridor. Return to the pyramid and take the corridor in this order: north, east, east, north, north. Speak with Brant’s spirit. After he opens the exit, go outside and open the chest to receive the Regal Necklace.
Return to the ship. The Regal Necklace is required to remove the cyclone guarding the Isle of Ruins. Treasure maps and other chests on the Isle of the Dead are optional.
- The king’s chin clue was followed.
- The hidden passage was found.
- The king’s eye switch was activated.
- The graveyard gate opened.
- The Phantom Corridor was crossed in north, east, east, north, north order.
- Brant was contacted.
- The Regal Necklace was collected.
Reach the Isle of Ruins and obtain the King’s Key
Sail to the Isle of Ruins. The Regal Necklace removes the cyclone as you approach, allowing you to dock. Enter the cave near the landing point, defeat the Zora Warrior, and cross the bridge. Follow the island’s paths toward the northwest temple, using bridges and jumps through the lower maze while avoiding or defeating Rupee-Likes.
Enter Bremeur’s temple at the northwest and speak with Bremeur. Leave after he opens the next route, cross the new bridge, and travel east toward the northeast pyramid. Defeat or avoid the Miniblins and enter Doylan’s temple.
Work through Doylan’s rolling-boulder and arrow corridors. Avoid trapdoors and continue to Doylan’s upper room. Speak with Doylan’s spirit to receive the King’s Key.
Return to Bremeur’s temple in the northwest and place the King’s Key in the golden obelisk. The water drains from the Isle of Ruins, exposing the lower level and opening the route toward the southeast pyramid.
- The cyclone disappeared when the ship approached.
- The Zora Warrior was defeated.
- Bremeur was visited.
- Doylan was reached.
- The King’s Key was collected.
- The King’s Key was returned to Bremeur’s obelisk.
- The Isle of Ruins was drained.
Enter Mutoh’s Temple and obtain the Hammer
After the island drains, follow the newly exposed paths toward the southeast pyramid. Push the boulders to clear the route, avoid or defeat the Stalfos, and enter Mutoh’s Temple through the red door. To open that door, use the island’s stone-tablet clue to draw the crest: start at the top-left, draw to the top-right, then bottom-right, center, bottom-left, and back to the top-left. Defeat the Zora Warriors beyond it and enter the temple.
On 1F, bomb the marked wall and return to the entrance. Use the right crystal switch to create the temporary bridge, cross it, defeat the Stalfos, and activate the eastern floor switch to light the first torch. Return to the entrance, use the left crystal switch, cross the moving platforms, defeat the second Stalfos group, and activate the western switch to light the second torch. The spikes near the stairs retract.
Descend through B1, pass through 1F, and climb to 2F. Open the right-hand door and cross the Rupee-Like maze to reach 3F. Defeat the two Stalfos and the Rupee-Like there. Open the chest to obtain the Hammer.
Return downstairs and use the Hammer on the rusty switch. Stand on the footprint markings and hammer the launch target to reach the upper ledges. Use the Hammer to defeat Shell Spinners and continue down toward the lower floors.
- The Isle of Ruins crest door was opened.
- Both Mutoh’s Temple entrance torches were lit.
- The entrance spikes retracted.
- The Hammer was collected on 3F.
- The Hammer was used on the rusty switch and Shell Spinners.
Solve Mutoh’s Temple’s lower-floor route
On B1, push the boulder so it breaks the second boulder and opens the route. Defeat the Stalfos, then descend to B2. Use the Hammer on the rusty switches and moving-block route while avoiding the rolling spike hazards. Open the eastern chest for the Small Key and return to B1.
Use the floor switch, unlock the northern door, and strike the floating pyramid to lower the water. In the exposed lower section, read the sign and strike the center tile of the nine-tile grid; this changes the grid and opens the route. Use the catapult to reach the upper ledge and shoot the next floating pyramid with an arrow to raise the water.
Cross the bone bridge and use the Hammer on the next tile grid until its tiles match the required state. Shoot the following floating pyramid to lower the water and continue through the next grid. In the later B1 section, note the visible tile arrangement before changing the water level. Use the catapults, turn the arrow shooter with the Boomerang, and fire the arrow to raise the water. Reproduce the recorded arrangement on the upper grid, then lower the water and continue west.
Do not rely on a memorized fixed tile pattern. The safe method is to observe the lower grid, change the water level, and reproduce the arrangement on the upper grid. This avoids confusing the separate grids and preserves the correct route to the boulder and Boss Key sections.
- The B2 Small Key was collected.
- The first nine-tile grid was changed.
- The water-level pyramids were activated.
- The later grid arrangement was recorded.
- The upper grid was matched to the recorded arrangement.
- The lower route toward the Boss Key opened.
Recover the Boss Key and defeat Eox
In the western B1 section, push the boulder onto the catapult and hammer it upward. Move it across the upper ledge so it breaks the blocking boulder, then open the chest for another Small Key. Continue through the boulder and catapult route, unlock the next door, and launch the second boulder upward until it reaches the highest platform. Push it into the final obstruction and open the chest for the Boss Key.
Carry the Boss Key to B2 and place it on the moving platform. Use the Hammer to defeat the Stalfos on both sides while the platform travels. When the platform reaches the left side, pick up the Boss Key and carry it to the Boss Door. Use the catapults beyond the door, descend to B3, and examine the sign to create a blue warp to the entrance.
Enter Eox’s arena when ready. Use the catapults to launch Link into the red pegs on Eox’s body and strike them with the Hammer. Destroy the outer pegs first. After the shell opens, use the catapults to hit the exposed inner pegs, then land on Eox’s head and slash the crystal. Repeat the catapult and Hammer sequence until the head crystal is destroyed. Avoid Eox’s arms and the arrows fired from the head openings; its attacks are slow enough to evade by moving around the arena.
- The second Small Key was collected.
- The Boss Key was recovered from the boulder route.
- The Boss Key was carried safely across the moving platform.
- The Boss Door was opened.
- Eox’s outer red pegs were destroyed.
- The inner pegs were struck with the Hammer.
- The crystal on Eox’s head was destroyed.
- Eox was defeated.
Collect Aquanine and continue to the Isle of Frost
After Eox is defeated, open the boss chest for the Heart Container if desired. Take the stairs behind the chest and continue north to King Mutoh’s sarcophagus. Speak with King Mutoh’s spirit, then tap Aquanine on the pedestal to add it to the inventory.
The three Pure Metals are Crimsonine from Goron Temple, Azurine from the Temple of Ice, and Aquanine from Mutoh’s Temple. Aquanine is the final metal obtained in this chapter, but the Phantom Sword cannot be completed until Azurine has also been collected.
Use the blue warp or the temple exit to return to the ship. Sail to the Isle of Frost in the Southeastern Sea. The next mandatory objective is the Isle of Frost route and the Temple of Ice. Do not begin the Phantom Sword forging sequence until all three Pure Metals are in the inventory.
- Eox was defeated.
- King Mutoh’s spirit was contacted.
- Aquanine was collected.
- The optional Heart Container was taken if desired.
- Link left Mutoh’s Temple.
- The Isle of Frost is the next destination.
Before you move on
- The fifth Temple visit began at B6 through the golden warp.
- The initial B7 moving-platform and Phantom section was cleared.
- B8’s invisible bridge was crossed.
- Link returned to B7 and obtained the Round Crystal.
- The Round Crystal was placed on the second B8 pedestal.
- The Triangle Crystal was recovered from B9 and carried back through B8.
- The Square Crystal was taken from the Phantom.
- Square was placed on the northwest B9 pedestal.
- The central crystals were placed in Square-Round-Triangle order.
- The B10 Bombchu switches were activated and the Gold Phantom was crushed with the boulder.
- The B10 Small Key opened the route to B11.
- The B11 four-switch route opened the western door.
- All three B12 Force Gems were delivered.
- The Northeastern Sea Chart was collected on B13 and the blue warp was used.
- Brant was visited on the Isle of the Dead.
- The Regal Necklace was collected.
- Doylan’s King’s Key was returned to Bremeur.
- The Isle of Ruins was drained.
- The Hammer was collected in Mutoh’s Temple.
- The Boss Key was delivered to the Boss Door and Eox was defeated with the Hammer and catapults acting as the attack route in the original Nintendo DS release context specified here, as documented by the referenced walkthrough sources. The blue warp was created before the boss approach, and King Mutoh’s spirit was spoken to after the battle. Aquanine was collected, and Link left Mutoh’s Temple ready for the Isle of Frost and Temple of Ice.
Isle of Frost and Temple of Ice — Gleeok and Azurine
Begin after the fifth Temple of the Ocean King visit and Mutoh’s Temple. Sail to the Isle of Frost in the Southeastern Sea, clear the surrounding ice, question all six Anouki in the Anouki Estates, expose Aroo as the Yook impostor, and receive access to the Great Ice Field. Defeat the Yooks there to open the Temple of Ice. Inside, alternate the red and blue barriers, solve the 3F lever puzzle, obtain the Grappling Hook, and use it to pull statue tongues, create tightropes, cross gaps, and reach the Boss Key. Defeat Gleeok by reflecting each elemental projectile into the opposite head, then pull the exposed tongues and attack the grounded heads. Collect the Heart Container and Azurine, then leave through the blue warp. Azurine is the second Pure Metal. The next mandatory objective is to take all three Pure Metals to Zauz’s Island and begin preparing the Phantom Sword.
Open the route to the Isle of Frost
Start this chapter after completing the fifth Temple of the Ocean King visit and Mutoh’s Temple. The Isle of Frost is in the Southeastern Sea, at the northeastern edge of that quadrant. Sail toward the ice-covered island and draw a route that circles it. Use the ship’s cannon to destroy every surrounding ice chunk; each chunk takes multiple hits. Eyeball enemies will also approach the ship, so keep the vessel moving and fire at them when they line up with your route.
After the ice ring is gone, dock at the Isle of Frost. The island’s optional treasure, rupees and gems can wait. The required route begins at the Island Chief’s house on the hill northeast of the dock. Speak with him and agree to investigate the Yook who has infiltrated the Anouki settlement.
- The fifth Temple of the Ocean King visit is complete.
- Mutoh’s Temple is complete.
- The Isle of Frost is reachable in the Southeastern Sea.
- The surrounding ice has been destroyed.
- The Island Chief has assigned the impostor investigation.
Question the Anouki and expose Aroo
Go north to the Anouki Estates. Enter all six houses and speak with Aroo, Fofo, Kumu, Dobo, Gumo and Mazo before making an accusation. The statements contain one contradiction. Aroo claims that Kumu is lying; Fofo says Gumo is truthful; Kumu says either Aroo or Mazo is lying; Dobo says Mazo is truthful; Gumo says either Fofo or Aroo is lying; and Mazo says that both Mazo and Dobo are truthful.
The liar is Aroo. After speaking with all six Anouki, return to Aroo’s house and accuse him. The Yook reveals the disguise and escapes. Return to the Island Chief to report what happened. Then go east and speak with the Anouki blocking the route. Once he learns that the Chief has authorized you to pass, he moves aside. Continue through the short cave to reach the Great Ice Field.
- All six Anouki have been questioned.
- Aroo has been identified as the liar.
- The impostor scene has played.
- The Island Chief has been informed.
- The eastern path to the Great Ice Field is open.
Clear the Great Ice Field
The Great Ice Field is slippery and contains six Yooks. Watch each Yook until it begins inhaling. Throw a bomb toward its mouth during the inhaling animation; the Yook sucks in the bomb, which stuns it when it explodes. Move in and attack with the sword while it is stunned, then retreat before it resumes its freezing attack. Repeat this method for all six Yooks.
When every Yook in the field is defeated, the northeastern route opens. Continue toward the Temple of Ice and fight the disguised Yook that escaped from the Anouki Estates. It uses the same inhaling weakness, although its attacks are more aggressive. Defeat it, then proceed north into the Temple of Ice. Refill bombs before entering if necessary, because bombs are the reliable answer to the Yooks outside and inside the dungeon.
- All six Great Ice Field Yooks are defeated.
- The escaped impostor Yook is defeated.
- The Temple of Ice entrance is open.
- Bombs are available for later Yook encounters.
Reach the Grappling Hook on 3F
On 1F, strike the nearby crystal switch to lower the red blocks. Move north, then use the Boomerang to hit the switch from the next position and lower the blue blocks. Cross the eastern ice ledge, avoid the blade traps, step on the floor switch and use the Bombchu route near the entrance to change the barrier state again. Take the northeastern stairs and climb through 2F to 3F.
On 3F, go to the southeast corner and stand on the wooden peg. Fire an arrow at the crystal switch to melt the nearby ice. Defeat the Stag Beetles by attacking from behind; their masks cannot yet be removed. At the upper wall, pull the four levers in the correct order from left to right: first, fourth, third, second. Solving the sequence causes the chest containing the Grappling Hook to appear. Open that chest before leaving 3F.
The Grappling Hook is the dungeon’s required item. It creates tightropes, crosses gaps, pulls tongues and can remove the masks from Stag Beetles. Use it on the peg to return toward 1F.
- The red and blue barriers have been manipulated.
- You have reached 3F.
- The lever order was first, fourth, third, second from left to right.
- The Grappling Hook has been collected.
Use the Grappling Hook to reach B2
Back on 1F, use the Grappling Hook on the Stag Beetles to pull away their masks, then defeat them with sword strikes. Pull the tongue of the central statue to melt the ice and grapple across the opened gap. Activate the floor switch to create a shortcut back toward the entrance.
At the entrance-side statues, pull both tongues to melt the ice in the southwest section. Defeat the Stag Beetles near the next tongue statue, stand low in the room, and pull the tongue. The opening is temporary, so cross the spike area quickly and take the chest containing the small key. Push the nearby block, activate the floor switch and use the bridge to reach the northeastern locked door. Unlock it and follow the Grappling Hook route down to B1.
On B1, bomb the marked blue tile, create tightropes between the wooden pegs and cross them while avoiding the moving blades. Use the Boomerang on the crystal switches, activate the eye switch with an arrow, and pull the wall lever. Collect the small key from the chest reached through the temporary tongue opening. Use it on the northeastern door, then follow the opened route down to B2.
- The Stag Beetle masks have been removed where required.
- The 1F small key has been collected.
- The 1F northeastern door is open.
- B1 has been cleared sufficiently to reach B2.
- The B2 entrance is accessible.
Find the Boss Key
On B2, grapple across the western gap and defeat the Yook and Gel near the ice. Create a tightrope between the wooden pegs and cross it while avoiding the moving blade. Continue through the ice passages, activate the floor switches and use the Grappling Hook to reach the torches and upper platforms.
Use bombs on the marked wall and activate the crystal and eye switches along the southern and upper routes. Where two eye switches cannot be reached directly, create a tightrope between the pegs and fire arrows so they ricochet into the eyes. Open the chest containing the second small key, unlock the eastern door and defeat the enemies beyond it.
Continue through the southeastern passage, activate the floor switches and melt the ice blocking the northern route. Grapple to the torch, cross the final narrow platforms and open the large chest for the Boss Key. Carry it back to the Boss Door. Break nearby pots for health, examine the tablet north of the Boss Door to create the blue warp, and enter the arena when ready.
- The B2 eye and crystal switches are active.
- The second small key has been collected.
- The eastern B2 door is open.
- The Boss Key is in the inventory.
- The blue warp outside the boss arena has been activated.
Defeat Gleeok
Gleeok has a fire head and an ice head. During the first phase, use the Grappling Hook to form diagonal tightropes between the four posts. When the fire head launches a fireball, connect the upper-left and lower-right posts so the fireball ricochets into the ice head. When the ice head launches its projectile, connect the opposite diagonal so the ice projectile strikes the fire head. The projectile must hit the opposite element; fire does not damage the fire head, and ice does not damage the ice head.
Keep moving when either head bites toward the rope. When both heads dive and send a wave across the arena, jump onto a post to avoid the wave, then move away from the floating ice chunks as they pass. Repeat the reflected-projectile pattern until both masks break. Gleeok then destroys the two front posts and begins the second phase.
In the second phase, wait for a head to bite, inhale and extend its tongue. Grapple from a remaining post to the extended tongue and pull the head down. Slash the grounded head repeatedly, then retreat before the other head attacks. Repeat the tongue-pull and sword sequence for both heads until Gleeok is defeated.
Open the arena chest for the Heart Container. Go north through the opened door and take Azurine from the pedestal. Azurine is the second Pure Metal required by Zauz. Step into the blue warp to leave the Temple of Ice. The next mandatory destination is Zauz’s Island: deliver Crimsonine, Aquanine and Azurine so Zauz can forge the Phantom Sword’s blade.
- Both elemental masks have been broken.
- Gleeok has been defeated with reflected projectiles and tongue pulls.
- The Heart Container has been collected.
- Azurine has been taken from the pedestal.
- The blue warp has returned Link outside.
- All three Pure Metals are ready for delivery to Zauz.
Before you move on
- The Isle of Frost has been opened and the Aroo impostor event is complete.
- The Temple of Ice has been entered and cleared.
- The Grappling Hook and Boss Key are in the inventory.
- Gleeok has been defeated.
- The Heart Container from Gleeok’s arena has been collected.
- Azurine has been taken from the reward pedestal.
- The blue warp has returned Link outside the temple.
- Crimsonine, Aquanine and Azurine are ready for Zauz’s forging sequence.
- The next story objective is Zauz’s Island and Phantom Sword preparation.
References for this chapter
- Isle of Frost - The Legend of Zelda: Phantom Hourglass Walkthrough
- Temple of Ice - The Legend of Zelda: Phantom Hourglass Walkthrough
- Phantom Hourglass Walkthrough - Temple of Ice
- The Legend of Zelda: Phantom Hourglass Walkthrough Main Page
- The Legend of Zelda: Phantom Hourglass — Guide and Walkthrough
Zauz and forging the Phantom Sword — fusion and effects
After collecting Crimsonine, Azurine, and Aquanine, take all three Pure Metals to Zauz’s Island in the Northwestern Sea. Zauz accepts the metals and begins forging the weapon, but he will not hand over the blade until Jolene’s final challenge is completed. Read Jolene’s letter at the mailbox, speak with Linebeck, and sail out to trigger the final sea duel. Defeat Jolene completely, including the prompted stylus struggle, then return to Zauz to receive the Sword Blade. Take the blade to Oshus’s house on Mercay Island. Oshus combines it with the Sand of Hours from the Phantom Hourglass and completes the Phantom Sword. The completed weapon is required for the final Temple of the Ocean King route and for damaging Bellum. The sword itself does not stop time. During the Bellum and Bellumbeck finale, Ciela supplies Phantom Spheres. When a sphere is available, tap the hourglass symbol on the lower screen and draw the figure-eight shape shown by the game to freeze time. Do not try to use Phantom Spheres during the forging sequence or the final Temple descent.
Confirm the three Pure Metals and visit Zauz’s Island
Before beginning this sequence, confirm that Crimsonine, Azurine, and Aquanine are in Link’s inventory. These are the three mandatory Pure Metals used for the Phantom Sword. Crimsonine comes from Goron Temple, Azurine comes from the Temple of Ice, and Aquanine comes from Mutoh’s Temple. Ship parts, treasure, gems, and salvage rewards do not substitute for these items.
Sail to the Northwestern Sea and look for Zauz’s Island in the northern part of the quadrant. The island is not initially displayed on the Sea Chart, so approach the area around the northern waters near the Isle of Gust if it is not already marked. Dock there, enter Zauz’s forge, and speak with him. Give him the three Pure Metals when prompted. Zauz accepts them and starts working, but he does not give Link the usable sword at this stage.
- Crimsonine, Azurine, and Aquanine are in the inventory.
- Zauz’s Island has been reached in the Northwestern Sea.
- Zauz has accepted all three Pure Metals.
- The initial forging scene has ended.
Read Jolene’s letter and arrange the final challenge
Leave Zauz’s forge and return to the mailbox near the dock or at the next available mailbox location. Read Jolene’s letter. It announces her final challenge and sets up the sea encounter needed to advance Zauz’s forging.
After reading the letter, return to Linebeck and speak with him aboard the ship. Complete the conversation that acknowledges Jolene’s challenge, then set sail. Do not return to Zauz immediately after reading the letter. The forging does not finish until the final Jolene encounter has been completed.
- Jolene’s final letter has been read.
- Linebeck has been spoken to after reading the letter.
- The ship is ready to sail for the required Jolene encounter.
Defeat Jolene in the final sea duel
Sail until Jolene’s ship ambushes you. The fight takes place aboard the ship as a close-range sword duel. Keep Link mobile and avoid standing directly in front of Jolene when she pulls back for a powerful attack. Move to the side while she commits to that strike, then slash her after the attack misses. Continue repeating this pattern rather than trading blows at close range.
After several successful exchanges, Jolene may force a sword clash. When the game displays the stylus prompt, rub the stylus rapidly from side to side as directed. The encounter is not complete merely because Jolene retreats from one exchange. Continue until the full duel and its resulting scene have ended. The completed encounter is what triggers Zauz to finish the blade.
- Jolene’s final sea ambush has been triggered.
- Her heavy attacks have been avoided and punished with counterattacks.
- The prompted stylus struggle has been completed.
- The duel’s full story scene has finished.
Return to Zauz for the Sword Blade
Sail back to Zauz’s Island and enter the forge again. Speak with Zauz after Jolene’s defeat. He has completed the forging and gives Link the Sword Blade.
The Sword Blade is an intermediate story item, not the completed Phantom Sword. It is not yet the finished weapon used for the final Temple or Bellum. If Zauz does not give it to Link, verify that Jolene’s final duel was completed in full and that the post-duel scene ended before sailing away.
- Zauz has handed over the Sword Blade.
- The item is present in Link’s inventory.
- You have not mistaken the Sword Blade for the finished Phantom Sword.
Take the Sword Blade to Oshus on Mercay Island
Sail to Mercay Island and travel to Oshus’s house on the western side of the island. Speak with Oshus while the Sword Blade is in Link’s inventory. Allow the complete conversation and forging scene to play without leaving the house.
Oshus combines the blade with the Sand of Hours associated with the Phantom Hourglass. There is no separate crafting menu and no manual fusion command. When the scene ends, the Sword Blade has become the completed Phantom Sword.
- Oshus has received the Sword Blade.
- The full forging cutscene has played.
- The Phantom Sword is now in Link’s inventory.
Use the Phantom Sword correctly
The completed Phantom Sword allows Link to defeat ordinary Phantoms that previously had to be avoided. Use it when a Phantom blocks required progress or when eliminating one is safer than attempting to slip past it. Continue watching patrols and attack openings; the sword does not make Link invulnerable.
The Phantom Sword’s normal strikes are separate from the time-stop mechanic used against Bellum. Swinging the sword does not freeze enemies, pause the Temple timer, or activate a Phantom Sphere. The time-stop input becomes available only during the final Bellum and Bellumbeck sequence, after Ciela supplies a Phantom Sphere.
- The Phantom Sword has replaced Oshus’s Sword.
- The sword can defeat ordinary Phantoms.
- You understand that normal sword attacks do not stop time.
- You have not attempted to use Phantom Spheres before the final confrontation.
Save before the final Temple approach
Leave Oshus’s house and head toward the Temple of the Ocean King. Complete the Linebeck scene near the temple approach before beginning the final descent. Save after obtaining the completed Phantom Sword so a failed Temple attempt can be retried from this point.
Prepare for the final Temple route by checking health and supplies, then mark or memorize the required crystal and Phantom routes. The Phantom Sword lets you clear mandatory Phantom encounters, but unnecessary fights still consume health and time. Use safe zones when available and avoid detours that are not needed for reaching Bellum’s door.
During the Bellum and Bellumbeck finale, wait for Ciela to create and supply a Phantom Sphere. When the Phantom Sphere is available, tap the hourglass symbol on the lower screen. A framed drawing area appears; draw the figure-eight shape shown by the game to activate the time stop. Do not describe or practice this as an alternate hourglass-outline input. The required sequence is tapping the hourglass symbol followed by drawing the figure-eight shape. Use the frozen opening to reach Bellum’s exposed eye or other vulnerable target with the Phantom Sword. Phantom Spheres are not available during the forging sequence or the final Temple descent.
- The Phantom Sword is complete and the game has been saved.
- The Linebeck approach scene has finished.
- You are ready for the final Temple of the Ocean King route.
- You know that Phantom Spheres are supplied only during the Bellum and Bellumbeck finale.
- You know to tap the hourglass symbol and then draw the figure-eight shape when using a Phantom Sphere.
Before you move on
- Crimsonine, Azurine, and Aquanine were delivered to Zauz.
- Jolene’s final challenge was read, arranged through Linebeck, and completed in full.
- Zauz handed Link the Sword Blade.
- The Sword Blade was taken to Oshus on Mercay Island.
- Oshus completed the Phantom Sword using the Sand of Hours.
- The completed Phantom Sword is in Link’s inventory and can defeat ordinary Phantoms.
- The game is saved and Link is ready for the final Temple of the Ocean King visit.
- During the Bellum and Bellumbeck finale, Phantom Sphere use is understood as tapping the hourglass symbol and drawing the figure-eight shape.
- Phantom Spheres have not been incorrectly treated as a prerequisite before the final confrontation.
Final Temple of the Ocean King visit — B7-B13 route to Bellum’s door
After Oshus completes the Phantom Sword, save and return to the Temple of the Ocean King. Use the golden warp near the entrance to reach B7, then carry the Round Crystal through B8 and complete the Square, Round, Triangle arrangement on B9. On B10, activate the required crystal switch, defeat the key-carrying Phantom and descend. On B11, use the available eastern staircase; the longer western lever, soil, geyser, bridge, Bombchu and four-switch sequence is not required for this route. On B12, cross the wall with the Hammer catapult, lower the spikes, and collect exactly three Force Gems: one from the large Phantom in the southern section, one from the northeast chest and one from the northwest chest route. Place all three at the central pedestals and descend to B13. Use the red pot as temporary protection, then defeat the Blue Phantom group, the Swift Phantom group and the Gold Phantom group. Cross the final bridge and use the blue warp. This chapter ends at the Bellum approach, before the boss sequence begins.
Prepare and take the golden warp to B7
Save before entering the Temple of the Ocean King. This route assumes that Oshus has completed the Phantom Sword after you delivered the Sword Blade to him. Enter the temple on Mercay Island and touch the golden warp near the entrance. Follow the short route down to B7 rather than repeating the earlier floors.
The Phantom Sword lets Link defeat ordinary Phantoms by striking their exposed backs. Natural purple Safe Zones remain the safest places to pause because they protect Link and stop the Sand of Hours from draining. Red pots create temporary Safe Zones when broken, but they disappear after use. Keep the Bombchu, Bow, Grappling Hook, Hammer and Shovel available. Skip optional treasure rooms if the Sand of Hours is running low.
- The Phantom Sword is complete.
- The game was saved before entering.
- The golden warp was used to reach B7.
- The Bombchu, Bow, Grappling Hook, Hammer and Shovel are available.
B7-B8: collect and move the Round Crystal
On B7, ride the moving platforms toward the upper route. When the platform is aligned, step onto the higher block and continue toward the western Safe Zone. Use the Grappling Hook to reach the treasure chest on the right side of the room and open it to obtain the Round Crystal. A nearby gold pot can restore Hourglass time, but it is optional.
Carry the Round Crystal east and then south to the southeastern stairs. On B8, cross the invisible bridge carefully and take the crystal to the pedestal in the northwest part of the floor. Placing it lowers the spikes and opens the required route. Activate the nearby switch to turn on the air vent if you need the adjacent time-restoring pot, then use the northwest stairs to reach B9. The Round Crystal will be needed again for the final B9 arrangement, so do not leave it in an inaccessible corner.
- The Round Crystal was collected on B7.
- The Round Crystal was carried through B8.
- The Round Crystal reached the northwest B8 pedestal.
- The B8 spikes were lowered.
- The route to B9 was opened.
B9 and the B8 return: obtain the Triangle Crystal
On B9, open the chest to obtain the Triangle Crystal. Carry it back upstairs to B8. Cross the invisible bridge again and send a Bombchu through the small opening to strike the crystal switch. This opens the northeastern route and lets you bring the Triangle Crystal back down to B9.
If the direct switch route is awkward, leave the Triangle Crystal in a Safe Zone while you clear the blocking route from the opposite side. The required result is unchanged: the Triangle Crystal must return to B9, and the Round Crystal must remain available for the final three-crystal placement.
- The Triangle Crystal was taken from the B9 chest.
- The B8 crystal switch was activated or its alternate route was opened.
- The Triangle Crystal returned to B9.
- The Round Crystal remains available for the final arrangement.
B9: obtain the Square Crystal and open B10
Carry the Triangle Crystal to the large Safe Zone in the northern part of B9 and leave it there temporarily. Use the Hammer to draw the nearby Phantom toward the Safe Zone. When the Phantom turns away, strike its exposed back with the Phantom Sword. It drops the Square Crystal.
Carry the Square Crystal to the separate northwest pedestal rather than to the three-crystal arrangement. Placing it there removes the flames and opens the route toward the upper section. Return to B8, recover the Round Crystal, and bring it back down to B9.
At the central arrangement, place the crystals in this order: Square, Round, Triangle. The correct order opens the passage to B10. If a Phantom blocks a carrying route, use a Safe Zone and Hammer strikes to control its position instead of trying to rush through an exposed patrol path.
- The Square Crystal was taken from the Phantom.
- The Square Crystal was placed on the northwest pedestal.
- The Round Crystal was recovered from B8.
- The crystals were placed Square, Round, Triangle.
- The passage to B10 opened.
B10: complete the required switch and Small Key progression
On B10, send a Bombchu through the small opening to strike the crystal switch. This lowers the spikes and opens the required route. Use the Safe Zones and surrounding walls to limit Phantom exposure while crossing the floor.
Defeat the Phantom carrying the Small Key. Lure it toward a Safe Zone with the Hammer, wait until it turns away, and attack its back with the Phantom Sword. Collect the Small Key, follow the opened route around the room and use the key on the locked passage. Continue through the available platform and Grappling Hook route to reach the stairs leading to B11.
The western B10 treasure route is optional. Do not spend Sand of Hours on extra chests if your objective is only to reach Bellum.
- The B10 crystal switch was activated.
- The Phantom carrying the Small Key was defeated.
- The Small Key was collected.
- The locked passage was opened.
- The stairs to B11 were used.
B11: bypass the optional western puzzle
B11 contains a longer western sequence involving levers, soil patches, wind geysers, a temporary bridge, a Bombchu switch and four switches. That sequence is not required for the stated final-visit route.
Move east across B11 and locate the staircase on the eastern side. Use the nearby Safe Zone to avoid or defeat Phantoms if they obstruct the path, then take the eastern staircase to B12. Complete the western puzzle only if you deliberately want its optional reward.
- The western B11 puzzle was bypassed.
- The eastern B11 staircase was located.
- The eastern staircase was used to enter B12.
B12: collect and place the three required Force Gems
Switch to the Hammer and stand on the catapult. Wait until the large Phantom moves toward the left, then use the Hammer to launch Link over the wall. Defeat the large Phantom with the Phantom Sword, but remember that its dropped Force Gem is the first of the three required gems. Collect it and carry it toward the central pedestal area when the route is safe.
Move north along the wall and use the Hammer on the switch beyond the spikes. This lowers the barriers. Go to the northeast Safe Zone and open the chest to obtain the second Force Gem. A Phantom appears after the chest opens. Leave the gem inside the Safe Zone, lure the Phantom with Hammer strikes and defeat it when it turns away. Carry the gem to the central pedestal area, but do not place it yet.
Use the northwest Safe Zone route to reach the other chest and collect the third Force Gem. A Phantom appears on this side as well. Use the Safe Zone to protect the gem, then defeat the Phantom with the same Hammer-and-Phantom-Sword method. Carry this gem to the central pedestal area.
You should now have exactly three required Force Gems: the southern-section gem dropped by the large Phantom, the northeast chest gem and the northwest chest gem. Place all three at the central pedestals. The stairs to B13 open. Optional treasure and rupee rooms can be skipped.
- The Hammer catapult route over the wall was used.
- The large Phantom was defeated.
- The southern-section Force Gem was collected.
- The B12 spikes were lowered.
- The northeast chest Force Gem was collected.
- The northwest chest Force Gem was collected.
- Exactly three Force Gems were carried to the central pedestal area.
- All three Force Gems were placed.
- The stairs to B13 opened.
B13: defeat the Blue, Swift and Gold Phantom groups
At the start of B13, move to the northeast corner and pick up the red pot without breaking it. Carry it left, drop down from the ledge and throw it toward the Phantom activity. Break the pot to create a temporary Safe Zone, then step into the protected area.
Use Hammer strikes from inside the temporary Safe Zone to attract the Phantoms one at a time. The first group consists of three Blue Phantoms. Defeat them with the Phantom Sword. Three Swift Phantoms then appear; defeat this second group before handling the final group of three Gold Phantoms. The groups must be cleared in this order: Blue, Swift, Gold.
If Link is spotted and red flames block an exit, defeat the active Phantom group or use the nearby soil spot with the Shovel to escape. Do not leave the temporary Safe Zone with the red pot still intact if you can avoid it; breaking it at the Phantom area gives you a safer position for the full encounter.
After all nine Phantoms are defeated, the northern door opens. Enter it and cross the bridge. The bridge collapses behind Link and a blue warp appears. Step into the warp to return to the temple entrance. The same warp can return Link to the cleared final chamber, allowing a final preparation stop before Bellum. Stop at the Bellum approach if this chapter is being used as the handoff to the final-boss chapter.
- The northeast red pot was carried to the Phantom area.
- The red pot was broken to create temporary protection.
- The three Blue Phantoms were defeated.
- The three Swift Phantoms were defeated.
- The three Gold Phantoms were defeated.
- The northern door opened.
- The bridge was crossed.
- The blue return warp appeared.
- Link reached the Bellum approach without beginning the boss battle.
Before you move on
- The Phantom Sword is complete and the game was saved.
- The golden warp was used to reach B7.
- The Round Crystal was collected on B7 and carried through B8.
- The Triangle Crystal was collected on B9.
- The Square Crystal was taken from the B9 Phantom.
- The crystals were placed Square, Round, Triangle.
- The B10 required switch was activated.
- The B10 Small Key Phantom was defeated and the key was collected.
- The eastern B11 staircase was used without completing the western puzzle.
- The B12 Hammer catapult route was used.
- The large B12 Phantom was defeated.
- The southern-section Force Gem was collected.
- The B12 spikes were lowered.
- The northeast chest Force Gem was collected.
- The northwest chest Force Gem was collected.
- Exactly three B12 Force Gems were placed at the central pedestals.
- The B13 Blue, Swift and Gold Phantom groups were defeated in that order.
- The northern bridge was crossed and the blue warp appeared.
- Link reached the Bellum approach without beginning the boss sequence.
Final confrontation(s) — Bellum, Bellumbeck and the Ghost Ship phase
Begin after the final Temple of the Ocean King route with the Phantom Sword, Grappling Hook, Bow and Phantom Hourglass ready. Bellum first appears in a purple ooze pool. Remove its slime with the Grappling Hook, pull the final piece near its mouth to stun it, and strike its exposed body with the Phantom Sword. Chase Bellum through the upper floors and shoot the eyes on its tentacles with the Bow until Ciela absorbs the released orb and restores her powers. On the collapsed bottom floor, collect Ciela’s Phantom Spheres. Tap the hourglass symbol, then draw the figure-eight shown by the game to stop time and slash Bellum’s exposed eye. After Bellum falls, fight the infected Ghost Ship with Linebeck’s cannon, destroying its eyes and incoming ooze projectiles. Accept the save prompt before boarding the wreckage. In the last battle, Bellum possesses Linebeck as Bellumbeck. Free Ciela through sword clashes, watch the top-screen rear view for the opening eye, then stop time and attack Bellumbeck from behind. Follow the rescue, ending, credits, post-credit material and final Touch Screen prompt.
Prepare at the final B13 approach
This chapter begins after the final Temple of the Ocean King route. Before climbing the staircase, confirm that the Phantom Sword, Grappling Hook, Bow and Phantom Hourglass are available. The final bridge leads to Bellum’s chamber, while the blue warp at the end of the B13 route provides a return route if you need to leave and prepare.
Save before beginning the final ascent. This gives you a practical recovery point if you fail a boss phase, rather than requiring another complete run through the final temple visit. Once you enter the boss sequence, follow the on-screen transitions instead of trying to return to the temple.
- Reach the final B13 approach after placing all three Force Gems.
- Confirm that the Phantom Sword, Grappling Hook, Bow and Phantom Hourglass are available.
- Save before beginning the final ascent.
Remove Bellum’s slime and attack its body
Bellum begins in a pool of purple ooze on the lowest floor. It moves slowly around the pool and throws ooze toward Link. The ooze can produce small enemies. Defeat those enemies when they block your path or provide useful recovery items, but keep your main attention on Bellum’s removable slime.
Use the Grappling Hook to pull slime away from Bellum. Continue removing the available pieces until the final piece beside Bellum’s mouth can be targeted. Pulling this piece draws Bellum toward Link and leaves it stunned for a short opening. Strike the exposed body with the Phantom Sword. The body is the target during this opening; do not waste time looking for an eye.
After taking enough damage, Bellum bounces around the pool and retreats upward. Chase it only when the route is safe, and avoid standing in the ooze. This phase is completed by removing slime, pulling Bellum close and landing sword attacks, not by using a Phantom Sphere.
- Use the Grappling Hook to remove Bellum’s purple slime.
- Pull the final slime piece beside Bellum’s mouth.
- Strike Bellum’s exposed body with the Phantom Sword.
- Avoid the ooze pool and clear spawned enemies when they obstruct movement.
Shoot the tentacle eyes with the Bow
Climb to the next floor after Bellum leaves the pool. Bellum’s tentacles attach to the surrounding pillars, and each vulnerable tentacle exposes an eye. Equip the Bow and move around the room, firing at an eye whenever it opens.
Keep moving after each shot because the tentacles can sweep across the floor. The pillars can provide cover from broad swipes, but avoid standing beneath a pillar while ooze or enemies are being dropped. Continue circling the room until the exposed tentacle eyes have been hit.
Bellum then returns to the lower floor. Repeat the Grappling Hook and sword sequence. It will throw more ooze during the later lower-floor visit, so clear enemies only when they interfere with movement or when you need dropped supplies.
When Bellum returns upstairs, the eyes open for shorter periods. Circle the room and fire immediately when a target becomes vulnerable. If you run low on arrows, defeat the small ooze enemies because they can provide replacement arrows. After the upper-floor eyes are destroyed, Bellum rises to the top floor and attacks more aggressively with its tentacles. Use the pillars as cover when necessary and shoot the remaining eyes.
When the final eye is hit, Bellum releases a large orb. Ciela absorbs it, recovers her memories and powers, and becomes able to create Phantom Spheres. Return to the bottom floor; the stairways collapse and begin the next phase.
- Shoot the vulnerable eyes on Bellum’s tentacles.
- Keep moving and use pillars as cover from sweeping attacks.
- Repeat the lower-floor slime section when Bellum returns.
- Recover arrows from spawned enemies if necessary.
- Destroy the final upper-floor eyes and return to the collapsed bottom floor.
Use Ciela’s Phantom Spheres against Bellum
On the collapsed bottom-floor arena, Ciela periodically creates a Phantom Sphere. Collect one to make the hourglass symbol available. Stay near the edge of the ooze pool while watching Bellum’s movement. This gives you room to avoid its attacks and lets you approach the exposed eye during the time-stop window.
Wait until Bellum is circling with its eye exposed and positioned so that you can reach it. Tap the hourglass symbol, then draw the figure-eight shown by the game on the Touch Screen. Time stops briefly. Run to Bellum’s exposed eye and slash it repeatedly with the Phantom Sword.
When time resumes, retreat toward the pool’s edge and wait for Ciela to create another Phantom Sphere. Do not activate a sphere while Bellum is too far away or positioned so that the eye cannot be reached before time resumes. Repeat the Phantom Sphere, time-stop and eye-slash sequence until Bellum is defeated.
The temple collapses after Bellum falls. Oshus transports Link and Ciela back to Linebeck’s ship. Tetra briefly awakens, but Bellum captures her again and carries her to the Ghost Ship. The Ghost Ship battle is part of the final sequence and is not the rescue itself.
- Collect each Phantom Sphere created by Ciela.
- Wait until Bellum’s exposed eye is reachable.
- Tap the hourglass symbol, then draw the figure-eight shown by the game.
- Slash Bellum’s eye with the Phantom Sword during stopped time.
- Repeat until Bellum is defeated and the temple collapses.
Destroy the infected Ghost Ship
The next battle takes place at sea. Linebeck controls the S.S. Linebeck while Link operates the cannon. The infected Ghost Ship moves across the view, exposing eyes along its sides and larger eyes on its deck. Fire at every open eye while keeping the ship moving so incoming ooze is harder to land.
Bellum launches ooze projectiles toward the S.S. Linebeck. Shoot these projectiles before they hit your ship; destroying them can restore ship health. Continue checking both sides and the deck because eyes appear in different positions and can reappear during the battle. The Ghost Ship is defeated after its required eyes have been destroyed.
When the Ghost Ship sinks, Link and the crew board the wreckage. Accept the save prompt before proceeding. This separates the cannon battle from the final Bellumbeck fight and provides the intended restart point for the last phase.
- Shoot the Ghost Ship’s side eyes.
- Destroy incoming ooze projectiles before they hit the S.S. Linebeck.
- Target the larger eyes on the deck.
- Keep the ship moving while firing.
- Accept the save prompt after the Ghost Ship sinks.
Defeat Bellumbeck and free Linebeck
On the wreckage, Bellum possesses Linebeck and becomes the armored Bellumbeck. Its front armor cannot be damaged effectively. The target is the eye on Bellumbeck’s back, but the eye begins closed, so do not waste time attacking the armor from the front.
At the start of this phase, Ciela creates a Phantom Sphere. Collect it, tap the hourglass symbol, then draw the figure-eight shown by the game. Run around Bellumbeck during stopped time, but note that the rear eye may still be closed. Ciela’s view on the top screen becomes the important indicator for when the eye opens.
Bellumbeck captures Ciela and stops producing Phantom Spheres. Attack it from the front until Link and Bellumbeck lock swords. Rub the stylus rapidly across the Touch Screen to win the clash, then slash Bellumbeck again. This frees Ciela long enough for her to create another Phantom Sphere.
Collect the new sphere and watch the top-screen rear view. When the rear eye opens, tap the hourglass symbol, draw the figure-eight shown by the game, run behind Bellumbeck and slash the exposed eye. Bellumbeck can sidestep after several hits and can use a wide spinning attack. Move away from the spin, then resume attacking after it ends.
Repeat the sword-clash and rear-eye sequence until Bellumbeck is defeated and Linebeck is restored. If Bellumbeck captures Ciela again, repeat the front-facing sword attacks and win the clash to release her and restore the Phantom Sphere supply.
- Attack Bellumbeck’s rear eye rather than its armored front.
- Use the top screen to monitor when the rear eye opens.
- Win each stylus sword clash to free Ciela.
- Collect the next Phantom Sphere after Ciela is released.
- Tap the hourglass symbol, then draw the figure-eight shown by the game.
- Move away from Bellumbeck’s sidestep and spinning attack.
View the ending and confirm completion
After the final rear-eye strikes, Bellum is defeated and Linebeck is restored. Let the rescue and aftermath scenes play without resetting the Nintendo DS. Tetra’s rescue is resolved during this final sequence; the earlier Ghost Ship encounter only led to the battle and did not rescue her.
Continue through the ending and credits. The game includes post-credit material, so remain on the ending sequence after the credits begin. When the final Touch Screen prompt appears, tap it as instructed.
The main Adventure Mode is complete when Bellum has been defeated in the Temple of the Ocean King, the infected Ghost Ship has been destroyed, Bellumbeck has been defeated, Linebeck has been restored, Tetra’s rescue scene has played, the ending and credits have been viewed, and the final Touch Screen prompt has been completed.
- Defeat Bellum in the Temple.
- Destroy the infected Ghost Ship with cannon fire.
- Defeat Bellumbeck on the wreckage.
- Restore Linebeck and view Tetra’s rescue.
- Watch the ending, credits and post-credit material.
- Tap the final Touch Screen prompt.
Before you move on
- The final B13 approach was reached after the sixth Temple of the Ocean King visit.
- The Phantom Sword, Bow, Grappling Hook and Phantom Hourglass were available.
- Bellum’s opening slime was removed with the Grappling Hook.
- Bellum was pulled close and struck in the exposed body during the opening phase.
- Bellum’s upper-floor tentacle eyes were destroyed with the Bow.
- Ciela absorbed the large orb and regained her powers.
- Phantom Spheres were used during the later bottom-floor phase.
- The hourglass symbol was tapped and the figure-eight shown by the game was drawn to stop time.
- Bellum’s exposed eye was struck during stopped-time openings.
- The infected Ghost Ship’s side eyes, deck eyes and ooze projectiles were handled with cannon fire.
- The save prompt was accepted before boarding the Ghost Ship wreckage.
- Bellumbeck was defeated by freeing Ciela, stopping time and striking the rear eye.
- Linebeck was restored, Tetra’s rescue sequence played, and the ending and credits were viewed.
- The post-credit material was viewed and the final Touch Screen prompt was completed.
Aftermath, epilogue and what to expect in the end credits
Begin this chapter after Bellumbeck has been defeated and Linebeck has been freed. The remaining sequence is automatic: watch the Ocean King’s farewell, Linebeck’s restored ship, the return of Link and Tetra, and the ending scenes that confirm the adventure really happened. The game offers a save opportunity immediately after the possessed Ghost Ship battle and before Link boards the wreckage; use it if you want to preserve access to the endgame state. Loading that file returns you to a replayable adventure state for optional sailing and collection, not to a permanently cleared world. To complete the ending, remain through the credits and tap the Touch Screen when The End appears.
1. Continue through the immediate aftermath
Start this chapter only after the Bellumbeck battle has ended and Linebeck is no longer possessed. Do not reset, close the game, or return to the title screen during the first ending scenes. The game proceeds through a sequence of automatic events rather than opening a new controllable dungeon or assigning another required objective.
Watch the Ocean King’s farewell and the departure of the Spirits. The story resolves the condition of Tetra, explains the fate of the Phantom Hourglass’s sand, and shows the consequence of Linebeck’s final wish. Linebeck’s ship is restored during the ending sequence; this is a cutscene event, not a ship part or an item that must be collected from the Sea Chart. The restored ship should not be treated as a new post-game unlock.
The ending also returns Link and Tetra to Tetra’s crew. The crew’s reaction establishes that the adventure in the Ocean King’s world did not consume the amount of time they expected. Continue watching instead of skipping events if you want to see the complete story resolution. The game manual confirms that START can skip events, so avoid pressing it during these scenes if your goal is to view the entire ending.
- Bellumbeck has already been defeated.
- Linebeck has been freed from Bellum’s possession.
- The Ocean King and the Spirits complete their farewell.
- Linebeck’s ship is restored in the ending sequence.
- Link and Tetra return to Tetra’s crew.
2. View the final proof of the adventure
After Link and Tetra return to the crew, remain with the sequence until the game shows the final images before and during the credits. The Phantom Hourglass is shown empty, indicating that its sand has been consumed. Linebeck’s restored ship is then seen at a distance. These scenes are part of the ending and do not create a new inventory item, Sea Chart, dungeon, or mandatory destination.
Let the credits run to completion. Do not assume that reaching the first credit screen is the same as completing the ending. When The End appears on the Touch Screen, tap the screen. This advances past the credit display to the final post-credits scene. A walkthrough for the Nintendo DS release specifically identifies the Touch Screen prompt after The End as the final ending interaction.
If the game appears to pause after The End, check the Touch Screen rather than pressing random buttons or powering off the system. The prompt is the completion point for viewing the full ending sequence. There is no further required boss, dungeon, item, or story route after this interaction.
- The empty Phantom Hourglass scene has played.
- The restored Linebeck ship appears in the ending.
- The credits have finished.
- The End appears on the Touch Screen.
- You have tapped the Touch Screen and viewed the post-credits scene.
3. Use the endgame save correctly
The save opportunity relevant to the final sequence appears after the possessed Ghost Ship battle, when the Ghost Ship has sunk partway and Linebeck asks Link to board the wreckage. The prompt occurs before the wreckage sequence and before the Bellumbeck encounter; it is not a save made after the credits. If you have not yet passed this point, save there if you want a reliable retry point.
This checkpoint is useful because loading it returns you to an endgame adventure state rather than forcing you to begin a new file. Community reports for the original Nintendo DS release describe Link returning to the ship with normal sea travel available and the Ghost Ship appearing near Mercay, allowing the final sequence to be attempted again. Treat that file as a pre-final-sequence exploration checkpoint, not as a completed-world flag.
The instruction booklet warns that, after saving and ending the game, there are situations in which Link may begin from a specific point different from the exact position where the save was made. Therefore, a changed starting position after loading does not by itself indicate lost progress. Check the Sea Chart, inventory, collected dungeon items, and other permanent progress before assuming that anything has been erased.
- The pre-wreckage save prompt was used if you wanted a final-sequence checkpoint.
- You understand that the checkpoint is before Bellumbeck, not after the credits.
- Loading the file returns you to a replayable endgame adventure state.
- The Ghost Ship remains available for another final-sequence attempt.
4. Continue optional exploration after the ending
After viewing the ending, load the endgame checkpoint if you want to continue the adventure. The save does not produce a permanently cleared world in which Bellum is marked as defeated while the normal map continues from a new chapter. Instead, it preserves access to the adventure state around the final sequence. From there, you can sail, salvage treasure, search for ship parts, complete remaining island activities, and pursue optional collection goals.
If you want to replay the ending, return to the Ghost Ship when it is available near Mercay and complete the final sequence again. The game does not require you to collect a new Sea Chart or unlock a post-credits dungeon. The restored ship seen during the ending is not a reward waiting at a later port.
Save optional progress before starting the final sequence again. This prevents a long collection session from being lost if you decide to replay the ending immediately afterward. The manual confirms that saving is performed through the game menu or pause menu, while the special final checkpoint is presented during the story before Link boards the wreckage.
- The endgame file loads without starting a new Adventure Mode file.
- Normal sea travel and optional activities remain available.
- Remaining treasure, ship-part, island, and salvage tasks can be pursued.
- You know that replaying the ending requires another final-sequence completion.
Before you move on
- Bellumbeck has been defeated and Linebeck has been freed.
- The Ocean King and the Spirits have completed their farewell.
- Linebeck’s ship has been restored in the ending sequence.
- Link and Tetra have returned to Tetra’s crew.
- The empty Phantom Hourglass scene has appeared.
- The credits have finished.
- The End has appeared on the Touch Screen and has been acknowledged by tapping the screen.
- The final post-credits scene has played.
- The pre-wreckage endgame save, if used, still loads into a replayable adventure state for optional exploration.
References for this chapter
- The Legend of Zelda: Phantom Hourglass — Official Nintendo Manual
- The Legend of Zelda: Phantom Hourglass Walkthrough — Bellum, Thonky
- The Legend of Zelda: Phantom Hourglass — Guide and Walkthrough, GameFAQs
- Saving near the end — The Legend of Zelda: Phantom Hourglass, GameFAQs discussion
- Phantom Hourglass — Zelda Dungeon Wiki
Optional completion — ship parts, treasure maps, maxing Hourglass capacity
Optional cleanup can begin once the Salvage Arm is installed and a sea route is open. Use each Treasure Map to locate its red X, then salvage the underwater chest for Rupees, treasure, ship parts, or Sand of Hours. Five specific sunken chests award one minute each: the Southwestern Sea northeast of Mercay Island, the Northwestern Sea southeast of Bannan Island, the Southwestern Sea west of Cannon Island, the Northwestern Sea north of the Isle of Gust, and the Southeastern Sea northwest of the Isle of Frost. Each requires its corresponding Treasure Map. These five minutes combine with the Sand of Hours earned during the main adventure to raise the Phantom Hourglass to its 25-minute maximum. Ship customization, fishing, treasure sales, minigames, and extra Heart Containers are optional and are not needed to forge the Phantom Sword, defeat Bellum, or view the ending.
1. Begin optional cleanup when the Salvage Arm and a reachable chart are available
You do not need to wait until after Bellum. Once the Salvage Arm is installed on the SS Linebeck, you can recover marked underwater treasure whenever the relevant sea route is open. A convenient full-cleanup point is after later Sea Charts have been obtained, because more of the ocean is accessible, but early Treasure Maps can be salvaged immediately.
Open each Sea Chart and inspect its red X marks. Treasure Maps are obtained from island chests, caves, shops, NPC rewards, dungeon rooms, minigames, and other optional events. A red X identifies a sunken treasure location, but not the reward. If an X lies beyond a fog route, chart boundary, or story-gated passage, mark it and return after the required campaign objective is complete.
Every underwater reward requires its matching Treasure Map. Reaching the approximate location without that map does not create a salvage target, so do not spend time searching for a chest that has not been revealed on the chart.
- Confirm that the Salvage Arm has been obtained.
- Review the Sea Charts whenever a new Treasure Map or story route becomes available.
- Separate reachable X marks from locations blocked by unfinished progression.
- Do not attempt to salvage an unmarked location.
2. Recover marked chests and repair the Salvage Arm at Mercay Island
Sail to a red X and choose Salvage from the ship controls. During the descent, guide the arm around underwater bombs, cliffs, and other hazards. The arm can be damaged by collisions, so slow down when the route becomes crowded instead of forcing a direct descent.
At the seabed, position the claw over the treasure chest and lower it onto the target. Missing the chest ends that attempt and requires another salvage run. After a successful dive, verify that the reward has been collected; merely reaching the red X does not complete the Treasure Map.
If the arm is damaged, return to Mercay Island and enter the shipyard beside the dock. Speak with the shipyard attendant to repair it before attempting another difficult dive. Ship customization and Salvage Arm repairs are separate services.
- Use slow, controlled movement around underwater hazards.
- Center the claw over the chest before lowering it.
- Repair the Salvage Arm at the Mercay Island shipyard when necessary.
- Confirm the reward before leaving the salvage site.
3. Collect the five optional one-minute Sand of Hours chests
Five specific sunken chests award one minute of Sand of Hours each. Obtain the corresponding Treasure Map before sailing to each location, then open the correct Sea Chart and salvage the red X. The five locations are: the Southwestern Sea northeast of Mercay Island; the Northwestern Sea southeast of Bannan Island; the Southwestern Sea west of Cannon Island; the Northwestern Sea north of the Isle of Gust; and the Southeastern Sea northwest of the Isle of Frost.
The maps are not all available at the same point in the story. Some are found during island exploration, while others appear in later Temple of the Ocean King visits or become useful only after a new Sea Chart opens the route. If one of these five X marks cannot be reached, continue the main campaign and return after the relevant map, item, or sea route becomes available.
These five optional minutes do not by themselves make the Hourglass hold 25 minutes. They combine with the Sand of Hours awarded through the main adventure, including the initial Hourglass supply and the increases received after required dungeon bosses. Collect all five salvage rewards and complete the relevant story progression if the maximum capacity is your goal.
- Obtain the Treasure Map for each Sand of Hours chest.
- Salvage the Southwestern Sea chest northeast of Mercay Island.
- Salvage the Northwestern Sea chest southeast of Bannan Island.
- Salvage the Southwestern Sea chest west of Cannon Island.
- Salvage the Northwestern Sea chest north of the Isle of Gust.
- Salvage the Southeastern Sea chest northwest of the Isle of Frost.
- Remember that these five minutes combine with main-story rewards to reach the 25-minute maximum.
4. Customize the SS Linebeck and sell unwanted parts carefully
Take recovered ship parts to the shipyard on Mercay Island and use the customization screen to review the available hull, cannon, bow, rail, bridge, and other pieces. Ship parts are optional and do not affect access to the Pure Metals, Phantom Sword, or Bellum. Equip a design you prefer or keep useful spare pieces, but do not postpone the main story while searching for a complete cosmetic collection.
Golden Ship parts provide the documented stamina benefit: equipping every two Golden parts increases the ship's stamina by one heart, up to the game's limit. Do not assume that any visually matching ordinary set grants the same bonus. Docking at an island restores ship stamina, so specialized parts are not required for normal campaign travel.
Use the Treasure Teller on Mercay Island to sell unwanted treasure and ship parts. Keep rare pieces, Golden parts, anything needed for a collection goal, and pieces you may want to trade before selling duplicates.
- Review new parts at the Mercay Island shipyard.
- Use Golden Ship parts when the goal is extra ship stamina.
- Sell unwanted parts and treasure through the Treasure Teller.
- Do not confuse customization with mandatory story progression.
5. Complete the optional fishing chain after it becomes available
Fishing begins after the Old Wayfarer and mermaid-related events on Bannan Island. Once the Fishing Rod is available, sail over fish shadows and select the fishing option when the ship is positioned over one. Follow the touchscreen reeling instructions and advance through the requested catches in order.
After the earlier fish have been delivered, the Old Wayfarer provides the Big Catch Lure for larger catches. The Rusty Swordfish can be shown to him for a ship part. Catch Neptoona and return it to him for an optional Heart Container. A Stowfish can be attached to a larger catch; show that catch to the Old Wayfarer for another ship-part reward.
Fishing does not provide a Pure Metal, does not unlock the Phantom Sword, and is not needed for Bellum. Treat the entire fishing chain as optional cleanup.
- Unlock the Fishing Rod through the Old Wayfarer and mermaid sequence.
- Advance through the requested fish before using the Big Catch Lure.
- Return the Rusty Swordfish for its ship-part reward.
- Return Neptoona for the optional Heart Container.
- Show a caught Stowfish to the Old Wayfarer for its ship-part reward.
6. Prepare optional Temple of the Ocean King practice runs
If the purpose of cleanup is to make later Temple attempts easier, collect the Sand of Hours chests that are already reachable and save outside the Temple entrance. On the dungeon map, mark Safe Zones, locked doors, switches, key locations, shortcuts, and Phantom patrol routes. Rehearse one floor or route segment at a time, then connect those segments once the movement and item actions are familiar.
During a timed run, ignore optional Rupees, ordinary chests, and side rooms unless they contain a required key, switch, shortcut, or useful recovery item. The 25-minute maximum is helpful, but it is not required for completing the final Temple route.
If the Hourglass is running low, move to a Safe Zone or leave the Temple rather than forcing an unfamiliar room. Return after recovering Sand of Hours or after gaining the Phantom Sword if the route now allows a safer attempt.
- Save outside the Temple before a practice run.
- Mark Safe Zones and Phantom patrol routes on the map.
- Prioritize required keys, switches, and shortcuts over optional treasure.
- Leave and retry rather than risking a long run with almost no sand.
Before you move on
- Every currently reachable red X has been salvaged, and blocked marks have been revisited after the required Sea Chart, item, or story route became available.
- The Salvage Arm has been repaired at the Mercay Island shipyard when damaged.
- The corresponding Treasure Map has been collected for each of the five Sand of Hours salvage locations.
- The five optional one-minute chests have been recovered: northeast of Mercay Island, southeast of Bannan Island, west of Cannon Island, north of the Isle of Gust, and northwest of the Isle of Frost.
- The five optional minutes have been combined with the Sand of Hours gained from main-story progression if the 25-minute maximum is the goal.
- The Old Wayfarer's fishing chain has been completed through Neptoona if the optional Heart Container is wanted.
- Desired ship parts have been reviewed, equipped, stored, traded, or sold deliberately.
- Optional cleanup has not been mistaken for the mandatory Pure Metals, Phantom Sword, final Temple, Bellum, or ending progression.
References for this chapter
- The Legend of Zelda: Phantom Hourglass — Official Nintendo Manual
- Phantom Hourglass Treasure Maps — Zelda Dungeon Wiki
- Sand of Hours — Zelda Dungeon Wiki
- Phantom Hourglass Walkthrough — Ocean King Part III
- The Legend of Zelda: Phantom Hourglass — Guide and Walkthrough
- Phantom Hourglass Sand of Hours — Zelda Wiki
Troubleshooting, recovery from failure and common traps
Temple of the Ocean King runs are safest when you divide them into short movements between known Safe Zones. Natural purple Safe Zones stop the Sand of Hours timer and prevent ordinary Phantoms from seeing or entering them. Red pots can create temporary protection, but those circles are limited to the current room and disappear when Link changes floors. If the timer becomes low, stop pursuing optional treasure and retreat through a route you already know. Reaching zero Sand of Hours does not instantly end the attempt, but the Temple’s curse begins damaging Link outside protected areas, so remaining exposed is rarely worth the risk. Leave the Temple, let the hourglass recharge, and return using opened doors, shortcuts, collected charts, and solved puzzles. When a puzzle or boss attempt goes badly, identify the single mistake, restock only the needed items, and repeat the shortest route to the problem. Use the DS map to mark keys, switches, patrol routes, Safe Zones, and exits. The goal of each recovery run is concrete: obtain the needed item or solve the required mechanism, reach the next staircase or portal, leave safely, and save after major story progress.
Save and prepare before a difficult Temple run
Save after major story progress, after receiving a Sea Chart or important item, and before beginning a difficult section that you have already reached. You do not need to treat every ordinary entry as a separate save ritual; the Temple’s persistent shortcuts and opened routes are the main recovery tools. A save made after an island dungeon or a newly unlocked story event is especially useful if a later Temple attempt goes badly.
Before entering, check Link’s health and confirm the item needed for the intended route. Bombs, arrows, the boomerang, the hammer, the grappling hook, and Bombchus solve different problems. If a switch or obstacle requires one of these items, do not spend time experimenting with another weapon while the Sand of Hours drains. Decide on one objective for the trip, such as reaching the next basement, collecting a key, activating a shortcut, or retrieving a Sea Chart.
- Save after major progress or before a known difficult section.
- Confirm the required dungeon item is available.
- Choose one route objective for the attempt.
Use natural Safe Zones as route checkpoints
Natural Safe Zones are the glowing purple floor areas in the Temple of the Ocean King. While Link stands inside one, the Sand of Hours timer stops, the Temple’s life-draining curse cannot harm him, and ordinary Phantoms cannot see, attack, or enter the zone. When a Phantom detects Link in open floor, run to the nearest known Safe Zone instead of trying to outmaneuver it across the room.
Do not rely on appearance alone. The Temple includes a false Safe Zone on B8 that lacks the normal floor animation. Test an unfamiliar area by watching the timer and observing whether the Phantom ignores the space before treating it as a refuge. If the timer continues to fall or the Phantom can enter, leave immediately and use a confirmed zone instead.
A Safe Zone is a checkpoint for planning, not merely a place to stand. From inside it, study the upper-screen map, wait for a patrol to turn away, and identify the next protected position. Do not cross an entire room just because a Phantom has temporarily moved away; move only as far as the next safe position or required switch.
- Confirm the timer stops in any unfamiliar purple area.
- Use the map to identify the next Safe Zone before leaving one.
- Retreat directly to safety when a Phantom detects Link.
Understand red pots and yellow-pot refills
A red pot can be thrown to create a small temporary Safe Zone. This circle hides Link from Phantoms, but it is not equivalent to a natural purple Safe Zone: enemies can walk through the created circle, and the protection is room-specific. Red-pot zones disappear when Link changes floors, so use them to cross one dangerous room, wait for a patrol, carry a Force Gem, or operate a nearby mechanism rather than planning an entire multi-floor route around one.
Yellow pots and certain Temple pickups restore Sand of Hours, commonly in small increments. Collect a refill when it is directly on the route or can be reached safely from a confirmed refuge. Fixed yellow pots do not immediately regenerate after Link collects them; leaving the Temple is part of the reset process. A refill is not worth crossing a Phantom’s patrol path if the entrance is already closer and safer.
Phantom hits remove 30 seconds of Sand of Hours. Wizzrobes can also steal time when they make contact. Phantom Eyes do not directly damage Link, but they can attach themselves to him, slow his movement, and make a Phantom encounter more likely. If one attaches, rub it off with the stylus or reach a Safe Zone rather than continuing a long crossing.
- Use red pots only for the current room.
- Collect yellow-pot sand when it is safely along the route.
- Treat Phantom and Wizzrobe contact as lost time, not as harmless damage.
Retreat before the timer becomes critical
If the Sand of Hours is low and you are still far from the next objective, abandon optional treasure and begin the return route. Use confirmed Safe Zones to pause the timer while you inspect the map and wait for patrols. The timer does not refill merely because Link is standing in a Safe Zone; the zone buys planning time, but leaving the Temple is what restores the hourglass for another attempt.
If the timer reaches zero, Link is no longer protected from the Temple’s curse outside Safe Zones and begins taking damage. This is a danger state, not an automatic instant failure. Move to the nearest confirmed Safe Zone or staircase immediately. Do not remain exposed to test how long Link can survive, and do not continue toward an optional chest while the curse is draining health.
After exiting, let the hourglass recharge and return later. Solved puzzles, opened doors, acquired Sea Charts, and shortcuts are what make the next run shorter. A retreat is successful if it preserves Link and the progress already made, even when the original objective was not completed.
- Turn back before a long crossing becomes unavoidable.
- Use Safe Zones to pause the timer while planning the exit.
- Leave the Temple when the route is no longer safe.
Rehearse one floor segment at a time
On an unfamiliar floor, make the first trip a scouting run. Identify the entrance, nearest natural Safe Zone, key or Force Gem location, required switch, Phantom patrol, and exit staircase. Do not attempt to optimize the route while still learning the room. On the next visit, move directly between those landmarks.
Use DS map stamps or a simple mental sequence such as entrance, safe zone, switch, key, exit. Mark the direction a Phantom travels after turning, the location of a Phantom Eye, a Wizzrobe’s attack position, and any wall or pot that can be used for cover. You do not need to mark every decorative object; useful markings are those that shorten the next attempt.
When possible, operate switches from safety with the boomerang, bow, hammer, or Bombchu. If a Phantom is near an objective, wait for its patrol to move away, cross only to the next protected position, and stop there. Force Gems slow Link while carried, so plan their delivery as separate short trips and drop one immediately if a Phantom spots you.
- Scout the floor before attempting a fast route.
- Mark keys, switches, Phantoms, Safe Zones, and exits.
- Break Force Gem deliveries and long crossings into short segments.
Recover from puzzle and boss mistakes
If a puzzle attempt fails because the wrong item was selected, return to safety or the nearest staircase instead of repeating the same exposed crossing. Recheck the room’s visual clue, switch location, and required weapon. For a boss attempt, leave and restock if Link lacks the required ammunition, health, or item. There is little value in continuing a poor attempt simply because the arena has already been reached.
Name the mistake before retrying: a missed stylus path, a bad attack lane, an incorrect item, a Phantom patrol crossed too early, or a limited resource used on the wrong target. Change that one part of the plan on the next attempt. This keeps the successful portions of the route intact and prevents panic-driven experimentation.
Do not defeat every Phantom unless the room requires it. Before the Phantom Sword is obtained, ordinary weapons cannot defeat regular Phantoms. Use Safe Zones, patrol timing, temporary red-pot protection, switches, and alternate paths. After the Phantom Sword becomes available, defeat only the Phantoms that block required progress or make the intended route substantially safer.
- Restock only the items required by the next objective.
- Identify one cause of failure before retrying.
- Avoid unnecessary Phantom encounters.
Avoid fatigue traps and verify the run is complete
Do not grind for rupees, ship parts, or optional treasure when repeated errors are coming from fatigue. Save, stop, and return with a shorter objective. Tired play is especially costly in a stylus-controlled game because it causes missed boomerang paths, accidental attacks, poor item selection, and rushed crossings.
Avoid unverified community tricks that depend on remake mechanics, a different Zelda title, or exact version-specific inputs. The original Nintendo DS release can be completed through its normal systems: confirmed Safe Zones, progressive Temple shortcuts, dungeon items, patrol timing, and the Phantom Hourglass. If a shortcut is unclear, use the ordinary route rather than risking a failed run.
A recovery run is complete when Link has obtained the required key, chart, Force Gem result, switch activation, or boss reward; reached the next staircase or return portal; and exited safely when the objective requires leaving. Save after the game advances the story or awards a major item. Before the final Temple push, confirm that the Phantom Sword and all required late-game progression are already secured rather than treating troubleshooting advice as a substitute for the final route.
- Stop and rest when repeated mistakes are caused by fatigue.
- Use normal edition-appropriate routes when a trick is uncertain.
- Confirm the required item or mechanism was completed before leaving.
- Save after major story progress.
Before you move on
- Link can recognize confirmed natural Safe Zones and use them to stop the Sand of Hours timer and avoid ordinary Phantoms.
- A low-timer run is handled by abandoning optional objectives, reaching a Safe Zone or staircase, and leaving before the curse causes unnecessary damage.
- Red pots are used as temporary room-specific protection, not as permanent or cross-floor Safe Zones.
- Failed puzzles and boss attempts are recovered by identifying the failed action, restocking the required item, and repeating only the necessary route.
- The player can use DS map marks or memorized landmarks to identify keys, switches, patrol paths, Safe Zones, and exits.
- The required Temple objective has been completed, Link has reached the appropriate staircase or return portal, and the game has been saved after major progress.
References for this chapter
- The Legend of Zelda: Phantom Hourglass — Official Nintendo Manual
- Phantom Hourglass Walkthrough — Ocean King Part II
- Temple of the Ocean King — Zelda Dungeon Wiki
- Safe Zone — Zelda Dungeon Wiki
- Phantom Hourglass — Zelda Dungeon Wiki
- Phantom — Zelda Dungeon Wiki
- Sand of Hours — Zelda Dungeon Wiki
- Fallen Adventurer — Zelda Dungeon Wiki
Finishing up
Defeat Bellum in the final Temple confrontation, defeat the possessed Bellumbeck on the wrecked Ghost Ship, and watch the ending and credits through the final post-credit prompt.
Forge the Phantom Sword by delivering Crimsonine, Azurine, and Aquanine to Zauz, completing Jolene’s required final challenge, receiving the Sword Blade, and having Oshus finish the sword.
Complete the Ghost Ship sequence and learn that Tetra has been turned to stone. Continue through the Zauz and Pure Metal quest chain, defeat Bellum, destroy the infected Ghost Ship, defeat Bellumbeck and restore Linebeck, then watch the subsequent ending sequence that completes Tetra’s rescue and the main story resolution.
Complete the required Temple of the Ocean King visits and reach the final Bellum approach with the Phantom Sword. Safe-zone routing and optional Hourglass upgrades may make the final run easier but are not required.
Optional salvage and Treasure Map rewards, including additional Sand of Hours, are not required for the main ending.
Choose your next gameScreenshots & video
Game imagery for reference. Follow the written chapters above for the route and strategies.
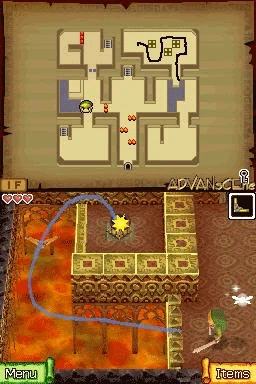
Sources & references
Our original guide draws on the references below. Check the edition at the top of this page before following controls or unlock requirements.
- The Legend of Zelda: Phantom Hourglass instruction manual
- Phantom Hourglass Walkthrough - Mercay Island - Zelda Dungeon
- The Legend of Zelda: Phantom Hourglass FAQ/Walkthrough - GameRevolution
- The Legend of Zelda: Phantom Hourglass Walkthrough
- The Legend of Zelda: Phantom Hourglass Instruction Booklet
- Isle of Ember — The Legend of Zelda: Phantom Hourglass Walkthrough
- Temple of Fire — The Legend of Zelda: Phantom Hourglass Walkthrough
- The Legend of Zelda: Phantom Hourglass/The Temple of Fire — StrategyWiki
- The Legend of Zelda: Phantom Hourglass — Walkthrough — DS — GameFAQs
- The Legend of Zelda: Phantom Hourglass — Official Nintendo Manual
- Temple of the Ocean King, Second Visit — Thonky Walkthrough
- Phantom Hourglass Walkthrough — Ocean King Part II
- Nintendo DS Games Manuals — The Legend of Zelda: Phantom Hourglass manual listing
- Phantom Hourglass Walkthrough — Temple of Wind, Zelda Dungeon
- The Legend of Zelda: Phantom Hourglass — The Isle of Gust and the Temple of Wind, StrategyWiki
- Temple of Wind — Zelda Dungeon Wiki
- Phantom Hourglass Walkthrough — Ocean King Part III
- Phantom Hourglass Walkthrough — Temple of Courage
- Salvage the Sun — The Legend of Zelda: Phantom Hourglass Walkthrough
- Temple of the Ocean King III
- The Legend of Zelda: Phantom Hourglass — Guide and Walkthrough — DS — By Dark_Link_13
- Temple of Courage — The Legend of Zelda: Phantom Hourglass Walkthrough
- The Legend of Zelda: Phantom Hourglass — Guide and Walkthrough, GameFAQs
- Ghost Ship — The Legend of Zelda: Phantom Hourglass Walkthrough
- Phantom Hourglass Walkthrough — Ghost Ship
- 7. The Ghost Ship — Zelda Universe
- Temple of the Ocean King, Fourth Visit - The Legend of Zelda: Phantom Hourglass Walkthrough
- Phantom Hourglass Walkthrough - Ocean King Part IV
- Goron Temple - The Legend of Zelda: Phantom Hourglass Walkthrough
- Phantom Hourglass Walkthrough - Goron Temple
- Temple of the Ocean King, Fifth Visit - The Legend of Zelda: Phantom Hourglass Walkthrough
- 11. Temple of the Ocean King V - Zelda Universe
- Phantom Hourglass Walkthrough - Mutoh’s Temple - Zelda Dungeon
- Isle of Frost - The Legend of Zelda: Phantom Hourglass Walkthrough
- Temple of Ice - The Legend of Zelda: Phantom Hourglass Walkthrough
- Phantom Hourglass Walkthrough - Temple of Ice
- The Legend of Zelda: Phantom Hourglass Walkthrough Main Page
- The Legend of Zelda: Phantom Hourglass — Guide and Walkthrough
- Phantom Hourglass Walkthrough - Ocean King Part VI
- Bellum – Zelda Dungeon Wiki
- The Legend of Zelda: Phantom Hourglass Walkthrough — Bellum, Thonky
- Temple of the Ocean King, Sixth Visit - The Legend of Zelda: Phantom Hourglass Walkthrough
- 14. Temple of the Ocean King - VI
- Temple of the Ocean King: B13 - Zelda Wiki
- Saving near the end — The Legend of Zelda: Phantom Hourglass, GameFAQs discussion
- Phantom Hourglass — Zelda Dungeon Wiki
- Phantom Hourglass Treasure Maps — Zelda Dungeon Wiki
- Sand of Hours — Zelda Dungeon Wiki
- Phantom Hourglass Sand of Hours — Zelda Wiki
- Temple of the Ocean King — Zelda Dungeon Wiki
- Safe Zone — Zelda Dungeon Wiki
- Phantom — Zelda Dungeon Wiki
- Fallen Adventurer — Zelda Dungeon Wiki
About the game & collecting notes
- Platform
- Nintendo DS
A step‑by‑step campaign walkthrough for the original North American Nintendo DS release of The Legend of Zelda: Phantom Hourglass. Covers movement and touchscreen controls, every main dungeon and boss, sea navigation and salvage, forging the Phantom Sword, final Temple runs and the ending — plus recovery tactics when the Hourglass runs low.
Darryl Polo
Darryl Polo loves tinkering with emulation and revisiting retro games. He enjoys exploring how old favorites play on different setups and sharing what he learns along the way. At Joking Joystick, he writes about the games, hardware, and small discoveries that keep the hobby fun.
Our editorial standardsFound a step that needs another look? Help us improve this guide.