
The Legend of Zelda: A Link to the Past — SNES (Original) Complete Campaign Walkthrough
A practical, step-by-step campaign walkthrough for the original Super Nintendo release of The Legend of Zelda: A Link to the Past. Follow the route through the Light World, claim the Master Sword, survive the Dark World dungeons, free the seven maidens and reach Ganon’s Tower to defeat Ganon and see the game’s ending.

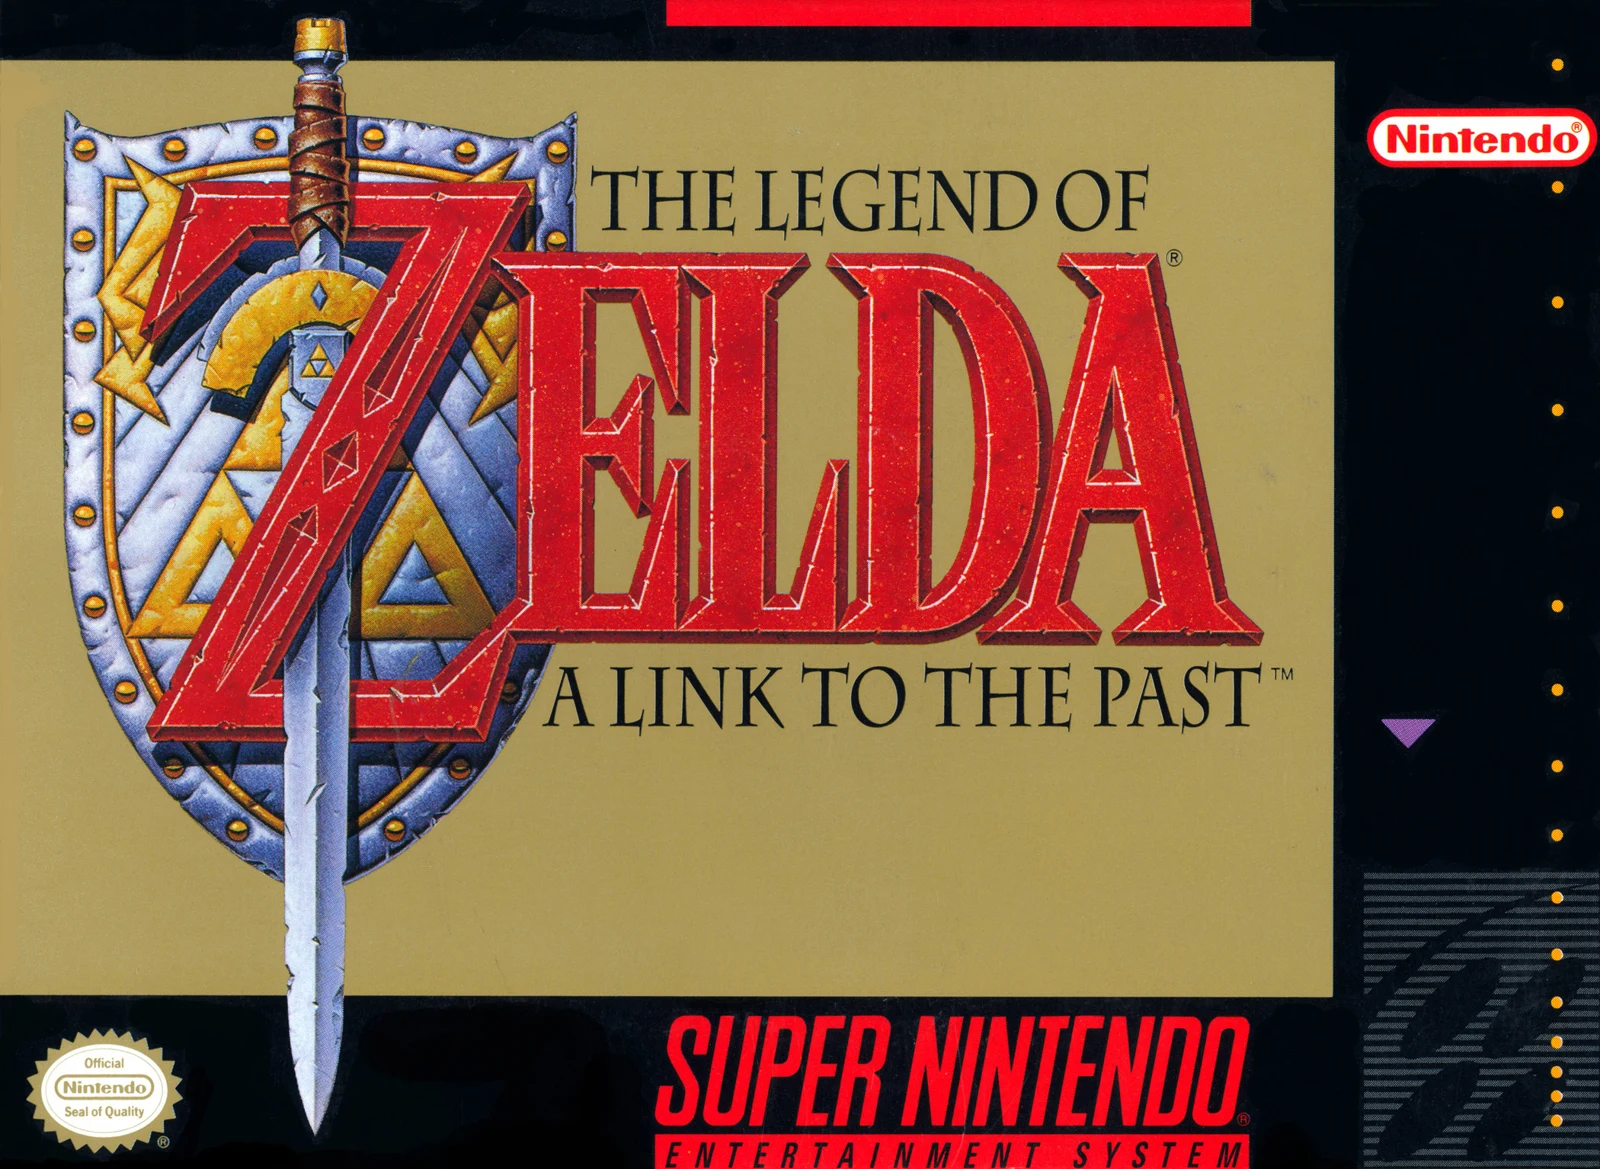
Find a copy
The Legend of Zelda: A Link to the Past Super Nintendo Entertainment System
We may earn a commission if you buy through these links, at no extra cost to you. As an Amazon Associate I earn from qualifying purchases.
Opens retailer search results. Check the model, edition, seller, availability and current price before buying.
Before you begin
You are playing the original SNES edition of A Link to the Past.
This walkthrough assumes the game’s native Light World → Master Sword → Dark World structure and focuses on the required objectives to complete the main campaign.
It includes practical directions for each dungeon, how to reach the next objective, what items you need to continue, and straightforward recovery advice for common failures.
Follow each chapter in order unless you understand how to sequence optional detours (heart pieces, shops) yourself.
Keep two things in mind before you begin.
First: many locations change between the Light and Dark Worlds; the Moon Pearl and the Magic Mirror are mandatory mechanics for safe travel between them and are introduced during normal story progress.
Second: this guide targets the original SNES release and explains where common later-port differences may appear; if you are on GBA, Virtual Console, or other ports, refer to the preparation notes and the sources for those differences before assuming identical behavior.
Set yourself up for the run
Confirm you are playing the original North American Super Nintendo release or a faithful port; this guide follows the original SNES campaign structure and item placements.
Verify the physical controller mapping for movement, sword, assigned items, interaction, inventory, map and saving on your platform.
Save through the game’s own save menu before major dungeons and after major rewards; do not assume a save resumes in the exact room where Link stopped.
Keep bombs, arrows, rupees and healing available before dungeon attempts. A bottle is useful but optional until longer Dark World dungeons.
The main route is Light World rescue, the three Pendant dungeons, the Master Sword and first Agahnim battle, followed by the seven Dark World crystal dungeons, Ganon’s Tower and Ganon.
Zora’s Flippers are a required progression item for the Swamp Palace route and the conventional Ice Palace route, not merely an optional shortcut. Obtain them from King Zora when the route calls for them.
The Magic Cape or Cane of Byrna is required for the normal spike-floor crossing in Ice Palace. Obtain the Magic Cape from the Light World Graveyard before entering Ice Palace unless you already have Cane of Byrna.
The Flute, Ether Medallion, Ice Rod and Quake Medallion are required later in this fixed route. The walkthrough must give their acquisition directions before Misery Mire and Turtle Rock.
The Moon Pearl and Magic Mirror are required for practical travel between the Light and Dark Worlds. Recheck the inventory whenever a route appears blocked.
Optional Heart Pieces, bottles, sword upgrades and capacity upgrades can be collected during a separate cleanup pass, but do not postpone required items needed to enter or clear later dungeons.
Basics, Controls, Saving and Early Overworld
Set up the original North American Super Nintendo controls, learn how the cartridge save system works, organize Link’s items, and prepare a practical supply of rupees and bombs before entering the Eastern Palace.
Set up the original SNES controls
Move Link with the Control Pad. Press B to swing the sword. Hold B until the sword finishes charging, then release it for a spin attack. Press Y to use the currently assigned item. Press A to lift, pull, talk, read, open chests, confirm menu choices, and interact with nearby objects.
Press Start to open the Sub Screen, where you can view equipment, usable items, bottles, dungeon information, and collected pendants. Select an item with the Control Pad and assign it to Y. Press X during normal play to view the overworld map or, while inside a dungeon, the dungeon map when that map has been obtained. Press Select to open the save menu.
On a modern controller, emulator, or re-release, verify the physical mapping for SNES B, Y, A, X, Start, Select, and the Control Pad. The labels may not correspond to the positions you expect on another controller.
- B swings the sword and performs the charged spin attack.
- Y uses the item assigned from the Sub Screen.
- A interacts with objects and confirms choices.
- Start opens the Sub Screen.
- X displays the overworld or dungeon map.
- Select opens the save menu.
Understand the item screen and use bombs and arrows
The sword and shield are equipment and are not assigned to Y. Bombs, the boomerang, the lantern, the net, bottles, the Bow, and later dungeon tools are selected from the item screen and assigned to Y. The current secondary item appears on the gameplay HUD.
To use a bomb, select Bomb on the Sub Screen and press Y. Link places it in front of himself. Move away before the fuse expires. Bombs are needed for certain cracked walls and later dungeon puzzles, so do not spend the entire supply testing every suspicious wall.
The Bow is not available at the beginning. You obtain it from the Big Chest in the Eastern Palace. After getting it, select the Bow and press Y to fire, consuming an arrow with each shot. Before that point, buying a large quantity of arrows has little practical value.
- Keep Bomb available on Y when checking a cracked wall.
- Reserve several bombs for required obstacles and dungeon puzzles.
- Do not treat the Bow and arrows as starting equipment; both become useful after the Eastern Palace Big Chest.
Use bottles and prepare healing
Bottles are selected from the bottle section of the Sub Screen. Highlight a bottle and press Y to use its contents. Empty bottles can later hold fairies, potions, and other bottle items. You do not need a bottle to complete the opening castle escape or the Eastern Palace, but one makes recovery safer when you begin longer dungeon attempts.
The bottle merchant in Kakariko Village sells a bottle for 100 rupees. This is an optional preparation purchase, not a progression requirement. If you buy it, keep one bottle slot available for a fairy or potion. A fairy can restore health when released, while potions provide more deliberate healing once you have access to them.
- Select the bottle from the bottle section before pressing Y.
- Treat the first 100-rupee bottle as useful preparation rather than a mandatory objective.
- Keep a bottle slot open if you plan to capture a fairy later.
Save through the original game menu
Press Select during play to open the save menu. Use the Control Pad to choose Save and Continue or Save and Quit, then confirm with the button prompt shown by the game. Save and Quit records the file and returns to the title screen. Save and Continue records the file and resumes the game, but it does not preserve Link in the exact room where you pressed Select.
When you reload, the game places Link at the appropriate established starting point. Depending on the game state, that may be Link’s House, the Sanctuary, the Pyramid of Power, or a dungeon entrance. Therefore, before quitting in a dungeon, finish a useful section or return to the entrance if you do not want to repeat several rooms. Saving at the start of a dungeon is a reliable habit.
If Link dies, the game offers save-related choices as well. Do not power off the original console immediately after important progress; use the in-game save menu so the battery-backed cartridge save is updated. Platform suspend points or emulator save states are separate conveniences and are not part of the original SNES save procedure.
- Use Select and the game’s own save menu before shutting down.
- Expect a reload to use a safe starting point rather than the exact quitting room.
- Save before a dungeon attempt and again after a major story or dungeon reward.
Travel to Kakariko Village and collect early rupees
After the opening rescue and the trip through the Sanctuary, follow the western route toward Kakariko Village. Visit the village before heading to the Eastern Palace so you can gather money, check the shop, and learn the local landmarks.
In the northwest part of town, enter the well by dropping into it from the ledge. The cave below contains four chests, pots, Bombs, and rupees. A cracked northern wall can be opened with a bomb, leading to an optional Piece of Heart. In the green-roofed house, descend to the basement and solve the simple block arrangement to reach four 20-rupee chests. If you disturb the arrangement, leave and re-enter to reset it.
These early rupees give you a useful buffer. Keep at least 100 rupees if you want the first bottle, and preferably retain roughly 100 to 500 rupees so you can buy consumables without emptying your wallet. Cutting grass, lifting pots, defeating nearby enemies, and opening accessible chests provide additional money. Optional minigames and cosmetic spending can wait.
- Visit the well and collect its accessible rupees and Bombs.
- Open the four 20-rupee chests in the green-roofed house if you want extra funds.
- Retain at least 100 rupees for the optional first bottle and keep additional money for supplies.
Replenish Bombs and check the Kakariko shops
At the southwest edge of Kakariko Village, find the small Mysterious Hut with no visible entrance. Place a bomb against its bottom wall to open it. Inside are replenishing Bombs and Arrows, along with rupees. You can leave and re-enter to restock, making this the most useful early supply stop when your bomb count is low.
The Kakariko Village Shop is directly east of this hut. Check its current stock before buying anything. Buy Bombs if you are short, but avoid spending heavily on Arrows before obtaining the Bow in Eastern Palace. The hut is more important than the shop for early replenishment.
Kakariko also contains optional preparation items. A merchant south and west of the village center sells the first bottle for 100 rupees. The inn has a back entrance with another bottle, but that bottle is optional and is not required for the first dungeon. The sick boy in the house north of the inn lends Link the Bug-Catching Net, which can later capture fairies. None of these side items is needed to enter Eastern Palace.
- Bomb the Mysterious Hut’s bottom wall.
- Use the hut to replenish Bombs and Arrows instead of buying more than necessary.
- Buy the 100-rupee bottle only if you have enough money after preserving your supply buffer.
- Consider collecting the Bug-Catching Net if you want an easier healing setup.
Reach the Eastern Palace with a practical starting loadout
From the Sanctuary, travel east across the bridge and follow the eastern route to the Eastern Palace compound. Speaking with villagers and Sahasrahla can mark locations on the map, but the conversations are not required to enter the dungeon. Follow the visible path through the compound to the palace entrance.
Before entering, confirm that Link has the Fighter’s Sword and shield, several hearts, and enough Bombs for required obstacles. The Bow is obtained inside the dungeon, so arrows are not a prerequisite for entry. Once the Bow is found, assign it to Y and use it against distant targets and Eyegores rather than wasting health by approaching them recklessly.
If you die before making progress, return to Kakariko, replenish Bombs, restore your health, and save again. The goal of this chapter is to establish reliable controls, understand the original save behavior, and arrive at Eastern Palace with enough resources that dungeon exploration—not preventable shopping problems—determines your progress.
- The Fighter’s Sword and shield are available.
- Bombs are stocked and can be assigned to Y.
- You understand that arrows become useful after finding the Bow.
- A current save exists before entering Eastern Palace.
Before you move on
- You can swing the sword with B, charge and release a spin attack, assign an item with Y, interact with A, open the Sub Screen with Start, view maps with X, and open the save menu with Select.
- You have visited Kakariko Village and know the locations of the well, green-roofed rupee house, southwest Mysterious Hut, village shop, and bottle merchant.
- You have completed at least one in-game save and understand that loading may place Link at a safe starting location rather than in the exact room where you stopped.
- You are carrying a practical Bomb supply, have preserved some rupees, and are ready to travel to the Eastern Palace.
- You know that the dungeon provides the Bow, so arrows are optional before entry rather than a required purchase.
Zelda’s Rescue — Hyrule Castle Escape
Rescue Princess Zelda from Hyrule Castle, escort her through the castle’s hidden sewer passage and deliver her safely to the Sanctuary. This opening sequence provides the Lamp, Fighter’s Sword, Fighter’s Shield, Boomerang and the first Heart Container. Afterward, the priest directs Link toward Kakariko Village and the elder Sahasrahla.
Collect the Lamp and reach Hyrule Castle
When Link wakes in his house, open the chest at the foot of the bed before leaving. It contains the Lamp, which is needed to see through the dark passage later. Equip it through the item menu when you need to illuminate torches or navigate dark rooms.
Leave Link’s House and travel north through the rain. Cross the bridge toward Hyrule Castle, but do not try to enter through the guarded front gate. Follow the path to the right of the castle entrance, continue north, and look for a bush surrounded by flowers. Lift the bush and drop through the concealed hole.
Follow the underground passage to find Link’s Uncle. Speak to him to receive the Fighter’s Sword and Fighter’s Shield. Continue through the passage and exit into the castle courtyard. Defeat or pass the guards, then enter Hyrule Castle through the main doorway.
- The Lamp is in your inventory.
- You have the Fighter’s Sword and Fighter’s Shield.
- You entered through the hidden hole east of the castle gate.
Cross the castle interior and enter the dungeon
From the main castle room, travel through the corridors toward the northern side. The first-floor route can be taken from either side of the central room; keep moving upward and then use the stairway leading down to the basement.
Fight guards one at a time rather than allowing several to surround you. Face sword-bearing guards from an angle when possible, and use the shield to block frontal attacks. Pots near the upper end of one hallway may contain hearts if you need recovery before entering the basement.
On the first basement floor, defeat the Blue Sword Soldier in the room near the locked southern door. He drops the first Small Key. Open the nearby chest for the Hyrule Castle Dungeon Map, then use the Small Key on the locked door to continue.
- You reached the first basement floor.
- The Blue Sword Soldier dropped a Small Key.
- You collected the dungeon map and opened the first locked door.
Get the Boomerang and reach Zelda’s cell
Continue through the basement corridors until you reach a room where a green guard blocks the way. Defeat him to open the surrounding doors. Take the eastern route into the next room and defeat the Blue Sword Soldier there. He drops the second Small Key.
Open the chest in that room to obtain the Boomerang. Assign it to the item button. The Boomerang can stun most guards, making it useful for creating a safe opening before attacking with the sword. Use the second Small Key on the locked door in the previous room, then proceed through the next two stairways toward the lower basement floors.
At the bottom, clear the green guard before moving to the right side of the room. The Ball and Chain Trooper is waiting there. Keep outside the reach of the swinging weapon. The safest quick method is to lift and throw the pots in the room at him; two successful pot hits defeat him on the SNES version. You can also wait for the chain to finish a swing, step in for a sword strike or spin attack, and retreat immediately.
- You collected the Boomerang.
- You have defeated the Ball and Chain Trooper.
- You obtained the Big Key from the defeated trooper.
Open Zelda’s cell and return to the throne room
Use the Big Key on the locked cell door. Speak to Princess Zelda to begin the escort section. Before leaving the cell area, open the nearby chest if you want the optional rupee reward. With the Lamp already collected from Link’s House, this chest is not required for progression.
Retrace your path upward through the basement and return to the castle’s first floor. Zelda follows Link automatically. Clear guards that block narrow corridors, and wait briefly at doors or stairways if necessary so she can catch up.
Return to the main castle hall and climb to the throne room. Zelda explains that a secret passage is hidden behind the ornamental shelf or throne structure. Stand on its left side and push it to the right. This reveals the stairway into the secret passage.
- Zelda is following you outside her cell.
- You returned to the throne room.
- The ornamental shelf has been pushed aside and the hidden stairway is open.
Navigate the dark sewer passage
Enter the secret passage with the Lamp assigned. Use it to see the immediate area and light wall torches when visibility is poor. The passage contains Rats, Ropes and Keese. You can defeat them with short sword swings, but avoid wandering into dark corners where several enemies can reach you at once.
Follow the passage toward the upper-right exit of the first dark room. In the next dark section, move toward the stairway on the left. You do not need to defeat every Rope if you can safely reach the stairway. Continue into the cross-shaped room where the exit is locked.
Search the right side of the cross-shaped room and open the chest to obtain another Small Key. Use it on the upper door. Continue through the sewer corridors with Zelda until you reach the final dark room with several Rats and another locked exit.
Defeat the Rats in this final dark room until one drops the required Small Key. Light a nearby torch if you need to identify the enemies. Use the key on the locked door on the right, then continue into the brighter room beyond.
- You found the Small Key in the sewer chest.
- You obtained the second sewer key from a Rat.
- You opened the locked sewer exit on the right.
Open the Sanctuary passage
In the room beyond the final locked door, move to the north side and push the middle block of the three-block arrangement upward. This clears the route to the staircase. Go up and continue through the next doorway.
The following room contains two wall levers. Pull the right-hand lever. Zelda indicates the correct choice when you approach it. Pulling the left lever releases Ropes into the room but does not open the exit, so avoid it unless you deliberately want to recover from the mistake.
The right lever opens the way to the Sanctuary. Enter and speak to the priest, also identified as the Loyal Sage. Zelda remains safe there, and the priest directs Link to seek the elder Sahasrahla in Kakariko Village.
- You pushed the center block upward.
- You pulled the right-hand lever.
- You entered the Sanctuary and spoke to the priest.
Collect the Heart Container and check Kakariko Village
Before leaving the Sanctuary, open the large chest to receive a full Heart Container. This raises Link’s maximum health from three hearts to four. The rescue sequence is complete once Zelda is safe and the priest has given his instructions.
Travel south from the Sanctuary toward Kakariko Village. The village is the next required story destination because Sahasrahla is needed to direct the pendant quest. The village shop is optional, so only buy supplies if you have enough rupees for what you need.
For optional early resources, inspect the village well and accessible houses. The well contains chests with rupees and bombs, while village enemies and pots can provide additional small rupees, hearts and magic. These detours are not required to complete Zelda’s rescue. No trade item is needed to leave the Sanctuary or begin the next objective; prioritize locating Sahasrahla over spending money on optional purchases.
- The Sanctuary Heart Container is collected.
- You reached Kakariko Village.
- You are ready to locate Sahasrahla rather than returning to Hyrule Castle.
Before you move on
- Link has the Lamp, Fighter’s Sword, Fighter’s Shield and Boomerang.
- Princess Zelda has been released from her cell.
- The Ball and Chain Trooper has been defeated and the Big Key has been collected.
- The throne-room shelf has been pushed aside and the hidden sewer route has been opened.
- The sewer chest key and Rat-dropped key have been used to reach the Sanctuary.
- The right-hand lever has opened the Sanctuary entrance.
- The priest has been spoken to and the Sanctuary Heart Container has been collected.
- The next objective is to find Sahasrahla in Kakariko Village.
References for this chapter
Eastern Palace — Pendant of Courage
The Eastern Palace is the first required Light World dungeon in the original North American Super Nintendo release. Follow the palace’s switch-and-key route to obtain the Big Key and Bow, then clear the upper rooms and defeat the six Armos Knights. Collect the Heart Container and Pendant of Courage before returning to Sahasrahla for the Pegasus Boots.
Reach the Eastern Palace
From the Sanctuary, travel east for two screens, then go down, cross the bridge, and continue down. Proceed down once more, move right, then go up to reach the Eastern Palace compound. You can defeat the Octoroks for rupees, but they are optional. The stationary Armos statues in the compound become active when Link approaches, so move around them rather than stopping in their paths.
Enter the large building at the northeast side of the compound. Sahasrahla’s cottage is in the northwest part of the compound. Speaking with him is useful for the story and map guidance, but the palace itself can be entered without first completing every conversation in Kakariko Village.
- Enter with the Fighter’s Sword and Shield.
- Bring bombs if available, but no bombable wall is required for the main route.
- If possible, begin with full health and a reasonable supply of arrows.
Cross the entrance rooms and collect the optional rupees
The first dungeon room has three doors. Ignore the east and west doors, lift the central pot, and step on the floor switch to open the north door. In the next room, defeat the three Popos and step on the floor switch to open the next passage.
The following corridor is filled with rolling iron balls, including a large ball that occupies the full width of the passage. Stay near the side recesses and wait whenever the large ball approaches. After crossing the corridor, go west, curve around to the south, climb the stairs, and follow the upper walkway to a chest containing 100 rupees. This chest and the surrounding pots are optional.
Return to the northern end of the ball corridor, climb the stairs, and continue north into the central hub room.
- Use the side recesses when the large ball blocks the corridor.
- The 100-rupee chest is optional and does not contain a key.
- Do not spend bombs searching this section for a required passage.
Collect the Map, Compass and first Small Key
From the central hub, take the east route by lifting the pots and stepping on the floor switch. Defeat or avoid the Blue Stalfos, then continue east. In the Anti-Fairy room, lift the center pot and step on the switch to open the southern door. Enter that room and open the chest for the Dungeon Map. The Map is optional, but this is the correct route to it.
Return to the hub and take the west route. Open the door with the switch, defeat the Blue Stalfos, and continue into the next room. Several more Blue Stalfos appear when the door closes. Throw pots at them if sword swings cause them to hop away. After they are defeated, go north and open the chest for the Compass.
Go down the nearby stairs and travel east twice to return to the lower level of the central chamber. The Eyegores here cannot yet be defeated reliably, so avoid them and continue east. Climb the stairs and enter the dark room. Move to the right side, step on the floor switch, and enter the newly opened door. Defeat the Blue Stalfos in the next dark room; the pot in the upper-right corner conceals Small Key 1.
Return to the previous dark room, cross to the west side, and use Small Key 1 on the locked door. This returns you to the upper ledge above the rolling-ball room. Cross west and continue into the next combat room.
- The Map is on the east branch from the hub.
- The Compass is on the west branch after the Blue Stalfos rooms.
- Small Key 1 is under the upper-right pot in the dark Stalfos room.
Obtain the Big Key and Bow
In the room west of the ball corridor, defeat the two Popos, two Blue Stalfos, and the Green Eyegore. The Green Eyegore’s eye opens when it approaches. A thrown pot defeats it immediately, so use the available pot if you want to save health and sword swings. Once all enemies are gone, the Anti-Fairies move away from the central pot. Lift that pot, step on the switch, and open the chest that appears to obtain the Big Key.
Use the Big Key on the locked door to the north. Push the northern block aside, follow the passage, and move east to return to the central chamber. Open the large central chest to obtain the Bow.
Gray Stalfos drop from the ceiling after the Bow is taken. Their detached skulls pursue Link, so move toward the exit rather than standing still. You can slash the skulls to drive them away, but fighting them is unnecessary. Before opening the northern locked door, Link can drop from the nearby ledges into the large white jars to reach a Fairy room. This recovery stop is optional.
- Confirm that the Big Key is in the inventory before opening the central large chest.
- The Bow is the dungeon item and is required for the upper rooms and boss.
- Use arrows carefully; pots in later rooms can replenish arrows.
Clear the upper rooms
Open the northern locked door from the Bow room. In the dark chamber, light the lower torches with the Lamp if visibility is poor. Defeat the Popos, then shoot the two Green Eyegores when their eyes open. The right Green Eyegore drops Small Key 2.
The east door leads to an optional room containing Blue Rupees. Return to the dark chamber and use Small Key 2 on the west door. Go down the stairs. In the next room, lift the bottom-left pot to reveal a floor switch, then defeat the three Green Eyegores and step on the southern switch.
The next room has rolling balls coming from multiple directions. Move carefully to the upper-left corner and step on the switch there. Enter the following room and defeat the Blue Stalfos and Red Eyegore. Red Eyegores cannot be damaged by the sword or pots; each requires two direct arrow hits after its eye opens.
The final room before the boss contains Popos and two Red Eyegores. Clear the Popos first, then lure and shoot the Red Eyegores one at a time. Lift the remaining pots to recover hearts and arrows before entering the northern boss door.
- The right Green Eyegore in the first upper dark room drops Small Key 2.
- Red Eyegores require arrows, not sword attacks.
- Use the final pots for recovery before the boss.
Defeat the Armos Knights and claim the Pendant
Six Armos Knights activate when Link enters, and the door closes. They initially hop in a clockwise circle, then line up along the north side and jump downward. Stand near a southern corner and fire arrows northward as they pass. Each Knight takes three arrows in the original SNES release, making the Bow much safer than close-range sword attacks.
When the Knights line up and jump downward, move away from their landing path while keeping the southern edge open for retreat. After five Knights are defeated, the final Knight turns red and begins jumping directly toward Link. Keep moving, watch where it is about to land, and fire an arrow during the brief opening after it lands. Sword attacks are possible if arrows run out, but they require close positioning and create more risk.
After the sixth Knight is defeated, collect the Heart Container and then take the Pendant of Courage. The game restores Link’s Life and Magic Meters and places him outside the palace. Return to Sahasrahla’s cottage and speak with him to receive the Pegasus Boots, which are needed for several subsequent overworld tasks and for reaching the Desert Palace route.
- Defeat all six Armos Knights.
- Collect the Heart Container and Pendant of Courage.
- Speak with Sahasrahla afterward to obtain the Pegasus Boots.
- Confirm the Bow and Pendant of Courage are present before moving on.
Before you move on
- The Bow is present in Link’s inventory.
- Small Key 1 was used to reach the Big Key route, and Small Key 2 was obtained from the right Green Eyegore in the upper dark room.
- The Heart Container from the Armos Knights has been collected.
- The Pendant of Courage is displayed among the collected Pendants.
- Link has been returned outside the Eastern Palace with his Life and Magic Meters restored.
- Sahasrahla has been spoken to after the dungeon and has awarded the Pegasus Boots.
- The next main-story objective is the Desert Palace and the Pendant of Power.
Desert Palace — Pendant of Power and Overworld Access
The Desert Palace is the second Light World pendant dungeon. Enter it with the Book of Mudora, collect the Map, Compass, Big Key and Power Glove, leave through the southwest exit, and use the new glove to open the northern entrance. The second wing leads to the three Lanmolas and the Pendant of Power. You need this pendant, along with the Pendants of Courage and Wisdom, before the Master Sword can be drawn.
Reach the Desert Palace entrance
From Link’s House, travel south and then west into the Desert of Mystery. Stay on the established paths around the desert’s rock formations rather than crossing the open sand at random. The palace entrance is at the southern edge of the desert, in front of a stone tablet. Stand at the tablet and use the Book of Mudora to read the inscription. The entrance opens and you can enter the dungeon.
The Book of Mudora is required for this entrance. If you do not have it, return to the library in Kakariko Village and use the Pegasus Boots to dash into the bookshelf holding the book. The Eastern Palace should already be complete, so bring the Bow and arrows as well; the Bow is useful against Eyegores in the dungeon.
- Book of Mudora in the inventory.
- Pegasus Boots available if you still need to retrieve the Book.
- Bow and arrows from the Eastern Palace.
- A few bombs and at least one healing option, although neither is required for the main route.
Collect the Map, first Small Key and Compass
Enter the large sandy hub room and go toward its northeast side. Lift the pots blocking the northern passage, then continue north. In the next room, defeat or avoid the Devalants and proceed through the northern door. The following room contains Leevers and two Eyegores. Lift the pot near the middle of the room to reveal a floor switch. Step on it to make a chest appear, then open the chest for the Map.
Return to the hub and take the northwest northern door. In the room with the Beamos and four lanterns, dash into the lantern in the northwest corner to knock down Small Key 1. Use the lanterns and walls as cover whenever the Beamos’s eye points toward Link. You may inspect the nearby Telepathy Tile, but it is optional.
Return to the hub, go to its northeast side, and travel south. Follow the passage east through the locked door, using Small Key 1. Defeat the Popos if necessary, then open the chest in the Beamos room to obtain the Compass. Move north into the long corridor and avoid the cannonballs fired by the wall turrets. The chest at the far end contains the Big Key.
- Map obtained from the switch-created chest in the northern room.
- Small Key 1 knocked from the northwest lantern.
- Compass collected through the locked eastern passage.
- Big Key collected at the end of the cannonball corridor.
Get the Power Glove and leave through the southwest exit
Return through the cannonball corridor and the Compass room to the main hub. Travel to the hub’s northwest corner, but do not take the northern door used for Small Key 1. Go west instead, then lift the northwest pot in the Beamos room to reveal a floor switch. Step on it and take the northern door. The large chest in the next room contains the Power Glove.
The Power Glove lets Link lift the light-colored stones found in the overworld. It does not lift the dark stones; those require the Titan’s Mitt much later. Return to the Beamos room, step on the switch again if needed, and go east to the hub.
You can optionally take the southwest route to the dungeon’s fairy room before leaving. In the room with the blocks, push the third block from the west wall north to open the door. The fairies are optional. Continue south and exit through the southwest dungeon entrance. Do not fall from the exterior ledge while leaving, or you will have to retrace the dungeon route.
- Power Glove obtained from the Big Chest.
- Optional fairy room visited if desired.
- Dungeon exited through the southwest opening.
- Link remains on the exterior ledge after exiting; avoid dropping to the lower sand until ready.
Open the northern entrance and clear the second wing
From the southwest exit, walk north along the western side of the desert, then continue east along the northern edge. Find the entrance blocked by light-colored stones. Lift the stones with the Power Glove and enter. This northern entrance is the intended route to the boss wing; the original tablet entrance does not lead directly to the remaining rooms.
Inside, move to the eastern side of the first room and push the lower block in the small group of blocks. This opens the northern door. In the next room, remain in or near the doorway while the flying floor tiles attack. Wait until the tiles finish, then search the southwest pot for Small Key 2. Use it on the northern door and go upstairs.
Cross the empty room to the south. In the next room, defeat the Popos to open the way while avoiding the Beamos beam. Continue east through the long room containing several Popos and Beamos statues. The third pot from the left contains Small Key 3. Take it and unlock the northern door.
The next room contains another wave of flying floor tiles. Wait in the doorway until they finish, then lift the pot in the northeast corner for Small Key 4. Unlock the next northern door. In the Red Eyegore room, shoot the Red Eyegore twice with arrows. Then light all four torches with the Lamp. The wall retracts and reveals the boss door. Open it with the Big Key.
- Northern entrance opened with the Power Glove.
- Small Keys 2, 3 and 4 collected from pots in the second wing.
- Red Eyegore defeated with two arrow hits.
- All four torches lit with the Lamp.
- Boss door opened with the Big Key.
Defeat Lanmolas and claim the Pendant of Power
The boss room contains three Lanmolas. Each worm burrows beneath the sand, then emerges with its head exposed. The disturbed sand shows where one is about to surface. Strike the head with the sword as it rises, or use a charged spin attack when positioned beside the emerging mound. Do not stand diagonally from the mound, because the Lanmola launches debris in four diagonal directions when it surfaces.
Keep moving around the outside of the room and concentrate on one Lanmola at a time. Avoid touching the worm’s body and do not wait in the center. After two Lanmolas are defeated, the last one sends debris in eight directions instead of four. Stay farther away, watch the disturbed sand, and attack when the head travels into reach. If Link has full health, a sword beam can provide occasional ranged damage, but normal sword strikes are the reliable method.
Defeating all three Lanmolas makes a Heart Container appear first. Collect it, then collect the Pendant of Power. The dungeon completion transition returns Link to the overworld with the pendant awarded and his life and magic restored.
- All three Lanmola heads defeated.
- Heart Container collected.
- Pendant of Power collected.
- Two of the three required Light World pendants are now complete.
Before you move on
- The Power Glove appears in Link’s inventory and allows him to lift light-colored stones.
- The Heart Container from Lanmolas has been collected.
- The Pendant of Power appears in the inventory alongside the Pendant of Courage.
- The dungeon transition has returned Link to the Light World outside the Desert Palace.
- The next required pendant objective is the Tower of Hera on Death Mountain; the Master Sword remains unavailable until the Pendant of Wisdom is also collected.
Death Mountain and Tower of Hera — Pendant of Wisdom and Moon Pearl
Reach Death Mountain through the cave near the Sanctuary, escort the lost old man to his home, and receive the Magic Mirror. Use the mountain warp and the Mirror to reach the raised Tower of Hera entrance. Inside, collect the dungeon’s Big Key, use the star-switch floor puzzle to reach the Moon Pearl, then defeat Moldorm for the Pendant of Wisdom. Confirm that all three Pendants are in your inventory before leaving for the Lost Woods and the Master Sword.
Enter Death Mountain and find the lost old man
From the Sanctuary, travel west and then north toward the sign warning Link not to enter Death Mountain. Just east of that sign, lift the large rock and enter the cave. This is the intended entrance to the mountain at this stage of the game; do not search for a direct exterior route from Kakariko Village.
Inside the cave, follow the passage and drop down from the opening near the beginning. At the first major turn, go right, then take the southern path at the next junction. Follow the narrow passage north along the right wall to find the lost old man. Speak to him, then continue through the cave with him following behind.
Avoid the holes and keep moving toward the far right side of the passage. When the old man directs you downward, follow the path and exit onto Death Mountain. On the outdoor screen, avoid the falling boulders and Deadrocks while moving east. When you pass the next cave, the old man thanks Link and gives him the Magic Mirror. He then enters the nearby cave; returning to him later restores Link’s health.
- Reach the mountain cave beside the warning sign near the Sanctuary.
- Find the lost old man inside the cave.
- Escort him through the passage to the Death Mountain exterior.
- Receive the Magic Mirror after passing the next cave.
Use the summit warp to reach the Tower of Hera
After receiving the Mirror, continue across Death Mountain. From the old man’s cave, move right, climb the first stairs and continue upward. Ignore the side caves unless you want optional fairies or a Piece of Heart. Follow the long staircase and head toward the upper-right portion of the mountain, where a blue warp tile sits among several boulders.
Step onto the warp tile to enter the Dark World. Because the Moon Pearl is not yet in your inventory, Link becomes a helpless bunny. Move directly west from the warp until you reach the pair of diamond-shaped markings. Stand on the right-hand marking and use the Magic Mirror.
The Mirror returns Link to the Light World on the elevated summit beside Spectacle Rock. Collect the nearby optional Piece of Heart if desired, then jump from the northern edge and move right. Enter the building there to begin the Tower of Hera. The Tower is the third Light World dungeon and contains both the final Pendant and the Moon Pearl.
- Reach the blue warp tile on the mountain summit.
- Cross into the Dark World and move west to the paired diamond markings.
- Use the Magic Mirror on the right-hand marking.
- Jump from the raised Light World summit and enter the Tower of Hera.
Collect the Small Key, Map and Big Key
At the dungeon entrance, strike the Crystal Switch so the blue blocks lower. Take the western stairs down. In the lower room, defeat or pass the Red Stalfos and Mini-Moldorm, then collect the Small Key from the block enclosure. You may use the Boomerang to retrieve the key without lowering the blocks, but ensure the orange blocks are raised before returning upstairs.
Back in the entrance room, strike the nearby switch to lower the orange blocks. Go north, avoid or defeat the Mini-Moldorm and Red Kodongos, and open the chest for the Dungeon Map. Use the Small Key on the locked door in the northwest corner.
The next room sends floor tiles toward Link. Keep your sword raised and slash the tiles as they fly in. When they stop, adjust the Crystal Switch so the blue blocks are lowered and go east. In the following room, lower the orange blocks, then go south. Defeat or avoid the Red Stalfos and light all four torches with the Lamp. A chest appears; open it to obtain the Big Key.
Return to the entrance room and set the Crystal Switch so the orange blocks are lowered, allowing access to the eastern stairs. Climb to the next floor. Defeat or bypass the Hardhat Beetles, use the Star Switches to alter the floor holes, and unlock the northern door with the Big Key. Continue through the next room, keeping the blue blocks raised before climbing to the upper floor. Open the central chest there for the Compass, then continue northwest and climb the stairs.
- Obtain the Small Key in the first lower room.
- Open the Map chest in the northern entrance room.
- Light all four torches to reveal the Big Key chest.
- Use the Big Key to reach the upper floors.
- Collect the Compass before climbing to the Moon Pearl floor.
Use the correct hole to obtain the Moon Pearl
On the upper floor, avoid the rotating flame, Bumpers and Hardhat Beetles while locating the Star Switch beside the rotating flame. Strike or step on that switch to change the floor-hole pattern. The required hole is in the north-central part of the room, just north of the central Bumper.
Approach the hole from its north side and walk south into it. Link falls to the floor below and lands north of two Star Switches. Do not activate those switches. Instead, walk north to the large chest. Wait for the Spark circling the chest to move away, then use the Big Key to open it and collect the Moon Pearl.
The Moon Pearl prevents the Dark World transformation into bunny form. Without it, Link cannot use his normal sword and equipment while in the Dark World, so this chest is mandatory for intended progression even though the game allows Link to defeat Moldorm before collecting it.
- Activate the Star Switch beside the rotating flame.
- Put the north-central hole in the floor pattern.
- Enter that hole from the north side.
- Do not touch the two Star Switches after landing.
- Open the large chest and confirm the Moon Pearl is in the inventory.
Prepare for Moldorm and claim the Pendant of Wisdom
Return to the upper floor through the northwest stairs. If you need healing, use the northernmost hole in the diagonal group of pits in the northwest area. Link drops through the tower and lands in a small fairy room; use the Warp Tile there to return to the upper floor.
Before entering the boss room, leave the pots surrounded by the lowered orange blocks intact. Hearts are hidden beneath them and are useful if Moldorm knocks Link down. Climb the northeast stairs, then drop from the southern side of the upper ledge into the boss arena.
Moldorm can only be damaged at the red tip of its tail. Strike the tail with the sword, then immediately reposition rather than chasing the boss around the narrow ledge. The southern wall provides the safest backing point because it prevents some knockback from sending Link over the edge. Avoid hitting the body, since contact knocks Link backward and can send him into a pit.
Moldorm requires six successful tail hits. After five hits it moves faster, but one more tail strike defeats it. If Link falls from the arena, climb back to the boss room; Moldorm’s health is restored, so the battle must be restarted. If you fall, use the preserved hearts on the previous floor before trying again.
After the victory, collect the Heart Container and then the Pendant of Wisdom. The pendant sequence returns Link to the overworld near the Tower of Hera entrance.
- Preserve the recovery hearts beneath the pots before the boss.
- Enter Moldorm’s arena from the southern ledge.
- Strike only the red tail.
- Recover and retry from the upper stairs if knocked down.
- Collect the Heart Container and Pendant of Wisdom.
Before you move on
- The Magic Mirror is in the inventory, and the Tower of Hera was reached by mirroring from the Dark World summit.
- The Dungeon Map, Big Key, Compass and Moon Pearl have been collected.
- Link can enter the Dark World without transforming into bunny form.
- Moldorm is defeated and the Heart Container has been collected.
- The Pendant of Wisdom is collected alongside the Pendants of Courage and Power.
- All three Pendants are confirmed before proceeding to the Lost Woods and Master Sword.
Lost Woods and the Master Sword; Return to Hyrule Castle (Agahnim 1)
Once the three Pendants are in your inventory, travel from Death Mountain through the Lost Woods to the Sacred Grove and draw the Master Sword. Respond to Zelda’s distress call, return to Hyrule Castle, break the barrier to the Castle Tower, and defeat Agahnim by reflecting the correct magical projectiles. The battle begins the Dark World portion of the original Super Nintendo campaign; it is not the ending.
Confirm the prerequisites and leave Death Mountain
Make sure you have the Pendant of Courage, Pendant of Power, and Pendant of Wisdom. The Master Sword cannot be removed from its pedestal until all three are collected. Heal before traveling and keep your health high, because full hearts allow the Master Sword to fire sword beams and those beams are useful against the tower’s enemies.
From the outside entrance of the Tower of Hera, move west across the Death Mountain plateau, then head south toward the long staircase leading down from the mountain. At the foot of the staircase, enter the cave. Walk through the cave’s two rooms, avoiding the holes and Keese, and exit on the lower side of Death Mountain. Outside, jump from the ledge and move north one screen. Go to the northwest side of this area and enter the Lost Woods.
- Pendant of Courage collected
- Pendant of Power collected
- Pendant of Wisdom collected
- Health restored before the tower climb
- Death Mountain cave reached
Follow the Lost Woods route to the Sacred Grove
Inside the Lost Woods, move southwest to the first log tunnel and walk through it. Immediately use the next nearby log to continue left, then enter the following log farther west. Continue through the next log and keep moving toward the northwest corner of the woods. The final log in this sequence leads into the special forest clearing containing the real Master Sword.
If you reach a fake sword, the thief hideout, or an area that loops back toward the entrance, you took a wrong branch. Return to the Lost Woods and repeat the southwest-to-northwest log route rather than wandering through the similar-looking clearings.
In the Sacred Grove, walk north to the pedestal. Approach it from the north side, face downward toward the sword, and press the action button. The three Pendants will rise from Link, the forest mist will clear, and Link will receive the Master Sword. Wait until the scene finishes before moving away.
- Enter the Lost Woods from the lower Death Mountain route
- Pass through the log tunnels toward the northwest corner
- Reach the Sacred Grove
- Pull the Master Sword from the pedestal
Answer the messages and check the Sanctuary
Immediately after obtaining the sword, Sahasrahla contacts Link telepathically and urges him to confront the wizard. Leave the Sacred Grove through the southern route. Once Link is back in the Lost Woods, Princess Zelda sends a second telepathic message: soldiers are attacking the Sanctuary.
Follow the familiar route from the northern edge of the woods toward the Sanctuary. From the area where Zelda’s message occurs, travel east and use the eastern log of the pair of long logs to head north. Continue east toward the Lumberjacks’ area, then travel south toward the whirlpool pond and east to the Sanctuary.
You will not reach the Sanctuary before the attack finishes, regardless of how quickly you travel. Enter and speak with the wounded priest. He explains that Zelda has been taken to the top of Hyrule Castle. This visit confirms the next objective and is part of the intended story sequence, although the game’s overworld route allows you to proceed toward the castle after hearing Zelda’s message.
- Receive Sahasrahla’s message after taking the sword
- Receive Zelda’s distress call after leaving the grove
- Visit the Sanctuary
- Learn that Zelda has been taken to Hyrule Castle
Reach the Castle Tower entrance
Leave the Sanctuary and travel to Hyrule Castle. The front gate is now open, so enter through the main entrance rather than using the secret passage from the opening sequence. Inside, move one room west and climb the stairs to the upper level.
On the upper level, take one of the southern exits. This places Link outside on the castle roof. Walk toward the north-central part of the roof, where a door is covered by an electric barrier. Face the barrier and swing the Master Sword. The barrier disappears, allowing you to enter Hyrule Castle Tower.
If the barrier remains, check that the sword was actually removed from the pedestal and that all three Pendants were collected. This is the only required equipment check for opening the tower.
- Enter Hyrule Castle through the front gate
- Reach the upper level
- Exit to the castle roof through a southern doorway
- Break the electric barrier with the Master Sword
- Enter Hyrule Castle Tower
Climb the tower and collect the required small keys
The tower has no dungeon map, compass, Big Key, or special dungeon item. Progress depends on defeating enemies, collecting small keys, and following the stair route. Keep your hearts high when possible so the Master Sword’s beams can damage enemies from a distance.
In the first combat room, defeat the two Gold Ball-and-Chain Troopers. Stay beyond the reach of their swinging weapons and use sword beams if you have full health. In the next room, defeat or bypass the two Blue Sword Soldiers. A chest appears after the room is cleared; collect Small Key 1 and use it on the locked door to reach the next floor.
Proceed through the dark rooms. Light torches when useful, and search the large dark maze for the chest against the west wall. It contains Small Key 2. Use that key on the southeast door and climb to the next floor.
Continue through the dark walkway rooms until you find the room with Blue Sword and Blue Bow Soldiers. One of the Blue Bow Soldiers provides Small Key 3. Use it on the north door and climb again.
On the next floor, pass the Red Spear Soldiers and move west. Then go south through the following rooms. In the room with pots and Red Spear Soldiers, lift or throw the pots and defeat the central soldier carrying Small Key 4. Use that key on the eastern locked door, then continue upward. Push the statue aside on the upper floor, cross the narrow walkway, and climb the final stairs.
- Collect Small Key 1 from the first cleared soldier room
- Collect Small Key 2 from the west-side dark maze chest
- Collect Small Key 3 from the Blue Bow Soldier room
- Collect Small Key 4 from the Red Spear Soldier room
- Reach the uppermost tower floor
Open the route to Agahnim
At the top of the tower, continue north until Link finds Agahnim with Princess Zelda. A short scene follows, and Agahnim retreats. Do not leave the room. Walk to the curtain along the north wall and slash it with the sword. The cut curtain reveals the hidden entrance to the boss chamber.
Before entering, refill your health if possible by using nearby pots or a healing item. The battle rewards patience more than aggressive sword swings.
- Trigger the scene with Agahnim and Zelda
- Cut the northern curtain
- Enter the hidden boss chamber
Defeat Agahnim by reflecting his magic
Agahnim cannot be damaged by direct Master Sword attacks. Stand at a moderate distance and wait for his projectile. When he fires the large straight energy bolt, swing the Master Sword into it so the bolt travels back across the room and strikes Agahnim. Repeat this until he has been hit six times.
Agahnim also fires a smaller spinning projectile. Do not strike this attack: hitting it causes it to split into several directions and creates a dangerous spread. Move away and let it pass. When Agahnim appears at the top of the room and faces downward, prepare for lightning. Move away from the center and stay near a safer side or corner until the attack ends.
Agahnim teleports after attacks, so reposition Link after every reflection instead of standing still. If you lose health, prioritize avoiding the split projectile and lightning over attempting an immediate counterattack. The Bug-Catching Net can also reflect the large bolts, but the Master Sword is the normal weapon for this battle.
- Reflect only the large straight energy bolts
- Avoid striking the splitting projectile
- Move away from the center for the lightning attack
- Land six successful reflected hits
- Defeat Agahnim
Complete the transition to the Dark World
After Agahnim is defeated, the story sequence automatically sends Link to the Dark World. This is a required transition, not a game over and not the final ending. Link awakens on the Pyramid of Power, and the familiar Light World has been replaced by its altered counterpart.
The next campaign objective is to explore the Dark World and rescue the maidens imprisoned in crystals. The Moon Pearl prevents Link from becoming a bunny when entering the Dark World, while the Magic Mirror is used for later travel between worlds. Neither item is needed to complete the Master Sword and first Agahnim sequence itself, so do not stop this chapter because you have not just acquired the Mirror.
Once the banishment scene has finished and Link is on the Pyramid, the chapter is complete. From there, begin the Dark World route and follow the next dungeon objective rather than returning to the cleared Castle Tower.
- Watch the complete Agahnim defeat sequence
- Awaken on the Pyramid of Power
- Confirm that the Dark World has replaced the Light World map
- Prepare to begin the Dark World campaign
Before you move on
- All three Pendants were in Link’s inventory before the sword sequence.
- The Master Sword was removed from the Sacred Grove pedestal.
- The Castle Tower barrier was destroyed with the Master Sword.
- The hidden curtain passage to Agahnim was opened.
- Agahnim was defeated after six successful reflected energy bolts.
- The banishment scene finished and Link awakened on the Pyramid of Power in the Dark World.
References for this chapter
Dark World Basics: Moon Pearl, Magic Mirror and Overworld Differences
The Dark World becomes accessible after defeating Agahnim in Hyrule Castle Tower. Before exploring it fully, confirm that the Moon Pearl is in your inventory and learn how to use the Magic Mirror. The Pearl keeps Link human in the Dark World, while the Mirror returns him to the corresponding Light World location and leaves a temporary portal behind. The two worlds share broad geography, but their roads, cliffs, bridges, water and buildings are often changed, so use familiar landmarks only as approximate guides.
Confirm the Moon Pearl before exploring the Dark World
The Moon Pearl is in the large chest on the upper floors of the Tower of Hera. It is not reached by simply walking to the chest. From the upper floor, drop through the correct floor opening so that Link lands on the level containing the chest, then open it and collect the Moon Pearl. If you completed the Tower of Hera without taking it, return to the tower before attempting extended Dark World travel.
The Moon Pearl prevents the Dark World from transforming Link into a rabbit-like form. Without it, Link cannot draw the sword or use normal equipment while outside buildings and caves, so he cannot make reliable progress through the Dark World. The item is therefore required for practical exploration, even though the game can technically send Link there before he has collected it.
If you arrive in the Dark World as a rabbit, do not search for a way to fight or open the next dungeon. Use the Death Mountain portal or the Magic Mirror, if you already have it, to return to the Light World. Then revisit the Tower of Hera and take the Moon Pearl. Afterward, re-enter the Dark World and verify that Link remains human.
- The Moon Pearl appears in the inventory.
- Link remains human after entering the Dark World.
- The sword and normal equipment work in Dark World overworld areas.
Obtain the Magic Mirror on the Light World Death Mountain route
The Magic Mirror is obtained from the Lost Old Man during the Light World climb toward the Tower of Hera. Enter the mountain cave on the route to Death Mountain and search through its dark passages until you find the old man. Guide him through the cave to the mountain exit. After he reaches safety, he gives Link the Magic Mirror. This reward is available before the first Dark World visit; it is not a post-Agahnim story reward.
Once Agahnim has been defeated, the Magic Mirror becomes the main way to leave the Dark World from ordinary overworld locations. Equip it and use it while standing in the Dark World overworld. Link returns to the corresponding Light World position, and a sparkling portal remains at the place where he started the crossing. Step into that portal to return to the Dark World at the same general location.
The temporary portal is not permanent. Using the Magic Mirror again from another Dark World location replaces the previous return point, so note the landmark before crossing. If you leave the area and cannot find the portal, use a permanent warp location instead of assuming the old portal is still active.
- The Lost Old Man has been escorted through the Death Mountain cave.
- The Magic Mirror appears in the inventory.
- A Dark World overworld crossing has been tested and its temporary portal has been located.
Understand the two different Magic Mirror uses
In the Dark World overworld, the Mirror returns Link to the Light World at the matching map position. This is useful for healing, buying supplies, collecting missed Light World items and checking whether a blocked Dark World route corresponds to a usable Light World path.
The Mirror also works inside dungeons, but it does not create an ordinary overworld portal there. Using it inside a dungeon returns Link to that dungeon’s entrance. This is a deliberate retreat: use it when you need to abandon the current dungeon position, recover supplies or leave after obtaining an important item. It does not preserve Link’s place in the room sequence.
When using the Mirror to solve a terrain problem, first inspect the immediate Light World surroundings. A Dark World cliff may correspond to a walkable Light World path, while a Dark World bridge may correspond to water or a missing road in the Light World. The Mirror does not let Link walk through the obstacle at the same coordinates; it changes worlds at that location, after which the different terrain may provide a route or reveal an item.
- The Mirror is used deliberately rather than repeatedly during a long trip.
- The distinction between overworld travel and dungeon retreat is understood.
- The temporary portal is preserved when Link still needs to return to the same Dark World area.
Reach the first Dark World objective after Agahnim
After defeating Agahnim, Link is transported to the Pyramid of Power in the Dark World. The front gate of Hyrule Castle in the Light World also becomes a one-way entrance to the Pyramid, which is useful if you return to Hyrule for supplies. The Death Mountain warp remains available as another route between worlds.
The first required Dark World dungeon is the Palace of Darkness, located in the eastern region where the Eastern Palace stood in the Light World. From the Pyramid, descend to ground level and travel east. The eastern area is covered by a maze of bushes rather than the open approach used for the Eastern Palace.
Follow the visible dirt paths and arrow-shaped paving until you reach the bush maze. Look for openings in the canopy and use the route through the large central brush area rather than cutting randomly through the bushes. A monkey named Kiki eventually joins Link. Pay Kiki 10 rupees to make him follow you. If he is lost, find him again and pay the fee once more. At the palace entrance, pay the additional 100-rupee fee so Kiki opens the door. Carry at least 110 rupees before committing to this route.
- The Pyramid of Power is recognized as the Dark World’s central landmark.
- The eastern bush maze is distinguished from the Light World Eastern Palace approach.
- At least 110 rupees are available for Kiki and the Palace of Darkness entrance.
- The Palace of Darkness is reached without treating the two world maps as identical.
Use broad landmark pairings without assuming identical terrain
The Dark World occupies the same general map space as the Light World, but its local geography has been reshaped. The Pyramid of Power corresponds broadly to the central Hyrule Castle region. The Village of Outcasts occupies the general position of Kakariko Village. The Palace of Darkness replaces the Eastern Palace area, and Skull Woods occupies the altered forest region associated with the Lost Woods and Skeleton Forest.
The Light World desert region corresponds broadly to the Swamp of Evil and Misery Mire area. Lake Hylia corresponds to the Dark World’s icy lake region, where the Ice Palace can eventually be reached. Death Mountain remains in the north, but the Dark World mountain paths, ledges and entrances do not match the Light World routes. These pairings are navigation aids, not guarantees that a specific entrance, bridge or cave is present in both worlds.
When lost, identify the large region first, then compare the nearest distinctive landmark: the Pyramid, the Village of Outcasts, the bush maze, the swamp, the ice lake or the mountain cliffs. Check the immediate terrain before taking a long route. Bridges, lakes, raised rocks, hammer pegs, cliffs and dungeon entrances may change between worlds.
- The Pyramid of Power, Village of Outcasts and Palace of Darkness are recognized by region.
- Skull Woods, the Swamp of Evil and the ice lake are treated as changed Dark World areas.
- Local terrain is checked instead of being assumed to match the Light World.
Before you move on
- The Moon Pearl and Magic Mirror are both present in the inventory.
- Link can enter the Dark World and remain human, draw the sword and use normal equipment.
- The Magic Mirror has been used in the Dark World overworld, and the temporary return portal has been identified.
- The difference between using the Mirror in the overworld and using it inside a dungeon is understood.
- The Pyramid of Power, Village of Outcasts, Palace of Darkness, Skull Woods, Swamp of Evil, ice lake and Dark World Death Mountain can be identified as altered counterparts or regions.
- Link can reach the Palace of Darkness from the Pyramid by navigating the eastern bush maze and has at least 110 rupees available for Kiki.
References for this chapter
- The Legend of Zelda: A Link to the Past - Nintendo instruction manual
- Magic Mirror — Zelda Dungeon Wiki
- Lost Old Man — Zelda Dungeon Wiki
- Climbing Death Mountain — The Legend of Zelda: A Link to the Past Walkthrough & Guide — GameFAQs
- The Legend of Zelda: A Link to the Past/Dark Palace — StrategyWiki
- A Link to the Past Warps — Zelda Dungeon Wiki
- The Legend of Zelda: A Link to the Past — Guide and Walkthrough — GameFAQs
Palace of Darkness — First Dark World Dungeon
Reach the Palace of Darkness with Kiki, manage its small keys without opening unnecessary doors, collect the Big Key and Magic Hammer, then defeat the Helmasaur King and rescue the first Dark World maiden. The dungeon is located where the Eastern Palace stood in the Light World. The Magic Hammer is required for later routes, but the dungeon’s completion alone does not open Ganon’s Tower; all seven maidens must eventually be rescued.
Pay Kiki and enter the Palace of Darkness
Before leaving the Pyramid of Power, carry bombs, arrows, and at least one healing bottle if available. You should have the Moon Pearl, Master Sword, and Bow from the preceding story route. The dungeon lies in the Dark World region corresponding to the Light World’s Eastern Palace.
From the Pyramid of Power, travel east, then south, east, and north to reach the wooded approach. Follow the visible path through the green maze. When Kiki the monkey joins you, pay 10 rupees so he follows. Take him to the large locked entrance in the northeast of the area and pay the additional 100 rupees when he offers to open it. Enter immediately; leaving before opening the dungeon can require paying again.
- Carry bombs, arrows, and healing.
- Confirm the Moon Pearl is in the inventory.
- Pay Kiki 10 rupees to follow and 100 rupees to open the entrance.
- Enter the dungeon in the Dark World location corresponding to Eastern Palace.
Get the first key and choose the efficient opening route
At the entrance, step on the floor switch on the left side and go through the opened door above. Defeat the Helmasaur by throwing a skull or pot at it, or simply move past it, then descend the stairs in the north wall. Avoid the fireballs from the statues. Lift the skull in the southwest corner to reveal a floor switch; stepping on it makes a chest appear in the southeast corner. Open that chest for a small key.
Return upstairs. The right-hand entrance path from the starting room is optional but useful: it contains the dungeon map, a fairy fountain, and another small key. If you want the most forgiving route, take it before spending the first key elsewhere. From the entrance, use a key on the upper route, pass the Terrorpins, and push the right-hand block off the ledge to drop into the lower room. Lift the skull to reveal another switch and open the nearby chest for another small key. Use the orange warp tile at the upper-right, then climb the stairs rather than taking the alternate warp that leads toward the map side route.
- Collect the first small key beneath the statue room.
- Consider taking the optional right-side route for the map and extra key.
- Do not spend keys on doors that only return to already explored rooms.
- Push the right-hand block off the ledge and collect the lower-room key.
Reach the Big Key
In the room above the lower key area, push the statue aside and take the left route. When you reach the cracked floor, place a bomb and drop through the opening. At the bottom, go north, use a small key on the locked door, climb the stairs, and open the chest for the Big Key.
After taking the Big Key, drop from the ledge on the right and use the warp tile to return to the connected route. Move the block that obstructs the stairs, then go upward. Take the right-hand path, open the chest for another small key, and follow the arrow markings across the gap. Climb the stairs, go to the northwest corner, and use the small key on the locked door.
- Bomb the cracked floor and drop to the Big Key route.
- Open the Big Key chest before attempting the boss path.
- Collect the small key in the upper-right route after returning from the warp.
- Use the northwest locked door to continue.
Cross the collapsing bridge and obtain the Magic Hammer
The next room has a narrow bridge over a pit and a floor that collapses behind Link. Lift the skulls blocking the bridge, then use the Pegasus Boots to dash across. Throw a skull at the first Helmasaur if needed and continue moving; stopping on the bridge makes a fall much more likely.
The following room is a dark maze with Kodongos. Move through it carefully and collect the chest in the northwest for bombs if you need them. The required chest is in the southeast corner and contains a small key. From that chest, go north along the eastern wall and bomb the visible crack. Enter the revealed room and open the large chest with the Big Key to obtain the Magic Hammer.
Return through the dark maze toward the eastern side. In the room with four Terrorpins around a chest, use the Magic Hammer to flip them, then defeat them with the sword before they recover. Open the chest for the Compass. The Hammer flips Terrorpins and destroys the dark posts and mole-like obstacles that blocked earlier routes.
- Dash across the collapsing bridge rather than walking slowly.
- Collect the required small key in the southeast of the dark maze.
- Bomb the eastern-wall crack and open the large chest for the Magic Hammer.
- Use the Hammer on the four Terrorpins before opening the Compass chest.
Open the boss route
From the Compass room, descend either staircase into the dark lower room. Two chests are at the bottom; take the one containing the small key. The other contains arrows. Return upstairs, but do not use the southern door from the Compass room if you are following the efficient route; it leads back toward previously visited central rooms and can consume a key without advancing.
Use the newly obtained key on the western locked door. Work through the dark Kodongo room, taking the bomb chest in the northwest if necessary and the small-key chest in the southeast if you did not already obtain it. After acquiring the Hammer, return to the upper central section and use it to flip the Terrorpins and clear the mole-like enemies.
In the room with the blue and orange blocks, hit the crystal switch with the Boomerang, an arrow, or a bomb so the blocks are positioned to let you cross. In the next room, place the large statue on the floor switch to hold the door open. In the Goriya room, defeat the green Goriyas with arrows. For the red Goriya, fire an arrow while standing off its direct line, then move so it walks into the arrow’s path; two hits defeat it.
Continue past the blade trap and shoot the eye on the statue with an arrow. This opens the route to the stairs. Use the Hammer on the remaining mole-like enemies, adjust the crystal switch, and open the final locked door. Clear the room of Terrorpins, push the indicated block beside the warp tile, and step onto the tile. Defeat the four Terrorpins in the narrow passage, then unlock the large boss door.
- Take the small key from the bottom of the Compass-room staircase section.
- Use the Hammer to clear Terrorpins and mole-like enemies.
- Use a projectile to control the crystal switch.
- Place the statue on the floor switch in the Goriya approach.
- Open the large boss door only after reaching the warp and clearing the final Terrorpins.
Defeat the Helmasaur King
The Helmasaur King’s mask must be destroyed before its exposed face can be damaged. Use the Magic Hammer at close range, or use bombs if you can place them safely. The Hammer is the normal method for this dungeon, but it requires staying near the boss and avoiding contact.
The boss swings its tail across the arena and launches a fireball that separates into three projectiles, which then split again toward the diagonals. Keep moving, watch the tail’s extended sweep, and attack during the openings. Staying near the front of the boss can reduce the danger from the tail, but retreat immediately if the boss moves into Link’s position.
When the mask breaks, attack the exposed green face with the sword or Bow. Arrows let you maintain distance, while sword strikes are reliable if you can stay near the front without being cornered. If health becomes low, use the healing bottle rather than risking a desperate attack. After the boss is defeated, collect the Heart Container and touch the falling crystal to rescue the maiden.
- Break the mask with the Magic Hammer or bombs.
- Avoid the tail sweep and the splitting fireball pattern.
- Damage the exposed green face with the sword or Bow.
- Collect the Heart Container and touch the maiden’s crystal.
Leave and verify the dungeon’s completion
The maiden’s rescue scene follows the battle. The game restores Link’s health and magic and marks the remaining Dark World dungeons on the map. Link is then returned outside the Palace of Darkness. The Magic Hammer remains in the inventory and is now available for overworld progress.
Use the Hammer on dark posts that block routes, but do not assume every Hammer location is immediately required. The next main-story dungeon is not forced by this crystal alone, and the remaining maidens must be rescued before the way to Ganon’s Tower opens. Save after leaving if your SNES setup permits it, especially if the dungeon used most of your bombs, arrows, or healing.
- The first crystal and maiden have been rescued.
- The Heart Container has been collected.
- The Magic Hammer remains in the inventory.
- The remaining Dark World dungeon locations are marked after the rescue scene.
- Link has been returned outside with restored health and magic.
Before you move on
- The Helmasaur King is defeated and the first Dark World crystal has been released.
- The Magic Hammer is in Link’s inventory and can flip Terrorpins or flatten dark posts.
- The Heart Container from the boss room has been collected.
- The maiden rescue scene has played, health and magic have been restored, and the remaining Dark World dungeon locations are marked on the map.
- Link has exited the Palace and is ready to use the Hammer for later overworld routes.
Swamp Palace — Hookshot and Water Puzzles
Before entering the Swamp Palace, obtain Zora’s Flippers from King Zora for 500 rupees. Then open the Light World floodgate, return to the Dark World, navigate the palace’s water-level puzzles, collect the Big Key and Hookshot, defeat Arrghus, and rescue the second maiden. This route applies to the original North American Super Nintendo release.
Prerequisite: obtain Zora’s Flippers
Do not begin this dungeon without Zora’s Flippers. They are required to swim through the flooded entrance and several interior channels; they are not optional preparation. You also need the Magic Hammer, Magic Mirror, and enough rupees to pay King Zora’s 500-rupee price.
From the Light World, travel east and then north toward Zora’s Domain. A practical route is to leave the area near the Witch’s Hut, go east, lift and throw the large white boulder blocking the path, and continue northeast. Follow the rocky path, dash through the piles of rocks with the Pegasus Boots, then go northwest and drop down to the grass beside the river.
Continue north along the shallow water. When the path divides, follow the route northeast, then take the southern branch of the next shallow-water split and follow it east until you reach the large waterfall. King Zora appears there. Speak to him and buy Zora’s Flippers for 500 rupees. If you lack the money, leave Zora’s Domain and gather rupees before returning; the purchase is required for this chapter.
Afterward, Link can swim in deep water and use the whirlpools that connect distant parts of Hyrule. The Flippers also let you reach the flooded Swamp Palace entrance and swim through its later rooms.
- Magic Hammer, Magic Mirror, and Pegasus Boots obtained.
- At least 500 rupees available.
- Zora’s Flippers purchased from King Zora.
- Link can swim in deep water before entering the dungeon.
Open the floodgate and enter the palace
From the Pyramid of Power, go one screen east and one screen south. Use the Magic Hammer on the stakes, then continue south, west, and south toward the Swamp Palace. Enter the entrance far enough to confirm that the route is blocked, then step outside and use the Magic Mirror to return to the corresponding Light World location.
Enter the Swamp Ruins building. In the first room, push the middle block upward, then push either side block sideways so you can reach the upper passage. Go north and pull the right-hand lever. This opens the floodgate and sends water into the Dark World swamp.
Leave the building and step into the sparkling warp tile outside to return to the Dark World. The Swamp Palace entrance is now flooded. Swim through the opening and enter. If the entrance is still dry or blocked, the floodgate was not pulled; return to the Light World building and use the right-hand lever.
- Floodgate opened in the Light World Swamp Ruins.
- Dark World entrance flooded.
- Flippers used to swim into the palace.
Collect the first keys and start the water flow
At the dungeon entrance, swim left and climb the short ladder. Defeat the three Hovers in the shallow water to make a chest appear, then open it for a Small Key. Use that key on the locked northern door.
In the next room, the cracked wall on the left can be bombed for the Dungeon Map. This is optional. Return to the larger room and lift the southernmost skull pot in the central group to find another Small Key. Use it on the locked door to the southwest.
Move through the next passage, go down the steps, and enter the room above. Lift the pot there to obtain another Small Key. Return to the previous room and use the key on the remaining locked door. Defeat or avoid the enemies, use the Magic Hammer on the moles beside the lever, and stand to the right of the lever to push it left. Water will begin flowing through the adjoining channel.
Return to the previous room, enter the water, and swim west to the short ladder. Go through the western door into the large central chamber. The southern branch from this chamber leads to the Compass and is optional. The required route continues through the southwest side.
- Small Key from the opening Hover room collected.
- Small Key from the central skull group collected.
- Small Key from the upper pot collected.
- First interior lever pushed left to send water through the passage.
Reach the Big Key
From the central chamber, climb the southwest stairs and go through the western door. Descend the steps, move north into the next room, and lift the skull pot to collect another Small Key. Return to the central chamber and climb to the northwest side. Use the key on the locked door.
Strike the crystal switch to lower the blue blocks. Go to the right side of the lever and push it left to fill the nearby waterway. Before leaving, strike the crystal switch again so it is red and the blue blocks are raised. Exit east to the central chamber.
Return through the southwest route. The filled waterway now allows you to swim across the blocks to the western side. Enter the western room, push the southern block left, and push the center block upward. Climb the stairs and continue north into the room with several enemies and pits.
Push the obstructing block aside and reach the northeast corner. Push the block near the pit out of the way, then drop through the eastern pit. On the lower ledge, move east and open the chest for the Big Key. If orange blocks prevent access, leave the ledge, change the nearby crystal switch to the required state, and return through the same route.
- Small Key from the southwest section collected.
- Waterway filled and blue blocks restored to the raised position.
- Correct eastern pit used.
- Big Key collected.
Take the Hookshot and open the northern route
From the Big Key room, return to the central chamber. Use the route through the shallow water and stairs to reach the raised central platform. Open the large chest to obtain the Hookshot.
The Hookshot latches onto skull pots, statues, chests, blocks, and other fixed targets. It pulls Link across gaps, retrieves some objects, and can stun or damage certain enemies. It is also the dungeon’s required item for reaching the remaining rooms and fighting Arrghus.
From the central platform, face east and Hookshot across to the skull pot on the eastern platform. Lift the easternmost skull to find another Small Key. Return to the central platform and Hookshot north to the skull pots on the upper ledge. Use the key on the locked northern door.
In the next room, go west and lift the northwest skull to reveal a floor switch. Pull the nearby statue onto the switch so both doors remain open. Do not take the nearby door; instead, go to the east side and use the door on the left. Continue north past the Bari, descend the stairs, and push the second lever left. This drains the water from the surrounding rooms.
- Hookshot obtained from the central large chest.
- Small Key beneath the eastern skull collected.
- Statue left on the floor switch.
- Second interior lever pushed left to drain the water.
Collect the final key and reach Arrghus
After draining the room, descend the stairs and go west. The southern room contains optional recovery hearts and rupees. Return west, then go north through the upper door. In the room with six blocks, push the third block from the left to reveal an optional rupee chest.
Continue to the room with the waterfall-like openings. Walk through the second waterfall from the right; it is a hidden doorway. In the next room, defeat or avoid the enemies and climb the northern stairs. Follow the hallway south and enter the large water room.
Jump into the water quickly so the Water Tektites do not crowd the ladder. Swim east against the current and climb onto the eastern ledge. Lift the skull there to obtain the final Small Key.
Swim back west and use the Small Key on the locked door. Proceed through the next door to reach Arrghus’s boss room. A cracked wall on the approach can be bombed for optional recovery items, but it is not required.
- Hidden waterfall doorway used.
- Final Small Key collected from the eastern ledge.
- Locked boss route opened.
Defeat Arrghus and rescue the second maiden
Arrghus begins surrounded by smaller enemies called Arrgi. Keep moving around the room and use the Hookshot to pull one Arrgi away from the central body at a time. Once an Arrgi is detached, attack it with the sword before it returns. Continue until the entire protective ring is gone. Sword slashes can also remove the Arrgi, but the Hookshot makes it easier to separate them safely.
When the Arrgi are defeated, Arrghus becomes exposed and begins jumping. Move away from each landing point, then attack the boss with the sword when it lands or passes within range. Do not stand in the center of the room, and avoid chasing it into a landing path. Keep circling and strike during the openings.
After Arrghus is defeated, collect the Heart Container and then pick up the crystal. The second maiden rescue scene plays immediately afterward. Link’s hearts and magic are restored, and the game returns him outside the dungeon.
- All Arrgi removed from Arrghus.
- Arrghus defeated with mobile sword attacks.
- Heart Container collected.
- Second crystal and maiden rescue scene completed.
Use the Hookshot after the dungeon
The Hookshot remains useful throughout the rest of the campaign. In the Dark World, use it at marked gaps where a skull, post, chest, or other target is visible on the opposite side. It opens the broken-bridge route north of the swamp and reaches isolated ledges containing optional treasures.
Inside later dungeons, test the Hookshot against distant pots, blocks, statues, and switches whenever a gap prevents normal movement. It does not replace the Hammer or Flippers, and it cannot cross a gap without a valid target. If the Hookshot has nothing to latch onto, look for another entrance or a required world transition instead of repeatedly firing it.
With the second crystal cleared and the Hookshot in your inventory, continue through the remaining Dark World objectives. Skull Woods and Thieves’ Town are the next major progression choices in a conventional campaign route.
- Hookshot remains in the inventory.
- A valid overworld Hookshot crossing has been completed or is now accessible.
- Second crystal is displayed as cleared on the Dark World map.
Before you move on
- Zora’s Flippers were purchased from King Zora for 500 rupees before entering the palace.
- The Light World floodgate was opened and the flooded Dark World entrance was entered.
- The Big Key and Hookshot are in Link’s inventory.
- Arrghus has been defeated and the Heart Container has been collected.
- The second crystal has been collected and the maiden rescue scene has played.
- Link has been returned outside the Swamp Palace with the Hookshot available for later Dark World crossings.
References for this chapter
- Swamp Palace - The Legend of Zelda: A Link to the Past Walkthrough
- Collection Before the Next Pendant - The Legend of Zelda: A Link to the Past Walkthrough
- A Link to the Past Walkthrough - Swamp Palace
- Swamp Palace (A Link to the Past) - Zelda Dungeon Wiki
- Level 2: Swamp Palace - The Legend of Zelda: A Link to the Past Walkthrough & Guide
- Swamp Palace — Hookshot & the water-level puzzle
Skull Woods — Maze Layout and Fire Rod
Skull Woods is the third Dark World crystal dungeon in the standard story route, following the Swamp Palace. It is spread across the Skeleton Forest rather than arranged behind one entrance, so progress requires repeatedly leaving the dungeon, walking through the forest and entering different holes or skull mouths. Bring the Moon Pearl, Hookshot, Magic Hammer, Bombs, Lamp and a healing item. The Hookshot is especially useful for the early Bari enemies and for crossing around obstacles. Your required rewards are the Big Key, Fire Rod, Heart Container and the third crystal containing the maiden.
Enter the first underground section and collect the Map
Reach the Skeleton Forest from its southeast side. Walk north or northwest until you see two holes in the ground, then drop through the hole farther west. You will land in a room flanked by Blue Bari. Defeat them with the Hookshot or sword, move south past the Blue Hardhat Beetles and bumper, then wait for the rotating bar to clear the way to the east door.
In the next room, move to the north side and open the chest for the Compass. Taking the Compass activates a Star Switch and changes the floor holes. Cross the room carefully, then enter the northern room. Defeat the Gibdos while watching for the Wallmaster shadow and falling sound. Wallmasters do not damage Link directly, but grabbing you returns you to the dungeon entrance and respawns the room’s enemies.
Open the chest in the northwest corner for Small Key 1. Use it on the east door and continue east through the next rooms. Defeat the Red Hardhat Beetle, activate the Star Switch and reach the chest containing the Map. At this stage, use the Magic Mirror to return to the entrance, or allow a Wallmaster to carry you back if you prefer not to walk the route again.
- Moon Pearl obtained before entering the Dark World.
- Hookshot, Bombs and Lamp available.
- Compass, Map and Small Key 1 collected.
- Wallmasters avoided whenever possible.
Get Small Key 2 and the Big Key
From the entrance, go south and then east through the rooms you previously crossed. This time, continue through the long room and defeat the Gibdos while lifting the skulls that block the path. Open the chest for Small Key 2, then unlock the northeast door and follow the connected rooms back outside into the Skeleton Forest.
You will emerge from a large skull mouth. Walk north through the bony passage, defeat the Ropa and loop back south to the other skull entrance at the dead end. Enter it and defeat the Blue Bari and Gibdos. In the room with the central skull, lift the skull to reveal the switch. Move the statue from the east side westward, get behind it and pull it north onto the switch. This opens the northern door.
The next room contains a Rabbit Beam, which can temporarily turn Link into a powerless bunny if it hits him. Avoid it, defeat the enemies and open the chest for the Big Key. A bombable wall on the east side leads to optional magic, but it is not required. Leave the dungeon and return to the forest.
- Small Key 2 collected.
- Statue placed on the hidden switch.
- Big Key collected.
- Do not spend the Big Key on any door other than the dungeon’s large treasure chest.
Reach the Fire Rod chest
Return through the bony tunnels and locate the group of nine bushes arranged in a three-by-three pattern. Cut the bushes and drop through the opening beneath the center bush. In the room below, throw skulls at the Helmasaur and Blue Hardhat Beetle. Step on the nearby Star Switch, then bomb the cracked wall on the west side.
Go through the opened passage. If the floor holes prevent access to the lever, return to the previous room and change the Star Switch arrangement until the route is open. Pull the lever to destroy the wall below. Continue south, defeat the two Mini-Moldorms and open the large chest for the Fire Rod.
The Fire Rod consumes magic and launches a flame projectile. It is useful against Gibdos, lights torches from a distance and is necessary for the final Skull Woods route and Mothula. After taking it, use the Hookshot on one of the statues at the south end of the room so you can reach the southern exit. Leave the dungeon and return to the forest.
- Cracked wall bombed.
- Lever pulled.
- Mini-Moldorms defeated.
- Fire Rod collected.
- Enough magic remains for the final torch room and Mothula.
Open the giant skull and prepare the final section
Enter the familiar skull mouth again and go west twice. In the room with another outside exit, defeat the Blue Hardhat Beetle and lift the skull in the northwest corner to collect Small Key 3. The locked door in this section is not the best place to spend that key. Leave through the southern exit instead.
Outside, follow the forest path on the left and continue north. You will find a large skull with a wooden obstruction covering its mouth. Equip the Fire Rod and burn the obstruction. The entrance is now open, leading to Skull Woods’ final underground section.
If you kept Small Key 3, use it on the locked northern door in the first room. If you already spent it, take the left stairs and follow the winding lower route to a chest containing another Small Key. The direct locked-door route is faster, but both routes lead into the same final sequence.
- Small Key 3 obtained from beneath the northwest skull.
- Giant skull obstruction burned with the Fire Rod.
- A Small Key is available for the final section.
Solve the torch room and reach Mothula
In the room with multiple Star Switches and floor holes, activate the switches to create a safe path. Avoid the Blue and Red Bari, the Wallmaster and the bottomless holes. Move across the room toward the eastern exit, changing the floor layout when necessary rather than trying to cross unsafe gaps.
The next room contains Gibdos and four torches. Light the three accessible lower torches with the Lamp to conserve magic. The fourth torch is across the gap and must be lit with the Fire Rod. Once all four torches are burning, the northwest door opens.
In the following room, defeat or bypass the enemies and slash the northern wall to reveal a hidden passage. Continue into the next room and defeat the enemies there. One Gibdo holds the final Small Key; defeat it and use that key on the east door. In the next room, break the skull pots for the available magic, then drop through the pit to reach Mothula.
- Star Switch floor puzzle crossed safely.
- All four torches lit.
- Final Small Key collected from the Gibdo.
- Magic recovered before dropping into the boss room.
Defeat Mothula and rescue the maiden
Mothula’s arena has a floor that constantly shifts direction, Blade Traps that travel from the walls and three-directional fire beams. Contact with Mothula is also damaging. Keep moving with the floor instead of fighting against it, avoid the spike-lined edges and do not let the Blade Traps pin Link against a wall.
Equip the Fire Rod and fire when Mothula’s path gives you a clear shot. In the original SNES encounter, eight Fire Rod hits defeat Mothula. The Fire Rod is much safer than relying on close sword swings, but it consumes magic, so use the magic found in the preceding pots and enter the room with a healthy meter. If the meter runs out, the sword can still finish the fight, but the moving floor makes that approach considerably riskier. The Magic Hammer is another valid backup weapon if you are comfortable getting close.
After Mothula is defeated, collect the Heart Container and touch the third crystal. The maiden is released, the dungeon objective is complete and the game restores Link’s health and magic during the return sequence. The Fire Rod remains available for later progression, including the Ice Palace entrance.
- Mothula defeated.
- Heart Container collected.
- Third crystal touched and the maiden released.
- Fire Rod remains in the inventory.
- Link returns to the Dark World overworld ready to continue to Thieves’ Town or another available objective.
Before you move on
- The Fire Rod is visible in Link’s inventory.
- The Big Key has been collected.
- Mothula has been defeated and the Heart Container taken.
- The third crystal has been touched and the maiden’s rescue scene has played.
- Link has returned to the Dark World overworld and can proceed with the remaining crystal dungeons.
References for this chapter
Thieves' Town — Blind Fight, Titan's Mitt and Mid-to-Late Game Trade Items
Thieves' Town is the fourth Dark World crystal dungeon in the normal story route after Skull Woods. It is located in the Dark World version of Kakariko Village, called the Village of Outcasts. The dungeon gives you the Titan’s Mitt, an upgrade to the Power Glove that lets Link lift the large dark rocks found in both worlds. Its boss is Blind the Thief, who is disguised as the maiden you rescue inside the dungeon. The original Super Nintendo version requires a specific light-and-maiden sequence before the boss fight can begin.
Reach the dungeon and collect the Map, Compass, and Big Key
Travel to the Village of Outcasts in the Dark World. Thieves’ Town is the large domed building near the village’s northwest side, marked by the familiar weathervane location from Kakariko Village. Enter through the front entrance; no medallion is required. You need the Moon Pearl to remain in Link’s normal form while traveling through the Dark World, but no dungeon-specific item is needed to enter.
From the entrance, drop to the lower level and go north past the Blue Zazak and Red Zazak. Avoid the Spark circling the statue, then go west to open the chest containing the dungeon Map. Continue north, then east through the connected rooms. Watch for Rabbit Beams hidden beneath walkways; they temporarily turn Link into a helpless bunny if they touch him.
Follow the route south and climb the stairs to the upper walkway. Circle around the pit to reach the chest containing the Compass. Drop back to the lower level and go west into the next room to find the chest containing the Big Key. This opening sequence is important: the Big Key is obtained before the maiden, not after the Titan’s Mitt.
- Enter the domed Thieves’ Town building in the Village of Outcasts.
- Collect the Map near the entrance.
- Collect the Compass from the upper walkway.
- Collect the Big Key from the chest west of the Compass room.
Open the upper section and create the shaft of light
Return east from the Big Key room, then go north and use the Big Key on the large locked door near the northeast side of the upper level. Enter the long hallway and take the Small Key hidden beneath the skull in the northeast corner. Use that key on the locked western door at the south end of the hallway.
Cross the rooms with Zazaks, Winders, Gibos, conveyors, and Blade Traps. You can avoid many enemies instead of fighting them. In the large conveyor room, travel north and enter the room with the Crystal Switch. Take the Small Key from beneath the skull, then set the Crystal Switch to blue so the blue blocks are lowered. Use the key on the northern door and go upstairs.
In the upper section, ignore the wall lever because it releases additional enemies. Lift the skulls between the lowered blue blocks until you uncover a floor switch. Step on it to open the eastern door. Continue east through the Buzz-filled rooms until you reach the room where sunlight shines onto a cracked patch of floor. Place a bomb on the crack, pick it up with the A button, and throw it so it lands directly on the marked section. The explosion opens a hole and sends sunlight into the boss room below.
Do not enter the boss room yet. The light has only prepared the arena; you still need to find the maiden and bring her there.
- Take the Small Key from the skull in the long upper hallway.
- Take the second Small Key beneath the skull near the Crystal Switch.
- Set the Crystal Switch to blue before continuing.
- Bomb the cracked floor beneath the upstairs sunlight.
Rescue the maiden and obtain the Titan’s Mitt
Return downstairs through the route you used to reach the upper section. Keep the Crystal Switch blue so the lowered blue blocks leave the eastern passage open. Travel east through the enemy rooms and conveyors, then descend to the basement level.
Defeat or bypass the enemies and go south and east until you reach the prison-cell rooms. The Big Key opens the cell doors. Proceed through the cells and speak to the maiden at the far end. Open the chest beside her to obtain another Small Key. The maiden now follows Link.
Lead her back west through the basement. In the conveyor room, use the new Small Key on the locked southwest door. This room contains the Big Chest, surrounded by Moles and a floor that collapses shortly after you enter. Equip the Magic Hammer, strike a Mole to clear a route, and quickly open the Big Chest. It contains the Titan’s Mitt.
If the floor collapses before you can leave, strike a Mole on the northern side and use the Hookshot on one of the statues across the gap. Move toward the statue after hooking it so Link does not slide off the platform. The Titan’s Mitt is a passive upgrade and does not need to be equipped as a secondary item.
- Reach the prison cells with the Big Key.
- Speak to the maiden at the end of the cells.
- Take the Small Key from the chest beside her.
- Open the Big Chest before the surrounding floor disappears.
- Confirm that Titan’s Mitt is visible in the inventory.
Return to the boss room and reveal Blind
After collecting the Titan’s Mitt, exit the Big Chest room and return through the conveyor rooms. In the room with the large block blocking the upper route, lift and throw the block with the Titan’s Mitt. Go upstairs, lift the skull in the northeast corner, and step on the floor switch to open the eastern door.
Take the eastern passage back to the long hallway, then go north into the room that appeared empty earlier. The hole you opened upstairs now sends a shaft of sunlight into this room. Bring the maiden through the northern doorway and walk her into the light. The door closes, and she transforms into Blind the Thief.
If Blind does not appear, the maiden is not with you. Return to her cell, speak to her again, and escort her through the basement route to the light-filled room. Do not try to leave the dungeon with her; the boss trigger is in the illuminated room.
- Use the Titan’s Mitt to clear the large block near the upper route.
- Open the eastern passage with the floor switch under the skull.
- Lead the maiden into the sunlight in the boss room.
- Confirm that Blind appears before beginning the fight.
Defeat Blind the Thief
Blind moves across the room and periodically fires a laser in the direction he is facing. He also releases spreads of fireballs. Keep moving around the room instead of standing directly in front of him, and approach for sword strikes when his attached head comes within range. A charged Spin Attack can deal damage safely when you have room to prepare it, but ordinary sword swings are reliable once Blind moves near the lower part of the arena.
Blind’s vulnerable target is the head attached to his body. After enough hits, that head detaches and floats around the room while Blind grows a replacement. The detached head cannot be damaged in the original SNES release, so do not waste sword swings or bombs trying to destroy it. Continue attacking only the head on Blind’s current body.
After more damage, a second detached head joins the first. The room becomes crowded with fireballs and lasers, so stay mobile and keep the body near the open center or lower area rather than allowing it to hide in a corner. Use a Red or Blue Potion if your health becomes low. A Magic Cape or Cane of Byrna, if already collected, can provide temporary protection during the most crowded portion of the fight.
- Attack the head attached to Blind’s body.
- Ignore the detached, invulnerable heads.
- Keep moving to avoid the laser and fireball spreads.
- Use a potion or defensive magic before the room becomes overwhelming.
Collect the crystal and use the Titan’s Mitt
When Blind is defeated, collect the Heart Container and then pick up the large crystal. The crystal contains the genuine fourth maiden, and the game restores Link’s health and magic before returning him outside the dungeon. This crystal is the completion reward for Thieves’ Town.
The Titan’s Mitt upgrades the Power Glove. Link can now lift the large dark rocks, boulders, and skulls that were previously immovable. The upgrade works in both the Light World and Dark World. It opens heavy-rock routes and shortcuts near the village, Death Mountain approaches, and later Dark World regions. It is also part of the normal preparation for reaching Misery Mire and Turtle Rock, although those areas still require other items such as the Hookshot, Hammer, and Cane of Somaria.
- Blind is defeated.
- The Heart Container is collected.
- The fourth maiden’s crystal is collected.
- Titan’s Mitt remains in the inventory after leaving the dungeon.
- Link can lift large dark rocks in both worlds.
Before you move on
- Titan’s Mitt is visible in Link’s inventory.
- Blind the Thief has been defeated and the Heart Container collected.
- The fourth crystal containing the maiden has been collected.
- The game has returned Link outside Thieves’ Town after the crystal scene.
- Link can lift the large dark rocks that the Power Glove could not move.
Ice Palace — Cold-Labyrinth Navigation and Boss Tactics
The Ice Palace is the fifth Dark World dungeon on the usual story route and contains the Blue Mail, the fifth crystal, and the boss Kholdstare. Its slick floors make positioning difficult, while its later spike crossing requires the Magic Cape or Cane of Byrna in the normal route. Before entering, collect the Magic Cape from the Light World Graveyard unless you already have the Cane of Byrna. The Cane of Somaria, obtained from Misery Mire, can shorten the final block puzzle in the original Super Nintendo release, but it is not required.
Secure the Magic Cape before entering
Before traveling to the Ice Palace, confirm that you have the Titan’s Mitt, Magic Mirror, and Pegasus Boots. The Magic Cape is in a hidden passage beneath the easternmost tomb in the upper-right part of the Light World Graveyard, east of the Sanctuary.
If you are already in the Dark World, stand at the corresponding Dark World graveyard location and use the Magic Mirror. This places Link on the otherwise inaccessible Light World ledge inside the graveyard enclosure. If you are traveling through the Light World normally, enter the graveyard from the Sanctuary side and reach the upper-right enclosure by lifting the large dark rocks with the Titan’s Mitt.
At the tomb inside the enclosure, line Link up below the tombstone and perform a Pegasus Boots dash into it. The tombstone moves and reveals a staircase. Enter the passage, follow it to the chest, and collect the Magic Cape. The Cape makes Link invulnerable to most contact and spike damage while it is active, but it drains magic continuously.
The Cane of Byrna is an acceptable substitute for the Cape during the Ice Palace spike crossing. It is found in the spike cave on Dark World Death Mountain, but obtaining it normally requires using protective equipment and a substantial amount of magic. If you already have the Cane of Byrna, you do not need the Magic Cape for this dungeon’s required hazard crossing. Cane of Somaria is not a substitute for the spike protection; it is only an optional late-dungeon shortcut.
- Titan’s Mitt obtained
- Magic Mirror available
- Pegasus Boots available to move the tombstone
- Magic Cape obtained, or Cane of Byrna already in the inventory
- Fire Rod, bombs, healing, and magic recovery prepared
Reach the Ice Palace island
The Light World entrance point is the island in the center of Lake Hylia. Use the Flute to travel to the lake area if desired, then swim to the island with the Flippers. Lift the large dark rock on the island with the Titan’s Mitt to reveal a warp tile.
Stand on the warp tile and use the Magic Mirror. Link appears on the Dark World ice island beside the Ice Palace entrance. Walk down the stairs and enter. The dungeon itself does not provide cold resistance; the Blue Mail reduces damage from enemy attacks after you obtain it, but it does not prevent slipping, falling, spike damage, or other environmental hazards.
Equip the Fire Rod before entering or be ready to select it immediately. Freezor enemies block early passages and cannot be handled reliably with ordinary sword attacks. Carry at least one healing item and, if possible, a green or blue potion because the Fire Rod and protective equipment both consume magic.
- Flippers used to reach the Light World Lake Hylia island
- Titan’s Mitt used to reveal the warp tile
- Magic Mirror used to reach the Dark World island
- Fire Rod equipped or readily available
- At least one healing or magic-recovery item carried
Open the upper route and descend through the first floors
In the entrance room, walk toward the upper wall. The ice statue on the left becomes a Freezor. Use the Fire Rod to defeat it and go through the opened passage. In the next room, defeat the enemies until you obtain the small key, then use that key on the locked door leading down to B1.
On B1, step on the floor switch in the corner and continue into the cross-shaped room. Push the central block as needed to open the southern route. The southern room contains the Compass if you want it; defeat or bypass the Pengators, then return to the cross-shaped room.
Use the eastern route and reveal the floor switch beneath a skull pot. Return to the cross-shaped room, adjust the block, and take the northern passage. Change the crystal switch so the blocks are in the position needed for the next room. Place a bomb beside the switch, then move into position before the explosion changes it again. Bomb the cracked section of floor and drop to B2.
On B2, defeat both Stalfos Knights by striking them with the sword and bombing their collapsed bodies before they recover. Continue through the moving-floor and blade-trap rooms. Defeat the enemies holding the next small key, then use the stairs and continue downward. When a large blade trap rolls toward Link, wait for it to pass and use the opening to reach the next stairway.
- Small key taken from the early enemy room
- Compass collected if desired
- Crystal switch and bomb timing used to open the cracked floor
- Both B2 Stalfos Knights destroyed completely
- Route to B4 reached
Reach the Big Key through the upper route
On B4, defeat the Freezors with the Fire Rod. A chest appears with bombs. Bomb the western cracked floor and drop through the western hole. This places Link beside the Blue Mail chest, but the chest cannot be opened yet because the Big Key is still missing. Push the blocks aside and leave the room.
Continue through the icy rooms, collecting the small key revealed beneath a skull pot and opening the required locked doors. Use the Hookshot to cross the gap in the large room, then climb back upward through the stairwell. Keep the Magic Cape or Cane of Byrna selected before entering the spike-floor section.
The normal safe method for the spike floor is to activate the Magic Cape or Cane of Byrna and cross while its protection remains active. The Cape and Cane both consume magic, so do not waste their effect in safe rooms. If you do not have either protective item, do not continue under the assumption that the route is complete; return to the Light World and obtain the Magic Cape, or obtain the Cane of Byrna first.
After crossing, reveal the switch beneath the skull and open the chest for a small key. Continue upward. In the peg room, use the Magic Hammer on the mole-like pegs, lift the large block, and collect the small key revealed beneath it. Activate the switch under the skull to make another chest appear. Pull the tongue of the stone statue to open the passage, then climb the stairs and enter the small upper room. The large chest there contains the Big Key.
- Blue Mail chest located but left unopened
- Hookshot used to cross the gap
- Magic Cape or Cane of Byrna used for the spike-floor crossing
- Small keys collected from the spike section and peg room
- Big Key obtained
Collect the Blue Mail and solve the final block route
Return toward the lower floors by retracing the route through the statue passage and the rooms with the crystal switch. Bomb the western cracked floor again and drop through the western hole beside the large chest. Use the Big Key to open the chest and collect the Blue Mail. It halves damage from ordinary enemy attacks, but it does not reduce damage from floor spikes, blade traps, falling ice, or pits.
Leave the Blue Mail room and continue through the next icy rooms. Collect the small key under the skull, activate the nearby floor switch, and use the locked door to reach the large ice room. Cross the narrow icy walkway carefully. Tap directions instead of holding them, and line Link up before each turn so that sliding does not carry him into a pit.
Use the Hookshot on available skulls or other targets when it gives you a stable way to cross a dangerous section. Cane of Byrna or the Magic Cape can also protect Link from the moving hazards in the spike-and-blade rooms, but conserve magic for Kholdstare. Continue until you reach the B6 block puzzle.
In the block puzzle, open the eastern route and change the crystal switch so the blue blocks lower. Loop back through the upper rooms and return to the block room from the western side. Push the southern block into the hole, drop after it, then lift the skull to expose the floor switch. Push the block onto the switch so the southern door stays open.
If you already cleared Misery Mire and obtained the Cane of Somaria, you can place a Somaria block directly on the switch and bypass most of this long loop. This shortcut exists in the original SNES version, but it is optional. The dungeon can be completed without Somaria.
- Blue Mail collected with the Big Key
- Narrow icy walkway crossed without falling
- Crystal switch placed so the blue blocks lower
- Block puzzle completed with the movable block, or bypassed with optional Cane of Somaria
- Southern door held open
Defeat Kholdstare and claim the fifth crystal
In the final room, defeat the enemies if necessary, then pull the eastern statue away from the wall. Hammer the remaining pegs and lift the large block to reveal the final hole. Drop through it to enter Kholdstare’s chamber.
Kholdstare begins inside a shell of ice. The shell must be destroyed before the boss can be damaged. Use the Fire Rod eight times, keeping Link moving so the falling ice blocks do not trap him. One use of the Bombos Medallion can also destroy the shell immediately, but reserve enough magic for the rest of the battle if you plan to use the Fire Rod afterward.
Once the shell is gone, Kholdstare separates into three icy forms that move diagonally around the room. Continue circling the outer part of the room and avoid standing beneath the falling ice. Fire Rod shots damage the forms, while charged sword spins are a dependable fallback after the magic meter is low. Defeat all three forms to win.
Collect the Heart Container, then touch the fifth crystal. Listen through the maiden’s dialogue before leaving. The game restores Link’s Life and Magic Meters and returns him to the area outside the dungeon. The next normal objective is Misery Mire, reached through the Dark World swamp by using the Ether Medallion at its entrance.
- Kholdstare’s ice shell destroyed with eight Fire Rod shots or Bombos
- All three Kholdstare forms defeated
- Heart Container collected
- Fifth crystal touched
- Maiden’s dialogue completed
Before you move on
- The Magic Cape is in Link’s inventory, or the Cane of Byrna is available as the protective substitute.
- The Blue Mail is equipped or visible in Link’s equipment inventory.
- Kholdstare has been defeated and the Heart Container has been collected.
- The fifth crystal has been touched and the maiden’s dialogue has finished.
- Link has left the Ice Palace with the dungeon rewards secured before proceeding to Misery Mire.
References for this chapter
Misery Mire — Cane of Somaria and Dark World Obstacles
Complete the sixth crystal dungeon in the original North American Super Nintendo release. Before entering Misery Mire, obtain the Flute, the Titan’s Mitt, and the Ether Medallion. Use Flute destination 6 to reach the Dark World swamp, open the dungeon with Ether, collect the Big Key and Cane of Somaria, then defeat Vitreous and rescue the sixth maiden. The Cane is required for the switch puzzle in Misery Mire’s final route and for mandatory puzzles in Turtle Rock.
Obtain the Flute before approaching Misery Mire
The Flute is obtained through the Flute Boy sequence. In the Dark World, go to the Haunted Grove east of the Village of Outcasts. Speak to the creature sitting on the tree stump. He is the Flute Boy and asks you to recover the instrument he buried in the Light World. He lends you a Shovel.
Use the Magic Mirror to return to the Light World. In the Light World version of the Haunted Grove, go to the northwest corner and dig among the flowers to uncover the Flute. Return to the Dark World and speak to the Flute Boy again, then play the Flute for him.
Return to the Light World and enter the Kakariko Village tavern through its front entrance. Speak to the sleeping man sitting on the rug; he is the Flute Boy’s father. Play the Flute for him, then go to the weathercock in the center of Kakariko Village and play the Flute again. The weathercock breaks open and releases the bird that carries Link to the eight numbered Light World landing points.
Destination 6 is the Desert of Mystery. You will use it to reach the Dark World entrance for Misery Mire.
- Speak to the Flute Boy in the Dark World Haunted Grove.
- Dig in the northwest corner of the Light World Haunted Grove.
- Play the Flute for the boy, then for his father in the Kakariko tavern.
- Play the Flute at the Kakariko weathercock to activate the bird.
Obtain the Ether Medallion
You need the Master Sword and the Book of Mudora before you can receive Ether. Return to the Light World and use the Flute to travel to destination 1, the Death Mountain landing point. Climb Death Mountain by the route used earlier to reach the Tower of Hera. The Lost Old Man’s cave is a safe shortcut if you do not want to retrace the exposed mountain paths.
Near the Tower of Hera, use the Dark World warp tile to reach the Dark World mountain, then use the Magic Mirror at the Dark World version of Spectacle Rock. This places Link on the elevated Light World plateau west of the Tower of Hera. Walk north and follow the railing toward the small bridge leading west to the green Hylian stone tablet.
Stand in front of the tablet with the Master Sword equipped and read it with the Book of Mudora. The tablet awards the Ether Medallion. If the tablet only produces text and no reward, confirm that the Master Sword, not an earlier sword, is in your inventory.
- Have the Master Sword and Book of Mudora.
- Reach the Light World plateau west of the Tower of Hera.
- Read the green tablet with the Book of Mudora while carrying the Master Sword.
- Confirm that Ether appears in the inventory.
Reach and open Misery Mire
You also need the Titan’s Mitt to lift the large dark rock at the Light World’s Flute destination 6. If you have not collected it, obtain it in Thieves’ Town before attempting this route. The Hookshot and Pegasus Boots are needed inside Misery Mire, and you should carry bombs, arrows, and either the Lamp or Fire Rod.
Return to the Light World and play the Flute. Choose destination 6, which lands Link in the Desert of Mystery. Two large rocks are nearby. Lift the large rock on the right with the Titan’s Mitt and step onto the exposed warp tile.
In the Dark World, move north through the Swamp of Evil. Follow the dry ground and avoid the deep swamp pools until you reach the Misery Mire courtyard, marked by several face-like structures and an Ether symbol. Stand directly on the Ether symbol and use the Ether Medallion. The storm clears, the dungeon entrance rises from the water, and you can enter.
- Have the Flute, Titan’s Mitt, Ether Medallion, Hookshot, and Pegasus Boots.
- Use Flute destination 6 in the Light World desert.
- Lift the right-hand large rock and use the warp tile.
- Stand on the Ether symbol at the Misery Mire courtyard before using Ether.
Collect the early keys
In the entrance room, use the Hookshot on the block across the gap, then descend the stairs. Defeat the Popos and Wizzrobes while avoiding the Beamos laser. Wizzrobes can only be struck when fully visible. Continue through the opened door to reach the large central hub room.
From the hub, descend and work around to the northeast corner. Climb the stairs, go up, push the lone block left, and continue north across the catwalks and wooden bridge. The chest at the end contains a Small Key. Return to the hub through the same route.
Next, reach the northwest side of the hub, climb to the upper passage, and travel toward the southwest locked door. Use the Small Key to enter. In the following room, defeat the Blue Bari to obtain another Small Key, then use it on the west door.
In the room with the Stalfos, Beamos, Medusa statue, and floor spikes, take the key hidden under the skull in the upper-left area. The second key in this room is under the skull on the spike floor. Use the Magic Cape or Cane of Byrna if available; otherwise cross the spikes quickly, reveal the switch, and open the appearing chest. Use the resulting key on the northern door.
- Hookshot across the first gap.
- Take the bridge chest key before returning to the hub.
- Defeat the Blue Bari for another key.
- Search the skulls in the Stalfos and spike room for two more keys.
Set the crystal switch and reach the Big Key
Continue through the catwalk rooms until you reach the room with the crystal switch and the narrow spike-lined passage. Turn the switch blue. This is important because the route ahead uses lowered blue blocks. Move around the structure, pass through the southern locked route, and collect the map only if you want it; the map is optional for completion.
Reach the room with the moving walkway and defeat the Blue Bari. It reveals another Small Key. Keep the crystal switch blue when leaving and use the key on the west door. In the Flying Tile room, light all four torches with the Lamp or Fire Rod. The northern door opens only while the torches remain lit, so move through it immediately.
Continue south from the Compass area and climb to the upper floor. You will reach two connected torch rooms containing Wizzrobes and three-block arrangements. Ignore the Wizzrobes unless they block you. For each torch arrangement, push the two outer blocks inward by one space, then push the center block up or down to make a path. Open access to both torches in the upper room and both torches in the room below.
Light all four torches. When the puzzle activates, a previously dark passage to the east extends. Enter it and drop through the apparently bottomless hole. The fall is intentional and places Link beside the Big Key chest.
- Leave the relevant crystal switch blue before taking the western route.
- Defeat the Blue Bari and collect its key.
- Light all four torches in the Flying Tile route to reach the Compass area.
- Rearrange both three-block torch groups and drop through the revealed hole for the Big Key.
Obtain the Cane of Somaria
From the Big Key room, use the nearby warp tile and follow the dungeon’s connected warp route back toward the central rooms. Return to the southeast side of the hub, climb the stairs, and enter the room with the crumbling catwalk. Have the Hookshot equipped before crossing the doorway.
Hookshot the block across the gap as soon as you enter. The catwalk begins to crumble, so immediately dash north with the Pegasus Boots. Avoid the Laser Eyes and do not stop on the catwalk. At the far end, slow down before the chest so the dash does not bounce Link away from it. Open the Big Chest to obtain the Cane of Somaria.
The Cane creates an orange block next to Link. The block can be picked up, pushed, or thrown. Using the Cane again while the block is present destroys it and releases four fireballs in the four cardinal directions. The block is temporary and disappears if Link moves too far away; it is not a permanent platform and does not replace bombs for cracked walls.
- Use the warp tiles to return to the southeast route after obtaining the Big Key.
- Hookshot the block across the gap immediately.
- Dash north across the collapsing catwalk.
- Open the Big Chest and confirm that the Cane of Somaria is in the inventory.
Use Somaria to open the boss route
Leave the Cane room and return toward the large locked door near the dungeon’s central route. Collect the remaining key under the pot in the upper-left area if it is still available. Use the Big Key to open the large door, then cross the long bridge and descend to the dark second basement.
The first dark room contains a floor switch hidden under a skull near the left side. The switch must remain held down. Create a Somaria block beside it and push the block onto the switch. This opens the southwest door. Do not walk away and leave the switch uncovered, or the door will close.
Continue west through the Stalfos room and around the blade trap. In the conveyor-belt room, reach the crystal switch across the gap and turn it red so the red blocks lower. Use the southwest door, bomb the cracked northern wall, and enter the hidden room. Strike the crystal switch there to turn it blue, then return south and pass through the lowered blue blocks.
In the next room, reach the upper crystal switch and turn it red. Descend to the lower level, cross the lowered red blocks, and use the remaining Small Key on the boss door. If the blocks do not match the route, return to the nearby switch and change its color before trying again.
- Use the Cane of Somaria block to hold the hidden floor switch.
- Turn the first crystal switch red to lower the red blocks.
- Bomb the cracked wall when the route is open.
- Turn the next switch blue, then the upper switch red before crossing to the boss door.
Defeat Vitreous and rescue the sixth maiden
Vitreous begins surrounded by smaller eyes. The safest general method is to use the Bow. Stay toward the lower part of the room and move sideways when Vitreous turns white; that signals its lightning attack. Do not stand directly beneath the main eye when the bolt is about to fire.
Shoot the smaller eyes as they approach. Arrows let Link attack from a safer distance, while sword attacks are faster if the eyes reach the lower area. Clear the moving small eyes before concentrating on Vitreous. Keep moving rather than allowing several eyes to surround Link.
After the smaller eyes are defeated, Vitreous rises and bounces around the arena. Stand below it when possible and fire arrows upward as it passes. Sword strikes also work, but arrows reduce the need to approach the lightning attack. Silver Arrows are not required for this boss.
When Vitreous is defeated, collect the Heart Container, then touch the sixth crystal. The maiden is rescued and Link is returned outside Misery Mire. If you die, the dungeon remains open; restock arrows and healing and repeat the route.
- Bring a useful supply of arrows and healing.
- Defeat the smaller eyes while staying in the lower half of the room.
- Move sideways whenever Vitreous turns white and prepares lightning.
- Defeat the exposed main eye, collect the Heart Container, and touch the sixth crystal.
Required result and later use of the Cane
Misery Mire is complete when the Cane of Somaria is in the inventory, Vitreous is defeated, the Heart Container is collected, and the sixth crystal has been touched. The crystal is mandatory because all seven rescued maidens are required for the final approach to Ganon’s Tower.
The Cane of Somaria is the dungeon’s required item for the next conventional dungeon, Turtle Rock. Its temporary blocks hold switches, interact with moving machinery, and solve several platform and corridor puzzles. The Cane’s four-way blast can also activate or clear nearby objects, but it should not be treated as a bomb or as a permanent bridge.
The dungeon Map and Compass, optional rupee rooms, magic refills, and other side rooms are not required to finish Misery Mire. After leaving the dungeon, prepare for Turtle Rock and make sure the Cane, Hookshot, Magic Mirror, and other Dark World equipment remain available.
- The Cane of Somaria appears in Link’s inventory.
- Vitreous is defeated and the Heart Container is collected.
- The sixth crystal has been touched and the maiden rescued.
- Misery Mire is cleared and Turtle Rock is the next mandatory dungeon.
Before you move on
- The Flute has been activated at the Kakariko weathercock and destination 6 is available.
- The Ether Medallion was obtained from the Hylian tablet west of the Tower of Hera.
- The Misery Mire entrance was opened by using Ether on the marked courtyard symbol.
- The Big Chest was opened and the Cane of Somaria appears in the inventory.
- Vitreous was defeated, the Heart Container was collected, and the sixth crystal was touched.
- Link has returned outside the dungeon, with Turtle Rock available as the next required dungeon.
References for this chapter
Turtle Rock — Complex Machinery, Big Key and Boss
Turtle Rock is the seventh Dark World crystal dungeon in the original North American Super Nintendo release. Before entering, obtain the Ice Rod and Quake Medallion because neither is found inside Turtle Rock. The dungeon requires the Cane of Somaria, Fire Rod, Hookshot, Hammer, Moon Pearl and Magic Mirror. Its major reward is the Mirror Shield, and its boss is Trinexx.
Required preparation: Ice Rod and Quake Medallion
Get the Ice Rod before attempting Turtle Rock. In the Light World, make sure you have the Zora’s Flippers, Bombs and access to Lake Hylia. Travel to the eastern shore of Lake Hylia and enter the small cave there. Inside, place a Bomb against the bombable wall on the left side of the cave. Enter the opened passage and take the chest containing the Ice Rod. Leave with it in your inventory; the Fire Rod from Skull Woods is also required for Trinexx.
Get the Quake Medallion from the Dark World Lake of Ill Omen. You need the Magic Mirror or another established world-transition route, the Flippers to swim through the lake area, and the Hammer to cross Dark World peg barriers on the approach. Enter the Dark World, travel to the northeastern lake corresponding to the Zora region, and swim to the circle of stones in the water. Stand in the center and interact with the water to summon the catfish, who gives you the Quake Medallion. If the pegs block the route, return to the Light World, use the Hammer on them, then cross through a nearby portal and continue in the Dark World.
Do not begin Turtle Rock until both items are secured. The Ice Rod is needed to damage Trinexx’s red fire head, and the Quake Medallion is needed to open the dungeon entrance. Bring the Cane of Somaria, Fire Rod, Hookshot, Hammer, Moon Pearl and Magic Mirror, plus healing and enough magic recovery for repeated Somaria and rod use.
- Ice Rod collected from the bombable cave east of Light World Lake Hylia
- Quake Medallion collected from the Dark World Lake of Ill Omen catfish
- Flippers, Bombs and Hammer available
- Fire Rod, Cane of Somaria, Hookshot, Moon Pearl and Magic Mirror available
- Healing and magic recovery prepared
Reach and open Turtle Rock
Travel to the Light World’s northeastern Death Mountain area. From the mountain path near the Tower of Hera, continue east across the upper plateau until you find the raised area with three large stakes. Use the Hammer on all three stakes. When the warp tile appears, step onto it to reach the corresponding Dark World plateau above Turtle Rock.
The Dark World plateau has a turtle-shaped rock and a medallion symbol. Stand on the symbol and use the Quake Medallion. The turtle’s head opens to reveal the entrance. Enter only after confirming that the Ice Rod and Fire Rod are in your inventory; Turtle Rock does not provide either one.
- All three Death Mountain stakes hammered
- Dark World Turtle Rock plateau reached
- Quake Medallion used on the entrance symbol
- Dungeon entered with both elemental rods
Collect the map, compass and early small keys
In the opening rooms, use the Cane of Somaria on the marked floor tile to create a moving platform. Ride it across the gaps and follow the connected doors toward the upper and eastern sections. Several rooms use platform tracks over lava; create the block only when Link is positioned to ride it, and avoid repeatedly recreating platforms because each use consumes magic.
Use the Fire Rod to light the four torches in the room where the moving platform crosses a large gap. Light them quickly, then take the northern door before the flames expire. Continue through the rolling-bar hazard and collect the dungeon map. Explore the nearby rooms for the compass and small keys, using the crystal switch to change the blue and orange blocks when a doorway is sealed.
Turtle Rock’s route is easier if you treat the large pipe-and-lava chamber as the dungeon’s central junction. When a pipe returns you there, use the map to identify which remaining pipe or door has not been explored instead of spending keys on every side passage.
- Dungeon map collected
- Compass collected
- Four-torch platform puzzle completed
- Early small keys collected without opening unnecessary dead ends
Find the Big Key and Mirror Shield
From the central pipe chamber, take the pipe route that leads through the crystal-switch room and the eastern passage. Defeat or avoid the enemies, change the crystal switch when necessary, and unlock the passage into the next lava section. Follow the pipe that deposits Link beside the Big Key chest, then collect the Big Key.
Return through the pipe network and use the Big Key on the large chest route. The Mirror Shield is Turtle Rock’s dungeon item. In the room before the chest, use the Hookshot to cross the gap to the large chest; do not try to replace this step with a Cane of Somaria platform. The Mirror Shield can block the large laser beams from eye statues when Link faces them.
After obtaining the shield, continue through the upper doors and pipes. Watch for rolling spiked bars, Medusa fireballs and laser eyes. The shield is useful in these rooms, but careful positioning and waiting for a safe opening also work.
- Big Key collected
- Hookshot used to cross to the large chest
- Mirror Shield collected
- Central pipe chamber and remaining locked routes identified
Clear the final Somaria and switch rooms
Continue from the Mirror Shield area through the upper pipe route until you reach the large Cane of Somaria track room. Create the moving platform on the marked tile and guide it along the track to reach the key and switches. The track loops, so wait for the platform to return if it passes a junction; do not create unnecessary replacement platforms.
Use the key and crystal switches to open the northern route. Some passages require changing the switch, crossing a short section, then changing it again from the opposite side. Keep the Mirror Shield facing laser eyes while crossing exposed corridors, and use the Hookshot where the dungeon provides a fixed target across a gap.
Before entering the boss room, restore hearts and magic. If you are low on magic, break pots and use a potion before committing to the final route. The Ice Rod and Fire Rod consume magic, so reserve enough for both heads of Trinexx.
- Final Somaria track room cleared
- Switches used to open the boss route
- Laser and rolling-bar sections crossed
- Hearts and magic restored
Defeat Trinexx and claim the seventh crystal
Trinexx begins with a red fire head, a blue ice head and a central shell. Use the Ice Rod against the red head, then strike that head with the sword while it is vulnerable. Use the Fire Rod against the blue head, then attack it with the sword. Keep moving around the arena to avoid the heads’ elemental attacks and the fire or ice hazards they leave behind.
Once both side heads are destroyed, the shell breaks and Trinexx becomes a long, moving body. Attack the exposed glowing section in the middle of the body with the sword, then move away before the body curves back through the arena. Do not stand in its path or trap Link against a wall.
After the boss falls, collect the Heart Container and touch the seventh crystal. The maiden sequence confirms that Turtle Rock is complete. The seventh crystal removes the final seal needed for the approach to Ganon’s Tower; the Silver Arrows and sword upgrades are separate late-game objectives.
- Red fire head defeated with Ice Rod and sword
- Blue ice head defeated with Fire Rod and sword
- Exposed central body defeated
- Heart Container collected
- Seventh crystal and maiden sequence completed
Before you move on
- The Turtle Rock entrance was opened with the Quake Medallion.
- The Big Key and Mirror Shield were collected.
- Trinexx was defeated and its Heart Container was collected.
- The seventh crystal and maiden sequence appeared.
- All seven crystals are now complete, allowing the main-story route toward Ganon’s Tower.
- The Ice Rod and Quake Medallion remain in the inventory or have been verified as previously collected; neither should be attributed to Turtle Rock.
References for this chapter
- A Link to the Past Walkthrough – Turtle Rock, Zelda Dungeon
- Level 7: Turtle Rock – The Legend of Zelda: A Link to the Past Guide and Walkthrough, GameFAQs
- Turtle Rock Walkthrough – Zelda: A Link to the Past Guide, Zelda Central
- Ice Rod – Zelda Dungeon Wiki
- Nintendo Player’s Guide: The Legend of Zelda: A Link to the Past
Final Preparation — Silver Arrows, Flippers, Shops and Optional Upgrades
Complete the remaining late-game errands before Ganon’s Tower. Confirm that all seven crystal dungeons are finished and all seven maidens have been rescued, obtain the Silver Arrows from the Pyramid Fairy, restore your supplies, and collect the optional sword upgrades if desired. Flippers are not needed to remove the seal at Ganon’s Tower, but they should already be owned for the conventional route through the Ice Palace.
Confirm the story requirements and inventory
Before preparing for the final climb, make sure you have rescued all seven maidens from their crystals: Palace of Darkness, Swamp Palace, Skull Woods, Thieves’ Town, Ice Palace, Misery Mire and Turtle Rock. The Turtle Rock rescue is the seventh and final one. After all seven crystal dungeons are completed, travel to the Dark World Pyramid of Power and approach the sealed tower entrance. The seven maidens will combine their magic to remove the seal blocking Ganon’s Tower, revealing the staircase into the dungeon.
There is no separate purchase, key or second tower-opening flag to activate. The required condition is completion of all seven crystal dungeons and rescue of all seven maidens. If the seal remains, one of those dungeons or crystals has not yet been completed.
Confirm that the Master Sword has been drawn and that the Bow, Moon Pearl and Magic Mirror remain in your inventory. The Hammer, Hookshot, Fire Rod, Cane of Somaria and Titan’s Mitt are also useful during the remaining end-game route and should normally already be available. The Ice Rod is important for the Trinexx battle in Turtle Rock, but it is not needed to open Ganon’s Tower or obtain the Silver Arrows.
The Silver Arrows are the important final weapon preparation. They are required for the intended finish of Ganon’s final phase, while the Tempered and Golden Swords are optional upgrades.
- All seven crystal dungeons have been completed.
- All seven maidens have been rescued, including the maiden from Turtle Rock.
- The Master Sword has been drawn.
- The Bow, Moon Pearl and Magic Mirror are in the inventory.
- The maidens have removed the seal at the Dark World Pyramid of Power.
Verify Flippers and finish the Ice Palace if necessary
If the Ice Palace has already been completed, you should already have Zora’s Flippers. If it remains unfinished, travel in the Light World to the northeastern Zora region and reach King Zora through the water route. Pay 500 rupees to obtain the Flippers. They let Link swim through deep water and are needed for the standard entrance route to the Ice Palace in the original SNES release.
The Waterfall of Wishing near King Zora is optional. With the Flippers, you can visit it for possible equipment upgrades, but those rewards are not required for Ganon’s Tower. There is no Flipper payment or other rupee fee associated with opening the tower itself.
Do not postpone the final preparation because you lack a particular optional fountain reward. The essential check is that the Ice Palace is complete if you are following the normal campaign route, and that all seven maidens have been rescued.
- Zora’s Flippers are owned if the Ice Palace still needs to be completed.
- At least 500 rupees are available before visiting King Zora, if necessary.
- Optional Waterfall of Wishing rewards have been collected only if desired.
Collect the optional Tempered Sword
To obtain the Tempered Sword, travel in the Dark World to the area south of the Village of Outcasts. Lift the heavy dark stones with the Titan’s Mitt and speak to the frog-shaped swordsmith apprentice. Agree to take him back to the smiths.
Use a nearby portal or the Magic Mirror to return to the Light World near the blacksmiths’ house east of Kakariko Village. Bring the frog into the smithy. Leave the building and return after visiting another area; the smiths will then have completed the upgrade. The red-bladed Tempered Sword will be on the counter inside the smithy.
The Tempered Sword is optional. It deals more damage than the Master Sword and makes Ganon’s Tower substantially easier, but you can complete the campaign without it. If you plan to pursue the Golden Sword, obtain the Tempered Sword first.
- The swordsmith apprentice has been brought back to the Light World.
- The red Tempered Sword has been collected from the smithy.
- The optional sword upgrade has not been confused with the required Silver Arrows.
Buy the Super Bomb and obtain the Silver Arrows
After both the Ice Palace and Misery Mire have been completed, return to the Dark World Bomb Shop. It stands where Link’s house is located in the Light World. The shop will now sell a Super Bomb for 100 rupees.
The Super Bomb is carried behind Link rather than stored as a normal inventory item. Carry it from the Bomb Shop to the Pyramid of Power. Avoid attacking, taking damage or entering hazards that cause the bomb to detonate. If it explodes before reaching the pyramid, return to the Bomb Shop and purchase another.
At the Pyramid of Power, take the Super Bomb to the large cracked section on the pyramid’s west side. Place it beside the crack, move away and let it explode. Enter the newly opened chamber and approach the fairy’s pool. Select the Bow when prompted and throw it into the pool. The fairy will return the upgraded weapon as the Silver Arrows.
The Silver Arrows are obtained from the Pyramid Fairy, not from a dungeon chest or a normal shop. Keep them available for the final battle.
- Ice Palace and Misery Mire have both been completed.
- The Super Bomb has been purchased for 100 rupees.
- The cracked west wall of the Pyramid of Power has been opened.
- The Bow has been upgraded to the Silver Arrows.
Optional Golden Sword and final supplies
If you want the strongest sword before entering the tower, return to the opened Pyramid Fairy chamber after obtaining the Tempered Sword. Throw the Tempered Sword into the fairy’s pool. The fairy will return the Golden Sword. This upgrade is optional and does not replace the Silver Arrows; Ganon still requires the appropriate arrow attacks during his final phase.
Before entering Ganon’s Tower, fill at least one bottle with a Red Potion or a captured Fairy. A Red Potion provides deliberate healing, while a bottled Fairy can revive Link after he loses all health. Replenish bombs and arrows from shops or enemy drops, and refill any other bottles you intend to use.
No special rupee total is required once the Flippers and Super Bomb have been paid for. Full hearts and a stocked healing supply are more useful than spending remaining rupees on unnecessary purchases. Save before entering the tower if the cartridge, console or authorized platform supports the normal save function.
Enter Ganon’s Tower with the Silver Arrows, at least one dependable healing bottle and the strongest sword you have chosen to obtain. The next chapter covers the tower, the second Agahnim encounter and Ganon.
- At least one bottle contains a Red Potion or Fairy.
- Bombs and arrows have been replenished.
- The Silver Arrows are in the inventory.
- The optional Golden Sword has been collected if desired.
- The game has been saved before entering Ganon’s Tower.
Before you move on
- All seven crystal dungeons are complete and all seven maidens have been rescued.
- The maidens have removed the seal blocking the entrance to Ganon’s Tower.
- The inventory contains the Silver Arrows and either the Master Sword, Tempered Sword or Golden Sword.
- At least one bottle contains reliable healing or a Fairy.
- Bombs and arrows have been replenished.
- If optional upgrades were chosen, the Tempered Sword was collected from the smithy and the Golden Sword was collected from the Pyramid Fairy.
References for this chapter
- The Legend of Zelda: A Link to the Past - Nintendo instruction manual
- Ganon’s Tower and the Pyramid — the final climb
- A Link to the Past Walkthrough — Return to Death Mountain and Super Bomb
- The Cursed Fairy in the Pyramid of Power — A Link to the Past Walkthrough
- A Link to the Past Walkthrough – Ganon’s Tower
Ganon’s Tower, Agahnim’s Second Battle and Ganon
After all seven maidens are freed, the seal at Ganon’s Tower breaks on Dark World Death Mountain. Obtain the Silver Arrows before committing to the final sequence, climb the tower for the Big Key and Red Mail, defeat Agahnim a second time, then defeat Ganon beneath the Pyramid of Power. The tower and final battle are for the original Super Nintendo release, including its automatic bird sequence after Agahnim’s defeat.
Prepare the final route and obtain the Silver Arrows
Before entering Ganon’s Tower, finish Turtle Rock so all seven maidens are free. The tower stands on the Dark World summit of Death Mountain, at the location corresponding to the Light World’s Tower of Hera. From Turtle Rock, travel west across the mountain path, avoiding or defeating the Lynels, then approach the sealed tower. The maidens will break the seal automatically when you touch the entrance.
Obtain the Silver Arrows before entering the final hole in the Pyramid. After completing Ice Palace and Misery Mire, the Dark World Bomb Shop north of the Swamp Palace sells a Super Bomb. Carry it to the cracked section of the Pyramid of Power’s west side and place it against the wall. Enter the opened chamber and throw the Bow into the Cursed Fairy’s pond. She returns the Bow upgraded to Silver Arrows. This fairy can also upgrade the Tempered Sword to the Golden Sword if you have it.
Fill your hearts and magic before the final sequence. Blue Potions are especially useful for the Fire Rod and torch sections, while fairies or ordinary potions provide emergency healing. The Silver Arrows are not needed for Agahnim, but they are required to finish Ganon.
- All seven maidens have been freed.
- The Super Bomb has opened the Pyramid wall and the Bow has been upgraded to Silver Arrows.
- A usable sword, bombs, Fire Rod, Hookshot, Cane of Somaria, and healing are available.
Reach the Big Key and Red Mail
Enter Ganon’s Tower and take the upper-left staircase from the entrance room. In the next room, lift the pot in the southeast corner for a small key. Continue west, hammer the moles, and push the central block to reveal the switch that opens the west door. In the Hookshot room, grapple across the platforms rather than trying to cross the gaps directly.
Use the crystal switch and the Cane of Somaria to manipulate the blue and orange blocks. In the warp-tile room, use the right-hand tile first, then the bottom-left tile, then the bottom-left tile again. Continue through the northeast warp sequence until you reach the large room with two skull pots. Lift only the upper pot. Light the torch near the upper-right side with the Fire Rod; the invisible walkway appears temporarily. Hookshot to the skull below and cross quickly before the path disappears. Ether can reveal the path again if necessary.
Bomb the cracked floor in the next section and drop into the slippery Armos Knights room. Silver Arrows defeat each Armos Knight in one shot. Go through the opened north door and take the Big Key from the south-central chest. Return to the Armos room, exit west, then climb the stairs back toward the large chest. Push the block aside and collect the Red Mail. Red Mail reduces enemy damage and is optional for progression, but it is the tower’s main defensive reward.
- The Big Key is in the inventory.
- The Red Mail has been collected if you want the tower’s defensive upgrade.
- Do not spend keys on optional map or supply rooms until the required route is open.
Cross the upper tower rooms
Use the Big Key to climb into the upper floors. Hit the crystal switch, push the upper-left block to open the route, and enter the rooms with Red Goriyas. Use arrows on the Goriyas; if Blade Traps interfere, move the nearby statue to block their path. Continue through the Eyegore and switch rooms, then cross the cannonball corridor. The Magic Cape is optional; careful movement is sufficient.
Use Bombos or normal attacks to clear crowded enemy rooms when you have enough magic. In the Lanmolas room, avoid the Medusa statue’s projectiles while attacking the emerging heads. Silver Arrows defeat these Lanmolas quickly, but conserve arrows for Ganon if your supply is low.
The upper floors contain invisible paths and Wizzrobes. Ether temporarily reveals the paths and can clear the Wizzrobes, while the Cane of Somaria can help mark or cross uncertain sections. In the first four-torch room, remove the skull pots, then light the torches quickly with the Fire Rod. In the collapsing-floor room above, light the southeast torch, the southwest torch, and then the two northern torches before the floor gives way.
Defeat the Helmasaurs to obtain another key, bomb the southern cracked wall by throwing a bomb onto the conveyor, and use the crystal switches to reach the key chest. Continue to the second Moldorm battle. Strike its tail and avoid the ledges; if you fall, climb the northeast stairs and return to the arena. After Moldorm is defeated, Hookshot to the chest, push the blocks aside, pass the bumper corridor, and enter the locked boss room.
- Fire Rod or Ether is ready for the invisible paths and torch rooms.
- A key has been saved for the locked route after the conveyor room.
- If Moldorm knocks Link down, use the northeast stairs to return rather than restarting the tower.
Defeat Agahnim for the second time
Agahnim splits into three figures. The darker figure is the real Agahnim. Stand near the center so you can face attacks from either side, but keep moving enough to avoid being cornered. Reflect the large flashing energy orb with the sword so it returns toward the real Agahnim. The reflected shot damages him; sword slashes against Agahnim himself do not.
The smaller blue orbs form a circular attack that should be sidestepped. Do not confuse this attack with the large flashing orb that must be reflected. In this second encounter, Agahnim does not use the first battle’s lightning attack. Continue identifying the dark figure and returning the large orbs until the battle ends.
After Agahnim falls, Ganon emerges and the original SNES game automatically carries Link to the top of the Pyramid of Power using the bird sequence. There is no need to walk back through the tower.
- Reflect the large flashing orbs into the real, darker Agahnim.
- Avoid the ring of smaller blue orbs.
- Do not waste Silver Arrows during this battle.
Defeat Ganon beneath the Pyramid
Before dropping through the hole at the top of the Pyramid, confirm that the Bow has become Silver Arrows and that healing is stocked. Fall through the hole to begin the battle. During the opening phases, attack Ganon with the sword whenever he finishes a teleport or pauses after moving his trident. Avoid the trident as it travels around the room. Later, Ganon releases expanding fireballs that become fire bats; keep moving and sidestep their straight-line paths.
In the next phase, Ganon teleports repeatedly and may create a large flame bat. Strike him quickly after he appears. If he completes the ground-pound attack, one edge of the arena collapses. Repeat the successful sword hits until all four edges have fallen. Falling into the pit sends Link out of the fight and forces a complete restart.
For the final phase, Ganon extinguishes the corner torches and becomes difficult or impossible to see. Relight the torches with the Fire Rod or Lamp. Once the arena is illuminated, strike Ganon with the sword. The hit turns him blue and leaves him vulnerable briefly. Immediately fire a Silver Arrow into him. Repeat the torch, sword, and Silver Arrow sequence four times. If a torch goes out, relight it before attempting the next sword strike.
When the final Silver Arrow hits, Ganon is destroyed and the Triforce appears. Walk into the Triforce to trigger the ending sequence. The campaign is complete when the restored-world ending begins.
- Ganon has been stunned with sword strikes during the torch-lit phase.
- Four successful Silver Arrow hits have been delivered in the final phase.
- The Triforce has been touched and the ending sequence has started.
Before you move on
- All seven maidens have been freed and the seal at Ganon’s Tower has opened.
- The Big Key has been collected and Agahnim has been defeated at the tower’s summit.
- The Silver Arrows have been obtained before the final battle.
- Ganon has been defeated with the torch, sword, and Silver Arrow sequence.
- The Triforce has been touched and the ending sequence is playing.
Optional Completion: Heart Pieces, Tempered and Golden Sword
Use this chapter for optional cleanup after the required Dark World route is open. You can complete these tasks before Ganon’s Tower or return to a save made before the final battle. The original North American Super Nintendo release has 24 Pieces of Heart. Four Pieces of Heart form one Heart Container. The main optional equipment goals are the Tempered Sword, Golden Sword, Silver Arrows, fourth bottle, shield and boomerang upgrades, bomb and arrow capacity upgrades, and the remaining minigame rewards.
Choose a safe cleanup point
The most convenient point is after rescuing all seven maidens and completing both Ice Palace and Misery Mire. At that stage the Dark World Bomb Shop can sell the Super Bomb, the later sword and arrow upgrades are available, and you can reach every important cleanup area. Keep a save before entering Ganon’s Tower or before the final approach to Ganon. The original SNES game does not provide a permanent free-roam state after the ending, so a pre-final-battle save is the reliable file for continued exploration.
For the sword upgrades, obtain the Master Sword, Titan’s Mitt, Magic Mirror and access to the Dark World. For all four bottles, obtain the Flippers before attempting the bottle beneath the bridge near Lake Hylia. The fourth bottle also requires the Dark World chest sequence and access to the desert thief.
- Seven maidens rescued, or a save retained before the final battle.
- Master Sword, Titan’s Mitt and Magic Mirror obtained.
- Flippers obtained for the bridge bottle.
- Ice Palace and Misery Mire completed before purchasing the Super Bomb.
- At least one bottle reserved for a fairy or potion if you plan to continue into Ganon’s Tower.
Collect all 24 Pieces of Heart
Follow this list in order and mark each location immediately. In the Light World, collect the hidden hole in the Lost Woods; the Kakariko Village well; the basement of the former thieves’ hideout in Kakariko; the Kakariko race course reward; the floodgate area south of Link’s House; and the western ledge beside the Sanctuary. In the Desert of Mystery, enter the eastern cave and bomb the wall for the piece. Leave the Desert Palace through its western exterior exit to reach the ledge outside. Near Zora’s Domain, use the route around the waterfall area to collect its piece.
On Death Mountain, collect the piece in the lower cave. After obtaining the Magic Mirror, warp from the Dark World mountaintop to Spectacle Rock and collect the piece on the Light World summit. From the Dark World, use the appropriate warp to reach the Pyramid of Power’s eastern ledge. Dash into the Lumberjacks’ tree after defeating Agahnim. Use the Magic Mirror at the South Hyrule Field ledge, the Graveyard ledge, the Lake Hylia island, the Desert of Mystery ledge, the Death Mountain floating island, and the Turtle Rock exterior ledge. These are separate locations even though several require a Dark World approach and a Light World warp.
The remaining Dark World locations are the Village of Outcasts chest game, the Dark World digging game, the stake area at the Dark World smithy, the Death Mountain lower-cave ledge reached with the Magic Mirror, and the small building west of the Misery Mire entrance. The chest and digging prizes may require repeated attempts; leave and re-enter to reset the minigame rather than assuming the piece has been missed.
- Lost Woods hidden hole.
- Kakariko well.
- Kakariko former thieves’ hideout basement.
- Kakariko race course.
- Floodgate area south of Link’s House.
- Sanctuary western ledge.
- Desert of Mystery eastern cave.
- Desert Palace western exterior ledge.
- Zora’s waterfall area.
- Death Mountain lower cave.
- Spectacle Rock via Magic Mirror.
- Pyramid of Power eastern ledge.
- Lumberjacks’ tree.
- South Hyrule Field ledge via Magic Mirror.
- Graveyard ledge via Magic Mirror.
- Village of Outcasts chest game.
- Dark World digging game.
- Dark World smithy stake area.
- Death Mountain lower-cave ledge via Magic Mirror.
- Lake Hylia island via Magic Mirror; Misery Mire west building; Desert of Mystery ledge via Magic Mirror; Death Mountain floating island via Magic Mirror; Turtle Rock exterior ledge via Magic Mirror.
Collect the four bottles and optional upgrades
Obtain the first bottle from the merchant in Kakariko Village. Enter the Kakariko building through its rear entrance and open the chest for the second bottle. After buying Zora’s Flippers from King Zora, swim under the bridge near Lake Hylia and speak to the man there for the third bottle.
The fourth bottle is not awarded by the smiths. In the Dark World, find the purple chest at the former smithy location and carry it while using the Magic Mirror to return to the Light World. Take the chest to the man in the desert south of the former thieves’ hideout and speak to him; he opens it and gives Link the fourth bottle. This sequence is separate from returning the frog-shaped smith and obtaining the Tempered Sword.
At the Waterfall of Wishing, throw in the Fighter’s Shield for the Red Shield and the Boomerang for the upgraded boomerang. At the Great Fairy fountain near Lake Hylia, pay for bomb and arrow capacity upgrades. These are optional and should not be confused with the 100-rupee Super Bomb sold later by the Dark World Bomb Shop.
- Kakariko bottle merchant.
- Kakariko rear-entrance chest.
- Man beneath the bridge near Lake Hylia.
- Purple chest carried from the Dark World smithy area and opened by the desert chest owner.
- Red Shield, if desired.
- Upgraded boomerang, if desired.
- Bomb and arrow capacity upgrades, if desired.
- Flute and shovel sequence completed, if still unfinished.
Obtain the Tempered Sword
In the Dark World, go to the area corresponding to the Light World blacksmith’s house and lift the large dark rock with the Titan’s Mitt. Speak to the frog-shaped smith, then use the Magic Mirror while he is with Link to return to the Light World. Walk to the blacksmiths’ house in Kakariko Village and hand over the Master Sword.
Leave the house and return after allowing time to pass. Speak to the smiths again to receive the Tempered Sword. If the sword is not ready, leave the screen and re-enter. Confirm that the blade has changed before attempting the Pyramid Fairy exchange.
- Frog-shaped smith recovered.
- Master Sword delivered to the Kakariko smiths.
- Tempered Sword received.
Obtain the Silver Arrows and Golden Sword
After completing Ice Palace and Misery Mire, visit the Bomb Shop in the Dark World, located where Link’s House stands in the Light World. Buy the Super Bomb for 100 rupees and carry it to the cracked wall on the Pyramid of Power. Walk normally while carrying it; avoid dashing, lifting, pushing, or dropping over ledges so it does not detonate before reaching the wall.
Enter the opened chamber and throw the Bow and Arrows into the fairy’s pond. The fairy returns them as Silver Arrows, which are the standard weapon required for Ganon’s final vulnerability. Return to the chamber and throw in the Tempered Sword to receive the Golden Sword. These upgrades are optional for entering Ganon’s Tower, but the Silver Arrows should be obtained before the final battle.
- Ice Palace and Misery Mire completed.
- Super Bomb purchased for 100 rupees.
- Pyramid chamber opened.
- Bow and Arrows upgraded to Silver Arrows.
- Tempered Sword upgraded to the Golden Sword.
Verify the completed file
A Link to the Past has no universal percentage counter for all optional objectives. Verify the file manually. Mark every one of the 24 listed Pieces of Heart, then check the heart meter for the resulting full containers. Inspect the inventory for four bottles, Flippers, Hookshot, Magic Cape, Titan’s Mitt, Hammer, Flute, the intended sword level, Silver Arrows, and any optional shield or boomerang upgrade.
For a campaign-completion file, confirm that all seven crystals and maidens are complete and retain a save before Ganon’s Tower. Enter the tower only after stocking bottles with fairies or potions and confirming the Silver Arrows. Optional cleanup is complete when every checklist entry has been collected directly in-game, not merely when the Golden Sword has been obtained.
- All 24 Pieces of Heart collected.
- All resulting full Heart Containers confirmed on the meter.
- All four bottles verified at their actual locations.
- Tempered Sword and Golden Sword obtained.
- Silver Arrows obtained.
- Desired shield, boomerang, bomb, and arrow upgrades checked.
- All seven maidens rescued.
- A pre-final-battle save retained.
Before you move on
- The 24-item Piece of Heart checklist is complete: Lost Woods hidden hole; Kakariko well; Kakariko former thieves’ hideout basement; Kakariko race course; floodgate area south of Link’s House; Sanctuary western ledge; Desert of Mystery eastern cave; Desert Palace western exterior ledge; Zora’s waterfall area; Death Mountain lower cave; Spectacle Rock via Magic Mirror; Pyramid of Power eastern ledge; Lumberjacks’ tree; South Hyrule Field ledge via Magic Mirror; Graveyard ledge via Magic Mirror; Village of Outcasts chest game; Dark World digging game; Dark World smithy stake area; Death Mountain lower-cave ledge via Magic Mirror; Lake Hylia island via Magic Mirror; Misery Mire west building; Desert of Mystery ledge via Magic Mirror; Death Mountain floating island via Magic Mirror; Turtle Rock exterior ledge via Magic Mirror.
- The heart meter reflects every completed four-piece upgrade.
- The four actual bottle locations are confirmed: Kakariko merchant, Kakariko rear-entrance chest, man beneath the bridge near Lake Hylia, and the purple chest opened by the desert chest owner.
- The Master Sword was tempered by the restored smiths, then exchanged for the Golden Sword.
- The Bow and Arrows were upgraded to Silver Arrows.
- All seven maidens were rescued and a pre-final-battle save remains available.
References for this chapter
- List of Pieces of Heart - The Legend of Zelda: A Link to the Past Walkthrough
- Heart Piece Locations - Zelda: A Link to the Past Guide
- The Legend of Zelda: A Link to the Past - 100% Item Walkthrough - Super Nintendo - By Lando_Kashmir
- The Legend of Zelda: A Link to the Past - Guide and Walkthrough - Super Nintendo - By Kirby021591
- Super Bomb - Zelda Dungeon Wiki
- The Legend of Zelda: A Link to the Past - Nintendo instruction manual
Finishing up
You have defeated Ganon in the final battle and watched the ending sequence that credits Link’s victory and the restoration of peace.
This is the canonical campaign ending for the original North American Super Nintendo release.
Ganon’s Tower, including the second Agahnim encounter, has been cleared and the final boss has been defeated.
You will not be asked to complete additional main-story dungeon objectives after this point.
All seven Dark World crystals and their maidens have been rescued. Their completion removes the seal blocking the entrance to Ganon’s Tower; Agahnim’s second encounter takes place inside that tower.
You have acquired the core campaign items required to reach the final battle: the Master Sword or a later sword upgrade, the Moon Pearl, the required Dark World dungeon items, and the Silver Arrows for the standard final phase against Ganon.
Optional completion is separate: if you intend to collect every Piece of Heart, obtain all bottles and upgrades, or complete the sword and side-activity checklist, follow the optional completion chapter and verify each objective individually.
Choose your next gameSources & references
Our original guide draws on the references below. Check the edition at the top of this page before following controls or unlock requirements.
- The Legend of Zelda: A Link to the Past - Nintendo instruction manual
- A Link to the Past Controls — Zelda Wiki / Neoseeker
- A Link to the Past Walkthrough — Eastern Palace — Zelda Dungeon
- The Legend of Zelda: A Link to the Past — Guide and Walkthrough, Super Nintendo
- A Link to the Past Walkthrough — Zelda Dungeon: Zelda’s Rescue
- Rescuing Princess Zelda Walkthrough — Zelda Central
- Chapter 1: Hyrule Castle — Zelda Universe
- The Legend of Zelda: A Link to the Past Walkthrough — RPGClassics
- The Legend of Zelda: A Link to the Past — Guide and Walkthrough — Eastern Palace — GameFAQs
- Eastern Palace Walkthrough — Zelda: A Link to the Past Guide — Zelda Central
- Desert Palace - The Legend of Zelda: A Link to the Past Walkthrough
- Desert Palace - The Legend of Zelda: A Link to the Past Walkthrough & Guide - GameFAQs
- A Link to the Past Walkthrough - Desert Palace - Zelda Dungeon
- The Desert Palace — Lanmolas & the Power Glove
- Tower of Hera - The Legend of Zelda: A Link to the Past Walkthrough
- A Link to the Past Walkthrough - Tower of Hera - Zelda Dungeon
- Tower of Hera - The Legend of Zelda: A Link to the Past Walkthrough & Guide - GameFAQs
- The Legend of Zelda: A Link to the Past SNES Manual
- Chapter 5: Hyrule Castle Tower
- The Master Sword - The Legend of Zelda: A Link to the Past Walkthrough
- A Link to the Past Walkthrough - Hyrule Castle Tower
- The Master Sword - The Legend of Zelda: A Link to the Past Walkthrough & Guide
- Magic Mirror — Zelda Dungeon Wiki
- Lost Old Man — Zelda Dungeon Wiki
- Climbing Death Mountain — The Legend of Zelda: A Link to the Past Walkthrough & Guide — GameFAQs
- The Legend of Zelda: A Link to the Past/Dark Palace — StrategyWiki
- A Link to the Past Warps — Zelda Dungeon Wiki
- The Legend of Zelda: A Link to the Past — Guide and Walkthrough — GameFAQs
- Palace of Darkness — The Legend of Zelda: A Link to the Past Walkthrough
- A Link to the Past Walkthrough — Dark Palace
- Chapter 6: Palace of Darkness
- Swamp Palace - The Legend of Zelda: A Link to the Past Walkthrough
- Collection Before the Next Pendant - The Legend of Zelda: A Link to the Past Walkthrough
- A Link to the Past Walkthrough - Swamp Palace
- Swamp Palace (A Link to the Past) - Zelda Dungeon Wiki
- Level 2: Swamp Palace - The Legend of Zelda: A Link to the Past Walkthrough & Guide
- Swamp Palace — Hookshot & the water-level puzzle
- A Link to the Past Walkthrough – Skull Woods – Zelda Dungeon
- Level 3: Skull Woods – The Legend of Zelda: A Link to the Past Walkthrough & Guide – GameFAQs
- Zelda 3 A Link to the Past Walkthrough on Super NES: Skull Woods, third crystal
- Skull Woods — Fire Rod & Mothula — Pixel Guides
- Thieves' Town — The Legend of Zelda: A Link to the Past Walkthrough
- Level 4: Thieves' Town — The Legend of Zelda: A Link to the Past Guide and Walkthrough (SNES)
- Chapter 9: Thieves’ Town — A Link to the Past Walkthrough
- Thieves' Town — the Titan's Mitt and Blind the Thief
- A Link to the Past Walkthrough - Ice Palace - Zelda Dungeon
- Ice Palace - Zelda Dungeon Wiki
- Magic Cape - Zelda Dungeon Wiki
- Level 5: Ice Palace - The Legend of Zelda: A Link to the Past Walkthrough & Guide - GameFAQs
- A Link to the Past Walkthrough: Light World Exploration - Zelda Central
- A Link to the Past Walkthrough - Misery Mire - Zelda Dungeon
- Chapter 11: Misery Mire - Zelda Universe
- A Boy and His Flute - The Legend of Zelda: A Link to the Past Walkthrough & Guide - GameFAQs
- Misery Mire — Cane of Somaria & Vitreous — The Legend of Zelda: A Link to the Past
- A Link to the Past Walkthrough – Turtle Rock, Zelda Dungeon
- Level 7: Turtle Rock – The Legend of Zelda: A Link to the Past Guide and Walkthrough, GameFAQs
- Turtle Rock Walkthrough – Zelda: A Link to the Past Guide, Zelda Central
- Ice Rod – Zelda Dungeon Wiki
- Nintendo Player’s Guide: The Legend of Zelda: A Link to the Past
- Ganon’s Tower and the Pyramid — the final climb
- A Link to the Past Walkthrough — Return to Death Mountain and Super Bomb
- The Cursed Fairy in the Pyramid of Power — A Link to the Past Walkthrough
- A Link to the Past Walkthrough – Ganon’s Tower
- Ganon’s Tower – The Legend of Zelda: A Link to the Past Walkthrough
- Level 8: Ganon’s Tower – The Legend of Zelda: A Link to the Past Walkthrough and Guide
- List of Pieces of Heart - The Legend of Zelda: A Link to the Past Walkthrough
- Heart Piece Locations - Zelda: A Link to the Past Guide
- The Legend of Zelda: A Link to the Past - 100% Item Walkthrough - Super Nintendo - By Lando_Kashmir
- The Legend of Zelda: A Link to the Past - Guide and Walkthrough - Super Nintendo - By Kirby021591
- Super Bomb - Zelda Dungeon Wiki
About the game & collecting notes
- Platform
- Super Nintendo Entertainment System
A practical, step-by-step campaign walkthrough for the original Super Nintendo release of The Legend of Zelda: A Link to the Past. Follow the route through the Light World, claim the Master Sword, survive the Dark World dungeons, free the seven maidens and reach Ganon’s Tower to defeat Ganon and see the game’s ending.
Darryl Polo
Darryl Polo loves tinkering with emulation and revisiting retro games. He enjoys exploring how old favorites play on different setups and sharing what he learns along the way. At Joking Joystick, he writes about the games, hardware, and small discoveries that keep the hobby fun.
Our editorial standardsFound a step that needs another look? Help us improve this guide.