
The Legend of Dragoon — PlayStation (USA) Complete Campaign Walkthrough
Complete, step-by-step campaign walkthrough for the original North American PlayStation edition of The Legend of Dragoon. This guide leads you through every required story beat to reach the canonical ending (final battle vs. Melbu Frahma), explains the Dragoon/Additions combat systems, covers party recruitment and required Dragoons, and lists optional completion goals like Stardust and sidequests.


Find a copy
The Legend of Dragoon Sony PlayStation
We may earn a commission if you buy through these links, at no extra cost to you. As an Amazon Associate I earn from qualifying purchases.
Opens retailer search results. Check the model, edition, seller, availability and current price before buying.
Before you begin
This guide is written for the original North American PlayStation release of The Legend of Dragoon.
It walks you from the opening scenes through every required story milestone to the final confrontation with Melbu Frahma, while explaining the game's unique combat systems (Additions and Dragoon transformations) so you can reliably win key battles.
You do not need to have prior experience with timed-input RPG systems to follow this guide, but you should practice Additions early and save often.
Optional content (Stardust entries, sidequests and full equipment sets) are covered separately so you can choose a focused story run or a completionist playthrough.
Set yourself up for the run
Learn Addition timing: Additions are the game's rhythm/timed-input combo system.
Practice the first Addition in low-risk fights until you can reliably land every input and finish the sequence without missing a press.
Understand Dragoon mechanics: Dragoon Spirit activation (transforming) is a limited but powerful resource.
Use transforms to break tough bosses, but plan MP and timing so you have access when bosses enter dangerous phases.
Stock essential consumables: keep potions/hi-potions, ethers or MP-restoring items, and status-heal items.
The guide flags recovery supplies before long dungeons and boss fights.
Save and keep multiple save files: important cutscenes and late-game battles are long; keep a mid-dungeon save slot so you can retry a boss or a sequence without replaying large sections.
Equipment and stat focus: prioritize weapons and armor that raise physical attack and defense early, and switch to accessories that raise survivability or resistances against late-game elemental attacks when they appear.
Party rotation and roles: the party changes across the story.
Learn which characters are available at each milestone, and set roles (physical attacker, healer/support, Dragoon user) accordingly.
Optional collectibles plan: Stardust and several sidequests can be completed during or after the main route at specific towns.
Decide early whether you want a focused story run or a 100% playthrough — the guide marks where Stardust entries and sidequests are optional or required.
Familiarize with boss patterns and recovery: most difficult fights are multi-phase.
If a boss summons status effects or large-area attacks, prioritize defensive buffs and MP reserves so you can recover between phases.
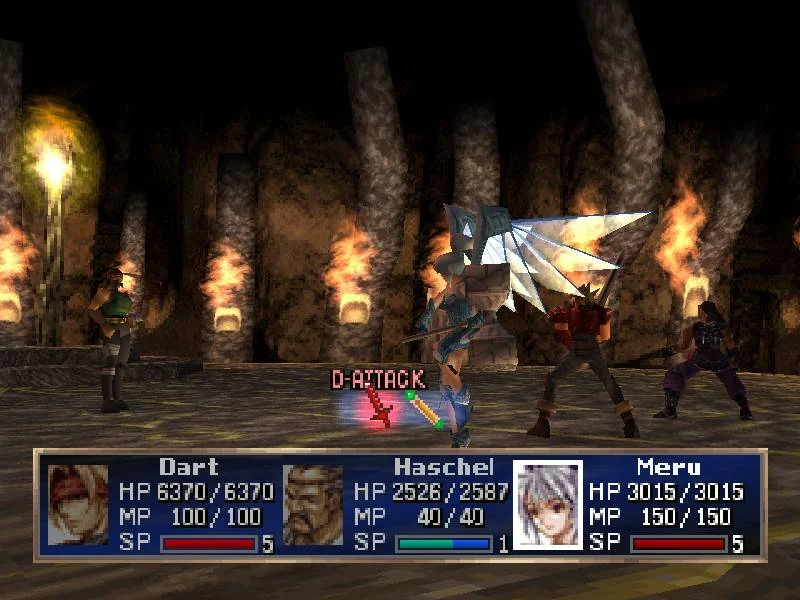
Prologue and Seles (Neet background) — Learn Additions
Follow Dart through the opening forest and the destruction of Seles, defeat the Sandoran Commander, practice the Addition, Counterattack, and Guard systems with Master Tasman, collect the first Stardust and the early Burn Out, then save before leaving for the Forest and Hellena Prison. The original North American PlayStation release does not provide a Seles equipment shop, so Dart keeps his starting equipment through this chapter.
1. Complete the opening forest sequence
The game begins with Dart returning from his five-year search for the Black Monster, the enemy associated with the destruction of Neet. Move through the opening forest and examine the War Bulletin when the route brings Dart to it. Continue along the visible path as the scenes introduce Feyrbrand and the Sandoran soldiers.
The forest is a guided opening area rather than a dungeon requiring route planning. Follow the path through the Feyrbrand sequence until Dart reaches Seles. The warrior who helps Dart during the opening danger is part of the story sequence and does not join the party here.
- Examine the War Bulletin in the opening forest.
- Finish the Feyrbrand sequence and reach Seles.
- Do not search the opening forest for a shop or recruitable companion.
2. Enter Seles and defeat the first Sandoran soldiers
Once Dart reaches the burning village, move down the route into Seles and cross the fence when the game permits it. The first Sandoran encounter is a low-risk introduction to normal attacks and Additions. Select Attack, target a soldier, and watch for the timing prompt during Dart’s Double Slash.
Use this battle to learn the basic rhythm rather than spending items. If a timing input is missed, the attack simply ends without the full Addition result. The soldiers are weak enough that Dart can finish the fight with ordinary attacks if necessary.
After the battle, explore the nearby ruined-village area and open the chest containing a Burn Out. This is an attack item and is optional for the upcoming Commander fight. Save it if you are comfortable attacking normally; use it only if you need extra damage or want to practice the item interface.
- Cross into the ruined village after the Feyrbrand scenes.
- Defeat the first Sandoran soldiers.
- Open the chest containing the Burn Out.
- Practice at least one Double Slash without spending a recovery item.
3. Defeat the Commander and identify the next objective
Continue through Seles until the Sandoran Commander confronts Dart. The Commander is accompanied by two Knights of Sandora. A reliable order is to defeat the two Knights first, then concentrate on the Commander. Dart’s Double Slash is sufficient if the timing is consistent, but ordinary attacks remain a safe fallback.
The Commander can use a Burn Out and a healing item. When both accompanying Knights have been removed, he powers himself up and changes to a stronger physical attack pattern. Keep Dart’s HP high, use Guard when you need recovery or reduced incoming damage, and spend a Healing Potion only when Guarding will not leave enough health for the next exchange.
After the battle, the Commander reveals that Shana has been taken to Hellena Prison. This establishes the required next destination. The fight also awards additional early supplies, including Healing Potions and another Burn Out, so check the results screen before using the item from the chest.
- Defeat both Knights of Sandora and the Commander.
- Use Guard or a Healing Potion if Dart’s health becomes unsafe.
- Confirm that Hellena Prison is identified as Shana’s destination.
- Check the post-battle item rewards.
4. Collect the first Stardust and complete Tasman’s tutorial
After the Commander battle, explore the cemetery in Seles. Examine the gravestones until you find the first Stardust. It is optional for immediate story progress, but collect it if you intend to complete the later Stardust sidequest. Its value is not realized until a later merchant-related event, so do not expect an immediate reward.
Next, find Master Tasman in the village. Tasman is the man in armor who taught Dart swordsmanship. Speak with him and accept his training. His tutorial covers Additions, Counterattacks, and Guarding. Follow the prompts and then practice Dart’s Double Slash until you can complete a short sequence consistently.
During a normal Addition, press the prompted attack button when the moving marker overlaps the stationary marker. If the display signals a Counterattack, use the button shown for that counter prompt instead of assuming every input is the normal attack button. Guarding both reduces most incoming damage and restores part of the character’s HP, making it useful while learning the timing system.
Tasman’s tutorial is missable in the practical sense that he leaves once Dart enters Hellena Prison. Finish the tutorial and any desired practice before departing Seles. You do not need to master Double Slash here; the goal is to become comfortable completing a short Addition and recognizing when to Guard.
- Search the Seles cemetery and collect the first Stardust.
- Speak with Master Tasman.
- Open the Addition, Counterattack, and Guard tutorials.
- Successfully complete Double Slash several times in practice or ordinary combat.
- Finish Tasman’s training before entering Hellena Prison.
5. Check equipment, save, and leave Seles
Open the menu and inspect Dart’s equipment before leaving. Seles has no item shop or weapon shop in the original PlayStation release, so there is no local sword, armor, or consumable upgrade to purchase. Keep Dart’s available starting equipment equipped and verify that no accidental menu change has left him without a weapon or armor.
The first useful buying opportunity comes after leaving Seles, when Dart reaches the Forest and encounters the traveling merchant. That merchant can provide early consumables and also offers an optional tutorial about attack items and elements. The Forest is outside this chapter’s main objective, but it is the next place to prepare before Hellena Prison.
Use the Seles save point after the Commander, cemetery, and Tasman events. Create a normal continuation save and a second backup save in another memory-card slot if available. Then leave Seles and proceed toward the Forest. Do not enter Hellena Prison until you are satisfied with Tasman’s tutorial and your Addition practice, because Tasman is no longer available once Dart enters the prison.
- Inspect Dart’s equipment in the menu.
- Confirm that no Seles equipment purchase is required or available.
- Save after completing the Commander, cemetery, and Tasman events.
- Create a second backup save in a separate slot if possible.
- Leave Seles toward the Forest and Hellena Prison.
Before you move on
- Dart has completed the opening forest and Feyrbrand sequence.
- The first Sandoran soldiers in Seles have been defeated.
- The Burn Out chest has been collected.
- The Commander and his two accompanying Knights have been defeated.
- The first Stardust has been collected from the Seles cemetery, if pursuing optional completion.
- Master Tasman’s Addition, Counterattack, and Guard tutorial has been completed or opened and practiced.
- Dart’s equipment has been checked, with no Seles shop upgrade required.
- A primary save and, if possible, a backup save exist after the Seles events.
- Hellena Prison is confirmed as the next story destination.
Joining Lavitz and Rose — First Dragoon encounters
Beginning after Dart leaves Seles, travel through the Forest and infiltrate Hellena Prison to rescue Shana and the imprisoned Basil knight Lavitz. Return to Bale for King Albert’s scenes and equipment preparation, then reach Hoax before the Sandora assault. The Hoax defense introduces Rose, triggers Dart’s automatic Red-Eyed Dragon Dragoon transformation, adds both early Dragoon Spirits, and sends the party toward the Marshland and Volcano Villude. This chapter covers the first Hellena Prison visit only; the later rescue of King Albert from Hellena occurs after the Hero Competition in chapter 3.
Leave Seles and prepare in the Forest
After the events covered in the previous chapter, leave Seles and follow the world-map path west toward the Forest. The Forest is the required route to the first Hellena Prison. There is no save point or rest area inside it, so save on the world map before entering if you want a fallback.
An item merchant appears near the Forest entrance. Use this opportunity to buy Healing Potions and any other affordable recovery or attack items you need. The merchant also offers an optional tutorial on attack items and elemental items. Take the tutorial if you are still learning the combat system; it is useful practice before the prison route, and the merchant will no longer be available after the party leaves Hellena Prison.
Follow the path through the Forest. Near the beginning, turn back along the upper path to reach the Healing Potion chest. Continue across the fallen tree, then inspect the background trees for the Charm Potion chest. In the maze section, take the lower paths to collect the 20G and Burn Out chests before continuing toward the southern exit. These rewards are optional and are not required for story progress.
Use ordinary battles to practice Dart’s current Addition without forcing risky inputs. Healing by Guarding between encounters is a reasonable way to preserve items, but restore the party with items before entering Hellena if either character is low on HP.
- Leave Seles and enter the Forest from the world map.
- Use the Forest merchant for supplies and the optional attack-item tutorial.
- Collect the Healing Potion, Charm Potion, 20G, and Burn Out if desired.
- Save on the world map before entering Hellena Prison.
- Enter Hellena with Dart healthy and adequately supplied.
Enter the first Hellena Prison
Approach Hellena Prison from the Forest and watch the arrival scene involving the merchant caravan. When the action prompt appears, move around the caravan as directed and press the action button to hide behind it. Dart enters the prison with the delivery instead of crossing the drawbridge openly.
Once inside, Dart is discovered and fights a Hellena Warden. After the battle, speak with the merchant if you need supplies; this merchant is another useful recovery-item stop during the prison sequence. A chest in the nearby upper area contains a Burn Out.
Proceed through the prison’s guard routes rather than trying to force your way through every patrol. Move up the stairs and use the elevator to reach the first prison tower. Cross the wooden bridge and enter the tower where the Basil prisoners are being held. A fight with wardens leads to Lavitz’s introduction and his temporary confrontation with Dart. After the scene, Lavitz recognizes that Dart is trying to rescue Shana and agrees to help.
Lavitz is not rescued from his cell in the same way as Shana. He joins after the prison encounter in the first tower, after which Dart and Lavitz must search the prison together for Shana. Confirm that Lavitz is in the active party before continuing.
- Follow the caravan into Hellena Prison.
- Defeat the first Hellena Warden.
- Use the prison merchant if supplies are needed.
- Reach the first prison tower by the stairs, bridge, and elevator.
- Complete Lavitz’s introduction and confirm that he has joined Dart.
Find Shana’s cell and escape the prison
After Lavitz joins, search the prison for information about Shana. The party learns that she is being held in a separate tower under heavy security. Continue through the corridors and guard patrols until you reach the route leading to the upper bridges.
On the bridge section, inspect the wooden crate to obtain the key to Shana’s cell. Return to the locked entrance of the second prison tower and use the key. Shana is inside the cell. After the rescue scene, she picks up a bow and becomes available as the party’s third character.
Take the return route toward the prison’s ground level. Guards intercept the group, so heal with items during battle when needed instead of allowing Shana to remain near defeat. The escape is not complete when Shana leaves her cell; the party must reach the ground floor and survive the confrontation with Fruegel.
Fruegel fights with supporting wardens. Eliminate the weaker supporting enemies when doing so makes the battle safer, then focus on Fruegel. Use reliable Additions, and spend recovery items freely if necessary. The important objective is to win and trigger the escape scene, not to conserve every item. Fruegel survives the encounter, and the party escapes from Hellena on horseback.
This is the first visit to Hellena Prison. Do not confuse it with the second visit later in the story, when Dart’s group returns after the Hero Competition to rescue King Albert. The second visit uses different prison routes, includes Jiango and the rooftop battle, and is not part of this chapter.
- Learn that Shana is being held in another prison tower.
- Retrieve the key from the crate on the upper bridge route.
- Open Shana’s cell and add her to the group.
- Return to the ground floor with Dart, Lavitz, and Shana.
- Defeat Fruegel and trigger the horseback escape.
- Record that the later King Albert rescue is a separate Hellena visit.
Return to Bale and complete King Albert’s scenes
After leaving Hellena, follow the escape route through the Prairie rather than trying to return through the Forest. Sandora soldiers occupy the Forest during the immediate escape, so the Prairie is the required route back toward Bale.
Enter Bale and proceed through the required scenes at Indels Castle. Lavitz reports the destruction of his knighthood and the events at Hellena to King Albert. The party’s immediate objective then changes from the rescue of Shana to responding to the threatened western fortress of Hoax.
When control returns, use Bale’s facilities before departing. Bale has a weapon shop, item shop, hotel, clinic, save point, and optional town treasures. Replace weak equipment on Dart and Lavitz, equip Shana with the best available weapon if desired, and carry a practical supply of Healing Potions. Do not spend all of your money on optional purchases if you still need basic recovery items.
Bale’s optional Stardust and treasure are separate from the required route. Collect them now if you are pursuing a completion run, but none is needed to unlock Hoax. Save before leaving Bale so you have a clean preparation point if the next sequence goes badly.
- Use the Prairie route after the prison escape.
- Complete the required King Albert and Lavitz scenes in Bale.
- Upgrade available weapons and armor before leaving.
- Purchase recovery items and save in Bale.
- Treat Bale’s Stardust and other treasures as optional.
Enter Hoax and complete the pre-assault preparation
Leave Bale on the world map and follow the route to Hoax, the fortress on Basil’s western frontier. Upon entering, proceed to the headquarters and report to Kaiser. Lavitz discusses the condition of the Eighth Knighthood and the possibility that Sandora’s attack is supported by a Dragon.
Kaiser assigns Dart and Lavitz to night watch while Shana helps with preparations. Before reporting back to Kaiser for the final guard-duty trigger, explore Hoax if you want its optional rewards. The fortress has no normal equipment or item shop, but the hotel restores the party for a fee.
Hoax contains two optional Stardust pieces. Inspect the crate beneath the candle in the headquarters, then inspect the fireplace in the basement of the house above the headquarters. Hoax also has three permanently missable treasure chests. Open the Angel’s Prayer in the upper-right area of the hotel, the Healing Potion in the lower floor of the barracks near the bottom edge of town, and the 20G in the attic of Midwife Gilda’s house before reporting back for guard duty.
Rest at the hotel before the assault if Dart or Lavitz is injured. The Hoax save point becomes available after the attack, above the hotel entrance, so retain your Bale save or another earlier save if you want a pre-assault backup.
- Report to Kaiser at Hoax headquarters.
- Receive the night-watch assignment for Dart and Lavitz.
- Collect both Hoax Stardust pieces if desired.
- Open all three missable Hoax treasure chests before reporting back for guard duty.
- Rest at the hotel and retain a pre-assault save.
Defend Hoax and fight Kongol
When the Sandora attack begins, control Dart and Lavitz during the first defense battle. Defeat the two Sandora Soldiers, then continue into the scripted fight with the Sandora Elite. Use Additions you can complete consistently, and heal rather than risking a knockout merely to finish an attack sequence.
After the Sandora Elite falls, Dart and Lavitz confront Kongol. Shana is not the second combatant in this battle, and Rose has not yet joined the party. Kongol is an Earth-element enemy and can punish failed attacks, so use dependable Additions and recovery items. There is no need to save Dragoon resources for a normal Kongol strategy because the encounter ends through a story event.
Continue the battle until the scripted defeat sequence occurs. Kongol knocks Dart down, and Rose arrives. Rose uses Dart’s father’s memento, which is actually the Red-Eyed Dragon Dragoon Spirit. Dart transforms automatically and defeats Kongol as part of the scene.
Do not attempt to trigger the transformation manually or expect a normal turn to select Dart’s Dragoon Attack. The Red-Eyed Dragon transformation is scripted, and Kongol’s defeat follows within the event. The practical preparation is simply to keep Dart and Lavitz alive until the story sequence begins.
- Defeat the two Sandora Soldiers.
- Defeat the Sandora Elite.
- Enter the Kongol battle with Dart and Lavitz alive.
- Use reliable Additions and preserve enough recovery items to reach the scripted event.
- Allow Rose’s intervention and Dart’s automatic Red-Eyed Dragon transformation.
- Confirm Kongol and the Hoax assault sequence are complete.
Recruit Rose and learn the Dragoon system
After the Kongol sequence, Dart awakens in a Hoax house. Rose explains what happened and joins the playable party. She is a permanent member of the playable roster, although later story scenes can temporarily control or restrict party availability.
The Red-Eyed Dragon Dragoon Spirit is added to Dart’s inventory, and Rose’s Dark Dragon Dragoon Spirit becomes available for her. These Spirits enable the corresponding characters to transform when their Spirit Gauge requirements are met. The Hoax transformation itself is automatic; it is not produced by filling the gauge during the Kongol battle.
Speak with Rose while she is offering instruction and complete the Dragoon tutorial before leaving Hoax. The tutorial covers transformation, Dragoon Attack, Dragoon Magic, and Spirit Points. While transformed, a character uses Dragoon commands rather than ordinary battle commands, so enter a transformation with enough HP to withstand the next enemy turns. Additions remain important because they generate SP in ordinary combat.
Rose’s tutorial is an optional teaching sequence but should be completed for a first playthrough. Once the party leaves Hoax, Rose no longer serves as the available Dragoon instructor in the same way, so use the opportunity before departure.
- Rose has joined the playable party.
- Dart has the Red-Eyed Dragon Dragoon Spirit.
- Rose has the Dark Dragon Dragoon Spirit.
- Complete Rose’s Dragoon tutorial.
- Understand that the Kongol transformation was scripted and not a manual gauge activation.
Save after the assault and leave for the dragon mission
After the tutorial and post-battle scenes, rest at the Hoax hotel if needed. Use the save point above the hotel entrance; this is the first normal Hoax save opportunity after the assault.
Continue the required conversations until a Basil soldier reports that the Seventh Fort in the Marshland has been attacked by a Dragon. The party learns that the Dragon’s nest is near Volcano Villude. Rose explains that Dragoons are needed to defeat it and agrees to accompany Dart, Lavitz, and Shana.
Leave Hoax when the game allows it. The next required route begins with the Marshland and continues toward Volcano Villude and the Nest of Dragon, which is covered in the later dragon-hunt chapters. Do not return to Hellena expecting the next story objective there; the later second Hellena Prison visit occurs only after the Lohan, Shrine of Shirley, and Hero Competition sequence.
The chapter is complete once Hoax has been defended, Rose and both early Dragoon Spirits are available, the Dragoon tutorial has been completed or knowingly skipped, and the party has departed with the Feyrbrand mission established.
- Rest at the Hoax hotel after the assault.
- Make a post-assault Hoax save above the hotel entrance.
- Receive the report about the Seventh Fort and the Dragon near Volcano Villude.
- Leave Hoax with Dart, Lavitz, Shana, and Rose available for the next route.
- Keep the later second Hellena Prison visit reserved for the Hero Competition chapter.
Before you move on
- Dart has left Seles and passed through the Forest.
- The Forest merchant and optional item tutorial were used or deliberately skipped.
- The party reached the first Hellena Prison by following the merchant caravan.
- Lavitz joined after the first prison-tower encounter.
- The key to Shana’s cell was retrieved from the prison bridge route.
- Shana was rescued and joined the party.
- Fruegel was defeated and the horseback escape was completed.
- The party returned to Bale and completed the required King Albert scenes.
- Dart and Lavitz were equipped and supplied before traveling to Hoax.
- Dart and Lavitz completed the Hoax night-watch defense.
- The Sandora Soldiers, Sandora Elite, and Kongol sequence are complete.
- Rose joined the playable party.
- Dart’s Red-Eyed Dragon Dragoon Spirit is available.
- Rose’s Dark Dragon Dragoon Spirit is available.
- Rose’s Dragoon tutorial was completed or intentionally skipped.
- A post-assault save was made at Hoax.
- The party left Hoax with the Dragon mission toward the Marshland, Volcano Villude, and the Nest of Dragon established.
- Optional check: the two Hoax Stardust pieces and all three permanently missable Hoax treasure chests were collected before reporting back to Kaiser.
References for this chapter
- Forest - Legend of Dragoon - Wiki Project
- Hellena Prison - Legend of Dragoon - Wiki Project
- Hoax - Legend of Dragoon - Wiki Project
- Tutorials - Legend of Dragoon - Wiki Project
- The Legend of Dragoon - Spoiler-Free Walkthrough - PlayStation - By Da_Great_SoFaRo
- The Legend of Dragoon - PlayStation official page
Volcano Villude and the Marshlands — Virage, Seventh Fort and the route to the Nest
After the Hoax defense, travel through the Marshlands, decide whether to assist the soldiers at the optional Seventh Fort, and continue into Volcano Villude. The required route includes the first Virage battle, a rescue involving Dabas, and the Fire Bird boss. After Fire Bird falls, Dabas opens a temporary item shop before the party proceeds to the Nest of Dragon. Stock recovery items before leaving Hoax, use the Seventh Fort rewards if desired, and save at the Volcano Villude save point before approaching the Virage.
Leave Hoax and prepare for the Marshlands
After the Hoax defense and the scenes involving Rose, leave Hoax and follow the world-map route toward the Marshlands. Rose is now available as a playable party member. Dart, Lavitz, and Rose make a practical group for this chapter because the Marshlands and Volcano Villude contain several physical fights and the volcanic enemies resist or reduce the usefulness of Dart’s ordinary fire-element attacks.
Heal and save before leaving Hoax. Hoax does not provide a normal equipment or item shop, so finish routine shopping before beginning the route. Carry Healing Potions, at least one revival item if available, and status-recovery supplies. Body Purifiers are useful against Stunned, and Mind Purifiers cover several mental conditions. If you have a Stun Guard, equip it before the Virage approach, but do not treat any single accessory as mandatory.
The Marshlands do not offer a permanent rest area. Enter with the party healed and with enough items to recover between battles. Do not plan around a fixed level requirement or a long grinding session; reliable Additions, sensible healing, and a few Dragoon charges are more useful than pursuing a specific number.
- Confirm Rose is in the playable party.
- Heal and save in Hoax before leaving.
- Carry healing, revival, and status-recovery items.
- Equip current weapons and armor before entering the Marshlands.
Cross the Marshlands and decide whether to assist Seventh Fort
Enter the Marshlands and follow the main path through the roots, branches, and shallow waterways. You will reach a battlefield near the Seventh Fort, where Basil soldiers are fighting Sandoran troops. The game allows you to assist the defenders or continue past the fighting. Assisting is optional for immediate campaign progress; you can proceed toward Volcano Villude without treating the fort as a required boss route.
If you want the optional reward, enter the battle sequence at the fort and defeat the Sandora soldiers until the Commander appears. The soldiers are not individually dangerous, but their thrown Spear Frost attacks can hurt a weakened character. Use normal Additions, guard when necessary, and heal between encounters with items rather than expecting a free recovery. The Commander is the final fight in this optional sequence. Once he is defeated, the fort is no longer occupied by the active enemy group.
Inside the cleared fort, inspect the room near the bed to collect the Marshland Stardust. Speak with the dying head of the Tenth Knighthood to receive the Wargod’s Amulet. The fort also contains recovery items and a Lance for Lavitz; collect what you can safely reach, but do not delay the story for unverified farming or a particular item count. The Wargod’s Amulet is useful but not required to defeat the Virage or finish the chapter.
If you skip the fort, return to the Marshlands fork and take the route toward Volcano Villude. If you complete it, backtrack to the same fork after collecting the reward. Follow the tree-branch path across the marsh until the world-map exit leads to the volcanic area.
- Choose whether to assist Seventh Fort; it is optional for immediate progression.
- If assisting, defeat the Sandora soldiers and Commander without retreating from the sequence.
- Collect the fort’s Stardust if pursuing optional completion.
- Speak with the dying knight to obtain the Wargod’s Amulet.
- Return to the Marshlands route and continue toward Volcano Villude.
Enter Volcano Villude and collect the accessible supplies
Enter Volcano Villude and follow the rocky path into the caves. Fire Bird appears early and drives the party farther into the dungeon, but this is not yet the boss battle. Continue through the volcanic passages, crossing the lava gaps with the area’s automatic jumping movement. Pick up the Spear Frost chest on the route, then collect the Mind Purifier in the following area. At the fork, the room to the right contains a Panic Guard; the other route leads toward the save point. The area also contains a chest with 50G near the final approach.
Most enemies here are fire-aligned. Lavitz and Rose generally provide more dependable ordinary damage than Dart, while Dart can use items, support the party, or build Spirit Points with safe attacks. Spear Frost is especially useful against volcanic enemies and can also contribute damage during the Virage battle. Salamanders can inflict Stunned, so cure the condition promptly or use a protective accessory if one is available.
There is one save point in Volcano Villude, located in the chasm before the Virage. Volcano Villude has no permanent rest area. Heal the party, restore MP with items if necessary, check equipment, and save before moving into the lava field. This save is the correct recovery point if the Virage defeats the party; reload it, replace any unsuitable accessory, and retry with a more conservative healing plan.
- Collect the Spear Frost and Mind Purifier along the main route.
- Take the right-hand fork for the Panic Guard if desired.
- Use the save point before the lava field and Virage encounter.
- Enter the boss area with healing items and status recovery available.
Defeat the first Virage
Continue across the lava field until Shana hears the Virage and runs toward the partially buried creature. The story forces the battle. The Virage has a Head, Body, and Arm component. Defeating the Head or Body ends the encounter; the Arm is an optional target. Destroying the Arm removes one source of damage temporarily, but it can regenerate, so do not spend the whole battle repeatedly attacking it unless its attacks are overwhelming.
A safe approach is to focus Lavitz and Rose on the Body or Head while Dart attacks the Arm briefly or uses Spear Frost and healing items. If you prefer the shortest route, concentrate on the Head or Body and ignore the Arm unless it is creating too much pressure. Keep the party above critical HP because the Virage can inflict disruptive status effects and can strike one character heavily. Guard with a character who is close to defeat instead of risking a failed Addition.
Use Dragoon forms selectively. Rose’s Astral Drain can deal damage while restoring party HP, but transforming removes access to ordinary Guard and Item commands for that character until the Dragoon gauge is spent. Leave at least one character untransformed so that healing and revival remain available. If the party loses, reload the save point before the encounter, change the target priority, equip Stun Guard if appropriate, and conserve Dragoon charges for recovery or sustained damage rather than opening with every transformation.
- Target the Virage Head or Body as the required victory condition.
- Destroy the Arm only if its attacks are causing trouble.
- Keep one character untransformed for items and emergency recovery.
- Use Rose’s Dragoon healing only when it will not leave the party without an item user.
- Reload the pre-Virage save and retry if the party is defeated.
Rescue Dabas, defeat Fire Bird, and continue to the Nest of Dragon
After the Virage battle and its story scenes, return toward the lava lake and follow the path to the next area. You will hear a man calling for help and find Dabas hanging from a cliff. Rescue him to receive the Sapphire Pin. Continue along the volcanic route after the scene.
Near the exit, Fire Bird blocks the route and becomes the chapter’s second required boss. Fire Bird is Fire-elemental. Lavitz’s physical Additions and Rose’s attacks are reliable, while Dart should favor support or non-fire attack items rather than relying on ordinary fire damage. If Fire Bird creates Volcano Balls, destroy them before they can remain on the field long enough to explode. Heal whenever a character is in danger instead of trying to finish the boss with a risky Addition.
After Fire Bird is defeated, Dabas appears again and acts as a temporary item shop. Use this opportunity to buy Healing Potions, Angel’s Prayers, Mind Purifiers, Body Purifiers, and other needed supplies. This shop remains available only for the relevant stretch and is no longer convenient after the party falls through the web in the Nest of Dragon, so make final purchases before leaving the area. Volcano Villude itself has no Stardust.
Leave Volcano Villude through the exit and follow the world map to the Nest of Dragon. The next chapter begins there. Save after returning to the world map if possible, and keep the newly purchased recovery items available for the dungeon ahead.
- Rescue Dabas and receive the Sapphire Pin.
- Defeat Fire Bird after it blocks the exit.
- Destroy Volcano Balls if they appear and threaten the party.
- Use Dabas’s temporary shop before leaving the volcanic route.
- Reach the Nest of Dragon and save at the next available opportunity.
Before you move on
- The party has left Hoax and entered the Marshlands.
- The Seventh Fort was either skipped deliberately or cleared, with the optional Stardust and Wargod’s Amulet collected if desired.
- The party entered Volcano Villude and used the save point before the Virage.
- The Virage’s Head or Body was defeated.
- Dabas was rescued and the Sapphire Pin was received.
- Fire Bird was defeated and the route out of Volcano Villude opened.
- Dabas’s temporary shop was used if additional supplies were needed.
- The party reached the world-map route leading to the Nest of Dragon.
- A current save exists after leaving Volcano Villude or upon reaching the next available save point.
References for this chapter
- Volcano Villude - Legend of Dragoon - Wiki Project
- Lavitz - Legend of Dragoon - Wiki Project
- Stardust – Legend of Dragoon Wiki Project
- The Legend of Dragoon - Guide and Walkthrough - PlayStation - By Gbness
- The Legend of Dragoon - Guide and Walkthrough - PlayStation - GameFAQs
- Marshlands - The Legend of Dragoon Wiki
- RPGClassics.com - Legend of Dragoon Shrine Bosses
Nest of Dragon and Lohan aftermath — rescue and moral choices
Complete the Nest of Dragon sequence, defeat Greham and Feyrbrand, take the poisoned Shana to Lohan, and return to the Nest with a Water Bottle to collect Life Water. Use it to clear the poisoned plant blocking the Shrine of Shirley. The shrine does not provide a Dragoni Plant; after defeating Drake and completing Shirley’s trial, Dart receives the White Silver Dragoon Spirit and carries it back to Lohan. Placing the spirit on Shana cures her and makes her the White Silver Dragoon. The chapter ends with the Hero Competition already started as the next required story objective.
1. Prepare for the first Nest of Dragon visit
Save before entering the Nest of Dragon and restore the party’s HP and MP. The route contains random encounters, optional treasure, a recovery spring, and a save point before the required Greham and Feyrbrand encounter. Carry ordinary healing items and at least one revival item if your inventory permits. Dart, Lavitz, and Rose are the available practical party for this section, and current weapons and armor are sufficient if you have kept them reasonably equipped.
Use Additions that you can complete consistently. A completed normal attack is safer than repeatedly missing a difficult Addition, especially because the boss sequence continues after Greham’s transformation. Shana’s poisoning is a story condition; ordinary status-curing items do not solve it.
- Save before entering the Nest of Dragon.
- Restore HP and MP.
- Equip current weapons and armor.
- Carry healing and revival items.
- Use reliable Additions rather than unfamiliar attacks.
2. Cross the forest and enter the underground Nest
Follow the route through the poisoned forest until you reach the large web stretched across the pit. Before crossing it, take the side path to the Chain Mail chest if you want the optional armor. Compare it with Dart’s and Lavitz’s current armor, then return to the web.
Cross the web and allow the scripted fall into the underground Nest of Dragon. After landing, go to the clear-water spring and use it to restore the party. Treat this as the area’s main recovery point rather than spending consumables immediately. The spring is important because you must explore the lower passages and later return through the area for Life Water.
- Collect the optional Chain Mail if useful.
- Cross the web.
- Allow the fall sequence to occur.
- Use the clear-water spring after landing.
- Avoid unnecessary item use before recovery.
3. Open the underground route and reach the save point
Explore the underground passages by climbing vines, entering holes, and examining the small umbrella-like plants that control the barriers. When one of the plants opens a route, backtrack through the newly accessible passage. The objective is to work upward through the connected paths and reach the upper section containing the save point.
The underground branches contain optional treasure, including a Mind Purifier, Bravery Amulet, Body Purifier, and Spirit Potion. These items are useful but not required to activate the boss sequence. If encounters have reduced your HP or MP, follow the cleared route back to the spring, recover, and return to the upper save point. Save before approaching the boss.
- Use the plants to remove the underground barriers.
- Reach the upper-area save point.
- Collect optional treasure only if it improves your preparation.
- Return to the spring if the party is weakened.
- Save before the boss sequence.
4. Defeat Greham and Feyrbrand
Continue north beyond the save point to trigger the Greham scene. Greham transforms and fights alongside Feyrbrand. This is one required battle sequence: defeating Greham does not finish the encounter, because Feyrbrand must also be defeated before the story can continue.
Both opponents are Wind-aligned. Use dependable physical Additions, Guard when a character is about to receive concentrated damage, and heal before a character reaches critical HP. Keep revival items ready. Dragoon transformations can provide emergency durability or damage, but do not spend every available resource at the start of the sequence.
After the battle, the story scenes show Lavitz confronting Greham and receiving the Jade Dragoon Spirit. Shana then collapses from the poison, and the party decides to take her to Lohan for treatment.
- Save at the upper Nest of Dragon save point.
- Defeat Greham and Feyrbrand in the same required sequence.
- Heal and revive promptly during the battle.
- Watch Lavitz receive the Jade Dragoon Spirit.
- Confirm that Shana collapses before leaving the Nest.
5. Take Shana to Lohan and obtain the Water Bottle
Leave the Nest of Dragon by retracing the route to the world map, then travel to Lohan. Enter the Sanator and speak with the doctor. The doctor explains that Shana has been poisoned and that a rare Dragoni Plant might help, but the route toward the shrine is blocked by a corrupted plant.
Speak with Dabas in Lohan. His information identifies the shrine beyond the troublesome plant and reminds the party that pure spring water from the Nest can be used to clear the obstruction. Before leaving town, find the street vendor on the lower shopping level and interact with him to obtain the Water Bottle. Reject the vendor’s inflated offers during the bargaining sequence; continue refusing until he gives the bottle to the party for free.
Restock recovery items and save before returning to the Nest. The Greham and Feyrbrand battle does not need to be repeated during this visit.
- Bring Shana to the Sanator.
- Speak with the doctor.
- Speak with Dabas.
- Bargain with the street vendor until the Water Bottle is free.
- Restock healing items and save.
6. Collect Life Water and open the Shrine of Shirley route
Re-enter the Nest and return to the clear-water spring in the underground section. With the Water Bottle in the inventory, examine the spring to collect Life Water. This is the required purpose of the second Nest visit.
Leave through the upper route and return to the forest approach. At the fork where the earlier route was blocked, use the Life Water on the corrupted plant. The plant disappears, opening the path to the Shrine of Shirley. Follow the newly opened route to the world map and enter the shrine.
Inside the Shrine of Shirley, follow the corridors and puzzle route to the upper section. The shrine includes statue positioning and minecart-related navigation. Reach the save point before the bandit encounter, then defeat Drake the Bandit. Drake’s bombs and wire can make the fight more dangerous than the earlier Nest battle, so keep HP high and use Dragoon attacks or attack items when the battle becomes difficult.
After Drake, Shirley begins her trial. Do not attack Shirley as though this were an ordinary boss. Choose the following responses when the game presents the questions: Dart and Lavitz fight to protect those they love; Dart left to pursue the Black Monster; after finding the Black Monster, Dart wants revenge; when forced to choose between Shana and revenge, choose Shana; Lavitz identifies his mother as the person most important to protect; Rose says she has never thought about what life means. When Dart is asked whether he still wants to advance despite the ordeals, choose that he will go no matter what.
Shirley then grants Dart the White Silver Dragoon Spirit. The shrine does not contain the Dragoni Plant, and the spirit is not immediately Shana’s equipment.
- Return to the spring with the Water Bottle.
- Collect Life Water.
- Use Life Water on the corrupted plant.
- Enter the Shrine of Shirley.
- Reach the shrine save point.
- Defeat Drake the Bandit.
- Complete Shirley’s trial with the required responses.
- Receive the White Silver Dragoon Spirit.
7. Cure Shana and hand off to the Hero Competition
Leave the shrine and return to the world map. Travel back through the Nest of Dragon using the opened route and continue to Lohan. Enter the Sanator and speak with the doctor while carrying the White Silver Dragoon Spirit.
During the recovery scene, Dart places the spirit on Shana. The spirit reacts to her, cures the poison, and recognizes her as the White Silver Dragoon. You do not need to locate or deliver a separate Dragoni Plant.
Save after Shana wakes. Leave the Sanator and enter the Hero Competition arena in Lohan. Speak with the registration attendant and register Dart. The competition is mandatory campaign progress, not an optional minigame. Dart is the participant; Lavitz and Rose do not enter in his place. Once registration is complete, the next chapter begins with the tournament already underway.
- Return to Lohan with the White Silver Dragoon Spirit.
- Give the spirit to the doctor at the Sanator.
- Watch Shana recover and become the White Silver Dragoon.
- Save after the recovery scene.
- Enter the Hero Competition arena.
- Register Dart with the attendant.
Before you move on
- Greham and Feyrbrand have been defeated.
- Lavitz has received the Jade Dragoon Spirit.
- Shana has been taken to the Sanator in Lohan.
- The doctor and Dabas have been consulted.
- The Water Bottle has been obtained from the street vendor.
- Life Water has been collected from the Nest’s spring.
- The corrupted plant has been cleared.
- Drake the Bandit has been defeated.
- Shirley’s trial has been completed.
- Dart has received the White Silver Dragoon Spirit.
- The spirit has been returned to the Sanator.
- Shana has been cured and recognized as the White Silver Dragoon.
- The party has saved in Lohan and registered Dart for the Hero Competition.
- The Lohan cure and Shrine of Shirley route are complete; the next chapter begins with the Hero Competition already underway.
References for this chapter
Hero Competition, Haschel and the Second Hellena Prison
Begin with Dart already registered for Lohan’s Hero Competition, as established by the preceding chapter. Complete the tournament matches, allow Lloyd’s scripted victory, meet Haschel, and respond to the report that King Albert has been captured. Return to the second Hellena Prison visit with Lavitz, rescue Albert, defeat Jiango and the rooftop enemies, and complete the scenes in which Lloyd kills Lavitz and the Jade Dragoon Spirit passes to Albert. Finish the Seles aftermath and travel through the Forest route to Kazas, the required destination before Black Castle.
Complete the Hero Competition
Enter Lohan’s arena with Dart already registered. Do not look for another registration desk or repeat the earlier tournament setup. Before speaking to the attendant, check Dart’s equipment, make sure a dependable Addition is equipped, and carry Healing Potions plus a Body Purifier or other reliable status recovery if available. A save point is available near the arena between matches.
The opponents appear in this order: Gorgaga, Serfius, Danton, Atlow and Lloyd. Gorgaga opens by poisoning Dart, so remove the poison promptly or use poison protection if you have it. Serfius uses a power-up during the fight; keep attacking, but heal before Dart reaches critical health.
Danton lowers his weapons when defending. Stop attacking during that stance and use Guard until he resumes a vulnerable posture. His all-out attack can reduce Dart to extremely low health, so heal immediately afterward. Atlow’s attack pattern leads into a powerful strike that can inflict Fear. Guarding beforehand or using Fear protection helps, but cure the condition if it lands. The first four matches advance the story even if Dart loses because the opponents are disqualified, but winning provides safer Addition practice.
- Enter the arena with Dart already registered.
- Confirm Dart’s equipment and Addition before the first match.
- Fight Gorgaga, Serfius, Danton, Atlow and Lloyd in order.
- Cure Gorgaga’s poison promptly.
- Guard while Danton is defending.
- Prepare for Atlow’s Fear attack.
Allow Lloyd’s result and recruit Haschel
Lloyd is the final opponent. The match is scripted: Lloyd avoids Dart’s attacks and wins the tournament. Attack or Guard until the scene takes over; do not spend rare items trying to force a normal victory. Lloyd places first, Dart places second and Haschel places third.
After the tournament result, Dart introduces Haschel to the group. Haschel becomes available for the next story section. The arena games and ticket exchange are optional. They may provide useful supplies, but they are not required for campaign progress.
When you are finished with optional arena activities, speak with Lavitz. A wounded Basil soldier arrives and reports that King Albert has been taken prisoner. Lavitz reacts immediately, and Haschel helps restrain him during the following scene. The party’s next required objective is the second return to Hellena Prison.
- Finish Lloyd’s scripted match without wasting rare supplies.
- Complete Haschel’s introduction.
- Treat arena games and tickets as optional.
- Speak with Lavitz after the tournament scenes.
- Watch the wounded soldier report Albert’s capture.
Prepare before leaving Lohan
Save in Lohan before departing. Lavitz is required for the Hellena Prison story sequence, while the remaining party slot can be filled with whichever available character has the best equipment and dependable Additions for you. There is no need to meet a precise level target.
The second Hellena visit has an item merchant and two save points, but no hotel-style rest area. Restock Healing Potions, Angel’s Prayers and Mind Purifiers if your supplies are low. Mind Purifiers remove several troublesome status effects, including confusion and Fear, so they are useful insurance for the prison battles.
The prison contains optional equipment, including the Therapy Ring, Felt Hat, Leather Armor, Thunderbolt, Silver Vest, Pandemonium, Healing Potions, Sachet, Broad Sword and Spear. These items are not required for the story. The Therapy Ring and other chests should be collected before leaving if you want them, because the prison cannot be freely revisited after this sequence.
- Save in Lohan before departure.
- Keep Lavitz in the active party.
- Restock healing, revival and status-recovery items.
- Use the Hellena merchant when needed.
- Collect desired optional equipment before leaving permanently.
Navigate the second Hellena Prison
Travel from Lohan to Hellena Prison. At the entrance, Lavitz crosses the raised bridge and opens the way for the group. After the opening scenes, return to the prison’s merchant before climbing too far if you need supplies.
Use the elevators, ladders and bridges to reach the upper prison routes. Explore the side paths for the Felt Hat and Therapy Ring, then continue through the elevator and rope-ladder sections for the Leather Armor, Thunderbolt, Silver Vest and Pandemonium. These are optional rewards, but this is the last safe opportunity to collect them.
Continue until the wardens spring their trap and drop the party into the lower chamber. Take the Sachet if desired, then speak with Shana. Examine the wall where she notices a draft. This opens the required Jiango encounter. After the battle, follow the newly accessible route upward and collect the Healing Potion if useful. The rooftop area contains the Broad Sword, Spear and money. Use the summit save point before proceeding to Albert’s execution.
- Visit the second-visit merchant.
- Use the elevator and rope-ladder routes to explore the optional chests.
- Reach the wardens’ trap chamber.
- Take the Sachet if desired.
- Speak with Shana and inspect the drafty wall.
- Use the summit save point before the rooftop battle.
Defeat Jiango
Jiango is fought after the party inspects the wall near Shana. The Sachet has a special scripted effect against Jiango and can put him to sleep for several turns, creating a safer opening. Use it if available, then attack with reliable Additions while keeping at least one character ready to heal or revive.
Carry Mind Purifiers and use them quickly if a character becomes confused or suffers another removable status effect. Do not transform the entire party at once if doing so would leave you without a dependable recovery turn. Dragoon forms are useful for damage and survival, but item healing remains important during this encounter.
If Jiango defeats the party, reload the nearest prison save, restock at the merchant and try again. After victory, continue up the opened route. Heal before the ascent and return to the merchant if your supplies are too low for the rooftop fight.
- Use the Sachet against Jiango if available.
- Keep a character available for healing or revival.
- Cure confusion and other removable status effects promptly.
- Avoid spending every recovery item before the rooftop battle.
- Use the prison save point as the main retry point.
Rescue King Albert on the rooftop
From the summit save point, continue to the roof and interrupt Fruegel’s execution of King Albert. The battle is against Fruegel, Rodriguez and Guftas. Focus on the smaller enemies first if their attacks or status effects are causing immediate trouble, then concentrate on Fruegel once they are defeated. If one target is creating a more urgent threat, adjust the order rather than following a rigid sequence.
Fruegel uses powerful physical attacks, so keep the party above critical health and preserve one character’s turn for Healing Potions, Angel’s Prayers or Mind Purifiers. Use reliable Additions and Dragoon transformations when they improve survival or provide a safe damage window. Avoid transforming the whole party if you will need immediate item healing.
After the battle, the story continues automatically. Lloyd appears, takes the Moon Gem from Albert and kills Lavitz with the Dragon Buster. Lavitz’s Jade Dragoon Spirit then transfers to King Albert. These scenes are mandatory and must play after the rooftop victory.
- Save immediately before the rooftop battle.
- Defeat Rodriguez and Guftas before focusing fully on Fruegel when practical.
- Keep recovery items available throughout the fight.
- Watch Lloyd take the Moon Gem.
- Confirm Lavitz’s death scene and Albert’s receipt of the Jade Dragoon Spirit.
Finish the Seles aftermath and reach Kazas
After the rooftop sequence, the group returns to Seles with Albert. Allow the post-battle conversations to finish and follow the scene directions before leaving. The party must establish its decision to confront Emperor Doel before the next route opens.
When control returns, leave Seles and follow the southwest world-map route through the Forest passage toward Kazas. This is the route to the next story area and is not the later Forest of Winglies sequence.
Kazas surrounds Black Castle and is the next required destination. Save and resupply in town before entering the castle. New weapons, armor and recovery items are available there. Any Stardust or optional equipment in Kazas is separate from the chapter’s required progression. The next chapter begins with the Black Castle route, so do not enter until you are ready to continue.
- Complete the Seles post-battle conversations.
- Confirm the decision to confront Emperor Doel.
- Leave Seles through the southwest route.
- Travel through the Forest passage to Kazas.
- Save and shop in Kazas.
- Treat Black Castle as the next chapter’s objective.
Recover after failure and verify completion
After a Jiango defeat, reload the nearest prison save, use the merchant to restore your supplies and keep one character assigned to healing and revival. After a rooftop defeat, reload the summit save instead of repeating the entire prison route. If a party member is struggling with survivability or status recovery, replace the optional third member before trying again.
For the Hero Competition, remember that the Lloyd match is scripted. Against Danton, stop attacking while he is defending. Against Atlow, prepare for Fear. In Hellena, use the wardens as safe Addition practice before triggering Jiango, then rely on the summit save for repeated rooftop attempts.
This chapter is complete when the tournament has concluded, Haschel has been introduced, Albert has been rescued, Jiango and the rooftop enemies have been defeated, Lloyd has killed Lavitz, Albert has inherited the Jade Dragoon Spirit, the Seles aftermath has finished and the party has reached Kazas.
- Hero Competition completed through Lloyd’s scripted victory.
- Haschel introduced and available.
- Jiango defeated.
- Fruegel, Rodriguez and Guftas defeated.
- King Albert rescued.
- Lavitz’s death scene completed.
- Jade Dragoon Spirit transferred to Albert.
- Seles aftermath completed.
- Kazas reached and saved as the next destination.
Before you move on
- The chapter began with Dart already registered for the Hero Competition.
- Dart completed the tournament through Lloyd’s scripted victory.
- Haschel was introduced and became available.
- King Albert was confirmed captive and then rescued from Hellena Prison.
- Jiango was defeated during the second Hellena visit.
- Fruegel, Rodriguez and Guftas were defeated on the rooftop.
- Lloyd took the Moon Gem and killed Lavitz.
- The Jade Dragoon Spirit transferred to King Albert.
- The Seles aftermath scenes completed.
- The party traveled through the southwest Forest route.
- Kazas was reached and saved as the next destination.
Black Castle — Kazas resistance and the end of Disc 1
Begin after the second Hellena Prison sequence, the return through Seles, and the transition to Kazas. Follow Popo’s resistance route into Black Castle, collect the three colored stones, defeat Kongol, defeat Emperor Doel in both battle forms, and finish the Disc 1 story scenes. Twin Castle is not part of this chapter; it occurs later on Disc 2 during the Fletz arc.
Enter Kazas and prepare for the resistance route
After the second Hellena Prison events, return through Seles and continue to Kazas. This chapter begins with that transition complete: you should already have rescued King Albert, recruited Haschel, and finished the Seles scenes that send the party toward the occupied town. Enter Kazas, inspect the available shops and houses, and restore the party before beginning Popo’s route.
Dart is required as the protagonist. Albert is available after the Hellena sequence, while Rose, Haschel, and Shana are also available according to the current story roster. Choose the two additional active fighters whose equipment is strongest and whose Additions you can perform consistently. Kongol is not yet a regular selectable party member; the Black Castle encounter is still a boss battle against him.
Upgrade weapons and armor if the Kazas shops offer improvements, and carry a useful reserve of Healing Potions, Angel’s Prayers, and status-recovery items. The castle includes a recovery point and an item shop, but entering with sufficient supplies reduces the risk of having to repeat the route. Save in Kazas before speaking to Popo, preferably in a separate slot from the previous story save.
- The second Hellena Prison and Seles transition are already complete.
- Reach Kazas and restore the party.
- Choose Dart plus two currently available companions.
- Upgrade equipment and stock healing and revival items.
- Save before starting Popo’s resistance route.
- Do not plan on using Kongol as a normal party member yet.
Find Popo and start the concealed route
Explore the occupied part of Kazas and speak with the residents before entering the house where Popo is hiding. Popo asks questions to determine whether the group can be trusted. Use the responses that identify Albert and support the New Serdio Party’s cause; the commonly documented sequence is the third answer, the third answer, and the second answer.
After Popo accepts the group, use the save point if needed and finish shopping before agreeing to leave. When Popo asks whether you are ready to enter Black Castle, choose the affirmative option only after your equipment and supplies are set. This confirmation begins the one-way infiltration sequence.
Follow Popo through the concealed underground passage. The route uses ropes, ladders, and several changes in elevation. When the path divides, continue through the connected cavern route toward the castle rather than returning to Kazas. A small treasure detour is optional; collect it if you want the item, but it is not required for the story.
At the end of the passage, approach the castle entrance and defeat the guards blocking the way. Once inside Black Castle, ordinary navigation replaces the underground rope route. The castle is a one-time story dungeon, so optional treasure should be collected before defeating Doel if you want to preserve it.
- Speak with Popo in the correct house.
- Answer Popo’s questions so he accepts the party.
- Finish shopping and saving before confirming readiness.
- Follow the underground ropes and ladders to Black Castle.
- Defeat the guards at the castle entrance.
- Treat optional Black Castle treasure as missable after the story sequence ends.
Navigate Black Castle and collect the three stones
Black Castle is divided among research rooms, elevators, galleries, construction areas, and waste-disposal platforms. If a door or elevator appears inactive, search the nearby room for a control panel, researcher, chest, or usable item rather than assuming the route is blocked.
Use the castle’s recovery point when necessary. The white-flame recovery point restores the party, but resting also restores enemies in the surrounding area. It is best used before a difficult section or after a failed attempt, not as a reason to repeatedly clear every room.
Progress through the research areas and collect the Red Stone and Blue Stone from their respective chest and laboratory routes. You will also obtain Magic Oil, which operates certain elevators. Apply it to the elevator controls that require fuel, then use the connected platforms to reach the lower and upper sections.
One route crosses a disposal area with moving platforms and falling rocks. Move across when the path is clear. Falling is not a permanent failure: the lower area reconnects to the main dungeon, and you can collect the nearby items before climbing back toward the working route. Continue through the research rooms, including the encounter with the researcher who changes form, and take the Blue Stone from the nearby chest if you have not already done so.
Reach the training and command sections to obtain the Yellow Stone. After the soldiers and commander scenes, return to the upper route. Visit the father near the statue if desired, then place the Red, Blue, and Yellow Stones into the altar at the statue’s base. This opens the route toward the upper chamber and the next boss sequence.
- Use Magic Oil on elevators that require it.
- Collect the Red Stone.
- Collect the Blue Stone.
- Obtain the Yellow Stone from the command section.
- Use the recovery point before the boss approach if needed.
- Treat the falling-rock section as a route hazard, not a game-over.
- Place all three stones into the statue altar.
Save and defeat Kongol
After opening the route with the three stones, continue upward until you reach the save point near Father Faza. Save before proceeding. This is the last convenient checkpoint before the first required boss encounter, so do not bypass it while carrying damaged characters or depleted supplies.
Kongol blocks the route to Doel and must be defeated. His physical attacks can heavily damage one target, so watch individual HP rather than waiting until the whole party is injured. Use your most reliable Additions, Guard when a character is in immediate danger, and spend healing items freely when they prevent a knockout.
Magic and Dragoon attacks can help, but do not exhaust every resource merely to shorten this fight. You still have Emperor Doel immediately afterward, and the party can return to the save point after Kongol’s defeat. Once the battle ends, collect nearby treasure if desired, then go back to the save point and restore the party.
Use the opportunity to change the active party. Select characters with dependable Additions, suitable equipment, and enough survivability for a two-part confrontation. There is no requirement to keep the same companions who fought Kongol.
- Save at the upper-floor checkpoint before Kongol.
- Defeat Kongol before entering the throne-room sequence.
- Heal and revive the party after the battle.
- Collect optional nearby treasure if desired.
- Return to the checkpoint and adjust the active party before Doel.
Defeat Emperor Doel and Dragoon Doel
Enter the throne room after the Kongol battle and watch the confrontation with Emperor Doel. The encounter begins with Doel in human form and continues after his transformation into Dragoon Doel. Dart remains required, but the other two active characters can be selected according to their equipment, Addition reliability, and ability to survive heavy attacks.
During the human-form portion, use normal attacks and Additions while preserving enough healing and Dragoon resources for the transformation. Do not spend every transformation immediately if doing so leaves the party unable to respond with ordinary items. Keeping at least one character in human form is useful because that character can continue using recovery items while the others attack or transform.
When Doel becomes a Dragoon, prioritize survival over maximum damage. Heal before a character is within knockout range, revive fallen members promptly, and Guard when a heavy attack would otherwise leave a character exposed. Use Dragoon abilities when they improve damage or defense, but do not allow the party’s MP and item supply to disappear without a plan for the remaining turns.
If the party is defeated, reload the Kazas or Black Castle save, replace an Addition you cannot perform consistently, restore equipment, and use the white-flame recovery point before trying again. Reserve more healing items and Dragoon resources for Dragoon Doel rather than spending them all on the first portion.
After Doel is defeated, allow the complete story sequence to play. Haschel receives the Violet Dragoon Spirit during the post-battle events. This is a story reward and does not remove him from the roster or force a permanent party change.
- Enter the throne room only after saving near the boss approach.
- Preserve recovery items for Dragoon Doel.
- Keep a human-form character available for item use when practical.
- Heal and revive early during the transformed phase.
- Reload and reconfigure if the party is defeated.
- Watch the complete post-battle sequence until Haschel receives the Violet Dragoon Spirit.
Confirm the end of Disc 1 and continue toward Fletz
The Black Castle chapter is complete after Emperor Doel has been defeated and the full post-battle story sequence has finished. Save at the first safe opportunity after the transition. Keep a separate post-Black Castle save so that the Doel battle remains available on another file if you want to replay it.
No playable character is permanently lost during this chapter. Albert remains available, Haschel remains available, and other recruited characters remain part of the story roster even when the active battle group changes. Kongol’s appearance as a Black Castle boss should not be mistaken for his later recruitment event.
The next major arc is not Twin Castle. Continue into the later Disc 2 Fletz route, where the party investigates Fletz, travels through Donau and the Valley of Corrupted Gravity, reaches the Home of Gigantos and the Barrens, and eventually returns to Twin Castle. Keep those events separate from Black Castle’s Disc 1 progression.
- Kongol has been defeated.
- Emperor Doel has been defeated in human and Violet Dragoon forms.
- The entire post-Doel story sequence has played.
- Haschel has received the Violet Dragoon Spirit.
- A post-Black Castle save has been created.
- No playable character has been permanently lost.
- The next chapter route leads toward Disc 2 and Fletz, not directly into Twin Castle.
Before you move on
- The party reached Kazas after completing the second Hellena Prison and Seles transition.
- Popo accepted the party and led it through the concealed route.
- Black Castle was entered through the underground passage.
- The Red, Blue, and Yellow Stones were collected and placed into the statue altar.
- Kongol was defeated before the throne-room battle.
- Emperor Doel was defeated in both battle portions.
- The complete post-Doel scenes finished.
- Haschel received the Violet Dragoon Spirit.
- A post-Black Castle save was created.
- The next objective is the later Disc 2 Fletz route, with Twin Castle reserved for that later chapter.
Fletz to Furni — Twin Castle, Valley route, Prison Island and sea travel
Disc 2 begins in Fletz and follows the required route through Donau, the first Twin Castle visit, the Valley of Corrupted Gravity and Home of Gigantos. After recovering Dart’s Red Dragon Dragoon Spirit, return through the Valley and Barrens to Fletz for the second Twin Castle operation. Rescue the real Princess Emille through the Moon Tower painting, stop the ceremony and defeat Lenus. Travel to Donau to board the Queen Fury, complete the Phantom Ship sequence, then continue through Lidiera, Fueno, the Undersea Cavern and Prison Island. The Prison Island battle awards Meru the Blue Sea Dragoon Spirit. Finish in Furni, obtain the boat license, complete the mayor’s required scenes and open the Evergreen Forest route. Stardust, equipment, Phantom Ship rewards and Kamuy remain optional objectives.
1. Begin in Fletz and prepare for the Donau route
When Disc 2 begins and Dart regains control in Fletz, explore the town before leaving. Visit the weapon, armor, item and accessory shops, then speak with the townspeople around the bridges, bar and upper streets to advance the investigation into the bandits and the royal family. The early Fletz conversations establish that passage toward the Valley of Corrupted Gravity requires permission from King Zior.
Fletz contains optional Stardust in several shops and field objects. Record anything you collect, but do not delay the story because none of the Fletz Stardust is required for the route. Rest at the inn or save point, stock healing items, Angel’s Prayers and status recovery, and leave through the Barrens toward Donau. The story returns to Fletz after Donau, so this is not your last chance to shop there.
- Investigate the current Fletz story scenes.
- Upgrade outdated equipment for the active party.
- Stock healing items, Angel’s Prayers and status recovery.
- Record Fletz Stardust separately if pursuing optional collection.
- Travel through the Barrens to Donau.
2. Complete Donau’s investigation and recruit Meru
In Donau, investigate the bandit problem and enter the mayor’s house. Give the mayor’s household the information or letter received during the town scenes, then speak with the mayor about the bandits’ connection to the Valley of Corrupted Gravity. Before leaving, search the mayor’s house if you are collecting Stardust.
As you leave the mayor’s area, Meru appears with the bandits. Complete the conversation and allow her to join the party. She is available as a normal fighter at this point, but she does not yet have the Blue Sea Dragoon Spirit. Do not expect Meru to transform during the Valley or Home of Gigantos sections.
Return to Fletz through the Barrens. Donau’s Stardust and other town items are optional. Meru’s recruitment and the mayor’s information are the required objectives.
- Complete the mayor’s Donau scenes.
- Allow Meru to join the party.
- Collect Donau Stardust only if desired.
- Return through the Barrens to Fletz.
- Prepare for the royal and castle sequence.
3. Obtain the royal pass during the first Twin Castle visit
Back in Fletz, follow the current story direction to Fester. His connection to Princess Lisa provides the party with access to Twin Castle. Enter the castle when the story opens the route, follow Fester to King Zior and receive the pass for the Valley of Corrupted Gravity.
The first Twin Castle visit is an investigation and preparation sequence, not the later painting rescue. After meeting King Zior, complete the dinner and overnight scenes. The party learns about Princess Lisa, Princess Emille and the coming ceremony involving the Moon Dagger. Explore the accessible castle areas after the story permits it, including the training room and the purple-doored room if you are collecting optional items or Stardust.
When the morning scenes are complete, leave Twin Castle with the royal pass. Save and restock in Fletz before entering the Valley. The painting rescue, Princess Lisa’s active assistance and the Lenus battle do not occur during this first visit.
- Meet Fester and enter Twin Castle.
- Speak with King Zior.
- Receive the pass for the Valley of Corrupted Gravity.
- Complete the dinner and overnight scenes.
- Collect accessible Twin Castle items or Stardust if desired.
- Save and restock in Fletz before entering the Valley.
4. Cross the Valley of Corrupted Gravity and defeat the Virage
Travel from Fletz through the Barrens to the guarded entrance of the Valley of Corrupted Gravity. Present the royal pass to open the gate. Inside, use the floating rocks, gravity lights and platform routes to move between ledges. When Dart is walking on the underside of a platform, make small movements and wait for a safe landing instead of rushing across the gap.
Use the recovery point in the valley before the final area. It restores the party and removes status problems, making it the best place to recover after the earlier platform sections. A save point is located before the required Virage encounter. The valley itself does not contain a Stardust checkpoint that must be added to the optional collection list.
At the Virage, focus on the head as the battle objective. Destroying every body section is not required. Heal before characters fall, use the save point if you need to retry and continue north after the victory. Follow the exit to the Home of Gigantos.
- Present the royal pass at the valley gate.
- Use the recovery point before the final approach.
- Save before the Virage encounter.
- Target the Virage head as the required objective.
- Exit toward the Home of Gigantos after victory.
5. Clear the Home of Gigantos and recover Dart’s Red Dragon Dragoon Spirit
Enter the Home of Gigantos and follow the route through the fortress. Continue past the arrow traps and blocked gates until the story leads to Gehrich, Mappi and Kongol. Choose the party for the required battle, then defeat Gehrich and Mappi. Concentrate damage on one target at a time and heal whenever the enemy pressure makes an Addition unsafe.
After the battle, complete the scenes involving Lynn. Search the battle area near the torch if you want the optional Stardust, then descend to Lynn’s cell. Free Lynn and continue to the lower section where the Red Dragon Dragoon Spirit is being held. Inspect the spirit and recover it for Dart. This is required progression; it is not an optional upgrade.
Leave the Home of Gigantos and return through the opened route toward the Barrens and Fletz. Do not board the Queen Fury yet. The next mandatory objective is the second Twin Castle operation.
- Defeat Gehrich and Mappi.
- Complete Kongol’s story entrance and Lynn’s rescue.
- Recover Dart’s Red Dragon Dragoon Spirit.
- Collect the Home of Gigantos Stardust if desired.
- Return through the opened route toward Fletz.
6. Return to Fletz for the required second Twin Castle rescue
After leaving the Home of Gigantos, travel back through the Valley of Corrupted Gravity and the Barrens to Fletz. The ceremony is now underway or about to begin. Enter Twin Castle; the gate is no longer handled like the first visit, and the party is drawn into the castle’s emergency sequence. This return is required and must occur before the Queen Fury can be boarded.
Proceed toward the throne-room area, then follow the story direction to Princess Lisa’s Star Tower. Navigate past the replacement guards by moving when their backs are turned. If Dart is caught, the game returns him to an earlier position, so wait for a clear opening rather than trying to force the route. Speak with Princess Lisa at the top of the Star Tower. She explains that the Princess Emille present at the ceremony is an impostor and helps the party search for the real Emille.
From Lisa’s tower, cross to the Moon Tower, where the false Emille’s room is located. Avoid the guards and climb to the top. Inspect the large painting in the room to enter the magical space behind it. Find the pulsing light near the party and activate it to create the bridge to the real Princess Emille. Cross the bridge, wake Emille and return with her toward the throne room.
Bring the real Princess Emille into the Chamber of the Sun and report to King Zior. The false princess reveals herself as Lenus. Defeat Lenus. After the battle, Lenus escapes with the Moon Dagger, but the story then authorizes the Queen Fury pursuit. The first castle visit did not contain this painting rescue; do not leave Fletz after Home of Gigantos without completing these events.
- Return from Home of Gigantos through the Valley and Barrens to Fletz.
- Enter Twin Castle during the ceremony sequence.
- Speak with Princess Lisa in the Star Tower.
- Enter the Moon Tower and inspect the painting in Emille’s room.
- Activate the pulsing light and rescue the real Princess Emille.
- Return Emille to the throne room and report to King Zior.
- Defeat Lenus at Twin Castle.
- Confirm that the Queen Fury pursuit has been announced.
7. Travel to Donau and board the Queen Fury
After Lenus escapes with the Moon Dagger, leave Fletz and travel to Donau. The Queen Fury is reached through Donau’s harbor, not from a Fletz castle dock. Go to the harbor and speak with the appropriate crew member or Commodore Puler when the story permits boarding.
Before triggering the ship’s departure, search the Queen Fury for its two optional Stardust pieces: one is in the lower area near Kongol, inside or near the lantern, and the other is in the passage leading toward Albert’s room and the kitchen, near the pipe. These are optional and do not affect the ship’s route.
The Queen Fury begins with a sequence in which the party members are controlled separately. Follow the ship’s required conversations: Shana searches for Dart, Dart searches for Rose, Rose speaks with Haschel, Haschel searches for Kongol, Kongol looks for Albert, Albert finds Meru and Meru returns to Dart. Finish the chain by returning to Rose. The Phantom Ship then appears and damages the Queen Fury.
- Travel from Fletz to Donau after defeating Lenus.
- Board the Queen Fury through Donau’s harbor.
- Collect the two Queen Fury Stardust pieces if desired.
- Complete the required party-member search sequence.
- Trigger the Phantom Ship appearance.
8. Complete the Phantom Ship and reach Lidiera and Fueno
After the Queen Fury is damaged, the party boards the Phantom Ship. Follow the required ghost-crew scenes through the ship. Search the cabins and corridors, speak with the captain’s ghost when the route directs you there and obtain the key needed to open the final locked section. The Phantom Ship has no Stardust, but it contains optional equipment and a chest-code sequence.
If pursuing the optional Phantom Ship rewards, obtain the chest passwords before defeating the ship’s final boss. The chest sequence can provide status-protection accessories, a Talisman and an Ultimate Wargod. These rewards are useful but not required for the campaign. Equip status protection against instant death or disabling effects if available, especially for the undead encounters.
Complete the Phantom Ship boss and the following scenes. Dart and Rose are separated from the rest of the party and arrive in Lidiera. Follow Pete and his dog to the village, collect the optional Stardust in the largest house if desired and leave through the opened route. The party eventually reaches Fueno. In Fueno, restock and follow the harbor, hotel and reunion scenes until the party learns that the route to Prison Island passes through the Undersea Cavern.
- Complete the Phantom Ship’s ghost and captain scenes.
- Obtain the ship key and clear the locked final section.
- Collect optional Phantom Ship equipment before the final boss if desired.
- Reach Lidiera after the sea sequence.
- Complete Lidiera’s required village scenes.
- Reach Fueno and learn the Prison Island route.
9. Open the Undersea Cavern route through Lidiera
If you did not already complete the Lidiera sequence, return there from the available sea route and use the town’s boat to reach the mayor’s area. Speak with the mayor and choose the conversation that asks to see the monster. A villager then opens the nearby gate.
Follow the route to Pete’s house and enter the cliff-wall opening. Collect the available healing supplies if desired, then operate the crank or valve that lowers the water in the Undersea Cavern. Without this Lidiera action, the cavern remains flooded and the Prison Island route is not available.
Return to the Undersea Cavern and proceed through the newly opened passages. Search for chests if you want equipment or attack items, but preserve healing supplies for the Prison Island sequence. Save at the cavern’s save point before entering the final area.
- Speak with Lidiera’s mayor.
- Ask to see the monster and wait for the gate to open.
- Reach Pete’s house through the opened route.
- Lower the Undersea Cavern’s water level.
- Enter the cavern and save before the Prison Island approach.
- Stock fire-element attack items and strong healing if available.
10. Complete Prison Island and defeat Lenus and Regole
Continue through the Undersea Cavern to Prison Island. The Prison Island boss sequence is separate from the earlier Lenus battle at Twin Castle. At Twin Castle, Lenus fought alone and escaped with the Moon Dagger. On Prison Island, Lenus returns with the dragon Regole, and both must be defeated.
Regole is normally the first target because its group attacks can create the greatest immediate danger. Use dependable physical Additions, fire-element attack items and regular healing. Keep one character ready to use a Healing Breeze, Healing Fog, Angel’s Prayer or status recovery instead of attacking when the party is in danger. After Regole falls, continue damaging Lenus while maintaining full or near-full party health.
Dragoon transformation is not mandatory. On later hardware, emulation or compatibility software, some players encounter a freeze at the experience screen after this fight when a character transformed during battle. If that occurs, retry the battle without transforming. This is a practical compatibility recovery measure, not a rule of the original PlayStation release.
If the party loses, return to Fueno, restock and save before re-entering the cavern. Re-equip defensive accessories, replace depleted healing items and use the same Regole-first priority on the next attempt.
- Reach Prison Island through the Undersea Cavern.
- Distinguish the Twin Castle Lenus battle from the Prison Island Lenus and Regole battle.
- Target Regole first unless healing is urgently required.
- Maintain healing while fighting Lenus after Regole falls.
- Retry without Dragoon transformation if a compatibility-related victory-screen freeze occurs.
- Defeat both Lenus and Regole.
11. Receive Meru’s Blue Sea Dragoon Spirit and return to Fueno
After the Prison Island battle, complete the scenes involving Lenus, Regole, Lloyd and the Moon Dagger. Meru receives the Blue Sea Dragoon Spirit during this post-battle sequence. This is required story progression. The spirit is not awarded in Furni, Evergreen Forest or the Forest of Winglies.
Leave Prison Island by retracing the route through the Undersea Cavern and return to Fueno. Speak with the harbor contacts and board the Queen Fury when prompted. The available travel and the next story destination are controlled by the current scenes, so follow the harbor dialogue rather than expecting unrestricted ship movement.
Before leaving the region, verify that Meru has the Blue Sea Dragoon Spirit in the Goods inventory. Meru can now transform and begin gaining Spirit Points, although using her is optional for immediate story progress.
- Complete the Prison Island post-battle scenes.
- Confirm Meru received the Blue Sea Dragoon Spirit.
- Return through the Undersea Cavern to Fueno.
- Board or continue with the Queen Fury as directed.
- Travel onward toward Furni.
12. Reach Furni, obtain the boat license and complete the mayor sequence
After the Queen Fury travel sequence, reach Furni and explore the canal town. Go to the save-point area and speak with the boat-rental attendant. Answer the conversation as required; the attendant recognizes Dart and provides the boat license. The license is obtained from this attendant, not from the mayor or a harbor merchant.
Use the boat to reach the accessible shops and upper canal routes. Furni contains two optional Stardust pieces. One is in a dead-end room in the house near the Queen Fury dock. The other is in Teo’s house: go upstairs to the top of the slide, inspect the wall or shelf to open the lower gate, slide down and inspect the container or snowglobe-like object in the storage area.
Take the boat to the mayor’s house and complete the required scenes involving Teo, Fa and the town’s situation. Stay through the overnight sequence. Afterward, the route toward Evergreen Forest opens. Restock before leaving, especially Depetrifiers, Angel’s Prayers and general healing items.
- Reach Furni after the Queen Fury route.
- Obtain the boat license from the attendant in the save-point area.
- Collect the two Furni Stardust pieces if desired.
- Use the boat to reach the mayor’s house.
- Complete the mayor’s required scenes and overnight sequence.
- Save and stock Depetrifiers, Angel’s Prayers and healing items.
13. Open Evergreen Forest and keep Kamuy optional
Leave Furni through the newly opened route to Evergreen Forest. Save in the first accessible area. The forest’s required path leads toward Deningrad and does not depend on defeating Kamuy.
Collect the optional forest equipment if desired, including the Destone Amulet, Body Purifier and Depetrifier. Evergreen Forest has no Stardust checkpoint in this section. Follow the route to the scene involving Teo and the hunters. Kamuy then carries Teo away, opening the optional pursuit.
Kamuy is optional. If you pursue the side event, follow Kamuy through the forest, defeat it with physical Additions and regular healing, then return to Furni and speak with Harris for the optional reward. If you skip Kamuy, continue through the forest toward Deningrad. Skipping the wolf does not block the main campaign or the next chapter.
- Save at the first Evergreen Forest save point.
- Collect optional forest equipment if desired.
- Open the route toward Deningrad.
- Mark Kamuy and the Teo-Harris sequence separately from required progress.
- If pursuing Kamuy, defeat it and return to Harris in Furni.
Before you move on
- The first Fletz and Twin Castle sequence is complete and the royal pass for the Valley of Corrupted Gravity has been obtained.
- The Valley Virage has been defeated.
- The Home of Gigantos sequence is complete and Dart has recovered the Red Dragon Dragoon Spirit.
- The party has returned to Fletz through the Valley and Barrens.
- Princess Lisa has been met in the Star Tower during the second Twin Castle visit.
- The real Princess Emille has been rescued through the Moon Tower painting and returned to the throne room.
- Lenus has been defeated at Twin Castle and the Queen Fury pursuit has been announced.
- The Queen Fury has been boarded through Donau and the Phantom Ship sequence is complete.
- Lidiera’s mayor sequence has lowered the Undersea Cavern water level.
- Prison Island has been reached through the Undersea Cavern.
- Lenus and Regole have been defeated on Prison Island.
- Meru has received the Blue Sea Dragoon Spirit.
- Fueno, Lidiera, Queen Fury and Furni Stardust have been collected only if pursuing optional collection.
- Furni’s boat license and mayor sequence are complete.
- The Evergreen Forest route toward Deningrad is open.
- Kamuy is marked separately as optional, with Harris visited only if that sidequest was completed.
References for this chapter
- The Legend of Dragoon - Guide and Walkthrough - PlayStation - GameFAQs
- RPGClassics.com - The Legend of Dragoon Shrine Walkthrough - Disk 2 Part 1
- RPGClassics.com - The Legend of Dragoon Shrine Walkthrough - Disk 2 Part 2
- The Legend of Dragoon FAQ/Walkthrough - Neoseeker Walkthroughs
- The Legend of Dragoon - PlayStation official page
Forest of Winglies — Deningrad crisis, Meru’s homeland and the route to the Forbidden Land
Begin at the end of the Evergreen Forest route from the previous chapter. Travel to Deningrad, investigate the Divine Tree and the Dragon Campaign in the church and library, then follow the story through Meru’s first visit to the Forest of Winglies. The Divine Dragon breaks free, flies over Deningrad and causes limited damage before the party is summoned to the Crystal Palace. After the palace scenes, Shana is drawn to the former Wingly sealing chamber and the White Silver Dragoon Spirit transfers to Miranda. Shana remains behind in Deningrad while the party returns through Evergreen Forest for the later Forest of Winglies visit. There, complete the required Guaraha, Bardel and Ancestor Blano events and use Blano’s transport to reach Kadessa, the Forbidden Land. This chapter does not include the later destruction of Deningrad after Kadessa; that belongs to the Dragon Block Staff and Divine Dragon chapter.
Leave Evergreen Forest and enter Deningrad
Start after the preceding Evergreen Forest objective has been completed. From the area where the party dealt with the earlier forest events, return through the southern route and leave the forest for the world map. Travel to Deningrad. This is the first Deningrad visit in this sequence, before the party has obtained the Dragon Block Staff and before the city is devastated by the Divine Dragon.
Save on the world map or at the town facility before beginning the investigation. The party will soon be moved through several story scenes, but there is no mandatory boss fight during this opening visit. Do not treat the later ruined-city visit as part of this opening route.
- Leave Evergreen Forest through the route leading to the world map.
- Travel to Deningrad.
- Save before beginning the city investigation.
- Confirm that the city is still intact; the later ruined Deningrad sequence has not happened yet.
Investigate the Divine Tree and the Dragon Campaign
Enter the church through the northeast exit of Deningrad. Speak with the appropriate church attendant and choose the option to learn about the Divine Tree. Watch the explanation, then speak with the black-robed man near the front of the church before leaving. These conversations establish the local information needed for the next story scenes.
Return to the main city area and use the northwest exit. Enter the library through the second door on the right. Speak with the people gathered there and inspect the available information until the party’s investigation advances. Continue speaking with the librarian when the story directs you to him. The resulting scenes provide information about the ancient Wingly civilization and Melbu Frahma, then shift briefly to Rose in Neet and Meru’s first trip toward her homeland.
- Visit the church through Deningrad’s northeast exit.
- Ask about the Divine Tree.
- Speak with the black-robed man before leaving the church.
- Enter the library through the northwest side of town.
- Talk with the people in the library.
- Speak with the librarian when the investigation points to him.
- Allow the Rose and Meru story scenes to begin.
Complete Meru’s first Forest of Winglies visit
When control changes to Meru, follow the route into the cave and use the teleporter. Continue into the next area. The Bardel brothers confront her, and the scene establishes the hostility Meru faces from some of the Winglies. Do not confuse this short, story-controlled visit with the later explorable Forest of Winglies section covered below.
After the confrontation, leave by the same route. Meru returns to the party’s story sequence in Deningrad. The party does not obtain Meru’s Blue Sea Dragoon Spirit here; that spirit was acquired earlier after the Lenus battle on the Disc 2 route.
- Control Meru during the first visit.
- Enter the cave and use its teleporter.
- Advance to the Bardel confrontation.
- Leave through the route by which Meru entered.
- Do not search this first visit for the later forest Stardust or shops.
- Remember that Meru’s Blue Sea Dragoon Spirit was obtained after Lenus, not here.
Witness the Divine Dragon escape and flyover
After the Meru scene, control returns to the main party in Deningrad. Leave the immediate area as the story directs. A cinematic shows the Divine Dragon breaking free of its restraints, followed by the party witnessing the ground shaking and the dragon flying over Deningrad. This is the initial escape and flyover sequence. The city suffers limited damage during this event, but it is not yet the later destruction that follows the party’s return from Kadessa.
Continue through the automatic scenes until the party is reunited with Meru and the Sacred Sisters request an audience. The party’s status as Dragoons becomes part of the discussion, and the need for the Dragon Block Staff is established. Meru identifies the Forest of Winglies as the place connected with the staff, opening the next route.
- Watch the Divine Dragon break free.
- Complete the initial Deningrad flyover sequence.
- Allow the party to reunite with Meru.
- Proceed when the Sacred Sisters request the party’s help.
- Confirm that the Dragon Block Staff is now the objective.
Go to the Crystal Palace and transfer the White Silver Dragoon Spirit
Enter the Crystal Palace from the northern part of Deningrad. Follow the palace route to the throne room and complete the audience with Queen Theresa, Miranda and the other Sacred Sisters. The discussion confirms that the Divine Dragon threatens Mille Seseau and that the party must seek the ancient Wingly weapon that can weaken it.
After the palace conversation, Shana becomes separated from the group. Return through the palace’s audience-hall area and locate her in the northeastern chamber or adjacent former sealing-room route indicated by the story. Shana has been drawn toward the spherical object associated with the old Wingly sealing chamber. Watch the scene in which the White Silver Dragoon Spirit leaves Shana and chooses Miranda. Miranda then becomes the new White Silver Dragoon and joins the active party.
When the scenes finish, visit Shana at the hotel as directed. She is unable to continue and remains in Deningrad. Miranda is the replacement for the party’s White Silver Dragoon, not an additional White Silver Dragoon user. Shana’s story equipment and Dragoon abilities do not remain available through Shana after this transfer.
- Reach the Crystal Palace throne room.
- Complete the audience with Queen Theresa and the Sacred Sisters.
- Find Shana after she becomes separated from the group.
- Watch the White Silver Dragoon Spirit transfer to Miranda.
- Confirm Miranda has joined as the White Silver Dragoon.
- Visit Shana before leaving Deningrad.
- Leave Shana behind as required by the story.
Return through Evergreen Forest to the later Forest of Winglies visit
Leave Deningrad after the farewell scenes and return to Evergreen Forest. Follow the route back toward the northern part of the forest. If you want the optional Stardust in Neet, take the side route before continuing; it is not needed for the story. Otherwise, stay on the upper route around the mound and continue north.
At the forest’s northern dead end, Meru reveals the hidden entrance. She opens the magical boundary and the party enters the Forest of Winglies. This is the later, fully explorable visit after the Crystal Palace transfer. Save at the forest’s save point before exploring the settlement.
- Leave Deningrad after Shana remains behind.
- Return through Evergreen Forest.
- Collect the optional Neet Stardust if desired.
- Reach the northern dead end of Evergreen Forest.
- Allow Meru to open the hidden Wingly entrance.
- Save after entering the later Forest of Winglies visit.
Enter the settlement and complete the required local events
At the entrance, proceed through the settlement until you reach the Wingly near the save point. Speak with him and use the transport to reach the upper level. This transport is required to access the main settlement buildings.
Enter the main building and visit Meru’s parents in the northwest room if you want the optional family scene. Then continue toward the area with the two teleporters. Use the left teleporter to reach the shops. Replenish healing and revival supplies if necessary; Healing Fog, Healing Breeze and Angel’s Prayer are useful before Kadessa, while Mind Purifier and Body Purifier are situational. Equipment purchases are optional and should be judged against the gear already equipped.
From the shop area, take the left exit or teleporter route to Guaraha’s room and speak with him. Search the upper-right shelf in the room for the optional Stardust. Return to the central teleporter area afterward.
- Speak with the Wingly beside the save point.
- Use the transport to reach the upper settlement.
- Visit Meru’s parents if desired.
- Reach the two-teleporter area.
- Visit the shops and restock if needed.
- Speak with Guaraha.
- Collect the optional Stardust from the upper-right shelf in Guaraha’s room if desired.
View the optional Archangel scene and find the second forest Stardust
From the central settlement area, follow the upper-right route toward the Archangel statue. Meru can explain the statue’s significance there. This is optional and does not replace any required conversation with Guaraha or Ancestor Blano.
Return to the central teleporter area and take the other teleporter toward the Bardel route. In the following section, inspect the dark pillar with green lights near the route below the healing area. The second Forest of Winglies Stardust is hidden in that pillar. Collecting it is optional and does not affect the Bardel event or access to Kadessa.
- Reach the Archangel statue if the optional scene is wanted.
- Return to the central teleporter area.
- Take the teleporter leading toward the Bardel route.
- Inspect the dark pillar with green lights below the healing area.
- Collect the optional second Forest of Winglies Stardust if desired.
Resolve the Bardel confrontation
Continue through the route and use the northern teleporter into the pink-lit room. The Elder Bardel confronts the party over the death of his sister. This is a scripted story confrontation rather than a normal boss battle. Dart automatically responds with his Red-Eyed Dragoon power when Bardel attacks, and the younger brother’s intervention ends the sequence.
Do not spend healing items or attempt to win through ordinary attack commands during this scene. Once control returns, leave the room and continue toward the upper section. If the sequence appears to stop, move out of the room and follow the nearby Wingly’s directions; the event advances through the next story scene rather than through a conventional victory screen.
- Enter the pink-lit room through the northern teleporter.
- Allow the Elder Bardel scene to play.
- Do not treat the confrontation as a standard boss battle.
- Leave the room after the scripted event.
- Continue toward the upper settlement.
Reach Ancestor Blano and teleport to Kadessa
In the outdoor section after the Bardel event, speak with the nearby Wingly and use the transport to reach the upper level. Follow the route into Ancestor Blano’s building. Heal at the nearby healing facility before the final conversation if the party needs it.
Speak with Ancestor Blano. He explains that the Dragon Block Staff is in Kadessa, the Forbidden Land and former royal capital of the Winglies. After the conversation, speak with him again and confirm that the party is ready to proceed. Blano activates the transport and sends the party to Kadessa.
Complete the optional forest checks before confirming readiness if you want them: Meru’s parents, the Archangel scene, Guaraha’s Stardust and the Stardust in the pillar. Once the teleport activates, the Forest of Winglies chapter is complete. The next chapter begins inside Kadessa, where the party must recover the Dragon Block Staff.
- Use the Wingly transport after the Bardel scene.
- Reach Ancestor Blano’s building.
- Heal before leaving if needed.
- Speak with Blano about the Dragon Block Staff.
- Speak with Blano again.
- Confirm readiness.
- Allow Blano to teleport the party to Kadessa.
- Begin the next chapter inside the Forbidden Land.
Before you move on
- The party left Evergreen Forest and entered intact Deningrad.
- The church investigation about the Divine Tree was completed.
- The library investigation and librarian scenes were completed.
- Meru’s first short visit to the Forest of Winglies occurred.
- The Divine Dragon broke free and flew over Deningrad during the initial crisis.
- The party reached the Crystal Palace and completed the audience with Queen Theresa and the Sacred Sisters.
- The White Silver Dragoon Spirit transferred from Shana to Miranda.
- Shana remained behind in Deningrad.
- The party returned through Evergreen Forest and entered the later explorable Forest of Winglies.
- The Wingly transport near the forest save point was used.
- The Guaraha interaction occurred.
- The optional parent and Archangel scenes were viewed if desired.
- The optional Stardust in Guaraha’s room and the pillar near the Bardel route were collected if desired.
- The Elder Bardel scripted confrontation occurred.
- The party reached Ancestor Blano and learned that the Dragon Block Staff is in Kadessa.
- The party spoke with Blano again, confirmed readiness and was teleported to Kadessa.
- The next chapter can begin inside the Forbidden Land.
- sources_typed_note_replaced_by_structured_field_only_use_urls_returned_by_search_tool_in_source_pairs_original_urls_preserved_in_urls_below;_this_string_is_not_instructional_content
References for this chapter
- The Legend of Dragoon - Game Script - PlayStation - By Shotgunnova
- The Legend of Dragoon - Guide and Walkthrough - PlayStation - By MotherKojiro
- The Legend of Dragoon — Guide and Walkthrough by DXie
- Deningrad | The Legend of Dragoon Wiki
- Forest of Winglies | The Legend of Dragoon Wiki
- Forest of Winglies - Legend of Dragoon - Wiki Project
- Chapter 3: Fate & Soul - The Legend of Dragoon Walkthrough & Guide
Forbidden Land, Deningrad and Mountain of Mortal Dragon — Dragon Block Staff and Divine Dragon
Begin after Ancestor Blano sends the party toward Kadessa, the ruined Wingly capital also called the Forbidden Land. Clear the seal and teleporter route, defeat S Virage, then defeat Grand Jewel and obtain the Dragon Block Staff. After leaving Kadessa, witness the destruction of Deningrad, pursue the Divine Dragon to the Mountain of Mortal Dragon, and continue through Kashua Glacier, Windigo, Flanvel Tower, Snow Field and the required Vellweb transition to Emperor Diaz. Lloyd takes the Divine Dragoon Spirit after the Divine Dragon battle; neither that spirit nor the Dragon Buster becomes immediate party equipment.
Kadessa entrance, seals and teleporters
After Ancestor Blano’s teleport, enter Kadessa and follow the main route through the ruined Wingly capital. Kadessa has no shop, but it does have a healing pad and a save point near the early part of the dungeon. Use both before committing to the deeper route, and heal again whenever the path returns you to that area.
Continue through the ruin areas and teleporter rooms until you reach the section containing the marked seal positions. Approach each active marker and press the action button when prompted. Enemies can interrupt your progress, so restore the party before activating the final marker. The barrier does not open after a single activation; complete the required seal sequence before moving on.
The later route uses moving platforms and teleporters. Take the accessible platforms upward, then use the teleporter network to reach the upper passage. Power Up, Mind Crush and the other Kadessa chests are optional rewards. If a platform seems to lead nowhere, inspect the stationary platforms and teleporters around the room edges rather than attempting to cross the gaps directly.
- Blano’s teleport has sent the party toward Kadessa.
- The marked seals have been activated.
- The barrier route has opened.
- The moving-platform and teleporter section has been crossed.
- The party has reached the route leading toward S Virage.
S Virage and the approach to Grand Jewel
Continue through Kadessa until the scripted S Virage encounter begins. Use the nearby healing pad and save point first if you have returned to that area. S Virage presents the familiar Virage structure with a head, body and arm. Watch the Lives display and keep the party healthy while choosing whether to focus on the head or reduce the encounter through the available body parts.
Do not leave every character at critical HP as the Lives count approaches its final stage. Use Guard, healing items or recovery magic before the final exchange, because the encounter can punish a party that tries to finish it while already weakened. Dragoon forms are optional; ordinary Additions and attack items are sufficient if your party is in good condition.
After S Virage is defeated, continue through the remaining teleporters and corridors. The next major encounter is Grand Jewel. Heal, restore status conditions and review your inventory before entering the staff chamber. Bring revival items, healing items and status recovery, since Kadessa has no shop.
- The party has used the Kadessa healing and save facilities before the encounter.
- S Virage has been defeated.
- The party has continued beyond the S Virage area.
- The route to the Dragon Block Staff chamber is open.
Grand Jewel and the Dragon Block Staff
Approaching the staff triggers the Grand Jewel battle. Grand Jewel is Earth-aligned and can punish careless Dragoon use. Fight mainly in human form with Additions you can complete consistently. Attack items are useful if your party is having difficulty dealing reliable damage.
If a Dragoon is present during its turn, Grand Jewel can activate the Dragon Block Staff. While that effect is active, offensive Dragoon actions become extremely inefficient and the transformed characters become much more vulnerable. Human-form Additions are the dependable choice. A Dragoon transformation can still be used for a healing or defensive spell when necessary, but avoid spending the party’s Spirit Points on prolonged offensive transformations while the staff is active.
After Grand Jewel falls, the party obtains the Dragon Block Staff, listed in the inventory as the Dragon Blocker. Confirm that it is present before leaving the room, then follow the exit route. Do not expect the Divine Dragon here; that battle takes place later at the Mountain of Mortal Dragon. The Dragon Buster is also not obtained as usable party equipment in Kadessa.
- Grand Jewel has been defeated.
- The Dragon Block Staff has been obtained.
- The item appears in the inventory as the Dragon Blocker.
- The party has begun the exit route from Kadessa.
- The Divine Dragon and Dragon Buster have not been incorrectly recorded as Kadessa rewards.
Exit Kadessa and witness the destruction of Deningrad
Continue through the exit route after obtaining the Dragon Blocker. The party leaves Kadessa before the next major story event begins. Follow the route back toward Deningrad and allow the required story scenes to play.
Enter the destroyed city and proceed to the Crystal Palace. Explore only far enough to complete the required survivor and palace scenes. Optional searches for Stardust or equipment in the ruined city do not affect campaign progress. When the party is directed to pursue the Divine Dragon, leave through Evergreen Forest and follow the route toward the Mountain of Mortal Dragon.
The mountain has no shop, so use the Deningrad visit to check equipment and recovery supplies before departing. Save before entering the deeper mountain route, and keep a secondary save if you intend to return later for optional content.
- Kadessa has been exited after defeating Grand Jewel.
- The Deningrad attack has occurred after the Kadessa sequence.
- The Crystal Palace scenes are complete.
- The party has left through Evergreen Forest.
- The Mountain of Mortal Dragon route is open.
Mountain of Mortal Dragon and the Divine Dragon
Enter the Mountain of Mortal Dragon and follow the main upward route through the dragon remains and volcanic areas. Equipment chests such as the Giganto Armor, Dragon Helm and other supplies are optional, but the Dragon Helm can be useful for the upcoming fight. Continue until you reach the save point between the volcanic vents. Heal, save and review your active party, armor and revival supply before proceeding.
The Divine Dragon battle includes the Divine Dragon, Divine Ball and Divine Cannon. At the start of the battle, Dart uses the Dragon Block Staff and it shatters. Its effect weakens Dragoon offense and defense for the encounter, so rely primarily on human-form Additions, attack items and careful healing. Transform only when a healing or defensive spell is worth the increased risk.
The Ball and Cannon can produce the most dangerous attacks, so remove them before committing to an extended exchange with the main body. Either support target can be handled first. Keep enough HP to survive the next area attack, revive important attackers or healers immediately, and avoid spending every recovery item before the support parts are destroyed. Once both parts are gone, finish the Divine Dragon with consistent Additions and attack items.
After the Divine Dragon is defeated, Lloyd appears, claims the victory and takes the Divine Dragoon Spirit. The spirit is not added to Dart’s inventory or assigned to a party member. The Dragon Buster is likewise not obtained as usable party equipment after this battle.
- The mountain save point has been used.
- The Dragon Block Staff has been activated and shattered.
- Divine Ball has been defeated.
- Divine Cannon has been defeated.
- The Divine Dragon has been defeated.
- Lloyd has taken the Divine Dragoon Spirit.
- The Dragon Buster has not been recorded as party equipment.
Pursuit of Lloyd and Kashua Glacier
After the Divine Dragon battle, return through the mountain and complete the required Lloyd scene. Leave the mountain, cross Evergreen Forest and return to Deningrad. Enter the Crystal Palace and go to the throne-room area. The party learns that Lloyd has taken Queen Theresa to Flanvel Tower in the Kashua Glacier.
Travel southwest from Deningrad to Kashua Glacier. The peddler brothers provide the next practical shopping opportunity. Restore healing and revival supplies, buy status recovery if needed and save before taking the lower glacier route. The glacier contains a Heat Blade chest in its upper section; collect it if available and equip it to Dart if its Fire property benefits your current setup.
Continue through the slippery ice route and descend toward the Windigo area. Prepare before the boss, because the glacier has no free healing rest area.
- The post-battle Lloyd scene has completed.
- The party has returned to the Crystal Palace throne room.
- Queen Theresa’s abduction and Flanvel Tower destination are established.
- Kashua Glacier has been reached.
- Supplies have been restored at the peddlers.
- The Heat Blade has been collected or deliberately left as an optional reward.
Windigo, Flanvel Tower and the Vellweb transition
Windigo uses its body, Snow Cannons and exposed Heart mechanics. If a party member is trapped inside Windigo’s rib cage, avoid attacks that would also damage the trapped character unless you are deliberately accepting that risk. Guard, heal the free characters and wait for the captive to be released. When the Heart is exposed, continue attacking it without wasting more resources than necessary.
After Windigo is defeated, follow the route north to Flanvel Tower. Use the save point before the Lloyd battle and review revival items, status protection and your strongest reliable Additions. The Faust route requires separate optional preparation, including the Vanishing Stone, so do not enter it while treating it as mandatory.
Continue through the tower’s teleporter rooms and defeat Lloyd. He does not become a selectable combat party member. Complete the following scenes, then follow the route through the Snow Field and its cave sequence. The Noisy Sword and Poltergeist content is optional.
Continue west to Vellweb. Use the peddlers if supplies are low, then enter the city and follow the mandatory route toward Emperor Diaz. The four trapped Dragoon encounters, Faust, Stardust and other Vellweb rewards are separate optional objectives. The required chapter endpoint is the Diaz scene involving the Divine Moon Objects.
- Windigo has been defeated.
- Flanvel Tower has been entered and the Lloyd battle completed.
- Lloyd has not been treated as a selectable party member.
- The Snow Field blizzard and cave sequence are complete.
- Vellweb has been reached.
- The mandatory route to Emperor Diaz has been followed.
- The required Diaz scene has played.
Before you move on
- Kadessa’s seal and teleporter route have been cleared.
- S Virage has been defeated before Grand Jewel.
- Grand Jewel has been defeated and the Dragon Block Staff has been obtained.
- The party has exited Kadessa before the Deningrad attack.
- The destroyed Deningrad and Crystal Palace scenes have completed.
- The party has reached the Mountain of Mortal Dragon save point.
- Divine Ball, Divine Cannon and the Divine Dragon have been defeated.
- Lloyd has taken the Divine Dragoon Spirit, while the Dragon Buster remains unavailable as party equipment.
- The party has returned to Deningrad and learned that Queen Theresa was taken to Flanvel Tower.
- Windigo and Lloyd have been defeated.
- The Snow Field route has been cleared.
- The party has reached Vellweb and completed the required Diaz transition.
- Optional Stardust, Faust, the four trapped Dragoons, Noisy Sword and Kongol’s Golden Dragoon Spirit remain separately tracked.
References for this chapter
- Kadessa - Legend of Dragoon Wiki Project
- Dragon Block Staff - Legend of Dragoon Wiki Project
- S Virage - Legend of Dragoon Wiki Project
- Mountain of Mortal Dragon - Legend of Dragoon Wiki Project
- Divine Dragon - Legend of Dragoon Wiki Project
- Kashua Glacier - Legend of Dragoon Wiki Project
- Vellweb – Legend of Dragoon Wiki Project
- The Legend of Dragoon — Guide and Walkthrough by DXie
- The Legend of Dragoon - PlayStation official page
Ulara, Rouge, Aglis, Zenebatos, Mayfil and the Divine Tree — final approach
After the Emperor Diaz and Vellweb scenes, cross the mandatory Death Frontier to Ulara. Complete Charle Frahma’s explanations and the nighttime reunion, then return through Home of Gigantos, the Valley of Corrupted Gravity and the Barrens to Fletz. Enter Twin Castle, speak with King Zior and complete the scene that authorizes use of the Queen Fury before sailing to Rouge. From Rouge, proceed through Aglis, Zenebatos and Mayfil, defeating the required bosses and revising the laws that unlock each destination. Finish optional exploration before climbing the beam of light, then clear the Divine Tree and reach the entrance to the Moon That Never Sets with a final preparation save.
Leave Vellweb and cross the Death Frontier
After the Emperor Diaz scenes in Vellweb, leave the ruins and return to the world map. The route to Ulara begins through the Death Frontier. This desert is mandatory campaign progress, not an optional Vellweb side area. The optional Dragoon-spirit battles in Vellweb can be completed later when Coolon is available.
Enter the Death Frontier and save at the first save point. Encounters begin by touching enemies or certain moving desert creatures. Sand pits do not directly damage the party, but they redirect you to another part of the maze, an oasis or a previous checkpoint. Treat them as route devices rather than hazards that must always be avoided.
From the entrance, go south rather than dropping into the first nearby pit. Continue east, then north as far as the terrain permits. Move south when the path ends, then east and north again until you reach the first oasis. Use the oasis to restore HP and MP, and save before exploring farther.
The desert contains two full-recovery oases and a Cave Water recovery point. The Cave Water is reached through a sand pit near the transition toward the latter half of the area. Treasure such as Power Down, Gladius, Recovery Ball and Bandit’s Shoes is optional. Do not delay the route to Ulara for these items unless you are deliberately collecting them.
- Complete the Emperor Diaz and Vellweb scenes.
- Enter the Death Frontier from the world map.
- Save at the first Death Frontier save point.
- Reach the first oasis.
- Restore HP and MP at the oasis before continuing.
Reach the northern Death Frontier exit
From the first oasis, use the upper route to explore optional treasure only if desired. The Power Down is reached through one branch, while the Gladius and Recovery Ball are found along other branches involving sand pits. Return to the oasis and recover whenever the route sends you back there.
When continuing toward Ulara, leave the first oasis through the northern route and follow the connected passages east and north until you reach the second oasis. Save there and use the oasis for a full recovery. This is the safest preparation point before the exit section.
From the second oasis, travel west and then north toward the upper wall. Continue east and north through the remaining passages until the route leads out of the desert. The exact visual landmarks are the oasis behind you and the northern boundary ahead; do not turn back toward Vellweb once the exit route is open.
After leaving the Death Frontier, save on the world map and proceed to Ulara. The desert’s treasure and enemy encounters are optional, but reaching Ulara is required.
- Reach the second oasis.
- Save and fully recover there.
- Take the northern route out of the Death Frontier.
- Save on the world map after exiting.
- Enter Ulara.
Complete Ulara and the nighttime reunion
In Ulara, speak with Caron near the teleporter. Follow the northern route through the city and take the teleporter route toward Charle Frahma’s residence. Speak with Charle and continue through the required explanations concerning the Signet Spheres, the Moon That Never Sets and Zieg. The story does not advance until the necessary conversation subjects have been exhausted.
When the nighttime scenes begin, locate the separated party members around Ulara and trigger their events. Find Rose, Haschel, Miranda, Albert, Kongol and Meru. Meru is encountered near the teleporter area after the other reunion scenes. If a character does not immediately appear to advance the sequence, return to the central paths and inspect the nearby areas again rather than leaving the city.
Ulara’s Stardust and treasure are optional. If collecting Stardust, check the rose bed near the save point, the weapon-shop area and the biting plants. Save after the reunion if you want a safe point before beginning the return route.
- Speak with Caron.
- Reach Charle Frahma’s residence.
- Complete Charle’s required explanations.
- Trigger the reunion scenes for Rose, Haschel, Miranda, Albert, Kongol and Meru.
- Save after the reunion if desired.
- Collect Ulara’s optional Stardust only if pursuing that goal.
Return to Fletz and obtain King Zior’s Queen Fury authorization
After the Ulara send-off, leave through the teleporter. The route does not immediately provide a usable ship trip to Rouge. Follow the newly available world-map path through Home of Gigantos, the Valley of Corrupted Gravity and the Barrens until you return to Fletz.
Enter Home of Gigantos and take the route opened by Kongol. Continue south through the area and leave to the world map. Enter the Valley of Corrupted Gravity and follow its passable route back to the world map. Then cross the Barrens toward Fletz. These areas are required for the post-Ulara return route, even though the party has visited some of them earlier in the campaign.
Enter Twin Castle in Fletz and go to the royal area. Speak with King Zior and complete the scene in which he is informed about the group’s destination and authorizes use of the Queen Fury. Do not attempt to board the ship before this conversation; the Queen Fury trip becomes available only after the king’s authorization scene.
Once King Zior has completed the authorization, leave the castle and travel to the harbor or ship access point in Fletz. Board the Queen Fury and sail to Rouge in the Broken Islands. This is the required transition into the Aglis portion of the chapter.
- Leave Ulara through the teleporter.
- Follow the world-map route through Home of Gigantos.
- Cross the Valley of Corrupted Gravity.
- Cross the Barrens and return to Fletz.
- Enter Twin Castle.
- Speak with King Zior.
- Complete the scene authorizing use of the Queen Fury.
- Only then board the Queen Fury.
- Sail to Rouge.
Visit Rouge and prepare for Aglis
After arriving in Rouge, enter the mayor’s house and follow the interior route toward Martel. If you are collecting all Stardust, inspect the container in the room beyond Martel’s room for Rouge’s Stardust entry.
Speak with Martel and turn in Stardust if you have reached any reward threshold. The Stardust rewards are optional, and the Vanishing Stone requires the complete Stardust collection. The Vanishing Stone is used to access Magician Faust and is not needed for the main story.
Aglis has no shop or rest area, so use Rouge as the preparation point. Carry healing items, revival items and status recovery for poison, fear, confusion, stun and other disabling effects. If you intend to complete Faust, the optional Vellweb battles, Kongol’s Golden Dragoon Spirit or other side content, finish those goals now or keep a separate save before entering Aglis.
- Return to Fletz through Home of Gigantos, the Valley and the Barrens before reaching Rouge.
- Complete King Zior’s Queen Fury authorization scene.
- Board the Queen Fury and arrive in Rouge.
- Collect Rouge’s optional Stardust if applicable.
- Use Martel’s Stardust rewards if desired.
- Restock healing, revival and status-recovery items before Aglis.
Clear Aglis and defeat Last Kraken
Enter Aglis from Rouge and follow Savan’s teleporter and test routes. Use the save points during the exploration and keep recovery items available because Aglis has no ordinary rest area. The tests supply the progression needed to reach the lower sections. The Psychedelic Bomb X and other Aglis treasure are optional.
Continue until the route reaches Last Kraken. Restore the party before starting the battle. Last Kraken is a Water-element boss with strong magical defenses, so physical Additions and appropriate attack items are generally more dependable than repeatedly using ordinary magic. Use group healing when the Cleones or the boss’s attacks put several characters in danger.
After defeating Last Kraken, follow the required return route through Aglis. Do not leave the area or stop after the victory scene. Use the teleporter that becomes available to reach Zenebatos, then save before beginning the law sequence.
- Complete Savan’s required tests.
- Save before the Last Kraken route.
- Defeat Last Kraken.
- Follow the post-battle return route.
- Use the teleporter to reach Zenebatos.
- Save before the law progression.
Revise Zenebatos laws and reach the Great Court
Meet Coolon after arriving in Zenebatos and use the city’s shops to purchase late-game supplies and equipment. Zenebatos has save points but no rest area, so heal with items or return to a previous destination if necessary.
Begin at the Legislation Center. Reach the front of the line and choose to revise an existing law. Enter Article 703, then carry the Law Production License to the Law Factory. Take the Law Launching License from the factory to the Law Launcher and launch the revised law. Article 703 is the required law that permits non-Winglies to reach the Signet Sphere route.
Article 659 is optional. Revising it removes the guards that send the party to prison and makes later movement easier, but it is not required to complete the chapter. If the party is arrested before revising it, Kongol’s escape event allows the story to continue.
After Article 703 has been launched, use the upper-platform guide and select the route to the Signet Sphere. Save before entering the Great Court and prepare a party with reliable healing, revival and status recovery.
- Meet Coolon in Zenebatos.
- Shop and save before starting the law sequence.
- Revise Article 703.
- Carry the Law Production License to the Law Factory.
- Carry the Law Launching License to the Law Launcher.
- Launch Article 703.
- Revise Article 659 only if you want the optional guard removal.
- Reach the Great Court route.
Defeat Kubila, Vector and Selebus and unlock Mayfil
The Great Court battle is against the three Winged Executioners: Kubila, Vector and Selebus. Choose the target order according to your party’s equipment and immediate danger. Keep revival items ready, remove disabling status effects promptly and guard when a character is too injured to risk an Addition.
Selebus can disrupt the party with status and support effects. Kubila presents severe condition and instant-death danger, while Vector is a major physical threat if allowed repeated turns. Maintain healing across the party rather than allowing one weakened character to remain exposed while the other two continue attacking.
After the executioners are defeated, proceed to the Signet Sphere and complete the mandatory scenes. Zieg destroys the sphere. Return to the Legislation Center and revise Article 410. Repeat the license route: take the Law Production License to the Law Factory, obtain the Law Launching License and launch Article 410. The Mayfil teleporter route becomes available only after this second law sequence.
- Save before the Great Court.
- Defeat Kubila.
- Defeat Vector.
- Defeat Selebus.
- Complete the Signet Sphere scenes.
- Revise Article 410.
- Complete the Law Factory license step.
- Complete the Law Launcher step.
- Use the unlocked teleporter route to Mayfil.
Clear Mayfil and defeat Zackwell
Mayfil includes optional battles involving the souls of earlier dragons and the Divine Dragon. These fights are not required for the ending. Complete them only if you are pursuing their rewards or optional story material, and use a separate save if you want to preserve the required route without committing to the extra battles.
Follow Mayfil’s required route until the encounter involving Lavitz’s spirit. During the scripted sequence, attack the parasite attached to Lavitz rather than treating the encounter as a standard battle against Lavitz alone. Continue through the scene until Zackwell becomes the active required boss.
Zackwell can disappear underground and become temporarily untargetable. Do not waste turns attacking while he is unavailable. Keep the party healed, revive fallen characters quickly and remove status effects when they threaten to disable the group. Use the party’s strongest reliable damage options during the periods when Zackwell is exposed.
After Zackwell is defeated, watch the required Lavitz scenes and return to the nearby save point. Create a separate backup save before proceeding to the beam of light.
- Decide whether to complete the optional Mayfil dragon-soul battles.
- Reach the Lavitz parasite encounter.
- Attack the parasite during the scripted sequence.
- Defeat Zackwell.
- Watch the required Lavitz scenes.
- Save after Zackwell.
- Create a separate pre-beam backup save.
Finish optional content before the beam of light
The beam of light after the Mayfil events is the practical cutoff for earlier towns and most optional exploration. Before climbing it, complete any remaining Faust attempt, Vellweb Dragoon-spirit battles, Stardust hand-ins, Kongol’s Golden Dragoon Spirit, equipment purchases and other sidequest goals.
Zenebatos and Coolon remain useful before taking the beam, so use this opportunity to travel and restock. Confirm that the optional checklist is complete before returning to Mayfil. Keep the pre-beam save untouched even after continuing, because the original PlayStation release does not provide post-ending free roam or New Game Plus.
When ready, return to the beam and climb it. The following Signet Sphere sequence is mandatory and leads directly into the final approach. Once the beam route is taken, do not expect to return to the world map.
- Complete Faust if pursuing it.
- Complete optional Vellweb battles if desired.
- Turn in remaining Stardust.
- Obtain Kongol’s optional Golden Dragoon Spirit if desired.
- Buy remaining equipment and supplies.
- Preserve the pre-beam save.
- Climb the beam only after optional cleanup is complete.
Clear the Divine Tree and reach the Moon That Never Sets
After crossing the beam, complete the final Signet Sphere scenes. Zieg destroys the last sphere, and the story carries the party toward the Divine Tree. Follow the route through the tree, using the recovery water when necessary and saving at the available save points.
The required Divine Tree battle proceeds through Caterpillar, Pupa and Imago. Maintain recovery coverage through each form. Cure poison or stun when those effects threaten to remove a character’s turn, continue attacking during Pupa’s inactive periods and preserve revival items for Imago’s stronger attacks.
After Imago is defeated, follow the remaining path to the foot of the Moon That Never Sets. The chapter ends when the party reaches the Moon approach and you create a final preparation save before entering the Moon dungeon. Do not overwrite the separate pre-beam save if optional content may still need to be revisited.
- Cross the beam of light.
- Complete the final Signet Sphere scenes.
- Reach the Divine Tree recovery water.
- Save before the Divine Tree boss sequence.
- Defeat Caterpillar.
- Defeat Pupa.
- Defeat Imago.
- Reach the foot of the Moon That Never Sets.
- Create a final save before entering the Moon dungeon.
Before you move on
- The Emperor Diaz and Vellweb scenes are complete.
- The party has crossed the Death Frontier and reached Ulara.
- The required Ulara explanations and nighttime reunion scenes are complete.
- The party has left Ulara through the teleporter.
- The party has traveled through Home of Gigantos, the Valley of Corrupted Gravity and the Barrens to Fletz.
- The party has entered Twin Castle and completed King Zior’s authorization scene for the Queen Fury.
- The party has boarded the Queen Fury and reached Rouge.
- Last Kraken has been defeated.
- The party has reached Zenebatos through the Aglis teleporter.
- Article 703 has been revised, produced and launched.
- The Great Court battle against Kubila, Vector and Selebus is complete.
- Article 410 has been revised, produced and launched.
- The Mayfil teleporter route is available.
- The Lavitz parasite sequence and Zackwell have been defeated.
- A separate save exists before climbing the beam of light.
- All desired optional content has been completed before the beam cutoff.
- Caterpillar, Pupa and Imago have been defeated in the Divine Tree.
- The party has reached the foot of the Moon That Never Sets and has a final pre-dungeon save.
References for this chapter
- Chapter 4: Moon and Fate - The Legend of Dragoon Walkthrough & Guide - PlayStation - By Gbness
- The Legend of Dragoon — Guide and Walkthrough by DXie
- Queen Fury - Legend of Dragoon Wiki Project
- Divine Tree - Legend of Dragoon Wiki Project
- Zackwell - Legend of Dragoon Wiki Project
- Bosses - Legend of Dragoon Wiki Project
- Ulara - The Legend of Dragoon Wiki
Optional: Stardust completion and missing sidequests
The original North American PlayStation release contains 50 Stardust pieces. They are optional for the campaign ending, but turning in all 50 to Martel awards the Physical Ring, Amulet, Wargod’s Sash, Rainbow Earring and Vanishing Stone. The Vanishing Stone opens the optional Magician Faust battle. Vellweb’s four ancient Dragoon battles, Kongol’s Golden Dragoon Spirit, Fort Magrad, Kamuy and other sidequests are separate from the main campaign. Finish all ordinary world-map cleanup before leaving Mayfil, and finish any content blocked by the beam of light before crossing it. Only after that cleanup should you make a separate pre-Moon save for replaying the final route.
Make the correct cleanup saves and track Stardust
Create a dedicated cleanup save before entering the final Mayfil route. This save should be made while ordinary world-map travel is still available, not after entering the Moon That Never Sets. Use it as the recovery point for missed Stardust, Martel hand-ins, Lohan purchases, Vellweb, Faust and other optional objectives that require returning to locations outside Mayfil.
There are 50 Stardust pieces. The distribution is 20 in Chapter 1, 15 in Chapter 2, 11 in Chapter 3 and 4 in Chapter 4. Record each piece as soon as you collect it. Stardust is consumed when submitted to Martel, so track both the physical locations visited and the number already turned in.
Martel’s availability changes during the story. She appears in Bale, later in Fletz, then in damaged Deningrad and finally in Rouge. She can become temporarily or permanently unavailable at specific story transitions, so do not assume that every earlier town remains a reliable hand-in point. The final Rouge visit is the safest place to submit the remaining total, provided you reach it before entering the irreversible late-game route.
- Create a pre-Mayfil cleanup save.
- Keep a written or in-game checklist of all 50 Stardust pieces.
- Do not treat the pre-Moon save as the point where optional cleanup begins.
- Reserve a second save for the completed cleanup state before entering the Moon That Never Sets.
Collect the Chapter 1 Stardust pieces
Seles has one Stardust in the cemetery, at the third headstone from the left near the tree. Bale has six: the well in Slambert Plaza, the crate of spears in the weapon shop, the furnace in the basement of Indels Castle, the raised room on the upper castle level, the wine area reached through the optional underground boat route and the rear-right shelf in Lavitz’s kitchen.
Hoax has two pieces: one in the crate at the far left of headquarters and one in the fireplace downstairs in the house near the meeting room. The Marshland piece is in the fireplace inside Seventh Fort. Seventh Fort itself is optional; collecting this Stardust does not make the fort a required story destination.
Lohan has four pieces: the small pot near the entrance soldier, the basket stack in the bazaar, the suit of armor in Dabas’ Antiques and the furnace behind the secret bookcase in the lower-left upper-housing room. Kazas has six: the barrels in the first house on the left, the upstairs pile in the first house on the right, the area left of the weapon-shop counter, the bookshelf in the upper resistance house and both barrel locations in the resistance-town shop.
- Seles: 1.
- Bale: 6.
- Hoax: 2.
- Marshland: 1.
- Lohan: 4.
- Kazas: 6.
- Chapter 1 total: 20.
Collect the Chapter 2 Stardust pieces
Fletz contains seven Stardust pieces. Search the crates near Kaffi’s bar, the roof of the building beside the church, the lower-left weapon-shop crate, the lower-left gem pile in the accessory shop, the area in front of the large telescope in the item shop and the remaining listed town containers around the opening screens. The tower-base Stardust in Twin Castle is available outside the active Princess Lisa assistance sequence; it is not restricted to the ceremony scene.
Twin Castle has two pieces in total. Inspect the first statue to the right of the entryway save point, then search the room at the base of the right-hand tower. Donau has two: the decorative pool left of the entrance and the sink in the mayor’s home. Home of Gigantos has one at the rear-right torch in the room where Gehrich was fought.
The Queen Fury has two pieces. Check the wheelbarrow or crate area below Kongol and the pipe on the right side of the three-door hallway. Lidiera’s piece is in the mayor’s house, in the rear-right room reached after descending. Fueno has two: the painting in the clinic and the barrels below the inn stairs.
These pieces are not required for the story, but the Queen Fury and Lidiera entries can be inconvenient to revisit later. Collect them while the sea route is active, then confirm the running total before continuing through Furni.
- Fletz and Twin Castle: 9 total for those locations.
- Donau: 2.
- Home of Gigantos: 1.
- Queen Fury: 2.
- Lidiera: 1.
- Fueno: 2.
- Chapter 2 total: 15.
- Overall total after Chapter 2: 35.
Collect the Chapter 3 and Chapter 4 pieces
Furni has two pieces: one in the barrels in the first house on the right and one in the metal basin below Teo’s house after using the switch or lever to ride the slide. Neet has one on the hanging lamp near the entrance. The Forest of Winglies has two: one in the far-right area of Guaraha’s room and one near the glowing pillar below the pink healing room, before the Elder Bardel confrontation.
After the Divine Dragon attack changes Deningrad, collect three pieces in the restored route through the city: the display mat near the shops, the second nearby mat or goods display and the circular structures beside the treatment light above the inn. The Crystal Palace has two more after the same event: the blocked path toward Shana’s former room and the blocked entrance to the Signet room. Vellweb has one at the altar in the Dragoon tower above the entrance area where Shirley appears.
Ulara contains three: the rose bed near the save point, the pots or containers in the upper weapon shop and the mouth of the large snapping plants along the main walkway. Rouge contains the fiftieth piece in the large pot or container in the room reached past Martel’s room.
Some of these locations depend on story damage or reconstruction. If a search produces ordinary dialogue rather than Stardust, confirm that the required story event has occurred before assuming the piece was missed.
- Furni: 2.
- Neet: 1.
- Forest of Winglies: 2.
- Deningrad and Crystal Palace after the Divine Dragon attack: 5.
- Vellweb: 1.
- Chapter 3 total: 11.
- Ulara and Rouge: 4.
- Overall total: 50.
Submit Stardust and open Magician Faust
Visit Martel at the earliest available safe opportunity, but do not postpone the final hand-in beyond the Rouge visit. The rewards are cumulative: 10 Stardust gives the Physical Ring, 20 gives the Amulet, 30 gives the Wargod’s Sash, 40 gives the Rainbow Earring and 50 gives the Vanishing Stone. Check the Goods or accessory inventory after each threshold rather than relying only on memory.
The Vanishing Stone permits the Faust sidequest at Flanvel Tower. Carry it in the Goods inventory and approach the Faust apparition; the barrier is removed as part of the event. Follow the teleporters into the Land of Taboo, collect the Therapy Ring near the entrance if it remains, and use the central save point before attempting the deeper route. The route requires visiting the Bottom Chamber branches before the bridge to Faust becomes available.
Faust has very high magic defense and strong area attacks. Favor completed physical Additions, use defensive equipment against magic where available and keep at least one dependable human-form item user. A full-party Dragoon transformation can leave the party without normal item access, so preserve a recovery option. If the battle is lost, return to the save point, restore equipment and supplies, then retry rather than abandoning the sidequest.
After defeating Faust, collect the Phantom Shield reward and inspect the three chests in the room. They contain the Magical Hat, Holy Ankh and Dancer’s Ring. These rewards are optional and do not affect the campaign ending.
- All 50 Stardust have been submitted to Martel.
- Physical Ring, Amulet, Wargod’s Sash, Rainbow Earring and Vanishing Stone are present.
- The Faust barrier has been removed.
- Faust has been defeated.
- The Phantom Shield and three post-battle chest items have been collected.
Complete Vellweb, Kongol and remaining sidequests
Return to Vellweb after the required story timing and speak with Shirley near the Dragoon towers. The four optional battles are Syuveil, Damia, Belzac and Kanzas. They are separate from the Vellweb Stardust altar. Use the nearby recovery point between fights and adjust equipment for each opponent’s elemental attacks. The battles reward the Jade Stone, Blue Sea Stone, Golden Stone and Violet Stone respectively.
Kongol’s Golden Dragoon Spirit is optional. After Kongol joins, the Lohan street vendor connected to the earlier Water Bottle event can sell it for 1,000G. If it is not purchased there, Kongol can still obtain the Spirit later from the Indora battle on the Moon That Never Sets. Buying it early is useful if Kongol will be an active party member, but it is not required for any ending scene.
Review Fort Magrad, Kamuy and other sidequests flagged in earlier chapters. Objectives requiring ordinary world-map travel, Martel, Lohan shops, Vellweb, Rouge or Flanvel must be completed before leaving Mayfil. Any objective affected by the beam of light must be completed before crossing the beam. Do not wait until the Moon That Never Sets to start cleanup; the Moon is reached after the relevant return routes have closed.
Once all desired optional content is finished, make a new pre-Moon save. This later save preserves the completed cleanup and lets you replay the final approach. It is not a post-ending continuation save, and the original North American PlayStation release does not provide post-credit free roam or New Game Plus.
- Syuveil, Damia, Belzac and Kanzas are defeated if pursuing the Vellweb sidequest.
- The four elemental stones are present if pursuing those rewards.
- Kongol’s Golden Dragoon Spirit is present if desired, whether purchased in Lohan or obtained from Indora.
- Fort Magrad, Kamuy and all other desired sidequests are complete.
- Martel hand-ins and ordinary world-map objectives are complete before leaving Mayfil.
- Beam-sensitive objectives are complete before crossing the beam of light.
- A separate pre-Moon save has been made after cleanup.
Before you move on
- All 50 Stardust location entries are marked collected.
- Martel has awarded all five rewards: Physical Ring, Amulet, Wargod’s Sash, Rainbow Earring and Vanishing Stone.
- The Faust apparition has been dispelled and Magician Faust has been defeated.
- The Phantom Shield, Magical Hat, Holy Ankh and Dancer’s Ring have been checked.
- The four Vellweb ancient Dragoon battles are complete if pursuing full side content.
- Kongol’s Golden Dragoon Spirit is present if pursuing Kongol’s optional content.
- Fort Magrad, Kamuy and other desired optional objectives are complete.
- All Martel hand-ins and ordinary world-map objectives were completed before leaving Mayfil.
- All beam-sensitive objectives were completed before crossing the beam of light.
- A post-cleanup pre-Moon save remains available for replaying the final route.
- The Moon-area save is not treated as a post-credit continuation save.
References for this chapter
- Stardust Locations & Rewards – Legend of Dragoon Community
- Stardust – Legend of Dragoon Wiki Project
- The Legend of Dragoon – Guide and Walkthrough – PlayStation – by abbisonny
- Side Quests – The Legend of Dragoon Walkthrough & Guide
- Vellweb – Legend of Dragoon Wiki Project
- Magician Faust – Legend of Dragoon Wiki Project
- Magician Faust Sidequest
- Kongol – The Legend of Dragoon Wiki
- Goods – Legend of Dragoon Wiki Project
The Moon That Never Sets — approach and preliminary encounters
This chapter begins after the repaired Divine Tree sequence, when the party enters the Moon That Never Sets. The Moon divides the party into personal memory encounters before reuniting everyone for the Wingly Palace and Moon’s Core route. Use the Moon’s Bale settlement for the last convenient hotel, clinic, item shop, weapon shop, and first save point. After Archangel, reach Moon’s Core and save before attempting Super Virage. The later Super Virage, Zieg Feld, and Melbu Frahma battles belong to the following chapters.
1. Enter the Moon and prepare for isolated battles
After the Divine Tree events are complete, follow the story into the Moon That Never Sets. You cannot freely return to the earlier world-map locations once this sequence is underway, so treat the entry as a major preparation checkpoint. Restore the party before entering and create a separate save if you have an unused slot.
Equip current armor and accessories on every character, not only on your preferred three-person team. The Moon isolates Miranda, Haschel, Kongol, Albert, and Meru for personal encounters, while Dart and Rose fight Michael together. Keep Angel’s Prayers, Healing Fogs or Healing Breezes, and status-curing items available. The personal battles are fought without Dragoon transformation, so ordinary items and reliable Additions matter more than a plan based entirely on Dragoon magic.
Dart remains part of the active party when the game allows party selection, while the other two active positions can be chosen from the valid party members. Select characters whose Additions you can perform consistently and make sure replacements have usable equipment before advancing.
- Complete the Divine Tree sequence before beginning this chapter.
- Save separately before entering the Moon That Never Sets.
- Restore HP, MP, and status conditions.
- Equip every character who may be isolated.
- Carry revival, healing, and status-curing items.
2. Complete Miranda’s Death Rose encounter
Move through the opening forest and continue across the grassland. A Frozen Jet is available in a chest on the right side of the first forest section. It is optional, so collect it only if you want the item. Continue into the boreal forest until Miranda recognizes the place and leaves the group.
Miranda then fights Death Rose alone. Use her Addition reliably and keep her HP high enough to survive the next attack. The battle advances through the scene as Miranda confronts her memory; it is not simply a matter of attacking until the enemy disappears. When the game presents the forgiveness choice, select “I forgive you.” This completes the encounter and returns Miranda to the party.
After the scene, continue south through the winter area. A Down Burst chest is available on the route. It is optional and does not affect the Moon’s required progression.
- Collect Frozen Jet if desired.
- Check Miranda’s weapon, armor, and accessory before she leaves.
- Use Miranda’s Addition and heal before she reaches critical HP.
- Choose “I forgive you” during the Death Rose scene.
- Collect Down Burst if desired.
3. Use Moon’s Bale for restocking and equipment
Continue until the route reaches the Moon’s Bale settlement, a recreation of Bale from twenty years earlier. Save at the point in front of the hotel. The hotel restores HP and MP, and the clinic cures status ailments. Use both before leaving if the party has suffered damage or abnormal conditions.
The item shop sells Healing Fog, Healing Breeze, Sun Rhapsody, Angel’s Prayer, Depetrifier, Mind Purifier, Body Purifier, Panic Bell, and Poison Needle. The weapon shop sells late-game weapons, Dragoon armors, Magical Rings, Spiritual Rings, Attack Badges, Guard Badges, and the Giganto Ring. Replace obsolete equipment on characters who will fight alone. Do not spend all of your money on marginal upgrades if your recovery inventory is low; several upcoming encounters are easier when you can heal without relying on Dragoon magic.
Follow the girl onward through the Minintos area. The 200G chest in the house nearest Bale and the Spectral Flash chest farther along the route are optional. The settlement remains the useful recovery and shopping point during this part of the Moon, so return there whenever the route permits and supplies are running low.
- Save at the Moon’s Bale hotel save point.
- Use the hotel and clinic.
- Buy healing, revival, and status-curing supplies.
- Upgrade important weapons, armor, and accessories.
- Collect 200G and Spectral Flash only if desired.
4. Resolve Haschel’s Claire battle
Continue through Minintos Village until Claire separates Haschel from the group. Equip Haschel before triggering the encounter, because he must handle the battle without party support. Use his most reliable Addition rather than one whose timing is inconsistent.
Claire’s battle progresses through dialogue and damage. Watch Haschel’s HP carefully. When her attack reduces him to critical health, heal immediately with a Healing Fog or another suitable recovery item. Continue attacking between dialogue sequences until the game presents the response “Mind’s eye, awaken!” Select it to resolve Claire’s memory and complete the fight.
The party reunites afterward. Continue along the route until you reach the Flash Hall chest, then backtrack toward the settlement. The chest is optional. Before taking the southern route out of the settlement, save and restock again.
- Equip Haschel before entering Claire’s area.
- Use a reliable Addition and monitor his HP.
- Heal immediately after the attack that leaves him near one HP.
- Choose “Mind’s eye, awaken!” when prompted.
- Collect Flash Hall if desired.
- Save and restock before leaving Moon’s Bale.
5. Defeat Indora with Kongol
Leave Moon’s Bale through the front route and follow the story toward the portal at the lower-left. After the party is transported and the scene ends, use the upper-left exit to reach the Gigantos Holy Land. The group separates, and Kongol proceeds into a solo fight with Indora.
Check Kongol’s weapon, armor, Addition, and accessory before entering the battle. Indora has strong physical attacks and can punish missed Additions, so use only a sequence you can perform consistently. Attack with Additions, heal when Kongol’s HP falls into danger, and avoid wasting turns on an elaborate Dragoon plan. The battle is designed to be won through steady physical damage.
After the victory, Kongol receives Indora’s Axe. If he did not already obtain the Golden Dragoon Spirit in Lohan, Indora provides it after the battle. This Spirit is optional for main-story completion but becomes available here if it was skipped earlier. Descend to the circular area, pull the lever on the left, and open the jail chest for Gold DG Armor if desired. Use the portal on the left to return toward the settlement.
- Equip Kongol before the Indora scene begins.
- Use reliable Additions and heal before critical HP.
- Collect Indora’s Axe after victory.
- Confirm whether Kongol receives the Golden Dragoon Spirit.
- Pull the lever and collect Gold DG Armor if desired.
6. Expose Michael’s core with Dart and Rose
After the party returns through the portal, the story switches to Dart and Rose in the dragon area. Optional chests contain Night Raid on the lower route and Burning Wave on a ledge reached from the nearby fork. Collect them if desired, then continue to the encounter with Michael.
Michael cannot be damaged during the opening portion of the fight. Ordinary attacks will have no useful effect while the shell is protecting the dragon, so guard and preserve HP while Rose’s dialogue advances. When the game presents Rose’s response, choose the option that tells Dart the blind spot. Rose explains that Michael’s core is exposed briefly after the black beam attack.
Wait for Michael to use the black beam. During the resulting opening, attack the exposed core with Dart’s strongest reliable Addition. Rose should heal whenever necessary and should not waste turns attacking while the shell is invulnerable. After the core is destroyed, continue through the scene and follow the route back toward Moon’s Bale.
- Equip Dart and Rose before the Michael encounter.
- Guard while Michael’s shell repels attacks.
- Choose the response that reveals the blind spot.
- Wait for the black beam before attacking the core.
- Use Rose primarily for recovery when Dart can finish the core.
- Collect Night Raid and Burning Wave if desired.
7. Defeat Dark Doel with Albert
After Dart and Rose return, the rest of the party reunites at Moon’s Bale. Use the hotel, clinic, shops, and save point again if necessary. When ready, leave the settlement and speak to the guards at the castle entrance. Albert is separated for his personal encounter, so check his equipment before starting the scene.
Dark Doel is protected by Light Sword and Shadow Blade. Destroy both swords before attacking Dark Doel himself; damaging Doel first is ineffective while the swords remain. Use Albert’s reliable Addition against one sword at a time and heal whenever his HP becomes unsafe. After both swords are gone, direct all further attacks toward Dark Doel.
The fight is resolved with Albert alone. Once Dark Doel is defeated, Albert rejoins the group. Return to the settlement if you need another rest or another supply purchase before continuing toward Wingly Palace.
- Equip Albert before speaking to the guards.
- Destroy Light Sword and Shadow Blade first.
- Heal Albert between dangerous attacks.
- Attack Dark Doel only after both swords are defeated.
- Restock at Moon’s Bale before leaving for the palace route.
8. Defeat Archangel and save in Moon’s Core
Leave Moon’s Bale and follow the route back through the floating-glass area toward the Wingly Palace. Take the upper-left route when the paths divide, then continue to the palace entrance. Meru is separated from the group and fights Archangel alone, so equip her before advancing.
Archangel’s battle includes dialogue and a powerful attack that can reduce Meru to one HP. Use Meru’s reliable Addition to advance the encounter, but heal immediately after that attack. Do not assume the fight ends merely because you have dealt a certain amount of damage; continue through the dialogue until Archangel is defeated and the party reunites.
After the battle, use the warp at the palace and continue through the beam of light into Moon’s Core. A Gravity Grabber chest is available in the second area after Archangel. It is optional. Continue toward the room containing the save point and the images of earlier locations, then save before proceeding. This is the required checkpoint before Super Virage, not the final save point of the entire Moon sequence: another save point becomes available after Super Virage before the later Zieg battle.
Make a final equipment check at this save point. Give the selected party current armor and accessories, verify that each character has a reliable Addition, and confirm that healing and revival items are available. The next chapter begins with the Super Virage encounter.
- Equip Meru before entering Archangel’s area.
- Use reliable Additions and heal after Meru is reduced to one HP.
- Continue through Archangel’s dialogue until the battle resolves.
- Use the warp after Archangel and enter Moon’s Core.
- Collect Gravity Grabber if desired.
- Save at the Moon’s Core save point before Super Virage.
- Confirm the selected party includes Dart plus any two valid party members.
- Confirm equipment, Additions, healing items, and revival items.
Before you move on
- The chapter was entered after the completed Divine Tree sequence and the party has entered the Moon That Never Sets.
- Miranda defeated Death Rose and selected “I forgive you.”
- Haschel completed Claire’s encounter and selected “Mind’s eye, awaken!”
- Kongol defeated Indora and received the Golden Dragoon Spirit if it had not already been obtained.
- Dart and Rose defeated Michael by attacking the exposed core after the black beam.
- Albert defeated Dark Doel after destroying Light Sword and Shadow Blade.
- Meru defeated Archangel and reunited with the party.
- The party passed through Wingly Palace and reached Moon’s Core.
- Gravity Grabber was collected or knowingly skipped.
- A save was created at the Moon’s Core save point before Super Virage.
- The selected party includes Dart plus any two valid party members, with current equipment, usable Additions, healing items, and revival items ready for the next chapter.
Penultimate battles: Zieg sequence and the lead-in to Melbu Frahma
Clear the final Moon That Never Sets approach, defeat the Super Virage, use the save point and Detonate Arrow checkpoint, defeat Zieg while Dart lacks the Red-Eye Dragoon Spirit, and watch the scripted Lloyd and Melbu sequence. The chapter ends after Dart receives the Divine Dragon Spirit, Rose receives the Dragon Buster, the final party is selected, supplies and equipment are prepared, and a separate pre-Melbu save is created. Do not begin the final battle until the next chapter.
Finish the approach and defeat the Super Virage
Continue through the Moon That Never Sets toward the central light beam and the strange television-like areas. In the area containing the Gravity Grabber chest, take the lower-left route to the save point. Save there before moving right and triggering the scene in which the party hears Shana calling. Proceed through the doorway after the scene to reach the Super Virage blocking the route to the God of Destruction.
The Super Virage has an arm, head and body. Destroy the arm first to reduce its offensive pressure, then concentrate on either the head or the body. Destroying the head ends the fight but can trigger a damaging explosion; destroying the body avoids that final blast. Guard when a character is in danger, heal before the party is worn down, and do not let the fight become a race in which several characters are left at critical health.
If the party is defeated, reload the approach save and adjust equipment before trying again. Prioritize magic defense and general survivability over a small increase in physical damage. Use dependable Additions rather than risking repeated misses, and preserve enough recovery items for the Zieg encounter that follows.
- Reach the save point before the Super Virage and save.
- Enter the Super Virage battle only after restoring the party.
- Destroy the arm first, then target either the head or body.
- Heal and guard through the boss’s strong area attacks.
- If the party wipes, reload the approach save and change equipment or tactics.
Use the second save point before Zieg
After defeating the Super Virage, continue north through the short story transition. The next area contains a chest with the Detonate Arrow and another save point. Collect the chest if desired, then save again. This is the most useful immediate recovery point because it sits directly before the Zieg sequence.
Use this checkpoint to inspect every active character’s weapon, armor and accessory. Equip current endgame gear, restore HP and MP through items or the available recovery options, and refill healing, revival, MP-recovery and status-recovery supplies before entering the next room. The Detonate Arrow is Miranda’s late-game weapon; it is optional for the chapter’s required progression, but it is available at this checkpoint.
Make a separate backup save rather than overwriting the earlier Super Virage save if possible. Keeping both saves gives you a recovery option if the Zieg attempt goes badly and also preserves the Super Virage checkpoint.
- Collect or inspect the Detonate Arrow chest.
- Save at the second save point after the Super Virage.
- Restore HP and MP before entering Zieg’s room.
- Check weapons, armor and accessories for the intended Zieg party.
- Maintain separate save slots when available.
Defeat Zieg without Dart’s Red-Eye transformation
Enter the next area to find Shana and Zieg. The scene ends with Zieg taking Dart’s Red-Eye Dragoon Spirit. Dart cannot transform during this battle, so do not plan on using his Red-Eye Dragoon form or its Dragoon Magic. The other active characters retain their own Dragoon Spirits and may transform if the defensive boost or healing and attack options justify spending their Spirit points.
Zieg is a fast, dangerous opponent who combines strong physical attacks with Dragoon Magic. Keep the party’s health high enough to survive consecutive enemy turns, and use guarding or recovery items instead of forcing an Addition when a failed input would leave a character vulnerable. Dart can contribute normal physical attacks, but he is also a useful turn for emergency healing because his Dragoon options are unavailable.
Use your most reliable physical Additions against Zieg and avoid depending on elemental magic as the main damage plan. If you use a second Dragoon, transform only when that character can gain a clear benefit from the form; do not spend every available resource simply to shorten the opening turns. Revive fallen characters promptly, especially anyone needed for healing or party-wide support.
If Zieg defeats the party, reload the second save point. Re-equip accessories for survivability, restore supplies, and consider replacing a low-defense active member with a better-developed character. The Red-Eye Spirit loss is scripted and cannot be prevented by winning with a particular party.
- Enter the battle knowing Dart cannot transform.
- Use other Dragoons only when their defensive or support benefits are useful.
- Favor reliable Additions, guarding and healing over risky damage attempts.
- Maintain enough recovery items for the later final preparation and battle.
- Reload the second save point after a defeat and revise equipment or party choice.
Allow the Melbu and Lloyd sequence to finish
After Zieg is defeated, Melbu Frahma emerges from Zieg and merges with the Virage Embryo. Lloyd then arrives in Divine Dragoon form. The game presents this as a battle scene, but it is not a normal party-controlled encounter: Lloyd attacks through the scripted sequence, and the player does not select his commands or need to satisfy ordinary victory conditions.
Continue through the scene until Melbu strikes Lloyd and Lloyd collapses. Dart then reaches him. Lloyd automatically gives Dart the Divine Dragon Spirit and gives Rose the Dragon Buster. These are required story rewards, not optional pickups, and no exploration or boss command is needed to obtain them.
Do not treat the Red-Eye Spirit as temporarily missing. Dart permanently loses that Spirit at this point and receives the Divine Dragon Spirit instead. Rose’s Dragon Buster is also obtained automatically during the same sequence. The chapter is not complete until both rewards have appeared and control returns to Dart.
- Wait for Melbu’s emergence from Zieg.
- Treat Lloyd’s encounter as scripted and uncontrolled.
- Confirm that Dart receives the Divine Dragon Spirit.
- Confirm that Rose receives the Dragon Buster.
- Wait until control returns to Dart before opening the preparation menu.
Select the final party and create the pre-Melbu save
When control returns, open the party and equipment menus. Select the three characters intended for the final battle and equip them individually. Dart must have the Divine Dragon Spirit available; Rose should have the Dragon Buster equipped if she is selected. Choose the remaining members according to reliable Additions, healing or support access, speed, defensive equipment and your familiarity with their timing. Miranda or Meru can provide useful recovery support, but neither is mandatory if your supplies and chosen strategy cover healing.
Return to the nearby save point and save after selecting the party. If the party needs more experience, Spirit points, Addition practice or consumables, leave the immediate area and complete that preparation before making the final save. Restock healing items, revival items, MP recovery and status recovery. Recheck armor and accessories after shopping because equipment changes made during the Zieg battle may no longer suit the final party.
Create a dedicated pre-Melbu save in a separate slot. Stop the chapter here. Do not walk north into the final trigger, choose a readiness response, or enter the party-selection screen associated with beginning Melbu Frahma’s battle; those actions belong to the next chapter. If the final preparation exposes a weakness, reload this save, change the party or equipment, and prepare again.
- Select the final three-person party after the Lloyd sequence.
- Confirm Dart has the Divine Dragon Spirit available.
- Confirm Rose has the Dragon Buster equipped when she is selected.
- Restock healing, revival, MP-recovery and status-recovery items.
- Recheck equipment and accessories for all selected characters.
- Return to the save point and create a dedicated pre-Melbu save.
- Stop before approaching the final battle trigger.
Before you move on
- The Super Virage has been defeated.
- The second save point after the Super Virage has been used.
- Zieg has been defeated and Dart has lost the Red-Eye Dragoon Spirit.
- Melbu Frahma has emerged from Zieg and merged with the Virage Embryo.
- Lloyd’s scripted encounter has finished.
- Dart has received the Divine Dragon Spirit.
- Rose has received the Dragon Buster.
- The final three-person party has been selected and equipped.
- Supplies, armor, accessories and reliable Additions have been checked.
- A separate pre-Melbu save has been created at the nearby save point.
- The final battle has not yet been started.
Final Battle — Melbu Frahma core (Phase by phase approach)
The final battle against Melbu Frahma consists of four forms: Embryo, First Generation, Fourth Generation and Seventh Generation. Dart is required, and the other two active characters can be chosen before the fight. Preserve healing, revival and status-recovery items during Embryo, then spend Dart’s Divine Dragoon resources during the middle forms. The Seventh Generation is the most dangerous stage because Melbu can suppress Dragoon power, remove a character from the fight and inflict attacks that can immediately end a character’s participation. Keep the pre-battle save until the ending sequence and post-credit scene have finished.
1. Load the preparation save and select the final battle
Begin from the save made during the final approach in the Moon That Never Sets, after the party has completed the preceding story events and Dart has received the Divine Dragoon Spirit. This is the last practical preparation point for the encounter. Confirm the active party before approaching Melbu Frahma, then choose the option that begins the final battle.
Dart must be present. Use the other two characters whose Additions you can perform consistently and whose equipment is already prepared. Rose is a strong offensive option because of the Dragon Buster, but she is not required for victory. A reliable healer or support character can be more valuable than a theoretically stronger attacker if your party has difficulty surviving area attacks.
Check that the active characters have their strongest available weapons, armor and completed Additions. Carry group healing such as Healing Fogs, revival items such as Angel’s Prayers, and Depetrifiers. Mind Purifiers and MP-restoring items are useful if you intend to rely heavily on Dragoon magic. Equip status protection or magic-damage protection where your available accessories permit it. Do not select the final-battle prompt until this check is complete; once the fight begins, your plan must use the inventory and equipment already prepared.
- Load the preparation save from the final approach.
- Keep Dart in the active party.
- Choose two dependable companions rather than characters whose Additions are unfamiliar.
- Equip practical endgame weapons, armor and accessories.
- Carry group healing, revival items, Depetrifiers and MP recovery.
- Select the final-battle prompt only after the preparation check.
2. Embryo — control the tentacles and preserve resources
Melbu’s Embryo form is accompanied by four tentacles. Each tentacle can act independently, so the party may receive several attacks before its next turn. Watch the entire enemy formation rather than focusing only on Melbu. If the tentacles are overwhelming your healing, use area damage or strong attacks to reduce them. A Psychedelic Bomb can help if you have one, but it is not necessary for the battle.
Melbu can use the tentacles defensively. When this happens, treat the defensive posture as a recovery opportunity instead of automatically attacking. Guard, heal, restore MP or use an item if necessary. Do not waste the opening by forcing normal Additions into a posture that can punish direct attacks.
This form can involve Virage imagery and petrification. Use a Depetrifier promptly when a character is petrified. A petrified character cannot contribute normally, and leaving the condition untreated can allow the tentacles and Melbu to overwhelm the remaining party. Use human Additions as the normal damage method and avoid spending every character’s Dragoon resources at the start. Dart’s most valuable Divine Dragoon actions are better reserved for the later forms.
- Reduce tentacles when their combined attacks exceed your healing capacity.
- Use Melbu’s defensive posture to Guard or recover.
- Cure petrification promptly with a Depetrifier.
- Keep at least one character available for healing or item use.
- Preserve Dart’s MP and the party’s remaining Dragoon resources.
3. First Generation — begin using Dart’s Divine Dragoon power
When Melbu changes to the First Generation, begin spending the offensive resources preserved during Embryo. Dart’s Divine Dragon Cannon is an appropriate way to deal heavy damage when his turn is safe and his MP allows it. The other characters can remain human, use their strongest Additions or attack items, and handle healing when the party is threatened. You do not need to transform everyone simultaneously.
Melbu can use powerful magical attacks in this form and can capture one party member inside his body. The captured character is temporarily unable to act. Do not spend turns trying to target the captured character. Keep the remaining two characters alive until Melbu releases the captive.
The release can inflict heavy damage on the released character and another party member. Heal immediately if either character is in danger of being defeated. If the active party is already weakened, use a group-healing item before resuming offensive turns. Spend Dart’s MP here, but do not empty every source of recovery; the Fourth Generation and Seventh Generation still require sustained healing and revival.
- Use Divine Dragon Cannon when Dart has a safe offensive turn.
- Keep one active character available for recovery actions.
- Wait for a captured party member to be released instead of trying to attack the effect.
- Heal both characters affected by the release if necessary.
- Reserve some MP, revival items and Dragoon resources for the final forms.
4. Fourth Generation — handle the changing time-of-day attacks
The Fourth Generation changes the battlefield’s time-of-day pattern. During the night pattern, Melbu can summon Bomb Stars. These support enemies can explode and damage the entire party. Defeat them when their presence creates an immediate threat, especially if the party has already been weakened by Melbu’s attacks.
During the daytime pattern, Melbu can call down a large fireball. Keep group healing ready and avoid committing every character to offense immediately after a damaging area attack. Guarding with one character or using a healing item can prevent the next attack from turning into a wipe.
Target priority is conditional. Remove Bomb Stars when their explosion would combine with Melbu’s next action or when the party lacks enough health to survive them. If Melbu is close to changing forms and the party can safely endure one more attack, continuing to damage Melbu may be more efficient than spending several turns on support enemies. Restore the party before the transition so the Seventh Generation does not begin with multiple characters already near defeat.
- Identify whether Melbu is using the day or night pattern.
- Destroy Bomb Stars when their explosion threatens a weakened party.
- Prepare group healing for the daytime fireball.
- Use strong attacks without abandoning recovery actions.
- Enter the Seventh Generation with living characters and usable revival items.
5. Seventh Generation — finish while managing Dragoon suppression
The Seventh Generation is the final and most dangerous form. Melbu’s attacks are stronger, and he can suppress Dragoon power in a way that makes a prolonged Dragoon Special unreliable. Use Dragoon actions for a clear purpose, such as casting Divine Dragon Cannon or delivering a finishing attack, then return to normal combat or item use before Melbu’s suppression effect leaves the party without its planned resources.
Melbu can replace one party member with a monster. The replaced character is unavailable until the monster is defeated. The monster can attack, but it can also use a healing action that restores the party. Decide whether defeating it immediately is safer than allowing the healing action. If the party is critically injured, the monster’s healing may buy time; if restoring the missing character is urgent or the monster is adding dangerous attacks, defeat it before returning to Melbu.
Watch for the Can’t Combat attack, which can remove a character from the battle immediately. Use an Angel’s Prayer as soon as a fallen character can safely be revived, unless another character is one hit from defeat and must be healed first. A Talisman can protect against this type of danger if equipped, but do not assume that every character has that protection. After a major area attack, heal before resuming Additions unless Melbu is clearly one action from defeat. A stable two- or three-person party is more valuable than one extra attack performed while everyone is near knockout range.
- Do not base the final phase on maintaining a long Dragoon Special.
- Use Divine Dragoon actions before Melbu suppresses Dragoon power.
- Judge whether the replacement monster’s healing or its defeat is the immediate priority.
- Revive characters lost to Can’t Combat or other attacks as soon as the party is stable enough.
- Heal after major area damage and attack only when the party can survive Melbu’s next action.
6. Recovery after a failed attempt
If the party is defeated, reload the preparation save made before selecting the final-battle prompt. There is no special automatic retry point that replaces a deliberate save. Restock any items used before the save if necessary, review the accessories on the active party and change the party only when the previous attempt exposed a specific weakness.
Repeated petrification failures call for more Depetrifiers or better status protection. If Bomb Stars repeatedly cause a collapse, remove them earlier or reserve stronger group healing for the night pattern. If the Seventh Generation causes the wipe, avoid keeping every character in Dragoon form, revive more promptly and enter the phase with more MP and healing items.
If an Addition is still unreliable, practice it in a safe nearby encounter before trying again. Modest additional training can help, but grinding alone will not correct a poor phase plan. Identify whether the defeat came from status effects, delayed healing, insufficient revival items, or poor Dragoon timing, then change that part of the strategy before re-entering the battle.
- Reload the save from before the final-battle prompt.
- Restock healing, revival and status-recovery items.
- Change accessories or party roles to address the failed phase.
- Practice unreliable Additions before retrying.
- Use a revised phase plan instead of repeating the same resource sequence.
Before you move on
- Melbu Frahma is defeated through the Embryo, First Generation, Fourth Generation and Seventh Generation forms.
- The battle ends and the final story scenes in the Moon That Never Sets begin.
- The post-battle scenes involving the Dragoons, Zieg and Rose play without another required combat.
- The ending credits begin, followed by the remaining ending sequence after the credits.
- The campaign is complete once the ending and post-credit scene have finished; retain the pre-battle save if optional content or another finale attempt is still desired.
- Defeating Melbu Frahma does not by itself prove completion of Stardust collection, optional bosses, optional equipment or every sidequest.
References for this chapter
Ending scenes, required cutscenes and post-final checks
This chapter begins immediately after Melbu Frahma has been defeated. Finish the Moon That Never Sets escape, allow the complete epilogue to play, watch the credits to the end, and continue through the short scene after the credits. The original North American PlayStation release does not create a post-ending continuation save, completion percentage, quest journal, trophy record, or New Game Plus mode. Use the retained pre-Moon world-map save for optional objectives and keep a separate Moon-area save only for replaying the final route.
Keep the correct save files
After the final battle, do not expect the game to return you to a playable world map. The original PlayStation campaign ends through its scripted escape and ending sequence rather than opening a post-game mode. If you retained a save from the late-game world-map period before entering the Moon That Never Sets, preserve it. That is the file to use for unfinished Stardust, Faust, Vellweb content, rare equipment, and other optional objectives.
A Moon-area save serves a different purpose. It lets you replay the approach to the final scenes and retry the ending route, but it does not restore access to Endiness after the credits. Do not overwrite the pre-Moon file with the Moon save if you still intend to complete optional content.
- Retain the pre-Moon world-map save if it is available.
- Keep any Moon-area save in a separate memory-card slot.
- Use the pre-Moon file for optional exploration and sidequests.
- Use the Moon file only for final-route retries or replaying the ending.
Continue the escape from the Moon That Never Sets
Once Melbu Frahma has fallen, the game takes control of the conclusion. Continue through the collapsing Moon That Never Sets and allow the escape sequence to play. There is no further objective to complete and no final item, secret switch, or party arrangement required after the battle.
Do not reset when the first ending movie or major scene finishes. The conclusion is presented in several parts, including the escape, the immediate aftermath, and the later epilogue scenes. If the display pauses or fades between scenes, wait rather than treating the pause as a return to the title screen.
- Allow the Moon escape to finish.
- Do not reset after the first ending scene.
- Wait through fades and transitions between the conclusion’s segments.
- Continue until the epilogue begins.
Watch the complete epilogue
Let the post-escape scenes run without skipping or turning off the system. The epilogue shows the aftermath for the surviving members of the party and closes the story’s major character threads. This is still part of the required campaign ending, not optional bonus material.
The game does not provide a completion menu that records which ending scenes have been viewed. Your practical confirmation is that the escape has finished and the full series of aftermath scenes has played before the credits begin.
- Watch the complete aftermath sequence.
- Allow the character epilogues to finish.
- Do not rely on the first ending movie alone as proof of completion.
- Wait for the credits to begin.
Let the credits finish and continue afterward
Allow the credits to run all the way to the end. Do not return to the title screen during the credit roll. After the credits, continue waiting for the final short scene instead of assuming the game has ended permanently at the last credit.
The post-credit scene shows a white bird with purple feathers and a red-and-white bird near the remains associated with the Divine Tree. The purple Darkness Dragon Dragoon Spirit and the red Red-Eye Dragon Dragoon Spirit are shown together below them. Seeing this scene confirms that the complete ending sequence has played.
- Let the entire credit roll finish.
- Remain on the ending screen after the last credit.
- Watch the scene with the two birds and the two Dragoon Spirits.
- Treat the post-credit scene as the final required story presentation.
Use the ending sequence as the completion check
For the original North American PlayStation release, mark the campaign complete only after all of the following have occurred: the Moon escape has finished, the epilogue scenes have played, the credits have ended, and the post-credit scene has appeared. The game does not create a special completed-game save or display a campaign percentage afterward.
There is also no quest journal, trophy record, or New Game Plus mode in this original release. If you want to pursue optional content after seeing the ending, reset or return to the title screen and load the preserved pre-Moon world-map save. The Moon-area save remains useful for replaying the final approach, but it is not a post-credit continuation file.
- Confirm the escape from the Moon is complete.
- Confirm the epilogue has finished.
- Confirm the credits have fully ended.
- Confirm the post-credit bird-and-Dragoon-Spirit scene appeared.
- Record completion outside the game if desired.
- Reload the pre-Moon save for optional content.
- Do not expect a post-ending world map or New Game Plus.
Before you move on
- The Moon That Never Sets escape has finished.
- The complete epilogue has played.
- The credits have run to completion.
- The final scene after the credits has appeared.
- The scene includes the two birds and the purple and red Dragoon Spirits.
- A pre-Moon world-map save remains available for optional content, if one was retained.
- A separate Moon-area save remains available for final-route retries, if one was created.
- No post-ending continuation save or New Game Plus mode is expected in the original North American PlayStation release.
Appendices: Combat refresher, Addition drills and common boss recovery
Use this chapter to rebuild reliable Addition timing, practice Dragoon Additions without wasting valuable resources, and correct the specific problems that caused a boss attempt to fail. These procedures apply to the original North American PlayStation release of The Legend of Dragoon. They avoid frame-specific timing claims because controller condition, display lag, and emulation can alter the feel of the input.
Understand the normal Addition sequence
Select Attack and choose a target. The timing sight appears as a fixed inner square and a larger square that moves toward it. Press X when the moving square overlaps the fixed square. A correct input continues the Addition; a mistimed input ends the chain and removes the remaining bonus hits.
Some enemies can counter an Addition while the chain is in progress. The timing sight turns red and the game signals the counterattack. For that input, press Circle rather than X when the moving square reaches the target. A successful counter input breaks through and lets the Addition continue. A failed counter input ends the Addition and causes the attacking character to take damage. Treat this as part of the same attack sequence, not as a separate reaction after the attack has finished.
Addition progress is recorded through successful performances. An Addition advances after 20 successful uses and can reach level 5. The level change is reflected after the battle, so do not assume that crossing a use threshold during a fight immediately changes the displayed level.
- Select an Addition you can already perform with reasonable consistency.
- Watch for the timing sight turning red during longer Additions.
- Press Circle only when the game signals an enemy counterattack.
- Check the Addition level and progress from the System Screen after leaving battle.
Run a repeatable Addition training drill
Choose a field or early-area route close to a town, save point, recovery point, or other reliable healing location. The ideal enemies survive long enough for the trainee to attempt an Addition but do not inflict enough damage to force constant item use. If your current equipment defeats enemies too quickly, use a weaker weapon or select a shorter Addition that lets you practice the timing without ending the battle immediately.
Place the character being trained in the active party. Have the other characters defend, use low-damage actions, or finish enemies only after the trainee has made the intended attempt. Repeat the same Addition until you can complete its full chain several times in succession. Then switch to the next Addition you want to develop. Each character's Additions are tracked separately, so practicing Dart's Addition does not advance Rose's or Haschel's progress.
Do not spend a large supply of healing items on ordinary practice. Return to the nearest recovery point when the party is damaged, refill resources, and begin another short loop. This is safer and more efficient than remaining in the field until the party is nearly defeated. When you are comfortable with a short Addition, move to a longer one and learn its rhythm gradually rather than changing several variables at once.
- Use a route with nearby healing and saving facilities.
- Make the trainee attempt the Addition before other characters finish the encounter.
- Complete several successful uses before changing routes or equipment.
- Heal at a recovery point instead of consuming valuable items during routine practice.
- Confirm that the Addition progress changed after the battle.
Practice Dragoon timing separately
Dragoon form uses a Dragoon Addition rather than the character's ordinary Addition list. Its timing display uses a rotating indicator, so practice it in a low-risk encounter before relying on it during a major boss. Enter with enough SP to transform, choose the Dragoon Addition, and concentrate on the indicator's movement instead of trying to memorize a fixed real-time interval.
The purpose of the drill is to learn the command flow and the rhythm of the rotating indicator. You do not need to transform in every routine battle. If the enemy is nearly defeated, finish the fight normally rather than spending SP solely for practice. When the character is transformed during a difficult encounter, choose the Dragoon Addition only when you can give it your full attention; a failed sequence can waste the offensive turn you needed for recovery or damage.
Transformation also gives access to that character's Dragoon command set and spell list. Its value varies by character and situation. Some characters have useful support or defensive Dragoon magic, while others are better used for direct damage or ordinary item support. Check the available commands before the boss rather than assuming every Dragoon has the same utility.
- Confirm the character has the intended Dragoon Spirit and sufficient SP.
- Practice the Dragoon Addition in an ordinary battle first.
- Know which Dragoon spells are available to the character you plan to transform.
- Do not transform automatically on the opening turn of every boss fight.
Change equipment before changing levels
When a boss repeatedly defeats the party with an elemental attack or status effect, inspect equipment before beginning a long grinding session. Elemental stones can reduce damage from their matching element, and status-protection accessories can prevent specific ailments. Equip them on the characters most likely to be targeted or most important to keeping the party alive. The correct defensive accessory can matter more than a modest increase in physical damage.
If physical damage is the main threat, consider a defensive accessory or armor improvement instead of stacking offensive bonuses on every character. If magical damage is the problem, prioritize the relevant elemental protection or stronger magic defense. Bosses often create different failure patterns, so record whether the defeat came from one large spell, repeated normal attacks, a status effect, missed Additions, or a lack of recovery actions.
Build the party around reliable turns. Keep at least one character capable of healing or reviving, one dependable damage source, and a third member whose Addition timing or elemental options suit the encounter. A shorter Addition completed consistently is preferable to a longer chain that repeatedly fails.
- Identify the attack or status effect causing most defeats.
- Equip elemental or status protection when the boss's threat is predictable.
- Keep one character prepared to heal, revive, or cure instead of attacking every turn.
- Use a dependable Addition if a longer one is causing repeated failures.
Delay or use Dragoon form deliberately
Do not transform all three characters immediately unless the opening phase is clearly the most dangerous part of the fight. A boss may change behavior, revive, expose a vulnerability, or begin using heavier attacks later. Saving some SP preserves access to Dragoon damage, spells, or the special command for the phase that actually threatens the party.
A useful general plan is to begin with ordinary Additions, guarding, and items while observing the boss. Transform when the boss enters a more dangerous phase, when a strong Dragoon spell can answer the current threat, or when you have a safe damage window. This is a flexible rule rather than a universal sequence; some encounters reward early transformation, while others punish spending SP before the later phase.
Spread recovery across turns. If one character is near defeat, heal or revive before committing the entire party to offense. Another character can guard or attack, while the third remains ready to cure a status effect or use another recovery item. Guarding is preferable to a risky Addition when the party is stable enough to survive one defensive turn but not another failed attack.
- Estimate whether the boss has a later phase before spending all available SP.
- Keep at least one recovery option available during the dangerous portion of the fight.
- Use Dragoon form for a clear purpose: damage, spell access, defense, or survival.
- Do not let all three characters attack while the party is within one enemy turn of defeat.
Recover methodically after a failed boss attempt
After a wipe, identify the immediate cause before changing the whole strategy. Write down whether the party lacked healing, ran out of SP, failed a key Addition, suffered an avoidable status effect, used the wrong elemental protection, or entered the next phase without a recovery plan. Correct one or two causes first so you can tell which adjustment worked.
If the party survives the opening but collapses later, preserve more SP and recovery items for the later phase. If the party cannot survive the opening, improve defensive equipment, guard more often, or raise levels modestly near the nearest safe recovery point. If damage is adequate but turns are being lost to missed Additions, train a shorter Addition rather than grinding indefinitely.
Restock healing items and status cures, re-equip the party, recover HP and SP where possible, and save before the retry when the route permits it. Keep a second save in another slot before a long dungeon or major boss sequence. After changing equipment or party composition, verify the new setup from the menu before entering the encounter.
- Name the actual cause of defeat before retrying.
- Restock and recover before grinding.
- Use a short training loop if Addition timing is the problem.
- Make only a modest level increase when equipment or tactics are the real issue.
- Keep a separate save before the dungeon or boss approach.
Before you move on
- You can complete each active character's selected ordinary Addition consistently in a low-risk encounter.
- You recognize the red counterattack signal and can respond with Circle instead of X.
- You can perform each intended Dragoon Addition reliably enough to use it during a boss attempt.
- Before a major retry, the party has appropriate elemental or status protection, recovered resources, stocked healing items, and a separate save.
- You can identify whether the previous defeat came from timing, equipment, resources, status effects, or phase management.
- You have a concrete retry plan that states when to heal, when to guard, and whether to save Dragoon transformations for a later phase.
References for this chapter
- Additions - Legend of Dragoon - Wiki Project
- Tutorials - Legend of Dragoon - Wiki Project
- Dragoon - Legend of Dragoon - Wiki Project
- The Legend of Dragoon - Guide and Walkthrough - PlayStation - GameFAQs
- The Legend of Dragoon/Combat - StrategyWiki
- Version Differences - Legend of Dragoon - Wiki Project
Finishing up
Defeat Melbu Frahma in the Moon That Never Sets and watch the complete ending through the post-credit scene.
Confirm all required campaign areas and story events were completed, including Volcano Villude, the Nest of Dragon, Shrine of Shirley, Black Castle, Twin Castle, Prison Island, Forest of Winglies, Forbidden Land, Deningrad, Zenebatos, Kadessa, the Divine Tree and the Moon That Never Sets.
Confirm the required Dragoon milestones: Dart, Rose, Lavitz, Shana, Albert, Haschel, Meru and Miranda receive their story-required Spirits at the correct points. Kongol’s Golden Dragoon Spirit is optional for the main campaign.
Keep a pre-Moon or pre-final-dungeon save for optional cleanup and a separate Moon or pre-Melbu save for replaying the finale. Do not expect a post-credit save or New Game Plus in the original North American PlayStation release.
Treat all Stardust, Faust, Vellweb, rare-equipment and optional-sidequest goals as separate completion targets.
Choose your next gameScreenshots & video
Game imagery for reference. Follow the written chapters above for the route and strategies.
Sources & references
Our original guide draws on the references below. Check the edition at the top of this page before following controls or unlock requirements.
- The Legend of Dragoon - Guide and Walkthrough - PlayStation - GameFAQs
- The Legend of Dragoon — Guide and Walkthrough by DXie
- Tutorials - Legend of Dragoon - Wiki Project
- Commander — Legend of Dragoon Wiki Project
- Seles — StrategyWiki
- Forest - Legend of Dragoon - Wiki Project
- Hellena Prison - Legend of Dragoon - Wiki Project
- Hoax - Legend of Dragoon - Wiki Project
- The Legend of Dragoon - Spoiler-Free Walkthrough - PlayStation - By Da_Great_SoFaRo
- The Legend of Dragoon - PlayStation official page
- Volcano Villude - Legend of Dragoon - Wiki Project
- Lavitz - Legend of Dragoon - Wiki Project
- Stardust – Legend of Dragoon Wiki Project
- The Legend of Dragoon - Guide and Walkthrough - PlayStation - By Gbness
- Marshlands - The Legend of Dragoon Wiki
- RPGClassics.com - Legend of Dragoon Shrine Bosses
- Shrine of Shirley — Legend of Dragoon Wiki Project
- Lohan - Legend of Dragoon - Wiki Project
- The Legend of Dragoon - Guide and Walkthrough - PlayStation 4 - By Gbness
- The Legend of Dragoon FAQ/Walkthrough - Neoseeker Walkthroughs
- Hellena Prison - The Legend of Dragoon Wiki
- Kazas / Black Castle — Legend of Dragoon Wiki Project
- Black Castle — The Legend of Dragoon Wiki
- RPGClassics.com - The Legend of Dragoon Shrine Walkthrough - Disk 2 Part 1
- RPGClassics.com - The Legend of Dragoon Shrine Walkthrough - Disk 2 Part 2
- The Legend of Dragoon - Game Script - PlayStation - By Shotgunnova
- The Legend of Dragoon - Guide and Walkthrough - PlayStation - By MotherKojiro
- Deningrad | The Legend of Dragoon Wiki
- Forest of Winglies | The Legend of Dragoon Wiki
- Forest of Winglies - Legend of Dragoon - Wiki Project
- Chapter 3: Fate & Soul - The Legend of Dragoon Walkthrough & Guide
- Kadessa - Legend of Dragoon Wiki Project
- Dragon Block Staff - Legend of Dragoon Wiki Project
- S Virage - Legend of Dragoon Wiki Project
- Mountain of Mortal Dragon - Legend of Dragoon Wiki Project
- Divine Dragon - Legend of Dragoon Wiki Project
- Kashua Glacier - Legend of Dragoon Wiki Project
- Vellweb – Legend of Dragoon Wiki Project
- Chapter 4: Moon and Fate - The Legend of Dragoon Walkthrough & Guide - PlayStation - By Gbness
- Queen Fury - Legend of Dragoon Wiki Project
- Divine Tree - Legend of Dragoon Wiki Project
- Zackwell - Legend of Dragoon Wiki Project
- Bosses - Legend of Dragoon Wiki Project
- Ulara - The Legend of Dragoon Wiki
- Stardust Locations & Rewards – Legend of Dragoon Community
- The Legend of Dragoon – Guide and Walkthrough – PlayStation – by abbisonny
- Side Quests – The Legend of Dragoon Walkthrough & Guide
- Magician Faust – Legend of Dragoon Wiki Project
- Magician Faust Sidequest
- Kongol – The Legend of Dragoon Wiki
- Goods – Legend of Dragoon Wiki Project
- Moon That Never Sets - Legend of Dragoon - Wiki Project
- The Legend of Dragoon - Melbu Frahma FAQ - PlayStation - By Alpha2099
- Chapter 4: Moon and Fate — The Legend of Dragoon Wiki
- Moon That Never Sets — The Legend of Dragoon Wiki
- The Legend of Dragoon — Story FAQ
- Additions - Legend of Dragoon - Wiki Project
- Dragoon - Legend of Dragoon - Wiki Project
- The Legend of Dragoon/Combat - StrategyWiki
- Version Differences - Legend of Dragoon - Wiki Project
About the game & collecting notes
- Platform
- Sony PlayStation
Complete, step-by-step campaign walkthrough for the original North American PlayStation edition of The Legend of Dragoon. This guide leads you through every required story beat to reach the canonical ending (final battle vs. Melbu Frahma), explains the Dragoon/Additions combat systems, covers party recruitment and required Dragoons, and lists optional completion goals like Stardust and sidequests.
Darryl Polo
Darryl Polo loves tinkering with emulation and revisiting retro games. He enjoys exploring how old favorites play on different setups and sharing what he learns along the way. At Joking Joystick, he writes about the games, hardware, and small discoveries that keep the hobby fun.
Our editorial standardsFound a step that needs another look? Help us improve this guide.