
The Elder Scrolls: Arena — Main Quest Walkthrough (GOG DOS edition)
Complete, step-by-step coverage of the original DOS Arena campaign as distributed through GOG and launched with DOSBox. The route covers the eight Staff-piece objectives, every required lead-in dungeon, the Dagoth-Ur reassembly sequence, the Imperial Palace finale, recovery from documented progression risks, and a concrete post-ending completion check. Specific dungeon names and travel locations are recorded from the current quest state because Arena randomizes overworld placement.


Find a copy
The Elder Scrolls: Arena PC (GOG)
We may earn a commission if you buy through these links, at no extra cost to you. As an Amazon Associate I earn from qualifying purchases.
Opens retailer search results. Check the model, edition, seller, availability and current price before buying.
Before you begin
This walkthrough targets the GOG distribution of the original DOS release of The Elder Scrolls: Arena and covers the Staff of Chaos main campaign.
The campaign consists of eight required lead-in dungeons, eight fixed main-quest Staff-piece dungeons, and the Imperial Palace finale.
Follow the chapters in order: escape, Stonekeep and Fang Lair, Fortress of Ice and Labyrinthian, Selene’s Web and Elden Grove, Temple of Agamanus and Halls of Colossus, Temple of the Mad God and Crystal Tower, Mines of Khuras and Crypt of Hearts, Vaults of Gemin and Murkwood, Black Gate and Dagoth-Ur, Imperial Palace and postgame checks.
Arena’s wilderness travel and quest markers use the current game state, but the named main-quest dungeons and their puzzle routes are fixed quest locations. Use the active logbook and map markers for travel rather than universal overworld coordinates.
Save before accepting each lead-in objective, before every major dungeon, before riddles or hazardous pickups, and before the final Palace approach.
The guide distinguishes required lead items from Staff pieces and optional artifact or random work quests.
The campaign is complete only after the Staff-and-Jewel interaction in the Imperial Palace produces the victory sequence and the completed save reloads successfully.
Set yourself up for the run
Install the GOG package and verify that it launches the original DOS game through its bundled DOSBox configuration.
Create a test save, exit, and identify the files whose timestamps change. Arena saves consist of a group of loose files associated with the selected slot; back up the complete group rather than one visible name file.
Keep separate PRISON, rotating pre-dungeon, pre-pickup, BEFORE_FINAL and AFTER_FINAL saves.
Use the current quest log, map markings and written notes to track the complete required chain: Stonekeep, Fang Lair, Fortress of Ice, Labyrinthian, Selene’s Web, Elden Grove, Temple of Agamanus, Halls of Colossus, Temple of the Mad God, Crystal Tower, Mines of Khuras, Crypt of Hearts, Vaults of Gemin, Murkwood, Black Gate, Dagoth-Ur and Imperial Palace.
Use the fixed routes and riddles in the main-quest chapters for the named quest dungeons. Do not confuse those handcrafted locations with Arena’s separately generated random dungeons used for optional exploration and ordinary work.
Do not assume all lead items are in bottom-level chests. Main-quest objectives may require riddles, keys, passwords, guarded rooms, tablets, maps or special routes.
Use the game’s original delay support or carefully tested DOSBox settings only if speed is excessive; do not mix several configuration changes without testing.
Optional artifact and Work Rumor quests are not required for the Staff campaign.
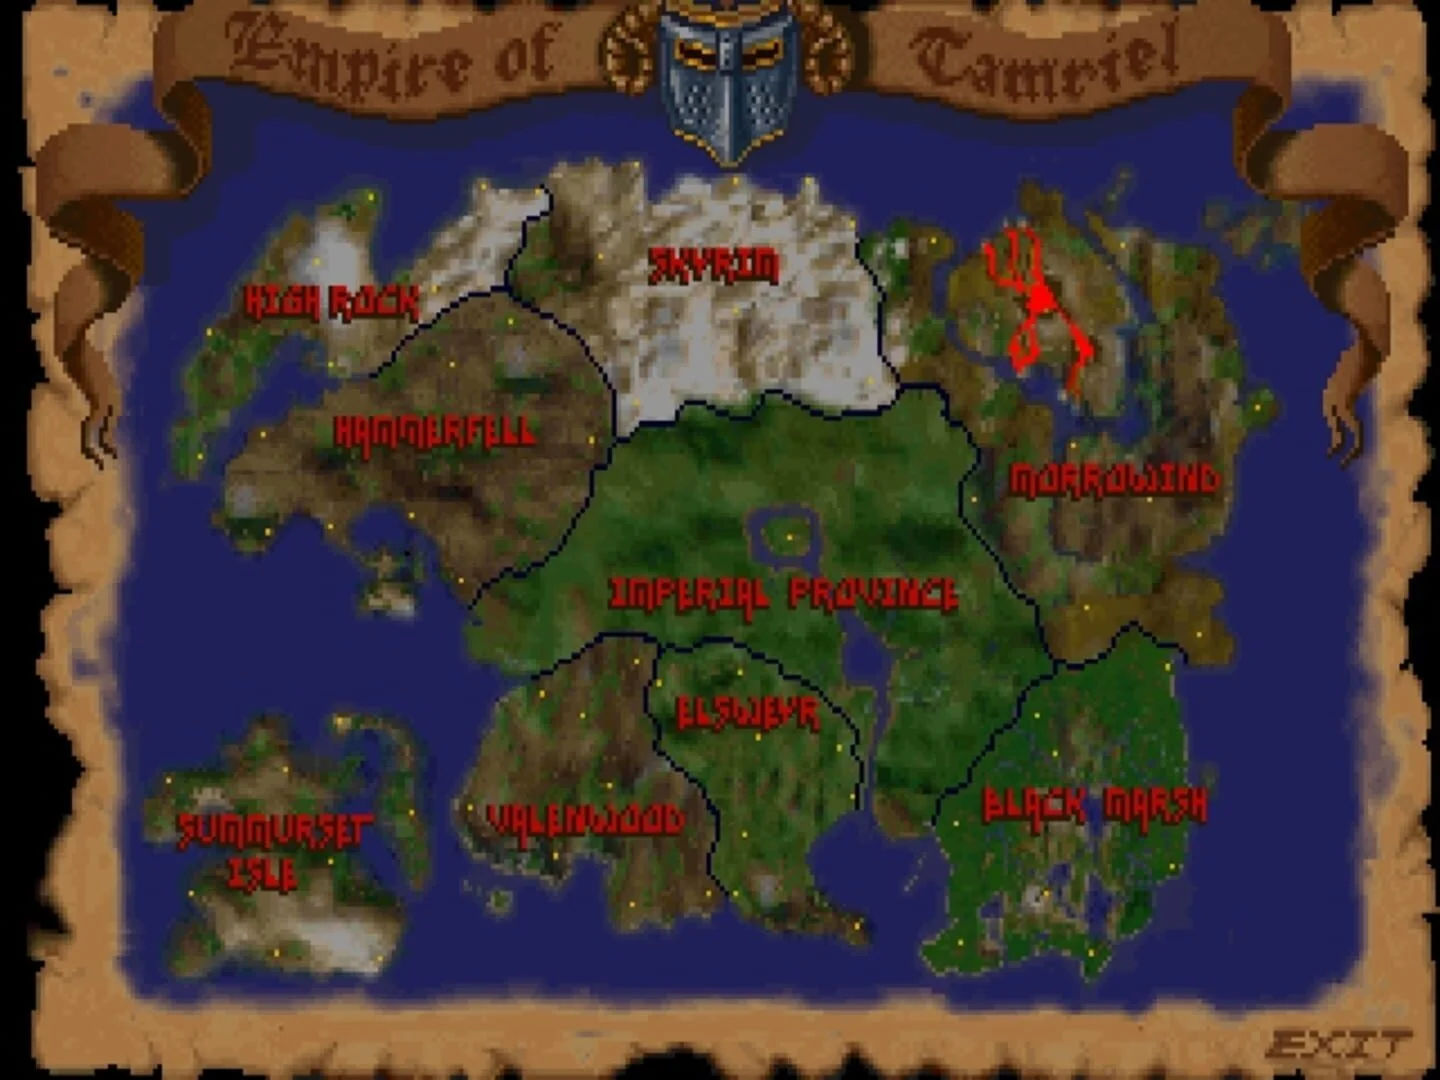
Preparation and GOG/DOSBox checklist
Prepare the GOG distribution of the original DOS version before beginning the Staff of Chaos campaign. Verify that the bundled DOSBox launch works, create and reload a test save, record the active save-file location, and establish external backups before making a serious character. Test movement, combat, inventory, map, spell, rest and text-entry functions before changing controls. If the game runs too quickly, use the original Arena delay option rather than changing several DOSBox settings at once. Choose a class you understand, keep essential equipment and recovery resources available, and preserve separate saves for the prison escape, major dungeons and the Imperial Palace approach.
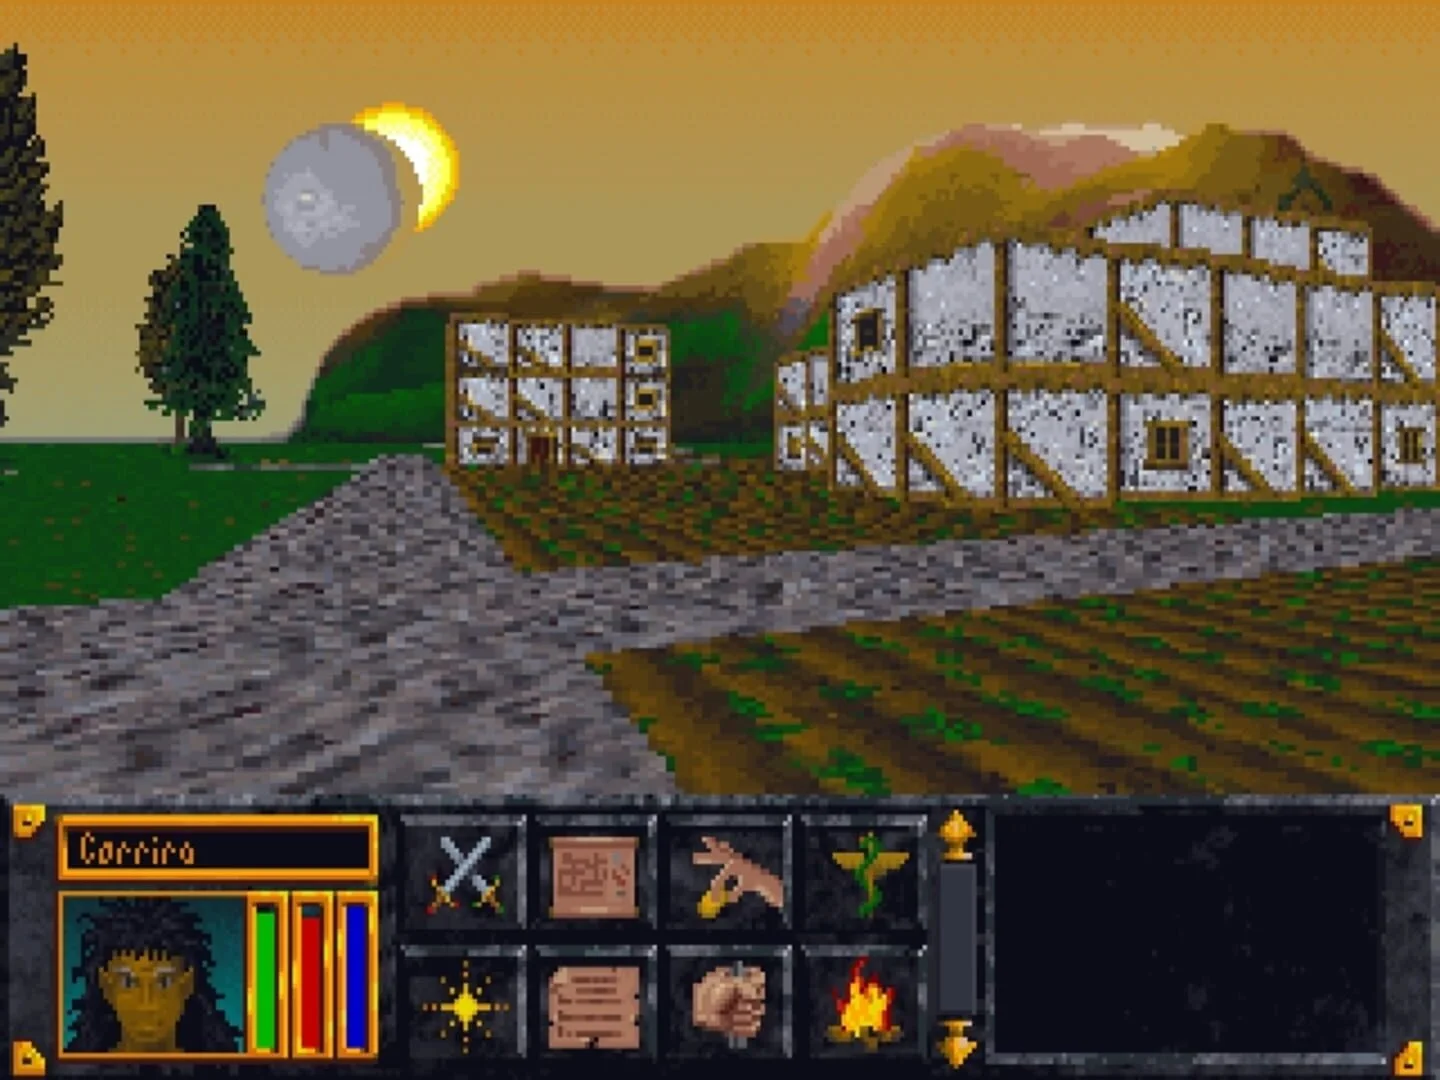
1. Confirm that the GOG package is the original DOS edition
Install The Elder Scrolls: Arena from GOG using either the standalone installer or GOG Galaxy. The GOG product page identifies this release as the classic 1994 Arena and states that it is powered by DOSBox. It is therefore the original DOS game running through an emulator wrapper, not a remake, remaster or modern source-port edition.
Launch the game from its GOG shortcut and allow it to reach the Arena title or opening menus. Start a temporary character and enter the opening Imperial Dungeon. This first launch is only a hardware and installation test. Confirm that the game does not stop at a DOSBox prompt, that the mouse responds, and that you can exit and launch it again without changing configuration files.
- The GOG shortcut launches Arena through its bundled DOSBox setup.
- The game reaches the opening prison rather than closing or stopping at a DOS prompt.
- A temporary character can be started, saved and loaded.
2. Locate and back up the complete save set
Arena does not store a save slot as one modern save file. Bethesda’s support documentation states that each save consists of 13 or more loose data files, with the in-game slot represented by the file extension. For example, files ending in .00 belong to one slot and files ending in .09 belong to another; names.dat is also part of the save system.
The active location depends on how DOSBox is configured. When it is not run as administrator, Bethesda lists the Windows VirtualStore location under the user profile and the Bethesda Softworks Arena directory. When DOSBox runs as administrator, the files are stored in the installed Arena directory instead. Do not assume that the files beside the shortcut are the active ones. Create a test save, exit, and search for the files whose timestamps changed. Keep the whole group together when copying it.
Make a backup folder outside the installation directory. Preserve the complete set of files for every important slot, not just the file that appears to contain the character. If you change the administrator setting later, check the save location again; Arena may then look in a different directory and appear to have lost your saves.
- You identified the folder whose files change when a test save is created.
- Your backup includes every file belonging to the selected slot and names.dat.
- You can restore or load a copied test save before beginning the real campaign.
3. Establish dependable save slots
Arena allows multiple in-game saves, but the old file layout makes accidental overwrites especially inconvenient. Reserve distinct slots for distinct purposes. Use one slot for PRISON after escaping the Imperial Dungeon, several rotating slots for BEFORE_DUNGEON saves, and a protected BEFORE_FINAL slot before entering the Imperial Palace. The names are conventions for your notes; use any in-game names that make the purpose unmistakable.
Before accepting a dangerous dungeon objective, save in town or another safe location. Save again after obtaining a quest item, but do not overwrite the earlier dungeon-entry save until you have safely reached the surface or a city. Keep an external copy of the pre-dungeon save before beginning a long expedition. Maintain the pre-final backup until the ending has played and you have created a separate completed-game save.
Avoid relying on quick saving alone. A manual save made before entering a dungeon gives you a clean recovery point if you die, become lost, overwrite an item-related state, or encounter an engine problem. Keep notes identifying the province, quest giver and dungeon associated with each major save.
- A PRISON save and at least two rotating dungeon saves are available.
- A complete external copy exists for the most important save slots.
- BEFORE_FINAL will remain untouched until the ending is confirmed.
4. Test the original controls before remapping
Use the temporary character to test every action needed during the campaign. Move and turn, draw and sheath the weapon, attack, open the inventory and character screens, open the local map, rest, save, load and access the spell interface. Also test ordinary text entry by naming a save. Arena’s DOS-era controls combine keyboard commands with mouse actions, so verify the actual response instead of relying on a modern control guide for another edition.
You may use DOSBox’s mapper if the default arrangement is uncomfortable. However, remapping movement can interfere with letters that Arena needs for save names, notes or other text fields. Change only a small group of keys, then test movement, combat, menu navigation and text entry again. Record the final layout beside your save backups. Do not install an unofficial remapping package before completing this basic test; it may be useful later, but it adds another variable while you are still confirming that the original package works.
- Movement, turning and weapon attacks work consistently.
- Inventory, map, spell, rest and save/load functions are reachable.
- Save-name entry still accepts the letters affected by any remapping.
5. Correct excessive game speed carefully
If movement or combat is too fast, use Arena’s documented delay support rather than making several DOSBox changes at once. Bethesda’s Arena 1.06 support page gives the command format arena -delay:#, with a value from 1 through 9; higher values add more delay, and the page recommends 4 as a useful starting point. Depending on the bundled launcher, this may require editing the launch configuration or starting the command from the appropriate DOSBox prompt.
After applying a delay, return to the opening prison and test walking, turning, weapon swings and menu response. The same support information states that the plus and minus keys can adjust the delay after launch. Change one setting at a time and keep an untouched copy of the original configuration. Do not increase cycles, change renderers and alter input mappings simultaneously, because you will not know which change caused a new problem.
The goal is a controllable pace, not maximum speed. If the bundled setup already responds correctly, leave it alone. Advanced DOSBox display changes are troubleshooting measures, not required preparation for the GOG release.
- The opening dungeon runs at a pace you can control.
- Combat inputs register without skipped or uncontrollable movement.
- The original launch configuration is backed up before any edits.
6. Create a practical first character and prepare for the escape
Choose a class whose restrictions and recovery needs you understand. A weapon-focused character is straightforward for a first campaign because basic equipment remains useful without requiring detailed spell creation. A magic-capable class is also viable, but it requires closer attention to spell points, available spells and recovery. Do not repeatedly restart for ideal attributes unless you already understand character creation; reaching the surface with a reliable save is more valuable than chasing a perfect opening roll.
Before entering the prison, confirm that the character has a usable weapon and that you understand how to equip it. During the escape, test combat against weaker enemies rather than experimenting with every menu at once. Save whenever the game permits before a risky branch or confrontation. After reaching the surface and a safe town, create the PRISON save and make an external copy.
Once you can buy supplies, prioritize practical recovery needs and equipment that your class can actually use. Keep enough money for travel and repairs instead of spending everything on one upgrade. Food and healing options are useful for dungeon recovery, while ammunition matters if you rely on a bow or other ranged weapon. Do not begin a major Staff-related dungeon until your equipment, save routine and controls are dependable.
- The character has usable starting equipment and understood class restrictions.
- The prison escape can be completed without control confusion.
- A PRISON save and first-town save are separate from the temporary test save.
- The character has enough recovery supplies and money for the first serious expedition.
Before you move on
- The GOG release launches the original DOS game through its bundled DOSBox configuration.
- A temporary character can move, fight, use the main interfaces, rest, save and reload.
- The active save directory is known, and a complete external backup has been tested.
- The speed is controllable and the final keyboard arrangement has been recorded.
- PRISON, rotating BEFORE_DUNGEON saves and a protected BEFORE_FINAL convention are ready.
- The real character can complete the prison escape and reach a safe town before beginning the Staff of Chaos campaign.
References for this chapter
Escape from Prison — starting the main quest
Arena opens in the first Imperial Dungeon, a sewer complex selected according to your character’s chosen home province. Ria Silmane appears in your cell, gives you a Ruby Key and explains the escape route: go west, then south, until you reach a shimmering blue Shift Gate in the dungeon’s southwestern corner. You do not need to clear the dungeon or recover loot before leaving. Once you pass through the gate, you arrive inside a city in your home province. Save immediately, learn the city’s basic services, heal and repair your equipment, then visit the palace and check the logbook for your first proper lead. This first dungeon is a one-time area, so do not leave a character or valuable equipment behind expecting to return.
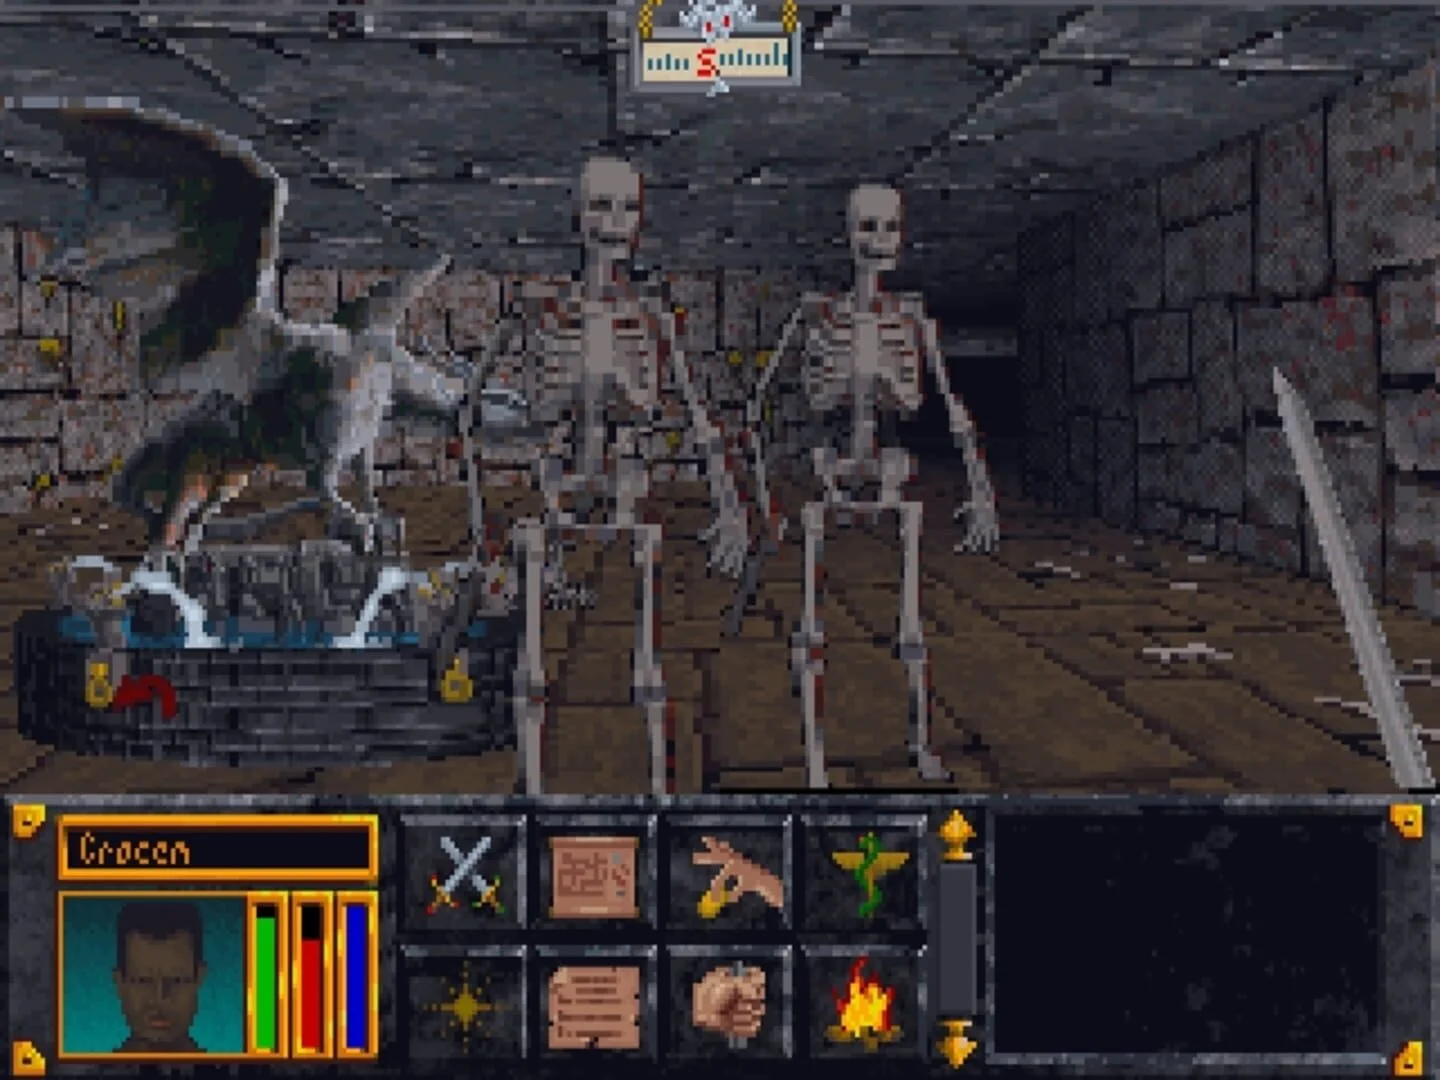
1. Take the Ruby Key and prepare to leave the cell
After character creation, the game places you in the first Imperial Dungeon. The exact dungeon and the city you reach after escaping depend on the home province selected during character creation, so do not expect every playthrough to use the same layout. The room itself is always the important starting landmark: your cell, Ria Silmane’s apparition and the northern wall niche containing the Ruby Key.
Take the Ruby Key from the niche in the north wall, then use it on the cell door. Before stepping into the corridor, open the character and equipment screens. Confirm which weapon your class starts with, make sure it is equipped, and identify the icons for status, inventory, attack, spellcasting, the logbook, map and camping. Arena’s original interface combines mouse-driven actions with keyboard movement, so a short practice inside the cell is safer than learning every function during an ambush.
Ria’s instructions are the route objective, not a suggestion to explore the entire dungeon. She tells you to make your way west and then south. The destination is a Shift Gate in the southwestern corner, which transports you to another city inside its gates.
- Take the Ruby Key from the northern wall niche.
- Unlock the cell door.
- Confirm that your starting weapon is equipped.
- Locate the status, logbook, map and camp functions.
2. Move through the first corridors without wasting resources
Leave the cell and follow corridors generally west. The dungeon is hostile, but killing every creature is unnecessary for campaign progress. Fight only when an enemy blocks the route or is close enough to threaten you. Arena melee attacks are made with the attack function and directional mouse movement; use controlled swings or thrusts, then step backward through a doorway if you are being surrounded.
A doorway or narrow passage is safer than an open junction because it limits the number of enemies that can reach you at once. If your health drops, retreat rather than trying to finish a fight at low strength. Check the status display after combat for health and harmful conditions. A disease, poison or paralysis effect is a reason to prioritize escape over treasure hunting.
Do not make resting in the opening dungeon your default recovery plan. Resting can cause stronger enemies to appear, and the first dungeon becomes more dangerous the longer you remain inside. If you are healthy enough to continue, keep moving toward the exit. If you need to recover, use a secure room only long enough to give yourself a chance to proceed, then resume the route.
You may search containers when a room is safe, but treat loot as optional. The required reward for this chapter is reaching the Shift Gate, not collecting starting equipment.
- Travel west from the cell before turning south.
- Use doorways to control encounters.
- Check health and conditions after fights.
- Avoid prolonged exploration and unnecessary resting.
- Leave optional containers unopened if enemies are nearby.
3. Use the automap and keep the route legible
Open the automap at junctions and use it to distinguish explored corridors from unvisited ones. The first dungeon’s passages can look similar, and the precise arrangement varies with the generated dungeon. Do not rely on a memorized room sequence from another character or guide. Instead, use the compass direction given by Ria and compare your position with the map after each major turn.
The practical route is west from the cell, then south toward the dungeon’s southwestern corner. If a passage bends or forces a short detour, continue choosing corridors that bring you back toward those directions. A dead end is not a failure; mark it mentally or on paper, turn around and continue from the last junction. The goal is to find the blue gate, not to produce a complete map.
If you become disoriented, stop moving before opening the map. Check the direction of your current corridor, identify the explored area nearest the cell and retrace your route until the westward path is clear. Do not use a random stairway or spend time searching for a lower level. The first-dungeon escape is completed through the Shift Gate, not through a dungeon boss or a treasure chamber.
- Open the automap at major forks.
- Use west, then south, as the route rule.
- Mark or remember dead ends before backtracking.
- Do not search for a boss, staff piece or deeper dungeon level.
4. Enter the Shift Gate in the southwestern corner
Continue south after making your way west. In the southwestern section, look for a shimmering blue opening rather than an ordinary door, staircase or grating. This is the Shift Gate described by Ria. Move into the gate to activate it and complete the escape. You do not have to defeat all the dungeon’s enemies first, and you do not need a special staff piece or additional key for this sequence.
If you reach the southwest area but do not immediately see the gate, inspect nearby corridor branches and use the automap to confirm that you are actually at the outer southwestern portion of the dungeon. The gate is the exit landmark. Do not mistake a normal blue-toned wall or decorative surface for it; the correct gate is a distinct shimmering opening that transports you away from the dungeon.
Once the transition finishes, note the name of the city and province where you arrive. The destination is tied to your selected home province, and this first dungeon cannot be revisited after you leave.
- Reach the southwestern section of the dungeon.
- Find the shimmering blue Shift Gate.
- Enter the gate instead of searching for another exit.
- Note the city and province after the transition.
5. Create the permanent post-escape save
Save as soon as you arrive inside the city. Use a slot or label such as PRISON, ESCAPED or POST-ESCAPE. Arena permits multiple saved games, so reserve this one as a fallback and do not overwrite it with ordinary travel or dungeon attempts. If you are using the GOG release with cloud saves enabled, also keep an external copy of the relevant save files when practical; Arena saves are stored as groups of numbered files rather than as one ordinary document.
After saving, move a short distance and confirm that the city loads and responds normally. Open the main interface, check the map and logbook, and make a second save only if you want a separate working slot. Keep the first post-escape save untouched until the character has completed several later quests.
Do not expect to return to the opening dungeon for missed loot. The area is a one-time starting dungeon, so any optional equipment left behind is less important than preserving a successful escape.
- Save immediately after arriving in the city.
- Reserve a separate PRISON or ESCAPED slot.
- Confirm the city, map and menus work after loading.
- Do not overwrite the fallback save during early exploration.
6. Learn the city’s recovery and travel services
Before pursuing a dangerous assignment, identify an inn or tavern, an equipment shop, a temple and the palace. If you are injured or affected by poison, disease or a curse, the temple can provide the appropriate treatment for a fee. You can also recover naturally by camping outside city walls or inside a tavern room that you have purchased or otherwise secured. You cannot simply camp in the middle of the city streets.
Repair damaged equipment before leaving town. Buy only what you can afford and prioritize a usable weapon, basic protection and enough funds for travel or treatment. You do not need to complete errands for random townspeople to escape or begin the main campaign. Local jobs and wilderness exploration are optional ways to earn money and experience.
When speaking with residents, put away your weapon if the conversation prompt does not appear. Ask about rumors when you need local information, but do not let optional errands bury the main objective.
- Locate an inn or tavern.
- Find the temple and equipment shop.
- Heal or treat harmful conditions before travel.
- Repair essential equipment.
- Remember that camping requires the wilderness or a rented tavern room.
7. Check the palace, logbook and continental map
Visit the city palace and speak with the ruler or palace staff. Palaces are the official source of regional quests and can provide clues, assignments and locations. After accepting any task, open the logbook and read the entry rather than relying on memory. The logbook records quest information and the provinces where discovered locations have been placed on the continental map.
Use the map to locate the province or dungeon named in the entry. Arena’s world locations and many dungeon layouts are randomized, so do not search for a universal coordinate or expect another player’s route to match yours. The logbook is especially important because it displays only a limited number of entries; optional errands can eventually displace older information. Write down the name of every main-quest dungeon and its province before accepting several unrelated jobs.
If the palace does not immediately give you the precise dungeon information you expected, check the logbook, speak with the relevant palace residents again and ask local NPCs for rumors. The next objective should be anchored to a named quest entry or map marker, not guessed from the city layout. Finish this chapter by healing, repairing, saving and preparing for the first provincial assignment.
- Visit the palace after escaping.
- Read the new logbook entry.
- Record the named location and province outside the game.
- Use the continental map to find the marked destination.
- Keep optional errands from filling the logbook.
Before you move on
- The character has entered the starting cell, taken the Ruby Key and unlocked the cell door.
- The character has traveled west and then south through the first Imperial Dungeon.
- The character has entered the shimmering Shift Gate in the southwestern corner.
- The game has loaded the character inside a city in the selected home province.
- A dedicated PRISON, ESCAPED or POST-ESCAPE save loads successfully.
- The player has located an inn or tavern, temple, equipment shop and palace.
- The logbook and continental map are available, and the character is ready to pursue the first provincial quest.
Main-quest progression, lead-in dungeons and map tracking
Arena’s Staff of Chaos campaign follows eight required lead-in objectives and eight paired Staff-piece locations. The reliable order is Stonekeep then Fang Lair; Fortress of Ice then Labyrinthian; Selene’s Web then Elden Grove; Temple of Agamanus then Halls of Colossus; Temple of the Mad God then Crystal Tower; Mines of Khuras then Crypt of Hearts; Vaults of Gemin then Murkwood; Black Gate then Dagoth-Ur; and finally the Imperial Palace. The overworld destination is determined by the current logbook and province map, so do not rely on universal travel coordinates. The named main-quest locations are authored quest sites with fixed objectives and puzzle logic, although some interiors, especially Murkwood’s misty first level, are deliberately confusing. Work Rumors, artifact quests and ordinary palace assignments are optional and do not replace a Staff objective.
Use the logbook and map to identify the current objective
After escaping the Imperial Dungeon, rest in a safe town or inn whenever the next main-quest instruction is due. Ria Silmane’s dream bridges provide the campaign’s broad direction, while named contacts provide several required lead-in tasks. Read the current logbook after each dream, hand-in and dungeon completion. Record the province, city, contact, lead-in location, required item and Staff dungeon before accepting unrelated work.
Use the current province map as the travel authority. Arena can place a marked overworld destination at a different location from another playthrough, so fixed compass directions and memorized coordinates are unreliable. This does not mean the main-quest dungeon interiors are procedurally regenerated. The quest sites have authored layouts, fixed objective logic and specific puzzle sequences. Murkwood is an exception only in presentation: its first level is a foggy forest without ordinary corridor walls, but the location, central descent, riddles and Staff-piece objective remain the same.
Create a progression save before resting for the next stage, another after accepting a lead-in request and a third after the required hand-in succeeds. Do not mark a pair complete merely because you entered the dungeon. Mark it complete only after the lead-in item has been delivered, the Staff dungeon has appeared on the map and the Staff piece has been collected.
- Read the logbook after every dream, hand-in and Staff-piece recovery.
- Record the marked province location instead of relying on a universal coordinate.
- Keep separate saves before accepting, before handing in and after completing each stage.
Complete the required sequence without substituting optional quests
Follow this order: Stonekeep, then Fang Lair; Fortress of Ice, then Labyrinthian; Selene’s Web, then Elden Grove; Temple of Agamanus, then Halls of Colossus; Temple of the Mad God, then Crystal Tower; Mines of Khuras, then Crypt of Hearts; Vaults of Gemin, then Murkwood; Black Gate, then Dagoth-Ur; and finally the Imperial Palace.
Stonekeep is the first lead-in and requires recovering its parchment for Queen Blubamka in Rihad. Her successful hand-in reveals Fang Lair, where the first Staff piece is found. Fortress of Ice is the next lead-in and points to Labyrinthian for the second piece. Selene’s Web provides the Heart of Selene for Queen Ulandra and reveals Elden Grove, the third Staff-piece site. Temple of Agamanus leads to Halls of Colossus, the fourth piece.
The Temple of the Mad God leads to Crystal Tower, the fifth piece. Mines of Khuras is not a Staff-piece dungeon: recover its Map Fragment and return it to Halfas Varn at the Brotherhood of Seth so that Crypt of Hearts is revealed for the sixth piece. Vaults of Gemin follows Crypt of Hearts and provides the tablet needed to reveal Murkwood, the seventh-piece site. Black Gate follows Murkwood and provides the Hammer of Gharen needed to reveal Dagoth-Ur, the eighth-piece site.
Work Rumors, artifact quests, guild jobs and ordinary assignments from rulers are optional. They can provide experience, gold and equipment, but they do not replace the named Staff campaign objectives.
- Complete all eight lead-in objectives and all eight paired Staff-piece locations in order.
- Treat Mines of Khuras, Stonekeep and the other lead-ins as preparation stages, not Staff-piece dungeons.
- Do not enter the Imperial Palace until Dagoth-Ur and the post-dungeon Staff transition are complete.
Complete Selene’s Web and reveal Elden Grove
After Labyrinthian, travel to Eldenroot in Valenwood and speak with Queen Ulandra. Accept her request to recover the Heart of Selene from Selene’s Web. The queen marks Selene’s Web on the Valenwood map; save before leaving Eldenroot and confirm that the marker is present.
Selene’s Web has a fixed quest objective. On the second level, reach the training-area section and search for the Diamond Key. The key is guarded, so heal before entering the room and be ready for Wraiths and other strong enemies. Use the Diamond Key on the central locked chamber, or use an appropriate lock-opening spell if your character has one, then take the Heart of Selene. Save before leaving the dungeon so a failed return trip does not erase the completed objective.
Return to Queen Ulandra in Eldenroot and hand over the Heart. The successful exchange reveals Elden Grove on the Valenwood map. Elden Grove is the third Staff-piece dungeon and must be completed before the Temple of Agamanus stage becomes the next campaign objective. Its misty first level and water-filled passages can make navigation difficult, so use the dungeon map and mark the entrance, descent and explored branches. The fixed gate riddle in Elden Grove is answered with “Time.” After taking the third Staff piece, save again and rest to trigger the next dream or logbook update.
- Queen Ulandra issued the Heart of Selene objective.
- The Heart of Selene was returned to Queen Ulandra.
- Elden Grove is marked on the Valenwood map.
- The third Staff piece was collected before moving to Temple of Agamanus.
Complete Vaults of Gemin and reveal Murkwood
After Crypt of Hearts, follow the next dream or logbook direction to Black Marsh. Travel to Stormhold and ask about the location of Murkwood if the game does not immediately identify the contact. The required contact is Idolan Lancaster, leader of the Conclave of Baal. Speak with him, accept his request and confirm that Vaults of Gemin is marked on the Black Marsh map before leaving the city.
Enter Vaults of Gemin and recover the Tablet of Baal. This is the required quest item; ordinary treasure or an artifact found in the same dungeon does not advance the Staff campaign. The dungeon has an authored two-level layout. Use the map to separate explored rooms from loops, and inspect the marked lower areas rather than leaving after finding unrelated loot. Save once the tablet is in your inventory.
Return to Idolan Lancaster at the Conclave of Baal and deliver the tablet. He then reveals Murkwood on the Black Marsh map. If the marker does not appear, reload the save from before the hand-in and confirm that you are speaking with Idolan and that the Tablet of Baal is still present. Do not enter an unmarked Murkwood location as a substitute for the current quest objective.
Murkwood contains the seventh Staff piece. Its first level is a large, fog-filled forest rather than a conventional corridor maze. Head toward the forest’s center, where stronger guardians and the descent gate are located. The gate’s riddle answer is “Love.” On the second level, answer the Staff-room riddle with “Water,” then take the seventh piece and save immediately. Rest after escaping to advance to the Black Gate objective.
- Idolan Lancaster accepted the Vaults of Gemin request.
- The Tablet of Baal was returned to the Conclave of Baal.
- Murkwood is marked on the Black Marsh map.
- The seventh Staff piece was collected and backed up in a separate save.
Complete Black Gate and reveal Dagoth-Ur
After Murkwood, travel to Ebonheart in Morrowind and speak with King Casik in the palace. Accept the request for the Hammer of Gharen, save before leaving Ebonheart and check the Morrowind map for the Black Gate marker. Black Gate is a lead-in location, not the eighth Staff-piece dungeon.
Enter Black Gate and follow its fixed quest layout toward the required keys and guarded weapon chamber. The dungeon includes water-separated passages and misleading routes, so keep the entrance and explored branches visible on the map. Recover the Hammer of Gharen, then save before travelling back to Ebonheart.
Return the hammer to King Casik. He uses it to identify and mark Dagoth-Ur on the Morrowind map. Confirm the marker before entering the final Staff-piece dungeon. Preserve one save outside Dagoth-Ur and another immediately before taking the final piece, because the pickup begins the final dungeon transition and an ambush.
Complete Dagoth-Ur, collect the eighth piece and survive the post-dungeon ambush. The final Staff restoration occurs during this sequence; do not require eight separate fragment objects to remain in the inventory afterward. Rest after the ambush and check the logbook and game state. A missing or unreliable final Ria vision in the original DOS/GOG progression is not by itself proof that the campaign failed. The required checks are the completed Dagoth-Ur transition, recognition of the restored Staff and access to the Imperial City and Imperial Palace.
Only then prepare for the finale. The campaign checklist must show Elden Grove, Murkwood and Dagoth-Ur complete before entering the Imperial Palace.
- King Casik accepted the Hammer of Gharen.
- Dagoth-Ur is marked on the Morrowind map.
- The eighth Staff piece and post-dungeon ambush are complete.
- The game recognizes the restored Staff before Imperial Palace entry.
Before you move on
- The completed campaign checklist shows these pairs in order: Stonekeep and Fang Lair; Fortress of Ice and Labyrinthian; Selene’s Web and Elden Grove; Temple of Agamanus and Halls of Colossus; Temple of the Mad God and Crystal Tower; Mines of Khuras and Crypt of Hearts; Vaults of Gemin and Murkwood; Black Gate and Dagoth-Ur.
- The Heart of Selene was returned to Queen Ulandra, the Mines of Khuras Map Fragment was returned to Halfas Varn, the Tablet of Baal was returned to Idolan Lancaster and the Hammer of Gharen was returned to King Casik.
- Elden Grove, Murkwood and Dagoth-Ur are complete before Imperial Palace entry.
- The final Dagoth-Ur transition and post-dungeon ambush are complete, and the game recognizes the restored Staff.
- The remaining required destination is the Imperial Palace finale.
References for this chapter
- The Elder Scrolls: Arena — GOG.com
- Bethesda Support: Does DOSBox need to be configured prior to running Arena?
- Main Quest (Arena) — Elder Scrolls Wiki
- Stonekeep (Quest) | Elder Scrolls Wiki
- Selene’s Web (Quest)
- Elden Grove (Quest)
- Mines of Khuras (Quest)
- Vaults of Gemin (Location)
- Murkwood (Quest)
- Black Gate (Quest) — Elder Scrolls Wiki
- The Book of Clues — Arena hintbook PDF
Fang Lair — claim the first Staff piece
Fang Lair is the second dungeon in the first Staff-piece objective. Queen Blubamka of Rihad first sends you to Stonekeep to recover a parchment stolen by Golthog the Dark. The parchment is on a ghoul-guarded island near Stonekeep’s entrance. Return it to Blubamka so she can mark Fang Lair on the Hammerfell map. Fang Lair then requires a specific route: reach the southwestern spider prisons, answer the cell riddle with Cell 2, take the golden key, descend to the second floor, cross the lava room, answer glove or gauntlet, defeat the two Hell Hounds and collect the first Staff piece. Save before entering each dungeon and immediately after each quest item. Stonekeep is optional to explore beyond the parchment; Fang Lair is the required Staff dungeon.
1. Receive the Stonekeep objective from Queen Blubamka
After the opening escape and Ria Silmane’s instructions, speak with people in cities, temples or guilds until the main-quest trail directs you to Rihad in Hammerfell. Enter Rihad Palace and request an audience with Queen Blubamka. She explains that Golthog the Dark and his goblins attacked the stronghold and stole a parchment containing clues to Fang Lair. Accept her request to recover it. The queen then marks Stonekeep on your Hammerfell map.
Do not travel to Fang Lair yet. At this stage, Fang Lair has not been revealed and is not the required destination. Open the logbook and confirm that Stonekeep is the active objective. The manual explains that quest locations are recorded in the logbook and appear as new dungeon icons on the relevant provincial map, so use the marked location rather than trying to identify a fixed coordinate from another playthrough.
Before leaving Rihad, repair your weapon and armor, heal at a temple and purchase healing supplies. A temple can also cure disease, poison or curses if the prison escape left you afflicted. Make a save named BEFORE_STONEKEEP and keep a separate backup outside the active save directory. The GOG distribution runs the original DOS game through DOSBox; do not install a remake or mod while diagnosing a quest problem.
- Queen Blubamka assigned the Stonekeep parchment objective.
- Stonekeep is marked on the Hammerfell map.
- The objective is visible in the logbook.
- A pre-dungeon save is preserved.
2. Recover the parchment in Stonekeep
Travel to the Stonekeep icon. Stonekeep is near Rihad, and the closest settlement is Chaseguard, but the exact travel route and time shown by your game are the authority. Enter the dungeon, save immediately and keep the entrance in mind. Stonekeep contains optional rooms and loot, but you only need the parchment to advance the main campaign.
For the fastest route, use the entrance landmarks described in the quest map: follow the right-hand wall and enter the last door on that side. In the next hallway, again take the last door on that side. Enter the room beyond it and use the opening in the west wall. This leads downward toward a group of skeletons. Defeat them or retreat and return after healing if the fight is too costly.
Beyond the skeleton area is water. Swim to the central island rather than searching every corridor for a chest. Ghouls guard the island and can inflict disease, so keep healing available and avoid lingering in the water after taking damage. The parchment is at the back of the island near the treasure chests. Search the item location directly; it is not a random bottom-level map reward. When you take it, the game displays a message identifying it as the parchment Rihad needs to locate Fang Lair.
The parchment is the required quest item. You may explore Stonekeep for additional treasure, and an iron key on the island opens optional areas farther south, but neither exploration nor the iron key is required for Fang Lair. If you become diseased, trapped or uncertain of the exit, reload the pre-Stonekeep save instead of overwriting it.
- The central island has been reached.
- The ghoul guards have been defeated or bypassed.
- The parchment was taken from the back of the island.
- The parchment-confirmation message appeared.
- A save exists with the parchment in your inventory.
3. Return the parchment and confirm Fang Lair
Leave Stonekeep and return to Rihad Palace. Speak with Queen Blubamka again while the parchment is in your inventory. She acknowledges the recovery and has the parchment deciphered. The reward is not a Staff piece: she inscribes Fang Lair’s location onto your Hammerfell map.
Open the map and logbook before leaving the palace. Confirm that Fang Lair now has a new dungeon marker and that the main-quest entry identifies Fang Lair as the next destination. If the queen gives only ordinary dialogue, reload the save made after obtaining the parchment, exit and restart the game if necessary, then return to the palace again. Do not abandon the parchment or accept a generic side quest in its place.
Create a save named BEFORE_FANG_LAIR. Buy Healing or Heal True potions, and purchase Resist Fire protection if the Mages Guild offers it. Fang Lair contains lava and ends with two Hell Hounds that cast fireballs. The dungeon has limited opportunities for safe recovery, so arrive with enough supplies to survive the second floor. From Rihad, the game may show a long journey to the Hammerfell-Skyrim border; the marked icon and current travel screen override any remembered travel duration.
- Queen Blubamka accepted the parchment.
- Fang Lair is marked on the Hammerfell map.
- The logbook identifies Fang Lair as the active destination.
- Healing and fire protection are ready.
- A BEFORE_FANG_LAIR save is preserved.
4. Reach the spider prisons
Enter Fang Lair and save in the entrance area. The first floor is a large mine complex containing interconnected tunnels, shafts and ledges. You do not need to clear every chamber. The required route trends toward the southwestern-most part of the dungeon, where a room contains six caged spiders and the ladder to the second floor.
Use the mine shafts as landmarks, but do not commit to a shaft unless you can identify the route back. Enemies include skeletons, minotaurs, ghouls, spiders, Orcs and trolls. If a fight blocks a narrow ledge, retreat into a wider room before attacking. Mark major junctions on paper or with your own map notes, because the shortest route spends considerable time around shafts and can make combat and navigation awkward.
When you reach the spider-prison room, save before approaching the speaking door at the southeastern end. Three southern cells contain keys. Cell 1 and Cell 3 contain steel keys; Cell 2 contains the golden key needed to open the route onward.
- The Fang Lair entrance save exists.
- The route is progressing southwest toward the caged spiders.
- The spider-prison room has been located.
- A save exists before the first riddle.
5. Solve the spider-prison riddle and descend
The speaking door asks which cell contains the gold key. Enter Cell 2, 2, cell2, the second cell, the 2nd cell or c2. Capitalization does not matter. These are the accepted forms documented for the original PC quest. Do not improvise another answer: an incorrect response releases five spiders and leaves the golden-key route closed until you solve the situation or reload.
After the correct response, Cell 2 opens. Take the golden key and use it on the puzzle door or portal in the prison area. This gives access to the ladder leading to Fang Lair’s second floor. Save again after the ladder becomes available. The golden key is a progression item, so do not discard it or leave the dungeon before confirming that the upper route is open.
- The answer identified Cell 2.
- The golden key was collected.
- The route to the second-floor ladder opened.
- A second-floor approach save is preserved.
6. Cross the lava room and answer the final riddle
The second floor is comparatively linear. Follow the hallway from the ladder and defeat or bypass the three skeletons. The passage leads to a square room with lava channels and a black-rock chamber in the middle. Resist Fire protection prevents lava damage while it lasts, so use it before crossing if available. Save in or just before this room.
Approach the central chamber only after healing and preparing for combat. Its door asks what is neither fish nor flesh, feathers nor bone, but has fingers and thumbs. Enter glove, gloves, a glove, gauntlet, gauntlets or a gauntlet. A wrong response does not damage the character, but the door remains closed until an accepted answer is entered.
Once the door opens, two Hell Hounds attack. Back away from the doorway so they cannot pin you against the entrance, keep space for movement and use fire resistance while fighting. Heal before reaching critical health; there is no dependable resting area inside this final section.
- The second-floor skeletons are defeated or bypassed.
- The lava room has been reached.
- Fire resistance and healing are ready.
- The final answer was glove or gauntlet.
- A save exists immediately before the central door.
7. Take the first Staff piece and exit safely
After both Hell Hounds are defeated, enter the central chamber and take the Staff piece floating over the blood pool. The game displays a message explaining that the piece flashes and becomes a dull piece of ebony, waiting to be joined with the other seven pieces. That message is the reliable completion confirmation; do not expect the item to remain a glowing weapon-like object.
Save immediately as FANG_LAIR_COMPLETE before beginning the return journey. Retrace the second-floor hallway to the ladder, return through the spider-prison route and follow your recorded landmarks through the mine. If an enemy blocks a shaft or you lose the route, reload the pre-extraction save rather than risking the only copy of the Staff-piece progress.
After leaving Fang Lair, travel to an inn and rest so Ria Silmane can deliver the next main-quest direction, which leads toward Fortress of Ice. On PC versions, Jagar Tharn may appear in a dream around this point, including before Ria’s next contact. That dream does not invalidate the quest. If Ria’s message does not appear, rest again and confirm that the dull Staff piece remains in your inventory and that Fang Lair is marked complete in the logbook.
- Both Hell Hounds were defeated.
- The first Staff piece was collected.
- The dull ebony piece remains in the inventory.
- FANG_LAIR_COMPLETE was created.
- You exited Fang Lair and rested at an inn.
- Ria’s next main-quest direction appeared, or the quest state was confirmed by the logbook and inventory.
Before you move on
- Stonekeep’s parchment was recovered from the ghoul-guarded island.
- Queen Blubamka accepted the parchment and Fang Lair appeared on the Hammerfell map.
- The spider-prison riddle was solved with Cell 2 and the golden key was used.
- The final riddle was answered with glove or gauntlet.
- Both Hell Hounds were defeated.
- The first Staff piece changed into the dull ebony piece and the confirmation message appeared.
- The piece remains in the inventory after exiting Fang Lair.
- A separate FANG_LAIR_COMPLETE save exists before continuing to the Fortress of Ice objective.
Labyrinthian — recover the second Staff of Chaos piece
After Fang Lair, Ria Silmane identifies Labyrinthian as the location of the second Staff piece. Travel to Winterhold, speak with Thelen Kaarn, recover his stolen tablet from Fortress of Ice, and return it so he can mark Labyrinthian on your map. Inside Labyrinthian, first follow the central passage to learn the clue sequence. Then enter Door 1 to reach Mogrus’s domain and obtain the Diamond Key by answering “nothing.” Return to the entrance, take Door 2 to Kanen’s domain, answer “hourglass” to receive the Sapphire Key, and return to the central locked route. Use the two keys in sequence, answer “key” at the final gate, defeat the two Ghosts, and take the second Staff piece. Save before each domain, before every riddle, and immediately after collecting the piece.
1. Complete the Fortress of Ice lead-in
Do not travel directly to Labyrinthian after Fang Lair. The next main-quest lead begins when Ria Silmane directs you toward the second Staff piece, but the actual location must be deciphered by Thelen Kaarn in the Mages Guild at Winterhold.
Travel to Winterhold in Skyrim and speak with Thelen Kaarn. He explains that a tablet connected with Archmagus Shalidor was stolen and that the tablet is needed to determine Labyrinthian’s location. Accept this objective before leaving the city.
Travel to Fortress of Ice using the location marked on your map. This is a separate dungeon and does not contain the second Staff piece. Search through the fortress until you reach the tablet chamber. The upper level can be confusing, and Ice Golems and Snow Wolves can punish a character who advances without healing supplies or a retreat route.
The tablet chamber is protected by a spoken door riddle. The answer is “air”; “wind” is also accepted by the original game’s quest sequence. After the door opens, defeat the Ice Golem inside and take the tablet from the chamber. Save before leaving if you have a separate slot available, then return to Winterhold and speak with Thelen Kaarn again.
- Thelen Kaarn gave you the Fortress of Ice objective.
- The tablet is in your inventory.
- Thelen Kaarn accepted the tablet and marked Labyrinthian on the world map.
2. Prepare for the Labyrinthian entrance
Before travelling to Labyrinthian, repair your primary weapon and armor and replenish healing supplies. The dungeon is substantially more complicated than Fortress of Ice, and the two domains contain lava, locked routes and stronger enemies, including Trolls, Ghouls, Ghosts and Iron Golems.
Use the world map marker rather than trying to infer an exact wilderness coordinate. The nearby settlement is useful for resupply, but the entrance marker is the authority for your edition and character’s generated world placement.
Create a dedicated save before entering. If you have not received a dream encounter from Jagar Tharn since the previous Staff dungeon, the game can force that encounter during the journey to Labyrinthian. Be prepared for an ambush near the dungeon entrance rather than assuming the travel sequence will be uneventful.
- Your equipment is repaired.
- Healing and offensive resources are available.
- A save exists immediately before entering Labyrinthian.
3. Follow the central passage and record the domain order
When you enter Labyrinthian, begin with the central route. The entrance area presents three grates or passages, but the central path provides the story and directional clue needed for the rest of the dungeon. Do not immediately commit to either side route before examining this central passage.
The clue identifies two brothers, Mogrus and Kanen, and explains that their domains contain the keys needed to reach the Staff chamber. After reading the central clues, return toward the entrance and identify the side routes marked Door 1 and Door 2.
Use Door 1 first. Door 1 leads to Mogrus’s domain and the Diamond Key. Door 2 leads to Kanen’s domain and the Sapphire Key. The original dungeon’s labels are important because taking the domains in the wrong order can make the central locked route harder to interpret.
- You examined the central passage.
- You identified Door 1 and Door 2.
- You are proceeding through Door 1 before Door 2.
4. Enter Mogrus’s domain and obtain the Diamond Key
Take Door 1 and follow the route into Mogrus’s domain. The domain leads upward to its second-floor area. Use the dungeon map if available, or mark every junction on paper; the corridors and lava sections make it easy to circle back to a previously visited room.
Your objective is the chamber containing two enclosed areas. Mogrus’s spirit is held in one enclosure, while the Diamond Key is held in the adjacent enclosure. The route includes difficult enemies and may require using upper and lower passages around lava rather than crossing dangerous ground directly.
Approach Mogrus’s enclosure and answer his riddle. The correct answer is “nothing.” If you answer incorrectly, Mogrus can escape and attack, so save before speaking to him. After the correct response, the spirit is released and the adjacent enclosure containing the Diamond Key becomes accessible. Take the Diamond Key and save again.
The Diamond Key is not obtained from an arbitrary chest and is not a random replacement for the tablet. If you cannot find it, return to Mogrus’s chamber and inspect the neighboring enclosure after completing the riddle.
- You entered Mogrus’s domain through Door 1.
- You answered Mogrus with “nothing.”
- You collected the Diamond Key.
5. Use the Diamond Key and enter Kanen’s domain
Return through Mogrus’s domain to the first-floor entrance area. Avoid unnecessary fights on the return trip; the objective is to reach the central locked route with the Diamond Key intact.
Use the Diamond Key on the locked door associated with Mogrus’s route. Once it opens, continue until the path directs you back toward the remaining domain entrance. Then take Door 2 to enter Kanen’s domain.
Kanen’s domain has its own upper area and can be just as confusing as Mogrus’s. Follow marked junctions and use upper or lower passages when lava blocks the direct route. The key is in Kanen’s enclosure, not in the ordinary treasure containers scattered through the domain.
Save before approaching Kanen. His riddle has a specific answer, and a failed response can turn the encounter hostile.
- The Diamond Key opened the Mogrus-side locked route.
- You entered Kanen’s domain through Door 2.
- You saved before speaking with Kanen.
6. Answer Kanen’s riddle and collect the Sapphire Key
Locate Kanen’s enclosure in his domain and speak with him. The riddle describes two bodies joined as one, with the answer becoming faster when standing still. Enter “hourglass” as the answer.
After the correct answer, collect the Sapphire Key from the adjoining enclosure. Do not confuse it with the Diamond Key; both are required, and neither one substitutes for the other.
If the answer is rejected, check the spelling and reload the save made before the conversation rather than repeatedly provoking the encounter. Keep the Sapphire Key in your inventory while retracing your route. You do not need to clear every side room or loot every chest once the key is secured.
- You answered Kanen with “hourglass.”
- You collected the Sapphire Key.
- Both the Diamond Key and Sapphire Key are in your inventory.
7. Open the final gate and claim the Staff piece
Return to the central route and use the Sapphire Key on the remaining locked door. The key sequence is therefore Diamond Key first, followed by Sapphire Key. If a door does not respond, confirm that you are at the central progression doors rather than an unrelated locked door in one of the domains.
Beyond the two keyed doors, approach the final gate and answer its riddle. The correct answer is “key.” Save immediately before entering the answer so that a mistake does not require repeating the domains.
Two Ghosts guard the Staff chamber beyond the opened gate. Fight from a position that prevents both enemies from surrounding you. Back toward the doorway or another narrow approach when possible, and use reliable weapon attacks or spells rather than exhausting every resource on lesser enemies earlier in the dungeon.
After defeating both Ghosts, approach the Staff piece and take it. Confirm that the acquisition message appears and that the piece is present in your inventory. The item may visually or mechanically appear connected with the first piece, but the important completion condition is that the second Staff piece has been collected.
- The Diamond Key opened the first progression door.
- The Sapphire Key opened the second progression door.
- The final riddle accepted “key.”
- Both Ghosts are defeated.
- The second Staff of Chaos piece is in your inventory.
8. Leave Labyrinthian and continue the main quest
Retrace your marked route to the entrance. Do not continue searching for optional treasure unless you deliberately want to explore; the main-quest objective is complete once the Staff piece has been taken.
Create a completed-Labyrinthian save outside the dungeon and keep the pre-entry and pre-final-gate saves. The next main-quest objective is normally delivered through the continuing Ria Silmane dream sequence or the next quest transition. Rest after reaching safety if you need to advance time, but do not treat a missing immediate dream as proof that the piece failed to register.
If the next objective does not appear, first confirm that the Staff piece is still in your inventory and that you received the pickup message. Reload the save made after the pickup or the save before the final gate and repeat the final sequence if necessary. Do not discard, sell or store the Staff piece away from the character.
- You exited Labyrinthian with the second piece.
- A completed-dungeon save exists outside the dungeon.
- Ria’s next main-quest direction has appeared, or the piece and completion save are securely preserved.
Before you move on
- Thelen Kaarn accepted the Fortress of Ice tablet and marked Labyrinthian.
- The central passage was examined before entering the two domains.
- Door 1 was used for Mogrus, and “nothing” opened the route to the Diamond Key.
- Door 2 was used for Kanen, and “hourglass” opened the route to the Sapphire Key.
- The Diamond Key and Sapphire Key opened the two central progression doors.
- The final gate accepted “key,” both Ghosts were defeated, and the second Staff of Chaos piece was collected.
- You left the dungeon with the piece in your inventory and preserved a completed-dungeon save.
Elden Grove and Halls of Colossus — Staff Pieces Three and Four
Return the Heart of Selene to Queen Ulandra in Eldenroot to reveal Elden Grove, then recover Staff Piece #3 by reaching the northern island, answering Footsteps at the piece door and using Time at the escape door. After the ambush and Ria’s next vision, travel to Corinth and speak with Turamane ap’Kolthis in the Mages Guild. Recover the tablet from Temple of Agamanus and answer Sun at the objective door. Temple of Agamanus Level 2 has a documented original-DOS obstruction that can block the normal route; prepare Passwall, Destroy Wall or a supported equivalent before entering. Levitation helps with the Level 3 lava and water crossings but does not guarantee passage through the Level 2 obstruction. Return the tablet to Turamane to reveal Halls of Colossus. Collect its seven progression keys, use the six Level 2 doors and the remaining Level 3 key route, then answer Theodorus and 108. Take Staff Piece #4 from the Homonculi chamber, save after leaving and follow the next Ria direction to Temple of the Mad God.
Return the Heart of Selene and reveal Elden Grove
After completing Selene’s Web, keep the Heart of Selene in your inventory and return to Eldenroot in Valenwood. Enter the palace and speak with Queen Ulandra. Give her the Heart when she asks for it. This hand-in marks Elden Grove on the Valenwood map and advances the main campaign. Elden Grove is the fourth main-quest dungeon and awards Staff Piece #3.
Save before the hand-in and again after Elden Grove appears on the map. Before travelling, repair your main weapon, rest and replenish healing supplies. Prepare a way to deal with hostile magic if available, because wraiths appear near the Staff piece. If Ulandra does not acknowledge the Heart, reload the pre-hand-in save rather than discarding the item or accepting unrelated palace work.
- The Heart of Selene is in the inventory.
- Queen Ulandra received the Heart.
- Elden Grove is marked on the Valenwood map.
- Pre-hand-in and pre-dungeon saves are protected.
Reach Staff Piece #3 in Elden Grove
Enter the marked Elden Grove entrance and use the automap throughout the outdoor section. Heavy fog makes visual navigation unreliable. Work generally toward the southeast corner until you find the stone building containing the stairs to Level 2. The exact corridor appearance can vary in usefulness, so treat the southeast descent building as the important landmark. Avoid unnecessary fights if health or spell reserves are low.
At the start of Level 2, answer Time at the opening cell. Once the passage opens, travel west as far as the dungeon allows, then use Levitation to travel north over the water toward the small island near the northern edge of the map. Save before entering the island area. If you use a boat, disembark before combat because normal fighting is restricted while riding it.
The Staff-piece door asks the riddle beginning with the line about a second being performed by a first. Enter Footsteps, using the plural form. The chamber contains Staff Piece #3 and wraiths. Use Invisibility, Resist Magic, ranged attacks or a fast pickup-and-retreat plan if the guardians are too dangerous to fight directly. Confirm the piece has entered the inventory before leaving.
The extraction route uses a different passage from the approach. Follow the revealed route back toward the entrance and answer Time again at the escape cell. Leave the dungeon and create a recovery save immediately. After taking the piece, Jagar Tharn can send servants in an ambush. Rest in a safe town only after preserving the post-pickup save.
- The Level 2 descent was found in the foggy southeast section.
- Time was entered at the opening cell.
- The northern island was reached.
- Footsteps was entered at the Staff-piece door.
- Staff Piece #3 was confirmed in the inventory.
- Time was entered at the escape door.
- A post-Elden Grove recovery save exists.
Prepare for Temple of Agamanus and its Level 2 obstruction
After surviving or recovering from the Elden Grove ambush, rest until Ria Silmane provides the next direction. Travel to Corinth in Elsweyr and enter the Mages Guild. Speak with Loremaster Turamane ap’Kolthis. He sends you to Temple of Agamanus to recover the sacred tablet stolen by the temple’s warrior-priests. The tablet hand-in is required before Halls of Colossus can be revealed.
Create a save outside Temple of Agamanus and prepare healing, defensive magic and enough spell power for several dungeon attempts. Most importantly, plan for a documented obstruction on Level 2 in the original DOS game. The normal route can be blocked by an impassable section or bad collision position. Carry or prepare Passwall, Destroy Wall or a supported item or equivalent that provides one of those effects. Levitation is useful later for the lava and water on Level 3, but it does not by itself guarantee passage through the Level 2 obstruction. If the normal route is blocked, do not keep forcing the character into the obstruction; reload the pre-temple save or use the prepared wall-breaking workaround.
Save again before entering Level 2 if the game permits. Keep the pre-entry save until the tablet has been handed in and Halls of Colossus is visible on the map.
- Turamane assigned the tablet objective.
- A pre-temple save exists.
- Passwall, Destroy Wall or a supported equivalent is available if needed.
- Levitation or another safe method is available for the Level 3 crossings.
- The Level 2 obstruction warning is understood before entry.
Recover and return the tablet
On Level 1, travel south to the large four-way intersection. Take the western door, continue south through the next door, then leave that room through its southern passage. Follow the hall south, turn west at the wall and continue south to the stairs for Level 2.
On Level 2, go north, then east, then south through the smaller maze until you reach the long vertical hallway near the centre of the map. At the northern end, go east through two doors, then move north and west through the door leading toward the Level 3 stairs. If the passage is blocked by the original-DOS obstruction, use Passwall, Destroy Wall or the prepared supported equivalent. Levitation alone is not a reliable solution to this Level 2 problem.
On Level 3, take the eastern door and continue south. Enter the first eastern door, then use Levitation or another safe method to cross the lava and proceed west. Continue across the water toward the southwest portion of the level, then move north to the objective chamber. The tablet door’s riddle answer is Sun. Enter Sun, take the sacred tablet and confirm the item before leaving. Passwall can provide an alternate approach around some hazardous crossings, but do not assume it will affect protected walls.
Retrace the route, leave the temple and return to Turamane in Corinth. Give him the tablet. He then marks Halls of Colossus on the Elsweyr map. Preserve the pre-hand-in save until the new destination is visible.
- The Level 3 objective chamber was reached.
- Sun was entered at the tablet door.
- The sacred tablet is confirmed in the inventory.
- The tablet was returned to Turamane.
- Halls of Colossus is marked on the Elsweyr map.
Collect the Halls of Colossus progression keys
Halls of Colossus is the fifth main quest but the fourth Staff-piece dungeon. Its first level is a large maze containing seven progression keys: Gold, Iron, Sapphire, Ruby, Diamond and two separate Amethyst Keys. The six doors leading from the first level into the major Level 2 sections are not the same thing as the final Level 3 progression door. Collect the keys while using the automap to mark explored branches.
The initial accessible area contains some keys, while other keys are behind the six Level 2 access doors or in first-level sections reached through them. Search rooms and dead ends carefully. Water routes, hidden passages and sections surrounded by protected walls can make a key appear unreachable from the current corridor. Passwall, Levitation and Skeleton Key can shorten or bypass parts of the route, but they are optional if the normal key sequence is completed.
After finding the seven keys, return to the Level 2 access area. Use the six appropriate keys to open the six Level 2 doors and reach the remaining route. The final approach to Level 3 uses the remaining progression key; do not treat the six Level 2 doors as proof that the dungeon is complete. Create a save once all seven keys and the Level 3 route are available. No disputed duplicate, worthless or incidental pickup is required beyond the documented seven progression keys.
- Gold Key collected.
- Iron Key collected.
- Sapphire Key collected.
- Ruby Key collected.
- Diamond Key collected.
- First Amethyst Key collected.
- Second Amethyst Key collected.
- The six Level 2 doors are understood as an intermediate route.
- The remaining Level 3 progression route is open or ready.
- The key-collection save is protected.
Solve Theodorus and 108, then take Staff Piece #4
Use the seven keys to complete the Level 2 route and open the remaining progression door to Level 3. The final level is smaller but more dangerous. The first riddle asks for the name of the architect. The clue refers to a place where the river would speak; the answer is Theodorus. Enter Theodorus exactly.
The next door asks for the architect’s age. Enter 108. Save immediately before the final chamber. The chamber contains Staff Piece #4 and Homonculi, flying guardians that use powerful ranged shock attacks. Resist Shock, Invisibility, ranged attacks and defensive magic are useful. If you cannot safely clear the room, preserve the save, move directly to the Staff piece and retreat rather than spending resources on optional combat.
Take Staff Piece #4 and verify the pickup in the inventory or quest state before leaving. The dungeon is complete only after the fourth piece has registered and you can return to the entrance. Do not overwrite the final-chamber save until the extraction is secure.
- The Level 3 route was opened.
- Theodorus was entered at the architect riddle.
- 108 was entered at the age riddle.
- A final-chamber save is protected.
- Staff Piece #4 was confirmed.
- The character exited the Homonculi chamber alive.
Exit Halls and begin the next quest
Retrace the route through Level 3 and the Level 2 access area, avoiding optional fights during extraction. If the return path appears blocked, reload the final-chamber save and confirm that Staff Piece #4 registered before moving away from the chamber. Once outside, create an AFTER_HALLS save and make an external copy of the active save-file group.
For the GOG DOSBox distribution, identify the active save location by creating a test save and checking which files change. Do not assume that cloud_saves is universal or that every installation redirects saves to the same folder. Keep the pre-Halls and final-chamber saves intact until the next quest is confirmed.
Rest in a safe town and wait for Ria’s next direction. The next required lead is Temple of the Mad God, which begins the route to Crystal Tower. Do not skip directly to Crystal Tower, Crypt of Hearts or a later Staff dungeon. Artifact hunts, random palace assignments and ordinary city quests remain optional.
- Staff Piece #4 remains secured after leaving.
- An AFTER_HALLS save exists and has been externally copied.
- The pre-Halls and final-chamber saves remain protected.
- The next main-quest direction is Temple of the Mad God.
- The chapter objectives are complete.
Before you move on
- Queen Ulandra received the Heart of Selene and marked Elden Grove.
- Staff Piece #3 was recovered with Footsteps at the piece door and Time at the escape door.
- The post-Elden Grove ambush was survived or safely recovered from.
- Turamane ap’Kolthis assigned the Temple of Agamanus tablet objective.
- A Level 2 obstruction workaround was available or the normal route was completed without blockage.
- The Temple of Agamanus tablet was recovered using Sun at the objective door.
- The tablet was returned to Turamane and Halls of Colossus was marked.
- The seven Halls progression keys were collected or the route was bypassed with supported magic.
- The six Level 2 doors and separate Level 3 progression route were completed.
- Theodorus and 108 were entered on Level 3.
- Staff Piece #4 was confirmed after the Homonculi chamber.
- The character exited Halls of Colossus with the piece secured.
- An AFTER_HALLS save and external backup exist.
- The next main-quest direction points to Temple of the Mad God and the Crystal Tower lead.
References for this chapter
Crystal Tower, Mines of Khuras and Crypt of Hearts — Staff pieces five and six
After Halls of Colossus, follow Ria Silmane’s next vision to Lillandril on Summurset Isle. Corim Ashlen in the Mages Guild sends you to the Temple of the Mad God for the Mages Guild Diamond. Return it to Corim to reveal Crystal Tower, the fifth Staff-piece dungeon. Climb its four levels, open the upper route with the Diamond Key found in the fixed second-section cage area on level three, answer Egg and recover Staff Piece #5. After the next vision, travel to Camlorn in High Rock and speak with Halfas Varn in the Brotherhood of Seth. Recover the Map Fragment from Mines of Khuras and return it to Halfas. Only then will Crypt of Hearts be marked. In the four-level Crypt, answer Shadow, defeat the two Fire Daemons and take Staff Piece #6. Escape, survive the resulting ambush and confirm Vaults of Gemin as the next main-quest lead.
Begin the Temple of the Mad God objective
Do not enter Crystal Tower immediately after Halls of Colossus. Rest until Ria Silmane gives the next main-quest vision, then ask NPCs about Crystal Tower if necessary. The investigation sends you to Lillandril in Summurset Isle. Enter the Mages Guild there and speak with Corim Ashlen. He explains that the priests of the Mad God stole a diamond needed to reveal the route to Crystal Tower. Corim’s request is the required objective for this stage; another guild member or a random palace assignment is not a substitute.
Accept the Mages Guild Diamond objective and follow the map marking to the Temple of the Mad God. Repair your equipment and replenish healing before leaving Lillandril. Resist Fire is useful for the later Fire Daemon encounter in Crystal Tower, but it is not mandatory. A reliable supply of healing items and a protected save are more important than waiting for one specific spell.
- Complete Halls of Colossus and receive Ria’s next vision.
- Travel to Lillandril in Summurset Isle.
- Speak with Corim Ashlen in the Mages Guild.
- Accept the Mages Guild Diamond objective.
- Save before entering the Temple of the Mad God.
Temple of the Mad God: recover the Mages Guild Diamond
The Temple of the Mad God has two levels. The first floor is cluttered with stone structures, altars and other solid obstacles, so use the automap to avoid circling the same blocks. Reach the stairway to the lower level without spending all your healing on optional enemies. You do not need to clear the entire floor.
On level two, work toward the northeast section. The diamond is behind a riddle door in that area, with hostile priests and other enemies nearby. The riddle describes something that flares up, does good and becomes a piece of wood when it dies. Enter Match or Torch; both answers are reported for the English release. Take the Mages Guild Diamond and make a new save before attempting the return trip. The diamond is a quest item, so keep it in your inventory.
Leave the temple and return to Corim Ashlen in Lillandril. Give him the diamond. The Crystal Tower location should then appear on your map. If it does not, confirm that the item was handed to Corim rather than merely shown to another Mages Guild member. Do not search for Crystal Tower by guessing at a wilderness coordinate; use the newly marked destination. The Temple’s northeast diamond room and the subsequent Crystal Tower reveal are supported by the specialist walkthrough and hintbook.
- Reach the second level.
- Go to the northeast diamond room.
- Answer Match or Torch.
- Take the Mages Guild Diamond.
- Return it to Corim Ashlen.
- Confirm that Crystal Tower is marked.
Prepare for Crystal Tower
Create a separate save immediately before entering Crystal Tower and keep it until Staff Piece #5 is safely outside the dungeon. Crystal Tower is the fifth Staff-piece dungeon and contains four levels. Unlike Mines of Khuras, it is a required Staff location rather than a document or map-fragment step.
Bring healing and enough equipment durability for several high-threat encounters. Resist Fire helps against the Fire Daemon near the upper route. Keep the automap available and record the staircase locations, because the return path is easier to lose after the vault encounter. The wilderness position is determined by the current game, so follow the map marker from Corim’s hand-in instead of relying on a universal distance or direction.
Save again before opening the level-three route to the Fire Daemon and once more after taking the Staff piece. Do not overwrite the entrance save until you have left the dungeon and confirmed that the piece is in your inventory.
- Confirm Crystal Tower is marked.
- Repair weapons and armor.
- Replenish healing and defensive supplies.
- Save before entering the tower.
- Keep a separate entrance save until the piece is outside.
Crystal Tower: reach the fixed Diamond Key route
Crystal Tower is climbed upward. On level one, begin in the southwest area and work almost directly north to the stairway. The route is comparatively open; use the automap to verify that you are advancing toward the green stair marker rather than looping around the perimeter.
Level two begins in the northwest area. The stairway to level three is in the northeast portion. Passwall can shorten the route, but it is optional. Without it, follow the connected corridors around the floor until you reach the stairs. Heal before continuing because level three contains the tower’s cage area and several dangerous creatures.
Level three begins in the northeast. Follow the western side of the floor until you find the large panel that releases the cages. Activate it and answer Yes when the game asks whether to release them. Proceed through the cage sections to the second section. The Diamond Key is on the floor in one of the cages there. This is the fixed key route: search the second-section cage area rather than treating the key’s location as a random troll-or-cage alternative. Take the key before attempting the Fire Daemon door. The specialist hintbook identifies the cage-section route and the key needed for the locked Fire Daemon room.
- Reach level one’s north stairway.
- Use the northeast stairs on level two.
- Reach level three from the northeast entrance.
- Activate the cage-release panel.
- Answer Yes.
- Search the second cage section.
- Take the Diamond Key.
- Save before opening the Fire Daemon route.
Crystal Tower: answer Egg and recover Staff Piece #5
Use the Diamond Key on the locked route leading to the Fire Daemon’s room. Fight from a position where you can retreat through the doorway or corridor. Resist Fire is useful, while healing and careful spacing remain valid alternatives. The Fire Daemon can use both close attacks and fire-based ranged attacks, so do not allow yourself to be trapped in the room with depleted health.
After the Fire Daemon is defeated, continue upward to level four. The upper level begins near the southeast area. Work west, go around the large black wall and reach the upper door of the Staff vault. The exact wilderness dungeon entrance is not relevant once inside; follow the level layout and automap landmarks.
The vault door presents the riddle describing a white marble hall, soft skin, a crystal-clear fountain and a golden apple. Enter Egg. A hostile encounter occurs inside the vault; defeat the Wraiths, move to the Staff piece and take it into your inventory. Save immediately in a new slot. The hintbook confirms the Egg answer and places the fifth piece in the vault after the level-three route.
Retrace the route to the entrance. If you released the cages, enemies may still complicate the return, so heal before crossing the level-three corridors. Do not overwrite the pre-entry save until you are safely outside. Once back in the wilderness, rest and allow the next main-quest progression event to occur before beginning the Crypt of Hearts lead.
- Use the Diamond Key on the Fire Daemon route.
- Defeat the Fire Daemon.
- Reach the level-four vault door.
- Answer Egg.
- Defeat the vault guardians.
- Take Staff Piece #5.
- Exit Crystal Tower and preserve a post-pickup save.
Begin the Mines of Khuras bridge quest
After Crystal Tower, rest until Ria identifies Crypt of Hearts as the location of the sixth Staff piece. Ask about the Crypt in towns if the next contact is not immediately clear. The investigation directs you to Camlorn in High Rock and the Brotherhood of Seth.
Enter the Brotherhood of Seth and speak with Senior Brother Halfas Varn. He explains that Brother Barnabas took a Map Fragment containing the information needed to locate Crypt of Hearts and went to Mines of Khuras. Accept the request. The hand-in is mandatory: completing Crystal Tower alone does not mark Crypt of Hearts.
Halfas marks Mines of Khuras on your map. Save before entering. Mines of Khuras is a two-level bridge dungeon, not a Staff-piece dungeon. Its required reward is the Map Fragment, which must be returned to Halfas before Crypt of Hearts becomes the active destination.
- Receive the Crypt of Hearts vision.
- Travel to Camlorn in High Rock.
- Find the Brotherhood of Seth.
- Speak with Halfas Varn.
- Accept the Map Fragment objective.
- Confirm Mines of Khuras is marked.
- Save before entering.
Mines of Khuras: retrieve and return the Map Fragment
The first level of Mines of Khuras is dominated by lava pools and separated platforms. Cross only when the route is clear. Levitation or Resist Fire can make the traversal safer, but neither should be treated as a universal requirement. Heal before jumps and avoid fighting on narrow platforms when you can retreat to solid ground.
Reach the stairway to level two rather than fully exploring the first floor. The second level has abysses and powerful enemies, so use the automap to keep a return route. The Map Fragment is in the southeast portion of level two, in the room associated with Brother Barnabas’s remains. Search that room and take the fragment from the floor.
Save before leaving the Mines. Return to Camlorn and speak with Halfas Varn inside the Brotherhood of Seth. Give him the Map Fragment. He deciphers it and marks Crypt of Hearts on the map. If the Crypt does not appear, verify that the fragment is still in your inventory and that you completed the hand-in with Halfas rather than merely visiting another Brotherhood member. The specialist walkthrough places the sought item in the southeast room of the second level.
- Reach level two without falling into lava.
- Go to the southeast room.
- Take the Map Fragment.
- Return to Halfas Varn in Camlorn.
- Confirm that Crypt of Hearts is marked.
- Keep a save before the hand-in.
Crypt of Hearts: reach the vault
Enter Crypt of Hearts only after Halfas has marked it. Create an entrance save and keep it separate until Staff Piece #6 is outside. Crypt of Hearts has four levels. The first is the largest; the remaining floors are smaller but contain abysses, ghosts, golems and other threats.
On level one, the route to level two is directly west of the entrance. Continue through the connected passages instead of clearing every room. On level two, follow the automap toward the southwest exit. On level three, move toward the southern exit to level four. Passwall can shorten the route, but the normal corridors are sufficient if you proceed carefully.
Level four begins in the southwest area. The direct shortcut is a breakable section of wall in the northeast corner of the starting area, but the ordinary route remains available. Reach the central chamber by crossing the gap and platforms. Save before opening the final door, because the two Fire Daemons inside can kill an unprepared character quickly. The level layout and the northeast wall shortcut are supported by the specialist walkthrough.
- Take the west exit from level one.
- Reach the southwest exit on level two.
- Take the southern exit from level three.
- Reach level four.
- Use the northeast wall shortcut if desired.
- Save before opening the central vault door.
Answer Shadow and recover Staff Piece #6
The central level-four door gives a riddle describing something that has a name but no thingness, can be tall or short, tumbles when people fall, joins sport and plays every game. Enter Shadow. The door opens into the chamber containing the sixth Staff piece.
Two Fire Daemons guard the chamber. Resist Fire is especially useful. Fight from the doorway or an adjacent corridor when possible, separate the enemies and keep a retreat path open. Do not cross the room while both Daemons have a clear line to you. After both are defeated, move to the Staff piece and take it into your inventory.
Save immediately after the pickup. Confirm that the item is actually in the inventory before leaving the chamber. The Crypt’s fixed objective, Shadow answer and two Fire Daemons are corroborated by the Arena quest reference and specialist walkthrough.
- Reach the central chamber.
- Answer Shadow.
- Defeat both Fire Daemons.
- Take Staff Piece #6.
- Save immediately after the pickup.
Escape the Crypt and advance to Vaults of Gemin
Retrace the route to the entrance using the automap. Preserve the entrance save until you are outside, because a fall or death during the return can otherwise force a complete replay of the Crypt. Once you leave, rest and allow the post-Crypt progression event or ambush to resolve. Treat the ambush as part of the campaign, not as evidence that the sixth-piece objective failed.
The next required lead is Vaults of Gemin in Black Marsh. Travel to Stormhold and follow the active instructions to Idolan Lancaster and the Conclave of Baal. Do not go directly to Murkwood, Dagoth-Ur or the Imperial Palace. Each requires its own lead-in objective.
This chapter is complete when the Mages Guild Diamond was returned to Corim Ashlen, Crystal Tower was completed, Staff Piece #5 was taken after answering Egg, the Map Fragment was recovered from Mines of Khuras and delivered to Halfas Varn, Crypt of Hearts was marked and completed, Shadow was answered, both Fire Daemons were defeated, Staff Piece #6 is in the inventory, the character exited safely and Vaults of Gemin is the next active main-quest lead.
- Exit Crypt of Hearts with Staff Piece #6.
- Survive the post-Crypt ambush or transition.
- Rest and confirm the next progression event.
- Travel next to Stormhold and the Vaults of Gemin lead.
- Preserve the Crystal Tower, Mines and Crypt backup saves.
Before you move on
- Ria’s post-Halls vision was received and Corim Ashlen’s Temple of the Mad God objective was accepted.
- The Mages Guild Diamond was recovered and returned to Corim Ashlen.
- Crystal Tower was marked, entered and completed.
- The level-three cage-release sequence was completed, the fixed second-section Diamond Key was taken and the Fire Daemon route was opened.
- Staff Piece #5 was taken after answering Egg and defeating the vault guardians.
- The Map Fragment was recovered from Mines of Khuras and delivered to Halfas Varn in Camlorn.
- Crypt of Hearts was marked and completed.
- The Shadow riddle was answered and both Fire Daemons were defeated.
- Staff Piece #6 is in the inventory and the character exited safely.
- The post-Crypt ambush or progression transition was survived.
- Vaults of Gemin is the next active main-quest lead.
References for this chapter
- The Elder Scrolls: Arena — GOG.com
- The Elder Scrolls: Arena | PCGamingWiki
- Temple of the Mad God and Crystal Tower walkthrough — ElderScrolls.Net
- Mines of Khuras and Crypt of Hearts walkthrough — ElderScrolls.Net
- Arena main-quest walkthrough index — ElderScrolls.Net
- The Book of Clues — Arena hintbook PDF
- Crypt of Hearts (Quest) — Elder Scrolls Wiki
Vaults of Gemin and Murkwood — recover Staff Piece #7
After recovering Staff Piece #6 from the Crypt of Hearts, rest and follow the new Murkwood lead. Ask about Murkwood until the investigation points to Stormhold in Black Marsh, then visit the Conclave of Baal and speak with Idolan Lancaster. He sends you to the two-level Vaults of Gemin to recover a tablet that reveals Murkwood’s location. The first level is large and easy to misread; the second is flooded and requires careful movement around water, platforms, Homunculi and Stone Golems. Use Levitation if available, answer Onion at the tablet room, and return the tablet to Idolan. After Murkwood is marked, save before entering. In Murkwood, move from the northern entrance toward the central bramble maze, follow the masonry walls to the building entrance, answer Love, and descend. On the compact lower level, Staff Piece #7 is directly ahead behind a riddle door. Answer Water, take the piece, exit, rest, and then begin the Black Gate lead in Ebonheart.
1. Activate the seventh-piece lead and reach Stormhold
Finish Crypt of Hearts and rest at a safe inn or other reliable resting place. The next main-quest vision identifies Murkwood as the location of the seventh Staff piece and narrows the search to Black Marsh or Morrowind. If the vision does not appear immediately, rest again rather than abandoning the campaign route. Murkwood should also become a subject that can be investigated through city rumors.
Ask townspeople about Murkwood until the lead directs you to Stormhold in Black Marsh. Travel to Stormhold and locate the Conclave of Baal. The relevant quest giver is Idolan Lancaster, the leader of the Conclave. Speak with him and accept his request to recover the tablet buried in the Vaults of Gemin. Idolan then marks the Vaults of Gemin on the world map.
Create a save outside the Conclave before accepting or leaving the quest. Keep this save until the tablet has been handed back and Murkwood is visibly marked. Do not treat Murkwood as available merely because you have heard its name; the required order is Stormhold, Idolan’s tablet quest, the Vaults of Gemin, the hand-in, and only then Murkwood.
- Crypt of Hearts is complete.
- The seventh-piece lead has appeared through the vision or investigation system.
- Stormhold is identified in Black Marsh.
- Idolan Lancaster has assigned the Vaults of Gemin objective.
- The Vaults of Gemin is marked on the map.
- A save exists before the tablet quest is accepted.
2. Prepare for the Vaults of Gemin
Repair your equipment in Stormhold and carry enough healing for a long first level followed by a hazardous second level. Levitation is especially useful in the lower level because water separates the solid platforms. Resist Fire is also helpful for the two Fire Daemons guarding the tablet room. These effects are recommended tools, not prerequisites; do not delay the quest if you lack them, but compensate with extra healing and careful retreating.
The Vaults contain Wraiths, Zombies, Hell Hounds, Homunculi, Stone Golems and Fire Daemons. You do not need to clear every corridor. Preserve supplies for the lower level and avoid collecting unnecessary loot if your inventory is crowded. Keep the active quest item space available and maintain a clear route back to the entrance.
Make a save named BEFORE_VAULTS before entering. Make a second save after reaching the stairs down, and a third immediately before opening the tablet room. If you become trapped, run out of healing, or lose your route on the first level, reload instead of pushing deeper from a failing position.
- Equipment is repaired.
- Healing supplies are sufficient for the return trip.
- Levitation is prepared if available.
- Fire resistance or an alternative defense is prepared for the Fire Daemons.
- BEFORE_VAULTS is backed up outside the dungeon.
3. Cross the first level and descend
Enter the Vaults of Gemin and use the automap to keep the entrance and major turns oriented. The first level is much larger than the lower level and contains numerous rooms and corridors. The descent is almost directly south of the entrance. From the entrance area, favor the eastern of the two large corridors; the western route does not lead efficiently to the stairs.
A practical route is to go south from the north-central entrance, take the first eastern corridor, follow it to its end, then continue through the connected southern and western passages as the layout requires. Continue around the large wall and work west, then north toward the stairs. The exact visual spacing can vary with your position and map view, so use the southern descent and the eastern approach as anchors rather than relying on a fixed number of turns.
Fight in doorways and retreat through cleared corridors when several enemies converge. Passwall can provide an alternate route for a spellcaster, but it is not required. Once you find the stairs, heal, check your supplies, and save before going down.
- The eastern approach from the entrance has been used.
- The southern descent area has been located.
- A retreat route to the entrance is known.
- You have saved before entering the flooded lower level.
4. Retrieve the tablet on level two
The second level is smaller but is surrounded by water and divided into separate solid platforms. Cast Levitation if you have it, then move across or above the water toward the southern portion of the map. Without Levitation, use the bridges and solid connections between platforms, checking the automap frequently so you do not circle back to the stairs.
Homunculi and Stone Golems can attack from islands and platforms while you cross. Keep moving, use cover where possible, and avoid remaining in open water or exposed gaps. The tablet room is in the southern, roughly south-central portion of the level. Save as BEFORE_TABLET before entering its approach.
The door presents a riddle. Enter Onion as the answer. The wording describes something pulled from the earth, sold in a market, peeled by the buyer and associated with tears. A correct answer opens the room. Two Fire Daemons guard the interior, so activate Resist Fire if available, defeat or bypass them, and take the tablet from the room. Confirm that the tablet is in your inventory before leaving.
- The flooded lower level has been crossed safely.
- The southern tablet-room area has been found.
- BEFORE_TABLET is preserved.
- The door riddle answer Onion has been entered.
- The tablet is confirmed in the inventory.
- The route back to the stairs is clear.
5. Return the tablet and reveal Murkwood
Leave the Vaults using the route you cleared. Do not overwrite BEFORE_VAULTS or BEFORE_TABLET until the hand-in succeeds. Return to Stormhold and enter the Conclave of Baal. Speak with Idolan Lancaster and give him the tablet. His reward is not a Staff piece; he deciphers the tablet and marks Murkwood on the world map.
Save outside the Conclave after the hand-in, then open the world map and confirm that Murkwood is now marked. If Idolan does not recognize the tablet, reload BEFORE_TABLET and repeat the pickup and return without discarding the original save. Do not travel to Dagoth-Ur at this stage, and do not treat Murkwood as optional. It is the required seventh-piece dungeon.
- The tablet has been returned to Idolan Lancaster.
- Murkwood is visibly marked on the world map.
- A post-hand-in save exists outside the Conclave.
- BEFORE_VAULTS and BEFORE_TABLET remain backed up.
6. Enter Murkwood and reach the lower level
Travel to the marked Murkwood entrance and create a save named BEFORE_MURKWOOD before entering. The first level is a broad, foggy forest with an outer area and a central maze of bramble walls. The entrance is in the north-central part of the level. Move south from the entrance toward the bramble maze rather than circling the outer forest indefinitely.
Inside the maze, look for masonry walls among the brambles. Follow those masonry walls around the central area until you locate the entrance to a building. Medusae and Homunculi are common warnings that you are near the objective structure; Fire Daemons may also appear, so do not assume the building approach is safe. Use ranged attacks, defensive magic, or short retreats through the maze when enemies group together.
The building entrance is sealed by a riddle door. Enter Love as the answer. The riddle refers to binding, capture, knights and servants. A correct answer opens the way to the lower level. Save immediately before answering if you want a recovery point for the transition.
- BEFORE_MURKWOOD is backed up.
- The central bramble maze has been reached.
- The masonry walls and building entrance have been found.
- The door answer Love has been entered.
- The lower level has been reached.
7. Take Staff Piece #7 and begin the Black Gate handoff
The lower level is much smaller than the forest above. When you arrive, the Staff piece is directly ahead behind a barred door. Approach the door and answer its riddle with Water. The riddle describes something that flows, falls, trembles in air and bears heavy burdens. A wrong answer can release hostile guardians from nearby cells, so keep the pre-riddle save until the door opens correctly.
After the barrier opens, take Staff Piece #7. Confirm the piece in your inventory and create a save named AFTER_MURKWOOD before leaving the dungeon. The piece is the required objective; there is no reason to explore every cell or fight optional enemies once the pickup is secured. Exit using the route available from the lower level and return to a nearby town.
Rest after completing Murkwood. The next main-quest transition concerns Dagoth-Ur, but the final dungeon is not entered directly from Murkwood. Ask about the new lead until the investigation points to Ebonheart in Morrowind. In Ebonheart, speak with King Casik to begin the Black Gate quest for the Hammer of Gharen. Keep AFTER_MURKWOOD, BEFORE_MURKWOOD and the successful Stormhold hand-in saves until the Hammer has been recovered and Dagoth-Ur has been marked.
- The Water riddle has been answered.
- Staff Piece #7 is confirmed in the inventory.
- AFTER_MURKWOOD is backed up.
- The Murkwood dungeon has been exited safely.
- The next lead points to Ebonheart and King Casik.
- Black Gate has not been skipped before Dagoth-Ur.
Before you move on
- Idolan Lancaster has accepted the Vaults of Gemin tablet.
- Murkwood is marked on the world map after the successful hand-in.
- The Murkwood descent door has been opened with Love.
- The lower-level barrier has been opened with Water.
- Staff Piece #7 is present in the inventory.
- AFTER_MURKWOOD, BEFORE_MURKWOOD and the successful Stormhold hand-in saves are backed up.
- The next active objective leads to King Casik in Ebonheart for the Black Gate hammer quest.
Black Gate and Dagoth-Ur — Staff Piece #8 and Staff reassembly
After Murkwood, travel to Ebonheart in Morrowind and speak with King Casik. Recover the Hammer of Gharen from Black Gate, return it to Casik, and confirm that Dagoth-Ur is marked on the Morrowind map. Black Gate’s second level has three possible keyed approaches to the hammer room; find only one of the Ruby, Sapphire or Emerald Keys, open its matching entrance and take the hammer. In Dagoth-Ur, obtain the Mithril Key from the first-level Vampire, collect the Ruby, Sapphire, Crystal, Amethyst and Diamond Keys on level two, then enter the lava-filled third level. Turn off Levitation before deliberately falling into the final-piece abyss, take the piece immediately and answer E. The piece joins the earlier fragments and restores the Staff of Chaos. Escape, survive Jagar Tharn’s ambush and travel to the Imperial City. A final Ria Silmane vision may fail to trigger reliably in the original PC release, so use Staff restoration, the completed ambush and Imperial Palace access as your practical progression checks.
Accept the Black Gate assignment in Ebonheart
After completing Murkwood and securing Staff Piece #7, travel to Ebonheart in Morrowind. Do not try to enter Dagoth-Ur yet. The volcano is revealed only after you complete the Black Gate objective and return the Hammer of Gharen to King Casik.
Enter Ebonheart’s Palace and speak with King Casik. He owns the Anvil of Mithas and asks you to recover the Hammer of Gharen from Black Gate. Accept the assignment, then check the Morrowind map for the newly marked dungeon.
Before leaving, create a save named BEFORE_BLACK_GATE. Repair your equipment and carry healing supplies. Resist Fire, Cure Paralysis or Free Action, and Levitation are useful, but none is mandatory for accepting the quest. Preserve this save until Casik confirms the next destination.
- Reach Ebonheart in Morrowind.
- Speak with King Casik in the Palace.
- Accept the Hammer of Gharen assignment.
- Confirm that Black Gate is marked on the Morrowind map.
- Create BEFORE_BLACK_GATE before entering the dungeon.
Cross Black Gate and answer Rain
Enter the marked Black Gate entrance. The first level is dominated by water channels and bridges. From the entrance, work south toward the bridge network, then follow the channels west and continue toward the route leading to the second-level stairs. Swimming, bridges and Levitation can all work; do not rely on a long Levitation effect if it prevents you from diving beneath low passages.
The first level contains hostile creatures and misleading corridors, but you do not need to clear every room. Keep the stairs to the next level as your immediate objective. If you become lost, return to a recognizable water crossing and retrace the route rather than opening a new direction at random.
At the door to the second level, answer the riddle asking what comes in sheets but cannot be folded or gathered again. Enter Rain. If the answer is rejected because of an input mistake, reload BEFORE_BLACK_GATE or another save from before the door and try again.
- Reach the second-level entrance.
- Answer Rain.
- Keep a usable route back to the entrance.
- Do not spend time clearing optional rooms.
Use one colored key to reach the Hammer of Gharen
After entering Black Gate’s second level, go south until you reach the group of three locked approaches to the hammer room. These are alternative entrances, not three locks that must all be opened. You need only one matching key: Ruby, Sapphire or Emerald.
Search the second level for one of those three keys. The Ruby and Emerald Keys are placed in separate rooms, while the Sapphire Key can be obtained from an Iron Golem in the dungeon. Choose whichever route you find first and keep a save before confronting its guardian.
Return to the three locked approaches and use the matching key on its corresponding door. For example, the Sapphire Key opens the Sapphire entrance; the Ruby and Emerald Keys work the same way for their respective doors. Once one entrance opens, ignore the other two and proceed through the accessible route toward the southern hammer chamber.
This is the important Black Gate shortcut: do not waste time collecting all three colored keys. The dungeon’s quest objective is satisfied by opening one valid approach to the room containing the hammer.
- Reach the three keyed approaches on level two.
- Find one of the Ruby, Sapphire or Emerald Keys.
- Open the matching entrance.
- Do not require the other two keys.
- Create a recovery save before entering the hammer room.
Recover the hammer and return it to Casik
Follow the opened passage into the hammer room in the southern portion of Black Gate. The Hammer of Gharen rests on a pedestal or stone block. Guardians can include an Iron Golem and a Fire Daemon, with other dangerous enemies nearby. Defeat them, bypass them where the layout allows, or retreat through the opened entrance to heal before trying again.
Take the Hammer of Gharen and verify that it appears in your inventory before leaving. Carrying it away from the dungeon is not enough to advance the quest. Return to Ebonheart and speak with King Casik again.
Give the hammer to Casik. He uses it with the Anvil of Mithas and marks Dagoth-Ur on the Morrowind map. Create an AFTER_BLACK_GATE save after the map update, and keep your pre-hand-in save untouched. If Dagoth-Ur does not appear, reload the save from before the conversation and repeat the hand-in.
- Take the Hammer of Gharen.
- Leave Black Gate safely.
- Return the hammer to King Casik.
- Confirm that Dagoth-Ur is marked on the Morrowind map.
- Create AFTER_BLACK_GATE.
Obtain the Mithril Key on Dagoth-Ur’s first level
Restock in Ebonheart before entering the marked Dagoth-Ur entrance. Save outside the dungeon as BEFORE_DAGOTH_UR. Resist Fire, Resist Shock, Levitate, Cure Paralysis or Passwall can reduce the danger, but your essential requirement is a workable combat and recovery plan.
On the first level, move generally toward the northwest section. Look for a large lava-associated room or crypt containing a Vampire behind a dark door. The door is not necessarily protected by a magical lock; an unlocking effect may open it, but attacking the door can also work in the original game.
Defeat the Vampire or otherwise gain access to its corpse, then loot the Mithril Key. Use it at the second-level entrance. Do not overwrite BEFORE_DAGOTH_UR until the transition succeeds. If the key is absent after the encounter, reload and repeat the Vampire sequence before exploring deeper.
- Save outside Dagoth-Ur.
- Reach the northwest Vampire room.
- Open the Vampire’s door.
- Loot the Mithril Key.
- Use the Mithril Key to enter level two.
Collect the five keys on level two
Dagoth-Ur’s second level contains five keys required for the normal route to level three: Ruby, Sapphire, Crystal, Amethyst and Diamond. Mark each one on paper as you collect it. The areas are spread across the level and contain lava, abysses and powerful guardians.
The Ruby Key is in the northwest area near lava and an Iron Golem. The Sapphire Key is in the northeast area near lava and a Fire Daemon; reaching it may require a hidden passage or Passwall. The Crystal Key is in the southwest area in a lava-surrounded room guarded by a Medusa. The Amethyst Key is in the southeast area near an abyss and a Vampire. The Diamond Key is near the center, close to an abyss and guarded by a Lich.
Use fire protection for lava-adjacent routes and Free Action or Cure Paralysis against the Medusa. You do not need to defeat every monster permanently; clear enough space to collect each key and retreat through a recognizable corridor when your health or resources drop.
Open the five-door sequence leading to level three. Stone Golems guard the transition after the final door. Save before entering the third level. If you use Passwall, keep a separate backup because restored walls can leave you trapped inside the dungeon.
- Collect the Ruby Key.
- Collect the Sapphire Key.
- Collect the Crystal Key.
- Collect the Amethyst Key.
- Collect the Diamond Key.
- Open the five-door route to level three.
- Save before entering the third level.
Take the final Staff piece and answer E
The third level is a lava-filled area with a central structure and hostile guardians. Levitation is useful for crossing the lava, and you can bypass many Fire Daemons, Liches, Wraiths and Homonculi rather than fighting them all.
Create a save immediately before the final approach. Reach the central structure and position yourself in front of the moving blocks or barriers surrounding the Staff piece. Levitation must be inactive for the deliberate fall. Turn it off, then jump or step through the intended opening and fall into the small abyss below the piece.
Climb toward the Staff piece and take it immediately. Do not leave the abyss before collecting it. If you exit without registering the pickup, the escape riddle may fail to start when you return. Reload the pre-jump save and repeat the fall and pickup as one uninterrupted sequence.
After taking the piece, answer the escape riddle with E. The final fragment joins the earlier pieces and restores the Staff of Chaos. Confirm the restoration message before leaving. The correct check is the completed Staff state; do not expect eight separate fragments to remain in your inventory.
- Save before the final approach.
- Turn Levitation off before the deliberate fall.
- Fall into the final-piece abyss.
- Take the Staff piece immediately.
- Answer E.
- Confirm the Staff-restoration message.
Escape, survive the ambush and prepare for the Palace
Retrace your route out of Dagoth-Ur. If you used Passwall, previously opened walls may have returned, so keep the Passwall backup and your pre-pickup save until you are safely outside. If your route becomes impossible, reload instead of overwriting the last workable save.
After the Staff is restored and you leave the dungeon, Jagar Tharn appears and sends hostile forces against you. Defeat the ambush. This encounter is a transition to the final campaign stage, not the ending itself.
Rest after the ambush if you need to recover. The final Ria Silmane vision may be absent or unreliable in some original PC progressions. Do not wait indefinitely for the vision or treat its absence alone as proof that the quest failed. Verify that the Staff-restoration message appeared, the ambush was completed and the game permits access to the Imperial Palace.
Travel to the Imperial City in Cyrodiil and test the Imperial Palace entrance. Once access is confirmed, create a protected BEFORE_FINAL save before entering the Palace. If access fails, reload the pre-ambush or pre-pickup save and repeat the transition. Keep the save that proves the Staff was restored.
- Exit Dagoth-Ur.
- Defeat Jagar Tharn’s post-dungeon ambush.
- Confirm the Staff-restoration message.
- Rest and recover if necessary.
- Travel to the Imperial City.
- Confirm Imperial Palace access.
- Create BEFORE_FINAL before entering the Palace.
Before you move on
- The Black Gate assignment was accepted from King Casik in Ebonheart.
- One of the Ruby, Sapphire or Emerald Keys was found and used to open a matching approach to the hammer room.
- The Hammer of Gharen was recovered and returned to King Casik.
- Dagoth-Ur was marked on the Morrowind map.
- The Mithril Key was recovered from the first-level Vampire.
- The Ruby, Sapphire, Crystal, Amethyst and Diamond Keys were collected on Dagoth-Ur’s second level, unless a documented Passwall shortcut was used with a separate recovery save.
- The final Staff piece was collected from the third-level abyss.
- The escape riddle accepted E.
- The Staff-restoration message appeared.
- Dagoth-Ur was exited successfully.
- Jagar Tharn’s post-dungeon ambush was defeated.
- The player traveled to the Imperial City and confirmed Imperial Palace access.
- A protected BEFORE_FINAL save exists before entering the Palace.
Final preparations before Imperial City
After Dagoth-Ur, confirm that the final Staff piece was collected, answer the escape riddle with E, and wait for the Staff-restoration message to finish. Complete the post-Dagoth-Ur ambush and transition before resting safely. A final Ria Silmane vision may be absent or unreliable in the original DOS progression, so verify the completed Staff sequence and successful Palace access instead of treating that vision as the only test. Repair equipment, replenish healing, food and spell resources, identify the active Arena save group with a test save, and copy the complete slot files outside the installation. Create a protected BEFORE_FINAL save before entering the Imperial Palace. For the original DOS Palace route, Levitation is required to reach the Fourth-Level central platform across the lava; Resist Fire is defensive protection only and is not a substitute. The campaign is complete only after the restored Staff is used on the Jewel of Fire and Emperor Uriel Septim VII is released.
Protect the Dagoth-Ur final-piece recovery point
If you still have access to Dagoth-Ur, make a manual save before touching the final Staff piece. Keep this slot separate from later saves and do not overwrite it after the pickup. It is the safest recovery point if the riddle, restoration message or exit transition fails to register.
Reach Dagoth-Ur’s third level and proceed into the central lava chamber. Levitation can help with the ordinary approach across the lava, but it must not be active for the intentional drop used to reach the final piece. At the moving-block barrier, stand directly before the blocks, jump over them, and allow the character to fall into the abyss. Do not leave the piece behind intending to return later.
After landing, climb toward the final piece and touch it. Remain in the abyss until the riddle appears and the game accepts the answer. The original PC quest has a documented failure state if the player leaves the abyss without properly taking the piece and later returns, so the pre-pickup save is more valuable than a later questionable save.
- A protected save exists immediately before touching the final piece.
- Levitation is disabled before the intentional drop.
- The final piece will be collected during this visit rather than left for a later return.
Answer the riddle and confirm Staff restoration
When the escape riddle appears, enter E. The answer refers to the beginning of eternity, the end of time and space, the beginning of every end, and the end of every place. Enter the single letter E, not an explanation or a longer word.
Wait for the full message sequence before moving, leaving the dungeon or saving. The final piece joins the earlier pieces and restores the Staff of Chaos. Do not expect eight separate fragment objects to remain as a completion requirement; the restoration message and the ensuing progression are the useful checks.
Create a separate post-restoration save only after the message has finished. If the riddle does not appear, E is rejected, or the restoration message is absent, reload the pre-pickup save and repeat the drop, pickup and answer without leaving the abyss. Never overwrite the only known-good recovery slot while testing.
- E was accepted by the riddle.
- The Staff-restoration message finished completely.
- A separate post-restoration save exists.
- Progress is being checked through Staff restoration rather than a fragment count.
Finish the post-Dagoth-Ur transition
Leave Dagoth-Ur only after restoration has completed. The game then presents Jagar Tharn’s threat and sends another group of enemies against you. Defeat the attackers and allow the event to finish before changing quests, overwriting saves or assuming that the Palace chapter is ready.
Rest in a safe location after the ambush and transition. The intended progression includes another Ria Silmane vision, but that presentation can be absent or unreliable in some original PC playthroughs. Its absence alone does not prove that the final piece failed. Use the completed pickup, restoration message, finished ambush and ability to proceed toward the Imperial City as the practical checks.
If Imperial Palace access is unavailable, preserve the confirmed restoration save and retry from the post-restoration or pre-exit slot. Repeat the dungeon exit and transition, then test Palace access again. Do not repeatedly overwrite the same save while attempting to force a missing vision.
- The post-Dagoth-Ur ambush has ended.
- The transition toward the Imperial Palace has completed.
- You have rested safely afterward.
- The confirmed restoration save remains untouched.
- A missing Ria vision has not been treated as the sole failure test.
Repair equipment and replenish final supplies
Travel to a city with the services you need before entering the Imperial Palace. Repair the weapon and armor you intend to use, equip them, and confirm that you are not relying on damaged replacements. If your character depends on one enchanted weapon or limited-use item, carry a dependable backup attack method.
Replenish healing items, food and the restorative supplies your character normally uses. Recover spell points through rest and available services, and check the charges on essential enchanted equipment. The Palace becomes especially dangerous on its Third and Fourth Levels, so prepare for a complete dungeon run rather than relying on one emergency potion.
Resist Fire is useful defensive protection against fire damage from enemies and hazards. It does not provide the movement needed to reach the central platform on the Fourth Level and must not be treated as a substitute for Levitation. Prepare Levitation before Palace entry and verify that you can cast it or otherwise have the required active effect available when you reach the lava crossing.
Optional artifacts, ordinary palace assignments and random side quests are not required for the Staff campaign. Keep required progression items and final supplies with the character until the Palace interaction is complete. Do not sell, discard or stash a required item merely because the Staff has been restored.
- Weapon and armor are repaired and equipped.
- Healing, food and restorative supplies are replenished.
- Spell points and essential item charges are available.
- Levitation is prepared for the Fourth-Level lava crossing.
- Resist Fire is understood as protection only, not as a crossing method.
- Optional quests have not been mistaken for final requirements.
Identify and back up the active Arena save group
Create a fresh manual save in a new slot with a distinctive temporary name. Close or suspend the game and compare modification times and file names in the Arena installation directory and any save-related locations used by Windows. Make another test save if necessary. The files that change identify the active save location for this GOG and DOSBox configuration.
Arena saves consist of multiple loose files for each slot. The slot number is represented by the file extension, so copy every file belonging to the chosen slot rather than only a visible name entry. Copy NAMES.DAT when present so the in-game save names are preserved, but do not mistake NAMES.DAT for the actual character and world data.
The GOG distribution runs through DOSBox, and Bethesda documents different save locations depending on whether DOSBox runs with administrator privileges. A non-administrator installation may use the Windows VirtualStore path; an administrator configuration may use the Arena folder under Program Files. Changing that setting can make existing saves appear to vanish because the game begins looking in another location. Keep one configuration and verify the active directory with a test save.
Back up the pre-pickup Dagoth-Ur save, the post-restoration save and the eventual BEFORE_FINAL save. Keep the original in-game slots as well as external copies. If restoration is necessary, replace the complete matching slot-file group rather than a single file.
- A uniquely named test save identified the active save location.
- Every file belonging to the test slot was copied externally.
- The pre-pickup and post-restoration slots were backed up.
- NAMES.DAT was copied when present but was not treated as the whole save.
- No universal cloud_saves path was assumed.
Create BEFORE_FINAL and hand off to the Imperial Palace chapter
After the transition, safe rest, repairs, resupply and external backup are complete, create a fresh manual save immediately before entering the Imperial Palace. Record the slot as BEFORE_FINAL in your own notes and copy its complete active file group outside the installation. Do not overwrite this save while exploring side rooms or testing the final route.
Enter the Palace only after confirming that Levitation is prepared. The objective is on the Fourth Level, where the central platform is surrounded by lava. In the original DOS route, Levitation is required to fly across that lava and reach the platform. Resist Fire can reduce fire damage but cannot carry the character across the gap. Do not enter the Palace for the finale without Levitation available.
Use the Palace’s efficient level progression: move through the First, Second and Third Levels while conserving resources, then take the Fourth-Level route. Be cautious of the false-wall section on the Fourth Level and the powerful enemies guarding the approach. Once Levitation is active, cross to the central platform.
The platform has four cells. Attack the northwest cell door to open it, enter and take the Mithril Key, then use that key on the northeast cell containing the Jewel of Fire. Do not substitute Destroy Wall, another cell or fire resistance for the normal key sequence. Passwall may be useful for optional wall access only; it does not replace Levitation for the lava crossing.
Touch the Jewel of Fire with the restored Staff sequence and remain in the Palace until the final scene completes. Jagar Tharn’s ordinary combat is not the completion test: the Jewel interaction triggers the resolution, destroys Tharn’s power, opens the dimensional passage and releases Emperor Uriel Septim VII. The Staff and Jewel may no longer remain as ordinary inventory items afterward. Create AFTER_FINAL only after Uriel has been released and the entire ending sequence has finished.
- BEFORE_FINAL was created immediately before Palace entry.
- The complete BEFORE_FINAL file group was copied externally.
- Levitation is available for the original DOS Fourth-Level lava crossing.
- Resist Fire is not being used as a substitute for Levitation.
- The northwest cell door will be attacked and opened.
- The Mithril Key from the northwest cell will open the northeast cell.
- The Jewel of Fire will be touched after the key sequence.
- You will remain in the Palace until the ending finishes.
- AFTER_FINAL will be created only after Uriel Septim VII is released.
Before you move on
- The final Dagoth-Ur piece was collected and E was accepted.
- The Staff-restoration message appeared and the completed Staff progression was confirmed.
- The post-Dagoth-Ur transition and ambush ended, and the character rested safely.
- The absence of a final Ria vision, if it occurred, was not treated as automatic failure.
- Equipment was repaired and healing, food and spell resources were replenished.
- The active save location was identified with a test save.
- The pre-pickup, post-restoration and BEFORE_FINAL slot-file groups were copied externally.
- BEFORE_FINAL was created before entering the Imperial Palace.
- Levitation was prepared before Palace entry.
- The Fourth-Level central lava platform was reached using Levitation.
- The northwest cell door was attacked and opened.
- The Mithril Key from the northwest cell opened the northeast cell.
- The Jewel of Fire was touched with the restored Staff sequence.
- Jagar Tharn’s power was defeated through the Jewel resolution.
- Emperor Uriel Septim VII was released and the ending sequence finished.
- AFTER_FINAL was created and backed up only after the ending completed.
Imperial Palace — reassemble the Staff, use the Jewel of Fire, final confrontation
After completing Dagoth-Ur, answer the escape riddle with E, survive the ambush and travel to the Imperial City. Confirm that the Staff-restoration transition has finished, repair your equipment, replenish health and spell points, and create a protected BEFORE_FINAL save. Prepare Levitation before entering the Imperial Palace: the original DOS/GOG route requires Levitation to cross the lava surrounding the Fourth-Level central platform. Resist Fire can reduce fire damage, but it does not replace Levitation. Take the efficient routes through the Palace’s first three levels, pass the false walls near the northern Fourth-Level entrance if using that approach, and reach the central platform. Attack the northwest cell door, take the Mithril Key, use it on the northeast cell and touch the Jewel of Fire. Allow the complete ending sequence to finish, then create and test an AFTER_FINAL save.
Finish Dagoth-Ur and prepare the protected final saves
Begin this chapter only after the Dagoth-Ur final-piece sequence is complete. Take the final Staff piece, answer the escape riddle with E and allow the Staff-restoration transition to finish. Survive the ambush that follows the dungeon exit before attempting the Imperial Palace journey. Dagoth-Ur is not the end of the campaign; the restored Staff must still be used with the Jewel of Fire in the Palace.
Rest in a safe location after the ambush if your health or spell points are low. The final Ria Silmane vision can be absent or unreliable in some original PC progressions. Do not treat that scene alone as proof that the campaign is broken if the final-piece sequence completed, the ambush occurred and the Palace can be entered. If Palace access fails, reload the protected Dagoth-Ur or pre-Palace save rather than overwriting it.
Travel to the Imperial City in the Imperial Province. Repair your strongest equipment, replenish healing supplies and restore enough spell points for the dungeon. Prepare Levitation before entering the Palace. The original DOS route requires Levitation to reach the central platform on the Fourth Level, where the lava prevents normal access. Resist Fire is useful protection against fire damage, but it is not a movement spell and must not be used as a substitute for Levitation.
Create a manual save outside the Palace and label it BEFORE_FINAL. Keep at least one additional slot available for a Palace recovery save. If you want an external backup, make a test save, close the game and identify which files changed, then copy the complete active save-file group. Do not assume that every file in the GOG cloud_saves folder is part of the active save group; verify it with the test save first.
- Dagoth-Ur’s final-piece sequence is complete.
- The escape riddle was answered with E.
- The Staff-restoration transition finished.
- The post-Dagoth-Ur ambush was survived.
- The Imperial City was reached.
- Equipment, health and spell points are ready.
- Levitation is available for the Fourth-Level lava crossing.
- A protected BEFORE_FINAL save exists.
Use the efficient route through the First and Second Levels
Enter the Imperial Palace from the Imperial City and let the opening appearance or dialogue finish. The Palace has four levels, but you do not need to clear every room. Fight enemies that block a doorway or make the route unsafe, then continue. Preserve healing and spell resources for the deeper levels.
On the First Level, move from the entrance through the main room and sleeping-room areas. Three routes lead to the Second Level: two are in the northern corridors and one is east of the sleeping rooms. Use the eastern route when practical because it gives the shorter approach to the later floors. If you use a northern route, the hidden passage beside the Ruby Throne can shorten the trip to the northern corridor.
The Second Level contains a more involved layout and dangerous enemies, including Vampires and Iron Golems. Avoid optional rooms unless they contain the route forward. Two entrances lead to the Third Level. Prefer the stairway near the center of the floor because it places you closer to the Fourth-Level approaches.
If several enemies pursue you, retreat through a cleared corridor rather than fighting in a room where you can be surrounded. Heal before entering a new section. Make a mid-dungeon save if possible, but never overwrite BEFORE_FINAL.
- The Palace opening sequence has finished.
- The First-Level eastern route was used when practical.
- The central Second-Level stairway was preferred.
- Optional rooms were ignored unless they blocked progress.
- BEFORE_FINAL remains preserved.
Reach the Third Level and enter the Fourth Level
Continue to the Third Level through the central Second-Level entrance when possible. Homonculi and other hostile creatures can make the corridors dangerous, so use doorways and cleared passages to control pursuit. Do not spend all healing or spell resources on enemies that can be bypassed.
The two Fourth-Level entrances are on the eastern side of the Third Level. The northern entrance is easier to reach, while the southern entrance places you in a safer position after the transition. Use the southern entrance when you can reach it without taking unnecessary damage; otherwise take the northern entrance and proceed cautiously.
The northern Fourth-Level route appears to be blocked, but the short corridor contains false walls that can be walked through. Move slowly because a Lich may be behind one of them. The southern entrance is less restrictive but still leads into a dangerous area. Once on the Fourth Level, avoid side rooms and focus on reaching the central platform.
Create another recovery save before committing to the final approach if you have an unused slot. Confirm that Levitation is prepared before proceeding. Do not enter the lava section while relying on Resist Fire alone; fire resistance may reduce damage, but it does not provide the required route to the platform.
- The Third Level was reached.
- The eastern Fourth-Level entrances were located.
- The southern entrance was used when practical.
- False walls near the northern entrance were treated as passable.
- A Fourth-Level recovery save exists if possible.
- Levitation remains available.
Use Levitation to reach the central platform
Follow the Fourth-Level corridors toward the central platform. The platform is surrounded by lava, and the original DOS/GOG Palace route requires Levitation to cross this section. Cast Levitation before leaving solid ground and keep the effect active until you are safely on the central platform. Do not attempt to cross by ordinary walking.
Resist Fire is optional protection against fire damage during the approach, but it is not an alternative to Levitation. Do not replace Levitation with Passwall, Destroy Wall, another spell, an item or a supposed terrain shortcut. The required objective is to reach the platform across the lava, and Levitation is the established original-DOS solution.
Jagar Tharn is near the central platform, but defeating him before the Jewel interaction is optional. Do not spend your last healing or spell resources on a conventional fight unless you specifically want the experience. The campaign-ending sequence is triggered by opening the Jewel’s cell and touching the Jewel of Fire, not by winning a preliminary boss battle.
Once you arrive on the platform, make a recovery save if possible. The northwest cell contains the Mithril Key, and the northeast cell contains the Jewel of Fire. Orient yourself before approaching the cells so that you do not accidentally leave the platform or waste Levitation time.
- Levitation was cast before leaving solid ground.
- The central platform was reached by Levitation.
- Resist Fire was not treated as a substitute for Levitation.
- Jagar Tharn was not treated as a required preliminary boss fight.
- A platform recovery save exists if possible.
- The northwest and northeast cells were identified.
Take the Mithril Key and activate the Jewel of Fire
Approach the northwest cell and attack its door. This is the intended way to open the cell. Enter and take the Mithril Key inside. The key is represented by the white map marker. Do not search other cells for the key, and do not use Destroy Wall as the expected solution to this sequence.
Carry the Mithril Key to the northeast cell. Use the key on that door to open the chamber containing the Jewel of Fire, represented by the yellow map marker. The required order is northwest cell door, Mithril Key, northeast cell door, then Jewel of Fire.
Enter the northeast cell and touch the Jewel. The restored Staff of Chaos is used in this interaction to destroy the power stored in the Jewel and end Jagar Tharn’s threat. You do not manually combine eight separate fragments in the Palace. The Staff-restoration transition occurred during the Dagoth-Ur progression; the Palace objective is to use the restored Staff on the Jewel.
If the Jewel does not activate, reload the platform save and repeat the exact order. If that fails, reload BEFORE_FINAL and confirm that the Dagoth-Ur transition and post-dungeon ambush were completed before returning to the Palace. Do not leave the Palace while the final interaction remains untriggered.
- The northwest cell door was attacked open.
- The Mithril Key was taken from the northwest cell.
- The northeast cell was opened with the Mithril Key.
- The Jewel of Fire was reached.
- The Jewel was touched after Staff restoration.
- The Palace was not abandoned before the ending began.
Let the ending finish and create AFTER_FINAL
After touching the Jewel, allow every dialogue exchange, visual sequence and final message to finish. The final interaction destroys Jagar Tharn’s stored power, frees Emperor Uriel Septim VII and leads to the Eternal Champion result where that presentation is displayed. Do not interrupt the sequence or leave the Palace immediately after opening the cell.
When the ending has completely finished, create a new save named AFTER_FINAL. Reload it immediately to confirm that it loads correctly, then back up the complete active save-file group outside the game directory. Keep BEFORE_FINAL until AFTER_FINAL has been tested and copied safely.
If the Palace is accessible afterward and displays a reconstruction message, treat that as normal postgame behavior rather than evidence that the campaign failed. The Staff of Chaos and Jewel of Fire may no longer remain as ordinary inventory items because they are expended during the ending. Artifact quests, random assignments and further exploration are optional after the Emperor’s release.
- The Jewel interaction triggered the ending.
- Jagar Tharn was destroyed or rendered powerless by the final sequence.
- Emperor Uriel Septim VII was released.
- The Eternal Champion result appeared where supported by the presentation.
- All ending dialogue and final messages finished.
- AFTER_FINAL was created and reloaded successfully.
- AFTER_FINAL was backed up externally.
- BEFORE_FINAL remains available for recovery.
Before you move on
- Dagoth-Ur’s final-piece sequence is complete.
- The escape riddle was answered with E.
- The Staff-restoration transition finished.
- The post-Dagoth-Ur ambush was survived.
- The Imperial Palace was entered from the Imperial City.
- All four Palace levels were traversed.
- The Fourth-Level central platform was reached using Levitation.
- The northwest cell door was attacked open.
- The Mithril Key was taken from the northwest cell.
- The northeast cell was opened with the Mithril Key.
- The Jewel of Fire was touched.
- Jagar Tharn was destroyed or rendered powerless by the final sequence.
- Emperor Uriel Septim VII was released.
- The ending dialogue and final messages completed.
- AFTER_FINAL was created, reloaded successfully and backed up.
- BEFORE_FINAL remains available for recovery.
Postgame checks, recovery and optional completion tasks
The campaign is complete only after the reassembled Staff of Chaos is used on the Jewel of Fire in the Imperial Palace, the ending establishes that Emperor Uriel Septim VII has been freed, and the game returns to normal post-ending play. Let every message and transition finish before saving. Create a separate AFTER_FINAL save, restart the same GOG DOSBox release, and confirm that the save loads correctly. Keep BEFORE_FINAL untouched until this test succeeds, then back up the complete save-file groups. Arena’s Staff and Jewel are not expected to remain usable inventory items after the finale, and the Imperial Palace reconstruction message is normal postgame behavior. Artifact quests, random assignments, equipment upgrades and freeform exploration are optional; continue them from a duplicate of the verified completion save.
Let the Imperial Palace ending finish without interruption
After reaching the final Jewel of Fire encounter, complete the required interaction with the completed Staff of Chaos. Do not leave the Imperial Palace immediately after confronting Jagar Tharn or reaching the Jewel. The campaign is not complete merely because the final enemy encounter has ended; the decisive action is touching the Staff of Chaos to the Jewel of Fire. This destroys the two quest objects, defeats Tharn and opens the way for Emperor Uriel Septim VII to return from his dimensional prison.
Wait through the complete scripted sequence, messages and transition before pressing keys or attempting to save. The original DOS game can present the finale differently depending on the distributed files and configuration, so do not use a particular voice line, animation, audio cue or screen duration as the sole completion test. Use the gameplay result instead: the Staff-and-Jewel action occurred, the game displayed its victory result, the Emperor’s release was established, and control returned to ordinary post-ending play.
If you only fought the final apparition, reached the Jewel without completing the Staff interaction, or exited before the transition finished, reload BEFORE_FINAL. Repeat the final sequence and do not create an archival save until the game has clearly returned to normal control.
- The completed Staff of Chaos was used with the Jewel of Fire.
- The ending messages and scripted transition finished completely.
- The game established that Emperor Uriel Septim VII was freed.
- The game returned to ordinary post-ending control.
- BEFORE_FINAL was not overwritten during the sequence.
Create and test an AFTER_FINAL save
When normal control returns, save in a new slot instead of overwriting BEFORE_FINAL. Record the slot number and, if helpful, write AFTER_FINAL in a separate note. The DOS-era save interface may not preserve modern descriptive labels in the way you expect, so the slot number is the reliable identifier.
Exit to the title screen or close the game normally. Relaunch the same GOG installation and load the new save. Confirm that it opens in ordinary post-ending play rather than returning to the final dungeon, an interrupted transition or the pre-ending state. If it loads correctly, keep this slot untouched as the archival completion save.
The post-ending game remains available for freeform activity. Returning to the Imperial Palace is expected to produce a message that the Palace is under reconstruction after the final conflict. Treat that message as normal postgame behavior, not as a new objective or a failed quest. The Palace reconstruction does not mean the Staff sequence must be repeated.
- AFTER_FINAL loads after restarting the GOG DOSBox release.
- The save opens in normal post-ending play.
- BEFORE_FINAL remains available in its original slot or backup.
- The Imperial Palace reconstruction message is treated as normal postgame behavior.
Identify the active save directory and back up the complete save groups
Do not assume that the visible GOG installation folder is the directory currently receiving saves. First make a harmless test save in an unused slot, exit the game, and compare recently changed files and folders. This identifies the active directory for that installation and Windows configuration.
Arena saves are not normally represented by one modern save file. Each slot consists of a group of 13 or more loose data files, with the slot number encoded in the file extensions. For example, files belonging to the first slot use the .00 extension, while another slot uses its corresponding numbered extension. Copy every file belonging to AFTER_FINAL and every file belonging to BEFORE_FINAL. Also copy names.dat when it is present in the active save directory, because it can contain the in-game save-name information used by the save interface.
The verified Bethesda locations are administrator-dependent. When DOSBox is not running with administrator privileges, Windows may redirect saves to the VirtualStore location under the user profile, such as the Bethesda Softworks Arena directory beneath AppData\Local\VirtualStore\Program Files (x86). When DOSBox is configured to run as administrator, saves may instead be written directly to the installed Arena directory, such as the Arena folder beneath Program Files (x86). These are examples, not substitutes for checking which files changed after the test save.
After identifying the directory, close the game before copying files. Keep one backup in a normal folder and another on separate storage. Use a duplicate of AFTER_FINAL for continued play so new quests, experiments and accidental saves cannot damage the archival completion state.
- A test save was created in an unused slot.
- The active save directory was identified by comparing changed files.
- All loose files belonging to AFTER_FINAL were copied.
- All loose files belonging to BEFORE_FINAL were copied.
- names.dat was copied when present.
- A separate working copy is used for further play.
Confirm the Emperor’s release and the destroyed quest items
Use several signs together when recording completion. First, the Staff of Chaos was used on the Jewel of Fire. Second, the game displayed its victory or congratulations result and completed the transition. Third, the reloaded AFTER_FINAL save opens in post-ending play. The narrative result is the destruction of Jagar Tharn’s life-force vessel and the return of Emperor Uriel Septim VII. The game may also grant or display the Eternal Champion result.
Do not expect the Staff of Chaos or Jewel of Fire to remain as useful quest items. Their destruction or disappearance is part of the intended finale. A missing Staff after the ending is not a reason to reload and repeat the campaign if the Jewel interaction, victory result and post-ending transition completed successfully.
Likewise, do not judge completion solely by the presence or absence of a specific audiovisual effect. Different original distributions and DOSBox configurations may show the finale differently. The reliable checks are the completed interaction, the victory result, the Emperor’s release, return to post-ending play and a readable completion save.
- The ending establishes that Uriel Septim VII has been freed.
- The game confirms victory or displays the Eternal Champion result where applicable.
- The Staff of Chaos and Jewel of Fire no longer function as quest items.
- AFTER_FINAL loads successfully after restarting the game.
Continue optional content from a duplicate save
After verifying completion, you may continue exploring Tamriel. Random inn and palace assignments, ordinary dungeon expeditions, wilderness travel, equipment purchases, repairs, guild and temple activities and other freeform play are optional. None of these activities is required to rescue the Emperor, and none restarts the Staff of Chaos campaign.
Artifact hunting is also separate from the main quest. Arena has sixteen class-dependent artifacts, but artifact availability follows the game’s quest and eligibility rules. You do not need to collect any artifact to complete the campaign, so treat artifact quests as an optional long-term objective rather than a postgame requirement.
Before accepting new work, copy AFTER_FINAL into a separate working location or preserve an additional duplicate slot. Continue from that duplicate and use new save slots where possible. Leave the untouched archival file and its external backup as permanent proof that the ending was completed.
- Optional quests are being played from a duplicate of AFTER_FINAL.
- Artifact collection is treated as separate from campaign completion.
- The untouched completion save remains archived.
- The Imperial Palace reconstruction state is not treated as an unfinished quest.
Recover from a failed or interrupted ending
If the game freezes, exits or leaves no clear victory result after the final interaction, do not overwrite BEFORE_FINAL. Close DOSBox normally if possible, relaunch the same GOG installation and load the preserved pre-Palace save. Repeat the final route and make sure the completed Staff is used with the Jewel of Fire before leaving the area.
If the game displays a shortened sequence but returns to ordinary play, save in a separate diagnostic slot and reload that save. If it loads into post-ending play and the Imperial Palace reports reconstruction, treat the campaign as complete even if a particular animation, message or audio segment was absent. If the save instead returns to the final dungeon or pre-ending state, restore BEFORE_FINAL and try again.
Do not apply unofficial patches, use save editors or replace executables while the only copy of your completion state is at risk. Preserve the original save groups first. If repeated attempts fail, keep both recovery saves and recheck the active save directory and DOSBox configuration separately. Make a new test save and compare changed files before copying or replacing anything; do not sacrifice the pre-Palace checkpoint while troubleshooting.
- BEFORE_FINAL was preserved during troubleshooting.
- The final interaction was repeated with the completed Staff, not an individual fragment.
- A diagnostic save was kept separate from the archival completion save.
- The active save directory was rechecked if files appeared missing.
- The post-ending Imperial Palace reconstruction state was checked before declaring failure.
Before you move on
- The reassembled Staff of Chaos was used on the Jewel of Fire in the Imperial Palace.
- The ending confirms victory and establishes that Emperor Uriel Septim VII was released.
- The Staff of Chaos and Jewel of Fire are destroyed or no longer function as quest items.
- The game returns to freeform post-ending play and the Imperial Palace reports reconstruction.
- AFTER_FINAL loads successfully after restarting the GOG DOSBox release.
- The active save directory was identified with a test save.
- BEFORE_FINAL and a complete external copy of AFTER_FINAL remain available.
- The complete loose-file groups and names.dat, when present, were preserved.
Finishing up
The final Staff piece has been recovered in Dagoth-Ur and the game has registered the Staff of Chaos as complete before the finale.
The Imperial Palace has been entered, the central lava platform has been reached, the northwest cell has been opened by attacking its door, the Mithril Key has been taken, and that key has opened the northeast cell containing the Jewel of Fire.
Jagar Tharn has been destroyed or rendered powerless, Emperor Uriel Septim VII has been released, and the victory or Eternal Champion sequence has finished.
A fresh AFTER_FINAL save loads successfully after restarting the GOG DOSBox release.
The Staff and Jewel do not need to remain in the inventory after the ending; their destruction is part of the intended conclusion.
Choose your next gameScreenshots & video
Game imagery for reference. Follow the written chapters above for the route and strategies.
Sources & references
Our original guide draws on the references below. Check the edition at the top of this page before following controls or unlock requirements.
- The Elder Scrolls: Arena — GOG.com
- Arena Player’s Guide
- The Elder Scrolls: Arena — DOS Manual — English
- The Elder Scrolls: Arena — FAQ — GameFAQs
- The Elder Scrolls: Arena — First Imperial Dungeon
- The Elder Scrolls: Arena | PCGamingWiki
- Bethesda Support: Does DOSBox need to be configured prior to running Arena?
- Main Quest (Arena) — Elder Scrolls Wiki
- Stonekeep (Quest) | Elder Scrolls Wiki
- Selene’s Web (Quest)
- Elden Grove (Quest)
- Mines of Khuras (Quest)
- Vaults of Gemin (Location)
- Murkwood (Quest)
- Black Gate (Quest) — Elder Scrolls Wiki
- The Book of Clues — Arena hintbook PDF
- Fang Lair (Quest) | Elder Scrolls Wiki
- The Elder Scrolls: Arena DOS Manual
- The Elder Scrolls: Arena Hint Book — Book of Clues 2
- Labyrinthian (Arena Quest)
- Fortress of Ice (Quest)
- La solution de la quête principale d’Arena
- The Elder Scrolls: Arena Walkthrough — Labyrinthian
- Temple of Agamanus quest reference
- Halls of Colossus quest reference
- Arena walkthrough — Halls of the Colossus
- Arena DOS manual
- Arena walkthrough and riddle table
- Temple of the Mad God and Crystal Tower walkthrough — ElderScrolls.Net
- Mines of Khuras and Crypt of Hearts walkthrough — ElderScrolls.Net
- Arena main-quest walkthrough index — ElderScrolls.Net
- Crypt of Hearts (Quest) — Elder Scrolls Wiki
- Vaults of Gemin (Quest) — Elder Scrolls Wiki
- Murkwood — Elder Scrolls Wiki
- Solution complète de la quête principale du jeu Arena
- Solution complète du jeu Arena
- Dagoth-Ur (Arena Quest) — Elder Scrolls Wiki
- The Elder Scrolls: Arena Walkthrough — ESN/TES Arena
- How do I access saved games for Arena? — Bethesda Support
- The Elder Scrolls: Arena — Imperial Palace Quest
- GAMES: The Elder Scrolls: Arena | DOSBoxWiki
- How do I access saved games for Arena? — Bethesda Support
- What are the 16 artifacts in Arena? — Bethesda Support
About the game & collecting notes
- Platform
- PC (GOG)
Complete, step-by-step coverage of the original DOS Arena campaign as distributed through GOG and launched with DOSBox. The route covers the eight Staff-piece objectives, every required lead-in dungeon, the Dagoth-Ur reassembly sequence, the Imperial Palace finale, recovery from documented progression risks, and a concrete post-ending completion check. Specific dungeon names and travel locations are recorded from the current quest state because Arena randomizes overworld placement.
Darryl Polo
Darryl Polo loves tinkering with emulation and revisiting retro games. He enjoys exploring how old favorites play on different setups and sharing what he learns along the way. At Joking Joystick, he writes about the games, hardware, and small discoveries that keep the hobby fun.
Our editorial standardsFound a step that needs another look? Help us improve this guide.