
Super Metroid (SNES, Europe — En/Fr/De) — Complete Campaign Walkthrough
Step-by-step campaign guide for the original Super Nintendo release of Super Metroid (Europe, PAL release). Covers every major region, required bosses, key progression items, escape sequence and the conditions for the game's alternate endings. Practical route advice, recovery strategies, and checks to confirm you reached the canonical Tourian ending and escape.

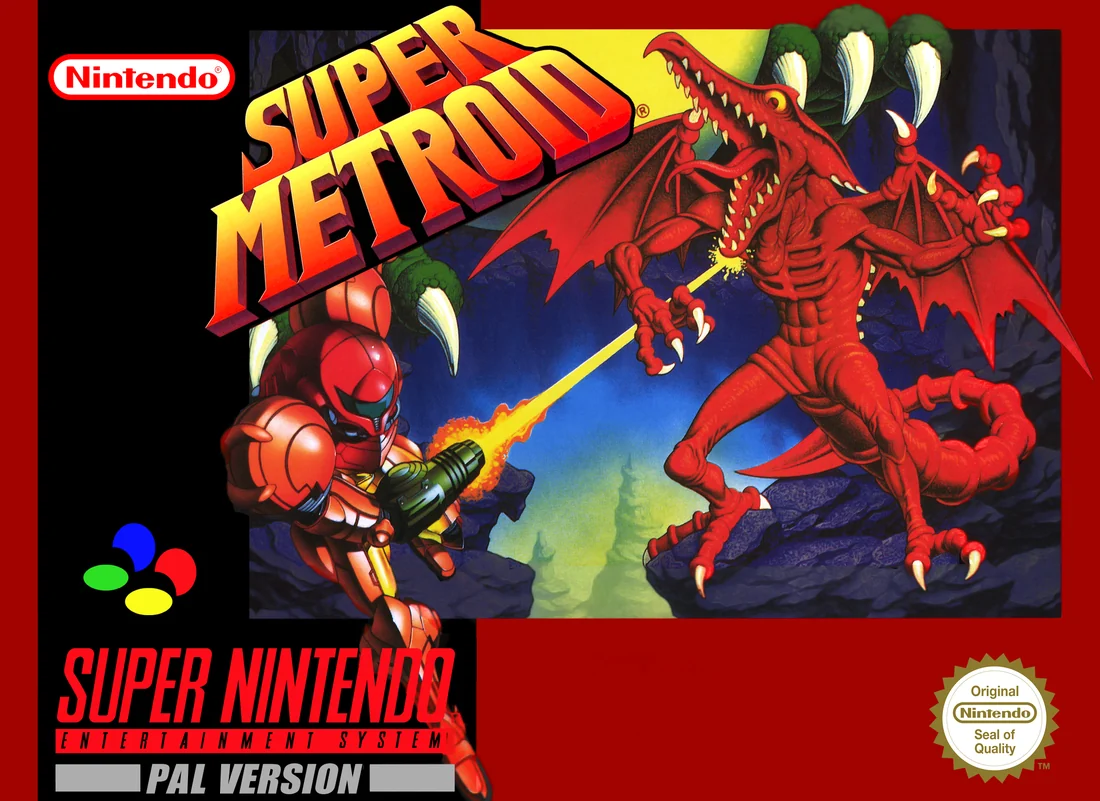
Find a copy
Super Metroid Super Nintendo Entertainment System
We may earn a commission if you buy through these links, at no extra cost to you. As an Amazon Associate I earn from qualifying purchases.
Opens retailer search results. Check the model, edition, seller, availability and current price before buying.
Before you begin
You are about to run the original Super Nintendo edition of Super Metroid (Europe PAL release).
This guide leads you from the opening crash through every major area of Zebes to the final confrontation in Tourian, with clear subgoals for each region.
Follow the area-by-area objectives and use the recommended saves and recovery steps when you take unexpected damage or get lost.
Super Metroid uses a linked-map, backtracking progression: expect to visit the same zones multiple times after obtaining new upgrades.
The guide separates required progress (bosses and progression items) from optional 100% exploration and time-saving techniques.
If you want the 'best' ending, read the ending criteria in the completion checks and plan your route/time accordingly.
Set yourself up for the run
Verify you are running the Europe (PAL) SNES release (this guide targets the original PAL edition and its map/speed characteristics).
Familiarize yourself with basic controls, the map screen and how to save at map/save stations.
Save frequently before boss rooms and before risky puzzle segments.
Set expectations: clear the main campaign first; optional item collection and speed strategies are separate.
Use this guide's chapter targets to avoid accidental skips that prevent progress.
Keep a conservative energy reserve habit: top off at save stations when possible and carry at least one Reserve Tank before major boss fights if you can find it early.
Prioritize finding the Morph Ball/bombs, the missile and super missile capacity upgrades, a Power Bomb, Varia/Gravity suit protections (as encountered), and the Grapple/Beam upgrades that open new routes.
These are the core progression upgrades you will need to reach later areas.
Use missile and super missile resources deliberately against bosses and sealed doors.
Power Bombs open crucial sealed rooms in multiple areas — conserve until you reach obvious Power Bomb gates.
If you plan to pursue the best (time-based) ending, keep an eye on in-game playtime and follow the streamlined route suggestions in the later chapters.
The guide separates a normal completion route from a speed-focused route.
If playing on emulation or a re-release with save states, still practice normal save discipline for skill-building; this guide assumes only in-game saves are used.
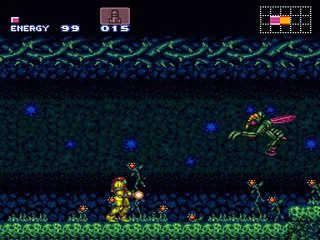
Opening and First Steps — Ceres Station to the Bomb Torizo Approach
Escape Ceres Station, land at the Crateria gunship, descend through the ruined Mother Brain chamber into Brinstar, and collect the Morphing Ball and the two opening Missile Tanks. Return to Crateria, download its map, use the Save Station, and stop outside Bomb Torizo’s chamber. In the original SNES layout, these early upgrades are divided between Brinstar and Crateria: the Morphing Ball and first two Missile Tanks are in Brinstar, while Bomb Torizo and the first practical Crateria Missile Tank come afterward.
Escape Ceres Station
Move down and right from the opening elevator, following the station’s linear route. There are no meaningful side branches or required pickups during this opening section. Continue until you reach the room containing the Metroid hatchling and Ridley.
After Ridley leaves, the station begins its self-destruct sequence and the escape timer starts. Turn around and retrace the route immediately. Keep moving through the corridors, jump over gaps, and use the elevators without stopping to fight. Venting steam and shifting platforms can interrupt movement, but the hazards in this escape do not damage Samus. Reach the starting elevator to leave Ceres Station and trigger the landing at Zebes.
- Reach the Metroid hatchling room.
- Allow the Ceres evacuation sequence to begin.
- Retrace the route and escape through the starting elevator.
Cross Crateria and take the Brinstar elevator
Exit the gunship and go left through the blue door. Continue across the stormy surface and descend the long shaft. Small openings near the early Crateria rooms are too narrow for Samus in her normal form, so ignore them for now. Do not waste time trying to reach the right side of the surface; the route is blocked at this stage.
At the bottom of the descent, pass through the ruined chamber that resembles the original Metroid’s Mother Brain area. Continue right to the yellow elevator and press Down while standing on it. This elevator leads to the opening Brinstar section, where the first essential upgrades are located.
- Leave the gunship after landing in Crateria.
- Descend through the old escape route and ruined chamber.
- Ride the yellow elevator from Crateria into Brinstar.
Collect the Morphing Ball in Brinstar
When the elevator reaches Brinstar, go left and climb around the platforms, then drop into the lower part of the room. The Chozo statue on the pedestal holds the Morphing Ball. Touch the item to collect it.
Use the Morphing Ball by pressing Down twice. Roll back toward the elevator and use the newly accessible low passage beneath the blocks. This is the first required use of a narrow Morph Ball tunnel. The Morphing Ball is a Brinstar pickup in the original SNES game, not a Crateria pickup.
- Reach the Chozo statue left of the Brinstar elevator.
- Collect the Morphing Ball.
- Roll through the newly accessible low passage and return toward the elevator.
Collect the two opening Missile Tanks
From the elevator room, travel right into the next chamber. Shoot the blocks in the floor and drop down, then roll beneath the platform and enter the lower room. Open the Chozo statue’s orb to collect the first Missile Tank. This raises the maximum missile capacity and supplies the ammunition needed for the nearby red door.
Return to the upper chamber and fire five missiles at the red door. Enter it and go right through the room. Roll under the low obstruction to collect the second Missile Tank. You may encounter the first spotlight and enemy activity here, but the spotlight itself is not harmful. After taking the tank, return to the Brinstar elevator and ride it back to Crateria.
Do not spend missiles freely on ordinary enemies. The first red door requires five missiles, and the opening route is easier if you retain ammunition for doors and recover missile drops from defeated enemies when necessary.
- Collect the first Missile Tank below the Brinstar floor blocks.
- Use five missiles to open the first red door.
- Collect the second Missile Tank beyond that door.
- Return to Crateria using the elevator.
Download the Crateria map
Once you return to Crateria, the route contains enemies that were absent during the initial crossing. Move through the shaft and climb toward the upper rooms, defeating or bypassing the small enemies as needed. At the pair of facing doors, use the right-hand red door with five missiles and follow the corridor to the map room.
Stand at the map terminal to download Crateria’s regional map. The map station fills in the known room layout for the current region, but it does not heal Samus, restore ammunition, or record the game. Hidden passages and unmarked blocks still require personal exploration and later upgrades.
- Return to the upper Crateria shaft after collecting the Brinstar upgrades.
- Open the red door leading toward the map room.
- Use the Crateria map station.
Save and stop outside Bomb Torizo’s chamber
Leave the map room and return through the corridor to the shaft. Take the nearby Morph Ball passage to the dedicated Save Station. Enter the station and confirm the save. A Save Station records progress and replenishes Samus’s health and ammunition. The gunship performs the same practical recovery functions when you stand on it and press Down, but it is a separate facility from the map station.
After saving, exit and continue upward through the Morph Ball passage. Follow the upper Crateria route, then descend through the narrow opening that was inaccessible during the first surface crossing. At the bottom, move right through the room of flying enemies and open the red door with five missiles. The Chozo statue inside holds the Bomb upgrade. Stop at the entrance to this chamber rather than collecting it; Bomb Torizo and Bombs belong to the next chapter.
At this point, several Crateria branches remain unavailable. Bomb blocks cannot be removed until Bombs are collected, the first practical Crateria Missile Tank cannot be reached before that upgrade, and later weapon-colored doors require missile types obtained farther into the campaign. If a shaft or passage appears to have no safe return route, leave it for later instead of dropping blindly.
- Use the Crateria Save Station before the first boss.
- Reach the red door leading to the Bomb Torizo room.
- End outside the chamber with Bombs still uncollected.
- Do not claim a pre-boss Crateria Missile Tank.
Before you move on
- Ceres Station has been evacuated and Samus has landed at the Crateria gunship.
- Samus has ridden the Crateria elevator into Brinstar and collected the Morphing Ball.
- Both opening Brinstar Missile Tanks have been collected, raising the starting missile capacity.
- Samus has returned to Crateria, downloaded the Crateria map, and used the Crateria Save Station.
- Samus is outside the Bomb Torizo chamber with Bombs and the post-boss Crateria Missile Tank still uncollected.
Crateria — Bomb Torizo, Bombs and the Brinstar elevator
Begin at the Crateria save station after the Morphing Ball, the early Missiles, the Crateria map and the preliminary route have already been completed. Follow the short approach to the Bombs chamber, collect the Bombs and defeat the Bomb Torizo miniboss. Then use the new bomb ability to open the exit route, optionally recover nearby supplies and ride the main Crateria elevator down into Brinstar.
Start from the Crateria save station
Load the save made in the Crateria save room. This chapter assumes Samus already has the Morphing Ball and enough regular Missiles to open the red door leading to the Bombs chamber. If the save station was not used after the earlier approach, save now before moving toward the miniboss.
Leave the save room and roll through the Morph Ball tunnel. Climb the adjoining room as far as possible, then move right. The ceiling Skrees dive toward Samus when she passes beneath them. Shoot them before crossing if your energy is low, or move through quickly and avoid stopping underneath them.
Roll through the low passage and descend to the bottom of the next area. Enter the door at the bottom, then go right through the Mellow-filled corridor. You may shoot the Mellows or run past them, but do not spend missiles unnecessarily on ordinary enemies.
- Start from the Crateria save station.
- Have the Morphing Ball and regular Missiles available.
- Cross the Skree room without taking avoidable contact damage.
- Reach the red door on the right side of the lower approach.
Enter the Bombs chamber
At the right side of the corridor, fire five regular Missiles at the red door and enter. The Chozo statue in the next room is holding the Bombs. Walk up to the statue and collect the item.
Taking the Bombs immediately activates the Bomb Torizo encounter. The exit door closes, so make sure you are ready before touching the statue. Bombs are not a separate reward collected after the miniboss; they are obtained first and serve as the event that wakes it.
- Open the red door with five regular Missiles.
- Collect the Bombs from the Chozo statue.
- Remain in the room when the Bomb Torizo appears.
Defeat Bomb Torizo
Bomb Torizo moves across the compact chamber and attacks with close-range claw swipes, horizontal energy cutters and egg-shaped bombs. Keep moving rather than waiting at either wall. The safest basic pattern is to fire a Missile when the boss is in front of you, then create space before it reaches you.
When Bomb Torizo approaches, roll under its legs before Samus is trapped against a wall. A jump over the boss also works if there is enough room. Do not attempt to roll through after the boss has already pinned Samus against the edge; the claw attack can connect before the Morph Ball clears its body.
The egg-shaped bombs can be destroyed before they land. They may release energy or ammunition, so shoot them when you need recovery, but do not stand still while focusing on drops. Regular Missiles deal damage efficiently. If the Missile supply is exhausted, the Power Beam can finish the fight, though it takes longer.
The encounter ends when Bomb Torizo collapses and the exit door reopens. There is no need to use advanced wall-jump techniques for the normal strategy.
- Keep the fight centered away from the walls.
- Use regular Missiles when a safe shot is available.
- Roll under or jump over Bomb Torizo before being cornered.
- Shoot falling egg bombs when recovery is needed.
- Defeat Bomb Torizo and wait for the exit to reopen.
Bomb through the post-boss exit
Leave the Bomb Torizo room and return left through the Mellow corridor. Take the door on the left, then climb the right side of the next room. At the upper section, enter Morph Ball form and place Bombs beside the blocks blocking the passage.
Bomb the obstructing blocks one at a time and roll through the opening to the right. This is the required use of the newly acquired ability. If the blocks do not break, make sure Samus is close enough for the bomb's blast and is positioned in Morph Ball form.
After leaving the tunnel, continue through the Crateria rooms toward the main elevator. Green Space Pirates take more punishment than the earlier enemies, so either use missiles when they directly block progress or avoid them where the room allows. Silver Geemers cannot be destroyed with the current equipment; run beneath them rather than stopping in their path. Jump over Kagos instead of trying to trade contact damage.
- Use Bombs on the blocks in the upper exit room.
- Roll through the opened passage.
- Avoid wasting ammunition on enemies that can be bypassed.
- Pass the Silver Geemers and Kagos safely.
Optional recovery before leaving Crateria
The route after Bomb Torizo allows optional detours for nearby capacity upgrades. A Missile Tank can be reached from the Crateria shaft by bombing a hidden section near the old ruined area, and another nearby Missile Tank is accessible by bombing the floor in a room with an exposed pipe structure. These upgrades are not required to enter Brinstar, so skip them if energy is low or if you want to continue the campaign.
If the approach or miniboss cost too much health, return to the gunship before taking the elevator. Standing on the gunship's central platform and pressing Down restores Samus's energy and ammunition and provides a save opportunity. The Crateria save station remains the safer retry point if you only need to preserve progress, while the gunship is the better full refill.
- Treat nearby Crateria Missile Tanks as optional.
- Use the save station or gunship if health is poor.
- Do not delay the Brinstar descent for nonessential pickups.
Leave the later Crateria gates closed
During this chapter, green doors marked for Super Missiles and yellow doors marked for Power Bombs cannot be opened with the current equipment. They are future-return markers, not alternate routes to Bomb Torizo or Brinstar. Record their locations on the map if desired, then continue along the normal path.
Crateria's rain and water slow Samus but do not require the Varia Suit. The immediate dangers are enemy contact, knockback near ledges, falling through vertical rooms and losing health while trying to recover from a bad landing. When dropping down a tall shaft, watch for the next doorway and avoid drifting into hazards without knowing where the landing area is.
If Samus falls below the intended platforming route, look for a lower door or a bombable obstruction rather than repeatedly jumping into the same wall. The Bombs now reveal breakable floors and passages, so inspect suspicious blocks when the route appears to end.
- Leave green Super Missile doors closed.
- Leave yellow Power Bomb doors closed.
- Do not treat Crateria's rain or water as heat damage.
- Check landing areas before dropping through tall shafts.
- Use Bombs to test suspicious obstructions.
Ride the main elevator into Brinstar
Continue left through the Crateria route after the post-boss tunnel. Follow the open passage past the enemies and enter the main elevator room. Step onto the elevator and ride it downward into Brinstar.
This descent marks the completion of the chapter. The next chapter begins in Green Brinstar, where the map station, early branching rooms and the route toward the area's progression upgrades become the priority. Bomb Torizo, Bombs and the elevator descent are required; the map, save station and nearby Missile Tanks are support resources.
- Reach the main Crateria elevator after leaving the Bombs route.
- Ride the elevator down into Brinstar.
- Begin the Green Brinstar route with Bombs equipped in the inventory.
Before you move on
- The chapter began at the Crateria save-station and Bomb Torizo approach rather than at the gunship.
- The Bombs were collected from the Chozo statue.
- Bomb Torizo was defeated and the exit door reopened.
- The upper post-boss obstruction was destroyed with Bombs.
- Any desired recovery was completed at the save station or gunship.
- Green Super Missile and yellow Power Bomb gates were left for later.
- Samus reached and rode the main Crateria elevator down into Brinstar.
- The next active objective is Green Brinstar progression, not another Crateria opening sequence.
Brinstar — Green Brinstar entry and essential upgrades
After returning from Crateria with the Morph Ball, Bombs and regular Missiles, follow Green Brinstar’s intended early route. Download the Brinstar map, collect the nearby missile tank, reach the Charge Beam, defeat Spore Spawn and claim the first Super Missiles. The map station and Charge Beam are not reached by simply forcing every blocked door: use Bombs on the marked tunnel walls, use regular missiles only on red doors, and leave green and yellow doors for the equipment they require.
Enter Green Brinstar and use the map station
Ride the elevator from Crateria and descend the large Brinstar shaft. At the first pair of red doors, open the left-hand door with five regular Missiles. Defeat the Zeelas and the Small Sidehopper, then bomb the right wall of the room. The hidden passage leads to the Brinstar Map Computer. Use it before continuing; the computer fills in the region’s normal room layout, but it does not reveal every hidden passage or item location.
Return through the bomb tunnel. The metal door leading back to the elevator room opens only after the enemies in the preceding room have been defeated, so if it remains closed, clear the Zeelas and the Small Sidehopper rather than searching for another exit. The Small Sidehopper moves quickly and causes substantial contact damage, so a Missile is acceptable if a beam shot would leave you exposed.
- Open the left red door with regular Missiles.
- Bomb through the wall to reach the Brinstar Map Computer.
- Defeat the enemies required to reopen the metal door to the elevator shaft.
Collect the early missile tank
Back in the elevator shaft, enter the opposite red door. Move across the room and let the pit blocks drop you to the lower section, or bomb through the lowest blocks if you prefer a controlled descent. The missile tank is at the bottom. Collect it, then bomb the blocks to escape and return to the shaft.
This tank is useful for the red doors and for Spore Spawn, but do not spend missiles on ordinary plant or insect enemies when beam shots are safe. Red doors require regular Missiles; once opened, they remain open. A green door is different and cannot be opened with regular Missiles. Leave it until you have Super Missiles.
- Collect the missile tank in the room opposite the map-station route.
- Bomb your way out of the tank room.
- Return to the central elevator shaft.
Save and refill before the Charge Beam route
Continue downward in the shaft. Use the red door on the left to reach the Save Station and save your game. At the bottom of the shaft, the left-hand red door leads through a dark Fireflea room to a Missile Recharge Station. Firefleas provide the room’s light; killing or touching them makes the room progressively darker, so avoid them unless you need to clear a path. Recharge there if your missile count is low, then return to the shaft.
Take the right-hand red door at the bottom to continue. In the following rooms, bomb through the wall where the passage appears to end. Metarees hang from the ceiling farther along; hold the Dash command and run through rather than stopping beneath them. This route leads into a large room containing the Charge Beam.
- Save at the Green Brinstar Save Station.
- Use the Missile Recharge Station if you spent missiles on doors or enemies.
- Avoid disturbing the Firefleas unnecessarily.
- Bomb through the apparent dead end and run past the Metarees.
Collect the Charge Beam
In the large room, travel to the bottom-left corner and collect the missile tank there. Then move to the bombable blocks at the base of the nearby wall. Bomb them to open the Morph Ball passage and roll through; Samus drops into the Chozo statue room below. Shoot the statue’s orb and collect the Charge Beam.
The Charge Beam lets you hold the beam command to fire a stronger charged shot. It is especially valuable against the Green Kihunters guarding Spore Spawn because it saves regular missiles. Charged shots can also damage Spore Spawn; ordinary uncharged beam shots do not damage its exposed core.
After taking the item, leave through the upper passage and return to the large room. Use the hidden Save Station in the upper-left portion if you want another safe checkpoint. The room contains optional routes and pickups, including a missile expansion that normally requires wall jumping. Ignore that detour unless you already know the technique; it is not required for the campaign.
- Collect the missile tank in the lower-left of the large room.
- Bomb the wall base and enter the Chozo statue room.
- Collect the Charge Beam.
- Use the nearby Save Station before the mini-boss approach.
Reach and defeat Spore Spawn
From the large room, climb through the upper platforms and follow the route to the red door near the upper-right side. The next corridor contains Green Kihunters. Defeat every Kihunter to unlock the metal door at the far end. Charged shots are the efficient choice; regular missiles work, but keep enough ammunition for opening doors and for emergencies.
Enter the Spore Spawn chamber. While it swings around the room, stay low and use the lowest floor or the corner ledges while rolled into a ball to reduce the chance of being struck. Spores fall from above; shoot them for Energy and Missile refills, or move around them if you are already supplied. When Spore Spawn opens its central core, jump and hit the core with a charged shot or Missiles. Normal beam shots do not work. As the fight continues, it moves faster and opens lower in the room, so avoid standing directly beneath the exposed core.
After the mini-boss is defeated, collect the Energy and Missile refills it leaves behind. Go upward through the opened route rather than backtracking immediately to the elevator.
- Defeat every Green Kihunter so the metal door opens.
- Use the low floor or corner ledges while Spore Spawn is closed.
- Attack only when the central core is exposed.
- Collect the refills after the fight.
Claim the first Super Missiles and set up the next chapter
After Spore Spawn, continue upward and to the right into the next room. Stand on the green pipe; it breaks and drops Samus through a long shaft. At the bottom, open the Chozo statue’s orb and collect the first Super Missiles.
Super Missiles open green doors and are more powerful than regular Missiles. Use the first one on the nearby green door when the route calls for it, but do not spend the entire supply on optional doors or side rooms. Yellow doors still require Power Bombs, which are not available in this early Brinstar sequence. From here, the intended route proceeds through lower Brinstar and eventually toward Norfair and Kraid.
Save at the nearby station whenever practical before making the next regional push. If you are low on Energy, return to the recharge route rather than attempting the Kihunter corridor or Spore Spawn again with depleted reserves.
- Collect the first Super Missile tank after Spore Spawn.
- Use Super Missiles only on green doors or clearly marked Super Missile blocks.
- Leave yellow Power Bomb doors closed.
- Save before leaving Green Brinstar for the next progression route.
Before you move on
- The Brinstar Map Computer has been used.
- The missile tank in the room opposite the map-station route has been collected.
- The Green Brinstar Save Station and Missile Recharge Station have been identified and used as needed.
- The Charge Beam has been collected from the Chozo statue below the large room.
- All Green Kihunters in the approach corridor have been defeated.
- Spore Spawn has been defeated and its post-fight refills collected.
- The first Super Missile tank has been collected from the Chozo statue after the pipe drop.
- You know that green doors require Super Missiles and yellow doors require Power Bombs.
- You are saved and ready to continue through lower Brinstar toward the next regional objectives.
References for this chapter
- Super Metroid instruction manual
- Brinstar: Get Charge Beam and Super Missiles — Thonky Super Metroid Walkthrough
- Super Metroid — Guide and Walkthrough by Super_Slash
- Super Metroid — Guide and Walkthrough by bover_87
- THE Super Metroid Guide — Nevermore Studios
- Super Metroid — Nintendo UK product information
Brinstar — Red Brinstar and Kraid approach
After defeating Spore Spawn, use the Super Missiles to open the concealed route from the Brinstar-Norfair elevator into Kraid’s lair. Take the optional Spazer Beam if you have not already collected it, use the nearby save and recharge stations, then defeat Kraid and collect the Varia Suit. This follows the intended progression of the original Super Nintendo release and does not require sequence breaks or advanced movement techniques.
1. Return to the Brinstar-Norfair elevator
After defeating Spore Spawn, collect the Super Missiles in the next room and retrace your route through Green Brinstar until you reach the large room containing the elevator to Norfair. Refill your energy at any recharge station you pass. Keep your Super Missiles available; the next route uses one to reveal the entrance to Kraid’s area.
If you have not collected the Spazer Beam, take that optional detour before entering Kraid’s lair. From the elevator area, travel through the nearby water-filled rooms until you find the concealed upper passage. Bomb the first blocking block, shoot the next one rather than bombing it, and enter the room containing the Spazer Beam. Spazer is not required, but its wider beam makes the Space Pirates and Kihunters on the Kraid route easier to handle.
- Defeat Spore Spawn and collect the Super Missiles.
- Return to the Brinstar-Norfair elevator room.
- Refill energy before beginning the Kraid approach.
- Collect Spazer if you want the optional combat upgrade.
2. Open the concealed Red Brinstar route
Stand in the Brinstar elevator room and face the right-hand wall. Fire a Super Missile into the suspicious metal section of that wall. The blocks will break open, revealing a passage. Enter it, jump to the upper-right side of the room and move into the statue’s mouth to reach the door leading deeper into Kraid’s lair.
This is the important progression lock between the upper Brinstar route and Kraid’s area. It is not a standard green-door transition, so firing ordinary missiles at the wall will not help. Once the passage is open, you can return to this area quickly from the elevator if you need to recover after a failed attempt.
- Face the right wall of the Brinstar-Norfair elevator room.
- Use a Super Missile to expose the hidden passage.
- Jump into the upper-right statue passage and enter the door.
3. Cross the first Kraid-lair rooms
In the first room beyond the statue passage, shoot the floor beneath the entrance and drop down. The door at the bottom is not the route forward yet. Instead, bomb the wall to the right of that door, roll through the tunnel and use the door in the ceiling to reach the upper chamber.
The next room contains Kihunters. Defeat them with the Spazer Beam, charged shots or missiles while staying mobile. The enemies must be cleared before the exit becomes usable. On the right side of this room, look for a small notch in the floor. Drop a bomb there, roll through the revealed tunnel and enter the Save Station. This save is the best checkpoint before the boss approach.
Leave the Save Station by reversing through the same tunnel. Bomb your way out, return to the Kihunter room and shoot the damaged-looking section of floor near the middle. Drop through the opening and continue downward.
- Bomb the wall to the right of the lower door.
- Use the ceiling door to reach the Kihunter room.
- Clear the Kihunters so the route remains open.
- Use the hidden tunnel on the right to reach the Save Station.
4. Defeat Mini-Kraid and use the recharge room
In the lower corridor, eliminate the Space Pirates before moving right. Spazer makes this safer, but missiles are also effective if you do not have the beam. Continue right while avoiding the spikes launched from the far side of the room. At the end, Mini-Kraid blocks the flashing door.
Mini-Kraid can be defeated with missiles or charged beam shots. Attack from a safe distance, collect the ammunition and energy drops it leaves behind, then enter the flashing door. If the door is not flashing, another enemy in the room still needs to be defeated.
In the next room, shoot the ceiling above the entrance to reveal an upper passage. Jump up and fire a Super Missile at the green door. Beyond it are an Energy Refill Station and a Missile Refill Station. Use both before the boss. This room is the most reliable way to restore your supplies without returning all the way to the main Brinstar shaft.
- Defeat every Space Pirate in the lower corridor.
- Kill Mini-Kraid and enter the flashing door.
- Open the upper green door with a Super Missile.
- Refill both energy and missiles before proceeding.
5. Reach Kraid’s chamber
Leave the recharge room and travel left. Shoot the floor and drop into the lower passage. Continue right past the deceased soldier until you reach the Gadora guarding the boss door.
Gadora is vulnerable when its eye opens. Fire missiles or charged shots during that opening, then move to avoid the energy orbs it launches. Do not waste Super Missiles on the surrounding room; keep them for Kraid if you have them available.
After Gadora is destroyed, enter the door and wait for Kraid to appear. If you fail, the Save Station is only a short detour away through the hidden tunnel in the Kihunter room. Refill at the recharge room again before making another attempt. This recovery loop is faster and safer than returning to the beginning of Brinstar.
- Pass the deceased soldier and reach Gadora.
- Attack Gadora only when its eye is open.
- Enter the boss door after Gadora is defeated.
- Remember the Save Station and recharge-room route for retries.
6. Defeat Kraid
Kraid’s weak point is the inside of his mouth. During the first part of the battle, stay on the upper floor and watch his face. When his eyes flash with rainbow colors, his mouth is about to open. Fire a Super Missile, missile or charged shot into the opening. You can also provoke the opening by shooting his face or body when his hand is not blocking it.
Avoid standing directly beneath Kraid. His claws and belly projectiles can damage you or knock you from the upper platforms. Jump over the platform-like projectiles from his chest, and shoot or avoid the claws as they travel across the room. Some defeated claws can provide energy or ammunition, so collect drops only when doing so does not put you in Kraid’s path.
After Kraid takes enough damage, he rises and fills the lower part of the screen. Move between the raised platforms, continue aiming at his open mouth and use your remaining missiles carefully. If Super Missiles run out, normal missiles and charged shots remain valid options; accuracy matters more than firing continuously. If Kraid moves close to your position, jump to the left platform to avoid contact damage.
- Target the inside of Kraid’s open mouth.
- Use Super Missiles for strong openings, then normal missiles or charged shots if necessary.
- Jump over chest projectiles and avoid contact with Kraid.
- Collect recovery drops only when the arena is safe.
7. Collect the Varia Suit and secure the result
When Kraid is defeated, leave the arena through the door on the right and collect the Varia Suit from the next room. The suit reduces damage and protects Samus from the heated atmosphere in most of Norfair. It does not make lava or acid safe, so continue treating those surfaces as hazards.
The Varia Suit is the required reward for this chapter. An optional Energy Tank is available by returning through Kraid’s area, revisiting the Kihunter section and using the concealed route to the room with Beetoms. Shoot the hidden section of the ceiling to reveal the tank. Collect it if you want additional health before Norfair, but it is not required to continue.
After securing the suit, save at the nearest available station. Then return through the upper passage to the Brinstar-Norfair elevator and continue into Norfair for the next progression sequence.
- Defeat Kraid.
- Leave through the right-hand exit.
- Collect the Varia Suit.
- Optionally collect the hidden Energy Tank near the Kraid approach.
- Save before continuing into Norfair.
Before you move on
- The concealed passage beside the Brinstar-Norfair elevator has been opened with a Super Missile.
- The Kraid-lair Save Station and recharge room have been used or identified.
- Mini-Kraid and Gadora have been defeated.
- Kraid has been defeated and the exit on the right has opened.
- Samus has collected the Varia Suit and saved afterward.
- The optional Energy Tank near the Kraid approach has been collected if desired.
Norfair — Upper Norfair, Wave Beam, Crocomire and the Grapple Beam
Return to Norfair after defeating Kraid and collecting the Varia Suit. Follow the normal Upper Norfair route to obtain the Hi-Jump Boots, Speed Booster, Ice Beam, Power Bombs, Crocomire’s defeat, the Grapple Beam and the Wave Beam. The Wave Beam is not optional on the standard campaign route: collect it before leaving Norfair because it is used to open a later colored gate on the approach to Lower Norfair. Save after the Norfair upgrades, return to Brinstar and continue toward the Wrecked Ship. Do not descend to Lower Norfair yet.
1. Enter Upper Norfair with the Varia Suit
Take the Brinstar-Norfair elevator after Kraid and confirm that the Varia Suit is equipped. Varia prevents the continuous heat damage in Norfair’s heated rooms and reduces ordinary damage, but it does not protect Samus from lava, acid, spikes, fire, enemy contact or other environmental hazards.
Use the save station near the Norfair elevator before making the deeper push. If you arrive without Varia, return to Brinstar and complete that upgrade first. Trying to cross the heated sections without it drains energy too quickly and makes the later item route unnecessarily dangerous.
- Varia Suit is in the inventory.
- The game has been saved near the Norfair elevator.
- Energy and ammunition are suitable for a long exploration trip.
2. Collect the Hi-Jump Boots
From the Norfair elevator room, take the lower-left route through the heated corridors. Enter the red door on the left and collect the visible Energy Tank if you can do so without falling into the hazards. Continue through the Morph Ball passages and the lower rooms until you reach the Chozo statue holding the Hi-Jump Boots.
Some of the route is concealed behind breakable blocks. When a corridor appears to end, check nearby walls and floors with the beam or Morph Ball bombs rather than assuming the room is a dead end. The Hi-Jump Boots increase Samus’s jump height and make the tall shafts and later lava-adjacent rooms much easier to cross.
On the return route, defeat the orange Geemer that blocks the exit if the door remains sealed. If the Hi-Jump Boots were already collected during an earlier visit, skip this detour and continue toward the Speed Booster.
- Hi-Jump Boots are collected or already owned.
- The blocking enemy has been defeated if the exit requires it.
- The optional Energy Tank was taken only if the route remained safe.
3. Obtain the Speed Booster
Return toward the central Upper Norfair rooms and follow the route toward the large chamber filled with bubbles. Use the nearby save station before continuing. Avoid unnecessary enemy contact, especially where a hit could knock Samus into lava or interrupt a long running corridor.
Continue through the rooms beyond the bubble chamber until you reach the Speed Booster statue. Several passages use hidden blocks and vertical platforms, so shoot suspicious walls and floors when the visible route stops. Collect the Speed Booster and leave through the newly useful paths.
The Speed Booster charges when Samus runs continuously. A charged dash breaks Speed Booster blocks and is needed for the long runs leading to the Ice Beam, Power Bombs and Crocomire approach. Practise charging on a safe, level corridor before attempting the more hazardous runs.
- Speed Booster is collected.
- A save station has been used before the deeper route.
- You can charge and release a Speed Booster dash consistently.
4. Collect the Ice Beam and Power Bombs
Use the Speed Booster routes branching from the central Upper Norfair rooms. When a passage is blocked by Speed Booster blocks, return to the beginning of the corridor and build speed again rather than trying to force the obstruction with ordinary shots.
Follow the normal route to the Ice Beam statue. The Ice Beam freezes many ordinary enemies, allowing some of them to serve as temporary platforms. This is useful in rooms where lava or gaps prevent a direct crossing. Collect the Ice Beam before continuing toward the lower Upper Norfair route.
Next, follow the connected passages toward the Power Bomb statue. Use frozen enemies and careful jumps where the floor is hazardous. Varia does not make lava harmless, so treat every lava contact as damaging. Collect the Power Bombs before entering Crocomire’s approach; the lower route after the boss contains Power Bomb blocks that must be removed.
Keep at least one Power Bomb available for progression. Optional Missile Tanks, Energy Tanks and Reserve Tanks can be collected if they do not compromise your health or ammunition, but none should delay the required route.
- Ice Beam is collected.
- Power Bombs are collected.
- At least one Power Bomb remains available for the Crocomire aftermath route.
- Samus has enough energy to continue through heated rooms.
5. Reach Crocomire’s arena
Return to the central Upper Norfair area and save before the boss approach. Look for the route leading to a long corridor and a green door in the floor. A Super Missile opens the relevant gate. Drop through and continue into the crumble-block shaft.
Jump as soon as Samus lands on each temporary platform. If you fall, use the lower route to reset the climb instead of attempting a jump from an unsuitable ledge. A Missile Tank in this area is optional; prioritize reaching the boss with strong energy and ammunition.
Continue through the horizontal corridor and enter Crocomire’s chamber. The arena has spikes behind Samus, so do not begin the fight with your back against the wall.
- The pre-boss save station has been used.
- The crumble-block shaft has been crossed.
- Samus has entered Crocomire’s lava arena with adequate energy.
6. Defeat Crocomire
Crocomire advances from the right and opens its mouth before attacking. Fire Missiles, Super Missiles or charged shots into the mouth while it is open. Each successful hit pushes Crocomire backward; stronger attacks push it farther, but ordinary Missiles are sufficient if you maintain the attack rhythm.
Stay far enough away to react to Crocomire’s movement and avoid being trapped against the spike-lined wall. If it closes the distance, jump over the attack when possible and resume firing immediately. Do not use Power Bombs as the main attack because they make Crocomire charge toward Samus instead of pushing it back.
Continue attacking until Crocomire falls into the acid. This is the defeat condition. Afterward, move left and wait for the arena events to finish. The Energy Tank and other drops in the aftermath are optional. Take the Energy Tank only if you can cross the hazardous area and return to solid ground safely.
- Crocomire has been forced into the acid.
- The boss exit is open.
- The optional post-battle Energy Tank was collected only if the return path was safe.
7. Collect the Grapple Beam
Leave Crocomire’s arena through the left route and descend. Use the nearby save station before entering the lower sequence. You can shoot the Gamets in the surrounding rooms to recover energy, missiles and bombs if necessary.
Follow the route to the room with rising and receding acid. Open the Missile door, wait for the acid to lower, then cross the tunnel and spikes. Continue down to the large room containing Power Bomb blocks. Detonate a Power Bomb near the entrance to clear the obstruction.
In the cleared room, run across the lower section and charge a Speed Booster. At the correct point, jump while carrying the charge toward the upper-left side. The timing is demanding, so if the attempt fails, return to the runway and try again rather than spending energy on repeated blind jumps. Enter the opened door and collect the Grapple Beam from the Chozo statue.
After collecting Grapple Beam, practise attaching to grapple blocks and swinging. Hold the attack button to remain attached and release it when Samus has the desired momentum. The beam is needed for the Wave Beam route and for the later crossing toward the Wrecked Ship.
- Grapple Beam is collected after Crocomire.
- The Power Bomb barrier is cleared.
- Samus can attach to grapple blocks and release with controlled momentum.
8. Collect the Wave Beam
Do not leave Norfair immediately after collecting Grapple Beam. Return through the Crocomire-area passages and use the grapple blocks above the acid and water sections. Follow the upper route through the rooms with grapple points, flying enemies and colored gates.
Where a gate blocks the route, use the required Super Missile or beam shot on its colored light. Continue through the grapple rooms until you reach the Wave Beam branch. Use the Grapple Beam to cross the water gaps and reach the upper ledges; avoid the enemies and spikes beneath the grapple points rather than dropping into them.
At the Wave Beam statue, shoot the item and collect the beam. Wave Beam shots pass through walls, and the upgrade is required on the normal campaign route for a later colored gate on the approach to Lower Norfair. It is therefore part of the required progression for this chapter, not an optional Norfair pickup.
Return through the same route. If energy is low, use the recharge and save rooms encountered on the way back before attempting the final climb to the Norfair elevator.
- Wave Beam is collected.
- The Grapple Beam route through the water and acid rooms has been completed.
- The game has been saved or Samus has reached a confirmed recharge room after the Wave Beam trip.
9. Leave Norfair and prepare for the Wrecked Ship
Use the Grapple Beam to cross the remaining gaps and climb toward the Upper Norfair elevator. Optional Missile Tanks, Energy Tanks, Reserve Tanks and Power Bomb expansions can be collected during this return, but do not risk a death for them if your energy is low.
Save before taking the elevator back to Brinstar. From Brinstar, travel through Crateria toward the Wrecked Ship. Grapple Beam is needed for the crossings on that approach. The next required regional objective is to enter the powerless Wrecked Ship and defeat Phantoon.
Do not descend to Lower Norfair at this point. The Lower Norfair route comes after the Wrecked Ship and Maridia sequence, once the required regional bosses have been defeated and the Crateria statue has opened the final path.
- Hi-Jump Boots, Speed Booster, Ice Beam, Power Bombs, Grapple Beam and Wave Beam are acquired.
- Crocomire has been defeated by forcing it into the acid.
- The game has been saved before returning to Brinstar.
- The Wrecked Ship and Phantoon are the next required objectives.
Before you move on
- Samus has the Varia Suit before entering the sustained Upper Norfair heat route.
- Hi-Jump Boots and Speed Booster are in the inventory.
- Ice Beam and Power Bombs are in the inventory.
- Crocomire has been forced into the acid.
- Grapple Beam has been collected from the route below Crocomire.
- Wave Beam has been collected before leaving Upper Norfair.
- The game has been saved before returning to Brinstar.
- The next main objective is the Wrecked Ship and Phantoon, not Lower Norfair.
Wrecked Ship — Phantoon, restored power and the Gravity Suit
After clearing the Upper Norfair route, defeating Crocomire and collecting the Grappling Beam, return through Brinstar to Crateria. Cross the eastern coastline to the powerless Wrecked Ship, reach Phantoon without an active interior save station, and defeat the ship’s guardian. Phantoon’s defeat restores power, bringing the map and save station online. Explore the newly active ship, use the Chozo statue route and collect the Gravity Suit. The next intended campaign destination is Maridia. Ridley is not fought in this chapter; that required battle occurs later in Lower Norfair.
1. Prepare before leaving Upper Norfair
The normal route to the Wrecked Ship begins after Crocomire and the Grappling Beam have been obtained. The Grappling Beam is the important requirement for crossing the Crateria coastline. Power Bombs are also needed for obstacles inside the ship. A standard newcomer route reaches this point with the Speed Booster, Varia Suit and other Upper Norfair upgrades already collected, but do not confuse those preparations with the Grappling Beam itself.
Save and refill before committing to the ship. The Wrecked Ship’s map terminal and save station are inactive while the area has no power, so a defeat against Phantoon returns you to the last working save point. Charge Beam shots can damage Phantoon, allowing you to preserve Super Missiles, although carrying a reasonable supply of missiles and Super Missiles makes the Eye Door and boss attempt more forgiving.
- Have the Grappling Beam before taking the intended coastline route.
- Carry Power Bombs for internal ship obstacles.
- Save and refill in Brinstar, Crateria or at Samus’s gunship before entering.
2. Return through Brinstar and cross Crateria
From Upper Norfair, use the normal elevator route back into Brinstar, then continue toward Crateria. At the Crateria surface, travel east, or right, from Samus’s gunship. The coastline contains long gaps over water and several visible grapple points. Attach to the fixed points and swing across rather than attempting ordinary jumps over the wide gaps.
Some grapple points crumble after being used. Move promptly once Samus reaches the far side. If the fixed points run out, grapple the moving flying enemy over the water and use it as a temporary anchor. The water slows Samus before the Gravity Suit is obtained, so avoid unnecessary exploration and concentrate on reaching the ship.
The Wrecked Ship is the large half-submerged structure on the far right of the coastline. Enter through its green door. Optional missile rooms along the approach are not required for the chapter. If you fall into the water, use the nearby platforms and grapple points to recover instead of trying to force a long jump from the surface.
- Travel right from the Crateria gunship.
- Use fixed grapple points and, where necessary, the moving enemy over the water.
- Enter the half-submerged Wrecked Ship through its green door.
3. Cross the powerless Wrecked Ship
The ship is dark and powerless when you first enter. The map terminal and save station do not function yet. The ghost-like Coven enemies can usually be avoided; there is little benefit in spending health and ammunition fighting every one of them because the practical save point remains outside the ship until Phantoon is defeated.
From the entrance, continue into the main vertical shaft and descend. Ignore inaccessible doors and keep looking for the lower route. At the bottom, fire at the floor and surrounding pipework to reveal the passage that leads downward. Enter the tunnel in Morph Ball form and continue through the lower corridor.
Follow the corridor to the right. Bomb the obstruction in the narrow tunnel if it remains intact, then continue to the door guarded by a Gadora. The Gadora’s eye opens periodically. Fire missiles or a Super Missile when the eye is exposed, then enter the boss room after the guardian is destroyed. If you need to retreat, do so before entering Phantoon’s room; once the battle begins, there is no normal safe disengagement route.
- Treat the interior as a one-way push until Phantoon is defeated.
- Use the revealed lower passage and Morph Ball tunnel to reach the boss door.
- Defeat the Gadora before entering Phantoon’s chamber.
4. Defeat Phantoon
Phantoon can only be damaged through its exposed eye. Keep a charged Beam shot ready while the boss is invisible or moving through its figure-eight pattern. When the eye opens, release the shot immediately. Missiles and Super Missiles also work against the eye, but Super Missiles can provoke a more aggressive flame response, so charged shots are a dependable ammunition-saving method.
Blue flames are the main hazard. Phantoon drops or launches them in several patterns, and they can bounce along the floor or descend in waves. Keep Samus moving around the room, watch where the flames are landing and use clear floor space rather than standing directly below the boss. Some flames can be shot for health, missile or bomb refills, but do not risk a hit by chasing a drop.
When the eye opens during a flame pattern, prioritize the attack over firing randomly at Phantoon’s closed body. Attacks against the closed eye do nothing. If Samus is defeated, reload the last active save and repeat the approach with full energy. The ship’s inactive save station cannot be used as a recovery point before this victory.
- Attack only when Phantoon’s eye is open.
- Use charged Beam shots to conserve Super Missiles if desired.
- Keep moving and watch the blue flame patterns.
- Return to the last active save station after a failed attempt.
5. Restore power and save immediately
After Phantoon is defeated, leave the boss chamber and return toward the ship’s central shaft. The Wrecked Ship powers up. Its map terminal and save station now function, so use the save station before exploring further. This is the most important recovery point in the chapter because the newly active ship contains additional hazards.
Power also activates parts of the ship that were previously inert. Sparking wires can damage Samus, while Workrobots and Atomics become active in the corridors. Move carefully through the central rooms and avoid touching electrical hazards. Download the map if you want the ship’s item rooms and corridors marked before continuing.
- Confirm that the ship’s lighting and systems have returned.
- Use the newly active save station immediately.
- Download the Wrecked Ship map if desired.
6. Reach the Gravity Suit statue
From the powered central section, follow the newly accessible route through the ship. Use the Grappling Beam across the long spike-lined room. Continue through the upper and side rooms until you reach the Chozo statue. The statue is not an ordinary item pedestal: stand on its hands in Morph Ball form. It will carry Samus down a hidden staircase to the Gravity Suit room.
Enter the room and collect the Gravity Suit. It greatly improves movement in water and removes the normal water movement penalty. It also protects Samus from ordinary lava damage, but acid remains harmful, so do not treat every liquid hazard as safe. The suit is the required reward from the Wrecked Ship and makes the intended Maridia route practical.
After taking the suit, return through the door to the statue room. From there, use the ship-side exit on the right to continue through the powered Wrecked Ship. Do not leave through an unfamiliar side route merely because it is nearby; the wrong exit can drop Samus outside the ship and create an awkward climb. If you do fall outside after obtaining the suit, its improved underwater movement allows you to jump back to the platforms, but using the statue-room route is simpler.
- Cross the spike-lined room with the Grappling Beam.
- Morph into a ball on the Chozo statue’s hands.
- Collect the Gravity Suit.
- Return to the statue room and use the right-hand ship exit.
7. Leave the ship and continue toward Maridia
Save after collecting the Gravity Suit, then return through the Wrecked Ship’s exterior route to Crateria. The suit now lets Samus move normally through water, making later submerged sections much easier. Continue through the Brinstar connection toward the glass tube and Maridia route described in the next chapters.
The Wrecked Ship chapter is complete when Phantoon has been defeated, the ship’s map and save facilities are active and the Gravity Suit is in Samus’s inventory. Ridley is not part of this area. The required Ridley battle remains later in Lower Norfair, after the Maridia sequence and additional upgrades.
- Save with the Gravity Suit in the inventory.
- Return from the Wrecked Ship toward Crateria and Brinstar.
- Continue to the Maridia route.
- Leave Ridley for the later Lower Norfair chapter.
Before you move on
- The Grappling Beam route across Crateria’s eastern coastline has been completed.
- Phantoon has been defeated.
- The Wrecked Ship has powered up.
- The ship’s map terminal and save station are active.
- Samus has collected the Gravity Suit from the Chozo statue.
- The intended next destination is Maridia.
- Ridley remains reserved for the later Lower Norfair progression.
Maridia — Entrance, Botwoon and the route to Draygon
With the Gravity Suit, Grappling Beam, Speed Booster and Power Bombs already obtained, enter Maridia by breaking the glass tube in Brinstar. Save immediately in the station below the shattered tube, then follow the submerged and quicksand routes to Botwoon. After defeating the miniboss, use the grapple passages and recharge rooms to reach the save station immediately before Draygon. Space Jump, Plasma Beam and Spring Ball are not part of this chapter; they come after Draygon.
Break the glass tube and save in Maridia
Return to the large glass tube in Brinstar, the room connected to the route between Brinstar and Norfair. Place a Power Bomb inside the tube. When the explosion finishes and you move, the glass breaks and the water drains into the lower passage, opening the normal entrance to Maridia.
Drop through the opening and enter the red door below. This is Maridia’s Save Station. Save before exploring the region. The save room is the most important early landmark because Maridia’s submerged rooms, Mochtroids and quicksand can cause repeated damage while you learn the route.
After saving, return to the glass-tube room and take the upper route into Maridia proper. Gravity Suit is required for the normal route: without it, underwater movement is severely restricted and the intended jumps, grapple crossings and Speed Booster sections become impractical. Do not confuse this entrance with the later Wrecked Ship route; the Wrecked Ship and Gravity Suit should already be complete.
- Have the Gravity Suit, Grappling Beam, Speed Booster and at least one Power Bomb.
- Break the glass tube with a Power Bomb.
- Use the Save Station below the tube before continuing.
- Take the upper route from the tube into Maridia proper.
Cross the first submerged rooms
From the upper Maridia entrance, continue through the aquatic rooms and deal with the Scisers around the platforms. Use the green shutter and the crumbling-block route to climb toward the upper part of the area. Grapple across gaps when a platform is too far away for a normal jump; Gravity Suit makes these underwater movements much more controllable.
At the top, enter the ceiling door and continue into the room containing trapped Mochtroids and shootable wall sections. These enemies are not Metroids and can be destroyed with ordinary beam fire. Clear only the walls and enemies that obstruct the route, then look for the long horizontal space needed to activate the Speed Booster.
Run to the right through the cleared passage. The Speed Booster route carries Samus into the room leading to Botwoon. If the run stops against a remaining wall or enemy, return to the previous room, clear more of the blocking terrain and try again. The objective is the right-hand door at the end of the boosted passage, not the optional missile route above or behind the nearby platforms.
- Use the upper door from the glass-tube area rather than wandering through the lower dead ends.
- Grapple across submerged gaps and use the green shutter to reach the upper rooms.
- Clear the shootable walls around the Mochtroids.
- Build a Speed Booster run to the right and enter Botwoon’s room.
Defeat Botwoon
Botwoon moves between four holes in the walls of the arena. Its head is the damage target. Missiles, Super Missiles and charged beam shots can all damage it, so aim for the head rather than firing at the body. Super Missiles end the fight quickly if you have a comfortable supply, while charged shots conserve ammunition.
At the beginning, Botwoon usually emerges from the upper-left hole and swims around the room. Stay toward the left side, watch its movement and fire when the head passes into a clear line. When only the head protrudes from a hole, Botwoon spits a spread of green projectiles. Move out of the corner or morph into a smaller target to avoid the spread, then fire at the head when it is exposed.
Botwoon becomes faster and changes color as it takes damage. Do not chase it across the room or stand beneath a hole waiting for it to emerge. Keep enough space to react to a charge, and fire only when the head is visible. After the miniboss is defeated, collect any health or ammunition it leaves behind and use the newly opened right-hand passage.
- Target Botwoon’s head.
- Use charged shots if you want to conserve missiles and Super Missiles.
- Move away from the corner when Botwoon spits its projectile spread.
- Collect the dropped supplies after the fight and exit through the opened right wall.
Cross the first quicksand room
In the room after Botwoon, move right toward the quicksand. A visible Energy Tank can be collected here, but it is optional. If you are following the required route, prioritize crossing the room rather than attempting the tank immediately.
Use Speed Booster to pass over the quicksand. Start the run on the available solid ground and keep moving right. If the sand pulls Samus down, she can fall into a lower section and lose the direct route. This is recoverable: continue to the bottom, take the left door and climb back through the grapple-block route until you return to the upper path.
After crossing, enter the right-hand room. Use Grappling Beam points on the walls to climb upward. Mochtroids occupy parts of this ascent; destroy them if they block a grapple point or your landing area, but do not stop to clear every enemy if the route is open.
- Treat the Energy Tank as optional.
- Use a Speed Booster run to cross the first quicksand area.
- If you sink, use the lower-left recovery route and climb back with the grapple blocks.
- Climb the next room with the wall grapple points.
Navigate the grapple and sand rooms
At the top of the grapple shaft, enter the next room and descend carefully. Several quicksand pits interrupt the route. Jump or grapple out as soon as Samus begins sinking; deeper sections contain spikes and can turn a minor mistake into heavy damage.
Use the isolated grapple point over the first sand pit, then swing to the vertical groups of grapple points on the walls. When Samus reaches the end of a grapple sequence, release and jump to gain height for the next point. The route alternates between single points, vertical groups and small square clusters, so do not drop straight down after releasing.
Continue toward the upper-right side of the room. The red door there leads to Maridia’s Save Station, and the adjacent room to the right is an Energy Recharge Station. Save and refill before opening the route toward Draygon. If your health is low, do not continue merely because the boss door is close; return through these rooms and refill first.
- Jump or grapple out of quicksand before reaching the spikes below.
- Use the isolated and vertical grapple points in sequence.
- Reach the upper-right Save Station.
- Use the adjacent Energy Recharge Station before proceeding.
Open the Draygon approach
From the save room, return to the main room and go down toward the lower-right side. Open the green door leading to the room with the apparently dangerous spikes. These spikes are fake and do not damage Samus, but they conceal holes in the floor.
The missile tank visible near the right-side pipe is optional. To continue, drop through one of the hidden holes beneath the fake spikes. Defeat the Gadora guarding the next door by waiting for its eye to open and striking the exposed eye with missiles or other appropriate ammunition.
The room beyond leads to the lower section outside Draygon’s chamber. Do not enter the boss room yet if your reserves are poor. Return to the nearby Save Station and Energy Recharge Station, then make one final preparation trip. The chapter is complete when you are standing outside Draygon’s chamber with a fresh save and a full or otherwise reliable energy supply.
- Use the lower-right route from the save-room area.
- Ignore the fake spikes; search beneath them for the hidden drop.
- Treat the nearby missile tank as optional.
- Defeat the Gadora with attacks timed to its open eye.
- Save and recharge immediately before entering Draygon’s arena.
Before you move on
- The Brinstar glass tube has been destroyed with a Power Bomb.
- The Maridia Save Station below the tube has been used.
- Samus has followed the upper submerged route and defeated Botwoon.
- The right-hand passage after Botwoon is open.
- Samus has crossed the quicksand and grapple rooms.
- The upper-right Maridia Save Station and adjacent Energy Recharge Station have been reached.
- The Gadora below the fake-spike room has been defeated.
- Samus is outside Draygon’s chamber with a recent save and a prepared energy supply.
Maridia — Draygon, Space Jump and post-boss routes
After defeating Botwoon, use the nearby save and Energy Recharge Stations before entering Draygon's arena. Open the pink Missile door with five regular Missiles or one Super Missile, pass the fake-spike room and defeat the Gadora below. Destroy the three wall turrets to create electrified grapple points, then defeat Draygon either with attacks aimed at the exposed belly or with the risky electrified Grapple Beam method. Space Jump is the required reward through the bottom-left exit. Plasma Beam, Spring Ball and additional Maridia tanks are optional; after recovering, return through the Maridia-Crateria elevator and continue toward Norfair.
Save and refill before Draygon
Begin at the Maridia save room immediately before Draygon's approach. The entrance is a pink Missile door in the upper-right portion of the preceding area. Open it with five regular Missiles or one Super Missile, then use the Energy Recharge Station in the next room. Save and refill before making the final approach.
From the recharge room, return through the route and go through the Super Missile door leading toward the fake-spike room. The spikes in the floor are harmless, but they conceal holes. Move across the room carefully rather than treating the visible spikes as solid ground.
On the right side of the fake-spike room, shoot the left-pointing pipe if you want the optional Missile Tank. Then return to the left side and drop through one of the hidden holes behind the fake spikes. Defeat the Gadora below by shooting its exposed eye, then enter the door to Draygon's chamber. If you took damage on the approach, retreat to the Energy Recharge Station before starting the fight.
- Open the pink pre-boss door with five regular Missiles or one Super Missile.
- Use the adjacent Energy Recharge Station.
- Save before crossing the fake-spike room.
- Remember that the fake spikes hide holes but do not damage Samus.
- Defeat the Gadora below before entering Draygon's arena.
Destroy the three wall turrets
When the fight begins, three turrets are mounted around the arena walls. Shoot each turret with Missiles or Super Missiles. A destroyed turret leaves an electrified patch on the wall. These patches are needed for the fast Grapple Beam strategy, although Draygon can also be defeated without using them.
Clear the turrets while Draygon is away from the wall you are targeting. Keep moving through the central part of the room, using short jumps or Morph Ball movement to avoid collisions. If Draygon begins a horizontal sweep, move underneath or over the creature instead of staying pressed against a wall.
You may destroy a turret during the battle if the opening is unsafe at the start, but destroying all three early makes the electrified strategy easier. Do not confuse the electrified patches with ordinary background details; they are the remains of the turrets and can be grappled.
- Destroy all three wall turrets with Missiles or Super Missiles.
- Leave the electrified patches intact.
- Keep away from the arena's bottom and walls during Draygon's passes.
- Do not spend ammunition on unrelated targets when a turret is exposed.
Defeat Draygon with conventional attacks
Draygon's vulnerable target is the exposed belly. Regular Missiles, Super Missiles and charged beam shots can damage it. Fire when the belly is visible during a pass, then immediately resume moving. Shots against the armored back are ineffective, so do not fire simply because the creature is on screen.
Several invulnerable Evirs appear before Draygon enters. Ignore them unless one blocks your movement. Draygon can swoop across the room, collide with Samus and spit sticky white blobs. If a blob attaches, the boss can grab Samus and strike repeatedly with its tail. Rapidly press the controller buttons to escape if you are not intentionally using the electrified method.
A reliable conventional rhythm is to remain near the middle of the arena, jump over or under Draygon's passes and fire at the belly during clear openings. Use Super Missiles when the target is exposed, not while Draygon is covered or moving out of range. If energy becomes low, stop pursuing damage and concentrate on evasion; a failed attempt is a reason to return to the recharge room, not to force the battle.
- Aim at Draygon's exposed belly.
- Use Missiles, Super Missiles or charged beam shots.
- Ignore the invulnerable Evirs.
- Mash buttons to escape a grab unless you are using the electrified method.
- Prioritize survival when energy is low.
Use the electrified Grapple Beam method
The quick method uses one of the electrified patches left by the destroyed turrets. Allow one of Draygon's sticky blobs to attach to Samus. The boss will grab her and carry her across the arena. While Samus is being held, aim the Grapple Beam at an electrified patch on the wall and connect to it.
Keep the Grapple Beam attached. The electrical current passes through Samus and damages Draygon rapidly, but it also drains Samus's energy. This is not a free attack: entering with low health, missing the wall patch or taking extra tail strikes can cause Samus to die before Draygon does.
Use this method only when an electrified patch is clearly reachable. If the beam misses, release the attempt, escape the grab by mashing buttons and return to conventional attacks. A full energy bar from the nearby recharge room gives the largest margin for error, but even then, stop if the current has reduced Samus to a dangerous level.
- Destroy the turrets before attempting the current strategy.
- Allow a sticky blob to attach if you want Draygon to grab Samus.
- Grapple an electrified turret remnant.
- Hold the connection to maintain the damage.
- Watch Samus's energy throughout the attack.
Collect Space Jump after the battle
After Draygon is defeated, leave the arena through the bottom-left door. The room beyond contains the Chozo statue holding Space Jump. Touch the statue's item to collect the upgrade; this is the required reward for clearing Maridia's boss.
Space Jump allows Samus to continue spin-jumping while airborne. Begin a spin jump, then press the jump button again after Samus has started descending but before she reaches maximum falling speed. Continue pressing at the same part of each descent to gain height and cross wide gaps. Pressing too early or waiting too long will end the sequence.
Practice the timing in the item room before leaving. If you fall back into the boss room during the return, use Space Jump to rise out rather than trying to repeat the pre-boss drop. Space Jump is also the normal way to reach the late Maridia branches and simplifies the route back toward the region's elevator.
- Use the bottom-left exit after Draygon's defeat.
- Collect Space Jump from the Chozo statue.
- Practice repeated spin jumps before leaving.
- Use Space Jump to recover from a fall into the arena.
Recover and leave Maridia
After collecting Space Jump, return through the Draygon arena and retrace the nearby rooms toward the save and recharge facilities. The route back passes through the room beyond the flashing metal door and the grapple-based passages used on the approach. Space Jump makes the vertical sections and spike crossings safer, but continue watching for enemies and concealed drops.
Save and refill again if the fight or return traversal consumed significant energy. Plasma Beam, Spring Ball and additional Maridia tanks are optional. Space Jump opens their branches, but none is required to defeat Draygon or to begin the standard Lower Norfair route. Collect them now only if you want optional upgrades; otherwise mark them for cleanup.
For the required continuation, leave Maridia through the Crateria-Maridia elevator and ride upward. Cross Crateria into Brinstar, then take the Brinstar-Norfair elevator. Before entering Lower Norfair, use an available save and recharge facility and confirm that Varia Suit, Ice Beam, Power Bombs and a dependable energy reserve are ready for the next chapter.
- Return to the Maridia save or recharge facilities.
- Use Space Jump to simplify the return route.
- Treat Plasma Beam, Spring Ball and Maridia tanks as optional.
- Ride the Maridia-Crateria elevator to leave the region.
- Cross Brinstar and take the elevator toward Norfair.
- Save and refill before beginning the Lower Norfair descent.
Before you move on
- Draygon has been defeated.
- All three wall turrets have been destroyed, whether or not the electrified strategy was used.
- Space Jump has been collected through the bottom-left exit.
- You can perform repeated spin jumps by pressing jump during the descent of a somersault.
- You have returned to a working save or recharge room after the fight.
- Plasma Beam, Spring Ball and remaining Maridia tanks are either collected as optional items or deliberately left for later.
- You have left or are ready to leave through the Crateria-Maridia elevator.
- You are prepared to cross Brinstar, use the Norfair elevator and begin Lower Norfair with a save, refill and adequate energy.
Maridia Cleanup — Plasma Beam, Spring Ball and return route
Begin this chapter after defeating Draygon and collecting Space Jump. Use the new movement to reach the optional Plasma Beam and Spring Ball, collect any remaining Maridia expansions if desired, then return through the established Brinstar connection and take the elevator toward Lower Norfair. None of the cleanup items is required to finish the campaign, but Plasma Beam makes late-game combat easier and Spring Ball simplifies several Maridia pickups.
1. Save after Space Jump and reach the Plasma Beam branch
Leave the Space Jump room through its upper-right exit. Use Space Jump to climb the next vertical room, then take the upper-left door. Continue upward and use the Save Station and recharge room in the upper-right if your energy, missiles or Super Missiles are not full. Return to the previous room and Space Jump left through it, using short controlled jumps rather than trying to recover after falling too far.
Continue through the upper-left route until you reach the room where the first door on the left is flashing. Go through it, Space Jump left across the next room and take the upper-left exit. Descend while avoiding the spike projectiles fired by the Cacatacs, then leave through the lower-left door and continue left.
In the following submerged room, move left until you have enough space to begin Space Jumping upward. Reach the flashing door near the upper-right side and enter it. Space Jump through the vertical room and take the top door. Cross the Puyo room, then enter the room on the right containing the pink Space Pirates.
Avoid fighting the Pirates until you reach the lower-right corner. Shoot the item held by the Chozo Statue to collect Plasma Beam. Plasma Beam is optional, but it is a strong improvement for the remaining campaign. Spazer and Plasma cannot be equipped together; open the Status screen and select the beam you want to use.
The Metal Door remains locked until every Space Pirate in the room has been defeated. Use Plasma Beam to clear them, then leave through the upper-left route. The Puyos in the previous room can now be destroyed more efficiently, allowing you to return to the lower-left exit and the large sandy section.
- Start with Space Jump already collected.
- Use the Maridia Save Station and recharge room before the long cleanup route.
- Collect Plasma Beam from the Chozo Statue in the lower-right of the Pirate room if desired.
- Defeat every Pirate in that room so the Metal Door opens.
- Remember that Plasma Beam and Spazer cannot be equipped together.
2. Reach the Spring Ball route
From the large sandy room, move toward the lower-right side and enter the route with the small quicksand room. Continue through the Cacatacs and thorn projectiles until you reach the room with a solitary Grapple Block in the ceiling. Grapple the block until it disappears, then immediately Space Jump through the opening and climb to the top of the shaft. Menus can knock you back down, so clear or avoid them before attempting the next jump.
At the top, move right and drop through the Pit Blocks into the small room with the mechanical creature called Shaktool. Do not destroy it before using it. Place a Power Bomb and wait while Shaktool clears the sand column. Stand clear of its wheels; the machine itself is not the target and is needed to open the passage.
When the sand has been removed, go through the newly opened passage and enter the next room. Drop down and follow the left branch to the Chozo Statue. Shoot the item it holds to collect Spring Ball. This upgrade allows Samus to jump while in Morph Ball form, making the remaining sand and Pit Block passages much easier. Spring Ball is optional and is not required for Lower Norfair or the final battle.
- Find the ceiling Grapple Block and clear it before using Space Jump upward.
- Use a Power Bomb beside Shaktool.
- Wait for Shaktool to clear the sand instead of killing it immediately.
- Follow the left branch after the cleared passage to reach Spring Ball.
- Use Spring Ball for Morph Ball jumps through narrow shafts and Pit Blocks.
3. Sweep optional Maridia expansions
After collecting Spring Ball, roll left through the tunnels and use Spring Ball to climb where ordinary bomb jumps would be awkward. Take the upper-left route, pass through the rooms with falling sand and Evirs, and return toward the central Maridia passages. You can ignore the map station if you only want to finish the campaign, but downloading it can make the remaining branches easier to identify.
For the upper optional expansion, enter the large room with the sand pits and use the exposed pipe route beneath the floor. Follow the first quicksand drop to a side room containing a Missile expansion and a Power Bomb expansion. The route requires careful movement across separated sand blocks; use Morph Ball and Spring Ball rather than dropping into an unintended pit.
Return to the same central room and use the farther-left quicksand drop for another side branch. This route contains another Missile expansion and a Reserve Tank. The floor is made partly from Pit Blocks, so roll to the edge of solid ground, press jump in Morph Ball form and steer into the upper passage. If you fall, use the lower quicksand route to return and try again.
A further optional branch contains an Energy Tank and another Missile expansion in the upper Maridia rooms. Space Jump is the key access upgrade; Plasma Beam and Spring Ball make the route safer but are not needed for the campaign objective. Do not spend Power Bombs on ordinary enemies while making this sweep. Keep at least one available for the return route if the yellow barrier has not been cleared.
- Treat the map station and every Maridia expansion as optional.
- Use the first quicksand branch for its Missile and Power Bomb expansions.
- Use the farther-left quicksand branch for its Missile expansion and Reserve Tank.
- Use Spring Ball to cross Pit Blocks without repeated bomb jumps.
- Collect the Energy Tank branch only if you want additional capacity before Lower Norfair.
4. Return to the Brinstar-Norfair elevator
When cleanup is complete, follow the leftward route through Maridia until you reach the room with the broken glass tunnel. Morph into a ball and roll beneath the central platform to drop into the room below. Take the door on the left, then continue left through the next room.
At the lighted gate, fire a Super Missile to open it. Fall through the opening on the left side of the room, then take the door on the right. This leads to the elevator route connecting Maridia and Brinstar. Do not confuse this with the earlier glass-tube entrance; the broken tunnel is now a return landmark.
Before descending, make sure you have saved at the Maridia station if you collected several expansions. Ride the elevator to Brinstar, then use the established route to the Norfair elevator. If you skipped Plasma Beam or Spring Ball, leave Maridia after Space Jump using the same connection; neither optional item blocks progression.
After reaching Norfair, save and refill before continuing toward Lower Norfair. The next campaign objective is the deeper Norfair route leading to Golden Torizo, Screw Attack and Ridley.
- Reach the broken glass tunnel before leaving Maridia.
- Roll beneath the central platform to access the lower room.
- Open the lighted gate with a Super Missile.
- Take the right-hand door after falling through the left opening.
- Use the Brinstar-Norfair connection and save before the Lower Norfair descent.
Before you move on
- Space Jump is in the inventory after Draygon's defeat.
- The optional Plasma Beam has been collected, or the player has deliberately skipped it.
- The optional Spring Ball has been collected, or the player has deliberately skipped it.
- Any desired Maridia Missile, Power Bomb, Energy or Reserve Tank expansions have been collected.
- The player has returned through the broken glass-tunnel route and opened the lighted gate with a Super Missile.
- The Maridia-to-Brinstar connection has been used, and the player is saved and ready to descend toward Lower Norfair.
- Chapter completion does not require the map station or any specific percentage of item collection.
Lower Norfair — Screw Attack, Ridley and Tourian Preparation
After completing the normal Maridia route, return to the Brinstar-Norfair connection and descend into Lower Norfair. This chapter covers the heat hazards, Golden Torizo, Screw Attack, the route through Ridley’s lair, the Ridley battle and the final preparation for Tourian. The intended route assumes that Varia Suit, Gravity Suit, Space Jump, Power Bombs and Ice Beam have already been obtained. Plasma Beam and Spring Ball are useful optional upgrades, but neither is required to open Tourian. Do not enter Tourian until Kraid, Phantoon, Draygon and Ridley have all been defeated.
1. Refill at the Lower Norfair entrance
Return to the Brinstar-Norfair elevator after finishing the main Maridia sequence. From the bottom of the elevator, go down to the second door on the right and enter the save room. Save here before beginning the descent. Use the adjacent route to reach the speed-boost corridor, then run right through the door and continue down through the heated rooms.
The normal route requires Varia Suit for Norfair’s heat and Gravity Suit for the lava section leading to the Lower Norfair elevator. Gravity Suit does not make acid harmless, so treat acid pools and rising acid as lethal hazards rather than safe flooring. Refill energy and ammunition before going farther. A comfortable reserve of energy is more important than a particular missile total, but entering with low health makes the acid rooms and Ridley’s damage race unnecessarily difficult.
Use the Wave Beam to shoot through the gate controls where the light is positioned on the opposite side. Continue through the red Space Pirate and Geemer rooms, then use the recharge room if needed. Grapple across the lava and spikes, open the next gate and use a Power Bomb at the sealed passage. In the following room, descend through the lava while using Space Jump to cross the flame hazards. Keep away from the spikes near the upper-left exit, then ride the elevator down to Lower Norfair.
- Have Varia Suit equipped for Norfair heat.
- Have Gravity Suit equipped before entering the lava route.
- Carry Power Bombs for the sealed Lower Norfair entrance.
- Save and refill before riding the Lower Norfair elevator.
- Keep Ice Beam available for the later Tourian Metroid encounters.
2. Reach the Golden Torizo chamber
At the bottom of the elevator, move left through the acid and flame hazards. Use Space Jump to cross the room and place a Power Bomb in the upper-left area. The blast reveals a golden Chozo statue. Stand on its hands and roll into a ball when prompted by the statue sequence. The floor below will open after the sequence finishes.
Drop through the opening and remove the blocks beneath you with bombs or another Power Bomb. Roll through the tunnel and continue right past the Holtzes and Magdolites. In the next room, cross the Pit Blocks to reach the missile pickup if you want the nearby optional expansion, then allow the blocks to give way and continue right. Golden Torizo will drop into the arena.
Before fighting, remember that Golden Torizo can evade ordinary Missiles and can catch Super Missiles, throwing them back at Samus. Charged beam shots are a dependable option, especially if Plasma Beam is equipped. Super Missiles still work, but do not fire them carelessly while the boss is positioned to catch them. Golden Torizo jumps toward Samus when kept at a distance, changes direction if Samus passes behind it and can create a damaging floor explosion with its beam. It also fires fast curved beams aimed at different heights.
Stay mobile with Space Jump and keep enough room to react to the jumps. Shoot the eggs Golden Torizo releases when you need health or ammunition. If the boss catches you, continue firing and concentrate on avoiding the follow-up attacks rather than standing directly beneath it. After the battle, inspect the left wall of the arena for the optional Super Missile tank before leaving.
- Activate the golden Chozo statue with a Power Bomb.
- Defeat Golden Torizo.
- Avoid relying on ordinary Missiles as the main attack.
- Use charged beam shots or carefully timed Super Missiles.
- Collect the nearby Super Missile tank only if desired.
3. Collect Screw Attack and open the route to Ridley
Leave the Golden Torizo arena through the right-hand door. Shoot the item held by the Chozo statue to collect Screw Attack. Screw Attack activates during Space Jump and destroys many enemies on contact. It also breaks certain blocks and protects Samus from several ordinary attacks, making the rest of Lower Norfair much safer.
Use Screw Attack to break through the ceiling and reach the upper route. An energy recharge room is available to the right; use it before continuing if Golden Torizo reduced your energy. Return to the upper part of the room and pass the Rippers with Screw Attack. Shoot the light on the next gate with a Super Missile, then continue right through the small room containing two Violas.
The following rooms require controlled movement rather than a full collection detour. Shoot through the floor where necessary and take the upper-right exit. In the rising-acid chamber, climb with Space Jump while staying clear of the central stalactite and the acid below. Once at the top, go right through the door. Continue through the rooms, opening bomb tunnels and Power Bomb barriers as required. The intended route eventually reaches a save room before the deeper approach to Ridley. Use it.
Screw Attack is the intended reward in this section, but it is not itself one of the four boss requirements for Tourian. Do not confuse Golden Torizo with one of the required regional bosses. Golden Torizo is a miniboss guarding the upgrade; Ridley is the required Lower Norfair boss.
- Collect Screw Attack from the Chozo statue.
- Use the energy recharge room after the Golden Torizo fight if necessary.
- Use Screw Attack against ordinary enemies and breakable blocks.
- Open the Super Missile gate on the upper route.
- Save before entering the deeper Ridley approach.
4. Travel through Ridley’s lair
From the save room, continue downward through the deeper Lower Norfair rooms. Bomb the concealed tunnels and use Power Bombs on sealed passages. Several rooms contain acid, spikes, flame hazards, Pit Blocks and enemies that can knock Samus into lower areas. Move deliberately instead of trying to clear every enemy. Most doors do not require a full room clear, so preserve health and ammunition for Ridley.
Spring Ball can simplify some of the Morph Ball passages, but it is optional. If you did not collect it in Maridia, use bombs, platforms and the available route instead of turning back. Space Jump and the standard bomb tunnels are sufficient for the intended campaign path.
Use the save room on the approach to Ridley whenever you need a reset. The final route passes through rooms with Power Bomb barriers and a large vertical section. If you fall, recover from the nearest ledge rather than rushing through the hazard again. Before opening Ridley’s chamber, refill energy and confirm that Super Missiles are selected or readily available. Plasma Beam is helpful but not mandatory.
- Use the deeper Lower Norfair route rather than returning to Maridia.
- Save at the Ridley approach when needed.
- Preserve Super Missiles for Ridley.
- Do not spend time collecting every Lower Norfair tank during the first campaign clear.
- Confirm that energy is refilled before the boss door.
5. Defeat Ridley
Ridley is vulnerable to Super Missiles and explosive attacks. Ordinary uncharged beam shots do not damage him, so do not waste time firing them. Super Missiles provide the strongest conventional damage and should be the main attack if you have a reasonable supply. Power Bombs can damage Ridley if he remains within the blast, but he may move away from the explosion, making them less reliable as a primary method.
Ridley spits fireballs that can spread into explosions when they hit the floor or walls. He also swings his tail, bounces on it near the bottom of the arena, swoops across the room and can grab Samus before carrying her upward. Screw Attack can destroy or avoid some incoming hazards, but Ridley’s tail remains dangerous even when Samus is using it. Keep Samus near the center when possible, then move toward a side only to avoid a specific attack.
Fire Super Missiles when Ridley is in a stable position and immediately return your attention to his movement. Do not stand beneath him during the tail-bounce pattern. When he swoops, use Space Jump to cross over him or move to the opposite side without jumping into the tail. If your energy becomes low, prioritize survival and use reserve energy only when necessary; the battle is a damage race, but careless contact can end an otherwise successful attempt.
After Ridley is defeated, leave through the left door. The next room contains an Energy Tank beneath the door area; collect it if you want the extra reserve, then backtrack through the lair. You do not need to clear every optional tank on the return trip. Follow the route back to the elevator and return to the upper Norfair save facilities or the ship for a full refill.
- Use Super Missiles as the primary weapon against Ridley.
- Avoid Ridley’s fireball explosions, tail, swoops and grab.
- Do not rely on ordinary uncharged beam shots.
- Collect the post-battle Energy Tank if desired.
- Return to a save station after leaving Ridley’s room.
6. Confirm the four-boss requirement
Before going to Tourian, verify that the four required bosses have been defeated: Kraid in Brinstar, Phantoon in the Wrecked Ship, Draygon in Maridia and Ridley in Lower Norfair. Golden Torizo does not count toward this requirement. When the four regional bosses are defeated, the golden statue in Crateria lowers and the route to Tourian opens.
If Tourian remains sealed, do not search Lower Norfair for another switch. Check the map and confirm that one of the four regional bosses was not merely reached but actually defeated. The required progression is based on those boss victories, not on collecting Plasma Beam, Spring Ball, Screw Attack or a particular number of tanks.
Return to the ship or another convenient recharge location after Ridley. Refill energy, missiles, Super Missiles and Power Bombs. Ice Beam must remain available for Tourian because the Metroids must be frozen before missiles or Super Missiles can finish them. Charge Beam is useful for charged attacks, and Plasma Beam is a strong optional damage upgrade. Plasma Beam and Spazer cannot be equipped together, so choose one rather than expecting both beam effects to operate simultaneously.
- Kraid is defeated.
- Phantoon is defeated.
- Draygon is defeated.
- Ridley is defeated.
- The Crateria golden statue has lowered.
- Tourian is accessible.
- Ice Beam is available for Metroids.
- Energy and ammunition are refilled.
7. Make the final save before Tourian
Travel to Crateria and enter the statue room where the four boss figures are displayed. After the statue lowers, ride the elevator down and use the save room through the door on the right. This is the final safe save before the point of no return. Save here after refilling, then leave the room and enter Tourian through the left-side route.
Do not enter Tourian merely to inspect it if you still need optional items elsewhere. The campaign can be completed without every missile, Super Missile, Power Bomb, reserve tank or beam upgrade, but saving beyond the final safe point can prevent convenient return to the rest of Zebes. If you want to pursue 100 percent collection, finish that cleanup before committing to Tourian.
At the end of this chapter, the correct state is: Ridley has been defeated, the four-boss requirement is complete, Tourian is open, Ice Beam is ready, ammunition and energy are full or safely replenished, and a final normal save exists immediately before entering Tourian.
- Return to Crateria after the Ridley victory.
- Confirm that the golden statue has lowered.
- Use the final save room before Tourian.
- Do not save deeper inside Tourian if you may still want to return for optional exploration.
- Enter Tourian only after the final loadout and route are ready.
Before you move on
- Lower Norfair was entered with Varia Suit, Gravity Suit and Power Bombs available.
- Golden Torizo was defeated.
- Screw Attack was collected from the Chozo statue.
- Ridley was defeated using Super Missiles or another verified damaging attack.
- Kraid, Phantoon, Draygon and Ridley are all defeated.
- The Crateria golden statue has lowered and Tourian is open.
- Ice Beam is available for the Tourian Metroid encounters.
- Energy, Missiles, Super Missiles and Power Bombs have been replenished.
- A final normal save was made in the Crateria save room immediately before Tourian.
- The player is ready to begin Tourian without needing to repeat the Lower Norfair route.
Tourian entry — Sealing the path and the Mother Brain approach
After Kraid, Phantoon, Draygon and Ridley are defeated, return to the Tourian entrance in Crateria. The four-boss statue opens the elevator into Tourian. This chapter covers the Tourian Metroid corridors, the Baby Metroid sequence, the recharge room, the Gadora eye guardian, the final save decision, the Zebetite corridor and entry into Mother Brain's chamber. Stop before attacking Mother Brain; the fight and escape belong to the next chapter.
1. Open the Tourian entrance and make the last safe preparation
Return to Crateria and travel left from the Gunship until you reach the room containing the golden statues of Kraid, Phantoon, Draygon and Ridley. The route is through the Crateria corridor with the Green Space Pirates and the red door leading toward the statue room.
When all four required bosses have been defeated, the lights in the statues' eyes fly upward and the statues sink. The floor opens to reveal the Tourian elevator. If the statues have not opened the passage, one of the four bosses is still undefeated; Tourian cannot be entered by clearing only some of them.
Before taking the elevator, return to the Gunship. Refill energy and ammunition, fill Reserve Tanks if necessary and save at the nearby Crateria station. The first Tourian Save Station is still available after the elevator, but the Crateria save is the best recovery point if you discover that an upgrade or optional item was missed.
- Kraid, Phantoon, Draygon and Ridley are defeated.
- The four statues have sunk and the Tourian elevator is visible.
- Energy and ammunition are restored before entering.
- The game is saved in Crateria.
2. Use the first Tourian Save Station and enter the Metroid halls
Ride the elevator down and take the door on the right to the first Tourian Save Station. Use it before proceeding. This is the last save point that still leaves a practical route back to the rest of Zebes.
Return to the elevator room and take the door on the left. Equip the Ice Beam before entering the Metroid rooms. A Tourian Metroid must be frozen before it can be destroyed. After freezing one, use five regular Missiles or one Super Missile to finish it.
If a Metroid attaches to Samus, immediately try to leave through the door you used to enter. The room resets and the Metroid detaches. If leaving is not practical, Morph and use bombs to break free, but do not make Power Bombs your normal method because they are more valuable for later exploration and emergencies.
- The first Tourian Save Station has been used.
- The Ice Beam is equipped.
- You have a useful supply of regular Missiles.
- You know that five Missiles or one Super Missile destroys a frozen Metroid.
3. Clear each Metroid room without wasting resources
Proceed through the metallic Tourian corridors. Every required Metroid in a room must be destroyed before the exit door becomes usable. Freeze each Metroid near the edge of a platform or at the far side of the room, then fire the finishing ammunition before it can cross back toward Samus.
Rinka projectiles from the wall turrets can disrupt a freeze or push Samus into a Metroid. Keep moving between shots, use diagonal fire when a projectile blocks a jump and avoid standing underneath a Metroid's approach path. You do not need to destroy every turret or projectile source; your objective is to clear the Metroids and advance with enough energy and ammunition.
If a room becomes chaotic, retreat through the entrance door rather than accepting unnecessary damage. Tourian Metroids provide ammunition pickups when defeated, but relying on drops is less safe than entering with a comfortable reserve.
- Each locked Metroid room is cleared before advancing.
- Regular Missiles are used for routine kills when the position is safe.
- Rinkas and turret fire are avoided rather than fought unnecessarily.
- A failed engagement is reset by leaving the room when possible.
4. Survive the Baby Metroid sequence and find the recharge room
After the Metroid rooms, shoot through the webbing and debris blocking the next passage. Continue through the shaft until you reach the room with the large blue Sidehopper. A Giant Metroid enters, destroys the Sidehopper and attaches to Samus. This is a scripted scene, so normal attacks cannot stop it.
Allow the scene to finish. The Baby Metroid recognizes Samus and releases her after draining her energy to one unit. When control returns, immediately move through the newly opened route rather than attempting to fight while remaining at one energy.
Continue left through the shaft and shoot the material blocking the passage. At the base of the route, use the lower-left door to enter the combined Energy and Missile Recharge Station. Refill both resources completely. This is the important recovery point for the final approach.
- The Giant Metroid scene has finished.
- Samus has been released at one energy unit.
- The combined Energy and Missile Recharge Station has been used.
- You have not wasted ammunition trying to interrupt the scripted scene.
5. Cross the eye-door approach and defeat the Gadora
Leave the recharge room and take the route to the right. The next passage is quiet, but the door ahead requires five regular Missiles to open. Keep moving through the room beyond it until you reach the vertical section containing the eye guardian.
Use a running start and Space Jump across the long gap in the approach room. If the jump fails, return to the previous platform and try again rather than dropping into the lower hazard. At the far side, face the Gadora on the door and wait for its eye to open.
When the eye opens, fire three regular Missiles or one Super Missile into it. Repeat the timing until the Gadora is destroyed, then enter the opened door. Do not confuse this encounter with a simple Super Missile door: a Super Missile can damage the guardian in one hit, but the eye must be open first.
- The five-Missile door after the recharge room is open.
- Space Jump is used to cross the long gap.
- The Gadora's eye is struck while open.
- The passage beyond the eye guardian is entered.
6. Decide whether to use the second Tourian Save Station
Descend the vertical shaft beyond the Gadora. A blue door on the left leads to the second and final Tourian Save Station. This station is useful for repeated Mother Brain attempts, but it is not a safe exploration save.
The Baby Metroid event has sealed the route back to the earlier Tourian Metroid rooms and the rest of Zebes. If you still intend to collect missed items, reload the Crateria save or the first Tourian save instead of overwriting your progress here. Saving at the second Tourian station commits that file to the final sequence and prevents normal return to unfinished areas.
For a first completion attempt, saving here is reasonable if your optional exploration is finished. Otherwise, pass the station and continue down the shaft. The next door leads to the Zebetite corridor and then Mother Brain's chamber.
- Optional exploration outside Tourian is finished, or an earlier save has been preserved.
- You understand that the second Tourian save is beyond the practical point of no return.
- Your energy and regular Missile supply are adequate for the approach.
7. Cross the Zebetite corridor and stop at the final chamber
Take the bottom route from the shaft to enter the Zebetite corridor. Acid rises in the room, while Rinkas and turret shots create additional pressure. Stay on the platforms and keep moving; do not drop into the acid while trying to line up a shot.
Destroy each red Zebetite barrier with Missiles or Super Missiles. Fire continuously until the barrier is gone, then move forward before another obstacle forces you into the acid. Some barriers are paired around a central support, so shoot the lower or upper section while standing where you can immediately jump through.
The barriers do not need to be destroyed with a particular weapon type, but they consume regular Missiles and may regenerate if you stop attacking too soon. If your regular Missile reserve becomes uncomfortable, retreat to the recharge room. Progress through the Zebetite corridor remains cleared when you leave and return, so you can refill energy and regular Missiles before the final commitment.
After the last barrier, enter the room containing Mother Brain's glass casing. Stop here. Do not begin the fight in this chapter; the next chapter covers the casing, Mother Brain's phases, the Hyper Beam and the escape sequence.
- The Zebetite corridor has been crossed without falling into the acid.
- All barriers blocking the route are destroyed.
- You have confirmed that the recharge room can be revisited before the final fight if needed.
- You are standing at the entrance to Mother Brain's chamber without attacking her.
Before you move on
- The four-boss statue in Crateria has sunk and the Tourian elevator has been used.
- The first Tourian Save Station has been used, or an earlier Crateria save has deliberately been preserved.
- All required Tourian Metroid rooms have been cleared with the Ice Beam.
- The Baby Metroid scene has occurred and the combined Energy and Missile Recharge Station has been used.
- The Gadora has been defeated with its eye open and the route beyond it has been entered.
- The second Tourian save decision has been made with unfinished exploration considered.
- The Zebetite corridor has been crossed and Samus has reached Mother Brain's chamber without starting the fight.
References for this chapter
The Mother Brain fight and escape sequence
Begin at the final Tourian save station, immediately before the last descent to Mother Brain. From there, clear the glass-tube approach, defeat Mother Brain’s tank and mechanical-body forms, receive the Hyper Beam during the scripted Baby Metroid sequence, then escape Tourian and reach Samus’s ship on the Crateria surface before the three-minute self-destruct timer expires.
Use the final Tourian save station, then commit to the final approach
This chapter starts at the save station in the tall Tourian shaft immediately before the Mother Brain approach. If you are still collecting items elsewhere, do not use this save station: after the point-of-no-return route has been entered, normal backtracking is no longer available. For a final-clear attempt, save here, refill beforehand if necessary, and then descend through the shaft while avoiding the Rinka shots fired by the wall turrets.
At the bottom, open the missile door and enter the corridor containing the glass tubes. Fire missiles into the first tube until it breaks, then continue left. The tubes gradually recover if you stop attacking them, so keep firing until each obstruction is destroyed. When two tubes are paired together, destroying one removes the pair; you do not need to waste ammunition on both. Continue through the remaining tube sections until the Mother Brain chamber opens.
- Start from the final Tourian save station before the Mother Brain approach.
- Do not use this save if you still intend to leave Tourian for item collection.
- Descend through the Rinka shaft and open the missile door at the bottom.
- Destroy every glass-tube obstruction before entering the boss chamber.
Break Mother Brain’s tank and finish the first form
Mother Brain’s chamber is a recreation of the original tank arrangement. Stand on the platforms and fire missiles into the glass container. Keep moving while watching the Rinka projectiles and other shots crossing the room. Regular missiles are enough to break the tank, although Super Missiles can shorten the process if you are comfortable spending them here.
Once the glass is gone, continue striking the exposed brain. Do not stop when the tank breaks: the first form continues until the surrounding housing is destroyed. Keep your shots aimed at Mother Brain rather than the machinery around her. After enough damage, the housing explodes and the mechanical body rises from the floor. The arena changes during this transition, so be ready to move as soon as Samus regains control.
- Fire missiles into the glass tank until it breaks.
- Continue damaging the exposed brain after the glass is destroyed.
- Keep moving to reduce the chance of being hit by Rinkas and other projectiles.
- Wait for the mechanical body to rise before treating the first form as complete.
Defeat Mother Brain’s mechanical body
In the second phase, Mother Brain’s exposed brain remains the damage target. Missiles, Super Missiles and charged beam shots can damage it; shots against the surrounding mechanical body do not help. Fire whenever the brain is exposed, then reposition rather than standing beneath the boss or near the left side of the arena for too long.
Mother Brain can drop a bomb that produces a spreading floor-level explosion. Jump over it when it expands. She also uses ring-shaped projectiles, a horizontal red laser and later a larger explosive red beam. Move before these attacks reach Samus instead of waiting until the last moment. The fight is meant to wear down your energy, so concentrate on steady damage and avoid unnecessary contact with the body or the arena floor.
After sufficient damage, Mother Brain begins charging the Rainbow Beam. This is a scripted part of the battle. The beam reduces Samus to one energy unit and drains much of the carried ammunition, including all Super Missiles and Power Bombs. Do not spend Reserve Tank energy trying to prevent this event and do not waste time attempting to interrupt it. Let the sequence play out.
- Aim at Mother Brain’s exposed brain.
- Use missiles, Super Missiles or charged shots when the target is available.
- Jump over the spreading floor bomb and move early against the beam attacks.
- Accept the scripted Rainbow Beam instead of trying to cancel it.
- Do not mistake the mechanical body for the damage target.
Receive the Hyper Beam and deliver the final blows
After the Rainbow Beam leaves Samus at one energy, the Baby Metroid enters the chamber and attacks Mother Brain. It drains Mother Brain, restores Samus and is then destroyed during the transfer. Samus receives the Hyper Beam automatically; this is not a pickup that can be missed or collected earlier in the route.
When control returns, fire the Hyper Beam at Mother Brain’s exposed brain. The weapon cuts through the boss rapidly, but continue firing until the defeat animation begins. Mother Brain’s destruction triggers the message announcing that the time bomb has been set. The separate three-minute escape countdown begins after this final defeat sequence, so be prepared to move immediately when control returns.
- Allow the Baby Metroid sequence to finish.
- Confirm that Samus has received the Hyper Beam.
- Fire the Hyper Beam at Mother Brain until the defeat animation begins.
- Move as soon as the escape countdown starts.
Leave the boss chamber and cross the first escape rooms
Go through the opening in the left wall of Mother Brain’s chamber. Fire the Hyper Beam through the barriers blocking the passage, then shoot the door in the floor and drop down. In the next room, move to the right side and fire downward to destroy the Space Pirate blocking the route and open the door.
Enter the next room, jump onto the ledge where the Space Pirate is standing and destroy it with the Hyper Beam. Run right to the end of the room, jump onto the upper ledge and run left. Jump upward through the opening, continue right and take the door on the right. Do not stop to clear enemies that are not blocking a doorway or a required platform.
- Leave through the left wall opening.
- Use the Hyper Beam on the escape barriers.
- Shoot the floor door and descend.
- Destroy only the Space Pirates blocking the route.
- Take the right-hand door after the ledge reversal.
Cross the collapsing Tourian route and the rising-acid shaft
In the next large room, go to the top, run right, drop down and travel left. Continue downward to the bottom, move slightly right and climb straight upward until the route stops. From there, go right and enter the door. The room landmarks matter more than fighting: keep moving and use safe platforms if a jump goes wrong.
In the following room, shoot to the right to break through the wall and enter the tall shaft. Acid begins rising immediately, so climb without delay. Use the platforms and normal jumps or Space Jump to reach the upper door. Controlled landings are safer than trying to maintain a perfect continuous Space Jump while the acid rises.
The route returns to the Crateria surface and the familiar escape area. Continue to the top of the surface section and move right. If you want the optional rescue imagery, use the side passage to reach the Etecoons and Dachora, shoot the bottom-right wall of their room, and wait for them to leave. This rescue is not required; skip it if the timer is low.
- In the large room, go top, right, down, left, down, then climb and exit right.
- Break the wall into the tall shaft with the Hyper Beam.
- Climb before the rising acid reaches Samus.
- Treat the Etecoon and Dachora rescue as optional.
- Return to the surface route and keep moving right.
Reach the ship and verify the campaign clear
After leaving the escape shaft, follow the surface route to the right. If you rescued the Etecoons and Dachora, retrace the short connection from their room and rejoin the route rather than searching for another exit. Continue right until Samus’s ship is visible.
Jump onto the top of the ship, position Samus over its center and press Down to board. Boarding before the timer expires triggers lift-off, the ending sequence and the credits. The campaign is complete when the ending begins; optional rescue imagery can alter the epilogue but is not necessary for victory.
If the escape fails, reload the final Tourian save and repeat the boss and escape. The route to memorize is: left from Mother Brain, Hyper Beam through the barriers, floor door, right-side Pirate, ledge reversal, right door, top-right-down-left route, climb, break the wall, ascend the rising-acid shaft, return to the surface and run right to the ship.
- Reach the Crateria surface before the three-minute timer expires.
- Run right to Samus’s ship.
- Jump onto the ship and press Down to board.
- Wait for the ending and credits.
- Reload the final Tourian save if the escape fails.
Before you move on
- The final Tourian save was used before the Mother Brain approach, if a retry point was needed.
- The approach glass tubes were destroyed and Mother Brain’s tank was broken.
- Mother Brain’s mechanical body was defeated after the tank phase.
- The Rainbow Beam sequence occurred and the Baby Metroid granted Samus the Hyper Beam.
- Mother Brain was destroyed with the Hyper Beam.
- The three-minute self-destruct countdown began.
- Samus crossed the escape route, climbed the rising-acid shaft and reached the Crateria surface.
- Samus boarded her ship before the countdown expired.
- The ending sequence and credits appeared.
- Optional Etecoon and Dachora rescue imagery may appear, but those rescues are not required for main-campaign completion.
Alternate endings, time management and epilogue choices
The original European PAL SNES release of Super Metroid has three time-based ending results. The game records the mission clear time separately from the three-minute escape countdown after Mother Brain. Finish the mission at 3:00 or less for the best ending image, from 3:01 through 10:00 for the middle result, or at 10:01 or more for the basic result. The item percentage shown after the ending does not determine which time-based result you receive. Rescuing the Dachora and Etecoons during the escape changes the closing scene but is optional and does not affect progression.
Understand the three ending brackets
The original SNES game uses the clear time displayed after Samus reaches the gunship. A time of 3:00 or less produces the best ending image. A time from 3:01 through 10:00 produces the middle image. A time of 10:01 or more produces the basic armored image. The boundary matters: exactly 3:00 belongs to the best bracket, while 3:01 begins the middle bracket; exactly 10:00 remains in the middle bracket, while 10:01 begins the basic bracket.
This mission timer is not the same as the escape countdown. Mother Brain's defeat starts a separate three-minute destruction sequence. You must reach the gunship before that countdown expires, but surviving the escape does not by itself determine Samus's ending image. The overall clear time is checked after you board the gunship, so use the displayed in-game time rather than a real-world stopwatch or timing information from a remake, randomizer, practice hack, or modified version.
- 3:00 or less: best ending image.
- 3:01 through 10:00: middle ending image.
- 10:01 or more: basic armored image.
- Do not confuse the overall mission timer with the three-minute escape countdown.
Rescue the Dachora and Etecoons during the escape
After Mother Brain is defeated, follow the escape route upward and toward the Crateria side of the map. When you reach the familiar Morph Ball passage from the opening section, take it down through the shaft instead of immediately continuing toward the gunship. Enter the room where Samus originally obtained the Bombs. This is the room containing the Dachora and Etecoons.
Inside that room, shoot the right-hand wall to open the animals' exit. The creatures leave through the opening, but Samus cannot follow them. Wait only long enough to confirm that the opening has been made, then leave through the route that becomes available. Return through the corridor and shaft, bomb the blocks that obstruct the upward path, and continue to the surface. Reach the gunship, stand on top of it, and press Down to board it before the countdown expires.
The rescue is optional. It does not open Tourian, provide an equipment upgrade, increase the item percentage, or move the clear time into a different ending bracket. Its effect appears in the closing sequence: after Zebes is destroyed and Samus's ship departs, a small craft carrying the rescued creatures can be seen leaving to the right.
- During the escape, take the Morph Ball passage back toward the Bombs room.
- Shoot the right-hand wall inside the Bombs room.
- Leave through the reopened route; Samus cannot enter the animals' opening.
- Return to the surface and board the gunship before the three-minute countdown ends.
Make a pre-Tourian save for a time-conscious attempt
If you are pursuing the best ending, finish most optional exploration before entering the final Tourian sequence. Save at the ship or at a nearby save station, refill energy and ammunition, and verify that the required area bosses have been defeated. Tourian's route is intended to follow the defeat of Kraid, Phantoon, Draygon, and Ridley. Once you begin the late-game descent, avoid relying on a late save as your only backup if you still need missed upgrades elsewhere.
Do not treat 100 percent collection as a requirement for the best ending. The ending tier is based on clear time, while the item percentage is displayed separately after the ending sequence. A low-percentage campaign can receive the best time-based result, and a complete item run can receive a slower result if the final clear time crosses a threshold.
For a first clear, collect enough energy tanks and ammunition to make the final battles reliable, even if that costs a few minutes. For a repeat attempt aimed at 3:00 or less, prioritize upgrades already along the intended route and skip isolated tanks or missile expansions that require long detours. The best time-saving decision is usually avoiding a large backtrack, not refusing every optional pickup.
- Create a reliable save before the final Tourian push.
- Confirm Kraid, Phantoon, Draygon, and Ridley are defeated.
- Refill energy and ammunition before the final descent.
- Skip remote optional pickups during a sub-three-hour attempt unless they clearly prevent a dangerous failure.
Use safe route planning instead of risky tricks
Plan the final route before the Mother Brain fight so that the escape is familiar. During the countdown, shoot only enemies or barriers that block progress. Do not stop to collect ammunition, search side rooms, or fight creatures that can be bypassed. The Hyper Beam makes ordinary enemies much less important than maintaining forward movement.
Use the movement upgrades you already know reliably. Speed Booster shortens long horizontal passages, Space Jump helps with the vertical Crateria shaft, and the Gravity Suit makes underwater movement earlier in the game more efficient. If you can perform a Shinespark or wall jump consistently, it can save time, but neither is required for this chapter's normal route. A failed advanced maneuver costs more time than the safe path it was meant to replace.
The escape route includes a rising-lava section, a long upward shaft, and the surface approach to the gunship. Keep moving upward through the lava room, climb the Crateria shaft without stopping for unnecessary enemies, then run right across the surface. Entering the gunship is the completion action; reaching the ship's exterior alone is not enough.
- Pre-run the route from Tourian to the gunship mentally or with the map.
- Use only movement techniques you can perform consistently.
- Ignore optional enemies and pickups during the escape.
- Press Down while standing on the gunship to complete the mission.
Verify the result after the credits
After Samus boards the gunship, the game shows the destruction of Zebes, the credits, the time-based Samus scene, and the item-percentage result. Check the displayed clear time against the exact brackets rather than judging the result only from Samus's pose. If you rescued the Dachora and Etecoons, watch the departure scene for the small craft moving away from Zebes; that visual confirms the optional rescue was registered.
A normal campaign completion requires defeating Mother Brain, surviving the three-minute escape, boarding the gunship, and reaching the ending sequence. A best-ending attempt additionally requires the displayed clear time to be 3:00 or less. The item percentage is a separate completion statistic, so it is possible to finish quickly with few items or slowly with nearly every item and still have the ending determined by time alone.
- Mother Brain is defeated.
- The escape countdown is survived.
- Samus boards the gunship and the ending sequence begins.
- The displayed clear time is checked against the correct bracket.
- The item percentage is recorded separately from the ending tier.
- If attempted, the Dachora and Etecoons' departing craft is visible in the closing scene.
Before you move on
- Mother Brain has been defeated and the escape sequence has started.
- Samus reaches the surface and boards the gunship before the three-minute countdown expires.
- The game displays the clear time after the escape.
- The ending image matches the exact time bracket: 3:00 or less, 3:01 through 10:00, or 10:01 or more.
- The item percentage appears separately after the ending sequence.
- If the optional rescue was completed, a small craft carrying the Dachora and Etecoons leaves Zebes in the closing scene.
References for this chapter
Optional completion: 100% item collection and post-credits runs
Super Metroid has no ordinary free-roaming post-game world. The reliable 100% method is to preserve a save before the final Tourian visit, reload that file while checking missed regional items, then make a final Tourian run after the inventory is complete. The original SNES game counts 100 items: 16 major upgrades, 46 Missile Tanks worth 230 missiles, 10 Super Missile Tanks worth 50 Super Missiles, 10 Power Bomb Tanks worth 50 Power Bombs, 14 Energy Tanks and 4 Reserve Tanks. The four Reserve Tanks are located outside Tourian: one in Brinstar, one in Norfair, one in the Wrecked Ship and one in Maridia. Tourian does not contain the two Reserve Tanks claimed in the earlier draft. The ending screen is the definitive completion check because it displays the finished item percentage and completion time.
Protect a pre-Tourian save and separate required progress from optional items
Before entering Tourian, save at Samus’s Ship or another convenient save station and keep that save untouched. After Mother Brain and the escape sequence, the game does not provide a normal completed-world state for free exploration. Reload the protected save to search for missed expansions, then make a final run when the inventory is complete.
For the standard campaign, the important progression equipment includes the Morphing Ball, Bombs, Varia Suit, Speed Booster, Grapple Beam, Gravity Suit, Space Jump, Screw Attack, Ice Beam, Super Missiles and Power Bombs. Hi-Jump Boots are part of the normal route and make several intended traversal sections practical. This checklist describes standard progression rather than sequence breaks or glitch-assisted routes.
Track the 16 major upgrades separately: Morphing Ball, Bombs, Hi-Jump Boots, Speed Booster, Varia Suit, Gravity Suit, Space Jump, Screw Attack, X-Ray Scope, Grapple Beam, Spring Ball, Charge Beam, Ice Beam, Wave Beam, Spazer Beam and Plasma Beam. X-Ray Scope, Spring Ball, Charge Beam, Wave Beam, Spazer Beam and Plasma Beam are not all mandatory for a normal campaign clear, but each counts toward 100 percent.
- Keep one save made before the final Tourian visit.
- Track the 16 major upgrades separately from expansions.
- Use a written checklist or an original-SNES item map; map markers show item locations but do not reliably confirm that an item was collected.
Sweep Crateria and Green Brinstar from the ship outward
Start at Samus’s Ship and inspect the nearby Crateria rooms before entering Brinstar. Check the surface rooms, the vertical shaft near the opening route and the passages around the Wrecked Ship entrance. Use Bombs, Power Bombs and the X-Ray Scope on suspicious floors, ceilings and apparently solid walls. The ship is a useful refill and save point, so return there after finishing this regional sweep.
Enter Green Brinstar through the elevator and revisit the rooms surrounding the early Morphing Ball route, map station and large vertical shafts. Late-game movement abilities open ledges and tunnels that were unreachable during the opening hours, while Power Bombs expose blocks that are easy to miss during a normal passage.
Record each expansion immediately after collecting it, including its type and region. Do not count a map dot as proof of collection: the original map can continue to indicate an item location after the item has been taken.
- Crateria surface and ship-adjacent rooms checked.
- Wrecked Ship entrance rooms checked from the Crateria side.
- Green Brinstar expansions recorded by type and location.
- The Brinstar Reserve Tank near the western Crateria elevator collected after using the Speed Booster through the shutter corridor.
Clear Red Brinstar and Kraid’s Lair in one connected visit
Use the Red Brinstar elevator and sweep both the upper passages and the deeper pink and red rooms. Check shafts from top to bottom, especially rooms with bombable floors, false walls and ledges reached with Space Jump, Screw Attack or Speed Booster movement. Use the X-Ray Scope where the room shape suggests a hidden continuation, but also test suspicious floors with Bombs or Power Bombs because not every hidden block is revealed in the same way.
Enter Kraid’s Lair and inspect its side branches independently of the route used to reach Kraid. Return after obtaining late-game movement abilities if an item was visible but unreachable earlier. A room being fully mapped does not mean every expansion inside it has been collected.
After Red Brinstar and Kraid’s Lair are complete, return to the elevator and refill before moving into Norfair.
- Red Brinstar upper and lower branches swept.
- Kraid’s Lair side rooms checked beyond the boss route.
- Visible but unreachable items marked for a later return.
- The Red Brinstar Reserve Tank collected from its Speed Booster shutter route.
Sweep Upper Norfair, Lower Norfair and the Ridley approach
Enter Norfair from Brinstar and clear Upper Norfair first. With Varia Suit equipped, revisit rooms containing long vertical climbs, speed-boost corridors and lava-adjacent ledges. Collect Energy Tanks and Reserve Tanks as soon as their routes are available, then refill before continuing deeper.
Use the Norfair elevator network to reach Lower Norfair and inspect the side corridors around Golden Torizo and Ridley. Check hidden floors, Morph Ball passages and rooms requiring Power Bombs or a Speed Booster run. The Norfair Reserve Tank is in the green-bubble room reached from the Upper Norfair route; its hidden piston must be revealed with the Wave Beam before the bomb-and-Morph-Ball passage can be used.
After defeating Ridley, inspect the newly accessible room immediately to the left of his lair, which contains an Energy Tank. Include it in the Norfair total before leaving the area. Save before entering the final boss approach and do not overwrite the protected pre-Tourian file.
- Upper Norfair checked with Varia Suit equipped.
- Lower Norfair side rooms checked around the Golden Torizo and Ridley routes.
- The Norfair Reserve Tank collected from the green-bubble room.
- The post-Ridley Energy Tank room inspected.
- The protected pre-Tourian save remains untouched.
Sweep the Wrecked Ship and all Maridia branches
From Crateria, enter the Wrecked Ship and inspect both sides of the main stairwell, the rooms around Phantoon’s arena and the lower passages. Use the Grapple Beam on grapple points and Power Bomb suspicious floors. Revisit rooms previously crossed only as part of the route to Phantoon or the Gravity Suit because the main path does not pass every expansion.
The Wrecked Ship Reserve Tank is in the walking Chozo chamber. Enter the chamber, allow the Chozo statue to carry Samus into the hidden section, and search the resulting room rather than leaving after collecting the nearby obvious item.
Continue through the Wrecked Ship connection into Maridia. With Gravity Suit and Space Jump available, check the main watery corridors, pink Maridia branches and passages leading toward Draygon. In the large room with the vertical Maridia elevator, bomb the lower-right floor, descend through the sand and use Spring Ball or the equivalent ball-jump route to reach the Maridia Reserve Tank. This is optional for story progression but mandatory for 100 percent.
- Wrecked Ship branches checked on both sides of the Phantoon route.
- Wrecked Ship Reserve Tank collected from the walking Chozo chamber.
- Main Maridia, pink Maridia and sand-filled passages checked.
- Maridia Reserve Tank collected from the bombed floor and sand passage.
- Grapple, Gravity Suit, Space Jump and Speed Booster routes revisited where required.
Check the totals and perform the final Tourian run
Before returning to Tourian, compare the inventory against the complete target: 230 Missiles, 50 Super Missiles, 50 Power Bombs, 14 Energy Tanks and 4 Reserve Tanks, plus all 16 major upgrades. If a category is short, use the written area list to narrow the search before consulting a full original-SNES location guide.
All four Reserve Tanks must be collected during the regional cleanup. They are in Brinstar, Norfair, the Wrecked Ship and Maridia; none is in Tourian. Tourian should therefore be entered only after the inventory already contains four Reserve Tanks and the other categories are complete.
Once every item is collected, make a fresh save before entering Tourian. Complete Tourian, defeat Mother Brain, finish the escape sequence and wait for the ending screen. The displayed item percentage should read 100 percent. If the run is also intended to preserve a legitimate completion time, use normal in-game saving and avoid save-state manipulation.
Rescuing the Dachora in Maridia and the Etecoons in Brinstar is optional. Their rescue changes the escape epilogue imagery, but it does not increase the item percentage or replace any required expansion.
- All 16 major upgrades collected.
- Inventory totals are 230 Missiles, 50 Super Missiles, 50 Power Bombs, 14 Energy Tanks and 4 Reserve Tanks.
- The Brinstar, Norfair, Wrecked Ship and Maridia Reserve Tanks are all collected.
- A final Tourian run displays 100 percent items on the ending screen.
- Dachora and Etecoons rescued if the optional epilogue scene is desired.
- The pre-Tourian save remains available if additional route practice or verification is needed.
Before you move on
- The final ending screen reports 100 percent items.
- The inventory contains 230 Missiles, 50 Super Missiles and 50 Power Bombs.
- The inventory contains all 14 Energy Tanks and all 4 Reserve Tanks.
- The four Reserve Tanks are accounted for in Brinstar, Norfair, the Wrecked Ship and Maridia.
- The 16 major upgrades are present: Morphing Ball, Bombs, Hi-Jump Boots, Speed Booster, Varia Suit, Gravity Suit, Space Jump, Screw Attack, X-Ray Scope, Grapple Beam, Spring Ball, Charge Beam, Ice Beam, Wave Beam, Spazer Beam and Plasma Beam.
- A pre-Tourian save remains available if additional route practice or verification is needed.
Finishing up
Defeat Mother Brain in Tourian, survive the three-minute escape sequence and board Samus's gunship on the Crateria surface so the ending and credits begin.
For optional cleanup, preserve a save made before entering Tourian, reload that file after a clear, collect remaining items, and complete another Tourian run. The original game does not open a normal post-credits free-roaming world.
For the best time-based ending, verify the displayed mission time after boarding the gunship: 3:00 or less is the best bracket, 3:01 through 10:00 is the middle bracket, and 10:01 or more is the basic bracket.
Dachora and Etecoons rescues are optional epilogue content and do not replace the required Mother Brain defeat, escape or gunship boarding.
Confirm that Kraid, Phantoon, Draygon and Ridley were defeated before Tourian opened.
For 100% cleanup, use ch14's inventory totals and final ending-screen item percentage as the completion check.
Choose your next gameScreenshots & video
Game imagery for reference. Follow the written chapters above for the route and strategies.
Sources & references
Our original guide draws on the references below. Check the edition at the top of this page before following controls or unlock requirements.
- Super Metroid — Guide and Walkthrough by bover_87
- Super Metroid — Guide and Walkthrough by Super_Slash
- Super Metroid - Walkthrough and Guide PDF
- Crateria: Get Bombs — Super Metroid Walkthrough
- Super Metroid — Nintendo instruction manual
- Super Metroid/Crateria — StrategyWiki
- The Bomb Battle — Super Metroid Walkthrough & Guide — GameFAQs
- Super Metroid instruction manual
- Brinstar: Get Charge Beam and Super Missiles — Thonky Super Metroid Walkthrough
- THE Super Metroid Guide — Nevermore Studios
- Super Metroid — Nintendo UK product information
- Norfair and Brinstar: Get the Hi-Jump Boots and Varia Suit — Super Metroid Walkthrough
- Brinstar — Morph Ball to Kraid — Super Metroid
- Super Metroid/Brinstar — StrategyWiki
- Super Metroid speed guide and item totals
- Norfair: Get the Grappling Beam and Wave Beam — Thonky
- Inside Central Norfair — Super Metroid Walkthrough and Guide — GameFAQs
- Super Metroid Norfair — StrategyWiki
- Super Metroid — Wrecked Ship: Get the Gravity Suit
- Super Metroid/Wrecked Ship — StrategyWiki
- Super Metroid — Guide and Walkthrough by BakonBitz
- Super Metroid — Boss Guide
- Super Metroid/Maridia — StrategyWiki
- Maridia: Get the Space Jump — Super Metroid Walkthrough
- Super Metroid — Guide and Walkthrough — Super Nintendo — Kodos86
- Chozo Guide — Super Metroid Guide — Chapter 6
- Maridia Continued: Get the Plasma Beam and Spring Ball — Super Metroid Walkthrough
- Super Metroid — Guide and Walkthrough, Items section
- Lower Norfair: Get the Screw Attack — Super Metroid Walkthrough
- Tourian and Final Boss - Super Metroid Walkthrough
- Super Metroid Walkthrough Main Page
- Super Metroid Bosses — StrategyWiki
- Super Metroid/Tourian — StrategyWiki
- Super Metroid — Guide and Walkthrough, GameFAQs
- Tourian — Mother Brain and the escape — Super Metroid
- Tourian Eye Door Room — Super Metroid speedrunning guide
- Mother Brain Room - A complete guide to Super Metroid speedrunning
- Super Metroid — Nintendo Players Guide SNES 1994
- Super Metroid — Complete walkthrough, PixelGuides
- Super Metroid — Guide and Walkthrough, GameFAQs, escape and ending
- Super Metroid — European release information
- Super Metroid Item Tree — Super Nintendo
- Reserve Tank locations — Super Metroid
- Super Metroid 100% Item Locations walkthrough
About the game & collecting notes
- Platform
- Super Nintendo Entertainment System
Step-by-step campaign guide for the original Super Nintendo release of Super Metroid (Europe, PAL release). Covers every major region, required bosses, key progression items, escape sequence and the conditions for the game's alternate endings. Practical route advice, recovery strategies, and checks to confirm you reached the canonical Tourian ending and escape.
Darryl Polo
Darryl Polo loves tinkering with emulation and revisiting retro games. He enjoys exploring how old favorites play on different setups and sharing what he learns along the way. At Joking Joystick, he writes about the games, hardware, and small discoveries that keep the hobby fun.
Our editorial standardsFound a step that needs another look? Help us improve this guide.