
Super Mario World (SNES, USA) — Complete Campaign Walkthrough
Step-by-step campaign walkthrough for the original Super Nintendo Entertainment System (USA) release of Super Mario World. Covers core progression from Yoshi’s House to Bowser’s Castle, boss tactics, all required secret exits to reach Star Road and Special World, cape/Yoshi techniques, and an optional 100% exits guide. Practical, route-focused directions for finishing the main ending and completing optional objectives.

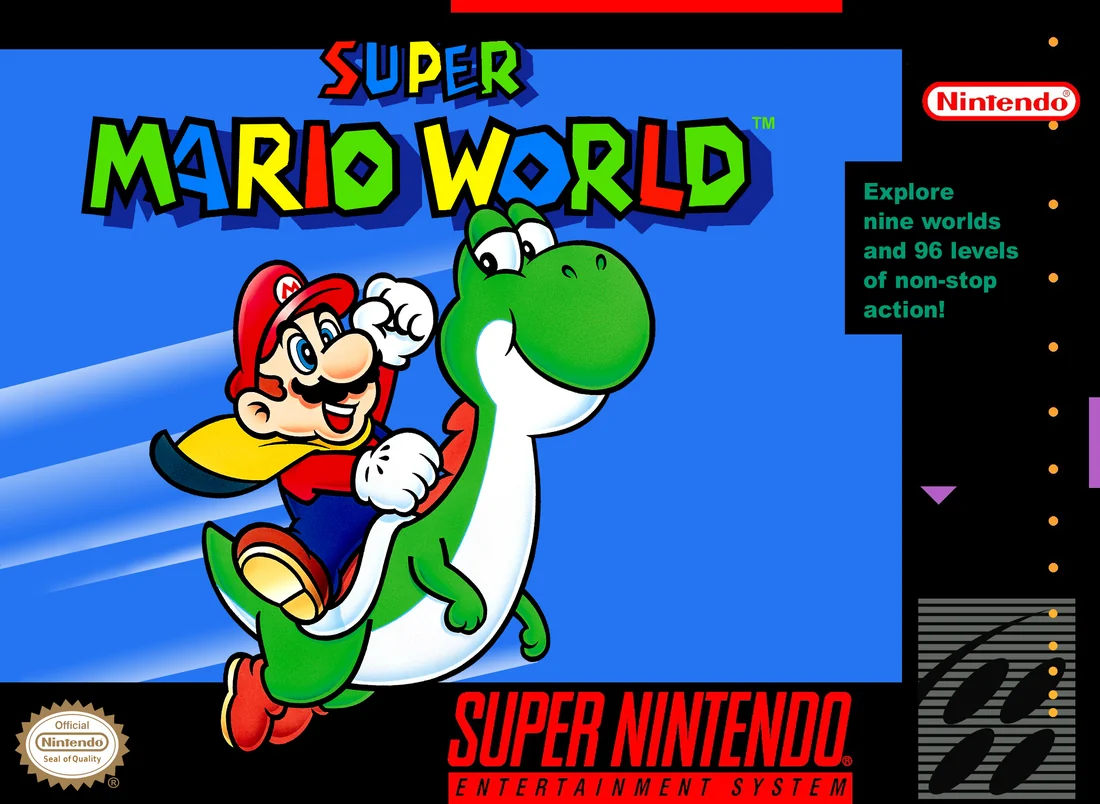
Find a copy
Super Mario World Super Nintendo Entertainment System
We may earn a commission if you buy through these links, at no extra cost to you. As an Amazon Associate I earn from qualifying purchases.
Opens retailer search results. Check the model, edition, seller, availability and current price before buying.
Before you begin
This guide targets the original North American Super Nintendo Entertainment System cartridge of Super Mario World, not the Game Boy Advance remake or another re-release.
For the main ending, follow Chapters 03 through 10, then use Chapter 15 to reach and defeat Bowser. Chapters 11 and 12 cover optional Star Road and Special World routes; Chapters 13 and 14 are completion and technique references that can be used whenever needed.
The guide gives ordered routes, secret-exit landmarks, hazards, boss methods, recovery advice, and concrete completion checks for the original SNES mechanics.
Use the Star Road and Special World chapters before Chapter 15 only if you deliberately want shortcuts or optional content; they are not required for the standard campaign ending.
For 96-exit completion, use the separate exit checklist and save-file total rather than relying only on overworld paths.
Set yourself up for the run
Use a dedicated save file for this run and keep a second slot for experimentation; the cartridge saves progress only at map checkpoints, so overwrite cautiously.
Familiarize yourself with original SNES controls from the instruction booklet: Y = run / pick up items / spit shells, B = jump / swim, A = spin jump, SELECT = release reserve item, D-pad = move / crouch.
Practice running, taking off, steering, and landing with the cape in Donut Plains 1 after clearing Iggy's Castle; Yoshi's Island 1 does not provide early Cape Feather access.
Practice basic Yoshi handling in Yoshi's Island 2: use shells to give Green Yoshi temporary fire, sand-cloud, or flight abilities, and learn the permanent abilities of Red, Yellow, and Blue Yoshis separately.
Learn to perform a slow landing while riding Yoshi, dismount safely with A, and use Yoshi's tongue to collect otherwise hard-to-reach items.
Plan your route before entering the Valley of Bowser.
Many Star Road connections require specific secret exits that appear in earlier levels; consult the Star Road chapter before attempting the final worlds if you want shortcuts or Special World access.
Keep at least one 1-up or extra lives buffer before attempting long sequences of secret exits (ghost houses, some castles).
If you're attempting 100% (all 96 exits), expect to revisit levels: prepare for multiple retries and deliberate route checks.
How the Game Files and Map Save Work
The original North American Super Nintendo cartridge has three save files and uses a battery-backed save system. It does not save immediately after every ordinary course. Progress is written when the game offers Continue and Save after designated locations, while ordinary-level exits are tracked through the save-file exit total once that progress is saved. Use the map to identify possible alternate routes, but keep your own checklist because the original game does not display a complete per-course exit record.
Choose and identify a save file
At the title screen, press Start to open the file-selection screen. The original cartridge provides three slots: Mario A, Mario B, and Mario C. Move the cursor to the intended slot and confirm it. An empty slot begins at Yoshi's House; a used slot resumes from the route recorded when that file was last saved.
The number shown beside a file is the number of level exits recorded for that file, not simply the number of stages completed. A course with a normal exit and a secret exit can contribute two exits. The North American version displays a star beside the completed total when all 96 exits have been recorded. Select Erase Data only when you are certain that the selected file is no longer needed, because erased cartridge data cannot be recovered.
- Confirm Mario A, Mario B, or Mario C before starting.
- Treat the number beside the file as an exit total.
- Do not select Erase Data unless you intend to delete that file.
Understand when the cartridge saves
Super Mario World does not save after every ordinary level. After clearing a castle, fortress, ghost house, or Switch Palace, the map presents Continue and Save or Continue Without Save. Choose Continue and Save if you want the route and recorded progress written to the selected cartridge file.
Save prompts also occur after designated Star World and Special World stages rather than after every stage in those areas. If you complete an ordinary course, find a secret exit, and then switch off the console before reaching a save-producing location, that newly recorded route may not be preserved. Reaching a newly opened map path is not the same as writing it to the cartridge.
- Choose Continue and Save at every available save prompt.
- Do not assume an ordinary goal automatically writes a cartridge save.
- After a secret exit, reach the next save-producing location before ending the session.
Know what Continue does after a game over
If Mario loses all remaining lives, select Continue to return to the course immediately after the most recent saved point. This is not necessarily the last ordinary level you cleared. Any ordinary-level progress made after the latest save-producing location may need to be replayed.
The same principle applies after powering off and restarting the cartridge. The game loads the selected file's most recent saved route, not a temporary record of every course entered during the previous session. Before attempting a difficult secret exit, save at a nearby ghost house, fortress, castle, Switch Palace, or qualifying Star or Special World stage whenever possible.
- Find the latest save-producing location before a risky attempt.
- Expect unsaved ordinary courses to be lost after a game over or power cycle.
- Replay later courses if the loaded map stops at an earlier saved point.
Read the map's route information correctly
The overworld records which routes have been opened, but it does not provide a complete visual checklist showing whether each individual exit has been found. A yellow course marker indicates a course with one exit. A red course marker indicates that the course has two possible exits, usually a normal goal and a secret exit, although the second exit is not always a keyhole.
A red marker does not mean both exits are complete. It means that an alternate exit exists somewhere in that course. When you use a key and keyhole, an alternate goal, or another hidden route, watch the map for the newly opened connection. Some secret exits create a shortcut, a different branch, a Switch Palace route, or a Star Road connection. Record the course and exit on paper because the original SNES release does not supply a per-course completion list.
- Investigate every red course when pursuing 96 exits.
- Use the map to confirm that a new route opened.
- Track normal and secret exits in a written checklist rather than relying on the map alone.
Do not look for a nonexistent map exit screen
The original cartridge's Select button is used for the reserve item during action stages. It does not open a world-map screen listing every completed exit. The map shows the current location, available courses, opened paths, and destinations, but it cannot reliably tell you which of two exits in a red course has already been counted.
To check progress, return to the title screen and look at the file's exit total. Do this only after saving, because the title-screen number reflects the last written cartridge save. If the total is lower than your written checklist, replay the suspected red courses, ghost houses, Star World stages, and other locations with alternate exits.
- Do not press Select expecting a map-based exit checklist.
- Check the title-screen total after using Continue and Save.
- Keep a separate list of every normal and secret exit completed.
Use the three slots for safe route testing
Reserve one file for the main campaign and another for practice. For example, use Mario A for trusted progress and Mario B for testing secret exits, alternate routes, or difficult stages. The second file is not a snapshot or duplicate of Mario A; the original cartridge has no command for copying one save file into another. It is useful because experiments on Mario B cannot overwrite Mario A unless you deliberately select and erase the wrong slot.
A practical routine is to save Mario A at the next available save-producing location before ending a session. Use Mario B when you want to rehearse a secret exit without risking the main route. Keep Mario C unused or dedicate it to a separate 96-exit checklist. After every important save prompt, return to the title screen and verify that the intended slot has the expected exit total.
- Mario A: main campaign and confirmed progress.
- Mario B: secret-exit testing and route practice.
- Mario C: optional separate completion file.
- Verify the intended slot and exit total after saving.
Before you move on
- Reload the intended file after a reset and confirm that its title-screen exit total is unchanged.
- Confirm that the most recent castle, fortress, ghost house, Switch Palace, or qualifying Star or Special World save point remains reflected on the map.
- After a normal or secret exit, confirm that its newly opened route remains available after saving and reloading.
- For full completion, confirm that the file shows all 96 exits and the North American version's completion star.
References for this chapter
Controls, Movement and Essential Techniques
Learn the original North American Super Nintendo controls, then practice cape movement and Yoshi handling before depending on either technique in difficult levels. The essential distinctions are between running and taking off, opening the cape, diving, climbing, and floating down. Yoshi uses the same basic movement layout as Mario, but A dismounts Mario, Yoshi's tongue is controlled with Y, and B controls jumping and special flight when Yoshi has the required ability.
Learn the original SNES button layout
Use the Control Pad to move left and right, crouch with Down, steer Mario in the air, and select directions on the overworld map. B is the normal jump and swim button. A performs a spin jump and, while riding Yoshi, dismounts Mario. If Mario is airborne when he dismounts, the dismount launches him upward, so use it only when a safe landing is visible.
Hold Y to accelerate, pick up and carry loose objects, spin the cape, throw fireballs when powered up with a Fire Flower, and extend Yoshi's tongue. X performs the same primary action as Y on the original SNES controller. When carrying a shell or another hard object, keep Y held and use the Control Pad to choose the throwing direction before releasing Y. Start pauses the game. Select releases the power-up stored in the reserve box.
L and R shift the screen view slightly in action scenes where that feature is available. This is useful for checking a landing or looking ahead, but it does not work in every area. On the map, press Start and use the Control Pad to inspect more of the map in worlds where map scrolling is enabled.
- Control Pad: move, crouch, steer, and select map directions
- B: jump, swim, and make Yoshi fly when he has the ability
- A: spin jump or dismount from Yoshi
- Y or X: accelerate, carry objects, use the cape, and operate Yoshi's tongue
- Select: release the reserve item
- Start: pause; on the map, enter map-scrolling mode
Build speed and perform a cape takeoff
Cape flight begins with acceleration. Hold Y while moving across a sufficiently long, clear stretch of ground. Mario's arms extend when he reaches full running speed. At that point, press B while continuing to move. This creates the takeoff jump. A quick takeoff is also possible by holding the movement direction, Y, and B together, but use the longer acceleration method while learning because it gives you more room to correct the jump.
During the takeoff, continue holding Y. To open the cape, release B during the ascent or wait until Mario reaches the top of the jump. Once the cape is open, keep the intended travel direction to descend and press the opposite direction to climb. This alternating steering converts the initial jump into sustained flight.
The appropriate early training course is Donut Plains 1. Enter without Yoshi if necessary, move right, and stomp the Super Koopa with the flashing cape near the beginning. It drops a Cape Feather. After collecting it, use the broad ground and open upper sections to repeat the takeoff without immediately facing a narrow platform sequence. The level also contains another Feather and a message area explaining the flight controls.
- Enter Donut Plains 1 and obtain the Cape Feather from the flashing Super Koopa.
- Find a long, unobstructed runway.
- Hold Y while running until Mario reaches full speed.
- Press B to jump while maintaining forward movement.
- Release B during the ascent or at the jump's highest point to open the cape.
- Practice over solid ground before attempting a long gap.
Control dives, climbs, and safe landings
With the cape open, hold Y and press the direction Mario is already traveling to make a fast dive. The dive loses altitude quickly but gives Mario forward speed and can strike enemies or the ground. To climb again, press the opposite direction while the cape is open. Make this correction before Mario gets too low; waiting until the last moment often leaves no room to recover.
To descend slowly, release Y while airborne with the cape open. Mario's cape attaches around his feet and lets him float downward. The original manual also describes a slow landing by holding B with a direction while airborne. Use the slow descent over broad platforms and aim for the center rather than the edge. If the landing area is narrow, stop trying to gain more height and use a controlled descent instead of committing to another dive.
A cape dive is not protection from pits, lava, crushing hazards, or a bad landing. In a room with low ceilings, walls, or moving platforms, use ordinary jumps or spin jumps. A cape attack on the ground can defeat nearby enemies, but it is not a substitute for spacing when an enemy is next to a pit.
- Dive by holding Y with the direction Mario is already traveling.
- Press the opposite direction to curve upward and regain height.
- Release Y, or use the manual's slow-landing input, to descend under control.
- Aim for the middle of the landing platform.
- Use short jumps in enclosed rooms and around moving platforms.
Ride, feed, and dismount Yoshi
Jump onto Yoshi from above to mount him. While riding, the basic movement controls remain familiar: the Control Pad moves, Y accelerates and extends Yoshi's tongue, and B jumps. A dismounts Mario. Do not treat A as another jump button while riding; it immediately removes Mario from Yoshi's back.
Press or hold Y to make Yoshi's tongue reach forward. Yoshi can eat many enemies and berries. When the tongue catches a shell or another hard object, keep the object in Yoshi's mouth until you are ready to use it. Release Y to spit the held object forward, following the original manual's control description. A shell left in Yoshi's mouth for too long is swallowed, so spit it out before you need its special effect.
If an enemy hits Yoshi while Mario is riding, Mario is knocked off and Yoshi runs away. Chase him only when the ground remains safe. If Yoshi is moving toward a pit, do not follow blindly. If Mario is airborne while riding, press A only toward a visible platform or upper route; the dismount can save Mario from a bad Yoshi landing, but it can also send him into a pit if used without a target.
- Jump onto Yoshi from above.
- Use Y to eat enemies, berries, or hard objects.
- Release Y to spit a held shell or other hard object.
- Press A to dismount deliberately.
- Use an airborne dismount only toward a clear landing.
- Recover Yoshi after an enemy hit only if the route is safe.
Use shell colors and Yoshi abilities correctly
A Green Yoshi gains a temporary ability from the shell currently held in his mouth. A red shell makes Green Yoshi spit fireballs when the shell is used. A yellow shell makes Green Yoshi create a damaging sand cloud when he lands from a jump. A blue shell gives Green Yoshi the ability to fly. A green shell provides no special shell ability. These effects belong to the shell being held; they do not change Green Yoshi's permanent color.
Red, Yellow, and Blue Yoshis have permanent color-based abilities. Red Yoshi spits fire regardless of the shell color in his mouth. Yellow Yoshi produces sand clouds when he jumps and lands regardless of the shell color. Blue Yoshi can fly for a limited period regardless of the shell color. Feeding enemies to a baby colored Yoshi is a separate growth mechanic and does not convert a Green Yoshi into one of these permanent colored Yoshis.
For Blue-shell flight with Green Yoshi, press B repeatedly while airborne. The repeated presses maintain upward movement. Do not confuse this with cape flight: cape control uses Y and directional steering, while blue-shell Yoshi flight uses repeated B presses. When Cape Mario is riding Yoshi, holding Y and B after acceleration produces a glide, and holding only B produces a slow landing; Mario's cape does not open in the normal ground-based flight sequence.
- Red shell held by Green Yoshi: fireballs.
- Yellow shell held by Green Yoshi: landing sand cloud.
- Blue shell held by Green Yoshi: flight with repeated B presses.
- Red Yoshi: permanent fire ability.
- Yellow Yoshi: permanent sand-cloud ability.
- Blue Yoshi: permanent limited-flight ability.
- Do not describe shell use as changing Green Yoshi's color.
Complete the two early practice drills
Use Donut Plains 1 for cape practice. First stomp the flashing Super Koopa near the beginning to obtain the Cape Feather. On clear ground, run while holding Y until Mario reaches full speed, jump with B, release B to open the cape, and steer toward a centered landing. Repeat short flights before attempting a large gap. After the takeoff is reliable, practice one fast dive followed by an opposite-direction climb, then release Y to float down.
Use Yoshi's Island 2 for ordinary Yoshi movement practice. Work through a safe section using short B jumps rather than long leaps. Mount Yoshi, extend his tongue toward a nearby enemy, then release Y to spit any held shell away from the route. Press A to dismount on safe ground, remount if necessary, and repeat the sequence. Practice a midair dismount only over a low obstacle with a visible landing platform.
These exercises are preparation, not required collectibles. The goal is to make the controls automatic before later levels combine cape flight, Yoshi, narrow platforms, shells, hidden routes, and recovery jumps.
- Perform three short cape flights in Donut Plains 1.
- Land on chosen platforms rather than falling wherever the jump ends.
- Practice one cape dive followed by an opposite-direction climb.
- Mount and dismount Yoshi safely in Yoshi's Island 2.
- Practice eating and spitting a shell without losing control of the route.
- Perform one safe midair A dismount over a low obstacle.
Before you move on
- You can distinguish acceleration, takeoff, cape opening, diving, climbing, and floating descent.
- You can obtain the Cape Feather in Donut Plains 1 and land a short cape flight on a chosen platform.
- You can perform a cape dive, regain height with the opposite direction, and float safely to the ground.
- You can mount Yoshi, use his tongue, hold and spit a shell, and dismount with A.
- You can perform a safe midair Yoshi dismount over a visible landing.
- You can identify the temporary shell abilities of Green Yoshi and the permanent color abilities of Red, Yellow, and Blue Yoshis.
- You can complete the Donut Plains 1 cape drill and the Yoshi's Island 2 short-jump drill without relying on remake-specific controls.
Yoshi's Island — First Steps, Palace, and Finding Your Early Item Options
Begin at Yoshi's House and choose between the optional Yellow Switch Palace detour and the ordinary route through Yoshi's Island 2, 3, and 4. Activating the Yellow Switch makes yellow outline blocks solid throughout Dinosaur Land and is useful for safer progression, but it is not required to reach Iggy's Castle. Finish the four opening courses, clear Iggy's Castle, and confirm that Donut Plains has opened.
Leave Yoshi's House and choose the opening route
Mario begins at Yoshi's House. The house is a map landmark, not a stage with a counted exit. Yoshi's Island 1 is to the left, while Yoshi's Island 2 is to the right. For a safer first run, clear Yoshi's Island 1, activate the Yellow Switch Palace, and then continue through Yoshi's Island 2, Yoshi's Island 3, and Yoshi's Island 4.
Yoshi's Island 1 is optional for the ordinary route. Its normal goal opens the Yellow Switch Palace, while the direct route toward Iggy's Castle can be reached by taking Yoshi's Island 2 from the starting junction. The opening world contains no required Star Road secret exit, so do not search these four courses for a keyhole or assume that one is needed before entering Donut Plains.
One useful preparation point concerns Yoshi's shells. In the original SNES game, the color of a shell held in Yoshi's mouth gives a temporary ability: a red shell produces fireballs when spat out, a yellow shell creates a damaging dust cloud when Yoshi lands, and a blue shell gives Yoshi wings while he holds it. The shell does not change Yoshi's body color. Later red, yellow, and blue Yoshis also have innate abilities, but those colored Yoshis are not part of this opening route. With the ordinary green Yoshi, treat shell powers as temporary tools and expect the effect to end when he swallows or spits out the shell.
- Leave Yoshi's House.
- Remember that Yoshi's Island 1 is left of the house and Yoshi's Island 2 is right of it.
- Choose the Yellow Switch Palace detour if you want the permanent yellow blocks.
- Do not search the opening world for a Star Road keyhole.
- Treat shell abilities as temporary effects, not as changes to Yoshi's color.
Clear Yoshi's Island 1 and reach the Yellow Switch Palace
Enter Yoshi's Island 1 from the left side of Yoshi's House. This introductory course contains Rexes, Banzai Bills, Koopas, and basic blocks. A Rex survives the first ordinary stomp in a flattened state, so either stomp it again or avoid it after the first hit. The large Banzai Bill follows a fixed horizontal path; duck beneath it where the terrain permits rather than making a risky jump without a clear landing.
The course supplies early opportunities to become Super Mario. Take the Mushroom if you need the extra hit, then use the extra height to handle the course more comfortably. Spin jumping is useful for breaking certain blocks, but it is not required to complete the stage. There is no Cape Feather here, and there are no flying Mechakoopas in this opening course; do not apply later castle enemy patterns to this level.
Finish through the normal goal. The map then opens the Yellow Switch Palace above the starting area. Enter it before continuing if you want the early defensive benefit. The palace is a detour rather than a branch with multiple exits, and activating its switch is permanent on that file.
- Defeat or bypass the early Rexes.
- Duck under or safely avoid the Banzai Bill.
- Use the available Mushroom if needed.
- Finish through the normal goal.
- Enter the Yellow Switch Palace from the new map path.
Activate the Yellow Switch Palace
The Yellow Switch Palace is a short, enemy-free stage. Hit the large P-Switch near the beginning, then move through the temporary coin-and-block arrangement it creates. The switch effect exposes the route to the pipe leading to the palace's main chamber. Enter the pipe while the P-Switch effect is active rather than treating the first room as the entire stage.
In the next chamber, press the large Yellow Switch. Yellow dotted outlines throughout the game become solid Yellow Exclamation Blocks. These blocks commonly contain Super Mushrooms and can provide extra footing or safer routes in later courses. The switch palace has one completion result: once the large switch has been pressed, the palace is finished and cannot be replayed on that file.
The Yellow Switch does not open a secret Star Road connection and is not required for the ordinary path to Iggy's Castle. Its value is practical. It gives small Mario more opportunities to recover and makes several later sections less punishing. Return to the overworld after the activation sequence and take the eastern path to Yoshi's Island 2.
- Press the P-Switch in the first chamber.
- Use the temporary arrangement to reach the pipe.
- Press the large Yellow Switch.
- Confirm that yellow dotted outlines have become solid Yellow Exclamation Blocks.
- Return to the overworld and enter Yoshi's Island 2.
Rescue and use Yoshi in Yoshi's Island 2
At the beginning of Yoshi's Island 2, use the nearby Koopa shell carefully. Kicking it through enemies can clear the opening, but stay behind it because it can rebound from walls or terrain. A later Prize Block contains a Yoshi Egg. Hit the block, let the egg hatch, and jump onto Yoshi's back.
Yoshi can eat many ordinary enemies with his tongue and can hold a swallowed shell temporarily. Use the tongue from a short distance instead of walking into an enemy. If an enemy hits Mario while he is riding Yoshi, Mario loses the hit but Yoshi runs away. Secure Mario first, then remount Yoshi only if the route remains safe; do not chase him toward a pit or off the edge of the screen.
The stage includes spaces where Mario's movement is more practical than Yoshi's. Press the dismount command when a narrow route, vine, or awkward platform requires Mario to proceed alone. If Yoshi is lost, the level can still be completed. Continue right through the normal route and cross the goal to open Yoshi's Island 3.
- Use the opening shell cautiously.
- Release Yoshi from the Prize Block egg.
- Practice tongue attacks and carrying shells.
- Dismount when a narrow section makes riding unsafe.
- Finish through the normal goal.
Cross Yoshi's Island 3's moving platforms
Yoshi's Island 3 emphasizes platform timing. Several platforms move over large gaps, and some are suspended from rotating chains. Before jumping, watch the destination platform for a full movement cycle. Move toward its center rather than its edge, then make a short jump when the platforms align.
Do not hold forward blindly through every platform section. A controlled jump gives more time to correct Mario's position, while a long committed leap can send him past the landing surface. If Yoshi is available, he can make some jumps more forgiving, but he cannot save a missed landing into a pit. The Yellow Switch blocks may fill some empty spaces, yet they do not remove the need to watch the platform pattern.
There is still no Cape Feather on this route. Complete the stage with ordinary jumps, spin jumps where appropriate, and careful movement. The normal goal opens Yoshi's Island 4.
- Watch each moving-platform cycle before jumping.
- Aim for the center of the destination platform.
- Use short jumps instead of uncontrolled running leaps.
- Do not expect cape flight in this opening world.
- Reach Yoshi's Island 4 through the normal goal.
Finish Yoshi's Island 4 and open Iggy's Castle
Yoshi's Island 4 moves through a mountain-and-lake setting with Cheep-Cheeps and yellow spiked mines. Stay on solid ground whenever possible. When entering water, make small corrections and give the mines a wide berth instead of trying to rush through their movement paths.
A side route includes Pokeys. Yoshi is useful there because he can eat them, but Mario should avoid their bodies if he is on foot. Later, position a Koopa shell so it can activate a P-Switch. The switch creates a temporary block bridge toward the exit. Do not kick the shell away before lining up the switch; losing it can force a more difficult recovery.
Finish through the normal goal to open Iggy's Castle. Yoshi cannot enter castle stages, so Mario approaches the castle alone even if he completed the previous course while riding Yoshi. Before entering, use a Mushroom or another available power-up if you have one. The opening island is intended to teach shell handling, moving-platform timing, Yoshi's tongue, and safe dismounting rather than cape flight.
- Avoid the Cheep-Cheeps and yellow mines.
- Use Yoshi against Pokeys when practical.
- Preserve the shell needed for the P-Switch.
- Cross the temporary block bridge.
- Finish the normal goal and enter Iggy's Castle as Mario.
Clear Iggy's Castle and defeat Iggy Koopa
The first castle room uses climbable fences. Jump onto the fence and use the directional controls to move across it while Koopas travel on both sides. Stay on the fence, change sides when necessary, and avoid punching a shell into yourself. Trigger the midway gate before continuing if you reach it.
The next section scrolls automatically and contains large yellow pillars that drop from above. Watch the space immediately ahead and move into the safe gaps as the pillars descend. Do not linger beneath a pillar or allow the scrolling screen to push Mario into the next obstacle. Continue to the large red door for the boss room.
Iggy Koopa stands on a tilting platform over lava and throws rolling fireballs across the arena. Defeat him by stomping him with regular jumps. Wait until the platform tilts so Iggy is moving toward a lower edge, then jump on him to push him in that direction. After each stomp, regain stable footing and watch the platform's next tilt instead of immediately jumping again. The rolling fireballs are easier to avoid when Mario stays away from the edge toward which Iggy is being pushed.
Three successful stomps send Iggy into the lava. Fireballs from Fire Mario can also push him, but the regular-jump method works with Super Mario or small Mario. The Cape Spin is not the attack to rely on here. After the third hit, the castle-destruction sequence plays and the route into Donut Plains opens.
- Cross the fence room without falling into the lava.
- Use the midway gate when reached.
- Survive the forced-scrolling pillar section.
- Enter the red boss door.
- Stomp Iggy three times with regular jumps.
- Avoid the rolling fireballs and confirm the castle-destruction sequence.
- Verify that Donut Plains is accessible from the map.
Before you move on
- Yoshi's Island 1 has been cleared through its normal goal if the Yellow Switch Palace detour was taken.
- The Yellow Switch Palace has been completed and yellow dotted outlines have become solid Yellow Exclamation Blocks.
- Yoshi has been released from the egg in Yoshi's Island 2 and used or safely abandoned as needed.
- Yoshi's Island 2, Yoshi's Island 3, and Yoshi's Island 4 have been cleared through their normal goals.
- The shell effects have been understood as temporary abilities rather than changes to Yoshi's body color.
- Iggy's Castle has been cleared and Iggy Koopa has been stomped three times.
- The castle-destruction sequence has played.
- The Donut Plains route is visible and accessible on the overworld map.
- No early Yoshi's Island course has been incorrectly treated as a Star Road prerequisite.
References for this chapter
- Super Mario World — Official Super NES Instruction Manual
- Super Mario World — Guide and Walkthrough for Super Nintendo
- Super Mario World — Guide and Walkthrough — Super Nintendo
- Super Mario World — Boss Guide, GameFAQs
- Super Mario World — Iggy's Castle, StrategyWiki
- Super Mario World — Yellow Switch Palace, StrategyWiki
- Yoshi's Island 2 — Super Mario World Walkthrough
Donut Plains — Switch Palace, Ghost House, and Moving Platforms
Donut Plains contains the Green Switch Palace, two ordinary stages with alternate exits, two Ghost Houses, Donut Secret 1, and the first route toward Star Road. The standard campaign uses Donut Plains 1, Donut Plains 2, Donut Ghost House, Donut Plains 3, Donut Plains 4, and Morton’s Castle. For the Star Road route, collect the secret exits in Donut Plains 1, Donut Secret 1, and Donut Secret House in that order. The Yellow, Red, and Blue Switch Palaces are elsewhere: Yellow is reached from Yoshi’s Island 1, Red from Vanilla Dome 2, and Blue from Forest of Illusion 2.
Clear Donut Plains 1 and decide when to take its secret exit
Enter Donut Plains 1 from the path that opens after Iggy’s Castle. The level introduces Cape Feathers through flashing Super Koopas, so take one if possible. Move through the opening normally and use short running jumps across the hills. Do not attempt a long flight until you have a clear landing area; Super Koopas and the Volcano Lotus near the later section can interrupt a takeoff.
The normal Giant Gate opens the route toward Donut Plains 2. Donut Plains 1 also contains a key and keyhole above the pipe maze near the end of the stage. The keyhole is high above the regular path. Cape Mario can fly up to it from a long, unobstructed stretch, and a Yoshi-assisted jump can also reach the upper area. After the Green Switch Palace is active, green blocks provide another way to gain height on repeat visits.
Carry the key to the keyhole without taking damage or dropping it into a pit. This secret exit opens Donut Secret 1. It is not required for the ordinary route to Morton’s Castle, but it is the first required link in the Donut Plains route to Star World 1 and counts as a separate exit for the 96-exit total.
- Clear Donut Plains 1 through the Giant Gate.
- Collect its key and use the elevated keyhole if pursuing all exits or Star Road.
- Confirm that Donut Secret 1 appears on the overworld map.
Clear Donut Plains 2 and activate the Green Switch Palace
Donut Plains 2 is an underwater stage with a normal Giant Gate and a secret keyhole exit. Rip Van Fish remain harmless while asleep but pursue Mario after being disturbed, so swim around them rather than waking several at once. Fire Mario can clear a safer route with fireballs; Cape Mario can use cape spins, but underwater movement makes this less reliable than simply maintaining distance.
The secret route is near the later part of the course. Pick up the P Switch and carry it to the section where brown blocks obstruct the key. Activate the switch, swim through the temporary coins, take the key from the exposed block, and bring it to the nearby keyhole. This exit opens the Green Switch Palace.
Complete the Green Switch Palace by moving right and activating the large green switch. The change is permanent for the save file: dotted green blocks throughout Dinosaur Land become solid green blocks. They are useful for reaching elevated areas, including some previously inaccessible routes, but the palace itself is not necessary for the ordinary progression to Morton’s Castle.
- Clear Donut Plains 2 through the secret keyhole exit.
- Enter and finish the Green Switch Palace.
- Verify that green dotted blocks have changed into solid green blocks.
Take Donut Plains 2’s normal exit and enter Donut Ghost House
Return to Donut Plains 2 and use the regular underwater route to the Giant Gate. This exit opens Donut Ghost House. The level can also be entered from Donut Secret 1’s normal exit, so the map may show more than one approach.
In Donut Ghost House’s first room, move right while avoiding the swooping Boos. They cannot be defeated, so use controlled jumps and turn away when they close in. Enter the door at the far right. In the next room, the upper door is initially unreachable. Continue through the room until you find the route that lets you hit the block containing a vine. Climb the vine to the upper passage and take the goal door or gate for the normal exit. This opens Donut Plains 3.
The Ghost House’s secret exit is separate. With a Cape Feather, return to the first room, run far enough right to create space, then turn and build speed toward the left side. Fly through the ceiling into the hidden upper passage. Follow it to the opening that drops into the exit area and complete the secret exit. This opens Top Secret Area, a repeatable supply stage with power-ups and Yoshi. Do not confuse this exit with the later Donut Secret House route to Star World.
- Use the normal Ghost House route to open Donut Plains 3.
- Use the hidden ceiling passage to open Top Secret Area.
- Record both Ghost House exits if pursuing 96 exits.
Complete Donut Secret 1 and Donut Secret House for the Star Road chain
Donut Secret 1 is reached from Donut Plains 1’s secret exit. Its normal Giant Gate leads back to Donut Ghost House, while its secret exit leads to Donut Secret House. Near the latter part of the underwater stage, carry the P Switch to the brown-block barrier, activate it, swim through the temporary coins, collect the key, and use the keyhole. This is the second link in the Donut Plains Star Road route.
Donut Secret House has two exits. The normal route eventually uses a blue door and opens Donut Secret 2. For the secret exit, carry the P Switch to the section with the message block and activate it. Use the temporary blocks to reach the beanstalk and blue door, then defeat Big Boo in the miniboss room. Pick up a Grab Block, wait until Big Boo becomes visible, and throw the block at him. Three successful hits finish the encounter and open the path to Star Road 1.
Big Boo is safest when Mario stays on the floor and avoids creating unnecessary holes. Throw only when the boss is visible, then move away before it reappears elsewhere. If you lose the attempt, return with a power-up from Top Secret Area rather than repeatedly risking small Mario.
- Clear Donut Secret 1’s Giant Gate and secret keyhole exits.
- Clear Donut Secret House’s normal exit if pursuing all exits.
- Defeat Big Boo through the secret exit to open Star World 1.
Cross Donut Plains 3 and Donut Plains 4 without relying on cape flight
Donut Plains 3 and Donut Plains 4 continue the ordinary route toward Morton’s Castle. Their moving platforms, narrow ledges, and rotating firebars reward timing rather than speed. Watch a platform complete one movement cycle before jumping. Start from the platform’s center, use a short running jump, and release the run button before landing so Mario does not slide off the next surface.
Do not use a long cape glide over a moving-platform sequence unless the landing area is broad and visible. A glide can carry Mario past the next platform and leaves little room to correct his position. Preserve the cape for an emergency spin, a controlled descent, or a clearly identified high route.
For rotating firebars, move through the gaps instead of racing alongside the bar. Wait for the opening to approach, jump through it, and stop briefly on secure ground before planning the next move. After clearing Donut Plains 3 and Donut Plains 4, complete Morton’s Castle to finish the standard Donut Plains campaign route. Donut Secret 2 is an optional branch reached from Donut Secret House’s normal exit and is not required to reach Morton.
- Clear Donut Plains 3 using short, controlled jumps.
- Clear Donut Plains 4 without committing to blind cape flights.
- Reach and defeat Morton in Morton’s Castle for standard campaign progression.
Before you move on
- Donut Plains 1 has both its Giant Gate and keyhole exits recorded if pursuing full completion.
- Donut Plains 2 has both its Giant Gate and keyhole exits recorded.
- Green Switch Palace has been completed and solid green blocks are active.
- Donut Ghost House has both exits recorded: the normal exit to Donut Plains 3 and the secret exit to Top Secret Area.
- Donut Secret 1 has both its normal Giant Gate and secret keyhole exits recorded if pursuing all Donut Plains exits.
- Donut Secret House has both its normal exit to Donut Secret 2 and its Big Boo secret exit to Star World 1 recorded if pursuing all exits.
- Donut Plains 3 and Donut Plains 4 are cleared, and Morton’s Castle has been defeated for the standard route.
References for this chapter
- Super Mario World — Official Super NES Instruction Manual
- Super Mario World — Donut Plains 1 Walkthrough
- Super Mario World — Donut Secret 1 Walkthrough
- Super Mario World — Donut Ghost House Walkthrough
- Super Mario World — Donut Secret House Walkthrough
- Super Mario World — Switch Palace Locations
- Super Mario World — List of All Exits and Secret Exits
- Super Mario World — Guide and Walkthrough by Pop, GameFAQs
Vanilla Dome — Pipes, Lava, and Secret Exits
Vanilla Dome is the third world in the original North American Super Nintendo release of Super Mario World. Its regular route runs through Vanilla Dome 1, Vanilla Dome 2, Vanilla Ghost House, Vanilla Dome 3, Vanilla Dome 4, and Lemmy's Castle. The main optional branch begins with the secret exit in Vanilla Dome 1. That keyhole opens Vanilla Secret 1 and the Vanilla Heights route, which continues through Vanilla Secret 2, Vanilla Secret 3, and Vanilla Fortress. Vanilla Dome 2 also has a secret exit, but it leads only to Red Switch Palace. Vanilla Secret 1 has the area's Star Road connection through its own secret exit.
1. Prepare before entering the dome
Enter Vanilla Dome with Super Mario, Cape Mario, or Fire Mario when possible. The underground stages use low ceilings, narrow ledges, Swoopers, Spike Tops, Buzzy Beetles, lava, and skull rafts. Super Mario is particularly useful because he can spin-jump through yellow blocks, while a cape provides safer recovery and access to high routes.
Use short jumps in enclosed passages instead of holding the run button through every opening. A cape flight can be valuable in broad rooms, but starting one beneath a low ceiling usually costs control. If you bring Yoshi, remember that cramped rooms and pipes make dismounting risky. Carrying a shell is useful, but do not let Yoshi swallow it before a maneuver that requires the shell to remain available.
- Enter with a power-up if possible.
- Use short jumps beneath low ceilings.
- Treat Yoshi as optional in the tightest underground sections.
2. Clear Vanilla Dome 1 and find its secret exit
For the regular exit, move right through the Swooper section and the turn-block maze. Staying low at the beginning avoids many Swoopers. In the maze, use the orange pipe and the Buzzy Beetle to work through the turn blocks, or use the cape to cross the arrangement if you have enough room. On the slope afterward, jump repeatedly rather than trying to walk straight up it. Continue through the pipe and the sinking yellow platform section, then move quickly across the lava area to the Giant Gate. This opens Vanilla Dome 2.
The secret key and keyhole are just beyond the turn-block maze in an alcove, close to one another. The normal route cannot reach the vine block that provides access. The easiest method is to return after pressing Red Switch Palace: the red blocks form a staircase that lets you climb to the vine, reach the key, and carry it into the keyhole. A more difficult alternative is to bring Yoshi into the turn-block maze, swallow a blue Koopa shell, and use Yoshi's flight to reach the alcove. The keyhole opens Vanilla Secret 1.
- Normal exit: cross the lava section and reach the Giant Gate.
- Secret exit: reach the alcove after the turn-block maze and use the keyhole.
- Use Red Switch Palace blocks if you want the safer secret-exit setup.
3. Clear Vanilla Dome 2 and unlock Red Switch Palace
Vanilla Dome 2 begins with a water section. Swim right, then follow the vine upward and watch for the downward route. For the regular exit, continue right through the underground section, avoid the Chargin' Chucks, use the changing block if needed, and reach the goal.
The secret exit requires the key. From the area around the downward route, go up and left, run left, and activate the P-Switch at the solid wall. The changed blocks reveal the route to the key. Carry it through the water while avoiding the fish, then place it in the keyhole. This opens Red Switch Palace.
Red Switch Palace is a switch course rather than an ordinary stage. Move through the opening room and the pipe, then press the large red switch in the next room. This activates red blocks throughout Dinosaur Land and creates the staircase needed for the easiest Vanilla Dome 1 secret exit. The palace does not have a separate normal or secret exit.
- Vanilla Dome 2 normal exit: continue right to the goal.
- Vanilla Dome 2 secret exit: use the P-Switch, collect the key, and reach the keyhole.
- Press the large red switch before revisiting Vanilla Dome 1.
4. Follow the regular route through Vanilla Ghost House
After Vanilla Dome 2's normal exit, enter Vanilla Ghost House. The first room contains Eeries and Boo formations; wait for openings instead of forcing a jump through a moving circle. A vine in the turn-block area provides a safer upper route past the Big Boo. If you approach the Big Boo, lure it away from the passage before moving through.
In the next room, green bubbles move along the floor and walls. The door at the far end is a trap that returns you to the beginning. Find the P-Switch in the turn-block section before the end, carry it to the coin formation, collect the coins first, and then activate the switch. The blue door that appears leads to the goal and opens Vanilla Dome 3.
Vanilla Ghost House has no secret exit in this original SNES release. Its alternate-looking doors are part of the puzzle for the normal completion route, not separate map exits.
- Use gaps in the Boo formations rather than rushing.
- Find the P-Switch near the end of the second room.
- Collect the coin formation before activating the P-Switch.
- Enter the blue door for the normal exit.
5. Cross Vanilla Dome 3's lava and skull-raft sections
Vanilla Dome 3 has one exit only: the regular exit to Vanilla Dome 4. You must begin by riding a skull raft over lava. Blarggs jump from the lava after watching your position, so keep moving and be ready to jump when one rises. Do not stop on a raft unless the next landing is clearly safe.
When several skull rafts appear, jump between them only when the next raft is approaching. Spin-jump on Blarggs if one blocks a landing and you have enough height, but a normal jump over the enemy is safer when space allows. Around the orange pipes, look for hidden blocks that provide stepping stones. Cape Mario can use the upper passage to skip part of the course, but the lower route remains possible with careful raft timing.
Later sections combine slippery ground, Piranha Plants, Spike Tops, and more lava. If you reach the upper route near the end, use the P-Switch staircase to reach the goal. If you remain on the lower route, move quickly because the skull lift can fall before you reach the goal.
- Ride the skull rafts and watch the lava for Blarggs.
- Use hidden blocks near the orange pipes as stepping stones.
- Remember that Vanilla Dome 3 has no keyhole or secret exit.
- Reach the Giant Gate to open Vanilla Dome 4.
6. Complete Vanilla Dome 4 and Lemmy's Castle
Vanilla Dome 4 is a fast underground course filled with Bullet Bills and narrow spaces. Keep moving through the Bullet Bill sections, but avoid jumping blindly when the floor is uneven. A cape can cross broad gaps, though short jumps are safer near pipes and low ceilings. When the screen fills with projectiles near the yellow pipe and Piranha Plant, do not wait for every Bullet Bill to clear; run through the opening and keep advancing toward the goal.
The regular route then enters Lemmy's Castle. The castle alternates between water, Magikoopa hazards, switches, moving blocks, and lava. When Magikoopa breaks a block, use the opening to descend, then move through the water and activate the switch. In the moving-block rooms, watch one complete pattern before committing to a gap. Preserve Super or Cape status for the final room if possible.
Lemmy's arena contains lava below and several pipes. Lemmy and the fireballs emerge from the pipes, while the orange balls bounce across the arena. Jump on Lemmy when he appears on a reachable platform, then reposition immediately. Three successful stomps defeat him. Avoid landing in the lava or standing beneath the pipe where Lemmy is about to emerge.
- Run decisively through the heaviest Bullet Bill sections.
- Use switches and moving-block patterns rather than forcing gaps.
- Defeat Lemmy with three stomps.
- Confirm that the map opens the route toward the next world.
7. Take the alternate Vanilla Heights route
If you used Vanilla Dome 1's secret exit, the map opens Vanilla Secret 1. This is a vertical level with springboards, vines, Paratroopas, and narrow platforms. Follow the vines upward and use the springboards to reach the higher sections. The normal exit leads to Vanilla Secret 2.
Vanilla Secret 1 also contains the area's Star Road connection. In the main area, an apparently inaccessible pipe sits on the left side. Cape Mario can fly to it. Without a cape, Blue Switch blocks can create the platform needed to carry a springboard upward. Enter that pipe and finish the exit course to open Star World 2.
The remaining alternate levels are Vanilla Secret 2, Vanilla Secret 3, and Vanilla Fortress. They form the route through Vanilla Heights toward the bridge area. Their progression is useful for an alternate campaign path, but it does not replace the need to clear the regular Vanilla Dome exits if you are pursuing the full exit total. Vanilla Secret 2 is a demanding enemy-and-P-Switch course; preserve the switch until you are ready to use it. Vanilla Fortress requires careful movement around moving platforms, enclosed corridors, and lava. Use spin jumps against dangerous enemies and wait for platforms to return before crossing.
- Vanilla Dome 1's secret exit is required to reach Vanilla Secret 1.
- Vanilla Secret 1 normal exit leads to Vanilla Secret 2.
- Vanilla Secret 1 secret exit leads to Star World 2.
- Clear Vanilla Secret 2, Vanilla Secret 3, and Vanilla Fortress for the alternate route.
Before you move on
- For the regular route, the map shows completed exits for Vanilla Dome 1, Vanilla Dome 2, Vanilla Ghost House, Vanilla Dome 3, Vanilla Dome 4, and Lemmy's Castle.
- For the switch branch, Vanilla Dome 2's secret exit has opened Red Switch Palace and the red switch has been pressed.
- For the alternate route, Vanilla Dome 1's secret exit has opened Vanilla Secret 1, followed by Vanilla Secret 2, Vanilla Secret 3, and Vanilla Fortress.
- For the Star Road connection, Vanilla Secret 1's secret exit has been completed and Star World 2 is available on the map.
- The chapter's progression goal is complete when either Lemmy's Castle or Vanilla Fortress has been cleared and the map route into the bridge area is open. Full-game completion requires revisiting these stages later for any exits not yet recorded.
References for this chapter
- Super Mario World — Official Super NES Instruction Manual
- Super Mario World/Vanilla Dome — StrategyWiki
- Super Mario World/Vanilla Dome 1 — StrategyWiki
- Super Mario World/Vanilla Dome 3 — StrategyWiki
- Super Mario World/Vanilla Secret 1 — StrategyWiki
- Super Mario World/Vanilla Ghost House — StrategyWiki
- Super Mario World/Red Switch Palace — StrategyWiki
- Super Mario World — Guide and Walkthrough by Pop, GameFAQs
Donut/Bridges and Cheese Bridge Area — Timing and Mid-Game Choices
The Twin Bridges region connects the Vanilla Dome side of Dinosaur Land to Cookie Mountain and Ludwig's Castle. The lower route begins with Cheese Bridge Area and continues through Cookie Mountain. Its secret exit leads to Soda Lake, which in turn connects to Star Road. The optional upper route consists of Butter Bridge 1 and Butter Bridge 2 and becomes available from the Vanilla Fortress-side route. Both bridge routes eventually lead to Ludwig's Castle.
1. Confirm which Twin Bridges route is available
After defeating Lemmy in Lemmy's Castle, return to the overworld and follow the path into Cheese Bridge Area. This is the normal entrance into the Twin Bridges region. Clearing Cheese Bridge Area's ordinary exit opens Cookie Mountain, and clearing Cookie Mountain opens the route to Ludwig's Castle.
Butter Bridge 1 and Butter Bridge 2 are an alternate route rather than a required detour. They appear when you reach the Twin Bridges side from the Vanilla Fortress route, which requires the secret route through Vanilla Dome. If your immediate goal is to continue the campaign, Cheese Bridge Area followed by Cookie Mountain is the simpler route. If you are pursuing all exits or want the upper bridge levels, return to this region after opening that alternate path.
- Enter Twin Bridges through the path after Lemmy's Castle for the standard route.
- Use Cheese Bridge Area's ordinary exit to open Cookie Mountain.
- Treat Butter Bridge 1 and Butter Bridge 2 as optional route levels for this chapter's main-campaign objective.
2. Cross the opening platforms in Cheese Bridge Area
Take the Cape Feather from the opening question block if you can do so safely. The first three tracked platforms begin moving when Mario steps onto them. The upper platform is the safest choice because it gives you access to the high midway gate and keeps more of the saw blades below you. The lower platform can carry you toward the bottom route, but it leaves less room for recovery if you miss a jump.
Let each platform move into a useful position before transferring to the next one. Use short jumps to pass over the Chainsaws, and use a spin jump only when the landing surface is clearly visible. Do not jump early just to collect a coin or Dragon Coin. If Mario falls to a lower platform, continue right and use the next available solid surface rather than attempting a blind cape launch.
The upper route reaches the midway gate. Activate it before entering the longer second section. A cape can help correct a missed jump, but do not hold a glide across the whole screen; the tracked platforms and saws require you to stop and re-center before each transfer.
- Prefer the upper tracked platform.
- Use short jumps around Chainsaws.
- Activate the midway gate before the long second section.
- Keep the next landing surface visible before committing to a jump.
3. Reach the ordinary exit and Cookie Mountain
Beyond the midway gate, continue through the tracked platforms, diagonal Bullet Bills, and the rope-and-pulley section. Mario can grab the ropes and move gradually from side to side. If you are riding Yoshi, he cannot grab these ropes, so remain on the solid platforms and use his flutter jump to stabilize landings instead.
When a Chainsaw approaches, wait for it to pass or jump over it with a short, controlled movement. The bridge sections are safer when you keep moving at a measured pace rather than stopping directly above a saw. A brief cape glide can save a missed landing, but a long glide often carries Mario beyond the next platform.
To take the ordinary exit, continue right until you reach the normal Giant Gate and touch it. This opens Cookie Mountain on the overworld. Cookie Mountain is the direct lower-route continuation toward Ludwig's Castle.
- Use ropes only when Mario is not riding Yoshi.
- Keep moving through the bridge sections without rushing blind gaps.
- Touch the normal Giant Gate to open Cookie Mountain.
4. Take the Cheese Bridge Area secret exit
The standard method requires bringing Yoshi into Cheese Bridge Area and keeping him past the midway gate. After the gate, do not collect Yoshi's Wings. The Wings route sends Yoshi into a bonus section and prevents you from using him for the intended secret-exit setup.
Continue right through the pipe and the second series of tracked platforms. Near the end, you will reach a long wooden platform followed by the normal goal structure. The secret exit is behind and below the normal Giant Gate. Approach the final section while riding Yoshi, run toward the gate, and descend beneath it. Use Yoshi to bounce from the saws or nearby surfaces as necessary, then press A to dismount once Mario is underneath and slightly beyond the gate's platform. Mario should rise into the space behind the goal structure.
This maneuver may take more than one attempt. If you miss the lower passage and are falling toward a pit, stop trying to correct the attempt and let the level resolve rather than making a risky late movement. If the secret route is your priority, return with another Yoshi. Cape Mario can also reach the underside of the goal without Yoshi, but the Yoshi method is generally easier to reproduce because Yoshi can bounce Mario upward after he passes beneath the platform.
Once behind the goal, move right. A 3-Up Moon appears before the second Giant Gate. Collect it if you can do so safely, then touch the second gate. The secret exit opens Soda Lake on the overworld. Soda Lake has its own exit to a Star Road connection, making this an important route for shortcut and 100-exit planning, although neither Cheese Bridge's secret exit nor Soda Lake is required for the ordinary path to Bowser.
- Bring Yoshi into the level and keep him after the midway gate.
- Do not take Yoshi's Wings while attempting the secret exit.
- Pass beneath the final Giant Gate instead of touching it.
- Dismount behind the gate and continue to the second Giant Gate.
- Confirm that Soda Lake appears on the overworld.
5. Clear Cookie Mountain or the optional Butter Bridge route
Cookie Mountain is the direct continuation after Cheese Bridge Area's normal exit. Treat blind drops cautiously, stop before slopes that hide the next platform, and use short hops around enemies. The stage is less dependent on tracked-platform timing than Cheese Bridge Area, but a cape flight can still carry Mario into a hazard if started near a slope or low ceiling. Clear its ordinary exit to open Ludwig's Castle.
If you opened the upper route through the Vanilla Fortress path, Butter Bridge 1 and Butter Bridge 2 provide an alternate approach. Butter Bridge 1 emphasizes moving platforms and bridge gaps, so wait for the platforms to align rather than jumping early. Butter Bridge 2 is more open and can be crossed quickly with a cape, but controlled running and jumping remain safer if your flight is inconsistent. The upper route is useful for additional exits and practice, not a prerequisite for Ludwig's Castle.
- Clear Cookie Mountain for the standard campaign route.
- If using the alternate route, clear Butter Bridge 1 and Butter Bridge 2 in order.
- Do not assume the upper bridge levels are required after Cheese Bridge Area.
6. Finish Ludwig's Castle and defeat Ludwig
Ludwig's Castle has demanding trap rooms and no midway gate, so enter with Super Mario or Cape Mario whenever possible. Preserve the power-up through the early rooms instead of taking unnecessary damage from firebars, moving platforms, and enclosed hazards. If you lose the power-up, slow down and prioritize reaching the boss door over collecting optional items.
Ludwig's arena is a long horizontal room. Ludwig begins by firing horizontal fireballs while moving and jumping around the arena. Jump over the fireballs, then land on his head when he is exposed. After each successful stomp, he retreats into his shell and slides across the floor before emerging again. Jump over the shell instead of trying to stop it, then reposition toward the center of the room so you have space to react to the next jump or fireball.
Three successful stomps defeat Ludwig. Do not chase him immediately after a hit; the shell movement is the dangerous part of the cycle. When small Mario, use the same pattern but wait for a clean opening and avoid trading contact for a fast hit. A cape is useful for recovery from a poor landing, but the boss is defeated by timed stomps rather than by throwing shells or using fireballs.
- Reach Ludwig's Castle through Cookie Mountain or the completed Butter Bridge route.
- Remember that the castle has no midway gate.
- Jump over Ludwig's fireballs and shell slides.
- Stomp Ludwig three times and verify that the castle is destroyed on the overworld.
Before you move on
- Cheese Bridge Area's ordinary exit has opened Cookie Mountain.
- If pursuing the shortcut network or all exits, Cheese Bridge Area's secret exit has opened Soda Lake.
- Cookie Mountain or the optional Butter Bridge route has been cleared.
- Ludwig's Castle is accessible from the overworld.
- Ludwig has been stomped three times and his castle is shown as destroyed.
References for this chapter
- Super Mario World — Official Super NES Instruction Manual
- Cheese Bridge Area — Super Mario Wiki
- Twin Bridges — Super Mario Wiki
- Super Mario World/Cheese Bridge Area — StrategyWiki
- Super Mario World — Guide and Walkthrough — Super Nintendo
- Super Mario World — Guide and Walkthrough for Super Nintendo by jonthomson
Forest of Illusion — Maze Routes and Forced Backtracking
Forest of Illusion deliberately sends ordinary exits in circles. The standard campaign escape is Forest of Illusion 3's secret exit, which opens Roy's Castle. Other exits open the Forest Ghost House, Blue Switch Palace, Forest of Illusion 4, Forest Secret Area, and Forest Fortress. Complete the secret exits deliberately because several connections overlap, and some are needed for the 96-exit total even though they do not advance the main campaign.
1. Understand the map before choosing a route
Begin with Forest of Illusion 1. Its normal Giant Gate opens Forest of Illusion 2, while its secret keyhole opens the Forest Ghost House. The ordinary route through Forest of Illusion 1, Forest of Illusion 2, and Forest of Illusion 3 does not lead out of the forest; it is a loop designed to make you search for alternate exits.
A course marker with more than one path should be treated as unfinished if you are pursuing all exits. The overworld records opened routes, but it does not provide a complete exit checklist, so note whether each red course has been cleared through its Giant Gate, keyhole, or both. Clearing an exit never removes a previously opened connection.
- Forest of Illusion 1 normal exit opens Forest of Illusion 2.
- Forest of Illusion 1 secret exit opens the Forest Ghost House.
- Do not treat every newly revealed map path as progress toward Roy's Castle.
2. Open the Forest Ghost House from Forest of Illusion 1
Play Forest of Illusion 1 past the midway point and continue beyond the large wooden platform. A ? Block after this section contains a P-Balloon. Collect it and float left toward the isolated ledge below the platform. The horizontal movement in this area can push Mario backward, so correct toward the ledge throughout the flight and try to be above solid ground when the balloon expires.
On the isolated ledge, hit the ? Block to obtain the key. Carry it to the nearby keyhole rather than continuing to the Giant Gate. This secret exit opens the Forest Ghost House. If you are only following the shortest campaign route, this exit is optional; for 96 exits, it must be recorded.
- Find the P-Balloon after the wooden platform.
- Float left to the isolated lower ledge.
- Use the keyhole to open the Forest Ghost House.
3. Clear Forest of Illusion 2 and optionally activate the Blue Switch
Use Forest of Illusion 2's normal Giant Gate to open Forest of Illusion 3. The course is underwater, so keep moving through the open passages and watch for Urchins and Rip Van Fish. Avoid dropping into lower passages merely because they are visible; the secret-exit route is in the later part of the level.
After the fourth Dragon Coin area, look for the unusual yellow ! Block near the lower-left side of the passage. The wall to the left is a false wall. Swim through it to reach the key and keyhole. This secret exit opens Blue Switch Palace. The palace is optional for campaign completion and does not lead toward Roy's Castle, but activating the large blue switch changes blue dotted-line blocks throughout Dinosaur Land into solid blue blocks.
- Normal exit: Giant Gate to Forest of Illusion 3.
- Secret exit: false wall near the unusual ! Block in the late underwater section.
- Blue Switch Palace is optional and has no further exit.
4. Use Forest of Illusion 3's secret exit to reach Roy's Castle
Reach Forest of Illusion 3 through Forest of Illusion 2's normal exit. The normal Giant Gate sends you to the Forest Ghost House and continues the loop. To open the campaign route, continue nearly to the goal and locate the tall green pipe immediately before the goal tape.
Enter the tall green pipe to reach the bonus area. The key and keyhole are hidden behind turn blocks. You must be large enough to break the blocks with a spin jump; Super Mario, Fire Mario, and Cape Mario can do this in the original SNES version. Take the key to the keyhole. This secret exit opens Roy's Castle, which is the required Forest of Illusion exit for the standard route to Chocolate Island and the later worlds.
- Normal exit: Forest Ghost House.
- Secret exit: tall green pipe before the goal, followed by the keyhole in the bonus area.
- Arrive as large Mario, Fire Mario, or Cape Mario so the turn blocks can be broken.
5. Use both Forest Ghost House exits when pursuing 96 exits
The Forest Ghost House has two exits. Its normal exit is found by solving the P-Switch and hidden-door sequence in the large hall; this opens Forest of Illusion 4. Its secret exit is reached from the upper corridor by passing the first door and entering the second door near the end. That exit returns to Forest of Illusion 1.
The return to Forest of Illusion 1 may appear useless if Forest of Illusion 1's secret exit already opened the Ghost House, but it is still a separate counted exit. Complete it once for a 96-exit file. In the Ghost House, keep facing approaching Boos, use the P-Switch when required, and do not assume the first visible door is the correct one.
- Normal Ghost House exit opens Forest of Illusion 4.
- Secret Ghost House exit returns to Forest of Illusion 1.
- Both exits count separately even when they lead to an already available area.
6. Finish Forest of Illusion 4 and understand its two destinations
Forest of Illusion 4 is reached through the Forest Ghost House's normal exit. Its normal Giant Gate returns to Forest of Illusion 2, creating another local loop. Its secret exit is in a bonus room reached through the blue pipe hovering in mid-air. Enter that pipe, take the key, and use the keyhole to open Forest Secret Area.
Forest Secret Area has a normal goal that opens Forest Fortress. Forest Fortress is optional for the standard campaign route, but clearing it opens the Forest Star Road connection. That connection is useful for shortcut routes and for reaching the broader Star Road network, but it is not required to reach Roy's Castle through Forest of Illusion 3.
- Forest of Illusion 4 normal exit returns to Forest of Illusion 2.
- Forest of Illusion 4 secret exit opens Forest Secret Area.
- Forest Secret Area leads to Forest Fortress.
- Forest Fortress opens the Forest Star Road connection.
7. Recover from a loop without losing progress
The forest does not contain a permanently one-way trap. If the map keeps cycling between Forest of Illusion 1, Forest of Illusion 2, Forest of Illusion 3, the Ghost House, and Forest of Illusion 4, replay the courses with unfinished exits rather than searching for an overworld switch.
For the shortest standard escape, make Forest of Illusion 3 available through Forest of Illusion 2's normal exit, then replay Forest of Illusion 3 and use the tall green pipe before the goal. If Forest of Illusion 3 is already cleared normally, it remains replayable. If you want the optional Forest Star Road, complete Forest of Illusion 4's secret exit, clear Forest Secret Area, and then clear Forest Fortress.
- A completed course can be replayed to obtain its other exit.
- Roy's Castle appears after Forest of Illusion 3's secret keyhole.
- Forest Fortress, not Roy's Castle, opens the Forest Star Road route.
Before you move on
- Roy's Castle is visible and accessible after using Forest of Illusion 3's secret keyhole.
- Blue Switch Palace is accessible if Forest of Illusion 2's secret exit was completed.
- Forest Secret Area is accessible if Forest of Illusion 4's secret exit was completed.
- Forest Fortress is accessible after clearing Forest Secret Area.
- For the Forest portion of a 96-exit file, both Forest Ghost House exits and both exits of each applicable red Forest course have been cleared.
References for this chapter
- Super Mario World/Forest of Illusion — StrategyWiki
- Super Mario World/Forest of Illusion 1 — StrategyWiki
- Super Mario World/Forest of Illusion 3 — StrategyWiki
- Super Mario World/Forest Ghost House — StrategyWiki
- Super Mario World/Forest of Illusion 4 — StrategyWiki
- Super Mario World/Forest Secret Area — StrategyWiki
- Super Mario World/Blue Switch Palace — StrategyWiki
Chocolate Island — Moving Chocolate, Thwomps and Safe Cape Use
Chocolate Island follows a mostly direct campaign route, but Chocolate Island 2 changes its internal sections according to two separate conditions: the coin total collected in its opening area and the time remaining at the end of its next area. Chocolate Island 3 also has two counted exits. Its visible normal goal loops back to Chocolate Island 3, while the lower route beyond that goal is the secret exit leading to Chocolate Fortress. The recommended progression is Chocolate Island 1, Choco-Ghost House, Chocolate Island 2, Chocolate Island 3, Chocolate Fortress, Chocolate Island 4, Chocolate Island 5, Wendy’s Castle, and Sunken Ghost Ship. Chocolate Island 2’s keyhole route through Chocolate Secret is an optional shortcut to Wendy’s Castle, but both exits of Chocolate Island 2 and both exits of Chocolate Island 3 should be recorded for full completion.
Clear Chocolate Island 1
Enter Chocolate Island 1 from the eastern route on the overworld. The opening section uses slopes, Dino Rhinos, and Dino Torches. Stomp a Dino Rhino to turn it into a Dino Torch, then avoid its fire attack or defeat it with a fireball. Yoshi can eat these enemies, but he is not required.
Follow the main route to the right, using short jumps on the slopes rather than committing to long cape flights. A yellow pipe launches Mario across a gap; prepare to land on the ground beyond it. Continue through the springboard section and reach the Muncher pit. Activate the nearby P-Switch before crossing so the temporary blocks form a safe route.
The later section contains more Dino enemies, pipes, and short gaps. Continue through the final pipe and cross the normal goal. This exit opens Choco-Ghost House. Chocolate Island 1 has no secret exit needed for this route.
- Use short jumps around Dino Rhinos and Dino Torches.
- Activate the P-Switch before crossing the Muncher pit.
- Clear the normal goal to open Choco-Ghost House.
Complete Choco-Ghost House
Yoshi cannot enter this Ghost House, so dismount before starting it. In the first room, the floor sections move back and forth while a Fishin’ Boo restricts the available jumping space. Wait for a safe floor section, then cross with controlled jumps. Do not stop directly beneath the Fishin’ Boo’s flame.
Use the reachable door to enter the second room. Boo Blocks become solid when Mario faces them and act as pursuing Boos when he turns away. Face the blocks to create a temporary staircase, climb onto the higher blocks, then turn away only when you need them to move into a new position. Keep the blocks below the upper doorway and use them to reach the exit door.
This Ghost House has no secret exit. The normal door leads to the goal and opens Chocolate Island 2. Cape flight is not required; the Boo Blocks provide the intended route.
- Time the moving-floor jumps around the Fishin’ Boo.
- Use facing direction to make Boo Blocks solid.
- Reach the upper exit door.
- Confirm that Chocolate Island 2 opens on the map.
Understand Chocolate Island 2’s two independent checks
Chocolate Island 2 does not use one fixed interior layout. The number of coins collected in the opening area selects the second area, and the amount of time remaining when that second area ends selects the following area. These checks are independent: the coin total does not itself determine whether the key appears.
Collecting 0–8 coins in the opening area sends Mario to the Paratroopa section. Collecting 9–20 coins sends him to the Rex section. Collecting 21 or more coins sends him to the section containing a Cape Feather and heavier coin activity. Dragon Coins and coins obtained through Yoshi interactions count toward this condition. The 0–8 branch is a convenient recommendation because it is relatively direct, but it is not required for the secret exit.
After clearing whichever second area the coin total selected, check the timer before entering the next pipe. If 250 or more seconds remain, the pipe leads to the Chargin’ Chuck section containing the key route. If fewer than 250 seconds remain, the level selects one of the normal-goal areas instead. The key condition is therefore at least 250 seconds remaining at the end of the selected second area, regardless of which coin branch was used.
For the ordinary exit, deliberately allow the timer to fall below 250 before reaching the pipe if you want to avoid the key route. The normal route eventually reaches a goal tape. When trying to stay in the low-coin branch, avoid unnecessary coins and move efficiently through the opening area.
- Treat the opening coin count and later timer as separate checks.
- Remember the three coin ranges: 0–8, 9–20, and 21 or more.
- Use the low-coin branch as a convenience, not a requirement.
- Reach the second-area exit with at least 250 seconds for the key route.
- Allow fewer than 250 seconds to remain if you want a normal-goal branch.
Take Chocolate Island 2’s keyhole exit and use Chocolate Secret
To reach the secret exit, complete the opening area and the selected second area while preserving at least 250 seconds on the timer. The key route contains Chargin’ Chucks, chocolate platforms, and the key near the right side. Move through the Chucks carefully, using a cape spin, shells, or cautious jumps to create space. A cape or Yoshi makes the route easier, but neither is mandatory.
Carry the key to the keyhole at the far right. Touching the ordinary goal does not count as the secret exit. Once the keyhole exit is recorded, the overworld opens a path to Chocolate Secret. Follow that new path and clear Chocolate Secret if you want the shortcut to Wendy’s Castle.
Chocolate Secret contains football-throwing Chargin’ Chucks, collapsing platforms, slopes, and a midway checkpoint. Move quickly across platforms that fall after Mario lands on them. Use shells or cape spins against the Chucks, but do not rely on long cape glides in the collapsing sections because they make precise landings harder.
Chocolate Secret’s normal completion leads directly to Wendy’s Castle, bypassing Chocolate Island 3, Chocolate Fortress, Chocolate Island 4, and Chocolate Island 5. This shortcut is optional and does not replace those stages when pursuing all exits.
- Reach the key area with 250 or more seconds remaining.
- Carry the key to the keyhole instead of touching the normal goal.
- Clear Chocolate Secret if using the Wendy’s Castle shortcut.
- Return later to clear Chocolate Island 2’s normal exit for full completion.
Clear Chocolate Island 3’s normal and secret exits
Chocolate Island 3 uses rotating platforms, Fuzzies, and Koopa Paratroopas. Land near the center of each rotating platform and wait for the next platform rather than jumping from an unstable edge. Move quickly through Fuzzy sections; Yoshi can bounce on Fuzzies safely, while Mario should use short jumps and avoid standing still.
The blue pipe leads to an optional bonus room with coins and a possible shortcut back into the level. Near the end of the main route, hit the turn block to reveal a vine and climb toward the visible goal. This is the visible normal goal. Taking it records a counted normal exit, but it sends Mario back into the Chocolate Island 3 loop instead of opening Chocolate Fortress.
After recording the normal exit, replay Chocolate Island 3 for the secret exit. Return to the area beneath the visible goal and use the lower route beyond it. Cape Mario can fly underneath and past the visible goal structure, then continue right to the second goal. If you bring Yoshi, swallow the nearby Blue Koopa to gain winged flight and use that flight to cross the gap. Do not touch the normal goal tape from below while attempting this route; approach the hidden platform beyond it and take the second goal. The secret exit opens Chocolate Fortress.
The three blocks near the secret route contain extra lives. They are optional, so prioritize reaching the second goal safely. The secret exit is the required Chocolate Island 3 route for continuing to Chocolate Fortress, while the normal exit remains necessary if you are recording every exit.
- Use controlled jumps on the rotating platforms.
- Treat the vine route and visible goal as the counted normal exit.
- Replay the level after the normal exit if necessary.
- Use cape flight or winged Yoshi to cross the lower route.
- Do not touch the normal goal tape from below during the secret-exit attempt.
- Take the second goal and confirm that Chocolate Fortress opens.
Cross Chocolate Fortress and defeat Reznor
Chocolate Fortress begins with molten chocolate, fireballs, and descending wooden spikes. The spikes are dangerous when they close from above, so wait until a gap is clearly open before entering it. Advance in short steps and use the midway checkpoint before attempting the Thwomp section.
The second half contains Thwomps, Thwimps, spikes, and narrow ledges. Trigger a Thwomp from a safe position, then cross while it is rising. If a Thwomp and Thwimp cover the same route, wait for the smaller enemy to move away before committing to the jump. A cape is useful for correcting a jump, but long flight is unreliable in the cramped rooms.
At the boss door, Reznor stands on four rotating platforms. Jump from below to strike each Reznor. Every defeated Reznor removes one platform, so keep moving around the arena and avoid staying beneath a fireball. Defeat all four to clear the fortress. Its completion opens Chocolate Island 4.
- Wait for the descending spikes to separate.
- Take the midway checkpoint.
- Trigger Thwomps before crossing their platforms.
- Defeat all four Reznors.
- Confirm that Chocolate Island 4 opens.
Finish Chocolate Island 4
Chocolate Island 4 is an underground stage with moving lifts above molten chocolate. Ride the lifts and wait for them to reach a useful height before jumping to the next ledge. Do not attempt to cape-glide across the entire level; lift timing is safer and more controllable.
Continue through the underground sections and take the midway checkpoint when it is safe. Some diagonal block arrangements lead to an optional bonus area containing a P-Switch and power-ups. Use the bonus area only if you need recovery items or extra lives, then return to the main route through its exit pipe.
The final portion contains Mega Moles, hot chocolate, and a jumping Chargin’ Chuck near a green pipe. Wait for the Chuck to jump, then pass beneath or over him. Continue to the goal tape. The normal exit opens Chocolate Island 5.
- Ride the moving lifts instead of using long cape glides.
- Take the midway checkpoint.
- Treat the bonus room as optional.
- Pass the final Chargin’ Chuck and clear the goal.
Cross Chocolate Island 5
Chocolate Island 5 begins with hard blocks containing enemies and a gray P-Switch. Do not activate the switch immediately if the blocks are supporting Mario’s current platform. First move into a safe position, then press the switch when the temporary coin platforms are useful. The level also provides opportunities to obtain Yoshi or a Fire Flower, but neither is required.
After the opening switch section, watch the enemies falling from above and cross the water with low, controlled jumps. Golden pipes lead to optional rooms containing power-ups and bonus items. Use them only when you need recovery or are collecting optional items.
The main route later uses rising and falling green pipes and temporary wooden platforms. Near the end, wait for the jumping Chargin’ Chuck beside the high pipe, then pass during the opening in his jump. Continue beyond the final Chucks and take the goal. This opens Wendy’s Castle. Chocolate Island 5 has no secret exit.
- Move to safety before activating the opening P-Switch.
- Stay low beneath falling enemies.
- Use the optional pipe rooms only when useful.
- Time the jumps around the rising pipes and Chargin’ Chucks.
- Clear the goal to open Wendy’s Castle.
Clear Wendy’s Castle and defeat Wendy
Yoshi cannot enter Wendy’s Castle, so dismount before entering. The first section contains Dry Bones, descending spikes, springboards, Grinders, and lava. Wait for each spike to rise before crossing, and use the Red Exclamation Blocks as solid platforms over the lava. Watch the Podoboos before jumping from one block to the next.
The later rooms combine Grinders, Monster Spikes, Hotheads, and moving floors. Duck or pause beneath a Grinder when its track allows it, then move through the opening rather than waiting beneath the next hazard. Use a power-up block near the boss approach if you have lost your reserve item.
Wendy’s room contains seven pipes, two bouncing fireballs, and two visually identical Koopas. Wendy and her decoy alternate emerging from the pipes. Avoid the fireballs first, then stomp the real Wendy whenever she is on a reachable platform. Three successful stomps defeat her. Do not jump directly into a pipe or fireball, and do not assume the first Koopa to appear is the real Wendy.
After Wendy is defeated, the castle is cleared and the overworld route to Sunken Ghost Ship opens. Chocolate Secret also leads into this castle, so the castle can be reached either through Chocolate Island 5 or through the optional shortcut.
- Enter without Yoshi.
- Wait for the descending spikes to rise.
- Use the Red Exclamation Blocks over lava.
- Avoid both bouncing fireballs in the boss room.
- Stomp the real Wendy three times.
- Confirm that Sunken Ghost Ship opens.
Clear Sunken Ghost Ship and open Valley of Bowser
Sunken Ghost Ship is the required transition after Wendy’s Castle. Yoshi may accompany Mario into this level. In the opening water section, swim through the wreckage and Bullet Bill cannons, then collect the Cape Feather from the early question block if you need a power-up. Continue through the trench and enter the yellow pipe.
The next section contains Eeries, crates, ordinary Boos, and large Boo formations that move across the passage. Stay patient and use the open spaces between formations. When a Boo blocks the route, face it so it remains in place, then wait for a safe opening before continuing. Maintain control of Mario’s vertical position rather than swimming rapidly into the next formation.
The final section is a vertical fall. Mario begins with temporary invincibility and can collect optional Dragon Coins, but the safest route for progression is to remain near the center and make small horizontal corrections. Avoid the falling spiked balls, especially after the invincibility ends. Land on the platform at the bottom and touch the green orb. This completes Sunken Ghost Ship and causes Valley of Bowser 1 to become accessible on the overworld.
- Enter Sunken Ghost Ship after Wendy’s Castle.
- Collect the early Cape Feather if needed.
- Wait for gaps in the Boo formations.
- Stay near the center during the final descent.
- Land at the bottom and touch the green orb.
- Confirm that Valley of Bowser 1 becomes accessible.
Before you move on
- Chocolate Island 1 and Choco-Ghost House are cleared.
- Chocolate Island 2’s normal exit has opened Chocolate Island 3.
- Chocolate Island 2’s keyhole exit has been cleared if pursuing all exits.
- Chocolate Secret has been cleared if using the shortcut to Wendy’s Castle.
- Chocolate Island 3’s visible normal exit has been recorded if pursuing all exits.
- Chocolate Island 3’s lower-route secret exit has been recorded and opens Chocolate Fortress.
- Chocolate Fortress has been cleared and all four Reznors defeated.
- Chocolate Island 4 and Chocolate Island 5 are cleared.
- Wendy has been defeated with three successful stomps.
- Sunken Ghost Ship has been completed and Valley of Bowser 1 is visible or accessible on the overworld.
References for this chapter
- Super Mario World — Official Super NES Instruction Manual
- Super Mario World — Guide and Walkthrough, Chocolate Island and Sunken Ghost Ship sections
- Super Mario World — Guide and Walkthrough for Super Nintendo by jonthomson
- Super Mario World — Chocolate Island 2 reference
- Super Mario World — Chocolate Island 3 reference
- Super Mario World — Chocolate Fortress reference
- Super Mario World — Chocolate Secret reference
- Super Mario World — Wendy’s Castle reference
- Super Mario World — Sunken Ghost Ship reference
Valley of Bowser — Castle Sequences and Mid-Boss Strategies
After clearing Sunken Ghost Ship, the Valley of Bowser entrance appears on the overworld. The ordinary campaign route proceeds through Valley of Bowser 1, Valley of Bowser 2, Valley Ghost House, Valley of Bowser 3, Valley of Bowser 4, Larry's Castle, and Bowser's Castle Front Door. Optional alternate exits provide two shortcuts: Valley of Bowser 2's secret exit opens Valley Fortress and the Back Door route, while Valley Ghost House's secret exit skips ahead to Larry's Castle. Valley of Bowser 4's secret exit opens Star World 5 and the Front Door connection. These routes remain available after they are opened.
Enter the Valley of Bowser and clear Valley of Bowser 1
Clear Sunken Ghost Ship first. When the ship is defeated, the large Bowser-head entrance rises from the water and opens the Valley of Bowser area. Select Valley of Bowser 1 to begin the normal route.
Valley of Bowser 1 uses Mega Moles, narrow cave passages, uneven platforms, and several drops where the landing area is difficult to see. Use short jumps in confined spaces. Mega Moles can be used as moving platforms, but check the ceiling and the next landing before committing to one. If you have a cape, avoid long flights in the enclosed sections; a controlled jump is safer.
The midway gate provides a useful recovery point. Dragon Coins are optional, so do not risk a life for one during the first clear. Finish the level through the Giant Gate to open Valley of Bowser 2.
- Clear the normal exit of Valley of Bowser 1.
- Confirm that Valley of Bowser 2 is available.
- Carry a power-up or reserve item into Valley of Bowser 2 if possible.
Clear Valley of Bowser 2 or take its secret exit
Valley of Bowser 2 has a normal exit to Valley Ghost House and a secret key exit to Valley Fortress. The secret exit is the route that opens Bowser's Castle Back Door.
The principal hazard is the set of large platforms that rise and fall through crushing spaces. Move through their openings deliberately rather than waiting under a platform until it is nearly closed. After the midway gate, continue through the crushing-platform section and look for the upper route near the Mega Mole. Use the moving platform to climb to the upper surface, then travel left across the top route toward the key and keyhole.
The key is at the far-left end of this upper route. Carry it to the keyhole to open Valley Fortress. If you miss it, complete the level through the normal exit or allow Mario to lose a life, then replay Valley of Bowser 2 from the overworld. Yoshi can be awkward in the narrow upper section, so dismount before the tightest passages if he makes positioning difficult.
- Use the normal exit to open Valley Ghost House.
- Use the upper route after the crushing-platform section to reach the key.
- Confirm that Valley Fortress appears after opening the keyhole.
Use the exact normal or secret door in Valley Ghost House
Valley Ghost House opens after the normal exit of Valley of Bowser 2. Its normal exit leads to Valley of Bowser 3. Its secret exit bypasses Valley of Bowser 3 and Valley of Bowser 4 and opens Larry's Castle.
In the first room, move through the door into the main room. Activate the P-Switch above the starting platform, then run right across the temporary blocks and coins while the switch effect is active. The hallway contains five doors arranged from left to right.
For the normal route, ignore the first two doors and enter the third door from the left. This door leads to the Giant Gate and opens Valley of Bowser 3. Do not use the fifth door if your immediate goal is the normal exit; it sends Mario into the secret-exit room instead.
For the secret route, reach the fifth and farthest-right door before the P-Switch effect ends. This door leads to a room containing another P-Switch, a Dragon Coin, and a controllable coin formation. Carry the P-Switch through the room before activating it. Use the nearby block to create the moving coin trail, then steer the trail with the D-pad so it forms a climb toward the key in the upper-right area. Activate the P-Switch when the route is positioned, climb the temporary blocks, and enter the small opening to reach the keyhole. The secret exit opens Larry's Castle.
The fifth-door route is time-sensitive. If the temporary path is badly positioned, replaying the level is usually safer than attempting repeated blind jumps. The cape can help with controlled landings, but it is not required.
- Activate the P-Switch in the main room and run to the five-door hallway.
- Enter the third door from the left for the normal Giant Gate and Valley of Bowser 3.
- Enter the fifth, far-right door for the second P-Switch, key route, and Larry's Castle.
- Do not confuse Valley Ghost House's fifth-door secret exit with Valley Fortress's separate route from Valley of Bowser 2.
Cross Valley of Bowser 3
Valley of Bowser 3 is opened by the normal exit of Valley Ghost House. It has one ordinary exit in the original SNES release and leads to Valley of Bowser 4.
The stage centers on Count-Lifts, platforms that disappear after their countdown expires. Jump from one lift to the next without standing still to line up a landing. Koopa Paratroopas occupy several gaps, and Banzai Bills appear after the midway gate. If you have a cape, a spin jump can clear an enemy, but keep the next platform visible before committing.
A Jumping Board near the first solid-ground section can help reach the midway gate. After the checkpoint, prioritize the next stable platform over optional pickups. Finish at the Giant Gate to open Valley of Bowser 4.
- Move promptly across Count-Lifts.
- Watch for Banzai Bills after the midway gate.
- Clear the Giant Gate to open Valley of Bowser 4.
Clear Valley of Bowser 4 and choose its exit
Valley of Bowser 4 has a normal exit to Larry's Castle and a secret key exit. The normal route contains lava gaps, Diggin' Chucks, red Koopa Paratroopas, Spike Tops, and Cheep Cheeps. Use short jumps near lava and wait for Diggin' Chucks to finish throwing rocks before crossing their platforms. Avoid long cape flights where the landing area is narrow.
For the normal route, continue right and finish through the Giant Gate. This opens Larry's Castle if it has not already been opened by Valley Ghost House's secret exit.
The secret exit requires Yoshi. Keep Yoshi through the later section, reach the enclosed key, and have Yoshi carry the key to the keyhole. A Blue Yoshi makes the route easier because of flight, but the important requirement is reaching the key while retaining Yoshi. Opening the keyhole reveals the route to Star World 5 and also opens the Front Door connection to Bowser's Castle through the Star Road junction.
- Clear the Giant Gate for Larry's Castle.
- Retain Yoshi for the key route if attempting the secret exit.
- Use the keyhole to open Star World 5 and the Front Door connection.
Defeat Larry in Larry's Castle
Larry's Castle can be reached from the normal exit of Valley of Bowser 4 or from Valley Ghost House's secret exit. The castle uses moving blocks, narrow passages, and Magikoopa's attacks. Stay on solid or predictable platforms and use short hops rather than extended cape flights.
The boss arena has a tilting platform over lava with Lava Bubbles rising from below. Larry must be stomped three times. Wait for a safe approach, jump on him, and retreat toward a stable part of the platform before the next Lava Bubble or platform movement cuts off the landing. A spin jump can help avoid a Lava Bubble, but do not spin directly into Larry.
Defeating Larry opens Bowser's Castle Front Door. This is the standard final-castle approach.
- Reach the boss room with a power-up if possible.
- Avoid direct contact with Larry and the Lava Bubbles.
- Stomp Larry three times and confirm that the Front Door route is available.
Clear Valley Fortress for the Back Door
Valley Fortress is opened only by the secret exit of Valley of Bowser 2. It is separate from Valley Ghost House and is not required if you use Larry's Castle to reach the Front Door. Clearing Valley Fortress opens Bowser's Castle Back Door.
The fortress uses Skewers, Lava Bubbles, Dry Bones, and Bony Beetles. Treat the Skewers as timing obstacles: wait in a safe pocket, watch their movement, then cross with a short run or jump. A cape helps with enemy control but does not remove the need to time each passage.
The final room contains four Reznors on rotating platforms above lava. Strike the underside of a supporting platform to raise it into a Reznor; do not land directly on the bosses. After two Reznors are defeated, the center of the arena collapses. Move immediately to one of the remaining rotating platforms and continue using small repositioning jumps while avoiding fireballs. Defeating all four Reznors opens the Back Door route.
- Reach Valley Fortress through Valley of Bowser 2's secret exit.
- Cross the Skewer rooms using deliberate timing.
- Defeat all four Reznors and confirm that the Back Door is available.
Choose a final-castle approach
The standard route is Sunken Ghost Ship, Valley of Bowser 1, Valley of Bowser 2, Valley Ghost House, Valley of Bowser 3, Valley of Bowser 4, Larry's Castle, and Bowser's Castle Front Door.
The alternate Valley route is Valley of Bowser 2's secret exit, Valley Fortress, and Bowser's Castle Back Door. The Valley Ghost House secret exit can skip directly to Larry's Castle, while the Valley of Bowser 4 secret exit opens the Front Door connection through Star World 5's Star Road junction.
Star Road access does not permanently trap the file or remove ordinary Valley routes. After opening a connection, Mario can return to the overworld and replay unlocked stages. The Front Door and Back Door lead to the same final Bowser encounter and count as one final exit, so only one needs to be cleared for the campaign and the 96-exit total.
Before entering Bowser's Castle, confirm whether you are selecting the Front Door or Back Door. The Front Door requires clearing one of the castle's selectable room routes before the final area. The Back Door bypasses those room choices and sends Mario directly toward the final section.
- Confirm which final-castle entrance is open.
- Use Larry's Castle or the Valley of Bowser 4 Star Road connection for the Front Door.
- Use Valley Fortress for the Back Door.
- Clear either entrance and continue to Bowser's battle.
Before you move on
- Sunken Ghost Ship is cleared and the Valley of Bowser entrance is visible.
- Valley of Bowser 1 and Valley of Bowser 2 are cleared.
- The standard route has been completed through Valley Ghost House, Valley of Bowser 3, and Valley of Bowser 4.
- Larry's Castle is cleared if using the ordinary Front Door route or the Valley Ghost House shortcut.
- Valley Fortress and its Reznor battle are cleared if using the Back Door route.
- The selected Front Door or Back Door entrance is open on the map.
- One final-castle entrance has been cleared and the Bowser encounter is accessible.
References for this chapter
- Super Mario World — Official Super NES Instruction Manual
- Super Mario World/Valley of Bowser — StrategyWiki
- Super Mario World/Valley of Bowser 2 — StrategyWiki
- Super Mario World/Valley Ghost House — StrategyWiki
- Valley Ghost House — Super Mario Wiki
- Valley Ghost House — Super Mario World Walkthrough
- Valley of Bowser 3 — Super Mario Wiki
- Valley Fortress — Super Mario Wiki
- Valley of Bowser 4 — Super Mario Wiki
- Super Mario World Walkthrough — Valley of Bowser 4
- #7 Larry's Castle — Super Mario Wiki
- Front Door — Super Mario Wiki
Boss Guide — Koopaling Patterns and Effective Counterplay
The original North American Super Nintendo release has seven Koopaling castle fights and four Reznor fortress fights. The Koopalings are normally defeated by three successful head jumps, while Reznor is defeated by striking the underside of each rotating platform. A cape or Fire Flower can make the approach safer, but the dependable plan is to learn each arena's movement, avoid contact, and attack only when the boss is exposed.
Prepare before the boss door
Use the midway gate before a castle boss whenever possible. If Mario dies after touching the gate, the level restarts from that checkpoint as Super Mario rather than Small Mario. The gate does not preserve Cape Mario, Fire Mario, or a reserve item after a death, so do not mistake the checkpoint for a permanent power-up save. If you reach the boss room with a cape, protect it by avoiding unnecessary spin jumps and by keeping clear of walls and lava edges.
Cape Mario is valuable as an extra damage buffer and for correcting a jump, but full cape flight is usually a poor choice inside a confined boss room. Fire Mario can clear ordinary castle enemies and can damage Iggy or Larry with fireballs, but direct head jumps remain the most reliable method for the entire boss sequence. If you enter as Small Mario, do not rush for a hit. Wait for a predictable opening, jump cleanly, and use the arena's edges only when the boss is moving away from you.
- Touch the midway gate before attempting the castle boss.
- Prefer Super Mario or Cape Mario at the boss door.
- Keep a reserve item available if the preceding level supplies one.
- Do not assume a checkpoint preserves the cape after a failed attempt.
Defeat Iggy on the tilting platform
Iggy Koopa is in Yoshi's Island's first castle. The arena is a single tilting platform above lava. Iggy remains inside his shell and sends rolling fireballs across the platform. Watch the platform's angle rather than chasing him. When the tilt gives you a stable approach, jump on Iggy's head. The impact pushes him toward the lava; repeat the process until he falls in.
Do not stand at the lowest edge while waiting for the platform to move. If a rolling fireball is approaching, make a short jump over it and return to the safer portion of the platform. Cape Mario can use a normal jump or a brief cape correction, but do not fly across the arena. Small Mario should wait for the platform to create a clear line to Iggy instead of attempting a risky edge jump.
- Watch the platform angle before jumping.
- Clear rolling fireballs with short jumps.
- Use each stomp to push Iggy toward the lava.
- Stay away from the low edge while waiting for the next opening.
Handle Morton and Roy's wall-climbing attacks
Morton Koopa Jr. is in Donut Plains's castle. The arena has walls that Morton climbs before dropping from the ceiling. Jump on him three times. At the start, try to land a quick first stomp before he reaches the wall. Once he climbs, move away from the point where he will land and jump as he slams down. Mario can be stunned if Morton lands while Mario is standing on the floor, so remain airborne through the impact and counterattack after Morton recovers.
Roy Koopa repeats Morton's basic pattern in Forest of Illusion's castle, but the walls close inward when Roy completes a ceiling slam, and Roy becomes faster as he takes hits. Take the first safe stomp early, then return toward the center. Never allow Roy to trap you against a closing wall. When he climbs, move away from his landing point, jump over the slam, and immediately prepare for the next head jump. If you are Small Mario, prioritize survival over speed, but do not spend so long waiting that the walls remove your jumping space.
- Morton: jump during his ceiling slam and land three head hits.
- Roy: stay near the center and finish before the walls become a trap.
- Avoid standing directly beneath either boss while he is on the ceiling.
- Use a cape only for jump correction, not uncontrolled flight.
Identify Lemmy among the pipe decoys
Lemmy Koopa's Vanilla Dome battle takes place over orange pipes of different heights. Lemmy appears with two decoys, and a Podoboo moves through the room. The real Lemmy is the yellow Koopaling. Wait until the figures emerge, identify the real Lemmy, and jump on him three times. The decoys are dangerous if you land on them, so do not jump at the first figure you see.
Use the pipe tops as temporary footing, but keep the Podoboo in view before committing to a jump. A short jump from a central position is easier to control than a cape flight across several pipes. If Lemmy appears on a distant pipe, let the Podoboo pass and then make one deliberate approach. Small Mario should accept that the fight may take longer; there is no need to attack every cycle.
- Find the yellow Lemmy before attacking.
- Avoid landing on the two decoys.
- Track the Podoboo before jumping between pipe tops.
- Deliver three head hits to the real Koopaling.
Defeat Ludwig in the long room
Ludwig von Koopa's castle is the fourth castle route, associated with the Twin Bridges area. The boss room is wider than the earlier Koopaling rooms. Ludwig spits horizontal fireballs, so jump over a fireball and land on his head. After a successful hit, Ludwig withdraws into his shell and spins along the floor. Jump over the shell; do not try to stop it from the side. When he returns to his upright position, repeat the fireball jump and head stomp until you have landed three hits.
The extra room gives you time to react, so do not use a full cape flight. If Ludwig's shell passes while you are still airborne, land away from his return point and wait for the next fireball pattern. Small Mario should stay patient and use the room's length to create distance. A spin jump is not required and can make the landing less predictable.
- Jump over Ludwig's horizontal fireballs.
- Clear the spinning shell with a normal jump.
- Attack only when Ludwig is upright and exposed.
- Repeat the sequence for three head hits.
Survive Wendy's flat pipes and two Podoboos
Wendy O. Koopa's Chocolate Island castle uses flat, evenly spaced pipes. Wendy appears with two decoys, and two Podoboos bounce through the arena. The fight follows Lemmy's basic pattern, but Wendy stays exposed for less time. Identify Wendy before jumping, then land on her head and immediately move away from the pipe where you landed. Repeat for three hits.
Watch both Podoboos rather than focusing only on the closest one. The safest opening is when the two hazards are moving away from the pipe you need to use. Cape Mario can absorb one mistake, but sustained flight makes the flat pipe spacing harder to judge. Small Mario should wait for a clear cycle and should never land on a decoy simply to escape a Podoboo.
- Distinguish Wendy from both decoys.
- Track both Podoboos before jumping.
- Use pipe tops only when the landing area is clear.
- Land three head hits and retreat after each one.
Clear Reznor and Larry
Each fortress ends with four Reznors on rotating platforms. Jump beneath a Reznor's platform to strike it from below and knock that Reznor into the lava. The Reznors fire slow-moving fireballs, so watch the projectiles while positioning for the next underside hit. After two Reznors are removed, the central floor begins breaking apart. Move onto an empty rotating platform and use it to reach the remaining Reznors. Knock all four away to finish the fortress. Small Mario can win by moving quickly, but do not jump blindly into a fireball while trying to save time.
Larry Koopa's Valley of Bowser castle uses a tilting platform like Iggy's fight, but the arena adds three Podoboos and Larry's rolling fireballs from his shell. Jump on Larry when the platform gives you a safe approach, then use the recoil to send him toward the lava. Keep checking the left, center, and right portions of the platform because the Podoboos rise from separate positions. Three successful head hits defeat Larry. Fireballs can damage Larry, but they are a secondary option; direct jumps are easier to reproduce when the platform is moving.
- Reznor: strike platforms from below.
- After two Reznors fall, move off the collapsing central floor.
- Use rotating platforms to reach the remaining Reznors.
- Larry: track the three Podoboos and his rolling fireballs.
- Send Larry into the lava with three successful head jumps.
Before you move on
- The castle or fortress encounter ends and the map returns after the boss victory sequence.
- The standard campaign's seven Koopalings have been defeated: Iggy, Morton, Lemmy, Ludwig, Roy, Wendy, and Larry.
- Any fortress route being used has been cleared by defeating all four Reznors in its boss room.
- Larry's defeat clears the final Koopaling castle route; the remaining main-campaign boss is Bowser.
- For the chapter's boss objective, every listed Koopaling and Reznor encounter can be completed using the described original SNES patterns without relying on remake-only mechanics.
Star Road — Finding Each Secret Exit and Building the Shortcuts
Star Road is Super Mario World's shortcut network. Five entrances are placed around Dinosaur Land, and five Star World courses connect those entrances into a loop. The first four Star World courses require their secret exits to advance through the network. Star World 5 is different: its normal exit returns to Star World 1, while its secret exit opens the Special Zone. In the original North American Super Nintendo release, the Star Road route can reach Bowser's Castle quickly, but it is not required to complete the normal campaign.
Open the five Dinosaur Land Star Road entrances
The five overworld Star Road entrances are opened by specific level completions. They are not all opened by secret exits. Use this checklist when building the network: Donut Secret House secret exit opens the Donut Plains entrance; Vanilla Secret 1 secret exit opens the Vanilla Dome entrance; Soda Lake, reached through the secret exit of Cheese Bridge Area, opens the entrance south of the Twin Bridges; Forest Fortress normal completion opens the entrance west of the Forest of Illusion; and Valley of Bowser 4 secret exit opens the entrance west of the Valley of Bowser.
The Donut Plains entrance is usually the first one available. To reach it, find the secret exit in Donut Secret House. In the room with the four doors, use the upper-left door. Continue through the next room and reach the hidden upper doorway, then carry the key to the keyhole. The keyhole exit opens the nearby Star Road and Star World 1.
For the Vanilla Dome entrance, reach Vanilla Secret 1 from the secret exit of Vanilla Dome 1. Vanilla Secret 1 is a cave course with sloped terrain and Koopa hazards. Near the end, look for the upper route and the pipe guarded by red Koopa Paratroopas. Enter that pipe and continue to the key and keyhole to open Star World 2's entrance.
The Twin Bridges entrance is different. In Cheese Bridge Area, take the second goal route rather than the ordinary Giant Gate. This secret exit leads to Soda Lake. Complete Soda Lake normally; after the course, an invisible overworld path opens southward to the Star Road entrance leading to Star World 3.
Complete Forest Fortress to open the Forest of Illusion Star Road entrance. Forest Fortress has an automatic-scrolling section, Grinder blades, lava, and a Reznor battle. Defeat all four Reznors. The normal fortress completion opens the western path to the Star Road entrance. There is no separate keyhole or secret exit in Forest Fortress.
The Valley of Bowser entrance is opened by the secret exit in Valley of Bowser 4. This course requires Yoshi for the most direct key route. After the lava-platform sections, reach the enclosed key area and have Yoshi eat the key. Walk Yoshi in front of the keyhole to activate it. This opens the Star Road route toward Star World 5 and also opens the path to Bowser's Castle Front Door.
- Donut Secret House — secret keyhole exit — opens Star World 1.
- Vanilla Secret 1 — secret pipe and keyhole exit — opens Star World 2.
- Cheese Bridge Area — second goal route — opens Soda Lake.
- Soda Lake — normal Giant Gate — opens the Twin Bridges Star Road entrance.
- Forest Fortress — normal Reznor completion — opens Star World 4.
- Valley of Bowser 4 — secret keyhole exit — opens Star World 5 and Bowser's Castle Front Door.
Advance from Star World 1 through Star World 4
Enter Star World 1 from the Donut Plains entrance. The course is a vertical descent through rows of Rotating Blocks. For the secret exit, stay toward the right as you spin-jump downward. The key and keyhole are in the right-hand portion of the block formation. Take the keyhole instead of dropping to the ordinary Giant Gate. This secret exit opens the route to Star World 2.
Star World 1's normal Giant Gate is still a separate counted exit. After opening the route with the keyhole, return and clear the course normally if you are tracking all 96 exits. The normal exit does not advance the Star World chain, but it is recorded as its own goal.
Star World 2 is an underwater course. For its secret exit, continue beneath the normal exit pipe at the far right instead of entering the pipe immediately. The lower passage leads to the key and keyhole. Use this exit to open Star World 3. The ordinary exit is another separate counted goal and should be cleared later for full completion.
Star World 3 is reached through the Star World 2 secret exit or from the Twin Bridges Star Road entrance. Progress through the course until the upper route near the end. Ride Lakitu's cloud upward, or use Cape Mario or Yoshi to reach the high passage. Find the key in this upper section and carry it to the keyhole. The secret exit opens Star World 4. If you only take the ordinary Giant Gate, you will not advance to the next Star World course.
Star World 4 is reached from the Forest Fortress Star Road entrance or from Star World 3's secret exit. The key route is in the lower section near the middle-to-late part of the course. The Red and Green Switch Palaces make this route easier by providing solid blocks, but they are not the only possible method. Cape flight, Blue Yoshi, or careful use of a shell can also reach the prize block containing the key.
To use the standard switch-block method in Star World 4, drop from the swing-lift area onto the Green Blocks below, then move right across the Red Blocks. Hit the prize block beside the keyhole, take the key, and enter the keyhole. The secret exit opens both Star World 5 and the Star Road leading to Bowser's Castle Front Door. This is the first Star World exit that opens two destinations at once.
The normal Giant Gate in Star World 4 returns you to the nearby Star Road and does not create another course. It still counts toward the exit total, so clear it separately if you are pursuing 96 exits.
- Star World 1 — secret keyhole at the right side of the block descent — opens Star World 2.
- Star World 2 — hidden passage below the right-side exit pipe — opens Star World 3.
- Star World 3 — upper route reached with Lakitu's cloud, a cape, or Yoshi — opens Star World 4.
- Star World 4 — lower switch-block route and prize block near the keyhole — opens Star World 5 and Bowser's Castle Front Door.
- Star World 1, 2, 3, and 4 normal Giant Gates — separate exits for completion counting.
Finish the Star World loop and open the Special Zone
Star World 5 can be reached from the Valley of Bowser Star Road or from Star World 4's secret exit. It is a long sky course containing a Yellow Mini-Yoshi. The normal Giant Gate is reached by continuing right across the Flimsy Lifts and enemy formations. Taking this normal exit returns to Star World 1, completing the overworld loop. It does not lead directly to the Special Zone.
The Star World 5 secret exit requires access to the upper key route. The Yellow, Green, Red, and Blue Switch Palaces make this route straightforward because their solid blocks form the platforms needed to reach the key. However, a cape, Blue Yoshi, or a suitable alternate route can also provide access in the original SNES mechanics.
After reaching the elevated platform near the right side, use the available blocks or flight route to reach the room containing the key and keyhole. Carry the key to the keyhole. The secret exit opens a new Star Road leading to Gnarly, the first course in the Special Zone. Star World 5 is the only Star World course whose secret exit does not continue to another Star World course.
Clear both Star World 5 exits for a complete file. The normal exit is easy to overlook because it appears to leave the Star Road map largely unchanged, but it is a separate counted goal. The secret exit is also counted and is required to reach the Special Zone.
- Star World 5 — normal Giant Gate — loops back to Star World 1 and counts as an exit.
- Star World 5 — elevated key and keyhole route — opens Gnarly and the Special Zone.
- Special Zone route after Star World 5 — Gnarly, Tubular, Way Cool, Awesome, Groovy, Mondo, Outrageous, and Funky.
Use the Bowser shortcut without losing your intended route
The Star World 4 secret exit and Valley of Bowser 4 secret exit both provide access to the Star Road near Bowser's Castle Front Door. Entering that Star Road takes Mario to the Front Door without requiring the normal approach through Larry's Castle. This is useful for a fast campaign completion, but it bypasses regular levels and exits.
If your goal is only to defeat Bowser, you may use the Front Door after opening it. If your goal includes the normal Valley route or all 96 exits, clear the regular Valley courses, Valley Fortress, Valley Ghost House, and Larry's Castle before using the shortcut. The shortcut does not erase progress, but taking it first can make it harder to remember which regular exits remain uncleared.
Do not assume that clearing a Star Road course's normal exit automatically opens the next Star World course. For Star World 1 through Star World 4, only the secret keyhole exits advance the chain. Star World 5 is the exception: its normal exit loops back to Star World 1, while its secret exit opens the Special Zone.
When checking progress on the original SNES cartridge, use the title-screen exit total and the overworld paths. The map does not provide a complete per-exit checklist. The five Star World courses contain ten counted exits altogether: one normal and one secret exit in each course. The complete game total is 96 exits, including the eight Special Zone courses.
- Before using the Bowser Front Door shortcut, decide whether you still need Larry's Castle or other Valley exits.
- For Star World progression, take the secret exits of Star World 1, 2, 3, and 4 in order.
- Clear the normal exits of Star World 1 through 5 separately if pursuing 96 exits.
- Take Star World 5's secret exit to open Gnarly and the Special Zone.
- Confirm the final file reaches 96 exits if pursuing full completion.
Before you move on
- The five Dinosaur Land Star Road entrances are available: Donut Plains, Vanilla Dome, Twin Bridges, Forest of Illusion, and Valley of Bowser.
- Star World 1's secret exit opens Star World 2.
- Star World 2's secret exit opens Star World 3.
- Star World 3's secret exit opens Star World 4.
- Star World 4's secret exit opens both Star World 5 and the Bowser's Castle Front Door route.
- Star World 5's normal exit loops to Star World 1.
- Star World 5's secret exit opens Gnarly and the Special Zone.
- For full completion, both exits in each Star World course are cleared and the save file eventually displays 96 exits.
References for this chapter
- Super Mario World — Official Super NES Instruction Manual
- Super Mario World Walkthrough — Star Road Entrances
- Super Mario World Walkthrough — Star World
- Super Mario World — List of All Exits and Secret Exits
- Super Mario World — Star World
- Super Mario World — Secret Exit List
- Super Mario World Walkthrough — Forest Fortress
- Super Mario World Walkthrough — Valley of Bowser 4
Special World — Reaching and Clearing the 8 Special Levels
In the original North American Super Nintendo release, Special World contains eight courses: Gnarly, Tubular, Way Cool, Awesome, Groovy, Mondo, Outrageous, and Funky. It opens when you take Star World 5's secret keyhole exit. Special World is optional for reaching Bowser, but its eight exits count toward the game's 96-exit completion total. Clearing Funky permanently changes the overworld to its autumn presentation on that SNES save file and changes the appearance of several enemies and terrain features.
1. Unlock Special World through Star World 5
Open the Star Road network and complete the Star World courses until Star World 5 is available. Star World 5 has two exits. The Giant Gate is the normal exit and returns you through the Star World route; it does not open Special World. For Special World, you must find the key and carry it to the keyhole.
A Blue Yoshi makes the secret route easier because eating a blue shell gives Yoshi flight. You can obtain a Blue Yoshi from the Star World route, but the secret area is also reachable with cape flight or careful use of the level's platforms and activated Switch Palace blocks. Bring a Cape Feather if possible, and enter the course with enough space to recover from a missed jump.
Advance through the opening section until you reach the area with the green pipe, red Koopa, and upper platforms. Use Blue Yoshi's flight, cape flight, or the available platform route to rise above the main path. Continue through the upper section until you reach the key. Pick it up, carry it to the keyhole, and let the secret exit finish the course.
After the secret exit, the map displays the route to Special World and its first course, Gnarly. Save when the game offers the option so the newly opened route is recorded.
- Star World 5 is open.
- You are attempting the keyhole rather than the Giant Gate.
- The key has been carried to the keyhole.
- Gnarly appears on the Special World map.
2. Follow the eight-course route
The original USA SNES game has eight Special World courses, in this order: Gnarly, Tubular, Way Cool, Awesome, Groovy, Mondo, Outrageous, and Funky. Each course uses a regular goal. There are no secret exits inside Special World, so once you enter a course, concentrate on reaching its goal rather than searching for a second route.
Clearing one course opens the next course along the map. The route is linear, although the map may show nearby paths and later return routes after more of the area has been cleared. You do not need to clear Special World before entering Bowser's Castle, and Special World does not create a required new route to the final battle.
Power-ups, Dragon Coins, and Yoshi are optional. Treat them as survival tools rather than collection requirements. If repeated attempts consume your lives, leave through the map, restock from an earlier level, and return. The Star World courses and their available Yoshi and cape opportunities are useful preparation points.
- You are progressing through the eight courses in order.
- You are using the regular goal in each course.
- You are treating Dragon Coins as optional unless they help with a difficult section.
- You are saving after difficult clears when the game offers the option.
3. Clear Gnarly using the vertical route
Gnarly begins with small platforms, springs, vines, and rope platforms. Move upward in short jumps rather than trying to fly across the opening. The level is designed around climbing, so secure each platform before committing to the next jump.
Use the vines to reach the higher sections and watch for Flying Koopas and Hammer Brothers. Defeat them before starting a rope transfer whenever possible. A missed jump on the rope section can send Mario back down or into a pit, so line up each jump from the center of a platform.
Carry the P-Switch found in the upper part of the course to the rope-wall area. Activate it when you are positioned to use the temporary blocks as steps toward the pipe. The pipe provides the safest transition into the next section. If you miss the intended setup, continue carefully rather than taking a blind leap after the switch timer begins.
In the second area, avoid the Lakitu and use the available platforms to reach the goal. Dragon Coins are not needed for the exit. The goal opens Tubular.
- The opening vine route has been climbed.
- The P-Switch has been carried to the upper rope section.
- The pipe transition has been reached or the alternate lower route has been recovered.
- Gnarly's regular goal has been crossed.
4. Manage Tubular's P-Balloon transfers
Tubular is built around P-Balloons and long open gaps. Before collecting a balloon, look ahead for the next balloon, platform, or safe landing. P-Balloon movement is slow, so short directional taps are safer than holding a direction and drifting past the intended target.
Chargin' Chucks, Paratroopas, and Volcano Lotuses occupy the airspace. Avoid approaching an enemy from below when there is no platform beneath Mario. If the next balloon is not clearly reachable, remain controlled on the current route instead of making a blind transfer.
A Blue Yoshi route can provide more horizontal control where a shell is available, but it is not automatically safe. Yoshi's flight still requires room to turn and land. Use it only if you are comfortable maintaining forward movement while avoiding enemies. A Cape Feather by itself does not replace the precision required by the open-air sections.
Treat every transfer as an individual checkpoint in your plan. Reach solid ground before the final goal if you need to stabilize Mario. A hit during an open gap normally means losing the attempt, so preserving the current balloon is more important than collecting optional coins.
- The next landing or balloon is identified before the current balloon expires.
- Directional inputs remain short and controlled.
- You are not relying on cape flight alone to cross the open-air route.
- Tubular's regular goal has been crossed.
5. Use the corrected switch sequence in Way Cool
Way Cool begins with mechanical lifts, Fuzzies, chainsaws, and ON/OFF switches. Get onto the moving lift and ignore the first two switches. Continue until the third switch, then turn the third switch on. Proceed to the next switch and turn the fourth switch off. This switch sequence opens the route to the pipe.
Enter the pipe and take the Yoshi in the following area. After leaving the pipe, hit the nearby Prize Block to produce Yoshi's Wings. Taking the Wings starts the Yoshi flight route, which is the safest way to bypass the more difficult rope and moving-platform section. Follow the flight route to the regular goal.
If you do not want to use Yoshi's Wings, continue through the ordinary route with the moving lifts and ropes. Stay near the center of each rope, adjust your height before a Fuzzy reaches you, and avoid rushing the final lift. The standard route is valid but less forgiving.
Do not activate switches merely because they are nearby. The useful sequence for the Yoshi route is to ignore the first two, turn the third on, turn the fourth off, then use the pipe, Yoshi, and nearby Yoshi's Wings. The Wings are optional for the exit count, but strongly recommended for a first clear.
- The first two switches have been ignored.
- The third switch has been turned on.
- The fourth switch has been turned off.
- The pipe has been entered.
- Yoshi has been obtained and the nearby Yoshi's Wings route has been used, or the ordinary rope route has been completed.
- Way Cool's regular goal has been crossed.
6. Clear Awesome, Groovy, and Mondo with controlled movement
Awesome is easier with Yoshi and a cape. Use shells to maintain Yoshi's flight where the level provides them, but do not chase a shell into a dangerous landing. The enemy formations and narrow platforms punish hurried movement. If you lose Yoshi, use short jumps and treat each solid platform as a deliberate recovery point rather than attempting a long blind flight.
Groovy is more direct. Use the crystal block to clear enemies, but avoid kicking or releasing it in a confined space where it can rebound into Mario. Once the main enemy group is cleared, proceed with ordinary jumps. The final Chargin' Chuck placement is the main point where slowing down is safer than rushing.
Mondo uses water, current, and changing water levels. Wait for a passage to open before entering a narrow section, and stay in the central open space when enemies approach. Hammer Brothers and other hazards are easier to avoid when you do not hug the floor or ceiling. Yoshi is useful but not required.
Clear the three courses in sequence. Their exits are regular goals, and the map advances from Awesome to Groovy to Mondo.
- Awesome has been cleared with controlled Yoshi or cape movement.
- Groovy's crystal block has been used safely.
- Mondo's current and changing water level have been handled without rushing narrow passages.
- All three regular goals have been crossed.
7. Finish Outrageous and Funky
Outrageous combines cannon fire, Living Flames, Hammer Brothers, narrow platforms, and a springboard section. Move after cannonballs have passed rather than waiting directly beside a cannon. Living Flames can spread across the ground, so leave their landing area immediately. At the tall-pipe section, carry the springboard into position, set it down with enough room for a jump, and use it to clear the pipe while watching the incoming hazards.
A Cape Feather is useful as protection, but do not depend on one long flight through the whole course. Yoshi can help with enemy management, yet the level still requires careful platforming. If a section becomes crowded, stop on solid ground and let the immediate hazard move before continuing.
Funky is the final course and has a limited timer. Green Berries eaten by Yoshi add time, so collect them whenever doing so does not expose you to a Sumo Brother or another hazard. Blue Yoshi is useful because a blue shell provides flight, but only eat a shell when you have enough room to control the resulting movement.
Watch the Sumo Brothers, Chargin' Chucks, Para-Goombas, and gaps near the end. After the tall yellow pipe, continue on foot through the final enemy formation rather than attempting an uncontrolled flight. The coin message near the finish is optional. Cross the Giant Gate to clear Funky.
- Outrageous's cannon and Living Flame sections have been crossed.
- The springboard has been used to pass the tall pipe.
- Funky's timer has been extended with Green Berries when necessary.
- The final Giant Gate in Funky has been crossed.
- All eight Special World courses show as cleared.
Before you move on
- Star World 5's secret keyhole exit has opened the route to Gnarly.
- Gnarly, Tubular, Way Cool, Awesome, Groovy, Mondo, Outrageous, and Funky have all been cleared.
- For Way Cool specifically, the first two switches were ignored, the third was turned on, the fourth was turned off, and the pipe, Yoshi, and nearby Yoshi's Wings route were used or the ordinary route was completed.
- The Special World map route shows all eight courses completed.
- The overworld has changed to its autumn-style presentation with altered enemy appearances and terrain features.
- The save file has not necessarily reached 96 exits; clearing Special World alone does not guarantee full completion.
- Bowser does not need to be defeated to unlock or clear Special World, and Special World does not need to be cleared to view the ending.
References for this chapter
100% Exits Guide — How to Count, Where to Revisit, and Efficient Routes
The original North American Super Nintendo release records 96 counted exits, also described as goals. The total includes ordinary goals, secret goals, the five Switch Palace goals, all ten Star World goals, and the eight Special World stages. Yellow Switch Palace, Green Switch Palace, Red Switch Palace, and Blue Switch Palace each contribute one exit. Yoshi’s House, ordinary map movement, Star Road map nodes, and Bowser’s Castle do not add exits to the total. When the saved file reaches the maximum, the USA file-selection screen displays 96 with a star.
1. Know exactly what counts toward 96
Super Mario World counts completed exits rather than unique stages. A normal course with both a giant goal tape and a secret keyhole contributes two exits. A course with only one finish contributes one. Switch Palaces also contribute one exit each: Yellow Switch Palace, Green Switch Palace, Red Switch Palace, and Blue Switch Palace are all part of the 96-goal total.
The complete total can be divided into 88 exits from the main worlds and Star World, followed by eight exits in Special World. The 88 includes the four Switch Palaces and the ten Star World exits. The eight Special World stages each contribute one exit.
The five Star World courses each have two counted exits. Their ordinary goals are easy to overlook because several simply return Mario to an existing Star Road position instead of opening an obvious new branch. They still raise the saved exit total. The eight Special World stages are Gnarly, Tubular, Way Cool, Awesome, Groovy, Mondo, Outrageous, and Funky; each has one counted finish.
- Count a normal goal and secret goal separately when both exist.
- Count Yellow, Green, Red, and Blue Switch Palace once each.
- Count both exits in Star World 1, 2, 3, 4, and 5.
- Count all eight Special World stages.
- Do not count Yoshi’s House, ordinary map movement, Star Road map nodes, or Bowser’s Castle as additional exits.
2. Confirm the saved total and completion mark
At the title screen, select the save file and read the number beside it. On the North American SNES release, a fully completed file displays 96 with a star. The original cartridge does not provide a modern percentage meter or a handheld-style checklist, so this file-selection display is the definitive in-game completion check.
The exit total is stored in the save data, but the game does not save after every ordinary course. After clearing a suspected final exit, travel to a dependable save-capable location such as a Ghost House, Switch Palace, fortress, or castle and save there. Then return to the file-selection screen and confirm that the number changed.
Keep a written checklist while cleaning up. If you use another save slot to test a secret route, record which file contains the authoritative progress. Do not erase the active file merely because the overworld appears to have every visible path.
- Record the current exit total before beginning the cleanup sweep.
- Save after finding a difficult or easily hidden exit.
- Recheck the file-selection screen instead of relying only on the overworld.
3. Use the overworld as a guide, not as the complete checklist
A red level marker usually indicates that a course has two exits, while a yellow marker usually indicates one. This is useful for ordinary stages, but it is not a complete checklist. Ghost Houses with secret exits do not always communicate their second exit through the same visual convention, and Switch Palaces are single-exit locations that must be counted separately.
A newly opened path proves that an exit was found, but it does not prove that every exit in the level is complete. Forest Ghost House is a notable trap: its secret exit returns to Forest of Illusion 1, so the map can look almost unchanged. Several Forest exits also create loops or redraw paths that overlap existing routes.
When reviewing a completed-looking map, inspect every Ghost House, every red-marker level, all four Switch Palaces, and every Star World course. Then compare the result with a written list. A missing exit can be recorded even when its map connection is invisible or leads back to a previously visited area.
- Review every red-marker course for both finishes.
- Review every Ghost House, including those whose paths appear complete.
- Confirm all four Switch Palaces are recorded.
- Treat loops, overlapping paths, and unchanged-looking routes as possible counted exits.
4. Sweep Yoshi’s Island and Donut Plains first
Begin in the opening world and work in geographic order. In Yoshi’s Island, verify Yoshi’s Island 1, Yellow Switch Palace, Yoshi’s Island 2, Yoshi’s Island 3, Yoshi’s Island 4, and Iggy’s Castle. Each of these contributes one exit. Yellow Switch Palace is not merely a world-map event; clearing its room records one counted goal.
In Donut Plains, check both exits in Donut Plains 1, both exits in Donut Plains 2, Green Switch Palace, both exits in Donut Ghost House, Donut Plains 3, Donut Plains 4, both exits in Donut Secret 1, both exits in Donut Secret House, Donut Secret 2, and Morton’s Castle.
Donut Secret 1’s normal goal is a frequent omission because many players enter the level only to reach its keyhole. Donut Ghost House and Donut Secret House also deserve deliberate checks because their alternate exits open useful areas and are easy to confuse with ordinary doors.
- Verify Yoshi’s Island 1, 2, 3, and 4.
- Verify Yellow Switch Palace and Iggy’s Castle.
- Check both exits in Donut Plains 1 and Donut Plains 2.
- Check Green Switch Palace.
- Check both exits in Donut Ghost House, Donut Secret 1, and Donut Secret House.
- Do not omit Donut Secret 1’s normal goal.
5. Clean up Vanilla Dome and Twin Bridges
In Vanilla Dome, check both exits in Vanilla Dome 1 and Vanilla Dome 2, then verify Red Switch Palace, Vanilla Ghost House, Vanilla Dome 3, Vanilla Dome 4, both exits in Vanilla Secret 1, Vanilla Secret 2, Vanilla Secret 3, Vanilla Fortress, and Lemmy’s Castle. Red Switch Palace contributes one counted exit just like the other three Switch Palaces.
For Twin Bridges, check both exits in Cheese Bridge Area, then verify Soda Lake, Cookie Mountain, Butter Bridge 1, Butter Bridge 2, and Ludwig’s Castle. Soda Lake is commonly missed because its exit opens a map connection that is difficult to see. It is a single counted exit, not a two-exit course.
Keep Sunken Ghost Ship on a separate Valley of Bowser checklist. It has one counted exit and should not be folded into the Twin Bridges total.
- Check both exits in Vanilla Dome 1, Vanilla Dome 2, and Vanilla Secret 1.
- Verify Red Switch Palace.
- Verify Vanilla Ghost House, Vanilla Secret 2, Vanilla Secret 3, Vanilla Fortress, and Lemmy’s Castle.
- Check both exits in Cheese Bridge Area.
- Verify Soda Lake even if its map connection is not obvious.
- Verify Cookie Mountain, both Butter Bridge stages, and Ludwig’s Castle.
- Record Sunken Ghost Ship separately for the Valley sweep.
6. Sweep Forest of Illusion, Chocolate Island, and Valley of Bowser
Forest of Illusion requires the most careful review. Check both exits in Forest of Illusion 1, Forest of Illusion 2, Forest of Illusion 3, and Forest of Illusion 4. Then verify Blue Switch Palace, both exits in Forest Ghost House, Forest Secret Area, Forest Fortress, and Roy’s Castle.
Forest Ghost House’s secret exit returns to Forest of Illusion 1 and is one of the most common final missing exits. Forest of Illusion 1, 2, 3, and 4 can also send Mario along routes that overlap previously opened paths, so do not use the map’s appearance as proof that both exits are complete.
In Chocolate Island, verify Chocolate Island 1, Choco-Ghost House, both exits in Chocolate Island 2, both exits in Chocolate Island 3, Chocolate Fortress, Chocolate Island 4, Chocolate Island 5, Chocolate Secret, and Wendy’s Castle. Chocolate Island 2’s timer-based branches can make the secret exit especially easy to miss.
For Valley of Bowser, verify Sunken Ghost Ship, Valley of Bowser 1, both exits in Valley of Bowser 2, both exits in Valley Ghost House, Valley of Bowser 3, both exits in Valley of Bowser 4, Valley Fortress, and Larry’s Castle.
- Check both exits in every red-marker Forest stage.
- Verify Blue Switch Palace.
- Check both exits in Forest Ghost House.
- Verify Forest Secret Area, Forest Fortress, and Roy’s Castle.
- Check both exits in Chocolate Island 2 and Chocolate Island 3.
- Verify Chocolate Secret and Wendy’s Castle.
- Review both exits in Valley of Bowser 2, Valley Ghost House, and Valley of Bowser 4.
- Clear Sunken Ghost Ship and all single-exit Valley locations.
7. Finish Star World and Special World
Complete both exits in Star World 1, Star World 2, Star World 3, Star World 4, and Star World 5. For each course, deliberately record the ordinary goal and the keyhole goal as separate entries. The ordinary exits in Star World 1 through 4 are particularly easy to miss because they often return to an existing Star Road position without creating a new-looking branch.
Star World 5’s secret exit opens the route to Special World, but its ordinary exit still counts separately. Do not treat the Special World entrance as a replacement for Star World 5’s ordinary goal.
After Special World is available, clear Gnarly, Tubular, Way Cool, Awesome, Groovy, Mondo, Outrageous, and Funky. Each stage contributes one exit. Completing Special World changes the overworld presentation in the original SNES game, but that visual change is not a substitute for checking the saved total.
If the file stops at 95, first review the five Star World ordinary goals. Then check Forest Ghost House, Soda Lake, Donut Secret 1, Chocolate Island 2 and 3, Valley Ghost House, and Valley of Bowser 4. These locations frequently produce a complete-looking map while leaving one exit unrecorded.
- Record both exits in all five Star World courses.
- Clear all eight Special World stages.
- Check Star World ordinary goals before assuming the missing exit is in a main-world course.
- Confirm that all four Switch Palaces are also present on the written list.
- Verify the file-selection screen after the final Special World exit.
8. Reproduce a difficult secret exit safely
When an exit is missing, use the written checklist to identify the exact course and finish instead of repeatedly exploring random levels. Enter with the power-up or item the route requires: a Cape Feather for controlled flight, a P-Switch for block or coin changes, a key for a keyhole, or Yoshi only when the course permits carrying him to the target area.
If Mario loses the required item, finish the attempt normally when possible, return to the map, and restock before trying again. For a cape route, begin from the same broad, flat area on each attempt and use short flights rather than committing to a long glide near the target. For a key route, carry the key carefully through doors and pipes and avoid throwing it into an unreachable position.
After the alternate finish triggers, reach the next reliable save location and save. Then check the file-selection screen. The final proof is not a changed path, a completed castle, or a different overworld appearance. The completion check is the saved North American SNES file displaying 96 with its star.
- Use a complete exit list instead of guessing from map appearance.
- Repeat the same setup with the required item or power-up.
- Save after the exit is recorded.
- Verify 96 and the star on the file-selection screen.
Before you move on
- The saved North American SNES file-selection screen displays 96 with a star.
- The written checklist contains 88 exits from the main worlds and Star World plus eight Special World exits.
- Yellow Switch Palace, Green Switch Palace, Red Switch Palace, and Blue Switch Palace are each counted once.
- Both exits are recorded for every two-exit course, including all five Star World courses.
- All eight Special World stages are cleared.
- Forest Ghost House, Soda Lake, Donut Secret 1, Chocolate Island 2 and 3, Valley Ghost House, Valley of Bowser 4, and the five Star World ordinary goals have been specifically checked.
- Yoshi’s House, ordinary map movement, Star Road nodes, and Bowser’s Castle have not been counted as extra exits.
Cape and Yoshi Mastery — Advanced Maneuvers and Recovery Techniques
Cape Mario and Yoshi use related but different movement systems in the original North American Super Nintendo release of Super Mario World. Normal Cape Mario can gain height by steering against his travel direction, descend by steering with it, float by releasing Y, and dive by holding Y while moving forward. A caped Mario riding Yoshi glides instead of opening the cape. Yoshi's shell effects depend on the shell being held, while adult Red, Blue, and Yellow Yoshis retain their own color abilities with any shell. Practice these techniques in open stages before relying on them in secret routes or Special World.
Set up a safe Cape practice route
The first reliable Cape practice area is Donut Plains 1, not Yoshi's Island 1. Progress through Yoshi's Island and clear Iggy's Castle, then enter Donut Plains 1 with a Cape Feather. The opening portion gives you room to accelerate and try short flights over broad ground.
Hold Y and a direction until Mario reaches running speed. Press B while continuing to hold Y and the direction of travel. This produces the powered takeoff. Begin with a short flight and land on the same wide stretch of ground. Do not begin by aiming for a narrow platform or a large gap.
Once the takeoff is consistent, repeat the exercise while stopping the climb earlier. The purpose is to learn how much horizontal distance Mario covers before descending. Leave more ground than you think you need when practicing; a safe landing is more valuable than a long flight.
- Clear Iggy's Castle before beginning this exercise.
- Enter Donut Plains 1 with a Cape Feather.
- Accelerate while holding Y and a direction.
- Press B to begin the powered takeoff.
- Practice short flights over wide ground before attempting gaps.
Control normal Cape Mario in flight
During normal Cape Mario flight, Mario gains height when you briefly press the direction opposite his current travel. If he is moving right, tap Left to catch air and rise. Return to Right to continue traveling across the stage. Reverse those inputs when moving left.
Use brief directional corrections rather than holding one direction continuously. A long opposite-direction hold can turn Mario around or move him away from the intended landing. A practical rhythm is forward movement, a short opposite-direction tap to gain height, then forward movement again.
Release Y when you want Mario to float downward with the cape open. For a fast descent, hold Y and the direction Mario is traveling. Begin descending while Mario is still above the target platform. Waiting until he is level with the platform often leaves too little room to correct his position.
The cape also gives Mario a ground-level attack. Press Y while standing to swing the cape, but do not depend on this in tight movement sections where a normal jump or spin jump provides better control.
- Tap opposite the travel direction to gain height.
- Return to the travel direction after catching air.
- Release Y to float down with the cape open.
- Hold Y with the travel direction only when a fast dive is safe.
- Begin descending over the center portion of the landing area.
Use short flights and land safely
Aim for the middle of the widest available platform, not its leading edge. If the original target becomes unreachable, steer toward the nearest solid ground and abandon the planned route. Keeping the Cape power is more useful than attempting a last-second reversal over a pit.
Short flights are safer around saws, firebars, spikes, and moving platforms. In cramped rooms, ordinary jumps and spin jumps usually provide more immediate control than a cape flight. Use the cape for a specific height or gap rather than flying automatically through every section.
If Mario hits an enemy while the cape is open, he falls but does not lose the Cape power. Stop trying to climb, steer toward solid ground, and let the hit recovery finish. Once Mario has landed safely, rebuild running speed before attempting another flight.
- Aim for the center of the landing platform.
- Choose nearby solid ground when the original target is lost.
- Prefer ordinary jumps in cramped rooms.
- Use short flights near moving hazards.
- After a collision, secure the landing before trying to fly again.
Glide while riding Yoshi
Jump onto Yoshi with B, then accelerate by holding Y and a direction. Press B to jump. When Cape Mario is riding Yoshi, holding Y and B does not open the cape. Instead, Mario and Yoshi glide forward. This is a separate movement mode from normal Cape Mario flight.
While the pair is airborne, hold B alone to slow the landing. Correct an overshoot early by reducing forward travel and steering toward the broadest part of the landing surface. Do not wait until Yoshi has passed the platform edge; the available correction becomes much smaller at that point.
Press A to dismount. Mario performs a spin jump from Yoshi, which can reach a higher ledge or let him leave Yoshi before a hazard. Confirm the destination before dismounting. A blind dismount above a pit loses both the mount and the attempted route.
The Cape-Yoshi glide is useful for crossing gaps and making controlled landings, but it does not use the normal Cape Mario catch-air rhythm. Do not expect opposite-direction taps to produce the same repeated height gain.
- Accelerate before jumping with Yoshi.
- Hold Y and B together for the Cape-Yoshi glide.
- Hold B alone to slow the landing.
- Correct an overshoot before reaching the platform edge.
- Use A to dismount only toward a confirmed safe destination.
Use Yoshi's tongue and shell effects
Press Y while facing a nearby enemy, berry, or shell to extend Yoshi's tongue. Line up the target with Yoshi's mouth rather than jumping directly into it. Yoshi can hold hard objects such as Koopa shells in his mouth. Press Y again to spit the held object.
A Green Yoshi receives a temporary ability from the shell in his mouth. A Red Shell lets him spit fireballs, a Yellow Shell creates a sand cloud when he lands from a jump, and a Blue Shell gives him wings and allows flight when B is pressed repeatedly. A flashing shell combines the shell-based effects. A Green Shell provides no special shell ability.
The shell must remain in Yoshi's mouth for the temporary effect to continue. If Yoshi spits it out or swallows it, that shell effect ends. Yoshi does not hold hard objects forever, so spit out and recapture a shell when a longer setup is needed and the surrounding area is safe.
Yoshi's tongue is primarily a horizontal tool. It does not pull Mario upward or create vertical movement by itself. Use it to secure a shell, remove an enemy from a jump route, or prepare the shell ability that will provide the needed height or reach.
- Face the target before pressing Y.
- Press Y again to spit a shell or other held object.
- Use Red Shells for fireballs.
- Use Yellow Shells for the landing sand cloud.
- Use Blue Shells with repeated B presses for Green Yoshi flight.
- Remember that the temporary effect ends when the shell is spat out or swallowed.
Apply the permanent abilities of adult colored Yoshis
Adult Red, Blue, and Yellow Yoshis retain their color abilities regardless of the shell they carry. Red Yoshi can spit fire with any shell, Blue Yoshi can use a shell to fly, and Yellow Yoshi creates a sand cloud when landing from a jump. These abilities belong to Yoshi's color and are separate from the temporary effect of the shell in his mouth.
Shell effects can be combined with a colored Yoshi. For example, Red Yoshi carrying a Blue Shell can use Red Yoshi's fire ability and the Blue Shell's flight effect. Yellow Yoshi carrying a Red Shell retains the Yellow Yoshi landing effect and can also spit the Red Shell's fireballs. The shell does not change Yoshi's color.
The colored Yoshis first appear as babies in Star World. A baby colored Yoshi becomes an adult after eating five enemies or after receiving a qualifying power-up such as a Super Mushroom, Fire Flower, Cape Feather, or Starman. Once the baby has grown, use the color ability only when the level's space and hazards make it practical. You do not need to wait for five enemies if a qualifying power-up is available.
For vertical access, combine these abilities with the level layout. Blue-Shell flight can reach high passages, while a Cape can carry Mario over a ceiling-level gap. A dismount with A can provide a high spin jump from Yoshi. Use Yoshi's tongue to obtain or position the shell first, then use the resulting ability for the actual climb or ceiling route.
- Red Yoshi retains fire-spitting with any shell.
- Blue Yoshi retains its flight ability with any shell.
- Yellow Yoshi retains its landing sand-cloud ability with any shell.
- Shells add temporary effects; they do not change Yoshi's color.
- Grow a baby colored Yoshi with five enemies or a qualifying power-up.
- Use the tongue to obtain shells, then use the shell or color ability for vertical access.
Recover from a missed flight or lost Yoshi
If normal Cape Mario flight goes wrong, stop trying to climb and search for solid ground. Steer in the direction of travel to descend, release Y to float down, and use small opposite-direction taps only when you need to correct the horizontal path. If the intended platform is gone, select the nearest safe surface instead of trying to restore the original route.
If Mario is carrying a shell or another object, release Y to drop or throw it according to the object's behavior. This is separate from the reserve item. Press SELECT only when you deliberately want the reserve power-up to fall from its box. Do not confuse SELECT with dropping a held object or making Yoshi spit out a shell.
If an enemy knocks Mario off Yoshi, Yoshi runs away. Secure Mario first, then pursue Yoshi only when the route is clear. To remount, jump onto Yoshi with B when he is beside Mario and the landing area is safe. Do not leap after Yoshi toward a pit; losing Yoshi is preferable to losing Mario.
After passing a Midway Gate, use the checkpoint to isolate the difficult section. On the next attempt, correct the specific mistake: begin the descent earlier, release a shell before a cramped passage, use B to slow a Yoshi glide, or dismount only toward a confirmed ledge.
- Steer toward solid ground when the planned landing is lost.
- Release Y to float down with the open cape.
- Use Y to drop or throw a held object.
- Use SELECT only for the reserve item.
- Secure Mario before chasing a fleeing Yoshi.
- Jump onto Yoshi with B to remount safely.
- Use a Midway Gate to retry the difficult section.
Before you move on
- You can reach Donut Plains 1 after clearing Iggy's Castle and practice with a real Cape Feather.
- You can accelerate, take off, catch air with the opposite direction, and descend with the travel direction.
- You can release Y to float down with the open cape and use a fast dive only when the landing area is safe.
- You can glide while riding Yoshi and hold B alone to slow that landing.
- You can use Yoshi's tongue and spit a shell safely.
- You can identify Red Shell, Yellow Shell, and Blue Shell effects.
- You can use repeated B presses for Green Yoshi's Blue Shell flight.
- You can distinguish permanent adult color abilities from Green Yoshi's temporary shell effects.
- You know that a baby colored Yoshi can mature after five enemies or a qualifying power-up such as a Super Mushroom, Fire Flower, Cape Feather, or Starman.
- You understand that shells do not change Yoshi's color.
- You can use a shell, Cape flight, or a controlled dismount to reach a higher route or ceiling area.
- You can recover from a missed landing by steering toward solid ground, floating down, dropping a held object, or safely dismounting.
- You can safely remount a fleeing Yoshi by jumping onto him with B.
- You can reach and use a Midway Gate to retry a difficult movement section.
References for this chapter
- Super Mario World — Official Super NES Instruction Manual
- Super NES Instruction Manuals: Super Mario World
- Super Mario World — Game Resources for Super Nintendo Entertainment System
- Super Mario World — Guide and Walkthrough — Super Nintendo
- Super Mario World — Guide and Walkthrough for Super Nintendo
- Super Mario World — Guide and Walkthrough
Final Bowser Battle — Methods to Reach and Defeat Bowser
Reach Bowser’s Castle through the normal Valley of Bowser route, the Back Door shortcut, or a Star Road connection. Prepare with at least Super Mario, learn the castle approach you are using, then defeat Bowser by throwing six Mechakoopas at him across three phases. The original North American Super Nintendo release uses two successful Mechakoopa hits per phase.
Choose your route to Bowser’s Castle
The standard route is to complete Valley of Bowser 1, then continue through Valley of Bowser 2, Valley Ghost House, Valley of Bowser 3, and Valley of Bowser 4. The normal exit from Valley of Bowser 4 opens Larry’s Castle. Clearing Larry’s Castle opens Bowser’s Castle Front Door.
For the shorter Back Door route, enter Valley of Bowser 2 and take its secret exit. This opens Valley Fortress. Clear Valley Fortress, defeat Reznor, and the overworld will reveal Bowser’s Castle Back Door. The Valley Ghost House secret exit is a different route: it opens Larry’s Castle and does not unlock the Back Door.
The Star Road shortcut does not require reaching a location called Star Road 5. The Front Door connection is opened by the secret exit from Star World 4 or by the secret exit from Valley of Bowser 4. Valley of Bowser 4’s secret exit is especially useful because it opens both the route to Star World 5 and the Star Road connection to Bowser’s Castle Front Door.
If you continue through Star World 5, its secret exit opens Special World, beginning with Gnarly. That is optional for the main campaign and is not required to reach Bowser. Entering the Front Door through Star Road does not permanently remove the ordinary Valley routes or trap the save file.
- For the normal route, clear Larry’s Castle to open Front Door.
- For the Back Door, take Valley of Bowser 2’s secret exit, then clear Valley Fortress.
- For the Star Road shortcut, use the connection opened by Star World 4’s secret exit or Valley of Bowser 4’s secret exit.
- Remember that Valley of Bowser 4’s secret exit opens both Star World 5 and Front Door access.
- Remember that Star World 5’s secret exit leads into Special World, beginning with Gnarly.
Prepare Mario before entering
Enter the castle as Super Mario, Cape Mario, or Fire Mario whenever possible. Any of these forms gives you more protection than Small Mario. A Cape Feather is useful for surviving the castle rooms and recovering from awkward jumps, but cape attacks do not damage Bowser. Fireballs also do not replace the required Mechakoopa hits.
Keep a reserve item in the item box while traveling across the overworld. If Mario reaches the castle in a weaker form, press SELECT to release the stored item, then collect it before starting another attempt. If you are repeatedly losing lives, return to a cleared level where you know a power-up or extra-life route and rebuild your supply before trying the castle again.
The Back Door is usually the better learning route because it skips the Front Door’s four opening rooms and contains a Midway Gate before the final battle. The Front Door has no equivalent shortcut through its opening rooms, so use it only when you are comfortable with one of its four door routes or when you are pursuing the normal campaign path.
Avoid entering the final room as Small Mario if you have a practical way to restore a power-up. Bowser’s battle can be won while small, but one mistake ends the attempt.
- Begin with at least Super Mario’s two-hit protection.
- Carry a Cape Feather or Fire Flower in reserve if available.
- Use the Back Door when you want the shortest castle practice route.
- Restore power-ups before entering rather than relying on a one-hit attempt.
Clear the castle entrance
At the Front Door, choose one of four numbered doors. Each door leads through a different hazard arrangement, including combinations of firebars, pistons, spikes, falling platforms, and other castle obstacles. All four routes eventually rejoin, so there is no required door for story completion. Choose the room whose hazards you recognize best and repeat that same route while learning it.
Use short jumps and stop on stable ground whenever possible. Watch the movement of a piston, firebar, or platform for one cycle before committing to a crossing. Cape flight is often less useful in enclosed rooms because Mario can overshoot a landing or collide with a ceiling hazard. Spin jumps are helpful against some hazards, but do not use them automatically near lava or narrow ledges.
At the Back Door, proceed through the shortened castle route and activate the Midway Gate before the final door. The checkpoint is important: if you lose a life after touching it, you restart near the final section instead of replaying the whole Back Door approach. Take care around the dark room, moving hazards, and Mechakoopas before the checkpoint, since arriving at the gate with unnecessary damage makes the last section harder.
Before entering the final room, avoid taking damage from enemies or obstacles that can be bypassed. If you are small and have no reserve item, deliberately retreat and prepare again rather than treating the first attempt as expendable.
- Front Door: select one of the four numbered rooms and learn its hazard pattern.
- Back Door: reach and activate the Midway Gate before Bowser’s room.
- Arrive at the final door with power-up protection whenever possible.
- Do not spend the cape on risky long flights in enclosed castle rooms.
Defeat Bowser in three phases
Bowser cannot be damaged by normal jumps, cape attacks, or Fire Mario’s fireballs. The only required weapon is a Mechakoopa dropped from the Koopa Clown Car. Stomp a Mechakoopa to disable it, pick it up while holding Y, and throw it upward so it strikes Bowser. A Mechakoopa that hits the Clown Car instead of Bowser is wasted.
In the first phase, Bowser moves across the upper part of the arena in swooping passes. After the opening movement, he drops two Mechakoopas. Stomp one, pick it up, and wait until Bowser is positioned over the arena before throwing upward. Repeat with the second Mechakoopa. Two successful hits make Bowser leave for the first transition.
During the transition, fireballs fall from above. Do not follow the departing Clown Car. Watch the first fireball’s landing position and move into the open space beside the falling pattern. The fireballs disappear after landing. Princess Toadstool then appears and provides a Super Mushroom during the transition; collect it if Mario needs the extra protection.
In the second phase, Bowser tracks Mario more closely and drops two large bowling balls before releasing the next pair of Mechakoopas. Jump over the bowling balls or spin-jump on them if you have room and the timing is comfortable. Stay clear of the Clown Car’s propeller, then stomp and throw both Mechakoopas upward. Bowser again needs two successful hits.
Another falling-fire transition follows. After it, Bowser begins the third phase by bouncing the Clown Car across the floor. Move away from the point where the vehicle is descending and do not stand directly under it. When the final two Mechakoopas appear, repeat the same stomp, pickup, and upward-throw method. The sixth successful hit defeats Bowser.
- Damage Bowser only with thrown Mechakoopas.
- Aim for Bowser’s body or head, not the Clown Car.
- Land two Mechakoopa hits in each of the three phases.
- Avoid the falling fireballs between phases.
- Jump over or spin-jump on the phase-two bowling balls.
- Stay away from the propeller and the phase-three bouncing Clown Car.
- Count six successful Mechakoopa hits before expecting victory.
Recover from failure and confirm completion
If Mario is hit while carrying a Mechakoopa, move to a clear section of the floor before attempting another pickup or throw. A disabled Mechakoopa can become active again, so do not leave it unattended for too long, but do not rush into Bowser’s path merely to save one. Surviving the phase is more important than forcing an immediate throw.
If you die before the Back Door Midway Gate, prepare again with a power-up and repeat the shortened route. Once the gate is active, use each attempt to learn the final room rather than changing routes. On the Front Door, keep practicing the same numbered door so the opening hazards become predictable.
After the sixth successful Mechakoopa hit, Bowser retreats and the ending sequence begins. Allow the ending to finish without resetting the console. The main campaign is complete once Bowser has been defeated and the official ending has been viewed. You may then return to the map and continue hunting exits, Star Road routes, or Special World stages on the same file.
- Use the Back Door Midway Gate as a restart point when practicing.
- Rebuild power-ups and lives instead of repeatedly entering as Small Mario.
- Confirm six successful Mechakoopa hits.
- Confirm Bowser retreats from the arena.
- View the complete ending sequence before considering the campaign finished.
Before you move on
- A valid route to Bowser’s Castle has been completed: Larry’s Castle for Front Door, Valley of Bowser 2 secret exit plus Valley Fortress for Back Door, or a verified Star Road connection from Star World 4 or Valley of Bowser 4.
- Bowser has been hit six times by successfully thrown Mechakoopas.
- Bowser has retreated from the arena.
- The complete official ending sequence has been viewed.
- The main campaign is complete; remaining exits, Star Road courses, and Special World are optional.
Post-Game, Replaying for Speedruns, and Optional Challenges
The original North American Super Nintendo release does not create a new saved overworld state after Bowser's defeat. Let the ending finish, reset the console, and reload the most recent save made before the final castle. From that earlier save, you can continue hunting exits, revisit completed castles and fortresses, clear Special World, or practice a fixed route for personal speedrun and low-death challenges.
1. Finish the ending and return to your saved route
Defeat Bowser and allow the ending sequence to play all the way through. The original SNES game does not return you to the map with a new post-Bowser save. When the ending is over, reset the console, return to the title screen, and select the file you used before entering Bowser's Castle.
Your file reloads its latest saved state rather than a newly created post-game state. For that reason, prepare your preferred save before the final approach. The safest point is a completed castle, fortress, haunted house, or Switch Palace that presents the Continue and Save choice. If you intend to keep exploring after the ending, make sure the file you plan to use has already recorded the route you want before entering Bowser's Castle.
Bowser's Castle is not required for the 96-exit file mark. The completion counter records the game's counted level exits, while the final battle is the main-campaign ending. You can therefore have a file showing 96 exits before defeating Bowser, or defeat Bowser first and then reload the earlier save to finish the exit hunt.
- Defeat Bowser and let the ending sequence finish.
- Reset the console after the ending reaches its final screen.
- Reload the file saved before the final castle.
- Use the file-select counter to check exit progress rather than expecting a post-Bowser save.
2. Keep separate files for completion and practice
The cartridge has three save slots. Keep one as your main completion file, use another for route experiments or difficult secret exits, and reserve the third as a backup before a major challenge attempt. This is especially useful if you want one file to remain at a reliable pre-Bowser save while another file is used for Special World or 96-exit cleanup.
The game does not save after every ordinary course. Saving is offered after qualifying areas such as castles, fortresses, haunted houses, and Switch Palaces, so do not turn off the console immediately after a normal stage and assume its result is protected. If you have just recorded an important exit, reach the next available save opportunity before shutting down.
During a course that has already been completed, pressing Start and then Select returns Mario to the overworld. Select by itself is not a map checklist or progress display; during a level it releases the item stored in the reserve box. Use the Start-then-Select return only for a previously cleared course, not as a substitute for completing an un-cleared one.
- Keep the primary completion file separate from experiments.
- Confirm a Continue and Save opportunity before powering off.
- Remember that Select releases the reserve item during a level.
- Use Start followed by Select only when abandoning a previously completed course.
3. Replay completed castles and fortresses for practice
After a castle or fortress has been cleared, stand on its ruined map location and press L and R together. On the original SNES version this reopens the completed castle or fortress, allowing you to rehearse its rooms and boss encounter. This is valuable for learning a consistent route without restarting the entire campaign.
Use the replay function to isolate the parts of a level that cause deaths: a room with moving platforms, a lava section, a Reznor arena, or the final Koopaling room. Re-entering a completed area is practice, not a new completion requirement. It does not create an extra exit for the file counter.
For ordinary courses and ghost houses, use the normal map icon to replay a course you have already cleared. If you are practicing a secret exit, write down the landmark that begins the attempt and repeat the same route. Avoid changing several variables at once; first make the secret exit reliable, then add speed or a challenge restriction.
- Stand on a defeated castle or fortress and press L and R together.
- Repeat the rooms that cause the most deaths.
- Treat replays as drills rather than additional exits.
- Record the landmark and setup needed for each secret-exit attempt.
4. Build a repeatable personal speedrun route
Choose one route and use it consistently. A standard-route practice run moves through the ordinary worlds and reaches Bowser's Castle through the Valley of Bowser. A shortcut route uses Star Road entrances and Star World secret exits to cross the map quickly. Neither route is automatically best for every player; the useful route is the one you can repeat without hesitation or frequent deaths.
Divide the run into sections: the opening worlds, the first Star Road connection, the Star World sequence, and the final Bowser approach. Practice each section separately before combining them. Star World stages have normal and secret exits, and both can matter for a 96-exit file even when one exit mainly returns you to an earlier Star Road location.
For a personal speedrun, keep a written level order beside the console. Mark whether each stage is being cleared through its normal goal, a keyhole, a secret pipe, or another alternate exit. Do not improvise a shortcut during a serious attempt unless you have already practiced the connection from a fresh save. Consistency is more useful than choosing a theoretically shorter route that is not yet reliable.
- Select one standard or Star Road-based route.
- Write the exact course order down.
- Practice each route section separately.
- Combine sections only after their transitions are reliable.
5. Practice movement, exits, and bosses as separate drills
Use open early stages to rehearse cape takeoffs, short glides, landing corrections, shell carrying, and Yoshi dismounts. Repeat the same maneuver until it can be performed without pausing to recall the button sequence. Cape flight is useful for speed, but a failed takeoff costs more time than a controlled ground route, so practice safe takeoffs and recoveries before attempting long flights.
Practice secret exits individually. Group attempts by their main requirement: carrying a key through hazards, reaching a high passage with a cape, using Yoshi to cross a gap, finding a concealed pipe, or navigating an alternate ghost-house door. If an attempt fails, repeat that same level and correct the specific mistake rather than switching immediately to another route.
Use completed-castle replays for boss and room drills. Practice reaching the boss while preserving a reserve power-up, then repeat the encounter until the movement pattern is predictable. For Bowser's Castle, choose one entrance route and learn its room sequence before trying to improve the pace. A fast run is built by removing deaths, hesitation, and unnecessary detours.
- Train one movement technique at a time.
- Practice one secret exit until its landmarks are familiar.
- Rehearse castle rooms and boss encounters separately.
- Track whether each failure came from movement, damage, timing, or route choice.
6. Hunt remaining exits without a false map checklist
The original SNES release does not provide a complete overworld exit checklist through Select. Select is reserved for releasing the item in the reserve box during a stage. To find missing exits, use the number beside your save file together with a written list of every normal and secret exit in the game.
Make a checklist with separate entries for every counted goal. Include the normal goal and secret goal for stages that have both, and include the normal exits in Star World even when they do not advance the route toward the next Star Road. Mark an entry only after you have personally cleared that exit and then reached a save opportunity that records the result.
Prioritize areas that commonly hide missed goals: Forest of Illusion, ghost houses with alternate routes, the Star World stages, and red-dot courses whose secret exits create map branches. The visible overworld paths are not enough to prove completion because some exits overlap, loop back, or open routes that do not look like new destinations. Compare the written list against the file-select number after saving.
The completion target for the original North American release is 96 counted exits. When the file reaches 96, the file-selection screen displays the 96 with a star. That is the practical in-game completion mark for the exit hunt. Yoshi's House, map paths, and simply entering Bowser's Castle are not additional counted exits.
- Do not use Select as an overworld status screen.
- Prepare a written list of all normal and secret exits.
- Check Forest of Illusion, ghost houses, red-dot courses, and Star World carefully.
- Save after important discoveries and compare the file-select total.
- Confirm the file displays 96 with a star for full exit completion.
7. Clear Special World and set optional challenge rules
Reach Special World by clearing Star World 5 through its secret exit. The Special World route contains eight stages: Gnarly, Tubular, Way Cool, Awesome, Groovy, Mondo, Outrageous, and Funky. Clear them in map order, keeping a power-up when possible and learning each stage's gimmick before trying to move quickly.
After all eight Special World stages are cleared, the original game changes the appearance of Dinosaur Land and some enemy graphics. This visual change is separate from the 96-exit star. Treat the map-color change as confirmation that Special World is complete, not as proof that every counted exit has been recorded.
For a low-death attempt, start with a route you have already completed safely. Keep a reserve power-up before difficult stages and choose a controlled jump whenever a faster technique is inconsistent. For a no-cape run, plan around ordinary jumps, shells, Yoshi, and Switch Palace blocks. For a no-Yoshi run, avoid treating Yoshi as disposable protection or a required shortcut. For a no-cape, no-Yoshi run, build a separate route plan rather than imposing both restrictions halfway through a normal attempt.
Other useful local challenges include a zero-death campaign, clearing a selected world without losing a life, collecting every Dragon Coin encountered on a chosen route, or completing the main campaign while never using the reserve item. These are personal rules; the original game does not record them as separate achievements or categories.
- Open Special World through Star World 5's secret exit.
- Clear all eight Special World stages.
- Confirm the Dinosaur Land appearance change.
- Define challenge rules before starting an attempt.
- Use a separate save slot for restrictive challenges.
Before you move on
- Bowser has been defeated and the complete ending has played.
- The pre-Bowser save remains available after resetting the console.
- A chosen personal speedrun route can be completed repeatedly without route uncertainty.
- Special World is cleared if that optional objective was selected.
- For full exit completion, the file-select screen shows 96 with a star.
Finishing up
Beat Bowser in Bowser's Castle through either the Front Door or Back Door and view the ending sequence to complete the main campaign.
After the ending finishes, reset the console and reload the latest save made before entering Bowser's Castle; the original SNES release does not create a new post-Bowser saved overworld state.
If you intended 100% completion, confirm 96 counted exits on the file-selection screen, including all five Star World normal exits, all five Star World secret exits, and all eight Special World exits.
If you used Star Road, confirm the relevant secret exits and Star Road connections were completed, while remembering that these shortcuts do not permanently remove access to other overworld routes.
For the conventional campaign route, progress through the seven main Dinosaur Land worlds, complete the required Valley route, and defeat Larry before entering Bowser's Castle Front Door.
Choose your next gameScreenshots & video
Game imagery for reference. Follow the written chapters above for the route and strategies.
Sources & references
Our original guide draws on the references below. Check the edition at the top of this page before following controls or unlock requirements.
- Super Mario World — Official SNES Manual
- Super Mario World — Official Super NES Instruction Manual
- Super Mario World — Guide and Walkthrough for Super Nintendo
- Super Mario World — Guide and Walkthrough — Super Nintendo — GameFAQs
- How do I save? — Super Mario World Q&A — GameFAQs
- Super NES Instruction Manuals: Super Mario World
- Donut Plains 1 - Super Mario World Walkthrough
- Super Mario World — Guide and Walkthrough — Super Nintendo
- Super Mario World — Guide and Walkthrough — Super Nintendo
- Super Mario World — Boss Guide, GameFAQs
- Super Mario World — Iggy's Castle, StrategyWiki
- Super Mario World — Yellow Switch Palace, StrategyWiki
- Yoshi's Island 2 — Super Mario World Walkthrough
- Super Mario World — Donut Plains 1 Walkthrough
- Super Mario World — Donut Secret 1 Walkthrough
- Super Mario World — Donut Ghost House Walkthrough
- Super Mario World — Donut Secret House Walkthrough
- Super Mario World — Switch Palace Locations
- Super Mario World — List of All Exits and Secret Exits
- Super Mario World — Guide and Walkthrough by Pop, GameFAQs
- Super Mario World/Vanilla Dome — StrategyWiki
- Super Mario World/Vanilla Dome 1 — StrategyWiki
- Super Mario World/Vanilla Dome 3 — StrategyWiki
- Super Mario World/Vanilla Secret 1 — StrategyWiki
- Super Mario World/Vanilla Ghost House — StrategyWiki
- Super Mario World/Red Switch Palace — StrategyWiki
- Cheese Bridge Area — Super Mario Wiki
- Twin Bridges — Super Mario Wiki
- Super Mario World/Cheese Bridge Area — StrategyWiki
- Super Mario World — Guide and Walkthrough for Super Nintendo by jonthomson
- Super Mario World/Forest of Illusion — StrategyWiki
- Super Mario World/Forest of Illusion 1 — StrategyWiki
- Super Mario World/Forest of Illusion 3 — StrategyWiki
- Super Mario World/Forest Ghost House — StrategyWiki
- Super Mario World/Forest of Illusion 4 — StrategyWiki
- Super Mario World/Forest Secret Area — StrategyWiki
- Super Mario World/Blue Switch Palace — StrategyWiki
- Super Mario World — Guide and Walkthrough, Chocolate Island and Sunken Ghost Ship sections
- Super Mario World — Chocolate Island 2 reference
- Super Mario World — Chocolate Island 3 reference
- Super Mario World — Chocolate Fortress reference
- Super Mario World — Chocolate Secret reference
- Super Mario World — Wendy’s Castle reference
- Super Mario World — Sunken Ghost Ship reference
- Super Mario World/Valley of Bowser — StrategyWiki
- Super Mario World/Valley of Bowser 2 — StrategyWiki
- Super Mario World/Valley Ghost House — StrategyWiki
- Valley Ghost House — Super Mario Wiki
- Valley Ghost House — Super Mario World Walkthrough
- Valley of Bowser 3 — Super Mario Wiki
- Valley Fortress — Super Mario Wiki
- Valley of Bowser 4 — Super Mario Wiki
- Super Mario World Walkthrough — Valley of Bowser 4
- #7 Larry's Castle — Super Mario Wiki
- Front Door — Super Mario Wiki
- Super Mario World — Boss FAQ, GameFAQs
- Super Mario World — Boss Levels Reference
- Super Mario World Walkthrough — Star Road Entrances
- Super Mario World Walkthrough — Star World
- Super Mario World — Star World
- Super Mario World — Secret Exit List
- Super Mario World Walkthrough — Forest Fortress
- Way Cool — Super Mario World Walkthrough
- Funky — Super Mario World Walkthrough
- Super Mario World/Way Cool — StrategyWiki
- Super Mario World — Game Resources for Super Nintendo Entertainment System
- Super Mario World — Guide and Walkthrough
- Super Mario World — Secret Goals FAQ for Super Nintendo
About the game & collecting notes
- Platform
- Super Nintendo Entertainment System
Step-by-step campaign walkthrough for the original Super Nintendo Entertainment System (USA) release of Super Mario World. Covers core progression from Yoshi’s House to Bowser’s Castle, boss tactics, all required secret exits to reach Star Road and Special World, cape/Yoshi techniques, and an optional 100% exits guide. Practical, route-focused directions for finishing the main ending and completing optional objectives.
Darryl Polo
Darryl Polo loves tinkering with emulation and revisiting retro games. He enjoys exploring how old favorites play on different setups and sharing what he learns along the way. At Joking Joystick, he writes about the games, hardware, and small discoveries that keep the hobby fun.
Our editorial standardsFound a step that needs another look? Help us improve this guide.