
Super Mario World 2: Yoshi's Island (SNES, USA) — Complete Campaign Walkthrough
Step-by-step coverage of the original Super Nintendo Entertainment System release (USA). Follow the six worlds from the Level Selection screen, clear all 48 regular stages, defeat Baby Bowser in World 6-8, and use the original scoring system to unlock the six optional Extra stages and six world Bonus Challenges. Optional 100-point guidance explains Flowers, Red Coins, Stars, Middle Rings, and the requirements for full SNES postgame completion.

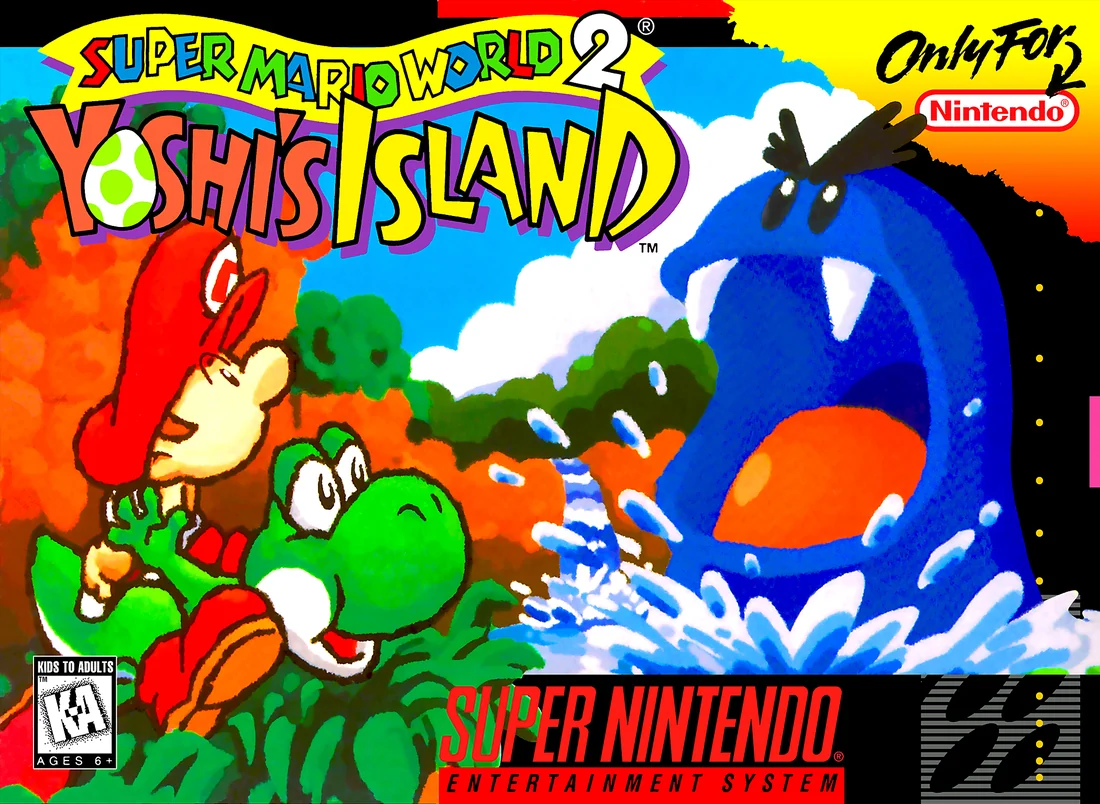
Find a copy
Super Mario World 2: Yoshi's Island Super Nintendo Entertainment System
We may earn a commission if you buy through these links, at no extra cost to you. As an Amazon Associate I earn from qualifying purchases.
Opens retailer search results. Check the model, edition, seller, availability and current price before buying.
Before you begin
This guide is written for the original Super Nintendo Entertainment System cartridge of Super Mario World 2: Yoshi's Island, USA.
Follow the Level Selection screen from World 1-1 through World 6-8, using practical directions for the main campaign, boss encounters, Baby Mario recovery, and the original SNES controls.
The main campaign ends after defeating Baby Bowser in World 6-8 and viewing the ending sequence.
Optional sections explain how to earn 100 points in every regular stage, unlock each world's Extra stage and Bonus Challenge, and clear the six original SNES Extra stages.
Game Boy Advance Secret stages, remake-only mechanics, and alternate-port progression are outside this guide's completion scope.
Set yourself up for the run
Familiarize yourself with the SNES control layout used by the original manual: Jump + Flutter (hold B after a jump to flutter), Aim/Throw eggs with A (two aiming modes), tongue/grab with Y, and Start to pause/select special items.
Consult the manual if using an emulator or reconfigured controllers so button roles match.
(Source: official manual conversion).
Practice three basic maneuvers before attempting new areas: (1) short jump and flutter timing to reach high ledges, (2) swallow + create eggs and practice aiming with the A cursor, and (3) ground pound (press down in midair) for secrets and enemy-stuns.
These are used constantly in the campaign.
(Source: manual, strategy references).
Know the per-stage scoring targets and how they affect extras: five Flowers per stage, twenty Red Coins per stage, Stars that refill the Countdown Timer, and the Middle Ring that gives 10 Stars and becomes an automatic checkpoint.
A perfect 100 in all eight regular stages of a world is required to unlock that world’s Extra/Special stage.
Plan retries for stages you want to perfect.
(Source: manual, wiki).
Adjust risk vs reward: keeping Baby Mario safe is the primary objective to finish a stage.
If you’re chasing Flowers or Red Coins, plan exits or middle ring usage to avoid losing progress.
If you take heavy damage near a goal, use Middle Rings or purposely pass through a Winged Cloud/Star to refill the Countdown Timer.
(Source: manual, guides).
Collect and conserve eggs: Yoshi can hold up to six eggs; some levels provide an Anytime Egg which refills your supply.
Use eggs both offensively (bosses, ranged enemies) and as tools to trigger items, reach red coins and activate distant switches.
When aiming, you can lock the cursor or use the hasty mode—use whichever matches your timing.
(Source: manual, guides).
Use metamorphosis sections intelligently: vehicle transformations (helicopter, train, submarine, etc.) change controls and let you reach otherwise inaccessible areas—keep these for red coins/flowers when possible and note that some bonus rooms require specific transformations.
(Source: manual).
Targeted hardware/emulation checks: if you are playing on a Virtual Console, GBA port, or emulator, confirm that the save system and reset behavior match the original SNES, and that button mapping preserves A for aiming/throwing and B for flutter.
Differences in remasters can alter control feel and some level geometry; consult your platform’s control options before beginning.
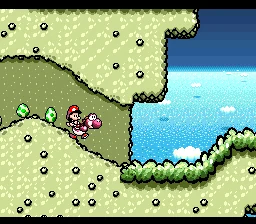
Core Mechanics — Yoshi, Baby Mario and the Scoring System
The original North American Super Nintendo version of Super Mario World 2: Yoshi’s Island is built around four dependable actions: movement and fluttering, tongue attacks, egg creation and egg throwing. Baby Mario’s Countdown Timer turns damage into a recovery problem, while Flowers, Red Coins and Stars determine whether a stage ends with an ordinary clear or a perfect 100-point score. Learn the controls and scoring rules before attempting full completion.
1. Learn the original SNES controls
Use the Control Pad to move Yoshi. Press Up to enter doors, press Down to crouch, and press Down while airborne to perform a ground pound when there is a valid surface or target beneath you. Press B to jump. Continue holding B during the jump to flutter, extending Yoshi’s horizontal travel and helping him correct his position over gaps. Fluttering is movement assistance, not protection from enemies or hazards.
Press Y to extend Yoshi’s tongue in the direction you are facing, or upward when the Control Pad is held upward. Yoshi can grab enemies and many objects. Press Y again to spit out what he is holding. Press Down while a swallowable enemy is in Yoshi’s mouth to turn it into an egg. The original SNES game allows Yoshi to carry a maximum of six eggs.
Egg throwing uses the A Button in both original control configurations. In Patient mode, press A once to display the aiming cursor and press A again to throw. In Hasty mode, hold A to display the cursor and release A to throw. While the cursor is active, press L or R to stop it at its current position. Holding Up locks the cursor directly above Yoshi. Press Down to cancel the throw. Patient is usually easier for careful puzzle shots; Hasty is useful when you already know the required angle. The control configuration can be changed from the world-map options screen.
- Move, crouch, enter a door and ground-pound with the Control Pad.
- Jump with B and hold B to flutter across a gap.
- Use Y to grab or spit, then Down to convert a swallowed enemy into an egg.
- Practise Patient and Hasty egg throws separately.
- Use L or R to stop the cursor and Up to aim directly overhead.
2. Treat eggs as tools
Eggs are useful for more than defeating enemies. Throw them at Winged Clouds, switches, distant enemies and objects that Yoshi cannot reach with his tongue. Use the aiming cursor to line up a direct shot, and use walls or floors for ricochets when the target is around a corner. If a target is above Yoshi, holding Up gives a reliable vertical throw rather than requiring a moving cursor.
Ordinary green eggs are the standard supply. Yellow and red eggs have additional effects when they break, so do not automatically spend a colored egg on a routine enemy if a nearby puzzle, Star group or coin opportunity can benefit from it. Before entering a section that visibly contains a switch, Winged Cloud or distant collectible, keep at least one egg available. If Yoshi is empty-handed, swallow a suitable enemy or use an egg-producing object before advancing.
Some stages provide special items that solve specific problems, such as an Anytime Egg that restores Yoshi’s egg supply. These items are optional aids rather than replacements for learning the normal swallow-and-throw cycle. For a first clear, spend ordinary eggs freely on safety. For a perfect-score replay, reserve an egg whenever the route ahead contains a cloud, switch or collectible that cannot be reached otherwise.
- Keep an egg available before a puzzle or hazardous crossing.
- Use direct throws for nearby targets and ricochets for targets around corners.
- Preserve unusual colored eggs when their special effect may help collect Stars or coins.
- Do not enter a switch or Winged Cloud section with no way to produce another egg.
3. Understand Baby Mario’s Countdown Timer
At the beginning of a stage, the Countdown Timer starts at 10. When Yoshi is hit by an enemy, Baby Mario leaves Yoshi and floats in a bubble. The timer counts down while Baby Mario is separated. Touch the bubble to recover him before the counter reaches zero. If the timer reaches zero, Toadies carry Baby Mario away and Yoshi loses a life. Falling into a pit, lava or another fatal hazard can also cost a life without using this ordinary separation sequence.
Collect small Stars to increase the timer, up to a maximum of 30. If the timer is below 10 when Yoshi recovers Baby Mario, it slowly rises back toward 10; this automatic recovery does not continue beyond 10 and does not by itself produce the 30 Stars required for a perfect score. The practical rule is simple: Stars are both emergency rescue time and end-of-stage score points.
When Baby Mario floats away, stop pursuing optional Flowers or Red Coins unless the bubble is already directly on your route. Reach the bubble first, using fluttering, platforms and safe egg throws if necessary. After the rescue, collect nearby Stars before attempting the difficult section again. A perfect-score attempt should be abandoned and replayed if the timer has fallen too low near the end and there are no safe Star supplies left.
- Remember that a new stage begins with 10 Stars, not 30.
- Recover Baby Mario before taking a distant detour for a collectible.
- Use Star groups to extend the rescue window and build the final score.
- Reach the stage-end scoring point with 30 Stars for the timer portion of a perfect result.
4. Use Middle Rings as checkpoints and Star supplies
Jump through a Middle Ring to activate it. The ring records a continue point and awards 10 Stars, with the total still limited by the 30-Star maximum. If Baby Mario is currently separated, the added Stars can extend the rescue window; otherwise they contribute to the stage’s available Star total. The manual describes the ring as a point from which Yoshi can continue after failing before the stage is completed.
Take a Middle Ring during a normal completion run whenever it is safe. It protects the earlier portion of the stage and gives a large timer boost. During a perfect-score attempt, activate the ring before a difficult late section, then avoid unnecessary damage afterward. Do not assume that activating it repairs missing Flowers or Red Coins, and do not assume that it guarantees 30 Stars at the goal.
A Middle Ring is not a substitute for extra lives. If the player reaches a full game over before completing the stage, the manual states that the stage must be restarted from the beginning rather than resumed at the ring. Consequently, use the ring as protection against an individual failed attempt, but preserve lives when practising a difficult section.
- Activate each Middle Ring unless deliberately restarting a practice run.
- Use the ring’s 10-Star award to restore a low timer or prepare for a difficult section.
- After continuing from a ring, still collect every required Flower and Red Coin.
- Remember that a full game over sends the stage back to its beginning.
5. Build and verify a 100-point stage score
Each regular stage contains five Flowers and twenty Red Coins. The stage score awards 10 points for each Flower, 1 point for each Red Coin and 1 point for each Star remaining in the timer, for a maximum of 100 points. To earn 100, collect all five Flowers, collect all twenty Red Coins and finish with the timer at 30. These requirements must be achieved in the same completed run; collecting an item on one attempt and finishing with a better timer on another does not combine the results.
For a newcomer, clear a stage safely before attempting perfection. On the replay, search in a consistent order: inspect the main route, then upper ledges, alcoves, side rooms, destructible scenery and areas opened by Winged Clouds. Use eggs for distant items and look upward whenever the camera permits. Ordinary yellow coins do not count as Red Coins, so verify that each coin has the red appearance before leaving an area.
The game records the stage’s highest completed score. A run with all Flowers and Red Coins but fewer than 30 Stars is not a perfect 100. Likewise, reaching the goal with 30 Stars is insufficient if even one Flower or Red Coin is missing. Check the result after the stage ends and replay immediately if the score is below 100, while the route and missed area are still familiar.
- Collect all five Flowers.
- Collect all twenty Red Coins.
- Finish with 30 Stars.
- Confirm the completed stage displays a 100-point result.
Before you move on
- You can perform both Patient and Hasty egg throws without accidentally releasing the egg.
- You can stop or vertically lock the egg cursor with L, R or Up and cancel the throw with Down.
- You understand that Baby Mario’s separation timer starts at 10, increases through Stars and caps at 30.
- You have activated a Middle Ring and understand both its checkpoint function and its 10-Star award.
- You can state the complete perfect-score requirement: five Flowers, twenty Red Coins and 30 Stars at the stage finish.
- You can distinguish a safe stage completion from a recorded 100-point result.
References for this chapter
Survival and Recovery — Keeping Baby Mario Safe
When Yoshi is hit, Baby Mario floats away in a bubble and the current Star total becomes the Countdown Timer. Recover him before the timer reaches zero, using the safest route and nearby Stars rather than chasing optional collectibles. Middle Rings are valuable because they create a continuation point and add 10 Stars, but they do not prevent the next hit or survive a Game Over.
React immediately when Baby Mario is separated
A damaging hit knocks Baby Mario from Yoshi and starts the Countdown Timer. The timer is 10 at the beginning of a stage, but if Yoshi has already collected more Stars, that higher total is used when the separation occurs. Stop searching for collectibles and locate Baby Mario’s bubble before making another attack or jump.
Take the safest direct route toward the bubble. If it is above Yoshi, jump underneath it and use Yoshi’s tongue upward when it comes within range. The original SNES manual also confirms that Yoshi can hit the bubble with an egg to bring Baby Mario closer. This is often safer than jumping through the hazard that caused the hit, especially near narrow ledges, enemies, or pits.
Do not automatically run toward the nearest Star before checking the bubble’s position. The first priority is to reduce the distance to Baby Mario. A Star is useful only if it can be collected without taking a longer or more dangerous route.
- Find Baby Mario’s bubble before chasing any collectible.
- Use the tongue upward when the bubble is within reach.
- Throw an egg at the bubble when that is safer than jumping into it.
- Avoid the enemy or obstacle that caused the original hit.
Use Stars to extend the recovery window
Each Star adds time to the Countdown Timer, up to a maximum of 30. During an emergency, collect nearby Stars that lie on the route to Baby Mario. Do not detour across a hazardous platform or through a long enemy section for a distant Star unless the direct route is even more dangerous.
Winged Clouds can be useful when they contain Stars. Break one with an egg or another suitable attack only when it is close enough to reach before the timer expires. A cloud that requires a difficult jump, a long climb, or a return through a dangerous passage is not a reliable emergency plan. Treat it as a possible resource, not as a guaranteed rescue.
After Yoshi recovers Baby Mario, the timer stops counting down. If the timer was below 10, it gradually rises back to 10. It does not naturally refill above 10, so collecting additional Stars is required if you want a 20- or 30-point safety margin for the next hazard or a perfect-score finish.
- Collect the closest safe Stars during a recovery.
- Use a Star-producing Winged Cloud only when it is reachable in time.
- Remember that natural recovery stops at 10.
- Collect additional Stars after recovery if you need the timer above 10.
Activate every Middle Ring before a dangerous section
Jump through each Middle Ring you encounter, with particular priority given to rings before bosses, long platforming sequences, water hazards, or areas where a fall is difficult to recover from. Activating a ring gives Yoshi 10 Stars and records a continuation point for the stage.
The 10 Stars immediately improve the recovery margin. If Yoshi is hit after the ring, Baby Mario still floats away and the timer still counts down, but the added Stars give more time to reach him. The ring also allows a failed attempt to continue from that section instead of restarting the entire stage, provided the game has not reached a Game Over.
A Middle Ring is not temporary invincibility. After passing through it, continue playing defensively. Do not deliberately take a hit to test the checkpoint, and do not assume that the ring protects collectibles already collected during the current attempt. Its primary benefits are the continuation point and the 10-Star award.
- Jump through the ring itself to activate it.
- Confirm that 10 Stars were added.
- Use the checkpoint before committing to a difficult section.
- Continue avoiding hazards after activation.
Abandon optional routes when Baby Mario is in danger
For a normal campaign run, save the stage before pursuing every Flower and Red Coin. If Baby Mario is floating and the remaining collectible requires a detour, a risky flutter, or a return through enemies, leave it behind and recover him first. A missed collectible can be collected on a replay; a timer reaching zero costs a life.
This rule is most important near bottomless pits, moving platforms, Bandits, narrow tunnels, and areas where a second hit would send Baby Mario in the opposite direction. A second hit can also force Yoshi to spend the remaining timer recovering from a worse position, so the safest route is usually the one that avoids further contact rather than the fastest-looking route.
For a perfect-score attempt, divide the work into two goals. First, learn a safe route to the Goal Ring and activate the Middle Ring. Then replay the stage to search for Flowers and Red Coins. If a collectible is missed while Baby Mario is safe, continue to the goal if the route remains stable; if Baby Mario is already separated, prioritize the recovery and accept the missed item.
- Recover Baby Mario before entering a risky optional detour.
- Finish a safe run before attempting a perfect-score replay.
- Leave a collectible for later if reaching it risks a second hit.
- Use the map and stage landmarks to remember where a missed item was located.
Understand losing a life versus a Game Over
If the Countdown Timer reaches zero, Kamek’s Toadies take Baby Mario and Yoshi loses a life. When a Middle Ring has been activated, the next attempt can continue from that ring’s section. Without an activated ring, the stage restarts from its beginning. This makes Middle Rings especially important in long stages and before difficult final areas.
A Game Over is different from losing one life. The original manual states that if the game ends before the stage is completed, the stage must be started from the beginning. Do not assume that the current Middle Ring will remain available after a Game Over. If several attempts are failing in the same section, stop trying to force a perfect score, use the safest route, and complete the stage before returning for missed collectibles.
A defensive completion is useful practice rather than wasted progress. It teaches the locations of the Goal Ring, Middle Ring, Star sources, enemy patterns, and recovery routes. Once the stage is cleared, replay it with a specific target: first Flowers, then Red Coins, and finally a full timer at the goal if the score is still incomplete.
- Activate a Middle Ring before a difficult section.
- Treat the timer reaching zero as a lost life, not as a harmless reset.
- Remember that a Game Over sends the stage back to its beginning.
- Secure a normal completion after repeated failed perfection attempts.
- Replay the completed stage for remaining score categories.
Before you move on
- You can identify Baby Mario’s bubble immediately after a hit and choose a safe route toward it.
- You know how to use an upward tongue attack or an egg to bring the bubble within reach.
- You collect nearby Stars during a recovery without taking a longer, more dangerous detour.
- You understand that the timer can reach 30 but naturally refills only to 10 after Baby Mario is recovered.
- You activate Middle Rings by jumping through them and recognize their 10-Star award.
- You know that a Middle Ring helps after a lost life but does not prevent damage or preserve the stage position after a Game Over.
- You can complete a defensive run to the Goal Ring before replaying the stage for Flowers, Red Coins, and the remaining score.
Common Level Tools — Eggs, Metamorphoses, and Special Items
The original Super Nintendo version gives Yoshi a compact toolkit for combat, exploration, collectible hunting, and recovery. Eggs are the most important general-purpose tool, while Morph Bubbles temporarily change Yoshi into vehicles suited to particular routes. Stored Special Items can refill eggs, expose hidden objects, create Stars or Winged Clouds, or give Yoshi a limited elemental attack. Learn what each tool actually does before spending it, especially during a 100-point attempt.
Build and manage Yoshi’s egg supply
Yoshi can carry up to six eggs behind him. The normal way to make an egg is to catch an edible enemy with Y, then press Down while the enemy is in Yoshi’s mouth. Some Egg Blocks and other level objects also provide eggs, so check the room before using a stored item. If you are carrying fewer than six eggs, refill whenever a safe enemy or Egg Block is available.
Treat eggs as puzzle ammunition rather than ordinary attacks. A later Winged Cloud, switch, Fly Guy, distant Flower, or Red Coin may require a projectile, so do not spend the entire supply on enemies that can simply be jumped over or swallowed. If the route has a nearby enemy, leave it available as an emergency egg source until the required targets have been activated.
The SNES manual identifies three useful non-green egg results. A Yellow Egg produces a coin when it hits a suitable target, a Red Egg produces two Stars, and a Flashing Egg produces a Red Coin when used against the appropriate target. A green egg can be bounced off solid scenery to change its color, but this is an optional technique and is less dependable than using an egg that already has the needed effect.
- Enter projectile-heavy rooms with several eggs whenever possible.
- Use ordinary enemies for egg production before consuming a stored Anytime Egg.
- Keep at least one egg when the next unexplored section contains a Winged Cloud, switch, or distant collectible.
- Use colored or flashing eggs only when you know what target will produce the needed reward.
Aim and throw eggs with the original SNES controls
Open the level-selection screen’s controller configuration and choose Patient or Hasty. In Patient mode, press A once to display the aiming cursor and press A again to throw. In Hasty mode, hold A to display the cursor and release A to throw. L or R stops the cursor’s movement, allowing you to lock the aiming line while repositioning Yoshi. Press Down while aiming to cancel the throw and conserve the egg.
Use direct throws for switches, Winged Clouds, and nearby enemies. Ricochets can change an egg’s color or reach a target around an obstacle, but they require more space and are poor choices when Baby Mario is already in danger. Eggs can also collect certain coins and Flowers from a distance, trigger objects above or below Yoshi, and hit enemies that are unsafe to approach with the tongue.
When a target is moving, lock the cursor with L or R before adjusting Yoshi’s position. This is particularly useful on narrow ledges, during vehicle sections, and when a Fly Guy is carrying a collectible. If the shot is no longer safe, press Down to cancel instead of throwing just because the cursor is active.
- Patient: press A to aim, then A again to throw.
- Hasty: hold A to aim, then release A to throw.
- Use L or R to stop cursor movement.
- Press Down while aiming to cancel the shot.
Use the Anytime Egg for genuine supply problems
The Anytime Egg is a stored Special Item that immediately gives Yoshi a full supply of six eggs, even when he is empty-handed. Select it from the pause menu during an ordinary level. Special Items cannot be used during boss battles, so use the Anytime Egg before entering a boss door if the approach has consumed the eggs needed for the final room.
The best time to use it is before a long puzzle sequence with no edible enemies or Egg Blocks. It can save a scoring run when a Flower, Red Coin, or hidden Winged Cloud requires several careful throws. Do not spend it merely because the supply has dropped from six to five; refill naturally when the stage provides a safe source.
- Save the Anytime Egg for a projectile-heavy section.
- Activate it before a boss battle, not after the boss encounter has begun.
- Use the pause menu only when Baby Mario is safe and the immediate room is under control.
Use Winged Clouds and the Winged Cloud Maker correctly
A regular Winged Cloud is normally activated by striking it with an egg or another suitable projectile. Depending on the cloud and level, it can release Stars, coins, a Flower, stairs, platforms, or another route-opening effect. If a cloud moves slightly, is positioned in an otherwise empty space, or appears above a dead end, inspect it before leaving the screen.
The stored Winged Cloud Maker has a narrower, specific function: it turns enemies currently on-screen into Winged Clouds. It does not directly create a universal bridge or guarantee a switch. The resulting clouds generally provide a coin, a Star, or a 1-Up when activated, so use the item in a crowded room where several enemies are visible and where you have enough eggs to open the clouds.
Position Yoshi safely before using the item. Enemies outside the current screen are not part of the conversion, and the newly created clouds are only useful if you can reach and activate them. This makes the item a situational source of rewards or Stars, not a replacement for normal egg production.
- Clear immediate hazards before activating the Winged Cloud Maker.
- Use it while several enemies are visible on the current screen.
- Carry enough eggs to activate the clouds it creates.
- Do not depend on it to reveal a specific switch or guaranteed route.
Use the Magnifying Glass early in a search
The Magnifying Glass is a stored Special Item that makes Red Coins easier to distinguish from ordinary coins and reveals secret Winged Clouds as they come onto the screen. Activate it while exploring, not just beside the Goal Ring. It is most useful before entering a large room with several coin trails, upper ledges, side chambers, or vehicle movement where a hidden Red Coin is easy to miss.
The effect remains active for the stage unless Yoshi loses a life. It does not collect coins, create platforms, or solve the route automatically. After activating it, search above and below the main path, check dead ends, and revisit nearby branches only after Baby Mario is safe. Combine the visual information with fluttering, ground-pounding, eggs, and Morph Bubble routes to reach the marked objects.
- Activate the Magnifying Glass before a coin-heavy unexplored section.
- Scroll through the room so hidden Winged Clouds can become visible.
- Search side paths and upper ledges after the item is active.
- Remember that dying ends the effect, so use it again on the next attempt if necessary.
Match each Super Watermelon to the obstacle
Stored Super Watermelons place a watermelon in Yoshi’s mouth and replace his normal mouth attack with limited special ammunition. The Super Green Watermelon lets him spit seeds, the Super Red Watermelon lets him breathe fire, and the Super Blue Watermelon lets him breathe ice. These are temporary tools, not permanent upgrades.
Green seeds are the broadest-purpose option for attacking enemies, striking distant objects, and clearing certain barriers or thorny obstacles. Red fire is suited to enemies or hazards that respond to flames, including some icy sections. Blue ice freezes enemies and is useful against enemies or hazards that can be affected by freezing. Do not assume every frozen enemy becomes a safe platform or that every target reacts identically; use the watermelon for the specific obstacle in front of you.
Watermelon ammunition is limited. More importantly, the effect ends when Yoshi enters a pipe, enters a door, or advances to a new area, even if ammunition remains. Use the item near the puzzle it is meant to solve, and complete that room before changing areas.
- Green: seeds for general attacks, distant targets, and certain barriers.
- Red: fire for flame-sensitive enemies or icy obstacles.
- Blue: ice for freezing enemies and solving ice-based hazards.
- Finish the local puzzle before entering a pipe, door, or new area.
Before you move on
- You can produce eggs by swallowing enemies, understand the six-egg carrying limit, and use Egg Blocks when available.
- You can switch between Patient and Hasty aiming without confusing pressing A with holding and releasing A.
- You can explain when to save and use the Anytime Egg and Winged Cloud Maker.
- You can activate the Magnifying Glass before exploring a collectible-heavy section and know that dying removes its effect.
- You can choose Green, Red, or Blue Super Watermelon based on the immediate obstacle and know that the effect ends when changing areas.
- You can use Morph Bubbles as temporary route tools without assuming that a vehicle transformation or watermelon attack persists through the entire stage.
References for this chapter
Level Selection, Middle Rings and Unlock Basics
The original North American Super Nintendo release organizes progress through a Level Selection screen rather than a connected overworld. Each of the six worlds contains eight regular stages. The game has no Super Mario World-style secret exits or alternate overworld routes, although individual stages contain internal rooms, side paths and hidden areas. A perfect regular-stage score requires all five Flowers, all 20 Red Coins and 30 Stars at the finish. Perfecting all eight regular stages in a world unlocks that world’s Extra stage and its replayable Bonus Challenge.
Use the Level Selection screen
After the opening sequence, choose stages from the Level Selection screen. The screen is divided into six numbered worlds, with eight regular entries in each world. The regular entries include ordinary action stages, fort stages and castle stages. Select a cleared stage to replay it, or return to an earlier stage when its recorded score is below 100.
The original SNES edition does not use a connected island map for navigation. Do not search for secret exits, alternate goal routes or map paths that lead to hidden worlds. Any optional rooms or detours are contained within individual stages. The Extra and Bonus entries are accessed from the Level Selection screen after their unlock conditions are met.
A safe first clear is useful even when it does not produce 100 points. Learn the stage layout, locate the Middle Ring and identify where the final Flowers, Red Coins and Star supplies appear. Then replay the stage for perfection rather than repeatedly risking a full-score attempt while still learning the route.
- Choose regular stages from the Level Selection screen.
- Treat side rooms and hidden areas as internal stage routes, not secret overworld exits.
- Clear unfamiliar stages once before attempting a perfect score.
- Replay stages whose recorded score is below 100.
Understand the perfect 100-point score
The stage score has three parts. Each Flower is worth 10 points, each Red Coin is worth 1 point, and each Star remaining at the finish is worth 1 point. The maximum is five Flowers for 50 points, 20 Red Coins for 20 points and 30 Stars for 30 points. A perfect result is therefore 100 points.
All five Flowers and all 20 Red Coins must be collected during the same completed run. Stars also matter at the finish: reaching the Goal Ring with fewer than 30 Stars lowers the score even if every Flower and Red Coin was collected. The Countdown Timer begins at 10 and can be increased to a maximum of 30 by collecting Stars and using other valid Star sources. If Baby Mario is recovered while the counter is below 10, it slowly rises back toward 10, but this recovery does not refill the counter to 30.
Fort and castle stages do not end with the ordinary Goal Ring roulette. Their Flowers still count for the score, however, so collect all five Flowers and all 20 Red Coins in those stages just as you would in a normal stage. The absence of a roulette does not change the requirements for 100 points.
- Collect all five Flowers in the stage.
- Collect all 20 Red Coins in the stage.
- Reach the finish with 30 Stars remaining.
- Confirm the result is 100 points on the stage-selection record.
Activate and use Middle Rings
Jump through a Middle Ring to activate it. The ring immediately awards 10 Stars and records a continuation point. If Yoshi loses a life later in the same stage, the game can restart him from that point instead of returning him to the beginning. The checkpoint state also preserves the Star count and eggs Yoshi had when he passed through the ring.
For a normal completion attempt, activate every Middle Ring you encounter. The extra Stars give Baby Mario more protection if Yoshi is hit, and the checkpoint is especially valuable before a long hazard section, a difficult vehicle segment or a boss approach. Do not pass beside a ring simply because the stage currently feels safe; the next section may be much less forgiving.
For a perfect-score attempt, activate the ring when it is safe and remember that it does not substitute for missing collectibles. Flowers and Red Coins collected before the ring remain part of the run if you continue from that checkpoint, but collectibles in sections after the ring must be collected again if the failed attempt is reset to the ring. If the game reaches a full game over, the stage restarts from its beginning and the temporary Middle Ring state is lost.
- Jump through each Middle Ring to activate it.
- Use the ring’s 10 Stars to strengthen the Countdown Timer before dangerous sections.
- Remember that the checkpoint preserves the relevant Star and egg state from activation.
- After continuing from a ring, recheck the section after the ring for missed Flowers or Red Coins.
- Avoid leaving the stage or allowing a full game over while relying on the temporary checkpoint.
Unlock the Extra stage and world Bonus Challenge
Each world has eight regular stages. To unlock that world’s optional content, every one of those eight regular stages must have a recorded score of 100 points. The requirement is evaluated separately for each world. A normal clear of the eighth stage is not enough, and seven perfect scores plus one lower score will not unlock the rewards.
When the eighth regular stage is completed and the game processes the world clear, return to the Level Selection screen. The previously unavailable question-mark entries for that world should be replaced by an Extra stage entry and a Bonus Challenge entry. In the international SNES release, Extra entries are displayed with a numbered star and the word EXTRA, while Bonus entries use a numbered Flower-style icon and the word BONUS.
The Extra stage is optional for the standard campaign ending. It is not a replacement for any regular stage and does not need to be cleared to trigger the ordinary ending after World 6-8 and the Baby Bowser battle. The world-specific Bonus Challenge is also separate from the random Bonus Challenge that may follow a Goal Ring.
- Record 100 points in all eight regular stages of one world.
- Finish the world so the game processes the completed set of scores.
- Return to the Level Selection screen.
- Confirm that both the EXTRA and BONUS entries have replaced their question marks.
- Do not count the Extra stage as one of the eight regular stages.
Use the Goal Ring roulette
On a stage that ends with a Goal Ring, the Flowers collected during that run determine which positions on the ten-position roulette display a Flower. Each collected Flower adds one winning Flower position. With all five Flowers, five of the ten positions are winning positions, giving the best possible chance but not a guarantee. Landing on a Flower sends Yoshi to a short Bonus Challenge after the stage score is calculated.
The possible Goal Ring Bonus Challenges are drawn from the game’s six mini-games: Flip Cards, Scratch and Match, Drawing Lots, Match Cards, Roulette and Slot Machine. Rewards can include extra lives or inventory items, depending on the mini-game. A Goal Ring Bonus Challenge is a one-time opportunity tied to that stage completion, unlike the world-specific Bonus Challenge unlocked by perfecting all eight regular stages, which can be replayed.
Collect Flowers before the Goal Ring whenever doing so is safe. If Baby Mario is separated, recover him first and secure the stage. Do not take a dangerous detour for a better roulette chance when it could cost a life or destroy a nearly complete 100-point run. The roulette is a useful source of supplies, not a required progression step.
- Collect as many of the five Flowers as the route safely permits.
- Expect improved odds rather than a guaranteed Bonus Challenge.
- Use roulette rewards to support later perfection attempts.
- Remember that fort and castle stages still require all Flowers for a 100-point score even though they lack the ordinary Goal Ring roulette.
Before you move on
- The player can select and replay stages from the Level Selection screen without looking for an overworld route.
- The player can explain that a perfect regular-stage score requires five Flowers, 20 Red Coins and 30 Stars at the finish.
- The player has activated Middle Rings before dangerous sections and understands that their temporary state is lost after a full game over or leaving the stage.
- The player knows that collectibles before an activated Middle Ring remain part of the run when continuing from that checkpoint, while later sections may need to be repeated.
- After perfecting all eight regular stages in a world, the player can return to the Level Selection screen and identify the newly available EXTRA and BONUS entries.
- The player understands that Flowers improve the odds of the Goal Ring roulette, while the world-unlocked Bonus Challenge is a separate replayable feature.
References for this chapter
- Super Mario World 2: Yoshi's Island — Super NES Instruction Manual
- Super NES Instruction Manuals: Super Mario World 2: Yoshi's Island
- Super Mario World 2: Yoshi's Island — Guide and Walkthrough — Super Nintendo
- Super Mario World 2: Yoshi's Island — The Mushroom Kingdom Guide
- Super Mario World 2: Yoshi's Island — Super Mario Wiki
- Yoshi's Island: Super Mario World 2 — Gameplay
World 1 — Yoshi’s Island: Safe Routes and Full-Score Strategy
World 1 contains eight regular stages. On a first playthrough, prioritize reaching each Goal Ring or defeating each boss safely. Return afterward for perfect scores, since every stage must be completed in one run with all five Flowers, all twenty Red Coins and thirty Stars remaining at the finish. Middle Rings are especially valuable before difficult collectible sections and boss approaches. Progress is selected from the Level Selection screen rather than a connected overworld route.
1. Make Eggs, Throw Eggs — World 1-1
Move right through the opening grassland and swallow Shy-Guys or Crazee Dayzees whenever you need eggs. Use eggs against the ground-level Wild Piranhas rather than taking unnecessary contact risks. Hit the first useful Winged Clouds with eggs, collecting the Flower, Stars and coins they release before continuing.
Take the pipe into the underground passage and use the Chomp Rock to clear enemies and reach the higher coins. Check the low paths beneath the wheel-shaped platforms for Red Coins and Flowers, then return to the main route. Near the ending, hit every accessible Winged Cloud before entering the Goal Ring.
For a safe clear, use the underground Chomp Rock route, preserve a few eggs and finish after checking the final cloud section. For a 100-point replay, sweep both upper and lower paths, verify every Winged Cloud has been opened and enter the goal with thirty Stars. If the timer is short, collect Stars first and leave a risky coin detour for another attempt.
- Use the underground Chomp Rock route.
- Search above and below the wheel-shaped platforms.
- Open the final Winged Clouds before the Goal Ring.
2. Watch Out Below! — World 1-2
Proceed carefully through the opening Incoming Chomp holes. Use nearby enemies for eggs and hit Winged Clouds for Flowers and Stars. Activate the first Middle Ring after the Chomp section and before the later platform and transformation routes; it becomes the restart point and immediately restores ten Stars.
After the spring and cloud route, reach the transformation bubble and become the Helicopter. During this timed section, stay high enough to inspect the walls and upper route for Flowers and Red Coins, but make small corrections instead of holding a direction continuously. If the form expires, return to the Yoshi Block and try the passage again rather than rushing.
When the Yoshi Block returns you to normal, check the platforms around the pipe and the lower route for the remaining Red Coins. Use the final Winged Cloud for Stars, then enter the Goal Ring. For perfection, treat the Helicopter section as its own sweep: check the upper walls, the secret passage containing Red Coins and the hidden passage above the exit before leaving the transformation area.
- Activate the Middle Ring before the main platform and Helicopter sections.
- Stay high during the Helicopter section and inspect the walls.
- Rebuild the timer with Winged Cloud Stars before the goal.
3. The Cave of Chomp Rock — World 1-3
Enter the cave and follow the Chomp Rock route. Ground-pound the posts and inspect the lower passages for hidden coins and Red Coins. Check the low pathways for Flowers before climbing back to the main route.
When you find the balloon carrying a key, hit it with an egg and carry the key back to the locked door. The room beyond is optional for basic completion, but it matters on a perfect-score attempt: defeat all four Wild Piranhas inside to reveal the Flower. Leave the room and continue through the cave.
In the later section, ground-pound the wooden posts and inspect the lower passages before taking the final pipe. Check the hidden cloud and coin room, then return to the main route and reach the Goal Ring. If Baby Mario is endangered while you are retracing a tunnel, recover him first; the side collectibles can be collected on a separate replay.
- Collect the key and return to the locked door.
- Clear the four Wild Piranhas in the locked room for its Flower.
- Search lower wooden platforms and the final coin room.
4. Burt the Bashful’s Fort — World 1-4
Move through the fort one hazard at a time. Use Egg Blocks and enemies to stock several eggs, and inspect the upper ceiling for cracked sections that lead to coins and alternate collectible routes. The fort has narrow platforms, lava lifts and falling hazards, so activate the Middle Ring before the long lava section.
In the boss room, Burt the Bashful hops across the arena. Throw eggs into him six times. Each hit makes him move faster, so stay in the lower, open portions of the room and avoid being trapped against a wall or edge. Ducking in the low areas gives you time to let him pass before standing up to throw another egg.
For a first clear, focus on maintaining a safe position and use the Middle Ring as your recovery point. For a perfect run, revisit the fort after learning the boss room. Check the upper cracked-ceiling routes, the lava lift section, the seesaw area and the moving platforms above the later lava hazards. Do not chase a nearby collectible if Burt has forced Yoshi toward a dangerous edge.
- Reach the Middle Ring before the final lava route.
- Enter the boss room with several eggs.
- Defeat Burt with six egg hits while using the sunken floor sections for cover.
5. Hop! Hop! Donut Lifts — World 1-5
This is an autoscrolling stage built around Donut Lifts. Stand near the center of each lift and use short flutter corrections when transferring between platforms. Avoid constant jumping, since it makes it easier to miss a lift or expose Baby Mario to an enemy.
Collect the early Flowers and Red Coins while the screen is calm, then activate the Middle Ring before the longer lift sequence. During the autoscroll, inspect both the upper and lower sides of each lift before the screen carries the area away. Use eggs on Winged Clouds or distant enemies, but retain enough eggs for the later cloud and enemy sections.
On a safe clear, stay with the lifts and take the Goal Ring when the final platform sequence ends. On a perfect replay, use the first run to learn the scroll rhythm, then deliberately pause at each safe platform to check the opposite side of the route. If the timer is low, collect Winged Cloud Stars before attempting a difficult transfer.
- Stay centered on the Donut Lifts.
- Search both sides of each scrolling section.
- Use the Middle Ring before the longest lift sequence.
6. Shy-Guys on Stilts — World 1-6
Treat the stilt-walking Shy-Guys as temporary platforms and egg sources. Swallow or defeat them only when the next landing area is clear. Flutter from one stilt enemy to the next, then land before the following enemy reaches Yoshi.
When the stage provides the Mole Tank transformation, use it to explore the dirt route instead of rushing straight through. Dig high through the section and inspect the upper passages; two Red Coins are placed along the Mole Tank route. Return to normal Yoshi at the transformation exit and continue through the upper ledges and wooden barriers.
Activate the Middle Ring before the last narrow-platform section. If Baby Mario is separated there, stop collecting immediately and recover him before attempting another flutter. For a perfect replay, revisit each stilt platform from both directions, check high ledges and ground-pound suspicious wooden surfaces before entering the final route.
- Use stilt enemies as temporary platforms.
- Search high during the Mole Tank section for two Red Coins.
- Activate the Middle Ring before the final narrow platforms.
7. Touch Fuzzy, Get Dizzy — World 1-7
Move slowly through the forest and avoid touching the Touch Fuzzies. Their effect makes Yoshi’s movement unreliable for a short time, so clear or bypass each group before attempting a difficult jump. Collect Stars from Winged Clouds before the Fuzzy sections and activate the Middle Ring before the final half of the stage.
Near the locked door, do not pass the flashing eggs. Collect them and throw them at the appropriate Tap-Taps; these special eggs are needed for Red Coins that ordinary attacks will not provide. Continue through the forest and inspect branches above and below the main trail rather than following the most obvious platform line.
Near the goal, pound through the red and yellow bridges and swim through the lower route to collect its coins. At the ramp-shaped ground, jump straight up from the highest point to reveal a Spring Ball. Use it to reach the hidden area, push the Chomp Rock to reveal the concealed Winged Cloud, hit that cloud and climb the Beanstalk. The Beanstalk route contains four Red Coins. Only take this detour when Baby Mario’s timer is secure; otherwise recover Stars first and return on a dedicated scoring run.
- Collect the flashing eggs near the locked door.
- Break the red and yellow bridges and check the swimming route.
- Use the Spring Ball, hidden Winged Cloud and Beanstalk for the final Red Coins.
8. Salvo the Slime’s Castle — World 1-8
Advance through the castle one platform at a time and keep several eggs available for the boss. Search the upper and lower sides of the rooms, especially around moving platforms and flower pots. Activate the Middle Ring before the final hazard route, then rebuild the Star total with Winged Clouds or other available sources.
The key is hidden in a flower pot. Use the nearby platform-flipping hazards to reach the pot, collect the key and open the locked door. Before leaving the route, check the platforms around the pot and the adjacent passages for Red Coins and Flowers. Do not assume the obvious center route contains every collectible.
Salvo the Slime begins large in the boss room. Hit him repeatedly with eggs, attacking from a distance. Each hit makes him smaller and causes Lemon Drops to break off. The Lemon Drops can damage Yoshi, but they can also be swallowed to produce more eggs. Salvo cannot directly damage Yoshi; he can push Yoshi toward the lava opening, so keep moving toward open space and avoid standing at the right edge. Continue attacking until Salvo disappears, completing World 1-8 and opening World 2 on the Level Selection screen.
- Find the key in the flower pot and open the locked door.
- Enter the boss room with several eggs and a strong timer.
- Stay away from the lava opening as Salvo becomes smaller and faster.
Before you move on
- All eight regular World 1 stages are cleared: Make Eggs, Throw Eggs; Watch Out Below!; The Cave of Chomp Rock; Burt the Bashful’s Fort; Hop! Hop! Donut Lifts; Shy-Guys on Stilts; Touch Fuzzy, Get Dizzy; and Salvo the Slime’s Castle.
- For the optional perfection route, every World 1 stage shows 100 points from five Flowers, twenty Red Coins and thirty Stars remaining at the goal.
- Burt the Bashful is defeated in World 1-4 and Salvo the Slime is defeated in World 1-8.
- After all eight regular stages show 100 points, Extra 1, Poochy Ain’t Stupid, appears on the World 1 Level Selection screen. The SNES version also unlocks the World 1 Bonus Challenge. The GBA-exclusive Secret 1 stage is not part of this original SNES completion check.
References for this chapter
- Yoshi's Island — Official North American Super NES instruction manual
- Super Mario World 2: Yoshi's Island — Guide and Walkthrough — Super Nintendo
- Super Mario World 2: Yoshi's Island — The Mushroom Kingdom Guide
- Shy-Guys On Stilts — Super Mario Wiki
- 1-8: Salvo The Slime’s Castle — Imasara Yoshi’s Island Guide
World 2 — Water, Clouds and Intermediate Hazards
World 2 introduces longer cloud routes, moving platforms, lava ferries, cave mazes and several transformation sections. Clear each level once before replaying it for 100 points. During a normal clear, prioritize reaching the next Middle Ring and keeping Baby Mario safe. During a scoring run, search every upper route, lower passage, side door, Winged Cloud and transformation area before taking the Goal Ring. World 2 ends with Roger the Potted Ghost, whose pot must be pushed off the platform rather than damaged with eggs.
Use a safe World 2 routine
At the beginning of each stage, swallow nearby enemies or use an Egg Block to build a supply. Keep several eggs for Winged Clouds, switches, distant Fly Guys and enemies positioned above pits. Do not spend every egg on enemies that can be jumped over.
Activate each Middle Ring before a major platforming, cave or boss section. For a first clear, continue forward after the checkpoint instead of repeatedly retreating for one missed collectible. For a 100-point replay, learn the route beyond the Middle Ring first, then return to search the upper path, lower path and side rooms with the timer protected.
If Baby Mario floats away, stop collecting immediately and return to him. A missed Flower or Red Coin can be recovered on another attempt; a long detour while the Countdown Timer is falling can cost the entire run.
- Carry eggs whenever the stage provides an Egg Block or swallowable enemy.
- Activate every Middle Ring before the next difficult section.
- Recover Baby Mario before attempting optional routes or risky jumps.
Clear 2-1: Visit Koopa and Para-Koopa
Treat the opening falling-block sections as timing puzzles. Stand on solid ground and let each block complete its movement before stepping below it. Search both above and below the blocks because the stage places collectibles on different elevations. Use eggs for Winged Clouds and distant enemies rather than jumping blindly from a falling block.
When Poochy appears, ride him across the spike route. Stay centered on his back and jump only when the next mound or platform requires it. This is safer than attempting long flutter jumps over the spikes. After the Middle Ring, allow falling blocks to settle before crossing, then check the upper side of the route for Flowers and Red Coins.
If the stage provides a temporary Super Baby Mario section, use it to cross the marked obstacle and collect nearby items before returning to Yoshi. Do not rush backtracking while the power is active; the safe campaign route is simply to complete the enclosed section and continue toward the Goal Ring.
- Wait for falling blocks instead of outrunning their movement.
- Ride Poochy across spikes whenever he is provided.
- Check both elevations around the falling-block routes.
Clear 2-2: The Baseball Boys
Open Winged Clouds near the beginning to lower barriers and reveal the first Flower route. Baseball Boys and Green Gloves can make the open areas dangerous, so attack from a side position or from outside their throwing range. Refill eggs from the nearby Egg Block or Shy Guy pipe before attempting the upper collectibles.
After the Middle Ring, look beneath the long wooden platform for a Winged Cloud guarded by a Slugger. Fire two eggs just over the Baseball Boy's head to strike the cloud without standing directly in front of the bat. In the Green Glove section, throw an egg horizontally into the chamber so the glove catches it and carries it toward the Red Coin. Stand near the red arrow on the opposite side so the returning throw does not force you into the pit.
Use the temporary transformation section as an exploration route rather than a speed challenge. Check both branches and collect items before leaving. If a Red Coin is above a narrow platform, wait for the platform to return instead of making a blind jump while Baby Mario is vulnerable.
- Use side attacks against Baseball Boys.
- Strike the low Winged Cloud from a safe position.
- Use the Green Glove to carry an egg into the Red Coin chamber.
- Search both branches of the transformation route.
Clear 2-3: What's Gusty Taste Like?
Gusty enemies can push Yoshi toward pits or disrupt a jump, so stay low and use Yoshi's tongue to eat them when possible. Build eggs from the Gusties and nearby enemies before entering the dirt and forest sections. Fluttering is useful for controlled descents, but do not hold the direction continuously near vertical gaps.
In the area with breakable dirt above Yoshi, search the left side for a hidden Switch. Use eggs to expose it, activate it, then follow the red arrow and press Down at the indicated location to enter the secret room. That room contains a concentration of Red Coins and is safer to complete before continuing than to revisit during the final route.
Use ground pounds on accessible dirt first, then use eggs to reveal switches, Winged Clouds and hidden openings. Complete enclosed rooms before moving on. If a temporary Super Baby Mario section appears, collect its nearby items and return to normal movement before attempting optional backtracking.
- Eat or egg Gusties before they can push Yoshi into a pit.
- Find the hidden Switch in the breakable-dirt section.
- Follow the red arrow into the secret Red Coin room.
- Finish side rooms before beginning the final route.
Defeat Bigger Boo in 2-4: Bigger Boo's Fort
Bring eggs into the fort because the opening stretch has limited ammunition. The first Boo enemies become vulnerable when Yoshi faces away and they pursue him. Fire an egg into a wall so it ricochets into the Boo's exposed face. Use the early switch to create the temporary bridge, then cross quickly and collect the Flower along the route.
Enter the side door containing two Big Boos and defeat both with ricocheted eggs. The Flower appears after they are gone. Later, use the high Winged Cloud to create the stair route, activate the switch and cross the temporary bridge. A carefully aimed ricochet into the Winged Cloud in the corner reveals the key needed for the locked door. Search the upper corridor and the room after the lava log ride for the remaining Flowers and Red Coins.
In the boss room, Kamek enlarges Bigger Boo. Face away from the boss and throw an egg against the wall so it rebounds into him. Bigger Boo is intangible while Yoshi faces him, so do not throw directly at the ghost. Fangs enter the room and can be eaten for additional eggs. Reposition whenever Bigger Boo closes in, then repeat the ricochet pattern five times. If Baby Mario is lost, recover him before attempting a difficult throw.
- Bring eggs into the fort.
- Use ricocheted eggs against pursuing Boos.
- Find the key by striking the Winged Cloud in the locked-route section.
- Defeat Bigger Boo with five successful ricocheted egg hits.
Clear 2-5: Watch Out For Lakitu
Ground-pound the early posts and inspect the moving log and teeter-totter sections for Red Coins. Lakitu throws Spiny Eggs from above, so use eggs against Lakitu when he blocks a narrow route, or wait until the next platform is clear before jumping. Do not remain beneath a Lakitu while trying to line up a flutter.
The key route requires careful ground pounding around breakable supports. Break the appropriate crate or block to obtain the key, then return to the locked door and enter the Train transformation. During the train section, follow the track and watch for Train Bandits. Use the route's turns rather than trying to jump away from every threat.
After returning to normal Yoshi, activate the Middle Ring before the final collectible section. Search the platforms, Winged Clouds and Fly Guys near the checkpoint for Flowers and Red Coins. The last stretch contains a dangerous enemy near the goal; jump over suspicious grass or bushes rather than walking through them while Baby Mario is exposed.
- Ground-pound posts and inspect moving logs.
- Obtain the key before entering the locked door.
- Use the Train transformation to follow the required track.
- Search the checkpoint area before taking the Goal Ring.
Clear 2-6: The Cave of the Mystery Maze
Begin by ground-pounding the dirt openings instead of assuming the surface route is complete. The early dirt passages contain Mufti Guys, Red Coins and a Flower. Continue downward until you reach the Egg Block, then search the nearby opening for the key and the door leading into the deeper cave.
In the cave, use Spring Balls to reach higher routes. A Winged Cloud hides a door to a room containing four Lantern Ghosts; defeat them to make the room's collectible rewards appear. Near the end of the cave, strike an Arrow Cloud with an egg to reveal another Flower. Keep track of which openings you have checked because several routes loop back toward earlier sections.
Take the Middle Ring before the final room. The last area uses platforms, Cloud Drops, Cactus Jacks and a Spring Ball leading toward Countdown Platforms and Spray Fish. Move one platform at a time, use short flutter corrections and wait for moving hazards to pass. The stage also contains a Watermelon Seed Spitting Contest bonus hut; it is optional and should not be entered while Baby Mario's timer is low.
- Ground-pound all reachable dirt openings in the first area.
- Use the key to enter the cave door.
- Complete the Lantern Ghost side room.
- Use Spring Balls and short flutter corrections in the final cave sections.
- Take the Middle Ring before the final platform route.
Clear 2-7: Lakitu's Wall
At the start, use the first Fat Guy as a platform to reach the upper ledge and the first Flower. Eat the next Fat Guy to create a large egg. Large eggs cannot be thrown far, but their impact clears enemies across the screen and turns them into Stars, making them useful for both safety and timer recovery. Use one before climbing into a crowded Wall Lakitu section if the route is blocked.
Stay on the high route near the beginning. Ground-pound the posts, strike the Winged Cloud to create a bridge and collect the Red Coins carried by the three Fly Guys before they escape. Search the area around the mini-battle hut, including the posts and the upper platforms, before dropping to the lower route.
Later, ground-pound posts around the Bullet Bill launchers and use eggs against Wall Lakitus. A hidden Winged Cloud in the soft rock reveals a Switch; activate it to create the route toward additional coins and the fourth Flower. After the Middle Ring, cross the falling-rock and spike sections carefully, then search the final Lakitu area for the last Flower and Red Coins. The Car transformation near the end is a forward-moving route: keep moving, avoid stopping under hazards and use the transformation exit to return to Yoshi.
- Bounce from the first Fat Guy to reach the upper ledge.
- Use a large Fat Guy egg to clear crowded screens and create Stars.
- Strike the bridge-making Winged Cloud and collect the three Fly Guy Red Coins.
- Find the hidden Switch in the soft rock.
- Activate the Middle Ring before the falling-rock and spike sections.
Finish 2-8: The Potted Ghost's Castle
The opening rooms use lava ferries and Lava Bubbles. Ride the ferries rather than attempting long jumps over the lava, and collect the Red Coins above the posts when the platforms reach a stable height. The first Flower is along the ferry and track route. Later rooms contain moving platforms, spikes and Shy Guys; clear enemies from narrow ledges before crossing them.
The Train transformation appears in the middle of the castle. Follow the track, watch for Train Bandits and take the branch that reaches the Flower and Yoshi block. After returning to normal Yoshi, search the upper and lower passages for the remaining collectibles. In the Bandit and pot section, inspect the pots and surrounding routes for the key, then use it on the locked door. Do not leave the area without checking the side passages, because the key route is easy to mistake for a dead end.
Roger the Potted Ghost cannot be defeated by throwing eggs at him. Push the pot toward the right-hand edge while avoiding the flames and bite attack. Shy Guys on the opposite side resist the push, so defeat or bypass them whenever they block the path, then resume pushing. Pause when Roger attacks rather than forcing Yoshi into contact with the pot. Continue until Roger and the pot are pushed off the right side.
- Use the lava ferries instead of attempting blind long jumps.
- Follow the Train track and take the route leading to the Yoshi block.
- Search the pot and side passages for the required key.
- Push Roger's pot to the right and off the platform.
- Do not waste eggs trying to damage Roger directly.
Before you move on
- Stages 2-1 through 2-8 are cleared: Visit Koopa and Para-Koopa, The Baseball Boys, What's Gusty Taste Like?, Bigger Boo's Fort, Watch Out for Lakitu, The Cave of the Mystery Maze, Lakitu's Wall and The Potted Ghost's Castle.
- Bigger Boo has been defeated with five successful ricocheted egg hits.
- Roger the Potted Ghost has been pushed off the right-hand edge of the boss platform.
- The Level Selection screen permits progression into World 3.
- For a perfect World 2, replay every regular stage until its result records all five Flowers, all twenty Red Coins and 30 Stars at the Goal Ring.
- After all eight regular World 2 stages reach 100, check the Level Selection screen for Extra 2, Hit That Switch!!, and the World 2 Bonus Challenge. The Extra stage is optional for the standard campaign ending.
References for this chapter
- Yoshi's Island — Official North American Super NES instruction manual
- Super Mario World 2: Yoshi's Island — The Mushroom Kingdom Guide
- Yoshi's Island: Super Mario World 2 — StrategyWiki Walkthrough
- Super Mario World 2: Yoshi's Island — GameFAQs SNES Guide by TheRewster, World 2 pages
- Super Mario World 2: Yoshi's Island — GameFAQs SNES Guide by TheRewster, World 2 continuation
- World 2 — Playing With Super Power: Nintendo Super NES Classics eGuide
- 2-7: Lakitu's Wall — Imasara Yoshi's Island Guide
- The Cave Of The Mystery Maze — Super Mario Wiki
World 3 — Verticality, caves and secret tunnels
World 3 runs from 3-1, Welcome To Monkey World!, through 3-8, Naval Piranha's Castle. Its stages hide collectibles above normal running routes, behind Winged Clouds, inside soft rock, across water sections, and in side rooms opened by switches. On the original Super Nintendo version, choose these stages from the Level Selection screen. For a reliable campaign clear, prioritize reaching each Middle Ring and finishing safely. For a perfect score, replay the stage after learning its route and sweep the branches methodically rather than risking Baby Mario during the first traversal.
1. Use a checkpoint-first routine
At the start of each World 3 stage, collect eggs from Shy Guys, Egg Plants, or Egg Blocks, but do not spend every egg immediately on distant coins. Keep eggs available for Winged Clouds, switches, Spear Guys, and cave obstacles. Reach the first Middle Ring before taking a dangerous side route whenever the level allows it.
If Baby Mario is separated, stop searching for Flowers or Red Coins and recover him first. Collect nearby Stars, pass through a Middle Ring, or use an accessible Winged Cloud that provides Stars if the Countdown Timer is falling. Once Baby Mario is safe, continue the collection sweep. If a collectible requires a risky retreat across a moving platform, water passage, or narrow bridge, finish the stage and replay it from the Level Selection screen instead.
World 3 frequently places collectibles above the obvious route or on the side opposite the next exit. Before dropping down a shaft, inspect upper ledges, leaves, posts, and Winged Clouds. Before climbing away from an area, check the lower corners and recesses. This habit prevents a late return through hazards.
- Keep several eggs before entering a vertical, cave, or boss section.
- Activate each Middle Ring before attempting a difficult detour.
- Recover Baby Mario before retracing for optional collectibles.
- Use the Level Selection screen to replay a stage instead of risking a completed run.
2. Clear 3-1, Welcome To Monkey World!
Follow the opening jungle route while checking elevated yellow fluff platforms, tree ledges, posts, and Winged Clouds. Ground-pound suspicious posts and throw eggs at clouds above slopes or platforms. The early and middle sections place Red Coins and Flowers above the normal running line, so flutter from solid ground and identify the landing platform before committing to a long jump.
The monkey sections contain elevated tree routes and open gaps. Defeat or bypass enemies before starting a long flutter, then land on solid ground before preparing another egg throw. If the visible route appears to end at a gap, search the upper trees and nearby clouds before dropping. A hit near the monkeys can send Baby Mario into open space, making recovery more difficult.
For a safe clear, follow the forward jungle route and inspect the final upper platforms before approaching the Goal Ring. On a scoring replay, use the Middle Ring as the start of a second sweep. Check the early posts, the water-side section, the spaces around the long log climb, and the later monkey platforms before entering the final approach. The stage also contains a hidden Bonus Area reached by following the underwater route in the middle portion, so investigate that branch when pursuing extra rewards rather than forcing it during a first survival run.
- Inspect yellow fluff platforms and upper tree ledges.
- Ground-pound posts and throw eggs at elevated Winged Clouds.
- Search the underwater branch if you are pursuing the optional Bonus Area.
- Finish the upper-route search before approaching the Goal Ring.
3. Cross 3-2, Jungle Rhythm...
Spear Guys block Yoshi's tongue from the front. Approach from behind, swallow them from a safe angle, or defeat them with an egg. Do not jump onto a shielded Spear Guy. Clear the early Spear Guys near the Wild Piranha before collecting the nearby Flower and Red Coins.
Use the checkered blocks as temporary moving platforms. Strike one while standing on stable ground, then ride it only as far as necessary. The paddle-wheel sections require the same discipline: let the platform rotate close to Yoshi instead of forcing a long flutter. Search the upper side of each climb for Winged Clouds, Flowers, and Red Coins.
In the middle section, inspect the foliage and recesses for the hidden Winged Cloud that reveals a switch. Activating it opens the entrance to a Bonus Area. At the highest paddle-wheel section, jump left behind the foliage to reach the alternate route into the next area. On a perfect-score replay, pass the Middle Ring first, then return through the platform sections for missed items. Never attempt a difficult platform jump while Baby Mario is floating.
- Attack Spear Guys from behind or with eggs.
- Use checkered blocks as temporary moving platforms.
- Search the middle recess for the Winged Cloud and switch.
- Check the foliage behind the highest paddle wheel.
- Delay risky platform retracing until after the Middle Ring.
4. Search 3-3, Nep-Enut's Domain
Move through the Nep-Enut zones carefully. Nep-Enuts cannot be defeated normally, but an egg can stagger one long enough to pass. Check the Winged Clouds around each outdoor section because they provide Stars and hide route-opening actions. Throw from stable ground rather than from the edge of a bridge.
At the far right of the second outdoor section, find the Winged Cloud that reveals a door to the third outdoor area. Enter that room and defeat all three Spear Guys; the Flower appears only after they are defeated. This is a required search point for a perfect score.
Use the Middle Rings as boundaries between collection sweeps. In the bridge, flat-ferry, and descending-stair sections, do not reverse direction immediately after spotting a missed Red Coin. Reach a stable platform or the next checkpoint first, then decide whether the return is safe. The final descent is especially poor terrain for improvising a retreat.
- Check Winged Clouds around every Nep-Enut zone.
- Find the far-right Winged Cloud that opens the side-room door.
- Defeat all three Spear Guys in that room for the Flower.
- Use stable platforms and Middle Rings before retracing over bridges.
5. Survive 3-4, Prince Froggy's Fort
Search both above and below the waterline. The central thorn contains a Winged Cloud that opens a side door. Later Winged Clouds provide Stars and Flowers, while the fort's water, spikes, Ball 'N' Chains, and Boo Guys punish hurried movement. Wait for rotating hazards to move into a favorable position instead of relying on a last-second flutter.
The fort's side rooms return to the main route, so note each entrance before leaving it. Use the Middle Ring in the interior route before completing the water and spike sections. A later Middle Ring near the boss approach is particularly useful for failed attempts. If a moving platform is not aligned, wait for its return rather than repeatedly fluttering while Baby Mario is exposed.
Frog Pirate swallows Yoshi and Baby Mario, beginning the fight inside its stomach. Stay near the center to avoid most stomach acid. Shy Guys fall from above; swallow one or spit it directly at the uvula. Eggs are not required, although making eggs and throwing them upward is also effective. Aim for the side of the uvula when possible: it takes fewer hits than striking the bottom. If Baby Mario is lost during the fight, prioritize the timer and recover him before continuing the attack.
- Search the central thorn for the Winged Cloud that opens the side door.
- Use the Middle Ring before the final water and spike rooms.
- Remain near the stomach's center during the boss fight.
- Spit Shy Guys or eggs at the side of the uvula.
- Recover Baby Mario immediately if a boss hit causes separation.
6. Clear 3-5 through 3-7 with deliberate retracing
In 3-5, Jammin' Through The Trees, check tree platforms and upper branches before dropping to a lower route. The stage hides Stars in Winged Clouds buried in soft rock, and its Red Coins sit around paddle wheels, spikes, and tall posts. A Flower in the later section must be collected by bouncing an egg off a wall, while another is reached with a watermelon seed. In the later part of Area 3, activate the switch on the tree to make coins appear above the pipe. Clear nearby enemies before making a long flutter or egg bounce.
In 3-6, The Cave Of Harry Hedgehog, use the starting tree to flutter to the upper-right route for its Red Coins. In the top-left interior section, break the hidden Winged Cloud to reveal stairs; follow them for the Stars, Flower, and Red Coins beyond. Harry Hedgehogs grow larger and sprout spikes when approached. Swallow or egg them only while they are still small. Later, transform into the Mole Tank and sweep the soft-rock tunnel rather than exiting as soon as the forward route becomes visible. The Mole Tank section contains both Red Coins and a Flower.
In 3-7, Monkeys' Favorite Lake, search the niche in the later part of Ground Area 1 for a hidden Winged Cloud. Break it, activate the revealed switch, and take the opened route. In Ground Area 2, break the central Winged Cloud to create the Beanstalk, then use the upper route behind the leaf. The Submarine section contains Red Coins and a Flower on the forward path; move steadily instead of reversing in confined water. Afterward, inspect the treetops, the water beneath the rocks, and the later water route before approaching the Goal Ring.
- In 3-5, inspect branches, soft rock, paddle-wheel gaps, and tall posts.
- Activate the 3-5 tree switch before leaving the later Area 3 section.
- In 3-6, defeat Harry Hedgehogs while they are small.
- Use the Mole Tank to sweep the soft-rock tunnel completely.
- In 3-7, activate the hidden switch and use the Beanstalk route.
- Collect the Submarine section's items while moving forward.
- Check both the treetops and water beneath the rocks before the final exit.
7. Finish 3-8, Naval Piranha's Castle
The castle begins with underground water rooms containing Hootie the Blue Fish, Aqua Lakitus, Caged Ghosts, pipes, and Nipper hazards. Clear or avoid enemies before entering narrow passages. Search below entrances, above the water, and beneath the far-right pipe. Hit Caged Ghosts repeatedly with eggs until they shrink enough to let Yoshi pass.
Activate the Middle Ring in the central ground area before exploring the branch routes. From that room, inspect the bottom-left passage for its Winged Cloud and Stars, the bottom-right passage for the Tulip and Red Coins, and the upper-right route for a Flower. The early water sections also contain Red Coins and Flowers, including the upper recess reached while the water sweeps Yoshi along. Do not assume the first open door is the whole collection route.
For the standard Naval Piranha fight, enter with several eggs. The enlarged boss is not vulnerable from the front. Throw an egg toward the opposite wall so it ricochets and skips across the water into the bandaged weak point on the boss's underside. Three successful hits defeat it. If the egg supply runs low, eat the Nipper Plants the boss spits out to create more eggs. Keep Baby Mario's timer safe before attempting each bounce.
There is an optional shortcut: remain at the far-left edge of the boss platform before advancing far enough to trigger Kamek. The Wild Piranha remains small and can be defeated with one egg. This is not required for campaign completion, and the standard enlarged-boss method is the better technique to practice for consistent play.
- Take the Middle Ring before the final branch sweep.
- Search the early water rooms and all passages from the Middle Ring.
- Use repeated egg hits to shrink Caged Ghosts blocking pipes.
- Bounce eggs off the opposite wall into Naval Piranha's underside.
- Eat Nipper Plants if more eggs are needed.
- Confirm that 3-8 is cleared on the Level Selection screen.
Before you move on
- Stages 3-1, Welcome To Monkey World!, through 3-8, Naval Piranha's Castle, are cleared on the SNES Level Selection screen.
- Prince Froggy's Fort and Naval Piranha's Castle are completed, making the World 4 stage group available.
- For a perfect World 3 run, replay every regular stage until its result contains all five Flowers, all twenty Red Coins, and 30 Stars at the finish.
- Verify progress by selecting each completed stage again and checking its recorded score rather than relying only on having reached the Goal Ring.
- If pursuing the World 3 Extra stage, perfect all eight regular World 3 stages. The Extra stage is optional for the standard campaign ending.
References for this chapter
- Yoshi's Island — Official North American Super NES instruction manual
- Imasara Yoshi's Island Guide — SNES level index
- Jungle Rhythm... — Imasara Yoshi's Island Guide
- Nep-Enut's Domain — Imasara Yoshi's Island Guide
- Prince Froggy's Fort — Imasara Yoshi's Island Guide
- Jammin' Through The Trees — Imasara Yoshi's Island Guide
- The Cave Of Harry Hedgehog — Imasara Yoshi's Island Guide
- Monkeys' Favorite Lake — Imasara Yoshi's Island Guide
- Naval Piranha's Castle — Imasara Yoshi's Island Guide
World 4 — Wind, Moving Hazards and Precision Fluttering
World 4 contains eight regular stages, ending with 4-8: Hookbill The Koopa’s Castle. Its main challenges are controlled fluttering, moving platforms, wind-driven routes, Countdown Platforms, Winged Clouds, and collectible paths that depend on preserving objects such as the red balloon in 4-1 and the Chomp Rock in 4-5. For ordinary completion, prioritize forward progress and activate Middle Rings as soon as the route is secure. For a perfect score, replay each stage after learning its layout and protect the objects that carry Flowers and Red Coins. World 4’s optional Extra stage and Bonus Challenge appear among the World 4 entries on the Level Selection screen only after all eight regular stages have perfect scores.
4-1: GO! GO! MARIO!! — prepare the balloon route
Stock eggs from the nearby enemies or Egg-Plant before entering the upper section. After the Middle Ring, use an egg to drop the large spring ball, bounce upward, and reach the second spring ball. This leads to the rainbow air pump. Jump repeatedly on the pump until the red balloon is fully inflated, then ride it right while keeping Yoshi near its center. The balloon gradually deflates, so avoid unnecessary side-to-side movement.
The upper route is important for a perfect score. Keep at least one egg before boarding because the route includes egg pickups and requires an upward egg throw for a Flower. Near the end, leave the balloon at the arrow-marked platform and flutter right across the final Red Coins. If the balloon ride is lost, do not repeatedly risk lives trying to recover it. Some upper-route collectibles may be unavailable on that attempt, so use the lower route to finish safely.
The lower route includes an Egg-Plant, Baron von Zeppelins, Blue Boos, a switch that activates dotted coins, a crate containing Stars, and a pipe that supplies Shy-Guys for eggs. Treat balloon-shaped 1-UP-looking Mock Ups as enemies; they explode if approached carelessly. Clear the yellow-stone section, use eggs to open the passage, and continue to the lower Goal Ring.
- Collect eggs before attempting the upper route.
- Inflate the red balloon fully and remain near its center.
- Keep an egg for the upward Flower shot.
- If the balloon route is lost, finish through the lower route instead of risking a life for missed items.
- Avoid approaching Mock Ups that resemble 1-UP balloons.
4-2: The Cave Of The Lakitus — use deliberate egg angles
Enter the pipe after the opening area and refill eggs from the available Shy-Guys. In the first cave, wait until the rotating arrow cloud points right, then throw an egg upward so it redirects into the Koopa shell and clears the nearby Koopas. Continue through the flippers, collecting Red Coins over the gaps and down the staircase.
The main cave contains Wall Lakitus, Tap-Taps, a POW Block, and a large arrow ball. Use the POW Block when enemies are grouped together, then collect the resulting Stars before moving on. Use the arrow ball to reach side chambers rather than attempting every vertical gap with a flutter. Search the upper side chamber and nearby alcoves for the Flower in a Winged Cloud and the crate before dropping back down.
Later, use a Koopa shell or egg to reach the Flower on the bridge. A red switch opens the concrete section, and another shell helps collect the next Flower and Red Coin. The later cave contains the Middle Ring, moving flatbed ferries, Wall Lakitus, and spikes. Activate the ring before the ferry descent. For the final Flowers, flutter from stable ledges over the spike section and aim eggs at arrow clouds rather than stepping into the hazard. If Baby Mario’s timer is low, take the safe lower route and return to optional collectibles only after the timer is secure.
- Use the rotating arrow cloud when it points toward the Koopa shell.
- Use POW Blocks to clear clustered enemies and recover Stars.
- Activate the Middle Ring before the final ferry and spike sections.
- Use eggs on the final arrow clouds instead of making blind jumps.
4-3: Don’t Look Back! — treat Countdown Platforms as disposable
Countdown Platforms disappear after Yoshi jumps off them. Use each one as a landing point rather than stopping to aim or explore. Move from platform to platform with a normal jump followed by a short flutter, then release the flutter before landing so Yoshi does not drift beyond the next surface.
Colorful balloons can carry Yoshi upward but respond slowly. Jump on them repeatedly when you need them to rise and avoid standing at the edge. Search the upper balloon routes and side areas, including the section with the Fly Guy, before leaving. A pipe leads to a helicopter bonus section with coins and hazards from a Wild Ptooie Piranha. Take this detour while Baby Mario is safe and restore the timer with Clouds or enemies before returning.
Later, cross the Countdown Platforms near the Bullet Bill cannon and Wild Ptooie Piranhas. Let Bullet Bills approach before jumping; they can serve as temporary stepping points, but do not risk Baby Mario for one Red Coin when the timer is low. Press the ! Switch to create the dotted-line route to the tulip, then defeat the Wild Ptooie Piranha blocking the way. Near the end, use the large red balloon for the high coin line and leave it only when the next ledge is visible. Activate the Middle Ring before the densest platform and Bullet Bill section.
- Do not wait on Countdown Platforms while aiming or searching.
- Use short, controlled flutters and release before landing.
- Search balloon routes for upper collectibles before advancing.
- Activate the Middle Ring before the crowded final platform section.
4-4: Marching Milde’s Fort — survive the chase and solve the four-key hub
The opening contains Incoming Chomps that destroy sections of ground. Pass quickly after they fall or wait until the damage is complete, then jump the gaps. A Shark Chomp chases Yoshi across the yellow-stone stretch. Keep moving, collect the early coin groups, and avoid stopping to fight ordinary enemies. The Shark Chomp falls away at the end of the chase.
Use the Winged Clouds near the end of the opening section to form stairways to the pipe. This leads to an X-shaped hub with a Middle Ring and a locked central door. Four surrounding doors contain four Keys. Enter every outer door, complete its room, and bring each Key back to the hub. Do not enter the central door until all four Keys are collected.
The four rooms use arrow lifts, lava, springs, flippers, and narrow ledges. Stand still before egg throws and conserve at least one egg for a Winged Cloud or switch. In the lava room, hit the bucket with an egg so it falls into the lava and becomes a ride. In another room, use a Winged Cloud to reveal the route to a Key. After opening the central door, collect the remaining Red Coin over the tumbling platform, pass the final Middle Ring, and enter the boss door.
Marching Milde is defeated in stages. Ground-pound the enlarged Milde from an upper ledge so it splits into two smaller large Mildes. Ground-pound those until the enemies become ordinary Mildes, then use eggs, stomps, or tongue attacks to clear them. Stay on upper ledges when possible so Baby Mario is not exposed among the moving bodies.
- Cross the opening Shark Chomp section without stopping.
- Collect all four Keys before using the central locked door.
- Use the Middle Rings in the hub and final key room.
- Ground-pound the larger Marching Mildes before clearing the small ones.
4-5: Chomp Rock Zone — preserve the rock for perfect scoring
Push the first Chomp Rock through the opening enemies, down into the tunnel, and across the long route. For a perfect score, do not lose it: Flowers and Red Coins depend on using it as a moving platform or breaking yellow stone. When it stops against pound posts, flatten the posts before moving the rock. Use nearby Winged Clouds to create platforms, but do not send the rock away before the next landing area is ready.
The first Middle Ring appears during the long push route. Activate it before continuing. If Yoshi loses a life after this checkpoint, the Chomp Rock returns at the checkpoint, making this ring especially valuable. Use the rock to reach upper ledges, the Flower above the enemies, and Red Coins over the later slopes.
Near the switch section, flatten the posts so the rock can cross the dotted-line blocks. Hit the switch, push the rock across the route, and use its upper surface to reach the door above. In the later room, use the second Chomp Rock through the flippers and enemies. Flatten the squishy block over the spikes with ground pounds, then use eggs or the opened path to collect the final Red Coins. The last Flower is in the small Green Glove room: knock down the spring ball, throw an egg at the Green Glove, and bounce so the enemy tosses the egg into the Flower.
- Keep the first Chomp Rock through the major route.
- Activate the Middle Ring before the longest push sequence.
- Flatten pound posts before moving the rock through narrow sections.
- Use the rock as a stepping platform for high collectibles.
4-6: Lake Shore Paradise — use the underwater detour and spring balls
At the opening, use the green Para-Koopa’s shell to clear the stairs. Eat a Flopsy Fish, ground-pound into the water, and hold left to swim under the stairway. This reaches the first Red Coin and a hidden tulip. Spit the shell into the tulip for Stars, then return to the main route.
Refill eggs at the Shy-Guy pipe before crossing the islands. Use Winged Clouds to make temporary platforms over water and spring balls to reach high coin lines. The first Flower is behind yellow stone; a Koopa shell can open the route. Preserve the crate in the later island section: break the yellow stone beneath it without destroying the lower support, push the crate onto solid ground, and ground-pound it to obtain the Key.
Use the Key at the locked door for the Bandit mini-game, then enter the narrow passage to the cave. The cave contains additional Red Coins, a Middle Ring, and Flowers. An Egg-Plant may release Needlenoses rather than ordinary eggs; eat them to clear the plant and replenish the egg supply. In the final outdoor section, use the correct Winged Clouds to create the return platform for the last Red Coin and Flower. Defeat the Wild Ptooie Piranhas with quick egg throws after their long projectile pattern, while watching for Woozy Guys behind Yoshi.
- Use the underwater left detour for the first Red Coin and Stars.
- Protect the crate until it reaches solid ground.
- Activate the Middle Ring before the final cave and outdoor hazards.
- Attack Wild Ptooie Piranhas after their long projectile sequence.
4-7: Ride Like The Wind — learn each ride before collecting
Use the opening Koopa Troopas for eggs. Flower 1 is below two red Para-Koopas; wait until one drifts underneath, drop onto it, and flutter back to the ledge. At the red flatbed ferry, wait for the double-headed Spinner to move away, board the ferry, and jump at the top of its rise to the next ledge.
Use the spring balls to climb to the upper route and collect the first Red Coins. A later spring ball leads to a bonus area with another red balloon. Inflate it at the air pump, ride it beneath the coin line, and collect the high items. When the balloon route ends, flutter right into the metamorphosis bubble and use the helicopter transformation to collect the remaining bonus-route coins. Touch the Yoshi Block to return to normal form and refill eggs.
Before entering the next door, backtrack left for Flower 2 and nearby Red Coins. Activate the Middle Ring before the green paddle wheel and fast red ferries. Watch the paddle wheel’s full movement cycle before stepping on it. The coins above and below include Red Coins, so jump only when the wheel is positioned safely. Transfer from the red ferry to the yellow ferry, enter the side enclosure for Flower 4, then remain on the fast ferries through the end cycle. The final looping ferry carries the last Red Coins and Flower 5 above it. Jump to the Goal Ring only after the loop brings Yoshi beneath the collectibles.
- Collect Flower 1 by bouncing from a Para-Koopa rather than forcing an egg throw.
- Use short flutter corrections on ferries and release before landing.
- Backtrack for bonus-area collectibles before passing the second door.
- Activate the Middle Ring before the paddle wheel and fast-ferry sequence.
4-8: Hookbill The Koopa’s Castle — follow the door loop and conserve eggs
The castle begins with lava bridges, Hot Lips, Spinners, and Koopa Troopas. Use the first Koopa shell to reach Flower 1 behind Yoshi, then repeat the shell maneuver at the second lava section for Flower 2. A pipe producing Boo Guys provides a dependable egg supply. At the hanging iron-ball traps, egg the cracked block below each ball and pass only when the ball is raised. The chain itself is dangerous and can separate Baby Mario.
In the first large room, hit the Winged Clouds to build stairways. At the upper pair, hit only one cloud first so the route remains open for the Red Coins below; activate the other afterward if needed. Use the high cloud in the top-right opening to create the stairway to Flower 3. Return through the door loop, use a Koopa shell to activate the Winged Cloud in the narrow passage, and enter the high door for the Key. Pass through the Middle Ring before the Arrow Lift and thorn section.
Use the blue Arrow Lift while it points right. If it catches on the overhang, jump briefly to redirect it, then collect the Red Coins beneath the overhang. Use an egg for the lower pair if dropping down is unsafe. In the next locked room, climb past Fishing Lakitu and defeat or eat it before it can hook Baby Mario. Refill eggs before entering the outdoor boss arena and pass through the final Middle Ring.
Hookbill crawls on all fours, then stands upright before charging and belly-flopping. Jump on him while he is crawling to make eggs drop from his nose. Pick up those eggs and throw them into his face. Continue the sequence until he falls onto his back, then ground-pound his exposed belly. Avoid the shell’s three jumping impacts. Repeat the egg-to-face setup and belly ground pound two more times. Three successful belly ground pounds defeat Hookbill and clear World 4.
- Use the Boo Guy pipe to refill eggs before the iron-ball traps and boss route.
- Keep the Winged Cloud stairways arranged so the lower Red Coins remain reachable.
- Activate the Middle Ring before the Arrow Lift and thorn section.
- Collect eggs from Hookbill’s nose, hit his face until he falls, then ground-pound his belly three times.
- Do not chase collectibles while Baby Mario’s timer is nearly empty.
Before you move on
- Clear 4-1 through 4-8 and confirm that World 5 becomes available on the Level Selection screen after Hookbill’s defeat.
- For a perfect World 4, replay each regular stage until the stage result shows all five Flowers, all twenty Red Coins, and 30 Stars at the Goal Ring.
- Use Middle Rings to separate difficult sections from opening collection routes, but remember that a checkpoint does not replace missing Flowers or Red Coins.
- After all eight regular World 4 stages have perfect scores, check the World 4 entries on the Level Selection screen for the Extra stage and Bonus Challenge unlocks.
- World 4’s Extra stage, The Impossible? Maze, is optional for the standard campaign ending but is part of the broader perfection and postgame path.
References for this chapter
World 5 — Platform puzzles, enemies and bonus mechanics
World 5 is the icy fifth world of the original North American SNES release. Its regular stages combine slippery terrain, ski lifts, Goonies, clouds, moving platforms, falling stones and several long vehicle sections. Clear the eight regular stages in order, using Middle Rings before the most dangerous sections. For a first campaign clear, protect Baby Mario and reach each Goal Ring. For a perfect score, replay stages after learning their routes, then collect all five Flowers, all twenty Red Coins and enough Stars to arrive at the goal with the Countdown Timer at 30.
1. Clear 5-1, BLIZZARD!!!
Take eggs from the opening Egg Block and remove the Thunder Lakitu quickly. Its fireballs spread along the ground, making the narrow early platforms dangerous. Pound the wooden peg and use the raised side to reach the first upper collectibles. Eat Snow Moles when possible because their straight-flying projectiles are awkward in confined spaces.
Continue through the climbing section and search the pits carefully. One lower detour contains a key, while later Egg Blocks let you deal with Chomp Chomps guarding collectibles. During the avalanche section, falling Chomp Rocks can knock Yoshi into a pit even though they do not normally make Baby Mario leave Yoshi, so stay near the center of each platform.
Use Lakitu’s cloud near the later upper route to reach the hidden Flower and Red Coins. Near the end, inspect the four bottomless pits before entering the Goal Ring. The red-switch route is optional for a safe clear but reveals additional routes and collectibles. On a scoring replay, handle Flying Shy Guys immediately because they can escape with Red Coins.
- Defeat or bypass Thunder Lakitu before crossing narrow ground routes.
- Search the lower pits for the key and hidden collectibles.
- Use Lakitu’s cloud and inspect the final bottomless-pit section before the Goal Ring.
2. Ride the lifts in 5-2, Ride The Ski Lifts
The stage begins with a large snowball. Push it to clear enemies and create access to several early Red Coins, then continue right to the first Middle Ring. Do not rush past the opening collectibles; this section is safer than the later lift routes and is a good place to establish the score.
During the first ski-lift sequence, remain on the lift and deal with Lakitus and Penguins without making unnecessary jumps. When you reach the red switch embedded in sand, activate it, collect the nearby Red Coins, then return to use the switch again if necessary. The surrounding clouds contain Stars and another Flower. Later, use the Egg Flower and the solid ground between lift rides to refill eggs.
A second Middle Ring appears before the long final lift sequence. Activate it before attempting the later Red Coins. Snowmen can ride the lifts and collide with Yoshi, so jump over them only when the landing area is clear. On a perfect-score replay, collect the coins above and below the lift paths one group at a time; if Baby Mario is floating, stay on the lift and recover him before pursuing a high coin.
- Push the opening snowball through the early enemy group.
- Use both Middle Rings before the long lift sequences.
- Treat the final lift ride as a checkpoint-based section rather than a single continuous jump.
3. Melt the ice in 5-3, Danger - Icy Conditions Ahead
Use the first Red Melon to gain fire breath and melt the large clear ice blocks. Red Melons are limited, so reserve the fire for ice that blocks progress or hides collectibles. Refill eggs at nearby Egg Blocks and avoid spending fire on enemies that can simply be swallowed or bypassed.
The stage then combines water, ski lifts and ice platforms. Use Winged Clouds when they reveal bridges or Stars, and wait for water hazards to pass before crossing. In the later ski section, keep Yoshi aligned with the slope and make controlled jumps over rocks and gaps. The Red Coins above the ski path are easier to collect after a practice run because the route gives little room for correction.
Take the Middle Ring before the most demanding ski section. A safe first clear can ignore a missed collectible and continue to the Goal Ring. For perfection, replay from the checkpoint and collect the ski-route Flowers and Red Coins in order instead of turning around after a miss.
- Reserve Red Melon fire breath for the clear ice blocks.
- Use Winged Clouds and solid platforms before attempting long water crossings.
- Activate the Middle Ring before the final skiing section.
4. Complete 5-4, Sluggy The Unshaven’s Fort
This fort contains unstable yellow ground, Ceiling Ghosts, thorns, stairs, pipes and several moving-platform sections. Ceiling Ghosts cannot be defeated permanently, so stun one with an egg only when it protects a collectible or blocks a narrow passage. In the unstable ground, jump immediately after landing for a higher jump; if Yoshi sinks into the surface first, his jump will be much shorter.
Explore the side rooms and pipes for Flowers and Red Coins, but do not spend all eggs on ordinary enemies. A later Egg Block and respawn area provide enough ammunition for the final approach. Use the cloud-created staircase, cross the thorn sections with short controlled jumps and use eggs aimed upward for high Flowers rather than forcing dangerous jumps.
Take the Middle Ring before the long moving-platform ride and boss hallway. Refill eggs before entering the boss door. Sluggy slowly pushes Yoshi toward the pit, but his body can be pushed back and stunned by egg hits. Fire into his body until the heart becomes exposed, then hit the exposed heart. Repeat this process until the heart has been struck four times. If ammunition runs low, use the Egg Flower in the boss room or the eggs that bounce back after body shots.
- Learn the unstable yellow-ground jump before attempting the thorn route.
- Activate the Middle Ring before the moving-platform section.
- Expose Sluggy’s heart and strike it four times.
5. Cross 5-5, Goonie Rides!
The first area uses ordinary ground, gaps, Chomp Chomps and Goonies. Remove enemies near a landing point, then use Goonies as moving platforms only after the next safe landing is visible. Do not reverse over a gap to recover a missed coin; continue to the next solid platform and plan the collectible on a replay.
The second area contains a Helicopter transformation course. Enter the transformation only after checking the direction of the route. Collect the high Red Coins during the flight, then return to the normal route when the transformation ends. In the third area, use switches and Chomp Chomps as landmarks while checking the upper and lower sides of the route for the remaining Flowers and Red Coins.
The Middle Ring separates the early ground route from the more demanding Goonie and switch sections. Optional items are not required: ordinary Egg Blocks, swallowed enemies and the stage’s own transformation bubble provide the necessary tools. If Baby Mario is endangered while riding a Goonie, prioritize the next stable platform over a collectible.
- Use Goonies only when the next landing is visible.
- Complete the Helicopter course with a deliberate flight path.
- Use the Middle Ring before the later switch and Goonie sections.
6. Clear 5-6, Welcome To Cloud World
This is the comparatively forgiving World 5 stage and includes a Helicopter course. The early route contains Chomp Chomps, Lakitus, Gusties, Baseball Boys and Ducks. Swallow the Ducklings when you need eggs, and ground-pound Baseball Boys when they block a cloud or platform. Collect the early Flowers and Red Coins while moving right rather than returning through enemy groups.
The Helicopter course contains a large concentration of Red Coins. Enter it with Baby Mario secure and follow the route from one visible checkpoint to the next. After returning to ordinary play, use the Middle Ring before the upper cloud and switch sections. Hidden clouds, pipes and platforms contain the remaining collectibles; inspect the area above and behind pipes instead of assuming the visible route is complete.
If a Baseball Boy’s egg knocks Baby Mario loose, recover first and then resume the collectible route. The stage does not require a Magnifying Glass or Anytime Egg. Its Egg Blocks, enemies and hidden clouds provide enough resources for a perfect attempt.
- Use Baseball Boys and Ducks as reliable egg sources.
- Treat the Helicopter course as a separate collectible section.
- Search above pipes and around the post-Middle-Ring cloud platforms.
7. Survive 5-7, Shifting Platforms Ahead
The opening route moves left across rotating and shifting platforms. Stay near each platform’s center and avoid unnecessary jumps. Penguins can be swallowed and spat at clouds to reveal Stars. When a platform carries a large stone, use the stone as a temporary landing point or wait for it to move rather than trying to force Yoshi through it.
Much of the stage hangs over a pit. Goonies can provide emergency recovery if Yoshi falls, but do not rely on them for a planned route. During the rising yellow-platform section, walk back and forth to avoid Tap-Taps instead of jumping repeatedly. Later, ride a Goonie to the high pipe, move quickly across the falling stones, collect the Flower and activate the red switch only after the stones settle.
The switch opens a short window through the red-block route. Collect the Stars if needed, then return left before the blocks vanish. For the remaining collectibles, use the spinning platforms and short hover jumps. This is a precision stage: if Baby Mario floats, abandon the Red Coin detour and land on the nearest stable platform before continuing.
- Stay centered on shifting platforms and use short flutter corrections.
- Use Penguins for cloud activation and avoid unnecessary jumps around Tap-Taps.
- Cross the red-switch route promptly after the falling stones settle.
8. Finish 5-8, Raphael The Raven’s Castle
The castle begins outdoors with Goonies, falling platforms and red pogo platforms. Continue upward and take the Ice Watermelon near the upper route. Its ice breath defeats Blow Hards and can activate a cloud for Stars. Preserve the remaining ice shots until the castle’s Bullet Bill and platform sections.
Several Flowers and Red Coins require jumping from Bullet Bills. Wait for a Bullet Bill to approach, jump on it and hold the jump button to extend Yoshi’s flutter. The first high platform contains a Flower; a second Bullet Bill jump reaches another platform with additional collectibles. Continue to the first Middle Ring, then refill eggs and use the moving arrow platforms to cross the breakable-block room.
Before leaving the upper platform route, inspect the three-dimensional platforms for Red Coins and enter the hidden alcove leading to the train transformation. At the fork in the train section, take the right path. Follow the track and collect the remaining Red Coins and final Flower. A later Middle Ring protects the approach to the boss, so activate it before the last enemy group and boss door.
Raphael fights on the circular moon. Eggs and ordinary jumps do not damage him. Wait until Raphael is on the opposite side of one of the moon’s posts, then ground-pound that post so it strikes him from below. After each hit he moves faster and launches more frequent attacks. Stay airborne when energy bolts approach, circle the moon to create distance and use a post only when Raphael is safely across from it. Three successful post strikes defeat him.
- Use the Ice Watermelon against Blow Hards and save useful shots for the upper route.
- Jump from Bullet Bills to reach the high Flowers and Red Coins.
- Take the right branch in the train section and collect its seven Red Coins.
- Ground-pound the opposite post three times to defeat Raphael.
Before you move on
- The World 5 Level Selection screen shows 5-1 through 5-8 cleared.
- Sluggy the Unshaven is defeated in 5-4 after four successful heart hits.
- Raphael the Raven is defeated in 5-8 after three successful ground-pound post strikes.
- For a perfect World 5 result, replay each regular stage until its result records five Flowers, twenty Red Coins and a full 30-point Countdown Timer.
- After all eight regular World 5 stages have perfect results, verify on the World 5 Level Selection screen that Extra 5: Kamek’s Revenge is available.
- Extra 5 is optional for the standard campaign ending and is not required to proceed to World 6.
References for this chapter
- Yoshi's Island — Official North American Super NES instruction manual
- Super Mario World 2: Yoshi’s Island — Guide and Walkthrough for Super Nintendo
- Super Mario World 2: Yoshi's Island — The Mushroom Kingdom Guide
- World 5 — Super Mario World 2: Yoshi’s Island
- 5-8: Raphael The Raven’s Castle — Level Guide and Map
World 6 and Final Approach — Lava, caves and King Bowser’s Castle
World 6 is the final main-world route of the original Super Nintendo release. Clear stages 6-1 through 6-7, then complete 6-8, King Bowser’s Castle. The castle ends with a two-part fight: first defeat normal-sized Baby Bowser with three ground-pound shockwaves, then defeat enlarged Big Baby Bowser with seven Giant Egg hits. Completing the second phase triggers the game’s standard ending sequence.
1. Clear World 6 with a completion-first plan
The seven stages before the castle are 6-1 Scary Skeleton Goonies!, 6-2 The Cave of the Bandits, 6-3 Beware the Spinning Logs, 6-4 Tap-Tap the Red Nose’s Fort, 6-5 The Very Looooong Cave, 6-6 The Deep, Underground Maze, and 6-7 KEEP MOVING!!. On a first attempt, prioritize reaching each goal over collecting every Flower and Red Coin. Activate each Middle Ring you encounter so a failed late section does not require a complete restart.
World 6 mixes caves, lava, Bandits, Skeleton Goonies, moving platforms, autoscrolling rooms and forced movement. Keep Yoshi near the center of a safe platform when the screen begins to scroll. This leaves room to correct either direction and reduces the chance of being pushed into an enemy or falling hazard. Do not spend time defeating every ordinary enemy if the route is already open.
Carry eggs when they are available, but preserve them for Winged Clouds, switches, locked doors and enemies that block narrow passages. If Baby Mario is knocked loose, recover him immediately. A Flower or Red Coin is never worth losing the current run when the Countdown Timer is already low.
- Activate every Middle Ring before repeating a difficult late section.
- Keep at least one egg when approaching a switch, Winged Cloud or locked passage.
- Treat the first clear of each stage as a route-learning run rather than a 100-point attempt.
2. Use conservative movement through lava and caves
In lava sections, use short jumps and controlled fluttering. Look at the next landing area before committing to a long leap, especially near Ball ’N’ Chains and moving platforms. Ground-pounding can defeat exposed enemies and stop Yoshi’s horizontal movement, but it is risky on a platform that is already carrying Yoshi toward a lava gap.
Bandits deserve priority because they can interfere with Baby Mario’s safety. Hit them with an egg when there is room to aim. Ground-pound only when the landing area is clear and the attack will not send Yoshi into another hazard. In vertical cave rooms, pause before one-way drops and inspect visible side passages, ceilings and Winged Clouds. If a collectible is missed, use the next safe checkpoint rather than forcing a dangerous reverse jump.
The route through 6-4 and the later cave stages becomes more manageable if you stop fighting enemies that can be bypassed. The goal is to preserve Baby Mario, eggs and a safe position for the next obstacle, not to clear every screen.
- Use eggs against Bandits when approaching them directly would expose Baby Mario.
- Check the next platform before falling through a vertical opening.
- Abandon an optional collectible detour when the timer or landing position is unsafe.
3. Survive 6-7 KEEP MOVING!!
The name of 6-7 describes its main requirement. When the stage forces Yoshi forward, stay slightly ahead of the screen’s center without running blindly into the next obstacle. Use fluttering to correct horizontal position, then briefly release the direction if Yoshi begins drifting too far. Broad platforms are safer than narrow ledges during the first clear.
Do not stop to fight every enemy in an autoscrolling section. Defeat only enemies that block the route, provide needed eggs or threaten the platform you must use. If a Middle Ring appears before a difficult sequence, take it even during a scoring attempt. The Stars it provides can restore time if Baby Mario is knocked away later.
If you fail in a forced-movement room, restart from the Middle Ring and repeat the same conservative pattern: enter the room centered, watch the next platform, flutter only to correct the landing, and move on as soon as the route is open.
- Stay visible ahead of the scrolling boundary.
- Choose wide platforms during the first clear.
- Use the Middle Ring before attempting the final forced-movement sequence again.
4. Enter King Bowser’s Castle and choose a route
Stage 6-8 begins with an outside section that includes a Helicopter transformation. Make small directional corrections while flying and collect the accessible Red Coins only when doing so does not risk the landing. Continue right until you pass the Middle Ring near the far end of this section. This gives ten Stars and protects the run before the castle interior.
After the first transformation section, enter the castle and use an egg on the door mechanism. The interior offers four route choices: a lava and Ball ’N’ Chain route, a Shy Guy route, a Tap-Tap the Golden route and a bonus route. These paths eventually rejoin in the final autoscrolling room. The bonus route is optional; there is no need to take it simply to reach Baby Bowser.
Treat Tap-Tap the Golden as an obstacle. Egg hits can push it back and create space, but the objective is to keep moving through the chase rather than defeat it. In the other rooms, bypass enemies when possible and spend eggs only on switches, Winged Clouds, keys or threats that occupy the required path.
All routes lead to a final autoscrolling room where Kamek fires magic into the room. Keep moving through the room and avoid stopping beneath newly created enemies or hazards. After Yoshi survives Kamek’s final attacks, the game awards another Middle Ring before the large door to Baby Bowser’s room. Take this checkpoint. It is the most important recovery point in the stage.
- Pass through the first Middle Ring in the outside section.
- Use an egg to activate the interior door mechanism.
- Choose any of the four interior routes; the bonus route is optional.
- Take the Middle Ring awarded after the final Kamek autoscroll.
5. Defeat normal-sized Baby Bowser
The first boss phase takes place in the castle room. Baby Bowser repeatedly jumps and ground-pounds toward Yoshi. His landing creates shockwaves that travel across the floor. Yoshi must ground-pound so his own shockwave meets Baby Bowser’s landing and strikes him.
Watch Baby Bowser’s descent instead of pressing Down as soon as he jumps. Jump, then ground-pound as he is about to land. If Yoshi’s shockwave is late, Baby Bowser can avoid it by jumping again. After a successful hit, return to a stable position and wait for the next attack rather than trying to stand directly beneath him.
Three successful shockwave hits defeat the first phase. Kamek then uses magic to enlarge Baby Bowser. Ordinary eggs are not the solution to this phase, so concentrate on reading the ground-pound timing and keeping Baby Mario safe if a shockwave or contact causes separation.
- Wait for Baby Bowser’s descent.
- Match Yoshi’s ground-pound to Baby Bowser’s landing.
- Land three shockwave hits.
- Do not waste ordinary eggs expecting them to damage this phase.
6. Defeat Big Baby Bowser with Giant Eggs
The second phase takes place outside the destroyed castle room. Big Baby Bowser appears in the background and advances toward Yoshi. Baron von Zeppelins carry red Giant Eggs into the arena. Collect a Giant Egg, aim across the distance and throw it toward Bowser’s head. The egg travels in a long arc, so allow time for the trajectory rather than releasing immediately at a low angle.
Falling rocks are marked by an indicator showing where they will land. Move away from the marked position before the rock drops. Once the rockfall ends, look for the next Baron von Zeppelin and secure the next Giant Egg. Big Baby Bowser also launches fireballs in a straight line. Move sideways after the fireball is released instead of remaining in its path.
Seven Giant Egg hits are required in total. After the third hit, another rockfall destroys more of the platform and leaves a narrower fighting area. Reposition as soon as the rock warning appears, then continue the same cycle: avoid the marker, collect the next Giant Egg, aim carefully and throw at Bowser. The final four hits complete the seven-hit total.
Do not wait at the far edge of the platform without a reason. Big Baby Bowser continues advancing, and if he gets too close, the remaining ground is destroyed and Yoshi loses the attempt. If a Giant Egg is available, use it promptly after surviving the current hazard. The final hit can occur during a dangerous late moment, so prioritize the throw when the target is lined up rather than delaying for a perfect position.
- Avoid every marked rockfall location.
- Move sideways after each straight-line fireball.
- Land three Giant Egg hits before the second rockfall.
- Survive the narrower platform and land four additional hits.
- Confirm the fight ends after seven total Giant Egg hits.
7. Confirm the campaign ending
After the seventh Giant Egg hit, Big Baby Bowser is defeated and returns to his normal size. Kamek retreats with him. Yoshi then reaches the captured stork and Baby Luigi, freeing them so the stork can complete the delivery. The ending sequence and credits follow.
The standard campaign is complete when this ending begins. Extra stages and Bonus Challenges are optional postgame content for players pursuing full scores and additional challenges. They are not required to defeat Baby Bowser or reach the normal ending.
- Big Baby Bowser is defeated after seven Giant Egg hits.
- Kamek retreats and the rescue sequence begins.
- The ending and credits play.
- Treat Extra stages and Bonus Challenges as optional postgame goals.
Before you move on
- Stages 6-1 through 6-7 are cleared and the 6-8 castle stage is completed.
- Normal-sized Baby Bowser has been hit three times with Yoshi’s ground-pound shockwave.
- Big Baby Bowser has been hit seven times with Giant Eggs.
- The rescue sequence, ending and credits begin.
- The main campaign is complete; Extra stages and Bonus Challenges remain optional postgame content.
References for this chapter
- 6-8: King Bowser’s Castle - Level Guide and Map - Imasara Yoshi’s Island Guide
- King Bowser’s Castle (Super Mario World 2: Yoshi’s Island) - Super Mario Wiki
- Super Mario World 2: Yoshi’s Island - Guide and Walkthrough - Super Nintendo - GameFAQs
- Super Mario World 2: Yoshi’s Island - Guide and Walkthrough - Super Nintendo - GameFAQs
- Yoshi's Island — Official North American Super NES instruction manual
Boss Patterns, Kamek Enlargements and Recovery Tactics
Boss encounters occur in the fourth and eighth stages of each world. Most follow the same broad pattern: Kamek enlarges an enemy before the fight, and the enlarged enemy has one continuous arena challenge rather than a separate second phase. The main exceptions are Prince Froggy, where Kamek shrinks Yoshi and Baby Mario, and Baby Bowser, whose battle has two distinct phases. Prepare for every boss by securing Baby Mario, carrying a useful supply of eggs, and raising the Countdown Timer during the approach. During the fight, use the required arena interaction instead of wasting ammunition, and rescue Baby Mario immediately if he is knocked loose.
Recognize the boss-stage structure
The fourth and eighth stages of each world are boss stages: World 1-4 and 1-8, World 2-4 and 2-8, continuing through World 6-4 and 6-8. The fourth-stage encounter is generally the world’s fort boss, while the eighth-stage encounter is the main castle boss.
Kamek normally appears before the battle and uses magic to enlarge the enemy. This usually creates one enlarged version of the boss with a particular weakness, not a first form followed by another Kamek transformation. Watch the boss’s movement for a full cycle before attacking so you can identify the vulnerable target and avoid throwing eggs during a protected animation.
Before entering the boss door, make sure Baby Mario is riding Yoshi. Refill eggs from safe enemies or Egg Blocks when the approach provides them, and collect reachable Stars so a hit will not immediately leave you with a nearly empty Countdown Timer. Do not take a dangerous detour for one last collectible if it risks entering the arena without Baby Mario or with no ammunition.
- Confirm that Baby Mario is on Yoshi’s back before entering.
- Carry as many eggs as the preceding room safely allows.
- Collect safe Stars and activate a Middle Ring when one is available.
- Enter with the Countdown Timer as high as practical.
Separate ordinary enlargement from true phase changes
Most bosses have one enlarged form and one attack method. Some are damaged directly with eggs, while others require Yoshi to manipulate the arena. Treat a change in size as a clue to study the boss, not as proof that another phase will begin after the first successful attack sequence.
Prince Froggy is the major midgame exception. Kamek shrinks Yoshi and Baby Mario instead of enlarging Froggy, and Froggy swallows them. The fight takes place inside the frog, where Yoshi attacks the enemies and objects found in the stomach. Do not enter this encounter expecting the normal open-arena egg pattern.
Baby Bowser is the game’s clear two-phase boss. In the first phase, normal-sized Baby Bowser repeatedly jumps and ground-pounds toward Yoshi. Each impact sends shockwaves across the floor. Jump over the incoming attack, then perform Yoshi’s own ground pound so the peak of Yoshi’s shockwave strikes Baby Bowser. Three correctly timed shockwave hits defeat this phase. Ordinary egg throws are not the required attack for normal-sized Baby Bowser.
After the first phase, Kamek enlarges Baby Bowser. The second phase takes place on the castle ramparts. Giant Eggs are supplied during the encounter, and Yoshi must throw them at the enlarged Baby Bowser. Seven successful Giant Egg hits are required. Avoid the giant fireballs and advancing attacks, keep moving toward safe ground, and throw only when Baby Bowser is within a dependable line of fire.
- Treat each new arena as a separate puzzle.
- Do not spend every egg before confirming what damages the boss.
- Defeat normal-sized Baby Bowser with three ground-pound shockwaves.
- Use Giant Eggs against enlarged Baby Bowser and land seven hits.
- Do not substitute ordinary egg throws for the first-phase ground-pound method.
Use the boss-specific attack method
Burt the Bashful is defeated with repeated egg hits. Keep moving through the open space and avoid standing where Burt will land. If the boss’s bouncing pattern becomes difficult, use the lower trenches to create distance before throwing again.
Salvo the Slime is also attacked with eggs. Aim at the exposed target as it moves, and avoid being cornered by the boss or its projectiles. Take a safe angle rather than throwing immediately whenever Salvo crosses the arena.
Bigger Boo cannot be damaged while Yoshi faces it directly. Face away and bounce eggs from a wall so they ricochet into the ghost. When Bigger Boo faces Yoshi, it becomes transparent; use that state to pass through it instead of trying to jump over its enlarged body. Five successful ricochet hits defeat the boss.
Roger the Potted Ghost is defeated by moving his pot, not by throwing eggs at the ghost. Get behind the pot and push it across the arena toward the required ledge. Work from a stable position and retreat when Roger’s contact or fire attack threatens to trap Yoshi against a wall.
Naval Piranha can be defeated before the conventional arena sequence if Yoshi strikes the plant during its vulnerable opening before Kamek completes the enlargement. If that opportunity is missed, wait for the plant’s attack to finish, hit the vulnerable target, and retreat from its reaching attacks.
Marching Milde is defeated with ground pounds. Wait until the large Milde is positioned over a safe landing point, then jump and pound it. Hookbill the Koopa must be hit with eggs until he falls onto his back; ground-pound the exposed belly, then move away before he recovers.
Sluggy the Unshaven blocks much of the arena with its soft body. Throw eggs into Sluggy to deform the body and expose the heart, then hit the exposed heart with eggs. Preserve enough room to retreat so the body cannot press Yoshi into a corner.
Raphael the Raven is fought on the moon. Ground-pound the stakes in the arena to launch them toward Raphael, then reposition before his movement and shockwaves close the available space. Tap-Tap the Red Nose cannot be defeated through ordinary direct egg damage. Ground-pound the floor blocks to open the route to the lava, then use egg impacts to push Tap-Tap into it.
- Use rear-facing ricochet eggs against Bigger Boo.
- Push Roger’s pot instead of wasting eggs on the ghost.
- Use the pre-enlargement opening against Naval Piranha when available.
- Use ground pounds against Marching Milde, Hookbill’s exposed belly, and Raphael’s stakes.
- Expose and strike Sluggy’s heart.
- Open the lava route and push Tap-Tap into the lava.
Manage Baby Mario and the Countdown Timer
Whenever Yoshi is hit and Baby Mario floats away, stop attacking and recover him immediately. The boss may be close to defeat, but another hit while Baby Mario is separated can consume the remaining timer and end the attempt.
Use the approach section to raise the timer before entering the boss room. Collect reachable Stars and activate the Middle Ring when one is present. These preparations improve the retry, but they do not guarantee that the boss chamber itself contains a safe checkpoint, Stars, or Winged Clouds.
If Baby Mario is nearby, take the shortest safe route to the bubble. Flutter over gaps instead of attempting a risky landing, and collect a reachable Star or activate a nearby Winged Cloud only when doing so does not delay the rescue. Once Baby Mario is recovered, return to the boss’s movement pattern rather than rushing into an attack.
Do not abandon Baby Mario to chase a Flower, Red Coin, egg, or possible attack opening. A boss clear is more valuable than an optional scoring item, and the stage can be replayed later for a perfect score.
- Rescue Baby Mario before pursuing another attack.
- Use the approach to raise the timer before entering the arena.
- Do not assume that every boss room contains a Middle Ring or recovery items.
- Abandon optional collectibles when the timer is low.
Recover after a failed attempt
After losing a life, rebuild the approach instead of repeating the same rushed sequence. Activate the Middle Ring when available, collect safe Stars, refill eggs, and observe the boss’s complete attack cycle before committing to an attack.
For fixed-method bosses, practise the setup rather than merely throwing more ammunition. Ricochet an egg against the wall for Bigger Boo, move Roger’s pot without standing in the ghost’s path, topple Hookbill before ground-pounding, expose Sluggy’s heart before spending additional eggs, and open the lava route before trying to move Tap-Tap.
For Baby Bowser, practise the first phase separately from the second. In the normal-sized phase, wait for Baby Bowser’s ground-pound jump, avoid the landing shockwave, and answer with Yoshi’s ground-pound shockwave three times. In the enlarged phase, prioritize staying on solid ground and throw Giant Eggs only when the trajectory is clear. The goal is seven successful Giant Egg hits, not a rapid series of risky throws.
Separate campaign progress from score perfection. Defeating a boss safely unlocks the next stage. If the Flowers, Red Coins, or timer total was incomplete, replay the stage after the boss pattern is familiar. A cautious clear is preferable to risking a life for one last collectible.
- Use the Middle Ring before a difficult retry when available.
- Refill eggs and Stars during the approach rather than inside the boss room.
- Practise the required arena interaction before attempting a perfect score.
- Use three ground-pound shockwaves for normal-sized Baby Bowser.
- Use seven Giant Egg hits for enlarged Baby Bowser.
- Replay the stage later if the boss clear was safe but the score was incomplete.
Before you move on
- The fort and castle boss in each world are defeated, allowing progression through the main campaign.
- World 6-8 is cleared through the three ground-pound shockwave hits against normal-sized Baby Bowser and the seven Giant Egg hits against enlarged Baby Bowser.
- The ending sequence begins after Baby Bowser is defeated and Baby Luigi is recovered.
- For score completion, replay any boss stage whose Flowers, Red Coins, or Countdown Timer score was incomplete.
References for this chapter
- Yoshi's Island — Official North American Super NES instruction manual
- Super Mario World 2: Yoshi's Island — Super Mario Wiki
- Super Mario World 2: Yoshi's Island — SNES Boss Guide
- Super Mario World 2: Yoshi's Island — Guide and Walkthrough — Super Nintendo
- Yoshi's Island: Super Mario World 2 — StrategyWiki Walkthrough
- World 2 — Playing With Super Power: Nintendo Super NES Classics eGuide
The Bonus Challenge and Mini-Games — Using the Goal Ring to your advantage
Bonus Challenges are optional reward games in the original North American Super Nintendo release of Super Mario World 2: Yoshi's Island. You can enter one after a regular stage when the Goal Ring roulette stops on a Flower, or unlock one permanently for repeated play by earning 800 total points in a world. Since each of that world's eight regular stages can contribute a maximum of 100 points, the permanent unlock requires a perfect score in every regular stage of that world. These games provide extra lives, special items, or both. They help with difficult stages and later scoring attempts, but they are not required for the standard ending.
Prepare the Goal Ring roulette
Collect Flowers before finishing a regular stage whenever the detour is safe. Each stage has five Flowers, and each collected Flower adds a Flower position to that stage's Goal Ring. The other positions are blue dots or uncollected Flower buds. The Flowers do not carry between stages, so the roulette is based only on the Flowers collected during the current run.
With zero, one, or two Flowers, the roulette must stop normally, so a Bonus Challenge is possible but not guaranteed. With at least three Flowers, you can run into the Goal Ring at full speed. In the original SNES version, this entry reliably stops on the bottom-left Flower position and sends you to a Bonus Challenge. Do not risk Baby Mario or a completed collectible route to obtain a third Flower; the challenge is optional support content.
Fortress and Castle stages do not use the ordinary Goal Ring roulette. They still contain Flowers for scoring, but they do not provide a Goal Ring Bonus Challenge at the finish.
- Collect Flowers only while Baby Mario and the route to the finish remain safe.
- Treat three Flowers as the reliable full-speed-entry threshold, not as a mere probability increase.
- Remember that the Goal Ring challenge is a one-time reward for that stage clear; it is not the repeatable world challenge.
Know the six challenges and their world pairings
The original SNES release has six Bonus Challenges: Flip Cards, Scratch and Match, Drawing Lots, Match Cards, Roulette, and Slot Machine. A Goal Ring Flower in a given world selects randomly from that world's assigned pair.
World 1 uses Flip Cards or Scratch and Match. World 2 uses Drawing Lots or Slot Machine. World 3 uses Match Cards or Roulette. World 4 uses Scratch and Match or Drawing Lots. World 5 uses Flip Cards or Roulette. World 6 uses Match Cards or Slot Machine.
The result of a Goal Ring roulette is separate from the permanent Bonus Challenge unlocked after scoring 800 points in a world. The permanent unlocks are fixed: World 1 unlocks Flip Cards, World 2 unlocks Scratch and Match, World 3 unlocks Drawing Lots, World 4 unlocks Match Cards, World 5 unlocks Roulette, and World 6 unlocks Slot Machine. Once unlocked, that challenge can be selected repeatedly from its Bonus panel on the Level Selection screen.
- World 1: Flip Cards or Scratch and Match at the Goal Ring; Flip Cards is the repeatable unlock.
- World 2: Drawing Lots or Slot Machine at the Goal Ring; Scratch and Match is the repeatable unlock.
- World 3: Match Cards or Roulette at the Goal Ring; Drawing Lots is the repeatable unlock.
- World 4: Scratch and Match or Drawing Lots at the Goal Ring; Match Cards is the repeatable unlock.
- World 5: Flip Cards or Roulette at the Goal Ring; Roulette is the repeatable unlock.
- World 6: Match Cards or Slot Machine at the Goal Ring; Slot Machine is the repeatable unlock.
Play each challenge for its actual reward
Drawing Lots asks you to choose one card. The card gives an item unless it shows Kamek, in which case you receive nothing. Scratch and Match lets you scratch three boxes; the number of Baby Mario symbols revealed determines the extra-life reward. In the Slot Machine, press a button to stop the spinning drums. The resulting combination determines the number of extra lives awarded.
Flip Cards is an item game with risk. Reveal cards to collect items, but finding Kamek removes every item collected during that attempt. To stop safely, reveal the EXIT icon in the middle. Clearing all the cards grants a special bonus gift, but continuing after receiving a useful item is a deliberate gamble.
Match Cards is a memory game. Reveal cards in pairs, remember their positions, and match identical cards to collect the displayed items. Completing the board grants a bonus gift. Roulette is a life wager: choose the bet, spin the wheel, and the resulting equation changes your life total. Avoid relying on it when you need a guaranteed stock of lives, because an unfavorable result can reduce your total.
- Use the EXIT card in Flip Cards after obtaining an item worth keeping.
- Stop treating Roulette and Slot Machine as guaranteed maximum rewards.
- Use memory and deliberate pair matching in Match Cards rather than random reveals.
- Choose Drawing Lots when you can accept the possibility of receiving nothing from Kamek.
Use item rewards deliberately
Item-oriented Bonus Challenges can award special items stored in Yoshi's inventory. Useful rewards include the Anytime Egg, which gives Yoshi six eggs; the Magnifying Glass, which reveals Red Coins in the current stage; the Anywhere POW, which turns enemies on screen into Stars; the Winged Cloud Maker, which turns enemies on screen into Winged Clouds; 10-Point and 20-Point Stars, which raise the Countdown Timer by the listed amount; and Super Red, Super Green, and Super Blue Watermelons, which provide fire, seed, and freezing attacks.
Save an item for a known problem rather than spending it at the start of a stage. Use the Magnifying Glass on a replay where only a few hidden Red Coins remain, especially in fast vehicle sections. Use an Anytime Egg before an area that demands repeated egg throws when enemies and Egg Blocks are scarce. Save a 10-Point or 20-Point Star for the end of a 100-point attempt if damage has lowered the timer and no ordinary Stars remain nearby.
These items do not replace the stage's five Flowers, 20 Red Coins, or 30 Stars required for a perfect score. They are tools for completing the route, restoring resources, or making a difficult collectible section safer.
- Check the inventory before entering a difficult scoring replay.
- Use Star items near the end of the run, not before a dangerous section where another hit may occur.
- Do not confuse Goal Ring Bonus Challenges with Mini Battles reached through locked doors.
Plan when to pursue a Bonus Challenge
On a first campaign clear, finish a regular stage whenever you reach the Goal Ring safely. Do not delay the ending for an optional Flower if Baby Mario is endangered or the return route is uncertain. For a deliberate reward run, replay a familiar early stage in the current world, collect at least three Flowers, and enter the Goal Ring at full speed. The resulting challenge can provide lives or items before a harder stage.
For 100-point attempts, collect Flowers and Red Coins first, then restore the Countdown Timer to 30 before entering the Goal Ring. If the route contains an enemy or hazard near the finish, secure Baby Mario and choose survival over a roulette setup. A failed optional detour can cost the entire scoring run.
After all eight regular stages in a world total 800 points, return to the Level Selection screen and use that world's repeatable Bonus Challenge whenever you need preparation. The permanent challenge remains available for repeated attempts, unlike a Goal Ring challenge tied to one stage completion. The normal ending still comes from clearing the main campaign and defeating Baby Bowser; Bonus Challenges are optional assistance.
- Farm rewards in a stage you can clear consistently.
- Use full-speed Goal Ring entry only after confirming that at least three Flowers were collected.
- Earn 800 points in a world to unlock its repeatable Bonus Challenge.
- Use repeatable challenges for lives and items before difficult 100-point replays, not as a substitute for required stage collectibles.
Before you move on
- You can name all six original SNES Bonus Challenges: Flip Cards, Scratch and Match, Drawing Lots, Match Cards, Roulette, and Slot Machine.
- You know the Goal Ring challenge pair for each of the six worlds.
- You know the fixed repeatable challenge unlocked by 800 total points in each world.
- You can collect at least three Flowers and enter the Goal Ring at full speed for a reliable Bonus Challenge.
- You understand the Kamek penalties in Drawing Lots and Flip Cards, the life risk in Roulette, and the reward purpose of the item games.
- You have used a Bonus Challenge reward to support a later stage without treating the challenge as required campaign progress.
- You understand that the standard ending requires the main campaign and the Baby Bowser battle, while Bonus Challenges are optional.
Perfect Scores and Unlocking Extra Levels
In the original North American Super Nintendo release, a regular stage earns a maximum score of 100 from five Flowers, twenty Red Coins, and thirty Stars remaining at the goal. Every one of those eight regular stages in a world must receive 100 points before that world’s Extra stage and permanent Bonus Challenge become available. Extra stages are optional for the normal ending, but they have their own score. To place a star beside the game logo on the title screen, complete that world’s Extra stage with a 100-point score as well. Therefore, six title-screen stars require perfect scores on all forty-eight regular stages and all six Extra stages.
Earn 100 points in a regular stage
The regular-stage score has three parts: five Flowers worth ten points each, twenty Red Coins worth one point each, and up to thirty Stars worth one point each. The Star portion is the amount remaining on Yoshi’s Countdown Timer when he reaches the goal. A perfect result therefore requires all five Flowers, all twenty Red Coins, and thirty Stars at the end of the same completed attempt.
Collectible progress is not combined across replays. If one attempt finds the Flowers and another finds the Red Coins, the game does not merge those results. Replay the stage and collect the complete set in one run. A score already saved for the stage remains recorded if a later attempt is abandoned, so restarting after a missed collectible is usually safer than continuing a run that can no longer reach 100.
The result is saved after the stage is cleared. Review the score on the result screen and later from the Level Selection screen. A stage that has been safely completed but shows 99 or less still counts as cleared for story progression, but it does not count toward that world’s Extra-stage unlock.
- Five Flowers were collected in the current attempt.
- Twenty Red Coins were collected in the current attempt.
- The Countdown Timer shows 30 when Yoshi reaches the goal.
- The completed stage displays 100 points after the score tally.
Keep the Countdown Timer at 30
Yoshi normally begins a stage with ten Stars. Collecting Star items raises the timer, up to a maximum of thirty. Middle Rings add ten Stars when activated, subject to that thirty-Star maximum, and they establish a continuation point after a lost life. A Middle Ring is useful for survival, but it is not a full refill and does not replace missing Flowers or Red Coins.
For a perfect attempt, activate the Middle Ring before the stage’s most dangerous late section whenever possible. Afterward, use nearby Star Clouds, defeated enemies, eggs that produce Stars, and other safe sources to rebuild the timer. Avoid taking damage after reaching thirty because the timer can fall below the required score even when every collectible has already been found.
If the stage provides no dependable late Star source, keep a stored Star item from a Bonus Challenge for the final route. Use it close to the goal rather than early in the stage, since another hit afterward can reduce the score again. If Baby Mario is separated, recover him immediately; do not leave him floating while searching for a last Red Coin.
- The Middle Ring has been activated before the hardest late section.
- The ten-Star checkpoint increase has been counted without exceeding thirty.
- Baby Mario is recovered before pursuing optional detours.
- The timer is restored to thirty before entering the Goal Ring.
Search before committing to the goal
A first clear teaches the route but does not necessarily reveal the perfect-score path. On the replay, inspect upper ledges, side rooms, pipes, doors, breakable walls, Winged Clouds, and spaces above the normal route. Flowers and Red Coins are frequently placed away from the route needed simply to finish the stage.
Use eggs to activate Winged Clouds, hit switches, defeat enemies, and collect distant objects. Ground-pound suspicious posts, soft platforms, and scenery when the layout suggests a hidden room or lower passage. During vehicle sections, check reachable branches before leaving the transformation area; a missed collectible there may require another full attempt.
Track Flowers and Red Coins separately. If one is missing near the end, backtrack only when the route is safe and Baby Mario’s timer is secure. Otherwise finish or restart and make the missed location the first objective on the next attempt. Do not sacrifice a nearly complete run to chase a collectible across a hazardous section without a reliable recovery route.
- Upper routes, side rooms, and breakable scenery have been checked.
- Flower and Red Coin totals are tracked separately.
- The final difficult section has been passed with the Middle Ring active.
- The Goal Ring is not entered until both collectible totals are complete.
Complete all eight regular stages in a world
Each world contains eight regular stages, including the fourth and eighth stages. Boss stages must also display 100 points; defeating a boss without the full score only clears the stage for normal progression. Seven perfect scores are not enough, and a perfect result in another world cannot substitute for the missing stage.
Use the Level Selection screen as the world checklist. After finishing the eighth regular stage, review the score display for all eight stages. If any result is below 100, replay that stage before treating the world as complete. The game saves completed stages, scores, and unlocked Extra stages automatically after stage completion, so returning to earlier worlds does not erase progress.
Once all eight regular stages in the same world show 100, the world’s Extra stage and its permanent Bonus Challenge become selectable. This unlock is separate for Worlds 1 through 6. A world with seven perfect stages and one 99-point stage remains locked even if every other world is complete.
- All eight regular stages in the world have been cleared.
- Every one of those eight stages displays 100 points.
- The fourth and eighth stages are included in the review.
- The Extra stage and permanent Bonus Challenge are now selectable.
Complete an Extra stage for its title-screen star
After an Extra stage becomes available, select it from that world’s Level Selection folder. Extra stages are harder optional stages with their own Flowers, Red Coins, and Star total. They are not required to defeat Baby Bowser or trigger the standard ending, but they are part of the original SNES game’s full-completion target.
For the world’s title-screen star, do not stop after merely reaching the goal. Earn 100 points in the Extra stage by collecting its full Flower and Red Coin set and finishing with thirty Stars. The game records the Extra-stage score separately from the eight regular-stage scores. A successful clear below 100 proves that the Extra stage was completed, but it does not satisfy the title-screen-star requirement.
After the Extra stage’s score has been saved, return to the title screen and check the logo. The corresponding star should appear after the game recognizes the perfect Extra-stage result. If it does not, return to the Level Selection screen and verify that the Extra stage itself displays 100 rather than merely showing as cleared.
- The world’s eight regular stages each display 100 points.
- The Extra stage has been cleared.
- The Extra stage itself displays 100 points.
- The title screen shows the corresponding world star after returning to it.
Use the correct completion targets
The standard campaign ends after World 6-8 and the Baby Bowser battle. You do not need to unlock or perfect any Extra stage to reach that ending. Extra stages become relevant only if you are pursuing the extended completion target.
For six title-screen stars, repeat the process in every world: perfect all eight regular stages, unlock the Extra stage, then perfect that Extra stage. There are six Extra stages in the original SNES release, one associated with each world. The six additional Secret stages associated with Super Mario Advance 3 are not part of this North American SNES checklist.
Do not treat an Extra-stage clear below 100 as the final completion check. It is useful practice and confirms access, but the title-screen star requires the stricter perfect score. The most reliable record is a written table with nine entries per world: eight regular stages and the Extra stage. Mark each entry only when its saved result reads 100.
- The standard ending has been reached by defeating Baby Bowser, if that is the only goal.
- All forty-eight regular stages display 100 for full world unlocking.
- All six Extra stages display 100 for six-star completion.
- The title screen displays six stars.
- No GBA-only Secret stages have been added to the SNES requirement.
Before you move on
- Each of Worlds 1 through 6 has eight regular stages showing 100 points.
- Each world’s Extra stage is selectable and has been completed with a score of 100.
- Each world’s permanent Bonus Challenge is selectable.
- The title screen displays six stars.
- World 6-8 and Baby Bowser have been completed for the standard ending.
- No GBA-only Secret stages are being counted for the original North American SNES release.
References for this chapter
- Yoshi's Island — Official North American Super NES instruction manual
- Super Mario World 2: Yoshi's Island — The Mushroom Kingdom Guide
- Super Mario World 2: Yoshi's Island — Guide and Walkthrough — Super Nintendo
- Super Mario World 2: Yoshi's Island — Super NES 100% TAS discussion
- Super Mario World 2: Yoshi's Island Cheats, Codes, and Secrets for Super Nintendo
100% Completion — Systematic Checklist and Run Patterns
For the original North American Super Nintendo release, a regular stage earns 100 points only when Yoshi collects all five Flowers and all twenty Red Coins, then reaches the Goal Ring with 30 Stars remaining on Baby Mario’s Countdown Timer. The most reliable approach is to clear unfamiliar stages safely first, record what was missed, and then replay them with a planned collectible sweep. Perfecting all eight regular stages in a world unlocks that world’s Extra stage and Bonus Challenge on the Level Selection screen. The standard campaign ending does not require perfect scores, but a full optional completion plan should also clear the six SNES Extra stages and track their results separately.
1. Build a Level Selection screen ledger
Use the Level Selection screen to work through the six worlds in order, from World 1-1 through World 6-8. Keep a separate record for every regular stage with four entries: Flowers, Red Coins, Stars, and final score. Mark a stage as campaign-clear when Yoshi reaches the Goal Ring, but mark it as perfect only after the end-of-stage result confirms 100 points.
Every regular stage contains five Flowers and twenty Red Coins. Flowers contribute ten points each, while every Red Coin and every Star remaining at the end contributes one point. The Countdown Timer begins at 10 and can hold up to 30 Stars. A perfect score therefore requires all three categories in the same completed run; progress from separate attempts is not combined.
The Level Selection screen lets you choose previously completed stages again, so use it as your central progress list. Do not rely on memory or on recognizing that you reached every major area. Record the result immediately after each stage ends, then return to Level Selection before deciding whether to replay or advance.
- Stage cleared and its completion recorded.
- Five Flowers collected in one run.
- Twenty Red Coins collected in one run.
- 30 Stars remain when Yoshi reaches the Goal Ring.
- The end-of-stage result confirms 100 points.
2. Use a safe first pass and a deliberate perfection pass
On a first attempt, prioritize learning the route and reaching the Goal Ring without wasting lives. Activate every Middle Ring that is safely accessible. Passing through one activates a checkpoint and adds 10 Stars, making it valuable for both survival and perfection attempts. Learn where the stage changes direction, which pipes and doors lead to side areas, and which sections use a transformation or vehicle.
Do not force a perfect result before you understand the stage layout. If Baby Mario is lost, recover him before investigating optional routes. If a Flower or Red Coin is missed in a one-way section, scrolling room, or dangerous pit sequence, finish safely if possible and record the omission rather than making a blind return.
On the second attempt, follow the route you learned. Sweep each room before taking its exit, and inspect upper ledges, side chambers, pipes, doors, destructible blocks, Winged Clouds, and transformation bubbles. Restart only when the missing item is in a route that cannot be safely revisited or when continuing would put Baby Mario at serious risk.
- The first attempt is used to learn hazards and route structure.
- Middle Rings are activated whenever reaching them is safe.
- The second attempt follows a planned search instead of improvised backtracking.
- Known one-way or dangerous omissions are recorded for a fresh attempt.
3. Collect Flowers as route markers
Count Flowers as you collect them rather than waiting until the Goal Ring. After taking one, pause briefly and inspect the surrounding space. A Flower may be above the main path, inside a side room, behind a Winged Cloud, near a vehicle section, or in an area requiring an egg or ground-pound.
At the end of each major section, compare your Flower count with the number expected from the route. If the count is low near the final area, check earlier branches before committing to a dangerous return. The game does not carry a Flower from a previous attempt into the current score, so all five must be collected during the same run.
Do not confuse the extra life awarded for collecting all five Flowers with the ten-point scoring value of each Flower. The life is helpful during a long completion campaign, but the 100-point requirement still depends on carrying all five Flowers into the same successfully completed stage.
- The Flower count is updated immediately after each pickup.
- Upper ledges, side rooms, and hidden-cloud areas are checked before leaving.
- All five Flowers are collected before entering the final approach.
4. Sweep Red Coins section by section
Red Coins are often mixed with ordinary coins or placed in enemy formations, vertical routes, cloud groups, and optional rooms. At each major section, scan from floor to ceiling before proceeding. Use eggs to hit distant coins, activate Winged Clouds, reveal routes, or remove enemies that block a coin cluster. Fluttering is safer than forcing a long jump over a pit.
Check the Red Coin total whenever the stage enters a new visual or mechanical area. This creates a useful decision point: if the count is short, search the current section while the route is still familiar; if the count is correct, advance without unnecessary retracing.
Avoid treating the final Goal Ring area as a place to solve every earlier mistake. If one or more Red Coins are missing and the route back crosses hazards, pipes, or one-way platforms, protect the current attempt unless the missing location is nearby and clearly reachable. Otherwise, finish if possible, note the location, and begin a fresh attempt with a known plan.
- The Red Coin total is checked after every major section.
- Enemy groups and coin clusters are inspected before moving on.
- Vertical spaces and side routes are searched before taking one-way exits.
- Late backtracking is attempted only when the route is clearly safe.
5. Manage Stars and protect the final 30
The Star category is the number of seconds remaining on Baby Mario’s Countdown Timer when Yoshi reaches the Goal Ring, with a maximum of 30. The timer starts at 10. Star items, Star-producing objects, and Middle Rings can raise it. Entering a Middle Ring adds 10 Stars, while recovery after Baby Mario has been separated gradually restores the timer only up to 10 unless additional Stars are collected.
For a perfection attempt, treat every safe Star source as part of the route. Activate Middle Rings promptly, collect Star items after difficult rooms, and avoid taking damage near the end. A run with all Flowers and Red Coins still fails to reach 100 if fewer than 30 Stars remain at the Goal Ring.
When Baby Mario floats away, stop searching for optional collectibles and recover him first. Use the shortest safe route, then resume the search only after the timer is stable. If a final Star source is in a clearly marked Winged Cloud or enemy area, collect it before the Goal Ring; do not risk a long detour when the timer is already full or Baby Mario is vulnerable.
- The timer is rebuilt after difficult sections.
- Middle Ring bonuses are included in the planned route.
- Baby Mario is recovered before optional exploration resumes.
- 30 Stars remain at the Goal Ring.
6. Decide when to move on
Move to the next stage after a safe clear when the route is unfamiliar, the stage contains a difficult boss, or the missing collectible is not obvious. Campaign progress is more valuable than repeatedly losing lives on an uncertain perfection attempt. Revisit the stage after gaining practice or after finding a reliable route to the missing Flower or Red Coin.
Replay immediately when the stage is short, the missing collectible has a known location, or the only missing category is the final timer. For a timer-only failure, preserve the established Flower and Red Coin route and focus on avoiding damage, activating Middle Rings, and saving safe Star sources for the last section.
After all eight regular stages in a world show 100 points in your ledger, return to the Level Selection screen and check for that world’s newly available Extra stage and Bonus Challenge. The unlock is based on perfect regular-stage results, not merely on clearing the world or collecting most of its items.
- Safe clears and perfect clears are recorded separately.
- Known mistakes are replayed while the route is still fresh in memory.
- All eight regular-stage scores in the world are confirmed as 100.
- The Extra stage and Bonus Challenge are checked on the Level Selection screen after the unlock.
7. Follow a practical session schedule
Use flexible one-hour blocks rather than trying to perfect every stage in one sitting. In the first hour, clear unfamiliar stages in the current world and record every missing category. In the second hour, perfect the shortest and most familiar stages while their routes are fresh. Use another hour for long stages, boss stages, or difficult Extra stages, since repeated timer failures become less productive when attempted without a break.
A reliable world-by-world order is: clear the regular stages in Level Selection order, perfect the stages with known routes, then return to the remaining stages before investing heavily in optional content. Continue this process through World 6. If a stage repeatedly fails because of one late hazard, practice that section during safe-clear attempts instead of repeatedly restarting without learning the problem.
Once all eight regular stages in a world have 100 points, verify the Extra stage and Bonus Challenge on the Level Selection screen before moving on. After the six worlds are handled, clear every unlocked SNES Extra stage and record its score separately from the 48 regular stages. Defeat Baby Bowser after completing World 6-8 to trigger the standard ending; perfect scores and Extra stages are not required for that ending.
- Worlds 1 through 6 are cleared through the Level Selection screen.
- Every regular stage has a recorded result.
- Each world’s Extra stage and Bonus Challenge are verified after its eight regular stages reach 100.
- World 6-8 and Baby Bowser are completed for the standard ending.
- All six original SNES Extra stages are cleared if pursuing optional full completion.
- Extra-stage results are recorded separately from regular-stage perfection.
Before you move on
- All 48 regular stages, from World 1-1 through World 6-8, have been cleared.
- Every regular stage has a confirmed 100-point result for the optional perfect-score path.
- Each world’s eight regular stages show 100 points, and its Extra stage and Bonus Challenge are visible from the Level Selection screen.
- World 6-8 has been completed and Baby Bowser defeated, triggering the main campaign ending.
- All six original SNES Extra stages have been cleared if pursuing strict optional full completion.
- Extra-stage results have been recorded separately from the regular-stage scores.
- Bonus Challenges associated with the completed worlds have been entered and tracked separately from regular-stage perfection.
Common Failure Modes and Recovery — What to do when the baby floats or you lose a life
Baby Mario’s separation is recoverable when you treat the Countdown Timer as an emergency resource. In the original North American Super Nintendo version, a stage begins with 10 Stars, the timer can reach a maximum of 30, and ordinary damage causes Baby Mario to leave Yoshi in a bubble. Recover him before the timer reaches zero, use Stars and Middle Rings to create more time, and abandon optional collectibles whenever they create a serious recovery risk.
1. Identify what happened and act immediately
When Yoshi is struck by an ordinary enemy or a damage-causing obstacle, Baby Mario leaves Yoshi’s back in a bubble. The Countdown Timer then shows how much time remains to recover him. A new stage normally begins with 10 Stars, and the timer cannot exceed 30.
Stop pursuing the enemy or collectible that caused the mistake. Find Baby Mario’s bubble and make recovery the only immediate objective. Move toward it using the safest available route: walk across solid ground, jump from a stable platform, or use a flutter jump when the bubble is above or beyond a gap.
Yoshi can recover Baby Mario by touching the bubble or by hitting it with his tongue. If the bubble is high above Yoshi, an egg can knock it closer, making a later tongue attack or jump safer. Do not throw eggs repeatedly without checking the bubble’s movement; an unnecessary throw can leave Yoshi exposed to another enemy while the timer continues to fall.
This recovery rule applies to ordinary hits. Some hazards are immediately lethal, including falls into pits and other stage-specific instant-death obstacles. Those hazards do not give Yoshi a normal opportunity to chase a bubble, so learn to recognize them and prioritize staying on safe ground near ledges, lava, spikes, and moving platforms.
- Locate Baby Mario before attacking enemies or searching for collectibles.
- Use the safest available combination of movement, fluttering, tongue, or egg.
- Remember that pits and other lethal hazards can bypass the normal bubble recovery sequence.
2. Use Stars to extend the recovery window
Each regular Star increases the Countdown Timer by one point, up to the maximum of 30. During a separation, collect a Star when it lies directly between Yoshi and Baby Mario or when it can be reached from the same safe platform. A Star is useful because it buys another second, but it is not worth a long detour through enemies, a pit, or an unfamiliar route.
Levels commonly provide Stars in Winged Clouds, crates, tulips, or other item sources. If you already know that a Winged Cloud is nearby, use an egg or another safe attack to open it while keeping the bubble in view. Do not turn a recovery into a search expedition. The timer is still counting down while Yoshi opens the cloud and while Baby Mario drifts.
After Baby Mario is recovered, the Countdown Timer stops. If it is below 10, it gradually restores toward 10 while Baby Mario is safely on Yoshi’s back. This natural recovery does not raise the counter above 10. To build a reserve between 10 and 30, Yoshi must collect additional Stars, use an appropriate Star item, or activate a Middle Ring.
If the bubble is close, recover Baby Mario first and then look for Stars. If the bubble is blocked behind a short obstacle and a Star is immediately available on the safe side of that obstacle, collect the Star while returning. Once the timer becomes low, stop exploring and take the shortest safe route to the bubble.
- Collect Stars only when they are on a safe recovery route.
- Use known Winged Clouds or Star sources without losing sight of Baby Mario.
- After recovery, remember that natural refill stops at 10.
3. Activate Middle Rings before difficult sections
Jump through every Middle Ring that you encounter. Activating a Middle Ring marks a continuation point for a later life loss and immediately adds 10 Stars, up to the 30-point maximum. The ring is therefore both a checkpoint and a reliable way to refill the Countdown Timer before a difficult section.
Do not wait for the ring’s bonus to accumulate; the 10-Star increase occurs when the ring is activated. If the current counter is 5, the result is normally 15. If the counter is already 25 or higher, the total is capped at 30. Passing through a ring while distracted is a common failure because an unactivated ring does not protect the remainder of the stage.
Activate the ring from a safe position whenever possible. If Baby Mario is already on Yoshi’s back, the checkpoint is ready for a later mistake. If Baby Mario is separated near the ring, recovering him first is the safest general choice, but crossing the ring can still be useful if doing so is the shortest safe route and the extra Stars will extend the recovery window. Never assume that merely reaching the area near the ring activates it; Yoshi must pass through the ring.
A Middle Ring does not prevent all deaths. A pit, lava, spikes, or another instant-death hazard can still cost a life. Its benefit appears after the failure: if Yoshi loses a life and has activated the ring, the next attempt resumes from that checkpoint rather than the beginning of the stage.
- Pass through every Middle Ring before taking a major risk.
- Confirm that the ring has activated before moving into the next hazard section.
- Use the ring’s 10-Star bonus to enter difficult areas with a larger recovery reserve.
4. Abandon optional collectibles when recovery becomes unsafe
During a separation, use this priority order: recover Baby Mario, reach stable ground, restore the timer if a safe Star is available, and only then resume collecting Flowers or Red Coins. A missed collectible can be obtained on a later replay. Losing a life can send Yoshi back to the latest Middle Ring and may erase a long stretch of careful collection.
If Baby Mario is close to the Goal Ring, take the direct route and finish the stage. Do not reverse direction for one last Red Coin or Flower when the bubble is moving, the timer is low, or the return path contains a major gap, lava, spikes, auto-scrolling danger, or enemies that are difficult to avoid. The final collectible is not worth allowing the timer to reach zero.
If the bubble is far away but a safe Star or Winged Cloud is immediately available on the same side of the hazard, use it while keeping the recovery route open. Avoid crossing an entire screen, entering a side room, or backtracking through a one-way section. When the counter enters its final few points, stop collecting entirely and make direct contact with Baby Mario.
For a 100-point attempt, it is better to finish the stage safely with an incomplete score and replay it than to force a dangerous recovery. Treat the safe clear as route practice, then return to the Level Selection screen and attempt the missing Flowers, Red Coins, or Stars when the ending section is familiar.
- Baby Mario takes priority over Flowers and Red Coins.
- Finish safely when the Goal Ring is close.
- Replay the level for perfection instead of gambling on a failing recovery.
5. Recover after a life loss or Game Over
If the Countdown Timer reaches zero, Kamek’s Toadies take Baby Mario and Yoshi loses a life. An instant-death hazard can also cause a life loss without a normal countdown. After a regular failure, use the activated Middle Ring as a practice checkpoint. Rebuild your egg supply if necessary, observe the hazard pattern that caused the failure, and choose the safer route through the remaining section.
A failed attempt does not make the Middle Ring permanent for all future attempts. It applies to the current stage attempt until the game is over or the stage is otherwise restarted. If the player reaches Game Over before completing the stage, the next attempt begins from the start of the stage rather than the activated Middle Ring.
After a Game Over, stop trying to perfect the stage immediately if the ending section is still unfamiliar. First clear it without chasing every Flower and Red Coin. Once the route is understood, replay the stage and use the checkpoint, Star sources, and safe pauses to restore the 30-point timer before the final hazards.
A recovery is complete only when Baby Mario is back on Yoshi’s back, the Countdown Timer has stopped counting down, and Yoshi is positioned on stable ground or a deliberate route toward the next checkpoint or Goal Ring.
- After a life loss, use the activated Middle Ring to learn the late section.
- After Game Over, expect to restart the stage from its beginning.
- Before resuming exploration, confirm that Baby Mario is recovered and the timer is stopped.
Before you move on
- For a safe clear, Baby Mario remains on Yoshi’s back when Yoshi reaches the Goal Ring.
- For a successful recovery, Baby Mario returns to Yoshi, the Countdown Timer stops, and any natural refill below 10 begins afterward.
- For checkpoint preparation, Yoshi has visibly passed through the Middle Ring and received its 10-Star bonus before attempting the dangerous section.
- For a perfect-score replay, collect all five Flowers and all 20 Red Coins and finish with the Countdown Timer at 30.
- For recovery practice, verify that an ordinary life loss resumes from the activated Middle Ring, while a Game Over restarts the stage from the beginning.
References for this chapter
Postgame, Extra Stages and Wrap-up Strategy
The ordinary campaign ends after World 6-8 and the Baby Bowser battle. The original North American Super Nintendo release then offers six optional Extra stages, one for each world. To unlock a world's Extra stage and its permanent Bonus Challenge, earn 100 points in all eight regular stages of that world. Clearing the Extra stage completes that optional level, but the title-screen star is tied to earning 100 points in the Extra stage as well. Therefore, completing the regular stages perfectly and clearing all six Extra stages is a practical postgame target, while earning 100 points in all six Extra stages is the strict six-star completion goal.
Finish the standard campaign
Clear the regular stages in Worlds 1 through 6, including World 6-8, and defeat Baby Bowser. The final battle and the following ending sequence complete the normal story campaign. No Extra stage, Bonus Challenge, or perfect score is required to reach the ending.
If you are playing only for the ending, prioritize reaching each Goal Ring safely. Recover Baby Mario immediately whenever he leaves Yoshi, use Middle Rings as soon as they appear, and abandon optional collectible routes when the Countdown Timer is nearly empty. Missing Flowers, Red Coins, or Stars does not prevent a stage clear; those objectives can be handled on later replays.
After the ending, use the level-selection screen to revisit earlier worlds. The SNES release uses a level-selection screen rather than a Super Mario World-style branching overworld, so postgame work consists of selecting the relevant world and replaying stages whose scores are incomplete.
- Worlds 1 through 6 have been reached.
- World 6-8 has been cleared.
- Baby Bowser has been defeated and the ending has played.
Perfect the eight regular stages in each world
A regular stage earns 100 points only when the same run contains all five Flowers, all twenty Red Coins, and a full 30 Stars at the Goal Ring. Flowers are worth ten points each, while Red Coins and the remaining Countdown Timer points are worth one point each.
Work one world at a time. First clear its regular stages without worrying about score, then replay them for perfection after learning their layouts. On a scoring run, search each branch before passing a point where the route becomes one-way, preserve eggs for distant collectibles and switches, and activate every Middle Ring that protects a difficult later section.
If the final score is below 100, replay the entire stage. The game does not combine Flowers or Red Coins collected across separate attempts into one perfect result. Check the stage's score on the selection screen and maintain a written tally so that one missed stage does not remain hidden among completed levels.
- All eight regular stages in the selected world display 100 points.
- Each perfect score was earned in one completed run.
- The world has been checked before moving on to its Extra stage.
Unlock the Extra stage and permanent Bonus Challenge
When all eight regular stages in a world have 100 points, that world's Extra stage becomes available on the level-selection screen. The same achievement also unlocks that world's Bonus Challenge for repeated use. There are six Extra stages and six corresponding Bonus Challenges in the original SNES game.
The Bonus Challenge is optional support content. Depending on the game, it can provide extra lives or useful items, making it valuable before difficult Extra-stage attempts. It does not replace a regular-stage score, and winning a Bonus Challenge does not count as clearing the Extra stage.
Confirm the unlock directly on the world-selection screen before assuming a score was recorded. If the Extra stage or Bonus Challenge is absent, inspect the eight regular-stage results and replay any stage below 100.
- The selected world has eight regular stages scored at 100.
- Its Extra stage is visible and selectable.
- Its permanent Bonus Challenge is available.
Clear each Extra stage safely before pursuing its score
Extra stages are optional challenge levels and are generally more demanding than the regular stages. They may use autoscrolling, narrow platforms, unusual enemy placements, transformations, or long sections where a Baby Mario mistake is difficult to recover from. Begin with a reconnaissance run whose purpose is to learn the route and reach the Goal Ring.
On the first attempt, identify the locations of eggs, switches, transformations, Middle Rings, and dangerous late sections. Do not sacrifice the run for a Flower or Red Coin when Baby Mario is separated. Recover the baby first, then return for collectibles on a later attempt.
The original manual allows Select to leave a previously cleared stage, and Extra stages can be exited through the game's stage-exit behavior. Do not treat Select as a universal escape from every first attempt or as a substitute for completing an uncleared stage. If the objective is practice, finish the run or use the permitted exit condition rather than assuming progress will be preserved automatically.
- Every Extra stage has been reached and cleared once.
- The route and major hazards are understood before score attempts.
- Extra-stage clears are tracked separately from regular-stage 100 scores.
Understand the six title-screen stars
For the original SNES release, clearing an Extra stage alone is not the researched requirement for its title-screen star. The established SNES references state that the Extra stage must also receive a perfect 100-point score: all five Flowers, all twenty Red Coins, and 30 Stars at the Goal Ring. One title-screen star is awarded for each Extra stage completed with that perfect score, for a maximum of six.
Use a two-pass method. First learn the Extra stage and finish it. Then plan a scoring run around its collectible order. Enter difficult sections with eggs available, use Middle Rings to protect the attempt, and take Star items whenever they are available after losing Countdown Timer points. A fast clear with missing collectibles is useful for learning but does not advance the six-star objective.
If the title screen does not show the expected star, inspect the Extra-stage result rather than assuming the game failed to save. A score below 100 means the stage must be replayed for the star requirement.
- Each Extra stage has a recorded score of 100 for the strict six-star goal.
- One title-screen star appears for each perfected Extra stage.
- Six title-screen stars are visible when all six Extra stages have been perfected.
Final completion check
For the normal ending, verify that World 6-8 is complete and Baby Bowser has been defeated. Extra stages are not required for the story ending.
For the practical postgame target, verify that all 48 regular stages have 100 points, all six Extra stages are unlocked, all six permanent Bonus Challenges are available, and every Extra stage has been cleared at least once.
For the strict original-SNES full-score target, also earn 100 points in every Extra stage. The six title-screen stars provide the clearest confirmation of that stronger achievement. Do not add the six Secret stages from Super Mario Advance 3: Yoshi's Island to an SNES checklist; they are not part of this edition.
After the six-star target is complete, remaining play is optional practice. You can improve route speed, repeat difficult Extra stages, refine egg throws, or replay regular stages without taking damage, but no additional campaign area is required.
- The normal ending has been triggered.
- All 48 regular stages have 100 points.
- All six Extra stages are unlocked.
- All six permanent Bonus Challenges are available.
- All six Extra stages have been cleared.
- For the strict six-star goal, all six Extra stages also have 100 points.
- The title screen displays six stars.
Before you move on
- World 6-8 is complete and Baby Bowser has been defeated.
- Every regular stage in Worlds 1 through 6 has a perfect 100-point score.
- All six Extra stages and six permanent Bonus Challenges are unlocked.
- Every Extra stage has been cleared at least once for the practical postgame target.
- Every Extra stage has a perfect 100-point score for the strict six-star target.
- The title screen displays six stars.
References for this chapter
- Yoshi's Island — Official North American Super NES instruction manual
- Super NES Instruction Manuals: Super Mario World 2: Yoshi's Island
- Super Mario World 2: Yoshi's Island Cheats, Codes, and Secrets for Super Nintendo
- Super Mario World 2: Yoshi's Island — Guide and Walkthrough — Super Nintendo
- Super Mario World 2: Yoshi's Island — Super Mario Wiki
Finishing up
You have cleared World 6-8 and defeated Baby Bowser, then watched the ending sequence and credits. This is the standard campaign completion point.
All six worlds' eight regular stages are cleared in the Level Selection screen.
For the optional regular-stage perfection route, every one of the 48 regular stages records 100 points from all five Flowers, all 20 Red Coins, and 30 Stars at the stage ending.
After all eight regular stages in a world record 100 points, that world's Extra stage and repeatable Bonus Challenge are visible on the Level Selection screen.
For the extended original-SNES postgame goal, all six Extra stages have been cleared. Bonus Challenges are optional support content and are not required for the standard ending.
Choose your next gameScreenshots & video
Game imagery for reference. Follow the written chapters above for the route and strategies.
Sources & references
Our original guide draws on the references below. Check the edition at the top of this page before following controls or unlock requirements.
- Yoshi's Island — Official North American Super NES instruction manual
- Super Mario World 2: Yoshi’s Island — Super Mario Wiki
- Gameplay — Imasara Yoshi's Island Guide
- Yoshi’s Island: Collectibles — Speedrunning Wiki
- Super NES Instruction Manuals: Super Mario World 2: Yoshi's Island
- Super Mario World 2: Yoshi's Island — Super NES Instruction Manual
- Yoshi's Island: Super Mario World 2 — Gameplay
- Super Mario World 2: Yoshi's Island — Guide and Walkthrough — Super Nintendo
- Special Item (Super Mario World 2: Yoshi's Island) — Super Mario Wiki
- Yoshi's Island: Super Mario World 2 — StrategyWiki Items
- Super Mario World 2: Yoshi's Island — The Mushroom Kingdom Guide
- Super Mario World 2: Yoshi's Island — Super Mario Wiki
- Shy-Guys On Stilts — Super Mario Wiki
- 1-8: Salvo The Slime’s Castle — Imasara Yoshi’s Island Guide
- Yoshi's Island: Super Mario World 2 — StrategyWiki Walkthrough
- Super Mario World 2: Yoshi's Island — GameFAQs SNES Guide by TheRewster, World 2 pages
- Super Mario World 2: Yoshi's Island — GameFAQs SNES Guide by TheRewster, World 2 continuation
- World 2 — Playing With Super Power: Nintendo Super NES Classics eGuide
- 2-7: Lakitu's Wall — Imasara Yoshi's Island Guide
- The Cave Of The Mystery Maze — Super Mario Wiki
- Imasara Yoshi's Island Guide — SNES level index
- Jungle Rhythm... — Imasara Yoshi's Island Guide
- Nep-Enut's Domain — Imasara Yoshi's Island Guide
- Prince Froggy's Fort — Imasara Yoshi's Island Guide
- Jammin' Through The Trees — Imasara Yoshi's Island Guide
- The Cave Of Harry Hedgehog — Imasara Yoshi's Island Guide
- Monkeys' Favorite Lake — Imasara Yoshi's Island Guide
- Naval Piranha's Castle — Imasara Yoshi's Island Guide
- Super Mario World 2: Yoshi’s Island — Guide and Walkthrough, World 4
- 4-8: Hookbill The Koopa’s Castle — Imasara Yoshi’s Island Guide
- Super Mario World 2: Yoshi’s Island — Guide and Walkthrough for Super Nintendo
- World 5 — Super Mario World 2: Yoshi’s Island
- 5-8: Raphael The Raven’s Castle — Level Guide and Map
- 6-8: King Bowser’s Castle - Level Guide and Map - Imasara Yoshi’s Island Guide
- King Bowser’s Castle (Super Mario World 2: Yoshi’s Island) - Super Mario Wiki
- Super Mario World 2: Yoshi’s Island - Guide and Walkthrough - Super Nintendo - GameFAQs
- Super Mario World 2: Yoshi’s Island - Guide and Walkthrough - Super Nintendo - GameFAQs
- Super Mario World 2: Yoshi's Island — SNES Boss Guide
- Bonus Challenge — Super Mario Wiki
- Goal Ring — Super Mario Wiki
- Super Mario World 2: Yoshi's Island — Super NES 100% TAS discussion
- Super Mario World 2: Yoshi's Island Cheats, Codes, and Secrets for Super Nintendo
- Super Mario World 2: Yoshi’s Island USA Instruction Booklet
- How do I unlock special and extra stages? — Super Mario World 2: Yoshi’s Island Q&A
- Countdown Timer — Super Mario Wiki
About the game & collecting notes
- Platform
- Super Nintendo Entertainment System
Step-by-step coverage of the original Super Nintendo Entertainment System release (USA). Follow the six worlds from the Level Selection screen, clear all 48 regular stages, defeat Baby Bowser in World 6-8, and use the original scoring system to unlock the six optional Extra stages and six world Bonus Challenges. Optional 100-point guidance explains Flowers, Red Coins, Stars, Middle Rings, and the requirements for full SNES postgame completion.
Darryl Polo
Darryl Polo loves tinkering with emulation and revisiting retro games. He enjoys exploring how old favorites play on different setups and sharing what he learns along the way. At Joking Joystick, he writes about the games, hardware, and small discoveries that keep the hobby fun.
Our editorial standardsFound a step that needs another look? Help us improve this guide.