
Super Mario RPG: Legend of the Seven Stars — Super Nintendo Entertainment System (USA) Complete Walkthrough
Step-by-step campaign walkthrough for the original Super Nintendo (USA) edition of Super Mario RPG: Legend of the Seven Stars. Follow the required story route from Mushroom Kingdom and Mack through Bowyer, Punchinello, Star Hill, Johnny and Yaridovich, the Axem Rangers in Barrel Volcano, and Smithy in the Factory. Optional areas and rewards are clearly separated from the seven-Star-Piece ending route.

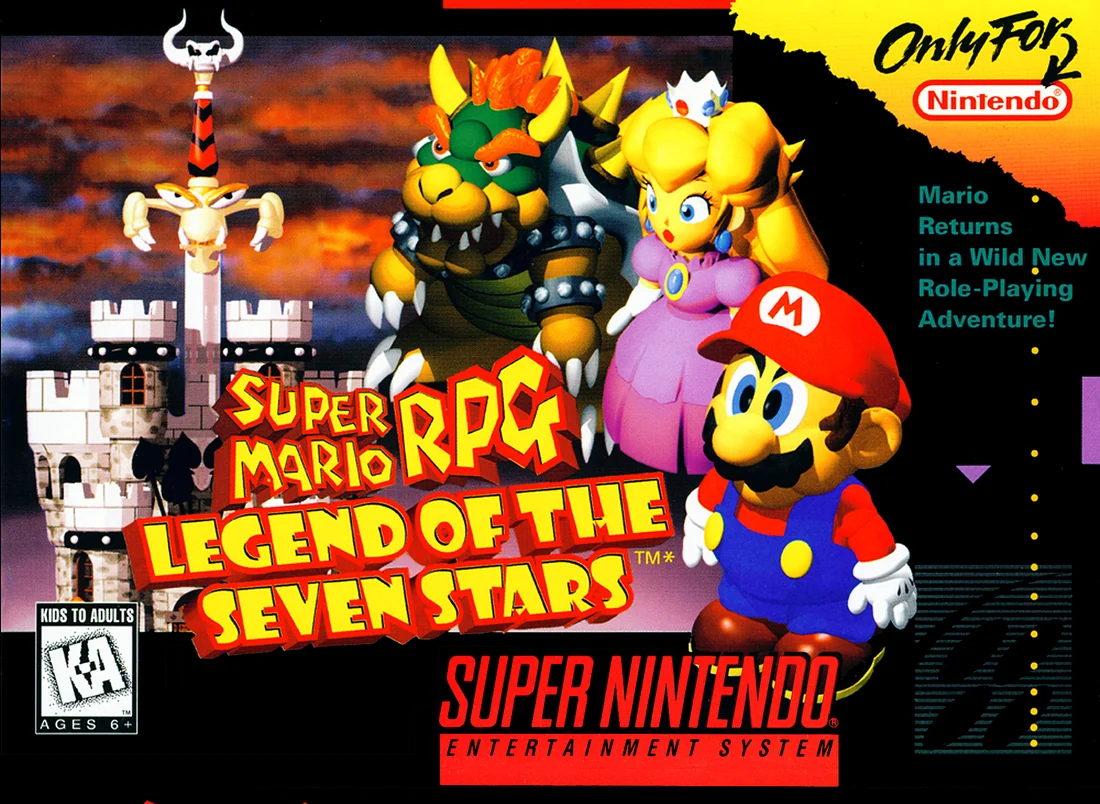
Find a copy
Super Mario RPG: Legend of the Seven Stars Super Nintendo Entertainment System
We may earn a commission if you buy through these links, at no extra cost to you. As an Amazon Associate I earn from qualifying purchases.
Opens retailer search results. Check the model, edition, seller, availability and current price before buying.
Before you begin
This walkthrough targets the original Super Nintendo Entertainment System USA release of Super Mario RPG: Legend of the Seven Stars.
Follow the required story route in order. Optional chapters such as Pipe Vault, Yo’ster Isle, Grate Guy’s Casino, Culex and Super Jump rewards are clearly marked and can be skipped for the ending.
Each required chapter identifies its actual story objective, prerequisite conversations, mandatory bosses, Star Piece milestone and next destination.
The original SNES game returns to the save state from before Smithy after the ending, so preserve that file and record the ending separately rather than expecting a permanent post-game world state.
Use Save Blocks, inns and recovery rooms before long routes and boss sequences.
Set yourself up for the run
Read the in-game instruction booklet or player’s guide for basic controls and the Special button timing mechanic (timed Jump/Attack and timed Defense).
Familiarize yourself with pressing the Special button during actions to boost damage or reduce incoming damage.
(See the official instruction booklet for exact control diagrams.)
Keep your inventory stocked with basic recovery items (Mid Mushrooms/Max Mushrooms, Maple Syrup or equivalent) and a supply of Revives/Revival items before major dungeons.
Use shops in towns you visit to top up before boss rooms.
Rotate party members to learn their Special Moves and equipments.
Early-game party members (Mallow, Geno, Toadstool, Bowser) are all required at various points; recruit and keep a flexible second character for healing/support when possible.
Use save points (benches) frequently.
If you want to farm levels, do so in areas with easy battles before entering major bosses or long dungeon runs.
Explore each town thoroughly before leaving: NPC conversations frequently give you the next objective or point to a secret entrance.
Check barrels, treasure chests, and obvious environmental puzzles for Frog Coins or equipment.
If you plan to pursue optional rewards (hidden bosses, bonus equipment, Grate Guy’s Casino, secret treasures), leave time to revisit areas after story triggers — many optional shops or exchanges appear only after specific events.
Understand that the SNES cartridge contains enhancement hardware (SA-1) that affects timing and some on-screen effects; use authentic SNES timing or an accurately-emulated environment for expected control feel.
If you prefer a smoother run, plan to reach mid-to-high levels before the Smithy Factory by completing accessible overworld and dungeon encounters; the guide will mark safe side-areas to level up without spoiling required progression.
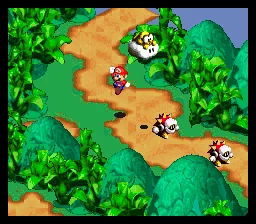
Quick Start and Controls (Preparation in-game)
The original North American Super Nintendo version uses four face buttons for field movement, battle commands, timed attacks, and menu navigation. Learn the action-command timing before leaving the opening areas, save at every Save Block, and spend early coins on armor and a small supply of recovery items rather than exhausting your money on disposable purchases.
Learn the controller layout at Mario’s Pad
Use the Control Pad to move Mario in the field and move the cursor during menus and battles. Press A to talk to characters, inspect objects, confirm menu choices, and select the Attack command in battle. Press B to jump or cancel a menu choice; in battle, B opens the Etc. command, which contains Defense and Run Away. Press X on the field to open the main menu, or in battle to open Items. Hold Y while pressing the Control Pad to run, and keep holding Y during a jump to make Mario travel farther. In battle, Y opens the Special command.
L, R, and SELECT are not regular movement or battle buttons in the original SNES adventure. They are used on the file-selection screen to change the sound setting between stereo and mono. START begins the game. These mappings are different from modern control schemes, so do not rely on a Switch remake layout if you are playing the original cartridge or an emulation of the USA SNES release.
- Use A for interaction, confirmation, and Attack.
- Use B to jump, cancel, or open Etc. in battle.
- Use X for the field menu and Items in battle.
- Use Y to run on the field and open Specials in battle.
Check the field menu and equip upgrades manually
Press X outside battle to open the field menu. Items lets you use consumables outside combat. Specials displays learned techniques and their Flower Point costs. Equip is where you assign weapons, armor, and accessories, while Status shows character statistics and current equipment. When you receive or purchase a weapon or armor piece, open Equip and assign it yourself; new gear is not automatically equipped in the original SNES version.
Flower Points are shared by the party. Mario begins with Jump, which costs 3 FP, so do not spend all of your FP on routine battles before a dungeon or boss. A normal attack with a successful timed hit is usually enough against early enemies. Use field healing items when necessary, but remember that Save Blocks and inns are the safer way to prepare for a long section.
- Open Equip after receiving the Hammer and later purchases.
- Check the FP cost before choosing a Special.
- Confirm that the intended character is wearing each new armor piece.
Practice normal timed attacks
Enter an early battle in Mushroom Way and choose Attack with A. Select an enemy, then press A again at the weapon’s impact moment. The correct timing produces a stronger attack or an additional hit. The exact moment depends on the weapon’s animation, so watch Mario rather than pressing repeatedly.
With an unarmed attack, press A again as Mario begins swinging his arm. With the Hammer, press A as Mario comes down with it. If you miss, the ordinary attack still occurs, making Mushroom Way a low-risk place to practice. Later weapons use their own animations, so recheck the impact point whenever Mario changes weapons.
- Choose Attack with A.
- Press A again at the first impact moment.
- Use the weapon animation as your timing cue.
- Do not confuse repeated button presses with a timed hit.
Practice Jump and other Special action commands
Choose Special with Y, select Jump, and choose a target. Press Y when Mario makes contact with the enemy. A successful input extends the attack’s damage; pressing too early or too late gives the ordinary result. Jump costs 3 FP, so use only a few attempts while learning the timing.
Later techniques use different action-command patterns. Fire Orb uses rapid Y presses, while Super Jump and Ultra Jump require another Y press as Mario lands so he can continue jumping. Some techniques use a held button or repeated presses instead. Open the Specials screen whenever a new move is learned and follow that move’s animation rather than assuming every Special uses the same timing.
- Select Special with Y.
- Press Y as Jump contacts the target.
- Use rapid or repeated inputs only when the specific move requires them.
- Keep enough FP for exploration and boss encounters.
Learn timed defense correctly
When an enemy uses a physical attack, press any face button immediately before the hit connects. A successful timed defense reduces the damage. It is not limited to A; A, B, X, or Y can perform the defensive action command in the original release. Watch the enemy’s final movement, then try the button press on the next attack.
This timed defense is separate from choosing Defend through the Etc. command. Defend is a normal battle command that gives a predictable defensive turn, while the timed input depends on reading the attack animation. The action command does not protect against magical attacks, so do not assume every spell can be reduced this way.
- Watch the final motion before a physical strike lands.
- Press any face button just before contact.
- Use Etc. and Defend when the timing is unclear.
- Do not rely on timed defense against magical attacks.
Use Save Blocks and the early inn
The Save Block beside Mario’s house is the first reliable saving point. After the opening Bowser sequence and Exor’s arrival, use the Save Block at Mario’s Pad before leaving. Mushroom Way also contains a Save Block; activate it when you reach it so a defeat does not force you to repeat the entire route.
After returning to the Mushroom Kingdom and helping Mallow, enter the building marked with a star. This is the inn. It provides a recovery stop and contains a Save Block. Use it before entering Bandit’s Way or another unfamiliar area. The inn is near the town’s shops and castle, so returning there from the town entrance is quicker than retreating all the way to Mario’s Pad.
- Save at Mario’s Pad after the opening crash.
- Activate the Save Block in Mushroom Way.
- Use the star-marked Mushroom Kingdom inn after Mallow joins.
- Save before entering each new dungeon or major route.
Spend early coins on useful upgrades
Keep enough coins for equipment and emergency recovery. After Mallow joins and the Mushroom Kingdom story sequence advances, visit the Item Shop. The shop sells Mario’s Shirt and Mallow’s Pants, and the shopkeeper gives Mario a Pick Me Up during the opening progression. Buy and equip the armor if you can afford it; these upgrades are more useful than filling the inventory with unnecessary single-use items.
A sensible early budget includes a few healing items, some Honey Syrups for restoring FP, and several Pick Me Ups for reviving a defeated party member. The exact number depends on how often you fight and how well your timed commands are going. Do not empty your wallet before the first dungeon, because equipment upgrades and recovery supplies become more valuable as the party expands.
- Reserve coins for Mario’s Shirt and Mallow’s Pants.
- Carry a modest supply of healing items and Honey Syrups.
- Keep Pick Me Ups for battles where a party member is defeated.
- Equip purchased armor immediately.
Before you move on
- You can identify A, B, X, and Y functions on the original SNES layout.
- You can perform Mario’s timed Jump input and recognize the stronger result.
- You have practiced a normal timed attack with Mario’s current weapon.
- You have successfully attempted timed defense against a physical attack using a face button.
- You know that magical attacks cannot be reduced by the timed-defense action command.
- You have saved at Mario’s Pad and Mushroom Way.
- You know the star-marked building in Mushroom Kingdom is the inn and contains a Save Block.
- You have kept coins available for early armor, FP recovery, and revival items.
References for this chapter
Prologue — Bowser’s Keep and the Exor Crash
Complete the opening rescue attempt, witness Exor’s arrival, report the crisis to the Mushroom Kingdom Chancellor, recruit Mallow, recover Mallow’s Frog Coin from Croco, repel the Shyster invasion, defeat Mack, and recover the first Star Piece. This chapter ends after Princess Toadstool is rescued, the Cricket Pie objective is available, and Mario and Mallow are ready to visit Tadpole Pond.
Begin inside Bowser’s Keep
The original North American Super Nintendo version begins inside Bowser’s Keep, with Mario already pursuing Princess Toadstool. Move through the opening rooms by following the doors and bridges toward Bowser’s chamber. The path is mostly linear, but the early enemies provide a safe place to learn the game’s timing mechanics.
During a normal attack, press A again as Mario’s weapon connects to attempt a Timed Hit. Press A immediately before an enemy attack lands to attempt a timed guard. The timing window depends on the individual attack, so practice against the first enemies instead of spending recovery items. Mario is alone during this opening section, so conserve Mushrooms unless you need them.
- Start inside Bowser’s Keep.
- Follow the doors and bridges toward Bowser’s chamber.
- Practice timed attacks and guards against the early enemies.
Complete the chandelier sequence
Continue until Mario reaches the chamber where Bowser is holding Princess Toadstool on a suspended platform. This opening encounter is not a normal selectable-command boss battle. When control is available, use Jump to move onto the chandelier chain and continue the required jumps as the scene progresses.
Mario is alone, and the sequence is resolved through the chandelier action rather than by reducing Bowser’s HP. After the confrontation, the keep begins shaking. Continue through the scene instead of trying to prepare a party or access ordinary battle commands.
- Reach Bowser’s chandelier chamber.
- Use Jump on the chandelier chain when control is available.
- Continue through the shaking-castle scene.
Watch Exor crash into the keep
A giant living sword named Exor crashes through Bowser’s Keep. The impact interrupts Mario’s rescue attempt, scatters Mario, Bowser, and Princess Toadstool, and leaves Exor embedded in the castle. The crash also destroys Star Road, creating the Star Piece quest that drives the main story.
Mario lands at Mario’s Pad. After Toad enters and speaks with him, press B to jump down from the wall when control returns. Leave the house and speak with Toad outside. Use the nearby Save Block before leaving if you want a safe restart point.
- Finish the Exor crash scene.
- Return to Mario’s Pad.
- Speak with Toad outside and save if desired.
Return to Mario’s Pad and receive the first supplies
Leave Mario’s Pad and travel toward Bowser’s Keep through Vista Hill. The route ends at the ruined bridge. Exor’s arrival has changed the area, and the Smithy Gang prevents Mario from entering the keep. After the bridge-destruction scene, return to Mario’s Pad and speak with Toad inside.
Follow Toad outside. When you attempt to leave, Toad stops Mario and begins the early item and Timed Hit explanations. Toad gives Mario Mushrooms during this sequence. You may complete the demonstrations or skip them if you already know how to use items and perform Timed Hits.
Before entering Mushroom Way, go back inside the house and touch the Fungi Light to restore Mario’s HP and FP without paying for an inn. Save at the block, then leave the area through the world map.
- Visit the ruined entrance to Bowser’s Keep.
- Return to Mario’s Pad and speak with Toad inside.
- Receive Toad’s Mushroom supplies.
- Use the Fungi Light and Save Block before entering Mushroom Way.
Cross Mushroom Way and defeat the Hammer Bros.
Follow the connected screens of Mushroom Way toward the Mushroom Kingdom. Fight or avoid enemies while collecting coins and gaining a little experience. Use the rotating flowers and upper routes to reach accessible chests if you want extra supplies, but do not spend all your recovery items on optional encounters.
Near the end of the route, Toad is being held by two Hammer Bros. Defeat them one at a time. Mario’s timed physical attacks are reliable, and timed guards reduce the damage from their hammer strikes. When both are defeated, collect the Hammer they leave behind and equip it to Mario immediately.
Continue into the Mushroom Kingdom. Save at the inn, identified by the rotating star sign, before entering the castle.
- Reach the Hammer Bros. encounter.
- Defeat both Hammer Bros.
- Collect and equip the Hammer.
- Save at the Mushroom Kingdom inn.
Report to the Chancellor and recruit Mallow
Enter the castle and follow Toad to the Chancellor’s room. Speak with the Chancellor to report Exor’s attack and Princess Toadstool’s disappearance. He asks Mario to help recover the princess and provides the world map. Follow the immediate castle instructions before leaving.
If you did not collect the castle vault items during this first visit, go to the lower-right route from the main hall, speak with the guard, and open the three vault chests. They provide early supplies, including coins, a Flower, and a Recovery Mushroom. Visit Princess Toadstool’s room as well and examine the item near the rear chair; the nearby Toad gives Mario another Mushroom after the scene.
Leave the castle. Outside, Mallow is chasing Croco. After the chase, speak with Mallow and agree to help recover his stolen Frog Coin. Complete the nearby jump demonstration when requested. Mallow joins Mario at this point, before the trip through Bandit’s Way.
Visit the Item Shop before leaving town. Speak with the shopkeeper to receive a free Pick Me Up. Buy practical equipment for Mario and Mallow if you can afford it, but keep coins for recovery items. Speak with the Toad near the shop to receive the route information for Bandit’s Way.
- Speak with the Chancellor.
- Receive the world map.
- Collect the castle vault supplies if they are still available.
- Complete the Princess’s room scene.
- Speak with Mallow after Croco’s chase and agree to help him.
- Collect the free Pick Me Up from the Item Shop.
- Leave toward Bandit’s Way.
Pursue Croco through Bandit’s Way
Enter Bandit’s Way and follow Croco through the connected areas. Use the rotating flowers and moving platforms to cross the route. Croco changes position when he sees Mario, so approach him from outside his facing direction and use the surrounding platforms to cut him off. You do not need to defeat every enemy, but fighting enough encounters to keep Mario and Mallow near the area’s expected level makes the next sequence safer.
The route includes optional chests, including recovery supplies and an Invincibility Star. Take them if you can reach them without taking unnecessary damage. Continue pursuing Croco until he is cornered in the final section and the battle begins.
During the Croco battle, have Mario use timed physical attacks while Mallow supports with healing or offensive magic. Keep Mallow alive because his HP Rain and Thunderbolt are the party’s most useful early special options. When Croco is defeated, he drops Mallow’s Frog Coin and a Wallet. Step onto the warp spring that appears to return to the beginning of Bandit’s Way, then exit to the world map and return to Mushroom Kingdom.
- Follow Croco through Bandit’s Way.
- Defeat Croco.
- Collect the Frog Coin and Wallet.
- Use the warp spring and return to Mushroom Kingdom.
Repel the Shyster invasion
When Mario and Mallow return to Mushroom Kingdom, Shysters are chasing townspeople through the streets. You can fight several of these enemies to rescue residents and receive small rewards. The southern town encounter is worth completing because returning the Wallet afterward produces a Flower Tab. The western house also contains a rescue battle that rewards another Flower Tab.
Rest at the inn if necessary, then enter the castle. Before going to the throne room, check the southeastern section. From there, enter the guest room to obtain the Wake Up Pin, then go southwest into the vault. Open the three vault chests if you did not open them during the first castle visit. This is the final opportunity to collect those early castle supplies in the original SNES version.
After checking the guest room and vault, return to the main hall and go northeast to the throne room. A cutscene reveals that the invasion has reached the castle. Once control returns, proceed through the northeast exit from the throne room to begin the Mack encounter.
- Rescue the available townspeople from Shysters.
- Return the Wallet for the Flower Tab.
- Search the western house for its rescue reward.
- Collect the Wake Up Pin from the guest room.
- Open any remaining vault chests.
- Enter the throne-room route to Mack.
Defeat Mack and recover Star Piece 1
Mack is the sword-like Smithy Gang commander occupying the castle. He fights with several Shysters, which can overwhelm Mallow if they remain on the field. Have Mario concentrate on Mack with Jump or timed Hammer attacks. Have Mallow use Thunderbolt to damage the group, especially when several Shysters are present, and use HP Rain whenever either character needs healing.
If Mallow’s FP runs low, use a Honey Syrup rather than allowing his healing to fail during a dangerous turn. Timed guards are valuable against Mack’s physical attacks, while his Flame Wall attack can damage both party members. Defeat the Shysters when their numbers become dangerous, then return your attention to Mack.
After Mack is defeated, collect the Star Piece in the castle. This is Star Piece 1 of the seven required story pieces. Continue through the following scene to rescue Princess Toadstool and restore the immediate safety of Mushroom Kingdom. Speak with the Chancellor after the rescue sequence so the next objective can trigger.
- Defeat the Shysters when they become a threat.
- Use Mario’s Jump or Hammer attacks on Mack.
- Use Mallow’s Thunderbolt and HP Rain appropriately.
- Defeat Mack.
- Collect Star Piece 1.
- Complete Princess Toadstool’s rescue sequence.
- Speak with the Chancellor afterward.
Obtain the Cricket Pie objective
After the castle sequence, return to the Item Shop in Mushroom Kingdom. Speak with the shopkeeper while Mallow has the Frog Coin recovered from Croco. The shopkeeper exchanges it for a Cricket Pie, which becomes the next required story item.
Do not treat the Cricket Pie as an optional purchase. Mallow needs it for the next trip to Tadpole Pond and Frogfucius. Restock a few Mushrooms, Honey Syrups, and Pick Me Ups if your funds allow, then save at the inn. The chapter is complete when Mario and Mallow have Star Piece 1, Princess Toadstool has been rescued, and the Cricket Pie is ready for delivery.
- Return to the Mushroom Kingdom Item Shop after Mack’s defeat.
- Exchange Mallow’s Frog Coin for the Cricket Pie.
- Restock and save at the inn.
- Prepare to travel to Tadpole Pond.
Before you move on
- The Bowser’s Keep opening is complete, including the chandelier sequence and Exor’s crash.
- Mario has returned to Mario’s Pad, spoken with Toad, received the early Mushroom supplies, and crossed Mushroom Way.
- The Hammer Bros. are defeated and the Hammer is equipped to Mario.
- Mario has spoken with the Mushroom Kingdom Chancellor and received the world map.
- The castle vault and Princess Toadstool’s room have been checked, with the vault chests collected if desired.
- Mallow has joined the party outside Mushroom Kingdom.
- Croco has been defeated in Bandit’s Way, and the Frog Coin and Wallet have been collected.
- The Shyster invasion has been cleared sufficiently to reach the throne room, with the guest room and vault checked before leaving.
- Mack has been defeated and Star Piece 1 has been collected.
- Princess Toadstool has been rescued, the Chancellor has been addressed after the rescue, and the Item Shop has exchanged the Frog Coin for the Cricket Pie.
- Mario and Mallow are saved at Mushroom Kingdom and ready to travel to Tadpole Pond.
References for this chapter
- Super Mario RPG: Legend of the Seven Stars - Manual - SNS
- Super Mario RPG: Legend of the Seven Stars - Guide and Walkthrough - Super Nintendo - By A_Backdated_Future
- Super Mario RPG: Legend of the Seven Stars - Guide and Walkthrough - Super Nintendo - By Super_Slash
- Stop the Invasion — Super Mario RPG Walkthrough and Guide
- Super Mario RPG: Legend of the Seven Stars - Guide and Walkthrough - Super Nintendo - By Mynock
- Super Mario RPG: Legend of the Seven Stars — Super Mario Wiki
Mallow and Tadpole Pond — Croco, Frogfucius and the Midas River Run
This chapter begins after the Mushroom Kingdom invasion has been resolved, the first Star Piece has been recovered, Mallow has joined Mario, Croco has been defeated, and the Cricket Pie has already been obtained from the Mushroom Kingdom shop. Enter Kero Sewers, drain the flooded passage, defeat Belome, complete the Midas River course, and equip the NokNok Shell. At Tadpole Pond, speak with Frogfucius, deliver the Cricket Pie to receive Mallow’s Froggie Stick, check the optional local rewards, and leave through Rose Way toward Rose Town.
Enter Kero Sewers and follow the pipe route
From the Mushroom Kingdom world-map entrance, enter Kero Sewers with Mario and Mallow. Save at the first Save Block if needed, then enter the water in the opening room and swim to the pipe on the opposite side. Continue through the next pipe near the bottom-right of the following room, then take the next pipe on the left side of the room after it.
You will reach a larger chamber containing stairs, pipes, and a treasure chest that is actually a Pandorite. The Pandorite is optional for immediate progress and can be dangerous at this point. If you fight it, use Mario’s Jump repeatedly, since ordinary special attacks are ineffective against it. Victory awards the Trueform Pin. Equip that accessory to Mario when you obtain it; it prevents the Scarecrow status that Belome can inflict.
Return through the pipes and climb to the upper route. In the room with Rat Funks, open the chest containing the Super Star if you want to clear nearby enemies quickly, then take the pipe at the far left. In the next room, stay out of the water and use the pipe on the left. This returns you to the earlier chamber, where the pipe on the right leads to the water-control room.
- The party has entered Kero Sewers from the Mushroom Kingdom route.
- The optional Pandorite and Trueform Pin have been handled, or the party has continued without them.
- The party has reached the water-control room.
Drain the sewer and reach Belome
In the water-control room, climb to the upper part and jump on the green switch. The switch drains the water from the lower chamber. A spring can return you toward the entrance if you need to heal or restock, but use the pipe back to the previous chamber when you are ready to continue.
Return to the chamber where the water was previously covering the floor. Drop into the newly exposed lower area and travel to the bottom corner. Enter the pipe there. In the next room, collect the reachable chest, then use the nearby recovery box and Save Block before entering the final pipe to Belome. Another chest above this route cannot be reached during this visit and is not required for the story.
Equip the Trueform Pin to Mario before the battle if you obtained it. Belome can use attacks that cause Scarecrow and can swallow Mallow temporarily. Keep Mario alive, use timed physical attacks, and use Mallow’s Thunderbolt for steady damage. If Mallow is swallowed, continue attacking Belome; Mallow returns automatically later in the fight. Heal Mario promptly if he becomes the only active character.
- The green switch has drained the sewer.
- The reachable pre-boss chest has been collected if desired.
- The recovery box and Save Block before Belome have been used.
- The Trueform Pin is equipped to Mario if available.
- Belome has been defeated.
Complete the Midas River course
Belome’s defeat triggers a flood that carries Mario and Mallow into Midas River. The river has a waterfall section followed by a barrel-jumping section. The course is optional for coin collection but mandatory for reaching Tadpole Pond.
During the waterfall section, steer with Left and Right and use the jump button to adjust Mario’s position against the current. Take the visible coin routes when they are safe, but do not restart because a coin was missed. The side caves contain optional rewards, including Flower Tabs and Frog Coins; the main route is sufficient for story progress.
The barrel section requires deliberate contact and jumping. A barrel collision can shift Mario between lanes, while jumping lets him clear hazards and collect suspended coins. Fish remove collected coins if they hit Mario. A useful rhythm for the original course is to collide with some barrels and jump over others rather than jumping continuously. If the coin total is low, finish the course anyway; the first completion still grants the NokNok Shell. The 60-coin amount concerns the first Frog Coin exchange, not the weapon reward.
At the end, collect the NokNok Shell and equip it as Mario’s weapon. You may use the nearby Save Block. The Midas River can be replayed later for additional coins, but replaying is optional and costs coins.
- The waterfall section is complete.
- The barrel section is complete.
- Mario has received and equipped the NokNok Shell.
- The game has been saved at the Midas River Save Block if desired.
Visit Frogfucius at Tadpole Pond
Leave Midas River and enter Tadpole Pond. Walk straight ahead to the gray stone at the pond’s edge. Step on it to trigger the tadpole bridge, then jump across the tadpoles to reach Frogfucius’s sanctuary.
Speak with Frogfucius and let his first conversation finish. Speak with him again afterward while the Cricket Pie is in the inventory. Give him the Cricket Pie that was obtained before this chapter. Frogfucius then gives Mallow the Froggie Stick, his next weapon. Open the equipment menu and equip the Froggie Stick to Mallow before leaving.
Cross the tadpole bridge again. On the left side are the Frog Coin Emporium and the Juice Bar. The Emporium accepts Frog Coins, while the Juice Bar initially offers limited stock unless you have the appropriate membership card. You do not need to buy anything here for story progress, and saving Frog Coins for later exchanges is sensible.
A Save Block is available near the Melody Bay route. Use it before leaving if you want a secure checkpoint. Do not pursue late-game optional boss triggers in this area; none are required for the next Star Piece.
- Frogfucius’s first conversation has finished.
- The Cricket Pie has been delivered.
- Mallow has received and equipped the Froggie Stick.
- The Frog Coin Emporium and Juice Bar have been checked if desired.
- The party has saved before leaving if desired.
Complete the optional Melody Bay reward and leave for Rose Way
Melody Bay is optional, but completing its first song now provides the Alto Card and improves the available Juice Bar stock. Speak with the tadpole near the route for the song hint, then enter Melody Bay and use the gray stone to begin the tadpole music puzzle.
For the first song, Frogfucius’ Suite #18, arrange the tadpoles to match the displayed melody. The game allows you to reposition them and retry, so do not leave if the first attempt is incorrect. Toadofsky awards the Alto Card when the song is completed. Return to the Juice Bar afterward if you want to inspect the improved stock; the card is optional and does not affect the main route.
When Tadpole Pond is finished, leave through the world-map exit and select Rose Way. Rose Way is the next required area. Its yellow moving blocks lead toward Rose Town, where the next chapter’s required events begin. The second Star Piece is not in Tadpole Pond or Midas River; it is obtained later after progressing through Rose Town and Forest Maze.
- The Alto Card has been obtained if the optional Melody Bay song was completed.
- The party has left Tadpole Pond through the world map.
- Rose Way is available as the next destination.
- The party is ready to continue toward Rose Town.
Before you move on
- Kero Sewers has been entered from the Mushroom Kingdom route.
- The sewer water has been drained with the green switch.
- Belome has been defeated.
- The Midas River waterfall and barrel sections have been completed.
- The NokNok Shell has been received and equipped to Mario.
- Frogfucius’s explanation has been completed.
- The Cricket Pie has been delivered and the Froggie Stick has been equipped to Mallow.
- The optional Alto Card has been obtained if Melody Bay was completed.
- The party has left Tadpole Pond and Rose Way is selected as the next destination.
References for this chapter
Rose Way and Rose Town — Geno Awakens and the Forest Maze
Cross Rose Way to reach Rose Town, trigger the Geno awakening sequence at the inn, follow Geno through the Forest Maze, and defeat Bowyer to recover the second Star Piece. Afterward, return to Rose Town to finish the chapter and obtain Geno’s first weapon.
Cross Rose Way and enter Rose Town
Enter Rose Way from the world map and use the yellow moving platforms to cross the water. Jump onto a platform, ride it until it reaches the next ledge or island, and transfer when the platforms meet. In the section with several moving platforms, enemies can be avoided, but fighting a few Shyguys and Crooks provides useful experience and coins before the Forest Maze.
Continue through the final Rose Way screens and exit to the world map. Enter Rose Town. The town’s residents are being immobilized by arrows from the forest. The arrows are part of the story event; do not search Rose Town for a status-curing item or attempt to solve the problem through the shops.
- Rose Town is visible on the world map and its residents are frozen in place by arrows.
- Mario and Mallow have entered the town and can access the inn, shops, and upper-left house.
Trigger Geno’s awakening at the inn
The inn is on the left side of Rose Town. Enter it and speak with Gaz, the young Toad playing with Mario, Princess Toadstool, and Bowser dolls. When Gaz asks Mario to prove that he is the real Mario, jump when prompted. Agree to play with him. Gaz then brings out the Geno doll, whose weapon misfires and knocks Mario unconscious.
The overnight sequence follows automatically. A star spirit enters the Geno doll and brings it to life before the doll leaves the inn for the Forest Maze. When Mario wakes upstairs, use the Save Block in the room. Go downstairs and listen to Gaz explain to his mother that Geno walked into the forest. This conversation supplies the required story lead.
You do not need to leave town and re-enter the inn to start this sequence. If the Geno scene has not occurred, return to the inn and finish Gaz’s doll conversation before attempting the forest.
- Gaz’s doll sequence has played from the identity test through Mario being knocked unconscious.
- The overnight scene has shown the Geno doll becoming alive and leaving the inn.
- Mario has awakened upstairs, and the downstairs conversation confirms that Geno entered the forest.
Prepare in Rose Town and open the optional treasure route
Use the item and equipment shop in the upper-right part of Rose Town if Mario or Mallow still lacks current equipment. The shop sells Thick Shirt and Thick Pants, plus useful status-protection pins and recovery items. Able Juice is useful against the abnormal conditions used by Forest Maze enemies, while Mushrooms, Honey Syrups, and Pick Me Ups help preserve Flower Points and recover from mistakes. These purchases are recommended, not required.
For an optional Frog Coin and the Forest Maze treasure-room clue, go to the house on the upper-left hill where a resident is trapped outside. Jump on his head to reach the roof and enter the house. Inside, activate the switch so the resident can return. Jump on the bed afterward to reveal a hidden Frog Coin, then speak with the resident outside. He gives the directions Left, Left, Straight, Right. Those directions use Mario’s viewpoint and apply only to the Forest Maze treasure-room branch.
The treasure room is optional and is not needed to recruit Geno or defeat Bowyer. If you want it, use that four-part route at the maze junction after the first forest sections. The final stump leads underground to chests containing coins, a Frog Coin, a Flower, and a recovery item. Do not substitute this route for Geno’s route if your goal is to advance the story.
- The party is healed and supplied before entering the Forest Maze.
- The trapped resident’s house has been opened if you want the hidden Frog Coin and treasure-room clue.
- A save has been made in Rose Town or at the Forest Maze Save Block.
Follow Geno through the first Forest Maze sections
Enter the Forest Maze north of Rose Town. In the first wooded screens, continue along Geno’s path. He appears ahead of Mario and Mallow and moves through several clearings, stump entrances, and underground passages. Treat the mushrooms as possible enemies; some are Amanita monsters rather than harmless field pickups.
When you reach the area with a stump and a Wiggler route, enter the stump and travel through the underground passage. Use the springboard at the end to return to the surface. In the larger stump area, enter the appropriate stump passages until you reach the sleeping Wiggler. Touch it to wake it. The Wiggler throws Mario back to the surface and opens the route onward.
Continue through the next underground passage and wooded screens. Fight only as many enemies as needed to stay in fighting shape; the maze contains a Save Block before the final junction. If Mario or Mallow is close to defeat, retreat to Rose Town, heal at the inn, and return. The Forest Maze does not permanently lock the party out after a retreat.
- Geno has been followed through the initial wooded clearings and stump passages.
- The sleeping Wiggler has been awakened and the newly opened route has been used.
- The Save Block before the maze junction has been reached.
Navigate the maze junction to Bowyer
At the junction where Geno is no longer continuously visible, follow the route Geno used rather than choosing random exits. The required sequence is Right, Left, Straight, Right, Left, Left, using Mario’s viewpoint for the directional choices. A wrong choice returns the party to the beginning of the junction section; it does not reset the earlier forest progress.
If you are following the optional treasure route instead, use Left, Left, Straight, Right from Mario’s viewpoint. Enter the stump at the end to collect the optional chests, then leave the room and repeat the required Geno route to reach Bowyer.
After the correct Geno route, proceed through the final clearing. Bowyer is firing the arrows that have immobilized Rose Town, and the Star Piece is visible during the confrontation. Heal before triggering the battle if necessary; the battle begins after the party approaches the clearing.
- The correct Geno route has been completed: Right, Left, Straight, Right, Left, Left.
- The optional treasure room has been visited only if desired.
- Bowyer’s clearing and the Star Piece have been reached.
Defeat Bowyer and recover the second Star Piece
Bowyer has 720 HP in the original SNES release. Geno joins Mario and Mallow during the opening of the fight, so the active party becomes Mario, Mallow, and Geno. Bowyer’s defining mechanic is his button lock: he disables one of the A, X, or Y buttons during the battle. A locked A command prevents normal attacks, X prevents item use, and Y prevents Special attacks. The restriction applies to the corresponding command category, not to one specific character.
Use Mario’s strongest available attack or Special, Geno’s normal attack or Geno Beam, and Mallow as the healer when HP Rain is available. If A is locked, use Specials or items. If X is locked, rely on attacks, Specials, and HP Rain. If Y is locked, use normal attacks and items, and defend or guard while waiting for access to Specials again. Do not build the entire plan around one command category.
Bowyer’s Static E attack damages the whole party, so keep everyone’s HP high rather than waiting for a character to become critical. G’Night can inflict sleep; an Able Juice or a Wake Up Pin can help if the condition interrupts an important turn. Geno has less HP than the other party members at this point, so revive him promptly if he falls, especially if Mario and Mallow have been hit by Static E.
Continue attacking until Bowyer is defeated. The battle awards experience, coins, and a Flower Box, and the story then identifies the recovered Star Piece as the second piece. Geno explains his connection to Star Road and becomes a permanent party member.
- Bowyer has been defeated after his button-lock mechanic is overcome.
- The second Star Piece, the Green Star Piece, has been recovered.
- Geno has joined the party and the post-battle explanation has finished.
Return to Rose Town and finish the chapter
Leave the Forest Maze by the route leading back to Rose Town. The arrows stop immobilizing the residents after Bowyer’s defeat, and the town returns to normal. Enter the inn and speak with Gaz. Geno can now interact with the child, and Gaz gives Geno the Finger Shot weapon.
Equip the Finger Shot on Geno before leaving. This is the practical completion point for the chapter: Bowyer is defeated, the Green Star Piece is secured, Geno is available, and his first post-recruitment weapon has been obtained. Save in Rose Town before proceeding to the Pipe Vault and Yo’ster Isle route.
- Rose Town’s residents have returned to normal.
- Gaz has given Geno the Finger Shot, and it is equipped if suitable.
- The game has been saved after the Bowyer battle and the return to Rose Town.
Before you move on
- Rose Town is no longer under the arrow attack.
- Bowyer has been defeated and the Green Star Piece is in the party’s story progression.
- Geno is a permanent party member.
- Gaz has given Geno the Finger Shot in Rose Town.
- A save has been made after returning to Rose Town, before continuing toward Pipe Vault and Yo’ster Isle.
References for this chapter
- Super Mario RPG: Legend of the Seven Stars — Guide and Walkthrough — Super Nintendo — AstroBlue
- Super Mario RPG: Legend of the Seven Stars — The Second Star Piece — StrategyWiki
- Super Mario RPG — Forest Maze Solution — RPG Site
- Treasure Rooms — Super Mario RPG: Legend of the Seven Stars — Secrets Guide (SNES)
- Rose Town — Super Mario Wiki
- Super Mario RPG: Legend of the Seven Stars — Instruction Manual
Yo’ster Isle, Yo’ster and Sea-related Sidequests
Yo’ster Isle is an optional area reached through Pipe Vault after Mario defeats Bowyer and obtains the second Star Piece. The original Super Nintendo version contains the Pipe Vault, the optional Goomba Thump minigame, hidden Frog Coins, the Mushroom Derby against Boshi, and Yoshi Cookies. It does not contain a Star Piece or a required story rescue. Complete the island’s optional activities if desired, then return to the mainland and continue to Moleville and the Mole Mines.
Enter Pipe Vault from the Rose Town side
After defeating Bowyer in Forest Maze and taking the second Star Piece, return to the world map. The Pipe Vault entrance is west of Rose Town. This route is optional: the main story allows you to continue toward Moleville without clearing the vault, but Pipe Vault is the only route to Yo’ster Isle in this version.
Enter the pipe and move through the first section by jumping across the platforms. Avoid the Goombas, then climb past the Thwomp and use the next pipe. Thwomps can knock Mario backward if he tries to pass while they are descending, so wait for one to land and jump as you move through its space. Piranha Plants, Nipper Plants and Sparky-type enemies can occupy narrow passages; fight or bypass them rather than rushing into a pit or losing coins to a plant.
- Bowyer has been defeated and the second Star Piece is in Mario’s inventory.
- You have entered the Pipe Vault west of Rose Town.
- You know that this entire visit is optional for the main story.
Collect the Pipe Vault treasures
In the room with the pipe and ledge arrangement, take the lower pipe and inspect the apparently unreachable ledge. Jump near the ledge to reveal a hidden yellow platform, then use it to reach the Flower treasure chest. In the same general room, jump beneath the overhead brick section to reveal hidden platforms and reach the two hidden treasure chests containing Frog Coins. One of the Frog Coins can also be reached by running toward the low brick barrier and pressing Down at the correct moment to slide beneath it; use the visible platform route if the slide is inconvenient.
Continue through the pipe sequence after checking the side routes. A later pipe leads to Goomba Thump, an optional thirty-second minigame. Jump on Goombas for points, avoid Spikeys, and use the score thresholds for its optional Flower and Frog Coin rewards. You can leave the minigame through its trampoline and return to the main Pipe Vault route without affecting story progress.
- The Flower chest in the ledge room has been opened if desired.
- Both hidden Frog Coins in the Pipe Vault ledge-and-brick section have been checked.
- The Goomba Thump minigame has been completed or skipped.
Reach Yo’ster Isle and collect the hidden Frog Coin
From the Goomba Thump area, use the trampoline to return to the pipe section and take the final route toward the exit. In the last room, avoid the Piranha and Nipper Plants, cross the yellow platform, and inspect the chest for the Flower reward before using the exit pipe. The pipe deposits Mario at Yo’ster Isle.
Save at the Save Block immediately after arriving. Walk behind the Save Block and jump to reveal a hidden treasure chest containing a Frog Coin. This is the island’s principal hidden pickup. There is no key item, song, elder conversation, or Star Piece waiting behind another island path.
- The final Pipe Vault room has been crossed and the exit pipe has been used.
- The game has been saved at the Yo’ster Isle Save Block.
- The hidden chest behind the Save Block has been opened if desired.
Ride green Yoshi to speak with the other Yoshis
Move into the main Yo’ster Isle area and find the green Yoshi. The other Yoshis cannot provide their normal dialogue until Mario is riding him. Jump onto green Yoshi’s saddle, then speak with the Yoshis around the field while mounted.
There is no island elder and no required exchange involving an item or song. The useful dialogue concerns the Mushroom Derby and the cookies used to enter races. Speak with the Yoshis until you receive the cookies needed to challenge Boshi. If you are unsure which NPC to use, remain mounted and check the nearby Yoshis rather than trying to talk to them on foot.
- Mario is riding green Yoshi.
- The nearby Yoshis can now be understood.
- You have obtained the cookies required to wager in the first Boshi race.
Challenge Boshi in the Mushroom Derby
Boshi is the sunglasses-wearing Yoshi at the race area. Speak to him after obtaining the cookies and accept the Mushroom Derby challenge. The original SNES race uses A and B alternately in time with the music. Follow the rhythm instead of rapidly mashing; consistent alternating inputs maintain Yoshi’s speed more reliably.
Yoshi Cookies can also be used during the race with Y. Use them as speed boosts when you need to close a gap or preserve a lead. If the race is lost, the wager is gone and you must ride green Yoshi again and obtain more cookies before making another attempt. Saving at the island Save Block before starting provides a convenient recovery point.
- Boshi has accepted the race.
- A and B are being alternated to the musical rhythm.
- Y is available for using a Yoshi Cookie as a race boost.
Finish the optional island activities and leave
After defeating Boshi, Mario receives three Yoshi Cookies. The Mushroom Derby can be revisited later by obtaining additional cookies and speaking with Boshi again. Cookies are optional: they can be used in battle for Yoshi-related item or enemy results, but they are not required to recruit a party member, unlock a Star Piece, or open the next story area.
When finished, leave through the southern exit and return through Pipe Vault to the mainland. Continue along the world map to Moleville and the Mole Mines. Yo’ster Isle does not increase the Star Piece total, so a count unchanged after this visit is correct.
- Boshi has been defeated in the first Mushroom Derby race.
- The three-win-cookie reward has been received.
- You have returned through Pipe Vault and are continuing toward Moleville.
Before you move on
- Bowyer has been defeated, the second Star Piece has been obtained, and Pipe Vault has been entered from the west side of Rose Town.
- The Pipe Vault route to Yo’ster Isle has been completed, with its hidden Frog Coins and optional minigame checked according to the player’s goals.
- The Save Block at Yo’ster Isle has been used, and the hidden Frog Coin behind it has been collected if desired.
- Mario has ridden green Yoshi, obtained race cookies from the island Yoshis, and defeated Boshi in the Mushroom Derby.
- The three Yoshi Cookies awarded after the victory have been received.
- Mario has left through the southern exit, returned to the mainland, and continued toward Moleville.
- The Star Piece count has not increased during this chapter; that is the correct result for the original SNES Yo’ster Isle visit.
References for this chapter
- Super Mario RPG: Pipe Vault & Yo’ster Isle Walkthrough
- Super Mario RPG: Legend of the Seven Stars - Guide and Walkthrough - Super Nintendo - By Super_Slash
- Super Mario RPG: Legend of the Seven Stars - Guide and Walkthrough, Super Nintendo, by A_Backdated_Future
- Super Mario RPG: Legend of the Seven Stars - Yoshi Cookie FAQ
- Super Mario RPG: Legend of the Seven Stars — Instruction Booklet, Nintendo
Moleville, Moleville Mountain and Punchinello
After clearing Rose Town and the Forest Maze, travel to Moleville to investigate the collapsed mines and rescue Dyna and Mite. Follow Bowser into the Mole Mines, recover your stolen coins from Croco, use the Bambino Bomb to open the blocked route, defeat Punchinello and collect the third Star Piece. Then escort Dyna and Mite out through the required mine-cart ride. Bean Valley, Megasmilax, the Seed and Grate Guy’s Casino belong to a later section of the adventure and are not required here.
Prepare in Moleville and enter the mines
When you first reach Moleville, visit the weapon and armor shop before entering the mine. The available upgrades are useful for Mario, Mallow and Geno, and the shop also carries Mid Mushrooms and Maple Syrups. Buy enough recovery items for the dungeon, but keep some coins available for later equipment and story purchases.
The town is unusually quiet because the miners and other residents have gone into the mountain to rescue the missing mole children, Dyna and Mite. After shopping, climb toward the upper part of town and watch Bowser’s conversation with his remaining troops. Follow Bowser into the Mole Mines; entering through the mine entrance is the required trigger for this section.
- Moleville has been reached after the Forest Maze.
- Useful weapon, armor and recovery upgrades have been purchased if needed.
- Bowser’s scene has played and Mario has entered the Mole Mines.
Cross the opening mine rooms and trigger Croco’s theft
In the first mine area, use the standing moles as steps to reach the higher ledge and the door onward. Continue through the next rooms until you find the trampoline. Jump on it to reach the upper area; Mario will hit the ceiling, lose consciousness and wake up without his coins.
Croco and his bandits run deeper into the mine. Follow them east through the connected rooms instead of trying to return to town. Three bandits hide along the route: one is behind a crate, another is in the following room near the spring, and the third is behind crates farther ahead. Defeat each one to receive a Flower Tab, then continue chasing Croco.
Croco repeatedly runs past Mario and pauses in later rooms. Follow him, wait for him to pass, or position yourself to cut him off. When Mario catches him, the second Croco battle begins. Defeat Croco to recover the stolen coins and receive the Bambino Bomb, which opens the next part of the mine.
- Mario has lost his coins in the scripted Croco event.
- The three hidden bandits have been defeated or bypassed while pursuing Croco.
- Croco has been defeated and the Bambino Bomb is in the inventory.
Use the Bambino Bomb and follow the railroad route
After the Croco battle, work back toward the upper-left side of the mine until you find the miner standing beside a blocked wall. Speak to him and he will use the Bambino Bomb to open the passage. This is the route to the deeper railroad rooms; do not search for another way through the sealed wall.
Continue through the newly opened area. A Shy Guy in a mine cart runs across one room and drops a Frog Coin after the encounter. The coin is optional, but the route continues through the nearby upper passage. Climb the crates, avoid or fight the enemies and open the chest containing an Invincibility Star if you want an easier trip through the next room.
Continue along the tracks and connected mine rooms. In the room with the save block, use it before approaching Punchinello. A nearby recovery chest can restore the party, and the surrounding rooms contain optional coins and items. This is the safest point to refill HP and Flower Points before the boss.
- The miner has opened the wall with the Bambino Bomb.
- The railroad section has been entered.
- The save block before Punchinello has been used.
Start and defeat Punchinello
In the boss room, approach Punchinello from behind or jump onto him when the room layout allows it. If he notices Mario first, he can knock the party back and force another approach, so do not walk directly into his front side.
Punchinello summons bombs during the battle. Treat the bombs as the immediate danger because they can attack or self-destruct and make the fight much more costly if several remain active. Mallow’s Thunderbolt is useful for damaging groups of bomb enemies. Have Mario and Geno use regular attacks or other reliable non-Jump attacks against the target you want to remove. Punchinello is not a good target for Mario’s Jump technique, so use Mario’s standard attack instead.
Keep Peach available if you need dependable healing, or use Mallow to restore the party when the fight permits. Guard against the bomb attacks with timed button presses, and heal before multiple enemies can act while one character is already near defeat. Punchinello’s oversized bomb sequence is part of the battle’s scripted conclusion, so focus on surviving the escalation rather than trying to force a special damage trick.
After Punchinello is defeated, the Star Piece falls from the ceiling. Walk over to it and collect it. This is the third story Star Piece, and it is the required reward for the Moleville Mountain objective.
- Punchinello has been engaged from the safe side of the room.
- Bomb enemies are being removed before they can overwhelm the party.
- Punchinello is defeated and the third Star Piece has been collected.
Find Dyna and Mite and begin the mine-cart escape
Once the Star Piece is collected, continue through the next rooms rather than leaving the mine. Follow the railroad route until you reach Dyna and Mite, the missing mole children. Speaking to them advances the rescue scene and starts the mine-cart escape.
The mine-cart section is required to finish this rescue sequence, but it is not a one-time high-score test. The course can be replayed later from Moleville, so missing coins or mushrooms does not block story progress. Your immediate objective is simply to reach the end and return to town.
- Dyna and Mite have been found after the Punchinello battle.
- The mine-cart escape has started.
- The Star Piece remains in the inventory.
Complete the original SNES mine-cart course
In the original North American SNES release, the mine cart follows the track automatically. Hold the directional pad toward a branch when you reach a fork to select that route. A and Y brake the cart, B jumps, and X boosts after you have collected a mushroom. Use the brakes before tight turns rather than trying to maintain maximum speed throughout the course.
Mushrooms are useful on long straight stretches and in the side-view portions. Jump with B to collect mushrooms placed above the rail, then press X to use the boost when the track ahead is clear. Do not spend a boost immediately before a sharp bend or an awkward fork, because high speed makes the next transition harder to control.
The course alternates between a forward view with turns and forks and side-scrolling sections where the rails and coin lines are easier to read. In the side-view sections, jump only when you can see the next rail or landing area. If the cart skids, misses a branch or the run ends badly, retry without treating every mushroom as mandatory. Braking early and choosing a visible rail is more reliable than forcing every coin pickup.
At the end of the course, Mario crashes through the roof of the Moleville house where Dyna and Mite live. Leave the house to trigger the post-ride town scene. The Snifits chasing a beetle provide the next story hint about Booster. Once that scene has finished, the Moleville Mountain rescue chapter is complete. The mine-cart entrance remains available for later replay if you want additional track coins.
- The SNES controls are being used: A and Y brake, B jumps and X boosts after collecting a mushroom.
- Mario reaches the end of the mine-cart course and crashes into the Moleville house.
- Mario exits the house and the post-ride Booster scene has occurred.
Deferred optional note: Grate Guy’s Casino
Do not detour to Bean Valley during this chapter. Grate Guy’s Casino is a later optional area reached after the main route eventually brings Mario through Bean Valley. Its access requires the Bright Card, which comes from returning to Booster Tower after the Knife Guy and Grate Guy story battle and completing Knife Guy’s juggling challenge.
The challenge uses a progress counter: identify the hand holding the yellow ball, and successful answers increase the counter while wrong answers reduce it. Reach twelve successful progress points to receive the Bright Card. Keep the card instead of selling or exchanging it if you intend to visit the casino later. The casino’s SNES games and rewards are optional and have no bearing on the third Star Piece or the Moleville rescue.
- Bean Valley has not been incorrectly inserted into this chapter’s required route.
- The Bright Card is treated as a later optional objective.
- No casino reward is being counted as a story Star Piece.
Before you move on
- Punchinello has been defeated in the Mole Mines.
- The third story Star Piece has been collected from the floor after falling from the ceiling.
- Dyna and Mite have been found in the railroad section beyond Punchinello.
- The mine-cart course has been completed and Mario has returned to Moleville through the roof of the mole house.
- The post-ride Snifit and beetle scene has finished, pointing the story toward Booster.
- Bean Valley, Megasmilax, the Seed and Grate Guy’s Casino have not been treated as part of this chapter’s required completion.
References for this chapter
- Super Mario RPG: Legend of the Seven Stars - Guide and Walkthrough - Super Nintendo - By Mynock
- Super Mario RPG: Moleville and Mole Mines Walkthrough
- Super Mario RPG — Legend of the Seven Stars Walkthrough, Part 6: Moleville and Coal Mines
- Super Mario RPG: How To Unlock Grate Guy's Casino
- Super Mario RPG: Legend of the Seven Stars - Manual - SNS
Booster’s Tower, Booster Pass, Marrymore and Star Hill
After Punchinello and the Moleville events, cross Booster Pass and climb Booster’s Tower. Bowser joins Mario, the tower’s portrait puzzle awards the Elder Key, and the upper rooms lead to the Princess, Knife Guy, and Grate Guy. Complete Booster Hill and the Marrymore wedding sequence, then follow the required return to Mushroom Kingdom and Tadpole Pond. Frogfucius directs the party to Star Hill, where the fourth Star Piece is recovered. Do not leave Marrymore directly for Bean Valley: Star Hill is the next required destination.
Cross Booster Pass and open its optional cave
Leave Moleville and follow the world-map route to Booster Pass. In the first area, go east, climb the raised ground, and use the exit at the top. In the second area, continue toward the upper route, but drop to the lower section first if you want the visible Flower. Search the lower area for the hidden switch and press it. This fills the holes in the upper part of the pass and also opens an optional cave near Booster Pass.
The cave is not required for story progress. After the switch has been pressed, return to the cave entrance and cross the Spikeys to collect its recovery items, Flower, Frog Coin, and KeroKero Cola. Save in Moleville before leaving if you want a safe retry point.
- Leave Moleville after Punchinello.
- Collect the visible Flower in the second Booster Pass area if desired.
- Press the hidden switch before entering Booster’s Tower.
- Visit the optional cave only if you want its supplies.
Recruit Bowser outside Booster’s Tower
Enter the area in front of Booster’s Tower and watch the scene with Bowser. After the conversation ends, try the tower door and begin to leave. Bowser returns, breaks the door open, and joins Mario’s party. Open the party menu and use the Switch command if you want Bowser active; Mario must remain available for the tower’s field sections.
Inside the tower, follow the main route through the Snifits and Spookums. In the early room with the Bob-omb seesaw, use the raised ledge to jump onto the seesaw. The Bob-omb’s movement launches Mario to the elevated chest containing the Masher. This weapon is optional but useful for Mario. Do not confuse it with the later Chomp reward.
- Trigger Bowser’s recruitment scene.
- Confirm that the Switch command is available.
- Use the Bob-omb seesaw to obtain the Masher if wanted.
Climb the tower and solve the portrait puzzle
Continue through the tower until you reach the visible exclamation-point switch and press it. This opens the optional cave back in Booster Pass; it does not open the portrait room. Continue through the rooms with enemies, narrow ledges, and platform jumps. Use the Save Block before the upper platforming sections.
The Thwomp and seesaw room requires Mario to land on the seesaw so the Thwomp launches him upward. Search the nearby lower and side ledges for hidden Frog Coins if you are collecting optional treasure. In the portrait room, first inspect the reference portraits so you know the Booster family order. Then enter the puzzle room, number its six portraits from left to right, and select them in this order: 4, 5, 3, 6, 2, 1.
A successful sequence produces the Elder Key. Use it on the nearby locked door, enter the room, and inspect the Chain Chomp. Bowser takes it as his Chomp weapon. If the portrait sequence is entered incorrectly, the room resets and may trigger a battle, so repeat the order carefully.
- Press the tower switch.
- Use the Thwomp seesaw to reach the upper route.
- Enter the portrait sequence 4, 5, 3, 6, 2, 1.
- Use the Elder Key and let Bowser obtain Chomp.
Cross the coin-floor room and reach the Princess
In the room covered with coins, use the coin-marked spaces as your route. Stepping on an incorrect space triggers a Fireball battle. Collect the four Frog Coins and the Room Key, then use the key on the locked door to obtain the Zoom Shoes. The shoes are optional equipment, but the Room Key is required to reach the item room.
Continue through the Chain Chomp and Bob-omb rooms, taking the available passages instead of trying to clear every enemy. Save at the next Save Block before the final approach. In the upper room, move across the floating platforms and reach the balcony where Princess Toadstool is being held.
- Use the coin-marked path through the Fireball room.
- Collect the Room Key.
- Open the locked room and take the Zoom Shoes if desired.
- Save before the Princess sequence.
Finish the curtain search and defeat Knife Guy and Grate Guy
Approach the locked room to begin the curtain sequence. Mario must move between the curtains while Booster and the Snifits search. Wait for the search pattern to move away before changing positions. If Mario avoids detection, he can knock down the Mario doll and receive the Amulet. If he is caught enough times, Booster fights instead; this battle is optional, and the story continues either way.
After the sequence, pursue Booster until Knife Guy and Grate Guy attack. Defeat Knife Guy first so the pair cannot continue coordinating their strongest attacks. Use Mario’s strongest reliable timed attack, Bowser’s Chomp, and Geno or Mallow for additional damage and healing. Restore fallen characters promptly if the battle turns against you. This is one required fight against the two-man team, not two separate mandatory boss battles.
- Complete the curtain search.
- Take the Amulet if Mario avoids detection.
- Defeat Knife Guy and Grate Guy.
- Confirm that the chase has moved to Booster Hill.
Complete Booster Hill and the Marrymore wedding
Booster Hill is a chase minigame. Move left and right to avoid barrels and jump over obstacles. Do not fall behind the group, because contact with barrels or Snifits pushes Mario backward. Jumping on a barrel or Snifit can provide a small speed boost. Touch Peach when possible to receive Flowers, but a poor result does not block the story.
After the minigame, enter Marrymore. Restock or upgrade equipment if needed, then enter the chapel sequence. Follow the events until the Bundt and Raspberry battles begin. Guard against their physical attacks and keep healing available for the longer cake battle. When the battles and scenes finish, the party is returned to the world map route, but Peach is not yet permanently back in the active party.
- Finish Booster Hill.
- Complete the chapel events.
- Defeat Bundt and Raspberry.
- Do not treat the Marrymore exit as the route to Bean Valley.
Return through Mushroom Kingdom and Tadpole Pond
Leave Marrymore after the wedding sequence. The story sends Mario back to Mushroom Kingdom. Enter the castle and proceed to the Chancellor’s area to trigger the next scene. When Mario leaves the castle, speak with Peach outside so she rejoins the party.
Travel to Tadpole Pond and cross the tadpole bridge to Frogfucius. Speak with him after Peach has rejoined. He identifies Star Hill as the next destination. Leave Tadpole Pond and use the world map route past Marrymore to reach Star Hill. If Star Hill is not available, return to Mushroom Kingdom, complete the castle conversation, confirm Peach’s reunion, and speak to Frogfucius again.
- Trigger the Mushroom Kingdom castle scene.
- Speak with Peach outside the castle.
- Confirm Peach is back in the party.
- Talk to Frogfucius at Tadpole Pond.
- Enter Star Hill from the world map.
Recover the fourth Star Piece in Star Hill
In the first Star Hill area, examine the star-shaped flower or nearby star marker to open the first passage. Continue through each section and examine the star flowers in the rooms. The flowers open the gates to the next areas; inspect the available flowers in each room rather than searching for a conventional switch.
Reach the final area and examine the large Star Piece to trigger the scene and obtain the fourth story Star Piece. Search the wish markers only if you want their messages; they are not required for progress. After taking the Star Piece, open the exit and return to the world map. The next required destination is Seaside Town, followed by the coastal route and Sunken Ship.
- Open the Star Hill passages by examining the star flowers.
- Reach the final Star Hill area.
- Take the fourth Star Piece.
- Exit Star Hill and save before continuing toward Seaside Town.
Before you move on
- Bowser has joined the party outside Booster’s Tower.
- The tower switch has been pressed, and the Masher, Elder Key, Chomp, Room Key, and Zoom Shoes have been collected if desired.
- Knife Guy and Grate Guy have been defeated, and Booster Hill is complete.
- The Bundt and Raspberry sequence is complete.
- Peach has rejoined the party after the Mushroom Kingdom castle scene.
- Frogfucius has directed Mario to Star Hill.
- The fourth Star Piece has been collected in Star Hill.
- A save has been made before proceeding toward Seaside Town and the coastal route.
References for this chapter
- Super Mario RPG: Legend of the Seven Stars — Guide and Walkthrough — Super Nintendo — Dark_Vortex
- Super Mario RPG: Legend of the Seven Stars — Guide and Walkthrough, SNES, marshmallow
- Super Mario RPG: Booster Tower Walkthrough
- Super Mario RPG: Star Hill Walkthrough
- Super Mario RPG: Legend of the Seven Stars - Guide and Walkthrough - Super Nintendo - By Super_Slash
- Super Mario RPG: Legend of the Seven Stars - Manual - SNS
Seaside Town and the Sunken Ship
Begin this chapter after Star Hill has already provided the fourth Star Piece. Travel to Seaside Town, investigate the suspicious residents, reach the Sunken Ship through the Sea, solve its six clue rooms, and defeat King Calamari and Johnny. Johnny gives Mario the fifth Star Piece, but the story does not secure it permanently until Yaridovich is defeated after the party returns to Seaside Town. Use the Shed Key to free the real residents, then speak with the restored elder to receive the lead toward Land’s End and Monstro Town.
Enter Seaside Town and investigate the fake residents
Travel to Seaside Town from the world map after completing Star Hill. The town appears populated, but the residents repeat unnatural statements and do not behave normally. Speak to the Elder in the upper-right house. On this first visit, the Elder is a Smithy Gang replacement, and this conversation establishes that the town is under hostile control.
The Frog upstairs in the Elder’s house runs the Frog Coin exchange. Buying the EXP Booster is optional, but it is a useful reward if you have enough Frog Coins. The item shop and free inn are also available before the town is restored. Restock Mushrooms and Pick Me Ups before leaving, especially if the party has spent Flower Points in Star Hill.
When ready, leave through the town’s eastern exit and enter the Sea. The objective is the wrecked ship on the ocean floor, not Land’s End. Do not try to open the guarded shed yet; the residents inside cannot be released until after Yaridovich has been defeated.
- Speak with the fake Elder in the upper-right house.
- Use the Frog Coin exchange only if you want its optional reward.
- Restock recovery items before entering the Sea.
- Leave through the eastern route toward the Sunken Ship.
Cross the Sea and enter the Sunken Ship
In the Sea, use the left exit in the early room to reach the save point, then return and take the lower route onward. In the Zeostar rooms, collect the Invincibility Star if you want to clear enemies quickly, or avoid the enemies and continue. Some treasure rooms branch from the upper-right exits; these rewards are optional and do not affect the story route.
When you reach the water-filled section, enter the water and use a whirlpool to descend. Enter the cave in the upper area and use the bubbles to rise to the next level. In the final Sea section, descend through a whirlpool, jump onto the shipwreck, and enter it from above as though it were a pipe.
Inside the ship, take the right door first to reach the save block. Save here before beginning the clue-room sequence, then return to the entrance and take the left door. This save point is the safest recovery location before the password puzzles and King Calamari.
- Use the early Sea save point if necessary.
- Descend through the whirlpools and rise through the bubble current.
- Enter the wreck from above.
- Save inside the Sunken Ship before the clue rooms.
Reach the six clue rooms
Proceed through the first ship rooms, avoiding or defeating Greapers and Dry Bones. In the room with the boxed-in corner, drop into the corner to collect the Flower, then descend the stairs and jump onto the boxes to reach the coin chest.
The next room contains six doors guarded by Greapers. Each door leads to one password clue. The doors do not need to be completed in a special order, but completing all six gives the full set of hints and opens the intended route to the password room. If a puzzle goes wrong, leave the room and re-enter to reset it.
The first clue room has a Koopa and an iron ball. Jump around the room so the Koopa knocks the ball onto the switch. The second room requires you to strike the floating blocks in the correct sequence so the falling ball bounces from spring to spring and reaches the switch. The third room is an invisible maze. Press the SNES controller’s X button if you need the game to reveal Mario’s position temporarily, and keep jumping to locate the route and the switch.
After the third puzzle, move left into the adjoining section. The fourth room is a coin trail challenge: follow the leading coin and collect the coins it leaves behind. In the fifth room, activate the leftmost block and then use the fired cannonball to hit the next floating block. Repeat the cannon sequence down the room. The sixth room contains two switches and a movable barrel. Knock the unusual barrel down, push it onto one switch, and stand on the other switch yourself.
- Complete all six clue doors.
- Use the exit-and-re-enter reset if a puzzle becomes unsolved.
- Use X to reveal Mario’s position in the invisible maze.
- Finish the coin, cannonball, and barrel-switch puzzles.
Enter the password and defeat King Calamari
The six clues describe a valuable object found on the ocean floor with two vowels, four consonants, adjacent consonants, an S, and R before L. In the original North American SNES release, the password is PEARLS.
In the password room, stand beneath each numbered letter block and jump into it until the bracket highlights the required letter. The required sequence is P for key 1, E for key 2, A for key 3, R for key 4, L for key 5, and S for key 6. Examine the tube or horn beside the note to submit the password. The door opens only after the password is entered and submitted.
The next area begins with groups of tentacles before the main King Calamari battle. Defeat the tentacles first so they cannot overwhelm the party, then attack King Calamari and his remaining tentacles. Fire-based attacks and Fire Bombs are effective against the tentacles and boss. Keep Peach or Mallow available for recovery if the party is taking repeated group damage. After the battle, Mario drops to the lower decks; the ship is only halfway complete.
- Set the six blocks to PEARLS.
- Submit the password at the nearby tube or horn.
- Defeat the tentacle groups.
- Defeat King Calamari and continue into the lower decks.
Cross the lower Sunken Ship
After the King Calamari battle, use the springboard and leave through the door. At the next fork, take the upper door. Cross the Bullet Bill section along the upper path. If a Bullet Bill hits Mario, he falls to the lower level rather than entering a battle; use the route back to the upper ledge and try again. In the lower section, jumping into the Bullet Bills from underneath can stop the cannons temporarily.
Continue past the room with running Alley Rats. In the following room, climb the barrels in the upper corner, jump over the two chests, and enter the nearby door. The Mario clone mirrors Mario’s movement. Jump beneath the middle of the room to reveal an invisible switch block, then use the clone as a platform by jumping on his head to reach the floating chest. This chest is optional.
Return to the previous room and use the concealed exit in the upper-left wall. Take the chest inside, return, and descend the stairs. At the bottom, open the recovery chest and save before checking the second chest. The second chest is Hidon, a hidden enemy. Defeat Hidon to receive the Safety Badge, then leave through the door. The Hidon reward is optional, but the save point makes this a good place to attempt it.
- Take the upper route after the King Calamari springboard.
- Recover from Bullet Bill hits by returning to the upper ledge.
- Use the Mario clone to reach the optional hidden chest.
- Save before opening the Hidon chest.
Finish the flooded corridors and reach Johnny
Continue right and use the whirlpool to enter the underwater passage. Return through the underwater route to collect the four Frog Coins in the previous room, then return and take the right-hand door. The Frog Coins are optional and can be skipped if you want to reduce exposure to enemies.
Pass the rooms containing Zeostars and Mr. Kippers. In the large room with the swimming Blooper, walk between the upper wall and the barrels to find a concealed doorway and chest. Return outside, climb the barrels on the right, and collect the Frog Coin in the lower-left water area if desired.
Use the right-hand door to reach Bandana Red battles. Defeat the first group, take the chest, climb the stairs, and defeat the next group. The final door opens after these fights. Inside, Johnny is waiting with Bandana Blues.
Defeat Johnny to receive the fifth Star Piece. The original SNES version allows the fight to proceed with Johnny and his crew. Leave the room after the battle and use the springboard to return to the world map. Do not count the fifth piece as permanently secured yet; the next story scene removes it.
- Use the whirlpool route and return for the optional Frog Coins if wanted.
- Collect the optional Safety Ring in the flooded section if you find the concealed chest.
- Defeat the Bandana Red groups.
- Defeat Johnny and receive the fifth Star Piece.
- Use the springboard to return to the world map.
Return to Seaside Town and defeat Yaridovich
Return to Seaside Town. The fake Elder meets Mario at the entrance and forcibly takes the Star Piece. The town is now empty except for the Frog in the Elder’s house. Heal at the inn if needed, then leave through the upper-left exit. The next area leads directly to Yaridovich; save before leaving town if you have not saved since Johnny.
Defeat Yaridovich to recover the Star Piece. He can create a duplicate during the battle. The false copy takes substantially more damage, while the real Yaridovich is the target the battle cursor initially selects. Watch the damage numbers and concentrate attacks on the real boss. If you allow the clone to remain active, keep the party’s HP high because Yaridovich’s Water Blast can damage the entire party.
Lightning attacks are useful against Yaridovich, and timed physical attacks remain reliable. Use Peach’s healing if she is in the party, or conserve recovery items for Water Blast and the split phase. When Yaridovich is defeated, the Shed Key is left behind. Read Johnny’s note on the nearby tree, then return to town with the key.
- Allow the fake Elder to take the fifth Star Piece.
- Leave through the upper-left exit.
- Defeat Yaridovich and his duplicate.
- Collect the Shed Key.
- Read Johnny’s note before returning to town.
Free the residents and receive the next destination
Back in Seaside Town, use the Shed Key on the guarded shed. The real residents return to town and the shops reopen. The restored Elder gives Mario a Flower Box. These events confirm that the town has been liberated and the fifth Star Piece is permanently recovered.
Speak with the real Elder again in his house. He directs Mario toward Land’s End and Monstro Town, where the next Star Piece route begins. The Frog Coin merchant remains available upstairs, and the restored shops provide optional weapons, armor, accessories, healing items, and specialty activities. The Beetle Box and Booster Hill beetle game are optional and are not needed to continue the story.
Save after freeing the residents. The chapter is complete at this point. Continue through Land’s End, then Belome Temple and Monstro Town, rather than searching Seaside Town for another Star Piece.
- Use the Shed Key to open the guarded shed.
- Confirm that the real residents return.
- Speak with the restored Elder.
- Save after the town is liberated.
- Leave toward Land’s End and Monstro Town.
Before you move on
- The fourth Star Piece from Star Hill was already collected before entering this chapter.
- The fake Elder was confronted in Seaside Town.
- The Sunken Ship was reached through the Sea.
- All six clue rooms were completed, or the password room was correctly opened with PEARLS.
- King Calamari was defeated.
- Johnny was defeated and the fifth Star Piece was received temporarily.
- Yaridovich was defeated after the return to Seaside Town.
- The Shed Key was collected and used on the guarded shed.
- The real residents returned and the restored Elder was spoken to.
- The party received the lead toward Land’s End and Monstro Town.
- A save was made after Seaside Town was restored.
Land’s End, Nimbus Land, and the Sixth Star Piece
After liberating Seaside Town, travel through Land’s End and Belome Temple to reach Monstro Town. Examine the star upstairs in Monstermama’s house and speak with her again to summon the Sky Troopas. Return through Land’s End, cross the cliff, and enter Bean Valley. Defeat Megasmilax, climb to Nimbus Land, expose Valentina, restore Mallow’s parents, and proceed through Barrel Volcano. Defeat Czar Dragon, Zombone, the Axem Rangers, and Blade to permanently recover the sixth story Star Piece. Optional Lazy Shell items and Monstro Town challenges are not required for this route.
1. Leave restored Seaside Town and reach Belome Temple
After defeating Yaridovich, return to the Elder’s house in Seaside Town and speak with the real Elder and nearby residents. Heal, restock recovery items, and leave by the route leading to Land’s End. The next required destination is Belome Temple; do not go looking for the Sky Troopas yet, because they do not appear until after the Monstro Town event.
Cross the Land’s End desert by following the available paths and using the whirlpools to move between sections. Avoid or defeat the enemies emerging from the sand holes, then continue to the cave route leading toward Belome Temple. This first trip through Land’s End is necessary to reach the temple and Monstro Town.
- Seaside Town has been liberated.
- The party has entered Land’s End from the Seaside Town side.
- The party is proceeding toward Belome Temple before attempting the cliff crossing.
2. Defeat the second Belome and enter Monstro Town
In Belome Temple, use the elevator and fortune device to open the route through the temple. If the message does not open the required passage, leave and re-enter the fortune room and activate the device again until the route continues. Follow the opened path to the pipe and the second Belome encounter.
Belome can swallow a party member temporarily and may inflict status effects. Keep Peach available for healing and use timed Guards against physical attacks. After the battle, hit the switch beyond the arena and enter the pipe. Follow the mouse through the passage to reach Monstro Town.
The Temple Key and the treasure vault are optional. They provide extra rewards but are not needed to trigger the Bean Valley route.
- The second Belome has been defeated.
- The switch beyond Belome has been activated.
- The party has entered Monstro Town.
3. Trigger the Sky Troopa event in Monstro Town
Enter the first house in Monstro Town and speak with Monstermama. Go upstairs and examine the star. After it finishes its musical scene, return downstairs and speak with Monstermama again. This conversation is the required trigger for the Sky Troopas.
The Jinx challenge, the sealed door, and other Monstro Town activities are optional. Complete them now only if desired, then leave town and return through Land’s End. The quickest return can be made through Belome Temple if the shortcut is available; otherwise retrace the desert route.
At the Land’s End cliff, the Sky Troopas now appear. Follow the climbing sequence by jumping from one Troopa to the next when the shells approach. Missing a jump sends Mario back down, so wait for a safe approach rather than jumping early. Reach the top and enter the passage to Bean Valley.
- The star upstairs has been examined.
- Monstermama has been spoken to again afterward.
- The Sky Troopas are present at the Land’s End cliff.
- The party has crossed into Bean Valley.
4. Cross Bean Valley and defeat Megasmilax
Bean Valley uses a pipe network connecting small platforms. Follow the pipes upward and across the area, avoiding or fighting the bees and plant enemies. Continue until you reach the section with several pipes and a Save Point. Use the Save Point before entering the plant area.
At the plant nest, a Shy Away waters the plants and begins a sequence of Smilax battles. Defeat each encounter until Megasmilax appears. Peach should handle healing and status recovery, while Geno Boost can strengthen Mario or another physical attacker. Mallow’s Snowy spell is useful against several plant-area enemies, but conserve enough Flower Points for recovery.
After Megasmilax falls, the Shy Away leaves a note. Examine it to receive the Seed, which is optional but required later for the Lazy Shell equipment quest. Enter the pipe where the plant stood, jump beneath the floating block, and hit it to grow the beanstalk. Climb the beanstalk into the cloud route.
- The Smilax battles are complete.
- Megasmilax has been defeated.
- The Seed has been collected if the Lazy Shell quest is planned.
- The beanstalk has been grown.
5. Reach Nimbus Land and receive Garro’s disguise
Climb the vines, cloud platforms, and springboards until you reach Nimbus Land. Use the visible route rather than attempting long jumps across gaps. Heal and purchase the available equipment if your funds allow.
Enter Garro’s house in the northwest portion of town. After the scene reveals that Mallow is the true prince, examine the statue and speak with Garro. Garro turns Mario into a gold statue, allowing the group to pass the castle guards and enter Nimbus Castle.
The Seed is not needed for this disguise. Yo’ster Isle rewards, Tadpole Pond items, and any supposed wind puzzle are not prerequisites for Nimbus Castle. Save before entering the castle.
- Nimbus Land has been reached through Bean Valley.
- Garro has provided the statue disguise.
- The party has saved before Nimbus Castle.
6. Infiltrate Nimbus Castle and defeat Birdo
Enter Nimbus Castle while disguised. During Dodo’s inspection, move only when necessary and jump when his head pulls back to avoid the peck. If Mario is caught, the resulting battle does not permanently block progression. Continue through the corridors and use the Save Points as you find them.
Follow the castle route to the first Castle Key and use it on the locked central door. Continue until you reach the large pink egg. Examine it and begin the Birdo battle. Attack the egg until it breaks, then continue attacking Birdo. Guard against her egg projectiles and heal before characters reach critical HP.
Birdo leaves Castle Key 2 after the battle. Take it and continue through the opened route. The castle’s extra chests and Frog Coins are optional.
- The Dodo inspection section has been passed or survived.
- The first Castle Key has been obtained.
- Birdo has been defeated.
- Castle Key 2 has been collected.
7. Defeat Valentina and Dodo and open the volcano route
Continue until Valentina and Dodo flee. In the room with the floating chest, stand beneath it and jump to reveal the hidden platform. Open the chest to obtain a temporary Star power-up. It grants temporary invincibility and is not a story Star Piece. Use it to clear the Bluebird section quickly, or continue normally if it expires.
Before the Valentina and Dodo battle, place Bowser in the middle position if possible. Dodo removes the middle character temporarily, making Bowser a durable choice for that portion. Once the full party returns, keep Peach ready to heal and focus damage on Valentina while responding to Dodo’s attacks. The encounter is complete when the pair flee or are defeated according to the battle sequence.
Return to the throne room and speak with King and Queen Nimbus through the complete scene. Mallow’s identity is confirmed, and the rulers direct the party to Barrel Volcano. The optional Fertilizer can be found later through the hidden Nimbus Land route, but it is not required for the volcano. Use the shop and inn, then take the route through the northeastern hot springs and onward to Barrel Volcano.
- The Valentina and Dodo encounter is complete.
- King and Queen Nimbus have been restored.
- The Barrel Volcano objective has been received.
- The party is healed and equipped before entering the volcano.
8. Defeat Czar Dragon and Zombone
Barrel Volcano is a mostly linear dungeon of lava platforms, ledges, stairways, and fire-based enemies. Jump carefully across the gaps and use the Save Point near the boss approach. Hinopio’s shop and inn provide a final opportunity to buy equipment, heal, and restock before the major battles.
Bring Mallow if possible. Czar Dragon uses powerful fire attacks and summons fire enemies during the fight. Mallow’s Snowy spell is useful against the fire enemies and Czar Dragon, while Mario’s timed physical attacks provide steady damage. Peach should heal and revive as needed. Do not spend all recovery items before the second phase begins.
When Czar Dragon is defeated, it immediately changes into Zombone. Treat this as a continuation of the same boss sequence. Restore the party if necessary, keep Peach alive, and use strong attacks while guarding against heavy damage. Mallow’s Shocker and Mario’s attacks are useful here. After Zombone falls, cross the newly opened route toward the Star Piece.
- The Barrel Volcano boss route has been cleared.
- Czar Dragon has been defeated.
- Zombone has been defeated.
- The party is ready for the Axem Rangers.
9. Defeat the Axem Rangers and Blade
The Star Piece is not secured after Czar Dragon and Zombone. The Axem Rangers steal it during the approach, so follow them through the remaining volcano rooms. Use the available Save Point before the final crater battle and heal before starting the encounter.
The five Rangers fight together. Axem Pink is the healer and is a strong first target. Axem Green can threaten the entire party with special attacks, so defeat Green next if the group is taking heavy damage. Remove the remaining Rangers one at a time, prioritizing whichever is most dangerous to your current party. Peach should reserve turns for healing and reviving, while Geno Boost can strengthen Mario or Bowser’s damage.
After the Rangers are defeated, Blade begins the final battle. Watch for Breaker Beam and heal before the attack resolves. Continue attacking during the openings between its major attacks, and revive fallen members immediately. When Blade is destroyed, the stolen Star Piece is returned and the sixth story Star Piece is permanently recovered.
Afterward, return to Nimbus Castle and speak with the rulers. Mallow reports the victory, and the Nimbus royal bus provides the route toward Bowser’s Keep. Stock up before leaving Nimbus Land; Bowser’s Keep belongs to the next chapter.
- All five Axem Rangers have been defeated.
- Blade has been destroyed.
- The sixth story Star Piece has been recovered.
- The Nimbus royal scene has been completed.
- The game has been saved before beginning the Bowser’s Keep route.
Before you move on
- Seaside Town has been liberated.
- Belome Temple has been cleared and Monstro Town has been reached.
- The upstairs star and follow-up Monstermama conversation have triggered the Sky Troopa event.
- Bean Valley has been entered and Megasmilax has been defeated.
- Nimbus Land has been reached and King and Queen Nimbus have been restored.
- Czar Dragon and Zombone have been defeated.
- The Axem Rangers and Blade have been defeated.
- Six story Star Pieces are secured, including the piece recovered at the end of Barrel Volcano.
- The game has been saved before proceeding to Bowser’s Keep.
References for this chapter
- Super Mario RPG: Legend of the Seven Stars — Instruction Booklet, Nintendo
- Super Mario RPG: Walkthrough, Tips, All Secrets, Minigames & Bosses, Nintendo Life
- Super Mario RPG: Monstro Town Walkthrough, Nintendo Life
- Super Mario RPG: Barrel Volcano Walkthrough, Nintendo Life
- Nimbus Castle — Super Mario RPG Walkthrough and Guide, Thonky
- Birdo Boss Battle — Super Mario RPG Walkthrough and Guide, Thonky
- Super Mario RPG: Legend of the Seven Stars — Guide and Walkthrough, GameFAQs
- Super Mario RPG: Legend of the Seven Stars — Guide and Walkthrough, GameFAQs
Monstro Town Return and Casino + Optional Miniquests
After recovering the sixth Star Piece in Barrel Volcano, return to Monstro Town and use this detour period for optional challenges. Jinx, Grate Guy’s Casino, the Star Egg and Culex are not required for the seven-Star-Piece route, Bowser’s Keep or the original SNES ending. Complete them only if you want their equipment and reusable item rewards, then save separately before beginning the final story sequence.
Defeat Jagger and challenge Jinx
Enter Monstro Town and take the staircase in the upper-right portion of town. The doorway leads to the dojo. Speak to Jagger and defeat him if you have not already done so. Jagger is the required preliminary opponent before Jinx will accept Mario’s challenge.
After Jagger is defeated, speak with Jinx. The original Super Nintendo version contains three separate Jinx battles, with each rematch becoming more difficult. Treat them as individual fights: after each victory, open the menu and restore HP and Flower Points with items if necessary before speaking to Jinx again.
Use Mario’s timed physical attacks for dependable damage. Geno Boost can raise the party’s damage output, while Peach is useful for healing and reviving. Watch for Jinx’s powerful physical attacks and death-related techniques, and do not leave a defeated character unrecovered if the next rematch is about to begin. If the fight becomes unreliable, leave the dojo, restock and return later; it is not a story requirement.
Defeating Jinx for the third time awards the Jinx Belt. The accessory increases physical attack, physical defense and speed, and protects its wearer from mortal blows. It is an optional reward, so equip it only where its bonuses help your intended final-dungeon party.
- Defeat Jagger in the Monstro Town dojo.
- Defeat Jinx in all three battles.
- Restore the party between rematches.
- Collect the Jinx Belt after the third victory.
Earn the Bright Card from Knife Guy
Return to Booster Tower after the tower’s story events are complete. Climb through the cleared tower until you find Knife Guy in a winding corridor around the middle-to-upper section. Speak to him to begin his ball-juggling game.
Knife Guy juggles one yellow ball among red balls and asks which hand holds the yellow ball when he stops. Follow the yellow ball as carefully as possible, then choose the hand where it ends. Correct guesses raise the challenge counter by one. An incorrect guess subtracts one point, so the counter does not represent twelve consecutive wins; you must raise it to the required twelve-level difficulty.
The juggling becomes faster as the counter increases. If you make a mistake, continue playing rather than assuming the attempt is permanently lost: the reduced counter gives you another chance at an easier speed. When you reach the highest difficulty, Knife Guy gives Mario the Bright Card.
Bright Card is kept in the normal item inventory in the original SNES release. Do not sell it if you still want to visit the casino. It is the membership pass shown to the guards at Grate Guy’s Casino.
- Find Knife Guy in the cleared Booster Tower.
- Raise the challenge counter to twelve.
- Remember that a wrong guess lowers the counter by one.
- Keep Bright Card in the inventory.
Open the route to Grate Guy’s Casino
Travel to Bean Valley and continue until you reach the outdoor area containing five green pipes. Wait for the Shy Away to water the plant occupying the upper part of the formation, then defeat the Piranha Plant that grows there. Enter the pipe after the battle.
The pipe leads to a room containing a Chomp Chomp in a corner. Defeat it, then move to the corner where it stood and jump three times. Each successful jump produces the expected hidden-platform effect. Use the revealed platform to leave the room through the newly accessible route, which places you on the path to the casino entrance.
Enter the casino building while carrying Bright Card. The attendants will admit you only when the card is in your inventory. This route is optional and does not affect the remaining Star Piece or final-dungeon objectives.
- Reach Bean Valley’s five-pipe formation.
- Defeat the watered Piranha Plant.
- Enter the pipe and defeat the corner Chomp Chomp.
- Jump three times at the Chomp Chomp’s former position.
- Enter the casino with Bright Card present.
Use the original SNES casino games
The left-hand attraction is the slot machine. In the original SNES release, each play costs coins. Matching symbols can produce coins or a Frog Coin, but the result is luck-based, so avoid spending money needed for supplies or equipment.
The table attraction is blackjack and costs one Frog Coin to play. You receive two cards, then decide whether to draw again or stop. The aim is to finish closer to 21 than the dealer without exceeding 21. A win awards Frog Coins, while a loss or tie is not a reliable way to build a reserve. Treat this as optional entertainment rather than a required source of resources.
At the rear, play Look the Other Way with Grate Guy. Choose Mario’s facing direction, then try to face opposite the direction Grate Guy indicates. The result is luck-based, so there is no dependable sequence that guarantees every win. The game tracks successful victories across attempts rather than requiring one uninterrupted streak.
After 100 total victories in Look the Other Way, Grate Guy awards the Star Egg. The Star Egg is a reusable battle item that damages every enemy, making it useful for ordinary encounters and optional challenges. It is not needed to defeat Smithy or view the ending.
- Use the slot machine only with spare coins.
- Play blackjack only with spare Frog Coins.
- Track cumulative Look the Other Way victories.
- Collect Star Egg after reaching 100 total wins.
Open Culex’s sealed door
To begin the optional Culex sequence, go to Moleville and buy Fireworks from the Mole merchant for 500 coins. Take the Fireworks outside and trade them to the Mole girl near the crates. She gives Mario a Shiny Stone.
Return to Monstro Town and inspect the sealed black door on the right side of town. Use the Shiny Stone to open it and begin the Culex battle. Culex fights with four elemental crystals, making this encounter much more dangerous than a normal optional fight.
Enter with the party healed and carrying Pick Me Ups, healing items and Flower Point recovery. Peach is useful for Group Hug and Come Back, while Geno Boost can improve physical damage. Use area attacks when they efficiently damage several targets, but prioritize survival over rushing the crystals. Revive defeated characters before committing to a risky attack cycle.
If the battle overwhelms the party, reload the save made before opening the door, improve equipment or gain experience in late-game areas, and return later. Culex does not block Bowser’s Keep, the seventh Star Piece or the ending. Victory awards the Quartz Charm, an accessory that greatly improves the wearer’s offensive and defensive performance and protects against mortal blows.
- Buy Fireworks in Moleville for 500 coins.
- Trade Fireworks to the Mole girl for a Shiny Stone.
- Use the Shiny Stone on Monstro Town’s sealed door.
- Defeat Culex and collect the Quartz Charm if pursuing the optional reward.
Restock and prepare before Bowser’s Keep
Visit the shops in Seaside Town, Nimbus Land and Moleville before beginning the final story route. Restock Pick Me Ups, healing items and Flower Point recovery, and check the weapons and armor of the characters you plan to use most often. Preserve enough coins for any remaining purchase you still intend to make.
For optional experience, fight enemies in Barrel Volcano or another late area where the party can win consistently without exhausting Flower Points. A practical grinding spot is one where ordinary attacks handle most battles and a nearby recovery point or town allows you to restore supplies. Do not continue grinding if the party is already surviving local encounters and boss attacks with regular timed guards.
Make a separate save before entering Bowser’s Keep. Keep another save before Culex and before substantial casino spending. The original SNES game returns the post-ending save to the point before the final Smithy sequence, so record your completion separately if you want a permanent checklist of the optional rewards.
- Restock healing, revival and Flower Point recovery items.
- Review equipment for the intended final party.
- Gain experience only in late areas that the party can clear safely.
- Create a separate save before Bowser’s Keep.
- Record optional rewards separately because the post-ending save returns to the pre-Smithy state.
Before you move on
- Bright Card remains in the normal item inventory.
- The Bean Valley route to Grate Guy’s Casino has been opened.
- Jagger and all three Jinx battles are complete if pursuing the Jinx Belt.
- Culex has been defeated and Quartz Charm collected if pursuing that optional reward.
- Star Egg has been collected after 100 cumulative Look the Other Way wins if pursuing the casino reward.
- The party has sufficient healing, revival items, Flower Points and late-game equipment.
- A separate save exists before entering Bowser’s Keep.
- Optional completion has been recorded separately from the pre-Smithy save used after the original SNES ending.
References for this chapter
Bowser’s Keep — Return, Exor and the Weapon’s World gateway
Return to Bowser’s Keep after the first six story Star Pieces are secured. Clear four of the six randomized challenge doors, use Magikoopa and Croco to recover and prepare, then defeat Boomer on the chandeliers. Exor follows immediately and must be defeated to open the gateway into Weapon World. This chapter ends at that transition; Smithy’s Factory remains mandatory afterward.
1. Prepare before entering Bowser’s Keep
Return to Bowser’s Keep from the world map after the story sends you back toward Bowser’s former castle. Save before entering. The Keep has several battles and action rooms before Boomer, so equip your strongest current weapons and armor and bring healing items plus several Pick-Me-Ups.
Set the party before the final approach because Boomer is followed immediately by Exor. Mario is required for the route and provides dependable damage. Peach is the safest third member if you need reliable healing; Geno is useful for Geno Boost and magic damage, while Bowser is a strong physical attacker. If you use Peach, give her priority for survival because she may be your best recovery option during Exor.
The six-door section is randomized in the original Super Nintendo release. Do not rely on a fixed order from another playthrough. The room types and their objectives may change when you enter the Keep.
- Save before entering Bowser’s Keep.
- Equip current weapons and armor.
- Carry healing items and Pick-Me-Ups.
- Set the party before Boomer, since Exor follows without a normal recovery break.
- Do not expect a fixed six-door order.
2. Clear four of the six challenge doors
Advance through the Keep until you reach the hallway containing six numbered doors. Four successful challenges are required; clearing all six is unnecessary for story progress. Each door leads to one of several room types, including battle, action, puzzle and maze challenges.
In battle rooms, defeat the enemy groups and continue through the exit. In action rooms, watch the movement cycle of Thwomps, Bullet Bills and platforms before crossing. In puzzle rooms, inspect the arrangement and use the available switches, blocks or routes rather than spending time fighting. Maze rooms are safest when you test one branch at a time and remember dead ends.
If you fail an action or puzzle room, its progress is lost, but you can return to the six-door hallway and choose another challenge or retry. Ordinary enemies are not worth exhausting your rare recovery items. Once four doors are complete, the blocked route beyond the hallway opens.
- Complete four successful challenges.
- Use the room’s objective to identify its type.
- Time movement around Thwomps, Bullet Bills and moving platforms.
- Choose another door if a challenge is costing too many resources.
- Follow the newly opened route after the fourth success.
3. Defeat Magikoopa and prepare for the final climb
Continue beyond the challenge doors until Magikoopa confronts the party. Defeat him, then speak with him after the battle. He becomes friendly and restores the party’s HP and FP when spoken to, making this the most important recovery point before Boomer and Exor.
Use the Save Block in Magikoopa’s room before leaving. Enter the room to the left and speak with Croco. He is the final equipment vendor in this section and carries powerful late-game equipment. Replace outdated weapons or armor if necessary, but keep enough coins for useful consumables elsewhere if you still need them.
When ready, take the route on the right into the final action course. This section uses Thwomps and incoming Bullet Bills. Move after a hazard passes, avoid landing directly beside a descending Thwomp, and do not rush across a gap while a projectile is approaching. The course ends in the chandelier room where Boomer waits.
- Defeat Magikoopa.
- Speak to Magikoopa afterward for a full recovery.
- Save in his room.
- Check Croco’s equipment stock.
- Cross the final Thwomp and Bullet Bill course carefully.
4. Defeat Boomer on the chandeliers
Boomer has 2,000 HP and changes armor color during the fight. His red armor is weak to Special attacks, while his blue armor is weak to normal physical attacks. When he is red, use practical Special attacks such as Mario’s Jump or another character’s effective Special. When he turns blue, switch to normal attacks such as Mario’s weapon attack or Bowser’s physical attack.
There is an important risk to this pattern: exploiting Boomer’s active weakness can provoke Shaker, an instant-death attack. If avoiding Shaker is more important than finishing quickly, use the opposite attack type instead of exploiting the current weakness. This deals less damage but can reduce the chance of triggering the dangerous counter. Timed Guards can also prevent some damage, but do not assume every failed defense will be recoverable.
Boomer can also use Vigor Up, which raises his attack while lowering his defense. If he uses it, physical attacks become especially attractive because his defense has dropped. Keep Peach ready to heal or revive, and have Pick-Me-Ups available for Shaker. After Boomer is defeated, the chandelier carries the party upward and the Exor battle begins immediately, so do not spend the final turns carelessly; keep the party in fighting condition.
- Use Special attacks while Boomer is red if you want maximum damage.
- Use normal physical attacks while Boomer is blue if you want maximum damage.
- Use the opposite attack type when avoiding Shaker is the priority.
- Watch for Vigor Up and exploit Boomer’s reduced defense with physical attacks.
- Keep Peach and Pick-Me-Ups available for the immediate Exor fight.
5. Identify Exor’s targets and break his protection
The chandelier carries the party to the upper arena, where Exor begins without a normal shop or town transition. The encounter has four targets: Exor’s central hilt or skull, the Left Eye, the Right Eye and the mouth called Neosquid. Exor’s central target is the one that must be destroyed, but its protection prevents effective damage until an eye is defeated.
The Left Eye has lower HP and can use status attacks such as Mute, Poison and Scarecrow. The Right Eye uses damaging attacks, including Dark Star. Neosquid adds powerful group attacks and can inflict sleep. If the party is taking too much damage, defeat Neosquid first or remove it whenever it becomes the immediate threat. Otherwise, defeat an eye and turn your strongest attacks on Exor’s central target.
Mario’s Ultra Flame is a practical way to damage an eye if you have the FP, although normal attacks and other effective Specials can also work. Geno Whirl can produce exceptional damage when its timed hit succeeds, but it is optional and should not be treated as necessary.
- Recognize Left Eye, Right Eye, Neosquid and the central Exor target.
- Defeat an eye before relying on damage against Exor’s hilt.
- Remove Neosquid if its group attacks or sleep effects overwhelm the party.
- Use Ultra Flame or another reliable attack against an eye.
- Do not depend on Geno Whirl if you cannot consistently time it.
6. Repeat the eye-and-hilt damage cycle
After an eye is defeated, watch for the battle message indicating that Exor’s protection has been broken. During this opening, attack the central Exor target with Mario’s strongest reliable attack and use Geno or Bowser for additional damage. Do not spend the opening attacking only a defeated eye.
The eyes can return during the battle. When an eye revives and protection is restored, defeat an eye again before wasting turns against the protected hilt. Repeat this cycle until Exor is destroyed. Neosquid may also return; remove it again if its spells are creating more danger than Peach can heal through.
Exor can use Aurora Flash to put the party to sleep, Corona for heavy group damage and Solidify for substantial damage to every character. Keep HP high enough to survive a group attack rather than allowing every character to remain near defeat. If Peach is knocked out, revive her first when she is your only dependable healer. Otherwise, revive the character who can restore control of the battle and use healing items until the party is stable.
- Attack Exor only during the opening after his protection is broken.
- Defeat an eye again when protection returns.
- Remove Neosquid again if it becomes the main threat.
- Heal before Corona, Solidify or another group attack can finish the party.
- Prioritize reviving Peach when she is your only reliable healer.
7. Enter Weapon World and stop before the next dungeon
When the central Exor target is destroyed, the victory sequence plays and Exor’s mouth becomes the gateway into Weapon World. This is not the ending and Exor is not Smithy. The remaining Star Piece and the final boss route are still ahead in Smithy’s Factory.
After arriving in Weapon World, use the nearby springboard if you need to leave and prepare elsewhere. You can return to the world map, restock healing items, improve equipment and save before committing to the factory route. If you continue immediately, follow Weapon World’s path toward Smithy’s Factory and conserve rare recovery items for the factory gauntlet and Smithy’s final battle.
- Confirm that Exor’s victory sequence has played.
- Confirm that the party has entered Weapon World.
- Use the springboard if additional preparation is needed.
- Save and restock before entering Smithy’s Factory.
- Do not treat Exor’s defeat as completion of the game.
Before you move on
- Four of the six Bowser’s Keep challenge doors have been cleared.
- Magikoopa has been defeated, the party has been restored, and the Keep has been saved in his room.
- Croco’s late-game equipment shop has been checked before the final action course.
- Boomer has been defeated and the chandelier has carried the party to Exor’s arena.
- At least one eye has been defeated and Exor’s protection has been broken during the fight.
- The central Exor target has been destroyed and the victory sequence has played.
- The party has entered Weapon World and the springboard remains available for preparation before Smithy’s Factory.
References for this chapter
- Super Mario RPG: Legend of the Seven Stars - Guide and Walkthrough, Factory and Seaside Town sections
- Super Mario RPG: Legend of the Seven Stars - Guide and Walkthrough - Super Nintendo - By A_Backdated_Future
- Super Mario RPG - Legend of the Seven Stars Walkthrough, Part 15: Bowser’s Keep
- Boomer Boss Battle - Super Mario RPG Walkthrough and Guide
- Super Mario RPG: How To Defeat Exor
- Super Mario RPG: Bowser’s Keep - The Six-Door Challenge Walkthrough
Weapon's World / Smithy Gateway and Mid-Dungeon Puzzles
After Exor pulls the party into the Gate, Mario must cross the bolt platforms, defeat Count Down, navigate the conveyor-belt production rooms, defeat the required Machine-Made Yaridovich and then clear Cloaker and Domino. The chapter ends when the party enters Smithy's Factory. This route is for the original North American Super Nintendo Entertainment System release, where the enemy is named Yaridovich rather than Speardovich.
1. Prepare at the Gate entrance
After the Exor sequence, Mario arrives in the Gate area. A trampoline on the left returns the party to the world map. Use it before advancing if you need an inn, shops, equipment or additional healing items. Entering Weapon's World does not permanently trap the party, so leave and prepare if your inventory is poor.
Save before beginning the platforming route. Bring regular healing items, FP recovery and several Pick-Me-Ups. The equipment found here is limited: the Ultra Hammer is available for Mario, but it is weaker than the Lazy Shell weapon if you completed the Rose Town seed and fertilizer sidequest. Compare the displayed attack values rather than changing weapons automatically.
There is no equipment shop in this opening section. If you missed earlier armor or accessories, use the entrance trampoline to leave and visit the appropriate town before continuing.
- Save before crossing the first bolt bridges.
- Use the left trampoline if you need shops, an inn or equipment.
- Carry enough healing, FP recovery and Pick-Me-Ups for several boss encounters.
- Check Mario's current weapon before equipping the Ultra Hammer.
2. Cross the bolt bridges and activate the switch
Move onto the first bolt and jump repeatedly while Mario is standing on it. The repeated jumps roll the bolt along its screw toward the next platform. Several crossings use the same principle. Keep Mario on the bolt and wait for a safe landing instead of trying to jump across the gaps directly.
Continue through the bolt screens until you reach the switch guarded by falling enemies. Activate the switch to create the route forward. The switch is the required progression action in this section; defeating every enemy is unnecessary. If an encounter blocks the path, fight or avoid it according to your resources, but do not spend items simply to clear optional battles.
Follow the opened route to the next room and reach the Save Block. A trampoline farther ahead leads toward Count Down. Heal and restore FP before using it, because the next platforming sequence ends at the first major battle.
- Every required bolt crossing is complete.
- The switch has been activated.
- The route to the Save Block is open.
- The party is healed before approaching Count Down.
3. Save and collect the optional Hidden Treasure
Use the Save Block immediately. In the same room, move to the far western side, west of the Save Block, and jump in place to reveal a Hidden Treasure containing a Mushroom. This item is optional and does not affect access to Smithy's Factory.
Leave through the northeast exit. Use the Save Block as your landmark for this part of the route. If you fall or need to retry the next platforming section, return here rather than retracing the entire opening bridge sequence.
- The Save Block has been used.
- The optional Mushroom has been collected if desired.
- The northeast exit has been taken.
4. Collect the Ultra Hammer and defeat Count Down
Open the treasure chest in the next area to obtain the Ultra Hammer. Equip it only if it improves Mario's current attack value. The Lazy Shell remains the stronger Mario weapon if you obtained it earlier, so the Ultra Hammer is not a mandatory replacement.
Use the trampoline to reach the screw platforms, cross the screws and roll the next bolt across the gap by jumping on it. The final trampoline drops the party into the Count Down battle. Restore HP and FP before using it.
Count Down is accompanied by two Ding-a-Lings. Prioritize the Ding-a-Lings if they are causing dangerous attacks or status effects, then attack Count Down. Count Down can recover health and changes its attacks as the clock advances, so keep Peach available for Group Hug and revival. Do not drain all FP on the first turns; a stable party is more valuable than a fast victory.
A Save Block appears after the battle. Use it before entering the production rooms.
- The Ultra Hammer has been collected.
- The party entered the battle with adequate HP and FP.
- Count Down and both Ding-a-Lings are defeated.
- The post-battle Save Block has been used.
5. Cross the conveyor-belt production rooms
Use the trampoline after the Count Down Save Block to enter the conveyor-belt section. Machine-Made enemies reproduce several earlier bosses and can usually be avoided. Run past them when there is a clear opening, jump over moving enemies where possible and do not chase optional fights merely for completion.
The route uses conveyor belts, raised platforms, gaps and falling arrows. Let a machine pass before climbing a belt, then move quickly while the path is open. Falling arrows can briefly paralyze Mario, so avoid standing beneath the conveyor lanes. Use platforms to cross the gaps rather than attempting long jumps.
Optional treasure on this route includes a Royal Syrup and a Max Mushroom. Collect them if you have a safe opening, but do not risk a battle or lose progress for them. Continue through the Machine-Made Bowyer and Machine-Made Axem Ranger sections. Jump over the moving machines and climb the final conveyor belts to reach another Save Block.
After the next Save Block, proceed north into the Ninja and Machine-Made Yaridovich room. If you need additional healing, the Save Block is the correct place to recover before the required encounter.
- The conveyor section has been crossed.
- The optional Royal Syrup and Max Mushroom have been collected if desired.
- Machine-Made enemies were avoided when conserving resources was more important than experience.
- The later Save Block has been used.
6. Defeat Machine-Made Yaridovich and enter the Factory
In the next room, Machine-Made Yaridovich repeatedly drops onto a gray block. Do not rush beneath a falling enemy. Wait until one lands on the block, then jump into it to begin the required battle. This is the Machine-Made Yaridovich fight specified for the original SNES USA version.
Machine-Made Yaridovich can use Multiplier, splitting into four Machine-Made Drill Bits. Defeat the Drill Bits when they appear, then resume attacking Yaridovich. When the Machine-Made Yaridovich on the gray block is defeated, the block disappears and opens a hole in the floor.
Before dropping through the hole, go north to the nearby room if you want the optional Mushroom and Flower from the treasure chests. Return to the Yaridovich room and drop through the opened hole when ready.
The fall begins the Cloaker and Domino battle. Defeating one causes the other to retreat and mount a snake. If you defeat Cloaker first, Domino mounts Mad Adder. If you defeat Domino first, Cloaker mounts Earth Link. A practical approach is to defeat Cloaker first, then focus on Mad Adder while Peach heals and revives as needed. Do not waste turns attacking the mounted character when the snake is the active target; defeat the snake to end the follow-up portion.
After the battle, Mario returns near the hole, with more replica Yaridovich enemies dropping from above. A nearby spring can take you back toward the earlier Weapon's World section if you need to retreat. Otherwise, travel northwest. This transition leads into Smithy's Factory proper. The next chapter begins there, with Factory enemies and the Toad supply shop available for consumables.
- Machine-Made Yaridovich has been defeated.
- The gray block has disappeared and the hole is open.
- The optional Mushroom and Flower have been collected if desired.
- Cloaker and Domino have been defeated.
- The correct snake follow-up, Mad Adder or Earth Link, has been defeated.
- The northwest route into Smithy's Factory has been entered.
Before you move on
- The party has used the entrance or intermediate Save Blocks as appropriate.
- Count Down and the Ding-a-Lings are defeated.
- The conveyor-belt production section has been crossed.
- Machine-Made Yaridovich has been defeated and the floor hole has opened.
- Cloaker, Domino and the resulting snake battle have been cleared.
- The party has traveled northwest into Smithy's Factory, which is the completion point for this chapter.
- The party has enough healing and FP recovery to begin the Factory route, or has returned through the available route to restock before continuing.
References for this chapter
- Super Mario RPG: Weapon World & Factory — The Final Dungeon Walkthrough
- Super Mario RPG: Legend of the Seven Stars - Guide and Walkthrough for Super Nintendo
- Super Mario RPG: Legend of the Seven Stars — Guide and Walkthrough by Kirby021591 — GameFAQs
- Super Mario RPG: Legend of the Seven Stars/The seventh Star Piece
- Cloaker and Domino - Super Mario RPG Walkthrough and Guide
- Super Mario RPG: Legend of the Seven Stars - Guide and Walkthrough, Factory and Seaside Town sections
Smithy Factory — The Boss Gauntlet
The Factory is the last production area before Smithy’s chamber. Complete the required encounters in this order: Clerk with Mad Mallets, Manager with Pounders, Director with Poundettes, then Factory Chief and Gunyolk together. Toad provides the final item shop after Clerk, and the Save Block after Director is the critical recovery point before the final Factory battle. After Factory Chief and Gunyolk are defeated, use the nearby switch and enter the pipe toward Smithy. The seventh Star Piece is not awarded in the Factory; it is recovered only after Smithy is defeated.
1. Enter the Factory and defeat Clerk
Begin this chapter after completing the preceding Weapon World section and entering Smithy’s Factory proper. Move forward through the production floor and defeat the initial Mad Mallets. The Clerk then confronts the party with two more Mad Mallets supporting him.
Use Mario’s strongest dependable timed physical attack against the Clerk. Geno’s group attacks can help clear the Mad Mallets, while Peach should heal with Group Hug when several characters are hurt. The supporting Mad Mallets must be defeated before the encounter is fully cleared.
After the battle, continue through the room. Mallow approaches a switch and is caught by a crane during the scene; Mario frees him automatically. No special item or manual input is required for this event. Toad then appears and opens the final item shop available before Smithy.
- Defeat the first Mad Mallets.
- Defeat the Clerk and his accompanying Mad Mallets.
- Let the Mallow crane scene finish.
- Speak with Toad before continuing.
- Do not expect a Star Piece from this encounter.
2. Restock at Toad’s shop
Use Toad’s shop to replace healing items, revival items, and Flower Point recovery. The shop is especially useful because the Factory’s regular enemies can inflict substantial damage, and conserving rare recovery items will make the final battles safer.
Toad also provides a Rock Candy during the shop sequence. Make room in the inventory before accepting it if necessary. A practical party for the remaining Factory fights is Mario, Geno, and Peach: Mario supplies reliable physical damage, Geno contributes strong attacks and group damage, and Peach provides Group Hug and Come Back. Bowser remains a valid substitute if that is the party you prefer.
Save at the nearby Save Block when the route provides one, and use normal attacks against routine enemies whenever possible. Do not spend your strongest single-use offensive items on the Clerk, Manager, or Director unless the party is severely underlevelled.
- Buy Pick Me Ups and healing supplies as needed.
- Restore Flower Points before leaving the area.
- Make room for the Rock Candy.
- Choose a party with reliable healing or revival support.
- Save when the nearby Save Block is available.
3. Defeat Manager and the Pounders
Proceed northwest into the next Factory room to meet Manager. Pounders accompany him and add physical damage, but Manager is the encounter’s primary threat. Attack Manager first so his health and offensive pressure are removed quickly.
Mario should use his strongest reliable timed attack. Geno Blast can help clear the Pounders after Manager falls, but preserve enough Flower Points for healing and the final Factory encounter. Peach should use Group Hug when several characters are damaged and should use Come Back promptly if someone is defeated.
The battle does not end when Manager falls if Pounders remain. Clear the supporting enemies before leaving the room, then continue through the production area toward Director.
- Enter the Manager battle with the party healed.
- Target Manager before concentrating on the Pounders.
- Use Group Hug when group damage accumulates.
- Defeat every remaining Pounder before proceeding.
4. Defeat Director and the Poundettes
The next room contains Director and several Poundettes. Director can strengthen himself with support abilities, while the Poundettes add extra attacks. Focus Director first, then eliminate the Poundettes once the main threat has been removed.
Timed physical attacks are the dependable approach. Geno Blast or Geno Flash can shorten the cleanup phase, but do not exhaust Geno’s Flower Points if Peach needs them for Group Hug or Come Back. Heal before the party reaches critical health rather than waiting for a character to fall.
After Director and the Poundettes are defeated, continue forward to the Save Block. This is the key guaranteed recovery point before Factory Chief and Gunyolk. Save here even if the earlier battles were easy; otherwise, a failed attempt against the final pair requires replaying the preceding Factory encounters.
- Defeat Director before focusing on the Poundettes.
- Use healing during the battle when necessary.
- Defeat the remaining Poundettes.
- Save at the Save Block after the Director encounter.
5. Prepare for Factory Chief and Gunyolk
At the Save Block, restore HP and Flower Points with your available items and save the game. If your supplies are low, backtrack to Toad’s shop before entering the final Factory battle. This is the last practical preparation opportunity before the Smithy sequence.
Equip the strongest available weapons and armor. Prioritize survivability for Peach if she is your healer, and confirm that Mario and Geno have their best usable equipment. Keep several Pick Me Ups or equivalent revival items available even when Peach is in the party, because a heavy attack can defeat her before she can heal.
Return from the Save Block toward the final Factory room. Factory Chief and Gunyolk begin a single combined encounter. There is no Star Piece in this room.
- Save at the post-Director Save Block.
- Restore HP and Flower Points.
- Backtrack to Toad if supplies are inadequate.
- Check weapons, armor, and revival items.
- Approach Factory Chief and Gunyolk only after preparing.
6. Defeat Factory Chief first, then Gunyolk
Target Factory Chief first. He has strong direct attacks and can use Shuriken and Thornet, so removing him reduces the number of dangerous actions the party must endure. Have Mario use his strongest timed physical attacks, while Geno attacks or provides support and Peach uses Group Hug when the group is badly damaged.
After Factory Chief falls, immediately target Gunyolk. Gunyolk has more health and can use Breaker Beam for heavy damage against the entire party. The reason to finish Gunyolk promptly after the Chief is defeated is to prevent repeated Breaker Beam attacks from wearing down the party. Do not switch to routine healing for several turns while Gunyolk remains alive; heal only when necessary and continue dealing damage.
If a character falls, revive that character promptly unless Gunyolk is already close to defeat and Mario can safely finish it. Once both enemies are defeated, the Factory gauntlet is complete. Direct damage is the reliable method; do not depend on a particular status effect.
- Target Factory Chief first.
- Defeat Factory Chief before concentrating on Gunyolk.
- After the Chief falls, attack Gunyolk immediately.
- Watch for Breaker Beam and heal when group damage becomes dangerous.
- Revive fallen characters before the party becomes vulnerable again.
- Defeat Gunyolk to clear the final Factory encounter.
7. Save and activate the route to Smithy
After Factory Chief and Gunyolk are defeated, allow the story scene to finish and return to the nearby Save Block. Save the cleared Factory state before proceeding. If you need more supplies, backtrack to Toad’s shop, restock, and return to the Save Block.
When the party is ready, return to the room following the final Factory battle and activate the green switch or button. A crane transports the party to a pipe leading onward to Smithy’s chamber. This transition is required, but it does not award the seventh Star Piece and does not complete the game.
Before entering the pipe, confirm that Mario is in the active party, your equipment is current, and your healing and revival supplies are sufficient for the final Smithy sequence. Once you proceed, continue to the next chapter for the final boss.
- Save after defeating Factory Chief and Gunyolk.
- Visit Toad again if healing or revival supplies are low.
- Restore HP and Flower Points.
- Activate the green switch or button after the final Factory battle.
- Enter the pipe toward Smithy.
- Continue to Smithy for the seventh Star Piece and the ending.
Before you move on
- Clerk and the accompanying Mad Mallets are defeated.
- Manager and the Pounders are defeated.
- Director and the Poundettes are defeated.
- The party has used the Save Block after Director.
- Factory Chief is defeated first in the combined final Factory encounter.
- Gunyolk is defeated immediately afterward.
- The party has restocked at Toad’s shop if additional supplies were needed.
- The green switch or button after the final Factory battle is activated.
- The party enters the pipe toward Smithy.
- For full game completion, continue to defeat Smithy, recover the seventh Star Piece, and watch the original SNES ending.
References for this chapter
- Super Mario RPG: Legend of the Seven Stars — Guide and Walkthrough by Kirby021591 — GameFAQs
- Super Mario RPG: Legend of the Seven Stars — Guide and Walkthrough — Super Nintendo — Dark_Vortex
- Super Mario RPG: Weapon World & Factory — The Final Dungeon Walkthrough
- Super Mario RPG: Legend of the Seven Stars - Guide and Walkthrough, Factory and Seaside Town sections
Final Chamber — Smithy (Final Boss) Strategy
Prepare at the last Factory Save Block, then activate the green switch to begin two connected battles against Smithy. The first battle is Smithy with Smelter and possible Shypers. The second is Smithy's true form, which consists of a changing head and a separately attackable body. In the original Super Nintendo Entertainment System USA release, the head changes as its shared HP crosses damage thresholds. Destroying the head wins the battle; disabling the body only stops it temporarily. Preserve the save made before the final switch because the original game returns to the pre-Smithy state after the ending.
Save, restock, and choose the party
After defeating Factory Chief and Gunyolk, use the Save Block in the Factory room before the final switch. This is the safest retry point for the Smithy sequence. If your supplies are low, backtrack to the Factory shop in the earlier area and buy healing items and Pick-Me-Ups before returning. Do not overwrite the pre-switch save if you still want a dependable retry file or plan to revisit optional content after viewing the ending.
Set your party and equipment before stepping on the green switch. Mario is required, while Toadstool is the safest support choice because Group Hug restores the party and Come Back revives fallen allies. Geno contributes Geno Boost and strong timed attacks. Bowser is a dependable physical attacker, and Mallow is especially useful if you want to exploit lightning against the Tank head or ice against the high-defense box-shaped head.
When ready, return to the room where Factory Chief and Gunyolk were defeated and step on the green switch. The crane carries Mario to the pipe leading to Smithy. There is no normal preparation screen between the first and second Smithy battles, so select the intended party and equipment before activating the switch.
- Defeat Factory Chief and Gunyolk.
- Save at the last Factory Save Block.
- Restock healing items and Pick-Me-Ups if necessary.
- Equip the strongest practical weapons, armor, and accessories.
- Choose the party before using the green switch.
First battle: Smithy, Smelter, and Shypers
Smithy begins the first battle with Smelter. Smelter can create Shypers during the fight, and Shypers can use Sword Rain for heavy damage to the whole party. Smelter is weak to Thunder, so Mallow's Thunder or Shocker can remove it efficiently if you decide to eliminate the source of the extra enemies.
You can either defeat Smelter first or concentrate on Smithy. For a safer, controlled fight, remove Smelter when Shypers begin appearing, then defeat any Shypers that remain before returning your attention to Smithy. If your party is durable and you are dealing high damage, focusing on Smithy is also valid; do not allow Sword Rain and Smithy's own area attacks to build up while the party is already injured.
Smithy uses attacks including Sledge, Mega Drain, Meteor Swarm, and strong physical strikes. Heal after Meteor Swarm or whenever two characters are in danger. Geno Boost is useful, but do not spend several turns buffing while Smelter and Shypers are active. Keep the party alive and finish Smithy as efficiently as possible.
After taking enough damage, Smithy causes the floor to collapse. The party falls into the lower arena and the second battle begins immediately. There is no healing screen, shop, or equipment menu during this transition, so enter the first battle with the correct party and enough recovery items.
- Decide whether to remove Smelter before focusing on Smithy.
- Defeat Shypers if Sword Rain is overwhelming the party.
- Heal before Smithy's floor-collapse transition.
- Do not expect a break between the two battles.
Second battle: target the head, not the body
Smithy's true form has a shared head HP total and a separate body. The body uses attacks such as Hammer and Finger Shot. If you reduce the body's HP to zero, it becomes temporarily unable to act and Smithy's head stops changing for a short time. The body eventually returns, so it is not the permanent victory target.
Direct most of your attacks at the head. Attack the body only when its extra attacks are overwhelming the party, when you need a brief period to heal, or when preventing an immediate head change gives you time to recover. Once the body is disabled, return to the head rather than spending the entire battle trying to destroy the body permanently.
The head changes when its shared HP crosses damage thresholds. The forms are not a separate sequence of bosses with separate full HP totals, and changing appearance does not restore all the damage already dealt. Watch the form currently visible and adjust your attack method to its strengths and weaknesses.
- Make the head your default target.
- Disable the body only for emergency relief or a useful healing window.
- Expect the body to return after being knocked out.
- Continue attacking the head across its transformations.
Use the original-SNES head weaknesses
The Tank head has high physical attack and can use Magnum, which can instantly defeat its target. It is weak to lightning. If Mallow is in the party, Thunder or Shocker is useful here; otherwise, use reliable special attacks and keep Toadstool ready to revive anyone lost to Magnum. Do not rely on ordinary physical attacks as your only damage source against this form.
The Wizard head has low physical defense but strong magic-based attacks and high magic resistance. Use Mario, Geno, Bowser, or another physical attacker with timed normal attacks. This is usually the best form for dealing direct physical damage. Heal through attacks such as Dark Star, Sword Rain, or other powerful spells rather than trying to counter every move with additional buffs.
The Treasure Chest head emphasizes status attacks, including effects such as Poison, Fear, Mute, and Scarecrow. Cure a status when it prevents an essential character from acting, but do not spend every turn on recovery if the party can continue attacking. The head is weak to fire, so Mario's Ultra Flame is a strong option when Flower Points allow it.
The high-defense box-shaped head has high defense and can use Shredder to remove active attack and defense enhancements. It can also recover HP. Unlike the Treasure Chest head, this form is weak to Ice in the original SNES battle data. Use Mallow's Snowy when available, or spend an Ice Bomb for effective damage. Do not assume this form is neutral to Ice, and do not waste time relying on ordinary physical attacks if an Ice option is available.
The head's visible form determines the best response, but the overall objective remains the same: keep damage directed at the head, heal through the body's attacks, and exploit the current weakness when you have the required character or item.
- Tank head: use lightning when practical and watch for Magnum.
- Wizard head: prioritize timed physical attacks.
- Treasure Chest head: use fire and manage disabling status effects.
- High-defense box-shaped head: use Snowy or Ice Bombs when available.
- Reapply Geno Boost only after Shredder and only when the party can safely spend a turn.
Healing, revival, and failure recovery
Use Group Hug when multiple characters have taken heavy damage. If one character falls, revive that character promptly with Come Back or a Pick-Me-Up. Restore Toadstool early if she is your primary healer. If several characters are down, revive Toadstool first unless Mario or another attacker is positioned to end the current form immediately.
Timed defense can reduce damage from many attacks, but it does not make every move safe to block. Magnum is especially dangerous, and the body and head can both act during one round. Use healing items before the party reaches a point where one additional attack can cause a wipe.
If the entire party is defeated, reload the Save Block file made before activating the green switch. You may need to repeat Factory Chief and Gunyolk, but this is the reliable recovery procedure for the original SNES release. If you want to retry Smithy or continue optional activities, do not replace that file with a save made at an earlier point.
- Heal before several characters reach critical HP.
- Revive Toadstool promptly if she is needed for recovery.
- Use Ice Bombs, Pick-Me-Ups, and other limited supplies deliberately.
- Reload the pre-switch save after a total defeat.
Confirm the ending and preserve the completion state
Smithy is defeated when the true head is destroyed. Disabling the body alone does not complete the battle. After the victory sequence, the seventh and final Star Piece is recovered. The Star Pieces return to Star Road, Geno completes his mission, and the Geno doll is left behind as the star spirit departs.
Watch the complete ending and credits. The original SNES version does not create a normal persistent post-ending free-roam save. When the game returns you to the pre-Smithy state, record the ending as completed separately and keep the pre-switch save for optional activities, retries, or further exploration.
- Complete Smithy's first battle with Smelter present or defeated.
- Defeat Smithy's true form by destroying the head.
- Confirm recovery of the seventh Star Piece.
- Watch the Star Road restoration and Geno's departure scenes.
- View the complete credits.
- Preserve the pre-Smithy save for optional content and future retries.
Before you move on
- Factory Chief and Gunyolk were defeated before the final switch.
- The first Smithy battle with Smelter was completed.
- Smithy's true form was defeated by destroying the head.
- The seventh Star Piece was recovered.
- The Star Road restoration and Geno departure scenes were viewed.
- The complete ending and credits were watched.
- The pre-Smithy Save Block file remains preserved for retries and optional revisits.
References for this chapter
- Super Mario RPG: Legend of the Seven Stars/The seventh Star Piece
- Smithy Final Boss Battle — Super Mario RPG Walkthrough and Guide — Thonky
- Super Mario RPG: Legend of the Seven Stars — Guide and Walkthrough by Kirby021591 — GameFAQs
- Super Mario RPG: Legend of the Seven Stars - Guide and Walkthrough - Super Nintendo - By Super_Slash
- Super Mario RPG: Legend of the Seven Stars — Guide and Walkthrough by nm14 — GameFAQs
- Super Mario RPG: Legend of the Seven Stars - Manual - SNS
Post-Ending Tasks and Optional Bosses/Rewards
After defeating Smithy and viewing the complete ending in the original Super Nintendo Entertainment System release, reload the continuation file that remains at the pre-Smithy point. This is normal behavior for the original SNES game: it does not create a permanent completed-world state for continued exploration. Use this chapter only as a record of story completion and optional rewards. Optional bosses, equipment, minigame prizes, and exchanges are not additional Star Pieces and are not required for the ending.
View the ending and reload the continuation file
Defeat Smithy and watch the complete ending sequence through the final credits. When you return to the title screen, load the file associated with the completed run. The original SNES version resumes from the pre-Smithy state rather than placing Mario in a permanently cleared world.
A loaded continuation file may therefore show the party, locations, equipment, and Star Piece display as they were before the final Smithy battle. Do not interpret the pre-Smithy state as a failed completion or as evidence that the final story objective was missed. The ending itself is the completion event, while the retained save is the practical file used for optional activities and another trip through the final area.
- The complete original-SNES ending was viewed.
- The continuation file was reloaded after the ending.
- The retained file is recognized as the pre-Smithy state.
- Story completion and optional-reward completion are recorded separately.
Optional boss and reward checks
Culex is optional and does not provide an additional Star Piece. Record this objective only when Culex and the four elemental Crystals have been defeated and the Quartz Charm has been awarded.
The Monstro Town dojo sequence is complete when Jagger has been defeated and all three Jinx battles have been won, resulting in the Jinx Belt. Neither Culex nor Jinx changes the Smithy ending requirement.
- Culex and the four Crystals were defeated, and the Quartz Charm was received, if pursued.
- Jagger was defeated, all three Jinx battles were won, and the Jinx Belt was received, if pursued.
Lazy Shell equipment check
The Lazy Shell equipment record requires all parts of the item sequence to be complete: the Seed, the Fertilizer, and the Rose Town gardener’s event. The equipment is counted as obtained only after both items have been given to the gardener and the two resulting Lazy Shell chests have been opened.
Both Lazy Shell rewards are optional equipment and are not required to defeat Smithy, recover the seven story Star Pieces, or view the ending.
- The Seed was obtained.
- The Fertilizer was obtained.
- Both items were given to the Rose Town gardener.
- The Lazy Shell weapon and Lazy Shell armor were collected.
Super Jump reward checks
The Super Jump prizes are separate optional challenge rewards. The Attack Scarf is recorded after Mario completes 30 consecutive Super Jumps in one battle and the reward is received. The Super Suit is recorded after Mario completes 100 consecutive Super Jumps in one battle and the reward is received.
These thresholds are separate milestones. Reaching one threshold does not replace the other, and neither item is needed for the story ending.
- The Attack Scarf was received after 30 consecutive Super Jumps in one battle, if pursued.
- The Super Suit was received after 100 consecutive Super Jumps in one battle, if pursued.
Bright Card, Star Egg, and Carbo Cookie checks
The optional casino record begins with obtaining the Bright Card from Knife Guy’s challenge. The Star Egg is recorded only after the cumulative Look the Other Way requirement has been completed and Grate Guy has awarded the item. These rewards are optional and do not count as Star Pieces.
The Shiny Stone must be used on Culex before it is exchanged for the Carbo Cookie. Record the Carbo Cookie exchange only after the Culex event has been completed and the later trade has been made. This preserves the correct order of the two optional objectives.
- The Bright Card was obtained, if pursuing casino access.
- The Star Egg was received after 100 cumulative Look the Other Way wins, if pursued.
- The Shiny Stone was used on Culex before the Carbo Cookie trade.
- The Carbo Cookie exchange was completed, if pursued.
Final record
Use the main-story record for the seven required Star Pieces, Smithy’s defeat, and the complete ending. Use the optional record only for rewards and challenges actually completed. Since the original SNES continuation returns to the pre-Smithy state, keep the continuation file available for optional checks or another final-battle attempt rather than expecting a permanent completed-world save.
- Main-story record: Mack, Bowyer, Punchinello, Star Hill, Johnny/Yaridovich, the Axem Rangers, and Smithy account for the seven story Star Pieces.
- Main-story record: Smithy was defeated and the complete original-SNES ending was viewed.
- Optional record: Quartz Charm, Jinx Belt, Lazy Shell weapon, Lazy Shell armor, Attack Scarf, Super Suit, Bright Card, Star Egg, and Carbo Cookie are listed only when actually obtained.
- The pre-Smithy continuation file remains available.
- No optional reward is being counted as a Star Piece or ending prerequisite.
Before you move on
- Main-story completion is recorded after all seven story Star Pieces were recovered, Smithy was defeated, and the complete ending was viewed.
- Optional completion is recorded separately after checking the desired Culex, Jinx, Lazy Shell, Super Jump, casino, and Carbo Cookie rewards.
- The original SNES continuation file remains preserved at the pre-Smithy state.
References for this chapter
- Super Mario RPG: Legend of the Seven Stars - Guide and Walkthrough - Super Nintendo - By Super_Slash
- Super Mario RPG: Legend of the Seven Stars - Lazy Shell FAQ - Super Nintendo
- Super Mario RPG: Legend of the Seven Stars - Super Jumping FAQ - Super Nintendo
- Super Mario RPG: Legend of the Seven Stars - Guide and Walkthrough - Super Nintendo - By Mynock
- Super Mario RPG: Legend of the Seven Stars - Manual - SNS
Completion Checklist and Troubleshooting
For the original North American Super Nintendo release, story completion means recovering six Star Pieces during the main route, defeating Smithy to obtain the seventh, and watching the complete ending. The original game does not preserve a normal post-Smithy world state. After the ending, the game returns to the last save before the final sequence, so keep a preparation save and record the ending separately.
1. Verify the six Star Pieces before entering Weapon World
Check your story progress in this order: defeat Mack in Mushroom Kingdom, Bowyer in Forest Maze, and Punchinello in Moleville Mountain. Complete the mine-cart escape afterward. The next story piece is in Star Hill, reached after the Booster Tower and Marrymore sequence. Activate the star-shaped gates as you move through Star Hill, then enter the northern area and collect the Star Piece. Star Hill has no boss guarding this piece.
The fifth piece follows the Seaside Town route before Land’s End. After collecting Star Hill’s piece, investigate Seaside Town, cross the Sea, and clear the Sunken Ship. Defeat King Calamari and Johnny to receive the fifth Star Piece temporarily. Return to Seaside Town, let the false Elder take the piece, leave through the upper-left exit, defeat Yaridovich, collect the Shed Key, and free the real residents. Only after Seaside Town is restored should you travel through Land’s End, Belome Temple, and Monstro Town toward Bean Valley.
The sixth piece is in Barrel Volcano. From Nimbus Land, follow the story route into the volcano, defeat Czar Dragon, continue through the post-battle section, and defeat Zombone. The Axem Rangers take the Star Piece before Mario can keep it, so continue after their escape and defeat all five near the Blade. The piece is secured only after the Axem Rangers are defeated.
Use this sequence rather than counting unrelated rewards: Mack, Bowyer, Punchinello, Star Hill, Johnny and Yaridovich, then the Axem Rangers. Valentina is required for the Nimbus Land storyline, but she does not hold a Star Piece.
- Mack and Bowyer are defeated.
- Punchinello is defeated and the mine-cart escape is complete.
- Star Hill has been cleared and its Star Piece collected.
- Seaside Town was investigated before Land’s End.
- The Sea, Sunken Ship, King Calamari, and Johnny are complete.
- Yaridovich is defeated, the Shed Key is collected, and the real Seaside Town residents are freed.
- Land’s End, Belome Temple, Monstro Town, and Bean Valley progression is complete after Seaside Town’s restoration.
- Czar Dragon, Zombone, and the Axem Rangers are defeated in Barrel Volcano.
2. Confirm the route into Weapon World and the Factory
After the Axem Rangers, return to Nimbus Land and speak with the rulers to receive the lead for the remaining Star Piece. Use the Royal Bus to reach Bowser’s Keep, clear the available challenges, and defeat Exor. The party is then carried through the gateway into Weapon World and toward Smithy’s Factory.
In the Factory, defeat the Clerk, then continue through the Manager and Director encounters. The Factory’s boss progression is Clerk, Manager, Director, Factory Chief and Gunyolk, followed by Smithy. After defeating the Director, use the Save Block before entering the next room. This is the important recovery point for the final Factory section.
Toad’s shop is not beside the Director’s Save Block. Toad first appears after the Clerk encounter and offers discounted supplies. After Factory Chief and Gunyolk are defeated, Geno explains the source of the weapons; return to Toad, replenish your inventory, and save before using the final switch. Do not spend your last healing items before this point.
- Nimbus Land has directed the party to Bowser’s Keep.
- Exor is defeated and Weapon World has been entered.
- Clerk, Manager, and Director are defeated.
- The Save Block after the Director has been used.
- Toad’s shop has been used to replenish items before Smithy.
- A separate backup save exists before the final switch.
3. Prepare for and defeat Factory Chief and Gunyolk
Factory Chief uses physical attacks and Shuriken, while Gunyolk is the major threat because Breaker Beam damages the whole party. Electroshock and Mega Drain can also pressure individual characters. Target Factory Chief first so his physical attacks cannot continue while you concentrate on Gunyolk. Once Factory Chief is defeated, focus on Gunyolk and heal after Breaker Beam.
Keep Mario in the party because he is required for the final sequence. Peach is the safest choice for emergency healing and revival, while Geno or Bowser can provide support and damage. This party arrangement is recommended, not mandatory. Restore HP and FP before the fight and keep Pick Me Ups available for a defeated healer or Mario.
If the battle fails, reload the Save Block after the Director. The Factory route does not need to be repeated from Bowser’s Keep. Reapply equipment, restock at the earliest available opportunity, and retry with priority on surviving Gunyolk’s group attacks.
- HP and FP are restored before the battle.
- Several Pick Me Ups and healing items are available.
- Peach or another reliable recovery plan is ready.
- Factory Chief is defeated before Gunyolk whenever possible.
- The party can survive repeated Breaker Beams through healing and timed guards.
4. Use the final switch to reach Smithy
After Factory Chief and Gunyolk are defeated, Geno explains what the Factory produces. Return to Toad, replenish your stock, and save. Then return to the room where the boss battle occurred and jump on the green switch marked with the exclamation symbol. The crane carries the party into Smithy’s chamber.
Treat the switch as the point of no convenient return. Finish shopping, equipment changes, healing, and saving before activating it. If you discover that you lack recovery items after entering Smithy’s area, reload the save made before the switch rather than relying on ordinary Factory enemies to supply replacements.
Smithy has an initial battle with Smelter and Shypers, followed by the true final battle after the floor collapses. In the second battle, Smithy has a body and changing heads. The head forms use different attack patterns: the Tank form is dangerous physically, the Wizard form emphasizes strong magic, the Treasure Chest form uses status effects and is vulnerable to fire, and the large Box form has high defense and is vulnerable to ice. The body can be damaged as well and may be temporarily disabled when reduced to zero HP.
Keep Peach alive whenever possible so she can heal and revive the party. Use timed attacks and guards consistently, remove Shypers when they become a threat, and reserve emergency revival items for the final phase. Defeat both Smithy encounters to receive the seventh Star Piece during the finale.
- Factory Chief and Gunyolk are defeated.
- Toad’s shop has been used before the final switch.
- The party has saved after restocking and before entering Smithy’s chamber.
- Smithy’s initial battle is defeated.
- Smithy’s body-and-head final battle is defeated.
- The seventh Star Piece is received during the ending sequence.
5. Troubleshoot missing progress or inactive events
If a Star Piece appears to be missing, compare the file against the exact order instead of counting Valentina, optional treasures, or rewards from side activities. Punchinello is third, Star Hill is fourth, Yaridovich restores the fifth, and the Axem Rangers secure the sixth before the final dungeon. If Star Hill is incomplete, revisit it after Booster Tower and Marrymore.
If the fifth piece is missing, return to Seaside Town and verify the complete sequence: speak with the false Elder, cross the Sea, clear the Sunken Ship, defeat King Calamari and Johnny, return to Seaside Town, surrender the piece to the false Elder, leave through the upper-left exit, defeat Yaridovich, collect the Shed Key, unlock the shed, and speak with the restored residents and Elder. Only then should the Land’s End route be considered complete.
If the sixth piece is missing, revisit Nimbus Land and confirm the entire Barrel Volcano sequence. Czar Dragon and Zombone must be defeated, and the Axem Rangers must be beaten after they take the Star Piece. Defeating only the earlier volcano bosses does not complete that piece’s route.
If a Factory transition does not open, allow the battle scene to finish, leave and re-enter the room, and confirm that the required boss actually fell. After the Director, look for the Save Block. After Factory Chief and Gunyolk, return to Toad and then inspect the green switch in the boss room.
If an NPC repeats ordinary dialogue, revisit the location directly tied to the current objective and speak with the principal story character again. Keep the current save intact. If the event still fails to advance, reload an earlier slot from before the relevant battle or cutscene. The original SNES version has no quest log or modern map markers, so separate milestone saves are the safest recovery method.
- The six Star Pieces are checked in their correct order.
- Seaside Town and the Sunken Ship sequence is complete before Land’s End.
- The Shed Key was collected and used after Yaridovich.
- Czar Dragon, Zombone, and the Axem Rangers are all defeated.
- The correct Factory Save Block and final switch have been checked.
- An earlier save is available without overwriting the current file.
6. Record completion correctly
Defeat Smithy through both stages and watch the complete ending, including Geno’s restoration of Star Road and his return to his original form. The final battle and ending sequence are the completion event for the original SNES story.
Do not require the seventh Star Piece to remain in the ordinary inventory after reloading. The original game returns the player to the last save point used before the final sequence, so the post-ending file represents the pre-Smithy situation rather than a permanent completed world. A returned save is not evidence that Smithy was missed.
Keep two records: a save before the final switch and a written note stating that Smithy was defeated and the complete ending was viewed. Track Culex, Grate Guy’s Casino, special equipment exchanges, Lazy Shell rewards, and Super Jump rewards separately. None is required for the seven-piece story ending.
- Mack, Bowyer, Punchinello, Star Hill, Yaridovich, and the Axem Rangers are complete.
- The six pre-Smithy Star Pieces are accounted for.
- Smithy is defeated in both stages.
- The seventh Star Piece is received during the final sequence.
- The complete ending through Geno’s Star Road resolution is watched.
- The pre-Smithy preparation save is retained.
- Optional bosses and rewards are recorded separately from story completion.
Before you move on
- Mack, Bowyer, Punchinello, Star Hill, Johnny and Yaridovich, and the Axem Rangers are complete.
- Seaside Town is restored before Land’s End, Belome Temple, Monstro Town, and Bean Valley are counted as the next route.
- Czar Dragon and Zombone are defeated before the Axem Rangers.
- Clerk, Manager, Director, Factory Chief, and Gunyolk are defeated.
- The Save Block after the Director has been used.
- Toad’s shop has been used and a final preparation save has been made before the green switch.
- Smithy is defeated in both stages and the complete ending is watched.
- The pre-Smithy save is retained because the original game returns to that save state after the ending.
- Optional bosses and rewards are tracked separately from story completion.
References for this chapter
- Super Mario RPG: Legend of the Seven Stars - Guide and Walkthrough, Factory and Seaside Town sections
- Super Mario RPG: Legend of the Seven Stars/The fifth Star Piece
- Super Mario RPG: Legend of the Seven Stars/The seventh Star Piece
- Super Mario RPG: Return To Seaside Town Walkthrough
- Super Mario RPG: Legend of the Seven Stars - Manual - SNS
Finishing up
You have defeated Mack, Bowyer, Punchinello, obtained the Star Hill Star Piece, defeated Johnny and Yaridovich, defeated the Axem Rangers in Barrel Volcano, and defeated Smithy.
You have watched the complete ending, including Geno’s restoration of Star Road and departure.
Your pre-Smithy save remains available for optional activities or another final-battle attempt. The original SNES version does not provide a normal freely explorable save after the ending with all seven pieces permanently represented in the world state.
Optional rewards such as Culex’s Quartz Charm, the Jinx Belt, Lazy Shell equipment, the Star Egg, Attack Scarf and Super Suit are tracked separately from required story completion.
Choose your next gameScreenshots & video
Game imagery for reference. Follow the written chapters above for the route and strategies.
Sources & references
Our original guide draws on the references below. Check the edition at the top of this page before following controls or unlock requirements.
- Super Mario RPG: Legend of the Seven Stars — Instruction Manual
- Super Mario RPG: Legend of the Seven Stars - Guide and Walkthrough - Super Nintendo - By A_Backdated_Future
- Walkthrough for Super Mario RPG — Super NES
- Super Mario RPG: Legend of the Seven Stars — Armor Reference
- Super Mario RPG: Legend of the Seven Stars - Manual - SNS
- Super Mario RPG: Legend of the Seven Stars - Guide and Walkthrough - Super Nintendo - By Super_Slash
- Stop the Invasion — Super Mario RPG Walkthrough and Guide
- Super Mario RPG: Legend of the Seven Stars - Guide and Walkthrough - Super Nintendo - By Mynock
- Super Mario RPG: Legend of the Seven Stars — Super Mario Wiki
- Super Mario RPG: Legend of the Seven Stars — Instruction Booklet, Nintendo
- Super Mario RPG: Kero Sewers Walkthrough
- Super Mario RPG: Midas River Walkthrough
- Super Mario RPG Walkthrough
- Super Mario RPG: Legend of the Seven Stars — Guide and Walkthrough — Super Nintendo — AstroBlue
- Super Mario RPG: Legend of the Seven Stars — The Second Star Piece — StrategyWiki
- Super Mario RPG — Forest Maze Solution — RPG Site
- Treasure Rooms — Super Mario RPG: Legend of the Seven Stars — Secrets Guide (SNES)
- Rose Town — Super Mario Wiki
- Super Mario RPG: Pipe Vault & Yo’ster Isle Walkthrough
- Super Mario RPG: Legend of the Seven Stars - Guide and Walkthrough, Super Nintendo, by A_Backdated_Future
- Super Mario RPG: Legend of the Seven Stars - Yoshi Cookie FAQ
- Super Mario RPG: Moleville and Mole Mines Walkthrough
- Super Mario RPG — Legend of the Seven Stars Walkthrough, Part 6: Moleville and Coal Mines
- Super Mario RPG: How To Unlock Grate Guy's Casino
- Super Mario RPG: Legend of the Seven Stars — Guide and Walkthrough — Super Nintendo — Dark_Vortex
- Super Mario RPG: Legend of the Seven Stars — Guide and Walkthrough, SNES, marshmallow
- Super Mario RPG: Booster Tower Walkthrough
- Super Mario RPG: Star Hill Walkthrough
- Super Mario RPG Speedruns: Sunken Ship
- Super Mario RPG Speedruns: Seaside Town
- Sunken Ship - Super Mario Wiki
- Super Mario RPG: Sunken Ship Walkthrough
- Super Mario RPG: Walkthrough, Tips, All Secrets, Minigames & Bosses, Nintendo Life
- Super Mario RPG: Monstro Town Walkthrough, Nintendo Life
- Super Mario RPG: Barrel Volcano Walkthrough, Nintendo Life
- Nimbus Castle — Super Mario RPG Walkthrough and Guide, Thonky
- Birdo Boss Battle — Super Mario RPG Walkthrough and Guide, Thonky
- Super Mario RPG: Legend of the Seven Stars — Guide and Walkthrough, GameFAQs
- Super Mario RPG: Legend of the Seven Stars — Guide and Walkthrough, GameFAQs
- Super Mario RPG: Legend of the Seven Stars - Sidequests
- How do you get into Grate Guy's Casino?
- Knife Guy - Super Mario Wiki
- Super Mario RPG: How To Find & Defeat The Culex
- Super Mario RPG: Legend of the Seven Stars - Guide and Walkthrough, Factory and Seaside Town sections
- Super Mario RPG - Legend of the Seven Stars Walkthrough, Part 15: Bowser’s Keep
- Boomer Boss Battle - Super Mario RPG Walkthrough and Guide
- Super Mario RPG: How To Defeat Exor
- Super Mario RPG: Bowser’s Keep - The Six-Door Challenge Walkthrough
- Super Mario RPG: Weapon World & Factory — The Final Dungeon Walkthrough
- Super Mario RPG: Legend of the Seven Stars - Guide and Walkthrough for Super Nintendo
- Super Mario RPG: Legend of the Seven Stars — Guide and Walkthrough by Kirby021591 — GameFAQs
- Super Mario RPG: Legend of the Seven Stars/The seventh Star Piece
- Cloaker and Domino - Super Mario RPG Walkthrough and Guide
- Smithy Final Boss Battle — Super Mario RPG Walkthrough and Guide — Thonky
- Super Mario RPG: Legend of the Seven Stars — Guide and Walkthrough by nm14 — GameFAQs
- Super Mario RPG: Legend of the Seven Stars - Lazy Shell FAQ - Super Nintendo
- Super Mario RPG: Legend of the Seven Stars - Super Jumping FAQ - Super Nintendo
- Super Mario RPG: Legend of the Seven Stars/The fifth Star Piece
- Super Mario RPG: Return To Seaside Town Walkthrough
About the game & collecting notes
- Platform
- Super Nintendo Entertainment System
Step-by-step campaign walkthrough for the original Super Nintendo (USA) edition of Super Mario RPG: Legend of the Seven Stars. Follow the required story route from Mushroom Kingdom and Mack through Bowyer, Punchinello, Star Hill, Johnny and Yaridovich, the Axem Rangers in Barrel Volcano, and Smithy in the Factory. Optional areas and rewards are clearly separated from the seven-Star-Piece ending route.
Darryl Polo
Darryl Polo loves tinkering with emulation and revisiting retro games. He enjoys exploring how old favorites play on different setups and sharing what he learns along the way. At Joking Joystick, he writes about the games, hardware, and small discoveries that keep the hobby fun.
Our editorial standardsFound a step that needs another look? Help us improve this guide.