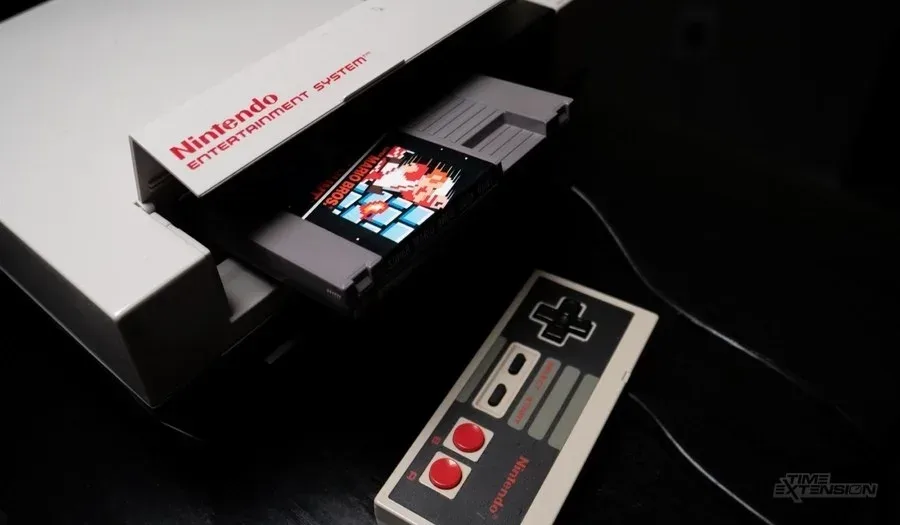
Super Mario Bros. (Nintendo Entertainment System, World) — Complete Campaign Walkthrough
Step-by-step campaign walkthrough for the original 1985 Super Mario Bros. (NES, World release). Covers controls, power-ups, enemy counters, every level from World 1-1 through World 8-4, castle strategies, warp zones and key secrets, plus optional no-warp and completion checks so you can finish the original NES ending reliably.


Before you begin
This guide is written for the original Super Mario Bros.
on the Nintendo Entertainment System (NES).
It shows you how to move through each stage, survive common hazards, make the most of power-ups, and beat every castle boss up to the final Bowser in World 8-4 so you can see the ending sequence.
Follow the chapters in order for a straightforward playthrough, or jump to specific worlds or sections for shortcuts, warp-zone routing, or no-warp completion.
Each world chapter explains level-by-level objectives, reliable tactics for enemies and pitfalls, and how to recover when you lose a life.
Set yourself up for the run
Confirm you are playing the original NES ROM/release or an official re-release of the original game; this guide targets the 1985 NES (World) behaviour and mechanics.
Use the NES controller layout: one jump button and one run/fire button.
Practice short vs.
long jumps and the timing for running-plus-jump to clear gaps and stomp enemies.
Learn power-up priorities: Mushroom converts to Super Mario (one extra hit), Fire Flower allows ranged attack (destroying many hazards), Starman grants brief invulnerability.
Preserve Super Mario status before castle fights if possible.
Familiarize yourself with tile-collision: ceilings, platforms, and pipes block movement; elevators in underground levels let you reach hidden ceilings where warp or coin rooms hide.
Set a play session goal per run (example: finish a single world, or attempt a no-warp full game).
Keep track of continues/lives — several levels have safe 1-Up farming tactics if you need more lives.
If you want to collect secrets or attempt optional completion runs (no-warp/no-death), decide before starting; warp zones and alternate routes change required steps significantly.
Have patience for castle boss patterns and learn to avoid throwing fireballs into lava pits — some bosses are best bypassed with careful running and timely jumps.
Controls, Core Mechanics, and HUD
Learn the original NES controls, how momentum changes jumps, how Mario’s three useful forms work, and how to read the HUD before attempting difficult stages.
Set up the NES controller and basic movement
Use the Control Pad to move Mario left or right. Press A to jump. Hold or press B while moving to make Mario run faster. As Fire Mario, press B to throw fireballs. START pauses the game, while SELECT is used at the title screen to choose between the available game selections. The original NES release has no wall-jump, double-jump, air-dash, or modern analog movement, so every jump must begin from the ground or from an enemy or object that the game specifically allows Mario to use.
Running and jumping are separate actions that work together. Holding B as Mario moves builds the speed needed for longer horizontal jumps. Begin holding B during the approach rather than waiting until Mario is already airborne. Press A for a short hop when you need to land close, or hold A longer for a higher jump. The game still imposes a fixed maximum height, so holding A does not make Mario rise forever.
- A makes Mario jump; holding it longer produces a higher jump up to the game’s limit.
- B increases running speed while moving.
- B throws fireballs when Mario has the Fire power-up.
- START pauses the game.
- There are no wall-jumps, double-jumps, or air-dashes in this NES edition.
Practice momentum before risking a pit
Use a safe, flat section to practice three approaches. First, tap A without running for a short hop. Next, hold A briefly during an ordinary jump. Finally, hold B while moving and press A from a stable runway for a running jump. The running version travels farther horizontally and is the standard answer for wide gaps. The short version is safer beneath low ceilings, around enemies, or when the landing platform is close.
Mario cannot jump again after leaving the ground. If a gap looks wide, build speed before takeoff and commit from solid ground. Pressing the opposite direction in the air can alter Mario’s horizontal movement, but late corrections cannot create a second jump or repair a jump that began too slowly. Do not hold Right and B automatically through every landing: release B or use a shorter jump when the platform is narrow.
When approaching stairs, pipes, or a small landing, judge the landing point before pressing A. A running jump is useful only when the extra distance is needed. Otherwise, a controlled short hop reduces the chance of overshooting the platform.
- Use short hops beneath low ceilings and near narrow platforms.
- Use running jumps for long gaps.
- Hold A longer for more height, but remember that the jump has a fixed maximum.
- Build speed before takeoff instead of trying to gain distance after Mario leaves the ground.
- Do not expect a second jump if the first one misses.
Understand Small, Super, and Fire Mario
Small Mario is the starting form and loses a life when a damaging enemy or hazard hits him. A Super Mushroom changes Mario into Super Mario. Super Mario is taller, can break ordinary brick blocks from below, and can survive one damaging hit that would defeat Small Mario. After that hit, he becomes Small Mario rather than remaining powered up.
A Fire Flower changes Super Mario into Fire Mario. Fire Mario keeps the larger body and can throw bouncing fireballs with B. In the original NES game, a normal damaging hit removes the powered-up state: Fire Mario becomes Small Mario, and Super Mario also becomes Small Mario. Do not treat a hit as harmless merely because it does not cost a life. Losing Fire power immediately before a castle or a tight enemy formation can make the next section much harder.
The larger forms are helpful but also have a larger body to place safely around low ceilings, enemies, and narrow ledges. Take a Mushroom or Fire Flower when you can reach it without creating a greater risk than the obstacle ahead. Never sacrifice a guaranteed safe landing for an optional power-up or brick.
- Small Mario has no damage buffer.
- Super Mario can break ordinary bricks from below and can survive one normal damaging hit.
- Fire Mario can throw fireballs and retains the Super-sized body.
- A damaging hit removes Super or Fire status instead of granting a modern recovery state.
- Pits and other fatal hazards still cost a life even when Mario is Super or Fire.
Use fireballs deliberately
Fireballs are most useful when they remove a threat before Mario reaches a landing area or narrow passage. Throw them at ground enemies approaching along Mario’s route, especially when several enemies are spaced close together. The fireballs bounce along the ground, so watch their path rather than assuming that every shot travels straight toward the target.
Do not stop moving just to fire at every enemy. Jumping over a single enemy is often safer and faster than waiting for a shot to connect. Fire before a difficult jump when clearing the enemy will make the landing safer, or fire while advancing toward a group so Mario does not remain stationary in danger. The NES game limits the number of fireballs that can remain active, so repeated presses do not produce an unlimited stream.
Fireballs are not a replacement for learning enemy timing. Some threats are better avoided, and some castle situations are safer when Mario reaches the bridge or axe instead of standing in front of the boss. Preserve Fire Mario when a later enemy group, Hammer Brother, or castle approach is likely to be more dangerous than the current target.
- Fire at clustered ground enemies before entering their space.
- Use a jump instead of wasting time on an isolated enemy when the route is clear.
- Keep advancing while firing when the area permits it.
- Do not assume repeated B presses create unlimited simultaneous fireballs.
- Protect Fire Mario before castles and tight enemy corridors.
Read the HUD and manage the run
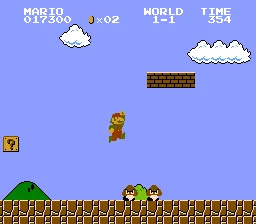
The HUD displays the current WORLD and stage, along with SCORE, COINS, and TIME. A display such as 1-1 identifies World 1, Stage 1. COINS are collected during the level, and collecting 100 coins awards an extra life. SCORE records points but does not replace stage progress, so do not take a dangerous detour merely to increase it.
TIME counts down continuously. Waiting for enemies, searching every block, or repeatedly attempting an optional coin route can turn a safe run into a time-out. When the timer is becoming low, take the direct route and accept missed coins. The level ends successfully only when Mario reaches the flagpole or the castle’s exit objective, not when the score or coin total reaches a particular value.
The life total determines how many attempts remain. Falling into a pit, being defeated while Small Mario, or allowing TIME to reach zero costs a life. A failed attempt restarts the current stage from its beginning rather than preserving Mario’s position. If the game reaches a Game Over, the original NES version provides a continue method at the title screen: hold A while pressing START to resume from the beginning of the world in which the game ended. This does not restore the lost stage position or any power-up.
Use START when you need to pause and assess the situation, but pausing does not restore a power-up, stop an already dangerous setup permanently, or make the next jump easier. Resume only after deciding whether the safe choice is to advance, retreat briefly, or take the direct route.
- Check WORLD to confirm the current stage and route.
- Watch TIME before exploring optional blocks or secret areas.
- Remember that 100 coins awards an extra life.
- Treat each life as a practice attempt rather than permission to rush.
- Use a direct route when the timer is low.
- After Game Over, use the original continue input if you want to resume at the start of the failed world.
Before you move on
- You can perform short, ordinary, and running jumps without confusing their distances.
- You know that holding A changes jump height and airtime only within the original game’s fixed limit.
- You can identify Small, Super, and Fire Mario and know what happens after a damaging hit.
- You can use B to throw fireballs as Fire Mario and reserve them for dangerous approaches.
- You can read WORLD, COINS, TIME, SCORE, and your remaining lives while playing.
- You know how to continue from the beginning of the failed world after a Game Over on the original NES release.
- You can choose a direct route when the timer is low instead of losing a life to a time-out.
References for this chapter
- Super Mario Bros. Nintendo Entertainment System manual ↗
- Super Mario Bros. Nintendo Entertainment System instruction manual ↗
- Super Mario Bros. — NES Guide and Walkthrough by brian_sulpher, GameFAQs ↗
- Super Mario Bros. — Guide and Walkthrough — GameFAQs ↗
- Super Mario Bros. — Guide and Walkthrough by dougqh — GameFAQs ↗
Power-ups, Enemies and Item Priorities
Use Super Mario Bros. NES power-ups deliberately, defeat each common enemy with the correct counter, and treat blocks, pipes, vines, and shells as practical tools for survival. The original NES game has only three normal forms: Small Mario, Super Mario, and Fire Mario.
Take power-ups in the correct order
Small Mario loses a life from one damaging hit, so collect a Super Mushroom whenever you can reach it without entering a worse hazard. The mushroom changes Small Mario into Super Mario, making him taller and giving him a second chance against ordinary enemy contact. A hit while Super Mario removes the power-up and returns him to Small Mario; it does not protect him from pits, lava, or running out of time.
A Fire Flower behaves differently depending on Mario's current form. If Small Mario collects one, it changes him only into Super Mario. If Super Mario collects one, he becomes Fire Mario. Fire Mario retains the extra-hit protection and can throw fireballs with B. Fireballs are valuable before Hammer Brothers, clustered Koopas, and crowded castle passages, but do not delay a safe route to chase an optional item.
If Mario is already Fire Mario, another Fire Flower does not create a stronger form. It only awards points. Treat every power-up as protection first and a weapon second: keep moving after collecting it, and do not take a risky coin or brick merely because it is nearby.
- Collect a Super Mushroom before a dense enemy section when the route is safe.
- Remember that Small Mario plus a Fire Flower becomes Super Mario, not Fire Mario.
- Preserve Fire Mario for Hammer Brothers, crowded corridors, and difficult castle approaches.
- Do not treat Super Mario or Fire Mario as immune to pits, lava, or time-outs.
Stomp Goombas and handle Koopa Troopas safely
Goombas can be defeated by landing on them from above, hitting the block they are standing on from below, or using a fireball. On level ground, a short jump is usually safer than running into them. If a Goomba is close to a pit, do not chase it toward the edge; jump over it and keep the landing area under control.
Jumping on a green or red Koopa Troopa retracts it into a shell. Touch the stationary shell from the side to kick it. A kicked shell can travel through several enemies on flat ground, but it remains dangerous after striking a wall or obstruction. Red Koopas turn around at edges, while green Koopas can walk off them, so do not assume the two colors behave identically.
A Koopa shell that has only been stomped eventually returns to its normal enemy form. Once kicked, it continues as a moving hazard until it is stopped or leaves the active area. You can stop a moving shell by jumping on it, but only attempt this when you have enough room to land safely. Jumping over a Koopa is often the best choice in a narrow corridor or near a pit.
- Stomp Goombas from above instead of approaching them at ground level.
- Use red and green Koopa behavior differently near platform edges.
- Kick shells only where the rebound path is visible.
- Stop a shell with a jump only when the landing area is clear.
Use fireballs against suitable targets
Fireballs defeat Goombas, Koopa Troopas, Koopa Paratroopas, Piranha Plants, Lakitu, Spinies, Hammer Brothers, Cheep-Cheeps, and Bloopers. Fire a moment before entering an enemy's space rather than waiting until Mario is already in contact range. Against Hammer Brothers, remain on stable ground and fire while their hammer arcs are away from Mario; a direct jump is riskier unless you have no other option.
Some threats cannot be removed with fireballs. Buzzy Beetles resist fire and must be stomped into shells, kicked into hazards, or struck by another shell. Bullet Bills can be jumped on but are not destroyed by fireballs, and their cannons cannot be removed. Fire Bars and Podoboos in castles are hazards to avoid, not enemies to defeat.
Piranha Plants cannot be stomped safely in this game. They emerge from pipes when Mario is not standing directly beside or on the pipe, so pause beside a pipe when possible and let the plant remain down while you pass. If you have Fire Mario, a fireball can remove the plant, but jumping over it or using the pipe's safe position is often more reliable.
- Use fireballs on enemy groups before crossing into their space.
- Do not waste fireballs on Buzzy Beetles, Bullet Bills, Fire Bars, or Podoboos.
- Treat Hammer Brothers as a priority target when Fire Mario is available.
- Pass Piranha Plants while they are retracted or remove them with a fireball.
Use shells as controlled moving hazards
A kicked Koopa shell can clear a line of enemies and can also strike the underside of blocks when sent beneath them. This may expose coins or help clear a route, but neither action is required for ordinary completion. Keep Mario behind the shell and watch for walls, steps, and narrow gaps that can send it back toward him.
Do not kick a shell in a cramped corridor unless you already know where it will stop. If the shell hits an enemy, that does not make the floor safe: the shell may continue into another enemy, rebound, or remain active near Mario. When the route becomes uncertain, leave the shell alone or stop it from above only when there is room to recover.
- Use shells on broad, level ground when possible.
- Watch the shell after every collision.
- Avoid shell kicks near pits, walls, and tight stairways.
- Remember that a shell can clear enemies but can also become the next hazard.
Read blocks, pipes, and vines before taking optional routes
Question Mark Blocks can contain coins or power-ups. Regular brick blocks may be empty, contain coins, power-ups, 1-Up Mushrooms, or vines, depending on the level. Super Mario and Fire Mario can break ordinary bricks from below or by jumping into them, while Small Mario cannot break them. Strike blocks from solid ground and be ready for a moving item to emerge and travel across the floor.
Some hidden blocks create a temporary platform or reveal a concealed item. If coins appear above an otherwise unreachable space, inspect nearby solid ground for a hidden block, but do not spend lives making blind attempts over pits. A vine produced from a block leads to a coin-filled bonus area in some stages; the special hidden vine in World 4-2 leads to that level's warp zone. These are different from ordinary hidden platforms and are optional unless you intentionally want to warp.
Some pipes are entrances to bonus rooms or alternate sections, but many are decoration. Stand centered above a usable vertical pipe and press Down. In an underwater section, remember that A controls swimming rather than a normal ground jump. Leave a bonus room if its detour costs too much time or exposes Mario to unnecessary damage.
- Hit blocks from safe ground and identify whether the emerging item moves.
- Use Super Mario's ability to break ordinary bricks only when it improves the route.
- Treat vines as level-specific bonus or warp routes, not universal elevators.
- Enter pipes only when the landing or exit area gives you room to recover.
Before you move on
- You can choose between stomping, avoiding, shelling, or firing at each enemy encountered in the original NES campaign.
- You can explain the difference between Small Mario, Super Mario, and Fire Mario and collect each power-up without confusing their upgrade order.
- You can kick a shell on open ground while keeping its rebound path under control.
- You can identify enemies and hazards that fireballs cannot defeat.
- You can recognize when a block, vine, or pipe provides an optional route and decide whether its reward is worth the time and risk.
World 1 — Learn the Basics (1-1 to 1-4)
Clear the first four stages of the original NES Super Mario Bros. in order. World 1 teaches the basic movement rhythm, power-up preservation, underground hazards, moving-platform timing, and the first castle encounter. The World 1-2 Warp Zone is optional; avoid it if you are following the complete no-warp route.
1-1: Secure the first Mushroom and learn the normal route
At the opening, let the first Goomba approach and stomp it when there is no overhead block interfering with your jump. Hit the first question block from below and collect the Mushroom. Take the power-up before entering the next enemy group. Super Mario can survive one ordinary hit and continue as Small Mario, while Small Mario loses a life when hit.
Use World 1-1 to practice the original NES movement. Hold B while moving to build running speed, then press A for a longer jump. Release B when you need to reduce forward movement or make a shorter hop. Run only when the landing area is clear. Jump over or stomp Goombas and Koopas, but leave room after kicking a shell because it can rebound from an obstacle and return toward Mario.
The visible coins and question blocks are useful, but do not risk a life for optional rewards. Near the later portion of the stage, the last pipe can take Mario to a bonus room containing coins. Enter it only when the Piranha Plant is safely lowered and exit through the pipe on the far side. The hidden 1-Up is also optional; learn the ordinary route first if you are still missing jumps.
- Collect the opening Mushroom whenever it is safe.
- Use running jumps for long gaps and shorter jumps near enemies or narrow landings.
- Treat the bonus room and hidden 1-Up as optional until the normal route is reliable.
Reach the World 1-1 flagpole safely
In the final section, move across the pipes and enemies without stopping in a position where a Koopa shell can trap you. Jump over the final obstacle if defeating it would require a risky shell kick. The staircase before the flagpole provides a controlled launch point: begin your jump from the upper steps and aim to land on the pole, but do not repeat the attempt solely for a higher score.
Finishing the stage sends you to World 1-2. If you lose a life, replay the opening conservatively and prioritize the first Mushroom over coins. The goal is to arrive at the underground stage with Super Mario whenever possible.
- Finish 1-1 rather than spending lives on score attempts.
- Leave room whenever you kick a shell.
- Preserve Super status for the next stage if possible.
1-2: Complete the underground route or take the optional warp
World 1-2 is an underground course with lower ceilings, Piranha Plants, Goombas, Koopas, and gaps. Move steadily through the opening corridors. Do not jump beneath a block if an enemy is approaching from the side. When crossing a pipe, wait for its Piranha Plant to retreat before jumping over it. The first pipe that can be entered leads to a coin room; collect the coins if the entrance is safe, then use the exit pipe to return to the main route.
Continue through the underground section and watch the lift area near the end. Between the rising and falling lifts is a platform with a Koopa Troopa, brick blocks, and a power-up in the rightmost brick. Secure the power-up only if you can land safely. The normal exit is reached by taking the final pipe to the surface and then crossing the short outdoor section to the flagpole.
To use the optional Warp Zone, ride one of the rising lifts near the end of the underground route and jump onto the ceiling. The timing is easier if you wait for the lifts to approach a useful height rather than jumping immediately. Once Mario is standing on the ceiling, run right across it without dropping through the gaps. The Warp Zone has three pipes. From right to left, they lead to Worlds 4, 3, and 2. Entering one skips the remaining stages before that destination. For a complete no-warp run, stay on the lower route, take the normal exit pipe, and finish at the flagpole.
- Wait for Piranha Plants to lower before crossing their pipes.
- Use the lift platforms patiently when attempting the ceiling route.
- Choose the normal exit for sequential completion.
- Remember that the Warp Zone skips content and cannot be reversed during that run.
1-3: Time the suspended platforms
World 1-3 introduces suspended platforms and larger gaps. Some jumps require a running start, while others need a shorter hop so Mario does not slide off the far edge. Hold forward during a long jump, but release B or reduce your direction input when the landing platform is narrow.
Stomp Goombas and Koopa Troopas only when the platform gives you room to recover. The Paratroopa in the middle portion moves vertically, so wait for its position before jumping. If an enemy and the next gap overlap, it is usually safer to let the enemy move away and then jump than to force a landing on a crowded platform.
Use the moving platforms in the later section as timed stepping stones. Keep Mario near the center of each platform and begin the next jump only when the destination is within range. The final stairway leads to the flagpole. A high jump can increase the score, but a safe landing is more important than the bonus.
- Build speed before long platform-to-platform jumps.
- Avoid landing on the extreme edge of a suspended platform.
- Do not sacrifice Super status for optional coins or score.
1-4: Cross the castle and touch the axe
At the start of the castle, descend the staircase and jump over the first lava pit. Continue right over the next lava gap to the platform with a swinging fire bar and a question block. Hit the block quickly; it provides a Mushroom or Fire Flower depending on Mario's current state. Collect it only after checking that the fire bar and lava leave a safe landing position.
Continue into the larger fire-bar room. Move through the gaps in the rotating bars rather than waiting so long that the screen traps Mario against an obstacle. After the final block, fireballs begin coming from the right, signaling that the bridge section is close. In the next area, continue across the small platforms. Hidden blocks in the floor area contain coins, but they are optional and are not worth a dangerous jump.
Bowser waits on the bridge above lava. If you are Fire Mario, throw repeated fireballs while staying clear of his fire breath and movement. In the original NES version, five successful fireball hits defeat the World 1 Bowser decoy. If you are Super Mario or Small Mario, wait for Bowser to jump, then run beneath him toward the axe. Do not attempt this pass while standing directly in his path; begin moving as he rises and keep the landing area beyond him in view.
Touch the axe after passing Bowser. The axe drops the bridge and completes the stage. Even if fireballs have already defeated the decoy, Mario must still reach the axe. The rescue message appears afterward and the game advances to World 2-1.
- Take the castle power-up when the fire-bar timing permits it.
- Keep moving through the fire-bar rooms without rushing blindly.
- Use five fireball hits if Fire Mario, or pass beneath Bowser when he jumps.
- Touch the axe and wait for the rescue message before counting 1-4 as complete.
Before you move on
- World 1-1, World 1-2, World 1-3, and World 1-4 have been cleared.
- World 1-2 was completed through its normal exit if following the no-warp route.
- The World 1-4 bridge fell after Mario touched the axe.
- The rescue message appeared and the game advanced to World 2-1.
References for this chapter
- Super Mario Bros. Nintendo Entertainment System instruction manual ↗
- Super Mario Bros./World 1 — StrategyWiki ↗
- Super Mario Bros./Walkthrough — StrategyWiki ↗
- Super Mario Bros. — Guide and Walkthrough for NES by peach_freak ↗
- World 1-2 — Super Mario Wiki ↗
- List of Warp Zones - Super Mario Bros. 1 Guide ↗
World 2 — Dirt Land and Underground Tricks (2-1 to 2-4)
Clear Worlds 2-1 through 2-4 conservatively, using the level layouts to preserve power-ups and lives. World 2-2 is an underwater stage rather than an underground stage, while World 2-4 introduces lava, Fire-Bars, vertical lifts, and the first castle boss encounter that can be handled safely with Fire Mario or a careful jump.
1. Enter World 2-1 with a power-up plan
World 2-1 begins with a long surface section containing Goombas, Koopa Troopas, gaps, and moving platforms. If you arrive as Small Mario, take the first obvious power-up block when it is safe to reach. Do not jump into the block while an enemy is directly beside it; clear the enemy first or approach from the side.
The opening groups of blocks conceal useful items and coins, but none is worth taking a blind hit for. Keep moving right at a controlled pace, and use short jumps when an enemy is close. When you kick a Koopa shell, watch its rebound before accelerating after it; the shell can return from a wall or clear enemies that would otherwise force a risky jump.
- Remain Super Mario if possible before the first moving-platform section.
- Use running jumps only when the takeoff ground is secure.
- Treat optional hidden blocks as secondary to reaching the next stable platform.
2. Cross the moving platforms and the stair sections in 2-1
Later in 2-1, moving platforms carry Mario over gaps while enemies occupy the landing areas. Board a platform near its center rather than its edge, then jump toward the next solid surface only when you can see the landing. If a Koopa is waiting there, land beyond it or stomp it immediately; do not kick a shell on a narrow platform unless you have room to avoid the rebound.
The final stretch uses stairs and another gap before the flagpole. Build speed on the level ground, then make a full running jump across the gap. At the flagpole, jumping from the staircase gives a safe finish; attempt a higher score only after you can reliably clear the approach without clipping the pole or falling short.
- Wait for platform alignment instead of jumping early.
- Avoid stopping beneath a moving platform when an enemy is approaching.
- Finish 2-1 with enough time to enter 2-2 without rushing mistakes.
3. Treat World 2-2 as an underwater stage
World 2-2 changes the movement rules: Mario swims through water while Cheep-Cheeps and other hazards approach from several directions. Press the jump button repeatedly to rise, release it to descend, and make small corrections rather than holding upward continuously. The safest route is generally the central open water, where you have room to adjust around enemies.
Do not chase every coin or attempt to fight enemies unnecessarily. Swimming into a Cheep-Cheep costs a life unless you are protected by an appropriate state, and the underwater layout gives little room for recovery after a bad collision. When the screen scrolls into tighter passages, enter at a moderate height and make short taps to keep Mario centered.
The stage’s elevated platforms and ledges can make the exit area look more dangerous than it is. Keep your attention on the open route toward the right and avoid drifting upward into enemies or the ceiling. Reach the pipe at the end to complete the level; there is no need to search for a secret route during a standard completion run.
- Use repeated light taps for controlled swimming.
- Stay in open water rather than hugging the ceiling or floor.
- Prioritize the exit over coins when several enemies converge.
4. Use shells carefully in World 2-3
World 2-3 is a surface level over water, with Cheep-Cheeps jumping from below and Koopa Troopas placed around the platforms. Keep moving so a fish does not rise into your landing point, but do not sprint blindly into the next enemy. A shell can clear a line of ground enemies, yet kicking it near a pit may send it back toward Mario or remove the safe space needed for the next jump.
For the long jumps, begin running before the edge and keep the jump held long enough to carry across. If a Cheep-Cheeep rises beneath Mario, continue toward the next platform instead of trying to reverse direction in midair. On narrow platforms, landing near the center is more valuable than collecting a nearby coin.
The final approach has more enemy pressure before the flagpole. Slow down briefly on solid ground, then make the last jump cleanly. Preserve Super or Fire status if you can, because World 2-4 begins with lava and moving hazards.
- Watch the water below every landing.
- Do not kick shells where their rebound can block your next jump.
- Enter 2-4 with a power-up whenever possible.
5. Cross the lava opening in World 2-4
World 2-4 is the World 2 castle. Mario starts above lava with Podoboos jumping from below and platforms placed across the opening. Take the central power-up block if you can reach it safely. If you are already Super Mario, it provides a Fire Flower instead, making Fire Mario especially useful for the boss encounter.
Cross the lava by watching the Podoboo’s rhythm and landing on the solid platforms, not at their extreme edges. After the lava, the route divides around Fire-Bars. Choose the path where you can maintain a steady pace; the upper route has more rotating hazards, while the lower route is usually easier to read. Stop briefly only when a Fire-Bar blocks the next step, then move through as it rotates away.
- Do not jump as a Podoboo is rising directly beneath the landing platform.
- Take the castle power-up before the Fire-Bar section if safe.
- Keep moving through Fire-Bar gaps instead of waiting in their sweep.
6. Use the lifts and defeat the World 2 boss
After the Fire-Bars, two lifts move vertically in opposite directions. Board the first lift near its center and watch the second lift before committing to the next jump. The following gaps are short enough for a controlled running jump, but the final approach is dangerous because the fake Bowser breathes fire while Mario crosses the gaps.
If you have Fire Mario, throw fireballs while advancing. The boss is a green Koopa Troopa in this castle, and repeated fireballs can defeat it without requiring a close pass. Keep enough distance to react to the flame, and do not stop on a small platform after throwing; the next safe landing is the priority.
Without Fire Mario, remain Super Mario if possible and jump over the boss when its position and flame pattern leave a clear opening. Continue to the axe on the far side and touch it. The axe drops the bridge, defeats the castle boss encounter, and opens the route to World 3-1. If you lose a life, replay the castle with the same priorities: secure the power-up, cross the lava without haste, and save your strongest state for the final gaps.
- Reach the axe rather than trying to defeat the boss at close range.
- Use Fire Mario’s fireballs before attempting the jump-over method.
- Confirm that World 3-1 appears after the castle sequence.
Before you move on
- World 2-1, 2-2, and 2-3 have been cleared and the game has advanced to the World 2 castle.
- World 2-4 has been completed by reaching the axe after the lift and Fire-Bar sections.
- The bridge has dropped and the game has advanced to World 3-1.
- You finish World 2 with the normal sequential route intact rather than using a warp zone.
World 3 — Speed and Gaps (3-1 to 3-4)
World 3 introduces faster enemy placement, longer jumps, Hammer Bros., moving platforms, and the first castle route that demands careful timing. Keep momentum for wide gaps, but do not rush blind jumps. A Super or Fire state is especially valuable before 3-4.
3-1: Secure the opening power-up and control your momentum
At the start of 3-1, move to the group of three question blocks and hit the right-hand block for a Mushroom or Fire Flower. If you are already powered up, use the area to settle your running speed before the first gaps. Jump over the Piranha Plant pipes rather than stopping beside them, then clear the Goombas with short, controlled jumps.
The first major rhythm change comes at the staircase and bridge section. Approach the stairs without sprinting into the enemies above them. Jump across the water gap, then use the brick area as stable ground. The leftmost brick in this section contains a Star; take it only if you can collect it without falling into the water. While invincible, keep moving right and use direct contact to clear enemies rather than attempting complicated shell setups.
Near the first Hammer Bros., Fire Mario can stand on the pipe and throw fireballs from a safer height. Without fire, stay below the brick platform and jump to strike them from underneath when their positions allow it. Do not leap directly into their hammers. Afterward, use the springboard for the next gap: land near its center, let Mario compress it, and hold the jump button as he launches. The final staircase is safer if you slow down, remove nearby Koopas, and then make the flagpole jump.
checklist:[
Take the opening Mushroom or Fire Flower when it is safe.
Use short hops around pipes and Hammer Bros. instead of charging through them.
Center Mario on the springboard before committing to the next gap.
3-2: Use shells to clear groups, not to create extra danger
The opening Goomba group is a good place to practice shell control. Stomp the first Koopa, kick its shell to the right, and follow behind it while it removes enemies. Keep enough distance to avoid touching the shell after it rebounds. If the shell reaches a wall or enemy and changes direction, stop following it and jump over it rather than trying to recover it.
Continue right with a running jump over the early block and collect the power-up from the question block. The level then alternates between flat ground, enemy clusters, and gaps. Run for the longer jumps, but release the run button before landing when you need to reduce forward distance. A full-speed leap is useful over broad gaps; it is dangerous when the landing area is narrow or contains a Koopa.
When you reach the moving platforms, watch their complete travel cycle before stepping onto them. Land near the center, let the platform carry you, and jump only after the destination is clearly within range. If a shell is available, use it to clear enemies on the next stretch, but do not kick it across a cramped platform where its rebound can catch you. Preserve your power-up for the closing stairs and flagpole approach.
checklist:[
Kick shells only when there is open space for them to travel.
Use running jumps for distance and release Run for precise landings.
Wait for moving platforms to return rather than attempting a desperate jump.
3-3: Treat every elevated platform as a timing test
3-3 places more of its danger above the ground, so avoid jumping simply because an enemy is nearby. Move onto a platform only after checking whether its next movement leaves enough room to land. When a platform rises or falls, keep Mario near its middle and prepare the next jump while it is still stable.
Long gaps require a running start. Begin on level ground, hold Run, and jump before the edge rather than at the last possible moment. If the landing platform is narrow, release Run during the flight so Mario does not overshoot. This is safer than trying to correct late with a second jump, which the NES game does not provide.
For score, you can attempt a high flagpole touch by using the final staircase and preserving running speed. Treat this as optional. A normal, secure flagpole grab is preferable when you are low on lives or entering the level as Small Mario. The level is complete as soon as Mario reaches the flagpole and the results screen appears.
checklist:[
Start long jumps from open ground with full running momentum.
Center Mario on elevated platforms before preparing the next jump.
Choose a safe flagpole landing over a risky high-score attempt.
3-4: Cross the castle and defeat the Bowser encounter
The castle begins with narrow platforms, lava, and firebars. Advance in short bursts: wait for a firebar to rotate away, cross the platform, and stop before the next hazard. Do not jump early across a lava gap just because the next platform is visible; use the full width of the current platform to build running speed and jump only when the firebar pattern gives you a clear opening.
As the route continues, moving platforms and low ceilings make large jumps unreliable. Stay aligned with the platform beneath Mario and use brief jumps to avoid overhead obstacles. If you are Fire Mario, preserve that state for the final room. Fireballs can defeat the Bowser replacement from a distance, but throw them only when you have stable footing and a clear line. If you are not Fire Mario, the reliable alternative is to wait for Bowser to move away, then run beneath him toward the axe. Do not jump into him from the front.
The axe is the required finish. Once Mario reaches it, the bridge drops and the castle exit activates. If you lose a life, retry with the same measured rhythm rather than sprinting to recover lost time. A castle attempt that reaches the final room with Super Mario is more valuable than a faster attempt that arrives Small.
checklist:[
Pause at firebars and moving platforms until the next opening is clear.
Use Fire Mario's fireballs when footing and line of sight are safe.
If jumping over Bowser, wait for him to move away and land beyond him; otherwise reach the axe.
Before you move on
- The stage results screen appears after clearing 3-1, 3-2, and 3-3, and the map proceeds to 3-4.
- In 3-4, Mario reaches the final room, passes or defeats the Bowser replacement, and touches the axe.
- The bridge drops and the castle completion message appears, advancing the game to World 4-1.
- You finish World 3 with enough lives and, ideally, Super or Fire status preserved for the tighter platforming ahead.
World 4 — Vines, Vertical Sections and Warp Power (4-1 to 4-4)
World 4 introduces Lakitu and Spinies, the Buzzy Beetle, moving lifts, treetop pulley platforms, two Warp Zones in World 4-2, and the first castle maze that requires specific route choices. Use the normal exits if you are completing every stage in order. Use either World 4-2 Warp Zone only when you deliberately want to skip stages.
Clear World 4-1 without letting Lakitu control the pace
World 4-1 begins with a Piranha Plant in the first pipe. Jump over the pipe, then prepare for Lakitu to appear above the course. Lakitu throws Spiny Eggs; after an egg lands, it becomes a Spiny. Spinies cannot be defeated by stomping, so jump over them, let them move behind you, or destroy them with fireballs if you are Fire Mario.
Keep moving through the open ground instead of waiting beneath Lakitu. Several eggs can land around Mario and make the next jump harder. Defeating Lakitu with a jump or fireball is optional. Attempt it only when Mario is on stable ground and the jump does not carry him toward a pit.
Treat the coins and hidden items as optional. If Mario is Small, collect a safe mushroom or Fire Flower when the route makes it convenient, but do not stop in a dangerous position for a single coin. If Mario is already Super or Fire, protect that state for World 4-2 and the castle.
Near the end, slow down before the final staircase and make the last jumps with a clean takeoff. A high flagpole landing is useful for score but is not required. Reach the flagpole and proceed to World 4-2.
- Jump over the first Piranha Plant.
- Expect Lakitu after the opening pipe.
- Never try to stomp a Spiny.
- Keep moving when Spiny Eggs begin to accumulate.
- Prioritize the flagpole over optional score or coins.
Use the World 4-2 vine route only when you want to warp
World 4-2 is an underground stage with Buzzy Beetles, Piranha Plants, moving lifts, pits, and two separate Warp Zones. Buzzy Beetles can be stomped or avoided; ordinary fireballs do not defeat them. Use short running jumps across the early gaps and do not rush onto a lift before its position is clear.
For sequential progress, remain on the lower route and use the normal exit. Along the way, take a safe power-up when it is directly available. Do not spend a life trying to collect a coin or reach a bonus area if the jump also risks losing Super or Fire status before the later sections.
For the vine Warp Zone, continue until the moving-lift section after the early underground hazards. After the downward-moving lift section, find the raised group of three bricks. Stand beneath the rightmost brick of that raised group and jump to reveal a hidden block. Then reveal the next hidden block beneath the brick immediately to its left. Move right onto the rightmost revealed block. Keep the leftmost raised brick on-screen, jump from the revealed support, and strike the leftmost raised brick in the raised group. A vine comes out of that brick.
Climb the vine and cross the elevated coin area. At the Warp Zone, the pipes are ordered from left to right as World 6-1, World 7-1, and World 8-1. Choose the right pipe for the World 8 shortcut. Choosing a pipe skips the rest of World 4-2 and the intervening worlds, so this is not the route for a full no-warp campaign.
The other secret route is near the normal end of World 4-2. Continue through the later pipes, lifts, stairs, and the long brick row. Use the nearby platforms and brick ceiling to reach the top route, run past the ordinary exit, and enter the single Warp Zone pipe for World 5-1. This ceiling route is separate from the vine route.
To complete World 4-2 normally, ignore both secret exits. Cross the later moving lifts, pass the tall pipes and enemies, use the final stairs to clear the pipe and pit, and enter the ordinary exit pipe.
- Use the ordinary exit for no-warp progress.
- Reach the downward-moving lift section before attempting the vine.
- Stand beneath the rightmost raised brick and reveal its hidden support block.
- Reveal the next hidden block beneath the brick immediately to its left.
- Move right onto the rightmost revealed block.
- Keep the leftmost raised brick on-screen and strike it to release the vine.
- Use the vine pipes left-to-right for Worlds 6, 7, and 8.
- Use the later ceiling route only for the World 5-1 warp.
Cross World 4-3 with deliberate pulley-lift movements
World 4-3 is built around mushroom platforms, Koopa Troopas, Koopa Paratroopas, and pulley lifts. Before jumping, identify the next platform and its height. The most common failure is jumping before the destination is aligned, then falling through the gap while trying to correct in midair.
On each pulley lift, Mario's weight lowers the side he occupies and raises the opposite side. Move to the side that gives the next platform a useful height, then leave the lift before it descends too far. Do not wait on a moving lift merely to collect an optional coin.
Use short directional taps while landing on small mushroom platforms. Hold the direction and B button for longer gaps, but release the direction as Mario reaches the destination so his momentum does not carry him off the far edge. If a Koopa is on the landing platform, either wait for it to move away or jump over it rather than attempting a risky shell kick above a pit.
Near the end, ride the last lift until it is positioned for the flagpole approach. Make the jump with enough forward momentum to reach the goal, even if that gives a lower score than a perfectly timed high landing.
- Look at the destination before every platform jump.
- Use Mario's weight to adjust each pulley lift.
- Use running momentum only for gaps that require it.
- Avoid optional coin grabs over pits.
- Reach the flagpole safely.
Solve the World 4-4 castle maze and reach the axe
World 4-4 contains lava pits, Fire Bars, Podoboos, and a route-selection maze. The correct path is required; a wrong choice repeats an earlier section instead of advancing. The first choice comes after the opening lava-pit sequence. Take the upper path. The lower path returns Mario toward the beginning of the puzzle.
Continue through the upper route and cross the small gaps without stopping in their centers. Use controlled jumps around Fire Bars and wait for a safe opening when a Podoboo is rising from the lava. In the next hall, climb across the platforms until the second route choice appears.
At the second choice, take the bottom path. The upper and middle paths return Mario to the earlier section, while the bottom path leads to the boss bridge. Keep moving through the bridge approach, but do not jump blindly: watch the Fire Bar and the Podoboo before committing to the final crossing.
The apparent Bowser at the bridge is a fake Bowser represented by a Spiny. Defeating it is optional. If Mario is Fire Mario, throw fireballs when the bridge is clear. Otherwise, wait for the fire breath and moving hazards to create an opening, then run underneath or jump over the fake Bowser. Super Mario has more room for error than Small Mario, but the axe remains the objective.
Touch the axe at the far right of the bridge. The bridge drops and World 4-4 ends. A normal clear advances to World 5-1. If you previously entered a World 4-2 Warp Zone, the selected destination replaces the normal World 4-3 and World 4-4 sequence.
- Take the upper path at the first World 4-4 choice.
- Take the bottom path at the second choice.
- Watch the Fire Bars and Podoboos before jumping.
- Pass or defeat the fake Bowser without falling into the lava.
- Touch the axe to finish World 4-4.
Before you move on
- World 4-1 has been cleared at the flagpole.
- World 4-2 has been completed through its normal exit, or the intended Warp Zone has been entered deliberately.
- For the vine shortcut, Mario reached the downward-moving lift section, revealed the hidden block beneath the rightmost raised brick, revealed the next hidden block beneath the brick immediately to its left, moved right onto the rightmost revealed block, kept the leftmost raised brick on-screen, struck that brick, and climbed the vine.
- The vine Warp Zone destination matches the pipe position: left for World 6-1, middle for World 7-1, and right for World 8-1.
- For the ceiling shortcut, Mario reached the upper route near the end of World 4-2 and entered the single pipe leading to World 5-1.
- World 4-3 has been cleared at the flagpole if no warp was used.
- In World 4-4, Mario took the upper path first, the bottom path second, reached the bridge, and touched the axe.
- The transition after World 4-4 has begun, confirming completion of World 4 on the original NES campaign route.
References for this chapter
- Super Mario Bros. Nintendo Entertainment System instruction manual ↗
- Super Mario Bros. - Guide and Walkthrough - NES by Pegboy ↗
- Super Mario Bros. — Guide and Walkthrough — GameFAQs ↗
- World 4-1 (Super Mario Bros.) — Super Mario Wiki ↗
- World 4-2 (Super Mario Bros.) — Super Mario Wiki ↗
- World 4-4 (Super Mario Bros.) — Super Mario Wiki ↗
- Super Mario Bros. / World 4 — StrategyWiki ↗
World 5 — Faster Pacing, Tight Platforms
World 5 contains four demanding NES stages: a fast outdoor course, an underground course with Hammer Brothers, a smaller-platform version of World 1-3, and a fire-bar-heavy castle. Preserve Super Mario or Fire Mario whenever possible. World 5-1 has no ordinary Mushroom or Fire Flower recovery, while 5-2 and 5-4 provide useful power-ups if you reach their blocks safely.
Prepare before entering World 5
If you are completing the game in order, try to finish World 4-4 as Super Mario or Fire Mario. World 5-1 does not provide an ordinary Mushroom or Fire Flower, so a mistake there cannot be repaired by finding a routine power-up later in the stage. Starman blocks and hidden items may exist, but they are not a dependable substitute for entering with a larger form.
Keep the run button available for long jumps, but release it before short landings or low-ceiling jumps. World 5 rewards controlled momentum rather than holding the button constantly. Treat coins and optional blocks as secondary objectives whenever collecting them would place Mario beside a Piranha Plant, Bullet Bill, fire bar, or lava pit.
- Enter 5-1 as Super Mario or Fire Mario if possible.
- Do not sacrifice a power-up for an optional coin.
- Use conservative routes when low on lives or when attempting the sequence without warps.
Clear World 5-1 by using open ground carefully
Move right through the opening flatland and use the first Koopa Troopa as a shell opportunity if the surrounding ground is clear. Kick the shell only when you can see its full travel path. Follow behind it to let it remove enemies, but stop before a wall or pipe if the shell may rebound toward Mario. In open areas, a shell can clear several enemies; near gaps, its rebound is more dangerous than the enemies it removes.
Continue across the small gaps and pipes without rushing the Piranha Plants. Jump over the pipes only after confirming that the plant has retreated. Near the group of three bricks above the inverted L-shaped blocks, the middle brick contains a Starman. It is optional, but it can make the next enemy groups safer if you can reach it without taking a risky jump.
Farther right, a narrow opening beside a tall column leads to a hidden 1-Up when approached correctly. This is optional and should not be attempted if the gap is likely to cost a life. A suspended pipe later leads to a coin room; ignore it if your priority is reaching the exit quickly. Continue past the Bullet Bill cannon and the approaching Koopa Paratroopas, then climb the final stairs and jump to the flagpole. Approach the stairs with enough room to react rather than sprinting into the Paratroopas.
- Use shells only on open ground where the rebound is visible.
- Treat the Starman and hidden 1-Up as optional rewards.
- Clear the final Paratroopas before making the flagpole jump.
Use World 5-2’s power-ups and avoid cramped shell rebounds
At the start of 5-2, climb the short staircase while watching for the Bullet Bill cannon. Move down to the ground, cross the first gap, and land on the lower row of bricks. The rightmost block at the end of the upper row contains a power-up. Collect it before dealing with the Hammer Brother on the short steps whenever the approach is safe.
If you are not Fire Mario, watch the Hammer Brother’s rhythm instead of jumping blindly. He throws two hammers in quick succession and then pauses. Use that pause to stomp him, then keep moving. Jumping over him while the hammers are active is riskier than waiting for the opening. Fire Mario can remove him from a safe distance.
The first pipe after this enemy can lead to an optional water area. The water route is not required; use it only if you are comfortable swimming around Bloobers and want the safer alternate approach or its items. The normal route continues through stairs, Goombas, additional Hammer Brothers, and brick formations. In these confined areas, prefer stomps or fireballs to shell kicks. A shell can strike a wall and return before Mario has enough space to jump.
Continue right through the later brick groups and island pipe. Several blocks provide additional power-ups, including a single brick before the island pipe. A Koopa Paratroopa descends the broken staircase near the end. Stomp or avoid it, climb the final stairs, and jump to the flagpole.
- Collect the early power-up before the first Hammer Brother if safe.
- Wait for a Hammer Brother’s pause when playing as Regular or Super Mario.
- Use the water pipe only as an optional route.
- Avoid shell kicks in narrow corridors.
Cross World 5-3’s smaller platforms
World 5-3 follows the general layout of World 1-3 but uses smaller platforms and adds Bullet Bills. Begin by dealing with the Koopa on the upper landing, then use the landing’s center as the setup point for the next jump. Do not launch from the extreme edge unless the next platform is already aligned.
Use the vertical platform near the early question block to reach the higher landing. The question block contains a power-up, so collect it if doing so does not force Mario into the moving platform’s edge or an incoming Bullet Bill. Later, two horizontal platforms create another timing section. Let a platform come into a favorable position, jump with controlled momentum, and release the run button in the air if the landing is too short.
Bullet Bills can arrive while Mario is standing on a small platform. Change position or jump only when the destination is visible; a blind jump often turns a survivable projectile into a fall. The lower section contains a vertically moving Koopa Paratroopa and a small gap between landings. Clear or avoid the Paratroopa, then climb the uneven final staircase and make the flagpole jump.
- Launch jumps from the center of each landing.
- Use the question-block power-up when the platform timing is safe.
- React to Bullet Bills without jumping toward an unseen landing.
- Skip coins that require an uncertain return jump.
Finish World 5-4 through the fire-bar corridor
World 5-4 resembles World 2-4 but adds more fire bars. At the start, run across the opening and jump to the upper center platform to reach the question block. This block contains the stage’s early power-up; collect it if possible, because the larger form gives you more room for error in the castle.
After the power-up, the route divides into high and low passages. Use the low passage while maintaining forward speed. The third lower fire bar requires a jump; Super Mario or Fire Mario must use a duck jump to pass beneath the obstruction safely. Do not stop in the fire-bar’s rotation unless you have already moved to a safe section of floor.
The corridor ends at two elevator platforms over a gap. Board the platforms when their positions give you a clear crossing, then prepare for Bowser’s fire on the opposite side. A fire bar guards a group of six coins. The coin beneath the fire bar is optional and is not worth the risk during a completion run.
Continue through the final fire bar and the lava pits. The rising Podoboos require a jump timed to their descent; do not leap merely because the bridge is visible. At Bowser, Fire Mario can use repeated fireballs to defeat him, but remain ready to avoid his fire and the lava hazards. If you are Super or Regular Mario, wait for a clear opening, jump over Bowser, and touch the axe on the far side of the bridge. The axe drops the bridge and completes the castle.
- Collect the opening 5-4 power-up when safely possible.
- Use the low corridor and duck jump beneath the third lower fire bar as Super or Fire Mario.
- Skip the coin beneath the fire bar during a completion attempt.
- Time the final jumps around the Podoboos before approaching Bowser.
- Use fireballs or jump over Bowser and touch the axe.
Before you move on
- World 5-1 has been cleared by touching its flagpole and advancing to 5-2.
- World 5-2 has been cleared after passing the Hammer Brothers and reaching its flagpole, whether or not the optional water route was used.
- World 5-3 has been cleared by crossing its small-platform sections and reaching the flagpole.
- World 5-4 has been cleared when Bowser is defeated with fireballs or bypassed and the axe drops the bridge.
- The game advances to World 6-1 after the World 5-4 castle transition, confirming that all four World 5 stages are complete.
World 6 — Precision and Timing (6-1 to 6-4)
World 6 introduces more demanding enemy placement, Piranha Plant formations, moving platforms, Bullet Bills, and a castle with additional Fire-Bars. Preserve Super or Fire Mario whenever possible, skip optional secrets when they create unnecessary risk, and treat every moving platform as a timing exercise rather than a race.
6-1: Control Lakitu and keep moving
World 6-1 is a night overworld stage with Lakitu, Spinies, and Spiny Eggs. Move across the opening terrain without stopping beneath the falling eggs. The first brick you reach contains a power-up. Take it if you are Small Mario, then continue with enough momentum to avoid being surrounded. If you can safely reach Lakitu from a raised block, stomp him or use fireballs, but do not assume he is gone permanently; he can return later in the stage.
Continue across the brick formations and use raised blocks as temporary safe positions rather than waiting in the open. Near the staircase beside two groups of three bricks, you can attempt the optional 1-Up route by moving down and jumping parallel to the steps. Treat this as optional: a missed jump costs a life and does not help required progress.
Later, two ? Blocks appear near another staircase. The left ? Block contains a power-up. Collect it only when the surrounding Spiny Eggs are clear, then move away before a Spiny lands nearby. The final staircase is also exposed to Spiny Eggs. Approach it with short, controlled jumps, keep moving between steps, and reach the flagpole to enter 6-2.
- Take the first power-up when it is safe.
- Defeat Lakitu if the opportunity is reliable, but expect him to return.
- Skip the optional staircase 1-Up if the jump is not comfortable.
- Cross the final staircase without waiting beneath Spiny Eggs.
6-2: Choose the safe surface route
World 6-2 is a night overworld stage filled with Piranha Plants, Buzzy Beetles, and pipe formations. Fire Mario is especially useful here. A Piranha Plant remains down while Mario is standing on or directly beside its pipe, so use pipe edges as brief pauses before making the next jump. Do not linger if another enemy is approaching.
After the first Piranha Plant, jump to reveal an invisible block and use it to reach the coin block above if desired. The first pipe can lead to an optional coin room. Enter it only if you want the detour; it is not needed to finish the level. Continue right past the pipe formations and Buzzy Beetles. Near a group of bricks, the right brick contains a power-up. Collect it when the landing area is clear. Avoid kicking a Buzzy shell in the cramped pipe sections unless you have checked its rebound path.
Later, an optional pipe leads to an underwater bonus area that skips part of the surface route. The water route is not required and can be dangerous around descending platforms, so staying on the overworld is the more direct practice route. Farther along, a hidden-block setup can produce a beanstalk leading to a bonus coin area. This is also optional. If you skip the bonuses, continue across the Piranha Plant formations and make the long jump while maintaining forward momentum.
Near the end, the paths converge at a staircase guarded by a Piranha Plant and a bouncing Paratroopa. Wait for the plant to descend, then jump through the opening and continue to the flagpole. Do not sacrifice a life for a coin room or beanstalk when the normal route is open.
- Use pipe edges as temporary safe positions.
- Take the power-up near the Buzzy Beetle formation when safe.
- Treat both coin rooms, the underwater area, and the beanstalk route as optional.
- Time the final staircase around both the Piranha Plant and Paratroopa.
6-3: Time the lifts and springboards
World 6-3 is a moving-platform stage. At the beginning, wait for rising and falling platforms to approach before jumping. Do not leap from a platform while it is still moving away from the next landing point. Use the springboard to reach the higher lifts; press the jump button as the springboard reaches full compression to obtain its highest launch.
A ? Block along the elevated route contains a power-up. Take it if you can land safely, but do not chase it across a moving platform when missing the jump would cost a life. The middle section uses Balance Lifts. Step onto one side to raise the opposite side, then cross promptly before the lift drops too far. When two lifts are available, use the first to improve the position of the second and jump across instead of waiting for both to become perfectly level.
Bullet Bills appear in the latter part of the stage. Look ahead while riding the lifts and prioritize stable landings over coins. Use the later springboard to reach the high horizontal platform, then cross the final Balance Lift. The last group of four platforms sinks under Mario’s weight, so make short jumps and keep moving. From the final raised ground, run and jump to the flagpole.
- Use the springboard at full compression for maximum height.
- Cross Balance Lifts promptly after positioning them.
- Watch for Bullet Bills during every exposed jump.
- Do not stand on the final sinking platforms.
6-4: Cross the castle and defeat the hammer-throwing impostor
World 6-4 is a castle stage with lava, Podoboos, and more Fire-Bars than the earlier versions of this castle layout. Begin by checking the rotation of each Fire-Bar before jumping. Use controlled running jumps across the lava gaps and avoid stopping on a small platform when the next Fire-Bar is already moving into your path.
An early ? Block contains a power-up. If you are Small Mario, collect it when the Fire-Bar leaves a safe opening. If you are already Super or Fire Mario, do not take a damaging risk for a second power-up. Continue through the corridor by passing one Fire-Bar opening at a time. Short pauses on genuinely safe ground are preferable to forcing a jump through a rotating bar.
After the main Fire-Bar sequence, additional fireball hazards appear as you approach the bridge. Skip optional invisible coin blocks if reaching them interrupts your movement. Watch the Podoboos over the lava and keep your character positioned so that a jump does not collide with a rotating bar immediately after landing.
At the bridge, the World 6 Bowser figure throws hammers like a Hammer Brother. This figure does not use Bowser’s fire-breath attack. If you are Fire Mario, throw fireballs from a distance until the figure is defeated. Otherwise, wait for a usable opening and run underneath or jump over it. Do not remain directly in front of the boss, where the hammers can trap you against the bridge edge. The Podoboo and remaining castle hazards still make the crossing dangerous, so commit to the escape once the boss is behind you.
Touch the axe at the far side of the bridge. The bridge collapses and the game advances to World 7-1. If you lose a life, repeat the same priorities: read the current Fire-Bar rotation, take the power-up only when safe, and save your most reliable movement for the hammer-filled bridge.
- Watch each Fire-Bar instead of following a memorized rhythm.
- Collect the early power-up only when the route is clear.
- At the boss, expect hammers, not fire breath.
- Use Fire Mario, run underneath, or jump over the figure, then touch the axe.
Before you move on
- Finish 6-1, 6-2, and 6-3 by reaching their flagpoles and entering the next stage.
- In 6-4, cross the Fire-Bar and lava sections, reach the bridge, pass or defeat the hammer-throwing Bowser figure, and touch the axe.
- Confirm that the castle collapses and the game advances to World 7-1. That transition verifies completion of all four required World 6 stages.
World 7 — Nearing the End (7-1 to 7-4)
World 7 combines cannon hazards, an underwater stage, flying Cheep-Cheeps, and the original NES campaign's second maze castle. Preserve Super or Fire Mario when practical, but prioritize consistent movement over optional coins and risky enemy defeats. In World 7-4, the original NES route begins on the bottom path, rises to the upper route, drops to the middle where the upper path ends, then returns to the upper route before the maze exit, followed by top, middle, top through the second maze. The Fake Bowser is a Hammer Brother, and touching the axe is the required objective.
Prepare for World 7
Clear World 7-1 through World 7-4 in order. These stages do not provide a mid-level checkpoint, so a death restarts the current stage from its beginning. Learn one safe rhythm and repeat it instead of changing several actions after each failure.
Keep Super Mario or Fire Mario when possible. Super Mario can survive one ordinary hit, while Fire Mario can remove Hammer Brothers and other enemies before they obstruct a jump. Do not trade a reliable power-up for optional coins or a dangerous shell maneuver immediately before 7-4.
- Enter 7-4 as Super or Fire Mario when practical.
- Skip optional risks when lives are low.
- After a death, repeat the established route rather than improvising.
Clear World 7-1's cannons and Hammer Brothers
Jump over the opening cannons while watching for Bullet Bills during both takeoff and landing. The brick group above the early cannon section contains a Mushroom or Fire Flower. Reach it only when the landing area is clear; do not wait beneath an active cannon.
Continue past the coin-only question blocks, flying Koopa, and later cannons. At the first pair of Hammer Brothers, either jump across the raised blocks or wait for an opening and pass underneath. If you are Fire Mario, fire from a position where you can still retreat. Do not stand directly beneath the brothers while their hammers are covering the route.
After the pipe and Piranha Plant hazards, deal with the second Hammer Brother pair in the same way. Near the end, use the springboard to reach the elevated brick containing another Mushroom or Fire Flower if you need protection. Cross the two staircases and make a controlled jump to the flagpole. A safe landing matters more than a high-scoring grab.
- Watch the cannon mouths before committing to jumps.
- Use raised blocks or a clear opening to pass Hammer Brothers.
- Do not wait beneath active hammers.
- Use the springboard only after confirming the landing area is safe.
- Finish with a controlled flagpole jump.
Cross World 7-2's underwater section
World 7-2 is the campaign's final underwater stage before a short land section. Swim right using small height corrections instead of holding upward movement continuously. Bloopers and green and red Cheep-Cheeps occupy the route, so avoid unnecessary vertical movement that places Mario directly in their paths.
When a Blooper approaches from above, stay low if the lower route is open and pass beneath it. If an obstruction forces you upward, draw the Blooper toward the left side of the screen, then move right as soon as the passage opens. This is safer than repeatedly turning around in open water.
Coins in the gaps are optional. Avoid dropping into lower coin areas when Bloopers and Cheep-Cheeps can surround Mario. Continue right over the raised platforms until the exit pipe. Enter it, climb the staircase outside, and jump to the flagpole.
- Use short swimming corrections.
- Stay low beneath Bloopers when possible.
- Skip coin pits that can trap Mario.
- Enter the exit pipe, climb the stairs, and reach the flagpole.
Cross World 7-3's bridges and flying fish
World 7-3 resembles World 2-3 but adds a denser enemy arrangement. Hold the Run button through the longer bridge sections, but begin each long jump from stable ground rather than from the edge of a platform. Cheep-Cheeps can rise into the landing area after the takeoff appears safe.
Jump over the early Koopas and bridge gaps, then collect the middle Mushroom or Fire Flower only if the landing area is secure. If Fire Mario is available, use fireballs against enemies blocking the next bridge, but do not stop long enough for a Cheep-Cheep to reach you.
Continue through the treetop and small platforms, then cross the later bridges while watching for flying Koopas and Cheep-Cheeps. When the route breaks into several small bridge sections, release some running speed and make deliberate jumps. Do not stop completely, because a stationary landing gives the flying fish more time to reach Mario. Descend toward the final stairs, cross the last gap, climb, and touch the flagpole.
- Start long jumps from stable ground.
- Expect Cheep-Cheeps during both takeoff and landing.
- Collect the middle power-up only when the landing is safe.
- Slow down for the broken bridge sections without standing still.
- Prioritize reaching the flagpole over optional coins.
Cross the opening hazards and solve the first 7-4 maze
At the start of 7-4, jump across the two sinking platforms over the lava while watching for the Podoboo between them. Step onto each platform briefly and keep moving. The platforms descend under Mario's weight, so lingering increases the chance of falling.
After reaching solid ground, the first maze begins. For the original NES version, take the lower path first. Continue right until the route requires a rise to the middle path, then continue until the next opening leads to the upper path. The practical sequence is bottom path, upper route, middle drop, then upper route again. These are physical path changes within one continuous section, not three unrelated choices made at the entrance.
If Mario returns to the beginning of this maze, the route was entered incorrectly or a path was missed. Repeat bottom, middle, top immediately instead of experimenting while the timer drains. Do not present bottom, middle, and top as three independent entrance choices; follow the physical route changes through the maze.
- Cross both sinking platforms without lingering.
- First maze: bottom path, upper route, middle drop where required, then upper route again.
- If the maze resets, repeat the same sequence.
- Do not substitute the VS. Super Mario Bros. route.
Solve the second maze and reach the axe
After the first maze, look for the Fire Bar suspended over the route. Pass above it using the upper path. After clearing that obstruction, remain in the middle route while jumping across the next gaps and long block sections. When the final opening appears, jump back to the upper route and stay there for the remainder of the puzzle. The second-maze sequence is top, middle, top.
Keep enough forward motion to clear the gaps, but do not sprint blindly into the Fire Bar or land at the edge of a hole. If the route sends Mario back to the Fire Bar, repeat the same physical landmarks: upper path over the Fire Bar, middle route through the next gap section, then upper route again.
After the maze, continue over the remaining gaps toward Fake Bowser. This disguise is a Hammer Brother, and a Podoboo rises from below near the bridge. Fire Mario can defeat him with fireballs, but fighting is optional. As Super or Small Mario, watch the hammer arc, wait for a jump or a safe opening, then run underneath or jump over him. Continue to the axe and touch it. The axe drops the bridge and completes World 7-4.
- Take the upper route over the first Fire Bar.
- Remain in the middle route through the following gap section.
- Return to the upper route for the final section.
- Treat Fake Bowser as a Hammer Brother.
- Touch the axe; defeating the boss is optional.
Before you move on
- World 7-1 is complete when Mario reaches the flagpole and the game advances to 7-2.
- World 7-2 is complete when Mario exits the water, crosses the short land section, and reaches the flagpole.
- World 7-3 is complete when Mario crosses the final bridges, climbs the staircase, and reaches the flagpole.
- World 7-4 is complete when Mario crosses the opening lifts, follows the bottom-upper-middle-drop-upper first maze route, follows the top-middle-top second maze route, passes or defeats Fake Bowser, and touches the axe.
- After the axe drops the bridge and the castle transition completes, the game advances to World 8-1.
- Beginning World 8 as Super or Fire Mario is helpful but not required.
World 8 — The Final Gauntlet (8-1 to 8-4)
World 8 is the final four-stage sequence in the original Nintendo Entertainment System version of Super Mario Bros. Clear 8-1, 8-2, and 8-3, then use the correct pipe route through the five areas of 8-4. Preserve Super or Fire status when possible, but do not sacrifice a life chasing optional coins or bonus rooms. The campaign is complete when Bowser is defeated or bypassed, the axe is touched, and the Princess Toadstool rescue sequence and ending message appear.
1. Clear World 8-1 with controlled running speed
World 8-1 is a long outdoor stage built around pipes, enemy groups, small gaps, and several demanding running jumps. Move decisively through the opening enemies, but do not sprint blindly into every landing. Hold the run button across safe ground before a wide gap so Mario reaches full speed before takeoff. The running jump is essential for the larger gaps in this level.
When you reach the large late-stage gap sequence, treat it as a set of controlled jumps rather than one blind leap. Use the small middle landing area to reset your position, then jump again toward the far side. If you miss the first landing, do not try to correct with a desperate second jump from the edge; repeat the section on the next life with the takeoff point in mind.
Optional coins, a hidden power-up, and bonus-room routes can help, but none is required to finish 8-1. Take them only when the surrounding enemies and landing space are under control. Near the end, approach the final staircase steadily and make the flagpole jump from a stable step rather than rushing into the pit.
- Build running speed before the major gaps.
- Use the middle landing area in the late gap sequence when needed.
- Skip optional items if they compromise the current life.
- Approach the final staircase deliberately and reach the flagpole.
2. Survive World 8-2’s Lakitu, cannons, and gaps
World 8-2 opens with Lakitu, Spiny Eggs, Paratroopas, Bullet Bills, and cannon placements. Keep moving instead of standing beneath Lakitu. Watch the ground and the falling Spiny Eggs together; a jump that avoids one hazard can place Mario directly in the path of another. Use the staircase and solid blocks as brief reset points, then continue right.
The central gap sequence requires a running start. Cross the first solid section, land on the small intermediate pieces, and carry speed into the next jump. If you stop at the edge, the remaining distance becomes much harder. A safer alternative is to use the edge of the first platform to make a controlled jump to the next small landing, then jump again from there.
After the main gap, the first pipe in the later section leads to an optional coin room. Enter it only if the jump is safe and you want the extra coins. It is not part of the required route. If you skip it, continue through the cannon and enemy placements, then use the final staircase to reach the flagpole. The underwater room often associated with the final world is not in 8-2; it is part of 8-4.
- Keep moving while Lakitu is active.
- Use a running start for the major gap.
- Treat the later pipe as an optional coin-room entrance.
- Do not confuse the optional 8-2 room with 8-4’s required underwater area.
- Reach the flagpole through the normal route.
3. Cross World 8-3’s Hammer Brother formations
World 8-3 is the final outdoor stage and concentrates Bullet Bills, Paratroopas, Piranha Plants, and Hammer Brothers. If you have Fire Mario, throw fireballs before entering a Hammer Brother’s jumping range. If you are Super or Small Mario, study the hammer arcs and commit only when the landing area is clear. The safest approach is to handle each formation as a separate encounter rather than charging through the entire stage.
Some Hammer Brothers can be bypassed with a full-speed jump, while others are easier to defeat with fireballs or a shell. Do not kick a shell into a cramped formation unless you have room to avoid its rebound. If you pass a formation and find stable ground afterward, pause briefly to observe the next one instead of carrying uncontrolled momentum into it.
Power-ups appear around the Hammer Brother sections, but collecting one is optional and can be dangerous if you stand beneath active hammers. Fire Mario is particularly useful because fireballs let you clear a formation before attempting the narrow jump around it. Near the end, use measured jumps across the floating staircase and reach the flagpole to enter 8-4.
- Use fireballs before entering Hammer Brother range when possible.
- Handle each formation separately.
- Avoid shell kicks when the shell can rebound into Mario.
- Collect power-ups only when the surrounding area is controlled.
- Cross the floating staircase carefully and touch the flagpole.
4. Follow the correct World 8-4 pipe route
World 8-4 is the final castle and has a 400-second time limit. The castle contains five areas connected by pipes. The reliable rule is that the first pipe after a lava gap advances to the next area; other pipes can return Mario to an earlier point or to the beginning. If you continue past the advancing pipe without entering it, the room loops back.
In the opening area, pass the first Piranha Plant pipe. Continue past the next pipe, which is a return route. Proceed to the large lava gap and use the moving lift riding on the lava to reach the far side. After the gap, enter the next Piranha Plant pipe. This advances to the second area. Do not continue right past it, because that path eventually returns you to an earlier pipe.
In the second area, continue past the return pipe and approach the lava gap with the Paratroopas. Once you are on the safe side, stand two block spaces to the left of the elevated floating pipe and jump straight up to reveal the hidden block. Use that block as a step, then jump into the elevated pipe. This pipe advances to the third area.
The third area has Cheep-Cheeps that rise from below. They can fall back onto the screen after appearing to pass, so keep moving but do not assume the path is clear. Ignore the return pipe, cross the lava gap, and enter the first pipe immediately after that gap. It leads to the underwater fourth area.
In the underwater area, use short swimming inputs to control Mario’s height while avoiding Fire-Bars and Bloopers. Staying low is often safer when you are not Fire Mario, but move upward whenever a rotating bar blocks the lower route. Be careful when backing up: the pipe you entered has an invisible Piranha Plant in the original NES graphics. Swim to the pipe at the far right to reach the final area.
- Pass the first pipe in the opening area.
- Skip the next pipe because it returns toward the start.
- Cross the lava gap with the moving lift.
- Enter the first pipe after that lava gap.
- In the second area, reveal the hidden block left of the elevated pipe.
- Use the hidden block to reach the elevated pipe.
- In the third area, enter the first pipe after the lava gap.
- Swim right through the underwater area and use the far-end pipe.
5. Cross the final room and trigger the ending
The final area begins with a Hammer Brother, followed by a Podoboo over lava and Bowser on the bridge. Stand on the right-side pipe and watch the Hammer Brother’s movement. When its hammers are not covering the intended landing area, accelerate and jump behind it. Continue immediately across the Podoboo section, timing the jump around the lava plume rather than trying to trade a hit for forward progress. Lava is fatal regardless of Mario’s power state.
Bowser throws hammers and breathes fire. If you preserved Fire Mario, use fireballs while moving to attack him from a safer distance. Fireball defeat is helpful but not required. You can also pass beneath Bowser when he is far enough away and the floor is clear, or jump over him if the hammer and fire patterns leave enough room. Do not force either maneuver while a projectile occupies the landing area.
Continue to the right after passing or defeating Bowser and touch the axe at the end of the bridge. The axe destroys the bridge and sends Bowser into the lava. Reaching Bowser alone is not enough for the normal stage completion; the axe is the reliable finish trigger. Wait through the Princess Toadstool rescue sequence and ending message. Seeing that rescue sequence and message verifies completion of the original NES campaign.
- Observe the final Hammer Brother before moving.
- Cross the Podoboo without being forced into the lava.
- Use fireballs against Bowser if Fire Mario is available.
- Otherwise pass beneath or jump over Bowser only through a clear opening.
- Touch the axe at the bridge’s right end.
- Wait for the Princess Toadstool rescue sequence and ending message.
Before you move on
- World 8-1, 8-2, and 8-3 have been cleared in order.
- World 8-4’s opening return pipes were skipped.
- The moving lift was used to cross the first major lava gap.
- The advancing pipe after the first lava gap was entered.
- The hidden block left of the elevated pipe in the second area was revealed and used as a step.
- The first pipe after the third-area lava gap was entered.
- The underwater area was crossed using the far-end pipe.
- Bowser was defeated with fireballs or bypassed safely.
Castles and Boss Patterns
The original NES castles combine fire bars, lava, moving platforms, enemy ambushes and a final bridge encounter. Each castle ends at an axe placed beyond Bowser or a disguised replacement. Reaching the axe is always enough to clear the stage; Fire Mario can also destroy the bridge guardian with five successful fireballs, but attacking is optional. The same basic plan works from World 1-4 through World 8-4, with later castles adding hammers and more demanding approach hazards.
Enter a castle with the right priority
Your first objective is to reach the bridge alive, not to collect every coin or defeat every enemy. Preserve Super Mario or Fire Mario whenever possible. In the original NES game, a castle death sends Mario back to the beginning of that castle; there is no mid-stage checkpoint to resume from.
Do not take a risky power-up or coin detour immediately before a fire bar, lava gap or Hammer Brother. If you are already Fire Mario, use that advantage on dangerous enemies rather than saving every fireball. If you are Small Mario, play for the axe route and avoid trading damage with the bridge guardian.
- Preserve Super Mario or Fire Mario before the final approach.
- Treat every failed castle attempt as a full restart.
- Choose survival over optional coins and risky power-ups.
Cross fire bars and lava safely
Fire bars rotate around fixed blocks. Stop on solid ground and watch their rotation long enough to identify the opening. Move through the gap instead of trying to outrun the flames. When a fire bar sweeps low, a short hop after the flames pass is usually safer than a long jump. When it rotates high above Mario, walking underneath can be safer than jumping into its lower arc.
Lava is an immediate death hazard. Start running jumps from stable ground rather than from the edge of a platform, and release the run button if you need a shorter landing. When a moving platform crosses lava, board near its center and jump toward the next solid surface before the platform reaches the end of its route. Podoboos can rise from lava without warning, so do not pause directly above a lava opening.
- Observe a rotating fire bar before committing.
- Begin lava jumps from stable ground.
- Avoid stopping over a Podoboo launch point.
Handle castle enemies without creating new hazards
Stomp or fire at Koopa Troopas when the landing area is clear. Kicking a shell in a cramped castle can be dangerous because it rebounds from walls and may return to Mario. Use shells only when you can see the full rebound path or when the shell will immediately clear a safe line.
Hammer Brothers are most dangerous when approached from below or beside a narrow platform. If you have Fire Mario, throw fireballs before entering their range. Without fire, wait for a Hammer Brother to jump, then run underneath during the opening. Do not linger beneath the enemy while hammers are being thrown.
Castles may combine an enemy with a fire bar or Podoboo. Let one hazard create an opening, then pass through decisively. Retreating is often limited because the screen scrolls forward, so avoid moving into the next section while an enemy is already beside Mario.
- Use fireballs on Hammer Brothers when possible.
- Do not kick shells without checking the rebound path.
- Pass combined enemy-and-hazard sections in one deliberate movement.
Know which bridge boss you are facing
Worlds 1-4 through 5-4 use bridge guardians that attack with fire and movement but do not throw hammers. Worlds 6-4, 7-4 and 8-4 add hammer throws, making a direct jump much less reliable. Every bridge also has an axe beyond the guardian, and touching that axe drops the bridge and ends the encounter.
The guardian may walk toward Mario, jump over him or fire a projectile. In some encounters, a Podoboo or flame chain adds a second timing problem near the bridge. Approach the arena without stopping at the lava edge. The safe goal is to create an opening, pass the guardian and continue right to the axe.
- Expect fire attacks in every bridge encounter.
- Expect hammers in Worlds 6-4, 7-4 and 8-4.
- Locate the axe beyond the guardian before committing to the crossing.
Use the axe as the dependable solution
When the guardian is moving toward Mario, wait for a jump or another clear opening. Then run underneath it or jump over it, depending on the space and the active hazards. Continue moving right immediately after passing. Do not stop to celebrate the crossing; a late fireball, hammer or Podoboo can still catch Mario before the axe.
Super Mario can sometimes survive contact and continue toward the axe after losing the power-up, but this is an emergency option rather than a planned method. Small Mario must avoid contact entirely. If Fire Mario is available, five successful fireballs destroy Bowser or the disguised guardian. Keep enough room to retreat while firing, and still move to the axe after the guardian disappears.
- Wait for a jump or opening rather than forcing a collision.
- Run right immediately after passing the guardian.
- Use the axe route if a fireball attack becomes unsafe.
Apply the plan to World 8-4
World 8-4 is a castle maze before it becomes a bridge fight. Follow the correct pipe routes rather than assuming every pipe advances the stage. The level includes an underwater section, so switch from normal jumping to controlled swimming and watch for enemies and fire hazards before entering the next pipe. After the maze and final platforming sections, a Hammer Brother and additional lava hazards guard the approach to Bowser.
At the final bridge, expect the World 8 hammer pattern. If you are Fire Mario, use fireballs on the Hammer Brother before the last lava opening when the shot is safe, then preserve enough control for Bowser. Against Bowser, wait for a jump and run underneath, or jump over him only when the hammer and fire patterns leave a clear route. Touch the axe on the far side to finish the campaign.
- Follow the correct pipes through the World 8-4 maze.
- Treat the underwater area as a separate movement challenge.
- Save enough control and power for the final Hammer Brother and Bowser.
Recover after a failed attempt
After a death, repeat the castle from its opening rather than changing every decision. First learn the opening hazards, then identify the safest route to the bridge, and finally practice the boss crossing. If you repeatedly lose Super or Fire Mario in the same section, stop taking the optional route that caused the loss and prioritize the next solid platform.
A bridge guardian does not need to be defeated for Worlds 1 through 7. Touching the axe is sufficient, and the same is true for World 8-4. After the axe is activated, the bridge collapses and the castle completion sequence begins. In Worlds 1 through 7, a Mushroom Retainer rescue message follows. In World 8-4, the ending sequence begins after the final Bowser encounter.
- Repeat the known safe route after a death.
- Do not require a boss defeat when the axe route is open.
- Confirm the bridge collapses after touching the axe.
Before you move on
- Mario has reached the end of the castle and touched the axe.
- The bridge visibly collapses and the guardian falls into the lava or disappears after fireball defeat.
- Worlds 1 through 7 display their post-castle rescue sequence.
- World 8-4 proceeds into the game's ending sequence after the final axe encounter.
- The run uses the original NES mechanics rather than features from Super Mario All-Stars, Super Mario Bros. Deluxe, The Lost Levels or another later version.
Warp Zones, Coin Rooms and Hidden Routes
The original NES version of Super Mario Bros. contains three standard Warp Zones: one in World 1-2 and two in World 4-2. The World 1-2 route leads to Worlds 2, 3, or 4. The early World 4-2 vine route leads to Worlds 6, 7, or 8, while the later ceiling route leads only to World 5. These areas are optional shortcuts. Use them for practice or a faster ending attempt, but avoid them when the goal is to clear all 32 normal stages in sequence.
Reach the World 1-2 Warp Zone
Play through the underground section of World 1-2 until you reach the rising-and-falling platforms near the normal exit. The platforms are the key landmark. Do not enter the ordinary pipe that returns Mario to the surface if you intend to use the Warp Zone.
Wait for a platform to rise high enough to support a safe jump. Ride it upward, then jump onto the brick ceiling. If you miss the platform, finish the course normally unless you have enough time and space to try again safely; the Warp Zone is optional and does not create a checkpoint.
Once Mario is on the ceiling, run right. Stay above the normal exit pipe and continue across the ceiling until the Warp Zone room appears. Its three pipes lead left-to-right to World 4-1, World 3-1, and World 2-1.
Take the left pipe for World 4-1, the middle pipe for World 3-1, or the right pipe for World 2-1. If you are aiming for the shortest standard route toward the World 4-2 vine shortcut, choose the right pipe. The Warp Zone skips the rest of World 1, so World 1-2 itself is not counted as cleared on that route.
For a full sequential campaign, drop to the normal route and enter the ordinary exit pipe. Continue to World 1-3 instead of entering any Warp Zone pipe.
- Reach the rising-and-falling platform section near the end of World 1-2.
- Ride a rising platform to the ceiling.
- Run right past the normal exit pipe.
- Choose left for World 2-1, middle for World 3-1, or right for World 4-1.
- Use the normal exit when clearing every stage in order.
Open the early World 4-2 vine Warp Zone
Enter World 4-2 and continue through the underground course until the first moving-platform area. After crossing the downward-moving lift section, look for the elevated row of three visible bricks. The left brick in this row contains the beanstalk.
Stand beneath the rightmost brick of the visible row and jump straight up to reveal a hidden block. Move beneath the brick immediately to its left and jump again to reveal the second hidden block. These two hidden blocks form the support needed to reach the upper row. Keep the leftmost visible brick on-screen while setting up the jump.
Move right so Mario can stand on the right hidden block, then jump onto the visible brick row. From there, strike the leftmost visible brick. A beanstalk emerges from it. The vine does not come from the middle or rightmost visible brick.
Climb the beanstalk into the elevated coin area. Continue right through this area until you reach the three-pipe Warp Zone. The pipes lead left-to-right to World 6-1, World 7-1, and World 8-1.
For the shortest conventional route to the ending, take the rightmost pipe. It begins World 8-1 and skips Worlds 5 through 7. The transfer is one-way for that run; after entering the pipe, you cannot return to World 4-2 without starting another game.
- Reach the downward-moving lift section in World 4-2.
- Find the visible three-brick row after the lift.
- Reveal the hidden support blocks in the lift-area setup until Mario can reach the upper brick row.
- Use the supports to reach the visible brick row.
- Hit the leftmost visible brick to release the beanstalk.
- Climb the beanstalk and follow the elevated area to the three pipes.
- Take the rightmost pipe to begin World 8-1.
Use the separate World 4-2 ceiling Warp Zone
The second World 4-2 shortcut is separate from the beanstalk route. Continue through the normal course instead of climbing the early vine. After the later stair section, look for the moving platforms near the end of the level.
Ride one of these platforms upward and jump onto the ceiling. Run right along the ceiling, passing over the normal exit route, until Mario reaches a separate Warp Zone room.
This room contains a single pipe. Enter it to begin World 5-1. It does not lead to World 6, World 7, or World 8; those destinations belong to the earlier beanstalk Warp Zone.
To continue sequentially, stay on the lower route, enter the normal exit pipe, and finish World 4-2. The ordinary exit sends Mario to World 4-3. The ceiling route is optional and should be treated as a shortcut rather than a required part of the course.
- Avoid the early beanstalk if you want the later ceiling route.
- Reach the moving-platform section after the later stairs.
- Ride a platform to the ceiling.
- Run right past the normal exit route.
- Enter the single pipe for World 5-1, or use the ordinary exit for World 4-3.
Find optional coin rooms and bonus areas
Coin rooms are optional areas that contain coins and sometimes additional block rewards. In World 1-2, the first pipe encountered during the underground route leads to a coin room. Enter it when you want the coins, then leave through its exit pipe and resume World 1-2. The room does not complete the course and does not alter the Warp Zone destinations.
World 4-2 contains another coin area along the normal route. After the early beanstalk setup, continue right past the Piranha Plant pipes. The pipe after the relevant pipe sequence leads to a coin room. Treat it as a detour: it returns you to World 4-2 rather than sending you to another world.
Do not confuse coin rooms with Warp Zones. A coin room returns Mario to the same course, while a Warp Zone sends him to the first course of another world. Neither type of area creates a checkpoint or protects progress after a game over.
Skip optional rooms when the timer is low, when Mario is exposed to enemies, or when preserving a power-up matters more than collecting coins. Coins are useful for score and extra-life progress, but no coin room is required to reach the ending.
- Enter coin rooms only when the detour is safe.
- Collect the coins and leave through the room’s exit pipe.
- Resume the same course after a coin-room detour.
- Distinguish coin rooms from Warp Zones.
- Skip optional areas when time or survival is more important than score.
Choose a sequential or warp-assisted route
For a complete no-warp campaign, clear every normal stage from World 1-1 through World 8-4 in order. In World 1-2, use the ordinary exit. In World 4-2, avoid both Warp Zones and take the normal exit to World 4-3. Optional coin rooms are allowed because they return Mario to the same course, but they are not required.
For the shortest conventional Warp Zone route, clear World 1-1, use the World 1-2 ceiling route, and take the leftmost pipe to World 4-1. Clear World 4-1 and enter World 4-2. After the downward-moving lift, reveal the hidden support blocks in the lift-area setup, use them to reach the upper brick row, hit the leftmost visible brick, climb the beanstalk, and take the rightmost pipe in the elevated Warp Zone for World 8-1.
After the shortcut, clear World 8-1, World 8-2, World 8-3, and World 8-4. Defeat Bowser in World 8-4 and touch the axe. The Princess rescue sequence and ending message confirm completion, even though the Warp Zone route skipped earlier worlds.
Use Warp Zones when the immediate goal is practicing later stages, reaching World 8, or making a shorter ending attempt. Avoid them when the goal is to learn every course, clear all 32 normal stages, or record a full sequential completion.
- No-warp route: clear World 1-1 through World 8-4 in order.
- World 1-2 pipes, left-to-right: Worlds 4, 3, and 2.
- World 4-2 vine pipes, left-to-right: Worlds 6, 7, and 8.
- Use the rightmost vine-zone pipe to begin World 8-1.
- Use the separate World 4-2 ceiling pipe only when deliberately choosing World 5-1.
- Confirm completion by seeing the Princess rescue sequence and ending message after World 8-4.
Before you move on
- For a no-warp campaign, confirm that every normal stage from World 1-1 through World 8-4 was cleared in sequence.
- For the World 1-2 Warp Zone, confirm that the selected pipe began World 2-1, World 3-1, or World 4-1 according to its position.
- For the World 4-2 vine route, confirm that the downward-moving lift section was reached before the setup.
- Confirm that the hidden support blocks in the lift-area setup let Mario reach the upper brick row.
- Confirm that the leftmost visible brick released the beanstalk.
- Confirm that the elevated World 4-2 pipes began Worlds 6-1, 7-1, and 8-1 from left to right.
- For the shortest Warp Zone route, confirm that the rightmost elevated pipe began World 8-1.
- For the separate World 4-2 ceiling shortcut, confirm that its single pipe began World 5-1.
Recovery from Mistakes and Troubleshooting
The original NES Super Mario Bros. has no mid-level checkpoints or save points. Recovery means reaching safe ground, protecting Mario’s current power state, managing the timer, and changing the failed decision on the next attempt. If a Game Over occurs, the NES version also has a continue command that can return you to the beginning of the world where the Game Over happened.
Stabilize immediately after taking damage
If Mario is hit while Super Mario or Fire Mario, the hit removes the powered-up state and leaves him as Small Mario. Treat the next mistake as fatal. Move onto a broad, solid section before attempting another jump whenever the level layout allows it.
Make the next safe power-up your priority. A Super Mushroom changes Small Mario into Super Mario. A Fire Flower changes Small Mario into Super Mario, while collecting a Fire Flower as Super Mario changes him into Fire Mario. Do not expect Small Mario to gain fireball ability from a Fire Flower immediately.
Take a safe power-up before optional coins, bonus-room detours, or a risky shortcut if both choices cannot be reached safely. Do not charge into the next enemy formation after being hit. Watch the enemy movement, then choose between jumping over the group, waiting for an opening, or using fireballs if you are Fire Mario. Fireballs are useful against enemies gathered on flat ground, but standing still too long can waste TIME or allow another enemy to reach you.
- Move to stable ground after a hit when the level permits it.
- Remember that Small Mario plus a Fire Flower becomes Super Mario, not Fire Mario.
- Prioritize the next safe power-up over optional coins or detours.
- Treat Small Mario as one mistake away from losing the life.
Use Koopa shells without creating a second hazard
In the original NES game, Mario does not pick up and carry Koopa shells. Stomp a Koopa Troopa to make it retreat into its shell, then touch the shell from the side to kick it. A kicked shell can clear a line of enemies or remove an enemy blocking a pipe, stairway, or landing area.
Only kick a shell when there is enough room to watch its path. After striking an enemy or wall, the shell can rebound and travel back toward Mario. Move behind it only after confirming its direction, and be ready to jump over it or step away when it returns. A shell near a wall, pit, or narrow underground passage is often more dangerous than the enemy it could remove.
Use shells as route-clearing tools, not as portable shields. If the shell has done its job and the area becomes cramped, leave it behind. When lives are scarce, a safe jump over one enemy is preferable to a complicated shell sequence beside a pit.
- Stomp the Koopa first, then kick the shell from the side.
- Leave rebound space before kicking.
- Watch the shell’s direction after every collision.
- Abandon the shell in tight areas rather than trying to control it through a hazard.
Recover a bad position or accept a failed jump
When enemies surround Mario, move toward the nearest wide platform, pipe, or open floor. A retreat is often safer than jumping in place, because a mistimed jump can land on another enemy or carry Mario beyond the platform edge. Enter a pipe only after checking that its exit will not place Mario directly into another hazard.
If Mario is standing on a small platform, identify the next solid landing before pressing forward. Do not make repeated blind attempts at a gap. Use the visible platform edge and the next landing as references, build running speed when a long jump is required, and release the run button when a shorter landing is safer.
Some situations cannot be recovered. If Mario has fallen into a pit, has no reachable surface, or is otherwise unable to reach the exit, allow the death to finish instead of repeatedly pressing buttons. The level restarts from its beginning after the life is lost; the original NES game has no standard checkpoint that returns Mario to the failed obstacle.
- Move toward a wide, stable landing before planning the next action.
- Use pipes as recovery landmarks only when their exits are safe.
- If no route is reachable, accept the death and replay the level with a changed approach.
- On the replay, alter the jump timing or route that caused the failure.
Manage lives and use legitimate 1-Up opportunities
When the life counter is low, skip risky flagpole jumps, optional coin rooms, and difficult bonus detours. Preserve Super or Fire Mario before castles and later-world enemy formations. Coins award an extra life after 100 are collected, but never cross a dangerous gap solely for one coin.
There are hidden 1-Up blocks in the first level of each world, from 1-1 through 8-1, but most are conditional. The block in the starting world is available when a new game begins, and warping to a world activates that world’s level 1 opportunity. During normal sequential play, the hidden 1-Up in the next world’s level 1 depends on collecting the required coins in the previous world’s level 3 and finishing that level. The usual requirement is every coin in that level; World 1-3 is an exception because collecting 21 of its 23 coins is sufficient.
The visible 1-Ups in 1-2 and 8-2 are separate opportunities. A hidden 1-Up can also be lost if Mario reaches or nearly reaches its location and then dies before collecting it. Simply being hit and becoming Small Mario does not remove the opportunity. Treat conditional mushrooms as useful bonuses, not guaranteed supplies.
World 3-1 offers the familiar staircase shell-bounce technique. Near the final staircase, let the first Koopa Troopa descend, then stomp the second Koopa and position its shell so it rebounds between Mario and the stair. With consistent timing, repeated bounces increase the scoring chain and eventually award extra lives. This is not a guaranteed emergency solution: a mistimed jump can cost the life you were trying to save.
- Skip optional hazards when the life counter is low.
- Use the 100-coin life only when the route is already safe.
- Do not assume every hidden level 1 1-Up is present.
- Remember that the previous world’s level 3 coin condition affects normal sequential access.
- Practice the World 3-1 staircase only when you can reach it consistently.
React to low TIME and apparent soft-locks
Watch TIME before entering a bonus room, coin room, or optional detour. If the counter is falling quickly, leave the detour and take the known route to the flagpole. A safer, less profitable path is better than losing a life to a timeout after the difficult section has already been cleared.
When TIME is low, stop experimenting with unfamiliar jumps. Use the route you already know, pass enemies rather than waiting for unnecessary scoring opportunities, and take the first safe opening through a narrow section. When TIME reaches zero, Mario loses a life and the current level restarts; there is no timeout recovery or checkpoint.
The original NES game does not normally require a reset when Mario appears stuck. Wait for a moving enemy to clear, defeat it with a stomp or fireball, or use a kicked shell only where there is room to control the rebound. If Mario has no reachable route, let the life end normally.
After a Game Over, the Player Select screen appears. To continue from the beginning of the world where the Game Over occurred, hold Down and A, then press Start while continuing to hold them. This is not a save point: it restarts that world from its first level with fresh lives and does not restore the failed level, power-up state, or previous position. Begin the world conservatively and rebuild Mario’s power state through safe opportunities.
- Check TIME before optional rooms and detours.
- Choose a known route rather than testing a new jump under time pressure.
- Allow a normal death when Mario is genuinely unable to progress.
- At the Player Select screen after a Game Over, hold Down and A before pressing Start.
- Remember that the continue command restarts the world, not the failed level.
Before you move on
- You can recover from a hit by reaching stable ground and choosing the next safe power-up.
- You know that Small Mario collecting a Fire Flower becomes Super Mario, while Super Mario collecting one becomes Fire Mario.
- You can kick a Koopa shell to clear an enemy line while allowing for its rebound, without attempting to carry it.
- When low on lives, you can identify optional risks to skip and distinguish conditional 1-Up opportunities from guaranteed resources.
- You understand the previous-world level 3 coin condition for normally activating a hidden 1-Up in the next world’s level 1.
- You can recognize that a timeout, pitfall, or unrecoverable position costs the current life and restarts the level.
- After a Game Over, you know to hold Down and A at the Player Select screen before pressing Start to restart at the beginning of the last world reached.
- You can complete a recovery attempt with Mario alive, TIME still active, and a known route to the level exit.
Optional Playstyles: No-Warp, Low-Death and Speed Approaches
Choose between clearing all 32 regular stages in order or using the original NES Warp Zones to reach later worlds quickly. Both routes are complete only after World 8-4 is cleared and the Princess rescue sequence and ending message appear. A low-death approach can be combined with either route by protecting power-ups, favoring repeatable movement over optional rewards, and abandoning a secret route when its setup becomes unsafe.
Choose the route before starting
For a full no-warp completion, begin at World 1-1 and clear every regular stage in order through World 8-4. In World 1-2, remain on the lower route near the end and use the normal exit pipe leading to World 1-3. Do not ride the rising platforms onto the ceiling or continue past the normal exit into the Warp Zone.
In World 4-2, use the normal exit leading to World 4-3. Do not climb the beanstalk or run across the ceiling into either Warp Zone. This route clears all 32 regular stages without skipping numbered levels.
Coin rooms, hidden blocks, vines, bonus areas, and extra-life opportunities are optional diversions within a stage. They do not replace that stage. Entering any Warp Zone changes the attempt into a warp-assisted run.
- Begin at World 1-1.
- Clear every regular stage through World 8-4.
- Use the normal exit in World 1-2.
- Use the normal exit in World 4-2.
- Do not count bonus rooms as substitutes for regular stages.
Use the World 1-2 Warp Zone
Near the end of World 1-2, reach the section with the rising platforms beside the brick ceiling. Ride a platform high enough to land on the ceiling, then run right across the top. Continue past the normal exit pipe to enter the three-pipe Warp Zone.
The pipes lead from left to right to World 4-1, World 3-1, and World 2-1. Take the left pipe for World 4, the middle pipe for World 3, or the right pipe for World 2. Every choice skips numbered stages, so none is suitable for an all-32-stage attempt.
For the shortest reliable route toward World 8, take the left pipe to World 4-1. If Mario misses the ceiling and falls to the lower route, finish World 1-2 normally rather than attempting an uncontrolled jump around the exit.
- Reach the rising-platform section near the end of World 1-2.
- Ride a platform onto the brick ceiling.
- Run right beyond the normal exit pipe.
- Choose left for World 4-1, middle for World 3-1, or right for World 2-1.
- Treat the attempt as warp-assisted after entering a pipe.
Reach the World 4-2 beanstalk Warp Zone
Enter World 4-2 and continue through the opening underground section. After the downward-moving lift, look for the overhead formation of three brick blocks. This is the landmark for the beanstalk route to the elevated Warp Zone.
Reveal the hidden support block beneath the rightmost brick in the formation. Then reveal the next hidden support block beneath the brick immediately to its left. Use the rightmost revealed block as a step while keeping the vine-containing brick visible. From that raised position, hit the leftmost brick in the overhead row. A beanstalk appears from it.
Climb the beanstalk to the outdoor bonus section. Move right across the platforms and coin area until you reach the three-pipe Warp Zone. The pipes lead from left to right to Worlds 6, 7, and 8. Take the right pipe to begin World 8-1.
Do not confuse this route with the later ceiling Warp Zone in World 4-2. The beanstalk route begins after the downward-moving lift and uses the overhead three-brick formation; the later route is reached by getting onto the ceiling near the end and leads only to World 5-1.
- Reach the downward-moving lift in World 4-2.
- Find the overhead row of three bricks after the lift.
- Reveal the hidden block beneath the rightmost brick.
- Reveal the next hidden block beneath the brick immediately to its left.
- Use the rightmost revealed block as a step.
- Hit the leftmost raised brick to release the vine.
- Climb the vine and take the right pipe for World 8-1.
Follow a practical warp-assisted route
Clear World 1-1 and take the left pipe in the World 1-2 Warp Zone to World 4-1. Clear World 4-1 normally and enter World 4-2.
In World 4-2, reach the downward-moving lift and set up the beanstalk route by revealing the hidden support blocks in the lift-area setup until Mario can stand high enough to reach the upper brick row. From that stable raised position, strike the leftmost brick in the overhead row. Climb the vine and take the right pipe in the elevated Warp Zone.
This sends Mario to World 8-1. Clear World 8-1, World 8-2, World 8-3, and World 8-4 in order. Reaching World 8 is only a route milestone; the campaign remains unfinished until World 8-4 is cleared and the ending begins.
The middle and left pipes in the beanstalk Warp Zone lead to Worlds 7 and 6 respectively. They are valid shortcuts but do not begin the final world immediately.
- Clear World 1-1.
- Take the left World 1-2 pipe for World 4-1.
- Clear World 4-1 and enter World 4-2.
- Use the post-lift hidden-support-block beanstalk setup.
- Take the right beanstalk-zone pipe for World 8-1.
- Clear World 8-1 through World 8-4.
Adopt a low-death strategy
A low-death run values reliable movement over coins, high flagpole scores, and optional secrets. Hold the run button for long jumps only when the landing is clear. Release it for shorter hops near enemies, narrow platforms, and pit edges. Do not chase a coin or hidden block if doing so leaves Mario badly positioned for the next obstacle.
Preserve Super Mario or Fire Mario before castles and difficult platforming sections whenever possible. Fire Mario can remove many ordinary enemies from a distance, but fireballs are safest from stable ground. Leaving an optional coin behind is usually better than losing a power-up immediately before a castle.
Use shells only when there is enough room to watch their movement and avoid the rebound. In tight corridors, a kicked shell can return into Mario or disrupt the next jump. After taking damage, move toward stable ground, bypass optional enemies, and prioritize the exit or the next safe power-up opportunity.
After a death, identify the exact movement that failed and change that action on the next attempt. Useful practice checkpoints include clearing World 1-4 without dying, reaching World 4-4 with spare lives, entering World 8 with Super or Fire power, and reaching World 8-4 consistently. These are practice goals, not game requirements.
- Preserve Super or Fire power before castles.
- Favor safe landings over optional coins.
- Use shells only when their rebounds are controllable.
- Change the failed action after each death.
- Track completed stages and remaining lives rather than score alone.
Before you move on
- For an all-stage completion, confirm that the run proceeded from World 1-1 through World 8-4 without entering a Warp Zone.
- For a warp-assisted completion, confirm that World 1-2 led to World 4-1, World 4-2 used the beanstalk route, and the right beanstalk-zone pipe began World 8-1.
- Confirm that World 8-1, World 8-2, World 8-3, and World 8-4 were cleared.
- Confirm that World 8-4 ended with Bowser defeated or bypassed, the axe touched, and the Princess rescue sequence and ending message displayed.
- A low-death attempt meets its optional goal when the ending is reached using the selected conservative route without unnecessary deaths.
References for this chapter
Final Play Checklist and Ending Verification
Prepare for the final world, clear World 8-1 through World 8-4, navigate the original NES World 8-4 castle, touch the axe, and confirm completion through the Princess Toadstool rescue sequence and ending message. The World 4-2 shortcut is optional and must not be used during a no-warp attempt.
1. Choose your completion standard
For the normal first-quest ending, clear World 8-1, World 8-2, World 8-3, and World 8-4. The final castle ends when Mario reaches and touches the axe. The axe drops the bridge, defeats Bowser, and begins the Princess Toadstool rescue sequence.
For a no-warp completion, clear every required stage from World 1-1 through World 8-4 in order. In World 1-2 and World 4-2, use the ordinary exits instead of entering a Warp Zone. The ending does not identify whether a Warp Zone was used earlier, so record that condition separately if it matters to your goal.
Coins, bonus rooms, risky flagpole jumps, and score techniques are optional. During the final attempt, preserving a power-up and reaching the next stage is more important than collecting rewards.
- You know whether the run is a standard clear or a no-warp clear.
- World 8-1 through World 8-4 are the required final stages.
- Optional score and coin goals will not take priority over survival.
2. Prepare for World 8
Enter World 8 with as many lives as practical. Super Mario or Fire Mario can survive one ordinary enemy hit, so avoid trading that protection for a dangerous coin or shell maneuver. Fire Mario is particularly useful against Hammer Brothers in World 8-3 and the final room of World 8-4, but Fire Mario is not required.
World 8-1 emphasizes long running jumps. Hold the run button when you need distance, then release it when a shorter landing gives better control. In World 8-2, watch Lakitu, Spinies, Bullet Bills, narrow platforms, and large gaps. Begin long jumps from stable ground rather than improvising from an uneven edge.
World 8-3 combines Bullet Bills, Paratroopas, Hammer Brothers, gaps, and a hazardous staircase near the flagpole. Use fireballs against a Hammer Brother when there is room, or wait for it to jump and pass through the opening. Do not stop in the hammer arc simply to force a defeat.
If the TIME counter is becoming low, take the direct route to the flagpole and ignore optional blocks. A missed reward costs nothing; a time-out costs a life and requires another attempt.
- Your lives and current power-up state have been checked.
- You use running speed deliberately and plan the landing before each long jump.
- You are prepared to bypass optional rewards when they create danger or waste time.
3. Take the advancing route through the first World 8-4 area
At the beginning of World 8-4, pass the first Piranha Plant pipe and do not enter the next pipe. That second pipe returns Mario to the opening section. Continue right, pass the Goombas, and cross the lava gap with the moving platform near the surface of the lava.
After the crossing, enter the Piranha Plant pipe. This is the advancing pipe for the first area. If you enter the wrong pipe, Mario returns to an earlier section and must repeat the route.
Continue through the next room past the low pipes and Buzzy Beetles. Do not enter the pipe immediately after the Buzzy Beetles; it returns Mario toward the start. After the Paratroopas, cross the lava gap and approach the elevated pipe.
Stand slightly to the left of the elevated pipe and jump straight up to reveal the hidden block. Use that block as a step, then jump onto and enter the elevated pipe. This advances to the Cheep-Cheep section.
- You avoided the early backward pipe.
- You crossed the first major lava gap with the moving platform.
- You revealed the hidden block beside the elevated pipe.
- You entered the elevated pipe rather than taking a looping pipe.
4. Cross the Cheep-Cheep and underwater sections
In the Cheep-Cheep area, watch the fish trajectories before jumping. Do not enter the second pipe from the pipe where you arrived; it returns Mario toward the beginning. Continue to the lava gap and enter the first pipe immediately after the crossing. That pipe leads to the underwater area.
In the underwater section, move right while watching the Bloopers and rotating Fire Bars. Stay low when that gives you room, but do not back into the entrance pipe or rush through a Fire Bar's path. Make small movements and advance when the hazards rotate away.
At the far right of the underwater area, enter the exit pipe. The other pipe loops back toward the beginning. The right-side exit leads to the final room containing the Hammer Brother, Podoboo, Bowser, and the axe.
- You used the pipe immediately after the Cheep-Cheep area's lava crossing.
- You gave Bloopers and Fire Bars time to move before advancing.
- You entered the pipe at the far right of the underwater area.
5. Reach the axe and finish the final castle
The final room begins with a Hammer Brother, followed by a lava gap with a jumping Podoboo. If you are Fire Mario, throw fireballs from a safe distance, but keep moving so the Hammer Brother does not trap you. Without firepower, wait for a safe opening and pass when the Hammer Brother jumps.
Bowser throws hammers and breathes fire. Fireballs can defeat him, but damaging him is optional. The required action is reaching the axe at the far side of the bridge. Touching the axe drops the bridge and defeats Bowser even if you did not defeat him with fireballs.
Small Mario can pass beneath Bowser when the opening is clear. Super Mario or Fire Mario can use a controlled jump, a careful passage beneath him, or fireballs. Commit to the route toward the axe instead of stopping beside Bowser.
- You passed the final Hammer Brother and Podoboo.
- You bypassed or damaged Bowser while continuing toward the axe.
- Mario touched the axe, the bridge fell, and Bowser dropped into the lava.
6. Verify the first-quest ending
After the axe drops the bridge, the Princess Toadstool rescue sequence appears. The ending message that follows confirms completion of the original NES first quest. The Princess rescue sequence and ending message are the completion signal; an automatic return to the title screen is not required as proof.
After the ending message, the game presents the instruction to select a world. Press B to cycle through the available starting-world choices, then press Start to begin the selected quest. Pressing B changes the selection; it does not begin the quest by itself.
The harder second quest is optional. It is not needed for the assigned first-quest completion. If you select a world after the ending, the game begins at that world's first stage rather than at an individual stage such as 7-4.
- The axe was touched and the bridge fell.
- The Princess Toadstool rescue sequence appeared.
- The ending message appeared after the rescue sequence.
- B was used to cycle the available starting-world choice.
- Start was pressed to begin the selected quest.
- You did not treat pressing B alone as the command to start the quest.
7. Use the World 4-2 shortcut only when skipping worlds is intentional
This shortcut is separate from the no-warp route. In World 4-2, reach the raised three-brick formation after the downward-moving lift. Stop before the formation scrolls too far left or right, and keep the leftmost brick of the upper row visible on-screen throughout the setup.
Stand below the right side of the formation and hit the right hidden support block first. Then hit the adjacent hidden support block immediately to its left. These two revealed blocks form the necessary stepping support. Use them to reach the upper brick row; do not rely on only one support block or on the two blocks beneath the wrong part of the formation.
From the support blocks, jump up and strike the leftmost brick of the upper three-brick row while that brick remains on-screen. That brick releases the vine. If the leftmost brick has scrolled off-screen, reposition before continuing rather than striking a different brick and risking the wrong setup.
Climb the vine to the elevated Warp Zone. Its pipes lead from left to right to Worlds 6, 7, and 8. For the shortest warp-assisted route to the final world, take the rightmost pipe, which starts World 8-1. If you want a sequential run, do not climb the vine; continue through the ordinary World 4-2 exit instead.
- You reached the raised three-brick formation after the downward-moving lift.
- You kept the leftmost upper brick visible while setting up the vine.
- You revealed the right hidden support block first.
- You revealed the adjacent hidden support block to its left second.
- You used the supports to reach the upper row.
- You struck the leftmost upper brick and climbed the vine.
- You took the rightmost Warp Zone pipe for World 8-1 only when a shortcut was intended.
- You recorded the run as warp-assisted if a Warp Zone was used.
8. Recover after a Game Over
If all lives are lost before completion, allow the Game Over sequence to finish. At the title screen, hold A while pressing Start. The game restarts at the first stage of the last world reached. A Game Over in World 8 therefore returns you to World 8-1, not to the exact stage where the final life was lost.
The continuation does not restore the previous power-up, lives, or exact stage position. You must clear that world's stages again. It also does not convert a warp-assisted run into a no-warp run.
The original NES game has no ordinary save system. Do not assume that powering off the console preserves the continuation state. If you are tracking a no-warp result, keep that record separate from any continuation or Warp Zone use.
- You held A while pressing Start after the Game Over sequence reached the title screen.
- You understand that the restart begins at the first stage of the last world reached.
- You do not expect the previous power-up, lives, or exact stage position to return.
- You kept the run's warp or no-warp status accurate.
Before you move on
- World 8-1, World 8-2, and World 8-3 were cleared, followed by World 8-4.
- In World 8-4, the advancing pipe after the first moving-platform lava crossing was used.
- The hidden block was used to reach the elevated pipe.
- The pipe after the Cheep-Cheep area's lava crossing was used to enter the underwater section.
- The pipe at the far right of the underwater area was used to reach the final room.
- The final Hammer Brother and Podoboo were passed.
- Mario touched the axe, the bridge fell, and Bowser dropped into the lava.
- The Princess Toadstool rescue sequence appeared.
References for this chapter
Finishing up
Defeat the final Bowser encounter in World 8-4; after clearing the castle platform section and touching the axe you will trigger the ending sequence.
Finish is verified when Bowser is defeated in World 8-4 and the Princess rescue sequence and ending message appear. The original NES game does not automatically return to the title screen as the completion signal; pressing B after the ending starts the harder second quest.
Optional completion checks: complete without using warp zones (play all 32 levels sequentially) — verify you cleared each world's levels rather than taking warp pipes.
Optional 100% style check: decide and record whether you collected all visible secrets you intended (warp zones explored or intentionally skipped) and whether you achieved high flagpole scores where desired.
Choose your next gameScreenshots & video
Game imagery for reference. Follow the written chapters above for the route and strategies.
Sources & references
Our original guide draws on the references below. Check the edition at the top of this page before following controls or unlock requirements.
- Super Mario Bros. Nintendo Entertainment System manual ↗
- Super Mario Bros. Nintendo Entertainment System instruction manual ↗
- Super Mario Bros. — NES Guide and Walkthrough by brian_sulpher, GameFAQs ↗
- Super Mario Bros. — Guide and Walkthrough — GameFAQs ↗
- Super Mario Bros. — Guide and Walkthrough by dougqh — GameFAQs ↗
- Super Mario Bros. - Guide and Walkthrough - NES by Kirby021591 ↗
- Super Mario Bros./World 1 — StrategyWiki ↗
- Super Mario Bros./Walkthrough — StrategyWiki ↗
- Super Mario Bros. — Guide and Walkthrough for NES by peach_freak ↗
- World 1-2 — Super Mario Wiki ↗
- List of Warp Zones - Super Mario Bros. 1 Guide ↗
- Super Mario Bros./World 2 — StrategyWiki ↗
- World 2-4 (Super Mario Bros.) — Super Mario Wiki ↗
- Super Mario Bros. — Guide and Walkthrough — GameFAQs ↗
- Super Mario Bros. - Guide and Walkthrough - NES by Pegboy ↗
- World 4-1 (Super Mario Bros.) — Super Mario Wiki ↗
- World 4-2 (Super Mario Bros.) — Super Mario Wiki ↗
- World 4-4 (Super Mario Bros.) — Super Mario Wiki ↗
- Super Mario Bros. / World 4 — StrategyWiki ↗
- Super Mario Bros./World 5 — StrategyWiki ↗
- TMK — Super Mario Bros. Reference Guide ↗
- Super Mario Bros. — Guide and Walkthrough, NES — VinnyVideo, GameFAQs ↗
- World 7-4 (Super Mario Bros.) — Super Mario Wiki ↗
- Super Mario Bros./World 7 — Wikibooks ↗
- World 8-4 (Super Mario Bros.) ↗
- World 8-4 - Super Mario Bros. 1 Guide ↗
- Super Mario Bros./World 8 — Wikibooks ↗
- World 4-2 - Super Mario Bros. 1 Guide ↗
- Super Mario Bros. Secrets — StrategyWiki ↗
- Where are the warp zones? ↗
- Super Mario Bros. Hidden 1-Ups ↗
- World 3-1 — Super Mario Bros. 1 Guide ↗
- World 4 — Nintendo Playing with Power eGuide ↗
About the game & collecting notes
- Platform
- Nintendo Entertainment System
Step-by-step campaign walkthrough for the original 1985 Super Mario Bros. (NES, World release). Covers controls, power-ups, enemy counters, every level from World 1-1 through World 8-4, castle strategies, warp zones and key secrets, plus optional no-warp and completion checks so you can finish the original NES ending reliably.
Darryl Polo
Darryl Polo loves tinkering with emulation and revisiting retro games. He enjoys exploring how old favorites play on different setups and sharing what he learns along the way. At Joking Joystick, he writes about the games, hardware, and small discoveries that keep the hobby fun.
Our editorial standardsFound a step that needs another look? Help us improve this guide.