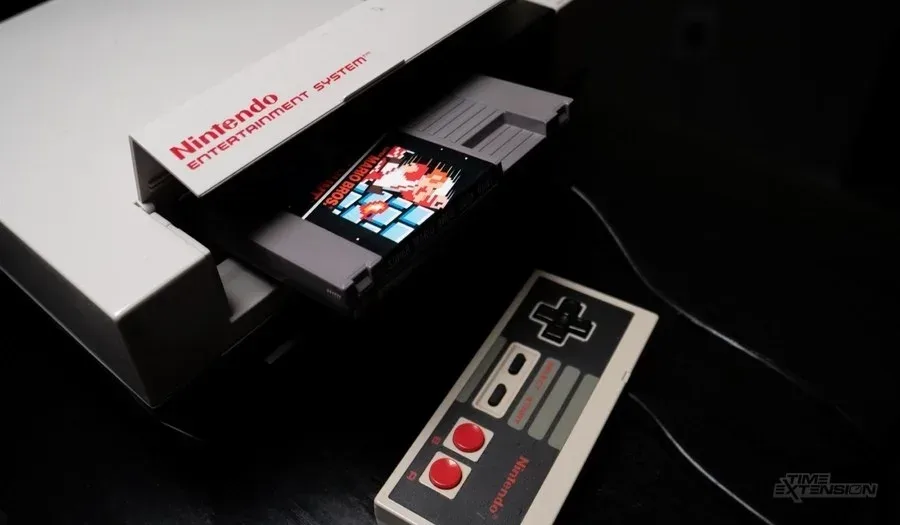
Super Mario Bros. 2 (NES USA, Rev A) — Complete Campaign Walkthrough
Step-by-step walkthrough of the North American NES release of Super Mario Bros. 2 (USA, Rev A). This guide covers controls, character choices, enemy and item tactics, every world and boss through Wart, and practical recovery and optional completion advice. Designed so a newcomer can finish the main campaign and confirm the true ending on the original NES edition.

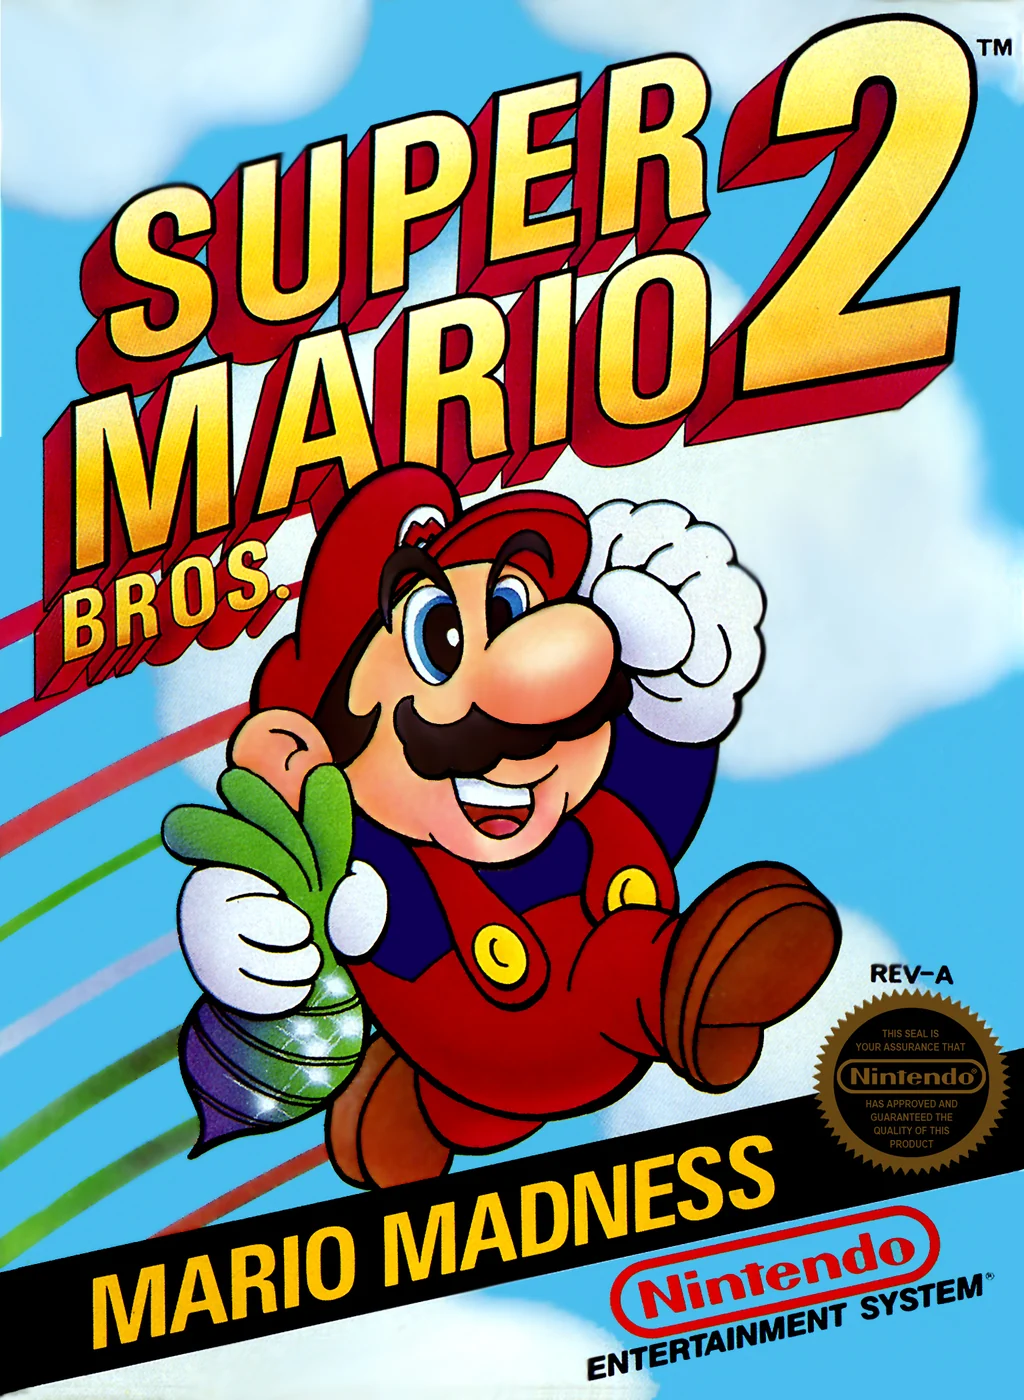
Find a copy
Super Mario Bros. 2 Nintendo Entertainment System
We may earn a commission if you buy through these links, at no extra cost to you. As an Amazon Associate I earn from qualifying purchases.
Opens retailer search results. Check the model, edition, seller, availability and current price before buying.
Before you begin
This guide covers the original North American Nintendo Entertainment System release of Super Mario Bros. 2, commonly called the USA version. It is the 1988 adventure based on Yume Kōjō: Doki Doki Panic, with Mario, Luigi, Toad, and Princess Toadstool as selectable characters.
Learn the game’s lift-and-throw mechanics, health system, character differences, key-and-door routes, recurring Birdo encounters, world bosses, and Wart’s final battle. The chapters follow the normal World 1 through World 7 route so a newcomer can finish the complete campaign on the original NES ruleset.
Optional Warp Zones and post-ending world selection are covered only as practice or shortcut features. They do not count as clearing every world and boss when using the guide’s full-campaign completion goal.
Set yourself up for the run
Read the instruction manual’s character summary and test each character briefly to feel their jump, float, and item-pickup timing.
The manual documents the core differences between Mario, Luigi, Princess Toadstool, and Toad.
Decide how you will use Continues. The original NES cartridge offers two Continue choices after Game Over, each restarting at the first area of the current world.
Practice picking up and throwing enemies and objects in the earliest safe screens; throwing is the core offense and is required for many boss encounters.
Familiarize yourself with the separate life counter and in-stage Life Meter, including Small Heart and Mushroom recovery.
Keep a mental checklist of keys and locked doors. Carry each required key to its matching door and avoid dropping it in an unreachable location.
Preserve useful Mushroom Blocks, bombs, eggs, and vegetables for the boss room that needs them.
If using an emulator or rerelease, confirm that the layouts and mechanics match the original North American NES edition. Do not rely on unverified post-ending world-selection claims.
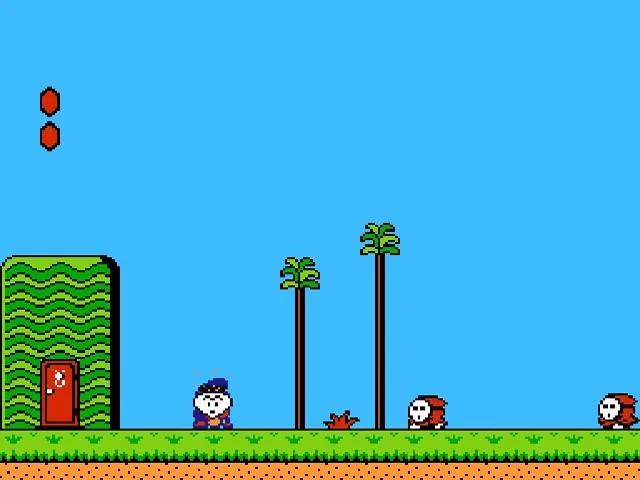
Edition Notes, Save/Continue and Menu Basics
Set up the original North American NES release of Super Mario Bros. 2, identify its separate life and health systems, choose a character before each area, and understand the limited Continue system. This cartridge has no battery-backed save, password, ordinary unfinished-run world select, or verified post-ending selector.
Confirm the correct game and edition
Use the North American NES cartridge titled Super Mario Bros. 2. The opening screen leads to a roster containing Mario, Luigi, Toad, and Princess Toadstool. The adventure takes place in Subcon and uses vegetables, Mushroom Blocks, jars, keys, doors, Crystal Balls, and Wart as its central progression elements.
Nintendo's manual describes seven worlds containing 20 areas in total. The first six worlds end with boss encounters, while World 7 leads to the final confrontation with Wart. This is the western NES game released in North America in 1988, not a later remake or compilation version.
Do not confuse this cartridge with the Japanese Famicom Disk System game also titled Super Mario Bros. 2. That separate game was later released internationally as Super Mario Bros.: The Lost Levels. It uses different stages, hazards, character rules, and progression. The North American cartridge covered here is the Subcon adventure with four selectable characters and a life meter represented by marks.
- The title screen reads Super Mario Bros. 2.
- The character roster contains Mario, Luigi, Toad, and Princess Toadstool.
- The stages use Subcon's vegetables, jars, keys, Crystal Balls, and doors.
- The game is not The Lost Levels, Super Mario All-Stars, or Super Mario Advance.
- The campaign is the seven-world, 20-area NES adventure ending with Wart.
Start a game and choose a character
Press START at the title screen. The game takes you to the character-selection screen before the area begins. Use the Control Pad to highlight Mario, Luigi, Toad, or Princess Toadstool, then press A to confirm. The selected character enters the next area immediately after confirmation.
Character choice is part of normal stage preparation. After clearing an area, the game gives you another selection opportunity before the following area. If the next screen requires long jumps, high platforms, floating across a gap, or rapid item handling, change characters instead of assuming that one choice must last through the entire campaign.
Mario is the balanced option for an unfamiliar area. Luigi has the greatest jumping power and falls more slowly, but his traction is poor. Toad has the weakest jumping ability but uproots and lifts objects quickly, and his movement suffers the least while carrying an item. Princess Toadstool can float briefly by holding A after a jump, but her jump is greatly reduced while carrying an item. These differences are gameplay mechanics of this NES release, not cosmetic variations.
- Press START on the title screen.
- Highlight a character with the Control Pad.
- Press A to confirm the selection.
- Expect a new character choice after clearing an area.
- Use Mario for balance, Luigi for height, Toad for fast item handling, and Princess Toadstool for controlled floating.
Separate the life counter from the life meter
A new game begins with three lives. The remaining-life count is shown on the character-selection screen and represents complete attempts remaining. Losing a life removes one entry from this reserve; it is not the same as losing one mark from the in-stage meter.
During an area, the life meter appears in the upper-left portion of the screen. It starts at its second mark. Contact with an enemy or an enemy attack removes one mark. When the meter reaches one mark, the character changes to the smaller form and becomes more vulnerable. If the meter is fully depleted, the current life ends.
The meter can contain up to four marks. A Small Heart restores one mark when collected. A Mushroom found in Sub-Space completely restores the meter, up to the game's normal maximum of four marks. A 1-UP grants another complete life rather than restoring health.
Falling into a pit or falling from a dangerous elevated route ends the current life immediately instead of merely removing ordinary meter marks. Treat pits and similar fall hazards as instant-death threats even when the meter is full.
- A new game begins with three lives.
- The in-stage meter starts at its second mark.
- Enemy contact removes one meter mark.
- One remaining mark changes the character to the smaller form.
- Small Hearts restore one mark.
- Mushrooms completely restore the meter up to four marks.
- A 1-UP adds a life.
- Pits and comparable falls end the current life immediately.
Use Continue after Game Over
When the final available life is lost, the Game Over screen presents Continue and Retry. Select Continue to restart from the first area of the current world. For example, if the run ends in World 4-3, Continue sends the next attempt to World 4-1. It does not return you to the exact area, room, boss arena, health state, or carried item from the failed attempt.
The original Nintendo manual specifies two Continues. After those two opportunities have been used, another Game Over ends the run. Select Retry when you want to return to the title screen and begin a completely new campaign from World 1.
Continue is therefore a world-level recovery tool, not a checkpoint system. It preserves neither the current screen nor the boss setup. When you use it, rebuild your lives, health, keys, and throwable supply from the beginning of that world.
- Choose Continue from the Game Over screen to restart the current world.
- Expect to begin at that world's first area.
- Remember that only two Continues are available.
- Choose Retry to return to the title screen and start again from World 1.
- Do not expect Continue to preserve a room, boss attempt, health, key, or carried item.
Understand the cartridge's lack of saving
The original North American NES cartridge has no battery-backed save file, password system, or modern quick-save command. World progress, remaining lives, and Continue usage belong to the active play session. Turning off the NES removes the unfinished campaign state.
There is also no ordinary unfinished-run world-select menu. After starting a campaign, you proceed through the connected area sequence, using Continue only to restart at the beginning of the current world after Game Over. Later releases may add saving, maps, altered menus, or other replay features; those do not apply to this original NES ruleset.
After Wart is defeated and the ending sequence begins, the cartridge does not provide a verified post-ending world-start selector. The game remains in its ending presentation rather than returning to a playable world-selection screen. To begin another ordinary run, reset the NES or turn the system off and start again. Do not treat any title-screen behavior from a remake, compilation, emulator feature, or different Mario game as evidence of a saved NES campaign.
- There is no battery-backed save file.
- There is no password system or quick-save command.
- There is no ordinary world-select menu during an unfinished run.
- The ending does not provide a verified post-ending world selector.
- Reset or power off before beginning a fresh ordinary run after the ending.
- Do not confuse this cartridge with The Lost Levels or later enhanced releases.
Before you move on
- You can press START from the title screen and reach the character-selection screen.
- You can select Mario, Luigi, Toad, or Princess Toadstool with the Control Pad and confirm with A.
- You know that a new game begins with three lives.
- You know that the life meter begins at its second mark and can hold up to four marks.
- You can distinguish enemy damage to the meter from losing a complete life.
- You know that Small Hearts restore one mark and Mushrooms completely restore the meter.
- You know that Continue restarts at the first area of the current world.
- You know that only two Continues are available and Retry starts a new run from World 1.
- You understand that the NES cartridge has no battery save, password, quick save, or ordinary unfinished-run world select.
- You understand that the game remains at its ending presentation after completion rather than offering a verified post-ending world selector.
- You can distinguish this North American Subcon adventure from the Japanese Famicom Disk System release later called The Lost Levels.
Controls, HUD and Core Mechanics (Pick-Up, Throw, Health)
Super Mario Bros. 2 on the original North American NES is built around lifting and throwing objects rather than defeating most enemies by jumping on them. Learn the controller inputs, practice the three jump types, account for each character’s handling while carrying objects, and monitor the diamond-shaped Life Meter so you enter hazardous rooms with enough health and useful projectiles.
Learn the NES controls
Use Left and Right on the Control Pad to move. Press Down to crouch, and use Up or Down to climb vines and ladders. Press Up while standing in front of an unlocked door to enter it. Hold B while moving to run faster. Press A to jump, and press START to pause during play.
The B button controls the main object mechanics. Stand over a vegetable or other uprootable item and press B to pull it from the ground. Stand on an enemy or Mushroom Block and press B to lift it. While carrying an object, press B to throw it. Directional input affects the throw: bombs and Mushroom Blocks travel only a short distance, while ordinary carried items such as vegetables can be thrown farther when you combine B with the appropriate direction.
At the title screen, press START to reach the character-selection screen. Use the Control Pad to highlight Mario, Luigi, Toad, or Princess Toadstool, then confirm the choice. The game also presents character selection between areas, allowing you to choose a different character before the next stage. You control one character at a time; this is not a simultaneous two-player mode.
- A jumps.
- B uproots, lifts, and throws objects; holding B while moving makes the character run.
- Up enters doors and climbs upward; Down crouches and descends vines or ladders.
- START pauses during play and opens character selection from the title screen.
- Choose a new character before an area when the next stage favors a different ability.
Practice the three jump types
Press A while standing still for a jump in place. This jump is comparatively low, so use it for short rises, controlled landings, or clearing an enemy that is close to you.
Press Left or Right together with A while moving for a running jump. A running jump travels higher and farther than a jump from a standstill. Keep steering with Left or Right in the air so you can line up with the landing platform or correct for a moving enemy.
For a power squat jump, hold Down until the character begins flashing, then press A. The manual describes this jump as about one and a half times the height of a regular jump. Charge it in a safe position because crouching beside an enemy or projectile leaves you exposed.
Carrying an object changes the jump for most characters. Mario’s jump height decreases slightly, and Luigi’s carrying jump power decreases more than Mario’s. Princess Toadstool also loses considerable jump power while carrying an item. If an object makes a gap unsafe, throw it to the far side first, cross without it, and retrieve it afterward. Toad is the exception in the manual’s description: his lifting power means his carrying speed and jump height do not change when he holds an item.
- Use a standing A jump for short, controlled movement.
- Use a running jump for distance and higher clearance.
- Hold Down until flashing, then press A for the power squat jump.
- Expect Mario, Luigi, and Princess Toadstool to handle differently while carrying objects.
- Use Toad when you need to move with an object without losing his normal carrying speed or jump height.
Choose a character for the movement problem
Mario is the balanced option. His jumping power is average, and his jump becomes slightly weaker while he carries an item. Use him when a stage mixes ordinary platforming, object transport, and moderate vertical gaps.
Luigi jumps the highest and travels farthest, but his jumps rise and fall more slowly. His loose traction also makes him harder to stop precisely. He is useful for high platforms and long empty-handed gaps, but his carrying jump power drops substantially, so he is not automatically the best choice for object-heavy sections.
Toad has the least jumping power, but he has the greatest lifting power. The manual lists him as the quickest at picking up Mushroom Blocks and as the quickest character when carrying an object. His carrying speed and jump height remain unchanged. Select him for repeated vegetable pulling, block movement, digging, or fast object transport, but avoid relying on him for large vertical gaps.
Princess Toadstool is third in jumping power and can float for roughly one and a half seconds by holding Down during her jump. This gives her strong aerial control over precision gaps and landings. She is the slowest at picking up Mushroom Blocks and loses considerable jump power while carrying an item, so use her for hovering routes rather than fast lifting work.
Do not apply a blanket equal-speed rule to every situation. The NES manual describes the characters as running at the same speed in ordinary running, but it separately ranks their movement while carrying an object from slowest to quickest as Princess Toadstool, Luigi, Mario, and Toad. In practical play, carrying speed matters frequently because stages ask you to transport vegetables, blocks, bombs, keys, and enemies.
- Choose Mario for balanced handling.
- Choose Luigi for high or long empty-handed jumps, while allowing for loose traction.
- Choose Toad for fast lifting, digging, and carrying.
- Choose Princess Toadstool when her brief hover can make a gap or landing safer.
- Remember that ordinary running and carrying speed are separate character properties.
Use Mushroom Blocks as weapons and cover
Mushroom Blocks can be thrown at enemies, placed as temporary steps, or stacked to create a barrier. In boss rooms, a short stack can block or absorb incoming projectiles long enough for you to reach a safe throwing position. This is especially useful when the boss fires repeatedly across the arena.
Before entering a boss room, identify where the boss stands, where projectiles travel, and where blocks can be stacked without trapping you. Do not throw every available block at minor enemies immediately before the fight. Keep at least one usable block nearby when the room provides enough ammunition, because a spare block can replace a missed projectile or buy time while you reposition.
Vegetables, enemies, bombs, shells, and blocks are local resources rather than an inventory. The game does not display a carried-item counter, and objects are not saved between areas. Carry an item only when it has a clear purpose. If an ordinary enemy is harmless and a boss room is close, leave a useful projectile available instead of spending it unnecessarily.
- Use Mushroom Blocks as projectiles, steps, and temporary defensive barriers.
- Build cover before committing your ammunition to a boss attack.
- Keep a replacement block or projectile within reach when the room permits it.
- Treat visible objects as a local supply, not a permanent inventory.
- Avoid spending the last convenient projectile on an unthreatening enemy.
Read the Life Meter and recover health
The original NES HUD calls the health display the Life Meter. It uses diamond-shaped marks rather than the heart icons used by later versions. The meter begins at the second mark and can increase to a maximum of four marks. An enemy or enemy attack removes one mark. When only one mark remains, the character becomes smaller and the next damaging hit can defeat you.
A Small Heart appears after eight defeated enemies and restores one lost Life Meter mark when collected. It is a recovery item, not an increase to the meter’s maximum. Collect it immediately when you need health; there is no benefit to treating it as stored inventory. A Mushroom found in Sub-Space refills the Life Meter and increases its maximum by one mark, up to four marks.
The game begins with three lives. Losing all Life Meter marks costs one life, and falling into a pit or off the screen also costs a life. When the current lives are exhausted, the Game Over screen offers Continue or Retry. Continue resumes the game from the beginning of the same world, while Retry starts a completely new game from the beginning. The original NES manual states that the game can be continued only twice.
A Continue does not return you to the screen where you died, and it does not preserve your health, carried object, or local projectile setup. The cartridge has no battery-backed save system and no persistent item counter. Preserve lives by taking the safest route through each area, collecting recovery items when needed, and entering boss rooms with both ammunition and a defensive plan.
- The NES Life Meter uses diamond-shaped marks and begins at the second mark.
- At one mark, the character becomes smaller.
- A Small Heart appears after eight defeated enemies and restores one lost mark.
- A Sub-Space Mushroom refills the meter and raises its maximum by one, up to four marks.
- The game starts with three lives.
- A Continue restarts from the beginning of the current world, and only two Continues are available.
- There is no battery-backed save, persistent item inventory, or carried-object counter.
Before you move on
- You can open character selection from the title screen, choose a character, and confirm the choice.
- You can uproot a vegetable, lift an enemy or Mushroom Block, and throw the object with B.
- You can perform a standing jump, running jump, and power squat jump.
- You understand that carrying an object changes movement and jump performance for most characters.
- You can explain Mario’s balanced role, Luigi’s high jump and loose traction, Toad’s lifting and carrying strength, and Princess Toadstool’s hover.
- You can use a Mushroom Block as a projectile, step, or temporary defensive barrier.
- You can identify the NES diamond-shaped Life Meter and recognize the one-mark small state.
- You know that Small Hearts restore one lost mark and that Sub-Space Mushrooms refill and extend the meter up to four marks.
- You know that the game starts with three lives, offers two Continues, and restarts a Continue from the beginning of the current world.
- You know the original NES edition has no battery-backed save system or persistent item counter.
References for this chapter
Character Roles and When to Switch
The original North American NES version lets you choose Mario, Luigi, Toad, or Princess Toadstool before each area. Their jump height, falling behavior, object-lifting speed, and carrying movement differ enough to change how a stage should be approached. Mario is the reliable generalist, Luigi is the strongest choice for height and distance, Princess Toadstool can hover over gaps, and Toad is the fastest character for digging, lifting, and carrying objects. The correct choice depends on the stage’s largest obstacle, not simply on personal preference.
Select your character before entering an area
At the title screen, press Start to reach the character-selection screen. Move the selection to Mario, Luigi, Toad, or Princess Toadstool with Left or Right, then press A to confirm. The choice is made before the area begins and cannot be changed while that area is in progress.
If you lose an ordinary life, the area restarts with the same character. You do not receive a new character-selection screen between attempts at that area. This makes it important to decide whether the character’s weakness caused the failure before spending more lives on the same approach.
After a Game Over, choose Continue if you want to resume from the beginning of the current world. The game gives you another character-selection opportunity at that point. Use this to change characters when the next attempt needs different jump reach, hovering, or object speed.
- Press Start to reach character selection.
- Use Left or Right to highlight a character and A to confirm.
- Expect the same character after an ordinary life loss.
- Change characters before a new area or after choosing Continue.
Choose Mario for balanced handling
Mario has average jumping power and middle-of-the-group object handling. Use him when you are unfamiliar with a stage, when the route alternates between platforming and lifting objects, or when no single character ability clearly solves the main obstacle.
Mario is a dependable learning choice because his jump arc and movement do not require the special adjustments associated with Luigi, Princess Toadstool, or Toad. He is also useful when a stage mixes narrow landings, ladders, vines, vegetables, and enemies rather than focusing on one task.
Carrying an item slightly reduces Mario’s jump height and running performance. Pick up a vegetable, enemy, key, or Mushroom Block only when it must be moved, then throw or set it down before attempting a demanding jump whenever the room allows it.
- Use Mario for unfamiliar or mixed-purpose areas.
- Treat him as the baseline for learning a route.
- Release carried objects before difficult jumps when possible.
Use Luigi for height and distance
Luigi has the highest and farthest normal jump of the four characters, and he falls more slowly. Select him for tall ledges, broad gaps, vertical platforming, and routes where Mario repeatedly falls just short of a landing.
His extra airtime is useful but less forgiving. Luigi’s movement feels loose, and he has poorer traction than Mario, so he takes more care to stop at a narrow platform. Begin horizontal corrections earlier and avoid sprinting toward a small landing unless you have enough room to brake.
Carrying an item reduces Luigi’s jump performance more heavily than it reduces Mario’s. Do not assume that an empty-handed Luigi jump will still work while holding a key, enemy, vegetable, or Mushroom Block. If the item is not needed during the jump, throw it first and retrieve another one afterward.
- Choose Luigi for high platforms and long gaps.
- Allow extra room to stop because of his weaker traction.
- Do not use his empty-handed jump timing while carrying an object.
Use Princess Toadstool for controlled gap crossing
Princess Toadstool has the third-highest jumping power, but holding A after takeoff lets her float for a short period. Use the float to extend a jump, correct a slightly poor approach, or remain above a moving platform until it reaches a safe position.
Start the jump normally, then continue holding A during the airborne portion. The hover is most useful when a stage contains repeated gaps, narrow ledges, or platforms that are difficult to reach with a direct jump. It is a correction ability, not a replacement for lining up the jump correctly.
Princess Toadstool is the slowest practical mover when carrying objects and has the slowest pickup speed. Her movement is also generally less forceful than the other characters’ object work. Avoid her in rooms that require rapid digging, repeated vegetable pulls, or quick enemy lifting unless her hover is essential to the route.
Her slower pace matters even when no special jump is required. Do not assume that a route cleared quickly with Toad will have the same rhythm with Princess Toadstool; she may need more time to reach and lift each item.
- Hold A after takeoff to activate the brief hover.
- Use the hover to correct gaps and moving-platform landings.
- Avoid Princess Toadstool when fast digging or lifting is the central requirement.
- Allow extra time for her slower movement and pickup speed.
Use Toad for digging, lifting, and carrying
Toad has the lowest jumping power, but he is the fastest character at uprooting vegetables and picking up Mushroom Blocks. He is also the quickest at carrying objects, making him valuable in sand stages, item-heavy rooms, and sections where an enemy or block must be moved before a hazard reaches you.
Toad’s carrying ability is unusually strong. The manual notes that his jump height and running speed do not decrease while carrying an item, and the NES version can make him move faster than normal with heavy objects such as keys and Mushroom Blocks. This makes Toad the best practical choice when the route requires transporting an item over ground quickly.
His low jump is the main limitation. If a normal jump cannot reach a platform, hold Down until Toad flashes, then press A to perform a power squat jump. This produces a higher jump than a normal standing jump, but it does not turn Toad into a high-jump specialist. Choose Luigi or Princess Toadstool instead when the stage’s decisive challenge is a wide gap or high ledge.
- Choose Toad for sand, digging, and repeated object work.
- Use his fast carrying speed to transport keys and heavy items.
- Use a power squat jump when a normal jump is insufficient.
- Switch away from Toad when height and distance matter more than lifting speed.
Match the character to the reason for failure
After a failed attempt, identify the obstacle that caused the death. If you missed a gap by a small amount, try Princess Toadstool and use her hover to correct the jump. If you could not reach a high ledge or distant platform, try Luigi. If you ran out of time while digging or moving objects, try Toad. If the stage combines all of these tasks without one dominant problem, return to Mario.
Do not switch characters randomly. Each selection changes jump timing, falling behavior, traction, pickup speed, and the way carrying affects movement. A replacement character helps only when the ability matches the section that caused the failure.
Remember that selection happens before an area, not in the middle of it. If the current character is poorly suited to the route, either complete the area with that character or deliberately accept a Game Over and use Continue to make a new selection. Do not waste repeated lives expecting the game to offer a new character after every death.
- Name the exact cause of failure before switching.
- Use Princess Toadstool for gap correction, Luigi for reach, and Toad for rapid object work.
- Use Mario when the area has no dominant requirement.
- Make the change before the next area or after Continue.
Before you move on
- You can reach the character-selection screen and confirm a choice before an area begins.
- You know that an ordinary death restarts the area with the same character.
- You can identify Mario as the balanced choice, Luigi as the highest and farthest jumper, Princess Toadstool as the hover specialist, and Toad as the fastest object handler.
- You understand that Princess Toadstool is slowest and Toad is quickest in practical object-carrying movement, while ordinary unburdened running is described separately in the manual.
- You can compensate for Luigi’s loose traction, use Princess Toadstool’s hover, and perform a power squat jump with Toad.
- After a failure, you can state whether the problem was reach, gap control, traction, digging, pickup speed, or carrying speed and select accordingly.
Enemy and Item Tactics: Birdo, Shy Guys, Bob-ombs, Pokeys, Ninjis
In the original North American NES release of Super Mario Bros. 2, lifting and throwing are the main offensive tools. Most regular enemies can be used as ammunition, but several hazards are safer to avoid than attack. Learn the difference between enemy types before committing to a grab, and preserve reliable projectiles for narrow passages and Birdo encounters.
Use Shy Guys and Snifits as ammunition
Approach a Shy Guy from the side or jump onto it, then pick it up and carry it away from immediate danger before throwing. A thrown Shy Guy can defeat another enemy, clear a ledge, or activate a target. When several enemies are grouped together, throwing one through the formation is usually safer than trying to jump across every enemy.
The red Shy Guy walks in one direction and can continue off a ledge. The pink Shy Guy paces within an area instead of automatically walking away from a platform. Use the red type when you want to lure an enemy toward a drop or keep it moving; use the pink type when you need a nearby projectile that is less likely to leave the screen before you grab it.
Snifits can also be picked up and thrown, but they shoot bullets while you are trying to approach. Wait for a bullet to pass, then move in from the side or attack with a vegetable or Shy Guy. Red Snifits stay in one place, pink Snifits move while firing, and gray Snifits jump as they shoot. Do not stand in front of a Snifit while deciding what to do; either close the distance quickly after a shot or use another projectile from outside its firing line.
- Keep one throwable enemy or vegetable available before entering a narrow combat room.
- Throw a Shy Guy through a group instead of attempting several risky jumps.
- Approach Snifits immediately after a shot or attack them from a safer angle.
Defeat Birdo by returning eggs or using the correct object
Pink Birdo fires eggs. Stand far enough away to see the projectile, jump into an incoming egg, and pick it up while touching it. Carry it only long enough to line up the throw, then throw the egg back at Birdo. Three successful hits defeat the encounter and normally leave a Crystal Ball, although the required item can differ in certain later-stage rooms.
Red Birdo fires both eggs and fireballs. Do not grab a projectile automatically: identify whether it is an egg before attempting to catch it. Return eggs when the approach is safe, but dodge fireballs and use Mushroom Blocks when the arena provides them. Red Birdo may fire a rapid sequence containing both projectile types, so standing directly in front of her and attempting every catch is unnecessarily dangerous.
Green Birdo, which appears gray in some NES stages, fires only fireballs. In the original NES ruleset, Green Birdo cannot be damaged by returning fireballs or by ordinary thrown enemies; use Mushroom Blocks supplied in the arena. Pick up a block, move into a throwing position, and throw it across the room while staying clear of the fireball path. If you cannot reach a block safely, wait for a firing opening rather than trying to catch a fireball.
Birdo is not defeated by jumping on her. The attack is always based on a valid thrown object: an egg for pink or red Birdo, and Mushroom Blocks for Green Birdo. After the final hit, collect the Crystal Ball or other required item only after checking that the room is clear enough to leave safely.
- Pink Birdo: catch and return eggs.
- Red Birdo: catch only eggs and dodge fireballs.
- Green Birdo: use Mushroom Blocks; do not attempt to catch fireballs.
- Never rely on a stomp to defeat Birdo.
Handle Bob-ombs before the fuse becomes a problem
Roaming Bob-ombs can be picked up and thrown, but they eventually become active and explode. A Bob-omb pulled from grass is already ready to detonate, so throw it immediately and run away from its landing point. Do not carry a plucked Bob-omb while searching for a target.
Use Bob-ombs for breakable walls, dense enemy groups, or a boss arena that clearly provides room to retreat. Throw the bomb toward the target, then move in the opposite direction or behind available cover. The explosion can hurt you even after the bomb has left your hands.
In a cramped passage, do not activate a bomb beside a locked door, ladder, or ledge with no escape route. If the bomb lands in the wrong place, leave the area rather than waiting beside it. When a bomb must destroy a wall, place the throw near the breakable section and immediately move toward the widest available space.
- Throw a Bob-omb pulled from grass without delay.
- Retreat after every activated-bomb throw.
- Use bombs for walls, groups, and planned attacks instead of isolated low-threat enemies.
Defeat or bypass Pokeys correctly
Pokeys are segmented cactus enemies that are dangerous to touch. A throwable vegetable, enemy, or other object striking the lowest segment defeats the Pokey in one hit. Hitting an upper segment removes that segment but leaves the Pokey active, with the next segment becoming its head, so aim low whenever possible.
Pokey segments are not ordinary pickup objects. Do not jump onto one expecting to lift it. If no projectile is available, jump over the Pokey or use nearby jars and platforms to route around it. Desert screens often provide a safer path over or around the cactus than the reward for attacking it is worth.
If you must throw at a Pokey, stand outside contact range and wait until its movement gives you a clear line to the bottom segment. After throwing, confirm that the entire enemy is gone before advancing; removing only the upper part does not make the remaining body safe.
- Aim at the lowest Pokey segment.
- Do not try to pick up Pokey segments.
- Bypass the enemy when no safe projectile or clear route is available.
Read Ninji movement before crossing
Ninjis jump repeatedly and can appear either to stay near one position or to move around while jumping. Watch their movement before entering a narrow gap. If the path is open, jump over the Ninji during a clear opening and keep moving so you do not land on it or collide with another enemy.
Ninjis can be picked up and thrown in the NES version, but the grab is riskier than it is with a Shy Guy because their jumping motion makes the landing point difficult to predict. Use a Ninji as ammunition only when you have a broad platform and a clear escape route. In a tight corridor, waiting or bypassing is usually safer.
In digging rooms, do not dig directly beneath a Ninji for an extended period. Move laterally between short digging sections so the enemy cannot drop into your path as you work. If a Ninji blocks the only narrow ledge, either throw a safe object at it or wait for its jump to carry it away; do not force a close-range grab against a wall.
- Observe whether the Ninji stays near its starting position or moves while jumping.
- Jump over it when the landing area is clear.
- Use a throwable only when the platform gives you room to recover.
- In digging rooms, change position instead of digging beneath a jumping Ninji.
Before you move on
- You can clear a Shy Guy or Snifit group by throwing one enemy through the formation.
- You can defeat Pink Birdo by catching eggs and throwing them back.
- You can identify Red Birdo fireballs and avoid grabbing them.
- You can defeat Green Birdo with Mushroom Blocks rather than attempting to return fireballs.
- You can use a plucked Bob-omb immediately, retreat, and survive the explosion.
- You can defeat a Pokey by striking its lowest segment or safely bypass it.
- You can recognize when a Ninji should be jumped over, thrown, or avoided.
World 1 Walkthrough — Opening Screens to World Boss
Clear World 1-1, World 1-2, and World 1-3 in order. World 1-1 and World 1-2 require Birdo encounters before their Crystal Balls, while World 1-3 leads to Mouser after its Crystal Ball. In every area, collect the Crystal Ball and enter the Hawkmouth or required exit to advance. The World 1-3 Warp Jar can send you to World 4, but it is an optional shortcut and does not count as clearing World 1 normally.
1. World 1-1: opening grassland, first Mushroom, and fixed 1-Up
Choose any character. Mario is the safest general-purpose choice, Toad pulls vegetables quickly, Luigi reaches higher platforms, and Princess Toadstool can hover across difficult gaps. From the opening hill, drop down carefully past the Shy Guys and enter the red door on the lower right. In the grassland, pull vegetables and throw them at Shy Guys and Tweeters, or pick up an enemy and throw it into another enemy. The early grass teaches the main attack method for the game: picking up and throwing objects rather than jumping on enemies.
Climb the vine near the middle of the area. On the upper ledge, pull only the rightmost grass tuft to reveal a Magic Potion. Drop it where you found it, enter the Sub-Space door, and immediately collect the Mushroom. The Mushroom adds one mark to the Life Meter. Grab the nearby coins if you can do so without delaying your return to the normal world. After leaving Sub-Space, continue right to the POW Block. Save it for the group of Shy Guys on the hills rather than wasting it on the first enemies.
Cross the waterfall by jumping from one descending log to the next. Luigi can clear this section more easily with his jump, and Princess Toadstool can hover across the gap. On the hills after the waterfall, throw the POW Block to clear the enemy group, then pull the grass just to the left of the POW Block's position to obtain the fixed 1-Up. Continue right past the bomb and turtle shell, using vegetables or the shell to clear enemies, and enter the cave door.
- Collect the first Sub-Space Mushroom if the opening route is safe.
- Save the POW Block for the crowded hill section.
- Take the fixed 1-Up after using the POW Block.
- Cross the waterfall on the descending logs instead of dropping into the water.
2. World 1-1: cave route, optional second Mushroom, and Birdo
Inside the cave, move left past the Ninji and climb the vine. For the full route, go right from the upper cave entrance and enter the door at the far end. In the next section, take only the leftmost grass tuft and carry the Potion to the gap between the grass groups. Enter Sub-Space and collect the second Mushroom, then return to the normal area. This Mushroom is optional for progression but useful for preserving health before the boss.
Return to the upper cave entrance and continue right to the vine section. Climb through the clouds and ledges, throwing a Hoopster or Shy Guy out of the way if it blocks a vine. Use the outside vines at the lower three-vine junction, then take the appropriate upper vine route to reach the top. Avoid unnecessary contact so you reach Birdo with as many hearts as possible. The nearby enemies can be defeated with vegetables, carried enemies, or a Stopwatch if one has appeared from pulling enough large vegetables.
In Birdo's room, stay on the blue blocks and keep to the side farthest from Birdo. Wait for an egg, jump on it to pick it up, and throw it back at Birdo. Repeat the process three times. Do not throw an egg while Birdo is simultaneously spitting another egg, because the projectiles can collide and both may be lost. After three successful hits, collect the Crystal Ball and enter the Hawkmouth on the right to finish World 1-1.
- Use the second Potion for the optional cave Mushroom if you need more health.
- Keep moving carefully through the vines and clouds.
- Return three eggs to Birdo.
- Collect the Crystal Ball before entering the Hawkmouth.
3. World 1-2: carpet crossing, Mushroom, 1-Up, and key
At the opening chasm, wait for Pidgit to fly low enough to reach. Jump on Pidgit, pick him up, and throw him away. His magic carpet remains, allowing you to ride right across the gap. Avoid the Beezos by staying low or moving diagonally, then jump off the carpet when solid ground appears.
Pull the first grass tuft on the far side to obtain a Magic Potion. Drop it between the two jars and enter Sub-Space for the Mushroom. Next, enter the left jar and pull the lone grass tuft to obtain a 1-Up. Leave that jar, then enter the right jar and take the Key. The Key is required for the locked door ahead.
Phanto becomes active as soon as the Key is picked up. Leave the jar immediately, move right, and keep the Key in your arms. Jump over the Ninjis rather than stopping to fight them. If you drop the Key, Phanto stops pursuing temporarily, but you must retrieve it and will restart the chase. Reach the locked door and press Up while standing in front of it. Do not throw the Key at an enemy; losing it here creates an unnecessary recovery trip.
- Use the first Potion between the jars for the Mushroom.
- Collect the 1-Up from the left jar before taking the Key.
- Keep the Key until you reach the locked door.
- Avoid fighting while Phanto is active.
4. World 1-2: Bomb barriers and the second Birdo
Beyond the locked door, move through the cave and pull the nearby grass to obtain Bombs. Place a Bomb beside the first broken-rock barrier, step away, and wait for it to explode. The blast may require more than one Bomb depending on the barrier arrangement. Climb the ladder and use the Bombs in the upper section to destroy the next broken rocks. Do not enter Sub-Space until the required rocks have been cleared, or you can place the Potion door where the Mushroom route is inaccessible.
After the barriers are gone, drop through the opening and pass the Ninjis. A Power Squat can help you reach the exit ledge: crouch until the character flashes, then jump. The Potion in the upper section is optional. It can be used for a Mushroom or for coins, but it is not required to finish the area. Continue through the exit door and reach the second Birdo encounter.
Use the same basic Birdo method as before, but fight from the side with the most floor space. Wait for an egg, jump on it, pick it up, and throw it back. Three returned eggs defeat this Birdo. Collect the Crystal Ball, enter the Hawkmouth, and complete World 1-2. The optional coin-producing Potion route can help with the Bonus Chance afterward, but it is not a mandatory power-up route.
- Reserve Bombs for the broken-rock barriers.
- Use a Power Squat if the exit ledge is too high.
- Do not mistake the optional coin route for required progression.
- Return three eggs to Birdo and take the Crystal Ball.
5. World 1-3: waterfalls, Mushrooms, and the Warp Jar warning
Cross the opening platforms and pits, then take the Potion found near the first waterfall. Carry it to the upper ledge reached after crossing the descending logs. Enter Sub-Space there for a Mushroom and return to the normal area. Continue over the next waterfall, moving carefully around Trouters and other enemies. The water below the logs is fatal, so wait for a safe log position before jumping.
Later, use the Potion in the next grass group for its optional Mushroom or coins. A jar that cannot normally be entered can become the World 4 Warp Jar when accessed through Sub-Space. Ignore it for the required route. Entering that Warp Jar is a shortcut, not normal completion of World 1, because it skips the remaining World 1 screens and boss encounter.
For the normal path, enter the obvious building door. Climb the chain and avoid the Sparks. Carry Mushroom Blocks to the raised ledges and stack them as stepping stones. Luigi may reach some ledges without a block, but other characters should preserve the blocks instead of throwing them at low-value enemies. Continue upward through the building until you reach the Key room.
- Use the first World 1-3 Potion for the upper-ledge Mushroom.
- Do not enter the Warp Jar unless you intentionally want to skip to World 4.
- Preserve Mushroom Blocks for climbing.
- Move slowly around Sparks.
6. World 1-3: Key escape, Crystal Ball, and Mouser
Take the Key in the upper building and immediately leave the room. Phanto begins chasing as soon as you pick it up. Drop through the building while keeping the Key in your arms. Follow the route toward the right-hand locked door, using the ledges and chains to descend. Do not throw the Key at enemies, and do not fall into the spike area on the left. If a Spark or Ninji blocks the route, jump over it rather than abandoning the Key. Unlock the door by pressing Up while holding the Key.
Beyond the locked door, move through the Spark-filled passage and the Ninji hallway. Use the POW Block or thrown objects if the enemies block the route, then collect the Crystal Ball. Enter the Hawkmouth; this Hawkmouth leads to Mouser rather than ending the area immediately.
In Mouser's room, use the available Bombs to destroy the barrier separating you from the boss, then retreat from the blast. Mouser runs along the raised platform and throws Bombs toward the floor. Pick up a Bomb after it lands, or catch one while jumping if you are comfortable with the timing. Throw the Bomb toward the position Mouser is moving into rather than directly at his current location. Keep away from Mouser himself and from active Bomb fuses. Three Bomb hits defeat him. A white exit door appears after the victory; enter it to complete World 1-3 and advance to World 2. Mushroom Blocks are not the required Mouser weapon, so do not waste time trying to build a shield in the boss room.
- Keep the second Key until the right-hand locked door.
- Aim for the right ledge during the Phanto escape.
- Collect the Crystal Ball before entering the Hawkmouth.
- Return three Bombs to Mouser.
- Enter the white exit door after Mouser is defeated.
Before you move on
- World 1-1 is cleared when its Birdo encounter is completed, the Crystal Ball is collected, and the Hawkmouth is entered.
- World 1-2 is cleared when its area route and required Birdo encounter are completed, the Crystal Ball is collected, and the Hawkmouth is entered.
- World 1-3 is cleared when the Crystal Ball is collected, Mouser is defeated with three Bomb hits, and the appearing exit door is entered.
- The World 2 stage selection appearing after World 1-3 confirms that World 1's three areas have been completed through the normal route.
- Using the World 1-3 Warp Jar does not count as normal World 1 completion because it bypasses the remaining route and Mouser encounter.
Worlds 2 and 3 — Mid-Game Techniques and First Repeatable Boss Patterns
World 2 is a desert sequence built around quicksand, digging, vases, keys and Mushroom Blocks. World 3 shifts to waterfalls, clouds, icy platforms and bomb puzzles. Toad is effective when rapid digging or item pulling matters, while Luigi helps with high platforms and long jumps. The key boss correction for the original NES release is that World 3-3 Mouser requires five bomb explosions, not three.
Choose characters for the desert and ice stages
Use Toad in World 2 when you want faster digging and quicker vegetable pulls. His short jump is manageable in the desert if you avoid unnecessary vertical routes. Choose Luigi for stages that emphasize high ledges, cloud platforms or long vertical jumps. Mario is the dependable choice when you are learning a route, especially in sections where Luigi’s low traction makes corrections difficult.
Princess Toadstool can hover across wide gaps, but her slow pickup speed is a disadvantage in narrow rooms crowded with vegetables, enemies or Mushroom Blocks. Change characters at the selection screen between stages rather than forcing one character through the entire world. Regardless of character, enter each boss room with the heart meter as full as possible and avoid spending the last useful projectile on a minor enemy.
- Use Toad for fast digging and item collection.
- Use Luigi for high ledges, long jumps and elevated boss platforms.
- Use Mario when you need predictable handling on an unfamiliar route.
- Avoid making Princess the default choice for tight item-heavy rooms.
Clear World 2-1 and reach the first Birdo
Move right through the opening desert and deal with the Cobrats by approaching carefully, picking them up after they emerge, and throwing them away from the edge of the next platform. Vases can contain Cobrats and optional rooms; enter them only when you have enough space to handle the enemy. Continue past the Shy Guys and use the Potion found near the stone structure if you want the Sub-Space Mushroom and coins.
Cross the quicksand by jumping repeatedly when the sand begins to pull you down. Do not stop in the middle of a pit to fight. Near the Panser on the stone structure, throw a Shy Guy or another safe object upward rather than approaching through its fireballs. Continue right past the cactus and enter the pyramid.
Inside the pyramid, dig through the sand while watching the Snifit that climbs upward with each jump. Descend to the door at the bottom, then move right to the Birdo room. Catch or jump onto Birdo’s eggs, carry them, and throw them back when there is space. Three successful egg hits produce the Crystal Ball. Take it to the Mask Gate on the right, then continue to World 2-2 after the transition.
- Jump repeatedly to escape quicksand.
- Use thrown enemies against the Panser instead of trading contact damage.
- Dig deliberately in the pyramid and watch the climbing Snifit.
- Use Birdo’s eggs as ammunition and collect the Crystal Ball.
Navigate World 2-2’s fast quicksand and bomb cave
Exit the opening cave and move right across the desert. Use a Cobrat or vegetable against enemies in vases, then cross the faster quicksand near the rolling bones. If you land in it, jump immediately and keep moving toward solid ground. You can use the bones as temporary stepping points, but do not wait on them while another enemy approaches.
At the next cave, take the rightmost grass for a 1-Up if you need the extra life. Pull a nearby grass to obtain a Bomb, crouch until it begins flashing, then jump to the upper ledge and throw the Bomb at the broken blocks. This opens the route through the cave. If Shy Guys remain, use the POW Block when available or throw one enemy into another rather than fighting in the cramped passage.
Continue through the desert and the long digging section. In the sand, collect the Cherries only when the route is safe, and clear the upper sand before trying to deal with the Snifit and Shy Guys below. At the bottom, enter the door and reach Red Birdo. Red Birdo can spit eggs and occasional fireballs, so wait for a pause in the projectile stream before throwing an egg back. Three hits produce the Crystal Ball. Carry it through the Mask Gate to World 2-3.
- Do not pause in the faster quicksand.
- Use the Bomb to open the broken-block route in the cave.
- Clear sand above enemies before attempting close-range throws.
- Against Red Birdo, throw eggs only during a projectile pause.
Take the pyramid key route in World 2-3
Climb out of the opening area and move right through the Beezos. The first Potion can be used for a Sub-Space Mushroom, but the route remains completable without taking every optional item. Continue to the cave on the higher hill if you want its Potion and Mushroom, then proceed right across the cactus-filled desert toward the pyramid.
Inside the pyramid, descend on the right side and use the POW Block if falling Shy Guys crowd the passage. Dig down through the sand and take the lower route to the door. In the small room, use a Power Squat Jump to reach the Key. Carry it back through the doorway; do not throw it. The Phanto will pursue you once the Key is taken, so move decisively and avoid stopping in its path.
Use the Key on the locked door at the bottom of the sand route. Continue right through the cactus and vase section. The vases contain short rooms with a Shy Guy and POW Block; these are optional opportunities to clear enemies safely. At the far end, take the Crystal Ball positioned between the vases and pass through the Mask Gate to Tryclyde’s arena.
- Carry the Key through the door instead of throwing it away.
- Use the POW Block in crowded vase rooms when necessary.
- Take the Crystal Ball between the final vases before entering the Mask Gate.
Defeat Tryclyde with a Mushroom Block shield
Tryclyde stands on the raised platform at the right and fires several fireballs across the arena. Start on the left side and build a vertical wall from the Mushroom Blocks before attempting repeated attacks. Two correctly positioned blocks are enough to form the intended shield against the direct fireball stream; if your placement leaves a gap, adjust the wall before committing to the fight.
Stay close behind the wall while Tryclyde fires. Pick up a Mushroom Block, jump or step to a protected throwing position, and throw it toward Tryclyde. Three successful Mushroom Block hits defeat him. After each throw, return behind the wall rather than remaining in the open. Missed blocks can usually be replaced from the nearby supply, so do not cross the arena recklessly to recover one while fireballs are approaching.
When Tryclyde disappears, enter the door that appears. The following Bonus Chance is optional; after the transition, the game advances to World 3-1. There is no need to preserve the World 2 shield or carry a projectile into the next stage.
- Build the Mushroom Block wall before attacking.
- Throw from a protected position and retreat after each attempt.
- Land three Mushroom Block hits.
- Use the appearing door after the boss disappears.
Cross World 3-1’s waterfall and cloud route
World 3-1 begins near a waterfall. Move right through the first door and climb toward the clouds, clearing Shy Guys only when they block the next jump. At the upper section, approach the Pidgit on its flying carpet. Jump onto Pidgit, pick it up or dismount it safely, then use the carpet to rise through the center of the screen. Grab the vine above to reach the cloud section.
The cloud route has an optional shortcut that uses Mushroom Blocks as stepping stones. Luigi can often reach the high door with his Super Jump; other characters may need to throw and stack blocks on the smaller clouds. If you take the standard route, continue right past the Pansers, use the Potion and Mushroom opportunities if needed, then reach the Red Birdo room.
Red Birdo occasionally substitutes a fireball for an egg. Stand where you have room to catch an egg, wait for a safe pause, and throw it back. Avoid falling into the pit beneath the platform. Three hits produce the Crystal Ball; take it through the Mask Gate to World 3-2.
- Use Pidgit’s carpet to climb through the middle of the waterfall area.
- Use Luigi or stacked Mushroom Blocks for the optional upper shortcut.
- Keep clear of the pit during the Red Birdo fight.
- Collect the Crystal Ball before leaving the stage.
Open World 3-2’s broken-block passages
In World 3-2, move right past the Shy Guy riding an Ostro and the descending Beezos. Pick a vegetable and throw it at the Panser. When you reach the Ostro riders, either throw the riders or continue to the ladder route. The upper route contains optional items, but the essential path uses Bombs to break through the damaged blocks.
In the bomb section, take a Bomb, fall carefully from the upper ledge and throw it at the broken blocks on the opposite side. Repeat this from the available grass patches until the passage opens. If a Bomb is mistimed, return to the previous room and try again rather than accepting damage in a blocked corridor. A POW Block can clear the Tweeters after the wall is opened.
Continue through the ladders and platforms while avoiding Panser fire and descending Beezos. Near the upper broken blocks, hold the Bomb briefly until it flashes, then release it so the explosion reaches the wall. Take the later Bomb and Potion rooms only if you need their benefits. The stage ends at another Red Birdo encounter. Use eggs during pauses, collect the Crystal Ball and enter the Mask Gate to World 3-3.
- Use Bombs to open the damaged-block passages.
- Return to the previous room if a Bomb is mistimed.
- Use a POW Block against the Tweeters when available.
- Do not rush Red Birdo while a fireball is on screen.
Defeat the second Mouser in World 3-3
World 3-3 contains the second NES Mouser battle. The route includes icy platforms, ladders, Sparks and several Bomb placements. On ice, release the direction early and avoid last-second corrections. When a Spark patrols a platform, watch its movement once, then cross during the opening instead of trying to outrun it.
In the boss approach, use the available Bombs to destroy the broken walls. A Bomb must detonate close enough to Mouser to damage him; throwing the Bomb directly at him is not sufficient if the explosion occurs too far away. Pick up a Bomb from the floor after it lands, throw it onto the raised platform or catch one in midair if you are comfortable with the timing, then move away before it explodes.
Mouser’s platform is higher here than in the first Mouser encounter. Luigi can throw from the floor more easily, while another character should jump from the left side or a nearby elevation before releasing the Bomb. The arena also contains a Spark that patrols the perimeter. Keep moving in the lower area and avoid standing directly beneath Mouser while waiting for a Bomb.
This Mouser requires five successful Bomb explosions in the original NES North American release. Count only explosions that visibly connect with Mouser; a Bomb that lands nearby without damaging him does not count. Continue collecting and throwing the Bombs he supplies. After the fifth damaging explosion, Mouser disappears and the exit door appears. Enter it, complete the transition and proceed to World 4.
- Use Bombs, not jumps, as the attack method.
- Account for the higher platform in World 3-3.
- Watch the perimeter Spark and keep moving when necessary.
- Land five Bomb explosions to defeat Mouser.
- Enter the exit door after Mouser disappears.
Before you move on
- World 2 is complete when Tryclyde has been hit three times, the exit door appears and the post-boss transition advances to World 3-1.
- World 3-1 and World 3-2 are complete after each Red Birdo is defeated, its Crystal Ball is collected and the Mask Gate transition advances to the next stage.
- World 3-3 is complete when Mouser has taken five damaging Bomb explosions, disappears and leaves an exit door.
- After entering the World 3-3 exit and completing the transition, World 4 becomes the next stage in the normal campaign sequence.
- If a boss attempt fails, select a character suited to the specific arena, then rebuild the wall or projectile position from the beginning rather than repeating the failed approach unchanged.
References for this chapter
- Super Mario Bros. 2 — Nintendo official instruction booklet
- World 2-1 — Super Mario Bros. 2 Guide
- World 2-2 — Super Mario Bros. 2 Guide
- World 2-3 — Super Mario Bros. 2 Guide
- World 3-1 — Super Mario Bros. 2 Guide
- World 3-2 — Super Mario Bros. 2 Guide
- Super Mario Bros. 2 — Guide and Walkthrough by GhostOfLegault
- Super Mario Bros. 2/Bosses — StrategyWiki
Worlds 4 and 5 — Platforming with Objects and Mid-Bosses
World 4 is an ice-themed world built around slippery ground, rockets, whales, Autobombs and a required egg ride. Its boss is Fryguy, who first requires three Mushroom Block hits and then splits into four smaller flames. World 5 changes to waterfalls, vines, Hoopstars, logs and Albatoss attacks. Luigi’s high jump is especially useful here, although Peach is also effective over long gaps. Preserve Mushroom Blocks, vegetables and useful enemies for Birdo and the two boss rooms rather than spending every projectile on ordinary enemies.
1. Select a character for the world
For World 4-1 and World 4-2, Mario is a dependable general-purpose choice. Luigi can clear taller ice ledges with less setup, while Peach’s hover helps with the long gaps in World 4-3. Toad is quick at pulling objects but has less jumping range, so use him only if you are comfortable with the terrain.
For World 5, Luigi is particularly useful because several sections involve waterfalls, logs and high ledges. Peach is a valid alternative when you prefer controlled horizontal movement over Luigi’s jump height. Character selection occurs before each stage, so change characters between levels instead of forcing one choice through every section.
- Use Luigi or Peach when a route depends on long or high jumps.
- Keep at least one throwable object available before a Birdo or boss room.
2. Clear World 4-1 and take the rocket
Move carefully across the slippery ice and avoid Flurries whenever possible. In the early section, use the potion between the ice ledges if you need the Mushroom. Near the far right, another potion can produce a second Mushroom. After reaching the upper cliff, drop into the alcove containing the single grass tuft and pull it up. This item is a rocket, not a normal vegetable, and it carries you to the next area.
The rocket’s destination contains Flurries and Shy Guys riding Autobombs. A Shy Guy can fire from the cannon while it remains mounted, but removing the rider disables that Autobomb. Do not waste time defeating every enemy. Move through the vehicles, reach the Crystal Ball, and enter the Hawkmouth. There is no Birdo encounter in World 4-1 on the original NES release.
- Brake early on ice because your character continues sliding after movement stops.
- Do not search for a boss projectile room after the Autobombs; World 4-1 ends with the Crystal Ball and Hawkmouth.
3. Cross World 4-2’s whale section and defeat Birdo
At the beginning, climb the vine and avoid the straight-line Beezos and incoming Flurries. After entering the next area, use the whales as the intended route. Stand on their backs and ride the water spouts upward, but do not touch the sides of a spout because they cause damage.
The potion on the whale route is optional. It can be used for Sub-Space coins, or carried toward the pipe that warps to World 6. That warp skips the rest of World 4 and is not required for a complete run, so ignore it if you are following the normal order. Continue to the rocket on the later metal ledge and use it to reach the Autobomb section.
Remove the Shy Guy from the Autobomb before riding it across the spikes. A nearby potion can produce a Mushroom on the ledge near the door. The following Birdo is red and can use fire as well as eggs. Avoid the fireballs, catch only eggs, and throw the eggs back when Birdo is exposed. After the required hits, take the Crystal Ball and enter the Hawkmouth.
- Use whale backs and spout tops as platforms, not the sides of the spouts.
- Treat the World 6 pipe as optional; using it skips World 4-3 and Fryguy.
4. Use the opening Birdo in World 4-3 as a platform
After climbing outside, you will meet a pink Birdo immediately. Do not defeat this Birdo. First, take the nearby potion to the Sub-Space area if you want the Mushroom, then return to the normal screen. Stand to the right of Birdo and wait for an egg. Jump onto the egg and ride it across the water to the stone platform. Throwing the egg away removes the safest route across this gap, so wait for another egg if necessary.
From the far side, use the potion if you want the plants and coins, then continue right. Peach can hover across the later gap, but other characters can use the normal door route through the vertical icy section. In the tower, climb past Flurries and narrow ledges. Use a power squat jump where the platform arrangement requires extra height, and avoid rushing into a Flurry’s path.
The final section leads to another Birdo encounter. Defeat this Birdo with eggs or supplied blocks, collect the Crystal Ball and enter the Hawkmouth to reach Fryguy.
- Leave the opening pink Birdo alive until the egg ride is complete.
- If an egg is lost, wait for another rather than attempting a blind jump across the water.
5. Defeat Fryguy and the four smaller flames
Fryguy can be damaged only with Mushroom Blocks in the original NES fight. Take a block from the upper ledge while Fryguy is moving away, then retreat to the opposite side or remain on the upper level. When Fryguy passes beneath your position, drop or throw the block into him. Repeat until he has taken three hits.
After the third hit, Fryguy splits into four smaller flames. They become faster as their numbers decrease, so keep moving and avoid being trapped against a wall. Use the remaining Mushroom Blocks against grouped flames whenever possible. Throw a block, retreat, then collect another instead of holding one while a flame closes in. A single well-positioned block can sometimes hit more than one mini-Fryguy.
When all four smaller flames are gone, a door appears. Enter it to complete World 4 and begin World 5.
- Preserve a clear path to at least one upper Mushroom Block before making the first attack.
- After the split, do not stand still to line up a perfect throw; survival and repeated safe throws are more important.
6. Cross World 5-1’s waterfalls
At the opening, remove the Shy Guy from the Ostro and use the Shy Guy or the Ostro to get past the red Panser. Drop to the rock ledges and enter the door. The main section is dominated by waterfalls, falling logs and Trouters. Logs cannot be picked up, so use them as temporary stepping stones. Trouters can be used as moving jump points, but their timing is dangerous.
Luigi’s jump makes the waterfall route easier, and Peach’s hover is also useful. On the ledge with two grass tufts, the left tuft contains a 1-Up and the right contains a potion. Carry the potion to the lower ledge near the Trouter to reach a Mushroom. Near the final log, a running jump can reach a higher area containing Mushroom Blocks. Pull the right block free, then use the potion at the far-left position to access another Mushroom.
The next room contains gray Birdo. This Birdo uses fire only, so eggs are not available as ammunition. Use the Mushroom Block supplied in the room and hit Birdo three times. Collect the Crystal Ball and continue.
- Stabilize each landing before attempting the next waterfall jump.
- Do not expect gray Birdo to provide eggs; reserve the supplied Mushroom Block for the entire fight.
7. Climb World 5-2 with Hoopstars and vines
Climb the opening ladder and move right to the pipe. Enter it, use the supplied Bob-omb to clear the floor, and take the potion inside. Drop the potion on the outside ledge to reach the Mushroom below if you need the health increase.
Use Hoopstars moving around the palm trees to reach the higher ledges. A Hoopstar can also be thrown at the gray Panser blocking the route. Continue through the vegetable section and take the POW Block when it becomes available. Carry it to the Porcupo, Ostro and Shy Guy near the vine, then use it after the stopwatch effect has ended if those enemies are frozen.
On the vine screens, avoid Snifits, Beezos and Hoopstars. In the next room, move the POW Block sideways while carrying it so you do not fall with it, then throw it onto the thin red floor to clear the obstruction. Cross the spikes by staying deliberate rather than holding one direction continuously.
The following Birdo is red. A Trouter is available and can provide an opening hit if thrown at Birdo. Finish the fight with returned eggs, avoiding fireballs if they appear. Take the Crystal Ball and enter the Hawkmouth.
- Keep the POW Block for the grouped enemies near the vine instead of wasting it early.
- Use the Trouter for an opening hit only when the throw is safe; do not sacrifice health trying to force it.
8. Cross World 5-3 and reach the pre-boss Birdo
World 5-3 begins with Albatosses dropping Bob-ombs. Move in short bursts and watch the shadows or falling bombs before committing to a jump. The first potion can be used for a Mushroom near the brick wall. A later potion and Bob-omb combination opens the blocked wall and provides another Mushroom opportunity.
After descending the ladder, remove the Mushroom Block covering the small pot and use a Bob-omb to open the route. A bomb can clear the wall ahead, while the nearby shell can help against the next Bob-omb. Continue through the Panser section and enter the teal door. In the following area, pull Mushroom Blocks from their wall spaces while avoiding Sparks and plug small pots when necessary to stop repeated Shy Guys from appearing.
Near the top, use the available stopwatch and vegetables to cross the Pidgit section. Take the carpet when practical, remain high while crossing the gap and avoid the second Pidgit after landing. Before the final boss door, pick up the frozen pink Shy Guy. A red Birdo appears before Clawgrip; throw the Shy Guy for an opening hit, then use returned eggs for the remaining hits. Collect the Crystal Ball and enter the expanded Hawkmouth.
- Treat Bob-ombs as tools for walls and pots, not as disposable weapons to throw beside yourself.
- Carry the Shy Guy into the final Birdo room if possible so the first hit does not depend on a risky egg catch.
9. Defeat Clawgrip and finish World 5
Clawgrip throws rocks from the claws. These rocks cannot be caught in midair. Wait for a rock to land and roll across the ground, then jump over it or onto it and pick it up. Carry the rock up the steps and throw it at Clawgrip when the crab is exposed.
Stay near the central step and alcove area rather than standing at the extreme edge. Rocks that land in the pit are difficult or impossible to recover, while rocks that roll along the steps can be collected quickly. Jump when a rock approaches at foot level, then use the opening after it passes to pick it up. Throwing during Clawgrip’s own attack can sometimes connect, but do not sacrifice positioning for a rushed attempt.
Clawgrip requires five successful rock hits in the original NES version. After the fifth hit, the boss disappears and the exit door appears. Enter the door to complete World 5 and load World 6-1.
- Never attempt to catch a Clawgrip rock before it lands.
- Use the steps as both a pickup route and a way to avoid low-rolling rocks.
- Confirm World 5 completion when the door appears after five hits and entering it loads World 6-1.
Before you move on
- World 4 is complete when Fryguy has taken three Mushroom Block hits, all four mini-Fryguys are defeated, the exit door appears and entering it loads World 5-1.
- World 5 is complete when Clawgrip has taken five rock hits, the exit door appears and entering it loads World 6-1.
- The original NES route is confirmed by World 4 ending at Fryguy and World 5 ending at Clawgrip, with the original egg, Mushroom Block and rock behaviors described above rather than later remake mechanics.
References for this chapter
World 6 — Advanced Enemy Traps and Boss Repeats
World 6 returns to the desert and contains three areas: 6-1, 6-2, and 6-3. The first two areas end with Green Birdo. World 6-3 ends with Red Birdo and then Tryclyde, the returning three-headed boss. The original NES North American cartridge does not replace Tryclyde with Mouser. World 6 is cleared when Tryclyde is defeated and the exit door carries you into World 7.
Choose a character before entering World 6
Mario is the most reliable all-purpose choice because his movement and lifting are balanced. Luigi helps with the high jumps in the desert and can make some vertical sections easier, but his sliding traction and slower object handling can make crowded jar rooms less forgiving. Princess is useful when a long gap or floating landing is the main problem, especially in 6-1, but her slower lifting can be awkward when you must move a key or Mushroom Block quickly. Toad is useful in 6-3 because he lifts blocks and plants quickly, which helps in the Bob-omb route and the final boss room.
You can select a different character before each area. Change characters to solve the problem that actually caused the previous failure: use Luigi for a missed height requirement, Princess for a difficult gap, or Toad when lifting speed matters. Do not choose a character solely for Tryclyde; the route into the arena is usually the more important factor.
- Use Mario while learning the world.
- Use Luigi or Princess when a jump or gap is the main obstacle.
- Use Toad when fast lifting is more valuable than float distance.
Clear World 6-1 and retrieve the key
Move right across the opening desert and quicksand, using Cobrats and Shy Guys as projectiles only when they block the next safe landing. Several enemy jars act as spawners: enemies emerge from them when you approach, so watch the opening before jumping onto or beside a jar. Remove the Cobrat if it prevents passage, but do not spend time clearing every enemy. In the early section, a Cobrat inside a jar can be removed so you can enter the jar and obtain a Potion. Use the Potion in the appropriate open area to enter Subspace and collect the Mushroom if you need the health recovery.
Continue across the desert, quicksand, cacti, Pokeys, and additional enemy jars. Jump over Pokeys when there is room rather than carrying a projectile through a crowded landing. A vegetable can clear a Pokey or other immediate obstruction, but reserve your safest throwable objects for the rooms ahead.
Enter the large structure and move to the jar-filled section. A Mushroom Block covers part of the route. Use it to control access to the jars, then enter a suitable lower jar and dig through the sand to collect the optional 1-Up. The required objective is farther along: enter the jar whose interior shows a Phanto near the sand, dig downward, and uncover the key. Once you pick up the key, Phanto becomes active and pursues you. Jump out of the jar and keep carrying or throwing the key toward the locked door. If Phanto closes in, throw the key forward, move past the threat, and pick the key up again rather than abandoning it.
The locked door leads to Green Birdo. Before attacking, use the Mushroom Blocks in the arena to build a small barrier or stacked firing position. The blocks prevent Birdo's fireballs from reaching you directly when positioned correctly. Pick up a block, move to the raised position, and throw it at Birdo. Retreat to cover, recover another block, and repeat until Birdo takes three hits. Take the Crystal Ball and carry it through the Hawkmouth at the right.
- Watch enemy jars before approaching them.
- Collect the key from the jar marked by the visible Phanto.
- Keep the key with you until the locked door.
- Use Mushroom Blocks to defeat Green Birdo in three hits.
- Take the Crystal Ball through Hawkmouth.
Ride the Albatoss route in World 6-2
Proceed outside and prepare for the Albatoss section. The birds are moving platforms over gaps, so wait for one to enter a usable position instead of jumping blindly. Land on an Albatoss, ride it toward the next solid platform, and jump off before the bird carries you beyond the safe landing. If an enemy occupies the platform, clear only that enemy or jump over it; unnecessary fighting makes the next landing harder.
The stage alternates between solid ledges and long gaps. Use a Power Squat Jump when you need extra height, then return to an Albatoss for the next crossing. Princess can float from a bird to a ledge and is a strong choice for this section. Luigi can also help with high landings, while Mario is safer if you are still learning the timing. When a Panser or another projectile enemy controls a landing, throw a nearby vegetable or other object before committing to the jump.
At the end of the aerial section, enter the door for the second Green Birdo. Drop into the lower part of the arena instead of standing in the direct line of the fireballs. Wait for a pause, lift the Mushroom Block on the floor, and throw it into Birdo. After the hit, retreat and recover the block. Use the second block from the raised platform for the final hit when Birdo moves beneath it. Collect the Crystal Ball and pass through Hawkmouth.
- Treat Albatosses as temporary moving platforms.
- Jump off before the bird carries you past the next landing.
- Clear only enemies that threaten your landing.
- Use the lower arena position to reduce Green Birdo's fireball danger.
- Take the second Crystal Ball through Hawkmouth.
Use the World 6-3 shortcut or the regular route
At the start of 6-3, climb the ladder and turn left. The quicksand beside the wall conceals an optional shortcut. Walk into the quicksand while holding Left. As your character sinks far enough to move beneath the wall, press Jump repeatedly while continuing left. The jumps keep you from sinking too deeply. Reach the door on the far side, enter it, and make running jumps across the cloud platforms. Enter the pyramid to skip most of the stage.
If the quicksand trick is unreliable, use the regular route. Move right through the desert, collect and use Bob-ombs to open blocked passages, and continue through the cave. After leaving the cave, climb the long vertical section of vines while avoiding Hoopsters. Continue across the upper route to the pyramid. The regular route is longer but avoids spending lives repeatedly on the shortcut.
Inside the pyramid, collect the Mushroom Block and use a Power Squat Jump to reach the upper position. Throw the block into Red Birdo for the first hit. Then stand near the edge of the lower opening and wait for an egg that can be caught safely. Throw returned eggs at Birdo for the remaining hits, avoiding fireballs and any eggs that land poorly. After three successful hits, collect the Crystal Ball and pass through Hawkmouth to Tryclyde's arena.
- Use the quicksand shortcut only when you can maintain repeated jumps.
- Use Bob-ombs to open the regular route if bypassing the shortcut.
- Climb the vine section carefully if taking the long route.
- Hit Red Birdo with the Mushroom Block and returned eggs.
- Carry the Crystal Ball through Hawkmouth.
Defeat Tryclyde with the Mushroom Blocks
Tryclyde fires repeated streams of fireballs from his three heads. Do not stand in the open and trade projectiles. Enter the room, move onto the lower Mushroom Blocks, and use the right side of the block arrangement as your starting position. The rightmost position gives useful protection from the lowest fire stream in the original NES arena.
When the fireballs pass, pick up a Mushroom Block, crouch, and perform a Power Squat Jump to throw the block at Tryclyde. Return to the protected position immediately. Repeat with the remaining blocks, timing each throw between fire streams. Three successful block hits defeat Tryclyde. Keep track of confirmed hits rather than assuming a near miss counted.
If a throw misses, do not chase the block into the open while Tryclyde is firing. Stay behind the remaining blocks, wait for the next safe interval, and retrieve or throw the next available block only when you can return to cover. If all useful blocks are gone and Tryclyde is still active, the room is usually no longer favorable; preserve the lesson from the attempt and rebuild the stage on the next life rather than improvising a long exchange.
- Move behind the right side of the Mushroom Block arrangement.
- Throw only during a gap in Tryclyde's fire stream.
- Return to cover after every throw.
- Confirm three hits before leaving the arena.
- Do not attempt to jump on Tryclyde.
Recover after a failed attempt
A lost life does not create a permanent boss checkpoint. Rebuild the current area according to the game's normal restart rules. If 6-1 is the problem, avoid optional detours until you can reach the key room consistently, then use the Phanto-marked jar and preserve a full health meter for the locked door. If 6-2 is the problem, choose Princess or Luigi and practice jumping from each Albatoss only after identifying the next solid landing. If 6-3 is the problem, use the shortcut for practice, but switch to the regular Bob-omb route if the quicksand passage is costing more lives than it saves.
If Tryclyde is repeatedly defeating you, do not spend Mushroom Blocks on ordinary enemies before the arena. Enter with the knowledge that the blocks are both ammunition and cover. A Continue is most useful after repeated late-world failures because it gives you another full attempt beginning at the current world's opening area. Rebuild health and object familiarity through 6-1 and 6-2 instead of repeatedly entering Tryclyde's room with no defensive blocks.
- Identify whether the failure is caused by movement, lifting, or the boss pattern.
- Preserve Mushroom Blocks for the final Tryclyde arena.
- Use the shortcut only if it consistently saves lives.
- Use a Continue to rebuild the whole world when the final arena is understocked.
Before you move on
- World 6-1 is complete after Green Birdo is defeated, the Crystal Ball is collected, and it is carried through Hawkmouth.
- World 6-2 is complete after the Albatoss crossings, the second Green Birdo fight, and the Crystal Ball exit.
- World 6-3 is complete after Red Birdo is defeated, the Crystal Ball is carried through Hawkmouth, and Tryclyde is defeated with three Mushroom Block hits.
- The exit after Tryclyde places the run in World 7, confirming that World 6 has been cleared in the original NES ruleset.
References for this chapter
World 7 — Final World, Living Hawkmouth and Wart Setup
World 7 contains the cloud stage 7-1 and Wart’s castle in 7-2. In 7-1, use the Rocket to reach the upper cloud route, defeat the fire-spitting gray Birdo with Mushroom Blocks, take the Crystal Ball and enter the first Hawkmouth. In 7-2, choose the safer lower route or the upper route that bypasses the first Red Birdo, then reach the later Red Birdo, recover its Key and unlock the final room. The living Hawkmouth, also called Mask Gate in some references, is one encounter immediately before Wart, not two separate gates. Defeat it with three Mushroom Block hits, then enter its mouth and prepare to use vegetables from the Dream Machine against Wart.
Choose a character and begin World 7-1
Peach is a strong choice for World 7 because her hover helps with the cloud platforms and gaps. Luigi can also reach high platforms with his jump, while Mario is the most balanced option. Toad handles pickups quickly but has less jump height, so use him only if you are comfortable with the cloud section.
A normal death restarts the current area. A Continue returns you to the beginning of World 7, so it does not preserve a checkpoint inside 7-1 or 7-2. Enter the world with a full life meter if possible, but do not spend lives repeatedly on optional coins when the main route is already open.
- Choose Peach, Luigi or the character you control most reliably.
- Treat both areas as one continuous final-world attempt.
- Remember that a Continue returns you to the start of World 7.
Collect the optional Mushrooms in the opening cloud section
Climb the opening cloud platforms and ladder, then move right past the Bob-ombs and Ninjis. Do not pull the grass on the first platform. Continue to the column before the pit, pull the grass there and take the Potion back to the platform with three grass tufts.
Drop the Potion between the two tufts on the right and enter the temporary door. The Mushroom in Sub-Space increases the life meter and restores health. Return to the normal area and continue right into the building.
Inside the building, climb to the upper platform and pull the third grass tuft from the right to find another Potion. Drop it where you found it, enter the Sub-Space door and collect the second Mushroom. The remaining grass is optional and mainly provides coins. If the enemies are causing damage, leave after taking the Mushroom rather than forcing the coin collection.
- Use the first Potion to reach the Mushroom near the opening grass.
- Use the building Potion to reach the second Mushroom.
- Treat the coins and any extra grass pulls as optional.
Ride the Albatoss and take the Rocket
After leaving the building, climb onto its roof and wait for an Albatoss traveling left. Jump onto it and stay aboard while it carries you back across the cloud section. Jump over the tall columns as the Albatoss approaches them; do not jump off merely because the screen scrolls or the bird changes position.
Near the far side, the Albatoss reaches a ladder and two columns with grass between them. Drop onto the grass between the columns and pull it up to reveal the Rocket. Take the Rocket to reach the upper part of 7-1. This is the intended route, not an optional bonus room.
- Use the building roof to reach the left-moving Albatoss.
- Remain on the Albatoss until the ladder and paired columns appear.
- Take the Rocket from the grass between the columns.
Cross the upper clouds and defeat gray Birdo
Move right across the upper clouds and collect Cherries only when the landing is safe. Avoid Snifits, Ninjis and Shy Guys unless throwing one clearly removes an immediate threat. In the cloud section with the pink Shy Guy, let it walk beneath you before crossing so you do not land on it or walk into it.
Continue to the ladder and climb through the Spark section. Wait for Sparks to pass rather than trying to race through their paths. When you reach the area with several Mushroom Blocks and ladders, use the blocks to build enough height to reach the upper ladders. Throwing a block at a Spark is possible, but preserve a usable block for the boss room if you can.
At the top, avoid the Hoopsters on the middle ladders and the Snifit’s shots. Enter the building to face gray Birdo. This Birdo spits fireballs instead of eggs, so there is nothing to catch and throw back. Pick up the available Mushroom Block and throw it at Birdo during a safe opening. After three successful hits, take the Crystal Ball.
- Use the Mushroom Blocks to reach the upper ladders.
- Do not wait for eggs from gray Birdo.
- Defeat gray Birdo, then collect the Crystal Ball.
Enter World 7-2 through the first Hawkmouth
Carry the Crystal Ball to the right side of the room and enter the Hawkmouth. The gate opens normally after gray Birdo is defeated, and this completes 7-1. You do not need to carry a Mushroom Block through the gate. Focus on entering 7-2 with as much health as possible.
- Collect the Crystal Ball after the Birdo fight.
- Enter the Hawkmouth on the right.
- Begin 7-2 with health rather than trying to preserve a leftover block.
Cross the castle entrance and choose a route
Move right past the three Snifits and enter the castle. The first conveyor carries you past a jar releasing Shy Guys and three Ninjis. Continue to the next conveyor, where a jar releases Bob-ombs. Hold the run button and move past the Bob-ombs quickly; if one turns around, jump over it rather than stopping in front of it.
At the route split, the lower route is usually easier to control. Use a Bob-omb to reach the chain leading down, then pick up Mushroom Blocks while avoiding the Spark. In the descending Cherry section, collect the Cherries in this order: left, right, right, left. Continue downward, take the final Cherry and enter the door.
The upper route bypasses the first Red Birdo. Ignore the downward chain, continue across the conveyors, avoid the gray Pansers and their fireballs, and climb the chain. This route contains more Spark and conveyor hazards but reaches the later castle rooms without requiring the first Red Birdo fight. An optional Potion and Mushroom are available on the upper route; take the detour only if you can do so without losing health.
- Run past the Bob-omb jar instead of fighting beside it.
- Use the lower route for the more direct, controllable path.
- Use the upper route if you want to bypass the first Red Birdo.
Reach the required key-bearing Red Birdo
From the lower route, continue past the chains and Sparks, use the nearby Potion and Mushroom room if desired, then climb through the castle. From the upper route, keep climbing through the chain and Spark rooms until the paths join the later section. Move patiently on the conveyors and crouch or wait when a Spark blocks the next landing.
At the first Red Birdo on the lower route, eggs are available and the fight is optional because the upper route can bypass it. If you fight, pick up an egg, wait until Birdo finishes the current volley and throw the egg back. Red Birdo can also spit a fireball, so do not stand directly in front of its mouth while waiting.
The later Red Birdo is required regardless of route. Defeat it with eggs, then take the Key it drops. Carry the Key through the next room. If Sparks block the path, throw the Key at one Spark at a time, then pick it up again. Do not leave the Key trapped under a block or in a corner. If you lose it, return to the later Red Birdo room and defeat that Birdo again for another Key.
Take the Key to the locked door on the left and unlock it. The room beyond contains the Crystal Ball and the final pre-Wart encounter.
- Bypass the first Red Birdo with the upper route if desired.
- Defeat the later Red Birdo and take its Key.
- Use the Key on the locked door to the left.
- Collect the Crystal Ball in the room beyond the locked door.
Defeat the living Hawkmouth and enter Wart’s room
The final pre-Wart enemy is the living Hawkmouth, also called Mask Gate in some references. It is one encounter, not two gates. After you collect the Crystal Ball, the Hawkmouth detaches from the wall and flies back and forth through the room.
Pick up one of the Mushroom Blocks on the floor and throw it at the Hawkmouth when it is turning or moving back toward you. The Hawkmouth cannot reach the floor easily, so stay low when it passes and use the open floor to retrieve another block. Avoid throwing a block into a corner where it cannot be recovered.
Three Mushroom Block hits defeat the Hawkmouth. When it stops and opens its mouth, move directly in front of it and enter immediately. If you wait too long, it can close its mouth and resume attacking, forcing you to repeat the encounter. The blocks in this room are enough for the fight; do not enter expecting to use jumps or vegetables against the Hawkmouth.
- Collect the Crystal Ball before the Hawkmouth becomes active.
- Hit the living Hawkmouth three times with Mushroom Blocks.
- Enter its open mouth promptly after it stops.
Prepare for Wart without wasting the final supplies
The room beyond the Hawkmouth contains Wart and the Dream Machine. The Dream Machine periodically produces vegetables from its pipes. These vegetables are the required weapon for Wart, so do not attempt to defeat him by jumping on him or by throwing Mushroom Blocks.
Before attacking, observe where the vegetables land and keep the machine accessible. Stand on or near the lower platform when it is safe, catch a vegetable, then move to a platform above Wart. Wait for Wart’s mouth to open and throw the vegetable into it. Wart’s bubbles can destroy a vegetable, so retreat or jump over the bubble pattern after a missed throw and return to the machine for another.
Wart requires six successful vegetables. The final-boss timing belongs to the next chapter, but entering this room with the Dream Machine available and the Hawkmouth cleared confirms that the World 7 setup is complete.
- Keep the Dream Machine accessible.
- Use vegetables, not jumps or Mushroom Blocks, against Wart.
- Recover at the machine after a missed or destroyed vegetable.
- Confirm completion only after Wart is defeated and the ending begins.
Before you move on
- World 7-1 is complete when gray Birdo is defeated, its Crystal Ball is collected and the first Hawkmouth is entered.
- World 7-2 progress is secure when the later Red Birdo is defeated, its Key opens the locked door and the second Crystal Ball is collected.
- The final Hawkmouth is cleared when it stops after three Mushroom Block hits and its open mouth can be entered.
- Wart’s room is reached when the Dream Machine is visible and the final boss encounter begins.
- The complete campaign is confirmed only after Wart is defeated and the original NES ending sequence starts.
Wart — Final Boss: Bubble Timing, Vegetable Throws and Recovery
The final battle in the original North American NES release requires feeding six vegetables to Wart. First defeat the living Hawkmouth at the end of World 7-2 with three Mushroom Block hits, then enter its opened mouth. In Wart’s room, collect vegetables from the central machine, avoid the falling bubble patterns, and throw each vegetable into Wart’s open mouth. The fight is won by six successful feeds, not by jumping on Wart or striking his body.
Enter Wart’s room through Hawkmouth
At the end of World 7-2, collect or preserve the Mushroom Blocks in the room before approaching the living Hawkmouth. The creature moves across the room and can be damaged with the blocks. Pick up a block, throw it into Hawkmouth, then reposition to avoid contact and retrieve another block. Three successful Mushroom Block hits stun it and make its mouth open.
Enter the opened mouth immediately. If the opening closes before you reach it, repeat the three-hit process. This leads directly to Wart’s arena. The character selected before entering World 7-2 remains the character for the boss attempt, so choose with the full level and final battle in mind. Peach’s hover can help with controlled movement, Luigi’s jump can reach elevated positions, Toad handles pickups quickly, and Mario has balanced handling.
- Hit Hawkmouth three times with Mushroom Blocks.
- Enter Hawkmouth while its mouth is open.
- Choose the boss character before starting World 7-2.
Read Wart’s attack pattern
Wart stays on the right side of the room and moves back and forth while periodically opening his mouth to inhale. He then releases a batch of bubbles. The bubbles travel across the arena and descend through the room, damaging your character if they touch you. They can also destroy a vegetable, including one you are carrying or throwing.
Stay in the lower part of the room while the bubbles are moving. Watch the gaps between the descending bubbles rather than trying to outrun the entire pattern. Wart cannot be defeated by jumping on him, touching him, or throwing an ordinary object at his body. Vegetables entering his open mouth are the required attack.
- Watch the gaps between falling bubbles.
- Treat bubbles as a threat to both health and ammunition.
- Do not attempt to stomp Wart.
Collect a vegetable safely
The machine in the middle of the room repeatedly ejects vegetables from its openings. Drop to the lower level and use the area near the machine as your recovery route. Staying toward the left side can give you more time to watch the bubbles and collect a vegetable when one emerges, but no location is permanently safe; adjust to the current pattern.
When a vegetable appears, let it come within reach whenever possible. You can jump beneath or toward it to catch it, then remain low while the current bubble batch passes. Do not cross the room immediately just because you have ammunition. If the route is covered by bubbles, wait for the next opening instead of sacrificing health or allowing the vegetable to be destroyed.
- Use the central machine as the renewable source of vegetables.
- Collect ammunition from the lower level when the bubble route is clear.
- Avoid chasing a vegetable through an active bubble pattern.
Move to the throwing line
After catching a vegetable, wait low until the bubbles have passed or a usable gap appears. Then move toward the middle platform or the ledge beneath Wart. You need a direct throwing line, but you do not need to stand against Wart. Approach only far enough to make the throw reach his mouth before a bubble crosses its path.
The platform and lower ledges are temporary positions, not guaranteed shelters. If Wart is near the side you need to use, wait below and let him move away. A short route from the machine is safer than crossing the entire room while carrying the vegetable. Preserve the item until Wart’s mouth-opening cycle gives you a realistic shot.
- Carry the vegetable through a gap rather than through bubbles.
- Use the nearest platform or ledge that gives a clear throwing line.
- Wait if Wart’s position blocks the route.
Throw when Wart opens his mouth
Wart’s mouth-opening animation is the attack signal. Throw the vegetable into his mouth during that opening, preferably as he begins the inhale before the next bubble batch. A throw made while his mouth is closed is rejected or deflected. A throw made too late can be intercepted and destroyed by a bubble.
Aim for the mouth rather than Wart’s body. The useful trajectory is one that travels below the bubble path and reaches him before the descending bubbles occupy that line. After the vegetable visibly enters his mouth, count one successful hit and retreat toward the lower level. Do not remain on the platform to wait for the next attack cycle.
- Throw during the mouth-opening window.
- Keep the vegetable below the bubble path when possible.
- Count only vegetables visibly swallowed by Wart.
- Retreat after each confirmed hit.
Recover from a miss or lost vegetable
If Wart’s mouth is closed, the vegetable is deflected, or a bubble destroys it, abandon that attempt. Do not chase the missing vegetable across the room. Return to the lower area near the machine, find a gap in the next bubble batch, and wait for another vegetable. The machine continues producing replacements, so patience is safer than forcing a bad throw.
If Wart hits you, prioritize survival and return to the lower level before trying again. A reduced life meter is a reason to wait for a clean cycle, not to rush toward Wart. If you lose a life, the boss room restarts and the six-hit sequence must be rebuilt from the beginning. To change character, restart World 7-2 and select a different character before entering Hawkmouth; there is no character-selection screen inside the arena.
- Abandon missed or destroyed vegetables.
- Recover low near the machine before collecting again.
- Restart World 7-2 if you need a different character.
- Expect the entire boss fight to restart after a lost life.
Finish the six-hit sequence
Repeat the complete cycle: collect a vegetable, wait low through the bubble pattern, move to a throwing line, feed Wart during his mouth opening, and retreat. Six successful vegetables are required. Do not count a vegetable that passes near Wart, hits his body, is deflected, or disappears in a bubble.
After the sixth vegetable enters Wart’s mouth, Wart is defeated and an exit door appears. Enter the door rather than continuing to attack. The following Subcon rescue, dream sequence, cast display, and final The End screen confirm that the original NES campaign has been completed.
- Wart swallowed six vegetables.
- The exit door appeared after the sixth successful hit.
- The arena was exited through the door.
- The ending sequence and final The End confirmation were reached.
Before you move on
- Hawkmouth was defeated with three Mushroom Block hits and its opened mouth was entered.
- Wart visibly swallowed six vegetables.
- The exit door appeared after Wart’s defeat.
- The arena was exited and the Subcon rescue, dream sequence, cast display, and final The End confirmation were reached.
Boss Room Troubleshooting and Recovery
Treat every failed boss attempt as a controlled retry. In the original North American NES release of Super Mario Bros. 2, losing a life while extra lives remain restarts the beginning of the area where the death occurred. If that area is a boss room, the boss encounter loads again from its starting state. Boss damage, carried items, health, and the room arrangement do not carry over. This is a temporary area retry, not a saved checkpoint. The character also remains the same during that retry. You can select a different character only before beginning a new area, or after Game Over when you choose Continue.
Reset the boss area with a normal death
If you die during a boss fight while another life remains, the game returns you to the beginning of that same area. For a boss area, this means you re-enter the encounter rather than replaying the preceding stage. The boss returns to its initial state, the room’s usable objects are restored to their starting arrangement, and any damage dealt during the failed attempt is lost. You do not retain a carried block, vegetable, bomb, egg, enemy, or other object, and your previous health state is not preserved.
Use the restart to identify one specific failure. Decide whether you entered without ammunition, threw during an attack wave, stood where retreat was impossible, or built cover that blocked the next object. Correct only that problem on the next attempt. Keeping the same character and general route makes it easier to determine whether the adjustment worked.
- Confirm that the retry begins at the entrance to the same boss area.
- Expect the boss, room objects, health state, and carried item to be reset.
- Choose one mistake to correct before beginning the next attack cycle.
Keep the selected character during the retry
On the original NES version, an ordinary death does not return you to the character-selection screen. The same character is used when the current area restarts. Do not plan to sacrifice a life simply to change from Mario to Toad, Luigi, or Princess Peach; that character change is not available between lives in this edition.
Choose the character before entering the next area. If you have not started the area yet, select the character whose movement best matches the upcoming obstacles. Mario is the balanced choice for uncertain routes. Toad is useful when rapid digging or fast pickup is the limiting factor. Luigi helps with high platforms and long jumps, but his traction and movement can be awkward. Princess Peach is valuable when hovering across gaps matters more than fast object handling.
A different character becomes available after Game Over if you select Continue, because Continue begins the first area of the world where the Game Over occurred and gives you a new character-selection opportunity before that area starts. This is a strategic reset, not a way to change characters inside the failed boss room. If you want another character without abandoning the run, finish the current area and make the change at the next area-selection screen.
- Keep the same character after an ordinary life loss.
- Choose a different character only before a new area or after Game Over followed by Continue.
- Do not waste a life expecting a character-selection screen that the original NES version does not provide.
Recover when you have no useful projectile
Inspect the boss room at the start of the attempt and identify its actual ammunition source. Depending on the encounter, the room may provide Mushroom Blocks, vegetables, eggs, bombs, or throwable enemies. Do not assume that every boss room supplies vegetables or that objects from one boss are available in another.
Against Birdo, use incoming eggs when the attack pattern allows you to catch and throw them back. Against Tryclyde, Mushroom Blocks provide both the primary attack and temporary protection from fireballs. Against Mouser, pick up the bombs he throws, move into a clear lane, and send them back rather than attempting to jump on him.
If an object has been lost in an active attack lane and no safe replacement is available, stop making repeated blind charges. A controlled death can be better than spending the rest of the life crossing the room without a plan. On the next attempt, leave one object available for the following attack cycle whenever the room permits it.
- Identify the confirmed projectile source before entering the attack lane.
- Keep one usable object in reserve when the arena allows it.
- Do not cross an active projectile lane solely to recover a missed item.
Fix mistimed throws
Pick up the object and watch the boss’s movement before throwing. Aim for a moment when the boss is moving into the projectile’s path or has finished an attack animation. Throwing while the boss is changing height, hopping away, or filling the room with projectiles is more likely to miss and can leave you exposed.
Against Tryclyde, stay behind or beside the Mushroom Blocks while fireballs are being launched. Throw during the opening after that sequence, then return to cover. If a block misses, do not immediately chase it. Let the attack pattern finish and use the next available block from a safer position.
Against Mouser, pick up a bomb, create a clear horizontal lane, throw toward the boss, and retreat before the next bomb reaches you. Against Birdo, use the egg’s approach to time a catch or return throw, and avoid standing directly in front of the boss while its pattern is changing.
- Wait for a clear throw lane instead of attacking on impulse.
- Throw during an opening or recovery window.
- After a miss, retreat and reset your position before pursuing another projectile.
Build cover without trapping yourself
When Mushroom Blocks are available, build only enough cover to interrupt the main projectile lane. A compact barrier is easier to work around than a tall stack that pins you against a wall or blocks access to replacement ammunition. Before placing the first block, identify both the object source and the route you will use to retreat.
Use the barrier temporarily: peek out, throw during the safe opening, and return behind the blocks before the next attack sequence. If the boss reaches your side, the stack is damaged, or the remaining ammunition is on the opposite side, abandon the position and relocate. Repairing cover while exposed is usually less safe than moving to an open lane and rebuilding.
- Leave access to the ammunition source and a retreat route.
- Do not build a wall that cuts off the next required object.
- Relocate when the boss reaches your side or the cover no longer protects you.
Spend Continue only after Game Over
When all lives are gone, the game displays the Game Over choices Continue and Retry. The original NES release allows two Continues. Choosing Continue restarts the first area of the world in which the Game Over occurred. It does not return you to the failed boss room, preserve boss damage, retain a carried object, keep your previous health state, or create a permanent save. You must replay that world’s earlier areas before attempting the boss again.
Use Continue when the current world’s opening area gives you a reasonable chance to rebuild health, lives, and supplies, or when a different character is clearly better suited to that world’s opening stages. Select the new character before starting the area, then replay the world deliberately. Avoid unnecessary fights, collect safe health increases, and preserve useful bombs, blocks, vegetables, and other objects for rooms that require them.
Do not spend a Continue after one bad throw while ordinary lives remain. Use the current-area reset to test a corrected plan with the same character. If repeated attempts consume lives before you can execute that plan, accept Game Over and use Continue to restart the world deliberately. Choosing Retry abandons the current run and starts a completely new game; it is not another checkpoint option.
- Choose Continue only from the Game Over screen.
- Remember that the original NES version has two Continues.
- Resume at the first area of the same world and select a character before entering it.
- Do not treat Continue as a saved boss checkpoint.
Before you move on
- After a boss-room death, you can recognize that the same area has restarted with the boss setup reset.
- You understand that previous boss damage, carried objects, health state, and room arrangement are not preserved.
- You understand that an ordinary death retries the area with the same character.
- You can choose a different character before a new area or after Game Over followed by Continue.
- You can identify the boss room’s actual projectile source before entering the attack lane.
- You can name the single timing or positioning mistake you are correcting on the next attempt.
- You can use cover without blocking the ammunition source or retreat route.
- After Game Over, you can select Continue and resume from the first area of the same world.
- You understand that Continue does not preserve the boss room or create a save file.
- You can defeat the boss through a repeatable plan instead of random changes between attempts.
Optional: Life Farming, Extra Continues and Revisit Routes
The original North American NES cartridge has no battery-backed saving, passwords, save states, or ordinary world-select menu. You can strengthen a run with fixed 1-Ups, temporary Mushrooms, Small Hearts, Sub-Space Coins, and the end-of-area Bonus Chance game. Continues return you to the first area of the current world, while Warp Zones begin at the first area of their destination world. These tools are useful for practice and recovery, but the assigned completion route remains a normal clear of Worlds 1 through 7 without entering a Warp Zone.
Use Continues only as world-level recovery
A life is lost when the life meter is emptied or the character falls into a pit. After the available lives are gone, the Game Over screen offers Continue or Retry. Continue restarts the first area of the current world rather than the area where the final death occurred. The NES instruction manual gives you two Continues, so save them for a later-world attempt or for deliberate practice in a difficult world.
A Continue does not create a save file and does not preserve the current area, carried item, temporary Mushroom upgrade, or defeated boss room. Turning off the NES ends the run. After continuing, replay the current world from its first area and rebuild your supply of health and throwable objects instead of expecting a checkpoint.
- Use Continue when replaying the current world is worthwhile.
- Expect to restart that world from its first area.
- Do not power off the NES expecting progress to remain.
Collect the dependable World 1-1 rewards
World 1-1 is a practical preparation route because its early hazards are manageable. After reaching the upper part of the stage near the second POW Block, pull the grass beside that POW Block to reveal the fixed 1-Up. If you miss it at that location, the same 1-Up can appear at the alternate grass location near the left side of the broad hill farther along the route. Do not spend several lives forcing the pickup; use it only when the approach is consistent.
World 1-1 also contains two Sub-Space Mushrooms. The first is reached with the Potion on the upper hill near the early POW Block. A later Potion, reached after the cave section, opens the second Mushroom room. A Mushroom restores the life meter and raises its temporary maximum by one mark, up to four marks for the current area. It is not a reserve life, and the added capacity does not carry into the next area.
- Take the upper POW Block 1-Up when the route is safe.
- Use a Potion room for health before a difficult section.
- Treat Mushrooms as temporary current-area upgrades, not permanent lives.
Use World 1-2 for a second life opportunity
After the carpet section in World 1-2, reach the group of vases and follow the correct order. Enter the leftmost vase first. Pull the grass in the lower room to reveal the 1-Up, then jump back up through the ceiling to leave the vase. This is a reserve life and is separate from a Mushroom’s temporary health effect.
Next, enter the rightmost vase to obtain the Key. One of the wall masks, called a Phanto, begins chasing as soon as the Key is taken. Keep moving toward the locked door. If Phanto closes in, drop or throw the Key briefly to stop the immediate pursuit, then recover it when the path is clear. The Key does not disappear. Reach the locked door while holding it and press Up to open the door. Do not treat the two vases as a simple right-first shortcut: the leftmost vase contains the 1-Up, and the rightmost vase contains the Key.
- Enter the leftmost vase first and collect its 1-Up.
- Enter the rightmost vase second for the Key.
- Carry the Key to the locked door while managing Phanto’s pursuit.
Convert safe enemy groups into recovery
A Small Heart appears after eight enemies have been defeated and restores one mark of the life meter. Defeat enemies from a distance with Vegetables, Mushroom Blocks, Bob-ombs, or thrown enemies whenever possible. Collect the Heart only when the route is clear; crossing a crowded room for one mark of health can cost more than it restores.
When a Potion door is easy to reach, use a Mushroom before a long hazard sequence or boss approach. The Mushroom completely restores the meter and adds one temporary maximum mark, while a Small Heart restores only one mark. Neither item increases the reserve-life count.
- Use ranged throws to reach the eight-enemy Small Heart safely.
- Take a Heart only when collecting it does not create greater danger.
- Use a Mushroom to prepare for the immediate area, not for permanent progression.
Use the four Warp Zones only for optional shortcuts
World 1-3 contains a Warp Zone to World 4-1. Carry the Potion through the stage to the lone vase beyond the normal door route, enter Sub-Space there, and press Down while standing on the vase.
World 3-1 contains a Warp Zone to World 5-1. After the opening carpet setup, fall down the waterfall onto the small island, enter its door, take the Potion from the vegetable-filled room, carry it to the vase on the opposite side, and use the vase while in Sub-Space.
World 4-2 contains a Warp Zone to World 6-1 in the whale section. Take the Potion from the grass group, carry it to the lone vase near the icy path and rocky island, enter Sub-Space, and press Down on the vase. World 5-3 contains a Warp Zone to World 7-1 near the opening. Reach the high platform with the vase and use a Potion there; Luigi’s high jump makes this route easier, although other characters can reach it with more setup.
Every Warp Zone begins at the first area of its destination world. It does not preserve an area checkpoint, defeated boss, carried item, or skipped progress. A Warp-assisted victory over Wart can show the ending, but it does not satisfy the assigned requirement to clear all seven worlds and their required bosses. For the full campaign, play Worlds 1, 2, 3, 4, 5, 6, and 7 normally and never enter a Warp Zone.
- Carry each Potion to the specified vase before throwing it.
- Enter the destination vase from Sub-Space by pressing Down.
- Use Warp Zones only for optional practice or shortened attempts.
- Do not count a Warp-assisted Wart victory as a complete seven-world campaign.
Use Bonus Chance coins without depending on them
Coins collected in Sub-Space provide attempts at the end-of-area Bonus Chance game. Stop the three reels one at a time with A. A Cherry on the first reel awards one extra life; Cherries on the first two reels award two; and three Cherries award five. Three matching non-Cherry symbols also award one extra life in the NES version. Because the result is chance-based, treat Bonus Chance as a supplement rather than a guaranteed farming method.
Collect Sub-Space Coins when the route is safe and when doing so does not cost a life or force you to abandon the stage’s required Key, Crystal Ball, or exit. A modest coin total is useful, but a risky detour can erase the benefit by consuming a life.
- Gather Coins only when the Sub-Space route is safe.
- Remember the one-, two-, and five-life Cherry results.
- Do not spend several lives chasing a favorable Bonus Chance setup.
Understand the original NES ending behavior
After Wart is defeated in World 7-2, continue through the ending sequence. The original NES cartridge has no battery-backed save and does not unlock a verified title-screen world-start selector or ordinary replay menu. To practice a later world on the original cartridge, use one of the Warp Zones during a new attempt or replay the campaign from World 1.
This behavior is different from later releases, emulator save states, and modern ports. Do not use a later edition’s level-selection feature as evidence that the North American NES cartridge preserved campaign progress.
- Watch the ending after defeating Wart.
- Do not expect a post-ending world selector on the original NES cartridge.
- Reset or power off only after confirming the ending has completed.
Before you move on
- A full-campaign run clears every area of Worlds 1, 2, 3, 4, 5, 6, and 7 without entering a Warp Zone.
- The run defeats the required bosses and ends with Wart in World 7-2.
- Continue is understood as a restart from the first area of the current world, with only two Continues available.
- The World 1-1 POW Block 1-Up and World 1-2 leftmost-vase 1-Up are treated as reserve lives, not temporary health.
- The World 1-2 rightmost vase is used for the Key, which is carried to the locked door while Phanto pursues.
- Mushrooms are recognized as current-area health restorations that raise the temporary maximum by one mark, up to four marks.
- Small Hearts are understood to appear after eight defeated enemies and restore one life-meter mark.
- Coins collected in Sub-Space can be used in Bonus Chance, where the NES Cherry results are one, two, or five extra lives.
- The four optional Warp Zones lead to World 4-1, World 5-1, World 6-1, or World 7-1, but using any of them skips worlds and bosses.
- After Wart’s defeat, the original NES cartridge has no save file or verified world-start selector; the ending continues until reset or power-off.
References for this chapter
- Super Mario Bros. 2 — Nintendo official instruction booklet, text version
- World 1-2 — Super Mario Bros. 2 Guide
- Super Mario Bros. 2/World 1-2 — StrategyWiki
- Super Mario Bros. 2 — Guide and Walkthrough, NES, Kirby021591
- World 1-1 — Super Mario Bros. 2 Guide
- Super Mario Bros. 2 — Guide and Walkthrough, NES, WWalker
Common Pitfalls, Frequently Asked Questions, and Quick Fixes
Most failed runs in the original NES North American Super Mario Bros. 2 come from losing track of a key, spending useful objects too early, choosing a character poorly for the immediate obstacle, or arriving at a boss with reduced health. Use these corrections during play instead of repeating the same failed approach.
Keep every key attached to its door plan
A key opens a locked door only when you enter the doorway while carrying it. Before picking up the key, identify the locked door or at least the route that leads back toward it. Once you lift the key, Phanto becomes active and pursues you through the room and across transitions. Carry the key directly toward the door instead of exploring side paths or fighting enemies that can be bypassed.
If you need to stop, set the key down in a safe, visible place. Phanto will stop pursuing while the key is dropped, but you must return to the key and pick it up again. Do not throw it into a pit, behind scenery, or into an unreachable corner. If the key is lost in a way you cannot recover, the practical fix is to let the life end and replay the area so the key sequence resets. Reaching the locked doorway without the key does not advance the stage.
- Locate or remember the locked door before committing to a long detour.
- Carry the key into the doorway; do not throw it through first.
- Keep the key on solid ground where you can retrieve it after creating distance from Phanto.
- Use nearby enemies as weapons only when they block the route or help you survive the return trip.
Choose the character for the obstacle ahead
Character choice is made before each area, so use it as a planning tool rather than selecting the same character automatically. Mario is the balanced option for unfamiliar routes. Luigi has the highest jump and the longest hang time, making him useful for tall platforms and long jumps, but his loose traction makes precise stopping harder. Princess Toadstool has the weakest lifting speed but can extend her jump by holding A after takeoff, making her the best choice when controlled horizontal distance or a recovery hover matters.
Toad has the fastest lifting and digging speed, but the shortest jump. Choose him when a stage requires rapid vegetable grabs, repeated digging, or quick object handling on broad, fairly low platforms. The simple rule is Mario for unknown routes, Luigi for height, Princess for hover-assisted distance, and Toad for fast lifting and digging. These are advantages, not mandatory locks; switch when the obstacle that caused the failure clearly favors another character.
- Use Luigi for vertical sections only if you can manage his slippery stopping.
- Use Princess for wide gaps and recovery jumps, not cramped rooms that demand repeated digging.
- Use Toad when speed of lifting matters more than jump height.
- Use Mario when you need predictable handling and do not know the route.
Preserve the life meter before the final screen
A normal enemy hit removes one mark from the life meter. When only one mark remains, the character becomes smaller; another damaging hit or a fall defeats the character. Small hearts appear after every eight defeated enemies and restore one missing mark. If you are already damaged, do not rush past a safely accessible heart merely to save a few seconds.
Across a multi-screen area, separate threats before advancing. Pull one enemy from a group, throw it from a distance, and clear the landing area before making a long jump. Avoid trading a hit to defeat an enemy that can simply be bypassed. When the route contains quicksand, fire, moving platforms, or projectile enemies, slow down after taking damage and look for a safer approach instead of repeating the same rush.
- Collect a small heart when the route to it is safer than the route ahead.
- Clear enemies from the platform where you expect to land.
- Do not carry an object through a narrow passage unless it is needed for progress.
- Treat the one-mark state as a warning to change tactics, not as permission to sprint.
Spend vegetables, Mushroom Blocks, and enemies deliberately
Vegetables are usually the safest ranged weapon, while Mushroom Blocks can serve as weapons, temporary cover, or stacked platforms. Shy Guys and Snifits can be picked up and thrown, and some stages place them where their bodies are intended to solve a short obstacle. Bob-ombs are useful against enemies and breakable barriers, but they explode after a delay and can damage you if handled at close range.
Before a Birdo or world-boss room, note where the required projectiles come from. Pink Birdo fires eggs that can be caught and thrown back. Red Birdo mixes eggs with fireballs, while the gray or green-looking Birdo variant fires only fireballs and must be attacked with Mushroom Blocks. For projectile-heavy bosses such as Tryclyde, stack available blocks into cover before committing to repeated throws. Do not assume every boss room supplies unlimited replacements; preserve the objects provided by the preceding route and arena.
- Carry a useful projectile forward when the route allows it.
- Build Mushroom Block cover before a fireball-heavy fight.
- Use eggs against egg-firing Birdo, but do not try to catch a fireball.
- Leave yourself an escape route before picking up a lit Bob-omb.
Recover from a missed jump or bad landing
If a jump starts to fail, hold toward the nearest solid platform rather than making frantic reversals. Aim for a lower safe platform if it is available; surviving the landing is more important than reaching the highest ledge immediately. Princess can extend a jump with her hover, Luigi can reach higher ledges, and Mario or Toad may recover more reliably on lower platforms.
Release a nonessential object before a precision jump. Carrying an item can alter how you move and may prevent the jump from being charged or controlled as expected. If an enemy occupies the landing platform, throw the object before landing or clear the enemy from a stable position. Do not treat stomping as the standard attack in this game: most enemies are meant to be lifted, thrown, avoided, or used as temporary platforms.
- Release objects that are not part of the solution before a difficult jump.
- Choose the safest reachable platform, even if it is lower.
- Return to stable ground after a missed throw before attempting another attack.
Use deaths and Continues correctly
If you die while extra lives remain, the NES version restarts you at the beginning of the area where you died. That can place you directly back in a boss area, allowing you to repeat one focused plan without replaying the preceding stages. Use this restart to test the same throw rhythm, cover position, or approach several times rather than changing every part of the strategy after one failure.
After all lives are lost, the Game Over screen offers Continue or Retry. Continue restarts at the first area of the current world, not at the area where you died, and the original NES game permits only two Continues. Retry returns you to the title screen and starts a new game. If a boss attempt fails because you arrived without projectiles, rebuild your supply during the world rather than spending another Continue on the same understocked approach. If the problem is timing, practice one attack window at a time: establish cover, wait for the enemy attack to pass, throw once, and reposition.
- Use an ordinary death to repeat the current area and refine one specific tactic.
- Remember that Continue sends you to the first area of the current world.
- Reserve Continues for a run with a reliable route through the earlier areas.
- Change characters at the next selection opportunity only when the failed obstacle clearly matches another character’s strength.
Before you move on
- You can carry a key from its guarded room to the locked door without throwing it away or losing track of its location.
- You can name the practical use of each character: Mario balanced, Luigi high-jumping, Princess hover-capable, and Toad fast at lifting and digging.
- You understand that small hearts appear after eight defeated enemies and restore missing life-meter marks.
- You reach boss entrances with enough health for mistakes and a specific plan for obtaining or preserving the required projectiles.
- After a failed attempt, you can identify whether the cause was the route, character choice, lost projectile, poor positioning, or throw timing and apply one correction on the next life.
- You know that an ordinary death restarts the current area, while one of the original NES edition’s two Continues restarts the first area of the current world.
References for this chapter
Final Checklist, Ending Confirmation and Post-Game Notes
Complete the original North American NES campaign by clearing Worlds 1 through 7 in normal order, finishing World 7-2, defeating the living Hawkmouth, feeding Wart six vegetables, and watching the ending through The End. A Warp Zone can provide a shortcut to the final world, but a shortcut does not count as clearing every world for the full-campaign goal. The original NES cartridge has no battery-backed save and no post-ending world-selection feature.
1. Confirm the full-campaign requirement
For this completion check, clear World 1, World 2, World 3, World 4, World 5, World 6, and World 7 in normal order. The final area is World 7-2. A run that uses a Warp Zone to skip one or more worlds may still defeat Wart and show the ending, but it does not prove that the skipped worlds were cleared.
The cartridge does not store a campaign record. If you are checking a full run, keep your own progression record and make sure every required world was completed before entering World 7-2. Treat a Warp-assisted result as a separate Wart-victory or ending result rather than as full seven-world completion.
- Worlds 1 through 6 were cleared in order.
- World 7-1 was cleared before World 7-2.
- No Warp Zone skipped a required world during the full-campaign attempt.
- The run is being treated as a temporary cartridge session, not a saved profile.
2. Clear the complete World 7-2 route
World 7-2 begins outside Wart's castle. Move across the opening cloud platforms, deal with the Snifits, and enter the castle. Inside, proceed through the conveyor-belt rooms, avoid the Ninjis and fire hazards, and use the chains to move between the upper and lower sections. The stage offers branching routes, but the paths eventually reconnect; choose the route that gives you the safest footing and preserves your life meter.
Continue through the castle rather than stopping after the first Birdo encounter. The required later Birdo encounter guards the key for the locked door leading toward Wart. Use the room's available Mushroom Blocks or Birdo projectiles as weapons. When Birdo fires an egg, jump onto the egg, press B to pick it up, and throw it back. If Mushroom Blocks are available, they can also be thrown when the opening is safe.
After Birdo is defeated, take the key and carry it to the locked door. Do not throw the key away while crossing a hazard section, and do not enter another door until you have confirmed that the key is still with you. Open the locked door, collect the Crystal Ball, and continue to the final gate room.
The final obstacle before Wart is the living Hawkmouth. It is a single animated gate encounter, not the Wart battle. Pick up the Mushroom Blocks in the room and throw them at Hawkmouth. Three successful hits stop it. Once Hawkmouth is immobilized, enter its opening to reach Wart's room.
- The opening Snifit and castle sections were cleared.
- The branching World 7-2 routes were navigated to their later shared section.
- The required later Birdo encounter was defeated.
- The key was carried to the locked door.
- The Crystal Ball was collected.
- Hawkmouth was struck three times with Mushroom Blocks.
- Hawkmouth's opening was entered to reach Wart.
3. Defeat Wart with six vegetables
Wart attacks from the far side of the room by spitting bubbles. The Dream Machine supplies the vegetables needed to damage him. Do not try to jump on Wart; jumps are used to position yourself and avoid bubbles, not to deal damage.
Stand near the Dream Machine, pick up a vegetable, and watch Wart's attack rhythm. When he opens his mouth to spit bubbles, jump and throw the vegetable into his mouth. The throw must reach the mouth during the opening. A bubble can destroy a vegetable, including one already thrown, so avoid forcing an attack while the bubble stream is in the way.
If a vegetable is lost, return to the Dream Machine and wait for another. Move between the machine and the attack position instead of standing directly in front of Wart while he is firing. Peach's hover can make the throwing jump easier, but Mario, Luigi, and Toad can also complete the fight. Six vegetables must enter Wart's mouth in the original North American NES version.
After the sixth successful hit, Wart is defeated and a door appears. Enter that door; defeating Wart alone is not the complete ending confirmation.
- Vegetables were taken from the Dream Machine.
- Wart was damaged by throwing vegetables into his mouth.
- Six successful vegetable hits were completed.
- The exit door after the battle was entered.
4. Watch the complete NES ending
After Wart's defeat, the inhabitants of Subcon are released from the large container. They carry Wart away. The game then presents the character-use and area-completion display. This display records the run; it does not require you to replay the campaign with every character or use each character a prescribed number of times.
The ending continues with Mario sleeping and dreaming about the adventure. He briefly wakes and then returns to sleep. A cast sequence follows, showing the game's characters and enemies. Let the sequence continue without resetting. The original NES presentation finishes by displaying the cursive message The End.
Seeing Wart disappear is not enough for this check. Resetting immediately after the battle can skip the rescue and ending scenes. The reliable completion confirmation is the full sequence: Subcon's rescue, Wart being carried away, the completion display, the sleeping-Mario dream scene, the cast sequence, and The End.
- The Subcons were released.
- The Subcons carried Wart away.
- The character-use or area-completion display appeared.
- Mario's sleeping-and-dreaming scene appeared.
- The cast sequence finished.
- The screen displayed The End.
5. Understand the post-ending behavior
The original North American NES cartridge has no battery-backed saving. It does not preserve cleared worlds, store a completed campaign, or provide a permanent post-ending world-selection screen. After The End, the game remains on its ending display rather than opening a modern results or replay menu.
Use RESET or power off the NES when you are finished viewing the ending. Do not apply world-selection behavior from another Mario title to this cartridge. Save files, suspend points, stage menus, and replay features found in later rereleases are not evidence of how the original NES cartridge works.
If you want to practice World 7-2 after completing the game, begin another run or use a separate legitimate practice method available on your equipment. The cartridge itself does not retain a completed World 7-2 or unlock permanent stage selection after power-off.
- No battery-backed save was expected.
- The ending was allowed to finish before resetting or powering off.
- No post-ending world-selection feature was expected from the original cartridge.
- Later remake and rerelease features were excluded from the completion proof.
6. Separate full completion from a Warp-assisted ending
A Warp Zone run that reaches World 7 and defeats Wart proves that the final boss can be beaten and that the ending can be reached. It does not prove that any skipped worlds or bosses were cleared. Record that result as a Wart victory and ending, not as the assigned full-campaign completion.
The full result requires World 1 through World 7 in normal order, including World 7-1 and the complete World 7-2 route. After that, defeat Wart with six vegetables and watch the ending through The End. Your final record should therefore contain both parts: every world was cleared without skipping, and the complete ending sequence was viewed.
This chapter targets the North American NES Super Mario Bros. 2 ruleset. It is not the Japanese Family Computer Disk System game released internationally as Super Mario Bros.: The Lost Levels. The four-character cast, heart meter, liftable objects, Subcon setting, Hawkmouth encounter, and Wart battle identify the game covered here.
- Worlds 1 through 7 were cleared in normal order.
- World 7-2 was completed through the required key route.
- Hawkmouth was defeated before entering Wart's room.
- Wart was defeated with six vegetables.
- The full ending reached The End.
- Any Warp-assisted result was recorded only as a Wart victory and ending.
- The game was identified as the North American NES Super Mario Bros. 2 ruleset.
Before you move on
- World 1, World 2, World 3, World 4, World 5, World 6, and World 7 were cleared in normal order.
- World 7-1 was cleared before World 7-2.
- The later World 7-2 Birdo encounter was defeated and its key was carried to the locked door.
- The Crystal Ball was collected.
- The living Hawkmouth was struck three times with Mushroom Blocks.
- Hawkmouth's opening was entered and Wart's room was reached.
- Wart was defeated by throwing six vegetables into his mouth.
- The exit door after the battle was entered.
- The Subcons were released and carried Wart away.
- The character-use display, sleeping-Mario dream scene, and cast sequence appeared.
- The final NES ending displayed The End.
- No battery-backed save or post-ending world-selection feature was expected.
- Any Warp Zone use was excluded from the full-campaign attempt.
- The game was verified as North American NES Super Mario Bros. 2 rather than The Lost Levels or a later remake.
References for this chapter
Finishing up
For the full-campaign goal, clear Worlds 1 through 7 in normal order, including every required area and boss encounter, defeat Wart, and watch the complete original NES ending through “The End.”
A Warp Zone may reach a later world and Wart, but it skips worlds and bosses and therefore does not satisfy the full seven-world completion requirement.
The original NES cartridge has no battery-backed save and no verified post-ending world-selection feature. After the ending, the game remains in its ending loop until reset or power-off.
Choose your next gameScreenshots & video
Game imagery for reference. Follow the written chapters above for the route and strategies.
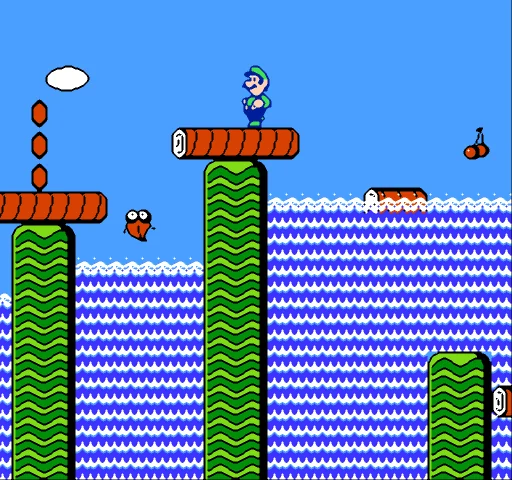
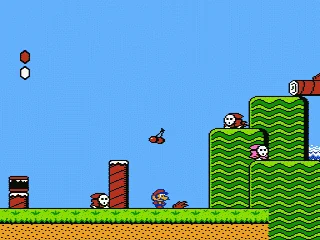
Sources & references
Our original guide draws on the references below. Check the edition at the top of this page before following controls or unlock requirements.
- Super Mario Bros. 2 — Nintendo official instruction booklet, text version
- Super Mario Bros. 2 — StrategyWiki Gameplay
- Super Mario Bros.: The Lost Levels — release and version distinction
- Super Mario Bros. 2 — NES ending reference
- NES Instruction Manuals: Super Mario Bros. 2
- Super Mario Bros. 2 Controls Reference
- Super Mario Bros. 2/Characters — StrategyWiki
- Super Mario Bros. 2 — StrategyWiki Items
- Super Mario Bros. 2 — Nintendo official instruction booklet
- GameResources/NES/SuperMarioBros2 — TASVideos
- Super Mario Bros. 2 — Super Mario Wiki
- Super Mario Bros. 2/Enemies — StrategyWiki
- Super Mario Bros. 2 — Guide and Walkthrough, NES, Kirby021591
- Birdo — Super Mario Wiki
- World 1-1 — Super Mario Bros. 2 Guide
- Super Mario Bros. 2 — Guide and Walkthrough, NES, WWalker
- Super Mario Bros. 2 — Guide and Walkthrough by GhostOfLegault
- World 2-1 — Super Mario Bros. 2 Guide
- World 2-2 — Super Mario Bros. 2 Guide
- World 2-3 — Super Mario Bros. 2 Guide
- World 3-1 — Super Mario Bros. 2 Guide
- World 3-2 — Super Mario Bros. 2 Guide
- Super Mario Bros. 2/Bosses — StrategyWiki
- Super Mario Bros. 2 — Guide and Walkthrough, NES, by Snow_Dragon
- Super Mario Bros. 2 — World 4-3 Guide, StrategyWiki
- Super Mario Bros. 2 — NES guide and walkthrough
- World 6-3 — Super Mario Bros. 2 Guide
- World 7-1 — Super Mario Bros. 2 Guide
- World 7-2 — Super Mario Bros. 2 Guide
- Super Mario Bros. 2 Guide — The Mushroom Kingdom
- Super Mario Bros. 2 — Guide and Walkthrough — NES, by Shibu_Jason
- Final Boss: Wart — Super Mario Bros. 2 Guide
- Super Mario Bros. 2 — StrategyWiki World 7-2 guide
- World 1-2 — Super Mario Bros. 2 Guide
- Super Mario Bros. 2/World 1-2 — StrategyWiki
- Super Mario Bros. 2 — StrategyWiki Walkthrough
- Super Mario Bros. 2 — Super Mario Wiki
- World 7-2 (Super Mario Bros. 2) — Super Mario Wiki
About the game & collecting notes
- Platform
- Nintendo Entertainment System
Step-by-step walkthrough of the North American NES release of Super Mario Bros. 2 (USA, Rev A). This guide covers controls, character choices, enemy and item tactics, every world and boss through Wart, and practical recovery and optional completion advice. Designed so a newcomer can finish the main campaign and confirm the true ending on the original NES edition.
Darryl Polo
Darryl Polo loves tinkering with emulation and revisiting retro games. He enjoys exploring how old favorites play on different setups and sharing what he learns along the way. At Joking Joystick, he writes about the games, hardware, and small discoveries that keep the hobby fun.
Our editorial standardsFound a step that needs another look? Help us improve this guide.