
Spyro: Year of the Dragon — Complete North American PlayStation Campaign Walkthrough (supplied v1.1 revision label unverified)
This guide covers the original North American PlayStation release of Spyro: Year of the Dragon, including the main campaign, all four playable critters, the 149 pre-bonus eggs, the 15,000-gem Super Bonus Round gate, the final bonus-area egg, the 117% endpoint, and the separate 20-Skill-Point epilogue objective. It distinguishes ordinary realms, critter stages, Part 2 returns, Speedways, Sparx stages, bosses, Challenge Portals, the post-Sorceress Moneybags event, and the Super Bonus Round.

Find a copy
Spyro: Year of the Dragon Sony PlayStation
We may earn a commission if you buy through these links, at no extra cost to you. As an Amazon Associate I earn from qualifying purchases.
Opens retailer search results. Check the model, edition, seller, availability and current price before buying.
Before you begin
You are about to tackle Spyro: Year of the Dragon on the original North American PlayStation release. The supplied USA v1.1 label is treated as an identification claim, not as independently verified revision evidence.
This guide is written for players who want a practical, step-by-step route through the main campaign and the collectible-driven objectives that unlock the game's final content.
You will be walked through core mechanics, the order of progression between homeworlds and Forgotten Worlds, how and when to free the critter characters, the structure of the friend/minigame and speedway levels, and the route to reach the Sorceress and the Super Bonus Round.
Follow the chapters in order on your first playthrough.
Each chapter details objectives you must complete to progress, what to look for in each realm-type, how to recover from common setbacks, and which activities are optional or advisable to postpone until later.
The plan emphasizes clear subgoals (rescue eggs, unlock portals, free critters) rather than exact gem counts when those counts are only necessary as local objectives, so you can keep moving without getting stuck.
Set yourself up for the run
Confirm that the disc or image is the original North American PlayStation release. Treat the supplied v1.1 label as an identification claim unless the physical revision or verified build has been independently checked.
Learn the original controls: Circle attacks or spits, Square charges or performs the character-specific action, X jumps, and Triangle handles headbash, hover, view changes or other character-specific functions.
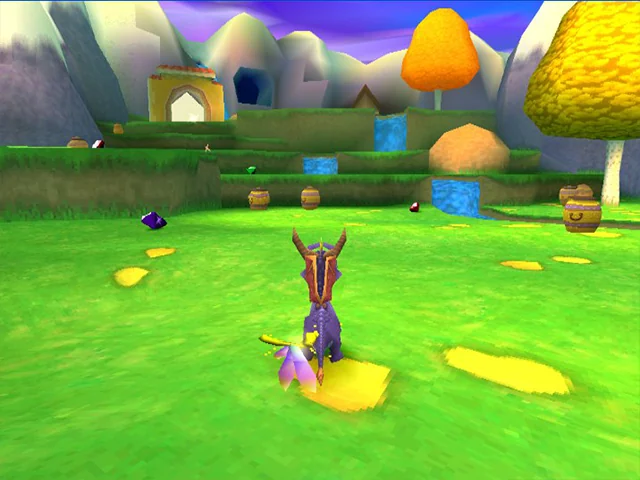
Practice Spyro's core movement in Sunrise Spring before entering difficult portals.
Understand that Zoe and other fairies provide temporary in-level restart checkpoints; use the game's Save Game command or a normal Realm/Home World transition for permanent Memory Card progress.
Reserve Memory Card space and avoid interrupting any save or transition.
Expect Spyro, Sparx, Sheila, Sgt. Byrd, Bentley, Agent 9 and Hunter activities, each with distinct controls and objectives.
Free the critters through Moneybags when their fees are available, then complete their dedicated and later character-gated activities.
Track eggs, gems, portal thresholds, boss clears and return sections separately.
Plan later revisits for character-gated eggs and gem cleanup instead of forcing inaccessible routes on the first visit.
Use the global egg total as the main unlock metric, while verifying each level's local objectives in the Atlas and a written checklist.
Start-up, HUD, Controls and Core Moves
The North American original PlayStation release uses the classic Spyro control layout. Circle flames or spits carried objects, Square charges, X jumps, and Triangle provides headbash, hover, or first-person viewing depending on Spyro’s movement state. L2 and R2 rotate the camera, while either L1 or R1 centers the camera behind the active character. Begin in Sunrise Spring Home, practice the movement loop before entering the first portals, learn Sparx’s health colors, and treat Zoe’s zap as a temporary in-level restart point rather than a permanent Memory Card save.
Start in Sunrise Spring Home and learn the basic movement loop
Begin by moving through Sunrise Spring Home instead of immediately entering the first portal. Use the D-pad or left analog stick to move Spyro. The analog stick allows gradual walking or running depending on how far it is tilted, which is useful near ledges and narrow platforms. The D-pad gives sharper directional changes when you need a quick turn.
Press Square to charge. Hold Square to continue charging while steering with the D-pad or left analog stick. Charging lets Spyro ram suitable enemies and objects and cross open ground quickly, but it reduces his ability to make small corrections. Release Square before a narrow platform, a drop, water, or an enemy that cannot safely be rammed.
Press Circle for Spyro’s flame attack. If Spyro is carrying an object that can be spat, Circle spits that object instead of producing normal flame. Later puzzles and minigames depend on this distinction, so check whether Spyro is carrying something before assuming Circle will attack normally.
Use L2 and R2 to rotate the camera. Press either L1 or R1 to center the camera behind the active character. Center the camera before a long jump, glide, or charge so the landing area remains visible. Hold Triangle while Spyro is standing still to enter the first-person view, then look around with the D-pad or left analog stick without turning Spyro.
- Walk and turn with both the D-pad and left analog stick.
- Hold Square in an open area, then release it before reaching a ledge.
- Use Circle on an ordinary enemy and practice centering the camera with either L1 or R1.
- Use L2 and R2 to rotate the camera around Spyro.
- Hold Triangle while standing still and look around without changing Spyro’s facing direction.
Practice jumping, gliding, hovering, and headbash
Press X to jump. Press X again while Spyro is airborne to begin a glide. Spyro glides in the direction he is facing, and the D-pad or left analog stick changes the direction during the glide. Establish the correct direction before the second X press, especially when crossing a gap toward a small platform.
To hover, press Triangle during a glide. The normal sequence is X, X, Triangle: jump, begin gliding, then hover. Hovering gives Spyro additional forward distance and height at the end of the glide. Save it for the final part of a jump rather than using it immediately after takeoff.
Headbash is a different airborne action. Press X to jump, then press Triangle while Spyro is airborne. The sequence is X, Triangle. This breaks headbash chests and other targets designed for the move. Pressing Triangle on the ground enters first-person view when Spyro is standing still; it does not headbash.
Use safe platforms and breakable targets around Sunrise Spring Home and the first stages to repeat these actions. For a long gap, jump near the edge, press X again to start the glide, steer toward the destination, and reserve Triangle for the final hover correction. After landing, pause your steering briefly before charging again so an accidental charge does not carry Spyro off a narrow platform.
- Complete a jump followed by X, X for a glide.
- Complete X, X, Triangle to hover at the end of a glide.
- Complete X, Triangle to headbash a breakable object or designated target.
- Center the camera with either L1 or R1 before attempting a gap that requires a glide.
- Use L2 or R2 to adjust the view when the landing platform is outside the current camera angle.
Read Sparx as Spyro’s health indicator
Sparx displays Spyro’s current protection. Yellow or gold indicates full health. After one damaging hit, Sparx becomes blue; after another, he becomes green. When Sparx disappears, Spyro has no remaining protection, so the next damaging hit causes him to lose a life. This applies to enemy attacks and hazards such as dangerous falls or environmental contact.
Treat blue Sparx as a warning and green Sparx as a reason to stop taking optional risks. Do not enter a crowded enemy area or attempt difficult platforming while assuming that another mistake can be absorbed safely.
Small passive creatures, called fodder, release butterflies when defeated. A butterfly restores Sparx’s health. If Sparx is already healthy, leave nearby fodder alive when practical so it remains available before a difficult section. If Sparx has disappeared, look for safe fodder before attempting optional exploration.
Some later Sparx abilities are unlocked through Sparx stages, but the normal health display remains the same in Spyro’s levels. Use Sparx’s color as an immediate warning and recover before continuing whenever a safe butterfly is available.
- Identify Sparx’s current color before entering a risky area.
- Defeat safe fodder and collect the butterfly when you need recovery.
- Treat a vanished Sparx as one-hit vulnerability.
- Leave nearby fodder alive when you expect a difficult section.
Use Zoe correctly: temporary checkpoint versus permanent save
Zoe’s fairy zap creates a temporary restart point inside the current level. Approach Zoe and allow the zap to finish. If Spyro later loses a life and still has lives available, he returns to the latest Zoe point reached in that level. This reduces the amount of ground you must repeat after a failed jump, enemy encounter, or minigame attempt.
Zoe’s checkpoint is not a permanent Memory Card save. It is valid only for the current visit to the level. To write progress permanently, pause with Start and choose SAVE GAME from the options menu while a Memory Card is inserted. The original manual also documents automatic saving when Spyro enters or exits a Realm or Home World, so leaving a level or hub through its normal transition can secure progress as well.
Use the Pause-menu Save Game command after completing a difficult level, collecting important eggs, freeing a critter, or making a significant Moneybags payment. Do not turn off the console merely because Zoe has zapped Spyro. A checkpoint can determine where a death restarts Spyro, but it is not proof that the latest progress has been written to the Memory Card.
After a death, continue from the Zoe point and check the level information or Atlas if you are unsure whether an objective was completed. If an egg, gem total, or challenge result is not reflected in the counters, replay the relevant objective and then use SAVE GAME or leave the Realm or Home World through its normal transition. This avoids relying on assumptions about what a death or checkpoint has permanently recorded.
- Activate each Zoe checkpoint by approaching her until the zap completes.
- Use Start, then SAVE GAME after a difficult egg, completed friend stage, or major Moneybags payment.
- Remember that entering or exiting a Realm or Home World also provides the game’s documented automatic save opportunity.
- After a death, verify the relevant counters or Atlas information if progress is uncertain.
- Do not turn off the console while relying only on a Zoe checkpoint.
Recognize Moneybags and critter entrances
Moneybags opens routes and releases playable critters in exchange for gems. These payments provide access to functional progression, character stages, bridges, doors, or challenges. Speak to him, read the fee and the stated purpose, then confirm the payment only after checking that you have enough gems remaining for the next required opening.
The main critter release fees are 300 gems for Sheila in Sunrise Spring Home, 700 gems for Sgt. Byrd in Midday Gardens Home, 1,000 gems for Bentley in Evening Lake Home, and 1,300 gems for Agent 9 in Midnight Mountain Home. The fee is paid at Moneybags’s location beside the relevant cage or entrance. The exact dialogue identifies what the current payment opens.
After paying, enter the released character’s home realm and complete its introductory stage before expecting that character to appear in later friend sections. Sheila, Sgt. Byrd, Bentley, and Agent 9 each use different movement and attack rules. Their levels contain objectives and routes that cannot be completed by trying to force Spyro through the entrance.
Keep a short note of each Moneybags location, fee, and unlocked route. Collect ordinary gems while exploring, but prioritize payments that release a required critter or open a route needed for the next part of the campaign. The Atlas and level information can then show which stages still have unfinished eggs or gems.
- Speak to Moneybags and read the fee before paying.
- Record which character, route, bridge, door, or challenge the payment opens.
- Budget 300 gems for Sheila, 700 for Sgt. Byrd, 1,000 for Bentley, and 1,300 for Agent 9.
- Enter each newly available critter stage and learn its distinct controls.
- Use the Atlas to check whether a level still has unfinished eggs or gems.
Before you move on
- You can identify the original PlayStation functions for Circle, Square, X, Triangle, L1, R1, L2, and R2.
- You can perform a normal glide with X, X, hover with X, X, Triangle, and headbash with X, Triangle.
- You can rotate the camera with L2 or R2 and center it behind the active character with either L1 or R1.
- You understand that yellow or gold Sparx is full, blue indicates reduced protection, green indicates one further hit is dangerous, and a vanished Sparx leaves Spyro vulnerable to the next damaging hit.
- You have activated a Zoe checkpoint and separately used SAVE GAME from the Pause menu.
- You understand that entering or exiting a Realm or Home World is also a documented automatic save opportunity.
- You can distinguish a Zoe checkpoint from permanent saving and know to verify counters after dying if progress is uncertain.
- You can identify Moneybags, understand that gems pay for route and critter unlocks, and recognize that critter stages require the appropriate playable character.
- You know the verified early release fees: Sheila 300 gems, Sgt. Byrd 700 gems, Bentley 1,000 gems, and Agent 9 1,300 gems.
References for this chapter
Game Structure: Homeworlds, Forgotten Worlds, Portals and Progression
The original North American PlayStation release of Spyro: Year of the Dragon is organized around four Homeworld hubs: Sunrise Spring, Midday Gardens, Evening Lake, and Midnight Mountain. Each hub links to ordinary realms, a critter realm, a Speedway, and separate boss, Sparx, challenge, or cleanup areas. Use the Atlas and the hub’s transport device to track what is complete. Do not treat every portal or side area as part of the boss route: the first three bosses use a specific set of five levels, while Part 2 critter sections, Speedways, Sparx realms, and challenge portals are tracked separately for full completion.
1. Learn the four Homeworld structure
Begin in Sunrise Spring and enter its portals one at a time. A Homeworld is a hub, not one continuous level: completing a realm returns Spyro to the hub, where other portals and Moneybags gates remain available. The Atlas records individual level progress, so use it to distinguish a completed realm from a portal that has not yet opened.
Sunrise Spring contains Sheila’s Alp, Sunny Villa, Cloud Spires, Molten Crater, Seashell Shore, Mushroom Speedway, Buzz’s Dungeon, and Crawdad Farm. Midday Gardens contains Sgt. Byrd’s Base, Icy Peak, Enchanted Towers, Spooky Swamp, Bamboo Terrace, Country Speedway, Spike’s Arena, and Spider Town.
Evening Lake contains Bentley’s Outpost, Frozen Altars, Lost Fleet, Fireworks Factory, Charmed Ridge, Honey Speedway, Scorch’s Pit, and Starfish Reef. Midnight Mountain contains Agent 9’s Lab, Crystal Islands, Desert Ruins, Haunted Tomb, Dino Mines, Harbor Speedway, the Sorceress’s Lair, Bugbot Factory, and the Super Bonus Round. Several realms later gain a Part 2 or return section; record those separately rather than treating them as new Homeworlds.
- Sunrise Spring: Sheila’s Alp, Sunny Villa, Cloud Spires, Molten Crater, Seashell Shore
- Midday Gardens: Sgt. Byrd’s Base, Icy Peak, Enchanted Towers, Spooky Swamp, Bamboo Terrace
- Evening Lake: Bentley’s Outpost, Frozen Altars, Lost Fleet, Fireworks Factory, Charmed Ridge
- Midnight Mountain: Agent 9’s Lab, Crystal Islands, Desert Ruins, Haunted Tomb, Dino Mines
2. Read the gate in front of each portal
A portal may be blocked by an egg threshold, a Moneybags payment, a critter rescue, or a previous boss result. Stand at the portal and read the displayed requirement instead of relying on a remembered gem or egg route. Egg gates use the total eggs rescued on the save; they do not mean that every egg in the current Homeworld must already be collected.
Examples of egg-gated progression include Spooky Swamp at 25 eggs, Bamboo Terrace at 30, Fireworks Factory at 50, Charmed Ridge at 58, Haunted Tomb at 70, Dino Mines at 80, Harbor Speedway at 90, and the Sorceress’s Lair at 100. The displayed requirement on the active save is the authority if your recollection differs.
Keep three separate records: total eggs, current gems, and completed level objectives. Moneybags fees consume gems but do not substitute for an egg requirement. A completed level can also contain an unfinished challenge, critter section, or later return objective, so note those independently.
- Read the requirement beside every sealed portal
- Track eggs separately from gems
- Record each Moneybags payment
- Use the Atlas to confirm completed levels
- Do not assume an unopened portal is waiting for gems
3. Free the critters as soon as their hubs allow
In Sunrise Spring, pay Moneybags 300 gems to release Sheila. Her dedicated realm, Sheila’s Alp, becomes available in the hub. In Midday Gardens, pay 700 gems to release Sgt. Byrd. In Evening Lake, pay 1,000 gems to release Bentley. In Midnight Mountain, pay 1,300 gems to release Agent 9.
These payments are progression purchases, not cosmetic conveniences. Each rescue opens the character’s dedicated realm and later character-specific sections in earlier levels. If you cannot afford the next payment, clear accessible gem groups in the ordinary realms and return to Moneybags rather than treating the rescue as optional.
After freeing a critter, complete the dedicated realm when practical. Then revisit earlier levels and look for the newly accessible critter entrance. This order reduces backtracking, especially for the return sections in Molten Crater, Bamboo Terrace, and Fireworks Factory.
- 300 gems: release Sheila
- 700 gems: release Sgt. Byrd
- 1,000 gems: release Bentley
- 1,300 gems: release Agent 9
- Complete each dedicated critter realm
- Revisit earlier levels after later critters become available
4. Use the correct boss route for Sunrise Spring
Buzz’s Dungeon is tied to Sunrise Spring’s five-level progression set: Sheila’s Alp, Sunny Villa, Cloud Spires, Molten Crater, and Seashell Shore. Complete the four ordinary realms and Sheila’s Alp, then check the hub and enter Buzz’s Dungeon when the route is open.
The boss route does not require Mushroom Speedway, Crawdad Farm, a challenge portal, or the later Sgt. Byrd section in Molten Crater. Those are separate objectives. If the boss portal is still closed, use the Atlas to identify which of the five required levels has not registered completion.
Molten Crater Part 2 becomes available after Sgt. Byrd has been released in Midday Gardens. Return to Molten Crater and use the Sgt. Byrd entrance for its additional egg and gem rewards. Do not wait for this section before attempting Buzz’s Dungeon; it is later completion content, not a boss-entry requirement.
- Sunny Villa complete
- Cloud Spires complete
- Molten Crater complete
- Seashell Shore complete
- Sheila released and Sheila’s Alp complete
- Buzz’s Dungeon complete
- Return later for Molten Crater Part 2
5. Use the correct boss route for Midday Gardens
Spike’s Arena is tied to Icy Peak, Enchanted Towers, Spooky Swamp, Bamboo Terrace, and Sgt. Byrd’s Base. Open the two egg-gated realms when the save reaches their displayed thresholds, finish the four ordinary Midday Gardens realms, release Sgt. Byrd for 700 gems, and complete Sgt. Byrd’s Base.
Once those five level objectives are registered, enter Spike’s Arena. Bentley’s Outpost, Agent 9’s Lab, Country Speedway, Spider Town, and the later Bentley section in Bamboo Terrace are not substitutes for any of the five required entries.
After Bentley is released in Evening Lake, return to Bamboo Terrace and use the Bentley entrance. Track this as Bamboo Terrace Part 2. It contains completion rewards but is not required to open Spike’s Arena.
- Icy Peak complete
- Enchanted Towers complete
- Spooky Swamp complete
- Bamboo Terrace complete
- Sgt. Byrd released and Sgt. Byrd’s Base complete
- Spike’s Arena complete
- Return later for Bamboo Terrace Part 2
6. Use the correct boss route for Evening Lake
Scorch’s Pit is tied to Frozen Altars, Lost Fleet, Fireworks Factory, Charmed Ridge, and Bentley’s Outpost. Reach the displayed egg requirements for Fireworks Factory and Charmed Ridge, complete all four ordinary realms, release Bentley for 1,000 gems, and finish Bentley’s Outpost.
When those five objectives are registered, enter Scorch’s Pit. Honey Speedway, Starfish Reef, Agent 9’s Lab, challenge portals, and the later Agent 9 section in Fireworks Factory are separate objectives and do not replace any part of the boss checklist.
After Agent 9 is released in Midnight Mountain, return to Fireworks Factory and use the Agent 9 entrance. Track this as Fireworks Factory Part 2. Complete it during the full-collection pass; it is not required to enter Scorch’s Pit.
- Frozen Altars complete
- Lost Fleet complete
- Fireworks Factory complete
- Charmed Ridge complete
- Bentley released and Bentley’s Outpost complete
- Scorch’s Pit complete
- Return later for Fireworks Factory Part 2
7. Track Speedways, Sparx realms, and challenges separately
Speedways are self-contained timed flying stages with their own eggs, gems, and race objectives. They are not ordinary realms and do not count toward the five-level boss sets. If a Speedway is causing repeated failures, continue the main route and return during cleanup; restarting an entire Homeworld is unnecessary.
The Sparx realms are separate top-down stages connected to boss progression. Crawdad Farm follows the Sunrise Spring boss sequence, Spider Town follows Midday Gardens, Starfish Reef follows Evening Lake, and Bugbot Factory is associated with the later Midnight Mountain sequence. Record them separately from the ordinary realms and critter realms.
Challenge portals can contain eggs, gems, races, character missions, or other rewards. Some require a critter, a boss result, or a later ability. Write down the Homeworld and level where each unfinished portal is located so that you can return directly to it.
- Record each Speedway separately
- Record each Sparx realm separately
- List challenge portals by Homeworld and level
- Do not use Speedway completion as a substitute for an ordinary realm
- Do not use a Sparx realm as a substitute for the associated critter realm
8. Finish Midnight Mountain and unlock the Super Bonus Round
After Scorch is defeated, proceed through Midnight Mountain. Complete Agent 9’s Lab, Crystal Islands, Desert Ruins, Haunted Tomb, and Dino Mines as their portals become available. The later Midnight Mountain Home Part 2 area and Bugbot Factory should be recorded separately from the four ordinary realms.
Open the Sorceress’s Lair when the save reaches its displayed 100-egg requirement and defeat the Sorceress to complete the main campaign. Post-boss areas and cleanup objectives remain available afterward, so do not assume the first Sorceress victory means the save is fully complete.
For the original game’s maximum completion route, finish the missing critter sections, Part 2 areas, Speedways, Sparx realms, challenge portals, and other collectible objectives until the save has 149 eggs and 15,000 gems. The Super Bonus Round then becomes available in Midnight Mountain. Enter it to obtain the final egg and remaining gems. The completed save should show 150 eggs, 20,000 gems, and 117 percent.
- Agent 9 released and Agent 9’s Lab complete
- Crystal Islands complete
- Desert Ruins complete
- Haunted Tomb complete
- Dino Mines complete
- Sorceress’s Lair opened at 100 eggs
- Sorceress defeated
- Midnight Mountain cleanup checked
- 149 eggs and 15,000 gems before entering the Super Bonus Round
- Super Bonus Round complete
- Final total: 150 eggs, 20,000 gems, 117 percent
Before you move on
- Buzz’s Dungeon is registered after Sunny Villa, Cloud Spires, Molten Crater, Seashell Shore, and Sheila’s Alp are complete.
- Spike’s Arena is registered after Icy Peak, Enchanted Towers, Spooky Swamp, Bamboo Terrace, and Sgt. Byrd’s Base are complete.
- Scorch’s Pit is registered after Frozen Altars, Lost Fleet, Fireworks Factory, Charmed Ridge, and Bentley’s Outpost are complete.
- Sheila, Sgt. Byrd, Bentley, and Agent 9 have all been released.
- Molten Crater Part 2, Bamboo Terrace Part 2, and Fireworks Factory Part 2 have been checked separately from the boss routes.
- Speedways, Sparx realms, challenge portals, and Midnight Mountain cleanup objectives have been tracked independently.
- The Sorceress has been defeated and the save has reached 149 eggs and 15,000 gems before entering the Super Bonus Round.
- The Super Bonus Round is complete and the save shows 150 eggs, 20,000 gems, and 117 percent.
References for this chapter
- Spyro: Year of the Dragon - Guide and Walkthrough - PlayStation - DrOctagonapus
- Spyro: Year of the Dragon — Guide and Walkthrough by SpyroCrashJak, GameFAQs
- darkSpyro - Spyro: Year of the Dragon Walkthrough
- darkSpyro - Guidebook: Buzz’s Dungeon
- darkSpyro - Guidebook: Spike’s Arena
- Spyro: Year of the Dragon — Sony PlayStation Manual
Egg Campaign Primer — Finding and Tracking the 150 Eggs
The original North American PlayStation release contains 150 dragon eggs. They are scattered through Home Worlds, regular levels, critter missions, Speedways, boss stages, challenge portals and the post-Sorceress Super Bonus Round. The most reliable completion method is to combine the game's global egg total with a written checklist organized by Home World and level. Do not treat every unreachable egg as a mistake: several rewards are deliberately held behind later critter abilities, egg thresholds, Moneybags payments or a second visit after a boss is defeated.
1. Understand the global total and the real completion sequence
The game tracks one adventure-wide dragon-egg total, ending at 150. Eggs are rescued by finding them in a level, catching an Egg Thief, completing a local request, finishing a critter activity, winning a Speedway task, defeating a boss or clearing a challenge area. The egg total does not reset when you leave a level, so use the number on the status screen as your master progress check.
The final sequence is important. The Sorceress's Lair opens at 100 eggs, but defeating the Sorceress does not immediately mean all 150 eggs are available. After the Sorceress is defeated, complete Bugbot Factory, then collect 149 eggs and 15,000 gems to open the Super Bonus Round. The 150th egg is awarded during the final Super Bonus Round encounter. A save showing 149 eggs before entering that area is therefore normal, not evidence of a missing collectible.
- Global egg total before entering a level: ______
- Global egg total after receiving a reward: ______
- Sorceress's Lair opened at 100 eggs: yes/no
- Bugbot Factory completed: yes/no
- Super Bonus Round requirement reached at 149 eggs and 15,000 gems: yes/no
- Final total after the Super Bonus Round: 150 eggs
2. Use the original PlayStation save procedure correctly
The North American PlayStation manual states that, with a Memory Card inserted in slot 1 before starting play, the game automatically saves when Spyro enters or exits a Realm or Home World. Use that transition deliberately after completing a difficult mission or collecting several eggs. Leaving a level for its Home World and then entering another Realm gives you a clear saving point.
Fairies and Zoe provide in-level guidance and checkpoint behavior, but merely reaching one should not be described as a guaranteed Memory Card save. Before switching off the console, exit the current level and complete a normal Realm or Home World transition. If a reward was especially difficult, enter another area and return to the Home World before ending the session.
- Memory Card inserted in slot 1 before starting play.
- Leave the level after a major egg reward.
- Complete a Home World or Realm transition before powering off.
- After resuming, verify that the global egg total is unchanged.
3. Build the checklist by Home World, level and reward type
Divide the record into Sunrise Spring, Midday Gardens, Evening Lake and Midnight Mountain. Under each Home World, list every regular level, Speedway, boss stage, Sparx stage and critter level. Give each level separate lines for ordinary exploration eggs, Egg Thief rewards, NPC or task rewards, critter activities, Speedway or Hunter activities, boss rewards and challenge-portal rewards.
Write a landmark and condition for every entry. “Egg near the water” is useful only if you also note the area, route and required ability. A stronger entry is “Desert Ruins — acid-pool hand statue — glide from Sheila entrance.” For a mission, record both the activity and its completion standard, such as reaching the second reward in a skateboard course, finishing a timed challenge or completing a Hunter race.
- Home World: ______
- Level or activity: ______
- Ordinary exploration egg: landmark and status
- Egg Thief: route and status
- NPC or task egg: condition and status
- Critter egg: character and objective
- Speedway or Hunter egg: result
- Boss or challenge egg: status
4. Collect accessible eggs first, then mark deferred eggs
On the first visit to a level, collect eggs on the main route and any side platforms reachable with Spyro's current moves. Search behind buildings, around corners, below bridges, beside water, on isolated islands and near the level exit. Many eggs reward observation rather than a special trick, so scan the entire room before moving on.
When an egg is visible but unreachable, record it as deferred instead of repeatedly attempting the jump. Sheila's hopping can reach vertical ledges, Sgt. Byrd handles flight and bombing routes, Bentley breaks heavy obstacles and Agent 9 solves ranged-combat sections. Some stages also require an egg threshold or a Moneybags payment before their later section opens. Return after the relevant prerequisite is complete.
- Accessible on first visit: yes/no
- Required critter: ______
- Required egg threshold: ______
- Moneybags payment or gate: ______
- Return after: ______
5. Track mission eggs as separate rewards
Do not mark a level complete after receiving only its easiest egg. Several activities have multiple reward conditions. A critter mission may give one egg for reaching a point and another for completing a harder route, time requirement or advanced round. Speedway stages commonly separate the normal course from a race or Hunter objective. Record each reward independently and wait for the egg to appear before marking it complete.
The same rule applies to bosses and challenge portals. Defeating a boss may open a new Home World, release a character or make a previously inaccessible section available, but it does not automatically clear every egg in the surrounding levels. Revisit levels that contain a newly opened critter portal after freeing that character.
- First mission reward received: yes/no
- Advanced or timed reward received: yes/no
- Speedway course reward received: yes/no
- Hunter or race reward received: yes/no
- Boss reward received: yes/no
- Challenge portal reward received: yes/no
6. Use thresholds and the final counter to diagnose missing eggs
Egg thresholds open later content throughout the campaign. The important progression checks include 10 eggs for later Sunrise Spring access, 14 and 20 for additional early activities, 25 and 30 in Midday Gardens, 36 for Country Speedway, 50 and 58 in Evening Lake, 65 for Honey Speedway, 70 and 80 in Midnight Mountain, 90 for Harbour Speedway and 100 for the Sorceress's Lair. If a portal remains closed, compare the displayed requirement with your global total before searching randomly.
At the end of a session, compare your written entries with the global counter and save through a Home World or Realm transition. If the notes say a reward was collected but the total is short, re-enter that activity and check whether the egg appears again or whether another reward line in the same level is still blank. Continue until the saved total, not merely the handwritten list, confirms the result.
- All threshold portals opened.
- Every level has a separate reward record.
- The saved game reaches 149 eggs before the Super Bonus Round.
- The completed game reaches 150 eggs after the final Super Bonus Round reward.
Before you move on
- The saved game shows 150 rescued dragon eggs.
- Bugbot Factory has been completed after defeating the Sorceress.
- The Super Bonus Round has been entered using 149 eggs and 15,000 gems.
- The final Super Bonus Round encounter awards the 150th egg.
- Every Home World, regular level, Speedway, boss stage, critter activity and challenge portal is marked complete on the checklist.
- A final Home World or Realm transition has been completed after receiving the last egg, and the save has been verified by reloading or checking the total before ending the session.
References for this chapter
- Spyro: Year of the Dragon — Sony PlayStation Manual
- Spyro: Year of the Dragon — Guide and Walkthrough by SpyroCrashJak, GameFAQs
- Spyro: Year of the Dragon — Guide and Walkthrough by dark52, GameFAQs
- Spyro: Year of the Dragon - Guide and Walkthrough - PlayStation - DrOctagonapus
- Spyro: Year of the Dragon — World 1 Eggs Walkthrough, PlayStation
Freeing the Critters: Moneybags, Fees and Friend Levels
Moneybags holds four playable allies in cages across the original PlayStation version: Sheila, Sgt. Byrd, Bentley and Agent 9. Pay the required gem fee at each homeworld cage, then enter the portal that opens behind the cage. Each dedicated friend level has three dragon eggs, a level-completion gem reward, and a distinct control style. Sheila, Sgt. Byrd and Bentley are part of the normal route to the later bosses. Agent 9 is not needed for the shortest route to the Sorceress, but he is required for the stated completion goal of freeing every critter and collecting all 150 eggs.
1. Reserve gems for the four rescue payments
The rescue fees are fixed in the original PlayStation release: 300 gems for Sheila, 700 for Sgt. Byrd, 1,000 for Bentley and 1,300 for Agent 9. The total cost is 3,300 gems. These payments are separate from Moneybags charges that open doors, bridges, speedway entrances or challenge areas, so check the next required fee before spending gems on optional access.
The safest rule is to collect the gems in the current homeworld and its accessible regular levels, then pay the local rescue fee as soon as the cage is reached. You do not need to save 3,300 gems at once. After each payment, the released character leaves the cage and the nearby dedicated portal becomes usable.
- Keep 300 gems available before finishing the first homeworld.
- Reserve 700 gems before committing to a complete Midday Gardens route.
- Reserve 1,000 gems before attempting a full Evening Lake cleanup.
- Keep 1,300 gems available in Midnight Mountain if you are pursuing 100 percent completion.
2. Release Sheila in Sunrise Springs
In Sunrise Springs Home, pass the Sunny Villa portal and follow the nearby raised route toward Moneybags. Sheila is caged beside him. Pay 300 gems and watch the release sequence; the portal directly behind the former cage leads to Sheila’s Alp.
Sheila’s main advantage is vertical movement. Press X to jump, press X again in the air to perform her air hop, and use Square or Circle to kick. Her air hop is the movement you will repeatedly use to reach high ledges, cross vertical gaps and attack enemies that Spyro cannot reach. Her dedicated level introduces these actions and contains three eggs, including rewards for completing its character missions. The level also gives a separate gem reward when cleared.
Sheila is the first rescue to prioritize because her level is part of the route to Buzz’s Dungeon. Later, Sheila sections appear inside regular levels and challenge portals. Some of those sections contain eggs needed for 100 percent completion, while others are optional rewards. Complete Sheila’s Alp before leaving Sunrise Springs so the next homeworld route is not blocked.
- Pay Moneybags 300 gems in Sunrise Springs Home.
- Enter Sheila’s Alp through the portal behind the cage.
- Complete all three Sheila’s Alp egg objectives before beginning the final cleanup pass.
- Record any later Sheila portals found in regular levels.
3. Release Sgt. Byrd in Midday Gardens
In Midday Gardens Home, move into the large central building and follow the interior route to Moneybags and Sgt. Byrd’s cage. The release fee is 700 gems. After paying, use the portal behind the cage to enter Sgt. Byrd’s Base.
Sgt. Byrd flies instead of running. Hold X to rise, use Square to drop bombs or carried objects, and use Circle to fire his missiles. Triangle is used for looking and aiming. His level is built around aerial navigation, rescuing hummingbirds, opening doors and bombing targets. Stay high enough to see the layout, but turn early near walls and ceilings; his flight momentum makes late corrections unreliable.
Sgt. Byrd’s Base contains three eggs and a level-completion gem reward. Completing it is not just a tutorial: later Byrd sections open in regular levels, including the second section of Molten Crater, and the Base is part of the progression requirements leading to Spike’s Arena. If the level feels difficult, first clear the open rooms and learn the missile range before attempting the tighter interior routes.
- Pay Moneybags 700 gems in Midday Gardens Home.
- Enter Sgt. Byrd’s Base and rescue all five hummingbirds.
- Collect all three Base eggs.
- Return to regular levels and enter Byrd-marked sections that were previously inaccessible.
4. Release Bentley in Evening Lake
In Evening Lake Home, dive beneath the surface and follow the underwater route near the frozen Atlas entrance. Moneybags is inside the cave near Bentley’s cage. Pay 1,000 gems to release Bentley, then use the portal behind the cage to enter Bentley’s Outpost.
Bentley uses a large club rather than Spyro’s charge and flame attacks. Square performs his heavy thump, while Circle swings or spins the club. His attacks can break sturdy objects, defeat enemies that resist ordinary attacks and move heavy boxes. Bentley is slower than Spyro, so fight from the edge of club range and let enemies approach instead of walking into groups.
Bentley’s Outpost contains three eggs and its own gem reward. Completing it is required for later Bentley sections, including the additional Bamboo Terrace section, and it is part of the route to Scorch’s Pit. Finish the Outpost before doing a final Evening Lake sweep; several collectible routes are deliberately placed behind Bentley portals.
- Reach Moneybags through the underwater cave in Evening Lake Home.
- Pay 1,000 gems to release Bentley.
- Complete Bentley’s Outpost and its three egg objectives.
- Revisit Bamboo Terrace and any Bentley-marked sections in other levels.
5. Release Agent 9 in Midnight Mountain
In Midnight Mountain Home, cross one of the first bridges from the central area. Moneybags stands near Agent 9’s cage and asks for 1,300 gems. Pay him and enter Agent 9’s Lab through the portal behind the cage.
Agent 9 is a ranged character. Circle fires his laser, Square throws bombs, and Triangle changes his aiming view or zoom. Use distance whenever possible: line up shots before entering a room, eliminate enemies that can attack from range, and use bombs against groups or targets that cannot be safely reached with the laser. His missions include first-person shooting sections, so watch the target area rather than moving constantly and restart the section if a required target escapes or damages you at the wrong moment.
Agent 9’s Lab contains three eggs and a level-completion gem reward. Agent 9 is the one rescue that can be postponed for the shortest story route; the Sorceress can be reached without completing his dedicated level. However, Agent 9 is mandatory for the stated goal. His ability unlocks the second Fireworks Factory section, which contains additional eggs and objectives, and his Lab itself contributes three eggs.
- Pay Moneybags 1,300 gems in Midnight Mountain Home.
- Complete Agent 9’s Lab instead of stopping after the cage opens.
- Return to Fireworks Factory for its Agent 9 section.
- Record every Agent 9 portal in the level checklist before declaring the world complete.
6. Use the friend levels correctly during progression
The dedicated friend levels are Sheila’s Alp, Sgt. Byrd’s Base, Bentley’s Outpost and Agent 9’s Lab. Each has three dragon eggs. Their gem rewards are 400 for Sheila’s Alp, 500 for Sgt. Byrd’s Base, 600 for Bentley’s Outpost and 700 for Agent 9’s Lab. Those rewards help recover the rescue fees, but they are not the same as the fees paid to Moneybags.
Use the following progression rule: complete Sheila’s Alp before Buzz’s Dungeon, Sgt. Byrd’s Base before relying on later Byrd routes and the Spike progression, and Bentley’s Outpost before the Scorch progression. Complete Agent 9’s Lab before trying to finish Fireworks Factory and the remaining Midnight Mountain eggs.
A friend level is optional only when the campaign can continue without its character or eggs. For maximum completion, treat all four as required, then revisit regular levels for their character-specific sections. A level can show as completed while still containing an inaccessible critter reward if the relevant rescue has not yet been purchased.
- All four cages are open and the four rescue fees are recorded.
- Each dedicated friend level shows completion and contributes three eggs.
- Every later Sheila, Byrd, Bentley and Agent 9 section is marked separately from the dedicated level.
- The checklist distinguishes main-route requirements from optional character rewards.
Before you move on
- Sheila, Sgt. Byrd, Bentley and Agent 9 are visibly released from their cages after paying 300, 700, 1,000 and 1,300 gems.
- Sheila’s Alp, Sgt. Byrd’s Base, Bentley’s Outpost and Agent 9’s Lab are all complete.
- The four dedicated friend levels contribute twelve recorded eggs in total.
- The relevant character sections in regular levels have been revisited and logged separately.
- Agent 9’s Lab is complete before the final Fireworks Factory cleanup.
- The player can continue through the normal boss route with Sheila, Sgt. Byrd and Bentley available, while Agent 9 is available for full-completion cleanup.
Speedways and Hunter Racing Levels — Techniques and Best Routes
The original North American PlayStation release has four Speedways: Mushroom Speedway in Sunrise Spring, Country Speedway in Midday Gardens, Honey Speedway in Evening Lake, and Harbor Speedway in Midnight Mountain. Each Speedway contains 400 gems and three eggs: one from the Time Attack, one from the race, and one from Hunter’s separate challenge. Together they provide twelve eggs and 1,600 gems. Speedways are separate from ordinary realm completion, but their eggs count toward later egg-gated portals and the 149 eggs required before the Super Bonus Round. Complete the Time Attack and race on the first visit when possible, confirm their eggs, and return for Honey Speedway’s Hunter event after Scorch if Hunter has been kidnapped.
1. Enter each Speedway at the correct campaign threshold
Mushroom Speedway is in Sunrise Spring and opens when the save has at least 20 eggs. Country Speedway is in Midday Gardens and opens at 36 eggs. Honey Speedway is in Evening Lake and requires 65 eggs plus Hunter being free. Harbor Speedway is in Midnight Mountain and opens at 90 eggs. These values govern access to the portals; they do not mean that every earlier level must already be completely cleared.
Each Speedway has three separate activities. The Time Attack and standard race are available when the Speedway first opens. Honey Speedway follows the same rule for those two activities: collect its normal Time Attack and race eggs on the initial visit if you can. Its Hunter activity is different. If the story has reached Hunter’s kidnapping, Hunter’s Narrow Escape is completed after Scorch is defeated, when Hunter returns to the Speedway. Do not treat that delayed Hunter egg as a permanently missed objective.
- Mushroom Speedway: enter at 20 eggs.
- Country Speedway: enter at 36 eggs.
- Honey Speedway: enter at 65 eggs with Hunter freed.
- Harbor Speedway: enter at 90 eggs.
- Record three eggs and 400 gems for every Speedway.
2. Understand the three Speedway events
The Time Attack is a timed sequence of four target groups. Sparx presents the intended order, and completing every group awards one egg. The race is a three-lap event. Follow the course markers and pass through the required green rings; missing a required ring can invalidate the attempt. Finish first to receive the second egg.
Hunter’s activity is a separate challenge selected from the Speedway’s Hunter location. It awards the third egg and uses a different control scheme or vehicle in each course. Completing the Time Attack or race does not complete Hunter’s activity automatically. After an event succeeds, allow the reward sequence to finish and check that the egg total increased before leaving.
Speedway gems are collected during normal flight and event play, not merely by winning the three egg challenges. Sweep the course after the activities if the level still shows an incomplete gem total. Do not confuse the three eggs with the 400-gem level total: the eggs come from event rewards, while gems are scattered throughout the course.
- Time Attack: one egg.
- Standard race: one egg for finishing first.
- Hunter challenge: one egg.
- Each Speedway: 3 eggs and 400 gems.
- Confirm the egg counter after each completed event.
3. Mushroom Speedway
Enter through the Sunrise Spring portal once you have 20 eggs. The Time Attack sequence is rings, dandelions, spiders, and butterflies. Stay with the current target group until it is finished instead of diverting toward a nearby target from the next group. The butterfly group is easier if you intercept the targets across their path rather than following directly behind them. Completing all four groups awards the first egg.
The standard race is three laps against the butterflies. Use the colored route markers and keep the camera pointed toward the next ring or turn. Blue stars provide a speed boost. Red stars provide a homing projectile in the race events where they appear; use one when an opponent is close enough to hit rather than firing at a distant target. A clean line through the rings is more valuable than attacking every opponent. Finish first for the second egg.
Hunter is hidden in a mushroom on an island near the seventh flower. Select his challenge from the Time Attack area and destroy the seven sheep saucers. Hold the fire button for continuous shots, use the speed control only when needed to close distance or avoid incoming fire, and approach targets from the side or front when possible. Destroying all seven awards the third egg.
- Time Attack order: rings, dandelions, spiders, butterflies.
- Race: three laps against the butterflies.
- Hunter landmark: mushroom on the island near the seventh flower.
- Hunter objective: destroy seven sheep saucers.
- Completion result: 3 eggs and 400 gems.
4. Country Speedway
Enter through the Midday Gardens portal at 36 eggs. The Time Attack order is rings, tractors, space cows, and biplanes. After clearing the rings, descend to the tractor route and use a controlled charge through the targets. Rise toward the space cows once the tractor group is complete, then finish with the biplanes above the course. Do not rush into the next group while targets from the current group remain; the timer is generous enough for a deliberate route. Completing all four groups awards the first egg.
The race is against flying pigs. It lasts three laps, and the green rings define the safe route. Blue stars are the most dependable way to maintain speed through a straight section. Red-star homing projectiles are best used when a pig is ahead and within targeting range. Avoid wide detours for attacks if they cause you to miss a ring. Take first place for the second egg.
Hunter is inside the large building on the hill. Speak to him from the Hunter location to begin Rescue Mission. Aim with the directional controls and fire with the attack button while Hunter follows the flight route. Prioritize space cows and sheep saucers that are about to complete an attack, then turn toward the next target rather than circling back. Destroy the full set to receive the third egg.
- Time Attack order: rings, tractors, space cows, biplanes.
- Race: three laps against the flying pigs.
- Hunter landmark: building on the hill.
- Hunter objective: destroy the space cows and sheep saucers.
- Completion result: 3 eggs and 400 gems.
5. Honey Speedway: initial visit and post-Scorch return
Enter from Evening Lake after reaching 65 eggs and freeing Hunter. The normal Time Attack is available immediately. Its recommended order is honeycombs, beehives, bees, and boat-riding bears. Remain with each group until the target count is complete. The final beehive is easy to overlook, so check the right side of the course before moving toward the bees. Approach moving bees along their flight path, then turn toward the honey river for the boat-riding bears. Completing the sequence awards the first egg.
The normal race is also available on the initial visit. Race the bees for three laps, passing through the green rings in order. Use blue stars on straight sections and red-star homing projectiles when a bee is close enough to target. Avoid risky shortcuts that make you miss a ring. Winning awards the second egg.
Hunter’s Narrow Escape is the third event, but its availability follows the story. If Hunter has been kidnapped, do not expect to complete this challenge during the initial visit. Defeat Scorch first, then return to Honey Speedway and find Hunter near the later beehive section along the course. In the challenge, Hunter’s boat moves down the honey river automatically. Jump over logs and steer around rocks. Jump only when an obstacle requires it, because repeated jumps make the next landing harder to control. Reach the end without enough collisions for the sheep saucer to catch Hunter to receive the third egg.
- Initial Time Attack order: honeycombs, beehives, bees, boat-riding bears.
- Initial standard race: three laps against the bees.
- Honey Hunter challenge: return after Scorch if Hunter was kidnapped.
- Hunter objective: survive the honey-river escape.
- Completion result: 3 eggs and 400 gems.
6. Harbor Speedway
Enter through the Midnight Mountain portal at 90 eggs. Harbor’s Time Attack order is seagulls, arches, lobsters, and fish on hovercrafts. Flame the seagulls from behind, then reorient for the arches. After the final arch, make the turn toward the lobsters and finish with the hovercraft fish. If a fish is difficult to hit from the front, fly past and turn back for a controlled approach. Completing all four groups awards the first egg.
The race is against blue-footed boobies and lasts three laps. Follow every green ring in sequence. Blue-star boosts are especially useful on long straight sections, while red-star projectiles can slow a nearby opponent. Do not abandon the required route to pursue a missile or a rival. Finishing first awards the second egg.
Hunter is inside the lighthouse visible from the opening area. His Pursuit follows a damaged sheep saucer that leaves green smoke rings. Fly through each ring before it disappears, look ahead to identify the next turn, and begin wide turns early rather than making a sharp correction at the last moment. Continue through the complete pursuit until the saucer crashes, then collect the third egg from Hunter.
- Time Attack order: seagulls, arches, lobsters, hovercraft fish.
- Race: three laps against the blue-footed boobies.
- Hunter landmark: lighthouse near the start.
- Hunter objective: pass through the green smoke rings.
- Completion result: 3 eggs and 400 gems.
7. Retry and save procedure
A failed event does not require restarting the Homeworld. Remain inside the Speedway and select the same event again. The target order, ring route, and boost placements are consistent, so repeated attempts build useful familiarity. If a race is already lost because of a missed ring or a fall, restart that event instead of spending the remaining lap on a result that cannot qualify.
For a cautious completion run, finish the Time Attack and standard race before leaving each Speedway whenever possible. This is especially important if the disc revision is uncertain because early North American releases are associated with a Speedway egg-registration problem. The North American revision 1.1 target and later corrected releases are treated separately from the early affected behavior, but the physical disc or image should be verified rather than inferred from packaging alone.
After each event, wait for the egg reward, check the egg total or Atlas entry, and save before beginning another difficult attempt. If an expected egg fails to register, stop overwriting the only save. Preserve a separate copy if possible, reload, re-enter the Speedway, and check the event again. Do not assume that a missing egg is harmless when the Super Bonus Round requires all 149 pre-bonus eggs.
- Retry from inside the same Speedway.
- Complete the normal Time Attack and race before leaving when practical.
- Return after Scorch for Honey’s Hunter egg if Hunter was kidnapped.
- Confirm the egg total after every reward.
- Protect the save before investigating a missing Speedway egg.
Before you move on
- Mushroom Speedway has three eggs: Time Attack, Race the Butterflies, and Hunter’s Dogfight.
- Country Speedway has three eggs: Time Attack, Race the Pigs, and Hunter’s Rescue Mission.
- Honey Speedway has three eggs: Time Attack, Race the Bees, and Hunter’s Narrow Escape.
- Harbor Speedway has three eggs: Time Attack, Race the Blue-footed Boobies, and Hunter’s Pursuit.
- The four Speedways contribute twelve eggs and 1,600 gems.
- The Honey Hunter egg was collected after Scorch when Hunter was kidnapped before the return visit.
- The egg total increased after every completed event.
- No Speedway has an available event or missing egg in the Atlas.
- The save was protected before investigating any registration problem.
References for this chapter
- Spyro: Year of the Dragon — Guide and Walkthrough by SpyroCrashJak, GameFAQs
- Spyro: Year of the Dragon - Guide and Walkthrough - PlayStation - CHyde
- Spyro: Year of the Dragon — Guide and Walkthrough by dudeman0009
- Spyro: Year of the Dragon — Guide and Walkthrough by dark52, GameFAQs
- Spyro: Year of the Dragon — Sony PlayStation Manual
- Warning: Speedway Egg Bug - Spyro: Year of the Dragon
- PSX Spyro: Year of the Dragon 100 Egg — TASVideos research
Boss Encounters — Recognition, Patterns and Safe Recovery
The original North American PlayStation release has four mandatory campaign bosses: Buzz in Sunrise Spring, Spike in Midday Gardens, Scorch in Evening Lake, and the Sorceress in Midnight Mountain. Buzz, Spike, and Scorch each require the four ordinary realms in their Homeworld and that Homeworld’s associated critter realm. Their later Part 2 return sections are completion content, not boss-entry requirements. The first Sorceress fight opens at 100 eggs. After defeating her, complete the remaining egg and gem sources, including the Moneybags chase and Bugbot Factory, until the save reaches 149 eggs and 15,000 ordinary gems. The Super Bonus Round then provides the final 5,000 gems, a Sorceress rematch, egg 150, and the original game’s 117 percent endpoint.
Prepare for a boss attempt
Boss stages are separate portals from the ordinary Homeworld realms. If Spyro is defeated, retry the boss stage itself; the surrounding levels do not need to be replayed. Before entering, restore Sparx with nearby fodder whenever the level provides it. Sparx begins in his strongest normal state, changes color after taking damage, and disappears after the final hit. Once Sparx is gone, the next damaging hit defeats Spyro.
Save after returning to a Homeworld or another stable checkpoint, particularly before a long cleanup session. Use the Atlas and each level’s displayed totals to separate a defeated boss from an uncollected egg, unfinished gem area, or incomplete bonus stage. Keep separate checklist entries for the four campaign bosses, the three ordinary-level minibosses, the four Sparx bosses, the Moneybags chase, and the Super Bonus Round finale.
- Restore Sparx before entering when fodder is available.
- Retry the boss portal itself after a defeat.
- Record the boss egg separately from other level eggs.
- Save after returning to a stable Homeworld checkpoint.
Confirm the campaign boss prerequisites
Buzz’s Dungeon opens after completing Sunrise Spring’s four ordinary realms: Sunny Villa, Cloud Spires, Molten Crater, and Seashell Shore. Sheila’s Alp must also be completed. Molten Crater Part 2 is a later Sgt. Byrd return section and is not required to enter Buzz’s Dungeon.
Spike’s Arena requires the four ordinary Midday Gardens realms—Icy Peak, Enchanted Towers, Spooky Swamp, and Bamboo Terrace—along with Sgt. Byrd’s Base. Bamboo Terrace Part 2 is a later Bentley section and is not part of the Spike-entry requirement.
Scorch’s Pit requires Frozen Altars, Lost Fleet, Fireworks Factory, and Charmed Ridge, together with Bentley’s Outpost. Fireworks Factory Part 2 is later Agent 9 content and does not have to be cleared before entering Scorch’s Pit.
The Sorceress’s Lair opens when the save reaches 100 eggs. Agent 9’s Lab, the Midnight Mountain ordinary realms, and the post-rescue return sections may be completed before or after the first Sorceress fight, but all egg-bearing content must be completed for the 149-egg pre-bonus target.
- Clear four ordinary realms plus the associated critter realm for Buzz.
- Clear four ordinary realms plus the associated critter realm for Spike.
- Clear four ordinary realms plus the associated critter realm for Scorch.
- Reach 100 eggs before entering the first Sorceress fight.
- Do not treat Part 2 critter sections as boss-entry requirements.
Buzz’s Dungeon: charge Buzz into the lava
Flame breath does not damage Buzz. Charge into him to push him toward the blue lava around the arena. Six successful knockbacks finish the fight, with Sheila stomping him after each fall.
After each stomp, Buzz returns with a spinning charge. Circle the arena until that attack ends, then line up another push. When his temporary fire shield is active, wait rather than charging into it. Later, he adds a fire-breath attack, so stay near the arena’s edge and approach only after the flame has ended.
Collect the egg after the battle. Defeating Buzz also opens Crawdad Farm, the Sunrise Spring Sparx stage. Crawdad Farm has its own egg and gem reward and must be tracked separately from Buzz’s campaign egg.
- Use charging rather than flame breath.
- Push Buzz into the lava six times.
- Wait out the temporary fire shield.
- Circle the arena during his fire-breath attack.
- Collect Buzz’s egg and record Crawdad Farm separately.
Spike’s Arena: use the arena weapons in sequence
Spike begins by firing at Spyro while the large red stones remain in the arena. Charge the stones into him three times, keeping mobile while positioning each one. After this phase, sections of the floor produce hazardous vents. Avoid active vents rather than standing still near a cracked section.
Sgt. Byrd then drops red crystals. Pick one up and flame Spike with the resulting superflame shot. Three successful red-crystal hits advance the fight to the blue-crystal phase. Use three blue-crystal hits to finish the battle.
Spike can use the crystals against Spyro. His attacks include a low fire blast that can be jumped and a large electrical attack that is safer to avoid by charging around the arena’s edge. Collect Spike’s egg after the battle. Spider Town, the Midday Gardens Sparx stage, is a separate egg-bearing objective.
- Charge three red stones into Spike.
- Avoid active floor vents.
- Use three red crystals, then three blue crystals.
- Jump the low fire attack when necessary.
- Charge away from the large electrical attack.
- Collect Spike’s egg and record Spider Town separately.
Scorch’s Pit: fire rockets during safe openings
Bentley supplies the rockets used to damage Scorch. Scorch’s electric shield prevents effective attacks, so fire only when he is exposed. Green rockets provide individual shots; red rockets provide rapid fire. Aim carefully and avoid wasting ammunition during the protected phase.
When Scorch crosses his wings and launches firebombs, watch the shadows on the floor. Move into uncovered space before the bombs land. He also summons enemies from eggs. Flame or shoot crabs. Flame or missile the TNT enemies, but do not charge into them. A burning enemy can be destroyed with missiles or avoided until it burns out.
Scorch can summon a Buzz copy. Charge that copy into the blue lava and remove it before returning attention to Scorch. Continue attacking during Scorch’s exposed windows until the fight ends. Collect Scorch’s campaign egg afterward. Starfish Reef, the Evening Lake Sparx stage, is a separate egg-bearing objective.
- Fire rockets only while Scorch is exposed.
- Read the firebomb shadows and move to uncovered ground.
- Flame or shoot TNT enemies instead of charging them.
- Charge the Buzz copy into the lava.
- Collect Scorch’s egg and record Starfish Reef separately.
The first Sorceress fight: use the supplied vehicles
The Sorceress’s Lair opens at 100 eggs. The arena is surrounded by lava. Her staff indicates her attack pattern: close-range staff strikes are dangerous when Spyro approaches, electrical attacks create hazardous floor patterns, and fireballs punish predictable movement. Stay mobile near the edge and avoid the shadows or impact zones rather than trying to hold one position.
Agent 9 supplies vehicles during the fight. The first are fixed gun turrets with limited ammunition. Use them to fire at the Sorceress while she is exposed, then leave before a turret is destroyed or becomes unsafe. Agent 9 later provides mobile cannon vehicles. Their movement lets Spyro attack while repositioning around the arena, but their ammunition is still limited.
At approximately the latter half of the battle, flying saucers become available. Their turning is broad, so make short attack passes: approach while firing, break away from the Sorceress’s next attack, and turn back for another pass. The saucers provide unlimited ammunition. Defeating this Sorceress completes the main campaign sequence and awards a campaign egg, but it does not award egg 150. Egg 150 belongs to the later Super Bonus Round finale.
- Reach 100 eggs before entering the Lair.
- Avoid the staff strike, electrical hazards, and fireballs.
- Use fixed turrets first, then mobile cannon vehicles.
- Use the flying saucer during the final phase.
- Defeat the first Sorceress and confirm the return to Midnight Mountain.
- Record the campaign egg separately from egg 150.
Optional level minibosses and their eggs
Bluto is the submarine miniboss in Seashell Shore. Collect missile crates and fire at his submarine when it surfaces. Keep moving away from its teeth and missiles, and replenish ammunition from crates that appear in the arena. Defeating Bluto awards an egg and is required for the complete egg total, but Bluto is not one of the four campaign bosses.
Sleepyhead appears in Spooky Swamp’s challenge section. Light the four large tealight huts to open the central building. Inside, use the bombs against Sleepyhead while avoiding the swamp hazards and the explosions. His defeat awards an egg.
The Twin Dragons are the special Fireworks Factory challenge encounter. Enter through the black portal in the later section after meeting the challenge’s access conditions. The superfly and superflame powerup remains active. Follow one dragon closely, aim for its exposed body, and keep attacking so it has less opportunity to recover. Defeat both dragons for the challenge egg.
- Defeat Bluto in Seashell Shore.
- Light the four huts and defeat Sleepyhead in Spooky Swamp.
- Enter the Twin Dragons challenge in Fireworks Factory.
- Defeat both dragons and confirm the egg.
Sparx-stage bosses
The four Sparx stages have their own bosses: King Crawdad in Crawdad Farm, Spider Queen in Spider Town, Manta Ray in Starfish Reef, and the Robotic Centipede in Bugbot Factory. These are top-down shooting stages, not replacements for Buzz, Spike, Scorch, or the Sorceress. Each stage supplies an egg after its boss is defeated.
King Crawdad uses increasingly dangerous fire attacks, including rockets and a broad fire wave. Keep moving and destroy incoming rockets when practical. Spider Queen is vulnerable when she exposes her head; avoid her spinning invulnerable phase and clear summoned enemies before the arena fills.
Manta Ray launches bombs and becomes more dangerous after splitting into two large targets that summon smaller mantas. Clear the smaller mantas when they crowd Sparx, then keep both large targets visible and continue firing. The Robotic Centipede’s exposed head is the reliable target; its armored body does not take effective damage. When it divides, back into open space, keep both heads visible, and continue firing while avoiding projectiles.
- Defeat King Crawdad.
- Defeat Spider Queen.
- Defeat Manta Ray and its smaller targets.
- Defeat the Robotic Centipede by targeting its exposed heads.
- Record all four Sparx-stage eggs separately.
Post-Sorceress cleanup: Moneybags, return sections, and Bugbot Factory
After defeating the first Sorceress, return to Midnight Mountain and complete the new Moneybags chase in the Homeworld. Moneybags has taken back the egg and gems connected to his earlier dealings. Chase and attack him through the Homeworld until the stolen rewards are returned. Track this as Midnight Mountain Home Part 2, separate from the first Sorceress egg.
Complete the remaining critter-gated return sections: Molten Crater Part 2 with Sgt. Byrd, Bamboo Terrace Part 2 with Bentley, Fireworks Factory Part 2 with Agent 9, and Honey Speedway Part 2 with Hunter. These sections contain completion rewards but are not substitutes for the campaign bosses and were not needed to open Buzz’s Dungeon, Spike’s Arena, or Scorch’s Pit.
Bugbot Factory is the post-Sorceress Sparx stage located in Midnight Mountain. It is unlocked by defeating the Sorceress and is independent of Agent 9’s Lab and Agent 9’s rescue. Bugbot Factory has its own egg and gem rewards and should be entered as a Sparx-stage checklist item. Agent 9’s Lab remains a separate dedicated critter level; completing it is not a prerequisite for Bugbot Factory.
Use the Atlas and displayed level totals rather than assuming a global egg number belongs to a specific room. When every pre-bonus source is complete, the save should show 149 eggs and 15,000 ordinary gems.
- Complete the post-Sorceress Moneybags chase in Midnight Mountain Home Part 2.
- Clear Molten Crater Part 2 with Sgt. Byrd.
- Clear Bamboo Terrace Part 2 with Bentley.
- Clear Fireworks Factory Part 2 with Agent 9.
- Clear Honey Speedway Part 2 with Hunter.
- Complete Agent 9’s Lab as its own dedicated critter-level objective.
- Complete Bugbot Factory as the post-Sorceress Sparx stage.
- Verify Bugbot Factory’s egg and gem rewards.
- Reach 149 eggs and 15,000 ordinary gems before entering the Super Bonus Round.
Open the Super Bonus Round and defeat the rematch
The Super Bonus Round opens after the first Sorceress is defeated and the save reaches 149 eggs and 15,000 ordinary gems. Do not substitute the later 20,000-gem finale requirement for the entry requirement.
The bonus realm contains the main area followed by a submarine challenge, a snowboard challenge, a flying-saucer challenge, and the final Sorceress rematch. Complete the challenges in the order their doors become available and follow each door’s displayed gem requirement. If the intermediate flying-saucer door shows a value that differs from a guide or checklist, use the number shown by the original game rather than hardcoding an external threshold.
The bonus realm contains an additional 5,000 gems. Continue collecting its central treasure and challenge rewards until the overall total reaches 20,000 gems. The ordinary 15,000-gem entry target and the overall 20,000-gem endpoint should be tracked as separate milestones, not assumed to be the same Atlas counter.
Enter the final Sorceress encounter and use the supplied flying saucer. Her saucer is faster than Spyro’s shots, so lead the target rather than firing directly at its current position. Make attack passes from the middle of the arena, break away from incoming fireballs, and turn back for another pass. Continue until her health reaches zero.
Defeating the bonus-area Sorceress awards egg 150. Save after the egg registers, reload if desired, and verify the displayed 117 percent endpoint. The 20 Skill Points remain a separate optional objective.
- Defeat the first Sorceress before attempting the bonus realm.
- Reach 149 eggs and 15,000 ordinary gems.
- Use the number displayed at the intermediate flying-saucer door.
- Complete the submarine, snowboard, and flying-saucer challenges.
- Collect bonus-area treasure until the overall total reaches 20,000 gems.
- Defeat the bonus-area Sorceress and record egg 150.
- Save, reload if desired, and confirm 117 percent.
- Track the 20 Skill Points separately.
Before you move on
- Buzz, Spike, Scorch, and the first Sorceress are defeated.
- The four campaign-boss eggs are recorded.
- Bluto, Sleepyhead, and the Twin Dragons are complete if pursuing all eggs.
- King Crawdad, Spider Queen, Manta Ray, and the Robotic Centipede are defeated.
- The post-Sorceress Moneybags chase is complete.
- Molten Crater Part 2, Bamboo Terrace Part 2, Fireworks Factory Part 2, and Honey Speedway Part 2 are complete.
- Agent 9’s Lab is complete as a separate critter-level objective.
- Bugbot Factory is complete as the post-Sorceress Sparx stage, with its egg and gems recorded.
- The save shows 149 eggs and 15,000 ordinary gems before entering the Super Bonus Round.
- The submarine, snowboard, and flying-saucer challenges are complete.
- The intermediate flying-challenge door was opened using the number displayed by the game.
- The overall gem total reaches 20,000.
- The bonus-area Sorceress rematch is defeated and egg 150 is recorded.
- The displayed completion reaches 117 percent.
- All 20 Skill Points are complete only if the separate optional challenge objective is desired.
References for this chapter
- Spyro: Year of the Dragon — Boss Guide, metalgearsonic, PlayStation
- Spyro: Year of the Dragon — Guide and Walkthrough by SpyroCrashJak, GameFAQs
- Spyro: Year of the Dragon - Guide and Walkthrough - PlayStation - DrOctagonapus
- Spyro: Year of the Dragon — Sony PlayStation Manual
- darkSpyro Guidebook — Bugbot Factory
- darkSpyro — Guidebook Location List: Super Bonus Round
Typical Realm Walkthrough Template — Entering, Clearing, and Exiting a Level
Use a three-pass method in every original PlayStation realm: map the entrance, complete objectives that are currently available, then leave a precise return note for anything gated by a critter, boss, Hunter, Moneybags, or a later power-up. This prevents wasted attempts and is especially important in Molten Crater, Bamboo Terrace, and Fireworks Factory, which each contain a later character section. Their Part 2 areas are completion work and are not required to enter the associated boss stage.
1. Map the realm before taking risks
On your first entry, walk a safe loop around the starting area before committing to the main route. Locate the Return Home portal, Zoe checkpoints, Moneybags, Hunter, character portals, Challenge Portals, power-ups, cannons, supercharge ramps, cracked walls, locked chests, and visible eggs. Talk to every friendly character. A character's request often identifies the objective that awards an egg, while a portal may remain locked until the associated critter has been freed.
Open the Atlas and record the realm's current egg and gem totals. The Atlas is a progress counter, not a room-by-room map, so pair it with landmark notes. Write entries such as 'egg behind the cracked wall beside the Return Home route' or 'return with Sgt. Byrd for the portal beside Tiki Lodge.' Classify each unfinished item as available, critter-gated, boss-gated, Moneybags-gated, Hunter-gated, power-up-gated, or unidentified. Never leave an unidentified shortfall as only 'look around later.'
- Locate the Return Home portal and first Zoe checkpoint.
- Talk to NPCs, Hunter, and Moneybags.
- Mark every character portal and Challenge Portal.
- Record visible eggs that require a later glide, critter, or power-up.
- Write down the Atlas egg and gem totals before beginning the main route.
2. Finish currently available objectives, then separate gated work
Follow the normal route until you reach the level's local objective or Return Home portal. Collect ordinary gems as you go, but do not repeatedly cross a dangerous section solely for a gem when an ability obtained later will make the visit safer. Complete nearby egg tasks while the relevant NPC, power-up, and minigame are available. If an egg requires a character who has not yet been rescued, record the portal and leave it alone.
The first three boss routes do not require every later Part 2 section. Buzz's Dungeon follows the four ordinary Sunrise Spring realms and Sheila's Alp; Spike's Arena follows the four ordinary Midday Gardens realms and Sgt. Byrd's Base; Scorch's Pit follows the four ordinary Evening Lake realms and Bentley's Outpost. Molten Crater Part 2, Bamboo Terrace Part 2, and Fireworks Factory Part 2 are later cleanup sections. Treat them as deferred objectives rather than reasons to delay the boss.
- Complete the local route-opening objective before searching every corner.
- Collect reachable eggs and gems without forcing character-specific obstacles.
- Record each locked portal with its required critter.
- Do not delay Buzz's Dungeon, Spike's Arena, or Scorch's Pit for a later Part 2 section.
- Return to the Home World when the next objective requires a newly freed character.
3. Use the correct return route in Sunrise Spring
Clear Sunny Villa, Cloud Spires, Molten Crater, and Seashell Shore as far as Spyro can go, then free Sheila through the Sunrise Spring Moneybags gate. Sheila's Alp is her dedicated character realm; use her hop, air hop, stomp, and kick to complete its tasks rather than trying to imitate Spyro's glide routes. In the ordinary realms, mark any Sheila portal that remains closed or any ledge whose intended approach is a character move.
After Sgt. Byrd is freed in Midday Gardens, return to Molten Crater. Enter through the level's normal route and continue to the far section near the Sgt. Byrd portal. The two return eggs are separate objectives: assemble the scattered idol heads on their matching bodies, then use Sgt. Byrd to destroy the marked wall and collect the egg beyond it. The wall objective is not the same as the idol-head objective, and both should be checked independently in your ledger.
Do not confuse this return with the first-visit Molten Crater tasks, such as the local thief route and the supercharge area. If the Sgt. Byrd portal is still locked, the required condition is character rescue and story progression, not a missing gem in Molten Crater.
- Finish available Sunny Villa, Cloud Spires, and Seashell Shore objectives.
- Free Sheila before attempting Sheila portals.
- After freeing Sgt. Byrd, revisit Molten Crater through the ordinary entrance.
- Record 'idol heads' and 'Sgt. Byrd wall' as two separate eggs.
- Leave Buzz's Dungeon available as soon as its ordinary-realm and critter requirements are met.
4. Clear Midday Gardens and return to Bamboo Terrace with Bentley
Work through Icy Peak, Enchanted Towers, Spooky Swamp, and Bamboo Terrace using the same rule: complete ordinary Spyro tasks first, then mark anything that visibly belongs to a later character. Character portals in these levels are not interchangeable. Sgt. Byrd's flight and bombing controls are used only in his dedicated tasks, while Bentley's heavy club is required for his own sections.
After freeing Bentley in Evening Lake, return to Bamboo Terrace. Travel through the level to the previously locked Bentley portal. In Bentley's section, climb the mountain route by smashing the large panda-like obstacles and other barriers in the way. The egg is awarded after reaching the upper part of the route and clearing the required obstacles. This is Bamboo Terrace Part 2 and is separate from the first-visit boat challenge and ordinary Spyro eggs.
Bamboo Terrace Part 2 is completion content, not a prerequisite for Spike's Arena. If the Bentley portal is closed, do not search for a hidden switch in the level; return to Midday Gardens and confirm Bentley has been rescued.
- Complete the four ordinary Midday Gardens realms as far as current abilities allow.
- Use Sgt. Byrd only for Sgt. Byrd portals and Bentley only for Bentley portals.
- After Bentley is freed, revisit Bamboo Terrace through its normal entrance.
- Reach the top of Bentley's mountain route and collect its egg.
- Enter Spike's Arena once the four ordinary realms and Sgt. Byrd's Base are complete.
5. Clear Evening Lake and handle both Fireworks Factory returns
In Frozen Altars, Lost Fleet, Fireworks Factory, and Charmed Ridge, finish the ordinary Spyro route and record any Hunter or character challenge that is unavailable. Some levels contain several separate minigames, so mark each by its NPC or challenge name rather than writing only 'race' or 'side area.' In Lost Fleet, Hunter's skateboard objectives may need to wait until the appropriate story state makes him available.
Fireworks Factory has a later Agent 9 section. After Agent 9 is freed in Midnight Mountain, return to Fireworks Factory and use the cannon near the start to reach the Agent 9 portal. The return challenge sends Agent 9 through a ninja-filled gunfight. Clear the rooms systematically, destroy the associated boxes, strafe away from gunfire, and use the sniper view for distant or elevated targets. Reach Handel at the end to receive the egg. This is one Agent 9 return objective; it is not part of the first-visit Fireworks Factory route and is not required to enter Scorch's Pit.
After Hunter is freed following the Evening Lake boss sequence, revisit Honey Speedway. Talk to Hunter near the beginning and complete his narrow-escape challenge, jumping the logs and avoiding rocks so the pursuing UFO does not catch him. Record this as Honey Speedway Part 2, separate from the Speedway's ordinary time attack and race rewards.
- Complete ordinary Frozen Altars, Lost Fleet, Fireworks Factory, and Charmed Ridge objectives.
- Mark unavailable Hunter challenges by name and return condition.
- After freeing Agent 9, use the Fireworks Factory cannon to reach his portal.
- Clear Agent 9's ninja rooms before speaking to Handel for the egg.
- After Hunter is free, complete Honey Speedway's narrow-escape challenge.
6. Sweep Midnight Mountain before and after the Sorceress
Complete Crystal Islands, Desert Ruins, Haunted Tomb, and Dino Mines as far as the available character tasks permit. Agent 9's Lab is a dedicated character realm and should be treated separately from Agent 9's return mission in Fireworks Factory. Do not assume that an egg in a character realm counts as an egg in the neighboring ordinary realm when checking your notes.
Midnight Mountain Home contains ordinary Home World objectives, including reachable eggs, thieves, cracked-wall routes, and the Moneybags gate that frees Agent 9. After collecting 100 eggs, the Sorceress fight is available. You may continue clearing Midnight Mountain first, but the post-boss return must be recorded separately.
After defeating the Sorceress, return to Midnight Mountain Home and find Moneybags on the bridge between Crystal Islands and Desert Ruins. Chase him and charge him whenever the route allows. Continue until you recover the gems he took and receive his egg. This Moneybags chase is Midnight Mountain Home Part 2 and should not be marked complete during the initial Home World visit.
Only after this post-boss sweep should you treat the ordinary Midnight Mountain cleanup as complete. Then use the Atlas and your ledger to identify any remaining eggs before attempting the 149-egg requirement for the Super Bonus Round.
- Separate Agent 9's Lab from Fireworks Factory Part 2.
- Complete all available ordinary Midnight Mountain realm tasks.
- Defeat the Sorceress once the 100-egg requirement is met.
- Return to Midnight Mountain Home after the boss.
- Recover Moneybags' stolen gems and collect his egg on the bridge between Crystal Islands and Desert Ruins.
7. Exit safely, save, and make the next visit specific
When the current route is finished, return to the Return Home portal through a safe path. Before leaving, check the immediate area for exposed eggs, cracked walls, activated whirlwinds, isolated platforms, and gem containers that became reachable after the main objective. Do not spend repeated lives on an item that clearly requires Sheila, Sgt. Byrd, Bentley, Agent 9, Hunter, a boss victory, or a later power-up.
Zoe provides a temporary in-level checkpoint after a death, allowing another attempt from the checkpoint. That is not the same as deliberately confirming a Memory Card save. The original PlayStation manual states that, with a Memory Card inserted, the game automatically saves when Spyro enters or exits a Realm or Home World. For a completion attempt, still use the game's save option when available and allow the save process to finish before powering down or changing discs.
After saving, update the log with the Atlas totals, completed egg names, paid Moneybags gates, unlocked characters, and every deferred landmark. A useful note is 'Molten Crater: Sgt. Byrd wall egg still missing.' An unhelpful note is 'search Sunrise Spring.' If Sparx has vanished or the remaining route is optional and dangerous, leave, save, and return with a full health state.
- Use Zoe for retries, not as your only save plan.
- Exit through the Return Home portal after a major objective.
- Allow automatic saving to complete when entering or leaving a realm or Home World.
- Save after freeing a critter, completing a return mission, or recovering Moneybags' egg.
- Confirm the Atlas total against your written ledger.
- Give every unfinished item a named landmark and prerequisite.
Before you move on
- The current realm's local rescue or route-opening objective is complete.
- Every currently available egg-bearing task is complete or named in the deferred log.
- Molten Crater has separate entries for idol heads and the Sgt. Byrd wall.
- Bamboo Terrace Part 2 is recorded for Bentley.
- Fireworks Factory Part 2 is recorded for Agent 9.
- Honey Speedway Part 2 is recorded for Hunter.
- Midnight Mountain Home Part 2 is recorded for the post-Sorceress Moneybags chase.
- Every remaining egg has a landmark and prerequisite.
- The Atlas total agrees with the written ledger or the discrepancy has a documented explanation.
- The player has returned to a Home World and completed a save before stopping.
- The next session begins with one concrete objective.
Mid-Game Routing — Minimizing Backtracking Between Forgotten Worlds
The most efficient route through the original North American PlayStation release is built around ability unlocks rather than a single uninterrupted sweep. In each of the first three Homeworlds, complete the local critter level, clear the ordinary realms, defeat the Homeworld boss when its ordinary-level requirements are met, and then use the newly freed critter to revisit an earlier realm. Those return sections are easy to overlook because they are not ordinary portals, but they contain required eggs and should be included before declaring the earlier circuit complete. Keep Speedways, Sparx stages and challenge portals on separate checklist lines so an unfinished bonus stage does not get confused with a missing transport requirement.
1. Sunrise Spring: free Sheila, clear the opening realms, then return to Molten Crater
Pay Moneybags 300 gems near the Sunny Villa area to free Sheila. Enter Sheila’s Alp and complete its objectives before attempting a perfect sweep of the rest of Sunrise Spring. Sheila’s hopping and double-jump movement are needed for her own level and for later character-specific challenges, so record any blocked Spyro route rather than repeatedly testing the same gap.
Clear Sunny Villa, Cloud Spires, Molten Crater and Seashell Shore. These are the four ordinary Sunrise Spring realms. Mushroom Speedway is a separate Speedways objective and should be logged independently. Once the ordinary-level requirements are satisfied, enter Buzz’s Dungeon and defeat Buzz. Crawdad Farm opens after Buzz is defeated and is a separate Sparx stage, not a replacement for an ordinary realm.
After Sgt. Byrd’s Base becomes available in Midday Gardens and you complete it, return to Sunrise Spring and revisit Molten Crater. Cross the bridge from the central area to the newly opened Sgt. Byrd portal and complete Molten Crater Part 2. This return section contains two eggs and should be checked off before you consider Sunrise Spring’s full progression circuit complete. Then complete Crawdad Farm if you are continuing the campaign’s structured bonus route.
- Sheila freed for 300 gems.
- Sheila’s Alp completed.
- Sunny Villa, Cloud Spires, Molten Crater and Seashell Shore completed.
- Buzz’s Dungeon defeated.
- After Sgt. Byrd’s Base, Molten Crater Part 2 completed.
- Mushroom Speedway and Crawdad Farm tracked separately.
2. Midday Gardens: free Sgt. Byrd, clear the four ordinary realms, and defeat Spike
Pay Moneybags 700 gems in Midday Gardens to free Sgt. Byrd, then complete Sgt. Byrd’s Base. His level is its own critter realm with separate eggs and gems; do not count it as one of the four ordinary Midday Gardens realms.
Clear Icy Peak, Enchanted Towers, Spooky Swamp and Bamboo Terrace. Country Speedway is separate and can be postponed if racing is slowing your main route. Once Sgt. Byrd’s Base and all four ordinary realms are complete, the Whirligig route and Spike’s Arena can be treated as the next progression checkpoint. Defeat Spike before moving on with the main campaign.
The later Bentley unlock creates an important return trip. After paying 1,000 gems to free Bentley in Evening Lake and completing Bentley’s Outpost, return through the Whirligig to Midday Gardens. Re-enter Bamboo Terrace and use the Bentley portal at the end of the level to complete Bamboo Terrace Part 2. This is a return section with its own egg and gem objective. It should be recorded separately from the original Bamboo Terrace clear and completed before you mark the Midday Gardens circuit as fully routed.
- Sgt. Byrd freed for 700 gems.
- Sgt. Byrd’s Base completed.
- Icy Peak, Enchanted Towers, Spooky Swamp and Bamboo Terrace completed.
- Spike’s Arena defeated after the required ordinary realms are complete.
- After Bentley’s Outpost, Bamboo Terrace Part 2 completed.
- Country Speedway and Spider Town tracked separately.
3. Evening Lake: free Bentley, clear the ordinary realms, then prepare the Fireworks return
Pay Moneybags 1,000 gems in the underwater section of Evening Lake to free Bentley. Complete Bentley’s Outpost early enough to learn his heavy club attacks before relying on him for return objectives. His outpost is a distinct critter realm and contributes its own eggs and gems.
Clear Frozen Altars, Lost Fleet, Fireworks Factory and Charmed Ridge. Honey Speedway is a separate race objective. When these four ordinary realms and Bentley’s Outpost are complete, enter Scorch’s Pit and defeat Scorch. Starfish Reef opens as a separate Sparx stage after the boss and should not be substituted for any ordinary realm.
After Agent 9 is freed and Agent 9’s Lab is completed in Midnight Mountain, return to Evening Lake and revisit Fireworks Factory. The Agent 9 portal at the end of the level opens Fireworks Factory Part 2, which contains its own egg and gem objectives. Complete it before declaring the late-game Evening Lake sweep complete. Honey Speedway Part 2 is also a distinct return objective and should have its own checklist entry.
- Bentley freed for 1,000 gems.
- Bentley’s Outpost completed.
- Frozen Altars, Lost Fleet, Fireworks Factory and Charmed Ridge completed.
- Scorch’s Pit defeated.
- After Agent 9’s Lab, Fireworks Factory Part 2 completed.
- Honey Speedway, Honey Speedway Part 2 and Starfish Reef tracked separately.
4. Midnight Mountain: protect the Agent 9 fee, then separate campaign progress from cleanup
On reaching Midnight Mountain, preserve 1,300 gems for Moneybags so Agent 9 can be freed. Complete Agent 9’s Lab soon after unlocking it; the level teaches the ranged mechanics that are needed for its own objectives and for later Agent 9 portals in the campaign.
The ordinary Midnight Mountain realms are Crystal Islands, Desert Ruins, Haunted Tomb and Dino Mines. Harbor Speedway is separate. Complete these realms in whatever order best matches your strengths, but keep each realm’s eggs and gems on its own checklist line. Sorceress’s Lair is the main story endpoint and should be treated separately from the optional Speedway, Sparx and challenge content.
Agent 9’s Lab is also the trigger for the Fireworks Factory return described above. Make that return before final cleanup so the first three Homeworld circuits are not left with an unrecorded character-gated section. Do not assume that freeing Agent 9 automatically completes the earlier worlds; the return portal must be entered and its objectives finished.
- Agent 9 freed for 1,300 gems.
- Agent 9’s Lab completed.
- Crystal Islands, Desert Ruins, Haunted Tomb and Dino Mines tracked separately.
- Harbor Speedway and the Midnight Mountain challenge portals recorded.
- Fireworks Factory Part 2 completed after Agent 9’s Lab.
- Sorceress’s Lair reserved as the campaign endpoint.
5. Manage gems and adapt the route without losing the progression order
The four critter fees total 3,300 gems: 300 for Sheila, 700 for Sgt. Byrd, 1,000 for Bentley and 1,300 for Agent 9. Treat those payments as the first priority. Collect safe gem clusters in ordinary realms before spending on optional Moneybags services, and do not leave a Homeworld with an unpaid critter fee if that character opens the next return section.
The order within a Homeworld can vary. A player comfortable with platforming may complete the critter realm immediately, while a player who struggles with flight, racing or ranged combat can clear safer ordinary objectives first. The fixed part is the dependency chain: free the critter, complete its realm, clear the ordinary realms and boss when available, then revisit the earlier level after the next critter becomes available. Use the level-complete marker, portal state and checklist rather than a guessed global egg total as the progress check.
- Required critter fees are paid before optional spending.
- Each return section has a named prerequisite and a separate completion mark.
- Ordinary realms, critter realms, Speedways, Sparx stages, challenge portals and bosses are tracked independently.
- Any deferred egg is recorded with its level and required character.
- The next Homeworld is entered only after the current boss and return-section status are understood.
Before you move on
- Sunrise Spring has Sheila’s Alp, Sunny Villa, Cloud Spires, Molten Crater, Seashell Shore and Buzz’s Dungeon completed.
- After Sgt. Byrd’s Base, Molten Crater Part 2 is completed and recorded separately.
- Midday Gardens has Sgt. Byrd’s Base, Icy Peak, Enchanted Towers, Spooky Swamp, Bamboo Terrace and Spike’s Arena completed.
- After Bentley’s Outpost, Bamboo Terrace Part 2 is completed and recorded separately.
- Evening Lake has Bentley’s Outpost, Frozen Altars, Lost Fleet, Fireworks Factory, Charmed Ridge and Scorch’s Pit completed.
- After Agent 9’s Lab, Fireworks Factory Part 2 is completed and recorded separately.
- Midnight Mountain has Agent 9’s Lab and the four ordinary realms tracked, with Harbor Speedway and Sorceress’s Lair treated as separate objectives.
- Mushroom Speedway, Country Speedway, Honey Speedway, Harbor Speedway, Crawdad Farm, Spider Town, Starfish Reef, challenge portals and return sections are not hidden inside a generic world-clear mark.
- The four critter fees are paid before optional Moneybags spending, or the exact remaining fee is written beside the current checklist.
- Every deferred egg has a named level and a required character or event, so the next cleanup pass has a concrete destination.
References for this chapter
- Spyro: Year of the Dragon — Sony PlayStation Manual
- Spyro: Year of the Dragon — Guide and Walkthrough by dark52, GameFAQs
- Spyro: Year of the Dragon — Guide and Walkthrough by SpyroCrashJak, GameFAQs
- darkSpyro — Spyro: Year of the Dragon Walkthrough Index
- Spyro: Year of the Dragon — Homeworlds Reference
Secret Areas, Challenge Portals and Optional Rewards
Challenge Portals are dark, swirling entrances inside regular levels. They lead to self-contained activities that award eggs, gems, or Skill Points. For a reliable 149-egg run on the original PlayStation release, record each activity under its parent level rather than using a single global portal count. Some entries are Spyro challenges, some use Sheila, Sgt. Byrd, Bentley, Agent 9, or Hunter, and several later entries are returns to an earlier level after a character or boss has been unlocked. The four Homeworld totals are Sunrise Spring 37 eggs, Midday Gardens 37, Evening Lake 37, and Midnight Mountain 38, for 149 eggs before the Super Bonus Round.
How to use this checklist
A Challenge Portal is normally a black, sparkling entrance placed inside a regular level. Entering it starts a separate activity, and the egg is awarded only after the stated objective is completed. Write down the parent level, activity name, character used, prerequisite, entrance landmark, and reward before moving on.
Do not list Sheila's Alp, Sgt. Byrd's Base, Bentley's Outpost, Agent 9's Lab, Speedways, Sparx stages, or boss arenas as ordinary Challenge Portals. They are separate level categories even when a later activity is reached through them. Likewise, a Part 2 return remains part of its original parent level for homeworld accounting.
Skill Points are separate optional objectives. A Skill Point earned during an egg activity does not create an additional egg and should be marked in a second column.
- Record every egg under its parent level.
- Separate ordinary level eggs from Portal, critter, Speedway, Sparx, boss, and return entries.
- Check the Atlas after an egg appears.
- Keep Skill Points on a separate list.
- Use the four Homeworld totals to diagnose a shortfall, not invented sequential egg ranges.
Sunrise Spring parent levels
Sunny Villa: Complete the first and second Skateboarding Park 1 challenges with Hunter. The park is reached at the back of the final building after the Mayor has been rescued. The first challenge is the lizard-hitting objective; the second repeats the park challenge under its time condition. Each completed challenge awards an egg. The Sheila Challenge Portal is left of the whirlwind tower and becomes available after Sheila's Alp is completed. Enter as Sheila, follow Marco's route through the buildings and hedges, and reach Rapunzel at the tower for the egg.
Cloud Spires: The egg-bearing activities are attached to the regular level. Speak with Fluffy near the end to restore the cloud generator; complete Cumulus's three burning sun-seed deliveries; speak with Stratus near the bell-tower route and flame all six spirits; and catch the thief circling the level's outer route near the whirlwind area. These are ordinary level tasks or local challenges, not one interchangeable portal. Record each reward under Cloud Spires.
Molten Crater: On the first visit, complete the tiki-lodge tasks and the ordinary egg objectives. The idol-head objective is unavailable until Sgt. Byrd has been unlocked and Sgt. Byrd's Base has been completed. Return later across the bridge from Tiki Lodge Central and enter the Sgt. Byrd portal. This Molten Crater Part 2 section awards two eggs; its completion check is the Level Complete sign after the Byrd objectives. It is a return section, not a separate level and not a prerequisite for Buzz's Dungeon.
Seashell Shore: Record the seal-rescue task, the underwater egg beneath the docks, the submarine-tube Challenge Portal, the Bluto submarine activity, and the Sheila return separately. The submarine tube is in the later underwater area near the wooden barriers; speak to Sandy, then clear the high-speed pipe without hitting the mines. The Bluto portal is reached by swimming upward near the tube area. Defeat Bluto's submarine for the boss-like challenge egg. Complete Sheila's later section only after Sheila's Alp is available.
Mushroom Speedway and Buzz's Dungeon: Keep the Speedway's Time Trial egg, Hunter challenge egg, and race egg on the Speedway line. The original release has a known Speedway registration problem if the level is exited before both relevant challenge eggs are secured and the game is then powered off; collect the Speedway rewards before leaving when possible. Buzz's Dungeon is a boss entry, not a Challenge Portal. Defeat Buzz for his egg after the four ordinary Sunrise Spring realms and Sheila's Alp have supplied the required route.
- Sunny Villa: two Skateboarding Park 1 eggs and Sheila's Rapunzel challenge.
- Cloud Spires: cloud generator, three sun seeds, six spirits, and thief.
- Molten Crater: first visit plus Sgt. Byrd Part 2 after Sgt. Byrd's Base.
- Seashell Shore: seal, underwater, submarine pipe, Bluto, and Sheila entries.
- Mushroom Speedway and Buzz's Dungeon recorded separately.
Midday Gardens parent levels
Icy Peak: The Nancy Challenge Portal is through the cave left of the route toward the final area. Protect Nancy by flaming each Rhynoc before it interrupts her skating. The Slippery Supercharge activity is reached from the left path at the four-way fork and uses the alternate track, hidden cave, and upper route to reach the thief. Record Nancy's egg and the two Slippery Supercharge eggs separately.
Enchanted Towers: The Hunter skateboarding activity is beneath the Sorceress statue. Destroy the statue with the nearby rockets, then complete the requested skating challenges for their eggs. Do not merge this with any Sgt. Byrd activity; the character missions are separate checklist entries.
Spooky Swamp: Enter the Sheila route near the Sleepy Head portion of the level and complete both Twin Escort stages. Stay ahead of the twins, clear hazards before they reach them, and finish each escort for its egg. Sleepy Head is an ordinary level objective and should not be recorded as the Sheila Portal.
Bamboo Terrace: Complete the panda route and ordinary eggs on the first visit. After Bentley's Outpost is complete, return to Bamboo Terrace and use the Bentley entrance near the later section of the level. Finish Bentley's club-and-box objectives for the Part 2 egg rewards. This return is required for the full egg total but is not required to enter Spike's Arena.
Sgt. Byrd's Base, Country Speedway, Spike's Arena, and Spider Town: Treat Sgt. Byrd's Base as a dedicated critter level, Country Speedway as a three-reward Speedway, Spike's Arena as the boss stage, and Spider Town as the Sparx stage. Their eggs belong on their own lines even though the homeworld total includes them.
- Icy Peak: Nancy and Slippery Supercharge.
- Enchanted Towers: Hunter skating activity.
- Spooky Swamp: both Sheila escort stages.
- Bamboo Terrace: normal route, then Bentley Part 2 after Bentley's Outpost.
- Sgt. Byrd's Base, Country Speedway, Spike's Arena, and Spider Town separate.
Evening Lake parent levels
Frozen Altars: The Bentley boxing entrance is in the dip-down area near the end. Win the first match and the rematch for two eggs. The ice-rink activity is across from the exit route after paying the local fee; speak with Errol, freeze the cats, and score five goals in your own net before the Rhynoc scores for the remaining activity egg. Record the boxing Skill Point separately.
Lost Fleet: Keep the ordinary ship, water, and upper-deck eggs separate from the Hunter skateboarding challenge and submarine challenge. Complete Hunter's requested activity and then destroy the submarines in the water-side challenge without breaking the sequence.
Fireworks Factory: Complete the Superfly and Superflame dragon challenge across from the bell tower as its own egg activity. After Agent 9's Lab is complete, return through the hole at the end near the rocket. Fireworks Factory Part 2 is an Agent 9 return and awards two eggs; it is not a new level and is not required to enter Scorch's Pit.
Charmed Ridge: Record the colored-seed route and the normal glide route separately from the Sgt. Byrd activity near the cat and fairy structures. As Byrd, fly through the marked windows and bomb the required targets for the activity egg. Honey Speedway, Bentley's Outpost, Scorch's Pit, and Starfish Reef remain separate entries.
Honey Speedway Part 2: After defeating Scorch, return to Honey Speedway and ask Sparx for the Time Attack. Near the honey river, Hunter offers the post-Scorch challenge. Ride the boat through the river while avoiding logs and rocks until the pursuing flying saucer crashes. This awards one egg and has no gem reward.
- Frozen Altars: two boxing matches and ice-rink activity.
- Lost Fleet: Hunter and submarine challenges.
- Fireworks Factory: dragon challenge, then Agent 9 Part 2 after Agent 9's Lab.
- Charmed Ridge: seed, ordinary route, and Sgt. Byrd activity.
- Honey Speedway Part 2: Hunter's narrow-escape boat challenge after Scorch.
Midnight Mountain parent levels
Crystal Islands: The long slide Challenge Portal is found by hugging the left side of the crystal tower. Ride the slide to the grass at the bottom for its egg. The Bentley mole activity on the island near the flying thief is a separate parent-level challenge; complete its requested rounds for the additional egg. The thief, key route, and ordinary crystal objectives are not the same activity.
Desert Ruins: Complete both Sheila Krash Kangaroo stages through the Sheila entrance. The Hunter manta activity near the underwater route is separate; destroy the shark riders for its egg. Seaweed destruction is a Skill Point objective, not another egg.
Haunted Tomb: Enter Agent 9's marked entrance and clear the shooting stages, including the final mummy-case sequence, for the Agent 9 egg. The riddle, underwater route, ladder cavern, and slide are ordinary objectives. The dark underwater passage is logged as a Skill Point route unless an egg is specifically awarded there.
Dino Mines: The Agent 9 gunfight is reached from the portal near the final water-tower area. Clear the fixed-view enemy waves and continue to the reward egg. The Secret Dino behind the group of three is a Skill Point target, not a second egg. The jail break, water-tunnel egg, cracked underwater wall, shaft descent, and hidden opening egg remain ordinary Dino Mines entries.
Agent 9's Lab, Harbour Speedway, Sorceress's Lair, Bugbot Factory, and Midnight Mountain Home Part 2: Agent 9's Lab is a dedicated critter level opened by Moneybags and must be completed before Fireworks Factory Part 2. Harbour Speedway has its own three rewards. Sorceress's Lair awards the pre-bonus boss egg. Bugbot Factory is the post-Sorceress level and awards the final pre-bonus egg after its Caterpillar encounter. Midnight Mountain Home Part 2 becomes available after the Sorceress is defeated: chase Moneybags around the upper bridge route until he drops all 8,000 gems, then he gives the egg.
- Crystal Islands: slide and Bentley mole activities.
- Desert Ruins: Sheila stages and Hunter manta activity.
- Haunted Tomb: Agent 9 activity and ordinary objectives.
- Dino Mines: Agent 9 gunfight, ordinary eggs, and optional Secret Dino Skill Point.
- Agent 9's Lab, Harbour Speedway, Sorceress's Lair, Bugbot Factory, and Moneybags chase separate.
Completion and return order
A failed Challenge Portal normally restarts that activity. Re-enter from the same landmark and check that the egg appeared before leaving the parent level. For locked activities, do not use glitches or assume the entrance is missing: complete the stated prerequisite and return through the original parent level.
A practical cleanup order is: finish all immediately available Challenge Portal entries in each ordinary level; free the next critter; complete that critter's dedicated level; return to Molten Crater, Bamboo Terrace, and Fireworks Factory for their Byrd, Bentley, and Agent 9 sections; defeat Scorch and complete Honey Speedway Part 2; defeat the Sorceress; complete Midnight Mountain Home Part 2; then finish Bugbot Factory.
The pre-bonus completion check is 149 eggs and 15,000 ordinary gems. The four Homeworld totals should read 37, 37, 37, and 38. The Atlas may show the ordinary-gem total after Moneybags has taken the 8,000-gem payment, so do not require its displayed value to equal the overall total held by the end of the game. The Super Bonus Round adds the final egg and 5,000 bonus gems, producing the 20,000-gem and 117 percent endpoint.
- Sunrise Spring: 37 eggs.
- Midday Gardens: 37 eggs.
- Evening Lake: 37 eggs.
- Midnight Mountain: 38 eggs.
- 149 eggs and 15,000 ordinary gems before Super Bonus Round.
- Final save: 150 eggs, 20,000 total gems, and 117 percent.
- Track all 20 Skill Points separately.
Before you move on
- Every egg-bearing activity is listed beneath its parent level with activity type, prerequisite, entrance landmark, reward condition, and completion check.
- All critter return sections are revisited after their required character or boss state is reached.
- Sunrise Spring reads 37 eggs, Midday Gardens 37, Evening Lake 37, and Midnight Mountain 38.
- The save reaches 149 eggs and 15,000 ordinary gems before entering the Super Bonus Round.
- The Super Bonus Round is completed separately for its final egg and additional 5,000 bonus gems.
- The final save reaches 150 eggs, 20,000 total gems, and 117 percent.
- Skill Points and the epilogue are tracked as optional objectives.
References for this chapter
- Spyro: Year of the Dragon — Guide and Walkthrough by SpyroCrashJak, GameFAQs
- Spyro: Year of the Dragon - Guide and Walkthrough - PlayStation - CHyde
- Spyro: Year of the Dragon - Guide and Walkthrough - PlayStation - DrOctagonapus
- Spyro: Year of the Dragon - Guide and Walkthrough - PlayStation - By kmintram
- Spyro: Year of the Dragon — Sony PlayStation Manual
The Sorceress and Final Gauntlet — How to Reach and Defeat Her
In the original North American PlayStation release of Spyro: Year of the Dragon, Sorceress’s Lair becomes available once the save contains 100 dragon eggs. You do not need 149 eggs, 15,000 ordinary gems, Agent 9’s Lab or every post-game stage to enter the first Sorceress fight. Agent 9 provides the weapons used during the battle, but freeing Agent 9 and completing Agent 9’s Lab are separate objectives required for full character and egg completion. After defeating the Sorceress, complete the Moneybags chase and the separate Bugbot Factory Sparx stage, then finish any remaining levels until the Atlas records 149 eggs and 15,000 ordinary gems. That opens the Super Bonus Round. The bonus realm contains another 5,000 gems, several challenges and the final Sorceress encounter, which awards egg 150 and produces the original game’s 117 percent endpoint.
Open Sorceress’s Lair
Enter Midnight Mountain and go to the large central doors near the middle of the Homeworld. Bianca opens the route once the save contains at least 100 dragon eggs. The requirement is based on the recorded egg total, not on completing every level in the first three Homeworlds, so check the Atlas before making the trip.
The first Sorceress fight does not require Agent 9’s Lab. Agent 9’s Lab is a separate Midnight Mountain critter level and remains necessary for full character and egg completion, but it is not a prerequisite for entering Sorceress’s Lair. If you are following the complete route, free Agent 9 and clear his lab during cleanup rather than treating it as a condition for the first boss.
Restore Sparx with nearby fodder before entering. The arena has open edges over lava, so a full health state gives you more room to learn the weapon phases and recover from an avoidable hit. Save before the attempt when practical, especially if you have just completed a long collection session.
- Confirm that the Atlas records at least 100 eggs.
- Reach the central Sorceress’s Lair doors in Midnight Mountain.
- Do not delay the first boss solely to complete Agent 9’s Lab.
- Restore Sparx before entering.
- Save before the fight when practical.
Read the Sorceress’s attack patterns
The Sorceress uses three staff-signaled attacks during the first battle. A green staff effect indicates a close-range strike. Keep away from her instead of trying to circle tightly around her body. If she runs directly toward Spyro, charge away and avoid being pushed toward the lava.
The yellow attack is a fast fireball that can adjust its path around turns. Change direction rather than charging in one straight line for the entire attack. Use broad movement and watch the arena edge before committing to a turn. If you are already near the boundary, move inward first so a dodge does not become a fall into the lava.
The blue attack sends several energy balls onto the arena floor. Keep moving and steer toward open ground. Between weapon phases she can launch many blue projectiles in succession; move well away from your previous position instead of waiting beneath the falling attacks. The safest rhythm is to survive the pattern first, then approach the next weapon when the arena is clear.
- Stay out of range of the green close attack.
- Change direction against the yellow fireball.
- Keep moving during the blue floor-projectile pattern.
- Charge away when the Sorceress runs toward Spyro.
- Avoid using the arena edge as your main escape route.
Use the fixed cannon phase
Agent 9 supplies the first weapon as a cannon that appears in the arena. Look for its outlined or ghostly position and jump onto it to board. The cannon is stationary, so aim ahead of the Sorceress rather than firing only at her current location. She moves around the arena, and the cannon’s limited firing opportunity makes prediction more useful than rapidly changing aim.
The cannon exposes Spyro while he is aboard it. Fire during the window when the Sorceress is moving across the cannon’s line, then jump off when she turns toward the cannon or prepares an attack. The cannon can disappear after its ammunition is spent, so do not remain on it waiting for another shot.
The first phase advances after enough successful hits. Spyro’s ordinary flame, charge and headbash attacks do not damage the Sorceress in this encounter. If the cannon is lost, return to movement, avoid the next attack pattern and wait for Agent 9 to supply the next weapon.
- Find the outlined stationary cannon.
- Lead shots ahead of the Sorceress’s movement.
- Fire while she crosses the cannon’s firing line.
- Jump off before a counterattack reaches the cannon.
- Do not try to damage her with Spyro’s normal attacks.
Handle the wheeled cannon or tank
After the stationary-cannon phase, Agent 9 supplies a cannon on wheels. Board it and use its movement to keep distance while firing. The vehicle turns more slowly than Spyro, so begin wide turns early. Sharp corrections near the lava are dangerous because the vehicle can carry you past the safe floor before the turn is complete.
Keep the Sorceress in front of the vehicle whenever possible. Fire during a safe approach, then steer away before her fireball reaches your route. During the blue projectile pattern, continue driving toward clear ground instead of stopping to line up a perfect shot. The vehicle’s mobility is helpful, but it is not a reason to drive directly into an attack.
If the vehicle is destroyed or lost, do not attempt to fight on foot. Circle the arena, avoid the staff and projectile attacks, and wait for another weapon to appear. Once enough hits have been registered, Agent 9 begins supplying the flying saucer.
- Board the wheeled cannon when it appears.
- Use broad turns and leave room near the lava.
- Fire during safe approaches rather than driving straight into her.
- Keep moving when blue projectiles cover the arena.
- Wait for another weapon if the vehicle is lost.
Finish the first battle with the flying saucer
The flying saucer is the final weapon phase of the first Sorceress battle. Board it when Agent 9 supplies one and make broad passes across the arena. Fire as you approach the Sorceress, then turn away before her fireball can intercept your path. The saucer has sustained firing capability, but it is still possible to be knocked off if you fly directly into her or remain in front of an incoming attack.
Begin turns early. Late corrections are especially dangerous when the Sorceress is close to the arena boundary. If you have trouble controlling the saucer, use short attack passes: board, fire immediately, turn away, then repeat. This is safer than chasing her through the entire arena.
Continue damaging her until the first Sorceress is defeated. The battle awards one egg and triggers the post-boss sequence, but it does not award egg 150 and does not by itself produce the 117 percent ending. Let the victory scene finish before leaving the level.
- Board the flying saucer.
- Use broad attack passes instead of uncontrolled pursuit.
- Turn away before the fireball reaches your path.
- Stay away from the lava boundary.
- Confirm that Sorceress’s Lair and its egg are recorded.
Complete the post-Sorceress Moneybags chase
Return to Midnight Mountain after the first Sorceress victory and locate Moneybags on the bridge between the later Homeworld routes. Approach him to start the chase. Charge into him whenever you catch up, then continue following him through the route until he gives back the gems he took and surrenders the dragon egg he was carrying.
The returned gems and the egg are separate rewards. The chase contributes one egg toward the 149-egg pre-bonus target and restores gems to the save. Wait for both reward notifications, then check the Atlas. If one reward appears not to have registered, leave and re-enter the Homeworld and verify again before assuming a wider save problem.
Agent 9’s Lab is not part of this chase. It remains a required full-completion objective because it contains Agent 9’s character content and an egg, but completing or skipping it does not determine whether the Moneybags chase can be started.
- Find Moneybags on the Midnight Mountain bridge.
- Start the chase and charge into him whenever possible.
- Confirm that the egg was awarded.
- Confirm that the stolen gems were returned.
- Check the Atlas before moving to the next cleanup stage.
Enter and clear Bugbot Factory as Sparx
Bugbot Factory is a separate post-Sorceress Sparx stage. It is not Agent 9’s Lab, and it is not unlocked by freeing Agent 9. Reach the Sparx level entrance near the Midnight Mountain routes, close to the Dino Mines and Harbor Speedway area. The original PlayStation route requires the first Sorceress to be defeated and the other Sparx stages to be completed before Bugbot Factory becomes available.
Inside the factory, play as Sparx. Chase key-carrying bugs and shoot them so they drop their keys, then collect the keys before they disappear. Use each key on the corresponding locked door. Clear the rooms in order, destroy the ladybird enemies and their generators, and pursue the later key carriers through the larger rooms. Check side passages for gems before using a key to advance.
The final area contains the Robotic Centipede, also called the Metapede in some guide descriptions. Keep firing while staying near a safe doorway or open section. Its body separates into sections as it takes damage. Continue shooting the active sections until the boss is destroyed, then collect the egg. Clearing Bugbot Factory also grants Sparx’s late-game utility rewards, including the ability to warp through the Atlas and break nearby containers.
- Confirm the first Sorceress is defeated.
- Confirm the other Sparx stages are complete.
- Enter Bugbot Factory from the Midnight Mountain Sparx entrance.
- Collect keys from the key-carrying bugs.
- Open the locked doors and destroy the enemy generators.
- Defeat the Robotic Centipede or Metapede.
- Collect and verify the factory egg.
Open the Super Bonus Round
The Super Bonus Round opens after the first Sorceress has been defeated and the save records 149 eggs and 15,000 ordinary gems. The 149 eggs are the pre-bonus total. Do not wait for egg 150 before opening the portal; egg 150 is awarded only after the bonus-area Sorceress finale.
If the portal remains closed, inspect the Atlas and level totals rather than guessing which item is missing. Recheck Sorceress’s Lair, the Moneybags chase, Bugbot Factory, Agent 9’s Lab, Harbor Speedway, the four Sparx stages, the four dedicated critter levels and any challenge portals or return sections that still lack their egg or gems. Agent 9’s Lab must be completed for full egg and character completion, even though it was not needed for the first boss.
The Super Bonus Round portal is in Midnight Mountain beyond the Harbor Speedway area. When the Atlas records 149 eggs and 15,000 ordinary gems, glide to the portal and enter. The ordinary-gem requirement is the gate for entry; do not describe it as already including the bonus realm’s additional gems.
- Defeat the first Sorceress.
- Confirm 149 eggs in the Atlas.
- Confirm 15,000 ordinary gems in the Atlas.
- Verify Agent 9’s Lab and all other required egg-bearing stages.
- Reach the Super Bonus Round portal beyond Harbor Speedway.
Clear the bonus realm and follow its displayed requirements
Begin by collecting the treasure in the entrance area and central islands. Chase the visible thieves, search the upper and lower paths, and collect the loose gems before entering the challenge doors. The bonus realm contains 5,000 additional gems, so the total rises beyond the 15,000 ordinary-gem entry gate as you complete its activities.
The first challenge is the submarine section. Lock onto the enemy submarines, wait for the targeting indicators to turn red, then fire. Destroy all targets and return to the central hub. The next challenge is the snowboard race against the Sasquatch riders. Stay on the course, use the boost gained from flips when you can do so safely, and retry immediately after a crash rather than trying to recover a hopeless run.
The flying challenge uses a Superfly-style power-up to destroy the flying saucers. Replenish the power-up when necessary and search above, below and behind the structures because some saucers are easy to miss. The exact intermediate requirement for this door is reported inconsistently in reference material for the original game, so use the number printed on the door in your copy rather than hardcoding a conflicting value.
Return to the central area after each challenge and collect the reward gems. Track the overall total separately from the 15,000 ordinary-gem entry requirement. The bonus realm’s additional gems are what bring the complete save to 20,000.
- Collect entrance-area treasure and defeat the first thieves.
- Complete the submarine challenge.
- Complete the snowboard race.
- Read the flying-challenge door and follow its displayed requirement.
- Destroy every flying saucer in the flying challenge.
- Return to the hub and verify the overall gem total.
Defeat Sorceress Finale and verify 117 percent
After the bonus realm’s total reaches 20,000 gems, open the final door and enter Sorceress Finale. Bianca provides a flying saucer, while the Sorceress uses her own saucer. Board immediately and hold the fire button to send a stream of shots. The saucers move quickly, and the firing aim is not perfectly reliable, so take early opportunities rather than waiting for an ideal alignment.
At the start, fire as the Sorceress approaches and try to land one or two early hits. When she pulls ahead and faces you, expect a fireball. Stop committing to a straight pursuit, turn away and dodge before resuming the chase. As her health decreases, she moves faster, so begin turns earlier and favor controlled passes over repeated head-on approaches.
When the Sorceress is defeated, she falls into the hazard and drops the final dragon egg. Collect it to raise the total from 149 to 150. Allow the ending sequence to finish, save the game, and reload if necessary to confirm the result was written to the memory card.
The original game’s maximum endpoint is 150 eggs, 20,000 gems overall and 117 percent. The 20 Skill Points and the complete Skill Point epilogue are separate optional objectives. They should be checked independently if the goal is the fullest possible save rather than merely the canonical 117 percent completion.
- Reach 20,000 total gems in the bonus realm.
- Enter Sorceress Finale through the final door.
- Board the flying saucer immediately.
- Lead shots during controlled passes.
- Dodge the fireball when the Sorceress faces you.
- Defeat the Sorceress and collect egg 150.
- Save and reload if necessary.
- Verify 150 eggs, 20,000 overall gems and 117 percent.
- Check all 20 Skill Points separately if pursuing the complete epilogue.
Before you move on
- Sorceress’s Lair is cleared and its egg is recorded.
- The first Sorceress victory sequence has finished.
- Moneybags has been chased in Midnight Mountain.
- Moneybags’s egg and returned gems are registered.
- Agent 9’s Lab is complete for full character and egg completion.
- The other Sparx stages are complete.
- Bugbot Factory is accessible and cleared as Sparx.
- The Robotic Centipede or Metapede is defeated.
- The Bugbot Factory egg is recorded.
- The Atlas shows 149 eggs and 15,000 ordinary gems before entering the Super Bonus Round.
- The submarine challenge is complete.
- The snowboard challenge is complete.
- The flying challenge is complete according to its displayed door requirement.
- The bonus realm reaches 20,000 total gems.
- Sorceress Finale is cleared.
- The final egg raises the total to 150.
- The save shows 117 percent after saving and, if necessary, reloading.
- All 20 Skill Points are checked separately if the complete epilogue is desired.
- The ending and any earned Skill Point epilogue scenes have played.
References for this chapter
- Spyro: Year of the Dragon — Guide and Walkthrough by dark52, GameFAQs
- Spyro: Year of the Dragon - Guide and Walkthrough - PlayStation - DrOctagonapus
- Spyro: Year of the Dragon — Boss Guide, metalgearsonic, PlayStation
- Spyro: Year of the Dragon — Sony PlayStation Manual
- darkSpyro — Guidebook Location List: Super Bonus Round
Super Bonus Round and True Completion (Post-Sorceress Objectives)
The Super Bonus Round is the original PlayStation game's post-campaign completion realm. Defeat the first Sorceress, collect all 149 pre-bonus eggs, and reach 15,000 ordinary gems. The portal is in Midnight Mountain on a platform reached by gliding to the right of the Harbor Speedway entrance. Inside, collect the realm's 5,000 additional gems, clear Super Submarine, win Super Snowboard, destroy the flying saucers, and enter the final Sorceress rematch. Defeating her awards egg 150 and brings the game to its 20,000-gem, 117-percent endpoint. The Atlas's ordinary-gem total and the overall 20,000-gem completion total should be treated as separate accounting values.
Finish the campaign and confirm the entry requirements
Defeat the first Sorceress before attempting the Super Bonus Round. The realm is not available merely because Midnight Mountain has been reached. You must also have all 149 eggs from the rest of the game and 15,000 ordinary gems.
Check the Atlas by Homeworld and level if either total is short. The final egg cannot help with the entry requirement because it is awarded inside the Super Bonus Round. Likewise, the five thousand gems in the bonus realm cannot substitute for the 15,000 ordinary gems required to open its portal.
If the missing egg is near the end of the campaign, check Bugbot Factory. Enter Sparx's stage from Midnight Mountain, collect keys to open the forcefields, clear the bug rooms, and reach the final arena. Keep the Caterpillar in view while firing, avoid standing directly in its attack line, and continue attacking after it splits until both sections are destroyed. The factory's egg is egg 149 in the pre-bonus total. Completing the stage also gives Sparx level warping and the ability to break nearby containers, but those abilities are not additional entry requirements.
- The first Sorceress is defeated.
- The pre-bonus total is 149 eggs.
- The ordinary-gem total is 15,000.
- Bugbot Factory has been checked if one egg is missing.
- The Atlas's ordinary-gem value is not being confused with the later 20,000-gem endpoint.
Reach the Super Bonus Round portal
Travel to Midnight Mountain and find the Harbor Speedway entrance. Do not enter the Speedway. From the entrance area, move to the right and glide to the separate platform containing the Super Bonus Round portal.
If the portal remains closed, recheck the Atlas totals rather than searching inside the bonus realm. The entry conditions are 149 eggs, 15,000 ordinary gems, and the first Sorceress defeated.
After entering, speak with Bianca and collect the loose treasure in the starting area. Defeat both thieves there; one circles the starting building and the other runs through the tunnels, platforms, and bridges. Then enter the central hub and defeat the three additional thieves scattered across its islands. Sweep the ground and the raised paths for gems before approaching the first door.
The first door requires 16,000 gems. The opening area contains enough treasure to reach it. Use the door's displayed counter as the immediate authority rather than relying on a predicted subtotal.
- The Harbor Speedway entrance has been located.
- The separate platform to its right has been reached.
- Bianca has been spoken to.
- Both entrance thieves and the three central-hub thieves are defeated.
- The 16,000-gem door is open.
Complete Super Submarine
Enter the black portal behind the 16,000-gem door and speak with Hunter. Spyro pilots a submarine and must destroy seven enemy submarines. This challenge has no egg; its purpose is to provide gems and unlock the next route.
Keep each enemy submarine in view until the three targeting rings change from green to red. Press Circle to fire after the lock is complete. X or Square accelerates the submarine. Make broad turns around the towers and underwater structures, and watch both sides of the central routes because some submarines linger near the towers.
The submarine positions are not fixed in a single convenient line. Follow their routes and wait for another lock if a shot misses. Destroy all seven. The targets release gems, and long-range hits can leave some treasure behind in the water. Return to the hub only after checking the water for missed gems, then speak with Hunter again if the reward interaction is available.
The combined submarine treasure should put the total safely above 17,000. Cross the hub to the 17,000-gem door for the snowboard event.
- All seven enemy submarines are destroyed.
- Shots were fired after the targeting rings turned red.
- Dropped submarine gems have been collected where necessary.
- Hunter's reward interaction has been completed if available.
- The 17,000-gem door is open.
Win Super Snowboard
Enter the challenge behind the 17,000-gem door. Before beginning the race, walk through the accessible portions of the track and collect loose gems. Check both directions from the start, the raised section near the opening, and the elevated ramp near the finish. Some treasure requires riding the course, but collecting the easy gems first reduces the amount needed from the race reward.
The event is a three-lap race against the Sasquatch Six, and Spyro begins behind the opponents. Use the first jump to build trick meter, then use the resulting boost on a straight section after landing cleanly. Short, controlled flips and rolls are safer than a large trick near an edge. Speed pads are useful, but staying on the narrow track is more important than taking every pad.
Missiles can disrupt opponents, and contact can knock riders from their boards, but do not sacrifice Spyro's line to attack. If you crash or fall far behind, restart rather than trying to recover a lost race. Finish in first place to receive the race reward, then revisit the track for gems that were inaccessible or overlooked during the race.
The next door is commonly identified in original PlayStation guides as requiring 18,500 gems. If the number printed on the disc's in-game screen differs, follow the displayed number rather than hardcoding a value from an external guide.
- Accessible track gems have been collected before or after the race.
- All three laps are complete.
- Spyro finishes in first place.
- The race reward has been collected.
- The next door's displayed requirement has been checked.
Clear UFO Chasing and reach the final door
Open the next door using the number shown in the hub. Cross the bridge to the Superfly and Superflame power-up. The effect is temporary, so treat the power-up as a refill point and return to it whenever the ability expires.
Destroy all seven flying saucers in the main hub. Search above and below the islands, around the buildings, along the outer routes, and behind the building containing the power-up. At least one saucer can travel below the normal platform level and near the island's edge, so do not search only the central skyline.
The power-up lasts long enough for broad circuits of the realm. Keep Spyro high enough to remain in flight, and return for a refill instead of attempting to chase a saucer after the ability has ended. Each destroyed saucer contributes gems. When all seven are destroyed and their treasure has been collected, the total reaches 20,000 gems.
Climb the raised route to the 20,000-gem door. If it remains locked, look for a missed saucer or dropped treasure in the hub and revisit the submarine and snowboard areas before assuming that the save is damaged.
- The Superfly and Superflame power-up has been reached.
- All seven flying saucers are destroyed.
- The associated gems have been collected.
- The overall total reaches 20,000 gems.
- The 20,000-gem door is open.
Defeat the Sorceress rematch and collect egg 150
Enter the final portal after reaching 20,000 gems. Bianca provides Spyro with a flying saucer. Hold the fire button to maintain a stream of shots, but aim ahead of the Sorceress because the projectiles travel slowly and the saucer's aim is imperfect.
Keep moving in broad turns around the arena. The Sorceress becomes faster as her health decreases, so stationary attacks become less reliable late in the fight. If she stops and faces Spyro, treat it as a warning for an incoming fireball. Change direction immediately, let the projectile pass, and resume firing during her next movement. Do not remain in front of her trying to trade shots.
If the rematch is lost, re-enter through the 20,000-gem door. The completed submarine, snowboard, and saucer sections do not need to be repeated. Continue using moving attack passes until her health is depleted.
When the Sorceress falls into the pink liquid, she drops the 150th and final egg. Collect it before leaving the arena and allow the ending sequence to finish. The Super Bonus Round contains 5,000 additional gems but only one egg, awarded here.
- The 20,000-gem final portal is entered.
- The flying saucer remains in motion during the battle.
- Fireballs are dodged when the Sorceress stops and faces Spyro.
- The Sorceress rematch is defeated.
- Egg 150 is collected.
- The ending sequence is allowed to finish.
Before you move on
- The game records 150 dragon eggs overall.
- The overall treasure total reaches 20,000 gems after the bonus-area treasure is collected.
- All seven Super Submarine targets are destroyed.
- Super Snowboard is completed with a first-place finish.
- All seven flying saucers are destroyed.
- The final Sorceress rematch is defeated.
- Egg 150 has been collected and the ending sequence has finished.
- The original game displays 117 percent completion.
- The 20 Skill Points and complete epilogue remain separate optional objectives.
References for this chapter
Playable-Critter Deep Dive — Sheila, Sgt. Byrd, Bentley, Agent 9 and Hunter
The original North American PlayStation release gives you four permanent ally characters—Sheila the Kangaroo, Sgt. Byrd, Bentley the Yeti, and Agent 9 the Monkey—plus recurring Hunter challenges. Each character has different movement and attack rules, and several eggs are awarded only after completing that character’s activity. The controls below are for the original PlayStation version, not Reignited Trilogy.
Release the four allies and organize their objectives
Moneybags releases Sheila, Sgt. Byrd, Bentley, and Agent 9 in sequence as you reach their cages in the Homeworlds. Their dedicated stages are Sheila’s Alp, Sgt. Byrd’s Base, Bentley’s Outpost, and Agent 9’s Lab. Enter each stage after paying the required fee, complete its introductory objective, and then return later when newly opened character challenges become available.
Do not treat an ally as fully completed after clearing only the introductory stage. The same character can appear in later levels, challenge rooms, or return sections with additional eggs. Record progress by level and activity in your checklist, using separate entries for the introductory stage, later character mission, and any optional Skill Point.
Before attempting a difficult character mission, collect nearby gems and eggs that do not require that character, then enter the challenge with full health where possible. If you fail, retry the activity itself rather than abandoning the entire Homeworld. Character stages are designed around their specialized movement, so a short practice attempt is more useful than trying to imitate Spyro’s controls.
- Release Sheila, Sgt. Byrd, Bentley, and Agent 9 through Moneybags.
- Complete each introductory character stage.
- Record eggs by level or activity rather than only by character.
- Keep Hunter’s recurring challenges in a separate checklist.
Sheila: air hop, landing double jump, and stomp
Use the D-pad or left analog stick to move Sheila. Press X to jump. Press X again while she is airborne to perform the air hop. Sheila also has a higher double jump: press X again immediately as she touches the ground after a jump. These are different timings. The air hop extends an existing jump, while the landing-triggered double jump launches her upward from the ground contact.
Square or Circle makes Sheila kick. Press X and Triangle together during a jump to perform her stomp, which attacks below her and breaks appropriate floors. Use the stomp when the target is directly underneath Sheila; it is not a substitute for the landing double jump when an elevated ledge is the objective.
In Sheila’s Alp, practice in the opening open area. Use a normal jump for a nearby platform, an air hop for a longer gap, and the landing double jump when the platform is too high for either of those alone. To practice the difficult timing, jump from a broad surface and press X only as Sheila’s feet touch down. If you press too early, you will get the air hop instead. On later ledges, step back onto flat ground if Sheila clips the platform edge rather than repeating the jump from a cramped position.
- Press X to jump.
- Press X again in the air for Sheila’s air hop.
- Press X as she touches down to perform the higher double jump.
- Use Square or Circle to kick.
- Use X plus Triangle in the air to stomp.
- Practice the landing timing on a wide platform.
Sgt. Byrd: flight, strafing, rockets, and object delivery
Use the D-pad or left analog stick to move Sgt. Byrd. Hold X to fly and gain altitude. L1 and R1 strafe left and right while Byrd is airborne; use these short lateral movements for lining up with narrow passages or targets instead of making a large turn.
Triangle switches between normal and bomb views. While carrying an object, press Square to release it. Byrd can pick up suitable objects by flying down over them until the game registers the pickup. Circle fires his shoulder rockets. When a mission requires delivery, fly above the target, use L1 or R1 for small corrections, switch to the appropriate view with Triangle, and release only when the object is aligned.
Sgt. Byrd’s Base teaches the main loop: fly through an area, destroy threats, collect an object, and deliver it to the correct location. Practice by picking up one object and returning to the starting area before releasing it. Then repeat while using bomb view. Avoid dropping objects while passing through a doorway or over a pit; Byrd’s momentum can carry the object into a wall or an unintended target. Against enemies, fire rockets from a safe distance rather than hovering directly over hazards.
- Hold X to fly and gain height.
- Use L1 and R1 to strafe while airborne.
- Use Triangle to switch between normal and bomb views.
- Press Square to release a carried object.
- Press Circle to fire shoulder rockets.
- Practice one pickup-and-delivery loop before tackling a timed objective.
Bentley: club attacks, shoulder shove, and box puzzles
Use the D-pad or left analog stick to move Bentley. Press X to jump. Circle performs the club smash, while Square performs the club spin. The smash is easier to control against one nearby enemy. Hold Square when you need the continuing spin attack, especially when several enemies are close, but stop spinning before approaching a narrow ledge or movable object.
Bentley can shoulder-shove boxes by moving into them while standing beside them. Push boxes in short corrections. Line up with the intended direction, move the box only as far as necessary, then stop and inspect its position. If it goes too far, walk around it and approach from another side instead of trying to correct the puzzle while still pushing.
Bentley’s heavier movement makes his levels less forgiving near pits. Clear nearby enemies before attempting a box puzzle, and avoid standing directly behind a box when a single mistake could push both Bentley and the box into a hazard. His boxing-style activities are separate from ordinary exploration: watch the opponent’s attack, avoid or defend against the committed strike, and counter during the recovery window rather than repeatedly swinging without regard for timing.
- Press X to jump.
- Press Circle for Bentley’s club smash.
- Hold Square for the club spin.
- Move into a box to shoulder-shove it.
- Use short inputs when aligning boxes.
- Counter during an opponent’s recovery window in boxing activities.
Agent 9: blaster, sniper mode, bomb aiming, and dodging
Use the D-pad or left analog stick to move Agent 9. Circle fires his weapon. X jumps. Triangle switches between normal view and sniper mode. In sniper mode, the D-pad or left analog stick aims instead of moving Agent 9 through the environment. Use sniper mode for distant, elevated, or stationary targets where accuracy matters more than movement.
L1 and R1 have two context-sensitive functions. In sniper mode, they zoom in and out. In normal play, they dodge left or right. They are not the original PlayStation camera-positioning buttons for Agent 9, and they should not be described as a general zoom or camera control outside these contexts.
When Agent 9 carries a bomb, hold Square and use the D-pad or left analog stick to aim it. Release Square to throw. Do not press Square immediately after collecting the bomb unless the target is already aligned. First move to a safe position, hold Square, adjust the aim, and release only after the target is centered. This is especially important when a failed throw leaves enemies active or forces you to repeat a sequence.
Use normal view when enemies are close enough to threaten Agent 9. Dodge with L1 or R1, fire with Circle, and reposition before entering sniper mode again. For distant targets, switch to sniper mode with Triangle, zoom with L1 or R1 if necessary, aim with the D-pad or left analog stick, and fire. If a mission requires destroying particular objects rather than simply defeating every visible enemy, check the area after the shooting stops and follow the objective until the reward appears.
- Use the D-pad or left analog stick to move Agent 9.
- Use Circle to fire the blaster.
- Press X to jump.
- Press Triangle to enter or leave sniper mode.
- Aim in sniper mode with the D-pad or left analog stick.
- Use L1 and R1 to zoom in or out in sniper mode.
- Use L1 and R1 to dodge left or right in normal play.
- Hold Square plus directional input to aim a bomb, then release Square to throw it.
Hunter: skating, races, dogfights, and pursuit missions
Hunter is not one of the four permanent ally characters and does not have a single dedicated critter portal. He appears in separate activities that include lizard skating, skateboarding lessons and competitions, races, flying or dogfight missions, rescue tasks, and pursuit challenges. Log these separately from Sheila’s, Byrd’s, Bentley’s, and Agent 9’s stages because their movement rules and rewards differ.
In the early skateboard lesson, press X at the top of a ramp to jump. While airborne, hold Triangle and press left or right to roll, or hold Triangle and press up or down to flip. On half-pipe ramps, jump at the top and hold a direction to spin. Land cleanly before attempting longer combinations. For a timed score challenge, use reliable tricks that you can land instead of repeating a high-value move that regularly causes a fall.
For lizard skating and races, learn the course before chasing the fastest time. Take broad turns from the inside when the path is clear, line up with ramps before jumping, and prioritize a stable landing over a risky shortcut. In flying or dogfight activities, keep firing while maintaining a safe approach and aim slightly ahead of moving targets. In pursuit missions, follow the required rings or targets in order; missing one can force a restart even when the target is nearby.
Hunter’s activities are not ordinary Speedways. Spyro’s Speedways focus on aerial routes and chained targets, while Hunter’s challenges can require board handling, ground racing, trick scoring, shooting, or ring pursuit. Confirm that Hunter has handed over the egg before marking the activity complete.
- Treat Hunter as a recurring challenge character, not a fourth permanent ally.
- Practice skateboard jumps, rolls, flips, and spins before timed competitions.
- Favor clean landings and controlled turns over risky shortcuts.
- Use forward aiming in dogfight missions against moving targets.
- Record Hunter’s egg rewards separately from the four ally stages.
- Verify the reward before leaving the activity.
Before you move on
- Sheila, Sgt. Byrd, Bentley, and Agent 9 have each been released through Moneybags.
- Each introductory character stage is complete.
- Later character missions and challenge rooms in visited levels have been checked for egg rewards.
- You can perform Sheila’s air hop, landing double jump, and stomp consistently.
- You can fly, strafe, fire rockets, and release carried objects as Sgt. Byrd.
- You can use Bentley’s smash, spin, jump, and shoulder shove without losing box alignment.
- You can use Agent 9’s blaster, sniper mode, bomb aiming, bomb throw, and normal-view dodge controls without consulting the mapping.
- All visited Hunter activities that award eggs are recorded separately and show their rewards as collected.
- Your checklist distinguishes required character stages, egg-bearing challenges, and optional Skill Point activities.
Collectible Routing — Practical Checklists and Tally Templates
Track Spyro: Year of the Dragon’s eggs by actual level and named return activity, not by disputed global egg-number ranges. The original PlayStation route contains 149 eggs before the Super Bonus Round: 37 assigned to Sunrise Spring, 37 to Midday Gardens, 37 to Evening Lake, and 38 to Midnight Mountain. Several levels have named Part 2 return sections. These are genuine later objectives in the original game, but their eggs are already included in the parent level totals. Record them as separate ledger rows with a folded contribution so they are not counted twice. The Super Bonus Round adds egg 150 and 5,000 additional gems after the 149-egg and 15,000-ordinary-gem requirements are met.
Set up the ledger before collecting late eggs
Use one ledger section for each Homeworld. Recommended columns are: source, egg contribution, objective or reward, prerequisite, accounting status, and gem status. Mark an egg complete only after the egg appears and the save has been updated. A level-complete message is not enough to diagnose a missing egg because some rewards come from return visits, character missions, Speedways, Sparx stages, or boss rooms.
Use the Homeworld subtotals as the primary check: Sunrise Spring 37, Midday Gardens 37, Evening Lake 37, and Midnight Mountain 38. Do not use the old global ranges 1–34, 35–72, 73–119, or 120–149 as a diagnostic system. Sequential numbering in walkthroughs can differ because return objectives are presented in different orders, while the in-game Atlas groups eggs by location.
Named Part 2 entries below are not extra portals or extra levels. They identify later visits that unlock after a critter, Hunter, or post-boss event becomes available. Their listed contribution is the number of eggs obtained during that return; the parent level’s total already includes it.
- Create four Homeworld sections.
- Record every actual level once.
- Record every named return section separately as a folded ledger row.
- Keep egg totals separate from gem totals.
- Confirm each reward on the save rather than relying only on memory or a sequential number.
Sunrise Spring ledger — 37 pre-bonus eggs
Sunrise Spring Home — 5 eggs. Collect the stream egg, Hunter’s gliding lesson reward, the cave or flight reward, the bottom-of-the-lake egg, and the headbash-rock egg. Prerequisite: none beyond the abilities taught in the Homeworld. This is the Homeworld contribution.
Sheila’s Alp — 3 eggs. Free Sheila by paying Moneybags, then complete the Billy, Pete, and Bobby rescue objectives. Each rescued goat rewards an egg. Prerequisite: Sheila must be freed. This is the dedicated critter level contribution.
Sunny Villa — 6 eggs. Record the mayor’s completion reward, the visible building egg, both Hunter lizard-skating rewards, the Rapunzel reward, and the remaining tower or building pickup. The Rapunzel objective requires Sheila; the skating rewards require Hunter’s access. Contribution: 6.
Cloud Spires — 6 eggs. Complete the cloud-generator objective, collect the ledge and high-island eggs, finish the local challenge, and catch the egg thief. Contribution: 6.
Molten Crater — 6 eggs total. The first visit provides the ordinary route eggs, including the lodge reward and the visible lava-area egg. The named Molten Crater Part 2 return provides 2 additional eggs after Sgt. Byrd is freed: replace the idol heads and use Sgt. Byrd to destroy the concealed wall and collect the egg. Prerequisite for Part 2: complete Sgt. Byrd’s Base. The return is folded into Molten Crater’s 6-egg total, not added as a seventh source.
Seashell Shore — 6 eggs. Free the seals, collect the underwater and pipe-area rewards, defeat the shark submarine, complete the Sheila-accessible sandcastle objective, and reach the secret cave. Contribution: 6.
Mushroom Speedway — 3 eggs. Complete Time Attack, win the race, and finish Hunter’s dogfight. Prerequisite: enter the Speedway and complete each reward condition. Contribution: 3.
Crawdad Farm — 1 egg. Take Sparx through the key-locked rooms, defeat the Crawdad King, and accept the egg. Prerequisite: the Sparx stage must be available from Sunrise Spring. Contribution: 1 as the Sunrise Sparx stage contribution to the 149 total. Buzz’s Dungeon — 1 egg. Complete the Buzz boss fight by repeatedly charging Buzz into the lava while avoiding his rolling and fire attacks. Prerequisite: the four ordinary Sunrise Spring realms and Sheila’s Alp. Contribution: 1 campaign-boss egg.
- Sunrise Spring Home: 5.
- Sheila’s Alp: 3.
- Sunny Villa: 6.
- Cloud Spires: 6.
- Molten Crater: 6 total, including 2 from Molten Crater Part 2.
- Molten Crater Part 2: 2 folded return eggs; prerequisite Sgt. Byrd’s Base.
- Seashell Shore: 6.
- Mushroom Speedway: 3.
- Crawdad Farm: 1.
- Buzz’s Dungeon: 1.
- Sunrise Spring subtotal: 37.
Midday Gardens ledger — 37 pre-bonus eggs
Midday Gardens Home — 5 eggs. Collect the underwater bridge egg, secret ice-cave egg, Homeworld thief egg, Superflame flowerpot reward, and high-ledge egg. Contribution: 5.
Icy Peak — 6 eggs. Complete the Doug rescue, skating activity, ordinary pickups, and both Speedy Thieves chases. Contribution: 6.
Enchanted Towers — 6 eggs. Record the statue objective, ordinary island pickup, both Hunter skateboarding rewards, Farley’s rescue, and Sgt. Byrd’s bone-collection objective. Contribution: 6.
Spooky Swamp — 6 eggs. Complete the ordinary route and every egg-producing firefly, candle, wizard, and challenge activity. Contribution: 6.
Bamboo Terrace — 6 eggs total. The initial visit supplies the ordinary route and challenge rewards. The named Bamboo Terrace Part 2 return becomes available after Bentley’s Outpost is completed; enter Bentley’s portal at the end of the level and finish the mountain-top smash route for the later egg. Contribution from Part 2: 1 folded egg. The full Bamboo Terrace total remains 6.
Bamboo Terrace Part 2 — 1 folded return egg. Prerequisite: complete Bentley’s Outpost and return through the Bentley portal in Bamboo Terrace. Do not add this egg to the 6 already assigned to Bamboo Terrace.
Country Speedway — 3 eggs. Complete Time Attack, win the race, and complete Hunter’s rescue mission. Contribution: 3.
Sgt. Byrd’s Base — 3 eggs. Complete the cave route, the base-building route, and the hummingbird rescue objective. Prerequisite: free Sgt. Byrd by paying Moneybags. Contribution: 3 as the dedicated critter level contribution. Spider Town — 1 egg. Complete the Sparx key, barrier, and Spider King route. Contribution: 1 Sparx-stage egg. Spike’s Arena — 1 egg. Complete the boss encounter’s rock, Superflame, and blue-crystal phases. Prerequisite: the four ordinary Midday Gardens realms and Sgt. Byrd’s Base. Contribution: 1 campaign-boss egg.
- Midday Gardens Home: 5.
- Icy Peak: 6.
- Enchanted Towers: 6.
- Spooky Swamp: 6.
- Bamboo Terrace: 6 total, including 1 from Bamboo Terrace Part 2.
- Bamboo Terrace Part 2: 1 folded return egg; prerequisite Bentley’s Outpost.
- Country Speedway: 3.
- Sgt. Byrd’s Base: 3.
- Spider Town: 1.
- Spike’s Arena: 1.
- Midday Gardens subtotal: 37.
Evening Lake ledger — 37 pre-bonus eggs
Evening Lake Home — 5 eggs. Collect the tower-glide, invincibility-route, bridge, cracked-wall, and whale-area eggs. Contribution: 5.
Frozen Altars — 6 eggs. Complete the ordinary pickups, snowman or laser activity, skating or hockey activity, Moneybags opening, and remaining challenge rewards. Contribution: 6.
Lost Fleet — 6 eggs. Record the ordinary route, acid swim, both submarine missions, and both Hunter skating rewards. Contribution: 6.
Fireworks Factory — 6 eggs total. The initial visit supplies the ordinary pickups and early challenge rewards. The named Fireworks Factory Part 2 return occurs after Agent 9 is available; use the cannon near the beginning to reach Agent 9’s section and complete both ninja missions. Contribution from Part 2: 2 folded return eggs. The complete Fireworks Factory total remains 6.
Fireworks Factory Part 2 — 2 folded return eggs. Prerequisite: free Agent 9 and access his Fireworks Factory mission. Record both ninja objectives separately because failing one does not prove the other is complete.
Charmed Ridge — 6 eggs. Complete the ordinary route, princess or fairy rescue, cat-witch challenge, and both Jack and the Beanstalk rewards. Contribution: 6.
Honey Speedway — 3 eggs. Complete Time Attack, the race, and Hunter’s mission. Contribution: 3.
Honey Speedway Part 2 — 1 folded return egg within the Speedway’s 3-egg total. Use this row when the Hunter mission is deferred until Hunter is freed or until the Speedway is revisited. Prerequisite: Hunter must be available for the pursuit challenge. Do not count it as a fourth Honey Speedway egg or as a separate level total. Bentley’s Outpost — 3 eggs. Complete the gong bridge, snowball route, and Bartholomew escort. Prerequisite: free Bentley by paying Moneybags. Contribution: 3 dedicated-critter eggs. Starfish Reef — 1 egg. Complete the Sparx route and defeat the Giant Stingray and its split forms. Contribution: 1 Sparx-stage egg. Scorch’s Pit — 1 egg. Defeat Scorch while using the rocket pickups and avoiding his summoned enemies. Prerequisite: the four ordinary Evening Lake realms and Bentley’s Outpost. Contribution: 1 campaign-boss egg.
- Evening Lake Home: 5.
- Frozen Altars: 6.
- Lost Fleet: 6.
- Fireworks Factory: 6 total, including 2 from Fireworks Factory Part 2.
- Fireworks Factory Part 2: 2 folded Agent 9 return eggs.
- Charmed Ridge: 6.
- Honey Speedway: 3 total.
- Honey Speedway Part 2: 1 folded Hunter return egg within the Speedway total.
- Bentley’s Outpost: 3.
- Starfish Reef: 1.
- Scorch’s Pit: 1.
- Evening Lake subtotal: 37.
Midnight Mountain ledger — 38 pre-bonus eggs
Midnight Mountain Home — 6 eggs total. The first visit provides 5 eggs through the island glide, thief, cracked-wall, waterfall, and headbash-floor objectives. The named Midnight Mountain Home Part 2 return provides the sixth egg after the first Sorceress battle: find Moneybags on the bridge between Crystal Islands and Desert Ruins, chase him, recover the gems he took, and force him to surrender the egg. Contribution from Part 2: 1 folded egg. The money recovered is not an additional egg source.
Midnight Mountain Home Part 2 — 1 folded post-Sorceress egg. Prerequisite: defeat the first Sorceress. Count this egg once under the Homeworld’s total of 6.
Agent 9’s Lab — 3 eggs. Complete the laboratory route, snipe the birds, destroy the boats, and finish the final blast-and-bomb objective. Prerequisite: free Agent 9. Contribution: 3 dedicated-critter eggs.
Crystal Islands — 6 eggs. Complete the gnome route, mole challenge, flying-thief chase, Superfly objectives, island glide, and slide. Contribution: 6.
Desert Ruins — 6 eggs. Complete both Krash Kangaroo segments, sinking-platform and hand routes, shark shooting, and the tomb objective. Contribution: 6.
Haunted Tomb — 6 eggs. Complete the climb, both tank-blast rounds, snake slide, temple riddle, and Agent 9 cave-clear mission. Contribution: 6.
Dino Mines — 6 eggs. Complete the leap-of-faith route, underwater wall, mine shaft, Sheriff rescue, Agent 9 gunfight, and bank pickup. Contribution: 6.
Harbor Speedway — 3 eggs. Complete Time Attack, win the race, and finish Hunter’s pursuit. Contribution: 3. Sorceress’s Lair — 1 egg. Defeat the first Sorceress using Agent 9’s dropped weapons, driveable cannons, and flying saucers. Contribution: 1 campaign-boss egg. Bugbot Factory — 1 egg. Take Sparx through the key-thief and ladybird rooms, then defeat the final factory boss. Contribution: 1 Sparx-stage egg.
- Midnight Mountain Home: 6 total, including 1 from Midnight Mountain Home Part 2.
- Midnight Mountain Home Part 2: 1 folded Moneybags-chase egg; prerequisite first Sorceress defeat.
- Agent 9’s Lab: 3.
- Crystal Islands: 6.
- Desert Ruins: 6.
- Haunted Tomb: 6.
- Dino Mines: 6.
- Harbor Speedway: 3.
- Sorceress’s Lair: 1.
- Bugbot Factory: 1.
- Midnight Mountain subtotal: 38.
Reconcile the pre-bonus save and finish the ledger
Add the four Homeworld subtotals: Sunrise Spring 37, Midday Gardens 37, Evening Lake 37, and Midnight Mountain 38. The result is 149 eggs before the Super Bonus Round. This total includes the four dedicated critter levels, four Speedways, four Sparx stages, four campaign bosses, the Moneybags chase, and the named Part 2 return objectives folded into their parent locations.
The four campaign-boss rows are Buzz’s Dungeon, Spike’s Arena, Scorch’s Pit, and Sorceress’s Lair. The first three require the four ordinary realms in their Homeworld plus the associated critter level. Sorceress’s Lair is reached later through Midnight Mountain and contributes its own egg. The four dedicated critter rows are Sheila’s Alp, Sgt. Byrd’s Base, Bentley’s Outpost, and Agent 9’s Lab, each contributing 3 eggs.
Before entering the Super Bonus Round, confirm that the save shows 149 eggs and that the displayed ordinary-gem requirement of 15,000 has been met. The Super Bonus Round is reached from the portal area beyond the Harbor Speedway route in Midnight Mountain. It contains 5,000 additional gems and the final Sorceress encounter. Complete the gem-thief section, submarine activity, Sasquatch Six snowboard challenge, and the flying-saucer challenge doors, following the number displayed by the game for any intermediate door requirement.
Defeat the final Sorceress, collect the last egg, finish the remaining bonus-area gems, save, and reload the file. The completion check is 150 eggs, 20,000 total gems across the full game, and 117%. The Atlas’s ordinary-gem accounting and the final overall 20,000-gem endpoint should not be described as the same counter. Skill Points remain a separate optional objective.
- Sunrise Spring: 37 eggs.
- Midday Gardens: 37 eggs.
- Evening Lake: 37 eggs.
- Midnight Mountain: 38 eggs.
- Pre-bonus total: 149 eggs.
- Pre-bonus ordinary-gem requirement: 15,000.
- Super Bonus Round: 1 final egg and 5,000 additional gems.
- Final endpoint: 150 eggs, 20,000 total gems, and 117%.
- Skill Points tracked separately.
Before you move on
- The four Homeworld subtotals are 37, 37, 37, and 38.
- Molten Crater Part 2 is complete under Molten Crater, including both Sgt. Byrd return eggs.
- Bamboo Terrace Part 2 is complete under Bamboo Terrace, including Bentley’s mountain-top objective.
- Fireworks Factory Part 2 is complete under Fireworks Factory, including both Agent 9 ninja missions.
- Honey Speedway Part 2 is marked complete when the deferred Hunter pursuit egg is collected; it is counted within Honey Speedway’s 3 eggs.
- Midnight Mountain Home Part 2 is complete after the first Sorceress fight, the Moneybags chase, gem recovery, and egg reward.
- All four Speedways are complete with their three egg rewards each.
- All four Sparx stages are complete: Crawdad Farm, Spider Town, Starfish Reef, and Bugbot Factory.
- All four dedicated critter levels are complete: Sheila’s Alp, Sgt. Byrd’s Base, Bentley’s Outpost, and Agent 9’s Lab.
- All four campaign-boss rows are complete: Buzz, Spike, Scorch, and the first Sorceress.
- The pre-bonus save shows 149 eggs and 15,000 ordinary gems.
- The Super Bonus Round’s gem thieves, submarine section, Sasquatch Six race, flying challenge, final Sorceress, and gem areas are complete.
- The final save shows 150 eggs, 20,000 total gems, and 117%.
- Skill Points remain a separate optional checklist.
References for this chapter
- Spyro: Year of the Dragon — Sony PlayStation Manual
- Spyro: Year of the Dragon - Guide and Walkthrough - PlayStation - CHyde
- darkSpyro — Spyro: Year of the Dragon Walkthrough: Sunrise Spring
- darkSpyro — Spyro: Year of the Dragon Walkthrough: Midnight Mountain
- darkSpyro — Guidebook Location List: Super Bonus Round
- darkSpyro — Guidebook Location List: Molten Crater
- darkSpyro — Guidebook Location List: Fireworks Factory
Troubleshooting Common Glitches, Save Issues and Recovery
Spyro: Year of the Dragon has more than one PlayStation revision, and the documented Speedway egg problem should not automatically be assigned to every North American copy. Early NTSC-U and PAL releases are associated with a bug that can prevent a Speedway egg from being awarded after the player leaves before completing both main egg challenges. Later corrected revisions exist, including NTSC-U revision 1.1, but a catalog label, case, or inventory description is not enough to verify the exact build in the console. Use a cautious completion routine, protect the save before troubleshooting, and treat a replacement revision as a possible recovery tool rather than a guaranteed fix.
1. Establish what is actually missing
Open the Atlas from a Home World and identify the exact level whose egg or gem total is incomplete. Record the current totals before entering the level again. An absent egg is not automatically a failed save: Year of the Dragon distributes eggs through ordinary exploration, critter stages, Speedway activities, Hunter challenges, challenge portals, bosses, and objectives that become available after returning with a newly freed critter.
Replay the smallest affected level and check the specific objective rather than wandering through the entire game. If the reward is still available, complete it, leave through the normal level transition, and then check the Atlas again from the Home World. The instruction manual states that the game automatically saves when Spyro enters or exits a Realm or Home World. It also provides a manual save command through the Pause menu’s Options screen.
Write down the level, the old egg and gem totals, the objective attempted, and the totals after leaving. This makes it easier to distinguish a missed conversation, incomplete challenge, or unrewarded activity from a wider save problem.
- Check the Atlas before replaying anything.
- Identify whether the missing reward belongs to Spyro, a critter, Hunter, or a Speedway activity.
- Record totals before and after the retry.
- Use a normal transition or the Pause menu save command before shutting down.
2. Verify the revision before assigning blame
Do not describe the supplied USA v1.1 metadata as independently verified merely because an inventory entry says “v1.1.” Research on the PlayStation release identifies distinct NTSC-U versions, including an early version 1.0 and a later version 1.1. The later build is commonly associated with Greatest Hits and Collector’s Edition releases, but updated material can also appear in black-label production, so the packaging category alone is not a complete identification method.
If you are investigating a real disc, verify the regional disc identity and revision through reliable disc information, documented build references, or a trusted hardware or preservation tool. Music, cutscene behavior, and packaging can provide clues, but they should not be treated as definitive proof when a 100% save is at stake. If the revision cannot be established, use the conservative Speedway procedure below.
This distinction matters because the known Speedway problem is tied to early or original revisions, not automatically to every North American release. A confirmed NTSC-U revision 1.1 copy should not be called bugged solely because it is the North American edition.
- Confirm the disc is the original PlayStation NTSC-U release.
- Do not infer the revision solely from a database entry or case color.
- Treat unverified revision information as uncertain.
- Apply the conservative Speedway routine when the revision is unknown.
3. Complete both main Speedway egg challenges in one visit
Whenever you enter one of the game’s Speedways, plan to complete both the Time Trial egg and the race egg before leaving. The documented early-revision failure occurs when the player leaves the Speedway before securing both main rewards and later finds that the remaining egg can no longer be awarded normally. The bug is not a reason to claim that every copy is affected, but it is a strong reason to use the same-visit routine on any unverified or early disc.
If an attempt goes badly, choose the retry option and remain inside the Speedway. Do not return to the Home World after earning only one of the two main eggs. Hunter’s activity may be a separate objective in a particular course; complete it as required, but the critical precaution is to secure both the Time Trial and race eggs before ending the visit.
After both rewards have appeared, leave normally, allow the transition to finish, save, and confirm the Speedway total in the Atlas. Do not switch off the console during a save or while the game is still transitioning.
- Complete the Time Trial and race eggs before abandoning a Speedway.
- Retry failed attempts from inside the Speedway.
- Confirm both rewards in the Atlas after leaving.
- Do not power off during a transition or save.
4. Recover cautiously if a Speedway egg is missing
If a Speedway egg is absent, preserve the current save before testing anything. Make a separate copy using a verified memory-card or save-management method appropriate to the hardware. Do not overwrite the only copy with a fresh campaign or repeatedly perform the same incomplete sequence on the original file.
First, reload the existing save and inspect the affected Speedway once. If the missing objective is still available, complete both main activities during that visit, leave normally, save, and recheck the Atlas. This is a sensible diagnostic attempt, not a guaranteed cure.
If the save appears to have been affected by an early-revision Speedway bug, a later corrected revision may be able to recover the file in some circumstances. Specialist reports identify Greatest Hits, Collector’s Edition, and other revision 1.1 releases as corrected versions, but compatibility and recovery behavior must be verified for the specific regional disc and save. Test only on a protected copy, and do not promise that changing discs will repair every NTSC-U save. If no verified recovery path works, use a known-good backup or restart only as a final option.
- Back up the affected save before testing a repair.
- Try one controlled replay from the existing save.
- Use a verified compatible corrected revision only on a protected copy.
- Treat disc replacement as a possible recovery method, not a guaranteed repair.
5. Diagnose broader memory-card or save trouble
Suspect a wider save problem when unrelated worlds lose progress, a freed critter becomes unavailable, multiple completed objectives revert, the file repeatedly fails to load, or totals change in several unrelated levels. One missing egg with otherwise consistent progress is more likely to be a missed objective or a Speedway-specific problem than complete memory-card failure.
Compare several Atlas entries with your written checklist, then save through the Pause menu or a normal Realm or Home World transition and reload the file. If unrelated changes continue to disappear, stop experimenting with the only copy. Faulty contacts, worn third-party cards, insufficient space, or damaged storage blocks can imitate a game bug.
Never remove the memory card, reset the console, or switch off power while saving. If the console reports a read or write error, preserve the card and decide how to copy or inspect the data before performing further tests.
- Compare unrelated worlds and objectives.
- Look for progress reverting in more than one location.
- Stop if the problem expands beyond the original item.
- Never interrupt a save operation.
6. Protect and finish the 100% attempt
Use a dependable memory card with free space, keep the card in the same slot during the run, and wait for every automatic or manual save to finish. The manual supports both automatic saving during Realm or Home World transitions and manual saving from the Pause menu’s Options screen.
Maintain a second verified copy when possible. Test that the backup can actually be read before relying on it. A backup protects against hardware failure, but it does not prevent a gameplay bug from being recorded, so the safest completion practice remains finishing both main Speedway eggs during the same visit whenever the revision is unknown.
Before starting the final campaign and Super Bonus Round checks, compare the Atlas with your written checklist. Confirm that the egg and gem totals are stable after a normal shutdown and restart, all four critters remain freed, and required portals remain accessible.
- Use a reliable card with available space.
- Wait for automatic or manual saving to finish.
- Verify that any backup can be loaded.
- Check the Atlas after restarting before treating the run as secure.
Before you move on
- The exact PlayStation region and, when possible, the disc revision have been verified rather than assumed.
- The Atlas shows the intended egg and gem totals for every completed level.
- Each Speedway has both its Time Trial and race eggs recorded before the level is abandoned.
- All four critters remain freed, required portals remain accessible, and no unrelated progress has reverted.
- The save loads correctly after a normal shutdown and restart.
- Any backup copy has been tested and can be read before the original is retired.
- The written checklist matches the final in-game totals before beginning the final campaign and Super Bonus Round checks.
References for this chapter
- Spyro: Year of the Dragon — Sony PlayStation Manual
- Spyro: Year of the Dragon - Guide and Walkthrough - PlayStation - CHyde
- Warning: Speedway Egg Bug - Spyro: Year of the Dragon
- Spyro: Year of the Dragon - Guide and Walkthrough - PlayStation - DrOctagonapus
- Spyro: Year of the Dragon NTSC-U Version Considerations - TASVideos
- Where is the very last egg in Spyro: Year of the Dragon?
Efficiency Tips: Gems, Fees and Time-saving Shortcuts
Treat gems as a progression budget rather than money to spend as soon as it appears. In the original North American PlayStation release, the most reliable approach is to clear safe treasure near a payment, complete the objectives available with Spyro, leave the Realm through a normal transition, and then return to the Home World before making the next major purchase. Prioritize fees that release a critter or open an area containing eggs, friend portals, required objectives, or substantial treasure. Use ordinary charge-glide routes and deliberate camera alignment to save travel time, but do not depend on glitches or blind skips during a completion run.
1. Understand when your gems are recorded
The original PlayStation manual states that gems are added to the overall total as Spyro leaves a Realm and returns to a Home World. With a memory card inserted, the game automatically saves when Spyro enters or exits a Realm or Home World; you can also use the save option from the pause menu. After a large treasure sweep, use a normal exit or Home World transition before beginning a major spending route.
Do not treat death as a dependable way to bank or recover a gem haul. If you are carrying a large amount and are close to the exit, take the normal route out instead of deliberately risking a fall. If you are still exploring, continue normally, then check the Home World total after returning. For a complete run, record each level’s collected gem total and Moneybags payments separately so you can distinguish treasure found from currency already spent.
- Clear nearby treasure before making a payment.
- Leave through the normal Realm exit when you finish a useful sweep.
- Check the Home World total after returning.
- Record paid fees separately from level gem totals.
- Use a manual save before stopping a long completion session.
2. Release the critters when their areas become available
The four main critter releases are high-value purchases because they open dedicated levels and abilities tied to eggs and other completion objectives. Sheila costs 300 gems in Sunrise Spring, Sgt. James Byrd costs 700 gems in Midday Gardens, Bentley costs 1,000 gems in Evening Lake, and Agent 9 costs 1,300 gems in Midnight Mountain.
Do not postpone a release merely to preserve a large unspent balance. Clear safe treasure in the surrounding Home World and nearby Realms, then pay when the required amount is available. Sheila’s jumping, Byrd’s flight and bombing, Bentley’s heavy attacks, and Agent 9’s blaster sections each open objectives Spyro cannot complete alone. Their dedicated levels also contain eggs, so releasing a critter normally reduces future backtracking rather than creating an unnecessary detour.
The practical order is Sheila, Sgt. Byrd, Bentley, and Agent 9 because that is the order in which the Home Worlds present them. You can delay a difficult friend level, but delaying the release itself gives no completion benefit. Release the character first, then return later if a specific challenge needs more practice.
- Sunrise Spring: pay 300 gems to release Sheila.
- Midday Gardens: pay 700 gems to release Sgt. James Byrd.
- Evening Lake: pay 1,000 gems to release Bentley.
- Midnight Mountain: pay 1,300 gems to release Agent 9.
- Return later to difficult critter challenges rather than leaving a required critter imprisoned.
3. Pay for routes that contain completion objectives
Before accepting a Moneybags fee, look beyond the obstruction and identify what the payment opens. A purchase is efficient when it leads to a required egg, a friend portal, a boss route, an exit objective, or a substantial treasure section. It is less urgent when it only removes a short walk that can be crossed safely on foot.
Several original PlayStation examples are especially useful. In Cloud Spires, paying 200 gems activates the bellows and opens the route to the upper section and its associated objectives. In Desert Ruins, the 800-gem payment opens the tomb route; this leads to Tara, the exit egg, and the Hunter shark-shooting challenge. In Crystal Islands, the 1,000-gem bridge payment is required to reach the crystal tower objective and its egg.
Pay these fees during your first serious clear of the relevant area if you already have the money. If you are short, finish nearby ordinary treasure first. Do not rely on a Moneybags skip during a completion run: bypassing an obstruction may save seconds but can leave a required room, egg, or gem group uncleared.
- Inspect the area beyond every paid obstruction.
- Pay immediately when the route contains an egg or required exit objective.
- Use Cloud Spires’ 200-gem bellows activation as an early example of a worthwhile payment.
- Use Desert Ruins’ 800-gem tomb door and Crystal Islands’ 1,000-gem bridge as planned progression expenses.
- Avoid glitch routes that bypass areas needed for completion.
4. Use safe charge-glide links to shorten level routes
The reliable movement shortcut in Spyro 3 is a normal charge followed by a jump and glide from a ramp, raised walkway, or high ledge. On the original PlayStation layout, Square charges, X jumps, pressing Triangle while airborne extends the glide, Circle breathes fire, and Triangle with X performs a headbash when the move is available. Triangle with the directional buttons controls looking, while L1 or R1 quickly centers the camera behind Spyro.
Stand still and align the camera before attempting the route. Charge toward the edge, jump only after Spyro has cleared the lip, then glide toward a visible landing. This is useful for returning from elevated egg platforms, crossing between nearby islands, and reaching a previously visited central area without repeating a full loop.
Do not use a blind glide simply because a gap looks short. If the landing is hidden by the camera, rotate the view first or take the intended path. A safe route that takes a few seconds longer is more efficient than a failed jump that costs a life or forces a long recovery.
- Recenter the camera before charging.
- Use visible ramps and raised ledges as launch points.
- Glide toward a platform you can see.
- Use the intended path when the landing is hidden.
- Treat normal charge-glides as movement shortcuts, not mandatory tricks.
5. Recover gems through short, low-risk treasure loops
If you are short for a fee, return to a nearby level with unopened containers, easy enemies, or a side path that ends near the exit. A short ordinary treasure loop is more dependable than repeatedly attempting a difficult race or challenge portal. Clear the loop, complete the normal exit transition, and then check whether the payment is affordable.
Optional challenge areas can be efficient when you are already in the correct Home World and have the required critter ability. Do not use them as emergency income if the challenge is unfamiliar. Their completion value is usually the egg or objective first, with gems as a secondary benefit. In Crystal Islands, for example, the Bentley portal, flying section, hidden egg route, and locked-chest route are best handled during one planned sweep around the exit-side platforms rather than through repeated random entries.
Speedways and Hunter challenges should be attempted for their eggs and completion objectives, not as a first choice for farming gems. If a run is failing, collect ordinary treasure elsewhere, then return after practicing the route. This keeps a failed race from delaying a necessary Moneybags payment.
- Choose a short route near an exit.
- Prefer ordinary treasure to an unfamiliar challenge.
- Group nearby eggs, portals, and locked chests into one return visit.
- Practice difficult races separately from gem planning.
- Exit normally after the sweep and verify the updated total.
Before you move on
- Sheila, Sgt. James Byrd, Bentley, and Agent 9 have all been released.
- The required Moneybags payments in each cleared level have been made and recorded.
- Cloud Spires’ bellows, Desert Ruins’ tomb door, and Crystal Islands’ bridge have been handled when their objectives are being cleared.
- Your checklist records each paid obstruction, the objective beyond it, and any remaining egg or gem task.
- You can use camera-aligned charge-glide routes for ordinary travel without depending on glitches or blind skips.
- After the final treasure sweeps, you have exited the relevant Realms normally and verified the updated Home World totals.
- For Super Bonus Round access, the save records 149 eggs and 15,000 gems from the preceding game content; the final bonus area supplies the 150th egg and its additional gems.
Late-Game Checklist — Final Pass for 100% and the Super Bonus Round
Use this checklist for the original Sony PlayStation release of Spyro: Year of the Dragon. Audit each Homeworld, ordinary realm, critter level, Speedway, Sparx stage, challenge portal, delayed return section, boss, Moneybags chase, and Bugbot Factory separately. Before entering the Super Bonus Round, the save must have 149 eggs and the 15,000-gem access requirement. The bonus area then supplies the final egg and 5,000 additional gems, producing 150 eggs, 20,000 total gems, and 117%. Keep the ordinary-gem progression value separate from the overall gem total.
1. Set up the final audit
Open the Atlas and record the current egg total, displayed gem total, percentage, and every incomplete level or activity. Use separate checklist groups for the four Homeworlds, ordinary realms, Sheila’s Alp, Sgt. Byrd’s Base, Bentley’s Outpost, Agent 9’s Lab, Speedways, Hunter missions, Sparx stages, challenge portals, bosses, delayed return sections, the Moneybags chase, Bugbot Factory, and the Super Bonus Round.
Confirm that Sheila, Sgt. Byrd, Bentley, and Agent 9 have been freed. Keep Skill Points in a separate column. The 20 Skill Points and the complete epilogue are optional objectives for this chapter’s purpose and should not be used as substitutes for missing eggs or gems.
The first three campaign bosses are reached through their four ordinary realms plus the associated critter realm. Molten Crater Part 2, Bamboo Terrace Part 2, and Fireworks Factory Part 2 are later cleanup sections and are not required to enter Buzz’s Dungeon, Spike’s Arena, or Scorch’s Pit.
- Atlas totals are recorded.
- All four critters are free.
- Eggs, ordinary-gem progress, bonus-area gems, and Skill Points are tracked separately.
- The main Sorceress fight is complete or scheduled after the ordinary realms.
2. Finish Sunrise Spring and Molten Crater Part 2
Audit Sunrise Spring Home, Sheila’s Alp, Sunny Villa, Cloud Spires, Molten Crater, Seashell Shore, Mushroom Speedway, and Crawdad Farm. Check side ledges, caves, thief routes, headbash chests, critter portals, and challenge entrances before leaving each level. Exit through the normal level exit so the completion state is saved.
Complete Mushroom Speedway’s time attack and Hunter activity, then defeat Buzz after Sunny Villa, Cloud Spires, Molten Crater, Seashell Shore, and Sheila’s Alp are complete. Crawdad Farm is a separate Sparx stage and must be checked independently.
After completing Sgt. Byrd’s Base, return to Molten Crater. Follow the route toward the later section and enter the now-open Sgt. Byrd portal. Complete the idol-head mission and the wall-destruction mission, collect both eggs, and leave through the level exit. Molten Crater Part 2 requires Sgt. Byrd’s Base; it is not a prerequisite for Buzz’s Dungeon.
- Sunrise Spring Home is complete.
- Sheila’s Alp and all four Sunrise Spring ordinary realms are complete.
- Mushroom Speedway and its Hunter activity are complete.
- Buzz’s Dungeon is defeated.
- Crawdad Farm is complete.
- Molten Crater Part 2 is complete and both eggs are registered.
3. Finish Midday Gardens and Bamboo Terrace Part 2
Audit Midday Gardens Home, Sgt. Byrd’s Base, Icy Peak, Enchanted Towers, Spooky Swamp, Bamboo Terrace, Country Speedway, and Spider Town. Recheck areas that require Sgt. Byrd’s flight or bombing abilities, especially elevated platforms and enclosed targets.
Complete Country Speedway and its Hunter activity, then defeat Spike after Icy Peak, Enchanted Towers, Spooky Swamp, Bamboo Terrace, and Sgt. Byrd’s Base are complete. Spider Town is the separate Sparx stage and needs its own completion check.
After completing Bentley’s Outpost, return to Bamboo Terrace and enter the Bentley portal in the later portion of the level. Finish the heavy-platforming mission, collect its egg, and exit normally. Bamboo Terrace Part 2 requires Bentley’s Outpost and is later cleanup rather than a condition for entering Spike’s Arena.
- Midday Gardens Home is complete.
- Sgt. Byrd’s Base and all four Midday Gardens ordinary realms are complete.
- Country Speedway and its Hunter activity are complete.
- Spike’s Arena is defeated.
- Spider Town is complete.
- Bamboo Terrace Part 2 is complete and its egg is registered.
4. Finish Evening Lake, Fireworks Factory Part 2, and Honey Speedway Part 2
Audit Evening Lake Home, Bentley’s Outpost, Frozen Altars, Lost Fleet, Fireworks Factory, Charmed Ridge, Honey Speedway, and Starfish Reef. Complete Honey Speedway’s ordinary events and defeat Scorch after the four ordinary Evening Lake realms and Bentley’s Outpost are complete. Fireworks Factory Part 2 is not required to enter Scorch’s Pit.
After Agent 9’s Lab is complete, return to Fireworks Factory and use the cannon near the beginning to reach the reopened Agent 9 section. Complete both missions and collect both eggs. Fireworks Factory Part 2 requires Agent 9’s Lab and contains two eggs.
Honey Speedway Part 2 requires defeating Scorch, not defeating the main Sorceress. Return to Honey Speedway, select the later Hunter activity, and complete the boat escape. Jump over logs, avoid rocks, and stay ahead of the pursuing UFO. Register its egg before leaving.
Completing Honey Speedway Part 2 during the post-Sorceress sweep is safe, but it can be done earlier once Scorch is defeated.
- Evening Lake Home is complete.
- Bentley’s Outpost and all four Evening Lake ordinary realms are complete.
- Honey Speedway’s ordinary events are complete.
- Scorch’s Pit is defeated.
- Starfish Reef is complete.
- Fireworks Factory Part 2 is complete and both eggs are registered.
- Honey Speedway Part 2 is complete and its egg is registered.
5. Complete Midnight Mountain and defeat the main Sorceress
Audit Midnight Mountain Home, Agent 9’s Lab, Crystal Islands, Desert Ruins, Haunted Tomb, Dino Mines, Harbor Speedway, and every egg-bearing Midnight Mountain challenge portal. Agent 9’s Lab is separate from Agent 9’s return missions in Fireworks Factory Part 2.
Complete Harbor Speedway’s ordinary events and Hunter activity. When the 100-egg requirement is satisfied, enter Sorceress’s Lair from Midnight Mountain. In the original PlayStation battle, Agent 9 supplies weapons during the early phase, followed by cannons and flying saucers. Use the dropped platforms and vehicles to attack during safe openings, and avoid the Sorceress’s direct attacks rather than attempting to rush her.
The first Sorceress victory awards the campaign egg, but it is not egg 150. The final pre-bonus eggs still include the Moneybags chase and Bugbot Factory egg.
- Midnight Mountain Home and all ordinary realms are complete.
- Agent 9’s Lab is complete.
- Harbor Speedway and its Hunter activity are complete.
- All relevant Midnight Mountain challenge portals are checked.
- The 100-egg requirement is met.
- The main Sorceress is defeated.
6. Complete Midnight Mountain Home Part 2 and Bugbot Factory
After defeating the main Sorceress, return to Midnight Mountain Home and find Moneybags on the bridge between Crystal Islands and Desert Ruins. Chase him through the Homeworld and charge into him whenever you catch him. Continue until the stolen gems are recovered and he gives up his egg. This section requires defeating the main Sorceress.
Enter Bugbot Factory from the Sparx entrance near Dino Mines and Harbor Speedway. Chase the key-carrying bugs, take their keys, open the forcefields, and destroy the ladybird generators. In the final arena, fight the Caterpillar. Keep Sparx moving, fire continuously, collect available health, and finish the exposed sections after the creature splits.
Bugbot Factory requires defeating the main Sorceress and awards egg 149. Its completion also grants Sparx the ability to warp to levels and break baskets remotely. Verify the egg and gem rewards once in the Atlas and global totals.
- The Moneybags chase is complete.
- The stolen gems are recovered.
- The Midnight Mountain Home Part 2 egg is registered.
- Bugbot Factory is complete.
- The Caterpillar is defeated.
- Bugbot Factory’s egg is registered.
7. Reconcile the pre-bonus total
Check the four Homeworlds and their local totals rather than relying on sequential egg numbers. The verified pre-bonus grouping is Sunrise Spring 37 eggs, Midday Gardens 37, Evening Lake 37, and Midnight Mountain 38, for 149 eggs before the Super Bonus Round.
The audit must include all four dedicated critter levels, all four Speedways, all four Hunter activities, all four Sparx stages, all campaign bosses, every egg-bearing challenge portal, Molten Crater Part 2, Bamboo Terrace Part 2, Fireworks Factory Part 2, Honey Speedway Part 2, Midnight Mountain Home Part 2, the Moneybags chase, and Bugbot Factory.
The pre-bonus target is 149 eggs and 15,000 ordinary-gem progress. Do not manually add delayed-section rewards a second time. If an egg is missing, use the Atlas to identify the incomplete source and replay that activity. If gems are short, inspect the same source list, including Sparx stages, Speedways, challenge portals, the Moneybags chase, and Bugbot Factory. Exit normally, save, reload, and check again.
- The four Homeworld totals reconcile to 37, 37, 37, and 38 eggs.
- The Atlas shows 149 pre-bonus eggs.
- The displayed ordinary-gem requirement reaches 15,000.
- All delayed sections are complete.
- All four Speedways, Hunter activities, Sparx stages, and egg-bearing challenge portals are complete.
8. Open and complete the Super Bonus Round
From Midnight Mountain, go past Harbor Speedway and glide down to the Super Bonus Round portal. It opens after the main Sorceress is defeated and the pre-bonus requirements of 149 eggs and 15,000 gems are satisfied.
In the main bonus area, chase thieves and collect the available gems. The fixed door milestones are 16,000 gems for Super Submarine, 17,000 gems for Super Snowboard, and 20,000 gems for the final Sorceress area. For the intermediate flying or UFO challenge, follow the number displayed by the original game rather than relying on a hardcoded value from a guide.
Complete Super Submarine, Super Snowboard, and the intermediate UFO challenge. Collect the remaining bonus-area gems until the overall total reaches 20,000, then enter the final area. Defeat the Sorceress in the flying-saucer battle. Her defeat awards egg 150.
The Super Bonus Round contains 5,000 additional gems. They raise the overall total from the 15,000-gem access target to 20,000, but the ordinary-gem value and the overall total must remain separate in the checklist.
- The Super Bonus Round opens at 149 eggs and 15,000 gems.
- Super Submarine is complete.
- Super Snowboard is complete.
- The intermediate UFO challenge is complete using the displayed door requirement.
- The overall total reaches 20,000 gems.
- The final flying-saucer Sorceress encounter is complete.
- Egg 150 is collected.
9. Save and verify the endpoint
Exit normally, save the file, reload it, and inspect the Atlas. The finished collectible endpoint is 150 eggs, 20,000 total gems, and 117%. The Atlas’s ordinary-gem progression value should not be described as the same counter as the overall 20,000-gem total.
Confirm both Sorceress encounters, every ordinary realm, all four critter levels, all four Speedways and Hunter activities, all four Sparx stages, every egg-bearing challenge portal, the five named delayed sections, the Moneybags chase, and Bugbot Factory.
Preserve this completed save before beginning troubleshooting or a new playthrough. The 20 Skill Points and full epilogue remain a separate optional goal.
- The save records 150 eggs.
- The overall gem total reaches 20,000.
- The game displays 117%.
- Both Sorceress encounters are complete.
- All five delayed sections and Bugbot Factory are complete.
- The completed save has been reloaded and preserved.
- All 20 Skill Points are complete only if the optional epilogue is desired.
Before you move on
- Sunrise Spring totals 37 eggs, Midday Gardens totals 37, Evening Lake totals 37, and Midnight Mountain totals 38 before the Super Bonus Round.
- All ordinary realms and all four dedicated critter levels are complete.
- Mushroom Speedway, Country Speedway, Honey Speedway, and Harbor Speedway are complete with their Hunter activities.
- Crawdad Farm, Spider Town, Starfish Reef, and Bugbot Factory are complete.
- Buzz’s Dungeon, Spike’s Arena, Scorch’s Pit, and the main Sorceress fight are complete.
- Molten Crater Part 2 is complete with both eggs registered.
- Bamboo Terrace Part 2 is complete with its egg registered.
- Fireworks Factory Part 2 is complete with both eggs registered.
- Honey Speedway Part 2 is complete with its egg registered.
- Midnight Mountain Home Part 2 and the Moneybags chase are complete with the recovered egg and gems registered.
- The pre-bonus counters show 149 eggs and the 15,000-gem access requirement.
- The Super Bonus Round main area, submarine, snowboard, intermediate UFO challenge, and final area are complete.
- The save records 150 eggs and 20,000 total gems.
- The game displays 117%.
- All 20 Skill Points and the full epilogue are complete only if the optional objective is desired.
- The completed save has been preserved.
Speedrun and 100% Strategies — If You Want to Push for Time or Perfection
Spyro: Year of the Dragon has several different completion goals. Any% aims to reach the ending as quickly as possible. The community 100 Egg category collects 100 eggs and does not represent a complete file. The original game’s full displayed completion is 117%, reached with 20,000 gems and all 150 eggs. All 20 Skill Points are worthwhile for the complete epilogue, but they are separate bonus objectives and are not required to make the counter reach 117%. Choose the goal before starting, because a fast route deliberately skips objectives that a full file must record.
Choose the category and version before starting
For an authentic North American PlayStation run, identify the disc as the original PS1 release and record the version shown by your timing or emulator setup. Do not compare a PS1 run directly with a PS2, PSTV, emulator, or Reignited Trilogy route without noting the platform. Community leaderboards list Any%, 100 Egg, and 117% as separate categories, and some submitted runs use different platforms or emulation environments.
Any% skips most eggs, optional challenges, and large parts of levels by using aggressive movement techniques. The 100 Egg category has its own endpoint and route; reaching 100 eggs does not mean the save has 150 eggs, 20,000 gems, or the complete 117% result. A full completion file must eventually collect all 150 eggs and 20,000 gems. The Super Bonus Round opens after 149 eggs and 15,000 gems, then provides the last egg and the final 5,000 gems. Skill Points are separate: collect all 20 if you want every epilogue page, but do not treat them as percentage requirements.
- Write down the category: Any%, 100 Egg, or 117%.
- Record USA or another region, PS1 or another platform, and the exact game version when timing a run.
- Keep a separate save for glitch practice and for a normal completion file.
Use a stable route for a casual 117% file
A reliable completion route should prioritize unlocked regular levels, necessary critter missions, speedways, bosses, and the egg or gem rewards attached to them. Use the Atlas after leaving each level to check the local gem and egg totals, then maintain a written list by homeworld. This is faster than attempting to reconstruct missing eggs after every major portal opens.
Do not force a speedrun skip simply because it removes a long section. A proxy can bypass an entrance or trigger without completing the mission, and an out-of-bounds route can make it difficult to tell whether an egg, NPC interaction, or portal state was registered. For a full file, clean charges, controlled glides, efficient camera turns, and practiced minigame routes usually save more time than repeated failed glitch attempts.
Complete the Skill Points separately if the goal includes the entire epilogue. They award extra lives and unlock epilogue material, but the 117% counter is based on the gem and egg totals. At the end of a full run, check 150 eggs, 20,000 gems, 117%, and all 20 Skill Points if you want the broadest possible completion target.
- Log every egg by its source: level exploration, critter mission, race, speedway, boss, or challenge.
- Check the Atlas after each level instead of relying on the global total alone.
- Treat Skill Points as a separate 20-item bonus checklist.
Learn safe movement improvements before glitches
Start with techniques that work within normal level design. Charge in straight lines, begin glides from the highest safe point, turn before narrow landings, and avoid sharp midair corrections near walls. In speedways, learn the order of targets and the safest approach to each turn before trying to cut corners. A route that finishes consistently is more useful than a theoretical shortcut that causes frequent deaths.
Once the normal route is reliable, practice one advanced technique at a time on a disposable save or practice setup. Original-PlayStation speedrun research uses proxies, squeeze proxies, out-of-bounds movement, ground-trigger jumps, and swim-in-air setups. A proxy uses collision or an animation to displace Spyro and preserve unusual momentum. Swim-in-air keeps Spyro in a swimming state outside the intended water area, allowing routes through spaces that normally require a long detour.
These techniques are version-sensitive and can leave Spyro stuck, trigger an unintended death, bypass required text, or make a later objective hard to activate. Never assume a skip completes the level objective it passes. After testing one, exit normally if possible, reload the backup, and verify that the level, egg, mission, and portal states are still correct.
- Master the intended route before adding a glitch.
- Test advanced movement on a backup save or separate run file.
- Confirm objective registration after any skip that crosses a trigger or cutscene.
Know the major named skips and their trade-offs
Swim-in-air is especially important in water-heavy routes. Speedrun research uses it to reach distant eggs, stored portals, or out-of-bounds positions from areas such as Sunny Villa and later Evening Lake sections. Its value is enormous, but it depends on entering and leaving the swimming state correctly. A failed setup can send Spyro outside the playable area or leave the run without a safe recovery point.
Proxy movement appears throughout high-level routes. Examples include enemy or dead-body proxies in Spooky Swamp, Lost Fleet, and Haunted Tomb, as well as squeeze proxies that use Spyro’s collision against enemies, fodder, walls, or ground. In Lost Fleet, proxy movement can shorten the escort and route toward the submarine challenges. In Haunted Tomb, a dead-body proxy can bypass part of the level and reach the Tanks or Agent 9 sections sooner. These are execution-heavy skips, not required techniques.
The Enchanted Towers route has a documented jackhammer Rhynoc clip that can bypass a wall near the end of the level after a death-abuse setup. Dino Mines uses precise collision and proxy movement to reach the Agent 9 area and the final egg more quickly. These examples show why a speedrun route cannot simply be copied into a completion checklist: the fastest line may intentionally avoid the normal mission order, save points, or cutscenes.
- Use named skips only in categories that allow them.
- Treat swim-in-air and proxy setups as high-risk techniques.
- If Spyro becomes stuck, reset rather than building the rest of the run on an uncertain game state.
Optimize speedways, Hunter races, and bosses
For speedways, first memorize target order, tunnel entrances, narrow gaps, and the position of the final target. Practice until you can finish twice consecutively without improvising. Then tighten the route by reducing missed targets, using cleaner charge lines, and taking shorter approaches to turns. Hunter races require separate practice because their handling and objectives do not follow Spyro’s ordinary speedway movement.
For bosses, learn the cycle rather than attacking continuously. Identify the safe position, the attack opening, and the point at which the arena becomes dangerous. The speedrun objective is not always maximum aggression: taking one unnecessary hit can remove Sparx protection and force a restart. For a normal run, preserve health and finish the encounter safely. For a timed attempt, restart after a serious early mistake, but continue through a minor error if the route remains recoverable.
High-level TAS material demonstrates optimized boss and level sequences, including intentional deaths and precise state manipulation. Those examples are useful for understanding the route, but they should not be treated as beginner requirements. Build a no-glitch or low-risk personal route first, then replace only the sections where the time saving is worth the added failure rate.
- Practice speedways until the target order is automatic.
- Learn one safe attack position for every boss phase.
- Use a reset rule for timed attempts: restart early after a major mistake, continue after a recoverable one.
Follow a repeatable practice schedule
For a 30-minute session, spend five minutes on charging and gliding, ten minutes on one speedway or Hunter race, ten minutes on one boss phase, and five minutes completing a familiar level section cleanly. For a longer session, divide the run into homeworld movement, one regular level, one critter mission, one race, and one boss. Record the exact failure point instead of writing only that the attempt was bad.
Practice difficult sections in isolation before linking them into a full run. If a proxy or swim-in-air setup fails repeatedly, switch to the safe route for that session. End with one clean repetition so the final movement pattern is controlled rather than the memory of another failed attempt. Do not alternate randomly between a glitch-heavy speedrun route and a collectible checklist; the routes use different assumptions about which objectives have been activated.
- Warm up before timing attempts.
- Practice races and boss phases separately from full runs.
- End each session with a successful, repeatable section.
Before you move on
- For a full original-game completion file, verify 150/150 eggs, 20,000 gems, and a displayed 117%.
- If pursuing the complete epilogue as well, verify all 20 Skill Points and every unlocked epilogue page.
- Confirm that the Super Bonus Round was opened at 149 eggs and 15,000 gems, then completed for its final egg and 5,000 gems.
- For a timed run, record the category, region, platform, game version, timing method, and endpoint before starting.
- After practicing a glitch, reload the backup and verify that the relevant level total, egg count, mission state, and portal access remain correct.
References for this chapter
- Spyro: Year of the Dragon — Speedrun.com resources and category listings
- PSX Spyro: Year of the Dragon 117% — TASVideos publication
- Nitrofski’s PSX Spyro: Year of the Dragon 117% submission and technical notes
- PSX Spyro: Year of the Dragon 100 Egg — TASVideos research
- Spyro: Year of the Dragon — Sony PlayStation Manual
- Spyro: Year of the Dragon — Guide and Walkthrough by dark52, GameFAQs
Final Checks, Save Exporting and Playing Again — Post-Completion Options
Finish the original PlayStation release by confirming the four Homeworld accounting totals, collecting all 149 pre-bonus eggs and 15,000 ordinary gems, opening and clearing the Super Bonus Round, defeating its second Sorceress encounter, collecting egg 150, and verifying a saved 117% file. Preserve the completed Memory Card before starting another run. Treat Reignited Trilogy as a separate release with different saving and control procedures.
Reconcile the ordinary campaign before entering the bonus realm
Defeat the first Sorceress in Sorceress's Lair before making the final audit. The first victory completes the main story and enables the post-campaign cleanup, but it does not by itself establish maximum completion. The Super Bonus Round requires 149 eggs and 15,000 ordinary gems from the game outside the bonus realm.
Use Homeworld totals rather than invented global egg ranges. The correct pre-bonus reconciliation is Sunrise Spring: 37 eggs; Midday Gardens: 37 eggs; Evening Lake: 37 eggs; Midnight Mountain: 38 eggs. These totals add to 149.
The Homeworld figures are parent-level accounting totals. They already include delayed sources assigned to those Homeworlds, so do not add them again after checking them individually. Your final sweep must explicitly check Molten Crater Part 2, Bamboo Terrace Part 2, Fireworks Factory Part 2, Honey Speedway Part 2, Midnight Mountain Home Part 2, and Bugbot Factory. The first five are delayed return or post-campaign entries associated with the broader Homeworld accounting; Bugbot Factory is a separate post-Sorceress level whose egg and gems must also be included in the correct parent total. They are not six additional piles placed on top of the 149-egg total.
Check the ordinary-gem requirement separately from the egg total. The bonus portal opens at 149 eggs and 15,000 ordinary gems. The Super Bonus Round then contains another 5,000 gems, producing the overall 20,000-gem endpoint. Do not demand that the Atlas's ordinary-gem display change from 15,000 to 20,000; the bonus-area gems are counted as part of the overall completion result rather than as the same ordinary-gem gate.
- The first Sorceress encounter is complete.
- Sunrise Spring is recorded at 37 eggs.
- Midday Gardens is recorded at 37 eggs.
- Evening Lake is recorded at 37 eggs.
- Midnight Mountain is recorded at 38 eggs.
- The four Homeworld totals equal 149 eggs.
- The saved game has reached 15,000 ordinary gems.
- Molten Crater Part 2 has been checked.
- Bamboo Terrace Part 2 has been checked.
- Fireworks Factory Part 2 has been checked.
- Honey Speedway Part 2 has been checked.
- Midnight Mountain Home Part 2 has been checked.
- Bugbot Factory has been checked.
- All four ordinary Speedways, four Sparx stages, four dedicated critter levels, bosses, challenge portals, and the Moneybags chase have been checked.
- All 20 Skill Points are complete if the full epilogue is also required.
Open and clear the Super Bonus Round
Go to Midnight Mountain and continue past Harbor Speedway to the large Super Bonus Round entrance. It opens when the game recognizes 149 eggs and 15,000 ordinary gems. If it remains closed, use the Atlas and individual level records to identify the missing ordinary collectible instead of assuming the portal is broken.
Start by clearing the central area and collecting accessible treasure, including the gems carried by thieves. When the total reaches 16,000, enter the first internal challenge door and complete the submarine challenge. Return to the main area and collect its rewards.
The next challenge opens at 17,000 gems. Complete Super Snowboard, then return to the central area with the challenge rewards secured. If a failed run makes the result unlikely, restart the challenge rather than wasting time trying to recover a poor attempt.
The flying-saucer challenge is the next gem-gated section. Different references describe its threshold inconsistently, so follow the number printed on the door in the original PlayStation game. Do not rely on a memorized 18,000 or 18,500 figure. Complete the challenge and search behind structures and around the edges for targets that are easy to miss.
Collect the remaining bonus-area treasure until the overall total reaches 20,000 gems. The final door then leads to the second Sorceress encounter. Keep moving in the flying saucer, fire during her exposed windows, and avoid staying in the path of her attacks. After she is defeated, collect the final egg before leaving.
- The Super Bonus Round opened at 149 eggs and 15,000 ordinary gems.
- The 16,000-gem submarine challenge was completed.
- The 17,000-gem snowboard challenge was completed.
- The flying challenge used the requirement displayed on the door.
- The remaining bonus-area gems were collected.
- The overall accounting reached 20,000 gems.
- The second Sorceress encounter was defeated.
- Egg 150 was collected.
Save, reload, and verify the 117% endpoint
On the original PlayStation release, a Memory Card save is made when Spyro enters or exits a Realm or Home World. After collecting egg 150, make a normal transition out of the Super Bonus Round or into a Home World and wait for the save to finish before shutting down.
Restart the console and load the completed file. Verify that the file shows 150 eggs and 117%. Confirm the completed bonus realm and the overall 20,000-gem result. The Atlas does not need to display 20,000 ordinary gems; the correct accounting is 15,000 ordinary gems for the entry requirement plus 5,000 gems obtained inside the bonus realm.
If the reloaded file shows 149 eggs or less than 117%, do not overwrite the only copy. Re-enter the bonus realm, confirm that the second Sorceress was defeated and that the egg was collected, make another ordinary save transition, and reload again. If the result still fails to register, preserve the original file and investigate the suspected level or save rather than beginning a new file over it.
Skill Points are separate from the collectible endpoint. Ten Skill Points unlock the first portion of the Atlas epilogue, and all 20 unlock the remaining portion. They are optional for the 117% collectible total but required if the goal includes the complete epilogue.
- A Realm or Home World save transition occurred after egg 150 was collected.
- The console was restarted and the completed file was loaded.
- The file shows 150 eggs.
- The file shows 117%.
- The overall accounting confirms 20,000 gems.
- The Atlas is not being treated as a 20,000-ordinary-gem counter.
- All 20 Skill Points are complete if the full epilogue is required.
Preserve the completed PlayStation save
Keep the completed Memory Card untouched. If compatible backup hardware is available, copy the complete card contents to another Memory Card or preserve a complete Memory Card image. Use a method known to read and write original PlayStation saves without modifying the source card.
Test the duplicate rather than assuming the copy worked. Load it on compatible hardware and confirm 150 eggs and 117%, then verify that the bonus realm completion remains present. Keep the original card as the archival copy and use the duplicate for practice, experiments, or a new campaign.
A save state can help practice the final boss or bonus challenges, but it is not a substitute for preserving the original Memory Card data. Archive the completed file before attempting glitches, speedrun techniques, or a new save.
- The original completed Memory Card remains untouched.
- A compatible duplicate or complete card image has been created.
- The duplicate loads successfully.
- The duplicate confirms 150 eggs and 117%.
- The original card is stored as the archival copy.
Start another run without overwriting the archive
Begin a replay only on a separate save slot, Memory Card, card image, or verified duplicate. A relaxed replay can follow the normal four-Homeworld route, freeing each critter and returning to delayed sections after the relevant ability becomes available.
For a low-challenge run, postpone difficult Skill Points, Speedway targets, and optional cleanup until the movement and critter abilities are familiar. Useful practice goals include completing a Homeworld without dying, clearing each dedicated critter level immediately after unlocking it, or improving one Speedway route without touching the archived completion file.
Keep separate notes for eggs, ordinary gems, bonus-area gems, and Skill Points. A speedrun attempt or experimental shortcut belongs on a disposable working copy because risky techniques are unnecessary for a normal PlayStation 117% completion.
- The replay uses a separate working copy.
- The 117% archive is not overwritten.
- Eggs, ordinary gems, bonus gems, and Skill Points are tracked separately.
- Risky experiments are performed only on a disposable copy.
Transfer general habits to Reignited Trilogy without mixing releases
Spyro Reignited Trilogy includes a remastered Year of the Dragon, but it is not the original PlayStation build. Activision's support information describes autosave checkpoints and separate Retro and Reignited control settings. Those procedures do not replace the original PlayStation Memory Card process.
Completion habits transfer well: inspect every area, record eggs tied to critter activities, and return after freeing the character who opens a blocked route. Exact movement timing, camera behavior, collision, minigame handling, and visual landmarks should be learned separately in the remaster.
Keep separate completion records. The original target is a PlayStation save with 150 eggs and 117%, with 20,000 gems confirmed after the bonus area is completed. A Reignited save uses its own autosave data and cannot serve as a backup for the original Memory Card file.
- Reignited Trilogy is treated as a separate release.
- Reignited autosave is not confused with PlayStation Memory Card saving.
- Retro and Reignited controls are kept separate.
- Original-release route notes remain separate from remaster notes.
- The original completed save is archived independently.
Before you move on
- The original North American PlayStation save displays 150 eggs.
- The original save displays 117%.
- The Super Bonus Round is complete.
- The second Sorceress encounter has been defeated.
- The final egg remains present after saving, quitting, and reloading.
- The overall accounting confirms 20,000 gems: 15,000 ordinary-gem progression plus 5,000 bonus-area gems.
- Molten Crater Part 2, Bamboo Terrace Part 2, Fireworks Factory Part 2, Honey Speedway Part 2, Midnight Mountain Home Part 2, and Bugbot Factory have all been checked without double-counting them.
- All 20 Skill Points are complete if the full epilogue is part of the goal.
- A duplicate save or Memory Card image has been loaded and tested successfully.
- Any later playthrough uses a separate working copy.
References for this chapter
- Spyro: Year of the Dragon — Guide and Walkthrough by SpyroCrashJak, GameFAQs
- Spyro: Year of the Dragon — Guide and Walkthrough by dark52, GameFAQs
- Spyro: Year of the Dragon — Skill Point/Butterfly FAQ, GameFAQs
- Spyro: Year of the Dragon — Sony PlayStation Manual
- Spyro Reignited Trilogy FAQ, Activision Support
Finishing up
You have defeated the first Sorceress and completed the main-story ending sequence.
You have verified 149 eggs and 15,000 ordinary gems before entering the Super Bonus Round.
You have completed the Super Bonus Round, obtained egg 150, and reached the game's 117% endpoint with the additional bonus gems included in the overall 20,000-gem total.
Sheila, Sgt. Byrd, Bentley, and Agent 9 have been rescued, and every required character-gated egg-bearing section has been completed.
If the complete epilogue is desired, all 20 Skill Points have been collected.
The completed Memory Card file has been saved and reloaded successfully.
Choose your next gameScreenshots & video
Game imagery for reference. Follow the written chapters above for the route and strategies.
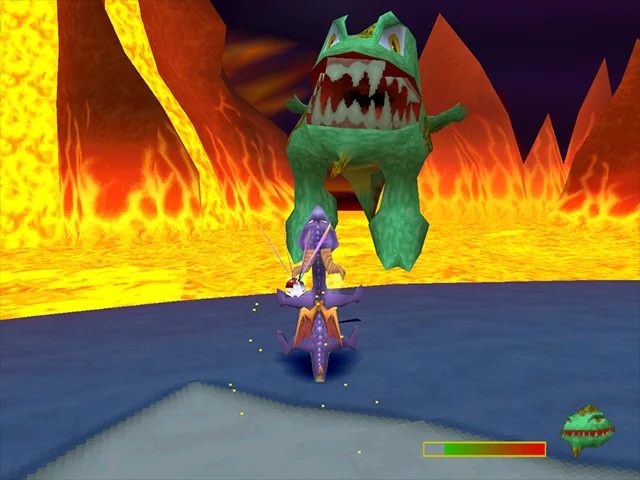
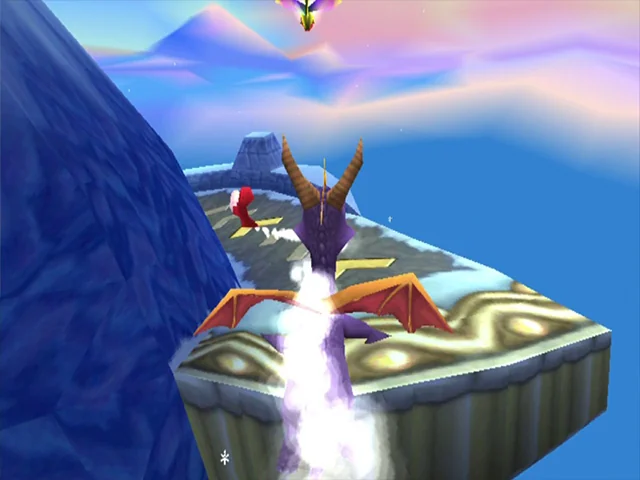
Sources & references
Our original guide draws on the references below. Check the edition at the top of this page before following controls or unlock requirements.
- Spyro: Year of the Dragon — Sony PlayStation Manual
- Spyro: Year of the Dragon - Guide and Walkthrough - PlayStation - CHyde
- Spyro: Year of the Dragon - Guide and Walkthrough - PlayStation - DrOctagonapus
- Spyro: Year of the Dragon — Guide and Walkthrough by SpyroCrashJak, GameFAQs
- darkSpyro - Spyro: Year of the Dragon Walkthrough
- darkSpyro - Guidebook: Buzz’s Dungeon
- darkSpyro - Guidebook: Spike’s Arena
- Spyro: Year of the Dragon — Guide and Walkthrough by dark52, GameFAQs
- Spyro: Year of the Dragon — World 1 Eggs Walkthrough, PlayStation
- Spyro: Year of the Dragon — Guide and Walkthrough by dudeman0009
- Warning: Speedway Egg Bug - Spyro: Year of the Dragon
- PSX Spyro: Year of the Dragon 100 Egg — TASVideos research
- Spyro: Year of the Dragon — Boss Guide, metalgearsonic, PlayStation
- darkSpyro Guidebook — Bugbot Factory
- darkSpyro — Guidebook Location List: Super Bonus Round
- darkSpyro — Spyro: Year of the Dragon Walkthrough Index
- Spyro: Year of the Dragon — Homeworlds Reference
- Spyro: Year of the Dragon - Guide and Walkthrough - PlayStation - By kmintram
- SPYRO — YEAR OF THE DRAGON — NTSC-U — PlayStation database entry
- darkSpyro — Spyro: Year of the Dragon Walkthrough: Sunrise Spring
- darkSpyro — Spyro: Year of the Dragon Walkthrough: Midnight Mountain
- darkSpyro — Guidebook Location List: Molten Crater
- darkSpyro — Guidebook Location List: Fireworks Factory
- Spyro: Year of the Dragon NTSC-U Version Considerations - TASVideos
- Where is the very last egg in Spyro: Year of the Dragon?
- Retro Game Walkthroughs - Spyro 3: Year Of The Dragon (PS1)
- Spyro: Year of the Dragon — Speedrun.com resources and category listings
- PSX Spyro: Year of the Dragon 117% — TASVideos publication
- Nitrofski’s PSX Spyro: Year of the Dragon 117% submission and technical notes
- Spyro: Year of the Dragon — Skill Point/Butterfly FAQ, GameFAQs
- Spyro Reignited Trilogy FAQ, Activision Support
About the game & collecting notes
- Platform
- Sony PlayStation
This guide covers the original North American PlayStation release of Spyro: Year of the Dragon, including the main campaign, all four playable critters, the 149 pre-bonus eggs, the 15,000-gem Super Bonus Round gate, the final bonus-area egg, the 117% endpoint, and the separate 20-Skill-Point epilogue objective. It distinguishes ordinary realms, critter stages, Part 2 returns, Speedways, Sparx stages, bosses, Challenge Portals, the post-Sorceress Moneybags event, and the Super Bonus Round.
Darryl Polo
Darryl Polo loves tinkering with emulation and revisiting retro games. He enjoys exploring how old favorites play on different setups and sharing what he learns along the way. At Joking Joystick, he writes about the games, hardware, and small discoveries that keep the hobby fun.
Our editorial standardsFound a step that needs another look? Help us improve this guide.