
Spyro the Dragon — PlayStation (USA) Complete Campaign Walkthrough
Complete the original North American PlayStation release of Spyro the Dragon from Artisans through Peace Keepers, Magic Crafters, Beast Makers, Dream Weavers and Gnasty’s World. The guide covers required balloonist thresholds, level routes, dragons, eggs, gems, flight stages, boss methods, failure recovery and the optional post-boss 100% route. Gnasty’s Loot is unlocked only after Gnasty Gnorc is defeated, Magnus is freed in Gnorc Gnexus, and the inventory reaches 12,000 gems, 80 dragons and 12 dragon eggs; completing it adds 2,000 gems and raises the game to 120%.

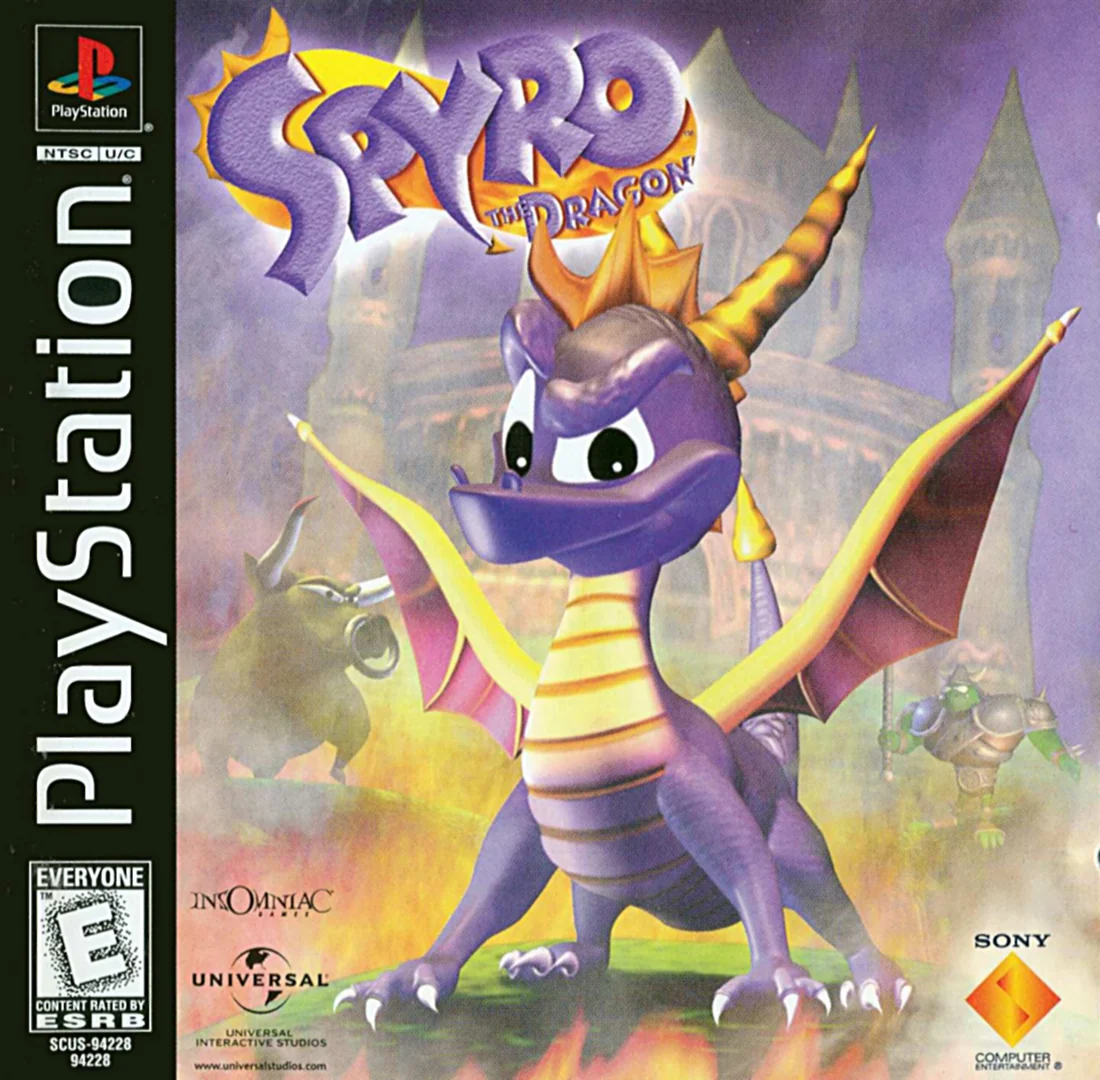
Find a copy
Spyro the Dragon Sony PlayStation
We may earn a commission if you buy through these links, at no extra cost to you. As an Amazon Associate I earn from qualifying purchases.
Opens retailer search results. Check the model, edition, seller, availability and current price before buying.
Before you begin
You play as Spyro, the young purple dragon left free after Gnasty Gnorc turns the other dragons into crystal.
The main route passes through the five standard Dragon Homeworlds: Artisans, Peace Keepers, Magic Crafters, Beast Makers and Dream Weavers.
The five standard Homeworlds each connect to regular levels, a boss level and a flight level. Gnasty’s World is different: it contains Gnorc Gnexus, Gnorc Cove, Twilight Harbor, Gnasty Gnorc and the optional Gnasty’s Loot bonus level; it has no standard flight stage.
Balloonists open the next Homeworld when Spyro meets the cumulative requirement for that gate: 10 dragons, 1,200 gems, 5 eggs, 50 dragons and 6,000 gems in sequence.
The main campaign ends when Spyro defeats Gnasty Gnorc. The separate 100% and 120% route requires the exact collection totals and post-boss Gnorc Gnexus steps described later.
Set yourself up for the run
Use a PlayStation controller or accurate emulator mapping for the original release: X jumps and glides, Square charges, Circle breathes fire, Triangle provides the close camera view or cancels a glide, L1/R1 roll, and L2/R2 rotate the camera.
Save deliberately at rescued-dragon platforms through the Red Fairy’s Save Game option; a Continue point is not the same as a Memory Card save.
Learn Sparx’s exact health sequence: yellow, blue, green, then missing. A butterfly from fodder restores one health stage, including restoring Sparx after he disappears when collected safely.
Flight stages contain no dragons or eggs. They are timed aerial stages with 32 targets and a full 300-gem reward when completed.
Track the cumulative totals used by balloonists separately from the exact level totals shown in the inventory. The campaign gates are 10 dragons, 1,200 gems, 5 eggs, 50 dragons and 6,000 gems.
For optional completion, track 12,000 main-game gems, 80 dragons and 12 eggs before attempting to open Gnasty’s Loot after defeating Gnasty Gnorc.
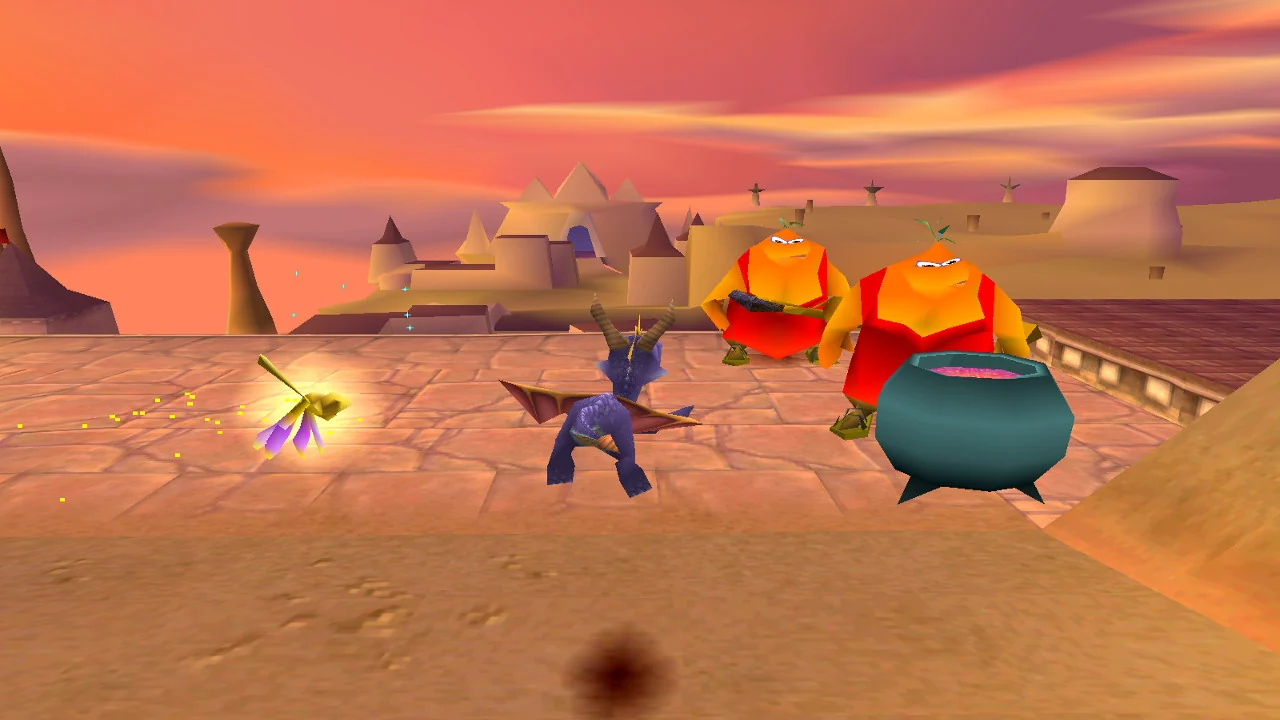
Getting Started — Controls, Health and Sparx
The original North American PlayStation release uses the classic Spyro control layout: X jumps and glides, Square charges, Circle breathes fire, and Triangle provides the close camera view or cancels a glide. Sparx is Spyro’s health indicator: yellow means full health, blue is the next reduced state, green is the final color before Sparx disappears, and a missing Sparx means the next damaging hit defeats Spyro. Learn to restore Sparx with butterflies, then practice the basic movement sequence in Stone Hill before tackling more dangerous levels.
Set up and test the original PlayStation controls
Use the directional pad or left analog stick to move Spyro. Press X to jump; hold X for a higher jump, then press X again while Spyro is airborne to begin a glide. Hold Square to charge forward. Press Circle to breathe fire. On the ground, hold Triangle to bring the camera close behind Spyro, then use the directional controls to look around. During a glide, pressing Triangle cancels the glide and makes Spyro drop from his current position.
The shoulder buttons also matter. L1 and R1 make Spyro roll sideways, while L2 and R2 rotate the camera left and right. Start pauses the game, and Select opens the inventory screen. If you are using an emulator, map these functions to the virtual PlayStation buttons rather than copying a Reignited Trilogy layout. The essential test is X for jump, Square for charge, Circle for flame, and Triangle for the close camera view and glide cancel.
Enter Artisans and test the controls on safe ground. Tap X once, hold X for a higher jump, press X again in midair to glide, hold Square briefly to charge, and press Circle to flame. Hold Triangle and move the directional input to confirm the camera view works. If the emulator displays an input overlay, verify that the button labels match the original PlayStation arrangement before continuing.
- Directional pad or left analog stick: move Spyro
- X: jump and glide
- Square: charge
- Circle: flame breath
- Triangle: close camera view or cancel a glide
- L1 and R1: sideways roll
- L2 and R2: rotate the camera
- Start: pause
- Select: inventory
Read Sparx as Spyro’s health meter
In the original game, Sparx is the health indicator. There is no separate health icon that must remain visible in a HUD corner. Watch the dragonfly beside Spyro: yellow means full health, blue is the next reduced state, and green is the final Sparx color before he disappears. Once Sparx is gone, Spyro has no remaining protection; the next damaging hit defeats him and costs a life.
Damage can come from enemies, falling, water, or other level hazards. A charge is an attack and movement technique, not general invulnerability, so do not charge blindly through traps or toward ledges. When Sparx turns green, slow down, clear nearby threats, and look for fodder before attempting a difficult fight or jump. If Sparx has disappeared, avoid every hazard while searching for fodder because the next damaging hit will defeat Spyro.
If Spyro is defeated after reaching a Continue point, such as the platform associated with a rescued dragon, the game returns him to that point on the next attempt. Rescue dragons when practical and use their platforms as natural progress markers before difficult sections.
- Yellow Sparx: full health
- Blue Sparx: next reduced health state
- Green Sparx: final color before disappearance
- No Sparx: the next damaging hit defeats Spyro
- A rescued dragon’s Continue point can provide a safer restart location
Restore Sparx with fodder and butterflies
Small harmless creatures are fodder. Flame or charge a fodder creature and it releases a butterfly. Sparx automatically eats the butterfly and regains one health stage. A butterfly can restore Sparx from green to blue, blue to yellow, or bring him back after he has disappeared. If Sparx is gone, do not assume the level must be abandoned: find fodder in the current area and let the released butterfly reach him.
The safest recovery method is to clear enemies first, then defeat one fodder creature in an open space. Stand near the butterfly instead of running away from it, and wait until Sparx has eaten it before entering the next danger area. If the current section has no fodder, retreat through territory you have already cleared. Leaving and re-entering a level is a fallback, not the first response, because it can require repeating progress made since the last Continue point.
Do not attack every fodder creature immediately when Sparx is already yellow. Leaving at least one nearby can provide an emergency health refill before a dragon rescue, thief chase, or difficult glide.
- Find a small fodder creature
- Defeat it with Circle or Square
- Wait for Sparx to collect the butterfly
- Use fodder to recover from blue, green, or missing Sparx
- Leave spare fodder near difficult sections when possible
Combine the core movement and attacks
For a normal platforming jump, hold X long enough to gain height, then press X again while airborne to glide. The second press is not a double jump and cannot increase Spyro’s height; it changes the jump into a forward glide. Steer toward the landing surface and begin from a suitable takeoff point. If the destination seems unreachable, search for a higher platform, a charge jump, or another route rather than repeating the same short jump.
Use Square against shielded or metallic enemies and for fast travel across open ground. Use Circle against ordinary enemies, large enemies that cannot be charged, and targets positioned where a charge would carry Spyro into danger. Release Square before a precision landing so Spyro is not still sliding forward when he reaches the edge.
Triangle is useful when a landing is uncertain. Hold it on the ground to inspect the route from behind Spyro, and press it during a glide if you have overshot the target and need to drop straight down. Recenter the camera before charging toward an enemy or starting a long glide.
- Hold X for a higher jump
- Press X again in midair to glide
- Use Square for charging and metallic targets
- Use Circle for flame-vulnerable targets and large enemies
- Use Triangle to inspect routes or cancel a glide
- Release Square before precision platforming
Complete the Artisans practice run in Stone Hill
From the Artisans Homeworld, enter Stone Hill. In the opening area, walk to clear ground and test jump, charge, flame, and camera controls. Stone Hill contains small fodder creatures near the early route, so this is a safe place to practice health recovery. Defeat one fodder creature with either attack and wait for Sparx to eat the butterfly. Confirm that his color improves before moving on.
Charge through one ordinary low enemy on open ground, then stop and flame a second suitable enemy. Do not charge toward the water or a ledge. When you reach a gap with a reachable platform, jump from a clear edge, press X again while airborne, and steer toward the platform. If you land safely, turn back and repeat the movement from the other side only if the route allows it.
Rescue any dragon encountered during this practice route by walking up to the crystal. The rescue creates a Continue point on its platform, which is useful if the next attempt goes badly. Before leaving Stone Hill, look directly at Sparx and identify his current state. If he is blue, green, or missing, use remaining fodder before entering another level. The objective is to finish with reliable control timing, not to complete Stone Hill’s entire treasure list.
- Enter Stone Hill from Artisans
- Test all four main face buttons
- Charge through one ordinary enemy
- Flame a suitable second enemy
- Restore Sparx with a butterfly
- Perform a controlled jump and glide
- Rescue a dragon and note the Continue point
- Finish with Sparx visible and his health state understood
Before you move on
- The control test produces jump and glide with X, charge with Square, flame with Circle, and the close camera view with Triangle.
- You can identify yellow, blue, green, and missing Sparx states without relying on a separate HUD icon.
- You have restored Sparx with a butterfly, including understanding that a missing Sparx can return but leaves Spyro vulnerable until then.
- You have completed the Stone Hill practice run with a charge attack, a flame attack, and a controlled glide.
- You understand how to use dragon rescue platforms as Continue points before risky sections.
Game Structure and Unlock Rules (Balloonists & Requirements)
The original North American PlayStation release of Spyro the Dragon is arranged as five standard Dragon Homeworlds followed by Gnasty’s World. The normal route is Artisans, Peace Keepers, Magic Crafters, Beast Makers, Dream Weavers and finally Gnasty’s World. Balloonists provide the intended transitions between these areas, but they only transport Spyro after the save file reaches the required cumulative total. The requirements are 10 rescued dragons to leave Artisans, 1,200 gems to leave Peace Keepers, 5 dragon eggs to leave Magic Crafters, 50 rescued dragons to leave Beast Makers and 6,000 gems to leave Dream Weavers. The main campaign ends when Gnasty Gnorc is defeated. The optional full-completion route continues after the boss: defeat Gnasty, free Magnus in Gnorc Gnexus, collect all 12,000 main-game gems, rescue all 80 dragons and recover all 12 dragon eggs. Once the inventory reaches 100%, Gnasty’s Loot becomes available. That bonus level contains another 2,000 gems and raises the displayed result to 120%.
Follow the standard world order
Begin in the Artisans Homeworld. Its portals lead to Stone Hill, Dark Hollow, Town Square, Sunny Flight and Toasty. After meeting the first requirement, Marco the Balloonist transports Spyro to Peace Keepers.
The remaining standard order is Peace Keepers, Magic Crafters, Beast Makers and Dream Weavers. Each Homeworld contains its own hub, portals to regular levels, a boss level and a flight level. The regular levels provide most of the gems, dragons and eggs needed for the next gate, so explore them before using a flight level merely as a last-minute top-up.
After Dream Weavers, Amos the Balloonist transports Spyro to Gnasty’s World. The final area is centered on Gnorc Gnexus and contains Gnorc Cove, Twilight Harbor and Gnasty Gnorc. Gnasty’s Loot is a separate bonus stage rather than part of the route needed to reach the boss.
- Start in Artisans.
- Travel through Peace Keepers, Magic Crafters, Beast Makers and Dream Weavers in order.
- Use the balloonist in Dream Weavers to enter Gnasty’s World.
- Treat Gnasty’s Loot as optional bonus content until the main campaign and collectible requirements are complete.
Use cumulative totals at the balloonists
The balloonist requirements are cumulative across the whole save file. Gems collected in Artisans still count when Gosnold checks the Peace Keepers requirement, and dragons or eggs collected in earlier worlds continue to count at later gates. A level’s local inventory entry shows what remains in that level, while the overall Inventory screen shows the totals that matter for world travel.
Talk to the balloonist whenever you return to a Homeworld. If the requirement has not been met, the balloonist explains which resource is missing. If it has been met, the balloonist offers the next destination. This is more reliable than estimating from the number of levels completed, particularly when a few gems or dragons were skipped during an early pass.
Collect nearby hub gems before leaving a Homeworld. Hub areas contain useful treasure and sometimes dragons or eggs, and collecting them reduces the amount of backtracking required when a total is just below the threshold.
- Check the overall Inventory totals, not only a level’s local counter.
- Speak to the current balloonist after reaching the required total.
- Use the balloonist’s dialogue to confirm the immediate gate.
- Collect easy treasure in each hub before moving on.
Leave Artisans after rescuing 10 dragons
Artisans is the starting Homeworld and the safest place to learn the movement system. Rescue dragons in the hub and in Stone Hill, Dark Hollow, Town Square and Toasty until the overall dragon total reaches 10. The flight stage Sunny Flight is optional for this gate because flight levels contain gems but no dragons or eggs.
Marco the Balloonist is inside the large palace area of the Artisans hub. The route toward him passes through the palace rather than requiring a difficult platforming detour. Once the Inventory shows at least 10 rescued dragons, return to Marco and choose Peace Keepers.
You do not need to finish every Artisans gem before leaving. If a few treasures or a dragon remain, the earlier Homeworlds stay available for revisits. For a full-completion file, however, it is efficient to rescue straightforward hub dragons and collect obvious gems before travelling.
- Rescue at least 10 dragons overall.
- Find Marco in the Artisans palace area.
- Confirm the dragon total in Inventory.
- Return later for unfinished Artisans collectibles if necessary.
Reach Magic Crafters with 1,200 gems
Peace Keepers uses a cumulative gem requirement. Search the Homeworld and ordinary levels such as Dry Canyon, Cliff Town and Ice Cavern. These stages combine loose gems, enemy drops, chests, dragons and eggs, making them more useful for normal progression than repeatedly restarting a flight stage before the regular levels have been explored.
Gosnold the Balloonist is in the Peace Keepers hub near the central routes, close to Magnus and the path leading toward Ice Cavern. The hub also contains a cannon puzzle that opens additional treasure routes, so inspect the surrounding area rather than heading directly to a level portal.
When the Inventory reaches 1,200 gems, return to Gosnold. He will offer travel to Magic Crafters. The requirement is a total held by the save file, not a demand to collect 1,200 gems inside Peace Keepers alone, although normal play usually supplies most of the total there.
- Reach 1,200 cumulative gems.
- Search ordinary Peace Keepers levels before relying on a flight retry.
- Check the Inventory total after returning from a level.
- Speak to Gosnold and travel to Magic Crafters.
Collect five eggs to enter Beast Makers
Magic Crafters is gated by recovered dragon eggs. The eggs are carried by Blue Thieves. When you see a thief, pursue it immediately if practical: charge to close distance and flame the thief when Spyro is within range. Avoid stopping to fight unrelated enemies during a chase, because the thief can gain distance or reach a route that is harder to intercept.
Five eggs are enough to open the next world, and eggs recovered in earlier areas count toward the total. Several early eggs can be found in Artisans and Peace Keepers, while Magic Crafters contains additional thieves. If Tuco’s dialogue points toward a particular nearby stage, use that hint as a route suggestion rather than assuming every egg must be found in Magic Crafters.
Tuco the Balloonist is in the Magic Crafters hub near the lower routes and the paths leading toward Blowhard. Once the Inventory records five recovered eggs, return to Tuco and choose Beast Makers. Continue collecting gems and rescuing dragons while hunting thieves, because the later 50-dragon and 6,000-gem gates still lie ahead.
- Recover at least five dragon eggs overall.
- Chase Blue Thieves without engaging unnecessary enemies.
- Confirm that each defeated thief has released its egg.
- Return to Tuco after reaching five eggs.
- Travel to Beast Makers.
Reach Dream Weavers with 50 rescued dragons
Beast Makers uses the largest early dragon requirement. Work through the hub, Terrace Village, Misty Bog, Tree Tops, Metalhead and Wild Flight’s surrounding routes, rescuing dragons wherever possible. The Beast Makers hub has only a small number of dragons, so reaching 50 normally requires returning to earlier Homeworlds if some easy rescues were skipped.
The most efficient approach is to clear accessible dragons in ordinary levels first, then revisit difficult platforming sections such as Tree Tops when the total is close to the target. Dragons in flight levels do not exist, so do not replay Wild Flight expecting it to increase the dragon count.
The Beast Makers balloonist is Cray, located in the hub near the routes leading toward Metalhead. Speak to him after the Inventory reaches 50 rescued dragons. Cray then opens travel to Dream Weavers. If the total is short, use the level entries and personal notes to identify stages with incomplete dragon counts instead of searching completed levels at random.
- Reach 50 rescued dragons overall.
- Prioritize accessible dragons in hubs and ordinary levels.
- Do not count flight levels toward the dragon total.
- Find Cray near the Metalhead-side hub routes.
- Return to Cray and travel to Dream Weavers.
Open Gnasty’s World with 6,000 gems
Dream Weavers is the final standard Homeworld and returns to a gem requirement. Explore Dark Passage, Lofty Castle and Haunted Towers, along with the Dream Weavers hub, before relying on Icy Flight for a small shortage. Check elevated platforms, side ledges, locked chests and areas reached by whirlwinds or the hub’s shrink rays. The unusual platforming makes it easy to finish a stage while still missing a small group of gems.
Amos the Balloonist is reached across the Dream Weavers hub after crossing the water and navigating the platforms controlled by the shrink-ray enemies. When the overall Inventory reaches 6,000 gems, return to Amos and select Gnasty’s World.
The 6,000-gem threshold only opens the final area. It is not the same as the 12,000 main-game gems required for 100% completion. Spyro still has to clear Gnorc Cove and Twilight Harbor, defeat Gnasty Gnorc and complete the optional collection route before Gnasty’s Loot becomes available.
- Reach 6,000 cumulative gems.
- Search ordinary Dream Weavers stages and hub routes first.
- Find Amos across the Dream Weavers hub.
- Use Amos to enter Gnasty’s World.
- Do not confuse the travel gate with the 100% requirement.
Separate campaign completion from Gnasty’s Loot
The main campaign is complete after Spyro clears Gnorc Cove and Twilight Harbor, enters the Gnasty Gnorc stage and defeats Gnasty Gnorc. Entering Gnasty’s World does not trigger the ending, and defeating the boss does not by itself prove that the save is at 100%.
After the boss sequence, return to the center of Gnorc Gnexus and free Magnus. Magnus explains the requirement for opening Gnasty’s treasure area. For the optional full-completion route, the standard game totals must be complete: 12,000 main-game gems, 80 rescued dragons and 12 recovered dragon eggs. These are the totals before counting the bonus stage’s treasure.
Confirm the 100% result in the Inventory after Gnasty has been defeated and Magnus has been freed. Then return to Gnorc Gnexus and enter the now-available Gnasty’s Loot portal. The bonus level contains 2,000 gems and adds 20 percentage points, producing the 120% result. If the portal remains unavailable, recheck the three standard totals and make sure Magnus was rescued after the boss.
- Defeat Gnasty Gnorc to finish the main campaign.
- Free Magnus in Gnorc Gnexus after the boss.
- Collect all 12,000 standard gems.
- Rescue all 80 dragons.
- Recover all 12 dragon eggs.
- Confirm 100% in the Inventory.
- Enter Gnasty’s Loot and collect its additional 2,000 gems for 120%.
Before you move on
- Spyro has travelled from Artisans through Peace Keepers, Magic Crafters, Beast Makers and Dream Weavers.
- Marco accepted 10 rescued dragons and opened Peace Keepers.
- Gosnold accepted 1,200 cumulative gems and opened Magic Crafters.
- Tuco accepted five recovered dragon eggs and opened Beast Makers.
- Cray accepted 50 rescued dragons and opened Dream Weavers.
- Amos accepted 6,000 cumulative gems and transported Spyro to Gnasty’s World.
- Gnorc Cove and Twilight Harbor are complete.
- Gnasty Gnorc has been defeated, completing the main campaign.
- Magnus has been freed in Gnorc Gnexus after the boss.
- For optional full completion, the Inventory shows 12,000 standard gems, 80 rescued dragons and 12 dragon eggs.
- The Inventory displays 100% before entering Gnasty’s Loot.
- Gnasty’s Loot is complete and its additional 2,000 gems have been collected, producing the 120% result.
Homeworld: Artisans — Stone Hill and Nearby Levels
Artisans is the opening homeworld in the original PlayStation release of Spyro the Dragon. Use it to learn charging, flame breath, gliding, whirlwind lifts, locked chests and egg-thief chases. Clear the hub, Stone Hill, Dark Hollow, Town Square, Sunny Flight and Toasty in a controlled order. Marco the Balloonist takes Spyro to Peace Keepers after ten dragons have been rescued in Artisans.
Sweep the Artisans homeworld first
Free Nestor immediately at the starting point, then drop to the lower path and collect the nearby gems. Search the central hill, the palace route toward Marco the Balloonist, the hedge maze leading to Dark Hollow, and the paths around the Stone Hill gate. Charge or flame the small Gnorcs, then inspect the edges of each area rather than following only the central path.
Delbin is beside the pond that contains the Sunny Flight switch stones. Tomas is in the corridor leading toward Town Square. Argus stands beside the large dragon-head entrance to Toasty. The fourth homeworld dragon, Nestor, is at the starting point; the fourth dragon count for the hub is completed by the dragon near the Town Square route. Rescue every hub dragon before leaving. The Artisans homeworld contains 100 gems and four dragons, so use the homeworld total as a quick confirmation that the hub itself is complete.
Do not expect Toasty to open simply because Argus has been rescued. Complete and leave at least one other Artisans level through its Return Home portal first. Stone Hill is the safest first choice, although Dark Hollow or Town Square can also satisfy the requirement.
- Free Nestor, Delbin, Tomas and Argus.
- Collect all 100 Artisans homeworld gems.
- Confirm that the Toasty entrance has been activated by completing and exiting another Artisans level.
Complete Stone Hill as the first regular level
Enter Stone Hill and clear the opening field before entering every side passage. Defeat the mountain goats, collect the loose gems and follow the route toward Astor and the Return Home portal. Stone Hill contains 200 gems, four dragons, one dragon egg and one key.
From Astor’s area, locate the whirlwind and use it to reach the beach below. Follow the green gems into the cave, collect the key and charge the iron chests. Use the whirlwind to return to the upper section, then use the key on the locked chest. This side route supplies a substantial portion of the level’s treasure and should be completed before moving on.
Return to the starting field and drop into the well to rescue Gavin. Use the nearby whirlwind to climb out. Enter the remaining side passage for the third dragon and its surrounding treasure. Continue into the later open field, collect the visible gems, then enter the tower with the whirlwind. Gildas is at the top.
From the high area, glide outward onto the raised perimeter around the field. Walk around the upper ledges and castle roof, collecting the remaining gems. The egg thief is also in this upper section. Chase him through the open route and use a charge or flame when Spyro closes the distance. If he gets away, continue around the loop and cut across corners rather than following directly behind him.
Leave Stone Hill through the Return Home portal only after checking the beach, well, cave, upper perimeter and castle roof. The level is complete when its total reaches 200 gems, four dragons and one egg.
- Rescue Astor, Gavin, the third route dragon and Gildas.
- Retrieve the key and open the locked chest.
- Defeat the egg thief in the upper section.
- Reach 200 gems, four dragons and one egg before leaving.
Use Dark Hollow to practise enemy matchups
Dark Hollow contains 100 gems and three dragons. Enter through the hedge maze in Artisans and begin by defeating the two shielded Gnorcs. In the original game, these shielded enemies can be charged; do not confuse them with the large armored Gnorcs encountered later. Flame the large armored enemies from behind or while they are walking away, because their armor protects the front of their bodies.
Follow the first courtyard to Alban, then return toward the central route and take the side passage. Clear each group before entering the next room. In the chamber with the pond, collect the key from the small platform and use the upper platforms to glide to Oswin. Avoid the water: Spyro cannot swim in this game, and falling into it causes damage.
Return to the beginning and use the key on the locked chest. Continue through the group of shielded Gnorcs and the large enemy, then climb the stairs toward Darius. Search the sunken pit, the room edges and the raised platforms near the exit. The final gems are on a yellow platform reached by a deliberate glide from the upper route.
If a jump fails, backtrack to the preceding safe platform or allow Spyro to respawn, then approach the jump again from a better launch point. Do not assume that a missed jump creates a permanent checkpoint at the nearest dragon.
- Charge the shielded Gnorcs and flame large armored Gnorcs from a safe angle.
- Rescue Alban, Oswin and Darius.
- Use the key on the starting-area locked chest.
- Reach 100 gems and three dragons.
Clear Town Square with deliberate glides
Town Square contains 200 gems, four dragons and one egg. Rescue Nils in the opening plaza, then follow his route to the bull enemies. Flame the bulls as they charge, and collect the gems on the steps and platforms before moving into the next courtyard.
Continue upward through the stairways and use the elevated ledges as launch points. Glide to Devlin across the water, then clear the nearby bull, matador Gnorc and chests. When you see the egg thief, first collect the gems on the ledge, then jump toward him while charging and finish with flame when he turns into a corner.
Proceed through the upper corridor and glide toward the later platform containing another bull and Alvar. A turbine chest is nearby; flame it repeatedly until it spins quickly enough to break open. Rescue Alvar, then collect the remaining gems in his area and around the Return Home portal.
Town Square rewards controlled takeoffs more than long charges. Turn the camera before each glide, identify the landing platform, and begin from the highest available ledge. If a platform is below Spyro, aim for its near edge and allow the glide to descend naturally. Finish with a sweep of the plaza, upper ledges, fountain route and side corridors.
- Rescue Nils, Devlin, the third route dragon and Alvar.
- Recover the egg from the thief above the square.
- Open the turbine chest with repeated flame attacks.
- Reach 200 gems, four dragons and one egg.
Unlock and complete Sunny Flight
Return to the Artisans pond near Delbin. Five flat stones are set in the water. Jump across each stone once without repeating a stone. Completing the sequence opens the concealed Sunny Flight entrance behind the pond. Sunny Flight contains 300 gems and no dragons or eggs.
The original PlayStation flight stage begins with a 30-second timer. Destroying an object adds time, so keep moving and avoid landing. The four target groups are chests, arches, airplanes and barrels. A reliable route is to steer right and downward into the cave containing the eight chests, then leave the cave and turn left toward the arches.
Pass through the first six arches, then break away to destroy the eight airplanes with flame. Return to the arch route to complete the final two arches. Once all eight arches are finished, locate the railroad tracks and approach the trains from the opposite direction. Flame the barrels as Spyro passes them; the flame can destroy the paired barrels near an approaching train.
The flight is complete after all 32 targets have been destroyed and the full 300-gem result has been awarded. If the first attempt fails, replay the stage and preserve the route rather than improvising sharp reversals. Flight stages use full flying rather than ordinary jumping and gliding.
- Activate all five pond stones without repeating one.
- Destroy eight chests, eight arches, eight airplanes and eight barrels.
- Finish the stage with the 300-gem total.
Defeat Toasty after the portal opens
Enter the dragon-head portal after completing and exiting another Artisans level. Toasty contains 100 gems and one dragon. The first enemies are tall robed figures and watchdogs. Flame the robed enemies from a distance. For each watchdog, flame it once, retreat immediately to avoid its pounce, then return for the second flame.
Follow the short route through the rooms and outer ledges. Search the perimeter for iron chests and gems before continuing. Rescue Nevin, the level’s only dragon, then proceed through Toasty’s three encounters. The first has one watchdog, the second has two, and the final encounter has three. Defeat the dogs before flaming Toasty in each area.
Toasty is exposed after the disguise is burned. Flame him once in each of the three areas rather than charging through the group. After the final encounter, collect the gems beside the Return Home portal and leave through it. If Sparx is weakened, slow down between dog encounters and avoid taking a second hit during a retreat.
- Defeat the watchdogs before attacking Toasty in each area.
- Rescue Nevin.
- Flame Toasty in all three encounters.
- Reach 100 gems and exit through the Return Home portal.
Use Marco the Balloonist to leave Artisans
Return to the palace route and speak to Marco the Balloonist. In the original PlayStation game, Marco requires ten rescued dragons before transporting Spyro to Peace Keepers. The four dragons in the Artisans homeworld are only part of that total, so complete the regular levels until the overall Artisans dragon count reaches ten.
Stone Hill, Dark Hollow, Town Square and Toasty together provide enough dragons to meet the requirement. Sunny Flight does not contain dragons, so it is useful for gems but does not help with Marco’s dragon quota. If Marco refuses to travel, revisit a level with an incomplete dragon total rather than repeatedly speaking to him.
After Marco accepts the total, travel to Peace Keepers. The Artisans portals remain available through later balloonist travel, so missed gems, dragons or the egg can be collected during cleanup.
- Confirm at least ten Artisans dragons are rescued.
- Confirm Toasty has been exited through its Return Home portal.
- Speak to Marco and travel to Peace Keepers.
Before you move on
- Artisans homeworld shows 100 gems and four rescued dragons.
- Stone Hill shows 200 gems, four dragons and one egg.
- Dark Hollow shows 100 gems and three dragons.
- Town Square shows 200 gems, four dragons and one egg.
- Sunny Flight has awarded its 300 gems after all four target groups are destroyed.
- Toasty shows 100 gems and one rescued dragon and has been exited through the Return Home portal.
- Marco the Balloonist accepts a total of ten rescued Artisans dragons and transports Spyro to Peace Keepers.
Homeworld: Peace Keepers — Gem-Focused Progression
Peace Keepers is the second Homeworld in the original PlayStation version of Spyro the Dragon. Its balloonist requires 1,200 total gems before taking Spyro to Magic Crafters. The safest progression is to clear the Peace Keepers hub, Dry Canyon, Cliff Town, Ice Cavern, Doctor Shemp, and Night Flight while collecting the level treasure and rescuing dragons. The regular stages provide the dependable gem total; Night Flight is best used as a final top-up rather than your main source of progress.
Secure the Peace Keepers hub and open the flight route
After arriving from Artisans, free the dragon in the starting building and then rescue the dragon standing near the balloonist. The balloonist is the route to Magic Crafters, but he will not carry Spyro until the gem counter reaches 1,200. A third hub dragon is beyond the cannon puzzle on the far side of the area.
Clear the nearby enemies before operating the cannons. Flame the cannon operator, then push the cannon so it faces the red target. Fire it to destroy the unbreakable boxes and the rock blocking the raised platform. That platform leads to Night Flight and the second half of the hub. Collect the gems around the arch, the cave, and the locked box before entering Dry Canyon.
This route matters because the hub treasure and the cannon puzzle are easy to overlook. Do not assume that reaching the Dry Canyon portal means the entire Homeworld is open. Return to the cannon area after the first stage if Night Flight is still inaccessible.
- Rescue the starting hub dragon and the dragon near the balloonist.
- Defeat the cannon operator before trying to use the cannon.
- Fire the cannon at the red target to open the Night Flight platform.
- Check the balloonist’s requirement: 1,200 gems for Magic Crafters.
Clear Dry Canyon in two passes
Dry Canyon has a broad first route followed by side platforms, tunnels, and long glides. Enter the left alcove near the beginning and charge through the area carefully; this route can contain an egg thief. Continue along the main path and rescue the first two dragons without immediately climbing the first staircase. Collect the ground treasure and reach the exit area before backtracking.
From the second dragon, glide to the distant platform and follow the tunnel. Glide left along the wall to reach another dragon and the key. Use the key on the locked box later in the route. Return to the staircase, climb it, and glide to the left ledge. Continue through the castle-like structure to reach the final dragon and the surrounding treasure.
The upper section contains firework boxes. Flame them, run away until they explode, and then return for the gems. The longest glide begins at the top step and leads to the platform with the locked box. After collecting it, return toward the castle structure and use the crack in the wall to reach the exit. Dry Canyon is one of the most valuable early gem stages, but falling can force a long retrace, so clear enemies before attempting its longer glides.
- Collect the first two dragons before climbing the first staircase.
- Glide left along the wall after reaching the distant platform.
- Use the key on the locked box.
- Collect the firework-box gems after the explosions finish.
- Search the castle structure and crack-in-the-wall exit route.
Use Cliff Town for compact gem clusters
Cliff Town is more compact than Dry Canyon, but its treasure is spread around buildings, rooftops, bridges, pots, and the river section. At the entrance, check both sides of the first building before crossing the bridges. Follow the main route to the first dragon, then search the small building maze for the egg thief before moving to the upper rooftops.
From the rooftop section, climb to the second dragon. Glide down to the rooftop with the rocket, flame it, and collect the contents of the previously unbreakable box. Return to the upper route, then glide across the river to the hidden area containing the final dragon. From there, use the available rooftops to sweep the remaining gems.
Flame pots whenever they are placed along the route; some contain gems. Also check behind the starting building and around the exit approach. Cliff Town is a good place to increase the total without relying on a flight level, but do not leave after following only the central bridges.
- Search both sides of the first building.
- Find the thief in the small building maze.
- Reach the second dragon through the rooftop route.
- Flame the rooftop rocket.
- Glide across the river to the hidden area and final dragon.
- Check behind the starting building before leaving.
Finish Ice Cavern and use its side caves
Ice Cavern contains five dragons and 400 gems. Follow the main path until the second dragon, charging the poles on the way because some release gems. Continue to the locked box, then glide to the ledge containing the key. Use the key after reaching the upper route, then climb toward the goal and the third dragon.
Near the upper section, jump across the blocks with gems to enter the side cave. Follow that cave around to the fourth dragon, then drop down for the nearby treasure. Return toward the exit and backtrack into the cave in the wall to reach the fifth dragon. Afterward, return to the locked box area, collect the remaining treasure, and glide across the central gap to the exit.
The stage is less dangerous than Dry Canyon, but its gems are often on platforms beside drops. Start glides from the highest safe ledge rather than from the cavern floor. If you miss a dragon or chest, use the exit route to orient yourself, then backtrack before leaving.
- Charge the poles along the early route.
- Collect the key before opening the locked box.
- Use the gem-block path to reach the fourth dragon.
- Backtrack into the wall cave for the fifth dragon.
- Revisit the locked-box area before taking the exit.
Defeat Doctor Shemp with a three-hit pattern
Before reaching the arena, collect the side treasure. At the first whirlwind, continue past it and use the second whirlwind behind the pillar. Glide to the distant rock for the purple gem, then return toward the main area and collect the key on the platform. Use the first whirlwind to reach the tunnel and glide left for the remaining approach treasure.
Doctor Shemp can be defeated by waiting for his movement, moving behind him, and flaming his exposed back. On the first hit, let him attempt his attack and move around him. On the second, wait for him to turn before flaming him again. On the final cycle, jump over his staff attack and flame him after the staff swing. Do not stand at the arena edge while repositioning, and let thrown enemies fall away when possible.
After the boss is defeated, free the dragon in the arena. Then visit the goal and drop down to the locked box for the final purple gem before returning to the exit.
- Collect the distant purple gem before the arena.
- Use the key and collect the approach treasure.
- Flame Doctor Shemp from behind three times.
- Jump over the staff on the final attack cycle.
- Rescue the boss-level dragon and collect the locked-box gem.
Run Night Flight as the final Peace Keepers sweep
Night Flight is optional for the immediate route if your regular stages already put you over 1,200 gems, but it is a useful final sweep. The documented order is Rings, Chests, Arches, Lights. Follow that sequence instead of making repeated sharp reversals between target types.
Maintain forward motion and use wide turns. If the attempt ends before all targets are destroyed, repeat it using the first run to learn the layout. Completing all four target groups provides the flight-stage gem reward and should put the balloonist requirement comfortably within reach when combined with the regular levels.
- Open Night Flight through the cannon puzzle.
- Target Rings first, then Chests, Arches, and Lights.
- Use broad turns instead of abrupt reversals.
- Repeat the flight only if gems remain necessary for the balloonist.
Confirm access to Magic Crafters
Return to the Peace Keepers hub after the stages are complete and check the total in the status display. Speak to the balloonist only after the counter shows at least 1,200 gems. If the requirement is not met, revisit the stage with the most obvious unfinished treasure: Dry Canyon’s upper platforms and locked box, Cliff Town’s rooftops and river section, or Ice Cavern’s side caves are the best places to check first.
Doctor Shemp and Night Flight are not substitutes for missed regular-stage treasure. The reliable completion point for this chapter is the balloonist accepting the 1,200-gem total and carrying Spyro to Magic Crafters.
- Doctor Shemp is defeated.
- The boss dragon is rescued.
- Dry Canyon, Cliff Town, and Ice Cavern have been searched for their dragons and treasure.
- Night Flight is complete or intentionally postponed because the gem requirement is already met.
- The Peace Keepers balloonist accepts at least 1,200 gems and opens Magic Crafters.
Before you move on
- The Peace Keepers hub cannon has opened the Night Flight route.
- Dry Canyon, Cliff Town, and Ice Cavern have been cleared for their required dragons and major treasure routes.
- Doctor Shemp has been defeated and his dragon has been freed.
- Night Flight has been completed or left for later because it is not needed for the current total.
- The Peace Keepers balloonist confirms travel to Magic Crafters after the gem counter reaches 1,200.
Homeworld: Magic Crafters — Eggs and Level Choice
Magic Crafters is the third Homeworld in the original North American PlayStation release of Spyro the Dragon. Its regular levels introduce moving platforms, Supercharge routes, long glides and metallic spiders that cannot be defeated with ordinary flame. A complete Magic Crafters sweep contains 2,500 gems, 14 dragons and 7 dragon eggs. Added to the earlier Homeworld totals, that produces 5,500 total gems, 46 total dragons and 12 total dragon eggs. Only five cumulative eggs are required to unlock Beast Makers, so you can leave some Magic Crafters eggs for later cleanup without blocking the campaign.
Survey Magic Crafters Home before entering a portal
After arriving by balloon, enter the tunnel and cross the pools. At the first fork, take the left corridor to find an egg thief. He circles the corridor and may run toward a raised, unreachable platform. If he reaches it, trace back toward the level entrance and he will return to the route. Cut across the corners when possible, then flame him when he comes within range.
Return to the fork and take the other branch. Defeat the fast sceptre enemies with charges, rescue Cosmos in the brightly lit room, and continue toward the Alpine Ridge gate. On the upper route, defeat the armoured enemies before chasing the second thief. He runs around a small loop and is easier to catch after the surrounding enemies are gone.
Continue through the Homeworld’s Supercharge route to rescue Zantor and Boldar. The Homeworld contains three dragons, two eggs, 300 gems and a key. To find the key, go behind the Wizard Peak portal, walk around the water-building edge and glide into the visible opening. The key opens the locked chest in the mountain alcove near the High Caves Supercharge route.
The Magic Crafters balloonist is down the slope near the Blowhard side of the Homeworld. Speak to him after collecting eggs to check the progression requirement. He opens Beast Makers when your cumulative total reaches five eggs; you do not need all seven eggs in Magic Crafters before travelling onward.
- Rescue Cosmos, Zantor and Boldar.
- Collect both Homeworld eggs if pursuing the local total.
- Recover the key from the water building.
- Use the key on the locked chest near the Supercharge route.
- Locate the balloonist near the Blowhard side and check the cumulative egg requirement.
Clear Alpine Ridge and collect its egg
Alpine Ridge contains 500 gems, four dragons and one egg. Follow the opening path to the first wizard-controlled stairs. The wizard changes the arrangement between steps and a steep slope, so wait until the route becomes usable before jumping. Flame the large orange creatures, climb the stairs and defeat the wizard at the top.
Continue through the doorway to rescue Zane, then use the raised platforms and glides to reach Eldrid and Zander. Approach each moving platform from stable ground. Do not jump while a wizard is changing its position, because the platform may retract before Spyro lands.
Near the Return Home portal, turn the camera toward the distant purple doorway and glide to it. This side route contains the fourth dragon, Kelvin, along with gems and the egg thief. Chase the thief around the loop and flame him when the path straightens. If the pursuit carries you past other collectibles, finish the chase first and then retrace the loop.
Open the firework chests carefully. Ignite each chest, jump back to the preceding ledge to avoid the blast, then return for the gem after the explosion. Check the upper platforms and the cave near the exit before leaving so that the level’s 500-gem total is not split across unnecessary revisits.
- Rescue Zane, Eldrid, Zander and Kelvin.
- Defeat the Alpine Ridge egg thief.
- Collect the egg in Kelvin’s tunnel.
- Use the moving stairs only when they are fully positioned.
- Open the firework chests and verify the local 500-gem total.
Use High Caves for Supercharge and Superflame practice
High Caves contains 500 gems, three dragons and two eggs. Enter the spider cave only far enough to collect safe gems, then continue through the level without touching the metallic spiders. Ordinary flame and normal charging cannot defeat them, and contact can cost Spyro a full health state.
Take the winding route past the tornado wizards and rescue Ajax. Stay near safe ledges while the tornado projectiles pass, then move forward during the gap between attacks. Continue toward the Supercharge hill and use it to smash the metallic spiders positioned on the charge route. Supercharge also opens the heavy chests placed along the route.
The other spiders require the temporary Superflame granted by the fairy. Clear the nearby enemies, reach the fairy, and move directly back toward the spider section while the enhanced flame remains active. Defeat the spiders before attempting to collect gems in their rooms. If the power expires, retreat immediately and repeat the route rather than entering a spider room unpowered.
The first egg thief is in a mountain tunnel reached by gliding from the side of the long central bridge. The second is in the area between the caves, near a circular pool. Complete the Supercharge jumps to reach both routes, then flame the thieves while they run around their loops. Rescue Cedric in the cave reached by a Supercharge jump near the Return Home portal.
- Rescue Ajax, the second dragon and Cedric.
- Defeat both High Caves egg thieves.
- Use Supercharge or Superflame against every metallic spider.
- Collect the mountain-tunnel and between-the-caves eggs.
- Search the upper ledges and side tunnels before exiting.
Use Wizard Peak to finish the five-egg requirement
Wizard Peak contains 500 gems, three dragons and two eggs. Begin by clearing the opening energy wizards, large monsters and lightning wizards. Search the perimeter ledges and side rooms before committing to the central Supercharge routes, because several gems are placed away from the main path.
Rescue Jarvis near the first Supercharge hill. Use the hill to charge through the groups of energy wizards, then continue through the upper route toward Hexus and Lucas. The first egg thief is reached through a chained Supercharge route. Start from the appropriate ramp, maintain the charge through the connected ramps and launch from the final ramp toward the thief’s platform. If the jump fails, return to the start of the ramp sequence and reset rather than trying to pursue him from below.
The second thief runs around a circular pool partway up the route toward the exit. Remove nearby enemies, then follow the pool’s edge and flame him when he enters a straight section. Complete the surrounding platforms and side alcoves before returning through the portal.
The two Homeworld eggs, one from Alpine Ridge, two from High Caves and two from Wizard Peak provide more than the five cumulative eggs required for Beast Makers. If you are following the levels in this order, the requirement should already be met before the final balloonist conversation.
- Rescue Jarvis, Hexus and Lucas.
- Complete the chained Supercharge route to the first thief.
- Defeat the thief near the circular pool.
- Search the perimeter ledges and side rooms for gems.
- Confirm that the cumulative egg total is at least five.
Defeat Blowhard after clearing the regular levels
Blowhard contains 400 gems and one dragon. Clear the opening lightning wizards by dodging their bolts and attacking immediately afterward. Charge through groups when they stand close together, but avoid running blindly across the moving platforms later in the level.
When Blowhard first appears, he remains airborne and sends a storm cloud toward Spyro. Move well away from the cloud and avoid the lightning strike. After the attack, Blowhard descends to a reachable height. Approach quickly and flame him before he rises again. The hit opens the wooden door behind him and allows the level to continue.
In the next section, jump onto the moving columns as they lower. Flame the druids when Spyro is level with them, and take the side alcove to rescue Altair. Return to the main route and cross the wooden bridge. At the next arena, wait for Blowhard to descend again, then flame him. Repeat the dodge-and-flame pattern at the final platform and collect the gems he leaves behind.
The fight has no conventional health bar. Progress is shown by the successive retreats through the level. Do not waste attempts by charging at him while he is floating high above the arena; wait for the storm-cloud attack to finish and use the descent window.
- Defeat Blowhard with the dodge-then-flame pattern.
- Rescue Altair.
- Collect the 400 gems in the boss level if pursuing local completion.
- Return to the Homeworld after the boss route is complete.
Sweep Crystal Flight and travel to Beast Makers
Crystal Flight contains 300 gems and no dragons or dragon eggs. A reliable route is to clear the rings first, then continue through the arches without taking a detour. The airplanes follow the arch section, so deal with them as they appear rather than breaking away too early. Finish with the treasure chests.
Maintain broad turns and forward momentum. If a target is missed, continue along the current route and make a wide return pass when the layout permits. Losing the flight path usually costs more time than leaving one object for a later pass. The level is complete when all of its gems have been collected; there is no dragon or egg inventory to check here.
Return to Magic Crafters Home and speak with the balloonist near the Blowhard route. When the cumulative egg total is at least five, he opens the passage to Beast Makers. If he refuses, revisit the egg routes in the Homeworld, Alpine Ridge, High Caves or Wizard Peak and check each level’s inventory.
For full completion through Magic Crafters, verify 2,500 local gems, 14 local dragons and 7 local eggs. The cumulative totals after all Magic Crafters levels are 5,500 gems, 46 dragons and 12 dragon eggs. These totals include the earlier Homeworlds and should not be confused with the local 2,500-gem figure.
- Complete the rings, arches, airplanes and chests in Crystal Flight.
- Confirm the flight level has yielded all 300 gems.
- Verify at least five cumulative eggs before speaking to the balloonist.
- Unlock Beast Makers through the Magic Crafters balloonist.
- For full completion, verify 5,500 total gems, 46 total dragons and 12 total dragon eggs after Magic Crafters.
Before you move on
- The Magic Crafters balloonist accepts at least five cumulative dragon eggs and opens Beast Makers.
- Blowhard is defeated and Altair is rescued.
- The Homeworld, Alpine Ridge, High Caves and Wizard Peak egg routes have been checked.
- Crystal Flight has been completed or its remaining gem targets have been recorded for cleanup.
- For local Magic Crafters completion, the level totals are 2,500 gems, 14 dragons and 7 eggs.
- For cumulative completion through Magic Crafters, the totals are 5,500 gems, 46 dragons and 12 dragon eggs.
References for this chapter
Homeworld: Beast Makers — Midgame Rescue Strategy
Beast Makers is the fourth homeworld in the original North American PlayStation release of Spyro the Dragon. The balloonist’s exit requirement is 50 rescued dragons across the entire game, not 50 dragons found only in Beast Makers. The homeworld contains two hub dragons, Terrace Village, Misty Bog, Tree Tops, Metalhead and Wild Flight. A dependable route is to free both hub dragons, clear Terrace Village, Misty Bog and Tree Tops, defeat Metalhead, then use Wild Flight as an optional gem sweep. If the balloonist still will not leave, check earlier homeworlds for missed dragons rather than assuming Beast Makers is incomplete. Metalhead is defeated indirectly: position Spyro so the enemies thrown by the boss collide with the power poles, then repeat this in both arenas while avoiding the electrical hazards.
Prepare the Beast Makers hub and open its routes
When Spyro arrives from Magic Crafters, move forward through the opening electric enemies. Flame the first enemy from the edge of the electric floor. For the next one, wait until the floor is inactive before charging through. Do not walk onto an active green floor simply to reach an enemy.
The first hub dragon is directly in front of the Terrace Village portal. Free him, then cross the log bridge. The right-hand route leads toward Wild Flight and the second hub dragon. Rescue that dragon and collect the nearby treasure. The central route leads toward Tree Tops, Metalhead and the balloonist.
To reach the upper central area, cross the bridge, jump across the rooftops and pass the electric enemies. At the temple, climb the stairs and glide to the key on the tree stump. Use the key on the locked chest, then take the whirlwind upward to reach the Metalhead entrance and the balloonist. The key-and-chest detour is optional for basic travel but useful when collecting the homeworld’s gems.
- Free the dragon beside the Terrace Village portal.
- Free the dragon near the Wild Flight entrance.
- Collect the hub key and open the locked chest if pursuing the homeworld gems.
- Locate the balloonist near the Metalhead route.
Complete Terrace Village first
Terrace Village is the most manageable of the three regular Beast Makers stages and is a good first stop. The opening area divides into paths that reconnect. Clear one route carefully, checking behind huts and in side corners before moving on. Flame the large purple enemies from a safe distance. Armored cannon enemies are better handled with a charge after their attack has been avoided.
Near the first dragon, look for the rocket crate. Rockets open heavy chests elsewhere in the level, so return to any chest that was inaccessible during the first pass. After the routes reconnect, electric floor sections, rooftop jumps and long glides are combined. Watch the floor before crossing, and time jumps between rooftops rather than charging blindly.
After using the whirlwind to reach the high rooftops, take the treasure route on the right before returning to the exit side. From the upper roof, glide toward the distant tower beside the exit building, land on its rooftop and climb across the connected roofs to reach the remaining rocket targets and chests. Return to the exit only after checking the side rooftops and the final electric floor.
- Use flame against large enemies from range.
- Charge armored cannon enemies only after avoiding their attack.
- Use rockets on the heavy chests they point toward.
- Search the upper rooftops before exiting.
Clear Misty Bog with controlled enemy spacing
At the start of Misty Bog, turn around and defeat the enemy behind the wall before leaving the opening platform. Glide to the nearby stairs and deal with the tree enemies one at a time. Do not charge directly into them: wait until a tree begins its attack, move aside, then flame it while it is exposed.
On the next island, frogs have long-range tongues. Approach one or two at a time and flame them before entering the range of a larger group. After the first dragon, use the bridge and nearby stumps to reach the fortress route. The fortress contains dense frog groups, so clear the entrance and fight from a position that gives Spyro room to retreat.
Misty Bog contains four dragons. After the first sections, return to the bridge and use the side platforms to reach the tree-cave area. The cave has a dense enemy group; do not rush into its center. Flame exposed frogs when possible, then charge isolated enemies once the group has thinned. Continue upward through the stump and bridge sections to reach the later dragons and the exit.
The final treasure area is reached from the exit-side platform. Jump onto the small column opposite the fourth dragon, glide to the wall enclosure and then to the stone stairs. Climb the sequence of high stumps and charge through the shielded enemies to collect the remaining treasure before returning to the exit.
- Flame tree enemies after they begin their attack.
- Do not enter large frog groups without a retreat route.
- Search the tree-cave side route for the second dragon and treasure.
- Use the column beside the exit to reach Misty Bog’s final treasure section.
Use Tree Tops supercharges as planned routes
Tree Tops is the most technical Beast Makers stage. At the beginning, go through the right window to obtain the key, then follow the route toward the first dragon. From the first dragon, use the nearby supercharge ramp and jump at the end while still charging. The linked ramps require Spyro to preserve momentum, jump onto the next ramp and charge up or down it as directed by the terrain.
Do not improvise the long routes while standing on a short ramp. First identify the landing platform, the next ramp and the direction of the required turn. If Spyro lands short, return to the beginning of that supercharge sequence instead of attempting the jump from an incomplete run.
The yellow thief is reached through the first series of supercharge routes. Later, a purple thief and the dragon Jed require a longer sequence: use the route around the ramps rather than trying to reach Jed directly with a single charge. Isaak is found along the route near the early supercharge area, while Lyle is reached by following the thief’s path toward the Stonehenge section.
After collecting the dragons and thieves, use the remaining supercharge routes to reach the high ledges near the goal platform. Check the locked chest and upper platforms before dropping to the exit. Tree Tops is best completed in separate route attempts if necessary: one pass for the early dragon and thief, one for the distant dragon, and one for the final treasure.
- Get the key through the right window near the start.
- Jump at the end of each long supercharge ramp.
- Do not try to reach Jed directly from the nearest ramp.
- Follow the yellow and purple thief routes separately.
- Return to the goal area only after checking the high ledges and locked chest.
Defeat Metalhead by redirecting his thrown enemies
Metalhead cannot be defeated by flaming or charging the robot itself. The boss is powered by the poles in the arena, and the reliable method is to make Metalhead’s own thrown enemies destroy them. Choose a pole, move so that the pole stands between Spyro and Metalhead, then wait for the boss to throw an enemy. Keep the line arranged so the thrown enemy collides with the pole instead of Spyro.
After each throw, move away from the impact area and reposition behind another pole. Do not stand directly beside a pole while waiting: the thrown enemy can hit Spyro, and Metalhead’s electrical attack can punish a stationary position. If the boss fires his beam, sidestep or circle away from its path, then return to a position with a pole between Spyro and the boss.
The first arena must be cleared before Metalhead retreats. Follow him through the opened route to the second arena and use the same method again. The second room is more dangerous because the thrown enemies and electrical attacks have less forgiving spacing, and some poles stand near swampy or hazardous edges. Keep Spyro on open ground whenever possible and use the nearest safe pole rather than crossing the arena unnecessarily.
When the final pole is destroyed, Metalhead collapses and drops his gem reward. Do not enter the building immediately if you are collecting everything. Return toward the entrance of the boss area and climb the steps behind the mud waterfall. The key collected from the hidden hub overlook opens the locked chest at the top. After collecting that treasure, return to the building and use the Return Home vortex.
- Do not flame or charge Metalhead directly.
- Place a power pole between Spyro and Metalhead.
- Let the enemy thrown by Metalhead collide with the pole.
- Dodge the electrical beam and move away from each impact.
- Repeat the positioning method in both arenas.
- Collect the post-boss treasure behind the mud waterfall if pursuing gems.
Use Wild Flight as an optional gem sweep and check the gate
Wild Flight is not required to reach Dream Weavers, but it is useful for collecting Beast Makers gems. Treat it as a planned route rather than a random flight. Maintain momentum through the target groups, make broad turns and avoid sharp braking that leaves distant chests or boats behind. The stage has a mixed route of boats, arches, chests and planes, so a missed target may require a deliberate loop rather than a straight continuation.
After clearing the regular levels and Metalhead, return to the Beast Makers hub. The balloonist requires 50 rescued dragons across the entire game. Beast Makers contributes only part of that total, so a shortfall does not prove that a Beast Makers dragon is missing. Check the level totals and revisit earlier homeworlds if necessary.
When the total reaches 50, speak to the balloonist near the Metalhead route. He will transport Spyro to Dream Weavers. Save after completing a level and before attempting Tree Tops or Metalhead again. Enter the next homeworld with Sparx restored whenever possible, since Dream Weavers combines narrow platforms with long glides.
- Complete Wild Flight if you want its gem total.
- Confirm the cumulative rescued-dragon count is at least 50.
- Use level totals to identify missing dragons in earlier worlds.
- Speak to the Beast Makers balloonist to enter Dream Weavers.
Before you move on
- Both Beast Makers hub dragons are free.
- Terrace Village, Misty Bog and Tree Tops have been completed.
- Metalhead has been defeated by causing his thrown enemies to destroy the power poles in both arenas.
- The post-boss treasure route has been checked if pursuing the homeworld’s full gem total.
- Wild Flight has been completed if pursuing the homeworld’s full gem total.
- The Beast Makers balloonist accepts the cumulative total of at least 50 rescued dragons and transports Spyro to Dream Weavers.
Homeworld: Dream Weavers — Hard Platforming and Final Gate
Enter Dream Weavers after freeing 50 dragons. Clear its homeworld and five portal levels, then use the balloonist on the bridge once your cumulative treasure total reaches 6,000 gems to enter Gnasty’s World. The homeworld contains 300 gems and 3 dragons; Dark Passage contains 500 gems and 5 dragons; Lofty Castle contains 400 gems and 3 dragons; Haunted Towers contains 500 gems and 3 dragons; Jacques contains 500 gems and 2 dragons; Icy Flight contains 300 gems. A complete Dream Weavers clear therefore awards 2,500 gems and frees 16 dragons.
Enter Dream Weavers and open the homeworld routes
After Beast Makers, speak to the balloonist when the save has at least 50 rescued dragons. You arrive on the Dream Weavers homeworld, an airborne area built from grassy islands, narrow paths and linked whirlwinds. The homeworld portal destinations are Dark Passage, Lofty Castle, Haunted Towers, Jacques and Icy Flight. Do not treat this as a four-level world: Jacques and Icy Flight are separate destinations, and both count toward a complete clear.
Start by collecting the gems on the entry island and defeating the nearby enemies when they are vulnerable. The tall winged creatures can be flamed even when large. The large armored creatures cannot be charged or flamed safely in that state; wait for the resizing magic to make them small, then charge them. Leave the two large armored creatures blocking the upper stairs until you have reached the cannon.
Move around the lower route, rescue Lateef near the Lofty Castle side of the large island, and collect the nearby chests and loose gems. Continue through the corridor toward the Haunted Towers side, rescue Zikomo on the small island near the cannon, and flame the Fool in the adjacent area to lower the temporary platform. Rescue Mazi near the Haunted Towers portal before returning to the central route.
Reach the resizing cannon by using the chain of whirlwinds. Defeat the cannon operator first, then push the cannon into position and flame it to fire. Shoot the two large armored creatures blocking the upper stairs until they shrink. Cross to them and charge them while they are small. From the upper route, flame the two Fools near the lowered platforms, then glide to the Icy Flight portal area and collect the remaining safe hub gems.
- Confirm that 50 dragons have been rescued before entering Dream Weavers.
- Rescue Lateef, Zikomo and Mazi in the homeworld.
- Use the resizing cannon to shrink the large armored creatures before charging them.
- Collect the 300 homeworld gems before leaving if you are pursuing a full clear.
Clear Dark Passage by controlling the lamps
Dark Passage uses lamp-carrying Fools to change nearby enemies between weak and dangerous forms. When a lamp is bright, the dog-like enemies are small and the armored turtle enemies are vulnerable to charging. When the area is dark, the dogs become large and the turtles are much harder to handle. Flame the lamp carriers whenever possible before entering a crowded section.
From the entrance, keep the lamp bright, defeat the first dogs and charge the small turtles. Use the first whirlwind to reach Kasiya, then continue through the upper path and rescue Azizi. Flame the bow-carrying enemies rather than trying to charge them, and keep moving when their projectiles are active.
After Azizi, follow the route toward Bakari and the Return Home vortex. Look below the heavy chest for the lower passage. Glide down into it, collect the gems, and continue through the dog-filled area. Some gems sit in corners below the main route, so check each landing before taking the next whirlwind.
Cross the large gap onto the narrow ledge and deal with the dogs there. In the next area, move between the two large turtles, flame the lamp carrier, then immediately charge the turtles while they are small. Use the whirlwind to reach the upper route, rescue Apara, and continue across the ledges to Obasi. At the end, use the whirlwind to reach the rocket, flame it, and use the explosion to open the heavy chest near the exit.
- Keep the lamp bright before entering enemy groups.
- Rescue Kasiya, Azizi, Bakari, Apara and Obasi.
- Search the lower passage beneath the heavy chest.
- Use the rocket to open the final heavy chest and finish the 500-gem sweep.
Use fairies, whirlwinds and supercharge in Lofty Castle
Lofty Castle begins near the Dream Weavers homeworld route beside the blocked passage. Flame the balloon-carrying armored enemies and defeat the vulnerable enemies around the first castle section. When you reach the caged fairies, free the required groups. Three freed fairies create a whirlwind that opens the next section.
Ride the first fairy whirlwind to Mudada, then cross the walkway and glide down to the next castle section. Free the additional fairies and rescue Baruti near the river. Use the nearby whirlwind to reach the upper castle and rescue Useni. Keep Spyro centered after each landing; the level often makes the next platform visible only after the camera is repositioned.
After collecting the key, return to the supercharge ramp. Charge down it and use the ramp to reach the upper route around the spiral structure. Stop on the destination platform rather than carrying the charge into a dangerous edge. Drop into the lower room, free the fairies, defeat the devil enemies, and open the locked chest.
Return to the unused fairy whirlwind and ride it to the final upper section. Free the last fairy group, then use the resulting whirlwind to reach the final gems and Return Home vortex. Check around the castle towers and beneath the upper walkways before leaving; several gems and the dragon platforms sit away from the most obvious route.
- Free the fairy groups in order to create the required whirlwinds.
- Rescue Mudada, Baruti and Useni.
- Use the key and supercharge ramp to reach the upper castle route.
- Collect all 400 gems before exiting.
Complete Haunted Towers with the powered flame
Haunted Towers is the most technical Dream Weavers level because the animated armored knights cannot be defeated with ordinary flame. At the opening, move past the inactive armor and defeat the enemies that can be handled normally. Do not waste time attacking the large knights before reaching a flame fairy.
Follow the route through the rooms and reach the first fairy. Let the fairy power Spyro’s flame, then return through the nearby knight section and destroy the armored enemies and metal doors. Continue through the whirlwind and use the powered flame on the next knight group before rescuing Kosoko.
After Kosoko, reach the next fairy near the center of the castle and use the powered flame to clear the surrounding knights and metal obstacles. Ride the whirlwind upward and charge down the supercharge ramp into the large room with multiple doors. The first door contains another fairy. Reach it before the awakened knights block the stairs.
For the difficult final dragon route, return to the top of the supercharge ramp and charge through the correct doorway to the outside. Jump the gap while still charging, then climb the ramp and glide around to the raised platform where Copano is held. If the knights wake before you reach the wizard, retreat through the outside route and use the nearby whirlwind to reset the armor before trying again.
Once the final fairy has powered Spyro’s flame, defeat the wizard and clear the knight-filled stairwell. Use the powered flame on the remaining armored enemies and nearby metal chest, then descend through the central opening and finish the remaining route. The fairy power is the solution to the armor puzzle; ordinary flame will not replace it.
- Reach the first flame fairy before fighting the armored knights.
- Rescue Kosoko, Lutalo and Copano.
- Use the supercharge ramp and outside gap to reach Copano.
- If the stairwell becomes blocked, retreat and reset the knight sequence instead of forcing through it.
Finish Icy Flight and Jacques
Icy Flight is the Dream Weavers flight stage and contains 300 gems. Use a planned loop rather than turning randomly after missed targets. Begin with the lighthouses and chests, then follow the train route. After flaming the first train, reverse along the track to meet the next trains head-on. Finish the train section before banking toward the helicopters, then sweep the remaining helicopters and chests without making sharp braking turns.
Jacques contains 500 gems and 2 dragons. From the entrance, defeat the armored claw enemies by charging and flame the larger claw enemies. Flame the Fools to raise the temporary platforms, then use those platforms to reach the side route. At the first fork, activate both Fools so the lower platform rises, wait for it to reach the correct height, and glide to Unika.
Continue through the lava section using the whirlwind and controlled glides. Flame the elevated enemies during the glide and use backward movement briefly if you need to lose altitude before landing. Return to the main route and activate the pair of Fools near the large platform. Their raised platforms lead to the key in the hole in the cliff. Keep the Fool timers active while climbing.
Rescue Revilo at the bottom of the stairs before the boss. Jacques throws boxes while moving between platforms. Approach quickly, jump onto the next platform and flame him when he pauses on a box platform. Repeat this at the next position, then use the raised platform and whirlwind to reach the final island. The last approach requires a curved glide because Jacques throws boxes rapidly; avoid overcorrecting, since falling into the lava restarts the chase. Flame Jacques once more at the final landing to finish the boss level, then collect the gems beside the exit.
- Use a broad, continuous route in Icy Flight and finish the train section before the helicopter sweep.
- Rescue Unika and Revilo in Jacques.
- Collect the key from the cliff hole by activating both Fools.
- Flame Jacques at each box-platform stop and finish with the final curved glide.
Reach the 6,000-gem final gate
Return to the Dream Weavers homeworld after clearing the portals. The five Dream Weavers portal levels plus the homeworld provide 2,500 gems in total, but the balloonist to Gnasty’s World checks the cumulative gem total from the entire game. You need at least 6,000 gems overall, not 6,000 gems collected inside Dream Weavers.
Check the status display before speaking to the balloonist. If the total is short, revisit earlier levels with skipped side paths, locked chests or explosive chests. Replaying Icy Flight is useful for a focused gem sweep only if the flight route is already familiar; otherwise, a missed chest or side platform in an earlier regular level is usually easier to recover.
When the total reaches 6,000, cross the bridge to the balloonist near the Dream Weavers homeworld route and choose Gnasty’s World. The Dream Weavers chapter is complete for campaign progression when the balloonist accepts the trip. Full completion additionally requires every gem, dragon and egg, but those requirements are not necessary merely to enter Gnasty’s World.
- Confirm that all five portal levels are complete: Dark Passage, Lofty Castle, Haunted Towers, Icy Flight and Jacques.
- Confirm that the Dream Weavers homeworld has 300/300 gems and 3/3 dragons if pursuing a full clear.
- Confirm the cumulative status total is at least 6,000 gems.
- Speak to the Dream Weavers balloonist and travel to Gnasty’s World.
Before you move on
- Spyro has entered Dream Weavers after freeing 50 dragons.
- The homeworld dragons Lateef, Zikomo and Mazi are free.
- Dark Passage, Lofty Castle, Haunted Towers, Icy Flight and Jacques are complete.
- Dream Weavers contributes 2,500 collected gems and 16 rescued dragons on a full clear.
- The cumulative gem total is at least 6,000.
- The Dream Weavers balloonist transports Spyro to Gnasty’s World.
Entering Gnasty’s World — Home and Quick Exit
Reach Gnorc Gnexus through Amos the Balloonist after collecting at least 6,000 cumulative gems. Gnasty’s World is the sixth and final world of the original PlayStation game, but it is not arranged like the first five Homeworlds: there is no standard flight stage. Its required progression is Gnorc Gnexus, Gnorc Cove, Twilight Harbor, and finally Gnasty Gnorc. Gnasty’s Loot is a separate post-boss bonus level that opens only after the full 100% collection requirements have been met.
Meet Amos’s 6,000-gem requirement
Before leaving Dream Weavers, speak to Amos the Balloonist and confirm that he will take Spyro to Gnasty’s World. The requirement is 6,000 cumulative gems. This is an entry gate, not a demand to have collected every gem, dragon, or egg in the game.
If Amos refuses, revisit levels with uncollected treasure until the total reaches 6,000. You can use Dream Weavers levels and their Homeworld treasure for a final top-up, but a complete collection run is unnecessary if your immediate goal is to finish the main campaign. The earlier progression requirements are separate: five dragon eggs open Beast Makers, 50 rescued dragons open Dream Weavers, and 6,000 gems opens Gnasty’s World.
Create a normal in-game save before boarding the balloon. Keep this save separate from any attempt made inside the final levels, especially if you are also planning a later 100% run.
- The total gem count is at least 6,000.
- Amos’s dialogue allows travel to Gnasty’s World.
- A normal in-game save exists before entering the final world.
Understand Gnorc Gnexus before leaving it
Gnorc Gnexus is a compact staging hub rather than another full Homeworld. It contains 200 gems and two dragon rescues, but they become available in stages. On the first visit, collect the accessible 75 gems and free Delbin in the middle of the hub. The first open level entrance is Gnorc Cove.
Gnasty’s World does not contain one of the five standard flight stages. The world’s required route is organized around the hub and its three level entrances: Gnorc Cove opens first, Twilight Harbor opens after Gnorc Cove, and Gnasty Gnorc opens after Twilight Harbor. Do not search Gnorc Gnexus for a missing flight portal.
The second dragon, Magnus, does not appear in the hub on the initial visit. He appears in Delbin’s central location only after Gnasty Gnorc has been defeated. Magnus is part of the full-completion route and is not required to enter or defeat the boss.
- Delbin has been freed from the central crystal.
- The accessible 75 Gnorc Gnexus gems have been collected if desired.
- The player understands that Gnasty’s World has no standard flight level.
- Magnus is being treated as post-boss content.
Enter and complete Gnorc Cove
Use the open dragon-head entrance to Gnorc Cove. This is the first required level in Gnasty’s World. The level contains industrial platforms, armed Gnorcs, barrels, and narrow routes. Clear dangerous enemies before committing to a long charge or glide, particularly when barrel-throwing enemies are positioned near ledges.
Use the barrel-launch machinery where it is provided. TNT barrels can remove obstacles and armored enemies when used correctly, while ordinary flame attacks are safer against isolated enemies. The level’s final section presents three colored tunnels. Follow the route that obtains the key, opens the locked area, and then leads to the Return Home exit.
Finish the level by passing through its Return Home portal. Merely entering Gnorc Cove and quitting or returning through a menu is not the progression trigger you want. When Spyro returns to Gnorc Gnexus through the level exit, the left dragon-head entrance opens. It contains another 50 gems and the portal to Twilight Harbor, bringing the hub’s available treasure to 125 gems.
- Gnorc Cove has been completed through its Return Home portal.
- The left dragon-head entrance in Gnorc Gnexus is open.
- The 50-gem section and Twilight Harbor portal are accessible.
Complete Twilight Harbor
Enter Twilight Harbor from the newly opened entrance. This level uses exposed platforms, armed Gnorcs, speed ramps, and water hazards. Flame or avoid enemies before beginning long glides, and stop at safe platforms to line up landings instead of carrying charge momentum into an unseen drop.
Use the speed ramp when the route requires it. Some treasure and elevated areas depend on carrying enough speed up a ramp, and the level includes a drawbridge mechanism that exposes a route to a hidden section. If you miss a platform, return to the last stable area and reset your approach rather than repeatedly charging into the same gap.
Continue to the Return Home portal and use it to leave. On returning to Gnorc Gnexus, the middle dragon-head entrance opens. The final 75 gems of the hub are available there, along with the portal to Gnasty Gnorc. Collecting all 200 Gnorc Gnexus gems is optional for the main campaign but required for the full collection total.
- Twilight Harbor has been completed through its Return Home portal.
- The middle dragon-head entrance has opened in Gnorc Gnexus.
- The final 75 Gnexus gems and the Gnasty Gnorc portal are accessible.
Prepare for the final boss level
Save in Gnorc Gnexus before entering Gnasty Gnorc. You do not need 12,000 gems, 80 dragons, or 12 dragon eggs to enter the boss level. Those totals are associated with full completion and the later opening of Gnasty’s Loot, not with the ordinary campaign route.
If Sparx is damaged, collect a nearby fodder butterfly when one is available, or return to a safer completed area before attempting the boss. The Gnasty Gnorc level begins with the key-thief route before the actual pursuit, so enter with enough health to handle several consecutive hazards.
The first thief carries a key that opens the next section. Chase the second thief after using that key, then take the second key to lower or open the route to Gnasty’s platform. The two thief chases are part of the boss level itself; they are not additional Gnorc Gnexus stages.
- Gnorc Cove and Twilight Harbor were both exited through their Return Home portals.
- The Gnasty Gnorc entrance is open.
- A pre-boss in-game save has been created.
- The 100% collection requirements have not been mistaken for boss access requirements.
Keep the ending and bonus route separate
Entering Gnorc Gnexus does not trigger the ending. The opening interview belongs to the beginning of the game, while the campaign ending follows the defeat of Gnasty Gnorc. Reaching the final hub, opening the boss portal, or collecting all 200 Gnexus gems is not proof that the main campaign is complete.
After defeating Gnasty Gnorc, return to the center of Gnorc Gnexus. Magnus appears where Delbin was located and can then be freed. If the game shows 12,000 gems, 80 dragons, and 12 dragon eggs collected, Magnus’s conversation opens the final dragon-head portal to Gnasty’s Loot. That bonus level is optional for the ordinary ending and is not part of the standard Gnasty’s World route before the boss.
For the main campaign, the completion point is defeating Gnasty Gnorc and reaching the resulting ending sequence. For the full route, continue afterward by freeing Magnus, entering Gnasty’s Loot, completing it, and collecting its additional treasure.
- Gnasty Gnorc has been defeated for the main-campaign completion.
- Magnus has been freed afterward if pursuing full completion.
- The 100% totals are confirmed before expecting Gnasty’s Loot to open.
- Gnasty’s Loot is treated as optional post-boss content, not as a prerequisite for the ordinary ending.
Before you move on
- Amos transported Spyro to Gnorc Gnexus after the cumulative gem total reached 6,000.
- Delbin was freed in the center of Gnorc Gnexus.
- Gnorc Cove was completed through its Return Home portal.
- Twilight Harbor was completed through its Return Home portal.
- The Gnasty Gnorc entrance opened in the central hub.
- A pre-boss in-game save was made.
- For the main campaign, the next required action is to enter Gnasty Gnorc, complete the two key-thief chases, and defeat Gnasty.
- For full completion, Magnus appears after the boss and the totals reach 12,000 gems, 80 dragons, and 12 eggs before Gnasty’s Loot opens.
Boss Fight: Gnasty Gnorc — Arena Strategy
In the original PlayStation version of Spyro the Dragon, Gnasty Gnorc is defeated through two thief chases, a fast ground pursuit and a retracting-platform section over lava. There is no stationary duel and no conventional damage bar. Spyro must first collect two keys, use them to lower Gnasty’s platform, catch him twice and flame him at close range. The safest approach is to preserve charge speed, avoid the outer edges of the chase route and use short, deliberate jumps during the final platform sequence.
Prepare the opening area and locate the first thief
Enter the Gnasty Gnorc level with Sparx in good condition if possible. Gnasty is visible on a raised platform near the start, but the battle has not begun. He occasionally fires energy balls into the opening area, so keep Spyro moving instead of standing directly below him. You can collect the nearby gems while moving around the perimeter, but do not let treasure gathering distract you from the two keys.
Follow the open tunnel from the starting area until you reach the first key thief. The thief runs through a looping route and eventually returns toward the room where the chase began. Start charging immediately and use charge-jumps through the bends. A charge-jump preserves momentum better than repeatedly running into corners, and it lets Spyro clear small changes in elevation without losing as much speed.
When Spyro reaches flame range, release the charge and breathe fire on the thief. The thief drops the first key. Pick it up, then return to the starting area and follow the perimeter toward the locked tunnel. The first key opens this route; it does not lower Gnasty’s platform directly.
- Keep moving while Gnasty is firing into the opening area.
- Catch the first thief and collect the first key.
- Use charge-jumps through the thief’s turns instead of scraping along the walls.
Open the second tunnel and catch the second thief
Approach the locked doorway in the starting area. The first key opens it automatically when you get close. The second thief is beyond this door and follows a longer route that leaves the tunnel, turns sharply right along a grey path and eventually loops back toward the first area.
Charge after the thief as soon as it starts running. At the hard right turn, begin steering before reaching the corner so Spyro does not collide with the outer wall. Continue using charge-jumps on straight sections and through small changes in height. When you are close enough, stop charging and flame the thief. Collect the second key immediately.
There are no dragons inside this boss level. If Spyro falls from the route or dies before Gnasty is defeated, the thieves must be caught again on the next attempt. For that reason, do not take unnecessary risks while collecting gems during the key chases. The treasure can be gathered after the first Gnasty hit, when the ground route is no longer active.
- The first key has opened the second tunnel.
- Catch the second thief and collect the second key.
- Avoid falling; a failed attempt resets the thief objectives.
Lower Gnasty’s platform and begin the ground chase
After taking the second key, leave the tunnel and return to the starting area. Approach Gnasty’s raised platform. The second key lowers it automatically, and Gnasty immediately runs away along the first chase route. Jump up the steps and begin charging without delay.
The route starts with a sharp turn of almost 180 degrees. Turn early and stay away from the outside edge. Falling from the route is fatal, so do not cut across corners blindly. If an edge is on Spyro’s left, keep to the right side of the track; if an edge is on the right, keep left. When the path narrows with edges on both sides, stay near the centre and reduce steering rather than trying to pass Gnasty aggressively.
Several steps descend along the route. Jump down them instead of charging directly into each step, because the elevation changes slow Spyro and can create too much distance between him and Gnasty. Continue through the tight bends. If Gnasty is not waiting at the final platform, Spyro was too slow; jump from the far end to restart the chase rather than wandering around the track.
- Approach Gnasty’s platform only after both keys are collected.
- Start charging as soon as Gnasty runs.
- Protect momentum over the descending steps and keep away from lethal edges.
Land the first hit
When Spyro reaches the end platform, Gnasty remains there briefly and attempts to squash him with his sceptre. Do not charge straight into him. Circle close enough to make him commit to the swing, then jump or move aside as the sceptre attack comes down. Immediately after the miss, step into flame range and breathe fire on Gnasty.
This is the first successful hit, not the end of the battle. Gnasty retreats through a second tunnel toward the lava-platform section. Before following him, you may safely return along the completed ground route and collect its gems. The level contains 500 gems in total, and the ground route accounts for most of the treasure available before the final hit. If your priority is simply finishing the campaign, skip the treasure and enter the tunnel.
- Bait or avoid Gnasty’s sceptre swing.
- Flame him only after reaching the end platform.
- Treat the first hit as the start of the final section, not the victory condition.
Cross the retracting platforms over lava
Enter the second tunnel and proceed until the platforms above the lava come into view. As Spyro lands on the first platform, the platforms begin retracting into the wall. Move forward immediately. The objective is to predict the next landing rather than wait for each platform to become perfectly aligned.
If the next platform is directly beside the current one, use a normal jump. If there is a larger gap, jump and glide, but do not glide farther than necessary. Extra gliding costs control and can carry Spyro into the wall. During a glide, descend toward the centre of the destination platform instead of arriving high and drifting over its far edge.
Keep the camera aimed along the route and make small steering corrections. Bumping into the wall can slow Spyro or push him sideways into the lava. Gnasty runs ahead while the platforms retract, so hesitation makes the route harder. If Spyro falls, the attempt fails; because the level has no dragons, you must repeat the thief section before trying again.
- Move as soon as the first retracting platform is reached.
- Use a jump for adjacent platforms and a short glide for wider gaps.
- Aim for the centre of each platform and avoid scraping the walls.
Avoid the final projectiles and finish Gnasty
Near the end of the lava route, Gnasty stops and fires energy projectiles at Spyro from the final platforms. Keep moving and avoid standing directly in front of him. Use lateral movement or a short turn to leave the projectile’s line, then close the distance once the attack has passed.
When Spyro reaches Gnasty, circle near him rather than charging directly into his body. Wait for the opening after his attack, then flame him at close range. The second flame defeats him. Long-distance flame attacks are not a reliable substitute for reaching the platform, and rushing directly into the projectile can cost Sparx or the attempt.
Gnasty drops the final 100 gems when he is defeated. Spyro then exits the level automatically and the first ending sequence plays, including the interview-style scene that follows the opening. This confirms that the main campaign has been completed.
- Stay out of the direct line of the final energy projectiles.
- Reach Gnasty’s platform before attacking.
- Flame him after his attack creates an opening.
- Wait for the automatic exit and ending sequence.
Continue to optional completion
Defeating Gnasty completes the main campaign even if the overall file is not at 100 percent. After the ending sequence, return to Gnorc Gnexus and free the dragon that appears in the homeworld. The remaining completion work includes any unfinished gems, dragons and eggs elsewhere in the game.
Gnasty’s Loot is optional bonus content. In the original PlayStation release, it becomes available after the full completion requirements are met: 12,000 gems, 80 dragons and 12 dragon eggs. Use the level totals and in-game progress display to identify anything missing before returning to Gnorc Gnexus.
- Gnasty’s defeat and the ending sequence have occurred.
- Return to Gnorc Gnexus for the post-boss dragon.
- For the bonus level, verify 12,000 gems, 80 dragons and 12 dragon eggs.
Before you move on
- Both key thieves have been caught and both keys have been collected.
- Gnasty’s raised platform has lowered after Spyro approaches it with both keys.
- Spyro has completed the first ground chase and flamed Gnasty after avoiding the sceptre swing.
- Spyro has crossed the retracting platforms over lava.
- Spyro has avoided the final energy projectile and landed the finishing flame.
- Gnasty has dropped the final gems, the level has exited automatically and the ending sequence has played.
- For optional bonus content, the file shows 12,000 gems, 80 dragons and 12 dragon eggs before entering Gnorc Gnexus’s final bonus portal.
Bonus Level: Gnasty’s Loot — Requirements & Entry
Gnasty’s Loot is the optional bonus level in the original North American PlayStation release of Spyro the Dragon. It becomes available only after Gnasty Gnorc has been defeated, Magnus has been freed in Gnorc Gnexus, and the main-game totals show 12,000 gems, 80 rescued dragons and all 12 dragon eggs. The level contains four key thieves, four locked doors and 2,000 gems. It has no dragons or dragon eggs. Completing it raises the game total to 14,000 gems and records 120% completion.
1. Defeat Gnasty Gnorc, then free Magnus
Complete Gnorc Cove and Twilight Harbor, then enter the Gnasty Gnorc portal and defeat the final boss. The first ending sequence follows automatically, but the game is not yet at 100%. Return to Gnorc Gnexus after the sequence finishes.
Magnus appears in the center of Gnorc Gnexus after Gnasty has been defeated. Free him before attempting to open the final dragon-head portal. Magnus explains that the portal requires complete main-game collection progress.
Check the totals before searching for the portal. You need 12,000 main-game gems, 80 rescued dragons and all 12 dragon eggs. Gnasty’s Loot contributes no dragons or eggs, and its 2,000 gems are added only after entry and collection.
- Gnasty Gnorc has been defeated.
- Magnus has been freed in Gnorc Gnexus.
- The inventory shows 12,000 main-game gems.
- The inventory shows 80 dragons.
- The inventory shows 12 dragon eggs.
- The final dragon-head portal has opened.
2. Enter Gnasty’s Loot and raise the flight barrier
Enter the opened final dragon-head portal in Gnorc Gnexus. Spyro can fly freely in this level, but his starting maximum height is restricted. Fly forward to the next land section, turn left and climb the steps there. Reaching this higher ground raises the invisible flight barrier.
The level is designed around progressively reaching higher platforms. Do not try to fly directly from the starting ledge to the upper treasure areas. Collect accessible yellow and purple gems while moving, but treat the four thieves and their keys as the main progression objectives.
The first thief circles a small building on the first raised section. Chase it with charge-jumps while keeping inside its loop rather than following the entire outside edge. Flame it when you close the distance and collect the first key.
- Free flight is active.
- The first raised section has been reached.
- The first flight-height barrier has been raised.
- The first ground thief has been defeated.
- The first key has been collected.
3. Open the first door and defeat the second ground thief
From the first thief’s area, sweep the nearby chests and loose gems, then follow the outer edge toward the smaller platform across the gap. Use the first key on the locked door there. Enter the room and climb its steps to raise the flight barrier again.
Leave the room and return toward the starting side. Fly to the higher platform beside the small structure, where the second thief circles across a broad open area. Chase from slightly inside its route instead of copying the full outer loop. Charge-jumps help you gain ground; flame the thief when you are close enough.
After taking the second key, continue around the area and collect the accessible treasure. Locate the next locked door on the far side near the green ground patch. Open it to release the first airplane thief, then climb the steps inside so Spyro can reach the higher flight level before starting the chase.
- The first locked door is open.
- The second flight barrier has been raised.
- The second ground thief has been defeated.
- The second key has been collected.
- The next locked door has been opened.
- The first airplane thief has been released.
4. Chase both airplane thieves and collect the final keys
After opening the second locked door, climb the steps and exit onto the higher ledge. The first airplane thief circles a building and passes beneath pipes. Do not copy the entire pipe route. Cut across the corners where the space is clear and maintain a controlled distance until the thief makes a broad turn. Flame it when Spyro is close to receive the third key.
Use the third key on the locked door near the high platform. Climb the steps behind it and collect the nearby treasure. The final airplane thief escapes below and to the right, then loops through the lava cave and the outside area.
The last chase is safer when you avoid the pipes completely. Cut corners through open space and watch for the point where the thief restarts its loop; its change in height gives Spyro a useful opportunity to close the gap. Several laps may be required. Flame the thief when you are within range and collect the fourth key.
- The first airplane thief has been defeated.
- The third key has been collected.
- The third locked door is open.
- The second airplane thief has been defeated.
- The fourth key has been collected.
5. Open the fourth door and sweep the upper treasure
Return to the area near the third locked door and locate the fourth locked door. Use the final key, enter the room and climb the last steps. The room contains a single yellow gem and, more importantly, raises Spyro to the highest flight level available in the stage.
From the elevated position, fly outside toward the firecrackers. Activate the sequence from one firecracker to the next, then wait for the projectile to destroy the strong chest before collecting its treasure. Continue through the upper firecracker route and sweep the replacement gem clusters around the third-door area.
When the accessible upper areas have been cleared, head toward the Return Home vortex. Reaching the goal area should leave Spyro with approximately 950 treasure. The level is not complete at that point, so do not use the vortex yet.
- The fourth locked door is open.
- The yellow gem beyond it has been collected.
- The upper flight barrier has been raised.
- The firecracker targets have been activated.
- The replacement gem clusters near the third-door area have been collected.
- Spyro has reached the goal area with about 950 treasure.
- The Return Home vortex has not been used yet.
6. Use the tunnel beside the vortex and finish the level
When you reach the Return Home vortex, circle behind and beside it instead of entering immediately. A tunnel beside the vortex leads to the final unvisited treasure area. This route contains the remaining 42 purple gems, worth 1,050 treasure in total.
Enter the final room and activate the explosive chest arrangement there. Move just outside the room after lighting the sequence, wait for the explosions to finish, then return and collect every released purple gem. The important tally is the combined result: about 950 treasure before the tunnel plus 1,050 treasure from the tunnel and final treasure room equals 2,000/2,000.
If the level counter is short, recheck the upper platforms, the firecracker targets, the replacement gem clusters near the third locked door and the room beyond the tunnel. Use Return Home only after the counter confirms 2,000/2,000.
After returning through the vortex, the second ending sequence plays and Spyro returns to the Artisans Home area. The completed file should show 14,000 gems, 80 dragons, 12 eggs and 120% completion.
- The tunnel beside the Return Home vortex has been entered.
- The remaining 42 purple gems have been collected.
- The final explosive treasure sequence has been activated.
- The level counter shows 2,000 out of 2,000 gems.
- The Return Home vortex has been used after the full treasure sweep.
- The final game total shows 14,000 gems and 120% completion.
Before you move on
- Gnasty Gnorc was defeated before attempting the bonus unlock.
- Magnus was freed in Gnorc Gnexus after the boss.
- The final portal opened with 12,000 gems, 80 dragons and 12 dragon eggs recorded.
- All four Gnasty’s Loot thieves were defeated.
- All four locked doors were opened.
- The upper firecracker targets and replacement gem clusters were collected.
- The goal area was reached with approximately 950 treasure.
- The tunnel beside the Return Home vortex was entered.
- The remaining 42 purple gems worth 1,050 treasure were collected.
- Gnasty’s Loot displayed 2,000 out of 2,000 gems.
- The final game total reached 14,000 gems, 80 dragons, 12 eggs and 120% completion.
Flight Levels — Scanning, Targeting and Scoring
The original PlayStation release contains five timed flight levels: Sunny Flight, Night Flight, Crystal Flight, Wild Flight and Icy Flight. Each stage has 32 targets arranged as four groups of eight. Rings and arches are cleared by flying through them; chests, barrels, boats, planes, lighthouses and other targets are destroyed with flame. Flight stages contain no dragons or dragon eggs. Their purpose is to collect gems, practice aerial control and complete the level’s full 300-gem reward.
Learn the original flight controls
When Spyro enters a flight level, he is already flying continuously rather than performing a normal jump and glide. Use the directional controls to steer, Circle to breathe fire and X to regain altitude if an impact interrupts the flight. Square is not needed for ordinary flight targets. The stages are designed to be completed in the air, so do not deliberately land when a route can be continued overhead.
The timer begins with a limited amount of time and is extended as targets are destroyed. Because the exact starting allowance differs by stage, treat every flight as a timed route rather than relying on one fixed number. The safest approach is to keep moving toward the next visible landmark, avoid sharp reversals and use target groups to build a continuous path.
Rings and arches must be passed through. Flame targets such as chests, barrels, boats, airplanes, lighthouses and moving Gnorcs as Spyro reaches their paths. If a collision stops the flight, press X immediately to get back into the air instead of trying to land and restart from the ground.
- Use the original PlayStation button roles: Circle for flame and X for jump or flight recovery.
- Stay airborne whenever possible.
- Destroy or pass through targets while continuing toward the next landmark.
- Press X after a collision interrupts Spyro’s flight.
Plan around the four groups of eight
Every original flight stage contains 32 objects arranged as four groups of eight. The groups differ by stage, but the practical goal is always the same: clear a connected group, use its added time to reach the next group and avoid wasting the clock on long cross-map searches.
If you miss one target, continue to the next part of the route unless the missed object is directly ahead. An immediate 180-degree turn often causes more trouble than the original miss. Finish the nearby group first, then loop back when the route opens. The final result awards the stage’s complete 300 gems only after all 32 objects have been cleared.
Do not assume that touching several groups means the level is finished. Watch the results display and continue until every target has been destroyed or passed through.
- Treat each stage as four groups of eight targets.
- Follow connected target chains before attempting a recovery turn.
- Leave isolated misses for a controlled loop back.
- Continue until the full 300-gem result appears.
Clear Sunny Flight from the Artisans entrance
Sunny Flight is opened in the Artisans Homeworld. Go to the pond near the area where Delbin was rescued and step on the five stones without falling into the water or repeating a stone. The hidden entrance opens beside the pond.
Inside Sunny Flight, steer right and descend into the cave. Destroy the eight chests there: take the first group near the entrance, then the chest in the middle and the remaining chests arranged around the cave wall. Leave the cave and turn left toward the green arches.
Pass through the first six arches, then break away from the line to attack the eight airplanes. Intercept the pilots from the side or front rather than following them from behind. After the airplanes are gone, return to the route and pass through the remaining two arches.
Turn toward the railroad tracks. Enter against the direction of the trains so the barrels approach Spyro. Flame each train as it reaches you; a well-timed attack can remove multiple barrels in one approach. Continue until all eight barrels are destroyed, then check the result screen for the complete 300-gem reward.
- Open Sunny Flight with the five Artisans pond stones.
- Route: chests, six arches, airplanes, final two arches, railroad barrels.
- Meet trains head-on instead of chasing them.
- Confirm the full 300-gem result.
Follow the fixed route in Night Flight
Night Flight is in Peace Keepers Home. From the hub, go up the tunnel and across the platforms near the Red-hatted Speargnorc; the portal is behind that route. The stage is comparatively linear, so avoid exploring away from the target chain.
Begin with the eight rings. After the final ring, turn left and follow the chests. They form a mostly forward route, although their height changes, so make small vertical adjustments rather than wide turns.
After the chests, dip low for the first arch and continue through the complete arch sequence. Do not divert toward the lighthouses early. The final arch places Spyro near the first lighthouse. Take the first four in sequence, then stay near the wall for the next two after the turn. Finish with the two outer lighthouses.
- Route: rings, chests, arches, lighthouses.
- Use small height corrections through the chest line.
- Do not start the lighthouse group before finishing the arches.
- Keep the route moving forward instead of circling the stage.
Clear Crystal Flight without losing the airplane line
Crystal Flight is reached from Magic Crafters Home. The portal is in the cave near Boldar, in front of the Crystal Flight entrance. Once inside, take all eight rings first. The eighth ring leads directly toward the first arch, so do not make a detour after leaving the ring section.
Continue through all eight arches in one line. The airplanes appear after the arches and move along straight paths at alternating heights. Adjust Spyro upward and downward to intercept them as they cross the route. Avoid tailing a plane; catching it from behind makes it easier to lose both time and position.
The chest group is positioned beyond the airplane route. If the airplane sequence has been completed cleanly, Spyro reaches the chests immediately afterward. Flame all eight chests and wait for the 300-gem completion result.
- Route: rings, arches, airplanes, chests.
- Make vertical adjustments for alternating airplane paths.
- Avoid turning around for a missed airplane until the route has opened.
- Flame the eight chests at the end.
Handle Wild Flight’s mixed boat and arch section
Wild Flight is entered through a well in Beast Makers Home. Drop into the hidden room and enter the portal. At the start of the stage, dip down and take the boats entering the opening area. Two boats arrive near the starting position.
Enter the tunnel used by the second boat and flame the boats as they approach. After the fourth boat, the route opens into an area containing both boats and arches. Work around the central arch while clearing the boats. When the boat group is nearly finished, loop back through the open area and take the central arch.
Continue through the remaining arches. The eighth boat should arrive as Spyro comes back into the area; flame it, then move directly toward the chest group.
The chests are mixed with airplanes. Destroy all eight chests first, then attack the airplanes. Fly across their paths rather than chasing them around the arena. This keeps Spyro moving forward and reduces the chance of losing the timer while turning.
- Route: boats, mixed boat-and-arch area, arches, chests, airplanes.
- Use the tunnel to meet boats as they approach.
- Return for the central arch after clearing the nearby boats.
- Clear all chests before pursuing the airplanes.
Combine the lighthouse and chest routes in Icy Flight
Icy Flight is the Dream Weavers flight stage. The most reliable route combines the lighthouse and chest groups instead of completing one group and then crossing the entire stage for the other.
At the second lighthouse, move left while flaming it to catch the nearby chest. At the third lighthouse, take the short left turn to the chest on the platform. While flaming the fourth lighthouse, turn left toward the cluster of four chests arranged in a circle. Continue taking lighthouses and chests as they appear until both groups of eight are complete.
After the lighthouse and chest groups are finished, head toward the railroad. Enter through the left tunnel so the trains come directly toward Spyro, then hold the line and flame the barrels as they approach. After the seventh and eighth barrels, Spyro reaches an area with five Gnorcs moving vertically beneath helicopter blades. Flame all five.
Use the lower of the two tunnels afterward to find the remaining three targets. Clear them and wait for the complete 300-gem result.
- Combine lighthouses and chests instead of making a long return trip.
- Use the left railroad tunnel so trains approach Spyro.
- Destroy the five helicopter-blade Gnorcs before searching for the final three.
- Take the lower tunnel for the last targets.
Use completed flights for gem cleanup
Flight levels are useful when a balloonist requirement leaves Spyro short of gems, but they are not required for dragons or dragon eggs. If a level is missing a dragon rescue or egg, the problem is in a normal level or homeworld, not in one of the five flight stages.
For a full completion run, enter each flight stage and continue until its result screen awards the complete 300 gems. Check the inventory total after returning home. A stage that ends before all 32 targets are cleared has not supplied its full reward, even if several target groups were completed.
Once Sunny Flight, Night Flight, Crystal Flight, Wild Flight and Icy Flight have each awarded their full gem results, stop replaying them unless you are practicing routes or correcting a missed attempt.
- Complete Sunny Flight, Night Flight, Crystal Flight, Wild Flight and Icy Flight.
- Verify the full 300-gem result for each stage.
- Do not search flight stages for dragons or eggs.
- Use the inventory total to confirm that the reward was added.
Before you move on
- The result screen shows the complete 300-gem reward for the flight stage.
- All 32 targets have been destroyed or passed through in four groups of eight.
- The inventory total increases by 300 after leaving the stage.
- Sunny Flight, Night Flight, Crystal Flight, Wild Flight and Icy Flight each show their full gem result for a full completion run.
- No dragon or dragon egg remains missing because flight stages contain neither collectible.
References for this chapter
Boss Levels (Non-Gnasty) — Metalhead, Jacques and Others
The five non-Gnasty boss levels in the original PlayStation version are Toasty, Doctor Shemp, Blowhard, Metalhead and Jacques. Each level combines a short route with a boss sequence, gems and at least one rescued dragon. The safest approach is to clear nearby enemies before committing to the boss, keep Sparx healthy, and wait for each boss’s attack cycle instead of charging forward blindly. Metalhead is the major exception: Spyro does not attack Metalhead directly, but uses the enemies Metalhead throws to destroy his power poles.
Prepare before entering a boss level
Restore Sparx before starting whenever practical. In a homeworld, defeat a small enemy and collect the butterfly it produces, or return to a previous level where fodder is available. Entering with Sparx visible gives you more room to survive a mistake, particularly in Metalhead and Jacques.
Clear ordinary enemies on the approach if they can interfere with your movement, but do not spend health fighting enemies that you can safely bypass. Boss levels contain their own gems and dragons, so after the boss is defeated, search the arena, upper ledges and exit route before leaving. The boss-level totals are Toasty: 100 gems and 1 dragon; Doctor Shemp: 300 gems and 1 dragon; Blowhard: 400 gems and 1 dragon; Metalhead: 500 gems and 1 dragon; Jacques: 500 gems and 2 dragons.
- Enter with Sparx visible if possible.
- Clear enemies that block the route or can attack during a chase.
- Record the level’s gem and dragon totals before leaving.
Toasty — Artisans
Toasty’s route contains shepherds and dogs. Flame the tall shepherd enemies from a distance. Dogs require two flame attacks: flame one once, immediately move away from its pounce, then return for the second flame. Do not charge into a group of dogs, because their leap can damage Spyro before you regain control.
Continue through the first rooms and side passage, collecting the open gems and iron-chest treasure. The level’s only dragon, Nevin, is on the route before the boss sequence. Rescue him before beginning the final pursuit if you are making a completion run.
Toasty appears several times while disguised as a tall enemy. In the first encounter, flame the dog guarding him, then flame Toasty. In the next area, defeat both guarding dogs before attacking Toasty. In the final area, defeat the three dogs and flame Toasty one last time. Each successful attack causes the disguise to fail and moves the encounter forward. Collect the gems around the Return Home portal before exiting.
- Defeat each dog before attacking the disguised Toasty.
- Use flame rather than charge against the dogs and Toasty.
- Rescue Nevin and collect the final portal-area gems.
Doctor Shemp — Peace Keepers
Doctor Shemp’s arena is built around ledges and staff swings. Approach from below or from the side, then wait for him to advance and finish striking the ground. When he turns away, jump up and flame his exposed back. After the first hit he moves to the next ledge.
On the second ledge, flame his armor to make him turn and circle. His back is exposed briefly during the movement. Flame him before he completes the turn and brings the staff around. On the third ledge, jump over the staff as he spins, then flame his back. Three successful flame attacks defeat him.
If the camera places Spyro directly in front of Shemp, stop attacking and circle around the arena perimeter until his back and staff are visible. Do not remain in front of the staff waiting for an opening. After victory, search around the Return Home portal and the lower side route for the remaining gems; Doctor Shemp contains 300 gems and one dragon.
- Wait for each staff sequence to finish.
- Flame Doctor Shemp from behind three times.
- Jump over the spinning staff on the final exchange.
- Check the lower side route and portal area for treasure.
Blowhard — Magic Crafters
Blowhard begins as a wizard riding a cyclone. Move toward him without committing to a long charge. Wait until the cyclone descends and Blowhard comes down to Spyro’s level, then jump onto the nearby ledge and flame him. He retreats through the wooden door after the hit.
Follow the route through the moving-column rooms. When a column is lowered or tilted toward Spyro, use it as the next platform and flame the wizard when he reaches your level. Do not jump onto a column while it is rising away from you; wait for its movement to give you a stable landing.
The route contains one dragon between the two moving-ledge sequences. Rescue it before continuing to the later part of the level. At the final approach, wait for Blowhard to descend again, flame him, cross to the next ledges and repeat the attack. His last defeat releases gems. Collect those gems and the chest near the Return Home portal to finish the level’s 400-gem total.
- Attack only when Blowhard descends to Spyro’s height.
- Use the moving columns when they are lowered or tilted toward you.
- Rescue the level’s single dragon before the final pursuit.
- Collect the gems released by Blowhard and the portal-area chest.
Metalhead — Beast Makers
Metalhead cannot be defeated by flaming or charging his body. The fight takes place in two rooms, each containing metal power poles. Metalhead throws enemies toward Spyro, and the objective is to position yourself so those thrown enemies hit the power poles.
In the first room, clear enemies that are already blocking your movement, then watch Metalhead’s throwing animation. Stand in front of a power pole as he launches an enemy. The enemy collides with the pole and damages or destroys it. Move away after the impact, collect the gems when safe, and repeat until the first group of poles is gone. Do not charge into the poles yourself, and do not stand directly in Metalhead’s path when there is no pole behind you.
After the first group is destroyed, follow the corridor into the next room. Before dropping down, inspect the left-side platforms and the hidden area behind the waterfall-like obstruction for additional treasure. Then repeat the pole method in the second room: let Metalhead throw his remaining enemies, line up each throw with a power pole, and retreat after every impact. The second group completes the fight and destroys Metalhead.
After the victory, use the nearby whirlwind to reach the upper section. Collect the gems around the Return Home gateway and the elevated treasure before leaving. Metalhead contains 500 gems and one dragon.
- Do not attack Metalhead’s body.
- Stand between a thrown enemy and a power pole.
- Use one throw at a time and retreat after the impact.
- Search the hidden side area and upper section after the fight.
- Rescue the single dragon before the boss sequence if possible.
Jacques — Dream Weavers
Jacques’s level has two dragons. The first is reached through the clock-fool and rising-platform route near the beginning. Flame the fools to turn them into timed clocks, then use the temporary platforms to cross to the dragon. The second dragon is reached later, after the locked-chest route and the steps leading toward the boss.
The level’s fools create temporary platforms when flamed. Stand on or near the circular platform before igniting one so you have a good starting position, then move quickly across the raised platforms. When a platform begins to lower, do not hesitate on it; jump or glide to the next safe ledge. Collect the key and open the locked chest before beginning the final chase.
Jacques retreats repeatedly instead of standing for a conventional exchange. Pursue him along the route and flame him whenever he pauses or becomes reachable. He throws boxes in your path, so jump over them or move around them rather than charging through. After each hit, continue forward to his next position. At the final large box, flame Jacques to defeat him and collect the large group of magenta gems he leaves behind. Use the box and nearby whirlwind to reach the Return Home portal and the final treasure, completing the 500-gem, two-dragon level.
- Activate fools from a position that gives a clear route to the next platform.
- Collect the key and open the locked chest before the boss chase.
- Pursue Jacques and flame him whenever he pauses.
- Jump over thrown boxes instead of charging through them.
- Rescue both dragons and collect the gems released at the final box.
Recover after a failed attempt
If Spyro loses a boss fight, first decide whether the route or the boss pattern caused the failure. If Sparx was lost during the approach, leave the level and restore him with fodder and butterflies before trying again. On a repeat attempt, bypass enemies that are not blocking the path; the ordinary route is usually safer once you know where the dragon and boss trigger are located.
For Doctor Shemp, return only after you can consistently evade the staff and reach his back. For Blowhard, wait rather than chasing his cyclone through a bad jump. For Metalhead, slow the fight down and line up one thrown enemy with one pole at a time. For Jacques, keep the camera oriented toward the next platform and avoid long charges near the edges.
Use the normal in-game save system before repeated attempts, especially before Metalhead or Jacques. An emulator save-state can be useful as a temporary retry point, but it should not replace a normal saved game. After winning, remain in the level long enough to verify the dragon and treasure totals before using Return Home.
- Restore Sparx before retrying if the approach caused the damage.
- Change the strategy according to the failed boss pattern.
- Use a normal in-game save before repeated attempts.
- Verify the boss level’s dragon and gem totals after victory.
Before you move on
- Toasty has been defeated, Nevin has been rescued, and the level shows 100 gems collected.
- Doctor Shemp has been defeated, the single dragon has been rescued, and the level shows 300 gems collected.
- Blowhard has been defeated, the single dragon has been rescued, and the level shows 400 gems collected.
- Metalhead has been defeated by destroying both groups of power poles, the single dragon has been rescued, and the level shows 500 gems collected.
- Jacques has been defeated, both dragons have been rescued, and the level shows 500 gems collected.
- The five boss levels are complete before proceeding with final collection or the route to Gnasty’s World.
Dragon Rescue Techniques — Finding and Releasing Dragons
Dragon rescue is the central required objective in Spyro the Dragon. Crystalized dragons are positioned throughout Homeworlds and regular levels, usually on the main route or a nearby detour, but many require careful exploration of caves, raised platforms, towers, courtyards, and side passages. Touch the circular pedestal beneath a crystal to free the dragon. Afterward, return to that pedestal when necessary to use its checkpoint, replay the dragon’s advice, or select Save Game for a Memory Card save. The original PlayStation release has no general hub map, so track incomplete levels through the inventory totals and written notes.
Survey the starting area before committing to the main route
At the beginning of every level, clear the immediate enemies and look around before following the first obvious trail. Check the space behind Spyro, both sides of the entrance, nearby caves, raised ledges, towers, beaches, courtyards, and platforms visible from below. A dragon may be close to the main path without being placed directly on it.
Stone Hill is a useful model for this method. From the starting area, the left branch leads to Lindar in the cave, the right branch leads toward the tower route and Gildas, and the central castle route leads toward Astor near the Return Home vortex. Gavin is beside the locked chest in the well near the starting area. The level teaches that dragons can be distributed across several branches instead of arranged in a straight line.
Use the camera to inspect the edges of the area before making a difficult jump. If a platform is visible but seems too far away, look for a higher ledge, stairway, or whirlwind that provides the intended launch point.
- Inspect the starting area in every direction.
- Identify caves, towers, beaches, courtyards, and raised platforms.
- Follow side branches before assuming the central route contains every dragon.
- Look for a higher launch point when a pedestal is visible but out of reach.
Touch the pedestal to release the dragon
A rescue is triggered when Spyro touches the circular pedestal beneath the crystalized dragon. No separate interaction command, flame attack, or charge is required. Approach the pedestal and step onto its center. The crystal opens, the dragon gives advice, and the rescue is added to the level’s dragon total.
Clear nearby enemies before stepping onto a narrow pedestal whenever possible. Charging directly into a pedestal beside a drop can send Spyro over the edge, while an enemy can interrupt the approach. If the pedestal is surrounded by hazards, defeat the immediate threats first and then walk onto it deliberately.
After the dragon has been freed, the pedestal remains useful. Stand on it again to open its menu. Depending on the situation, you can replay the dragon’s message or select Save Game. Touching the pedestal also establishes the level checkpoint used if Spyro later loses a life, but that checkpoint function should not be confused with writing a permanent save to the Memory Card.
- Step onto the circular pedestal beneath the crystal.
- Wait for the rescue sequence to finish before moving away.
- Return to the freed pedestal to replay advice or choose Save Game.
- Save to the Memory Card before leaving after a productive run.
Use elevation, whirlwinds, and deliberate glides for raised dragons
Many dragons are placed above the ordinary ground route. Search for stairways, sloped hills, raised platforms, and whirlwinds that provide height. Jump first, then begin the glide near the peak of the jump when distance is important. Starting a glide immediately after leaving the ground usually gives less range and less control.
When a pedestal is on an isolated platform, do not repeatedly attempt the jump from the floor. Move around the area and find the higher platform from which the level expects Spyro to glide. In Stone Hill, Gildas is reached through the tower route and a whirlwind rather than by jumping directly from the starting ground.
Once a dragon is rescued, pause at the pedestal and look outward from the new elevation. The viewpoint may reveal another platform, gem trail, or side ledge that was difficult to see from below. This is especially helpful in levels with layered courtyards or vertical castle sections.
- Find the highest safe launch point before attempting a long glide.
- Begin important glides near the peak of the jump.
- Use whirlwinds and stairways instead of forcing ground-level jumps.
- Scan the surrounding platforms after each elevated rescue.
Search side passages and routes around large scenery
Do not treat the central enemy path as a complete route. Check narrow passages beside buildings, spaces behind towers, ledges on the far side of bridges, and alcoves tucked around corners. Some dragons are placed where the level’s forward-facing camera does not show the pedestal until Spyro turns around or approaches from another direction.
Inspect both sides of ramps and bridges. If the route appears to send Spyro toward an exit, look behind the buildings and platforms near that route before leaving. A pedestal that is visible from a distance but unreachable usually means that Spyro has missed a side path, a higher approach, or a required whirlwind—not that a later ability is needed.
The original Spyro the Dragon does not use unlockable movement abilities to make ordinary dragon pedestals reachable. If a rescue appears impossible, retrace the level from the last obvious junction and search for the alternate approach. Do not postpone it merely because the pedestal is not accessible from the current floor.
- Inspect both sides of bridges, ramps, and courtyards.
- Walk around buildings and towers instead of viewing them only from the front.
- Retrace from the last junction when a pedestal is visible but inaccessible.
- Search for an alternate approach before assuming the dragon requires later progress.
Track incomplete levels through totals and targeted revisits
The original release does not provide a general Homeworld map that marks every missed dragon. Use the inventory or status display to check each level’s dragon total, then write down the level name and a landmark for anything incomplete. Notes such as cave, tower, castle roof, beach, or exit vortex are more useful than relying on memory after several Homeworlds.
When only one dragon is missing, re-enter that specific level through its Homeworld portal and inspect the branches you skipped. If several dragons are missing in the same Homeworld, clean up those levels together so the Homeworld remains the navigation center. The level entrance and the Return Home vortex provide the normal route in and out; a balloonist is used for travel between Homeworlds, not as a replacement for a level’s entrance.
After rescuing a missing dragon, check the level total again before leaving. If the total remains incomplete, revisit the side routes rather than assuming the game failed to register the rescue. Once the dragon is freed, return to its pedestal and select Save Game if you want the progress written permanently to the Memory Card.
- Check the dragon total for every level before declaring it complete.
- Record the level name and a nearby landmark for each missing rescue.
- Use the level portal for a targeted revisit and the balloonist for Homeworld travel.
- Confirm the total after the rescue and select Save Game at a pedestal.
Before you move on
- Every visited level shows its complete dragon total in the inventory or status display.
- You have checked raised platforms, caves, side passages, routes around buildings, and areas beyond the apparent main path.
- Each crystalized dragon was released by touching its pedestal, and the pedestal can be revisited for its checkpoint and menu.
- Any incomplete level is recorded by name and landmark for a targeted revisit through its Homeworld entrance.
- After important rescues, you selected Save Game from a freed dragon pedestal so the progress was written to the Memory Card.
Egg Chases and Key Thieves — Capture & Retrieval Tactics
In the original PlayStation version of Spyro the Dragon, egg thieves and key thieves are chase targets rather than ordinary enemies. Egg thieves carry stolen dragon eggs, while key thieves in Gnasty’s World and Gnasty’s Loot drop keys that open progression doors. The reliable approach is to learn the thief’s route, intercept it at a corner or narrow section, and avoid unnecessary combat until the chase is complete.
Identify the thief’s objective and route
Before chasing an egg thief, look at the surrounding terrain. Many thieves run a repeated circuit with sharp corners, ramps, narrow ledges, or a figure-eight path. Watch the route briefly instead of immediately charging behind the thief. Your goal is to catch the thief and strike it; the egg is recovered when the thief is defeated.
Key thieves work differently only in their reward. The thieves in Gnasty’s World drop keys for the locked routes leading toward Gnasty Gnorc. The four thieves in Gnasty’s Loot also drop keys, but those keys open separate doors throughout the bonus level. They do not provide dragon eggs, and Gnasty’s Loot contains no dragons or eggs to collect.
- Determine whether the target carries an egg or a key.
- Observe at least one section of the thief’s route before committing.
- Identify the next corner, ramp, wall, or dead end where Spyro can intercept.
Intercept instead of following directly behind
A long pursuit from directly behind is usually the least reliable method. Spyro can lose ground on turns, run into enemies, or overshoot the thief on narrow platforms. Follow far enough to understand the route, then cut across the inside of the next turn. Charge toward the point where the thief will be, not the point where it was.
On a ramp or raised path, begin the interception before the thief reaches the incline so Spyro arrives at the upper section first. If you pass the thief, stop charging and turn around rather than making a wide recovery turn. A short charge or flame attack is safer once the thief is close and has limited room to escape.
- Aim for the thief’s next position rather than its current position.
- Use tight turns and avoid wide loops around the level.
- Stop charging after an overshoot and realign before attacking again.
Use corners, walls, and narrow platforms
The best capture points are places where the thief has only one practical exit. Stand near the inside of a corner, beside a wall, or at the end of a narrow platform and let the thief approach. This is especially useful when the thief is faster than Spyro on an open straightaway.
Do not assume that a thief must be stunned before it can be captured. In the original game, striking the thief with a charge or flame attack is what ends the chase. Charging is usually the most consistent option on an open path. Flame can work when the thief is trapped against a wall or forced around a tight bend, but do not stop in a dangerous area just to attempt a flame hit.
- Choose an interception point with limited escape directions.
- Use charge for a clear approach and flame only when the shot is dependable.
- Do not begin a blind glide after a thief drops to a lower route.
Protect Sparx and clear only necessary enemies
Ignore enemies that do not block the chase. Fighting everything around an egg thief wastes Sparx health and can make the thief complete several more circuits. If a guard directly blocks the interception point, defeat that guard first, move to an open section, and allow the thief to return before trying again.
When Sparx is already damaged, collect an available butterfly or leave the immediate chase area before making another attempt. A thief is normally easier to catch after Spyro has a clear route and a full opportunity to approach, not while Spyro is surrounded by unrelated enemies.
- Leave non-blocking enemies alone.
- Defeat only enemies that prevent access to the interception point.
- Recover Sparx before repeating a difficult chase.
Recover from a missed egg chase
If the thief turns a corner before you reach it, do not immediately restart. Return to the route and watch for its next circuit. Some thieves can be caught by moving to the next corner instead of following the entire loop. If the thief becomes unreachable because of a fall or an awkward position, leave the area and return after completing another nearby objective; many chases allow another attempt when the thief resumes its route.
If the attempt is still unsafe or the thief remains inaccessible, use the level exit and re-enter rather than repeatedly risking lives. Do not treat this as a guaranteed reset for every thief or level. After the successful capture, open the Inventory screen and confirm that the egg total has increased before leaving the level.
- Try the next circuit before abandoning the chase.
- Use nearby objectives to give yourself space for another attempt.
- Confirm the egg total after the thief is defeated.
Complete the two key chases in Gnasty’s World
At the start of Gnasty’s World, find the first key thief and chase it around the opening route until it drops the key. Take that key to the locked door in the level’s route; approaching the lock opens the way forward.
The newly opened section contains the second key thief. Chase it around its tunnel and path, then collect the second key. Return to the locked mechanism at Gnasty Gnorc’s platform and use the key there. The platform lowers, allowing access to the boss encounter. These two thieves are required progression, so do not leave Gnasty’s World while either key is missing.
- Capture the first key thief.
- Use the first key on the locked route, not Gnasty’s platform.
- Capture the second thief and use its key to lower Gnasty’s platform.
Open the routes in Gnasty’s Loot
Gnasty’s Loot is unlocked after the game’s full collection requirements are met. At the beginning of the level, Spyro’s flight height is restricted. Capturing key thieves and opening the corresponding doors raises access to additional sections and higher treasure routes.
There are four key thieves in this level. Capture them one at a time, collect each dropped key, and use the key on the locked door it opens. Some thieves move through open areas, while later thieves use airborne routes and tunnels. Keep the camera aligned with the route, avoid unnecessary flame attempts while moving quickly, and use the normal path around lava or obstacles when a thief changes elevation.
After all four keys have been used, the entire level is accessible for the final gem sweep. If a door remains closed, do not repeatedly charge into it. Retrace the accessible areas and look for the key thief whose route has not yet been completed.
- Capture all four key thieves.
- Use every dropped key on its corresponding locked door.
- Reach the higher sections and complete the remaining gem sweep.
Before you move on
- Each targeted egg thief has been defeated and the Inventory screen shows the increased egg total.
- In Gnasty’s World, both key thieves have been captured, the first locked route is open, and Gnasty Gnorc’s platform has been lowered.
- In Gnasty’s Loot, all four key thieves have been defeated and every required locked door has opened.
- The level’s remaining gem routes are accessible, allowing the final treasure sweep without another key chase.
References for this chapter
Collection Tidy-Up: Efficient Mopping Up Before Final Run
Use the original PlayStation inventory to identify unfinished levels, then clean up gems, dragons, and eggs in focused same-Homeworld sessions. The 6,000-gem requirement opens the route to Gnasty’s World, but it is not a completion requirement. For the optional full-completion route, collect 12,000 gems, 79 dragons, and 12 dragon eggs before defeating Gnasty Gnorc. After the boss fight, return to Gnorc Gnexus and free Magnus, who supplies the 80th dragon and opens the final requirement for Gnasty’s Loot.
Read the inventory before choosing a level
Press Select during gameplay to open the inventory. Review each visited world and level, then record which entries are short on gems or dragons. Track eggs separately because the level display does not replace the need to remember which thief still carries an unrecovered egg.
Make a short list for every incomplete area: missing gems, missing dragons, missing eggs, or a combination. A level with its full dragon count but incomplete treasure needs a gem sweep, not another search for a hidden dragon. If the global egg total is short, concentrate on levels containing unfinished blue-thief encounters.
Keep the progression targets separate. You need 6,000 gems to travel from Dream Weavers to Gnasty’s World. The pre-boss full-collection target is 12,000 gems, 79 dragons, and 12 eggs. The 80th dragon is Magnus, who appears in Gnorc Gnexus only after Gnasty Gnorc is defeated. The additional 2,000 gems in Gnasty’s Loot are collected after that level opens and are not part of its unlock requirement.
- Press Select and record the global totals.
- Compare every unfinished level with its listed gem and dragon totals.
- Track missing eggs independently from gems and dragons.
- Separate the 6,000-gem campaign gate from the 12,000-gem full-collection target.
- Remember that Magnus supplies the 80th dragon after the boss.
Inspect the current Homeworld first
Start cleanup in the Homeworld that contains an unfinished inventory entry. Check the Homeworld itself before entering a portal. Raised paths, side platforms, areas around portals, and routes near the balloonist can contain gems or dragons that are easy to overlook while travelling directly between level entrances.
Rescue a missing Homeworld dragon when practical. The freed dragon provides a convenient return point, and completing a short rescue first gives you a clear improvement to verify. A rescued dragon does not prove that the Homeworld’s gems are complete, so reopen the inventory before leaving.
Group work by Homeworld. Travelling to one world, clearing two or three nearby objectives, and returning home is more efficient than making separate trips for isolated collectibles. Begin with the easiest unfinished task in that world so the session produces a confirmed improvement immediately.
- Check the Homeworld’s own inventory entry.
- Search paths beside portals, balloonists, buildings, and raised platforms.
- Rescue nearby missing dragons when convenient.
- Group several revisits in the same Homeworld.
- Update your notes after every confirmed rescue or treasure sweep.
Sweep incomplete levels manually for gems
When a level is short on gems, replay it from the entrance and sweep the entire route rather than searching only the places where enemies were fought. Inspect both sides of ramps, spaces behind buildings, narrow passages beside walls, courtyards, pits, water edges, upper ledges, and isolated platforms reached by jumping and gliding.
Check every chest route separately. Wooden chests may be placed on side paths or behind structures. Metal chests require a charge, while locked chests require the level’s key; finding the key does not automatically collect the treasure inside the chest. If the level still shows missing gems, revisit the key route and every chest location before assuming the gems are hidden elsewhere.
The original North American PlayStation release does not provide the later Sparx gem-radar feature. Do not rely on L3 or Sparx to point toward nearby treasure. Use the Select inventory to identify the incomplete level, then manually sweep its elevated platforms, side passages, chests, locked areas, enemy drops, and hidden glide routes. Record distinctive landmarks in your notes, such as the courtyard before a dragon, the ramp beside a chest, or the ledge above a return-home vortex.
Replay a flight level only when that flight’s own inventory entry is incomplete. A completed flight cannot repair a shortage belonging to a normal level or Homeworld. If the global total is short while all flight entries are complete, return to normal levels and inspect their chests, side routes, and high platforms.
- Sweep the main route and every side passage.
- Check elevated platforms, isolated glide lines, and enclosed spaces.
- Find each key and open every matching locked chest.
- Inspect enemy drops and treasure behind structures.
- Use written landmarks instead of a gem-radar feature.
- Replay flights only when their own inventory entry is incomplete.
Find missing dragons by landmarks and alternate routes
For a missing dragon, retrace the level by major landmarks. Recheck the first large enemy arena, rooms behind buildings, upper ledges visible from below, courtyards, whirlwind destinations, supercharge paths, and platforms reached by a separate glide. Dragons are frequently placed away from the direct combat route, so defeating every enemy does not confirm that the level is complete.
Search for the route that reaches the dragon’s pedestal instead of jumping directly toward it from below. Circle structures, use raised paths from adjacent rooms, follow a supercharge ramp to its intended jump, and inspect platforms that become visible only after crossing a gap. In levels with a Return Home vortex, search the surrounding area and nearby upper platforms before exiting.
After freeing a dragon, open the inventory and confirm that both the level total and global total increased. Mark the area complete only when its displayed dragon count matches the level’s listed count. During the pre-boss cleanup, the correct global target is 79 dragons, because Magnus cannot be freed until Gnasty Gnorc has been defeated.
- Retrace the route by distinctive landmarks.
- Check side rooms, upper ledges, whirlwinds, and supercharge routes.
- Use alternate access paths instead of forcing a jump from below.
- Verify the level and global dragon totals after each rescue.
- Stop the pre-boss dragon sweep at 79 dragons if Magnus is the only remaining dragon.
Handle missing eggs as dedicated thief chases
Dragon eggs are carried by blue thieves and should be handled as a separate cleanup category. Identify the level associated with the missing egg, enter it, and pursue the thief before spending time on unrelated enemies. Defeat only enemies that block the route or create an immediate danger.
Use charge to maintain pursuit on open ground and flame the thief when Spyro is close enough. Watch the thief’s route once before committing to a shortcut. When the thief repeats a loop, stay with the loop and use safe corners to reduce the distance. Avoid repeatedly approaching from directly in front, because the thief can turn away when blocked.
After recovering the egg, confirm that the global egg total increased. If the thief falls into an awkward route or the chase becomes impractical after a failed attempt, return through the level’s normal Return Home exit and re-enter for a clean chase. Replaying the route is usually safer than spending a long session trying to recover from a bad position.
- Identify the missing thief before entering the level.
- Avoid unnecessary combat during the pursuit.
- Use charge for distance and flame at close range.
- Observe loops and cut corners only where the landing is safe.
- Verify the egg total after the recovery.
- Reach 12 eggs before the final boss if pursuing the full-completion route.
Use 15–30 minute same-Homeworld sessions
Choose two or three unfinished entries in one Homeworld for each short session. Start with an easy dragon or egg recovery, continue with a normal level that has a meaningful gem shortage, and finish with another nearby objective. This order gives you an early confirmed success and limits travel time.
Prioritize normal levels when the global gem total is low. Boss stages generally contain fewer collectibles, while flight stages are worthwhile only when their own treasure entry is incomplete. Do not repeat a flight merely because it is quick; first identify which inventory entry is missing gems.
If a difficult platforming section causes repeated deaths, leave through the Return Home vortex, save at a safe point, and return after completing an easier objective. Update your notes after every level exit. Record a level as complete only when its inventory entry reaches the listed gem and dragon totals, not merely because the main route or boss has been cleared.
- Choose two or three unfinished entries in one Homeworld.
- Begin with an easy, verifiable objective.
- Use normal levels for substantial gem shortages.
- Leave and save if a difficult section is consuming lives.
- Update the notes after every level exit.
- Keep one stable in-game save before beginning a difficult cleanup session.
Verify the endgame state before the final run
For the main campaign, confirm that the inventory contains at least 6,000 gems before speaking to the Dream Weavers balloonist and travelling to Gnasty’s World. You do not need 12,000 gems, 79 dragons, 80 dragons, or 12 eggs to enter the final world or defeat Gnasty Gnorc.
For the optional full-collection route, remain in the regular worlds until the inventory shows 12,000 gems, 79 dragons, and 12 dragon eggs. Enter Gnasty’s World and defeat Gnasty Gnorc. The boss fight completes with 79 dragons because the remaining dragon, Magnus, is unavailable until after the defeat.
After the ending sequence, return to Gnorc Gnexus. Magnus appears at the central dragon location once Gnasty Gnorc has been defeated. Speak to and free Magnus, then reopen the inventory. It should now show 12,000 gems, 80 dragons, and 12 dragon eggs. Once those totals are complete, the Gnasty’s Loot entrance opens.
Save before entering the bonus level. Gnasty’s Loot contains 2,000 additional gems and four key-thief encounters. Completing it raises the overall treasure total to 14,000 gems and produces the game’s 120% result. If the bonus entrance does not open, confirm that Gnasty has been defeated, Magnus has been freed, and all three post-Magnus totals are complete.
- Confirm 6,000 gems before travelling to Gnasty’s World.
- Before the boss, confirm 12,000 gems, 79 dragons, and 12 eggs if pursuing full collection.
- Defeat Gnasty Gnorc before expecting Magnus to appear.
- Return to Gnorc Gnexus after the ending sequence.
- Free Magnus, the 80th dragon.
- Confirm 12,000 gems, 80 dragons, and 12 eggs before entering Gnasty’s Loot.
- Save before entering the bonus level.
- Finish Gnasty’s Loot for 14,000 gems and 120% completion.
Before you move on
- For the main campaign, the inventory shows at least 6,000 gems before travelling to Gnasty’s World.
- For the pre-boss full-collection route, the inventory shows 12,000 gems, 79 dragons, and 12 dragon eggs before entering Gnasty Gnorc’s level.
- Gnasty Gnorc has been defeated.
- Magnus has appeared in Gnorc Gnexus after the boss fight and has been freed.
- After freeing Magnus, the inventory shows 12,000 gems, 80 dragons, and 12 dragon eggs.
- The Gnasty’s Loot entrance is open before entering the bonus level.
- After completing Gnasty’s Loot, the total reaches 14,000 gems and the game displays 120% completion.
Troubleshooting, Common Failure Recovery & Save Advice
In the original PlayStation release of Spyro the Dragon, Sparx is Spyro’s health indicator, rescued-dragon platforms provide Continue points, and the Red Fairy offers the Memory Card save menu. Recover carefully after damage, death, missed collectibles, camera problems, or collision trouble. Keep a confirmed in-game save before difficult sections and use emulator save-states only as temporary retry tools.
Restore Sparx with fodder and butterflies
Sparx’s color shows Spyro’s remaining protection. The normal sequence is yellow with full protection, blue after one damaging hit, green after the next hit, and missing after the third. If Sparx is green, Spyro can still survive one more damaging hit; the next hit after Sparx disappears defeats Spyro. Falling, touching harmful terrain, and enemy attacks can all cause damage, so check Sparx before a boss, a long glide, or a hazardous platforming section.
To recover, find a fodder creature such as a sheep, defeat it with a charge or flame, and collect the butterfly it releases. Each butterfly restores one stage of Sparx’s health. If Sparx is blue or green, this is a dependable way to improve his condition before continuing. A butterfly can also restore Sparx after he has disappeared when the game allows Sparx to reach and collect it, but do not gamble on recovery while standing beside an active enemy or over a dangerous drop.
Search cleared side paths, level entrances, open courtyards, and areas near previously rescued dragons for unused fodder. Do not assume that simply leaving and re-entering a level always restores Sparx. If no safe fodder remains, either continue only through a section you can reliably avoid, deliberately accept a defeat to reach the latest Continue point, or reload a confirmed in-game save. A fresh attempt is usually safer than carrying missing Sparx into a dense enemy group or precision glide.
- Read Sparx’s color before starting a boss, flight stage, long glide, or difficult combat route.
- Remember the correct sequence: yellow, blue, green, missing.
- Defeat nearby fodder and collect its butterfly before repeating a dangerous section.
- Do not treat level re-entry as a guaranteed Sparx reset.
- If Sparx is missing and no safe recovery is available, restart or reload rather than taking another unnecessary hit.
Recover after death or a failed level attempt
Rescuing a dragon activates that dragon’s platform as a Continue point. If Spyro is defeated later in the same level, the game can return him to the latest reached Continue point instead of sending him automatically to the beginning of the entire level. This is one reason to rescue dragons as you encounter them, even when your immediate goal is only reaching the exit.
After respawning, pause before moving into the next hazard. Decide what caused the failure: low Sparx health, an unsafe charge, a missed glide, an enemy attack from behind, or a poor camera angle. If health caused the defeat, look for fodder before repeating the route. If positioning caused it, return to the last broad platform and approach the jump or enemy from a controlled starting position. Repeating the same rush without changing the setup usually produces the same failure.
A death does not necessarily mean that the whole level must be abandoned. Continue from the activated dragon platform, collect nearby gems again if necessary, and resume from the landmark you reached. If the remaining section is long and the goal is a missed gem, dragon, or egg rather than level completion, use the Return Home portal when practical. Note the level name and a landmark such as a dragon, doorway, raised platform, thief route, whirlwind, or distinctive enemy group before leaving. Re-entering with a specific target is more reliable than searching a partly completed level from memory.
- Use the latest activated dragon platform after defeat.
- Identify the cause of death before repeating the section.
- Recover Sparx before retrying if fodder is available.
- Record a level and landmark for any collectible left behind.
- Return Home when the remaining cleanup route is lengthy or unsafe.
Recover from a bad camera angle or collision
If Spyro is pressed against scenery, stop charging and attacking. Use short movement inputs to back away from the wall, corner, raised edge, or decorative object. The camera is easier to manage in an open area, so retreat toward the last broad platform or clear path instead of attempting a blind jump from an obstructed position.
When the camera faces away from the intended route, release movement briefly and let Spyro settle. Then turn toward an open surface and regain a normal view before jumping or gliding. If the landing platform is hidden, do not commit to the glide. Land on the current surface, turn Spyro manually, or backtrack to a known safe area. Charging into scenery can make both the camera and Spyro’s position harder to judge.
If Spyro appears embedded in geometry, cannot respond normally, or remains trapped after backing away, reload the latest confirmed in-game save. An emulator save-state may preserve the same bad collision or camera position, so loading it repeatedly may not solve the problem. If a temporary state is used to test a recovery, keep the Memory Card save as the reliable fallback and do not overwrite it with the glitched position.
- Stop charging when Spyro is wedged against scenery.
- Back away using small movements rather than jumping blindly.
- Return to an open platform before adjusting the camera or attempting another glide.
- Reload a confirmed in-game save if normal movement does not return.
- Do not rely on a save-state that may preserve the collision problem.
Save correctly on the original PlayStation release
The original PlayStation game does not provide a modern autosave after every gem, dragon, or egg. After rescuing a dragon, step onto that dragon’s platform and wait for the Red Fairy to appear. The menu provides Save Game, Replay Dragon, and Continue choices. Saving is a deliberate action: select Save Game, choose the intended Memory Card file, and wait until the operation is complete before turning off the console or closing the emulator.
The rescued-dragon platform also serves as a Continue point, but reaching one does not mean that every recent collectible has already been written to the Memory Card. Use the Continue function to proceed when appropriate, and use Save Game when you want durable progress. Save after completing a difficult level, before a boss or demanding flight stage, after a successful cleanup route, and before entering a section where a long failure would force substantial repetition.
On original hardware, verify that a compatible PlayStation Memory Card is inserted and has free space. If the game does not detect the card or reports that it is full, fix that issue before beginning a long session. On an emulator, confirm that the virtual Memory Card file is writable and back it up periodically. Emulator save-states are useful for short retries, but they are not a substitute for the game’s own save data.
- Stand on a rescued-dragon platform and wait for the Red Fairy.
- Choose Save Game when you need durable progress; do not confuse it with Continue.
- Wait for the save operation to finish before powering down or closing the emulator.
- Keep free space on the physical or virtual Memory Card.
- Back up the emulator’s Memory Card file and do not rely exclusively on quick save-states.
Use a final recovery routine before Gnasty’s World
Before beginning the final campaign route, return to a rescued-dragon platform and make a confirmed Memory Card save. Check whether the goal is simply defeating Gnasty Gnorc or completing the optional full-collection route. These goals require different amounts of cleanup, so do not risk the only stable save while testing an optional revisit or a difficult final section.
For a standard campaign attempt, check Sparx’s color, restore him with fodder if a safe source is nearby, and save before entering the final sequence. Keep one stable save that preserves the start of the hub or endgame preparation and use a separate in-progress save for risky cleanup or boss attempts. If the attempt fails, reload the stable copy rather than repeatedly overwriting the same fallback.
For 100% cleanup, work in small groups of one or two targeted revisits. Finish a group, return to a rescued-dragon platform, and save again. If a gem, dragon, or egg remains missing, use your written level-and-landmark note to begin the next search from a known objective. This prevents a failed search from turning into an untracked full-level replay.
- Keep a confirmed Memory Card save before the final approach.
- Check Sparx’s color and recover him before repeating a dangerous section when possible.
- Maintain a separate stable save and in-progress save if your setup permits it.
- Record the exact level and landmark for missing collectibles.
- Save after each manageable cleanup group instead of overwriting the only fallback immediately.
Before you move on
- You can identify the correct Sparx sequence: yellow, blue, green, missing.
- You can defeat fodder and collect its butterfly to restore one stage of Sparx’s health.
- You know that rescued-dragon platforms provide Continue points after defeat.
- You know to use the Red Fairy’s Save Game option for durable Memory Card progress.
- You can retreat from a camera or collision problem without attempting a blind jump.
- You maintain at least one confirmed in-game save before a boss, flight stage, or major cleanup route.
- Your final recovery routine includes a Sparx check, a stable save, and written landmarks for missing collectibles.
Finishing up
The main campaign is complete when Spyro defeats Gnasty Gnorc and the automatic post-boss ending sequence plays.
The route to Gnasty’s World is correct when Amos accepts at least 6,000 cumulative gems and transports Spyro from Dream Weavers to Gnorc Gnexus.
For the optional 100% state, defeat Gnasty Gnorc, free Magnus in Gnorc Gnexus, and reach 12,000 gems, 80 dragons and 12 dragon eggs. Magnus then opens the final dragon-head entrance to Gnasty’s Loot.
The 120% result is complete when Gnasty’s Loot is cleared for its additional 2,000 gems and the inventory records 14,000 gems, 80 dragons, 12 eggs and 120% completion.
Use the Red Fairy at a rescued-dragon platform to create a durable Memory Card save before difficult endgame attempts; the ending sequence alone is not proof of 100% completion.
Choose your next gameScreenshots & video
Game imagery for reference. Follow the written chapters above for the route and strategies.
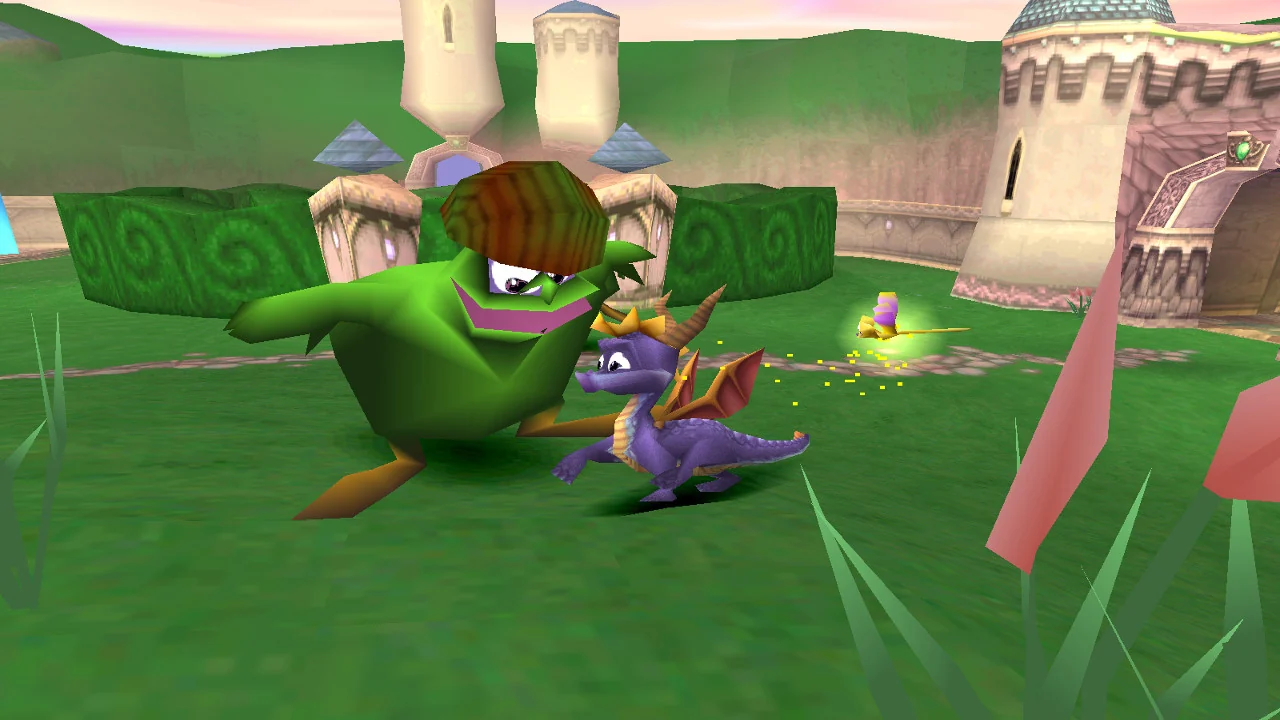
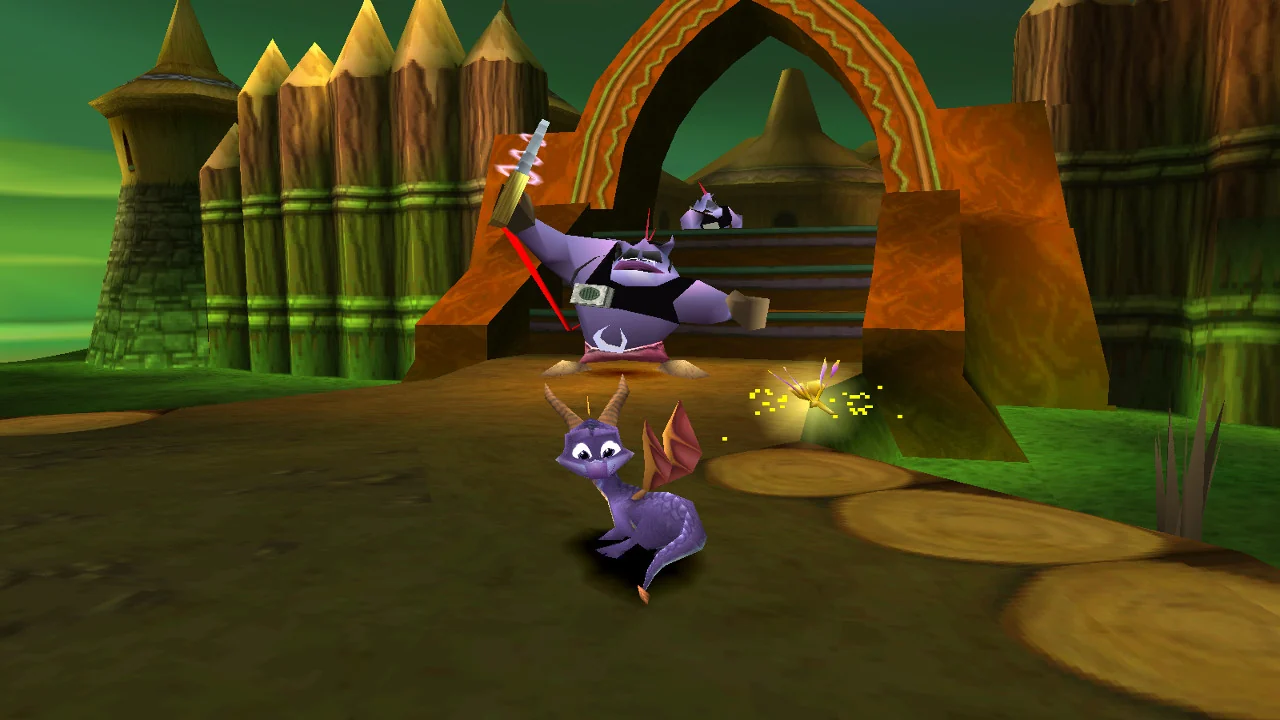
Sources & references
Our original guide draws on the references below. Check the edition at the top of this page before following controls or unlock requirements.
- Spyro the Dragon Controls — StrategyWiki
- Spyro the Dragon Gameplay — StrategyWiki
- Spyro the Dragon — Guide and Walkthrough — GameFAQs, Snow_Dragon
- Spyro the Dragon Guide and Walkthrough — SpyroCrashJak, GameFAQs
- Spyro the Dragon — Spyro Wiki
- Spyro the Dragon (USA) PlayStation Instruction Manual
- Spyro the Dragon Walkthrough — StrategyWiki
- Spyro the Dragon — Dialogue FAQ by KilledKenny
- Spyro the Dragon/Gnasty’s Loot — StrategyWiki
- Spyro the Dragon – Walkthrough – PlayStation – NickWhiz1
- Spyro the Dragon/Artisans — StrategyWiki
- Spyro the Dragon/Peace Keepers — StrategyWiki
- Speed Demos Archive — Spyro the Dragon
- Spyro the Dragon — Guide and Walkthrough by Gbness, PlayStation, GameFAQs
- Spyro the Dragon — Enemy/Boss FAQ, Gnasty Gnorc strategy
- Dream Weavers — Haunted Towers guide, Almar’s Guides
- darkSpyro — Spyro the Dragon Walkthrough
- Spyro the Dragon/Stone Hill — StrategyWiki
- Spyro the Dragon — Guide and Walkthrough by dark52 — GameFAQs
- Spyro the Dragon – Dragon Egg Location FAQ – PlayStation
- Spyro 1: The Dragon Trophy Guide & Roadmap — PowerPyx
- Spyro the Dragon Instruction Manual
About the game & collecting notes
- Platform
- Sony PlayStation
Complete the original North American PlayStation release of Spyro the Dragon from Artisans through Peace Keepers, Magic Crafters, Beast Makers, Dream Weavers and Gnasty’s World. The guide covers required balloonist thresholds, level routes, dragons, eggs, gems, flight stages, boss methods, failure recovery and the optional post-boss 100% route. Gnasty’s Loot is unlocked only after Gnasty Gnorc is defeated, Magnus is freed in Gnorc Gnexus, and the inventory reaches 12,000 gems, 80 dragons and 12 dragon eggs; completing it adds 2,000 gems and raises the game to 120%.
Darryl Polo
Darryl Polo loves tinkering with emulation and revisiting retro games. He enjoys exploring how old favorites play on different setups and sharing what he learns along the way. At Joking Joystick, he writes about the games, hardware, and small discoveries that keep the hobby fun.
Our editorial standardsFound a step that needs another look? Help us improve this guide.