
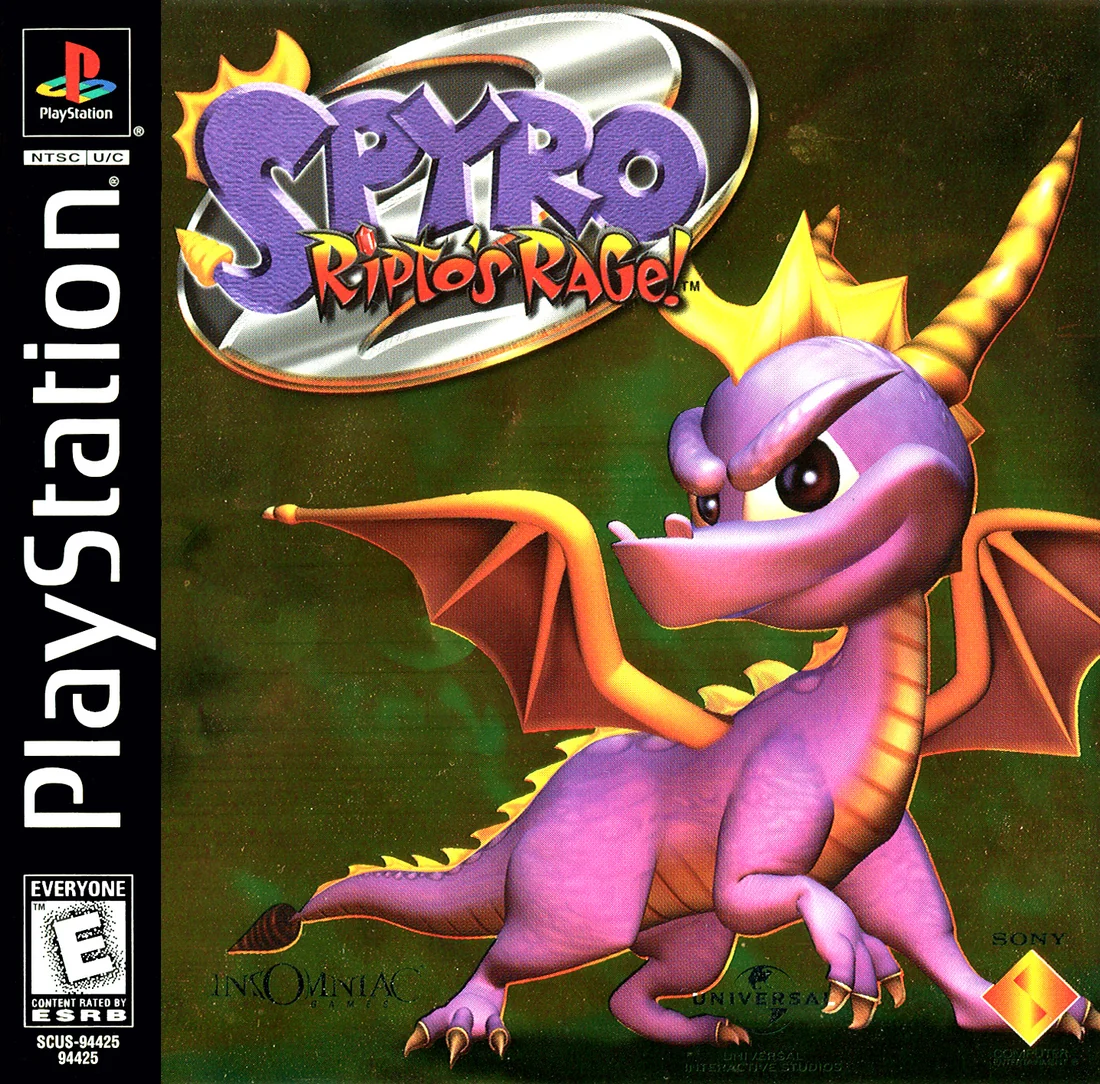
Spyro 2: Ripto's Rage! (PlayStation, USA) — Complete Campaign Walkthrough
Step through Avalar and finish the original PlayStation (USA) edition of Spyro 2: Ripto’s Rage!. This guide walks you from the opening hub through each realm’s talisman levels, orb side-quests, hub bosses, Ripto’s Arena and the post‑final Dragon Shores content, with practical routes, recovery advice and clear completion checks for the PS1 release (not the Reignited remaster).

Find a copy
Spyro 2: Ripto's Rage! Sony PlayStation
We may earn a commission if you buy through these links, at no extra cost to you. As an Amazon Associate I earn from qualifying purchases.
Opens retailer search results. Check the model, edition, seller, availability and current price before buying.
Before you begin
You are playing the original North American PlayStation release of Spyro 2: Ripto’s Rage!.
Talismans from Glimmer and the regular Summer Forest and Autumn Plains realms drive the main story route; orbs are optional rewards until later orb gates require them.
This walkthrough assumes the original PS1 controls, progression, and game balance, not the Reignited Trilogy remake.
Follow the intended route: clear Glimmer and the Summer Forest realms, defeat Crush, clear the Autumn Plains realms, defeat Gulp, then enter Winter Tundra and collect enough orbs to reach Ripto.
You need at least 40 recorded orbs to open the final Ripto route after speaking with Elora in Winter Tundra.
Use the optional cleanup sections to reach Dragon Shores after the ending and pursue the separate full-collection reward.
Set yourself up for the run
Confirm you are using the original PlayStation (USA) edition. The North American release is titled Spyro 2: Ripto’s Rage!.
Save frequently to a PS1 memory card and back up your most important file if you have multiple cards.
Familiarize yourself with the original PS1 controls: flame, charge, jump, glide, hover when available, and the Start and Select buttons. Select shows the quick HUD/status information. Start opens the pause menu, whose direct Guidebook entry provides detailed records; Save Game and other commands are also reached from the pause menu.
If you use a DualShock or analog pad, keep camera and movement comfortable—camera control matters for aiming flames and charging.
Treat talisman objectives in regular realms as the required story route. Orb objectives are optional until the 40-orb Ripto gate and other late-game access checks.
Balance main-level progress with easy orb side-quests so you do not become blocked later.
Use gems to purchase abilities, access, and level-specific services from Moneybags.
Return to earlier levels after acquiring Swimming, Climbing, and Headbash to finish ability-gated objectives.
Track which orb side-quests are gated by later abilities and postpone those until the required move or access is available.
Keep one objective per visit: complete the main talisman objective first, then add an easy orb task if convenient.
Exiting a level preserves rewards that have been properly recorded; check the status display or direct Guidebook entry and save before ending a session.
For a fast route to Ripto, prioritize safe orbs and skip difficult, gated challenges until after the final boss.
For full collection, revisit hubs after all three Moneybags abilities and required access routes are available.
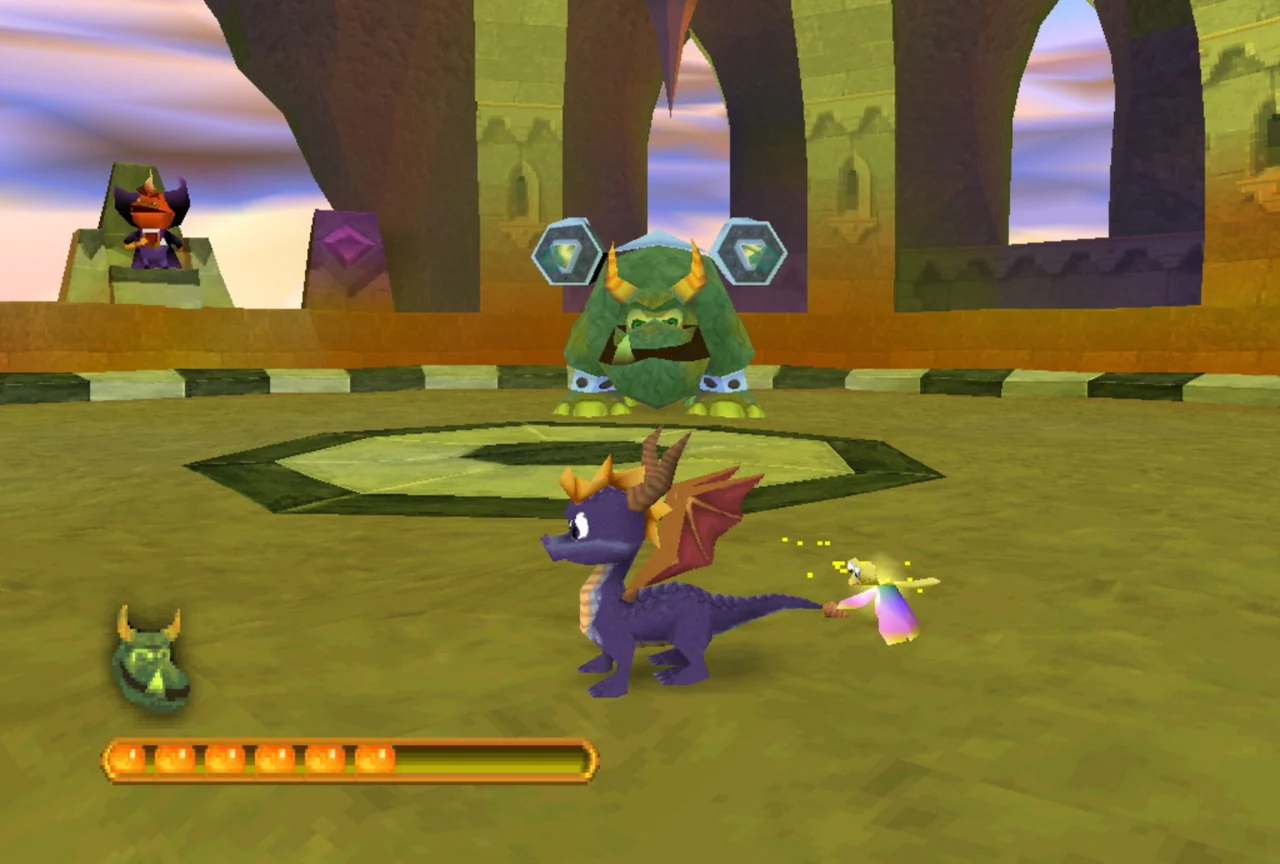
Start: Controls, Save, and PS1 Edition Notes
Set up a reliable PlayStation memory-card save, confirm the North American Spyro 2: Ripto’s Rage! edition, learn the original controls, and verify the correct status and Guidebook menus. These directions apply to the original 1999 PlayStation release, not Spyro 2: Gateway to Glimmer or Spyro Reignited Trilogy.
Confirm the original North American edition
Use the original PlayStation release titled Spyro 2: Ripto’s Rage! The North American disc uses serial SCUS-94425. The European PlayStation release is titled Spyro 2: Gateway to Glimmer, and Spyro Reignited Trilogy is a later remake with different presentation and menu behavior.
Check the title on the disc, case, or legitimate listing before starting. A North American Greatest Hits copy remains part of the original PlayStation release family and uses the same basic progression and control layout covered here. Do not apply this chapter to Gateway to Glimmer or Reignited Trilogy without checking the edition-specific instructions first.
- The title reads Spyro 2: Ripto’s Rage!.
- The game is for the original Sony PlayStation.
- The serial is SCUS-94425, if it is visible.
- The copy is not Gateway to Glimmer or Reignited Trilogy.
- A PlayStation-compatible memory card is available.
Insert and test the memory card
Insert a compatible PlayStation memory card into Memory Card Slot 1 before turning on the console. This game uses one memory-card block for a save file, so make sure the card has free space. If you are using a replacement or third-party card, test it before beginning a long session rather than assuming the original software will read it reliably.
At the title screen, press Start and choose the command for beginning or loading a game. Select an empty save slot for a new file, or select an existing slot to continue. Once Spyro is active, press Start to pause, choose Save Game, select the intended file slot, and confirm with X. Wait until the save operation finishes before resetting, removing the card, or turning off the console.
Use Save Game whenever you want a deliberate memory-card save. The game also records progress around ordinary realm travel when a memory card is present, but explicit saving is the safer habit when testing an unfamiliar card or ending a session after an important objective. Zoe’s in-level progress point can restore Spyro after a defeat during the current run; it is not a replacement for the memory-card save.
After your first test save, return to the title screen and load the file. Confirm that the file appears and that the recorded progress is present. Loading restores saved game data, but it does not function like a modern checkpoint that places Spyro at the exact position where you stopped inside a realm.
- The card is inserted in Memory Card Slot 1 before startup.
- A new file or existing file has been selected from the title screen.
- Save Game has been completed from the Start pause menu.
- The saved file appears and loads successfully.
- You understand that a Zoe checkpoint is not the same as a memory-card save.
- The console remains powered on until saving is complete.
Learn the basic original controls
Move Spyro with the D-pad or the left analog stick when using a compatible analog controller. Press X to jump. Press X twice while airborne to glide, then press Triangle during the glide to hover. Press Circle to breathe fire or spit an object that Spyro is carrying. Press Square to charge.
Hold Triangle while Spyro is standing still to enter free-look mode and inspect the area. Press and hold L1 or R1 to pan the camera. Press L1 and R1 together to center the camera behind Spyro; L2 and R2 together perform the same centering function. These are the original PlayStation camera controls and should not be replaced with Reignited Trilogy control assumptions.
Some actions are learned later. Press X underwater to paddle after Swimming has been purchased. Press Square underwater to dive or charge. Use directional input and X near a ladder to jump onto it and climb. After Headbash has been learned from Moneybags, press X and Triangle together to perform it. A ladder, underwater passage, or heavy breakable object may therefore be an intentional reason to return later rather than a missed jump.
- You can move Spyro, jump, glide, and hover.
- You can use Circle for flame and Square for charge.
- You can enter free-look mode with Triangle.
- You can pan and recenter the camera correctly.
- You know that Swimming, Climbing, and Headbash are later abilities.
Check the quick status display and Guidebook
Press Select during gameplay to open the quick status display. Use it to check immediate information such as your current gem and life status. Select is the quick HUD/status command; it is not the route to the detailed Guidebook in this original menu layout.
Press Start during gameplay to open the pause menu. Highlight Guidebook and press X to open the detailed Guidebook directly. Do not enter Options to reach it. Options is a separate settings menu for choices such as the map and camera behavior.
Use the Guidebook pages to inspect visited Home Worlds and realms. Realm records show progress such as gems, enemies, orbs, talismans, skill points, and other completion information where applicable. On a Home World page, select a realm to view its recorded progress. Turn pages with the directional buttons or left and right on the analog stick; use up or down to select a realm where the page provides that choice.
A missing item does not always mean that you made a mistake. It may be behind Swimming, Climbing, Headbash, a Moneybags purchase, a power-up, or a later story event. Note the nearby landmark and continue along the accessible route instead of repeatedly attempting an unavailable jump.
- Select opens the quick status display.
- Start opens the pause menu.
- Guidebook is a direct Start-menu entry.
- Options is a separate settings menu.
- The Guidebook records visited-realm progress and collection information.
- You can identify ability-gated objectives for later revisits.
Use Save Game, Exit Level, and camera aids correctly
The Start pause menu contains the commands needed for ordinary session management. Use Guidebook for detailed progress records. Use Options for settings. Use Save Game to write progress to the memory card. Use Exit Level when you need to leave the current realm and return to its Home World; this is the correct way to abandon a run rather than turning off the console.
For camera control, use L1 or R1 individually to pan and L1 plus R1 or L2 plus R2 together to center the view behind Spyro. For Sparx’s gem finder, hold L1, L2, R1, and R2 together. Keep these combinations distinct: L1 plus R1 centers the camera, whereas all four shoulder buttons activate the treasure-finding aid.
- Save Game is available from the Start pause menu.
- Exit Level is available for safely leaving a realm.
- Guidebook opens directly from the Start pause menu.
- Options is used for settings rather than Guidebook access.
- L1 plus R1 or L2 plus R2 centers the camera.
- L1 plus L2 plus R1 plus R2 activates Sparx’s gem finder.
Prepare to enter Glimmer
Talismans come from designated main realms and advance the story. Orbs come from side challenges, minigames, and special objectives. Gems are the currency Moneybags uses to open passages, provide access, and teach Spyro new abilities.
Do not expect to finish every visible route during the first visit. If a path ends at a ladder, underwater passage, or breakable object that Spyro cannot use yet, record the landmark and leave it for a return visit. Concentrate on the accessible route, the realm’s talisman objective, and introductory orb tasks that do not require later abilities.
Before ending the first session, press Select to check the quick status display. If you need detailed realm records, press Start and choose Guidebook directly. Use Options only when you want to adjust settings. Then return to the pause menu, choose Save Game, and confirm the file slot. Reload the file once if this is your first use of the card. When the status display works, Guidebook opens directly through Start, and the saved progress is present, you are ready to begin Glimmer using the original PlayStation controls.
- You understand the difference between talismans, orbs, and gems.
- You know that some paths are intentionally ability-gated.
- You can use Select for the quick status display.
- You can use Start and Guidebook for detailed records.
- You know that Options is a separate settings menu.
- You can use Save Game and Exit Level from the pause menu.
- You have saved and reloaded successfully before beginning the main route.
Before you move on
- A compatible PlayStation memory card is inserted in Slot 1.
- A save file exists and has been successfully reloaded.
- You can jump, glide, hover, flame, charge, look around, and adjust the camera.
- Select opens the quick status display.
- Start opens the pause menu.
- Guidebook opens directly from the Start pause menu.
- Options is recognized as a separate settings menu.
- Save Game and Exit Level can be selected from the pause menu.
- The Guidebook displays visited-realm progress and collection records.
- You can hold L1 plus L2 plus R1 plus R2 together to use Sparx’s treasure finder.
- Your copy is identified as the North American PlayStation Spyro 2: Ripto’s Rage! release rather than Gateway to Glimmer or Reignited Trilogy.
- You are ready to enter Glimmer while leaving ability-gated objectives for later.
Glimmer (Opening Level) — Learn the Rules
Glimmer is the first level reached from Summer Forest in the original North American PlayStation release of Spyro 2: Ripto’s Rage!. Pay Moneybags 100 gems to open the bridge, reach Twitchy for the Magic Pick talisman, then complete the two orb challenges available with Spyro’s starting abilities. The remaining cave lamp orb normally requires Climbing, which is purchased later in Autumn Plains, so leave that task for a return visit.
Enter Glimmer and collect gems for the bridge
Enter the Glimmer portal from Summer Forest. This opening level introduces the basic actions used throughout the game: Square charges, Circle uses flame, X jumps and glides, and Triangle activates the closer or first-person camera view. Practice jumping, gliding, charging and flame attacks in the mine before moving deeper into the level.
Collect gems as you travel through the mine. The large brown or red enemies have enough reach to punish a careless charge, so defeat them with flame from outside their attack range. Smaller enemies can usually be charged when you have room to stop safely. You need 100 gems for the required Moneybags payment, and the opening route provides enough treasure. Full gem collection is not required on this visit because some Glimmer gems are behind the later Climbing ability.
- Enter Glimmer from the Summer Forest portal.
- Collect at least 100 gems before reaching Moneybags.
- Use flame against the large brown or red enemies.
- Leave gems behind ladders or other inaccessible areas for the return visit.
Pay Moneybags and cross the bridge
Continue through the mine until you find Moneybags beside the unopened bridge. The ladder in this general area cannot be used during normal first-visit progression because Spyro has not yet purchased Climbing.
Speak with Moneybags and pay the 100-gem charge. Cross the newly opened bridge and follow the route through the remaining mine area. Defeat enemies that block the path, but do not spend time clearing every corner if your immediate goal is the talisman.
- Find Moneybags beside the unopened bridge.
- Pay the 100-gem charge.
- Cross the bridge and continue through the mine.
Reach Twitchy and receive the Magic Pick talisman
Follow the route beyond the bridge until you reach Twitchy, a Gemcutter near the end of the required path. Speak with him to receive the Magic Pick talisman. This is Glimmer’s required first-visit objective; you do not need every gem or orb before the talisman is awarded.
After the conversation, remain in Glimmer instead of immediately entering the exit portal. Turn around from the talisman area and follow the raised route into the larger rear outdoor section. The two orb challenges that can normally be completed on the first visit are found there.
- Reach Twitchy beyond the bridge.
- Speak with Twitchy.
- Confirm that the Magic Pick talisman is recorded in the status display or Guidebook.
- Stay in Glimmer and enter the rear challenge area.
Complete Kanga’s outdoor Gem Lamp Flight
In the rear outdoor area, find Kanga beside the flight power-up. The power-up becomes active after enough enemies that release spirit particles have been defeated in Glimmer. If it is inactive, clear more enemies along the surrounding route, then return to Kanga and check again.
Speak with Kanga and enter the active power-up. Spyro can fly temporarily, but the vertical controls are reversed: pressing up makes him descend, while pressing down makes him rise. Flame all six gem lamps in the outdoor area before the flight ends. Keep the route compact and avoid unnecessary turns so you do not waste the available flight.
When all six lamps are lit, the challenge ends and Kanga awards an orb. If you miss lamps or run out of flight, return to the power-up and attempt the circuit again. Make sure the orb has been awarded before leaving the area.
- Find Kanga in the rear outdoor area.
- Activate the flight power-up by defeating enough enemies.
- Light all six outdoor gem lamps.
- Collect the orb awarded by Kanga.
Complete Bounsa’s six-lizard rock challenge
Locate the cave in the same rear section and speak with Bounsa. He starts the lizard hunt and supplies rocks for Spyro to throw. Walk over a rock so Spyro picks it up, hold Triangle to enter the aiming view, and press Circle to throw it. Flame and charge attacks do not complete this challenge.
After each successful hit, follow Bounsa to his next position. He pauses at set locations, so wait for him rather than assuming the challenge has stopped. The targets are placed on ledges, higher platforms and other parts of the area. Use the aiming circle to line up distant lizards, and allow moving targets to enter the throw path before releasing the rock.
The full sequence contains six lizards. Continue following Bounsa after every successful hit until the sixth target is defeated, then collect the orb he awards.
- Speak with Bounsa in the cave.
- Pick up one of the supplied rocks.
- Hold Triangle to aim and press Circle to throw.
- Follow Bounsa after every successful hit.
- Defeat all six lizards and collect the orb.
Mark the cave lamp orb for a later return
Glimmer’s remaining orb comes from an indoor Gem Lamp Flight. Its ladder is in the mine area near the room where Moneybags opened the bridge. During intended progression, Spyro cannot climb that ladder until he purchases Climbing from Moneybags in Autumn Plains.
Do not treat the inaccessible ladder as a missed story requirement. Leave the level after completing the talisman, outdoor lamp orb and lizard orb, then return after learning Climbing. Climb the ladder, enter the flight power-up and light the six lamps in the upper cave. The flight is temporary, so use a compact circuit and avoid wide detours.
After all six lamps are lit, collect the orb from the Gemcutter in the upper cave. The upper area also contains gems to collect during this return if you are pursuing full completion.
- Identify the ladder near the Moneybags bridge room.
- Leave the indoor lamp challenge for after Climbing is purchased.
- Return to Glimmer with Climbing available.
- Light the six upper-cave lamps and collect the final Glimmer orb.
Check the records and save before leaving
Press Select during gameplay to open the quick HUD/status display. Use it to check Spyro’s current gem, life and orb totals. Select does not open the detailed Guidebook in this original PlayStation edition.
For detailed realm records, press Start to open the pause menu, then select Guidebook directly. Open Glimmer’s entry to inspect the talisman and orb records. The Magic Pick talisman and the outdoor lamp and lizard orbs should be recorded after the first visit. The indoor lamp entry can remain incomplete until the later Climbing visit.
Use the Start pause menu’s Save Game command when you want to protect your progress. Select the intended PlayStation memory-card file or slot and wait for the save operation to finish. If you have just received an orb or talisman, save before switching off the console so the new record is protected.
If an enemy, NPC or challenge becomes stuck, use Exit Level from the Start pause menu and re-enter Glimmer from Summer Forest. This resets the active level state. Previously saved talismans and orbs remain recorded, but any progress made since the last save should be checked and saved again.
- Press Select and verify the quick HUD/status display.
- Press Start and select Guidebook directly from the pause menu.
- Confirm that the Magic Pick talisman is recorded.
- Confirm that the outdoor lamp and lizard orbs are recorded.
- Leave the indoor lamp orb marked for later if Climbing is unavailable.
- Use Start and Save Game to save to the intended PlayStation memory-card file.
- Return to Summer Forest when ready to continue.
Before you move on
- Twitchy has awarded the Magic Pick talisman.
- Kanga’s outdoor six-lamp orb is recorded.
- Bounsa’s six-lizard orb is recorded.
- The indoor cave-lamp orb is either completed after learning Climbing or deliberately marked for later.
- Select has been used to check the quick HUD/status display.
- Start and the direct Guidebook entry have been used to inspect Glimmer’s detailed realm records.
- The game has been saved through Start and Save Game, with the intended PlayStation memory-card file confirmed.
- Spyro has returned to Summer Forest and can enter the next available level portal.
References for this chapter
- Spyro 2: Ripto’s Rage! Original PlayStation Manual Scan
- Spyro 2: Ripto's Rage! — Guide and Walkthrough — PlayStation — By Cyril
- Spyro 2: Ripto’s Rage! — PlayStation Guide and Walkthrough by SaDi
- Spyro 2: Ripto’s Rage! — Guide and Walkthrough, PlayStation, by dark52
- Spyro 2: Ripto’s Rage! — Spyro Wiki
Summer Forest: Clearing the Main Hub
Summer Forest is the first Home World in the original North American PlayStation release of Spyro 2: Ripto’s Rage!. The Home World itself awards no talisman. To open Crush’s Dungeon, collect the Magic Pick from Glimmer plus the five Summer Forest realm talismans: Jade Idol, Golden Statue, Gear of Power, Turtle Medallion, and Enchanted Shell. Buy Swimming from Moneybags for 500 gems, use it to open the underwater routes, and return later for any objectives that require Climbing.
Orient yourself and check the correct progress screens
Return to Summer Forest after completing Glimmer and receiving the Magic Pick. The Home World contains portals to Idol Springs, Colossus, Hurricos, Sunny Beach, and Aquaria Towers, as well as the routes to Moneybags, Elora, and Crush’s Dungeon.
Press Select during gameplay to display the quick status information. To inspect detailed realm records, press Start to open the pause menu and choose Guidebook directly. Do not choose Options for this; Options is the separate settings area. The pause menu also contains Save Game and Exit Level commands.
The six talismans needed for Crush’s Dungeon are Magic Pick from Glimmer, Jade Idol from Idol Springs, Golden Statue from Colossus, Gear of Power from Hurricos, Turtle Medallion from Sunny Beach, and Enchanted Shell from Aquaria Towers. Summer Forest awards no talisman of its own.
- Magic Pick is recorded.
- Select displays the quick status information.
- Start opens the pause menu.
- Guidebook has been opened directly from the Start menu.
- The five Summer Forest realm entrances are identified.
Complete Idol Springs and receive Jade Idol
Enter Idol Springs and speak with the workers to learn the level’s objective. Follow the main route, clear the enemies blocking the worksite, and flame the large idol when the level directs you to do so. Rescue the workers as you advance; their events open the next portions of the realm.
If you reach a water-based puzzle or challenge before learning Swimming, leave it for later rather than searching for a nonexistent land route. Once Swimming is available, return and complete the underwater tasks by following the visible patterns and instructions presented in the room. Do not rely on a fixed sequence if the game displays a different order.
Continue through the worksite until the final workers’ events are complete, then collect the Jade Idol talisman. The Hula Girl Rescue is separate from this objective. It is an optional orb challenge using the Supercharge power-up. All targets must be struck during one successful run; if one is missed, restart from the power-up and try again.
- The opening idol route is cleared.
- The worker-rescue events are complete.
- Any Swimming-gated puzzle is finished or marked for return.
- Jade Idol is recorded.
- The Hula Girl Rescue orb is complete or deliberately postponed.
Clear Colossus and protect the Swimming fund
Enter Colossus through its portal in the large pond. Follow the monastery route, speak with the monks, and defeat the enemies that block the temple. Use flame against enemies that are awkward to charge, then continue upward until the monk sequence awards the Golden Statue talisman.
Colossus also contains optional hockey challenges and a Professor-related statue challenge. Neither is needed for the talisman or for opening Crush’s Dungeon. For hockey, approach from an angle and shoot across the goal after making the goalie commit instead of charging straight at the target. Postpone the challenge if it is costing lives or time.
Collect available gems before leaving, but keep 500 gems reserved for Swimming. Optional services and small side routes can wait until the movement ability has been purchased.
- Golden Statue is recorded.
- The optional hockey and Professor challenges are identified.
- At least 500 gems are reserved for Swimming.
Buy Swimming and open the underwater routes
Return to Moneybags in Summer Forest and pay 500 gems to learn Swimming. Test the ability in the nearby water. You can now use underwater passages in Summer Forest and complete the water-dependent portions of Idol Springs, Sunny Beach, and Aquaria Towers.
Dive into the pool near the Glimmer side of the Home World and follow the underwater tunnel. Explore the passage and the castle-side rooms for accessible gems and orb objectives. If a ladder or upper ledge clearly requires Climbing, record it in the Guidebook and leave it for the later return.
Use the red-switch route on the far side of Summer Forest to reach Moneybags at the Aquaria Towers entrance. Pay 400 gems to open the realm. This is separate from the 100-gem submarine service found inside Aquaria Towers.
- Swimming has been purchased and tested.
- The underwater Summer Forest route has been explored.
- Climbing-gated ledges are marked for later.
- The 400-gem Aquaria Towers entrance is open or affordable.
Complete Hurricos and collect Gear of Power
Enter Hurricos and follow the electrical machinery route. Restore the required power components and activate the machinery that removes the force-field barriers. Inspect upper platforms and side passages as you go; some orb challenges are easy to pass without noticing.
The Gear Grinder challenge and the windmill or moving-platform challenges are optional orb objectives. Attempt them if the route is comfortable, but do not let them interrupt the main talisman path. On moving platforms, use patient glides and controlled hovering rather than jumping early.
Finish the required electrical events and follow the final route. Speak with the appropriate level character after the machinery objectives are complete to receive Gear of Power.
- The first force-field route is open.
- The required electrical components are restored.
- Optional Hurricos orb challenges are complete or marked for cleanup.
- Gear of Power is recorded.
Guide the turtles through Sunny Beach
Enter Sunny Beach and follow the turtle-switch route. Flame the large turtles onto the blue floor switches to open each door, then clear the connected surface and underwater areas. Repeat the process as new rooms introduce additional switches.
Use flame against belt-wearing enemies when charging is unreliable. The temporary flame-power-up box challenge is an optional orb and is not part of the talisman requirement.
Continue through the baby-turtle sections and position the final large turtle on its switch. Enter the last room and collect Turtle Medallion. Any ladder or high ledge that stops you is Climbing-dependent cleanup; leave it until that ability is available.
- The turtle switches have opened the main route.
- The surface and underwater sections are cleared.
- Turtle Medallion is recorded.
- The optional box challenge is complete or postponed.
- Climbing-dependent Sunny Beach content is marked for later.
Open Aquaria Towers and receive Enchanted Shell
After paying 400 gems at the Home World entrance, enter Aquaria Towers and speak with the Seahorse. Defeat the enemies in the opening area, activate the red switch, and follow the newly flooded route to the next surface area. Activate the tower switch to continue.
Avoid the mechanical sharks. Proceed through the lower underwater passage until you reach Moneybags, then pay 100 gems to borrow the submarine. This service lets Spyro pass the shark barrier and remains available for later attempts.
In the next section, defeat the enemies and activate the wall switch to raise the water. Swim through the newly opened passage and return toward the upper part of the level. Speak with the Seahorse again to receive Enchanted Shell.
The manta-ray courses and Seahorse King rescue are optional orb challenges. They can be attempted after the required route is open, but neither is needed for the talisman or the Crush gate.
- Aquaria Towers is open.
- The required water switches are activated.
- The 100-gem submarine service has been purchased.
- Enchanted Shell is recorded.
- The manta-ray and Seahorse King orbs are complete or postponed.
Verify the talismans and enter Crush’s Dungeon
Return to Summer Forest and press Select for the quick status display. For detailed records, press Start and choose Guidebook directly from the pause menu. Confirm that Magic Pick, Jade Idol, Golden Statue, Gear of Power, Turtle Medallion, and Enchanted Shell are recorded.
Complete the Summer Forest orbs that are accessible with Swimming if you want early cleanup, but do not confuse them with required progression. Ocean Speedway and the remaining orb challenges are optional for entering Crush’s Dungeon. Mark Climbing-dependent objectives for the later visit after Autumn Plains provides the ability.
If an enemy, NPC, or puzzle event becomes stuck, press Start and choose Exit Level. Return to the Home World and re-enter the realm to reload temporary enemies, obstacles, and event states. Already awarded talismans and recorded orbs remain registered; an unfinished temporary challenge must be replayed. Save from the pause menu after important progress and never interrupt the console during saving.
When all six required talismans are recorded, follow the castle-side route near Elora to the talisman door. It opens into Crush’s Dungeon. No complete gem or orb clear of Summer Forest is required for this entry.
- Select confirms the quick status display works.
- Guidebook has been checked directly through Start.
- All six required talismans are recorded.
- Accessible Summer Forest orbs are complete or marked for later.
- Climbing-dependent objectives are recorded for a future return.
- The six-talisman door opens and Crush’s Dungeon is accessible.
Before you move on
- The quick status display is accessible with Select.
- The detailed Guidebook is opened directly from Start.
- Magic Pick, Jade Idol, Golden Statue, Gear of Power, Turtle Medallion, and Enchanted Shell are recorded.
- Swimming has been purchased and tested.
- Idol Springs, Colossus, Hurricos, Sunny Beach, and Aquaria Towers have each awarded their talisman.
- Aquaria Towers has been opened and its submarine service has been handled as needed.
- Remaining Summer Forest and realm orbs are either complete or marked for later ability cleanup.
- The six-talisman door opens and Crush’s Dungeon can be entered.
Defeating the Summer Forest Boss: Crush’s Dungeon
Collect the six Summer Forest talismans, enter Crush’s Dungeon from the Summer Forest castle area, and defeat Crush by attacking only while he moves between panels. Each successful flame hit causes a retaliation that ends with falling rocks damaging him. The fight has seven damage cycles, and Crush’s attacks change as his health decreases.
Collect all six Summer Forest talismans
Finish Glimmer, Idol Springs, Colossus, Hurricos, Sunny Beach, and Aquaria Towers, taking the talisman awarded at the end of each realm. These are the six talismans required to open Crush’s Dungeon. You do not need every Summer Forest orb, every gem, or Ocean Speedway to trigger the boss route.
If Aquaria Towers is unfinished, return after purchasing the required swimming ability from Moneybags and complete its main route. Check the Guidebook or status display if you are unsure which of the six realms still lacks its talisman. Optional challenges can wait until after Crush.
- Glimmer talisman recorded.
- Idol Springs talisman recorded.
- Colossus talisman recorded.
- Hurricos talisman recorded.
- Sunny Beach talisman recorded.
- Aquaria Towers talisman recorded.
- You have saved if you want a secure restore point before the boss.
Open the route to Crush’s Dungeon
Return to the Summer Forest homeworld and enter the castle area. Follow the interior route toward the far side of the castle, near the Aquaria Towers side of the hub. The boss doorway is separate from the ordinary realm portals and remains closed until all six Summer Forest talismans are recorded.
Once the doorway opens, drop into the entrance and proceed into Crush’s Dungeon. The dungeon contains no normal gem collection, talisman, or orb objective. Its purpose is the boss battle, so concentrate on the floor panels, Crush’s position, and the open space around the arena.
- You are in the Summer Forest homeworld, not inside a regular realm.
- The boss doorway has opened after the sixth talisman.
- The destination is Crush’s Dungeon.
- You are not spending time searching the dungeon for collectibles.
Survive the blue-panel phase
Crush begins by standing on blue panels behind a protective barrier. Do not waste Flame against him while the barrier is active. Keep moving around the arena and watch the energy waves he sends across the floor. Jump over each blue wave as it reaches Spyro, leaving yourself enough room to continue moving afterward.
When Crush leaves the panel and runs toward another one, he is exposed. Follow far enough to reach him, flame him once, and immediately charge away. Do not remain beside him for a second attack. He will pursue Spyro and strike the floor with his hammer; the impact causes rocks to fall from the roof and damage Crush. Let this retaliation finish instead of trying to force another hit.
- You wait for the barrier to disappear.
- You jump over the blue energy waves.
- You flame Crush during his movement between panels.
- You retreat immediately after one successful flame.
- The falling rocks complete the damage cycle.
Avoid the red-panel projectiles
After two damage points, the panels turn red and Crush replaces the blue wave attack with energy projectiles. Keep moving across the arena, preferably laterally or in a broad circle, so the shots pass behind Spyro. Charging helps maintain distance, but do not charge blindly into a wall or corner.
As before, wait until Crush leaves the panel. Flame him once while he is moving between panels, then charge away before his hammer attack. The boss takes the damage from the falling rocks, so patience is safer than chasing him or attempting multiple flames.
- You identify the red panel before choosing your evasive movement.
- You avoid the projectiles by moving or charging away.
- You attack only during Crush’s exposed transition.
- You preserve open space instead of retreating into an arena edge.
Handle the mixed final phase
After four total damage points, blue and red panels appear together. Watch the panel Crush actually selects each time. A blue panel means jump over the energy waves; a red panel means move or charge away from the projectiles. In this later phase, the attack sequence is longer, with three waves or projectiles rather than the earlier two, so keep moving until the entire attack has ended.
Once Crush begins moving again, repeat the same conservative loop: one flame, immediate retreat, then wait for the falling rocks. Crush chases more aggressively after the hit during this phase, making a wide circle around the chamber safer than stopping near him. Sheep begin appearing in the arena during the later part of the fight. Use one for Sparx recovery only when you can reach it without walking into Crush’s path.
- You read the current panel color instead of assuming the attack.
- You jump blue attacks and move away from red attacks.
- You leave room for the longer three-shot sequence.
- You use sheep only when recovery is safe.
- You continue the one-hit-and-retreat pattern until all seven damage points are removed.
Recover after a failed attempt
A defeat does not remove completed talismans or recorded orb progress. Re-enter Crush’s Dungeon from Summer Forest and begin the encounter again; there is no need to replay the six completed realms. If the battle state appears abnormal, leave the dungeon and reload it from the hub so the encounter resets.
For practice, make a normal save before entering the boss route if you want your latest progress secured. If you lose, identify the cause rather than changing the whole strategy: blue waves require jumping, red projectiles require lateral movement, and every successful flame must be followed by an immediate retreat.
- Your six talismans remain recorded after defeat.
- You return to the boss doorway rather than repeating completed realms.
- You reload the dungeon if the encounter state behaves incorrectly.
- You know which attack or positioning mistake caused the failure.
Confirm victory and proceed to Autumn Plains
Crush has seven hit points. The complete fight therefore requires seven successful damage cycles, with each cycle consisting of an exposed flame hit followed by the falling-rock retaliation. After the final cycle, allow the victory scene and story transition to finish before leaving or resetting the game.
Crush’s defeat clears the Summer Forest boss gate and advances the story toward Autumn Plains. Remaining Summer Forest gems, optional orbs, and Ocean Speedway can be completed before moving on or saved for later cleanup. They are not requirements for this chapter’s progression.
- Crush has lost all seven hit points.
- The victory scene has played to completion.
- The route toward Autumn Plains is available.
- Your completed talismans and existing orb total remain recorded.
- You understand that Crush’s Dungeon has no gem, orb, or talisman collectible.
Before you move on
- The Guidebook records all six Summer Forest talismans.
- The Crush’s Dungeon doorway opened in the Summer Forest castle area.
- Crush was defeated after seven completed damage cycles.
- The post-boss scene finished and the Autumn Plains route became available.
- No optional orb, gem, or Speedway reward was required for this boss victory.
References for this chapter
Autumn Plains: New Challenges and Route Planning
Autumn Plains is the second home world in the original North American PlayStation release of Spyro 2: Ripto’s Rage!. It is larger and more vertical than Summer Forest, and its routes are opened gradually through Moneybags payments, Climbing, orb thresholds, whirlwinds and long glides. The intended route requires eight talismans from Crystal Glacier, Skelos Badlands, Breeze Harbor, Zephyr, Scorch, Fracture Hills, Magma Cone and Shady Oasis. Metro Speedway and Icy Speedway are separate optional levels and do not replace any of those talismans.
Enter Autumn Plains and make a landmark circuit
After defeating Crush in Summer Forest, enter Autumn Plains and first identify the major landmarks rather than trying to memorize every portal. Locate Elora, the entrance courtyard, the Moneybags positions, the ladder that is initially unusable, the castle-side stairs, the outer wall and the route leading toward Gulp’s Overlook.
Autumn Plains is built around delayed access. A ledge, doorway or bridge may require Climbing, a total orb threshold, a Moneybags payment, a power-up or an approach from another side of the hub. When a route is clearly blocked, note its landmark and continue through the open paths. Repeatedly attempting the same jump will not bypass a missing ability or unopened passage.
- Locate Elora and the central courtyard.
- Find the ladder beside the early Climbing purchase point.
- Identify the outer wall and the castle-side stairs.
- Find the approach to Gulp’s Overlook.
- Note each blocked route by its nearest landmark.
Activate the first whirlwind route and collect the hub orb
Collect the available gems in the opening section, then speak with Moneybags on the raised platform near Elora and pay the displayed 400-gem fee. This payment opens his particular route; it is not the same action as activating the whirlwind.
After the payment, return to Elora. Her interaction activates the whirlwind. Ride it to the raised section, then glide to the surrounding wall. Follow the wall around to the apparent dead end and charge through the cracked section to obtain the orb hidden behind it.
If Elora does not activate the whirlwind, check that the nearby Moneybags transaction has been completed and speak with her again. Do not assume another 400-gem payment or a different Moneybags barrier controls this event.
- Have enough gems for the 400-gem Moneybags transaction.
- Complete the correct Moneybags interaction near Elora.
- Speak with Elora after the transaction.
- Ride the whirlwind to the raised section.
- Glide to the outer wall and charge through the cracked section.
Buy Climbing and open the ladder routes
Return to Moneybags beside the ladder and purchase Climbing for 500 gems. This is the key early Autumn Plains ability. It opens the ladder beside Moneybags and also enables cleanup in previously visited areas, including Summer Forest and levels such as Glimmer and Sunny Beach.
Climb the nearby ladder and follow the upper route. Gather the accessible gems and inspect the ledges from above. Climbing does not open every blocked route: Headbash, later orb thresholds, power-ups and additional Moneybags payments can still be required. Mark those barriers instead of treating them as failed jumps.
- Have 500 gems available.
- Purchase Climbing from Moneybags beside the ladder.
- Climb the ladder immediately to confirm the ability works.
- Inspect the upper hub route for accessible gems and doors.
- Mark barriers that still require another ability or payment.
Open the Professor’s passage with eight recorded orbs
From the Climbing route, continue through the upper castle-side passages until you reach the Professor’s door. The requirement is eight total recorded orbs across the game, not eight orbs found only in Autumn Plains. Once the total reaches eight, speak with the Professor and the passage opens.
Press Select during gameplay to view the quick status display, including your current totals. For detailed progress, press Start to pause, choose Guidebook, and inspect the home-world and realm records. If you are below eight orbs, finish accessible orb challenges in Summer Forest or Autumn Plains and then return to the Professor.
After the passage opens, follow the route beyond it and inspect the additional Moneybags barriers. Some payments open bridges or shortcuts; they are separate from the eight-orb requirement and should be handled according to the route you are trying to reach.
- Use Select to check the quick orb total.
- Use Start and choose Guidebook for detailed records.
- Reach eight total recorded orbs.
- Return to the Professor and open the passage.
- Distinguish the orb requirement from later Moneybags payments.
Complete the eight required talisman realms
Complete the main talisman objective in Crystal Glacier, Skelos Badlands, Breeze Harbor, Zephyr, Scorch, Fracture Hills, Magma Cone and Shady Oasis. The game allows flexibility in the order of several realms, so use the Guidebook to track missing talismans rather than forcing one exact sequence.
Prioritize the main talisman objective in each realm before optional orb cleanup. If an orb visibly requires Headbash, Climbing, a power-up or a route that is not yet open, leave it for a return visit. Once the realm’s main objective awards its talisman, record the delayed task and move on.
Shady Oasis is part of the required story route. Its main objective awards the Mystic Lamp talisman, which counts toward the eight Autumn Plains talismans and the fourteen talismans required to enter Gulp’s Overlook. Only its optional orb, gems and related cleanup can be postponed.
- Track Crystal Glacier separately.
- Track Skelos Badlands separately.
- Track Breeze Harbor and Zephyr separately.
- Track Scorch and Fracture Hills separately.
- Track Magma Cone separately.
- Complete Shady Oasis’s main objective and record the Mystic Lamp talisman.
- Do not count either speedway as a talisman realm.
Open Shady Oasis and keep the speedways separate
Reach the castle-side Moneybags barrier for Shady Oasis and pay the displayed fee to open access. The payment opens the route; it does not award the Mystic Lamp. Enter the realm and follow its main objective through the berry bushes, doors, enemies and seed-powered obstacles until the level’s NPC awards the talisman.
Some Shady Oasis challenges cannot be completed until Headbash is available. If an optional activity leads to a breakable obstruction or a clearly inaccessible side area, mark it for later rather than repeatedly attempting it. Return after purchasing the later ability in Winter Tundra.
Metro Speedway and Icy Speedway are separate optional Autumn Plains sublevels. They provide gems, orbs and speedway rewards, but neither contributes a talisman to the eight-realm requirement. Icy Speedway is entered from Autumn Plains and should not be confused with Winter Tundra content.
- Reach the Shady Oasis Moneybags barrier.
- Pay the access fee and enter the realm.
- Complete the main Shady Oasis objective.
- Record the Mystic Lamp talisman.
- Mark Headbash-dependent activities for later.
- Treat Metro Speedway and Icy Speedway as optional levels.
Organize delayed orb cleanup with the Guidebook
Use Start to pause and select Guidebook whenever you need detailed realm records. Inspect each visited Autumn Plains realm and distinguish three situations: an orb that is available now, an orb that requires a later ability, and an orb whose route is open but whose challenge needs more practice.
For every delayed orb, record the realm, a nearby landmark and the suspected requirement. Useful notes include Climbing, Headbash, an unopened bridge, the Professor’s eight-orb passage, a power-up or an approach from the opposite side of the hub. This prevents wasted searches and makes later cleanup efficient.
If an escort, enemy group, switch or other active event becomes stuck, press Start and choose Exit Level, then re-enter the realm from Autumn Plains. Reloading the realm is safer than continuing an unreliable event state and does not erase already recorded talismans or orbs.
- Use Select only for quick totals.
- Use Start and Guidebook for realm-by-realm records.
- Confirm each talisman entry after completing a realm.
- Write a return note for every inaccessible orb.
- Exit and re-enter a realm if an event stops responding.
Verify the story route before Gulp’s Overlook
After learning Climbing, opening the Professor’s passage at eight total orbs and completing the eight regular Autumn Plains talisman realms, make one organized hub sweep. Recheck the courtyard, Elora’s whirlwind, the outer-wall crack, the ladder routes, the upper castle, the Professor’s passage, the Shady Oasis access route and the stairs toward Gulp’s Overlook.
The normal route requires fourteen talismans total: six from Summer Forest and eight from Autumn Plains. Home-world orbs, speedway rewards and ability-gated optional challenges may wait, but the Shady Oasis talisman may not. Before entering Gulp’s Overlook, open the Guidebook and verify all fourteen talismans are recorded.
Once the fourteen-talisman requirement is satisfied, enter Gulp’s Overlook from the Autumn Plains boss route. Keep any remaining optional orb and gem tasks listed for later cleanup rather than confusing them with the mandatory route.
- Confirm Climbing is learned.
- Confirm the Professor’s passage opened at eight total orbs.
- Confirm all eight Autumn Plains talismans are recorded.
- Confirm the Shady Oasis Mystic Lamp specifically.
- Confirm all six Summer Forest talismans are recorded.
- Verify all fourteen talismans before entering Gulp’s Overlook.
Before you move on
- The central courtyard, Elora, the outer wall, ladder, upper castle and Gulp’s Overlook route have been identified.
- The first Autumn Plains whirlwind has been activated through the correct Elora interaction.
- The outer-wall cracked section has been cleared and its orb is recorded.
- Climbing has been purchased from Moneybags for 500 gems.
- The Professor’s passage has opened after reaching eight total recorded orbs.
- All eight required Autumn Plains talisman realms are tracked separately.
- Shady Oasis has been opened and its main objective completed.
- The Mystic Lamp talisman is recorded.
- Metro Speedway and Icy Speedway are recognized as optional speedways.
- Every delayed orb has a return note naming its realm, landmark and suspected requirement.
- Start opens the pause screen and Guidebook, while Select opens the quick status display.
- The Guidebook shows all six Summer Forest talismans and all eight Autumn Plains talismans before Gulp’s Overlook is attempted.
Autumn Plains Bosses and Dungeon Puzzles
Complete the eight Autumn Plains talisman realms, learn Climb from Moneybags, then defeat Gulp in Gulp’s Overlook. The boss entrance requires all 14 regular-level talismans: six from Summer Forest and eight from Autumn Plains. The realms use different objectives, including rescue tasks, cannons, switches, moving boats, escort sections, supercharge routes, and combat puzzles. Optional orbs, Speedways, gems, and skill points are separate from the required story route.
1. Learn Climb and establish the Autumn Plains route
After entering Autumn Plains, collect the ordinary gems around the starting area and speak with Moneybags near the ladder. Pay 500 gems to learn Climb. This is the important first purchase in the hub because it opens the upper route to Scorch and lets you return to unfinished areas in Summer Forest and earlier realms.
Climb does not automatically open every blocked route. Some passages still require a separate Moneybags payment, a temporary power-up, a story event, or Headbash later in the game. If a ledge remains unreachable after learning Climb, mark it for cleanup instead of repeatedly attempting the same jump.
The eight Autumn Plains talisman realms can be completed in a flexible order. The route below follows the main level objectives and separates required talisman progress from optional orb challenges.
- Collect 500 gems for Climb.
- Learn Climb from Moneybags in Autumn Plains.
- Treat locked ladders, bridges, and power-ups as separate requirements.
- Do not count optional orbs or Speedways as talisman progress.
2. Skelos Badlands — reach Glug and collect the Ancient Bone
Enter Skelos Badlands through the portal near the Autumn Plains starting area. Rescue the opening characters and use charge against the fire-based enemies; ordinary flame is ineffective against these enemies. When you reach the large skull, use the rocks that erupt from the lava to defeat the enemy positioned above it.
Follow the route through the skull tunnel and the adjoining paths. Continue defeating enemies and collecting gems while using rocks against fire creatures. The level’s main route eventually leads around the outer area toward Glug. Speak with Glug after reaching him to receive the Ancient Bone talisman and open the exit portal.
Ooga’s bone collection is an optional orb challenge, not part of the talisman requirement. If you accept it, collect the scattered bones around the rib platforms, volcano opening, lava-platform cave, and skull routes. The temporary lava-walking power-up allows access to bones over lava. You can safely leave this activity for a later attempt if the hazards are costing lives.
The two lava-lizard activities near Lumpy are also optional orbs. They require rapid flame attacks and, especially in the harder version, learning the order in which the lizards hatch. Neither activity is needed to receive the talisman.
- Rescue the opening characters.
- Use lava rocks against fire enemies and the skull-area target.
- Continue through the normal route to Glug.
- Receive the Ancient Bone talisman.
- Treat Ooga’s bones and Lumpy’s lizards as optional orb challenges.
3. Crystal Glacier — free the Icebuilders and open the jail route
At the entrance, flame the three trapped Icebuilders, then stand on the large bone catapult to cross the gap. On the far side, defeat the blue ice wizards before freeing the next group. If the wizards remain active, they can refreeze characters you have just released.
After the area is safe, free the additional Icebuilders. Their release creates the route up the wall. Continue through the upper section, defeating wizards before relying on newly freed characters. When you reach Moneybags, pay 200 gems to move the bridge.
Cross the bridge and clear the next group of enemies before melting the remaining Icebuilders. Follow the resulting route through the jail area and continue until the level’s shaman sequence awards the Ice Crystal talisman and opens the return portal.
The snow-leopard and Draclet activities are optional orbs. They can be completed after the talisman, so do not confuse those side objectives with the jail route.
- Free the opening Icebuilders.
- Defeat the ice wizards before depending on freed characters.
- Pay Moneybags 200 gems to move the bridge.
- Melt the remaining Icebuilders and complete the jail route.
- Collect the Ice Crystal talisman.
4. Breeze Harbor — operate the cannons and raise the large boat
Speak with Beaky at the entrance, then return to the nearby fire and light it. Use the whirlwind to reach the cannon platform. Defeat enemies before lighting later fires; if enemies remain nearby, a fire may not stay active.
Use the cannons to clear the required route and deal with the floating mines and blocked targets. The mine-blasting objective is an optional orb, so you do not need to destroy every mine for the talisman.
After lighting the fire in the next section, board the moving boat. Stay aboard until it reaches its landing point, then disembark and follow the path to the red launch target. Stand on the target to be thrown to the large boat.
Defeat all Land Blubbers on the large boat and light both fires. The boat rises and gives access to Squawk, who awards the Glass Anchor talisman. The Gear Grab cart challenge is an optional orb and can be postponed if its track hazards are costing repeated attempts.
- Defeat the required Land Blubbers.
- Light the fires that activate the route.
- Use the cannons to clear blocked passages where necessary.
- Cross with the moving boat and use the red launch target.
- Light both fires on the large boat.
- Receive the Glass Anchor talisman.
5. Zephyr — use cannons and TNT to reach the Ruby Bomb
Zephyr is on the upper side of Autumn Plains. If Moneybags is blocking its entrance, pay the required 400 gems to open it. At the beginning of the realm, keep moving through the enemy groups and avoid the TNT thrown by the small yellow birds.
Speak with Sergeant Tub to obtain access to a cannon. Use it to defeat the birds and open the first door. Continue through the caves, jumping over thrown TNT, until you reach the next cannon. Use that cannon to open the large door across the gap and clear the route to the talisman.
The cowlek and seed activities are optional orbs. They may use parts of the same upper platforms and cannon routes, but they are not needed for the Ruby Bomb. If you reach a side challenge and do not want to attempt it, return to the main route and continue toward the large door.
After the upper door is open, glide across to the far platform and collect the Ruby Bomb talisman. You can then return for the cowlek and seed orbs if you want to clean up the realm.
- Pay Moneybags if Zephyr is closed.
- Use the first cannon to open the initial route.
- Avoid TNT while moving through the caves.
- Use the upper cannon to open the large door.
- Collect the Ruby Bomb talisman.
6. Scorch — activate the buttons and reach Greta
Reach Scorch through the upper Autumn Plains route. Speak with Greta, then glide across the opening gap and flame the first button. The opened door leads into the next section.
Move through the enemies and climb the stairs. Return to the area before Hunter and flame the next button, then enter the newly opened section and activate the third button. Follow the adjoining path to the whirlwind and ride it upward.
At the upper route, flame an exploding vase to start the chain reaction that clears the group. Return through the opened door and continue through the enemy area. Greta is at the end of the required route and awards the Emerald Scarab talisman.
Hunter’s monkey activity and the flag-capture activity are optional orbs. The flag challenge uses a temporary Superflame power-up and requires chasing Bombo while avoiding his bombs, but it does not affect access to Gulp’s Overlook.
- Flame the opening button.
- Activate the second and third buttons.
- Use the whirlwind to reach the upper route.
- Trigger the exploding-vase chain.
- Reach Greta and collect the Emerald Scarab talisman.
7. Fracture Hills — free the six Satyrs and reach the talisman
Speak with Lila, then flame the first Satyr beside her. Follow the normal route through Fracture Hills and free all six Satyrs trapped in stone. Check the upper paths and side corners as you advance; the required Satyrs are placed along the main route.
Earthshapers cannot be defeated by ordinary flame. Charge them repeatedly so they are pushed backward, using the lava or the level terrain to remove them. Stay aware of the narrow paths, because a mistimed charge can send Spyro toward a hazardous edge.
After all six Satyrs are free, enter the central temple area and collect the Bronze Flute talisman. The supercharge route and the Alchemist escort are optional orb content. If you attempt the escort, move just ahead of the Alchemist and charge Earthshapers before they can reach him. Do not run so far ahead that he loses contact with the route.
The later Earthshaper cleanup activity requires Headbash and can wait until Winter Tundra. It is not part of the eight-talisman Autumn Plains requirement.
- Free all six Satyrs.
- Use charge rather than flame against Earthshapers.
- Collect the Bronze Flute talisman in the central temple.
- Treat the supercharge, faun, and Alchemist tasks as optional orbs.
- Leave Headbash-dependent cleanup for later.
8. Magma Cone — clear the Earthshapers and climb the volcano
Enter Magma Cone and speak with the starting character. Climb the first ladder and deal with the Earthshapers standing near the large red marks. Charge them onto those marks so the local characters can destroy them.
Continue across the upper sections, defeating the Earthshapers that block the route. Use Climb to follow the ladders up the volcano. When you reach the bridge, speak with Moneybags and pay 200 gems to activate the elevator.
Ride the elevator down, then climb the volcano using the ladder sequence. Rolling rocks descend on the paths near the upper section. Watch the route before moving, step aside after a rock passes, and keep Spyro positioned away from the outer edge. Continue upward until you reach the summit and receive the Volcano Idol talisman.
Hunter’s crystal-geyser activities and the Superfly enemy challenge are optional orbs. Hunter is not required for the talisman. You can return after completing the level if you want to attempt those challenges with the route familiar.
- Charge Earthshapers onto the red ground marks.
- Defeat the Earthshapers blocking the upper route.
- Pay Moneybags 200 gems to activate the elevator.
- Climb the volcano while watching for rolling rocks.
- Collect the Volcano Idol talisman.
9. Shady Oasis — feed the hippo and collect the Mystic Lamp
Moneybags must open the Autumn Plains castle route before you can enter Shady Oasis. Inside the realm, speak with the opening character and flame or charge the nearby bush. The berry opens the first path.
Follow the hippo through the level. Flame the raised second tree to open the next door, then make the difficult jumps around the camera angles to reach the third tree. Flame or charge it to continue.
Eventually you will reach a large green seed. Pick it up, clear nearby enemies, and spit it at the final tree to knock down the berry. Follow the hippo through the opened route and continue to the end of the level, where the Mystic Lamp talisman becomes available.
The thief chase is an optional orb. The lower hippo rescue route and other blocked areas require Headbash, so an inaccessible lower path is not evidence that the talisman route has been missed.
- Open the Shady Oasis entrance through Moneybags.
- Use the first berry to open the starting route.
- Flame the two raised trees.
- Use the green seed on the final tree.
- Reach the end of the realm and collect the Mystic Lamp talisman.
10. Open Gulp’s Overlook after all 14 talismans
The Gulp entrance checks the complete regular-level talisman total, not merely the eight talismans found in Autumn Plains. You need six talismans from Summer Forest and the eight from Skelos Badlands, Crystal Glacier, Breeze Harbor, Zephyr, Scorch, Fracture Hills, Magma Cone, and Shady Oasis.
If the entrance remains closed, open the Guidebook from the Start pause menu and check the realm records. Select shows the quick status display; Start pauses the game and provides the detailed Guidebook. Return to any realm whose talisman is missing.
Once all 14 regular-level talismans are recorded, return to the central Autumn Plains hub and approach the large boss entrance. Optional orbs, Speedways, gems, and skill points do not need to be complete before entering Gulp’s Overlook.
- The Guidebook records six Summer Forest talismans.
- The Guidebook records eight Autumn Plains talismans.
- The Gulp’s Overlook entrance opens.
- Optional orb and Speedway progress is kept separate from the boss requirement.
11. Defeat Gulp with the dropped weapons
Enter the hole in Gulp’s Overlook. Ordinary flame and charge attacks do not damage Gulp. At the start, keep moving around the arena until the pterodactyls drop barrels. Charge a barrel into Gulp before he can take it.
Gulp then begins using large energy shots. Watch the shadows and landing points, keep moving, and avoid being pushed against the arena boundary. When bombs are dropped, flame a bomb toward Gulp, then move away immediately so the blast does not catch Spyro.
When rockets appear, pick one up and spit it at Gulp from a safe distance. Reposition after firing instead of standing near the impact point. As the fight continues, the pterodactyls drop mixed weapons and Gulp tries to collect or destroy them, so act quickly when a useful weapon appears.
The safest rhythm is movement, observation, one weapon attack, and immediate repositioning. Use the camera to keep Gulp visible, turn inward when an attack drives Spyro toward the edge, and abandon a weapon if Gulp reaches it first. Do not contest a pickup at close range.
- Charge barrels into Gulp.
- Flame bombs toward Gulp and retreat from the blast.
- Pick up and spit rockets from a safe distance.
- Watch energy-shot shadows and avoid the arena edge.
- Defeat Gulp and leave through the newly available route.
12. Recover after a failed attempt
A defeat does not erase recorded talismans or completed orb progress. Re-enter Gulp’s Overlook and change the response to the attack or weapon phase that caused the failure. You do not need to repeat the eight talisman realms.
If a switch, enemy, escort, or event stops responding inside an Autumn Plains realm, exit to the hub and re-enter the level. Reloading the realm generally resets its active enemies and events while preserving recorded progress.
After defeating Gulp, confirm that the route to Winter Tundra is available. Remaining gems, optional orbs, Speedways, and skill points can be completed later and should not be confused with the required boss completion.
- Re-enter the boss without redoing completed talisman realms.
- Reload a level from the hub if an event becomes stuck.
- Confirm Winter Tundra access after Gulp’s defeat.
Before you move on
- The Guidebook records all 14 regular-level talismans.
- Climb has been purchased from Moneybags for 500 gems.
- Skelos Badlands, Crystal Glacier, Breeze Harbor, Zephyr, Scorch, Fracture Hills, Magma Cone, and Shady Oasis each show their talisman completed.
- The Gulp’s Overlook entrance is open.
- Gulp has been defeated using barrels, bombs, and rockets.
- The route to Winter Tundra is available.
- Optional Autumn Plains orbs, Speedways, gems, and skill points remain separately tracked from required story progression.
Winter Tundra: Short Hub, Important Gatekeeping
Winter Tundra is the third and final home world in the original North American PlayStation release of Spyro 2: Ripto’s Rage!. It has no talisman realms. Its four ordinary realms—Mystic Marsh, Cloud Temples, Robotica Farms, and Metropolis—award orbs, while Canyon Speedway provides a separate optional speedway challenge. Ripto’s Arena becomes available when the active save records at least 40 orbs and you return to speak with Elora. Buy Headbash from Moneybags, collect the easy local rewards, then use the Guidebook to decide whether to clear more optional content before the final fight.
1. Enter Winter Tundra and check the active save
After defeating Gulp in Gulp’s Overlook, follow the newly available route into Winter Tundra. This is the final home world and is more compact than Summer Forest or Autumn Plains. Do not search here for talismans: the fourteen story talismans come from the regular realms in the first two home worlds. Winter Tundra’s progression is centered on orbs, ability access, and the final route to Ripto’s Arena.
Press Select during play to display the quick status information, including the current orb and talisman totals. For detailed realm records, press Start to open the pause menu and choose the Guidebook entry shown there. The Guidebook lets you inspect individual realm progress and identify unfinished orb challenges. Do not use Options as the route to the Guidebook; Options is a separate settings area.
Ripto’s Arena requires 40 recorded orbs across the entire game. The total does not need to come entirely from Winter Tundra, and you do not need to clear every Winter Tundra realm before attempting the final fight. If the active save already has 40 orbs, collect Headbash if desired and then return to Elora’s area.
- Winter Tundra was entered after Gulp’s defeat.
- Select was used for the quick status display.
- Start was used to open the pause menu and its direct Guidebook entry.
- The global orb total, rather than a new talisman total, is being checked.
2. Buy Headbash from Moneybags
Find Moneybags in the Winter Tundra hub and pay the displayed 1,000-gem fee to learn Headbash. This is the final normal movement ability. It lets Spyro break marked large rocks and reach several late-game cleanup objectives.
Use Headbash on the large breakable rock near Moneybags and the Mystic Marsh entrance. A marked breakable object will react; ordinary scenery will not. The orb inside is optional for the story gate, but it is one of the safest local rewards to collect if you are below 40.
Headbash also unlocks cleanup in earlier realms. Some orb challenges, enemy routes, and blocked passages cannot be completed until this ability is available, so record any inaccessible objective in the Guidebook and return later instead of repeatedly testing an unreachable route.
- Moneybags was found in Winter Tundra.
- Headbash was purchased for 1,000 gems.
- The large marked rock near the Mystic Marsh side was checked.
- Headbash-gated earlier objectives were noted for later revisits.
3. Collect the three Winter Tundra home-world orbs
Winter Tundra has three home-world orbs. They are optional for opening Ripto’s Arena, but they are reliable rewards when you need to raise the global total.
For the rock orb, use Headbash on the large marked rock near Moneybags. For the waterfall orb, locate the whirlwind behind Moneybags. Ride it upward, then glide toward the waterfall rather than following the normal stair route. Although the destination looks like an open drop, there is water below and a lower route leading to the orb.
For the tall-wall orb, climb toward the upper castle area near the Ripto’s Arena side of the hub. From a high ledge, glide onto the castle wall and walk along it to the orb. If the glide falls short, restart from a higher ledge rather than trying to charge across the gap.
After collecting each orb, use Select or the Guidebook from Start to confirm that the active save total increased. These are permanent recorded rewards, not temporary arena pickups.
- The rock orb was collected if it was needed.
- The waterfall orb was collected if it was needed.
- The tall-wall orb was collected if it was needed.
- The active save reflects the collected rewards.
4. Choose which Winter Tundra realms to visit
The four ordinary Winter Tundra realms are Mystic Marsh, Cloud Temples, Robotica Farms, and Metropolis. Their completion rewards are orbs rather than talismans. Mystic Marsh is a sensible first choice when you want to begin with a normally accessible realm and learn its local objectives.
Cloud Temples is gated until the save has at least 15 orbs, and Metropolis is gated until the save has at least 25. If a portal remains closed, return to earlier hubs and collect easier orb rewards; do not treat the closed entrance as a bug. Robotica Farms is also part of Winter Tundra and includes machinery, movement routes, and ability-related cleanup, so revisit it after buying Headbash if a path appears blocked.
Individual realm objectives remain optional unless you need their orbs. You can postpone difficult thief pursuits, precision challenges, combat tasks, or ability-gated objectives. If an event or enemy state behaves incorrectly, leave through the normal menu route, return to the hub, and re-enter the realm to reset its local state.
Canyon Speedway is the separate speedway associated with Winter Tundra. It is optional for opening Ripto’s Arena. Icy Speedway is not in Winter Tundra; it belongs to Autumn Plains. Check the Guidebook carefully so you do not search the wrong home world for a missing speedway reward.
- Mystic Marsh, Cloud Temples, Robotica Farms, and Metropolis were identified as the four ordinary Winter Tundra realms.
- The 15-orb Cloud Temples gate and 25-orb Metropolis gate were noted.
- Canyon Speedway was distinguished from Icy Speedway.
- Ability-gated and high-risk challenges were marked for later.
5. Reach 40 orbs efficiently
If the status display shows fewer than 40 orbs, begin with the three Winter Tundra home-world orbs, then return to earlier areas. Prioritize short and repeatable objectives: accessible home-world rewards, straightforward enemy-clear challenges, brief escort or assistance tasks, and speedway rewards you can complete consistently.
Use the Guidebook from the Start pause menu after securing a reward. Confirm both the realm record and the global total before moving on. This prevents confusion between an orb that appeared during a challenge and one that was successfully recorded on the active save.
Do not clear every gem, realm, or difficult side challenge merely to open the final route. Once the total reaches 40, return to Winter Tundra. Remaining realms and challenges can be completed later for broader collection progress.
- Easy orb objectives were attempted before difficult ones.
- The Guidebook was checked after important rewards.
- The active save shows at least 40 recorded orbs.
- Repeated deaths on a difficult optional challenge were avoided when easier rewards remained elsewhere.
6. Speak with Elora and open Ripto’s Arena
When Select or the Guidebook confirms at least 40 orbs, return to the upper castle area of Winter Tundra. Find Elora beside the entrance to Ripto’s Arena and speak with her. Reaching the threshold alone is not the final step: the interaction with Elora activates the route.
If the entrance remains closed, press Start and inspect the Guidebook on the active save. Confirm that the displayed orb total belongs to the intended memory-card slot, then speak with Elora again after the threshold is clearly recorded. You do not need to finish Mystic Marsh, Cloud Temples, Robotica Farms, Metropolis, Canyon Speedway, or all three home-world orbs for this story gate.
Once the entrance opens, follow the corridor into Ripto’s Arena. Defeat there does not erase recorded talismans or orbs; if you lose, return from the hub and attempt the arena again with the attack patterns you learned.
- The active save shows at least 40 orbs.
- Elora was spoken to after reaching the threshold.
- The Ripto’s Arena entrance opened.
- Ripto’s Arena loaded successfully.
- No Winter Tundra talisman requirement is blocking access.
Before you move on
- Headbash was purchased from Moneybags for 1,000 gems.
- The three Winter Tundra home-world orbs were collected if needed.
- Mystic Marsh, Cloud Temples, Robotica Farms, and Metropolis were identified as the four ordinary realms.
- Canyon Speedway was distinguished from Icy Speedway.
- The active save shows at least 40 recorded orbs.
- Elora was spoken to after the threshold was reached.
- The Ripto’s Arena entrance opened and the arena loaded successfully.
- For broader Winter Tundra cleanup, the Guidebook records the intended home-world and realm orb rewards.
References for this chapter
- Spyro 2: Ripto’s Rage! Original PlayStation Manual Scan
- Spyro 2: Ripto's Rage! — Guide and Walkthrough — PlayStation — By Cyril
- Spyro 2: Ripto’s Rage! — Guide and Walkthrough, PlayStation, by dark52
- Spyro 2: Ripto’s Rage! — PlayStation Guide and Walkthrough by SaDi
- Cloud Temples, Spyro Wiki
- Metropolis, Spyro Wiki
Orb Farming: Best Returns for Time Spent
The original PlayStation version of Spyro 2: Ripto’s Rage! contains 64 permanent orb rewards. You need 40 recorded orbs to open the route to Ripto’s Arena, but you do not need all 64 to finish the story. Efficient orb collection means taking dependable objectives first, postponing ability-gated or precision-heavy challenges, and grouping revisits by homeworld. Orbs are one-time rewards, so farming is about selecting good objectives and reducing travel rather than repeating completed challenges.
Track orb progress with the original PlayStation menus
Press Select during gameplay to open the quick status display. Use it to check your recorded orb total and confirm that a newly completed challenge has registered. Select is not the pause button and does not open the detailed Guidebook.
Press Start to pause the game, then choose Guidebook from the pause menu. The Guidebook provides the detailed progress records for realms and levels. Do not enter Options to reach it; Options is the separate settings area. Check the relevant level after leaving a challenge if you are unsure whether the orb was awarded.
The Guidebook records completion but should not be treated as a complete physical map of every orb. Locate unfinished objectives by searching around challenge givers, recognizable switches, power-up gates, whirlwinds, underwater passages, cracked walls, ladders, windowsills and unusual NPC areas. Classify each unfinished objective as available now, gated by an ability or story progress, or available but high-risk. Clear the first category before spending repeated attempts on the others.
- Press Select for the quick status display.
- Press Start and choose Guidebook directly from the pause menu.
- Use Options only for settings.
- Check the level record after receiving an orb.
- Use landmarks and challenge NPCs to find objectives the Guidebook does not physically map.
Take the dependable Glimmer and Summer Forest orbs first
Glimmer’s outdoor Gem Lamp Flight is a strong early target. Defeat enough enemies to activate the Superfly power-up near the Gemcutters, pass through it, and flame the lamps in a compact circuit. If you miss a lamp or lose the flight power, return to the power-up and recharge. The lamps can go out if you take too long, so survey the route before starting rather than improvising after the first miss.
Glimmer’s Lizard Hunt is another useful early orb, but normal flame does not work. Pick up the rock projectile, hold Triangle to enter the aiming view, and hit each lizard. Follow the Gemcutter as he moves through the level; he leads you to new firing positions and supplies the next rock when necessary. Later targets are harder to see, so stand back, aim carefully and wait for a clear shot instead of firing blindly.
The second Gem Lamp Flight in Glimmer is a later revisit. Continue through the level until the cave power-up becomes active, then use the flight to light the lamps in the enclosed area. Treat it separately from the outdoor lamp challenge because it uses a different route and becomes practical after you have explored farther into Glimmer.
Hunter’s Challenge in Summer Forest is also a good early orb. Follow Hunter’s movement lesson across the ledges, using the jump, glide and hover techniques he demonstrates. This objective is valuable because it builds the movement skills required for later long-glide and platforming challenges.
Other efficient early targets include short rescue tasks, simple enemy-clear objectives and collection challenges with an obvious start and finish. Before beginning a temporary-power-up challenge, locate the recharge point and remove nearby threats where possible.
- Complete Glimmer’s outdoor Gem Lamp Flight.
- Use the rock projectile and Triangle aiming view for Lizard Hunt.
- Return later for Glimmer’s cave Gem Lamp Flight if it is not yet practical.
- Complete Hunter’s Challenge in Summer Forest.
- Prepare the route before activating temporary flight or power-up challenges.
Sweep each homeworld before changing areas
When you enter Summer Forest, Autumn Plains or Winter Tundra, inspect the homeworld before taking another portal. Homeworld orbs are commonly positioned near ordinary traversal routes, so collecting them during a planned sweep prevents unnecessary return trips.
After purchasing Swimming from Moneybags in Summer Forest, return to the large pool near the Glimmer portal. Dive into the submerged passage and follow it upward through the tunnel to the orb on the secret ledge. Collect nearby underwater gems during the same visit.
Summer Forest also contains Atop a Ladder and Behind the Door. Atop a Ladder requires Climb, which you obtain from Moneybags in Autumn Plains, so mark it for a later return. For Behind the Door, use the switch-controlled doors in the castle area. Set the doors so the route beside the window is usable, climb to the windowsill and glide around the outside of the building to the next sill. The orb is reached through that exterior glide rather than by forcing both doors open.
Autumn Plains contains The End of the Wall and Long Glide. Break through the relevant weak wall, ride the successive whirlwinds to the upper route, and use the tower as the launch point for the distant-island glide. Postpone this sweep until the required route is open and you can control the final glide consistently.
Winter Tundra has three homeworld orbs. After learning Headbash, smash the large rock near Moneybags. From the upper route near Ripto’s Arena, glide toward the waterfall, land in the water below and follow the underwater path for another. The remaining orb is reached from the upper arena approach by gliding to the tall wall. Collect all three during one late-game Winter Tundra visit.
- Sweep the current homeworld before entering another portal.
- Return to Summer Forest after buying Swimming and later Climb.
- Use the door switches before attempting Behind the Door.
- Delay Autumn Plains’ distant-island glide until the upper route is available.
- Use Headbash and the upper routes to collect all three Winter Tundra homeworld orbs.
Group nearby levels into one backtracking loop
Plan revisits by homeworld rather than by isolated orb. In Summer Forest, complete the available homeworld objectives, then enter nearby unfinished levels before leaving the hub. In Autumn Plains, combine the keep, outer-wall and upper-whirlwind routes with level entries in the same homeworld. In Winter Tundra, handle the rock, waterfall and tall-wall objectives during one visit.
When a level contains multiple orb challenges, complete the easiest available objective first. Attempt a harder challenge during that same visit only when the required ability, power-up and route are ready. Otherwise, record it as a later task and move on. This approach is especially helpful for difficult flight paths, long Supercharge routes, moving-platform sections and precision shooting challenges.
Speedways are optional orb sources. Their rewards are not required for ordinary story progression, so use them when you want additional orbs and gems without committing to extensive level backtracking. Practice the opening section, use safe lines through obstacles and stop spending attempts on a difficult speedway while easier realm objectives remain.
- Plan routes around homeworld geography.
- Combine hub objectives with nearby level portals.
- Finish reliable challenges before precision challenges.
- Treat speedways as optional orb and gem sources.
- Review the Guidebook after each completed route.
Postpone risky tasks and confirm the 40-orb goal
Do not measure efficiency by the apparent value of an orb challenge. A difficult flight, advanced Supercharge route or repeated escort attempt can consume more time than several straightforward rescue, collection or enemy-clear objectives. If you are approaching the story requirement, choose challenges you can complete consistently. Return for harder orbs after gaining Swimming, Climb or Headbash, or after learning the route through ordinary level exploration.
If an NPC, enemy group or temporary event behaves incorrectly, leave the level through its normal exit and re-enter from the homeworld. Reloading the level resets active enemies and event states while preserving orb rewards already recorded in the Guidebook. Re-entry is also useful after a failed attempt when temporary objects or enemy positions make the route difficult to read.
When the status display or Guidebook shows at least 40 recorded orbs, return to Winter Tundra. Approach the sealed route to Ripto’s Arena and speak with Elora when the interaction is available. The interaction opens the final route; reaching 40 orbs alone does not mean Dragon Shores is available and does not complete the game.
After defeating Ripto and completing the ending sequence, Dragon Shores becomes available through the post-game route. Entry requires 55 orbs and 8,000 gems. The separate permanent Superflame door requires all 64 orbs and 10,000 gems. Pursue those thresholds only if you are aiming for completionist rewards rather than simply finishing the story.
- Leave difficult precision challenges for a later sweep.
- Exit and re-enter a level to reset troublesome event states.
- Confirm at least 40 recorded orbs before returning to Winter Tundra.
- Speak with Elora and verify that Ripto’s Arena is open.
- After Ripto, reach 55 orbs and 8,000 gems to enter Dragon Shores.
- Reach 64 orbs and 10,000 gems for the permanent Superflame reward.
Before you move on
- Select opens the quick status display and shows the current totals.
- Start opens the pause menu and Guidebook is available directly there.
- The Guidebook confirms at least 40 recorded orbs before the Ripto attempt.
- Available low-risk orb challenges have been completed before high-risk precision routes.
- Ability-gated objectives are marked for a later sweep rather than repeatedly attempted early.
- Summer Forest, Autumn Plains and Winter Tundra homeworld routes have been grouped into efficient revisits.
- You returned to Winter Tundra after reaching 40 orbs.
- You spoke with Elora and confirmed that Ripto’s Arena is open.
- After defeating Ripto, Dragon Shores is available and its 55-orb, 8,000-gem entry requirement has been checked.
- If pursuing the permanent Superflame reward, the total reaches 64 orbs and 10,000 gems.
References for this chapter
- Spyro 2: Ripto’s Rage! Original PlayStation Manual Scan
- Spyro 2: Ripto's Rage! — Guide and Walkthrough — PlayStation — By Cyril
- Spyro 2: Ripto’s Rage! Spoiler FAQ by Ryuuko, PlayStation
- Spyro Hints: Summer Forest guide for Spyro 2: Ripto’s Rage!
- Spyro 2: Ripto’s Rage! — PlayStation Guide and Walkthrough by SaDi
Moneybags, Purchases and Ability Priorities
Moneybags controls several important progression gates in the original North American PlayStation release. He charges gems for movement lessons, level entrances, shortcuts, and temporary tools used inside particular realms. The three permanent abilities are Swimming in Summer Forest, Climbing in Autumn Plains, and Headbash in Winter Tundra. Spend gems first on payments that advance the current route or permanently expand where Spyro can go, then return later for optional branches and cleanup. Use Select to view the quick status display during play. Press Start to pause, then open the Guidebook directly from the pause menu to review recorded talismans, orbs, gems, and visited realms.
Use the original PlayStation status and Guidebook screens
During gameplay, press Select to display the quick status information. This is useful for checking your current health, lives, gems, and general collection progress without leaving the level. Select is not the detailed realm-record screen.
Press Start to pause the game. From the pause menu, choose the Guidebook entry to inspect individual realm records and determine which talismans, orbs, or gems remain. The Guidebook is the reliable place to check whether an ability-gated return trip has actually been recorded. Do not apply Reignited Trilogy menu behavior to this original PlayStation release.
- Press Select once during a level to confirm the quick status display.
- Use Start for the pause menu and open the Guidebook from there.
- Check the relevant realm record before deciding that a level is complete.
Treat gems as progression currency
Gems pay for Moneybags services throughout Avalar. Before making a payment, identify what is behind him. A service may open a required level, activate a route through the current realm, provide a tool for a specific objective, or expose only an optional treasure branch. Pay for required access and permanent abilities before spending heavily on isolated optional detours.
Gather treasure while pursuing the current talisman or orb objective. Defeat enemies, break containers, inspect side platforms, and collect gems along the route. You do not need to clear every corner before leaving, but keep enough gems available for the next known progression payment. Moneybags does not provide a general shop where you can freely select upgrades; each encounter offers a specific service, so judge it by the route you are currently following.
- Collect nearby gems while working toward the current objective.
- Identify whether a payment advances the story, teaches an ability, provides a tool, or opens optional treasure.
- Avoid emptying your gem total immediately before a known required lesson or entrance.
Buy Swimming in Summer Forest
Moneybags teaches Swimming in the Summer Forest homeworld after you have gathered enough gems. Before this lesson, Spyro can remain on the surface of ordinary water but cannot dive beneath it. After purchasing Swimming, press Square while Spyro is in suitable water to submerge. Underwater, flame breath is unavailable, but Spyro can charge.
Swimming should be an early priority because submerged tunnels and treasure routes appear in Summer Forest and in levels that become available from it. After buying the lesson, revisit visible underwater passages rather than trying to force them beforehand. Harmful liquids remain dangerous; Swimming does not make acidic or otherwise hazardous liquid safe.
- Purchase Swimming when Moneybags offers it in Summer Forest.
- Return to obvious underwater pools, tunnels, and submerged treasure routes.
- Use charge underwater and do not expect flame breath to work below the surface.
Buy Climbing in Autumn Plains
When Autumn Plains is available, find Moneybags near the homeworld's ladder routes and purchase Climbing when he offers the lesson. Climbing lets Spyro use the ladders placed on marked walls and reach elevated areas that ordinary jumps and glides cannot reach. It is a major progression purchase because it opens parts of Autumn Plains and also enables cleanup in earlier levels.
After learning Climbing, revisit realms with obvious ladders or high ledges that were previously out of reach. Combine multiple objectives in one return trip whenever possible. Some elevated areas still depend on a separate challenge, switch, or later ability, so use the Guidebook and the level layout rather than assuming every inaccessible platform is solved by Climbing alone.
- Buy Climbing before beginning serious Autumn Plains cleanup.
- Treat marked ladders as the clearest sign that Climbing is required.
- Return to Summer Forest levels with ladder routes and record the newly completed objectives.
Buy Headbash in Winter Tundra
Headbash is the final purchased movement ability and is taught by Moneybags in Winter Tundra. It allows Spyro to break designated Headbash targets, including certain rocks, chests, barriers, and other objects that do not respond to flame or ordinary charging. Purchase it before attempting comprehensive 100% cleanup, because several late orb and gem objectives in earlier homeworlds depend on it.
Do not treat every large rock, chest, or piece of scenery as a Headbash target. Look for an object placed as an intentional obstacle or one that clearly resembles other breakable targets in the same realm. If it does not react, search for a switch, NPC challenge, power-up, or alternate route instead of repeatedly attacking it.
- Purchase Headbash in Winter Tundra before the final cleanup circuit.
- Return to clearly designated Headbash objects in earlier realms.
- Confirm the objective or Guidebook record changes after collecting the reward behind the target.
Pay required entrances and services before optional branches
Some Moneybags encounters are part of the intended route. If a payment opens a level needed for the next homeworld boss or activates a route through the current level, make that payment before opening an isolated optional chamber. After paying, use the newly opened bridge, doorway, portal, or tool during the same visit when practical so you do not create needless backtracking.
Other payments provide equipment or a temporary service for a particular level. These are not permanent upgrades, so evaluate them by the objective they solve. A required entrance or ability lesson takes priority over a small optional treasure branch. Once a payment is made, walk through the opening or test the service immediately; this confirms that the correct progression flag was triggered.
- Prioritize mandatory realm entrances and permanent abilities.
- Use newly opened tools or routes before leaving the level when possible.
- Verify that the intended bridge, door, portal, or service is active.
Batch ability-gated revisits
Keep blocked objectives grouped by requirement: underwater paths for Swimming, ladders for Climbing, and marked breakable objects for Headbash. When a new ability becomes available, revisit several nearby levels with the same requirement instead of making separate trips for isolated gems or orbs.
Complete the main talisman route first, then use the abilities to clear older barriers and combine gem collection with orb challenges. A visible object may be reachable while the associated NPC task remains unavailable, so use the Guidebook to distinguish an unfinished challenge from a movement gate.
If an NPC, enemy, or level mechanism stops responding correctly, exit to the homeworld and re-enter the level. This reloads the active level state without requiring you to repurchase an ability. Check the Guidebook after completing the objective so the reward is confirmed.
- Group blocked objectives by Swimming, Climbing, or Headbash.
- Clear several levels with the same ability during one revisit route.
- Use Start and the Guidebook to confirm recorded progress after leaving each level.
Before you move on
- Select displays the quick status information during gameplay.
- Start opens the pause menu and the Guidebook can be opened from that menu.
- Swimming has been purchased in Summer Forest and an underwater route has been tested.
- Climbing has been purchased in Autumn Plains and at least one ladder route has been used.
- Headbash has been purchased in Winter Tundra and at least one clearly designated target has been broken.
- Every payment required for the current talisman route has been made and its opened route or service has been tested.
- Earlier levels with underwater passages, ladders, or designated Headbash targets have been revisited.
- The Guidebook confirms that the intended talismans and orbs were recorded after cleanup visits.
- Enough gems remain for the next known required payment, or all required progression purchases are complete.
Speedways and Racing Levels — Tips That Save Time
The original North American PlayStation version has four Speedway realms: Ocean Speedway in Summer Forest, Metro Speedway and Icy Speedway in Autumn Plains, and Canyon Speedway in Winter Tundra. Each Speedway contains 400 gems and one orb, but no talisman. The first visit is a timed target course. After completing or abandoning that run, retry the realm to find its separate orb challenge. Skill Point time goals are optional records and are not required for the ordinary gem, orb, talisman or story-completion route.
1. Enter the correct Speedway and check progress
Use the Speedway portal in the appropriate home world. Ocean Speedway is in Summer Forest. Metro Speedway and Icy Speedway are in Autumn Plains. Canyon Speedway is in Winter Tundra. Some entrances require a hub route, a whirlwind or a Moneybags purchase before the portal becomes usable, so do not assume every Speedway is immediately available when you first arrive in a home world.
Every Speedway has 400 gems and one orb. None awards a talisman. The opening visit presents the timed target course; the orb challenge is a separate activity reached by retrying the realm and locating the character or entrance associated with it.
On the original PlayStation controls, press Select to show the quick status display. Press Start to open the pause menu, then choose Guidebook directly to inspect the detailed realm records. Do not go through Options to reach the Guidebook. The Guidebook is a Start-menu entry, and the pause screen also provides the available commands for retrying, giving up, leaving or saving according to the current game state.
- Enter the correct home-world portal.
- Expect 400 gems and one orb, with no talisman.
- Use Select for the quick status display.
- Use Start and choose Guidebook directly for detailed records.
2. Learn the opening timed course
The opening Speedway run is a timed chain of target groups. Destroying or passing through the required targets keeps the timer active, so maintain forward movement instead of stopping to make repeated corrections. Depending on the realm, the targets include rings, arches, airborne enemies, ground targets and vehicles.
Use the action that matches each target. Flame targets positioned for flaming, charge ground targets when you have a clean line, and fly through rings or arches. If you miss one, continue toward the next group and return from open space. A sharp reversal near a wall, road or water usually costs more time than completing the current section and circling back.
Use the first successful run as route practice. Learn the altitude changes, where the course transitions between open air and ground level, and which target groups naturally lead into one another. Charge on clear straight sections, glide through arches without unnecessary altitude changes, and avoid descending so low that Spyro clips the terrain or falls into water.
The ordinary completion route does not require a Skill Point. The optional fast-time records are Ocean Speedway under 1:10, Metro Speedway under 1:15, Icy Speedway under 1:15 and Canyon Speedway under 1:10. These records are separate bonuses and do not replace the required gem or orb.
- Chain targets together to keep the timer active.
- Flame, charge or fly according to the target type.
- Use the first clear as route practice.
- Treat Skill Point times as optional extras.
3. Ocean Speedway: Follow Hunter
Ocean Speedway is reached from Summer Forest. A practical opening route begins with the rings, continues through the arches, then drops toward the boats. Approach the boats from a broad angle and stay above the water. After the boats, rise toward the road and charge through the cars. If a target remains, make a wide return rather than forcing a sharp turn beside the road or water.
When the timed course is complete, retry the realm and fly toward the spectator stands. Talk to Queen Finny to begin Follow Hunter. This is not a conventional race in which Spyro must pass Hunter. Follow his route and pass through the rings associated with the challenge.
Keep Hunter in view and avoid making large improvised turns. If a ring is missed, restarting the attempt is safer than trying to reverse sharply through the course. After the challenge is complete, use Select for the quick status display, or Start followed by the direct Guidebook entry, and confirm that the Ocean Speedway orb is recorded.
- Clear the rings, arches, boats and cars.
- After retrying, find Queen Finny at the spectator stands.
- Complete Follow Hunter.
- Verify the Ocean Speedway orb.
4. Metro Speedway: Grab the Loot
Metro Speedway is in Autumn Plains. Follow the available hub route to the portal; the entrance is associated with the Autumn Plains progression and the whirlwind opened through the hub's orb-related progress. It is not a randomly placed portal that becomes available without following the intended route.
For the timed course, begin with the pigeons on the switches and the nearby bungee jumpers. Continue through the arches, handle the slow-sign targets along the road, then finish the remaining arches. Keeping nearby target types together reduces wasted travel and makes the timer easier to maintain.
After completing the opening run, retry the realm and enter the waterfall in the first section. Speak with the Mayor to begin Grab the Loot. Hunter shoots the cat burglars, and Spyro must catch the bags they drop. Stay close enough to see where Hunter is aiming, but approach each bag only after it appears. The challenge requires twelve loot drops.
If a building or turn blocks your view, use a wide line rather than crossing directly through Hunter's position. A missed or obstructed drop generally means restarting the attempt. Once all twelve are collected, verify the Metro Speedway orb in the status display or Guidebook.
- Clear the pigeons, bungee jumpers, arches and slow-sign targets.
- Find the Mayor behind the waterfall after retrying.
- Catch all twelve bags in Grab the Loot.
- Confirm the Metro Speedway orb.
5. Icy Speedway: Parasail through Rings
Icy Speedway is the second Autumn Plains Speedway. Its entrance is on a platform near the end of the home world, and Moneybags may need to open the route before you can enter.
For the timed run, handle the elevated hang-glider targets first, descend to the sleds, continue through the arches, and finish with the skaters and serpents. Make altitude changes gradually. A controlled descent is safer than dropping suddenly and attempting a sharp correction near the ground.
After completing the course, retry and locate the blue igloo. Charge into it to reach Hunter and begin Parasail through Rings. Hunter pulls Spyro through the course while you steer left and right through the ring sequence.
The rings appear in central and side positions. Make small corrections and avoid swinging from one extreme to the other unless the next ring clearly requires it. The challenge requires fifty rings in one attempt. If the sequence is missed, restart rather than trying to reverse through the course. Confirm the orb after success.
- Clear the hang-gliders, sleds, arches, skaters and serpents.
- Reach Hunter inside the blue igloo after retrying.
- Pass through all fifty rings in one attempt.
- Verify the Icy Speedway orb.
6. Canyon Speedway: Shoot Down Balloons
Canyon Speedway is located in Winter Tundra. Open the entrance through the required Moneybags route if it is still blocked. For the timed run, handle the target groups in a controlled order: flame the rams, pass through the rings, then deal with the ground vehicles and airborne birds or vultures.
Start a charge only when the path ahead is visible, especially near canyon walls, ramps and ledges. Wide turns are safer than attempting a reversal beside a wall. If a target is missed, continue along the course and return from open space rather than turning sharply into the canyon wall.
After completing the timed course, retry and search the elevated section near the bird or vulture targets for Hunter. His challenge places Spyro in a remote-controlled plane and requires shooting twenty-five balloons or targets. Hunter pilots along a set route while Spyro aims and fires.
Hold the fire button when useful and make small aiming corrections. Track each target's travel path instead of steering the plane aggressively toward it. If a balloon is missed, the challenge must be attempted again, so prioritize stable aim over a frantic turn near the canyon edges. Verify the Canyon Speedway orb once all twenty-five targets are destroyed.
- Clear the rams, rings and remaining course targets.
- Find Hunter in the elevated section near the bird targets.
- Destroy all twenty-five targets in Shoot Down Balloons.
- Confirm the Canyon Speedway orb.
7. Retry, leave and verify a Speedway
A Speedway attempt has no ordinary mid-course checkpoint. If the timer expires, Spyro falls or a bonus challenge fails, the active attempt ends. Press Start to open the pause menu and use the available Give Up or leave command when you want to abandon the current round. After a completed run, use the retry prompt to attempt the course or challenge again, or choose the option to leave when finished.
Leaving the realm and entering it again is also a safe way to restart the course. Completed gem and orb progress remains recorded, but an unfinished timed run or bonus challenge must be attempted again. Use repeated entries to isolate one problem section, such as a low arch, water-level target, sharp canyon bend or difficult loot drop.
When checking progress, press Select for the quick status display. For detailed records, press Start and choose Guidebook directly from the pause menu. Confirm that Ocean Speedway, Metro Speedway, Icy Speedway and Canyon Speedway each show their complete gem record and separate orb. Skill Point records are optional bonuses and do not substitute for the gem or orb.
- Use Start for retry, Give Up, leaving and other available pause commands.
- Remember that completed gem and orb records remain recorded.
- Use Select for the quick status display.
- Use Start and the direct Guidebook entry for detailed completion records.
- Verify all four Speedway realms before declaring Speedway completion.
Before you move on
- Ocean Speedway records 400 gems and the Follow Hunter orb.
- Metro Speedway records 400 gems and the Grab the Loot orb.
- Icy Speedway records 400 gems and the Parasail through Rings orb.
- Canyon Speedway records 400 gems and the Shoot Down Balloons orb.
- Use Select to check the quick status display, then use Start and the direct Guidebook entry to inspect detailed realm records.
- For ordinary original-game 100% completion, confirm all four Speedway gem and orb records.
- Treat Speedway Skill Point times as optional extras rather than substitutes for the gem and orb records.
References for this chapter
- Spyro 2: Ripto’s Rage! Original PlayStation Manual Scan
- Spyro 2: Ripto’s Rage! — Guide and Walkthrough, PlayStation, by dark52
- Spyro 2: Ripto's Rage! — Guide and Walkthrough — PlayStation — By Cyril
- Spyro 2: Ripto’s Rage! — PlayStation Guide and Walkthrough by HisDudeness
- Spyro 2: Ripto’s Rage! — PlayStation Guide and Walkthrough by SaDi
- Spyro 2: Ripto's Rage FAQ/Walkthrough Final — Neoseeker
Hub Boss Tactics (Generalized Patterns)
The original North American PlayStation release has three required boss realms: Crush's Dungeon after the six Summer Forest talismans, Gulp's Overlook after all fourteen Summer Forest and Autumn Plains talismans, and Ripto's Arena after the Winter Tundra orb requirement has been met and Elora opens the route. These encounters do not share one identical attack pattern. The dependable approach is to preserve room to move, identify each boss's preparation animation, attack only during a confirmed opening, and retreat before the next attack begins.
Prepare Before Entering a Boss Realm
Boss realms are combat stages rather than ordinary levels. They do not contain normal gem, talisman, orb, or Moneybags objectives, so enter with your attention on the arena and the boss. If Sparx is damaged, restore him with nearby fodder in the hub when convenient. An extra life is useful, but do not take unnecessary risks to obtain one.
Crush's Dungeon becomes available after all six Summer Forest talismans are recorded. Gulp's Overlook opens after all fourteen talismans from Summer Forest and Autumn Plains are recorded. Ripto's Arena requires the Winter Tundra orb progression and the required interaction with Elora before you can enter.
Make a normal memory-card save before practicing. On the original PlayStation release, press Start during play to open the pause menu. The menu provides direct access to Guidebook, Save Game, and Exit Level. Press Select during play for the quick HUD and status display. Do not use the remaster's menu instructions or assume that a later port has the same layout.
If you want to abandon an attempt, use the pause menu's Exit Level command and return to the hub instead of switching off the console. Save after successful progress when practical, and never remove the memory card or power off while a save is being written.
- Confirm the required talisman or orb gate is complete.
- Restore Sparx before entering when practical.
- Use Start for Guidebook, Save Game, and Exit Level.
- Use Select for the quick HUD and status display.
- Do not expect ordinary collectibles inside a boss realm.
- Use original PlayStation controls and menu instructions.
Crush's Dungeon: Wait Out the Barrier
Crush moves between colored floor panels. While he stands on a panel, the barrier protects him and he begins an attack sequence. Do not try to flame him through the barrier. Keep Spyro in the open part of the room, watch the energy attacks, and jump over low beams when they approach. Continue moving rather than standing directly in front of Crush.
When Crush leaves the protected position and the barrier disappears, close the distance and use flame once. Retreat immediately after the hit. Crush follows with a heavy ground attack, so staying beside him after a successful flame creates unnecessary danger. The arena changes as the fight progresses: later panel patterns introduce more dangerous projectiles and more active pursuit. Charge around the room to avoid the attacks, then wait for the next exposure.
Use the same loop for the whole encounter: evade the current attack, confirm that the barrier has ended, flame Crush, and create distance. Do not treat the first successful hit as permission to keep attacking. The safe objective is to survive every cycle, not to finish the fight during one opening.
- Stay away while the barrier is active.
- Jump over low energy beams.
- Use flame only after Crush is exposed.
- Retreat immediately after each confirmed hit.
- Keep moving when later projectile patterns begin.
Gulp's Overlook: Use the Weapons Dropped by the Birds
Spyro's ordinary flame and charge do not damage Gulp. At the beginning, keep moving around the arena while Gulp charges. The birds drop a barrel; charge the barrel into Gulp before he can destroy or claim the opportunity. Each successful weapon hit removes health, and the fight then introduces additional dropped weapons.
As Gulp begins firing energy attacks, keep moving and watch the attack's landing pattern rather than standing still to follow the projectile. When a bomb or rocket appears, approach it only with a clear escape route, take it before Gulp can destroy the opening, and use it against him. After firing or charging the weapon into Gulp, resume movement instead of lingering nearby.
A dropped weapon near the edge is not worth a blind rush. Reposition first, keep Gulp visible, and collect the weapon only when Spyro has room to escape. Sheep can restore Spyro's health, but reaching one is optional and should never take priority over avoiding Gulp's next attack. The reliable rhythm is move, intercept a weapon, strike Gulp, then move again.
- Do not use ordinary flame or charge as the damage method.
- Intercept each barrel before the opportunity is lost.
- Watch the attack's landing pattern while moving.
- Use bombs and rockets as they appear.
- Use sheep for recovery only when the route is safe.
- Keep an escape route before collecting a weapon.
Ripto's Arena: Win the Orb Contest
Ripto's fight has three phases. In the first, Hunter provides temporary arena orbs. Collect three before Ripto claims them; the completed set grants a temporary power, and you must use that power to damage Ripto. The final orb of the set determines the temporary effect, so observe what Spyro receives instead of assuming every set works the same way.
Do not chase Ripto across the entire arena. Move toward the next orb with a clear line around his spells, collect the set, attack during the resulting opening, and disengage. If Ripto reaches an orb first, abandon that pickup and reposition for the next opportunity instead of colliding with him while trying to recover it.
After Ripto's first defeat, he summons a mechanical Gulp. The second phase repeats the orb-contest idea while adding the machine's attacks. Keep both threats visible when possible, prioritize safe routes to the next orb, and attack only after the temporary power is active. In the final phase, the floor becomes hazardous and Spyro fights from the air with a temporary superflame attack. Change height and direction instead of flying in a predictable line, fire when Ripto is in a safe path, and move away immediately.
- Collect three temporary arena orbs before Ripto does.
- Use the power granted by the completed set.
- Do not assume every orb set produces the same effect.
- Track both Ripto and mechanical Gulp in phase two.
- Stay airborne over the hazardous floor in the final phase.
- Change height and direction while pursuing airborne Ripto.
Control Space and Visibility
The safest position is usually open space, not a corner or arena edge. Open space gives Spyro room to jump, charge past an attack, reach a dropped weapon, or change direction. Keep the boss and the immediate hazard visible. If the camera loses the target, reposition before attacking rather than guessing where the next projectile will land.
Use the original PlayStation camera controls deliberately. If the boss or a weapon leaves the useful part of the screen, center the camera and move to a wider section of the arena. Select is for the quick HUD and status display. Start opens the pause menu, including Guidebook, Save Game, and Exit Level. These controls are separate from the boss mechanics but matter when checking progress between attempts.
- Prefer open floor over corners.
- Keep hazards and objectives visible.
- Reposition if the camera hides the boss.
- Use Select for the quick status display.
- Use Start for Guidebook, Save Game, and Exit Level.
Practice in Short, Repeatable Loops
On a first attempt, learn three things: what announces the attack, where the safe space is, and when the vulnerability ends. Dodge one complete sequence, take one confirmed opening, and retreat. This is more dependable than relying on a fixed timer because boss position changes according to Spyro's movement.
Treat Ripto's Arena as three separate encounters rather than one long fight. First learn the route between orb pickups and Ripto's spells. Then repeat that discipline with mechanical Gulp present. Finally, practice aerial movement over the hazardous floor. After every successful hit, reset Spyro's position and wait for the next clear cycle.
- Learn one attack sequence before forcing a full attempt.
- Take one safe opening instead of several risky hits.
- Reset position after every successful attack.
- Practice each Ripto phase as its own movement problem.
Recover After Defeat or an Abnormal Attempt
Losing a boss attempt does not erase completed talismans or recorded orb progress. Return to the hub, restore Sparx, and re-enter the boss realm. You do not need to replay the levels that opened the realm.
If an event appears stuck or the arena behaves abnormally, press Start and choose Exit Level, return to the hub, and enter the boss realm again. Use Select to check the quick status display, then use Start and Guidebook for the detailed record. Save normally with Start after successful progression when practical.
For persistent problems, consult references for the original North American PlayStation edition. Do not substitute Reignited Trilogy control advice, camera behavior, or boss strategies for the 1999 release.
- Confirm progress after a failed attempt.
- Use Start, then Exit Level, to reload a stuck encounter.
- Restore Sparx before retrying.
- Use Select for the quick status display.
- Use Start and Guidebook for detailed progress.
- Save with Start after successful progression.
- Use original PlayStation references for troubleshooting.
Before you move on
- Crush's Dungeon is cleared when Crush is defeated after the six Summer Forest talismans have been collected.
- Gulp's Overlook is cleared when Gulp is defeated with the bird-dropped weapons after the fourteen required talismans have been collected.
- Ripto's first phase is complete when the temporary orb power defeats Ripto on foot.
- Ripto's second phase is complete when the orb contest and temporary powers defeat mechanical Gulp.
- Ripto's final phase is complete when the aerial temporary superflame defeats Ripto over the hazardous floor.
- Use Select to confirm the quick status display, then open Guidebook from the Start pause menu to verify detailed progression.
- The corresponding story route remains open after each boss victory during normal play.
Final Preparation: Confirm Orbs, Talismans and Hub Completion
Before entering Ripto’s Arena in the original North American PlayStation release of Spyro 2: Ripto’s Rage!, finish the normal story route, confirm the fourteen required Talismans, defeat Crush and Gulp, collect at least 40 awarded Orbs, and return to Winter Tundra. Speak with Elora to activate the final route, then save from the pause menu and restore Spyro’s health. You do not need all 64 Orbs or every Gem to begin the final battle.
1. Check progress with the correct PlayStation menus
This chapter applies to the original North American PlayStation release titled Spyro 2: Ripto’s Rage!. It does not cover the PAL release Gateway to Glimmer or the Reignited Trilogy. Use the original PlayStation menu behavior and progression described here.
During gameplay, press Select to open the quick status display. Use it for a fast check of current totals and basic status. Select is not the detailed Guidebook command.
Press Start to pause the game. The pause screen contains the direct Guidebook and Save Game entries. Highlight Guidebook and press the X button to open the current realm record. From there, use the directional buttons or left stick to turn pages. Home World pages list visited Realms and their completion percentages; select a Realm to inspect its recorded Gems, defeated enemies, and Orbs.
The pause screen also contains Save Game as its own command. Options is separate and is used for settings such as the map and camera behavior. Do not enter Options when you intend to inspect Guidebook records or save your progress.
- Press Select and confirm that it opens the quick status display.
- Press Start and confirm that the pause menu appears.
- Select Guidebook directly from the pause menu.
- Use the Guidebook’s Home World and Realm pages to inspect progress.
- Use Save Game directly from the pause menu rather than looking under Options.
2. Confirm the fourteen-Talisman story route
The normal story route contains six Talisman Realms associated with Summer Forest, including Glimmer. Complete the six Summer Forest Talismans, then enter Crush’s Dungeon from the Summer Forest Home World and defeat Crush. This opens the route to Autumn Plains.
Autumn Plains supplies eight more Talisman Realms. Complete those eight Talismans, then use the route to Gulp’s Overlook and defeat Gulp. Six Summer Forest Talismans plus eight Autumn Plains Talismans gives the fourteen Talismans associated with the normal story progression.
Winter Tundra is the final Home World. Its regular content focuses on Orbs, Gems, abilities, Moneybags purchases, and cleanup challenges rather than another required set of story Talismans. You do not need to complete every Winter Tundra Realm before opening Ripto’s Arena.
Open Start, select Guidebook, and review the Home World pages. Check that the Summer Forest and Autumn Plains Realm records show the Talisman progression you expect. Also confirm that Crush and Gulp have been defeated and that Winter Tundra is accessible. If either boss remains unbeaten, return to the relevant Home World and finish the required Talisman route before looking for the final battle.
- Six Summer Forest Talismans, including Glimmer, are recorded.
- Eight Autumn Plains Talismans are recorded.
- Crush has been defeated in Crush’s Dungeon.
- Gulp has been defeated at Gulp’s Overlook.
- Winter Tundra is accessible.
3. Reach at least 40 awarded Orbs
Ripto’s Arena requires at least 40 recorded Orbs. The game checks Orbs that have been awarded and entered into the Guidebook total. A challenge that has merely been started, an Orb still waiting to be collected, or a temporary Orb appearing during a boss fight does not increase the permanent total used to open the Arena.
Press Start, select Guidebook, and check the overall Orb total shown in the Guidebook. The complete game contains 64 Orbs, but you do not need all 64 to begin the final battle. If the total is below 40, inspect the individual Home World and Realm pages for incomplete Orb entries.
Prioritize short challenges that match the abilities you already possess. Early tasks in Glimmer and Summer Forest are useful targets, including the introductory flight, lizard, and Hunter challenges. Revisit completed Talisman Realms and finish accessible escort, enemy-hunt, collection, or movement challenges before attempting difficult ability-gated objectives.
If a Realm record identifies a route that requires swimming, climbing, or headbash and you do not yet have that ability, leave the challenge for later. Repeatedly entering an inaccessible route wastes lives and does not advance the total. After completing a challenge, return to the pause menu and check Guidebook to confirm that the Orb was awarded.
- The Guidebook’s overall total shows at least 40 awarded Orbs.
- Only completed Orb rewards are included in the total.
- Unreachable swimming, climbing, and headbash challenges are marked for later.
- The total is rechecked after cleanup trips.
4. Return to Winter Tundra and speak with Elora
When the Guidebook shows 40 or more awarded Orbs, return to Winter Tundra. Follow the Home World route toward the castle and the approach to Ripto’s Arena. Find Elora near this final route and speak with her after reaching the Orb threshold.
Do not assume that collecting the fortieth Orb opens the Arena while you remain inside another Realm. The required story interaction takes place in Winter Tundra. The Orbs are not consumed when the route is activated.
After speaking with Elora, walk toward the Arena entrance and verify that the previously closed route is open. If it remains closed, press Start, select Guidebook, confirm that the overall total is at least 40, then return to Elora and speak with her again. This also helps identify whether an Orb challenge was completed or only attempted.
- Return to Winter Tundra with at least 40 awarded Orbs.
- Follow the route toward the castle and Ripto’s Arena.
- Speak with Elora after reaching the threshold.
- Walk to the Arena entrance and confirm that the route is open.
5. Save and restore health before entering
After Elora activates the route, press Start and select Save Game directly from the pause menu. Choose the intended PlayStation Memory Card file and confirm the save. This preserves the preparation state before the final Realm.
Restore Spyro’s health before entering. If Sparx has lost health, defeat nearby enemies in Winter Tundra and collect the butterflies they release. Extra lives are useful for practice, but Gems are not required to open Ripto’s Arena.
A recent save gives you a dependable preparation point if the first attempt fails. Avoid starting a long optional cleanup session after this save unless you are prepared to repeat the final setup later. Boss failure does not remove awarded Talismans or Orbs, but saving beforehand prevents uncertainty about your latest progress.
- Select Save Game directly from the Start pause menu.
- Confirm the intended Memory Card file and completed save.
- Restore Spyro’s health before entering.
- Restore Sparx where practical.
- Keep the post-Elora save available for retries.
6. Perform the final readiness check
Press Select for the quick status display, then press Start and select Guidebook for the detailed check. Confirm at least 40 awarded Orbs, the fourteen story Talismans, defeated Crush and Gulp, accessible Winter Tundra, and an open route to Ripto’s Arena.
The temporary Orbs dropped during the Ripto encounter are separate from the permanent total used to open the Arena. The same distinction applies to the complete-game totals: 64 Orbs and the full Gem collection are optional completion targets, not requirements for entering the final battle.
Your concrete readiness state is: at least 40 awarded Orbs; six Summer Forest Talismans; eight Autumn Plains Talismans; Crush and Gulp defeated; Elora spoken to in Winter Tundra; the Arena route open; Spyro’s health restored; and a recent Memory Card save available.
- Select opens the quick status display.
- Start opens the pause menu and Guidebook is selected directly there.
- The Guidebook shows at least 40 awarded Orbs.
- The Guidebook records six Summer Forest and eight Autumn Plains Talismans.
- Crush and Gulp have been defeated.
- Elora has been spoken to after reaching the Orb threshold.
- The route to Ripto’s Arena is open.
- Spyro enters with restored health and a recent save exists.
Before you move on
- Select opens the quick status display.
- Start opens the pause menu, with Guidebook and Save Game available as direct entries and Options separate.
- The Guidebook shows at least 40 awarded Orbs.
- The Guidebook records six Summer Forest and eight Autumn Plains Talismans.
- Crush and Gulp are defeated, and Winter Tundra is accessible.
- Elora has been spoken to after the 40-Orb threshold was reached.
- The route to Ripto’s Arena is open.
- Spyro’s health is restored and a recent Memory Card save exists before entry.
Ripto’s Arena — Final Fight Walkthrough
Once you have at least 40 permanent orbs, return to Winter Tundra and speak with Elora to open the route to Ripto’s Arena. The original North American PlayStation battle has three phases: Ripto on foot, Ripto riding Mecha-Gulp, and an aerial pursuit over lava. Temporary combat orbs appear during the first two phases and grant short-term powers; they are separate from the permanent orbs recorded in the Guidebook. After the flying machine is destroyed, let the ending sequence and credits finish. When control returns, Spyro is in Dragon Shores, where Gatekeeper Gniles checks the 55-orb and 8,000-gem requirement for entering the park.
Open Ripto’s Arena and prepare
Use Select during gameplay to check the quick status display. For detailed records, press Start to open the pause menu and select the Guidebook. Confirm that your permanent orb total is at least 40. If the entrance remains closed, return to Winter Tundra and speak with Elora in the castle area. Reaching the required total does not replace that conversation; Elora activates the route to the arena.
The orbs that appear inside Ripto’s Arena are temporary battle pickups. They do not increase the permanent orb total shown in the Guidebook. Enter with full health where possible, and save beforehand if you want a clean practice attempt. This chapter covers the original PlayStation release of Spyro 2: Ripto’s Rage!, not Reignited Trilogy mechanics.
The battle is continuous, but the phases are separated by short scenes. Use the first attempt to learn where the temporary orbs appear, how much room each boss needs, and where the arena edges become dangerous. Conservative movement is more useful than chasing every pickup immediately.
- The permanent orb total is at least 40.
- Elora has opened the route from Winter Tundra.
- Spyro enters with full health when practical.
- You understand that arena pickups are temporary and do not count toward the permanent total.
Phase one: defeat Ripto
Ripto begins on foot in the arena. Fairies drop temporary combat orbs, and collecting three activates a temporary attack power. The final orb in the group determines the power, so watch the pickup sequence and learn what each result does during practice attempts.
Keep moving in broad loops instead of standing still. Watch Ripto while also tracking the next orb drop. Approach a pickup from the side whenever possible so Spyro has room to turn away. If Ripto is already attacking the area, allow the attack to finish or take a wider route. Missing one orb is safer than taking damage while crossing an active spell.
After collecting three orbs, use the resulting power against Ripto during a clear opening. Flame-based attacks are useful when he is exposed at range; a charge can help reposition Spyro or punish an opening when the path is safe. Do not remain beside Ripto after attacking. Retreat immediately and prepare for the next orb cycle.
Ripto can also collect the temporary orbs. Keep him in view while moving toward the next group and take the safest route rather than trying to beat him to every pickup. Sheep may appear as recovery opportunities. Only go after one when the path is clear; never cross Ripto’s attack line just to restore health.
Repeat the pattern of collecting three orbs, using the resulting power, attacking during the opening, and retreating. Continue until Ripto’s first form is defeated.
- Collect three temporary orbs before attacking when the route is safe.
- Use the power determined by the third orb during Ripto’s exposed period.
- Keep moving after every attack.
- Avoid active spells and hazardous crossings for a single pickup.
- Repeat the cycle until Ripto’s first form falls.
Phase two: defeat Mecha-Gulp
Ripto then summons a mechanical version of Gulp. The battle remains an orb-powered ground fight, but Mecha-Gulp covers more space and makes the arena edge more dangerous. The temporary power from phase one does not carry over, so begin a new three-orb cycle after the transition.
Use wide movement loops and leave yourself room to turn. Keep Mecha-Gulp visible while checking where the next orb has appeared. If the machine is facing Spyro or an attack is already travelling across the route, continue circling instead of forcing the pickup. Avoid allowing the boss to pin Spyro against the outside of the arena.
Once three new orbs have been collected, attack during a clear recovery period. Use the temporary power while Mecha-Gulp is exposed, then withdraw as soon as the opening ends. Do not stay close hoping to chain another hit; the safest approach is one attack opportunity followed by repositioning.
When Spyro takes damage, move to open ground before looking for another orb or a sheep. Recovery is useful only if the route is safe. Continue alternating between orb collection, temporary power use, and retreat until Mecha-Gulp is destroyed.
- Begin a fresh three-orb cycle after phase one.
- Use wider loops than in the Ripto-on-foot phase.
- Stay away from the arena edge and attack paths.
- Attack only during a clear recovery window.
- Defeat Mecha-Gulp before attempting the aerial phase.
Phase three: destroy Ripto’s flying machine
The floor becomes lava and Ripto escapes in a flying machine. Spyro receives a flying superflame attack for this final section. There is no ground-orb cycle to complete, so stop searching for pickups and concentrate on controlling Spyro in the air.
Make short attack passes. Approach the flying machine from an angle or a different height, fire when you have a clear line, then break away and reposition. Do not follow directly behind it for too long. A long chase can carry Spyro toward the lava or make it difficult to react to incoming attacks.
Leave open space for the recovery turn after every pass. If the machine leads Spyro into a poor position, stop chasing, regain control, and make another wide approach. The reliable rhythm is approach, fire, disengage, reposition, and repeat.
Continue making controlled passes with the flying superflame until the machine is destroyed. This completes the combat portion of the game.
- Stop looking for ground pickups when the aerial phase begins.
- Use the flying superflame against Ripto’s machine.
- Vary Spyro’s height and direction between attack passes.
- Break away before drifting over the lava.
- Destroy the flying machine to win the battle.
Recover after defeat and complete Dragon Shores
If Spyro loses all health or falls into the lava, the attempt ends and you must start the battle again. Your completed talismans, permanent orbs, gems, and other saved progress are not removed. Before trying again, identify the cause of failure: unsafe orb collection in phase one, insufficient space around Mecha-Gulp in phase two, or overlong attack passes in phase three.
After destroying the flying machine, let the ending sequence and credits finish. When control returns, the original North American PlayStation game places Spyro in Dragon Shores. Do not return to Winter Tundra looking for a replacement portal; Dragon Shores is the post-final destination reached after the ending.
Find Gatekeeper Gniles in Dragon Shores and speak with him at the park entrance. The entrance requires at least 55 permanent orbs and 8,000 gems. If you have fewer than either amount, leave the entrance closed and use the Guidebook to identify remaining levels, gems, or orb challenges. Defeating Ripto is still the basic victory condition, while entering the park begins the optional post-final content.
Once inside, Dragon Shores contains bonus activities and later completion rewards. The permanent Superflame reward is tied to the broader collection goal and requires the higher 64-orb and 10,000-gem totals. Those totals are separate from the 40-orb requirement that opens Ripto’s Arena and the 55-orb, 8,000-gem requirement that opens the park.
- Ripto’s first form is defeated.
- Mecha-Gulp is defeated after a new temporary-orb cycle.
- Ripto’s flying machine is destroyed.
- The ending sequence and credits are shown.
- When control returns, Spyro is in Dragon Shores.
- Gatekeeper Gniles is found at the park entrance.
- The 55-orb and 8,000-gem requirement is checked before attempting to enter.
- If pursuing full completion, the 64-orb and 10,000-gem Superflame requirement is tracked separately.
Before you move on
- The permanent orb total was at least 40 before entering the arena.
- Elora opened the Ripto’s Arena route in Winter Tundra.
- Ripto was defeated in the first ground phase.
- Mecha-Gulp was defeated in the second ground phase.
- Ripto’s flying machine was destroyed in the aerial phase.
- The ending sequence and credits were shown.
- When control returned, Spyro was placed in Dragon Shores.
- Gatekeeper Gniles was found and the 55-orb, 8,000-gem park requirement was checked.
- If the basic completion goal was intended, the game-ending sequence was completed.
- If pursuing post-final completion, Dragon Shores was entered and its remaining rewards were pursued.
- If pursuing the permanent Superflame reward, the 64-orb and 10,000-gem totals were confirmed separately.
References for this chapter
- Spyro 2: Ripto’s Rage! — Guide and Walkthrough, PlayStation, by dark52
- Spyro 2: Ripto's Rage! — Guide and Walkthrough — PlayStation — By Cyril
- Spyro 2: Ripto’s Rage! — PlayStation Guide and Walkthrough by SaDi
- Spyro 2: Ripto’s Rage! — PlayStation Guide and Walkthrough by HisDudeness
- Spyro 2: Ripto’s Rage! Original PlayStation Manual Scan
- Dragon Shores — Spyro Wiki
Dragon Shores — Post-Final Rewards and 100% Completion
After defeating Ripto in the original North American PlayStation release, allow the ending sequence and credits to finish. Gameplay then resumes in Dragon Shores. Locate Gatekeeper Gniles at the amusement-park entrance and meet the requirement of at least 55 recorded orbs and 8,000 gems. Complete the four attractions to earn 10 tokens and open the theatre. For the permanent Superflame reward, collect all 64 orbs and all 10,000 gems, then open the separate marked door in Dragon Shores.
1. Defeat Ripto and resume in Dragon Shores
Finish the battle in Ripto’s Arena, then allow the ending scenes and credits to play until the game returns control to you. The 40-orb requirement used to reach Ripto’s Arena is only a story-progression threshold. It is not the requirement for entering the Dragon Shores amusement park and it does not provide the permanent Superflame reward.
When gameplay resumes, Spyro is in Dragon Shores. Do not return to Winter Tundra looking for a portal and do not assume that another world must be activated first. Move through the Dragon Shores area and locate Gatekeeper Gniles at the entrance to the amusement park.
Gniles checks the recorded gem and orb totals on the save file. If he refuses entry, leave the gate and return to Avalar through the available level routes. Finish more orb challenges or collect more gems, then return to Dragon Shores and speak with him again.
- Ripto has been defeated.
- The complete ending sequence and credits have finished.
- Gameplay has resumed in Dragon Shores.
- Gatekeeper Gniles is visible at the amusement-park entrance.
- You have not incorrectly searched Winter Tundra for a post-final portal.
2. Meet the park entrance requirements
The amusement park opens when the save contains at least 55 recorded orbs and 8,000 gems. These are permanent collection totals, not the temporary orbs that appear as power-ups during the Ripto battle. The entrance requirement is lower than the full 64-orb and 10,000-gem collection required for the permanent Superflame reward.
Press Select during play to check the quick HUD and status information. For detailed records, press Start to open the pause menu and select the Guidebook directly. Inspect the realm records to identify incomplete orb challenges, gem totals, and unfinished levels. Do not use the number of completed talismans as a substitute for the orb or gem totals.
If you are short on either requirement, revisit ordinary realms, home-world side paths, and speedways. Unfinished speedways are useful places to check when the gem total is lower than expected. Prioritize objectives accessible with your current abilities, then return later for challenges requiring swimming, climbing, headbash, or another purchased movement ability.
- The quick status display or Guidebook confirms at least 55 recorded orbs.
- The gem total is at least 8,000.
- Gniles allows Spyro through the park gate.
- The amusement-park attractions are accessible.
3. Complete the four attractions for 10 tokens
The dunking booth awards three tokens. Pick up the baseball, use the aiming view when necessary, and hit the target to dunk each character. Repeat the challenge until all three rewards have registered.
The roller coaster awards three tokens over its successive rides. Stay on the track, shoot the required targets, and avoid hazards and other obstacles. Later rides use more demanding routes, so learn the course before attempting to play aggressively. Staying alive and completing the ride is more important than taking a risky line for a target.
The Tunnel of Love awards one token for completing the ride. Remain in the boat until the attraction ends and the token appears. The shooting range awards three tokens through its target rounds. Complete each round successfully and repeat any unfinished round until its token is recorded.
The total is three dunking-booth tokens, three roller-coaster tokens, one Tunnel of Love token, and three shooting-range tokens. These 10 tokens are Dragon Shores progress and do not increase the main 64-orb total.
- The dunking booth has awarded three tokens.
- The roller coaster has awarded three tokens.
- The Tunnel of Love has awarded one token.
- The shooting range has awarded three tokens.
- The Dragon Shores counter shows 10 tokens.
4. Open the theatre
After all 10 tokens are recorded, return to the theatre in the central part of the park and speak with the attendant. The theatre opens as a post-game bonus and allows you to replay story movies shown during the adventure.
The theatre is not required to defeat Ripto, enter the amusement park, or claim the permanent Superflame. If it remains closed, revisit the attractions and determine which token challenge failed to register. Do not search Avalar for another orb when the missing progress is a Dragon Shores token.
- All 10 Dragon Shores tokens are recorded.
- The theatre entrance opens.
- The available story movies can be selected.
5. Complete the full orb-and-gem collection
For the permanent Superflame, collect all 64 orbs and all 10,000 gems in the original game. Use the Guidebook to inspect each realm, home world, speedway, and orb challenge. A realm may have its talisman and gems completed while still retaining an unfinished orb objective, so check both records separately.
Revisit areas that were inaccessible on the first visit because they required later abilities. Search newly reachable ledges, upper routes, underwater passages, side rooms, and blocked return paths methodically. If a Guidebook entry remains incomplete, return to that specific realm instead of assuming the missing item is in Dragon Shores.
Skill Points are separate bonus objectives. They are not required for the 64-orb and 10,000-gem permanent Superflame reward. Pursue them only if you want every optional post-game challenge.
- The Guidebook records all 64 orbs.
- The gem total reaches 10,000.
- Previously ability-gated routes have been revisited.
- Skill Points are treated as optional unless pursuing every bonus objective.
6. Claim the permanent Superflame and save
After reaching 64 orbs and 10,000 gems, return to Dragon Shores and locate the separate door marked with those requirements. This is not Gniles’ entrance and is not the theatre entrance.
The door opens when both collection totals are complete. Enter the room and collect the permanent Superflame power-up. Test a flame attack to confirm the upgraded effect, then use the PlayStation pause menu’s Save Game command to preserve the completed file on the memory card.
The park gate, attraction tokens, theatre, and Superflame door are separate objectives. Completing the 10-token theatre route does not provide the permanent power-up, and opening the Superflame door does not require the optional Skill Points.
- The door marked 64 Orbs and 10,000 Gems opens.
- The permanent Superflame power-up is collected.
- A flame attack confirms the upgraded effect.
- The completed file is saved on the PlayStation memory card.
Before you move on
- Defeat Ripto and allow the complete ending sequence and credits to finish.
- Confirm that gameplay resumes in Dragon Shores.
- Locate Gatekeeper Gniles at the amusement-park entrance and record at least 55 orbs and 8,000 gems to enter the park.
- Collect all 10 Dragon Shores tokens: three from the dunking booth, three from the roller coaster, one from the Tunnel of Love, and three from the shooting range.
- Enter the theatre after all 10 tokens are recorded.
- Use Select for quick status information and Start for the pause menu’s direct Guidebook entry.
- Confirm 64 orbs and 10,000 gems for the full-collection reward.
- Open the separate marked door in Dragon Shores and collect the permanent Superflame.
- Save the completed file on the PlayStation memory card.
- Treat remaining Skill Points as optional unless pursuing every post-game bonus.
Optional Completion: 100% Targets and Speedrun Shortcuts
For the original North American PlayStation release of Spyro 2: Ripto's Rage!, the main collection target is 14 talismans, 64 orbs, and 10,000 gems. Defeating Ripto completes the story, and the ending sequence leads directly into Dragon Shores on the original release. Dragon Shores opens when you have at least 55 orbs and 8,000 gems. Its permanent Superflame reward requires all 64 orbs and 10,000 gems. Skill Points are separate optional objectives: eight unlock the Epilogue page in the Guidebook, and all 16 unlock the additional Epilogue material.
Finish the intended story route before the collection sweep
Complete the talisman-awarding realms in Summer Forest and Autumn Plains before beginning a dedicated cleanup pass. These regular realms provide all 14 talismans. Winter Tundra is the final home world; its important functions are late-game access, additional orb challenges, and the route to Ripto's Arena rather than another group of regular talisman stages.
Defeat Crush after collecting the required Summer Forest talismans, continue through Autumn Plains, and defeat Gulp when Gulp's Overlook becomes available. In Winter Tundra, collect at least 40 recorded orbs and complete the required hub interaction that opens the final-boss route. Defeat Ripto, then allow the ending sequence and credits to finish completely.
On the original PlayStation release, gameplay resumes in Dragon Shores after Ripto's ending sequence. Do not return to Winter Tundra looking for a post-final Super Portal. If Dragon Shores is not yet open, check that you have at least 55 recorded orbs and 8,000 gems, then follow the available Dragon Shores entrance route from the resumed post-game area.
Collect convenient gems and orbs during the story route, but postpone objectives that visibly require Climb, Headbash, a Moneybags purchase, a later minigame round, or another unavailable access condition. A recorded talisman proves that the main realm objective is complete, not that every orb, gem, Skill Point, or speedway reward has been collected.
- Record all 14 talismans.
- Defeat Crush, Gulp, and Ripto.
- Finish the ending sequence and credits.
- Continue into Dragon Shores when gameplay resumes.
- Use the Guidebook to identify unfinished realm totals and optional objectives.
Use a consistent cleanup order
Revisit the realms in home-world order and clear straightforward objectives first. Follow each realm's main route again, inspect side rooms and elevated ledges, and check underwater sections that are already accessible. Before leaving, return through the entrance area and inspect early branches; these are easy to miss when traveling directly toward the exit portal.
Classify every missing item before attempting another run. An unfinished orb may come from a resident's challenge, a hidden ledge, a speedway, a minigame, a later round, or a route opened by a new ability. Missing gems may be behind a Moneybags barrier, inside a breakable container, on a raised route, in a rocket-accessed area, or within a challenge section.
Check each realm entrance and every speedway entrance whenever a home-world total is incomplete. To review progress, press Start to open the pause menu and choose the direct Guidebook entry. Do not enter Options to reach the Guidebook. The Guidebook records overall totals, realm progress, and challenge information, while the entrances and residents reveal which remaining task must actually be performed.
- Collect visible gems and open-route gems first.
- Speak to challenge givers again when an orb remains missing.
- Mark Climb-, Headbash-, and purchase-gated areas for later.
- Check speedways separately from ordinary realms.
- Use Start, then the direct Guidebook entry, to review records.
Buy broad-use upgrades before minor detours
Spend gems on movement abilities, required access, and tools that open several routes. Prioritize purchases with broad benefits over a small optional passage containing only a few collectibles. This reduces the number of separate revisits needed for final cleanup.
When you obtain a new ability, revisit earlier home worlds systematically. Climb and Headbash are especially important for reopening earlier routes, but do not assume every missing item is ability-gated. Some objectives belong to a challenge giver, a rocket route, a later minigame round, or a side path that was simply overlooked.
On the original PlayStation version, Sparx's gem finder points toward the nearest remaining gem or gem container when you press L1, L2, R1, and R2 together. It locates gems and gem containers only. It does not locate orbs, talismans, Skill Points, challenge givers, or rockets needed to open containers. L1 plus R1 centers the camera behind Spyro and is not the gem-finder command. Use the finder after checking the Guidebook realm total, not as a substitute for completing orb challenges.
- Buy movement and access upgrades before small optional detours.
- Revisit earlier realms after learning each new ability.
- Use L1 plus L2 plus R1 plus R2 for Sparx's gem finder.
- Use L1 plus R1 only to center the camera.
Verify the principal collection totals and Skill Points
For the original game, verify 14 talismans, 64 orbs, and 10,000 gems. Select provides the quick status display during play. For detailed realm records and the Skill Point list, press Start, choose the direct Guidebook entry, and review the relevant pages. Options is a separate menu and is not required for this check.
Skill Points are tracked separately from the main talisman, orb, and gem totals. There are 16 in the original game. Eight Skill Points unlock the Epilogue page in the Guidebook. Completing all 16 unlocks the additional Epilogue material. Skill Points are optional for reaching and defeating Ripto, but they are part of a complete optional file.
Dragon Shores attraction rewards are also separate. Complete the park's coaster, shooting, love-boat, and dunking activities if you want every bonus objective, but do not count those rewards as replacements for missing orbs, gems, or Skill Points.
- Confirm 14 talismans.
- Confirm 64 orbs.
- Confirm 10,000 gems.
- Confirm eight Skill Points for the Epilogue page.
- Confirm all 16 Skill Points for the additional Epilogue material.
- Treat Dragon Shores attraction rewards as separate bonus objectives.
Complete Dragon Shores and claim the permanent reward
After defeating Ripto, let the ending sequence and credits finish. On the original PlayStation edition, the game resumes in Dragon Shores; do not search Winter Tundra for a reactivated Super Portal. If the park entrance remains closed, verify that you have at least 55 recorded orbs and 8,000 gems, then follow the Dragon Shores access route available from the resumed game state.
Dragon Shores entry is an access threshold, not the full-collection requirement. Once inside, complete the park's attraction activities if you want every bonus reward. The attractions provide their own rewards and do not replace missing realm orbs, gems, or Skill Points.
For the permanent Superflame reward, continue cleanup until the totals reach all 64 orbs and 10,000 gems, then open the reward door in Dragon Shores. If it remains closed, recheck both totals in the Guidebook and confirm that the missing item is recorded as collected rather than searching for another Skill Point or attraction reward.
- Defeat Ripto and finish the ending sequence and credits.
- Continue into Dragon Shores when gameplay resumes.
- Reach 55 orbs and 8,000 gems to enter the park.
- Reach 64 orbs and 10,000 gems to collect permanent Superflame.
- Complete the attractions separately if pursuing every bonus objective.
Keep speedrun techniques on a separate save
The original PlayStation game has documented movement skips, boss-access techniques, proxy setups, and other route-specific methods. These can depend on the exact release, hardware, emulator configuration, controller behavior, and timing method. They are not needed for intended progression or ordinary collection completion.
For a normal completion file, follow the home-world order and do not attempt an out-of-bounds shortcut merely to bypass a difficult orb. Practice unfamiliar techniques on a separate memory-card slot or separate save. If a trick leaves Spyro in an abnormal position, exit safely to the hub or reload the practice save rather than risking the primary file.
Before using a speedrun method, verify that it is documented for the original North American PlayStation version of Ripto's Rage!, not the PAL release Gateway to Glimmer, Reignited Trilogy, or another port. Do not treat a shortcut as proof that an orb, gem, or realm objective has been recorded. Confirm the result in the Guidebook and the relevant total.
- Use intended progression for the main completion save.
- Practice glitches on a separate save.
- Verify version compatibility before using a speedrun technique.
- Use the Guidebook to confirm recorded progress.
Before you move on
- All 14 talismans are recorded.
- Crush, Gulp, and Ripto are defeated.
- The ending sequence and credits have finished.
- Gameplay has resumed in Dragon Shores on the original PlayStation edition.
- The Dragon Shores entrance has opened with at least 55 orbs and 8,000 gems.
- The Guidebook totals show 64 orbs and 10,000 gems if pursuing full collection.
- The permanent Superflame reward has been collected if pursuing the complete 100% reward.
- Eight Skill Points are recorded if the Epilogue page is part of the goal.
- All 16 Skill Points are recorded if the additional Epilogue material is part of the goal.
- Dragon Shores attractions are complete if pursuing every bonus objective.
- Any speedrun shortcut used was verified separately for the original North American PlayStation release.
References for this chapter
Recovering From Mistakes: Saves, Glitches and Common Hangs
On the original North American PlayStation release of Spyro 2: Ripto’s Rage!, deaths and failed challenges are normally recoverable. The safest routine is to verify permanent rewards, save through the original pause menu, and reload a level from its home-world portal when a temporary event stops responding. These instructions apply to the original PlayStation version of Ripto’s Rage!, not the PAL Gateway to Glimmer release or Reignited Trilogy.
1. Establish a dependable memory-card routine
Insert a PlayStation memory card before beginning a serious session. Confirm that the console recognizes the card and that the intended save slot has room for Spyro 2. If the game cannot find a usable card, solve that problem before relying on the session for progress; inserting a card later does not restore gameplay that was never written to one.
At the title screen, select or create the save file you intend to use. During play, press Start to open the pause menu. The original game places Save Game directly in that menu, along with Exit Level and Guidebook. Press Select only when you want the quick status display. Options is a separate settings area and is not the route to the Guidebook.
Save before a boss attempt, before experimenting with a difficult orb challenge, and before spending a large amount of gems at Moneybags. After earning a talisman, orb, ability, or other permanent reward, allow its conversation or reward sequence to finish. Press Select for a quick check, then use Start and Guidebook to inspect the detailed record. Choose Save Game before shutting down.
- The memory card is inserted, recognized, and has available space.
- The intended Spyro 2 file is selected or created.
- Select opens the quick status display.
- Start opens the pause menu.
- Save Game, Exit Level, and Guidebook are available directly from Start.
- The reward is confirmed before the session ends.
2. Recover from ordinary deaths and failed challenges
A normal death does not erase the save file. Let the defeat and restart sequence finish, then continue from the position supplied by the game. If you fail an orb challenge, race, escort, or timed activity, assume that the reward still needs to be earned unless the Guidebook shows that it has been recorded. A retry position or temporary restart point is not the same as a memory-card save.
When an attempt succeeds, wait until the final objective, conversation, and reward animation have completed. Some challenges have a multi-step ending, so leaving immediately after the last action can make it unclear whether the game has registered the result. Check the relevant Guidebook entry through Start, then use Save Game.
If Sparx is weakened, restore him with safe nearby fodder or butterflies before trying again when practical. Entering another attempt with little health can turn a minor mistake into repeated deaths. The goal is not to preserve every temporary enemy or pickup, but to preserve confirmed permanent progress.
- The defeat sequence is allowed to finish normally.
- The Guidebook is checked after a successful challenge.
- The reward is saved through the Start menu.
- Sparx is restored when safe and practical.
- A temporary restart position is not mistaken for a permanent save.
3. Reload a level when an event stops responding
If an NPC disappears, an enemy becomes trapped in scenery, a switch does not react, or a moving platform remains in an impossible position, stop repeating the same action inside the loaded level. First confirm that the problem is not a normal ability requirement or a missed interaction. If the pause menu still responds, press Start and choose Exit Level.
Wait until Spyro has returned completely to the home world. Then enter the same level portal again. This creates a fresh level instance and normally resets temporary enemies, NPC positions, switches, moving platforms, and event states. Test the affected event soon after re-entry, before spending time on unrelated collectibles.
Re-entry is a reset for the active level, not a replacement for saving. Permanent rewards that were already confirmed and saved remain recorded, while an unfinished escort, race, timed challenge, or multi-stage event should be expected to reset. If you leave before the success condition and reward sequence finish, plan to repeat that activity.
- The problem is checked against the level’s ability requirements first.
- Start and Exit Level are used while the menu remains responsive.
- The home-world transition finishes completely.
- The same portal is entered again.
- The affected event is tested before unrelated objectives are attempted.
- Confirmed progress is saved after the level behaves normally.
4. Abandon unfinished activities without losing track of them
Leaving a level does not complete an unfinished challenge. If an orb task has not displayed its success result, the game should be treated as though the orb is still unearned. This applies to escort objectives, races, timed trials, enemy-clearance tasks, and challenges with a final conversation or handoff.
After returning to the level, locate the same NPC or challenge marker and repeat the activity from its beginning if necessary. Do not rely only on memory of the last step. Once the reward appears, let the complete sequence finish, open the Guidebook from Start, and verify the appropriate realm record. Save before powering off.
If the Guidebook still lacks the reward, repeat the final objective rather than assuming the file is damaged. If it shows the reward but the level has become unstable, use Exit Level, re-enter from the home world, and save again after confirming that the record remains present.
- The challenge reaches its actual success condition.
- The reward sequence finishes before leaving.
- The relevant Guidebook record is checked through Start.
- The confirmed result is saved before shutdown.
- An absent reward is repeated instead of being assumed to be present.
5. Protect the memory card during shutdowns and resets
Keep the memory card inserted while saving, loading, or changing areas. Do not switch off the PlayStation during a save operation or during a level transition. If the game freezes but the pause menu still responds, use Exit Level instead of interrupting the console.
If neither Start nor any normal exit responds, a reset may be unavoidable. After restarting, load the save and compare the Guidebook with the last reward you deliberately confirmed. If it is missing, repeat that objective and save properly. Do not delete the file or overwrite your only usable copy while investigating a problem.
When possible, keep an older working file or use a separate slot before testing unusual recovery advice. A hardware reset, damaged memory card, or interrupted write can cause more serious loss than an ordinary in-game failure.
- The memory card stays inserted during saves and transitions.
- The console is not powered off during saving.
- The file is checked after any forced reset.
- A usable save is preserved before risky testing.
- The only working file is not deleted during troubleshooting.
6. Investigate persistent faults safely
If Exit Level, re-entry, and a normal reload do not correct the problem, write down the exact home world, level, objective, NPC, switch, platform, and action that caused the fault. This information helps distinguish a genuine bug from a missed activation step, an ability gate, or a challenge that is designed to reset when the level is left.
Consult documentation for the original North American PlayStation edition. The USA manual covers the original pause-menu functions, status display, Guidebook, saving, and level-exit behavior. PlayStation-specific walkthroughs can help determine whether the suspected fault is actually a required return visit or a later-ability restriction.
Do not apply instructions from Reignited Trilogy or PAL Gateway to Glimmer without confirming that the behavior also exists in the USA PlayStation release. If you test advice involving an unusual sequence, use a separate save slot when possible. No troubleshooting method is guaranteed to repair every rare hardware, disc, or software fault.
- The exact edition, level, and fault are recorded.
- The main save is left untouched while advice is tested.
- A separate slot is used when possible.
- The manual or a specialist PlayStation walkthrough is consulted.
- No rare bug is treated as having a guaranteed fix.
Before you move on
- Press Select and confirm that the quick status display appears after recovering from a mistake.
- For detailed verification, press Start, select Guidebook, and confirm the relevant talisman, orb, gem total, ability, or realm entry.
- For a suspected soft-lock, press Start, choose Exit Level if available, re-enter the level portal, and test the affected event.
- After a successful challenge, allow the entire completion sequence to finish, then use Start and Save Game.
- Before ending the session, compare the Guidebook records with the last objective you intended to keep.
- If the fault persists after a reload, preserve the save and consult original-edition documentation or a specialist PlayStation walkthrough instead of assuming the problem has a guaranteed fix.
Final Checks: How to Confirm You’ve Truly Finished
For the original North American PlayStation release of Spyro 2: Ripto’s Rage!, story completion means defeating Ripto and allowing the complete ending sequence and credits to finish. Afterward, gameplay resumes in Dragon Shores. Speak with Gatekeeper Gniles there to enter the park when you have at least 55 recorded orbs and 8,000 gems. Dragon Shores tokens, the permanent Superflame reward, and the Skill Point Epilogue are optional completion milestones rather than requirements for defeating Ripto.
1. Confirm the story ending
Defeat Ripto through the complete final encounter, including every phase, then allow the ending sequence and credits to play without resetting the console or quitting immediately. Entering Ripto’s Arena, defeating only one phase, or returning to the title screen before the post-battle sequence finishes is not a reliable story-completion check.
When the credits and ending sequence are finished, normal gameplay resumes in Dragon Shores. This is the correct post-final destination for the original PlayStation release. Do not return to Winter Tundra looking for a reactivated portal; Dragon Shores is where the post-final access check takes place.
- Ripto has been defeated in the completed final encounter.
- The entire ending sequence and credits have played.
- Gameplay has resumed in Dragon Shores.
- The save has not been reset before the post-final transition finished.
2. Check progress with the original menu controls
Press Select during normal gameplay to open the quick status display. Use it to check the recorded gem and orb totals and other immediate progress information. This is the fastest way to determine whether you meet the Dragon Shores entry requirement or the later permanent Superflame requirement.
Press Start to pause the game, then select Guidebook from the pause menu. Review the Home World, realm, speedway, special-stage, and bonus pages to find unfinished objectives. A realm can have its talisman recorded while still containing missing gems or an incomplete orb challenge, so do not treat a talisman alone as a full-clear confirmation.
Use the Guidebook as a record of cleanup rather than relying on memory. If a remaining objective requires Climb, Headbash, Swimming, Superfly, a Moneybags purchase, or later story access, leave it marked for a return visit and continue with tasks that are currently available.
- Select opens the quick status display during normal play.
- Start opens the pause menu.
- Guidebook is available directly from the pause menu.
- Realm, speedway, and special-stage records have been reviewed when cleanup is intended.
3. Verify Dragon Shores access through Gatekeeper Gniles
After the ending and credits finish, move forward through Dragon Shores toward the park entrance and speak with Gatekeeper Gniles. He admits Spyro when the save contains at least 55 recorded orbs and 8,000 recorded gems. These totals are entry requirements for the park, not requirements for defeating Ripto.
If Gniles does not allow entry, press Select and check both totals. If gems are missing, use the Guidebook to inspect realm pages for high ledges, underwater routes, side chambers, and areas opened by later abilities or Moneybags purchases. If orbs are missing, check speedways and special challenges as well as ordinary realms; a completed-looking platforming level may still have an unfinished speedway objective.
Entering the park confirms that the Dragon Shores entry threshold has been met. It does not confirm that every gem, orb, attraction, token, or Skill Point has been completed.
- The ending sequence and credits have finished.
- Spyro is in Dragon Shores after the post-final transition.
- The save records at least 55 orbs and 8,000 gems.
- Gatekeeper Gniles admits Spyro into the park.
4. Check the required story records
Open the Guidebook and verify that the required story route is recorded across Summer Forest and Autumn Plains. The main progression should include the completed talisman route, Crush’s Dungeon, Gulp’s Overlook, and Ripto’s Arena.
For the basic completion goal, the decisive checks are Ripto’s defeat, the complete ending sequence, and the return to post-final gameplay in Dragon Shores. Dragon Shores entry is a useful additional milestone, but its 55-orb and 8,000-gem requirement is a bonus-world gate rather than a prerequisite for the final battle.
Recorded talismans, orbs, and gems remain recorded when you leave a realm, so cleanup can be divided across multiple sessions. If an area was blocked during the first visit, return after gaining the required ability and use the Guidebook to identify what remains.
- The required talisman progression is recorded.
- Crush’s Dungeon is complete.
- Gulp’s Overlook is complete.
- Ripto’s Arena is complete.
- Blocked areas have been revisited when full completion is intended.
5. Finish the Dragon Shores attractions
Dragon Shores contains several optional attractions, including the roller coaster, Tunnel of Love, shooting range, and dunk-tank activities. Speak with the attraction attendants and complete their available stages if you want the full park objective.
The attractions award ten tokens in total. Continue until all ten tokens are recorded if you want to unlock the Dragon Shores theater. The theater is separate from the park entrance: meeting Gniles’ 55-orb and 8,000-gem requirement only gets Spyro into the park and does not award the tokens automatically.
Once all ten tokens have been collected, enter the theater to confirm that it is available for viewing the game’s previously shown cutscenes. These attractions and the theater are optional for story completion and are not required to defeat Ripto.
- Dragon Shores has been entered through Gatekeeper Gniles.
- The intended attractions have been completed.
- All ten tokens are recorded if full park completion is wanted.
- The theater is available after the ten-token objective is complete.
6. Verify full gem-and-orb completion
For the original PlayStation release, the complete gem-and-orb target is 10,000 gems and 64 orbs. Use Select to check the totals, then use Start and Guidebook to investigate any missing realm, speedway, or special-challenge records. If the totals are short, check speedways before repeatedly replaying completed story levels.
When the save records 10,000 gems and 64 orbs, return to the Dragon Shores park and approach the locked reward door. The door opens at those totals and reveals the permanent Superflame power-up. Collecting it is the clearest in-game confirmation that the full gem-and-orb target has been reached.
Keep the milestones separate: 55 orbs and 8,000 gems allow entry into Dragon Shores; ten tokens unlock the theater; 64 orbs and 10,000 gems open the permanent Superflame reward.
- The status display shows 10,000 gems.
- The status display shows 64 orbs.
- The Guidebook has been used to investigate remaining objectives.
- The Dragon Shores reward door opens.
- The permanent Superflame power-up has been collected.
7. Verify the optional Skill Point records
Skill Points are hidden bonus objectives separate from talismans, gems, orbs, Dragon Shores tokens, and the main story. The original game contains 16 Skill Points covering realm tasks, speedway targets, and perfect boss challenges.
After earning eight Skill Points, open the final Guidebook pages and select the Epilogue section. Eight is the threshold for opening the Epilogue page; it is not the complete Skill Point target.
Continue until all 16 Skill Points are recorded if you want the full optional Skill Point objective. Completing all 16 adds the remaining Epilogue material. Do not require all 16 merely to open the Epilogue, and do not treat eight Skill Points as equivalent to full gem-and-orb completion.
- The Skill Point records are available in the Guidebook after the relevant progression.
- Eight Skill Points are complete if opening the Epilogue is the intended target.
- All 16 Skill Points are complete if the full optional target is wanted.
- The Epilogue and its additional material have been checked separately.
8. Apply the correct completion standard and save
For story completion, require Ripto’s defeat, the complete ending sequence and credits, and the return to normal gameplay in Dragon Shores. For post-game park access, add successful entry through Gatekeeper Gniles with at least 55 orbs and 8,000 gems.
For full Dragon Shores completion, collect all ten tokens and confirm that the theater is available. For full gem-and-orb completion, require 10,000 gems, 64 orbs, and the permanent Superflame reward. For the optional Skill Point objective, eight Skill Points open the Epilogue page, while all 16 complete the full Skill Point target and unlock the additional Epilogue material.
Save after reaching the milestone you want to preserve, especially after collecting permanent Superflame or finishing the Skill Point objectives. The original PlayStation release has no modern trophy or achievement notification system. Use the Guidebook records, Select totals, completed ending route, Dragon Shores access, unlocked theater, reward door, and Epilogue pages as the physical-save evidence of completion.
- Story goal: Ripto is defeated, the ending sequence and credits have played, and gameplay has resumed in Dragon Shores.
- Post-game goal: Gatekeeper Gniles admits Spyro after the save reaches at least 55 orbs and 8,000 gems.
- Park goal: the attractions are complete, ten tokens are collected, and the theater is available.
- Full collection goal: 10,000 gems and 64 orbs are recorded, and permanent Superflame has been collected.
- Optional Epilogue goal: at least eight Skill Points are complete and the Epilogue page opens.
- Maximum optional Skill Point goal: all 16 Skill Points are complete and the additional Epilogue material is available.
- The completed save has been preserved on the PlayStation memory card.
Before you move on
- Story completion: Ripto is defeated, the complete ending sequence and credits have played, and gameplay has resumed in Dragon Shores.
- Post-game completion: Gatekeeper Gniles admits Spyro after the save reaches at least 55 orbs and 8,000 gems.
- Park completion: the intended attractions are finished, ten tokens are collected, and the theater is available.
- Full collection: the status display shows 10,000 gems and 64 orbs, the permanent Superflame reward has been collected, and no intended gem-orb objectives remain.
- Skill Point completion: eight Skill Points open the Epilogue page; all 16 complete the maximum optional Skill Point target and add the additional Epilogue material.
- Control verification: Select shows the quick status display; Start opens the pause menu; Guidebook is selected directly from Start.
- Edition verification: these checks apply to the original North American PlayStation version of Spyro 2: Ripto’s Rage!, not Gateway to Glimmer or Reignited Trilogy.
References for this chapter
- Spyro 2: Ripto’s Rage! Original PlayStation Manual Scan
- SpyroHints: Spyro 2 Dragon Shores and Skill Points
- darkSpyro: Spyro 2 Gateway to Glimmer Skill Points
- darkSpyro: Guidebook Location List for Dragon Shores
- Spyro 2: Ripto’s Rage! Secrets Guide by Ryuuko
- Spyro 2: Ripto’s Rage! PlayStation Unlockables
Finishing up
You have defeated Ripto in Ripto’s Arena and watched the ending sequence.
You have completed the 14 regular talisman levels required for the story route and defeated Crush and Gulp; Winter Tundra does not contain regular talisman levels.
You have collected at least 40 recorded orbs and completed the Winter Tundra interaction that opens Ripto’s Arena.
Optional post-game completion: after defeating Ripto and completing the ending transition, reach Dragon Shores through the game's post-final route. Entering the park requires at least 55 orbs and 8,000 gems. For the permanent Superflame reward, collect all 64 orbs and 10,000 gems, then open the marked reward door.
Choose your next gameScreenshots & video
Game imagery for reference. Follow the written chapters above for the route and strategies.
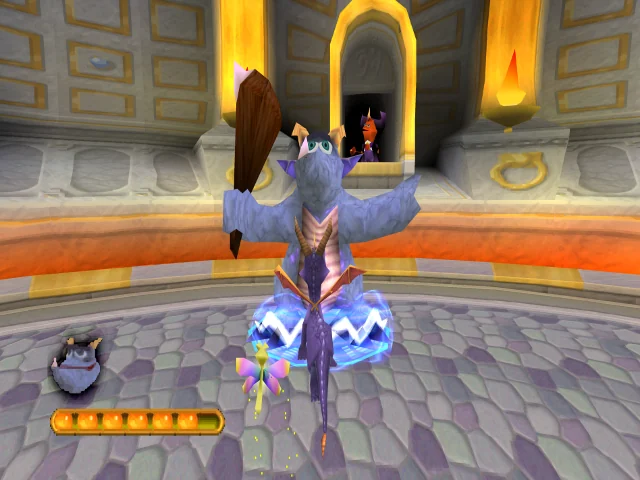
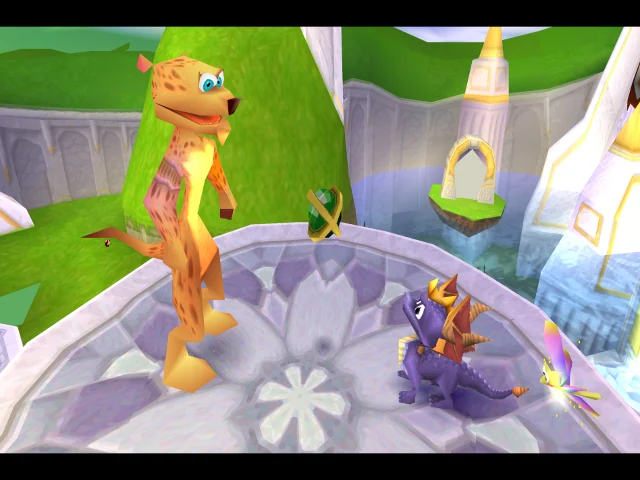
Sources & references
Our original guide draws on the references below. Check the edition at the top of this page before following controls or unlock requirements.
- Spyro 2: Ripto’s Rage! Original PlayStation Manual Scan
- Spyro 2: Ripto’s Rage! North American PlayStation catalog record
- Spyro 2: Ripto’s Rage! — Guide and Walkthrough, PlayStation, by dark52
- Spyro 2: Ripto's Rage! — Guide and Walkthrough — PlayStation — By Cyril
- Spyro 2: Ripto’s Rage! — PlayStation Guide and Walkthrough by SaDi
- Spyro 2: Ripto’s Rage! — Spyro Wiki
- Spyro 2: Ripto’s Rage! — PlayStation Guide and Walkthrough by HisDudeness
- Spyro 2: Ripto’s Rage! – Strategy Guide and Game Reference Wiki: Summer Forest
- Spyro: Ripto’s Rage! PlayStation Manual
- Spyro 2: Ripto’s Rage! FAQ/Walkthrough v1.1
- Cloud Temples, Spyro Wiki
- Metropolis, Spyro Wiki
- Spyro 2: Ripto’s Rage! Spoiler FAQ by Ryuuko, PlayStation
- Spyro Hints: Summer Forest guide for Spyro 2: Ripto’s Rage!
- Spyro 2: Ripto's Rage! Controls and game information
- Spyro 2: Ripto's Rage FAQ/Walkthrough Final — Neoseeker
- Dragon Shores — Spyro Wiki
- SpyroHints: Spyro 2 Dragon Shores and Skill Points
- Spyro 2: Ripto's Rage! — Secrets Guide — PlayStation — By Ryuuko
- Spyro 2: Ripto's Rage! — Speedrun.com Resources
- Spyro 2: Ripto’s Rage! — PlayStation FAQs and Walkthroughs
- darkSpyro: Spyro 2 Gateway to Glimmer Skill Points
- darkSpyro: Guidebook Location List for Dragon Shores
- Spyro 2: Ripto’s Rage! Secrets Guide by Ryuuko
- Spyro 2: Ripto’s Rage! PlayStation Unlockables
About the game & collecting notes
- Platform
- Sony PlayStation
Step through Avalar and finish the original PlayStation (USA) edition of Spyro 2: Ripto’s Rage!. This guide walks you from the opening hub through each realm’s talisman levels, orb side-quests, hub bosses, Ripto’s Arena and the post‑final Dragon Shores content, with practical routes, recovery advice and clear completion checks for the PS1 release (not the Reignited remaster).
Darryl Polo
Darryl Polo loves tinkering with emulation and revisiting retro games. He enjoys exploring how old favorites play on different setups and sharing what he learns along the way. At Joking Joystick, he writes about the games, hardware, and small discoveries that keep the hobby fun.
Our editorial standardsFound a step that needs another look? Help us improve this guide.