Sonic Adventure Walkthrough: All Six Stories and Super Sonic
Finish the original Dreamcast adventure from Sonic's first stage through the Perfect Chaos finale. Follow all six character stories with hub directions, required upgrades, Action Stage routes, boss strategies, and help for Big's fishing. Optional emblems, extra upgrades, and Chao activities have their own sections after the main story route.

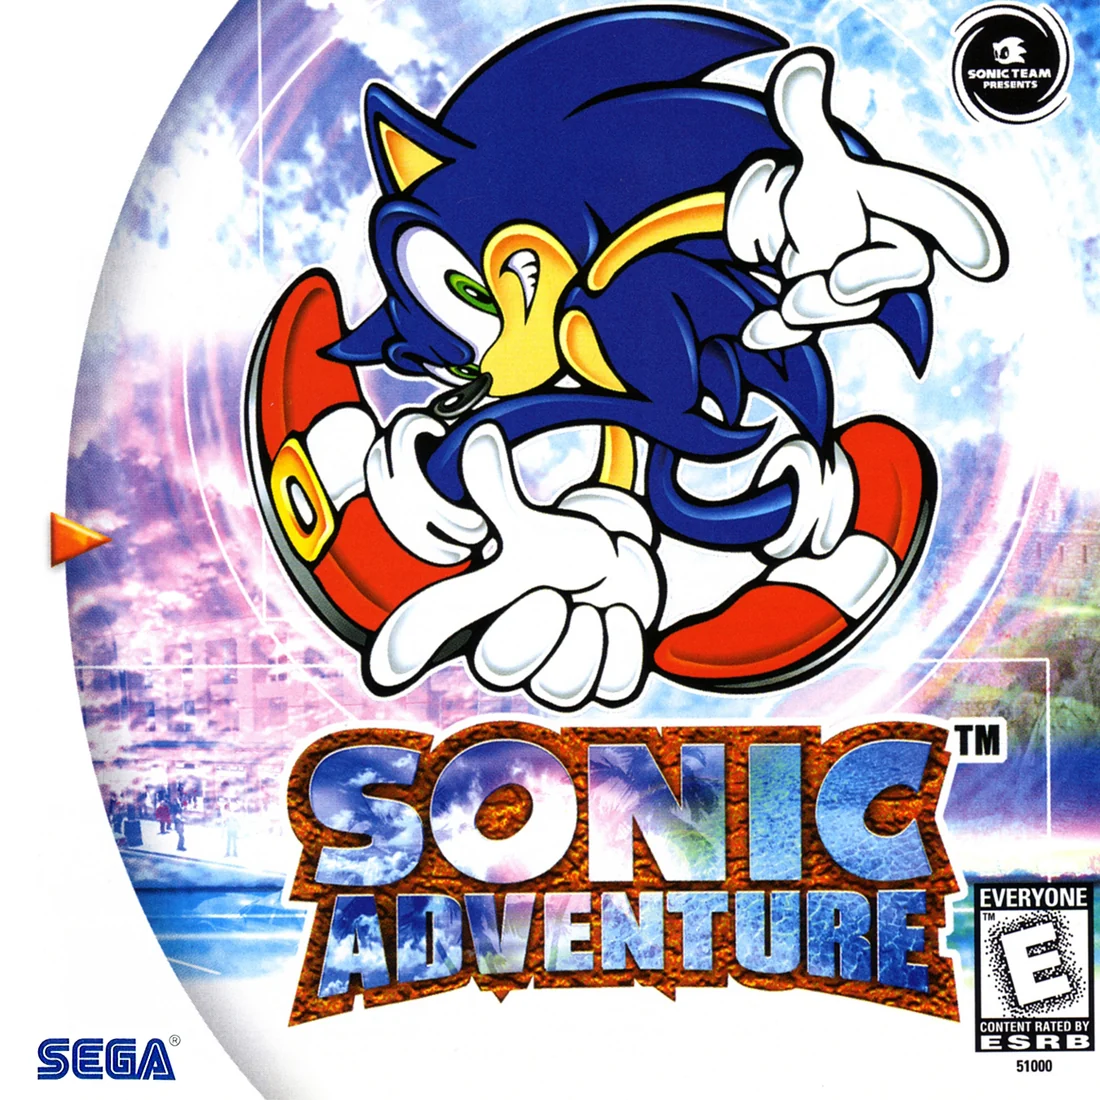
Find a copy
Sonic Adventure Dreamcast
We may earn a commission if you buy through these links, at no extra cost to you. As an Amazon Associate I earn from qualifying purchases.
Opens retailer search results. Check the model, edition, seller, availability and current price before buying.
Before you begin
Sonic Adventure moves between Action Stages and story events in Station Square, Mystic Ruins, and the Egg Carrier. Reaching the next stage often requires a conversation, item, switch, or cutscene first. This walkthrough includes those connecting steps alongside the stages and bosses, using the original Dreamcast game.
Begin with Sonic, then follow the other characters' chapters as their stories become available. Each character has different abilities and a different finish line. Completing all six stories opens the Super Sonic scenario and the game's final confrontation with Perfect Chaos. Optional upgrades, emblem challenges, and Chao activities are covered separately so you can return to them after the ending.
Set yourself up for the run
Use the original Dreamcast edition; DX Mission Mode, Metal Sonic, Game Gear unlocks, and Chao Karate are outside this guide.
Practice each character's central action before relying on it in a stage: Sonic's charged Light Speed Dash, Tails's flight, Knuckles's digging, Amy's hammer moves, Big's fishing, and Gamma's lock-on attacks.
Watch hub scenes and check NPC or Tikal hints when the next route has not opened.
Follow visible landmarks in the hubs rather than assuming that every camera angle preserves the same directions.
For Big, locate Froggy before casting and manage the line's tension after setting the hook.
For Gamma, group targets into lock-on chains to earn useful time extensions.
Let the game finish saving after story clears before switching characters or quitting.
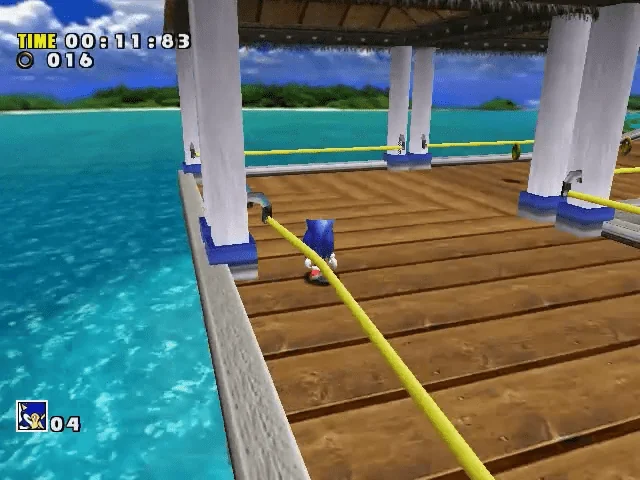
Sonic: Emerald Coast and Windy Valley
In the original Dreamcast release of Sonic Adventure, Sonic opens the game by stopping Chaos 0 in Station Square, then rushing from the hotel side of town to Emerald Coast to rescue Tails. After that rescue, return through the hotel to the oceanfront street, ride the train to Mystic Ruins, defeat Egg Hornet near Tails's workshop, carry the Wind Stone to the cave pedestal, and clear Windy Valley for the Chaos Emerald. This chapter keeps the route strictly on Sonic's required story path and points out the safe attack windows and field triggers that matter on a first playthrough.
Beat Chaos 0 in Station Square
Sonic starts in the Station Square plaza at night in an immediate boss battle. Do not attack Chaos 0 while it is flattened into water or splashing around the arena. Wait until it rises into a solid upright form and the head or core is plainly exposed, then jump and use the homing attack for a clean hit.
After each hit, break off and watch the next pattern instead of staying underneath it. Chaos 0 will lunge and swipe early, and after the second hit it begins using the poles around the plaza as part of its movement. When it leaps to the poles, keep moving and jump to avoid the strike path, then punish it again only after it settles back into a vulnerable shape. Sonic only needs three good hits here, so patience is safer than forcing contact.
- Do not attack Chaos 0 in its liquid state.
- Wait for the fully formed body and exposed head or core.
- Avoid the pole movement after the second hit and finish the fight in 3 hits.
Run to the beach and enter Emerald Coast
After the cutscene with Tails's crash, head from the Station Square hotel side toward the beach entrance. This is Sonic's first Action Stage and the goal card is simple: reach the end and rescue Tails.
For a first clear, stay on the obvious forward route instead of trying trick jumps. The early beach stretch uses loops, ramps, curved paths, and springs to carry you ahead. Keep Sonic centered before narrow turns so speed does not throw you off the path.
- Follow the story prompt toward the beach by the hotel.
- Enter Emerald Coast from the beachfront route.
- Use the main path instead of risky shortcut jumps on a first run.
Clear Emerald Coast and survive the orca chase
The opening half of Emerald Coast is a straight push through beach furniture, wooden walkways, loops, and seaside curves. Break boxes that sit directly on your line, but do not stop to farm rings. Your real job is to keep pace toward the coast route where Tails is stranded.
When the orca appears, commit to the boardwalk and keep Sonic near the middle. The camera shifts quickly here, and panic side movement is what usually throws you into the water. Jump only when a broken plank or gap is directly in front of you. Repeated extra hops make the landings worse on the narrow wood sections.
After the chase, keep following the lighthouse-side route. Use the springs, dash panels, and marked path through the coast section instead of trying to improvise wide jumps. If you take a hit, regain your footing first, then line up the next ramp. The stage ends when you reach Tails at the far end of the route and trigger the rescue.
- Stay centered during the orca boardwalk sequence.
- Make deliberate jumps over actual gaps instead of panic hopping.
- Follow the lighthouse and coast route to Tails and finish the rescue.
Return through the hotel, ride the train, and beat Egg Hornet
Back in Station Square, the story resumes at the hotel poolside while Tails shows Sonic a Chaos Emerald. From the pool area, go through the hotel and out to the oceanfront street with the train station. Enter the station and take the train to Mystic Ruins.
After arriving in Mystic Ruins, head right and go up the hill near the steps to Tails's workshop. This triggers Egg Hornet. Do not waste time chasing it while it hovers and fires missiles. Circle the arena, keep enough room to sidestep, and wait for Eggman to commit to the diving attack.
The real opening comes when Egg Hornet slams down and gets stuck at ground level. Avoid the impact, then immediately homing attack the cockpit while it is exposed. Back away after every hit. The missile barrages increase as the fight goes on, but the answer never changes: stay mobile, bait the ground dive, punish the grounded machine. Sonic wins after three hits. Eggman then steals the emerald and leaves, advancing the story.
- Go from the hotel poolside through the hotel to the train station.
- Ride the train to Mystic Ruins and climb toward Tails's workshop.
- Ignore the hover phase and punish the grounded dive opening.
- Defeat Egg Hornet in 3 hits.
Take the Wind Stone to the cave pedestal
After the boss, continue up to Tails's workshop. The green Wind Stone is outside near the front of the workshop. Pick it up and carry it back down toward the lake area.
Before you reach the lake, look for the cave set into the cliffside. Inside is the pedestal that matches the Wind Stone. Set the stone into place to activate the wind route. If you accidentally drop it on the way, just pick it back up and continue. You do not need to reload or reset the area.
Once the pedestal activates, jump into the wind vortex to enter Windy Valley.
- Pick up the Wind Stone outside Tails's workshop.
- Carry it to the cave in the cliff before the lake.
- Place it on the pedestal and enter the vortex to start Windy Valley.
Cross Windy Valley and claim the Chaos Emerald
Windy Valley is safer if you respect the air currents. In the opening section, run into the marked path and use springs and wind lanes to cross gaps. When you see leaves blowing across the route, build speed and let the current carry Sonic rather than fighting it with sharp turns.
The middle tornado section is the main place players throw lives away. You are climbing on chunks of land trapped inside the tornado, so stop overcorrecting the stick. Use the trampolines, springs, and obvious land pieces above you. Face each landing before the next jump. If you miss a platform but survive on a lower piece, recover by taking the nearest spring or updraft back onto the intended route instead of leaping blindly for a distant ledge.
In the final sky section, the road pieces tilt and fall through the air at strange angles. Stay on the central route, compensate gently for the camera angle, and keep following the bridges, dash panels, and floating path upward. Ignore side temptations on a first clear. Watch the narrow walkways near hazards, then touch the Chaos Emerald at the end to clear the stage.
- Use speed and marked currents in the first section.
- Climb the tornado carefully with springs and stable landings.
- Stay on the main route in the final sky section.
- Grab the Chaos Emerald to finish Windy Valley.
Before you move on
- Chaos 0 is defeated and the opening Station Square event is over.
- Emerald Coast is cleared by reaching Tails at the end of the coast and lighthouse route.
- You returned through the hotel, rode the train to Mystic Ruins, defeated Egg Hornet, and watched Eggman steal the emerald.
- The Wind Stone has been placed, Windy Valley is cleared, and Tails has been introduced as an available character while Sonic is ready to continue the next Station Square segment.
Sonic: Casinopolis and Ice Cap
After Windy Valley, Sonic must learn the Light Speed Dash in Station Square, use it to open Casinopolis, and build a deposited total of 400 rings to claim the Chaos Emerald. Once Eggman steals that emerald in the field, carry the blue Ice Stone from the alley by the casino through the newly opened Mystic Ruins cave route, place it on the ice pedestal, and clear Ice Cap's climb, cave, and snowboard finish. The Crystal Ring in the hotel is helpful but optional.
Get the Light Speed Shoes and learn the charged dash
Return to Station Square and go back to the district where Sonic fought Chaos 0, near City Hall and the Burger Shop. The police car that blocked the manhole earlier is gone now. Drop into the sewer, move forward, and jump to the ledge on the right to reach Sonic's upgrade capsule.
Take the Light Speed Shoes. From here on, Sonic can charge a Light Speed Dash by holding his dash input until the charge completes, then releasing while he is lined up with a trail of rings. Use the test ring trail in the sewer before you leave. If the dash fails, the usual problem is angle, not timing. Reset your position so Sonic is pointed through the first ring instead of across the row.
Before heading for the casino, you may go into the hotel lobby and use the upstairs ring trail to reach the locked room with the Crystal Ring. This upgrade only reduces the charge time for the Light Speed Dash. It is useful, but it is not required for stage access or story progress.
- Enter the sewer in the City Hall district
- Collect the Light Speed Shoes
- Perform at least one successful Light Speed Dash on a ring trail
- Treat the Crystal Ring as optional, not mandatory
Open the Casinopolis door
Leave the sewer and head to the part of Station Square with the casino entrance, opposite the route that leads toward Emerald Coast. The casino door is shut, but the nearby field switch creates a ring line that runs up to the large button above the entrance.
Stand directly in line with the first ring, charge the Light Speed Dash fully, and release to ride the trail upward and strike the overhead switch. When the button is hit, the main door opens below.
Do not keep trying from a crooked angle. If Sonic slides past the first few rings or peels off the path, back up and realign. Opening the front door is the only field requirement here.
- Find the closed Casinopolis entrance
- Trigger the ring trail outside
- Dash up to the overhead switch
- Enter Casinopolis
Build and bank the 400-ring total in Casinopolis
Sonic does not clear this stage by reaching a normal exit. He must deposit a total of 400 rings into the vault, then climb the pile that forms inside and take the gray Chaos Emerald. The important number is the deposited total, not the number you are holding at one time.
Start in the main hall. The two pinball tables are the fastest way to build a large haul, especially the NiGHTS table when it pays out well, but pinball is volatile. If you come out with a strong total, leave greed behind and head straight for the vault room to bank it. Two or three safe trips are better than losing a huge run.
The slot machines in the hall can help, but do not build your whole plan around them. Use them only if you are already nearby. The real decision is when to stop gambling and lock in progress.
If a pinball run ends before you have built enough rings, Sonic can be dumped into Dilapidated Way, the sewer route under the casino. Treat that as a recovery loop. Break ring boxes, stay with the wind paths, and keep an eye out for the ring trail before the spike stretch. Using the Light Speed Dash there helps you sweep up rings while reducing the chance of getting clipped.
When you return to the main hall, go back to the vault and bank what you earned. Repeat until the running deposit reaches 400. Once the pile is tall enough, climb it and take the gray Chaos Emerald to finish the stage.
- Use pinball to build rings quickly
- Bank rings in the vault instead of hoarding them too long
- Use Dilapidated Way as a recovery route if pinball drops you below
- Reach 400 deposited rings total
- Take the gray Chaos Emerald
Carry the Ice Stone through Mystic Ruins
After the stage, a blue Ice Stone appears in the alley beside the casino. Eggman interrupts the celebration, steals the emerald, and leaves Sonic and Tails knocked out. When the scene ends, pick up the Ice Stone and carry it to the train station.
Ride the train to Mystic Ruins. Near the station, the cliffside has opened into a new cave. Take the Ice Stone inside. A wind updraft carries you upward into a second cave system. Keep carrying the stone until you reach the icy door with a pedestal in front of it.
Place the Ice Stone on the pedestal to open the door. Go through the ice cave, cross to the far side of the small lake, and climb the ladder to begin Ice Cap. If you set the stone down by mistake, just pick it back up and continue. You do not need to restart anything.
- Pick up the Ice Stone in the alley by Casinopolis
- Ride the train to Mystic Ruins
- Use the newly opened cave and wind updraft route
- Place the Ice Stone on the pedestal
- Climb the ladder into Ice Cap
Clear Ice Cap from the climb to the snowboard finish
Ice Cap starts with Snowy Mountain. Move forward with control instead of trying to improvise across slippery edges. Use the springs, boosters, and straightforward ledges the route gives you. There is a shortcut involving a ring trail and numbered panel near the lower part of the opening section, but you do not need it for a clean clear. If you are learning the stage, the regular route is safer.
As the climb turns into cave traversal, keep following the intended path around the cavern rather than forcing long blind jumps. In the Limestone Cave section, the route feeds Sonic toward numbered panels that carry him upward. Follow the ledges, use the panels as they appear, and keep your camera settled before jumping away from narrow perches.
Near the end of the cave route, the last numbered panel sequence drops a giant icicle and opens the way out. That transition leads into the snowboard section. Once you mount the board, keep your line clean and shallow. Stay near the middle unless you are clearly moving for rings or a ramp.
During the snowboard descent, jump early over obvious gaps and rough terrain. Yellow ramps can carry you farther, but only commit when you are lined up straight. Late swerves cause more crashes than they save. If you get bumped or land crooked, recover with small corrections instead of a hard turn. Finish the downhill run to clear Ice Cap.
- Reach the Limestone Cave without losing the route
- Use the ledges and numbered panels to climb through the cave
- Trigger the final cave exit and transition to the snowboard
- Complete the snowboard descent safely
Before you move on
- Sonic has collected the Light Speed Shoes in Station Square.
- Casinopolis is cleared by depositing 400 rings total and taking the gray Chaos Emerald from the vault.
- The optional Crystal Ring, if collected, was treated as a convenience upgrade rather than a story requirement.
- The Ice Stone has been carried from the alley by Casinopolis to the pedestal in the Mystic Ruins ice cave.
- Ice Cap is finished, including the climb, cave progression, and snowboard descent.
- You return to the Mystic Ruins lake and waterfall area ready for the next story event.
Sonic: Chaos 4, Sky Chase and Twinkle Park
This stretch begins as soon as Sonic clears Ice Cap. You must settle Knuckles at the Mystic Ruins lake, beat Chaos 4 on the floating leaves, survive Sky Chase Act I in the Tornado, then return to Station Square, follow Amy to Twinkle Park, and clear that stage. The chapter matters because it mixes three very different tasks in a row: a boss where patience is safer than aggression, a shooting sequence where the Tornado's health matters more than score, and a park stage split into a bumper-car opener, a moving coaster hazard section, and a final castle platform route.
1. Trigger the post-Ice Cap fight with Knuckles
After Ice Cap ends, stay in Mystic Ruins and head back toward the lake below Tails's workshop. Approaching that open water area starts the next scene with Knuckles. This is required story progress, not an optional duel.
Knuckles goes down after three hits. The easy answer is still Sonic's homing attack, but do not mash it from point-blank range while Knuckles is already attacking. If he is facing you and punching or gliding into you, Sonic can bounce off without dealing damage. Circle a little, jump as Knuckles commits, then home in from the side or just after his attack misses.
Once you land the third clean hit, the scene continues automatically. Sonic and Knuckles lose their Chaos Emeralds, Eggman feeds them to Chaos, and the real boss begins right there at the lake.
- Go to the Mystic Ruins lake after Ice Cap.
- Defeat Knuckles in three hits.
- Avoid trying to ram through his active frontal attack.
2. Beat Chaos 4 by using the leaf platforms safely
Chaos 4 is fought over water on floating leaves. Treat the leaves as safe islands and the water as a penalty zone. Stay centered on a leaf whenever Chaos is swimming. If you chase him while he is submerged, you are more likely to fall in, lose position, and waste rings for no damage.
Wait for the opening where Chaos rises and exposes the head. That is the attack window. Jump, use the homing attack, and then steer back toward the nearest leaf as soon as the hit connects. Sonic needs five good hits, so one clean hit at a time is the right pace.
Between openings, watch the shockwave and the way Chaos can upset your footing. If a leaf tips or you land awkwardly, jump again immediately and move to another leaf instead of trying to correct yourself at the edge. If you fall in, get back onto a leaf first and rebuild your spacing before looking for the next opening. A missed chance costs far less than a reckless jump into open water.
- Attack only when Chaos surfaces and the head is exposed.
- Use five homing-attack hits to finish the fight.
- Reset on a leaf after any bad landing instead of forcing another jump.
3. Survive Sky Chase Act I with the Tornado intact
After the Egg Carrier lifts Eggman away, go up to Tails's workshop and board the Tornado to start Sky Chase Act I. The Dreamcast manual confirms this is one of the story mini-games, so think of it as a survival shooting segment rather than a speed stage.
Use the rapid-fire gun for targets already lined up in front of you. Save the lock-on missiles for groups, side formations, and enemies clustered around the carrier. Sweeping across several targets and releasing one burst clears pressure faster than tunneling on a single machine while other shots come in from the sides.
Your real resource here is plane health. Do not chase every last target for score. Knock out the enemies directly ahead, break up obvious clusters with lock-on bursts, and accept that a few stragglers may escape if dodging them would cost more damage than ignoring them. Stay calm through the final exchange and survive until the Egg Carrier's cannon shoots the Tornado down. Sonic will be separated from Tails and dropped back into Station Square.
- Board the Tornado at Tails's workshop.
- Use rapid fire for singles and lock-on missiles for clusters.
- Protect plane health and finish the sub-game alive.
4. Follow Amy to the real Twinkle Park entrance
Back in Station Square, move from the hotel side toward the casino side of town to trigger Sonic's scene with Amy and the bird she is protecting. That scene alone does not start the level. After it ends, keep moving to the seaside park entrance area.
At the Twinkle Park gate, Sonic and Amy encounter ZERO. Amy still runs inside, and Sonic follows her. This is the mandatory story entrance. Do not confuse it with Twinkle Circuit, which is a separate optional mini-game and not the way Sonic advances the story here.
- Trigger Amy's first Station Square scene near the casino side.
- Go to the Twinkle Park gate afterward.
- Enter the story stage, not optional Twinkle Circuit.
5. Clear Twinkle Park's bumper-car and coaster sections
The opening section puts Sonic in a bumper car. Drive aggressively enough to hit the enemy cars, but do not zigzag wildly from wall to wall. Clean lines matter more than grabbing every ring. Use the car to ram enemies and finish the section without bleeding all your speed on barriers.
After the opener, the stage pushes you into the moving amusement ride section. Keep your attention on immediate hazards instead of trying to rush. If the route throws objects into your lane, react early and keep a few rings in reserve so a surprise hit does not send you into the castle empty-handed.
This middle stretch is short, so the goal is simple: arrive at the platforming half with control and at least some protection. Checkpoints you touch here are worth more than a risky shortcut.
- Finish the enemy-car opener cleanly.
- Preserve rings through the moving ride hazards.
- Touch checkpoints whenever the route offers one.
6. Take the castle route to the goal capsule, then set up Speed Highway
The final part of Twinkle Park is a normal Sonic platform stage through the castle. Follow the rising forward route through springs, narrow paths, and moving platforms. When a speed panel or spring launches you into a blind camera angle, ease up for a moment after landing so you can line up the next jump instead of running straight off a ledge.
If enemies are parked on a landing spot, clear them before the next jump rather than trying to thread through them at full speed. The stage likes to mix quick movement with precision footing, so staying readable is better than staying maximal. Keep taking the obvious higher path until you reach the end capsule and break it to clear the stage.
When Sonic exits, you appear in the small room connected to Twinkle Park. The door to Twinkle Circuit is optional. Leave through the other door to get outside. Your next story landmark is the grassy traffic island in front of the train station, where the employee card appears. Pick it up, then take it to the locked shutter beside the Twinkle Park elevator to open Speed Highway for the next chapter.
- Use the upward castle route and break the goal capsule.
- Leave through the outside door, not the optional Twinkle Circuit door.
- Pick up the employee card by the train station and use it at the shutter beside Twinkle Park.
Before you move on
- You triggered the lake scene after Ice Cap, defeated Knuckles in three hits, and beat Chaos 4 with five safe attacks on its exposed head.
- You boarded the Tornado at Tails's workshop and survived Sky Chase Act I.
- You met Amy in Station Square, reached the Twinkle Park gate scene with ZERO, and cleared Twinkle Park through its bumper-car, ride, and castle sections.
- You left Twinkle Park, collected the employee card by the train station, and know to use it on the shutter beside the Twinkle Park elevator to open Speed Highway next.
References for this chapter
Sonic: Speed Highway and Red Mountain
After Twinkle Park, Sonic needs one Station Square key item and one Mystic Ruins upgrade before he can continue the chase. First, use the Employee Card to open Speed Highway and clear its three Sonic-only sections in the right order: the elevated highway run, then Goin' Down on the skyscraper wall, then At Dawn in the streets. After the next Station Square scene, return to Mystic Ruins, collect the Ancient Light near the bridge to the floating island side, use the charged Light Speed Attack to destroy the caged monkey blocking Red Mountain, and finish the mountain stage to reach Tornado 2 and Sky Chase Act II.
Open the route to Speed Highway
When you come back from Twinkle Park, do not head for the hotel first. As you step out near the station district, pick up the Employee Card from the grass patch in front of the train station area. Carry it to the locked building beside the Twinkle Park elevator. Walk up to the shutter while holding the card and the door will accept it and open.
Keep Sonic's upgrades straight before you enter. The Light Speed Shoes from the sewer were required earlier and are already in your inventory. The Crystal Ring in the hotel is still optional here. It only reduces the charge time for the Light Speed Dash. The next required upgrade is the Ancient Light, and you will collect that after Speed Highway, not before it.
- Pick up the Employee Card after leaving Twinkle Park.
- Use the card at the locked building beside the park elevator.
- Enter Speed Highway with Light Speed Shoes already owned and Crystal Ring still optional.
Speed Highway: elevated roads and the helicopter ride
The first section is the high-speed road network above Station Square. Stay centered unless you can clearly read where a side path lands. Dash panels and banked walls push Sonic very quickly, so make small steering corrections instead of jerking left and right. Rings matter more as insurance than as a score target here, so grab enough to survive a bump and keep moving.
After the first save point, Sonic is launched up the side of a building and back onto the upper route. Keep following the roadway and rockets forward. The helicopter sequence belongs in this first elevated section, not after the skyscraper descent. When you reach the helipad area, do not jump too early. Wait for the helicopter to hover close enough, then jump to catch the bars underneath it. Avoid the rotor area above you. Let it carry Sonic to the next helipad and checkpoint, then continue across the remaining elevated roads and rockets until you reach the glass-room transition.
- Stay on the main elevated route unless a shortcut landing is obvious.
- Use gentle steering through banked roads and dash-panel curves.
- Wait for the helicopter to hover, grab the bars underneath, and ride to the next helipad before continuing.
Speed Highway: Goin' Down and At Dawn
Only after the glass gives way does Sonic enter Goin' Down. Here he runs down the outside of the skyscraper instead of falling. This is a different hazard set from the earlier helicopter ride. Keep your line steady, hop cleanly over barricades, and treat the passing helicopter blades as separate obstacles that can strip your rings if you drift into them.
At the bottom, the stage changes to At Dawn in the city streets. Police cars and enemy drivers can hit you if you stop in traffic, so keep the camera forward and stay in motion. Follow the street route to the end area, then use the fountain as your launcher. Jump into the water jet to be thrown upward to the goal capsule beside the bell. If you stay on the road and ignore the fountain, you can run past the proper finish.
- Clear Goin' Down after the glass-room transition, not before.
- Dodge barricades and rotor hazards during the skyscraper run.
- Use the fountain at the end of At Dawn to reach the capsule near the bell.
Trigger the next scene and collect the Ancient Light
After Speed Highway, Sonic still has not rescued Amy. Go through the hotel to the casino side of Station Square and watch the next story scene with ZERO taking Amy. Then return to the station and ride the train to Mystic Ruins.
At Mystic Ruins, head into the cave directly in front of the train station, the same general route used earlier for Ice Cap. This time, keep going all the way through instead of turning off for the snow stage. On the far side, near the bridge leading toward the floating island approach, collect the Ancient Light from the rock there. This upgrade adds the Light Speed Attack, letting a full Light Speed charge home in on enemies instead of only following ring trails.
- See the Station Square casino-side scene before leaving for Mystic Ruins.
- Go through the cave beyond the Mystic Ruins station and continue past the Ice Cap turnoff.
- Pick up the Ancient Light near the bridge on the floating island side.
Open Red Mountain and clear both sections
Near the Red Mountain gate, a caged monkey blocks the entrance. Stand in a straight line facing it, charge the Light Speed move fully, and release to perform the Light Speed Attack. If Sonic fires at a bad angle or releases too soon, simply back up and try again from a cleaner position. You are not meant to break this obstacle with ordinary jumps or homing attacks.
Red Mountain starts outside on cliff paths with flame geysers, monkeys, springs, and rockets. Follow the camera and the main route instead of forcing speed through blind jumps. Time the flame bursts, use rockets when the path presents them, and keep your landings short and controlled on narrow ledges. Near the transition, drop through the opening that leads into the volcano interior.
Inside, the route becomes a lava-and-machinery climb where hesitation and panic are both dangerous. Move quickly when platforms are stable, but stop long enough to read each jump. The rising lava and crumbling footing punish missed inputs more than slow play. Near the end, follow the obvious path through the last hazard line and take the final rocket to the capsule. Clearing Red Mountain immediately advances the story into Tornado 2 and Sky Chase Act II.
- Destroy the caged monkey with a full Light Speed Attack to open Red Mountain.
- Clear the outer cliff route with measured jumps and timed flame crossings.
- Finish the inner lava section and break the goal capsule to reach the next story sequence.
Before you move on
- You picked up the Employee Card, unlocked the building by Twinkle Park, and cleared Speed Highway as Sonic.
- You rode the helicopter during the first Speed Highway section, then completed Goin' Down and At Dawn in that order.
- You used the fountain at the end of At Dawn to reach the goal capsule near the bell.
- You saw the next Station Square scene, returned to Mystic Ruins, and collected the Ancient Light near the bridge on the floating island side.
- You used the Light Speed Attack to destroy the caged monkey, opened Red Mountain, and cleared the stage to advance to Tornado 2 and Sky Chase Act II.
Sonic: Sky Chase Act II and Sky Deck
Red Mountain feeds directly into Sky Chase Act II. Clear the air chase, land on the Egg Carrier, let Eggman convert the ship into its battle form, and use that state to enter Sky Deck. Sonic’s route here is mostly about safe footing, not speed. After the stage, defeat E-102 Gamma, then use the bridge switch to return the carrier to its earlier layout and head back toward the ship’s broad center deck for the next story event.
Launch into Sky Chase Act II and protect the Tornado 2
When Red Mountain ends, Sonic boards Tails’s upgraded Tornado 2 automatically. This plays like the earlier Sky Chase, but the screen gets busier and mistakes add up faster, so keep your movement controlled instead of weaving wildly.
Prioritize anything directly ahead of the plane first. Small fighters and missiles that stay in the center lane are the real threat. Use lock-on bursts when enemies bunch together, then release for a quick clear. If a target is drifting off to the far side, let it go unless it is lining up a shot at you. Staying centered and preserving room to dodge matters more than chasing every enemy on the edge of the screen.
The end target is the Egg Carrier’s main cannon. You do not force this by firing nonstop into the shield. Watch the face of the gun. When the cover opens, fire into the opening. When it closes or the weapon starts charging again, move off the center line and wait for the next opening. Repeat until the cannon breaks and Sonic and Tails land on the ship.
- Use small movements, not huge swerves.
- Lock on to grouped enemies and missiles whenever the center lane gets crowded.
- Hit the Egg Carrier cannon only when its shield opens.
Use the transformation to reach Sky Deck
After landing on the deck, do not waste time searching every side path. Move around the main deck and up toward the obvious upper route. Eggman soon transforms the Egg Carrier into its attack layout. That change is the point: Sonic’s Sky Deck entrance is available while the ship is in this battle form.
Once the transformation scene ends, continue forward along the deck route to the stage entrance instead of doubling back. Think of this as the exterior assault course across the carrier itself. When you enter, Sonic is fired from a cannon onto the narrow outer structures under the ship.
- Wait for the battle-form transformation scene.
- Keep moving along the main deck route until you reach the Sky Deck door.
- Do not try to solve later bridge-switch routing before clearing the stage.
Clear the first Sky Deck section with ladders, rails, and cannon access
The first half of Sky Deck is the precision section. You are crossing thin rails and catwalks suspended under the carrier, so slow down and square Sonic up before each jump. If the camera looks awkward, stop on solid ground, adjust it, then jump. Midair camera corrections are the easiest way to turn a safe hop into a fall.
Follow the metal path from platform to platform and use ladders whenever the route offers them. This stage punishes flashy shortcut attempts. The important goal in this section is reaching the cannon platform that lets you blast away the large central gun blocking the route. If you slip, reset your line at the last safe platform or checkpoint instead of rushing the next jump out of frustration.
Treat every rail crossing as a balance check. Face the next landing fully, jump cleanly, and only start turning again after Sonic is stable on the new surface.
- Take jumps from stable footing.
- Use ladders instead of gambling on long skips.
- Reach the cannon platform and remove the blocked gun to open the route forward.
Survive the wing and deck section without getting blown overboard
Sonic’s second Sky Deck section is more open, but it is not safer. The carrier dives, gunfire tears up the deck, and sections can collapse. Listen for the warning siren. When it sounds, grab a fixed object such as a handrail or cannon base immediately. If you keep running through the dive, the wind can sweep Sonic off the ship.
Move between safe platforms in short bursts. If a ledge starts breaking or dropping, leave it right away and line up the next jump from the first stable spot you reach. Later stretches mix hanging movement and awkward camera angles, so pause whenever the view becomes unclear and correct it before committing to the next drop or leap.
Keep pushing forward until you destroy the last blocking gun and reach the goal capsule. Breaking the capsule ends Sky Deck and drops Sonic into the main internal room of the Egg Carrier.
- Grab a rail or cannon base when the siren sounds.
- Do not stand on a collapsing edge to set up a long jump.
- Break the goal capsule to finish Sky Deck.
Beat E-102 Gamma and reset the ship for the next chapter
In the internal room, take the large golden lift pod up to the main deck. A scene with Eggman, Amy, and the bird leads into Sonic’s fight with E-102 Gamma. Keep moving to avoid Gamma’s shots, then use a homing attack when he pauses or leaves himself open. Three solid hits end the fight.
Amy stops Sonic from finishing Gamma, and this opens the next navigation step. Continue up the deck until you find the side door on Sonic’s left. Inside is a small room with a button. Press it to create a ring trail, charge Light Speed Dash, and follow the rings into Eggman’s bridge.
Stand on the moving chair to slide it forward, jump off, and press the hidden floor switch underneath where the chair was. This returns the Egg Carrier to its earlier layout. Exit back outside and head toward the ship’s broad center section, the area with the large pool-like deck space and central machinery. That center deck landmark is where you should reorient yourself before the next story sequence.
- Take the golden lift pod to reach Gamma.
- Defeat Gamma in three hits and watch Amy’s interruption.
- Use the side room, ring trail, and hidden floor switch to revert the ship.
- Return toward the broad center deck area as your next landmark.
Before you move on
- Sky Chase Act II is cleared and the Egg Carrier’s main cannon is destroyed.
- The Egg Carrier transforms into battle form and Sonic enters Sky Deck from that exterior route.
- Sky Deck is completed from the opening catwalks to the goal capsule, including the dive-and-grab section.
- E-102 Gamma is defeated, Amy interrupts, and the hidden bridge floor switch is used to return the ship to its earlier layout.
- You are back near the Egg Carrier’s broad center deck area and ready to continue to the next story event.
Sonic: Chaos 6 and Lost World
From the end of Sky Deck, Sonic still has one more Egg Carrier event before the jungle temple. Trigger Chaos 6 on the ship's outer deck, defeat it by freezing the body and striking the head four times, then follow Tikal straight into Lost World. Inside the temple, the important progression is opening the three-lock snake room, reading the mirror sections as a chain of lit walkways rather than blind jumps, using the Light Speed Dash whenever a ring line spans a gap, and handling the last wall-panel chamber quickly enough to stay on the upper route to the mural exit.
Trigger Chaos 6 from the Egg Carrier deck
Pick up directly from the end of the previous chapter. After Sonic leaves the Gamma scene and enters the hidden bridge room, step on the floor switch there, then go back out to the ship's exterior. Do not wander through the pool room or try to revisit Sky Deck. Your story trigger is now on the outer deck ahead of you.
Run straight toward the broad front-center deck area. Big and Eggman are standing there, and walking up to them starts the Chaos 6 scene immediately. If nothing happens, keep moving forward onto the large open section of deck instead of stopping on the narrow walkway behind it.
- Leave the hidden bridge room and return outside.
- Head to the large forward deck, not back into the ship.
- Approach Big and Eggman to force the boss cutscene.
Freeze Chaos 6 and punish the exposed head
Chaos 6 is not a normal damage race. Stay off the broken rim as much as you can and work from the safer middle area so a tail swipe or shoulder hit does not knock you into the water or off a gap. Eggman drops freeze devices into the arena for you. Homing attack one to activate it, pick it up, and watch Chaos instead of throwing immediately.
The safest opening is the inhaling attack. When Chaos leans in and starts sucking air toward its mouth, throw the activated device into the opening, or release it late enough that the suction helps pull it in. If the freeze works, the body locks up. Immediately homing attack the head once, then get out before the body wakes back up.
If you miss the mouth, do not chase the bad throw to the arena edge. Keep running, avoid the arm sweeps and tail, and wait for the next freeze device. A missed throw only becomes dangerous if you stop moving or try to force a hit while Chaos is still active. Repeat the freeze and head-hit cycle four times to finish the fight.
- Use Eggman's freeze devices; normal attacks are not the main method here.
- Throw during the inhaling animation for the easiest freeze.
- Land one clean hit on the head after each freeze.
- Back away and reset after every hit until you have done this four times.
Follow Tikal into the temple
After Chaos 6 falls, Sonic chases Eggman and tumbles into the Mystic Ruins rainforest. The next destination is not a hidden side path and there is no statue puzzle for Sonic here. Look at the large stone temple directly ahead. It shakes, the front opening is visible, and Tikal's light moves inside.
Run straight up the approach and enter the front opening. Ignore the train, workshop, and other jungle paths. If you are unsure whether you are at the right place, the correct landmark is the giant temple entrance directly in front of Sonic after the landing scene.
- Use the temple as your immediate landmark after the fall.
- Enter the front opening opened by the story scene.
- Do not backtrack through Mystic Ruins.
Open the three-lock snake room
Lost World begins with a linear approach of corridors, enemies, and fire traps. Clear that opening carefully until you reach the circular room with water, a giant stone snake, and the locked exit. This is the first real puzzle room. Treat it as three identical setup cycles rather than trying to rush across on instinct.
From the entry side, go to the water-level button on the ledge and press it. The water rises to that level and lifts the snake higher. Jump onto the snake near its head and let it carry you around until you can reach the first blue lock switch overhead. Jump to the switch to remove one lock from the exit door.
Climb to the next higher ledge, hit the next water button, ride the snake again at its new height, and tag the second blue switch. Then repeat the same process one last time from the highest water button to reach the third switch. After all three locks are gone, the door on the far side opens near the fire enemy. Ride the snake back into position and jump through that open doorway instead of dropping into the water and trying to improvise from below.
- Raise the water from each ledge before riding the snake.
- Use the snake as your transport to each blue lock switch.
- Wait until the switch is in range; early jumps are what usually kill this room.
- After the third switch, use the snake again to reach the newly opened door.
Read the dark mirror halls correctly
The next section changes from water puzzle to navigation puzzle. In the dark mirror chambers, your job is to move the active mirror so the beam reaches the larger reflector and lights the next safe ledge. Do not spin mirrors randomly. Each room only asks you to illuminate the next piece of path, cross it, and then solve the next chamber.
Move one room at a time and confirm the newly lit platform before jumping. Between mirror chambers there are short hazard corridors, so keep your speed under control and do not let the camera rush you into blind leaps. When you reach a suspended line of rings over a gap, that is not a normal jump. Charge the Light Speed Dash and use the ring line to cross.
After the ring crossing, stay on the intended route and keep following the lit path logic. If you fall or lose your bearings, reset your position, look for the mirror that currently emits light, and rebuild the beam toward the next reflector rather than guessing at an unlit jump.
- Aim each lit mirror at the next large reflector.
- Cross only after you can clearly see the path ahead.
- Use the Light Speed Dash on the ring line over the gap.
- If you get turned around, relocate the active beam source and relight the route.
Survive the waterfall escape and finish the wall-panel chamber
The mirror route feeds into the faster final half of the stage. Ride through the water and waterfall sequence, then commit to the forward escape line when the boulder chase begins. Keep moving, use the bumpers and marked path in front of you, and do not stop to fight enemies while the camera shifts. Clean, direct movement is safer than trying to freestyle shortcuts on the edges.
At the last major chamber, step on the floor switch and watch the wall panels ahead. The switch cycles the wall layout. Keep using it until the panels form a continuous climbable route up the wall. The moment the path is connected, run up the wall and stay on the upper level instead of dropping back to the floor.
From the upper route, continue carefully through the traps and hit the next switch to create the final ring trail across the room. Charge the Light Speed Dash, cross the ring line, and follow the last passage into the mural chamber. Reaching that mural clears Lost World and advances Sonic toward the jungle base and Final Egg.
- Keep your line steady through the waterfall and boulder chase.
- Cycle the final room's floor switch until the wall route is connected.
- Run up immediately and stay on the upper path.
- Use the last Light Speed Dash to reach the mural exit.
Before you move on
- You leave the hidden bridge-room sequence, return to the Egg Carrier exterior, and trigger Chaos 6 by approaching Big and Eggman on the forward deck.
- Chaos 6 is defeated by freezing it with Eggman's devices and striking the head four separate times.
- Sonic lands in the Mystic Ruins rainforest and enters the temple by following Tikal through the front opening.
- Inside Lost World, you clear the three-lock snake room, advance through the mirror halls with Light Speed Dash ring crossings, survive the waterfall and boulder escape, and finish the wall-panel climb.
- The chapter is complete when Sonic reaches the mural at the end of Lost World and the story advances toward Final Egg.
References for this chapter
- SONIC TEAM PRESENTS SEGA
- Sonic Adventure - Guide and Walkthrough - Dreamcast - By CKohler - GameFAQs
- Sonic Adventure - Guide and Walkthrough - Dreamcast - By CChan - GameFAQs
- Sonic Adventure - FAQ and Walkthrough - Dreamcast - By Luxor - GameFAQs
- Sonic Adventure/Walkthrough — StrategyWiki | Strategy guide and game reference wiki
Sonic: Final Egg and Egg Viper
This chapter finishes Sonic's Dreamcast story in the original Sonic Adventure route. From the Mystic Ruins jungle, open Eggman's base, clear Final Egg's two stage sections, then beat Egg Viper without losing focus at the false finish. Final Egg is a hazard course more than a speed test, so protect a ring, read each moving platform before committing, and clear enemies that block narrow paths. Egg Viper is won by patience: survive the lasers first, take only the real cockpit openings, then use the spinning discs correctly when the arena starts breaking apart. Do not celebrate on the last hit. The machine can still kill Sonic after its life bar is empty.
Open the jungle base and start Final Egg
After the Lost World scenes and the past flashback, return to the Mystic Ruins jungle and head for Eggman's base near the large docking structure. Cross the bridge into the entrance hall. The sealed door ahead is controlled by six floor lights.
If the puzzle is untouched, number the panels from left to right and step on 5, then 4, then 3, then 2. That sequence opens the door quickly on the fresh layout.
If you already changed the pattern, stop brute-forcing it. Watch which lights change each time you step on a panel. Work from the outside toward the middle until all six stay lit together, then go through the opened door to enter Final Egg.
- Reach the jungle-side base in Mystic Ruins.
- Use the fresh-layout shortcut 5, 4, 3, 2 if the floor puzzle has not been altered.
- If the layout was changed, solve deliberately by tracking each panel's effect instead of guessing.
- Enter the opened door to begin Final Egg.
Final Egg first half: mechanical lanes, lasers, moving roads, and transport tubes
The first section is built around narrow catwalks, laser devices, and Egg Keeper robots. Treat it as controlled movement, not a full-speed dash. If a robot or laser unit is blocking the lane, remove it before trying to slip by. A safe Homing Attack is better than getting clipped and bounced off a platform.
On moving roads and conveyor stretches, stay near the center and use short jumps. Final Egg punishes long panic leaps. If you take damage, recover one ring as soon as the lane is safe so the next hazard does not finish you.
The transport tube area is fast, but you still need to steer calmly. Let the speed carry Sonic through, then reset your footing for the next moving-platform section instead of chaining reckless jumps. Wait for a platform to come into a readable position, then jump cleanly to the next one.
- Clear blocking enemies before forcing a narrow path.
- Stay centered on moving roads and conveyors.
- Replace long panic jumps with short controlled jumps.
- Keep at least one ring before each new hazard sequence.
Final Egg second half: lift, vertical drop, hammer rooms, fans, and the goal capsule
Ride the lift up and protect your rings through the enemy rooms. The next major trap is the long drop. Do not simply fall straight through the middle. Guide Sonic slightly to the right so you can land on the safer platform with wind machines ahead of it.
In the hammer area, wait just outside each swing and move through right after the hammer slams down. If an enemy is mixed into the pattern, destroy that enemy first so you only have one timing problem to solve.
When the fans blow across gaps, jump into the airflow and correct gently. Hard left-right steering is what usually throws Sonic off. Near the end, follow the final ring line with a charged Light Speed Dash to cross to the last path. Break the animal capsule to clear Final Egg and go straight into the boss scene.
- Ride the lift and keep your ring safety through the enemy chambers.
- Steer slightly right during the long drop for the safer landing.
- Cross hammer rooms after each slam instead of racing the swing.
- Use gentle steering in the fan section.
- Take the final Light Speed Dash and break the goal capsule.
Egg Viper early cycles: dodge first, then take the offered opening
The fight starts on long floating bridge sections above a bottomless drop. Stay mobile and watch Eggman's laser line before you jump. Side movement solves most of the opening fire. Random extra jumping is more dangerous than the attack itself because a bad landing means instant death.
When Eggman comes close and pauses to taunt, take the direct cockpit opening with a Homing Attack. If you miss, do not force a second jump from bad footing. Land, rebuild your position on the bridge, and wait for the next attack cycle.
Soon after that, Egg Viper begins mixing in a tail approach. When the green targets line up along the tail, use measured Homing Attacks up the chain and finish on the cockpit. Do not mash. Pressing too fast is the common reason Sonic shoots past the targets and falls. Keep one ring whenever possible by using the rings at the bridge ends only during safe moments.
- Use side movement to avoid the opening lasers.
- Take the direct cockpit hit only when Eggman pauses near the bridge.
- Use the green tail targets carefully and slowly when that opening appears.
- Recover a ring during calm moments instead of chasing full health in live fire.
Egg Viper late cycles: shrinking arena, spinning disc platform attacks, and the final escape
The full battle takes seven successful cockpit hits, and the dangerous part starts when Egg Viper begins breaking away the bridge sections. Once the arena shrinks, every missed opening matters more because you have less safe ground left for the next cycle.
When Eggman retreats and fires the spiked spinning discs, do not treat them only as hazards. Jump onto the flat top of a disc as it reaches you. Keep your balance on it and let it carry Sonic back toward Eggman. As the disc returns, use a Homing Attack from that moving platform into the cockpit. That disc ride is the intended late-phase attack method. If you hesitate too long, the opening closes and you lose more floor on the next exchange.
If a disc knocks you back or you mistime the jump, recover by claiming the nearest ring on the remaining bridge, then reset to the middle of the safest intact section and watch the next pattern. Do not stand at a broken edge waiting for the next disc. Give yourself room to jump onto it deliberately.
After the seventh hit empties the life bar, do not celebrate yet. Egg Viper still makes a last crashing lunge toward Sonic's current platform. The moment you land from the final attack, move to another intact section and wait there. Only when the crash finishes and the cutscene takes over is the boss truly beaten. Watch the ending, allow the save to complete, and Sonic's story will be marked clear.
- Expect the late phase to become stricter as bridge sections disappear.
- Jump onto the flat top of a spinning disc and ride it back toward Eggman.
- Use the disc's return trip as your launch point for the cockpit Homing Attack.
- After a mistake, recover a ring and reset on the safest intact section.
- After the last hit, move away immediately to avoid the final crash.
- Watch the ending and confirm the save so Sonic's story is complete.
Before you move on
- The jungle base door is opened and Sonic enters Final Egg.
- Final Egg is cleared by reaching and breaking the goal capsule.
- Egg Viper is defeated by using the early cockpit and tail openings, then the late spinning-disc platform method.
- Sonic survives the post-defeat crash and the ending scenes play.
- The game records Sonic's story as complete on the save file.
References for this chapter
- SONIC TEAM PRESENTS SEGA
- Sonic Adventure - Guide and Walkthrough - Dreamcast - By CChan - GameFAQs
- Sonic Adventure - Guide and Walkthrough - Dreamcast - By CKohler - GameFAQs
- Sonic Adventure - Walkthrough - Dreamcast - By Terminal_Omega - GameFAQs
- Sonic Adventure Release Information for Dreamcast - GameFAQs
Tails: Windy Valley, Casinopolis and Ice Cap
In the original Dreamcast Sonic Adventure, Tails's early Adventure Mode is a string of races against Sonic broken up by the same field travel and boss scenes seen from Tails's side. The required order is Egg Hornet, Windy Valley, Casinopolis, Ice Cap, then the Knuckles fight and Chaos 4. Use Propeller Flight in short, planned bursts to shorten the route and land still running. Do not try to hover through whole stages. The Jet Anklet from Station Square's sewer is optional and can help, but nothing in this chapter requires it.
Race basics and the trip to Mystic Ruins
Tails wins these stages by reaching the goal before Sonic, so your real weapon is route quality. Jump and start Propeller Flight only when it lets you cross a gap, climb to a higher lane, or fix a bad jump. End the flight early so Tails touches down with forward speed instead of dropping straight down and losing traction.
At the start of Tails's story, follow the opening scenes through Station Square, pass through the hotel, and reach the train station. Ride the train to Mystic Ruins and head up the stairs toward Tails's workshop. If you already collected the Jet Anklet from the sewer behind Twinkle Park, it helps your air time, but it is an optional convenience rather than a story gate.
- Use flight to shorten the route, not to stay in the air as long as possible.
- Land running whenever possible.
- Take the train from Station Square to Mystic Ruins before looking for the first stage gate.
Egg Hornet at the workshop
Near the workshop, Eggman appears in the Egg Hornet. Do not swing wildly while it is circling above you. Keep moving until it drops low enough to give you a real opening.
When the machine descends and exposes a safe attack chance, jump in with Tails Attack, score one hit, and move back out. Treat it as a repeatable punish window. Taking one clean hit per opening is faster than eating missiles or body damage while trying to force extra attacks.
After the fight, Eggman steals Tails's Chaos Emerald and leaves. Now go right up to the workshop entrance. The green Wind Stone is beside Tails's workshop. Pick it up and carry it toward the lake. Before the waterfall and lake area, there is a cave in the cliff with a pedestal and rising wind. Set the Wind Stone on that pedestal to open Windy Valley.
- Beat Egg Hornet by hitting only during its low opening.
- Pick up the Wind Stone beside the workshop.
- Carry the Wind Stone to the cliffside cave pedestal near the lake entrance.
Windy Valley race route
Tails does not run Sonic's full Windy Valley here. His race uses the final airy section, so do not expect the tornado interior. Think of this stage as a chain of floating roads, gaps, and air routes where clean landings matter more than stunts.
From the start, run the straightest line you can and look one platform ahead. If Sonic follows the full curve of a suspended path, you can often cut across with a short flight and land on the next solid piece of road. The green dash rings help, but only take them if they send you cleanly into the next lane instead of into a bad angle.
Stay centered on narrow air roads and correct small mistakes with a quick hop and glide, not a long panic hover. Every time you see separated pieces of track, ask whether a brief flight can skip the bend and still let you land in control. If the answer is no, keep running. Smooth, low-risk cuts beat desperate airborne gambling here.
- Treat Windy Valley as the aerial race section only.
- Use short flights to cut bends and gaps.
- Prioritize clean landings over maximum airtime.
Return to Station Square and clear Casinopolis
After Windy Valley, take the train back to Station Square. Go through the opened route from the station area toward the casino district. Tails opens Casinopolis differently from Sonic. Fly up to the big button on the casino front and hit it to open the entrance.
Inside, Tails's version is a sewer race. This is not Sonic's 400-ring vault mission, so do not stop to grind rings or treat the stage like a pinball objective. Push forward through the tunnel route under the casino and race Sonic to the Chaos Emerald.
The main danger is losing speed in cramped passages. Stay off the walls, steer into turns early, and use flight only when it clearly shortens a broken section or bad lip in the floor. In the windy tunnel stretches, keep your movement compact and aimed down the lane. Touching down cleanly out of each bend matters more than floating above everything.
- Open the casino by flying to the front button.
- Run Tails's sewer race, not Sonic's vault objective.
- Keep speed by hugging the lane and avoiding wall scrapes in tight turns.
Carry the Ice Stone and enter Ice Cap
When you leave Casinopolis, Eggman ambushes Sonic and Tails, gasses them, and steals the Chaos Emerald. After the scene, go into the alley next to the casino and pick up the blue Ice Stone. Carry it back to the train and ride to Mystic Ruins.
Once you arrive, the cliffside near the lake has opened into a new cave. Carry the Ice Stone inside. You will find an upward wind column like the Windy Valley entrance, so ride that current up, continue through the next cave, and place the Ice Stone on the icy pedestal that blocks the route forward.
Go through the ice cave beyond it and reach the ladder on the far side of the small pool to start Ice Cap. If Ice Cap does not open, the usual problem is simple: you either left the Ice Stone behind in Station Square or never placed it on the pedestal in the second cave.
- Pick up the Ice Stone from the alley after the ambush.
- Ride the train back to Mystic Ruins while carrying it.
- Use the new cave, the upward wind column, and the icy pedestal to unlock Ice Cap.
Ice Cap snowboard race, then Knuckles and Chaos 4
Tails's Ice Cap story stage is the snowboard race, so this section is about reading the slope, not fighting. Keep your board lined up early for the next opening. Wide, calm steering saves more time than last-second swerves. When the course gives you ramps or drops, aim for the lane you want to land in rather than chasing unnecessary airtime.
Watch for trees, walls, gates, and narrow snow corridors. If you clip something, straighten first and recover your line before trying another aggressive turn. The race is usually lost by chaining one collision into another, not by a single small bump.
After you clear Ice Cap, go back toward the Mystic Ruins lake and waterfall area. This is where the next required story scene happens. Knuckles attacks here, and you must fight him now, after Ice Cap, not before it. He is hard to hurt from the front, so circle and strike from the side or back with Tails Attack or a jump-in hit.
After that clash, Eggman feeds the dropped Emeralds to Chaos and creates Chaos 4. Fight Chaos 4 on the nearby water. Stay mobile on the leaf platforms, avoid overcommitting, and attack only when Chaos rises and exposes its head. If you miss a jump or fall into the water, recover onto a leaf and reset your position instead of forcing a bad attack. Once Chaos 4 falls, the Egg Carrier scene pushes Tails toward the workshop and Sky Chase Act I, which is the next chapter of his story.
- Beat Sonic in Ice Cap's snowboard race before returning to the lake.
- Fight Knuckles only after Ice Cap is complete.
- Defeat Chaos 4 by waiting for exposed-head openings from the leaf platforms.
- After Chaos 4, the next mandatory destination is the workshop for Sky Chase Act I.
Before you move on
- You rode the train to Mystic Ruins, defeated Egg Hornet near Tails's workshop, and used the Wind Stone beside the workshop to open Windy Valley.
- You beat Sonic in Tails's Windy Valley race by using short flight shortcuts in the aerial section rather than searching for a tornado interior route.
- You returned to Station Square, opened Casinopolis by hitting the front button, and cleared Tails's sewer race instead of Sonic's 400-ring vault objective.
- You picked up the Ice Stone from the alley after the ambush, carried it by train to Mystic Ruins, used the new cave and wind column, and opened Ice Cap at the icy pedestal.
- You beat Sonic in the Ice Cap snowboard race before returning toward the lake and waterfall.
- Only after Ice Cap, you fought Knuckles, defeated Chaos 4, and advanced Tails's story to the point where Sky Chase Act I is next.
Tails: the Tornado, Sand Hill and Sky Deck
This chapter covers the middle of Tails's original Dreamcast story after Chaos 4. In order, you must launch Sky Chase Act I from Tails's workshop, survive the crash, track Froggy into the Mystic Ruins jungle, open and clear the mandatory Sand Hill sub-game, finish the required playable flashback by collecting the Rhythm Badge before speaking to Tikal, return to the workshop to power Tornado 2 with the recovered Chaos Emerald, clear Sky Chase Act II, beat Sonic through Tails's Sky Deck race, then use the yellow lift pod to return to the Egg Carrier's outer deck, defeat E-102 Gamma, and escape with Amy as the carrier loses altitude. Sky Chase and Sand Hill are required Adventure-mode progress. High scores in those sub-games are optional replay goals for later.
Launch Sky Chase Act I from Tails's workshop
After defeating Chaos 4 at the Mystic Ruins lake, do not head into the jungle yet. Go straight up the stairs to Tails's workshop. That scene is the next story trigger for Tails in the original Dreamcast version.
Sky Chase Act I is a required mini-game in Adventure mode. Treat it as a survival clear, not a score run. Keep the Tornado near the center so you can react to the next wave instead of chasing enemies out to the edges.
Use rapid fire on enemies already lined up ahead of you. Save lock-on bursts for clusters or sturdier targets so you get damage without drifting off course. If the screen fills up, protect the plane first and let a stray target go. Clearing the route matters more than your point total.
- Go to Tails's workshop immediately after Chaos 4.
- Start Sky Chase Act I from the workshop event.
- Prioritize survival over score.
Crash in Mystic Ruins and open the Sand Hill route
After the Tornado is shot down and the dream scene ends, Tails wakes up alone beside the Mystic Ruins lake. Ride the mine cart beside the water into the jungle. When you get off, drop down and keep to the left path.
Tails spots a Chaos Emerald on the path, but Froggy grabs it and disappears into the cave ahead. Follow him inside and look up instead of searching the floor. Fly onto the top of the large echidna statue in the cave. Landing on its top surface clears the sand blockage and opens the route onward.
If the passage does not open, you probably touched the side or landed too low. Back off, line up again, and make sure Tails fully stands on the statue's top before moving on.
- Ride the mine cart from the lake to the jungle.
- Take the left path to the Froggy scene.
- Land on the top of the echidna statue to open Sand Hill.
Clear Sand Hill, then finish the flashback the right way
Sand Hill is another mandatory story sub-game. For story progress, the goal is simply to finish the course. Do not worry about posting a great score on this first clear. Keep your steering small and steady, stay centered when the route is readable, and only jump when a ramp or obstacle clearly calls for it.
If you start sliding toward a wall or ruin, skip the next speed gate if needed and recover your line first. One clean correction saves more time than a panic turn that sends you into another obstacle. Reach the end and Tails recovers the Chaos Emerald from Froggy.
The next playable flashback is also required. It does not end automatically. From the starting point in the ancient echidna settlement, climb the low structure to the left of where you arrive, then angle right and pick up the Rhythm Badge beside the wall and pillar. This pickup is the real progression trigger here. After you collect it, go to the front of the main temple and approach Tikal to trigger the conversation and return to present-day Mystic Ruins.
The Rhythm Badge improves Tails's attack by allowing continuous tail strikes when you hold the attack button, but using that move is not required just to advance. Collecting the badge is the important part.
- Finish Sand Hill instead of chasing score.
- Recover the Chaos Emerald from Froggy.
- In the flashback, collect the Rhythm Badge before approaching Tikal.
Return to the workshop and create Tornado 2
Back at the Mystic Ruins lake, Big rushes after Froggy, but your route is back to Tails's workshop. Head up the stairs and approach the entrance to trigger the next event.
Tails uses the recovered red Chaos Emerald to power his upgraded plane, Tornado 2. Stay with the scene until the launch begins. This is the required gate to the second pursuit of the Egg Carrier.
- Return from the lake area to Tails's workshop.
- Trigger the Tornado 2 scene.
- Begin Sky Chase Act II.
Clear Sky Chase Act II and reach Sky Deck
Sky Chase Act II is mandatory and denser than the first flight. Keep the Tornado centered, clear groups in front of you, and do not drift too far sideways for one target. Losing position usually costs more health than the missed enemy would.
Near the end, pour fire into the center of the Egg Carrier when the opening is available, then stay ready for the counterattack. Survive the finish and Sonic and Tails crash-land on the carrier.
Once you can move again, head up the obvious deck route. Eggman transforms the ship into attack mode as you climb. Keep going upward to the Sky Deck entrance rather than wandering the carrier for side activities.
- Stay centered in Sky Chase Act II and clear grouped targets.
- Survive the attack on the Egg Carrier's main gun.
- Climb the deck and enter Sky Deck.
Beat Sonic through Tails's Sky Deck race
Tails's version of Sky Deck is a race to the capsule, so open fast but stay clean. Move around the large launcher at the start and get onto the forward route immediately. Standing still in exposed spots only loses time and rings.
Use Propeller Flight for short, controlled shortcuts. Glide to obvious booster or dash-ring lines, then land early and keep running. Do not try to stay airborne for long stretches. Tails tires if you overuse flight, and a bad drop costs the race faster than a modest shortcut saves it.
On narrow platforms, commit to a landing and move at once. If a plate starts to drop, jump to the next safe one instead of waiting for the camera to settle. In the last stretch around the four corner towers, keep following the clean forward path and take the dash-ring lines that keep your speed up. Tails's Sky Deck goal capsule is just beyond the fourth tower.
- Beat Sonic to the Sky Deck capsule.
- Use short flight shortcuts, not long hovers.
- Clear the four-tower finish section.
Use the yellow pod, defeat Gamma, and escape the falling carrier
After clearing Sky Deck, do not end the chapter yet. Tails is now inside the Egg Carrier. Take the yellow lift pod back up to the outer deck. This triggers the next required scene with Eggman, Amy, and the bird.
Eggman takes the Chaos Emerald from the bird and sends E-102 Gamma after Tails. Stay mobile for this fight. Do not charge straight through Gamma's fire. Circle or sidestep to keep his shots from pinning you down, wait for a safe opening, then go in for a single Tails Attack and back out again. Reset your spacing after each hit instead of mashing for extra damage. Three clean hits finish the fight.
If you get clipped, do not force a revenge attack from point-blank range. Pull away, gather yourself, and make Gamma turn before you re-enter. Tails wins more safely by choosing short openings than by trying to overpower the boss.
After the third hit, Amy stops the fight and explains that Gamma helped her earlier. Gamma short-circuits instead of pressing the attack. Sonic tells Tails to carry Amy to safety while he goes after Eggman. Lift Amy away with Tails's tails, watch the Egg Carrier lose altitude, and follow the transition back to Station Square. That crash escape is the real end of this chapter.
- Take the yellow pod back to the outer deck after Sky Deck.
- Defeat E-102 Gamma with three safe Tails Attack hits.
- Watch Amy's interruption, Gamma's shutdown, and Tails's escape with Amy to Station Square.
Before you move on
- You launched and cleared Sky Chase Act I from Tails's workshop after Chaos 4.
- You rode the mine cart into the jungle, opened Sand Hill by landing on the echidna statue, and finished the sub-game.
- You recovered the Chaos Emerald from Froggy and completed the flashback by collecting the Rhythm Badge before speaking to Tikal.
- You returned to the workshop, powered Tornado 2 with the red Chaos Emerald, and cleared Sky Chase Act II.
- You entered Sky Deck, beat Sonic through Tails's race section, and reached the goal capsule.
- You used the yellow pod back to the outer deck, defeated E-102 Gamma, saw Amy stop the fight, and carried Amy away as the Egg Carrier fell toward Station Square.
Tails: Speed Highway and Egg Walker
This chapter covers the original Dreamcast release of Sonic Adventure and begins exactly where Tails's previous chapter leaves off. After Sky Chase Act II, Sky Deck, the fight with E-102 Gamma on the Egg Carrier deck, and Amy's interruption during the escape scene, the story returns to Station Square. Eggman realizes the missile did not finish the city, heads for it himself, and blasts open the Speed Highway entrance on the casino side of town. Go straight there. Tails's final Action Stage is a race to the missile through Speed Highway's elevated opening section only, followed immediately by the Egg Walker boss fight. You do not play Sonic's later skyscraper descent or the street-level finish here.
Go straight from the return scene to Speed Highway
Once the deck scene is over and the story places Tails back in Station Square, do not roam for a new field item. The final trigger is already active. Eggman has opened the route himself while rushing to the dud missile, so your destination is the broken Speed Highway entrance on the casino side of the city.
This is a race stage, not a fight. Rings still matter because one ring lets you survive a hit, but the clear condition is simple: reach the missile before Eggman. If you take contact from Eggman's craft, recover forward immediately instead of trying to retaliate. Losing momentum costs more here than missing one attack opportunity, because there is nothing to attack until the boss battle afterward.
- After the Egg Carrier return scene, head straight to the newly opened Speed Highway entrance.
- Do not look for Sonic's Employee Card or any older Station Square trigger.
- Start the stage expecting a race to the missile, not a full Sonic-style level clear.
Win Tails's Speed Highway race
At the start, jump and fly right as early as the course allows. Tails's key shortcut is the road on the right side rather than the more direct-looking line ahead. Both major Dreamcast walkthroughs point to this opening move because it gets Tails onto a faster lane and keeps Eggman from gaining free distance while you sort yourself out.
After that first shortcut, stay on solid roadway whenever possible and let the stage's speed panels do the work. Tails can fly, but long hovering is slower than clean running and makes bad landings more likely. Use short bursts of flight only to cross a broken gap, trim a corner, or correct a landing onto the next road piece. If you see a line of dash panels or a clear airborne shortcut that lands directly back onto the road, take it. If a flight path leaves you hanging over open air with no certain landing, stay grounded instead.
This race ends in Speed Highway's elevated section at the missile itself. You are not going into the glass-building descent, the vertical run down the tower, or the dawn streets from Sonic's route. Keep chaining roadway speed, recover from bumps by moving back to the next clear lane instead of stopping, and touch the missile before Eggman does.
- Take the opening right-side road shortcut.
- Favor running and dash panels over long hovering.
- Use flight in short bursts for gaps and landing fixes only.
- Finish by reaching the missile in Tails's elevated Speed Highway route.
Read Egg Walker's first openings correctly
The boss fight starts right after the race. Keep at least one ring on hand and fight from a comfortable middle distance so you can read the legs. Egg Walker pressures you with missiles and close-range fire, but the real trigger for progress is the stomp pattern. Do not rush under the body and swing at random. Wait for a foot to slam down, jump the shockwave it creates, and watch for the glowing weak point on that foot.
For the first two openings, one disabled foot is enough. After a stomp, hit the glowing foot with Tails Attack. When Egg Walker loses balance, Eggman's cockpit drops within reach. Jump in, hit the cockpit once, and back away. Treat every opening as a single hit window. If you miss the cockpit hit or get stuck too far under the boss, retreat, gather any nearby rings, and reset your spacing before the next stomp instead of trying to mash through the flames and missiles.
- Stay at medium range so you can see which foot stomped.
- Jump every shockwave before attacking a weak point.
- Break the glowing foot, then hit the cockpit once.
- Back off after each cockpit hit rather than staying under the walker.
Handle the two-foot and three-foot phases
After two successful cockpit hits, the fight changes. One broken foot is no longer enough. Egg Walker now requires two vulnerable feet in the same cycle before the cockpit lowers again. Keep circling, keep jumping each shockwave, and strike each glowing foot as it becomes available. Do not sprint toward the cockpit after the first broken foot, because Eggman will not lower yet. Only after the second disabled foot does the cockpit drop for your third hit. The same rule applies for the fourth hit as well.
After four cockpit hits, the final phase begins. Now you must break three glowing feet in one cycle before Eggman comes down for the last time. This is the important late-fight escalation. Do not wait for only the last glowing foot and do not assume the earlier one-foot opening still works. Survive the full sequence: jump a stomp shockwave, hit the glowing foot, reposition, repeat for the second, then repeat for the third. Once the third required foot is disabled, land one more cockpit hit to finish the battle. Five total cockpit hits defeat Egg Walker.
If you get clipped by bombs, missiles, or flame during these later cycles, recover your spilled rings if they are close and safe to grab, then reset. The biggest mistake is panicking under the boss after taking damage. Open ground and ring control are worth more than forcing a low-percentage hit.
- For cockpit hits three and four, disable two glowing feet in one cycle first.
- For the final opening, disable three glowing feet before attacking Eggman.
- Count five cockpit hits total to end the fight.
- If damaged, recover rings and spacing before re-engaging.
Watch the ending and save the clear
When Egg Walker goes down, let the ending scenes finish. Tails's clear is what matters for unlocking the final story later, so do not power off early. Save when the game offers it.
Your clean completion standard for this chapter is straightforward: you used the story-opened entrance in Station Square, won Tails's elevated Speed Highway race to the missile, then beat Egg Walker by respecting the stomp cycles instead of forcing cockpit hits. Once the save is written, Tails's story counts toward Super Sonic.
- Watch Tails's ending through to the save prompt.
- Save the file so the story clear is recorded.
- Confirm that Speed Highway and Egg Walker are no longer unfinished on this file.
Before you move on
- You resumed Tails's story after the Gamma fight, Amy interruption, and return from the Egg Carrier, then entered Speed Highway through Eggman's newly opened route in Station Square.
- You beat Eggman to the missile by taking the early right-side road, using short flight corrections, and staying on the elevated highway section instead of expecting Sonic's later segments.
- You defeated Egg Walker with five cockpit hits total: one-foot openings for the first two hits, two-foot openings for the next two, and a three-foot opening for the last hit.
- You watched the ending and saved, so Tails now counts as a completed story for unlocking Super Sonic.
Knuckles: radar hunting in Station Square
Knuckles begins in Station Square and immediately plays two treasure hunts, not goal-ring speed stages. First is Speed Highway, then Casinopolis. In both, you must recover three Master Emerald shards whose exact placements can change between runs. The original Dreamcast release gives Knuckles the generous three-shard radar, so use it constantly, search by height instead of wandering, and treat Tikal hint balls as backup when a district stops making sense. After Casinopolis, finish the brief echidna flashback, follow Eggman through the hotel elevator, and beat Chaos 2 by punishing real openings instead of punching into its guard.
Open City Hall and use the radar correctly
From Knuckles's start in Station Square, head to the plaza where Sonic fought Chaos 0. The entrance to City Hall is blocked by loose barriers. Punch the barriers into the doors to break them open, then enter to start Speed Highway.
Before you chase anything, understand the radar. In this original Dreamcast version, all three remaining shard icons can react at the same time. Each icon belongs to one shard, and the signal grows more urgent as you get closer, but it does not tell you whether the shard is above, below, inside a container, or hidden in scenery. When a signal heats up, stop and test the area vertically instead of dashing away.
Use a disciplined sweep. Clear one height band at a time: street level first, then mid-level ledges and signs, then rooftops. If you lose the trail, touch a Tikal hint ball for a clue about a landmark or room, then finish searching that specific zone before changing districts.
- Break open City Hall from the Chaos 0 plaza.
- Read the three radar icons as three separate shard trackers.
- Search by floors and rooftops, not by random glides.
Search Speed Highway by ground, mid-levels, and rooftops
Knuckles searches the dawn city section of Speed Highway rather than Sonic's full run. Start with the open streets, sidewalks, traffic islands, and the bases of signs. Make a complete lap at ground level first so you can rule out easy enemy, corner, and street-side placements before climbing.
Next, work the middle height. Climb building walls and inspect awnings, narrow ledges, sign tops, and the raised road pieces that cross the block. If the radar suddenly strengthens near a billboard or elevated roadway, check both the platform you can see and the wall or roof just above it. A shard can be only a short climb higher than the camera suggests.
Finish with a rooftop circuit. Once you reach the high buildings, stay up there for a full pass and glide between roofs instead of dropping after every check. That makes it much easier to separate a true roof signal from one coming from the street below. When you grab the third shard, Knuckles returns to Station Square automatically.
- Clear the streets before climbing.
- Inspect signs, ledges, and raised road sections second.
- Do one committed rooftop pass before abandoning the upper level.
Open Casinopolis from the hotel side
Back in Station Square, go through the hotel lobby and use the double doors that lead to the casino district. You will see a ring trail running up the side of the movie theater. Climb up until you are standing on the Chao in Space poster, then glide across to the large switch above the casino entrance. Hit it to unlock Casinopolis and go inside.
Do not search for Knuckles's shards in the sewers here. Those routes belong to Sonic and Tails. Knuckles's hunt is in the casino proper, with the large main hall, the upper walkways, and the themed landmark areas connected to them.
- Reach the casino side through the hotel.
- Climb to the Chao in Space poster.
- Glide to the switch and open Casinopolis.
Sweep Casinopolis without relying on fixed spawns
Begin on the main floor. Walk a full loop around the fountain, the open carpeted floor, the vault side, and the giant golden Sonic statue in the center. Watch the radar as you circle each landmark rather than sprinting through once. If the signal peaks around the statue, inspect the base closely. A shard can be hidden inside it, so punch the cracked area on the statue's foot if the radar says the source is in there.
After the floor sweep, move upward on purpose. Use the spring and Knuckles's climbing and gliding to reach the upper routes, then search the balconies, high walkways, lion area, and pirate-ship side. Strong signals in this stage are often height problems, so compare the radar on the lower floor, then again directly above it, before deciding the clue was false.
If a whole side goes cold, change floors instead of repeating the same lap. Shards can appear in enemies, props, or awkward decorative spots, so treat the fountain, vault, statue, lion, and pirate ship as search zones, not guaranteed answers. Once you collect the third shard, the story immediately shifts to an echidna flashback.
- Sweep the fountain, vault side, and golden Sonic statue first.
- Check the cracked statue foot if the radar points into it.
- Use the spring, climbs, and glides to clear the lion and pirate-ship upper routes.
Finish the flashback and defeat Chaos 2
In the flashback, walk across the village toward the far side to trigger the scene with Tikal and the elder. When Knuckles returns to present-day Station Square, Sonic and Tails are lying outside near the casino after Eggman gassed them. Ignore them for now and go straight into the hotel.
Inside, you will see Eggman ride the right elevator while holding the Chaos Emerald. Take that elevator to reach Chaos 2. Do not stand in front of the boss and trade punches. Chaos 2 can guard frontal pressure and punish greedy attacks.
Keep moving in a loose circle with at least one ring in reserve if possible. Bait a committed attack such as its arm strike, sidestep, then hit from the side or behind while its defense is open. When the head is clearly exposed during its recovery, step in for a fast punch or Dash Punch, then pull back immediately. If you get hit and lose your rings, grab one first, reset your spacing, and wait for another opening instead of forcing damage through the guard. Winning this fight advances Knuckles's story to Mystic Ruins.
- Walk through the flashback village to finish the scene.
- Take the hotel's right elevator after spotting Eggman.
- Punish Chaos 2 only after a committed attack or exposed-head opening.
Before you move on
- You opened City Hall from the Chaos 0 plaza and cleared Knuckles's Speed Highway by collecting all three shards.
- You opened Casinopolis from the Chao in Space poster route and searched the casino hall and upper areas without relying on sewer directions or fixed spawns.
- You completed the echidna flashback after Casinopolis and used the hotel's right elevator to reach Eggman.
- You defeated Chaos 2 by waiting for a safe side, rear, or exposed-head opening, and the story advanced toward Mystic Ruins.
References for this chapter
- SEGA SONIC ADVENTURE INSTRUCTION MANUAL Pdf Download | ManualsLib
- Console And Controller Operation; Basic Controls - Sega Sonic Adventure Instruction Manual [Page 2] | ManualsLib
- Sonic Adventure - Guide and Walkthrough - Dreamcast - By CKohler - GameFAQs
- Sonic Adventure - Walkthrough - Dreamcast - By Terminal_Omega - GameFAQs
- Sonic Adventure - Guide and Walkthrough - Dreamcast - By CChan - GameFAQs
Knuckles: Red Mountain and Lost World
In the original Dreamcast Sonic Adventure, Knuckles opens Red Mountain by getting the Shovel Claw, digging up a detonation switch, and carrying that same switch to the stage gate. His Red Mountain hunt stays in the outdoor mountain section only. Afterward, he fights Sonic, defeats Chaos 4 at the lake, rides into the jungle, places both echidna statues at the rear of the temple, and searches Knuckles's version of Lost World in the tall final chamber rather than Sonic's puzzle rooms.
Get the Shovel Claw and carry the monkey switch to Red Mountain
After Chaos 2 and the flashback, return to Mystic Ruins and go into the valley beside Tails's workshop. Enter the cave there, then go into the smaller cave chamber that is not the mine cart route. The gate closes behind Knuckles, so this is the intended story stop.
Pick up the Shovel Claw in that room. This is the required upgrade that gives Knuckles his digging move. Use it on soft ground and on the marked spot with Eggman's symbol rising and falling in the next chamber. Dig there to uncover the Monkey Destruction Switch.
Carry the switch back to the caged monkey in the first room and place it underneath the cage to blast it open and release the exit. Pick the same switch up again. Do not leave it behind. Take it through the opened cave route by the station side, ride the wind up toward the Angel Island side, and follow the path to Red Mountain's gate. A second caged monkey blocks the entrance. Set the switch below that cage to destroy it and unlock Red Mountain.
- Collect the Shovel Claw before trying to progress.
- Dig at the marked Eggman-symbol patch to uncover the switch.
- Use the switch on the first monkey cage, then pick it up again.
- Carry the same switch to Red Mountain's outer gate and destroy the second cage.
Search Red Mountain as layered outdoor cliffs, not a straight run
Knuckles hunts only the first outdoor section of Red Mountain. Do not expect the interior volcano rooms from Sonic or Gamma. Treat the whole stage as a loop of cliffs, bridges, rockets, lava pools, wall faces, and buried shard spots.
Start with the entrance plateau and the first narrow bridges. Check the low ledges beside the main path before taking the first rocket. If one radar icon turns active, stop and compare height immediately. On this stage, a weak signal often means the shard is on the wall above you or on a shelf directly below the bridge you just crossed.
After each rocket ride, pause on the landing instead of charging ahead. Look at the cliff rim behind the landing point, then at the lava-side shelves and any flat dirt patches nearby. Knuckles's new digging move matters here because some shard placements are buried rather than visible.
Finish by sweeping the upper exterior ridges and dead ends near the highest rock paths. If the radar gets hotter while you climb, search the upper band thoroughly. If it cools off, drop back one level and check the ledges under the current route. Climbing and gliding let Knuckles cut across gaps quickly, so use height changes to narrow the search instead of circling the whole map blindly.
- Search the opening bridges and cliff shelves before riding upward.
- Recheck the radar after every rocket and major height change.
- Inspect lava-side ledges, wall faces, and flat diggable ground.
- Stay in the outdoor mountain section; Knuckles does not enter the inner volcano route here.
Beat Sonic, then handle Chaos 4 at the lake
When Red Mountain ends, Knuckles appears back on the Angel Island side. Go through the cave toward the main lake and waterfall area to trigger the next story scenes. Sonic is first.
Against Sonic, keep moving and do not swing wildly. Let him commit to a homing attack or spin movement, sidestep the approach, then punish his recovery with a punch combo. If you try to challenge him head-on while he is attacking, you waste openings. Land clean hits and reset your position rather than chasing him into another attack.
After the cutscene, Chaos 4 forms in the lake. Watch the water and avoid rushing at the body while it is still liquid. The safe time to strike is when Chaos exposes its head above the surface. Jump, glide, or punch into the head, then back off before the next wave or body sweep. If you get knocked into the water, swim back to solid footing right away and wait for the next exposed-head opening instead of flailing at the body.
- Return to the lake after Red Mountain to trigger the next fights.
- Bait Sonic into recovery, then punch him cleanly.
- Attack Chaos 4 only when the head is exposed.
- Recover to stable footing if you fall into the water.
Ride to the jungle and open Lost World with both statues
After Chaos 4, take the mine cart beside the lake to the jungle side of Mystic Ruins. On the arrival ledge, pick up the gold statue near Tikal's spirit. Carry it to the rear of the temple and place it on the matching gold pedestal.
That is only half of the unlock. From the temple's west side, follow the path until you reach a small circular clearing with a dig spot in the middle. Dig there to uncover the silver statue. Carry it back to the rear of the temple and place it on the matching silver pedestal.
When both statues are in place, the floor entrance between them opens. That rear floor opening is Knuckles's route into Lost World. The optional Fighting Gloves are on a ledge above Big's house in the jungle, but they only improve Knuckles's charged attack. They do not replace the Shovel Claw and they are not required to open Lost World.
- Take the gold statue from the mine cart arrival ledge.
- Place the gold statue on the gold pedestal at the back of the temple.
- Dig up the silver statue from the circular clearing west of the temple.
- Place the silver statue on its pedestal to open the rear floor entrance to Lost World.
Search Lost World's tall chamber from high to low
Knuckles does not play Sonic's snake room, water-switch sequence, or mirror-light corridor here. His Lost World hunt is the tall final chamber reached from the rear floor entrance. Search this version by height bands and connected side passages.
As soon as you enter, look upward and claim the highest easy routes first. Climb the outer walls and check the upper ledges, the tops of the side structures, and the small temple-like section visible across the chamber. Starting high is faster because it tells you immediately whether a flashing radar icon belongs to the top tier or to something far below.
After clearing the top band, work down through the middle balconies and any side passages branching off the main chamber. Each time the radar grows stronger, test one height change at a time. Climb one ledge higher, or drop one shelf lower, and watch which shard icon reacts. The Dreamcast radar tracks all three remaining shards, so use the individual icon that is flashing hardest to decide which route to keep following.
Clean up the bottom level last. Check around pillars, enemies, item boxes, and any obvious diggable ground when the radar is strong but nothing is visible. If a shard seems close but hidden, stop gliding in wide circles and search the nearest wall base, corner platform, or buried patch before moving to a different floor. Once all three shards are collected, Knuckles's Lost World clear is complete.
- Use the rear floor opening; this is Knuckles's Lost World route.
- Search the chamber from upper ledges downward instead of starting on the floor.
- Use separate radar icons and height changes to narrow each shard.
- Check side passages, boxes, enemies, and dig spots before abandoning a hot signal.
Before you move on
- You collected the Shovel Claw, dug up the Monkey Destruction Switch, and used that switch to open both monkey cages on the route to Red Mountain.
- You found all three Red Mountain shards in the outdoor cliff and rocket section without relying on Sonic's inner volcano path.
- After Red Mountain, you returned to the lake, beat Sonic, beat Chaos 4 by punishing exposed-head openings, and took the mine cart into the jungle.
- You placed the gold statue and silver statue at the back of the temple, opened Lost World's rear entrance, and collected all three shards in Knuckles's tall chamber version of Lost World.
References for this chapter
- SONIC TEAM PRESENTS SEGA
- Sonic Adventure - Guide and Walkthrough - Dreamcast - By CKohler - GameFAQs
- Sonic Adventure - Guide and Walkthrough - Dreamcast - By CChan - GameFAQs
- Sonic Adventure/Knuckles the Echidna — StrategyWiki
- Mystic Ruins (Sonic Adventure) | Sonic Wiki Zone | Fandom
- Red Mountain | Sonic Wiki Zone | Fandom
- Lost World | Sonic Wiki Zone | Fandom
Knuckles: Sky Deck and Chaos 6
Knuckles's last playable stage in the original Dreamcast Sonic Adventure is a treasure hunt on the transformed Egg Carrier, followed by a rematch with Chaos 6. This is not a straight run to a goal capsule. You need to reach the carrier from Mystic Ruins, use the drained pool entrance to enter Sky Deck, read Knuckles's three-part radar correctly, and search above, below, and behind your current route whenever the ship's tilt changes the layout. When the third shard is collected, the stage ends at once and sends Knuckles into one more past vision. After that, return to the outer deck for the final boss. Chaos 6 still cannot be damaged in liquid form, so win by freezing it with Eggman's dropped devices, landing quick close-range hits, and backing off before the arena's gaps or Chaos's counterattacks punish you.
Board the Egg Carrier after Lost World
After Lost World, follow the story lead back out through the temple area and return by minecart to the Mystic Ruins jungle side. From the jungle path, head toward Eggman's large docking structure behind the temple, the one marked by bright spotlights and the carrier approach scene. Walking up to that illuminated base triggers Knuckles's boarding event; you do not need to search for a separate hidden dock on the cliff edge.
Once Knuckles arrives on the Egg Carrier, move forward until the ship finishes transforming. Do not waste time combing the open deck yet. Turn around and go back into the interior door that leads to the pool room. In Knuckles's visit, the pool has been drained. Drop into the dry deep end, enter the doorway there, cross the small hidden room, and use the opposite door to begin Sky Deck.
- Ride back toward the jungle after Lost World and approach Eggman's spotlighted docking base.
- Wait for the Egg Carrier transformation before going for the stage entrance.
- Use the drained pool's deep-end doorway to reach Knuckles's Sky Deck.
Read Knuckles's radar the right way before choosing a route
In the original Dreamcast Sonic Adventure, Knuckles's radar can track all three remaining Master Emerald shards at once. The three shard icons at the bottom of the screen represent three separate pieces, not a simple far-to-near meter. Watch which icon is reacting. As Knuckles gets closer to that shard, its icon shifts through colder to warmer colors and flashes more urgently, while the beeping speeds up as well.
Because all three icons can respond independently, collect information before you commit to a long glide or drop. One shard may be somewhere above you while another is somewhere below the current path. If the icon you were following cools off as you advance, stop immediately and check height first. In Sky Deck, a weaker reading often means the piece is behind a shutter opened by the opposite tilt, on a lower deck below a moving plate, or back near a path you just changed.
- Treat each radar icon as one specific shard.
- Use color, beep speed, and height changes together.
- If the signal weakens, stop and recheck instead of charging ahead.
Search Sky Deck in layers, not as a one-way stage
Start around the opening platforms and the first tilt lever. Pull the lever and note which shutters open, which catwalks line up, and which surfaces shift. If a signal strengthens after the ship tilts, inspect the newly changed route before moving on. Sky Deck likes to hide Knuckles's shards in spaces that only make sense after a layout change.
Move next through the broader middle deck carefully. The changing plates here can expose lower recesses, alternate walkways, and buried spots that are easy to skip if you play like Sonic. When the radar is hot but the visible floor looks empty, walk the edges, look down through any opening, and dig on suspicious flat patches. If the active icon gets stronger when you descend, commit to the lower area and search it fully before climbing back up.
Always remember that collecting the third shard ends the stage instantly. There is no bonus for reaching Sonic's goal path. Your real job is to sweep upper rails, central moving sections, and lower compartments in whichever order the radar demands. Use ladders, springs, climbing surfaces, and short glides to correct your height instead of making long risky leaps with a bad camera angle.
- Test both ship-tilt states when a shutter or path seems wrong.
- Check newly exposed lower spaces under moving plates.
- Backtrack whenever the radar points behind or below the current route.
Recover if you feel lost or think the stage dead-ended
If you fall, overshoot, or reach a closed shutter, assume route state first, not story failure. Regain a safe platform, center the camera, and read the radar again. On this stage, a blocked path usually means the carrier is tilted the wrong way or the shard is on another height layer. It does not mean you missed an upgrade or broke the chapter.
When you collect the third shard, Sky Deck ends immediately and Tikal sends Knuckles into the burning Angel Island vision. Run uphill toward the Master Emerald shrine and speak with Tikal. After the scene, Knuckles returns to the hidden room behind the drained pool. Leave through the deck side, head outside, and move toward the bright flash on the outer deck to trigger the last confrontation.
- Reset your footing and camera after a fall.
- Treat closed routes as a tilt or elevation problem first.
- After the flashback, head toward the bright flash on deck for the finale.
Freeze Chaos 6, hit fast, and retreat before the counter
Chaos 6 cannot be hurt in liquid form. Eggman drops freezing devices into the arena during the fight. Knock one down to activate it before trying to carry it. Then pick it up and keep to a solid section of floor with room to move, because Knuckles's version already has dangerous holes in the platform.
The safest attack cycle is to wait for Chaos 6 to approach and start inhaling, then throw the activated device into the mouth opening. If the timing lines up, Chaos freezes solid. Rush in at once and land quick punches or a jumping hit, then back away before the ice breaks. Do not linger for extra damage at the edge of a gap.
If your throw misses, do not panic and mash attacks. Circle the remaining floor, avoid the stretching arms and suction, and wait for the next device. A failed freeze costs less than getting knocked into a hole with no rings. Keep a ring reserve when you can, attack only during the frozen window, and repeat the freeze-and-punch pattern until Chaos 6 finally collapses.
- Activate the freezing device before carrying it.
- Throw during Chaos 6's inhale for the cleanest freeze.
- Attack only while frozen, then retreat to safer floor.
Finish Knuckles's story cleanly
After Chaos 6 is defeated, let the ending scenes play out. Knuckles restores the Master Emerald on Angel Island, and this story clear counts toward unlocking the final story later.
Do not reset the console during save activity. Once the ending and save finish, Knuckles's adventure is complete on that file.
- Watch the Angel Island restoration ending.
- Allow the automatic save to finish.
- Knuckles's story now counts as cleared.
Before you move on
- You returned from Lost World, approached Eggman's spotlighted docking base behind the temple, and boarded the Egg Carrier.
- You entered Knuckles's Sky Deck through the drained pool's deep-end passage and collected all three final Master Emerald shards.
- You completed the burning Angel Island vision, returned to the deck, and triggered the final boss scene.
- You beat Chaos 6 by freezing it with Eggman's dropped devices, then watched the ending and let the clear save register.
Amy: Twinkle Park and Hot Shelter
Amy’s first half is an escape route. You are not trying to defeat ZERO. You are trying to stay moving, clear the stage puzzles in the right order, and reach each goal balloon before he pins you in a corner. The required path is Twinkle Park, capture aboard the Egg Carrier, Hedgehog Hammer for the Warrior Feather, then Hot Shelter and the short past scene that follows it. Long Hammer is not part of this chapter. Amy already has Hammer Jump from the start, and Warrior Feather adds Spin Hammer Attack after the mini-game.
Reach Twinkle Park and use Amy’s movement correctly
After Amy’s opening in Station Square, go through the hotel to the casino-side street and meet Sonic. When the scene ends, return through the hotel to the seaside road and approach the Twinkle Park elevator to trigger the stage.
Amy’s Hammer Jump already works from the beginning, but only from a full run. Get her up to speed first, wait until the hammer trails behind her, then use an attack button to vault higher than a normal jump. If you try it from a standstill, Amy will only swing the hammer and lose time.
Treat ZERO as a moving obstacle. A hammer blow can knock him down briefly, but it will not destroy him, and repeated hits stop being a reliable plan. If he blocks a switch, doorway, or narrow landing, stun him once and move past immediately.
- Trigger Twinkle Park from the seaside elevator.
- Build full speed before attempting Hammer Jump.
- Use hammer hits to interrupt ZERO, not to stand and fight.
Clear Twinkle Park and leave by the correct exit
In Pleasure Castle, circle the outer edge and press all three floor buttons to open the castle door. Staying on the move is safer than waiting in the middle where ZERO can line you up.
Inside the mirror rooms, slow down and read the reflections before each jump. The mirrors reveal narrow paths and floor holes that are easy to miss if you sprint. Line Amy up carefully, then cross. If ZERO gets close while you are setting up a jump, turn around, hit him once, and finish the platforming while he is down.
Follow the mirrored route to the goal balloon. After the stage, you will be in a small room with doors for Twinkle Park and Twinkle Circuit plus the outside exit. Do not enter Twinkle Circuit. Take the outside exit so Amy is captured and the story continues aboard the Egg Carrier.
- Press all three castle buttons.
- Use the mirrors to spot safe footing and gaps.
- Leave through the outside exit, not the optional Twinkle Circuit door.
Escape the prison and earn Warrior Feather
Amy wakes in a prison cell aboard the Egg Carrier. Let Gamma release her, then walk into the next room for Hedgehog Hammer.
You must beat Eggman’s posted score here to progress. Focus on the Sonic dolls, especially the higher-value yellow ones when they appear, and avoid hitting Eggman targets because they cost points. Clean, accurate swings score better than wild mashing.
Winning Hedgehog Hammer gives Amy the Warrior Feather. This upgrade unlocks Spin Hammer Attack. After the reward scene, leave through the newly opened door and enter the ship’s central hall. Stand in front of the three doors and hit the floor switch in front of the middle one to open Hot Shelter.
- Reach Hedgehog Hammer after Gamma frees Amy.
- Beat Eggman’s displayed score.
- Take the Warrior Feather and open the middle door to Hot Shelter.
Hot Shelter: clear the aquarium machinery in order
The opening section is Bad Taste Aquarium. Start by turning the first large handle to open the first watertight door. Go through the newly opened passage and keep moving along the catwalks and ladders so ZERO does not trap you on the narrow walkways.
In the next flooded machinery room, use the central switch to change the room state, then go to the forward crank and turn it clockwise to open the route ahead. Do that first instead of wandering between side paths. Once the forward door opens, take that new path at once.
A little later you reach the other important handle room. Here the needed sequence is one turn left and three turns right. This is the specific setup Tikal hints at. Complete that pattern cleanly, then take the passage the mechanism opens and continue upward through the aquarium route.
If ZERO crowds you while you are grabbing a handle, knock him down once, finish the interaction, and leave. Do not keep retrying random turns. The stage expects these handles in order, and once the correct path opens, you should commit to it immediately.
- Open the first watertight door with the starting handle.
- In the flooded room, use the center switch and then the forward crank to open the way ahead.
- At the later handle, turn left once and right three times before moving on.
Hot Shelter: finish Red Barrage and complete the past scene
After the aquarium machinery, continue into the Red Barrage area. Carry each colored block to the matching colored socket. This is a placement puzzle, so slow down and place the correct block instead of dropping them in random holes while ZERO is nearby.
At the second block set, one piece seems missing. Do not search the floor forever. Use the nearby bumper to launch onto the overhead beam, cross the support above the room, pick up the missing block there, and bring it back down to its matching slot.
Once the sockets are filled, continue through the final platforming to the goal balloon. On the ledges, line Amy up before each jump because a hurried miss costs more time than a brief pause.
After Hot Shelter, Tikal sends Amy into the past. The sequence is not finished automatically. Turn around from Amy’s starting point, go through the tunnel behind her, and approach the Master Emerald scene to trigger the required event. When that ends, Amy returns to the Egg Carrier pool room and this chapter is complete.
- Match each colored block to its socket.
- Use the bumper and overhead beam to recover the missing block.
- Touch the goal balloon, then finish the past scene by going through the rear tunnel to the Master Emerald area.
Before you move on
- Twinkle Park is cleared and Amy has been captured aboard the Egg Carrier.
- Hedgehog Hammer is beaten, Warrior Feather is collected, and Amy can use Spin Hammer Attack.
- Hot Shelter is cleared through the middle door route and the goal balloon is reached.
- The short past sequence at the Master Emerald is completed, and Amy returns to the Egg Carrier pool room for the next story event.
Amy: Final Egg and ZERO
This is Amy's last chapter in the original Dreamcast Sonic Adventure. After the Hot Shelter ending and Tikal flashback, you still need to follow the story back through the Egg Carrier, return to Station Square, reach Eggman's jungle base in Mystic Ruins, clear Amy's version of Final Egg, and then finish ZERO at the crashed carrier. Warrior Feather should already be in hand from Hedgehog Hammer earlier. Long Hammer can help, but it is optional and never blocks story progress. Amy does not fight Gamma as a playable boss here; that encounter happens in a cutscene before the route to Final Egg opens.
From the Hot Shelter flashback back to Station Square
When control returns after Hot Shelter, Amy has already come back from the past and is in the Egg Carrier pool area. Leave through the far door that leads out to the rear deck instead of wandering the interior. This triggers the required story sequence with Eggman, Sonic, Tails, the bird, and Gamma.
Let the whole scene play. Eggman takes the bird's emerald and calls Gamma. Sonic fights Gamma during the scene, and Amy steps in, but Amy herself does not enter a boss battle here. After the carrier starts failing, Tails carries Amy away to Station Square. Do not look for a playable Gamma fight or another Hot Shelter objective at this point; the story has already moved on.
- Leave the pool by the far door to the rear deck.
- Watch the Eggman, Sonic, Tails, bird, and Gamma scene.
- Wait until Tails brings Amy to Station Square and control returns there.
Optional Long Hammer detour
If you want the larger hammer hitbox before the ending, take the short detour now from Station Square. Go to the small beach-side pier between the hotel and Twinkle Park, across from the station area, and board the little boat there to revisit the crashed Egg Carrier.
Use the yellow pod to enter the ship, return to the Hedgehog Hammer room, and beat the posted score again to receive Long Hammer. This only improves reach. It does not unlock Final Egg, it is not required to defeat ZERO, and you should leave as soon as you have it. Afterward, return to Station Square and continue the real route toward Mystic Ruins.
- Optional only: use the small Station Square beach pier boat.
- Re-enter the crashed carrier and replay Hedgehog Hammer if you want Long Hammer.
- Return to Station Square when ready to continue the story.
Reach the Final Egg base in Mystic Ruins
Once the Station Square scenes are over, head for Mystic Ruins. Use the train if you are still in Station Square, then take your route into the jungle area. The direct field link is the truck by the waterfall, though some routes also approach the jungle from the lake-side path. In either case, your destination is Eggman's base at the far end of the jungle.
At the base entrance, go inside and climb to the upper side of the room where the locked Final Egg door sits behind six floor panels. The puzzle goal is simple even if the route is not: all six lamps around the door must be lit at once. If the panel layout is untouched, a common quick solution is 5, 4, 3, 2 counting left to right. If you have already stepped on panels, stop guessing and watch the lamps as you move until every light is on and the door opens.
- Travel from Station Square to Mystic Ruins.
- Enter the jungle and reach Eggman's base.
- Light all six door lamps and open Amy's Final Egg entrance.
Amy's Final Egg route
Amy's Final Egg is a chase stage. Keep moving forward and only stop for hazards that truly block the lane, especially laser emitters, Egg Keeper enemies, and jumps that need a running Hammer Jump. Amy already has Hammer Jump from the start, but it needs forward speed, so give yourself a runway before short ledges instead of trying to pop straight up from a standstill.
ZERO is pressure, not the target yet. If it gets too close in a narrow corridor, swat it once to create space and immediately resume moving. Do not stand still trying to win a hallway fight. Touch every checkpoint you pass because the stage becomes much easier when mistakes only send you back a room or two.
Most of the stage is a straightforward forward escape through machinery and laser corridors. The main place players lose time is the five-door room late in the stage. There is no permanent safe left, middle, or right answer to memorize. One door is the live route and the other four are dead ends. Pick a consistent order around the room, test one unopened door at a time, and back out immediately when you find a dead end. If ZERO crowds you during a test, interrupt it with one hammer hit, regain space, and continue the pattern. As soon as you find the correct route, commit to it and take the goal balloon.
- Use running starts for Hammer Jump.
- Hit ZERO only when you need breathing room.
- Treat the five-door room as random and test doors methodically.
- Grab the goal balloon to clear Final Egg.
Return to the crashed Egg Carrier
After the stage, Amy is back inside the base rather than at the final boss. Go up the stairs on the left to return to the upper floor, exit the base, and head back out through the jungle to Mystic Ruins station.
The required return trip is from Mystic Ruins, not from Station Square. Go below the Mystic Ruins train station and board the raft there to reach the crashed Egg Carrier. This is separate from the optional Station Square pier boat used for Long Hammer. Once you arrive, move forward and let the family reunion scene begin. ZERO interrupts it, which starts Amy's actual final boss.
- Exit the base and return to Mystic Ruins station.
- Use the raft below the station to reach the crashed Egg Carrier.
- Trigger the reunion scene and final ZERO battle.
Defeat ZERO
Fight from open floor near the middle first. Ordinary body hits do not finish ZERO. You need to knock it into the electrified perimeter so the impact stuns it and flips open the top of its head. As soon as the head opens, run in, land one clean hammer hit on the exposed weak point, and back away before the recovery swing or shockwave catches you.
Repeat that fence stun and head-hit sequence three times total. Watch for the expanding shockwave and jump it cleanly instead of trying to trade through it. If you miss the exposed-head opening, reset the fight rather than forcing extra swings beside the fence. Pull back toward the middle, bait another rush, and line up a better knockback.
If ZERO corners Amy along the wall, escaping matters more than attacking. Move sideways along the perimeter, jump the next shockwave, then cut back toward open ground before setting up another fence stun. Long Hammer can make spacing easier, but the safe pattern never changes: knock ZERO into the electric barrier, strike the exposed head once, retreat, and repeat until the third hit ends the fight.
- Use the electric fence to stun ZERO.
- Hit the exposed head once per stun.
- Jump shockwaves and reset to center if spacing gets bad.
- Land three exposed-head hits to win.
Ending and save
After the third exposed-head hit, let the ending scenes and credits run until the game records the clear. Amy's story only counts toward the final Super Sonic unlock when the save completes.
Keep the cleared file. Long Hammer remains optional even if you skipped it, and Amy's completed story now counts exactly the same either way.
- Watch the ending through the save.
- Confirm Amy's story is cleared.
- Keep the saved clear for the final story unlock.
Before you move on
- You left the Egg Carrier pool area by the far door, watched the rear-deck story sequence, and let Tails carry Amy to Station Square.
- You optionally used the small beach-side pier boat only for Long Hammer, not as the required route after Final Egg.
- You reached Eggman's jungle base in Mystic Ruins, solved the six-light entrance, and cleared Amy's Final Egg.
- You handled the random five-door room methodically and took the goal balloon.
- You returned to the crashed Egg Carrier by the raft below Mystic Ruins station and defeated ZERO with three electric-fence stuns followed by three exposed-head hits.
- Amy's ending and save completed, so her story now counts toward unlocking Super Sonic.
References for this chapter
- SONIC TEAM PRESENTS SEGA
- Sonic Adventure/Amy Rose — StrategyWiki
- Sonic Adventure - Guide and Walkthrough - Dreamcast - By CChan - GameFAQs
- Sonic Adventure - Guide and Walkthrough - Dreamcast - By CKohler - GameFAQs
- Sonic Adventure - Walkthrough - Dreamcast - By Terminal_Omega - GameFAQs
- Mystic Ruins (Sonic Adventure) | Sonic Wiki Zone | Fandom
Big: fishing at Twinkle Park and Ice Cap
This chapter covers Big's first two required Froggy rescues in the original Dreamcast Sonic Adventure. In Station Square, move the car off the blocked manhole, go through the sewer route to Twinkle Park, and catch Froggy there. After the stage, collect the Ice Stone behind the Twinkle Park elevator area, carry it by train to Mystic Ruins, and use it to open the Ice Cap cave. This guide then picks up the Life Belt inside that cave because it makes Big much easier to position on water, but it is an optional upgrade rather than a story flag. From there, enter Ice Cap, open the first practical fishing hole in the starting area, and catch Froggy a second time. Big's optional Power Rod and lure upgrades help with larger fish and later emblem hunting, but they are not required for either story catch here.
Open the Twinkle Park route from Station Square
When Big arrives in Station Square, head toward the City Hall side where Froggy disappears under a car parked on top of a manhole. Stand next to the car and use Big's lifting ability to move it out of the way. Drop through the manhole once the cover is clear.
Follow the sewer tunnel until you reach the box in front of a doorway. Jump onto the box to get Big through the door, then continue along the overpass-style corridor until you reach the Twinkle Park entrance. This is the intended story route, so do not waste time hunting optional upgrades first unless you want them for later fishing challenges.
If you get turned around, remember the immediate goal is only to reach the marked Twinkle Park door through the sewer passage. The Power Rod under Big's bed and the lure upgrades can wait. Froggy can be caught with Big's default equipment.
- Lift the car blocking the manhole
- Drop into the sewer and use the box to reach the door
- Follow the corridor to the Twinkle Park entrance
- Ignore optional rod and lure detours for now if you only want story progress
Catch Froggy in Twinkle Park
Big does not clear Twinkle Park by reaching a capsule. His objective is to find Froggy in the water and fish him out. Once inside, go to the pool area and stop moving for a moment so you can actually spot Froggy's position before casting. Casting blind into open water only wastes time.
Face the water and hold the cast button to aim your lure. Drop it close to Froggy instead of far past him. After he bites, pull the stick down to set the hook, then reel him in while watching the line tension. If the strain climbs too high, ease off briefly rather than forcing the pull and losing him.
If Froggy swims to a bad side of the pool, walk around the edge and cast again from a cleaner angle. Repositioning is one of Big's safest habits. A short reset from a better side is usually faster than dragging the line across walls, corners, or the lip of the pool.
- Find Froggy visually before your first cast
- Aim the lure near him instead of across the whole pool
- Pull the stick down on the bite to hook him
- Reel with controlled tension until the catch registers
Take the Ice Stone to Mystic Ruins
After Twinkle Park ends, return fully to Station Square. The Ice Stone appears behind the Twinkle Park elevator area near the water. Pick it up before heading to the train. This stone is the field item that opens Big's next route.
Carry the Ice Stone to the Station Square train and ride to Mystic Ruins. From the station side, go into the cliffside cave that leads toward the Ice Cap area. Keep carrying the stone through the cave and use the upward wind current to continue deeper inside.
At the pedestal in front of the icy doorway, place the Ice Stone to open the route. That opens the cave section Big uses to reach Ice Cap. Optional fishing upgrades are still separate from story progress, so do not mistake them for the required field item here.
- Collect the Ice Stone behind the Twinkle Park elevator area
- Ride the train to Mystic Ruins while carrying it
- Take the cliffside cave and ride the upward wind
- Place the Ice Stone on the pedestal to open the ice route
Pick up the optional Life Belt before Ice Cap
Enter the newly opened ice cave. On this route, pick up the Life Belt before climbing the ladder to Ice Cap. It is a strongly recommended convenience upgrade, not a mandatory story trigger. Big can finish his story without it, but the belt makes water positioning much easier.
Once Big has the Life Belt, he automatically floats on the surface. Hold the jump button to descend underwater, and release it to come back up. Use that mainly for movement and repositioning, not for repeated underwater casting attempts. If you want to fish again, bring Big back to the surface or to a solid edge first.
Cross the cave pool and climb the ladder into Ice Cap. If you skipped the belt on purpose, you can still continue, but this guide assumes you collected it here because later water handling is simpler and more forgiving with it.
- Enter the opened ice cave
- Pick up the optional Life Belt used by this route
- Use floating and descending to cross the cave pool cleanly
- Climb the ladder into Ice Cap
Open the starting pool in Ice Cap and catch Froggy
At Ice Cap, stay in the opening area instead of wandering deep into the stage. Big's story catch is set up near the start. Use the nearby rock to break the weak ice and create a usable fishing hole in the opening section.
Before you cast, look down and confirm where Froggy is moving in the water. Then aim the lure close to him, wait for the bite, pull the stick down to hook him, and reel with the same controlled tension you used in Twinkle Park. Big does not need the Power Rod or any lure upgrade for this required catch.
If Froggy pulls to a bad angle, do not keep yanking the line across the ice rim. Move to another edge of the opening, or if you have the Life Belt, use it to reposition and then return to the surface or a stable edge before casting again. Once Froggy is landed here, Ice Cap ends and Big's second required rescue is complete.
- Stay in Ice Cap's opening area
- Break the weak ice with the nearby rock
- Fish from the opening-area pool after locating Froggy
- Reposition instead of forcing a bad line angle
- Catch Froggy to clear Ice Cap
Before you move on
- You opened Twinkle Park by moving the car, entering the sewer, and following the overpass corridor to the stage door.
- You caught Froggy in Twinkle Park by finding him first, casting nearby, hooking with a downward stick pull, and reeling with controlled tension.
- You collected the Ice Stone behind the Twinkle Park elevator area, carried it to Mystic Ruins, and opened the Ice Cap route at the cave pedestal.
- You picked up the optional Life Belt used by this route inside the ice cave, climbed into Ice Cap, opened the starting fishing hole, and caught Froggy there.
References for this chapter
Big: Emerald Coast, Hot Shelter and Chaos 6
This chapter finishes Big's story in the original Dreamcast Sonic Adventure, English-language international release. Big's last stretch is short, but it is easy to lose time if you wander around the Egg Carrier or treat Chaos 6 like a normal boss. Your required path is Emerald Coast, then Big's brief Hot Shelter visit, then the past shrine scene, then the outside Egg Carrier route to the reactor cylinder for the Froggy rescue. On this guide's route you already collected the Life Belt in the Mystic Ruins ice cave before Ice Cap, so use it here for easier surface positioning and controlled dives.
1. Return to Station Square and open Emerald Coast
After Ice Cap, take the train back to Station Square. Froggy leads the route once you arrive, so do not overthink the hub navigation. Follow him into the hotel, go through the lobby, and head out to the poolside area behind the building. The Emerald Coast entrance there is Big's next required stage.
If you already have the Life Belt from the Mystic Ruins cave, remember how it changes movement. Big floats automatically on the water surface, you steer him with the stick, and holding the jump button makes him dive so you can reposition below the surface before rising again. Use that to improve your casting angle, not to replace basic fishing discipline. Recast from a clear surface or shoreline position instead of trying to throw from underwater.
- Returned from Mystic Ruins to Station Square after Ice Cap.
- Followed Froggy through the hotel to the poolside route.
- Entered Emerald Coast as Big's next required stage.
2. Catch Froggy at Emerald Coast
Emerald Coast still ends the moment you reel Froggy in, so first locate him visually before you cast. Walk the sand and look for a clean side angle instead of throwing blindly into distant surf. Shorter, accurate casts are usually better than max-distance guesses.
Drop the lure near Froggy's path. When he bites, pull back to set the hook, then reel with control instead of force. Watch the line angle the whole time. If the line starts scraping rocks, beach edges, or other awkward geometry, stop dragging straight backward. Shift your position, ease Froggy toward a cleaner lane, or break off and cast again from a better angle. Once you bring him in, the scene with Gamma takes over automatically and Big ends up aboard the Egg Carrier.
- Saw Froggy clearly before casting.
- Hooked him with a controlled cast instead of blind distance fishing.
- Finished Emerald Coast by reeling Froggy in.
3. Enter Hot Shelter and use Big's short route
On the Egg Carrier, Big appears in the main interior hall. Go to the far end with the three doors. Step on the switch for the middle door and enter when it opens. Ignore optional lure detours unless you are replaying later; the middle door is the story route to Hot Shelter.
Big only uses the opening section of Hot Shelter. Follow the aquarium corridor until you reach the large circular pool room where he spots Froggy. You are not clearing Amy's puzzle route or Gamma's full timer stage here. Stay focused on this first pool area.
Use the drainage control in this section so the room changes into a workable fishing space, then search the pool for Froggy. With the Life Belt, float into a straighter lane and dive only long enough to fix your position around the room's center structure or pillars. Without it, stay on the dry edges and recast patiently from cleaner ledges. Do not keep yanking a bad line across obstacles. When Froggy is reeled in, Hot Shelter ends immediately and Tikal sends Big to the past.
- Reached the three doors in the Egg Carrier hall and opened the middle one.
- Followed Hot Shelter only as far as Big's first circular pool room.
- Used the room control, located Froggy, and finished Hot Shelter by catching him.
4. Resolve the shrine scene and reach the reactor cylinder
In the flashback, walk up to the Master Emerald shrine and let the scene finish. After Big returns to the present Egg Carrier interior, do not wander outside at random. A blast has changed the situation, but your route is still controlled from this same hall.
Use one of the floor call switches in the hall to summon the monorail, then ride it to the upper deck. From the monorail exit, move up to the lift that leads toward the runway area. Ride that lift, then use a spring to cross onto the reactor structure, the large cylinder at the ship's top center where the next confrontation triggers. This outside route is the required post-Hot Shelter connection and is separate from Big's earlier aquarium stop.
Approach the top of that cylinder to start the scene with Sonic, Eggman, Chaos, and Froggy. Once Chaos transforms again and swallows Froggy into its body, the last rescue begins.
- Finished the shrine flashback and returned to the Egg Carrier hall.
- Called the monorail and rode it to the upper deck.
- Took the lift toward the runway and used the spring to reach the reactor cylinder.
- Triggered the Chaos 6 scene at the top-center reactor area.
5. Rescue Froggy from Chaos 6 and finish Big's story
Big does not win this fight by draining a boss health bar. Treat it as a fishing rescue. Collect the nearby rings first when it is safe, because Chaos can still hit you and rings remain your damage buffer. Watch for the jump and shockwave so you do not get knocked around while setting up.
Wait until Froggy is visible inside Chaos 6 and the game gives you a proper target. Face Froggy, cast into the opening, hook him cleanly, and reel him out under control. If the cast misses, do not panic. Re-center the camera, move to restore a clear line of sight, and throw again. The important part is aiming at Froggy inside Chaos, not attacking Chaos himself.
As soon as Froggy is pulled free, the rescue is over. Walk to the Tornado 2 on deck to trigger Big's ending. Let the credits complete and save your clear. Bigger fish records, extra lure pickups, and other optional fishing goals can wait until after the six-story clear.
- Collected a safe ring buffer before forcing casts at Chaos 6.
- Cast at Froggy while he was visible inside Chaos 6 instead of treating the fight like a damage race.
- Reeled Froggy out to finish the rescue.
- Walked to the Tornado 2, watched Big's ending, and saved the clear data.
Before you move on
- Big returned to Station Square after Ice Cap and cleared Emerald Coast by catching Froggy near the hotel-side beach route.
- Big boarded the Egg Carrier, opened the middle door in the main hall, and finished his short Hot Shelter visit by catching Froggy in the first circular pool section.
- Big completed the past shrine scene, called the monorail from the Egg Carrier hall, rode to the upper deck, took the lift toward the runway, and used the spring to reach the top-center reactor cylinder.
- Big rescued Froggy from inside Chaos 6 by casting at the visible target and reeling him out.
- Big's ending triggered at the Tornado 2, the credits finished, and the save now marks Big's story complete.
Gamma: Final Egg, Emerald Coast and the Jet Booster
This chapter covers the opening half of E-102 Gamma's story in the original Dreamcast Sonic Adventure. Gamma does not begin aboard the Egg Carrier. He is activated inside Eggman's Final Egg base in the Mystic Ruins jungle, takes a short timed shooting test in Final Egg, defeats E-101 Beta, captures Froggy in Emerald Coast, then is brought aboard the Egg Carrier for Amy's prison scene, the mandatory Jet Booster pickup, and the fight with Sonic. Gamma's stages reward quick movement and grouped lock-ons, so the main skill here is painting several targets at once for bonus time instead of stopping to pick off single enemies.
Wake up in Final Egg and learn how Gamma's timer works
Gamma's story starts in Eggman's Final Egg base in the Mystic Ruins, not on the Egg Carrier. After the opening scene, move to Eggman and enter the nearby Final Egg test door when he orders Gamma to prove himself.
Gamma's action stages all run on a countdown. Hold the attack button to sweep the targeting laser across several enemies, then release to fire homing shots. Destroying chained targets adds time, so the fastest safe habit is to enter a room, paint the full group, fire one burst, and keep moving.
Do not waste seconds shooting scenery or chasing one target off the main route. If your aim slips, straighten Gamma first, then rebuild a clean lock. A short pause for a proper chain is better than spraying weak single shots and starving the clock.
- Enter Final Egg from the Mystic Ruins base after speaking to Eggman
- Use lock-on chains to add time
- Ignore props and lone side targets that cost more time than they give back
Clear Final Egg and destroy the Sonic Doll
Gamma's Final Egg test is short and direct. Follow the forward corridors and obvious room sequence. Each time enemies appear in a pack, stop only long enough to lock the cluster and release a volley.
Because the stage is brief, movement matters as much as accuracy. If the camera changes angle in a narrow passage, square Gamma to the center of the route before trying to tag anything. This prevents wasted shots into walls and keeps the timer healthy for the end.
The mission clear is tied to the Sonic Doll target in the last room. As soon as you reach it, lock on and destroy it. If your remaining time is low, skip anything else and finish the doll immediately rather than trying to farm a few extra seconds first.
- Stay on the direct route through the test course
- Take clustered enemies in single volleys
- Destroy the Sonic Doll in the final room to clear the stage
Defeat E-101 Beta in the acceptance test
After the stage, Eggman immediately pits Gamma against E-101 Beta. This first Beta battle is much simpler than Gamma's final boss later in the story. Keep a little space between you and Beta so the reticle has time to settle.
Move sideways instead of backing straight away. Beta fires missiles, and those missiles can also be locked onto. A practical pattern is to strafe, wait for Beta and any nearby missiles to enter the reticle, then release one clean shot and keep circling.
Do not rush point-blank to trade hits. Gamma wins this fight by staying composed and firing from mid-range. Once Beta falls, Eggman accepts Gamma into the E-series mission and sends the robots after Froggy.
- Fight from mid-range so the reticle can settle
- Strafe around Beta instead of retreating in a straight line
- Use Beta and incoming missiles as easy lock-on targets
Open Emerald Coast and capture Froggy
Gamma is next sent to Station Square. Go to the Emerald Coast entrance by the hotel beach side and destroy the fence blocking the way with Gamma's gun. Once the barrier is gone, enter the stage immediately.
This run is another timer stage, but the route is still the natural beach path forward. Stay on the main sand and boardwalk line, sweep up enemy groups that sit directly in front of you, and avoid veering off after stray targets on tables or scenery.
At the end of the route, Froggy is enclosed in a floating bubble. Touch the bubble to complete the mission. Afterward Gamma is pulled into the Mystic Ruins past sequence. Walk to the Master Emerald shrine and the nearby Chao to trigger Tikal's scene, then the story automatically transfers Gamma to the Egg Carrier.
- Blast open the Emerald Coast gate in Station Square
- Follow the direct beach route and take easy lock-on chains
- Touch Froggy's bubble at the end
- Advance the past scene at the Master Emerald shrine
Find Amy in Prison Hall and collect the Jet Booster
When Gamma arrives on the Egg Carrier, begin in the Egg Carrier Hall. Enter the Hedgehog Hammer room and go through to Prison Hall to reach Amy's cell scene. This conversation is the story turn where Gamma begins to question Eggman's orders.
There is an optional side room on the ship where Gamma can briefly see Beta being rebuilt, but it is only a detour. For progress, finish Amy's scene, then return through Hedgehog Hammer to the main hall.
Next, enter the Arsenal in the upper hall area and pick up the Jet Booster. This upgrade is mandatory. With it, Gamma can hover by holding the jump button in midair or during descent, slowing falls and letting you correct short gaps. Do not confuse this with the Laser Blaster. The Laser Blaster is optional and comes later, after the ship has crashed.
- Use the Hedgehog Hammer side route to reach Prison Hall
- Trigger Amy's prison cutscene
- Return to the main hall and enter the Arsenal
- Pick up the mandatory Jet Booster
- Learn to hold jump to hover and control your descent
Ride to the deck, fight Sonic and escape
After taking the Jet Booster, return to the main hall and use the large yellow floating lift to reach the outer deck. Eggman orders Gamma to destroy Sonic as soon as you arrive outside.
This fight is short, but Sonic is most dangerous when he is allowed to crowd you. Strafe to the side when he rushes, create a little distance, then lock on and fire. Do not try to stand still and outshoot him at point-blank range. If rings lie directly along your movement line, grab them between openings, but do not chase them into Sonic's attack path.
After several solid hits, Amy interrupts the battle. Let the following scenes play. Gamma refuses the order, the Egg Carrier starts failing, and Gamma escapes the ship. Once control returns after the story scenes, this opening chapter is complete and you are ready to hunt the remaining E-series robots in the next stages.
- Use the yellow lift to reach the deck after taking the Jet Booster
- Strafe away from Sonic's rushes before firing
- Survive until Amy interrupts the fight
- Watch the escape scenes to finish the chapter
Before you move on
- You started Gamma's story inside Eggman's Final Egg base in the Mystic Ruins and cleared the timed Final Egg test.
- You destroyed the Sonic Doll to finish Final Egg and then defeated E-101 Beta.
- You opened Emerald Coast in Station Square, reached Froggy's bubble, and cleared the stage.
- You advanced the Mystic Ruins past scene at the Master Emerald shrine and were taken to the Egg Carrier.
- You triggered Amy's prison scene, collected the Jet Booster from the Arsenal, reached the deck by the yellow lift, and fought Sonic until Amy stopped the battle.
Gamma: rescue the E-series and defeat Beta
After Gamma rejects Eggman and survives the Egg Carrier crash, the rest of his story becomes a rescue mission. You can make it easier by collecting the optional Laser Blaster inside the wrecked carrier, then clear Windy Valley, Red Mountain, and Hot Shelter in that order. Each stage is still a timed mission, so the safest route is also the fastest one: lock onto enemy groups for bonus seconds, avoid pointless duels, and keep moving toward the E-series target at the end of each stage. Once E-103 Delta, E-104 Epsilon, and E-105 Zeta are freed, Gamma must chase down E-101 Beta Mk II on the carrier deck and finish his story.
Optional Laser Blaster and the path to Windy Valley
From the crashed Egg Carrier in Mystic Ruins, ride the yellow pod back into the ship. The Laser Blaster is now available in the room opposite the Jet Booster room. It is optional, but the wider shot makes the last three stages much more forgiving because it catches clustered targets and stray missiles without perfect aim.
Leave the carrier and go to Tails's workshop area in Mystic Ruins. Pick up the Wind Stone in front of the workshop and carry it to the pedestal in the cave near the waterfall and lake. Place it to reopen Windy Valley.
Remember how Gamma's timer works before you enter. Do not stop to pick off one enemy at a time unless it is directly blocking your path. Hold the laser to lock onto as many targets or enemy segments as possible, then fire once for a larger time bonus.
- Laser Blaster is optional and only appears after the carrier crashes.
- Wind Stone opens Windy Valley from the cave pedestal near the waterfall.
- Multi-lock chains are your main time recovery tool in every remaining Gamma stage.
Windy Valley and E-103 Delta
Windy Valley is the cleanest of Gamma's last three stages, so use it to rebuild confidence and timer discipline. Follow the forward route, and use short hover bursts only when the next landing is clearly in front of you. Long, nervous hovering wastes time and makes it easier to drift off a platform.
The best bonus here comes from the long caterpillar enemy. Hold your aim until several body sections are tagged, then fire once. A good chain here gives a large time refill and removes the biggest threat in the area at the same time.
At the end, E-103 Delta fights much like Gamma's earlier robot battles. Keep moving in a broad circle so homing missiles trail behind instead of boxing you in. If missiles are close, lock onto Delta and the missiles together and fire. Repeat until Delta falls and the animal inside is released.
- Use brief hover corrections, not long floating detours.
- Lock onto as many caterpillar segments as possible for bonus time.
- Against Delta, keep a circular strafe and clear missiles only when they threaten your lane.
Open Red Mountain and free E-104 Epsilon
Back in Mystic Ruins, head through the cave route toward Angel Island. At the Red Mountain entrance, a monkey sits in a cage in front of the doorway. Target and destroy the monkey to unlock the stage.
Gamma's Red Mountain route is enemy-heavy and more dangerous on the clock than Windy Valley. Push through the lava interior instead of lingering at each firing lane. Whenever the path narrows, tag groups before you shoot so you gain time while clearing the route. Use hover only to steady short crossings or recover from a rough landing.
E-104 Epsilon is faster and more aggressive than Delta, so do not plant your feet and trade fire. Stay mobile, sidestep the incoming shots, and answer with your own lock-on bursts as soon as you have space. The fight ends quickly if you keep pressure on without letting the missiles surround you.
- Use the Angel Island cave route and destroy the caged monkey to open Red Mountain.
- Chain enemy groups for time instead of inching forward one target at a time.
- Beat Epsilon by staying close enough to return fire quickly while still sidestepping missiles.
Hot Shelter route and E-105 Zeta
Return to the crashed Egg Carrier by boat, ride the yellow pod inside, and use the middle door in the central room to enter Hot Shelter. This is Gamma's hardest stage because the layout is longer and hesitation drains the timer fast.
In the early section, clear only what blocks the route and move through the rotating platform area without waiting around. Soon you reach the lift-switch section. Shoot the switch that activates the hanging transport, then stand centered underneath it so the claw picks Gamma up and places him on the upper path. Move off immediately when it sets you down.
After that, keep the route tight through the moving platform and tram section. When a car ahead is blocked, jump sideways to the next tram instead of stalling. On the long drop near the end, hold hover to control your descent and keep shooting anything directly in your fall line for extra seconds. If you have time to spare, use the accelerator before Zeta's arena to grab the invincibility item above, but do not detour for it if the clock is low.
E-105 Zeta does not flinch like the smaller robots. Run with the direction of the rotating platform so incoming fire stays behind you as much as possible. Target the outer weapon units and missiles from a safe angle instead of staring at the central body. Keep circling and stripping the dangerous parts away until Zeta is destroyed.
- Hot Shelter begins through the middle door inside the wrecked Egg Carrier.
- Use the switch and centered position to ride the hanging lift to the upper route.
- Jump between trams sideways when blocked, then hover the long drop to protect your timer.
- Circle with the platform during Zeta's fight and prioritize the weapon sections.
Find Beta Mk II and finish Gamma's story
After Zeta is freed, take the yellow pod back outside. Gamma pauses on the deck, then Beta Mk II flies overhead. Follow it to the large circular deck area where Sonic fought Chaos 6. The final boss starts there.
Beta Mk II is not a normal shootout. Its front armor absorbs your attacks, so firing straight ahead only wastes time and space. Open the fight by running in a wide arc. If missiles are about to trap you, destroy them, then go back to movement. Watch for Beta's charge setup and move to the side as it rushes past. The moment it overshoots you, turn quickly and fire into its back. That rear opening is the real damage window.
Later Beta rises and adds heavier projectile pressure. Do not chase it through the center of the arena. Keep circling until the barrage ends and Beta commits to another attack, then punish the rear again after it recovers or passes by. Stay patient, preserve your rings, and take the clean opening instead of forcing shots into the shielded front. After the last hit, let the ending scene and credits finish, then save when prompted to record Gamma's clear.
- Follow Beta Mk II to the Chaos 6 deck area for the last battle.
- Front armor is protected; wait for the back opening after a charge or recovery.
- Watch the ending through and save to lock in Gamma's completed story.
Before you move on
- You collected the optional Laser Blaster or deliberately skipped it and still opened Windy Valley with the Wind Stone.
- You destroyed E-103 Delta in Windy Valley, E-104 Epsilon in Red Mountain, and E-105 Zeta in Hot Shelter.
- You followed Beta Mk II to the Chaos 6 deck, damaged it through rear openings, saw Gamma's ending, and saved the completed story.
References for this chapter
- SONIC TEAM PRESENTS SEGA
- Sonic Adventure - E-102 Walkthrough Guide - Dreamcast - By Knux2001 - GameFAQs
- Sonic Adventure - Guide and Walkthrough - Dreamcast - By CChan - GameFAQs
- Sonic Adventure - Emblem FAQ - Dreamcast - By lloyd700 - GameFAQs
- Sonic Adventure/E-102 "Gamma" — StrategyWiki
- Sonic Adventure - Boss Guide - Dreamcast - By ChronoCactaur - GameFAQs
Open Super Sonic's final story
Finish the six regular stories completely, return to the Adventure character ring, and select the new Super Sonic slot. The unlock is based on story completion in the original Dreamcast release, not emblem totals and not on carrying rings from another stage. Super Sonic's short field sequence then runs from Mystic Ruins to Angel Island, through Tikal's past, and back to the jungle route that leads directly into the Perfect Chaos setup.
Make sure all six regular stories are truly cleared
Super Sonic does not open from emblem hunting. The requirement is the six character stories: Sonic, Tails, Knuckles, Amy, Big, and E-102 Gamma. Each one needs to be played through its final boss and ending sequence until the game finishes recording the clear and returns you to the menu flow. Do not quit out early during credits or immediately after the last hit.
Use the final clears as your checklist. Sonic must finish Egg Viper. Tails must finish Egg Walker. Knuckles must finish Chaos 6. Amy must finish ZERO. Big must finish his Chaos 6 Froggy rescue. Gamma must finish E-101 Beta Mk II. If even one of those endings is incomplete, the final story slot may not appear.
Do not waste time chasing 130 emblems for this unlock. Emblems are optional extras on Dreamcast. You also do not need to carry 50 rings into this chapter from another save or stage. The final battle handles Super Sonic's ring condition on its own later.
- Sonic cleared through Egg Viper and the ending sequence
- Tails cleared through Egg Walker and the ending sequence
- Knuckles cleared through Chaos 6 and the ending sequence
- Amy cleared through ZERO and the ending sequence
- Big cleared through the Chaos 6 Froggy rescue and the ending sequence
- Gamma cleared through E-101 Beta Mk II and the ending sequence
Return to Adventure mode and select the new Super Sonic slot
Go back to the main Adventure character ring, not Trial mode. When all six stories are complete, a separate Super Sonic choice appears there. Pick that slot to begin the game's final story.
Do not expect this to unlock a general-purpose transformation for Sonic. In the original Dreamcast release, Super Sonic is the final-story character used for the ending battle sequence. He is not a normal free-roam option for Sonic's Action Stages.
- Back out to the Adventure selection ring
- Ignore Trial mode for this unlock
- Select the new Super Sonic character slot
From Mystic Ruins, go to the fallen Angel Island area
The story opens with scenes around Tornado 2 near Big's house, then control returns in Mystic Ruins as Sonic. From the main ruins area, head for the cave route that leads toward Angel Island, the same side of the hub used to reach the Master Emerald area earlier in Sonic's story.
Come out onto the floating-island approach and cross the bridge toward the Master Emerald shrine side. Keep moving until you reach Knuckles and Dr. Eggman lying ahead near the shrine area. Walking up to them triggers the next event. If nothing happens, you probably loaded the wrong character instead of starting the Super Sonic story from the Adventure ring.
- Leave the central Mystic Ruins area for the Angel Island route
- Cross the bridge toward the Master Emerald side
- Approach Knuckles and Eggman to trigger the next scene
Finish the Tikal flashback without getting sidetracked
Tikal sends Sonic into the past after the Angel Island scene. This section is short and linear. Run straight along the main path toward the burning temple area until the next story scene plays with Tikal, the echidnas, and Chaos.
Once control returns, move directly to Tikal instead of circling the battlefield. She heads up the stairs toward the Master Emerald, and your job is simply to follow her to the shrine. Reaching her at the emerald ends the flashback and returns Sonic to the present. There is no optional item here that you need for final-story progress.
- Run the main path to the temple scene
- Approach Tikal when control returns
- Follow her up the stairs to the Master Emerald
- Wait for the automatic return to the present
Use the waterfall mine cart to the rain forest and trigger the last story scene
Back in the present, return to the main Mystic Ruins side and head for the rain forest route by the waterfall. Use the mine cart beside the waterfall, the same jungle access used earlier for Lost World and Final Egg progress. This is the key landmark if you feel lost.
After entering the rain forest approach, you do not solve a fresh puzzle here. Advancing into that route triggers the next sequence automatically. Sonic and Tails reach Tornado 2, the last emerald is taken, and the game shifts into the Station Square disaster scenes.
From that point, hub navigation is effectively over. The other five characters appear, the Chaos Emeralds are brought together, and Sonic transforms. Once the transformation sequence begins, you are finished with this chapter and ready for the Perfect Chaos battle chapter.
- Return from Angel Island to the main Mystic Ruins side
- Use the waterfall-side mine cart into the rain forest
- Advance far enough to trigger the Tornado 2 scene
- Watch for the Station Square destruction and transformation setup
Before you move on
- A Super Sonic option appears on the Adventure character ring after the six regular stories are complete.
- You reached Knuckles and Eggman in the Angel Island Master Emerald area and triggered Tikal's trip to the past.
- You followed Tikal to the Master Emerald in the flashback and returned to the present automatically.
- You used the waterfall-side rain forest route in Mystic Ruins and triggered the Tornado 2 and transformation sequence that leads into Perfect Chaos.
Perfect Chaos: the final battle
In the original Dreamcast Sonic Adventure, Super Sonic's finale is a two-round speed attack against Perfect Chaos. You begin with 50 rings, Super Sonic spends one ring every second, and the fight is won by striking Chaos's brain three times in the first round and three more times in the second. The important rule is simple: this is a sprint, not a normal boss duel. Do not waste time trying to fight the outside of the body. Build speed on the flooded roadway, stay on the clearest forward line, enter the opening at the front base of Perfect Chaos, and let the charge carry you up to the brain.
Understand the battle before the first run
Super Sonic starts this fight already transformed, and the form is maintained by rings. Your initial stock is 50, and it drains continuously. If you spend too long wandering or recovering, the timer beats you before the boss does.
Perfect Chaos is not defeated by hitting the outer body. The only meaningful attack is the fast charge through the opening at the front of the creature. If your approach has enough speed, Super Sonic spirals through the body and hits the brain. That counts as one full hit.
Do not rely on homing attacks here. They are not the solution to this boss and can cost you the speed you need for the real opening. Treat every approach as a straight run whose goal is momentum, lane discipline, and a clean entry.
- Start the fight knowing you need six brain hits total.
- Think of rings as a timer, not a resource to hoard off-route.
- Ignore the body surface and aim for the frontal opening every run.
Round one: take the shortest clean route
The first round is the simpler half of the fight, so use it to build good habits. Stay on the main forward route and make only small steering corrections. Wide swerves may avoid one obstacle, but they also bleed speed and pull you away from the boost lines that make the attack work.
Take boost pads whenever they are already in your lane or require only a gentle move to line up. A clean boost is worth more than a risky ring detour. Collect ring trails that sit directly on your path, but skip side clusters that would force you to drift away from the center of the run.
As Perfect Chaos fills the screen, commit to the entry. Do not hesitate at the last second and do not jump around looking for a separate target. Drive straight into the opening at the base, reach the brain, and reset for the next pass. Repeat this process until you have landed three successful hits and the second round begins.
- Favor straight lines over big dodges.
- Use convenient boost pads to secure entry speed.
- Count three successful runs before expecting the phase change.
Round two: keep momentum under heavier pressure
The second round keeps the same win condition, but Chaos attacks more aggressively and failed approaches become more expensive. The biggest danger is not direct damage in the usual sense. The real problem is getting slowed, knocked off line, or forced into a bad route so that you miss the body-entry window.
When attacks appear, make one clean adjustment and then recenter. Repeated weaving usually creates a second mistake. If the safest lane has fewer rings, take the safer lane anyway. A clear road with enough speed is better than a crowded route that leaves you too slow to break through.
You still need three brain hits in this round. Stay calm between attempts. If you reached Chaos but failed to climb all the way to the brain, that run accomplished nothing, so your next decision should be immediate: reclaim the main route, line up the next useful boost, and prepare another full-speed charge.
- Treat lost momentum as the main threat in round two.
- Dodge once, then return to the best forward line.
- Expect to repeat the same successful charge three more times.
Recover correctly after a bad attempt
If you miss the opening or enter too slowly to reach the brain, do not turn the fight into a scavenger hunt for rings. Swing back onto the natural forward line and take the next ring trail or boost pad that already fits your route. The battle gives you chances to refill while moving, but it punishes stopping and fishing around.
If Chaos clips you and your pace falls apart, spend the next moments restoring alignment first. Once you are facing down the clearest lane again, rebuild speed and make the next approach count. The longer you stay in messy side movement, the more rings you lose to the timer.
A useful rule for low-ring situations is this: only collect what lies in front of progress. If a ring pickup requires a sharp turn, it usually costs more time than it saves. Forward rings, a clean lane, and a proper boost matter more than one greedy detour.
- After a miss, rejoin the main route immediately.
- Recover direction before worrying about extra rings.
- Take only ring lines that support your next attack run.
Finish the sixth hit and let the ending complete
After the third hit of the second round, Perfect Chaos is beaten and the ending sequence takes over. There is no separate final trick after the sixth successful brain strike. Your job is to stay composed until control is removed and the cutscene begins.
On Dreamcast, Sonic Adventure records cleared events and victorious boss battles automatically. Let the ending and credits play through and do not power off during saving activity. Once that sequence is finished, the final story clear is recorded properly.
This victory completes Super Sonic's story, but it does not unlock a free-roam Super Sonic transformation for normal Adventure areas or regular Action Stages. Super Sonic remains tied to this finale and can only be replayed by selecting his story again.
- Confirm three hits in round one and three in round two.
- Let the ending and credits finish without interrupting the save process.
- Remember that Super Sonic is not available for normal stage free play afterward.
Practical habits that make the fight easier
Keep your steering economical. The best runs come from tiny corrections that hold a fast line, not from dramatic lane changes.
Use boosts that fit naturally into your path. If a boost and a ring line overlap, that is ideal, but speed still comes first.
If you keep failing late, simplify your route. Stop chasing side rings, stop improvising, and focus on one clean lane into the frontal opening.
- Steer lightly and stay forward.
- Take natural boosts instead of risky detours.
- Simplify phase two if repeated misses drain your rings.
Before you move on
- You cleared Perfect Chaos by landing three brain hits in the first round and three more in the second.
- You finished the ending sequence and allowed the Dreamcast version to record the clear.
- You know Super Sonic does not become a normal free-roam form after this battle.
After the ending: emblems, Trial and Chao
Perfect Chaos ends the required story. Everything here is optional completion work for the original Dreamcast Sonic Adventure. If you want the full 130-emblem file, split the task into the real Dreamcast categories instead of replaying stages blindly: Action Stage ranks, hidden Adventure Field emblems, Trial mini-game emblems, ending emblems, and Chao race emblems. Super Sonic is already handled by the six story clears, so emblem cleanup is a separate long-term target rather than another story unlock.
Know the five emblem pools before you start grinding
On Dreamcast, the full emblem total is 130. The biggest block is Action Stage replay emblems, because each Action Stage has three rank clears tied to that character’s own objective rules. Beyond that, you also have hidden Adventure Field emblems, mini-game emblems, one ending emblem for each finished story including Super Sonic, and five Chao race emblems.
Use that split to decide what is actually missing. If you have already seen every ending, do not keep replaying story clears expecting new rewards there. After the credits, the useful question is whether you still need ranked Action Stages, free-roam field pickups, Trial mini-games, or Chao races.
- Treat 130 emblems as an optional Dreamcast completion goal.
- Do not confuse story completion with emblem completion.
- Remember that Super Sonic was unlocked by clearing the six character stories, not by emblem totals.
Use Trial mode for replays, but leave Chao and field hunting out of it
From the title screen, Trial mode is the fast route back into cleared content. It is divided into Action Stage and Mini-game. Action Stage lets you replay stages a chosen character has already cleared. Mini-game is for the separate side events that get registered once you clear them in Adventure mode.
Use Trial when you want rank emblems or score-based repeats without walking through Station Square, Mystic Ruins, or the Egg Carrier again. Mini-games here include Sky Chase Act 1, Sky Chase Act 2, Sand Hill, Hedgehog Hammer, and Twinkle Circuit. Chao races are not in Trial mode, and hidden Adventure Field emblems are not in Trial mode either, so switch back to Adventure mode when your target is a hub collectible or Chao work.
- Use Trial Action Stage for ranked stage replays.
- Use Trial Mini-game for Sky Chase, Sand Hill, Hedgehog Hammer, and Twinkle Circuit cleanup.
- Use Adventure mode for hidden field emblems and Chao Garden access.
Read the objective card before every replay
Do not force one replay rule onto every character. Sonic and Amy follow the familiar platforming pattern: C is a normal clear, B usually asks you to finish with at least 50 rings, and A asks for a time clear. That makes ring routing and safe speed more important than fighting every enemy.
Tails is a race character, so his goals stay tied to beating the rival. C is a normal race win, B adds the ring requirement while still beating the rival, and A upgrades the rival’s pace. Knuckles is different again: C is finding the three shards, B removes hint-ball use, and A is a strict one-minute hunt. Big does not use the ring pattern at all. His C clear is catching Froggy, B requires a fish over 1000 grams before Froggy, and A raises that fish requirement to over 2000 grams before Froggy. Gamma returns to stage clears, but his timer matters on A runs, so efficient lock-on chains and route discipline matter more than ring hoarding alone.
The practical rule is simple: when the stage card appears, stop and read it. If you are chasing a replay emblem after a long break, let the card tell you whether this is a ring run, a time run, a race, a hintless treasure hunt, or a fishing requirement.
- Never assume every B emblem means 50 rings.
- Expect different replay rules for Sonic, Tails, Knuckles, Amy, Big, and Gamma.
- If you forgot a stage’s replay condition, confirm it from the objective card before committing to the run.
Clear mini-game emblems as a separate block
The Dreamcast total includes ten mini-game emblems. Think of these as two-emblem sets attached to five side activities rather than extensions of the story routes. Sky Chase Act 1, Sky Chase Act 2, Sand Hill, Hedgehog Hammer, and Twinkle Circuit all belong in this cleanup pass.
A good method is to finish your Action Stage work for a character, then enter Trial Mini-game and clear the side events while your controls are fresh. Sky Chase and Sand Hill are score-driven, Hedgehog Hammer is its own score challenge, and Twinkle Circuit is a best-time driving event. None of these should be mixed up with the Chao Stadium, and none of them replace hidden field emblem hunting.
- There are ten mini-game emblems in total.
- Handle mini-game replays from Trial, not from hub travel.
- Treat Twinkle Circuit and Hedgehog Hammer as their own emblem tasks, not as story leftovers.
Hunt Adventure Field emblems in Adventure mode with the right character
The Adventure Fields have their own hidden emblem set. There are four in Station Square, four in Mystic Ruins, and four on the Egg Carrier. Because several of them rely on character movement abilities, do not stubbornly search every hub with the same lead character if your route is clearly too short or too low.
A practical cleanup route is to search one field at a time and swap characters only when movement demands it. If you hit a ledge, tree interior, distant air gap, or high platform that obviously favors flight or gliding, use the character suited to that space instead of guessing the emblem is absent. Once your Trial replays start feeling repetitive, field emblem hunting is often the faster way to move the total upward.
- Return to Adventure mode for field emblem hunting.
- Search Station Square, Mystic Ruins, and the Egg Carrier separately.
- Swap characters when a hidden emblem clearly depends on better height, flight, or access.
Enter the Chao Stadium correctly and chase the Jewel race emblems
The five Chao emblems come from Chao racing, but not from Trial mode and not from the Beginner race category. Go into a Chao Garden, enter the Chao Stadium, and use the Entry button in the lobby. For emblem cleanup, choose Chao Race (Jewel). The five emblem races are Pearl, Amethyst, Sapphire, Ruby, and then Emerald after the first four are cleared.
Do not waste time looking for those emblems in the Beginner menu. If your Chao is not ready, leave the stadium and raise it first instead of brute-forcing losses. On Dreamcast, VMU Chao Adventure is part of the original loop: you can transport a Chao to a VMU, build it there, and return it to the garden later. That is authentic to this release, but it is still optional support work for the race goal rather than a story requirement.
- Get Chao emblems through Chao Race (Jewel), not Trial mode.
- Win Pearl, Amethyst, Sapphire, and Ruby to open Emerald.
- Use VMU Chao Adventure only if you want extra Chao raising help on Dreamcast.
Keep the Dreamcast postgame separate from later versions
For this chapter, stay locked to the original Dreamcast feature set. The optional loop here is Trial replays, hidden field emblems, Chao Gardens, the Chao Stadium, and VMU Chao Adventure. That is the real post-ending cleanup for this version.
Do not bring in Sonic Adventure DX extras or Sonic Adventure 2 systems. There is no Dreamcast Mission Mode card hunt in this guide, no Metal Sonic reward path to chase here, no Adventure 2 Chaos Drives, and no Chao Karate. If a checklist item sounds like it belongs to a later port or sequel, cut it out of your route and go back to emblem counts, Trial results, field searches, or Chao races.
- Dreamcast cleanup means Trial, field emblems, Chao Garden, Chao Stadium, and VMU Chao Adventure.
- Ignore DX Mission Mode and Metal Sonic while completing this Dreamcast chapter.
- Ignore Adventure 2 Chao systems such as Chaos Drives and Karate.
Before you move on
- You can separate the optional Dreamcast emblem work into Action Stages, Adventure Fields, mini-games, endings, and Chao races.
- You know Trial mode only covers Action Stage and Mini-game replays, while Chao races and field emblems require Adventure mode access.
- You can explain the replay goal style for each character without pretending every stage uses the same ring rule.
- You know the five Chao emblems are won in the Jewel races and that Emerald opens after the first four are cleared.
- You understand that 130 emblems are optional after the ending and are not required to unlock or replay the final Super Sonic story.
Find your next destination
Use this recovery chapter for the original Sega Dreamcast release of Sonic Adventure in Adventure Mode, not DX and not Trial Mode. If the game seems to stop giving clear directions, do not assume the file is broken. Most dead ends come from one missing field trigger, one uncollected required upgrade, the wrong hub map, or a story action that was done in Trial instead of Adventure. The safest reset is to back out, read the file-select progress clues, reload the same character in Adventure Mode, and touch a nearby Tikal hint orb or hint ball for the next nudge.
Start with the game’s own recovery tools
Back out to the file-select screen before you guess. In this Dreamcast version, that screen tells you the character used when the file was last saved, the next adventure stage tied to that character, and the last action stage or boss already cleared. Use that as your progress snapshot before you run around a hub looking for random switches.
Then load Adventure Mode. Trial Mode only replays stages and mini-games you already opened. It is useful for ranks, practice, and optional emblems, but it does not move story objects, trigger hub cutscenes, or count as the missing field step when you are trying to continue a character route.
Once you are back in the field, look for Tikal’s glowing hint orb. These illuminated balls are the intended way to recover your bearings in the original release. If the orb points away from your current map, take the train between Station Square and Mystic Ruins, use the jungle route, or return to the Egg Carrier area that matches your story state instead of assuming the save is stuck.
Do not delete your file to solve a missing trigger. Sonic Adventure usually wants one specific story action, not a restart.
- Check the file-select screen first and read the active character, next adventure stage, and last cleared stage or boss.
- Reload Adventure Mode if you were using Trial Mode.
- Touch a nearby Tikal hint orb or hint ball before testing unrelated doors, caves, or pedestals.
- Travel to the hinted hub first if the clue clearly points to Station Square, Mystic Ruins, the jungle, or the Egg Carrier.
Symptom, cause, action quick table
Use the matching symptom below and do the fix exactly once before you start free-roaming again. Most of these problems come from missing one earlier field step.
If the same blocker returns, go back to the last major landmark that was definitely part of the story. In practice that usually means the Station Square hotel and casino block, Tails’s workshop, the waterfall cave, the temple area in Mystic Ruins, or the Egg Carrier pool and deck rooms.
- Casinopolis door will not open for Sonic. Cause: you have not used the Light Speed Shoes route to hit the hidden switch. Action: go through Station Square’s sewer, collect the Light Speed Shoes if Sonic still lacks them, charge the Light Speed Dash on the ring line, and let it carry you to the casino-opening switch.
- Light Speed Dash keeps failing. Cause: you are trying to tap it instead of charging it first, or you are not lined up with the ring trail. Action: stop, charge the move fully, face the ring line cleanly, then release. If Sonic only spins or veers off, reset your angle and try again.
- A Windy Valley or Ice Cap pedestal does nothing. Cause: the matching stone item is missing. Action: bring the Wind Stone from beside Tails’s workshop to the windy cave pedestal for Windy Valley, or carry the Ice Stone from the Station Square alley to the Mystic Ruins ice-cave pedestal for Ice Cap.
- The monkey barrier on the Red Mountain route stays locked. Cause: Sonic has the Light Speed Shoes but not the Ancient Light, or you are trying to dash through instead of using the attack upgrade. Action: collect the Ancient Light on the route toward the mountain and use the Light Speed Attack on the caged Kiki to break the lock.
- The Egg Carrier route looks wrong, a familiar passage is gone, or a dry path is flooded. Cause: the ship is in the other layout for that story moment. Action: recheck whether your character needs the transformed or untransformed state and return to the proper control-room sequence or pool passage for that chapter instead of forcing the wrong deck layout.
- Knuckles gets strong radar orbs but no shard is where you stand. Cause: you are on the wrong height, or the shard is buried or hidden in a wall object. Action: stop circling, search one elevation at a time, hit Tikal’s hint orbs or hint balls for direction, then test above, below, and diggable ground when the radar stays hot.
- Big sees Froggy but will not secure the catch. Cause: you cast from a bad angle, failed to set the hook, or are forcing the reel with too much tension. Action: confirm Froggy’s position first, cast close to him from a usable edge or surface position, pull back when he bites to hook him, then reel while easing up if the line strains. If the angle is ugly, walk to shorten it and recast.
- Gamma runs out of time. Cause: you are sniping targets one by one or taking a slower route than the stage expects. Action: chain several targets before firing so the lock-on bonus adds time, hover across gaps instead of climbing the long way, and if movement still feels wrong, confirm you collected the Jet Booster earlier in Gamma’s story.
Character-specific fixes when a route feels dead
Sonic is usually blocked by one required field interaction. Separate his tools clearly. Light Speed Shoes are for Light Speed Dash ring routes and the Casinopolis switch. Ancient Light is for the monkey barrier and later Light Speed Attack uses. Crystal Ring helps but is optional, so do not chase it as a story repair.
Tails does have one required pickup that is easy to forget. After Sand Hill, Tikal sends him to the ancient echidna settlement. From the arrival point, climb the low structure on the left, take the Rhythm Badge near the wall and pillar, then go to Tikal in front of the main temple. That conversation sends Tails back to present-day Mystic Ruins so he can return to the workshop and launch Tornado 2. If you skipped that badge, Jet Anklet is not the answer because Jet Anklet is optional.
Knuckles is usually not blocked by a missing event. He is blocked by search discipline. Do not rely on remembered shard spawns. Use Tikal hint orbs or hint balls, read the radar, and commit to a full sweep of upper paths, middle routes, and lower floors instead of bouncing between levels every few seconds.
Amy can appear stuck on the Egg Carrier if Hedgehog Hammer was left unfinished. Beat Eggman’s displayed score there to receive the Warrior Feather and reopen the path forward. Long Hammer is optional later and is not the fix for a halted story flag.
Big’s story blocker is almost never an upgrade. This guide grabs the Life Belt because it makes water handling much safer before Ice Cap and Hot Shelter, but an uncollected Life Belt is not the usual reason story progression stopped. If Big is stuck, solve the fishing problem first: find Froggy, cast from a workable position, hook cleanly, then manage the reel.
Gamma’s hard gate is the Jet Booster. If he already has it, most failures come from timer management, not missing plot events.
- If Sonic is stuck, ask whether the missing step is Light Speed Shoes, Ancient Light, or a stone pedestal placement.
- If Tails is stuck after Sand Hill, return to the past settlement, collect the Rhythm Badge from the low left structure, then approach Tikal at the temple front.
- If Knuckles is stuck, change height deliberately and use Tikal hint orbs or hint balls instead of assuming the shard failed to spawn.
- If Amy is stuck on the carrier, clear Hedgehog Hammer and take the Warrior Feather before checking other doors.
- If Big is stuck, troubleshoot Froggy visibility, hook timing, and line angle before blaming missing upgrades.
- If Gamma is stuck, confirm Jet Booster first, then shorten your route and build lock-on chains for more time.
Required versus optional upgrades
Use this list to separate true story gates from conveniences. If a route is blocked, go after the required item named for that character and ignore score tools or comfort upgrades until the story moves again.
The chapter references below point back to the relevant character chapter in this guide plan.
- Sonic required: Light Speed Shoes and Ancient Light. Sonic optional: Crystal Ring. See Sonic: Casinopolis and Ice Cap, and Sonic: Speed Highway and Red Mountain.
- Tails required: Rhythm Badge. Tails optional: Jet Anklet. See Tails: Windy Valley, Casinopolis and Ice Cap, and Tails: the Tornado, Sand Hill and Sky Deck.
- Knuckles required: Shovel Claw. Knuckles optional: Fighting Gloves. See Knuckles: Red Mountain and Lost World.
- Amy required: Warrior Feather. Amy optional: Long Hammer. See Amy: Twinkle Park and Hot Shelter, and Amy: Final Egg and ZERO.
- Big required for story recovery: none. Big strongly recommended on this route: Life Belt. Big optional extras: Power Rod and lure upgrades. See Big: fishing at Twinkle Park and Ice Cap, and Big: Emerald Coast, Hot Shelter and Chaos 6.
- Gamma required: Jet Booster. Gamma optional: Laser Blaster. See Gamma: Final Egg, Emerald Coast and the Jet Booster, and Gamma: rescue the E-series and defeat Beta.
Before you move on
- You can use the file-select screen, Adventure Mode, and a Tikal hint orb or hint ball to identify the next real objective without guessing.
- You can diagnose the common blockers: Casinopolis access, an uncharged Light Speed Dash, a missing Wind Stone or Ice Stone placement, the Red Mountain monkey barrier, the wrong Egg Carrier layout, bad Knuckles elevation search, a failed Froggy hook, or Gamma timer trouble.
- You know that Tails’s Rhythm Badge is required after Sand Hill, while Big’s Life Belt is strongly recommended but not a mandatory story gate for fixing progression.
- You have one specific next action to try in Adventure Mode and you did not need to erase or restart your file.
References for this chapter
- Sonic Adventure Dreamcast manual
- Games SEGA DREAMCAST SONIC ADVENTURE : User Guide : Page 3
- Sonic Adventure/Knuckles the Echidna — StrategyWiki
- Sonic Adventure - Guide and Walkthrough - Dreamcast - By CChan - GameFAQs
- Sonic Adventure - FAQ - Dreamcast - By MSTie2K - GameFAQs
- Sonic Adventure - Guide and Walkthrough - Dreamcast - By CKohler - GameFAQs
Finishing up
Clear Sonic, Tails, Knuckles, Amy, Big, and Gamma's stories and preserve each story's save.
Select the unlocked Super Sonic scenario and follow its hub sequence into the finale.
Defeat Perfect Chaos and watch the ending.
Return to the optional chapters for emblem ranks, remaining upgrades, or Chao activities after the full story is complete.
Choose your next gameScreenshots & video
Game imagery for reference. Follow the written chapters above for the route and strategies.
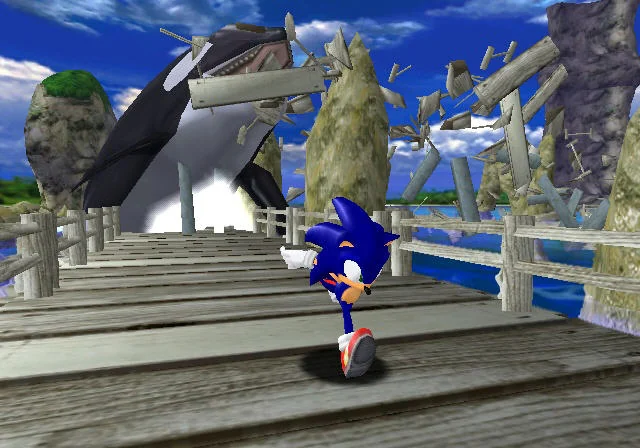
Sources & references
Our original guide draws on the references below. Check the edition at the top of this page before following controls or unlock requirements.
- Sonic Adventure Release Information for Dreamcast - GameFAQs
- Sonic Adventure - Guide and Walkthrough - Dreamcast - By CKohler - GameFAQs
- Sonic Adventure/Walkthrough — StrategyWiki | Strategy guide and game reference wiki
- Sonic Adventure/Gameplay — StrategyWiki
- Hint Orb | Sonic Wiki Zone | Fandom
- Sonic Adventure Dreamcast manual
- Sonic Adventure - Boss Guide - Dreamcast - By ChronoCactaur - GameFAQs
- Sonic Adventure - FAQ and Walkthrough - Dreamcast - By Luxor - GameFAQs
- Sonic Adventure - Guide and Walkthrough - Dreamcast - By CChan - GameFAQs
- Sonic Adventure/Sonic/Ice Cap — StrategyWiki
- Sonic Adventure/Sonic/Sky Chase: Act I — StrategyWiki
- SONIC TEAM PRESENTS SEGA
- Sonic Adventure - Walkthrough - Dreamcast - By Terminal_Omega - GameFAQs
- SEGA SONIC ADVENTURE INSTRUCTION MANUAL Pdf Download | ManualsLib
- Sonic Adventure - Emblem FAQ - Dreamcast - By lloyd700 - GameFAQs
- Sonic Adventure
- Console And Controller Operation; Basic Controls - Sega Sonic Adventure Instruction Manual [Page 2] | ManualsLib
- Sonic Adventure/Knuckles the Echidna — StrategyWiki
- Mystic Ruins (Sonic Adventure) | Sonic Wiki Zone | Fandom
- Red Mountain | Sonic Wiki Zone | Fandom
- Lost World | Sonic Wiki Zone | Fandom
- Sonic Adventure - Boss Guide - Dreamcast - By NTsui - GameFAQs
- Guide for Sonic Adventure - Story: Amy
- Sonic Adventure/Amy Rose — StrategyWiki
- Sonic Adventure Instruction Manual | Manualzz
- Sonic Adventure - Big Walkthrough Guide - PlayStation 3 - By DJosef - GameFAQs
- Sonic Adventure Cheats, Codes, and Secrets for Dreamcast - GameFAQs
- Sonic Adventure - FAQ - Dreamcast - By MSTie2K - GameFAQs
- Egg Carrier (Sonic Adventure) | Sonic Wiki Zone | Fandom
- Sonic Adventure/E-102 "Gamma" — StrategyWiki
- Sonic Adventure - E-102 Walkthrough Guide - Dreamcast - By Knux2001 - GameFAQs
- Sonic Adventure/Super Sonic — StrategyWiki
- Sonic Adventure - Emblem FAQ - Dreamcast - By NTsui - GameFAQs
- Games SEGA DREAMCAST SONIC ADVENTURE : User Guide : Page 3
About the game & collecting notes
- Platform
- Dreamcast
- Developer
- Sonic Team
- Publisher
- Sega
- Release Date
- 1998-12-23
- Region
- Japan (original Dreamcast release)
- Genre
- 3D action
- Players
- 1–2, mode dependent
Sonic Adventure is a Dreamcast action game in Sega’s Sonic series. Sega’s Japanese Dreamcast catalog lists the original release on December 23, 1998, and separately lists Sonic Adventure International on October 14, 1999.
The date and region in this record identify the original Japanese release. Later regional versions and releases on other platforms are separate collecting questions, even where a listing uses the same short title.
When evaluating a physical copy, compare the disc, rear cover, region, and exact title. Test saving with the intended memory accessory and check the video arrangement for the release you own. This guide does not assign a current market value or a hands-on review score.
Collector notes
Keep the Japanese original, International release, other regional editions, and later ports distinct in your records.Darryl Polo
Darryl Polo loves tinkering with emulation and revisiting retro games. He enjoys exploring how old favorites play on different setups and sharing what he learns along the way. At Joking Joystick, he writes about the games, hardware, and small discoveries that keep the hobby fun.
Our editorial standardsFound a step that needs another look? Help us improve this guide.