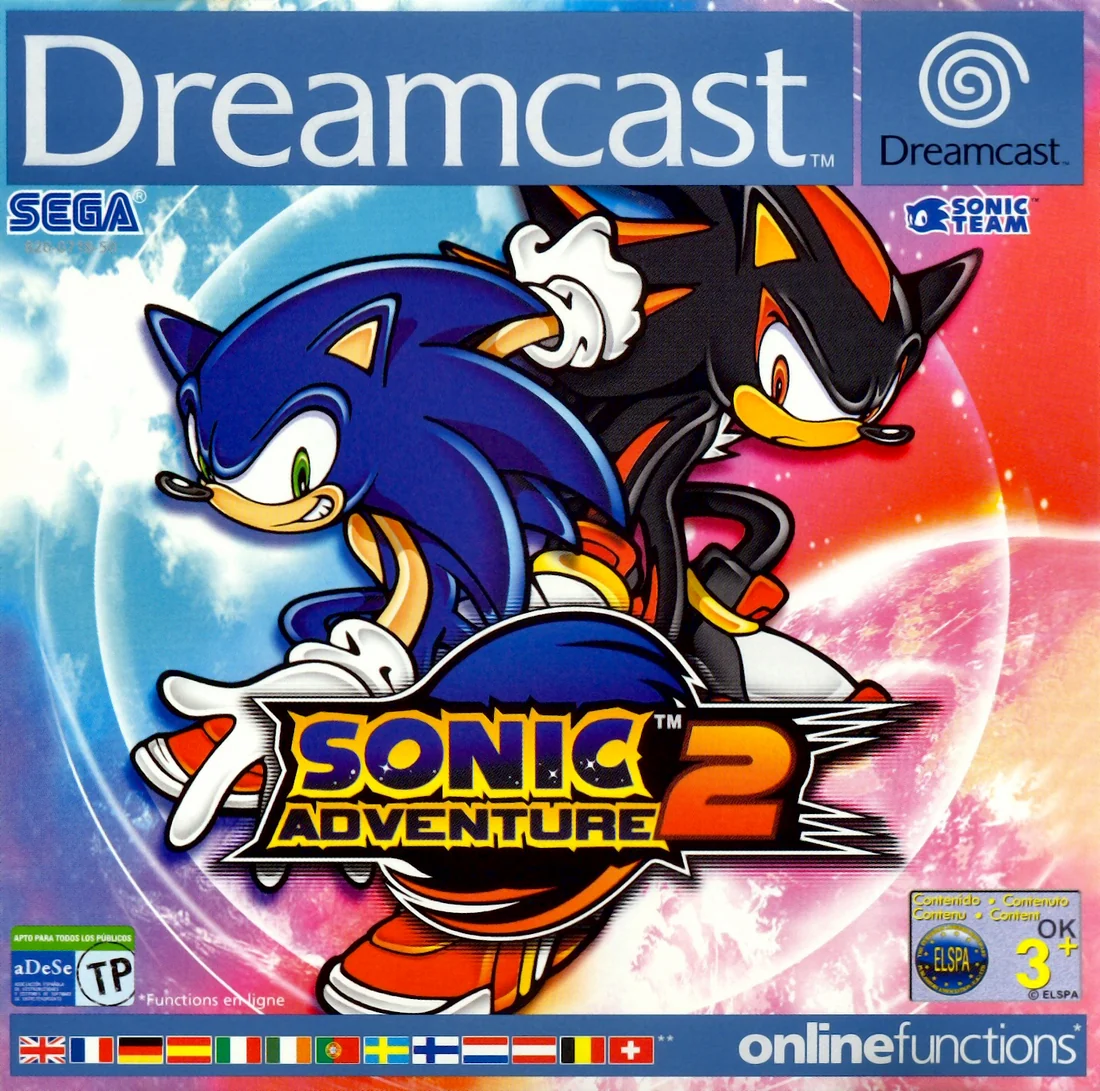
Sonic Adventure 2 — Dreamcast (Europe) Walkthrough (En / Ja / Fr / De / Es)
Complete, platform-accurate Dreamcast walkthrough for Sonic Adventure 2 (Europe release). This guide steers you through Hero and Dark stories, the Last Story and the Finalhazard finale, plus emblem missions, Chao raising and Dreamcast-specific extras. It avoids mechanics introduced in later ports and explains recovery, boss patterns and required unlocks.

Find a copy
Sonic Adventure 2 Dreamcast
We may earn a commission if you buy through these links, at no extra cost to you. As an Amazon Associate I earn from qualifying purchases.
Opens retailer search results. Check the model, edition, seller, availability and current price before buying.
Before you begin
This walkthrough is written specifically for the original Sega Dreamcast release as sold in Europe.
Follow the ordered Hero Story, Dark Story and Last Story route first. Optional missions, emblems, A ranks, multiplayer, Chao raising and VMU features are separated from the required ending route.
The canonical ending requires both main story campaigns, Cannon's Core, the Biolizard and the Finalhazard. No emblem total, A rank or Chao result is required to unlock that ending.
The guide distinguishes Dreamcast features from Sonic Adventure 2: Battle and later ports, including controls, multiplayer, Chao systems and completion rewards.
Set yourself up for the run
Have a formatted Dreamcast memory card with at least 18 blocks free for the main file and 52 blocks for Chao data (VMU support for Chao mini-game requires extra VMU space if used).
Confirm which control port/VMU you will use before starting a new file.
Open Options and choose your preferred voice language (English or Japanese) and pick the text/subtitle language from the game’s five available text formats.
Set sound output and camera/trigger options to your comfort before beginning.
(The original Dreamcast manual documents these options.)
Familiarize yourself with the four gameplay types: Action (Sonic/Shadow), Lock-On Shooting (Tails/Eggman), Treasure Hunting (Knuckles/Rouge), and Boss/Kart/Chao modes.
Each stage enforces a lead character and mission structure; treat them as different minigames with distinct controls.
Decide your main run target: reach the canonical ending (complete both storylines + Last Story) or pursue full completion (collect all 180 emblems, all mission A-ranks, Chao breeding).
If going for full completion, expect many repeat stage runs to reach emblem/missions.
Prioritize emblem-bearing missions that are quick to repeat.
Before attempting harder missions or the Last Story, learn boss patterns in the Early Boss and Mid Boss chapters and gather upgrades shown in stages.
Upgrades and small-item pickups change how fast later missions become and are stage-specific in the Dreamcast build.
If you intend to use VMU mini-game features or trade Chao with another Dreamcast, prepare a VMU with 128 blocks free for Chao Adventure 2 transfers.
Note: VMU transfers and 2P features are Dreamcast-specific and differ from later ports.
Before You Insert the Disc — Options, Saves and Controls
Prepare the European Sega Dreamcast release of Sonic Adventure 2 by checking VMU space, selecting the correct game file, setting voice and text languages, and learning the original Dreamcast controller layout. These instructions apply to the original Dreamcast game, not Sonic Adventure 2: Battle or later ports.
1. Connect a VMU and check the required space
Insert a VMU into a Dreamcast Controller before starting the game. The Dreamcast release uses separate files for different parts of the game: the main save requires 18 blocks, Chao data requires 52 blocks, and the Chao Adventure 2 VMU mini-game requires 128 blocks. The mini-game can use another VMU, so you do not have to keep all three files together.
For story progression, begin with at least 18 free blocks for the main file. If you plan to use the Chao Gardens, leave another 52 blocks available for Chao data. If you want to export a Chao and play Chao Adventure 2, use a VMU with 128 free blocks and avoid treating that space as part of the ordinary 18-block story save.
- A VMU is connected to the controller
- At least 18 blocks are free for the main game file
- Extra space is available for Chao data or the VMU mini-game if needed
2. Select and remember the correct game file
After the Dreamcast is powered on for the first time with the game running, the Memory Card Select screen asks which memory card and game file to use. Select the VMU that has enough free space, then choose an existing Sonic Adventure 2 file or create the main file when the game offers that choice.
Record the controller port, VMU, and file you selected. Later, use Options if you need to change the active game file. Your story progress, records, mission results, and unlocked content are associated with the selected main file, while Chao progress is stored separately in the Chao data file.
Do not turn off the Dreamcast, remove the VMU, or disconnect the controller while the game is saving or loading. Before attempting a long set of mission runs, return to a reliable save point and wait until all writing has finished.
- The correct VMU is selected on the Memory Card Select screen
- The main Sonic Adventure 2 file is present and identifiable
- You know which controller port and VMU contain the file
- The VMU is left connected during saving and loading
3. Set voice and text language
From the title screen, press START to open the Main Menu, choose Options, and enter the language setting. The European Dreamcast release allows English or Japanese voice audio and provides five selectable text languages. Use the directional controls to choose the voice and text settings separately, then press A to confirm. Press B to cancel without applying a menu change.
Language choices affect menus, subtitles, and spoken dialogue presentation. They do not alter the Hero Story, Dark Story, stage order, controls, save requirements, or mission structure. English text is the simplest choice when matching the stage names used in this guide, but any available text language works for gameplay.
- Voice is set to English or Japanese
- Text is set to the desired language
- The settings are confirmed before entering Story mode
4. Learn the universal Dreamcast controls
Move with the Analog Thumb Pad. Press A to jump and press B or X to perform the current Action. START pauses the game and opens the pause menu. The D-pad is used for menu navigation. In menus, A confirms a selection and B returns to the previous screen where cancellation is available.
Press Y to switch between choices in the Action Window when more than one contextual action is available. Press L or R to rotate the camera. The Dreamcast version does not use a second analog stick for camera control, so do not follow control layouts from PC or later console releases.
When powering on the Dreamcast, avoid touching the Analog Thumb Pad and L/R triggers during startup. The manual warns that doing so can interfere with controller initialization.
- Analog Thumb Pad: move the character or menu cursor
- D-pad: move the menu cursor
- A: jump or confirm
- B/X: Action during play; B cancels in menus
- Y: switch the Action Window
- L/R: rotate the camera
- START: pause
5. Use the Action Window correctly
The Action Window appears at the top right of the screen. It shows what the current Action button will do in the character’s surroundings, such as opening a door, using a spring, breaking a container, calling a small animal, or performing a character-specific move.
If several actions are available, press Y until the desired action is displayed, then press B or X. Do not press Y as the action itself: Y only cycles the choices. The B and X buttons are both Action buttons during gameplay, although B is also the normal cancel button in menus.
For Sonic and Shadow, press A to jump and press A while airborne to perform the Homing Attack when a nearby target is available. Hold B and release it to Spin Dash while on the ground. Press B near a suitable ring trail to use Light Dash after obtaining the required power-up. These character-specific actions are separate from the general Action Window function.
- The Action Window is visible at the top right
- Y is used only to cycle multiple contextual actions
- B or X activates the displayed action
- Sonic and Shadow’s Homing Attack uses A while airborne
6. Practice camera control before entering Story mode
Use L and R to rotate the camera before committing to a jump, rail, or narrow platform. Stop on safe ground if the view points across a gap or behind the character, then adjust the camera and line up the next movement.
This habit is especially useful in Sonic and Shadow’s high-speed stages, where a poor angle can hide rails or landing platforms. It also helps in treasure-hunting stages, where the search indicators can lead toward hazards or lower platforms. If the route is unclear, reposition the camera first instead of moving blindly.
- You can rotate the camera with L and R
- You check the landing area before jumping
- You can identify the difference between Y for Action Window selection and B/X for performing an action
Before you move on
- The intended voice and text languages are displayed in Options.
- The correct VMU contains a usable Sonic Adventure 2 main file.
- You have confirmed at least 18 free blocks for ordinary story progress.
- If using Chao, you have separate space for the 52-block Chao data file.
- If exporting a Chao, the target VMU has 128 free blocks and no incompatible existing mini-game file.
- You can identify Analog Pad movement, A jump, B/X Action, Y Action Window switching, L/R camera rotation, and START pause.
- You understand that Sonic and Shadow use A while airborne for the Homing Attack and hold-and-release B for Spin Dash.
Story Structure — Hero, Dark and the Last Story
Sonic Adventure 2 on Sega Dreamcast divides its main campaign into Hero Story and Dark Story. These are separate, fixed progressions with different characters, stages, events, and bosses. Completing only one side is not the game’s ending. Finish both campaigns to unlock the Last Story, then complete Cannon’s Core, the Biolizard battle, and the Finalhazard battle to reach the canonical ending.
Open Story Mode and choose a campaign
At the title screen, select 1P Play, then Story. The Dreamcast version initially offers Hero Story and Dark Story. Hero Story uses Sonic, Tails, and Knuckles for its playable stages. Dark Story uses Shadow, Dr. Eggman, and Rouge.
Choose either campaign first. Your choice does not lock the other campaign or alter the requirement for the final story. Hero first is a practical introduction because it opens with Sonic’s City Escape, but starting with Dark is equally valid if you prefer Shadow, Eggman, and Rouge.
- Select 1P Play.
- Select Story.
- Choose Hero or Dark Story.
Play the selected campaign in its fixed order
The chosen story advances through a predetermined sequence. Complete the stage or boss encounter currently presented, watch the following event, and continue to the next unlocked entry. You cannot replace a required stage with a different character’s stage or bypass the next story encounter through Mission Mode.
Hero Story contains 16 stages. Dark Story contains 14 stages. The two sequences overlap in locations and themes, but their stage orders and playable characters are not interchangeable. A stage cleared in Hero Story does not count as the equivalent Dark Story stage.
- Follow the stage order shown by Story Mode.
- Complete every required stage and boss encounter in the selected campaign.
- Do not treat a similarly named or similarly located stage in the other campaign as cleared.
Know which objectives advance the plot
For story progression, complete the normal first objective assigned to each stage. Depending on the character and stage type, this may mean reaching the goal as Sonic or Shadow, destroying targets or surviving to the goal in a Tails or Eggman mech, recovering the required objects as Knuckles or Rouge, completing a kart race, or winning a boss encounter.
You do not need an A rank, all rings, every animal, every Chaos Drive, a lost Chao, or any other alternate objective to advance the story. Those challenges belong to the replayable mission structure. Mission 2, Mission 3, Mission 4, and Mission 5 are optional for unlocking the Last Story.
- Finish the standard objective displayed for each story stage.
- Ignore optional rank and collection goals until the main story is complete.
- Do not enter Mission Mode expecting its alternate objectives to advance the campaign.
Finish one side completely, then select the other
Continue until the selected campaign reaches its final story encounter and credits. The game records the completed campaign separately and provides replay access for its scenes and bosses. Completing Hero Story does not complete Dark Story, and completing Dark Story does not complete Hero Story.
After the credits, return to the Story selection screen. Select the unfinished side from the Hero or Dark entry and play it from its beginning. A straightforward first-playthrough route is Hero Story followed by Dark Story, although the reverse order produces the same final unlock.
- Reach the ending credits for the first campaign.
- Return to Story selection.
- Select the campaign that is not yet complete.
- Finish that campaign through its final encounter and credits.
Unlock and start the Last Story
When both Hero Story and Dark Story have been completed, a new Last Story selection appears in Story. On the Dreamcast menu it is represented as the additional final-story entry between the two completed sides. If it is absent, verify that both campaigns were finished through their final encounters and that you allowed the ending sequence to complete.
Select Last Story to begin Cannon’s Core. This final stage changes playable characters as the team works through the ARK interior. Completing Cannon’s Core leads to the Biolizard battle and then the Finalhazard battle. The Last Story, rather than emblem collection or Chao progress, is the required route to the canonical ending.
- Hero Story is complete through its credits.
- Dark Story is complete through its credits.
- Last Story appears in Story selection.
- Select Last Story and begin Cannon’s Core.
Before you move on
- Hero Story has been completed through its final encounter and credits.
- Dark Story has been completed through its final encounter and credits.
- The Last Story entry is visible in the Story selection menu.
- Selecting Last Story starts Cannon’s Core.
- Mission ranks, emblems, Chao development, and alternate mission objectives remain optional and can be pursued after the main campaign unlocks.
Stage List and Character Roles (Dreamcast original)
The European Sega Dreamcast release contains 16 Hero Story stages, 14 Dark Story stages, and one Last Story stage. The required campaign uses four main stage formats: Action, Lock-on Shooting, Treasure Hunting, and Kart Racing. Boss encounters are separate required story events placed between some numbered stages. Chao World and the Green Hill Zone are outside the required story route.
Understand the stage formats
Action stages are the speed-platforming levels played by Sonic and Shadow. The objective for the first story mission is normally to reach the Goal Ring. These stages emphasize running, jumping, homing attacks, springs, rails, loops, gravity devices and hazard avoidance. Sonic and Shadow share the same broad role, but their stages and upgrade placements are not interchangeable.
Lock-on Shooting stages are played by Tails and Dr. Eggman in their walking vehicles. Move through combat-focused courses, lock onto enemies, destroy targets and continue toward the Goal Ring or mission objective. Their health meters function differently from Sonic and Shadow’s ring protection, so avoid unnecessary damage and be cautious around explosive objects, open space and narrow platforms.
Treasure Hunting stages are played by Knuckles and Rouge. The first mission normally requires three target objects, but the target can be Master Emerald pieces, gate keys or another specified item depending on the stage. Use the radar, Hint Boxes, vertical movement and recognizable room landmarks to search systematically. Do not assume every Knuckles or Rouge stage uses Master Emerald pieces.
Kart Racing stages are Route 101 in the Hero Story and Route 280 in the Dark Story. Tails drives Route 101, while Rouge drives Route 280. Follow the road, collect useful Rings and balloons when safe, use boosts on straights and finish the race objective. These are not standard Action or Treasure Hunting stages.
Boss battles occur as separate required events between parts of the story sequence. Chao World is an optional activity reached after obtaining a Chao Key, and Green Hill is an unlockable extra rather than a story stage.
- Action: reach the Goal Ring while surviving platforming hazards.
- Lock-on Shooting: destroy targets and reach the end while protecting vehicle health.
- Treasure Hunting: locate the exact objects named by the mission briefing.
- Kart Racing: complete the course and its stated race objective.
- Bosses: continue through every required boss result and story scene.
- Optional: enter Chao World when a Chao Key is available.
Complete the Hero Story in order
Choose Hero Story from the Story menu. Clear each numbered stage in this order:
City Escape — Sonic — Action.
Wild Canyon — Knuckles — Treasure Hunting.
Prison Lane — Tails — Lock-on Shooting.
Metal Harbor — Sonic — Action.
Green Forest — Sonic — Action.
Pumpkin Hill — Knuckles — Treasure Hunting.
Mission Street — Tails — Lock-on Shooting. The route continues after this stage; do not leave the story assuming the early stages are the complete campaign.
- Hero stages 1 through 7 are City Escape, Wild Canyon, Prison Lane, Metal Harbor, Green Forest, Pumpkin Hill and Mission Street.
- Required boss events are separate from the numbered stage count. The early Hero sequence includes Big Foot, Dr. Eggman and Shadow encounters.
Finish the later Hero stages
Continue with Aquatic Mine — Knuckles — Treasure Hunting; Route 101 — Tails — Kart Racing; Hidden Base — Tails — Lock-on Shooting; Pyramid Cave — Sonic — Action; Death Chamber — Knuckles — Treasure Hunting; Eternal Engine — Tails — Lock-on Shooting; Meteor Herd — Knuckles — Treasure Hunting; Crazy Gadget — Sonic — Action; and Final Rush — Sonic — Action.
The correct Hero numbering is stage 8 Aquatic Mine, stage 9 Route 101, stage 10 Hidden Base, stage 11 Pyramid Cave, stage 12 Death Chamber, stage 13 Eternal Engine, stage 14 Meteor Herd, stage 15 Crazy Gadget and stage 16 Final Rush.
The later required encounters include King Boom Boo after Death Chamber, Egg Golem before Eternal Engine, Rouge after Meteor Herd and Dr. Eggman followed by the concluding Shadow encounter after Crazy Gadget and Final Rush. The exact story transition may place a boss before the next numbered stage, so continue through the result screen and cutscenes rather than returning to Stage Select.
- Hero stage order ends with Meteor Herd, Crazy Gadget and Final Rush.
- Route 101 is the Hero kart stage and is played by Tails.
- Final Rush is the sixteenth and final numbered Hero stage.
- Clearing Hero Story alone does not unlock the game ending.
Complete the Dark Story in order
Return to the Story menu and select Dark Story. Clear the numbered stages in this order:
Iron Gate — Dr. Eggman — Lock-on Shooting.
Dry Lagoon — Rouge — Treasure Hunting.
Sand Ocean — Dr. Eggman — Lock-on Shooting.
Radical Highway — Shadow — Action.
Egg Quarters — Rouge — Treasure Hunting.
Lost Colony — Dr. Eggman — Lock-on Shooting.
Weapons Bed — Dr. Eggman — Lock-on Shooting.
- Dark stages 1 through 7 are Iron Gate, Dry Lagoon, Sand Ocean, Radical Highway, Egg Quarters, Lost Colony and Weapons Bed.
- The Dark route includes the Hot Shot encounter after Iron Gate and the Tails encounter after Weapons Bed.
Finish the Dark Story and identify Last Story
Continue with Security Hall — Rouge — Treasure Hunting; White Jungle — Shadow — Action; Route 280 — Rouge — Kart Racing; Sky Rail — Shadow — Action; Mad Space — Rouge — Treasure Hunting; Cosmic Wall — Dr. Eggman — Lock-on Shooting; and Final Chase — Shadow — Action.
The correct Dark numbering is stage 8 Security Hall, stage 9 White Jungle, stage 10 Route 280, stage 11 Sky Rail, stage 12 Mad Space, stage 13 Cosmic Wall and stage 14 Final Chase.
Route 280 is the Dark equivalent of Route 101, but it is a kart course driven by Rouge rather than a treasure-hunting stage. The later Dark route includes the Flying Dog, Sonic, Egg Golem, Knuckles, Tails and final Sonic encounters around these stages.
After both Hero Story and Dark Story are cleared, Last Story becomes available. Cannon’s Core is the sole numbered Last Story stage and switches characters in this order: Tails, Dr. Eggman, Rouge, Knuckles and Sonic. Complete all five sections before the Biolizard battle. The final sequence then uses Super Sonic and Super Shadow against Finalhazard.
- Dark stage order includes Route 280 at position 10.
- Final Chase, not Final Rush, is the fourteenth Dark stage.
- Cannon’s Core is the Last Story stage and uses five character sections.
- Last Story requires completion of both Hero Story and Dark Story.
Before you move on
- Hero Story stages 1 through 16 are cleared in the corrected order, ending with Final Rush and its required concluding battle.
- Dark Story stages 1 through 14 are cleared in the corrected order, including Route 280 and ending with Final Chase and its required concluding battle.
- Last Story appears after both sides are complete.
- Cannon’s Core is cleared through its Tails, Dr. Eggman, Rouge, Knuckles and Sonic sections.
- The Biolizard and Finalhazard encounters are completed to reach the ending sequence and credits.
Sonic Action Stages — City Escape, Metal Harbor, Green Forest, Pyramid Cave, Crazy Gadget, Final Rush
Sonic’s six Hero Story action stages are completed by reaching the goal ring, but several upgrades are placed in these levels for later missions and optional routes. Clear Mission 1 first using the safest visible path. Return afterward for upgrades, rings, time targets, animals, Chaos Drives and Lost Chao objectives.
1. City Escape — survive the pursuit
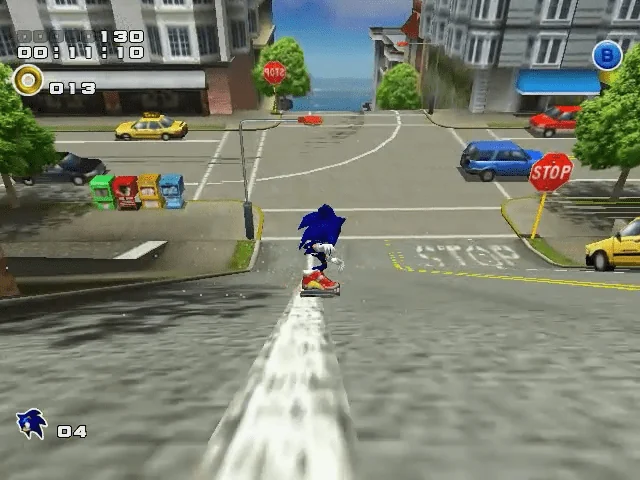
Sonic begins on a board in the city streets. Stay near the middle of the road, make broad steering corrections and use the ramps without forcing the highest stunt line. After landing, follow the streets and stairs, using homing attacks only when an enemy blocks the route. Watch for bottomless gaps because a poorly aimed homing attack can carry Sonic away from the safe platform.
When the large truck begins its pursuit, keep running downhill and avoid stopping beside walls or parked vehicles. The chase route is largely linear. On the final board descent, favor the center of the slope and take a lower line if a side ramp is not clearly aligned. The goal ring appears immediately after the escape sequence.
The steel containers and the Magic Gloves room are optional. Return after obtaining the Bounce Bracelet from Pyramid Cave and the Flame Ring from Crazy Gadget. After the long building descent, continue toward the stairs and look for four steel containers set into the floor. Use the Bounce Attack to break through them and drop into the small room containing the Magic Gloves. Use the spring to leave.
- Clear Mission 1 by reaching the goal ring.
- Do not delay the first clear to search for the Magic Gloves.
- Return later with the Bounce Bracelet and Flame Ring for the optional upgrade.
2. Metal Harbor — collect the Light Shoes
Proceed through the opening platforms until Sonic reaches the area with a trail of rings over the water. Before using the ring trail, look to the left for the tower and pulley. Ride the pulley to the green upgrade container and collect the Light Shoes. They enable Light Dash, performed by pressing B near the beginning of a connected ring trail while facing along it.
After collecting the upgrade, use the ring trail rather than attempting a blind jump across the gap. Continue through the military platforms, springs and rocket launches. Line Sonic up with the destination before using a rocket; a centered approach is safer than trying to redirect during the launch. If a landing is missed, look for the lower platform or nearby spring instead of repeatedly jumping from empty space.
The final rocket carries Sonic toward the goal and the following Sonic-versus-Shadow boss encounter. For later time or ring missions, avoid unnecessary enemy attacks and preserve rings through the opening sections.
- Collect the Light Shoes on the first visit if possible.
- Use Light Dash only when Sonic is close to and facing the connected ring trail.
- Save lives for the stage-ending boss sequence.
3. Green Forest — maintain momentum under the escape timer
Mission 1 requires Sonic to cut through the jungle within the stage’s escape time. Follow the opening half-pipe, use the spring and continue through the loops and forest platforms without stopping to defeat every robot. The normal route provides enough time when Sonic keeps moving.
Near the early open area before the second checkpoint, a concealed route leads to the Ancient Light. Move toward the right wall and edge toward the camera until the hidden robot and floating platforms come into view. Use homing attacks across the visible targets to reach the upgrade. Ancient Light enables Sonic’s Light Speed Attack, but it is optional for the story clear.
The main hazards are gaps after rails, narrow platforms and enemies placed beside landing points. If a rail or homing chain is missed, take the lower platform or nearby spring rather than trying to reverse in midair. Checkpoints divide the escape into recoverable sections. Continue through the forest and ruin route to the goal.
- Treat the timer as the Mission 1 priority.
- Use the lower recovery path after a missed rail.
- Collect Ancient Light on a separate exploration run if the first clear is difficult.
4. Pyramid Cave — use the Bounce Bracelet
Follow the cave route through the first robot groups, springs and vertical chambers. The Bounce Bracelet is placed directly along the normal route. Collect it before continuing. Press B while Sonic is airborne to perform the Bounce Attack; repeated bounces can gain height and can break certain objects and enemies.
The remaining hazards are spike corridors, falling platforms and rail transfers. Approach a rail from its center and wait until the next landing surface is visible before jumping. If a transfer fails, search for the lower platform or spring in the same chamber instead of trying to climb back from a wall. Doors and blocked passages normally have a nearby switch, spring or breakable object that reveals the intended route.
The Bounce Bracelet is also required for the optional Magic Gloves visit in City Escape. It is not required to finish the main story route beyond its normal collection in Pyramid Cave.
- Collect the Bounce Bracelet.
- Use the safer lower route while learning the cave.
- Do not attack spike-bearing enemies unless the homing target is clearly active.
5. Crazy Gadget — control gravity and obtain the Flame Ring
Crazy Gadget introduces gravity-changing cylinders, colored platforms, vertical shafts and narrow landings. Move deliberately whenever the camera rotates. Before jumping, identify the next solid surface and the direction in which Sonic will fall. A homing attack is safe only when its target leads to a visible platform.
The Flame Ring is obtained after the third checkpoint. Cross the green pool, use the gravity sequence until Sonic is upright again, then turn back toward the nearby spring. Use that spring to reach the green upgrade container. The Flame Ring lets Sonic break steel containers with his somersault and opens optional routes in earlier stages.
Continue through the colored gravity section by matching each jump to the current orientation. If Sonic misses a block, wait for the next safe cycle or use the lower platform rather than making a blind recovery jump. Follow the final springs and platforms to the goal.
- Collect the Flame Ring before attempting the City Escape Magic Gloves route.
- Treat every gravity change as a new movement setup.
- Use the nearby spring after the third checkpoint rather than searching the wrong side of the room.
6. Final Rush — favor stable rails and collect Mystic Melody
Final Rush is a long descent through the ARK with rails, loops, springs and large gaps. On the first clear, use the main route and choose the rail or platform with the widest visible landing area. Collect rings only when doing so does not change Sonic’s approach angle. Use homing attacks on clearly marked targets; attacking a distant target can redirect Sonic away from the intended landing.
Late in the stage, after the checkpoint and rail sequence with a long grind, watch for two small platforms positioned to the left of the rail. Jump carefully onto the platforms, take the rocket and follow the route to Sonic’s Mystic Melody. This upgrade is optional for story completion but is needed for Sonic’s Lost Chao work and other third-mission objectives. Do not restart a successful story run merely because you missed it; replay Final Rush afterward.
For rail transfers, keep the camera aimed toward the next landing area and avoid excessive directional input while Sonic is settling onto a rail. If a shortcut is missed, use the lower route and continue from the next checkpoint. The goal ring at the end leads into the Sonic-versus-Shadow boss sequence.
- Clear Mission 1 by reaching the goal ring.
- Collect Mystic Melody on a dedicated return run if it is missed during story progress.
- Practice late rail transfers before attempting time or A-rank missions.
7. Upgrade and rerun plan
For ordinary Hero Story progress, clear each stage’s Mission 1. The upgrades most relevant to this chapter are Light Shoes in Metal Harbor, Ancient Light in Green Forest, Bounce Bracelet in Pyramid Cave, Flame Ring in Crazy Gadget, Magic Gloves in City Escape and Mystic Melody in Final Rush.
A practical rerun order is Metal Harbor first for Light Dash, Pyramid Cave for Bounce Attack, Crazy Gadget for the Flame Ring, City Escape for Magic Gloves, Green Forest for Ancient Light and Final Rush for Mystic Melody. The first four upgrades affect movement or breakable-container access; Ancient Light and Mystic Melody mainly support optional objectives and Lost Chao routes.
Animals, Chaos Drives, ring totals, time limits and hidden routes matter only when the selected mission asks for them. Do not interrupt a first story clear to pursue an optional item unless the route is already safe.
- City Escape, Metal Harbor, Green Forest, Pyramid Cave, Crazy Gadget and Final Rush each show a completed Mission 1 result.
- Light Shoes, Bounce Bracelet and Flame Ring are collected.
- Ancient Light, Magic Gloves and Mystic Melody are collected if optional mission completion is being pursued.
- The Final Rush clear has been followed by its stage-ending boss sequence.
Before you move on
- Mission 1 is complete in all six Sonic stages: City Escape, Metal Harbor, Green Forest, Pyramid Cave, Crazy Gadget and Final Rush.
- Sonic has collected the Light Shoes, Bounce Bracelet and Flame Ring, which are the principal movement upgrades needed for the chapter’s later return routes.
- If optional completion is being pursued, Sonic also has Ancient Light, Magic Gloves and Mystic Melody.
- The Final Rush clear has triggered the following Sonic-versus-Shadow boss sequence, confirming completion of Sonic’s Hero Story action-stage progression.
References for this chapter
- Sonic Adventure 2 — Sega Dreamcast Manual
- Sonic Adventure 2 — Guide and Walkthrough — Dreamcast — By Matt_the_Yak
- Sonic Adventure 2 — Guide and Walkthrough — Dreamcast — By NTsui
- Sonic Adventure 2 — Upgrade FAQ — Dreamcast
- Sonic Adventure 2 — Guide and Walkthrough — Dreamcast
- Prima’s Official Strategy Guide — Sonic Adventure 2
Shadow Action Stages — Radical Highway, White Jungle, Sky Rail and Final Chase
Shadow’s Dark Story route contains four action stages: Radical Highway, White Jungle, Sky Rail and Final Chase. Mission 1 in each stage is required for story progression. The stages emphasize rails, ramps, gravity cylinders, vines and narrow platforming rather than the ice hazards found elsewhere in the game. Collecting Shadow’s upgrades is optional for the first clear, although Air Shoes are needed to obtain the Flame Ring later.
1. Begin the Dark Story and use Shadow’s Dreamcast controls
Select Dark Story and play Shadow’s action stages as they become available. For ordinary story completion, each stage only requires a Mission 1 clear: reach the goal. Animals, Chao containers, Chaos Drives and most upgrade items can be ignored until a later replay.
On the original Dreamcast control layout, A jumps and also performs a homing attack when a target is available. X or B performs Shadow’s action commands, including the somersault and Light Dash when the appropriate upgrade is held. Y opens the Action Window when a nearby object provides a contextual command. Use the Analog Pad for movement and make small corrections while grinding.
Do not treat Chaos Control as a standard movement ability. Shadow’s normal stages are completed with jumps, homing attacks, somersaults, rails, springs and stage machinery. Chaos Control belongs to story scenes and specific scripted events rather than free traversal.
- Select Dark Story.
- Clear Mission 1 rather than attempting optional missions during the first run.
- Use X or B for action commands on the Dreamcast controller, not a later-port layout.
2. Clear Radical Highway
Radical Highway is Dark Stage 4. Follow the freeway forward through traffic, ramps, G.U.N. enemies, pulleys, springs and elevated road sections. Use the road and lower platforms when the upper route is unclear. On ramps, jump from the marked launch area only after Shadow is aligned with the intended landing. Homing attacks are safest when the reticle clearly identifies an enemy or spring.
When Shadow reaches a rotating bar, jump onto it and wait until the rotating indicator reaches the red launch area before pressing A. This sends him toward the higher route. If the launch is missed, look for the lower roadway instead of repeatedly jumping in midair; the lower route often allows the stage to continue.
The Flame Ring is optional and requires the Air Shoes. After the first pulley and the springs that lead back to the highway, turn around beneath the spinning barrel-like obstacle. Somersault underneath it, then use the Air Shoes on the nearby trail of Rings. The spring at the end carries Shadow to the Flame Ring. If Air Shoes have not yet been collected, complete Radical Highway and return later.
- Reach the goal using the lower roadway when an elevated jump is uncertain.
- Return after White Jungle for the Flame Ring if desired.
- Do not attempt the Flame Ring route without Air Shoes.
3. Clear White Jungle and collect the Air Shoes
White Jungle is Dark Stage 9. Follow the platform route through the vegetation, crates, enemies and hanging vines. Shadow automatically grabs some vines and is carried toward the next landing, so avoid jumping away before the vine’s movement has placed him near the destination. Bungie vines are different: approach them to be thrown forward or upward.
After breaking through the group of four crates, continue until Shadow swings from a vine to a platform containing enemies and a Chao container. Look for the crate on the right side of this area. Break it and drop through the opening to collect the Air Shoes. No earlier upgrade is required.
The Air Shoes enable Shadow’s Light Dash along a visible trail of Rings. They are not required to reach the White Jungle goal, but they are required for the Flame Ring in Radical Highway. If Shadow misses a platform after a vine launch, aim for a lower branch or platform and use a homing attack if a target appears. Vegetation can hide the camera, so reduce speed before blind turns.
- Collect the Air Shoes from the crate on the right after the vine section.
- Use the Air Shoes to revisit Radical Highway for the Flame Ring.
- Do not confuse automatically carried vines with rails that require player control.
4. Clear Sky Rail and obtain Ancient Light
Sky Rail is Dark Stage 11. Begin by following the normal route toward the first rocket. For the Ancient Light, do not take that rocket. Instead, cross toward the nearby enemy using a homing attack, land near the Chao container and move carefully toward the edge. Successive beetle enemies lead to a spring beetle that launches Shadow to the platform holding Ancient Light.
For the required run, keep Shadow centered on rails and use X or B to crouch and gain speed while grinding. Make gentle Analog Pad corrections rather than holding a sharp direction. Before a rail gap, release the speed command if necessary and wait until the next rail or platform is visible. A missed rail may lead to a lower route; a fall into the void costs a life.
Ancient Light enables Shadow’s Light-Speed Attack against nearby eligible targets. It is optional for Mission 1 and does not alter the route needed to complete Dark Story.
- Pass the first rocket instead of taking it when collecting Ancient Light.
- Use small steering corrections on rails.
- Treat Ancient Light as optional for story progression.
5. Clear Final Chase and finish Shadow’s stage route
Final Chase is Dark Stage 14. Mission 1 is to hurry to the Eclipse Cannon. The opening uses a rail, springs and a downhill section with falling meteorites. Continue through boosters, blue enemies, springs and the first gravity cylinders, then use the cylinders as platforms to cross the large gaps.
The gravity cylinders rotate the apparent floor, so orient Shadow toward the next visible platform rather than relying on the camera’s usual vertical perspective. Move across each cylinder deliberately and avoid jumping until the destination is clear. After a booster launches Shadow into another group of cylinders, keep moving across their surfaces while watching for meteorites. The vertical cylinder near the later checkpoint must be climbed before the route continues.
Mystic Melody is optional. After the third Point Marker, enter the large gravity-cylinder section. Reach the top of the fifth cylinder and jump to the tall cylinder with the electric fence. Clear the fence, use the spring at the top and follow the resulting path to Mystic Melody.
There are no ice sections in Shadow’s four Dreamcast action stages. The major hazards here are traffic and rotating bars in Radical Highway, vines and obscured landings in White Jungle, rail gaps in Sky Rail, and meteorites plus rotating gravity cylinders in Final Chase.
- Clear Final Chase Mission 1.
- Collect Mystic Melody only if pursuing optional upgrades or secret-area objectives.
- Use the stage checkpoint after a failed jump instead of restarting immediately when the route remains recoverable.
6. Chaos Drives, Chaos Control and Super Shadow
Chaos Drives come from defeated enemies and are used for Chao raising. They do not unlock Shadow’s transformation and should not be farmed for story purposes. Similarly, Chaos Control is not a freely available substitute for Shadow’s normal stage movement.
Super Shadow appears in the Last Story after Hero Story and Dark Story have both been completed. His transformation is part of the scripted final sequence involving the Chaos Emeralds, not an item obtained in Radical Highway, White Jungle, Sky Rail or Final Chase. In the Finalhazard battle, Super Shadow fights alongside Super Sonic under the Last Story’s story conditions.
After Final Chase, continue through the remaining Dark Story events and boss sequence. Completing Shadow’s four action stages alone does not unlock the Last Story; the full Dark Story and full Hero Story must both be cleared first.
- Do not farm Chaos Drives for Super Shadow.
- Finish the complete Dark Story after Final Chase.
- Complete Hero Story as well before expecting the Last Story and Super Shadow sequence.
Before you move on
- Radical Highway Mission 1 is cleared in Dark Story.
- White Jungle Mission 1 is cleared in Dark Story.
- Sky Rail Mission 1 is cleared in Dark Story.
- Final Chase Mission 1 is cleared in Dark Story.
- Air Shoes, Flame Ring, Ancient Light and Mystic Melody are collected if optional upgrades are being pursued.
- The Dark Story continues beyond Final Chase into its remaining boss sequence.
- Super Shadow is reserved for the scripted Last Story finale after both main storylines are complete.
Tails & Eggman — Lock-on Shooting and Vehicle Stages
Tails and Dr. Eggman’s Dreamcast stages use the Cyclone and Egg Walker for lock-on shooting, platforming and controlled hovering. Their story missions are usually completed by reaching the Goal Ring, but survival depends on managing the life bar, collecting rings after damage and using the correct upgrade when the route demands it. Route 101 is the exception: it is a timed kart pursuit rather than a standard mech stage.
Learn the Dreamcast mech controls
Press B to fire the Volkan Cannon. Hold B and sweep the Analog Pad to move the targeting laser over enemies, then release B to fire homing missiles at every target marked. A quick B press is better for a single nearby enemy, a crate or a stage object that must be hit precisely. The lock-on attack is strongest when several enemies are grouped together, but do not stand in an exposed position while charging it.
Press A to jump. After Tails or Eggman obtains the Booster or Jet Engine, press and hold A while airborne to hover and control the descent. Before those upgrades, use shorter jumps and wait for platforms to line up. The Egg Walker can also punch at close range with B, but shooting from a safe distance is normally preferable.
Both characters have a life bar. Enemy attacks and explosions damage it, while rings replenish the bar after damage. Keep collecting rings as you move through a stage, but do not cross a dangerous gap solely to reach a ring. A fall into a pit, quicksand or open space is a fatal mistake, not a normal HP trade.
- Use a direct cannon shot for nearby targets and stage objects.
- Hold B only when you have room to aim safely.
- Collect rings after taking damage, but treat pits and open space as instant-death hazards.
- Use A in midair only for a controlled jump or an unlocked hover.
Upgrade priorities and stage objects
Tails finds the Booster in Mission Street, allowing him to hover, and the Bazooka in Eternal Engine, allowing the Volkan Cannon to destroy steel containers. The Laser Blaster is in Prison Lane but requires the Bazooka, so it is an optional return visit rather than a first-run requirement. These items remain available for later missions after they are collected.
Eggman finds the Jet Engine in Lost Colony, the Large Cannon in Weapons Bed and the Protection Armor in Cosmic Wall. The Jet Engine gives him the same hover function. The Large Cannon lets the Volkan Cannon destroy steel containers and is needed to open the required route in Weapons Bed. Protection Armor is optional for story progression but increases Eggman’s health and is useful for later missions.
Missiles mounted in stages are not ammunition pickups. They are mechanisms that can destroy cages, open routes or trigger other objects. Look for their target before firing, especially near a gap. Likewise, dynamite packs can open doors or platforms, but firing the wrong pack can expose a dangerous route.
- Collect the Booster in Mission Street before attempting its later broken-road gaps.
- Do not confuse the Bazooka or Large Cannon with ordinary ammunition.
- Use stage missiles only after identifying the object they are meant to destroy.
- Return for optional upgrades after story completion if the required prerequisite was unavailable earlier.
Prison Lane — Tails
Prison Lane is Tails’s introduction to lock-on shooting. Move through the prison corridors and eliminate every nearby GUN robot when a security door refuses to open. If progress stops, backtrack and check behind the camera or around the elevator area; a missed enemy is usually the reason the door remains shut. Jump the floor holes and use the nearby platforms to reach the next cell-block section.
For the story mission, follow the main route to the Goal Ring. Ignore Chao Boxes and elevated optional passages on the first clear. Tails’s life bar makes rings valuable, so take a safe route through enemy groups instead of trying to fire while standing beside explosives. The Laser Blaster can be obtained here only on a later visit after the Bazooka has been collected in Eternal Engine.
- Destroy all enemies around a locked prison door.
- Search behind the camera if a door does not open.
- Reach the Goal Ring before attempting upgrade or collectible detours.
Mission Street — Tails
Follow the city road and tunnel while GUN robots and bombs attack from above. Several road sections collapse to lower streets; follow the falling route when it leads to a visible lower roadway, but avoid the gaps that drop into the void. When the route reaches a right-arrow sign near damaged streets, take the left path to find the Booster. This upgrade is required to hover across the larger destroyed-road gaps later in the stage.
After obtaining the Booster, hold A during each jump to drift across the broken road and land on the next solid section. A falling shadow marks a floor trap; avoid it by moving around the metal pillars when possible. Use nearby missiles to destroy cages, then continue along the road to the Goal Ring.
- Take the lower street when the road collapses onto a safe route.
- Collect the Booster before the large broken-road gaps.
- Avoid the marked floor trap and destroy cages with nearby missiles.
Route 101 — Tails’s kart pursuit
Route 101 changes the Cyclone into a kart. The objective is to pass the checkpoints and catch the President’s limousine before the time limit expires. Use A to accelerate. Release A briefly and press it again while turning for a sharper cornering adjustment. Collect rings from balloons and along the road; reaching 20 rings grants one boost, and Y activates the stored boost.
Keep the kart centered on the road and save boosts for straight sections or a clear approach to the next checkpoint. Do not spend a boost immediately before a bend, traffic obstacle or blocked lane. This stage has no standard mech life-bar combat and ends when the pursuit is completed. Clearing Route 101 unlocks the one-player Kart Race mode; clearing both Route 101 and Rouge’s Route 280 also unlocks the Dreamcast two-player Kart Race.
- Pass both checkpoints and catch the limousine.
- Use A for acceleration and Y for a stored boost.
- Collect 20 rings before expecting a boost.
- Release and repress A to tighten difficult turns.
Hidden Base — Tails
Move through the desert machinery and use the main platforms, lifts and Lift Hooks to reach the pyramid entrance. Shoot dynamite packs when they are positioned to drop a platform or open the next route. Do not jump into quicksand: it kills Tails. If the path appears unclear, look for an Eggman-marked door, a nearby missile or a dynamite pack that changes the platform layout.
One early navigation problem places square pillars above quicksand. Hover between the pillars and continue left toward the main route; the right side contains an optional animal. On lift sections, clear Kiki enemies and other bomb-throwing robots before jumping away. Checkpoints are widely spaced, so avoid optional detours until the route is familiar. Continue through the upper platforms and doors to the Goal Ring.
- Use dynamite packs to change the platform route.
- Hover across the pillar section above quicksand.
- Destroy Kikis before leaving a Lift Hook.
- Choose the main route over optional animals and Chao Boxes on the first clear.
Eternal Engine — Tails
Eternal Engine’s objective is to destroy the colony power generator and reach the Goal Ring. Its defining hazard is the dynamite placed near the colony’s exterior. In earlier stages, shooting dynamite is often useful; here, a bad explosion can open the hull and pull Tails into space. Leave dynamite packs alone unless the route clearly requires them, and never stand beside a newly opened exterior gap.
In the bomb-dropping room, use the right spring to reach the pulley and destroy the enemy above. When a door does not open, take the left passage and activate the switch instead of shooting the boxes near the blocked route. At the ledge with three floating platforms, drop onto the large platform beneath the ledge, fire the missile to remove the cages and hover across. Artificial Chaos enemies can be defeated with repeated Volkan Cannon fire or a close punch when safe.
The Bazooka is found later in the stage and permits steel containers to be destroyed. After obtaining it, avoid red lasers, use pulleys to cross exposed sections and keep dynamite intact unless it is part of the route. Fire repeatedly at the generator, then proceed to the Goal Ring. Eternal Engine is followed by the Hero Story’s Meteor Herd stage, not an immediate shooter boss.
- Do not fire at dynamite beside the colony exterior.
- Use the switch route when the first door does not open.
- Drop to the large platform below the three-platform ledge.
- Collect the Bazooka before attempting steel containers.
- Destroy the generator and then reach the Goal Ring.
Iron Gate — Eggman
Iron Gate is Eggman’s first Dark Story mech stage. Hold B to lock onto GUN robots, then release it to fire homing missiles. Use direct cannon shots for crates and individual enemies. The early security doors open after all red locks are destroyed. Continue through the lifts and corridors until the Level 5 security door triggers Emergency Defense Mode.
Near the end, a missile platform is blocked by emergency doors. Walk back to the nearby console and target its antenna. The missile will destroy the doors, allowing Eggman to reach the Goal Ring. The Laser Blaster is an optional upgrade in Iron Gate, but it requires the Large Cannon from Weapons Bed and is not needed for the first story clear.
- Destroy every red lock on each security door.
- Use the console antenna to redirect the missile.
- Do not spend time searching for the Laser Blaster during the first run.
Sand Ocean — Eggman
Sand Ocean introduces moving platforms and longer exposed jumps. Follow the rotating platforms, destroy enemies before boarding the next one and use the Egg Walker’s hover after obtaining the Jet Engine later in the Dark Story. Stay near the center of platforms because a missed landing sends Eggman into the desert void.
The story objective is to return to the Hidden Base. When the route presents a choice between a risky jump and a wider platform, take the wider platform and reorient the camera before firing. The Mystic Melody is an optional upgrade in this stage and requires the Jet Engine; it is not part of the mission-one route.
- Wait for rotating platforms to provide a safe landing.
- Use the wider platform when the camera obscures the destination.
- Treat every desert fall as fatal.
- Leave the Mystic Melody detour for a later mission.
Lost Colony — Eggman
Lost Colony begins with doors opened by destroying dynamite packs. Proceed through corridors and use pulleys to cross laser-filled rooms. Green floor sections damage Eggman, so move across them promptly and clear the nearest enemy before attempting a longer lock-on volley.
In the large dark room, climb the boxes on the left to reach the Jet Engine. Once obtained, hold A in the air to hover around the corner, activate the missile and cross the gap. Later, use the lift platform to aim at enemies and accumulate safe hits before continuing. The stage ends after another corridor and a missile-assisted cage section. The Jet Engine is required for the normal route.
- Use pulleys over laser floors.
- Collect the Jet Engine in the dark room.
- Hover around the corner after obtaining it.
- Clear enemies before leaving the rising platform.
Weapons Bed — Eggman
Weapons Bed takes place across a military carrier and is more open than Iron Gate. Destroy the stationary robots on the deck from a distance, but preserve enough room to move around explosive objects. Near the end of the deck, enter the steel-door area on the left and collect the Large Cannon. This upgrade is required to destroy the steel containers blocking the route.
After collecting the Large Cannon, return to the blocked path, destroy the steel containers and continue through the carrier defenses to the Goal Ring. Weapons Bed is immediately followed by the Dark Story boss against Tails. Enter the final stretch with rings and as much health as possible; optional score routes are not worth sacrificing a life before that fight.
- Clear the carrier deck before crossing narrow sections.
- Collect the Large Cannon in the steel-door area.
- Use it to remove the steel containers blocking progress.
- Treat the Goal Ring as preparation for the following Tails boss.
Cosmic Wall — Eggman
Cosmic Wall is Eggman’s final dedicated Dark Story mech stage and emphasizes vertical movement. Use the lifts, platforms and hover sections to climb through the space-colony interior. After the second checkpoint, a missile on the left opens the alcove containing Protection Armor. Collect it if you want the extra health for later missions, then continue through the shafts and walkways.
Checkpoint carts provide long shooting opportunities, but do not let score chasing pull Eggman into hazards. Near the end, a large metal enemy pursues the cart; keep firing until the sequence throws Eggman toward the Goal Ring. Cosmic Wall is followed by the Dark Story boss against Tails, so prioritize a clean finish over optional rings and mission items.
- Use hover at the peak of jumps to gain height where required.
- Collect Protection Armor from the missile-opened alcove if desired.
- Keep firing during the cart pursuit.
- Reach the Goal Ring with health and rings preserved for the Tails boss.
Boss transitions and resource management
The standard mech stages do not all lead directly into bosses. Tails’s Prison Lane is preceded by the Hero Story Eggman boss after Wild Canyon; Mission Street, Route 101, Hidden Base and Eternal Engine continue the Hero route without an immediate mech boss. Eggman’s Weapons Bed is followed by the Tails boss, and Cosmic Wall is followed by another Tails boss. Iron Gate, Sand Ocean and Lost Colony lead into later Dark Story stages rather than an immediate fight.
For a difficult boss attempt, first replay the preceding mech stage only if you need practice with the controls or want a safer supply of rings. Do not deliberately sacrifice lives for optional upgrades. Use the stage’s checkpoints to rehearse the section that caused the failure, and remember that a fall usually costs a life or checkpoint restart rather than merely reducing the life bar.
- Know whether the next event is a boss or another story stage.
- Enter Weapons Bed and Cosmic Wall’s following boss events with health and rings intact.
- Practice the failing checkpoint section instead of replaying the whole story route unnecessarily.
- Treat optional upgrades and collectibles as separate rerun objectives.
Before you move on
- Tails has cleared Prison Lane, Mission Street, Route 101, Hidden Base and Eternal Engine in Hero Story.
- Eggman has cleared Iron Gate, Sand Ocean, Lost Colony, Weapons Bed and Cosmic Wall in Dark Story.
- Tails’s Booster and Bazooka have been collected where required for the Hero route.
- Eggman’s Jet Engine and Large Cannon have been collected where required for the Dark route.
- Weapons Bed and Cosmic Wall have advanced into their following Tails boss events.
- Each required mech or kart stage ends at its Goal Ring or completed pursuit, with the next story event or stage available.
- Optional Laser Blaster, Mystic Melody and Protection Armor detours have been kept separate from the required story progression.
Knuckles & Rouge — Treasure Hunting, Keys and Shards
Knuckles and Rouge use the radar, landmarks, climbing, gliding and digging to clear their search stages. Their story objectives are not identical: most treasure stages require three Master Emerald pieces, but Death Chamber requires three Gate Keys and Security Hall requires three Chaos Emeralds within five minutes. Route 280 is a kart race, and Rouge’s Cannon’s Core section is a separate Last Story objective.
Use the radar and treasure-hunt movement correctly
The radar is your main search tool. Its signal becomes stronger as you approach the currently selected objective, but direction alone is not enough: the target may be above, below, behind a wall, inside a side room or on another platform. When the signal is strong, stop and check elevation before travelling farther. Look up at ceilings, down into pits and across nearby ledges.
Knuckles and Rouge can climb suitable walls, glide after jumping, swim underwater and dig when the required digging upgrade is available. Holding B while swimming makes the character descend quickly, while holding A raises the character. Digging can reveal a treasure, a power-up, a skull or nothing, so do not assume every dig spot contains a required item.
Search in zones rather than wandering. Clear the starting room or landmark, then move to the next distinct area and return to the previous landmark whenever the radar becomes difficult to interpret. This method is especially important in large stages where a long glide can move you to the wrong height or side of the map.
- Check vertical position whenever the radar is strong but the item is not visible.
- Use landmarks as reset points instead of crossing the entire stage at random.
- Read the mission objective before assuming the targets are Master Emerald pieces.
Clear Knuckles’s Hero Story stages
Knuckles’s five required Hero stages are Wild Canyon, Pumpkin Hill, Aquatic Mine, Death Chamber and Meteor Herd. Wild Canyon is the introductory search area. Check the underground starting section, then climb the surrounding walls and upper platforms before travelling to the other open areas.
Pumpkin Hill is divided into recognizable regions including Pumpkin Hill, the church area and Ghost Train Mountain. If the radar points away from the current landmark, return to the central mountain or church area and search the next region systematically. The Shovel Claw is found in Pumpkin Hill and enables digging for later searches and optional mission objectives.
Aquatic Mine is organized by water level. Use the water-level switches to search one level completely before changing depth. The Air Necklace is also found here; it gives Knuckles unlimited underwater air and is strongly useful for his Cannon’s Core section in the Last Story.
Death Chamber is not a shard hunt in Mission 1. Its story objective is to find three Gate Keys. Use the colour-coded Green, Red and Blue room groups and the central Pyramid Core as navigation references. The Hammer Gloves are found in this stage and allow Knuckles to break steel containers.
Meteor Herd is tall and mostly vertical. Search upward deliberately, using platforms and glides to change levels instead of repeatedly dropping to the bottom. The Sunglasses upgrade is found here after obtaining the Hammer Gloves; it reveals otherwise hidden objects and is mainly important for later missions, not story completion.
- Wild Canyon completed.
- Pumpkin Hill completed.
- Aquatic Mine completed.
- Death Chamber completed with three Gate Keys.
- Meteor Herd completed with its three required Master Emerald pieces.
Clear Rouge’s Dark Story stages
Rouge’s required stages are Dry Lagoon, Egg Quarters, Security Hall, Route 280 and Mad Space. Dry Lagoon’s Mission 1 requires three Master Emerald pieces. Search the starting lagoon first, then use the turtle route to reach the larger oasis and inspect both surface and underwater areas. The Pick Nails upgrade is found in Egg Quarters and enables digging.
Egg Quarters also uses a three-item search objective in its story mission. The stage is compact and clearly divided into labelled rooms, so finish one room before returning through the central passages. Watch for the Scarab enemies and use the room names and coloured routes to avoid circling the same corridors.
Security Hall is the major exception to the normal treasure routine. Rouge must find three Chaos Emeralds within a five-minute limit. Do not spend time defeating every robot or collecting points. Read Hint Computers when available, use the radar immediately and move between rooms with the timer as the priority. The Emeralds can be placed throughout the hall rather than in one predictable route.
Route 280 is Rouge’s kart race, not a treasure hunt. Reach the finish while avoiding traffic. Release and reapply acceleration as you enter sharp turns so the kart rotates more cleanly, and choose a wide line through corners rather than colliding with cars. The race is required for Dark Story progress.
Mad Space returns to a three-piece Master Emerald search, but its separated platforms and unusual gravity make height control more important than speed. Land on stable platforms, check the radar again and avoid long uncontrolled glides. The Iron Boots upgrade is found here and allows steel containers to be broken.
- Dry Lagoon completed with its three Master Emerald pieces.
- Egg Quarters completed with its story items.
- Security Hall completed by recovering three Chaos Emeralds within the time limit.
- Route 280 won.
- Mad Space completed with its three Master Emerald pieces.
Separate story objectives from optional missions
The required first mission is only one objective per stage. Later missions can replace treasure with rings, enemy defeats, time targets, lost Chao searches or other mission-specific tasks. Items collected during one attempt do not remain collected when a new mission begins, so always follow the target shown for the current mission.
Upgrades are optional for basic story completion unless a later objective specifically depends on them. For efficient re-runs, collect Shovel Claw or Pick Nails for digging, Hammer Gloves or Iron Boots for steel containers, and the Air Necklace before attempting Knuckles’s Cannon’s Core section. Rouge’s Security Hall Sunglasses upgrade requires earlier progress and is relevant to optional hidden-item objectives rather than her story-clear condition.
- Confirm the current mission number before beginning a search.
- Treat Master Emerald pieces, Gate Keys and Chaos Emeralds as different objectives.
- Do not replay a failed mission expecting previous targets to remain collected.
Recover when lost or when a search fails
If the radar becomes confusing, return to a fixed landmark: the Wild Canyon underground room, a Pumpkin Hill mountain or church, the Aquatic Mine control area, the Death Chamber Pyramid Core, a Dry Lagoon oasis, an Egg Quarters room entrance or the Security Hall’s main corridor. From there, search one zone at a time and check both upper and lower routes.
A fall or hit can cost rings, time or a life, but it does not permanently remove story progress. In Security Hall, restart with a direct route if the timer is no longer recoverable. In Mad Space, avoid trying to cross the entire stage in one glide; land, reorient and let the radar guide the next short movement. A mission is cleared only when the results screen confirms completion.
- You can identify the landmark used to reset your search.
- You have checked the relevant upper, lower and underwater routes.
- The results screen confirms the required objective before leaving the stage.
Before you move on
- Hero Story shows Wild Canyon, Pumpkin Hill, Aquatic Mine, Death Chamber and Meteor Herd completed.
- Dark Story shows Dry Lagoon, Egg Quarters, Security Hall, Route 280 and Mad Space completed.
- Death Chamber’s story result confirms three Gate Keys rather than three Master Emerald pieces.
- Security Hall’s story result confirms three Chaos Emeralds recovered within the five-minute mission limit.
- The Last Story Rouge section in Cannon’s Core is treated as a separate stage objective, not as a three-item treasure hunt.
- Optional upgrades needed for later objectives, especially the Air Necklace for Knuckles’s Last Story section, have been collected if pursuing the full campaign and mission set.
References for this chapter
- Sonic Adventure 2 — Guide and Walkthrough — Dreamcast — By Matt_the_Yak
- Sonic Adventure 2 — Guide and Walkthrough — Dreamcast — By MBareket
- Sonic Adventure 2 — Guide and Walkthrough — Dreamcast
- Sonic Adventure 2 — Guide and Walkthrough — Dreamcast — By NTsui
- Sonic Adventure 2 Dreamcast Walkthrough, Version 0.7
Boss Fight Primer — Early Boss Patterns and Counters
Early Sonic Adventure 2 bosses use readable cycles rather than large health bars or complicated damage systems. Survive the current attack, wait for the exposed target or scripted opening, land one safe attack, then reset your position. The Dreamcast boss order begins with Big Foot, Dr. Eggman and Shadow in the Hero Story, followed by King Boom Boo. The Dark Story begins with Hot Shot, then the Tails fight, Flying Dog and later bosses. Rings protect against ordinary hits, but they do not prevent deaths from falls or other stage hazards.
1. Prepare before entering a boss fight
Boss encounters follow specific story stages, so use the preceding level to settle into the character’s controls and preserve your lives. Pick up a ring as soon as the arena provides one. Losing all rings makes the next mistake much more dangerous, while a fall from a platform or into a lethal hazard can still cost a life immediately.
At the start of a new fight, spend the first cycle watching the boss rather than forcing an attack. Identify whether the opening comes after a landing, a missile volley, a turn, or a temporary exposure. Sonic and Shadow should use the homing reticle only when the target is clearly reachable. Tails and Eggman should keep moving while bringing the mech’s aim back onto the boss before firing.
- Collect a ring before taking a deliberate risk.
- Watch one complete attack cycle if the boss is unfamiliar.
- Attack only after the boss’s current action has ended.
2. F-6t Big Foot — Sonic’s first Hero boss
Big Foot begins by hovering above the parking-lot arena and firing at Sonic. Move sideways around the open area instead of trying to chase the machine. The crates provide a useful elevated position: if Big Foot flies toward Sonic, jump from a crate and homing-attack the cockpit. This is faster but requires Sonic to land safely afterward.
The safer repeatable method is to wait for Big Foot to land. It fires a missile volley from the ground; once that attack finishes, move toward the cockpit and homing-attack it. Retreat immediately after the hit. Repeat the same landing-phase counter rather than staying underneath the machine while it rises. The Dreamcast walkthrough identifies the cockpit as the weak point and records four successful hits for the fight.
- Move laterally during the airborne firing phase.
- Use crates only when the jump to the cockpit is controlled.
- Prefer the ground missile volley opening for a safer approach.
- Retreat after each cockpit hit.
3. Dr. Eggman — Tails’ first Hero boss
This is the first Hero-side boss after Big Foot, and the player controls Tails in his mech. Eggman’s Egg Mobile moves around the arena and fires its machine gun. Keep Tails moving in a broad curve while turning the mech toward Eggman. When the lock-on target appears, fire rather than shooting blindly while facing away.
Do not pin the mech directly against the arena boundary. If Eggman gets behind Tails, turn out of the corner and restore distance before trying to fire. The fight rewards steady pursuit: maintain a safe angle, lock on, fire, and continue moving while Eggman repositions.
- Remember that this fight is Tails versus Eggman.
- Keep the mech moving while restoring its aim.
- Use lock-on shots when Eggman is in front of the mech.
- Escape corners before attempting another attack.
4. Shadow — Sonic’s first duel
The first Sonic-versus-Shadow fight takes place on a restricted platform above water. Shadow jumps and approaches from changing angles, so do not launch a homing attack simply because he is nearby. Let him complete the jump or landing, then attack when the homing target is stable and Sonic has room to recover.
Keep Sonic near the center of the platform without standing still. After a hit or a collision, steer back toward the safe middle before attacking again. If Shadow lands close to an edge, use the available space to sidestep rather than charging straight at him. The reliable principle is evade first, attack during the recovery window, and reset position after every attempt.
- Do not attack a moving or poorly aligned target.
- Re-center Sonic after knockback.
- Avoid trading direct collisions near the platform edge.
- Treat the arena boundary as the main danger.
5. King Boom Boo — Knuckles’ early Hero-side boss
King Boom Boo cannot be damaged while the room is dark. Run around the circular arena while the boss pursues Knuckles and throws blue fireballs. Continue moving through the fireball sequence. When King Boom Boo exhales a longer stream of flame, keep running around the arena and pass behind him. This is the opening to hit the smaller ghost behind the boss, causing the hourglass to drop and light the room.
After the room brightens, the boss sinks into the floor and tries to escape. Watch for its shadow and use Knuckles’ digging attack on the shadow to force King Boom Boo back into the arena. Do not try to intercept the boss before the shadow gives you a position to attack. Once the room is dark again, repeat the fireball-and-flame cycle, then use the next shadow opening.
- Keep moving through the blue fireballs.
- Go behind the boss during the extended flame breath.
- Strike the smaller ghost to release the hourglass.
- Dig at the boss’s shadow after the room brightens.
6. B-3x Hot Shot — Shadow’s first Dark boss
Hot Shot follows the Big Foot pattern but adds a lock-on energy beam. Keep Shadow moving around the arena while the machine fires missiles or sweeps the area. When Hot Shot exposes itself during its attack cycle, use a homing attack on the reachable target and immediately move away.
After several successful attacks, watch for the targeting warning and energy-beam sequence. Do not remain inside the indicated danger area while waiting for the next opening. The safest rhythm is to evade the beam, wait for Hot Shot to finish the sequence, then attack the exposed target. Do not treat this fight as an uninterrupted version of Big Foot; the lock-on beam makes lingering in the arena especially costly.
- Keep moving during missile and machine-gun attacks.
- Leave the indicated beam-targeting area before the shot fires.
- Attack only after Hot Shot completes its current attack.
- Move away after each homing attack.
7. Tails — Dr. Eggman’s first Dark boss
In the next early Dark-side boss, the player controls Dr. Eggman and fights Tails in a mech. Tails moves aggressively and can attack while changing position, so maintain distance instead of chasing him into a corner. Face Tails, wait for the lock-on indicator, and fire when the shot is aligned.
If Tails closes the distance, steer away in a wide arc and re-establish room before firing again. Firing while the mech is turned away wastes the opportunity and leaves Eggman exposed. This is a ranged pursuit fight: survive Tails’ approach, restore the lock-on angle, fire, and repeat.
- Remember that Dr. Eggman is the playable character.
- Keep Tails in front of the mech before firing.
- Create distance when Tails closes in.
- Do not replace lock-on shots with blind fire.
8. R-1/A Flying Dog — Rouge’s early Dark boss
Flying Dog uses the same general family of attacks as Big Foot and Hot Shot but remains airborne rather than landing for an easy cockpit opening. Keep Rouge moving around the arena and avoid standing directly beneath the machine while it fires. Use the walls and Rouge’s climbing ability to reach a safer angle when the arena layout allows it.
Wait for Flying Dog’s vulnerable section to become reachable, then approach with a controlled jump or glide and attack. If Rouge is knocked away, stop trying to force the next jump. Recover on a wall or platform, regain a clear view of the machine, and wait for the next cycle. The battle is safer when Rouge uses vertical space instead of repeatedly jumping from the floor.
- Do not remain beneath the airborne machine.
- Use walls to escape the firing line when necessary.
- Approach only when the vulnerable section is reachable.
- Recover Rouge’s position before attempting another attack.
9. Manage lives and practice attempts
A failed attempt should identify the attack that caused the death. If the same boss keeps being reached without rings, replay the preceding stage and collect available rings, extra-life monitors and other safe pickups before returning. This is more useful than repeatedly entering the arena with no protection and hoping for a perfect run.
During practice, learn the first complete cycle before attempting a fast clear. Boss stages generally give you a fixed arena and a repeatable pattern, so survival is the priority. If a retry sends you back to the boss, use the same method and change only the part that caused the failure. Do not abandon a reliable counter merely because the boss reached a later phase.
For the Shadow duel, preserve space in the center and avoid risky attacks near the edge. For King Boom Boo, practice the transition from the flame-breath opening to the smaller ghost, then the shadow-digging phase. For the mech bosses, prioritize keeping the target in front of the vehicle and protecting the mech from unnecessary contact.
- Replay the preceding stage when entering without rings repeatedly causes deaths.
- Practice attack cycles before optimizing speed.
- Use the same reliable counter after a retry.
- Identify whether the failure came from positioning, timing or aim before changing tactics.
Before you move on
- Big Foot is defeated by reaching its cockpit during an airborne or post-missile opening.
- The Hero Dr. Eggman fight is cleared with Tails’ mech and lock-on fire.
- The first Sonic-versus-Shadow duel is cleared by attacking during a safe recovery window rather than forcing frontal collisions.
- King Boom Boo is defeated by triggering the hourglass with the smaller ghost and attacking the boss’s shadow during its escape phase.
- Hot Shot is cleared while avoiding the lock-on energy beam.
- The early Dark Tails fight is cleared as Dr. Eggman.
- Flying Dog is defeated as Rouge after using a controlled approach to its airborne vulnerable section.
- The next story stages become available, confirming that the early boss route is progressing.
References for this chapter
Mid-to-Late Bosses — Egg Golem, ARK Fights and Biolizard
The late boss sequence contains two Egg Golem battles, the closing Hero and Dark encounters, and the Biolizard in the Last Story. These fights reward controlled movement more than fast attacks. Optional upgrades can make the preceding Cannon’s Core sections safer, but no boss requires an emblem, an A-rank or a special mission result.
Prepare before the late-story bosses
Keep a save before entering the late stages. The required boss fights are tied to story progression, not mission rank, so do not replay optional missions expecting to unlock the Last Story faster. Clear the Hero Story and Dark Story normally; the Last Story becomes available after both sides are complete.
For the Last Story, the most useful preparation is for Cannon’s Core rather than the Biolizard itself. Knuckles’s Air Necklace is found in Aquatic Mine and lets him remain underwater, making his Cannon’s Core section considerably safer. Sonic’s Light Shoes from Metal Harbor and Shadow’s Air Shoes from White Jungle remain useful for their ring-dash movement, but neither is a special requirement for the Biolizard. Sonic’s Flame Ring in Crazy Gadget and Shadow’s Flame Ring in Radical Highway are optional movement and exploration upgrades, not boss prerequisites.
If a boss defeat costs several lives, restart from the saved game or practise the relevant character’s movement in an earlier stage. Do not confuse a lost boss attempt with lost story progress: the game returns you to the stage or boss retry flow, while a completed boss permanently advances that story side once the result is saved.
- Save before starting the late stage.
- Treat the Air Necklace as optional for story completion but highly useful in Cannon’s Core.
- Do not pursue A-ranks as a condition for unlocking the Last Story.
Defeat the Hero-story Egg Golem as Sonic
Sonic fights the Egg Golem after the Hero Story’s earlier ARK and character encounters. The arena consists of separated stone ledges surrounded by quicksand. When the Golem begins striking the area, move around toward its rear rather than standing beneath its arms. Panels on its back open during the attack cycle; jump across the exposed panels and home in on the large button on its head.
After the hit, return to a stable ledge instead of trying to remain on the Golem. The platforms and the boss’s movement make a second immediate attack risky. If Sonic drops into the quicksand, keep jumping to pull him out and steer toward a crane hook or solid ledge. The quicksand is dangerous, but Sonic can recover if he reacts immediately. Repeat the rear-panel route until the Golem is defeated.
This is a required Hero Story boss. It does not unlock an extra character or an optional mission; defeating it simply opens the next story stage.
- Circle behind the Golem while it attacks.
- Use the opened back panels to reach the head button.
- Keep jumping if Sonic falls into the quicksand and aim for a crane hook.
Defeat the Dark-story Egg Golem as Eggman
Eggman fights the second Egg Golem encounter later in the Dark Story. The arena and quicksand hazard are similar, but Eggman’s mech is less forgiving when it falls. Stay on the platform that the Golem has just struck; the boss does not normally strike the same nearby platform twice in succession, giving you time to reposition.
Fire the Volkan Cannon continuously at the Golem’s body. Damage exposes one of the blue battery-like targets on its chest. Lock on to the exposed target and fire the required volley, then return to body shots until the next target opens. Repeat this process for the exposed targets while moving between solid platforms.
If the mech is knocked off, hover only long enough to reach a crane hook, platform or item box. Landing in the quicksand is fatal for Eggman. Use health or ring items when they are safely reachable, but do not cross open sand merely to collect them.
- Use body fire to expose the blue targets.
- Lock on to each exposed target before returning to body fire.
- Avoid quicksand completely; use hovering to reach a recovery point.
Handle the closing Hero and Dark encounters
The remaining story bosses are separate character matchups, not a single ARK boss sequence. In the Hero Story, Knuckles fights Rouge in a combat arena. Begin defensively and attack when Rouge pauses. When the floor opens and the arena changes, land on her ledge and continue using short attacks rather than chasing her across the gap. When she signals her reflective wave, keep moving and do not attack into it.
Tails’s second Hero-story boss is Dr. Eggman. Follow him while firing, then react to his missile and large laser attacks. Staying mobile is safer than standing directly in front of him. In the final Hero encounter, Sonic fights Shadow on collapsing ledges. Keep running, attack Shadow from behind when he lands, and avoid homing into him while he is jumping. When Shadow uses Chaos Spear, somersault over the attack or prepare a Spin Dash and release it as the attack passes.
On the Dark side, Rouge fights the Flying Dog. The machine remains airborne: first avoid its laser fire, then wait through the missile pattern. When it pauses, climb one of the arena walls and glide into the cockpit to attack. After several hits it charges another blast, so retreat and repeat the laser, missile and cockpit cycle. Rouge’s later fight against Knuckles uses a similar arena approach, but Knuckles adds a lightning attack; keep moving or glide away when the warning appears. Eggman’s fight against Tails and Shadow’s final fight against Sonic are required Dark-story encounters. During Sonic’s fight, keep moving because the ledges collapse, avoid Sonic Wind, and use a Light Dash into a row of rings if Sonic begins dodging ordinary attacks.
- Treat each character matchup as its own required story boss.
- Wait for the Flying Dog’s missile sequence to end before climbing.
- Keep moving in the collapsing-ledge fights against Shadow and Sonic.
Defeat the Biolizard in the Last Story
The Biolizard follows the Cannon’s Core portion of the Last Story and is fought by Shadow. The circular arena has two gaps filled with orange liquid. Move at a controlled speed: run fast enough to stay ahead of the head and tail, but not so fast that you lose sight of the floor color change before a gap. Pick up a ring at the start and preserve rings whenever possible.
During the opening cycle, the Biolizard chases Shadow and then pauses with its head held still. Grind along the pipe beside the left side of its neck. When Shadow reaches the flashing weak point on the Biolizard’s back, jump and use the homing attack. As Shadow falls, steer away from the liquid gap and land on the arena floor.
After the next chase, the Biolizard fires black energy balls. Jump over low shots and somersault beneath high shots, giving the low shots extra distance because their hit area is broad. When the attack ends, the boss pauses again; use the pipe and strike the weak point. This opening-and-energy pattern continues until the egg phase begins.
Once the Biolizard summons floating pink eggs, home in on the eggs in sequence and use them as stepping stones toward the weak point. After the next hit, the eggs lift Shadow into the air. Guide him toward the metal platform around the weak point without colliding with the eggs, then home in on the weak point for the finishing attack. A safe landing is more important than collecting every ring during this phase.
Defeating the Biolizard triggers the Finalhazard sequence with Super Sonic and Super Shadow. It is required for the canonical ending, but the Biolizard itself does not need an A-rank or any optional upgrade.
- Control Shadow’s speed so both orange-liquid gaps remain visible.
- Use the pipe when the Biolizard pauses and its weak point is exposed.
- Use the pink eggs as stepping stones, then guide Shadow to the final metal platform.
Before you move on
- The Hero-story Egg Golem, Rouge, Dr. Eggman and Shadow encounters are cleared as required by the Hero route.
- The Dark-story Egg Golem, Knuckles, Tails and Sonic encounters are cleared as required by the Dark route.
- Cannon’s Core is completed in the Last Story.
- Shadow defeats the Biolizard and the game advances to the Finalhazard fight with Super Sonic and Super Shadow.
- No A-rank, emblem total or optional upgrade is being treated as a requirement for this chapter’s story progression.
The Last Story and Cannon’s Core — Preparing for the Finalhazard
The Last Story unlocks only after both the Hero Story and Dark Story are complete. It contains one long stage, Cannon’s Core, followed by the Biolizard and Finalhazard boss battles. The Dreamcast version requires you to alternate between Tails, Dr. Eggman, Rouge, Knuckles and Sonic in Cannon’s Core, then fight as Shadow and finally as Super Sonic and Super Shadow. Prepare extra lives, obtain Knuckles’ Air Necklace if the underwater section is causing repeated failures, and treat the final battle as a timed ring-management fight.
1. Complete both campaigns and confirm the unlock
Clear every required Mission 1 stage in the Hero Story, then clear every required Mission 1 stage in the Dark Story. Mission 2 through Mission 5 objectives, Emblems and A-ranks are optional and do not prevent the Last Story from appearing.
After both sides are cleared, return to the Story selection screen. A Last Story entry appears between the Hero and Dark selections. Choose it to begin the final scenario. If it is absent, one of the two campaign endings has not been completed on the current save.
- Hero Story cleared.
- Dark Story cleared.
- Last Story appears in Story selection.
2. Prepare your save and lives before Cannon’s Core
Save your current progress before selecting the Last Story. Keep the VMU connected during the save process and do not reset the Dreamcast until saving has finished. The Last Story is a continuous final scenario rather than a normal collection of short, independently selected stages, so do not begin it while relying on an unfinished practice run.
Use Stage Select to earn extra lives before attempting Cannon’s Core. The stage changes character several times and combines shooting, hovering, treasure-hunting movement, underwater navigation and Sonic platforming. If you are consistently losing lives with Knuckles, return to Aquatic Mine and collect the Air Necklace upgrade. It lets Knuckles remain underwater without the normal air restriction and is especially useful in Cannon’s Core.
The Air Necklace is optional for unlocking the Last Story, but it substantially reduces the risk in Knuckles’ section. Similarly, earlier character upgrades remain available because Cannon’s Core uses the normal character abilities and equipment from the save.
- A current save is visible on the VMU.
- Several extra lives are available before starting.
- Knuckles has the Air Necklace if the underwater route is difficult.
3. Cannon’s Core: Tails and Dr. Eggman
Cannon’s Core begins with Tails. The objective is to reach and destroy the first security door. Use the lock-on reticle to eliminate enemies, but do not rush across open gaps while the vehicle is taking fire. Shoot or touch the Time Stop switches to freeze most moving objects temporarily, including hazards and enemies. Use those pauses to cross platforms and disable dangerous laser timing.
After the first Time Stop switch, hover from the ledge to the moving platform, defeat the missile robots and hover down the wall toward the locked door. Destroy the explosive packs on the door, then pass through. In the final room, activate the Time Stop switch, position yourself on a side platform, reactivate it when the central moving platform is aligned, and use that platform to reach the door.
Eggman follows with a similar lock-on section but has more demanding moving-platform hazards. After the elevator, deal with the Artificial Chaos enemies from a position that avoids being struck by their long-reaching attacks. Later, the apparently useful small platform collapses; use the descending route instead, activate a nearby Time Stop switch and hover over the damaging green floor. In the moving-box rooms, activate switches so the upward-moving boxes are reachable, then ride them toward the second security door.
- Tails destroys the first security door.
- Time Stop switches are used to control lasers and moving hazards.
- Eggman reaches and destroys the second security door.
4. Cannon’s Core: Rouge and Knuckles
Rouge’s objective is to open the route around the Cannon’s Core by activating the large switch. From the start, climb the four cylindrical pillars in increasing height, gliding from one to the next until you reach the tallest. Activate the Time Stop switch at the top, then drop and glide through the lower opening beneath the waterfall.
In the next room, avoid the green electric floor. Move to the far wall and wait for the moving block to clear the opening above the Time Stop switch. Activate the switch, pass through and defeat the Artificial Chaos on the raised platform. Activate the switch beneath it, then return through the same route. Use the nearby invincibility item if needed, and time the spring jump so you do not land on the electric floor. Return through the waterfall and activate the large switch.
Knuckles follows and must find the switch that opens the final security route. His section is underwater and includes damaging floors, barriers and short-lived Time Stop effects. Move from safe platform to safe platform, use the switches to stop the moving hazards and take air bubbles whenever they are available. The Air Necklace removes the need to surface for air, but it does not protect Knuckles from electrical floors or enemy contact. After reaching the final room, activate the large switch to open Sonic’s route.
- Rouge activates the large switch that drains or redirects the surrounding liquid.
- Knuckles opens the final security route.
- You use air bubbles or the Air Necklace while crossing the underwater section.
5. Cannon’s Core: Sonic’s final run
Sonic’s objective is to enter the core after the other characters have opened the doors. In the room with moving water and a low gate, use the Time Stop switch to make the somersault passage safer. Bounce onto the gate when necessary and continue through the opened route.
When you reach the platform guarded by two Shield Robots and an Artificial Chaos over a drop, defeat all three enemies to open the nearby door. Attack the Shield Robots after they begin charging, or somersault into them from a safe position. After homing-attacking the Artificial Chaos, immediately steer back toward the main platform rather than allowing Sonic to fall.
Near the end, Eggman’s message leads into a series of descending slides. The first slide is dangerous if Sonic simply rides downward, so use repeated Homing Attacks to climb toward the upper route. Continue from slide to slide, then follow the final curved slide to the Goal Ring. Reaching the ring completes Cannon’s Core and starts the Biolizard encounter.
- The water-current room is crossed without falling.
- All three enemies near the locked door are defeated.
- Sonic reaches the Goal Ring.
6. Defeat the Biolizard as Shadow
The Biolizard requires six successful attacks on the red life-support dome on its back. At the beginning of each ground phase, run at a controlled pace around the arena while keeping enough distance from the head or tail that is pursuing Shadow. Jump over the two fast-flowing water channels at the arena’s edge; falling into them can cost the life immediately.
When the Biolizard becomes exhausted, a glowing life-support tube provides the route upward. Grind along it and Homing Attack the red dome. Repeat this chase-and-grind pattern for the early attacks. After the boss begins firing blue energy balls, jump over the low shots and somersault under the high shots before using the exposed tube again.
For the later attacks, the Biolizard releases pink bubbles. Homing Attack from one bubble to the next to climb toward the dome. Do not attack the boss’s body when Shadow is not lined up with the red target. After the fifth successful hit, Shadow is lifted into the air among more bubbles. Avoid the bubbles, find a safe route to the dome and make the sixth attack. If Shadow is knocked down, collect only the nearby Rings that can be reached safely and wait for the next opening instead of forcing a doomed jump.
- The water channels are avoided during every ground phase.
- Six attacks connect with the red life-support dome.
- The transformation sequence for Super Sonic and Super Shadow begins.
7. Prepare for and clear the Finalhazard
The seven Chaos Emeralds transform Sonic and Shadow into Super Sonic and Super Shadow. This is a special flight battle, not a normal Action stage. On the Dreamcast controller, use the Analog Stick to steer forward, backward and sideways. Press A to ascend; press X or B to descend. Homing Attack is performed with the Action buttons when the character is close enough to the red sore on the Finalhazard.
The Finalhazard has six red sores to hit. Each successful attack switches control to the other super character and restores that character’s ring supply to the stage’s current maximum. The early attacks begin with 50 Rings; the final two use 40 Rings. Rings drain continuously while the character remains super, and the overall battle has a five-minute limit before the ARK reaches Earth.
The attack pattern escalates. The first approach uses a small barrier of homing projectiles. Later approaches add repeated short laser shots, longer lasers and larger projectile barriers. Steer vertically and horizontally to pass between the attacks, then commit to the red sore when it is in range. If the active character is running low on Rings, fly completely above or below the Finalhazard to switch sides. The replacement character inherits the reserve determined by the previous character’s remaining Rings, so switching too early can leave the next approach with less time.
After every successful hit, immediately begin lining up the next approach. Avoid circling without purpose: the Ring supply and five-minute limit continue to decrease. Six successful Homing Attacks defeat the Finalhazard and trigger the concluding cutscenes and credits.
- Super Sonic and Super Shadow are active.
- Six red sores are struck.
- The Finalhazard is defeated before the five-minute limit expires.
- The ending cutscenes and credits play.
Before you move on
- Hero Story is cleared.
- Dark Story is cleared.
- Last Story is unlocked and selected.
- Cannon’s Core is completed as Tails, Dr. Eggman, Rouge, Knuckles and Sonic.
- Biolizard is defeated as Shadow.
- Finalhazard is defeated with Super Sonic and Super Shadow.
- The final cutscenes and credits play.
References for this chapter
- Sonic Adventure 2 — Guide and Walkthrough — Dreamcast — By Matt_the_Yak
- Sonic Adventure 2 — Guide and Walkthrough — Dreamcast — By Kajtek
- Sonic Adventure 2 — Guide and Walkthrough — Dreamcast — By AdmiralSyrup
- Sonic Adventure 2 — Guide and Walkthrough — Dreamcast — By NTsui
- Sonic Adventure 2 — Sega Dreamcast Manual
Finalhazard — The Final Fight and How to Reach the Ending
The Finalhazard is the last battle in Sonic Adventure 2’s Last Story. After clearing both Hero Story and Dark Story, complete Cannon’s Core and defeat the Biolizard. Sonic and Shadow then transform into Super Sonic and Super Shadow. The battle uses special flying controls, steadily drains Rings, and requires six successful attacks on the red sores on the Finalhazard’s body. Defeating it starts the canonical ending and credits.
Unlock Last Story and reach the final battle
Last Story appears in the Story menu only after both Hero Story and Dark Story have been completed. Select it and clear Cannon’s Core, which cycles through Tails, Dr. Eggman, Rouge, Knuckles and Sonic before the Biolizard fight. After the Biolizard sequence, the game presents the final cutscene and automatically begins the Finalhazard battle.
There is no equipment menu or upgrade preparation for this fight. Super Sonic and Super Shadow are supplied by the story, and they take turns fighting the boss. Save your progress before beginning Last Story if possible, and be prepared to replay the preceding sequence if a failed attempt sends you back rather than allowing an ordinary stage checkpoint restart.
- Hero Story is complete.
- Dark Story is complete.
- Last Story is visible in the Story menu.
- Cannon’s Core and the Biolizard have been cleared.
Learn the Dreamcast controls
The Finalhazard does not use Sonic’s normal running and jumping controls. The Analog Stick moves the active character forward, backward, left and right through the battle space. Press A to ascend and charge upward. Press X or B to descend and charge downward. When you are close enough to a red sore, the charge becomes the homing attack that damages the boss.
The characters continuously lose Rings while they remain active. There are no Ring pickups scattered through the arena. A normal turn gives roughly 50 seconds of Ring supply, while the final two attacks have a shorter reserve. If the Ring count reaches zero, that Super character is lost and the battle ends.
- Analog Stick: move forward, backward, left and right.
- A: ascend and charge.
- X or B: descend and charge.
- Use a charge near a red sore to attack.
- Do not wait for Ring pickups; none are placed in the arena.
Complete the six attacks
The Finalhazard’s weak point is a large red sore that appears on its body. Fly toward it with the Analog Stick, correct your height with A or X/B, and charge when the target is close. Do not aim at the surrounding body; the attack must connect with the red sore. Each successful hit switches control to the other Super character and restores that incoming character’s Ring supply for the current stage of the battle.
The first attack is guarded by a small group of red, homing egg-like projectiles. Keep moving and approach the sore rather than trying to destroy every projectile. The next two attacks use laser beams. Continue steering across the boss’s face and body, then change height to pass clear of a beam before charging the target.
The fourth attack uses two beams. The fifth and sixth attacks combine the beam hazards with larger groups of red projectiles, making the approach more difficult. Keep the boss centered in view, make small height adjustments, and attack as soon as the sore is within homing range. The Finalhazard cannot directly injure the Super forms through a normal hit, but its attacks repel or slow them, wasting Rings and reducing the time available for the approach.
- Hit the red sore six times in total.
- Avoid the red projectiles during the opening pattern.
- Use lateral movement and height changes against the beam patterns.
- Expect the fifth and sixth attacks to combine beams and projectiles.
- Attack promptly because Rings drain continuously.
Switch characters when necessary
A successful hit automatically changes from Super Sonic to Super Shadow or from Super Shadow to Super Sonic, and the incoming character receives the appropriate refreshed Ring supply. You can also switch manually by flying over or under the Finalhazard. Use this only when the active character is running low on Rings or has been knocked far away.
A manual switch is not the same as a successful hit: it does not provide the normal full refresh. The incoming character’s available Rings depend on the reserve carried from that character’s previous turn. Switching repeatedly therefore wastes time and can leave both characters with poor reserves. Prefer a direct attack whenever the red sore is reachable.
- Use automatic switches after successful attacks whenever possible.
- Manually pass over or under the boss only to escape a failing approach.
- Do not assume a manual switch restores Rings.
Finish the game and verify completion
After six successful attacks, the Finalhazard is defeated. The game then plays the closing sequence in which Super Sonic and Super Shadow use Chaos Control to stop the ARK from striking Earth. Allow the cutscenes and credits to run to completion.
The canonical main-story finish is confirmed when the Finalhazard is destroyed and the ending credits begin. After returning to the menus, check that Last Story is recorded as cleared. This confirms that the complete Hero, Dark and Last Story route has been finished rather than only one campaign.
- Six red sores have been destroyed.
- The Finalhazard is defeated.
- The Chaos Control ending plays.
- The credits begin.
- Last Story is cleared in the Story menu.
Before you move on
- Hero Story and Dark Story are both cleared.
- Last Story is selected and Cannon’s Core is completed.
- The Biolizard is defeated.
- Super Sonic and Super Shadow defeat the Finalhazard with six successful attacks.
- The Chaos Control ending and credits play.
- Last Story remains recorded as completed after returning to the Story menu.
References for this chapter
Emblems and Missions — How to Triage Runs for Progress or 100%
The European Sega Dreamcast release contains 180 Emblems. Story progression requires the first mission of each stage, while the remaining missions, Boss Modes, kart races, Chao races and character-wide all-A-rank rewards form the optional completion route. Use Stage Select and the Emblem Results screen to organize replays instead of repeating stages at random.
Understand the Dreamcast Emblem total
Sonic Adventure 2 on Dreamcast has 180 Emblems. The game contains 31 stages, and each stage has five missions, producing 155 mission Emblems. The 31-stage total consists of the Hero Story stages, Dark Story stages and Cannon's Core in the Last Story.
The other 25 Emblems are awarded outside the ordinary stage-mission total: three for completing Hero Story, Dark Story and Last Story; three for completing Hero, Dark and All Bosses Mode; ten for the Dreamcast Chao Race events; three for the Beginner, Standard and Expert kart courses; and six for earning every A rank on the missions assigned to Sonic, Shadow, Tails, Eggman, Knuckles and Rouge.
A mission Emblem is awarded when the mission is cleared. The rank shown afterward is a separate performance record. You can therefore obtain the Emblem with a normal clear and return later to improve the result to an A rank.
- The complete Dreamcast target is 180 Emblems.
- There are 31 stages and five missions per stage, for 155 mission Emblems.
- The original Dreamcast release has six character all-A-rank Emblems, not seven.
- Mission completion and rank improvement are separate goals.
Complete the story route before specializing
Choose either Hero Story or Dark Story and clear every stage's first mission in order. Mission 1 is the ordinary story objective for that stage, but the objective can be a speed run, treasure hunt, shooting stage, boss fight or kart race depending on the stage and character.
After completing one side, complete the other. Clearing only Hero Story or only Dark Story does not finish the campaign. Once both sides are complete, Last Story becomes available. Finish Cannon's Core and the remaining Last Story sequence, then allow the ending and credits to finish so the Last Story completion Emblem is registered.
This first pass establishes the stage records without forcing difficult variants early. Stage Select is then the correct place to replay missions. Missions within a stage unlock in order: clear Mission 1 before Mission 2, Mission 2 before Mission 3, and so on. If a later mission is unavailable, check the preceding mission for that same stage rather than assuming the save is damaged.
- Hero Story is cleared.
- Dark Story is cleared.
- Last Story and Cannon's Core are cleared.
- The credits are allowed to finish after each story ending.
- Every stage's first mission is recorded as complete.
Use the five missions as a replay checklist
The standard mission pattern is consistent across most stages. Mission 1 is the normal stage objective. Mission 2 requires collecting 100 Rings. Mission 3 requires finding the Lost Chao. Mission 4 requires reaching the Goal Ring within a specified time. Mission 5 is Hard Mode.
Read the objective shown on the stage-selection screen before launching each attempt. Mission 2 changes the normal stage structure: the level generally loops until 100 Rings have been collected. Knuckles and Rouge do not search for Emerald shards during this mission, while the other characters commonly encounter Back Rings instead of the ordinary Goal Ring. Back Rings can restore rings to the stage, making them useful when a route has been partially cleared.
Mission 3 places the Lost Chao somewhere in the stage. The Mystic Melody and Ancient Ruin route is central to many of these searches, and some Lost Chao paths require a character upgrade found elsewhere in the same stage or an earlier stage. Mission 4 is usually a direct timed run and often removes the normal checkpoint safety net. Mission 5 changes hazards, enemy placement or route geometry, so treat it as a separate Hard Mode layout rather than simply attempting Mission 1 faster.
- Read the mission description before every attempt.
- Clear Missions 1 through 5 in order.
- Use Mystic Melody and the required permanent upgrades for Lost Chao routes.
- Expect Hard Mode to change hazards or the route.
Prioritize quick, reliable mission Emblems
After both stories are complete, begin with familiar Mission 2 and Mission 4 attempts. Mission 2 rewards careful route knowledge and ring collection. Learn where ring groups, shields and Back Rings appear, and avoid unnecessary enemies while preserving the rings already collected. In treasure-hunt stages, use known landmarks and character upgrades to search efficiently rather than crossing the same area repeatedly.
Next, attempt timed Mission 4 objectives on stages whose ordinary route you already know. Practice the route in Mission 1 first, then remove detours and risky tricks. Sonic and Shadow can use homing attacks to bridge gaps or maintain speed, while Tails and Eggman should favor safe hovering routes when a fall would cost the run. Knuckles and Rouge should use the radar and stage landmarks instead of wandering after the timer has become unfavorable.
Leave Lost Chao searches and Hard Mode until you are familiar with the ordinary layout and have obtained the relevant character upgrades. If a timed attempt is clearly lost, restart rather than spending lives finishing a run that cannot meet its objective. These are practical routing recommendations, not requirements for which mission must be attempted first.
- Clear straightforward 100-Ring missions first.
- Use a familiar route before attempting a timed mission.
- Delay difficult Lost Chao and Hard Mode missions until upgrades are available.
- Restart a failed time trial promptly when recovery is no longer realistic.
Pursue A ranks after the mission sweep
Once every mission has been cleared once, review the rank records and target the easiest improvements. Missions are graded from A through E. In the usual stage pattern, Missions 1, 4 and 5 are primarily score-based, while Missions 2 and 3 are primarily time-based. Tails's Route 101 and Rouge's Route 280 use time-based grading across their missions, so do not apply the ordinary score-versus-time pattern blindly to those kart stages.
Action missions generally benefit from combining a fast finish with rings, enemy defeats and useful pickups. Shooting missions reward efficient target destruction while preserving vehicle health. Treasure hunts become more consistent when the search is planned around landmarks, hint computers and radar behavior rather than improvised movement.
The six all-A-rank Emblems are character-wide rewards. To earn one, every mission assigned to that character must show an A. Cannon's Core is not a seventh character category in the Dreamcast breakdown. Leave these rewards until the routes, upgrades and mission objectives are already familiar.
- Review rank records after clearing all missions.
- Improve the weakest missions rather than replaying stages at random.
- Track Sonic, Shadow, Tails, Eggman, Knuckles and Rouge separately.
- Do not expect one individual A rank to award an all-A Emblem.
Finish the non-stage categories and verify the total
After the 155 stage-mission Emblems are complete, use the Emblem Results screen to identify missing categories. Complete the Hero, Dark and All Bosses Modes; win the Beginner, Standard and Expert kart courses; and finish the Dreamcast Chao Race requirements. The Chao Race category contributes ten Emblems on this original release.
Do not search for Chao Karate Emblems or a Cannon's Core all-A-rank Emblem on the European Dreamcast version. If another chapter or menu guide mentions Chao Karate, that information belongs to Sonic Adventure 2: Battle or a later port and must not be followed for this edition.
When the Emblem record reaches 180, Green Hill Zone becomes available in Stage Select. That is the completion check for the full Emblem collection. The campaign itself is complete earlier, when Hero Story, Dark Story and Last Story have been cleared.
- 155 stage-mission Emblems are collected.
- Three story-ending Emblems are collected.
- Three Boss Mode Emblems are collected.
- Ten Dreamcast Chao Race Emblems are collected.
- Three kart-race Emblems are collected.
- Six character all-A-rank Emblems are collected.
- The Emblem record reaches 180 and Green Hill Zone is available.
Before you move on
- Hero Story is cleared and its ending Emblem is recorded.
- Dark Story is cleared and its ending Emblem is recorded.
- Last Story, including Cannon's Core, is cleared and its ending Emblem is recorded.
- All 31 stages show five cleared mission Emblems if pursuing the complete collection.
- The Dreamcast Emblem record shows 180 Emblems.
- Green Hill Zone is available from Stage Select.
- Any remaining objective is optional personal improvement, such as better ranks or additional Chao development.
References for this chapter
Green Hill Zone Unlock and Extras
On the original Sega Dreamcast release, Green Hill Zone becomes available after the active save contains all 180 Emblems. The Dreamcast total is made from 155 stage-mission Emblems, three story-ending Emblems, three Boss Attack Emblems, ten Chao Race Emblems, three kart-racing Emblems, and six character-wide all-A Emblems. Chao Karate is not part of the original Dreamcast game and is not required for Green Hill Zone. Other rewards, including Boss Attack, Last Story, kart modes, Chao gardens, and secret two-player characters, unlock through their own prerequisites.
Check the Dreamcast emblem target
Open the Extra menu and select Emblem Results. Use this screen as the authoritative progress record for the current Dreamcast save. Green Hill Zone requires all 180 Emblems; completing Hero Story, Dark Story, and Last Story alone is not enough.
The full total is divided into six Dreamcast categories: 155 stage-mission Emblems, three story-ending Emblems, three Boss Attack Emblems, ten Chao Race Emblems, three kart-racing Emblems, and six character-wide all-A Emblems. These categories total 180. Chao Karate does not appear in this Dreamcast breakdown and must not be added from Sonic Adventure 2: Battle guides.
- Open Extra and record the current Emblem total.
- Use the category entries to identify unfinished activities.
- Keep ordinary mission clears and all-A performance records separate.
Complete the 155 stage-mission Emblems
Return to Stage Select and clear the five missions attached to every stage. The first mission is the normal stage objective. Later missions include tasks such as collecting 100 Rings, finding the Lost Chao, completing a time challenge, or clearing a harder version of the stage. There are 31 stages with five missions each, producing 155 stage-mission Emblems.
A normal mission Emblem is awarded for clearing its stated objective; it does not automatically require an A rank. Revisit stages after obtaining upgrades when an item, shortcut, or hidden route is difficult to reach. Grouping replays by character can reduce setup time: handle Sonic and Shadow action stages together, Tails and Eggman shooting stages together, and Knuckles and Rouge treasure-hunting stages together.
- Clear all five listed missions for every stage.
- Verify each stage record in the Emblem Results display.
- Do not mistake an A-rank record for the ordinary mission-clear requirement.
Finish the story and Boss Attack categories
Complete Hero Story, Dark Story, and Last Story to obtain the three story-ending Emblems. Last Story becomes available only after both Hero Story and Dark Story are complete, so finishing one side does not supply the complete story total.
Boss Attack provides three additional Dreamcast Emblems: the Hero-side boss set, the Dark-side boss set, and the combined all-boss set. The relevant Boss Attack activities become available as the corresponding story progress is completed. Enter the Boss Attack menu and clear each available set, then confirm the three category entries in Emblem Results.
- Confirm Hero Story has been cleared.
- Confirm Dark Story has been cleared.
- Unlock and complete Last Story.
- Complete the Hero, Dark, and combined Boss Attack activities.
Complete kart racing and Chao Race
The kart category contributes three Emblems. Complete the Dreamcast kart-racing requirements shown in the kart menu, including the available course progression. Route 101 and Route 280 are the story kart stages; completing both also unlocks the Dreamcast two-player kart-racing option.
Chao Race contributes ten Emblems. Raise and develop Chao in Chao World, then enter the available race groups and win the required races. Chao Race progress is separate from stage missions and A ranks. If a race group is unavailable, continue developing the Chao and advancing through the available race progression rather than assuming the save is defective.
Do not search for Chao Karate requirements on the Dreamcast disc. That activity and its emblem structure belong to later versions, not this original release.
- Complete the three kart-racing Emblem requirements.
- Advance Chao development until the required race groups are available.
- Win the ten Dreamcast Chao Race Emblems.
- Confirm that no Chao Karate entry is needed.
Earn the six character-wide all-A Emblems
The final six Emblems come from completing the relevant mission sets with A ranks for Sonic, Shadow, Tails, Dr. Eggman, Knuckles, and Rouge. These are character-wide rewards: clearing a character’s stages once is not enough. Use the mission-rank records to identify the remaining non-A results and replay those missions with better time, Ring totals, accuracy, survival, or objective completion as appropriate.
These all-A rewards also unlock the original Dreamcast secret two-player character replacements. The substitutes are Amy Rose for Sonic, Metal Sonic for Shadow, Chao for Tails, Big the Cat for Dr. Eggman, Tikal for Knuckles, and Chaos 0 for Rouge. They are two-player options, not additional Story Mode characters.
- Review the mission-rank records for all six characters.
- Improve every required result to A rank.
- Save after completing each character-wide rank set.
- Check the two-player character selections after the rewards register.
Enter Green Hill Zone
When Emblem Results displays 180 collected Emblems, leave the results screen and open Stage Select. Green Hill Zone appears as a new Sonic stage on the active Dreamcast save. No additional story trigger, upgrade, or Chao requirement is needed once all 180 Emblems are recorded.
Green Hill Zone is an optional three-dimensional recreation of the original Sonic the Hedgehog stage. It uses Sonic Adventure 2’s Dreamcast movement and controls. It is not required to finish Hero Story, Dark Story, or Last Story, but completing it confirms that the final unlock is functioning on the save.
- Verify that the total is exactly 180.
- Open Stage Select and confirm that Green Hill Zone is present.
- Start Green Hill Zone as Sonic and complete the stage once.
Check earlier extras without mixing editions
Boss Attack is tied to story-side completion, while Last Story is tied to clearing both main story sides. Kart modes are tied to the Route 101 and Route 280 progression described above. Chao gardens and additional Chao Race groups depend on Chao development and race progress rather than on the 180-Emblem threshold.
The Dreamcast release has its own two-player roster and reward structure. Do not import Chao Karate, Battle-exclusive Chao options, later costume systems, or other GameCube, PC, or HD-port requirements into this checklist. Use the Emblem Results categories on the original Dreamcast save as the final authority.
- Check Boss Attack after clearing the relevant story side.
- Check kart modes after completing Route 101 and Route 280.
- Check Chao World after evolving and racing Chao.
- Keep all Battle and later-port features out of the Dreamcast completion target.
Before you move on
- Extra’s Emblem Results screen displays 180 collected Emblems.
- Green Hill Zone appears in Stage Select on the Dreamcast save.
- Green Hill Zone starts and can be completed as Sonic.
- Hero Story, Dark Story, and Last Story completion records are present.
- The three Boss Attack Emblems, three kart-racing Emblems, ten Chao Race Emblems, and six character-wide all-A Emblems are accounted for.
- Any separately pursued Dreamcast two-player replacement characters are visible in their applicable modes.
References for this chapter
- Sonic Adventure 2 — Sega Dreamcast Manual
- Sonic Adventure 2 — Guide and Walkthrough — Dreamcast — By Matt_the_Yak
- Sonic Adventure 2 — Guide and Walkthrough, Dreamcast
- Sonic Adventure 2 — Dreamcast Cheats, Codes, and Secrets
- Sonic Adventure 2 cheats — Dreamcast entries
- Prima’s Official Strategy Guide — Sonic Adventure 2
Chao Gardens — Raising, Exporting and the VMU Mini-Game
Chao raising is optional to the Hero, Dark and Last Story campaigns, but it provides the Dreamcast release’s Chao races, gardens, kindergarten features and VMU mini-game. First unlock Chao World by finding a Chao Key before clearing an Action Stage. Then hatch an egg, provide food and affection, use animals and Chaos Drives to guide development, and save carefully before transferring a Chao to a VMU for Chao Adventure 2.
1. Unlock Chao World and enter the first garden
During an Action Stage, look for a blue Chao container and collect the Chao Key inside it before reaching the Goal Ring. Clear the stage after obtaining the key. The post-stage flow will then allow access to Chao World; enter the garden from the Chao World entrance. If you clear the stage without the key, replay a suitable stage and find one before clearing it again.
The first Chao Garden contains two eggs, a tree that provides food, seeds, the Chao Transporter and the entrance to the Chao Stadium. Time advances in the garden while you are present there, so remain in the garden when you want a Chao to rest or mature. Leave through the normal exit after saving important changes.
- Find a Chao Key before clearing an Action Stage.
- Enter Chao World after the stage is cleared.
- Confirm that the first garden contains two eggs and the food tree.
2. Hatch an egg without harming the new Chao
Approach an egg and press B to pick it up. While holding it, move the Analog Thumb Pad to gently shake it, then place it back on the ground. The egg will eventually hatch. This is the safest method for a first Chao because the game records how the egg is handled; throwing or otherwise treating it roughly can produce an unhappy Chao.
After hatching, place the Chao on the ground and watch where it moves. Stay near water if necessary because Chao can get into danger, including drowning in the Dreamcast gardens. Press B near the Chao to pet it. Calm handling is preferable while establishing its first alignment and personality.
- Pick up the egg with B.
- Shake it gently with the Analog Thumb Pad.
- Place it down and avoid throwing it.
- Pet the hatched Chao and supervise it near water.
3. Feed and develop the Chao
Stand at a tree and press B to grab it, then move the Analog Thumb Pad to shake loose a nut. Pick up the food and give it to the Chao. Seeds can also be found in the garden; giving a seed to the Chao lets it plant the seed. Feed when the Chao is hungry, but allow it to rest rather than repeatedly forcing interactions.
Small animals and Chaos Drives collected during Action Stages are released into the garden when you enter it. Pick them up and give them to the Chao to improve its abilities and influence its development. Chaos Drives are useful when you want to raise a stat without adding animal parts to the Chao’s appearance. Animals can improve abilities while also changing the Chao’s visible features, so use them deliberately.
The character group used for affection affects alignment. Regular care from Hero characters encourages a Hero direction, while care from Dark characters encourages a Dark direction. A neutral direction is also possible. Raising alignment and stats is optional and does not affect required story completion. The Chao Kindergarten is available from Chao World and provides advice, lessons and health checks; use it when you want structured care instead of relying only on garden interactions.
- Feed the Chao with nuts from the garden tree.
- Use seeds when you want the Chao to plant them.
- Use Chaos Drives for controlled stat development.
- Use animals selectively because they can alter appearance.
- Choose Hero or Dark characters consistently if a particular alignment is wanted.
4. Save before racing or transferring
The Dreamcast manual lists 18 blocks for the main file, 52 blocks for Chao data and 128 blocks for the VMU mini-game. Keep the VMU or memory card connected while the game is saving or loading. Never turn off the Dreamcast, remove the memory card or disconnect the controller during data access.
Save after raising a Chao, completing a race or returning from a VMU session. If the Chao or its records are important, use a separate compatible memory card as a backup only after the save has fully finished. Do not assume that moving a Chao to a VMU creates a second independent copy; treat the transferred Chao as your only current copy until it has been returned and saved again.
- Reserve 52 blocks for Chao data on the game memory card.
- Wait for all saving or loading activity to finish.
- Do not interrupt the controller or memory card during access.
- Back up only after the original save is complete.
5. Transfer one Chao to a VMU
Pick up the Chao and carry it to the large VMU-shaped Chao Transporter in the garden. Place it on the transporter and step on the red button. Select the VMU that will receive the data. The VMU needs at least 128 free blocks. The manual also states that one VMU can hold only one Chao and one Chao egg for this feature, that an existing executable file may be erased, and that the VMU mini-game is not compatible with 4X Memory Cards.
Leave the VMU attached until the transfer finishes. If the VMU already contains an executable mini-game, confirm that you are willing to replace it before proceeding. If there is not enough free space, cancel and use another VMU rather than deleting an unrelated file by mistake.
- Use a standard VMU, not a 4X Memory Card.
- Check for at least 128 free blocks.
- Confirm that replacing an existing executable file is acceptable.
- Wait until the transfer is complete before detaching the VMU.
6. Start Chao Adventure 2
Detach the VMU only after saving has finished. Wake it if necessary, use the VMU’s MODE/menu control to reach the Chao Adventure 2 icon, and select it. At the mini-game title screen, press A and B together to begin. The VMU requires its batteries to run the screen-based mini-game; without battery power it can still function as a memory card but cannot normally run its portable game.
During the adventure, the Chao can become hungry or tired and stop moving. Use the snack and pat options to restore its condition. The Chao may meet characters, receive requests and reach different outcomes based on the choices you make. Chao Adventure 2 can also raise its VMU-only Intelligence and Luck attributes, and it can return items such as seeds to the garden.
- Start the game from the VMU icon.
- Press A+B at the Chao Adventure 2 title screen.
- Use snacks and pats when the Chao becomes hungry or tired.
- Keep the VMU powered while playing the mini-game.
7. Return the Chao and use VMU connectivity
Reconnect the VMU to a Dreamcast controller and enter Chao World. Stand on the Chao Transporter and use the L and R triggers to select the memory card. Highlight the Chao’s Select option and bring it back into the garden. Wait for the transfer to finish, then save before removing the VMU or leaving Chao World.
The Dreamcast release can move a Chao between compatible Chao gardens through its memory-card data. Chao Adventure 2 also has a Hello function for connecting two VMUs; the manual describes this as a way to connect Chao and potentially obtain a new egg. These are optional Chao features, not story requirements. They are separate from Sonic Adventure 2: Battle’s GameCube and Game Boy Advance connectivity, which is not part of the original Dreamcast release.
- Use L/R to choose the VMU at the transporter.
- Select and retrieve the Chao into the garden.
- Save after the Chao returns.
- Use Hello only when both VMUs are connected and you intend to perform the exchange or interaction.
- Do not expect GameCube-to-Game Boy Advance features on Dreamcast.
Before you move on
- Chao World was unlocked by obtaining a Chao Key before clearing an Action Stage.
- At least one egg was gently hatched in the first Chao Garden.
- The Chao was fed, petted and saved successfully.
- Animals or Chaos Drives were used according to the intended development plan.
- A compatible VMU with at least 128 free blocks received Chao Adventure 2 and one Chao.
- Chao Adventure 2 started successfully from the VMU icon.
- The Chao was returned through the Chao Transporter and saved in the garden.
- Any desired Chao race results, VMU items or connected-VMU interactions were completed before leaving Chao World.
Two-Player and Multiplayer Notes (Dreamcast specific)
The European Sega Dreamcast release has a substantial but compact multiplayer package. Its 2P PLAY menu includes Action versus games based on Sonic and Shadow Race stages, Tails and Eggman Shooting stages, Knuckles and Rouge Hunting stages, a Random option, and Kart Race after both story Kart stages are cleared. The Dreamcast also includes Chao Race for up to eight participants. It does not include the expanded Sonic Adventure 2: Battle roster, Chao Karate, or Battle’s additional character-versus formats.
1. Enter the Dreamcast versus modes
Connect controllers before entering 2P PLAY. The manual identifies the Dreamcast release as a one- or two-player game and places the main competitive modes under 2P PLAY. Select Action to choose a gameplay type, then choose the stage when the menu permits stage selection.
Action contains four choices: Race, Shooting, Hunting and Random. Race uses Sonic and Shadow stages, Shooting uses Tails and Dr. Eggman stages, and Hunting uses Knuckles and Rouge stages. Random selects one of those categories for you. The controls remain based on the corresponding Story Mode character, but versus rules determine how a match is won.
- Connect the second controller before selecting 2P PLAY.
- Use Race for Sonic or Shadow competition.
- Use Shooting for Tails or Eggman competition.
- Use Hunting for Knuckles or Rouge competition.
2. Learn the Action mode win conditions
Race is a contest to reach the Goal Ring first. Race and Hunting display the competitors in a vertical split-screen, with Player 1 on the left and Player 2 on the right. Choose a familiar stage first, because knowing the route is more valuable than attempting risky shortcuts immediately.
Shooting is played on one full screen rather than split-screen. Each player controls a Tails or Eggman-style mech, and the winner is the player who reduces the opponent’s life gauge to zero. Stay mobile, use cover or platforms when available, and avoid trading damage blindly when your own gauge is low.
Hunting is won by finding two Master Emerald pieces before the opponent. Use the radar and recognizable stage landmarks to divide the area into sections. If you find one piece, do not assume the match is secured: the other player can still locate both pieces or interrupt your search by reaching the remaining target first.
The manual describes these contests as best-of-three matches: the first player to win two games takes the match. Ring-based special attacks are also available in Action mode, with the attack changing as a player collects more rings. Save those attacks for an opponent who is close to the Goal Ring, an Emerald piece, or a favorable shooting position.
- Reach the Goal Ring first in Race.
- Reduce the opposing life gauge to zero in Shooting.
- Find two Master Emerald pieces first in Hunting.
- Remember that two game wins decide the Action match.
3. Unlock and use two-player Kart Race
There are two Story Mode Kart stages: Tails’s Route 101 on the Hero side and Rouge’s Route 280 on the Dark side. Clearing either one makes Kart Race available in 1P PLAY against the CPU. Clear both stages to enable Kart Race in 2P PLAY.
In Kart Race, select a character and then choose Beginner, Standard or Expert. The original Dreamcast manual also lists Download as a course category for content obtained through the period’s official online service; treat that as legacy optional content rather than a requirement for the retail game’s normal multiplayer unlock.
The 2P Kart display is divided into top and bottom sections, rather than the vertical arrangement used by Race and Hunting. Each race lasts three laps. Collecting at least 20 rings gives access to a temporary boost; use it on a straight or after exiting a turn instead of activating it while pointed at a wall. Release acceleration briefly and reapply it while steering when a sharper turn is needed, then prioritize staying on the course over aggressive shortcuts.
- Clear Route 101 or Route 280 for 1P Kart Race.
- Clear both Route 101 and Route 280 for 2P Kart Race.
- Select Beginner, Standard or Expert for ordinary Dreamcast courses.
- Use ring boosts on straights and recover your racing line after collisions.
4. Use Chao Race for group play
Chao Race is a separate 2P PLAY activity. Before entering it, participate in a Chao race through Story Mode or Stage Select so that you have a race-ready Chao. The Dreamcast manual states that Chao Race can use hand-raised Chao and support up to eight participants.
The controller assignment uses the Dreamcast’s four controller ports, with two player positions associated with each port. During the race, odd-numbered players encourage their Chao with the left trigger and even-numbered players with the right trigger. This is a Chao competition, not Chao Karate: the Dreamcast version does not provide the later Battle expansion’s dedicated Chao fighting mode.
Chao data can be stored on a VMU or a 4X Memory Card for use by the game’s Chao features. Keep the correct memory device connected before entering the race and verify which Chao save is active if more than one device is present.
- Enter at least one Chao race before attempting multiplayer Chao Race.
- Prepare the Chao you want to use and confirm its save device.
- Use the assigned left or right trigger to encourage the Chao.
- Do not search the Dreamcast menus for Chao Karate.
5. Understand the VMU connection and safe transfers
The VMU feature is not a replacement for 2P PLAY. It is a separate Chao-data system that lets you transport one Chao and one Chao egg to a VMU and play Chao Adventure 2 away from the main screen. The manual requires 128 free VMU blocks for the mini-game, and the mini-game is not compatible with a 4X Memory Card.
To transfer a Chao, pick it up in the garden, carry it to the Chao transporter, step on the red button, and choose the memory card destination. If you remove the VMU from the controller, you can start Chao Adventure 2 by pressing A and B at its title screen. Return the Chao through the Chao-related transfer process before changing devices.
Chao Adventure 2 includes a Hello function for connecting two VMUs containing Chao. This can support a friendly exchange or produce a new egg, but it is not a simultaneous console multiplayer battle. Save first, identify each VMU, and never remove a memory device or switch off the Dreamcast while data is being written.
- Reserve 128 free VMU blocks before exporting a Chao.
- Remember that only one Chao and one Chao egg fit on a VMU.
- Use the Chao transporter rather than removing a device during saving.
- Treat VMU Hello as Chao data interaction, not as a 2P PLAY mode.
6. Know what belongs only to Sonic Adventure 2: Battle
The GameCube release Sonic Adventure 2: Battle expanded the versus package with additional playable characters, alternate forms, and modes such as broader character battles and Chao Karate. Those additions should not be expected on the European Dreamcast disc.
For Dreamcast multiplayer, concentrate on Action Race, Shooting, Hunting and Random, Kart Race, and Chao Race. These are the features that can be verified for the original release. If a menu or guide refers to Battle-only characters, costumes, Chao Karate or expanded battle categories, do not treat them as missing Dreamcast unlocks.
- Use only Dreamcast-listed Action categories.
- Do not expect Battle’s enlarged character roster.
- Do not expect Chao Karate on the original disc.
- Do not confuse VMU Chao Adventure 2 with a console battle mode.
Before you move on
- Action mode offers Race, Shooting, Hunting and Random.
- Route 101 or Route 280 makes 1P Kart Race available.
- Both Route 101 and Route 280 make 2P Kart Race available.
- Chao Race is accessible after participating in a Chao race and supports up to eight participants.
- A VMU with sufficient free space can hold one exported Chao and one Chao egg for Chao Adventure 2.
- The Dreamcast menus do not contain Battle-only Chao Karate or the expanded GameCube character-versus package.
Troubleshooting, Recovery and Efficient Re-Runs
Protect the Dreamcast save, recover cleanly from failed attempts or hardware interruptions, and build efficient Stage Select routines for missions, emblems and A-ranks without mixing in later-port behavior.
Protect the VMU save before troubleshooting
Allow every save operation to finish before switching off the Dreamcast, opening the disc lid, removing the VMU or disconnecting the controller. The Dreamcast manual specifically warns against interrupting power, removing the memory card or disconnecting the controller during saving. Keep the VMU containing the Sonic Adventure 2 file in the same controller until the operation is complete.
If the game stops recognizing the file or reports a damaged save, stop saving over that VMU. Power down normally, reseat the VMU and start the game again. If you have another VMU, check its free space before using it, but do not overwrite the original file while investigating. Do not use save editors, unofficial save manipulation or hardware modifications to bypass the problem.
- Wait until saving has finished before powering down.
- Do not remove or swap the VMU during a save.
- Preserve a suspected damaged file instead of overwriting it.
Recover after a reset, freeze or missing progress
After a power failure, accidental reset or freeze, reload the last confirmed save and check the Story or Stage Select menus before replaying anything. If the last stage result or story event is absent, replay that stage from Story and complete it normally. Do not assume that reaching a checkpoint, pausing or entering a stage has recorded permanent progress.
If the same freeze happens repeatedly, inspect the GD-ROM for dirt or damage and test the Dreamcast, controller and VMU with another known-good game or save. If the fault follows the console, disc or VMU, resolve that hardware or media problem before attempting long mission sessions. A normal completed-stage save is safer than repeatedly resetting during loading or results screens.
- Reload and verify the last known stage or event.
- Test whether the problem follows the disc, console or VMU.
- Complete a normal stage and allow its result to be recorded before quitting.
Recover from deaths and a depleted attempt supply
Rings are the first line of protection for Sonic, Shadow, Knuckles and Rouge. A hit while carrying rings scatters them; a hit with no rings costs a life. Collecting 100 rings awards an extra life, so take safe ring routes during practice instead of treating every run as a speed attempt. Falling from a course is also dangerous and should be treated separately from ordinary damage.
Use Point Markers in Action and Lock-on Shooting stages. After a death, the next attempt can restart from the last marker reached, with the time recorded when that marker was touched. Do not select Restart casually from the pause menu: it begins the stage again and costs a life. If you have exhausted your useful attempts on a boss or stage, return to an earlier cleared Story stage, practice the relevant movement or firing pattern, collect safe rings and extra lives where practical, and finish the recovery run normally before trying again.
- Enter difficult sections with at least one ring whenever possible.
- Touch Point Markers instead of rushing past them.
- Use Restart only when the complete reset is worth the life cost.
- Finish recovery runs normally before leaving the game.
Use Stage Select to isolate practice
After at least one stage has been cleared in Story, Stage Select lets you replay cleared stages. Select a stage, then choose an unlocked mission. The Dreamcast version uses five ordered missions: Mission 1 is the normal clear condition, Mission 2 requires 100 rings, Mission 3 requires finding the lost Chao and Mystic Melody, Mission 4 adds a time limit, and Mission 5 is the harder version of the stage. Later missions unlock only after the preceding mission is completed.
For efficient practice, begin with Mission 1 on a stage whose route you already know. Use Mission 2 to learn safe ring paths, Mission 3 to memorize landmarks and Mystic Melody routes, and Mission 4 to remove hesitation only after the normal route is reliable. Treat Mission 5 as a separate challenge rather than assuming the Story route will remain safe under its harder conditions.
- Confirm the stage is already cleared before looking for it in Stage Select.
- Unlock missions in order.
- Use Mission 1 for route learning before attempting time or hard-mode goals.
Build an efficient emblem and A-rank loop
Finish the Hero and Dark Story progression before committing to a large mission-grinding session. Each cleared mission awards an emblem, and the first mission for a stage is the Story clear. After that, work through quick, repeatable targets: straightforward 100-ring missions, lost-Chao missions with a memorized landmark route, then time missions on stages with few confusing branches.
Improve one factor at a time. In Action stages, remove missed jumps and unnecessary braking. In Lock-on Shooting stages, maintain accurate locks while protecting vehicle HP; do not chase speed if damage is causing repeated failures. In Treasure Hunting stages, memorize a search order based on obvious landmarks and use the radar and hints methodically rather than sweeping the entire map at random. For A-ranks, keep rings when the route allows, finish with a strong time, and preserve point-marker access.
Do not restart every imperfect run. A failed time can still confirm a route, a ring position or a lost-Chao landmark. Record the mistake mentally, then make the next attempt target that one problem. Leave the hardest hard-mode, rescue and precision item-finding missions until the normal route and character controls are stable.
- Clear simple missions before difficult A-rank targets.
- Change one performance factor per attempt.
- Use Stage Select to practice without disturbing Story order.
- Prioritize repeatable routes over random full-stage retries.
Before you move on
- Reloading the file shows the latest confirmed Story stage, event or mission result.
- Cleared stages appear in Stage Select and their missions unlock one at a time in order.
- You can reach difficult sections with a planned ring and Point Marker strategy.
- Your practice loop distinguishes normal clears, 100-ring missions, lost-Chao missions, time missions and hard missions.
- Any save or hardware problem has been isolated to the VMU, disc or console before more progress is recorded.
Optional Challenges — A-Rank Strategy and 100% Roadmap
Treat the Dreamcast version’s mission system as a long-term progression plan rather than trying to earn every A rank during the story. Finish both stories and the Last Story first, then use Stage Select to work through the five missions available for each stage. Separate the mission objective from the ranking method: some missions ask for speed but award rank by score, while others are judged by time. The complete Dreamcast target is 180 emblems, including 155 mission emblems and six character-based all-A-rank emblems.
1. Finish the story before serious A-rank attempts
Clear the Hero Story, Dark Story, and Last Story using the normal Mission 1 objectives. Completing a stage’s first mission establishes its story reward and makes the stage available for later mission work through Stage Select. This gives you access to the complete Dreamcast stage list before you spend time optimizing individual routes.
Story completion is only part of the total. The 31 Dreamcast stages provide five mission emblems each, for 155 mission emblems. The remaining 25 are awarded through the three story endings, three Boss Mode categories, ten Chao Race goals, three Kart Race courses, and six all-A character rewards.
- Hero Story cleared
- Dark Story cleared
- Last Story cleared
- All available stages visible in Stage Select
2. Identify the objective and the ranking method
Mission 1 is the standard stage clear. Mission 2 asks you to collect 100 Rings, and the stage loops until the total is reached. Mission 3 asks you to find the hidden Chao, usually by locating the Ancient Ruin and using Mystic Melody to open the route. These two missions are normally ranked by time, so learn the route before attempting to optimize it.
Mission 4 asks you to reach the Goal Ring within a stated time, but in the standard Dreamcast structure its rank is generally based on score rather than completion time. Collect rings, defeat useful targets, and use safe movement bonuses while still finishing within the mission’s stated limit. Mission 5 is Hard Mode and is generally score-ranked. It changes hazards, enemy placement, gaps, or routes, so do not assume that a successful Mission 1 route will produce a good Mission 5 score.
Route 101, played by Tails, and Route 280, played by Rouge, are exceptions: all five missions on each driving stage are time-ranked. Treat these as dedicated time trials and learn the track layout before trying to preserve rings or maximize score.
- Read the mission description before starting
- Use ring and Chao routes for time-ranked Missions 2 and 3
- Score enemies, rings, and movement bonuses on normal Mission 1, Mission 4, and Mission 5 runs
- Treat Route 101 and Route 280 as all-mission time trials
3. Build a low-stress mission order
After the story, begin with short Action stages and familiar missions. Revisit City Escape, Radical Highway, Green Forest, White Jungle, and similar stages to secure straightforward Mission 2 and Mission 3 results while practicing movement. Then handle shooter stages, where accurate lock-on attacks, ring collection, and avoiding unnecessary damage help protect the score.
Work by character rather than jumping randomly between stages: Sonic, Tails, Knuckles, Shadow, Dr. Eggman, then Rouge is a practical order. This keeps control styles and route habits consistent. When a character’s mission list is complete, the corresponding all-A emblem becomes a clear short-term goal instead of one unfinished result among many.
- Clear straightforward missions first
- Group stages by character
- Record the reason for every failed A-rank attempt
- Use Stage Select results to locate unfinished missions
4. Improve difficult missions deliberately
For score-ranked missions, do not race directly to the goal unless the mission description also imposes a strict completion limit. Collect reliable rings, destroy worthwhile enemies, use springs and ramps for bonuses, and avoid shortcuts that create a serious death risk. In shooting stages, lock onto groups efficiently and preserve vehicle health rather than attacking isolated targets that cost more time than they are worth.
For Mission 4 and Mission 5, first complete the objective safely so you understand the altered route. On the next attempt, optimize only the sections that cost the most points or create the greatest danger. A failed late run is still useful if it identifies one unsafe shortcut; change one route choice at a time instead of rebuilding the entire attempt from memory.
- Determine whether the rank is score-based or time-based
- Prioritize reliable rings, enemies, and bonuses
- Learn Hard Mode separately from the normal layout
- Avoid risky shortcuts until the safe route is consistent
5. Complete the six character all-A emblems
The Dreamcast release awards one all-A emblem for each of the six story characters: Sonic, Tails, Knuckles, Shadow, Dr. Eggman, and Rouge. Every mission assigned to that character must show an A rank. An A on most missions is not enough, and the later GameCube Cannon’s Core all-A requirement does not apply to this original Dreamcast target.
For Sonic and Shadow, practice rails, slopes, gravity transitions, and enemy chains until the route is repeatable. For Tails and Eggman, protect vehicle health while maintaining accurate lock-on attacks. For Knuckles and Rouge, memorize search zones, use the radar systematically, and note landmarks that let you return to the correct area after checking another part of the stage.
- All Sonic missions show A
- All Tails missions show A
- All Knuckles missions show A
- All Shadow missions show A
- All Dr. Eggman missions show A
- All Rouge missions show A
6. Finish the remaining emblem categories and protect progress
After the mission work, complete the three Kart Race courses, the required Chao Race goals, and the three Boss Mode categories. Check the Emblem Results screen after each group instead of replaying stages at random. The complete Dreamcast total is 180 emblems: 155 missions, 3 story endings, 3 Boss Mode rewards, 10 Chao Race rewards, 3 Kart Race rewards, and 6 all-A character rewards.
Save after major sessions and, if possible, keep a second VMU copy of the save. A practical estimate is three required story runs for the Hero, Dark, and Last Story rewards, followed by one or more attempts for each mission and targeted retries for missed A ranks. The total varies substantially with familiarity, especially on Hard Mode, treasure hunts, vehicle stages, and the two driving stages.
- 155 mission emblems complete
- Six character all-A emblems complete
- Kart Race emblems checked
- Chao Race emblems checked
- Hero, Dark, and All Boss Mode rewards checked
- Save backed up after major milestones
Before you move on
- The Emblem Results screen shows 180 emblems if pursuing complete Dreamcast completion.
- Every mission for Sonic, Tails, Knuckles, Shadow, Dr. Eggman, and Rouge shows an A rank.
- Hero, Dark, and Last Story ending rewards are present; allow the credits to finish so the ending emblems register.
- The three Boss Mode rewards, three Kart Race rewards, and ten Dreamcast Chao Race rewards are present.
- The save has been backed up after the final major milestone, and any remaining objective is identified by category rather than guessed.
Post-Game Checklist and Final Checks
Use this checklist to verify the complete Sonic Adventure 2 story ending on Sega Dreamcast, then separate the optional 180-emblem and Chao goals from the required campaign finish.
1. Confirm the complete story ending
The required campaign is complete only after Hero Story, Dark Story, and Last Story have all been cleared. Completing Hero Story or Dark Story alone is not the ending. After both main campaigns are finished, select Last Story from the story menu.
Last Story begins with Cannon’s Core. Play its five sections in order as Tails, Dr. Eggman, Rouge, Knuckles, and Sonic. Cannon’s Core is followed by the Biolizard battle as Shadow and then the Finalhazard battle using Super Sonic and Super Shadow. This is the original Dreamcast story sequence; it is not an optional mission or a later-port bonus mode.
After defeating Finalhazard, allow the ending scenes and credits to finish. The Dreamcast emblem guide identifies separate Hero, Dark, and Last Story completion emblems, with the Last Story emblem awarded after the ending sequence has completed. Do not reset the Dreamcast, remove the VMU, or interrupt saving during this process.
- Hero Story is cleared
- Dark Story is cleared
- Last Story is available and completed
- Cannon’s Core is cleared
- Biolizard is defeated
- Finalhazard is defeated
- The ending scenes and credits have finished
2. Check the story records after the credits
Return to the story or stage-selection menus and load the save again. Confirm that the Hero and Dark campaigns remain accessible and that Last Story is still selectable. The exact menu presentation can vary by screen, so rely on the available story entries and emblem records rather than expecting a particular “complete” label.
Story completion is separate from Mission 2 through Mission 5. You do not need every A-rank, Boss Attack, Kart Racing result, or Chao Race result to reach the ending. Those activities are optional and should be pursued only if you want the full emblem total.
- The save reloads without an error
- Hero Story remains accessible
- Dark Story remains accessible
- Last Story remains selectable
- No optional mission is being mistaken for unfinished story progress
3. Verify the 180-emblem target correctly
The original Dreamcast release contains 180 emblems. The mission structure provides 155 of them: the game has 31 stages with five missions each, including the Cannon’s Core missions. The remaining emblems come from the three story endings, Boss Attack, Kart Racing, Chao Race, and the all-A-rank rewards associated with the character groups. The Dreamcast version’s Chao category is Chao Race, not Chao Karate.
Open Emblem Results and write down the missing entries before starting a cleanup run. Clear ordinary stage missions first, then work through the all-A requirements, Boss Attack, Kart Racing, and Chao Race. The Dreamcast guide lists ten Chao Race emblems, awarded across the available race progression. Raising Chao and exporting one to a VMU are useful optional features, but they are not interchangeable with the Chao Race emblem requirements.
Do not use Sonic Adventure 2: Battle’s emblem list for this checklist. Battle adds Chao Karate and changes other multiplayer and bonus details; Chao Karate is not a required or available category in the original Dreamcast release.
- The current emblem total is recorded
- Missing stage missions are listed
- All-A-rank rewards are checked
- Boss Attack results are checked
- Kart Racing results are checked
- Chao Race progress is checked
- Chao Karate has not been counted
4. Confirm Green Hill Zone
When the Emblem Results total reaches 180, check the stage-selection area for Green Hill Zone. This 3D recreation is the principal full-emblem reward in the Dreamcast release. It is not part of Hero Story, Dark Story, Last Story, Cannon’s Core, or the required ending.
Green Hill Zone should therefore be treated as the final confirmation of the optional 180-emblem objective, not as evidence that the story ending has just been reached. If it does not appear, return to Emblem Results and identify the missing emblem rather than replaying story stages at random.
- Emblem Results shows 180
- Green Hill Zone appears in stage selection
- Green Hill Zone can be entered
- Green Hill is recorded as an optional reward
5. Preserve Chao and VMU data
If you have raised Chao, enter Chao World and confirm that the gardens and important Chao still load. Chao data and the main story save are separate concerns on Dreamcast, so verify both before changing files or moving a VMU between controllers.
If you exported a Chao to Chao Adventure 2, confirm that the exported Chao loads on the VMU before deleting or replacing any related data. Keep important Chao on a known VMU and never remove the memory card or VMU while the game is saving. Chao raising, Chao Adventure 2, and VMU transfers are optional to the story ending, even though Chao Race results contribute to the full emblem target.
- Chao World opens normally
- Important Chao are present
- The exported Chao loads on the VMU
- The correct VMU remains connected
- No Chao or story data has been overwritten
6. Choose the next objective
If your goal was to finish the game, stop after confirming Hero Story, Dark Story, Last Story, Finalhazard, and the completed credits. If you want the Dreamcast’s full optional target, continue with the missing stage missions, all-A-rank rewards, Boss Attack, Kart Racing, and Chao Race until Emblem Results reaches 180 and Green Hill Zone appears.
Once those checks are complete, keep any later Sonic Adventure 2: Battle goals on a separate list. In particular, do not add Chao Karate, Battle-specific multiplayer rewards, or later-port unlocks to the Dreamcast completion record.
- The canonical ending is verified
- Required story progress is separated from optional progress
- The desired emblem target is recorded
- Green Hill Zone is confirmed if pursuing all 180 emblems
- Chao and VMU data remain intact
Before you move on
- Hero Story is cleared.
- Dark Story is cleared.
- Last Story is selectable and completed.
- Cannon’s Core, Biolizard, and Finalhazard are cleared.
- The ending scenes and credits have been viewed.
- The Emblem Results screen shows the desired total.
- A total of 180 emblems confirms the full Dreamcast emblem goal.
- Green Hill Zone appears after reaching 180 emblems.
- Chao Race, not Chao Karate, is used for the Dreamcast Chao emblem requirements.
- Any retained Chao and VMU exports load correctly.
References for this chapter
- Sonic Adventure 2 — Sega Dreamcast Manual
- Sonic Adventure 2 — Guide and Walkthrough — Dreamcast — By Matt_the_Yak
- Sonic Adventure 2 — Guide and Walkthrough — Dreamcast — By MBareket
- Sonic Adventure 2 — Guide and Walkthrough — Dreamcast — By Kajtek
- Sonic Adventure 2 — Guide and Walkthrough — Dreamcast — By NTsui
- Sonic Adventure 2 Emblem overview
Finishing up
The canonical ending is complete after Hero Story, Dark Story and Last Story have been cleared, Cannon's Core and the Biolizard have been completed, and Finalhazard has been defeated so the ending scenes and credits play.
Last Story unlocks only after both Hero Story and Dark Story are complete.
For required progression, clear the normal first mission or required boss encounter presented by Story Mode, following the ordered Hero, Dark and Last Story chapters.
Optional completion is separate: pursue the 180-emblem Dreamcast target, Green Hill Zone, character all-A rewards, kart and Boss Attack records, Chao Race goals, and Chao raising or VMU features if desired.
Verify the ending by allowing the Finalhazard ending sequence and credits to play, then confirm that Hero Story, Dark Story and Last Story remain available on the current save.
Choose your next gameScreenshots & video
Game imagery for reference. Follow the written chapters above for the route and strategies.
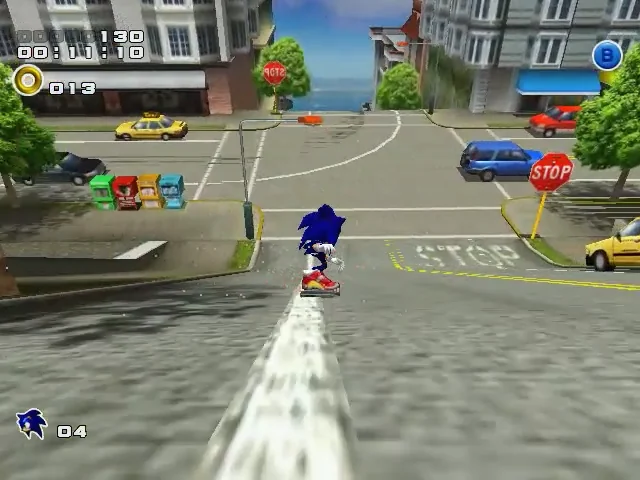
Sources & references
Our original guide draws on the references below. Check the edition at the top of this page before following controls or unlock requirements.
- Sonic Adventure 2 Sega Dreamcast Instruction Manual
- Sega Sonic Adventure 2 Instruction Manual
- Sonic Adventure 2 — Guide and Walkthrough — Dreamcast — By Kajtek
- Sonic Adventure 2 — Sega Dreamcast Manual
- Sonic Adventure 2 — Guide and Walkthrough — Dreamcast
- Sonic Adventure 2 — Guide and Walkthrough — Dreamcast — By Matt_the_Yak
- Sonic Adventure 2 — Sonic Wiki Zone
- Sonic Adventure 2 — Guide and Walkthrough — Dreamcast — By NTsui
- Route 280 — Sonic Adventure 2
- Sonic Adventure 2 — Guide and Walkthrough — Dreamcast — By MBareket
- Sonic Adventure 2 — Upgrade FAQ — Dreamcast
- Prima’s Official Strategy Guide — Sonic Adventure 2
- Sonic Adventure 2 — Guide and Walkthrough, Dreamcast
- Sonic Adventure 2 Dreamcast Walkthrough, Version 0.7
- Sonic Adventure 2 — Boss Guide — Dreamcast
- Sonic Adventure 2 – Official Sega Boss Battle Reference
- Sonic Adventure 2 — Guide and Walkthrough — Dreamcast — By AdmiralSyrup
- Sonic Adventure 2 — A-Rank Guide — Dreamcast
- Sonic Adventure 2 — Dreamcast FAQ, updated July 12, 2001
- Sonic Adventure 2 — Dreamcast stage and mission information
- Sonic Adventure 2 — Dreamcast Cheats, Codes, and Secrets
- Sonic Adventure 2 cheats — Dreamcast entries
- Sonic Adventure 2 Chao Adventure 2 FAQ — Dreamcast
- Chao Adventure 2 Interface Guide
- Chao Adventure 2 Guide
- Chao Gardens — Sonic Adventure 2 Dreamcast
- The Differences Between the Chao System Generations
- Sonic Adventure 2 Kart Racing — StrategyWiki
- Sonic Adventure 2 — Guide and Walkthrough for Dreamcast, GameFAQs
- Dreamcast v. GameCube: Who Wins Out?
- Sonic Adventure 2 Emblem overview
About the game & collecting notes
- Platform
- Dreamcast
Complete, platform-accurate Dreamcast walkthrough for Sonic Adventure 2 (Europe release). This guide steers you through Hero and Dark stories, the Last Story and the Finalhazard finale, plus emblem missions, Chao raising and Dreamcast-specific extras. It avoids mechanics introduced in later ports and explains recovery, boss patterns and required unlocks.
Darryl Polo
Darryl Polo loves tinkering with emulation and revisiting retro games. He enjoys exploring how old favorites play on different setups and sharing what he learns along the way. At Joking Joystick, he writes about the games, hardware, and small discoveries that keep the hobby fun.
Our editorial standardsFound a step that needs another look? Help us improve this guide.