
Silent Hill (Original PlayStation, North American retail release) — Complete Campaign Walkthrough
Step-by-step campaign walkthrough for the original Silent Hill on PlayStation, targeting the North American retail release SLUS-00707. Covers the required route from Harry’s opening crash through Nowhere, including puzzle solutions, boss strategies, optional Kaufmann and Cybil quests, all four standard endings, the Next Fear UFO route, resource management, save points and verified original-edition differences.

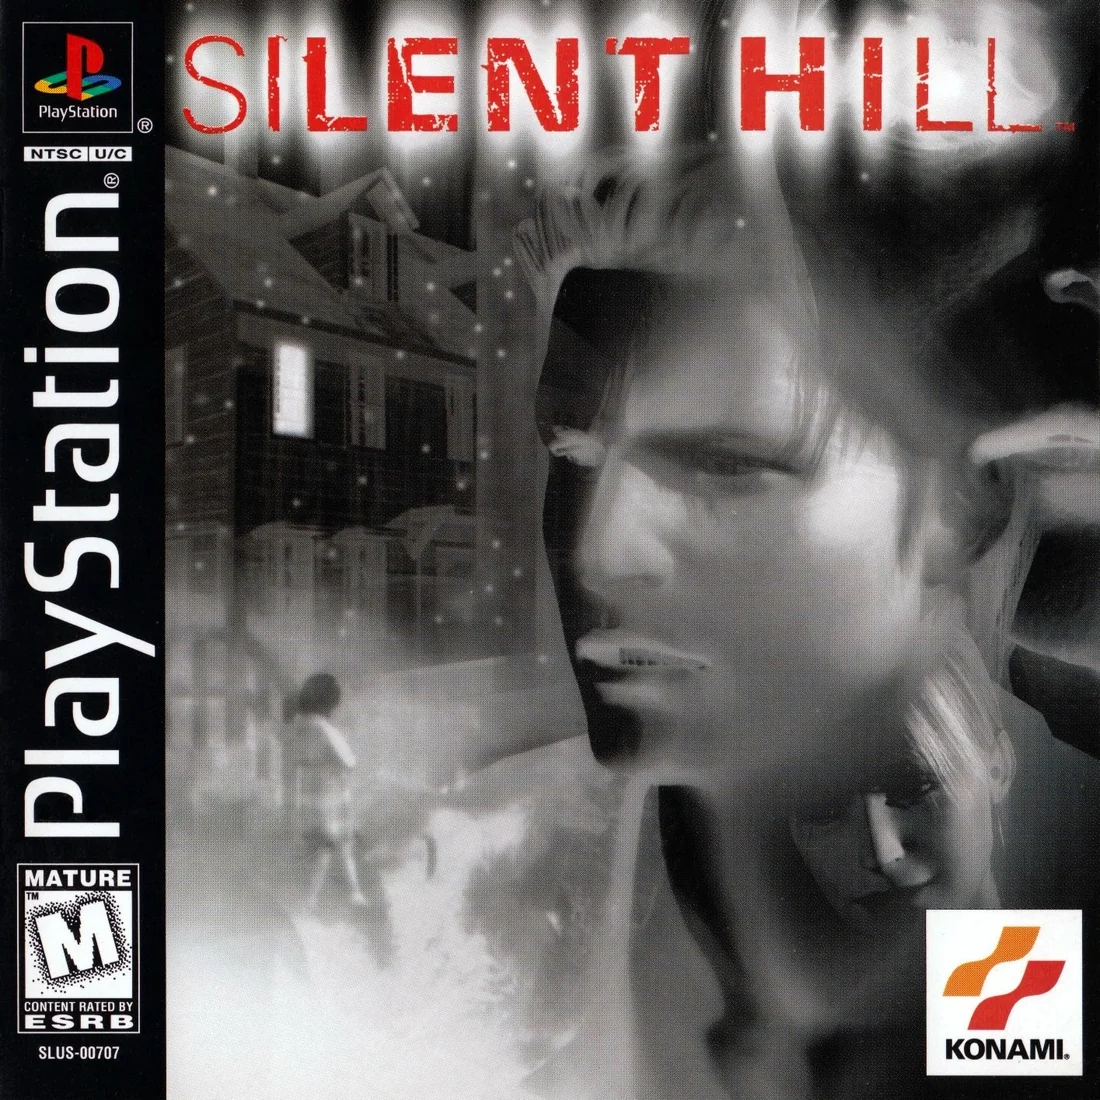
Find a copy
Silent Hill Sony PlayStation
We may earn a commission if you buy through these links, at no extra cost to you. As an Amazon Associate I earn from qualifying purchases.
Opens retailer search results. Check the model, edition, seller, availability and current price before buying.
Before you begin
You are Harry Mason.
Your immediate objective is to find your missing daughter Cheryl and survive Silent Hill.
Follow the chapters in order from the opening alley through Midwich Elementary, Alchemilla Hospital, the Resort Area, Lakeside Amusement Park and Nowhere.
The guide gives practical routes, puzzle solutions, boss methods, save points, supply priorities and recovery advice for the original North American PlayStation release.
Optional objectives are identified separately: Kaufmann’s vial determines the Incubus or Incubator finale and whether a Good ending is possible; Cybil’s rescue determines the plus or standard ending variant.
The five ritual items used to open the final door are all collected in Nowhere. Hospital plates, keys and other earlier objects are separate progression items.
Set yourself up for the run
Set controller options to suit your preference; Reverse Walk/Run Control is optional.
The PlayStation manual documents the original control layout, including R2 weapon ready, Square run, Circle flashlight, Triangle map and L2 camera positioning.
Normal is a suitable first-run difficulty; Easy is available if the controls are unfamiliar.
Save at red notepads and other in-game Save Points. This release does not use typewriters.
Carry a ranged weapon when possible, but conserve ammunition for bosses and narrow corridors.
Keep healing items available before entering a major area or boss route.
Use the map whenever one is available; destroyed roads and marked destinations are important progression clues.
Do not confuse hospital plates, keys and other local quest items with the five ritual items collected in Nowhere.
For Good or Good+, collect the Plastic Bottle and Unknown Liquid in Alchemilla Hospital.
For Good or Good+, complete Kaufmann’s Resort Area quest through the motorcycle gas tank.
For Good+, use the Unknown Liquid to save Cybil at the Lakeside Amusement Park carousel.
For Bad or Bad+, omit the Kaufmann vial recovery; Cybil’s fate determines the standard or plus bad ending.
The UFO ending requires a later Next Fear run, the Channeling Stone and its five specified uses.
After completing a run, save the cleared data to create a Next Fear file. Each Next Fear raises the difficulty by one level until Hard.
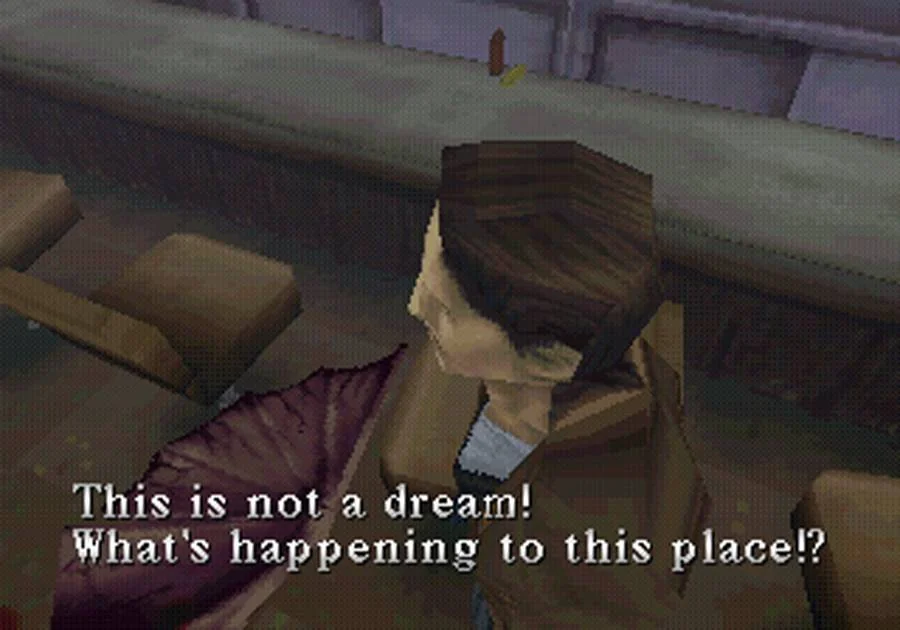
Arrival — Crash Site, Back Alley, and First Footsteps
Follow Cheryl from Harry’s crashed Jeep through the opening alley sequence, then search Café 5 to 2 for the first map, weapons, healing supplies, flashlight and radio. After saving, begin the Old Silent Hill route by checking the marked alley and preparing to reach the Levin Street house and Midwich Elementary School.
Follow Cheryl from the crashed Jeep
After the opening scene, Harry is beside his Jeep on the road outside Silent Hill. Move forward until the camera and story scene redirect him around the corner. Continue after Cheryl as she crosses the road and disappears into the alley. Follow the alley to the gate at its far end, then pass through it and keep moving along the next section.
The opening route is deliberately linear. Fixed camera angles, darkness and disturbing scenery are used to keep Harry moving toward Cheryl. Do not spend time searching for items or attempting to fight here; Harry has no usable weapon during this sequence. When the route reaches its mutilated body and the exits close, the Grey Children attack. Allow the scripted defeat to occur. The game then moves Harry to Café 5 to 2.
- Leave the Jeep area.
- Follow Cheryl across the road and through the first gate.
- Continue through the second alley until the Grey Children attack.
- Allow the opening sequence to end.
Search Café 5 to 2 and save
Harry wakes inside Café 5 to 2 and meets Cybil Bennett. After their conversation, Cybil gives Harry the Handgun. Search both ends of the café before approaching the exit. On the counter near the pinball machine, collect the Flashlight, the map of Old Silent Hill, and a Health Drink. The red notepad in this area is the first Save Point; use it before leaving.
At the opposite end of the counter, collect the second Health Drink and the Kitchen Knife. The knife is a short-range backup weapon, not a replacement for the Handgun. Use the map frequently with Triangle. It records explored streets, blocked routes and useful notes, which will be essential once the residential roads begin looping around destroyed sections.
- Receive the Handgun from Cybil.
- Collect the map of Old Silent Hill.
- Collect both café Health Drinks.
- Take the Flashlight and Kitchen Knife.
- Save at the café’s red notepad.
Defeat the Air Screamer and take the radio
Equip the Handgun from the inventory before trying to leave. As Harry approaches the café exit, the Pocket Radio produces static and an Air Screamer crashes through the window. Keep some distance, hold R2 to ready the weapon, and fire controlled shots. When the creature falls, approach and finish it with a kick if it is still moving; the radio static may continue while an enemy is only knocked down.
Collect the Pocket Radio from the table after the encounter. Its static changes when enemies are nearby and is useful for warning you about threats beyond a camera angle. The creatures do not hear the radio noise, so there is no need to turn it off for stealth. The Flashlight is toggled with Circle. Turning it off can make Harry less noticeable, but it also makes searching and aiming more difficult.
- Equip the Handgun before opening the exit route.
- Defeat the Air Screamer.
- Collect the Pocket Radio from the café table.
- Test the Flashlight with Circle.
Collect supplies outside the café
Leave Café 5 to 2 and use the map to orient yourself on Bachman Road. A Health Drink is available outside Queen Burger. Near the café, on the bench along Bachman Road, collect the Handgun Bullets. These supplies are worth taking before entering the residential route, but do not feel obligated to kill every Air Screamer in the streets. Open roads usually provide enough room to run around them.
Continue toward the Convenience Store at the northeast corner of the Bachman Road and Finney Street intersection. Enter through the partly open entrance. Inside are a Save Point, three Health Drinks and a First Aid Kit. Save again if you want a second checkpoint. The Channeling Stone is not present in a first playthrough; it appears there only during an eligible Next Fear run and is not part of this opening chapter.
- Collect the Health Drink outside Queen Burger.
- Take the Handgun Bullets from the bench near the café.
- Search the Convenience Store for three Health Drinks and a First Aid Kit.
- Use the store’s Save Point if needed.
Return to the alley and mark the school
From the café or Convenience Store, return to the alley marked on the map near Finney Street. Pass through the first gate and continue to the second gate. In the back section, collect the two boxes of Handgun Bullets and the Steel Pipe. Examine the note lying beside Cheryl’s sketchbook. The note says “To school,” and Harry marks Midwich Elementary School on his map. The sketchbook remains in place and is not an inventory item.
Leave the alley and be ready for a Groaner on the way back to the street. The Steel Pipe and the note are useful, but this visit is not the complete route to the school. The direct roads are destroyed, so the next chapter requires following the map to Levin Street, locating the doghouse, entering the house and collecting the three keys that open its backyard route.
- Reach the alley marked on the map.
- Collect the Steel Pipe and two boxes of Handgun Bullets.
- Examine the note beside Cheryl’s sketchbook.
- Confirm that Midwich Elementary is marked on the map.
- Return to the street and prepare for the Levin Street route.
Before you move on
- The opening alley sequence has ended and Harry has awakened in Café 5 to 2.
- Harry has the Handgun, Flashlight, Kitchen Knife and Pocket Radio.
- The map of Old Silent Hill and both café Health Drinks have been collected.
- Harry has saved at the café notepad, with an optional second save available at the Convenience Store.
- The alley near Finney Street has been checked, and the note beside Cheryl’s sketchbook has marked Midwich Elementary School.
- Harry is ready to follow the map toward Levin Street, the doghouse and the locked backyard route to Midwich Elementary School.
Old Silent Hill — Fogworld Streets and First Shops
Begin this chapter after the opening-area supplies and weapons have already been collected. Harry should have the Handgun, Flashlight, Residential Area Map, Pocket Radio, Steel Pipe, and enough healing items to make the street crossing safely. The required route is to find the Doghouse note, use it to reveal the House Key, enter the Levin Street house, collect the three Keys for Eclipse, unlock the backyard, use the school-bus save point, and enter Midwich Elementary School.
1. Find the Doghouse note at west Matheson Street
Open the Residential Area Map and follow the accessible streets toward the destroyed west end of Matheson Street. The collapsed roads are deliberate; do not waste time looking for a direct road into the school district. You are looking for the scattered papers near the broken western end of Matheson Street.
Examine the papers and find A Note "Doghouse." The note identifies the doghouse on Levin Street and is required before Harry will properly search it. If you inspected the doghouse earlier and found nothing, return to it after reading this note rather than searching for another key location.
Air Screamers and Groaners may patrol the streets. Most can be avoided by running through open intersections and keeping away from walls, fences, and dead ends. Use the Steel Pipe only when a Groaner blocks a narrow route, and reserve Handgun ammunition for situations where an Air Screamer prevents passage.
- A Note "Doghouse" examined
- The destroyed west end of Matheson Street identified on the map
- Enough health and ammunition retained for the remaining street route
2. Obtain the House Key and enter the Levin Street house
From the note location, follow the connected streets toward north Levin Street. Look for the doghouse in front of the locked Levin Street house. Examine the doghouse again after reading the note. Harry will search more carefully and find the House Key taped inside the roof area.
Use the House Key on the nearby Levin Street house. Inside, take the First Aid Kit near the entrance if you need it. The dining room contains a save point and two Handgun Bullet pickups, while the kitchen has a Health Drink. Save at the dining-room counter before beginning the key search; this is the most useful checkpoint before the longer outdoor loop.
Do not try to leave through the rear door immediately. First examine the locked rear door and the large map mounted beside it. The map explains that three Keys for Eclipse are needed and marks the general locations of the Key of "Woodman," Key of "Lion," and Key of "Scarecrow." Harry copies those locations onto his own map.
- House Key obtained from the doghouse
- Levin Street house entered
- Rear-door map examined
- Levin Street house save completed
3. Collect the Key of "Woodman"
Leave the Levin Street house and travel toward the alley between East Finney Street and Matheson Street. Look for the wide gate marked Off Limits. Enter the gate and cross into the small basketball court.
The Key of "Woodman" is on the ground beside the bloody dog head. Pick it up and leave through the same gate. A Health Drink may be collected from the nearby garbage bin if the route is clear, but it is optional and should not cost you health to obtain.
You do not need to clear the basketball court or the surrounding streets. If enemies gather near the exit, move around them and use the gate as soon as Harry has enough space to run.
- Key of "Woodman" collected
- Basketball-court gate located
- Optional nearby healing item collected only if safe
4. Collect the Key of "Lion" at the broken bridge
Return to Finney Street and follow it east toward the destroyed bridge. The bridge is a prominent dead end with a police car hanging near the broken edge. Search the open trunk of that police car to obtain the Key of "Lion."
Handgun Bullets are near the police car, but they are optional. Take them only if the nearby Air Screamer is not forcing Harry into the bridge edge. Once the key is collected, turn around rather than trying to cross the destroyed bridge; this route does not continue across the gap.
Follow the map back west as needed, then turn south toward Ellroy Street for the final key.
- Key of "Lion" collected from the police-car trunk
- Destroyed Finney Street bridge identified
- No attempt made to cross the collapsed bridge
5. Collect the Key of "Scarecrow" on Ellroy Street
From the bridge area, turn south onto Ellroy Street. Stay on the right side of the route and continue past Matheson Street until you reach the fallen tree. The tree creates the landmark for a small accessible area beyond the road obstruction.
Pass over the wooden platform beside the fallen tree and search the bloody mailbox. Take the Key of "Scarecrow." A Health Drink is available on the nearby porch, but it is optional. If the street is crowded, grab the key first and retreat along the same route instead of fighting every enemy.
With all three keys in the inventory, use Matheson Street to return to the Levin Street house. Check the map if the streets begin to loop; the required destination is the house where the three-lock rear door was found.
- Key of "Scarecrow" collected from the mailbox
- Fallen-tree landmark used correctly
- All three Keys for Eclipse in the inventory
6. Unlock the backyard and enter Midwich Elementary
Re-enter the Levin Street house and examine the rear door. Use the Key of "Lion," Key of "Woodman," and Key of "Scarecrow" on the three locks. The game accepts them in sequence, and the door opens into the backyard. The three keys are no longer needed after the door has been unlocked.
Cross the backyard and leave through the gate into the next alley. Follow the alley to the main road, turn toward Matheson Street, then turn onto Midwich Street. Continue south toward the school. This route is easier if you run past enemies instead of stopping in the narrow alley to fight them.
Before entering the school, continue past the school walkway to the bus at the south end of Midwich Street. Enter through the open door and collect the two Health Drinks if they are useful. The seats contain a save point. Save here before leaving the bus; it is the final reliable checkpoint for this chapter.
Exit the bus and return to the school entrance. The large Midwich stone and the school walkway identify the correct approach. Groaners can be present near the doors, and an Air Screamer may approach from the street. Move through either front entrance to trigger the transition into Midwich Elementary School.
- All three Keys for Eclipse used on the Levin Street rear door
- Backyard gate crossed
- School-bus save point used
- Midwich Elementary School entered
Before you move on
- Harry has entered Midwich Elementary School through one of the front doors.
- The Doghouse note was examined before the House Key was obtained.
- The House Key opened the Levin Street house.
- The Key of "Lion," Key of "Woodman," and Key of "Scarecrow" were used on the rear door.
- The school-bus save point was used immediately before entering the school.
- Harry still has the Handgun, Flashlight, Pocket Radio, and Steel Pipe, with at least some healing supplies remaining for the school section.
Midwich Elementary School — Puzzles and the First Major Shift
The first half of Midwich Elementary is the normal Fogworld school. Follow the three blood-written reception clues in order: use the Chemical in the Chemistry Lab to obtain the Gold Medallion, solve the Music Room piano puzzle for the Silver Medallion, then activate the boiler in the basement. Placing both medallions in the courtyard Clock Tower opens the passage into the Nightmare School. This chapter stops at that transition; the Nightmare School’s item route, puzzles, boss, and exit belong to Chapter 03.
1. Enter the school, collect the map, and save
Enter Midwich Elementary through the available front entrance and take the School Map from the left side of the Lobby. The map is rotated compared with ordinary north-up maps, so use room names and the courtyard as your main landmarks rather than relying only on compass directions.
Go through the Lobby and enter the Infirmary. Use the save point on the desk before exploring. The Infirmary is the school’s save location, and it also contains a First Aid Kit and a Health Drink. Take these supplies, then leave the room and return to the Lobby.
Behind the Reception desk, examine the three blood-written messages. They identify three destinations by time: the Alchemy Laboratory at 10:00, the Music Room at 12:00, and the Boiler Room at 5:00. The Clock Tower in the central courtyard displays those times as the puzzle advances. The locked side doors in the Lobby are not your immediate route, so go through the accessible doors toward the courtyard.
- Collect the School Map from the Lobby.
- Save in the Infirmary.
- Take the available healing items if needed.
- Read all three blood-written reception clues.
- Use the courtyard Clock Tower as the central landmark.
2. Find the Chemical and obtain the Gold Medallion
Cross the courtyard and enter the upper hall on the opposite side. Follow the open route to the stairs and go to the second floor. Enter the Lab Equipment Room and take the purple Chemical bottle from the shelf.
Go through the adjacent door into the Chemistry Lab. Examine the hand statue on the central counter and use the Chemical on it. The substance dissolves the material covering the hand, allowing you to take the Gold Medallion, also identified by the clue as the Golden Sun.
Do not search the classrooms for this item; it is specifically obtained by using the Chemical in the Chemistry Lab. Once the Gold Medallion is in your inventory, return to the courtyard. Avoid unnecessary fights in the halls if enemies are blocking only a route you can safely run past.
- Reach the second-floor Lab Equipment Room.
- Take the Chemical from the shelf.
- Use the Chemical on the hand statue in the Chemistry Lab.
- Collect the Gold Medallion.
- Return to the courtyard Clock Tower.
3. Place the Gold Medallion and open the Music Room puzzle
At the courtyard Clock Tower, examine the left medallion slot marked for the Golden Sun and place the Gold Medallion there. The clock advances from 10:00 to 12:00. This change also makes the next clue relevant: the place with songs and sound is the Music Room.
Return to the second floor and follow the school’s open hall route to the Music Room. Examine the blood-written piano clue before interacting with the piano. The riddle names five birds in order: Pelican, Dove, Raven, Swan, and Crow.
Only the piano’s broken, silent keys are used. Press the five non-sounding keys in the order represented by the riddle. If counting the relevant broken keys from left to right as they appear in the puzzle, the solution is 2, 3, 5, 4, 1. When the sequence is correct, the Silver Medallion falls from above the piano area. Pick it up before leaving the room.
- Place the Gold Medallion in the left Clock Tower slot.
- Read the piano riddle in the Music Room.
- Press only the five broken keys.
- Use the order Pelican, Dove, Raven, Swan, Crow.
- Collect the Silver Medallion.
4. Place the Silver Medallion and activate the boiler
Return to the courtyard Clock Tower and place the Silver Medallion in the right slot marked for the Silver Moon. The clock advances to 5:00, pointing to the final reception clue: “Darkness that brings the choking heat,” which refers to the Boiler Room.
Use the bottom-right staircase from the school’s accessible route to reach the basement. Other stairways do not provide the required basement access. Enter the Boiler Room through the available door and activate the boiler at the illuminated control. This is the only action needed in the normal school’s Boiler Room.
Once the boiler is running, return through the halls to the courtyard. The small Clock Tower doors are now open. Before entering, go back to the Infirmary and make the requested final save. Heal if necessary and check that you have enough supplies to begin the next chapter. Do not continue into the Nightmare School’s item route in this chapter; the transition itself is the endpoint here.
- Place the Silver Medallion in the right Clock Tower slot.
- Use the bottom-right staircase to reach the basement.
- Activate the boiler in the Boiler Room.
- Return to the Infirmary and make a final save.
- Confirm that the Clock Tower doors are open.
5. Cross the Clock Tower into the Nightmare School
From the courtyard, enter the newly opened Clock Tower. Descend the ladder, cross the passage, and climb the ladder on the opposite side. Continue through the doors at the top. The passage brings Harry into the Nightmare version of Midwich Elementary School.
Stop after the transition. The Rubber Ball, Picture Card, Shotgun, rooftop drainage puzzle, Classroom Key, Library Reserve Key, Boiler Room turnstiles, Split Head fight, K. Gordon Key, and school exit are all part of the next chapter. Keeping those objectives separate prevents the two school sections from being confused.
- Enter the opened Clock Tower from the courtyard.
- Descend the first ladder.
- Cross the passage and climb the second ladder.
- Exit into the Nightmare School.
- Begin Chapter 03 from the Nightmare School side.
Before you move on
- The School Map has been collected and the Infirmary save point has been used.
- The three blood-written reception clues have been read.
- The Chemical was used on the Chemistry Lab hand statue and the Gold Medallion was collected.
- The Gold Medallion is in the left Golden Sun slot of the courtyard Clock Tower.
- The piano riddle was solved using the five broken keys and the Silver Medallion was collected.
- The Silver Medallion is in the right Silver Moon slot.
- The boiler has been activated in the basement Boiler Room.
- A final save has been made in the Infirmary.
- The Clock Tower passage has been crossed and Harry has entered the Nightmare School. The chapter is complete at this point.
References for this chapter
Nightmare School — Otherworld School Sequences
The Otherworld version of Midwich Elementary is a short but densely connected route. Start by collecting the Rubber Ball and Picture Card, use the card to reach the washrooms and obtain the Shotgun, then cross the rooftop and drainage system to recover the Classroom Key. The Locker Room provides the Library Reserve Key, after which the Library Reserve and upper Classroom lead to the basement. Solve the Boiler Room valve puzzle, defeat Split Head by shooting into its opened mouth, and return to the normal school to collect the K. Gordon Key.
1. Leave the courtyard and collect the Rubber Ball
When the school shifts into the Otherworld, Harry is standing in the courtyard. The lower courtyard doors are locked, so go through the upper entrance into the first-floor top hallway. Do not waste time trying to force the locked doors.
Enter the Storage room on the left side of this hallway and take the Rubber Ball from the table at the back. In the unmarked hall beside Storage, collect the Handgun Bullets and First Aid Kit from the benches near the large fan. These supplies are useful, but avoid fighting every Grey Child in the surrounding halls.
The marked Hall at the top-right end of the area is the only open route forward. Creepers ambush Harry inside. Shoot them if they block the passage, or run along the wall and leave through the other door into the first-floor right hallway.
- Rubber Ball collected from Storage.
- Handgun Bullets and First Aid Kit collected beside the large fan.
- Top-right Hall used to reach the first-floor right hallway.
2. Find the Picture Card and save in the Infirmary
In the first-floor right hallway, enter the upper Classroom and take the Picture Card from the table covered with scattered cards. The next Classroom is crowded with Grey Children but contains no required item, so pass through it and leave by the nearer exit if the enemies give you an opening.
Take the Health Drink from the nearby bench, then continue into the first-floor bottom hallway. Enter the Infirmary on the left. This room contains a save point on the desk, a First Aid Kit on the table, and a Health Drink in the cabinet. Save here before continuing; it is the only save point in the Otherworld school.
The Lobby contains an Ampoule on the wheelchair in its back-right corner. Take it if you have inventory space. The Lobby exit is locked, so return to the hallway, unlock any accessible courtyard doors, and enter the small room behind Reception after dealing with or bypassing the Grey Child nearby.
- Picture Card collected from the upper first-floor Classroom.
- Infirmary save completed.
- Ampoule, First Aid Kit, and Health Drink collected when inventory space permits.
3. Use the Picture Card and obtain the Shotgun
Examine the strange door in the small room behind Reception. Its thin horizontal slot matches the Picture Card, so use the card to open it. Follow the short warped route to the first-floor washrooms.
Enter the Girls’ Washroom to warp to the second-floor Girls’ Washroom. There is nothing essential in the room. Leave and enter the second-floor Boys’ Washroom to collect two boxes of Handgun Bullets and one box of Shotgun Shells.
Return through the Girls’ Washroom warp to the first floor. Enter the first-floor Boys’ Washroom and examine the door ahead. After the scene, take the Shotgun from the floor. A note on the wall mentions The Monster Lurks. Remember this clue, because a book with the same title can later be examined in the Library Reserve.
Leave the washrooms and enter the lower Teacher’s Room route. Move through the two Teacher’s Rooms, killing or bypassing enemies that block the way. In the upper Teacher’s Room, collect the Handgun Bullets from the chair. When Harry attempts to leave near the three blue phones, a phone rings and he answers automatically. Continue to the top of the left hallway after the call.
- Picture Card used on the strange door.
- Second-floor washroom ammunition collected.
- Shotgun collected from the first-floor Boys’ Washroom.
- The Monster Lurks clue observed.
4. Open the rooftop route and recover the Classroom Key
Unlock the accessible doors at the top of the left hallway, then climb the top-left stairs to the second floor and continue to the rooftop. At the right side of the roof, examine the blood and hole to see a key below, out of reach.
At the far end of the rooftop, locate the red water valve. Before turning it, use the Rubber Ball on the separate hole in the corner. The ball plugs the hole so the water will flow through the drainage system. Turn the valve after placing the ball.
Return to the first floor using the top-left stairs and leave through the top hallway into the courtyard. Go around to the upper-right part of the courtyard, where the water has carried the Classroom Key into a drainage ditch. Take the key from the puddle.
- Rooftop key sight examined.
- Rubber Ball placed in the corner drainage hole.
- Red valve turned.
- Classroom Key recovered from the upper-right courtyard drainage ditch.
5. Obtain the Library Reserve Key
Return to the second floor through the top-left staircase. The left hallway contains a Health Drink on a side bench. The upper Classroom has Handgun Bullets and Grey Children, while the lower Classroom contains Shotgun Shells. Take the supplies only if you can do so without being trapped by the enemies.
Continue through the second-floor left hallway to the bottom hall and enter the Locker Room. Approach the locker that is making the familiar banging sound. Open it, then move toward the exit. A corpse falls from another locker and drops the Library Reserve Key.
The right-side hallway doors remain locked, so return through the two Classrooms to reach the second-floor top hallway. Do not try to use the Classroom Key yet; its required door is on the right side and becomes accessible only after the Library Reserve route.
- Library Reserve Key collected from the Locker Room.
- Optional second-floor Health Drink, Handgun Bullets, and Shotgun Shells collected.
- Return route to the second-floor top hallway established.
6. Use both keys and prepare for the basement
In the second-floor top hallway, use the Library Reserve Key on the Library Reserve door. Take the First Aid Kit from the shelf. Examine the book titled The Monster Lurks; it can be read because you saw the matching note beside the Shotgun. Continue through the Library and read the fairy tale involving a lizard. Its description explains the boss’s vulnerability.
Use the Classroom Key on the upper Classroom door in the second-floor right hallway. The key opens the upper door, not the other Classroom entrance. Pass through the upper Classroom and the next Classroom, taking the Health Drink from the chair if desired. Continue to the lower staircase and descend all the way to the basement.
Before entering the Boiler Room, unlock the first-floor gate if necessary and return to the Infirmary to save. Equip the Shotgun and keep healing items available. The Storage room beside the basement entrance contains two Shotgun Shell pickups and an Ampoule.
- The Monster Lurks book examined after seeing its note.
- Lizard fairy tale read in the Library.
- Classroom Key used on the correct upper Classroom door.
- Fresh Infirmary save completed before the boss route.
7. Solve the Boiler Room valves and defeat Split Head
Enter the Boiler Room on the right side of the basement. A turnstile blocks the route, with one valve on each side. If neither valve has been turned, use this sequence: turn the right valve twice to the left, then turn the left valve once to the right. The turnstiles should open. If you have already changed the valves, turn them back and forth until both barriers clear; the puzzle can be corrected without restarting.
Continue through the opening. The floor carries Harry down to Split Head’s arena. At the beginning of the fight, Split Head uses a headbutt and keeps its mouth closed, so ordinary shots are needed to anger it. Use the Shotgun while backing away and curving around the arena to maintain distance.
After roughly several shells, Split Head freezes, growls, and begins opening its mouth. This is the dangerous phase. Allow it to approach while Harry retreats, then fire into the open mouth. The mouth attack can kill Harry immediately if he remains in front of the jaws, so never stand still when the creature opens up. On Normal or Hard, fire about two shells during each opening before continuing to retreat. Repeat the pattern until the boss collapses.
After the screen blurs, Harry returns to the normal school’s Boiler Room. Pick up the K. Gordon Key from the floor beside the boiler. Go upstairs to the first-floor bottom hall and examine the Reception list. Harry records K. Gordon’s address on the map. Save in the Infirmary, then leave through the Lobby and follow the route toward Balkan Church.
- Both turnstile valves solved.
- Split Head first angered with Shotgun fire.
- Split Head defeated by shooting into its open mouth while retreating.
- K. Gordon Key collected from the normal school Boiler Room.
- K. Gordon’s address copied from the Reception list.
- School exited toward Balkan Church.
Before you move on
- Harry has returned to the normal Midwich Elementary School Boiler Room.
- The K. Gordon Key is in the inventory.
- K. Gordon’s address has been copied from the Reception list.
- A save has been made in the Infirmary after the boss.
- Harry has left the school through the Lobby and is proceeding toward Balkan Church and Old Silent Hill Part 2.
Old Silent Hill Part 2 — Returning Streets and Residential Areas
After Nightmare School, return to Old Silent Hill and follow the route through K. Gordon’s house and Balkan Church. Take the Flauros and Drawbridge Key from the church altar, gather useful supplies, then operate the bridge control room to cross into Central Silent Hill. Before starting, confirm that you obtained the K. Gordon Key from the school boiler room. The teacher list in the school Reception identifies the house and causes it to be marked on the map.
1. Confirm the school items and locate K. Gordon’s house
Before leaving the school area, verify that the K. Gordon Key is in your inventory. It is obtained from the boiler room after the school’s major confrontation. If you examined the teacher list in the Reception area, K. Gordon’s house will be marked on the Old Silent Hill map. That map marker is the clearest way to identify the correct alley.
Your next destination is Balkan Church on Bloch Street, but the direct streets are destroyed. From the school area, travel toward Bradbury Street. The road fails shortly beyond the first alley on the north side, so enter that alley rather than trying to continue along the blocked section. A Groaner can be encountered halfway through; running past it is usually safer than spending ammunition.
- Confirm that the K. Gordon Key is in your inventory.
- Check the school Reception teacher list if K. Gordon’s house is not marked.
- Use the alley near the destroyed Bradbury Street route.
2. Enter K. Gordon’s house
Continue through the alley until the camera angle changes and reveals a wooden gate leading into K. Gordon’s backyard. Open the house with the K. Gordon Key. This is not merely a supply detour: the backyard and house provide the route across the damaged streets, and you must pass through the house to continue toward the church.
Inside, collect the Handgun Bullets from the nearby counter and the kitchen. A save point is on the dining-room table. Use it before leaving, especially if you took damage while crossing the alley. Exit through the front door; do not try to return through the locked or obstructed backyard route.
- Use the K. Gordon Key on the house entrance.
- Collect the Handgun Bullets from the counter and kitchen.
- Save at the dining-room table.
- Leave through the front door.
3. Follow the damaged streets to Balkan Church
After leaving the house, continue through the residential streets toward Bradbury and Bloch. A Health Drink is available on the porch of the last house on the northeast side before the road drops away. Farther along, on the other side of the damaged section, another Health Drink is on a bench. An Air Screamer may attack while you collect it, so take the item quickly and move away if necessary.
Continue east along Bradbury until the road fails again. Enter the northern alley and proceed through it while avoiding the Air Screamers. Handgun Bullets are positioned on the right side of the alley. The alley brings you to Bloch Street. Turn east and climb the short steps to Balkan Church on the south side of the street.
- Take either Health Drink if you need healing and have inventory space.
- Collect the Handgun Bullets in the alley.
- Use the map to confirm that you are heading east on Bloch Street.
- Enter Balkan Church by the steps on the south side of Bloch.
4. Take the Flauros and Drawbridge Key in Balkan Church
Enter the church and let the scene with Dahlia Gillespie play out. Once she leaves the altar area, examine the altar and collect both required items: the Flauros and the Drawbridge Key. The Flauros is a story item for later progression; the Drawbridge Key is needed immediately to reach Central Silent Hill.
Before leaving, take the Health Drink from the display on the left if you need it. A save point is on the desk near the entrance. Save here if you did not save in K. Gordon’s house. This chapter does not provide the five ritual relics used much later in Nowhere, so do not search the church for relic pieces that are not present.
- Collect the Flauros from the altar.
- Collect the Drawbridge Key from the altar.
- Take the Health Drink if needed.
- Save at the desk near the entrance.
5. Use the Gas Station detour
Leave Balkan Church and travel east toward the bridge. The Gas Station is on the south side of the road before the bridge control area. Enter through the partially open garage door. Handgun Bullets are beside the car, and a save point is on a small table. This is an optional supply stop, but it is useful if the street enemies damaged you.
The Gasoline Tank is not available during the initial campaign. It appears in a completed-game Next Fear run and is used to obtain replay weapons such as the Chainsaw or Rock Drill. Do not treat the empty display or the dark weapon room as missing first-run objectives.
- Collect the Handgun Bullets beside the car.
- Use the Gas Station save point if useful.
- Do not search for the Gasoline Tank during the first campaign.
6. Gather supplies near the bridge
Continue east past the Gas Station and follow the buildings around toward south Ellroy. Near the demolished road, enter the alley on the right and run alongside the parked truck. Shotgun Shells and Handgun Bullets are in the corner. Collect them, then retreat from the alley if a Groaner blocks your return.
At the beginning of the bridge, use the steps on the south side to reach a First Aid Kit and Shotgun Shells. Air Screamers patrol nearby, so avoid lingering in the open. The bridge itself is raised and cannot be crossed yet. The control room is on the south side of the bridge area.
- Collect the ammunition near the parked truck.
- Check the steps for the First Aid Kit and Shotgun Shells.
- Do not attempt to cross the raised bridge.
7. Lower the bridge and enter Central Silent Hill
Go to the Bridge Control Room. Ignore the lower door by the barrels during a first playthrough; it leads to a dark room containing the replay-only Rock Drill. Instead, climb the exterior stairs and enter the upper control room.
Inside, collect the Shopping District Map from the chair near the save point. A Health Drink is beside the control panel. Save, then use the Drawbridge Key on the panel. The machinery lowers the bridge. Leave the tower, return to the bridge and cross to Central Silent Hill. Once Harry reaches the far side and the next area begins, Old Silent Hill Part 2 is complete.
- Enter the upper Bridge Control Room.
- Collect the Shopping District Map.
- Take the Health Drink beside the control panel if needed.
- Save before operating the machinery.
- Use the Drawbridge Key on the control panel.
- Cross the lowered bridge into Central Silent Hill.
Before you move on
- The K. Gordon Key was obtained from the school boiler room before starting this route.
- K. Gordon’s house was entered, its supplies were collected if desired, and the dining-room save point was used.
- The Flauros and Drawbridge Key were collected from the Balkan Church altar.
- The Shopping District Map was collected in the upper Bridge Control Room.
- The Drawbridge Key was used on the control panel.
- Harry crossed the lowered bridge and entered Central Silent Hill.
Central Silent Hill — The Downtown Loop and Shops
Central Silent Hill is a short transition area in the original North American PlayStation release. Harry crosses the bridge, collects a few supplies, optionally visits the Police Station for ammunition and a save point, then follows Crichton Street and Koontz Street to Alchemilla Hospital. The downtown buildings are not a shop-search puzzle in this section, so do not waste time trying to open every storefront.
Cross the bridge and collect the first supplies
After leaving the Balkan Church and crossing the lowered bridge, continue forward into Central Silent Hill. Before following the road farther east, check the north side for a Health Drink resting on a barrel. Farther along, inspect the steps on the south side to collect Handgun Bullets.
These pickups are optional, but they are worth taking before the hospital. The next areas contain narrow corridors and enemies that are easier to avoid when Harry has a little extra healing and ammunition. Keep the handgun ready while crossing the foggy streets because Air Screamers can approach from above and may not be immediately visible.
- Health Drink collected from the barrel on the north side.
- Handgun Bullets collected from the steps farther east.
- Map checked so Sagan Street, Crichton Street and Koontz Street can be identified.
Reach the Police Station from Sagan Street
Continue east until the road becomes Sagan Street. Air Screamers occupy this approach. Avoid them when the road is clear, but do not hesitate to fire the handgun if one blocks Harry’s path or forces him into a corner.
The Police Station is marked on the map ahead. Two Rompers are near the entrance. These enemies move quickly, so approach with the handgun equipped and be prepared to shoot as soon as one closes in. A few handgun shots are enough on the standard route; there is no reason to spend shotgun ammunition here unless you are in immediate danger.
The Police Station entrance on the Crichton Street side will not open. Walk around to the front entrance on Sagan Street and enter there.
- Sagan Street reached.
- Rompers bypassed or defeated safely.
- Police Station entered through its front Sagan Street entrance.
- Shotgun ammunition preserved where possible.
Search the Police Station and save
Inside the Police Station, collect the Shotgun Shells from the bench on the right. The tall reception counter contains two packs of Handgun Bullets. The door on the right side of the interior does not open, so use the room on the left.
In that room, collect more Handgun Bullets and use the Save Point on the desk. A deeper desk contains additional Shotgun Shells. If the Shotgun was missed during the Nightmare School section, the weapon can also be found on this desk; if it is already in your inventory, only the ammunition is relevant.
The Officer Gucci note on the desk and the case information on the chalkboard are optional story material. Examine them if you want the investigation details, but neither item is needed to reach Alchemilla Hospital. Save before leaving, especially if the Rompers damaged Harry on the approach.
- Shotgun Shells taken from the bench.
- Two Handgun Bullet packs taken from the reception counter.
- Additional Handgun Bullets collected from the left room.
- Additional Shotgun Shells collected from the deeper desk.
- Game saved at the Police Station.
Leave the station and follow Crichton Street
Leave through the front entrance and return to the street. Do not keep trying the west entrance on Crichton Street; it remains unusable. From the Police Station, head back toward Crichton Street and run south.
The nearby storefronts, diner, post office and convenience-store interiors are not required for this section’s progression. They do not contain a hospital key that must be found here. Use the street names on Harry’s map rather than searching every locked building.
Continue along Crichton Street until it reaches Koontz Street. Turn left onto Koontz and follow it toward the hospital. Rompers and Air Screamers may still be present, so avoid unnecessary fights and keep moving if the route is open.
- Police Station left through the front entrance.
- Crichton Street followed south.
- No time wasted searching nonessential downtown storefronts.
- Koontz Street located from Crichton Street.
Enter the Alchemilla Hospital courtyard
Follow Koontz Street until the entrance gate to Alchemilla Hospital appears on the south side. Enter through the gate. Harry may hear sounds resembling gunshots as he approaches, but there is no downtown puzzle or code to solve at this point.
Two Groaners are in or near the courtyard. Move directly toward the hospital entrance and avoid them if they do not block the route. If one corners Harry, use the handgun while backing away. Do not spend shotgun shells on these enemies unless conserving health has become more important than conserving ammunition.
- Hospital gate on the south side of Koontz Street entered.
- Courtyard Groaners bypassed or defeated.
- Health and ammunition checked before entering the building.
Use the correct hospital doors
The single door in the courtyard will not open. Face the hospital and use the pair of doors on Harry’s right instead. Entering through these doors completes Central Silent Hill and begins the Alchemilla Hospital chapter.
Once inside, move to the reception area and use the Save Point on the reception desk. This is the first useful save opportunity in the hospital section. The next objective is to enter the side examination area, meet Michael Kaufmann and begin the hospital power-and-elevator sequence. Do not return to Central Silent Hill looking for a missing key; the required route is complete when the hospital reception area is accessible.
- Right-hand double doors used to enter Alchemilla Hospital.
- Hospital reception reached.
- Game saved at the reception desk.
- Ready to begin the hospital examination-room and elevator objectives.
Before you move on
- Harry has crossed into Central Silent Hill and collected the optional Health Drink and Handgun Bullets.
- The Police Station has been visited from its Sagan Street entrance, its ammunition has been collected, and its desk save point has been used.
- Harry has returned to Crichton Street, followed it south, turned onto Koontz Street and entered the Alchemilla Hospital courtyard.
- The right-hand double doors have been used to enter Alchemilla Hospital.
- The hospital reception area and reception-desk save point are accessible, establishing the starting position for the next chapter.
Alchemilla Hospital — Fogworld Medical Floors
Search the first floor of Alchemilla Hospital, collect the maps and basement key, optionally recover the Unknown Liquid for a plus-ending route, restore power in the basement, and use the elevator to trigger the Nightmare Hospital transition.
1. Enter the hospital and search Reception
Enter Alchemilla Hospital through the main entrance and immediately save at the Save Point on the Reception desk. The double doors at the end of the reception hall are jammed, so use the door on the left. A gunshot leads Harry to the Examination Room, where he meets Dr. Michael Kaufmann. After the scene, leave through the nearby empty Office to reach the area behind the Reception counter.
Collect the First Aid Kit from the box and take the Hospital Map from the information board. The map is easy to miss because it cannot be reached from the front of the counter. Return to the Examination Room and use the far door to enter the Medicine Room. Only a newspaper clipping is present there; check it if desired, then leave through the opposite door to reach the east hall.
This is the complete required search of the entrance side. The hospital’s story documents do not provide a code that must be entered during this Fogworld section, so do not waste time searching for a password in the Medicine Room.
- Save at the Reception desk.
- Meet Kaufmann in the Examination Room.
- Go through the Office to reach the rear of the Reception counter.
- Take the First Aid Kit and Hospital Map.
- Pass through the Medicine Room to reach the east hall.
2. Collect the basement map and 23 Basement Key
In the east hall, enter the Doctor’s Office. Take the Hospital Basement Map from the table near the door leading onward. Continue through that door into the Conference Room and walk around the conference table to collect the 23 Basement Key.
The elevator is not usable yet because the hospital has no power. The basement stairway beside the elevator is the intended route, but it remains locked until you obtain this key. Before descending, search the Kitchen next door for the optional ending item and the available healing item.
You can avoid fighting every enemy in the hospital. If a creature blocks a narrow passage, use the handgun to create space and move on. Clearing every room is unnecessary and costs resources that are more useful later.
- Take the Hospital Basement Map in the Doctor’s Office.
- Enter the Conference Room through the connecting door.
- Walk around the table and collect the 23 Basement Key.
- Search the Kitchen before using the basement key.
3. Recover the optional Unknown Liquid
In the Kitchen, examine the bottles in the far corner to collect the Plastic Bottle. Take the Health Drink from the other side of the island, then leave through the hall. Enter the Director’s Office, which is the next relevant room along the corridor.
The office has been damaged, and a red liquid remains behind the back desk near the smashed vial. Open the inventory and use the Plastic Bottle on the liquid to obtain the Unknown Liquid. Keep it in the inventory; it is not used during the Fogworld hospital sequence.
The Plastic Bottle and Unknown Liquid are optional for completing the campaign. They are required, however, if you want to preserve the possibility of receiving a plus ending later. If you are pursuing that route, do not leave the hospital without the filled bottle.
- Take the Plastic Bottle from the Kitchen.
- Take the Health Drink beside the island.
- Use the Plastic Bottle on the red liquid behind the desk in the Director’s Office.
- Confirm that the item is now named Unknown Liquid.
- Keep the Unknown Liquid for the later Resort Area sequence.
4. Restore power in the basement
Return to the hall and use the 23 Basement Key on the basement stairway beside the elevator. Descend and consult the Hospital Basement Map. Creepers may be present, but fighting them is optional unless they block your route. Avoid being trapped against the walls because the basement corridors offer little room to recover from contact damage.
Locate the Generator Room and examine the generator panel. Harry finds a note explaining what the generator supplies, including the elevator. Activate the generator, then leave the room. The elevator can now be used from the basement or the first floor.
Heal and reload before continuing. There is no additional Fogworld objective requiring a hospital code or a special document; once the generator is running, the elevator sequence is the direct route forward.
- Use the 23 Basement Key on the stairway beside the elevator.
- Reach the Generator Room.
- Examine and activate the generator.
- Return to the elevator after power is restored.
- Heal and reload before starting the transition.
5. Test the elevator floors and enter Nightmare Hospital
Enter the elevator and select 2F. The hallway doors are jammed, so return to the elevator rather than searching for another entrance. Select 3F and find that those doors are jammed as well. Return to the elevator panel once more.
After Harry checks the panel again, a new 4F button is available. Select 4F to trigger the transition into the Nightmare Hospital. This is the end of the Fogworld hospital chapter and begins the next area immediately.
Before choosing 4F, make sure you have collected the Hospital Map, Hospital Basement Map, and 23 Basement Key, activated the generator, and taken the Unknown Liquid if you are pursuing a plus ending. Save at Reception before the elevator sequence if you want a clean restart point.
- Select 2F and confirm that the doors are jammed.
- Select 3F and confirm that the doors are jammed.
- Return to the elevator panel.
- Select the newly available 4F button.
- Confirm the Nightmare Hospital transition begins.
Before you move on
- Harry has saved at the Reception desk.
- The Hospital Map is in the inventory.
- The Hospital Basement Map and 23 Basement Key have been collected.
- The Plastic Bottle has been collected, and it has been filled with Unknown Liquid if pursuing a plus ending.
- The basement generator is running.
- The elevator has been tested on 2F and 3F, where the hallway doors are jammed.
- Selecting 4F begins the Nightmare Hospital transition.
Nightmare Hospital — Otherworld Alchemilla Sequences
The Otherworld hospital begins on a fourth floor that does not appear on the map. Follow the forced route down to the mapped floors, collect four colored plates, solve the Nurse Center puzzle, obtain the Basement Storeroom Key, and use the Disinfecting Alcohol and Lighter to open the hidden route into the second basement. Recover the Examination Room Key, meet Lisa Garland, then return to the normal hospital and take the Antique Shop Key. This chapter has no boss fight and does not contain any of Nowhere’s five ritual relics.
Cross the unmapped fourth floor and reach the third floor
After the hospital changes, Harry starts on a decayed fourth floor. The side doors are jammed, so do not waste time checking every room. Follow the connected corridors until you reach the stairs, then descend and pass through the double doors to the third floor. The fourth floor will not be available as a normal mapped area afterward.
Puppet Nurses begin appearing on the third floor. Avoid isolated enemies when the corridor is clear, but use the Handgun or Shotgun if a Nurse blocks a doorway or traps you against a wall. Keep enough health for the lower floors rather than trying to clear every room.
- Fourth-floor corridors crossed without searching for a nonexistent map route.
- Third-floor double doors reached.
- Handgun, Shotgun, and at least one healing item available.
Collect the Turtle, Cat, and Blood Pack items
On the third floor, enter the Men’s Washroom and take the Plate of Turtle from the window sill. Go to room 302 and save. This room also contains Shotgun Shells and a VCR, which can be used later if you collect the Video Tape.
Continue through the third-floor route to the Storage Room. Collect the Handgun Bullets, First Aid Kit, and Blood Pack from the shelves. Then enter room 306 and take the Plate of Cat from the far wall. The Blood Pack is required shortly, so do not discard or overlook it.
- Plate of Turtle collected from the Men’s Washroom.
- Save made in room 302.
- Blood Pack collected in the third-floor Storage Room.
- Plate of Cat collected from room 306.
Visit the first floor and collect the Queen plate
Use the elevator to reach the first floor. The broken vending machines near the elevator provide three Health Drinks, making this a useful recovery stop. Enter the Director’s Office and take the Plate of Queen from the table. A save point is available in the office.
Search the Kitchen and nearby office if you need supplies, but the Examination Room remains locked. After checking the first-floor west wing, go upstairs to the second-floor west wing.
- Plate of Queen collected from the Director’s Office.
- Director’s Office save point used if necessary.
- Examination Room confirmed as locked for now.
Get the Lighter, Hatter plate, and solve the Nurse Center puzzle
Enter room 201 on the second-floor west wing and take the Lighter. Next, enter room 204. Tentacles guard the Plate of Hatter, and attempting to take it directly causes damage. Open the inventory beside the creature and use the Blood Pack. When the tentacles are distracted, take the Plate of Hatter from the wall.
Go to the Nurse Center. Insert the four plates into the door using this arrangement: Plate of Turtle in the top-right slot, Plate of Hatter in the bottom-right slot, Plate of Cat in the bottom-left slot, and Plate of Queen in the top-left slot. The door opens when all four are correctly placed. This puzzle is the required route to the hospital’s east wing.
- Lighter collected from room 201.
- Blood Pack used to distract the room 204 tentacles.
- Plate of Hatter collected from room 204.
- All four plates inserted in the correct Nurse Center positions.
Obtain the Basement Storeroom Key and Disinfecting Alcohol
Pass through the opened Nurse Center door into the second-floor east wing. Go through the Operating Prep Room and enter the Operating Room. Defeat or avoid the nearby Nurses, then take the Basement Storeroom Key from the table.
Enter the Intensive Care Unit and collect the Disinfecting Alcohol. Room 206 contains a First Aid Kit if you need recovery. At the end of the wing, use the elevator to descend to the basement.
- Basement Storeroom Key collected from the Operating Room.
- Disinfecting Alcohol collected from the Intensive Care Unit.
- First Aid Kit from room 206 taken if needed.
- Elevator route to the basement open.
Open the hidden basement route
In the basement, the Morgue contains an Ampoule and a Health Drink on separate gurneys. The Generator Room contains the Hammer, an optional but powerful melee weapon. Then enter the Basement Storeroom with the key.
Take the Handgun Bullets and Shotgun Shells from the shelves. Examine the large cabinet from its side and push it aside to reveal a concealed doorway. Beyond it, a grate is covered with vines. Use the Disinfecting Alcohol on the vines first, then use the Lighter. Once the vines are burned away, descend through the grate into the second basement.
- Basement Storeroom unlocked.
- Cabinet moved from the side rather than examined from the front.
- Disinfecting Alcohol applied to the vines.
- Lighter used after the alcohol.
- Second-basement grate opened.
Find the Examination Room Key and return to Lisa
The second basement is unmapped and contains several Puppet Nurses. Follow the narrow route, using the Handgun or Hammer only when enemies block your path. In the second hallway, the first room on the right contains the Video Tape. It is optional for immediate progression; room 302’s VCR can play it later.
Continue to the last room on the left. Examine the photograph of the young girl, then take the Examination Room Key from the room. Retrace the route through the second basement and return to the first-floor Medicine Room. Defeat or avoid the Doctor blocking the way, then use the Examination Room Key on the adjoining Examination Room door. The scene with Lisa Garland follows.
- Video Tape collected if desired.
- Photograph examined in the final second-basement room.
- Examination Room Key collected.
- Lisa Garland scene completed.
Return to the normal hospital and leave
After the scene, Harry returns to the normal hospital Examination Room. Dahlia Gillespie appears and leaves the Antique Shop Key on the table. Take the key before leaving the room. The phone near the Examination Room can identify and mark the antique shop on the map, but using the phone is optional.
Return to the main reception area and save at the front desk. Leave through the hospital entrance and avoid the Groaners in the courtyard if you do not need to fight them. The next chapter begins in Central Silent Hill Part 2 at the Green Lion Antique Shop.
- Antique Shop Key collected from the Examination Room.
- Save made at the hospital reception desk.
- Hospital courtyard crossed and exit reached.
- Green Lion Antique Shop marked or identified for the next chapter.
Before you move on
- Harry has collected the Plates of Turtle, Cat, Hatter, and Queen.
- The Nurse Center door has been opened with the correct plate arrangement.
- The Basement Storeroom Key and Disinfecting Alcohol have been obtained.
- The basement cabinet has been moved and the vine-covered grate has been burned open.
- Harry has crossed the second basement and collected the Examination Room Key.
- The Lisa Garland scene has played and the hospital has returned to its normal form.
- The Antique Shop Key is in the inventory and a new save has been made at the hospital reception desk.
Central Silent Hill Part 2 — Green Lion Antique Shop
After the Nightmare Hospital examination-room sequence, take the Antique Shop Key from the desk and leave Alchemilla Hospital. Travel north on Simmons Street to the Green Lion Antique Shop, use the key, move the cabinet, and enter the concealed passage. Examine the altar and collect the optional Axe. The altar scene then leads into Lisa’s hospital examination-room sequence and an automatic transition to Nightmare Central Silent Hill. This chapter does not open the sewers; that route begins in the next chapter after the Nightmare downtown events.
1. Take the Antique Shop Key
When control returns after the hospital examination-room scene, take the Antique Shop Key from the desk before leaving. If you examine it with Harry’s Look function, the tag identifies the destination as Green Lion. Do not leave the room without it: this key is required to enter the locked interior door of the Green Lion Antique Shop.
If you checked the hospital lobby phones and phone books earlier, the antique shop may already be marked on the map. That marking is helpful but not required. Save before departing if Harry is badly injured or short on ammunition, although the trip to the shop can usually be made by avoiding most street enemies.
- Take the Antique Shop Key from the examination-room desk.
- Examine the key if you want to confirm the Green Lion destination.
- Check the map or hospital phone book if the shop is not already marked.
- Save before leaving if your supplies are poor.
2. Reach the Green Lion Antique Shop
Leave Alchemilla Hospital through the main entrance and travel east along Koontz Street toward Simmons Street. At the Koontz and Simmons area, an alley southwest of the intersection contains Handgun Bullets and a Health Drink. These supplies are optional; collect them only if the nearby Air Screamers are not forcing you into a bad fight.
A Health Drink can also be found on an umbrella table near Cafe Sun, northwest of the same intersection. Rompers may be in the area, so do not stop for this item if the route is unsafe. The most important objective is reaching the shop without wasting ammunition.
Continue north on Simmons Street. The Green Lion Antique Shop is at the north end of the street, above the Silent Hill Town Center area. Its open entrance is easy to recognize. Enter, go down the stairs, and use the Antique Shop Key on the locked interior door.
- Leave through the hospital’s main entrance.
- Follow Koontz Street to the Simmons Street area.
- Optional: collect the Handgun Bullets and Health Drink in the alley.
- Optional: collect the Health Drink near Cafe Sun.
- Continue north on Simmons Street.
- Use the Antique Shop Key on the interior door.
3. Save and move the cabinet
Turn on the Flashlight after entering the shop. A Save Point is located on a nearby table; use it before continuing if you want a reliable checkpoint for the altar sequence.
Search the room for the cabinet near the rear. Scrape marks on the floor indicate that it can be moved. Push the cabinet aside to reveal a large opening in the wall. A scene involving Cybil plays after the opening is revealed. When control returns, enter the passage rather than searching the shop for a second key or a storekeeper.
The Green Lion Antique Shop is not a functioning shop with purchases in the original North American PlayStation release. Its purpose here is story progression, the concealed altar area, and the optional weapon pickup.
- Turn on the Flashlight.
- Use the shop’s Save Point if desired.
- Find the cabinet with scrape marks beneath it.
- Push the cabinet aside.
- Enter the passage after the Cybil scene.
4. Examine the concealed altar and take the Axe
Follow the narrow passage and continue through the next opening into the small concealed room. This is the second church or altar location connected with Dahlia’s warnings. There is no combination, code, or multi-part altar puzzle in this room.
Examine the altar and inspect the nearby wall. Take the Axe, also described in some guides as the Small Axe or .38 Axe. It is an optional melee weapon and is not required to open the next area, but collecting it is worthwhile because it adds another close-range option for later exploration.
After taking the Axe, attempt to leave through the passage. The altar scene proceeds automatically. Do not search this room for the five Nowhere relics, a sewer entrance, or a key for the Five Rites door; none of those objectives belongs here.
- Enter the concealed altar room.
- Examine the altar.
- Take the Axe from the wall.
- Attempt to leave through the passage.
- Allow the altar scene to proceed.
5. Complete the hospital transition
After the altar sequence, the game moves Harry into Lisa’s hospital examination-room scene. This is not a free-roaming return trip in which you must manually find another route through Central Silent Hill. Let the scene play out and wait for control or the next transition.
Once Lisa’s examination-room scene is complete, the game automatically shifts Harry into Nightmare Central Silent Hill. No additional key, shop entrance, sewer route, or downtown puzzle is required between the Lisa scene and that transition.
The next chapter begins at the Nightmare Antique Shop. From there, the progression continues through Nightmare Central Silent Hill, including the downtown route and the waterworks descent that leads toward the sewers. Therefore, do not leave this chapter expecting to open the sewers from the Green Lion altar room.
- Allow the Lisa hospital examination-room scene to finish.
- Confirm that the game automatically shifts to Nightmare Central Silent Hill.
- Begin the next chapter at the Nightmare Antique Shop.
- Do not search the Green Lion area for a sewer entrance.
Before you move on
- The Antique Shop Key was taken from the hospital examination-room desk.
- Harry reached the Green Lion Antique Shop at the north end of Simmons Street.
- The interior door was opened with the Antique Shop Key.
- The cabinet was pushed aside and the concealed passage was revealed.
- The altar room was entered and examined.
- The Axe was collected or deliberately left behind.
- The altar sequence finished and Harry entered Lisa’s hospital examination-room scene.
- The game automatically shifted Harry into Nightmare Central Silent Hill.
- The next chapter can begin at the Nightmare Antique Shop without searching for another key or route.
References for this chapter
Nightmare Central Silent Hill — Otherworld Downtown Challenges
After leaving the Nightmare Antique Shop, Harry must cross the transformed Central Silent Hill streets by cutting through Silent Hill Town Center. The route contains the Twinfeeler boss, followed by a dangerous run through Sagan Street to the Nightmare Police Station and Alchemilla Hospital. Lisa then reveals that an abandoned waterworks near Midwich may provide an underground route to the lake. Outside the hospital, Harry fights Twinfeeler’s adult form, Floatstinger. Defeating it restores the normal snowy streets and opens the return route to Old Silent Hill, where Harry breaks into the waterworks and descends into the sewers.
Leave the Nightmare Antique Shop
Use the notepad in the Nightmare Antique Shop before leaving. This is the safest save point at the start of the chapter. Exit through the front door, then follow the available street route south. The Nightmare version of Central Silent Hill has mesh-covered surfaces and a much heavier enemy presence, including Night Flutters and Wormheads.
Do not attempt to clear the streets. The enemies are numerous and the next safe room is close enough that running is more valuable than ammunition. The road eventually ends before Sagan Street. On the east side of the street, look for the torn opening in the shutters of Silent Hill Town Center. Enter through that opening; it is the required alternate route.
- Save at the Nightmare Antique Shop notepad.
- Leave through the main entrance.
- Run south through the Nightmare streets.
- Enter Silent Hill Town Center through the torn shutter opening.
Cross Silent Hill Town Center
The first floor has no required item. Move toward the escalators and continue upstairs. The large television screens near the escalators activate as you approach, confirming that you are on the intended path.
On the second floor, the passage on the right is blocked by a collapsed floor. Take the left-hand route and enter the former jewelry shop. Pick up the two packs of Rifle Shells and the First Aid Kit, then use the save point inside. Leave the shop and continue along the remaining passage. A second door does not provide another route, so proceed toward the corpse surrounded by slug-like creatures.
Approaching the corpse causes the floor to collapse. Harry falls into the Twinfeeler arena, and there is no route back to the Town Center until the battle is resolved.
- Use the escalator to reach the second floor.
- Take the left route past the collapsed passage.
- Collect two packs of Rifle Shells and the First Aid Kit.
- Save in the former jewelry shop.
- Approach the corpse to trigger the Twinfeeler encounter.
Defeat Twinfeeler
Immediately after landing in the pit, locate the Hunting Rifle leaning against the wall and pick it up before concentrating on the boss. This is the only opportunity to obtain the weapon in the original PlayStation campaign. The Shotgun is generally easier to use because it fires and recovers more quickly, but the Hunting Rifle is useful if you can maintain distance.
Stand on or near the fallen metal grate in the center of the arena. Twinfeeler can surface from the soil, spit acid, crawl across the floor and ram Harry. The grate prevents the creature from emerging directly beside Harry and encourages it to crawl across the metal surface, where it remains exposed longer.
When you hear Twinfeeler emerge, strafe or run sideways to avoid the acid, then aim and fire while the larva is above ground. If it begins crawling across the grate, keep attacking until it reaches the far side. At close range, about six accurate Shotgun blasts can be enough; the Rifle may require roughly ten or more shots depending on difficulty and accuracy. When Twinfeeler curls into a ball, the encounter is complete. It does not leave a normal corpse. Instead, it smashes through the sealed doors and creates the exit.
- Pick up the Hunting Rifle before finishing the encounter.
- Use the center grate as your main position.
- Dodge sideways when Twinfeeler surfaces or spits acid.
- Keep firing while the larva crawls over the grate.
- Exit through the doors Twinfeeler destroys.
Run to the Nightmare Police Station
After leaving the Town Center, turn right and head south. The road becomes a narrow grated path before turning onto Sagan Street. Cross Simmons Street; the southern route is blocked there. Continue west along Sagan Street without stopping to fight the Night Flutters, Groaners or other enemies pursuing Harry.
Enter the police station on the right side of the road. Take the Rifle Shells and Handgun Bullets from the reception counter, then save at the notepad near the front entrance. This room is the main recovery point before the hospital and rooftop sequence.
- Turn right and head south after the Twinfeeler arena.
- Follow the grated path onto Sagan Street.
- Cross Simmons Street and run west.
- Collect the ammunition at the police station.
- Save before leaving the station.
Reach Alchemilla Hospital and speak with Lisa
Leave the police station and continue past the Romper. Turn left onto Crichton Street, then go south until you reach Koontz Street. Continue to the Alchemilla Hospital entrance. Dodge the Wormheads outside and enter through the front gate rather than wasting ammunition in the street.
Use the notepad in the Nightmare Hospital lobby. Enter the Examination Room through the side door and speak with Lisa Garland. Bachman Road is destroyed, so the normal route to the lake is unavailable. Lisa remembers an abandoned waterworks near her old elementary school, with underground inspection tunnels that may reach the lake. This conversation is mandatory progression; there is no additional hospital puzzle or key to find in this visit.
Return to the lobby and leave the hospital. A new route is now available outside.
- Turn south from Crichton Street onto Koontz Street.
- Enter Alchemilla Hospital.
- Save in the Nightmare Hospital lobby.
- Speak with Lisa in the Examination Room.
- Leave after the waterworks conversation.
Defeat Floatstinger on the Koontz Street rooftop
Outside the hospital, follow the newly available path to the stairway and climb to the rooftop. A brief scene destroys the stairs and Floatstinger appears. This is Twinfeeler’s adult form and the second boss of this chapter.
At the beginning, create space before firing. The broad lower roof gives Harry room to run and strafe. The higher roof near the water tower provides a longer view and works particularly well with the Hunting Rifle, although the Shotgun remains effective at closer range.
Use a shoot-and-move pattern. Fire once or twice, then run or strafe several steps before attacking again. Floatstinger can spit acid and strike with its abdomen. The acid attack is telegraphed by a distinct sound; move sideways as soon as you hear it. Do not remain beside the moth after firing, because the abdomen attack can hit Harry before he has time to recover.
Keep repeating the pattern until Floatstinger falls. Around fifteen to twenty Rifle or Shotgun shells is a useful estimate, but actual ammunition use varies with difficulty, range and accuracy. Sirens sound after the boss dies, and the route back down becomes available.
- Create distance before attacking.
- Use the lower roof for room to strafe or the water-tower roof for rifle range.
- Move immediately when the acid-spit sound plays.
- Avoid standing beside Floatstinger’s abdomen.
- Confirm the boss is dead and the sirens have sounded.
Return to the waterworks
Descend from the rooftop and return to the normal snowy version of Central Silent Hill. Go down to Koontz Street, then travel north along Crichton Street. Cross the bridge west toward Old Silent Hill. The game then places Harry near the abandoned waterworks and reveals the location on the map.
Inspect the waterworks gate. The lock is rusted, so equip a melee weapon such as the Axe, Hammer or Steel Pipe and strike the lock until it breaks. Enter the enclosure. The manhole inside is already open; descend the ladder to begin the sewer section connecting toward the Resort Area. This descent is the final required action of the chapter.
- Return to the normal streets after Floatstinger’s defeat.
- Go north on Crichton Street.
- Cross the bridge into Old Silent Hill.
- Break the waterworks gate lock with a melee weapon.
- Descend through the open manhole.
Before you move on
- Twinfeeler has been defeated or driven away and Harry has exited the Town Center.
- Harry has reached the Nightmare Police Station, collected the available ammunition and saved.
- Lisa has been spoken to in the Nightmare Hospital Examination Room.
- Floatstinger has been defeated on the Koontz Street rooftop.
- The game has returned to the normal snowy version of Central Silent Hill.
- Harry has crossed back toward Old Silent Hill, broken the waterworks gate lock and descended the ladder into the sewer system.
Sewers (Connecting to Resort Area) — Tunnels and Environmental Hazards
Begin this chapter with Harry already inside the first sewer tunnel after leaving Nightmare Central Silent Hill. The route has two connected sewer levels. On the lower level, reach the sewer office to collect the Sewer Map (Connecting to Resort Area), use the nearby save point, and take the Sewer Key from the open key box. Use that key to reach the upper level, cross to the western end, retrieve the Sewer Exit Key from the bloody water, and escape through the locked gate. The chapter ends when Harry climbs into the Resort Area and takes the map from the information sign. This original PlayStation section has no pump controls, pressure valves, timed flood gates, or separate torch mechanic.
1. Cross the first sewer tunnel
Harry starts inside the first long sewer tunnel. Keep the flashlight on while moving through the passage so that gates, pickups, and enemies are easier to identify. Follow the tunnel to the first intersection and take the right-hand route around the corner. Continue forward until the passage opens into the next junction.
Two Creepers may approach from behind during this stretch. Keep moving if the route is clear, or turn and fire only when they block the passage. Near the next narrow section, clicking sounds signal Hanged Scratchers. Back into the wider part of the tunnel so they cannot surround Harry, then defeat them one at a time with the Handgun or run past them after creating space.
- Start inside the first sewer tunnel.
- Reach the first major intersection.
- Pass the Creepers and the initial Hanged Scratchers without becoming trapped.
2. Reach the sewer office and collect the map and key
At the first major intersection, the right-hand branch ends at a fence with a locked gate. Take the left branch instead. At the following intersection, continue straight ahead before backtracking. The dead end contains useful supplies, including Rifle Shells, a Health Drink, Handgun Bullets, and Shotgun Shells. Collect what you can carry, then return to the intersection.
Take the remaining branch, staying along the fence and passing through the open gate on the left. Follow the route around the wall until it opens into the sewer office. The desk contains the Sewer Map (Connecting to Resort Area), and a save point is available there. Check the open key box beside the desk to obtain the Sewer Key. Save before leaving; this is the safest checkpoint for the lower-level route.
- Collect the Sewer Map (Connecting to Resort Area).
- Take the Sewer Key from the open key box.
- Use the office save point before continuing.
3. Use the Sewer Key and climb to the upper level
Leave the office through the nearby gates and retrace the route toward the central passage. The gate opened by the Sewer Key is near the middle-south portion of the lower-level map. Use the map if the intersections become confusing, then pass through the fenced gate with the Sewer Key.
Beyond the gate, follow the blue grating. Several Creepers occupy this section. At the split, a First Aid Kit is available on the branch that ends shortly afterward; take it if you need the healing item and have inventory space. Return to the split and take the other branch to the ladder. Climb it to reach the upper sewer level.
Hanged Scratchers can drop from the ceiling on the approach and on later return trips. Hold L2 when you want to focus the camera farther ahead and check the ceiling before committing to a narrow passage. Fighting is optional when the route is open, so running past isolated enemies is a good way to conserve ammunition.
- Open the lower-level fence with the Sewer Key.
- Collect the First Aid Kit if useful.
- Climb the ladder to the upper sewer level.
4. Cross the upper sewer level
At the top of the ladder, check the grating to Harry’s left for another First Aid Kit, then take the opposite route. The western and southern passages are initially blocked, so use the eastern path around the bend. Continue through the tunnel past the Creepers until you reach the far side, where a Health Drink and Handgun Bullets are available.
From the end of that tunnel, continue south and turn around the right-hand corner. Pass the Scratcher in the approach and enter the larger southern passage. The gate on the left is locked and is not the route to the key. Use the gate on the right instead, then continue through the connected passages toward the western end.
- Check the upper-level grating for the First Aid Kit.
- Take the eastern route around the blocked passages.
- Reach the large southern passage and use the right-hand gate.
5. Retrieve the Sewer Exit Key and escape the ambush
Continue west through the connected gates and corridors. Keep moving through open areas when possible; the upper level contains several Scratchers, and stopping in a narrow passage makes it easier to be surrounded. At the western end, examine the suspicious bloody patch in the water. Harry retrieves the Sewer Exit Key from the water.
The pickup immediately triggers an ambush by three Scratchers. Turn around and retreat through the gate you just used. Do not take the nearby branch that ends in a dead end, because the enemies can corner Harry there. Continue back through the route, passing through the next gates on the left side as you return toward the eastern end of the southern passage.
When you reach the final approach, more Scratchers may be near the exit gate. You can fight them if they block the way, but running is usually safer and preserves ammunition. Use the Sewer Exit Key on the locked gate at the end of the route.
- Examine the bloody water at the western end.
- Collect the Sewer Exit Key.
- Retreat through the same gate and avoid the dead-end branch.
- Use the Sewer Exit Key at the final locked gate.
6. Save and enter the Resort Area
After opening the final gate, Harry reaches a safe section beside the exit ladder. A save point is on the barrel next to the ladder. Save here before climbing out; it is the important upper-level checkpoint for this chapter.
Climb the ladder to leave the sewers. Outside, move toward the road and examine the large information sign at the edge of Bachman Road to collect the Resort Area map. The sewer chapter is complete once Harry is outside, the Resort Area map is in the inventory, and the sewer save has been secured if you want a recovery point before continuing.
- Open the final gate with the Sewer Exit Key.
- Save at the barrel beside the exit ladder.
- Climb into the Resort Area.
- Collect the Resort Area map from the information sign at Bachman Road.
Before you move on
- Harry began this chapter already inside the first sewer tunnel after the Chapter 09 descent.
- The Sewer Map (Connecting to Resort Area) and Sewer Key were collected from the sewer office.
- The lower-level southern fence was opened with the Sewer Key.
- Harry climbed to the upper sewer level and reached the western bloody-water area.
- The Sewer Exit Key was retrieved from the water.
- The final sewer gate was opened with the Sewer Exit Key.
- Harry saved at the barrel beside the exit ladder, climbed into the Resort Area, and collected the Resort Area map from the Bachman Road information sign.
Silent Hill Resort Area — Kaufmann’s Shop, Motel, and Side-quests
The Resort Area is a short transition between the sewer exit and the lake, but its northeast buildings contain the optional Kaufmann quest. Completing that quest is required for the Good and Good+ ending routes because it allows Kaufmann to use Aglaophotis during the finale. The route to the lake itself remains available even if you skip the investigation.
1. Get the Resort Area map and nearby supplies
From the sewer exit, follow the road forward and turn right. Enter the demolished building beside the road to collect Rifle Shells, Handgun Bullets, and a First Aid Kit. Outside, examine the information sign to obtain the Resort Area Map.
The main route continues toward Bachman Road and Sandford Street, but turn toward the northeast buildings if you want the Kaufmann quest. Rompers, Groaners, Air Screamers, Wormheads, and Night Flutters patrol this section. Avoiding unnecessary fights preserves ammunition and healing items.
- Resort Area Map obtained from the information sign
- Rifle Shells collected
- Handgun Bullets collected
- First Aid Kit collected
- Optional save made before exploring the northeast buildings
2. Rescue Kaufmann at Annie’s Bar
Use the map to reach Annie’s Bar near Craig Street. Enter through the front entrance under the awning. A monster is attacking Kaufmann inside; approach and shoot it until the scene ends. Harry does not need to clear every enemy outside the bar.
After Kaufmann leaves, examine the floor between the billiard tables beside the defeated monster. Pick up the Kaufmann Key and the Receipt. The bar counter also has two Health Drinks and a Save Point, making Annie’s Bar the safest place to save before crossing the streets again.
Examine the Receipt. It identifies Indian Runner and shows the number 0473. The Kaufmann Key is marked for Room 3, but visit Indian Runner before going to the motel.
- Kaufmann rescued
- Kaufmann Key collected
- Receipt collected
- Code 0473 recorded
- Health Drinks collected if needed
- Annie’s Bar save point used if desired
3. Enter Indian Runner and obtain the motel code
Travel to Indian Runner on Weaver Street. Its entrance is secured by a padlock, not a keypad. Enter 0473 to open it. Inside, collect the Rifle Shells at the end of the counter and the Health Drink near the journal and cash register.
A Safe Key is inside the large cabinet behind the counter. It opens the safe under the counter, but the safe is optional: its contents provide story context and do not provide a required progression item. Before leaving, examine the back wall beside the motel photograph. The posted receipt gives the rear-entrance code 0886.
- Indian Runner opened with 0473
- Rifle Shells collected if desired
- Health Drink collected if desired
- Safe Key collected only if investigating the optional safe
- Code 0886 recorded from the posted receipt
4. Enter the motel office and take the Magnet
Follow Weaver Street south to Motel Haerbey Inn. Use 0886 on the keypad at the rear entrance. Inside the lounge, collect the Magnet from the couch. The nearby documents explain more about the drug operation but are not required to solve the quest.
Use the door beside the couch to inspect the garage. You can collect Shotgun Shells and a Health Drink there. Examine the motorcycle if you want to confirm that its gas tank is locked and has been disturbed; the Motorcycle Key is not available yet.
Return to the lounge and pass through the open doorway near the opposite corner. Use the Save Point on the counter, then unlock the exit to the motel compound.
- Motel rear entrance opened with 0886
- Magnet collected
- Shotgun Shells collected if desired
- Health Drink collected if desired
- Motel office save point used
- Motel compound exit unlocked
5. Open Room 3 and retrieve the Motorcycle Key
From the motel compound, turn toward Room 3 and use the Kaufmann Key. Search the room, including the washroom, for a Health Drink.
A large shelf blocks part of a poster. Push the shelf aside from the side to expose a hole in the floor. Examine the opening to see the Motorcycle Key in a crack. Harry cannot reach it by hand, so select the Magnet and use it on the key. The long string pulls the Motorcycle Key out.
- Room 3 opened with the Kaufmann Key
- Shelf moved aside
- Motorcycle Key retrieved with the Magnet
- Health Drink collected if available
6. Complete the optional Kaufmann quest
Return through the motel office to the garage beside the lounge. Examine the motorcycle and use the Motorcycle Key on its gas tank. Harry discovers a small glass vial hidden inside.
Kaufmann enters, takes the vial, and leaves. Harry does not keep it. This scene completes the optional quest and establishes the Good-ending route: later, Kaufmann uses the Aglaophotis during the final confrontation, producing the Incubus outcome rather than the Incubator outcome. The quest is not required to reach the lake or complete the campaign, but skipping it prevents the Good and Good+ endings.
The separate Cybil rescue quest determines whether the completed route becomes Good+ rather than Good. That earlier hospital objective requires obtaining the Unknown Liquid and using it during the amusement-park encounter.
- Motorcycle Key used on the gas tank
- Vial discovered
- Kaufmann takes the vial
- Good-ending route established
- Cybil rescue status confirmed separately if pursuing Good+
7. Leave the Resort Area for the lake
Exit the motel and return to the main streets. If you skipped the optional quest, simply continue down Bachman Road and turn onto Sandford Street. If you completed it, follow the same route west.
A collapsed staircase beneath the letter F in SANDFORD contains a Health Drink and Rifle Shells. Collect them if your inventory has room and the surrounding enemies are not forcing a costly fight. Continue west along Sandford Street and cross the bridge. Static signals the transition out of the Fogworld Resort Area.
The next chapter begins at the Lakeside pier in Nightmare Silent Hill Resort Area. Save at Annie’s Bar before the investigation or at the motel office after opening the rear entrance; there is no need to defeat every street enemy before crossing the bridge.
- Optional staircase supplies collected if desired
- Sandford Street bridge crossed
- Resort Area investigation completed or deliberately skipped
- Save made before the bridge when practical
- Nightmare Resort transition triggered
Before you move on
- Harry has crossed the Sandford Street bridge toward the Lakeside pier and the Nightmare Resort transition has begun.
- For the optional ending route, the completed chain is visible in the run: Kaufmann rescued, Kaufmann Key collected, Receipt used for 0473, motel code 0886 obtained, Magnet collected, Motorcycle Key retrieved, motorcycle gas tank opened, and Kaufmann taking the vial.
- A Good+ attempt also has the separate Unknown Liquid and Cybil rescue event completed before leaving the amusement park.
- The player has not mistaken the optional Indian Runner safe for a required progression objective.
Nightmare Silent Hill Resort Area — Lighthouse, Boat, and the Route to Cybil
The Nightmare Resort Area is a short transition chapter in the original North American PlayStation version of Silent Hill. Harry crosses the transformed pier, reaches the boat, meets Cybil and Dahlia, visits the lighthouse, and is returned to the boat automatically. He then crosses the mainland road to a fenced lot on W. Sandford Street and descends into the sewer route leading to Lakeside Amusement Park. Cybil’s possession encounter does not happen here; it occurs later at the amusement park’s merry-go-round. Use this chapter to conserve supplies, save at the boat or lighthouse, and preserve the Unknown Liquid if you intend to rescue Cybil and pursue a plus ending.
Cross the bridge and reach the western pier
After the Resort Area changes into the Nightmare state, cross the bridge and remain on the north side of the road. A northern detour contains Shotgun Shells and a Health Drink behind several barrels. These supplies are optional, so do not force the detour if the nearby Romper or Night Flutter makes the approach unsafe.
Return to the main road and continue west, passing the two large garages. After the western garage, turn south and follow the narrowing walkway toward the pier. A Night Flutter and two Wormheads patrol this approach. Running past them is generally safer than spending ammunition in the open area.
- Cross the bridge into the Nightmare Resort Area.
- Search the northern barrel detour for the optional Shotgun Shells and Health Drink.
- Pass both large garages and turn south toward the pier.
Board the boat and trigger the story scene
Continue along the pier until you reach stairs on the left. Descend, cross the wooden walkway, and enter the boat through the short double doors. Go through the next door to reach the cabin.
Cybil and Dahlia are inside. The conversation establishes that the demon must be confronted at the Lighthouse and the Amusement Park. Cybil leaves before Harry, so there is no rescue or combat decision to make during this scene.
- Use the left-side stairs to reach the lower pier.
- Cross the wooden walkway and enter the boat.
- Enter the cabin and complete the Cybil and Dahlia conversation.
Search and save in the boat cabin
After the conversation ends, search the cabin. Handgun Bullets, Rifle Shells, and a Health Drink are available, and the room contains a Save Point. Collect the supplies and save before leaving. This is the safest checkpoint during the chapter.
The Unknown Liquid is not obtained here. If you plan to save Cybil later, it must already have been collected in the hospital by using the Plastic Bottle on the smashed vial in the Director’s Office. Keep that item available for the later merry-go-round encounter.
- Collect the Handgun Bullets, Rifle Shells, and Health Drink.
- Save at the cabin Save Point.
- Confirm that the Unknown Liquid has not been used if you intend to rescue Cybil later.
Cross the second pier toward the lighthouse
Leave the cabin through the double doors on the opposite side of the boat. Cross the platform and follow the route back toward the upper pier. Descend the stairs on the lower-right side, then cross the wooden boards and red-railed walkway.
Continue past the fence and the two Rompers. Stay to the right and keep moving as the path narrows. A First Aid Kit is located farther south beyond the upward stairs, guarded by two Night Flutters. It is optional; collect it only if you need the healing and can retreat without becoming trapped.
- Leave the boat through the far-side doors.
- Descend to the lower walkway and cross the red-railed section.
- Decide whether the optional First Aid Kit is worth the enemy risk.
Reach and search the lighthouse
At the central platform, take the first left around the higher path, then descend the stairs on the right. Follow the narrow route up the next stairs. Wormheads are present near the top, so avoid stopping against the railings. Turn right toward the visible lighthouse and climb the steps to enter.
Inside, activate the Save Point on the barrel. Then climb the spiral staircase to the roof. Harry sees the blue-clothed girl, but the scene ends without a boss fight or item pickup. Return down the same staircase after the scene finishes.
- Reach the central platform and follow the higher left route.
- Enter the lighthouse and save at the barrel.
- Climb to the roof, trigger the scene, and return downstairs.
Return automatically to the boat
A Wormhead may be outside the lighthouse. Move away from the building and follow the route back toward the pier. After Harry proceeds far enough, the game advances him automatically to the boat. Cybil has not returned, and there is no additional lighthouse puzzle.
Leave through the other boat door, the one beside the cabin Save Point. This places Harry on the north side of the boat and begins the final overland section of the chapter.
- Leave the lighthouse after the rooftop scene.
- Allow the automatic return to the boat to occur.
- Exit through the door beside the cabin Save Point.
Find the sewer entrance on W. Sandford Street
Cross the platform and follow the mainland path north. Two Wormheads may attack, so continue moving and avoid unnecessary combat. Proceed all the way to W. Sandford Street.
Check Harry’s map for the red arrow beside a pink block on the north side of the street. Enter the fence-enclosed lot at that marker. Two Wormheads may be inside. Locate the open manhole and descend the ladder.
The descent confirms that the Nightmare Resort chapter is complete and starts the sewer route to Lakeside Amusement Park. Cybil’s possession encounter takes place only after this sewer section, at the amusement park merry-go-round.
- Reach W. Sandford Street after leaving the boat.
- Use the red-arrow map marker to find the fenced lot.
- Descend the open manhole to begin the sewer chapter.
Before you move on
- The boat conversation with Cybil and Dahlia has finished.
- Harry has reached the lighthouse roof, triggered the scene with the blue-clothed girl, and returned automatically to the boat.
- Harry has exited the boat and reached W. Sandford Street on the mainland.
- Harry has entered the fenced lot north of W. Sandford Street and descended the open manhole.
- If pursuing a plus ending, the Unknown Liquid remains available for the later Cybil encounter at Lakeside Amusement Park.
Sewers (Connecting to Amusement Park) — Route to Lakeside
This short sewer section connects the Lakeside Resort Area to Lakeside Amusement Park in the original North American PlayStation release of Silent Hill. It contains no valve puzzle, pump sequence, sewer key, or typewriter. The route does include several branching tunnels, optional supplies, Hanged Scratchers, Mumblers, and a dangerous narrow crossing near a corpse. Save in the Resort Area before entering, collect the sewer map if desired, and move quickly through the final west tunnel once the amusement-park exit comes into view.
1. Save and prepare in the Resort Area
Save at the Resort Area before entering the sewer. The listed save points for this chapter are in the preceding Nightmare Resort section, not inside the connecting sewer, so do not expect a typewriter after descending. Check Harry’s health and arrange a dependable close-range weapon before leaving the previous area.
The sewer itself is brief, but the next transition leads directly to Lakeside Amusement Park and the Cybil sequence. Keep enough healing available for the park rather than spending every item simply to eliminate enemies in the tunnels. If you are pursuing a Good or Good+ ending, make sure the Unknown Liquid from the hospital side quest is still in your inventory. It is needed for the later attempt to save Cybil.
- Save before entering the sewer.
- Carry healing items and a reliable weapon.
- Retain the Unknown Liquid if you are pursuing a Good or Good+ ending.
- Do not plan on using a sewer typewriter.
2. Take the map and enter the east and south tunnels
After the brief scene involving Cybil, examine the wall near the sewer entrance and take the Sewer Map (Connecting to Amusement Park). The map is optional, but it makes the tunnel branches much easier to identify and prevents this section from being mistaken for the earlier sewer route leading to the Resort Area.
Go down the tunnel from the map and watch the ceiling. Hanged Scratchers can cling to the roof, with another enemy on the ground farther ahead. Hold L2 when necessary to keep the camera and targeting direction under control. Continue forward, then take the right-hand route when the passage divides. The passage directly ahead ends at a dead end with more enemies, so do not pursue it unless you are deliberately clearing threats.
- Collect the connecting sewer map from the wall.
- Watch for Hanged Scratchers above and ahead.
- At the first major division, take the right-hand route.
- Avoid the dead-end passage unless you need to escape an enemy.
3. Move west toward the center tunnel
Follow the east and south tunnel route westward. Mumblers appear in this section; they are more important to recognize than to fight because they can close the distance while Harry is turning through the narrow corridors. Shoot an enemy only when it blocks your path or when running past would leave you trapped between multiple creatures.
Continue until the passage joins the center tunnel. A Health Drink is located at the west end of the approach where it connects to the center section. Pick it up if your health is low or if you have room to spare. If you are already healthy and the enemies are close behind, take the item only if doing so will not corner Harry.
- Proceed west through the branching tunnel.
- Expect Mumblers in addition to Hanged Scratchers.
- Collect the Health Drink at the west end if it is safe.
- Do not spend ammunition clearing every enemy.
4. Search the center tunnel, then go north
Before continuing north, check the south side of the center tunnel for Handgun Bullets and another Health Drink. These supplies are easy to miss because the main route continues in the opposite direction. Take them if you need the ammunition or healing, but avoid lingering while enemies are approaching from the adjoining passages.
Return to the center tunnel and proceed north. Two Mumblers are positioned along the route, and a Hanged Scratcher may also be present. You can fire while backing away, but running is usually the better choice if the passage remains open. At the next junction, take the left route into the west tunnel.
- Search the south side of the center tunnel for Handgun Bullets.
- Collect the second Health Drink if needed.
- Return to the center path and travel north.
- Take the left route into the west tunnel.
5. Cross the damaged west tunnel
A Mumbler may approach soon after entering the west tunnel. There is enough room to slip past it on the right side if the passage is clear. You may hear a loud bang while passing; do not stop to investigate. Keep moving unless the enemy physically blocks the corridor.
Continue across the grated walkway and watch for holes on both sides. Farther ahead, most of the floor is missing and a corpse lies in the water below. Cross using the narrow strip of intact walkway along the right side. The important point is to follow the remaining footing beside the gap, not to search the corpse or look for an interaction. Turning repeatedly in this section makes it easier to catch Harry on the edge.
- Pass the Mumbler or shoot it only if it blocks the route.
- Ignore the loud noise and keep moving.
- Watch for holes in the grating.
- Use the narrow intact strip beside the missing floor and corpse.
6. Reach the amusement-park ladder
After the damaged crossing, continue through the west tunnel toward the visible amusement-park structures. Merry-go-round horses can be seen ahead near the exit. Approach the ladder and climb it as soon as you reach it.
Enemies from behind, including Mumblers and Hanged Scratchers, can catch Harry if he stops on either side of the final passage. If you are badly hurt, heal before climbing only if there is enough distance to do so safely; otherwise prioritize reaching the ladder. There is no separate sewer boss and no final sewer puzzle.
- Continue toward the visible merry-go-round horses.
- Use the ladder at the end of the west tunnel.
- Do not stop to fight enemies that are no longer blocking the route.
- Confirm that Harry exits into Lakeside Amusement Park.
7. Confirm completion and prepare for Cybil
The chapter is complete when Harry climbs out and the Lakeside Amusement Park area loads. The next objective is to search the park and reach the merry-go-round confrontation with Cybil. The sewer map, Health Drinks, and Handgun Bullets are useful but not required for the transition.
Before moving farther into the park, check health and ammunition. If you intend to save Cybil, keep the Unknown Liquid available and do not discard it. The North American retail version uses the original Cybil encounter route; do not substitute mechanics from later Silent Hill releases or from a different regional build.
- Harry has climbed out of the connecting sewer.
- Lakeside Amusement Park has loaded.
- The next objective is finding Cybil and reaching the merry-go-round.
- The Unknown Liquid remains available if pursuing a Good or Good+ ending.
Before you move on
- The Sewer Map (Connecting to Amusement Park) has been collected or deliberately left behind.
- Harry has passed through the center tunnel and the damaged west-tunnel crossing.
- Harry has climbed the ladder beside the amusement-park exit.
- The Lakeside Amusement Park exterior and the Cybil-related transition have triggered.
- For a Good or Good+ route, the Unknown Liquid is still available for the later Cybil encounter.
Lakeside Amusement Park — Possession, Carousel, and Cybil
The original North American PlayStation version of Silent Hill has a short Lakeside Amusement Park section after the sewer. The park has no usable map and contains no required rollercoaster sequence, ritual relic, or extended puzzle chain. Use the damaged grating, carnival rides, ferris wheel, and ice-cream shop as landmarks. Save at the ice-cream shop, then reach the merry-go-round to confront possessed Cybil. If you obtained the Unknown Liquid earlier, you can save her; otherwise, defeat her in combat. The encounter is followed by the automatic Flauros sequence and the transition into Nowhere.
Enter Lakeside Amusement Park and follow the damaged path
After the sewer transition, Harry begins in Lakeside Amusement Park. The Sewer Map from the previous chapter may already be in your inventory, but there is no new park map to collect or use. The park itself is a compact, confusing area with torn-up flooring, fences, ride structures, and limited visibility, so navigate by landmarks rather than trying to chart every side path.
Move forward from the entrance and follow the ripped grate flooring as it bends to the right and then curves back toward the left. Larval Stalkers and Grey Children occupy parts of the route. You do not need to defeat every enemy. Run through open sections, avoid being cornered against fences, and keep moving when an enemy is not blocking the route.
- Confirm that Harry is inside Lakeside Amusement Park after leaving the sewer.
- Use the damaged grate flooring and amusement rides as navigation landmarks.
- Do not search the park for a required map, relic, rollercoaster objective, or central puzzle.
- Avoid unnecessary fights so health and ammunition remain available for Cybil.
Locate and use the ice-cream-shop save point
Continue along the grated route until you reach a circular ride area with a Grey Child approaching from the left. Turn sharply right and continue past the ride that is playing carnival music. Follow the route toward the ice-cream shop, which is across from the ferris wheel.
The save point is on the ice-cream-shop counter. Save before approaching the carousel. This is the important recovery point for the chapter because the park does not provide another convenient save immediately around the Cybil encounter. Heal before leaving the shop if Harry is already badly injured, but preserve at least one recovery item for the fight if possible.
- Find the ice-cream shop opposite the ferris wheel.
- Save at the counter before going to the carousel.
- Check Harry’s health and ammunition before entering the boss area.
- Keep the Unknown Liquid in the inventory if you intend to save Cybil.
Reach the merry-go-round
From the ice-cream shop, turn around and move through the ride area while angling to the right. Continue past the shop and locate the merry-go-round. If the route is unclear, return to the shop and use the surrounding structures as reference points: the ferris wheel is across from the shop, the music-playing ride is along the approach, and the damaged grating leads toward the carousel.
Climb the carousel steps and pass through the gate. The story scene begins when Harry reaches the merry-go-round, so make sure you have saved first. There is no separate attraction-order puzzle to complete before this point.
- Use the ice-cream shop as the last safe navigation landmark.
- Reach the merry-go-round without spending unnecessary ammunition.
- Enter the carousel only after confirming that the save is complete.
Save Cybil with the Unknown Liquid
If you completed the optional hospital item sequence, Harry should have the Plastic Bottle filled with Unknown Liquid. At the start of the carousel encounter, approach possessed Cybil and use the Unknown Liquid while standing in front of her. The liquid expels the parasite, saves Cybil, and ends the battle without requiring a normal boss fight.
The Unknown Liquid must have been obtained before reaching the amusement park. There is no replacement bottle or liquid available in this chapter. If you reached the carousel without it, saving Cybil through the normal encounter is not possible. Reload an earlier save only if you specifically want to pursue the Cybil-saving route.
- Confirm that the Unknown Liquid is in the inventory before committing to the encounter.
- Approach Cybil and use the item directly on her.
- Wait for the parasite-removal scene and Cybil’s follow-up dialogue.
- Do not expect to find the required liquid anywhere in the park.
Defeat Cybil if you are not using the liquid
Without the Unknown Liquid, Cybil attacks with her handgun. Keep moving laterally around the carousel and avoid standing directly in front of her. The carousel horses and central structure can interfere with movement, so maintain enough space to retreat rather than letting Harry become trapped against the scenery.
Cybil eventually drops the handgun and switches to close-range attacks, including a grab that can cause substantial damage. At that stage, use the Hunting Rifle or Shotgun if you have ammunition available. The Handgun can also defeat her, although it generally takes longer. Fire while backing away, and heal promptly after a serious hit instead of waiting until Harry is near death.
If Cybil grabs Harry, use the directional and shoulder controls to break free more quickly. Continue circling and attacking until the battle ends. Her defeat is required to continue the campaign if the Unknown Liquid was not used.
- Keep moving during the handgun phase.
- Do not remain beside Cybil after firing or striking her.
- Use a strong ranged weapon after she drops the handgun when possible.
- Break free quickly from a grab and heal before Harry reaches critical condition.
Finish the park section and enter Nowhere
After Cybil has been saved or defeated, Harry leaves the carousel area and encounters Alessa. The Flauros activates automatically during the following story sequence, and Dahlia appears afterward. There is no additional amusement-park key, relic, ride-control mechanism, or rollercoaster objective before this transition.
When the cutscene sequence concludes, the game moves directly into Nowhere. The Cybil result cannot be changed by returning through the park after the transition. To pursue the other outcome, reload the ice-cream-shop save or an earlier save from before entering the carousel and repeat the encounter with the appropriate item or combat decision.
- Cybil has been saved with the Unknown Liquid or defeated in combat.
- The Alessa and Flauros sequence has played.
- Dahlia has appeared after the automatic story event.
- The game has transitioned from Lakeside Amusement Park to Nowhere.
Before you move on
- Harry has entered Lakeside Amusement Park after leaving the sewer.
- The ice-cream-shop save point has been used before the carousel encounter.
- Harry has reached the merry-go-round.
- Cybil has either been saved with the Unknown Liquid or defeated in combat.
- Alessa has appeared and the Flauros has activated automatically.
- The story has transitioned from Lakeside Amusement Park to Nowhere.
Nowhere — Final Rooms, the Five Rites and the Final Boss
Nowhere is the final area of the original North American PlayStation release of Silent Hill. It has no usable map and combines distorted versions of earlier locations. Recover the five ritual items, open the locked door in Alessa’s bedroom, then defeat either the Incubus or Incubator. Kaufmann’s optional Resort Area quest determines the boss form and whether a Good ending is possible. Cybil’s fate determines the standard or plus variant. The UFO ending is a separate Next Fear route using the Channeling Stone.
1. Leave the Examination Room and collect the tools
Harry begins in the Examination Room with Lisa. Use the Save Point before leaving. Follow the corridor to the elevator and enter the first-floor hall. Nowhere has no usable map, so use elevator locations, locked door labels and familiar room layouts as landmarks.
The room beside the elevator contains a key stuck in a faucet. Another nearby room has a key inside a birdcage, with Handgun Bullets behind it. Neither key can be collected yet. Across from the elevator is a room resembling the antique shop. It contains a Save Point, a First Aid Kit, Shotgun Shells and a clock with a square depression beneath its face. Leave the clock alone until you find the Stone of Time.
At the far end of the corridor, the last unlocked door leads downstairs to a classroom. Examine the desk if desired, then use the other door to reach the back room. Take the Screwdriver and Pliers from the table, then return upstairs.
- Save before beginning the Nowhere puzzle route.
- Remember the faucet key, birdcage key and antique-shop clock.
- Collect the Screwdriver and Pliers from the classroom back room.
2. Open Ophiel and take the Amulet of Solomon
Return to the room beside the elevator with the key in the faucet. Use the Pliers on the faucet to obtain the Key of Ophiel. Use that key on the door marked Ophiel farther along the corridor.
Inside the Ophiel corridor, read both engraved slates. One lists five people and their ages; the other instructs you to arrange them from youngest to oldest and use their names. Sorting the names by age produces the initials A, L, E, R and T. Enter ALERT on the letter keypad.
Pass through the opened storage room and continue into the morgue. Take the Amulet of Solomon from the rear wall. When you return toward the Ophiel hall, a Lisa scene occurs. Her diary in the storage room can be read afterward, but it is optional and is not required for the ending.
- Use the Pliers to remove the Key of Ophiel.
- Enter ALERT at the Ophiel keypad.
- Take the Amulet of Solomon from the morgue.
3. Solve the astrology puzzle and obtain the Stone of Time
In the Ophiel corridor, enter the astrology room. The numbered zodiac symbols establish a limb-counting rule: Pisces is 0, Libra is 2, Aries is 4 and Cancer is 10.
Apply the same rule to the three symbols above the keypads. Sagittarius, represented by a centaur, is 6. Taurus, represented by a bull, is 4. Gemini, represented by twins, is 8. Enter 6 on the Sagittarius keypad, 4 on the Taurus keypad and 8 on the Gemini keypad.
The stone plate drops after the final correct input. Take the Stone of Time and return through the first corridor to the antique-shop room. Place it in the square depression beneath the clock. After the clock strikes five times, the glass breaks and the Key of Hagith becomes accessible.
Use the Key of Hagith on the double doors at the end of the corridor, then ride the elevator to the second floor.
- Enter the astrology answers 6, 4 and 8.
- Take the Stone of Time.
- Use the Stone of Time in the clock and collect the Key of Hagith.
4. Collect the Crest, Ring, Camera and Bird Cage Key
On the second-floor first corridor, enter the damaged jewelry shop, the third room on the left. Take the Crest of Mercury from the display case and the Ring of Contract from the other case. Rifle Shells are also available in the room.
Continue through the double doors into the second second-floor corridor. Enter the room on the right to collect the Camera and nearby ammunition. In the last room on the left, use the Screwdriver on the wall plate to expose the electrified Key of Aratron. Do not try to take it while the power is active.
Before leaving the second floor, unlock the connecting door that leads back to the first-floor section. This route is essential because the elevator stops working after the generator is switched off.
Ride the elevator to the third floor. At the altar hall, examine the two paintings beside the altar. The left painting is captioned The light to the future and corresponds to the left-hand door. The right painting is captioned The light illuminating the darkness and corresponds to the right-hand door.
Use the Camera on the left painting. Its flash reveals three shapes positioned in the same top, middle and bottom arrangement as the three keypad rows on the left-hand door. Press those three revealed shapes on the matching left door in top-to-bottom order. Then use the Camera on the right painting and repeat the process on the right-hand door, again pressing the revealed shapes from top to bottom on that door. Each correctly matched door opens.
The left room contains the Bird Cage Key. The right room contains optional supplies and story material. Return to the first floor and use the Bird Cage Key in the room beside the inactive starting elevator. Take the Key of Phaleg.
- Collect the Crest of Mercury and Ring of Contract.
- Take the Camera and expose both altar paintings.
- Match the left painting to the left door and the right painting to the right door.
- Press each painting’s three revealed shapes in top-to-bottom order.
- Unlock the second-floor connecting door before shutting off the generator.
- Use the Bird Cage Key to obtain the Key of Phaleg.
5. Obtain the Dagger, Ankh, Key of Aratron and Disk of Ouroboros
Use the Key of Phaleg on the marked door. Stalkers occupy the corridor beyond it. In the first room on the right, examine the refrigerator and take the Dagger of Melchior. Before leaving, use the Ring of Contract on the broken chain link beneath the refrigerator. This seals the door and prevents the creature inside from killing Harry.
The next room is a storage room containing a bag of jellybeans. Open the bag, then search the floor for the Key of Bethor. Continue into the hospital room with the television and VCR. The Video Tape is optional, although this is the clearest place to view it if you collected it earlier.
Enter the room ahead where a child is crying and an Alessa apparition appears. Take the Ankh from the wall. Then use the Key of Bethor on the generator-room door and switch off the generator.
The elevator will no longer work. Return through the connecting door you unlocked on the second floor. Enter the last room on the left and take the now-safe Key of Aratron from the wall plate. If you did not remove the plate earlier, use the Screwdriver first.
Return through the connecting door to the first floor. Use the Key of Aratron on the marked door at the end of the Phaleg corridor. After the scene in the hospital room, take the Disk of Ouroboros from the life-support machine panel beside Alessa’s photograph.
- Use the Ring of Contract before leaving the refrigerator room.
- Collect the Dagger of Melchior, Key of Bethor and Ankh.
- Switch off the generator only after the second-floor connecting door is open.
- Take the Key of Aratron and Disk of Ouroboros.
6. Perform the Five Rites
Leave the Aratron room through the door ahead and enter Alessa’s bedroom. Use the Save Point on the desk. The locked door requires five specific items: the Amulet of Solomon, Crest of Mercury, Ankh, Dagger of Melchior and Disk of Ouroboros.
Check the inventory before examining the door. If an item is missing, use the preceding steps to identify the unfinished section. Place all five items into the door. It opens into the final sequence.
Save again in Alessa’s bedroom before leaving. Heal and equip a ranged weapon before passing through the opened door. Watch the cutscene, follow the house hallway and descend the stairs to the final arena.
- Verify that all five ritual items are in the inventory.
- Save in Alessa’s bedroom before opening the door.
- Heal and equip a suitable ranged weapon before descending to the finale.
7. Defeat the final boss
If you completed Kaufmann’s optional Resort Area quest and recovered the vial from the motorcycle’s gas tank, Kaufmann uses it during the finale and Harry fights the winged Incubus. If you did not recover the vial, the boss is the bright Incubator form. Only one of these bosses appears in a playthrough. Cybil’s fate does not change which boss form appears.
The Hunting Rifle is the most useful weapon for either form. Begin with full health and use L2 when needed to keep the boss in view. Fire several rifle shots, then move in a broad circle when the boss prepares its lightning attack. Red lightning identifies the Incubus’s attack; the Incubator uses blue lightning.
If a lightning strike connects, heal immediately, preferably to full health. The attack can continue for several seconds and may kill Harry if recovery is delayed. After healing, keep moving and resume firing when the attack ends. If rifle ammunition becomes scarce, use the Shotgun or Handgun rather than approaching the boss unnecessarily.
After the boss falls, allow the ending scenes and credits to play. When the game presents its clear-data save option, save the completed file if you want to begin a subsequent Next Fear playthrough.
- Enter the arena at full health with ranged ammunition available.
- Use L2 to keep the boss in view when necessary.
- Move during the lightning attack and heal immediately if struck.
- Defeat the Incubus or Incubator and save the completed game data.
8. Choose the ending route
The standard campaign has four main endings. Good requires completing Kaufmann’s optional Resort Area quest so that the vial is recovered, then killing Cybil during her parasitic fight at the amusement-park carousel. Good+ requires completing the same Kaufmann quest and saving Cybil with the Unknown Liquid from Alchemilla Hospital.
Bad results when the vial is not recovered and Cybil is killed. Bad+ results when the vial is not recovered but Cybil is saved with the Unknown Liquid. Saving Kaufmann in Annie’s Bar alone is not enough for a Good ending; the Resort Area chain must be completed through the motel and motorcycle so the vial is recovered.
The UFO ending is separate from the four standard campaign endings. It requires a completed-game save that has unlocked the Channeling Stone, a Next Fear playthrough, and the Channeling Stone from the Convenience Store near the start of the game. Use the stone at the Nightmare School rooftop, the Nightmare Hospital courtyard before the Floatstinger fight, the Norman’s Motel parking lot near the apartments, the boat cabin after the Resort conversation, and the top of the Lakeside lighthouse. The fifth use at the lighthouse ends the game early with the UFO sequence instead of sending Harry through Nowhere.
- For Good, recover Kaufmann’s vial and kill Cybil.
- For Good+, recover the vial and save Cybil with Unknown Liquid.
- For Bad or Bad+, do not recover the vial, then kill or save Cybil respectively.
- For UFO, use the Channeling Stone at all five required locations in Next Fear.
Before you move on
- The Incubus or Incubator has been defeated.
- The ending scene and credits have played.
- The completed game data has been saved if another playthrough is desired.
- Good: Kaufmann’s vial was recovered and Cybil was killed.
- Good+: Kaufmann’s vial was recovered and Cybil was saved with Unknown Liquid.
- Bad: the vial was not recovered and Cybil was killed.
- Bad+: the vial was not recovered and Cybil was saved with Unknown Liquid.
- UFO: Next Fear was active and the Channeling Stone was used at all five required locations.
Finishing up
You defeated the Incubus or Incubator in Nowhere and viewed the ending and credits.
You collected and used the Amulet of Solomon, Crest of Mercury, Ankh, Dagger of Melchior and Disk of Ouroboros to open the final door.
You recorded whether Cybil was saved or killed and whether Kaufmann’s vial quest was completed, establishing the resulting Good, Good+, Bad or Bad+ route.
If you saved the completed-game data after the credits, the file now provides Next Fear for a subsequent run.
Choose your next gameScreenshots & video
Game imagery for reference. Follow the written chapters above for the route and strategies.
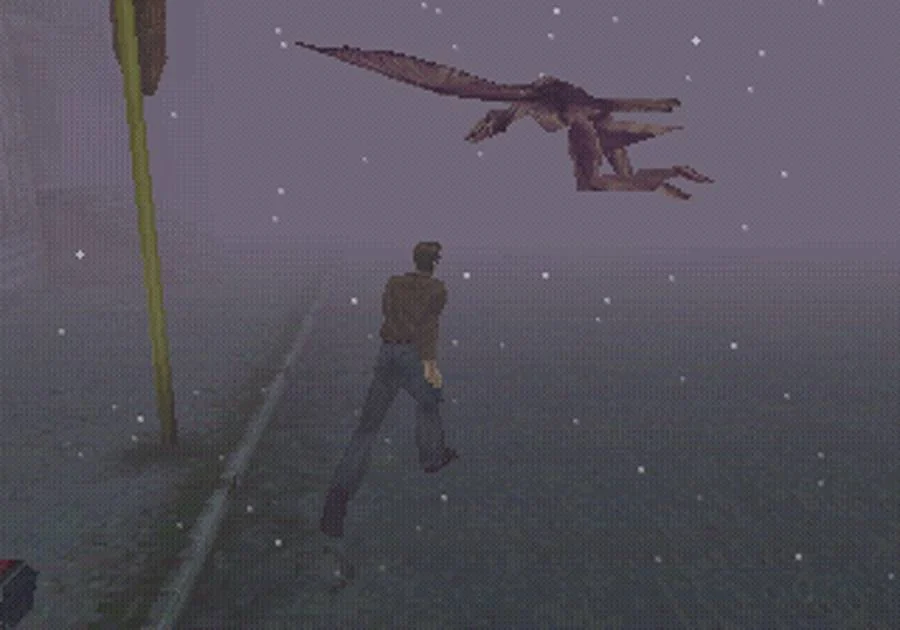
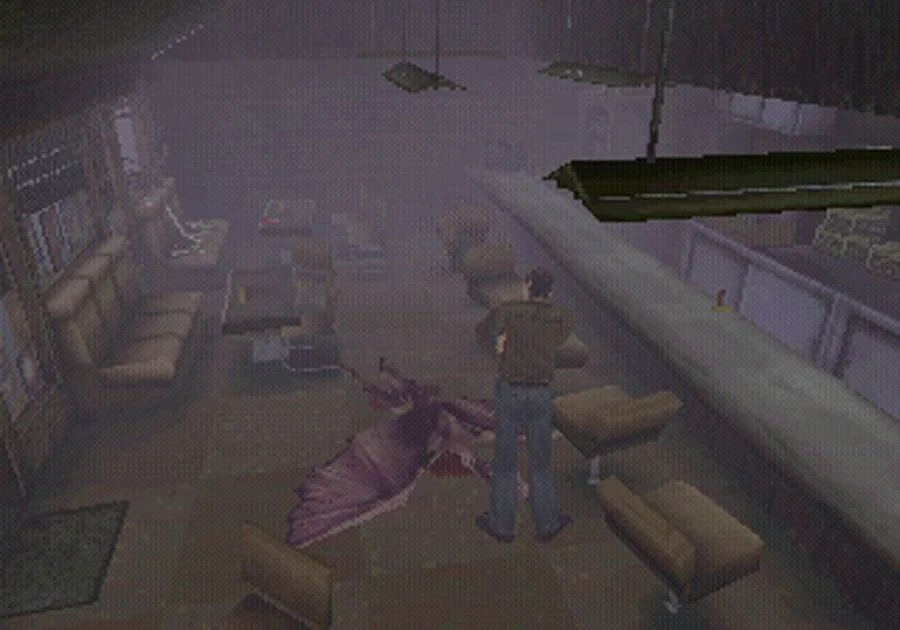
Sources & references
Our original guide draws on the references below. Check the edition at the top of this page before following controls or unlock requirements.
- Silent Hill Speed Walkthrough — Lakeside Amusement Park
- Silent Hill Walkthrough — Café 5 to 2 and Old Silent Hill
- Silent Hill Item List — Original Game Items and Locations
- Playing Silent Hill — Controls, Maps, Radio, Flashlight and Combat
- Silent Hill Manual (US)
- Silent Hill Walkthrough - Old Silent Hill
- Silent Hill Mini-Puzzles — Resort Area Motorcycle Quest
- Silent Hill - Guide and Walkthrough - PlayStation - By Conquerer
- Silent Hill — Walkthrough: Midwich Elementary School
- Silent Hill — Official Strategy Guide, Original PlayStation Edition
- Silent Hill — Guide and Walkthrough for PlayStation
- Chapter Two: School — Silent Hill Walkthrough and Guide
- Silent Hill Walkthrough — Nightmare School
- Silent Hill Walkthrough — Old Silent Hill Part 2
- Silent Hill — Guide and Walkthrough — PlayStation — Conquerer
- Silent Hill Walkthrough - Central Silent Hill
- Silent Hill Walkthrough — Nightmare Central Silent Hill
- Silent Hill Walkthrough — Alchemilla Hospital
- Silent Hill — Guide and Walkthrough — PlayStation
- Silent Hill — Nightmare Hospital walkthrough
- Silent Hill — Guide and Walkthrough by A_I_e_x
- Silent Hill — Guide and Walkthrough — PlayStation — By Millers_C
- Silent Hill Walkthrough — Central Silent Hill Part 2
- Silent Hill Guide and Walkthrough — PlayStation
- Silent Hill Heaven — Green Lion Antiques Walkthrough
- Silent Hill — 10-Star FAQ/Walkthrough — PlayStation
- Silent Hill — Walkthrough — PlayStation — By Gunsmith
- Silent Hill Walkthrough - Sewers (To Resort Area)
- Silent Hill Walkthrough — Silent Hill Resort Area
- Silent Hill Walkthrough — Complete Chapter List
- Silent Hill Walkthrough — Nightmare Silent Hill Resort Area
- Silent Hill Bosses — Cybil
- Silent Hill Endings
- Silent Hill Frequently Asked Questions
- Silent Hill — Sewers (to Amusement Park) Walkthrough
- Silent Hill Maps
- Silent Hill Enemies
- Silent Hill Walkthrough — Lakeside Amusement Park
- Silent Hill Game Script — Lakeside Amusement Park
- Silent Hill Walkthrough - Nowhere
- Silent Hill Endings and Secret Items
- Silent Hill — Guide and Walkthrough — PlayStation — By Conquerer
About the game & collecting notes
- Platform
- Sony PlayStation
Step-by-step campaign walkthrough for the original Silent Hill on PlayStation, targeting the North American retail release SLUS-00707. Covers the required route from Harry’s opening crash through Nowhere, including puzzle solutions, boss strategies, optional Kaufmann and Cybil quests, all four standard endings, the Next Fear UFO route, resource management, save points and verified original-edition differences.
Darryl Polo
Darryl Polo loves tinkering with emulation and revisiting retro games. He enjoys exploring how old favorites play on different setups and sharing what he learns along the way. At Joking Joystick, he writes about the games, hardware, and small discoveries that keep the hobby fun.
Our editorial standardsFound a step that needs another look? Help us improve this guide.