
Sekiro: Shadows Die Twice — PS4 Complete Campaign Walkthrough (Main Ending + optional endings)
A focused, step-by-step campaign walkthrough for the PS4 edition that takes you from the prologue through the game's main ending (Immortal Severance). Includes preparation, trusted routes for required bosses, prosthetic and skill guidance, and optional routes for Purification, Return and Shura endings.

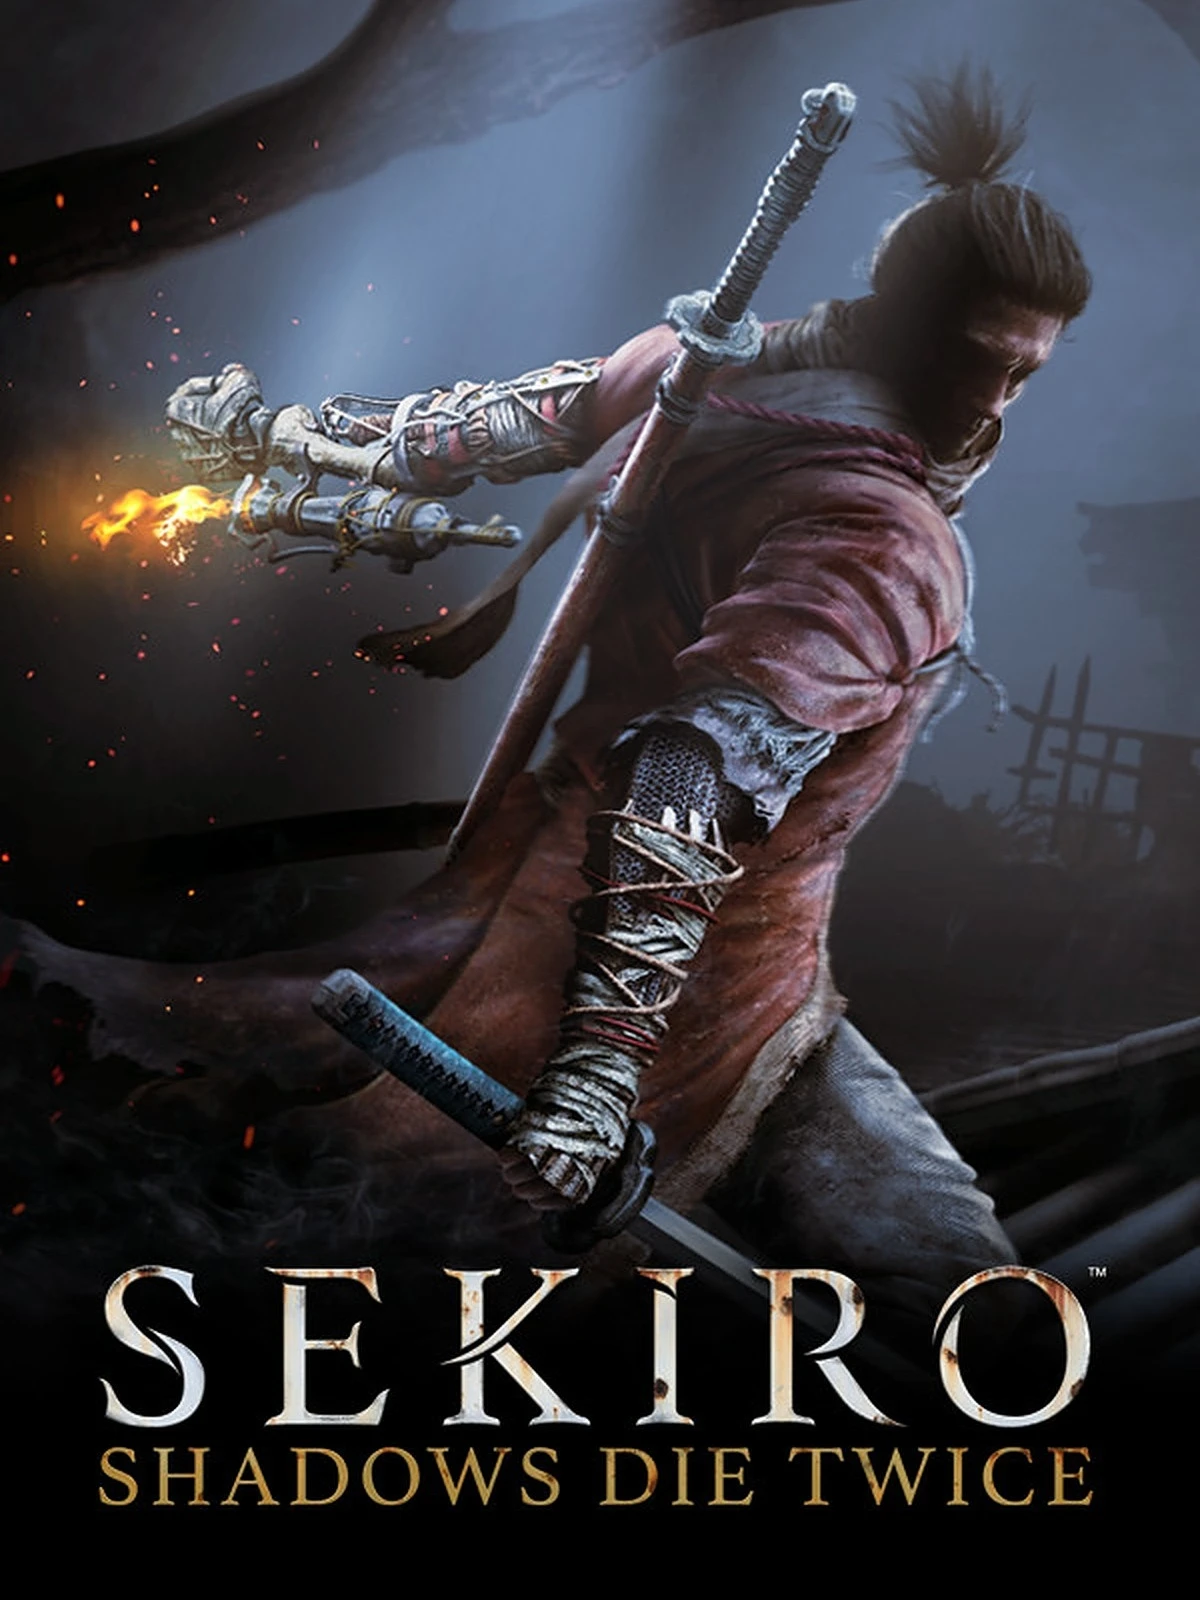
Find a copy
Sekiro: Shadows Die Twice PlayStation 4
We may earn a commission if you buy through these links, at no extra cost to you. As an Amazon Associate I earn from qualifying purchases.
Opens retailer search results. Check the model, edition, seller, availability and current price before buying.
Before you begin
You are the one-armed wolf.
This guide walks you through the PS4 edition of Sekiro: Shadows Die Twice from the opening rescue of the Divine Heir to the canonical main ending (Immortal Severance).
It emphasizes the progression order, crucial NPC quest checkpoints, prosthetic and skill priorities, and reliable approaches for every required boss encounter so you can finish the campaign without missing locked content.
Playstation controls and platform-specific UI cues are assumed (DualShock 4).
The guide separates required advancement from optional questlines that change endings.
Each chapter lists its objective order, where to return if you miss something, and clear completion checks so you always know whether you have the prerequisites to continue or unlock alternate endings.
Set yourself up for the run
Learn the four combat pillars: deflect, Mikiri Counter, dodge or step and posture management.
Prioritize Mikiri Counter, Breath of Life: Light, posture-focused Combat Arts such as Ichimonji: Double, and skills that improve attack follow-ups or prosthetic utility. Do not describe a nonexistent skill as improving the deflect window.
Use early minibosses and Hanbei the Undying to practice deflections, perilous-attack responses and Deathblows.
Equip and upgrade the Shinobi Prosthetic by returning tool components to the Sculptor.
Early useful tools include Shuriken, Axe, Firecrackers and Flame Vent; match each tool to the enemy or hazard it addresses.
Collect Prayer Beads and Gourd Seeds early. Four Prayer Beads form a Prayer Necklace, while each Gourd Seed increases Healing Gourd capacity when given to Emma.
Use Sculptor’s Idols to rest, fast-travel, change equipment and backtrack for missed permanent upgrades.
Understand resurrection rules and use resurrection strategically rather than treating it as an unlimited extra life.
Complete the Emma, Divine Child, Kuro and Owl-related quest stages before their late-game lockpoints if alternate endings are desired.
Before the final ending ritual, use a standard PS4 saved-data backup if you want to branch to multiple endings without replaying the entire campaign.
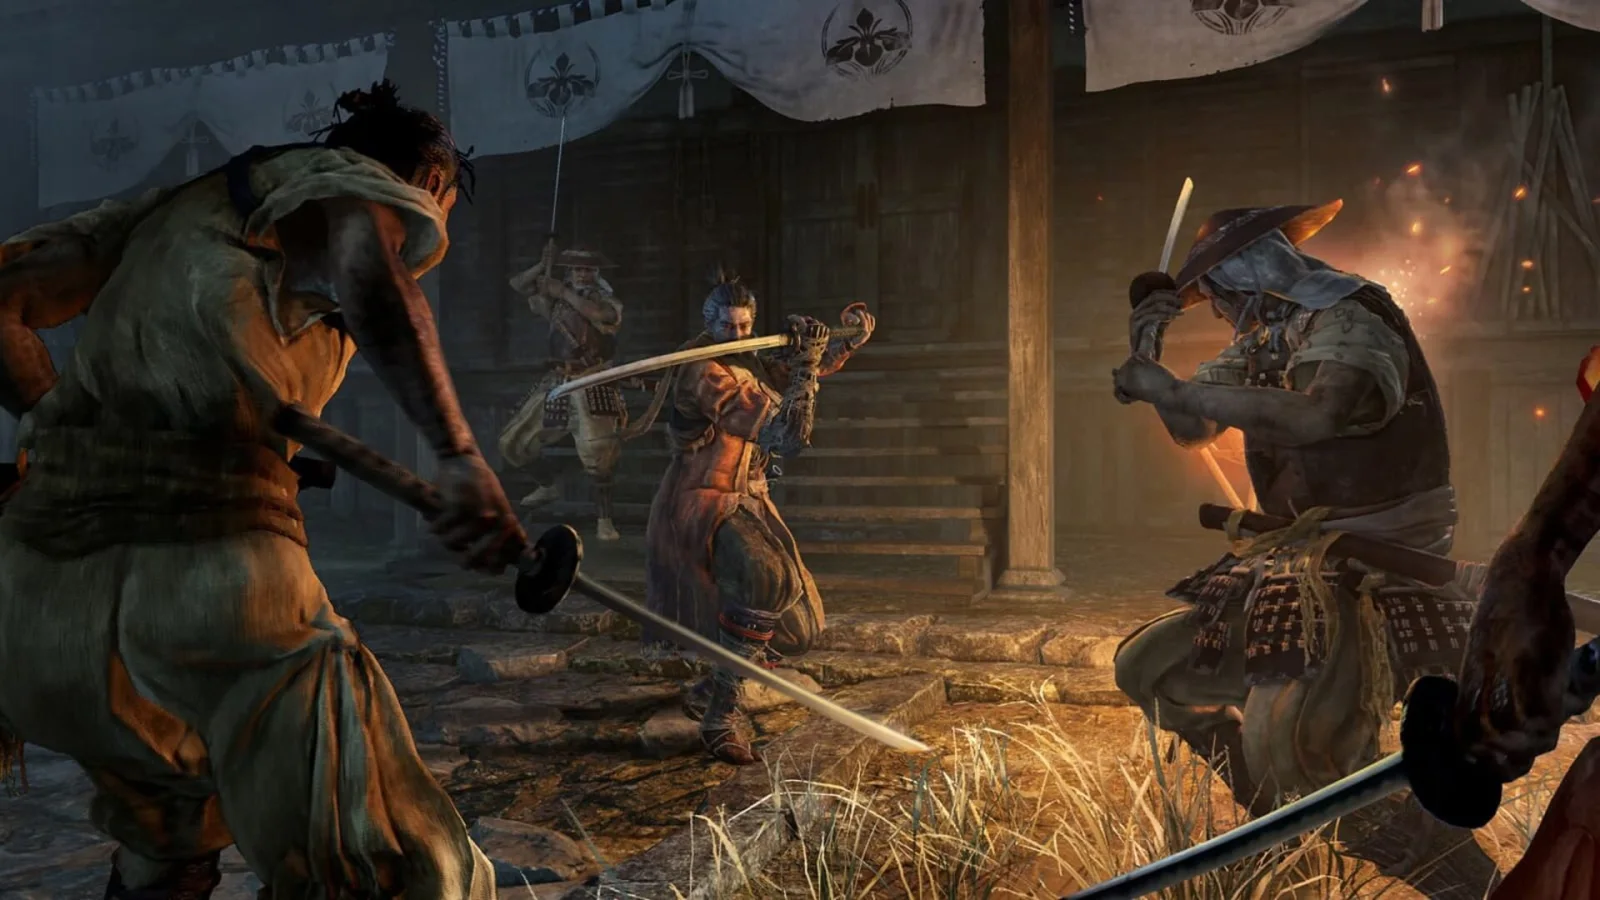
Preparation — Controls, Combat Basics and Early Priorities
Sekiro’s PS4 combat is built around attacking, deflecting and maintaining pressure rather than rolling away from every exchange. Learn the default DualShock 4 inputs, obtain the Shinobi Arts Esoteric Text from the Sculptor, and spend two skill points on Mikiri Counter as soon as the skill tree opens. Kuro provides the Healing Gourd during the prologue, while Emma increases its uses when you bring her Gourd Seeds. Early Prayer Beads, Gourd Seeds and prosthetic tools are more valuable than stockpiling currency. Fit each tool at the Dilapidated Temple, then use it for the specific enemy or situation it was designed to answer.
Learn the default PS4 controls before leaving the Dilapidated Temple
The standard DualShock 4 layout uses R1 for sword attacks and L1 for guard. Tap L1 immediately before an enemy strike lands to deflect; holding L1 guards but is less effective for posture damage. Circle performs a step or dash, and holding Circle while moving makes Wolf sprint. Cross jumps, while L3 makes Wolf crouch. R3 locks on to a nearby target, and the right stick changes targets while locked on. Square performs context actions, picks up placed items and, when held near defeated enemies, collects dropped loot.
Triangle cycles through fitted prosthetic tools, and R2 activates the selected tool. L2 uses the grappling hook when a green grapple marker is available. Press Up on the directional pad to use the selected quick item, and Left or Right to cycle items. Equip a Combat Art from the Equipment menu; then use it with L1 plus R1. Down on the directional pad is used for eavesdropping and certain other context actions. You can review or remap these inputs under Settings, but the directions in this guide assume the default arrangement.
- Lock on with R3 before beginning a serious duel.
- Test Square, Circle, Cross, L2 and R2 near the temple.
- Equip the Healing Gourd as the selected quick item.
Use attacks and deflections to control posture
Attack with R1 when the opponent is recovering, repositioning or failing to cover an opening. Even a blocked sword attack can damage enemy Posture, while an unblocked attack also reduces Vitality. When the enemy begins a response, return to L1 and deflect the incoming blows as they arrive. A successful deflection protects Wolf and adds posture damage to the opponent, often allowing you to win without first emptying the enemy’s health bar.
Vitality and Posture are linked. An enemy with high Vitality recovers Posture quickly, so safe attacks or prosthetic tools may be needed to lower that Vitality first. Once the enemy’s Vitality is reduced, keep attacking and deflecting instead of disengaging; continued pressure slows recovery. When the Posture gauge breaks, a red Deathblow marker appears. Press R1 while close enough to perform the execution. Elite enemies and bosses may require more than one marker.
Holding L1 is useful when you need to recover Wolf’s Posture, but do not confuse a held guard with a deflection. Circle is better for escaping a grab, changing position or avoiding an attack that is unsafe to deflect. It is not the normal answer to ordinary sword swings. If Wolf is knocked down, press Circle or Cross to perform a safety roll and reduce the time spent vulnerable.
- Practice alternating R1 attacks with L1 deflections.
- Watch both Vitality and Posture rather than relying on only one gauge.
- Press R1 promptly when a Deathblow marker appears.
Unlock Mikiri Counter correctly
After you obtain your first skill point, speak with the Sculptor at the Dilapidated Temple and receive the Shinobi Arts Esoteric Text. Rest at a Sculptor’s Idol and open Acquire Skills. Mikiri Counter is in the Shinobi Arts tree and costs two skill points, so do not assume that the first point alone unlocks it. Defeat low-risk enemies or finish a nearby exploration loop until you can purchase the skill.
When a red perilous symbol appears, identify the attack before responding. For a thrust, move toward the attacker and press Circle as the weapon is about to connect. Wolf steps onto the weapon and deals substantial Posture damage. A sweeping perilous attack must be avoided by jumping with Cross, while a grab generally requires stepping or dashing away. Practice these distinctions with Hanbei the Undying beside the Dilapidated Temple.
- Obtain the Shinobi Arts Esoteric Text from the Sculptor.
- Save two skill points for Mikiri Counter.
- Use Circle toward a thrust, Cross over a sweep and movement away from a grab.
Secure the Healing Gourd and early survivability upgrades
During the prologue, after reaching Kuro at the Moon-view Tower, speak with him to receive the Healing Gourd. Equip it through the Equipment menu and press Up on the directional pad to drink. Resting at a Sculptor’s Idol restores its available uses. If you find a Gourd Seed, bring it to Emma at the Dilapidated Temple; she adds another use to the Gourd. Give her available seeds rather than carrying them through dangerous areas.
Prayer Beads are obtained from selected minibosses and exploration rewards. Four Prayer Beads can be exchanged for a Prayer Necklace, which raises Wolf’s maximum Vitality and Posture. Take these upgrades whenever available while learning the game, because they increase the margin for error in both exploration and boss attempts. Rest at an Idol before a difficult fight to restore healing, health and available resurrection resources.
- Receive the Healing Gourd from Kuro at the Moon-view Tower.
- Give every early Gourd Seed to Emma when she is available.
- Exchange four Prayer Beads for a Prayer Necklace as soon as possible.
Fit prosthetic tools and protect currency before risky attempts
A tool component found in the world is not automatically usable. Return it to the Sculptor at the Dilapidated Temple, who installs it in the Shinobi Prosthetic. Use Triangle to select among fitted tools and R2 to activate the selected one. Spirit Emblems are consumed when prosthetic tools are used, so rest at an Idol before a planned boss attempt if your supply is low.
Treat each prosthetic as a situational answer. The Loaded Axe is a strong early response to shielded enemies, while other tools can interrupt, stun, control space or exploit a particular enemy weakness. Upgrade tools when the Sculptor offers an available branch and you have the materials, but do not postpone story progress to purchase every upgrade immediately.
Spend surplus sen before entering an area where death is likely. A true death removes half of your carried sen and half of your current progress toward the next skill point; already-earned skill points are not lost. Coin purses protect sen, and advancing to the next skill point before a difficult attempt protects the completed point even if the remaining progress is later lost.
- Return every newly found prosthetic component to the Sculptor.
- Keep a suitable tool equipped for the enemy type ahead.
- Spend or protect excess sen before a boss attempt.
- Reach the next skill point before risking a large amount of accumulated experience.
Before you move on
- The Shinobi Arts Esoteric Text has been obtained and Mikiri Counter has been purchased for two skill points.
- You can distinguish and answer a thrust, sweep and grab during Hanbei practice.
- Kuro has provided the Healing Gourd, Emma has received available Gourd Seeds, and the Gourd is equipped.
- At least one prosthetic tool has been installed by the Sculptor and can be activated with R2.
- You understand that sustained attacks, timely deflections, posture pressure and Deathblows are the normal route to victory.
References for this chapter
- Sekiro: Shadows Die Twice Game Mechanics — Activision Support
- SEKIRO: SHADOWS DIE TWICE — PS4 Web Manual: Controls
- Sekiro: Shadows Die Twice — FromSoftware PS4 Web Manual: Basic Actions
- SEKIRO: SHADOWS DIE TWICE Web Manual — PS4 Special Actions and Prosthetic Tools
- SEKIRO: SHADOWS DIE TWICE — PS4 Web Manual: Game Basics
- How to Unlock and Use Mikiri Counter in Sekiro: Shadows Die Twice
- Healing Gourd — Sekiro: Shadows Die Twice Wiki
Prologue & Ashina Outskirts — The First Steps
Escape the opening reservoir, rescue Lord Kuro, receive the Shinobi Prosthetic, and establish the first Ashina Outskirts checkpoints. This route teaches stealth, grappling, Deathblows, and safe retreat without requiring a difficult shortcut. Before continuing toward the Chained Ogre, activate the Gate Path and Stairway Idols, defeat General Naomori Kawarada for the first Prayer Bead and Gourd Seed, and collect the Shuriken Wheel so the Sculptor can install Loaded Shuriken. Hirata Estate is optional at this stage and can be entered after these objectives.
Escape the well and collect the Ornamental Letter
At the beginning, move through the shallow water in the reservoir and climb the wall using the visible handholds. Before leaving the starting well, turn toward the item on the ground and collect the Ornamental Letter. Open the inventory and read it; this early message establishes that Wolf has been contacted and must recover Lord Kuro.
Continue through the narrow passage and climb toward the Moon-view Tower. Use crouching and tall grass when the game introduces stealth. The first guards can be bypassed rather than defeated. Approach the tower, enter, and speak with Lord Kuro. Exhaust the available conversation and receive Kusabimaru. Follow Kuro toward the escape route, using the grapple points to cross the rooftops and walls.
- Collect the Ornamental Letter from the opening well.
- Read the letter from the inventory.
- Speak with Lord Kuro and receive Kusabimaru.
Cross the reservoir and complete the scripted duel
Leave the tower by following the elevated route toward the reservoir. Grapple between branches and ledges, then drop into the water when the route descends. Swim across and climb into the grass on the opposite side. Continue toward the broken bridge and the silver-grass field where Genichiro Ashina is waiting.
The duel with Genichiro is a scripted prologue encounter. Attack, guard, and deflect to learn the rhythm, but do not spend resources trying to force a victory. The encounter ends with Wolf’s defeat, the loss of his arm, and the transition to the Dilapidated Temple.
- Reach the silver-grass field without needing to defeat every guard.
- Treat the Genichiro fight as a scripted story event.
- Allow the cutscene to move Wolf to the Dilapidated Temple.
Wake at the Dilapidated Temple and activate the first Idol
Speak with the Sculptor inside the temple. He fits Wolf with the Shinobi Prosthetic and explains its basic functions. Step outside and activate the Dilapidated Temple Sculptor’s Idol immediately. This is the first permanent checkpoint and the central fast-travel location for the early game.
Speak with Emma near the temple. She will upgrade the Healing Gourd when you bring her Gourd Seeds, so return here whenever you obtain one. On the slope around the temple, find Hanbei the Undying. His practice fights are optional, but they are useful for learning deflections, Deathblows, jumping over sweeps, and the Mikiri Counter before committing to the outskirts.
- Activate the Dilapidated Temple Sculptor’s Idol.
- Speak with the Sculptor and Emma.
- Use Hanbei if you need a safe place to practice combat.
Enter Ashina Outskirts and activate Gate Path
Leave the temple and take the route to the left. Grapple across the gap, then follow the branches and ledges into Ashina Outskirts. You can use the upper route to pass over or behind many soldiers. When enemies are isolated, crouch behind them and press the attack button when the red Deathblow marker appears. After the execution, move back into cover instead of remaining in the patrol’s sightline.
Continue past the dogs and soldiers until you reach the Outskirts Wall—Gate Path area. Activate the Sculptor’s Idol on the ledge before pushing into the next courtyard. Rest there if you need to refill healing uses, reset enemies, or recover after a failed attempt. This Idol is the safest staging point for both the Shuriken Wheel and General Naomori Kawarada.
- Reach and activate the Outskirts Wall—Gate Path Idol.
- Perform at least one stealth Deathblow on a regular enemy.
- Use the Idol to reset the area before attempting the mini-boss.
Collect the Shuriken Wheel and install Loaded Shuriken
From the Gate Path Idol, look toward the nearby gatehouse. The building has a damaged upper section and a hole or broken wall that can be reached with the grapple. Enter the upper floor and collect the Shuriken Wheel from the corpse inside. The item is a prosthetic material, not the finished tool.
Return to the Dilapidated Temple through the Idol’s travel menu and give the Shuriken Wheel to the Sculptor. He installs Loaded Shuriken as a usable prosthetic tool. Equip it at any Idol and remember that each use consumes Spirit Emblems. Shuriken are especially useful against dogs, small agile enemies, and foes that jump away or take to the air.
- Enter the gatehouse beside the Gate Path Idol through its broken upper opening.
- Collect the Shuriken Wheel.
- Give it to the Sculptor and equip Loaded Shuriken.
Defeat General Naomori Kawarada and claim the first upgrades
General Naomori Kawarada waits in the courtyard beyond the Gate Path Idol. Before engaging him, eliminate or bypass the nearby soldiers so they cannot join the fight. From the surrounding rooftops, circle behind the general and perform a stealth Deathblow to remove one of his two health markers.
For the second marker, stay close and deflect his sword attacks rather than constantly retreating. Watch for his perilous attacks: jump over a sweep and move away from a grab. When his posture breaks, press the attack button at the red prompt to perform the finishing Deathblow. Defeating him awards both the first Prayer Bead and the first Gourd Seed. Give the Gourd Seed to Emma at the Dilapidated Temple. Save the Prayer Bead until you have four, then use a Sculptor’s Idol to create a Prayer Necklace and increase maximum Vitality and Posture.
- Remove nearby enemies before starting the mini-boss fight.
- Use a stealth Deathblow for the first health marker.
- Collect the Prayer Bead and Gourd Seed after victory.
- Give the Gourd Seed to Emma.
Activate the Stairway Idol and establish a safe stopping point
Continue from the Gate Path area toward the large fortified route and the Outskirts Wall—Stairway Sculptor’s Idol. Activate it before approaching the Chained Ogre. The Ogre is the next major obstacle, but defeating it is not required to complete this chapter’s opening objectives. If you attempt the fight, first clear the surrounding soldiers and use the nearby rooftops to approach safely.
The Dilapidated Temple, Gate Path, and Stairway Idols remain available as return points. You can now challenge the Ogre, enter the Hirata Estate memory through the appropriate NPC and bell-charm sequence, or return to the temple for upgrades. No speedrun route or sequence break is needed.
- Activate the Outskirts Wall—Stairway Idol.
- Clear or bypass the nearby soldiers before fighting the Chained Ogre.
- Confirm that Loaded Shuriken is installed and the Gourd Seed has been given to Emma.
Before you move on
- The Dilapidated Temple Idol is active and the Sculptor has installed the Shinobi Prosthetic.
- The Ornamental Letter was collected and read, and Lord Kuro gave Wolf Kusabimaru.
- The Outskirts Wall—Gate Path and Outskirts Wall—Stairway Idols are active.
- General Naomori Kawarada is defeated, with his Prayer Bead secured and Gourd Seed given to Emma.
- The Shuriken Wheel has been given to the Sculptor and Loaded Shuriken is available at an Idol.
References for this chapter
Hirata Estate (Memory) — Learning Boss Tools and Combat Flow
Use the Young Lord’s Bell Charm at the Buddha statue in the Dilapidated Temple to enter Hirata Estate, a memory of the attack three years earlier. The route introduces stealth, grappling, Mikiri Counter practice and prosthetic-tool use before Lady Butterfly tests deflect timing and posture control. Collect the Flame Barrel, Loaded Axe and Mist Raven Feathers if you want the early prosthetic tools, then defeat Shinobi Hunter Enshin and Juzou the Drunkard for two Prayer Beads. A third Prayer Bead is hidden behind a wall in the building beyond Juzou. Owl provides the Hidden Temple Key in the burning courtyard; use it after Juzou to reach Lady Butterfly. Against her, stay aggressive enough to preserve posture damage, deflect grounded strings, knock her from wires with shuriken and use Snap Seeds or pillar cover during her illusion phase. Victory awards Memory: Lady Butterfly and the Sakura Droplet. The memory remains available through its Idol, so you can leave, upgrade and return if the boss is currently beyond your limits.
Enter Hirata Estate and establish the first checkpoint
After receiving the Young Lord’s Bell Charm from the old woman in Ashina Outskirts, return to the Dilapidated Temple. Interact with the golden Buddha statue beside the Sculptor and choose to offer the charm. The memory begins at the Estate Path Sculptor’s Idol; rest there before advancing.
Move through the burning approach using rooftops, grapple points and tall grass. Lock onto isolated bandits and use stealth Deathblows from behind or above. If several enemies detect you, break line of sight by grappling to a roof or retreating into grass, then re-enter from a safer angle. You do not need to defeat every group before reaching the next checkpoint.
- Offer the Young Lord’s Bell Charm at the Dilapidated Temple Buddha.
- Rest at the Estate Path Sculptor’s Idol.
- Use rooftops and grass to separate enemies instead of fighting groups in the open.
Collect the prosthetic tools and Snap Seed
Search the early estate route and side paths for the Flame Barrel, Loaded Axe and Mist Raven Feathers. These are world pickups, not automatically installed abilities. Return to the Dilapidated Temple and speak with the Sculptor to fit each tool before relying on it. The Flame Barrel is useful against beasts and fire-sensitive targets, the Loaded Axe breaks wooden shields and deals strong posture damage, and Mist Raven is an evasive repositioning option.
Collect the Snap Seed found along the Hirata route and keep it for Lady Butterfly’s illusion phase. It is not required for ordinary estate enemies. If you leave the memory, items already collected remain collected, and you can return through the same Buddha statue.
- Collect Flame Barrel, Loaded Axe and Mist Raven Feathers if you want the optional early tools.
- Return to the Sculptor so the tools can be installed.
- Reserve Snap Seed for Lady Butterfly’s second phase.
Defeat Shinobi Hunter Enshin of Misen
Follow the main path through the bamboo area toward the bridge and long stairway. Before challenging Shinobi Hunter Enshin of Misen, remove the nearby ranged and melee guards so they cannot attack during the duel. If the area becomes chaotic, retreat down the approach, wait for enemies to reset, and return.
Enshin is an important Mikiri Counter lesson. When the red perilous-attack symbol appears and his spear thrust comes toward you, step into the attack with Circle rather than dodging backward. Deflect his ordinary spear swings with L1 and stay close enough that his posture does not recover completely. Defeating him awards a Prayer Bead.
- Clear the guards around the bridge and stairway.
- Use Mikiri Counter against Enshin’s thrusts.
- Collect the Prayer Bead after victory.
Cross the estate and defeat Juzou the Drunkard
Continue past the burning buildings to the pond and the large entrance guarded by Juzou the Drunkard. Thin the nearby soldiers before engaging him. You can clear enemies inside the adjacent buildings, then draw Juzou away from the remaining group. A blue-robed samurai, Nogami Gensai, stands near the water; speak with him so he can assist, or lure Juzou toward him after the fight begins.
Juzou’s broad attacks are slow enough to deflect, but poison and fire hazards punish careless extended exchanges. Keep him between Wolf and other enemies, deflect the end of his attack strings, and strike during recovery. If you use Gensai, let him draw Juzou’s attention before attacking from the side or rear. Juzou awards a Prayer Bead and Unrefined Sake.
- Remove the surrounding guards before starting the duel.
- Use Nogami Gensai as optional support.
- Collect Juzou’s Prayer Bead and Unrefined Sake.
Find the hidden Prayer Bead and obtain Owl’s key
After Juzou is defeated, enter the large building he guarded and activate the Hirata Audience Chamber Sculptor’s Idol. Before going to the boss, explore the corridor and rooms near the Idol. In the corridor with an archer and swordsman, find the wall displaying a scroll and press against it to reveal a hidden room. Open the chest inside for the third Prayer Bead associated with the standard Hirata memory.
Return toward the burning courtyard and locate Owl, who is standing beyond the bridge near the estate’s main approach. Speak with him to receive the Hidden Temple Key. This key is required; the door leading to Lady Butterfly will not open without it. After obtaining it, rest at the Audience Chamber Idol and prepare your prosthetic loadout.
- Activate the Hirata Audience Chamber Idol.
- Open the hidden wall room near the corridor with the scroll and take its Prayer Bead.
- Speak with Owl in the burning courtyard and receive the Hidden Temple Key.
Open the Hidden Temple and prepare for Lady Butterfly
From the Hirata Audience Chamber Idol, follow the passage toward the room where the estate route ends. Use the Hidden Temple Key on the locked door below the corridor. The passage leads to Lady Butterfly’s arena.
Equip Loaded Shuriken and Prosthetic Firecrackers if available. Shuriken are the important tool for knocking Lady Butterfly from her wires. Firecrackers can interrupt her briefly and help you regain initiative, but the fight is won through deflects, controlled attacks and posture pressure rather than repeated tool use. Keep healing items available and rest at the Idol before entering.
- Use the Hidden Temple Key on the locked door beyond the Audience Chamber.
- Equip shuriken before entering the arena.
- Equip Firecrackers if you have them, but do not rely on them instead of deflecting.
Defeat Lady Butterfly’s two phases
Stay near Lady Butterfly when she is on the ground. Deflect her normal strings with L1 and answer with a few attacks when her sequence ends. Avoid backing away for the entire fight, because excessive distance lets her posture recover. When she jumps onto a wire, watch for her launch. Throw a shuriken as she leaves the wire to knock her down and create a brief punish window. If she begins a perilous overhead grab, move away rather than trying to block it.
After the first Deathblow, she summons illusionary enemies. Sprint around the outside of the room if you need to avoid being surrounded. Use a Snap Seed when the apparitions are close enough to be caught, or wait for them to disappear and then hide behind one of the wooden pillars when the resulting homing projectiles cross the arena. Firecrackers can interrupt Lady Butterfly during this phase. Resume close pressure, deflect grounded attacks and use shuriken against wire launches until the second Deathblow becomes available.
- Deflect grounded strings and attack during her recoveries.
- Knock her from wires with shuriken.
- Use Snap Seed or pillar cover against the illusion phase.
- Perform both Deathblows.
Take the rewards and decide whether to continue the campaign
Lady Butterfly awards Memory: Lady Butterfly and the Sakura Droplet. At any Sculptor’s Idol, select the Memory to increase Attack Power. The Sakura Droplet is not consumed at the boss arena. After later story progression makes the hand-in available, it can be given to Kuro or the Divine Child to increase Wolf’s resurrection capacity by one.
Defeating Lady Butterfly does not automatically transport Wolf back to present-day Ashina. When you are ready to leave, use the memory’s Sculptor’s Idol and travel to another unlocked Idol. Hirata Estate can be revisited, so leaving is safe if you want more Healing Gourd uses, prosthetic upgrades or combat experience before attempting the boss again.
- Use Memory: Lady Butterfly at a Sculptor’s Idol.
- Keep the Sakura Droplet until Kuro or the Divine Child can receive it later.
- Leave through an Idol when ready; do not wait for an automatic return scene.
- Confirm that the three standard Hirata Prayer Beads, if pursued, are in your inventory or have been used toward a Prayer Necklace.
Before you move on
- Young Lord’s Bell Charm has been offered at the Dilapidated Temple Buddha and Hirata Estate is available from the travel menu.
- Flame Barrel, Loaded Axe and Mist Raven Feathers have been collected if the optional prosthetic pickups are being pursued and the Sculptor has installed the desired tools.
- Shinobi Hunter Enshin of Misen and Juzou the Drunkard are defeated, with their Prayer Beads collected.
- The hidden wall room near Hirata Audience Chamber has been opened and its Prayer Bead collected.
- Owl has provided the Hidden Temple Key and the key has opened the route to the boss.
- Lady Butterfly has been defeated with two Deathblows.
- Memory: Lady Butterfly has been converted into an Attack Power increase at a Sculptor’s Idol.
- Sakura Droplet is in the inventory or has later been handed to Kuro or the Divine Child for the additional resurrection capacity.
- The player can leave and revisit the memory through its Idol without treating the area as permanently closed.
Ashina Reservoir & Early Mini-Bosses — Gyoubu and Turning Points
Follow the Ashina Outskirts route through Outskirts Wall — Gate Path, the Chained Ogre and the ravine leading to Ashina Castle Gate. General Naomori Kawarada and General Tenzen Yamauchi provide optional early Prayer Beads, while the Ogre is part of the intended route. Defeat Gyoubu Masataka Oniwa to obtain his Memory and Mechanical Barrel, then use the new castle access to continue toward the Blazing Bull and Ashina Castle. The nearby Gourd Seeds, Prayer Beads, Loaded Shuriken and Shinobi Firecrackers are valuable but not all are required before the boss.
1. Clear Outskirts Wall — Gate Path
From the Outskirts Wall — Gate Path Sculptor’s Idol, move through the broken gatehouse and use the rooftops to scout the courtyard. The Loaded Shuriken Wheel is in an opening along the early wall section. Pick it up, then return to the Dilapidated Temple so the Sculptor can install the Loaded Shuriken prosthetic tool.
General Naomori Kawarada stands in the courtyard beyond the idol. Eliminate nearby soldiers first, then approach from the rooftops or the rear for a stealth Deathblow. Fight his remaining marker with guard, deflects and ordinary sword pressure. Defeating him gives both a Prayer Bead and the first Gourd Seed; give the Seed to Emma at the Dilapidated Temple to increase Healing Gourd uses.
- Collect and install the Loaded Shuriken.
- Defeat Kawarada for his Prayer Bead and Gourd Seed, or return later if necessary.
- Speak with Emma after obtaining the Gourd Seed.
2. Reach and defeat the Chained Ogre
Travel to the Outskirts Wall — Stairway Idol and rest before approaching the Chained Ogre. Remove the nearby soldiers first so they do not join the fight. When the Ogre breaks free, stay mobile around its front and sides. Its grabs are marked by the red perilous symbol and must be avoided rather than blocked; jump or run clear when necessary.
The Flame Vent from Hirata Estate can make this encounter easier, but it is not required. Deflect ordinary kicks and strikes when you can, then punish the recovery after a missed grab, leap or dropkick. After the Ogre is defeated, enter the large gatehouse above and behind its arena. The second Gourd Seed is on the floor inside; collect it and take it to Emma.
- Activate the Stairway Idol before beginning the fight.
- Avoid the Ogre’s red-symbol grabs instead of attempting to deflect them.
- Search the gatehouse above the Ogre for the second Gourd Seed.
- Claim the Ogre’s Prayer Bead.
3. Decide whether to fight General Tenzen Yamauchi
Continue through the area beyond the Ogre and use stealth to remove ordinary soldiers around General Tenzen Yamauchi. Hide in grass, on rooftops or behind walls until the alert state clears, then approach Tenzen from behind for one Deathblow. His second marker is a conventional sword fight; deflecting his deliberate swings is safer than retreating into the surrounding enemies.
Tenzen’s Prayer Bead is a permanent upgrade, but this mini-boss is not required to reach Gyoubu. If the fight is consuming healing items or resurrection charges, leave him and proceed. You can return later through the same route.
- Clear the courtyard before engaging Tenzen.
- Use a stealth Deathblow whenever possible.
- Treat Tenzen as an optional early upgrade rather than a progression requirement.
4. Cross the ravine and reach Ashina Castle Gate Fortress
From the path beyond Tenzen, grapple across the ravine and follow the route toward the serpent encounter. Use the marked grapple points and hide in the designated spaces when the serpent searches for Wolf. Continue until you reach the Ashina Castle Gate Fortress Sculptor’s Idol.
Rest there before entering the battlefield. You may equip Loaded Shuriken and Shinobi Firecrackers, but neither is mandatory. The broad battlefield ahead is Gyoubu’s arena. The soldiers around the fortress can be avoided or cleared from the edges; do not waste healing items fighting them immediately before the boss.
- Commune with the Ashina Castle Gate Fortress Idol.
- Stock Healing Gourd uses and resurrection before entering the arena.
- Equip Firecrackers if you purchased them from the Crow’s Bed Memorial Mob.
5. Defeat Gyoubu Masataka Oniwa
Stay within a useful combat distance of Gyoubu instead of repeatedly retreating to the arena wall. Most of his spear swings can be deflected. When he charges directly at Wolf, face him and deflect as he reaches you. When the red perilous symbol accompanies a broad sweep, jump over it; reserve Mikiri Counter for a true forward thrust.
When the green grapple indicator appears on Gyoubu’s spear, grapple to it. This closes the distance, damages his posture and gives you a short opportunity to attack. Shinobi Firecrackers can interrupt the horse and create a brief opening, but return to deflecting once the interruption ends. Loaded Shuriken are useful when he creates distance, not as a replacement for close-range posture combat.
Gyoubu has two Deathblow markers. Maintain pressure after the first Deathblow instead of backing away to heal automatically. If you die, revive only when you can realistically continue the attempt; otherwise return to the Idol and begin again with the battlefield reset.
- Deflect charges and spear strings while facing Gyoubu.
- Jump his broad sweep and Mikiri Counter his forward thrust.
- Grapple to the spear when the green indicator appears.
- Use Firecrackers for controlled interruptions.
- Perform both Deathblows and collect the Memory and Mechanical Barrel.
6. Open the castle route and collect nearby upgrades
After Gyoubu’s defeat, commune with the Ashina Castle Gate Idol and cross the battlefield toward the large building. The next main-route obstacle is the Blazing Bull, which must be defeated before the normal approach into Ashina Castle. The Bull awards another Prayer Bead, but it is a separate encounter from Gyoubu and can be covered with the castle approach.
Before leaving the fortress, grapple through the rafters of the building associated with the Tengu of Ashina and climb to the attic chest for an additional Prayer Bead. The Battlefield Memorial Mob near the pagoda also becomes useful after Gyoubu, including a purchasable Gourd Seed if you have enough Sen.
Take the Mechanical Barrel to the Sculptor at the Dilapidated Temple. It unlocks the prosthetic upgrade tree, allowing materials and Sen to improve tools. You do not need every Outskirts mini-boss or item before proceeding; Gyoubu’s defeat and access to the castle route are the essential chapter goals.
- Ashina Castle Gate Idol is active.
- Mechanical Barrel has been delivered to the Sculptor or is ready to deliver.
- The attic Prayer Bead has been collected if desired.
- The Blazing Bull is the next required obstacle on the castle approach.
Before you move on
- Gyoubu Masataka Oniwa has been defeated and his Memory collected.
- The Mechanical Barrel has been obtained and delivered to the Sculptor, unlocking prosthetic upgrades.
- The Ashina Castle Gate Sculptor’s Idol is active.
- The route toward the Blazing Bull and Ashina Castle is open.
- Recommended optional upgrades include the Prayer Beads from Kawarada, the Chained Ogre, Tenzen and the attic chest, plus the first two Ashina Outskirts Gourd Seeds.
Ashina Castle — Genichiro and the First Major Tests
After defeating Gyoubu Oniwa, pass through the opened castle gate and climb the rooftops into Ashina Castle. Activate the Ashina Castle, Upper Tower Antechamber and Ashina Dojo Sculptor’s Idols while collecting the castle’s Gourd Seed, Sabimaru tool and accessible Prayer Beads. The castle teaches sustained close-range pressure against stronger samurai and introduces the Ashina Elite’s rapid draw attacks. Genichiro Ashina waits on the highest rooftop. Defeat his two sword phases and Way of Tomoe lightning phase through deflects, Mikiri Counters, jumps over sweeps and lightning reversals. Afterward, speak with Kuro and Emma, then follow Kuro’s instructions toward the Mortal Blade, the Lotus of the Palace and the Shelter Stone.
Reach the castle entrance from Gyoubu’s battlefield
Travel to the Ashina Castle Gate Fortress Sculptor’s Idol, the Idol near Gyoubu Oniwa’s arena. Go through the large gate that opens after Gyoubu’s defeat and climb the stairs beyond it. The route leads into the castle approach, where riflemen and a strong general guard the main stairs.
You do not need to defeat every soldier. Use the rooftops and grappling points to approach from above, removing isolated enemies with stealth deathblows. If you want an early permanent upgrade, stealth the general on the stairs before engaging his remaining health bar. Defeating General Kuranosuke Matsumoto awards a Prayer Bead, but he is optional and can be left for later.
Continue around the upper rooftops rather than trying to force the front doors from ground level. Cross toward the central castle structure, using the moat and tall roofline as landmarks. Grapple into the opening beneath the purple banners to enter the Upper Tower route.
- Start from the Ashina Castle Gate Fortress Idol.
- Use rooftops to bypass or separate the castle guards.
- Defeat General Kuranosuke Matsumoto only if you want his Prayer Bead now.
- Enter the central tower through the rooftop opening.
Activate Upper Tower Antechamber and collect the first castle upgrades
Inside the upper tower, look for the Gourd Seed chest before moving deeper into the building. Activate the Upper Tower Antechamber Sculptor’s Idol immediately afterward. This is the main checkpoint for the approach to Genichiro and makes repeated attempts much shorter.
From the Antechamber Idol, drop through the interior of the tower and explore the lower room. A chest there contains the Sabimaru Shinobi Prosthetic Tool. Return to an Idol and have the Sculptor install it before using it. Sabimaru is a complete tool, not a blueprint, so no separate fitting plan is needed.
The Antechamber also contains a hidden Prayer Bead. Look for the wall panel between the displayed suits of armor; it is a shinobi wall that rotates when hugged. Open the hidden room and take the chest. These upgrades are optional for Genichiro but are worthwhile if you are still learning the combat rhythm.
- Collect the Gourd Seed near the Antechamber approach.
- Rest at Upper Tower Antechamber.
- Take Sabimaru from the lower tower chest if desired.
- Open the shinobi wall between the armor displays for the hidden Prayer Bead.
Climb through the castle interior and reach the dojo
From Upper Tower Antechamber, move through the rooms occupied by blue-robed Ashina soldiers. Use stealth to remove one enemy before fighting another; several can punish healing or interrupt attacks when grouped. Follow the interior stairs and grapple through the ceiling opening when the normal passage appears to end.
Continue through the upper rooms until you reach Upper Tower Ashina Dojo. Activate its Sculptor’s Idol before entering the rooftop route. The dojo contains Ashina Elite — Jinsuke Saze, whose fast draw attacks are a direct test of deflect timing. Stay close, watch his hands and tap guard as the draw begins. Repeated successful deflects quickly damage his posture. Defeating him awards another Prayer Bead, but he can be postponed if the fight is consuming healing items.
After the dojo, climb through the window and grapple upward across the tower roofs. The highest rooftop is the Genichiro arena. Rest at the Idol and prepare a healing supply before crossing onto it.
- Activate Upper Tower Ashina Dojo.
- Defeat Jinsuke Saze for his Prayer Bead or return later.
- Use the rooftop above the dojo to reach Genichiro’s arena.
Defeat Genichiro’s sword phases
Genichiro’s first two phases reward the same approach: remain close, attack until he deflects, then answer his retaliation with your own deflects. Do not spend the entire fight dodging away. Sustained pressure prevents his posture from recovering and limits his bow use.
When he raises his sword and jumps, prepare for the landing attack and its follow-up. A red perilous symbol followed by a forward thrust is a Mikiri Counter opportunity. If he sweeps low instead, jump over the blade and press jump again to stomp his posture. Learn the difference from the weapon’s path rather than reacting to the symbol alone.
His bow shots can be blocked or deflected, but close the distance afterward. If you need to heal, create space only after a completed attack string and use a pillar or the arena edge for cover. Holding guard briefly restores posture more safely when your vitality is healthy; do not retreat so far that Genichiro resets his posture.
After each posture break, perform the Deathblow and immediately resume the same close-range rhythm. The second sword phase is more aggressive, but it uses the same essential responses: deflect strings, Mikiri thrusts and jump sweeps.
- Attack until Genichiro deflects, then prepare for his counterattack.
- Use Mikiri Counter on thrusts and jump over sweeps.
- Heal behind cover or after a finished exchange.
- Perform both sword-phase Deathblows.
Handle Way of Tomoe and reverse lightning
After the second Deathblow, Genichiro enters the Way of Tomoe phase. His sword attacks remain deflectable, and his thrusts and sweeps still require Mikiri Counters or jumps. He also adds lightning attacks, which are the main new hazard.
When lightning forms and Genichiro launches the attack, jump so that the lightning strikes you while you are airborne. Before touching the ground, press the attack button to send the lightning back. A successful reversal damages and stuns him, giving you time to attack. Do not wait until after landing, and do not treat a normal ground guard as the reversal.
If you miss the timing, prioritize survival: land, guard the next sword attack and recover your position. You can still defeat this phase through ordinary deflects and Mikiri Counters, although successful reversals shorten the fight and create safer openings. Save your resurrection for a genuine fatal mistake rather than spending it to recover from every failed reversal.
Break his posture, perform the final Deathblow and watch the complete scene before leaving the rooftop.
- Jump when Genichiro launches a lightning attack.
- Press attack while airborne after being struck to reverse the lightning.
- Continue using deflects, Mikiri Counters and sweep jumps.
- Perform the final Deathblow and finish the rooftop sequence.
Follow Kuro’s instructions after victory
Collect Genichiro’s Memory after the fight. The post-boss sequence moves you into the castle’s upper rooms, where you can activate the Castle Tower Lookout and Upper Tower — Kuro’s Room Sculptor’s Idols. Speak with Emma, then speak with Kuro and exhaust his available conversations. Follow the prompts involving the incense and the next stage of the Dragon’s Heritage investigation.
Kuro’s next objectives point you toward three major items: the Mortal Blade in Senpou Temple, the Lotus of the Palace in Sunken Valley and the Shelter Stone in Ashina Depths. These regions are not newly created by Genichiro’s defeat; their entrances may already be available, and the boss simply advances the narrative instructions that tell you what to seek.
Before leaving, use the castle rooftops to reach Isshin Ashina’s room when the game directs you there. Follow the smoke signals from Kuro’s room and exhaust Isshin’s dialogue. This conversation helps establish the next objective and prevents confusion when the castle route branches.
- Collect Genichiro’s Memory.
- Activate Castle Tower Lookout and Upper Tower — Kuro’s Room Idols.
- Speak with Emma, Kuro and Isshin when prompted.
- Record the three next objectives: Mortal Blade, Lotus of the Palace and Shelter Stone.
Before you move on
- Genichiro Ashina has been defeated and his Memory has been collected.
- Upper Tower Antechamber and Upper Tower Ashina Dojo Idols have been activated.
- The Gourd Seed, hidden Antechamber Prayer Bead and Sabimaru have been collected if desired.
- Jinsuke Saze and General Kuranosuke Matsumoto have been defeated if their optional Prayer Beads were pursued.
- Kuro and Emma have been spoken to after the rooftop battle, and the objectives for the Mortal Blade, Lotus of the Palace and Shelter Stone are available.
- The player can reach Kuro’s Room and Isshin’s room without repeating the entire climb from the castle entrance.
Senpou Temple, Mount Kongo — The Midgame Skill Check
Reach Senpou Temple through the Abandoned Dungeon, climb through Shugendo and Temple Grounds, and activate the Main Hall route. Use roofs, branches and grapple points to divide monk patrols, then defeat Armored Warrior and Long-arm Centipede Sen’un for permanent Prayer Bead upgrades. Explore the cave beside Main Hall for the Senpou Esoteric Text, then activate the altar and defeat the Folding Screen Monkeys to receive the Mortal Blade and Puppeteer Ninjutsu. Afterward, begin the Divine Child’s Return-ending quest by advancing her Rice, Holy Chapter and Serpent Viscera stages. The Large Fan is not in Senpou Temple; it is found at the Gun Fort shrine after Long-arm Centipede Giraffe in Sunken Valley. Finish the Divine Child’s quest and obtain Frozen Tears before defeating the Divine Dragon.
1. Enter Senpou Temple and climb through Shugendo
From the Abandoned Dungeon, follow the upward route into Senpou Temple, Mount Kongo and activate the Senpou Temple, Mt. Kongo Sculptor’s Idol. Continue toward Shugendo, resting at each Idol. The monks occupy stairs, bridges, rooftops and courtyards, but you do not need to clear every group. Crouch through grass, grapple to branches and use roofs to approach isolated enemies from above for stealth Deathblows.
Loaded Shuriken is useful against dogs and other small targets. When several monks detect Wolf, retreat to a broad platform or the previous Idol rather than fighting beside a drop. Senpou’s narrow paths make missed deflects especially dangerous, and a fall can be more damaging than the enemies themselves.
The Mid-air Prosthetic skill is useful here if you have unlocked it. It allows prosthetic tools to be used during jumps or from grapple approaches, which can help start fights against exposed monks, dogs or other vulnerable targets. It is an enhancement, not a requirement for completing the area.
- Activate the Senpou Temple, Mt. Kongo and Shugendo Idols.
- Use roofs, branches and grapple points to divide patrols.
- Keep major fights away from cliff edges and narrow bridges.
2. Defeat Armored Warrior on the Shugendo bridge
Continue past the Shugendo Idol until you reach the large bridge occupied by Armored Warrior. His armor prevents normal sword attacks from being a practical way to finish the encounter. Deflect his sword swings to raise posture, then keep him near the bridge railing. When his posture breaks and the Deathblow prompt appears, perform the Deathblow while he is positioned beside the edge so Wolf can kick him through the railing.
Watch his forward pressure and avoid being pushed toward the center of the bridge. If you lose control of the position, create distance, let him approach again and resume deflecting rather than attacking recklessly. His confirmed reward is a Prayer Bead. The combat encounter does not itself grant Breath of Nature: Shadow; acquire skills from the appropriate skill tree at Sculptor’s Idols.
Activate the Idol on the far side of the bridge before moving toward Temple Grounds. A pond in this wider region contains another Prayer Bead, but it cannot be collected until you have Mibu Breathing Technique from the Corrupted Monk in Ashina Depths.
- Defeat Armored Warrior by breaking his posture beside the railing.
- Collect the Prayer Bead he drops.
- Activate the Idol beyond the bridge.
- Return later for the underwater pond Prayer Bead after learning Mibu Breathing Technique.
3. Reach Temple Grounds and defeat Long-arm Centipede Sen’un
At the Temple Grounds Idol, move forward through the wolf and monk patrols, then grapple across the rooftops. Drop from the roof into the lower building with the opening in its ceiling. Clear nearby supporting enemies before concentrating on Long-arm Centipede Sen’un; the surrounding clawed enemies can interrupt the fight if left active.
Sen’un’s repeated claw sequence is best handled with consecutive deflects. His posture rises quickly when the rhythm is maintained. Jump over his perilous sweep rather than trying to block it, and use a Deathblow from above if you can safely begin the encounter that way. Defeating him awards a Prayer Bead.
The building and nearby Senpou route do not contain the Large Fan. The Large Fan is found later at the Gun Fort shrine in Sunken Valley, after defeating Long-arm Centipede Giraffe. Pick it up at the shrine and return it to the Sculptor to install Divine Abduction.
- Defeat Long-arm Centipede Sen’un.
- Collect his Prayer Bead.
- Clear the room before attempting repeated deflects.
- Remember that the Large Fan comes from Gun Fort, not Sen’un’s building.
4. Search the pond, Main Hall and Senpou cave
From Temple Grounds, inspect the pond below the Idol when you have Mibu Breathing Technique. Dive to collect the underwater Prayer Bead. Depending on when you reach the area, Holy Chapter: Infested is either obtained from the priest in Main Hall or found in the same pond after the relevant story progression. If the priest is no longer present, check the pond instead.
Reach the Main Hall Idol and search the cave through the side route beside the hall. The passage contains centipede enemies and leads to a concealed building with the Senpou Esoteric Text. Collecting it unlocks the Temple Arts skill tree at Sculptor’s Idols. Optional loot around Main Hall includes upgrade materials and healing-related supplies; take it when safe, but it is not required to reach the Mortal Blade.
The Large Fan is not an optional Senpou pickup. If you want that tool, travel to Sunken Valley and defeat Long-arm Centipede Giraffe at Gun Fort, then take the fan from the shrine behind the arena.
- Collect the underwater Prayer Bead after obtaining Mibu Breathing Technique.
- Check Main Hall or the Temple Grounds pond for Holy Chapter: Infested.
- Collect the Senpou Esoteric Text in the cave route.
- Obtain the Large Fan separately at Gun Fort if desired.
5. Defeat the Folding Screen Monkeys and receive the Mortal Blade
After the required story progress makes the Main Hall altar usable, interact with it to enter the Hall of Illusions. The Folding Screen Monkeys are a pursuit puzzle rather than a conventional duel. Use the rooftops, buildings and sound cues to cut off their escape routes instead of chasing them in open ground.
The green monkey is commonly intercepted across the upper platforms. The orange monkey can be cornered inside a building. Approach the purple monkey from behind when its route allows a stealth Deathblow. Ring the bell to help reveal the invisible monkey, then turn around and attack the space behind Wolf when its presence is exposed. The exact order can vary as the monkeys move, so use the environment rather than relying on a fixed chase path.
After all four monkeys are defeated, speak with the Divine Child in the Inner Sanctum. The reward sequence grants the Mortal Blade and Puppeteer Ninjutsu. The Mortal Blade is required for later story progression, while Puppeteer Ninjutsu is also useful for manipulating certain enemies and environmental mechanisms.
- Activate the Hall of Illusions from the Main Hall altar.
- Defeat all four Folding Screen Monkeys.
- Receive the Mortal Blade.
- Confirm that Puppeteer Ninjutsu is available.
6. Start and complete the Divine Child checkpoints for Return
After receiving the Mortal Blade, speak with the Divine Child repeatedly until she gives Wolf Rice. Use the Rice, leave the Inner Sanctum and return after resting or traveling so her dialogue advances. Continue until she becomes ill, then give her a Persimmon or Taro Persimmon to progress the recovery conversation.
When she gives Rice intended for Kuro, take it to Kuro in his room. Advance the dialogue and reload the area as needed until the Divine Child provides Kuro’s Sweet Rice Ball. Use the Sweet Rice Ball and report the result to the Divine Child. Give her Holy Chapter: Infested. If you obtained it from the Main Hall priest, hand it over directly; otherwise retrieve it from the Temple Grounds pond after learning to dive.
After the quest advances, obtain Holy Chapter: Dragon’s Return from the concealed cave route near Main Hall and deliver it to the Divine Child when she is in the Inner Sanctum. Follow her instructions to obtain Fresh Serpent Viscera and Dried Serpent Viscera, then give both items to her. Continue resting, speaking with her and checking the Inner Sanctum until the remaining dialogue and eavesdrop stage advances and she gives you Frozen Tears.
Complete this sequence before defeating the Divine Dragon in Fountainhead Palace. The Divine Dragon’s Tears are obtained automatically after that boss, but Frozen Tears must already be secured for the Return ending. These preparations are optional for the standard campaign and do not prevent you from continuing if you only want Immortal Severance.
- Advance the Rice and Persimmon conversations.
- Deliver Rice to Kuro and use the resulting Sweet Rice Ball.
- Give Holy Chapter: Infested to the Divine Child.
- Deliver Holy Chapter: Dragon’s Return.
- Deliver Fresh Serpent Viscera and Dried Serpent Viscera.
- Obtain Frozen Tears before defeating the Divine Dragon.
Before you move on
- Armored Warrior and Long-arm Centipede Sen’un are defeated and their Prayer Beads have been collected.
- The Main Hall and Temple Grounds Idols are active.
- The Senpou Esoteric Text has been collected.
- The Folding Screen Monkeys are defeated.
- The Mortal Blade and Puppeteer Ninjutsu are secured.
- The Divine Child has advanced through Rice, the Persimmon recovery, Holy Chapter: Infested, Holy Chapter: Dragon’s Return and both Serpent Viscera deliveries.
- Frozen Tears is in the key-item inventory before entering the Divine Dragon fight.
- If the Large Fan is wanted, it has been collected from the Gun Fort shrine and installed as Divine Abduction.
References for this chapter
- Sekiro: Shadows Die Twice – Senpou Temple, Mt. Kongo Walkthrough
- Walkthrough: Senpou Temple, Mt. Kongo – Sekiro: Shadows Die Twice
- Sekiro Shadows Die Twice: Senpou Temple Walkthrough
- Sekiro Guide: Here’s How To Unlock The Four Endings
- SEKIRO | How to Get the Return Ending — Procedure Walkthrough
- Sekiro – All Prosthetic Tools Locations
- SEKIRO | How To Beat Long-Arm Centipede Sen’un
Ashina Depths, Sunken Valley & Hidden Paths — Midgame Openings
After defeating Genichiro Ashina, obtain the Gun Fort Shrine Key from Kuro’s opened library, then complete the Sunken Valley and Ashina Depths routes in either practical order. The required objectives are the Mortal Blade from Senpou Temple, the Lotus of the Palace from Guardian Ape and the Shelter Stone beyond the Corrupted Monk in Mibu Village. This chapter covers Snake Eyes Shirafuji and Shirahagi, Long-arm Centipede Giraffe, Guardian Ape, the Poison Pool, Hidden Forest, Mibu Village and Water Mill. Headless Ape, Headless, Shichimen Warrior, O’Rin of the Water and underwater treasure are optional. Continue beyond Hidden Forest through Mibu Village, defeat the illusion Corrupted Monk, receive Mibu Breathing Technique, activate the Wedding Cave Door Idol and collect the Shelter Stone. If the Mortal Blade and Lotus are already in your inventory, taking the Shelter Stone completes the three-item requirement and changes Ashina Castle, so use the new diving ability for worthwhile underwater cleanup before returning.
1. Unlock the Sunken Valley and Ashina Depths routes
After defeating Genichiro Ashina on the Ashina Castle rooftop, speak with Kuro until his library is opened. Follow Isshin Ashina’s smoke signal across the rooftops, find him in his tower and exhaust his conversation, then return to Kuro. The Gun Fort Shrine Key is in the library beside Kuro. It is required for the locked passage beyond Long-arm Centipede Giraffe.
The two major routes can be handled in either order. For Sunken Valley, travel from the Great Serpent Shrine or Under-Shrine Valley area and grapple down the cliffside toward the gun emplacements. For Ashina Depths, enter the well in Ashina Reservoir, defeat or bypass Lone Shadow Longswordsman, swim through the lower passage and descend toward the Bottomless Hole. Abandoned Dungeon provides another route into the Depths. Activate every Sculptor’s Idol you pass; this is more valuable than clearing every ordinary enemy.
The three required midgame key items are separate objectives: the Mortal Blade comes from Senpou Temple, the Lotus of the Palace comes from Guardian Ape’s route, and the Shelter Stone comes from the Mibu Village route covered below. All three are needed before the game advances to the next Ashina Castle state.
- Genichiro Ashina is defeated.
- Kuro’s library is open and the Gun Fort Shrine Key is collected.
- The Sunken Valley, Bottomless Hole and nearby route Idols are available.
2. Cross Sunken Valley and open the Gun Fort passage
From the Sunken Valley Idol, grapple down the cliffside and approach Snake Eyes Shirafuji. You can bypass her temporarily to reach the next Idol, or fight her after removing nearby riflemen. Deflect her ordinary attacks, leave the line of fire when the gunshot is telegraphed and avoid the perilous grab. Fighting on a ledge or dry platform is safer than staying exposed to several guns.
Continue through the exposed bridge and gun positions to the Gun Fort. Activate the Idol before entering the shrine. Long-arm Centipede Giraffe is most safely handled at close range: stay near him and deflect his rapid chains instead of retreating. Jump when the perilous sweep appears, then execute the Deathblow when his posture breaks.
Collect the Prayer Bead and the Large Fan in the shrine area. The Large Fan is a prosthetic tool, not an upgrade material. Return to the Dilapidated Temple and give it to the Sculptor for installation; its upgrade line later becomes Divine Abduction. Return to the Gun Fort shrine and use the Gun Fort Shrine Key on the locked door behind the statue.
- Snake Eyes Shirafuji is defeated or bypassed.
- Long-arm Centipede Giraffe is defeated.
- The Prayer Bead and Large Fan are collected.
- The locked Gun Fort passage is opened.
3. Reach Guardian Ape and decide when to explore the Depths
Beyond the Gun Fort door, follow the passage toward Sunken Valley Passage. The Great Serpent sequence is traversal, not a normal boss battle. Use the available cover, wait for the route to expose the next grapple point and avoid attacking or dropping from a ledge without a clear landing or grapple prompt. Continue until you reach the Guardian Ape Idol.
Guardian Ape is required because the Lotus of the Palace is collected after this encounter. Learn the first phase by staying mobile around the arena, punishing safe recovery windows and using deflects when his attacks are readable rather than trying to trade blows continuously. In the second phase, the sword and scream attacks require more deliberate spacing; retreat from the terror scream and return only after the danger has passed.
You may explore Ashina Depths before or after Guardian Ape. If you activate the Hidden Forest route before defeating Guardian Ape, you can progress toward Mibu Village without immediately dealing with the later Headless Ape encounter. Once Guardian Ape has been defeated, the Headless Ape pair can appear in the connecting cave. That fight is optional for normal story completion and can be postponed.
- The Guardian Ape Idol is active.
- The Great Serpent traversal is complete.
- You have chosen whether to explore Hidden Forest before or after Guardian Ape.
- Guardian Ape is defeated when you are ready to claim the Lotus of the Palace.
4. Cross the Poison Pool and activate Hidden Forest
From the Ashina Depths route, descend into the Poison Pool. Poison builds while Wolf stands in contaminated water, so move between dry islands, raised ledges and wooden platforms. Snake Eyes Shirahagi can be approached from above, allowing a stealth Deathblow to remove one health bar. Clear or avoid the nearby cannoneers, then fight on dry ground near the Idol. Deflect her normal attacks, leave the firing lane when she aims and move away from the perilous grab.
After Shirahagi is defeated, search the nearby tunnel and ledges for the Prayer Bead route before continuing. The main path leads through the cave toward Hidden Forest. Activate the Hidden Forest Idol as soon as you reach it.
The Headless Ape arena is in the cave between the Poison Pool and Hidden Forest. If the pair is present, it is optional and rewards permanent upgrades, but it is substantially easier after increasing attack power, healing capacity and spirit-emblem reserves. Headless and Shichimen Warrior encounters in this region are also optional. Postpone them if you lack Divine Confetti, anti-apparition items or a reliable plan for terror damage.
- Snake Eyes Shirahagi is defeated.
- The Poison Pool Idol is active.
- The tunnel Prayer Bead is collected or marked for later.
- The Hidden Forest Idol is active.
- Headless Ape is defeated or deliberately postponed.
5. Travel through Hidden Forest into Mibu Village
From the Hidden Forest Idol, use the branches and rooftops to move through the fog. The ghostly enemies are easier to avoid than to fight in groups. Reach the Mist Noble’s building and perform the stealth Deathblow from above or from the building’s approach, then continue down the cleared path. The fog recedes after the Mist Noble is defeated, making the route toward Mibu Village easier to read.
Enter Mibu Village and activate the Mibu Village Sculptor’s Idol. Move through the village using rooftops, side paths and stealth rather than walking through every flooded lane. Villagers can swarm when alerted, and the large enemies near the houses are better isolated or bypassed. Pick up the Gourd Seed in the village if you find it; it is an optional but useful upgrade to hand to Emma.
Continue uphill and activate the Water Mill Sculptor’s Idol. O’Rin of the Water stands near the path and is a skippable miniboss. You can avoid her by taking the rear bridge route. If you fight her, deflect her repeated sword strings, jump over the perilous sweep and use a Mikiri Counter when the peril symbol accompanies a thrust. Defeating her grants a Prayer Bead and the Breath of Life: Shadow skill, but neither is required to reach the main boss.
- The Mist Noble is defeated or the fog route is cleared.
- The Mibu Village Idol is active.
- The Water Mill Idol is active.
- O’Rin of the Water is defeated or bypassed.
6. Defeat the required Corrupted Monk and collect the Shelter Stone
From the Water Mill Idol, continue past O’Rin’s area, cross the bridge and follow the path toward the large clearing and torii gate. The illusion Corrupted Monk waits beyond this approach. This is a required main-story boss: defeating her is necessary to complete the three-item objective and proceed toward the second Ashina Castle visit and Great Shinobi Owl.
The Corrupted Monk uses long glaive strings that are best answered with deflects when you are close enough to read the rhythm. Do not panic-roll through the entire sequence; repeated deflects damage posture and keep the boss from resetting. When the red peril symbol appears for a sweeping attack, jump over the glaive and press jump again to stomp the boss if you are positioned above her. When the symbol marks a thrust, use Mikiri Counter. If you lose rhythm, sprint away after the combo finishes, heal only at a clear distance and re-enter after the boss has committed to a recoverable animation.
Firecrackers, Fistful of Ash and Snap Seeds can create recovery windows, while Divine Confetti is useful against this apparition-type enemy but is not a mandatory requirement. The important strategy is to preserve enough healing and resurrection for learning the full moveset rather than spending all resources during the opening exchanges. The illusion has one health bar; finish it with a Deathblow when posture breaks.
Victory grants Memory: Corrupted Monk and Mibu Breathing Technique. Rest at the new Wedding Cave Door Idol, then enter the cave beyond the arena. Follow the passage to the altar and collect the Shelter Stone. The Shelter Stone is the required story item, not merely optional cave loot.
If you already possess the Mortal Blade and Lotus of the Palace, taking the Shelter Stone completes the three key items and causes the first Ashina Castle invasion state. Before returning to the castle, use Mibu Breathing Technique to inspect worthwhile underwater areas, such as the Ashina Castle moat, Abandoned Dungeon waterway and other previously unreachable pools. Headless underwater fights remain optional and can be left for cleanup.
- The Corrupted Monk is defeated.
- Memory: Corrupted Monk is received.
- Mibu Breathing Technique is obtained.
- The Wedding Cave Door Idol is active.
- The Shelter Stone is collected from the cave altar.
- The player understands that the Mortal Blade, Lotus of the Palace and Shelter Stone together advance the Ashina Castle state.
7. Confirm the midgame route is complete before returning to Ashina Castle
Before fast-traveling back to Ashina Castle, confirm that the required route is finished rather than stopping at Mibu Village. You should have defeated Guardian Ape and claimed the Lotus of the Palace, obtained the Mortal Blade from Senpou Temple, defeated the illusion Corrupted Monk and collected the Shelter Stone. Mibu Breathing Technique should be visible among your acquired skills.
Use the new diving ability for permanent upgrades that are convenient to collect now, but do not treat every underwater Headless or treasure pool as mandatory. The essential progression route is complete when the three key items are in your inventory and the Wedding Cave route is open. Return through the Abandoned Dungeon or another active Idol only after you are ready for the Ashina Castle change.
- Mibu Village and Water Mill have been reached.
- Corrupted Monk is defeated and the Shelter Stone is secured.
- Mibu Breathing Technique is active.
- Guardian Ape and the Mortal Blade objective are complete.
- The player is ready for the next Ashina Castle sequence.
Before you move on
- The Gun Fort Shrine Key has opened the passage beyond Long-arm Centipede Giraffe.
- Long-arm Centipede Giraffe and Snake Eyes Shirahagi are defeated, with their Prayer Beads collected or deliberately deferred.
- The Large Fan has been collected and installed or is ready for installation at the Dilapidated Temple.
- The Poison Pool, Hidden Forest, Mibu Village, Water Mill and Wedding Cave Door Sculptor’s Idols are active.
- Guardian Ape is defeated and the Lotus of the Palace is secured.
- The Mortal Blade has been obtained from Senpou Temple.
- The illusion Corrupted Monk is defeated.
- Memory: Corrupted Monk and Mibu Breathing Technique are obtained.
- The Shelter Stone is collected from the cave altar behind the Corrupted Monk arena.
- The three required items are complete: Mortal Blade, Lotus of the Palace and Shelter Stone.
- The route is ready to continue into the next Ashina Castle sequence.
References for this chapter
Great Shinobi Owl — The Branch Point that Locks Endings
After defeating the Guardian Ape in Sunken Valley and the Corrupted Monk in Ashina Depths, return to Ashina Castle and climb to the rooftop outside Kuro’s Room. Great Shinobi Owl waits there and forces the game’s permanent ending decision. Obeying Owl and forsaking Kuro immediately locks the playthrough into Shura, ending access to Fountainhead Palace, the Divine Dragon and the Sword Saint route. To continue toward Immortal Severance, Purification or Return, reject Owl’s command and remain loyal to Kuro, then defeat Great Shinobi Owl. The fight rewards close pressure, timely deflects and careful responses to the healing-denial bomb, poison pools and smoke.
1. Return to the rooftop outside Kuro’s Room
The rooftop encounter becomes available after you have defeated both the Guardian Ape in Sunken Valley and the Corrupted Monk in Ashina Depths. Travel back to Ashina Castle. Because the castle’s layout and idol access have changed, approach through the Abandoned Dungeon if the usual entrance is unavailable.
From the castle side, make your way to the Upper Tower and the Ashina Dojo area, then use the interior stairs and grapple points to reach the upper rooftop outside Kuro’s Room. This is the same general rooftop where Genichiro was fought earlier, but Great Shinobi Owl now occupies the area. Approach him to begin the cutscene and the ending decision.
If you want to see more than one ending without replaying the entire game, make a PS4 saved-data backup before speaking to Owl. A USB copy or PlayStation Plus cloud copy is appropriate, but keep automatic cloud overwriting disabled if you are relying on an older backup.
- Guardian Ape defeated.
- Corrupted Monk in Ashina Depths defeated.
- Ashina Castle revisited through the changed late-game route.
- Backup made before speaking to Owl if multiple endings are planned.
2. Choose the route that matches your intended ending
Owl asks Sekiro to follow the Iron Code and abandon Kuro. Choosing to obey him commits the current playthrough to Shura. The game proceeds directly to its Shura-exclusive boss sequence after the conversation. Fountainhead Palace, the Divine Dragon and the Sword Saint route will not become available on that playthrough.
If you want Immortal Severance, Purification or Return, reject Owl’s order and remain loyal to Kuro. This choice starts the Great Shinobi Owl boss fight. It cannot be reversed by resting, fast travel or reloading an ordinary in-game checkpoint.
The specialized quest work for Purification and Return must be completed at the appropriate earlier points, but those endings all require this same decision to oppose Owl. If you have not prepared those quests, refusing Owl still leaves Immortal Severance available.
- Choose obedience only if you deliberately want Shura.
- Choose loyalty to Kuro for every non-Shura ending.
- Do not expect the decision to change after the conversation ends.
3. Fight Owl at close range and build posture safely
Great Shinobi Owl has two Deathblow markers. Stay near him rather than retreating across the rooftop, because his posture recovers quickly when he has time to disengage. Attack in short strings until he deflects your attack, then stop pressing offense and prepare for his counterattack. Deflect his sword sequences and resume attacking when the exchange ends.
Do not hold guard continuously while waiting for him. Blocking prevents damage but still strains your posture, so use guard briefly to recover after a mistake and rely on deflects during his actual sword strings. Reduce his vitality when a safe opening appears; a damaged vitality bar makes his posture recover more slowly and makes the posture victory more practical.
His jump attack can be deflected. After the impact, watch for the follow-up rather than automatically chasing him. When he throws shuriken, maintain your guard or close the distance only when you can avoid the next sword attack. A Combat Art is safest after a clearly finished sequence, not during the middle of his long combos.
- Attack until Owl deflects, then defend.
- Use deflects instead of prolonged blocking.
- Keep enough distance to see projectiles without giving him time to recover posture.
- Damage vitality during confirmed recovery windows.
4. Handle healing denial, poison and smoke
Owl can throw a healing-denial bomb that prevents the use of healing items while its effect remains on Sekiro. When he reaches for the small projectile, either move clear of its area or use the opening to pass around him and strike if you are already in position. Do not immediately drink the Healing Gourd after being caught in the cloud; wait until the effect has ended or create enough distance to make the attempt safe.
Firecrackers can interrupt Owl and create room for a heal, but they are optional and consume Spirit Emblems. Use them when you need to reset the pace rather than spending them automatically. If a failed attempt leaves you short on Emblems or healing items, return to the Idol and rest before trying again.
After the first Deathblow, the second phase adds poison-producing attacks and smoke. When poison lands on the floor, move to clean ground instead of fighting through the buildup. When smoke obscures the arena and disrupts your view, stop chasing blindly, guard against the expected follow-up and reacquire Owl as soon as the screen clears. Antidote Powder or Contact Medicine can help if poison repeatedly decides the attempt, but positioning away from the contaminated area is the primary answer.
- Do not heal inside the healing-denial cloud.
- Use Firecrackers only when their interruption or healing window is valuable.
- Move away from poison pools during the second phase.
- Treat smoke as a visibility hazard and defend before re-engaging.
5. Deliver the second Deathblow and verify the branch
Once both Deathblows are delivered, let the rooftop cutscene and subsequent dialogue finish. Defeating Owl after choosing loyalty to Kuro keeps the normal late-game route open. Continue the required conversations and item collection to reach Fountainhead Palace; the story will eventually direct you back to the Wedding Cave Door in Ashina Depths, where the route onward begins.
If you obeyed Owl, the game instead continues into the Shura sequence. Defeating or losing to Great Shinobi Owl does not change the decision you made before the fight. If you die, return from the nearest Sculptor’s Idol, restock consumables and Spirit Emblems, and repeat the encounter without worrying that the ending branch has changed.
Great Shinobi Owl awards the Memory: Great Shinobi, which raises attack power, and the Aromatic Branch. These rewards are obtained regardless of whether you used a cautious posture strategy or a more aggressive vitality-focused approach.
- Great Shinobi Owl defeated with two Deathblows.
- Post-fight cutscene completed.
- For non-Shura endings, the route toward Fountainhead Palace remains available.
- For Shura, the game has begun the exclusive endgame sequence.
Before you move on
- Great Shinobi Owl has been defeated after choosing to remain loyal to Kuro.
- The post-fight route continues toward Fountainhead Palace rather than the Shura boss sequence.
- For Immortal Severance, continue the normal story without needing Aromatic Flower or Frozen Tears.
- For Purification or Return, confirm that their quest items and conversations were completed before the relevant late-game lockpoints.
- If pursuing multiple endings, retain a PS4 backup made before the Owl conversation or before the final item selection.
Return to the Outskirts & Sunken Valley Clean-Up — Prepare for the Late Game
After defeating Great Shinobi Owl, stop before entering the Fountainhead Palace Sanctuary and complete any ending-related quests you want. Refusing Owl keeps the Immortal Severance, Purification and Return routes available. The Purification route requires Emma’s investigation, Father’s Bell Charm and the second Hirata Estate memory, ending with the Everblossom, also called the Aromatic Flower. The Return route requires the Divine Child’s full rice and serpent-viscera quest, ending with Frozen Tears. Use this period to revisit Ashina, the Outskirts and Sunken Valley for Prayer Beads, Gourd Seeds and prosthetic materials, but do not delay the story for every optional item. There is no fixed Prayer Bead minimum for Fountainhead Palace or the final bosses. Finish the desired NPC quests before beginning the Divine Dragon sequence, because the late Ashina changes can end those preparations.
1. Refuse Owl and trigger the late-game quest state
At the Ashina Castle rooftop, choose Break the Iron Code, stay loyal to Kuro. Choosing Obey the Iron Code, forsake Kuro immediately commits the playthrough to Shura and removes access to Fountainhead Palace. Defeat Great Shinobi Owl, then rest at a Sculptor’s Idol before beginning the ending preparations.
Return to Kuro’s Room. Stand behind the altar or screen and eavesdrop on Kuro. If the prompt does not appear, exhaust Kuro’s available dialogue, rest, and try again. After the eavesdrop, rest and speak with Emma at the top of the stairs. For Purification, choose the response agreeing that Kuro cannot be allowed to die, then rest and speak with Emma again.
- Break the Iron Code, stay loyal to Kuro was selected.
- Great Shinobi Owl is defeated.
- Kuro was eavesdropped on from behind the altar or screen.
- Emma’s post-eavesdrop dialogue has been completed.
2. Complete Emma’s Purification preparations
After the required conversations in Kuro’s Room, travel toward the Old Grave area and speak with Emma beside the graves. The Old Grave Idol can be unavailable after the Shinobi invasion, so if it is locked, approach the graveyard through the changed Ashina Castle route and reactivate the Idol when you reach it.
Travel to the Dilapidated Temple. Do not stop at Emma immediately. Walk around behind the temple and use the opening in the rear wall to eavesdrop on Emma and the Sculptor. Enter the temple, question Emma about what you overheard, and exhaust the follow-up dialogue to receive Father’s Bell Charm.
Use Father’s Bell Charm at the Buddha statue inside the Dilapidated Temple. This opens the second Hirata Estate memory. Progress through the memory to the Hirata Audience Chamber and defeat Owl (Father). The boss awards the Aromatic Flower, commonly called the Everblossom. Father’s Bell Charm and the Aromatic Flower must be obtained before the Divine Dragon sequence if Purification is wanted.
- Emma was spoken to at the Old Grave area.
- Emma and the Sculptor were eavesdropped on behind the Dilapidated Temple.
- Father’s Bell Charm is in Key Items.
- Owl (Father) is defeated and the Aromatic Flower or Everblossom is in Key Items.
3. Finish the Divine Child’s Return preparations
At the Inner Sanctum in Senpou Temple, give the Divine Child the Holy Chapter: Infested. If the priest is no longer in the Main Hall, obtain the chapter from the underwater pool near the Temple Grounds Idol after acquiring the ability to dive. Speak with the Divine Child and repeatedly use her rice requests: take the rice, consume it or use it as directed, leave and return, and continue until she becomes ill.
When she asks for a Persimmon, obtain one from the Shugendo Memorial Mob or another available source and give it to her. She then provides Rice for Kuro. Take that rice to Kuro in Ashina Castle, rest, and return as required to receive the Sweet Rice Ball. Consume the Sweet Rice Ball, then revisit the Divine Child and follow her move to the Hall of Illusions.
Obtain Holy Chapter: Dragon’s Return from the cave beyond the Senpou Temple Main Hall and give it to the Divine Child. Next acquire both serpent viscera: use the kite and Puppeteer Ninjutsu route in Senpou Temple for Fresh Serpent Viscera, and distract the Great Serpent in Sunken Valley to reach the shrine containing Dried Serpent Viscera. Give both to the Divine Child, rest and wait for the Inner Sanctum sequence to advance, then speak with her again to receive Frozen Tears.
Frozen Tears, Father’s Bell Charm and the Aromatic Flower should all be secured before praying at the Sanctuary in Fountainhead Palace. The Return ending uses Dragon’s Tears from the Divine Dragon together with Frozen Tears after the final boss.
- Holy Chapter: Infested was delivered to the Divine Child.
- Rice, Persimmon, Rice for Kuro and the Sweet Rice Ball stages are complete.
- Holy Chapter: Dragon’s Return was delivered.
- Fresh and Dried Serpent Viscera were delivered.
- Frozen Tears are in Key Items.
4. Sweep Ashina for permanent upgrades
Use the available Ashina Castle, Ashina Reservoir, Ashina Outskirts and Sunken Valley Idols to collect short-route upgrades you skipped earlier. Prioritize Prayer Beads from nearby minibosses: four beads form a Prayer Necklace, raising maximum vitality and posture. Gourd Seeds and prosthetic materials are also worthwhile, especially if they require only a brief detour.
Do not treat every missed item as mandatory. A practical late-game character with several Prayer Necklaces, upgraded healing and a prosthetic tool you can deploy reliably is better prepared than one carrying many unspent materials. If a miniboss is surrounded by gunmen, poison, cliffs or narrow bridges, clear the surrounding threats first, take the reward, and rest before continuing.
- Nearby Prayer Bead minibosses have been checked.
- Healing Gourd upgrades have been collected when routes are convenient.
- Useful prosthetic materials and blueprints have been returned to the Sculptor.
- No long consumable or experience farm is being used as a substitute for learning boss patterns.
5. Prepare the final route and move on
Check the fast-travel list for reliable routes to Ashina Castle, Senpou Temple, the Dilapidated Temple and the Sunken Valley. Before Fountainhead Palace is entered, make sure the Wedding Cave route is available and that you have completed every desired conversation or hand-in. You cannot select an undiscovered Fountainhead Palace Idol from the map, so the meaningful readiness check is that the route through the Wedding Cave and Corrupted Monk encounter is open.
Equip healing items, a familiar prosthetic and a Combat Art that does not disrupt your deflect rhythm. Firecrackers remain useful against beasts, while shuriken are useful against airborne or retreating enemies, but neither is mandatory. Spend skill points if you are close to a valuable unlock, then stop grinding and proceed. Once you begin the Divine Dragon sequence, the world changes to the final Ashina state and missed ending preparations may no longer be recoverable.
- The desired ending items are secured before the Sanctuary sequence.
- The Wedding Cave route to Fountainhead Palace is available.
- Ashina, Senpou Temple, Dilapidated Temple and Sunken Valley travel routes are known.
- The player has enough healing and Spirit Emblems for serious late-game attempts.
Before you move on
- Kuro’s post-Owl eavesdrop and dialogue are complete.
- For Purification, Father’s Bell Charm and the Aromatic Flower are secured.
- For Return, Frozen Tears are secured and the Divine Child’s quest is complete.
- The player has collected practical nearby Prayer Beads, Gourd Seeds or prosthetic materials without treating optional cleanup as mandatory.
- The Wedding Cave route to Fountainhead Palace is open, and no desired ending-critical conversation remains outstanding.
- The player is ready to pray at the Fountainhead Palace Sanctuary and begin the Divine Dragon sequence.
References for this chapter
- Sekiro: Shadows Die Twice — PlayStation product page
- Sekiro: Shadows Die Twice — Official Game Website
- SEKIRO Ending Guide — GameWith
- SEKIRO | How to Get Purification Ending — Father’s Bell Charm
- SEKIRO | How to Get the Return Ending — Procedure Walkthrough
- Sekiro: Shadows Die Twice — How to Get All Endings
- Things to Do Before Divine Dragon — EzzyGameStats
Fountainhead Palace — Divine Dragon and Divine Dragon’s Tears
After completing the Fountainhead Incense ritual, travel to the Wedding Cave Door Sculptor’s Idol in Ashina Depths and pray inside the wedding palanquin. Fountainhead Palace begins with the True Corrupted Monk and continues through flooded palace districts to Palace Grounds, the Great Sakura area and the Sanctuary. Okami Leader Shizu is optional in the broad completion sense, but defeating this mini-boss is required for the guide’s intended safer route across the palace lake because Shizu is responsible for the lightning striking the water. From the Sanctuary, pray at the shrine to enter the Divine Realm. Defeat the Old Dragons of the Tree, then use the lightning-charged roots to defeat the Divine Dragon. Victory automatically awards Memory: Divine Dragon and Divine Dragon’s Tears and changes Ashina Castle to its final state. If pursuing Purification or Return, prepare those routes before defeating the Divine Dragon: obtain Father’s Bell Charm before the lockout, and obtain Frozen Tears for Return. The recommended safe order is to defeat Owl (Father) and obtain Aromatic Flower before entering the Divine Realm, although Owl (Father) can still be fought later if Father’s Bell Charm was already secured.
1. Enter Fountainhead Palace through the Wedding Cave Door
Travel to the Wedding Cave Door Sculptor’s Idol in Ashina Depths. Enter the cave behind the idol and pray inside the wedding palanquin. After the cutscene, Wolf is carried to Fountainhead Palace. When control returns, move down along the giant straw carrier, drop to the lower ground when the route allows, and climb toward the nearby Sculptor’s Idol. Rest before crossing toward the palace bridge. This is the Ashina Traveller story transition into Fountainhead Palace.
Use this point for an ending-preparation check. For Return, complete the Divine Child’s quest and obtain Frozen Tears before the late-game ritual. For Purification, obtain Father’s Bell Charm through Emma’s investigation before defeating the Divine Dragon. The safest order is to use the charm, enter the second Hirata Estate memory, defeat Owl (Father) and obtain Aromatic Flower before continuing to the Divine Realm. The Bell Charm is the important pre-Divine Dragon deadline; Owl (Father) may be postponed if the charm was already obtained, but completing the fight now avoids confusion about the ending items.
- Wedding Cave Door Sculptor’s Idol used.
- Frozen Tears obtained if pursuing Return.
- Father’s Bell Charm obtained if pursuing Purification.
- Owl (Father) defeated and Aromatic Flower obtained for the recommended Purification route.
- Healing items and preferred prosthetic tools restocked.
2. Defeat the True Corrupted Monk and activate Vermilion Bridge
Cross the bridge beyond the first Fountainhead Palace Idol to begin the True Corrupted Monk encounter. Grapple to the branches above the bridge for an opening aerial deathblow if you reach the correct position quickly. This removes one health bar, but missing the opening does not prevent progress; fight through the Monk’s health bars normally if necessary.
Deflect the Monk’s broad glaive strings, jump over perilous sweeps and Mikiri Counter visible thrusts. During the middle phase, the Monk disappears and creates spectral attacks. Grapple to the branches to escape the apparition sequence, or remain on the bridge only when you can clearly track the incoming strikes. Firecrackers and Fistful of Ash can create short openings, but active deflections remain the most dependable way to build posture. After the final deathblow, collect Memory: True Monk and the Dragon’s Tally Board, then rest at the Vermilion Bridge Sculptor’s Idol.
- True Corrupted Monk defeated.
- Memory: True Monk received.
- Dragon’s Tally Board received.
- Vermilion Bridge Sculptor’s Idol activated.
3. Cross the flooded palace district and reach Palace Grounds
From Vermilion Bridge, follow the rooftops and grapple branches through the flooded district. Okami warriors attack from range and may use lightning, while Palace Nobles can slow Wolf with their flutes before attempting a grab. Use rooftops, stealth deathblows and short retreats instead of fighting several enemies in an exposed courtyard.
Follow the roofline, walkways and buildings through the palace district and Mibu Manor. Stay out of the open lake while lightning is striking the water. The required route eventually reaches the Palace Grounds Sculptor’s Idol near the large house. Treasure Carp, merchants, underwater items and optional enemies can be handled separately; none is required to reach the Divine Dragon.
- Flooded district crossed through roofs and walkways.
- Mibu Manor route followed.
- Palace Grounds Sculptor’s Idol activated.
- Optional carp and underwater loot kept separate from required progression.
4. Defeat Okami Leader Shizu and reach the Sanctuary
From Palace Grounds, follow the upper route toward the Great Sakura area and activate the Great Sakura Sculptor’s Idol. Continue to the large tree and confront Okami Leader Shizu. The name matters: this is Okami Leader Shizu, not Great Sakura Leader Shizu. Shizu uses lightning attacks and can be approached aggressively from the tree. Close the distance, attack during safe openings and reverse lightning when the attack is clearly telegraphed.
Shizu is optional in the broad completion sense: the game does not require every Fountainhead mini-boss to be defeated. For this guide’s intended safe route, however, defeat Shizu before using the lake. Shizu is the source of the lightning assault over the water, and defeating the mini-boss removes that hazard, making the remaining lake traversal much safer. Afterward, use the upper branches and safe water routes to continue toward the Sanctuary Sculptor’s Idol.
- Great Sakura Sculptor’s Idol activated.
- Okami Leader Shizu defeated for the safe lake route.
- Lightning hazard removed from the palace water.
- Sanctuary Sculptor’s Idol activated.
5. Make the final preparation at the Sanctuary
Rest at the Sanctuary Idol, refill the Healing Gourd, adjust prosthetic tools and spend skill points if desired. Check the inventory rather than relying on memory: Frozen Tears are the additional item for Return, Aromatic Flower is the additional item for Purification, and Divine Dragon’s Tears cannot be obtained until the boss is defeated.
The shrine near the Sanctuary Idol begins the Divine Realm sequence. Defeating the Divine Dragon changes Ashina Castle and Ashina Outskirts into their final states, so finish desired pre-lockpoint exploration and quest preparation first. If Father’s Bell Charm was not obtained before the Divine Dragon, the Purification route is locked for that playthrough. If Frozen Tears were not obtained before the relevant late-game cutoff, Return is unavailable.
- Sanctuary Idol used for preparation.
- Frozen Tears checked for Return.
- Aromatic Flower checked for Purification.
- Desired optional Fountainhead exploration completed.
- Consumables and combat setup ready.
6. Clear the Old Dragons of the Tree
Pray at the Sanctuary shrine to enter the Divine Realm. The encounter begins with the Old Dragons of the Tree. Keep moving around the arena rather than holding one position. Ordinary dragons use close attacks and poison breath, while roots can erupt from the ground and punish stationary movement.
Attack the ordinary dragons as you circle the arena. When a large root rises and presents a grapple point, use it to reach an elevated position and perform an aerial deathblow where possible. This can remove several nearby dragons at once. Continue clearing the group until the Divine Dragon appears. If Wolf dies during this section, the encounter restarts, so prioritize movement, camera awareness and safe attacks over rushing the final targets.
- Old Dragons of the Tree defeated.
- Divine Dragon phase begun.
- Poison breath and erupting roots avoided.
7. Use lightning-charged roots against the Divine Dragon
The Divine Dragon is a large-scale movement encounter rather than a conventional sword duel. Run across the arena while watching for broad sword sweeps, overhead attacks, wind blasts and breath attacks. Jump over low horizontal waves when needed, keep away from the blade’s immediate path and avoid standing directly beneath the boss.
When roots rise from the ground, watch for the root charged with lightning. Grapple to that root, then attack to perform the lightning reversal against the Divine Dragon. Move away after each successful hit so the roar, shockwave or follow-up sword attack does not catch Wolf during recovery. Repeat the charged-root sequence until the boss falls and the final aerial route becomes available. Run along the sword toward the head and perform the finishing deathblow.
Use resurrection after a mistake that would otherwise end a strong attempt, but avoid spending it while Wolf is trapped in a breath attack, knockback animation or unsafe landing. Reposition first whenever possible, then resurrect when it returns Wolf to a viable position. Prosthetic tools are not required for this encounter; movement, grappling and lightning reversal are the essential actions.
- Charged roots identified and used.
- Sword waves, wind blasts and breath attacks avoided.
- Final aerial route reached.
- Finishing deathblow performed.
8. Confirm the reward and the late-game transition
After the final deathblow, the game awards Memory: Divine Dragon and Divine Dragon’s Tears automatically. There is no separate arena pickup that must be found for the tears. On PS4, defeating the Divine Dragon registers the Gracious Gift of Tears trophy.
The following cutscene returns Wolf to Kuro’s room and changes Ashina Castle to its final altered state. Continue through the late-game Castle and Ashina Reservoir route toward the final boss. At the ending ritual, Divine Dragon’s Tears alone support Immortal Severance; adding Aromatic Flower supports Purification, while adding Frozen Tears supports Return. Shura is unavailable on this route because reaching Fountainhead Palace required refusing Owl earlier.
- Memory: Divine Dragon received.
- Divine Dragon’s Tears automatically awarded.
- Gracious Gift of Tears trophy registered.
- Wolf returned to Kuro’s room.
- Final Ashina Castle state begun.
Before you move on
- Fountainhead Palace entered through the Wedding Cave Door.
- True Corrupted Monk defeated and Dragon’s Tally Board received.
- Okami Leader Shizu defeated for the safer lake route.
- Sanctuary Sculptor’s Idol activated.
- Divine Realm entered through the Sanctuary shrine.
- Old Dragons of the Tree defeated.
- Divine Dragon defeated with the lightning-root method.
- Memory: Divine Dragon and Divine Dragon’s Tears awarded automatically.
- Gracious Gift of Tears trophy registered.
- Wolf returned to Kuro’s room and Ashina Castle entered its final altered state.
References for this chapter
- Fountainhead Palace — Sekiro: Shadows Die Twice Walkthrough & Guide, PS4
- Fountainhead Palace — Sekiro: Shadows Die Twice Walkthrough & Guide, PS4
- Sekiro Guide: Here’s How To Unlock The Four Endings
- Sekiro: Shadows Die Twice — How to Get All Endings
- Sekiro Divine Dragon Boss Guide: How to Beat the Divine Dragon and the Old Dragons of the Tree
- SEKIRO: How to Beat Divine Dragon
Return to Ashina Castle — Genichiro and Sword Saint Isshin
After defeating the Divine Dragon, Sekiro returns to Kuro’s Room during the final Ashina Castle invasion. Speak with Emma to receive the Secret Passage Key, leave through the window and follow the rooftop smoke signals toward Ashina Reservoir. Seven Ashina Spears – Shume Masaji Oniwa can be defeated for an optional Prayer Bead or bypassed through the reservoir branches. Activate the Near Secret Passage Sculptor’s Idol before entering the Silvergrass Field. Genichiro, Way of Tomoe and Sword Saint Isshin then form one continuous final boss sequence with no Sculptor’s Idol between them. For Immortal Severance, you must have refused Owl at Ashina Castle, defeated Great Shinobi Owl and collected the Divine Dragon’s Tears. After Sword Saint Isshin falls, give Kuro only the Divine Dragon’s Tears and complete the Mortal Blade ritual.
1. Return to Kuro’s Room and obtain the Secret Passage Key
After defeating the Divine Dragon, Sekiro returns to Kuro’s Room in Ashina Castle. Emma is beside Isshin Ashina’s body. Speak with Emma and exhaust the available immediate dialogue. She gives Sekiro the Secret Passage Key, which opens the route through Ashina Reservoir used during the opening escape and the earlier Genichiro encounter.
Leave Kuro’s Room through the window beside Emma. Follow the pink smoke signals across the occupied castle rooftops. The Central Forces now control the area, but the route can be handled largely through grappling, stealth and rooftop movement. Enter the building indicated by the smoke, drop through it and continue toward Ashina Reservoir. Do not treat this return trip as a normal castle exploration phase: the objective is to reach the reservoir passage and the final field.
- The Divine Dragon has been defeated.
- Divine Dragon’s Tears are in the inventory.
- Emma has given Sekiro the Secret Passage Key.
- The route through the invaded castle leads toward Ashina Reservoir.
2. Cross Ashina Reservoir and activate the final checkpoint
At Ashina Reservoir, Seven Ashina Spears – Shume Masaji Oniwa occupies the direct ground route. This miniboss is optional. To bypass him, move toward the branches and tree trunk on the left side of the cliff, grapple across the branches and descend through the dried reservoir route. Continue toward the passage rather than attempting to clear every Ministry soldier.
If you fight Seven Ashina Spears, remove nearby support when possible. His forward thrust is a good Mikiri Counter opportunity, while his broad perilous sweep must be jumped. Avoid being pinned against the cliff or fighting with the camera pressed against the surrounding terrain. Defeating him awards a Prayer Bead, but neither his death nor the bead is required for the final boss.
Continue through the reservoir route and activate the Near Secret Passage Sculptor’s Idol. Rest, replenish healing items and prepare your combat arts and prosthetic tools here. The Silvergrass Field encounter begins after the nearby gate, and there is no ordinary Sculptor’s Idol between Genichiro and Sword Saint Isshin.
- Seven Ashina Spears has been defeated or bypassed.
- The Near Secret Passage Sculptor’s Idol has been activated.
- Healing charges, resurrection availability and useful consumables are ready.
- You understand that the next two boss fights form one continuous sequence.
3. Defeat Genichiro, Way of Tomoe
Open the gate beside the Near Secret Passage Idol and enter the Silvergrass Field. Genichiro, Way of Tomoe begins the encounter. Stay close enough to keep his posture from recovering, but use controlled attacks between defensive exchanges. Deflect his sword strings instead of repeatedly retreating, and use Mikiri Counter against his thrusts. Jump over his sweeping perilous attacks when the red perilous symbol and body movement identify a low sweep.
This version of Genichiro uses the Black Mortal Blade. When he raises it for Mortal Draw, move outside the attack’s range or defend with deliberate timing; do not continue attacking into the stance. His final encounter does not use the lightning phase from his earlier fight. After delivering the Deathblow, Sword Saint Isshin appears immediately. There is no healing reset, idol, shop or normal rest point between the two bosses, so avoid spending every resource merely to finish Genichiro.
- Genichiro’s sword strings are being deflected.
- Thrusts are being answered with Mikiri Counter.
- Sweeping perilous attacks are being jumped.
- The Black Mortal Blade’s Mortal Draw is avoided or defended correctly.
- Genichiro has been defeated without expecting an intermediate checkpoint.
4. Defeat Sword Saint Isshin’s katana phase
Sword Saint Isshin begins with a katana phase. Fight at close range and alternate short attacks with deflections so his posture does not fully recover. His ordinary sword strings are best answered by rhythmically deflecting rather than backing away from every swing. When he presents a thrust, use Mikiri Counter. When he sweeps low, jump over it and continue pressure if the landing is safe.
When Isshin sheaths his sword, prepare for a rapid draw attack. Create enough distance to escape the attack or use a deliberate deflection; do not attack into the sheathed stance. Large committed attacks and vertical shockwave-style moves are safer to avoid laterally than to absorb while standing still. Firecrackers can interrupt some openings, but Spirit Emblems are usually more valuable in the spear phases, so avoid spending them without a clear advantage.
The first Deathblow changes the fight substantially. Isshin draws his spear and adds firearm attacks, jumping attacks and longer strings. Before delivering the first Deathblow, make sure you have a plan for the remaining phases rather than using every healing item and emblem to force the katana phase.
- Isshin’s katana phase has been completed with the first Deathblow.
- Thrusts are being handled with Mikiri Counter.
- The sheathed draw attack is being recognized.
- Healing and Spirit Emblems remain available for the spear phases.
5. Survive the spear, firearm and lightning phases
After the first Deathblow, Isshin uses a long spear and firearm. Remain close enough to read his movements, but do not attack through the beginning of a spear sequence. Deflect chained swings, use Mikiri Counter against his thrusts and jump over low sweeping perilous attacks. His jumping spear attack can be avoided by moving away from the landing area or deflected if the timing is familiar.
When Isshin fires his pistol, defend against the shots while watching for the attack that follows them. Do not assume the firearm sequence has ended after the first shot. A thrust or sweep can follow immediately, so keep the perilous-attack response ready.
In the final phase, Isshin adds lightning attacks. Jump so Sekiro is airborne when the lightning connects, then attack before landing to reverse it. A successful reversal damages Isshin and creates posture pressure. Continue using deflections as the main method of victory, with vitality damage serving primarily to prevent rapid posture recovery. Heal only after a clear separation, stagger or other safe opening because Isshin can punish slow recovery animations.
- Spear thrusts are being answered with Mikiri Counter.
- The firearm sequence and its follow-up attacks are recognized.
- Sweeping perilous attacks are being jumped.
- Lightning is being reversed while Sekiro is airborne.
- Sword Saint Isshin’s final Deathblow has been delivered.
6. Complete the Immortal Severance ending
After defeating Sword Saint Isshin, Sekiro receives Memory: Saint Isshin and the Dragon Flash Esoteric Text. Walk toward Kuro in the Silvergrass Field and begin the final interaction. The available offering choices depend on the ending items and quest progress obtained earlier in the campaign.
For Immortal Severance, present Kuro with only the Divine Dragon’s Tears. Do not add the Aromatic Flower or Frozen Tears. Those additional items are used for Purification or Return when their separate quest requirements have been completed. The standard ending does not require you to avoid collecting those items; it requires choosing only the Divine Dragon’s Tears during the final offering.
Continue through Kuro’s dialogue and interact with him again when the final action is presented. Use the Mortal Blade as instructed to complete the ritual. The Immortal Severance ending cutscene follows. This route requires that you previously broke the Iron Code by refusing Owl at the Ashina Castle rooftop and defeated Great Shinobi Owl. If you obeyed Owl, the game enters the Shura branch instead, where the final bosses and ending sequence differ.
- Sword Saint Isshin has been defeated.
- Memory: Saint Isshin and Dragon Flash Esoteric Text have been received.
- Only Divine Dragon’s Tears are given to Kuro.
- The final Mortal Blade action is completed when prompted.
- The Immortal Severance ending cutscene finishes.
- The Immortal Severance trophy is recorded in the PS4 trophy list.
- The save reaches the post-ending state, allowing continuation or New Game Plus.
Before you move on
- The Divine Dragon has been defeated and Divine Dragon’s Tears are held.
- Genichiro, Way of Tomoe has been defeated.
- Sword Saint Isshin has been defeated.
- Memory: Saint Isshin and Dragon Flash Esoteric Text have been received.
- Kuro receives only Divine Dragon’s Tears.
- The Mortal Blade action after Kuro’s final dialogue is completed.
- The Immortal Severance ending cutscene finishes.
- The Immortal Severance trophy is recorded on the PS4 trophy list.
- The completed save reaches the post-ending state.
Immortal Severance (Main Ending) — Step-by-Step Completion
Immortal Severance is the standard ending on the Kuro-loyal route. At the Ashina Castle rooftop, reject Owl’s Iron Code and remain loyal to Kuro. Defeat Great Shinobi Owl, complete the campaign through Fountainhead Palace, and defeat the Divine Dragon to obtain Divine Dragon’s Tears. After returning to Ashina Castle, speak with Emma in Kuro’s Room to receive the Secret Passage Key. Follow the route through Ashina Reservoir and the secret passage, then defeat Genichiro, Way of Tomoe, and Sword Saint Isshin. After the final battle, approach Kuro and offer only Divine Dragon’s Tears. Continue through the scripted Immortal Severance ritual, ending cutscene, and credits. The Immortal Severance trophy should then be recorded in the PS4 trophy list.
1. Confirm that the Immortal Severance route is available
At the Ashina Castle rooftop confrontation with Great Shinobi Owl, choose the response that breaks the Iron Code and keeps Wolf loyal to Kuro. This begins the Great Shinobi Owl boss fight and preserves the three Kuro-loyal endings, including Immortal Severance.
If you instead obey Owl and forsake Kuro, the game immediately diverts to the Shura route. You cannot return to the Immortal Severance path later in that playthrough, so verify the choice before selecting it.
Continue through the normal campaign. Defeat the required story bosses, reach Fountainhead Palace, and defeat the Divine Dragon. The Divine Dragon awards Divine Dragon’s Tears, the key item needed for the standard ending ritual. No specialized supplemental quest item is required for Immortal Severance beyond normal story progression.
- You chose to break the Iron Code and remain loyal to Kuro.
- Great Shinobi Owl was defeated on the Ashina Castle rooftop.
- You reached Fountainhead Palace and defeated the Divine Dragon.
- Divine Dragon’s Tears are present in your Key Items.
2. Return to Ashina Castle and collect the Secret Passage Key
After the Divine Dragon sequence, Wolf returns to Ashina Castle’s Upper Tower — Kuro’s Room. Emma is beside Isshin’s body. Speak with her and exhaust the available conversation. She gives Wolf the Secret Passage Key and explains that Kuro has gone through the passage.
Before entering the final route, commune with the nearby Sculptor’s Idol. Resting restores Wolf’s health and Healing Gourd uses and replenishes stored Spirit Emblems up to the current carrying limit. It does not automatically refill ordinary consumables such as Pellets, Sugars, or other inventory items, so check those separately before proceeding.
Leave Kuro’s Room through the window near Emma. Cross the rooftops and descend toward Ashina Reservoir. Follow the route toward the secret passage used during the prologue. Activate the Near Secret Passage Sculptor’s Idol, then use the Secret Passage Key on the locked door beside it. The passage leads to the Silvergrass Field.
- Emma gave you the Secret Passage Key.
- You rested at an Idol before beginning the final sequence.
- Your Spirit Emblems were replenished to the current carrying limit.
- You reached the Near Secret Passage Sculptor’s Idol.
- The secret-passage door is open.
3. Defeat Genichiro, Way of Tomoe, and Sword Saint Isshin
Genichiro, Way of Tomoe, is fought first in the Silvergrass Field. His sword strings resemble his earlier style, and he continues to use perilous thrusts and sweeps. His distinctive addition is the Black Mortal Blade and its Mortal Draw attack; he does not use lightning in this encounter. Stay close enough to maintain posture pressure, deflect his sword strings, Mikiri Counter readable thrusts, and jump over perilous sweeps. When he begins Mortal Draw, move out of its line or punish the recovery from a safe angle.
Conserve healing items and combat buffs during Genichiro because Sword Saint Isshin begins immediately after the final Deathblow. If Wolf dies during Isshin’s fight, the sequence resets to Genichiro, so use early attempts to make this opening battle consistent without spending more resources than necessary.
Sword Saint Isshin follows without a Sculptor’s Idol checkpoint. His first phase emphasizes sword attacks and deliberate perilous moves. Deflect rather than retreat continuously; Isshin’s posture recovers quickly if you give him too much distance. Use Mikiri Counter against readable thrusts and jump over sweeping perilous attacks.
In Isshin’s spear phases, keep enough space to identify long-range attacks, but return to close pressure after a safe response. His final phase adds lightning attacks. Jump when lightning is released, catch it while airborne, and attack before landing to perform a lightning reversal. The returned lightning damages and stuns Isshin, creating a strong posture opportunity.
- Genichiro, Way of Tomoe, was defeated.
- Sword Saint Isshin was defeated with the final Deathblow.
- The post-boss scene in the Silvergrass Field has begun.
4. Offer Kuro only Divine Dragon’s Tears
After Sword Saint Isshin falls, wait for control to return and approach Kuro in the Silvergrass Field. Interact with Kuro to begin the ending ritual. When the game presents the offering choice, select Divine Dragon’s Tears only.
Do not select Aromatic Flower or Frozen Tears. Those additional items produce the Purification or Return endings instead. For Immortal Severance, the required offering is Divine Dragon’s Tears without either specialized supplemental ending item.
Confirm the offering when prompted. Wolf performs the Immortal Severance ritual through the following scripted sequence. There is no separate combat action or inventory command required after confirming the offering; allow the dialogue and cutscenes to continue.
- The selected offering is Divine Dragon’s Tears only.
- Aromatic Flower is not selected.
- Frozen Tears is not selected.
- You confirmed the offering.
5. Confirm the ending and handle the post-game prompt
Allow the Immortal Severance ending cutscene and credits to finish. The ending is confirmed when the standard Kuro-loyal ritual sequence concludes and the Immortal Severance trophy registers.
If the notification was missed or disabled, open the PS4 Trophies application and check the Sekiro: Shadows Die Twice trophy list for Immortal Severance. The trophy is the most direct console-level confirmation that the intended ending was awarded.
After the credits, Sekiro asks whether to begin New Game+. Choose No if you still want to explore the completed world, collect missed upgrades, defeat optional bosses, or finish other tasks. New Game+ can be started later by interacting with the Sculptor’s Idol at the Dilapidated Temple.
- The Immortal Severance ending cutscene played.
- The credits finished or were allowed to progress to the post-game prompt.
- The Immortal Severance trophy is listed as earned on PS4.
- You declined New Game+ if you want to continue exploring the current playthrough.
Before you move on
- Great Shinobi Owl was defeated after Wolf chose to remain loyal to Kuro.
- The Divine Dragon was defeated and Divine Dragon’s Tears were obtained.
- Emma provided the Secret Passage Key after the return to Ashina Castle.
- Genichiro, Way of Tomoe, and Sword Saint Isshin were defeated in the final sequence.
- Only Divine Dragon’s Tears were offered to Kuro.
- The Immortal Severance ending cutscene and credits completed.
- The Immortal Severance trophy is listed as earned in the PS4 trophy list.
References for this chapter
Alternative Endings — Purification, Return (True Ending) and Shura
Sekiro has four endings. Shura begins when you obey Great Shinobi Owl at the Ashina Castle rooftop and ends through the exclusive Emma and Isshin Ashina boss sequence. The other three endings require you to refuse Owl, defeat him, and continue to Fountainhead Palace. Immortal Severance requires only Divine Dragon’s Tears. Purification requires Emma’s investigation, Father’s Bell Charm, the second Hirata Estate memory, and the Aromatic Flower. Return, also called Dragon’s Homecoming, requires the Divine Child’s quest, Holy Chapter: Infested, Holy Chapter: Dragon’s Return, Fresh Serpent Viscera, Dried Serpent Viscera, and Frozen Tears. Finish the ending preparations before defeating the Divine Dragon, then present the correct items to Kuro after the final boss.
1. Choose the route at Ashina Castle
After defeating the Guardian Ape and Corrupted Monk, return to Ashina Castle and reach the rooftop of the Castle Keep. Great Shinobi Owl will ask you to follow the Iron Code and abandon Kuro. Choose “Break the Iron Code, stay loyal to Kuro.” This begins the Great Shinobi Owl boss fight and keeps Fountainhead Palace, Divine Dragon, Purification, Return, and Immortal Severance available.
Choosing “Obey the Iron Code, forsake Kuro” immediately locks the playthrough to Shura. You will not reach Fountainhead Palace, the Divine Dragon, or Sword Saint Isshin. Instead, the game sends you through the exclusive Emma, the Gentle Blade fight and then Isshin Ashina. Defeating Isshin Ashina completes the Shura route.
- Choose “Break the Iron Code, stay loyal to Kuro.”
- Defeat Great Shinobi Owl after refusing him.
- Choose obedience only if you specifically want Shura.
2. Prepare the Purification ending
After defeating Great Shinobi Owl, exhaust Kuro’s conversations in his room and rest as needed until the eavesdrop opportunity appears behind the large statue near Kuro. Listen to Kuro, then speak with Emma near the stairs and agree with her concern that Kuro cannot be allowed to die.
Rest, then travel to the Old Grave Sculptor’s Idol. Find Emma near the graves and exhaust her dialogue. Return to the Dilapidated Temple. Go behind the building and use the opening in the rear wall to eavesdrop on Emma and the Sculptor. Enter the temple, speak with Emma, ask about what you overheard, and then ask what she is hiding. Emma gives you Father’s Bell Charm.
Use Father’s Bell Charm at the Buddha statue inside the Dilapidated Temple. This opens the second Hirata Estate memory. Follow the memory route to the Hirata Audience Chamber and defeat Owl (Father). The fight awards the Memory and the Aromatic Flower, also called Everblossom. For a reliable Purification attempt, complete the Emma sequence, obtain Father’s Bell Charm, and defeat Owl (Father) before defeating the Divine Dragon. The Divine Dragon is the relevant late-game lockpoint for starting this preparation.
- Eavesdrop on Kuro after refusing Owl.
- Visit Emma at the Old Grave.
- Eavesdrop on Emma and the Sculptor at the Dilapidated Temple.
- Receive Father’s Bell Charm.
- Defeat Owl (Father) and obtain the Aromatic Flower.
3. Begin the Return quest with the Divine Child
Visit the Divine Child in the Inner Sanctum of Senpou Temple. Give her Holy Chapter: Infested. If you do not have it, retrieve it from the underwater pond near the Temple Grounds Sculptor’s Idol; it can also be obtained earlier from the Senpou priest under the appropriate progression conditions.
Request Rice from the Divine Child, consume the Rice, leave the area, and return for the next request. Continue until she becomes sick and asks for a Persimmon. Give her a Persimmon, which can be purchased from the Memorial Mob near Shugendo if necessary. She then gives you Rice for Kuro.
Take Rice for Kuro to Kuro in Ashina Castle. Leave and return after resting or fast-traveling. Kuro gives you a Sweet Rice Ball. Consume it, then return to the Divine Child and tell her that you ate it. After the required dialogue, she moves to the Halls of Illusion. Follow her there and speak with her.
Retrieve Holy Chapter: Dragon’s Return from the dark cave reached from the Senpou Temple Main Hall area. Follow the cave passage and search near the dead monk at the end. Give the chapter to the Divine Child when she returns to the Inner Sanctum.
- Give Holy Chapter: Infested to the Divine Child.
- Consume the Rice she gives you and provide a Persimmon when requested.
- Deliver Rice for Kuro, consume Kuro’s Sweet Rice Ball, and report back.
- Find and give her Holy Chapter: Dragon’s Return.
4. Deliver the serpent viscera and receive Frozen Tears
Obtain Fresh Serpent Viscera by using Puppeteer Ninjutsu on the Senpou Temple kite-handler. Use the raised kite as a grapple route, follow the elevated path, and perform the required deathblow on the Great Serpent to obtain the viscera.
Obtain Dried Serpent Viscera in the Sunken Valley route. Enter the serpent’s cave near the poison pools, use Puppeteer Ninjutsu on the monkey inside, and use the distraction to pass the serpent and enter the small shrine. Take the item inside.
Give both Fresh Serpent Viscera and Dried Serpent Viscera to the Divine Child in the Inner Sanctum. Leave and return. The Inner Sanctum door will be closed; eavesdrop on the door to hear the Divine Child consuming the viscera. Travel to Kuro’s room and exhaust Kuro’s available dialogue, then return to the Inner Sanctum. Speak with the Divine Child again to receive Frozen Tears.
Complete this quest before defeating the Divine Dragon. Do not assume that merely possessing the two viscera is enough; the door eavesdrop and subsequent Divine Child conversation are required for Frozen Tears.
- Obtain Fresh Serpent Viscera.
- Obtain Dried Serpent Viscera.
- Give both items to the Divine Child.
- Eavesdrop on the closed Inner Sanctum door.
- Exhaust Kuro’s required dialogue and receive Frozen Tears.
5. Present the correct ending items after the final boss
On any non-Shura route, defeat the Divine Dragon and obtain Divine Dragon’s Tears. Continue through the late Ashina Castle sequence, defeat Genichiro, Way of Tomoe, and Sword Saint Isshin, then follow the post-boss route until you reach Kuro at the ending location.
For Immortal Severance, present Divine Dragon’s Tears alone. For Purification, present Divine Dragon’s Tears together with the Aromatic Flower. For Return, present Divine Dragon’s Tears together with Frozen Tears. The game uses the additional ending item to determine which ending ritual and cutscene follows; these are not separate menu selections.
If you want multiple endings on one PS4, make a normal saved-data backup before choosing the Owl dialogue and another before presenting the final items to Kuro. Use standard PS4 saved-data management or PlayStation Plus backup features. Keep the backup that precedes the ending ritual separate so it is not overwritten by the completed ending save.
- Defeat the Divine Dragon and obtain Divine Dragon’s Tears.
- Defeat Sword Saint Isshin on the non-Shura route.
- Use Divine Dragon’s Tears alone for Immortal Severance.
- Add Aromatic Flower for Purification or Frozen Tears for Return.
- Allow the ending cutscene and trophy notification to finish.
Before you move on
- Shura is confirmed by the Emma and Isshin Ashina boss sequence after obeying Owl.
- Purification is confirmed by presenting Divine Dragon’s Tears and Aromatic Flower to Kuro, followed by the Purification cutscene and trophy.
- Return is confirmed by presenting Divine Dragon’s Tears and Frozen Tears to Kuro, followed by the Dragon’s Homecoming cutscene and trophy.
- Immortal Severance is confirmed by presenting only Divine Dragon’s Tears to Kuro, followed by its ending cutscene and trophy.
- The relevant ending trophy appears in the PS4 trophy list after the ending sequence completes.
References for this chapter
Prosthetic Tools and Combat Arts — Where to Get Them and How to Use Them
Shinobi Prosthetic Tools solve specific combat problems, but Kusabimaru attacks and deflections remain your foundation. Find a tool component in the world or buy it from a merchant, return it to the Sculptor at the Dilapidated Temple, and have it fitted before it can be used. Equip up to three fitted tools, cycle with Triangle, and activate the selected tool with R2; most uses consume Spirit Emblems. Combat Arts are equipped separately, one at a time, and activate with L1 plus R1 on PS4. Use Firecrackers to interrupt beasts, the Axe to break wooden shields, Shuriken to pressure airborne or retreating targets, Flame Vent against fire-vulnerable enemies, Sabimaru against poison-susceptible targets, and an Umbrella for appropriate ranged, fire or terror attacks. After fitting three different tools, speak with the Sculptor to receive the Prosthetic Esoteric Text and unlock Prosthetic Arts. Ichimonji: Double is a dependable posture-focused choice, Mortal Draw is for confirmed openings, and Breath of Life: Light improves recovery during exploration.
Find a Shinobi Prosthetic Tool and have it fitted
A tool component is not usable when you first find it. Bring it to the Sculptor at the Dilapidated Temple, speak with him, and choose the fitting option. The completed tool then appears in the Prosthetic Tool list. Finding a component does not automatically install it.
The main tools can be collected during normal exploration. The Loaded Shuriken begins with the Shuriken Wheel inside the damaged building near the Outskirts Wall—Gate Path Sculptor’s Idol. Buy Robert’s Firecrackers from the Memorial Mob merchant on the cliff above the early Outskirts route. In Hirata Estate, collect the Flame Barrel from the burning camp on Estate Path and the Shinobi Axe from the nearby shrine building. The Mist Raven’s Feathers are in the pagoda-like structure reached from Bamboo Thicket Slope; a purple-clad shinobi guards the approach.
The Loaded Spear is obtained from the locked gatehouse near Ashina Reservoir after you acquire the Gatehouse Key from the guards on the bridge route. Sabimaru is in a chest in Ashina Castle’s Upper Tower—Antechamber area. Blackhat Badger sells the Iron Fortress from his house beneath the Old Grave Sculptor’s Idol; this leads to the Loaded Umbrella upgrade path. Divine Abduction is found in the shrine after the Gun Fort section. Defeat the Guardian Ape to obtain the Finger Whistle component. These tools are individually optional, but return each one to the Sculptor as soon as practical so it becomes available in combat.
- Bring every newly found tool component to the Sculptor before relying on it.
- Remember that finding or buying a component is only the first step; fitting is required.
- Obtain Firecrackers, Flame Vent and the Axe early because they answer common early-game threats.
Equip tools and manage Spirit Emblems
Open the Equipment menu and place up to three fitted tools in the active Prosthetic Tool slots. Press Triangle to cycle through the equipped tools and R2 to use the selected tool. The PS4 manual assigns L1 to guard or deflect, L2 to the Grappling Hook, R1 to attack, R2 to the Prosthetic Tool, and L1 plus R1 to Combat Arts.
Most Prosthetic Tool uses consume Spirit Emblems. Rest at a Sculptor’s Idol to refill your carried stock, and buy additional emblems from Idols or merchants when preparing for a difficult encounter. The normal carried limit is limited, with excess purchased emblems stored rather than lost, so purchase more before a boss if you expect to use several tools.
Choose the loadout for the encounter instead of keeping the same three tools everywhere. A practical exploration set is Shuriken, Firecrackers and Axe. Replace the Axe with an Umbrella for a ranged, fire or terror-focused area, or replace Shuriken with Flame Vent when enemies are vulnerable to fire. Tools supplement swordplay; do not spend every emblem at the beginning of a fight and then lose access to a defensive response later.
- Set the three active tools before entering a boss arena.
- Check your Spirit Emblem supply after resting and before a serious attempt.
- Use each tool for a recognizable purpose instead of activating it during an enemy’s active combo.
Match each major tool to its problem
Loaded Shuriken is a flexible, low-commitment option. Throw it at dogs and other light enemies, use it to interrupt some recovery animations, and fire it at airborne targets such as Lady Butterfly when she leaves the ground. It is also useful for maintaining pressure on a retreating enemy without chasing recklessly. The upgraded spinning versions are especially effective against jumping targets.
The Loaded Axe breaks wooden shields and can open shielded soldiers to a deathblow. It is slow, so use it after a stealth opening or when the enemy is committed to an animation that cannot immediately punish you. Shinobi Firecrackers interrupt beasts particularly well, making them useful against dogs, bulls, apes and other large animal targets. They can also stagger some large enemies, but they do not replace learning a boss’s perilous attacks.
Flame Vent deals fire damage and builds Burn. Use oil first when practical, then strike with Flame Vent during a safe opening. It is particularly useful against red-eyed enemies and targets that react strongly to fire. Sabimaru applies poison to susceptible enemies; it is a matchup tool rather than a universal replacement for the sword. The Loaded Spear has specialized value against certain armor and removable body parts, including the Guardian Ape’s centipede during the second phase.
The basic Loaded Umbrella gives a safer way to block or deflect many attacks and projectiles. The Suzaku variant is intended for fire threats, while the Lilac variant is the relevant choice for apparition and terror situations. Do not stand inside a ground-based terror field simply because an umbrella is equipped; leave the area when the attack cannot be covered by the tool. Finger Whistle is mainly a distraction and beast-control tool, with later upgrades adding specialized uses.
- Use Axe against wooden shields, Firecrackers against beasts, and Shuriken against airborne targets.
- Use Flame Vent with oil when fire vulnerability is available.
- Choose Suzaku for fire threats and Lilac for apparition or terror-focused encounters, but still move out of uncovered area attacks.
Unlock Prosthetic Arts and upgrade useful branches
After the Sculptor has fitted at least three different Prosthetic Tools, speak with him again to receive the Prosthetic Esoteric Text. This unlocks the Prosthetic Arts skill tree. Chasing Slice lets a shuriken or other tool flow into a forward sword attack; Mid-air Prosthetic Tool allows tool use while airborne; Fang and Blade adds a sword follow-up after certain tools; and Projected Force lets some defensive tools convert a successful guard into an attack. Living Force can turn a Flame Vent or other elemental tool use into a temporary weapon effect.
Upgrade materials come from exploration, defeated enemies, merchants and rewards. At the Sculptor, select a tool to see its exact material and Sen requirements. Upgrade the tools you actually use first. Stronger Firecracker branches, improved Shuriken options, Flame Vent upgrades and the Umbrella branches generally provide practical value, but do not spend rare materials across every path before deciding which tools fit your play style.
- Fit at least three different tools and collect the Prosthetic Esoteric Text from the Sculptor.
- Buy Prosthetic Arts that support your chosen tools rather than unlocking branches at random.
- Inspect material requirements before spending rare upgrade components.
Equip and use a Combat Art correctly
Combat Arts are learned from skill trees, Esoteric Texts or specific rewards. After learning one, open Equipment and select it as the active Combat Art; only one can be equipped at a time. On the PS4 layout, hold L1 and press R1 to activate it. R1 plus R2 is not the Combat Art input: R2 uses the selected Prosthetic Tool.
Use a Combat Art after a deflection, Mikiri Counter, jump counter or enemy recovery when the opponent cannot immediately interrupt you. Some arts consume Spirit Emblems, while others do not. Practice the input away from a boss so you do not confuse the Combat Art command with the Prosthetic Tool command. If an art has a long animation, use it only after confirming that the enemy is staggered or committed to recovery.
- Equip the Combat Art manually after learning it.
- Use L1 plus R1 for the Combat Art and R2 for the Prosthetic Tool.
- Do not begin a long art while the enemy is still attacking or your posture is close to breaking.
Choose arts for posture, openings and recovery
Ichimonji: Double is a dependable general-purpose art for human duels. Its strikes apply posture pressure and restore some of Wolf’s posture when they connect. Use it after a deflection or during a clear pause, and be ready to return to defense if the opponent recovers quickly. The single Ichimonji is safer when there is not enough time for the second swing.
Mortal Draw is a high-impact punish for a confirmed opening, such as a stagger, a failed grab or the recovery after a large attack. It has a committed animation and normally consumes Spirit Emblems, so do not force it into a neutral exchange. It remains usable without enough emblems, but the attack is weaker.
High Monk can punish particular perilous sweep patterns, but it is not a universal answer to every sweep. If the timing or enemy animation is unfamiliar, use the standard jump counter instead. Whirlwind Slash is a practical exploration art when several ordinary enemies are grouped together.
Breath of Life: Light is a Shinobi Arts skill rather than a Combat Art. It restores vitality after a deathblow, making it valuable while clearing areas and reducing the need to spend healing items on ordinary enemies. It does not replace healing during a boss attempt and does not need to be equipped in the Combat Art slot.
- Use Ichimonji: Double as the default posture-focused art when its animation is safe.
- Reserve Mortal Draw for openings that cannot be interrupted.
- Use High Monk only when you have identified the sweep timing and follow-up.
- Take Breath of Life: Light for safer recovery during ordinary exploration.
Before you move on
- The Sculptor has fitted the tools you intend to use, and the Equipment menu shows three suitable active slots.
- You have obtained the Prosthetic Arts text after fitting at least three different tools and purchased at least one useful Prosthetic Arts skill.
- Your loadout includes an answer for shields, an answer for beasts or large targets, and a defensive or ranged-response option.
- You can use R2 for the selected Prosthetic Tool and L1 plus R1 for the equipped Combat Art without checking the controls.
- You have Ichimonji: Double, Mortal Draw or another deliberate choice equipped for combat, and you know the opening in which you intend to use it.
- You understand that optional tools and Combat Arts improve specific matchups but do not replace attacks, deflections, Mikiri Counters and movement.
References for this chapter
- SEKIRO: SHADOWS DIE TWICE Web Manual — PS4 Special Actions and Prosthetic Tools
- Sekiro: Shadows Die Twice Game Mechanics — Activision Support
- SEKIRO: All Prosthetic Tools List — GameWith
- SEKIRO: All Skill List — GameWith
- Sekiro Shadows Die Twice All Combat Styles & Skills Locations — PowerPyx
- SEKIRO: Loaded Shuriken — Where To Get & How To Use — GameWith
Boss Patterns, Recovery and Failure Management
Sekiro’s bosses are learned through controlled attempts rather than long damage races. Use Sculptor’s Idols to restore health, Healing Gourd uses and the basic Resurrection charge, then return with one specific lesson to practice. Keep pressure on an enemy so its posture does not recover, deflect attacks instead of retreating from every exchange, and use vitality damage only when posture is recovering too quickly. Resurrection is a tactical resource, not permission to trade lives carelessly: use it to preserve a promising attempt, then regain further Resurrective Power through enemy defeats and Deathblows. When an attempt fails, identify the phase or attack that ended it, change one part of your approach, and try again. If repeated attempts reveal no progress, backtrack for permanent upgrades or practice elsewhere before returning.
Reset cleanly at a Sculptor’s Idol
When a boss attempt is lost, return to the nearest Sculptor’s Idol instead of repeatedly entering the arena while injured or short on supplies. Resting restores Vitality, replenishes Healing Gourd uses, restores the basic Resurrection charge and refills items that were transferred to the Idol because they exceeded their normal inventory limits. It also revives most ordinary enemies along the route. Use fast travel to the Dilapidated Temple or another discovered Idol if you need to change skills, spend experience, redeem Prayer Beads or ask the Sculptor to fit a more suitable prosthetic tool.
Do not assume that resting replenishes every ordinary Quick Item. Pellets, sugars and similar consumables must be managed from your inventory unless they were sent to the Idol because you exceeded their carrying limit. Resting also resets ordinary enemies, so a cleared approach may need to be cleared again. If the run is long, search for a shortcut, a stealth route or a closer Idol before spending time farming.
- Rest and refill before re-entering the arena.
- Confirm the selected prosthetic tool and Combat Art.
- Fast-travel for upgrades instead of attempting underprepared.
- Check ordinary consumable supplies separately from Idol-refilled resources.
Decide whether to continue or backtrack
Continue practicing if you are consistently reaching a later phase, learning attacks or surviving long enough to test a new response. Backtrack when your Vitality is low for the encounter, your Healing Gourd capacity is poor or your attack power and posture upgrades are noticeably behind the areas already available to you.
Prayer Beads permanently increase maximum Vitality and Posture when redeemed in complete sets, while Memories increase attack power after major bosses. A difficult fight is often a mechanics lesson, but an available upgrade can make mistakes less punishing. Revisit opened routes for missed minibosses, Gourd Seeds, prosthetic tools and Prayer Beads before deciding that a boss requires brute force. If you die without resurrecting, you can lose half of your unprotected sen and skill experience, so bank experience by earning the next skill point before taking unnecessary risks.
- Redeem every complete Prayer Bead necklace at an Idol.
- Check nearby routes for a missed Gourd Seed or miniboss upgrade.
- Bank experience before a risky series of attempts.
- Do not farm ordinary enemies indefinitely when a nearby permanent upgrade or new route is available.
Use a three-part study cycle
Treat each boss attempt as one lesson. First, learn the opening: identify whether the response is a normal deflect, Mikiri Counter, jump counter or reposition. Second, practice the deflect rhythm. Stay close enough to keep posture pressure active, attack between defensive strings and stop attacking when the enemy’s animation clearly demands a response. Third, exploit the opening: when posture breaks, perform the Deathblow immediately rather than adding ordinary attacks.
If vitality is high and posture recovers quickly, maintain aggression with short attacks followed by deflects. If vitality has been reduced, posture damage becomes easier to maintain. This does not mean every boss should be played as a slow health-drain fight; deflection and continued engagement remain the main route to posture breaks. Against an enemy with unusually fast posture recovery, deliberately reduce vitality first, then return to posture pressure.
- Name the attack you are trying to recognize before the attempt.
- Practice one response until it becomes reliable.
- Maintain pressure without attacking through a clearly signaled response.
- Convert a posture break into a Deathblow without hesitating.
Manage Resurrection deliberately
Use Resurrection when it preserves a useful attempt, such as after reaching a new phase, learning a late attack or leaving the boss one Deathblow from defeat. After resurrecting, create space only long enough to heal or reset your camera. A second death can end the attempt, and the used Resurrection may remain unavailable until you restore Resurrective Power.
Enemy defeats gradually rebuild additional Resurrective Power, and Deathblows help restore access more efficiently during a prolonged attempt. Resting restores the basic charge tied to the Idol, but it does not automatically refill every available Resurrection node. Dragon’s Blood Droplets and related recovery items have specific uses, but do not spend them casually while still learning the opening phase. If the attempt has taught you little and you are out of healing, accept the true death and restart from the Idol.
- Reserve Resurrection for a meaningful recovery or newly reached phase.
- After reviving, heal only during a confirmed opening.
- Do not expect one Idol rest to refill every Resurrection node.
- Return to the Idol when the attempt has stopped teaching you anything.
Adjust after reaching a later phase
If you regularly defeat the first phase but fail in the second, stop spending every attempt perfecting the opening phase. Practice the later phase with one clear objective: survive a particular attack string, identify one perilous attack or reach one safe healing opportunity. Once that phase becomes familiar, the earlier phase will require less attention and the complete fight will become more consistent.
Change one variable at a time. Equip a prosthetic that addresses the attack causing trouble, switch Combat Arts if the current one leaves you exposed or replace a damage-boosting item with a defensive or learning aid. Avoid changing the entire loadout after every death, because you will not know which adjustment helped. When a new tactic works, repeat it until it remains reliable while under pressure.
- Record the exact attack or phase that caused the death.
- Change one tool, skill, item or tactic for the next attempt.
- Return to the Idol and refill before testing the adjustment again.
- Keep the successful change if it improves consistency across several attempts.
Before you move on
- You can reach the boss arena with full Vitality, Healing Gourd uses, Spirit Emblems and a deliberate prosthetic loadout.
- You can identify the boss’s main normal, perilous and recovery patterns and respond consistently.
- You understand that resting at an Idol restores the basic Resurrection charge, while additional Resurrective Power returns through enemy defeats and Deathblows.
- You are reaching the same later phase repeatedly while using fewer healing items and fewer emergency Resurrections.
- You can explain why the final successful attempt worked: which posture openings, deflect strings, vitality damage or tool uses created the Deathblow.
Optional Sidequests and NPC Walkthroughs (Emma, Divine Child, Kuro, Owl)
The Purification and Return endings depend on NPC steps completed after refusing Owl’s Iron Code at the second Ashina Castle visit. For Purification, advance Kuro and Emma’s conversations, obtain Father’s Bell Charm, revisit Hirata Estate, and defeat Owl (Father) for the Aromatic Flower. For Return, progress the Divine Child through Holy Chapter: Infested, repeated Rice requests, a Persimmon, Holy Chapter: Dragon’s Return, both Great Serpent viscera and the final Frozen Tears reward. Complete these routes before defeating the Divine Dragon. Obeying Owl permanently selects Shura for that playthrough.
1. Refuse Owl and preserve the alternate endings
At the second visit to Ashina Castle, reach the rooftop where Owl confronts Wolf. When Owl demands obedience to the Iron Code, choose the option to remain loyal to Kuro. This begins the Great Shinobi Owl boss fight. Defeat Owl before continuing the late-game route.
Choosing to obey Owl instead immediately locks the playthrough to Shura. The Fountainhead Palace route, Emma’s Purification investigation and the Divine Child’s Return route are unavailable after that choice. If you want multiple endings on one PS4 save, create a backup before speaking to Owl.
- Choose to break the Iron Code and remain loyal to Kuro.
- Defeat Great Shinobi Owl.
- Do not defeat the Divine Dragon until the desired Emma and Divine Child steps are complete.
2. Start Emma’s Purification investigation
After defeating Great Shinobi Owl, return to Kuro’s Room and exhaust Kuro’s available dialogue. Rest at the nearby Sculptor’s Idol, then stand behind the screen in Kuro’s room and eavesdrop on Kuro. If the prompt is unavailable, speak with Kuro again, rest, and retry from the concealed position.
Rest once more and speak with Emma in Kuro’s room. Agree with her plan to protect Kuro, then rest and speak with her again if she has additional dialogue. Travel to the Old Grave Sculptor’s Idol. Emma is near the graves beyond the bridge; speak with her there.
Return to the Dilapidated Temple. Walk behind the temple and eavesdrop on Emma and the Sculptor. Enter the temple and speak with Emma. Ask about what you overheard, then ask what she is hiding. She gives Wolf Father’s Bell Charm. This is the required key item for the second Hirata Estate memory.
- Kuro’s concealed eavesdrop has triggered.
- Emma has been spoken to in Kuro’s room and at the Old Grave.
- Emma and the Sculptor were eavesdropped on behind the Dilapidated Temple.
- Father’s Bell Charm is in the Key Items inventory.
3. Revisit Hirata Estate and defeat Owl (Father)
At the Dilapidated Temple, use the Buddha statue that originally transported Wolf to Hirata Estate and offer Father’s Bell Charm. This opens the later Hirata memory. Follow the burning-estate route through the updated enemy encounters until you reach the audience chamber where Owl waits.
Defeat Owl (Father). This fight awards the Memory: Foster Father and the Aromatic Flower, also called the Everblossom. The flower is the Purification item used with Divine Dragon’s Tears during the ending ritual. If the optional minibosses in this memory are too difficult, they are not the ending requirement; Owl (Father) is the necessary target.
- Father’s Bell Charm was offered at the Hirata Buddha statue.
- Owl (Father) was defeated.
- Aromatic Flower or Everblossom is held before the final ending choice.
4. Begin the Divine Child’s Return route
After obtaining the Mortal Blade and accessing the Divine Child in Senpou Temple’s Inner Sanctum, obtain Holy Chapter: Infested. Depending on your progression, it is either given by the High Priest in the Main Hall or found in the underwater pool near the Temple Grounds area. Give the chapter to the Divine Child.
Request Rice from her, use or consume it, rest at an Idol, and return for more. Repeat the Rice exchanges until the Divine Child becomes ill and asks for a Persimmon. Give her a regular Persimmon; a Taro Persimmon is not required for this step.
After she recovers, continue her dialogue and obtain Rice for Kuro. Take that Rice to Kuro in Ashina Castle and exhaust the resulting dialogue. Continue resting and speaking with the Divine Child as her position changes. She eventually moves to the Hall of Illusions. Speak with her there, then obtain Holy Chapter: Dragon’s Return from the corpse in the cave beyond Senpou Temple’s Main Hall and deliver it to her.
- Holy Chapter: Infested was given to the Divine Child.
- Rice was requested and consumed until the Persimmon request appeared.
- A Persimmon was delivered.
- Rice for Kuro was delivered and Kuro’s related dialogue was exhausted.
- The Divine Child was found in the Hall of Illusions and given Holy Chapter: Dragon’s Return.
5. Deliver both serpent viscera
After receiving Holy Chapter: Dragon’s Return, the Divine Child asks for two serpent fruits. These are the Fresh Serpent Viscera and Dried Serpent Viscera. They are separate key items and both are required.
Obtain Fresh Serpent Viscera by using the Senpou Temple kite route to reach and deathblow the Great Serpent. Obtain Dried Serpent Viscera in the Sunken Valley poison-cave route by using Puppeteer Ninjutsu on the nearby monkey so it distracts the serpent, allowing Wolf to reach the building and retrieve the item.
Return to the Inner Sanctum and give the requested viscera to the Divine Child. Rest at the nearby Idol to refresh the area. If she does not immediately advance, leave and return, then check for the closed-door eavesdrop prompt. Complete that eavesdrop and speak with her afterward. She awards Frozen Tears.
- Fresh Serpent Viscera is held and delivered.
- Dried Serpent Viscera is held and delivered.
- The Divine Child’s closed-door eavesdrop has been completed.
- Frozen Tears are in the Key Items inventory before the Divine Dragon fight.
6. Observe the lockpoints and recover stalled quests
The reliable preparation rule is to finish Emma’s investigation, defeat Owl (Father) if pursuing Purification, and obtain Frozen Tears if pursuing Return before defeating the Divine Dragon. The Divine Dragon’s victory advances the game into the final Ashina sequence, where missed NPC stages may no longer be recoverable.
When an NPC appears stuck, rest at an Idol, reload the area, and exhaust every available dialogue option before moving elsewhere. Check Kuro’s Room, Emma’s current location near the Old Grave or Dilapidated Temple, the Inner Sanctum and the Hall of Illusions. Verify key items directly rather than relying on remembered dialogue.
At the final ritual after the last boss, give Kuro Divine Dragon’s Tears alone for Immortal Severance, Divine Dragon’s Tears with Aromatic Flower for Purification, or Divine Dragon’s Tears with Frozen Tears for Return. These choices only appear when the corresponding quest item has been secured.
- For Purification: Father’s Bell Charm was used, Owl (Father) was defeated, and Aromatic Flower is held.
- For Return: Holy Chapter: Infested and Holy Chapter: Dragon’s Return were delivered, both serpent viscera were given to the Divine Child, and Frozen Tears were received.
- The Divine Dragon has not been defeated before the desired sidequest items were obtained.
- A PS4 saved-data backup was made before the Owl decision and, if desired, before the final ritual.
Before you move on
- Great Shinobi Owl was refused and defeated rather than obeyed.
- For Purification, Father’s Bell Charm was used, Owl (Father) was defeated and Aromatic Flower is held.
- For Return, the Divine Child received both Holy Chapters and both serpent viscera, then awarded Frozen Tears.
- The selected ending ritual uses the intended combination of Divine Dragon’s Tears and the supplemental item.
- A backup exists before the irreversible Owl choice or final ritual if alternate endings are planned.
References for this chapter
- Sekiro: Shadows Die Twice — PlayStation product page
- SEKIRO | How to Get the Return Ending — Procedure Walkthrough
- SEKIRO | How to Get Purification Ending — Father’s Bell Charm
- Sekiro Guide: Here’s How To Unlock The Four Endings
- Divine Child of Rejuvenation Walkthrough
- Sekiro: Shadows Die Twice — Endings Walkthrough
Completion Checklist, Trophies and New Game+ Notes
Use this chapter to verify a completed standard Immortal Severance route, decide whether to begin New Game Plus, and prepare for the other endings or broader trophy goals. The normal non-Shura route requires refusing Great Shinobi Owl, defeating the Divine Dragon, then defeating Genichiro, Way of Tomoe and Sword Saint Isshin at Ashina Reservoir. After the final fight, give Kuro only Divine Dragon’s Tears for Immortal Severance. Prayer Necklaces, Healing Gourd upgrades, prosthetic tools and skills improve the character but have no fixed minimum requirement for the story ending. For future endings, preserve a PS4 backup before the Owl decision and another before the final item choice.
Confirm the standard campaign route
For the ordinary non-Shura route, you must refuse Great Shinobi Owl on the Ashina Castle rooftop and remain loyal to Kuro. Choosing to obey Owl ends the route early and commits that playthrough to Shura; Fountainhead Palace and Sword Saint Isshin are unavailable on that branch.
The late-game sequence for the standard route includes the Divine Dragon in Fountainhead Palace, followed after the return to Ashina by Genichiro, Way of Tomoe and Sword Saint Isshin. The Divine Dragon encounter awards the key item Divine Dragon’s Tears. This is the required tear item for every non-Shura ending.
- Great Shinobi Owl was refused.
- The Divine Dragon was defeated.
- Genichiro, Way of Tomoe and Sword Saint Isshin were defeated.
- Divine Dragon’s Tears were received.
Trigger Immortal Severance
After defeating Sword Saint Isshin, follow the scripted sequence until you reach the wounded Kuro in the field. Speak with Kuro and choose to give him Divine Dragon’s Tears without adding Frozen Tears or the Aromatic Flower. The item combination determines the ending: Divine Dragon’s Tears alone produces Immortal Severance, while the additional ending items lead to Return or Purification.
Remain in the area and continue the dialogue and ritual as presented. Let the ending sequence finish rather than quitting during the final interactions. On PS4, the Immortal Severance trophy should be awarded when the ending has been completed.
- Only Divine Dragon’s Tears were given to Kuro.
- Frozen Tears and the Aromatic Flower were not selected.
- The Immortal Severance ending sequence completed.
- The Immortal Severance trophy appears in the PS4 trophy panel.
Audit practical upgrades
The story does not require a fixed number of Prayer Beads, Gourd Seeds, Prayer Necklaces or prosthetic upgrades. For a practical completion standard, give at least one Gourd Seed to Emma so the Healing Gourd has been improved beyond its starting capacity. Prayer Beads should be offered at Sculptor’s Idols in groups of four to create Prayer Necklaces and raise vitality and posture.
Prosthetic tools and skill unlocks are optional for story completion, but they make later encounters more manageable. Record missing Prayer Beads, Gourd Seeds, tool upgrades and skill-tree requirements before starting another cycle. Some Prayer Beads are associated with optional or late-game content, including the Purification route, so a standard-ending file does not necessarily contain every bead.
- At least one Gourd Seed was given to Emma.
- Collected groups of four Prayer Beads were converted into Prayer Necklaces where possible.
- Useful prosthetic tools are installed and upgraded as materials allow.
- Missing upgrades and optional bosses have been recorded.
Check optional ending preparation
Immortal Severance does not require the Purification or Return questlines. If you plan to pursue Purification in another branch, Emma’s investigation must be advanced before the relevant late-game lockpoint, the Father’s Bell Charm must be obtained, and Owl (Father) must be defeated in the second Hirata Estate memory to obtain the Aromatic Flower.
For Return, the Divine Child of Rejuvenation quest must be completed far enough to obtain Frozen Tears before the Divine Dragon is defeated. At the final choice, Divine Dragon’s Tears plus Frozen Tears produces Return; Divine Dragon’s Tears plus the Aromatic Flower produces Purification. These items and their associated quest stages should be completed before entering the final Fountainhead Palace progression.
- Aromatic Flower is available if Purification is planned.
- Frozen Tears are available if Return is planned.
- Emma and the Divine Child reached the required quest stages before the late-game lockpoint.
Choose whether to begin New Game Plus
After the ending and credits, the game offers to begin the next journey. You may accept immediately or decline and continue from the completed save. Starting New Game Plus resets story progression, NPC states, area access and story-related key items, so the campaign must be replayed to reacquire the Mortal Blade, route keys and other progression items.
Character development and normal equipment carry over. This includes learned skills, attack power, vitality and posture, Prayer Necklaces, Healing Gourd capacity, prosthetic tools and their upgrades, Sen, experience and most ordinary inventory. Do not treat the new cycle as a fresh character, but do expect its story flags and key progression items to be reset.
- The completed save is backed up or otherwise preserved before starting NG+.
- Skills, prosthetic tools and upgrades are organized for the next run.
- Story keys and NPC progress are understood to reset.
- Missed upgrades and optional bosses are noted for the next cycle.
Plan all four endings and related trophies
Sekiro has four recognized endings: Shura, Immortal Severance, Purification and Return. Shura requires obeying Great Shinobi Owl and cannot be combined with the Fountainhead Palace route in the same playthrough. The other three endings require refusing Owl.
For a single-save branching plan, create a standard PS4 saved-data backup before the Owl decision if you want to preserve both the Shura and non-Shura routes. For the three non-Shura endings, make another backup after defeating Sword Saint Isshin and before choosing the items for Kuro. Restore only your own saved data through normal PS4 backup or cloud-management procedures, and check the trophy panel after each completed ending.
- A backup exists before the Owl decision if both major branches are wanted.
- A second backup exists before the final item choice if the three non-Shura endings are wanted.
- Each earned ending trophy has been verified in the PS4 trophy panel.
Perform the final completion audit
A standard campaign completion consists of the intended ending trophy, the Divine Dragon victory and the correct final boss route. A broader trophy-completion file must separately account for all four endings, the required boss trophies, maximum vitality and posture, every skill and all prosthetic upgrades, along with the remaining collection trophies shown in the PS4 trophy list.
Keep the completed save if you want a permanent record of the first ending. Use New Game Plus for another ending, missed upgrades, additional Lapis Lazuli, optional boss rematches and experience farming. The story resets, but the strengthened character and carried-over equipment make the next route faster to prepare.
- The intended ending trophy is recorded.
- The Divine Dragon and correct final boss route are complete.
- At least one Gourd Seed was used to increase Healing Gourd capacity.
- Remaining endings, bosses, skills, prosthetic upgrades and collection trophies have been checked individually.
Before you move on
- The Immortal Severance trophy appears on PS4 after giving Kuro only Divine Dragon’s Tears and completing the ending sequence.
- The standard non-Shura route includes the Divine Dragon, Genichiro, Way of Tomoe and Sword Saint Isshin.
- At least one Gourd Seed was given to Emma and Healing Gourd capacity increased.
- If broader completion is intended, the PS4 trophy panel confirms the additional endings, bosses, skills, prosthetic upgrades and collection goals individually.
References for this chapter
Finishing up
Defeat the Divine Dragon at Fountainhead Palace and Sword Saint Isshin, then complete the post-Isshin sequence that produces the Immortal Severance ending.
Confirm acquisition or deliberate non-acquisition of the ending-critical items and quest states: Divine Dragon’s Tears, Frozen Tears, Aromatic Flower, or the decision to obey Owl that locks the Shura route.
Have practical preparation for late bosses, such as one or more Healing Gourd capacity upgrades, useful Prayer Necklaces, selected Combat Arts and multiple installed prosthetic tools. These upgrades are recommended, not fixed completion requirements.
Confirm the major route milestones and bosses cleared in Ashina Outskirts, Hirata Estate, Ashina Castle, Sunken Valley, Ashina Depths, Fountainhead Palace and the final Ashina sequence.
Choose your next gameScreenshots & video
Game imagery for reference. Follow the written chapters above for the route and strategies.
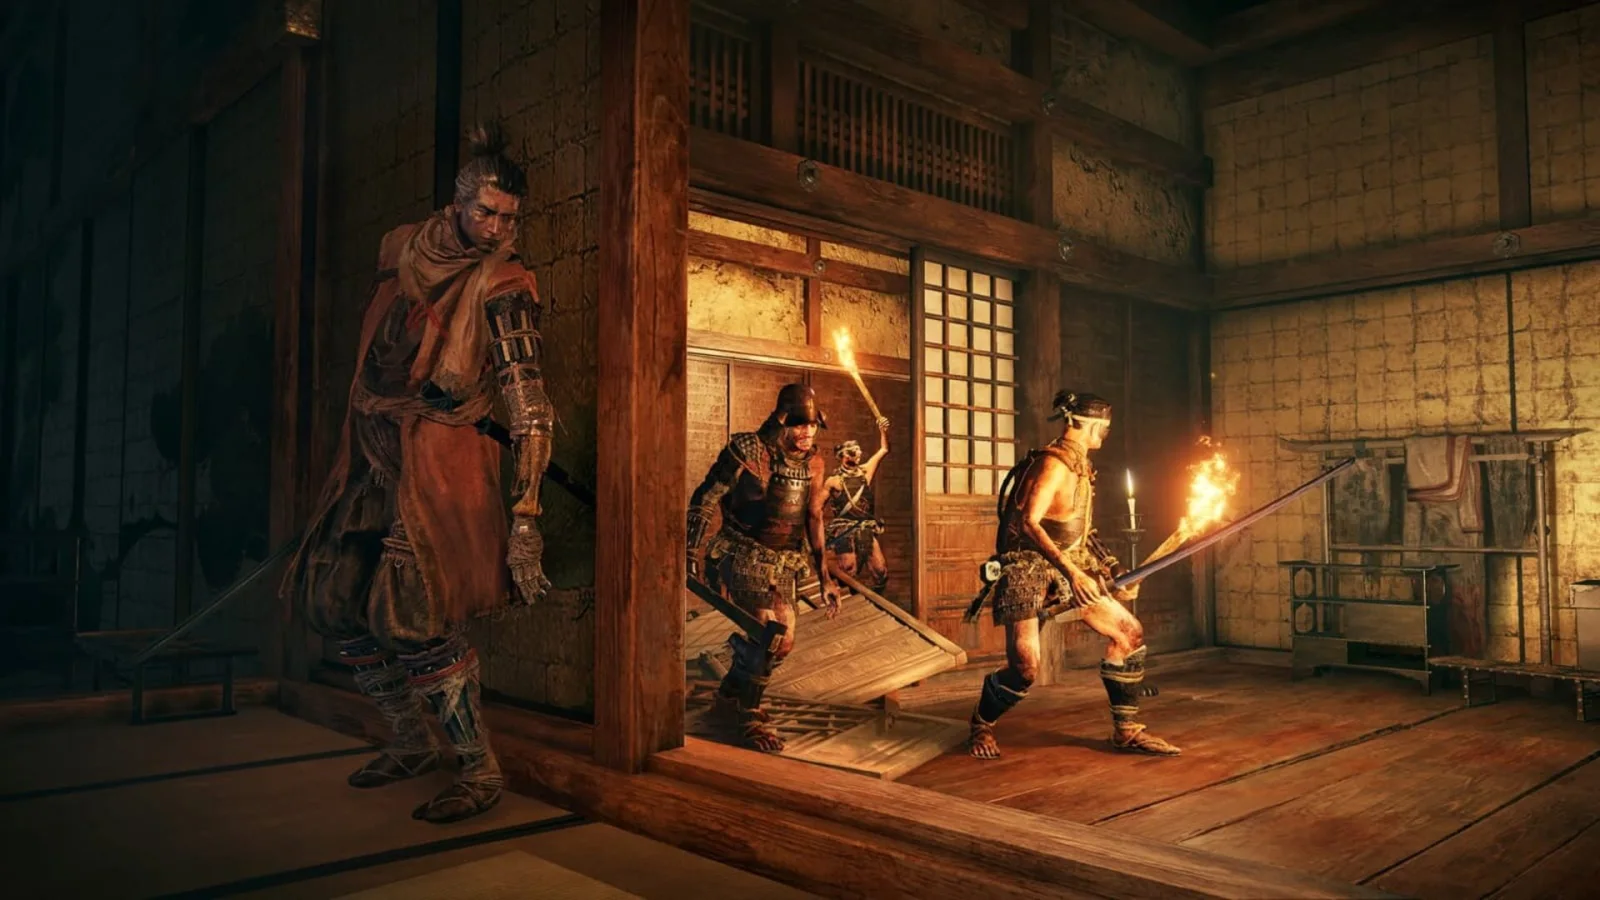
Sources & references
Our original guide draws on the references below. Check the edition at the top of this page before following controls or unlock requirements.
- Sekiro: Shadows Die Twice Game Mechanics — Activision Support
- SEKIRO: SHADOWS DIE TWICE — PS4 Web Manual: Controls
- Sekiro: Shadows Die Twice — FromSoftware PS4 Web Manual: Basic Actions
- SEKIRO: SHADOWS DIE TWICE Web Manual — PS4 Special Actions and Prosthetic Tools
- SEKIRO: SHADOWS DIE TWICE — PS4 Web Manual: Game Basics
- How to Unlock and Use Mikiri Counter in Sekiro: Shadows Die Twice
- Healing Gourd — Sekiro: Shadows Die Twice Wiki
- SEKIRO: SHADOWS DIE TWICE — Web Manual: Controls
- Part 1: Ashina Outskirts & Hirata Estate Walkthrough
- Sekiro Shadows Die Twice – Ashina Outskirts Walkthrough
- Sekiro Shinobi Prosthetics Location Guide
- Ashina Reservoir Prologue Walkthrough
- Hirata Estate (Kuro’s Memory) — Sekiro: Shadows Die Twice walkthrough
- Sekiro Shadows Die Twice — Hirata Estate walkthrough
- SEKIRO — Prayer Bead Locations
- Sekiro Shadows Die Twice – All Prayer Bead Locations
- Part 2: Act 1 — Ashina Outskirts – Sekiro Walkthrough
- All 9 Gourd Seed Locations Guide
- Sekiro walkthrough — GamesRadar+
- Sekiro Shadows Die Twice — Ashina Castle Walkthrough
- Ashina Castle — Sekiro: Shadows Die Twice Walkthrough & Guide
- Sekiro: Shadows Die Twice — Ashina Castle
- Sekiro: Shadows Die Twice – Senpou Temple, Mt. Kongo Walkthrough
- Walkthrough: Senpou Temple, Mt. Kongo – Sekiro: Shadows Die Twice
- Sekiro Shadows Die Twice: Senpou Temple Walkthrough
- Sekiro Guide: Here’s How To Unlock The Four Endings
- SEKIRO | How to Get the Return Ending — Procedure Walkthrough
- Sekiro – All Prosthetic Tools Locations
- SEKIRO | How To Beat Long-Arm Centipede Sen’un
- Sekiro Shadows Die Twice - Ashina Depths Walkthrough
- SEKIRO | Mibu Village ~ Water Mill
- Mibu Breathing Technique - Sekiro: Shadows Die Twice Walkthrough
- Mibu Village - Sekiro: Shadows Die Twice Walkthrough & Guide
- Ashina Depths and Mibu Village - Immortal Severance - Walkthrough
- Sekiro: Shadows Die Twice — How to Get All Endings
- Sekiro Shadows Die Twice Fountainhead Palace Walkthrough
- Sekiro Shadows Die Twice Boss Guide All Bosses
- Great Shinobi Owl Boss Walkthrough
- Sekiro Shadows Die Twice Great Shinobi Owl Boss Guide
- Sekiro: Shadows Die Twice — PlayStation product page
- Sekiro: Shadows Die Twice — Official Game Website
- SEKIRO Ending Guide — GameWith
- SEKIRO | How to Get Purification Ending — Father’s Bell Charm
- Things to Do Before Divine Dragon — EzzyGameStats
- Fountainhead Palace — Sekiro: Shadows Die Twice Walkthrough & Guide, PS4
- Fountainhead Palace — Sekiro: Shadows Die Twice Walkthrough & Guide, PS4
- Sekiro Divine Dragon Boss Guide: How to Beat the Divine Dragon and the Old Dragons of the Tree
- SEKIRO: How to Beat Divine Dragon
- Ashina Castle — Final — Immortal Severance Walkthrough
- Ending 2: Immortal Severance
- Immortal Severance Ending Guide
- Ashina Castle & Outskirts (The Final Visit) — Sekiro Walkthrough & Guide
- SEKIRO | Ashina Castle ~ vs. Sword Saint Isshin
- Endings — Sekiro: Shadows Die Twice Walkthrough & Guide
- How to Get All Four Sekiro Endings — PC Gamer
- Walkthrough: Path to Fountainhead Palace — Neoseeker
- SEKIRO: All Prosthetic Tools List — GameWith
- SEKIRO: All Skill List — GameWith
- Sekiro Shadows Die Twice All Combat Styles & Skills Locations — PowerPyx
- SEKIRO: Loaded Shuriken — Where To Get & How To Use — GameWith
- SEKIRO: SHADOWS DIE TWICE — PS4 Web Manual: Game Screen
- SEKIRO: SHADOWS DIE TWICE — FromSoftware Manual Directory
- Divine Child of Rejuvenation Walkthrough
- Sekiro: Shadows Die Twice — Endings Walkthrough
- Sekiro: Shadows Die Twice — official site
- SEKIRO — New Game Plus Guide
- Sekiro: Shadows Die Twice — Immortal Severance Trophy
About the game & collecting notes
- Platform
- PlayStation 4
A focused, step-by-step campaign walkthrough for the PS4 edition that takes you from the prologue through the game's main ending (Immortal Severance). Includes preparation, trusted routes for required bosses, prosthetic and skill guidance, and optional routes for Purification, Return and Shura endings.
Darryl Polo
Darryl Polo loves tinkering with emulation and revisiting retro games. He enjoys exploring how old favorites play on different setups and sharing what he learns along the way. At Joking Joystick, he writes about the games, hardware, and small discoveries that keep the hobby fun.
Our editorial standardsFound a step that needs another look? Help us improve this guide.