
Secret of Mana (Super Nintendo Entertainment System, USA) — Complete Campaign Walkthrough
Step-by-step campaign walkthrough for the original 1993 Super Nintendo (USA) release of Secret of Mana. This guide covers core progression from pulling the rusty Mana Sword at the waterfall through obtaining all eight elemental spirits and completing their Mana Seed story events, the Pure Land and Mana Tree sequence, and the Mana Fortress finale. It includes practical advice on party control, Ring Commands, weapon orbs, magic, boss behavior and required story triggers, ending when the Mana Beast is defeated and the ending sequence and credits play.

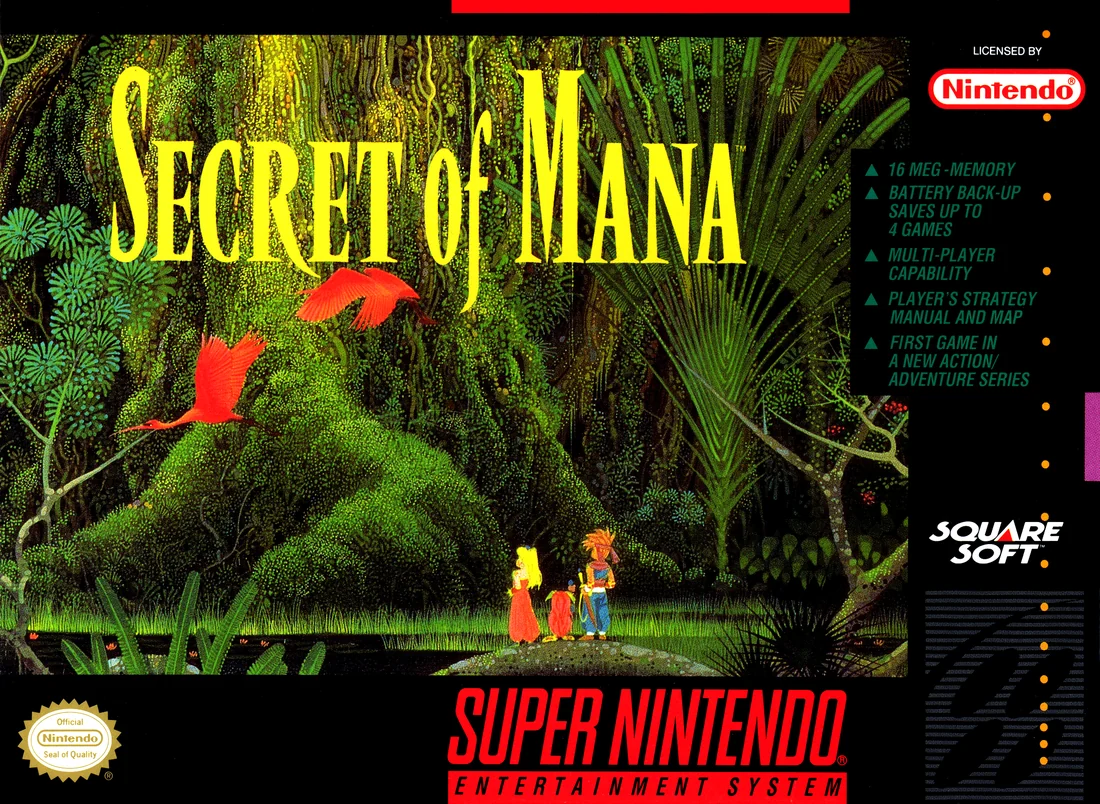
Find a copy
Secret of Mana Super Nintendo Entertainment System
We may earn a commission if you buy through these links, at no extra cost to you. As an Amazon Associate I earn from qualifying purchases.
Opens retailer search results. Check the model, edition, seller, availability and current price before buying.
Before you begin
You play as the lone hero who pulls the rusty Mana Sword from a stone near a waterfall and is cast out of Potos, beginning a globe-trotting real-time action RPG.
The original SNES USA release uses Ring Commands for weapons, equipment, items and magic, while the other two party members can be controlled by the computer or by additional local players.
This walkthrough follows the required story route from Potos through the Mana Fortress. It distinguishes mandatory objectives from optional weapon forging, equipment, spell leveling and side areas. The Wood Mana Seed event is handled accurately: the attempted sealing fails at the Tree Palace, Dryad joins the party, and Dryad’s Mana Magic remains sealed until Dark Lich is defeated. The guide ends with the Mana Beast’s defeat and the closing credits.
Set yourself up for the run
Familiarize yourself with the Ring menu and weapon gauge: open the Ring to use spells, items, equipment and to switch which allied character the Ring targets.
Using the Ring pauses action and is your primary survival tool.
(See the official manual for the Ring controls.)
Decide single-player or local co-op: the SNES original supports two- and three-player local play.
A second or third player can join at any time by pressing Start on their controller once their character has joined the party.
In single-player, use the Ring to issue commands and switch active characters quickly.
(Manual reference.)
Plan your weapon-orb deliveries: many weapon upgrades are unlocked by taking Weapon Orbs to Watts the blacksmith.
Deliver orbs as you find them to keep weapon level ahead of enemy scaling; delayed upgrades make later palaces significantly harder.
Keep magic casting balanced: spell strength grows with use.
Primm (the female ally) handles defensive/healing spirits and Popoi (the Sprite) handles most offensive spells — consistently cast each element during normal fights so every spirit levels up steadily.
Stock items and save often: towns, inns and chests replenish your supplies at set points.
Make explicit save points before palace entries and major boss rooms to avoid repeating long approaches.
Use Flammie (dragon) travel when it becomes available to skip long overworld treks — you must trigger the Flammie hatch event to unlock free overworld flight.
Note which overworld paths remain inaccessible until specific story beats are complete.
If you plan co-op, assign roles: one player leads melee (main protagonist), others focus on spellcasting and support.
For a two-player game assign Player 2 to the most vulnerable caster to reduce friendly fire and improve survivability.
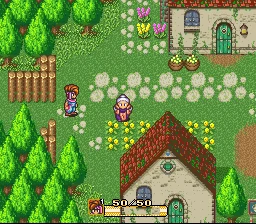
Core systems, controls and local co-op
Learn the original North American SNES control scheme, Ring Command layout, weapon gauges, ally targeting and drop-in multiplayer before relying on these systems in battle. The default controls below assume the original controller configuration; Secret of Mana also lets you change button assignments through Controller Edit.
Open and navigate the Ring Commands
Press Y to open the Ring Commands for the character currently controlled by your controller. Press Y again to close that Ring. When an ally's Ring is displayed, pressing Y returns to the hero's Ring first; press Y again to close the menu. The Ring can also be used as a pause window, giving you time to choose an item, inspect equipment or select a spell before returning to the battlefield.
Use Left and Right to rotate around the visible Ring. Use Up and Down to move between Ring types. Move the command you want into the box at the top, then press B to select it. The hero has the general command Rings, while the Girl and Sprite also gain Magic Rings after receiving elemental spirits.
The Item Ring holds consumables and permanent usable items. Highlight Candy, Chocolate, a Cup of Wishes or another item and press B. If the item requires a target, a hand cursor appears over the party portraits. Move the cursor to the intended character and press B again. This is the normal way to heal or revive a specific ally. Do not confuse opening the Item Ring with using the item: the menu pauses your planning, but the item action still occurs after you confirm it.
The Weapon Ring lets the current character equip a weapon already in the party inventory. Highlight the weapon and press B; the selection flashes. Press B again to confirm, or press Y to cancel. If another party member is carrying the chosen weapon, the game exchanges the weapons rather than producing a duplicate. Use the Equip option in the Edit Ring for helmets, suits, dresses, gloves and other armor. Armor changes also require selecting the equipment and confirming it with B.
The Edit Ring contains Targeting, Status, Weapon/Magic Level, Action Grid, Controller Edit, Window Edit and Equip. Use Weapon/Magic Level to check weapon experience, available weapon orbs and spell levels. Use Controller Edit only if you deliberately want to change the default assignments; directions in this chapter refer to the original layout.
- Y opens the current character's Ring.
- Left and Right rotate the visible Ring; Up and Down change Ring types.
- B selects the command at the top of the Ring and confirms equipment or targets.
- Use the hand cursor after selecting a recoverable item to choose the ally who receives it.
- Use Edit Ring and Equip to manage armor, not the Weapon Ring.
Open an ally's Ring and manage spells
Press X to open the Ring Commands of an ally who is not the character currently controlled by your controller. Press X again to cycle to the other ally. This lets you change an ally's weapon, armor, items, Action Grid settings or spells without first switching direct movement to that character. To close an ally's Ring, press Y twice as needed: once to return to the hero's Ring and once to leave the Ring screen.
The Girl and Sprite each have a Magic Ring containing the spells granted by their elementals. Open the appropriate ally's Ring with X, move Up or Down to the Magic Ring, rotate to the desired spell and press B. For a spell that needs a target, use the target cursor to select an enemy or party member, then confirm with B. Healing and support spells should normally be assigned to a party member who is not standing inside the enemy group.
The Ring is a planning pause, not a guarantee that a spell resolves instantly. After you confirm a spell, the caster must complete the casting action in the active field. If the caster is surrounded, move that character away before issuing another spell command. The computer-controlled party members can follow, attack and cast according to their settings, but they do not consistently avoid every area attack.
For routine recovery, select the Item Ring and aim the hand cursor at the injured character. For magic recovery, open the Girl's or Sprite's Magic Ring and choose the proper ally target. Keep the target cursor visible long enough to verify the correct portrait; an accidental self-target or wrong ally can waste a valuable item or spell.
- Use X to access an ally's Ring without changing the character under direct control.
- Press X again to cycle between the two allied Rings.
- Use the Magic Ring only after that ally has received elemental spirits.
- Confirm the target cursor is on the intended ally or enemy before pressing B.
- Move a caster away from melee range before chaining spell commands.
Set ally behavior and focus targets
Open an ally's Edit Ring and choose Action Grid to control that character's computer behavior. The grid includes positions that make an ally stay farther from monsters, guard the hero, approach more cautiously or attack more aggressively. Use the safer positions for the Girl and Sprite when a room contains wide area attacks. A front-line setting can be useful for the hero or another durable fighter, but it is not automatically safe for a caster.
The Action Grid also includes a charge setting for computer-controlled weapon attacks. Leaving the setting low or at zero makes the ally act more frequently instead of waiting for a long power attack. Raise it only when you deliberately want that character to attempt charged blows and the battlefield gives enough room to survive the delay.
Choose Targeting from the Edit Ring when you want an ally to concentrate on a particular enemy. Place the hand cursor over the enemy and press B. The computer-controlled allies then focus their attacks on that target while you handle another enemy or reposition the party. Retarget after the selected enemy dies or leaves the room. The Hero's Target function can also identify an enemy, but ally-focused attacking is the practical combat use.
Use Targeting against a dangerous monster in a group, a distant enemy that ordinary ally movement ignores or a boss with supporting enemies. This does not make the ally invulnerable; keep checking the ally's position and health, especially when the target uses an area attack.
- Use Action Grid to keep fragile casters away from crowded melee.
- Leave the ally charge setting low when frequent attacks are safer than delayed power attacks.
- Use Targeting to assign a dangerous enemy to computer-controlled allies.
- Retarget when the chosen enemy is defeated or no longer relevant.
Understand the action gauge and power attacks
Press B to perform a normal weapon attack. After attacking, watch the weapon power meter in the status display refill. When it reaches 100 percent, the character is ready to perform another full-power normal attack. Moving and positioning during this recovery period is usually safer than standing still beside the enemy.
A power attack uses a second stage of charging. Hold B while the character is ready to act. The normal action meter reaches 100 percent, then a power bar appears and continues building toward the charge level available from the equipped weapon. Release B after reaching the desired level to perform the stronger attack. The maximum charge available depends on the weapon's current level and the weapon orbs collected for that weapon.
This means 100 percent on the ordinary action meter is not the complete description of a power attack. At 100 percent, you may release for a ready full-power normal strike, or continue holding B to build the separate power-attack bar. Do not remain exposed simply because the power bar is still filling. The manual specifically warns that charging takes time and leaves the character open to attack.
Use a charged strike after an enemy finishes a visible attack, becomes trapped against terrain or moves through a narrow approach. Against a fast enemy, a normal attack followed by movement is often safer than waiting for a high charge. Against a slow enemy, charge from outside its immediate attack range, then step away after the strike. Practice this rhythm in a field area before attempting it during a boss fight.
- Press B for a normal attack and wait for the action meter to recover.
- At 100 percent, the character is ready for a full-power normal strike.
- Continue holding B after 100 percent to build the separate power-attack bar.
- Release after reaching the desired available charge level.
- Move during recovery and stop charging if an enemy is about to reach you.
Join and leave local multiplayer
The original SNES release supports up to two players with two controllers and up to three players when a compatible multitap is connected. The opening begins with the hero alone, so a second controller cannot take control of an absent ally. Once another hero has joined the party, press Start on Controller Two to enter the quest. The player takes control of an available allied character while the remaining character stays under computer control.
In a one-player session, press Select on Controller One to switch direct control between the hero, Girl and Sprite. The previously controlled character returns to computer control. This is useful for moving the Sprite away from a hazard, positioning the Girl before opening her Magic Ring or using a different weapon for a particular enemy.
In a two-player session, Controller Two cannot take the character controlled by Controller One. Press Select on Controller Two to switch between the other available characters. Controller One likewise switches only among characters not assigned to Controller Two. This prevents both players from controlling the same hero. If a third player joins through a multitap, each player takes a separate character and the remaining assignments are fixed while all three controllers are active.
To remove a human player, press Start again on that player's controller. The character is returned to computer control. This is the emergency un-assign procedure if a player needs to leave or if you want the AI to handle an ally temporarily. Check the character portraits and controller indicators afterward so you know which hero each controller currently owns.
Test multiplayer in a safe field or town area. Have each player move, attack, open the correct Ring, switch characters with Select where allowed and then leave with Start. Do not wait until a boss is casting an area attack to discover that the wrong player controls the healer.
- Wait until an ally has joined before using a second controller for character control.
- Press Start on Controller Two to join and Start again to leave.
- Use Select to switch among characters not assigned to another human player.
- Use a compatible multitap for three-player control after all three heroes are present.
- Check controller indicators after every join, leave or character switch.
Before you move on
- Open the active character's Ring with Y, select a Candy or Cup of Wishes, place the hand cursor on the intended ally and confirm the item.
- Press X to open an ally's Ring, cycle to the other ally with X, inspect the Magic or Action option and close the Ring with Y.
- Open an ally's Edit Ring, select Targeting and assign a visible enemy; confirm that the computer-controlled ally focuses that target.
- Perform a normal B attack, wait for the action meter to reach 100 percent, then hold B beyond that point and release a power attack after the separate charge bar has built.
- After a second party member joins, press Start on Controller Two, move the controlled ally, use Select to switch among permitted characters and press Start again to return that controller's character to computer control.
Potos Village and the Mana Sword
Pull the rusty Mana Sword from the waterfall clearing, return to Potos, survive the Elder’s trap and defeat the solo Mantis Ant battle. Claim the Sword Orb, complete the final departure sequence in Potos and follow the signs toward the Water Palace. The Water Palace itself belongs to the next chapter.
Reach the waterfall clearing and pull the Mana Sword
After the opening fall, follow the visible route through the forest. The path soon reaches a blocked section of undergrowth that cannot be cleared with your bare hands. Continue to the nearby water and approach the rusty sword embedded in the ground beside the waterfall. Examine the sword and pull it free when prompted.
This is the required opening event. The sword is the Mana Sword, although it begins in a weakened, rusty state. Removing it allows you to cut through the plants that blocked the route. Equip the sword and use it to clear the undergrowth, then continue along the newly opened path toward Potos Village.
The early forest is also the safest place to learn the basic combat rhythm. Let the attack gauge recover between swings instead of repeatedly attacking while the character is still recovering. Rabites are useful for earning a little experience and GP, and fighting several of them before entering Potos makes the first boss more forgiving. Do not treat this as a mandatory grinding requirement; the Mantis Ant can be defeated without extensive preparation.
- Reach the clearing beside the waterfall.
- Pull the rusty Mana Sword from the ground.
- Equip the sword and cut through the blocking plants.
- Continue along the path to Potos Village.
Prepare in Potos before visiting the Elder
Enter Potos Village and take a moment to prepare before starting the Elder’s sequence. The item shop is the building marked with the pot sign. If you have enough GP, purchase the Bandana and equip it through the equipment ring. Early armor is more useful than spending all your money on consumables, but keep enough GP for at least one or two basic healing items if the shop inventory and your funds allow.
You can also save your progress in the village before entering the Elder’s house. The Elder’s house is in the upper-right part of Potos. Do not enter it until you are ready for the first boss sequence, because speaking with the Elder advances the story and drops the hero into the battle area.
The hero fights alone at this point. No ally is available for the Mantis Ant encounter, and Undine has not joined or granted any magic. Do not search Potos for a water spell or attempt to plan around one. The battle is intended to be handled with the Mana Sword, movement and basic recovery items.
- Visit the Potos item shop if you need early armor or healing items.
- Equip the Bandana if you purchase it.
- Save in Potos before entering the Elder’s house.
- Confirm that you are ready to fight alone.
Trigger the Elder’s house event
Enter the Elder’s house in the upper-right area of the village and speak with him. The conversation explains why the sword’s removal has placed Potos in danger. After the dialogue, an earthquake interrupts the scene and the floor gives way beneath the hero.
You cannot freely leave once this sequence begins. The fall leads directly to the Mantis Ant arena, so make sure the hero is healed and carrying any basic recovery items before speaking with the Elder. The battle begins immediately after the scene finishes.
The game’s opening sequence is designed to teach the consequences of attacking during an enemy’s recovery window. Move around the arena rather than standing directly beside the boss at all times. Watch for an opening, strike, then move away before the Mantis Ant can answer.
- Enter the upper-right house in Potos.
- Speak with the Elder.
- Allow the earthquake and falling-floor sequence to finish.
- Begin the Mantis Ant battle.
Defeat the solo Mantis Ant
The Mantis Ant is fought with the hero alone. Use ordinary sword swings when the boss is within safe reach, or build the weapon gauge while moving and release a level-one charged strike after the boss finishes an attack or movement. A charged attack is most reliable when the Mantis Ant has just missed or completed a commitment, because attacking while it is already striking can leave the hero exposed.
Keep circling the arena and avoid standing directly in front of the boss for longer than necessary. The Mantis Ant can knock the hero down and can use a ranged attack, so do not assume that staying close guarantees safety. Approach only when you have a clear opening, attack once or twice, and resume moving.
If the hero’s health becomes low, open the Ring menu and use a Candy or another available healing item. The menu provides time to select the item, but movement and danger resume after the menu closes. Heal before reaching critical health rather than waiting for a single mistake to end the fight.
If the hero is defeated during this introductory battle, the original game can revive him and let the sequence continue. Even so, healing before the fight and using short attack exchanges is the safer method. Do not reset merely because the hero falls; allow the encounter to resolve before deciding whether another attempt is necessary.
- Fight the Mantis Ant without Undine or party support.
- Attack after the boss misses or finishes moving.
- Use short sword exchanges and level-one charged strikes when safe.
- Heal through the Ring menu when necessary.
- Defeat the Mantis Ant.
Claim the Sword Orb and leave Potos
When the Mantis Ant is defeated, the game awards the Sword Orb. This is the first weapon orb in the campaign. Keep track of it in the weapon section of the Ring menu; it is not the same thing as an immediate weapon-level increase. A blacksmith will be needed later to reforge the sword when the story reaches the appropriate town.
After the battle, return to the surface and follow the Elder’s next instructions. If you did not open it earlier, check the basement chest in the Elder’s house for the early GP reward. This is optional but useful for buying recovery items and equipment. Do not wander into later story areas while trying to complete this chapter; the required objective here is only to finish the Potos departure sequence.
Leave Potos through the lower-right exit once the guards and story events allow it. Follow the posted signs along the route toward the Water Palace. You may encounter enemies on the road, but no Water Palace interior, Mana Seed sealing scene or elemental spirit event belongs in this chapter. Stop at the chapter endpoint when the hero has left Potos and is traveling toward the Water Palace.
- Receive the Sword Orb after defeating the Mantis Ant.
- Check the Elder’s basement chest if it remains unopened.
- Leave Potos through the lower-right exit.
- Follow the signs toward the Water Palace.
- Stop before beginning the first Water Palace visit.
Before you move on
- The rusty Mana Sword has been pulled from the waterfall clearing.
- The sword has been used to clear the opening forest route to Potos.
- The Elder’s house event has been triggered.
- The solo Mantis Ant has been defeated.
- The Sword Orb has been awarded.
- The hero has completed the post-battle Potos sequence and left through the lower-right exit.
- The route toward the Water Palace has been identified, but the first Water Palace visit has not yet been covered.
References for this chapter
- Secret of Mana - Super NES Instruction Manual
- Secret of Mana Walkthrough Part 1 — RPG Classics
- Secret of Mana — Guide and Walkthrough by JD_Cyr, Super Nintendo — GameFAQs
- Secret of Mana - Guide and Walkthrough - Super Nintendo - By Snow_Dragon
- Secret of Mana — Complete walkthrough for the SNES US/EU route
Water Palace through Undine’s Cave — recruit Primm and obtain Undine
After Mantis Ant, travel to the Water Palace, restore the Water Mana Seed and receive the Spear. Recruit Primm in Pandora Castle, then take her through the Haunted Forest far enough to break the route blockage before entering Gaia’s Navel. Complete the dwarf village events, recruit Popoi and defeat Tropicallo. Return through the Haunted Forest, clear Elinee’s Castle and defeat Spikey Tiger. After Luka calls the party back, enter the cave east of the Water Palace, defeat Tonpole and Biting Lizard, then receive Undine’s magic and the Pole Dart. The chapter ends with the Underground Palace route ready to open.
Restore the Water Mana Seed
From the area after Mantis Ant, travel north toward the Water Palace. You can walk or use the Cannon Travel station southeast of Potos. Walking gives more opportunities to raise weapon levels and collect money, but Cannon Travel is safe if you want to reach the palace quickly. Neko’s shop lies along the route; his prices are high, so use him mainly when you need supplies or a save point.
Speak with the soldiers outside the Water Palace, then enter the palace and move north through the opening rooms. Activate the floor switch to extend the bridge and cross to Luka’s chamber. Speak with Luka and use the Mana Sword on the Water Mana Seed when the scene prompts you. The seed is restored, and Luka gives Randi the Spear. This is the first spear reward; it is not the Pole Dart received later from Undine.
Leave the palace and travel south toward Pandora. If the soldiers were spoken to until they leave, the goblin capture scene occurs on the road and the mysterious girl rescues Randi. If that scene does not occur, she will not join during the first Pandora visit, and the recruitment timing changes. For the normal route covered here, make sure the girl is encountered before entering Pandora Castle.
- Reach the Water Palace after defeating Mantis Ant.
- Activate the bridge switch and speak with Luka.
- Restore the Water Mana Seed with the Mana Sword.
- Receive the Spear from Luka.
- Travel south toward Pandora.
Recruit Primm in Pandora Castle
Enter Pandora through the southern approach and go to the castle in the northeast part of town. If the goblin capture occurred, go to the second floor and follow the girl when she appears. She insists on joining the party; accept her and keep the default name or choose another name. She is the character called Primm in most modern guides, although the original North American release may display a different default spelling.
Equip Primm with the best current head, body and wrist armor available in Pandora or Kippo Village. She has poor front-line durability at this stage. Keep her behind Randi and Popoi, and use the Ring menu to heal her before she is surrounded. The Ring menu pauses the action while it is open, but enemies remain positioned where they were when the menu opened, so move her immediately after using an item or spell.
Before entering Gaia’s Navel, leave Pandora through the western exit and travel toward Kippo Village. Do not simply enter the cave route. Primm refuses to go to Gaia’s Navel until the party has reached the blockage in the Haunted Forest and established that the path cannot be cleared with the weapons currently available.
- Enter Pandora Castle after the goblin rescue scene.
- Recruit Primm on the castle’s second floor.
- Equip Primm with current armor.
- Set Primm to a rearward support position.
- Leave Pandora through the western route.
Use the Haunted Forest detour to keep Primm
From the Pandora route, pass Kippo Village and continue north toward Gaia’s Navel. Before entering the cave, turn toward the Haunted Forest. The forest contains repeating screens and warp points, so use distinctive scenery as landmarks. Visit Neko when you reach him, save, and buy only the healing items you can afford; the forest and castle are long enough that a few Candies, Chocolates and Cups of Wishes are valuable.
From Neko, continue through the warp points until you reach the skull statues blocking the route. Try to clear the obstruction with the weapon currently available. The party cannot remove it yet, and the scene causes Primm to agree to continue with the party toward Gaia’s Navel. This detour is required for the normal route. If you enter Gaia’s Navel before completing it, Primm can leave and the next sequence becomes more troublesome.
Return from the forest to the Gaia’s Navel approach. Use the northwest route and follow the cave entrances toward the dwarf village. In the first cave sections, slimes can multiply and bats can inflict Balloon, so defeat them quickly rather than allowing a group to build up around Primm.
- Visit the Haunted Forest before entering Gaia’s Navel with Primm.
- Reach the skull blockage and trigger the scene.
- Visit Neko and save before the longer route.
- Return to the Gaia’s Navel entrance.
- Keep Primm in the party.
Reach the dwarf village and defeat Tropicallo
Inside Gaia’s Navel, follow the cave route through the lava-blocked passages. When lava prevents progress, search the nearby side rooms for skull-shaped switches. Strike each switch with a weapon to release water and cool the lava. In the later cave section, activate the second switch to reach the ledge leading into the dwarf village.
Complete the dwarf village theater scene. Popoi joins the party before the boss battle, giving the group its third member. Speak with the villagers, rest at the inn if needed and check the weapon and armor rings. Randi should normally use the Sword or Spear, Popoi should attack from range, and Primm should remain behind both characters.
Enter the Tropicallo battle after saving and restoring. Tropicallo alternates between hiding and exposing itself, so attack when its body is available and retreat when it launches projectiles or when the supporting enemies close in. Charged attacks are effective, but do not wait motionless in front of the boss while it is preparing an attack. If Primm is hit repeatedly, switch control to her or use the Ring menu to heal and then move her behind Randi.
After Tropicallo falls, finish the dwarf village dialogue and leave through the route back to Gaia’s Navel. Popoi’s weapon and the Axe obtained during this part are important for clearing the Haunted Forest. Use the Axe to cut the vegetation and skull obstructions that previously blocked the route.
- Reach the dwarf village through Gaia’s Navel.
- Complete Popoi’s recruitment scene.
- Defeat Tropicallo.
- Acquire and equip the Axe when available.
- Return to the Haunted Forest route.
Cross the Haunted Forest and enter Elinee’s Castle
Use the Axe to clear the plants and skull statues in the Haunted Forest. Follow the warp points north and use the non-repeating route rather than repeatedly taking exits that return to earlier screens. Neko’s position is a useful landmark. Once the forest route opens, continue north to the castle grounds.
At Elinee’s Castle, clear the opening Werewolves and enter the building. Activate the switches that open the gates, defeat the Eye Spies and identify the lighter-colored Polter Chairs before they ambush the party. When a switch appears inactive, go downstairs into the prison area and speak with the imprisoned soldiers. Freeing them explains how to continue and opens the intended route upstairs.
Neko appears in the prison section. Save there and replenish healing items before continuing. Cups of Wishes are especially useful because the upcoming boss sequence can defeat a poorly positioned character quickly. Proceed upstairs, cross the bridge created by the switch and use the central route when several doors appear; the side doors are dead ends in the relevant rooms.
Follow the castle corridors until Elinee is reached. The story scene sends Dyluck away and reveals that Thanatos is involved. Elinee then summons Spikey Tiger. The battle takes place as the castle sequence’s boss encounter, after the confrontation with Elinee rather than at the castle entrance.
- Use the Axe to open the forest route.
- Reach Elinee’s Castle.
- Free the guards in the prison area.
- Save and restock at Neko.
- Activate the castle switches.
- Confront Elinee and trigger Spikey Tiger.
Defeat Spikey Tiger and obtain the Whip
Spikey Tiger moves between the floor and raised positions. When it is on the ground, use the Spear or another weapon with useful reach and strike after the weapon gauge has charged. When it climbs onto a raised position, melee attacks may fail to connect; switch to the Bow, Boomerang or another ranged weapon if one is available rather than standing underneath it.
At the start of the battle, move immediately because the boss can land on the party. Spread the characters so one fire attack does not hit everyone. Popoi and Primm should stay behind Randi, and Primm should heal with items because Undine magic is not yet available. If a character is burning or suffering another status effect, use a Medical Herb rather than allowing the damage to continue while waiting for a perfect attack window.
After Spikey Tiger is defeated, return to Elinee and complete the scene. The revealed chests contain money and the Whip. Equip the Whip when the route requires crossing the stakes outside the castle. Leave the castle area, and Luka will contact the party and direct everyone back to the Water Palace.
- Attack Spikey Tiger on the ground with charged strikes.
- Use ranged weapons while it is out of melee reach.
- Keep the party spread apart.
- Use Medical Herbs for damaging status effects.
- Defeat Spikey Tiger.
- Collect the Whip and use it on the nearby stakes.
Return to Luka and enter the waterfall cave
Use the Whip crossing and the forest route to leave the castle area. Return to the Water Palace and speak with Luka. She explains that Undine is in danger and directs the party to the cave east of the palace. Save and restore before leaving; the next route contains Iffish and the Tonpole-to-Biting-Lizard sequence.
Exit the palace and follow the waterway to the right, then continue toward the waterfall. Defeat the Iffish outside the cave before entering. They can attack from range, so use the Whip, Spear or another long-reaching weapon and avoid advancing into the next screen while an earlier group is still surrounding Primm.
Enter the cave behind the waterfall and clear the Iffish inside. Keep Randi or Popoi between the enemies and Primm. This is still a no-magic section for the party, so conserve Candies, Chocolates and Cups of Wishes for the boss sequence rather than spending them on every minor hit.
- Return to the Water Palace after Spikey Tiger.
- Speak with Luka about Undine.
- Save and restore before leaving.
- Follow the waterway east of the palace.
- Defeat or pass the Iffish outside and inside the cave.
Defeat Tonpole and Biting Lizard
Proceed north through the cave until the egg-like Tonpole appears. Attack it until it changes into Biting Lizard. Treat both forms as one boss sequence and avoid exhausting all healing items before the transformation.
Biting Lizard uses its long tongue to pull a character toward its mouth. Attack from a diagonal angle or from outside the tongue’s reach, then retreat while the weapon gauge recharges. The Whip is useful for keeping a controlled character out of immediate danger. If a character is swallowed or pulled forward, switch control or open the Ring menu as soon as a safe pause is available.
Biting Lizard can cast Cure Water on itself when badly injured. Keep attacking during safe openings rather than abandoning the fight whenever it heals. Randi should draw the boss’s attention while Popoi attacks from range and Primm stays far enough away to use recovery items. If an ally falls, revive first and reposition before resuming the attack.
Defeating the sequence awards the Glove Orb and opens the passage to Undine. Collect the orb before continuing.
- Reach Tonpole in the waterfall cave.
- Defeat Tonpole and continue into the Biting Lizard form.
- Attack from diagonal or ranged positions.
- Prevent Primm and Popoi from standing together in front of the boss.
- Revive and reposition fallen allies.
- Collect the Glove Orb.
Receive Undine and open the Underground Palace route
Continue through the opened passage and speak with Undine. Undine grants water magic to Primm and Popoi and gives the party the Pole Dart. The first Water Palace reward was the Spear; the Pole Dart is a separate weapon obtained here.
Open Primm’s Magic ring and confirm that Cure Water and Ice Saber are available. Open Popoi’s Magic ring and confirm that Freeze is available. Cure Water is the practical replacement for routine item healing, while Freeze is the important offensive spell for the next fire-focused area. Randi does not receive elemental magic from Undine.
Return to Gaia’s Navel and the dwarf village. Visit Watts with the Glove Orb and any other available weapon orbs. Then locate the sealed orb blocking the Underground Palace route. Have Popoi cast Freeze on it. The ice magic removes the obstruction and opens the entrance to the Underground Palace.
Before entering, buy or recover healing items, save, and make sure Popoi has enough MP for Freeze. Use Cure Water between fights, but keep Primm away from melee enemies while she casts. The next chapter begins inside the Underground Palace and centers on the Earth Mana Seed and Fire Gigas.
- Speak with Undine after defeating Biting Lizard.
- Receive the Pole Dart.
- Confirm Primm has Cure Water and Ice Saber.
- Confirm Popoi has Freeze.
- Return the Glove Orb to Watts.
- Use Freeze on the sealed orb in the dwarf area.
- Open the Underground Palace entrance.
- Save before entering the next chapter.
Before you move on
- The Water Mana Seed has been restored at the Water Palace.
- The Spear was received from Luka.
- Primm has joined the party in Pandora Castle.
- The Haunted Forest blockage scene has been triggered before entering Gaia’s Navel.
- Popoi has joined in the dwarf village.
- Tropicallo has been defeated.
- The Haunted Forest route has been cleared with the Axe.
- Elinee’s Castle has been completed.
- Spikey Tiger has been defeated.
- The Whip is in the weapon inventory and has been used at the castle-area stake crossing.
- Luka has directed the party back to the Water Palace.
- Tonpole and Biting Lizard have been defeated in the waterfall cave.
- The Glove Orb has been collected.
- Undine has granted water magic to Primm and Popoi.
- Primm has Cure Water and Ice Saber.
- Popoi has Freeze.
- The Pole Dart is in the weapon inventory.
- The Glove Orb has been delivered to Watts or is ready for delivery.
- Freeze has been used on the sealed orb in the dwarf area.
- The Underground Palace entrance is open and the party is prepared to continue.
References for this chapter
- Secret of Mana - Super NES Instruction Manual
- From the Water Palace to Gaia’s Navel — Secret of Mana Walkthrough
- Haunted Forest and Elinee’s Castle — Secret of Mana Walkthrough
- Spikey Tiger — Secret of Mana Walkthrough
- Secret of Mana - Guide and Walkthrough - Super Nintendo - By Snow_Dragon
- Secret of Mana — Guide and Walkthrough by JD_Cyr, Super Nintendo — GameFAQs
- Secret of Mana Walkthrough Part 1 — RPG Classics
Underground Palace, Earth progression and the Water Seed return
Clear the Underground Palace, defeat Fire Gigas, obtain Gnome, and seal the Earth Mana Seed. Then travel through Pandora’s Ruins, defeat Wall Face, recover the stolen Water Seed from the thieves’ ship, defeat Jabberwocky at the Water Palace, and unlock the Upper Land route through Cannon Travel.
Prepare in Gaia’s Navel and the Dwarf Village
Return to Gaia’s Navel by Cannon Travel or by the overland route and enter the Dwarf Village. Visit Watts before entering the Underground Palace. Give him every weapon Energy Orb you have already collected and can afford to reforge. An orb raises a weapon’s available level, but Watts must process it before the upgrade takes effect.
Rest at the inn, save, and refill healing items. Bring Candy or Chocolate for HP recovery, Faerie Walnuts for MP, and Cups of Wishes if available. Make sure Popoi can cast Freeze from the Undine spell group, and keep Primm ready to cast Cure Water. Freeze is needed to open the palace entrance and is the most reliable offensive spell against Fire Gigas.
Keep the Whip available in the weapon ring. The palace contains a gap that must be crossed with the Whip, even if you normally use another weapon for combat.
- Visit Watts and reforge available weapons.
- Rest, save, and refill healing and revival items.
- Confirm that Popoi can cast Freeze.
- Keep Primm’s Cure Water available.
- Keep the Whip in the weapon ring.
Open the Underground Palace
From the Dwarf Village, return to the cave entrance near the area where Tropicallo was defeated. The Underground Palace entrance is sealed by lava and an Energy Orb. Open the Ring menu, select Popoi, choose Undine, and cast Freeze on the orb. The lava drains and the entrance becomes passable.
Enter the palace and move through the opening rooms. Goblins, Ma Goblins, and Chess Knights can be fought for experience, but none of these battles is required. Narrow corridors make it easy to become surrounded, so pass enemies when the route is clear and avoid spending Popoi’s MP on unnecessary spells.
If Freeze used most of Popoi’s MP, return to the Dwarf Village inn before continuing. The same spell is the safest way to damage Fire Gigas, and the boss encounter is more demanding if the party enters without MP recovery.
- Find the lava-sealed entrance near the Dwarf Village.
- Cast Freeze on the entrance Energy Orb.
- Confirm that the lava has drained.
- Restore MP before continuing if necessary.
Activate the two palace switches
Continue until you reach the large chamber with a blocked route toward the north. Take one side passage and follow it to its switch. Activate the switch, return to the large chamber, and use the opposite side passage to reach the second switch.
The switches may be activated in either order. Once both have been triggered, return to the central chamber and confirm that the obstruction blocking the northern route has disappeared. If the route remains closed, one of the side branches has not been activated; there is no hidden key or boss required to open it.
Use the Ring menu to heal between branches instead of carrying a badly injured character into the newly opened route. Avoid unnecessary spell use so that Popoi retains Freeze for the boss.
- Find the large switch chamber.
- Activate the switch in one side branch.
- Activate the switch in the opposite side branch.
- Verify that the northern route is open.
Cross the gap and reach Fire Gigas
Follow the opened northern passage. When the route reaches the palace gap with poles, equip the Whip and use it to cross to the next platform. This is the required traversal method; no elevator, mine cart, or hidden passage is needed here.
After crossing, re-equip the weapon you want for normal combat. Continue north through the remaining rooms. Move around Chess Knights and other enemies when possible, because the narrow corridors make it difficult to retreat after a group surrounds the party.
Heal before entering the final stage-like room. Keep Popoi’s MP for Freeze and position Primm so that she can use Cure Water without standing directly beside the boss. Save before the approach if you have a safe opportunity to return to town.
- Equip and use the Whip at the palace gap.
- Re-equip the preferred combat weapon afterward.
- Avoid wasting MP on ordinary enemies.
- Heal before entering the boss room.
Defeat Fire Gigas and collect the Axe Orb
Fire Gigas is vulnerable to ice. Have Popoi cast Freeze whenever the boss is in its solid form. The Ring menu pauses the action, allowing you to select the next spell after the previous cast resolves, but do not stand still in front of the boss while waiting for the spell command.
Fire Gigas can disperse into moving fireball-like forms and relocate around the room. Do not chase this form with ordinary melee attacks. Use the dispersed phase to heal, select the next Freeze spell, or build a weapon charge. Release a charged attack after the boss reforms and a safe opening appears.
When Fire Gigas begins an attack, move sideways or retreat instead of remaining directly in front of it. Check the entire party’s HP after each fire attack because more than one character can be hit. Use Cure Water when Primm has a safe position, and use items when immediate recovery is more important than preserving MP.
After the boss falls, collect the Axe Orb. The orb is a separate reward from the weapon itself and does not automatically reforge the axe.
- Use Freeze while Fire Gigas is solid.
- Ignore the dispersed fireball form instead of chasing it.
- Prepare charged attacks during the dispersed phase.
- Move away from the boss’s casting position.
- Collect the Axe Orb after victory.
Meet Gnome and seal the Earth Mana Seed
Leave the Fire Gigas room through the northern route and continue into the chamber beyond. Complete the scene with Gnome. Gnome grants Earth-element magic to the party’s spellcasters; this is separate from the Axe Orb obtained from Fire Gigas.
Continue to the Mana Seed pedestal and interact with the seed using the Mana Sword. The Earth Mana Seed is now sealed, completing the Underground Palace portion of the chapter. The seal also permits the party’s elemental magic to progress to the next available level cap.
Do not leave after the boss without completing both events. Gnome’s magic is obtained in the chamber beyond the boss, while the Earth Mana Seed must still be restored at its pedestal.
- Complete the Gnome event.
- Confirm that the Earth-element spells are available.
- Reach the Earth Mana Seed pedestal.
- Use the Mana Sword to reseal the seed.
Travel to Pandora and defeat Wall Face
Use an Escape Rope if you want to leave the Underground Palace quickly, or retrace the cleared route. Return to Pandora and enter the town rather than going directly to the ruins. Speak with the blue-haired girl, Phanna, in the lower-right area of town. She disappears toward the ruins; follow her out through the southern exit and approach the ruins entrance.
Enter Pandora’s Ruins and follow the main route through the rooms. The side rooms near the first major hall contain enemies and are not required for reaching the boss. Continue through the ruins until the party is dropped into the Wall Face arena.
Wall Face consists of a central eye and two side eyes. Concentrate attacks on the central eye. Popoi’s Gnome spell Earth Slide is the most effective straightforward attack; cast it repeatedly and use Faerie Walnuts when MP runs low. Weapon attacks can be used between spell casts when the eye is accessible. Avoid standing directly in front of active eyes and heal whenever the party’s HP is reduced by the room’s attacks.
After Wall Face is defeated, find and speak with Jema in the ruins. He directs the party to return to Luka at the Water Palace. Pandora’s citizens return to normal after this event. If you want optional rewards, the restored Pandora Castle allows access to treasure containing weapon orbs, but those chests are not required for the Water Seed sequence.
- Speak with Phanna in Pandora before entering the ruins.
- Follow the main route through Pandora’s Ruins.
- Use Earth Slide against Wall Face when available.
- Defeat the central eye and finish the Wall Face battle.
- Speak with Jema after the victory.
Recover the Water Seed from the thieves’ ship
Travel north to the Water Palace and speak with Luka. She explains that the Water Mana Seed has been stolen and directs the party toward Gaia’s Navel. Return to the Dwarf Village. Jema and the Dwarf Elder are standing near the hole created by the thieves; step onto the ledge and enter the thieves’ ship.
On the ship, go down the central stairs. In the next room, move north and open the chest to obtain the Whip Orb. Then pass through the northern door and continue through the ship until the Scorpion Army leaves the room with the Water Seed. Follow them through the next door to reach Kilroy.
Kilroy has no elemental weakness, so rely mainly on charged weapon attacks. Keep the party spread out and avoid the swinging hammers. A hammer hit can inflict the Moogle status, leaving a character unable to attack effectively; use a Medical Herb or Remedy as soon as possible. Kilroy becomes more mobile after taking substantial damage, so do not corner yourself against the walls.
After Kilroy is defeated, collect the Javelin Orb and take the recovered Water Seed. Use the Magic Rope if you need to exit the ship immediately. Before returning to the Water Palace, visit Watts and reforge the Javelin, Whip, and any other weapons for which you now possess orbs.
- Speak with Luka after Wall Face.
- Enter the thieves’ ship through the hole in the Dwarf Village.
- Collect the Whip Orb from the chest.
- Defeat Kilroy without an elemental weakness strategy.
- Collect the Javelin Orb.
- Recover the Water Seed.
- Reforge new weapon orbs at Watts.
Return the Water Seed and defeat Jabberwocky
Take the recovered seed back to the Water Palace. Geshtar is holding Luka and demands the Water Seed. When the game presents the choice between handing over the seed and running, choose Run. The scene continues into the boss battle; the choice does not avoid the fight.
Jabberwocky uses Acid Storm, which temporarily lowers the party’s defense, and has two heads that must both be destroyed. Earth Slide is effective against it, so have Popoi cast Earth Slide while the other characters attack during openings. Keep moving around the arena instead of standing between the heads, and use Faerie Walnuts or items to maintain enough MP for repeated casts.
Jabberwocky’s reward is the Bow Orb. After the battle, return to the upper area and speak with Luka to reseal the Water Mana Seed using the Mana Sword. Then speak with Jema. He gives the party another Whip Orb and explains that the next destination is the Upper Land. This Whip Orb is separate from the Whip Orb found in the thieves’ ship.
- Choose Run when Geshtar demands the Water Seed.
- Defeat both heads of Jabberwocky.
- Use Earth Slide and weapon attacks during safe openings.
- Collect the Bow Orb after victory.
- Use the Mana Sword to reseal the Water Mana Seed.
- Speak with Jema and receive the later Whip Orb.
Obtain the Midge Mallet and unlock Upper Land
Before leaving the lower-world route, return to Gaia’s Navel and enter the Dwarf Village again. Speak with the Dwarf Elder near the hole used to reach the thieves’ ship. After the Water Palace sequence, he gives the Midge Mallet. This item changes a character between normal and shrunken size and is required later when the party encounters the Moogle status in the Upper Land route.
Travel to the Cannon Travel point south of Potos Village. Speak with the cannon operator and choose the Upper Land destination. This Cannon Travel event is the chapter’s final progression trigger; simply sealing the Earth or Water Seed does not unlock Upper Land.
Before departing, save at the Water Palace or Dwarf Village, make sure the new weapon orbs have been given to Watts, and carry healing items and at least one status-removing item. The next chapter begins after arriving in the Upper Land.
- Return to the Dwarf Village after resealing the Water Seed.
- Speak with the Dwarf Elder near the thieves’ ship hole.
- Receive the Midge Mallet.
- Reach the Cannon Travel point south of Potos Village.
- Choose Upper Land as the destination.
Before you move on
- The Underground Palace entrance lava has been drained with Freeze.
- Both Underground Palace switches have been activated.
- The palace gap has been crossed with the Whip.
- Fire Gigas has been defeated.
- The Axe Orb is in the weapon inventory.
- Gnome has granted Earth-element magic.
- The Earth Mana Seed has been sealed with the Mana Sword.
- Wall Face has been defeated in Pandora’s Ruins.
- Jema has directed the party to return to Luka.
- The thieves’ ship has been entered from the Dwarf Village.
- The ship’s Whip Orb and Kilroy’s Javelin Orb have been collected.
- Kilroy has been defeated and the Water Seed recovered.
- Geshtar’s confrontation has been completed by choosing Run.
- Jabberwocky has been defeated and the Bow Orb collected.
- The Water Mana Seed has been resealed with the Mana Sword.
- Jema has provided the later Whip Orb.
- The Dwarf Elder has provided the Midge Mallet.
- The party has used Cannon Travel south of Potos Village to reach the Upper Land route.
References for this chapter
- Secret of Mana - Super NES Instruction Manual
- Get the Water Seed — Secret of Mana Walkthrough
- Secret of Mana - Guide and Walkthrough - Super Nintendo - By Snow_Dragon
- Secret of Mana — Walkthrough Part 3
- Secret of Mana/Pandora Ruins — StrategyWiki
- Secret of Mana/Thieves’ Ship — StrategyWiki
- Secret of Mana — Complete walkthrough for the SNES US/EU route
- Secret of Mana - Guide and Walkthrough - Super Nintendo - By Phoenix_1911
Upper Land, Spring Beak, and the Wind Palace
Complete the Upper Land season route, defeat Spring Beak, obtain Sylphid from Popoi’s grandfather, and seal the Wind Mana Seed. This chapter ends inside the Wind Palace. Do not continue into the Matango route yet.
Enter the Upper Land and prepare for the season route
After the preceding story events, travel to the Cannon Travel location that sends the party to the Upper Land. The landing area is the winter section of the forest, recognizable by its snow-covered scenery. Explore only as much as needed to learn the layout and restock. The required destination is the Moogle Village farther through the winter section.
Enter the village and clear the monsters that have taken it over. Once the enemies are gone, leave the village screen and return. The Moogles will come back, and one of them gives the clue for the next route: walk from Spring to Summer, Autumn, Winter, and then Spring again. The clue refers to the tree colors in each connected forest section, not to a menu choice or a dialogue answer.
Before starting the route, make sure the party has healing items and that the girl and sprite have enough MP for a boss battle. Spring Beak is mobile and difficult to strike with short-range weapons, so equip a long-range weapon such as the Bow or Boomerang on the characters who can use one. Keep the sprite ready to cast Gnome magic.
The Upper Land is also a useful point to bring any available weapon orbs to Watts if he is present in the area. This is optional for completing the route, but current weapon levels make the ordinary forest fights safer. Do not spend all your Faerie Walnuts on minor enemies; reserve MP recovery for Spring Beak if necessary.
- Reach the winter section of the Upper Land.
- Clear the monsters from the Moogle Village and return so the Moogles reappear.
- Hear the clue to walk Spring, Summer, Autumn, Winter, and Spring again.
- Equip at least one reliable ranged weapon and carry MP recovery items.
Complete the Spring, Summer, Autumn, Winter, Spring route
Leave the Moogle Village and travel to the section with pink trees. This is Spring. From Spring, take the exit to the green-tree section, Summer. From Summer, use the route leading north or northeast into the brown-tree section, Autumn. From Autumn, travel west into the snowy section, Winter. From Winter, take the southern route back to Spring.
The order matters. The intended route is Spring to Summer to Autumn to Winter and then back to Spring. Do not turn around early or return to Spring by a different shortcut. You do not need to defeat every enemy in these screens; run past groups when the route is clear and preserve HP and MP for the boss.
When the party returns to Spring in the correct order, a confirmation sound plays and a previously blocked exit opens on the eastern or northeastern side of the Spring screen. If the sound does not play, repeat the circuit from Spring and check that you used the seasonal exits in the correct order. The tree colors are the safest landmarks because the forest screens can otherwise look similar.
Take the newly opened exit. It leads toward the ruined Sprite Village. Heal before moving north from the ruined village, because the next area begins the Spring Beak encounter.
- Travel through Spring, Summer, Autumn, Winter, then Spring.
- Confirm the sound indicating that the route was accepted.
- Find the newly opened exit on the eastern or northeastern side of Spring.
- Reach the ruined Sprite Village with the party healed.
Defeat Spring Beak
Move north from the ruined Sprite Village to begin the boss battle against Spring Beak. The bird moves quickly, jumps over the battlefield, and is hard to hit consistently with short-range weapons. It can also use wind-based attacks, including Thunderbolt, so avoid allowing all three characters to stand together.
The sprite should cast Earth Slide, the Gnome spell that exploits Spring Beak’s Earth weakness. Direct the sprite yourself when accurate targeting matters, and cast while the boss is visible rather than wasting MP while it is moving outside a useful position. If the sprite runs out of MP, use a Faerie Walnut rather than trying to defeat the bird entirely with sword swings.
Use the Bow, Boomerang, or Javelin from a distance when available. Randi can attack during the brief moments when Spring Beak lands, but do not chase it across the arena with the sword. Short-range attacks frequently miss and leave the attacker exposed to the boss’s landing or area attacks.
Keep Primm behind the other characters and use Cure Water whenever a character’s HP drops sharply. Open the Ring menu before an ally reaches critical health so you can heal without rushing through the command selection. If a character is knocked out, revive that character only after Spring Beak has moved away; stopping to revive directly under the boss can cause a second defeat.
When Spring Beak is defeated, the party receives the Boomerang Orb. This is the required reward for this section. The northern route to the Wind Palace opens after the battle.
- Use Earth Slide or another Gnome spell as the primary attack.
- Favor ranged weapons over repeated short-range sword attacks.
- Keep the party spread apart to reduce damage from wind attacks.
- Defeat Spring Beak and obtain the Boomerang Orb.
Enter the Wind Palace and obtain Sylphid
Proceed north from the Spring Beak arena and enter the Wind Palace. In the original North American SNES release, this is a short story location rather than a conventional dungeon. Do not look for a series of combat rooms, moving platforms, wind-current puzzles, or a lengthy palace route. The required actions are the conversation, the elemental event, and the Mana Seed interaction.
Inside the palace, speak with the older man near the altar. He is Popoi’s grandfather. His conversation explains the attack on the Sprite settlement and grants Popoi the power of Sylphid. After the scene, check Popoi’s spell list to confirm that Sylphid magic is available. Sylphid provides wind-based magic for Popoi and utility magic for Primm, including Analyzer.
The palace’s older man can restore the party and provide a chance to save in the original SNES progression. Use that opportunity before leaving. Restoring HP and MP here is especially useful because it lets you prepare for the next section without consuming the supplies reserved for later areas.
After the conversation, approach the Wind Mana Seed at the altar. Equip the Mana Sword if necessary, face the seed, and interact with it to seal the seed and receive its power. Obtaining Sylphid and sealing the seed are separate progression flags. Do both before considering the chapter complete.
Once the seed has been sealed, the Upper Land objective is finished. The next story route leads back through the forest toward the path beyond the Crystal Orb, but that route belongs to the following chapter. Stop here rather than proceeding into Matango or any later area.
- Enter the Wind Palace after defeating Spring Beak.
- Speak with Popoi’s grandfather near the altar.
- Confirm that Sylphid magic has been added to Popoi’s available powers.
- Use the Mana Sword at the Wind Mana Seed to seal it.
- Heal and save before leaving the palace.
Before you move on
- The Moogle Village has been cleared and the seasonal clue has been received.
- The party has completed the route from Spring through Summer, Autumn, Winter, and back to Spring.
- The new passage from the Spring section has opened.
- Spring Beak has been defeated.
- The Boomerang Orb has been obtained.
- Popoi has received Sylphid’s magic from his grandfather.
- The Wind Mana Seed has been sealed with the Mana Sword.
- The party has been healed and saved inside the Wind Palace before continuing to the next chapter.
References for this chapter
Matango, Ice Country, the Imperial Sandship and Mech Rider
In the original Super Nintendo release, this section begins in Matango and proceeds first through Kakkara Desert and the Imperial Sandship. After defeating Mech Rider 1, the party reaches Kakkara, learns that the Fire Seed and Salamando have been stolen, and uses Cannon Travel to reach Ice Country. There you free Salamando, clear the Ice Palace, defeat Frost Gigas and recover the Fire Seed. The chapter ends back in Kakkara, with the Fire Palace as the next required destination.
Matango, King Truffle and the Great Viper route
From the Upper Land, take the route through the Kimono Bird cave toward Matango. Use the Axe to clear the ground spikes blocking the cave passage, then follow the exit into the mushroom settlement. Enter Fung Castle and speak with King Truffle. His report about a dragon fighting a snake opens the next objective: investigate the cave beyond Matango.
Before leaving the castle, visit Watts and reforge every weapon for which you have an orb and enough money. Open the chest upstairs in the castle to obtain the Javelin Orb, then return to Watts to forge it. Rest at the inn and replenish Medical Herbs, Chocolates and Faerie Walnuts. Current armor is worth buying if your funds allow, but do not postpone the story indefinitely for grinding.
Leave the castle by the southern route and continue through the outdoor area to the cave entrance. Follow the cave, using the Whip at the small gaps and charged attacks against Kimono Birds that are awkward to hit normally. In the room with the Crystal Orb, cast the Sprite’s Earth Slide on the orb. Return toward the previous passage and take the exit that has opened toward the Great Viper arena.
- Speak with King Truffle in Fung Castle.
- Collect the Javelin Orb from the upstairs chest.
- Forge the Javelin and other available weapons at Watts.
- Restock healing items and Faerie Walnuts.
- Use Earth Slide on the Crystal Orb in the Great Viper cave.
Defeat Great Viper and complete the white-dragon scene
Great Viper can pygmize a character when it makes contact. Keep the party separated rather than standing directly on top of one another, and use Air Blast or Thunderbolt with Popoi whenever possible. The snake is easiest to hit after it stops moving or finishes a pass across the arena. Randi should charge the sword while the boss is moving away, then release the attack when the snake becomes vulnerable.
If someone is pygmized, use a Medical Herb, Remedy or another available status cure before relying on that character’s weapon damage. When Great Viper disappears, use the pause to heal and restore formation instead of chasing it. Defeating the boss awards the Sword Orb, so return to Watts later when you want the sword reforged.
After the fight, take the newly opened northern passage. Follow the quiet cave to the room containing the small white dragon and approach it to trigger the scene. You cannot take the dragon with you. Return to King Truffle, who agrees to raise it and names it Flammie. This is only the story introduction to Flammie; the Flammie Drum and free flight are not obtained here.
Leave Matango through the route used to enter the area. The Cannon Travel center outside the caves now provides the route to Kakkara Desert. Select Kakkara. Do not select Ice Country at this point: the required story order for this chapter sends the party to the desert and Sandship first.
- Defeat Great Viper and collect the Sword Orb.
- Cure pygmize status before depending on melee attacks.
- Visit the white dragon in the northern cave.
- Return to King Truffle and complete the Flammie naming scene.
- Use Cannon Travel from Matango to reach Kakkara Desert.
Cross Kakkara Desert and board the Imperial Sandship
The cannon drops the party into a looping section of Kakkara Desert rather than directly beside the Sandship. A reliable route through the loop is Up, Left, Left, Down, Left. When the party comments that it cannot continue, move north. The route then leads to the Sandship. Avoid the sand whirlpools when possible; Spider Legs can attack from them and use Earth Slide.
After the Sandship scene separates the party, Randi is placed in the kitchen. Speak with Sergo twice, then talk to the guards at the door. Sergo creates the diversion that lets you leave. Explore the ship until you find the staircase leading down, then enter the lower room and speak with Popoi to reunite the party.
Return toward the deck and look for the low doorway in the middle of the lower wall. It is easy to miss because it blends into the ship’s structure. Go through it, climb the stairs and speak with the guard to activate the save point. Return to the guards blocking the northern doors. Speak with them; Popoi’s claim that rats ate the food sends them away.
Enter the next room to trigger the scene involving Primm and the Sandship crew. The Imperial interruption moves the party to the deck. Speak with Geshtar, the green-haired Imperial officer, to begin the first Mech Rider battle. Save immediately before this sequence so a failed attempt does not require repeating the entire Sandship exploration.
- Follow the desert route Up, Left, Left, Down, Left.
- Move north after the party says it cannot continue.
- Speak with Sergo twice in the kitchen.
- Recover Popoi from the lower room.
- Find the low central doorway and activate the Sandship save point.
- Clear the northern guards with Popoi’s rats dialogue.
- Speak with Geshtar on the deck.
Defeat Mech Rider 1 and reach Kakkara
Mech Rider has no required elemental weakness. Use the strongest offensive magic that is currently leveled, with Gem Missile, Freeze or another reliable attack spell being suitable choices. The spellcaster must be close enough for the spell to connect, so cast from the side of the deck rather than from the far edge. Randi should charge the sword while Mech Rider is moving, then strike after the machine finishes a charge or stops.
The boss uses a rushing attack, missiles and Speed Up. Do not stand directly in its path, and do not chase it continuously across the deck. Primm should remain ready with Cure Water and revival items. If a character falls, revive and regroup before resuming the attack. Defeating Mech Rider awards the Whip Orb.
After the battle, speak with the soldiers in the new Sandship area. Talk to the soldier who asks whether you are leaving and answer Yes. The party is transferred back to the desert. Move north through the sand-pit area to enter Kakkara. Save at the inn, refill supplies, visit Watts to forge the Whip and other available weapons, and speak with the residents near the dried lake.
Kakkara’s dialogue reveals the problem: the Fire Seed is missing, and Salamando has been taken. This is the reason the party must travel to Ice Country before entering the Fire Palace. Leave Kakkara through the eastern route and use the Cannon Travel center. Select Ice Country. Do not go directly toward the Fire Palace yet; the Fire Seed cannot be recovered until the Ice Palace sequence is complete.
- Defeat the first Mech Rider.
- Collect the Whip Orb.
- Answer Yes to the departing soldier.
- Reach Kakkara and speak with the residents near the dried lake.
- Confirm that the Fire Seed and Salamando are missing.
- Use Cannon Travel from Kakkara to Ice Country.
Todo Village, Rudolph and Boreal Face
The cannon sends the party to Todo Village. Save and heal at the inn, buy the strongest available armor and replenish status cures, healing items and Faerie Walnuts. Watts is available in the village area for weapon reforging. Howlers outside Todo can provide money and experience if your equipment is behind, but the Ice Country enemies hit hard enough that current armor matters more than excessive leveling.
Leave Todo through the western route and continue through the forest. In the next area, speak with Rudolph. He explains that his master has been taken by a monster in the Ice Palace. Enter Santa’s house and open the chest to collect the Spear Orb. Reforge it at Watts when convenient, then continue through the forest toward the northern route.
Boreal Face is a stronger version of the earlier Tropicallo-style plant boss. Ignore the Brambler growths unless one blocks your movement. Charge Randi’s weapon while Boreal Face is underground, then strike from the side when the main body emerges in one of the arena’s corners. Offensive magic is unreliable here, so conserve Popoi’s MP for the Ice Palace and use Cure Water if Boreal Face lands Burst or another damaging attack.
Defeating Boreal Face awards the Bow Orb and moves the party into the warm settlement created by the Scorpion Army’s stove. This is the required Salamando event, not an optional village visit.
- Restock and save in Todo Village.
- Speak with Rudolph.
- Collect the Spear Orb from Santa’s house.
- Defeat Boreal Face by attacking as it emerges.
- Collect the Bow Orb.
- Enter the heated settlement after the boss.
Free Salamando and prepare for the Ice Palace
In the heated settlement, speak with the Scorpion Army member tending the wood stove. He asks you to watch it while he leaves. Examine the stove and choose Yes when prompted to open it. Salamando is inside. Freeing the elemental restores the area to its frozen state and grants Popoi the Salamando spells.
After the confrontation, leave through the northern exit. The next area has two useful routes. The western exit leads to Neko, where you can save, heal and replenish supplies. The eastern exit leads toward the Ice Palace. Visit Neko before entering if your MP or status cures are low. Salamando magic should be available on Popoi before the palace bosses.
Do not spend all of Popoi’s Salamando MP on ordinary enemies. Use fire magic selectively against enemies that resist physical attacks, and keep enough MP for the three Tonpoles and Frost Gigas. Carry Medical Herbs or Remedies because Frost Gigas can inflict freezing status.
- Speak with the stove attendant.
- Open the stove and choose Yes.
- Receive Salamando’s magic.
- Use Neko to save and restock.
- Take the eastern route toward the Ice Palace.
Clear the Ice Palace, defeat Frost Gigas and recover the Fire Seed
At the Ice Palace entrance, the northern switch does not initially open the route. Move right and activate the switch at the end of the passage. Continue to the room with two northern doors. Take the right-hand door first and follow it to the chest containing the Glove Orb. Return to the split and take the left-hand door. In the following room, activate the switch on the right to open the next passage.
Continue through the Weepy Eye rooms and the library-like section. Mystic Books can cast Lucid Barrier, which makes ordinary physical attacks ineffective for a time; use magic or bypass them rather than wasting charged attacks. If Specters obstruct the route, Freeze or Gem Missile can remove them. The path eventually reaches a room with two switches at the top. Step on either switch to fall into the mid-boss room.
The three Tonpoles can become Biting Lizards. Focus on one target at a time. Use charged attacks while each Tonpole is exposed, and use Fireball when it changes form. Approach Biting Lizards diagonally so they are less likely to swallow a party member. If someone is swallowed, attack that lizard immediately to release them. Defeating all three opens the next route.
Continue through the newly opened doorway, cross the gaps with the Whip and activate the switch near the end. Enter the room above it and answer No when the voice asks whether you will leave. This begins the Frost Gigas battle.
Frost Gigas is weak to Salamando. Have Popoi cast Fireball or Exploder while Randi uses charged attacks only when the boss is fully re-formed. When Frost Gigas breaks into smaller pieces, use that interval to heal and charge the sword. If the boss casts Ice Saber, counter with Flame Saber or stop relying on physical attacks until the effect is addressed. Cure Freeze Breath with a Medical Herb or Remedy when necessary. Defeating Frost Gigas awards the Boomerang Orb.
The party returns to the palace hall and meets Santa. After the conversation, Santa gives the party the Fire Seed. Save and restock in Todo Village, then return to the nearby Cannon Travel center. This cannon cannot send the party directly to Kakkara, so select Matango. From Matango, leave through the familiar cave route and use the Cannon Travel center outside Matango to select Kakkara.
- Activate the right switch at the palace entrance.
- Collect the Glove Orb from the right-hand branch.
- Activate the right switch in the following room.
- Defeat the three Tonpoles.
- Answer No to the voice before Frost Gigas.
- Defeat Frost Gigas with Salamando magic and charged attacks.
- Collect the Boomerang Orb.
- Receive the Fire Seed from Santa.
- Travel through Matango to return to Kakkara.
Before you move on
- King Truffle’s Matango conversation is complete, the Javelin Orb and Sword Orb have been collected, and the white-dragon scene has been triggered.
- The party has returned to Matango, used the cannon to reach Kakkara Desert and completed the Sandship escape.
- The first Mech Rider has been defeated and the Whip Orb has been collected.
- The party has entered Kakkara, learned that the Fire Seed and Salamando are missing, and used Cannon Travel to reach Ice Country.
- Todo Village has been visited, Rudolph has been spoken to, the Spear Orb has been collected and Boreal Face has been defeated.
- The Bow Orb has been collected and Salamando has been freed from the heated settlement’s stove.
- The Ice Palace has been entered, the Glove Orb has been collected, the three Tonpoles have been defeated and Frost Gigas has been defeated.
- The Boomerang Orb has been collected and Santa has given the party the Fire Seed.
- The party has returned through Matango to Kakkara and is ready to leave south toward the Fire Palace.
- The Flammie Drum and free overworld flight have not been awarded in this chapter.
References for this chapter
The Fire Palace and late mid-game routing
After defeating Frost Gigas in the Ice Palace, take the recovered Fire Seed to the Fire Palace. Clear the palace’s Salamando and Freeze mechanisms, collect the Axe Orb, defeat Minotaur with Sylphid magic, then use the Mana Sword to reseal the Fire Seed. Return to Kakkara, have Watts reforge the new weapons, and use Cannon Travel to begin the Empire sequence.
Prepare in Kakkara after the Ice Palace
When Frost Gigas is defeated, he returns to Santa and gives the party the stolen Fire Seed. Salamando was rescued before this point; the immediate objective is to carry the recovered seed back to the Fire Palace. Use the Cannon Travel Center in the Ice Country to return directly to Kakkara Village.
Save at the inn, restore HP and MP, and restock Candy, Chocolate, Faerie Walnuts, and Cups of Wishes. The Fire Palace is not especially dangerous because of a single mandatory puzzle, but its enemy groups and hidden Spider Legs can drain the party before Minotaur. Keep at least some MP available for Undine, Sylphid, and emergency healing.
Visit Watts before leaving town and reforge every weapon for which you already possess an orb. If you collected the Ice Palace’s weapon orbs, spend them now. Do not confuse weapon experience with weapon forging: weapon levels cannot rise beyond the current orb limit until Watts has reforged the weapon.
Set computer-controlled allies to keep their distance if you are playing alone. The palace contains fire attacks, narrow paths, and enemies hidden near stairs. Keeping the Sprite out of melee gives it more opportunities to cast. Equip or place Undine, Sylphid, Freeze, Exploder, Fireball, healing items, and Faerie Walnuts where they can be selected quickly.
- Receive the Fire Seed from Santa after defeating Frost Gigas.
- Return from the Ice Country to Kakkara by Cannon Travel.
- Save, heal, and restock recovery items.
- Spend every available weapon orb at Watts.
Reach the Fire Palace from Kakkara
Leave Kakkara through the southern exit. On the first desert screen, go south, then west, then north. This leads to the Fire Palace approach. Defeat or run past the Sand Stingers outside, then climb the stairs and enter the palace.
Mad Mallards can summon Pumpkin Bombs, so eliminate them quickly if they block the route. Spider Legs are easy to overlook near stairs and along the palace approach; do not let the controlled character become trapped against a wall while an ally is being attacked. You can skip many ordinary encounters because the objective is to reach the seed, not clear every room.
Inside the entrance, two Robin Foots guard the first passage. The direct northern route is blocked, and the right-side room does not provide access from this direction. Take the door on the left, defeat the Robin Foot in the side passage, and follow the stairs downward into the hot lower room.
- From Kakkara, travel south, west, then north.
- Pass the Sand Stingers and enter the palace.
- Use the left-side door after the entrance enemies.
- Watch for hidden Spider Legs near stairs and columns.
Cool the first room and cross the Fireball bridge
The first hot room is filled with Dark Funks and has a strong red glow that makes the floor and enemies difficult to see. Dark Funks are vulnerable to Undine, so use Freeze or other Undine attacks selectively rather than spending all your MP on every enemy.
Move toward the upper-right portion of the room and use Analyzer on the crystal orb if you want to confirm the required element. The orb calls for Salamando’s magic. Have the Sprite cast Exploder on it. The flames then disappear, revealing the stairs in the upper-right corner.
Continue upstairs into the room containing Red Drops. Avoid touching them when possible; contact can engulf a character in fire. Use the middle staircase to continue rather than taking the southern door unless you specifically want the shortcut back toward the entrance.
In the next section, go left to find another crystal orb. Analyze it and cast Fireball, another Salamando spell, on the orb. The spell creates a bridge. Cross it, follow the narrow route north, and enter the corridor leading to a chest containing 1000 GP. Return to the main route afterward and continue toward the lower and left-hand passages.
- Use Undine selectively against Dark Funks.
- Cast Exploder on the first crystal orb in the hot room.
- Avoid contact with Red Drops.
- Cast Fireball on the second Salamando crystal to create the bridge.
- Collect the optional 1000 GP chest if desired.
Collect the Axe Orb and reach the torch room
After crossing the Fireball bridge, continue through the connected passages and take the stairs toward the lower maze. The palace’s important weapon chest is in this section. Follow the side route through the small maze and collect the Axe Orb before returning to the main path. This orb is optional for immediate story completion but important for keeping the Axe’s forged level current.
After collecting the orb, return toward the central route and descend through the passages. Follow the stairs and corridors until you reach a switch area. Step on the switch to remove the barrier, then take the lower route that has opened. Use the whip to cross the gap when the path ends at a pit.
Continue past the stairs and avoid unnecessary fights with Dark Funks. Eventually you will reach a room with empty fire bowls and a green switch. Step on the switch to light the bowls and reveal a crystal orb. Cast Freeze on this orb. Most of the flames go out, leaving two large fire pots still burning.
Stand between the two fire pots that remain lit. This reveals the stairs to Minotaur. Heal the party, restore MP with a Faerie Walnut if needed, and prepare the Sprite’s Sylphid spells before climbing.
- Collect the Axe Orb from the side chest.
- Activate the switch that removes the barrier.
- Use the whip across the gap.
- Light the fire bowls with the green switch.
- Cast Freeze on the revealed crystal orb.
- Stand between the two remaining lit fire pots.
Defeat Minotaur with Sylphid magic
Minotaur is weak to Sylphid. Use the Sprite’s Air Blast or Thunderbolt as the main damage source. The controlled character should not stand beside the boss continuously. Minotaur can charge, seize, and throw party members, so attack during the recovery after one of his movements and retreat before he reaches the front line.
Keep the Sprite at a distance and cast through the Ring menu when Minotaur is recovering from an attack. The Ring pauses the action while it is open, but the party is not protected once the menu closes, so choose the spell, reposition if necessary, and cast from a safe angle.
Minotaur can use Earth Slide, a powerful area attack. After seeing the spell or after a character is thrown, check the entire party’s health rather than healing only the controlled character. Use Cure Water or a healing item immediately when necessary. If an ally falls, revive with a Cup of Wishes and move away before resuming the attack.
Minotaur becomes faster and turns red near defeat. Do not chase it into a risky melee exchange. Continue using Sylphid magic, or land charged weapon attacks only after the boss completes an attack animation. Defeating Minotaur awards the Javelin Orb.
- Use Sylphid magic as the primary offense.
- Keep the Sprite away from melee range.
- Heal after Earth Slide or a throw.
- Revive fallen allies before continuing the attack.
- Collect the Javelin Orb after victory.
Reseal the Fire Seed and leave the palace
After Minotaur is defeated, go north through the newly opened door. The Fire Seed is in the room beyond. Stand in front of it and use the Mana Sword on the seed to reseal it. The party receives the seed’s power, and elemental magic can now be raised to level 4.
There is no second boss after Minotaur. Once the seed has been resealed, use Magic Rope to return to the Fire Palace entrance. Magic Rope is reusable in the original SNES game, so it is the safest way to avoid retracing the palace.
Exit the palace and return to Kakkara. From the palace area, travel south, east, and north twice to reach the village. Speak with the village leader near the dry well if you want the current story information. The village still needs a Sea Hare’s Tail to restore its water, but that item is not available during this immediate sequence and is not required to open the Empire route.
- Use the Mana Sword on the Fire Seed.
- Confirm that magic can now be raised to level 4.
- Use Magic Rope to return to the palace entrance.
- Return to Kakkara and speak with the village leader if desired.
Reforge weapons and begin the Empire sequence
Visit Watts in Kakkara immediately after leaving the palace. Have him reforge the Axe and Javelin using the Axe Orb and Javelin Orb, then check the other weapon categories for any earlier unspent orbs. The Axe Orb is found in the palace chest; the Javelin Orb is the Minotaur reward. Leaving either one unspent lowers the party’s available weapon levels for the next area.
Use the inn, save, and refill supplies before departing. If important magic is still below level 4, the Ice Country is a convenient place to build spell experience because it is available through Cannon Travel and provides room to cast while the party retains weapon access. Do not exhaust all Faerie Walnuts while leveling; keep enough for the opening Empire battles.
When ready, use Kakkara’s Cannon Travel Center and select the Empire destination. The party arrives in Southtown, where the next progression begins by finding the Tasnican spy Mara and obtaining the sewer access code. The Fire Palace chapter is complete once the Fire Seed is resealed, the weapon orbs have been taken to Watts, and Cannon Travel offers the Empire route.
- Have Watts reforge the Axe and Javelin.
- Check for any other unspent weapon orbs.
- Save and restock in Kakkara.
- Use Cannon Travel to reach the Empire and begin the Southtown sequence.
Before you move on
- Frost Gigas has been defeated and the recovered Fire Seed is in the party’s possession.
- The Axe Orb has been collected from the Fire Palace chest.
- Minotaur has been defeated and the Javelin Orb is in the inventory.
- The Mana Sword has resealed the Fire Seed.
- The party can now raise elemental magic to level 4.
- Watts has reforged the Axe, Javelin, and all other weapons covered by currently available orbs.
- Kakkara’s Cannon Travel Center offers the Empire destination.
References for this chapter
The Empire — Southtown, Northtown, Ruins and Castle
After returning the Fire Seed to the Fire Palace, travel from Kakkara to Empire Southtown. Get Mara’s sewer password, cross into Northtown, clear the Empire Ruins, defeat Doom’s Wall and Vampire, then report to Krissie. The Emperor’s supposed truce leads to a trap in Northtown Castle. Escape the prison, defeat Metal Mantis, rescue the Resistance, collect the available weapon orbs, defeat Mech Rider 2, and speak with King Truffle to receive the Flammie Drum.
1. Reach Southtown and obtain the sewer password
After the Fire Palace sequence, return to Kakkara Village and use the Cannon Travel Center. Choose the Empire destination. The Cannon Travel route places you in Empire Southtown, where you initially walk along the outer wall before descending the stairs into town.
From the stairs, travel northwest. When you approach the blue-haired woman near the upper-left houses, she enters one of them. Follow her inside and speak with Mara. She is a Tasnican spy and an ally of Jema. Mara explains that the Resistance controls a sewer entrance leading to Northtown and gives you the password 634.
Leave Mara’s house and travel to the east side of Southtown. Speak with the Resistance member beside the grated sewer entrance. Enter 634 when prompted, then go through the opened passage. The Southtown armor shop can be used if necessary, but Northtown soon offers stronger equipment, so prioritize healing supplies and enough money for the next town.
- Use Kakkara’s Cannon Travel Center to reach the Empire.
- Find Mara’s house in northwest Southtown.
- Obtain the password 634.
- Give 634 to the Resistance guard at the sewer entrance.
2. Cross the Resistance sewerway and meet Krissie
The sewer route is mostly linear. In the first room, move toward the northeast stairs. In the next section, descend into the water and travel southeast rather than lingering near the Blue Drop. Continue through the following room and use the southwest exit.
The next passage contains Dinofish and another Blue Drop. Move south to leave the room, then continue through the next water area by going north and west toward the stairs. In the later section, move south from the Blue Drop and cross the water to reach the steps on the opposite side. Climb out to enter the Resistance Headquarters beneath Northtown.
Speak with Krissie, the Resistance leader. When Primm mentions Dyluck, Krissie explains that someone in the eastern ruins has been draining people’s energy. This conversation establishes the Empire Ruins as the next required objective. Reaching Northtown without speaking with Krissie does not advance the sequence.
- Use the northeast stairs in the first sewer room.
- Take the southwest exit at the first major division.
- Cross the later water section and climb the final stairs.
- Speak with Krissie in the Resistance Headquarters.
3. Prepare in Northtown
Before entering the Empire Ruins, use the Northtown shops and inn. Buy the strongest armor you can afford for Randi, Primm, and Popoi. The ruins contain consecutive boss encounters, and improved armor is more valuable here than spending money on unnecessary offensive items.
Watts is in the lower part of the Northtown inn. Give him any Weapon Orbs you have already collected and pay for the forging. Weapon Orbs do not improve weapons automatically. If you collected optional orbs earlier, this is a good time to keep the party’s weapons current.
Rest at the inn and save before leaving. Carry healing items, Cups of Wishes, Medical Herbs, and Faerie Walnuts. The two ruins bosses occur in the same extended story sequence, so enter with enough MP for Doom’s Wall and Vampire. Avoid spending Popoi’s MP on ordinary enemies unless a fight is blocking the route.
- Buy improved armor in Northtown.
- Forge available Weapon Orbs with Watts.
- Rest and save at the inn.
- Stock healing, revival, status-curing, and MP-restoring items.
4. Enter the Empire Ruins and collect optional orbs
Leave Northtown through the northeast exit to reach the Empire Ruins. In the area before the entrance, a scene with Phanna occurs. Continue north into the ruins after the scene.
The first large room contains three main routes. The upper-left door leads to a Spear’s Orb, and the upper-right door leads to a Bow’s Orb. These rewards are optional for story progress, but collecting them keeps the corresponding weapons from falling behind. If you prefer to avoid early fights, the rooms can be revisited after the bosses when the normal enemies are no longer a concern.
For the required route, return to the first large room and use the lower-center door. Move north through the room with Ghouls and a Specter, then pass the Weepy Eyes and go west down the stairs. Continue south through the Grave Bats and Drop enemies. In the next room, stay to the left and use the far-left door; the nearby door guarded by a Robin Foot is not the route forward.
Continue through the rooms with Ghouls, an Imp, Wizard Eyes, and LA Funk. Eventually you reach a switch-controlled section. Activate the first switch, backtrack to the previously blocked route, and activate the second switch. The door behind that switch leads onward. In the large spike-filled room, follow the passage to the switch at the far end. Activating it lowers the spikes and opens the route north.
- Trigger the Phanna scene outside the ruins.
- Collect the Spear’s Orb from the upper-left route if desired.
- Collect the Bow’s Orb from the upper-right route if desired.
- Use the lower-center door for the required route.
- Activate the switch-controlled passages and lower the large spike field.
5. Defeat Doom’s Wall
After lowering the spikes, continue through the newly opened rooms until you reach the Wizard Eye outside the double doors. Heal the party, restore MP if needed, and enter for the Doom’s Wall battle.
Doom’s Wall is weak to Lumina, but Lumina is not available at this point in the original SNES progression. Use your strongest dependable offensive magic instead. Air Blast is a practical choice; other high-level spells can also contribute. Aim spells at the central eye. Charged weapon attacks are useful when the wall is within reach, but do not allow the party to remain directly in its path.
The wall can use Thunderbolt and Energy Absorb, and Cave-In becomes a serious danger if the side eyes are destroyed or the boss runs out of MP. Keep the party spread enough that one attack does not cripple everyone, and use the Ring menu to heal immediately after a heavy hit. There is no need to spend time destroying the side eyes unless they are creating a particular problem.
Defeating Doom’s Wall awards the Whip’s Orb. Continue north through the door, then move to the altar room for the Dyluck scene. Prepare for another boss before proceeding through the door behind the altar.
- Heal and restore MP before the double doors.
- Use strong available magic instead of waiting for Lumina.
- Prioritize the central eye and cure after heavy attacks.
- Defeat Doom’s Wall and collect the Whip’s Orb.
6. Defeat Vampire and return to Krissie
After the Dyluck and Thanatos scenes, Vampire attacks in the next room. Vampire is also weak to Lumina, which the party still does not possess, so use Air Blast or another reliable offensive spell. Physical attacks connect more reliably when Vampire’s wings are open or when it lands; do not waste time striking while it is airborne with its wings closed.
Vampire moves around the arena and can put party members to sleep. If the controlled character is disabled, switch to another character instead of waiting helplessly. Keep Primm ready to use Cure Water, and use a Medical Herb if sleep or another status condition prevents normal recovery. Retreat from contact damage rather than chasing Vampire continuously.
The boss can use Freeze and Energy Absorb, so watch the party’s HP and MP during the fight. Use charged attacks during landing windows, then move away as Vampire resumes its aerial movement. Defeating Vampire awards the Boomerang’s Orb.
Use the Magic Rope if you want to leave quickly, or retrace the route to return to Northtown. Visit Watts in the inn and forge the newly acquired Boomerang’s Orb and any optional orbs you skipped earlier. Restock before entering the Resistance Headquarters. Speak with Krissie again to report what happened. Her conversation triggers the Emperor’s proposed truce and opens the route to Northtown Castle.
- Defeat Vampire after the Thanatos scene.
- Use magic while Vampire is airborne and physical attacks when it lands.
- Collect the Boomerang’s Orb.
- Return to Northtown, forge weapons, and speak with Krissie.
7. Enter Northtown Castle and defeat Metal Mantis
After Krissie’s truce dialogue, leave Northtown through the northwest exit and follow the route to Northtown Castle. Soldiers block alternate passages, so continue north and enter through the central door. Inside, follow the only available route until you reach the empty dining room.
Go to the north end of the dining room and speak with the man wearing the horned helmet. He is Emperor Vandole, and the peace offer is revealed as a trap. The party is imprisoned with Krissie and the Resistance members. Speak with the soldier through the cell bars. He releases Randi, Primm, and Popoi but leaves the other prisoners behind, then drops the party into a pit.
Metal Mantis is weak to Thunderbolt. Have Popoi cast Thunderbolt repeatedly while Randi attacks whenever the machine is in range. Primm should keep Cure Water ready. The boss’s Fire Beam is comparatively manageable; focus on keeping HP high rather than treating it as a major status-effect attack. If MP is limited, combine Thunderbolt with ordinary weapon strikes instead of spending all recovery items at once.
After Metal Mantis falls, collect the Glove’s Orb and step on the checkered tile that appears in the center of the room. Follow the yellow creature across the gap. Continue to the chest containing 1000 GP, then leave through the north door. In the next room, activate the switch to free the Resistance members. Leave through the western route and go outside.
- Use the northwest Northtown exit after Krissie’s truce dialogue.
- Speak with Emperor Vandole in the dining room.
- Escape the cell and enter the Metal Mantis pit.
- Use Thunderbolt against Metal Mantis.
- Collect the Glove’s Orb and free the Resistance members.
8. Clear the castle, defeat Mech Rider 2, and receive the Flammie Drum
Once outside, move to the far right and enter the rightmost side entrance. Follow the route upward to the switch guarded by Armored Men. Activate the switch, then enter the northern room to collect the Axe’s Orb and Whip’s Orb. Opening one of the chests can cause more Armored Men to appear, so heal before taking both rewards. These orbs are optional, but this is the practical opportunity to collect them.
Return outside and enter through the large main doors on the lower level. Defeat or bypass the Armored Men, then use the left staircase to continue upward. Follow the castle route until you reach the room with tables and Dark Ninjas hidden behind mirrors. Move to the northeast corner and activate the switch; this makes the next door appear.
Continue through the rooms with beds and stairs. At the warp-tile section, take the route to the right rather than the dead-end left path. When you reach the room with the warp tile that knocks the party back, pass through the left arch and deal with the Dark Ninja. Locate the small wall switch immediately to the left of the warp tile and activate it. This disables the trap so the party can cross. Heal before entering the final double doors.
The next scene places the party before Vandole, Sheex, Fanha, and Geshtar. Geshtar becomes Mech Rider 2. This is separate from the earlier Mech Rider fought near the Imperial Sandship. Mech Rider 2 has no special elemental weakness, so use any dependable spell when it is safe, while Randi attacks during openings. Keep moving horizontally to avoid the machine’s charges and missiles. If it runs out of MP, it uses Wave Cannon, which deals heavy damage, so do not prolong the fight unnecessarily. Primm should heal immediately after a major hit.
Defeating Mech Rider 2 awards the Javelin’s Orb. During the castle’s collapse, move to the right and speak with King Truffle. He explains that Flammie has grown enough to fly and gives you the Flammie Drum. Use the drum outdoors to summon Flammie and confirm that free flight is available. This replaces Cannon Travel for overworld movement, but it does not by itself complete the later palace prerequisites or immediately unlock the Sunken Continent sequence.
- Use the rightmost side entrance for the optional Axe’s Orb and Whip’s Orb.
- Return outside and use the large main entrance for the castle’s central route.
- Use the left staircase and activate the hidden switch near the warp tile.
- Defeat Mech Rider 2 and collect the Javelin’s Orb.
- Speak with King Truffle and receive the Flammie Drum.
- Summon Flammie outdoors.
Before you move on
- Mara has provided password 634.
- The party has entered Northtown through the Resistance sewer.
- Krissie has explained the eastern ruins situation.
- The Phanna scene has occurred outside the Empire Ruins.
- Doom’s Wall has been defeated and the Whip’s Orb has been obtained.
- Vampire has been defeated and the Boomerang’s Orb has been obtained.
- The party has returned to Krissie and triggered the Emperor’s truce dialogue.
- Metal Mantis has been defeated and the Glove’s Orb has been obtained.
- The Resistance prisoners have been freed inside Northtown Castle.
- The optional castle Axe’s Orb and Whip’s Orb have been collected or deliberately skipped.
- Mech Rider 2 has been defeated and the Javelin’s Orb has been obtained.
- King Truffle has given the party the Flammie Drum.
- Flammie can be summoned from an outdoor area.
- The player understands that the Sandship Mech Rider and Northtown Castle’s Mech Rider 2 are separate encounters.
References for this chapter
Dark, Light and Moon Palaces — Shade, Lumina and Luna
After the Empire sequence gives you access to Flammie, clear the Palace of Darkness, Palace of Light, and Moon Palace. These areas provide the Shade, Lumina, and Luna spirits, along with several weapon orbs and three Mana Seed seals. The route below follows the practical story order: Darkness first, Light second, and Moon third. Do not confuse this chapter with the later Wood Mana Seed event. That event already occurred at the Tree Palace: the attempt to seal the Wood Mana Seed fails, Dryad appears, and her power is obtained before the Sunken Continent rises.
Prepare before visiting the three palaces
Visit Watts before entering the Lofty Mountains and reforge every weapon for which you have an orb. The original SNES release makes current weapon levels important in these late mid-game areas, especially when enemies resist or evade ordinary attacks. Carry Cups of Wishes, medical herbs, and Faerie Walnuts. Keep several healing items available even if Primm has Cure Water, because the Ring Command pauses the action while you select a target but does not protect the party after you close the menu.
You need Flammie’s Drum for the Lofty Mountains, Gold Isle, and Kakkara Desert. The Palace of Light additionally requires the Golden Tower Key, which you obtain from Mara in Southtown. The Moon Palace has no separate palace key and no boat item to collect: after the required story conversation, land in the correct part of Kakkara Desert and use Karon’s ferry. Before attempting the Moon Palace, make sure Primm has Lucent Beam, because that spell is required to remove the palace’s illusion.
The main required objectives in this chapter are the three palace bosses and the three spirit events. The Glove Orb in the Palace of Darkness is optional, but the Javelin Orb there and the weapon orbs in the Palace of Light are part of the area rewards. The Wood Mana Seed is not sealed during this chapter and should not be listed as a pending task here.
- Reforge available weapons at Watts.
- Carry revival items, healing items, and Faerie Walnuts.
- Have Flammie’s Drum and Primm’s Lucent Beam ready.
- Obtain the Golden Tower Key before entering the Palace of Light.
- Remember that the Wood Mana Seed was already handled at the Tree Palace.
Enter the Palace of Darkness
Fly to the Lofty Mountains and enter the cave leading to the Palace of Darkness. Defeat the Fierce Head in the opening room, continue north, and defeat the Dark Knight. Take the east route past the Dark Ninja, then go north. In the Emberman area, use the Axe to cut the stalagmites on the right. Follow the route south and use the southeast exit.
Continue west and north until you reach the cave room containing a switch. Step on it to create the whip post, then leave through the south exit because the post cannot yet be reached from that side. Go east, continue south past the Dark Ninja, and enter the next room. Move west and step on the second switch. This opens the gate near the entrance.
The newly opened route allows an optional detour for the Glove Orb. Use an Escape Rope to return to the entrance, go north through the opened gate, and defeat the two Fierce Heads guarding the chest. Return to the switch area afterward. If you are following only the required story path, leave the orb for later and continue east, down the stairs, and through the lower door.
Work through the Dark Knight rooms and the western passages until you reach the Emberman room containing the whip post. Use the whip to cross right, go north, and activate the switch. Cross back left and continue south. Follow the stairs and doors until another Emberman area appears. Cut the western stalactites with the Axe and leave through the northwest exit.
In the next large Emberman room, go north and through the north door. Step on the switch to reveal the invisible bridge to the west. Cross it and continue to the large Dark Knight room. Activate the switch in the southeast corner, cross the newly revealed bridge to the east, and activate the next switch. The second bridge then permits a return west. Cross it and use the north door to reach Lime Slime.
- Activate both switches that control the palace gates and bridges.
- Use the Axe on blocking stalagmites and stalactites.
- Collect the optional Glove Orb only if you want the additional weapon upgrade.
- Reveal both invisible bridges before entering the Lime Slime room.
Defeat Lime Slime and obtain Shade
Lime Slime is vulnerable to Salamando magic. Have Primm use Fire Bouquet and Popoi use Exploder, then wait long enough to see the damage before casting again. Repeated spells can waste MP when the game’s damage limit prevents every cast from contributing its full potential. Keep the party moving so the slime’s airborne goo and elemental attacks do not trap everyone in one position. Use charged weapon attacks when the exposed center is within reach, and heal immediately if a character is caught by an area attack.
After Lime Slime is defeated, collect the Javelin Orb and go north. Shade grants his magic to Popoi only; Primm does not receive Shade spells in the original SNES release. Continue to the altar and strike the Darkness Mana Seed with the Mana Sword. This is the required palace completion event. Use the Escape Rope after the seal is restored, then leave the Lofty Mountains or visit Watts before starting the Gold Isle route.
- Use Salamando magic as the main counter to Lime Slime.
- Confirm the Javelin Orb appears after the battle.
- Confirm Shade is listed for Popoi, not Primm.
- Seal the Darkness Mana Seed with the Mana Sword.
Obtain the Golden Tower Key and enter the Palace of Light
Return to the Lofty Mountains and speak with Jehk if the story has not already directed you toward Gold Isle. Fly to Gold Isle and visit the old man near the sealed Golden Tower. He explains that the key was connected to the spy in Tasnica. Fly to Southtown, enter Mara’s house in the northwest part of town, and speak with her to receive the Golden Tower Key.
Fly back to Gold Isle and unlock the Golden Tower. In the opening room of the Palace of Light, defeat the two Beast Zombies and open the chest for the Spear Orb. Continue north, then work east through the Dark Ninja, Wizard Eye, Weepy Eye, and Beast Zombie encounters. At the far east side, go south and climb the stairs on the left to reach Blue Spike.
- Speak with Mara in Southtown and obtain the Golden Tower Key.
- Open the first Palace of Light chest for the Spear Orb.
- Heal and restore MP before climbing to Blue Spike.
Defeat Blue Spike and Gorgon Bull
Blue Spike has no specific elemental weakness in the original SNES release. Use charged melee strikes during its exposed periods, or use Earth Slide, Thunderbolt, Exploder, or Dark Force for ranged damage. Blue Spike uses fire and status attacks, including Fireball, Fire Bouquet, Moogle Glare, and Acid Bubbles. It can appear to explode before the battle is actually over. Do not leave the room while the boss is still moving; continue attacking until the victory result appears.
After Blue Spike is truly defeated, collect the Boomerang Orb. Climb the stairs that appear and open the chest for the Axe Orb. Continue north and east through the Dark Ninja and Beast Zombie rooms. At the east side, go south through the door, defeat the Emberman group, and climb the stairs to Gorgon Bull.
Gorgon Bull uses physical attacks and Earth Slide. Keep the party spread out, use Thunderbolt from a safe distance, and reposition after each cast rather than waiting directly beside the boss. If a character is paralyzed or struck by Earth Slide, use the Ring Command to heal or revive before resuming attacks. The battle awards the Bow Orb.
- Do not leave after Blue Spike appears to explode; verify the actual victory.
- Collect the Boomerang Orb and the Axe Orb.
- Use Thunderbolt against Gorgon Bull.
- Collect the Bow Orb after the Gorgon Bull battle.
Receive Lumina and seal the Light Mana Seed
After Gorgon Bull, go upstairs and speak with Lumina. Lumina grants her magic to Primm only. Popoi does not receive Lumina spells in this release, so use Primm’s spell ring when casting Lucent Beam and the other Light magic.
Continue upstairs to the Light Mana Seed and use the Mana Sword to restore its seal. This completes the Palace of Light. Use the Magic Rope to leave, then visit Watts and reforge the Spear, Boomerang, Axe, and Bow if you collected their orbs. The optional Glove Orb from the Palace of Darkness can also be reforged if obtained.
- Confirm Lumina appears in Primm’s spirit list.
- Seal the Light Mana Seed with the Mana Sword.
- Confirm Primm has Lucent Beam available.
- Deliver the new weapon orbs to Watts.
Reach the Moon Palace through Kakkara Desert
Return to the top of the Lofty Mountains and speak with Jehk after completing the Palace of Light. He explains that Sage Joch has gone to the Moon Palace in the Sea of Wonders. Call Flammie and fly to Kakkara Desert. Land around the large dark area in the northwest portion of the desert, rather than on an ordinary section of sand.
The correct landing area contains colorful stars and Mad Mallard enemies. Travel north until you find Karon, the ferry pilot. Speak with Karon and he will carry the party to the Moon Palace. No separate boat, key, or consumable is required. When the ferry stops, go north through the Marmablue-filled approach and enter the palace.
- Speak with Jehk after the Palace of Light.
- Land in the star-filled area of northwest Kakkara Desert.
- Use Karon’s ferry to reach the Moon Palace.
- Keep Lucent Beam available before entering.
Dispel the Moon Palace illusion, receive Luna, and seal the Moon Seed
The Moon Palace initially appears as darkness and stars with purple flames marking the entrance. Move slightly north until the uppermost entrance flames are near the top of the screen, then travel west or east across the room. Find the Marmablue guarding a crystal orb and have Primm cast Lucent Beam on the orb. This removes the illusion and reveals the normal palace interior.
Go north into the revealed room and speak with Luna. Luna grants magic to both Primm and Popoi, unlike Shade and Lumina. Popoi receives Moon-based utility magic including Magic Absorb, while Primm receives Luna’s support and offensive spells. Continue to the altar and strike the Moon Mana Seed with the Mana Sword.
Flammie cannot be called inside the Moon Palace. Return south to Karon’s ferry and ride back to Kakkara Desert. After leaving, fly back to the Lofty Mountains and speak with Jehk again. His next conversation directs the story toward Tasnica. Do not proceed on the assumption that the chapter is complete until this post-Moon Palace dialogue has advanced.
- Use Primm’s Lucent Beam on the crystal orb beside the Marmablue.
- Confirm Luna appears in both Primm’s and Popoi’s spirit lists.
- Seal the Moon Mana Seed with the Mana Sword.
- Ride Karon’s ferry back to Kakkara Desert.
- Return to Jehk and trigger the dialogue that sends the party toward Tasnica.
Before you move on
- Lime Slime, Blue Spike, and Gorgon Bull have been defeated.
- Shade is visible in Popoi’s spirit list.
- Lumina is visible in Primm’s spirit list.
- Luna is visible in both Primm’s and Popoi’s spirit lists.
- The Darkness, Light, and Moon Mana Seeds have been sealed with the Mana Sword.
- The Javelin, Spear, Boomerang, Axe, and Bow Orbs have been collected, with the optional Glove Orb obtained if desired.
- The Golden Tower Key was obtained from Mara and used at the Palace of Light.
- The Moon Palace illusion was removed with Lucent Beam.
- The party returned from the Moon Palace by Karon’s ferry.
- Jehk’s post-Moon Palace conversation advances the route toward Tasnica.
- All newly obtained weapon orbs have been delivered to Watts before continuing the late-game route.
- The Wood Mana Seed is correctly recorded as an earlier Tree Palace event rather than a successful sealing objective in this chapter.
References for this chapter
- Palace of Darkness - Secret of Mana Walkthrough
- Palace of Light - Secret of Mana Walkthrough
- Gold Isle - Secret of Mana Walkthrough
- Lofty Mountains - Secret of Mana Walkthrough
- Tasnica - Secret of Mana Walkthrough
- Secret of Mana - Guide and Walkthrough - Super Nintendo - By Snow_Dragon
- Secret of Mana - Super NES Instruction Manual
Tasnica, the Sunken Continent and the path to the Pure Land
After obtaining Luna, expose the spy in Tasnica, complete Joch’s Test of Courage, defeat Aegagropilon at the Tree Palace and obtain Dryad. The Mana Palace then rises from the Sunken Continent. Enter it through the lower route, defeat Hydra and Kettle Kin, activate the Grand Palace crystal orbs in order, and defeat Snap Dragon, Hexas and Mech Rider 3. The Mana Fortress activates afterward, but the next required destination is the Pure Land.
Expose the spy in Tasnica
After obtaining Luna, speak with Jehk at the Lofty Mountains. He directs the party toward Tasnica. Summon Flammie and fly to the castle west of the mountains, then enter through the main entrance. Speak with Jema inside and follow the corridors to the throne room. Talk to the king to trigger the Imperial spy event and the Dark Stalker battle.
Dark Stalker is also encountered later as a normal enemy, so this fight does not require a special setup. Keep Randi moving instead of standing directly beside the enemy, and use Lucent Beam if Primm has enough MP. The battle ends quickly with ordinary weapon attacks as well.
After Dark Stalker is defeated, speak with the king again to receive the Sword Orb. Speak with Jema before leaving. Take the Sword Orb to Watts when practical, but do not delay the main route if the smith is inconvenient to reach.
- Reach Tasnica after obtaining Luna.
- Speak with Jema and trigger the spy event.
- Defeat Dark Stalker.
- Receive the Sword Orb from the king.
- Speak with Jema before leaving.
Complete Joch’s Test of Courage
Return to the Lofty Mountains and speak with Jehk. Continue through the mountain route to the test area and accept the trial. Three shadow copies appear in the final room. Physical attacks are the reliable answer; do not waste offensive magic expecting the copies to take normal spell damage.
Control Randi and attack one shadow at a time while keeping the party moving. Primm should concentrate on healing and support rather than entering the middle of the group. After all three shadows fall, return to Jehk and speak with him again. He directs the party to the Tree Palace.
Save, restore HP and MP, and reforge the Sword Orb if Watts is available. Then summon Flammie and fly to the purple island containing the Tree Palace.
- Accept Joch’s test through Jehk.
- Defeat all three shadow copies with physical attacks.
- Return to Jehk after the battle.
- Reach the Tree Palace by Flammie.
Defeat Aegagropilon and obtain Dryad
Enter the Tree Palace and proceed through the Imperial scene. Sheex transforms into Aegagropilon. The boss can cast Wall, Sleep Flower and Burst, and its Wall reflects offensive magic back at the party. Do not continue casting at Aegagropilon while Wall is active. Have Popoi use Dispel Magic to remove it before resuming spell attacks.
A safe general plan is to have Primm cast Moon Energy on Randi and use Moon Saber if desired, then let Randi attack during openings. If Aegagropilon restores Wall, stop offensive casting until it has been dispelled again. Keep the party away from corners so the boss cannot trap multiple characters with its spinning and jumping attacks. Cure Sleep Flower immediately with a status-recovery item.
Aegagropilon awards the Spear Orb. After the battle, leave the arena, move left and climb to the Mana Seed chamber. Attempt to seal the Wood Mana Seed with the Mana Sword. The seal is already failing, so the attempt does not complete normally. Dryad appears, grants her power to the party and becomes the eighth elemental spirit. The Sunken Continent then rises.
Dryad is obtained here, before the Grand Palace and before the Pure Land. The Wood Mana Seed event is a failed sealing attempt followed by Dryad’s appearance; do not describe it as a normal completed seed seal.
- Defeat Aegagropilon.
- Dispel Wall before using offensive magic.
- Collect the Spear Orb.
- Attempt to seal the Wood Mana Seed.
- Receive Dryad and trigger the rising-continent event.
Enter the raised Mana Palace through the lower route
After the continent rises, land on it and speak with Jema. The upper entrance does not provide the needed route. Descend to the bottom of the exterior area and take the left staircase at the water section. The opposite staircase is a dead end for the required progression.
Continue through the lower passages, using the Axe to cut through the red and blue barriers. Stand on the yellow spring platform to reach the upper ledge. At the waterfall, approach from the upper side and let the current carry the party across. Collect the Boomerang Orb from the chest on this route, then enter the door above the spring platform.
In the next obstacle area, use the Axe carefully. Continue north, then take the left route when the corridor divides. The waterfall section has three drops. Hit the switch on the left during the first drop, hold left through the second drop because it has no switch, and hit the switch on the right during the third drop. When the water route is opened, enter the door to fight Hydra.
- Speak with Jema on the raised continent.
- Use the lower entrance rather than the blocked upper route.
- Take the left staircase at the water section.
- Use the Axe and yellow spring platform.
- Collect the Boomerang Orb.
- Activate the waterfall switches and reach Hydra.
Clear the Mana Palace and defeat Kettle Kin
Hydra is best handled with Exploder from Popoi or another Salamando spell. Its heads and fire attacks can disrupt the party, so keep Randi moving and use the Ring menu to heal between attack windows. Use Magic Absorb if Popoi’s MP becomes low. Defeating Hydra awards a Whip Orb.
Continue through the palace and use the conveyor belts and hidden passages to reach the Resistance area. Find Watts and reforge weapons if needed, then speak with Krissie for healing. Continue through the switch rooms. When you reach the four colored buttons, press them in this order: red, blue, yellow, green.
Follow the opened route to the conveyor and train-like section. Enter the train from the left and run through it to the right side. After leaving, travel south through the H-shaped structures and use the lower-left passage to reach the Scorpion Army’s next encounter. Kettle Kin uses Lucid Barrier, which blocks physical attacks. Dispel it whenever it appears, and use Magic Absorb when possible to limit its ability to maintain the barrier. Keep the party clear of its hammer strikes. Defeating Kettle Kin awards the Bow Orb.
After the battle, leave the area and enter the large double doors. This is the Grand Palace entrance. Save and restock before committing to its long route.
- Defeat Hydra and collect the Whip Orb.
- Find Watts and Krissie in the palace route.
- Press the colored buttons red, blue, yellow, green.
- Defeat Kettle Kin and collect the Bow Orb.
- Enter the Grand Palace after healing and restocking.
Activate every Grand Palace crystal orb in order
At the Grand Palace entrance, use the lower route. The main upper entrance does not lead forward. Descend to the bottom exterior section, take the left staircase, cut through the colored barriers with the Axe, use the yellow spring platform, cross the waterfall and enter the interior door.
In the first Grand Palace room, take the middle doorway. Reach the first crystal-orb room and cast Gem Missile on the orb. Return to the main room and enter the next orb room, then cast Freeze. Return again, take the upper route and use the Whip across the gaps. Enter the wind-element room and cast Air Blast on its crystal orb. Do not substitute Thunderbolt for this instruction.
Continue through the opened passages to the fire-element room and cast Fireball. Return toward the central staircase and follow the newly accessible route. Collect the Sword Orb chest as soon as it appears; leaving the room before opening it can cause the chest to disappear in the original SNES release. Then reach the light-element room and cast Lucent Beam. Proceed to the darkness-element room and cast Dark Force.
Return to the central area and activate the switch that opens the grille. Follow the newly opened passage through the switch rooms, using the Whip to cross gaps. Reach the final crystal-orb room and cast Lunar Magic. If a barrier remains closed, retrace the route and confirm that every orb has reacted.
- Cast Gem Missile on the first crystal orb.
- Cast Freeze on the second orb.
- Cast Air Blast on the Sylphid orb.
- Cast Fireball on the Salamando orb.
- Collect the Sword Orb chest immediately.
- Cast Lucent Beam, then Dark Force.
- Cast Lunar Magic on the final orb.
Defeat Snap Dragon, Hexas and Mech Rider 3
After the final orb and switch sequence, restore HP and MP before entering the boss area. Snap Dragon is vulnerable to fire magic, so use Fireball or Exploder while Primm keeps the party healed. Its low MP limits its ability to recover. Defeating Snap Dragon awards the Javelin Orb.
Continue to the stage area. The Emperor is dead, and the route behind the altar leads to Fanha, who transforms into Hexas. Hexas can cast Pygmus Flare, shrinking a character and lowering that character’s defense. Use the Midge Mallet immediately, or use a reliable status cure. Hexas can also use Freeze, Acid Storm and Dispel Magic, so keep healing available and do not rely on a single buff for the entire fight.
Burst is a strong offensive option if Popoi has enough MP. Otherwise, use Moon Energy on Randi and rely on physical attacks during safe openings. After Hexas falls, collect the Whip Orb.
From the Hexas area, go north and step on the green switch to begin Mech Rider 3. The machine can cast Wall. Use Dispel Magic before relying on offensive spells, then attack with Thunderbolt or charged weapon strikes while the barrier is gone. Keep Randi out of the machine’s horizontal charge path and use Primm for emergency healing. Defeating Mech Rider 3 awards the Spear Orb.
- Defeat Snap Dragon and collect the Javelin Orb.
- Defeat Hexas and collect the Whip Orb.
- Cure Pygmus Flare immediately.
- Dispel Mech Rider 3’s Wall.
- Defeat Mech Rider 3 and collect the Spear Orb.
Return to Jema and prepare for the Pure Land
After Mech Rider 3, the Mana Fortress activates and the Sunken Continent sinks. The fortress cannot be entered as the next step. Ride Flammie back to the raised island area and land at the Tree Palace. Speak with Jema. He explains that the Mana Beast will eventually destroy the fortress and that the Mana Sword must be revived in the Pure Land first.
Walk around the outside of the palace to find Neko and purchase the late-game armor that the party can afford. Sell obsolete equipment if necessary. Visit Watts to reforge the weapons represented by the newly collected orbs. Speak with Krissie or use another available recovery point, then save.
Before leaving, confirm that the party has the eight elemental spirits: Undine, Gnome, Sylphid, Salamando, Shade, Lumina, Luna and Dryad. The Wood Mana Seed event has been completed through Dryad’s appearance, even though the seed could not be sealed normally.
Summon Flammie and fly to the Moon Palace area. From there, fly north to the large mountain formation with a hole in its center. Land in the green opening at the middle to enter the Pure Land. Save and restock before crossing beyond the first area; the Pure Land can be left for supplies, but the later dragon route is a major progression point.
- Watch the Mana Fortress activate and the continent sink.
- Return to the Tree Palace and speak with Jema.
- Buy available late-game armor from Neko.
- Reforge the collected weapon orbs at Watts.
- Confirm all eight elemental spirits are present.
- Save and restock before entering the Pure Land.
- Land Flammie in the green center of the Pure Land entrance.
Before you move on
- The Tasnica spy event is complete, Dark Stalker is defeated, the king has awarded the Sword Orb and Jema has been spoken to.
- Joch’s Test of Courage is complete and Jehk has directed the party to the Tree Palace.
- Aegagropilon is defeated and the Spear Orb is collected.
- Dryad has appeared after the failed Wood Mana Seed sealing attempt.
- The raised Mana Palace has been entered through its lower route using the left staircase.
- Hydra and Kettle Kin are defeated, with their Whip Orb and Bow Orb collected.
- The Grand Palace crystal orbs have been activated in the order Gem Missile, Freeze, Air Blast, Fireball, Lucent Beam, Dark Force and Lunar Magic.
- Snap Dragon, Hexas and Mech Rider 3 are defeated, with the Javelin Orb, Whip Orb and Spear Orb collected.
- The Mana Fortress has activated and the Sunken Continent has sunk.
- The eight elemental spirits are present: Undine, Gnome, Sylphid, Salamando, Shade, Lumina, Luna and Dryad.
- The party has returned to Jema, prepared equipment and supplies, and reached the Pure Land entrance without attempting to enter the Mana Fortress.
References for this chapter
- Secret of Mana - Super NES Instruction Manual
- Secret of Mana - Guide and Walkthrough - Super Nintendo - By Phoenix_1911
- Secret of Mana - Guide and Walkthrough - Super Nintendo - By Snow_Dragon
- Grand Palace — Secret of Mana Walkthrough
- Secret of Mana — Complete walkthrough for the SNES US/EU route
- Secret of Mana — Guide and Walkthrough — Qhr1s
The Pure Land and Mana Tree gauntlet
The Pure Land is the final wilderness route before the Mana Fortress in the original North American Super Nintendo release of Secret of Mana. The Tree Palace sealing attempt has already failed: Dryad joined the party there, but Thanatos sealed her Mana Magic. In this chapter, prepare at the Tree Palace, enter the Pure Land through the volcanic island north of Kakkara, defeat six required bosses, collect their weapon orbs, reach the Mana Tree, and leave with Flammie. The Mana Tree restores the Mana Sword and raises the elemental magic limit to level eight, but Dryad’s Mana Magic remains unavailable until the Dark Lich is defeated.
Prepare at the Tree Palace and enter the Pure Land
After the Grand Palace sequence has finished and the party has spoken with Jema about the Pure Land, complete your preparations before flying out. Do not search this area for a new Mana Seed or for Dryad. The Wood element’s story event occurred earlier at the Tree Palace: the party attempted to seal the Wood Mana Seed, the attempt failed, Dryad appeared, and she joined while Thanatos’s seal remained on her Mana Magic.
Walk around the outside of the Tree Palace and use Neko’s late-game armor shop. Replace outdated armor on all three characters if you can afford it. Pure Land enemies and bosses hit hard, and current armor is more useful here than carrying a large reserve of offensive items. Visit Watts and forge every weapon for which you already have an orb, prioritizing the weapons you use most often.
Restock Medical Herbs, Cups of Wishes, Faerie Walnuts, and Remedies or other status-recovery items. Make sure Primm can use Cure Water and Remedy. Popoi should have usable Sylphid, Salamando, Undine, and Gnome spells, because those elements cover the six bosses. Shade, Lumina, Luna, and Dryad are also important later, but Dryad’s Mana Magic cannot yet be used.
Use Flammie to fly to the Pure Land, the volcanic island north of Kakkara. Land in the opening at the center of the mountain. Save before entering if possible. Once the Mana Tree scene is completed, the Pure Land route is no longer available in the normal way, so obtain any optional enemy drops you care about before approaching the tree.
- Late-game armor equipped on Randi, Primm, and Popoi
- Existing weapon orbs delivered to Watts where practical
- Healing, revival, MP-recovery, and status-recovery supplies stocked
- Primm’s Cure Water and Remedy ready
- Sylphid, Salamando, Undine, and Gnome magic available
- Save made before entering the Pure Land
- Pure Land entered through the central volcanic opening
Cross the opening forest and defeat Dragon Worm
From the landing area, head north. At the first split, continue north and take the right-hand waterfall. At the top, move northwest through the forest and enter the small cave. This cave leads to Dragon Worm.
Dragon Worm is weak to Sylphid. Have Popoi use Thunderbolt or Air Blast whenever the boss is visible and targetable. Randi can attack during safe openings, but do not chase the boss merely to complete a weapon charge. Dragon Worm can use Earth Slide and can inflict Balloon or Petrify, so keep Cure Water, Remedy, and Cups of Wishes available.
When Dragon Worm moves out of reach or disappears from the visible area, stop advancing. Use that interval to heal, revive, cure status effects, and separate the party before the next attack. After the boss falls, collect the Axe’s Orb and continue north.
- Waterfall and northwest cave route followed
- Dragon Worm defeated
- Sylphid magic used for the main damage
- Balloon and Petrify treated promptly
- Axe’s Orb collected
- Party healed before continuing
Use the first shrine and defeat Snow Dragon
Continue north from the Dragon Worm arena. You will reach a gate or shrine that explains that the dragon to the left must be defeated before the route can open. Use this shrine as a recovery and save point before taking the detour to Snow Dragon.
Leave the shrine, follow the route toward the northwest passage, and enter the cave or arena where Snow Dragon waits. Snow Dragon is weak to Salamando. Use Popoi’s Fireball and Primm’s Fire Bouquet if available. Fire magic is safer and more consistent than trying to fight the boss entirely at close range.
Snow Dragon uses ice attacks and Balloon Ring. Keep the characters spread rather than standing in one cluster, and cure a disabled ally immediately. When the dragon moves away, heal instead of pursuing it. Defeating Snow Dragon awards the Bow’s Orb.
Return to the shrine by the route you used to reach the boss. The gate is now open. Save again before entering the next section.
- Save made at the first Pure Land shrine
- Snow Dragon defeated with Salamando magic
- Balloon and ice damage managed
- Bow’s Orb collected
- First gate opened
Defeat Axe Beak and Red Dragon
Pass through the opened gate and continue through the cave and forest screens. Ghosts appear along this route; use magic against them or move past them rather than relying on ordinary weapon swings when they cannot be struck reliably. Follow the stairs and northern passages to the cave containing Axe Beak.
Axe Beak is weak to Undine. Use Popoi’s Freeze while the boss is visible. Axe Beak jumps frequently and is awkward to hit with melee weapons, so keep the party away from the point directly beneath it. Heal after fire attacks and avoid grouping the characters together. Victory awards the Javelin’s Orb and opens the next route.
Continue through the newly opened stairs and follow the path toward the next shrine or gate. When the route directs you to defeat another dragon, take the western or left-hand branch. Avoid unnecessary fights with Eggplant Men if the path is clear, then enter the cave containing Red Dragon.
Red Dragon is also weak to Undine, so continue using Freeze. Keep Remedy or another status cure ready and use the boss’s off-screen intervals to recover. Close-range attacks are possible, but they are less dependable than repeated Freeze casts. Defeating Red Dragon awards the Glove’s Orb. Leave the arena and return to the shrine or gate before proceeding.
- Ghosts bypassed or defeated with magic
- Axe Beak defeated with Freeze
- Javelin’s Orb collected
- Red Dragon defeated with Freeze
- Glove’s Orb collected
- Party returned to the shrine or gate
Defeat Thunder Gigas and Blue Dragon
From the second shrine or gate, follow the northern route through the remaining forest and cave screens. The path contains a fork and a loop, but both forward branches eventually reconnect. Use the shrine before Thunder Gigas as a save and recovery point before entering the boss area.
Thunder Gigas is weak to Gnome. Have Popoi use Gem Missile while the boss is visible. Watch for Blitz Breath, which can damage several characters at once. Thunder Gigas can cast Thunder Saber on the party’s weapons. When Thunder Saber is active, stop attacking physically; weapon hits can restore the boss’s health. Continue with Gem Missile and heal or revive during the periods when the boss separates into smaller forms or disappears from immediate reach.
After Thunder Gigas is defeated, collect the Sword’s Orb and save at the shrine. Continue toward the final dragon. Clear obstructing grass with a suitable weapon and follow the northern route through the forest and building screens until you reach the rooftop arena.
Blue Dragon is also weak to Gnome, so use Gem Missile whenever it is visible and targetable. Its Blitz Breath is dangerous, although less threatening than Thunder Gigas’s version. If it flies or moves off-screen, wait and recover rather than chasing it into an attack. Victory awards the Boomerang’s Orb.
- Thunder Gigas defeated with Gnome magic
- Physical attacks stopped while Thunder Saber is active
- Sword’s Orb collected
- Blue Dragon defeated with Gnome magic
- Boomerang’s Orb collected
- Final shrine reached or route prepared for the Mana Tree
Reach the Mana Tree and complete the story event
After Blue Dragon, continue through the remaining forest and building screens. The path leads to the Mana Tree. The Pure Land’s required boss order is Dragon Worm, Snow Dragon, Axe Beak, Red Dragon, Thunder Gigas, and Blue Dragon; there is no additional required boss between Blue Dragon and the tree.
Approach the Mana Tree and allow the full scene to play. The Mana Tree explains the connection involving Randi, Serin, and the Mana Sword before the tree is destroyed. The scene restores the sword’s power and restores the world’s Mana power sufficiently for elemental magic to advance toward level eight.
This event does not unseal Dryad’s Mana Magic. Dryad already joined during the earlier failed Wood Mana Seed sealing attempt at the Tree Palace, and Thanatos’s seal remains in place until the Dark Lich is defeated in the Mana Fortress. Do not treat the Mana Tree scene as a second Dryad recruitment or as the point where the eighth elemental spirit is obtained.
After the scene, use the Flammie Drum to leave the Pure Land. The six weapon orbs should already be in your inventory. If you have not yet collected all six, do so before approaching the Mana Tree, because the completed route cannot normally be revisited afterward.
- All six Pure Land bosses defeated
- Mana Tree scene completed
- Mana Sword restored
- Elemental magic can progress toward level eight
- Dryad’s earlier Tree Palace recruitment confirmed
- Dryad’s Mana Magic still sealed until the Dark Lich
- Pure Land exited with Flammie
Deliver the orbs and prepare for the Mana Fortress
After leaving the Pure Land, fly to a convenient town or forge location and visit Watts. Deliver and forge the Axe’s Orb, Bow’s Orb, Javelin’s Orb, Glove’s Orb, Sword’s Orb, and Boomerang’s Orb. Additional weapon orbs can still be found in later areas, so missing an optional upgrade does not block the campaign, but entering the Mana Fortress with the weapons you rely on properly forged makes the final battles safer.
Restock Cups of Wishes, Medical Herbs, Remedies, and Faerie Walnuts. Raise Primm’s healing and support magic and Popoi’s elemental magic toward the newly available level-eight limit. Give particular attention to the elements used for the final areas, including Gnome, Undine, Salamando, Sylphid, Lumina, Shade, Luna, and Dryad’s available non-Mana spells.
Do not use a checklist that asks whether all eight Mana Seeds are sealed or confirmed. The correct story check is whether the party has completed the eight elemental spirit events: Undine, Gnome, Sylphid, Salamando, Shade, Lumina, Luna, and Dryad. For Dryad, the relevant event is the failed Wood Mana Seed sealing attempt at the Tree Palace followed by Dryad joining the party. The Pure Land contributes the Mana Tree event and the sword’s restoration, not a new eighth seed.
The chapter is complete when Dragon Worm, Snow Dragon, Axe Beak, Red Dragon, Thunder Gigas, and Blue Dragon have been defeated; the Axe, Bow, Javelin, Glove, Sword, and Boomerang orbs have been collected; the Mana Tree scene has played; the party has left with Flammie; and the new orbs have been delivered to Watts where practical. Make a final preparation save before entering the Mana Fortress. The overall campaign still requires defeating the Dark Lich, using Dryad’s Mana Magic on Randi during the Mana Beast battle, defeating the Mana Beast, and watching the ending scenes.
- All six Pure Land weapon orbs delivered to Watts where practical
- Current armor equipped on all three characters
- Healing, revival, status-recovery, and MP-recovery supplies restocked
- Important elemental magic raised toward level eight
- Eight elemental spirit events confirmed: Undine, Gnome, Sylphid, Salamando, Shade, Lumina, Luna, and Dryad
- Dryad confirmed as recruited at the earlier Tree Palace event
- Mana Tree event completed
- Dryad’s Mana Magic noted as sealed until the Dark Lich
- Final save made before entering the Mana Fortress
Before you move on
- Jema was spoken to after the Grand Palace sequence and the Pure Land objective was established.
- The party used Flammie to reach the volcanic Pure Land island north of Kakkara and entered through the central opening.
- Dragon Worm, Snow Dragon, Axe Beak, Red Dragon, Thunder Gigas, and Blue Dragon were defeated.
- The Axe’s Orb, Bow’s Orb, Javelin’s Orb, Glove’s Orb, Sword’s Orb, and Boomerang’s Orb were collected.
- The Mana Tree scene played and the Mana Sword was restored.
- Elemental magic could advance toward level eight, while Dryad’s Mana Magic remained sealed until the Dark Lich.
- The eight elemental spirit events were confirmed: Undine, Gnome, Sylphid, Salamando, Shade, Lumina, Luna, and Dryad.
- The party left the Pure Land with Flammie, delivered the new orbs to Watts where practical, restocked, and saved.
- The overall campaign completion condition remains defeating the Dark Lich, using Dryad’s Mana Magic on Randi during the Mana Beast battle, defeating the Mana Beast, and watching the ending.
References for this chapter
- The Pure Land - Secret of Mana Walkthrough
- Secret of Mana - Guide and Walkthrough - Super Nintendo - By Snow_Dragon
- Secret of Mana - Guide and Walkthrough - Super Nintendo - By Phoenix_1911
- Secret of Mana - Boss Guide - Super Nintendo - By Qhr1s
- Secret of Mana - Walkthrough Part 9: The Pure Land
- Secret of Mana/Pure Land - StrategyWiki
- Secret of Mana - Super NES Instruction Manual
Mana Fortress finale — Dark Lich, the Mana Beast and ending
After the Mana Tree restores the Mana Sword in the Pure Land, fly to the Mana Fortress with Flammie. Follow the fortress route through its switches, bridges, green crystals, whip posts, and forced boss encounters. Buffy and Dread Slime are required route fights in the original SNES progression, not optional bosses. After reaching the final platform, defeat Dark Lich with Lumina magic. Dark Lich then grants Primm and Popoi Dryad’s Mana Magic. Have both allies cast that spell on Randi’s equipped sword to restore the Mana Sword before attacking the Mana Beast. Strike the Beast only during its close passes, renew the Mana Sword whenever its effect expires, and remain through the destruction scene, ending sequence, and credits.
Prepare before entering the Mana Fortress
The Mana Tree sequence in the Pure Land restores the Mana Sword before this chapter begins. Fly to the Mana Fortress with Flammie and make a normal save before entering. You can call Flammie to leave the fortress before activating the final switch on the interior platform, so use that opportunity if you need to restock or deliver Weapon Orbs to Watts.
Equip Randi with the sword and give all three characters their strongest practical armor. Stock Candy or Chocolate for healing, Faerie Walnuts for MP, Cups of Wishes for revival, and status-curing items. The fortress contains long enemy stretches, and Dark Lich can inflict several disabling conditions, so do not enter with an almost empty supply pouch.
Place Lucent Beam, Dark Force, healing, revival, and Dryad’s Mana Magic where they are easy to select from the Ring menu. The Ring pauses the action while open, but spells and items still need time to resolve after selection. In a dangerous room, move away from enemies before opening the Ring rather than trying to heal while surrounded.
- Randi has the sword equipped.
- All characters have their strongest available armor.
- Healing, MP recovery, revival, and status-curing items are stocked.
- A save exists before the fortress approach.
- Dryad’s Mana Magic is not yet available; it is awarded after Dark Lich.
Enter the fortress and cross the opening bridge route
Land at the Mana Fortress and walk north to the entrance door on the outside structure. Inside, go north past the Metal Crabs and follow the passage beneath the wall. When the path reaches the Turtlances, move to the left side, go north, and use the whip post to cross to the eastern side.
Go down from the landing point and step on the purple floor switch. This creates a bridge to the northern door. Cross it and continue north through the Fiend Head and Dark Stalker rooms, then through the room containing Heck Hounds and a Wolf Lord.
The next area is blocked by green crystals. Equip the sword or axe and strike the crystals until the passage opens. Step on the switch to extend a bridge east, then use the eastern switch to extend the next bridge west. Cross west and use the whip post. When you reach the National Scar, go south. Ignore the left-hand branch in the following area because it is a dead end, and use either whip post to continue south.
Continue through the Whimper, Doom Sword, National Scar, and Dark Stalker rooms. In the next green-crystal room, cut through the crystals and do not step on the switch; that switch restores the barrier and makes you repeat the passage. Go west through the cleared room and north through the door at the end. Step on the switch near the Marmablue to extend the bridge west, cross to the Tsunami, then go south and use the whip post. Continue west past the Captain Ducks and enter the next room.
- Use the purple switch to create the first bridge.
- Cut green crystals with the sword or axe.
- Ignore the left-hand dead end after the National Scar.
- Do not activate the switch in the second crystal room.
- Use the whip post after crossing the Tsunami area.
Defeat Buffy, then reach Dread Slime
The next room contains a Whimper and a switch. Step on the switch to be transported to Buffy. This is a required route encounter in the direct fortress progression. Before activating the switch, restore HP and MP if needed and consider casting Light Saber on the weapons.
Buffy is vulnerable to Lumina magic, so have Primm cast Lucent Beam repeatedly. Wait for each cast to resolve before selecting it again. Buffy can absorb HP and use claw attacks, Freeze, and Leaden Glare. Keep the party spread away from the boss, and heal immediately if a character is frozen or heavily damaged. Randi can contribute with attacks when Buffy is safely exposed, but survival and steady Lucent Beam casts are more reliable than standing directly beside it.
After Buffy falls, walk to the north side of the room and step on the switch. In the next section, go right and then north. At the next split, go east and use the whip post to travel north. At the following split, go east again. Continue until the route becomes maze-like; choose south at the first major split and west at the next. At the end of the maze, step on the switch to create a bridge south. Cross it and activate the switch at the far end to reach Dread Slime.
Dread Slime is the second required fortress boss. Use Popoi’s Dark Force, Dread Slime’s effective elemental counter, but do not queue the spell repeatedly without waiting. Let the spell’s explosions begin and resolve before casting again. Rapid recasting can run into the game’s damage display limit and reduce the practical damage dealt. Dread Slime grows larger as it takes damage, and its enlarged body makes melee attacks harder to land. It can also use Acid Storm, so keep healing available and avoid letting Randi remain directly in front of it for long.
- Use Lucent Beam on Buffy.
- Keep the party away from Buffy’s claws and status attacks.
- Take the south-then-west route through the maze.
- Use Dark Force against Dread Slime.
- Pause between Dark Force casts.
- Heal after Acid Storm lowers the party’s defense.
Cross the long route to the final platform
After Dread Slime is defeated, the party appears in a new area. Go north through the first rooms and cut through the green crystal blocking the route. Continue past the Dark Stalkers and Master Ninja, then move north through the room containing Whimper, Doom Sword, and Terminator.
In the next section, pass the Heck Hound and Wolf Lord, go west, and use the whip post to cross the gap. Continue south after the enemies on the far side. At the Dark Stalker and Fiend Head area, go west and then north. When you reach the Armored Fiends and Terminator, go west and then south.
Continue west from the next Heck Hound area, then go north past the Shape Shifter and Wolf Lord. In the Master Ninja and Dark Stalker room, go west to the Fiend Head and then south. Pass the Doom Sword, move south beyond the Terminator, and stay on the left side of the area near the Metal Crab so you can continue south past the next Terminator.
The route then passes two Wolf Lords and a Whimper on a central platform. Go south through the Tsunami and Fiend Head area. At the next Master Ninja section, go east through the green crystals, then north past the Terminators. The floor in the following room forms a loop around a central switch. Step on that switch to reach the large circular platform seen during the opening sequence.
The fortress enemies can rarely drop late-game armor and Weapon Orbs, including possible drops from Wolf Lords, Fiend Heads, Tsunamis, Terminators, Metal Crabs, Master Ninjas, and Whimpers. These rewards are optional. Do not delay the final sequence by farming unless you specifically need equipment or an orb.
- Conserve MP and healing items during the long route.
- Use whip posts whenever the path ends at a gap.
- Cut through green crystals instead of searching for a side path.
- Activate the central switch in the loop-shaped room.
- Reach the circular platform before beginning the final sequence.
Activate the final switch and defeat Dark Lich
On the circular platform, heal the party completely and check that Primm has enough MP for repeated Lucent Beam casts. Make sure Popoi has enough MP for Dark Force if Dread Slime required heavy use, and keep Cups of Wishes ready. The switch on the right begins the Thanatos scene and commits you to the final fortress battles, so do not activate it while the party is depleted.
After the scene with Thanatos and Dyluck, Dark Lich appears. Use Primm’s Lucent Beam as the main attack because Dark Lich is vulnerable to Lumina. Wait until both beams from a Lucent Beam cast have struck before selecting the spell again. Rapid recasting can waste the spell’s damage and gives the boss more opportunity to act.
Keep Primm and Popoi away from Dark Lich’s immediate position. The boss can use Freeze, Balloon, Pygmize, Confusion, Petrify, Dispel Magic, and Thunder Beam. If a character is disabled or defeated, move the surviving characters away first, then open the Ring to cure or revive. Do not rush into the boss’s body merely to recover an ally.
Randi can use a charged weapon attack when Dark Lich becomes visible, but melee is optional. The safer approach is to keep distance and let Lucent Beam do the work. If Lucent Beam runs low, use Faerie Walnuts before Primm reaches zero MP. When Dark Lich falls, both Primm and Popoi gain Dryad’s Mana Magic.
- Heal before activating the right-hand switch.
- Use Lucent Beam as the primary Dark Lich attack.
- Wait for both beams to hit before recasting.
- Keep the two allies away from Dark Lich.
- Reserve revival items for the Mana Beast if possible.
- Confirm that both allies have gained Dryad’s Mana Magic.
Restore the Mana Sword before attacking the Mana Beast
After Dark Lich is defeated, go south and step on the switch to trigger the Mana Beast sequence. Randi must have the sword equipped. Primm and Popoi now have Dryad’s Mana Magic, and both casts are required.
At the start of the battle, have one ally cast Mana Magic on Randi, then have the other ally cast it on him. The sword turns green and the game displays the restoration message. Do not attack the Mana Beast or spend time on offensive spells before both casts have completed; without the restored Mana Sword, attacks will deal no useful damage.
Avoid casting Wall on Randi before the Mana Sword is established. Wall can interfere with the Mana Magic effect until it expires. If the sword’s green effect fades later in the battle and Randi’s attacks return to negligible damage, repeat both Mana Magic casts as soon as the Beast enters a safe close-pass window.
- Randi is holding the sword.
- Primm casts Dryad’s Mana Magic on Randi.
- Popoi casts Dryad’s Mana Magic on Randi.
- The blade turns green and the restoration message appears.
- No attack is attempted before both casts are complete.
Defeat the Mana Beast and trigger the ending
The Mana Beast uses a repeating approach pattern. It attacks from range, passes across the platform, and returns for a close approach. Keep Randi near the horizontal center of the platform and toward the northern side without chasing the Beast. When the Beast is directly in front of him, attack with the restored Mana Sword. Normal swings at full weapon gauge are practical because the Beast leaves the attack position quickly; do not spend the entire encounter waiting for a long charge.
Move off the Beast’s direct line when a flame attack or beam begins, then return to the center for the next close pass. The Beast can use flame attacks and high-level Lucent Beam and Wall effects. Keep Primm and Popoi positioned away from the immediate attack line, but close enough that their healing and Mana Magic can be selected quickly.
Primm should prioritize healing, revival, status recovery, and renewing Mana Magic. Popoi can support with Moon Energy or Lunar Energy if available, and Magic Absorb can recover Popoi’s MP from the Mana Beast if needed. Defensive support such as Lucid Barrier or Defender can help, but do not let support casting delay the two Mana Magic casts when the sword effect expires.
If an ally falls, move Randi away from the Beast’s line, revive from the Ring during a safe interval, and heal before returning to the attack cycle. If the Mana Sword effect ends, stop attacking and have both allies cast Mana Magic again. Continue striking only while the sword remains restored.
When the Mana Beast turns white and begins its destruction animation, stop attacking and allow the scripted sequence to continue. Remain through the closing scenes and credits. The campaign is complete when the final ending sequence begins after the Beast’s defeat.
- Attack only when the Mana Beast is directly in front of Randi.
- Move away from flame and beam attacks.
- Renew the Mana Sword with both allies whenever its effect expires.
- Use Magic Absorb if Popoi needs MP.
- Revive and reposition fallen allies before resuming attacks.
- Confirm the white destruction animation.
- Watch the final scenes and credits.
Before you move on
- The Mana Tree has restored the Mana Sword before the fortress sequence.
- Buffy is defeated.
- Dread Slime is defeated.
- Dark Lich is defeated.
- Primm and Popoi have both gained Dryad’s Mana Magic.
- Both allies have cast Mana Magic on Randi’s equipped sword.
- The sword turns green and the restoration message appears.
- The Mana Beast turns white and begins its destruction animation.
- The final scripted scenes and credits begin.
Finishing up
The campaign is complete when the Mana Tree event has restored the Mana Sword, Dark Lich has been defeated, both Primm and Popoi cast Dryad’s Mana Magic on Randi’s sword during the Mana Beast encounter, the Mana Beast is defeated, and the ending sequence and credits play.
The required elemental progression is the completion of the Water, Earth, Wind, Fire, Dark, Light and Moon Mana Seed events plus the Tree Palace Wood Mana Seed event that causes Dryad to appear. The Wood Seed is not successfully sealed in the original SNES story; Dryad’s Mana Magic is sealed by Thanatos until the Dark Lich battle.
Weapon-orb collection, Watts forging, maximum spell levels, rare Mana Fortress drops, Tasnica rewards and other side content are optional. They improve combat readiness but are not required to reach the ending.
Choose your next gameScreenshots & video
Game imagery for reference. Follow the written chapters above for the route and strategies.
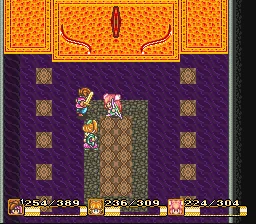
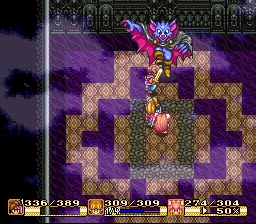
Sources & references
Our original guide draws on the references below. Check the edition at the top of this page before following controls or unlock requirements.
- Super NES Instruction Manual: Secret of Mana
- Secret of Mana - Super NES Instruction Manual
- Secret of Mana - Guide and Walkthrough - Super Nintendo - By Snow_Dragon
- Secret of Mana/Controls — StrategyWiki
- Secret of Mana — controls and core systems
- Secret of Mana Walkthrough Part 1 — RPG Classics
- Secret of Mana — Guide and Walkthrough by JD_Cyr, Super Nintendo — GameFAQs
- Secret of Mana — Complete walkthrough for the SNES US/EU route
- From the Water Palace to Gaia’s Navel — Secret of Mana Walkthrough
- Haunted Forest and Elinee’s Castle — Secret of Mana Walkthrough
- Spikey Tiger — Secret of Mana Walkthrough
- Get the Water Seed — Secret of Mana Walkthrough
- Secret of Mana — Walkthrough Part 3
- Secret of Mana/Pandora Ruins — StrategyWiki
- Secret of Mana/Thieves’ Ship — StrategyWiki
- Secret of Mana - Guide and Walkthrough - Super Nintendo - By Phoenix_1911
- Secret of Mana — Upper Land walkthrough
- Secret of Mana — Walkthrough Part 4, RPGClassics Shrines
- Secret of Mana — Guide and Walkthrough by CaSPeR, Super Nintendo
- Secret of Mana — Guide and Walkthrough — Qhr1s
- Secret of Mana — Short Walkthrough by NTsui, Super Nintendo
- Secret of Mana/Fire Palace — StrategyWiki
- Return the Fire Seed — Thonky Secret of Mana Walkthrough
- The Empire - Secret of Mana Walkthrough
- Empire Ruins - Secret of Mana Walkthrough
- Northtown Castle - Secret of Mana Walkthrough
- Secret of Mana - Walkthrough Part 6: The Empire to Flammie
- Secret of Mana - Boss Guide - Super Nintendo - By Qhr1s
- Palace of Darkness - Secret of Mana Walkthrough
- Palace of Light - Secret of Mana Walkthrough
- Gold Isle - Secret of Mana Walkthrough
- Lofty Mountains - Secret of Mana Walkthrough
- Tasnica - Secret of Mana Walkthrough
- Grand Palace — Secret of Mana Walkthrough
- The Pure Land - Secret of Mana Walkthrough
- Secret of Mana - Walkthrough Part 9: The Pure Land
- Secret of Mana/Pure Land - StrategyWiki
- Mana Fortress - Secret of Mana Walkthrough
- Secret of Mana - Guide and Walkthrough - Super Nintendo - By Anonymous
- Secret of Mana - Walkthrough Part 10
- Secret of Mana - Walkthrough
- Secret of Mana instruction manual
About the game & collecting notes
- Platform
- Super Nintendo Entertainment System
Step-by-step campaign walkthrough for the original 1993 Super Nintendo (USA) release of Secret of Mana. This guide covers core progression from pulling the rusty Mana Sword at the waterfall through obtaining all eight elemental spirits and completing their Mana Seed story events, the Pure Land and Mana Tree sequence, and the Mana Fortress finale. It includes practical advice on party control, Ring Commands, weapon orbs, magic, boss behavior and required story triggers, ending when the Mana Beast is defeated and the ending sequence and credits play.
Darryl Polo
Darryl Polo loves tinkering with emulation and revisiting retro games. He enjoys exploring how old favorites play on different setups and sharing what he learns along the way. At Joking Joystick, he writes about the games, hardware, and small discoveries that keep the hobby fun.
Our editorial standardsFound a step that needs another look? Help us improve this guide.