
Resident Evil 3: Nemesis (PlayStation, USA) — Complete Main Campaign Walkthrough
Practical, step-by-step guidance to complete the original North American PlayStation campaign of Resident Evil 3: Nemesis, from Jill's opening escape through the Clock Tower, Hospital, Raccoon Park, abandoned Waste Processing Plant, Control Tower, missile countdown, final Power Plant confrontation, and credits. Optional Nemesis rewards, Carlos interludes, route choices, and post-completion unlocks are clearly separated from required progress.


Find a copy
Resident Evil 3: Nemesis Sony PlayStation
We may earn a commission if you buy through these links, at no extra cost to you. As an Amazon Associate I earn from qualifying purchases.
Opens retailer search results. Check the model, edition, seller, availability and current price before buying.
Before you begin
You are Jill Valentine, trapped in Raccoon City while the bioweapon Nemesis hunts the surviving S.T.A.R.S. members.
This walkthrough follows the original North American PlayStation campaign from the opening streets through Downtown, the Clock Tower, Carlos's Hospital interlude, Raccoon Park, the abandoned Waste Processing Plant, the Control Tower, and the final escape.
Required objectives are separated from optional Nemesis reward fights, ammunition caches, weapon upgrades, costumes, Mercenaries progression, and epilogue replays.
Where Live Selections branch the route, the guide identifies the consequences without treating an optional outcome as a required canonical choice.
The final completion check is the ending sequence and credits, followed by saving the clear data for post-completion unlocks.
Set yourself up for the run
Confirm that this guide is for the original North American PlayStation release of Resident Evil 3: Nemesis, not the 2020 remake or a later port.
Use the original PlayStation control configuration shown in the USA manual; this guide does not use remake controls or mechanics.
Normal story completion does not require defeating every Nemesis encounter. Run from optional fights when the ammunition cost threatens a mandatory objective.
For ranking, use the verified Game Clear scoring rules for the selected difficulty. Do not describe First Aid Sprays as an automatic failure; total recovery, time, saves, and the edition's scoring table determine the result.
Keep healing, ammunition, and inventory space for mandatory transitions: the Hospital vaccine, the Grave Digger route, the cable-car repair, the Clock Tower courtyard, the Dead Factory disposal fight, and the final Power Plant escape.
Treat the Nemesis reward sequence, optional heavy weapons, costumes, Mercenaries purchases, and epilogues as replay or bonus objectives rather than requirements for the first credits.
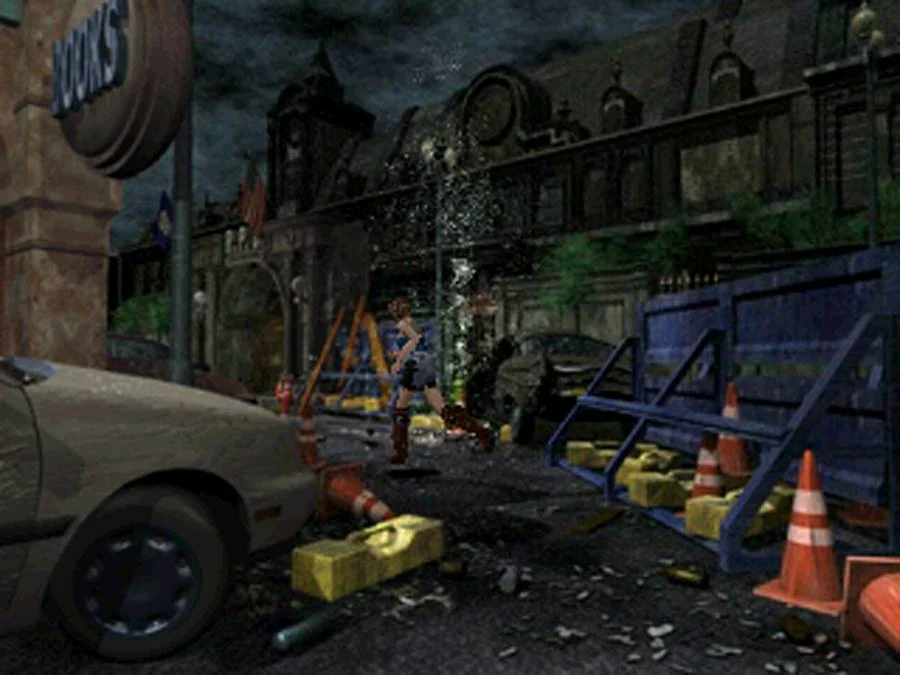
Opening Escape — Alley and First Contacts
The original North American PlayStation opening starts with Jill escaping the front of her apartment building and climbing over a dumpster. A cutscene then places her in the warehouse, which contains the first supplies, typewriter, and Item Box. From there, collect the Backdoor Key, take the Uptown route through Shotgun Alley and Bar Black Jack, open the barricaded alley with a filled lighter, and reach the first Nemesis encounter at the Raccoon City Police Department courtyard.
1. Escape the apartment building and reach the warehouse
As soon as Jill becomes controllable outside the apartment building, run straight toward the lone zombie blocking the passage. You can fire until it falls, but the efficient option is to angle around its side and continue moving. Do not stop to clear the zombies emerging behind Jill; staying in the open lets them surround her.
At the dumpster ahead, press X to climb over it. The game then plays the opening transition and places Jill inside the warehouse. This is the actual start of the exploration portion, so do not expect to search the apartment interior or find a weapon there. The only early enemy encounter that must be navigated before the warehouse is the single zombie at the dumpster route.
- Run away from the apartment building immediately.
- Pass the lone zombie or knock it down briefly.
- Climb over the dumpster with X.
- Regain control inside the warehouse.
2. Use the warehouse as your first safe room
The warehouse has no enemies on this visit. Move to the far end beneath the second-floor office and collect the Handgun Bullets marked by the green light. Take the First Aid Spray from the boxes near the forklift if you have room. Then climb the short stairs and follow the metal walkway to the office.
In the office, take the Warehouse Key from the wall. Open the Status screen and examine it; the tag identifies it as the Backdoor Key. This examination step is useful because key items often receive their functional names only after being checked.
The office contains a typewriter and Item Box, making it the first safe room. If this is a first run, examine the red and blue Game Instructions books and place them in the File Archive if you do not need the extra inventory spaces for reading. Collect the two Gunpowder A bottles and the Ink Ribbon. Store the gunpowder and Ink Ribbon unless you intend to save immediately, and keep the Handgun, Handgun Bullets, Backdoor Key, and one recovery item. Saving with at least one healing item in reserve is a sensible safety rule; do not spend your only recovery item just to remove minor damage before leaving.
- Collect the Handgun Bullets and First Aid Spray.
- Take and examine the Warehouse Key so it becomes the Backdoor Key.
- Recognize the warehouse office as the first typewriter and Item Box room.
- Store spare materials while keeping the route’s weapon, ammunition, key, and healing item.
3. Learn the defensive controls before leaving
The 180-degree quick turn is the most dependable emergency movement tool. Hold Down and press Square. Jill immediately turns around, allowing you to run away from a zombie or reverse direction before a group closes in. Practice it on the warehouse walkway so the input is familiar before entering the streets.
The original game’s dodge is timing-sensitive. With a weapon equipped and Jill not already aiming, press R1 or R2 at the instant an enemy attack is about to connect. If Jill is already holding R1 or R2 to aim, press X at that same moment instead. A successful dodge may sidestep or push the attacker away, but the window is brief and the move is less reliable beside walls or when several enemies attack together.
Use the dodge to slip past a single dangerous attacker, especially a fast enemy, but treat doors, distance, and the quick turn as your primary defenses. If Jill is grabbed, rapidly press directional buttons and the face or shoulder buttons to shorten the escape animation. This reduces the time spent trapped but does not replace avoiding groups in the first place.
- Practice Down plus Square for the quick turn.
- Test R1 or R2 against a single enemy only when there is open space.
- Remember X is the dodge input only while R1 or R2 is already being held to aim.
- Use doors and distance rather than trying to dodge an entire crowd.
4. Take the Uptown route and collect the shotgun supplies
Return to the warehouse ground floor and use the Backdoor Key on the exit. When the game offers to discard the used key, choose Yes. If no discard prompt appears after a key item is used, keep it because it may be needed again.
Pass through Warehouse Access into Business Street. Five zombies occupy the area, but you can avoid most or all of them by moving into the small alcove on Jill’s left and taking the door. Do not spend handgun ammunition on enemies that are not blocking the exit.
In Shotgun Alley, approach the conspicuous door to trigger the yellow-vested survivor’s movement. Zombies come out from the stairwell beyond it, so create space before firing. Enter the lower area and collect the Lighter Oil and Shotgun. The shotgun is the important early upgrade; use it to clear only enemies that prevent safe movement, then return upstairs.
Continue along the concrete path and take the Green Herbs if you have room. In Boutique Street, climb the lumber beneath the fire escape to collect the Uptown Map. Continue through Playground Alley, follow the route toward the rear of Bar Black Jack, and enter the bar.
- Use and discard the Backdoor Key at the warehouse exit.
- Avoid wasting ammunition in Business Street.
- Collect the Lighter Oil and Shotgun in Shotgun Alley.
- Collect the Uptown Map and reach Bar Black Jack.
5. Fill the lighter and open the barricaded alley
After the brief Brad scene in Bar Black Jack, take the Lighter from the table beside the pay phone and examine it so it becomes the Empty Lighter. Combine it with the Lighter Oil from Shotgun Alley to create the Lighter. The combination both solves the next obstacle and frees an inventory slot.
Leave through the rear route and return to the junction in Playground Alley. Take the path leading to the rope-tied iron gate in Barricaded Alley. Stand in front of the gate and use the Lighter from the inventory. Once the barrier collapses, several zombies appear. Back away toward the entrance and aim at the red explosive barrel with R2 before firing; the blast can remove multiple zombies without spending a large amount of ammunition.
If the route is clear, collect the Red Herbs beyond the collapsed barrier only if you have space. Continue into Blazing Alley. Run around the curve, avoid the zombie dogs, and enter the side door on Jill’s left as quickly as possible. The adjoining Blazing Storeroom contains Gunpowder A and B and a typewriter and Item Box. This is a good point to save, combine herbs where useful, and leave with the Handgun, Shotgun, ammunition, and at least one full-heal item or equivalent recovery combination.
- Combine Empty Lighter with Lighter Oil.
- Use the filled Lighter on the rope-tied gate.
- Use the explosive barrel to reduce the zombie group if needed.
- Reach the Blazing Storeroom save room before the first Nemesis encounter.
6. Handle the first Nemesis encounter without getting trapped
From the Blazing Storeroom, return to Blazing Alley and run left through the gate while avoiding the zombie dogs. Follow the road to the Raccoon City Police Department gates. A cutscene introduces Nemesis in the courtyard and immediately presents the first Live Selection.
Choose Enter the Police Station if this is your first run or your supplies are limited. Jill escapes the courtyard and continues into the station, avoiding this optional battle. Choosing Fight with the Monster commits you to a difficult close-quarters fight; use the shotgun while circling in the open space, keep moving after each shot, and reserve your healing item for a mistake rather than attempting to stand toe-to-toe. If Nemesis is knocked down here, he drops an item case containing Eagle Parts A.
Do not choose Do Nothing unless you deliberately want the fight to begin with Jill taking a free hit. After selecting Enter the Police Station, move through the door immediately instead of lingering near Nemesis. The police station route is the next chapter’s progression, and the first encounter does not require a Nemesis victory.
- Save in the Blazing Storeroom before leaving if desired.
- Carry the Handgun, Shotgun, ammunition, and healing into the courtyard.
- Choose Enter the Police Station to avoid the optional first Nemesis battle.
- If fighting, keep moving and circle rather than trapping Jill against the courtyard walls.
- Enter the Police Station to complete this chapter.
Before you move on
- Jill has escaped the apartment-building exterior by climbing over the dumpster.
- Jill has entered the warehouse, collected Handgun Bullets and a First Aid Spray, and reached the warehouse office.
- The Warehouse Key has been examined into the Backdoor Key and used at the warehouse exit.
- Jill has obtained the Shotgun and Lighter Oil, filled the Lighter, opened the barricaded alley, and reached the Blazing Storeroom save room.
- Jill has passed the zombie-dog alley and reached the Raccoon City Police Department courtyard.
- The first Nemesis Live Selection has been resolved, preferably by choosing Enter the Police Station, and Jill has entered the Police Station.
Raccoon City Streets — Early Downtown Routing
The Police Station section provides the S.T.A.R.S. Card, the Evidence Room code, the Sapphire, the S.T.A.R.S. Key and the Lockpick. Jill then crosses the early Downtown areas, meets Carlos at either the Restaurant or Newspaper Office, collects the Emerald from the alternate location, opens the City Hall gate and reaches the Cable Car. The first Cable Car visit installs only the Power Cable and gives Jill the Wrench; the Fuse and Mixed Oil remain for the later repair loop.
1. Enter the Police Station and secure a S.T.A.R.S. Card
At the Police Station courtyard, resolve the opening Live Selection. If you choose Fight with the Monster and knock Nemesis down, search Brad’s body for the Card Case, then examine the Card Case in the inventory to obtain Brad’s S.T.A.R.S. Card. If you evade Nemesis or choose to enter the station without taking Brad’s card, Jill must find her own S.T.A.R.S. Card inside the building.
Enter the Main Hall and use whichever S.T.A.R.S. Card you possess on the computer at the reception desk. The computer displays the randomized code needed for the red-lit Evidence Room locker. Record the code shown in your game; do not rely on a code from another playthrough.
If Jill entered without Brad’s card, pass through the only available door from the Main Hall and work through the first Police Station rooms until you reach the Operations Room. Search the grey desk in the Operations Room for Jill’s S.T.A.R.S. Card, then return to the Main Hall computer and use it to obtain the Evidence Room code. The Operations Room is the alternate card location for this route, not the Briefing Room.
- Resolve the courtyard Live Selection.
- Obtain Brad’s Card Case and examine it, or enter the station and find Jill’s card in the Operations Room.
- Use the S.T.A.R.S. Card at the Main Hall computer.
- Record the randomized Evidence Room code.
2. Collect the Sapphire and S.T.A.R.S. Key
From the Main Hall, take the accessible route into the Police Station’s west-side rooms. Pass or defeat the zombies blocking the way, then enter the Evidence Room. Open the ordinary unlocked locker to take the Blue Gem, which becomes the Sapphire when examined.
Use the code displayed by the Main Hall computer on the red-lit Evidence Room locker. Take the Emblem Key and examine it in the inventory; it is identified as the S.T.A.R.S. Key. Both the Sapphire and S.T.A.R.S. Key are required for the next part of the route, so do not discard either item.
Leave through the other Evidence Room door and use the nearby Dark Room as a recovery point. Save if needed, organize the item box and keep at least one healing item available. The next objective is upstairs, and Jill will need an open slot for the Lockpick.
- Take and identify the Sapphire.
- Use the computer’s code on the red-lit locker.
- Take and identify the S.T.A.R.S. Key.
- Save and reorganize in the Dark Room if necessary.
3. Unlock the S.T.A.R.S. Office and take the Lockpick
From the Dark Room area, return to the West Stairway and go upstairs. Pass the statue and continue through the Office Corridor until you reach the locked S.T.A.R.S. Office door. Use the S.T.A.R.S. Key to enter.
Take the Lockpick from Jill’s desk. This is mandatory: it opens the Police Avenue gate that leads out of the station and into Downtown. The office also contains a powerful weapon in the locker. Depending on the item arrangement, it is either the Grenade Launcher or the Magnum; the other weapon appears later in the game. Take it if you have room and can carry it without leaving essential items behind.
Before leaving, make sure Jill is carrying the Lockpick, Sapphire and a healing item. Store excess ammunition or herbs in the Dark Room if the inventory is crowded.
- Use the S.T.A.R.S. Key on the upstairs office door.
- Take the Lockpick from Jill’s desk.
- Collect the randomized heavy weapon if inventory space permits.
- Prepare for the optional Nemesis encounter on the way out.
4. Leave the station and decide whether to fight Nemesis
When Jill descends from the upstairs area, Nemesis may break through the West Stairway window and begin pursuing her. This encounter is not required for story progress. If conservation is the priority, retreat through the Police Station rooms, use door transitions to create distance and return to the Main Hall. Exit the station once the route is clear.
On Hard mode, a deliberate knockdown here can count toward the optional Nemesis reward sequence. Fight only if you have enough shotgun or heavy ammunition and are specifically pursuing the reward cases. Keep moving around the room, avoid standing directly in front of Nemesis and use the Dark Room route as a fallback if Jill becomes injured. Otherwise, evade him and preserve ammunition for the mandatory encounters later.
After leaving the Main Hall, use the Police Avenue gate. The Lockpick is the required tool for this exit.
- Choose whether to evade or fight Nemesis on the West Stairway.
- Return to the Main Hall through the Evidence Room route if Nemesis pursues Jill.
- Use the Lockpick on the Police Avenue gate.
- Leave the Police Station with the Sapphire and access to the Downtown route.
5. Collect the Power Cable in the Parking Garage
Follow Police Avenue through the exterior route toward the Parking Garage. Cerberuses can be bypassed if they block the doorway; do not waste ammunition clearing every enemy unless you need a safe return path.
Inside the Parking Garage, examine the sparking vehicle and take the Power Cable. This is the first mandatory Cable Car repair component. Continue through the garage to the save-room area if you need to use a typewriter or item box.
Proceed through the connecting streets to Maintenance Access and take the Downtown Map from the wall. Use the map to identify the routes toward the Restaurant, Newspaper Office, City Hall and the Cable Car Station. Keep the Lockpick available because it is needed for the Restaurant branch and other Downtown objects.
- Reach the Parking Garage.
- Take the Power Cable from the sparking vehicle.
- Use the garage save room if necessary.
- Take the Downtown Map in Maintenance Access.
6. Meet Carlos and obtain the Emerald
From the Downtown supply area, take the Rusted Crank and examine it so it becomes the Rust Hex Crank. Save before entering the Restaurant or Newspaper Office, and leave enough inventory space for the Fire Hook and Emerald.
Choose either the Restaurant or Newspaper Office. The choice determines where the Emerald is found and changes the immediate Nemesis scene, but neither route blocks campaign completion. If you meet Carlos at the Restaurant, use the Lockpick on the rear cabinet to take the Fire Hook, then use the Fire Hook on the kitchen floor opening. The Emerald is obtained in the Newspaper Office on this branch.
If you meet Carlos at the Newspaper Office, restore power by moving the stepladder beneath the power box and operating the nearby switch to raise the shutter. Reach the upper office area and complete the scene. The Emerald is obtained in the Restaurant Basement on this branch.
At the Restaurant, the Run into the Basement choice sends Jill and Carlos below the kitchen. Move quickly toward the ventilation exit as the room floods. Hide inside the Kitchen instead creates the gas-explosion scene that knocks Nemesis down. Either choice can continue the main route; the Nemesis knockdown is optional and should not consume supplies needed for the repair loop.
- Take and examine the Rusted Crank.
- Choose the Restaurant or Newspaper Office route.
- Restaurant-first route: obtain the Fire Hook and collect the Emerald in the Newspaper Office.
- Newspaper-first route: restore power and collect the Emerald in the Restaurant Basement.
- Save before beginning the return trip toward City Hall.
7. Open City Hall and reach the Cable Car
Return to the City Hall entrance carrying the Sapphire and Emerald. Use both jewels in the clock-shaped mechanism beside the gate. The gate opens and allows Jill to reach the Cable Car Station.
Enter the Cable Car Station and move to the rear Cable Car maintenance panel. Examine the sparking panel and use the Power Cable. This installs only the Power Cable; the Cable Car is not yet ready to depart because the Fuse and Mixed Oil are still missing.
Continue into the front section of the Cable Car to trigger the transport-related scene. Take the Wrench from inside the Cable Car after the scene. The Wrench is required for the next Downtown objectives, including removing the Fire Hose from the hydrant. On the higher difficulty route, Carlos may also provide the Side Pack during this sequence; take it if it appears and inventory space is available.
- Use the Sapphire and Emerald at the City Hall gate.
- Reach the Cable Car Station.
- Install the Power Cable at the rear maintenance panel.
- Take the Wrench from the Cable Car.
- Do not leave believing the Cable Car is fully repaired.
8. Prepare for the later repair loop
Before starting the next chapter’s backtracking, save at the nearest safe room and sort Jill’s inventory. Keep the Wrench accessible, retain the Rust Hex Crank for the Downtown machinery that requires it and leave space for the remaining repair components.
The outstanding Cable Car requirements are the Fuse and Mixed Oil. Mixed Oil is produced later by combining Machine Oil with Oil Additive. The Fuse comes from the Substation sequence. Do not spend time searching for those items during this first Cable Car visit; the route is designed to return to Downtown and the surrounding areas afterward.
Avoid optional Nemesis fights if Jill lacks healing items or heavy ammunition. If a fight goes badly, retreat through a door transition, return to a safe room and reorganize rather than repeatedly trading health for a reward case.
- Confirm that the Power Cable has been installed.
- Confirm that Jill has the Wrench.
- Keep access to the Rust Hex Crank.
- Leave the Fuse and Mixed Oil for the later repair loop.
- Save before beginning the Substation and Downtown backtracking objectives.
Before you move on
- Jill has entered the Police Station Main Hall.
- Jill has obtained Brad’s S.T.A.R.S. Card from the Card Case, or has found Jill’s S.T.A.R.S. Card in the Operations Room.
- The S.T.A.R.S. Card has been used at the Main Hall computer and the current Evidence Room code has been recorded.
- Jill has collected the Sapphire from the unlocked Evidence Room locker.
- Jill has used the code on the red-lit locker and obtained the S.T.A.R.S. Key.
- Jill has entered the upstairs S.T.A.R.S. Office and taken the Lockpick from Jill’s desk.
- Jill has returned to the Main Hall and left the Police Station through the Police Avenue gate.
- Jill has collected the Power Cable from the Parking Garage.
- Jill has taken the Downtown Map from Maintenance Access.
- Carlos has been encountered at either the Restaurant or Newspaper Office.
- The Emerald has been collected from the alternate Carlos location.
- The Sapphire and Emerald have been used at the City Hall gate.
- Jill has reached the Cable Car Station and installed the Power Cable at the rear maintenance panel.
- Jill has obtained the Wrench from the Cable Car.
- The Fuse and Mixed Oil remain outstanding for the later repair section, so the Cable Car is not yet ready to depart.
Substation and Underground Maintenance Areas
Obtain the Book of Wisdom, Compass of Wisdom, and Battery, power the underground elevator, then solve the Electrical Substation voltage puzzle. Open both shutters before taking either item whenever possible, collect the mandatory Fuse, survive the resulting Live Selection, and leave without treating the cable car as fully repaired.
Obtain the Book of Wisdom, Compass of Wisdom, and Battery
After the City Hall route is available, go to Statue Junction and examine the mayor’s statue to take the Book of Wisdom. Carry it to the nearby Fountain Street water feature. Use the Book of Wisdom on the empty recess in the pool mechanism, then take the Compass of Wisdom that appears.
Return to the mayor’s statue and use the Compass of Wisdom on it. Examine the statue again to obtain the Battery. The Battery is required to power the elevator leading to the underground Substation.
Before entering the underground route, visit the nearest item box. Keep at least one open inventory slot for the Fuse and preferably another slot for the optional weapon in the second shutter room. Carry a healing item and retain practical ammunition for clearing a blocked corridor. Shotgun shells are particularly useful here; grenade rounds are better saved for Nemesis or later mandatory encounters unless you are deliberately pursuing an optional reward.
- The Book of Wisdom was taken from the mayor’s statue.
- The Book of Wisdom was used at the Fountain Street water feature.
- The Compass of Wisdom was collected.
- The Compass of Wisdom was used on the mayor’s statue.
- The Battery was collected.
- At least one inventory slot is open for the Fuse.
Power the underground elevator
Return to Maintenance Access and use the Battery in the empty panel beside the elevator. Ride down to Substation Access. Enemies on the approach can include zombies, Drain Deimoses, or Brain Suckers depending on the route state and item placement.
Do not stop in the center of a narrow passage to fight isolated enemies. Run past anything that can be safely bypassed, but use the Shotgun if an enemy blocks the next turn or door. An explosive barrel can clear several enemies, but avoid standing beside it if Nemesis is attacking from a nearby position.
Heal before entering the Substation if Jill is in Danger or if a single grab would leave her unable to survive the return trip. The elevator and door transitions are important fallback points: if Nemesis appears in a corridor, retreat through the previous door, wait for his attack animation to finish, then move through the opening rather than trying to circle him at close range.
- The Battery was used on the elevator panel.
- Jill rode the elevator underground.
- The Substation entrance is accessible.
- Jill has room for the Fuse.
- A healing item and emergency ammunition are available.
Activate the voltage panel
Enter the Electrical Substation and reach the control room. Activate the Power Transmitter by pressing its large red button. This enables the voltage panel used to open the two nearby shutters.
The low-voltage shutter opens when the final value is between 15 and 25 volts. The high-voltage shutter opens between 115 and 125 volts. The panel begins at 50 volts. Each of the four positions accepts either Red, which increases voltage, or Blue, which decreases it.
In the normal state, the four Red values are plus 15, plus 30, plus 45, and plus 60. The normal Blue values are minus 5, minus 10, minus 15, and minus 20. Solve the low-voltage shutter first with Red, Blue, Blue, Blue. This produces 20 volts and opens the room containing the Fuse.
Then reset the panel and solve the high-voltage shutter with Blue, Red, Blue, Red. This produces 120 volts and opens the room containing the optional heavy weapon, either the Magnum or Grenade Launcher depending on the weapon obtained earlier in the campaign.
- The Power Transmitter was activated.
- The low-voltage target range of 15-25 volts is understood.
- The high-voltage target range of 115-125 volts is understood.
- The normal low-voltage solution is Red, Blue, Blue, Blue.
- The normal high-voltage solution is Blue, Red, Blue, Red.
Open both shutters before collecting items
Open both shutters before entering either room whenever possible. The Fuse is in the low-voltage room. The high-voltage room contains the optional heavy weapon that was not obtained earlier.
Take the Fuse first if inventory space is limited. The weapon is optional and must never be prioritized over the Fuse. If you already have the Fuse but lack room for the weapon, leave the Substation rather than discarding a necessary key item or healing supply.
A Live Selection occurs when Jill leaves a room after taking an item. Opening both shutters first prevents the choice from leaving one room inaccessible while enemies are attacking.
- Both shutters were opened before collecting items whenever possible.
- The Fuse was taken from the low-voltage room.
- The optional weapon was taken only if inventory space allowed.
- No required key item was discarded for the optional weapon.
Resolve the Substation Live Selection
After Jill takes an item and attempts to leave, zombies attack and the Live Selection offers Head to the emergency exit or Increase electricity output. If both shutters are already open, choose Increase electricity output. The resulting surge electrocutes the zombies and allows Jill to leave without fighting through the group.
Head to the emergency exit sends Jill outside through the rear door. Zombies surround her in Substation Access, and Nemesis may be waiting along the escape route. If this option is chosen before both shutters are open, returning for the missing item is much more dangerous, so secure the Fuse first whenever possible.
If the timer expires, the zombies break through. Use the Shotgun, an explosive barrel, or another available weapon to create an opening, then move through a door or toward the elevator. You do not need to defeat every enemy. Do not stand beside the barrel while Nemesis is firing rockets.
- The Live Selection was resolved.
- The Fuse remains in Jill’s inventory.
- Jill has a clear route to a door or elevator transition.
- Heavy ammunition was not wasted on an optional encounter.
If Increase electricity output was chosen too early
Choosing Increase electricity output before opening both shutters scrambles the voltage puzzle for any shutter that remains closed. Do not rely on the normal sequences after the overload, and do not repeat random button combinations while carrying the Fuse or optional weapon.
Read the current values shown by the panel and select Red or Blue at each position until the displayed total falls within the target range for the remaining shutter: 15-25 volts for the low-voltage room or 115-125 volts for the high-voltage room. The exact usable sequence depends on which shutter was already opened and the altered Blue values shown by the panel.
The dependable recovery method is to reload the save made before entering the Substation or before taking the item that triggered the Live Selection, then open both shutters using the normal solutions before collecting either item. This avoids spending health and ammunition while experimenting with the scrambled panel.
- The player knows that an early overload scrambles the remaining puzzle.
- The current panel values are being used rather than the normal sequences.
- The pre-selection save is available if the altered puzzle becomes unsafe to solve.
- The Fuse is secured before leaving the area.
Leave with the Fuse
Confirm that the Fuse is in Jill’s inventory before returning to the elevator. If Nemesis appears in Substation Access, use the previous doorway or elevator transition as a fallback. Wait for his attack to finish, pass through the opening, and keep moving toward the next door.
Ride back toward Downtown with the Fuse secured. The Fuse is only one cable-car repair component. The Power Cable and Mixed Oil are separate objectives, and this chapter does not complete the cable-car repair.
Stop after Jill has left the Substation. The later Fire Hose, Oil Additive, Grave Digger passage, and final cable-car preparation belong to subsequent chapters.
- The Fuse is in Jill’s inventory.
- Jill has left the Electrical Substation.
- The route back toward Downtown is available.
- The cable car has not been declared repaired.
- The chapter ends before the later Grave Digger passage.
Before you move on
- The Book of Wisdom was used at the Fountain Street water feature.
- The Compass of Wisdom was placed in the mayor’s statue.
- The Battery was collected and used to power the underground elevator.
- The Substation control room was reached.
- The Power Transmitter was activated.
- The low-voltage shutter was opened with Red, Blue, Blue, Blue.
- The high-voltage shutter was opened with Blue, Red, Blue, Red.
- The mandatory Fuse was collected.
- The Substation Live Selection was resolved.
- Jill left the Substation with the Fuse secured.
- If the voltage panel was overloaded before both shutters opened, the remaining puzzle was solved from its displayed values or the pre-selection save was reloaded.
- The chapter stops before cable-car repair and before the later Grave Digger passage.
References for this chapter
- Resident Evil 3: Nemesis — Guide and Walkthrough — PlayStation, GameFAQs
- Resident Evil 3: Nemesis - Guide and Walkthrough - PlayStation - By Stinger_316
- Resident Evil 3: Nemesis — Guide and Walkthrough — PlayStation — By HLaPierre
- Downtown Sub Station - Resident Evil 3: Nemesis
- Resident Evil 3 - Nemesis (USA) Manual
Backstreets and Secondary Objectives — Collectibles and Key Items
With the Power Cable already installed during the first cable-car visit, Jill now completes the return loop through Downtown and Uptown. The required objectives are to obtain Machine Oil at the Gas Station, use the Wrench to free the Fire Hose, extinguish the flames blocking the Sales Office route, take the Oil Additive, and combine the two oils into Mixed Oil. The Fuse should already be in Jill’s possession or stored in a nearby Item Box after the Substation chapter. The Power Cable is not part of this return loop unless you are recovering from an unusual earlier mistake. The chapter ends with the Fuse and Mixed Oil ready for the final cable-car repair, not with the transport sequence completed.
1. Prepare for the return loop
Use the Downtown safe room before beginning the collection route. Save, combine herbs if useful, and clear several inventory spaces. The required items for this chapter are the Rust Hex Crank, Wrench, Machine Oil, Oil Additive, and Mixed Oil. The Fuse should also be available for the later cable-car panel. The Power Cable should already have been used on the cable car during the first visit; do not plan the normal route around retrieving or reinstalling it.
Carry a reliable firearm, healing, and enough ammunition to create openings rather than clear every room. The Gas Station, Fire Hose route, and Sales Office all contain confined encounters, while Nemesis may interrupt the return depending on earlier choices and item timing. Store obsolete keys and tools, but keep the Rust Hex Crank and Wrench until the Gas Station task is finished.
- Save before leaving the safe room.
- Carry the Rust Hex Crank and Wrench.
- Keep the Fuse available for the later repair.
- Confirm that the Power Cable was already installed at the first cable-car visit.
- Leave open inventory slots for Machine Oil, Fire Hose, Oil Additive, and Mixed Oil.
2. Enter the Gas Station and take Machine Oil
From the Downtown route, reach the Gas Station entrance behind the metal shutter. Use the Rust Hex Crank on the shutter. The crank is supposed to break during this attempt; this is not a failed item use. Finish opening the shutter with the Wrench obtained from the front carriage of the cable car.
Inside the Gas Station, reach the electronic cabinet behind the counter. Its puzzle is randomized. The display presents a row of letters, a highlighted target, and a movable red marker. Press the corresponding controls to shift the marker until it lands on the highlighted letter, then open the cabinet and take the Machine Oil. Do not use a memorized solution from another run.
Depending on earlier Downtown Live Selection choices, Carlos or Nicholai may appear in the Gas Station. That scene changes later optional rewards but does not change the Machine Oil objective. Take the Machine Oil before leaving. Once the story event closes off the building, you cannot rely on returning for this required item.
- Use the Rust Hex Crank on the Gas Station shutter.
- Finish the shutter with the Wrench after the crank breaks.
- Solve the current letter-panel arrangement.
- Take the Machine Oil before leaving the building.
3. Free and use the Fire Hose
Return toward Uptown and locate the wall-mounted Fire Hose in the Straight Alleyway. Use the Wrench to remove it. The Wrench is not consumed by this action, but it has completed its relevant tasks once the Gas Station shutter and Fire Hose mount have been handled.
Carry the Fire Hose to the burning obstruction in the Forked or Blazing Alley route. Use it on the hydrant to extinguish the flames and open the way toward the Sales Office. Enemies may occupy the connecting areas. Use an explosive barrel when it gives a safe opening, or fire only enough to reach the next door. Running past Drain Deimoses, Brain Suckers, or zombies is usually more efficient than spending heavy ammunition on them.
Before taking the Oil Additive, return to a safe room if Jill is badly injured or the inventory is crowded. Taking the Oil Additive changes the Sales Office room by triggering an enemy invasion, so enter with healing and at least one usable weapon.
- Use the Wrench to remove the Fire Hose.
- Use the Fire Hose on the burning alley obstruction.
- Reserve inventory space for the Oil Additive and healing.
- Do not spend all heavy ammunition on enemies that can be bypassed.
4. Open the Sales Office storeroom
Enter the Sales Office through the route cleared by the Fire Hose. Before taking the Oil Additive, search the office for any files or supplies you intend to collect, because the pickup triggers the room’s zombie invasion. The required progression item is in the locked storeroom.
Use the remote control on the television to display the pharmaceutical advertisement. The product name shown is the current password: ADRAVIL, SAFSPRIN, or AQUACURE. Enter exactly the name displayed into the nearby computer. The password changes between runs, so do not rely on a fixed answer.
Enter the unlocked storeroom and take the Oil Additive. Combine it with Machine Oil to create Mixed Oil. The separate ingredients are not the final cable-car item; confirm that Mixed Oil appears in the inventory before leaving.
When the invasion begins, do not remain in the confined room trying to eliminate every zombie. Move around the furniture, use the steam or environmental hazard if it gives you space, and retreat through the door. If Jill takes damage, use the nearest safe room before beginning the return.
- Use the television remote to reveal the current product name.
- Enter the displayed name into the Sales Office computer.
- Take the Oil Additive from the storeroom.
- Combine Machine Oil and Oil Additive into Mixed Oil.
- Escape the zombie invasion without sacrificing all healing.
5. Decide whether to collect optional supplies
The Square Crank can be collected near the Sales Office route and used on the shutter in the Private Backyard or Playground Alley area. This opens an optional Grenade Round cache. It is worthwhile for a Grenade Launcher or Nemesis-focused run, but it is not required for the cable car or city escape.
Dario’s Warehouse can also be revisited after the initial visit. Dario is no longer occupying the container, allowing Jill to search it for the optional memo and remaining supplies. Collect these only if you want the file or need the ammunition. The warehouse is also a useful staging point for sorting items before the final return.
Treat both detours as optional. The Fuse and Mixed Oil, healing, and space for the next sequence matter more than ammunition caches. If Nemesis is active in the area, postpone optional pickups rather than burning heavy ammunition merely to reach them.
- Use the Square Crank only if the optional Grenade Round cache is worthwhile.
- Search Dario’s Warehouse only for desired supplies or the memo.
- Do not sacrifice healing or required-item space for optional ammunition.
6. Return with the Fuse and Mixed Oil
At a safe room, confirm that Machine Oil and Oil Additive have become Mixed Oil. Take the Fuse from the Item Box if it is stored there. The normal repair loadout is now Fuse and Mixed Oil, because the Power Cable was installed during the first cable-car visit. Keep the Power Cable out of the route planning unless you are recovering from an exceptional earlier failure or an interrupted save.
The Rust Hex Crank and Wrench no longer serve a required purpose. Store them, along with the Square Crank and other obsolete tools, to make room for healing and weapons. Carry at least one dependable healing item and a weapon suited to close-range emergencies.
Holding the required repair items can trigger or relocate a Nemesis encounter according to earlier events. If Nemesis appears, use corners, door transitions, and open space to escape. A temporary knockdown is optional; the cable-car route does not require spending the last healing item or the ammunition reserved for later mandatory fights.
- Mixed Oil is present in the inventory or Item Box.
- The Fuse is ready for the cable-car panel.
- The Power Cable remains installed from the earlier visit.
- Obsolete tools have been stored.
- Jill has healing and enough ammunition to survive the return.
7. Cross the Parking Garage and handle the Live Selection
On the return route, continue through the Parking Area and Parking Garage. Crows or other enemies near the wrecked bus are best handled by moving directly to the next door. Do not stop in an exposed lane to fight every target.
When the garage floor breaks and the crates begin sliding, choose Climb Up. This keeps Jill on the direct route. Choosing Jump Off sends her into the underground passage, and allowing the choice to expire can also result in the detour after Jill is struck. The detour is recoverable, but it adds the Sliding Worm passage and costs time and health.
If Jill falls, run past the worms instead of trying to clear them. Reach the ladder and return to the surface, then continue toward the Downtown streets. Use the Parking Office or another nearby safe room to heal, save, and reorganize before approaching the cable car.
- Run past the crows near the wrecked bus when possible.
- Choose Climb Up at the Parking Garage Live Selection.
- If forced into the underground route, evade the Sliding Worms and climb out.
- Save and reorganize before the final approach.
8. Completion check before the transport chapter
The chapter is complete when Machine Oil has been collected from the Gas Station, the Fire Hose has opened the Sales Office route, Oil Additive has been taken from the storeroom, and the two oils have been combined into Mixed Oil. The Fuse must also be available. The Power Cable should already be installed at the cable car from the earlier Downtown visit.
Make a final save near the cable-car approach. Store the Rust Hex Crank, Wrench, Square Crank, and any other obsolete tool. Carry the Fuse, Mixed Oil, a primary weapon, optional explosive ammunition, and dependable healing. The next chapter begins when Jill returns to the cable-car maintenance panel and installs the remaining repair parts.
Do not confuse preparation with completion of the transport objective. This chapter ends before the Fuse and Mixed Oil are used, before the cable-car cutscenes, and before the onboard Nemesis Live Selection.
- Machine Oil was taken before the Gas Station became inaccessible.
- The Fire Hose was removed and used to clear the burning route.
- Oil Additive was taken from the Sales Office storeroom.
- Machine Oil and Oil Additive were combined into Mixed Oil.
- The Fuse is ready.
- The Power Cable is already installed.
- Jill is saved and prepared near the cable-car approach.
- The Fuse and Mixed Oil have not yet been installed.
Before you move on
- Machine Oil has been taken from the Gas Station cabinet.
- The Rust Hex Crank has broken as scripted and the Wrench has completed the shutter opening.
- The Wrench has removed the Fire Hose without being treated as consumed.
- The Fire Hose has extinguished the burning alley obstruction.
- The Sales Office storeroom has been opened using the product name shown by the television advertisement.
- Oil Additive has been collected.
- Machine Oil and Oil Additive have been combined into Mixed Oil.
- The Fuse is available for the next chapter.
- The Power Cable was already installed during the first cable-car visit.
- Jill has been saved and prepared near the cable-car approach.
- The Fuse and Mixed Oil have not yet been installed, and the transport sequence has not begun.
References for this chapter
- Resident Evil 3: Nemesis — Guide and Walkthrough — PlayStation, GameFAQs
- Resident Evil 3: Nemesis (1999) — 100% Guide, All Choices & Puzzle Solutions
- Resident Evil 3: Nemesis - Guide and Walkthrough - PlayStation - By Stinger_316
- Resident Evil 3: Nemesis — Guide and Walkthrough, PlayStation — Undrtakr
- Resident Evil 3 - Nemesis (USA) Manual
Optional: Early Downtown Nemesis Rewards
On the original North American PlayStation release, Nemesis can drop special item cases during specific optional encounters on Hard Mode. This chapter covers the first five qualifying reward opportunities before the cable car leaves for the Clock Tower: the RPD Courtyard, Police Station West Stairway, Restaurant or Press Office, Substation Control or the alternative Blazing Alley condition after obtaining the Oil Additive, and Statue Junction after all four cable-car repair parts are obtained. These cases are optional. They can provide the EAGLE and Western Custom parts, but forcing every fight can cost more ammunition and healing than the rewards are worth. Later Clock Tower reward opportunities are outside this chapter's scope.
Prepare before pursuing optional cases
Select Hard Mode if you are deliberately collecting Nemesis cases. In the original PlayStation release, the special case sequence is associated with the harder campaign setting; Easy Mode provides extra starting equipment but does not use the same Nemesis reward system. Save before each planned encounter so you can reload if the fight causes excessive damage or consumes ammunition needed for mandatory progress.
Leave at least one inventory slot open before committing to a fight. Store puzzle items, spare herbs, excess handgun ammunition and materials that are not currently needed in the nearest Item Box. Carry a healing item and a weapon with reliable stopping power. The case is optional, so do not spend irreplaceable resources merely to preserve the collection attempt.
If Jill reaches Danger, loses her reserve healing or spends ammunition needed for the cable-car, Clock Tower or later boss encounters, reload the preparation save and continue the main route without the case. A healthy Jill with a stocked inventory is more valuable than an optional weapon part.
- Use Hard Mode for the optional reward sequence.
- Save before each planned Nemesis encounter.
- Reserve at least one inventory slot for the item case.
- Keep healing and high-damage ammunition for mandatory progression.
Understand the case order
The first five qualifying cases appear in a fixed reward order even when a route offers an alternative location. The first case contains EAGLE Parts A, the second contains EAGLE Parts B, the third contains a First Aid Box, the fourth contains M37 Parts A and the fifth contains M37 Parts B. The contents advance when a qualifying case is successfully obtained; they are not permanently assigned to a room name.
Combine EAGLE Parts A and B to create the EAGLE 6.0 when you have room to carry both parts. Combine M37 Parts A and B to create the Western Custom when convenient. The First Aid Box contains First Aid Sprays and occupies an inventory slot. Do not count ordinary pursuits, scripted appearances, mandatory boss fights, Carlos encounters or non-qualifying knockdowns as additional reward slots.
If an earlier opportunity is skipped, the next successful qualifying case gives the next reward in sequence. For example, the first case you collect may contain EAGLE Parts A even if you collect it at a later qualifying location. Record the case actually received instead of assuming that a location always contains a particular item.
- Track the first five cases in order.
- Expect EAGLE Parts A, EAGLE Parts B, First Aid Box, M37 Parts A and M37 Parts B.
- Combine matching weapon parts when inventory space permits.
- Do not count every Nemesis appearance or temporary knockdown.
First case: RPD Courtyard
During Jill's first approach to the Police Station, a Live Selection determines how the initial Nemesis encounter begins. Choose the fight-oriented outcome if you want to pursue the first case. If you enter the Police Station without fighting, this early opportunity is bypassed. If Nemesis remains outside after the selection, he can still be defeated there for the case before Jill enters the station.
Use the open courtyard to create distance. Fire while Nemesis is recovering or committed to an attack, then keep moving around the perimeter rather than standing directly in front of him. After the qualifying knockdown, search the courtyard for the dropped item case and collect EAGLE Parts A if this is your first successful case.
Do not confuse the Nemesis item case with Brad's Card Case. Brad's Card Case is a separate progression item used to reveal Brad's S.T.A.R.S. Card. If Jill has weak weapons, limited healing or a nearly full inventory, entering the Police Station and continuing the story is the safer choice. The campaign does not require this reward.
- Choose the fight-oriented opening outcome if pursuing the first case.
- Collect the separate item case after the qualifying knockdown.
- Keep Brad's Card Case separate from the Nemesis reward case.
- Reload if the encounter consumes essential early supplies.
Second case: Police Station West Stairway
After completing the required Police Station route, obtaining the S.T.A.R.S. Key and taking the Lockpick from the S.T.A.R.S. Office, prepare at the Dark Room or another nearby safe room. Return through the station toward the West Stairway. Nemesis appears during this optional pursuit encounter as Jill leaves the station area.
The stairway is restrictive, so do not let Jill become trapped against the railing, wall or doorway. Fire while Nemesis is committed to an attack, then move around the landing or pass through the available doorway. If you secure the qualifying knockdown, collect the next case. It contains EAGLE Parts B when the RPD Courtyard case was collected first.
If the Courtyard case was skipped, this successful encounter gives the first reward in the sequence instead. Check the item received and update your collection record rather than assuming that the West Stairway case must contain EAGLE Parts B.
- Return after obtaining the S.T.A.R.S. Key and Lockpick.
- Prepare at the Dark Room before triggering the stairway encounter.
- Keep the landing and doorway available as escape routes.
- Record the reward actually received.
Third case: Restaurant or Press Office
The next Downtown opportunity occurs at either the Restaurant or the Press Office, depending on which building Jill uses for her meeting with Carlos. These are alternative locations for one reward opportunity, not two separate cases. When Nemesis enters the selected building, fight only if Jill has enough ammunition and a clear route to an exit.
The Restaurant is cramped, particularly around the kitchen and basement routes. The Press Office also has limited maneuvering room, so use the room's exits and avoid allowing Nemesis to pin Jill against furniture or walls. In the Restaurant, the scripted kitchen fire can knock Nemesis down, but he recovers after a short interval; collect the case before leaving. In the Press Office, collect the case after the qualifying knockdown or after the branch's scripted interruption leaves it available.
This is the third reward in sequence and normally provides a First Aid Box. Do not count a second knockdown in the same branch as another case. If Carlos is present, protect him; his death can end the scenario.
- Treat Restaurant and Press Office as alternative locations.
- Fight only with a safe escape route and sufficient healing.
- Collect the third case, normally a First Aid Box.
- Do not count a later pursuit in the same branch as another reward.
Fourth case: Substation Control or the Blazing Alley alternative
The fourth qualifying opportunity is tied to the Live Selection in Substation Control. If Nemesis appears there, the reward-bearing encounter occurs in that room. Complete the Substation voltage procedure only as far as needed for the story, then decide whether Jill has enough supplies to pursue the optional knockdown. Use the shutters and room transitions as fallback points instead of allowing Nemesis to trap Jill beside the control panel.
Blazing Alley is the alternative route condition after Jill obtains the Oil Additive. If the relevant Substation encounter was not triggered, Nemesis can instead appear in Blazing Alley while Jill is returning through the area. Treat this as the same fourth reward opportunity, not an additional case. Do not label it a Substation Entrance encounter.
The fourth successful case contains M37 Parts A when it is the fourth case collected. Shotgun shells or grenade ammunition are practical choices if available. Conserve Magnum ammunition unless the fight is already well supplied. If the battle removes the healing reserve needed for the Substation, cable-car or Clock Tower objectives, reload the earlier save and abandon the optional reward.
- Treat Substation Control and the Blazing Alley condition as one reward slot.
- Use Blazing Alley only as the alternative condition after obtaining the Oil Additive.
- Keep doors, shutters and room transitions available as fallback points.
- Collect M37 Parts A if this is the fourth qualifying case.
Fifth case: Statue Junction after the cable-car repair parts
The fifth early-Downtown reward becomes available at Statue Junction after all four cable-car repair parts are obtained. Do not count an earlier Nemesis appearance in Statue Junction before this condition as the fifth reward opportunity. Finish the required repair-item collection first, return to the area and prepare Jill at the nearest safe room before triggering the encounter.
Use the junction's open space to keep a retreat route behind Jill. Fire while Nemesis is recovering, then move toward a door rather than trying to trade blows at close range. After the qualifying knockdown, search Statue Junction for the dropped case. When this is the fifth successful case, it contains M37 Parts B. Combine it with M37 Parts A to create the Western Custom when inventory space and ammunition planning allow.
This fight occurs close to cable-car departure preparations. Confirm that Jill still has healing and the supplies needed for the remaining mandatory route. If the encounter becomes too costly, leave Nemesis behind and complete the cable-car sequence. The fifth case is a bonus, not a prerequisite for reaching the Clock Tower.
- Wait until all four cable-car repair parts are obtained.
- Use Statue Junction as the fifth reward location.
- Collect M37 Parts B after the fifth qualifying knockdown.
- Combine both M37 parts only when doing so does not delay mandatory progress.
Combat and recovery method
Keep Jill in the widest available part of each encounter area and preserve a clear route to a door. The Shotgun is a dependable early choice for stopping Nemesis, while grenade rounds can provide strong damage when available. Do not rely on handgun ammunition if the encounter is already causing repeated damage. Save rare Magnum ammunition unless your supply is substantial or the reward attempt is deliberate.
On the original PlayStation control layout, the emergency dodge is performed with R1 or R2 immediately before an enemy attack connects. The timing window is narrow; pressing too early may only draw the weapon or begin normal aiming. While aiming, the Action button can also perform the dodge. The quick 180-degree turn uses the Run button while Jill is retreating; with the standard PlayStation layout, this is Square. Use it to reverse direction, then keep moving instead of stopping in Nemesis's attack lane.
If Jill reaches Danger, loses her reserve healing, becomes trapped in a narrow room or spends ammunition needed for the next mandatory objective, retreat through a door and reload the preparation save. Do not repeatedly brute-force an optional fight from a damaged file. Later Clock Tower reward opportunities are outside this chapter and should not be added to the early-Downtown count.
- Fight from open space with a retreat route.
- Prefer Shotgun or available grenade ammunition before rare Magnum rounds.
- Use R1 or R2 immediately before an attack connects for the emergency dodge.
- Use Square while retreating for the quick 180-degree turn.
- Reload instead of sacrificing mandatory resources for an optional case.
Before you move on
- The player understands that the early Nemesis reward route is optional and subordinate to campaign ammunition and healing needs.
- The player can state the first five reward order: EAGLE Parts A, EAGLE Parts B, First Aid Box, M37 Parts A and M37 Parts B.
- The player can identify the first five qualifying opportunities: RPD Courtyard, Police Station West Stairway, Restaurant or Press Office, Substation Control or the Blazing Alley alternative after obtaining the Oil Additive, and Statue Junction after all four cable-car repair parts are obtained.
- The player knows that Restaurant and Press Office are alternative locations for one reward.
- The player knows that Substation Control and Blazing Alley are alternative conditions for one reward.
- The player knows that Statue Junction becomes the fifth listed opportunity only after the cable-car repair condition is met.
- The player can distinguish Brad's Card Case from the item case dropped by Nemesis.
- The player can perform the original emergency dodge with R1 or R2 and the standard Square quick turn while retreating.
- The player preserves at least one inventory slot and protects mandatory healing and ammunition.
- The player understands that later Clock Tower reward opportunities are outside this chapter's scope.
- A successful early reward attempt is verified by recording the case actually collected, rather than counting Nemesis appearances.
Cable Car / Transport Sequence — Timed Escape Mechanics
Complete the cable-car repair with the Fuse and Mixed Oil, using the Power Cable if it was not installed during the earlier visit. Start the transport sequence, trigger Nemesis in the rear carriage, retreat toward the front so Mikhail can intervene, and resolve the runaway cable-car Live Selection. The choice determines Jill’s Clock Tower entry route, the locations of the Winder Key and Bezel Key, and whether Carlos later gives Jill Freeze Rounds.
1. Prepare the repair parts
Before returning to the cable-car station, confirm that Jill has the Fuse and Mixed Oil. The Fuse comes from the Electrical Substation. Create Mixed Oil by combining Machine Oil with Oil Additive; the two ingredients cannot be installed separately as the oil component.
The Power Cable should already have been used at the cable-car panel during the earlier downtown visit. If that installation was interrupted, carry the Power Cable and install it with the other required parts during this return visit. On the ordinary route, however, only the Fuse and Mixed Oil remain outstanding.
Save at the nearest safe room before triggering the transport sequence. Carry at least one healing item and leave inventory space for any ammunition Carlos may provide. A shotgun is useful in the cramped carriage, while Freeze Rounds or other Grenade Launcher ammunition can slow Nemesis if Jill chooses to fight. Fighting is not required, so preserve heavy ammunition for the Clock Tower battle.
- Fuse is in Jill’s inventory
- Machine Oil and Oil Additive have been combined into Mixed Oil
- Power Cable is confirmed installed, or is being carried as a recovery item
- At least one healing item is available
- A save has been made before the final station visit
2. Finish repairing the cable car
Return to the cable-car station and enter the rear carriage. Examine the sparking maintenance panel. Use the Fuse and Mixed Oil on the panel. If the Power Cable was not installed earlier, use it there as well before applying the remaining two parts.
When every required component has been accepted, the repair is complete and a story scene follows. Depending on earlier Live Selection choices, Carlos may provide bonus ammunition after the repair sequence. This ammunition is optional and is not required to activate the cable car.
After the repair scene, move through the connecting passage to the front carriage. The departure sequence begins after Jill reaches the front section and the associated scene finishes.
- Fuse has been used at the maintenance panel
- Mixed Oil has been used at the maintenance panel
- Power Cable is installed if it was previously missing
- The repair scene has played
- The cable car has started moving
3. Trigger Nemesis in the rear carriage
Once the cable car is moving and control returns, follow the prompt to investigate the disturbance behind Jill. Move back through the connecting door toward the rear carriage. Nemesis has entered through the rear carriage, and this is the encounter that leads to Mikhail’s sacrifice.
The purpose of returning to the rear is to trigger the scene. Do not remain there to force a defeat. The cable-car encounter does not provide the normal Nemesis item-case reward, and defeating him is unnecessary for progression.
- The cable car is moving
- The rear disturbance has been investigated
- Nemesis has appeared in the rear carriage
- Jill is ready to retreat toward the front carriage
4. Retreat toward the front and let Mikhail intervene
As soon as Nemesis appears, turn around and retreat through the connecting door toward the front carriage. Create distance rather than attempting to hold the rear compartment. The narrow carriage gives Nemesis little room to be avoided, so do not reload or heal directly in front of him.
If Jill is hit, keep moving toward the front and heal once there is enough distance. If Jill elects to fire, use only enough ammunition to create space, then continue forward. Freeze Rounds can slow Nemesis, but they are not necessary because the scene advances without a permanent defeat.
Mikhail intervenes as Jill retreats toward the front. He confronts Nemesis in the rear carriage, pulls the pin on a grenade, and blasts Nemesis out of the cable car. Mikhail’s sacrifice is mandatory story progression; Jill does not need to defeat Nemesis herself.
- Jill has left the rear carriage after Nemesis appears
- Jill has retreated toward the front carriage
- Mikhail’s intervention has occurred
- The grenade explosion has removed Nemesis from the cable car
- Mikhail’s sacrifice scene has finished
5. Resolve the runaway cable-car Live Selection
After the explosion, the brakes fail and the cable car accelerates toward the Clock Tower. The Live Selection offers Jump Out of the Window or Use the Emergency Brake. If the timer expires without a selection, the result follows the Emergency Brake branch.
Choose Jump Out of the Window to wake Jill in the Clock Tower Bedroom. This branch places the Winder Key behind the loose picture in the Bedroom and the Bezel Key in the Chapel. Later, Carlos meets Jill in the Small Library and gives her Freeze Rounds for the Grenade Launcher. This is the only one of the three outcomes that provides those Freeze Rounds.
Choose Use the Emergency Brake to enter through the Clock Tower Courtyard. The Winder Key is in the Chapel and the Bezel Key is behind the loose picture in the Bedroom. Carlos later appears in the Dining Room without giving Jill Freeze Rounds. The same Courtyard route and no-Freeze-Rounds outcome occur if the Live Selection expires.
Neither option prevents the crash. The choice determines Jill’s entry point, key placement, Carlos’s meeting location, and later support during the Clock Tower sequence.
- Jump Out of the Window, Use the Emergency Brake, or an expired choice has been resolved
- The crash scene has finished
- Jill has entered through the Bedroom or Courtyard route
- The correct Winder Key location has been identified
- The correct Bezel Key location has been identified
- Freeze Rounds are expected only if Jump Out of the Window was chosen
6. Establish the Clock Tower route
On the Jump Out of the Window route, leave the Bedroom area, inspect the loose picture, and take the Winder Key. Continue through the available Clock Tower rooms and later search the Chapel for the Bezel Key. Carlos’s Freeze Rounds are obtained in the Small Library when that branch’s scene occurs.
On the Emergency Brake or expired-choice route, leave the Courtyard and proceed through the accessible Clock Tower entrance. Search the Chapel for the Winder Key, then inspect the loose picture in the Bedroom to obtain the Bezel Key. Carlos appears in the Dining Room without supplying Freeze Rounds.
Once Jill has entered the Clock Tower and obtained the branch-specific key progression, the cable-car objective is complete. Use the next safe room to reorganize supplies before solving the music box, Chronos, clock, and bell puzzles.
- Jill has left the crash area
- The correct Clock Tower entry route is active
- Branch-specific key locations have been checked
- Carlos’s branch-specific meeting has occurred or is reachable
- Jill is inside the Clock Tower
- The next objective is the Clock Tower puzzle sequence
Before you move on
- The Fuse and Mixed Oil were ready before the final station visit.
- The Power Cable was already installed or was installed during the recovery visit.
- The rear maintenance panel accepted every required component.
- The cable car began moving.
- Jill investigated the rear carriage after departure.
- Nemesis appeared in the rear carriage.
- Jill retreated toward the front carriage instead of treating the fight as mandatory.
- Mikhail intervened with the grenade and his sacrifice scene played.
- The runaway cable-car Live Selection was resolved.
- Jill reached the Bedroom route after Jump Out of the Window, or the Courtyard route after Use the Emergency Brake or an expired choice.
- The branch-specific Winder Key and Bezel Key locations are understood.
- The Clock Tower interior has been reached and the next task is the Clock Tower puzzle sequence.
Clock Tower and Midtown Puzzles
The Clock Tower section begins after the cable-car crash and ends when Jill is infected by Nemesis, loses consciousness, and is carried to the Chapel for Carlos’s hospital sequence. The entry branch changes Jill’s starting room, Carlos’s meeting room, and whether Freeze Rounds are provided, but both branches converge at the Main Hall, Balcony, Machinery Room, and Clock Tower courtyard.
Enter through the correct cable-car branch
If you chose Jump Out of the Window, Jill begins in the Clock Tower Bedroom. Examine the crooked picture near the exit to obtain the Winder Key, also called the Clock Tower Key. Leave the Bedroom and use the Winder Key on the Living Room door. Carlos is waiting in the Small Library beyond it. Speak to him there; he gives Jill Freeze Rounds before leaving. Continue into the Main Hall, where you can collect the Clock Tower map and inspect the two music boxes behind the staircase.
If you chose Use the Emergency Brake, or allowed the Live Selection to expire, Jill begins in the Clock Tower Courtyard. Enter the Clock Tower through the available door, pass through the Chapel and Dance Room, and enter the Dining Room. Carlos meets Jill in the Dining Room, but this branch does not provide Freeze Rounds. Continue through the Main Hall route, then enter the Study-side rooms and the Bedroom reached from the Library. Examine the fallen picture there to obtain the Winder Key.
The two branches converge in the Main Hall. Visit both small music boxes behind the staircase and remember which melody sounds correct; this tune is the reference for the later randomized music-box puzzle. Visit the Chapel save room before committing to the machinery sequence. Store unnecessary items and keep healing, the Grenade Launcher or another strong weapon, and several empty inventory slots.
- Identify whether Jill entered through the Bedroom or Courtyard.
- Take the Winder Key from the Bedroom in the window branch or from the picture beyond the Library in the emergency-brake branch.
- Meet Carlos in the Small Library only on the window branch; Freeze Rounds are provided there.
- Meet Carlos in the Dining Room on the emergency-brake or expired-choice branch; no Freeze Rounds are provided there.
- Listen to both Main Hall music boxes and save in the Chapel.
Collect the Bezel Key and reach the Balcony
The Bezel Key is the second Clock Tower key and lowers the ladder to the Machinery Room. On the Jump Out of the Window route, leave the Main Hall through the Dining Room and Dance Room, then enter the Chapel. Examine the appropriate item location in the Chapel to obtain the Bezel Key. On the Use the Emergency Brake or expired-choice route, go from the Main Hall through the Library and its adjoining save-room corridor to the Bedroom. Examine the fallen picture there to obtain the Bezel Key.
Return to the Main Hall and climb the main staircase. Giant spiders occupy the upper corridor. Running past them is usually safer than spending valuable ammunition, but do not let Jill become trapped against the walls. If Jill is poisoned, use a Blue Herb when safe or retreat through the nearest door before reorganizing.
On the Clock Tower Balcony, use the Bezel Key on the green plate. The mechanism lowers the ladder. Climb into the Machinery Room and take the Silver Gear. Inspect the large music box to hear its target melody before changing any switches.
- Obtain the Bezel Key from the branch-specific location.
- Reach the second-floor Balcony.
- Use the Bezel Key on the green plate.
- Climb the ladder and take the Silver Gear.
- Listen to the Machinery Room music box’s target melody.
Solve the music box and handle Balcony Nemesis
The music-box solution is randomized on the original PlayStation release. The six switches are labeled A through F, and each switch offers Up or Down. Compare the notes produced by the current setting with the reference melody heard from the box. Select Next to advance, use Back if you need to revise an earlier setting, and select Play after setting switch F. Continue testing and adjusting until the played tune matches the reference. A correct solution opens the front panel and provides the Chronos Chain.
After taking the Chronos Chain, descend toward the Balcony. Nemesis appears and Jill receives a Live Selection: Use the Light or Use the Cord. Use the Light is the simplest progression choice because it blinds Nemesis and sends him over the railing. Use the Cord temporarily electrocutes him; he can recover and continue the pursuit, so do not linger if you are not deliberately attempting the optional Hard-mode reward. If the choice is ignored, Jill must deal with Nemesis directly.
Return to the Study. Combine the Winder Key with the Chronos Chain to create the Chronos Key. Use the Chronos Key on the greenish locked door in the Study. The key has now served its required purpose, so make room for the three colored balls ahead.
- Match switches A through F to the reference melody.
- Take the Chronos Chain.
- Choose a Balcony response and avoid wasting resources on an optional fight.
- Combine the Winder Key and Chronos Chain into the Chronos Key.
- Use the Chronos Key on the greenish Study door.
Solve the three-clock puzzle
Follow the corridor beyond the Chronos Key door and pass the giant spiders. Running is acceptable if Jill has enough room to avoid their leaps. Search the dead mercenary if you have inventory space, then enter the Clock Tower Closet. Take the Crystal Ball, Obsidian Ball, and Amber Ball from the statues. Keep enough empty slots to carry the balls and the reward.
Place the balls in the three clock paintings to adjust the center clock. The starting time is randomized, so calculate from the time currently displayed rather than copying a universal arrangement. In the left painting, Crystal moves the center clock back one hour, Obsidian back two, and Amber back three. In the middle painting, the same balls move it forward one, two, or three hours. In the right painting, they move it forward two, four, or six hours. Use the available placements until the center clock reads 12:00.
When the puzzle is solved, take the Gold Gear. Return through the spider corridor and climb back to the Machinery Room.
- Take the Crystal, Obsidian, and Amber Balls.
- Use the left, middle, and right painting values to calculate the center-clock adjustment.
- Set the center clock to 12:00.
- Take the Gold Gear and return to the Machinery Room.
Ring the bell and defeat courtyard Nemesis
Combine the Gold Gear with the Silver Gear to create the Chronos Gear. Install the Chronos Gear in the empty mechanism beside the item box in the Machinery Room. The Clock Tower bell rings, triggering the rescue sequence. Save before leaving if possible and reorganize Jill’s inventory for the mandatory fight.
Carry healing and reserve your strongest practical ammunition. Freeze Rounds are useful when available, while Flame, Acid, Grenade, Magnum, Shotgun, or Mine Thrower ammunition can also contribute depending on the inventory. Do not spend all high-damage ammunition during the Balcony event. Keep moving around the open courtyard, avoid corners, and fire after Nemesis completes an attack or recovers from a hit.
The rescue helicopter arrives and Nemesis destroys it. He infects Jill with the T-Virus, then the courtyard battle begins. This fight cannot be bypassed. Jill must knock Nemesis down twice. On the route that began with the Courtyard entry, Carlos arrives during the fight and his gunfire destroys Nemesis’s rocket launcher, but Jill still has to finish the encounter. On the window-entry route, Carlos does not intervene during this battle. After the second knockdown, Nemesis collapses near the fire and Jill loses consciousness.
- Combine the Silver Gear and Gold Gear into the Chronos Gear.
- Install the Chronos Gear and ring the bell.
- Save and prepare healing plus strong ammunition.
- Survive the helicopter scene and T-Virus infection.
- Knock Nemesis down twice in the courtyard.
Confirm the Clock Tower completion state
The chapter is complete when Nemesis has collapsed after the second courtyard knockdown, Jill has fallen unconscious from the infection, and Carlos has carried her to the Chapel. Control then transfers to Carlos. His next objective is to push the large bell out of the rear passage and reach the Hospital for the Vaccine Base and Vaccine Medium; those actions belong to the Carlos chapter, not this Clock Tower puzzle section.
If the courtyard fight goes badly, reload the Chapel or Machinery Room save made before the final sequence. Restore Jill’s inventory, leave optional Balcony encounters unresolved, and reserve healing for the courtyard. Do not restart merely because the music box required several attempts; its solution is randomized and repeated testing is expected.
- The Clock Tower bell has rung.
- The rescue helicopter scene has occurred.
- Nemesis has been knocked down twice.
- Jill is infected and unconscious.
- Carlos has moved Jill to the Chapel and control has transferred to him.
Before you move on
- Jill entered the Clock Tower through one of the two verified cable-car branches.
- The branch-specific Winder Key and Bezel Key were collected.
- The Chronos Chain was obtained from the randomized music-box puzzle.
- The Winder Key and Chronos Chain were combined into the Chronos Key.
- The Chronos Key opened the greenish Study door.
- The Crystal, Obsidian, and Amber Balls set the center clock to 12:00.
- The Gold Gear and Silver Gear were combined into the Chronos Gear.
- The Chronos Gear was installed and the Clock Tower bell rang.
- Nemesis was knocked down twice in the courtyard.
- Jill was infected, lost consciousness, and was carried to the Chapel for Carlos’s Hospital objective.
Carlos Interlude — Alternate Playable Sections
After Jill is infected with the T-Virus during the Clock Tower battle, control changes to Carlos. He must leave the Clock Tower, enter Raccoon General Hospital, obtain the Vaccine Base and Medium Base, synthesize the Vaccine, escape the hospital before its bomb detonates, and return to the Chapel before Nemesis reaches Jill. This is the original North American PlayStation route, not the 2020 remake. Carlos has his own equipment and cannot use the items Jill is carrying, so organize the Chapel Item Box before leaving. His Assault Rifle is especially useful against Hunters, but the safest approach is still to bypass enemies that do not block the route.
Prepare in the Clock Tower Chapel
Save at the Chapel typewriter and sort the Item Box before taking control of Carlos. Leave several inventory spaces open for the Sickroom Key, Vaccine Base, Medium Base and completed Vaccine. Keep at least one healing item available in case a Hunter clips Carlos during a retreat, but do not overload his inventory with optional supplies.
Carlos has his own weapons and does not inherit Jill’s carried items. His Assault Rifle can handle Hunters and other enemies blocking narrow passages, while ordinary zombies can often be bypassed. Use the quick turn to face enemies that appear behind him and use emergency dodges only when a close attack is already committed. Doors are usually safer escape points than prolonged fights.
- Save in the Chapel before leaving.
- Organize the Item Box and leave open inventory space.
- Keep healing available for the hospital route.
- Do not plan around Jill’s current carried items.
Open the route to Raccoon General Hospital
Leave the Chapel and enter the Clock Tower Closet. Go into the rear section where the large bell blocks the back exit. Push the bell forward until the doorway is clear, then leave through the rear door. Follow the outside route to Park Street and enter Raccoon General Hospital.
Hunters appear in the hospital lobby. Equip the Assault Rifle before opening the dangerous doors, fire only as much as needed to create a path, and retreat through a doorway if a Hunter closes the distance. The hospital Office provides a typewriter and Item Box, making it the main recovery point for this interlude. Red Herbs and other incidental supplies can be collected if they do not cost you the inventory space needed for the vaccine components.
- Push the large bell away from the Clock Tower rear exit.
- Follow Park Street to Raccoon General Hospital.
- Use the hospital Office save room to reorganize before continuing.
Activate the hospital elevator
From the hospital lobby, enter the Office and continue into the Doctor’s Station. Search this area for the Hospital Map, Director’s Diary and Tape Recorder. Examine the elevator panel and activate its microphone when prompted, then use the Tape Recorder on the panel. The recorded voice opens the elevator’s voice-activated lock.
The elevator offers 4F and B3. Either floor can be visited first, but both are required. The order changes some enemy and story placements, not the essential items. For the clearest item route, visit 4F first for the Sickroom Key and Vaccine Base, then go to B3 for the Medium Base and synthesizer.
- Find the Tape Recorder in the Doctor’s Station.
- Use it at the elevator’s voice-activated panel.
- Choose 4F or B3 and plan to complete the other floor afterward.
Obtain the Vaccine Base on 4F
On 4F, enter the Data Room and take the Sickroom Key. Continue to Room 401 and examine the corpse to receive the three-digit safe combination. While in Room 401, note which corner contains the movable drawer stand.
Use the Sickroom Key to enter Room 402. Push the Room 402 drawer stand onto the metal plate in the corresponding opposite-side corner. The correct plate depends on Room 401’s position: a front-left position requires the front-right plate in Room 402, while a back-right position requires the back-left plate. Use the same left-right relationship for the other positions. If Carlos receives a shock, leave Room 402 and re-enter to reset the stand before trying again.
When the stand is correctly placed, the wall picture falls and reveals the safe. Enter the three-digit combination from the Room 401 corpse and take the Vaccine Base. Keep it with Carlos; do not leave it in the Item Box.
- Take the Sickroom Key from the Data Room.
- Record the code from the Room 401 corpse.
- Note the Room 401 drawer-stand position.
- Place the Room 402 stand on the correct opposite-side plate.
- Open the revealed safe and take the Vaccine Base.
Create the Vaccine Medium in B3
Take the elevator to B3 and follow the route to the laboratory. Collect the Medium Base from the laboratory shelf and read the Medical Instruction Manual if desired. Activate the nearby power supply to drain the Hunter tanks and enable the synthesizer.
Place the Medium Base in the synthesizer. The five controls are labeled I, II, III, A and B. Use the sequence I, III, A. The game’s display may present A as the fourth selection or as the lower control, but it is the control labeled A. When the indicators are centered, collect the Vaccine Medium and combine it with the Vaccine Base to create the Vaccine.
Hunters can break free after the synthesizer procedure. Do not search optional corners on the return trip. Shoot an enemy only when it blocks the elevator route, use explosive objects when they provide a safe opening, and retreat through doors rather than trying to clear every creature.
- Take the Medium Base from the laboratory.
- Activate the power supply.
- Use synthesizer controls I, III and A.
- Collect the Vaccine Medium.
- Combine it with the Vaccine Base to make the Vaccine.
- Return to the elevator without abandoning the Vaccine.
Escape the hospital before the bomb detonates
Return to the hospital lobby with the completed Vaccine in Carlos’s inventory. When the bomb sequence begins, the escape window is extremely short. Ignore optional ammunition, herbs and side rooms. Run directly to the main entrance, using doors and the shortest available route instead of stopping to fight enemies that do not block progress.
Reaching the exterior triggers the hospital destruction sequence. If Carlos is knocked down or killed before leaving, reload the hospital save and repeat the final approach with the Assault Rifle ready for only the enemies that obstruct the exit. Do not place the Vaccine in the Item Box before starting the escape.
- Keep the completed Vaccine with Carlos.
- Trigger the hospital bomb sequence at the lobby entrance.
- Run directly to the main entrance without detours.
- Confirm that Carlos escapes and the hospital is destroyed.
Return to the Chapel and cure Jill
After the hospital is destroyed, follow the route back to the Clock Tower. When Carlos enters the Clock Tower interior, the damaged, tentacled Nemesis appears and moves toward Jill’s Chapel. This is not a normal reward-bearing Nemesis encounter. You may fire to create space, but the priority is reaching Jill before Nemesis breaks through the Chapel entrance.
Move through the Clock Tower rooms toward the Chapel without searching side rooms. Use the quick turn if the camera leaves Nemesis behind Carlos, and use door transitions to create distance. If Nemesis reaches Jill before Carlos, the sequence ends in a game over, so do not stop to reload or fight unless the creature is physically blocking the route.
Enter the Chapel, examine Jill and use the Vaccine when prompted. Carlos administers the cure, the story scene plays, and control returns to Jill for the Raccoon Park route.
- Leave the destroyed hospital and return to the Clock Tower.
- Run directly toward the Chapel when Nemesis appears.
- Reach Jill before Nemesis breaks through the Chapel entrance.
- Examine Jill and administer the Vaccine.
- Confirm that control returns to Jill for the Park route.
Before you move on
- Carlos has pushed the Clock Tower bell aside and entered the original Raccoon General Hospital route.
- The Tape Recorder has activated the hospital elevator.
- Carlos has obtained the Sickroom Key and the Room 401 safe code.
- The Room 402 cabinet has been placed on the correct corresponding plate and the Vaccine Base has been taken from the safe.
- Carlos has obtained the Medium Base, synthesized the Vaccine Medium with controls I, III and A, and combined both components into the Vaccine.
- Carlos has escaped through the hospital entrance before the bomb destroys the building.
- Carlos has returned to the Clock Tower and reached Jill in the Chapel before Nemesis gets to her.
- The Vaccine has been administered and control has returned to Jill for the Raccoon Park route.
Disused Plant / Bridge Sequence — Choice and Consequence
After Carlos administers the Vaccine in the Clock Tower Chapel, Jill returns to Raccoon Park to find another way out of Raccoon City. She must collect the Park Key, drain the fountain, cross the underground water passage, open the caretaker’s hidden Strategy Room, and escape the first Grave Digger encounter. The Grave Digger can be bypassed through the electrical switches and ladder, or defeated by using the electrified pool. Jill then reaches the suspension bridge and chooses whether to push Nemesis off, jump into the water, or allow the choice to expire. Push Him Off sends Jill into the upper Dead Factory route. Jump Off and the timeout outcome send her through the lower route. Either branch can reach the credits.
Return to Raccoon Park and prepare in the Security Center
Resume control of Jill after Carlos has administered the completed Vaccine in the Clock Tower Chapel. Leave the Clock Tower and follow the route back toward Park Street and Raccoon Park. A Nemesis encounter can occur before the park entrance. If you are conserving ammunition, use door transitions and adjoining rooms to create distance instead of spending heavy ammunition on an optional knockdown.
At the park entrance, use the Lockpick on the white door to enter the Park Security Center. Take the Park Key from the room. This area contains a typewriter and Item Box, making it the best preparation point before the park section. Keep the Lighter, a healing item, and enough inventory space for the Graveyard Key, Iron Pipe, and Rear Gate Key. The Lockpick is no longer needed after opening this door and can be stored.
- Jill has received the Vaccine.
- The Park Security Center has been entered.
- The Lockpick has opened the white door.
- The Park Key has been collected.
- The Lighter, a healing item, and free inventory space are available.
Collect the Graveyard Key and drain the fountain
Use the Park Key at the main park gate. Follow the park paths toward the body of the fallen U.B.C.S. mercenary. Examine the body and take the Graveyard Key and Written Order. Enemy layouts can vary, so move cautiously and avoid discarding required items for optional ammunition unless the inventory is completely full.
Return to the Fountain Area and examine the fountain mechanism. Solve the gear arrangement by moving the gears until they match the diagram shown on the mechanism. The original PlayStation game presents this as a small arrangement puzzle rather than a universal room code, so use the displayed pattern on your screen. When the gears are aligned, operate the mechanism to drain the fountain.
Climb down into the underground water passage. Follow it to the opposite ladder and climb out into the Graveyard. Use the Graveyard Key on the caretaker’s shed. Take the Iron Pipe, then use the nearby typewriter and Item Box to save and reorganize before continuing.
- The Graveyard Key and Written Order have been collected.
- The fountain gear puzzle has been solved.
- The fountain has been drained.
- Jill has crossed the underground water passage.
- The Graveyard Key has opened the caretaker’s shed.
- The Iron Pipe is in the inventory.
Open the hidden Strategy Room
Inside the caretaker’s shed, enter the adjoining storage room and use the Lighter on the fireplace. The fire reveals a damaged section of wall. Return to the shed side and use the Iron Pipe on the exposed bricks. Jill can then crawl through the opening into the hidden Strategy Room.
Take the Rear Gate Key from the table. Examine files or ammunition only if you have enough inventory space. When you attempt to leave after taking the key, a story scene occurs. Nicholai’s appearance does not replace the key objective; keep the Rear Gate Key with Jill.
Leave the caretaker’s area and cross back through the Graveyard. The ground collapses after the Rear Gate Key objective, dropping Jill into the underground Grave Digger area. You can now choose between a noncombat escape and a combat escape.
- The fireplace has been ignited with the Lighter.
- The Iron Pipe has opened the concealed wall.
- The hidden Strategy Room has been entered.
- The Rear Gate Key has been collected.
- The collapse into the Grave Digger area has occurred.
Escape through the switches and ladder
To conserve ammunition, move through the underground passage and activate both electrical panels. Approach one panel, watch or listen for the Grave Digger’s movement, and retreat into the wider section if it surfaces nearby. Activate the first panel when the creature has withdrawn, then repeat the process at the second panel. Acid Rounds can force it back, but they are optional and should be saved if your later supplies are limited.
After both passage switches are active, reach the ladder-control panel and operate it. The ladder lowers, allowing Jill to climb out. If Grave Digger corners you, use the opposite alcove, a door transition, or an emergency dodge rather than trying to pass directly through the creature.
After climbing out, follow the sewer passage back to the Fountain Area. Retrace the park route to the locked rear gate. This method bypasses the need to defeat Grave Digger.
- Both electrical passage panels have been activated.
- The ladder-control panel has been operated.
- Jill has climbed out of the underground area.
- The Fountain Area has been reached through the sewer.
- The Rear Gate Key is still in the inventory.
Defeat Grave Digger with the electrified pool
The alternative is to defeat Grave Digger in the open trench. Use a powerful weapon while maintaining enough distance to avoid its burrowing attacks. Lure the creature toward the two light posts beside the puddle. Damage the posts until both fall into the water. The resulting electrical current kills Grave Digger when it enters the electrified pool.
Do not stand in the puddle after the posts fall. If necessary, use a handgun or another low-cost weapon to finish damaging a post, but remain ready to move when the creature surfaces. Acid Rounds and Grenade Launcher ammunition are useful for controlling the encounter, though the electrical trap is the key objective.
When Grave Digger is defeated, leave through the opened fallen-fence or ramp route. Do not activate the switch-and-ladder sequence merely because it is another possible solution. The combat route supplies its own exit. Follow the sewer back to the Fountain Area and return to the park walkway.
- Grave Digger has been lured toward the light posts.
- Both posts have fallen into the puddle.
- The electrical current has defeated Grave Digger.
- Jill has used the fallen-fence or ramp exit.
- Jill has returned to the Fountain Area.
Open the rear gate and save before the bridge
Return to the northeastern park path and use the Rear Gate Key on the locked gate. Continue through the path to the suspension bridge leading to the abandoned Waste Processing Plant, also called the Dead Factory.
Heal before crossing if Jill is in Danger status. Carry a dependable weapon and at least one recovery item, then make a separate save before triggering the bridge scene. The bridge choice changes the factory entry route and later scenes, so this save lets you select the other branch without replaying the entire park section.
- The Grave Digger encounter has been resolved by either valid route.
- The Fountain Area has been revisited through the sewer.
- The Rear Gate Key has opened the eastern park exit.
- Jill has saved before crossing the suspension bridge.
Choose Push Him Off for the upper factory route
When Nemesis blocks the suspension bridge, select Push Him Off before the Live Selection expires. Jill dodges the tentacle swipe and sends Nemesis into the water. She then enters the upper Dead Factory route on 2F.
Follow the 2F route until Jill reaches the resting/save room, where Carlos appears during the story scene. After the scene, take the Facility Key from the cupboard or shelf in this room, then continue through the route. Use the room’s typewriter and Item Box to reorganize before spending ammunition or proceeding to the Steam Room sequence.
Push Him Off is not mandatory for campaign completion, but it produces the branch in which Jill later encounters Nicholai at the water-treatment-room entry and Carlos finds a helicopter in the factory landing zone. Keep those later consequences separate from the required objective here: reaching the correct 2F route, meeting Carlos, and securing the Facility Key.
- Push Him Off has been selected.
- Jill has entered the upper Dead Factory route on 2F.
- Jill has reached the resting/save room where Carlos appears.
- The Facility Key has been collected from the cupboard or shelf in that room.
- Jill is ready to continue with route-specific Dead Factory progression.
Choose Jump Off or allow the choice to expire for the lower route
Select Jump Off if you want the lower Dead Factory route. Jill drops into the water, climbs out, and enters through the lower, or 1F, access passage. This branch changes the order of the facility objectives and does not use the same early 2F Facility Key sequence as Push Him Off.
If the Live Selection expires, Nemesis knocks Jill from the bridge. The timeout follows the same lower route as Jump Off, but Jill takes some damage. The timeout is still completable, although it is less controlled and can leave Jill in worse condition for the factory.
On the lower route, Jill encounters Carlos in the water-filter passage and later reaches the Communications Tower, where Nicholai appears in a helicopter. The later scene offers route-dependent choices, but neither the Jump Off branch nor the timeout outcome is a dead end. Both can continue to the final facility sequence and credits.
- Jump Off has been selected, or the timeout has been allowed intentionally.
- Jill has entered the lower Dead Factory route.
- Carlos has been encountered in the water-filter passage.
- The Communications Tower route is expected later.
- The player understands that this branch remains fully completable.
Before you move on
- Jill has received the Vaccine from Carlos in the Clock Tower Chapel.
- The Park Key has been collected from the Park Security Center.
- The fountain has been drained after solving its gear puzzle.
- Jill has crossed the underground water passage into the Graveyard.
- The Graveyard Key has opened the caretaker’s shed.
- The fireplace has been burned and the Iron Pipe has opened the concealed passage.
- The Rear Gate Key has been collected from the hidden Strategy Room.
- The Grave Digger encounter has been completed either by activating both passage switches and using the ladder-control exit, or by defeating Grave Digger with the electrified-pool method and leaving through the fallen fence or ramp.
- Jill has returned to the Fountain Area through the sewer route.
- The Rear Gate Key has opened the eastern park exit.
- The bridge Live Selection has been resolved through Push Him Off, Jump Off, or the timeout outcome.
- For Push Him Off, Jill has entered the upper Dead Factory route on 2F, reached the resting/save room where Carlos appears, and collected the Facility Key from the cupboard or shelf there.
- For Jump Off or the timeout, Jill has entered the lower Dead Factory route and is ready to continue through the factory.
- The next objective is Dead Factory progression, not another search of Raccoon Park.
Entering the Dead Factory — Key Items and Security Systems
The original North American PlayStation route through the Dead Factory, also called the abandoned Waste Processing Plant, changes according to the Suspension Bridge decision. Push Him Off sends Jill through the factory’s upper entrance. She takes the Facility Key in the Factory Lounge, completes the Steam Room lock, uses the key to enter Treatment Control, and collects the Dead Factory Map and System Disc. She then obtains and solves the Water Sample puzzle before using the System Disc at Disposal Access. After both security locks are released, Nicholai appears at Disposal Access and fires at Jill before retreating. Jump Off or allowing the choice to expire sends Jill through the lower entrance first. On that branch she completes the Water Sample, reaches Treatment Control for the Map and System Disc, returns upstairs for the Facility Key, completes the Steam Room lock, and then proceeds to Disposal Access. This chapter ends before Jill enters B.O.W. Disposal and fights transformed Nemesis.
Prepare before entering the Dead Factory
Save before crossing into the Dead Factory and leave inventory space for the Facility Key, Water Sample, Dead Factory Map and System Disc. Bring a dependable weapon, practical ammunition for the enemies in the lower passages, and at least one healing item. The area contains narrow corridors and ambush points, so avoid spending your strongest ammunition on enemies that can be bypassed through a door or stairwell.
The factory has two required security locks. The first is released by the Steam Room control sequence. The second is released by solving the Water Sample test. The System Disc is collected in Treatment Control and is used afterward at Disposal Access; it does not replace either security procedure.
The Facility Key can later be processed through the ultraviolet machine near the Water Sample area to create the Coded Facility Key. This opens an optional weapon locker containing the Rocket Launcher. The detour is useful but is not required for Disposal Access or campaign completion.
- A save was made before entering the factory.
- Several inventory spaces are available.
- Healing items and practical ammunition are ready.
- The Suspension Bridge result is known.
Push Him Off route: enter on 2F and take the Facility Key
If Jill chose Push Him Off at the Suspension Bridge, she enters through the upper Dead Factory route. Follow the 2F passage to the Factory Lounge and take the Facility Key. Use the nearby Item Box and typewriter if necessary, but keep enough space for the Map, System Disc and Water Sample.
The Facility Key is the first required factory item on this branch. After taking it, proceed toward the Steam Room. Do not descend to the Water Sample area yet; the correct Push Him Off order begins with the upper route, the Facility Key and the Steam Room lock.
- Jill entered through the 2F route.
- The Factory Lounge was reached.
- The Facility Key was collected.
- Inventory was reorganized without discarding required items.
Complete the Steam Room lock
At the Steam Room control panel, operate the labeled controls in this exact order: A, B, C, A, D, E, A, C, Main Switch, B, A.
The first eight inputs are the lettered controls. After the second C, interact with Main Switch as its own control-panel action. Main Switch is not a substitute for any lettered input. After activating it, enter B and then A to finish the sequence.
Move around the steam jets rather than standing in their paths. If the door remains locked, return to the panel and verify that Main Switch was activated after the first eight inputs and that B followed it, with A entered last.
- A, B, C, A, D, E, A and C were entered in order.
- Main Switch was activated separately.
- B was entered after Main Switch.
- A was entered last.
- The first Disposal Access lock was released.
Push Him Off route: enter Treatment Control and collect the factory items
After releasing the Steam Room lock, return to the upper hallway and use the Facility Key on the locked entrance to Treatment Control. Enter the room and collect the Dead Factory Map from the wall and the System Disc from the central control panel.
Do not use the System Disc at Disposal Access yet. The Water Sample procedure must be completed first. Keep the disc in Jill’s inventory or place it in a nearby Item Box only if you can retrieve it before returning to the Disposal Access reader.
The required Nicholai scene does not occur in Treatment Control or Treatment Room Entry on this branch. Continue to the lower factory area and complete the Water Sample procedure before returning to Disposal Access.
- The Facility Key opened Treatment Control.
- The Dead Factory Map was collected.
- The System Disc was collected from the central control panel.
- The System Disc was not used prematurely.
Push Him Off route: obtain and solve the Water Sample
Descend to the lower level and follow the factory route to Sewage Monitoring. Examine the wall panel and take the Water Sample. Carry it to the water-testing machine in the Sewer Lab.
Insert the Water Sample into the machine. The screen displays a target waveform and adjustable rows. Move the rows until their combined pattern matches the target displayed during that attempt. The solution is randomized, so a sequence from another playthrough may not work.
When the pattern matches, the second Disposal Access lock is released. If you want the optional Rocket Launcher, use the Facility Key at the ultraviolet machine to produce the Coded Facility Key, then use the coded item at the appropriate locker. Skip this detour if it costs too much time, healing or inventory space.
- The Water Sample was taken from Sewage Monitoring.
- The sample was inserted into the testing machine.
- The displayed target waveform was matched.
- The second security lock was released.
- The optional Coded Facility Key was made only if the Rocket Launcher detour was chosen.
Jump Off or expired choice: complete the lower route first
Choosing Jump Off, or allowing the Suspension Bridge choice to expire, sends Jill through the lower Dead Factory entrance. Follow the drainage route to Sewage Monitoring, take the Water Sample from the wall panel and carry it to the Sewer Lab testing machine.
Adjust the three displayed rows until their combined waveform matches the target pattern shown by the machine. This puzzle is randomized, so solve the pattern visible on the current screen rather than relying on a fixed arrangement.
After the Water Sample test succeeds, continue through the lower route to Treatment Control. Collect the Dead Factory Map and System Disc there. The Treatment Control items come before the return trip upstairs for the Facility Key on this branch.
- The lower entrance route was followed.
- The Water Sample was collected first.
- The Water Sample waveform was solved.
- Treatment Control was reached.
- The Dead Factory Map and System Disc were collected.
Jump Off or expired choice: return upstairs for the Facility Key and Steam Room lock
After collecting the Map and System Disc, return through the factory route and use the elevator or stairs to reach 2F. Go to the Factory Lounge and take the Facility Key.
Proceed to the Steam Room and enter A, B, C, A, D, E, A, C, Main Switch, B, A. Main Switch remains a separate interaction after the first eight lettered controls. Finish with B and then A.
Once the Steam Room lock is released, use the Facility Key to open any remaining required upper-route access and prepare to return to Disposal Access. The optional ultraviolet conversion and Rocket Launcher locker can still be handled if desired, but neither is necessary.
- The Water Sample test was completed before returning upstairs.
- The Dead Factory Map and System Disc were collected.
- The Factory Lounge was reached.
- The Facility Key was collected.
- The Steam Room sequence was completed in full.
- Main Switch was activated separately.
Use the System Disc at Disposal Access and trigger the Nicholai scene
With both security locks released, go to Disposal Access and use the System Disc at the reader. The unlocked passage leads toward B.O.W. Disposal. Do not enter the disposal chamber if you are keeping this chapter separate from the transformed Nemesis battle.
On the Push Him Off branch, the complete order is: enter on 2F, take the Facility Key in the Factory Lounge, complete the Steam Room lock, use the Facility Key to enter Treatment Control, collect the Dead Factory Map and System Disc, obtain and solve the Water Sample, then use the System Disc at Disposal Access. After both locks are released and Jill reaches the Disposal Access sequence, Nicholai appears, fires at her and retreats. This is the required Nicholai event for this branch.
On the Jump Off or expired-choice branch, the complete order is: enter through the lower route, obtain and solve the Water Sample, reach Treatment Control for the Map and System Disc, return upstairs for the Facility Key, complete the Steam Room lock, then use the System Disc at Disposal Access. Do not expect the Push Him Off Nicholai scene in the same location or order on this branch.
If the System Disc reader does not respond, confirm that the Steam Room lock and Water Sample test were both completed. Also verify that the disc came from the Treatment Control console and that Jill is using it at the Disposal Access reader. The transformed Nemesis encounter belongs to the next chapter.
- Both security locks are released.
- The Facility Key was obtained on the correct branch order.
- The Dead Factory Map and System Disc came from Treatment Control.
- The System Disc opened Disposal Access.
- On Push Him Off, Nicholai’s Disposal Access potshot scene occurred after both locks were released.
- Jill has not yet entered B.O.W. Disposal or fought transformed Nemesis.
Before you move on
- The correct Dead Factory entrance was used for the selected Suspension Bridge outcome.
- Push Him Off: Jill entered on 2F, collected the Facility Key from the Factory Lounge, completed the Steam Room sequence, entered Treatment Control, collected the Dead Factory Map and System Disc, solved the Water Sample, used the System Disc at Disposal Access, and witnessed Nicholai’s potshot scene after both locks were released.
- Jump Off or timeout: Jill solved the lower-route Water Sample, reached Treatment Control for the Map and System Disc, returned upstairs, collected the Facility Key, completed the Steam Room sequence and used the System Disc at Disposal Access.
- The Steam Room sequence was completed as A, B, C, A, D, E, A, C, Main Switch, B, A.
- The Water Sample matched the displayed randomized waveform.
- Both factory security procedures were released.
- The System Disc unlocked the route toward B.O.W. Disposal.
- The optional Rocket Launcher was not treated as required.
- Jill has not entered B.O.W. Disposal or fought transformed Nemesis.
References for this chapter
- Resident Evil 3: Nemesis — Guide and Walkthrough — PlayStation, GameFAQs
- Resident Evil 3: Nemesis - Guide and Walkthrough - PlayStation - By Stinger_316
- Resident Evil 3: Nemesis — Guide and Walkthrough — PlayStation — By kylohk
- Resident Evil 3: Nemesis — Guide and Walkthrough — PlayStation — By HLaPierre
- Resident Evil 3: Nemesis - Guide and Walkthrough - PlayStation - By AWebCraft
Nemesis — Mid-to-Late Transformations and Boss Tactics
Begin this chapter with the System Disc collected in the Dead Factory Treatment Control Room during the preceding route. If Jill stored it, retrieve it from the Item Box in the Resting Room. Complete both the Steam Room power procedure and the Water Sample test before using the System Disc at Disposal Access. Enter B.O.W. Disposal only after checking health, ammunition and inventory space. The transformed Nemesis encounter is timed: the four-minute disposal sequence covers the battle, the post-battle scene, the Card Key pickup and the escape through the exit reader. The safest solution is to lure Nemesis beneath the acid valves and discharge three doses while staying clear of the spray. After escaping, the Card Key can activate the Steam Room elevator and open the Factory Hallway shutter. The optional Rocket Launcher requires the Coded Facility Key, created earlier by taking the ordinary Facility Key to the ultraviolet filtering machine in the Sewer Lab.
Prepare in the Dead Factory Resting Room
Return to the Dead Factory Resting Room before opening Disposal Access. This room provides a typewriter and Item Box, making it the correct place to save, sort supplies and retrieve the System Disc if it was stored. Do not search the Control Room for another disc; the required System Disc was obtained from the Control Room console during the facility route.
Leave at least one inventory slot open for the Card Key. Carry healing and a weapon that can be raised and fired quickly. The acid-valve method is the preferred way to beat the timer, so a handgun or another fast weapon is useful for activating the controls. Freeze Rounds can slow Nemesis if he keeps reaching Jill before she can line up a valve. Strong ammunition such as Magnum rounds, Grenade Rounds or other high-damage supplies is a fallback, not a requirement for the intended solution.
Save before entering the disposal sequence. Once Jill enters B.O.W. Disposal, the battle and escape must be handled as one continuous timed objective.
- Save in the Resting Room.
- Retrieve the System Disc if it is in the Item Box.
- Leave an inventory slot open for the Card Key.
- Carry healing and a fast weapon.
- Reserve stronger ammunition as a fallback.
Use the System Disc at Disposal Access
From the Resting Room, follow the completed Dead Factory route toward Disposal Access. The Water Sample test and the Steam Room power procedure must both be complete before the route can be opened. If one of those locks remains closed, return to the appropriate facility area and finish that procedure before trying the disc reader again.
Use the System Disc at the reader that releases the treatment-room passage from Disposal Access. The disc is used to unlock the door leading into B.O.W. Disposal; it is not collected in this chapter and it does not replace the Facility Key or Card Key.
Check Jill’s health and inventory before entering. The disposal chamber locks Jill in with transformed Nemesis and begins the timed sequence. Keep the System Disc in the inventory until it has been used, then make sure the newly available slot will accommodate the Card Key.
- Confirm that the Steam Room lock is released.
- Confirm that the Water Sample test is complete.
- Carry the System Disc from the Resting Room.
- Use the disc at Disposal Access.
- Enter B.O.W. Disposal only after checking supplies.
Defeat transformed Nemesis with the acid valves
The disposal chamber is a broad room with acid-discharge valves around its perimeter. Keep Jill moving through the open space and avoid allowing Nemesis to pin her against the outside wall, machinery or a corner. His tentacles reach across a significant part of the room, so do not wait beside a valve while he is already within striking distance.
Lead Nemesis underneath an acid valve, then aim at the valve control and shoot it when he is positioned below the pipe. The acid damages Jill as well as Nemesis. Immediately move away from the falling spray and continue circling while the valve’s green indicator recharges. Do not stand between Nemesis and the valve, and do not remain in the spray to confirm the hit.
Three successful acid discharges defeat this transformed form. The first dose heavily damages him, and later doses may alter his movement and attack behavior, but Jill should continue using the same method until the third dose lands. Freeze Rounds can create the space needed to reach a valve, but do not spend so much time setting up a perfect shot that the timer becomes unsafe.
If Nemesis will not stay beneath a valve or too much time has been lost, use the strongest available weapon and keep moving. The objective is to defeat him and escape before the disposal process finishes, not to preserve every round.
- Keep moving in the open part of the chamber.
- Lure Nemesis below an acid valve.
- Discharge the acid three times.
- Move away from every spray immediately.
- Use Freeze Rounds for temporary control if needed.
- Switch to heavy ammunition if the timer becomes dangerous.
Take the Card Key and escape
After Nemesis is defeated, a short scene shows the Card Key falling from the coat of a dead scientist in the disposal chamber. As soon as Jill can move, examine the body and take the Card Key. Do not search the room for optional supplies before collecting it.
Use the Card Key at the blinking reader beside the disposal-room exit. Defeating Nemesis does not unlock the door automatically. The four-minute limit includes the battle, any time spent repositioning, the post-battle scene, the Card Key pickup and the run to the exit reader. Leave immediately once the key is in Jill’s inventory.
Return through Disposal Access toward the Dead Factory interior. Eliminate only enemies that block the route; door transitions and movement are safer than spending ammunition on every enemy. If Jill reaches the exit with little time remaining, prioritize the reader and the next door rather than healing or exploring.
- Take the Card Key from the dead scientist’s coat.
- Use the Card Key at the disposal exit reader.
- Leave before the four-minute sequence expires.
- Return through Disposal Access.
- Avoid unnecessary combat during the escape.
Optional Armory and Rocket Launcher route
The Armory detour is optional and should be attempted only if Jill has enough health and time for the backtracking. Return to the Steam Room and use the Card Key on the elevator reader. The Card Key activates the elevator; it does not open the weapon locker.
To open the locker, Jill needs the Coded Facility Key. If the Facility Key is still in its ordinary form, take it to the Sewer Lab and place it in the ultraviolet filtering machine. The machine imprints the code pattern and returns the key as the Coded Facility Key. The Sewer Lab is the correct coding location; do not look for this machine in the Water Control Room.
Return to the Steam Room, ride the Card Key elevator down and use the Coded Facility Key on the Armory locker. This obtains the optional Rocket Launcher and its associated supplies. The Rocket Launcher is not required for the transformed Nemesis battle, the Communications Tower route or the ending. If Jill is badly injured or the detour would consume critical resources, skip it and continue with the Card Key.
- Use the Card Key on the Steam Room elevator.
- Take the ordinary Facility Key to the Sewer Lab.
- Use the ultraviolet filtering machine to create the Coded Facility Key.
- Use the Coded Facility Key on the Armory locker.
- Skip the detour if it threatens the main route.
Open the Factory Hallway shutter
After the Armory detour, or after choosing to skip it, return to the Dead Factory interior and make a final inventory check. Keep healing and strong ammunition for the remaining facility route. Make sure the Card Key remains with Jill; it is still needed beyond the disposal escape.
Follow the Factory Hallway route to the metal shutter leading toward the Communications Tower. Use the Card Key at the reader to open it. This is the final objective of the chapter and confirms that the disposal sequence has been completed successfully.
Stop after opening the shutter and reaching the route beyond it. Do not collect the Portable Radar Receiver or begin the Communications Tower event here. The route-dependent Carlos or Nicholai scenes, emergency hatch, missile countdown and final Power Plant sequence belong to the following chapters.
- Return from optional detours with the Card Key.
- Keep healing and strong ammunition available.
- Use the Card Key on the Factory Hallway shutter.
- Reach the passage toward the Communications Tower.
- Stop before the Portable Radar Receiver and missile countdown.
Before you move on
- The System Disc from Chapter 10 is in Jill’s inventory or has been retrieved from the Resting Room Item Box.
- The Steam Room and Water Sample security procedures are complete.
- The System Disc has opened the route from Disposal Access into B.O.W. Disposal.
- Transformed Nemesis has been defeated in the disposal chamber.
- Jill has taken the Card Key from the dead scientist’s coat.
- The Card Key has opened the disposal exit before the timer expired.
- Jill has returned through Disposal Access into the Dead Factory.
- If the optional Armory route was attempted, the Facility Key was coded in the Sewer Lab.
- If pursued, the Coded Facility Key has opened the Armory locker and the Rocket Launcher has been collected.
- The Card Key has opened the Factory Hallway shutter toward the Communications Tower.
- The Portable Radar Receiver, Communications Tower event, missile countdown and final Power Plant confrontation remain for the next chapter.
References for this chapter
- Resident Evil 3: Nemesis — Guide and Walkthrough — PlayStation, GameFAQs
- Resident Evil 3: Nemesis — Guide and Walkthrough — PlayStation — By HLaPierre
- Resident Evil 3: Nemesis — Guide and Walkthrough, GameFAQs
- Resident Evil 3: Nemesis (1999) — 100% Guide, All Choices & Puzzle Solutions
- Resident Evil 3 - Nemesis (USA) Manual
Final Facility Puzzles — Control Room and Shutdown
After defeating the transformed Nemesis in the Dead Factory’s treatment area, Jill takes the Card Key and opens the shutter leading to the Communications Tower. The bridge choice now determines the late-factory scenes. Push Him Off uses the upper factory route: Nicholai’s required scene occurs at Disposal Access after the Steam Room and Water Sample locks have been released, and no Nicholai helicopter choice appears in the Communications Tower. Carlos later reports that he has found a helicopter at the factory landing zone. Jump Off, or allowing the bridge choice to expire, uses the lower route: Carlos is encountered in the Water Filter Passage, and Nicholai confronts Jill from a helicopter after she collects the Portable Radar Receiver. After the route-specific event, Jill opens the emergency hatch, starts the missile countdown and reaches the Rail Cannon Room. Do not activate a battery in this chapter.
Take the Card Key and open the Communications Tower shutter
Begin this chapter after the transformed Nemesis battle in the treatment or disposal area is complete. Take the Card Key, then leave through the disposal exit and return to the factory’s main circulation route. The Card Key is the item required for the shutter leading to the Communications Tower; do not look for a second card in the tower.
At the shutter in the Entrance Corridor, use the Card Key on the reader. Continue through the narrow passage beyond it. Two Green Herbs may be found along this route; take them only if Jill has room and does not need to discard ammunition or healing supplies.
Before entering the Communications Tower, organize Jill’s inventory at the nearest available box. Carry a weapon with enough ammunition to clear enemies blocking the path and at least one healing item. If Jill intends to use Return Fire during the Jump Off branch, the Rocket Launcher must be in her current inventory. Merely having it stored in an Item Box does not satisfy the condition.
- The transformed Nemesis battle is complete.
- The Card Key was collected.
- The Card Key opened the Communications Tower shutter.
- Jill has a usable weapon and healing item.
- The Rocket Launcher is carried if Return Fire may be used.
Collect the Portable Radar Receiver
Enter the Communications Tower and examine the console near the window. Take the Portable Radar Receiver. This is mandatory progress: it tracks the incoming missile and remains relevant during the final escape.
The next scene depends on the bridge decision made outside the Waste Processing Plant. The Push Him Off route produces Carlos’s radio contact after Jill enters the tower. The Jump Off and expired-choice routes produce Nicholai’s helicopter confrontation when Jill attempts to leave after taking the receiver.
Do not leave the tower before collecting the receiver. Optional ammunition and healing items can be taken if they fit, but the receiver and a practical combat loadout are more important than clearing every pickup.
- The Portable Radar Receiver was collected from the Communications Tower console.
- The receiver remains in Jill’s inventory.
- The bridge choice is identified.
- Jill has enough space and supplies for the route-specific event.
Resolve the Push Him Off route
If Jill selected Push Him Off at the suspension bridge, she entered the Dead Factory on the upper route. That branch requires the Facility Key during the earlier factory progression, followed by the Steam Room procedure, the Water Sample test and use of the System Disc. Complete both the Steam Room and Water Sample locks before attempting to advance through Disposal Access.
After both locks are released, Jill reaches Disposal Access and Nicholai appears there. This is the Push Him Off branch’s required late-factory Nicholai scene. It occurs at Disposal Access, not in Treatment Room Entry and not in the Communications Tower. Nemesis then becomes involved, leading into the transformed Nemesis battle covered before this chapter.
Once the Card Key has been taken, return to the Entrance Corridor, open the Communications Tower shutter and collect the Portable Radar Receiver. No Communications Tower Nicholai Live Selection appears on this branch. Carlos instead contacts Jill by radio and tells her that a helicopter is available at the factory landing zone. Follow the post-call objective rather than waiting for a helicopter choice in the tower.
- Push Him Off was selected at the bridge.
- The Dead Factory upper route was used.
- The Steam Room and Water Sample locks were completed.
- Nicholai’s scene occurred at Disposal Access after those locks were released.
- The transformed Nemesis battle was completed and the Card Key was collected.
- The Communications Tower was opened and the Portable Radar Receiver was taken.
- No Communications Tower Nicholai choice appeared.
- Carlos reported the factory landing-zone helicopter.
Resolve the Jump Off or expired-choice route
If Jill selected Jump Off, or allowed the bridge choice to expire, she entered the Dead Factory through the lower route. Carlos appears in the Water Filter Passage during this branch. Complete the lower-route objectives, return to the upper factory areas as required, defeat the transformed Nemesis and take the Card Key.
Use the Card Key at the Entrance Corridor shutter and enter the Communications Tower. Take the Portable Radar Receiver from the console, then attempt to leave the room. Nicholai appears in his helicopter and begins firing through the tower windows. This is the route-specific Live Selection.
Return Fire requires the Rocket Launcher to be in Jill’s current inventory. If she is carrying it, choose Return Fire and fire when control returns. If the launcher is unavailable, choose Negotiate; Nicholai leaves and the story continues. Do not assume that a launcher in the Item Box can be retrieved during the selection.
If no selection is made, Jill remains exposed to the helicopter attack. Survive the incoming fire and continue once the scene ends. The timeout is harmful but does not create a route block.
- Jump Off was selected, or the bridge choice expired.
- Carlos appeared in the Water Filter Passage.
- The Card Key opened the Communications Tower shutter.
- The Portable Radar Receiver was collected.
- Nicholai appeared in the helicopter outside the tower.
- Return Fire was used only with the Rocket Launcher in Jill’s inventory.
- Negotiate was selected when the launcher was unavailable, or the timeout scene was survived.
Open the emergency hatch and start the missile countdown
After the Push Him Off radio event or the Jump Off-route helicopter event ends, examine the floor hatch in the Communications Tower. Carlos’s follow-up scene occurs around this sequence. When control returns to Jill, inspect the hatch again if necessary and use the ladder to descend.
The missile warning begins after the hatch sequence, and the Portable Radar Receiver displays the approaching missile. From this point onward, prioritize movement toward the escape route. Take nearby healing or ammunition only if doing so does not delay Jill or overfill the inventory.
The hatch is mandatory progress. The earlier Nicholai scene, the receiver pickup and Carlos’s follow-up must be complete before the game permits the final descent sequence.
- The route-specific event has ended.
- Carlos’s follow-up scene has finished where applicable.
- The floor hatch was examined and opened.
- The missile warning played.
- The countdown is active.
- Jill descended through the hatch.
Cross the lower escape route and stop at the Rail Cannon Room
Continue through the lower factory escape route. In the room below the tower, use the Item Box if necessary, then pass through the rear exit and continue toward the Scrap Passage. The Classified Photo File is optional and is not required to finish the campaign.
Enter the Waste Incinerator or Rail Cannon approach and continue until Jill reaches the Rail Cannon Room. Enemies in the lower route can often be bypassed, so do not spend valuable ammunition on bodies or monsters that are not blocking the exit.
Stop when Jill reaches the Rail Cannon Room and the three numbered batteries are visible. Do not push Battery 1, Battery 2 or Battery 3. Do not activate the rail cannon, trigger the final Nemesis form or resolve the final Live Selection here.
The next chapter begins with battery activation and the final Nemesis confrontation. Leaving all three batteries in their original positions confirms that this chapter’s objective is complete.
- Jill crossed the lower escape route.
- Jill reached the Scrap Passage and the Rail Cannon approach.
- Jill entered the Rail Cannon Room.
- All three batteries remain unmoved.
- The rail cannon has not been activated.
- The final Nemesis battle has not begun.
Before you move on
- Jill defeated the transformed Nemesis and collected the Card Key.
- The Card Key opened the shutter leading to the Communications Tower.
- The Portable Radar Receiver was collected and retained.
- On Push Him Off, the Steam Room and Water Sample locks were complete before Nicholai appeared at Disposal Access.
- On Push Him Off, no Communications Tower Nicholai choice appeared and Carlos reported the factory landing-zone helicopter.
- On Jump Off or the expired choice, Carlos appeared in the Water Filter Passage and Nicholai’s helicopter appeared in the Communications Tower.
- Return Fire was used only when the Rocket Launcher was in Jill’s current inventory, or Negotiate was selected when it was unavailable.
- The route-specific radio or helicopter event ended.
- Jill examined and opened the emergency hatch.
- The missile warning played and the countdown became active.
- Jill descended through the hatch and crossed the lower escape route.
- Jill reached the Rail Cannon Room.
- All three batteries remain in their original positions.
- The final Nemesis battle has not begun.
Final Nemesis Showdown — Options and Execution
After the missile countdown begins, Jill travels through the Rear Exit Room, Scrap Passage and Waste Incinerator to reach the Power Plant in the abandoned Waste Processing Plant. She must activate the Sword of Paracelsus, push the three batteries into their chambers in numerical order, and use the Rail Cannon to defeat final-form Nemesis. The first automatic discharge clears the central machinery and opens the firing lane. Two further direct Rail Cannon hits are required to defeat Nemesis. Jill then resolves the final Live Selection, takes the maintenance elevator and completes the escape to the ending and credits.
Prepare before starting the Power Plant battle
This chapter begins after Jill examines the floor hatch in the Control Tower, starts the missile countdown and travels through the Emergency Tunnel route. Continue through the Rear Exit Room, Scrap Passage and Waste Incinerator. In the Rear Exit Room, use the item box if you need to reorganize before entering the final chamber. Carry several healing items and leave at least one inventory slot open.
A Magnum, Grenade Launcher or Rocket Launcher is useful for staggering final-form Nemesis and creating room to reach the batteries, but these weapons are support tools only. They do not replace the Rail Cannon as the required method for defeating this form. Keep enough healing available for the battery-loading sequence and the short escape after the fight.
If you are trying for a strong rank, make your last safe save before beginning the final procedure. Pushing Battery 1 triggers the final-form encounter, so treat that action as the practical point of no return for preparation.
- Reach the Power Plant after starting the missile countdown.
- Use the Rear Exit Room item box before entering if necessary.
- Carry healing items and leave an open inventory slot.
- Bring a high-damage weapon if available, but reserve ammunition for staggering and space-making.
- Save before pushing Battery 1 if you are protecting a high-rank attempt.
Activate the Rail Cannon system
Enter the large Power Plant chamber and examine the computer terminal beside the Rail Cannon, also identified as the Sword of Paracelsus. The terminal reports that the weapon lacks sufficient power. Examining it activates the battery-loading system and makes the three battery mechanisms usable.
The batteries are large cartridges positioned around the room. They are not inventory items and are not activated by simply examining them. Jill must stand beside each cartridge and push it physically into the matching chamber.
The required order is Battery 1, Battery 2 and Battery 3. Battery 1 is near the entrance, Battery 2 is across the chamber, and Battery 3 is beside the Rail Cannon. Do not attempt to load them out of order.
- Examine the terminal beside the Rail Cannon.
- Activate the battery-loading system.
- Identify the three numbered battery cartridges.
- Push Battery 1, then Battery 2, then Battery 3.
- Confirm each battery is fully inside its chamber.
Trigger the mutation and create room to move
Push Battery 1 completely into its chamber. The damaged Nemesis enters, consumes the Tyrant remains in the room and mutates into his final form. Control returns to Jill after the scene.
Final-form Nemesis moves slowly but has wide-reaching attacks, including tentacle strikes and acid attacks that can cover space in front of him. Keep moving around the outside of the chamber and avoid stopping beside the walls, the Rail Cannon or the ends of the central machinery.
You can fire a powerful weapon to stagger him when he blocks a battery route. The goal is to open a path, not to defeat him with conventional ammunition. After Nemesis is staggered, move immediately toward Battery 2. If he recovers before you reach it, circle around the room rather than trying to pass directly through his attack range.
- Push Battery 1 fully into place.
- Allow the mutation scene to finish.
- Stay mobile around the outer edge of the chamber.
- Use heavy weapons only to stagger Nemesis or create a route to the next battery.
- Avoid being pinned against machinery or walls.
Load Batteries 2 and 3
Reach Battery 2 and push it into its chamber. Keep moving while the animation finishes, because Nemesis can close the distance as Jill works. If he approaches, retreat around the chamber and return when there is a clear opening.
Next, move to Battery 3 beside the Rail Cannon and push it into place. Battery 3 must be loaded after Batteries 1 and 2. Once all three batteries are connected, the Rail Cannon begins charging and will fire automatically at intervals.
Do not waste time searching the room once Battery 3 is loaded. Keep Jill away from the Rail Cannon’s firing line and concentrate on positioning Nemesis. If ammunition is limited, movement and healing are more important than repeated attacks. A Magnum round, explosive round or Rocket Launcher shot can buy time when Nemesis cuts off the route, but do not use attacks continuously.
- Push Battery 2 after Battery 1.
- Retreat and circle if Nemesis blocks the battery.
- Push Battery 3 after Battery 2.
- Confirm that the Rail Cannon begins charging.
- Keep Jill out of the cannon’s firing path.
Use the Rail Cannon to defeat Nemesis
The first automatic Rail Cannon shot clears the large central machinery from the firing lane. This discharge opens the straight path through the chamber; it is not one of the two direct hits required to defeat final-form Nemesis.
After the machinery is cleared, run around the outer perimeter so Nemesis follows Jill. Cross the room only when needed to place him in the newly opened firing lane. The cannon fires automatically, so Jill does not manually aim or fire it. Keep her outside the line of fire when the discharge occurs.
Two direct Rail Cannon hits are required to defeat final-form Nemesis. The first direct hit damages him, and the second direct hit finishes the encounter. Conventional weapon damage does not reduce this required count. Continue circling and repositioning Nemesis until both direct shots connect.
Do not stand at the end of the firing lane waiting for him. That gives Nemesis a chance to trap Jill with a tentacle or acid attack. Keep moving, use a heavy weapon only when necessary to create distance, and wait until the second direct Rail Cannon hit has destroyed him before heading for the rear exit.
- Allow the first automatic shot to clear the central machinery.
- Use the cleared path as the Rail Cannon firing lane.
- Lure Nemesis into the lane instead of standing in front of the cannon.
- Remain outside the cannon’s line of fire.
- Allow two direct Rail Cannon hits to connect.
- Do not leave until the second direct hit has defeated Nemesis.
Resolve the final Live Selection
After the Rail Cannon sequence, go to the rear exit and attempt to open the door. A surviving piece of Nemesis crawls toward Jill, triggering the final Live Selection. The choices are Exterminate the Monster and Ignore it and evacuate.
Choose Exterminate the Monster if you want Jill to finish the creature directly. She avoids its acid attack, finds a fully loaded Magnum on the floor and automatically empties it into Nemesis. You do not need to carry Magnum ammunition for this scene. The missile countdown continues while the scene plays, so do not spend unnecessary time after control returns.
Choose Ignore it and evacuate when the missile is close to reaching the city or when you prefer the quickest exit. Jill leaves through the rear door without performing the additional finishing scene. If the selection expires, Nemesis lands one final acid attack, poisoning Jill before it dies. The campaign can still continue, but this outcome costs health and should not be chosen deliberately.
- Attempt to open the rear exit after Nemesis is destroyed.
- Choose Exterminate the Monster or Ignore it and evacuate.
- Remember that Exterminate supplies the Magnum automatically.
- Choose promptly because the missile timer continues.
- Avoid allowing the selection to expire.
Take the elevator and finish the campaign
After the final Live Selection resolves, go through the rear door and operate the maintenance elevator. The elevator carries Jill to the Scrap Site, where the final rescue and escape scenes occur. Defeating final-form Nemesis is not the completion check by itself; Jill must leave the Power Plant and complete the ending sequence.
Continue through the Scrap Site escape and allow the game to reach the credits. When the game offers the completed-game save, save it to an available memory-card slot. Preserve this clear-data file if you want the post-completion features and replay rewards to register.
A save made before the elevator escape is not a completed campaign file. Verify that the ending has played through the credits and that the clear-data save has been created before switching off the PlayStation.
- Leave the Rail Cannon room through the rear door.
- Operate the maintenance elevator.
- Complete the Scrap Site escape.
- Allow the ending and credits to finish.
- Save and retain the completed-game data.
Before you move on
- Jill entered the Power Plant after the missile countdown began.
- The Rail Cannon terminal was examined.
- The battery-loading system was activated.
- Battery 1 was pushed into its chamber first.
- Final-form Nemesis appeared.
- Jill reached Battery 2 without being trapped.
- Battery 2 was pushed into place after Battery 1.
- Battery 3 was pushed into place after Battery 2.
- The Rail Cannon charged and fired automatically.
- The first shot cleared the central machinery and opened the firing lane.
- Nemesis was positioned in the opened firing lane.
- The first direct Rail Cannon hit connected.
- The second direct Rail Cannon hit defeated final-form Nemesis.
- The final Live Selection was resolved.
- Jill left through the rear exit and operated the maintenance elevator.
- The Scrap Site escape and ending completed.
- The credits played.
- The completed-game data was saved.
After the Credits — Unlocks, Rank and Epilogue Notes
Save the completed North American PlayStation campaign as clear or Next Game data, then use that continuing file to access The Mercenaries, the Boutique Key, Jill’s five alternate costumes and the successive epilogue files. The Boutique Key and Mercenaries are available after the first completed campaign. Costume availability is cumulative: stronger campaign grades unlock more outfits, but the exact costume-to-rank assignment is inconsistently documented and should not be treated as a universal fixed table. The eight epilogues are tracked through repeated completions on the same continuing data, with repeated Hard clears serving as the dependable PlayStation method.
Save the completed campaign and preserve the clear data
After the final escape, allow the ending and credits to finish until the completion and ranking screens appear. On Hard mode, the game displays the clear time, number of saves, total health recovered and final grade. Easy mode does not use the same displayed A-through-F ranking process, so do not apply the Hard ranking chart to an Easy result.
When the game offers the completion save or Next Game save, record it on a separate memory-card slot if possible. Keep an unfinished campaign file in another slot so a completed file cannot erase the run you may still want to revisit. The completed data is the file that carries the post-completion options into later campaigns.
Load the completed data from the load screen rather than starting an unrelated New Game. Confirm that the replay menu contains the continuing campaign choices and The Mercenaries. Use this same completed-data block for later campaign clears if you want to build the epilogue sequence.
- Reach the completion and ranking screens.
- Record time, saves, health recovered and grade on a Hard clear.
- Save the completion or Next Game data.
- Keep an unfinished campaign save in another slot.
- Reload the completed data and verify the replay options.
Open The Mercenaries — Operation Mad Jackal
The Mercenaries becomes available after completing the main game once on the original PlayStation release. Select it from the completed-data options. It is a separate U.B.C.S. scenario rather than a chapter inside Jill’s campaign, so it is not required for the story ending.
Mercenaries places a character on the city route with a countdown. Defeating enemies and rescuing civilians extends the available time, while the selectable characters begin with different weapons and supplies. The mode awards money according to performance, and its bounty rewards can provide optional weapons or ammunition for later main-game replays.
You may complete Mercenaries before beginning another story run, but do not overwrite the only clear-data file while experimenting. Reload the saved completion data whenever you need to return to the campaign or verify an unlock.
- Open The Mercenaries from the completed data.
- Choose a U.B.C.S. character and begin the warehouse-bound scenario.
- Extend the timer through enemy defeats and civilian rescues.
- Treat Mercenaries rewards as optional replay assistance.
- Preserve the clear-data save.
Take the Boutique Key and reach the Uptown boutique
Begin a replay from the completed-data option. At the warehouse, check Jill’s Item Box in the warehouse office and take the Boutique Key. The key is added after a completed campaign; it is not a required story item during the first run.
Carry the key to the Uptown area. The boutique is on Boutique Street beside the front entrance of Bar Jack. Use the key on the locked boutique door to enter the dressing room area. Available costumes can be selected there before Jill leaves the accessible Uptown route for good.
The boutique is optional and has no effect on the required route through the Police Station, Clock Tower, Disused Plant or Dead Factory. If the key is absent, first confirm that you loaded the completion or Next Game data and did not choose an unrelated New Game. The Boutique and Boutique Key are features associated with the original PlayStation version and should not be confused with the costume menus used by other ports.
- Start a replay from the completed data.
- Check the warehouse office Item Box.
- Take the Boutique Key.
- Use it at the Uptown boutique beside Bar Jack.
- Inspect the available costume stalls.
Unlock the five costumes through cumulative grades
The original PlayStation version contains five alternate Jill costumes in the boutique: the Biker, Resident Evil 1, Disco, Police and Regina outfits. The supported behavior is cumulative rather than a dependable one-clear-per-costume table. A completed campaign opens the post-game system, and better final grades make more costumes available on the continuing data.
Do not promise that a particular named costume always comes from one specific Easy grade, one specific Hard grade or one specific number of clears. Published PlayStation references disagree about the exact costume-to-rank mapping and sometimes mix PlayStation information with other versions. The safe instruction is to complete and save campaigns, then inspect the boutique after each qualifying result. The game’s own cumulative unlock behavior determines which stalls are open.
If your goal is simply to use the boutique, complete the campaign once and save the result. If your goal is all five outfits, continue producing stronger grades and check the boutique after each saved clear. Keep the completion files on the same continuing data when possible, and do not assume that one named outfit must be earned before another unless the game shows that result.
- Confirm the five available PlayStation costumes in the boutique.
- Use completed campaigns to build cumulative costume progress.
- Aim for better grades rather than separate fixed costume conditions.
- Inspect the boutique after saving each qualifying clear.
- Do not rely on conflicting named costume tables.
Improve the Hard-mode grade using the verified scoring categories
The Hard-mode grade uses three scoring categories: total play time, number of saves and total health recovered with healing items. Each category contributes points toward a combined score, and an A rank requires at least 270 total points. The ranking screen is the authority for the result shown on your particular clear.
For a strong attempt, follow the required route directly, run past enemies that do not block progress, avoid unnecessary detours and limit optional Nemesis fights when their reward is not worth the time or damage risk. Save deliberately rather than refusing every save. A death that forces a long replay can cost more time and resources than one carefully chosen save.
The commonly documented maximum targets are a completion time of 2:29:59 or less, zero saves and no more than 1,500 health points recovered. These are useful perfect-score targets, not three mandatory conditions for every A rank. A weaker result in one category can be offset by stronger results in the others as long as the combined score reaches the A threshold. Preserve healing for the Clock Tower, Dead Factory and final Nemesis encounters instead of damaging the run merely to protect an ideal statistic.
- Play on Hard for a letter-grade attempt.
- Track time, saves and total health recovered.
- Use 270 combined points as the A-rank threshold.
- Treat 2:29:59, zero saves and 1,500 HP recovered as perfect-score targets, not universal requirements.
- Protect the final-run resources needed for mandatory encounters.
Build the eight epilogues on one continuing data block
The epilogues unlock through successive campaign completions on the same continuing data. Their order is Jill Valentine, Chris Redfield, Barry Burton, Leon S. Kennedy, Claire Redfield, Sherry Birkin, Ada Wong and Hunk.
For the dependable original PlayStation method, complete the campaign repeatedly on Hard and save each result to the same clear-data block. The documented PlayStation references describe a new epilogue becoming available after each Hard completion on that continuing data. This method avoids relying on uncertain cross-version interpretations of difficulty requirements.
After every completion, reload the continuing data and check the epilogue option before beginning the next run. Keep a written tally so the seventh clear is checked for Ada’s file and the eighth for Hunk’s. Do not create separate unrelated New Game files if the purpose is to advance the sequence.
The full post-completion check is complete when the menu contains all eight files in order: Jill, Chris, Barry, Leon, Claire, Sherry, Ada and Hunk. The epilogues are separate from the campaign ending and do not change which story route or final Live Selection was used.
- Use one continuing clear-data block.
- Prefer repeated Hard clears as the dependable PlayStation method.
- Track Jill, Chris, Barry, Leon, Claire, Sherry, Ada and Hunk in that order.
- Reload the clear data after every completion.
- Confirm Hunk’s file after the eighth completion.
Before you move on
- A completion or Next Game file is saved after the campaign.
- Loading that data provides the continuing replay options and The Mercenaries.
- The Boutique Key appears in Jill’s warehouse office Item Box on the replay data.
- The Uptown boutique beside Bar Jack opens with the key.
- The boutique contains the five PlayStation alternate costumes as cumulative unlocks.
- Higher campaign grades unlock additional costumes; no disputed fixed costume table is being relied upon.
- A Hard clear displays time, saves, health recovered and a letter grade.
- The ranking attempt uses the verified categories of time, saves and health recovered.
- An A-rank attempt reaches at least 270 combined points.
- The epilogues appear in order: Jill, Chris, Barry, Leon, Claire, Sherry, Ada and Hunk.
- The eighth completion on the same continuing data displays Hunk’s file.
References for this chapter
- Resident Evil 3: Nemesis — Cheats, Codes, and Secrets for PlayStation
- Resident Evil 3: Nemesis — Guide and Walkthrough — PlayStation, GameFAQs
- The Epilogue Files — Resident Evil 3: Nemesis Walkthrough & Guide
- Resident Evil 3: Nemesis — Guide and Walkthrough — PlayStation — By kylohk
- Resident Evil 3: Nemesis — Guide and Walkthrough — PlayStation — By HLaPierre
- Resident Evil 3: Nemesis Versions and PlayStation Features
Optional: Complete Nemesis Reward Sweep
In the original North American PlayStation release of Resident Evil 3: Nemesis, Hard mode contains seven optional Nemesis item-case rewards. Defeat Nemesis during the seven qualifying non-boss encounters and collect the cases in sequence. The fixed reward order is EAGLE Parts A, EAGLE Parts B, First Aid Box, M37 Parts A, M37 Parts B, First Aid Box, then the Assault Rifle on the first Hard-mode playthrough or Infinite Bullets on later Hard-mode playthroughs. The cases are optional and are not needed to reach the ending. Easy mode does not provide this Nemesis reward chain. Several opportunities depend on Live Selection choices or route conditions, so a reward log is more reliable than counting every Nemesis appearance. The Cable Car Rear Carriage encounter, the mandatory Clock Tower courtyard battle, transformed Nemesis encounters and final-facility battles do not advance the seven-case sequence.
Prepare the reward run
Select Hard mode before starting. Nemesis item cases are a bonus for the harder campaign route and are not awarded on Easy mode. Keep a written seven-slot log, but advance it only after a case appears and you collect it. A stagger, forced retreat, scripted explosion or cutscene removal is not enough.
Save before the Police Station, Substation and Clock Tower opportunities when practical. Carry a strong weapon, healing and ammunition appropriate to the area, but leave at least one inventory slot open. Store duplicate ammunition and excess healing in the nearest Item Box. If a fight consumes resources needed for the Clock Tower or Dead Factory, reload the pre-fight save rather than trying to recover through the rest of the campaign.
Dropped cases remain in the room after Jill leaves, so you do not have to pick one up immediately if your inventory is full. Exit through a door, use an Item Box, then return for the case. This is especially useful for the early Police Station and Downtown encounters.
- Start a Hard-mode campaign.
- Record seven empty reward slots.
- Save before difficult qualifying encounters.
- Leave one inventory slot open or plan a return trip.
- Confirm a visible case before advancing the log.
Use the fixed reward order
The item inside a case depends on the number of qualifying cases already collected, not on the room where Nemesis falls. The first case contains EAGLE Parts A. The second contains EAGLE Parts B. The third contains a First Aid Box. The fourth contains M37 Parts A. The fifth contains M37 Parts B. The sixth contains a First Aid Box. The seventh contains the Assault Rifle on the first playthrough or Infinite Bullets on later playthroughs.
Combine EAGLE Parts A and B into the EAGLE 6.0 when you have safe inventory space. Combine M37 Parts A and B into the Western Custom when convenient. Both weapons are optional, so do not force a fight or waste critical ammunition merely to combine the parts immediately.
- Reward 1: EAGLE Parts A.
- Reward 2: EAGLE Parts B.
- Reward 3: First Aid Box.
- Reward 4: M37 Parts A.
- Reward 5: M37 Parts B.
- Reward 6: First Aid Box.
- Reward 7: Assault Rifle on the first playthrough or Infinite Bullets on later playthroughs.
Claim rewards one and two at the Police Station
At the RPD Courtyard, choose Fight with the Monster or Do Nothing if you want the first case. Defeat Nemesis before entering the Police Station. Keep moving around the courtyard, avoid standing directly in front of the rocket launcher and use the open space to create firing distance. When Nemesis falls, collect reward one, EAGLE Parts A. Entering the station immediately skips this qualifying opportunity.
After obtaining the Lockpick and progressing through the station, return through West Stairway 1F. Nemesis appears near the stairway. Defeat him and collect reward two, EAGLE Parts B. Use the nearby doors and stair landing as escape points if Jill becomes trapped, but do not mistake a brief stagger or pursuit interruption for a completed reward. The case must appear.
- RPD Courtyard: collect EAGLE Parts A.
- West Stairway 1F after obtaining the Lockpick: collect EAGLE Parts B.
- Do not count ordinary Police Station encounters.
- Use a previous save if a case fails to appear.
Claim reward three at the Restaurant or Newspaper Office
The third qualifying location depends on where Jill meets Carlos. If the meeting occurs in the Restaurant, the reward encounter is there. If the meeting occurs in the Newspaper Office, that building contains the corresponding opportunity instead. These are alternative locations for one reward slot, not two separate cases.
At the Restaurant, hiding in the kitchen can knock Nemesis down through the gas explosion; collect the case before leaving if it appears. At the Newspaper Office, hiding in the office can produce the equivalent encounter. If the scripted event only removes or staggers Nemesis and no case appears, continue through the route and watch for the qualifying follow-up encounter. Collect reward three, the First Aid Box, only when the case is visible.
- Restaurant or Newspaper Office, depending on the Carlos route: collect the First Aid Box.
- Count only one of these locations.
- Do not count a scripted explosion or escape without a case.
- Leave through a door and return later if inventory space is unavailable.
Claim reward four at Substation Control or Blazing Alley
The fourth qualifying reward is at Substation Control after the appropriate Live Selection, or at Blazing Alley after Jill has obtained the Oil Additive. These are alternative locations for one reward slot. Do not attempt to count both locations on the same run.
At Substation Control, use the room's exits and stair access to avoid being pinned while attacking. At Blazing Alley, keep moving along the open section and retreat toward a door when Nemesis closes the distance. Defeat him at the active qualifying location and collect reward four, M37 Parts A.
The route condition determines which opportunity is active. Follow the location produced by the Substation choice and the timing of the Oil Additive rather than revisiting both areas in search of a second case. Preserve enough shotgun, grenade or Magnum ammunition for the Clock Tower and mandatory later fights.
- Substation Control or Blazing Alley: collect M37 Parts A.
- Count only the active route-specific location.
- Do not use the old Forked Alley label for this reward slot.
- Retreat through a door after the case appears if Jill is injured.
Claim reward five at Statue Junction
After obtaining all four cable-car parts, return through Downtown before boarding the Cable Car. The fifth qualifying encounter occurs at Statue Junction. The prerequisite matters: an earlier Nemesis pursuit in the same Downtown section is not automatically reward slot five.
Defeat Nemesis at Statue Junction and collect reward five, M37 Parts B. If Jill has low health or no inventory space, leave the case in the room, reach the nearest safe area, heal and reorganize, then return. The case persists. Combine the M37 parts only after confirming that the route is safe and that the Western Custom will not displace ammunition or key items.
- Obtain all four cable-car parts first.
- Statue Junction: collect M37 Parts B.
- Do not count an earlier Downtown pursuit.
- Use the case's persistence to solve inventory problems.
Claim reward six at the Clock Tower Spotlight Balcony
At the Spotlight Balcony, the Live Selection provides the qualifying opportunity. Choose Use the Cord or Do Nothing, then defeat Nemesis and collect reward six, the second First Aid Box. Use the balcony's space to keep distance and avoid being cornered at the exit.
Choosing Use the Light causes Nemesis to fall without producing this reward case, so that choice completes the story route but skips the sixth item-case opportunity. The Cable Car Rear Carriage encounter is also excluded: Nemesis's appearance there is scripted, produces no case and does not advance the reward counter.
- Spotlight Balcony: choose Use the Cord or Do Nothing for the reward opportunity.
- Collect the second First Aid Box.
- Do not count Use the Light as a reward defeat.
- Do not count the Cable Car Rear Carriage.
Claim reward seven in the Ballroom after Carlos cures Jill
After the Clock Tower courtyard sequence, Jill is infected and control changes to Carlos. Once Carlos obtains the vaccine and cures Jill, control returns to Jill at the start of the next chapter. Enter the Ballroom and prepare for the transformed Nemesis encounter. This is the seventh and final qualifying reward location; it is not a Piano Room, Main Hall or Chapel-area requirement.
Defeat Nemesis in the Ballroom and collect the final case. On the first Hard-mode playthrough it contains the Assault Rifle. On later Hard-mode playthroughs it contains Infinite Bullets. Use evasion if ammunition is limited, but keep enough damage available to make the fight safe. The final case is optional and is separate from the mandatory Clock Tower courtyard battle before Jill is cured.
Do not count the Cable Car Rear Carriage, Clock Tower courtyard, B.O.W. Disposal, transformed Dead Factory encounters or final Power Plant battles toward the seven-case log. Carlos-controlled Nemesis encounters also do not advance Jill's reward sequence.
- Carlos must cure Jill first.
- Ballroom after control returns to Jill: collect the seventh case.
- First Hard-mode playthrough: verify the Assault Rifle.
- Later Hard-mode playthrough: verify Infinite Bullets.
- Do not substitute another Clock Tower room for the Ballroom encounter.
Before you move on
- The reward log contains seven collected cases in the correct order.
- Case one was collected at the RPD Courtyard and contained EAGLE Parts A.
- Case two was collected at West Stairway 1F after obtaining the Lockpick and contained EAGLE Parts B.
- Case three was collected at the Restaurant or Newspaper Office and contained a First Aid Box.
- Case four was collected at Substation Control or Blazing Alley and contained M37 Parts A.
- Case five was collected at Statue Junction after all four cable-car parts were obtained and contained M37 Parts B.
- Case six was collected at the Clock Tower Spotlight Balcony and contained a First Aid Box.
- Case seven was collected in the Ballroom after Carlos cured Jill and contained the Assault Rifle on the first Hard-mode playthrough or Infinite Bullets on a later Hard-mode playthrough.
- The Cable Car Rear Carriage encounter was not counted.
- The mandatory Clock Tower courtyard battle was not counted.
- Any case left temporarily for inventory reasons was retrieved before leaving the reward route permanently.
- EAGLE Parts A and B were combined into the EAGLE 6.0 or stored together.
- M37 Parts A and B were combined into the Western Custom or stored together.
- The optional sweep remains separate from mandatory campaign completion.
References for this chapter
- Resident Evil 3: Nemesis — Guide and Walkthrough — PlayStation, GameFAQs
- Resident Evil 3: Nemesis - Guide and Walkthrough - PlayStation - By Stinger_316
- Resident Evil 3: Nemesis - Weapons/Ammo FAQ - PlayStation - By KTeoh
- Infinite Bullets (Resident Evil 3: Nemesis) - Evil Resource
- Resident Evil 3 - Nemesis (USA) Manual
Troubleshooting and Recovery — Recovering from Failed Encounters
A damaged Resident Evil 3: Nemesis PlayStation run is usually recoverable if you separate mandatory progress from optional rewards. Break pursuit through a loading door, return to a confirmed save-room route, use the linked Item Box to rebuild Jill’s inventory, and reload an earlier typewriter save when the next required fight can no longer be supplied. Do not repeat a failed Nemesis encounter unchanged: alter the route, weapon choice, timing or decision to fight.
Stabilize the run before making another attempt
When Jill reaches Caution or Danger, loses a weapon, or fills her inventory with optional items, stop advancing through unexplored rooms. Use the nearest loading door to break contact, then follow the known route to a room containing a typewriter and Item Box. Early examples include the Warehouse Office, the Police Station save room, the Parking Garage save room and the Clock Tower Chapel save room. Later recovery hubs include the Hospital save room and the Dead Factory save rooms.
Do not open the inventory in front of an active enemy or assume that every room containing a typewriter is safe during a scripted pursuit. First reach a room in which Jill has control and the immediate attack has ended. Then save if the position is worth preserving, and reorganize through the Item Box. The game’s Item Boxes are linked, so ammunition or healing placed in one can be retrieved from another later.
For an ordinary completion, carry the key item needed for the next objective, one dependable weapon, its ammunition and healing if available. Store optional Gunpowder, spare weapon parts, surplus ammunition and Nemesis reward cases until there is room to collect them safely. Do not discard a required key item merely to pick up a temporary resource.
- Break pursuit through a loading door before reorganizing.
- Use a typewriter and Item Box only after Jill has regained control.
- Keep the current objective item, a usable weapon and enough ammunition for enemies that block the route.
- Save to a new file when possible instead of destroying the last recoverable position.
Recover after wasting heavy ammunition on Nemesis
First determine whether the encounter was mandatory. The original game contains both required Nemesis confrontations and optional opportunities that produce item cases. If the fight occurred in an open route and Jill can continue through a door or around the arena, do not spend the rest of the campaign trying to recover an optional case. Nemesis cases remain on the floor after Jill leaves and returns, so an uncollected case can be postponed while inventory space is restored.
If the case is important to your planned run, return from the nearest save room with a controlled loadout rather than immediately repeating the fight. Use the widest available part of the room, keep Jill moving around the perimeter, and leave through the next loading door if the encounter is not required. If the encounter is mandatory, reserve the strongest remaining weapon for that fight and use ordinary ammunition on isolated zombies elsewhere. Do not compensate for lost Grenade Launcher or Magnum ammunition by wasting handgun rounds on enemies that can be bypassed.
The Nemesis reward sequence is based on successful non-boss knockdowns in Heavy mode. The documented order is Eagle Parts A, Eagle Parts B, First Aid Box, M37 Parts A, M37 Parts B, First Aid Box, then the first-playthrough Assault Rifle or the later-playthrough Infinite Bullets reward. Missing an earlier case does not make the next case contain that earlier reward; the reward sequence advances when a qualifying case is obtained. Pursue optional knockdowns only when the ammunition cost will not compromise a required boss.
- Decide whether the dropped case is optional before spending more ammunition.
- Leave a persistent case on the floor if inventory space is the immediate problem.
- Protect ammunition for the next unavoidable boss or facility encounter.
- Track the next expected Nemesis reward instead of assuming a missed reward will be repeated.
Backtrack for a missed key item without creating a second crisis
Before retracing the route, check Jill’s inventory, the Item Box and the current map. A required item may already be stored in a box, may be inside a locker or safe, or may be in a room reached by a short loop rather than at the end of the entire area. The Police Station’s randomized safe code is an example of information that must be recorded when obtained; if it was forgotten, return to the computer and check the S.T.A.R.S. Card procedure before attempting the locker.
Build the return trip around the nearest known save room. Take the relevant key or tool, a weapon appropriate to the enemies on that loop and healing if the route is dangerous. Leave optional pickups behind until the required item is in hand. If Nemesis reappears, use corners, room transitions and open lanes to create distance. Do not stop to reclaim an optional item while carrying the mandatory key.
After recovering the item, return to the Item Box rather than carrying unrelated resources into the next objective. Save again before using the key at a major door, beginning a Carlos interlude, entering the Hospital sequence or triggering a late facility transition. If the recovered item does not work, inspect it and confirm that the game is asking for the correct key, crank, fuse, card, disc or vaccine component; do not discard it until the destination is confirmed.
- Check every relevant Item Box before beginning a long backtrack.
- Carry the mandatory item and route-specific supplies only.
- Avoid optional pickups until the required item is secured.
- Save after the successful return, not merely after reaching the item.
Choose between continuing, reloading or restarting
Continue a normal completion when Jill still has a functional weapon, enough ammunition to pass the next required room and a route to a save room. Resident Evil 3 can be completed with a poor rank, so a slow recovery is preferable to abandoning a run that remains mechanically viable.
Reload an earlier typewriter save when the last practical healing has been used, the ammunition reserved for the next mandatory Nemesis battle is gone, a required item was discarded before its destination was known, or a mistake has caused a long and dangerous backtrack. On real PlayStation hardware, saving requires an Ink Ribbon and a Memory Card, so maintain separate saves before major choices when ribbons allow it.
For a rank-focused attempt, reload before a costly mistake instead of accepting it. The original ranking system considers completion time, number of saves and total health restored with recovery items. A First Aid Spray is not an automatic separate ranking penalty; its effect is counted through the health it restores. Therefore, avoid unnecessary healing because it raises total health recovered and consumes a useful resource, not because the spray itself is uniquely forbidden. A death, a wasted boss attempt or a long detour is a good point to reload if the previous save is close enough. If the mistake occurred early and the only save is much later, restarting from the title screen may be faster than repairing the run.
- Continue if the next required objective is still adequately supplied.
- Reload when the next mandatory fight has been compromised.
- Keep a pre-boss or pre-transition save for ranking attempts.
- Track total health restored, along with time and saves, when pursuing a high rank.
- Restart only when the recovery route costs more time and resources than replaying from the last sound position.
Make the retry deliberate
Before leaving the save room, state the next objective in concrete terms: retrieve the Facility Key, return the Vaccine, activate the power system, use the System Disc or reach the rail cannon batteries. Decide which enemies block that objective and which can be bypassed. Carry only the supplies needed for that route.
Change one variable on each retry. Use a different approach direction, begin farther from Nemesis, switch between Grenade Launcher and ordinary ammunition, or choose the alternate Live Selection outcome when the route permits it. Repeating the same approach with the same inventory usually reproduces the same failure.
A successful recovery ends when Jill reaches the next stable save room with the required key item used or secured, enough health to survive the following route and a weapon that can handle the next unavoidable encounter. Save at that point, then resume normal progression rather than continuing to collect optional rewards while under-supplied.
- Name the next objective before leaving the save room.
- Clear only enemies that block the route.
- Change the approach after each failed attempt.
- Save once the required item, health and ammunition are stable.
Before you move on
- The missed key item has been recovered from the floor, locker, safe or Item Box and used at its correct destination.
- Any optional Nemesis case has either been collected with its reward recorded or deliberately left behind without compromising mandatory progression.
- Jill has reached the next confirmed save room with a usable weapon, route-appropriate ammunition and healing when available.
- A separate recovery save exists before the next major Nemesis confrontation or facility transition whenever Ink Ribbons permit it.
- For a ranking attempt, the run was reloaded or restarted before the avoidable mistake rather than carried forward without a deliberate reason.
- The next objective can be completed without spending ammunition reserved for the following mandatory encounter.
- For ranking purposes, the player has considered completion time, number of saves and total health restored rather than treating First Aid Spray use as a separate forbidden category.
References for this chapter
Finishing up
Jill has completed the abandoned Waste Processing Plant route, the Control Tower and missile-radar sequence, the final Power Plant battle, and the escape.
The ending presentation and credits have begun or finished.
The clear data has been saved after the campaign, preserving access to the verified post-completion modes and replay rewards.
Optional Boutique, costume, Mercenaries, epilogue, rank, and Nemesis-reward goals are tracked separately from main-campaign completion.
Choose your next gameScreenshots & video
Game imagery for reference. Follow the written chapters above for the route and strategies.
Sources & references
Our original guide draws on the references below. Check the edition at the top of this page before following controls or unlock requirements.
- Resident Evil 3: Nemesis — Guide and Walkthrough — PlayStation, GameFAQs
- Resident Evil 3 - Nemesis (USA) Manual
- Resident Evil 3: Nemesis — Manual — PSX
- Resident Evil 3: Nemesis — Guide and Walkthrough, GameFAQs
- Resident Evil 3: Nemesis — Guide and Walkthrough, PlayStation — Undrtakr
- Resident Evil 3: Nemesis - Guide and Walkthrough - PlayStation - By gasparnt
- Police Station: Contents (Resident Evil 3: Nemesis)
- Resident Evil 3: Nemesis - Guide and Walkthrough - PlayStation - By Stinger_316
- Resident Evil 3: Nemesis — Guide and Walkthrough — PlayStation — By HLaPierre
- Downtown Sub Station - Resident Evil 3: Nemesis
- Resident Evil 3: Nemesis (1999) — 100% Guide, All Choices & Puzzle Solutions
- Game Instructions A - Resident Evil 3: Nemesis
- Resident Evil 3 - Nemesis - NTSC-U PlayStation Database Entry
- Downtown Cable Car
- Live selection outcomes (Resident Evil 3: Nemesis)
- Resident Evil 3: Nemesis - Guide and Walkthrough - PlayStation - By AWebCraft
- Resident Evil 3: Nemesis/Clock Tower - StrategyWiki
- Resident Evil 3: Nemesis — Guide and Walkthrough — PlayStation — By kylohk
- Resident Evil 3 PS1: All Choices Explained and Rewards
- Resident Evil 3: Nemesis - Monsters Guide - PlayStation - By ARedfield
- Sword of Paracelsus
- Resident Evil 3: Nemesis — Cheats, Codes, and Secrets for PlayStation
- The Epilogue Files — Resident Evil 3: Nemesis Walkthrough & Guide
- Resident Evil 3: Nemesis Versions and PlayStation Features
- Resident Evil 3: Nemesis - Weapons/Ammo FAQ - PlayStation - By KTeoh
- Infinite Bullets (Resident Evil 3: Nemesis) - Evil Resource
- Resident Evil 3: Nemesis — Beginners Guide — PlayStation, GameFAQs
- Resident Evil 3: Nemesis — Gameplay and Ranking Information
About the game & collecting notes
- Platform
- Sony PlayStation
Practical, step-by-step guidance to complete the original North American PlayStation campaign of Resident Evil 3: Nemesis, from Jill's opening escape through the Clock Tower, Hospital, Raccoon Park, abandoned Waste Processing Plant, Control Tower, missile countdown, final Power Plant confrontation, and credits. Optional Nemesis rewards, Carlos interludes, route choices, and post-completion unlocks are clearly separated from required progress.
Darryl Polo
Darryl Polo loves tinkering with emulation and revisiting retro games. He enjoys exploring how old favorites play on different setups and sharing what he learns along the way. At Joking Joystick, he writes about the games, hardware, and small discoveries that keep the hobby fun.
Our editorial standardsFound a step that needs another look? Help us improve this guide.