
Red Dead Redemption 2 — PlayStation 4 (Standard) Story-Mode Complete Campaign Guide
Complete, step-by-step campaign walkthrough for the PlayStation 4 Standard Edition of Red Dead Redemption 2. This guide takes you from the frozen prologue through all six main chapters and both epilogues to the final ending, with clear objectives, route notes, boss/encounter strategies and post-story completion checks.


Find a copy
Red Dead Redemption 2 PlayStation 4
We may earn a commission if you buy through these links, at no extra cost to you. As an Amazon Associate I earn from qualifying purchases.
Opens retailer search results. Check the model, edition, seller, availability and current price before buying.
Before you begin
This guide covers the original Red Dead Redemption 2 story campaign on PlayStation 4 Standard Edition, from the six Chapter 1 missions in Colter through American Venom in Epilogue Part 2.
Follow the required missions in each chapter in the displayed order and use the optional-content notes only for side missions, camp activities and trophy planning.
The guide distinguishes required story progress from optional rewards, chapter-limited content and broader Total Completion goals.
Manual saves protect against unwanted progression and missed optional content, but story missions do not delete existing manual saves.
The campaign endpoint is completion of American Venom, the final Epilogue Part 2 story mission, followed by a confirmed post-story save.
Set yourself up for the run
Create separate manual saves before chapter-closing or lockout missions, especially The Sheep and the Goats, The Battle of Shady Belle, Banking, the Old American Art, That’s Murfree Country, Our Best Selves and American Venom.
Keep ordinary ammunition, health cures, Dead Eye tonics, horse medicine and cooked food available before long combat missions.
Clean the weapons you normally use and carry a repeater or rifle plus a close-range weapon; no special weapon or suppressor is required for campaign completion.
Use the in-game mission markers and Progress → Story list to identify the next required mission. Do not assume that every white marker is required.
Finish optional chapter-limited missions, camp requests and companion activities before the stated lockout missions if you want their scenes or trophy progress.
Do not rely on autosaves alone, but do not claim that story missions delete manual saves. Keep protected saves in separate slots.
For trophy or Total Completion goals, use the relevant checklist and do not assume that mission replay repairs every missed campaign-state requirement.
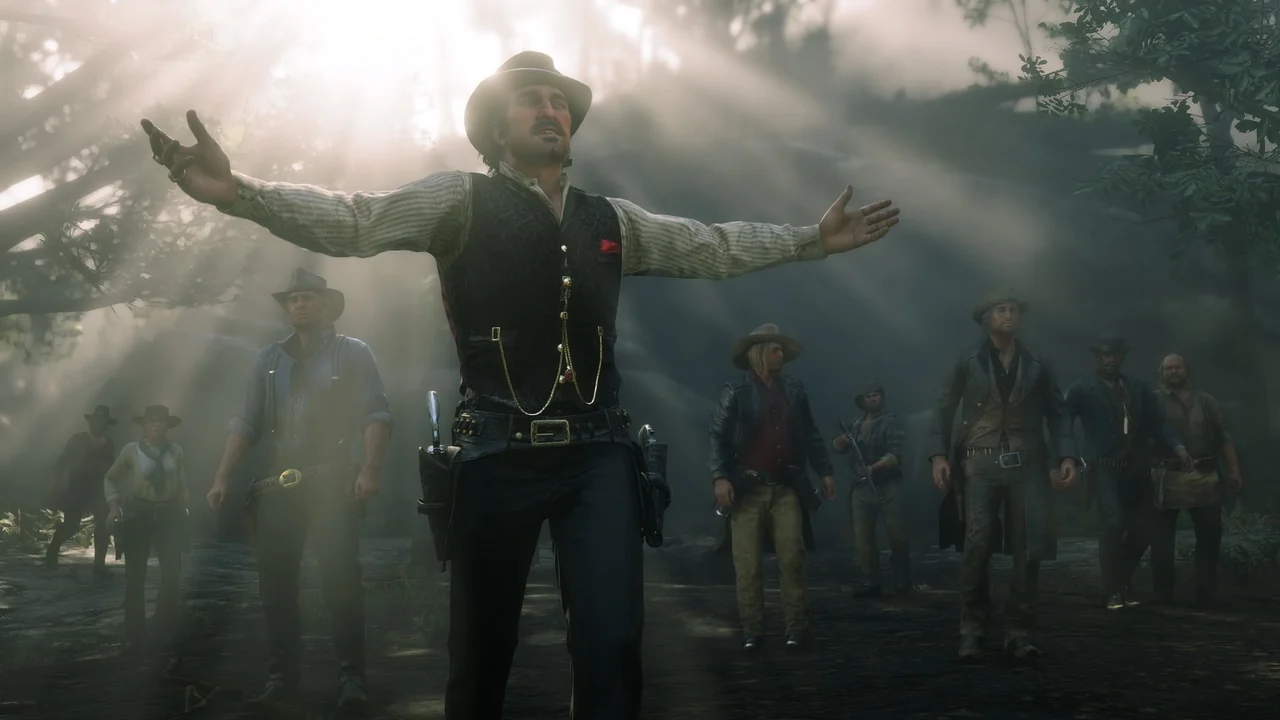
Prologue — Colter: Escape, survival and the first camp move
Colter is Red Dead Redemption 2’s controlled opening sequence. The gang shelters in an abandoned mining town after the failed Blackwater robbery, then Arthur helps Dutch’s group find supplies, rescue John Marston, hunt for food, attack an O’Driscoll camp and rob a train belonging to Leviticus Cornwall. The chapter has six required story missions: Outlaws from the West, Enter, Pursued by a Memory, The Aftermath of Genesis, Old Friends, Who the Hell is Leviticus Cornwall? and Eastward Bound. After John’s rescue, The Aftermath of Genesis and Old Friends can be completed in either order. Colter is intentionally restrictive, so follow the yellow mission markers instead of trying to explore widely. Eastward Bound is the sixth and final mission; when its arrival sequence ends at Horseshoe Overlook, create a manual save before beginning Chapter 2 activities.
1. Complete Outlaws from the West at Adler Ranch
Follow Dutch, Micah and Bill through the snow toward Adler Ranch. Stay with Dutch and follow the on-screen prompts for movement, aiming and cover. On PlayStation 4, L2 aims and R2 fires under the default control layout. During the first exchange, remain behind the marked cover and shoot the O’Driscolls when they expose themselves instead of crossing the open ground.
Follow the fleeing outlaw toward the ranch buildings. Search the house when prompted, then investigate the barn. Arthur must grab and interrogate the O’Driscoll inside. After the confrontation, collect Arthur’s revolver and hat, then approach the Tennessee Walker. Use the calm prompt, pat the horse when instructed and lead it to the hitching post. Return to the house after hearing the noise inside. The resulting scene introduces Sadie Adler and completes the mission.
You do not need to loot every object or pursue a gold medal on this first run. The required objective is to finish the ranch investigation and return to Colter with the rescued survivor and horse.
- Stay with Dutch during the approach.
- Use the shed and nearby barricades as cover.
- Search the house and investigate the barn.
- Interrogate the O’Driscoll, recover Arthur’s gear and lead the horse to the hitching post.
- Return to the house and complete the Sadie Adler scene.
2. Rescue John in Enter, Pursued by a Memory
Speak with Abigail or follow the available mission marker to begin the search for John. Ride with Javier into the mountains and stay on his route along the stream. When the search area appears, use Eagle Eye to identify tracks and follow the highlighted trail. Keep Arthur close to Javier because the snow and steep slopes make improvised shortcuts unreliable.
After reaching John, help bring him down from the mountain. The group is attacked by wolves during the return journey. Keep the shotgun ready and target the nearest wolf first, especially any animal closing on John or Javier. Use Dead Eye for a difficult shot if needed, but do not waste the meter before the wolves appear. Some wolves attack while Arthur is on horseback, so slow down enough to aim accurately rather than firing repeatedly at long range.
Once the wolves retreat, ride back to Colter with John. The mission ends when the rescued gang member is returned to camp. Afterward, the game provides two mission markers for the next assignments.
- Follow Javier’s trail and use Eagle Eye at the search points.
- Reach and free John.
- Defend John and Javier from the wolves on foot and horseback.
- Return John safely to Colter.
3. Complete The Aftermath of Genesis and Old Friends
The two missions available after John’s rescue may be completed in either order. The Aftermath of Genesis sends Arthur out with Charles to hunt deer. Follow the tracks with Eagle Eye, crouch while approaching the animals and wait for a clear shot with the supplied bow or rifle. Skin the deer when prompted, collect the carcass and take it back to camp. This mission teaches tracking, hunting and supplying Pearson.
Old Friends sends Arthur, Dutch and Bill to the O’Driscoll camp at Six Point Cabin. Ride with the group, dismount at the marked position and use the cabin, trees and terrain for cover. Clear the enemies around the camp, advance when the gang moves forward and search the area when the mission directs you to do so. Kieran Duffy is captured during the aftermath. Follow the restraint prompts and bring him back alive; killing him fails the intended objective.
If one marker is not immediately visible, check the camp map and complete the other available mission first. Both missions are required before Who the Hell is Leviticus Cornwall? becomes available.
- Track, kill, skin and return a deer in The Aftermath of Genesis.
- Clear the O’Driscoll camp during Old Friends.
- Capture Kieran Duffy instead of killing him.
- Finish both missions before proceeding to the train robbery.
4. Rob the train in Who the Hell is Leviticus Cornwall?
Speak with Dutch after the hunting and cabin missions are complete. Ride with the gang to the ambush site and take the indicated position. Follow the prompts to place the dynamite equipment, then move onto the train when the assault begins. Advance from car to car with your weapon ready and use cover around the train and nearby rocks.
Dead Eye is useful for exposed guards and for protecting gang members during the train assault, but it is not necessary to activate it continuously. Prioritize enemies who are close to Arthur or threatening Lenny and the other gang members. Reload behind cover, then search the train cars when the mission objective changes. Follow the prompts to open the cargo car and collect the explosives and valuables.
After the train stops, move to the marked escape area and help repel the remaining guards. The mission is complete when the gang leaves with the train cargo and returns to Colter. Gold-medal requirements such as accuracy, headshots or avoiding damage are optional and do not affect story progression.
- Reach the train ambush point with Dutch’s group.
- Place the explosives and board the train when instructed.
- Use cover and protect the gang during the assault.
- Search the cargo car and escape with the gang.
5. Move the gang to Horseshoe Overlook in Eastward Bound
Eastward Bound becomes available after Who the Hell is Leviticus Cornwall? Speak with Dutch at camp to begin the final Colter mission. Follow the caravan and operate the wagon as directed. When a wheel breaks, dismount, pick it up and carry it back to the wagon. Follow the prompts while Hosea and Charles lift the wagon, then return to the driver’s position.
Continue along the marked route toward Horseshoe Overlook. Do not leave the convoy to explore the mountains. The path remains guided, and separating too far from the wagons can fail the mission. Watch for Javier near the approach to the new camp; stop and pick him up when the game provides the prompt. Then drive the wagon into the marked destination and allow the arrival cutscene to finish.
Eastward Bound is the sixth and final required mission of Chapter 1, not an additional seventh mission. Picking up Javier and completing the mission within the medal time limit are gold-medal objectives, not requirements for campaign completion.
- Speak with Dutch to start Eastward Bound.
- Repair the wagon wheel when it breaks.
- Stay with the caravan on the marked route.
- Pick up Javier when prompted.
- Drive the wagon into Horseshoe Overlook and finish the arrival sequence.
6. Save at Horseshoe Overlook and verify the prologue
After the arrival scene ends and control returns to Arthur at Horseshoe Overlook, create a manual save. Open the pause menu, select Story and choose Save Game, then use an unused slot rather than overwriting your only campaign file. This preserves a clean post-Colter starting point for Chapter 2.
To verify progression, open Progress and enter Story. Chapter 1 should be marked complete, with Eastward Bound listed as its final mission. The next available story content should belong to Chapter 2. You may now explore, hunt, visit Valentine, complete camp activities or replay missions for medals. None of those optional activities is needed to finish Colter or continue the main campaign.
If you fail a mission before Eastward Bound, use the retry prompt or reload the latest autosave. A failed mission does not require restarting the chapter. If you want another attempt at a gold medal, replay the completed mission from Progress, then Story, after the chapter is finished.
- Create a manual save after arriving at Horseshoe Overlook.
- Confirm Eastward Bound appears as complete.
- Confirm Chapter 2 is the active story chapter.
- Keep the protected save separate from ordinary campaign saves.
Before you move on
- Outlaws from the West is complete.
- Enter, Pursued by a Memory is complete.
- The Aftermath of Genesis is complete.
- Old Friends is complete.
- Who the Hell is Leviticus Cornwall? is complete.
- Eastward Bound is complete as the sixth and final Chapter 1 mission.
- The gang has arrived at Horseshoe Overlook and Chapter 2 is active.
- A manual save exists after the arrival sequence.
- Progress, then Story, shows Chapter 1 complete. Gold medals, optional conversations, hunting and camp activities are not required for campaign completion.
Chapter 2 — Horseshoe Overlook: Settling in, freedom and core systems
Eastward Bound places the gang at Horseshoe Overlook and opens the first unrestricted section of the campaign. Begin with The Polite Society, Valentine Style, then work through the main Chapter 2 missions involving Javier, Hosea, Sean, Reverend Swanson, Micah, John, Abigail and the oil-wagon robbery. Americans at Rest is a required story mission: meet Javier in Valentine, survive the saloon fight and rescue him from the bounty hunters outside town. Exit Pursued by a Bruised Ego establishes regular horse care and stable use. Strauss’s early Money Lending and Other Sins missions are optional for chapter and campaign progression, but completing the initial debt work unlocks the camp ledger and contributes to the optional Lending a Hand trophy route. Finish The Sheep and the Goats, then complete A Strange Kindness to move the gang to Clemens Point. An American Pastoral Scene can be completed in Chapter 2 or postponed until Chapter 3; camp upgrades, satchel work, hunting, treasure activities, stranger missions and companion requests are optional.
1. Establish Horseshoe Overlook and unlock the first route
Eastward Bound ends when the gang reaches Horseshoe Overlook. Once Arthur is under your control, walk through camp, inspect the map and check the yellow mission markers. The donation box and ledger area are beside Dutch’s tent, while the stew pot and gang tents are in the central camp. Do not spend time trying to explore far into the mountains; the story now expects you to begin using Valentine as the nearby service town.
Start The Polite Society, Valentine Style from Uncle. Ride with the group into Valentine, follow the marked route and keep Arthur’s weapon holstered while moving through town. The mission introduces the town’s shops and social spaces. After it ends, Valentine is available for ammunition, food, medicine, clothing, horse services and general supplies. Buying a map is optional and is not a campaign prerequisite.
After returning to camp, check the map again. Chapter 2 missions can become available in overlapping groups, so do not wait for one rigid order if another named yellow marker is already present. A practical route is to complete Americans at Rest, Exit Pursued by a Bruised Ego and the early Reverend Swanson or Strauss markers as they appear.
- Confirm Horseshoe Overlook is active.
- Complete The Polite Society, Valentine Style.
- Visit Valentine and identify its shops, stable and saloon.
- Remember that purchasing a map is optional.
2. Complete Americans at Rest and the Javier rescue
Go to Valentine and meet Javier Escuella at the saloon marker for Americans at Rest. Enter the saloon with him and follow the confrontation that develops inside. The sequence becomes a fistfight, so use the on-screen prompts to punch, block and grapple rather than drawing a firearm. Keep the fight inside the designated area and focus on the marked opponent.
When Javier is taken outside, follow him immediately. The mission changes from a bar fight to a rescue involving bounty hunters. Ride or run to the marked location, deal with the hunters and free Javier. The objective is to reach him quickly; if you are knocked down, recover first rather than chasing blindly through the group. Use Dead Eye or a shotgun at close range if the enemies surround Javier, then search the area only after the rescue objective is complete.
Return to camp with Javier as instructed. Americans at Rest is not an optional saloon activity; it is part of the Chapter 2 story route and should be recorded as complete in Progress after the mission ends.
- Meet Javier in Valentine.
- Finish the saloon fistfight without drawing a gun.
- Reach and rescue Javier from the bounty hunters.
- Return to camp and confirm Americans at Rest is complete.
3. Complete Exit Pursued by a Bruised Ego and establish horse care
Start Hosea’s yellow mission, Exit Pursued by a Bruised Ego. Follow Hosea out of camp toward the hunting area, using Eagle Eye when the mission directs you to inspect tracks and clues. The mission teaches horse switching, saddling and stable use, so follow the prompts even if you already understand the systems.
The bear encounter is scripted. Use the Dead Eye opportunity when the bear charges and remain ready to move when it retreats. Killing the legendary bear during this mission is not required. If it escapes, you can return to the hunt later during free roam.
Complete the stable sequence in Valentine before leaving. Make sure Arthur’s saddle is placed on the horse you intend to use regularly. Bonding improves through ordinary riding, feeding, brushing, calming and leading. You do not need maximum bonding for Chapter 2, but maintaining one dependable horse is useful during chases and mission escapes.
- Complete Exit Pursued by a Bruised Ego.
- Finish the stable tutorial.
- Place Arthur’s saddle on the intended primary horse.
- Feed, brush or ride the horse to begin normal bonding.
4. Treat Strauss’s early debt work as optional progression content
Speak with Leopold Strauss at the camp marker if you want the optional Money Lending and Other Sins content. The early debt work is not required to complete A Strange Kindness, move to Clemens Point or finish the campaign. It is relevant to honor-oriented content and the optional Lending a Hand trophy route.
To unlock the camp ledger, follow Strauss’s opening briefing, complete the available debt-collection objective and return the recovered money or valuables to camp as directed. The ledger then appears beside the donation box. The exact debt target can vary among the early assignments; follow the marker given by Strauss and return the proceeds before leaving camp again.
Ledger purchases are optional. Camp lodging, supply improvements, leather-working tools and satchel upgrades provide convenience or capacity, but none is required for the Chapter 2 transition or the campaign ending. If you are saving money for ammunition, medicine, horse provisions or weapons, you can postpone every camp purchase after the ledger appears.
Money Lending and Other Sins should therefore be listed separately from the mandatory yellow story route: complete it for the ledger, honor content or trophy progress, not because A Strange Kindness is blocked by camp upgrades.
- Speak with Strauss if pursuing the optional debt strand.
- Complete the required initial debt objective for ledger access.
- Return the recovered debt to camp.
- Confirm the ledger appears beside the donation box.
- Do not mistake camp upgrades for campaign prerequisites.
5. Clear the main Chapter 2 mission chains
Continue the available yellow missions until the principal Chapter 2 route is complete. The required named missions include Paying a Social Call, A Quiet Time, Who Is Not Without Sin?, Blessed are the Meek?, The First Shall Be Last, Pouring Forth Oil and A Fisher of Men. Complete each mission from its named character marker and follow the objective prompts rather than riding away from the marked group.
Paying a Social Call takes Arthur to an O’Driscoll hideout, so carry a reliable repeater or rifle and use cover during the attack. A Quiet Time is the Valentine drinking sequence with Lenny; follow the search prompts and do not leave Valentine before the mission concludes. Who Is Not Without Sin? sends Arthur to recover Reverend Swanson, while Blessed are the Meek? requires the Strawberry jail break for Micah. Expect law attention after Micah’s escape and leave town by the marked route.
The First Shall Be Last begins the Sean rescue. Ride with Javier and Charles, approach the rescue site as directed and free Sean before withdrawing with the group. The Pouring Forth Oil chain appears in stages. Complete the available setup portions, including the oil-wagon preparation, then finish Pouring Forth Oil IV. In the final stage, follow John’s train-robbery instructions and use Dead Eye during the ambush when prompted.
A Fisher of Men is started by Abigail and teaches Arthur to fish with Jack. Follow Jack to the fishing spot, use the supplied tackle and return when the lawmen arrive. Do not turn the fishing trip into a separate exploration detour; the mission completes only after Arthur and Jack return to camp.
- Complete Paying a Social Call.
- Complete A Quiet Time.
- Complete Who Is Not Without Sin?.
- Complete Blessed are the Meek?.
- Complete The First Shall Be Last.
- Complete the available Pouring Forth Oil stages through Pouring Forth Oil IV.
- Complete A Fisher of Men.
6. Finish The Spines of America, then close Chapter 2
Complete The Spines of America with Hosea at Emerald Ranch. Follow Hosea to the homestead, use the approach the mission provides and complete the wagon objective. This mission introduces the fence at Emerald Ranch and is part of the Chapter 2 route. Selling stolen goods to the fence afterward is optional.
If An American Pastoral Scene appears, you may complete it now or postpone it. The mission takes Arthur to Micah’s stagecoach robbery and includes a substantial gunfight and wagon escape. It is useful to complete if you want the full Chapter 2 mission list before moving camps, but it is not necessary to unlock A Strange Kindness immediately and can remain available into Chapter 3. Keep this distinction in mind when checking unfinished missions.
Start The Sheep and the Goats from John in Valentine once the required route is ready. Follow John’s plan, obtain or use the required rifle as the mission directs and help move the sheep toward town. The mission then becomes a large Valentine firefight. Use buildings, fences and other cover, stay near the marked allies and follow the retreat instructions when they appear. Do not remain in town trying to eliminate every lawman.
After The Sheep and the Goats, return to Horseshoe Overlook and start A Strange Kindness from Dutch. Ride with Charles to Dewberry Creek, inspect the proposed camp location, deal with the hostile occupants and rescue the captive. Follow Charles back and complete the return objective. When the mission ends, the gang relocates to Clemens Point and Chapter 3 begins.
Create a separate manual save after the transition. This preserves a completed Horseshoe Overlook state without overwriting the new Clemens Point campaign save.
- Complete The Spines of America.
- Complete An American Pastoral Scene now or deliberately postpone it to Chapter 3.
- Complete The Sheep and the Goats.
- Start A Strange Kindness from Dutch.
- Complete the Dewberry Creek scouting and rescue sequence.
- Confirm the gang has moved to Clemens Point.
- Create a protected manual save after the chapter transition.
Before you move on
- Eastward Bound is complete and Horseshoe Overlook is established.
- The Polite Society, Valentine Style is complete.
- Americans at Rest is complete, including Javier’s rescue from the bounty hunters.
- Exit Pursued by a Bruised Ego is complete and Arthur’s regular horse is saddled.
- The optional early Strauss progression is complete if ledger, honor or Lending a Hand progress is desired.
- The ledger is available beside the camp donation box if Strauss progression was completed.
- Paying a Social Call, A Quiet Time, Who Is Not Without Sin?, Blessed are the Meek? and The First Shall Be Last are complete.
- Pouring Forth Oil has been completed through Part IV.
- A Fisher of Men and The Spines of America are complete.
- An American Pastoral Scene is either complete or intentionally postponed to Chapter 3.
- The Sheep and the Goats is complete.
- A Strange Kindness is complete.
- The gang has moved to Clemens Point and Chapter 3 is active in the Story progress screen.
- A separate manual save exists after the move to Clemens Point.
References for this chapter
- Red Dead Redemption 2 — Americans at Rest Walkthrough
- Red Dead Redemption 2 — A Strange Kindness Walkthrough
- Red Dead Redemption 2 — The Sheep and the Goats Walkthrough
- Red Dead Redemption 2 — Chapter 2 Mission Chart
- Red Dead Redemption 2 — Money Lending and Other Sins I & II Mission Guide
- Red Dead Redemption 2 — Money Lending and Other Sins I & II Mission Guide
- Red Dead Redemption 2 — Camp Guide
- Red Dead Redemption 2 Now Available for PlayStation 4 and Xbox One Systems
Optional Chapter 2 Content — Valentine, hunting and early side threads
Once Chapter 2 opens at Horseshoe Overlook, use this optional section to learn the Heartlands, maintain Arthur’s supplies and begin side content without delaying the required story. Valentine is the nearest full-service town, while the surrounding countryside is a safe place to practise hunting, cook provisions and gather materials for Pearson. Several Stranger strands can begin during Chapter 2, including The Noblest of Men, and a Woman, A Test of Faith, Geology for Beginners and Arcadia for Amateurs, but none is required to reach the campaign ending. Camp item requests are optional, timing-sensitive interactions that appear during Chapters 2–4. Hunting Requests begin by reading an eligible Hunters Sought poster and continue as a long-term activity; they are not part of the main-story route. If a marker or request is not present, continue the yellow missions and check again later rather than repeatedly searching for it.
1. Use Valentine as the optional Chapter 2 service hub
From Horseshoe Overlook, ride east to Valentine when you need supplies, a stable, a gunsmith, a post office or a general store. Group errands together instead of making separate trips: collect mail, check available notices, handle any affordable bounty and buy only the ammunition, food and basic health items you actually need. The purpose of this visit is preparation for optional exploration, not a requirement before the next story mission.
If your previous chapter already covered the camp donation box, ledger or standard shopping routine, do not repeat those tasks solely for this section. The camp ledger remains tied to the relevant Strauss story progress, including Money Lending and Other Sins III; it is not available simply because Chapter 2 has begun. Ledger upgrades and Pearson’s satchel crafting are separate systems, and neither is needed for the campaign ending.
- Ride to Valentine when you need town services.
- Buy practical supplies instead of spending early cash on cosmetics.
- Treat ledger and satchel upgrades as optional systems, not chapter requirements.
2. Hunt near Horseshoe Overlook and the Dakota River
The Heartlands around camp, Valentine and the Dakota River provide low-risk places to practise tracking. Use Eagle Eye to follow tracks, study animals when possible and select the weapon or ammunition appropriate to the target. When pursuing a three-star animal, avoid repeated body shots and take the clean-kill opportunity indicated by the game. A damaged animal may produce an inferior pelt or carcass, so do not fire rapidly just to secure a kill.
Skin animals when the area is safe. Cook meat at the campfire or a wilderness camp to keep food available for restoring cores. Donate useful carcasses and pelts to Pearson if you want camp-crafting materials; sell unwanted surplus to a butcher or other appropriate vendor. Keep perfect pelts that match an upgrade you intend to craft, but do not turn ordinary Chapter 2 progress into a full hunting catalogue. A small reserve of cooked meat, ammunition and horse provisions is enough to resume the story.
- Practise clean kills with the appropriate weapon.
- Cook a modest reserve of meat.
- Donate useful materials to Pearson and sell only unwanted surplus.
3. Begin the early Stranger strands when their markers appear
The Noblest of Men, and a Woman begins at Keane’s Saloon in Valentine. Speak with Theodore Levin, inspect the information he provides and follow the resulting objectives to locate the named gunslingers. The strand is optional and can involve travel and combat, so make a manual save first if you want a safe fallback.
A Test of Faith begins with Deborah MacGuiness in the Heartlands and introduces the dinosaur-bone activity. Geology for Beginners begins with Francis Sinclair near Strawberry and introduces rock carvings. Arcadia for Amateurs begins when Arthur encounters Albert Mason in the countryside west of the Dakota River and follows a wildlife photographer through separate meetings. These activities can be started during Chapter 2, but their next stages may require travel, waiting or additional story progress. Start them when their white Stranger markers are on the map rather than assuming that every stage will appear immediately.
Smoking and Other Hobbies is another optional strand connected to cigarette cards. Do not search for it as soon as Horseshoe Overlook opens; wait until its marker becomes available after the necessary story progress. None of these Stranger strands replaces a yellow story mission, and beginning one does not change the required route to the end of the game.
- Visit Keane’s Saloon for The Noblest of Men, and a Woman if desired.
- Start A Test of Faith, Geology for Beginners or Arcadia for Amateurs when their markers appear.
- Wait for the correct story progress before looking for Smoking and Other Hobbies.
4. Start Hunting Requests only if you want the long-term side activity
Hunting Requests are optional. To begin, read one Hunters Sought poster displayed at an eligible train station or post office. Valentine is a convenient early location, but the poster may also be available elsewhere. Reading the poster, rather than merely visiting the station, starts the activity and records the first requested animals.
The requests ask for perfect carcasses, so inspect the animal’s quality before hunting and use the suitable weapon. Small animals can be stored in the satchel without the same decay concern as large carcasses carried on the horse. When a request is complete, take the required items to a post office and mail them, then check for the next stage when the game makes it available. The chain extends beyond Chapter 2, and later requests are not required for campaign completion. If the poster is absent, do not treat that as a story blockage: check other eligible stations later and continue the main route.
- Read one Hunters Sought poster if you want to begin the activity.
- Hunt only the requested animals and preserve their quality.
- Mail completed requests through a post office and leave later stages for a convenient time.
5. Check Horseshoe Overlook for companion requests and activities
Walk through camp during ordinary daytime routines and speak with companions who are available. Camp item requests are short optional interactions triggered by specific conversations, character availability and story timing. If a companion asks for an item already in Arthur’s inventory, use the prompted interaction to hand it over. Other requests require finding an item in the world and returning to camp later.
Do not repeatedly circle the camp trying to force a request. If nobody offers one, complete a story mission or another activity, then return during a later camp visit. Some camp requests and companion activities can close as the story advances, especially when a chapter ends, so complete the ones you care about before pushing into the next chapter. They provide scenes, small rewards and optional achievement-related progress, but they are not necessary to finish the campaign through American Venom.
- Visit camp during normal routines and speak with available companions.
- Deliver requested items only when the interaction appears.
- Complete important requests before leaving Chapter 2 if you want their optional scenes.
6. Clear travel complications, save and resume the required route
Before returning to the yellow markers, use the post office to pay an unnecessary bounty if the cost is reasonable. An unpaid bounty can cause lawmen or bounty hunters to interrupt travel, but clearing it is a convenience rather than a prerequisite for story progression. Restock ammunition and food only when your supplies are genuinely low.
Make a manual save after finishing the optional activity you wanted. Then return to Horseshoe Overlook and follow the available yellow story markers. If a Stranger marker disappears, a request does not trigger or a poster is missing, do not postpone the campaign indefinitely while searching for it. Some optional content has chapter windows, while other strands return later. Continue Chapter 2’s required missions and revisit optional markers when the game presents them again.
- Pay unnecessary bounties when convenient.
- Make a manual save before resuming story missions.
- Follow yellow story markers; optional activities must not replace campaign progress.
Before you move on
- Arthur has used Valentine or another nearby service town for any supplies needed before optional exploration.
- Arthur has hunted local game, cooked or stored food and dealt with useful materials appropriately.
- The player understands that ledger access follows Money Lending and Other Sins III rather than treating it as an immediate Chapter 2 feature.
- At least one desired Stranger strand has been started only if its marker is available; no Stranger mission is being counted as required campaign progress.
- Hunting Requests have either been deliberately left for later or started by reading an eligible Hunters Sought poster.
- Camp has been checked for optional requests, unnecessary travel complications have been handled when convenient and a manual save exists before returning to the yellow story route.
References for this chapter
- Red Dead Redemption 2 — PlayStation Store PS4 Standard Edition
- Chapter 2: Horseshoe Overlook — Red Dead Redemption 2 Walkthrough & Guide
- Red Dead Redemption 2 Stranger Missions Walkthrough
- Arcadia for Amateurs Stranger Mission Guide
- Red Dead Redemption 2 Hunting Request Guide
- Red Dead Redemption 2 All Hunting Request Locations
- Red Dead Redemption 2 Item Requests: How to Trigger Every Camp Request
- Red Dead Redemption 2 — Money Lending and Other Sins I & II Mission Guide
Chapter 3A — Clemens Point and Rhodes: Early feud missions and heist setup
After A Strange Kindness moves the gang to Clemens Point, complete the early Rhodes operations and the missions that deepen the Gray-Braithwaite feud. This section covers The New South, Further Questions of Female Suffrage, American Distillation, An Honest Mistake, Advertising, the New American Art, Horse Flesh for Dinner, The Fine Joys of Tobacco, Magicians for Sport, Friends in Very Low Places and Preaching Forgiveness as He Went. Mission availability is partly flexible, so use the prerequisite notes and complete each assigned yellow marker as it appears. Money Lending and Other Sins IV is optional and belongs here only for honor and Lending a Hand progress. End immediately after Preaching Forgiveness as He Went. Make a manual save at Clemens Point; Sodom? Back to Gomorrah is the sole next story mission for the following chapter section. Do not start it here.
Settle at Clemens Point and complete The New South
Begin after A Strange Kindness. At Clemens Point, take Dutch’s yellow marker and ride with Dutch and Hosea toward Rhodes. When the prisoner wagon breaks down, pursue the escaped convicts and catch Anders Anderson. Use the prompted takedown, place him on Arthur’s horse and deliver him to the sheriff’s office in Rhodes. Stay with the marked route rather than riding ahead, because the mission advances through scripted conversations and short chase sections.
After the sheriff sequence, continue with Dutch and Hosea to the fishing spot. Equip the fishing rod, catch a fish and remain with the group until the return conversation finishes. Catching the fish is part of the mission route and is also one of its Gold Medal objectives. Return to Clemens Point and check the camp map for the next yellow markers.
- Complete A Strange Kindness before entering this chapter section.
- Deliver Anders Anderson to the Rhodes sheriff.
- Catch a fish with Dutch and Hosea.
- Return to Clemens Point and check for new yellow markers.
Complete Further Questions of Female Suffrage
Start at Pearson’s marker in Clemens Point. Intervene when Pearson and Sadie argue, then drive the wagon to Rhodes. Park in the marked area, go to the post office and mail Pearson’s letter. Return to the wagon and collect the supplies with Sadie before beginning the trip back to camp.
The Lemoyne Raiders stop the wagon on the return journey. Stay in the wagon while it is moving, use the wagon as cover when Arthur dismounts and deal with the closest attackers first. Dead Eye is useful for quick headshots, but ordinary completion only requires surviving and driving the wagon back to the marked camp position. Park inside the yellow area and allow the closing conversation to finish.
- Start the mission from Pearson.
- Mail the letter at the Rhodes post office.
- Defend Sadie and the wagon from the Lemoyne Raiders.
- Return the wagon to Clemens Point.
Break up the moonshine operation in American Distillation
Take Dutch’s marker at the Rhodes sheriff’s office after The New South. Ride with Dutch, Bill and Archibald to the moonshine operation. Approach the camp from the instructed direction and subdue or carry the marked moonshiners to the wagon. Do not rush into the camp before the stealth prompts appear; the mission is designed to let you remove the first guards quietly.
Place the dynamite at the distillery, move away before it detonates and use the wagon and nearby terrain as cover when the Lemoyne Raiders counterattack. Let the allied characters advance before leaving cover. Once the fight is over, rejoin the wagon and follow the return route. If Dutch challenges Arthur to race back to camp, accepting is optional for normal completion. The mission unlocks useful camp and story markers, but the Gold Medal requirements are separate from the campaign route.
- Complete American Distillation from the Rhodes sheriff’s office.
- Subdue the moonshiners and transport them to the wagon.
- Destroy the distillery without standing beside the dynamite.
- Survive the Lemoyne Raider attack and return with the group.
Complete An Honest Mistake and preserve the required rescue
Start An Honest Mistake from the camp marker when Uncle, Charles and Bill gather for the payroll-wagon job. Follow the group to the wagon and search the chests when the robbery goes wrong. Once Cornwall’s men arrive, stay near the group and use the barn’s walls, windows and hay bales as cover.
When the fight moves into the barn, prioritize enemies who can reach the interior. As the fire spreads, follow the marked escape route through the rear opening. The mission requires Arthur to return for Uncle when he is overpowered, so do not remain outside looting or chasing distant enemies. After the rescue, follow Charles and Bill through the final exchange and ride back with the group.
- Start An Honest Mistake from the camp marker.
- Search the payroll wagon after the robbery goes wrong.
- Escape the burning barn through the marked route.
- Save Uncle when he is overpowered and finish the return ride.
Run the moonshine operation and the Gray-Braithwaite missions
Advertising, the New American Art is a two-part story mission. Begin Part I from Abigail’s camp marker and follow her instructions to meet John and Hosea at the moonshine stash. Remain with the group through the preparation sequence. For Part II, meet Abigail or follow the newly displayed marker to Hosea, drive the moonshine wagon to Braithwaite Manor and then take the load to the Rhodes saloon. Serve the drinks as prompted, then use the saloon’s walls and stairway as cover when the Lemoyne Raiders attack. Clear the ground floor before following Hosea upstairs and out to the wagon.
Horse Flesh for Dinner begins at Caliga Hall when its marker becomes available. Ride with John and Javier, enter the stables and follow the deception sequence. When the horses are released, stay with the marked horse and group rather than wandering through the estate. During the escape, control the fleeing horse as directed and follow the objective route back toward the rendezvous.
The Fine Joys of Tobacco starts from Hosea’s marker at Braithwaite Manor after the required setup. Ride with Sean to Caliga Hall and use the wagon as cover during the approach. Follow Sean through the tobacco fields, douse every marked section with moonshine and then ignite the designated barn. Visibility falls sharply during the escape, so stay near Sean, use Dead Eye on nearby guards and cut the payroll horses free when prompted.
- Complete both parts of Advertising, the New American Art.
- Complete Horse Flesh for Dinner when the Caliga Hall marker appears.
- Douse the marked tobacco fields in The Fine Joys of Tobacco.
- Ignite the barn and escape Caliga Hall with Sean.
Find Trelawny and complete Magicians for Sport
Start Magicians for Sport from Dutch’s marker at Clemens Point when it appears. Take Charles to Trelawny’s caravan near Rhodes. Search the caravan and inspect the three highlighted clues: the untouched food, the disturbed bed and the bloody cloth at the washbasin. Outside, activate Eagle Eye and follow the trail while staying close enough for the tracking sequence to continue.
The trail leads through the fields and toward the bounty hunters. When the hunters split into the cornfields, use the elevated ground and Dead Eye to locate and eliminate them. Keep moving toward Charles’s position instead of searching for loot. After the hunters are dealt with, follow Charles to the final confrontation, clear the remaining enemies and return to Trelawny to complete the mission.
- Inspect all three clues at Trelawny’s caravan.
- Follow the trail with Eagle Eye.
- Defeat the bounty hunters in the cornfields.
- Return Trelawny safely to his horse.
Rob the stagecoach in Friends in Very Low Places
After Magicians for Sport, take Trelawny’s marker at Clemens Point. Ride with him to the Rhodes station and speak with Alden. Follow Trelawny from the station to the river-road ambush point. Hitch or park Arthur’s horse where instructed, then keep low and approach the stagecoach from behind while Trelawny distracts its occupants.
Wait for the guard to leave the rear of the coach before moving to the lockbox. Open the box using the prompted action, take the contents and retreat along the same concealed route. Do not fire unless the stealth sequence has already failed. Return to the meeting point and speak with Trelawny to finish the mission. If the marker does not appear, confirm that Magicians for Sport is complete and check camp again after leaving the area or completing a short non-story activity.
- Meet Trelawny and Alden at the Rhodes station.
- Reach the stagecoach without rushing the approach.
- Open and loot the lockbox.
- Return to Trelawny without starting a needless gunfight.
Optional Money Lending and Other Sins IV
Money Lending and Other Sins IV is not required to advance the ordinary yellow-mission story route. Start it from Strauss at Clemens Point if you are pursuing the Lending a Hand trophy or want the optional honor content. Resolve both debts separately: find Gwyn Hughes in Rhodes and assist him at the graveyard, then locate Winton Holmes north of Strawberry and follow him into the cave.
The Winton Holmes section requires Arthur’s lantern. When the White Cougar attacks, use Dead Eye immediately, kill and skin it, then take the pelt to the Strawberry butcher. Return the requested proceeds and valuables to the camp tithing box. The optional sequence is not complete merely because each debtor has been visited; make the final camp deposit and confirm that Strauss’s marker closes.
- Speak with Strauss at Clemens Point.
- Resolve the Gwyn Hughes debt.
- Kill and skin the White Cougar for Winton Holmes.
- Make the required camp deposit.
Finish Preaching Forgiveness as He Went and stop
Take Lenny’s yellow marker at Clemens Point after An Honest Mistake and the required supporting missions are complete. Ride with Lenny toward Shady Belle and follow the approach to the Lemoyne Raider camp. Take the long-scoped rifle when the mission equips or offers it, move to the marked firing position and use the scope to clear the Raiders around the buildings and wagons.
Prioritize enemies threatening Lenny and the mounted gun. Remain behind the marked cover position until the game advances the objective, then move with Lenny to search the camp. Collect the weapons from the marked wagon or crates and load them onto the wagon. During the return trip, stop the pursuing Raiders with controlled shots or Dead Eye, then continue driving until the camp-return sequence ends.
This mission is the endpoint of this chapter section. Do not start Sodom? Back to Gomorrah even if Bill’s marker appears at Clemens Point. That mission is the sole next story mission and belongs to Chapter 3B. Make a manual save after the completion scene, preferably in a new slot, before doing anything else.
- Start Preaching Forgiveness as He Went from Lenny.
- Clear the Lemoyne Raider camp from the marked firing position.
- Recover the weapons and load them onto the wagon.
- Survive the return trip and let the completion scene finish.
- Create a manual save before starting Sodom? Back to Gomorrah.
Before you move on
- Open Pause Menu, then Progress, then Story, and confirm the assigned Chapter 3 missions through Preaching Forgiveness as He Went are complete.
- If pursuing Lending a Hand, confirm both optional debts were resolved and the final valuables or proceeds were deposited at Clemens Point.
- Confirm Advertising, the New American Art, Horse Flesh for Dinner, The Fine Joys of Tobacco, Magicians for Sport and Friends in Very Low Places are complete if their markers were included in your route.
- Finish the return-to-camp sequence after Preaching Forgiveness as He Went rather than quitting during the weapons-wagon objective.
- Create a protected manual save at Clemens Point. The next assigned story mission is Sodom? Back to Gomorrah; do not begin it in this chapter save.
References for this chapter
- Red Dead Redemption 2 — PS4 Games, PlayStation US
- Chapter 3: Clemens Point — Red Dead Redemption 2 Walkthrough & Guide
- Red Dead Redemption 2 Full Walkthrough – All Story Missions
- Red Dead Redemption 2 Further Questions of Female Suffrage Walkthrough, PowerPyx
- Red Dead Redemption 2 American Distillation Walkthrough, PowerPyx
- Red Dead Redemption 2 An Honest Mistake Walkthrough, PowerPyx
- Red Dead Redemption 2 Advertising, the New American Art — II Walkthrough, PowerPyx
- Red Dead Redemption 2 Magicians for Sport Walkthrough, PowerPyx
- Red Dead Redemption 2 Friends in Very Low Places Walkthrough, PowerPyx
- Red Dead Redemption 2 The Fine Joys of Tobacco Walkthrough, PowerPyx
- Red Dead Redemption 2 Preaching Forgiveness as He Went Walkthrough, PowerPyx
- Red Dead Redemption 2 Money Lending and Other Sins IV Walkthrough, PowerPyx
Chapter 3B — Rhodes operations, the family feud and the move to Shady Belle
Begin this section only after the Chapter 3A route has completed its assigned Clemens Point and Rhodes missions. Confirm that American Distillation and Preaching Forgiveness as He Went are complete, then wait for Bill’s marker and finish Sodom? Back to Gomorrah. After the remaining Chapter 3 prerequisites are satisfied, complete Blessed are the Peacemakers, A Short Walk in a Pretty Town, Blood Feuds, Ancient and Modern, and The Battle of Shady Belle in that order. The closing mission clears the Lemoyne Raiders from Shady Belle, requires Arthur to dispose of two bodies, and then moves the gang into the estate. Chapter 3 is not complete merely because the manor is secure; remain in the mission until the camp relocation and Saint Denis transition have finished.
Verify the Chapter 3A handoff before starting
Use this chapter only after the earlier section has recorded The New South, Further Questions of Female Suffrage, American Distillation, An Honest Mistake, Advertising, the New American Art, The Fine Joys of Tobacco, Magicians for Sport, Friends in Very Low Places, and Preaching Forgiveness as He Went as complete where applicable to your assigned route. Do not replay those missions as part of this continuation.
The first required mission here is Sodom? Back to Gomorrah. Its story prerequisite is American Distillation plus Preaching Forgiveness as He Went; after both are complete, the marker may require roughly an hour of in-game time before Bill offers the robbery. If the marker is missing, leave Clemens Point, perform a non-story activity, or allow time to pass, then check camp again.
Before riding out, make a manual save in a separate slot. Clean the repeater and sidearm, fill ammunition, and carry health cures and Dead Eye restoratives. These missions use scripted objectives rather than a selectable stealth, suppressive, or loud approach. Preparation and cover matter more than trying to force an alternate plan.
Camp chores, donations, and companion requests are optional for reaching Shady Belle. Complete them for honor, dialogue, or rewards only if you want them; they do not substitute for a missing yellow story marker.
- The Chapter 3A route is complete without duplicating its assigned missions.
- American Distillation and Preaching Forgiveness as He Went are complete.
- Arthur has a manual save, adequate ammunition, and restored health and Dead Eye cores.
Rob Valentine in Sodom? Back to Gomorrah
Start Bill’s yellow marker at Clemens Point after the prerequisite wait. Ride with Bill, Karen, and Lenny to Valentine, staying with the robbery group during the approach. Karen creates the distraction while Arthur and the others enter the bank. Follow the prompts to reach the vault area.
At the safes, either crack them through the instructed combination interaction or use dynamite. Cracking the safes is the calmer campaign route because it avoids the larger immediate gunfight caused by an explosive escape. If you use dynamite, retreat from the blast and be ready for lawmen outside. Take the money and leave through the mission’s marked route.
Valentine becomes a fixed gunfight during the escape. Use the bank entrance, storefronts, wagons, and other solid cover instead of standing in the street. Shoot lawmen who block the group’s route, mount when prompted, and follow the gang out of town. Do not stay behind to clear every pursuing officer; the objective is to escape with the robbers.
After the mission ends, let the wanted search clear before entering another settlement. Save at camp or in a second manual slot. Sodom? Back to Gomorrah is required progression, not an optional Valentine robbery.
- Sodom? Back to Gomorrah is recorded as complete.
- Arthur and the robbery party have escaped Valentine.
- The wanted search has ended before the next mission is started.
Survive the ambush in Blessed are the Peacemakers
When Micah’s yellow marker appears at Clemens Point, begin Blessed are the Peacemakers. Ride with Micah and Dutch toward the arranged meeting with Colm O’Driscoll, then follow the objective to the observation position. Stay on the directed route and dismount where the mission indicates.
The meeting is a trap and Arthur’s capture is a fixed story event. Do not waste tonics or ammunition trying to prevent the kidnapping. After Arthur wakes, follow the on-screen prompts for the self-treatment sequence carefully. The button prompts are part of the mission objective, and failure can reload the recent checkpoint.
Once free, crouch through the camp and use the available cover. Kill the nearby O’Driscolls who directly obstruct the escape, then go to the marked weapon location and recover Arthur’s guns. You do not need to hunt every enemy in the camp. After retrieving the weapons, move away from the area and avoid unnecessary pursuit; use the map to stay clear of patrols while returning toward Clemens Point.
The mission’s stealth and treatment conditions are relevant to its optional medal requirements, not ordinary story completion. Restock after returning to camp and make a new manual save before the Rhodes confrontation.
- Arthur has completed the prompted treatment sequence.
- Arthur has recovered his weapons from the marked location.
- Blessed are the Peacemakers is complete and Arthur has returned to free roam.
Fight through Rhodes in A Short Walk in a Pretty Town
After Blessed are the Peacemakers, verify that The Fine Joys of Tobacco, Horse Flesh for Dinner, and Friends in Very Low Places are also complete. These missions, together with Blessed are the Peacemakers, unlock A Short Walk in a Pretty Town. If Bill’s marker is absent, check Story Progress for one of those four missions before waiting for another marker.
Start Bill’s mission in Rhodes and ride with Bill, Sean, and Micah to the meeting. Sean’s death and the Gray ambush are fixed story outcomes. When the shooting begins, stay with the group and use the initial cover instead of running into the open streets.
Advance through Rhodes by moving between barrels, wagons, storefronts, and building corners. Prioritize enemies close to Arthur and the other gang members, then push forward only when the objective updates. The gunsmith provides useful cover during the middle section; follow Micah’s movement and clear the attackers outside before proceeding to the sheriff’s office.
At the sheriff’s office, wait for the Dead Eye sequence and eliminate the lawmen holding Bill. Continue with the marked escape route until the mission ends. Rhodes becomes dangerous after this event, so do not wander around town after the final gunfight. Return to camp, replenish ammunition, and save.
- A Short Walk in a Pretty Town is complete.
- Sean’s scripted death has occurred.
- Bill has been rescued and Arthur has returned to free roam.
Assault Braithwaite Manor in Blood Feuds, Ancient and Modern
Start Dutch’s marker at Clemens Point after A Short Walk in a Pretty Town. The gang rides together to Braithwaite Manor to recover Jack. Stay with the group during the approach and dismount when instructed; this is a coordinated assault, not a free-form infiltration.
The first fight takes place outside the manor. Use the wagon, trees, walls, and manor structures as cover while the gang advances. Dead Eye is effective against clustered defenders and balcony shooters, but do not remain exposed after firing. Follow Dutch and John indoors once the exterior is clear.
Search the marked downstairs rooms, then help Dutch at the barricaded upstairs door. Reinforcements arrive outside during this section. Move to the balcony or another solid position, watch for riders and wagons, and eliminate attackers before they reach the manor. You do not need to roam beyond the mission area or search unmarked buildings.
The mission reveals that Jack was taken to Saint Denis. That discovery is a story transition, not the beginning of Chapter 4 by itself. Finish the return sequence and remain in control until the mission-complete notification appears. Then prepare immediately for The Battle of Shady Belle.
- Blood Feuds, Ancient and Modern is complete.
- The manor search and Jack-related objectives are complete.
- The Battle of Shady Belle is available after the mission’s return sequence.
Clear the estate and establish Shady Belle
Begin The Battle of Shady Belle from John’s marker after Blood Feuds, Ancient and Modern. Ride with John toward the estate. You can follow the suggested route or cut across open ground if you are not attempting the mission’s time medal, but remain close enough for the mission to continue.
Dismount at Shady Belle and immediately prepare for the Lemoyne Raiders outside. Dead Eye is useful against the first attackers. Enter the manor and clear the marked rooms methodically: check the downstairs rooms, then go upstairs and inspect the highlighted areas. Raiders may be behind furniture or in side rooms, so keep your weapon ready before crossing each doorway.
When the house is secure, do not ride away. The mission requires Arthur to dispose of two bodies at the nearby swamp or jetty area. Carry the indicated corpses to the marked drop point and repeat the action for the second body. The rest of the cleanup then proceeds through the mission’s scripted sequence.
Once the gang arrives, remain with Dutch for the ride toward Saint Denis. The camp relocation and transition establish Shady Belle as the active Chapter 4 base. Only after that sequence concludes is Chapter 3 complete. Make a protected manual save once control returns in the new camp.
- Every Lemoyne Raider in the mission area has been cleared.
- Both required bodies have been moved to the marked disposal location.
- The gang has relocated to Shady Belle and Chapter 4 story markers are available.
Before you move on
- Story Progress records Sodom? Back to Gomorrah, Blessed are the Peacemakers, A Short Walk in a Pretty Town, Blood Feuds, Ancient and Modern, and The Battle of Shady Belle.
- The active camp is Shady Belle rather than Clemens Point.
- Arthur can travel freely after the relocation sequence and Chapter 4 markers are visible.
- No wanted search from the Valentine or Rhodes missions is active.
- A protected manual save exists after the gang has settled at Shady Belle.
References for this chapter
- Chapter 3: Clemens Point — Red Dead Redemption 2 Walkthrough & Guide
- RDR2 Missions List: Full Story Guide & Gold Medal Walkthrough
- Red Dead Redemption 2 Blood Feuds, Ancient and Modern Walkthrough
- RDR2 The Battle of Shady Belle Walkthrough
- The Battle of Shady Belle — Chapter 3 Walkthrough
- Red Dead Redemption 2 Title Update 1.15 Notes — Rockstar Games Support
Chapter 4A — Saint Denis: City infiltration, the market and new systems
Begin after The Battle of Shady Belle, with Shady Belle established as the gang’s Chapter 4 camp. Complete the early Saint Denis route through The Joys of Civilization, Angelo Bronte, a Man of Honor, No, No and Thrice, No, The Gilded Cage, A Fine Night of Debauchery, Horsemen, Apocalypses, Urban Pleasures and Country Pursuits. These missions introduce the city, Bronte’s influence, the riverboat operation, the trolley robbery and the Lagras sequence. Keep weapons holstered during social objectives, avoid unnecessary law attention and use cover during forced firefights. Saint Denis services can help with ammunition, clothing, weapon maintenance and selling valuables, but no specific purchase is required for story progression. Country Pursuits is the endpoint of this section. Revenge Is a Dish Best Eaten becomes available afterward, but it belongs to Chapter 4B and must not be treated as completed here.
1. Start Chapter 4 after The Battle of Shady Belle
Begin this section only after The Battle of Shady Belle is complete and the gang has moved into Shady Belle. Ride to the yellow mission marker for The Joys of Civilization in Saint Denis. No specific outfit, weapon or city purchase is required before starting it.
Make a manual save at Shady Belle, clean the weapons you expect to use and replenish ordinary ammunition and healing items. A repeater or rifle is useful for later firefights, but the campaign does not require a particular loadout. Saint Denis can be crossed on horseback, but dismount for interiors, conversations and narrow pursuit routes. Keep weapons holstered near civilians and shopkeepers.
- The Battle of Shady Belle is complete.
- Shady Belle is the active camp.
- The Joys of Civilization is available.
- A manual save and supply check are complete.
2. Complete The Joys of Civilization
Meet Dutch at the marked location and enter the Bastille Saloon. Speak with the bartender, then follow the objective toward the street children. When the child runs, stay close and follow the marked pursuit route through the streets and market.
Do not shoot at the child or attack bystanders. The pursuit is scripted, and creating a wanted level can complicate the sequence. Continue following the search prompts until Arthur’s stolen belongings are recovered. If the chase fails, use the checkpoint restart instead of forcing the objective through free-roaming combat.
- The Bastille Saloon conversation is complete.
- The street-urchin pursuit reaches the market.
- Arthur’s belongings are recovered.
- The mission has ended.
3. Meet Angelo Bronte and complete the cemetery operation
Start Angelo Bronte, a Man of Honor at its yellow marker and accompany Dutch and John to Bronte’s mansion. Stay with the group during the meeting, then follow the objective to the cemetery. The mission is driven by marked actions and companion movement, so do not leave the route to explore Saint Denis during the operation.
Search the highlighted cemetery area and respond when the grave-robbing encounter begins. Use nearby cover against the attackers, then follow the escape route with Dutch and John. Complete the return sequence so the next Chapter 4 markers can appear.
- Bronte’s mansion meeting is complete.
- The cemetery search is complete.
- The grave-robbing confrontation is over.
- Arthur, Dutch and John have escaped.
- The next yellow markers are available.
4. Finish No, No and Thrice, No and The Gilded Cage
Complete No, No and Thrice, No when its marker is available. Follow the assigned objective and remain near the companions. When combat begins, move from cover to cover and avoid turning the encounter into an unnecessary citywide pursuit.
For The Gilded Cage, join Dutch at the mayor’s party. Follow the group through the social objectives, keep Arthur’s weapon put away and use the marked conversation prompts. This mission is a social infiltration sequence, not a free-roaming robbery. Continue following the objectives until the party operation concludes.
- No, No and Thrice, No is complete.
- The Gilded Cage is complete.
- Arthur has avoided unnecessary violence during the party.
- No avoidable wanted level is active.
5. Complete A Fine Night of Debauchery
Start A Fine Night of Debauchery from Trelawny’s marker. Follow him to the tailor and barber, accept the formal preparation required by the mission and board the riverboat. Continue through the poker game and follow the pit boss upstairs when instructed.
Take the safe contents, then escape with Javier and Trelawny. Once the alarm begins, prioritize the marked exit and use cover against the guards. There is no benefit to stopping for unrelated fights. Reach the escape route and finish the riverboat robbery before leaving the mission.
- The formal preparation is complete.
- The poker and safe objectives are complete.
- Arthur, Javier and Trelawny escape the riverboat.
- A Fine Night of Debauchery is complete.
6. Rescue the hostages in Horsemen, Apocalypses
Start Horsemen, Apocalypses from Sadie’s marker at Shady Belle and ride with the group to the Adler ranch. Follow the gang into the ranch and use buildings, fences and wagons as cover while clearing the O’Driscoll attackers.
When the objective changes, enter the indicated building and rescue the captives. Escort them along the marked route. Enemies can appear during the return, so stay with the group and eliminate threats before crossing open ground. The mission ends after the survivors reach safety.
- The Adler ranch is reached.
- The O’Driscoll attackers are defeated.
- The captives are rescued.
- The survivors are escorted out.
- Horsemen, Apocalypses is complete.
7. Survive the trolley operation in Urban Pleasures
Start Urban Pleasures from Dutch’s yellow marker in Saint Denis. Enter the trolley station with Dutch and Lenny, follow the robbery prompts and force the cashier to open the safe. Leave through the designated exit and board the trolley when instructed.
During the fixed trolley escape, use Dead Eye or controlled bursts against lawmen and watch for officers climbing onto the vehicle. After the crash, follow Dutch and Lenny through the streets. Use cover at blockades, then continue to the escape wagon. Shoot pursuing riders only when they threaten the escape route and stay with the companions until the mission ends.
- The trolley station robbery is complete.
- The trolley crash and street firefight are complete.
- The gang reaches the escape wagon.
- Urban Pleasures is complete.
8. Finish this section with Country Pursuits
After Urban Pleasures, wait for the Country Pursuits marker to appear at Shady Belle. Ride with Dutch to Lagras and meet Thomas. Follow him through the swamp, stop when he warns about the alligators and interact with the marked traps instead of running ahead.
When Jules is found in the tree, retrieve the skiff from the marked obstruction and return to the boat. After Jules falls into the water, follow the search area and his calls. Reach him, carry him back and use the prompts to help him aboard. When the Bullgator attacks, shoot it while protecting Arthur and Jules, then treat Jules when prompted. Return to the dock to complete the mission.
Country Pursuits is the final mission covered in this chapter section. It unlocks Revenge Is a Dish Best Eaten, but that Bronte assault belongs exclusively to Chapter 4B. The bank robbery, the move toward Guarma and the Chapter 4 finale have not happened yet.
- Thomas has been followed through Lagras.
- Jules has been recovered.
- Jules has been returned to the skiff.
- The Bullgator encounter is complete.
- Jules has been treated.
- Country Pursuits is complete.
- Revenge Is a Dish Best Eaten is identified as the next Chapter 4B mission.
9. Use Saint Denis services without confusing them with story progress
Between missions, Saint Denis offers a gunsmith, tailor, fence and other services. Use them to clean weapons, buy ammunition, sell valuables or change clothing. These are optional preparations. No specific Saint Denis purchase, weapon upgrade or outfit is required to unlock the listed campaign route.
Optional activities may appear near the yellow markers, including Help a Brother Out, Brothers and Sisters, One and All, Fatherhood and Other Dreams, and American Fathers. They are not required for the ending. Complete them during Chapter 4 if you want their narrative content, but continue the yellow route if an optional marker is unavailable.
- Optional Saint Denis markers have been checked.
- Arthur has adequate ammunition and healing supplies.
- A protected save exists after Country Pursuits.
- The next section begins with Revenge Is a Dish Best Eaten.
- The bank robbery and Guarma transition remain unfinished.
Before you move on
- The Battle of Shady Belle was completed before this section began.
- The Joys of Civilization is complete.
- Angelo Bronte, a Man of Honor is complete.
- No, No and Thrice, No is complete.
- The Gilded Cage is complete.
- A Fine Night of Debauchery is complete.
- Horsemen, Apocalypses is complete.
- Urban Pleasures is complete.
- Country Pursuits is complete.
- Revenge Is a Dish Best Eaten is identified as the next Chapter 4B mission.
- The Saint Denis bank robbery is not counted as complete.
- The Guarma transition is not counted as complete.
- Arthur has adequate ammunition, weapons and healing supplies for the next section.
- A manual save exists after Country Pursuits.
References for this chapter
- Chapter 4: Saint Denis - Red Dead Redemption 2 Walkthrough & Guide
- Chapter 4 Missions And Gold Medals Guide
- Red Dead Redemption 2 Full Walkthrough – All Story Missions
- Horsemen, Apocalypses — Chapter 4 Walkthrough
- Chapter 4-12: Country Pursuits Walkthrough
- Chapter 4-13: Revenge Is a Dish Best Eaten Walkthrough
Chapter 4B — Saint Denis aftermath: Bronte, the bank robbery and the march to Guarma
Start after Country Pursuits and Revenge Is a Dish Best Eaten are complete. At Shady Belle, Banking, the Old American Art becomes Chapter 4’s final main mission. Make a separate manual save before starting it, finish any Chapter 4 optional content you want to keep, then ride with Dutch’s gang to rob the Saint Denis bank. The mission follows a fixed sequence: wait for Hosea’s diversion, force the manager to open the vault, crack the safe, defend the bank, blast through the wall, cross the rooftops, hide with Dutch and use the train cars and dockside distractions to reach the boat. The robbery cannot be turned into a successful stealth outcome, and Hosea’s capture, Lenny’s death and John’s capture are scripted. Completing the boat escape ends Chapter 4 and immediately hands the campaign to Welcome to the New World and the restricted Guarma sequence.
1. Confirm the required starting state
Do not begin this section during Revenge Is a Dish Best Eaten. That mission belongs to the preceding route and must already be complete. Open Story progress and confirm that Country Pursuits and Revenge Is a Dish Best Eaten are listed as completed. If the Revenge mission is still incomplete, finish it before following this chapter.
After Revenge is complete, return to Shady Belle. Banking, the Old American Art is given by Dutch inside the camp and is the final main mission of Chapter 4. The mission starts from Shady Belle and sends the gang into Saint Denis for one last major robbery.
- Country Pursuits is complete.
- Revenge Is a Dish Best Eaten is complete.
- Dutch’s Banking, the Old American Art marker is available at Shady Belle.
2. Make the pre-robbery save and clear optional Chapter 4 content
Create a manual save in a separate slot before speaking with Dutch. This is the practical recovery point for Chapter 4 exploration, optional missions and camp activities. Once the robbery is complete, the story moves directly into the Chapter 5 transition, so do not rely on an autosave as your only backup.
If you want the Chapter 4 optional content or related trophies, complete Help a Brother Out, Brothers and Sisters, One and All, and the Fatherhood and Other Dreams mission chain before starting the robbery. This is also the last useful opportunity for Shady Belle companion activities, camp item requests and normal access to the gang’s tithing box. These activities are optional for reaching the campaign ending, but they are important if you are pursuing the relevant trophies or want to preserve every available Chapter 4 activity.
Clean the sidearms you intend to use, refill ammunition and carry health and Dead Eye supplies. The gold-medal requirements are to crack the safe without mistakes, use only sidearms, score 25 headshots and finish without taking health items. Those requirements are not needed for ordinary story completion.
- A protected manual save exists before Banking, the Old American Art.
- Desired Chapter 4 optional missions and camp activities are complete.
- Weapons, ammunition and useful tonics are prepared.
3. Reach the Saint Denis bank and open the vault
Speak with Dutch at Shady Belle and remain with the gang during the ride to Saint Denis. Hosea and Abigail move ahead to prepare the diversion. When the gang reaches the bank area, meet Bill across from the entrance and wait for the diversion to occur.
Follow Dutch to the bank entrance and equip the prompted mask or bandana before entering. The gang forces the customers and staff into the rear office. Keep your weapon trained on the manager and follow the intimidation prompts until he opens the vault.
Enter the vault and approach the large safe. The combination is 19, 72, 54. Turn the dial slowly and stop on each number; changing direction between numbers is part of the safe-opening sequence. Loot the safe, then return toward the bank’s main area when the Pinkertons arrive.
- Hosea’s diversion has occurred.
- The gang has entered the bank.
- The manager has opened the vault.
- The safe has been opened and looted.
4. Defend the bank and breach the wall
Take cover inside the bank and engage the Pinkertons through the front windows. Prioritize exposed enemies on the opposite balcony, then deal with mounted reinforcements and the gun wagon as they arrive. Dead Eye helps with accurate headshots, but normal campaign completion does not require a particular weapon or number of kills.
When Dutch calls Arthur back, return behind the desk and collect the mission-provided dynamite. Carry it to the highlighted wall, place it at the marked point and move back behind the desk before detonating it. The mission will not advance until the supplied dynamite is used at the objective.
Go through the opening and climb to the roof. Javier gives Arthur a rifle during the transition. If you are attempting the sidearms-only gold requirement, switch back to a pistol or revolver before firing. For a normal completion, use whichever weapon is most reliable.
- The Pinkertons are attacking the bank.
- Arthur has returned to the desk when ordered.
- The dynamite has breached the wall.
- Arthur and the gang have reached the roof.
5. Follow the rooftop escape and do not fight the script
Follow Lenny across the rooftops, using cover at the marked firing positions. Eliminate enemies blocking the route, but keep moving when Dutch gives the order to retreat. The escape path is fixed; searching for another roof route does not change the outcome.
The losses during this mission are scripted. Hosea is captured and killed, Lenny dies during the rooftop escape, and John is captured. These events cannot be prevented by killing enemies more quickly, taking a different route or remaining behind to clear every Pinkerton.
After the rooftop firefight, follow Dutch into the building where the gang hides until nightfall. This is a required transition, not an opportunity to return to the bank or explore the city.
- The rooftop firefight is complete.
- The scripted losses have occurred.
- Arthur and Dutch have reached the hiding place.
- The mission has advanced to the night escape.
6. Sneak through the train cars and reach the boat
When control returns, leave the hiding place with Dutch and move toward the docks at ground level. Stay crouched when he tells Arthur to use stealth. Follow his pace rather than running ahead, because the guards and cover positions are arranged for the scripted route.
Enter the train cars behind Dutch. Move from cover to cover and hide behind the indicated seat when a guard approaches. Wait until Dutch continues before following him to the next position. At the next group of guards, move to the yellow objective area and perform the prompted distraction. Remain low, circle behind the barrels or other marked cover and rejoin Dutch from the indicated side.
When Charles creates the final distraction, follow Dutch to the boat. Do not stop to loot, clear the docks or search for a second escape route. Reaching the boat and allowing the closing cinematic to play completes the mission.
- The ground-level stealth approach is complete.
- Arthur has passed through the train cars.
- The guard distraction has been performed.
- Charles’s distraction has begun.
- Arthur has reached the boat with Dutch.
7. Confirm the Chapter 4 handoff
Banking, the Old American Art ends after the boat escape and closing cinematic. It is the final main mission of Chapter 4. The next mission is Welcome to the New World, which begins the Chapter 5 transition and leads into Guarma.
Once Welcome to the New World appears or its opening objectives begin, stop looking for another Chapter 4 yellow story marker. The chapter is finished. Keep the separate pre-robbery save protected if you left optional Saint Denis content unfinished or want to replay the robbery for gold medals.
Guarma is a restricted, mission-led sequence. Mainland shops, ordinary camp routines, unrestricted travel and much of Arthur’s normal equipment access are temporarily limited. If you fail after the transition, reload the checkpoint or the protected pre-robbery save rather than trying to escape the scripted route by swimming or finding another boat.
- Banking, the Old American Art is marked complete.
- The rooftop escape and dockside stealth sequence have finished.
- Arthur has boarded the boat.
- Welcome to the New World has begun.
- The protected pre-robbery save remains intact.
Before you move on
- Country Pursuits is complete.
- Revenge Is a Dish Best Eaten is complete.
- Banking, the Old American Art is marked complete in Story progress.
- The bank defense, dynamite breach, rooftop escape, train-car stealth section and boat departure have occurred.
- Welcome to the New World has begun, confirming the Chapter 4-to-Chapter 5 handoff.
- A protected manual save remains available from before Banking, the Old American Art.
References for this chapter
- Red Dead Redemption 2 Banking, the Old American Art Walkthrough
- Banking, the Old American Art - Chapter 4 - Walkthrough
- Chapter 4: Saint Denis - Red Dead Redemption 2 Walkthrough & Guide
- Red Dead Redemption 2 Full Walkthrough – All Story Missions
- Red Dead Redemption 2 Now Available for PlayStation 4 and Xbox One Systems
Chapter 5 — Guarma: The island escape
After Banking, the Old American Art, Arthur and several gang members are stranded on Guarma. The island section is a restricted, linear story arc with no normal mainland camp, shops, horse management or free-roaming progression. Follow Hercule’s resistance movement through the chain-gang escape, the plantation rescue, Javier’s prison break and the beach defense. The chapter ends with Paradise Mercifully Departed, when Arthur and the others escape the island by boat. Do not continue into Dear Uncle Tacitus, Fleeting Joy, A Fork in the Road or That’s Murfree Country here; those missions belong to the following Beaver Hollow transition chapter.
1. Begin Welcome to the New World and reach the resistance camp
Welcome to the New World begins after Banking, the Old American Art. Arthur wakes on Guarma after the shipwreck and is separated from the gang’s normal equipment and routines. Follow Dutch, Micah, Bill and Javier along the beach. When soldiers capture the group, stay with the chain gang and keep pace during the forced march. Do not leave the route to explore or search for supplies; falling too far behind can fail the objective.
When Hercule’s resistance fighters attack, use nearby cover and help the group defeat the soldiers. Follow the retreat rather than pursuing enemies into the surrounding terrain. The mission leads Arthur to Hercule’s camp, which becomes the staging point for the rest of the Guarma sequence. Treat the camp as a mission hub only; it does not restore the normal mainland camp systems.
- Complete Welcome to the New World.
- Stay with the chain gang during the march.
- Reach Hercule’s resistance camp.
2. Free the workers in Savagery Unleashed
Start Savagery Unleashed from Hercule’s camp and follow Leon and the resistance fighters toward the plantation worksite. The early section is tightly scripted, so remain with the marked group instead of trying to clear distant guards. Move from cover to cover when the mission directs you into the work area.
At the plantation, eliminate the guards threatening the captives and use the prompted interaction to release the workers. Once the escape begins, stay close to the marked group and shoot enemies who block the route or pressure the fleeing workers. Fences, buildings and vegetation provide useful cover. The mission ends after the workers reach safety; it does not open Guarma for unrestricted exploration.
- Follow Leon and the resistance to the plantation.
- Release the captive workers.
- Remain with the escape group until the mission ends.
3. Rescue Javier in A Kind and Benevolent Despot
Return to Hercule’s camp and begin A Kind and Benevolent Despot. Follow Dutch and the resistance toward the prison and sugar-refinery area. The approach supports stealth, but detection does not prevent ordinary story completion. If the alarm sounds, use cover and advance with Dutch instead of abandoning the route to fight every enemy in the compound.
Reach Javier’s cell and follow the prompts to free him. The escape becomes a moving firefight through the facility. Prioritize guards who block the immediate path, use Dead Eye when several enemies appear together, and keep moving when Dutch carries or escorts Javier. Finish the retreat back to the resistance camp. This mission follows Savagery Unleashed and precedes Hell Hath No Fury in the Guarma sequence.
- Follow Dutch’s approach to the prison.
- Free Javier from his cell.
- Escape with Javier and return to the resistance camp.
4. Defend the beach in Hell Hath No Fury
Begin Hell Hath No Fury after the worker rescue and Javier rescue missions. Follow Hercule’s group to the beach and take cover in the defensive area. Deal with nearby soldiers first, but do not chase enemies away from the marked position unless the objective sends you forward. The mission alternates between ordinary rifle combat and a required cannon sequence.
When Arthur is directed to the cannon, operate it against the approaching boats. Aim at the vessels and fire until the naval assault is stopped, then return to the beach battle when the objective changes. Reload before exposing yourself and use the defensive structures to reduce incoming fire. The cannon section is mandatory for completion; leaving the position early can fail the objective.
- Defend the resistance position on the beach.
- Operate the cannon against the attacking boats.
- Complete the beach defense and proceed to the final Guarma mission.
5. Rescue the captain in Paradise Mercifully Departed
Paradise Mercifully Departed follows Hell Hath No Fury and begins the escape from Guarma. Follow Hercule, Dutch and Micah toward the artillery positions. The opening approach allows a stealth takedown of the first sentries; if you are not pursuing the gold medal, ordinary completion is more important than preserving stealth. Once the explosives are planted, the mission becomes a sustained advance through enemy positions.
Use cover and eliminate exposed soldiers before moving forward. Snipers and enemies overlooking the route should be dealt with early because they can punish movement between cover. Continue through the workers’ compound until the group reaches the building where the ship’s captain is being held. Follow the scripted rescue sequence, then clear the path while escorting the captain toward the boat. The captain pauses when reinforcements block the route, so kill those enemies before trying to push ahead.
At the final artillery position, use the cannon when the mission directs Arthur to stop Fussar. The required shot ends the immediate threat and allows the group to reach the boat. Boarding the boat completes Paradise Mercifully Departed and ends the Guarma portion of this chapter. The next mission is Dear Uncle Tacitus, but do not cover or begin that mission as part of this chapter.
- Advance through the artillery positions and workers’ compound.
- Rescue the captain and escort him toward the boat.
- Use the final cannon objective against Fussar.
- Board the boat and complete Paradise Mercifully Departed.
Before you move on
- Welcome to the New World is marked complete.
- Savagery Unleashed is marked complete.
- A Kind and Benevolent Despot is marked complete.
- Hell Hath No Fury is marked complete.
- Paradise Mercifully Departed is marked complete.
- Arthur and the surviving gang members have escaped Guarma by boat.
- The next available story mission is Dear Uncle Tacitus; stop this chapter here and continue with the Beaver Hollow transition chapter.
- Create a manual save after the Guarma sequence if you want a protected checkpoint before continuing into the mainland return missions.
Chapter 5 Mainland Return and Chapter 6 Beaver Hollow Opening — Lakay to John’s Rescue
After Paradise Mercifully Departed, Arthur returns to the mainland and completes the Chapter 5 missions Dear Uncle Tacitus, Fleeting Joy, A Fork in the Road and That’s Murfree Country. Dear Uncle Tacitus sends him from Shady Belle to Lakay, where the gang survives a Pinkerton assault in Fleeting Joy. A Fork in the Road is a short Saint Denis sequence triggered by approaching Sadie’s Icarus and Friends marker. That’s Murfree Country sends Arthur and Charles into Murfree Brood territory to rescue Meredith; delivering her to Annesburg causes the gang to abandon Lakay and establish Beaver Hollow. Chapter 6 then begins. Complete Icarus and Friends, Visiting Hours and Just a Social Call in that opening Beaver Hollow route, while remembering that other Chapter 6 missions may appear between them. Preserve separate Lakay and Beaver Hollow saves before moving into the later Chapter 6 branches.
1. Return from Guarma and reach Lakay
Dear Uncle Tacitus begins after Paradise Mercifully Departed and is a Chapter 5 mission. Arthur reaches the mainland near Van Horn Trading Post, where a horse is available for the journey to Shady Belle. Follow the marked route south and enter the former camp. Inside the house, locate and read the letter addressed to Uncle Tacitus. The letter explains that the gang has moved to Lakay.
Reading the letter brings Pinkertons to Shady Belle. Leave the house and follow the escape route toward the waiting horse. Sneaking past the patrol is the safest approach and is also necessary for the mission’s detection-related Gold Medal requirement. Ride to Lakay and approach the marked gang members, including Pearson, Abigail and Sadie, to complete the mission.
- Complete Dear Uncle Tacitus.
- Read the letter at Shady Belle.
- Leave Shady Belle without being detected if pursuing the Gold Medal.
- Reach Lakay and confirm that the gang has relocated there.
2. Defend Lakay in Fleeting Joy
Fleeting Joy is the next Chapter 5 mission. The Pinkertons attack Lakay, forcing Arthur and the gang through several defensive positions. Follow Sadie and Bill rather than advancing alone into the swamp. Use the available cover and move when the mission directs the gang to change positions.
The final defense places Arthur on Lakay’s Gatling gun. Track the enemy groups called out by the gang and fire controlled bursts instead of sweeping constantly across the field. The weapon is powerful but inaccurate when fired carelessly. If you want the Gold Medal, preserve your health, fulfill the Dead Eye requirement and maintain the required Gatling Gun accuracy. When the Pinkertons withdraw, allow the closing scene to finish before leaving camp.
- Complete Fleeting Joy.
- Follow the gang between the marked defensive positions.
- Use the Gatling gun during the final defense.
- Make a manual Lakay save after the mission if you want a fallback before the relocation.
3. Trigger and complete A Fork in the Road
A Fork in the Road is also a Chapter 5 mission, although the trigger can occur at the transition into Chapter 6. It is not started from a conventional yellow mission giver. After Fleeting Joy, approach Sadie’s Saint Denis waypoint for Icarus and Friends. Arthur’s illness sequence triggers as he travels through the city.
Follow the person who helps Arthur reach the doctor. Enter the doctor’s office and complete the examination and diagnosis sequence. This is a short, guided story mission with little combat. Continue through the prompted movement and dialogue until the mission ends and the normal map returns. If the sequence has not appeared, travel away from Saint Denis, allow time to pass, then approach Sadie’s Icarus and Friends marker again.
- Trigger A Fork in the Road in Saint Denis.
- Follow the helper to the doctor.
- Complete the examination and diagnosis.
- Remain in the guided sequence until the mission-complete transition occurs.
4. Prepare for the Lakay relocation
That’s Murfree Country is the final required Chapter 5 mission in this section and moves the gang from Lakay to Beaver Hollow. Before accepting it, review any optional Lakay-era markers you specifically want to complete. The camp transition changes the available camp setting and can affect optional activities, so make a separate manual save before starting.
Clean and reload the weapons you expect to use. Carry ammunition, health cures, Dead Eye tonics and horse medicine. The mission begins on horseback but changes into a confined cave fight, so keep a close-range weapon available. Do not rely only on autosaves if you want to preserve the Lakay state.
- Review optional Chapter 5 markers.
- Complete any Lakay activities you do not want to lose.
- Restock ammunition and recovery items.
- Create a protected manual save before That’s Murfree Country.
5. Investigate the Murfree Brood and rescue Meredith
Start That’s Murfree Country at Dutch’s marker in Lakay. Ride north with Charles toward the Murfree Brood territory near Butcher Creek and follow Charles during the approach. When the mission shifts to stealth, stay close to him and use the prompted silent takedown on the lookout. Follow the marked route into the cave rather than searching the surrounding woods.
Inside the cave, the Murfree Brood attacks at close range and can approach through side passages. Use the cave walls and other cover to limit the directions from which Arthur can be attacked. Watch the minimap for flanking enemies and use Dead Eye when several opponents rush together. After the fight, approach Meredith carefully and choose the defusing response before taking her away.
Place Meredith on the horse and ride to Annesburg. Follow the marked route and deliver her to her mother. Completing the delivery finishes the Chapter 5 mission and begins the gang’s relocation from Lakay.
- Ride with Charles into Murfree Brood territory.
- Clear the cave.
- Free Meredith without escalating the encounter unnecessarily.
- Deliver Meredith to her mother in Annesburg.
- Complete That’s Murfree Country.
6. Establish Beaver Hollow and begin Chapter 6
Allow the relocation scene and loading transition to finish after Meredith’s delivery. The gang abandons Lakay and establishes Beaver Hollow in Roanoke Ridge. This is the handoff from Chapter 5 into Chapter 6. When control returns, confirm Beaver Hollow is the active camp and create a second manual save in a different slot from the Lakay file.
In this route, treat the following Beaver Hollow missions as Chapter 6 content even though Icarus and Friends can be triggered near the chapter transition in some mission listings. The practical order is to finish That’s Murfree Country first, then begin the Chapter 6 opening sequence from Beaver Hollow.
- Complete Meredith’s delivery.
- Allow the camp relocation to finish.
- Verify Beaver Hollow is active.
- Create a separate Chapter 6 save.
7. Complete Icarus and Friends
Go to Sadie’s marker in Saint Denis for Icarus and Friends. Follow her through the city and begin the balloon reconnaissance of Sisika Penitentiary. Keep the balloon within the green altitude zone shown by the on-screen gauge. Make small adjustments rather than holding the ascend control continuously.
When the balloon reaches the prison, use the binoculars to identify John in the chain gang near the red barn. Once the guards begin firing, raise the balloon as directed. During the return flight, protect the balloon and Sadie from the pursuing O’Driscolls. After the crash, clear the attackers from the immediate area, move with Sadie and finish the closing scene.
- Complete Icarus and Friends.
- Maintain the balloon’s required altitude if pursuing Gold.
- Identify John with the binoculars.
- Survive the balloon crash and clear the attackers.
8. Rescue John in Visiting Hours
Visiting Hours is a Chapter 6 mission unlocked after Icarus and Friends and That’s Murfree Country. Meet Sadie at the marked dock near Sisika Penitentiary and follow her into the rescue operation. During the opening exchange, use the requested hostage trade and then move immediately when John and Sadie begin the escape.
Prioritize guards who threaten the escape route instead of stopping to loot. Use the sniper rifle from the tower for the opening guards if pursuing Gold Medal requirements, then follow John and Sadie across the bridge and through the fields. Keep moving between cover points, eliminate mounted pursuers and reach the boat before the escape timer expires. Once on the boat, shoot guards who continue the pursuit, then follow Sadie back toward Beaver Hollow.
- Complete Visiting Hours.
- Reach John at Sisika.
- Follow John and Sadie to the boat without detouring to loot.
- Return to Beaver Hollow and confirm John has rejoined the gang.
9. Complete Just a Social Call and secure the handoff
After the Chapter 6 prerequisites are satisfied, meet Dutch and Micah at the Annesburg marker for Just a Social Call. Follow them to the docks and take cover behind the indicated crates during the confrontation with Cornwall. When the objective changes to reach the horses, move directly through the industrial area instead of stopping to loot or clear every enemy.
Shoot only the enemies blocking the route, mount promptly and stay with Dutch and Micah during the escape. If pursuing the Gold Medal, prioritize the mounted headshots and the timed ride to the horses. After the mission, return to Beaver Hollow and create a protected save.
A Rage Unleashed becomes available after Just a Social Call, but it is not necessarily the only marker that can be present. The later Chapter 6 branches can appear in overlapping order, so use the mission names and prerequisites rather than assuming that every player will see one exclusive next mission.
- Complete Just a Social Call.
- Reach the horses quickly after Cornwall is killed if pursuing Gold.
- Return safely from Annesburg.
- Save at Beaver Hollow.
- Confirm A Rage Unleashed is available or has been unlocked as a later Chapter 6 branch.
Before you move on
- Dear Uncle Tacitus and Fleeting Joy are complete as Chapter 5 missions.
- A Fork in the Road is complete, including Arthur’s doctor examination and diagnosis sequence.
- That’s Murfree Country is complete, including the cave fight and Meredith’s delivery.
- The gang has left Lakay and Beaver Hollow is the active Chapter 6 camp.
- A protected Lakay save and a separate Beaver Hollow save exist.
- Icarus and Friends is complete.
- Visiting Hours is complete and John has been rescued from Sisika.
- Just a Social Call is complete.
- A Rage Unleashed is available or identified as a later unlocked Chapter 6 branch.
- The guide is ready to hand off to the remaining Chapter 6 missions without repeating any Chapter 5 or Beaver Hollow opening mission.
References for this chapter
- Red Dead Redemption 2 Full Walkthrough – All Story Missions
- Red Dead Redemption 2 Dear Uncle Tacitus Walkthrough
- Red Dead Redemption 2 Fleeting Joy Walkthrough
- Red Dead Redemption 2 A Fork in the Road Walkthrough
- Red Dead Redemption 2 That’s Murfee Country Walkthrough
- Red Dead Redemption 2 Icarus and Friends Walkthrough
- Red Dead Redemption 2 Visiting Hours Walkthrough
- Red Dead Redemption 2 Just a Social Call Walkthrough
- Red Dead Redemption 2 A Rage Unleashed Walkthrough
- Chapter 5 | Red Dead Redemption 2 Story Missions List
- Chapter 6: Beaver Hollow — Red Dead Redemption 2 Walkthrough & Guide
Chapter 6B — Beaver Hollow: Betrayals, camp collapse and turning points
After Just a Social Call, complete The Delights of Van Horn and then The Bridge to Nowhere. Continue through A Rage Unleashed, Goodbye, Dear Friend, Favored Sons and The Fine Art of Conversation. The conditional Archaeology for Beginners and Honor, Amongst Thieves missions are optional Wapiti content, not ordinary campaign requirements. Favored Sons and The Fine Art of Conversation unlock The King’s Son. After The Bridge to Nowhere and The King’s Son, My Last Boy becomes available without requiring either Mrs. Sadie Adler, Widow mission. Play Sadie’s two-part mission only for its optional story, honor, gold-medal or trophy-related progress. Finish desired Chapter 6 side content, complete My Last Boy, and stop at a protected save before Our Best Selves.
Prepare after Just a Social Call
Begin this section after Just a Social Call is complete. Return to Beaver Hollow, replenish ammunition for your repeater, rifle and sidearms, carry health and Dead Eye tonics, restore your horse’s cores and create a manual save in a separate slot. Chapter 6 can display several yellow markers at once, so use the prerequisite route below rather than assuming the closest marker is the only way forward.
If you want Arthur-only honor missions, camp requests, debt work, bounty work or other optional activities, complete them before starting My Last Boy. That mission leads directly into the final Chapter 6 sequence and may close outstanding optional content. Gold Medal objectives are not needed for ordinary story progression.
- Just a Social Call is complete.
- Ammunition, tonics and horse provisions are replenished.
- A separate manual fallback save exists.
Complete The Delights of Van Horn, then The Bridge to Nowhere
Ride to the yellow marker near Van Horn and begin The Delights of Van Horn with Bill. During the convoy ambush, use the available cover and prioritize soldiers threatening Arthur, Bill or the dynamite wagon. Once the escape begins, stay with the wagon and the gang instead of stopping to loot. Follow the pursuit until the mission ends.
The Bridge to Nowhere follows The Delights of Van Horn. Its marker appears at Bacchus Station after the required delay. Ride the handcart to the bridge site, collect both dynamite crates and lower them to John using the displayed prompts. When the train approaches, follow the escape objective immediately. Reach the detonator, trigger the explosion and retreat with John. Ordinary completion does not require the Gold Medal time limits.
- The Delights of Van Horn is complete.
- The Bridge to Nowhere appears at Bacchus Station.
- Both dynamite crates are delivered.
- The bridge is demolished and the escape is complete.
Begin the Wapiti route with A Rage Unleashed
Start A Rage Unleashed at the Wapiti Reservation. Follow Eagle Flies and the group to the army boat, remain close to the marked allies and use the displayed prompts to release the horses. During the escape, stay on the marked route, use nearby cover during the shore firefight and save Dead Eye for groups of soldiers or a dangerous close-range exchange. Continue with the group until Arthur returns to the reservation.
At the conclusion, Arthur can accept or decline the additional request connected to Rains Fall. Declining allows the ordinary story route to continue without the optional Wapiti branch. Accepting makes Archaeology for Beginners available. This branch is optional for the campaign, although it contributes to optional honor, story and trophy-related progress.
- A Rage Unleashed is complete.
- The choice concerning further help for Rains Fall is made.
- The optional Wapiti branch is either declined or deliberately accepted.
Play Archaeology for Beginners and Honor, Amongst Thieves only if pursuing the optional branch
If Arthur accepted the continuation after A Rage Unleashed, meet Rains Fall at the Wapiti Reservation for Archaeology for Beginners. Follow him to the sacred site, recover the marked relics and return them as directed. For a safe ordinary completion, prioritize remaining undetected and follow the objective route rather than wandering after collecting the relics.
During the branch, Captain Monroe can request Arthur’s help. Accepting that request unlocks Honor, Amongst Thieves. This mission is optional and does not block The Fine Art of Conversation, The King’s Son or My Last Boy on the ordinary campaign route. Play it for its honor and optional trophy-related value if desired, then return to the main Wapiti markers.
- Archaeology for Beginners is complete only if the optional continuation was accepted.
- Honor, Amongst Thieves is complete only if Arthur accepted Monroe’s request.
- The optional branch is not being mistaken for a mandatory campaign prerequisite.
Complete Goodbye, Dear Friend and Favored Sons
Travel to Saint Denis for Goodbye, Dear Friend when Sadie and Dutch’s marker appears. Follow the search through the city and avoid creating unrelated law trouble. When Arthur reaches the rifle position, use the scoped rifle to cover Sadie and Dutch. Track enemy positions from the shots, clear the courtyard and follow the escape sequence back toward camp.
For Favored Sons, meet Dutch and Eagle Flies near Cumberland Forest. Follow the setup, collect the spool and place the marked dynamite charges. Return to the overlook before the convoy arrives. During the attack, use the rocks and slope for cover, remove enemies on elevated positions and deal with the cannon threat promptly. Advance when the objective changes, then follow the gang’s retreat instead of stopping to loot exposed bodies.
- Goodbye, Dear Friend is complete.
- The Saint Denis rifle-cover sequence is complete.
- Favored Sons is complete.
- The convoy attack and retreat are finished.
Complete The Fine Art of Conversation, then The King’s Son
Begin The Fine Art of Conversation when its marker becomes available. It can follow A Rage Unleashed directly if Arthur declined the optional continuation, or appear after the Archaeology for Beginners route. If Honor, Amongst Thieves is available, complete it before continuing only if you want that optional mission; it is not needed for the main route. During The Fine Art of Conversation, stay with Charles and Rains Fall through the meeting, protect Captain Monroe during the escape and remain with the marked group until the mission ends.
The King’s Son becomes available after Favored Sons and The Fine Art of Conversation. Meet Charles at the Wapiti Reservation and follow him to Fort Wallace. Stay behind the marked allies during the infiltration, use the bow or stealth takedowns when practical, shoot the marked lantern to create the distraction and free Eagle Flies. During the canoe escape, fire at pursuing soldiers nearest to the canoe or blocking its route. Do not stop to loot until the escape is complete.
- The Fine Art of Conversation is complete.
- Favored Sons is complete.
- The King’s Son is available and complete.
- Honor, Amongst Thieves is recorded only if its conditional branch was pursued.
Treat Mrs. Sadie Adler, Widow as optional Chapter 6 content
Mrs. Sadie Adler, Widow is a two-part optional mission chain. Its marker can appear after the relevant Chapter 6 story missions, with availability depending on the order in which missions are completed. It is not required for My Last Boy, and neither part is required for the ordinary campaign ending. Play Part I if you want Sadie’s additional story scenes or optional honor progress.
If Part II becomes available, travel with Sadie to Hanging Dog Ranch and follow the assault objectives. Use exterior cover before entering, watch for defenders around the ranch buildings and advance with Sadie instead of charging ahead alone. Complete the second part for its optional continuation, gold-medal attempts or trophy-related progress. If you skip either part, the main campaign route remains available after The Bridge to Nowhere and The King’s Son.
- Mrs. Sadie Adler, Widow Part I is optional and may be complete.
- Mrs. Sadie Adler, Widow Part II is optional follow-up content.
- Neither Sadie mission is being treated as a prerequisite for My Last Boy.
Complete My Last Boy and stop before Our Best Selves
Before starting My Last Boy, finish any desired optional Chapter 6 activities, including the conditional Wapiti branch, Sadie’s optional mission chain, debt missions, stranger missions, bounty work and camp requests. Do not assume all Arthur activities will remain available after the late-Chapter 6 story advances.
My Last Boy becomes available after The King’s Son and The Bridge to Nowhere. Ride with Dutch and Eagle Flies to Cornwall Kerosene and Tar. During the oil-field assault, use cover and remove elevated shooters first. Advance with the gang rather than crossing open ground alone. When Arthur is ordered to rescue Paytah, follow the marked route, clear nearby soldiers and stay with the group through the retreat. Preserve tonics where possible because the mission contains several consecutive firefights.
When My Last Boy ends and Arthur is controllable, create a new manual save in a separate slot. Stop there. Our Best Selves is the next major late-Chapter 6 mission and belongs to the following chapter section; do not start it if this save is intended to preserve the pre-finale state.
- The King’s Son is complete.
- The Bridge to Nowhere is complete.
- Desired optional Wapiti content is complete or deliberately skipped.
- Desired Sadie Adler content is complete or deliberately skipped.
- Desired Chapter 6 optional activities are finished.
- My Last Boy is complete.
- A protected save exists after My Last Boy and before Our Best Selves.
Before you move on
- The Progress menu records The Delights of Van Horn, The Bridge to Nowhere, A Rage Unleashed, Goodbye, Dear Friend, Favored Sons, The Fine Art of Conversation, The King’s Son and My Last Boy as complete.
- Archaeology for Beginners and Honor, Amongst Thieves are complete only if their conditional Wapiti branch was pursued.
- Mrs. Sadie Adler, Widow Part I and Part II may be complete if their optional story or trophy-related content was pursued, but neither is required for My Last Boy.
- The ordinary campaign route reached My Last Boy after The Bridge to Nowhere and The King’s Son.
- A separate manual save exists after My Last Boy and before Our Best Selves.
- Our Best Selves is the next major late-Chapter 6 mission.
- No walkthrough for Our Best Selves appears in this chapter.
References for this chapter
- Chapter 6: Beaver Hollow — Red Dead Redemption 2 Walkthrough & Guide
- Red Dead Redemption 2 My Last Boy walkthrough — PowerPyx
- Archeology for Beginners — Red Dead Redemption 2 Walkthrough
- Mrs. Sadie Adler, Widow — Red Dead Wiki
- Red Dead Redemption 2 Now Available for PlayStation 4 and Xbox One Systems
Final Chapter 6 — Arthur’s last missions and the transition to the Epilogue
After My Last Boy, finish any Chapter 6 optional content you want to preserve, then make a protected manual save before accepting Our Best Selves from Dutch at Beaver Hollow. Our Best Selves is the final train robbery and flows directly into Red Dead Redemption; Arthur does not return to ordinary free roam between those missions. Retrieve the dynamite, board the moving train, cross the burning carriage with Dutch’s horse, operate the Maxim gun and breach the armored payroll carriage. Red Dead Redemption then sends Arthur back to Beaver Hollow during the Pinkerton assault. Stay with the marked group, help John and Abigail, choose either Help John or Return for the Money, and follow the scripted final confrontation with Micah. Allow the cutscenes and save transition to finish before checking Story progress and the PS4 Redemption trophy. Preserve both the pre-finale Arthur save and a separate save after control passes toward the Epilogue.
1. Finish My Last Boy and decide whether to clear optional Chapter 6 content
Begin this section after My Last Boy is complete. Arthur returns to Beaver Hollow with the gang, and the next major story marker is Our Best Selves. My Last Boy is not itself the uninterrupted finale: it leaves a short final Arthur free-roam window before you accept Dutch’s next mission.
Before entering Our Best Selves, check the map, mission log and camp for any Chapter 6 content you want to complete. This can include available honor missions, companion activities, camp requests and stranger missions. These activities are optional for reaching the campaign ending, and not every white marker is available on every save, so use the markers and log shown in your game rather than assuming that a particular side mission must appear.
When you are ready to end Arthur’s normal exploration, return to Beaver Hollow. The required route from this point is Our Best Selves followed immediately by Red Dead Redemption. Do not start the mission merely to inspect its opening scene if you still intend to roam as Arthur; accepting the mission begins the final connected sequence.
- Complete My Last Boy.
- Finish any available Chapter 6 optional content you want to keep.
- Return to Beaver Hollow before beginning Our Best Selves.
2. Create and protect the pre-finale save
Restore Arthur’s health, stamina and Dead Eye cores with food or tonics. Clean the weapons you expect to use and refill ammunition. A repeater or rifle is useful for the train’s medium-range targets, while a shotgun or sidearm is helpful in close quarters. These preparations are not required to unlock the mission, but they reduce the chance of a failed attempt.
On PlayStation 4, press Options, open the Story menu, choose Save Game, select an unused manual-save slot and confirm. Keep this slot separate from your current autosave and do not overwrite it after starting the finale. Rockstar’s PS4 support instructions use the Options menu, Save command and a selected save slot for manual story saves.
Start Our Best Selves only after confirming that the protected save exists. Once Arthur accepts the mission from Dutch at Beaver Hollow, the train robbery leads directly into Red Dead Redemption. There is no ordinary Arthur free-roam break between the two missions.
- Restore all three core meters.
- Check weapon condition and ammunition.
- Make and protect a separate manual save before accepting Our Best Selves.
3. Collect the dynamite and reach the train
Approach Dutch’s yellow marker at Beaver Hollow to begin Our Best Selves. Ride with Dutch and the gang while the plan is discussed. When Arthur separates with John, follow John to the wagon carrying the explosives.
Dismount at the wagon, climb into its rear and collect the dynamite from the marked crate when prompted. Return to your horse and follow John back to Dutch’s group. Stay with the marked riders as they move toward the train route near Saint Denis.
When the train begins moving, gallop alongside it rather than trying to cut away from the mission path. Align Arthur with the accessible flatbed and use the prompted jump to board. If Arthur falls or misses the train, follow the checkpoint restart instead of attempting an unrelated route through the city.
- Follow John to the explosives wagon.
- Take the dynamite from the marked crate.
- Return to the gang and ride to the train.
- Jump onto the moving train when prompted.
4. Fight through the train and cross the burning carriage
Advance toward the front of the train, using carriage walls, crates and other cover. Fire deliberately if you are trying to preserve accuracy for the mission’s Gold Medal requirement, and use Dead Eye when several enemies appear together. Move forward after each immediate group is under control rather than exposing Arthur on the roof for longer than necessary.
The train catches fire and blocks the direct route. Move to the side of the train and wait for Dutch to ride close enough. Use the prompt to jump onto Dutch’s horse. Dutch carries Arthur past the burning section; when the game presents the next transition, jump back onto the train and continue with the gang.
A brief Dead Eye opportunity occurs after the horse transition. It is relevant to the Gold Medal challenge, not to ordinary story completion. If you are only completing the campaign, prioritize landing the transition and remaining with the mission group.
- Clear the train cars while using cover.
- Wait for Dutch beside the burning section.
- Jump onto Dutch’s horse when prompted.
- Return to the train after crossing the fire.
5. Operate the Maxim gun and breach the payroll carriage
After Arthur reaches the next carriage, he takes control of the mounted Maxim gun while the train is pursued by mounted enemies. Remain at the gun and track attackers on both sides and behind the train. Continue firing until the objective changes; leaving the weapon early can interrupt the sequence.
Once the pursuit section is complete, move forward with the gang. Select the regular dynamite collected earlier when the game directs Arthur to the armored carriage. Place it on the carriage door and follow the ignition prompt. Do not substitute another explosive if the objective specifically identifies the dynamite.
The blast and following cutscenes conclude Our Best Selves. The game then starts Red Dead Redemption automatically. Let the transition finish; do not quit to the title screen expecting a normal return to Beaver Hollow.
- Stay on the Maxim gun until the objective changes.
- Advance to the armored payroll carriage.
- Place and ignite the dynamite at the marked door.
- Allow the automatic transition into Red Dead Redemption.
6. Follow Red Dead Redemption through the Beaver Hollow assault
Red Dead Redemption begins with Arthur returning to the gang’s collapsing camp while Pinkertons attack. Stay with the marked allies and follow the mission route through Beaver Hollow. The mission boundary and scripted objectives prevent ordinary exploration, so do not attempt to ride away, open a separate travel route or start unrelated activities.
Advance from cover to cover as the objective changes. Rocks, trees, camp structures and terrain folds can protect Arthur during the firefights. Move forward after nearby enemies are suppressed and follow John or the next yellow objective marker when the route opens.
Continue with the group when the mission directs Arthur toward Abigail. Use health, Dead Eye or other combat tonics if needed; conserving them for later free roam has no benefit during this sequence. If Arthur dies, restart from the checkpoint and repeat only the current objective.
- Stay with John and the marked allies.
- Follow the route through Beaver Hollow.
- Use terrain and camp structures as cover.
- Reach Abigail by following the mission objectives.
7. Make the final choice and complete Arthur’s confrontation
After the escape sequence and the fight against the pursuing Pinkertons, the game presents two choices: Help John or Return for the Money. Help John sends Arthur back toward John’s escape. Return for the Money sends Arthur toward the gang’s hidden cash and produces a different final route. Either choice completes Chapter 6; neither is required for campaign completion over the other.
Continue following the displayed objectives after choosing. The final encounter with Micah is heavily scripted and includes close-quarters combat. Treat it as a prompted sequence rather than a normal firefight: follow the on-screen movement, struggle, block and counter instructions, and continue until the game takes control for the final cutscenes.
Arthur’s honor changes the presentation of the ending, while the choice changes the route and scenes. Do not quit immediately after the last exchange. Wait for the final cutscenes, the saving process and the transition that leads into the Epilogue.
- Choose Help John or Return for the Money.
- Follow all displayed combat and movement prompts.
- Complete the scripted confrontation with Micah.
- Watch the final Arthur cutscenes and wait for saving to finish.
8. Verify the ending and preserve both campaign states
After the game transitions toward the Epilogue, open the pause menu and review Story and Progress. Confirm that Our Best Selves and Red Dead Redemption are listed as completed. Mission Replay can confirm that missions are recorded, but replaying a mission does not restore Arthur’s normal free-roam state or undo the story transition.
Completing Red Dead Redemption awards the PS4 story trophy Redemption. Wait until the game has finished saving and the transition has settled, then check the console trophy notification or trophy list. The trophy is associated with Arthur’s final story mission, not with completing Epilogue Part 1, Epilogue Part 2 or American Venom.
Keep the manual save made before Our Best Selves in its original slot. When the Epilogue gives you control as John, create a second manual save in a different slot. The first save preserves the last ordinary Arthur state; the second preserves the campaign after Chapter 6 and allows continued progression toward the Epilogue ending.
- Confirm Our Best Selves is complete in Story or Progress.
- Confirm Red Dead Redemption is complete.
- Confirm the PS4 Redemption trophy has unlocked after saving finishes.
- Preserve the pre-finale Arthur save.
- Create a separate save after the Epilogue transition begins.
Before you move on
- My Last Boy is complete and desired optional Chapter 6 content has been handled.
- A protected manual save exists from before accepting Our Best Selves.
- Our Best Selves was completed through the train robbery and armored-carriage breach.
- Red Dead Redemption was completed through Arthur’s final confrontation.
- The Help John or Return for the Money choice was resolved.
- The PS4 Redemption trophy is visible as unlocked after the game saves.
- A separate post-transition campaign save exists after control begins moving into the Epilogue.
References for this chapter
- Red Dead Redemption 2: Our Best Selves walkthrough — PowerPyx
- Our Best Selves — Chapter 6 walkthrough — Gamer Guides
- Red Dead Redemption 2: Our Best Selves walkthrough — Gamepressure
- Red Dead Redemption — Chapter 6 walkthrough — Gamer Guides
- Red Dead Redemption 2: Red Dead Redemption mission walkthrough — Gamepressure
- Red Dead Redemption 2 My Last Boy walkthrough — PowerPyx
- Red Dead Redemption 2 PS4 manual save instructions — Rockstar Games Support
- Red Dead Redemption 2 PS4/Xbox One title update notes — Rockstar Games Support
Epilogue Part 1 — Pronghorn Ranch: Play as John, rebuilding and new objectives
Epilogue Part 1 begins with John Marston working at Pronghorn Ranch. Complete The Wheel, Simple Pleasures, Farming, for Beginners, Fatherhood, for Beginners, Old Habits, Jim Milton Rides, Again?, Fatherhood, for Idiots and Motherhood. After Motherhood, Gainful Employment appears as optional yellow-marker content and does not have to be completed before the land purchase. The required land-purchase sequence is one continuous mission: start The Landowning Classes at the Blackwater bank, travel to Beecher’s Hope, deal with the squatters, finish the financing and property objectives, meet Uncle, and ride back to the ranch. The mission’s later section is titled Home of the Gentry?, but it is not a separate mission to seek out or start. Epilogue Part 1 ends only after that continuous mission concludes and the game transitions to Epilogue Part 2: Beecher’s Hope.
1. Complete The Wheel and reach Pronghorn Ranch
The Wheel places you back in control of John after Arthur’s final story mission. Follow the marked route to Strawberry, enter the general store and speak with the shopkeeper about work. Go to the doctor’s office to meet Abigail, then return to the wagon once the delivery is ready.
Drive the wagon to Pronghorn Ranch by following the objective route. Avoid collisions so the supplies remain aboard. At the ranch, speak with the workers and follow the introduction until the outlaws steal the wagon. Mount the nearby horse, chase the wagon, use the prompted action to recover it, and return it to the ranch. The mission ends after the ranch introduction. A manual save here is useful if you want a checkpoint before the restricted ranch chores begin.
- Complete The Wheel.
- Deliver the wagon and supplies to Pronghorn Ranch.
- Recover the stolen wagon.
- Return the wagon to the ranch.
2. Finish the first ranch lessons
Start Simple Pleasures by speaking with Tom Dickens at Pronghorn Ranch. Follow Abe through the marked work areas, welcome Abigail and Jack at the house, milk the cows using the alternating stick prompts, and clean the stable with the pitchfork. Return to the marked location after the chores to finish the lesson.
Farming, for Beginners follows the ranch routine. Complete the fence-repair prompts, then follow Tom to the bull. Chase the animal, lasso it when prompted, calm it after it is restrained, and lead it back once the game allows you to do so. Stay close to the objective area rather than attempting to leave the ranch.
Fatherhood, for Beginners begins with David Geddes. Follow the instructions for calming and tiring Jeremiah, feed the horse the requested treat, and help Duncan with the riding lesson. Later, accompany Jack and teach him to ride. Keep Jack nearby, avoid pushing the horse beyond the instructed pace, and win the return race to Pronghorn Ranch.
- Complete Simple Pleasures.
- Complete Farming, for Beginners.
- Complete Fatherhood, for Beginners.
- Return to the ranch after Jack’s riding lesson.
3. Complete Old Habits, Jim Milton Rides, Again?, and Fatherhood, for Idiots
Old Habits follows the early ranch lessons. Go to Abe when the disturbance begins and confront the Laramie man in the fistfight. Block before counterattacking, then continue the prompted melee until the confrontation ends. This mission is short, but taking unnecessary damage can cause a restart if you are pursuing its medal requirements.
Jim Milton Rides, Again? and Fatherhood, for Idiots become available after the relevant ranch missions and can be completed in either order. In Jim Milton Rides, Again?, follow the ranch workers during the nighttime attack near Hanging Dog Ranch. Use the buildings and terrain for cover, let the allied ranch hands draw some enemy attention, and use Dead Eye deliberately rather than crossing open ground under fire.
In Fatherhood, for Idiots, take the wagon to Strawberry, collect the mail and begin the return trip. When the ambush occurs near the fallen tree, dismount and defeat the attackers, then get back into the wagon and complete the return journey. The mission is not complete when the ambush ends; the wagon must reach its destination.
- Complete Old Habits.
- Complete Jim Milton Rides, Again?.
- Complete Fatherhood, for Idiots.
- Return the mail wagon after the ambush.
4. Complete Motherhood and prepare for the open epilogue route
Start Motherhood at Pronghorn Ranch after the preceding ranch missions are complete. Take the telegram when directed, follow the chores and travel objectives, and remain inside the active mission area during the time transitions. This is a guided story mission, so follow the prompts instead of trying to turn it into free-roam exploration.
When Motherhood ends, John can access the next yellow-marker missions. His equipment and supplies are more limited than Arthur’s during much of this section, so check the available weapons and replenish ammunition and healing supplies before leaving the ranch. Keep a manual save from before Motherhood if you want to replay the ranch opening, then create another save after Motherhood if you want a clean starting point for the remaining Epilogue Part 1 missions.
- Complete Motherhood.
- Confirm that post-Motherhood yellow markers are available.
- Check John’s available weapons and supplies.
- Keep a protected save before or immediately after Motherhood.
5. Decide when to complete Gainful Employment
Gainful Employment is optional relative to the ordinary campaign route and does not have to be completed before the land-purchase sequence. When its yellow marker is available, meet Sadie in Valentine and follow her investigation to Strawberry. Ask around as directed, go to the Welcome Center, and pursue Nathan Kirk when he flees.
During the chase, stay close enough to use the lasso, then dismount and hogtie Kirk when he is down. Deliver him as the mission directs. Completing Gainful Employment restores access to later bounty content, but it is not the trigger that divides The Landowning Classes from Home of the Gentry?. You may complete it before or after the land-purchase sequence when the game makes it available.
- Treat Gainful Employment as optional campaign content.
- Meet Sadie in Valentine when its marker is available.
- Find Nathan Kirk at the Welcome Center.
- Capture and deliver Kirk if completing the mission.
6. Start and finish the continuous land-purchase mission
Travel to the yellow marker at the Blackwater bank and enter to meet Ansel Atherton. The mission begins under the title The Landowning Classes. Speak with Atherton about John’s loan and the purchase of Beecher’s Hope. Do not leave the bank expecting a separate mission marker to begin the property section; this is one continuous land-purchase sequence.
After the bank conversation, follow the active objective directly to Beecher’s Hope. The mission’s later section is presented under the title Home of the Gentry?. At the property, deal with the squatters. You can pay them to leave for the noncombat resolution, or choose the hostile resolution and clear them with your weapons. The choice affects honor and money but does not create a separate mission route.
Once the squatters are dealt with, follow the objectives for the paperwork and financing sequence. When John exits the bank, meet Uncle outside. Ride with him back to Beecher’s Hope and complete the return ride and closing ranch sequence. Do not treat the bank conversation or squatter clearance as the endpoint: the mission is complete only after the return to Beecher’s Hope and the concluding scenes.
- Start the mission at the Blackwater bank under The Landowning Classes.
- Speak with Ansel Atherton and accept the loan arrangement.
- Continue directly to Beecher’s Hope within the same mission.
- Resolve the squatter situation.
- Complete the paperwork and financing objectives.
- Meet Uncle outside Blackwater.
- Ride back to Beecher’s Hope with Uncle.
- Wait for the mission-complete transition.
7. Confirm the end of Epilogue Part 1
After the return to Beecher’s Hope and the closing sequence, the game transitions to Epilogue Part 2: Beecher’s Hope. This transition is the completion point for Epilogue Part 1. Create a protected manual save only after the continuous land-purchase mission has ended and the next epilogue section is available.
If you want to continue optional exploration, you can do so after the transition. Keep the completed Part 1 save separate from later free-roam saves so the campaign handoff remains available.
- Confirm the land-purchase sequence has fully concluded.
- Confirm that the game has transitioned to Epilogue Part 2: Beecher’s Hope.
- Create a protected post-transition save.
Before you move on
- The Story or Progress menu records The Wheel, Simple Pleasures, Farming, for Beginners, Fatherhood, for Beginners, Old Habits, Jim Milton Rides, Again?, Fatherhood, for Idiots and Motherhood as complete.
- Gainful Employment is complete if you chose to do the optional Sadie and Nathan Kirk mission.
- The Blackwater loan conversation has been completed under The Landowning Classes.
- The Beecher’s Hope squatter, paperwork, Uncle and return objectives have all been completed under the continuing Home of the Gentry? section.
- The game has transitioned to Epilogue Part 2: Beecher’s Hope.
- A protected manual save exists after that transition.
Epilogue Part 2 — Beecher's Hope & American Venom: The campaign ending
Epilogue Part 2 is a required yellow-marker sequence with limited flexibility in mission availability. Complete Bare Knuckle Friendships, Home Improvement for Beginners, An Honest Day’s Labors, The Tool Box, A New Jerusalem, A Quick Favor for an Old Friend, Uncle’s Bad Day, Trying Again, A Really Big Bastard and A New Future Imagined. The game may offer some of these markers in a different order, so follow the currently displayed yellow marker rather than waiting for an assumed fixed sequence. Use the prerequisite notes if a marker is absent. After both Trying Again and A Really Big Bastard are complete, finish A New Future Imagined, then enter the Beecher’s Hope house and go to the living room to begin American Venom. Follow Sadie and Charles to Strawberry, catch Cleet, travel to Mount Hagen and fight uphill through Micah’s gang. Gold Medal conditions are optional. After the ending scenes and credits, verify American Venom in Progress, confirm the Endless Summer trophy on PS4 and preserve a separate completed save.
1. Complete the yellow-marker missions at Beecher’s Hope
At the start of Epilogue Part 2, treat every available yellow mission marker as required campaign progress. The full required set is Bare Knuckle Friendships, Home Improvement for Beginners, An Honest Day’s Labors, The Tool Box, A New Jerusalem, A Quick Favor for an Old Friend, Uncle’s Bad Day, Trying Again, A Really Big Bastard and A New Future Imagined.
Do not assume the ten missions always appear in one unchanging order. Bare Knuckle Friendships begins the Beecher’s Hope sequence. Home Improvement for Beginners and An Honest Day’s Labors are both required, but their availability can vary. The Tool Box follows the construction-related setup, A New Jerusalem follows it, and A Quick Favor for an Old Friend leads into Uncle’s Bad Day. After Uncle’s Bad Day, Trying Again and A Really Big Bastard can be presented in either order. Both must be completed before A New Future Imagined becomes available.
If a listed marker is missing, check the map for another yellow marker first and complete that mission. If no yellow marker is visible, return to Beecher’s Hope, leave the immediate area, sleep or pass time, and check again. Do not replace a missing story mission with a white stranger marker, challenge, collectible hunt or ordinary ranch activity. Those are optional and do not unlock American Venom.
- Complete Bare Knuckle Friendships.
- Complete Home Improvement for Beginners and An Honest Day’s Labors.
- Complete The Tool Box, A New Jerusalem and A Quick Favor for an Old Friend.
- Complete Uncle’s Bad Day.
- Complete both Trying Again and A Really Big Bastard, in whichever order the yellow markers provide them.
- Wait for A New Future Imagined.
2. Finish A New Future Imagined and make a pre-finale save
When A New Future Imagined appears at Beecher’s Hope, start it and follow the displayed yellow route. Ride with Abigail to Blackwater, go to the photo studio, attend the theatre sequence and continue to the shore. The mission ends after John proposes to Abigail and control returns at Beecher’s Hope.
A New Future Imagined is the direct prerequisite for American Venom, but it is not necessary to search Strawberry or Mount Hagen before starting it. Once the mission is fully complete, wait for free control to return and create a manual save in a separate slot. Keep this save instead of relying only on the autosave; it is the most useful point for replaying the finale without repeating the rest of Epilogue Part 2.
Before beginning American Venom, clean your preferred firearms, refill ammunition and carry ordinary health cures and Dead Eye tonics. A repeater or rifle is useful for the mountain firefights, while a sidearm is useful when enemies close in. These preparations are for a normal completion; they are not required to unlock the story ending.
- Complete A New Future Imagined completely.
- Wait until control returns at Beecher’s Hope.
- Create a separate manual save before starting American Venom.
- Clean weapons and replenish ammunition if needed.
3. Start American Venom and catch Cleet in Strawberry
Enter the Beecher’s Hope house and go to the living room. Speak with Abigail and follow the opening scene until control returns outside. Ride with Sadie Adler and Charles Smith toward Strawberry. Follow the mission route rather than leaving the group, because the next objectives are scripted around their arrival in town.
When instructed to search, cross the bridge and follow the active objective toward Cleet. Cleet runs through Strawberry after the search phase begins. Chase him immediately through the streets and around the buildings. For an ordinary story completion, stay on the route and keep moving; avoid firing at him, colliding with civilians or turning the chase into an unnecessary law response. Sadie eventually tackles him.
After Cleet is captured, follow the prompts to interrogate him and take him to the gallows. Bring him up the stairs, place the noose around his neck and operate the lever when prompted. Cleet gives the information that leads the group to Mount Hagen. Whether you spare or hang him is not required for campaign completion. The Gold Medal requirement to help Sadie catch him within 35 seconds is optional.
- Begin American Venom from the Beecher’s Hope living room.
- Ride with Sadie and Charles to Strawberry.
- Chase Cleet as soon as the search becomes active.
- Take Cleet to the gallows and obtain the Mount Hagen lead.
- Do not worry about the 35-second chase condition unless pursuing Gold Medals.
4. Travel to Mount Hagen and defeat the sniper
Leave Strawberry with Sadie and Charles and follow the marked route toward Mount Hagen. After the travel transition, Charles is hit by a sniper. Dismount as soon as the firefight begins and move behind rocks or other available cover. Do not attempt to sprint uphill through the exposed snow.
Advance from cover to cover while watching the elevated firing position. Wait for a pause in the sniper’s fire before crossing open ground. When the sniper becomes visible, use Dead Eye or a scoped rifle to make a controlled shot. A headshot is required only for the American Venom Gold Medal, not for mission completion.
After the sniper is eliminated, regroup with Charles and continue up the marked mountain path with Sadie. Search the next ledges and rock lines before exposing yourself, because enemies can fire from above, beside the path and from positions behind the route. Reload during safe pauses and heal when necessary. Stay near the active objective so the mission’s checkpoints advance.
- Dismount when Charles is shot.
- Use rocks and terrain as cover.
- Cross exposed snow only during firing pauses.
- Eliminate the sniper and regroup with Charles.
- Continue along the marked mountain route.
5. Clear the mountain camp and complete the finale
Continue the ascent with Sadie and Charles. Use cover instead of charging uphill, and let your allies draw some enemy attention while you clear visible gunmen. Dead Eye is especially useful when enemies appear on higher ledges or several targets expose themselves together. Keep a repeater or rifle ready for distant targets and switch to a sidearm when enemies reach close range.
The route contains several firefights before the summit. Follow the yellow objective, reload after each exchange and restore your health before crossing another exposed section. If John dies, the game reloads the latest checkpoint; resume the same mountain phase and use a slower cover-to-cover approach rather than repeating an open-ground charge.
At the summit, remain near the objective and follow every on-screen prompt. The confrontation is scripted, so do not attempt to leave the area or explore away from the mission route. When the final sequence ends, allow the closing scenes and credits to play. American Venom is the final story mission of the campaign.
- Advance with cover during every mountain firefight.
- Watch elevated positions and side angles.
- Reload and recover between enemy groups.
- Follow the summit prompts without leaving the objective area.
- Allow the closing scenes and credits to finish.
6. Verify the ending and protect the completed save
After the closing scenes and credits, wait until control returns to John in the post-story world. Open the pause menu and check Progress, then Story. American Venom should be recorded as completed and Epilogue Part 2 should show its final story mission completed. The Endless Summer trophy is awarded for completing the Epilogue; if its notification was missed, check the PS4 Trophies screen after returning to free roam.
Create a new manual save in a different slot after control returns. Keep both the completed save and the pre-American Venom save if you want to replay the finale. For additional protection, copy the completed saved data through the PS4 saved-data tools to a USB device or configured online storage. Do this before extensive post-story activity begins overwriting convenient save points.
American Venom completes the campaign story but not 100 percent Total Completion. Collectibles, challenges, compendium progress, stranger content and other optional objectives can continue from the post-story John save. They are not prerequisites for finishing Epilogue Part 2 or unlocking Endless Summer.
- American Venom is listed as complete under Progress and Story.
- Epilogue Part 2 shows the final mission completed.
- The ending scenes and credits have played.
- John is controllable again in the post-story world.
- Endless Summer is registered in the PS4 trophy list.
- A separate completed save exists and the pre-finale save remains available.
Before you move on
- All required Epilogue Part 2 yellow-marker missions are complete.
- A New Future Imagined is complete.
- American Venom is marked complete in Progress and Story.
- The ending scenes and credits have played.
- John is controllable again in the post-story world.
- The Endless Summer trophy is registered on PS4.
- A protected completed save exists, with the pre-American Venom save retained separately.
Post-Story checks and optional clean-up: verifying progress and trophies
After American Venom, Red Dead Redemption 2 remains playable as John Marston at Beecher’s Hope. Confirm the completed epilogue, preserve a manual save, and keep three goals separate: finishing the story, reaching the in-game Total Completion target, and earning PlayStation trophies. Post-story free roam supports many remaining animals, challenges, equipment goals, treasure activities, collectibles, compendium entries, graves, and stranger missions, but it cannot restore every chapter-limited camp activity, request, or optional mission. Use an earlier chapter save for missed requirements, and use a separate working save for post-story cleanup so the completed campaign state remains protected.
1. Confirm the campaign endpoint
Complete American Venom and let its concluding scenes and credits sequence finish until control returns to John in the post-story world. American Venom is the final story mission in Epilogue Part 2 and completes the main campaign. There is no additional yellow story mission required after it.
Open the pause menu and choose Progress, then Story. Check that the epilogue and final story progress are recorded as complete. Next, open Progress, then Total Completion. Treat this as a separate checklist: the story can be finished while Total Completion is still well below 100 percent.
If control has not returned after the finale, continue through the remaining presentation rather than closing the application immediately. Once John is available at Beecher’s Hope or elsewhere in the post-story world, make the manual save described in the next step.
- American Venom is recorded as completed in Progress → Story.
- Control has returned to John after the finale.
- Progress → Total Completion has been checked separately from story progress.
2. Make and test a protected completed-campaign save
At Beecher’s Hope or another safe location, open the pause menu, choose Story, then Save Game, and create a manual save in a dedicated slot. Keep the last pre-American Venom save in a different slot if you want to replay the finale or preserve the world immediately before the ending. Do not rely on one slot for both the completed campaign and later cleanup.
Test the completed slot immediately. Save, return to the title screen, reload that exact manual save, and confirm that it loads John in the post-story world with American Venom still complete. This verifies the slot itself rather than merely trusting the autosave indicator.
For additional protection, copy the intended PS4 saved data to compatible USB storage or upload it to PlayStation Plus online storage. These are backup locations, not extra in-game save slots. Confirm the selected game and save data before copying or downloading, and avoid restoring an older backup over newer cleanup progress by mistake.
- A manual save exists after American Venom.
- The completed save is separate from the pre-finale save.
- The completed slot has been reloaded successfully.
- Any USB or cloud backup contains the intended save.
3. Check trophies by their exact requirements
Open the PS4 Trophies area for Red Dead Redemption 2 and inspect each missing trophy’s exact requirement. Mandatory story trophies should be earned during normal campaign progression, but optional awards involving camp activities, donations, companion requests, honor missions, or stranger strands depend on actions that may have been missed earlier.
Do not assume a missing trophy is waiting for the Progress menu to refresh. Compare its stated requirement with the actions recorded in the current campaign and with any available mission or activity records. If the requirement remains available in the post-story world, complete it normally and save. If it was chapter-limited, use an earlier suitable save or plan to complete it during another playthrough.
Mission replay can help with some replayable mission objectives and gold-medal-related requirements, but it is not a universal repair method for trophies based on the original campaign state. A replayed mission should not be treated as proof that a missed camp donation, request, companion activity, or honor-mission condition has been restored.
- The PS4 trophy list has been inspected.
- Each missing trophy has been compared with its exact requirement.
- Mission replay has not been assumed to repair every missed campaign-state requirement.
4. Create a separate cleanup save
Keep the protected ending save untouched and make a second manual save for post-story activities. Continue as John from this working slot for activities that remain available, including hunting, challenges, equipment, treasure chains, collectibles, compendium entries, graves, and many stranger missions.
Use another rotating slot before a long or expensive activity if you want an additional fallback. This is useful before major purchases, risky exploration, honor-sensitive encounters, or any route where you want to preserve a known position. There is no need to restart the campaign merely because American Venom is complete; the post-story world is designed for continued free roam.
If a cleanup task fails or produces an unwanted result, reload the working save rather than the protected ending save. Keep the protected slot unchanged until the campaign-only finish has been preserved externally or in a second storage location.
- The protected campaign-ending slot is not used for routine cleanup.
- A separate working slot contains John in the post-story world.
- Long activities are saved at sensible milestones.
5. Review chapter-limited trophy requirements
If Lending a Hand, Friends With Benefits, Give to the Poor, or Errand Boy is missing, investigate that requirement before spending time on unrelated collectibles. These trophies concern optional honor missions, companion activities in the gang’s camps, camp donations, and companion item requests. Their opportunities are tied to particular chapters or camp states and are not guaranteed to remain available after the story advances.
Friends With Benefits requires a qualifying companion activity in each relevant camp. Errand Boy requires five delivered camp companion item requests. Give to the Poor requires the required camp donation total, and Lending a Hand requires the relevant optional honor-story missions. Use a reliable trophy checklist to identify the precise missing condition rather than inferring it from the Total Completion percentage.
For a missed chapter requirement, load the earliest suitable manual save and complete the action there. If no suitable save exists, the practical recovery is another campaign playthrough. Preserve the post-story save separately so an older recovery save cannot overwrite the completed campaign state.
- Chapter-specific camp and companion requirements have been reviewed.
- Earlier saves are available for genuinely missable actions.
- The protected post-story save remains separate from any recovery attempt.
6. Use Total Completion for in-game cleanup
Open Progress, then Total Completion, and work from the categories shown there. This is the game’s defined 100 percent checklist, not a count of every animal, weapon, random encounter, or trophy. It includes selected story and stranger missions, collectibles, equipment, challenges, compendium-related goals, and specified activities such as hunting requests.
American Venom completes the final story portion needed for the checklist. If Hunting Requests is still unchecked after finishing Mrs. Hobbs’s request chain and receiving the squirrel statue, go to Beecher’s Hope and place the statue in its required permanent location. Then check Total Completion again. This checklist entry is separate from the PlayStation trophy for finding a permanent home for the squirrel statue.
Record unfinished categories before beginning a lengthy hunting or collectible route. Check the menu after each major requirement so you can identify which action advanced the percentage instead of assuming that every related reward has counted automatically.
- Progress → Total Completion is being used as the authoritative in-game checklist.
- American Venom is complete before final checklist verification.
- The hunting-request chain and Beecher’s Hope squirrel-statue placement are complete when required.
- Remaining categories are tracked directly from the menu.
7. Perform the final verification
When the intended cleanup is finished, save manually in the working slot, reload it, and check Progress again. Confirm that the epilogue and American Venom remain complete and that completed Total Completion categories stayed recorded after the reload. Then inspect the PS4 trophy list again after the console has synchronized the trophy data.
For a campaign-only finish, the concrete endpoint is American Venom completed, Epilogue Part 2 recorded as finished, John available in the post-story world, and a protected manual save that reloads into that state. For the broader in-game goal, continue until Progress → Total Completion reaches 100 percent. That result is separate from the Platinum Trophy, which also requires trophy-specific objectives, including optional or potentially missable activities.
Do not delete the pre-American Venom save until the completed slot has been tested and protected. Do not overwrite the protected ending save with routine cleanup progress.
- The final save reloads into the post-story world.
- American Venom and the epilogue remain complete after reloading.
- The intended campaign-only, trophy, or Total Completion target is visibly recorded.
Before you move on
- American Venom is complete in Progress → Story, and Epilogue Part 2 is recorded as finished.
- A protected manual save reloads with John in the post-story world after the finale.
- The PS4 trophy list has been inspected against the exact story and optional requirements.
- If pursuing in-game full completion, Progress → Total Completion reaches 100 percent rather than merely showing that the story is finished.
- Any chapter-limited trophy recovery has been completed from an earlier save or identified as requiring another playthrough.
References for this chapter
- Red Dead Redemption 2 Trophy Guide & Roadmap
- Red Dead Redemption 2 American Venom Walkthrough
- Red Dead Redemption 2 100% Completion Guide & Checklist
- Red Dead Redemption 2 All Hunting Request Locations
- Red Dead Redemption 2 Item Requests: How to Trigger Every Camp Request
- Errand Boy Trophy in Red Dead Redemption 2
- Transfer or dispose of your PlayStation console
- How to manage PS4 console storage space
Finishing up
Finish the required story route through Epilogue Part 2 and complete American Venom.
Allow the ending and credits transition to finish, then confirm American Venom and the Epilogue are recorded under Progress → Story.
Create and test a separate post-story manual save with John available in the post-campaign world.
Keep pre-lockout saves if you want to revisit Arthur-era or chapter-limited content.
Treat story completion, Total Completion, and PlayStation trophy completion as separate goals; a missing trophy may require its exact prerequisite, an earlier save or another playthrough.
Choose your next gameScreenshots & video
Game imagery for reference. Follow the written chapters above for the route and strategies.
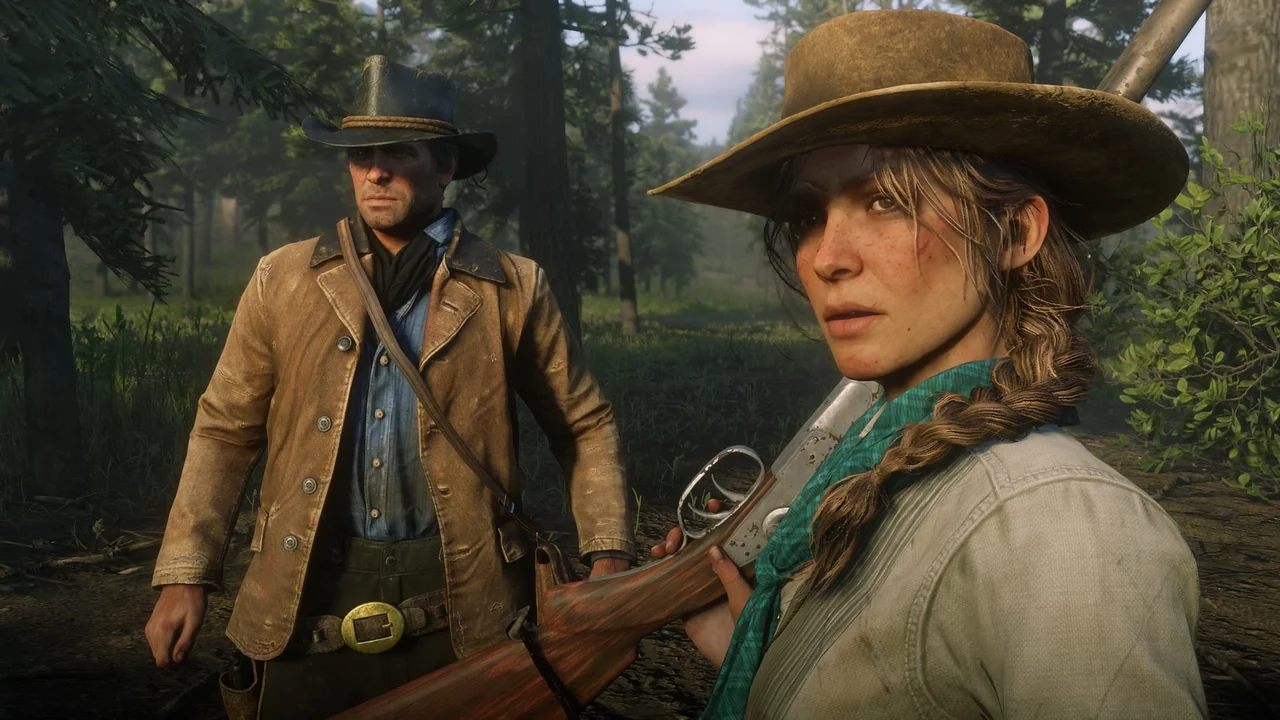
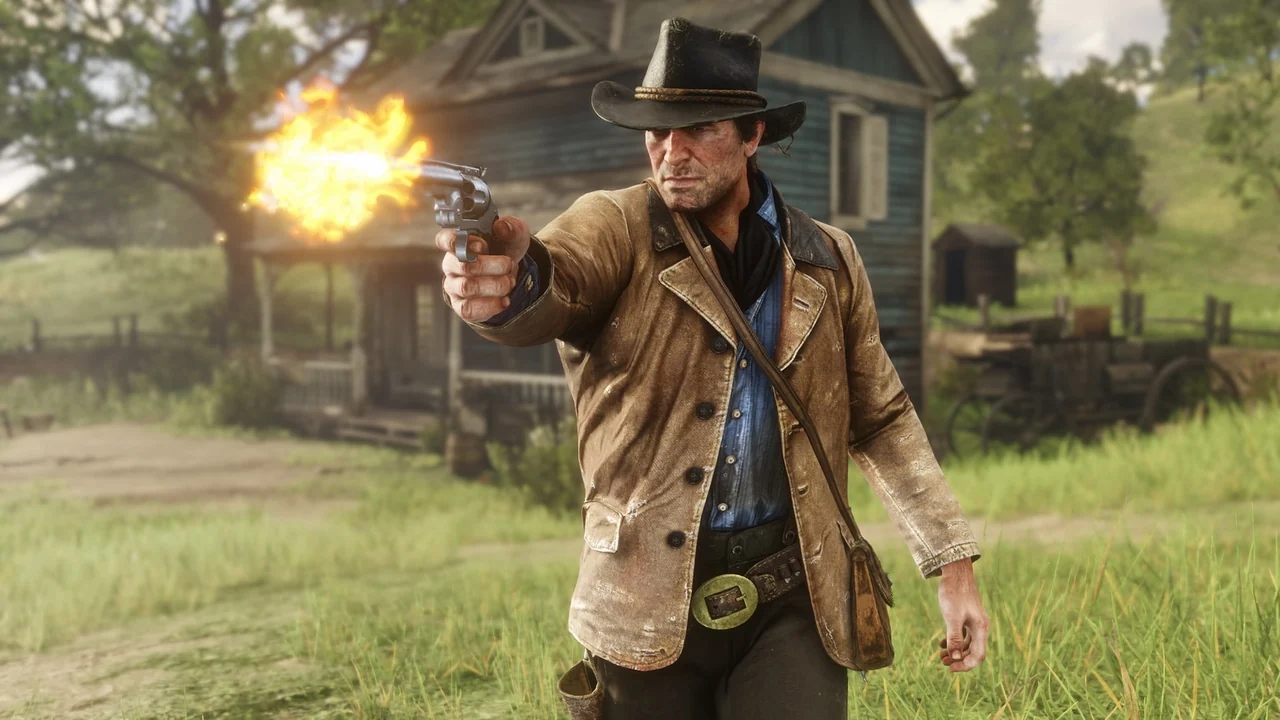
Sources & references
Our original guide draws on the references below. Check the edition at the top of this page before following controls or unlock requirements.
- Chapter 1: Colter — Red Dead Redemption 2 Walkthrough & Guide
- Red Dead Redemption 2 Full Walkthrough – All Story Missions
- Red Dead Redemption 2 Eastward Bound Walkthrough
- Outlaws from the West — RDR2 Mission
- Red Dead Redemption 2 — Americans at Rest Walkthrough
- Red Dead Redemption 2 — A Strange Kindness Walkthrough
- Red Dead Redemption 2 — The Sheep and the Goats Walkthrough
- Red Dead Redemption 2 — Chapter 2 Mission Chart
- Red Dead Redemption 2 — Money Lending and Other Sins I & II Mission Guide
- Red Dead Redemption 2 — Money Lending and Other Sins I & II Mission Guide
- Red Dead Redemption 2 — Camp Guide
- Red Dead Redemption 2 Now Available for PlayStation 4 and Xbox One Systems
- Red Dead Redemption 2 — PlayStation Store PS4 Standard Edition
- Chapter 2: Horseshoe Overlook — Red Dead Redemption 2 Walkthrough & Guide
- Red Dead Redemption 2 Stranger Missions Walkthrough
- Arcadia for Amateurs Stranger Mission Guide
- Red Dead Redemption 2 Hunting Request Guide
- Red Dead Redemption 2 All Hunting Request Locations
- Red Dead Redemption 2 Item Requests: How to Trigger Every Camp Request
- Red Dead Redemption 2 — PS4 Games, PlayStation US
- Chapter 3: Clemens Point — Red Dead Redemption 2 Walkthrough & Guide
- Red Dead Redemption 2 Further Questions of Female Suffrage Walkthrough, PowerPyx
- Red Dead Redemption 2 American Distillation Walkthrough, PowerPyx
- Red Dead Redemption 2 An Honest Mistake Walkthrough, PowerPyx
- Red Dead Redemption 2 Advertising, the New American Art — II Walkthrough, PowerPyx
- Red Dead Redemption 2 Magicians for Sport Walkthrough, PowerPyx
- Red Dead Redemption 2 Friends in Very Low Places Walkthrough, PowerPyx
- Red Dead Redemption 2 The Fine Joys of Tobacco Walkthrough, PowerPyx
- Red Dead Redemption 2 Preaching Forgiveness as He Went Walkthrough, PowerPyx
- Red Dead Redemption 2 Money Lending and Other Sins IV Walkthrough, PowerPyx
- RDR2 Missions List: Full Story Guide & Gold Medal Walkthrough
- Red Dead Redemption 2 Blood Feuds, Ancient and Modern Walkthrough
- RDR2 The Battle of Shady Belle Walkthrough
- The Battle of Shady Belle — Chapter 3 Walkthrough
- Red Dead Redemption 2 Title Update 1.15 Notes — Rockstar Games Support
- Chapter 4: Saint Denis - Red Dead Redemption 2 Walkthrough & Guide
- Chapter 4 Missions And Gold Medals Guide
- Horsemen, Apocalypses — Chapter 4 Walkthrough
- Chapter 4-12: Country Pursuits Walkthrough
- Chapter 4-13: Revenge Is a Dish Best Eaten Walkthrough
- Red Dead Redemption 2 Banking, the Old American Art Walkthrough
- Banking, the Old American Art - Chapter 4 - Walkthrough
- Chapter 5 | Red Dead Redemption 2 Story Missions List
- Red Dead Redemption 2 Paradise Mercifully Departed Walkthrough
- Chapter 5: Guarma - Red Dead Redemption 2 Walkthrough & Guide
- Red Dead Redemption 2 That’s Murfree Country Walkthrough
- Red Dead Redemption 2 Dear Uncle Tacitus Walkthrough
- Red Dead Redemption 2 Fleeting Joy Walkthrough
- Red Dead Redemption 2 A Fork in the Road Walkthrough
- Red Dead Redemption 2 That’s Murfee Country Walkthrough
- Red Dead Redemption 2 Icarus and Friends Walkthrough
- Red Dead Redemption 2 Visiting Hours Walkthrough
- Red Dead Redemption 2 Just a Social Call Walkthrough
- Red Dead Redemption 2 A Rage Unleashed Walkthrough
- Chapter 6: Beaver Hollow — Red Dead Redemption 2 Walkthrough & Guide
- Red Dead Redemption 2 My Last Boy walkthrough — PowerPyx
- Archeology for Beginners — Red Dead Redemption 2 Walkthrough
- Mrs. Sadie Adler, Widow — Red Dead Wiki
- Red Dead Redemption 2: Our Best Selves walkthrough — PowerPyx
- Our Best Selves — Chapter 6 walkthrough — Gamer Guides
- Red Dead Redemption 2: Our Best Selves walkthrough — Gamepressure
- Red Dead Redemption — Chapter 6 walkthrough — Gamer Guides
- Red Dead Redemption 2: Red Dead Redemption mission walkthrough — Gamepressure
- Red Dead Redemption 2 PS4 manual save instructions — Rockstar Games Support
- Red Dead Redemption 2 PS4/Xbox One title update notes — Rockstar Games Support
- Epilogue 1 Missions And Gold Medals Guide
- Epilogue - Part I: Pronghorn Ranch - Red Dead Redemption 2 Walkthrough & Guide
- The Landowning Classes / Home of the Gentry? | RDR2 Mission Gold Medal Guide
- Red Dead Redemption 2 Home of the Gentry? Walkthrough
- Red Dead Redemption 2 American Venom Walkthrough
- RDR2 American Venom Walkthrough
- Epilogue Part 2 — Beecher’s Hope Mission List
- Epilogue Part 2 — Beecher’s Hope Walkthrough and Prerequisites
- Red Dead Redemption 2 Trophy Guide & Roadmap
- Red Dead Redemption 2 100% Completion Guide & Checklist
- Errand Boy Trophy in Red Dead Redemption 2
- Transfer or dispose of your PlayStation console
- How to manage PS4 console storage space
About the game & collecting notes
- Platform
- PlayStation 4
Complete, step-by-step campaign walkthrough for the PlayStation 4 Standard Edition of Red Dead Redemption 2. This guide takes you from the frozen prologue through all six main chapters and both epilogues to the final ending, with clear objectives, route notes, boss/encounter strategies and post-story completion checks.
Darryl Polo
Darryl Polo loves tinkering with emulation and revisiting retro games. He enjoys exploring how old favorites play on different setups and sharing what he learns along the way. At Joking Joystick, he writes about the games, hardware, and small discoveries that keep the hobby fun.
Our editorial standardsFound a step that needs another look? Help us improve this guide.