
Pokémon White Version 2 — Complete Main Campaign Walkthrough (Nintendo DS, USA/EU, DSi‑enhanced)
Step-by-step campaign walkthrough for the original North American and European Pokémon White Version 2 cartridge on Nintendo DS. Follow the story from Aspertia City through all eight Gyms, including the required Lentimas Town, Reversal Mountain, Undella, Lacunosa, Route 12, Village Bridge, and Route 11 progression, then complete the Plasma Frigate, Giant Chasm, Pokémon League, Elite Four, Champion Iris, Hall of Fame, credits, and immediate post-game Key System verification. Normal Kyurem capture, Reshiram capture, White Kyurem fusion, White Forest challenges, and additional Pokémon World Tournament tiers are optional post-game content.

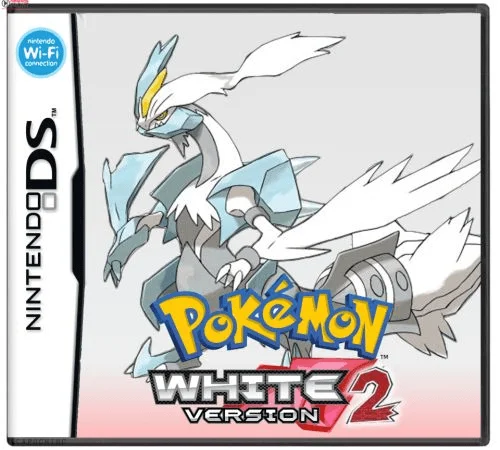
Find a copy
Pokémon White Version 2 Nintendo DS
We may earn a commission if you buy through these links, at no extra cost to you. As an Amazon Associate I earn from qualifying purchases.
Opens retailer search results. Check the model, edition, seller, availability and current price before buying.
Before you begin
You begin in Aspertia City and follow the original White 2 campaign through its fixed Gym and story route order.
Your required route includes the eastern Unova journey from Mistralton and Lentimas through Reversal Mountain, Undella, Route 13, Lacunosa, Route 12, Village Bridge, Route 11, and Opelucid before the final Humilau Gym.
After all eight Badges, complete the Plasma Frigate and Giant Chasm storyline, defeat White Kyurem and Ghetsis, then travel through Route 23 and Victory Road to the Pokémon League.
This walkthrough separates required campaign progress from optional post-game activities such as Reshiram, normal Kyurem, White Kyurem fusion, White Forest, White Treehollow, and expanded Pokémon World Tournament events.
Follow the chapters in order. Each chapter ends at a concrete location or event so the next chapter begins from the correct point in the original Nintendo DS White 2 campaign.
Set yourself up for the run
Bring healing and recovery items: a stack of Full Restores/Max Potions (or many Hyper Potions), 20–40 Super Potions or Full Heals depending on your play style, and plenty of Revives if you avoid training backtracking.
Build a balanced core: an early physical sweeper with coverage, a reliable special attacker, a dedicated status/healer or cleric (e.g., a Pokémon with Recover/Heal Pulse), and one Pokémon to handle bulky Dragon/Steel types found late in the game.
Diversity beats single‑type teams across Unova.
Pick and commit to a starter early.
You receive a starter in Aspertia City from Bianca; that Pokémon will be your earliest reliable teammate.
If you want version flavor, note White 2's encounter differences when planning catches (this guide does not require any version‑exclusive catch to finish the campaign).
Carry TMs and HMs you plan to use: Surf, Fly, and Strength/HM‑relevant moves are required to access areas.
TM purchases and key TMs are available in major cities; keep money on hand for them.
Use the save button often.
Save before every Gym leader, the Giant Chasm Kyurem sequence, and any major story boss with permanent consequences to avoid long replays.
If you have access to Pokémon Dream Radar (3DS downloadable companion), it can provide extra Pokémon to import — optional and not required to finish the main campaign.
Know the version and hardware behavior: White Version 2 is DSi‑enhanced and may enable extra features on DSi/3DS systems; this does not change the core campaign progression but affects a handful of optional features.
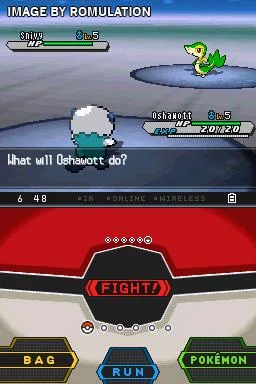
Start at Aspertia City — Choosing your starter and taking the Basic Badge (Cheren)
Begin in Aspertia City, receive your starter and Pokédex from Bianca, build an early party through Route 19, Route 20, and Floccesy Ranch, resolve the first Neo Team Plasma incident, complete Alder’s training battles, then return to Aspertia City to defeat Cheren and earn the Basic Badge.
Choose your starter at the Aspertia Outlook
Leave your house and follow Hugh up the stairs to the Aspertia Outlook on the north side of town. Bianca is waiting on the platform. Speak with her and choose Snivy, Tepig, or Oshawott. The choice is permanent for this playthrough, so select the one whose play style you prefer. Oshawott offers a straightforward early game, Tepig eventually gains the Fighting type, and Snivy emphasizes speed and defensive utility later on.
Bianca gives you the Pokédex after you choose. Hugh then receives his own Pokédex and challenges you with the starter that is weak to yours: Tepig if you chose Snivy, Oshawott if you chose Tepig, or Snivy if you chose Oshawott. Hugh’s Pokémon is Level 5 and knows only basic early moves, so use your starter’s attacking move and do not worry about conserving items for this battle. Winning gives experience and money, while losing does not end the game or block progression.
- Meet Bianca at the Aspertia Outlook.
- Choose Snivy, Tepig, or Oshawott.
- Receive the Pokédex and defeat or complete the opening battle with Hugh.
Collect the early supplies before leaving town
After the battle, Bianca leads you to the Pokémon Center. This is Aspertia’s main recovery point and also contains the Poké Mart counter. Bianca gives you 10 Poké Balls here, which is enough to begin building a party without immediately spending your starting money. Heal before leaving if Hugh’s battle reduced your HP.
Outside the Pokémon Center, Mom gives you the Running Shoes. Hold the B Button while moving to run. Hugh’s sister gives you a Town Map and asks you to deliver the second map to Hugh, who has already gone toward Route 19. Check the Pokémon Center’s Poké Mart for a few Potions if you can afford them, but leave enough money for later healing supplies. The gate attendant on the way to Route 19 gives you another Potion.
- Receive 10 Poké Balls from Bianca at the Pokémon Center.
- Receive the Running Shoes from Mom.
- Receive the Town Map from Hugh’s sister.
- Take the free Potion from the Route 19 gate attendant.
Cross Route 19 and reach Floccesy Town
Exit Aspertia City through the northern gate to enter Route 19. Bianca demonstrates how to catch a Pokémon by catching a Purrloin in the tall grass. After the demonstration, you can catch your own Pokémon. In White 2, the normal walking encounters on Route 19 are Patrat and Purrloin at low levels. Catch one if you want a second party member immediately, but do not spend all your Poké Balls trying to find a particular nature or ability.
Follow the route east. You can pick up the Potion in the eastern patch of grass before continuing. Alder appears at the cliffside and then leads you toward Floccesy Town. Heal at the Floccesy Town Pokémon Center when you arrive. Speak with Alder north of town and explain why you have two Town Maps. He tells you that Hugh has gone to Route 20, establishing the next objective.
- Catch at least one additional Pokémon if your party needs another battler.
- Collect the Potion on Route 19.
- Reach Floccesy Town and speak with Alder.
Train on Route 20 and search Floccesy Ranch
Leave Floccesy Town through the eastern path to Route 20. Fight the trainers along the route rather than avoiding every battle; the money and experience make the first Gym considerably safer. Route 20 offers encounters such as Pidove, Sewaddle, and Sunkern, with additional species possible in special grass conditions. Sewaddle can provide useful Bug- and Grass-type attacks, while Pidove supplies Flying coverage.
Continue to Floccesy Ranch. The Ranch is the best early location for expanding your team. Its encounters include Lillipup, Psyduck, Mareep, Riolu, and Azurill, alongside other version-appropriate possibilities. Riolu is especially useful against Cheren because Fighting-type attacks are super effective against Normal types, but it is not required. Mareep is also valuable because its Electric typing and Static ability can punish physical attackers. Use whichever reliable Pokémon you find instead of delaying the story for a specific encounter.
Follow the ranch paths and battle the trainers while looking for Hugh’s missing Herdier. The direct route eventually leads to the Team Plasma grunt responsible for the incident. Speak with the grunt and win the required battle, then continue the conversations with Hugh and the ranch characters until the Herdier situation is resolved.
- Battle Route 20 trainers for experience and money.
- Add a dependable second or third Pokémon if needed.
- Search Floccesy Ranch and resolve the missing Herdier incident.
- Consider Riolu, Mareep, Lillipup, Psyduck, or Azurill as useful early team options.
Complete Alder’s training battles
Return to Floccesy Town after the ranch event and go to Alder’s house. Alder asks you to help train two young Trainers. Battle both School Kids one after the other. Their teams depend on your starter: each uses one of the elemental monkey Pokémon that demonstrates a type advantage or disadvantage against your choice. Alder heals your party between the two battles, so you can safely use this sequence to give experience to a weaker teammate.
After the battles, leave Alder’s house. Alder gives you five Oran Berries. Give them to Pokémon that are likely to participate in the Gym battle if you want automatic emergency healing. Before leaving Floccesy Town, collect the X Speed near Alder’s house if you want the item, then return west through Route 20 and Route 19 to Aspertia City.
- Defeat both of Alder’s training opponents.
- Receive five Oran Berries from Alder.
- Return to Aspertia City with a healed party.
Enter the Aspertia Gym and defeat its trainers
The Aspertia Gym is the building beside the Pokémon Center, attached to the Trainers’ School. Enter and speak with the student near the chalkboard if you want the X Defend, then use the rear exit to reach the Gym’s training yard. Clyde gives you a Fresh Water. Cheren explains that you must defeat the two Gym Trainers before he will battle you.
The first trainer uses a Level 9 Patrat and a Level 9 Lillipup. The second uses a Level 9 Lillipup and a Level 9 Patrat. Defeat them, then return to the Pokémon Center if any important party member is weakened. Aim for a balanced party around Levels 11 to 13 rather than relying entirely on the starter. There is no penalty for leaving the Gym to heal before challenging Cheren.
- Find the Gym beside the Aspertia Pokémon Center.
- Receive the Fresh Water from Clyde.
- Defeat both Level 9 Gym Trainer teams.
- Heal before challenging Cheren.
Defeat Cheren for the Basic Badge
Cheren’s White 2 team is a Level 11 Patrat and a Level 13 Lillipup. Both Pokémon are Normal type and can use Work Up, which raises their Attack and Special Attack. Do not give either Pokémon several free turns to boost. Attack immediately with your strongest reliable moves, or use Fighting-type damage from Riolu or a Tepig evolution if you have one. A healthy Mareep can also help because Static may paralyze a Pokémon that makes contact, although Mareep is not a direct type counter.
Cheren may use a Potion during the battle, so leave enough damage to finish each Pokémon after its recovery. If your lead becomes too weak, switch to another healthy party member rather than allowing a boosted Lillipup to continue attacking. Oran Berries are useful for surviving one dangerous hit, but heal at the Pokémon Center before the fight instead of relying on held items alone.
After the victory, Cheren gives you the Basic Badge and TM83 Work Up. The badge raises the obedience limit for traded Pokémon to Level 20. Leave the Gym to trigger the post-battle sequence: Bianca gives you TM27 Return, Cheren, Bianca, and the player register one another in their Xtransceivers, and Bianca provides the C-Gear after the conversation. Hugh then challenges Cheren and runs back into the Trainers’ School. Complete these scenes before heading onward.
- Defeat Cheren’s Level 11 Patrat.
- Defeat Cheren’s Level 13 Lillipup.
- Receive the Basic Badge and TM83 Work Up.
- Receive TM27 Return from Bianca.
- Complete the Xtransceiver and C-Gear events after leaving the Gym.
Before you move on
- The Basic Badge is visible in your case, and TM83 Work Up is in your Bag.
- Cheren’s Level 11 Patrat and Level 13 Lillipup have been defeated.
- The Bianca post-battle conversation has delivered TM27 Return.
- The Xtransceiver registration and C-Gear sequence has finished.
- Your party has at least two usable Pokémon, several healing items, and enough Poké Balls to continue.
- The route through Floccesy Town and Route 20 is available, and the next objective points toward Virbank City.
References for this chapter
- Walkthrough: Pokémon Black 2 and White 2/Part 1 — Bulbapedia
- Pokémon Black 2 and White 2 Walkthrough, Part 2: Route 19 — ArrPeeGeeZ
- Pokémon Black 2 and White 2 Walkthrough, Part 5: Aspertia Gym — ArrPeeGeeZ
- Aspertia Gym: Cheren — Thonky
- Route 19 — Unova Pokéarth — Serebii.net
- Pokémon Black 2 and White 2 Walkthrough — National Dex
Virbank City and Roxie — Poison gym and the first major version story beats
Cross Route 20 to Virbank City, train in the optional Virbank Complex if needed, defeat Roxie in the city’s rock-club Gym, complete the required Pokéstar Studios introduction, then chase Team Plasma from the docks to Route 20 so the ferry to Castelia City becomes available.
Reach Virbank City through Route 20
Leave Aspertia City through the eastern gate and follow Route 20 toward the southeast. Continue past the route trainers and use the grass to bring a second or third Pokémon near your starter’s level. The route’s dark grass contains somewhat stronger encounters and can produce double battles, so heal at the Pokémon Center in Aspertia before leaving if several team members are already damaged.
Stay on the main route path until you reach Virbank City. On arrival, heal at the Pokémon Center and check your supplies. Buy a few Potions, Poké Balls, and Antidotes or bring Pecha Berries for the Gym. Keep enough money for recovery items; there is no need to spend heavily on optional purchases before Roxie.
- Arrive in Virbank City with at least two Pokémon you can use in battle.
- Heal at the Pokémon Center.
- Carry reliable HP recovery and at least one way to cure poison.
Use the Virbank Complex for optional training
The Virbank Complex is reached through the western side of Virbank City. It is optional for story progress, but it is the best nearby training area before the Gym. Battle the workers in the outdoor and indoor sections, returning to the Pokémon Center when necessary rather than allowing the whole team to become weakened.
White 2 has Magnemite, Koffing, Growlithe, and Elekid available in the Complex. Magnemite is especially useful defensively because its Steel typing prevents poison, while a Pokémon with Psychic-type damage is a strong answer to Roxie. Elekid is a White 2 version-exclusive encounter in this area. You can also complete the worker side task for an optional reward, but it is not required to challenge Roxie.
A balanced party around levels 14 to 17 is appropriate for the normal campaign. Do not rely on only one starter or one high-level Pokémon; training several team members makes the Gym trainers and the later Team Plasma battles safer.
- Train more than one party member if your starter is carrying the team.
- Consider catching Magnemite, Koffing, Growlithe, or Elekid for additional coverage.
- Return to the Pokémon Center before entering the Gym.
Enter the Virbank Gym and defeat the band members
Virbank Gym is the rock-club venue in the southern part of the city. Speak to Clyde at the entrance to receive the Gym’s Fresh Water. Roxie is performing on the stage, and the music prevents her from hearing your challenge.
Move through the club and defeat Roughneck Nicky and Guitarist Billy Jo. Each uses two level 14 Poison-type Pokémon. Nicky uses Grimer and Koffing, while Billy Jo uses Venipede and Koffing. Their battles can inflict poison, so use an Antidote or return to the Pokémon Center before facing Roxie if necessary.
After both band members are defeated, walk to the back of the stage and speak to Roxie. The Gym trainers do not need to be challenged again if you leave to heal, so there is no disadvantage to restoring the team before the Leader battle.
- Collect the Fresh Water from Clyde.
- Defeat Nicky and Billy Jo.
- Heal poison and restore HP before speaking to Roxie.
Defeat Roxie and claim the Toxic Badge
In the standard USA and Europe campaign, Roxie uses Koffing at level 16 and Whirlipede at level 18. Koffing has Levitate, so Ground-type moves do not affect it. Use Psychic-type attacks for the most reliable advantage against both Pokémon, or use strong neutral damage if your team lacks that coverage. Fire, Flying, Rock, and Psychic attacks are effective against Whirlipede, while Ground is effective against Whirlipede but not Koffing.
Whirlipede can poison a Pokémon through Poison Point when struck by a contact move, and Venoshock becomes much more dangerous against a poisoned target. Cure poison quickly rather than allowing a poisoned Pokémon to remain in battle at low HP. Whirlipede can also use Protect, so do not waste your strongest attack on a protected turn. Avoid depending on repeated stat boosts against Koffing because Clear Smog can remove stat changes.
Defeat Koffing first if it is causing accuracy or status problems, or remove Whirlipede first if your best answer is vulnerable to Poison Point. Use Potions between knockouts when necessary. After the battle, Roxie awards the Toxic Badge and TM09 Venoshock. The badge allows Pokémon up to level 30 to obey you and marks the second Gym victory.
- Defeat Roxie’s level 16 Koffing.
- Defeat Roxie’s level 18 Whirlipede.
- Receive the Toxic Badge and TM09 Venoshock.
- Heal before continuing the story.
Complete the required Pokéstar Studios introduction
After leaving the Gym, a Pokéstar Studios scout approaches you and directs you to the studio on the north side of Virbank City. Go through the northern gate and enter Pokéstar Studios. Follow the scout’s tour and watch Pop Roxie’s first movie in the theater.
The game then places you in a guided movie shoot with Brycen. Follow the provided scenario until the film is completed, then watch the screening. The dialogue choices affect the movie’s result, but the result does not determine whether the main story can continue. Optional movie scripts, better endings, fan rankings, and studio rewards can be ignored for now.
Do not leave the studio during the guided introduction. You must finish the initial sequence and return to Virbank City before the Team Plasma event at the docks can proceed.
- Enter Pokéstar Studios after defeating Roxie.
- Complete the guided movie shoot with Brycen.
- Finish the screening and regain control in Virbank City.
Pursue Team Plasma and unlock the Castelia ferry
After the studio sequence, return to the southeastern docks of Virbank City. Roxie and Hugh are confronting Team Plasma. Speak to the central Grunt to start the required battle; this Grunt uses a single level 14 Patrat. Defeat it, and the group will flee.
Roxie gives you HM01 Cut after the dock battle. She then asks you to search Route 20. Leave the city through the eastern route entrance and return to Route 20. Climb the central stairway, move south, and look for the fleeing Grunt in a small clearing beside the main path. Speak to the Grunt to begin the second battle, which uses a single level 14 Purrloin.
After defeating the Grunt, Hugh appears and explains that Team Plasma is using a ship. Return to Virbank City and go back to the southeastern pier. Enter the dock building and speak to Hugh at the counter. Pop Roxie has returned to his ferry duties, and the conversation unlocks passage to Castelia City. Board the ship when prompted to begin the next chapter.
- Defeat the level 14 Patrat at the Virbank docks.
- Receive HM01 Cut from Roxie.
- Defeat the level 14 Purrloin on Route 20.
- Return to the dock building and speak with Hugh.
- Board the ferry to Castelia City.
Before you move on
- The Toxic Badge is displayed in the Badge Case.
- TM09 Venoshock is in the Bag.
- The introductory Pokéstar Studios movie sequence has been completed.
- HM01 Cut has been received from Roxie.
- The Route 20 Team Plasma Grunt has been defeated.
- Hugh is inside the Virbank dock building and the ferry to Castelia City is available.
Castelia City — Burgh, the sewers, and Colress' first appearance
After arriving in Castelia City from Virbank City, check the Gym before exploring elsewhere. Clyde will explain that Burgh is absent, which triggers Iris to appear and send you to the Castelia Sewers. Work through the sewer route with Hugh, defeat the two Neo Team Plasma Grunts in a Double Battle, meet Burgh and Colress, then return to Castelia Gym. Burgh uses Swadloon, Dwebble, and Leavanny in the standard White 2 campaign. Defeat him to earn the Insect Badge and TM76 Struggle Bug.
Arrive in Castelia City and activate the required story event
When you arrive in Castelia City, heal at the Pokémon Center near the central area and use it as your checkpoint. The city contains several optional buildings, shops, and side activities, but the next required event begins at Castelia Gym on Gym Street, the western street reached from the central plaza.
Go to the Gym entrance and speak with Clyde, the Gym Guide blocking the doorway. Burgh is not inside yet. After this conversation, Iris appears and discusses suspicious Neo Team Plasma activity. Follow Iris east along Oceanfront Road toward Thumb Pier. The pier is on the eastern side of the city and contains the entrance to the Castelia Sewers.
Do not try to enter the sewers before checking the Gym. The entrance is not available for this first story visit until the Clyde and Iris conversation has occurred. Once Hugh rushes into the tunnel, follow him inside.
- Heal at the Castelia City Pokémon Center.
- Speak with Clyde at the Castelia Gym entrance.
- Follow Iris east along Oceanfront Road to Thumb Pier.
- Enter the Castelia Sewers after Hugh runs inside.
Explore the sewer with Hugh
Hugh joins you during the first sewer visit. He helps in wild Pokémon encounters and restores your party after battles, making this a useful opportunity to train weaker team members. Because Hugh is present, wild encounters appear as Double Battles. If you want to catch something, defeat or weaken one Pokémon first; attempting to catch one while both opponents remain active can make the encounter unnecessarily dangerous.
The standard sewer wild encounters in White 2 include Rattata and Zubat, with Grimer appearing less often. Zubat is a practical temporary team member because its Flying typing helps against some Bug Pokémon, although it will not be ready to carry the entire Gym by itself without training. The sewer also connects to optional areas, including the Relic Passage and the Empty Lot. These areas are not needed to earn the badge.
The sewer layout changes with the season. In spring and summer, higher water can open some passages and close others; in autumn and winter, the water recedes and different walkways become available. The required story route remains identifiable by the main walkways and the path leading toward the Team Plasma encounter, so do not worry if your layout does not match a map from another season.
- Use Hugh's healing to train weaker party members.
- Catch Zubat or Grimer only if they fit your team plan.
- Remember that the sewer layout changes with the in-game season.
- Continue toward the Team Plasma blockade rather than leaving immediately.
Reach the Team Plasma Double Battle
From the sewer entrance, proceed west through the main passage and climb the northern stairway. Continue along the upper walkway until you find a TwistedSpoon near two Neo Team Plasma Grunts. This is the required confrontation that completes the Castelia investigation.
The two Grunts battle you and Hugh together in a Double Battle. Their Pokémon are a level 16 Sandile and a level 16 Scraggy. Hugh participates in this fight, but you still need to protect your own active Pokémon because two opposing attacks can quickly overwhelm a fragile team. Focus attacks on one target at a time, especially if one of your Pokémon has a type advantage against it.
After the battle, the Grunts retreat. Hugh gives you HM04 Strength as thanks, although Strength is not required to reach Burgh or complete this chapter. Burgh then arrives and says he has not found additional suspicious people. Hugh leaves after the conversation, so his free healing is no longer available once this event ends.
- Reach the northern walkway and find the two Grunts near the TwistedSpoon.
- Defeat Sandile and Scraggy in the required Double Battle.
- Receive HM04 Strength from Hugh.
- Watch the conversation with Burgh before leaving the area.
Meet Colress and return to the city
Immediately after Burgh and Hugh finish speaking, a man in a white coat emerges from the nearby cave entrance. This is Colress, whose research concerns the strength of Pokémon. He comments on the battle and leaves after the conversation. This is Colress's first appearance in the main White 2 storyline; later, he will appear again on Route 4 and become more directly involved with Neo Team Plasma.
Once the scripted conversations are complete, the sewer investigation is finished. You may explore the side rooms, collect items, visit the Empty Lot, or enter the accessible portion of Relic Passage. These activities are optional. If your team needs experience, battle the remaining trainers while Hugh is still present, because his healing support ends after he leaves.
Return to Castelia City through the sewer entrance. Heal at the Pokémon Center before challenging Burgh. If Clyde is still blocking the Gym entrance, the required sewer battle or the Burgh and Colress scene has not been completed.
- See Colress appear after the Team Plasma battle.
- Optionally explore the Empty Lot or Relic Passage.
- Return to Castelia City and heal before entering the Gym.
- Confirm that Clyde no longer blocks the Gym entrance.
Solve the Castelia Gym puzzle
Enter Castelia Gym on Gym Street. The Gym is built around large silk cocoons that carry you between platforms. Step into the open cocoon entrances and follow the connected passages upward. The route is linear once you use each available silk opening, although several Gym Trainers can be battled along the way.
The Gym Trainers use Bug Pokémon around levels 19 and 20. Fighting them is useful if your party is below the low twenties, particularly because Burgh's strongest Pokémon is level 24 in the standard version. Keep a Fire-, Flying-, Rock-, Water-, or Steel-type attack available if possible.
Bug/Grass Pokémon such as Swadloon and Leavanny are weak to Fire and Flying attacks. Burgh's Dwebble is Bug/Rock, so Fire and Flying attacks are not reliable super-effective answers against it. Water-, Rock-, and Steel-type attacks are safer choices, and strong neutral damage also works. Dwebble has Sturdy, so a full-health Dwebble can survive a single attack that would otherwise knock it out. Be ready to finish it with a second move.
- Use the silk cocoons to reach the upper Gym platforms.
- Battle Gym Trainers if you need experience.
- Prepare separate answers for Bug/Grass Pokémon and Bug/Rock Dwebble.
- Do not rely exclusively on Fire or Flying attacks against Dwebble.
Defeat Burgh and confirm the badge objective
In the standard White 2 campaign, Burgh uses Swadloon at level 22, Dwebble at level 22, and Leavanny at level 24. Swadloon can use String Shot to reduce your Speed and Struggle Bug to lower Special Attack. Dwebble can use Smack Down, Faint Attack, Rock Polish, and Struggle Bug; its Rock typing makes it less vulnerable to the Fire and Flying moves that work well against the other two Pokémon.
Leavanny carries a Sitrus Berry and is Burgh's highest-level Pokémon. Its Grass attacks punish Water- and Ground-type Pokémon, so switch to a Fire-, Flying-, Ice-, Poison-, or Bug-resistant answer when necessary. If Leavanny lowers your team's Speed with String Shot, do not leave a weakened Pokémon in merely to finish it; switch to a healthy attacker or use a healing item.
After winning, Burgh awards the Insect Badge and TM76 Struggle Bug. The badge allows Pokémon up to level 40 to obey you and confirms that the Castelia Gym objective is complete. Heal at the Pokémon Center before continuing toward Route 4 and the next story section.
- Defeat Swadloon level 22.
- Defeat Dwebble level 22 while accounting for Sturdy and Rock typing.
- Defeat Leavanny level 24 and its Sitrus Berry.
- Receive the Insect Badge and TM76 Struggle Bug.
- Heal before leaving Castelia City.
Before you move on
- The two Neo Team Plasma Grunts in Castelia Sewers have been defeated in the Double Battle.
- Hugh has given you HM04 Strength and left the sewer.
- You have seen Burgh and Colress during the sewer sequence.
- Clyde no longer blocks Castelia Gym.
- Burgh's Swadloon, Dwebble, and Leavanny are defeated.
- The Insect Badge and TM76 Struggle Bug are in your possession.
- Your party is healed and ready to leave Castelia City toward Route 4.
Nimbasa City and Elesa — The runway, Triple Battle and Bolt Badge
Enter Nimbasa City from Route 4, complete the Subway Boss tag battle, clear the former Gym's Shining Roller Coaster course, and defeat Elesa in the new runway Gym. After earning the Bolt Badge, leave through Route 5, receive HM02 Fly from Bianca, defeat Charles in White 2's required Triple Battle, and cross Driftveil Drawbridge.
Enter Nimbasa City and complete the Subway Boss tag battle
Travel west from Route 4 through Join Avenue and enter Nimbasa City. Heal at the Pokémon Center before beginning the city's progression events. Nimbasa has several optional facilities, including the Battle Subway, Musical Theater, Big Stadium, Small Court, and Ferris wheel, but these do not replace the required story encounters.
Near the city entrance, go to Gear Station and speak to the Trainer standing with Subway Bosses Ingo and Emmet. This begins a tag battle. A male protagonist teams up with Rosa; a female protagonist teams up with Nate. Your partner uses a middle-stage starter chosen according to your starter: Dewott if you chose Snivy, Servine if you chose Tepig, or Pignite if you chose Oshawott.
Ingo and Emmet use Boldore and Gurdurr at level 26. Put two healthy Pokémon at the front of your party. Focus attacks on one opposing Pokémon at a time, and avoid using moves such as Earthquake or Surf if they would damage your partner. After the victory, Rosa or Nate gives you the Vs. Recorder.
- Heal at the Nimbasa Pokémon Center.
- Place two healthy Pokémon first in the party.
- Defeat Ingo and Emmet in the tag battle.
- Receive the Vs. Recorder.
Clear the Shining Roller Coaster
Go east toward the Ferris wheel and the new Gym. The entrance to Elesa's new Gym is blocked because she is visiting the building that housed Nimbasa Gym in the previous games. Clyde directs you to the old Gym, now called the Shining Roller Coaster.
Enter the old building and use the roller-coaster car on the right side of the entrance. Ride to the next platform, get out, and press the nearby switch to redirect the track. Continue using the cars and switches until you reach the back of the building.
Two trainers must be defeated on this route. Rich Boy Rolan uses a level 24 Blitzle, and Lady Colette uses a level 24 Flaaffy. Both are Electric-type Pokémon, so a Ground-type attack is useful. At the back, speak to the woman to receive a Parlyz Heal. Once this course is cleared, Elesa returns to the new Gym east of the Ferris wheel.
- Enter the former Gym, the Shining Roller Coaster.
- Use the right-hand entrance car.
- Press the switches to redirect the track.
- Defeat Rolan and Colette.
- Collect the Parlyz Heal at the back.
Prepare for Elesa's Electric team
Return to the new Gym and accept the Fresh Water from Clyde. In the normal version of White 2, Elesa uses Emolga at level 28, Flaaffy at level 28, and Zebstrika at level 30. Training several Pokémon into the high twenties is safer than relying on a single lead.
Ground-type Pokémon such as Sandile or Sandshrew are strong answers to Flaaffy and Zebstrika, and Electric attacks do not affect them. Emolga is Electric/Flying, however, so Ground moves cannot hit it. Bring Rock-type damage or a strong neutral attack for Emolga before entering the Gym.
Carry Parlyz Heals or Full Heals. Flaaffy knows Thunder Wave, and Emolga's Static can paralyze Pokémon that make contact. Keep a second healthy switch-in available because Elesa's Pokémon can use Volt Switch to leave battle and bring in another team member. Zebstrika has Motor Drive, so do not use Electric attacks against it.
- Prepare multiple Pokémon around levels 28 to 30.
- Bring Ground-type attacks for Flaaffy and Zebstrika.
- Bring Rock or neutral coverage for Emolga.
- Carry paralysis-curing items.
- Keep a backup switch-in healthy.
Cross the runway and defeat the Gym trainers
Enter the runway Gym and walk forward. Sections of the catwalk light up as you approach each trainer. The three required battles are Beauty Nikola, Beauty Fleming, and Beauty Ampère.
Nikola uses Elekid and Flaaffy, both level 27. Fleming uses Flaaffy and Blitzle, both level 27. Ampère uses Blitzle and Elekid, both level 27. These trainers are ordinary single battles. Use Ground attacks when they can connect, but do not send a Ground-only lead against a possible Emolga later.
If a Pokémon becomes paralyzed or takes heavy damage, leave the Gym and heal before continuing. The defeated Gym trainers remain defeated when you return. After the third Beauty, continue along the runway to Elesa's stage.
- Accept Clyde's Fresh Water.
- Defeat Beauty Nikola.
- Defeat Beauty Fleming.
- Defeat Beauty Ampère.
- Heal before challenging Elesa if necessary.
Defeat Elesa and claim the Bolt Badge
Elesa's battle is a standard single battle, not a Double, Triple, or Rotation Battle. She opens with Emolga, followed by Flaaffy and Zebstrika. Emolga's Volt Switch can deal damage and return it to Elesa's party, so use Rock or strong neutral damage immediately rather than attempting a Ground attack.
When Flaaffy or Zebstrika appears, switch to a Ground-type if that switch-in is safe. Flaaffy carries Thunder Wave, while Zebstrika can use Flame Charge to raise its Speed. Zebstrika also holds a Sitrus Berry, so be prepared to attack again after the berry restores its health. Its Motor Drive ability makes Electric attacks ineffective as a damage plan and can raise its Speed if activated.
Elesa awards the Bolt Badge and TM72, Volt Switch, after you win. The badge raises the obedience limit for traded Pokémon to level 50. Heal at the Pokémon Center before leaving Nimbasa through the western gate.
- Defeat Emolga with Rock or neutral damage.
- Use Ground attacks against Flaaffy and Zebstrika when safe.
- Watch for Thunder Wave, Volt Switch, Flame Charge, and the Sitrus Berry.
- Receive the Bolt Badge.
- Receive TM72, Volt Switch.
Defeat Charles on Route 5 and cross Driftveil Drawbridge
Leave Nimbasa through the western gate to Route 5. Bianca meets you outside the city, gives you HM02 Fly, and demonstrates the Hidden Grotto mechanic. The Hidden Grotto demonstration and any Pokémon or items found there are optional.
Continue west until you reach the crowd gathered near Motorcyclist Charles. Charles cannot be challenged until you have earned the Bolt Badge. In White 2, this encounter is a Triple Battle; Black 2 uses a Rotation Battle instead. Put three healthy Pokémon at the front of your party before speaking to Charles.
Charles uses level 26 Sigilyph, Archen, and Tirtouga. Sigilyph is Psychic/Flying, Archen is Rock/Flying, and Tirtouga is Water/Rock. Tirtouga can use Wide Guard, which can block spread attacks, so single-target moves are often more reliable. Rock, Electric, Water, Dark, and other appropriate super-effective attacks can cover the opposing team, but pay attention to Triple Battle positioning because not every Pokémon can target every opposing position.
After Charles is defeated, the crowd disperses and Driftveil Drawbridge becomes accessible. Cross the bridge toward Driftveil City. This is the completion point for the Nimbasa chapter; the next chapter begins with Driftveil's local events and Gym progression.
- Leave through the western Route 5 gate.
- Receive HM02, Fly, from Bianca.
- Place three healthy Pokémon first in the party.
- Defeat Charles in White 2's Triple Battle.
- Confirm that the crowd has cleared.
- Cross Driftveil Drawbridge.
Before you move on
- The Bolt Badge appears in the Badge Case.
- TM72, Volt Switch, has been received from Elesa.
- The Vs. Recorder is in the Key Items pocket.
- Charles has been defeated in White 2's Triple Battle.
- The Route 5 crowd has dispersed.
- Driftveil Drawbridge is accessible from Route 5.
References for this chapter
- Walkthrough: Pokémon Black 2 and White 2/Part 6 — Bulbapedia
- Walkthrough: Pokémon Black 2 and White 2/Part 7 — Bulbapedia
- Pokémon Black 2 and White 2 Gyms and Gym Leader data
- Pokémon Black 2 and White 2/Nimbasa Gym — StrategyWiki
- Pokémon Black 2 and White 2/Route 5 — StrategyWiki
- Pokémon White Version 2 Instruction Booklet
Driftveil City and Clay — Desert exploration, the Gym and story escalation
After crossing the Driftveil Drawbridge, complete the former Team Plasma story in Driftveil City, defeat Clay for the Quake Badge, win the required Driftveil Tournament, and board the first Plasma Frigate operation. Optional hotels, the Driftveil Market, Clay Tunnel, and deeper Relic Passage areas can wait. The chapter ends when the Plasma Frigate scene is complete and Driftveil’s western exit to Route 6 is open.
Enter Driftveil City and follow the Team Plasma confrontation
Begin this chapter in Driftveil City, immediately after crossing the Driftveil Drawbridge. The city’s Pokémon Center is the safest first stop: heal your party, restore PP, and purchase Poké Balls, Potions, status-healing items, and a few stronger recovery items if your supply is low. You will have several battles before the next free healing point, so do not continue with a damaged team merely to save a short walk.
From the drawbridge entrance, move into the city and watch the confrontation between a former Team Plasma member and a current Team Plasma member. Hugh arrives, and the current member runs away. Hugh follows him, while the former member directs you toward the former Plasma base on the hill west of the Gym. This conversation is the story trigger for the next sequence; do not head straight into the Gym and assume the badge battle is available immediately.
The base is the house on the hill near Driftveil Gym. Rood is waiting outside. Speak to him to begin the required battle. He uses Herdier at level 27 and Swoobat at level 27. A Fighting-type move is effective against Herdier, but Swoobat is Psychic/Flying, so switch to a Pokémon with reliable Dark-, Electric-, Ice-, Rock-, or other suitable coverage. Swoobat can use Air Cutter and Heart Stamp, so a frail Fighting-type is a poor answer to the entire battle.
After Rood loses, enter the base with Hugh and finish the dialogue. Rood explains that the former members are trying to atone for their past actions. Hugh asks about his younger sister’s stolen Purrloin, and the conversation establishes why he remains hostile toward the new Team Plasma. Rood then offers you a Zorua that once traveled with N. Taking the Zorua is optional, but entering the base and completing the conversation is required before the story proceeds normally.
- Heal and resupply at the Driftveil City Pokémon Center.
- Watch the Team Plasma confrontation near the city entrance.
- Go to the former Plasma base west of the Gym.
- Defeat Rood’s level 27 Herdier and level 27 Swoobat.
- Complete the base dialogue with Hugh and Rood.
- Take Rood’s Zorua if you want it; it is optional.
Use Driftveil’s optional facilities before the Gym
The Pokémon Center and Poké Mart cover the essential preparation. The Driftveil Market on the western side of town sells herbal medicine, Moomoo Milk, and incense items. Moomoo Milk is a useful economical healing option for the Gym approach, while herbal medicine can remove status conditions at the cost of lowering friendship. None of the Market errands are required.
You can also visit the city hotels for optional items, including the Shell Bell in Grand Hotel Driftveil if your Pokédex has enough entries, the Haban Berry from the Axew upstairs, and other rewards in the Luxury Suites, Continental Hotel, and Chateau Hotel. The local Move Tutor accepts Red Shards and can teach moves such as Seed Bomb or Ice Punch. These services are useful if your current party lacks Grass- or Ice-type coverage, but they are not prerequisites for Clay.
Clay Tunnel and the deeper Relic Passage sections are optional at this point. Do not spend time clearing side areas when your immediate objective is the Gym. Make sure at least two Pokémon can contribute against Ground types, and keep one Pokémon with a dependable special attack if possible. Clay’s Intimidate-bearing Krokorok can reduce the power of physical attackers, while Bulldoze lowers Speed during the battle.
- Buy healing and status-recovery items before entering the Gym.
- Use the Market or Move Tutor only if your team needs the extra support.
- Do not confuse Clay Tunnel or deeper Relic Passage exploration with required story progress.
- Prepare at least two reliable answers to Clay’s Ground-type team.
Navigate Driftveil Gym’s conveyor-belt maze
Driftveil Gym is in the northern part of the city. Speak to Clyde near the entrance to receive a Fresh Water. The Gym is an underground mine chamber filled with green crystals, conveyor belts, platforms, lifts, and spotlights. Your objective is to work through the platforms until you reach Clay in the northeastern section.
Step onto the conveyor belts and use the raised platforms to reveal the surrounding routes. Each platform you visit receives a spotlight, which helps you recognize areas already reached. The four lift platforms provide better views of the maze and help you identify the next conveyor route. If you take a wrong belt, continue following the platforms rather than trying to retrace every turn; the Gym’s layout is designed around reaching the next illuminated platform.
The Workers use Ground-oriented Pokémon such as Baltoy, Drilbur, and Sandile, generally around levels 29 to 31. Water and Grass attacks are effective against most of them. Baltoy is Psychic/Ground, so do not send a Poison- or Fighting-focused Pokémon into it without checking the matchup. Fight enough Workers to keep your team near the Gym’s level range, but leave and heal if your Clay counters lose significant HP or PP.
- Receive the Fresh Water from Clyde.
- Follow the conveyor belts between the illuminated platforms.
- Use the lifts to inspect the surrounding routes.
- Defeat or bypass the Workers while preserving Water and Grass PP.
- Reach Clay in the northeastern end of the Gym.
Defeat Clay and claim the Quake Badge
In the normal White 2 campaign, Clay uses Krokorok at level 31, Sandslash at level 31, and Excadrill at level 33. Krokorok has Intimidate and uses moves including Crunch, Sand Tomb, Bulldoze, and Torment. Sandslash can use Bulldoze, Crush Claw, Fury Cutter, and Rollout. Excadrill carries a Sitrus Berry and uses Slash, Rock Slide, Metal Claw, and Bulldoze.
Water attacks are the simplest answer because all three Pokémon are weak to Water. Grass attacks are effective against Krokorok and Sandslash, while Fighting attacks work well against Krokorok and Excadrill. Ice attacks also exploit the Ground typing, but an Ice user must still survive Rock Slide or strong physical hits. Do not rely on a single Flying-type: Excadrill’s Rock Slide and Bulldoze can punish it, and Bulldoze may lower its Speed enough to reverse the turn order.
Remove Krokorok before repeated Bulldozes and Sand Tombs wear down your team. If Sandslash begins Rollout, defeat it quickly rather than allowing the sequence to build power. When Excadrill appears, use your strongest dependable super-effective attack and expect the Sitrus Berry to restore some HP once. If your first counter is weakened or slowed, switch instead of leaving it in solely because it has a type advantage.
Victory awards the Quake Badge and TM78, Bulldoze. The badge allows Pokémon up to level 60 to obey you. Heal at the Pokémon Center after the battle, because the next objective is a consecutive-battle tournament followed by the Plasma Frigate operation.
- Defeat Krokorok, Sandslash, and Excadrill.
- Receive the Quake Badge.
- Receive TM78, Bulldoze.
- Heal before following Clay and Hugh to the south side of Driftveil.
Win the required Driftveil Tournament
After Clay’s battle, follow him and Hugh south to the Pokémon World Tournament building. The first Driftveil Tournament is required for the story. Heal before registering and give held items to the Pokémon you plan to use. Bag items cannot be used during tournament battles, so berries, type-boosting items, and other held equipment must be prepared beforehand.
The tournament consists of three consecutive battles with Pokémon scaled to level 25. Hugh is the first story opponent, Cheren appears in the bracket, and Colress is the final story opponent. The exact opposing Pokémon depend on the event’s trainer lineup, so prepare for variety rather than building around one predicted roster. Fighting coverage is useful against Normal-type Pokémon, while Ground- or Fighting-type attacks help against Colress’s Steel Pokémon such as Magneton and Klink. Bring a Dark-resistant or specially sturdy answer for his Psychic-type Pokémon.
You receive one Battle Point for completing the story tournament. After the event, leave the building. Team Plasma members move toward the southern pier, and Colress tries to stop Hugh from following them. Hugh ignores him and runs after the group. Heal at the Pokémon Center before entering the pier area; the next sequence includes several battles without a normal opportunity to return to town between every fight.
- Follow Clay and Hugh to the Pokémon World Tournament.
- Heal and equip held items before registering.
- Complete all three level 25 tournament rounds.
- Defeat Hugh, Cheren, and Colress as the story bracket presents them.
- Receive the Battle Point and follow Team Plasma toward the southern pier.
Board the Plasma Frigate and finish the Driftveil operation
At the southern pier, follow Hugh onto the Plasma Frigate. Cheren joins the operation. Two Team Plasma Grunts challenge you in separate battles first, using Pokémon around levels 29 and 30. After those fights, you enter partner-assisted battles: first alongside Cheren, then alongside Hugh. Their Pokémon help absorb attacks, but you still need a healthy party because the sequence includes several Poison-, Normal-, Dark-, and Flying-type opponents.
Use Fighting attacks against many of the Normal- and Dark-type Pokémon, but do not send a Fighting-type blindly into every matchup. Electric- or Ice-type coverage is useful against Golbat, while Psychic attacks can help against Poison types if the opponent’s moves do not threaten your attacker. Keep status-healing items ready outside battle, and switch weakened Pokémon rather than sacrificing them simply because your partners are present.
The required operation ends after Zinzolin appears and calls in the Shadow Triad. The Shadow Triad removes you, Hugh, and Cheren from the ship. Hugh runs off, and Cheren heads toward Route 6. There is no need to clear optional rooms or search every corner of Relic Passage for the main story.
Return to Driftveil City if you need to heal, then use the western exit to enter Route 6. Route 6 is the endpoint for this chapter and the beginning of the Mistralton progression.
- Board the Plasma Frigate at the Driftveil pier.
- Defeat the first two Grunts in solo battles.
- Complete the partner battle with Cheren.
- Complete the partner battle with Hugh.
- Watch the Zinzolin and Shadow Triad scene.
- Confirm that Driftveil’s western exit leads to Route 6.
Before you move on
- The Trainer Card displays the Quake Badge.
- TM78, Bulldoze, is in the Bag.
- Clay’s normal-mode Krokorok, Sandslash, and Excadrill have been defeated.
- The required Driftveil Tournament has been completed and the Battle Point received.
- The first Plasma Frigate operation has ended with the Zinzolin and Shadow Triad scene.
- The western Driftveil exit is open and Route 6 is accessible.
References for this chapter
- Walkthrough: Pokémon Black 2 and White 2/Part 7 — Bulbapedia
- Walkthrough: Pokémon Black 2 and White 2/Part 8 — Bulbapedia
- Pokémon Black 2 and White 2 Gyms and Gym Leader data
- Pokémon Black 2 and White 2 — Driftveil Tournament — Serebii.net
- Pokémon World Tournament - Serebii.net
- Pokémon White Version 2 Instruction Booklet
Mistralton City and Skyla — Chargestone Cave, the Jet Badge, and the eastern route to Opelucid
After the first Plasma Frigate operation, leave the Driftveil area through Route 6, obtain Surf from Cheren, and cross Chargestone Cave to Mistralton City. Complete Professor Juniper's Master Ball event, climb Celestial Tower, speak with Skyla at the summit, and ring the tower bell so Skyla returns to her Gym. Defeat Skyla, fly from Mistralton City to Lentimas Town, cross White 2's lava-filled Reversal Mountain with Bianca, and follow the required eastern route through Undella Town, Route 13, Lacunosa Town, Route 12, Village Bridge, and Route 11 until you reach Opelucid City.
Leave Route 6 with Surf and prepare for Chargestone Cave
Begin at the Route 6 area reached after the first Plasma Frigate operation. Travel north across the bridges and through the tall grass. Cheren is outside the Season Research Lab near the center of the route. Speak with him to advance the investigation into Unova's unusual temperature changes and receive HM03 Surf. You do not need to enter the laboratory for the main story, although its optional Deerling-related events can be completed now.
A house north of the Season Research Lab contains a woman who can restore your party. Use her service before continuing if your team has taken damage. Mistralton Cave lies to the east across water and is an optional detour; it is not the passage to Mistralton City. The required destination is Chargestone Cave, whose entrance is in the northwestern part of Route 6.
Continue through the route's trainers with several Pokémon rather than relying on one lead. The battles around this point include Electric-, Rock-, Steel-, Bug-, and mixed-type opponents. The brief Cobalion appearance near the western bridge and the Surf-accessible items are optional. Stock up on healing items before entering Chargestone Cave.
- Speak with Cheren outside the Season Research Lab.
- Receive HM03 Surf.
- Use the Route 6 recovery house if necessary.
- Continue to the northwestern entrance of Chargestone Cave.
- Treat Mistralton Cave and the Cobalion scene as optional.
Cross Chargestone Cave and reach Mistralton City
Enter Chargestone Cave and meet Bianca near the entrance. The cave's floating stones are moved by pushing them toward the large blue magnetic rocks. If a stone seems to block progress, circle around the chamber and approach it from another side; the goal is to make the magnetic rock pull the stone into place rather than pushing it into an open dead end.
Follow the cleared passages across the upper floor, down to B1F and B2F, and back through the connected chambers toward the eastern exit. The cave contains a required Triple Battle and a Rotation Battle, so place sturdy Pokémon in the active positions and avoid entering with only fragile attackers. A Doctor in the lower section can heal the party after you defeat him, making that trainer a useful recovery point.
The cave's items, including the Thunderstone, Metal Coat, and Electric Gem, are optional. The route to Mistralton City eventually returns to the upper level and leads out through the eastern exit. Heal at the Mistralton Pokémon Center as soon as you arrive, then buy Potions or Super Potions, status cures, and a few Repels if you want to reduce encounters on Route 7 and Celestial Tower.
- Meet Bianca inside Chargestone Cave.
- Use the blue magnetic rocks to clear the floating stones.
- Complete the required Triple Battle and Rotation Battle.
- Use the Doctor's healing service if needed.
- Exit through the eastern side into Mistralton City.
Trigger the Celestial Tower sequence correctly
Walk north past the Mistralton Pokémon Center. Professor Juniper will evaluate your Pokédex progress and give you a Master Ball. The gift occurs west of the Pokémon Center. Afterward, Skyla explains that Juniper needs transportation and that the professor has gone to Celestial Tower. Skyla does not simply return to the Gym at this point; you must complete the tower event first.
Leave Mistralton City through the northern entrance onto Route 7 and follow the raised walkways north to Celestial Tower. Enter the tower and climb through the floors. Professor Juniper can be found during the climb, and a Nurse on an upper floor will restore your Pokémon after you defeat her. Ghost-type wild Pokémon and trainers can inflict status conditions, so carry Awakening, Burn Heal, and Paralyze Heal or use the tower's Nurse whenever necessary.
Do not stop after speaking with Juniper. Continue all the way to the rooftop summit. Speak with Skyla there, then interact with the large bell and ring it. This bell event is required. Skyla will not return to Mistralton Gym until you have reached the summit, spoken with her, and rung the bell. After the bell scene, leave Celestial Tower and return to Mistralton City. The eastern Route 7 path toward Twist Mountain is blocked by a cave-in, confirming that the Gym is now the intended destination.
- Receive the Master Ball from Professor Juniper west of the Pokémon Center.
- Travel north through Route 7 to Celestial Tower.
- Climb to the tower summit.
- Speak with Skyla at the summit.
- Ring the Celestial Tower bell.
- Return to Mistralton City only after the bell event is complete.
Navigate the Mistralton Gym and defeat Skyla
Enter Mistralton Gym at the north end of the runway. In Pokémon White 2, the Gym is an aircraft hangar with large turbines and gusts of wind. Move forward while the wind is calm, then stand behind a wall or other solid structure when the turbines activate. If you are caught in the open, the gust can push you back toward the entrance. Advance in short sections and wait for a safe interval rather than attempting to cross the entire room at once.
On the normal White 2 setting, Skyla uses Swoobat at level 37, Skarmory at level 37, and Swanna at level 39. All three are weak to Electric attacks. Swoobat and Swanna are also weak to Rock attacks, while Skarmory is especially vulnerable to Fire and Electric attacks. Skarmory has Sturdy, so a full-health super-effective attack may leave it with 1 HP; be prepared to finish it on the next turn. Swanna holds a Sitrus Berry and can use Roost, so keep a strong Electric or Rock attacker healthy for the final part of the battle. Ice attacks are also useful against the Flying types, but Electric coverage is the most consistent answer to the complete team.
After the victory, Skyla awards the Jet Badge and TM55 Acrobatics. The Jet Badge allows Pokémon up to level 70 to obey you. Heal at the Pokémon Center and restore your move PP before going to the Cargo Service building.
- Use walls as cover when the turbine gusts begin.
- Defeat Swoobat level 37.
- Defeat Skarmory level 37.
- Defeat Swanna level 39.
- Receive the Jet Badge and TM55 Acrobatics.
- Heal before entering Cargo Service.
Fly to Lentimas Town and cross White 2's Reversal Mountain
Enter Mistralton Cargo Service and speak with Skyla. Professor Juniper and Bianca arrive, and Skyla arranges the required flight to Lentimas Town. The usual land route through Twist Mountain and Tubeline Bridge is unavailable during this part of the story, so the flight is not optional for normal progression.
After landing in Lentimas Town, listen to Juniper's explanation and her request that you consult Drayden in Opelucid City about the legendary dragons. Heal at the Lentimas Pokémon Center. The Move Tutor and the town's gifts are optional, although Icy Wind or Dragon Pulse can be useful before the next Gym.
Leave Lentimas through the eastern exit and enter Reversal Mountain. White 2 uses the lava-filled interior layout rather than the Black 2 layout. Bianca joins you inside and restores the party after battles. In the first main chamber, follow the connected passages through the mountain, using the southern and western openings as needed to loop back into the central area. Continue east through the later chambers. Bianca stops to investigate a lower chamber associated with Heatran, but you only need to continue through the main route and reach the eastern exit. Strange House, the Lunar Wing, and Heatran-related exploration are optional.
When Bianca finishes her investigation, she leaves you free to continue. Take the eastern exit to Undella Town, then heal before approaching the town's gate.
- Speak with Skyla in Mistralton Cargo Service.
- Complete the required flight to Lentimas Town.
- Enter White 2's lava-filled Reversal Mountain interior.
- Travel through the mountain with Bianca.
- Reach Undella Town through the eastern exit.
Follow Undella Town, Lacunosa Town, and the northern road to Opelucid
In Undella Town, heal at the Pokémon Center and approach the gate leading toward Route 13. Hugh catches up to you near the gate and starts a rival battle. His team includes a level 39 Unfezant, a level 39 elemental monkey determined by your starter choice, and his level 41 starter evolution. Bring answers for Flying, Normal, and the possible Grass-, Fire-, or Water-type partner instead of relying on one narrow counter.
After defeating Hugh, continue north onto Route 13. Follow the main land path toward Lacunosa Town. Surf-accessible branches, item paths, and the Cobalion encounter are optional. In Lacunosa, speak with the elderly woman and complete the Giant Chasm legend conversation involving Professor Juniper and Bianca. Continue through the required Team Plasma confrontation involving Hugh and Zinzolin before leaving town toward Route 12. If the western route remains blocked, return to the town's central and northern areas and speak with the story NPCs again until the Plasma scene has played out.
From Lacunosa, enter Route 12 and follow the main path west. Route 12 contains optional side paths and trainers, but the destination is Village Bridge. Cross the bridge from east to west and use the rest house there if your team needs healing. Continue west through Route 11. Virizion and the Surf- and Waterfall-accessible items on Route 11 are optional. Take the western gate to enter Opelucid City, where the next chapter begins.
- Defeat Hugh at the Undella Town gate.
- Travel north through Route 13.
- Complete the Giant Chasm legend conversation in Lacunosa Town.
- Complete the required Team Plasma event involving Hugh and Zinzolin.
- Cross Route 12 and Village Bridge.
- Travel west through Route 11 and enter Opelucid City.
Before you move on
- Cheren has given HM03 Surf on Route 6.
- Chargestone Cave has been crossed and Mistralton City has been reached.
- Professor Juniper has evaluated the Pokédex and given the Master Ball west of the Mistralton Pokémon Center.
- The player has climbed to the summit of Celestial Tower.
- The player has spoken with Skyla at the summit and rung the tower bell.
- Skyla's Swoobat, Skarmory, and Swanna have been defeated on the normal White 2 setting.
- The Jet Badge and TM55 Acrobatics are in the Trainer Card and Bag.
- The player has spoken with Skyla in Mistralton Cargo Service and completed the flight to Lentimas Town.
- Bianca's Reversal Mountain investigation has been completed in the White 2 lava-filled interior.
- The player has reached Undella Town and defeated Hugh at the town gate.
- The Giant Chasm legend conversation in Lacunosa Town has been completed.
- The required Team Plasma event involving Hugh and Zinzolin has been completed.
- The player has crossed Route 12, Village Bridge, and Route 11 and has entered Opelucid City or is standing at its Route 11 entrance.
References for this chapter
Opelucid City approach — Plot shifts, two city versions, and Drayden
This chapter begins after you have completed the eastern route from Lentimas Town through Reversal Mountain, Undella Town, Route 13, Lacunosa Town, Route 12, Village Bridge, and Route 11. Enter Opelucid City from Route 11, prepare for and defeat Drayden, then resolve the frozen-city Team Plasma operation. The chapter ends only after the Shadow Triad battle, when the game directs you back to Undella Town and the Marine Tube to Humilau City.
Confirm the prerequisite route and enter Opelucid City
Do not treat Opelucid as the immediate destination after defeating Skyla. Before this chapter starts, you must have completed the required journey from Lentimas Town through White 2’s Reversal Mountain, Undella Town, Route 13, Lacunosa Town, Route 12, Village Bridge, and Route 11. In particular, the Lacunosa and Giant Chasm-related conversations must already be finished, and Route 11 must be open.
From Route 11, continue west through the gate into Opelucid City. This is the correct White 2 approach for the main story. Route 9 is on the opposite, western side of the city and is available as an optional training detour after you arrive. When you enter Opelucid, Iris speaks to you and points you toward Drayden’s Gym. She also recommends Route 9 if your party needs more experience.
Heal at the Pokémon Center before exploring or challenging the Gym. The Center’s shop sells useful late-game Poké Balls, including Dusk Balls, Quick Balls, and Timer Balls. If you need additional experience, leave through Opelucid’s western exit and battle trainers on Route 9. Shopping Mall Nine, at the northern end of Route 9, provides another place to buy supplies. Return to Opelucid and restore your party before entering the Gym.
- Finish the Lentimas-to-Route-11 route before starting this chapter.
- Enter Opelucid City from Route 11, not from Route 9.
- Speak with Iris near the city entrance.
- Use Route 9 and Shopping Mall Nine for optional training and supplies.
- Heal at the Opelucid Pokémon Center before the Gym.
Use White 2’s city layout and collect optional items
Pokémon White 2 uses Opelucid’s traditional, rustic appearance, with greenery and older architecture. Pokémon Black 2 uses a futuristic version of the same city. This difference changes the city’s presentation but not the required route, Gym Leader, badge, or story events. In White 2, Drayden is the Opelucid Gym Leader; Iris is no longer the Leader.
Drayden’s house is beside the Pokémon Center. The second floor contains a Float Stone from the Linebacker and a Ring Target from the girl nearby. A house near the western exit has a Musical Prop gift that changes by day, and the house east of the Gym contains a Smoke Ball gift. These rewards are optional. If your team is ready, buy healing items and enter the Gym rather than spending time on nonessential errands.
- Confirm that Drayden, not Iris, is the White 2 Opelucid Gym Leader.
- Collect the Float Stone, Ring Target, or Smoke Ball if useful.
- Treat the Musical Prop as optional.
- Keep money available for healing items and battle supplies.
Prepare for Drayden’s Dragon team
Drayden uses Druddigon at level 46, Flygon at level 46, and Haxorus at level 48 in the normal version of White 2. Druddigon and Haxorus are pure Dragon types. Flygon is Dragon/Ground, so Electric attacks do nothing to it. Ice attacks are especially valuable because they are super effective against all three Pokémon, including Flygon’s Ground typing. Dragon attacks are also super effective, but a Dragon-type attacker can be exposed to the same weakness in return.
Bring at least one dependable Ice move and preferably a second Dragon answer. A Steel-type can resist Dragon attacks and provide a safe switch in some situations, but it is not a complete solution: Flygon carries Ground-type coverage, and Gym trainers can also use Fire-type attacks. Keep a sturdy Pokémon available rather than relying entirely on a frail Ice or Dragon attacker.
Haxorus is Drayden’s final Pokémon. It knows Dragon Dance, carries a Sitrus Berry, and has Mold Breaker. Do not give it several free turns to boost. Attack it promptly, or use a defensive switch to create a healing opportunity before returning to your strongest Ice or Dragon attack. Drayden’s Pokémon know Dragon Tail, which can force your active Pokémon out, so keep more than one usable counter ready.
Fairy-type moves and Fairy-type weaknesses do not exist in this Nintendo DS Generation V release. Plan around Ice, Dragon, Steel, and other available coverage instead of using a Fairy-based strategy.
- Bring a strong Ice move if possible.
- Prepare two usable answers to Dragon Pokémon.
- Avoid sending Electric attacks against Flygon.
- Keep a sturdy switch-in available for physical attacks.
- Do not plan around Fairy-type mechanics.
Clear the Opelucid Gym puzzle
Speak with Clyde at the entrance to receive a Fresh Water. The Gym uses two large dragon statues. Follow the illuminated path onto the first dragon and ride it upward until you reach Veteran Lucius. Defeat him to activate the switch on the dragon’s neck.
After the statue rises, return to the dragon’s head and use the arrow panels to choose a route. The left route leads to Veteran Rhona, who uses a defensive team, while the right route leads to Veteran Jerry, who favors offense. You only need to defeat one of them to unlock the next ascent, although fighting both provides extra experience.
At the next level, the left route leads to Veteran Denae’s Rotation Battle and the right route leads to Veteran Ron’s Triple Battle. Both use Fraxure, Druddigon, and Axew at level 44. Defeat either trainer. The dragon then rises to Drayden’s platform, and the two statues move together to open the path to the Leader. If you are underleveled, battle every Gym trainer; if your party is prepared, take one route on each level to conserve HP and PP.
- Take Clyde’s Fresh Water.
- Defeat Veteran Lucius.
- Defeat either Veteran Rhona or Veteran Jerry.
- Defeat either Veteran Denae or Veteran Ron.
- Reach Drayden’s platform.
Defeat Drayden and claim the Legend Badge
Lead with a Pokémon that can use Ice attacks and survive a physical hit. Druddigon can use Dragon Tail, Revenge, Slash, and Crunch. Flygon can use Dragon Tail, Crunch, Earth Power, and Rock Slide; switch to Ice coverage immediately and never waste a turn on Electric attacks. Haxorus can use Dragon Tail, Slash, Assurance, and Dragon Dance, so treat it as the most urgent target once it appears.
If Haxorus uses Dragon Dance, prioritize damage over setting up your own boosts. If Dragon Tail forces your counter out, continue switching until your strongest available Ice or Dragon attacker returns. Use healing items when necessary, but avoid sacrificing your only answer just to preserve a weaker Pokémon.
After the victory, Drayden awards the Legend Badge and TM82, Dragon Tail. The badge raises the obedience limit to level 80. Heal at the Pokémon Center before continuing, because the next sequence contains several mandatory battles and movement across the frozen city.
- Defeat Druddigon at level 46.
- Defeat Flygon at level 46.
- Defeat Haxorus at level 48.
- Receive the Legend Badge.
- Receive TM82, Dragon Tail.
Resolve the frozen Opelucid Team Plasma sequence
After the Gym battle, Drayden asks you to follow him to his house. You may heal at the Pokémon Center first. In the house, Drayden explains the history of Reshiram, Zekrom, and Kyurem and discusses the DNA Splicers, an heirloom connected to the ancient Dragon legend.
An explosion interrupts the conversation. The Plasma Frigate freezes parts of Opelucid City, and Zinzolin demands the DNA Splicers. When the Plasma members leave to search the city, Drayden asks you to defeat the Grunts. Slide across the ice and use the Pokémon Center if needed before engaging them.
The first Grunt is east of the Pokémon Center and uses level 44 Watchog and Muk. From there, slide north across the ice and then west to reach the Grunt near a building; she uses level 44 Golbat and Garbodor. Continue west and south, then move slightly left and up to reach the third Grunt, who uses level 44 Seviper and Weezing. Defeat all three before returning to the Gym.
Zinzolin is waiting in front of the Gym. He uses two level 46 Cryogonal and a level 48 Weavile. Fighting, Fire, Rock, and Steel attacks are effective against the Cryogonal, while Weavile is especially vulnerable to Fighting attacks. Watch for Ice attacks and confusion effects, and heal before the battle if your party has taken damage.
After Zinzolin loses, Drayden heals your party and brings out the DNA Splicers. The Shadow Triad immediately steals them. Leave the Gym and follow the pursuit route south and then east through the city. You will meet one Shadow Triad member, who uses two level 46 Pawniard and a level 48 Absol. Fighting-type attacks are effective against all three, although Ground and Fire attacks also help against Pawniard. Defeat this Shadow Triad member; the theft still succeeds, and the story continues.
- Follow Drayden to his house after the Gym battle.
- Watch the explanation of Kyurem, Reshiram, Zekrom, and the DNA Splicers.
- Defeat the three level 44 Plasma Grunts in frozen Opelucid.
- Return to the Gym and defeat Zinzolin.
- Allow Drayden to retrieve the DNA Splicers.
- Defeat the Shadow Triad member encountered during the chase.
Return to Undella Town and continue through the Marine Tube
After the Shadow Triad battle, Hugh and Cheren contact you. The immediate Opelucid objective is complete, but the chapter is not complete until you have defeated the Shadow Triad member. Do not go directly to the Marine Tube before that battle, because the story trigger remains unfinished.
Once the battle and follow-up conversation are over, return to Undella Town. From there, enter the Marine Tube and travel to Humilau City. The Marine Tube is the required next route for the main story and leads into the eighth-Gym sequence covered in the following chapter.
Dragonspiral Tower is not the next mandatory destination. It is associated with later legendary content, including White 2’s post-game Reshiram route. For this chapter, stay on the Opelucid-to-Undella-to-Marine-Tube path.
- Finish the Shadow Triad battle before leaving Opelucid.
- Receive the follow-up direction from Hugh and Cheren.
- Return to Undella Town.
- Enter the Marine Tube toward Humilau City.
- Leave Dragonspiral Tower for later optional content.
Before you move on
- The Lentimas Town-to-Route-11 route was completed before entering this chapter.
- You entered White 2’s Opelucid City from Route 11.
- You defeated Drayden’s level 46 Druddigon, level 46 Flygon, and level 48 Haxorus.
- The Legend Badge and TM82, Dragon Tail, are in your inventory.
- You followed Drayden to his house and watched the Dragon legend explanation.
- You defeated all three frozen-city Plasma Grunts and defeated Zinzolin.
- Drayden retrieved the DNA Splicers, and the Shadow Triad stole them.
- You defeated the Shadow Triad member during the chase.
- You received the follow-up direction to return to Undella Town.
- You are ready to enter the Marine Tube and continue to Humilau City.
References for this chapter
- Pokémon Black 2 and White 2 Walkthrough, Section 13: Opelucid City, Marine Tube, and Humilau City
- Opelucid City - Pokémon Black 2 and White 2 Guide
- Opelucid Gym: Drayden - Pokémon Black 2 and White 2 Guide
- Opelucid City, Part 2 - Pokémon Black 2 and White 2 Guide
- Pokémon Black 2 and White 2 Gyms and Gym Leader data
Humilau City and Marlon — Final Gym, Route 22, and the Plasma Frigate approach
After the frozen Opelucid City events, use the Marine Tube from Undella Town to reach Humilau City. Meet Hugh and Marlon, solve the lily-pad Gym puzzle, and defeat Marlon for the Wave Badge. Then investigate Route 22 to obtain the Colress MCHN, return through Humilau, travel along Route 21, clear the required portion of Seaside Cave, and stop at the Plasma Frigate entrance. The ship’s interior, Plasma Card, password, and Zinzolin sequence are covered in Chapter 09.
Use the Marine Tube to reach Humilau City
Finish the frozen Opelucid City sequence before attempting this chapter. The required events include defeating the Team Plasma Grunts frozen around the city, confronting Zinzolin, pursuing the Shadow Triad near the Route 11 gate, and completing the conversations that direct you back toward Undella Town.
In Undella Town, enter the Marine Tube on the town’s northern side. The Tube carries you directly to Humilau City. Near the city entrance, Hugh tells you to challenge the final Gym Leader. Walk north through Humilau and approach the water to trigger Marlon’s appearance. He returns to the Gym after the short conversation.
Humilau has a Pokémon Center and Poké Mart, so heal and resupply before entering the Gym. Route 21 is south of the city, while Route 22 is west. Neither route needs to be cleared before Marlon’s Gym battle. Route 22 becomes necessary immediately afterward because Colress is waiting there with the device needed to open the way through Seaside Cave.
- Complete the frozen Opelucid City story sequence.
- Return to Undella Town.
- Ride the Marine Tube to Humilau City.
- Speak with Hugh and trigger Marlon’s appearance.
- Heal and resupply before entering the Gym.
Navigate the Humilau Gym’s lily pads
Speak to the Gym attendant to receive the Fresh Water, then step onto the first lily pad from the entrance boardwalk. Each pad carries you in the direction from which you boarded it until it reaches another pad, dock, or obstruction. The puzzle is solved by approaching the same pad from different sides, not by repeatedly riding it from one direction.
From the opening area, use the first pad to reach the southwest dock. Continue east through the connected boardwalks and lily pads, battling or avoiding the Gym Trainers as desired. The route loops through the west and east sections before directing you toward the northwest portion of the Gym. If a pad leaves you at a dead end, use the nearby boardwalk to approach it from another direction rather than assuming the puzzle is stuck.
A practical route is to ride from the entrance to the southwest dock, move east, use the next pads to reach the western and central platforms, then loop back through the southern and eastern platforms. Continue until the final pad carries you to Marlon’s platform. The Gym’s trainers use Water-type Pokémon, so Grass- and Electric-type attacks are the most reliable answers.
- Collect the Fresh Water at the entrance.
- Use the first lily pad to reach the southwest dock.
- Approach pads from different sides when the route appears blocked.
- Bring reliable Grass- or Electric-type attacks.
- Heal before speaking to Marlon if the Gym Trainers weakened the party.
Defeat Marlon and earn the Wave Badge
In the standard White 2 release, Marlon uses Carracosta at level 49, Wailord at level 49, and Jellicent at level 51. These are the normal-version levels; Challenge Mode uses a different, stronger lineup.
Carracosta is Water/Rock and has Sturdy, so a full-health super-effective attack may leave it with 1 HP instead of defeating it. It also knows Shell Smash. Use a strong Grass attack when possible and finish it immediately if it survives. Electric attacks are useful, but Grass is especially effective because Carracosta’s Rock typing adds another weakness.
Wailord has very high HP and can use Bounce, Rollout, and Amnesia in addition to Scald. Grass and Electric attacks both work well. If it uses Amnesia, physical damage is preferable; if it uses Bounce, switch to a Pokémon that can withstand the attack or exploit the temporary turn safely.
Jellicent is Water/Ghost, so Normal- and Fighting-type attacks fail against it. Use Grass or Electric damage and expect Scald, Ominous Wind, Brine, and Recover. Keep your active Pokémon reasonably healthy because Brine is more powerful against targets below half HP. A strong super-effective attack is preferable to allowing repeated Recover turns.
Marlon awards the Wave Badge and TM55 Scald after the battle. The Wave Badge is the eighth Gym Badge and raises the obedience limit to level 100. Challenge Mode is outside the target route for the standard USA and European White 2 release.
- Defeat level 49 Carracosta.
- Defeat level 49 Wailord.
- Defeat level 51 Jellicent.
- Receive the Wave Badge.
- Receive TM55 Scald.
Visit Route 22 and obtain the Colress MCHN
Leave the Gym after the battle. Hugh and Marlon meet you outside, and Hugh asks you to investigate Route 22, which is west of Humilau. Heal at the Pokémon Center before leaving because the route contains trainers with evolved Pokémon around the mid-to-high 40s.
Travel west through Route 22 until you approach Terrakion. Colress appears beside it and gives you the Colress MCHN. Terrakion is not required for the story, so do not spend time attempting to catch it unless you want the optional legendary encounter.
The Colress MCHN is required because a Crustle blocks the ship-side exit of Seaside Cave. Once you have received the device, return to Humilau rather than trying to find another route around the obstruction. This is the required progression trigger for the Plasma Frigate approach.
- Leave Humilau through the western exit.
- Approach Terrakion on Route 22.
- Speak with Colress.
- Receive the Colress MCHN.
- Return to Humilau after the conversation.
Cross Route 21 and clear the required Seaside Cave passage
From Humilau, travel south and use Surf from the shoreline near the Pokémon Center to enter Route 21. Follow the water route between the rocks. Some Swimmers and other trainers can be bypassed, but battle them if your team needs experience before the upcoming story sequence.
Continue south and west toward the beach outside Seaside Cave. A Doctor near the cave entrance can heal the party after you defeat him, making this a useful recovery point. Enter Seaside Cave and proceed through the upper and lower sections. Surf is required for the water routes, and Strength is useful for moving boulders and opening shortcuts, although optional item paths can be skipped.
Work through the cave until you reach the strange rock blocking the eastern, ship-side exit. Examine it after obtaining the Colress MCHN. It reveals itself as a wild Crustle and must be battled. You may defeat or catch it; either result opens the passage. The Colress MCHN is consumed or breaks during this event, so do not expect to use it again for another Crustle in this sequence.
- Surf south from Humilau onto Route 21.
- Use the Doctor near Seaside Cave if you need a free recovery.
- Enter Seaside Cave from the Route 21 beach.
- Use Surf and, if available, Strength to navigate the cave.
- Use the Colress MCHN on the blocking Crustle.
- Open the eastern exit toward the ship.
Stop at the Plasma Frigate entrance
After defeating or catching the Crustle, exit through the newly opened passage to the coast. The Plasma Frigate is anchored outside Seaside Cave. As you approach, Hugh appears, followed by Marlon, who lowers the gangplank so that you can board the ship.
This is the stopping point for Chapter 08. Do not enter the Frigate’s interior if following the chapter order. The next chapter begins with the ship sequence, including the Plasma Grunt battles, the White 2 Plasma Card, the password barrier, and the confrontation involving Zinzolin.
Before boarding, heal at the Doctor or Pokémon Center if necessary and review the party. Keep a strong Grass or Electric attacker for Water-type encounters, retain Ice coverage for later Dragon battles, and avoid carrying several weak Pokémon whose only purpose is holding field moves. Save immediately before approaching the gangplank so the party is ready for the consecutive Team Plasma events in Chapter 09.
- Reach the coast outside Seaside Cave.
- Trigger Marlon’s gangplank event.
- Confirm that the Plasma Frigate is accessible.
- Stop at the Frigate entrance.
- Do not begin the ship interior sequence until Chapter 09.
- Save with a healed and battle-ready party.
Before you move on
- The frozen Opelucid City story events are complete.
- The Marine Tube has been used to reach Humilau City.
- Marlon has been defeated.
- The Wave Badge and TM55 Scald are in the bag.
- Colress has been met beside Terrakion on Route 22.
- The Colress MCHN has been obtained.
- Route 21 has been crossed to the Seaside Cave entrance.
- The blocking Crustle in Seaside Cave has been defeated or caught.
- The eastern cave exit to the coast is open.
- Marlon has lowered the gangplank to the Plasma Frigate.
- The player is standing at or immediately outside the Frigate entrance, ready for Chapter 09.
- The Plasma Card, password barrier, and Zinzolin ship battle have not yet been counted as completed.
References for this chapter
- Pokémon Black 2 and White 2 Walkthrough, Section 13: Opelucid City, Marine Tube, and Humilau City
- Appendix: Black 2 and White 2 walkthrough/Section 14 — Bulbapedia
- Pokémon Black 2 and White 2 Gyms and Gym Leader data
- Seaside Cave — Pokémon Black 2 and White 2 Guide
- Route 21 — Pokémon Black 2 and White 2 Guide
- Pokémon Black 2 and White 2 Team Plasma encounters
Final story push — The Plasma Frigate, Shadow Triad and the Giant Chasm
Begin at the first Plasma Frigate entrance reached from Route 21 and Seaside Cave after Chapter 08. In White 2, the first ship visit uses a Plasma Card and password console. After Team Plasma escapes, return through Humilau City and Route 22 to the Giant Chasm, board the Frigate a second time, solve the White 2 pipe-and-transporter puzzle, defeat Colress and the Shadow Triad, then fight White Kyurem and Ghetsis. The forced White Kyurem encounter cannot be captured.
1. Board the first Plasma Frigate from Route 21
Start at the Plasma Frigate entrance on Route 21, beside Seaside Cave, with Hugh and Marlon. Heal before entering if you have not done so since Chapter 08. The ship contains several battles with Pokémon around the mid-40s, so bring a full party with current moves, status cures and enough healing items.
Follow Hugh onto the ship and defeat the opening Team Plasma Grunts. You may collect the nearby TM and Revive, but those items are optional. Move through the ship's accessible rooms and search the southern section for the Plasma Card. Several Grunts provide clues for the password, while others can be bypassed once the card has been obtained.
White 2 uses the password console on this visit. Return to the barrier terminal after collecting the Plasma Card and enter the answer indicated by the clues. The possible English answers include repeated-number codes and the names Reshiram, Zekrom or Kyurem. Do not use the four-switch solution from the other version or copy a password from a different language without checking the clues in your game.
- Enter the Plasma Frigate from Route 21.
- Obtain the Plasma Card in the southern rooms.
- Collect the password clues you need.
- Use the password console to lower the barrier.
2. Defeat Zinzolin and leave the first ship
After the barrier falls, proceed into the Frigate's containment area. Zinzolin confronts you beside Kyurem's machinery, and Hugh joins the fight. This is a tag battle against Zinzolin and a Team Plasma Grunt, not a solo Zinzolin battle. Zinzolin uses two level 48 Cryogonal and a level 50 Weavile in White 2, while his partner brings additional support.
Fighting-type moves are valuable against Weavile and the partner's Dark- and Normal-type Pokémon. Fire- and Steel-type attacks also help against the Cryogonal, but watch for Reflect and Light Screen. Defeat the Cryogonal quickly if they begin reducing your team's damage. Heal between turns if a key Pokémon is weakened; the battle ends the visit, so preserving a single sweeper is less important than keeping reliable counters alive.
Once the tag battle is won, the Shadow Triad removes you and Hugh from the ship. You awaken on the beach near Route 21. Cheren explains that the Frigate has flown toward the Giant Chasm. The first ship sequence is complete; there is no Colress battle on this visit.
- Win the tag battle against Zinzolin and the Team Plasma Grunt.
- Watch for Reflect and Light Screen from Cryogonal.
- Confirm that the Shadow Triad ejects you from the ship.
- Speak with Cheren on the beach.
3. Return through Humilau City and enter Giant Chasm
Travel back to Humilau City, heal at the Pokémon Center and follow the previously opened route to Route 22. Enter the Giant Chasm through the Route 22 side entrance. You do not need to repeat the Colress Machine or Seaside Cave objectives from Chapter 08; the Colress Machine has already served its purpose at this point.
Follow the available path through the cave and into the crater forest. Team Plasma members occupy the route, and Rood arrives with former Team Plasma members. Defeat or pass the required Grunts, then continue through the crater until the frozen Plasma Frigate is accessible. Hugh advances ahead of you, so follow the story path rather than searching the optional side areas.
Before boarding, restore the party and make sure your best Fighting-, Fire-, Ground-, Steel-, Rock- and Dark-type attacks have adequate PP. The upcoming ship sequence contains the Colress battle and three consecutive Shadow Triad battles. A Doctor inside the Frigate can heal your party, but reaching that Doctor requires progressing through the ship first.
- Return to Route 22 through Humilau City.
- Enter Giant Chasm from the Route 22 side.
- Follow Rood and Hugh through the required Team Plasma events.
- Reach the frozen Plasma Frigate.
4. Solve the second White 2 Frigate puzzle
Board the Frigate and go south into the ship's lower section. Hugh is already confronting Grunts. Enter the southern room when directed and defeat the double-team of Grunts blocking the route. Afterward, use the green transporter to reach the pipe-puzzle area.
White 2 uses red switches that change the positions of the ship's pipes. Return to the upper level whenever a route below is blocked, activate the appropriate red switch, then descend again. On the lower level, use the green transporters to reach the four separate rooms containing the barrier switches. The transporter routes change as the pipes move, so there is no useful single sequence if you have not first matched the pipe layout.
Activate all four switches. If a transporter seems inaccessible, go back upstairs and test another red pipe switch rather than repeatedly walking against the same blocked passage. Defeat the Grunts guarding the lower rooms as needed. After the fourth switch is pressed, return to the upper barrier and proceed toward the containment area.
A Doctor is positioned in the puzzle section. Defeat the Doctor to make him available as a healing point, then use him before continuing. This is the safest recovery point before the major battles.
- Enter the southern puzzle section.
- Use red pipe switches to change the routes.
- Use green transporters to reach all four switches.
- Lower the barrier and heal with the Doctor.
5. Defeat Zinzolin and Colress
Beyond the lowered barrier, Zinzolin confronts you again. Hugh assists in the required tag battle, and Zinzolin uses two level 48 Cryogonal and a level 50 Weavile. Fighting-type attacks handle Weavile and the accompanying Dark- or Normal-type support, while Fire- and Steel-type attacks are effective against Cryogonal. Defeat the screen-setting Cryogonal early if possible.
After the battle, use the transporter near the containment area to reach Colress's control room. Colress's White 2 team is Magneton, Magnezone, Metang and Beheeyem at level 50, followed by level 52 Klinklang. Ground, Fighting and Fire coverage handles much of the team, but do not rely exclusively on Ground attacks: Klinklang carries an Air Balloon. Break the balloon first or use a Fighting- or Fire-type move, then prevent Klinklang from gaining several turns with Shift Gear.
Paralysis cures are useful because Colress's Steel Pokémon can create a long fight if your main attacker is slowed. If your team needs recovery after Colress, use the transporter route back to the Doctor before continuing toward the next room.
- Win the second Zinzolin tag battle with Hugh.
- Defeat Colress's five Pokémon.
- Break Klinklang's Air Balloon before using Ground attacks against it.
- Heal before entering the Shadow Triad sequence.
6. Defeat the Shadow Triad
Follow the route from Colress's room toward Ghetsis's office. Ghetsis leaves the confrontation to the Shadow Triad, and Hugh joins you because of the stolen Purrloin that has become a Liepard. The three Shadow Triad members are fought one at a time, not as one triple battle.
Each member uses two level 49 Pawniard and one level 51 Pokémon. The three final Pokémon are Absol, Accelgor and Banette. Fighting-type attacks are especially effective against Pawniard, while Ground- and Fire-type moves are also useful. Use Fighting or Bug attacks against Absol, Fire-, Flying- or Rock-type attacks against Accelgor, and Dark- or Ghost-type attacks against Banette. Watch for Banette's Will-O-Wisp and Sucker Punch, and clear burn if it is crippling a physical attacker.
After the first Shadow Triad battle, speak to each of the other two members to trigger the remaining fights. Heal between battles if necessary; the Doctor remains the important recovery point before the final Chasm route. When all three are defeated, the Triad returns Hugh's sister's evolved Purrloin and disappears. Take the southern stairs out of the Frigate.
- Defeat the first Shadow Triad member.
- Speak to and defeat the other two members individually.
- Use status cures after Will-O-Wisp or other disabling effects.
- Collect Hugh's story resolution before leaving the ship.
7. Defeat White Kyurem and Ghetsis
After leaving the Frigate, descend the icy path and enter the cave to the north. From the cave entrance, follow the direct route to the deepest chamber. Save before approaching Ghetsis. Make sure the party is healed and carry Revives, Full Restores or other status-healing items; White Kyurem and Ghetsis are mandatory battles in succession.
In White 2, N arrives with Reshiram. Ghetsis uses the DNA Splicers to fuse Reshiram with Kyurem, creating White Kyurem. His cane disrupts the normal capture process, so the game blocks capture during this level 55 forced battle. Do not waste turns throwing Poké Balls. White Kyurem is Dragon- and Ice-type and is weak to Fighting, Steel, Rock and Dragon attacks. Fighting and Steel moves are usually safer than sending out a Dragon, because White Kyurem's Dragon attacks can severely damage your own Dragon-type Pokémon. Its special Ice and Fire attacks also punish exposed Steel or Grass Pokémon, so use a bulky counter and heal before it falls into knockout range.
When White Kyurem is defeated, it separates from Reshiram and vanishes. Ghetsis immediately challenges you. His team includes level 50 Cofagrigus, Seismitoad, Eelektross, Drapion and Toxicroak, followed by a level 52 Hydreigon holding a Life Orb. Use Ghost- or Dark-type attacks on Cofagrigus, Grass on Seismitoad, and strong neutral damage or a prepared matchup against Eelektross because Levitate removes its Ground weakness. Drapion is weak to Ground, Toxicroak is weak to Psychic and Flying, and Hydreigon is vulnerable to Fighting, Ice, Bug and Dragon attacks. Heal freely during this battle; saving every item for the Elite Four is less important than finishing the story safely.
After Ghetsis falls, the remaining scenes play automatically. N departs with Reshiram, the Frigate leaves, and the ice in the Giant Chasm clears. Hugh then tells you how to reach Victory Road. Follow the newly available exit toward Route 23; the next chapter begins with final League preparation.
- Save before approaching Ghetsis in the inner cave.
- Defeat the forced level 55 White Kyurem battle without attempting capture.
- Defeat Ghetsis immediately afterward.
- Watch the departure and Giant Chasm resolution scenes.
- Confirm that Route 23 and Victory Road are accessible.
Before you move on
- The first Plasma Frigate visit has been completed with the White 2 password console.
- Zinzolin and his Team Plasma partner have been defeated on the first visit.
- The Giant Chasm Frigate has been reached through the Route 22 side.
- The second White 2 pipe-and-green-transporter puzzle has been completed.
- Zinzolin and his partner have been defeated on the second visit.
- Colress has been defeated and Klinklang's Air Balloon has been handled.
- All three Shadow Triad members have been defeated.
- White Kyurem has been defeated without attempting capture.
- Ghetsis has been defeated immediately afterward.
- The Frigate has departed, the Giant Chasm ice has cleared and Route 23 and Victory Road are accessible.
References for this chapter
Optional post-game Reshiram, Kyurem capture, and White Kyurem fusion
This chapter covers optional content in Pokémon White Version 2 after the main story is complete. Do not begin it before defeating the Elite Four and Champion Iris and entering the Hall of Fame. The required campaign ends before this sequence. After the Hall of Fame, follow N's Zoroark from Victory Road into the ruins of N's Castle, defeat N and his level 70 Reshiram, take the Light Stone to Dragonspiral Tower, capture Reshiram, and then return to Giant Chasm for the level 70 Kyurem encounter. After Kyurem is caught, use the DNA Splicers to create White Kyurem if desired.
1. Confirm that the post-game sequence is available
Finish the main story first. You must have defeated the Elite Four and Champion Iris and completed the Hall of Fame sequence. This chapter is not part of the route to the Pokémon League, and none of its objectives is required to unlock the credits or complete the campaign.
After returning to the overworld, fly to the Pokémon League and enter Victory Road. Bring a team capable of handling level 70 legendary Pokémon, along with status-curing items, healing items, and a large supply of Poké Balls. A Pokémon with False Swipe is useful, but it should be supported by sleep or paralysis and a second Pokémon that can safely absorb attacks.
- Defeat the Elite Four and Champion Iris.
- Enter the Hall of Fame before starting this chapter.
- Prepare status moves, controlled damage, healing items, and Poké Balls.
- Do not treat this sequence as a prerequisite for the main story.
2. Follow Zoroark into N's Castle and defeat N
From the Pokémon League side of Victory Road, return to the area where Hugh's sister's dream was discussed during the story. Take the stairway down from the section with the Veterans. N's Zoroark is now at the entrance that was previously blocked. Follow it through the cave and down the long stairway into the ruins of N's Castle.
Inside the castle, move through the accessible rooms until you reach N's old room and then the throne room. The route is short, but collect supplies or items only after confirming that your team is ready for the battle. N challenges you in the throne room with one Pokémon: Reshiram in White 2, at level 70.
Reshiram is Dragon and Fire type and knows a powerful mixed set including Fusion Flare, Dragon Pulse, and Extrasensory. Rock-, Ground-, and Dragon-type attacks can deal useful damage, but avoid sending a frail Pokémon into an attack it cannot withstand. A bulky Pokémon with reliable healing or a strong Rock-type move makes a safer lead than an unprotected Ice-type attacker.
This is a trainer battle, not a normal wild encounter. You cannot catch N's Reshiram during the battle. After you defeat it, N changes Reshiram back into the Light Stone and gives the stone to you.
- Enter N's Castle from Victory Road after the Hall of Fame.
- Follow Zoroark through the ruins.
- Defeat N's level 70 Reshiram.
- Receive the Light Stone after the battle.
3. Take the Light Stone to Dragonspiral Tower
Leave Victory Road and travel to Icirrus City. From there, go north to Dragonspiral Tower. Carry the Light Stone in your Bag; it is the required trigger for the White 2 legendary encounter.
Climb the tower to its upper area. You do not need to complete a new story route through every optional post-game location, but you must reach the top section where the stone can be activated. When the event begins, the Light Stone restores Reshiram and starts the level 70 wild encounter.
Save before activating the stone. Reshiram is a one-time static encounter for the current attempt, so saving gives you the best chance to retry without losing the opportunity. Use a status move if possible, then reduce its HP gradually. Avoid high-powered super-effective attacks once Reshiram is in the red, because a critical hit can end the battle.
Use Ultra Balls as a general option. Timer Balls become more useful after the battle has continued for several turns. If you defeat Reshiram or flee, it can return after another Hall of Fame entry, but saving before the encounter is still the safer approach.
- Travel from Victory Road or a nearby flight point to Icirrus City.
- Reach the upper area of Dragonspiral Tower.
- Save before using the Light Stone event.
- Capture level 70 Reshiram in White 2.
- If the encounter is lost, enter the Hall of Fame again before checking for its return.
4. Return to Giant Chasm and capture Kyurem
After Reshiram has been captured, leave Dragonspiral Tower. N will indicate that Kyurem has returned to Giant Chasm. Travel to the Giant Chasm area and retrace the route to the deepest cave chamber where the main-story confrontation occurred.
The earlier White Kyurem battle does not provide a Pokémon for your party. The later encounter is a separate level 70 wild Kyurem in its normal Dragon and Ice form. Save immediately before interacting with it.
Kyurem's available moves include Scary Face, Glaciate, Dragon Pulse, and Imprison. Its total move usage is limited, so avoid allowing the fight to continue indefinitely. Scary Face and Glaciate lower Speed, while Dragon Pulse is its main direct special threat. A Pokémon that resists Ice or can survive Dragon Pulse gives you a safer switch-in than a fragile sweeper.
Lower Kyurem's HP with False Swipe or another controlled-damage move. False Swipe alone is not enough: apply sleep or paralysis, heal the status user when necessary, and reapply the status if it wears off. The deepest chamber is indoors, so Dusk Balls are especially useful. Ultra Balls work at any point, and Timer Balls improve as more turns pass.
If Kyurem is defeated or you flee, it can return after another Hall of Fame entry. Once Kyurem is caught, the DNA Splicers appear in the chamber. Pick them up before leaving.
- Capture Reshiram before returning to Giant Chasm.
- Reach the deepest Giant Chasm chamber.
- Save before the level 70 Kyurem encounter.
- Use controlled damage and a reliable status condition.
- Capture Kyurem and collect the DNA Splicers afterward.
5. Create White Kyurem with the DNA Splicers
White Kyurem is not caught directly. It is created by combining the Kyurem you caught in Giant Chasm with Reshiram using the DNA Splicers. Make sure both Pokémon are available in your party or PC before attempting the fusion.
Use the DNA Splicers from the Key Items pocket and select Kyurem first, then select Reshiram as the Pokémon to combine with it. The result is White Kyurem. This is the player-controlled equivalent of the fusion performed during the main story, but it is optional and does not reopen the earlier Ghetsis sequence.
The DNA Splicers can also separate the fusion. Use the item again when you want to restore normal Kyurem and Reshiram. The fused form is not a separate species that must be caught independently. It is a form created from the two Pokémon, and the relevant Kyurem remains central to the fusion.
If you have not yet caught Kyurem, merely collecting the DNA Splicers is not enough to create White Kyurem. Capture Kyurem first, then make sure Reshiram is available.
- Have both Kyurem and Reshiram available.
- Use the DNA Splicers on Kyurem and select Reshiram.
- Confirm that White Kyurem has been created.
- Use the DNA Splicers again later if you want to separate the fusion.
- Remember that fusion is optional post-game content.
Before you move on
- The player has already defeated the Elite Four and Champion Iris and entered the Hall of Fame.
- N's Zoroark has led the player from Victory Road into N's Castle.
- N has been defeated and the Light Stone has been received.
- Reshiram has been awakened and captured at Dragonspiral Tower.
- Kyurem has been encountered and captured in the deepest Giant Chasm chamber.
- The DNA Splicers have been collected after the Kyurem encounter.
- If desired, Kyurem and Reshiram have been fused into White Kyurem.
- The player understands that every objective in this chapter is optional and not required for the main-story completion check.
References for this chapter
- Walkthrough: Pokémon Black 2 and White 2/Part 19 — Bulbapedia
- N's Castle — Bulbapedia
- Pokémon Black 2 and White 2 Legendary Guide - Smogon University
- How to Catch Kyurem in Pokémon Black, White, and B2W2 — NationalDex
- Pokémon Black 2 and White 2 Walkthrough, Post-Game: Icirrus City and Dragonspiral Tower — ArrPeeGeeZ
Head to the Pokémon League — Final preparation and recommended party levels
After defeating Ghetsis in Giant Chasm, leave through the newly opened western passage and follow Route 23 northwest to Victory Road. Pass the eight-Badge check, receive HM05 Waterfall from N, cross White 2’s altered Victory Road, and defeat Hugh near the northern exit. Use the Pokémon Center at the League entrance as the final recovery point. A party averaging about level 55–58 can complete the first League run with good matchups and item use, but raising the main team closer to level 58–60 gives a safer margin against Champion Iris, whose normal White 2 team reaches level 59.
1. Leave Giant Chasm and reach Route 23
Do not attempt the League route until the Giant Chasm story is complete and Ghetsis has been defeated. After the battle and the closing conversations, return to the exterior and enter the western passage that was previously blocked by Team Plasma. This passage leads to Route 23, the final numbered route before Victory Road.
Route 23 runs northwest through a long mountain road. Follow the main route rather than trying to return to the sealed Route 10 approach; Route 10 is not the active League route in Black 2 or White 2. The eastern side follows a river below the cliffs, while the western side winds through a tree-filled grove. Continue north until the Victory Road entrance comes into view.
Route 23 has trainers around the low-to-mid 50s, including Fighting, Electric, Water, Ground, and Ice-related threats. Use these battles to identify weaknesses before entering Victory Road. If one party member is far behind the others, this is a reasonable place to bring that Pokémon closer to the rest of the team, but do not exhaust all of your strongest moves before the League.
- Defeat Ghetsis in Giant Chasm.
- Leave through the opened western passage.
- Enter Route 23 and follow it northwest.
- Do not use sealed Route 10 as the League approach.
- Check that the team is not carrying avoidable level or moveset gaps.
2. Cross Route 23 and use the last approach to Victory Road
Follow Route 23’s main trail north. The route includes cliffs, narrow paths, water, tall grass, ledges, and a Strength puzzle in the western section. Cut, Surf, and Strength are useful for the practical route and its item branches. Some optional items require additional field moves, so do not detour into a dead end if your immediate goal is the League entrance.
The route’s trainers are useful for experience and money, but the more important preparation is keeping the party healthy. Use status-healing items during the route instead of entering Victory Road with a poisoned, paralyzed, or badly damaged lead. Save stronger PP-restoring items for the League unless a key move is nearly empty.
Continue to the northern end of Route 23 and enter Victory Road. The Pokémon Center at the Victory Road entrance is not yet the League’s final healing point, so use it if you need to repair the party before the Badge Check Gate.
- Use the main northwest route through Route 23.
- Solve the Strength obstruction when it blocks the main path.
- Heal status conditions before entering Victory Road.
- Preserve PP on the moves needed for Hugh and the Elite Four.
- Enter Victory Road from Route 23 rather than an older Unova route.
3. Enter Victory Road and receive Waterfall from N
When you first enter Victory Road, N is waiting near the entrance. Speak to him to receive HM05 Waterfall. Follow the path after he leaves and pass the Badge Check Gate, which verifies all eight Gym Badges. If the gate does not open, confirm that every Badge has been earned before trying to continue.
The Victory Road Pokémon Center is northeast of the entrance. Heal there before exploring the mountain. You can also return to this Center during the route if you use an Escape Rope or backtrack through an opened shortcut. Keep a temporary HM user available if necessary, but plan to replace it before the Elite Four if it contributes little in battle.
White 2’s Victory Road is not the same route layout as the original Black and White version. It uses damaged passages, ruins, a river valley, caves, a grove, mountainside paths, and a northern tunnel. White 2 and Black 2 also differ in some route details, so follow the White 2 side of the path rather than using directions intended for the original games.
- Speak to N and receive HM05 Waterfall.
- Pass the eight-Badge Check Gate.
- Heal at the Victory Road Pokémon Center.
- Keep Waterfall, Surf, Strength, Cut, and Flash available for the route.
- Do not apply original Black and White Victory Road directions to this sequel.
4. Follow the White 2 Victory Road route
From the entrance, enter the first cave and move north past the early trainers. Use Strength to place the boulder into the hole, then continue toward the River Valley. In the valley, follow the water and bridges north, collecting recovery items if desired, and enter the next cave.
The second cave branches into southern, southwest, and northern paths. The southern path returns toward the river and includes a Waterfall section. The southwest route leads through the grove and eventually lets you approach a boulder from the opposite side. In the grove, use Cut where the tree blocks the route and work around to the boulder shortcut. The northern route is the progression path toward the higher sections of Victory Road.
Flash is not mandatory for every movement, but it makes the darker cave sections easier to read. If you reach a branch containing only an item or optional trainer, return to the last major fork and choose the route that climbs toward the mountainside and northern passage. A Zoroark blocks an optional deeper area during the first visit. It is not part of the route to the Pokémon League and should not be treated as a required objective.
- Use Strength in the first cave.
- Move through the River Valley and second cave.
- Use Surf and Waterfall where the main path requires them.
- Use Cut in the grove when the tree blocks the route.
- Treat the Zoroark-blocked area as optional post-game content.
- Continue toward the mountainside and northern tunnel.
5. Defeat Hugh near the northern exit
After passing the Veterans near the northern end of Victory Road, enter the tunnel. Hugh catches up with you there and starts his final main-story battle. Save before entering the tunnel, and heal at the Pokémon Center before beginning this approach; the game does not provide a convenient recovery pause immediately before the rival fight.
Hugh’s team includes Unfezant at level 55, a Simisage, Simisear, or Simipour at level 55 depending on your starter choice, Bouffalant at level 55, and his fully evolved starter at level 57. Unfezant can use Flying attacks and U-turn, Bouffalant has strong physical attacks plus coverage such as Megahorn, Wild Charge, and Earthquake, and the final starter evolution can punish a careless switch.
Use Electric or Rock coverage against Unfezant when safe, Fighting coverage against Bouffalant, and a dedicated answer to Hugh’s starter evolution. Do not assume a single lead can defeat all four Pokémon. After winning, Hugh gives you TM24 Thunderbolt. Restore HP, status, and important PP before leaving the final Victory Road passage.
- Save before entering Hugh’s tunnel.
- Heal the entire party first.
- Prepare an answer for Unfezant.
- Use a sturdy Fighting answer or strong neutral damage against Bouffalant.
- Bring a specific counter for Hugh’s fully evolved starter.
- Collect TM24 Thunderbolt after the battle if desired.
6. Use the Pokémon League entrance as the final preparation point
Leave the northern Victory Road passage after defeating Hugh and enter the Pokémon League complex. The Pokémon Center west of the League entrance is the final convenient recovery point before beginning the Elite Four challenge. Heal there, remove temporary HM users from the active party when possible, and reorganize the team before entering the League building.
Buy Full Restores, Revives, and a cheaper healing supply such as Hyper Potions or Max Potions. A practical starting stock is around 12–20 Full Restores and 8–12 Revives, but these are recommendations rather than requirements. Carry additional healing items if the team is lower than the recommended range or if you expect to recover from mistakes with items.
The Elite Four can be challenged in any order, but the game does not normally let you return to the outside Pokémon Center between members without abandoning the current challenge. Make sure every Pokémon has enough PP for its dependable attacks. Carry Ether or Elixir items if available, especially for a move that is your only reliable answer to one Elite Four member or to Iris’s Haxorus.
- Reach the Pokémon League complex after Hugh’s battle.
- Heal at the Pokémon Center west of the entrance.
- Replace ineffective HM users with battle-ready party members.
- Buy Full Restores, Revives, and additional healing items.
- Check PP before entering the League challenge.
- Save after the final healing and shopping trip.
7. Build answers for the Elite Four
The Elite Four specialize in Ghost, Dark, Psychic, and Fighting types. Prepare separate answers instead of expecting one Pokémon to sweep every room. A Dark attacker or strong Dark coverage helps against Shauntal and Caitlin, but protect it from Fighting attacks and dangerous neutral damage. A Normal-type Pokémon can provide an immunity to Ghost attacks, while a bulky Psychic- or Flying-type Pokémon is valuable against Marshal.
Against Grimsley, Fighting attacks are effective against much of his Dark-centered team, but do not switch carelessly into coverage. Against Caitlin, Bug, Dark, and Ghost moves are useful; a specially bulky Pokémon with reliable damage can also work. Against Marshal, use Psychic- or Flying-type attacks and preserve the Pokémon that can safely absorb physical Fighting attacks.
Use both physical and special attackers. Give each member a clear role: fast damage, physical durability, special durability, Fighting coverage, Ghost or Psychic coverage, and a dependable answer to Dragon-types. If one Pokémon is your only response to a major matchup, keep it healthy and avoid exposing it to unnecessary route battles.
- Prepare separate answers for Ghost, Dark, Psychic, and Fighting teams.
- Include at least one safe Ghost immunity or resistance where practical.
- Bring both physical and special damage.
- Keep a sturdy answer for Marshal’s physical attackers.
- Protect the only Pokémon capable of handling a key Elite Four matchup.
8. Prepare specifically for Champion Iris
Normal White 2’s first Iris battle uses Hydreigon, Druddigon, Aggron, Archeops, and Lapras at level 57, followed by Haxorus at level 59. This is not the lower level 53–55 configuration sometimes listed for another battle setup. Plan around the level 59 Haxorus when choosing your final training target.
Iris’s team is Dragon-centered but not a pure Dragon team. Ice moves are broadly useful, and Dragon moves can damage her Dragon-types heavily, but Ice coverage alone does not solve the battle. Hydreigon carries Dragon Pulse, Surf, Flamethrower, and Charge Beam, so it can punish Ice answers that are weak to Fire or special attacks. Use a fast Fighting-type or strong Fighting coverage if it can survive the matchup, and avoid giving Hydreigon free turns to raise its Special Attack with Charge Beam.
Druddigon is physically dangerous and carries Sheer Force with a Life Orb. Aggron has high physical Defense but is vulnerable to strong Fighting- and Ground-type attacks. Archeops is fast and hits hard, but reducing it below half HP activates Defeatist and sharply lowers its offensive power. Lapras can use Ice Beam, so do not send a Dragon-type into it without checking the risk. Haxorus holds a Focus Sash and can use Dragon Dance; break the Sash with an initial hit, then finish it with a reliable Ice or Dragon attack before it gains too many boosts.
For a normal first attempt, aim for roughly level 55–58 across the active party, with your most important counters at level 58–60 if possible. A team averaging the low 50s can win with strong matchups and careful item use, but it has less room for a critical hit or a missed knockout. A balanced team near the upper 50s is more reliable than one level 60 sweeper supported by several underleveled Pokémon.
- Prepare for five level 57 Pokémon and level 59 Haxorus.
- Bring at least two dependable ways to damage Dragon-types.
- Use Fighting or Ground coverage against Aggron where appropriate.
- Lower Archeops below half HP to activate Defeatist.
- Account for Lapras’s Ice Beam before using a Dragon-type.
- Break Haxorus’s Focus Sash before attempting the final knockout.
- Do not rely only on Ice attacks against Iris.
9. Final moveset, item, and save check
Use Rare Candies on Pokémon that are falling behind rather than placing every item on the strongest member. EV training is optional and not required for the story. If you do use EV training, focus each Pokémon on its principal attacking stat and either Speed or a preferred defensive stat instead of spreading training evenly.
Replace weak early-game moves, keep reliable same-type attacks, and add coverage for matchups the party currently lacks. Held items can remain simple: type-boosting items for attackers, Leftovers for durable Pokémon, and damage-reducing Berries for a matchup where surviving one attack matters. Do not remove a dependable attack merely to force an elaborate setup strategy.
Before entering the League, confirm that the active party has adequate PP, no avoidable status conditions, and at least one answer to each Elite Four specialty. Heal at the Pokémon Center, purchase supplies, reorganize the party, and save immediately before entering the League building. This is the correct final preparation save for the first Elite Four attempt.
- Use Rare Candies to repair level gaps.
- Treat EV training as optional.
- Replace weak moves and confirm coverage.
- Assign useful held items by role.
- Heal and restore PP at the League Pokémon Center.
- Save immediately before entering the Elite Four building.
Before you move on
- Ghetsis has been defeated in Giant Chasm.
- The western Giant Chasm passage is open.
- Route 23 has been crossed toward Victory Road.
- N has given HM05 Waterfall at the Victory Road entrance.
- The eight-Badge Check Gate has been passed.
- White 2’s Victory Road has been traversed through its caves, river valleys, grove, mountainside, and northern tunnel.
- Hugh’s final pre-League battle has been won.
- The Pokémon League Pokémon Center has been used for a full recovery.
- Full Restores, Revives, and additional healing supplies have been purchased.
- The party averages approximately level 55–58, with key Iris counters preferably near level 58–60.
- The team has separate answers for Ghost, Dark, Psychic, Fighting, and Dragon-centered battles.
- A final save exists immediately before entering the Pokémon League challenge.
References for this chapter
Elite Four — Strategies for Shauntal, Grimsley, Caitlin and Marshal
The Unova Elite Four can be challenged in any order. A practical clockwise route is Shauntal, Grimsley, Caitlin, then Marshal, but you may choose another order if your team has a better matchup plan. In the original Pokémon White Version 2 normal mode, each member uses three Pokémon at level 56 and a final Pokémon at level 58. There is a Pokémon Center and Poké Mart outside the four rooms, but no automatic recovery between battles, so prepare for four consecutive fights and then the Champion battle.
Prepare in the Pokémon League plaza
Before entering any room, use the Pokémon Center in the western building to restore HP, status, PP and fainted party members. The Pokémon League recommends a party in the upper 50s or around level 60 for a comfortable first clear. A lower-level team can still succeed, but it must use type advantages, switching and healing carefully.
Buy enough Hyper Potions or stronger healing items for ordinary HP damage, several Full Restores for combined HP and status problems, and Revives for emergencies. Use regular healing items when a Pokémon only needs HP; save Full Restores for burns, paralysis, poison, sleep or another status that would interfere with the next fight. Ether or Elixir is useful if an important move has limited PP, especially Focus Blast, Stone Edge, Blizzard or another move you rely on repeatedly.
Give important party members useful held items. Type-boosting items, Leftovers, Shell Bell or Sitrus Berry can all help, but the exact choice depends on your team. Have at least one dependable Dark or Ghost attack, one accurate Fighting attack, one Psychic or Flying attack, and an Ice, Dragon or other strong neutral answer for the Champion battle that follows.
- Heal the entire party at the Pokémon Center.
- Buy healing items, Revives and status cures before entering.
- Check PP on every important attacking and recovery move.
- Carry Dark, Fighting, Psychic or Flying, and anti-Dragon coverage.
Defeat Shauntal in the left room
Shauntal is in the left room of the central plaza. Her normal-mode team is Cofagrigus at level 56, Drifblim at level 56, Golurk at level 56 and Chandelure at level 58. Dark- and Ghost-type attacks are effective against her Ghost Pokémon. Golurk is also vulnerable to Water, Grass, Ice, Dark and Ghost attacks, while Chandelure is weak to Water, Ground, Rock and Ghost moves.
Cofagrigus carries Will-O-Wisp, Grass Knot, Psychic and Shadow Ball. A physical attacker that is burned will lose much of its Attack and take continuing damage, so either use a special attacker, cure the burn promptly, or switch to a Pokémon that can finish Cofagrigus without depending on physical damage. Do not assume a Dark type is completely safe: Cofagrigus can use Psychic, and Golurk carries Brick Break.
Drifblim uses Psychic, Thunderbolt, Acrobatics and Shadow Ball. Its Flying typing makes Ground attacks ineffective, so use Dark, Electric, Ice, Rock or Ghost coverage instead. Chandelure is Shauntal’s strongest threat and carries Energy Ball, Fire Blast, Psychic and Shadow Ball. Water- and Ground-type Pokémon can work well, but Energy Ball punishes an unsafe Water or Ground switch. Keep a healthy answer for Chandelure rather than allowing it to gain several free turns.
- Use Dark or Ghost attacks against Cofagrigus and Drifblim.
- Do not use Ground attacks against Drifblim.
- Watch for Will-O-Wisp before committing a physical attacker.
- Save a reliable Water, Ground, Rock or Dark answer for Chandelure.
Challenge Grimsley in the center-left room
Grimsley’s room is immediately to the right of Shauntal’s. His normal team is Liepard at level 56, Scrafty at level 56, Krookodile at level 56 and Bisharp at level 58. Fighting- and Bug-type attacks are the clearest answers, although strong neutral special attacks are useful when your Fighting counter is weakened.
Liepard uses Night Slash, Fake Out, Aerial Ace and Attract. Expect Fake Out to interrupt your opening plan and do not rely on a slow setup strategy unless Liepard cannot threaten the Pokémon you send out. Scrafty carries Crunch, Brick Break, Poison Jab and Rock Tomb. Fighting moves are effective, but Flying counters must respect Rock Tomb and Poison Jab.
Krookodile uses Crunch, Dragon Claw, Earthquake and Rock Tomb. It is weak to Water, Grass, Ice, Fighting and Bug attacks. Its Intimidate ability lowers the Attack of a Pokémon that enters against it, so a special attacker or a Pokémon with a reliable super-effective move can avoid losing momentum. Bisharp is especially vulnerable to Fighting attacks, but it carries Night Slash, X-Scissor, Metal Claw and Aerial Ace. Use an accurate Fighting move rather than gambling on an unreliable attack, and avoid sending a frail Psychic or Grass Pokémon into it.
- Use Fighting or Bug coverage whenever possible.
- Expect Fake Out from Liepard.
- Use Water, Grass, Ice, Fighting or Bug moves against Krookodile.
- Reserve a reliable Fighting move for Bisharp.
Use Dark or Bug coverage against Caitlin
Caitlin occupies the center-right room. Her normal-mode team is Musharna at level 56, Reuniclus at level 56, Sigilyph at level 56 and Gothitelle at level 58. Dark-, Ghost- and Bug-type attacks exploit the Psychic weakness shared by the team. Fairy-type attacks are not available in the original Generation V games, so do not plan around Fairy coverage.
Musharna carries Charge Beam, Dream Eater, Yawn and Reflect. It is bulky and can put a Pokémon to sleep with Yawn, then use Dream Eater if the sleep takes effect. Switch or use a status cure when necessary, and attack with your strongest reliable Dark, Ghost or Bug move rather than spending several turns on weak attacks. Reflect reduces physical damage, so a strong special attack can be preferable if your team has one.
Reuniclus uses Psychic, Energy Ball, Focus Blast and Recover. It can survive a weak attack and restore its HP, so pressure it with a strong super-effective move and do not give it repeated opportunities to use Recover. Sigilyph is Psychic/Flying and carries Psychic, Shadow Ball, Ice Beam and Air Slash. Do not answer it with a Fighting-type attack; use Dark, Electric, Ice, Rock or Ghost coverage instead. Gothitelle finishes the battle with Psychic, Shadow Ball, Thunderbolt and Calm Mind. Defeat it quickly if it begins boosting, and avoid using a Psychic type that cannot withstand Shadow Ball.
- Use Dark, Ghost or Bug attacks as the primary offense.
- Cure or avoid Yawn before Musharna can use Dream Eater.
- Do not use Fighting attacks against Sigilyph.
- Stop Gothitelle before Calm Mind makes it difficult to defeat.
Finish with Marshal in the right room
Marshal is in the rightmost room. His normal-mode team is Throh at level 56, Sawk at level 56, Mienshao at level 56 and Conkeldurr at level 58. All four are pure Fighting types, so Psychic- and Flying-type attacks are super effective. Fairy moves are not part of this original release. A bulky special attacker can be particularly valuable because Marshal’s team is built around strong physical attacks.
Throh uses Storm Throw, Bulldoze, Rock Tomb and Payback. Storm Throw always produces a critical hit, so do not rely on defensive stat boosts to reduce that move’s damage. Sawk carries Brick Break, Retaliate, Rock Slide and Payback, and its Sturdy ability prevents it from being knocked out from full HP by one attack. If you expect a knockout, be ready for Sawk to survive and retaliate.
Mienshao is fast and uses Hi Jump Kick, U-turn, Bounce and Retaliate. A Ghost type blocks its Fighting attacks, but Payback and the other coverage moves mean a Ghost type is not automatically safe. Conkeldurr is the final threat and carries Hammer Arm, Bulk Up, Stone Edge and Retaliate. Defeat it before it can use Bulk Up several times. Flying Pokémon must be protected from Rock Tomb and Rock Slide, while Psychic Pokémon should avoid Payback when possible.
- Use accurate Psychic or Flying attacks.
- Account for Sawk’s Sturdy ability.
- Protect Flying Pokémon from Rock attacks.
- Defeat Conkeldurr before repeated Bulk Up uses make it too strong.
Restore the party before the Champion route opens
After each victory, you return to the central plaza, and the defeated member’s floor tile lights up. The room order is not fixed, so you can return to the plaza and choose any remaining Elite Four member. Once all four have been defeated, the central route to the Champion opens.
There is no automatic full recovery between Elite Four battles. Open the Bag after every fight and restore HP, remove status conditions and revive essential counters. If a move has lost too much PP, use an Ether or Elixir before the next room if you have one. Before starting the Champion approach, aim to have every surviving Pokémon at full HP, no damaging status conditions, and enough PP for your strongest Ice, Dragon, Fighting, Water or other coverage moves. Keep several healing items and at least one Revive available because the Champion battle follows the Elite Four sequence.
- All four Elite Four members have been defeated.
- All four plaza floor tiles are illuminated.
- The party is healed and essential status conditions are removed.
- Your anti-Dragon coverage and important move PP are ready for Champion Iris.
Before you move on
- Shauntal, Grimsley, Caitlin and Marshal have all been defeated.
- All four Elite Four floor tiles in the central plaza are lit.
- The route to Champion Iris has opened.
- The party has been manually healed, status conditions have been removed, and key anti-Dragon moves still have PP.
Champion Iris — Handling mixed types and the Dragon finale
Defeat Champion Iris in Pokémon White Version 2 by preparing for her balanced six-Pokémon team rather than treating the battle as a pure Dragon-type matchup. Hydreigon and Haxorus are the most dangerous opponents, but Aggron, Archeops and Lapras punish careless switching. Enter the Pokémon League with a complete party, restored PP and enough healing items to survive the Elite Four and Champion without relying on a single sweeper.
1. Prepare before entering the Pokémon League
Do all healing and resupply before entering the Pokémon League challenge. Restore the HP and PP of your full party at the Pokémon Center outside the League, then buy Full Restores, Revives and strong HP recovery items. The Elite Four and Iris form one continuous challenge, so plan to use medicine between battles rather than expecting a healing stop inside the Champion’s chamber.
A party around the high 50s is appropriate for the first normal-mode Champion battle. Iris’s first five Pokémon are level 57, while her final Pokémon is level 59. You do not need every Pokémon to match level 59, but bring six usable members rather than one overleveled sweeper. Restore the PP of your best Ice, Fighting, Electric, Ground and Dragon attacks before entering.
After each Elite Four battle, use the League’s teleporters to return to the central lobby if needed, but do not enter the challenge assuming your team will be automatically healed. If the Elite Four has consumed too many resources, leave only if you are prepared to repeat the League battles. The safest plan is to stock enough items before the first fight and conserve them throughout the run.
- Heal the entire party before entering the League.
- Restore PP for your key offensive and recovery moves.
- Carry Full Restores, Revives and reliable HP recovery.
- Bring at least two Pokémon that can answer Iris’s Dragon-types.
- Do not depend on a Pokémon that is already exhausted from the Elite Four.
2. Build a matchup plan around Iris’s actual team
On the first normal-mode battle, Iris uses Hydreigon, Druddigon, Aggron, Archeops, Lapras and Haxorus. The team is Dragon-centered but not made entirely of Dragon-types. Prepare separate answers for the Steel/Rock Aggron, Rock/Flying Archeops and Water/Ice Lapras instead of repeatedly sending the same attacker into every matchup.
Ice attacks are useful against Hydreigon, Druddigon, Archeops and Haxorus. A strong Ice Beam user can solve several matchups, but it must not be left in front of Flamethrower, Rock Slide or Lapras’s attacks. Fighting attacks are especially valuable against Hydreigon, Aggron and Lapras, while Electric attacks are reliable against Lapras and Archeops. Ground attacks help against Aggron, but they do nothing to Hydreigon because of Levitate.
A bulky Steel-type can provide a useful emergency switch into Dragon attacks, but it is not a universal answer. Aggron has Earthquake, Lapras has Surf and Thunderbolt, and Haxorus has Earthquake. Keep a second defensive option available so one unlucky critical hit or status effect does not end the battle plan.
- Have a dependable Ice attack.
- Pair the Ice attacker with a bulky switch-in.
- Keep Fighting or Ground coverage for Aggron.
- Keep Electric, Grass or Fighting coverage for Lapras.
- Do not use Ground attacks against Hydreigon.
3. Defeat Hydreigon without giving it a free boost
Iris leads with Hydreigon at level 57. Its moves are Dragon Pulse, Surf, Flamethrower and Charge Beam, and its Levitate ability makes Ground-type attacks ineffective. Open with a Pokémon that can deliver strong Ice, Fighting or other powerful super-effective damage. Fighting attacks are particularly effective because Hydreigon is Dark/Dragon, but use whichever answer is healthiest and fastest on your team.
Hydreigon’s coverage makes careless switching dangerous. Flamethrower threatens Ice- and Steel-types, Surf punishes Fire- and Ground-types, and Dragon Pulse is its most immediately dangerous attack against neutral targets. Charge Beam can raise Hydreigon’s Special Attack while dealing damage. If it gains the boost, stop using weak attacks or passive setup and finish the exchange quickly.
If your intended counter cannot safely take a hit, use a bulky member to absorb the first attack, then switch to the counter after Hydreigon has committed to a move or after a safe knockout. Avoid sending a fragile Psychic- or Ghost-type merely because it has a neutral attack; Hydreigon’s special coverage can remove it before it contributes.
- Use Ice or Fighting damage when possible.
- Do not waste turns on Ground attacks.
- Treat a Charge Beam boost as an emergency.
- Heal the Hydreigon counter before the next matchup if necessary.
4. Handle Druddigon, Aggron and Archeops individually
Druddigon is level 57, holds a Life Orb and uses Dragon Tail, Rock Slide, Flamethrower and Focus Blast. Ice attacks are effective, but do not switch a fragile Ice-type directly into Flamethrower. Bring that Pokémon in after a knockout or from a position where it can survive the incoming move. Dragon Tail can force your Pokémon out, so avoid relying on repeated setup turns.
Aggron is Steel/Rock and carries Double-Edge, Rock Slide, Earthquake and Autotomize. Fighting and Ground attacks are the most direct answers. Strong Water attacks also work, but preserve the Pokémon you intend to use against Lapras. Aggron’s high Defense makes weak physical attacks inefficient, and Autotomize can sharply increase its Speed. Defeat it promptly instead of allowing repeated setup turns.
Archeops is Rock/Flying and uses Acrobatics, Rock Slide, Dragon Claw and Endeavor. Electric, Ice, Rock and Water attacks all work well. Its Defeatist ability cuts its offensive power after its HP falls below half, but Endeavor can still reduce a healthy Pokémon to the same HP as Archeops. Finish it before it can exploit that move, especially if your active Pokémon is already weakened.
- Use a safe entry for Ice damage against Druddigon.
- Do not allow Druddigon to force repeated switches with Dragon Tail.
- Use Fighting, Ground or strong Water attacks against Aggron.
- Stop Aggron before Autotomize turns it into a faster threat.
- Defeat Archeops quickly and do not rely only on Defeatist reducing its damage.
5. Defeat Lapras while preserving your final Haxorus answer
Lapras is level 57 and uses Surf, Ice Beam, Thunderbolt and Sing. Electric and Fighting attacks are good choices. Grass attacks can also work, but check whether your Grass attacker can withstand Ice Beam. Do not use Water attacks because Lapras has Water Absorb and will recover HP instead of taking damage.
Sing is the main disruption. If Lapras puts a key Pokémon to sleep, use a Full Restore rather than allowing several turns of inactivity, especially if Iris can follow with a critical hit or switch pressure. Avoid sending a Flying- or Water-dependent Pokémon into Lapras without checking its defenses, because Thunderbolt and Ice Beam cover common responses.
Track your remaining healing items and Ice PP before Lapras falls. Haxorus is next and should be treated as the final planned matchup, not as an opponent to face with whatever happens to remain on the field.
- Use Electric or Fighting attacks against Lapras.
- Do not use Water attacks because of Water Absorb.
- Clear Sing quickly if it affects an important counter.
- Keep enough healing and Ice PP for Haxorus.
6. Stop Haxorus before Dragon Dance becomes a sweep
Iris’s final Pokémon is level 59 Haxorus. It has Mold Breaker, holds a Focus Sash and uses Dual Chop, Dragon Dance, Earthquake and X-Scissor. The Focus Sash means a full-health Haxorus survives a one-hit knockout with 1 HP. Do not stop attacking after the first apparent knockout; select a second attack or priority move immediately unless residual damage has already broken the Sash.
Dragon Dance raises Haxorus’s Attack and Speed. If it uses the move, switch to a healthy Dragon-resistant or Steel-type if one remains, then attack with Ice damage or another reliable move. Mold Breaker means abilities that would normally block Ground attacks do not provide a dependable answer to its Earthquake. A weakened Pokémon should not stay in merely to deal one more hit if Haxorus has already boosted.
A priority move can finish Haxorus after the Focus Sash activates, provided the move is strong enough and the user survives. If you do not have priority, use two consecutive attacks, residual damage, a multi-hit move or a bulky second attacker. Preserve at least one emergency answer for this final exchange instead of spending every counter earlier.
- Expect Focus Sash to prevent a full-health one-hit knockout.
- Finish Haxorus on the next turn after the Sash activates.
- Answer Dragon Dance immediately.
- Keep a priority user, second Ice attacker or bulky Steel-type alive.
- Do not rely on an ability to block Earthquake because Haxorus has Mold Breaker.
7. Use items and PP deliberately during the Champion battle
Use a Full Restore when both HP and status need attention; otherwise use a normal HP recovery item to conserve Full Restores. Revive a fainted counter only when Iris’s active Pokémon cannot immediately remove it again, or after creating a safe turn through a knockout or a defensive switch. Do not spend several turns reviving Pokémon in front of a boosted Haxorus or Hydreigon.
Conserve your strongest Ice move for Hydreigon, Druddigon and Haxorus. Use weaker super-effective or neutral attacks against a target that another team member handles reliably. If you use X-items, set them up only when the active Pokémon can safely survive the opponent’s attacks. An offensive boost is not worth sacrificing your only answer to Haxorus.
If the battle is going badly, prioritize removing the active threat rather than preserving every item. A defeated Iris battle sends you back to continue the League challenge, but you will need to rebuild the team and restore supplies before trying again.
- Use Full Restores for combined HP and status emergencies.
- Revive important counters only during a safe turn.
- Conserve Ice PP for Iris’s Dragon-types.
- Use X-items only from a secure position.
- Keep one emergency healing item for the Haxorus exchange.
8. Complete the Hall of Fame sequence and verify the victory
When Haxorus is defeated, Iris loses the battle and recognizes you as the new Unova Champion. The game opens the route to the Hall of Fame room. Follow the newly available stairs, enter the Hall of Fame and allow your winning party to be registered. The game then saves during the closing sequence before the credits roll.
Do not treat the battle result alone as the completion point. Let the Hall of Fame registration and credits progress to the end, then load the completed save when the game returns to normal play. The post-game begins from the player’s home in Aspertia City, where additional eastern Unova routes, facilities and story events become available.
The first victory over Iris completes the main Pokémon League campaign. Later Elite Four and Champion rematches are optional and use stronger teams. The next chapter handles the immediate post-league route and remaining story objectives.
- Hydreigon, Druddigon, Aggron, Archeops, Lapras and Haxorus are defeated.
- The Hall of Fame registers the victorious party.
- The closing save and credits sequence completes.
- The completed save can be loaded for post-game play.
- Normal control resumes from the post-league game state.
Before you move on
- Champion Iris’s first normal-mode team has been defeated: Hydreigon, Druddigon, Aggron, Archeops, Lapras and Haxorus.
- The Hall of Fame has registered the party.
- The closing save and credits have completed.
- The completed save can be loaded and normal control resumes for post-game progression.
- The party has been healed and the next post-league route can be started from the home area in Aspertia City.
Immediate post-league epilogue and Key System unlock
Defeating Champion Iris completes the main Pokémon White Version 2 campaign after the Hall of Fame and credits sequence. Reloading the completed save returns you to Aspertia City and unlocks the post-game portion of Unova. White Forest is the normal version-specific southeastern area in White 2. The Easy Key, Pokémon World Tournament legacy events, White Treehollow, transferred city keys, and legendary hunts are post-game features rather than additional main-story requirements.
1. Finish the Hall of Fame and reload the completed save
After defeating Champion Iris, continue through the Hall of Fame registration, closing scenes, and credits. Do not reset the Nintendo DS or turn it off while the ending is still running. When the title screen appears, select your save file rather than starting a new game.
The completed save resumes in Aspertia City. Your badges, party, items, Pokédex progress, and Hall of Fame result remain recorded. This return to Aspertia is the practical start of the post-game. You do not need to defeat Iris again to make the post-game areas appear.
The main-story completion check is satisfied when the game has recorded your party in the Hall of Fame, the credits have ended, and the save reloads normally in Aspertia City. If the game returns to the title screen and your save loads with the previous adventure intact, the ending was recorded successfully.
- Iris has been recorded in the Hall of Fame.
- The ending and credits have finished normally.
- The completed save reloads in Aspertia City.
- The eight Badges and Hall of Fame result remain on the Trainer Card.
2. Confirm the White 2 Easy Key and open the Key System
From the title screen, open the Main Menu and select Unova Link. The Key System is accessed from Unova Link; it is not an option in the ordinary field menu while you are walking around Unova.
Defeating the Champion awards the Easy Key in White 2. In the English release, the corresponding setting is Easy Mode. It lowers the levels of opposing Trainers’ Pokémon in future battles. Normal Mode remains the default unless you change the setting, and using Easy Mode is optional. It does not change the fact that the current save has completed the League.
The three difficulty settings are Normal Mode, Easy Mode, and Challenge Mode. White 2 natively awards the Easy Key. Challenge Mode is associated with Black 2 and requires the appropriate transferred key if you want to use it in White 2. Keys received from another game unlock settings but are not necessarily listed as keys held in the same way as keys earned on your own cartridge.
The Key System also includes Change City and Mystery Door settings. Change City can switch between White Forest and Black City only when the relevant version access has been unlocked. In White 2, White Forest is the native area and does not require a transferred key. Black City is not automatically available in White 2: it requires the Tower Key transferred from a Black 2 game after the required Black Tower progress. Never save while standing inside White Forest or Black City if you intend to use Change City immediately afterward, because the game disables that option from either location.
- Unova Link is visible on the title screen Main Menu.
- Key System opens through Unova Link.
- The White 2 Easy Key is available after Champion victory.
- Easy Mode is distinguished from Normal Mode and Black 2’s Challenge Mode.
- White Forest is recognized as the native White 2 city-area setting.
- Black City is not claimed as automatically available without a transferred key.
3. Enter the Pokémon World Tournament
Fly to Driftveil City and leave through the southern exit. The Pokémon World Tournament facility occupies the area south of the city where the Cold Storage stood earlier in the adventure. Enter the building and speak with the staff to view the available tournaments.
The standard Driftveil Tournament is available as part of the story before the League. After you have defeated the Elite Four, the Unova Leaders Tournament becomes available in the legacy-tournament section. Enter it to battle representatives of the Unova Gym Leaders under the event’s listed battle format and restrictions.
Winning the Unova Leaders Tournament unlocks the Kanto, Johto, Hoenn, and Sinnoh Leaders Tournaments. Winning all five regional Leaders Tournaments unlocks the World Leaders Tournament. The Champions Tournament is a later goal and requires ten victories in the World Leaders Tournament. These unlocks are sequential; entering the PWT alone does not open every tournament.
Read the rules before each entry. The PWT can use Single, Double, Triple, or Rotation Battles depending on the event. Teams may also be level-scaled or subject to species and item restrictions. Victories award Battle Points, which can be spent at the facility’s shops on battle supplies, held items, TMs, and other rewards. None of the leader or Champion tournaments is required for the main-story completion check.
- The PWT south of Driftveil City has been entered.
- The Unova Leaders Tournament is available after the Elite Four.
- The tournament rules and battle format have been checked before entry.
- Later regional, World Leaders, and Champions events are understood to require successive wins.
4. Reach native White Forest through Route 14
White Forest is the normal southeastern version-specific area in Pokémon White 2. Before the Hall of Fame, the gate from Route 14 is blocked. After the Hall of Fame has been recorded, travel to Route 14 and use the newly opened southeastern connection to enter White Forest.
A convenient approach is to Fly to Nimbasa City, leave east onto Route 16, cross Marvelous Bridge, continue through Route 15, and enter Route 14 from the eastern side. You can also reach Route 14 from Undella Town. Follow the route’s bridges and paths toward the White Forest gate. The route contains trainers, items, and water routes, so bring the field moves required for any optional branches you intend to explore.
White Forest is a settlement and wild-Pokémon area. Its residents and available encounters are controlled by the save data and supported connectivity features, so entering the forest does not guarantee every possible resident or encounter immediately. Explore the settlement and inspect its services, but do not confuse White Forest with the original Pokémon White version’s forest mechanics.
White Forest is not the same facility as White Treehollow. White Treehollow stands in the northern part of the White Forest area and is an optional battle challenge with sequential areas. During its battles, ordinary Bag use is restricted, so prepare the party before entering and use the facility’s recovery arrangements between areas. Clearing Area 5 in White 2 awards the Treehollow Key. That key is primarily used to give a connected Black 2 game access to White Forest; it is not required to unlock or enter White Forest on your own White 2 save.
- The Route 14 gate is open after Hall of Fame completion.
- White Forest is reached through southeastern Unova.
- White Forest is identified as the native White 2 area.
- White Treehollow is treated as a separate optional battle facility.
- The Treehollow Key is not incorrectly described as a prerequisite for White Forest in White 2.
5. Choose optional post-game objectives
After confirming the completed save, the PWT and White Forest provide two reliable starting points. Use the PWT for structured battles, returning Gym Leaders, Battle Points, and progressively harder legacy tournaments. Use White Forest for its residents, wild Pokémon, local services, and access to White Treehollow.
The opened eastern routes also lead to optional locations, stronger Trainers, legendary encounters, N’s Castle, the former Unova areas, and other post-game events. Before approaching any legendary Pokémon, heal the party, carry status moves, prepare a controlled damage option, and save immediately before the encounter. These targets are optional and are not needed to validate the Iris victory, the credits, or the White 2 Easy Key.
If you have a compatible second game, Unova Link can exchange certain keys. A Black 2 game that clears the required Black Tower progress can provide the Tower Key, allowing Black City to be accessed in White 2. A White 2 game that clears Area 5 of White Treehollow can provide the Treehollow Key to a Black 2 game, allowing White Forest to be accessed there. These cross-version features do not replace the native White Forest access in White 2.
- Optional post-game travel begins from the completed save.
- The PWT and White Forest are both available for optional activities.
- White Treehollow and legendary encounters are treated as extensions rather than required campaign steps.
- Black City is pursued only if the appropriate transferred key is available.
- A save is made before optional legendary encounters.
Before you move on
- The save reloads in Aspertia City after the Hall of Fame and credits.
- The title-screen Main Menu contains Unova Link and its Key System option.
- The White 2 Easy Key is available after defeating Champion Iris.
- The Pokémon World Tournament south of Driftveil City can be entered, and the Unova Leaders Tournament is available after the Elite Four.
- Route 14’s post-game gate is open and White Forest can be reached in southeastern Unova.
- White Forest is confirmed as the normal native area for Pokémon White Version 2.
- Black City has not been claimed as directly available without a transferred Tower Key from Black 2.
- White Treehollow, additional PWT tournaments, transferred keys, and legendary hunts are correctly recorded as optional extensions.
References for this chapter
Optional post-game routing: World Tournament, White Forest, rematches and Kyurem follow-ups
Pokémon White Version 2 is complete for main-story purposes after Champion Iris is defeated, the Hall of Fame registration occurs, the credits finish and the post-credits save is created. The Pokémon World Tournament, White Forest, White Treehollow, Gym Leader and Champion tournaments, N’s Reshiram route, normal Kyurem capture and White Kyurem fusion are optional post-game objectives. Complete the campaign checklist first, then use the optional routes below in any order.
Confirm the main campaign completion point
Defeat Champion Iris and allow the Hall of Fame and credits sequence to finish. When control returns after the ending, save the game. This confirms the story completion target: all eight Gym Badges, the Elite Four, Champion Iris, Hall of Fame registration and the credits sequence.
After saving, open the title-screen Unova Link menu if you want to review the Key System. White 2 provides the Easy Key as its normal difficulty key after the first successful League completion. This key is separate from the Treehollow Key and Tower Key, which are tied to the version-specific battle facilities.
Do not delay the campaign completion check while pursuing the legendary Pokémon. The post-game Reshiram, Kyurem and DNA Splicers route is separate from the League ending and is not needed to finish the main story.
- Defeat Champion Iris.
- See the Hall of Fame registration and credits.
- Return to the game and save.
- Verify the Easy Key through Unova Link if desired.
- Treat all remaining activities in this chapter as optional.
Return to the Pokémon World Tournament
The Pokémon World Tournament is south of Driftveil City. Enter the large tournament building from the Driftveil side and speak with the attendants to select a tournament or battle format. The facility is introduced during the main story, so returning after the League is not required unless you skipped one of its earlier events.
The first post-game specialty tournament is the Unova Leaders Tournament. Enter and win it once to unlock the Kanto, Johto, Hoenn and Sinnoh Leaders tournaments. Win each of those four regional tournaments to unlock the World Leaders Tournament. After ten victories in World Leaders, the Champions Tournament becomes available.
These tournaments are repeatable Battle Point challenges rather than story battles. They may use Singles, Doubles, Triples or Rotation rules depending on the selected event. Build a balanced party with answers to different types, heal before entering and adjust held items or moves between attempts. Rental and Mix tournaments are additional PWT branches and are optional.
The complete PWT progression is not the same as ordinary Gym Leader rematches elsewhere in Unova. Use the tournament attendants inside the Driftveil facility for the regional leader, World Leaders and Champions brackets.
- Visit the PWT south of Driftveil City.
- Complete the Driftveil Tournament if it was skipped earlier.
- Win the Unova Leaders Tournament.
- Win the Kanto, Johto, Hoenn and Sinnoh Leaders tournaments.
- Win World Leaders ten times to unlock the Champions Tournament.
- Complete Rental, Mix or other formats only if desired.
Enter White Forest through Route 14
White Forest is the normal version-specific area in White 2. From Undella Town, travel south onto Route 14 and continue through the route to the White Forest gate. This is the direct entrance and the simplest route to use when beginning the post-game area. The connecting gate is unavailable before entering the Hall of Fame, so return after the League if the way was previously blocked.
Route 15 and Marvelous Bridge provide an alternate approach from the Nimbasa side. They are useful if you are exploring eastern Unova, but they should not be treated as White Forest’s direct eastern entrance. From that alternate route, continue through Route 15 and use the White Forest connection.
Heal at the Pokémon Center after entering White Forest, then explore the local houses and resident areas. White 2 normally has White Forest, while Black 2 normally has Black City. The opposite version can be accessed only if the appropriate transferred key has been obtained through the Key System.
- Enter the Hall of Fame first.
- Travel south from Undella Town onto Route 14.
- Use the White Forest gate at the end of Route 14.
- Use Route 15 and Marvelous Bridge only as an alternate approach.
- Heal and resupply at the White Forest Pokémon Center.
Challenge White Treehollow and handle transferred keys
White Treehollow is located in the northern part of White Forest. Speak with the attendant to begin the challenge. Its areas consist of consecutive trainer battles under facility rules, so prepare a team that can handle repeated fights and conserve move PP. Heal and reorganize the party between completed areas before starting another run.
Clearing five areas of White Treehollow awards the Treehollow Key. In White 2, this key is primarily used for transfer to a compatible Black 2 game, where it unlocks White Forest and White Treehollow. It is not required to access the White Forest or White Treehollow already present in a White 2 save.
Black 2’s corresponding facility is Black Tower, and its reward is the Tower Key. A transferred Tower Key can provide access to the opposite version’s Black City and Black Tower on a White 2 save. The Easy Key is a separate difficulty setting and does not replace either facility key. Leave the affected area before changing version-specific settings, then save elsewhere.
- Enter White Treehollow in northern White Forest.
- Clear areas at your preferred pace.
- Clear Area 5 to receive the Treehollow Key.
- Transfer the key only if an opposite-version facility is wanted.
- Keep White Forest and White Treehollow as the normal White 2 facilities otherwise.
Use Chapter 10 for the legendary follow-up
The post-game legendary sequence begins with the Zoroark route near Victory Road and N’s Castle. In White 2, following that sequence leads to N’s Reshiram encounter, the Light Stone and the later Reshiram encounter at Dragonspiral Tower. The full route, battle preparation and capture advice are covered in Chapter 10.
After Reshiram is obtained, Chapter 10 also covers the return to Giant Chasm for the separate normal Kyurem encounter. The forced White Kyurem battle during the main story is not a standard capture opportunity. The same chapter explains how to recover and use the DNA Splicers to create White Kyurem, and how to reverse the fusion.
These legendary objectives remain optional. Save before each encounter, carry status support and use controlled damage if you choose to attempt them. Do not count the legendary route as part of the main campaign completion check.
- Use Chapter 10 for N’s Castle and the Light Stone.
- Use Chapter 10 for the Dragonspiral Tower Reshiram encounter.
- Use Chapter 10 for normal Kyurem in Giant Chasm.
- Use Chapter 10 for DNA Splicers and White Kyurem fusion.
Before you move on
- Campaign: all eight Gym Badges earned.
- Campaign: Elite Four defeated.
- Campaign: Champion Iris defeated.
- Campaign: Hall of Fame registration completed.
- Campaign: credits sequence completed and the post-credits save created.
- Optional PWT: Driftveil Tournament completed if desired.
- Optional PWT: Unova, Kanto, Johto, Hoenn and Sinnoh Leaders tournaments completed if desired.
- Optional PWT: World Leaders completed ten times if the Champions Tournament is desired.
- Optional White 2 facility: White Forest entered through Route 14.
- Optional White 2 facility: White Treehollow entered and desired areas cleared.
- Optional Key System: Treehollow Key or a transferred Tower Key used only if opposite-version facilities are desired.
- Optional legendary: N defeated in the post-game route and Reshiram caught at Dragonspiral Tower.
- Optional legendary: normal Kyurem caught in Giant Chasm.
- Optional fusion: DNA Splicers recovered and White Kyurem created if desired.
References for this chapter
- Route 14 - Unova - Serebii Pokéarth
- Unova Route 14 - Bulbapedia
- White Forest - East Unova Post-Game Walkthrough
- Pokémon World Tournament - Serebii.net
- Pokémon World Tournament - World Leaders - Serebii.net
- Pokémon World Tournament - Bulbapedia
- Key System - Bulbapedia
- Pokémon Black 2 and White 2 Legendary Guide - Smogon University
Finishing up
The eight Gym Badges are registered: Basic, Toxic, Insect, Bolt, Quake, Jet, Legend, and Wave.
The Giant Chasm story is complete: White Kyurem and Ghetsis have been defeated and the route to Victory Road is open.
The Elite Four and Champion Iris have been defeated, the Hall of Fame has registered the party, and the credits sequence has finished.
The completed save reloads normally and White 2's post-game Easy Key is available through Unova Link's Key System.
White Forest, White Treehollow, the Pokémon World Tournament's higher tiers, Reshiram, normal Kyurem, and White Kyurem fusion remain optional post-game content.
Choose your next gameScreenshots & video
Game imagery for reference. Follow the written chapters above for the route and strategies.
Sources & references
Our original guide draws on the references below. Check the edition at the top of this page before following controls or unlock requirements.
- Walkthrough: Pokémon Black 2 and White 2/Part 1 — Bulbapedia
- Pokémon Black 2 and White 2 Walkthrough, Part 2: Route 19 — ArrPeeGeeZ
- Pokémon Black 2 and White 2 Walkthrough, Part 5: Aspertia Gym — ArrPeeGeeZ
- Aspertia Gym: Cheren — Thonky
- Route 19 — Unova Pokéarth — Serebii.net
- Pokémon Black 2 and White 2 Walkthrough — National Dex
- Walkthrough: Pokémon Black 2 and White 2/Part 3
- Pokémon Black 2 and White 2 Gyms and Gym Leader data
- Castelia City - Pokémon Black 2 and White 2 Guide
- Pokémon Black 2 and White 2 Team Plasma encounters
- Walkthrough: Pokémon Black 2 and White 2/Part 4
- Castelia Sewers - Bulbapedia
- Pokémon Black 2 and White 2/Castelia City - StrategyWiki
- Pokemon Black 2 and White 2 Full Walkthrough
- Walkthrough: Pokémon Black 2 and White 2/Part 6 — Bulbapedia
- Walkthrough: Pokémon Black 2 and White 2/Part 7 — Bulbapedia
- Pokémon Black 2 and White 2/Nimbasa Gym — StrategyWiki
- Pokémon Black 2 and White 2/Route 5 — StrategyWiki
- Pokémon White Version 2 Instruction Booklet
- Walkthrough: Pokémon Black 2 and White 2/Part 8 — Bulbapedia
- Pokémon Black 2 and White 2 — Driftveil Tournament — Serebii.net
- Pokémon World Tournament - Serebii.net
- Walkthrough: Pokémon Black 2 and White 2/Part 9 — Bulbapedia
- Walkthrough: Pokémon Black 2 and White 2/Part 10 — Bulbapedia
- Walkthrough: Pokémon Black 2 and White 2/Part 11 — Bulbapedia
- Walkthrough: Pokémon Black 2 and White 2/Part 12 — Bulbapedia
- Mistralton Gym — Bulbapedia
- Pokémon Black 2 and White 2 Walkthrough, Section 13: Opelucid City, Marine Tube, and Humilau City
- Opelucid City - Pokémon Black 2 and White 2 Guide
- Opelucid Gym: Drayden - Pokémon Black 2 and White 2 Guide
- Opelucid City, Part 2 - Pokémon Black 2 and White 2 Guide
- Appendix: Black 2 and White 2 walkthrough/Section 14 — Bulbapedia
- Seaside Cave — Pokémon Black 2 and White 2 Guide
- Route 21 — Pokémon Black 2 and White 2 Guide
- Plasma Frigate — Pokémon Black 2 and White 2 Guide
- Plasma Frigate, part 2 — Pokémon Black 2 and White 2 Guide
- Giant Chasm, Part 2 — Pokémon Black 2 and White 2 Guide
- Pokémon Black 2 and White 2 Walkthrough, Part 46: Plasma Frigate
- Walkthrough: Pokémon Black 2 and White 2/Part 19 — Bulbapedia
- N's Castle — Bulbapedia
- Pokémon Black 2 and White 2 Legendary Guide - Smogon University
- How to Catch Kyurem in Pokémon Black, White, and B2W2 — NationalDex
- Pokémon Black 2 and White 2 Walkthrough, Post-Game: Icirrus City and Dragonspiral Tower — ArrPeeGeeZ
- Pokémon Black 2 and White 2 Walkthrough — Pokémon League and Champion Iris
- Victory Road B2W2 — Unova Pokéarth, Serebii.net
- Pokémon Black 2 and White 2 Walkthrough, Part 49: Victory Road
- Pokémon Black 2 and White 2 Walkthrough, Part 50: The Elite Four and the Champion
- Iris — Bulbapedia
- Pokémon Black 2 and White 2 — Elite Four and Champion teams
- Pokémon Black 2 and White 2 Pokémon League walkthrough
- Pokémon League (Unova) location and progression reference
- Pokémon White Version 2 Instruction Booklet
- Pokémon White Version 2 Instruction Booklet, Key System and Unova Link text
- Walkthrough: Pokémon Black 2 and White 2, Part 18
- Unova Route 14 - Bulbapedia
- White Forest
- Key System - Bulbapedia
- Route 14 - Unova - Serebii Pokéarth
- White Forest - East Unova Post-Game Walkthrough
- Pokémon World Tournament - World Leaders - Serebii.net
- Pokémon World Tournament - Bulbapedia
About the game & collecting notes
- Platform
- Nintendo DS
Step-by-step campaign walkthrough for the original North American and European Pokémon White Version 2 cartridge on Nintendo DS. Follow the story from Aspertia City through all eight Gyms, including the required Lentimas Town, Reversal Mountain, Undella, Lacunosa, Route 12, Village Bridge, and Route 11 progression, then complete the Plasma Frigate, Giant Chasm, Pokémon League, Elite Four, Champion Iris, Hall of Fame, credits, and immediate post-game Key System verification. Normal Kyurem capture, Reshiram capture, White Kyurem fusion, White Forest challenges, and additional Pokémon World Tournament tiers are optional post-game content.
Darryl Polo
Darryl Polo loves tinkering with emulation and revisiting retro games. He enjoys exploring how old favorites play on different setups and sharing what he learns along the way. At Joking Joystick, he writes about the games, hardware, and small discoveries that keep the hobby fun.
Our editorial standardsFound a step that needs another look? Help us improve this guide.