
Pokémon SoulSilver Version — Complete Walkthrough (Nintendo DS, USA)
Step-by-step campaign walkthrough for Pokémon SoulSilver Version on Nintendo DS in North America. Covers the Johto story from New Bark Town through all eight Johto Gyms, the required Kimono Girl and SoulSilver Whirl Islands Lugia story event, the Indigo Plateau Elite Four and Champion, the Kanto Gym campaign, the optional upgraded Indigo Plateau rematch available after obtaining all 16 Badges, and the postgame Mt. Silver battle with Red. Optional sections cover capturing Lugia after resolving the required event, Suicune, other legendary encounters, Pokéwalker use, and National Pokédex planning.

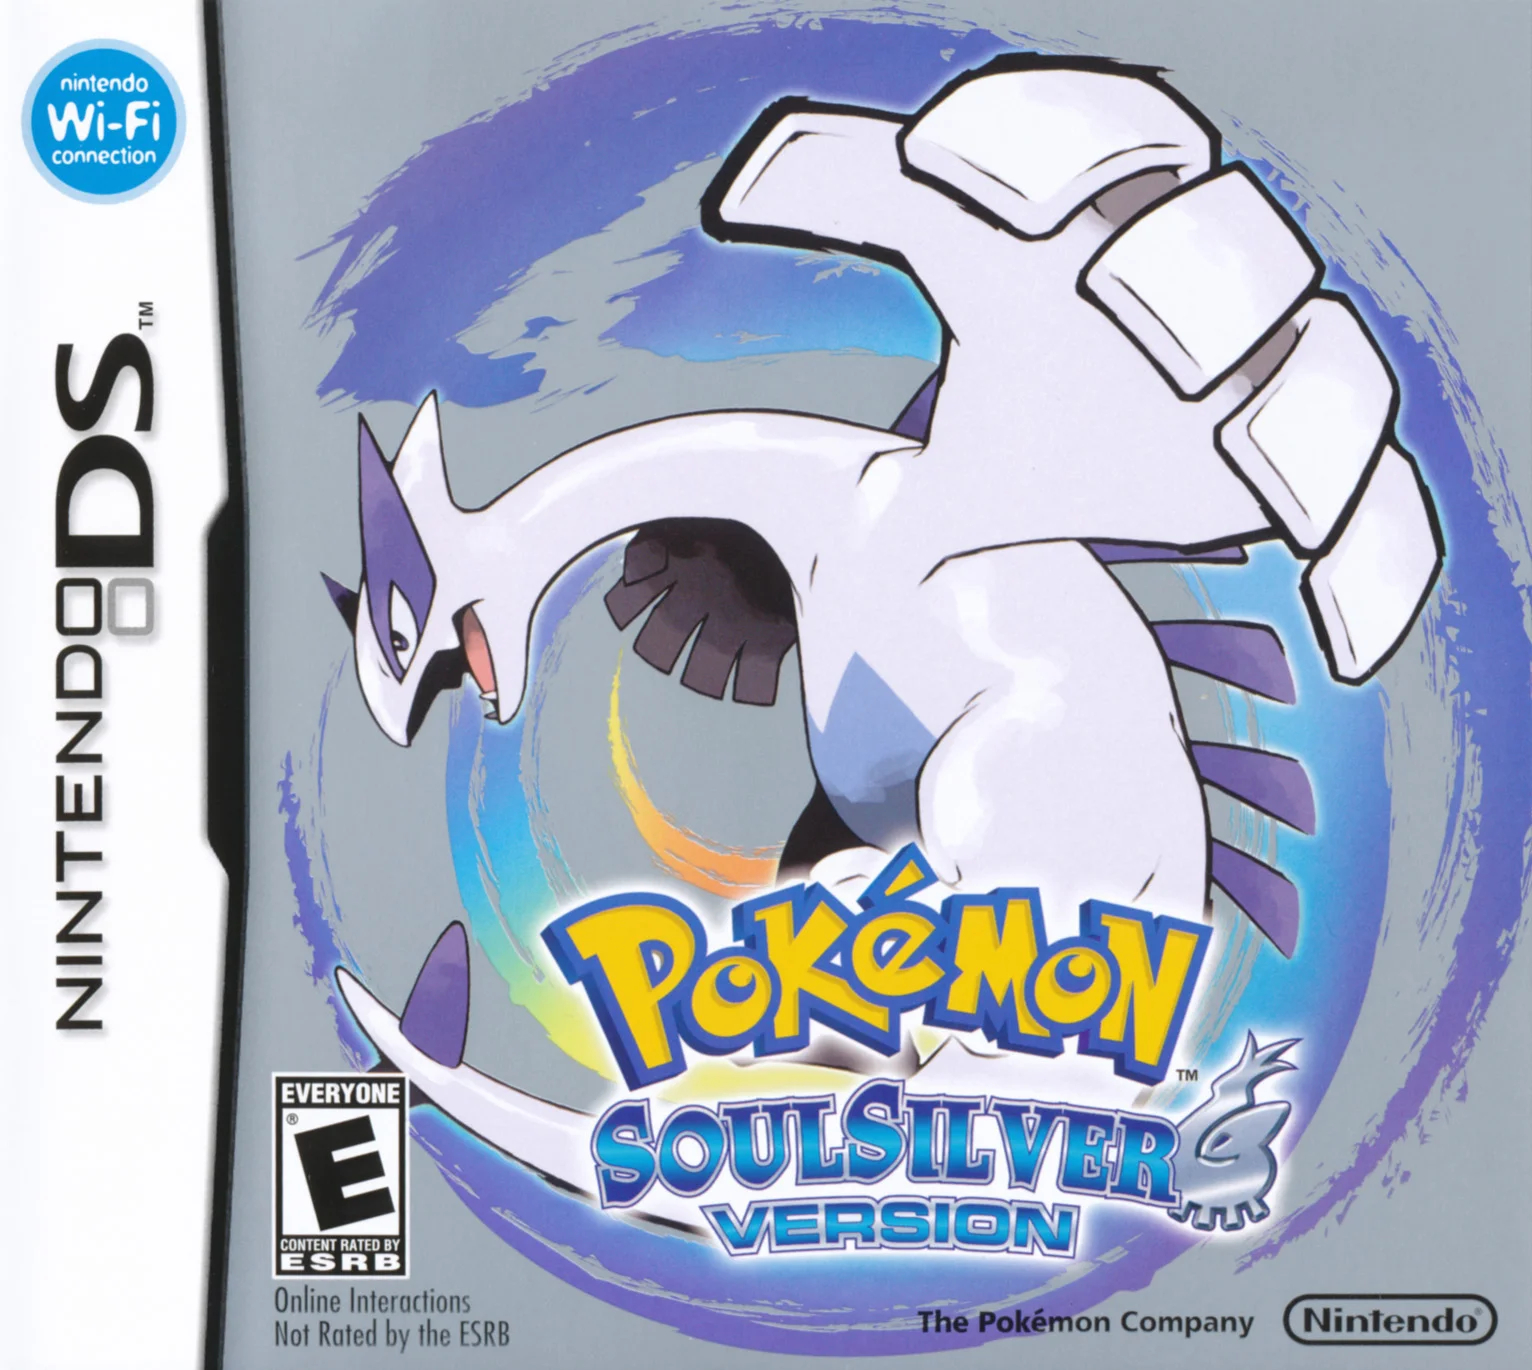
Find a copy
Pokémon SoulSilver Version Nintendo DS
We may earn a commission if you buy through these links, at no extra cost to you. As an Amazon Associate I earn from qualifying purchases.
Opens retailer search results. Check the model, edition, seller, availability and current price before buying.
Before you begin
You are starting Pokémon SoulSilver on the Nintendo DS.
This guide covers the main campaign: the eight Johto Gym Badges, the required SoulSilver Kimono Girl and Whirl Islands Lugia story event, the first Indigo Plateau Elite Four and Champion victory, all eight Kanto Gym Badges, access to Mt. Silver, and the battle with Red.
Follow the route chapters in order, but use the deferred checkpoints in this order: complete Chapter 4's first Ecruteak visit, complete Chapter 6's Cianwood, Olivine, Mahogany, and Pryce objectives, return to Chapter 5 for the Goldenrod Radio Tower, return to Chapter 6 for Route 44, Ice Path, Blackthorn City, Clair, the Dragon's Den examination, and Professor Elm's Master Ball handoff, then return to Chapter 4 for the final Kimono Girl gauntlet and required Lugia event before continuing to Chapter 9 and the Pokémon League.
Save normally before every Gym leader, major story battle, one-time legendary encounter, and the final Red battle.
Use the checklist to confirm key items and field moves such as Cut, Surf, Strength, Whirlpool, Waterfall, and Rock Climb before entering restricted areas. Surf and Waterfall are required for the Route 27 and Tohjo Falls crossing toward Victory Road, while Strength is required later for the normal Victory Road route. Rock Climb is the required field move for the direct Mt. Silver route to Red. Surf and Waterfall open optional Mt. Silver areas, including lower and western cave branches; Rock Smash and Strength are also optional for Mt. Silver side exploration.
Pokéwalker use, version exclusives, trade evolutions, and optional legendary captures are separate goals unless selected. The SoulSilver Lugia encounter itself is part of the pre-League story route, although capturing Lugia is optional.
Set yourself up for the run
Update or inspect your DS hardware: SoulSilver uses the DS internal clock for day/night events, so set the clock correctly if you want time-based encounters and events to behave normally.
Use ordinary in-game saves before Gyms, major story battles, Radio Tower, the Elite Four, and one-time legendary encounters.
Choose any of Chikorita, Cyndaquil, or Totodile; all three are viable with appropriate team support.
Plan for Cut, Surf, Strength, Whirlpool, Waterfall, and Rock Climb at the points where the route requires them. Rock Climb is required for the direct ascent to Red in Mt. Silver. Surf and Waterfall are useful for optional Mt. Silver areas but are not direct Red-route prerequisites. Rock Smash and Strength are useful for optional branches.
Keep at least one replaceable or utility Pokémon available for field moves where practical.
Treat the Pokéwalker, version exclusives, trade evolutions, and optional legendary captures as separate goals. Do not treat the SoulSilver Kimono Girl and Whirl Islands Lugia story event as optional, because it is required before the Johto Pokémon League route opens.
New Bark to Violet — Starting Safe and Choosing Your Team
Choose a starter, establish a compact team on Routes 29–31, complete the Mr. Pokémon and rival sequence, and reach Violet City ready for Sprout Tower and Falkner. The safest early coverage comes from a Flying-type, Rock-type, or strong neutral attacker. Cut is not available in this opening section, so do not plan an HM carrier until Ilex Forest.
1. Choose your starter and begin the opening sequence
Professor Elm offers Chikorita, Cyndaquil, and Totodile in New Bark Town. Choose according to the team you want to build, then save normally from the menu after leaving the laboratory. The choice is permanent unless you restart the save.
Cyndaquil usually has the smoothest early battles because Fire attacks are useful against many Bug- and Grass-type Pokémon. Totodile is sturdy and gives the party dependable Water coverage later. Chikorita is usable, but its Grass typing is a poor direct answer to Falkner’s Flying-type team and makes the first few badges less forgiving. If you choose Chikorita, plan to add a backup attacker rather than forcing it to handle every battle.
- Starter choice has been made and recorded in your own notes if you are keeping a save log.
- The starter is fully healed before leaving New Bark Town.
- The game has been saved normally before the first trip onto Route 29.
2. Catch only the early Pokémon that fill a role
Route 29 is the first practical catching area. During the day, Pidgey is an excellent early Flying-type choice for general battles and later Grass- and Bug-type opponents. At night, Hoothoot can fill the same broad role. Rattata is a fast, inexpensive backup attacker and can remain useful while the rest of the team develops.
Do not spend the entire opening trying to assemble a six-Pokémon party. A starter plus Pidgey or Hoothoot is enough to begin, while Rattata or Sentret can provide another emergency switch. Train new captures through ordinary wild battles and nearby Trainers so they do not remain several levels behind the starter. Keep at least two Pokémon healthy before entering an unfamiliar route.
- A Flying-type option has been caught if you want one for early coverage.
- A second Pokémon can switch in if the starter is weakened or affected by status.
- Potions are available before leaving Route 29.
3. Complete Cherrygrove City and Route 30 in order
Enter Cherrygrove City and speak with the Guide Gent. In SoulSilver, his tour introduces the Pokémon Center, Poké Mart, route exit, shoreline, and his house; he gives the Map Card as you leave toward Route 30. Visit the Pokémon Center and buy several Potions. An Antidote is useful insurance, but do not overspend on status items this early.
Travel north on Route 30 to Mr. Pokémon’s house. The route contains low-level wild Pokémon, visible items, and Trainers, so heal before the northern approach if necessary. Mr. Pokémon gives you the Mystery Egg, and Professor Oak gives you the Pokédex. Return south toward Cherrygrove and New Bark Town. On Route 29, the rival battle occurs before you reach the laboratory. Use your starter’s strongest reliable move and heal afterward if needed.
At Professor Elm’s laboratory, return the Mystery Egg and resolve the theft investigation. Once the opening sequence is complete, continue north again. After Falkner is defeated, Elm’s aide will return the Mystery Egg to you from the Violet City Poké Mart; that later handoff is part of the normal story and is not required before the rival battle.
- The Guide Gent sequence has been completed.
- The Mystery Egg and Pokédex have been obtained from Mr. Pokémon and Professor Oak.
- The rival battle on the return through Route 29 has been completed.
- The Mystery Egg has been returned to Professor Elm before continuing toward Violet.
4. Use Routes 30 and 31 to fill missing coverage
Once the story clears the route blockage, Route 30 and Route 31 provide more useful choices. Weedle is available in SoulSilver on these routes during the appropriate daytime periods, giving you early Bug and Poison utility after evolution. Pidgey, Rattata, and nighttime Hoothoot remain practical alternatives. You do not need a Bug-type for the first Gym, so stop searching once your party has reliable battle coverage.
If Falkner is your concern, enter the western side of Dark Cave from Route 31 after healing. Geodude can be found in the early Johto cave areas, including Dark Cave, and its Rock-type attacks are particularly useful against Falkner’s Flying Pokémon. The cave is optional, and you do not need Flash for the short initial section. Leave if your team begins taking too much damage; the wild encounters are not worth risking a defeat.
An Electric-type answer is not normally available on Routes 29–31, so do not delay the story expecting to find one there. You can defeat Falkner with Geodude, another Rock move, a suitably trained neutral attacker, or your starter supported by a second Pokémon.
- The party has two to four Pokémon with distinct roles.
- At least one Pokémon can use Rock-type damage or another dependable answer to Flying Pokémon.
- The team has been healed before entering Dark Cave or continuing to Violet.
5. Prepare for Sprout Tower and Falkner
Violet City’s Pokémon Center and Poké Mart should be your preparation point. Buy Potions and save normally before entering Sprout Tower or challenging the Gym. Sprout Tower provides useful experience, but you do not need to clear every optional battle if your party is already near the low teens.
Falkner uses Pidgey at level 9 and Pidgeotto at level 13. Pidgeotto knows Tackle, Roost, and Gust, so Bug- and Grass-type Pokémon can take heavy damage from Gust. Its Roost can extend the battle, especially if your attacks are weak. Rock-type Pokémon are the most reliable early answer because Flying attacks do little to them; Geodude with a Rock move is a practical example. A Flying-type should be treated as general team support rather than a direct type advantage against Falkner.
Keep the party close in level instead of relying on one fragile lead. If Sand-Attack lowers accuracy, switch to a second Pokémon rather than wasting several turns attacking through poor accuracy. Use Potions between battles when necessary, and return to the Pokémon Center before the Gym attempt.
- The team is generally around the low teens, with the Falkner counter able to survive multiple hits.
- Potions and at least one status remedy are stocked.
- A fresh normal save has been made before the Gym attempt.
- You know Falkner’s Pidgeotto can use Roost and Gust.
6. Plan for Cut later instead of carrying it now
Cut is not obtained in New Bark Town, Cherrygrove City, Violet City, or on Routes 29–31. HM01 is awarded in Ilex Forest after you help return the runaway Farfetch’d. The Hive Badge is needed before Cut can be used outside battle, so the opening party cannot use it as a field move.
When HM01 becomes available, teach it to a replaceable utility Pokémon if possible. Sentret or Furret is a practical early carrier because it can learn Cut and other useful field moves. Avoid teaching Cut to a core battler with four valuable attacks: HM moves cannot be removed at an ordinary Pokémon Center. The Move Deleter can eventually remove them, but using a utility Pokémon prevents unnecessary moveset compromises.
- Cut has not been expected or assigned during the New Bark-to-Violet section.
- A utility Pokémon can be reserved later for HM duties.
- The core team remains free to learn stronger level-up and TM moves.
7. Pair the Pokéwalker only after the game allows it
If you own a Pokéwalker and intend to use it, wait until the game has given you the Pokédex and the Mystery Egg has been returned to Professor Elm. Nintendo’s connection instructions also require at least one Pokémon in a PC Box. From the SoulSilver main menu, choose Connect to Pokéwalker, select Save, then Go for a Stroll. Choose a Pokémon from the PC, select a route, place the Pokéwalker and game card close together, and press the accessory’s center button when prompted.
The first completed transfer synchronizes the Pokéwalker with that game card. Retrieve the Pokémon through the Pokéwalker menu before beginning another transfer, and confirm that the Pokémon and any intended items have returned successfully. Pokéwalker use is optional: it can provide extra experience, Watts, encounters, and items, but it does not replace normal story progression and is not needed to defeat Falkner.
- The Pokédex and returned Mystery Egg requirements have been completed.
- At least one Pokémon is stored in a PC Box.
- The first transfer has finished before the Pokéwalker is handled again.
- The Pokémon has been retrieved successfully if you are using the accessory.
Before you move on
- The starter choice and early team plan are recorded in the save log.
- The Pokédex has been received, the Mystery Egg has been returned to Professor Elm, and the rival battle is complete.
- The party contains at least two trained Pokémon, preferably three, with a Rock-type, Flying-type, or other dependable answer to Falkner.
- The team is healed in Violet City with Potions stocked and a normal save made before Sprout Tower or the Gym.
- The player understands that Cut is a later Ilex Forest reward and has not weakened a core battler with an unnecessary HM.
- If using the Pokéwalker, the accessory has been connected only after the Pokédex, returned Mystery Egg, and PC-box requirements were met.
Violet and Azalea — Falkner and Bugsy: Flight and Bug Counters
Clear Sprout Tower, defeat Falkner in Violet City, remove Team Rocket from Slowpoke Well, defeat Bugsy in Azalea Town, and open the road through Ilex Forest toward Goldenrod City. Rock, Electric, Fire, and Flying coverage make the first two Gyms safer. TM70 Flash and HM06 Rock Smash are separate items with separate sources: Elder Li gives Flash in Sprout Tower, while the man east of the cleared Sudowoodo on Route 36 gives HM06 later.
1. Clear Sprout Tower and prepare for Falkner
Enter Sprout Tower in northern Violet City and climb to the upper floor. Defeat the Sage trainers, then battle Elder Li. After this battle, Li gives you TM70 Flash. Flash is a Technical Machine in this Nintendo DS release, not an HM, and it is useful for Dark Cave and other dark areas but is not required for the immediate Gym battle.
Heal at the Violet City Pokémon Center and restock Potions, Antidotes, and Paralyze Heals. Aim for roughly level 11 to 13 on your main Falkner counter, with the rest of the party near level 10 or above. Geodude is available around Route 46 and in the Violet-side area of Dark Cave, where Rock Throw is effective against Falkner’s Flying types. Mareep becomes available on Route 32 after Violet City and provides dependable Electric coverage. Pidgey, Spearow, Hoothoot, or Zubat can fill a Flying-type or general-purpose slot.
Gastly in Sprout Tower is an optional capture rather than a required counter. Save with the normal in-game Save command before entering the Gym. Carry healing items instead of relying on any nonexistent quick-save feature.
- Defeat Elder Li at the top of Sprout Tower.
- Receive TM70 Flash.
- Heal and restock before entering Violet Gym.
- Aim for level 11 to 13 on the main Falkner counter.
- Consider Geodude for Rock Throw or Mareep for Electric coverage.
2. Defeat Falkner and claim the Zephyr Badge
Follow the Violet Gym’s raised platform and S-shaped route to Falkner. The Gym trainers can be bypassed by walking around the central platform, although defeating them supplies useful experience. Falkner uses level 9 Pidgey followed by level 13 Pidgeotto.
Lead with Mareep and use its Electric attack, or use Geodude’s Rock Throw. If neither is available, use your starter’s strongest reliable move and switch when necessary. Chikorita has no favorable type matchup here, so do not depend on it alone. Pidgey can use Tackle and Sand-Attack. Pidgeotto uses Tackle, Roost, and Gust; keep your counter healthy so accuracy drops and Roost do not turn the battle into a long attrition fight.
Falkner awards the Zephyr Badge and TM51 Roost. The badge raises the obedience limit for traded Pokémon to level 20 and permits Rock Smash outside battle after HM06 has been obtained and a compatible Pokémon knows it. The badge does not permit Flash. HM06 is not awarded by Falkner and is not collected during this chapter. Later, after the Sudowoodo on Route 36 has been cleared with the SquirtBottle, speak with the man east of its former position to receive HM06.
- Defeat level 9 Pidgey and level 13 Pidgeotto.
- Use Electric or Rock attacks when possible.
- Receive the Zephyr Badge and TM51 Roost.
- Do not claim HM06 yet.
- Do not describe Flash as a Zephyr Badge field ability.
3. Travel from Violet to Azalea Town
Leave Violet through the southern gate and follow Route 32. Heal at the Route 32 Pokémon Center before entering Union Cave. Search the grass for Mareep if your team lacks Electric coverage. Wooper supplies Water- and Ground-type coverage, while Pidgey, Spearow, Hoothoot, or Zubat can provide Flying attacks and a useful answer to several Bug-type opponents.
Battle route trainers for experience, collect visible items, and heal before entering Union Cave. Follow the main southern passage through the cave to Route 33, then continue east into Azalea Town. An Escape Rope is useful if the party is injured inside the cave. Repels are optional and are most useful after you have selected your core team and want to reduce wild encounters.
Azalea’s Poké Mart supplies Poké Balls, Potions, status cures, Repels, and Escape Ropes. Speak with Kurt in the house near the Slowpoke Well entrance. His Apricorn Ball service becomes available after the Team Rocket incident, but it is optional and does not affect badge progression.
- Heal at the Route 32 Pokémon Center.
- Add Mareep, Wooper, or a Flying-type if your team lacks coverage.
- Pass through Union Cave and Route 33.
- Speak with Kurt before entering Slowpoke Well.
4. Remove Team Rocket from Slowpoke Well
After speaking with Kurt, follow him to Slowpoke Well. With the guard gone, enter the well and defeat the Team Rocket Grunts inside. The accessible section is short and mostly linear. Battle through it for experience and collect nearby items if your party is healthy.
The final confrontation removes Team Rocket from the well. Return to Azalea Town and check Kurt’s house if you want to begin using his Apricorn service. Heal at the Pokémon Center before the Gym.
After Team Rocket has been driven out, Silver stops you at the western entrance to Ilex Forest, just outside Azalea Town. This rival battle occurs before the Farfetch’d task and is a useful experience check. Heal before approaching the forest entrance if your party is already weakened.
- Follow Kurt into Slowpoke Well.
- Defeat the Team Rocket Grunts and complete the well event.
- Confirm Kurt has returned to his house.
- Heal before the rival battle and Bugsy.
5. Prepare for Bugsy’s opening Scyther
Bugsy’s first-clear team is level 17 Scyther followed by level 15 Metapod and level 15 Kakuna. Scyther has Technician, holds a Sitrus Berry, and knows U-turn, Quick Attack, Leer, and Focus Energy. U-turn damages your Pokémon and switches Scyther out, while Quick Attack can finish a weakened counter. Treat Scyther as the real Gym battle rather than saving all resources for the two cocoon Pokémon.
A team in the level 15 to 17 range is a comfortable target. Cyndaquil or Quilava can use Ember against all three Pokémon, but keep it healthy because Scyther’s U-turn and Quick Attack still matter. Geodude or Onix can use Rock Throw against Scyther’s Bug/Flying typing. Pidgey, Spearow, or Hoothoot can provide Flying attacks, and Mareep can offer paralysis support if it knows Thunder Wave. Zubat is a useful defensive pivot because it resists Bug-type attacks.
A practical three-Pokémon plan is a healthy Rock-type for Scyther, a Fire- or Flying-type for the remaining Pokémon, and a neutral backup. If Scyther uses U-turn, reassess the replacement instead of leaving a fragile Pokémon in battle. Use Potions during safe turns and cure status before entering the Gym. Avoid relying on a Chikorita-only or Grass-heavy party.
- Train the main team to approximately level 15 to 17.
- Keep a Rock, Fire, or Flying counter at full health.
- Expect Scyther to lead and use U-turn.
- Carry Potions and status cures.
6. Earn the Hive Badge and continue through Ilex Forest
Defeat Scyther first, then remove Metapod and Kakuna with reliable attacks. Bugsy awards the Hive Badge and TM89 U-turn. The Hive Badge permits Cut outside battle and raises the obedience limit for traded Pokémon to level 30. It does not provide Surf, Strength, Whirlpool, or Rock Smash.
Teach Cut to a utility Pokémon or to a long-term team member whose moveset can spare the slot. Leave Azalea through the western entrance and enter Ilex Forest. The forest task uses two runaway Farfetch’d. Approach each one from behind by using the surrounding branches and rustling sticks to manipulate which direction it faces. Return both Farfetch’d to the charcoal maker’s apprentice. You then receive HM01 Cut, which lets you remove the tree blocking the route to Route 34 and Goldenrod City.
The National Park is an optional detour with pickups and the Bug-Catching Contest. The contest is held on Tuesdays, Thursdays, and Saturdays. Before obtaining the National Pokédex, first place awards a Sun Stone, while lower placements provide lesser prizes such as an Everstone or Sitrus Berry. The contest and its rewards are not required for either badge or for Goldenrod progression.
If you want to use Headbutt, speak with the appropriate forest NPC and check your party’s moves before replacing anything important. Do not use a valuable long-term moveslot for Cut without considering later HM requirements; a replaceable utility Pokémon is usually safer.
- Defeat Bugsy and receive the Hive Badge.
- Collect TM89 U-turn.
- Defeat Silver at the Ilex Forest entrance.
- Return both runaway Farfetch’d.
- Obtain HM01 Cut and clear the Cut tree.
- Treat National Park and Bug-Catching Contest rewards as optional.
- Leave HM06 Rock Smash for the later cleared-Sudowoodo visit on Route 36.
Before you move on
- The Zephyr Badge is displayed in the case and TM51 Roost is in the Bag.
- TM70 Flash has been received from Elder Li in Sprout Tower.
- Falkner’s level 9 Pidgey and level 13 Pidgeotto have been defeated.
- Team Rocket has been removed from Slowpoke Well and Kurt has returned to his house.
- Silver has been defeated at the Ilex Forest entrance.
- Bugsy’s level 17 Scyther and level 15 Metapod and Kakuna have been defeated.
- The Hive Badge and TM89 U-turn are in the Bag, and Cut can be used outside battle.
- Both Ilex Forest Farfetch’d have been returned, HM01 Cut has been obtained, and the route toward Goldenrod City is open.
- HM06 Rock Smash is not required to mark this chapter complete. Obtain it later from the Route 36 man after the Sudowoodo obstruction is cleared.
References for this chapter
- Walkthrough: Pokémon HeartGold and SoulSilver — Part 5
- Walkthrough: Pokémon HeartGold and SoulSilver
- Falkner — Bulbapedia
- Bugsy’s Scyther — Bulbapedia
- Ilex Forest — Bulbapedia
- Johto Route 36 — Bulbapedia
- Pokémon Heart Gold & Soul Silver — The Bug Catching Contest
- Pokémon Heart Gold & Soul Silver — Gym Leaders
- Pokémon Heart Gold & Soul Silver — TMs & HMs — Serebii.net
Goldenrod — Whitney and the Plain Badge (timing and Sudowoodo)
Goldenrod City is the third major Johto checkpoint in Pokémon SoulSilver Version for Nintendo DS. Complete the Radio Tower quiz to receive the Radio Card, then speak to Whitney so her Gym opens. Prepare for her level 17 Clefairy and level 19 Miltank, defeat the Miltank's Rollout and recovery cycle, and collect the Plain Badge. The badge unlocks Strength outside battle and lets the Flower Shop give you the SquirtBottle. Use that item on the odd tree on Route 36 to battle the fixed level 20 Sudowoodo and open the route toward Ecruteak City. Sudowoodo can be captured or defeated; the battle is required to clear the road.
Enter Goldenrod and obtain the Radio Card
Reach Goldenrod City from Route 34 and heal at the Pokémon Center. Before challenging the Gym, go to Goldenrod Radio Tower in the northwest part of the city. On the first floor, speak to the quiz host at the counter farthest from the entrance.
Answer the five questions in this exact sequence: Yes to the Town Map question; Yes to the question asking whether Nidorina can only be female; No to the question stating that Kurt uses apricots; Yes to the question stating that it is impossible to use a TM on Magikarp; and No to the question asking whether Professor Oak appears on Pokémon Talk with Mary.
The quiz awards the Radio Card. Check the Pokégear afterward if you want to confirm it is installed. This is a progression requirement, not merely a Radio Tower collectible: Whitney will not be ready for battle until the quiz has been completed and you have spoken to her at the Gym.
- Heal at the Goldenrod Pokémon Center.
- Complete the Radio Tower promotional quiz.
- Answer Yes, Yes, No, Yes, No in order.
- Receive the Radio Card.
- Speak to Whitney at the Goldenrod Gym before attempting the battle.
Prepare a practical Whitney counter
Whitney uses a level 17 Clefairy followed by a level 19 Miltank. Both are Normal type, so Fighting-type attacks are the most direct answer. A particularly convenient option is the traded Machop available on the fifth floor of the Goldenrod Department Store. Bring a Drowzee from Route 34 or Route 35 and trade it to the clerk there for Machop. The traded Pokémon is ready for this part of the game and is an effective answer to Miltank.
Other workable answers include a durable Rock-type or Fighting-capable Pokémon, a strong physical attacker, or a Pokémon that can put Miltank to sleep or paralyze it. A female counter avoids Miltank's Attract, though gender is not a substitute for damage. Do not rely on a Ghost-type as a complete wall: Miltank has Scrappy, allowing its Normal-type moves to hit Ghost Pokémon.
Aim for a principal counter around levels 18 or 19 and keep the rest of the party near that range. Bring Potions or Super Potions, a Paralyze Heal or Full Heal, and enough Poké Balls if you intend to capture Sudowoodo immediately afterward. Save with the normal in-game save command before entering the Gym.
- Bring a reliable Fighting-type attack.
- Consider trading a Route 34 or Route 35 Drowzee for Machop.
- Use a female Pokémon if Attract is causing repeated immobilization.
- Carry healing items and status cures.
- Save normally before the Gym battle.
Use Goldenrod's shops and available trainers
The Department Store's second floor sells routine supplies including Great Balls, Super Potions and status-healing items. The third floor sells temporary battle items such as X Defend, X Attack, Guard Spec. and Dire Hit. X Defend is optional, but one can reduce the danger from Stomp while you attack.
The fifth-floor TM Corner sells TM70 Flash, TM17 Protect, TM54 False Swipe, TM83 Natural Gift, TM16 Light Screen, TM33 Reflect, TM22 SolarBeam, TM52 Focus Blast, TM38 Fire Blast, TM25 Thunder, TM14 Blizzard and TM15 Hyper Beam. These are mostly optional at this point. Protect can interrupt a Rollout sequence, but do not spend money on a TM merely because it is available. The same floor contains the Drowzee-for-Machop trade.
For experience, battle the trainers on Routes 34 and 35 that you have not defeated, then clear the Goldenrod Gym trainers. The Gym route includes Beauty Victoria, Beauty Samantha, Lass Carrie and Lass Cathy; their highest regular Pokémon are around level 17. Restore at the Pokémon Center before Whitney so the Fighting counter has full HP and move PP.
- Restock healing items on the Department Store's second floor.
- Buy X Defend only if you have a specific plan for it.
- Check the fifth-floor TM Corner and Machop trade.
- Clear Route 34, Route 35 and Gym trainers if your team is underleveled.
- Restore HP and PP before speaking to Whitney.
Navigate the raised Goldenrod Gym
The Gym's central platform is shaped like a raised Clefairy. From the entrance, walk north and climb the first stairway. Continue north to battle Beauty Victoria. Turn east, descend the northeast stairway and enter the central room through the northeast doorway.
Move southwest to battle Lass Carrie, then go north to draw Lass Cathy into battle. After defeating Cathy, circle behind her and continue to Whitney. This path follows the Gym's raised platform and avoids wandering around the outer edge.
Whitney's Clefairy is level 17 and can use DoubleSlap, Mimic, Encore and Metronome. Defeat it without exhausting the attacks or HP of the Pokémon you intend to use against Miltank. Encore can lock you into an unhelpful move, while Metronome is unpredictable.
- Climb the first stairway and proceed north.
- Use the northeast stairway into the central section.
- Defeat Lass Carrie and then Lass Cathy.
- Keep the main Fighting counter healthy for Miltank.
Defeat Clefairy and control Miltank
Lead with a Pokémon that can defeat Clefairy efficiently, then switch to your Fighting counter for Miltank. Miltank is level 19, holds a Lum Berry and has Scrappy. Its moves are Rollout, Attract, Stomp and Milk Drink. Rollout becomes stronger with consecutive successful hits, so do not give Miltank several uninterrupted turns if you can avoid it.
Attack with your strongest reliable Fighting move immediately. If you have Protect, using it can interrupt a developing Rollout chain, although Protect is not essential. If Attract prevents your counter from acting, switch to a same-gender Pokémon or cure the condition. The Lum Berry can remove one early sleep, paralysis or other status condition, so status is best treated as support rather than the whole strategy.
Miltank may use Milk Drink when weakened, and Whitney can use a Super Potion. Continue applying meaningful damage rather than spending multiple turns on weak setup moves. Heal before your active Pokémon reaches knockout range, especially because Stomp can cause flinching. If the battle is lost, return to the Pokémon Center, restore PP and change the lead or counter order before trying again.
- Use Fighting damage as the primary plan.
- Prevent or interrupt consecutive Rollout hits when possible.
- Switch or cure when Attract stops the counter from acting.
- Expect Milk Drink and a possible Super Potion.
- Restore HP and PP before retrying after a loss.
Receive the Plain Badge and collect the SquirtBottle
After Miltank faints, Whitney cries and initially refuses to give you the badge. Walk away from her and speak to Lass Cathy. Cathy explains that Whitney will recover. Return to Whitney and speak to her again; she then awards the Plain Badge and gives you TM45 Attract.
The Plain Badge allows Strength to be used outside battle. You do not need to teach Strength immediately. If you plan to use it later, assign it to a durable or replaceable Pokémon when practical rather than overwriting an important attack on a core team member.
Leave the Gym and enter the Goldenrod Flower Shop east-northeast of it. Speak to the woman inside. Because you now have the Plain Badge, she gives you the SquirtBottle and explains that an odd tree is blocking Route 36. This badge check is why the Sudowoodo route cannot be cleared before Whitney.
- Speak to Lass Cathy after Whitney begins crying.
- Speak to Whitney again to receive the Plain Badge.
- Collect TM45 Attract.
- Confirm that Strength can be used outside battle.
- Receive the SquirtBottle from the Flower Shop.
Clear Sudowoodo and continue toward Ecruteak
Leave Goldenrod through the northern gate and follow Route 35 toward Route 36. The odd tree blocks the route near the middle of Route 36. Stand in front of it, open the Key Items pocket and use the SquirtBottle. The tree attacks as the fixed level 20 Sudowoodo encounter begins.
Save before using the SquirtBottle if you want to capture Sudowoodo. Weaken it carefully and use status effects or suitable Poké Balls. Sudowoodo is Rock type and can use Flail, Low Kick, Rock Throw and Mimic. If you only need the road open, defeating it also removes the obstruction; the encounter does not need to be captured for story progression.
After the battle, speak with Floria. She gives you the Berry Pots, three Oran Berries and three Pecha Berries, then directs you toward Ecruteak City. Walk east from the cleared tree and speak to the man there to receive HM06 Rock Smash. Continue north through Route 36 and Route 37 to reach Ecruteak. The next major progression checkpoint is the Burned Tower and Morty's Gym sequence.
- Save before using the SquirtBottle if capture matters.
- Battle the fixed level 20 Sudowoodo.
- Capture or defeat Sudowoodo.
- Collect the Berry Pots, three Oran Berries and three Pecha Berries from Floria.
- Receive HM06 Rock Smash from the man east of the cleared tree.
- Continue through Route 37 to Ecruteak City.
Before you move on
- The Trainer Card shows the Plain Badge.
- The Radio Card is installed in the Pokégear.
- TM45 Attract is in the Bag.
- The SquirtBottle is in the Key Items pocket.
- Strength can be used outside battle.
- Sudowoodo no longer blocks Route 36.
- Floria has given the Berry Pots and starter berries.
- HM06 Rock Smash has been collected from the man east of the cleared tree.
- The route through Route 36 and Route 37 to Ecruteak City is open.
Ecruteak, the Kimono Girls and the Tidal Bell Sequence
Ecruteak contains two separate Dance Theater events. During the first visit, defeat the Team Rocket Grunt inside the theater to receive HM03 Surf, then clear the Burned Tower so Morty returns to the Gym. The final Kimono Girl challenge happens much later. You must first clear the Goldenrod Radio Tower, earn all eight Johto Badges, complete Clair’s Dragon’s Den examination, return to New Bark Town, and receive the Master Ball from Professor Elm. After those checkpoints, defeat the five Kimono Girls in one consecutive sequence to receive SoulSilver’s Tidal Bell. The bell is not a standalone summoning tool: it works with the Silver Wing at the Whirl Islands. The next chapter covers that route and the required Lugia encounter.
First Ecruteak visit: defeat the theater Grunt and receive Surf
Enter Ecruteak City from Route 37 and go to the Dance Theater, the large traditional building north of the Pokémon Center. Walk onto the stage and speak to the Team Rocket Grunt harassing a Kimono Girl. This is the first Ecruteak theater event and is available during the normal Johto story; it does not require the Radio Tower or any badge beyond the progress that brought you to Ecruteak.
The Grunt uses one Level 12 Koffing. A normally trained Pokémon with reliable damage should handle it. Ground- and Psychic-type attacks are effective, but do not risk a weakened lead against Poison attacks or accuracy disruption. Heal at the Pokémon Center if necessary after the battle.
Once the Grunt leaves, speak to the Gentleman watching from the audience. He gives you HM03 Surf. The HM enters your bag immediately, but Surf cannot be used outside battle until you earn the Fog Badge from Morty. This reward is separate from the later five-battle Kimono Girl sequence.
- Enter the Ecruteak Dance Theater.
- Defeat the Team Rocket Grunt’s Level 12 Koffing.
- Speak to the Gentleman in the audience.
- Receive HM03 Surf.
- Remember that the Fog Badge is required for using Surf outside battle.
Clear the Burned Tower before challenging Morty
Heal before entering the Burned Tower in northwestern Ecruteak. Move through the first floor until Silver challenges you. His exact team depends on your starter, and his Pokémon are in the low 20s. Defeat him, then continue through the tower until you fall into the basement.
In the basement, approach the legendary beasts to trigger the story scene. Raikou, Entei, and Suicune escape and begin their roaming encounters. You do not need to catch any of them for Ecruteak’s required progression, and Suicune’s later fixed encounter sequence is separate from this chapter.
Leave the Burned Tower and return to the Ecruteak Gym. Morty is now present. Defeat him to earn the Fog Badge, which enables Surf outside battle. Morty’s Ghost-type team is vulnerable to Dark- and Ghost-type attacks, but avoid relying on Normal- or Fighting-type moves, which cannot hit his Ghost Pokémon. The Burned Tower event releases the beasts and opens the Gym; it does not award the Tidal Bell.
- Defeat Silver in the Burned Tower.
- Trigger the basement scene that releases Raikou, Entei, and Suicune.
- Return to the Ecruteak Gym.
- Defeat Morty and obtain the Fog Badge.
- Use Surf for travel only after the badge is recorded.
Complete the checkpoints before returning for the final theater event
The late Kimono Girl battle is not available immediately after Morty. Continue through the Johto campaign and clear Team Rocket’s occupation of Goldenrod Radio Tower. The real Director must be rescued from the Goldenrod Tunnel basement, the Card Key must be obtained, and the remaining Radio Tower executives must be defeated. In SoulSilver, the rescued Director provides the Silver Wing. Keep it in the Key Items pocket for the later Lugia route.
After the Radio Tower, continue through Route 44 and Ice Path to Blackthorn City. Defeat Clair, complete the Dragon’s Den examination, and receive the Rising Badge. The badge is not awarded simply by winning the Gym battle; you must enter the Dragon’s Den and answer the Elder’s questions before Clair gives it to you.
With all eight Johto Badges recorded, return to New Bark Town and enter Professor Elm’s laboratory. After the conversation about your completed badge set, Elm gives you the Master Ball. This handoff is the final trigger for the late Ecruteak event. Fly or travel back to Ecruteak only after receiving it.
- Goldenrod Radio Tower is completely cleared.
- The real Director has been rescued and the Silver Wing is available.
- All eight Johto Badges are recorded.
- Clair’s Dragon’s Den examination is complete and the Rising Badge has been awarded.
- Professor Elm has given you the Master Ball.
- Return to Ecruteak after all of these conditions are satisfied.
Prepare for the five consecutive Kimono Girl battles
Heal at the Ecruteak Pokémon Center, then buy healing and status-curing items. Save before entering the theater. The five battles begin in sequence and there is no free healing break between opponents. You may use Potions, status cures, and other items during the sequence, but you cannot leave to visit the Pokémon Center once the challenge has started.
A party around the high 30s to low 40s is a practical target. Bring multiple answers rather than relying on one attacker. Fighting coverage is especially useful for Umbreon, Dark or Bug coverage helps against Espeon, and Ground, Water, Rock, Electric, and Grass attacks cover the remaining Eeveelutions. Keep a Ground-type available for Jolteon and a dependable Electric- or Grass-type attacker for Vaporeon.
Use the party menu before entering to place a reliable lead first. If an attacker is burned, paralyzed, confused, or badly weakened, use an item immediately rather than carrying the condition into the next fight.
- Heal the entire party before entering.
- Stock Potions or stronger healing items, Full Heals, and Revives.
- Save before speaking to the first Kimono Girl.
- Bring coverage for Umbreon, Espeon, Flareon, Jolteon, and Vaporeon.
- Remember that the battles are consecutive without a free healing interval.
Defeat Zuki, Naoko, Miki, Sayo, and Kuni
Zuki is first and uses Level 38 Umbreon. Fighting-type attacks are the most direct answer. Umbreon’s Dark Pulse, Shadow Ball, Confuse Ray, and Last Resort can wear down a frail attacker, so cure confusion or switch if your Fighting Pokémon cannot finish safely.
Naoko follows with Level 38 Espeon. Espeon uses Psychic, Swift, Psych Up, and Last Resort. Dark- and Bug-type attacks are effective. Do not leave a Fighting-type exposed to Psychic unless it can survive and finish immediately.
Miki uses Level 38 Flareon with Fire Blast, Quick Attack, Will-O-Wisp, and Last Resort. Water-, Ground-, and Rock-type attacks are reliable. Will-O-Wisp cuts the effectiveness of physical attackers, so cure the burn or switch to a special attacker if necessary.
Sayo uses Level 38 Jolteon with Thunderbolt, Double Team, Thunder Wave, and Last Resort. A Ground-type Pokémon is the safest answer because Electric attacks do not affect it. Use a move with dependable accuracy if Double Team causes misses, and cure paralysis before the final battle if it threatens your next attacker.
Kuni is last and uses Level 38 Vaporeon with Surf, Quick Attack, Aurora Beam, and Last Resort. Electric- and Grass-type attacks are effective. Aurora Beam threatens Grass Pokémon, so use a sturdy attacker and heal before delivering the finishing blow.
- Defeat Zuki’s Level 38 Umbreon with Fighting coverage.
- Defeat Naoko’s Level 38 Espeon with Dark or Bug coverage.
- Defeat Miki’s Level 38 Flareon with Water, Ground, or Rock coverage.
- Defeat Sayo’s Level 38 Jolteon with a Ground-type Pokémon or move.
- Defeat Kuni’s Level 38 Vaporeon with Electric or Grass coverage.
- Use items during the sequence when required.
Receive the Tidal Bell and hand off to the Whirl Islands route
After the fifth victory, the Kimono Girls give you the Tidal Bell. This is SoulSilver’s version-specific bell; HeartGold receives the Clear Bell instead. The Tidal Bell is a Key Item, is awarded once, and is not consumed when the Lugia event occurs.
The bell does not summon Lugia inside Ecruteak and has no independent battle effect. In SoulSilver, it combines with the Silver Wing and the Kimono Girls’ ritual at the Whirl Islands. Prepare a Pokémon that can use Surf and another that can use Whirlpool, or use one Pokémon compatible with both moves. Flash can make the cave easier to navigate but is optional. Strength is not required for the direct northeast-island route described in the next chapter.
Your next objective is the Whirl Islands. Enter from Route 41, use Whirlpool to reach the northeast island, follow the B1F and B2F route to the Silver Wing checkpoint, pass through B3F Upper, return to B2F, and enter B3F Lower. There the Kimono Girls perform the Tidal Bell ritual and Lugia appears at Level 45. To open the path toward Route 27, you must resolve the encounter by catching or defeating Lugia; capturing it is optional. If you defeat or flee from it, it can return after you enter the Hall of Fame, allowing a later capture attempt.
- Defeat all five Kimono Girls in this order: Zuki, Naoko, Miki, Sayo, Kuni.
- Confirm that the Tidal Bell is in the Key Items pocket.
- Confirm that the Silver Wing is available.
- Prepare Surf and Whirlpool for Route 41 and the Whirl Islands.
- Begin Chapter 7 for the northeast-island route and Lugia encounter.
- Treat catching Lugia as optional, but resolve the encounter before attempting to pass Route 27.
Before you move on
- The first Ecruteak Dance Theater Grunt was defeated.
- HM03 Surf was received and the Fog Badge was earned for field use.
- Silver was defeated in the Burned Tower and the legendary beasts were released.
- Goldenrod Radio Tower was cleared and the Silver Wing was obtained.
- All eight Johto Badges are recorded.
- The Dragon’s Den examination was completed and Clair awarded the Rising Badge.
- Professor Elm gave the Master Ball in New Bark Town.
- The five Kimono Girls were defeated in order: Zuki, Naoko, Miki, Sayo, Kuni.
- The Tidal Bell is present in the SoulSilver Key Items pocket.
- The party is prepared with Surf and Whirlpool for the Whirl Islands.
- Chapter 7 is the next handoff: follow the northeast-island route, complete the Kimono Girl ritual, and catch or defeat the Level 45 Lugia before continuing to Route 27.
Goldenrod Radio Tower and the Silver Wing — Handoff Back to Chapter 6’s Blackthorn Segment
Complete this deferred Johto checkpoint after clearing Mahogany Town’s Team Rocket operation and defeating Pryce. Team Rocket has occupied Goldenrod Radio Tower and is broadcasting a message intended to bring Giovanni back. Clear the tower, rescue the real Director from the Goldenrod Underground Warehouse, defeat the remaining executives, and receive SoulSilver’s Silver Wing. The Radio Tower is not the end of the Johto campaign. Afterward, return to Mahogany Town and continue east through Route 44 and Ice Path to Blackthorn City. Clair, the Dragon’s Den examination, the Rising Badge, Professor Elm’s Master Ball handoff, the final Kimono Girl sequence, and Lugia remain later objectives.
Begin after Pryce and enter the Radio Tower
First complete the Lake of Rage and Mahogany Town Team Rocket events, including the Team Rocket Hideout and the Electrode encounter. Defeat Pryce in the Mahogany Gym and obtain the Glacier Badge. Professor Elm will then contact you about the takeover in Goldenrod City.
Fly to Goldenrod City, heal, and purchase healing items, status cures, and Poké Balls. The Radio Tower is beside the Magnet Train station. A Team Rocket Grunt blocks the stairs on the first floor and says that only members may proceed.
Leave the tower and enter Goldenrod Tunnel. Visit the Photo Booth at the northern end and speak with the Rocket Grunt to receive the disguise. Return to the Radio Tower and approach the stairs. Silver exposes the disguise and battles you. Defeat him and then continue through the tower; the disguise has completed its purpose.
- The Mahogany Team Rocket operation is complete.
- Pryce has been defeated and the Glacier Badge is secured.
- Professor Elm has reported the Goldenrod takeover.
- The Team Rocket disguise has been obtained.
- Silver has been defeated at the Radio Tower entrance.
Defeat Petrel and take the Basement Key
Climb through the accessible Radio Tower floors, defeating Grunts and the Scientist on the way. On the fifth-floor west side, the apparent Radio Director is revealed to be Executive Petrel in disguise.
Petrel uses five level 30 Koffing and one level 32 Weezing. Every one of these Poison Pokémon has Levitate, so ordinary Ground-type attacks will fail. Psychic, Water, Fire, Rock, Fighting, and strong neutral attacks are practical choices. Several Koffing can use Selfdestruct, and Weezing can use Explosion, so keep weakened Pokémon away from the front when those moves are possible.
After the battle, Petrel reveals that the real Director is being held in the Underground Warehouse and gives you the Basement Key. This key opens the locked Goldenrod Tunnel entrance; it does not open the Radio Tower’s third-floor shutter.
- Petrel has been defeated.
- The Basement Key is in the Key Items pocket.
- You are ready to enter Goldenrod Tunnel.
Rescue the real Director in Goldenrod Tunnel
Return to Goldenrod Tunnel and head to the access hallway. A Kimono Girl is present, but this visit does not begin the Lugia event. Use the Basement Key on the locked door and descend into the Underground Warehouse route.
Silver battles you in the underground passage. His party includes Golbat, Magnemite, Haunter, Sneasel, and the evolved starter that has a type advantage over your chosen starter. Use Fighting moves against Sneasel, Fire or other suitable attacks against Magnemite, and remember that Haunter’s Levitate makes Ground attacks ineffective. Bring a cure for confusion because Haunter can disrupt a fragile lead.
After Silver leaves, defeat the nearby Rocket Grunts and collect the Full Heal and Smoke Ball if desired. In the shutter room, press the blue switch on the left, then the green switch in the middle, and finally the red switch on the right. If the shutters are in an unhelpful state, reset the puzzle by flipping the switches again or leaving and re-entering the room.
Pass through the opened maze and continue into the warehouse. Optional items include an Ultra Ball, Max Ether, TM82 Sleep Talk, and the Amulet Coin route near the Department Store basement. Speak with the real Director at the end. He gives you the Card Key, which opens the Radio Tower’s third-floor shutter.
- The Basement Key has been used.
- Silver has been defeated underground.
- The blue, green, red switch sequence has been completed.
- The real Director has been rescued.
- The Card Key has been received.
Use the Card Key and defeat Proton and Ariana
Return to the Radio Tower and use the Card Key on the third-floor shutter. Defeat the Grunt beyond it, then take the eastern stairs. Executive Proton challenges you on the east side of the fourth floor.
Proton uses a level 28 Golbat and a level 33 Weezing. Electric, Ice, Psychic, Rock, or other strong non-Ground attacks handle Golbat well. Weezing has Levitate, so do not rely on Ground attacks. Confuse Ray and SmokeScreen can interfere with a sweep, so keep a second attacker available.
After Proton falls, continue to the fifth-floor broadcasting studio. Ariana’s SoulSilver team is Arbok level 28, Vileplume level 28, and Murkrow level 33. Use Psychic or strong neutral attacks against Arbok and Vileplume. Electric, Ice, or Rock attacks are useful against Murkrow. Arbok may inflict paralysis with Glare, while Vileplume can use Sleep Powder. Heal before the next executive if the party has been worn down.
- The third-floor shutter has been opened.
- Proton has been defeated.
- Ariana has been defeated with her level 28 Arbok, level 28 Vileplume, and level 33 Murkrow.
- The party is healed before Archer.
Defeat Archer and receive the Silver Wing
After Ariana’s defeat, use the elevator to reach the Observation Deck. Executive Archer explains that the broadcast is intended to summon Giovanni back to Team Rocket, then challenges you.
Archer uses Houndour level 35, Koffing level 35, and Houndoom level 38. Water, Rock, Ground, and Fighting attacks are effective against the Fire- and Dark-type Houndour and Houndoom. Archer’s Koffing has Levitate, so use a non-Ground attack against it. Houndour can use Roar, so do not depend on a single setup Pokémon.
After Archer loses, Team Rocket abandons the tower. Speak with the Director on the Observation Deck. In SoulSilver, he gives you the Silver Wing. The Silver Wing is not consumed and does not summon Lugia by itself. It grants access to the deepest Whirl Islands cave, but the later Lugia event also requires the Tidal Bell from the five Kimono Girls, plus Surf and Whirlpool.
- Archer has been defeated.
- The Radio Tower takeover has ended.
- The SoulSilver Director has awarded the Silver Wing.
- The Silver Wing has not been confused with HeartGold’s Rainbow Wing.
- The Tidal Bell remains a separate later prerequisite.
Collect optional rewards and return to Chapter 6
Once Team Rocket has been defeated, optional rewards are available in the tower. Speak with the woman on the third floor for TM11 Sunny Day and speak with DJ Mary on the fourth-floor east side for BrightPowder. The Ultra Ball near Proton can also be collected now that the Card Key route is open. None of these rewards is required for the Silver Wing or the campaign.
Leave Goldenrod and return to Mahogany Town. The eastern route is now open, so take Route 44 toward Ice Path. The reopened Mahogany souvenir shop sells useful supplies, including Hyper Potions, Revives, Super Repels, and status-healing items.
The next required section is Chapter 6’s Blackthorn segment. Cross Route 44 and complete the Ice Path boulder obstacles, then enter Blackthorn City. Defeat Clair after preparing for her Dragon-type team. Clair withholds the Rising Badge after the Gym battle, so enter the Dragon’s Den, complete the shrine examination, and answer the required SoulSilver questions correctly. Return to New Bark Town afterward and speak with Professor Elm to receive the Master Ball.
Only after Professor Elm’s handoff should you return to Chapter 4 for the final Kimono Girl sequence. That later event supplies the Tidal Bell and prepares the SoulSilver Whirl Islands Lugia encounter. Clearing the Radio Tower does not make Lugia immediately available.
- The optional TM11 Sunny Day, BrightPowder, and Ultra Ball have been collected if desired.
- The Director’s reward is confirmed as the SoulSilver Silver Wing.
- You have returned to Mahogany Town.
- Route 44 and Ice Path are the next destinations.
- Blackthorn City, Clair, the Dragon’s Den examination, the Rising Badge, and Professor Elm’s Master Ball handoff remain outstanding.
- The final Kimono Girl sequence and Lugia have not been incorrectly marked complete.
Before you move on
- The Mahogany Team Rocket operation and Pryce battle were completed before returning to Goldenrod.
- Petrel has been defeated and the Basement Key is in the Key Items pocket.
- Silver has been defeated in the Goldenrod Tunnel passage.
- The blue, green, red shutter puzzle has been cleared.
- The real Director has been rescued and has given you the Card Key.
- The Radio Tower’s third-floor shutter has been opened.
- Proton, Ariana, and Archer have been defeated.
- Ariana’s corrected roster is level 28 Arbok, level 28 Vileplume, and level 33 Murkrow.
- The Radio Tower takeover has ended.
- The SoulSilver Director has awarded the Silver Wing.
- Optional tower rewards have been collected if desired.
- You have returned to Mahogany Town and are ready to take Route 44 toward Ice Path.
- Chapter 6’s Route 44, Ice Path, Blackthorn, Clair, Dragon’s Den, Rising Badge, and Master Ball objectives are explicitly next.
- The Tidal Bell, final Kimono Girl sequence, and Lugia remain later objectives.
Cianwood, Olivine, Mahogany and Blackthorn — Johto's Final Badges and Required Handoffs
Complete the Cianwood, Olivine, Mahogany and Blackthorn objectives in Pokémon SoulSilver. Collect the SecretPotion, defeat Chuck, Jasmine, Pryce and Clair, clear Team Rocket’s Mahogany Hideout and Goldenrod Radio Tower, obtain Whirlpool and the Silver Wing, cross Route 44 and Ice Path, pass the Dragon’s Den examination, receive the Rising Badge, and return to New Bark Town for Professor Elm’s Master Ball. Only after that handoff should you return to Ecruteak for the five Kimono Girls and Tidal Bell.
1. Prepare for Cianwood and collect the SecretPotion
Before leaving Olivine, confirm that HM03 Surf is in the Bag and that at least one healthy party member can use it. Surf west from Olivine across Route 40, then continue south through Route 41 to Cianwood City. Route 41’s whirlpools still block shortcuts, so follow the open-water route around them. Bring Super Potions or better, status cures and Repels if you want fewer Tentacool encounters.
HM04 Strength is obtained from the Hiker on Route 42, outside Mt. Mortar. It is not needed for SoulSilver’s Cianwood Gym puzzle, but it is mandatory for the boulder section of Ice Path later. Teach it to a utility Pokémon if possible, but make sure a compatible Pokémon remains available before entering Ice Path.
In Cianwood, visit the Pharmacy on the southern side of town. Because you spoke with Jasmine at the top of Olivine Lighthouse, the pharmacist gives you the SecretPotion. Return to the lighthouse and use it on Ampharos. Jasmine then returns to the Olivine Gym. The western Cliff Edge Gate route from Cianwood also becomes available for optional travel toward Route 47 and the Safari Zone.
- HM03 Surf is available to a compatible Pokémon.
- HM04 Strength has been obtained and a compatible user is available.
- The SecretPotion has been collected from the Cianwood Pharmacy.
- Ampharos has been healed at Olivine Lighthouse.
- The western Cliff Edge Gate route is open.
2. Defeat Chuck and obtain Fly
Enter Cianwood Gym and climb through the trainer area to the upper level. SoulSilver uses a waterfall winch rather than the original Gold and Silver boulder puzzle. Reach the large winch at the top and activate it to stop the waterfall covering Chuck. Return to the leader once the water has stopped.
Chuck uses Primeape at level 29 and Poliwrath at level 31. Flying- and Psychic-type attacks are reliable against Primeape. Poliwrath is Water/Fighting, so Grass- and Electric-type attacks are useful, while a Psychic-type remains a good general counter. Chuck’s Pokémon can use disruptive moves, including Rock Slide, Hypnosis and Body Slam, so carry Awakening, Chesto Berries or other status recovery.
Aim for approximately levels 28 to 31 on the Pokémon you intend to use. After winning, receive the Storm Badge and TM01 Focus Punch. Speak with Chuck’s wife outside the Gym to receive HM02 Fly. Keep Fly on a utility Pokémon unless it is a useful move for a member of your main party.
- The waterfall over Chuck has been stopped.
- Primeape and Poliwrath have been defeated.
- The Storm Badge and TM01 have been collected.
- HM02 Fly has been received from Chuck’s wife.
3. Defeat Jasmine in Olivine
Fly back to Olivine and enter the Gym. There are no Gym Trainers in the SoulSilver version, so speak directly with Jasmine after Ampharos has been healed. She uses two level 30 Magnemite followed by a level 35 Steelix.
Ground-type attacks are effective against all three Pokémon. Fire- and Fighting-type attacks are also useful, and a strong Water-type can handle Steelix. Avoid relying on weak physical neutral attacks because Steelix has high physical Defense. Be ready for paralysis and heal before your counter is in knockout range.
Victory gives you the Mineral Badge and TM23 Iron Tail. Route 47, reached through the western Cliff Edge Gate from Cianwood, is optional and can provide experience, items and access toward the Safari Zone. It is not required before continuing with the Mahogany objectives.
- Jasmine’s two Magnemite and Steelix have been defeated.
- The Mineral Badge and TM23 have been collected.
- The party is healed before beginning the Mahogany sequence.
4. Clear Lake of Rage and Mahogany’s Team Rocket Hideout
Travel east from Olivine through Route 42, or return through Ecruteak and continue east to Mahogany Town. Go north through Route 43 to Lake of Rage and resolve the Red Gyarados event. Lance then appears and directs you back to Mahogany Town, where Team Rocket’s Hideout is beneath the souvenir shop.
Follow Lance through the Hideout. Defeat the required Grunts and Scientists, obtain the passwords, and cooperate with Lance in the double battle. The final generator encounter involves six Electrode in total: you handle the three on your side while Lance handles the other three. Catching or defeating the player-side Electrode completes this objective.
After the generator is disabled, Lance gives you HM05 Whirlpool. The move can be taught immediately, but the Glacier Badge is required before Whirlpool can be used outside battle. Give it to a durable Water-type or replaceable utility Pokémon and retain a healthy Surf user for later travel.
- The Lake of Rage event is complete.
- The Team Rocket Hideout has been cleared.
- The three Electrode on the player’s side have been caught or defeated.
- Lance has given you HM05 Whirlpool.
- A compatible Pokémon can use Surf and Whirlpool.
5. Defeat Pryce and clear Goldenrod Radio Tower
Enter Mahogany Gym after Team Rocket has been removed. The Gym uses sliding ice floors. Move in straight lines and use the solid barriers to redirect yourself; if a slide leaves you in a poor position, plan from the nearest solid tile rather than moving randomly.
Pryce uses Seel at level 30, Dewgong at level 32 and Piloswine at level 34. Electric- and Grass-type attacks work well against Seel and Dewgong. Piloswine is Ice/Ground, so Electric attacks have no effect; use Water, Grass, Fire or Fighting coverage instead. A Water-type can contribute against the full team, but keep another answer ready because Dewgong’s Water attacks threaten Fire- and Ground-type counters.
Defeat Pryce to receive the Glacier Badge and TM07 Hail. The badge now permits Whirlpool to be used outside battle. Heal and return to Goldenrod City. Complete the occupied Radio Tower: expose Petrel’s disguise, rescue the real Director from Goldenrod Tunnel, use the Card Key to reach the upper floors, defeat the remaining executives and defeat Archer. After Team Rocket disbands, the Director gives SoulSilver’s Silver Wing. This is the required version-specific key item for the later Lugia sequence.
- Pryce’s ice puzzle has been completed.
- Seel and Dewgong have been handled with Electric or Grass coverage.
- Piloswine has not been targeted with Electric attacks.
- The Glacier Badge and TM07 have been collected.
- Whirlpool works outside battle.
- Goldenrod Radio Tower is complete and the Silver Wing is in the Bag.
6. Cross Route 44 and complete Ice Path
After the Radio Tower operation, the Rocket-controlled barrier east of Mahogany is gone. Follow Route 44 east and enter Ice Path. Heal first and confirm that a party member knows Strength and that Strength can be used outside battle.
Strength is required for the mandatory Ice Path boulder route to Blackthorn City. Push all four boulders through the required holes in the northern section, then descend through the opened route and continue through the slippery floors. Optional item branches can be skipped, but the boulders on the main path cannot.
Pick up HM07 Waterfall on the first floor if you want to prepare for the post-League route. Waterfall is not needed to reach the Dragon’s Den shrine or receive the Rising Badge, but the HM is useful later. In the southeastern first-floor area, reach the Kimono Girl whose sandals are frozen to the ice and push her free. Then continue south to the Blackthorn exit.
- Route 44 is open after the Radio Tower event.
- HM04 Strength is available and usable outside battle.
- The mandatory Ice Path boulder route has been completed.
- HM07 Waterfall has been collected or deliberately left for a later visit.
- The frozen Kimono Girl has been pushed free.
- Blackthorn City has been reached.
7. Defeat Clair and complete the exact Dragon’s Den examination
Enter Blackthorn Gym and solve the platform puzzle over the lava. The three movable platforms have arrow panels that move them and blue center panels that rotate them. Use the panels to align each platform with the next section, then battle through the Gym Trainers to reach Clair.
Clair’s first-clear SoulSilver team is Gyarados at level 38, Dragonair at level 38, a second Dragonair at level 38, and Kingdra at level 41. Electric attacks are especially effective against the lead Gyarados. Ice attacks pressure Dragonair, although the two Dragonair can use Thunder Wave and one carries Fire Blast. Kingdra is Water/Dragon and has only the Dragon-type weakness in Generation IV, so use a reliable Dragon-type attack if available, or weaken it with strong neutral damage, status support and healing. Kingdra carries a Sitrus Berry and can use Hydro Pump, SmokeScreen, Hyper Beam and Dragon Pulse.
After defeating Clair, she withholds the Rising Badge and sends you to the Dragon’s Den shrine. Heal, bring Pokémon that know Surf and Whirlpool, and cross the lake behind the Gym to enter the cave. In the main cavern, Surf to the southwest, use Whirlpool to cross the water, follow the southern wall east, and enter the shrine on the southern platform.
The elder asks five questions. To pass the examination with the correct SoulSilver answers, choose these responses in order: Ally, Strategy, Anyone, Love, and Both. These answers are sufficient for the Rising Badge sequence. Clair then arrives, is compelled to award the Rising Badge, and gives you TM59 Dragon Pulse near the northern end of the broken bridge. The badge permits Waterfall outside battle.
The ExtremeSpeed Dratini is optional. After receiving TM59 from Clair, return to the shrine with no more than five Pokémon in your party and speak with the elder again. Because all five answers were correct, the gift Dratini knows ExtremeSpeed. A wrong answer does not block the badge, but it changes the optional Dratini’s move to Leer.
After the badge handoff, leave Blackthorn. Professor Elm calls and asks you to return to New Bark Town. Visit his laboratory to receive the Master Ball. This completes Chapter 6’s required handoff. Do not go directly to the Kimono Girls after the Radio Tower; the required order is Route 44, Ice Path, Blackthorn Gym, Dragon’s Den, Rising Badge, New Bark Town and Master Ball. Only then return to Ecruteak for Chapter 4’s five Kimono Girl battles and Tidal Bell event.
- Clair’s platform puzzle has been completed.
- Gyarados, both Dragonair and Kingdra have been defeated.
- The Dragon’s Den shrine has been reached using Surf and Whirlpool.
- The answers Ally, Strategy, Anyone, Love and Both have been selected.
- Clair has awarded the Rising Badge and TM59 Dragon Pulse.
- The optional ExtremeSpeed Dratini has been claimed only if desired.
- Professor Elm has given the Master Ball in New Bark Town.
- The player is ready to return to Ecruteak for the final Kimono Girl sequence.
Before you move on
- The Trainer Card shows the Storm, Mineral and Glacier Badges.
- Ampharos has been healed and Jasmine has been defeated.
- HM02 Fly, HM03 Surf and HM05 Whirlpool are available to compatible Pokémon.
- HM04 Strength is available and usable outside battle.
- Team Rocket has been removed from the Mahogany Hideout and the player’s three Electrode have been caught or defeated.
- Pryce has been defeated and Whirlpool works outside battle.
- Goldenrod Radio Tower is complete and the Silver Wing has been obtained.
- Route 44 and Ice Path have been cleared, including the required Strength boulders.
- The frozen Kimono Girl event has been completed and Blackthorn City has been reached.
- Clair has been defeated.
- The Dragon’s Den examination has been completed with Ally, Strategy, Anyone, Love and Both.
- The Rising Badge and TM59 Dragon Pulse have been received.
- All eight Johto Badges are recorded.
- Professor Elm has given the Master Ball in New Bark Town.
- The player is ready to return to Ecruteak for the five Kimono Girls and Tidal Bell before beginning the Whirl Islands Lugia route.
The Whirl Islands — Finding and Capturing Lugia (SoulSilver)
In Pokémon SoulSilver Version for Nintendo DS, the Whirl Islands Lugia event requires the Silver Wing from the rescued Goldenrod Radio Tower Director, the Tidal Bell from the five Kimono Girls, Surf, and Whirlpool. Enter through the northeast island and follow the route through B1F, B2F, B3F Upper, back to B2F, and B3F Lower. After the Kimono Girls complete their ritual, Lugia is not immediately adjacent to the platform: walk down the stairway on the north side and use Surf across the basin to reach the fixed level 45 encounter. Resolving this event is required before the route toward the Pokémon League opens, but capturing Lugia is optional for the campaign.
Confirm the story prerequisites and prepare the party
Clear the Goldenrod Radio Tower occupation and speak with the rescued Director to receive the Silver Wing. After completing the Dragon’s Den examination and receiving the Master Ball from Professor Elm, return to Ecruteak City and defeat all five Kimono Girls in the Dance Theater. In SoulSilver, they give you the Tidal Bell and direct you to the Whirl Islands.
Check the Key Items pocket before leaving Ecruteak. You should have both the Silver Wing and Tidal Bell. Do not substitute HeartGold’s Clear Bell or its later Silver Wing event; those are different version-specific progression items.
Prepare a Pokémon that can use Surf and another that can use Whirlpool. Surf is needed to cross Route 41 and later to reach Lugia across the waterfall basin. Whirlpool removes the swirling barriers around the Whirl Islands. Flash is optional, although it makes the dark rooms easier to navigate. Heal at Cianwood City or Olivine City, buy recovery items and Poké Balls, and save before crossing Route 41.
- Goldenrod Radio Tower is fully cleared.
- The Silver Wing was received from the rescued Director.
- All five Kimono Girls were defeated in Ecruteak City.
- The Tidal Bell is in the Key Items pocket.
- Surf and Whirlpool are available in the party.
- A Pokémon capable of Surf is ready for the final basin crossing.
- The party is healed and the game is saved.
Enter through the northeast Whirl Island
Fly to Cianwood City or Olivine City and use Surf to reach Route 41. The four islands are connected, but the northeast island provides the direct SoulSilver route to Lugia. Use Whirlpool at the swirling barrier and enter the cave on that island.
Inside the northeast entrance, jump over the first ledge, continue east, take the northern route across the next ledges, and climb down the ladder in the northeast corner. On B1F, follow the rocky ridge southwest and descend the next ladder to B2F.
The cave contains wild Pokémon at much lower levels than Lugia, so Super Repels are useful if you want to conserve time. Flash is not mandatory for this route, but it can make the walls, ramps, and ledges easier to distinguish.
- You reached Route 41 by Surf.
- You entered through the northeast Whirl Island.
- The Whirlpool barrier was cleared.
- You reached B1F and then B2F.
- Super Repels are available if desired.
Pass the Silver Wing checkpoint on B2F
On B2F, collect the visible Max Revive if you want it, then speak with the man standing at the cliff’s edge. When he recognizes the Silver Wing, he steps aside and allows you to continue downward. This is the Silver Wing checkpoint, not the Lugia battle chamber.
Walk down the opened route and enter the first cave opening to reach B3F Upper. This room overlooks the waterfall basin and contains an optional Rare Candy. Lugia does not appear here. Collect the item if desired, then return to B2F using the same opening.
- The B2F man recognized the Silver Wing.
- The blocked path opened.
- You entered B3F Upper.
- You understand that B3F Upper is not the encounter chamber.
- You returned to B2F or are ready to do so.
Return to B2F and trigger the summoning ritual
From B3F Upper, retrace your route to B2F. Continue down the cliffside instead of returning to the upper opening. Enter the lower cave opening to reach B3F Lower and the bottom of the waterfall basin.
The five Kimono Girls are waiting in B3F Lower. Walk into the chamber to trigger their conversation and summoning ritual. The Tidal Bell and Silver Wing are used during the scene. The girls dance, the bells chime, and Lugia emerges from the waterfall basin.
Save before starting the ritual if you want a convenient retry point. After the scene ends, do not walk directly toward the water from the platform. The route to Lugia requires one more movement sequence.
- You returned from B3F Upper to B2F.
- You entered B3F Lower through the lower opening.
- The Kimono Girls performed the summoning ritual.
- Lugia appeared in the waterfall basin.
- The game is saved before approaching the encounter.
- Surf remains available for the basin crossing.
Use the north stairway and Surf to reach Lugia
After the ritual, move to the north side of the rocky platform. Walk down the stairway there, step into the water, and use Surf to cross the basin toward Lugia. The stationary Pokémon is on the far side of the water, so the encounter cannot be started from the Kimono Girls’ platform.
Reach the opposite side, save if you have not already done so, and interact with Lugia to begin the battle. SoulSilver’s Lugia is level 45, Psychic and Flying type, with Pressure and the moves Extrasensory, Rain Dance, Hydro Pump, and Aeroblast.
The encounter is fixed in SoulSilver. The HeartGold level 70 Whirl Islands encounter must not be used for this edition.
- You walked down the stairway on the north side of the platform.
- You used Surf across the waterfall basin.
- You reached Lugia’s side of the basin.
- You saved before interacting with Lugia.
- The level 45 SoulSilver encounter began.
Use a controlled capture strategy
Lead with a Pokémon that can inflict Sleep or Paralysis. Sleep generally provides the strongest capture control, while paralysis is a dependable alternative when sleep moves have limited accuracy or PP. If available, use False Swipe to reduce Lugia to 1 HP. Without False Swipe, use weak neutral attacks and check the damage after every hit.
Lugia has high defensive endurance, and Pressure causes attacking moves to consume extra PP. Rock, Electric, Ice, Ghost, and Dark attacks are super effective, but use them cautiously after Lugia’s HP is low because a critical hit can end the encounter. Avoid recoil or uncontrolled multi-hit moves.
Start with Ultra Balls. If the battle lasts many turns, Timer Balls become more effective. Bring more balls than you expect to need, along with healing items and status cures. A Master Ball is not required for Lugia, so reserve it for a target you specifically do not want to risk losing.
- Lugia is asleep or paralyzed when possible.
- Its HP is in the red, preferably at 1 HP after False Swipe.
- Ultra Balls are available.
- Timer Balls are available if you have them.
- The capture team has enough HP and recovery items.
- No uncontrolled super-effective or knockout move is being used.
Resolve the event and recover from failure
The Kimono Girl and Lugia event must be resolved before the route toward the Pokémon League opens in SoulSilver. Capturing Lugia is optional for the campaign: ownership is not required, but completing the encounter sequence is required for story progression.
If Lugia is defeated, the stationary encounter returns after you enter the Hall of Fame. A pre-battle save is still the easiest way to retry immediately, especially if you want to capture Lugia before the first Elite Four run. If you want to avoid relying on the later return condition, restore the save made before approaching Lugia.
Use an Escape Rope to leave quickly if you brought one. Otherwise, retrace the route through B2F and B1F to the northeast entrance. Heal at a Pokémon Center before continuing through New Bark Town, Route 27, Victory Road, and the Indigo Plateau.
- The required Lugia encounter has ended.
- Lugia was caught, or the event was completed without capture.
- If Lugia was defeated, the pre-battle save was restored or a later Hall of Fame revival is planned.
- You exited through the northeast Whirl Island route.
- The party was healed at a Pokémon Center.
Before you move on
- Goldenrod Radio Tower was cleared and the Silver Wing was received from the Director.
- All five Kimono Girls were defeated and the Tidal Bell was received in SoulSilver.
- The northeast Whirl Island entrance was used.
- The cave route was completed through B1F, B2F, B3F Upper, back to B2F, and B3F Lower.
- The Kimono Girls performed the summoning ritual in B3F Lower.
- The player walked down the north-side stairway and used Surf across the waterfall basin.
- The fixed level 45 Lugia encounter was resolved.
- Lugia was captured if desired, or the event was completed without capture.
- The player can continue toward the Pokémon League and has healed after leaving the Whirl Islands.
References for this chapter
Suicune’s Fixed Encounters — Cianwood to Route 25
In Pokémon SoulSilver, Suicune is an optional stationary legendary with a sequence of fixed overworld sightings. After the Burned Tower basement event, follow it through Cianwood City, Route 42, Vermilion City, and Route 14. Repair the Kanto Power Plant, return Misty to the Cerulean Gym, and defeat her. Suicune then becomes battleable at the northern end of Route 25 near Bill’s house at level 40. This sequence is separate from Bell Tower, Ho-Oh, the Tidal Bell, Lugia, and the genuinely roaming Raikou and Entei.
1. Release the legendary beasts at the Burned Tower
Enter the Burned Tower in Ecruteak City and descend to the basement chamber. Approach the three legendary beasts to trigger the story scene. Raikou, Entei, and Suicune flee, which releases Raikou and Entei as roaming encounters and begins Suicune’s fixed sighting sequence.
Suicune is not battleable in this chamber. Do not go to the Bell Tower expecting the final Suicune encounter. In SoulSilver, the first required step is the Burned Tower release, followed by the fixed sightings in Cianwood City, Route 42, Vermilion City, and Route 14.
- Complete the Burned Tower basement scene.
- Watch Raikou, Entei, and Suicune flee.
- Do not treat the Burned Tower release as the capture battle.
2. Trigger the Cianwood City sighting and defeat Eusine
Travel to Cianwood City after the Burned Tower event. Go north through the city toward the elevated shoreline area. Suicune is standing there; approach it to make it flee. This is a scripted sighting, not a wild battle.
Eusine challenges you immediately afterward. Defeat his Drowzee, Haunter, and Electrode. The team is Drowzee at level 25, Haunter at level 25, and Electrode at level 27. Dark- or Bug-type attacks help against Drowzee and Haunter, while a Ground-type attack is useful against Electrode. Avoid relying on a slow Water-type lead against Electrode if you can use a Ground-type alternative.
- Reach the northern elevated area of Cianwood City.
- Approach Suicune and let the scene finish.
- Defeat Eusine’s Drowzee, Haunter, and Electrode.
3. Follow Suicune to Route 42
Return to Johto and travel along Route 42 between Ecruteak City and Mahogany Town. Look near the Mt. Mortar entrances and the Apricorn-tree area. Suicune appears there as another scripted sighting and flees when approached.
The route is divided by water, so Surf may be needed to reach the correct side depending on your approach. This is not a roaming encounter: Suicune does not appear in grass, does not move through the Pokégear map, and cannot be captured during this scene.
- Reach Route 42 after completing Cianwood and Eusine’s battle.
- Search the Mt. Mortar entrance area near the Apricorn trees.
- Approach Suicune and allow it to flee.
4. Complete the Vermilion City and Route 14 sightings
After reaching Kanto, go to Vermilion City and check the waterside harbor area. Suicune appears there and flees when approached. This is the next fixed event in the chain.
Travel to Route 14 after the Vermilion sighting. Check the waterside section of the route and approach Suicune to trigger its final escape. The required order is Burned Tower release, Cianwood City, Route 42, Vermilion City, and Route 14. If Suicune is absent, revisit those locations in order and confirm that the Cianwood Eusine battle was completed.
- Trigger Suicune’s Vermilion City sighting.
- Trigger its Route 14 sighting.
- Do not search the Pokégear map for Suicune; only Raikou and Entei roam this way.
5. Repair the Power Plant and return Misty to her Gym
Visit the Kanto Power Plant and speak to the plant manager. Learn that the Machine Part has been stolen, then leave the building and follow the lead back to Cerulean City.
Enter the Cerulean Gym. A Team Rocket Grunt runs away when you approach. Follow him north across Route 24, the Nugget Bridge area, and battle him there. After defeating him, return to the Cerulean Gym and inspect the rear area near the pile of inflatable tubes or lifebuoys. The hidden Machine Part is there; pick it up and return it to the Power Plant.
Once the Machine Part is restored, travel north from Cerulean City to Route 25 and speak to Misty at the cape near Bill’s house. She returns to the Cerulean Gym. Enter the Gym and defeat Misty for the Cascade Badge. The final Suicune encounter requires Misty’s Badge, not merely seeing her at the cape.
- Report the theft at the Kanto Power Plant.
- Defeat the Team Rocket Grunt on Route 24.
- Recover the hidden Machine Part from the back of Cerulean Gym.
- Return the part to the Power Plant.
- Speak to Misty at Route 25 and defeat her in Cerulean Gym.
6. Battle and capture Suicune at Route 25
Return to the northern end of Route 25 and climb toward the cape near Bill’s house. After the previous sightings and Misty’s defeat, Suicune waits there. Eusine appears during the scene, then the level 40 Suicune battle begins.
Save immediately before interacting with Suicune. It has Pressure and knows Rain Dance, Gust, Aurora Beam, and Mist. Use a controlled Grass- or Electric-type attack to reduce its HP, then switch to weaker attacks or use False Swipe if available. Avoid critical hits and high-powered super-effective moves once its HP is low.
Sleep or paralysis improves the capture chance. Bring Ultra Balls and healing items; Timer Balls become more useful as turns pass. Rain Dance changes the weather but does not add a Water-type attack to this encounter, so prepare specifically for Gust and Aurora Beam as its damaging moves.
- Save before approaching Suicune.
- Lower the level 40 Pokémon without knocking it out.
- Apply sleep or paralysis when possible.
- Capture Suicune and confirm it is in the party or a PC box.
7. Recover from a failed capture attempt
If Suicune is defeated or you flee from the Route 25 battle, it is not permanently lost. Enter the Hall of Fame again by defeating the Pokémon League. After that Hall of Fame entry, Suicune respawns as a level 40 stationary encounter on B1F of the Burned Tower.
You do not need to repeat the Cianwood, Route 42, Vermilion, Route 14, Power Plant, or Misty sequence after the respawn. Return to the Burned Tower basement, save before interacting with Suicune, and repeat the capture plan. This is also the correct recovery route if you accidentally ran from the Route 25 battle.
- If Suicune was defeated or fled, defeat the Pokémon League again.
- Return to B1F of the Burned Tower.
- Save before the restored encounter.
- Capture Suicune there.
8. Keep Bell Tower and the Tidal Bell separate
Bell Tower is associated with Ho-Oh and is not the SoulSilver Suicune destination. The Tidal Bell is used for the SoulSilver Lugia sequence at the Whirl Islands and is not required to trigger, battle, or recapture Suicune.
Suicune is optional for the core campaign. It is not required for the Johto Elite Four, the Kanto Gym circuit, the upgraded Indigo Plateau rematch, Mt. Silver, or Red. Raikou and Entei remain roaming Pokémon after the Burned Tower release, while Suicune follows the fixed sighting sequence described here.
- Use Route 25 as the normal final Suicune location.
- Use the Burned Tower only as the post-Hall-of-Fame recovery location if needed.
- Do not delay Suicune while waiting for the Tidal Bell or Bell Tower access.
Before you move on
- The Burned Tower basement release scene is complete.
- Suicune was seen in Cianwood City and Eusine was defeated there.
- Suicune was seen near the Mt. Mortar entrances on Route 42.
- Suicune was seen in Vermilion City and on Route 14.
- The Kanto Power Plant Machine Part was recovered and returned.
- Misty returned to Cerulean Gym and was defeated for the Cascade Badge.
- Suicune was captured at Route 25, or was later restored and captured in the Burned Tower after another Hall of Fame entry.
References for this chapter
The Pokémon League — Preparing for the Johto Elite Four and Champion
After completing the SoulSilver Lugia story event, cross Route 27 and Tohjo Falls, pass through Victory Road, and defeat the fixed five-battle Indigo Plateau sequence. The first clear uses Will, Koga, Bruno, Karen, and Champion Lance. A balanced party around the high 40s to low 50s can win with good type coverage, but Lance’s Level 50 Dragonite is the key threat. Surf and Waterfall are required for the Route 27 and Tohjo Falls crossing. Strength is not required there, but it is required later for the normal Victory Road route.
1. Finish the required SoulSilver handoff before Route 27
Defeat Clair in Blackthorn City, complete the Dragon’s Den elder examination, and return to Clair to receive the Rising Badge. Then return to New Bark Town and speak with Professor Elm to receive the Master Ball.
Travel to Ecruteak City and enter the Dance Theater. Defeat all five Kimono Girls in succession. In SoulSilver, this event awards the Tidal Bell. You must also have cleared Goldenrod Radio Tower and received the Silver Wing before the Lugia sequence can proceed.
Travel from Olivine City across Routes 40 and 41 to the northeast Whirl Island. Use Whirlpool at the entrance, follow the cave route through the Silver Wing checkpoint, and reach the lower chamber. The Kimono Girls perform their summoning ritual there. Follow the north stairway and use Surf to reach Lugia at the waterfall basin.
Save before speaking to Lugia. The SoulSilver encounter is Level 45. Use a sleep- or paralysis-inducing move, weaken Lugia carefully, and bring Ultra Balls or Timer Balls. Capturing Lugia is optional for campaign progression; defeating the stationary encounter also resolves the story event and opens the route toward the Pokémon League.
- All eight Johto Badges are recorded.
- Clair has been defeated and the Dragon’s Den examination is complete.
- The Rising Badge and Professor Elm’s Master Ball have been obtained.
- All five Kimono Girls have been defeated.
- The Silver Wing and Tidal Bell requirements are complete.
- The Level 45 SoulSilver Lugia encounter has been captured or defeated.
- Surf and Whirlpool are available for the direct northeast Whirl Islands route.
- Strength has not been incorrectly treated as a requirement for the direct Lugia route.
2. Build a practical League party
For a comfortable first clear, bring a balanced party around the high 40s to low 50s, with at least one or two Pokémon capable of reaching the low-to-mid 50s. The opposing teams begin at Level 40, while Lance’s strongest Pokémon is Level 50. A lower-level team can succeed with strong matchups, but do not rely on one overleveled sweeper.
Prepare Electric coverage for Lance’s Gyarados and Karen’s Murkrow. Preserve Ice coverage for Lance’s three Dragonite. Fighting attacks are useful against Karen’s Umbreon and Houndoom, while Flying or Psychic attacks are reliable against Bruno’s Fighting Pokémon. Water or Grass handles Bruno’s Onix. Psychic, Ground, Fire, Rock, and strong neutral attacks cover much of Koga’s Poison-focused team.
Use attacks with enough PP to last through multiple battles. Keep several Pokémon healthy enough to switch into a predicted attack, and include at least one defensive Pokémon that can create a safe healing turn. Status moves can help against bulky targets, but do not depend on paralysis or sleep alone because accuracy, healing items, and status cures can disrupt the plan.
- Ice coverage is available for Lance’s Dragonite.
- Electric coverage is available for Gyarados and Murkrow.
- Fighting or another strong physical attack is available for Dark targets.
- Water or Grass coverage is available for Bruno’s Onix.
- Psychic, Ground, Fire, Rock, or comparable coverage is available for Koga.
- Multiple party members can switch safely instead of leaving one Pokémon to fight every opponent.
3. Cross Route 27, Tohjo Falls, and Victory Road
After the Lugia encounter, return to New Bark Town and speak with Professor Elm if you have not already completed his post-badge handoff. Before leaving, confirm that Surf and Waterfall are usable. These are the field moves required to cross Route 27 and Tohjo Falls.
Surf east from New Bark Town along Route 27. Continue until you reach land, then follow the route to the entrance of Tohjo Falls. Use Surf through the cave and Waterfall to climb the waterfall, then exit on the eastern side. Continue through Route 27 and Route 26 toward the Pokémon League Reception Gate.
Strength is not required to cross Route 27 or Tohjo Falls. Have it available before entering the normal Victory Road route, where pushing boulders is required to reach the exit. After crossing Victory Road, defeat Rival Silver near the exit, then enter the Indigo Plateau Pokémon Center and heal before beginning the League.
- Surf is usable before leaving New Bark Town.
- Waterfall is usable before entering Tohjo Falls.
- Strength is usable before entering the standard Victory Road route.
- Route 27, Tohjo Falls, Route 26, and Victory Road have been crossed.
- Rival Silver has been defeated near the Victory Road exit.
- The Indigo Plateau Pokémon Center has been used before Will.
4. Stock items and save before the challenge
Buy Full Restores, Hyper Potions or Max Potions, Revives, and Full Heals. Ordinary Potions are generally too weak for the later battles, but they can still be useful for topping off a lightly damaged Pokémon between fights. Carry Ethers or Elixirs if your best Ice, Electric, recovery, or accuracy-dependent moves have limited PP.
You cannot return to the Pokémon Center between Elite Four members. All healing during the five-battle sequence must come from the bag, so reserve Full Restores for situations where both HP and a dangerous status condition need to be removed. Use ordinary healing when only HP is missing.
Save before speaking to Will. You may save after later victories if you want a restart point, but saving does not restore spent items, PP, or fainted Pokémon. Restore important Ice and Electric move PP before entering Lance’s room.
- The full party is healed before Will.
- Revives, Full Restores, healing items, and status cures are stocked.
- Important Ice and Electric moves have usable PP.
- The game is saved before the first battle.
5. Defeat Will and Koga
Will’s team is Xatu at Level 40, Jynx at Level 41, Exeggutor at Level 41, Slowbro at Level 41, and a second Xatu at Level 42. Dark- and Bug-type attacks are useful against his Psychic Pokémon. Fire, Bug, Ice, or strong neutral physical attacks can handle Jynx and Exeggutor. If Slowbro uses Amnesia, physical damage may be more reliable than special attacks. Avoid exposing Fighting- or Poison-weak Pokémon to Psychic attacks.
Koga sends out Ariados at Level 40, Venomoth at Level 41, Forretress at Level 43, Muk at Level 42, and Crobat at Level 44. Psychic attacks work against most of the team, while Fire attacks are particularly useful against Ariados, Venomoth, and Forretress. Forretress can use Explosion, so do not leave a weakened Pokémon in front of it without a reason. Crobat is part Flying-type and is immune to Ground attacks; use Electric, Ice, Rock, or another reliable answer instead.
- Will is defeated before Koga.
- Koga’s order is Ariados, Venomoth, Forretress, Muk, then Crobat.
- Ground attacks are not used against Crobat.
- Important status effects are cured before Bruno.
6. Defeat Bruno and Karen
Bruno’s team is Hitmontop, Hitmonlee, and Hitmonchan at Level 42, Onix at Level 43, and Machamp at Level 46. Flying- and Psychic-type attacks are the most direct answers to the Fighting Pokémon. Use Water- or Grass-type attacks against Onix, which is Rock/Ground. Keep an accurate, powerful attack available for Machamp, Bruno’s highest-level Pokémon.
Karen’s first-clear send-out order is Umbreon at Level 42, Vileplume at Level 42, Gengar at Level 45, Murkrow at Level 44, and Houndoom at Level 47. Start with a strong Fighting attack or another dependable physical move against Umbreon. Umbreon can use Double Team and Confuse Ray, so do not give it unnecessary turns.
Use Fire, Ice, Flying, or another strong super-effective attack against Vileplume. Gengar is third; use a suitable Dark, Ghost, or other reliable attack and account for Destiny Bond before delivering the knockout. Murkrow is fourth and is vulnerable to Electric, Ice, and Rock attacks. Houndoom is last and is vulnerable to Water, Ground, Rock, and Fighting attacks. Heal before entering Lance’s room.
- Bruno’s Onix is handled with Water or Grass rather than Flying or Electric attacks.
- Karen is faced in the order Umbreon, Vileplume, Gengar, Murkrow, Houndoom.
- Destiny Bond is considered before knocking out Karen’s Gengar.
- A dependable answer remains for Houndoom.
- Healing items and important PP remain for Lance.
7. Defeat Champion Lance
Lance sends out Gyarados at Level 44, Dragonite at Level 49, a second Dragonite at Level 49, Aerodactyl at Level 48, Charizard at Level 48, and a final Dragonite at Level 50. Open with a safe Electric answer to Gyarados, but preserve enough Electric PP for later use if needed.
Ice coverage is the central requirement because Lance has three Dragonite. Use a healthy Pokémon that can survive a possible attack rather than sending a frail Ice-type into an unfavorable matchup. If your team has a reliable sleep or paralysis move, status can create a safer opportunity, but do not waste all of your turns attempting a low-accuracy effect.
Water, Rock, or Electric attacks are useful against Aerodactyl and Charizard when the matchup is safe. Use Full Restores when both HP and status need attention, and ordinary healing when only HP is missing. After Lance is defeated, the Hall of Fame registration and ending sequence begin.
- Gyarados has a safe Electric counter.
- Ice coverage remains available for all three Dragonite.
- A healthy reserve Pokémon remains for the Level 50 Dragonite.
- Aerodactyl and Charizard have Water, Rock, or Electric answers.
- The Hall of Fame sequence begins after Lance’s defeat.
Before you move on
- All eight Johto Gym Badges are recorded.
- Clair has been defeated and the Rising Badge has been received.
- The Dragon’s Den examination and Professor Elm’s Master Ball handoff are complete.
- All five Kimono Girls have been defeated.
- The Silver Wing and Tidal Bell requirements have been fulfilled.
- The Level 45 SoulSilver Lugia encounter has been captured or defeated.
- Surf and Waterfall were used to cross Route 27 and Tohjo Falls.
- Strength was available for the normal Victory Road route but was not treated as necessary for Route 27 or Tohjo Falls.
- Route 27, Tohjo Falls, Route 26, and Victory Road have been crossed.
- Rival Silver has been defeated near the Victory Road exit.
- Will, Koga, Bruno, Karen, and Lance have been defeated in that fixed order.
- Karen’s team was faced as Umbreon, Vileplume, Gengar, Murkrow, then Houndoom.
- Lance’s team was faced as Gyarados, Dragonite, Dragonite, Aerodactyl, Charizard, then Dragonite.
- The Hall of Fame registration and ending sequence begin after Lance’s defeat.
After the Johto League — Kanto Access and Story Prerequisites
After entering the Hall of Fame in Pokémon SoulSilver Version, Professor Elm sends you to Kanto by way of the S.S. Aqua. This chapter establishes the travel and story conditions needed for the Kanto region: receive the S.S. Ticket, reach Vermilion City, restore the Kanto Power Plant, obtain the EXPN Card in Lavender Town, set Misty’s return to Cerulean Gym, and wake the Snorlax blocking Diglett’s Cave. Copycat’s Poké Doll errand and the Magnet Train Pass are optional convenience objectives. Do not count a Kanto Badge here; Chapter 11 covers the Gym circuit.
Prepare for Kanto travel and receive the S.S. Ticket
Before leaving Johto, heal your party and place a Pokémon that can use Surf outside battle in your active party. Surf is needed for the route to the Kanto Power Plant and for several later travel shortcuts. A Pokémon with Cut is also useful once Diglett’s Cave is cleared, although it is not required for the S.S. Aqua voyage itself. Carry healing items because the ship contains optional Trainer battles with Pokémon around the upper 30s and low 40s.
After the Hall of Fame sequence, return to New Bark Town and go downstairs at home. Your mother tells you that Professor Elm wants to see you. Visit Elm’s laboratory and speak with him to receive the S.S. Ticket. This is the Key Item required to board the S.S. Aqua at Olivine City.
Fly to Olivine City and enter the harbor south of town. Show the ticket to the sailor at the entrance, then speak to the sailor inside to board. The S.S. Aqua normally sails between Olivine City and Vermilion City, so this is the required route into Kanto. The ship’s trainers are optional, and you can return later if you want their experience or items.
- Enter the Hall of Fame.
- Speak with Professor Elm in New Bark Town.
- Confirm that the S.S. Ticket is in the Key Items pocket.
- Board the S.S. Aqua at Olivine Harbor.
Finish the S.S. Aqua event and arrive in Vermilion City
After boarding, a Gentleman explains that his granddaughter is missing. Search the ship’s lower areas and follow the sailors’ requests when a crew member is blocking the route. You must locate the girl, who is hiding in the ship’s lower section, and then return her to her grandfather. If a sailor refuses to move, look for the sleeping crew member elsewhere on the ship and speak to him so the search can continue.
Once the girl has been found and reunited with her grandfather, the ship reaches Vermilion City. Heal at the Pokémon Center before beginning the Kanto errands. You may explore the city, but do not count the Vermilion Gym or any other Kanto Gym as completed in this chapter.
- Locate the missing girl aboard the S.S. Aqua.
- Return her to her grandfather.
- Arrive at Vermilion City.
- Heal and restock before crossing Kanto.
Restore the Kanto Power Plant
From Vermilion City, travel west through Route 6 to Saffron City, then take Route 8 toward Lavender Town. Continue through Route 10 and Rock Tunnel to reach the Kanto Power Plant. At the north end of Route 10, follow the river and use Surf to reach the facility. Speak with the Manager near the generator. He explains that a Machine Part was stolen and that the plant cannot operate without it.
Travel to Cerulean City and enter Cerulean Gym. The Gym Leader is absent, and a Team Rocket Grunt runs away when you approach him. Follow him north across Nugget Bridge to Route 24 and battle him there. After losing, he admits that he hid the Machine Part near the inflatable tubes inside Cerulean Gym.
Return to Cerulean Gym and search the inflatable tubes near the back of the building. The Machine Part is obtained by interacting with the correct area after the Route 24 battle; searching the Gym before confronting the Grunt will not complete this objective. Take the part back to the Kanto Power Plant and give it to the Manager. The generator is restored, and he gives you TM57, Charge Beam.
- Speak with the Kanto Power Plant Manager.
- Confront the fleeing Team Rocket Grunt at Cerulean Gym.
- Defeat the Grunt on Route 24.
- Search the inflatable tubes in Cerulean Gym.
- Return the Machine Part to the Power Plant Manager.
- Confirm that the generator is operating again.
Obtain the EXPN Card and activate the Poké Flute broadcast
After returning the Machine Part, travel to Lavender Town and enter the Kanto Radio Tower. Speak with the Manager near the north wall. Because the Power Plant is operating again, he gives you the EXPN Card, which expands the Pokégear radio so it can receive the Poké Flute Channel.
The Poké Flute is not a separate Key Item in SoulSilver. To use it, open the Pokégear radio while standing beside the Snorlax and manually move the circular tuning indicator to the top-center position until the Poké Flute broadcast is selected. Confirm that the expanded radio channel is available before returning to Vermilion City.
- Return the Machine Part before visiting Lavender’s Radio Tower.
- Receive the EXPN Card from the Radio Tower Manager.
- Confirm that the Poké Flute Channel can be selected in the Pokégear.
Set up Misty’s return to Cerulean Gym
After the Power Plant problem has been resolved and the Team Rocket Grunt has been dealt with, travel north from Cerulean City across Route 24 and continue along Route 25 to the cape near Bill’s Sea Cottage. Misty is there with another person. Approach her to trigger the conversation; she recognizes your Johto Badges and says that she will return to Cerulean Gym.
Do not battle Misty during this visit. The encounter at the cape only restores her to the Gym. Her Water-type Gym battle belongs to Chapter 11, along with the other Kanto Badge battles. If Misty is not at the cape, verify that the Power Plant Machine Part was returned and that the Route 24 Grunt event was completed.
- Visit Route 25 after restoring the Power Plant.
- Find Misty at the cape near Bill’s Sea Cottage.
- Trigger her return to Cerulean Gym.
- Leave the Cerulean Gym battle for Chapter 11.
Wake Snorlax and clear the Diglett’s Cave roadblock
Return to Vermilion City and go east toward the entrance to Diglett’s Cave. Snorlax blocks the entrance. Stand directly in front of it, open the Pokégear radio, and tune to the Poké Flute Channel using the EXPN Card. Close the radio screen and interact with Snorlax to begin the stationary encounter.
You may capture Snorlax or defeat it. The capture is optional, but the roadblock must be removed if you want to pass through Diglett’s Cave and reach the western Kanto routes from Vermilion’s side. Save before interacting if you want the capture opportunity. After the encounter, enter Diglett’s Cave and confirm that the passage is open. Cut may still be needed for some route branches and item paths beyond the cave, so keep a compatible Pokémon available if you plan to explore immediately.
Copycat’s Poké Doll errand can be completed before or after this objective. It does not control the Kanto Gym circuit, Mt. Silver access, or the battle with Red.
- Stand beside Snorlax at the Vermilion entrance to Diglett’s Cave.
- Select the Poké Flute Channel through the upgraded Pokégear radio.
- Wake Snorlax and resolve the encounter.
- Confirm that Diglett’s Cave is accessible.
- Do not count a Kanto Badge in this chapter.
Optional: recover Copycat’s Poké Doll and obtain the Magnet Train Pass
After the Power Plant has been repaired, visit Copycat’s house in the northwest part of Saffron City. Speak with her to learn that her favorite Poké Doll, treated as her Lost Item, is missing and may be in Vermilion City.
Travel to the Pokémon Fan Club in Vermilion City and speak with the man holding the Clefairy Poké Doll. He gives you the Lost Item after learning that Copycat is looking for it. Return to Copycat in Saffron City and give the doll back to her. She rewards you with the Pass for the Magnet Train.
The Pass and Magnet Train are optional convenience content. The repaired Power Plant allows the train to operate, but neither the Pass nor the train is required for Kanto Gym access, Mt. Silver, or Red. The S.S. Aqua remains available for travel between Olivine and Vermilion, so postpone this errand if you prefer to follow only the mandatory route.
- Optional: speak with Copycat after the Power Plant repair.
- Optional: collect the Poké Doll from the Vermilion Pokémon Fan Club.
- Optional: return the doll to Copycat.
- Optional: receive the Magnet Train Pass.
Before you move on
- The Hall of Fame has been entered.
- Professor Elm has given you the S.S. Ticket in New Bark Town.
- The S.S. Aqua has delivered you from Olivine City to Vermilion City.
- The Kanto Power Plant Manager has received the stolen Machine Part.
- The generator is operating and TM57, Charge Beam, was awarded.
- The EXPN Card was obtained from the Kanto Radio Tower in Lavender Town.
- Misty was found at Route 25 and sent back to Cerulean Gym.
- The Poké Flute Channel was used to wake or resolve the Snorlax blocking Diglett’s Cave.
- Diglett’s Cave is accessible from Vermilion City.
- Optional status: Copycat’s Poké Doll may have been returned and the Magnet Train Pass may have been received, but neither is required.
- No Kanto Gym Badge has been counted. Continue to Chapter 11 for the Kanto Gym circuit.
Kanto Gyms — Badge-by-Badge Practical Strategies
Begin this chapter after Chapter 10’s Kanto access sequence is complete: the S.S. Aqua has reached Vermilion City, the Kanto Power Plant has been repaired, the EXPN Card has been obtained, the Route 11 Snorlax has been cleared or captured, and Misty has returned to Cerulean Gym. Kanto Gym Leaders do not scale to your progress, so the first seven can be challenged in several orders. Blue is the exception: defeat the other seven Kanto Leaders, speak with Blue on Cinnabar Island, then return to Viridian Gym for the eighth and final Kanto Badge. A practical route is Lt. Surge, Sabrina, Erika, Misty, Janine, Brock, Blaine, and Blue. The leaders range from the high 40s to level 60, so bring a balanced party rather than relying on one sweeper.
1. Vermilion City — Lt. Surge and the Thunder Badge
Enter Vermilion Gym and solve the trash-can switch puzzle. Search cans until you find the first switch, then inspect an adjacent can for the second. If the second choice is wrong, the switches reset. Heal before searching so a reset does not leave you wasting time with a damaged party.
Lt. Surge uses Raichu at level 51, two Electrode at level 47, Magneton at level 47, and Electabuzz at level 53. A Ground-type is the safest lead because Electric attacks cannot affect it. Donphan, Quagsire, Nidoking, Nidoqueen, or another sturdy Pokémon with Earthquake or Dig can handle much of the team. Keep Water- and Flying-types away from Raichu and Electabuzz. Victory awards the Thunder Badge and TM34, Shock Wave.
- Heal before beginning the switch puzzle.
- Lead with a Ground-type or reliable Ground move.
- Collect the Thunder Badge and TM34.
2. Saffron City — Sabrina and the Marsh Badge
Saffron Gym is a warp-tile maze. Use the connected rooms to work toward Sabrina’s platform. Some Gym Trainers can be bypassed, but defeating several is useful if your party is below the mid-50s.
Sabrina uses Espeon at level 53, Mr. Mime at level 53, and Alakazam at level 55. Dark- and Bug-type attacks are super effective, and strong physical attackers are useful because Alakazam is comparatively frail physically. Tyranitar, Umbreon, Scizor, Heracross, or a Pokémon with Crunch, Bite, U-turn, or X-Scissor are practical choices. Do not leave Fighting-types exposed to Psychic attacks. Sabrina awards the Marsh Badge and TM48, Skill Swap.
- Use Dark- or Bug-type attacks when available.
- Keep a strong physical attacker healthy for Alakazam.
- Take TM48 after the battle.
3. Celadon City — Erika and the Rainbow Badge
Celadon Gym is arranged as a hedge-and-flower maze. Follow the open passages around the flower beds until you reach Erika. Cut may help with some routes through the Gym, but use an expendable HM carrier if possible rather than replacing a valuable battle move.
Erika uses Jumpluff at level 51, Tangela at level 52, Victreebel at level 56, and Bellossom at level 56. Fire, Flying, Ice, and Bug attacks are effective. Typhlosion, Flareon, Crobat, Fearow, Pidgeot, or a Pokémon with Ice Beam can cover these matchups. Jumpluff may use Sleep Powder and Leech Seed, so carry Awakenings or Full Heals. Winning gives the Rainbow Badge and TM19, Giga Drain.
- Bring Cut only if your chosen route requires it.
- Prepare for Sleep Powder and Leech Seed.
- Use Fire, Flying, Ice, or Bug coverage.
4. Cerulean City — Misty and the Cascade Badge
Misty must have returned to Cerulean Gym after the Route 25 event. Inside the Gym, use the outer walkway or Surf across the pool. The walkway avoids unnecessary battles and keeps the approach straightforward.
Misty uses Golduck at level 49, Quagsire at level 49, Lapras at level 52, and Starmie at level 54. Electric attacks work against Golduck, Lapras, and Starmie, but Quagsire’s Ground typing makes it immune to Electric moves. Use Grass against Quagsire, then preserve a strong Electric- or Grass-type attacker for Starmie. Ampharos, Venusaur, Victreebel, and Lanturn can fill these roles. Misty awards the Cascade Badge and TM03, Water Pulse.
- Confirm Misty has returned before entering.
- Use Grass against Quagsire.
- Keep an Electric- or Grass-type answer ready for Starmie.
5. Fuchsia City — Janine and the Soul Badge
Fuchsia Gym uses invisible walls and several Trainers disguised as Janine. Move through the visible openings in the barriers until you reach the real Leader. The decoys are optional, but defeating some provides useful experience before the main battle.
Janine uses Crobat at level 47, Weezing at level 44, two Ariados at level 47, and Venomoth at level 50. Ground attacks are excellent against Weezing and Ariados, but they do not affect Crobat because it is part Flying-type. Use Electric, Rock, Ice, or Psychic attacks against Crobat and Venomoth. Ampharos, Espeon, a Rock-type, or a Pokémon with Ice Beam can cover these matchups. Carry Antidotes or Full Heals for poison. Janine awards the Soul Badge and TM84, Poison Jab.
- Bring Ground coverage for Weezing and Ariados.
- Keep Electric, Rock, Ice, or Psychic coverage for Crobat and Venomoth.
- Carry poison cures.
6. Pewter City — Brock and the Boulder Badge
Use the EXPN Card’s Poké Flute channel beside the sleeping Snorlax on Route 11. Catching Snorlax is optional; clearing the obstruction is what matters. Enter Diglett’s Cave from Route 11, leave through its western exit, and continue through Route 2 to Pewter City.
Brock uses Graveler at level 51, Rhyhorn at level 51, Omastar at level 53, Onix at level 54, and Kabutops at level 52. Water and Grass attacks are dependable against the entire team. Surf is especially effective against the Rock- and Ground-types, while Grass is particularly useful against Omastar and Kabutops. Avoid exposing Flying-types to Rock attacks. Brock awards the Boulder Badge and TM80, Rock Slide.
- Use the Poké Flute channel to clear Route 11.
- Travel through Diglett’s Cave to reach Pewter.
- Use Surf or Grass attacks against Brock.
7. Seafoam Islands — Blaine and the Volcano Badge
Cinnabar’s original Gym was destroyed by the volcanic eruption, so Blaine operates from the Seafoam Islands. Surf south from Fuchsia or Cinnabar to reach the islands. Inside, the Gym’s Trainers affect which passages remain open; defeat Trainers that block your route and follow the newly available paths.
Blaine uses Magmar at level 54, Magcargo at level 54, and Rapidash at level 59. Water attacks are the most reliable solution, with Ground and Rock attacks also effective. A Water-type using Surf can handle all three. Heal before Rapidash if earlier battles have worn down your main counter. Blaine awards the Volcano Badge and TM50, Overheat.
- Bring Surf and Water, Ground, or Rock coverage.
- Defeat Trainers that block the Seafoam passages.
- Heal before facing Rapidash if necessary.
8. Cinnabar Island and Viridian City — Blue and the Earth Badge
Blue cannot be challenged immediately. First defeat the other seven Kanto Gym Leaders, then travel to Cinnabar Island and speak with Blue. He leaves for Viridian City, making the previously unavailable Viridian Gym battle accessible. Return to Viridian City and follow the Gym’s directional spinner tiles through the Trainer-filled maze until you reach Blue. Battle the Gym Trainers along the route if you need experience or want to avoid entering the Leader battle with a weakened team.
Blue’s team is Exeggutor at level 55, Machamp at level 56, Arcanine at level 58, Rhydon at level 58, Gyarados at level 52, and Pidgeot at level 60. Use Bug, Ghost, or Dark attacks against Exeggutor; Psychic or Flying attacks against Machamp; Electric attacks against Gyarados; and Water or Ground attacks against Arcanine and Rhydon. Rock or Electric attacks are useful against Pidgeot. His varied coverage makes a single-sweeper strategy unreliable, so keep several answers healthy and use healing items during the battle when necessary.
After victory, Blue awards the Earth Badge and TM92, Trick Room. This is the eighth Kanto Badge. Visit Professor Oak in Pallet Town afterward. Oak gives you HM08, Rock Climb, and confirms that Mt. Silver is now accessible once the full set of sixteen Badges is recorded.
- Defeat the other seven Kanto Leaders before speaking with Blue on Cinnabar Island.
- Challenge Blue in Viridian Gym, not on Cinnabar Island.
- Prepare answers for Grass, Psychic, Fighting, Water, Fire, Ground, and Flying threats.
- Collect the Earth Badge and TM92, Trick Room.
- Visit Professor Oak after the battle to receive HM08, Rock Climb, and Mt. Silver access.
Before you move on
- The Trainer Card shows the Thunder, Marsh, Rainbow, Cascade, Soul, Boulder, Volcano, and Earth Badges.
- Lt. Surge, Sabrina, Erika, Misty, Janine, Brock, Blaine, and Blue have all been defeated.
- The Route 11 Snorlax has been cleared or captured, confirming that the route to Pewter is open.
- Blue has left Cinnabar Island and has been defeated in Viridian Gym.
- Professor Oak has provided HM08, Rock Climb, and confirmed access to Mt. Silver.
- The chapter’s Kanto Gym count is exactly eight victories; no Elite Four rematch or optional legendary encounter is included.
Indigo Plateau Rematch — Upgraded Elite Four and Champion
After earning all sixteen Gym Badges, return to the Indigo Plateau for the upgraded Elite Four and Champion sequence. This is an optional second run through Will, Koga, Bruno, Karen, and Lance. It is not a separate Kanto Elite Four, and it is not required to reach Mt. Silver or battle Red. The upgraded teams range from level 58 to level 75, so prepare broad type coverage, reliable recovery, and answers to status, setup, priority, and accuracy-lowering moves.
Earn all 16 Badges and prepare at the Indigo Plateau
The upgraded teams become available after you have earned every Johto and Kanto Gym Badge, including Blue’s Earth Badge in Viridian City. You do not need to defeat Red first. The Indigo Plateau still uses the same five-battle sequence: Will, Koga, Bruno, Karen, then Lance.
Heal before entering, restore the PP of every important attack, and buy Full Restores, Revives or Max Revives, status cures, and PP-recovery items. The battles are consecutive, so plan to spend items during the run rather than expecting to leave and restock between opponents.
A party in the high 60s is a practical starting point, although Lance’s level 75 Dragonite is the final benchmark. Use six dependable Pokémon instead of one fragile sweeper. A strong Fighting attacker, at least two Ice-capable Pokémon, an Electric attacker, and Ground, Psychic, Rock, Dark, or Flying coverage will give useful answers across the full run.
- All 16 Gym Badges are recorded.
- The party is fully healed before entering.
- Important move PP has been restored.
- Full Restores, Revives, status cures, and PP-recovery items are stocked.
- At least two Pokémon can deal reliable Ice damage.
- A Fighting-type and Electric-type answer are available.
Will’s upgraded team
Will’s upgraded roster is Bronzong level 58 with Heatproof and no held item; Jynx level 60 with Forewarn and no held item; Grumpig level 59 with Own Tempo and no held item; Slowbro level 60 with Own Tempo and no held item; Gardevoir level 61 with Trace and no held item; and Xatu level 62 with Early Bird holding a Sitrus Berry. Treat this as a roster rather than relying on a fixed send-out order.
Bronzong uses Reflect, Payback, Gravity, and Psychic. Heatproof reduces Fire damage, so ordinary Fire attacks are not a dependable answer. Use strong Ground, Dark, Ghost, or neutral damage instead. Jynx carries Fake Tears, Lovely Kiss, Dream Eater, and Blizzard; keep a sleep cure ready and switch out a sleeping Pokémon before Dream Eater restores Jynx’s health.
Grumpig uses Confuse Ray, Signal Beam, Power Gem, and Psychic. Slowbro carries Curse, Amnesia, Body Slam, and Psychic. Gardevoir has Calm Mind, Charge Beam, Focus Blast, and Psychic. Xatu carries Confuse Ray, Quick Attack, Shadow Ball, and Psychic. Remove setup users promptly instead of allowing Curse, Amnesia, or Calm Mind to accumulate.
- Heatproof Bronzong is not treated as a normal Fire target.
- A sleep cure is ready for Jynx.
- Confusion recovery is available.
- A plan exists for Slowbro’s Curse and Amnesia and Gardevoir’s Calm Mind.
- Xatu’s Confuse Ray and Shadow Ball are accounted for.
Koga’s upgraded roster
Koga’s unordered upgraded roster is Skuntank level 61 with Aftermath and no held item; Venomoth level 63 with Tinted Lens and no held item; Toxicroak level 60 with Dry Skin and no held item; Swalot level 62 with Sticky Hold holding Leftovers; Crobat level 64 with Inner Focus and no held item; and Muk level 62 with Sticky Hold holding Black Sludge. Do not build the plan around a fixed Koga send-out order.
Skuntank uses Toxic, Dig, Sucker Punch, and Explosion. Prefer a non-contact finishing move when practical, and remember that Aftermath can damage the attacker when a contact move causes the knockout. Venomoth carries Baton Pass, Double Team, Silver Wind, and Psychic. Use accurate attacks and do not give it time to pass evasion boosts.
Toxicroak has Swagger, X-Scissor, Cross Chop, and Gunk Shot. Dry Skin makes Water attacks restore its HP, so use Psychic, Flying, or Ground damage instead. Swalot uses Sludge Bomb, Amnesia, Pain Split, and Yawn while Leftovers restores its health. Crobat carries Fly, Cross Poison, Mean Look, and Toxic. Muk uses Minimize, Screech, Swagger, and Toxic with Black Sludge recovery. Keep an accurate attacker and poison or confusion cures available.
- Water attacks are not the primary answer to Dry Skin Toxicroak.
- Aftermath Skuntank is approached with a non-contact finishing move when practical.
- An accurate move is ready for Double Team or Minimize.
- Poison and confusion recovery items are stocked.
- Venomoth is not given time to pass evasion boosts.
Bruno’s exact 16-Badge battle order
Bruno’s SoulSilver rematch order is Hitmontop level 62, Hitmonlee level 61, Hariyama level 62, Machamp level 64, Lucario level 64, then Hitmonchan level 61. This order is required for practical planning because the later threats can punish a party that spends its best counters too early.
Hitmontop has Technician, no held item, and Close Combat, Earthquake, Counter, and Quick Attack. Avoid using a large physical attack into Counter unless it will secure the knockout. Hitmonlee has Reckless, no held item, and Close Combat, Blaze Kick, Reversal, and Swagger. Reversal becomes more dangerous as its HP falls, so do not leave a weakened Pokémon in front of it.
Hariyama has Guts, holds a Sitrus Berry, and uses Bulk Up, Low Kick, Payback, and Bullet Punch. Defeat it before repeated Bulk Up turns make it difficult to stop, and do not use deliberate status as the primary strategy because Guts increases its offensive threat.
Machamp has No Guard, no held item, and DynamicPunch, Stone Edge, Bullet Punch, and Foresight. No Guard makes DynamicPunch especially dangerous because it will not miss. Stone Edge threatens Flying-type answers, while Bullet Punch can finish a weakened target.
Lucario has Inner Focus, no held item, and Close Combat, Iron Tail, Counter, and ExtremeSpeed. Use strong special Psychic or Flying attacks where practical, and do not trigger Counter with a careless physical attack. Hitmonchan has Iron Fist, no held item, and Close Combat, Drain Punch, Bullet Punch, and Substitute. Break its Substitute quickly and prevent Drain Punch from recovering health.
- The exact order is Hitmontop, Hitmonlee, Hariyama, Machamp, Lucario, then Hitmonchan.
- Hitmontop’s Counter and Earthquake are accounted for.
- Hitmonlee’s Reckless ability and Reversal are respected.
- Hariyama’s Guts, Bulk Up, Sitrus Berry, and Bullet Punch are accounted for.
- Machamp’s guaranteed DynamicPunch and Stone Edge are accounted for.
- Lucario’s Counter and ExtremeSpeed are not triggered recklessly.
- Hitmonchan’s Substitute and Drain Punch are handled quickly.
Karen’s unordered upgraded roster
Karen’s unordered upgraded roster is Weavile level 62 with Pressure and no held item; Spiritomb level 62 with Pressure and no held item; Absol level 62 with Super Luck and no held item; Houndoom level 63 with Flash Fire and no held item; Honchkrow level 64 with Super Luck and no held item; and Umbreon level 64 with Synchronize holding a Sitrus Berry. Do not use a fixed Karen send-out order as a required instruction.
Weavile uses Ice Punch, Night Slash, Low Kick, and Ice Shard. A strong Fighting attack is the preferred answer, but respect its speed and priority Ice Shard. Absol carries Detect, Perish Song, Night Slash, and Psycho Cut. Defeat it promptly after Perish Song appears or switch before the countdown becomes dangerous.
Spiritomb has Curse, Confuse Ray, Pain Split, and Sucker Punch. In Generation IV it has no standard type weakness, so use strong neutral damage, status, or a safe setup opportunity. Houndoom uses Nasty Plot, Dark Pulse, Flamethrower, and Sludge Bomb. Use Water, Ground, Rock, or Fighting attacks; Flash Fire blocks Fire attacks and strengthens Houndoom’s Fire moves.
Honchkrow carries Thunder Wave, Whirlwind, Drill Peck, and Sucker Punch. Electric, Ice, and Rock attacks are useful, but cure paralysis before it disables a key attacker. Umbreon uses Confuse Ray, Curse, Payback, and Sucker Punch and restores health with its Sitrus Berry. Preserve a healthy Fighting-type answer.
- Spiritomb is handled with neutral damage or status rather than an assumed weakness.
- A healthy Fighting-type answer remains available.
- Houndoom is not attacked with Fire moves as the main strategy.
- Perish Song, Thunder Wave, Whirlwind, confusion, and Sucker Punch are accounted for.
- Umbreon’s Sitrus Berry is expected.
Lance’s unordered upgraded roster
Lance’s unordered upgraded roster is Salamence level 72 with Intimidate holding a Lum Berry; Gyarados level 68 with Intimidate and no held item; Garchomp level 72 with Sand Veil and no held item; Altaria level 73 with Natural Cure and no held item; Charizard level 68 with Blaze and no held item; and Dragonite level 75 with Inner Focus holding a Sitrus Berry. Do not rely on a fixed Lance send-out order.
Salamence uses Dragon Claw, Flamethrower, Shadow Claw, and Rest. Its Lum Berry can remove one status condition, so do not depend on a single attempt to paralyze or sleep it. Special Ice damage avoids Intimidate’s physical Attack reduction. Gyarados carries Dragon Dance, Waterfall, Ice Fang, and Thunder Wave. Defeat it quickly with Electric attacks before Dragon Dance creates a sweeping threat.
Garchomp uses Outrage, Swords Dance, Earthquake, and Roar. Use Ice damage immediately rather than allowing Swords Dance. Sand Veil can cause misses, so accurate attacks are valuable. Altaria carries Double Team, DragonBreath, Perish Song, and Hyper Beam. Do not spend repeated turns while it raises evasion, and switch or finish it before Perish Song becomes dangerous.
Charizard uses Flamethrower, Hyper Beam, Dragon Claw, and Air Slash. Water, Electric, and Rock attacks are dependable answers. Dragonite carries Draco Meteor, Safeguard, Fire Blast, and Hyper Beam, along with its Sitrus Berry. Preserve your strongest reliable Ice attacker for Dragonite. Safeguard blocks new status conditions, while Draco Meteor and Fire Blast punish careless Ice- or Steel-type switch-ins. Lance can use Full Restores, so retain enough PP and damage to finish weakened targets after healing.
- Two Ice-capable Pokémon remain healthy before Lance.
- An Electric answer is ready for Gyarados.
- Garchomp cannot freely use Swords Dance.
- Dragonite’s level 75 benchmark, Sitrus Berry, Inner Focus, Safeguard, and Fire Blast are accounted for.
- Several Full Restores remain for Lance’s healing.
Recover after failure and confirm completion
If the run fails, identify which matchup consumed the most resources. Retrain or replace that specific counter instead of only buying more healing items. A reliable Fighting attacker, one or two Ice users, a Ground or Psychic attacker, an Electric attacker, and a durable switch-in for physical threats provide a better foundation than six Pokémon with overlapping roles.
If Bruno is the problem, preserve the Fighting or Flying counter needed for Hariyama, Machamp, Lucario, and Hitmonchan. Use special Psychic or Flying damage where practical, and avoid triggering Counter with an attack that will not finish the target. If Lance is the problem, improve the Ice-user matchup first and reserve healing items and PP for Garchomp and Dragonite.
The rematch is optional. It does not replace a separate Kanto Elite Four and is not required for Professor Oak’s Rock Climb handoff, Mt. Silver access, or the first battle with Red. Defeating Red does not unlock these teams; all sixteen Gym Badges are the relevant unlock condition.
Completion is confirmed when Will, Koga, Bruno, Karen, and Lance are defeated consecutively with their upgraded teams and the game records the resulting Indigo Plateau victory. Keep this result separate from earning the sixteen Gym Badges, completing the Kanto Gym circuit, and defeating Red at Mt. Silver.
- All 16 Gym Badges were obtained before attempting the upgraded teams.
- The party was healed and stocked before entering the Indigo Plateau.
- Will, Koga, Bruno, Karen, and Lance were defeated consecutively.
- Bruno was prepared for in the exact order Hitmontop, Hitmonlee, Hariyama, Machamp, Lucario, then Hitmonchan.
- Hitmonchan’s moves are recognized as Close Combat, Drain Punch, Bullet Punch, and Substitute.
- No fixed Koga, Karen, or Lance send-out order was required.
- The upgraded Indigo Plateau victory was recorded.
- The rematch is understood to be distinct from the Kanto Gym circuit and the Mt. Silver battle with Red.
Before you move on
- All 16 Gym Badges are obtained before attempting the upgraded teams.
- The party is healed and stocked before entering the Indigo Plateau.
- Will, Koga, Bruno, Karen, and Lance are defeated consecutively.
- The verified six-Pokémon rosters, levels, abilities, held items, and major moves have been used for preparation.
- Bruno’s exact SoulSilver order is Hitmontop, Hitmonlee, Hariyama, Machamp, Lucario, then Hitmonchan.
- Hitmonchan’s verified moves are Close Combat, Drain Punch, Bullet Punch, and Substitute.
- No fixed Koga, Karen, or Lance send-out order is required.
- The upgraded Indigo Plateau victory is recorded.
- The rematch is understood to be optional and distinct from both the Kanto Gym circuit and the Mt. Silver battle with Red.
Preparing for Mt. Silver — HMs, Levels and Route Planning
After all sixteen Gym Badges are recorded, Professor Oak gives you HM08 Rock Climb and permits access to Mt. Silver. The direct route to Red begins at the eastern side of Mt. Silver Cave and requires Rock Climb through the upper cave and mountainside sections. Surf, Waterfall, Rock Smash, and Strength open optional rooms, items, and the Moltres branch, but they are not required for the direct eastern ascent. Prepare for Red’s unusually high levels before making the climb.
Unlock Mt. Silver and receive HM08 Rock Climb
Confirm that the Trainer Card shows all eight Johto Badges and all eight Kanto Badges. Blue’s Earth Badge is the final badge in the Kanto circuit, but the game checks the complete total of sixteen rather than a special alternate badge order. The upgraded Indigo Plateau rematch is not required to open Mt. Silver.
Travel to Pallet Town and enter Professor Oak’s laboratory. Speak with Oak after the sixteenth Badge has been obtained. He gives you HM08 Rock Climb and opens the route to Mt. Silver. Teach Rock Climb to a compatible Pokémon and verify that the move appears as usable outside battle. If Oak does not provide it, check the Trainer Card, leave the laboratory, and speak with him again after confirming the badge total.
Reach Mt. Silver from the Kanto side by traveling west from Viridian City through Route 22, passing through the Pokémon League Reception Gate, then continuing along Routes 26 and 28. The Mt. Silver Pokémon Center is at the foot of the mountain. Heal there, restore move PP, and stock supplies before entering the cave.
The Route 28 guard and the mountain entrance will not allow normal access until the sixteen-Badge requirement and Oak’s event have been completed. Fly is convenient for returning to the Pokémon Center later, but it is not needed to travel to the mountain by foot.
- All sixteen Gym Badges are recorded on the Trainer Card.
- Blue has been defeated in Viridian City Gym.
- Professor Oak has given HM08 Rock Climb.
- A compatible party Pokémon can use Rock Climb outside battle.
- The Mt. Silver Pokémon Center has been used for final healing.
Choose the direct route and decide which HMs to bring
Enter Mt. Silver Cave and take the eastern path from the opening area. The direct route climbs through the cave and then across the mountain’s exterior ledges before returning to higher cave sections. Rock Climb is used repeatedly on the rocky walls and ledges that connect these areas. Follow the upward route rather than heading toward the lower water passages.
Flash improves visibility in the dark opening cave area and is useful if the entrances and ledges are difficult to see. It is not a progression prerequisite for the direct eastern route to Red, so you can complete the ascent without treating Flash as mandatory. Bring it if navigation is more comfortable with the cave illuminated.
Surf and Waterfall are optional for this chapter’s objective. They open lower and western sections of Mt. Silver, including the southern chamber, waterfall passages, extra item locations, and the route toward Moltres. These areas are exploration branches rather than steps on the direct path to Red.
Rock Smash opens breakable-rock branches in the higher cave areas. Those branches can produce items or Rock Smash rewards, but they do not replace Rock Climb and do not unlock the summit route. Strength similarly moves boulders in optional sections and exposes additional item paths. If Red is the only objective, use an easily replaceable HM carrier rather than changing a core battler’s final moveset for these detours.
The direct Red route therefore requires Rock Climb and benefits from ordinary healing supplies. Surf, Waterfall, Rock Smash, Strength, and Flash should be treated according to whether you intend to explore optional rooms, not as a single mandatory HM package.
- Rock Climb is available and usable outside battle.
- Flash is available if you want better visibility in the opening cave area.
- Surf and Waterfall are not counted as direct-route requirements.
- Rock Smash is reserved for optional breakable-rock branches.
- Strength is reserved for optional boulder detours.
- No core battler has been burdened with unnecessary field moves.
Set training targets for Red’s level gap
Red’s fixed SoulSilver team is Pikachu at level 88, Lapras at level 80, Snorlax at level 82, and Venusaur, Charizard, and Blastoise at level 84. The game does not require a particular party level, but a practical target is approximately level 75 or higher for the Pokémon you expect to use. Put your most important answers near level 80 if possible, especially if you want a margin for critical hits, missed attacks, status effects, or an unfavorable switch.
Build the party around roles rather than six unrelated attackers. Prepare a sturdy Ground-type or a strong Pokémon with a reliable Ground attack for Pikachu. Ground-type Pokémon avoid Electric attacks, but Pikachu can still use physical coverage, so do not rely on a frail Ground Pokémon that cannot survive a non-Electric hit.
Bring a physical Fighting-type or another powerful physical attacker for Snorlax. Its high durability makes weak neutral attacks inefficient, and its coverage can punish a Ghost-only strategy. Keep a second answer available in case the first Fighting counter is weakened or disabled.
Prepare both physical and special damage. Electric- and Grass-type attacks are useful against Lapras and Blastoise, Rock attacks pressure Charizard, and Fire- or Ice-type attacks threaten Venusaur. Keep alternate answers available because Lapras and Blastoise carry coverage, while Venusaur can disrupt a faster counter with sleep.
Do not assume that reaching level 75 automatically solves the fight. Take a test run through the lower sections of Mt. Silver and see whether your team can defeat wild Pokémon without exhausting its healing items or important move PP. If the party is already depleted before the upper mountain, train elsewhere, revise the movesets, or return to the Pokémon Center before continuing.
- Most intended Red battlers are around level 75 or higher.
- At least one primary counter is close to level 80.
- The party has both physical and special damage.
- A sturdy Ground answer to Pikachu is ready.
- A physical answer to Snorlax is ready.
- The party has separate answers for Lapras, Venusaur, Charizard, and Blastoise.
Climb through the eastern Mt. Silver route
From the entrance, move toward the east side of the first cave area. Use Rock Climb on the accessible rocky walls and continue through the cave opening that leads upward. When the route reaches the mountainside, follow the ledges and take the climbable walls that continue toward higher elevations.
The path alternates between cave rooms and snowy exterior sections. Use each cave entrance to move between the lower mountainside, upper mountainside, and deeper floors. Some ledges contain items, but collecting them is optional and can be skipped without blocking the summit route.
Do not mistake the lower water passages for a dead end in the required route. They lead to optional chambers and item branches. If you are not deliberately exploring for Moltres or supplies such as the Expert Belt, Full Restore, Max Revive, or other cave items, stay on the eastern upward route and conserve time and PP.
Continue using Rock Climb until the route reaches the upper cave and then the snowy summit. Red is at the end of this summit area. The Mt. Silver Pokémon Center is too far away for convenient mid-route healing, so return to it before the final climb if the party has taken meaningful damage. Save immediately before approaching Red.
- The eastern path was chosen at the cave entrance.
- Rock Climb has been used for the required cave and mountainside ascent.
- Lower water branches have not been mistaken for required progression.
- The Moltres and optional item branches were skipped or intentionally explored.
- The party is fully healed before the summit.
- The game is saved before initiating Red’s battle.
Account for summit weather and recover after failure
Snowfall at the summit creates hail during the battle on ordinary weather days, damaging Pokémon that are not protected from hail. This adds passive damage to both sides and makes the fight less forgiving for weakened Pokémon. Keep the party healthy before the battle and avoid entering with several Pokémon already in low HP.
Red’s Pikachu is the highest-level member at level 88, so open with the Ground answer if it can safely withstand Pikachu’s physical coverage. Use a strong physical Fighting attack against Snorlax, but do not leave the counter exposed if Snorlax’s coverage can defeat it. Against Lapras and Blastoise, use prepared Electric- or Grass-type attacks while respecting their Ice- and other coverage. Rock attacks are a strong option against Charizard, and Venusaur is vulnerable to Fire- and Ice-type pressure but can disrupt the fight with sleep.
Carry Full Restores or equivalent healing items, Max Potions, Revives, and status cures. Keep enough supplies for the battle itself instead of spending everything on optional cave encounters. If you use a temporary setup move, do so only when the active Pokémon can survive Red’s next attack; a failed setup turn can cost more than it gains.
If Red defeats the party, return to the Mt. Silver Pokémon Center, restore all HP and PP, and review which matchup failed. Raise the weakest counters, replace unreliable moves, and bring a second answer to the Pokémon that caused the loss. Do not simply repeat the same lead if Pikachu, Snorlax, hail damage, or a status move exposed the same weakness.
- A Ground counter is ready for Pikachu.
- A physical Fighting answer or equivalent is ready for Snorlax.
- The team has safe responses to Lapras and Blastoise.
- Rock-based damage is available for Charizard.
- A plan exists for Venusaur’s sleep disruption.
- Healing items, Revives, and status cures are stocked.
- The summit save is complete before the battle.
Before you move on
- All sixteen Gym Badges are recorded.
- Blue has been defeated in Viridian City Gym.
- Professor Oak has given HM08 Rock Climb.
- The Route 28 guard and Mt. Silver access checks are cleared.
- The eastern Mt. Silver route has been chosen.
- Rock Climb is available for the direct ascent.
- Surf and Waterfall are not being counted as direct-route requirements.
- Rock Smash and Strength are being treated as optional side-content tools.
- Flash is available if desired for visibility but is not being treated as mandatory progression.
- The intended Red team is approximately level 75 or higher, with important counters preferably near level 80.
- A Ground answer to Pikachu and a strong physical answer to Snorlax are prepared.
- Reliable counters for all six of Red’s Pokémon are prepared.
- The Mt. Silver Pokémon Center has been used for final healing and restocking.
- The game is saved immediately before Red.
Mt. Silver — The Red Battle (Postgame Final Boss)
After all sixteen Johto and Kanto Badges are recorded, visit Professor Oak in Pallet Town to receive HM08 Rock Climb and permission to enter Mt. Silver. Reach the mountain through Viridian City, Route 22, the Pokémon League Reception Gate, and Route 28. The direct eastern ascent through Mt. Silver Cave and its mountainside sections requires Rock Climb but does not require Surf, Waterfall, Rock Smash, or Strength. Flash improves visibility inside the cave, but it is not a field-move gate for reaching Red. Those other HMs open optional exploration areas, including the Moltres chamber and extra item branches. Red uses Pikachu at level 88, Lapras at level 80, Snorlax at level 82, and Venusaur, Charizard, and Blastoise at level 84. Prepare for the summit’s hail, save before the battle, and carry enough healing and status-recovery items for a six-Pokémon fight. When Red is defeated, the credits play and every Pokémon in the party receives the Legend Ribbon, including party members that never entered battle.
Unlock Mt. Silver and reach the entrance
Confirm that all eight Johto Badges and all eight Kanto Badges are recorded. Blue’s Earth Badge is the final Kanto requirement; defeating the Johto Elite Four alone does not open Mt. Silver.
Fly to Pallet Town and enter Professor Oak’s laboratory. Speak with Oak after earning all sixteen Badges. He gives you HM08 Rock Climb and grants permission to travel to Mt. Silver. There is no separate hidden event or phone call required.
Fly to Viridian City and leave west through Route 22. Continue through the Pokémon League Reception Gate, then follow Route 28 to the Pokémon Center at the foot of Mt. Silver. Heal there, organize your party, buy supplies, and save before entering the cave.
- All sixteen Gym Badges are recorded.
- Professor Oak has given HM08 Rock Climb.
- Mt. Silver access is open.
- The party is healed at the Pokémon Center outside Mt. Silver Cave.
Prepare a balanced party for Red
Red’s fixed SoulSilver team is Pikachu level 88, Lapras level 80, Snorlax level 82, Venusaur level 84, Charizard level 84, and Blastoise level 84. A team in the mid-70s can win with favorable matchups and careful item use, but upper-70s or low-80s levels make the battle more dependable. Bring several answers rather than one overleveled sweeper, because Red’s team covers many common counters.
Pikachu holds a Light Ball and knows Volt Tackle, Iron Tail, Quick Attack, and Thunderbolt. A durable Ground-type with Earthquake is a strong opening answer because Ground-types ignore Pikachu’s Electric attacks. Iron Tail can still damage a Ground counter, and Static can paralyze a Pokémon that makes contact, so use a powerful non-contact move when available.
Lapras has Body Slam, Brine, Blizzard, and Psychic. Electric, Grass, Fighting, and Rock attacks are effective. Fighting-types must respect Psychic, while Body Slam can cause paralysis. Brine becomes stronger when Lapras is below half HP, so finish a weakened Lapras promptly instead of allowing a long exchange.
Snorlax carries Shadow Ball, Crunch, Blizzard, and Giga Impact. Strong Fighting attacks are the most reliable answer. Do not rely on a Ghost-only wall: Shadow Ball and Crunch both threaten Ghost-types, and Snorlax’s high HP allows it to survive weak attacks.
Venusaur uses Frenzy Plant, Giga Drain, Sludge Bomb, and Sleep Powder. Fire and Ice attacks are useful, but keep Full Heals or Full Restores ready. Charizard knows Blast Burn, Flare Blitz, Air Slash, and Dragon Pulse; Rock attacks are especially effective. Blastoise uses Hydro Cannon, Blizzard, Flash Cannon, and Focus Blast, so Electric and Grass attackers should have a sturdier backup available.
- A durable Ground-type or another reliable Electric immunity is ready for Pikachu.
- Strong Fighting coverage is available for Snorlax.
- Rock coverage is available for Charizard.
- Electric or Grass coverage is available for Lapras and Blastoise.
- Fire or Ice coverage is available for Venusaur.
- The main party is preferably in the upper-70s or low-80s.
Take the direct Rock Climb route
Enter Mt. Silver Cave from the Pokémon Center side. Flash improves visibility in the cave and can make navigation easier, but using Flash is not required to unlock or complete the direct route to Red. If you do not want to dedicate a party slot to Flash, follow the visible ledges, stairs, cave exits, and Rock Climb walls instead.
From the entrance area, take the eastern route and use Rock Climb on the climbable wall. Continue across the lower mountainside, using the ledges and stairs that carry the path upward. The ascent alternates between interior cave rooms and snowy mountainside sections. When several exits are available, favor the higher route and avoid returning toward the entrance.
Continue through the upper cave and upper mountainside areas. Use Rock Climb whenever the path rises to another ledge, then follow the cliff paths toward the northern cave opening. The final cave section leads to the upper passage and then the snowy summit where Red waits.
Surf and Waterfall are not required for the direct route to Red. They open lower and western portions of Mt. Silver, including the route toward Moltres and several item branches. Rock Smash opens additional item locations, while Strength is unnecessary for the direct ascent. If you explore those areas, return to the main eastern route and continue upward.
- Flash is available if you want easier cave visibility, but it has not been mistaken for a required field-move gate.
- The eastern Rock Climb wall has been used.
- The lower mountainside has been crossed.
- The upper cave and mountainside sections have been completed.
- Optional Surf, Waterfall, Rock Smash, and Strength branches have not been mistaken for required progress.
- The snowy summit has been reached.
Save at the summit and plan around hail
The summit normally applies hail during battle. Hail damages non-Ice Pokémon at the end of each turn and makes Blizzard perfectly accurate. On certain diamond-dust days, snow appears without applying the normal hail battle effect.
Restore HP and check the PP of your main attacks before approaching Red. Save immediately before the encounter. Carry Full Restores for Sleep Powder, paralysis, and other status problems, along with Revives or Max Revives for emergencies. Red can use four Full Restores, so avoid lowering several of his Pokémon into healing range unless you can finish them or exploit a recharge turn.
- The game is saved immediately before Red.
- HP and important PP are restored.
- Full Restores, Revives, and status cures are stocked.
- The battle plan accounts for hail and accurate Blizzard.
Defeat Red’s six Pokémon
Red leads with Pikachu. Send out the Ground-type prepared for it and use Earthquake or another powerful Ground attack. Avoid unnecessary contact attacks if Static paralysis would disrupt your plan, and remember that Iron Tail can still hurt a Ground counter.
Against Lapras, use Electric, Grass, Fighting, or Rock damage. Cure Body Slam paralysis when necessary and be ready for Psychic if using a Fighting-type. Because Brine is stronger once Lapras is below half HP, attack decisively rather than allowing a long low-HP exchange.
Use Fighting damage against Snorlax and preserve a second Fighting-capable Pokémon if possible. Giga Impact creates a recharge turn if Snorlax uses it, but do not count on that opening unless your active Pokémon can survive the attack.
Use Fire or Ice damage against Venusaur and cure Sleep Powder promptly. Frenzy Plant forces Venusaur to recharge after use, giving you an opportunity to heal, switch, or attack. Rock attacks are the most efficient answer to Charizard, although Water and Electric attacks are also effective. Blast Burn likewise creates a recharge turn if Charizard survives.
Finish Blastoise with Electric or Grass attacks while respecting Blizzard, Focus Blast, and Flash Cannon. Hydro Cannon creates a recharge turn after use, but hail and a follow-up attack can still defeat a weakened Pokémon. Keep at least one reserve attacker for the final part of the battle.
- Pikachu is handled with Ground coverage or a reliable Electric immunity.
- Lapras is not allowed to exploit Brine during a prolonged low-HP exchange.
- Snorlax is confronted with Fighting coverage.
- Venusaur’s Sleep Powder is answered with a cure or planned switch.
- Charizard is pressured with Rock, Water, or Electric damage.
- Blastoise is handled with Electric or Grass coverage.
Recover after a failed attempt
If Red defeats you, return to the Pokémon Center at the mountain’s foot and restock. Red’s team and moves do not change after a loss, so identify the specific matchup that caused the failure before changing the entire party.
If Pikachu swept the team, add a durable Ground-type or another Electric-immune answer. If Snorlax caused the loss, improve Fighting coverage and stop relying on Ghost immunity alone. If Charizard survived too long, strengthen Rock coverage. If Lapras or Blastoise overwhelmed the party, add Electric or Grass damage and preserve a backup attacker. If Venusaur repeatedly used Sleep Powder, carry more status cures or use a faster Fire- or Ice-type attacker.
Re-level the main counters toward the upper-70s or low-80s if necessary. Restore PP, heal fully, climb again, and save at the summit before retrying. Losing does not require a new story event or a different route.
- The cause of the loss has been identified.
- The revised party has a specific answer to that threat.
- Counters have been re-leveled or retooled where necessary.
- Supplies and PP are restored before the next attempt.
Confirm the ending and Legend Ribbon
Defeat all six members of Red’s fixed team: Pikachu level 88, Lapras level 80, Snorlax level 82, Venusaur level 84, Charizard level 84, and Blastoise level 84. Red disappears after defeat, the credits play, and the game returns you to New Bark Town after the ending sequence.
The Legend Ribbon is awarded to every Pokémon in the party when Red is defeated. This includes party members that fainted or were never sent into battle, so check the ribbon records of the complete party after the credits rather than checking only Pokémon that acted. Pokémon in the PC are not part of the active party and should not be expected to receive the ribbon from that victory.
Red does not immediately reappear after leaving and returning to Mt. Silver. A rematch becomes available after defeating the Elite Four and Champion again and entering the Hall of Fame. The first victory completes the Mt. Silver and Red objectives.
- Red’s six Pokémon have been defeated.
- The ending credits have appeared.
- The Legend Ribbon has been checked on every Pokémon that was in the party at the time of victory.
- The player understands that Red returns only after another Elite Four and Champion victory followed by Hall of Fame entry.
Before you move on
- All sixteen Gym Badges are recorded.
- Professor Oak has given HM08 Rock Climb and opened Mt. Silver access.
- The eastern Rock Climb route through the cave and mountainside has been completed.
- Flash was treated as a visibility aid rather than a required field-move gate.
- Surf and Waterfall were correctly treated as optional Mt. Silver exploration tools rather than direct Red-route requirements.
- Red’s fixed SoulSilver team has been defeated: Pikachu level 88, Lapras level 80, Snorlax level 82, Venusaur level 84, Charizard level 84, and Blastoise level 84.
- The ending credits have appeared.
- The Legend Ribbon has been checked on every Pokémon that was in the party at the time of victory.
- The player understands that Red returns after another Elite Four and Champion victory followed by a Hall of Fame entry.
Pokéwalker and Side Activities — Watts, Courses and Useful Rewards
The Pokéwalker is an optional infrared accessory bundled with Pokémon SoulSilver Version. After the save reaches the required early-game point, it can take one Pokémon from a PC Box on a course. Walking earns experience and Watts, while the Poké Radar and Dowsing Machine use Watts to find course-specific Pokémon and items. The accessory supports training and supplies, but it does not replace badges, story events, field moves, or normal battle preparation.
Reach the connection point and register the Pokéwalker
Before the first connection, obtain the Pokédex, return the Mystery Egg to Professor Elm, and place at least one Pokémon in a PC Box. SoulSilver also requires at least five open PC spaces for the Pokéwalker connection. From the title screen, select Connect to Pokéwalker, choose Save, then choose Go for a Stroll. Select a Pokémon from the PC Box, choose a course, and confirm the transfer. Keep the top infrared areas of the game card and Pokéwalker about two inches apart and facing each other, then press the Pokéwalker’s center button when prompted.
The first successful connection registers the Pokéwalker to that SoulSilver save. This is not a permanent one-time pairing in the sense of being irreversible: the device can be reset and linked to a different HeartGold or SoulSilver save. To reset it, open Connect to Pokéwalker on the Nintendo DS, hold Down on the D-pad, X, and L together, confirm the warning, select Erase Pokéwalker Records, and connect the device when prompted. Resetting erases the data stored on the Pokéwalker, so first return any Pokémon and transfer any wanted Watts, items, or caught Pokémon.
Only one Pokémon can be on a Stroll at a time. Use a backup Pokémon, a newly caught replacement, or a temporary utility Pokémon for the first test. Do not send the only Pokémon you intend to use for an imminent Gym or important battle unless you are prepared to continue without it until the return transfer is complete.
- Reach the Pokédex and return the Mystery Egg to Professor Elm.
- Keep at least one Pokémon in a PC Box and five open PC spaces.
- Use Connect to Pokéwalker, then Save and Go for a Stroll.
- Reset the device only after its stored Pokémon and rewards are no longer needed.
Walk, earn Watts, and use the Poké Radar or Dowsing Machine
The Pokéwalker counts steps while the Pokémon is away. Every 20 steps provides 1 Watt, and the walking Pokémon gains experience from the stroll. A Pokémon can gain only one level during a single trip. It cannot learn a level-up move or evolve by leveling up while it is on the Pokéwalker, so inspect its level, moves, and evolution requirements after returning it to SoulSilver.
Spend 10 Watts to use the Poké Radar and 3 Watts to use the Dowsing Machine. The Poké Radar presents grass patches and requires you to select the patch marked by the exclamation indicator. Later indicators correspond to different encounter groups, so follow the marked patch promptly. A failed search wastes the Radar use and its 10 Watts.
The Dowsing Machine gives two searches among six locations. Use the first result’s distance clue to narrow down the second search rather than choosing randomly. The available Pokémon and items depend on the selected course, the course’s step progress, and the Pokémon groups chosen when that stroll begins. If a wanted Pokémon was not selected for the current stroll, return the Pokémon and start another stroll on the same course rather than repeatedly spending Watts on an unavailable result.
The Pokéwalker can hold up to three Pokémon caught through the Poké Radar and up to three items found through the Dowsing Machine. When a category is full, a new result requires a replacement decision. Review the stored results before accepting another catch or item.
- Earn Watts by walking; the normal rate is 1 Watt per 20 steps.
- Use 10 Watts for the Poké Radar and 3 Watts for the Dowsing Machine.
- Expect only one level of experience per stroll.
- Check storage before accepting a fourth caught Pokémon or fourth found item.
Return the Pokémon and transfer the rewards safely
When you want the Pokémon back, select Connect to Pokéwalker from the SoulSilver main menu and choose Return from a Stroll. On the device, select Connect and keep the game card and Pokéwalker still until the game confirms that communication is complete. Return from a Stroll brings back the walking Pokémon and transfers the accumulated Watts, caught Pokémon, and found items. Caught Pokémon go to the PC Box, while items go to the appropriate Bag pocket.
Receive a Gift has a different purpose. It transfers the accumulated Watts, caught Pokémon, and items but deliberately leaves the current walking Pokémon on the Pokéwalker. Use it only when you want to collect the rewards without ending that Pokémon’s stroll. If you want the Pokémon itself back, use Return from a Stroll instead.
The accessory saves information during communication and periodically during a walk. A weak or removed battery can cost unsaved steps, Watts, items, and caught Pokémon from the current portion of the trip, although the Pokémon assigned to the stroll is protected by the game’s recovery system. Transfer important sessions regularly, especially before replacing the CR2032 battery.
If the Pokéwalker is lost or damaged, the linked SoulSilver save can recover the walking Pokémon. At the Connect to Pokéwalker screen, hold Up, Select, and R together and follow the confirmation prompts. This returns the Pokémon to the PC Box, but the unsent rewards from the missing device are not transferred. Do not confuse this recovery command with Down, X, and L, which resets the device and erases its stored records.
- Choose Return from a Stroll when the Pokémon must come home.
- Choose Receive a Gift only when the Pokémon should remain on the device.
- Wait for the completed communication and save confirmation.
- Use Up, Select, and R for a lost-device recovery; use Down, X, and L only for a deliberate reset.
Choose courses for a defined purpose
Use the early standard courses for modest experience, ordinary recovery items, and course Pokémon that are not immediately available on nearby Johto routes. Check the course’s encounter and item table before starting a stroll. Course progress affects which encounter groups and item results are available, so a short walk may not expose every listed result.
Yellow Forest is an optional special course associated with Pikachu encounters and unusual move possibilities. It is not guaranteed to be present on every SoulSilver save because it depended on historical event distribution. If Yellow Forest is already available, use it for a specific Pikachu goal rather than treating it as part of the main campaign.
Stormy Beach and Quiet Cave can be useful later for course-specific Pokémon and items. Quiet Cave is a later target because its availability depends on substantial Watt progress and National Pokédex progress. Beyond the Sea and Night Sky’s Edge also have special unlock conditions, so confirm that they appear in the course list before planning around them. Do not assume a course is available simply because it is listed in a guide.
A practical course plan has one stated goal: send a backup Pokémon for catch-up experience, spend Watts on a known item search, or hunt a named course Pokémon. If the target is locked behind a step threshold or course requirement, return the Pokémon and work toward that requirement instead of wasting repeated Radar attempts.
- Use ordinary early courses for supplementary experience and common supplies.
- Use Yellow Forest only if it is already available on the save.
- Treat Quiet Cave, Beyond the Sea, and Night Sky’s Edge as conditional later courses.
- Confirm the course, step requirement, and target encounter before beginning a long stroll.
Integrate Pokéwalker rewards into the SoulSilver campaign
Send a Pokémon that needs modest catch-up experience while you are shopping, traveling, or preparing another party member. A backup Pokémon, replacement capture, or temporary HM user is safer than sending the centerpiece of an upcoming Gym strategy. Retrieve it before a Gym, rival battle, Elite Four attempt, or difficult cave so you can check its level and moves and restore the party you actually intend to use.
Use the Dowsing Machine when a course contains a supply you specifically want, and use the Poké Radar when the course offers a Pokémon unavailable on nearby Johto routes. Sort transferred Pokémon in the PC, check items in the Bag, and handle evolution or move-learning decisions on the SoulSilver cartridge. Pokéwalker experience and rewards are conveniences, not substitutes for ordinary battle training.
For a reliable routine, send one backup Pokémon, select a course with a stated purpose, walk until the trip produces useful experience or enough Watts for the intended search, and return from a Stroll before the next major objective. Record which course produced the result so later walks remain targeted. Leave the main story on the cartridge: Pokéwalker rewards do not bypass Gym Badge requirements, story checkpoints, HM access, or required legendary events.
- Use the device between major objectives rather than during an urgent battle sequence.
- Retrieve the Pokémon before changing its moves or evolving it.
- Spend Watts with the current course’s encounter and item tables in mind.
- Keep required progression and ordinary party preparation on SoulSilver.
Before you move on
- The SoulSilver save has reached the Pokéwalker connection point and has at least five open PC spaces.
- A Pokémon has been sent from the Nintendo DS SoulSilver save to a selected Pokéwalker course.
- At least one 10-Watt Poké Radar search or 3-Watt Dowsing Machine search has been completed.
- The walking Pokémon has been returned with Return from a Stroll, and the result has been checked in the PC Box or Bag.
- At least one course was selected for a defined purpose such as experience, a named item, or a course Pokémon.
- The Pokéwalker remains optional support while badges, story events, field moves, and ordinary party training are completed in SoulSilver.
References for this chapter
- Pokémon SoulSilver Version Instruction Booklet — Nintendo
- Pokéwalker Operations Manual — Nintendo
- How to Sync the Pokéwalker — Nintendo Support
- How to Reset the Pokéwalker — Nintendo Support
- Pokéwalker — Bulbapedia
- Pokémon HeartGold & SoulSilver — PokéWalker
- Pokémon HeartGold & SoulSilver — PokéWalker Courses
Postgame Cleanup — National Pokédex, Rare Spawns and Completing the Map
After entering the Hall of Fame, unlock the National Pokédex, finish SoulSilver’s ordinary encounters, arrange required trades and special transfers, and then work through the optional legendary encounters. The core campaign record remains all 16 Badges, the completed SoulSilver Lugia story event, the Hall of Fame, Professor Oak’s Rock Climb handoff, access to Mt. Silver and Red’s defeat. National Pokédex completion requires an entry-by-entry plan because some species require a HeartGold trade, trade evolution, Pokéwalker access, transfer from another game or an external event.
Unlock the National Pokédex and organize the trade list
After the Hall of Fame sequence, return to New Bark Town and speak with Professor Elm to receive the S.S. Ticket. Travel to Olivine City Harbor and enter the building where the S.S. Aqua is docked. Professor Oak upgrades the Pokédex to National Mode before you board for Vermilion City. You do not need to complete every Johto Pokédex entry first.
Separate SoulSilver’s ordinary version-exclusive families from other missing entries. SoulSilver contains Vulpix and Ninetales, Meowth and Persian, Ledyba and Ledian, Teddiursa and Ursaring, Delibird, Skarmory, Mawile, Gulpin and Swalot, plus the postgame Groudon encounter. HeartGold normally supplies Mankey, Growlithe, Spinarak, Gligar, Mantine, Phanpy, Sableye, Baltoy and Kyogre, among others, so those entries generally require a trade from HeartGold or another compatible source.
Do not classify Groudon as an ordinary wild encounter available immediately after the National Pokédex upgrade. In SoulSilver, it is unlocked later through the Red Orb sequence. Lunatone is also not simply a HeartGold-only trade target: it can be obtained through the Safari Zone after the necessary area-point setup. For each missing entry, record its real method: ordinary encounter, time-of-day encounter, fishing, Headbutt, swarm, Safari Zone, Pokéwalker, breeding, trade, trade evolution, transfer or event distribution.
- Enter the Hall of Fame.
- Receive the S.S. Ticket from Professor Elm.
- Have Professor Oak upgrade the Pokédex at Olivine Harbor.
- Separate SoulSilver encounters from HeartGold trade targets.
- Record every missing National Pokédex entry by acquisition method.
Finish local captures before the legendary sweep
Use the Pokédex area function, Pokégear radio programs, swarms, Headbutt trees, fishing, the Safari Zone and Pokéwalker courses to complete entries available on the cartridge. Check time-of-day and Safari Zone area-point requirements before deciding that a Pokémon is unavailable. Breeding helps produce earlier evolutionary stages when you already own the parent, but it does not replace a required trade, transfer or event.
Build a capture party around controlled damage and status. False Swipe is useful when available, while Sleep or paralysis improves capture odds. Carry Ultra Balls, Dusk Balls for caves and Timer Balls for long battles, together with healing items and status cures. Save before stationary legends, one-time gifts, fossils and event interactions.
Keep Mythical Pokémon in a separate event category. Celebi, Mew, Jirachi, Deoxys, Darkrai, Shaymin and Manaphy are not ordinary SoulSilver encounters. The Sinjoh Ruins Dialga, Palkia or Giratina gift also depends on the special Arceus event and should not be counted as a normal postgame capture.
- Stock Poké Balls and recovery items.
- Prepare a controlled-damage move and a status move.
- Save before one-time gifts and stationary legendary battles.
- Separate event-only and transfer-only Pokémon from ordinary captures.
Verify the required SoulSilver Lugia event
Before the first Johto League victory, confirm that the Goldenrod Radio Tower occupation was cleared, the real Director gave you the Silver Wing, and all five Kimono Girls were defeated in Ecruteak City. Their reward is the Tidal Bell.
Use Surf and Whirlpool to enter the northeast Whirl Island route. Follow the cave path to the summoning area, where the Kimono Girls perform the Tidal Bell sequence. Lugia then appears at level 45 in SoulSilver. The story encounter must be resolved for the stated campaign checklist, but capturing Lugia is optional if the objective is only story completion.
If you want to capture Lugia, save before approaching it. Use Sleep or paralysis, weaken it carefully, and bring recovery items and enough Poké Balls. Record the story encounter separately from the capture result.
- Obtain the Silver Wing from the completed Radio Tower storyline.
- Defeat the five Kimono Girls and receive the Tidal Bell.
- Reach the northeast Whirl Islands entrance with Surf and Whirlpool.
- Resolve the level 45 Lugia encounter before the first Elite Four victory.
- Record Lugia’s capture as optional.
Capture the Kanto stationary legends
Zapdos appears outside the restored Kanto Power Plant after the Machine Part crisis is resolved. Articuno is in the Seafoam Islands. After all 16 Badges and access to Mt. Silver, Moltres is found inside Mt. Silver. Once the Kanto Badge circuit is complete and Cerulean Cave is open, Mewtwo waits in its deepest area.
Save immediately before each battle. Apply Sleep or paralysis and use controlled damage rather than a high-power attack that could cause an accidental knockout. These are separate static encounters with individual access conditions, not one shared legendary unlock.
If a legendary is defeated or the battle ends without capture, check the game’s reset condition before abandoning the attempt. Reloading the save made immediately before the battle is the safest recovery method. Stationary encounters can also become available again after the relevant Elite Four reset conditions in this generation.
- Restore the Power Plant before searching for Zapdos.
- Visit Seafoam Islands for Articuno.
- Earn all 16 Badges before searching Mt. Silver for Moltres.
- Open Cerulean Cave before attempting Mewtwo.
- Save before every stationary legendary battle.
Trigger Groudon and the Rayquaza route
After unlocking the National Pokédex and defeating Red, visit Professor Oak in Pallet Town to receive a Kanto starter. Then return to Mr. Pokémon’s house on Route 30. In SoulSilver, Mr. Pokémon gives you the Red Orb after the required postgame conditions have been met.
Carry the Red Orb through Route 47 and Cliff Cave to the Embedded Tower. Groudon appears there at level 50. Save before interacting with it and bring a capture party prepared for a high-level Ground-type legendary.
Rayquaza requires both qualifying Embedded Tower Pokémon. Trade for Kyogre caught at the Embedded Tower in HeartGold rather than relying on an ordinary Kyogre from another location. Show Professor Oak the Embedded Tower Groudon and Embedded Tower Kyogre; he then gives you the Jade Orb. Return the Jade Orb to the Embedded Tower to activate the level 50 Rayquaza encounter.
If Groudon, Kyogre or Rayquaza is defeated or fled from, enter the Hall of Fame again before checking whether the encounter has returned.
- Defeat Red and obtain a Kanto starter from Professor Oak.
- Visit Mr. Pokémon and receive SoulSilver’s Red Orb.
- Capture or deliberately preserve the Embedded Tower Groudon encounter.
- Trade for an Embedded Tower Kyogre from HeartGold if Rayquaza is desired.
- Show both qualifying Pokémon to Professor Oak and obtain the Jade Orb.
Handle Raikou, Entei, Latios and Suicune
Raikou and Entei are released during the Burned Tower storyline and roam Johto at level 40. Use the Pokégear map to track them, changing routes to update their locations. Repels can reduce unwanted encounters when the lead Pokémon is near the roamers’ level. A fast Pokémon with a trapping or sleep strategy helps, but these Pokémon normally flee immediately, so plan for repeated attempts.
In SoulSilver, Latios becomes the roaming Hoenn legend after the required Kanto progression. First restore the Kanto Power Plant. Then go to Copycat’s house in Saffron City and speak with her to confirm that her Poké Doll is missing. Travel to the Vermilion City Pokémon Fan Club and speak with the man holding the Clefairy Poké Doll; he gives you the Lost Item. Exit the Fan Club. Steven Stone approaches outside and announces that Latios is roaming Kanto. After Steven’s announcement, return to Copycat in Saffron City and give her the Lost Item to receive the Magnet Train Pass. Do not try to activate the event by speaking with Steven inside the Fan Club.
Suicune follows its fixed SoulSilver sequence: Burned Tower, Cianwood City, Route 42, Vermilion City and Route 14. After the Power Plant has been repaired, Misty has returned to the Cerulean Gym and Misty has been defeated, Suicune becomes battleable at Route 25. Save before that level 40 encounter. Suicune is optional and is not required for the Lugia or Bell Tower sequence.
- Carry Repels and status support for Raikou, Entei and Latios.
- Restore the Kanto Power Plant.
- Speak with Copycat in Saffron City and confirm that her Poké Doll is missing.
- Obtain the Lost Item from the man in the Vermilion Pokémon Fan Club.
- Exit the Fan Club and let Steven Stone announce that Latios is roaming.
- Return the Lost Item to Copycat and receive the Magnet Train Pass.
- Follow Suicune’s fixed locations in order and save before Route 25.
Record completion without inventing a second Kanto League
The core campaign record should show all eight Johto Badges, the completed Radio Tower storyline, the five Kimono Girls, the Tidal Bell, the resolved pre-League Lugia story encounter, the Johto Elite Four and Champion victory, all eight Kanto Badges, Professor Oak’s HM08 Rock Climb handoff, Mt. Silver access and Red’s defeat.
There is no separate Kanto Elite Four or Kanto Champion sequence. After all 16 Badges, the Indigo Plateau offers an optional upgraded Elite Four and Champion rematch. Track that rematch separately; it is not required to reach Mt. Silver or battle Red.
For National Pokédex cleanup, label every remaining entry as SoulSilver-obtainable, special-system obtainable, HeartGold or compatible-game trade, trade evolution, transfer-required or event-only. Pokéwalker Pokémon and item rewards are optional supplements and do not replace trades, trade evolutions or events.
Retrieve Pokéwalker Pokémon and items through the connection menu, confirming that each transfer has finished before beginning another transfer or erasing stored course data. The Battle Frontier, Pokéathlon records, Shiny Leaves, rematches, living-Dex organization and optional legendary captures can be tracked as separate goals.
- The Trainer Card displays all 16 Badges.
- The Kimono Girl sequence and SoulSilver Lugia story event were resolved before the first Elite Four victory.
- The Johto Elite Four and Champion have been defeated.
- The National Pokédex was unlocked at Olivine Harbor after the Hall of Fame.
- All eight Kanto Gyms have been defeated.
- Professor Oak supplied HM08 Rock Climb.
- Red has been defeated at Mt. Silver.
- Groudon, Articuno, Zapdos, Moltres, Mewtwo, Suicune, Raikou, Entei and Latios are captured or assigned documented later attempts.
- Rayquaza’s route is enabled with qualifying Embedded Tower Groudon, qualifying Embedded Tower Kyogre from HeartGold and the Jade Orb.
- Every remaining National Pokédex entry has a documented acquisition category.
- Pokéwalker Pokémon and item rewards have been retrieved successfully.
Before you move on
- All 16 Gym Badges are displayed on the Trainer Card.
- The five Kimono Girls were defeated, the Tidal Bell was received and the SoulSilver Lugia story encounter was resolved before the first Elite Four victory.
- The Johto Elite Four and Champion have been defeated and a Hall of Fame record exists.
- The National Pokédex was unlocked through the post-Hall-of-Fame Olivine Harbor sequence.
- All eight Kanto Gyms have been defeated.
- Professor Oak supplied HM08 Rock Climb after the 16-Badge requirement.
- Red has been defeated at Mt. Silver.
- SoulSilver’s major postgame legends are captured or assigned documented later attempts: Groudon, Articuno, Zapdos, Moltres, Mewtwo, Suicune, Raikou, Entei and Latios.
- The Latios record confirms the correct order: Copycat’s missing Poké Doll, the Fan Club Lost Item, Steven’s announcement after leaving the Fan Club, then the return to Copycat for the Magnet Train Pass.
- A desired Rayquaza attempt is enabled with qualifying Embedded Tower Groudon, qualifying Embedded Tower Kyogre from HeartGold and the Jade Orb.
- Every remaining National Pokédex entry is labeled as SoulSilver-obtainable, special-system obtainable, trade-required, trade-evolution, transfer-required or event-only.
- Pokéwalker Pokémon and item rewards have been retrieved successfully.
Finishing up
Core campaign completion: all eight Johto Badges, the required SoulSilver Kimono Girl and Whirl Islands Lugia story event resolved, the first Indigo Plateau Elite Four and Champion victory, all eight Kanto Gym Badges, Professor Oak's HM08 Rock Climb and Mt. Silver access, and Red defeated at the summit.
Optional postgame completion: capturing Lugia after the required encounter, Suicune and other legendary captures, the upgraded Indigo Plateau rematch after obtaining all 16 Badges, National Pokédex and trade planning, and Pokéwalker rewards. These are not prerequisites for the core campaign.
After Red is defeated, verify the Legend Ribbon on every Pokémon that was in the party when Red was defeated, including party members that did not participate directly; check those Pokémon separately from the campaign victory.
Choose your next gameScreenshots & video
Game imagery for reference. Follow the written chapters above for the route and strategies.
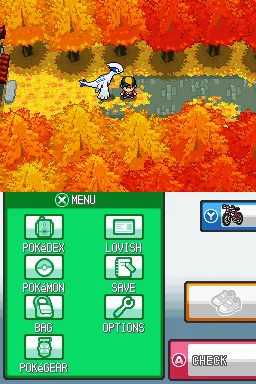
Sources & references
Our original guide draws on the references below. Check the edition at the top of this page before following controls or unlock requirements.
- Walkthrough: Pokémon HeartGold and SoulSilver, Part 3 — Bulbapedia
- Johto Route 29 — Bulbapedia
- Johto Route 31 — Bulbapedia
- Violet Gym — Bulbapedia
- Hidden Machines in HeartGold and SoulSilver — Pokémon Database
- How to Sync the Pokéwalker — Nintendo Support
- Walkthrough: Pokémon HeartGold and SoulSilver — Part 5
- Walkthrough: Pokémon HeartGold and SoulSilver
- Falkner — Bulbapedia
- Bugsy’s Scyther — Bulbapedia
- Ilex Forest — Bulbapedia
- Johto Route 36 — Bulbapedia
- Pokémon Heart Gold & Soul Silver — The Bug Catching Contest
- Pokémon Heart Gold & Soul Silver — Gym Leaders
- Pokémon Heart Gold & Soul Silver — TMs & HMs — Serebii.net
- Walkthrough: Pokémon HeartGold and SoulSilver/Part 7 — Bulbapedia
- Pokémon HeartGold and SoulSilver Walkthrough: Section 14
- Tidal Bell - Bulbapedia
- Pokémon HeartGold and SoulSilver Versions - Bulbapedia
- Pokémon SoulSilver Version - Guide and Walkthrough - GameFAQs
- The Kimono Girls and the Legendary - Thonky
- Walkthrough: Pokémon HeartGold and SoulSilver, Part 12
- Goldenrod Radio Tower — Bulbapedia
- Team Rocket in HeartGold and SoulSilver — Serebii.net
- Pokéarth — Johto — Radio Tower — Serebii
- Pokémon SoulSilver Version Instruction Booklet — Nintendo
- Walkthrough: Pokémon HeartGold and SoulSilver, Part 13
- Cianwood Gym
- Dragon’s Den
- Radio Director
- Walkthrough: Pokémon HeartGold and SoulSilver — Whirl Islands and Lugia
- Capturing HGSS Legendaries — Smogon University
- Pokémon Heart Gold & SoulSilver — Legendary Pokémon
- Pokémon SoulSilver Version — Guide and Walkthrough
- Suicune — Bulbapedia
- Kanto Route 25 — Bulbapedia
- Pokémon HeartGold and SoulSilver Walkthrough, Part 30 — Bulbapedia
- Walkthrough: Pokémon HeartGold and SoulSilver — Part 20
- Pokémon Heart Gold & Soul Silver - Elite Four
- Pokémon HeartGold and SoulSilver/Route 27 — StrategyWiki
- Walkthrough: Pokémon HeartGold and SoulSilver/Part 17
- Walkthrough: Pokémon HeartGold and SoulSilver/Part 19
- S.S. Ticket
- Magnet Train
- Walkthrough: Pokémon HeartGold and SoulSilver, Part 28
- Walkthrough: Pokémon HeartGold and SoulSilver, Part 27
- Pokémon HeartGold and SoulSilver Versions — Bulbapedia overview and progression
- Indigo Plateau/Generation IV — Bulbapedia
- Bruno — Bulbapedia
- Pokémon HeartGold and SoulSilver Elite Four/Champion Rematches — PsyPokes
- Heart Gold and Soul Silver Trainers — PokéBeach
- Pokémon HeartGold and SoulSilver Versions — Bulbapedia
- Pokémon Heart Gold & Soul Silver — Pokémon Trainer Red
- Mt. Silver Cave
- Pokémon HeartGold and SoulSilver/Mt. Silver — StrategyWiki
- Pokemon SoulSilver Version Guide and Walkthrough — GameFAQs
- Red (game)
- Pokémon HeartGold and SoulSilver Walkthrough, Part 29
- Pokémon HeartGold/SoulSilver Ribbons
- Pokéwalker Operations Manual — Nintendo
- How to Reset the Pokéwalker — Nintendo Support
- Pokéwalker — Bulbapedia
- Pokémon HeartGold & SoulSilver — PokéWalker
- Pokémon HeartGold & SoulSilver — PokéWalker Courses
- Pokémon Heart Gold & Soul Silver — Version Exclusives
- Red Orb (Generation IV)
- Embedded Tower
- Lunatone
- Cerulean Cave
- Pokéwalker Operations Manual — Nintendo
About the game & collecting notes
- Platform
- Nintendo DS
Step-by-step campaign walkthrough for Pokémon SoulSilver Version on Nintendo DS in North America. Covers the Johto story from New Bark Town through all eight Johto Gyms, the required Kimono Girl and SoulSilver Whirl Islands Lugia story event, the Indigo Plateau Elite Four and Champion, the Kanto Gym campaign, the optional upgraded Indigo Plateau rematch available after obtaining all 16 Badges, and the postgame Mt. Silver battle with Red. Optional sections cover capturing Lugia after resolving the required event, Suicune, other legendary encounters, Pokéwalker use, and National Pokédex planning.
Darryl Polo
Darryl Polo loves tinkering with emulation and revisiting retro games. He enjoys exploring how old favorites play on different setups and sharing what he learns along the way. At Joking Joystick, he writes about the games, hardware, and small discoveries that keep the hobby fun.
Our editorial standardsFound a step that needs another look? Help us improve this guide.