
Pokémon Platinum Version (Nintendo DS, North American original) — Complete Campaign Walkthrough
After the Hall of Fame, reach the Fight Area and open the Battle Frontier, complete Turnback Cave and the Griseous Orb branch, obtain the National Pokédex, collect the Adamant and Lustrous Orbs, complete the Stark Mountain storyline and the required Buck follow-up conversations for the Heatran branch, finish the Celestic Town grandmother and rear-painting sequence, and return to Spear Pillar for separate Dialga and Palkia encounters. The Dialga/Palkia route requires the National Pokédex, the matching orb, the postgame Cynthia’s-grandmother conversation, and the completed rear-painting scene; Stark Mountain and Buck’s conversations remain separate Heatran objectives and are not portal prerequisites.

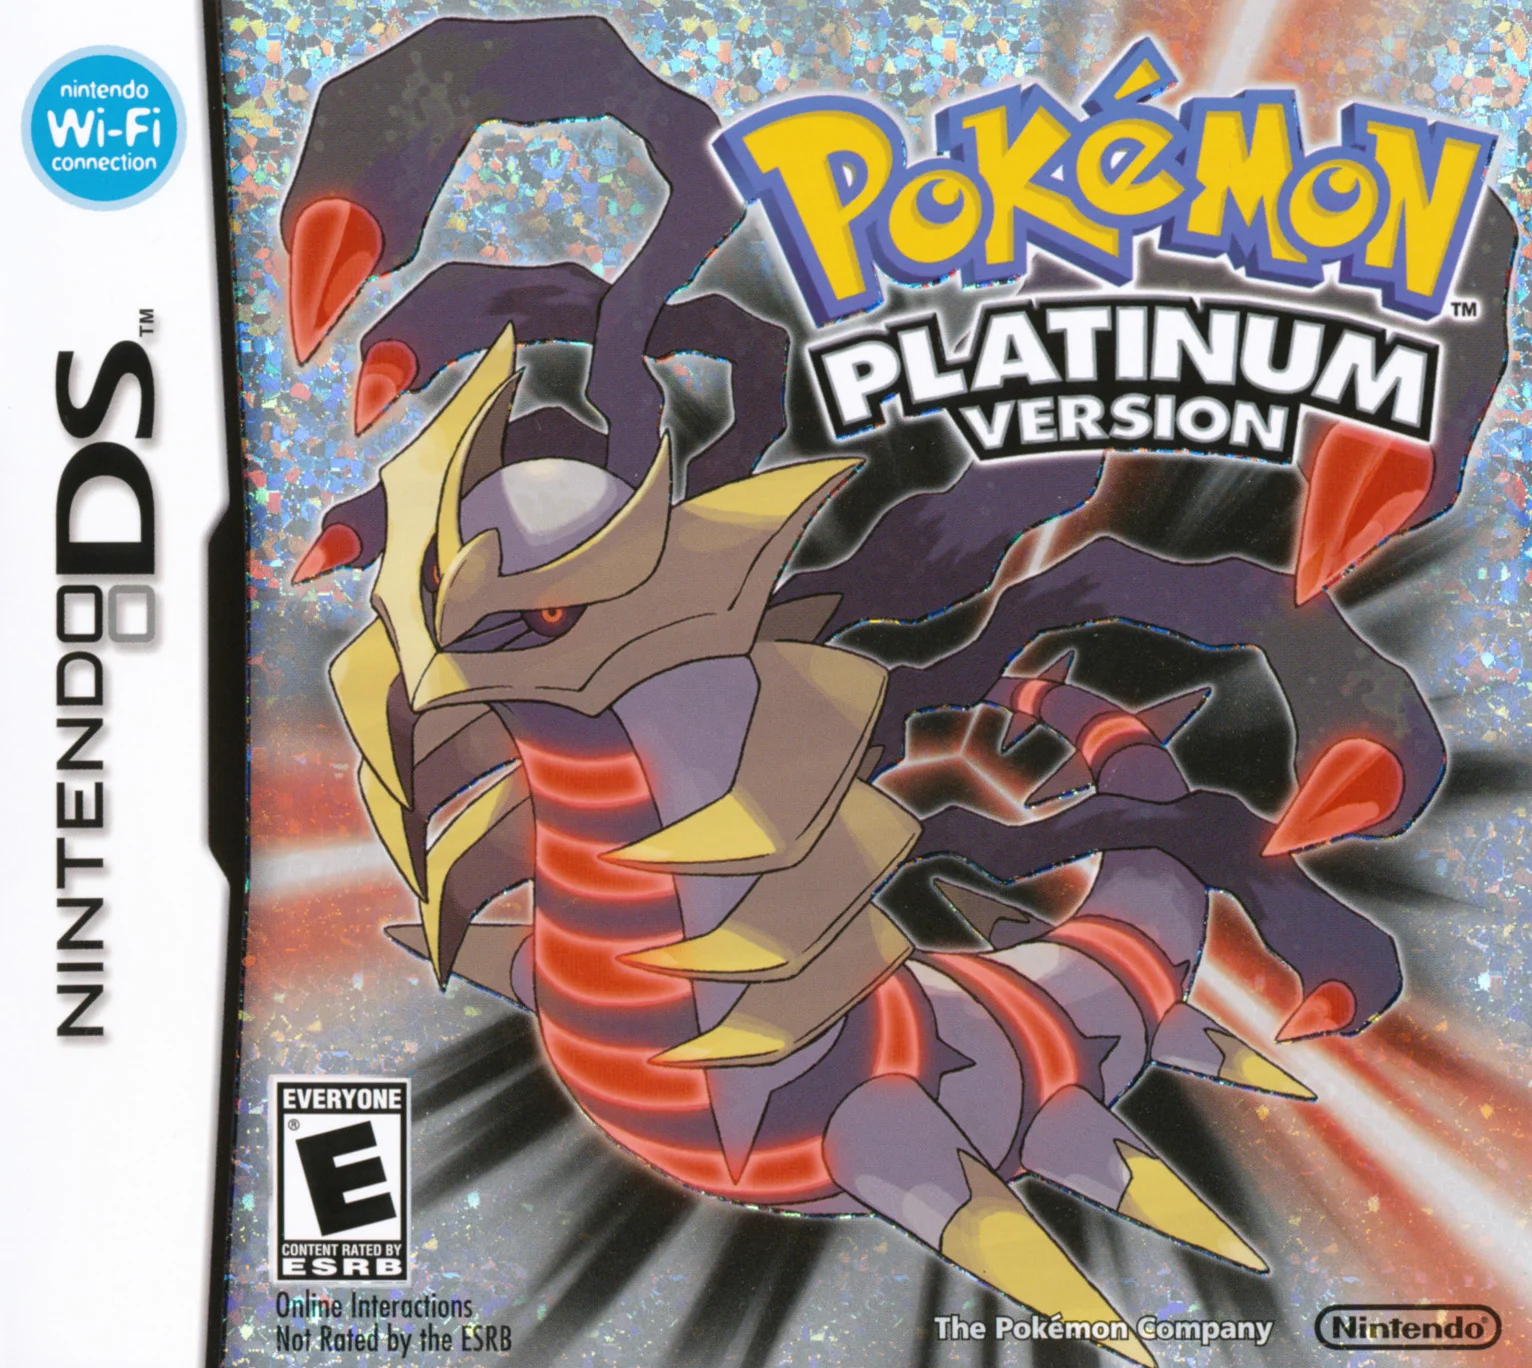
Find a copy
Pokémon Platinum Version Nintendo DS
We may earn a commission if you buy through these links, at no extra cost to you. As an Amazon Associate I earn from qualifying purchases.
Opens retailer search results. Check the model, edition, seller, availability and current price before buying.
Before you begin
This walkthrough is written for the original Nintendo DS retail edition of Pokémon Platinum Version (North America).
Follow each chapter in order to progress through the main story without missing required events: starter selection, badge progression, the Mount Coronet / Spear Pillar arc and the Distortion World, then the Pokémon League and immediate postgame access.
Use the Preparation checklist below before you begin each major sequence.
I assume you are playing a standard cartridge copy on original DS/DS Lite/DSi hardware or an equivalent environment.
The guide focuses on required progression and practical steps: where to go, which NPCs or obstacles gate progress, gym objectives, threats and recovery options, and how to reach postgame content such as the Battle Frontier and post‑game legendary encounters.
Optional catches, breeding, or competitive team builds are treated in later chapters.
Set yourself up for the run
Make a backup save point before every major story battle (Gyms, Distortion World, Spear Pillar).
Keep separate save files if possible so you can revert to retry catches or story outcomes.
Carry ample Poké Balls (Great/Ultra Balls), plenty of healing items (Hyper Potions/Full Restores) and status healers (Full Heals/Antidotes).
The Distortion World and postgame legendary fights can be long; stock on repels for long cave navigation.
Build a balanced core that covers Rock, Grass, Water, Ghost, Fighting, Steel and Electric.
Recommended early specialists: a Rock/Steel counter (Water), a strong physical attacker for Gym puzzles and HMs, and one reliable status inflictor (Sleep/Paralyze) for captures.
Keep HMs on trusted Pokémon before critical sequences (Surf, Strength, Rock Climb, Fly).
Avoid leaving required HMs only on expendable team members late in the story.
If you plan to use multiplayer features or trades, finish any necessary trades before the League: Platinum can trade with Diamond/Pearl and some Generation III transfers via backward-compatible methods; however the main campaign does not require external trades.
Recharge/replace your DS battery and ensure the cartridge contacts are clean.
Major story sequences require uninterrupted play (Distortion World, long cave navigation to Turnback Cave).
If you intend to capture Giratina in the Distortion World, bring Pokémon with moves to induce Sleep/Paralysis, False Swipe or other 1-HP reducing strategies, and at least one Pokémon with Mean Look/Block-style effects or trapping moves to avoid escape behaviors where applicable.
Start Here: Sandgem Town, Professor Rowan and your Starter
The opening of Pokémon Platinum begins in Twinleaf Town, but the starter is chosen on Route 201 before the first rival battle. After the battle, return home for the Running Shoes, then travel with Barry to Lake Verity. Only after that visit do you reach Sandgem Town, receive the Pokédex, buy Poké Balls, return home for the Journal and Parcel, and proceed through Route 202 to Jubilife City.
Leave Twinleaf Town and meet Professor Rowan
Begin in your room in Twinleaf Town. After the opening television scene, Barry comes to your house and tells you to meet him outside. Go downstairs and speak with your mother, then leave the house. Walk to the house in the northwest part of Twinleaf Town. Barry bumps into you at the entrance, runs back inside to retrieve something, and then tells you to meet him on Route 201.
Exit Twinleaf Town through the northern path. Barry is waiting on Route 201, where he suggests that you and he travel to Sandgem Town to obtain Pokémon from Professor Rowan. When the two of you approach the tall grass, Professor Rowan stops you. Rowan and his assistant explain that entering the grass without Pokémon is dangerous, then present the briefcase containing the three starter choices.
This is the correct point to make a manual save if you want a clean retry before the opening rival battle. You can save before selecting the starter, allowing you to reconsider the choice or retry the battle without repeating the entire introduction.
- Speak with your mother and leave Twinleaf Town.
- Enter Route 201 from the north side of town.
- Meet Barry and Professor Rowan near the tall grass.
- Save before choosing a starter if you want an easy retry point.
Choose Turtwig, Chimchar, or Piplup
Choose one level 5 starter from Rowan’s briefcase: Turtwig, Chimchar, or Piplup. The choice is permanent for the save file. Barry immediately chooses the starter with a type advantage over yours, so the first battle is designed to be close rather than effortless.
Turtwig is a Grass-type with strong early durability and later becomes Grass/Ground as Torterra. It is useful against Water-, Rock-, and Ground-type opponents, but its lower Speed can make the first rival battle less comfortable. Chimchar begins as Fire and later becomes Fire/Fighting, giving it valuable coverage for several Sinnoh Gyms and the Pokémon League. Piplup begins as Water and eventually becomes Water/Steel, giving it many useful resistances and a reliable answer to Rock- and Ground-type Pokémon.
All three starters can complete the game. Choose based on the team you want to build rather than assuming one is required. If you want the easiest access to early Fire coverage, Chimchar is the most direct choice. If you prefer a sturdy Water attacker, choose Piplup. If you want a defensive Grass starter with Ground coverage later, choose Turtwig.
- Choose one level 5 starter from Rowan’s briefcase.
- Remember that Barry chooses the starter with a type advantage.
- Choose according to your intended team; no starter is mandatory for completion.
Defeat or survive the first rival battle
Immediately after the starter choice, Barry challenges you on Route 201. His Pokémon is level 5 and knows only its opening moves. Use your starter’s damaging move as the main plan. If your starter has Growl, Leer, or Withdraw, one use can reduce incoming damage, but avoid spending several turns on setup while your HP is dropping.
Winning gives the starter experience and a small amount of money, but the story continues even if you lose. A defeat is not a permanent failure: the game returns you to the opening home sequence and you can try again. If you saved before choosing the starter, reload that save when you want to change your approach.
After the battle, the game returns you automatically to your house in Twinleaf Town. Speak with your mother to receive the Running Shoes. Hold the B Button while moving to run. Running is useful for crossing routes quickly, but it does not prevent wild encounters in tall grass and can make encounters more likely while moving through grass.
- Use the starter’s damaging move as your primary attack.
- Use one defensive stat move only if the battle is going poorly.
- If you lose, restart from the automatic return to Twinleaf or reload your manual save.
- Receive the Running Shoes from your mother after the battle.
Travel with Barry to Lake Verity
Return to Route 201 after receiving the Running Shoes. Barry meets you again and asks you to travel west to Lake Verity before continuing to Sandgem Town. Follow Route 201 west, then take the northern path into the lake area. You still do not have Poké Balls, so there is no reason to enter the tall grass for a capture attempt yet.
At Lake Verity, you see Cyrus, the leader of Team Galactic, speaking about the legendary Pokémon associated with the lake. After Cyrus leaves, the legendary Pokémon cries out. Barry realizes that neither of you has a Poké Ball, so the encounter cannot become a capture. Barry then remembers that Professor Rowan told you to seek him out if you needed help and leaves for Sandgem Town.
There are no required battles at this first Lake Verity visit. Leave the lake and follow Route 201 east toward Sandgem Town. Your starter may have taken damage during the rival battle, so avoid unnecessary wild encounters on the return trip.
- Return to Route 201 after receiving the Running Shoes.
- Follow Barry west to Lake Verity.
- Watch the Cyrus and legendary Pokémon scene.
- Leave Lake Verity and follow Route 201 toward Sandgem Town.
Reach Sandgem Town and receive the Pokédex
As you approach Sandgem Town from Route 201, speak with the Poké Mart employee near the entrance to receive a free Potion. Continue into town. Lucas or Dawn is waiting outside Professor Rowan’s laboratory and escorts you inside. Barry rushes out of the laboratory before you enter, then you speak with Rowan.
Professor Rowan examines the starter and allows you to keep it. He gives you the Pokédex and asks you to travel through Sinnoh while recording information about the Pokémon you encounter. When you leave the laboratory, Rowan gives you TM27, Return, in Platinum.
Lucas or Dawn then shows you the Pokémon Center and Poké Mart. Heal your party at the Pokémon Center before doing anything else. Speak with the Poké Mart cashier to buy Poké Balls. Buy enough for several captures, and spend the remaining money on Potions. Antidotes are also useful because early wild Pokémon and trainers can inflict Poison.
You may optionally visit Route 219 south of Sandgem to collect the Antidote there. You may also inspect Verity Lakefront on the way back toward Twinleaf; it contains a hidden TinyMushroom, but this is not required for progress.
- Collect the free Potion from the employee on Route 201.
- Receive the Pokédex from Professor Rowan.
- Collect TM27, Return, outside the laboratory.
- Heal at Sandgem’s Pokémon Center.
- Buy Poké Balls and a few Potions.
- Treat Route 219 and Verity Lakefront items as optional.
Return to Twinleaf Town for the Journal and Parcel
After the Sandgem tour, leave town through the western exit and use the ledges on Route 201 to return to Twinleaf Town. Enter your house and speak with your mother. She agrees that you should begin your journey and gives you the Journal, which records major story events.
Barry’s mother then arrives looking for him. She gives you a Parcel and asks you to deliver it to Barry, who is expected to be in Jubilife City. Take the Parcel before leaving. This visit is required for the next progression trigger; do not go directly to Route 202 without it.
Return east through Route 201 to Sandgem Town. Heal again if necessary. You now have access to wild Pokémon captures, so use the grass on Route 201 or the Verity Lakefront area to add a partner before entering Route 202.
- Receive the Journal from your mother.
- Receive the Parcel from Barry’s mother.
- Return to Sandgem Town after collecting both items.
- Heal before starting Route 202.
Build an early party and reserve a field-move Pokémon
With Poké Balls available, useful early captures include Starly and Bidoof on Route 201 and Verity Lakefront. Route 202 also offers Starly, Bidoof, Shinx, and Kricketot in Platinum. Starly develops into a strong early Flying-type attacker, Shinx provides Electric coverage for future Water- and Flying-type opponents, and Bidoof is a practical utility choice even if it does not remain in your main battle party.
Keep at least one Bidoof available if you want convenient field-move management later. Bidoof and its evolution Bibarel can learn several Hidden Machines, reducing the need to place every field move on your primary battlers. You do not need to teach any HM during this chapter, and you should not sacrifice a useful battle move merely to prepare for a field move that is still several areas away.
Train new captures safely by switching them into battles against low-level wild Pokémon or weak route trainers. Return to Sandgem’s Pokémon Center whenever the party is badly injured. A balanced early party is safer than relying on a single starter with reduced HP.
- Catch at least one partner after buying Poké Balls.
- Consider Starly, Shinx, or Bidoof for early team utility.
- Keep a Bidoof available if you want a future field-move carrier.
- Do not teach HMs yet or remove important battle moves prematurely.
Complete Route 202 and the catching demonstration
Leave Sandgem through the northern exit to enter Route 202. Lucas or Dawn blocks the path near the first grass until you have received the Parcel. Once the Parcel is in your bag, the assistant demonstrates how to catch a Pokémon. After the demonstration, you receive five Poké Balls and can continue north.
The route contains the first regular trainer battles. Youngster Tristan uses a level 5 Starly, Lass Natalie uses a level 5 Bidoof, and Youngster Logan uses a level 5 Burmy in Platinum. Fight these trainers if your team needs experience, but return to Sandgem when your party is low rather than risking a defeat. The Potion is in the grass near the northern end of the route.
Route 202 has a simple path. Follow it north, then west and around the bends until the route turns north again. Continue past the trainers and take the northern exit to Jubilife City. If you want another early capture, search the grass along the route before leaving. The route’s available encounters include Starly, Bidoof, Shinx, and Kricketot, with availability and levels varying by species.
- Receive the Parcel before attempting the catching demonstration.
- Complete the demonstration and receive five Poké Balls.
- Catch another Pokémon on Route 202 if your party needs a new member.
- Collect the Potion in the grass near the route’s northern end.
- Battle the route trainers for experience or bypass them if you need to conserve HP.
- Reach Jubilife City through the northern exit.
Use Repels at the appropriate time
Repels suppress wild encounters from Pokémon at or below the level of the Pokémon leading your party. They are useful when crossing areas you have already searched or when you need to preserve HP and move PP for trainers. They are not necessary during this opening chapter because the routes are short and the available wild Pokémon provide useful early experience.
In Platinum, the Sandgem Poké Mart does not sell Repels until after you earn the Coal Badge. Do not waste time searching the opening shop for a purchasable supply. You can proceed through Route 202 normally, fight selected wild Pokémon, and heal in Sandgem whenever needed. Individual Repel items become available through exploration later, but they are not required to reach Jubilife City.
Before leaving Route 202, check that your starter and at least one partner have usable HP, that you have several Poké Balls, and that the Parcel has been delivered to the progression sequence by triggering the catching tutorial. Jubilife City is the next safe hub and the starting point for the road toward Oreburgh City.
- Do not plan on buying Repels in Sandgem before the Coal Badge.
- Use wild encounters for controlled early experience instead of forcing a long grind.
- Confirm that you have Poké Balls, healing items, and a healthy party.
- Enter Jubilife City through Route 202’s northern exit.
Before you move on
- You chose Turtwig, Chimchar, or Piplup from Professor Rowan’s briefcase on Route 201.
- You completed the first rival battle and received the Running Shoes from your mother.
- You traveled with Barry to Lake Verity and completed the Cyrus and legendary Pokémon scene.
- Professor Rowan gave you the Pokédex in Sandgem Town.
- You received TM27, Return, after leaving Rowan’s laboratory.
- You collected the free Potion on Route 201 and healed at Sandgem’s Pokémon Center.
- You bought Poké Balls and basic healing items.
- Your mother gave you the Journal, and Barry’s mother gave you the Parcel.
- You completed the Route 202 catching demonstration and received five Poké Balls.
- You collected the Route 202 Potion or deliberately left it as an optional item.
- You reached Jubilife City with a healthy starter, at least one captured Pokémon, and a future field-move candidate available if desired.
Oreburgh Mine and Oreburgh City — Roark (Gym 1)
Cross Oreburgh Gate from Route 203, visit Oreburgh Mine to bring Roark back to his Gym, then defeat him for the Coal Badge. This chapter covers the safest early counters, optional catches, mine items, Gym shortcuts, and the next route after the badge.
Cross Oreburgh Gate and enter Oreburgh City
From Jubilife City, follow Route 203 east toward Oreburgh City. Enter Oreburgh Gate, the short cave connecting the route to the city. A hiker near the entrance gives you HM06 Rock Smash. You cannot use Rock Smash outside battle until you earn the Coal Badge, so do not worry about breaking rocks in the gate yet.
Continue east through Oreburgh Gate and follow the path into Oreburgh City. When you approach the Gym, your Rival is outside and explains that Roark is currently working in Oreburgh Mine. The Gym cannot be completed until you find Roark in the mine and speak with him.
Heal at the Oreburgh City Pokémon Center before entering the mine. You can also visit the Poké Mart to buy Potions and Poké Balls. Save your game before beginning the mine visit if you want a clear retry point for the upcoming Gym battle.
- Receive HM06 Rock Smash from the hiker in Oreburgh Gate.
- Heal at the Oreburgh City Pokémon Center.
- Buy a few Potions and Poké Balls if your supplies are low.
- Save before entering Oreburgh Mine.
Find Roark in Oreburgh Mine
Oreburgh Mine is directly south of Oreburgh City. Enter the mine and follow the main walkway downward. Go down the first staircase, move right to collect the visible Poké Ball, then continue south. At the fork, turn left to reach the Escape Rope, then continue through the work area toward the miners.
Some mine workers can be avoided, but battling them is useful if your team needs experience before the Gym. The first notable worker uses Geodude and Machop. After passing him, look for the worker in the red helmet: this is Roark. Speak to him to trigger his Rock Smash demonstration. He then leaves the mine and returns to the Gym.
You do not need to clear every branch of Oreburgh Mine or use Rock Smash to reach Roark. After the scene, pick up the Potion near the mine’s exit route and return to Oreburgh City. Wild Geodude, Zubat, and Onix are available in the mine. Geodude is a practical early addition because its Rock/Ground typing gives it useful physical durability. Zubat is fragile at first but can become Crobat through high friendship. Onix is defensive but may deal less damage than other early options.
- Speak to Roark in the mine’s lower work area.
- Collect the Poké Ball, Escape Rope, and nearby Potion if you pass them.
- Consider catching Geodude, Zubat, or Onix if your current team lacks a useful switch-in.
- Return to Oreburgh City after Roark leaves.
Choose practical early counters
Heal before challenging the Gym. Roark’s Pokémon are Rock-type. His Platinum team consists of Geodude at level 12, Onix at level 12, and Cranidos at level 14. Geodude and Onix are Rock/Ground types, while Cranidos is pure Rock-type. Cranidos is the main danger because its physical Attack is high for this point in the game.
Water- and Grass-type attacks are the most direct answers. Piplup can use Water Gun effectively, and Turtwig’s Grass attacks can handle the entire Gym if it is trained appropriately. Chimchar has a harder matchup before evolving, but Monferno gains Fighting-type access and can use Mach Punch after evolution. If you chose Chimchar and do not want to wait for evolution, catch a suitable Water- or Grass-capable Pokémon instead.
A Fighting-type move is also excellent against Roark’s team. Machop is available on Route 207, north of Oreburgh City, and can provide strong early physical damage. Ponyta is available there as well, although it is not a direct answer to this Gym unless it has useful neutral damage. Geodude from Oreburgh Mine is another reasonable choice if you need a sturdy physical attacker.
Avoid relying on Normal- or Flying-type attacks. Rock-type Pokémon resist Flying attacks, and Normal attacks do not exploit Roark’s weaknesses. Carry several Potions, but do not use rare items such as the Master Ball for any early-game purpose; there is no reason to spend it in this chapter.
- Bring at least one Water, Grass, or Fighting attack.
- Train the Pokémon carrying your main counter near Roark’s level range.
- Keep a backup Pokémon available in case Cranidos defeats your lead.
- Carry Potions and save before entering the Gym battle.
Work through Oreburgh Gym and defeat Roark
Enter Oreburgh Gym after speaking with Roark in the mine. The Gym contains two trainers and a short raised-platform route. You can walk around the trainers by using the side path, but fighting them gives useful experience and money. Battle them if your team is close to Roark’s level range; bypass them if you are already prepared and want to preserve health and move PP.
Lead with your Water- or Grass-type attacker against Geodude. If your first attack does not defeat it, continue using the same super-effective coverage unless a critical hit or unexpected damage leaves your Pokémon in danger. Onix is also weak to Water, Grass, and Fighting attacks because of its Rock/Ground typing.
Keep your strongest healthy counter available for Cranidos. Cranidos is not Ground-type, but it has high physical Attack and can punish a weakened Pokémon. Use your strongest super-effective move immediately. If your counter is close to being knocked out, switch to a Pokémon that can survive a physical hit or use a Potion rather than attempting a risky final attack.
Roark may use a Potion during the fight, so do not assume the battle is over when one of his Pokémon reaches low HP. Continue applying super-effective damage and heal whenever a knockout would otherwise occur.
- Defeat Geodude with Water, Grass, or Fighting coverage.
- Use the same coverage against Onix while preserving your best counter.
- Keep your healthiest attacker ready for Cranidos.
- Use Potions during the battle when necessary rather than risking an avoidable knockout.
- Defeat Roark to earn the Coal Badge.
Collect the badge rewards and restock
After defeating Roark, you receive the Coal Badge and TM76 Stealth Rock. The Coal Badge allows you to use Rock Smash outside battle. HM06 came from the Oreburgh Gate hiker; Roark does not give you that HM after the battle.
Stealth Rock is optional for the main story. It can support a tactical or competitive moveset, but it is not required for the next routes. Do not teach it immediately unless you already have a clear plan for the Pokémon using it.
Return to the Pokémon Center and heal. Visit the Poké Mart to replenish Potions and Poké Balls. Optional Oreburgh activities include checking the houses for item gifts and dialogue, showing a Geodude to the local resident who requests one, and visiting Route 207 for possible Machop, Ponyta, or additional Geodude encounters. These catches are optional and are not required to advance the story.
Keep Rock Smash available for later route obstacles. You may teach it to a temporary utility Pokémon, but do not place it permanently on a core team member unless you are comfortable giving up one of that Pokémon’s move slots.
When you are ready to continue, return west through Oreburgh Gate to Jubilife City. From there, travel north on Route 204, pass through Ravaged Path, and continue toward Floaroma Town. The next major story objectives involve Team Galactic and the route toward Eterna City.
- Receive the Coal Badge and TM76 Stealth Rock.
- Confirm that Rock Smash can now be used outside battle.
- Heal and restock in Oreburgh City.
- Decide whether to add Geodude, Zubat, Onix, Machop, or Ponyta to the team.
- Return toward Jubilife City, then continue north through Route 204 and Ravaged Path.
Before you move on
- Roark has been defeated and the Coal Badge is displayed on the Trainer Card.
- HM06 Rock Smash can be used outside battle.
- TM76 Stealth Rock is in the Bag.
- The party has been healed and the supply of Potions and Poké Balls has been restored.
- The team has at least one reliable Water-, Grass-, or Fighting-type attack for future route battles.
- The player is ready to return through Oreburgh Gate toward Jubilife City and continue through Route 204 and Ravaged Path.
Eterna City and Eterna Forest — Gardenia (Gym 2) and story setup
Complete the required Floaroma Meadow and Valley Windworks operation before crossing Route 205 with Cheryl. In Eterna City, finish the Cyrus statue scene, receive HM01 Cut from Cynthia, defeat Gardenia, clear the Team Galactic Eterna Building, and obtain the Bicycle. The Old Chateau, Explorer Kit, Friendship Checker, and optional Togepi Egg are not required for the main route. These directions apply to the original Nintendo DS release of Pokémon Platinum Version.
Travel from Ravaged Path to Floaroma Town
After leaving Ravaged Path, continue north through the upper section of Route 204. Follow the path through the tall grass and trainers until you reach Floaroma Town. Heal at the Pokémon Center before starting the next Team Galactic sequence, because the required events send you back and forth between town and Valley Windworks.
Explore the town if you want to collect berries, buy supplies, or speak with the residents, but do not enter Route 205 and expect to continue normally. The Team Galactic operation at Valley Windworks must be resolved first.
- Leave Ravaged Path through northern Route 204.
- Reach Floaroma Town and heal.
- Carry Poké Balls, Potions, and at least a few status cures before starting the Windworks events.
Obtain the Works Key in Floaroma Meadow
From the northwestern side of Floaroma Town, enter Floaroma Meadow. Two Team Galactic Grunts are threatening the Honey seller. Battle them one at a time. One uses Stunky, while the other uses two Zubat. Ground, Rock, Electric, or other reliable neutral attacks handle these low-level teams well.
After both Grunts retreat, speak with the Honey seller. He gives you the Works Key and Honey. The Honey is optional; the Works Key is required because it opens the locked Valley Windworks building. Save before leaving the meadow if your team took heavy damage.
- Enter Floaroma Meadow from the northwestern part of town.
- Defeat both Galactic Grunts threatening the Honey seller.
- Receive the Works Key from the rescued man.
- Treat Honey as optional and the Works Key as required.
Clear the Valley Windworks entrance and rescue the employee
Return to Floaroma Town, then walk east onto Route 205. Near the bridge, a young girl asks you to rescue her father, who is trapped inside Valley Windworks. Continue east to the Windworks entrance and battle the Galactic Grunt blocking the door. He uses a level 13 Glameow, then runs inside and locks the door.
The entrance battle and the Floaroma Meadow battles can be completed in either order after speaking with the girl, but you need both the defeated guard and the Works Key. Once you have the key, interact with the Windworks door to open it.
Inside, the Grunt who fled the entrance runs deeper into the building. Follow him through the interior, battling the two additional Grunts on the way. The first has a level 13 Zubat; the second uses a level 11 Glameow and a level 11 Stunky. Poison moves and status effects are possible, so use Antidotes or return to the Pokémon Center if necessary.
Commander Mars waits at the back of the building. In Platinum, she uses a level 15 Zubat and a level 17 Purugly. Electric, Rock, or Ice attacks are useful against Zubat, but Purugly is the more dangerous opponent because it opens with Fake Out and can use Bite and Faint Attack. Do not rely on a fragile Psychic-type Pokémon against Purugly; use a sturdy neutral attacker, Fighting-type damage if available, or a Pokémon that can survive its Dark attacks.
After Mars is defeated, the trapped employee is rescued and his daughter enters the building. Team Galactic leaves the Windworks. Looker then appears outside and mentions the Team Galactic presence in Eterna City. The northern section of Route 205 is now open, allowing you to continue toward Eterna Forest.
- Speak with the girl on Route 205 near the Windworks bridge.
- Defeat the Grunt guarding the Valley Windworks door.
- Use the Works Key on the locked door.
- Defeat the two interior Grunts.
- Save before challenging Commander Mars.
- Defeat Mars and confirm that the hostage has been rescued.
- Leave through the newly opened northern route.
Cross Route 205 and enter Eterna Forest with Cheryl
Follow Route 205 north from Valley Windworks. The route contains trainers, grass, and a small rest house where you can recover your party. Use the rest house before entering Eterna Forest if your team is injured. Continue north until you meet Cheryl at the forest entrance, then accept her request to travel together.
Cheryl remains with you until the northern exit. While she is your partner, wild encounters are Double Battles and her Chansey restores the party after battles. You can battle paired trainers alongside her or speak to individual trainers to fight them separately. This healing support makes the forest a safe place to train, but it also makes catching Pokémon awkward because a wild target may be defeated by Chansey before you can throw a Poké Ball.
Eterna Forest contains useful optional encounters including Buneary, Budew, Wurmple, Bidoof, and Gastly in Platinum. Gastly is not restricted to the Old Chateau in this version. If you want to catch one, weaken it carefully and remember that Cheryl’s Chansey may finish a weakened target. You can also wait until Cheryl leaves and return to the forest to catch Pokémon without the partner battle format.
For the most direct route, move northeast from the entrance, continue north between the early trainers, then travel east toward the large grass area. Follow the eastern side north until you reach the exit. Side paths contain items and optional battles, so explore them if you want experience or supplies. Cheryl leaves at the northern exit and gives you a Soothe Bell.
- Use the Route 205 rest house if necessary.
- Accept Cheryl’s request at the forest entrance.
- Use her healing to train or bring a newly caught Pokémon up to the rest of the team.
- Remember that Gastly is available in Eterna Forest in Platinum.
- Reach the northern exit and receive the Soothe Bell from Cheryl.
Reach Eterna City and complete the Cyrus statue scene
After leaving the forest, cross the short eastern section of Route 205 and continue into Eterna City. Heal at the Pokémon Center before handling the next sequence. If you speak with residents, the Underground Man near the Pokémon Center can give you the Explorer Kit. This begins optional Underground content and is not needed for the story.
Go to the ancient statue in the eastern part of Eterna City. Barry is present, and Cyrus appears during the scene. Let the conversation finish. When you move away from the statue, Cynthia approaches and gives you HM01, Cut.
Cut cannot be used outside battle until you defeat Gardenia and earn the Forest Badge. You may teach it to a temporary utility Pokémon, but avoid placing essential battle moves on a team member you plan to keep unless you are comfortable replacing one of its moves later.
- Cross Route 205 into Eterna City.
- Complete the Cyrus and Barry statue scene.
- Speak with Cynthia afterward and receive HM01, Cut.
- Remember that the Forest Badge is required for field use of Cut.
Solve the Eterna Gym puzzle and defeat Gardenia
The Eterna Gym is in the southeastern part of the city. Platinum uses a giant floral clock puzzle. Each time you defeat one of the Gym trainers, the clock hands reposition. Defeat the required trainers and use the hands when they point toward the next section. You must defeat three Gym trainers before Gardenia becomes available.
Gardenia’s Platinum team is Turtwig at level 20, Cherrim at level 20, and Roserade at level 22. Fire- and Flying-type attacks are the simplest answers. A Chimchar or Monferno with a Fire move is particularly effective, while Staravia is a strong alternative if you chose another starter. Poison, Bug, and Psychic attacks can also help, especially against Roserade.
Gardenia leads with Turtwig, which can use Sunny Day and Reflect. Sunny Day strengthens Fire attacks as well as activating Cherrim’s Flower Gift, so a Fire-type attacker can benefit from the weather. Defeat Turtwig quickly before Reflect reduces physical damage or Sunny Day creates a stronger follow-up.
Cherrim can use Leech Seed, Safeguard, Grass Knot, and Magical Leaf. Avoid allowing Leech Seed to remain on your main attacker. Roserade holds a Sitrus Berry and knows Grass Knot, Magical Leaf, Poison Sting, and Stun Spore. Save a Parlyz Heal or another status cure for Stun Spore, and use a Psychic attack if you have one that can safely reach Roserade.
Save before speaking to Gardenia. Victory gives you the Forest Badge and TM86, Grass Knot. The badge allows Cut to be used outside battle and permits the next required Team Galactic event.
- Bring a Fire- or Flying-type attack if possible.
- Defeat the three required Gym trainers to open Gardenia’s room.
- Save before the Gym Leader battle.
- Defeat Turtwig before its setup becomes difficult to overcome.
- Keep a cure ready for Roserade’s Stun Spore.
- Receive the Forest Badge and TM86, Grass Knot.
Clear the Team Galactic Eterna Building and obtain the Bicycle
Use Cut on the small trees blocking the Team Galactic building in the northwestern part of Eterna City. Enter the building after Gardenia has been defeated. The building has four floors in Platinum and contains Galactic Grunts, a Scientist, and Commander Jupiter. Looker is involved in the entry sequence, but the building itself is the required objective.
Follow the staircases through the storage and laboratory areas. Some branches are dead ends or lead only to optional items, so use the stairs and corridors that continue upward. You can collect useful items such as X items, a Revive, a Blue Shard, and an Up-Grade while clearing the building, but none of these items is required.
Commander Jupiter is on the top floor. Her Platinum team is a level 21 Zubat and a level 23 Skuntank. Electric, Rock, or Ice damage handles Zubat, but remember that Jupiter’s Zubat knows Giga Drain as well as Wing Attack and Bite. Skuntank is Poison/Dark, so Psychic attacks do nothing. Ground-type attacks such as Magnitude or Mud Bomb are effective, while a sturdy neutral attacker can finish the battle if Ground coverage is unavailable. Skuntank carries a Sitrus Berry and can use Night Slash, Poison Gas, SmokeScreen, and Screech, so heal poison promptly and do not let accuracy drops decide the battle.
After Jupiter is defeated, Rad Rickshaw’s stolen Pokémon are freed. Leave the building and visit the Cycle Shop in the southeastern part of Eterna City. Speak with the owner to receive the Bicycle. The Bicycle opens the route through Cycling Road and is required for the most convenient continuation toward Route 206.
Optional content can be handled before or after this sequence. The Old Chateau is reached from Eterna Forest after Cut becomes usable and contains additional exploration and encounters. The Explorer Kit starts Underground activities, the Friendship Checker is available from a woman in the Pokémon Center, and the optional Togepi Egg interaction can be accepted if the relevant NPC offers it. None of these is required to leave Eterna City or continue the main story.
- Use Cut to enter the Team Galactic Eterna Building.
- Climb through the building and defeat the required Galactic trainers.
- Do not use Psychic attacks against Skuntank.
- Defeat Commander Jupiter.
- Confirm that Rad Rickshaw’s stolen Pokémon have been freed.
- Visit the Cycle Shop and receive the Bicycle.
- Leave optional Old Chateau, Underground, Friendship Checker, and Togepi content out of the required route.
Before you move on
- You traveled from Ravaged Path through northern Route 204 to Floaroma Town.
- The two Galactic Grunts in Floaroma Meadow were defeated, and the Honey seller gave you the Works Key.
- The Valley Windworks door was opened with the Works Key.
- Commander Mars was defeated and the Windworks employee was rescued.
- Cheryl escorted you through Eterna Forest, then left at the northern exit and gave you the Soothe Bell.
- The Cyrus statue scene occurred, and Cynthia gave you HM01, Cut.
- Gardenia was defeated, and you received the Forest Badge and TM86, Grass Knot.
- Cut works outside battle, allowing access to the Team Galactic Eterna Building.
- Commander Jupiter was defeated in the Eterna Building.
- Rad Rickshaw’s stolen Pokémon were freed, and the Cycle Shop owner gave you the Bicycle.
Hearthome City and Fantina (Gym 3) — story beats and contests
After finishing the required Team Galactic events and Gym battle in Eterna City, leave through Eterna’s southern entrance with the Bicycle. Ride south along Route 206’s Cycling Road, continue through Route 207, cross the southern passage of Mt. Coronet, and follow Route 208 east into Hearthome City. Resolve the Buneary and Super Contest Hall scenes, speak with Fantina to open the Hearthome Gym, defeat her in Platinum’s dark symbol maze, then battle Barry in the southeastern gate before continuing to Route 209 and Solaceon Town. Super Contests, Amity Square, Jubilife TV, and the other city activities are optional.
Leave Eterna City and take the southern route to Hearthome
Begin in Eterna City after completing the required Gym and Team Galactic building events. Make sure you have received the Bicycle from the Cycle Shop. You need it to enter Route 206 from Eterna City because the accessible section is Cycling Road.
Heal at the Eterna Pokémon Center, then leave through the southern entrance. Ride south along Cycling Road. The road contains several Cyclists, so either battle them for useful experience or move around them where the path allows. The grassy area beneath Cycling Road is not required for reaching Hearthome, although you can return later for items, encounters, and optional trainers.
At the southern end of Route 206, leave through the gate and continue east on Route 207. Follow the route toward the entrance to Mt. Coronet. Do not turn back toward Oreburgh unless you need healing or supplies; the required path continues through the mountain.
- Finish the required Eterna City objectives before leaving.
- Have the Bicycle in your Bag.
- Enter Route 206 through Eterna’s southern entrance.
- Ride south through Cycling Road.
- Continue east along Route 207.
Cross the southern Mt. Coronet passage
Enter Mt. Coronet from Route 207 and follow the straightforward southern passage toward the eastern exit. This section is not the summit route and does not require Surf, Strength, or Rock Climb for the main passage.
Cyrus is present inside the mountain and delivers a short speech about his plans. You do not need to battle him or complete a puzzle here. Continue through the cave and leave through the eastern exit onto Route 208.
Route 207 and Mt. Coronet contain trainers and wild Pokémon around the high-teens and low-twenties. If your team is below the level range of the upcoming Gym, fight some trainers rather than avoiding every encounter. Wayward Cave, accessible from the lower part of Route 206, is an optional detour and is not part of the route to Hearthome.
- Enter Mt. Coronet from Route 207.
- Watch Cyrus’s story scene.
- Continue through the southern passage.
- Exit onto Route 208.
- Treat Wayward Cave as optional.
Cross Route 208 and enter Hearthome City
On Route 208, follow the main path east. Cross the first bridge section, go north briefly if you want the Great Ball, then return to the main path and descend the stairs. Continue through the tall grass and use the eastern entrance to reach Hearthome City.
Route 208 has several optional trainers, a Berry Master’s house, berry patches, and useful wild Pokémon such as Ralts and Roselia. You can battle the trainers for experience or return later with field moves for items that are not yet accessible. None of these activities is required to trigger Fantina’s Gym.
Heal as soon as you enter Hearthome. The lost Buneary scene begins when you arrive in the city, so let it play before exploring. Keira follows after the Buneary and thanks you once it returns to her.
- Follow Route 208 east toward Hearthome.
- Enter Hearthome through the eastern entrance.
- Let the Buneary scene finish.
- Heal at the Pokémon Center.
Complete the Buneary and Super Contest Hall scenes
After the Buneary scene, go to the Super Contest Hall, the large building near the Gym. Inside, Keira is speaking with your mother. The conversation introduces Super Contests and provides the local gifts associated with the scene: Keira gives Glitter Powder, while your mother gives the male player character a Tuxedo or the female player character a Dress.
These items are optional Contest-related rewards. You do not need to enter a Contest, win a ribbon, make Poffins, or use the outfit before challenging the Gym.
Speak with Fantina in the Super Contest Hall after the conversation with your mother and Keira. In Pokémon Platinum, this is the actual trigger that sends Fantina back to the Hearthome Gym. Once she leaves, the Gym is available. Jubilife TV and any supposed television event do not unlock it.
- Visit the Super Contest Hall after the Buneary scene.
- Speak with your mother and Keira.
- Talk to Fantina in the hall.
- Confirm that Fantina has returned to the Gym.
- Do not attempt a Super Contest unless you want the optional activity.
Prepare for Fantina’s Ghost-type team
Fantina uses Duskull at level 24, Haunter at level 24, and Mismagius at level 26. Dark- and Ghost-type attacks are super effective against the entire team. Bite is a practical early option for Pokémon such as Shinx or a starter that can learn it. A strong neutral attack also works if you lack type advantage.
Normal- and Fighting-type attacks do not affect Ghost Pokémon. A Normal-type Pokémon is immune to Ghost-type attacks, but do not assume it is completely safe: Fantina’s Pokémon also carry Dark-, Psychic-, and status-based attacks. Psychic moves are useful against Haunter because of its Poison typing, but they are not a universal solution against Duskull and Mismagius.
Duskull is physically sturdy and can use Will-O-Wisp, Shadow Sneak, Future Sight, and Pursuit. Burn halves the Attack stat of a burned physical attacker, so carry a Burn Heal or switch to a special attacker. Future Sight resolves later and can damage the Pokémon active when it strikes. Pursuit is more dangerous when you switch out.
Haunter uses Confuse Ray, Shadow Claw, Hypnosis, and Sucker Punch. Sucker Punch only works when you select an attacking move, so a status move or switch can avoid giving it that priority attack. Mismagius is the main threat: it carries Confuse Ray, Psybeam, Shadow Ball, and Magical Leaf, and holds a Sitrus Berry. Keep a healthy answer ready for it, especially if confusion or sleep has already weakened your lead.
- Bring a Dark- or Ghost-type attack if possible.
- Carry Burn Heals, Awakenings, or Full Heals.
- Prepare a second attacker in case the first is burned or confused.
- Save a reliable Pokémon for Mismagius.
Solve the Platinum Hearthome Gym maze
The Gym is in Hearthome’s northeast corner. Platinum uses a dark maze rather than Diamond and Pearl’s arithmetic-door puzzle. A small illuminated area surrounds your character, and Duskull lamps help mark the layout and trainer positions.
Each maze section contains a blue floor tile displaying a symbol. Walk to the tile, memorize the symbol’s shape, and then choose the door with the matching symbol. The correct door advances you to the next section. A wrong door sends you back toward the beginning of that section.
The symbol is randomized if you leave and reenter the Gym, so do not rely on a door position remembered from an earlier attempt. Gym Trainers are optional for progression but provide useful experience. If you need to heal, leave for the Pokémon Center and return; simply identify the newly displayed symbol again.
- Find the blue symbol tile in the first maze.
- Match it to the correct door.
- Repeat the process in the second maze.
- Battle Gym Trainers if you need experience.
- Heal and save before Fantina.
Defeat Fantina and earn the Relic Badge
Use Dark- or Ghost-type attacks against Duskull, but cure Will-O-Wisp promptly if it affects a physical attacker. If Duskull uses Future Sight, remember that the delayed attack may strike after you switch. Avoid unnecessary switching while Pursuit is available.
Haunter has lower defenses than Duskull but can disrupt your team with Confuse Ray and Hypnosis. Attack it with a Dark- or Ghost-type move, or use a strong Psychic move if you have one. When Haunter is active, Sucker Punch only activates against an attacking move, so a status move or safe switch can deny it.
Against Mismagius, use your most accurate and reliable attacker. Shadow Ball is dangerous because of Mismagius’s Special Attack, while Psybeam threatens Fighting- and Poison-type Pokémon and Magical Leaf punishes Water-, Ground-, and Rock-type answers. Account for the Sitrus Berry and cure confusion when necessary.
After defeating all three Pokémon, Fantina gives you the Relic Badge and TM65, Shadow Claw. The badge also allows HM05 Defog to be used outside battle. Defog will be important later, especially on Route 210, but it is not needed to leave Hearthome immediately.
- Defeat Duskull.
- Defeat Haunter.
- Defeat Mismagius.
- Receive the Relic Badge.
- Receive TM65 Shadow Claw.
- Confirm that Defog works outside battle.
Collect optional Hearthome rewards
Once Fantina is defeated, Hearthome’s optional activities are available without affecting the main route. The Pokémon Fan Club chairman gives you the Poffin Case. A woman in the Pokémon Hotel gives you a Shell Bell. Bebe’s house beside the Pokémon Center provides an Eevee if you have an empty party slot.
The Super Contest Hall, Poffin House, Amity Square, Pokémon Fan Club, Hotel, and other city facilities can be visited now or postponed. Amity Square has compatible-Pokémon restrictions and optional items, but it is not required for the Gym or Route 209.
Jubilife TV is also optional. It does not unlock Fantina, replace the Super Contest Hall conversation, or open the Route 209 gate.
- Collect the Poffin Case if wanted.
- Collect the Shell Bell if wanted.
- Visit Bebe with an empty party slot if you want the Eevee.
- Treat Contests and Amity Square as optional.
Heal and battle Barry at the Route 209 gate
Heal before entering the southeastern Hearthome gate. Barry challenges you inside the gate before you can continue onto Route 209, so do not enter with a damaged lead or an unprepared team.
Barry’s team includes Staravia at level 25 and three starter-dependent Pokémon, with his evolved starter reaching level 27. Staravia has Intimidate, which lowers the Attack of the Pokémon sent against it, and can use Flying-type attacks. An Electric-, Rock-, or Ice-type move is useful, although a strong neutral attack can also defeat it.
After the battle, Route 209 is open. Follow the route east toward Solaceon Town. The Lost Tower is an optional detour for battles, items, and training. The Happiny Egg interaction near the Route 209 gate is also optional and should not be treated as a story requirement.
- Heal before entering the southeastern gate.
- Defeat Barry inside the gate.
- Continue east onto Route 209.
- Use Lost Tower only if you want its optional content.
- Proceed toward Solaceon Town.
Before you move on
- You left Eterna City through the southern entrance with the Bicycle.
- You crossed Route 206, Route 207, southern Mt. Coronet, and Route 208.
- Fantina has been defeated.
- The Relic Badge appears in the Badge Case.
- TM65 Shadow Claw has been received.
- Defog can be used outside battle.
- Barry has been defeated inside the southeastern Hearthome gate.
- Route 209 is open and you are traveling toward Solaceon Town.
- Optional: the Poffin Case, Shell Bell, Bebe’s Eevee, Happiny Egg, Contest rewards, and Amity Square items have been collected if desired.
Veilstone City, the Department Store and Maylene (Gym 4) — Galactic HQ approach
After the Route 209 rival battle and your visit to Solaceon Town, travel through southern Route 210 and Route 215 to reach Veilstone City. Restock at the Department Store, solve Platinum’s punching-bag Gym puzzle, and defeat Maylene for the Cobble Badge and TM60 Drain Punch. Then complete the required double battle outside the Galactic Warehouse, recover Dawn or Lucas’s stolen Pokédex, and collect HM02 Fly. The main Team Galactic Headquarters raid is not available yet; leave Veilstone through Route 214 toward Pastoria City.
Travel from Solaceon Town to Veilstone City
Heal in Solaceon Town, then leave through the northern gate to enter Route 210. The Psyduck group blocks the northern portion of the route, so do not try to continue toward Celestic Town. Follow the accessible southern section eastward and take the branch into Route 215. Continue east through Route 215 until you reach Veilstone City.
Route 215 has many Trainers and optional item branches. Cut can open some side paths, but it is not required to reach Veilstone. If you are trying to conserve resources, use Repels while crossing the grass and battle only the Trainers that provide useful experience. The route’s rain makes Water-type attacks stronger and Fire-type attacks weaker, so do not rely exclusively on Fire moves while traveling here.
Maylene’s strongest Pokémon is level 32. Arriving with several Pokémon around the upper twenties or low thirties gives you a reasonable margin, especially because Lucario has useful coverage against common Flying- and Fire-type answers. Heal immediately at the Veilstone Pokémon Center before shopping or entering the Gym.
- Leave Solaceon Town through its northern gate.
- Use the southern section of Route 210 because Psyduck blocks the northern road.
- Take the eastern branch into Route 215.
- Continue east through Route 215 to Veilstone City.
- Heal at the Veilstone Pokémon Center.
Restock at the Veilstone Department Store
Visit the Department Store before challenging Maylene. Buy a practical supply of Potions or Super Potions, status-healing items, and Poké Balls if you intend to catch Pokémon on Route 214 or elsewhere nearby. The upper floors sell battle items and TMs, but do not spend money indiscriminately: prioritize healing supplies and moves that fit Pokémon you expect to keep.
The Department Store’s vending machines are another useful recovery option. Fresh Water, Soda Pop, and Lemonade provide inexpensive healing, with Lemonade offering particularly good value at this stage. Keep enough money available for future Poké Balls and recovery items rather than buying every available TM.
Several Veilstone activities are optional. A man in a house near the Pokémon Center gives you a level 25 Porygon if you have an empty party slot. The Game Corner, Coin Case, Prize Exchange, daily massage, hidden items, and the city’s other rewards are not required for story progress. Take the Porygon only if you have room and want to use it; do not rearrange your party solely for this gift.
Before entering the Gym, prepare at least two Fighting-type answers. Psychic and Flying attacks are effective against Meditite and Machoke. Lucario is Fighting and Steel, so Psychic and Flying attacks are only neutral against it; Fire, Ground, and Fighting attacks are more effective choices for that final battle.
- Buy healing items and Poké Balls at the Department Store.
- Consider using the vending machines for inexpensive recovery items.
- Optionally receive the level 25 Porygon with an empty party slot.
- Prepare separate counters for Meditite, Machoke, and Lucario.
- Do not treat the Game Corner or other city activities as required.
Solve the Platinum punching-bag Gym puzzle
The Veilstone Gym is in the southwestern part of the city. Before entering, speak with Rowan’s assistant, Dawn or Lucas, outside the Gym. Crasher Wake also appears for a brief story conversation. After they leave, enter the Gym and save before beginning the puzzle.
Platinum uses punching bags instead of Diamond and Pearl’s sliding-wall puzzle. Push each bag along its overhead rail so it knocks down the piles of tires blocking the route. Orange clamps stop a bag at fixed points, so some bags must be pushed from different positions before they can clear the next obstacle.
At the first bag, stand to its left and push it right into the tires. Walk through the opening, climb onto the first raised boxing ring, and defeat the Trainer there. Return down the steps, walk behind the first bag, and push it along its rail until it reaches the next stopping point. Then push the nearby bag upward to remove the next tires.
Cross the second boxing ring and defeat its Trainer. Go down the steps on the far side and battle the next Trainer, then move to the western side and defeat the fourth Gym Trainer. Continue from that area by pushing the adjacent bag down once and then right.
Next, move the lower-right bag that sits above the bottommost bag. Push it up, then left, then down. This gives you access to the lower bag. Push the lower bag up and then right to clear the next tires.
Return toward the upper-right boxing ring. Walk around behind the northern bag and push it left twice. Cross the ring, pass between the training boards, and reach the last bag in front of Maylene’s platform. Push it right once, then use the steps to reach Maylene. The route is now open.
- Push the first bag right into the tires.
- Use the first and second raised rings as landmarks.
- Push the middle bag down once and then right.
- Move the lower-right bag up, left, and down.
- Push the lower bag up and then right.
- Push the northern bag left twice.
- Push the final bag right once and climb to Maylene.
Defeat Maylene
Maylene’s Platinum team is Meditite at level 28, Machoke at level 29, and Lucario at level 32. Meditite is Fighting and Psychic, while Machoke is pure Fighting. Psychic and Flying attacks are effective against both of them, but Meditite and Machoke carry Rock Tomb, so a fragile Flying-type can be punished if it remains in battle after taking a Speed drop.
Meditite uses Fake Out, which can flinch your lead on its first turn. It also has Confusion and Rock Tomb. If your best counter is a Flying-type, consider switching it in safely rather than leading with it, then attack immediately before Rock Tomb lowers its Speed or deals heavy damage.
Machoke carries Karate Chop, Strength, Focus Energy, and Rock Tomb. Psychic attacks are effective, and strong neutral attacks can also finish it before Focus Energy creates a critical-hit risk. Avoid allowing Machoke several turns to increase its critical-hit chance if your Pokémon is already injured.
Lucario is Fighting and Steel. Its moves are Drain Punch, Metal Claw, Bone Rush, and Force Palm. Use Fire, Ground, or Fighting attacks when available. Bone Rush threatens Fire-type counters, while Force Palm can paralyze a Pokémon that would otherwise outspeed Lucario. Keep a second answer available in case your first counter is paralyzed or weakened.
A Ghost-type can avoid ordinary Fighting attacks, but Bone Rush and Metal Claw still matter, and not every Ghost-type has the power to defeat Lucario quickly. Direct attacks and controlled switches are safer than prolonged setup. Lucario’s Drain Punch can restore its health when it deals damage, so do not give it unnecessary turns.
Fairy-type Pokémon and Fairy-type moves do not exist in the original Generation IV mechanics. Do not plan this battle around Fairy coverage.
- Expect Fake Out and Rock Tomb from Meditite.
- Use Psychic or Flying attacks against Meditite and Machoke.
- Watch for Focus Energy and critical-hit risk from Machoke.
- Use Fire, Ground, or Fighting attacks against Lucario.
- Prepare for Bone Rush and Force Palm.
- Keep a backup counter in case of paralysis or a critical hit.
Receive the Cobble Badge and TM60
After defeating Maylene, receive the Cobble Badge and TM60 Drain Punch. The Cobble Badge allows traded Pokémon up to level 50 to obey you and permits the use of Fly outside battle once HM02 has been obtained.
Drain Punch is a physical Fighting-type attack that restores the user’s HP based on the damage dealt. Teach it to a physical attacker that benefits from Fighting coverage and that you expect to keep. It is a poor choice for a primarily special attacker or a temporary HM carrier.
Leave the Gym and heal at the Pokémon Center. Dawn or Lucas will be waiting outside with the next required event, so do not leave Veilstone for Route 214 until the warehouse sequence is complete.
- Defeat Maylene.
- Receive the Cobble Badge.
- Receive TM60 Drain Punch.
- Confirm that traded Pokémon up to level 50 will obey.
- Heal before approaching the Galactic Warehouse.
Recover the Pokédex and collect HM02 Fly
After leaving the Gym, speak with Dawn or Lucas. The assistant explains that Team Galactic has taken the Pokédex. Go to the northern part of Veilstone City, where Dawn or Lucas is standing near two Team Galactic Grunts. Speak to the assistant again to begin the required double battle.
Your partner fights alongside you. Focus attacks on one Grunt at a time and avoid using attacks that could strike your partner. The Grunts use Pokémon around the mid-twenties, so the battle should be manageable if your team is healed after the Gym. Once both Grunts are defeated, they return the Pokédex and flee.
Looker then arrives and leads you into the accessible portion of the Galactic Warehouse. Wait for the dialogue to finish, move through the room, and pick up HM02 Fly. The deeper headquarters route is locked during this visit. The Storage Key, Galactic Key, Master Ball, and lake-guardian events belong to the later Team Galactic Headquarters sequence after the Lake Acuity story event; they are not part of this chapter.
Heal again after collecting Fly. To continue the main story, leave Veilstone through the southeastern gatehouse and enter Route 214. Follow Route 214 south toward Valor Lakefront and then Route 213 to Pastoria City. Crasher Wake and the Pastoria events are the next objectives.
- Speak with Dawn or Lucas outside the Gym.
- Approach the two Galactic Grunts in northern Veilstone.
- Complete the required double battle.
- Confirm that the Pokédex has been returned.
- Follow Looker into the accessible Galactic Warehouse.
- Pick up HM02 Fly.
- Do not search for the Storage Key or begin the main HQ raid.
- Leave through Route 214 toward Valor Lakefront and Pastoria City.
Before you move on
- The party reached Veilstone City through Route 210 and Route 215.
- Maylene was defeated.
- The Cobble Badge is recorded.
- TM60 Drain Punch is in the Bag.
- The double battle beside the Galactic Warehouse is complete.
- Dawn or Lucas has recovered the stolen Pokédex.
- HM02 Fly is in the Bag.
- The main Galactic Headquarters raid remains reserved for its later story sequence.
- The party is healed and ready to travel south through Route 214 toward Pastoria City.
Pastoria and Crasher Wake (Gym 5) — Galactic chase and SecretPotion
From Veilstone City, travel south through Route 214, cross Valor Lakefront and continue along Route 213 to Pastoria City. Confirm that the earlier Warehouse double battle and HM02 Fly pickup from chapter ch05 are complete; if they were skipped, return to Veilstone before continuing. Solve Pastoria Gym’s water-level puzzle, defeat Crasher Wake and receive the Fen Badge, TM55 Brine and permission to use Surf outside battle. After the Gym, follow the Team Galactic Grunt through the Great Marsh and Route 213 to Valor Lakefront. Cynthia gives you the SecretPotion there. Use it on the Psyduck blocking northern Route 210, then receive the Old Charm from Cynthia and continue toward Celestic Town. The main Galactic HQ raid remains a later objective triggered by the Lake Acuity story event.
Continuity check before leaving Veilstone
The Veilstone Warehouse event belongs to the preceding chapter. After Maylene’s defeat, Dawn or Lucas should have recovered the stolen Pokédex in the double battle outside the Galactic Warehouse, and HM02 Fly should have been collected from the Warehouse interior.
Check your Bag for HM02 Fly and confirm that the Pokédex has been returned. If either event is unfinished, go back to the Galactic Warehouse on Veilstone City’s west side and complete that short sequence before starting this chapter. Do not count the Warehouse event as part of the Pastoria objectives, and do not treat it as the later Galactic HQ infiltration.
Once the continuity check is complete, heal in Veilstone and carry several Super Potions or Hyper Potions, status-healing items and a few Repels. Fly is convenient for returning to Solaceon after Cynthia gives the SecretPotion, but it is not required to reach Pastoria.
- Confirm that Dawn or Lucas recovered the Pokédex in chapter ch05.
- Confirm that HM02 Fly is in the Bag.
- If either event was skipped, return to the Veilstone Galactic Warehouse now.
- Heal and restock before taking Route 214.
Travel from Veilstone to Pastoria City
Leave Veilstone through the southeastern gate and enter Route 214. Follow the route south. The Ruin Maniac’s area, side paths and optional trainers can be explored for experience and items, but none of them is required for Pastoria.
Continue south until you reach Valor Lakefront. Lake Valor itself is not yet the next story destination, so stay on the route and proceed east onto Route 213. Route 213 is a beach route with trainers, grass, sand and portions of Hotel Grand Lake. If your party is worn down, the hotel receptionist can restore your Pokémon without requiring a return to a Pokémon Center.
Follow the beach and road east until you enter Pastoria City. Heal at the Pokémon Center and restock before entering the Gym. The Great Marsh is available for optional encounters and Safari Game exploration, but you do not need to complete a Safari Game to challenge Wake or continue the story.
- Take the southeast exit from Veilstone to Route 214.
- Travel south through Route 214.
- Cross Valor Lakefront and enter Route 213.
- Continue east to Pastoria City.
- Heal before entering Pastoria Gym.
Solve the Pastoria Gym water puzzle
Pastoria Gym uses colored floor switches to change the water level. The most reliable route is to activate the switches in this order: yellow, green, blue, green, yellow, blue. Trainer battles along the route are optional, so skip them if your team needs to preserve health and PP.
From the entrance, move north and circle left across the floating platforms until you reach the first yellow switch near the Tuber. Step on it to drain the pool. Go down the stairs and follow the lower route north, then climb the central stairs to reach the green switch near the Fisherman. Activate it to raise the water to the middle level.
Move back through the opened route and head toward the sailor’s section. Step on the blue switch near the Sailor to raise the water to the highest level. Follow the newly opened path, ignoring the yellow switch you pass, and reach the next green switch near the Fisherman on the opposite side. Activate it.
Continue downward through the changed route and step on the yellow switch at the southern end of the Gym. The water drains again. Move back north through the lower level, cross to the far side and climb toward the final blue switch near the Fisherman. Activate it, then cross the two floating bridges to reach Crasher Wake.
If you activate a switch out of order, simply retrace the open path and correct the water level. Save before speaking to Wake.
- Activate the switches in this order: yellow, green, blue, green, yellow, blue.
- Use the changed water levels to reach the next section.
- Skip optional trainers if resources are low.
- Reach Wake’s platform and save.
Defeat Crasher Wake for the Fen Badge
Wake uses Gyarados at level 33, Quagsire at level 34 and Floatzel at level 37. Gyarados is Water/Flying with Intimidate, Quagsire is Water/Ground, and Floatzel is Water with Swift Swim and a Sitrus Berry. Wake can use two Hyper Potions during the battle.
Use Electric attacks against Gyarados and Floatzel, but never use Electric attacks against Quagsire because its Ground typing makes it immune. Grass attacks are the practical answer to Quagsire. Keep the Grass user away from Floatzel whenever possible because Floatzel carries Ice Fang and can move quickly. If you lack a strong Electric or Grass Pokémon, use neutral damage from a sturdy, appropriately leveled attacker and preserve your best switch-ins for Floatzel.
Gyarados’s Intimidate lowers the Attack of a newly switched-in physical attacker, so special Electric attacks are especially useful. Quagsire can use Yawn, so either defeat it promptly or switch before sleep leaves your counter unable to act. Floatzel knows Brine, Crunch, Ice Fang and priority Aqua Jet. Do not leave a low-health Pokémon in front of it merely to finish with a slower attack.
Victory awards the Fen Badge and TM55 Brine. The Fen Badge allows Surf to be used outside battle. Teach Surf to a Pokémon you intend to keep available; it will become important for later routes and story areas.
- Use Electric coverage on Gyarados and Floatzel.
- Use Grass coverage or strong neutral damage on Quagsire.
- Respect Quagsire’s Electric immunity and Yawn.
- Keep a healthy answer to Floatzel’s Ice Fang and Aqua Jet.
- Receive the Fen Badge and TM55 Brine.
- Confirm that Surf works outside battle.
Follow the Galactic Grunt and obtain the SecretPotion
After leaving the Gym, Barry and Crasher Wake trigger the next scene. Go to the Great Marsh entrance in Pastoria City. Enter the area far enough to trigger the commotion, then follow the fleeing Galactic Grunt east toward Route 213.
The Grunt runs through several positions rather than fighting immediately. Continue following him along Route 213. Looker appears near Hotel Grand Lake and investigates the hotel reception area, but this does not end the chase. Continue east and then toward Valor Lakefront until the Grunt stops and battles you.
In Pokémon Platinum, this Grunt uses one level 31 Croagunk. Defeat it and continue toward the Lake Valor entrance. Cynthia and Barry appear after the battle. Cynthia gives you the SecretPotion for the Psyduck blocking Route 210. This is the point at which you receive the medicine; the Old Charm comes later.
Return to Solaceon Town by Fly if you have that option, or walk back through the connected routes. From Solaceon, enter Route 210 and travel north to the Psyduck near the Café Cabin. Interact with the group and use the SecretPotion. The Psyduck move aside, opening the northern route toward Celestic Town. Defog is useful in the fog beyond them, but it is not required to perform the SecretPotion event.
- Visit the Great Marsh entrance after Wake’s post-Gym scene.
- Follow the Grunt east through Route 213.
- Continue past the Hotel Grand Lake area.
- Defeat the Grunt’s level 31 Croagunk near Valor Lakefront.
- Receive Cynthia’s SecretPotion.
- Use the SecretPotion on the Psyduck north of Solaceon Town.
Receive the Old Charm and continue toward Celestic Town
After the Psyduck move, Cynthia appears on Route 210 and gives you the Old Charm. Keep it in your Bag; it must be delivered later in Celestic Town. The Old Charm is not obtained during the Valor Lakefront conversation, so do not leave the route expecting to receive it there.
Proceed north through the newly opened section of Route 210. The fog makes navigation harder and wild encounters more frequent, so use Defog if you have it and Repels if you want to conserve healing items. Follow the main route toward Celestic Town rather than treating the optional side areas as required objectives.
This chapter is complete once the Fen Badge has been earned, Wake’s reward has been collected, the Pastoria Grunt has been defeated, Cynthia’s SecretPotion and Old Charm are in your Bag, and the Psyduck have moved. The next chapter can begin with the Celestic Town and Canalave sequence.
- Receive the Old Charm from Cynthia after clearing the Psyduck.
- Keep the Old Charm for delivery in Celestic Town.
- Open the northern route from Route 210 toward Celestic Town.
- Leave optional fog-route items and encounters for later if resources are low.
Deferred note: the later Galactic HQ raid
Do not return to Veilstone to begin the main Galactic HQ raid yet. Continue through Celestic Town, Canalave City and Snowpoint City first. After earning the Icicle Badge, obtain HM08 Rock Climb from the hiker on Route 217 and use it at Acuity Lakefront.
The Lake Acuity story event involving Barry and Commander Jupiter is the condition that opens the later Veilstone HQ sequence. After that event, return to Veilstone and approach the Galactic presence outside the main headquarters. Looker will then direct you back to the Warehouse and open the previously locked passage.
The later raid includes the Galactic Key, Cyrus, the Master Ball, Commander Saturn and the release of the lake guardians. None of those events belongs in this chapter’s completion check. Complete that raid later, before the Mount Coronet summit ascent.
- Do not require the main HQ raid before Canalave or Snowpoint.
- Reach and complete the Lake Acuity event later in the story.
- Return to Veilstone only after that event.
- Treat the Galactic Key, Master Ball and lake-guardian release as later objectives.
Before you move on
- The Fen Badge is in your Badge Case.
- TM55 Brine is in your Bag.
- Surf can be used outside battle.
- The Pastoria Galactic Grunt has been defeated.
- Cynthia has given you the SecretPotion and Old Charm.
- The Psyduck blocking northern Route 210 have moved.
- The route toward Celestic Town is open.
- The later Galactic HQ raid has not been incorrectly counted as chapter completion.
References for this chapter
- Walkthrough: Pokémon Platinum/Part 8 — Bulbapedia
- Appendix: Platinum walkthrough/Section 9 — Bulbapedia
- Walkthrough: Pokémon Platinum/Part 10 — Bulbapedia
- Crasher Wake — Bulbapedia
- Pokémon Platinum Full Walkthrough — Canalave Gym and Iron Island
- Pokémon Platinum Version Guide and Walkthrough — GameFAQs
Canalave City, the Library and Byron (Gym 6)
Complete the required Celestic Town story sequence before traveling to Canalave City. Deliver Cynthia’s Old Charm, defeat Cyrus at the ruins and receive HM03 Surf. Then cross Route 218, defeat the rival, obtain HM04 Strength from Riley on Iron Island, defeat Byron for the Mine Badge, attend the Canalave Library meeting and resolve the mandatory Lake Valor and Lake Verity events. Finish by opening the northern Mount Coronet route toward Route 216. The later Lake Acuity-triggered Galactic HQ raid, Stark Mountain and Heatran are not part of this chapter.
Finish the Celestic Town story before leaving for Canalave
Begin on the northern section of Route 210 after using Cynthia’s SecretPotion on the Psyduck. Use Defog if the fog is obscuring the path, then follow the route north until you enter Celestic Town. Heal at the Pokémon Center before starting the town sequence.
Speak with Cynthia’s grandmother, who stands near the Pokémon Center. She explains that a Team Galactic member is blocking the entrance to the Celestic Ruins. Go down into the lower part of town and approach the Galactic Grunt at the cave entrance. He uses Houndour at level 32 and Golbat at level 30. Water, Ground, Rock or strong neutral attacks handle this battle well; avoid relying on a slow Psychic Pokémon against Golbat’s Flying attacks.
After defeating the Grunt, return to Cynthia’s grandmother and deliver the Old Charm Cynthia gave you. She then asks you to inspect the ruins. Enter the cave, walk to the mural at the back and examine it. The mural depicts the three lake guardians: Azelf, Uxie and Mesprit.
Cyrus appears after the mural is examined. Save before speaking to him if you want a safe retry point, then accept the battle when ready. In original Platinum, Cyrus uses Sneasel at level 34, Golbat at level 36 and Murkrow at level 36. Fighting attacks are useful against Sneasel, Electric or Rock attacks help against Golbat, and Rock, Electric or Ice coverage can pressure Murkrow. Watch for Sneasel’s Ice Punch and Murkrow’s Drill Peck.
After Cyrus leaves, Cynthia’s grandmother gives you HM03 Surf. Exit the ruins and speak with Cynthia outside town. She recognizes that Team Galactic is more dangerous than she thought and points you toward the Canalave City Library. This entire Celestic Town sequence must be completed before the Canalave route can proceed normally.
- Reach Celestic Town through northern Route 210.
- Speak with Cynthia’s grandmother.
- Defeat the Galactic Grunt guarding the ruins.
- Deliver the Old Charm to Cynthia’s grandmother.
- Examine the mural inside the ruins.
- Defeat Cyrus.
- Receive HM03 Surf.
- Speak with Cynthia outside the ruins before traveling toward Canalave.
Reach Canalave City through Jubilife and Route 218
From Celestic Town, return south through northern Route 210 and Solaceon Town. Continue through Route 209 to Hearthome City, then leave through Hearthome’s western gate and travel to Jubilife City. This is the correct route from the completed Celestic sequence; do not attempt to use Canalave as a substitute for the Celestic events.
In Jubilife City, leave through the western gate onto Route 218. Approach the water at the route’s western end and use Surf to cross to Canalave City. Heal at the Pokémon Center before crossing the central bridge. Surf is now available because Cynthia’s grandmother gave you HM03 in Celestic Town.
The Canalave approach contains the rival battle. Keep a balanced team rather than preparing only for Byron, because the rival can use Staraptor, Heracross and a starter-dependent Pokémon. Electric, Rock or Ice coverage is helpful against Staraptor. Flying, Fire or Psychic attacks are useful against Heracross, but protect fragile attackers from strong physical hits.
- Return through Route 210, Solaceon Town and Route 209.
- Cross Hearthome City and reach Jubilife City.
- Leave west onto Route 218.
- Use Surf to enter Canalave City.
- Heal before crossing the bridge.
Defeat the rival and collect HM04 Strength on Iron Island
Cross Canalave’s central bridge to trigger the rival battle. Defeat him, then heal at the Pokémon Center. After the battle, the rival directs you toward the Canalave Library, but the next story sequence will stop you unless you have first visited Iron Island and obtained HM04 Strength.
Go to the harbor on Canalave’s western side and take the boat to Iron Island. Speak with Riley near the cave entrance. He gives you HM04 Strength immediately. Receiving the HM is the required part of this visit; clearing the entire mine is optional for immediate story progression.
If you enter the mine, Riley eventually joins you as a temporary partner and heals the party after battles. Continue through the lower section and defeat the Team Galactic members if you want the optional Riolu Egg. Keep an open party slot before reaching the end if you intend to take the Egg. You may also use the mine for training before Byron.
Return to Canalave City after receiving Strength. The Mine Badge is required before Strength can be used outside battle, so the boulders on Iron Island are not a problem if they remain immovable during this first visit.
- Defeat the rival on Canalave’s bridge.
- Take the boat from Canalave to Iron Island.
- Speak with Riley at the cave entrance.
- Receive HM04 Strength.
- Leave a party slot open if you want the optional Riolu Egg.
- Return to Canalave City.
Solve Canalave Gym’s elevator puzzle
Canalave Gym specializes in Steel Pokémon. Fire, Ground, Fighting and Water attacks are practical choices, and special attacks are often preferable because many Steel Pokémon have high Defense. Bring healing items if your team is already worn down by Iron Island.
From the first floor, take the easternmost elevator in the group of four. On the second floor, take the elevator south of your position to reach the southeastern part of the first floor. Use the next elevator to return to the second floor, then ride the moving lift attached to the wire across the ledge.
Take the regular elevator at the far side to reach the third floor. Use the moving lift to the north, then choose the northern lift from the pair of side-by-side platforms. Follow the resulting path back toward the second floor and use the next elevator to reach the northern part of the first floor. The red-outlined elevator there leads to Byron on the fourth floor.
If you take an incorrect elevator, the Gym does not permanently trap you. Use the floor landmarks and return to the wired platforms rather than restarting.
- Take the easternmost elevator on the first floor.
- Use the southern second-floor elevator.
- Cross the wired moving lift.
- On the third floor, use the northern lift from the side-by-side pair.
- Reach the northern first-floor area.
- Take the red-outlined elevator to Byron.
Defeat Byron for the Mine Badge
In original Pokémon Platinum, Byron’s team is Magneton at level 37, Steelix at level 38 and Bastiodon at level 41. Ground attacks are effective against Magneton, but remember that Magneton can use Thunderbolt and Flash Cannon. A Ground-type attacker that is also Rock-type should be cautious because Flash Cannon is super effective against Rock.
Steelix is Steel and Ground, so Electric attacks do nothing. Water, Fighting, Ground or a strong special Fire attack can work, but Steelix carries Earthquake and Ice Fang. Special attacks are valuable because Steelix’s physical Defense is high. Do not leave a frail Fire Pokémon in front of Steelix unless it can defeat it immediately.
Bastiodon is Rock and Steel and has very high physical Defense. Use a strong Fighting, Ground or Water attack. Try to defeat it quickly: its Metal Burst can punish the damage from your previous attack, while Stone Edge threatens Fire Pokémon and Iron Defense makes physical attacks less effective. Taunt can prevent setup, but direct super-effective damage is usually safer.
After the battle, Byron awards the Mine Badge and TM91 Flash Cannon. The badge allows you to use Strength outside battle and raises the obedience limit for traded Pokémon to level 70. Riley supplied HM04; Byron only unlocks its field use.
- Bring Ground, Fighting or Water coverage.
- Use special attacks when possible against Steelix and Bastiodon.
- Do not use Electric attacks against Steelix.
- Watch for Steelix’s Earthquake and Ice Fang.
- Defeat Byron.
- Receive the Mine Badge and TM91 Flash Cannon.
- Confirm that Strength now works outside battle.
Attend the Canalave Library meeting
After earning the Mine Badge, leave the Gym. Your rival is waiting outside and directs you to the Canalave Library. Enter the Library and go to the third floor. If the rival refuses to proceed, return to Iron Island and confirm that Riley gave you HM04 Strength.
Professor Rowan, his assistant Lucas or Dawn, and your rival are on the third floor. Rowan explains that the three lake guardians may help his research into Pokémon evolution. Rowan and his assistant go to Lake Verity, you are assigned to Lake Valor, and your rival is sent toward Lake Acuity.
A tremor interrupts the meeting, revealing that Team Galactic has caused an explosion at Lake Valor. Once the scene ends, Lake Valor is your immediate destination. You can Fly to Pastoria City and approach the lake from the Valor Lakefront side, or use another available route that reaches the same entrance.
This Library meeting is a main-story trigger, not a postgame unlock. It does not complete the later Galactic HQ operation. That operation becomes available only after the Lake Acuity event and is handled later, before the Mount Coronet summit.
- Have the Mine Badge.
- Have HM04 Strength from Riley.
- Enter the Canalave Library.
- Go to the third floor.
- Complete Rowan’s lake assignment scene.
- Set Lake Valor as the next objective.
Investigate the drained Lake Valor and defeat Saturn
Travel to Valor Lakefront and enter the dried Lake Valor area. Team Galactic has drained the lake with a bomb to reach the cavern where Azelf sleeps. Defeat the Galactic Grunts on the lakebed and enter Valor Cavern.
Commander Saturn is inside. His Platinum team is Golbat at level 38, Bronzor at level 38 and Toxicroak at level 40. Electric or Rock attacks are useful against Golbat. Use a special Fire attack against Bronzor, but note that Bronzor has Levitate, so Ground attacks are not reliable against it. Toxicroak is weak to Psychic, Ground and Flying attacks; a fast Psychic Pokémon is particularly useful, but avoid exposing it to Toxicroak’s Dark-type Faint Attack.
Saturn has already taken Azelf by the time you arrive. Defeating him completes the Valor portion of the lake operation. Heal after leaving the cavern, then Fly to Twinleaf Town and travel north to Lake Verity. The Lake Verity event is mandatory and must be completed before the northern Mount Coronet route opens.
- Reach the dried Lake Valor.
- Clear the lakebed Grunts.
- Enter Valor Cavern.
- Defeat Commander Saturn.
- Heal after leaving the cavern.
- Travel to Lake Verity near Twinleaf Town.
Resolve Lake Verity and open the route to the snowfields
At Lake Verity, Professor Rowan is holding off a Galactic Grunt while Lucas or Dawn is farther ahead confronting Commander Mars. Follow the path into the lake area. You will participate in the required battles leading to Mars, including the double-battle sequence with Rowan’s assistant.
Mars uses Golbat at level 38, Bronzor at level 38 and Purugly at level 40. Electric or Rock attacks work against Golbat. Use a special Fire attack against Bronzor and remember that its Levitate ability blocks Ground attacks. Purugly is fast and can use Fake Out and Hypnosis, so Fighting attacks are effective but should be used by a Pokémon that can withstand its physical attacks and avoid being left asleep.
Defeat Mars and the lake event concludes. Rowan directs you toward Lake Acuity, where your rival is in danger. Team Galactic then withdraws from the northern Mount Coronet passage. This withdrawal is the condition that lets you travel from the Route 211 side of Mount Coronet toward Route 216.
The full Galactic HQ raid is still later. Do not return to Veilstone to look for the HQ operation yet. First cross the northern Mount Coronet route, Routes 216 and 217, Snowpoint City and Acuity Lakefront. The Lake Acuity event will then direct you back to Veilstone for the HQ sequence.
- Reach Lake Verity after defeating Saturn.
- Complete the required battles with Rowan’s assistant.
- Defeat Commander Mars.
- Confirm that the northern Mount Coronet passage is open.
- Do not mark the Galactic HQ raid as complete.
- Prepare to travel toward Route 216 and Snowpoint City.
Cross northern Mount Coronet and reach Route 216
From Lake Verity, Fly to Celestic Town or Eterna City and travel to the eastern side of Route 211. Enter the northern Mount Coronet passage from Route 211. You need Strength and Rock Smash for the practical route through the mountain. Defog is helpful in the foggy lower section, and Surf may be useful for optional movement and items.
Inside Mount Coronet, use Strength to push the boulders blocking the northern route. Follow the passage downward into the lower floor, then continue through the foggy area and take the western exit that leads to Route 216. The path is more straightforward once the boulders are cleared; use the cave walls and water pool as landmarks rather than wandering through every side path.
The team cannot be changed at the mountain’s Route 216 exit until Snowpoint City, so heal and restore important move PP before entering. Carry status recovery and healing items, and keep varied answers for Ice, Ground, Rock and Steel opponents. Do not depend on a single Fire Pokémon for the snowy routes or the later Galactic battles.
This chapter is complete once the northern Mount Coronet passage has been opened and the Route 216 entrance has been reached. The next chapter covers Routes 216 and 217, Snowpoint Gym and the Lake Acuity event.
- Complete Lake Verity and defeat Mars first.
- Reach Route 211 from Celestic Town or Eterna City.
- Bring Pokémon capable of using Strength and Rock Smash.
- Use Defog if the mountain fog obstructs movement.
- Reach the Route 216 exit.
- Restore HP and PP before entering the snowy routes.
- Save before continuing through Route 216.
Before you move on
- The Celestic Town Old Charm sequence is complete.
- The Galactic Grunt at the Celestic Ruins entrance has been defeated.
- The Old Charm was delivered to Cynthia’s grandmother.
- Cyrus was defeated at the Celestic Ruins mural.
- HM03 Surf was received.
- Cynthia’s post-Celestic conversation was completed.
- The rival was defeated on Canalave’s bridge.
- HM04 Strength was received from Riley on Iron Island.
- Byron was defeated.
- The Mine Badge and TM91 Flash Cannon are in the trainer’s possession.
- The third-floor Canalave Library meeting has completed.
- Lake Valor’s explosion aftermath was investigated.
- Commander Saturn was defeated in Valor Cavern.
- The Lake Verity battle sequence and Commander Mars battle have been completed.
- The northern Mount Coronet passage toward Route 216 is open.
- The Route 216 entrance has been reached.
- The later Galactic HQ raid has not been incorrectly marked as completed.
References for this chapter
- Walkthrough: Pokémon Platinum/Part 11 — Celestic Town and Cyrus sequence
- Walkthrough: Pokémon Platinum/Part 13 — Iron Island, Canalave Gym, Library and Lake Valor
- Walkthrough: Pokémon Platinum/Part 14 — Lake Verity, northern Mount Coronet and Route 216
- Pokémon Platinum Version Walkthrough — Champion Cynthia battle details
- Pokémon Platinum Full Walkthrough — Canalave Gym and Iron Island
Snowpoint City and Candice (Gym 7) — arctic survival and late-game prep
After resolving the Lake Valor and Lake Verity incidents, travel through northern Mount Coronet to reach Routes 216 and 217. Collect HM08 Rock Climb, cross the snowy routes, defeat Candice in Snowpoint Gym, then return to Acuity Lakefront to trigger the scene that sends you to Team Galactic’s Veilstone headquarters.
Leave the completed lake events through northern Mount Coronet
Begin this chapter after the Canalave Library meeting and the mandatory Team Galactic events at Lake Valor and Lake Verity. If you have not defeated Saturn at Lake Valor and Mars at Lake Verity, the northern route to Snowpoint will not be open.
Travel to Celestic Town, then leave through its eastern exit onto Route 211. Enter Mount Coronet from the Route 211 side. This is the northern passage you need; do not use the southern entrances near Oreburgh or Oreburgh Gate if you are trying to reach Route 216 efficiently.
Inside Mount Coronet, bring a Pokémon that knows Strength. Follow the cave path, push the boulders blocking the northern passage, and continue through the upper section of the mountain. The objective is to reach the snowy exit rather than explore every side room. You do not need Rock Climb for this initial passage.
The cave contains wild Pokémon and several trainers. Fight enough opponents to keep your team near the level range for the next routes, but use Repels if your party is already prepared. Save before entering the mountain if you have not saved since the lake events, and heal before beginning the crossing if necessary.
Continue through the northern passage until you emerge onto Route 216. This exit places you at the eastern side of the snowy route, below the route’s western lodge and the path toward Route 217.
- Finish the Lake Valor and Lake Verity story events first.
- Reach Celestic Town and use Route 211’s eastern Mount Coronet entrance.
- Bring Strength for the boulders inside Mount Coronet.
- Push through the northern cave passage and emerge on Route 216.
- Use Repels or battle trainers according to your team’s level and PP supply.
Cross Route 216 and use Snowbound Lodge
From the Mount Coronet exit, follow Route 216 west through the snow. The route runs west toward Snowbound Lodge and then north toward Route 217. Snow slows your movement, and bicycles cannot be used in the deep snow, so walk along the visible paths between the trees, ledges, bridges, and patches of tall grass.
Snowbound Lodge is the important recovery landmark on Route 216. Enter the house near the western end of the route and speak with the person inside to restore the entire party. Use this free healing point before continuing rather than spending a large portion of your item supply on route battles.
The route contains optional trainers and wild encounters. Ace Trainers provide useful experience if your team is underprepared, while Repels are sensible if you are trying to conserve HP and PP for Candice. Keep at least one Fire-, Fighting-, Rock-, Steel-, or other reliable Ice counter available. Do not build the entire plan around Water attacks, because the next battles include Grass- and Ground/Ice Pokémon with coverage moves.
Continue north from the lodge through the narrow snowy path. You will eventually reach the southern part of Route 217. If your team needs additional levels, the trainers on Route 216 are a safer source of experience than repeatedly fighting wild Pokémon and returning to the lodge.
- Walk west across Route 216 from Mount Coronet.
- Heal the party inside Snowbound Lodge.
- Use Repels if you are conserving HP and PP.
- Keep multiple answers to Ice-type opponents ready.
- Continue north into Route 217.
Cross Route 217 and collect HM08 Rock Climb
Route 217 is wider and more difficult to read because of the heavy snow. Use the houses, isolated trees, trainer positions, and the route’s edges as landmarks. Your destination is the northern exit into Acuity Lakefront, but stop near the Hiker’s house to collect the required HM.
HM08 Rock Climb is lying on the ground in the snow northeast of the Hiker’s house. Pick up the item directly; the Hiker does not hand you the HM. After collecting it, enter the nearby house and speak to the Hiker to receive the Icicle Plate.
Rock Climb cannot be used outside battle immediately. You must first defeat Candice and earn the Icicle Badge. The HM is still worth collecting now because it is needed for the mountain and lake routes later in the story.
The remaining items on Route 217, including TM07 Hail and other hidden or optional pickups, can wait. If your party is weakened, continue north rather than searching the snowfield. Use the Route 216 lodge before entering Route 217 if you need a full recovery, because there is no equivalent free healing point along the main snowy crossing.
Fight route trainers if your core team is below a comfortable range for Candice. A balanced party is more useful than one heavily overleveled Pokémon: Candice’s team includes fast physical damage, Ground coverage, hail, and a Ghost-type that blocks Fighting and Normal attacks.
- Find HM08 in the snow northeast of the Hiker’s house.
- Enter the nearby house and receive the Icicle Plate from the Hiker.
- Do not expect Rock Climb to work outside battle before earning the Icicle Badge.
- Skip optional snowfield items if HP or PP is low.
- Continue north to Acuity Lakefront and then Snowpoint City.
Enter Snowpoint City and prepare for the Gym
Leave Route 217 through Acuity Lakefront and continue into Snowpoint City. The lake itself is not yet the active story destination; you will return there after the Gym battle. Heal at the Snowpoint Pokémon Center as soon as you arrive.
Snowpoint Temple is north of town, but it is not part of this badge route and is not available for normal story progress at this point. The town’s houses, port, trade, and other activities are optional. Buy healing items and status cures before entering the Gym.
Organize a party with more than one way to damage Ice Pokémon. Fire and Fighting attacks are excellent against Sneasel and Abomasnow, while Water attacks are particularly useful against Piloswine. Rock and Steel attacks can help against several members of Candice’s team, but do not assume one Pokémon can safely handle everything.
Keep a dedicated answer to Froslass. It is Ice/Ghost, so Fighting and Normal attacks do not affect it. Dark, Ghost, Rock, Fire, and Steel attacks are useful, provided the user can withstand Froslass’s special attacks. A fast Pokémon with a strong super-effective move is preferable to relying on a slow Fighting-type that cannot hit back safely.
If you need training, make short trips back through Acuity Lakefront and Route 217, then use the Pokémon Center in Snowpoint or Snowbound Lodge when necessary. Restore PP before entering the Gym and save before beginning the puzzle.
- Heal at Snowpoint City’s Pokémon Center.
- Buy recovery items and status cures.
- Prepare separate answers for Piloswine and Froslass.
- Do not treat Snowpoint Temple as a current story requirement.
- Save before entering the Gym puzzle.
Solve Snowpoint Gym’s sliding-ice puzzle
Snowpoint Gym is built around ice floors that carry you in a straight line until you hit a wall, snowball, trainer, or other solid obstacle. Large snowballs block the central routes. Your goal is to line up slides that break these snowballs and create a path to Candice.
Do not choose a direction immediately after every landing. First identify the wall, trainer, or snowball that will stop the next slide. The Gym has several floors, and a poorly aligned slide can send you to the wrong side of the puzzle or force a long repositioning route.
Use the non-ice patches, Gym Trainers, cleared snowball lanes, and walls as landmarks. You can walk normally on non-ice surfaces, so use them to adjust your position before committing to another slide. If a trainer blocks the useful route, battle that trainer rather than trying to force a difficult detour.
The puzzle’s trainers are optional in the sense that you do not need to seek out every battle, but fighting them can provide valuable experience before Candice. Avoid unnecessary battles if your team is already prepared and your PP is limited. Once the central snowballs are cleared, follow the open lanes to Candice.
Heal with items after solving the puzzle if necessary. Arrange a suitable lead Pokémon before speaking to Candice, and save before the battle if you want a secure retry point.
- Use long slides to crash into and clear snowballs.
- Pause after each landing and identify the next stopping point.
- Use cleared lanes and non-ice patches to reposition.
- Fight only the Gym Trainers that fit your experience and resource plan.
- Save and restore the party before challenging Candice.
Defeat Candice’s original Platinum team
Candice’s Pokémon Platinum team is Sneasel at level 40, Piloswine at level 40, Abomasnow at level 42, and Froslass at level 44. This is different from the Diamond and Pearl lineup, so prepare for these four Pokémon specifically.
Sneasel is Dark/Ice and is especially vulnerable to Fighting attacks. Fire and Steel attacks also work. Sneasel is fast and knows Aerial Ace, so do not switch a frail Fighting-type into it casually. Use a durable attacker, a faster Pokémon, or a move that can defeat it before Aerial Ace becomes a problem.
Piloswine is Ice/Ground. Water attacks are a dependable choice, and Grass or Fighting attacks can also work if the attacker can handle its Ice coverage. Electric attacks do not work because Piloswine’s Ground typing makes it immune. Its Earthquake and Stone Edge make fragile Fire- or Flying-type switch-ins risky.
Abomasnow is Grass/Ice and activates hail through Snow Warning. Fire attacks are especially effective, and Fighting attacks are also strong. Steel and Rock coverage can help, but Abomasnow carries Focus Blast and Water Pulse, so do not assume every Fire, Rock, or Steel Pokémon is safe. Defeat it promptly if hail is wearing down your team.
Froslass is Ice/Ghost and holds a Sitrus Berry. Fighting and Normal attacks fail against it. Use Fire, Rock, Dark, Ghost, or Steel coverage, and keep that answer healthy until the end of the battle. Froslass can use Double Team, Blizzard, Shadow Ball, and Psychic, so a slow Pokémon that cannot hit it reliably may lose momentum. If Double Team becomes a problem, switch to a strong, accurate attack rather than repeatedly using weak moves.
- Sneasel: use Fighting, Fire, or Steel while respecting Aerial Ace.
- Piloswine: use Water, Grass, or Fighting; never use Electric attacks.
- Abomasnow: use Fire or Fighting and account for Focus Blast and Water Pulse.
- Froslass: use Fire, Rock, Dark, Ghost, or Steel; Fighting does not work.
- Keep your Froslass counter healthy for the final exchange.
Claim the Icicle Badge and trigger the Acuity Lakefront handoff
After defeating Candice, receive the Icicle Badge and TM72 Avalanche. The badge allows Rock Climb to be used outside battle. Teach HM08 only to a Pokémon that fits your long-term team plan, since Rock Climb is needed for later routes but may occupy a valuable moveslot.
Heal in Snowpoint City and restock before leaving. Return south through Acuity Lakefront and use Rock Climb on the wall leading to Lake Acuity. Approach the lake area to trigger the story scene with Barry and Commander Jupiter. Barry has already lost to Jupiter when you arrive, so this is a cutscene and handoff rather than another mandatory battle against Jupiter.
After the Acuity Lakefront scene, the next required destination is Veilstone City. Team Galactic’s main headquarters operation is handled there, not at Acuity Lakefront. Follow the Looker and Team Galactic progression in Veilstone to begin the later headquarters raid, including the route toward the Galactic Warehouse and the locked headquarters interior.
Before leaving Snowpoint, restore HP and PP and carry enough healing items for the upcoming Team Galactic sequence. A useful team for the next chapters includes a Fire- or Fighting-type attacker, a Ground- or Rock-capable Pokémon, a Steel-resistant switch-in, and reliable status or recovery support. The next mountain and Spear Pillar sections are longer than the Snowpoint route, so avoid proceeding with a depleted party.
- Receive the Icicle Badge and TM72 Avalanche.
- Confirm that Rock Climb works outside battle.
- Return to Acuity Lakefront and climb to Lake Acuity.
- Watch the Barry and Jupiter story scene; no mandatory Jupiter battle occurs there.
- Travel to Veilstone City afterward to begin the later Galactic HQ operation.
- Heal, restore PP, and restock before the next long story sequence.
Before you move on
- The party has reached Route 216 through northern Mount Coronet after the Lake Valor and Lake Verity events.
- Snowbound Lodge has been used or is available as a recovery point.
- HM08 Rock Climb has been collected from the snow northeast of the Route 217 Hiker’s house.
- The Icicle Plate has been received from the Hiker.
- Candice has been defeated with the Platinum team: Sneasel, Piloswine, Abomasnow, and Froslass.
- The Icicle Badge and TM72 Avalanche are in the inventory or Badge Case.
- Rock Climb can be used outside battle.
- The Acuity Lakefront and Lake Acuity scene with Barry and Jupiter has been triggered.
- The player knows to continue to Veilstone City for the later Galactic HQ operation.
Mount Coronet: Galactic HQ, ascent, puzzles and the road to Spear Pillar
After the Lake Acuity scene, return to Veilstone City and complete the Team Galactic Headquarters raid before attempting the summit. The raid begins at the Galactic Warehouse, continues through the underground passage and main HQ, and ends with Cyrus, Saturn and the release of Uxie, Mesprit and Azelf. Once that event is complete, heal and enter Mount Coronet from the southern entrance near Route 207 or Route 208. The summit route uses Surf, Strength and Rock Climb, crosses a snowy exterior section and ends at Spear Pillar. Save before triggering the summit story event.
Finish the Lake Acuity trigger and prepare for Team Galactic HQ
After Candice has been defeated and you have reached Lake Acuity, enter the lake area and watch the scene involving Barry and Commander Jupiter. You do not fight Jupiter there. Once the scene ends, Fly to Veilstone City and heal at the Pokémon Center before starting the raid.
Team Galactic Headquarters is in the northeast part of Veilstone. Approach the lone Galactic Grunt outside the main building and speak to him. He runs away after denying knowledge of the Storage Key, and Looker appears with the key. Follow Looker’s direction to the Galactic Warehouse on the western side of Veilstone, near the Department Store area.
This raid contains many trainer battles and several warp-panel rooms. Bring a balanced party rather than relying on one sweeper. Fighting moves are useful against many Dark-type Pokémon, Electric, Ice or Rock attacks help against Golbat and Crobat, and a strong answer to Bronzor and Toxicroak prevents the later Commander Saturn battle from becoming a resource drain. Restore the PP of your important attacks before entering.
- Complete the Lake Acuity scene.
- Heal in Veilstone City.
- Speak to the grunt outside the main HQ.
- Confirm that Looker has appeared with the Storage Key.
- Carry a balanced team, healing items and status cures.
Enter the Galactic Warehouse and obtain the Galactic Key
Enter the Galactic Warehouse and approach the locked metal doors. Looker opens them after you examine the entrance. Go downstairs into the basement and follow the passage east, fighting or avoiding trainers as the layout allows. The basement connects to the main Team Galactic complex.
Continue through the warehouse basement and use the stairs and corridors to reach the upper section. The important objective is the Galactic Key, which is behind a locked door in the warehouse basement. Pick it up before leaving. The key opens the steel doors in the main HQ and is required to reach Cyrus.
The warehouse also contains optional items, including the Dusk Stone and TM36 Sludge Bomb. Collect them if you want them, but do not spend time clearing every item branch if your party is already using significant PP. After obtaining the Galactic Key, use the nearby route back toward the warehouse entrance and return outside to Veilstone.
- Use Looker’s Storage Key at the warehouse.
- Reach the warehouse basement.
- Pick up the Galactic Key.
- Return to Veilstone and approach the main HQ entrance.
Clear the main Team Galactic Headquarters
Enter the main Team Galactic HQ in northeastern Veilstone and use the Galactic Key on the locked door. The interior is built around warp panels. At each set of panels, choose the route that continues through the building; the other panels commonly lead to optional items or return paths.
Fight the grunts that block the corridors, then use the warp panel near the televisions to reach the meeting hall. Looker joins you there while Cyrus gives his speech. When Cyrus and the grunts leave, follow the route Looker takes. Continue through the upper floors, using the beds on the second floor to restore your party if necessary before the final battles.
On the third floor, use the warp panels to reach the stairs to the fourth floor. Optional items include a Protein and Max Elixir, but the lower-left panel is the progression route. On the fourth floor, open the locked door and save before speaking to Cyrus if you want a safe retry point immediately before his battle.
- Use the Galactic Key on the main HQ door.
- Follow the progression warp panels through the first three floors.
- Use the beds to heal before the upper-floor battles.
- Save before approaching Cyrus.
Defeat Cyrus, then release the lake guardians
Cyrus uses Sneasel, Crobat and Honchkrow in the Platinum HQ battle. A Fighting move is a strong answer to Sneasel. Crobat and Honchkrow are Flying types, so Electric, Rock or Ice attacks are effective options. Crobat is fast and can cause confusion, while Honchkrow hits harder physically, so avoid leaving a weakened Pokémon in front of either one.
After Cyrus is defeated, he gives you the Master Ball and leaves. Do not exit the building yet. Use the nearby warp panel to reach the room where the lake guardians are being held. Speak to Commander Saturn to start the required battle.
Saturn uses Golbat, Bronzor and Toxicroak. Electric or Rock attacks are useful against Golbat, but remember that Bronzor has Levitate, so Ground moves will not work on it. Use a reliable Dark, Ghost, Fire or strong neutral attack against Bronzor, and use Psychic, Flying or Ground coverage against Toxicroak while watching for its Fighting and Poison attacks.
After defeating Saturn, interact with the control switch to release Uxie, Mesprit and Azelf. The release is the required story action that clears the way toward the summit. Return to Cyrus’s office and use the newly available warp route to exit the headquarters. Heal at the Veilstone Pokémon Center before entering Mount Coronet.
- Defeat Cyrus.
- Receive the Master Ball.
- Reach the lake-guardian room.
- Defeat Commander Saturn.
- Activate the release switch for Uxie, Mesprit and Azelf.
- Exit the HQ and heal.
Prepare the field-move party for Mount Coronet
For the direct route to Spear Pillar, bring access to Surf, Strength and Rock Climb. Surf is needed in the southern interior section, Strength moves the boulders that block the rising route, and Rock Climb is required on the snowy exterior and later mountain walls. Rock Smash is not required for the direct summit path, but it opens optional item branches and is useful if you want to collect side rewards. Defog is not necessary for the direct summit route.
Keep every field-move carrier conscious. If the Pokémon holding one of these moves faints, you cannot use the field action until it is restored. You can distribute the HMs across your main party or bring a saved utility Pokémon, but do not box the only Pokémon carrying Surf, Strength or Rock Climb.
Buy Super Repels or Max Repels if you want fewer wild encounters. Also carry healing items, Revives, status cures and spare Poké Balls. This chapter leads directly into the Spear Pillar sequence and then the Distortion World, so a team that arrives with low PP or several fainted members is poorly positioned for the next section.
- Bring Surf, Strength and Rock Climb.
- Bring Rock Smash only if collecting optional branches.
- Keep field-move carriers conscious.
- Restore PP and stock healing items and Poké Balls.
- Save before entering the mountain.
Enter from the southern entrance and reach the snowy exterior
The clearest entrance is the southern Mount Coronet entrance reached from Route 207, north of Oreburgh City. The connected Route 208 side also works, but the Oreburgh approach is easier to identify. Do not use the northern Route 216-side section expecting it to lead directly to Spear Pillar; that section is a different part of the mountain and does not provide the summit route.
Inside the southern cavern, use Surf across the water and continue toward the upper side of the room. Follow the stairs and corridors upward, using Strength when boulders block the continuing path. The main route passes through increasingly higher interior floors. Ignore item branches when you want to conserve time and PP.
After the interior climb, you emerge onto the snowy exterior. Aim toward the western side of the area rather than entering the lower cave in the trench. That lower cave is a return route and does not lead to the summit. Continue across the snow until you reach the climbable wall near the western side, then use Rock Climb.
- Enter Mount Coronet from Route 207 or the connected Route 208 side.
- Surf across the southern interior water.
- Use Strength on the blocking boulders.
- Follow the upward stairs and corridors.
- Do not enter the lower return cave in the snowy trench.
Use the western Rock Climb wall and follow the final cave route
After using Rock Climb on the western wall, move toward the far-left cave entrance. This is the correct entrance for the final summit route. If the cave begins taking you back toward the lower mountain or the familiar Route 211 side, you used the wrong opening; return to the snowy area and use the western climbable wall again.
The final cave section is more linear than the lower floors, but it contains stairs, bridges, item branches and Galactic Grunts. Take the route that continues upward and north. You may use Repels to suppress wild encounters, but Repels do not affect trainer battles. Fight some trainers if your main team needs experience, or pass avoidable trainers when HP and PP are more important than additional levels.
Use varied attacks against Galactic Pokémon. Fire, Fighting, Electric, Rock and Ice coverage all have useful targets, but do not rely on a single type because the grunts use mixed teams. Heal immediately if a key Pokémon becomes badly injured or confused. The summit events follow soon after the final exit, so do not treat the last cave as a safe place to spend all of your recovery items.
- Use Rock Climb on the western wall.
- Enter the far-left cave.
- Choose stairs and corridors that continue upward.
- Use Repels only for wild encounters.
- Keep enough HP and PP for the summit events.
Reach Spear Pillar and make the final save
The final northern exit from the upper cave leads to Spear Pillar, the stone platform at the peak of Mount Coronet. When you step outside and see the summit structure and Galactic presence, you have reached the correct destination.
Before approaching the central story area, heal with items if necessary, restore the PP of your main attacks and check that your strongest Pokémon are in the party. Keep a Pokémon with Sleep or Paralysis available if you intend to use status during the later Giratina encounter. Status is not required to complete the story, but it makes the capture attempt more manageable.
Save manually at Spear Pillar before triggering the central event. The following sequence contains mandatory cutscenes, battles and the transition into the Distortion World. A save at this point provides a reliable restart point if you need to retry the approach or adjust your party. The next chapter begins when you approach the summit event and follow the Team Galactic confrontation.
- Exit the final cave at Spear Pillar.
- Confirm that the lake guardians have been released.
- Heal the party and restore important PP.
- Verify that your preferred status move is available.
- Save before approaching the summit story trigger.
Before you move on
- The Lake Acuity scene has been completed.
- Looker opened the Galactic Warehouse route with the Storage Key.
- The Galactic Key was collected in the warehouse basement.
- Cyrus was defeated and the Master Ball was received.
- Saturn was defeated and the switch released Uxie, Mesprit and Azelf.
- The party entered Mount Coronet from the southern Route 207 or Route 208 side.
- Surf, Strength and Rock Climb were used to reach the snowy exterior and final cave.
- The western Rock Climb wall and far-left cave entrance were used for the summit route.
- The player exited at Spear Pillar.
- The game was saved at or immediately before the summit story trigger with a healed party, restored PP and capture supplies ready.
Spear Pillar — story climax and the Distortion World trigger
Reach the summit of Mount Coronet, defeat the Galactic forces at Spear Pillar, and activate the Distortion World sequence. In Pokémon Platinum, Cyrus is not fought at Spear Pillar. The summit events instead lead to Giratina’s appearance, Cyrus’s disappearance into the portal, and Cynthia’s request to enter the Distortion World.
Prepare before the final Mount Coronet approach
Before entering the last interior section of Mount Coronet, heal at the nearest Pokémon Center if your team is damaged. You should be ready for a Double Battle against Galactic Grunts at the Spear Pillar entrance and a Multi Battle against Mars and Jupiter immediately afterward. Bring ordinary healing items and status cures in case you need them during the approach, but the later Distortion World section includes a healing opportunity after its Cyrus battle.
Make sure your party includes Pokémon that can handle Poison-, Flying-, Psychic-, Rock-, Fighting-, and Ground-related threats. You do not need a particular team or field-move carrier for the Spear Pillar event itself, but the Mount Coronet route requires the field actions used during the preceding ascent, including Rock Climb and Strength. Surf and other field moves are also useful for the broader mountain route and later Distortion World navigation.
Save before committing to the final summit sequence. The most useful save is made after healing and restocking, while you can still freely leave Mount Coronet and adjust your party. If you plan to catch Giratina during the story, also carry a substantial supply of Poké Balls and at least one reliable status move, although the actual Giratina save should be made later, immediately before approaching it in the Distortion World.
- Heal before entering the final Mount Coronet section.
- Confirm that your team can handle the upcoming Galactic battles.
- Carry healing items, status cures, Poké Balls, and a useful status move.
- Save before entering the summit event sequence.
Reach the Spear Pillar entrance
Continue through the upper Mount Coronet route until you emerge at the summit ruins. Follow the passage toward the large open area rather than searching for a side exit. Galactic personnel are stationed at the entrance, and approaching them begins the first required battle of the sequence.
The first fight is a Double Battle against two Galactic Grunts. This battle occurs before Mars and Jupiter appear, so do not treat the first pair of Grunts as optional guards. Use reliable attacks instead of spending turns on a long setup plan. Electric- or Rock-type attacks are useful against the Flying Pokémon used in this part of the route, while Fighting- or Ground-type coverage helps against the other Galactic Pokémon.
- Follow the upper Mount Coronet path to the summit ruins.
- Approach the Galactic guards at the Spear Pillar entrance.
- Complete the mandatory Double Battle against both Grunts.
Defeat Mars and Jupiter with Barry
After the entrance battle, continue forward through Spear Pillar. Mars and Jupiter then challenge you together. Barry arrives automatically, turning the confrontation into a Multi Battle. You control your own Pokémon while Barry’s team fights alongside you, so lead with Pokémon that can deal immediate damage and survive attacks from multiple opponents.
Both Commanders use Bronzor and Golbat, while Mars also uses Purugly and Jupiter uses Skuntank. Defeat the Bronzor early if possible because Reflect and Light Screen can reduce the damage dealt by your side. Fighting-type attacks are effective against Purugly, Ground-type attacks are effective against Skuntank, and Electric- or Rock-type attacks are useful against Golbat. Avoid relying on a single fragile attacker, since the opposing side can focus attacks on it while Barry’s Pokémon provide the other half of the field.
When both Commanders are defeated, Barry heals your Pokémon before leaving. This is an important Platinum-specific recovery point: you do not need to spend your own healing items immediately after this battle unless you want to prepare for later areas. Once Barry leaves, remain at the summit and wait for the next scene to begin.
- Expect a Multi Battle, not a one-on-one fight.
- Prioritize the Bronzor before their screens make the battle longer.
- Use Fighting, Ground, Electric, or Rock coverage where appropriate.
- Allow Barry to heal the party after the battle.
Watch Cyrus activate the Red Chain
After the Commanders are defeated, move toward the center of Spear Pillar as the dialogue directs. Cyrus uses the Red Chain to summon both Dialga and Palkia. This is the Platinum version of the summit ceremony, so do not apply the simpler Diamond or Pearl expectation that only one of the two Legendary Pokémon appears during the main event.
Remain in the summit area while Cyrus completes the ceremony. The three Lake guardians then appear, and the ground opens as Giratina emerges from the Distortion World. Cyrus is taken through the opening along with the mysterious Pokémon, leaving a portal behind. There is no Cyrus battle at Spear Pillar in Pokémon Platinum; that battle occurs later in the Distortion World after you solve its required puzzles.
- Move to the central summit area after the Commander battle.
- Let Cyrus complete the Red Chain ceremony.
- Expect both Dialga and Palkia to be part of the scene.
- Do not search for a Cyrus battle at Spear Pillar.
Enter the Distortion World with Cynthia
After Cyrus and Giratina disappear, Cynthia arrives at Spear Pillar. She explains that the portal leads to the Distortion World and that the opening threatens the normal world. The three Lake guardians enter the portal first. When Cynthia asks you to follow, accept the offer and step into the opening.
This portal is the required entry condition for the next chapter. You do not battle Giratina at Spear Pillar, and you do not need to interact with Dialga or Palkia before entering. The next sequence takes place inside the Distortion World, where Cynthia accompanies you, the Lake guardians help indicate the puzzle route, and Cyrus is confronted near the end of the area.
- Wait for Cynthia to arrive after the portal opens.
- Accept her request to enter the Distortion World.
- Confirm that you have entered the new area before making any further preparations.
Preserve the correct save and resource plan
Keep the pre-summit save until you are certain that the story transition has completed. During the active cutscenes, simply allow the dialogue and area transition to finish normally rather than interrupting the game. Once you regain control inside the Distortion World, you can proceed through its platforms and gravity-shifting paths.
The Distortion World requires Surf and Strength during its navigation, and there are no wild Pokémon encounters there. Do not spend your capture supplies on the summit scene: Giratina appears later, at the end of the Distortion World. The later chapter should explain the exact route, Cyrus battle, healing point, and the separate save immediately before approaching Giratina.
- Keep the pre-event save until the transition is complete.
- Do not waste Poké Balls on the summit sequence.
- Enter the Distortion World with Surf and Strength available.
- Begin the next chapter only after control returns inside the Distortion World.
Before you move on
- The two Galactic Grunts at the Spear Pillar entrance have been defeated.
- Mars and Jupiter have been defeated in the Multi Battle with Barry.
- Barry has healed the party and left the summit.
- Cyrus has used the Red Chain to summon both Dialga and Palkia.
- The Lake guardians have entered the portal.
- Giratina has appeared, Cyrus has disappeared into the rupture, and Cynthia has arrived.
- You have accepted Cynthia’s request and regained control inside the Distortion World.
The Distortion World — navigation, battle flow and the Giratina encounter
Enter the Distortion World from Spear Pillar with a healed party, restored PP, Surf and Strength available, and enough capture supplies. Follow Cynthia and the Lake Guardians through the shifting floors, send the Uxie, Mesprit, and Azelf boulders down to B6F, place each beside its matching guardian, defeat Cyrus, and save after Cynthia restores the party. The final encounter is level 47 Origin Forme Giratina. If it is defeated or fled, it becomes available later in Turnback Cave after the Hall of Fame.
Prepare before entering the Distortion World
Heal at a Pokémon Center before returning to Spear Pillar. The Distortion World has no Pokémon Center, shop, wild Pokémon, or ordinary healing stop. Restore the PP of your main attacks and any sleep- or paralysis-inducing move intended for Giratina. Bring Ultra Balls and other useful capture supplies. Dusk Balls are stronger during the game’s nighttime period, while Timer Balls become more useful as a battle lasts longer.
Keep Pokémon that know Surf and Strength in the party. Both field moves are required during the first visit. Bring healing items for the Cyrus battle, even though Cynthia restores the party afterward. Save before entering the portal if you want a general fallback, but plan to make your most important capture save after Cyrus has been defeated and Cynthia has completed her recovery dialogue.
- Heal and restore important PP before Spear Pillar.
- Bring Surf and Strength.
- Carry Ultra Balls and other capture supplies.
- Bring healing items for Cyrus.
- Save before entering if you want a broad fallback point.
Cross the opening floors and complete the early platform route
Follow Cynthia from the entrance and use the central gray marker to descend to B1F. The Distortion World changes gravity and perspective, placing the character on walls, ceilings, or sideways platforms. The controls remain screen-relative: press the direction that moves toward the route as it appears on the current screen.
Gray markers move platforms, alter gravity, reveal routes, or act as elevators. Some trees, rocks, ledges, and platforms appear or disappear when approached. If scenery appears to block a path, walk toward it before turning around. Proximity often causes the obstruction to vanish or reveals the next platform.
Continue through the first platform sections until Mesprit appears. Follow the visible stones and marked platforms, then use the central marker to descend. On B2F, activate the directional markers in this sequence: right, right, down, and left. This is not the end of the route. Continue to the upper marker, then the right-hand marker, and finally the center marker. Avoid the nearby platform that leads to a dead end. The center marker lowers you to the next section.
- Use screen-relative directions when the camera rotates.
- Approach apparent obstacles instead of assuming they are solid.
- On B2F, activate right, right, down, then left.
- Continue upward, rightward, and through the center marker afterward.
- Avoid the nearby dead-end platform.
Reach the upper floors and send down Uxie’s and Mesprit’s boulders
On B3F, use the lower gray marker to expose the next platforms. Move toward the upper-right marker, then travel right and down to reach the following marker and its revealed route. Continue right to the elevator leading to B5F. Use the visible markers and changes in the terrain as landmarks; the apparent direction of the floor is not always the actual route.
On B5F, continue until Uxie appears beside a boulder. Use Strength to push that boulder down to B6F. Do not immediately take the nearby elevator. Use the ledge and left-side route to reach Mesprit, then push Mesprit’s boulder down as well. Both boulders must be sent below before continuing upward.
After the two boulders are down, take the elevator to the upper section. Follow the disappearing trees and rocks until the next elevator leads to another B3F area. Touch the nearby gray marker, travel left and down to the invisible platform, then go right and right again to reach the elevator. This route leads toward the later Surf section and Cyrus’s position.
- Use the B3F upper-right and lower markers as route landmarks.
- Push Uxie’s boulder down before leaving the area.
- Use the left ledge to reach Mesprit’s boulder.
- Push Mesprit’s boulder down before taking the upper elevator.
- From the later B3F area, go left, down, right, and right to reach the elevator.
Use the upside-down Surf route and send down Azelf’s boulder
From the later upper section, Surf across the water and activate the markers that shift you onto sideways and upside-down platforms. Continue through the perspective changes until you reach another water route. Surf toward the waterfall. The waterfall carries you downward and returns you to B5F.
Walk left until Azelf appears beside the final boulder. Use Strength to push Azelf’s boulder down to B6F, then take the nearby elevator downward. At this stage all three boulders are below, but the puzzle is not complete. Each boulder must still be placed into the hole beside the correct Lake Guardian.
- Surf across the water after the upper-floor route.
- Follow the sideways and upside-down platform changes.
- Surf toward the waterfall to return to B5F.
- Push Azelf’s boulder down and descend to B6F.
Complete the B6F boulder puzzle and open the route to Cyrus
On B6F, place the boulders into the matching holes: Uxie’s boulder beside Uxie, Mesprit’s boulder beside Mesprit, and Azelf’s boulder beside Azelf. Approach each boulder from the side that gives it a clear line toward its guardian. Make deliberate pushes near walls and corners. A poorly positioned boulder may require returning to the upper floors and sending it down again.
When all three boulders are correctly placed, return to Cynthia and use the newly opened platform or elevator behind her. Step onto the center marker to descend to B7F. Follow the path until the dialogue between Cynthia and Cyrus ends, then speak to Cyrus to begin the mandatory battle. There is no optional path around this confrontation.
- Place all three boulders beside their matching guardians.
- Confirm that Uxie, Mesprit, and Azelf have each been cleared.
- Return to Cynthia and use the opened descent.
- Do not leave the area before confirming the route to B7F.
Defeat Cyrus without relying on a fixed send-out order
Cyrus’s original Platinum Distortion World roster is Houndoom at level 45, Honchkrow at level 47, Crobat at level 46, Gyarados at level 46, and Weavile at level 48. Use this as a roster and threat list rather than assuming a guaranteed send-out order. The verified references list the same five Pokémon and levels but differ on the displayed sequence, so build a flexible response plan.
Houndoom knows Flamethrower, Dark Pulse, Will-O-Wisp, and Thunder Fang. Water, Ground, Rock, and Fighting attacks are useful, but Thunder Fang can punish an exposed Water Pokémon. Honchkrow carries Drill Peck, Night Slash, Heat Wave, and Psychic. Use Electric, Ice, Rock, or other reliable super-effective coverage while avoiding fragile Ice- or Steel-based answers that cannot tolerate Heat Wave.
Crobat uses Cross Poison, Air Slash, Toxic, and Confuse Ray. Remove it promptly if possible, or switch to a Pokémon that can withstand its status pressure. Gyarados carries Waterfall, Ice Fang, Earthquake, and Giga Impact. Electric attacks are effective, but do not leave an Electric Pokémon in against Earthquake. Gyarados’s Giga Impact also creates a recovery opportunity on the following turn if it is still active.
Weavile is the highest-level threat at level 48 and carries Night Slash, Ice Punch, Fake Out, and X-Scissor. Fighting attacks are especially valuable, but Fake Out can disrupt the opening turn and its speed threatens frailer Pokémon. Keep more than one answer available instead of depending on a single sweeper.
Cynthia does not heal the party before this battle. After Cyrus is defeated, wait for the dialogue and recovery sequence to finish; Cynthia then restores the entire party before the Giratina approach.
- Expect Houndoom 45, Crobat 46, Gyarados 46, Honchkrow 47, and Weavile 48.
- Do not assume a fixed send-out order.
- Prepare Water, Ground, Rock, Fighting, Electric, Ice, or other appropriate coverage.
- Respect Gyarados’s Earthquake and Crobat’s status moves.
- Confirm Cynthia’s full-party healing after Cyrus.
Save before Origin Forme Giratina and control the capture
After Cynthia heals the party, follow the route toward Giratina. When Giratina flies past, continue across the invisible platforms until you reach the final approach. Stop before interacting with Giratina and save manually. This is the best retry point because a failed capture attempt can then be repeated without replaying the Distortion World puzzle or Cyrus battle.
The story encounter is level 47 Origin Forme Giratina, a Ghost- and Dragon-type Pokémon. Its moves are Ominous Wind, AncientPower, Dragon Claw, and Shadow Force. The four moves total 30 PP: 5 for Ominous Wind, 5 for AncientPower, 15 for Dragon Claw, and 5 for Shadow Force. If the battle continues long enough, Giratina can exhaust its moves and use Struggle.
Lower its HP gradually rather than opening with a powerful super-effective attack. Ghost-, Dark-, Ice-, and Dragon-type moves can deal heavy damage and may knock it out unexpectedly. Sleep or paralysis improves the capture attempt. Do not use poison or burn, because residual damage can defeat Giratina between turns. Use Ultra Balls, Dusk Balls during their nighttime bonus period, or Timer Balls after the battle has continued for many turns.
If Giratina is defeated or fled, it is not permanently lost. After entering the Hall of Fame, Giratina becomes available at level 47 in Altered Forme in Turnback Cave. If the Distortion World Giratina was caught, the later Turnback Cave route instead leads to the Griseous Orb area. The orb changes Giratina to Origin Forme outside the Distortion World when held.
- Save immediately before the final Giratina interaction.
- Use controlled damage and avoid accidental knockouts.
- Use sleep or paralysis if available.
- Avoid poison and burn.
- Remember that Giratina’s four moves total 30 PP.
- Use Turnback Cave after the Hall of Fame if Giratina was defeated or fled.
Return to the normal world
After the encounter and the remaining dialogue, continue along the nearby route rather than waiting for an automatic exit. Cynthia points out the portal that returns to the normal world. Enter it to reach Sendoff Spring and conclude this chapter’s Distortion World sequence.
Record whether Giratina was caught. That determines whether the later Turnback Cave objective is a level 47 Altered Forme Giratina encounter or the route to the Griseous Orb. The story continues from Sendoff Spring, with the next major progression leading toward Sunyshore City and the eighth Gym.
- Finish the post-battle dialogue.
- Enter the nearby portal manually.
- Confirm that Sendoff Spring has been reached.
- Note whether Giratina was caught or remains available in Turnback Cave.
Before you move on
- The Uxie, Mesprit, and Azelf boulders are placed beside their matching guardians on B6F.
- The lower route has opened and Cyrus has been defeated on B7F.
- Cynthia’s post-Cyrus full-party recovery has completed.
- The level 47 Origin Forme Giratina has been caught, defeated, or fled.
- The nearby portal has been entered and Sendoff Spring has been reached.
- If Giratina was not caught, Turnback Cave becomes the later level 47 Altered Forme encounter after the Hall of Fame.
- If Giratina was caught, Turnback Cave later provides access to the Griseous Orb area.
Return from the Distortion World and Sunyshore City — Volkner (Gym 8)
After the Distortion World events, return through Sendoff Spring and report to Professor Rowan in Sandgem Town. Travel through Valor Lakefront and Route 222 to Sunyshore City, speak with Flint, bring Volkner back from Vista Lighthouse, and defeat him in the final Sinnoh Gym. Receive the Beacon Badge and HM07 Waterfall from Jasmine, then begin the route through Route 223 toward the Pokémon League. Victory Road, the Elite Four, Champion Cynthia, Turnback Cave, and the Griseous Orb branch are handled in later chapters.
Return from the Distortion World to Sendoff Spring
Complete the Giratina encounter and the final Distortion World sequence. After the story transition, you return to the normal world at Sendoff Spring with Cynthia. This is the correct point to leave the Distortion World; do not look for the Griseous Orb there.
Heal your party as soon as possible and save after returning to the normal world. If you caught Giratina, check that it is safely in your party or PC before changing your team. If Giratina was defeated or fled, do not stop the main story to search for another encounter. The later Turnback Cave and Griseous Orb branch is reserved for chapter 18 after the Hall of Fame.
- Finish the Distortion World story sequence.
- Complete the Giratina encounter or leave the battle.
- Return to Sendoff Spring.
- Heal and save before continuing.
- Do not treat Turnback Cave as the next objective.
Report to Professor Rowan in Sandgem Town
Travel to Sandgem Town and enter Professor Rowan’s laboratory. Speak with Rowan and allow the post-Distortion World conversation to finish. The immediate story route now points toward Sunyshore City and the final Gym challenge.
If you use Fly, Pastoria City is a convenient staging point for the eastern route. You do not need to complete any separate lake-guardian objective before continuing to Sunyshore City. Those encounters are separate content and are not required for this chapter’s route.
Before leaving Sandgem, make sure your team has enough healing items and that at least one Pokémon can eventually use Surf. You will need Surf for Route 223 after receiving Waterfall, while Waterfall itself becomes available only after the final Gym battle.
- Enter Professor Rowan’s laboratory.
- Finish the full post-Distortion World conversation.
- Confirm Sunyshore City as the next main destination.
- Prepare Surf access and healing supplies.
- Leave Turnback Cave and other postgame objectives for chapter 18.
Travel through Valor Lakefront and Route 222
From Sandgem Town, Fly to Pastoria City if convenient, then travel east through Valor Lakefront and enter Route 222. Follow the route east toward Sunyshore City. The path contains fishermen and other trainers, with higher-level wild Pokémon than the earlier Sinnoh routes.
Heal in Pastoria or at the Sunyshore Pokémon Center before challenging the Gym. Route 222 is a useful place to gain experience if your team is below the mid-to-high 40s, but use Repels if you need to preserve PP for the Gym. The optional houses, route items, and fishing-related conversations are not required for progression.
Continue east through the gatehouse into Sunyshore City. Flint will stop you near the Gym and explain that Volkner is not currently there. This is the required entrance event; the Gym cannot be completed until you locate Volkner at Vista Lighthouse.
- Reach Valor Lakefront or Pastoria City.
- Enter Route 222 from the western side.
- Follow Route 222 east to Sunyshore City.
- Heal and restock before the Gym sequence.
- Treat Route 222’s side interactions as optional.
Bring Volkner back from Vista Lighthouse
After Flint’s conversation, go to Vista Lighthouse in the southeastern part of Sunyshore City. Use the elevator to reach the upper floor and speak with Volkner. He agrees to return to the Gym after recognizing that you are a strong enough challenger.
Leave the lighthouse and return to the Gym. Flint should no longer be blocking the entrance. Heal at the Pokémon Center before entering, because the Gym contains several trainers and the leader’s strongest Pokémon is level 50.
There is no separate power-plant mission to complete in Platinum before Volkner. The required order is Flint’s entrance conversation, Volkner at Vista Lighthouse, then the Sunyshore Gym.
- Speak with Flint near the Gym.
- Enter Vista Lighthouse.
- Talk to Volkner on the upper floor.
- Return to the Gym after Volkner leaves.
- Heal before solving the Gym puzzle.
Solve the Platinum Sunyshore Gym puzzle
Sunyshore Gym uses rotating gear platforms controlled by colored switches. The puzzle has three rooms. Trainer battles can be fought or avoided where the path allows, but defeating them provides useful experience before Volkner.
In the first room, press the green switch on the platform to the right of the entrance once. Follow the new path to the switch on the left and press it once. Continue through the opened route into the second room.
In the second room, go to the nearby blue switch on the left and press it three times. Cross the drawbridge near the stairs, then reach the blue switch in the upper-left area and press it once. Press the nearby green switch once. The drawbridge around the right wall should now provide the route to the third room.
In the third room, press the nearby red switch once, then press the red switch to the left. Cross the drawbridge on the left wall and follow the path to the green switch. Press the green switch twice, then press the blue switch once. Use the right-side drawbridge to return toward the room’s first section.
Press the first red switch again. Backtrack across the right-side drawbridge. The gears should now be aligned to create the path to Volkner. If the route is blocked, retrace the sequence rather than pressing random switches; the repeated red-switch activation is the final alignment step.
- First room: green switch on the right once, then the left switch once.
- Second room: left blue switch three times, upper-left blue switch once, nearby green switch once.
- Third room: first red switch once, left red switch once, green switch twice, blue switch once.
- Return to the first red switch and press it again.
- Reach Volkner through the final gear alignment.
Defeat Volkner’s Platinum team
Volkner uses Jolteon at level 46, Raichu at level 46, Luxray at level 48, and Electivire at level 50. All four are pure Electric types and are weak to Ground-type attacks. Ground types are also immune to Electric attacks, making a sturdy Ground Pokémon the best primary answer.
Jolteon knows Charge Beam, Thunder Wave, Iron Tail, and Quick Attack. Its Speed and Thunder Wave are the main concerns, so use a strong physical Ground move immediately rather than allowing it to build momentum.
Raichu carries Charge Beam, Signal Beam, Focus Blast, and Quick Attack. Focus Blast can punish Rock-type substitutes, while Signal Beam threatens some Grass- and Psychic-type alternatives. A durable Ground Pokémon should still handle it well if you attack decisively.
Luxray knows Thunder Fang, Fire Fang, Crunch, and Ice Fang. These coverage moves make it unsafe to assume that every Ground counter is automatically secure. Avoid using a Pokémon with a severe Ice weakness unless it can defeat Luxray quickly. A bulky Ground type or a strong neutral attacker is safer than a fragile dual-type counter.
Electivire holds a Sitrus Berry and knows ThunderPunch, Fire Punch, Giga Impact, and Quick Attack. Its Motor Drive ability raises its Speed if it is hit by an Electric move, so never use Electric attacks against it. Ground moves bypass its Electric attacks, but Fire Punch and Giga Impact can still deal heavy damage. If Electivire uses Giga Impact, exploit the recharge turn to attack or heal.
Bring at least one backup Ground answer or a strong neutral attacker. Grass types resist Electric attacks, but they must respect Fire Punch, Fire Fang, Ice Fang, Iron Tail, and Focus Blast depending on the matchup.
- Bring a reliable Ground-type move.
- Keep a backup answer for Luxray’s Ice Fang.
- Avoid Electric attacks against Electivire because of Motor Drive.
- Use healing items if paralysis or coverage damage puts the lead at risk.
- Restore HP and PP after the battle.
Claim the Beacon Badge and receive HM07 Waterfall
After defeating Volkner, receive the Beacon Badge and TM57 Charge Beam. The Beacon Badge is the eighth Sinnoh Gym Badge and allows you to use Waterfall outside battle. It also removes the final badge-based obedience restriction for traded Pokémon.
Leave the Gym and go to the northern beach area of Sunyshore City. Speak with Jasmine, the visiting Johto Gym Leader. After Volkner’s defeat and the rival’s brief conversation, Jasmine gives you HM07 Waterfall.
Teach Waterfall to a suitable Pokémon if you need immediate field access. HM moves cannot normally be forgotten until visiting the Move Deleter, so avoid assigning Waterfall to a team member whose moveset you want to keep completely free of field moves. You will need a Pokémon that knows Surf and a Pokémon capable of using Waterfall for the next route.
- Defeat Volkner.
- Receive the Beacon Badge.
- Receive TM57 Charge Beam.
- Speak with Jasmine on the northern beach.
- Obtain HM07 Waterfall.
- Prepare Surf and Waterfall access.
Begin Route 223 and hand off to Victory Road
From the northern side of Sunyshore City, use Surf to enter Route 223. Follow the water route north, stopping at the small islands as needed. The route contains many Water-type trainers, so Electric- and Grass-type attacks are useful, while a Pokémon with reliable recovery can reduce item use.
Continue north through the route and use Waterfall at the northern waterfall. The Pokémon League entrance is beyond the route. Optional items, fishing encounters, and most trainer battles can wait if your party needs to conserve PP for the next section.
At the Pokémon League, use the Pokémon Center to restore HP and PP before entering Victory Road. Bring Pokémon that can provide Surf, Waterfall, Strength, and Rock Climb for the main route. Rock Smash and Defog are useful for optional paths and visibility, but do not spend time collecting every item before the next chapter.
This chapter ends once the route to the Pokémon League is open and you are ready to begin Victory Road. Chapter 13 covers the actual Victory Road traversal, final training, Elite Four preparation, and League entrance. Turnback Cave, the Griseous Orb branch, and other post-League objectives remain deferred to chapter 18 after the Hall of Fame.
- Leave Sunyshore City by Surfing north onto Route 223.
- Follow Route 223 toward the northern waterfall.
- Use Waterfall to reach the Pokémon League entrance.
- Restore HP and PP at the League Pokémon Center.
- Enter chapter 13 for Victory Road and final League preparation.
- Do not enter Turnback Cave as part of this chapter.
Before you move on
- The player has returned from the Distortion World to Sendoff Spring.
- The player has completed Professor Rowan’s post-Distortion World conversation in Sandgem Town.
- The player has followed Valor Lakefront and Route 222 to Sunyshore City.
- The player has spoken with Flint and Volkner at Vista Lighthouse.
- The player has defeated Volkner’s Jolteon, Raichu, Luxray, and Electivire.
- The player has received the Beacon Badge and TM57 Charge Beam.
- The player has spoken with Jasmine and obtained HM07 Waterfall.
- The player can travel north through Route 223 and use Waterfall at its northern end.
- The player has reached the Pokémon League entrance and restored the party before Victory Road.
- The player is ready to begin chapter 13, which covers Victory Road and the Pokémon League.
- Turnback Cave and the Griseous Orb branch have not been incorrectly placed in this chapter.
Victory Road and the final push to the Pokémon League
After defeating Volkner, speak with Jasmine in Sunyshore City to receive HM07 Waterfall. Cross Route 223, climb the waterfall, clear the main route through Victory Road, and reach the Pokémon League. Victory Road’s first-trip route uses Surf, Strength, Rock Smash, Waterfall, and Rock Climb. Defog is not needed for this initial journey; it is associated with the blocked postgame section that opens after the Hall of Fame and National Pokédex. Heal at both Pokémon Center locations, defeat Barry in the League lobby, and enter the Elite Four with balanced coverage, preserved PP, and a backup plan for Cynthia’s Garchomp.
Prepare in Sunyshore City and cross Route 223
Heal your party in Sunyshore City and restock before leaving. Carry a substantial supply of Hyper Potions or stronger healing items, Full Heals, Revives, and at least a few status cures. Victory Road contains many trainers and wild Pokémon in the mid-to-upper 40s, while the League challenge continues through the Elite Four and Champion Cynthia without a return to a Pokémon Center between battles.
Go to the beach area on the eastern side of Sunyshore City and speak with Jasmine after Volkner has been defeated. She gives you HM07 Waterfall. Keep a Pokémon that knows Surf and another that knows Waterfall available before heading north. Surf through Route 223, using the islands and shoreline as landmarks. The route contains numerous swimmers and other trainers, so battle enough of them to gain experience, but do not spend all of your PP and healing items before Victory Road.
At the northern end of Route 223, use Waterfall to climb the large falls. Enter the Pokémon League grounds and use the Pokémon Center on the southern side before entering the cave. This is the most convenient recovery point before the main Victory Road route.
- Defeat Volkner before speaking with Jasmine.
- Receive HM07 Waterfall from Jasmine.
- Have Surf and Waterfall available.
- Restock healing items, Revives, status cures, and useful Poké Balls.
- Heal at the Pokémon Center outside Victory Road.
Arrange the field moves before entering
For the first trip through Platinum’s main Victory Road route, your party collectively needs Surf, Strength, Rock Smash, Waterfall, and Rock Climb. Spread these moves across two or more Pokémon whenever possible. A Bibarel or another temporary field-move Pokémon can carry several of them, while your primary battlers retain their most important attacks.
Surf is needed for the water sections, Waterfall is needed to change elevation, and Rock Climb opens the climbable walls that connect the cave’s levels. Strength moves the boulders in the central puzzle areas, while Rock Smash clears cracked rocks that obstruct parts of the route. You do not need Defog for this first League trip. The foggy extension toward Route 224 is a postgame area and is not part of the required route to Cynthia.
Check the field-move Pokémon before entering. If one is fainted or too underleveled to survive an accidental battle, you may be forced to retreat. A temporary reserve Pokémon is preferable to replacing several crucial battle moves on your League team.
- Collectively carry Surf, Strength, Rock Smash, Waterfall, and Rock Climb.
- Use two or more Pokémon if one cannot carry all required moves.
- Do not treat Defog as a first-trip requirement.
- Keep at least four reliable battlers available for the League.
Cross the opening floors and choose the active route
Enter Victory Road from the Pokémon League side and cross the opening bridges. Use the first Rock Climb wall to descend to the lower section, then return to the upper path when the route requires it. The cave is built around connected elevation changes rather than a single straight corridor, so use stairs, bridges, and climbable walls as your main landmarks.
The first major puzzle area uses cracked rocks, Strength boulders, and bicycle ramps. Clear the cracked rock that blocks the active passage, then push the nearby boulders only far enough to open the staircase or ramp route. If a boulder arrangement becomes unusable, leave the section and re-enter to reset the field obstacles. Do not keep pushing randomly while trying to solve the same room.
Several paths branch toward items and optional trainers. Fight trainers when your team can safely gain experience, especially if one or more League members are still below the desired range. Use Repels when backtracking or collecting items, but do not automatically avoid every encounter if your party needs the experience. Victory Road is a useful final training area, but it is also long enough to drain a narrow moveset.
- Use Rock Climb to connect the opening upper and lower paths.
- Clear cracked rocks with Rock Smash.
- Move Strength boulders to open stairs, ramps, and corridors.
- Use the Bicycle where the ramp sections require it.
- Reset a puzzle room by leaving and re-entering if a boulder is misplaced.
Navigate the lower water section and reach the exit
Continue through the central floors by following the stairs and Rock Climb walls toward the deeper section. After the Strength and Rock Smash passages, the route reaches water. Use Surf to cross the pool and Waterfall to change elevation. Follow the resulting path back toward the upper side of the cave rather than treating the waterfall as an optional item route.
The lower and upper sections contain trainer battles with varied types, including strong physical attackers and several Pokémon that can punish a team relying on one sweeper. Rotate your party so that no single Pokémon loses all of its PP before the League. Use an Ether or Elixir only when returning to the entrance would be more dangerous or time-consuming than restoring the move in place. An Escape Rope can help you leave after reaching the cave entrance, but it does not replace the need to navigate to the exit.
After the final water and elevation changes, look for the climbable wall on the right-hand side of the route. The Rock Climb ledge there leads to the exit into the northern Pokémon League grounds. The eastern postgame extension is blocked during this first visit, so ignore it and do not spend time searching for a way through it.
- Use Surf for the lower water passage.
- Use Waterfall to reach the next elevation.
- Preserve PP for your League counters.
- Use the final right-side Rock Climb ledge to reach the exit.
- Ignore the blocked postgame extension on the first visit.
Heal inside the League building and prepare for Barry
Once outside Victory Road, enter the Pokémon League building. Use its Pokémon Center before approaching the receptionist. This second healing point is important: the exterior Pokémon Center restores you after the cave, while the League building lets you arrange the final team and restore PP immediately before Barry.
Use the PC to place your intended six Pokémon in the correct order, check held items, and remove unnecessary field moves if you brought a temporary HM carrier. Save inside the building. When you walk toward the access area, Barry appears and begins the required rival battle before you enter the Elite Four rooms.
Barry’s exact team depends on your starter, but his lineup always includes Staraptor, Floatzel, Heracross, and Snorlax. The remaining members are chosen from Roserade, Rapidash, and the fully evolved starter with a type advantage over your selection. Expect Staraptor’s strong Flying and Fighting coverage, Floatzel’s Water attacks plus Ice Fang and Crunch, Heracross’s Fighting and Bug attacks, Snorlax’s durability and Rest, and the final starter’s stronger coverage. Lead with a healthy Pokémon that is not exposed to an obvious opening weakness.
- Heal again at the Pokémon Center inside the League building.
- Restore HP and PP and arrange held items.
- Save before approaching Barry.
- Prepare answers for Staraptor, Floatzel, Heracross, Snorlax, and the starter-dependent members.
- Defeat Barry before entering the Elite Four rooms.
Train and build coverage for the League
A balanced party in the mid-to-upper 50s is a practical preparation target, although exact requirements depend on moves, held items, type matchups, and battle decisions. Avoid relying on one overleveled Pokémon while the rest of the party remains unable to switch in safely. Use Victory Road trainers and the final Route 223 trainers for experience, then heal and stop grinding once each intended League member can contribute.
Aaron is Bug-focused. Fire, Flying, and Rock attacks are broad answers to his team, while Ground is mainly relevant for Drapion rather than being a general solution to the entire battle. Bertha is Ground-focused, so strong Water and Grass attacks are useful; avoid assuming that a single Flying Pokémon is safe because her team carries Rock coverage. Flint’s Fire-focused team can be handled with Water and Ground attacks, but keep a second answer available because his Pokémon use coverage that can punish careless switches.
Lucian’s Psychic-focused team is vulnerable to Dark and Ghost attacks, but strong physical attackers are also valuable because several of his Pokémon can withstand weak special attacks or respond with their own coverage. Cynthia requires mixed preparation rather than one type-specific counter. Keep reliable answers to Water, Ground, Ghost, Dragon, Steel, and Fighting threats. Ice or Dragon coverage is especially important for Garchomp, but prepare a backup plan in case the Pokémon carrying that move is defeated or cannot switch in safely.
Bring healing items for use between League battles and reserve your strongest recovery items for Cynthia. Carry PP-restoring items for the attacks that serve as your primary answers, and avoid spending every Ether or Elixir inside Victory Road. If a key Pokémon faints against Barry or an early Elite Four member, reassess whether the remaining team still has coverage before committing to the full challenge.
- Train the main team to a reasonably even mid-to-upper-50s range.
- Use Fire, Flying, or Rock coverage for Aaron’s Bug team.
- Reserve Ground primarily for Drapion rather than treating Aaron as a Ground specialist.
- Use Water or Grass coverage for Bertha.
- Use Water or Ground coverage for Flint.
- Use Dark, Ghost, or strong physical options for Lucian.
- Preserve Ice or Dragon coverage and a backup plan for Garchomp.
- Carry healing items, Revives, status cures, and PP-restoring items.
Before you move on
- You received HM07 Waterfall from Jasmine after defeating Volkner.
- You crossed Route 223 and climbed the waterfall to the Pokémon League grounds.
- You cleared the main first-trip route through Victory Road with Surf, Strength, Rock Smash, Waterfall, and Rock Climb available across the party.
- You reached the League building and healed there before approaching Barry.
- Barry has been defeated and the receptionist has granted access to the Elite Four rooms.
- Your party has restored HP and PP, suitable held items, and enough recovery supplies for a continuous League attempt.
- Your team has practical plans for Aaron’s Bug team, Bertha’s Ground team, Flint’s Fire team, Lucian’s Psychic team, and Cynthia’s mixed team, including a backup answer to Garchomp.
References for this chapter
- Walkthrough: Pokémon Platinum/Part 19 — Bulbapedia
- Walkthrough: Pokémon Platinum/Part 23 — Bulbapedia
- Victory Road (Sinnoh) — Serebii Pokéarth
- Pokéarth — Sinnoh Pokémon League, Pokémon Platinum
- Pokémon Platinum Full Walkthrough — PsyPokes
- Pokémon Platinum Full Walkthrough — PsyPokes, Victory Road section
The Elite Four — Aaron and Bertha: approaches and counters
Prepare for the Pokémon League with reliable answers to Bug, Ground, Rock, and Flying threats. Aaron is first and uses Yanmega, Scizor, Vespiquen, Heracross, and Drapion. Bertha follows with Whiscash, Gliscor, Hippowdon, Golem, and Rhyperior. Preserve your strongest coverage, heal between battles, and keep enough recovery items and PP for Flint, Lucian, and Cynthia.
Prepare before entering the League
Heal at the Pokémon Center outside the Pokémon League and save before beginning the challenge. Once you enter, the battles proceed in sequence: Aaron, Bertha, Flint, Lucian, and then Champion Cynthia. There is no Pokémon Center between these battles, but you can use healing items, status cures, PP-restoring items, and Revives from the Bag between fights.
Build your plan around dependable coverage rather than one Pokémon intended to sweep everything. Fire, Flying, Rock, Water, Grass, Ground, and Ice attacks are all useful across Aaron and Bertha. A mixed team is safer than relying entirely on physical or special damage, because some of their Pokémon are much easier to defeat from one side of the defensive spectrum.
Restore the PP of your main attacks before starting. Carry Full Restores for combined health and status recovery, plus Max Potions or Hyper Potions for ordinary damage. Revives are valuable if an essential counter falls, but do not spend them automatically on a Pokémon that has no useful matchup remaining.
- Heal the full team and save before starting the League challenge.
- Restore the PP of the attacks planned for Aaron and Bertha.
- Carry Full Restores, Revives, and several strong healing items.
- Check that at least one team member has reliable Fire, Rock, Water, Grass, Ground, or Ice coverage.
Defeat Aaron’s Yanmega first
Aaron leads with Yanmega at level 49. In Platinum, it knows Air Slash, Bug Buzz, U-turn, and Double Team, and its Speed Boost ability raises its Speed at the end of each turn. Use a strong Rock or Electric attack immediately if you have one. Rock is especially effective, while Electric also exploits Yanmega’s Flying typing.
Do not allow Yanmega several turns to use Double Team or gain Speed. If your first answer is slow, lead with a Pokémon that can survive Air Slash or Bug Buzz and remove Yanmega quickly. A move with reliable accuracy is preferable to gambling on a very powerful attack that may miss. If Yanmega uses U-turn, be ready for Aaron to bring in another member and adjust your matchup rather than trying to force the original plan.
- Use Rock or Electric coverage against Yanmega when available.
- Prevent repeated Speed Boost and Double Team turns.
- Avoid leaving a slow, weak Grass Pokémon in front of Yanmega.
- Prefer reliable accuracy when a miss could cost the League attempt.
Use Fire, Flying, and Rock coverage against Aaron’s middle team
Scizor is level 49 and has Bug/Steel typing, giving it a severe weakness to Fire. Bring in your Fire attacker after a safe knockout or through a protected switch, then use a strong Fire move. Do not sacrifice a fragile Fire-type by switching it into an attack unnecessarily; if your lead has just defeated Yanmega, it is often safer to heal or switch on the next turn according to the matchup.
Vespiquen is level 50 and Heracross is level 51. Both are vulnerable to Rock and Flying attacks. Vespiquen may use Attack Order, Defend Order, Heal Order, and Power Gem, so allowing it to build its defenses or repeatedly heal can waste PP. Heracross carries strong physical attacks, including Megahorn, Close Combat, Night Slash, and Stone Edge. Use a healthy Flying or Rock attacker and avoid sending in a weakened Pokémon that may fall to one hit.
Rock coverage can handle Yanmega and Vespiquen, while Flying coverage is especially valuable against Heracross. If your only Flying move is Fly, it can still work, but an immediate Flying attack is safer when Heracross is already threatening a knockout.
- Use Fire against Scizor.
- Use Rock or Flying attacks against Vespiquen.
- Use a healthy Flying or strong neutral attacker against Heracross.
- Do not allow Vespiquen repeated Defend Order and Heal Order turns.
Finish Aaron with Ground attacks on Drapion
Drapion is Aaron’s level 53 ace. In Pokémon Platinum it is Poison/Dark, not Bug-type, and its Dark typing makes it immune to Psychic-type moves. Do not attempt to solve it with Psychic attacks. Ground attacks are the reliable super-effective option, so preserve a Ground user or a Pokémon carrying a strong Ground move for this final matchup.
Drapion carries X-Scissor, Cross Poison, Ice Fang, and Aerial Ace, so a frail Grass- or Flying-type should not be treated as a safe switch-in. If your Ground attacker has been damaged during the earlier fights, heal it before committing. After Drapion falls, review the team before moving to Bertha and restore the Pokémon that will handle Whiscash, Hippowdon, Golem, and Rhyperior.
- Use Ground attacks against Drapion whenever possible.
- Do not use Psychic attacks because Drapion is Dark-type.
- Heal the Ground counter if it is within knockout range.
- Restore PP before beginning Bertha’s battle.
Open against Bertha’s Whiscash and read the team order correctly
Bertha’s Platinum team is Whiscash level 50, Gliscor level 53, Hippowdon level 52, Golem level 52, and Rhyperior level 55. Whiscash is Water/Ground, so it is immune to Electric attacks and is especially vulnerable to Grass. Lead with a strong Grass attack if you have one. A powerful neutral or Water attack can work in an emergency, but Grass is the cleanest way to pressure Whiscash.
Whiscash can use Earth Power, Aqua Tail, Zen Headbutt, and Sandstorm. Do not leave an Electric-type move selected just because Whiscash appears to be a Water Pokémon; its Ground typing prevents the attack from working. If your Grass attacker is vulnerable to Ice or lacks the power to finish the battle, use a safer switch rather than repeatedly trading damage.
- Use Grass against Whiscash.
- Do not use Electric attacks on Whiscash.
- Remember Bertha’s order: Whiscash, Gliscor, Hippowdon, Golem, Rhyperior.
- Switch if your Grass attacker cannot safely survive the next attack.
Handle Gliscor with Ice coverage
Gliscor is Ground/Flying and carries Earthquake, Ice Fang, Fire Fang, and Thunder Fang. Grass is not super effective against it because of its Flying typing. Ice attacks are the strongest direct answer and are particularly valuable if you have Ice Beam or another reliable Ice move. Preserve that move for Gliscor unless an earlier emergency makes it necessary.
Water attacks can still damage Gliscor normally, but do not assume a Water-type automatically wins: Earthquake can heavily damage a fragile attacker. Switch in after a safe knockout, use a sturdy Pokémon, or heal before committing to the exchange.
- Use Ice coverage against Gliscor when available.
- Do not rely on Grass attacks against Gliscor.
- Watch for Earthquake and the elemental Fang attacks.
- Keep the Ice user healthy enough to survive a possible counterattack.
Break through Hippowdon, Golem, and Rhyperior
Hippowdon is level 52 and can start a sandstorm with Sand Stream. The weather causes residual damage at the end of turns; it does not prevent or weaken healing items. Hippowdon also has Earthquake, Stone Edge, Crunch, and Yawn, so remove it efficiently instead of allowing repeated Yawn turns and unnecessary item use. Water and Grass attacks are both effective, though a strong special attack can be safer against its physical bulk.
Golem and Rhyperior are Rock/Ground Pokémon and are weak to Water and Grass. Use Surf, another strong Water attack, or a dependable Grass move. Rhyperior is level 55 and can punish a frail attacker with powerful physical moves, so bring it in safely and avoid leaving a low-health Pokémon exposed. If your main Water or Grass attacker is weakened, use a backup rather than spending several turns hoping to survive.
- Use Water or Grass against Hippowdon, Golem, and Rhyperior.
- Expect Sand Stream from Hippowdon and account for residual damage.
- Use special attacks when ordinary physical attacks are failing to break through.
- Save a backup counter if your primary Water or Grass attacker is weakened.
Recover between the first two battles and retry intelligently
After Aaron is defeated, heal the Pokémon intended to answer Bertha and cure any status conditions. Do not automatically use every Full Restore on minor damage. Between Bertha’s battle and the later members, prioritize the Pokémon that cover Fire, Psychic, Dark, Water, Ground, and Dragon threats. Keep enough PP and recovery for Flint, Lucian, and Cynthia rather than spending all resources to achieve a perfect first two battles.
If the team is defeated, the League attempt ends and you return outside the challenge. Use the Pokémon Center, revise moves or held items, train the weakest members, and save before trying again. If you want to preserve the original supply of items, reset to the save made before entering instead of accepting the failed run’s item usage.
A useful retry identifies the specific failure. If Yanmega outspeeds the team, add a faster lead or priority option. If Drapion defeats the planned counter, strengthen the Ground answer or improve the switch timing. If Bertha’s bulky Pokémon survive, use stronger Water or Grass attacks, especially special moves, rather than simply repeating the same underpowered strategy.
- Heal and cure status between Aaron and Bertha.
- Use Revives only for Pokémon with a clear role in the remaining battles.
- After a failed run, revise the exact matchup that caused the loss.
- Save before every new League attempt.
- Keep backup coverage and PP for Flint, Lucian, and Cynthia.
Before you move on
- Aaron’s Yanmega, Scizor, Vespiquen, Heracross, and Drapion are defeated.
- Bertha’s Whiscash, Gliscor, Hippowdon, Golem, and Rhyperior are defeated in the Platinum team order.
- At least one usable Water, Grass, Ice, or Ground answer remains for the next Elite Four battle.
- The surviving team is healed, status-free, and has enough PP and recovery items to continue toward Flint.
- If the attempt failed, the team has been healed and adjusted at the League Pokémon Center, and a new pre-challenge save has been made.
The Elite Four — Flint and Lucian: speed, priority and setup breakers
After defeating Aaron and Bertha, heal completely before Flint and arrange reliable Ground, Water, Rock, Dark, Ghost, Bug, or Fire coverage. Flint’s Platinum team is Houndoom, Flareon, Rapidash, Infernape, and Magmortar. Sunny Day can weaken Water attacks and strengthen Fire attacks, while Infernape’s Mach Punch punishes weakened Pokémon. Lucian follows with Mr. Mime, Espeon, Bronzong, Alakazam, and Gallade. Remove his screens quickly, use physical attacks against his frailer Psychic types, remember that Bronzong has Levitate, and reserve enough recovery items for Cynthia.
Heal and reorganize before Flint
You cannot return to the Pokémon League lobby or visit a Pokémon Center between Elite Four battles, so use the room between Bertha and Flint as your preparation point. Restore every Pokémon, cure status, revive important team members, and check the PP on your main attacking moves before speaking to Flint.
Place a Ground- or Water-type attacker near the front if it can handle Houndoom safely. Rock attacks are also useful against Flint’s Fire types, but do not rely on one sweeper. His Pokémon use Sunny Day, ThunderPunch, Earthquake, SolarBeam, status moves, and priority damage. Keep at least one backup answer alive in case your first counter is burned or knocked out.
- Heal the entire party before initiating Flint’s battle.
- Carry reliable Ground, Water, Rock, or other super-effective attacks.
- Keep a second Fire counter or a sturdy switch-in available.
Defeat Houndoom before Sunny Day takes control
Flint opens with Houndoom at level 52. It knows Flamethrower, Sludge Bomb, Dark Pulse, and Sunny Day. A strong Ground, Water, or Rock attack is the most direct answer. If Houndoom uses Sunny Day, Water attacks become weaker and Flint’s Fire attacks become more dangerous, so avoid a long exchange unless your Pokémon can comfortably withstand the boosted damage.
Do not send out a fragile Grass type merely because Water attacks are weakened by sun; Houndoom’s Flamethrower and Sludge Bomb can punish that switch. If your best Water attacker cannot defeat Houndoom quickly, use a Ground or Rock move instead, or switch to a bulky Pokémon that can survive one attack and regain control.
- Prioritize removing Houndoom before it repeatedly changes the weather.
- Use Ground or Rock damage when Sunny Day weakens your Water attacks.
- Do not spend several turns setting up while Houndoom can attack or use Sunny Day.
Handle Flareon and Rapidash without losing your physical attacker
Flareon is level 55 and carries Overheat, Giga Impact, Quick Attack, and Will-O-Wisp. Ground, Water, and Rock attacks are effective, but Will-O-Wisp can cripple a physical attacker for the remainder of the League run. If your plan depends on a physical Ground or Rock user, either attack immediately or switch to a Pokémon that does not mind being burned.
Rapidash is level 53 and knows Flare Blitz, SolarBeam, Bounce, and Sunny Day. It is particularly dangerous after Sunny Day because SolarBeam requires no charging turn and Water attacks are weakened. A strong Ground or Rock attacker is preferable while the weather is active. If Rapidash uses Bounce, remember that the move creates a semi-invulnerable turn; use that time to heal or switch rather than wasting an attack.
- Protect your main physical attacker from Will-O-Wisp.
- Use Ground or Rock coverage against Rapidash when Sunny Day is active.
- Do not assume a slow Water Pokémon is safe against Rapidash in the sun.
Stop Infernape’s priority and mixed coverage
Flint’s level 55 Infernape knows Flare Blitz, ThunderPunch, Mach Punch, and Earthquake. Water and Ground attacks are effective, but ThunderPunch makes an automatic Water-type switch unsafe, while Earthquake punishes some Fire counters. Bring Infernape in against a Pokémon that can survive its first attack, then use a strong Water, Ground, Flying, or Psychic move.
Mach Punch has priority, so a weakened faster Pokémon may still lose before it can act. Do not leave a low-health attacker in simply because it outspeeds Infernape. Heal first, use a sturdier switch-in, or finish the fight with a move that survives the priority retaliation.
- Keep a healthy response to Mach Punch.
- Check your Pokémon’s health before relying on speed.
- Avoid exposing your only Water or Ground counter to unnecessary ThunderPunch or Earthquake damage.
Finish Magmortar and use the next room immediately
Magmortar is Flint’s level 57 final Pokémon and holds a Sitrus Berry. Its moves are Flamethrower, Thunderbolt, SolarBeam, and Hyper Beam, giving it answers to many ordinary Fire counters. A fast Ground or Rock attacker can end the battle before Magmortar uses its coverage. Otherwise, use a Pokémon that can survive its special attacks and avoid leaving a weakened Water type in front of it.
After Flint falls, heal in the room before Lucian. Revive the Pokémon you need, cure burn or paralysis, and restore HP on the team members intended for Cynthia. Do not use every Full Restore merely to end Flint at full health; the more important goal is to keep your best Dark, Bug, Ghost, Fire, or Flying answers available for Lucian and reserve recovery items for the Champion.
- Defeat Magmortar without sacrificing every Ground or Rock answer.
- Restore Flint’s lasting status effects before Lucian.
- Keep several Full Restores and Revives for Cynthia.
Remove Mr. Mime’s screens immediately
Lucian opens with level 53 Mr. Mime, which knows Psychic, Thunderbolt, Reflect, and Light Screen. The two screens reduce physical and special damage on Lucian’s side, so attack immediately rather than spending multiple turns boosting. A physical Dark, Bug, or Ghost attack is useful, but make sure the attacker can survive Psychic or Thunderbolt.
If one screen goes up, continue applying pressure instead of switching repeatedly. Removing Mr. Mime quickly prevents the rest of Lucian’s team from gaining the protection it needs to survive your attacks.
- Lead with a Pokémon that can threaten Mr. Mime immediately.
- Prefer strong physical damage when Light Screen is active.
- Do not waste several turns on setup before removing Mr. Mime.
Break Espeon and Alakazam with physical pressure
Espeon is level 55 and knows Psychic, Shadow Ball, Quick Attack, and Signal Beam. Dark types are useful, but Signal Beam means a frail Dark type is not automatically safe. A faster physical attacker can often defeat Espeon directly; otherwise, use a specially bulky Pokémon and avoid leaving a weakened target in front of it.
Alakazam is level 56 and carries Psychic, Energy Ball, Focus Blast, and Recover. Its physical Defense is low, so a strong physical attacker is preferable. Do not rely on chip damage if Alakazam can Recover; either deal enough damage to defeat it or apply pressure while keeping your attacker healthy enough to survive Focus Blast.
- Use physical attacks against Espeon and Alakazam when possible.
- Respect Espeon’s Signal Beam and Alakazam’s Focus Blast.
- Do not give Alakazam repeated opportunities to use Recover.
Defeat Bronzong and Gallade, then prepare for Cynthia
Bronzong is level 54 and knows Psychic, Gyro Ball, Earthquake, and Calm Mind. Its Levitate ability makes Ground-type attacks ineffective, so do not use Earthquake against it unless its ability has been removed. In Pokémon Platinum, Fire is the reliable super-effective type against this Bronzong. A strong Fire attack is the cleanest answer; Ghost- or Dark-type physical attacks are useful alternatives if your Fire user cannot safely stay in. Defeat it before repeated Calm Mind boosts make Psychic difficult to withstand.
Gallade is level 59, holds a Sitrus Berry, and knows Drain Punch, Psycho Cut, Leaf Blade, and Stone Edge. It is weak to Flying and Ghost attacks, but Stone Edge can punish a careless Flying-type switch. A fast Flying or Ghost attacker is valuable, while a sturdy Pokémon can buy time for healing. Avoid weak repeated attacks that allow Drain Punch to restore Gallade’s health.
When Lucian is defeated, fully restore the party in the final room, cure every status condition, and revive the Pokémon you intend to use against Cynthia. Review held items and move PP before entering the Champion’s chamber. Cynthia’s mixed team and high-level Garchomp require a separate plan, so retain a reserve of Full Restores and Revives rather than spending everything on Lucian.
- Defeat Bronzong with Fire, Ghost, or Dark attacks rather than Ground attacks.
- Keep a Flying or Ghost answer ready for Gallade, while respecting Stone Edge.
- Enter Cynthia’s room with the main counters, emergency switch-ins, and recovery items available.
Before you move on
- Flint’s Houndoom, Flareon, Rapidash, Infernape, and Magmortar are defeated.
- Lucian’s Mr. Mime, Espeon, Bronzong, Alakazam, and Gallade are defeated.
- The party has been healed, revived where necessary, and cured of lasting status before Cynthia.
- Your main Ground, Water, Fire, Dark, Ghost, Bug, or Flying answers remain available, with enough Full Restores and Revives reserved for the Champion.
Champion Cynthia — team composition, dangerous members and concrete tactics
Cynthia is the final opponent of the Sinnoh Pokémon League in the original Nintendo DS Pokémon Platinum Version. Her six-Pokémon team mixes defensive walls, fast attackers and broad coverage, with level 62 Garchomp as the main threat. Prepare a balanced party, preserve healing items, and enter with reliable answers to Water, Dragon, Ground, Grass, Flying, Steel and Fighting matchups.
Prepare before entering Cynthia’s chamber
After defeating Lucian, do not assume that you can return to a Pokémon Center before fighting Cynthia. Treat the Elite Four and Champion as one continuous League run. Use the healing items in your Bag between battles, then restore the HP and PP of every Pokémon before leaving Lucian’s room for the Champion’s chamber. Save before triggering the final battle if you want a retry point without repeating the preceding fight.
Cynthia’s Platinum team is Spiritomb at level 58, Roserade at level 58, Togekiss at level 60, Lucario at level 60, Milotic at level 58 and Garchomp at level 62. A party around levels 54 to 58 can win with favorable matchups, but several Pokémon near the upper end of that range make the battle more dependable. Do not build the entire plan around one sweeper: Cynthia combines physical and special attacks, and her Pokémon cover common switch-ins.
Carry Full Restores, Revives and strong healing items. Restore the PP of the moves you need most, especially your strongest Ice, Electric, Fire, Fighting, Ground and Flying attacks. Keep at least one healthy Pokémon that can answer Garchomp and another that can pressure Milotic. Held items that improve survivability or damage are useful, but a held item cannot replace a backup switch-in.
- Heal the party and restore key move PP before entering Cynthia’s room.
- Carry several Full Restores and Revives.
- Preserve a strong Ice attack for Garchomp.
- Keep both a primary and backup answer for Milotic or Garchomp.
- Save before entering the Champion’s chamber.
Handle Spiritomb with strong neutral damage
Cynthia leads with level 58 Spiritomb. In the original Platinum battle system, Spiritomb is Ghost/Dark and has no direct type weakness. Do not waste turns searching for a super-effective attack. Use your strongest reliable neutral move, preferably one that uses the better attacking stat of your Pokémon and does not have dangerously low accuracy.
Spiritomb’s listed moves are Dark Pulse, Psychic, Shadow Ball and Silver Wind. A Steel-type can resist much of this combination, but do not send a fragile Psychic- or Ghost-type into the battle simply because those types are associated with Spiritomb. If your lead has a dependable setup move and can comfortably survive Spiritomb’s attacks, this is one of the safer opportunities to use it. Otherwise, attack directly and save specialized coverage for Milotic and Garchomp.
Do not spend several Full Restores or Revives here unless Spiritomb has created a genuine emergency. If it inflicts a status condition, cure it before moving into a matchup where the condition could cost a turn or prevent a needed knockout.
- Use reliable neutral damage.
- Do not expect a normal type weakness.
- Avoid exposing frail Psychic- or Ghost-types to unnecessary risk.
- Preserve most recovery items for Milotic and Garchomp.
Defeat Roserade and Togekiss with targeted switches
Roserade is level 58 and is Grass/Poison. Fire and Flying attacks are dependable answers, while Psychic and Ice coverage can also help if the attacker can survive Roserade’s response. Its moves include Energy Ball, Extrasensory, Sludge Bomb and Toxic. Avoid leaving a vulnerable Water- or Grass-type in front of it simply because that Pokémon has a useful secondary move. Toxic becomes more dangerous the longer Roserade remains active, so attack decisively rather than attempting a slow exchange.
Togekiss is level 60 and is Normal/Flying in Platinum, before the Fairy type existed. Its moves are Air Slash, Aura Sphere, Shock Wave and Water Pulse. Electric attacks are effective and are often the safest way to pressure it, provided the Electric-type can withstand its coverage. Rock and Ice attacks are also super effective, but Rock-types must account for Aura Sphere and Water Pulse. Air Slash can flinch, so avoid relying on a slower, already weakened Pokémon if you have a safer switch.
Cynthia may use Full Restores during the fight. Do not spend your best attack or recovery item merely because an opponent survives at low health; keep enough resources for the final two members.
- Use Fire or Flying coverage against Roserade when possible.
- Cure Toxic before it accumulates too much damage.
- Use Electric coverage against Togekiss when the switch-in is safe.
- Do not send a weakened Fighting- or Rock-type into an unscouted Togekiss.
Break Lucario with Fire, Ground or Fighting damage
Lucario is level 60 and is Fighting/Steel. Fire, Ground and Fighting attacks are the most practical ways to defeat it. Its moves are Aura Sphere, ExtremeSpeed, Shadow Ball and Stone Edge. A Ground-type attacker can deal heavy damage, but it must survive Aura Sphere. A Fire-type is also effective, though Stone Edge makes an unscouted Fire or Flying switch dangerous.
Do not assume that a Psychic- or Flying-type is automatically safe. Shadow Ball threatens Psychic- and Ghost-types, while Stone Edge can punish Flying-types. If Lucario is reduced to low health, remember that ExtremeSpeed has priority and can finish a weakened Pokémon before it acts. Use a healing item or switch to a healthy resist rather than leaving a damaged counter in range of the priority move.
- Use Fire, Ground or Fighting attacks.
- Respect Aura Sphere, Shadow Ball and Stone Edge coverage.
- Keep weakened Pokémon away from ExtremeSpeed range.
- Do not sacrifice your best Garchomp answer to an avoidable Lucario knockout.
Control Milotic without feeding Mirror Coat
Milotic is level 58 and is one of Cynthia’s most durable Pokémon. Its moves are Dragon Pulse, Ice Beam, Mirror Coat and Surf. Electric and Grass attacks are super effective, but Ice Beam makes an unprepared Grass-type a poor switch-in. Milotic’s Mirror Coat reflects damage from special attacks, so a special Electric or Grass move can be punished even if it would normally score super-effective damage.
Use physical Electric or Grass attacks when you have them. If your only Electric attack is special, weaken Milotic first with a safe physical attack or another method that does not expose a fragile attacker to Mirror Coat. Do not repeatedly use weak special attacks while hoping to wear it down; each hit can create an opportunity for Mirror Coat to remove the attacker.
Bring Milotic down with immediate pressure and keep a second answer available. If Milotic survives the first strong hit, do not switch randomly: choose the Pokémon that can take Surf, Dragon Pulse or Ice Beam and finish the exchange without losing your Garchomp counter.
- Prefer physical Electric or Grass attacks when available.
- Treat every special attack as a Mirror Coat risk.
- Do not send an unprepared Grass-type into Ice Beam range.
- Keep a second Milotic answer available.
Plan the final exchange around Garchomp
Cynthia’s final Pokémon is level 62 Garchomp, a Dragon/Ground type holding a Sitrus Berry. Ice attacks are the clearest answer because Ice is four times super effective against it. Bring your Ice user into the battle safely after a knockout, a resisted hit or a controlled switch; do not sacrifice it to an unnecessary prediction earlier in the fight.
Garchomp’s moves are Dragon Rush, Earthquake, Flamethrower and Giga Impact. A Ground immunity is useful against Earthquake but does not make the matchup safe because Flamethrower and Dragon Rush still threaten common switch-ins. If Garchomp uses Giga Impact, it must recharge on the following turn. Use that opening to attack, heal, or switch to the correct counter rather than giving it a free turn.
If the Sitrus Berry activates and Garchomp survives an Ice attack, attack again if your Pokémon can survive the next hit. Do not switch merely because the Berry restored some health. Paralysis can help a slower Ice attacker, but do not rely on setting status if Garchomp can knock out the user first. Preserve Full Restores and Revives for this stage if the earlier battles went well.
- Reserve the strongest reliable Ice move for Garchomp.
- Do not rely on Ground immunity alone.
- Exploit Giga Impact’s recharge turn if it appears.
- Heal or revive the Ice answer before the final exchange if necessary.
- Attack again after the Sitrus Berry if the matchup remains favorable.
Complete the Hall of Fame sequence and confirm the victory
When Cynthia’s final Pokémon faints, the game begins the Hall of Fame sequence. Cynthia takes you forward, Professor Rowan appears, and the Pokémon in your current party are recorded. Allow the sequence to finish rather than resetting during the transition. When normal play resumes, make a new save so the League victory is safely recorded.
The immediate post-League game returns you to normal Sinnoh gameplay. Heal before beginning postgame objectives. The next major route leads toward the Fight Area and the Battle Frontier, but some postgame legendary encounters require additional Pokédex or story conditions. Do not treat the Hall of Fame entry as proof that every postgame encounter has already been unlocked.
- Spiritomb, Roserade, Togekiss, Lucario, Milotic and Garchomp are defeated.
- The Hall of Fame records the Pokémon in your party.
- The game returns to normal gameplay after the ceremony.
- A save is made after the Hall of Fame sequence.
- You are ready to begin post-League routing toward the Fight Area and later postgame objectives.
Before you move on
- Cynthia’s Platinum team has been defeated: Spiritomb, Roserade, Togekiss, Lucario, Milotic and Garchomp.
- The Hall of Fame ceremony has recorded the Pokémon in the current party.
- The game has returned to normal Sinnoh gameplay.
- A save has been made after the Hall of Fame sequence.
- The file is ready for the post-League route toward the Fight Area, Battle Frontier and later legendary objectives.
Immediate Postgame: the Battle Frontier and Fight Area access
After defeating the Elite Four and Champion Cynthia in the original North American Nintendo DS release of Pokémon Platinum, enter the Hall of Fame and travel from Snowpoint City to the Fight Area. Barry then leads you to the Battle Frontier entrance, where Volkner and Flint block the way. Defeat them in the required Double Battle with Barry as your partner, enter the Frontier, learn its five facility formats and complete an initial challenge round. The National Pokédex is not part of this chapter’s completion state; it is a later Chapter 18 milestone for wider Battle Zone exploration.
Finish the League and sail to the Fight Area
Defeat Aaron, Bertha, Flint, Lucian and Champion Cynthia, then allow the Hall of Fame registration and ending sequence to finish. When you regain control, heal your party and save. The Battle Frontier and Fight Area cannot be reached before you have beaten both the Elite Four and the Pokémon Champion.
Fly to Snowpoint City and walk to the harbor at the town’s southern edge. Speak with the sailor who previously carried you toward the Pokémon League. After the Hall of Fame, he offers passage to the Battle Zone. Select the Fight Area destination. Cynthia appears before departure in Platinum, then the ship takes you to the postgame island.
The National Pokédex is not required for this first trip. You can reach the Fight Area and open the Battle Frontier while still using the completed Sinnoh Pokédex. Do not wait for the National Pokédex before making this visit. Later Chapter 18 objectives use the National Pokédex to open the wider Battle Zone route, including Route 225 and the locations beyond the Fight Area.
Heal at the Fight Area Pokémon Center as soon as you arrive. The Super Rod is available from a Fisherman near the northern exit, and the Poké Mart has useful supplies, but neither is required to open the Frontier. Save before following Barry so you have a convenient retry point.
- Defeat the Elite Four and Champion Cynthia.
- Finish the Hall of Fame sequence.
- Sail from Snowpoint City to the Fight Area.
- Heal and save after arrival.
- Do not treat the National Pokédex as an entry requirement for this chapter.
Follow Barry to the Frontier entrance
Barry is waiting in the Fight Area and immediately draws your attention toward the Battle Frontier. Follow him north along the main path to the large Frontier building. Volkner and Flint are standing at the entrance and refuse to let Barry pass because they doubt his strength.
Speak with Barry only after healing and arranging the two Pokémon you want at the front of your party. You may refuse his offer if you need to return to the Pokémon Center, change moves or choose a better lead pair. The game begins the event automatically after you accept.
This is a story Double Battle, not a Battle Frontier streak. You do not select a facility, and losing does not undo your League victory or force you to repeat the Pokémon League. Return to the Center, adjust your leads and accept the battle again when ready.
- Reach the Battle Frontier entrance with Barry.
- Heal before accepting the battle.
- Choose two reliable lead Pokémon.
- Reject the offer temporarily if your party is not ready.
Defeat Volkner and Flint with Barry
Accept Barry’s offer to start the automatic Double Battle against Volkner and Flint. Volkner uses Luxray, Jolteon and Electivire; Flint uses Houndoom, Flareon and Magmortar. Their Pokémon are in the mid-to-high 50s and carry coverage that makes a one-type strategy risky.
Ground attacks are valuable against Volkner’s Electric Pokémon, but remember that Electivire has Fire Punch and Brick Break, while Luxray carries Ice Fang, Crunch and Fire Fang. Water, Ground and Rock attacks work against Flint’s Fire Pokémon, but Magmortar can use SolarBeam, so do not leave a slow Ground- or Rock-type exposed after sunny conditions or an obvious SolarBeam turn.
Focus both of your active Pokémon on one opposing target whenever possible. Removing one enemy quickly is safer than spreading damage across all six opponents. Use single-target attacks when Barry’s Pokémon is beside your intended target. Earthquake and other spread moves can damage Barry’s side, so use them only when the trade is worthwhile. Protect your strongest attacker from unnecessary status, double targeting and recoil.
After the victory, Volkner and Flint leave the entrance. Palmer appears and explains the Frontier’s challenge structure. The Vs. Recorder is upgraded with a Frontier Record by the attendant when you first enter the Battle Frontier. Enter the building after the conversation rather than treating the entrance event as a separate repeatable challenge.
- Use Ground coverage against Volkner when safe.
- Use Water, Ground or Rock coverage against Flint.
- Watch for Magmortar’s SolarBeam.
- Avoid careless spread attacks that damage Barry’s Pokémon.
- Win the battle and enter the Frontier.
Learn the five Platinum facilities
Pokémon Platinum’s Battle Frontier has five facilities: Battle Tower, Battle Factory, Battle Arcade, Battle Castle and Battle Hall. The Battle Tower and Battle Factory return from Pokémon Emerald; the Battle Arcade, Battle Castle and Battle Hall are the Platinum Frontier’s other three facilities. Platinum does not use Emerald’s seven-facility layout.
Battle Tower uses your own Pokémon in Single, Double or Multi formats. The standard challenges use seven-battle rounds, with healing between battles. Battle Factory also uses seven-battle rounds, but you rent the available Pokémon instead of bringing your normal team. After victories, you can often exchange a rental for one used by the defeated opponent, so judge the full moveset, ability, item and typing rather than choosing by species alone.
Battle Arcade uses seven-battle rounds and activates a roulette board before encounters. The result can impose status, change statistics, affect weather or create another advantage or disadvantage. Build a team that still functions when the board produces an unfavorable result.
Battle Castle also uses seven-battle rounds, but your party is not automatically restored after each fight. You earn Castle Points during the run and spend them on services such as HP recovery, PP recovery, information and temporary items. Castle Points are separate from Battle Points and can be used only within the Castle challenge.
Battle Hall uses one Pokémon in Singles or two in Doubles and organizes normal progress into ten-battle rounds. Before each battle, select the opponent’s type and difficulty rank. You cannot switch the registered Pokémon during a campaign without resetting that campaign, so broad coverage and reliable survival matter more than a narrow type advantage.
- Locate all five facilities.
- Use seven-battle rounds in Tower, Factory, Arcade and Castle.
- Use ten-battle rounds in Battle Hall.
- Keep Castle Points separate from Battle Points.
- Remember that Battle Hall restricts the number of registered Pokémon.
Prepare a legal first challenge team
For Battle Tower Singles, prepare three different Pokémon with complementary roles: a fast attacker, a durable switch-in and a finisher or setup Pokémon. Avoid giving all three the same major weakness. The Frontier enforces restrictions including Species Clause and Item Clause, so do not enter duplicate species or give two entrants the same held item. Eggs and certain powerful Legendary Pokémon are prohibited; allow the facility’s registration screen to confirm legality for a specific Pokémon or item.
For Level 50 challenges, bring Pokémon that are legal at or below the selected level. If your intended team is above Level 50, choose an Open Level challenge instead of assuming the game will lower every entrant for you. Battle Hall has separate level behavior and does not use the same reduction pattern as the standard facilities, so plan it independently. The Battle Castle specifically reduces chosen Pokémon to Level 50 before the challenge.
Battle Factory is the best starting point if your story team has not been trained for consecutive competitive fights. Inspect rental moves, abilities, held items, defensive resistances and speed before swapping. A rental with recovery or useful coverage can be better than a species with higher-looking offensive stats.
Battle Hall should be treated as a separate project. Choose one Pokémon with dependable attacks across several types, enough speed or durability to survive an unfavorable matchup and no reliance on switching. Selecting a type does not guarantee that the opponent will lack a secondary typing or coverage move.
- Register three Pokémon for Battle Tower Singles.
- Avoid duplicate species and held items.
- Use Level 50-legal Pokémon for Level 50 challenges.
- Choose Open Level for a higher-level team.
- Plan Battle Hall around one Pokémon in Singles.
- Review every rental’s complete set in the Battle Factory.
Complete the first round and spend rewards sensibly
Battle Frontier fights do not provide ordinary experience or normal trainer prize money. Use regular routes, the Pokémon League, the Vs. Seeker and other standard training methods for leveling, evolution, move learning and EV preparation. Frontier wins award Battle Points at the end of facility rounds, while Battle Castle also awards Castle Points during the run.
For a first attempt, choose a format you understand and complete one full round: seven battles in Battle Tower, Battle Factory, Battle Arcade or Battle Castle, or ten battles in Battle Hall. You do not need a long winning streak or a Frontier Brain victory to complete this chapter.
Spend BP at the Exchange Service Corner only after identifying what ended your run. Held items, vitamins, Power items and technical machines can support later team building, but a stronger item is not a substitute for fixing a type weakness, poor speed control or unreliable recovery. In Battle Castle, preserve Castle Points for HP and PP recovery before buying optional information or temporary advantages.
A lost streak ends the current challenge, but it does not remove BP already awarded for completed rounds. Heal outside the Frontier, adjust the team and begin another challenge. Long streaks, silver and gold commemorative prints, Frontier Brain victories and optimized competitive teams are optional goals beyond this chapter’s required access objective.
- Finish one complete facility round.
- Confirm that BP has been awarded.
- Train and evolve Pokémon outside the Frontier.
- Spend BP on a demonstrated team need.
- Reserve Castle Points for recovery when necessary.
- Treat Frontier Brain streaks as optional long-term goals.
Before you move on
- The Hall of Fame has been recorded after defeating Cynthia.
- The Fight Area can be reached by sailing from Snowpoint City.
- The National Pokédex has not been incorrectly treated as an initial Frontier requirement.
- Barry’s Double Battle against Volkner and Flint has been won.
- The Battle Frontier entrance is open.
- The Frontier building has been entered.
- The Vs. Recorder has received its Frontier Record upgrade.
- Battle Tower, Battle Factory, Battle Arcade, Battle Castle and Battle Hall are accessible.
- At least one complete facility round has been finished and Battle Points have been awarded.
- The Exchange Service Corner and its BP stalls have been located.
- The National Pokédex is reserved for the later Chapter 18 wider Battle Zone route, not this chapter’s completion state.
References for this chapter
- Pokémon Platinum Version Instruction Booklet
- Walkthrough: Pokémon Platinum Part 24
- Battle Frontier (Generation IV)
- Battle Tower (Sinnoh)
- Battle Castle
- Battle Hall
- Pokémon Platinum — The Battle Frontier
- Pokémon Platinum — The Battle Hall
- Pokémon Platinum — The Battle Castle
- Pokéarth — Sinnoh: Fight Area
Postgame legendaries and late objectives: Giratina, Dialga/Palkia, Heatran and Turnback Cave
After the Hall of Fame, reach the Fight Area and defeat Volkner and Flint in the required Tag Battle with Barry to open the Battle Frontier entrance. Then complete Turnback Cave, the National Pokédex milestone, the Adamant and Lustrous Orb collection, Stark Mountain and Heatran, and the Celestic Town activation scene. For the Dialga and Palkia route, use this complete prerequisite checklist: after the Hall of Fame, obtain the National Pokédex, collect the Adamant Orb and Lustrous Orb, speak with Cynthia’s grandmother in Celestic Town, examine the rear painting in the Celestic Ruins, and allow Cynthia’s explanation to finish. Return to Spear Pillar for Dialga’s blue portal, leave the summit, and return for Palkia’s separate pink portal. The lake guardians, roaming birds, Cresselia and Regigigas remain optional.
1. Reach the Fight Area and open the Battle Frontier
After the Hall of Fame is recorded, go to Snowpoint City and board the ship at the southern dock. Cynthia appears before departure and gives a short postgame conversation. The ship takes you to the Fight Area, the entry point for the Battle Zone.
Barry immediately leads you toward the Battle Frontier entrance. Flint and Volkner are blocking the way and challenge you and Barry to a required Tag Battle. You may refuse Barry’s offer temporarily if you need to heal or reorganize, but accept it once ready. Use a balanced team because Flint and Volkner combine Fire, Electric and mixed coverage rather than presenting a single-type matchup.
Winning the Tag Battle clears the entrance. Platinum’s five facilities are the Battle Tower, Battle Factory, Battle Hall, Battle Castle and Battle Arcade. Frontier battles award Battle Points and facility progress rather than ordinary story rewards or normal experience. Frontier completion is optional, but reaching the facilities completes this chapter’s Battle Frontier objective.
- The Hall of Fame is recorded.
- The ship from Snowpoint City has taken you to the Fight Area.
- The Tag Battle against Flint and Volkner has been won with Barry.
- The Battle Frontier entrance is open.
2. Complete Turnback Cave and resolve the Giratina branch
Travel to Route 214, enter Spring Path, cross Sendoff Spring and enter Turnback Cave from the north side of the lake. Bring Defog if you want clear visibility, and carry healing items and capture Balls. Repels are useful, but do not rely on a fixed map: the intermediate rooms are randomized between attempts.
Read the entrance pillar, then move through the maze while looking for three rooms that contain a central pillar. Examine every pillar and note the two numbers shown at its base. The room immediately after the third pillar room is the terminal chamber. You must reach it before the total room count reaches 30. If the limit is exceeded, the cave returns you to the entrance and you must try again. The unusual rock pattern can help indicate which doorway to test, but there is no universal room-by-room route.
If story Giratina was caught in the Distortion World, the terminal chamber contains a portal back to the Distortion World. Enter it to collect the Griseous Orb. This is an item branch, not a second Giratina encounter. If story Giratina was defeated or fled, the terminal chamber instead contains the level 47 Altered Forme Giratina after the Hall of Fame. Save before interacting with it, lower its HP carefully, and use sleep or paralysis if available. Avoid poison and burn on a weakened target because residual damage can cause an accidental knockout.
- Three pillar rooms have been examined before the 30-room limit is exceeded.
- The postgame Giratina has been caught if story Giratina was defeated or fled.
- The Distortion World portal has been entered and the Griseous Orb collected if story Giratina was already caught.
- A save was made before any Giratina battle.
3. Obtain the National Pokédex and collect the Adamant and Lustrous Orbs
Return to Sandgem Town and complete all 210 Sinnoh Pokédex entries as seen entries. You do not need to catch all 210 Pokémon. Check trainer battles, story encounters and required evolutions for missing entries, then speak with Professor Rowan after the Sinnoh Pokédex is complete to receive the National Pokédex.
Next, prepare Surf, Waterfall, Strength, Rock Smash and Rock Climb. Return to the eastern summit-side section of Mt. Coronet and enter the 4F area below the waterfall. Climb the waterfall and enter the small cave at the top. Collect the Adamant Orb and Lustrous Orb, along with the nearby Stone Plate if desired. These orbs can remain in the Bag; they do not need to be held.
The Fight Area and Battle Frontier do not require the National Pokédex. Treat the National Pokédex as the separate earlier milestone for the wider legendary route and postgame access.
- All 210 Sinnoh Pokédex entries have been seen.
- The National Pokédex has been obtained.
- The Adamant Orb has been collected.
- The Lustrous Orb has been collected.
- Surf, Waterfall, Strength, Rock Smash and Rock Climb are available.
4. Complete Stark Mountain and enable Heatran
From the Fight Area, cross Route 225 to the Survival Area, then continue through Route 226 and Route 227 to Stark Mountain. Bring Strength and Rock Smash for the interior, with Rock Climb available for the return trip. On the exterior, follow the winding route toward the entrance and defeat the Team Galactic commanders encountered there.
Inside the main cavern, Buck joins you. While he is your partner, wild encounters become double battles and he restores your party after battles, so this is a good opportunity to defeat trainers for experience. Follow the route through the cavern until you reach the deepest chamber. Charon takes the Magma Stone, but Looker arrives, arrests him and takes control of the situation. Buck then restores the Magma Stone before you leave.
Fly back to the Survival Area and enter the Battleground, the house associated with Buck. Speak with Buck and then speak with his grandfather. Both conversations are required; speaking to only one of them does not complete the Heatran trigger. Return to Stark Mountain’s deepest chamber alone and save before interacting with Heatran. Heatran is level 50 and is Fire/Steel. Water-, Ground- and Fighting-type attacks are effective, but weaken it carefully and use sleep or paralysis when possible.
- The Stark Mountain sequence with Buck is complete.
- Charon has been arrested and the Magma Stone has been restored.
- Buck has been spoken to in the Survival Area Battleground.
- Buck’s grandfather has also been spoken to there.
- Heatran is available in Stark Mountain’s deepest chamber.
- A save was made before the Heatran encounter.
5. Complete the Celestic Town activation scene
Use the following single prerequisite checklist before attempting the Dialga and Palkia portals: after the Hall of Fame, obtain the National Pokédex, collect the Adamant Orb and Lustrous Orb, speak with Cynthia’s grandmother in Celestic Town, examine the rear painting in the Celestic Ruins, and allow Cynthia’s explanation to finish.
Travel to Celestic Town and speak with Cynthia’s grandmother in the house beside the ruins. Make sure both the Adamant Orb and Lustrous Orb are in the Bag before speaking to her. Her conversation explains the connection between the orbs and the legendary Pokémon.
Enter the Celestic Ruins and examine the painting at the rear of the room. Do not leave during the scene. Cynthia appears and completes the explanation involving Dialga, Palkia and Giratina. This painting interaction is part of the required route for this guide, not optional lore.
- The Hall of Fame is recorded.
- The National Pokédex has been obtained.
- The Adamant Orb and Lustrous Orb are in the Bag.
- Cynthia’s grandmother has been spoken to in Celestic Town.
- The rear painting in the Celestic Ruins has been examined.
- Cynthia’s full explanation has finished.
6. Encounter Dialga first, then return for Palkia
Return to Mt. Coronet and climb to Spear Pillar with the required field moves and enough healing items and capture Balls. Confirm the complete prerequisite checklist before entering the summit: after the Hall of Fame, obtain the National Pokédex, collect the Adamant Orb and Lustrous Orb, speak with Cynthia’s grandmother in Celestic Town, examine the rear painting in the Celestic Ruins, and allow Cynthia’s explanation to finish.
At Spear Pillar, save before interacting with the blue dimensional rift. The rift begins the level 70 Dialga encounter. Use controlled, normally effective damage, then apply sleep or paralysis and reduce its HP without risking a critical knockout. Dialga knows Roar of Time, Heal Block, Earth Power and Slash, so Steel Pokémon are not automatically safe from Earth Power.
After the Dialga battle, leave the summit and return to Spear Pillar. The blue rift is replaced by a separate pink or purple-colored rift for level 70 Palkia. Save again before interacting with it. Palkia has Spacial Rend, Heal Block, Earth Power and Slash. Water typing makes Net Balls useful, while Dusk Balls at night, Ultra Balls and Timer Balls are reliable alternatives.
Dialga and Palkia do not appear simultaneously. Dialga must be activated first, then the summit must be exited and revisited for Palkia. The Master Ball is optional; ordinary capture preparation is sufficient.
- After the Hall of Fame, the National Pokédex was obtained.
- The Adamant Orb and Lustrous Orb were collected.
- Cynthia’s grandmother was spoken to in Celestic Town.
- The rear Celestic Ruins painting was examined and Cynthia’s explanation finished.
- Dialga was activated at the blue portal.
- Spear Pillar was left after the Dialga encounter.
- The summit was revisited for Palkia’s separate portal.
- Palkia was activated at the second portal.
- Separate saves were made before both encounters.
7. Keep the remaining legendary objectives optional
Uxie and Azelf are stationary lake encounters, while Mesprit becomes a roaming encounter after its story event. Cresselia becomes a roaming encounter after the Fullmoon Island event, and the Kanto birds require their own post-National-Dex activation sequence. None is required for the Battle Frontier, Turnback Cave, National Pokédex, Heatran, Celestic painting scene, Dialga or Palkia objectives in this chapter.
Regigigas is a separate Snowpoint Temple encounter that requires Regirock, Regice and Registeel in the party in the original Platinum release. It is not part of the Stark Mountain or Spear Pillar route. Treat all optional legendary encounters as separate save-and-capture objectives, using controlled damage and status support.
- The lake guardians are treated as optional.
- Mesprit, Cresselia and the roaming birds are treated as separate objectives.
- Regigigas is not required for this chapter’s route.
- A separate save and capture plan is ready for any optional legendary target.
Before you move on
- The Hall of Fame is recorded, the Fight Area has been reached, Volkner and Flint have been defeated there with Barry, and the Battle Frontier entrance is accessible.
- Turnback Cave has been completed: the postgame Giratina was caught if story Giratina was defeated or fled, or the Distortion World portal was entered and the Griseous Orb was collected if story Giratina was already caught.
- All 210 Sinnoh Pokédex entries have been seen and the National Pokédex has been obtained.
- The Adamant Orb and Lustrous Orb have been collected from Mt. Coronet.
- The Stark Mountain storyline is complete, Charon has been arrested, the Magma Stone has been restored, and both Buck and Buck’s grandfather have been consulted in the Survival Area Battleground.
- The Dialga and Palkia prerequisite checklist is complete: after the Hall of Fame, the National Pokédex was obtained, the Adamant Orb and Lustrous Orb were collected, Cynthia’s grandmother was consulted in Celestic Town, the rear painting in the Celestic Ruins was examined, and Cynthia’s explanation was allowed to finish.
- Dialga was activated at the blue Spear Pillar portal, Spear Pillar was left, and Palkia was activated at its separate pink or purple portal after returning.
- Heatran is available in Stark Mountain’s deepest chamber, whether or not it has been caught.
- Uxie, Azelf, Mesprit, Cresselia, the roaming birds and Regigigas are clearly treated as optional rather than required.
Finishing up
You have defeated the Sinnoh Elite Four and Champion Cynthia and seen your name placed in the Hall of Fame.
You have completed the Distortion World sequence and either captured Giratina during the story encounter or gained access to its post-League Turnback Cave encounter.
You can access the Fight Area and Battle Frontier after winning the required Barry-and-player versus Volkner-and-Flint Double Battle.
You have obtained the National Pokédex, collected the Adamant and Lustrous Orbs, completed the Stark Mountain storyline and the required Buck/Buck’s-grandfather follow-up conversations, spoken with Cynthia’s grandmother, examined the rear painting in the Celestic Ruins, and activated the separate Dialga and Palkia encounters at Spear Pillar. The Stark Mountain and Buck objectives are part of this guide’s completion scope and are not presented as portal prerequisites.
You have completed the Turnback Cave objective: either caught Giratina there if it was not caught during the story, or entered the connected Distortion World portal and collected the Griseous Orb if Giratina was already caught.
Optional within this scope: catch Heatran after the Stark Mountain sequence. Other roaming and legendary routes remain available under their individual conditions.
Choose your next gameScreenshots & video
Game imagery for reference. Follow the written chapters above for the route and strategies.
Sources & references
Our original guide draws on the references below. Check the edition at the top of this page before following controls or unlock requirements.
- Nintendo DS — Pokémon Platinum Version — Instruction Booklet
- Walkthrough: Pokémon Platinum/Part 1
- Sinnoh Route 201
- Sinnoh Route 202
- Sandgem Town
- Pokémon Platinum Version — Full Walkthrough, Part 1
- Pokémon Platinum Version Instruction Booklet
- Walkthrough: Pokémon Platinum/Part 2 — Bulbapedia
- Oreburgh Mine — Bulbapedia
- Pokémon Platinum Version Walkthrough — Champion Cynthia battle details
- Pokémon Platinum Version — Guide and Walkthrough — GameFAQs
- Walkthrough: Pokémon Platinum/Part 3 — Bulbapedia
- Walkthrough: Pokémon Platinum/Part 4 — Bulbapedia
- Walkthrough: Pokémon Platinum/Part 5 — Bulbapedia
- Eterna Galactic Building — Serebii Pokéarth
- Pokémon Platinum Version Guide and Walkthrough — GameFAQs
- Pokémon Platinum Version Instruction Booklet
- Walkthrough: Pokémon Platinum/Part 6 — Mt. Coronet, Route 208, Hearthome City, Hearthome Gym and Route 209
- Walkthrough: Pokémon Platinum
- Pokémon Platinum — The Gyms
- Walkthrough: Pokémon Platinum/Part 8 — Bulbapedia
- Veilstone Gym — Bulbapedia
- Appendix: Platinum walkthrough/Section 9 — Bulbapedia
- Walkthrough: Pokémon Platinum/Part 10 — Bulbapedia
- Crasher Wake — Bulbapedia
- Pokémon Platinum Full Walkthrough — Canalave Gym and Iron Island
- Pokémon Platinum Version Guide and Walkthrough — GameFAQs
- Walkthrough: Pokémon Platinum/Part 11 — Celestic Town and Cyrus sequence
- Walkthrough: Pokémon Platinum/Part 13 — Iron Island, Canalave Gym, Library and Lake Valor
- Walkthrough: Pokémon Platinum/Part 14 — Lake Verity, northern Mount Coronet and Route 216
- Sinnoh Route 217
- Snowpoint City Gym
- Snowbound Lodge
- Pokémon Platinum Walkthrough — Phase 7: Icicle Badge
- Pokémon Platinum Full Walkthrough
- Walkthrough: Pokémon Platinum/Part 15 — Bulbapedia
- Mount Coronet — Bulbapedia
- Pokéarth: Sinnoh — Mt. Coronet — Serebii.net
- Pokémon Platinum Full Walkthrough — Psypokes
- Walkthrough: Pokémon Platinum/Part 17
- Pokémon Platinum — The Distortion World
- Pokéarth — Sinnoh — Distortion World
- Pokéarth — Sinnoh — Turnback Cave
- Giratina generation IV move learnset
- Walkthrough: Pokémon Platinum/Part 19
- Sunyshore City Pokémon Gym
- Pokemon Platinum Version Walkthrough & Guide — Sunyshore Gym
- Walkthrough: Pokémon Platinum/Part 19 — Bulbapedia
- Walkthrough: Pokémon Platinum/Part 23 — Bulbapedia
- Victory Road (Sinnoh) — Serebii Pokéarth
- Pokéarth — Sinnoh Pokémon League, Pokémon Platinum
- Pokémon Platinum Full Walkthrough — PsyPokes
- Pokémon Platinum Full Walkthrough — PsyPokes, Victory Road section
- Pokémon Platinum — The Elite Four
- Aaron — Bulbapedia
- Bertha — Bulbapedia
- Flint — Pokémon Platinum battle data
- Lucian — Pokémon Platinum battle data
- Walkthrough: Pokémon Platinum/Part 20 — Pokémon League and Champion Cynthia
- Walkthrough: Pokémon Platinum Part 24
- Battle Frontier (Generation IV)
- Battle Tower (Sinnoh)
- Battle Castle
- Battle Hall
- Pokémon Platinum — The Battle Frontier
- Pokémon Platinum — The Battle Hall
- Pokémon Platinum — The Battle Castle
- Pokéarth — Sinnoh: Fight Area
- Walkthrough: Pokémon Platinum Part 22
- Walkthrough: Pokémon Platinum Part 25
- Turnback Cave
- Capturing Platinum Legendaries
- Pokémon Platinum Version
About the game & collecting notes
- Platform
- Nintendo DS
After the Hall of Fame, reach the Fight Area and open the Battle Frontier, complete Turnback Cave and the Griseous Orb branch, obtain the National Pokédex, collect the Adamant and Lustrous Orbs, complete the Stark Mountain storyline and the required Buck follow-up conversations for the Heatran branch, finish the Celestic Town grandmother and rear-painting sequence, and return to Spear Pillar for separate Dialga and Palkia encounters. The Dialga/Palkia route requires the National Pokédex, the matching orb, the postgame Cynthia’s-grandmother conversation, and the completed rear-painting scene; Stark Mountain and Buck’s conversations remain separate Heatran objectives and are not portal prerequisites.
Darryl Polo
Darryl Polo loves tinkering with emulation and revisiting retro games. He enjoys exploring how old favorites play on different setups and sharing what he learns along the way. At Joking Joystick, he writes about the games, hardware, and small discoveries that keep the hobby fun.
Our editorial standardsFound a step that needs another look? Help us improve this guide.