
Pokémon Pearl Version — Complete Walkthrough (Nintendo DS, USA Rev 5)
Complete this project in clearly separated categories. First finish the Sinnoh Pokédex and unlock National Mode. Then distinguish ordinary local Diamond/Pearl encounters from Poké Radar species, swarm species, Trophy Garden and Great Marsh encounters, trade evolutions, fossils, breeding results, GBA dual-slot encounters, Pal Park transfers, fixed or roaming legendaries, and event-limited species. Do not list Larvitar, Stantler, Bagon, Spheal, Slowpoke, or comparable special-condition species as ordinary route exclusives, and do not treat GBA dual-slot species such as Growlithe or Elekid as obtainable through a normal Pearl encounter or an ordinary Diamond-to-Pearl trade. Houndour and Houndoom must remain in their verified special-local and breeding categories, not the GBA dual-slot category.

Find a copy
Pokémon Pearl Version Nintendo DS
We may earn a commission if you buy through these links, at no extra cost to you. As an Amazon Associate I earn from qualifying purchases.
Opens retailer search results. Check the model, edition, seller, availability and current price before buying.
Before you begin
You are playing the original Nintendo DS release of Pokémon Pearl Version (North American retail, Revision 5).
This walkthrough takes you through every required objective to complete the main campaign: starter choice, all mandatory Gyms, the Team Galactic story arc, the Sinnoh League challenge and the in-game campaign ending where you become the region’s Champion.
Follow the ordered chapters below.
Each chapter lists short objectives, precise subgoals you must complete, practical counters for the major fights and recovery guidance when things go wrong.
Optional rewards and postgame activities are covered after the main campaign so you can choose how complete you want your save to become.
Set yourself up for the run
Play the original Nintendo DS Pokémon Pearl Version and save frequently from the in-game menu.
Save before starter selection, fixed legendary encounters, Gym Leader battles, major rival battles, and the Pokémon League.
Choose Turtwig, Chimchar, or Piplup according to preferred matchups: Turtwig gives the easiest first Gym, Chimchar gains valuable Fighting coverage after evolving, and Piplup offers reliable Water damage and later Water/Steel typing.
Build a balanced team with answers for Rock, Grass, Fighting, Water, Steel, Electric, Psychic, Ice, and Dragon threats rather than relying on the starter alone.
Carry an HM-capable Pokémon or distribute required HMs across the active party. Late-game progression requires Surf, Strength, Rock Smash, Rock Climb, and Waterfall; Defog is useful but not required for the main route.
Keep Potions or stronger healing items, status cures, Revives, Poké Balls, and Repels available before long routes and caves.
Use Pokémon Centers to restore HP and PP instead of wasting rare PP-restoring items early.
Organize the PC regularly and leave party space when pursuing gifts such as the Riolu Egg.
Version exclusives and trade evolutions are optional collection goals, not requirements for the main campaign. Original Nintendo DS online services are unavailable, so use local Generation IV trading for those goals.
Twinleaf Town Start and Early Objectives
Begin in Twinleaf Town, follow Barry to Lake Verity, choose Turtwig, Chimchar, or Piplup, and complete the scripted Starly battle. Meet Professor Rowan in Sandgem Town, receive the Pokédex and Journal, collect Barry’s Parcel, learn to catch Pokémon on Route 202, and build a small team from the early routes. Continue north through Route 202 to Jubilife City, deliver the Parcel at the Trainers’ School, collect the three Pokétch coupons by answering yes to the clowns’ questions, then travel east through Route 203 for the mandatory rival battle. Finish the chapter by entering Oreburgh Gate on the way to Oreburgh City.
Set up the file and leave Twinleaf Town
Start a new game and enter your Trainer name, gender, and rival’s name carefully. These choices cannot be changed later on the same save. After the opening television broadcast, go downstairs and speak with your mother. Leave the house and enter Barry’s house, the building in the upper-left portion of Twinleaf Town. Go upstairs to speak with Barry, then follow him north toward Route 201.
On Route 201, Barry joins you and leads you west through Verity Lakefront to Lake Verity. You do not have Poké Balls yet, so the early grass cannot be used for normal captures. Save before entering the lake area if you want a manual checkpoint before choosing your permanent starter.
- Enter the Trainer and rival names carefully.
- Visit Barry’s house and follow him to Route 201.
- Save before entering the Lake Verity starter sequence.
Choose the starter and complete the Lake Verity battle
At Lake Verity, examine the bag in the grass. A wild Level 2 Starly attacks, and you must choose one of the three Pokémon inside: Turtwig, Chimchar, or Piplup. The choice is permanent for the file. Use the selected Pokémon’s damaging move until Starly faints; this is a scripted battle, not a normal capture opportunity.
Turtwig gives the easiest opening against Roark because Grass attacks are super effective against his Rock-type team. Its early drawback is Gardenia’s Grass Gym, where Grass attacks are resisted. Piplup also has a favorable first Gym because Water attacks work well against Rock, and it develops into a durable Water/Steel line, but it also wants help against Gardenia. Chimchar has the least convenient first Gym typing, but it evolves into Monferno at Level 14 and gains Fighting-type attacks, giving it a strong matchup against Gardenia and useful coverage afterward. Each starter is viable; choose according to the campaign style you prefer rather than treating one as universally best.
After the battle, return to the Route 201 intersection. Professor Rowan and his assistant meet you there, and a scene returns you to Twinleaf Town with your starter healed. Speak with your mother to receive the Running Shoes. Save again before beginning the Sandgem Town sequence.
- Choose Turtwig, Chimchar, or Piplup.
- Defeat the scripted Level 2 Starly.
- Receive the Running Shoes from your mother.
- Save before traveling to Sandgem Town.
Reach Sandgem Town and receive the Pokédex
Travel east along Route 201 to Sandgem Town. You still cannot catch wild Pokémon because Poké Balls have not yet been distributed. You can battle wild Pokémon for experience, then heal at home or in Sandgem’s Pokémon Center if necessary. A Potion is available in the grass on Route 201; take it if you want an early emergency recovery item.
Enter Professor Rowan’s laboratory in Sandgem Town. Speak with Rowan and accept the Pokédex. Afterward, the assistant gives you a short introduction to the Pokémon Center and Poké Mart. The Pokémon Center restores your party for free, while the Poké Mart is where you can buy additional Potions, Antidotes, Parlyz Heals, and later Poké Balls.
Return to Twinleaf Town after the town tour. Speak with your mother to receive the Journal, then speak with Barry’s mother when she arrives. She gives you Barry’s Parcel and asks you to deliver it to Barry in Jubilife City. Heal before leaving and save if you want a checkpoint before the catching tutorial and the next group of trainer battles.
- Receive the Pokédex from Professor Rowan.
- Visit the Pokémon Center and Poké Mart during the introduction.
- Collect the Route 201 Potion if desired.
- Receive the Journal and Barry’s Parcel in Twinleaf Town.
Learn to catch Pokémon on Route 202
Return to Sandgem Town, heal, and head north through Route 202. Dawn or Lucas stops you near the route entrance and demonstrates how to catch a wild Bidoof. After the demonstration, you receive five Poké Balls. This is the original Pearl amount; buy more at the Sandgem Poké Mart if you plan to catch several team members.
To catch a Pokémon, choose Bag during a wild battle, open the Poké Balls pocket, select a ball, and confirm the throw. Lower the target’s HP first without making it faint. A status condition can improve the odds, but you may not yet have a reliable status move, so early captures usually depend on careful damage and repeated throws. If you accidentally knock out a desired Pokémon, leave the grass and return later rather than wasting all your supplies.
After the demonstration, continue north through Route 202 and battle the Youngsters and Lass along the path. Fight wild Pokémon between trainer battles if you need experience, but return to Sandgem’s Pokémon Center before proceeding if your party becomes worn down. Route 202 contains early encounters such as Starly, Bidoof, Shinx, and Kricketot in Pearl, giving you several options for a second team member.
During battle, Fight selects a move, Pokémon opens your party for switching, Bag opens usable battle items, and Run attempts to escape from a wild encounter. Trainer battles do not allow you to run. Outside battle, open the party screen, select a Pokémon, and choose Switch to place it in the lead position. To train a weaker Pokémon safely, start with it, switch immediately to a stronger partner, and finish the battle. The participating Pokémon receive experience when the battle is won.
- Complete the Route 202 catching demonstration.
- Receive five Poké Balls.
- Catch at least one additional Pokémon.
- Battle the Route 202 trainers or train in the grass as needed.
- Heal before entering Jubilife City.
Build a practical early party
Starly is the most useful early Flying-type recruit. It provides fast physical offense and helps against Grass Pokémon, which is especially useful if you chose Piplup or intend to keep Chimchar healthy for Gardenia. Shinx gives you Electric coverage against opposing Flying- and Water-types and remains a reasonable long-term team member. Bidoof is optional: it is easy to obtain and can later provide field-move utility, but it is not required for the story.
If you chose Chimchar, Starly gives you support against Grass opponents while Chimchar develops its Fighting coverage. If you chose Turtwig, Shinx adds a different offensive profile and helps against Flying-types. If you chose Piplup, Shinx is useful against opposing Water-types, while Starly gives you a direct answer to Grass Pokémon.
There is no immediately available Water-type partner on Route 202. Psyduck becomes available on Route 204 after Jubilife City, and Magikarp becomes available once you obtain the Old Rod in Jubilife City. Neither is required before the Route 203 rival battle. A starter plus one or two additional Pokémon is enough for the next sequence.
- Catch Starly, Shinx, Bidoof, or another preferred early Pokémon.
- Keep at least two battle-capable Pokémon in the party.
- Buy extra Poké Balls and a few Potions if needed.
- Prepare to travel north through Route 202 to Jubilife City.
Enter Jubilife City and deliver Barry’s Parcel
Continue north from Route 202 until you reach Jubilife City. Dawn or Lucas directs you toward the Trainers’ School, which is the building near the Pokémon Center with the large Poké Ball sign. Enter the school and speak with Barry at the front blackboard. Give him Barry’s Parcel to complete the delivery. The Parcel contains two Town Maps; Barry keeps one and gives the other to you.
The two school trainers are optional, but battling them is a useful source of early experience. Their Abras know limited early moves and are not difficult if your starter is healthy. After delivering the Parcel, leave the school and heal at the Pokémon Center if necessary.
Before leaving Jubilife, you can also visit the western gate and speak with the fisherman inside to receive the Old Rod. This is optional for the chapter’s required route, but it allows you to fish for Magikarp in accessible water. The Quick Claw in the northern apartment building is another optional early item.
- Reach Jubilife City through Route 202.
- Enter the Trainers’ School.
- Deliver Barry’s Parcel to Barry.
- Receive the Town Map.
- Optionally collect the Old Rod and Quick Claw.
Obtain the Pokétch from the three clowns
After delivering the Parcel, speak with the Pokétch campaign representative standing near the city’s central area. He asks you to find three clowns and answer their questions. Locate the first clown near the Pokémon Center, the second near the Jubilife TV building, and the third outside the Pokétch Company headquarters. Speak with each clown and answer yes to each question to receive a coupon.
Return to the Pokétch representative with all three coupons. He gives you the Pokétch, which appears on the Nintendo DS touch screen. The Pokétch is required for the normal story route because it provides access to several applications and registers field moves such as Rock Smash later in the adventure. Do not confuse this original Pearl sequence with the remake interface or remake item presentation.
- Find the clown near the Pokémon Center.
- Find the clown near Jubilife TV.
- Find the clown outside the Pokétch Company.
- Answer yes to all three questions.
- Return the coupons to the Pokétch representative and receive the Pokétch.
Take Route 203, defeat Barry, and enter Oreburgh Gate
Heal in Jubilife City, make sure your starter and at least one partner are healthy, and leave through the eastern exit onto Route 203. Barry challenges you immediately near the route entrance. His team depends on your starter choice, but he uses a Level 7 Starly and a Level 9 starter with a type advantage over the Pokémon you selected. Start with a healthy Pokémon, switch if your lead has a poor matchup, and use Potions between battles only if necessary; there is no automatic healing before this fight.
After defeating Barry, continue east across Route 203. Battle or avoid the route trainers according to your party’s condition, but battling them is useful experience for the upcoming Oreburgh sequence. Wild Abra can appear on this route; if you want to catch one, throw a Poké Ball immediately because it may use Teleport before you can weaken it.
Enter Oreburgh Gate at the eastern end of Route 203. Speak with the Hiker near the entrance to receive HM06 Rock Smash. You cannot use Rock Smash outside battle until you have the Coal Badge, so treat the item as a later-return objective. Follow the main passage through the cave and exit on the eastern side into Oreburgh City. Heal at the city’s Pokémon Center and prepare for the Oreburgh Mine and Roark sequence covered in the next chapter.
- Heal before entering Route 203.
- Defeat Barry’s mandatory Route 203 battle.
- Cross Route 203 toward the cave entrance.
- Receive HM06 Rock Smash from the Hiker in Oreburgh Gate.
- Exit Oreburgh Gate into Oreburgh City.
- Save and heal before beginning the next chapter.
Before you move on
- The chosen starter is in the party and at least one Pokémon has been caught after receiving Poké Balls.
- Professor Rowan has given you the Pokédex.
- Your mother has given you the Journal, and Barry’s mother has given you Barry’s Parcel.
- Dawn or Lucas has completed the Route 202 catching demonstration and given you five Poké Balls.
- You reached Jubilife City through Route 202 and delivered Barry’s Parcel to Barry at the Trainers’ School.
- You found all three Pokétch clowns, answered yes to their questions, and received the Pokétch.
- You defeated Barry on Route 203.
- You received HM06 Rock Smash from the Hiker in Oreburgh Gate and exited into Oreburgh City.
- Your party is healed and you are ready to begin the Oreburgh Mine and Roark sequence.
References for this chapter
- Pokémon Diamond and Pearl — Walkthrough: Jubilife City, Pokétch Company, Route 203, Oreburgh Gate — Bulbapedia
- Pokémon Diamond and Pearl — Lake Verity — StrategyWiki
- Pokémon Diamond and Pearl — Route 203 — StrategyWiki
- Pokémon Pearl Version — Guide and Walkthrough
- Pokémon Pearl Version — Guide and Walkthrough — Marriland/GameFAQs
- Nintendo of America Pokémon Pearl Version Instruction Booklet
Oreburgh City and Roark — First Gym (Rock)
Travel from Jubilife City through Oreburgh Gate, obtain HM06 Rock Smash, locate Roark in Oreburgh Mine, prepare at least two reliable Rock-type counters, and defeat him in the Oreburgh Gym. This chapter covers the first badge in the original Nintendo DS Pokémon Pearl Version, not Brilliant Diamond or Shining Pearl.
Enter Oreburgh City and obtain Rock Smash
From Jubilife City, take Route 203 east and enter Oreburgh Gate. Shortly after entering the cave, speak with the Hiker near the west side of the passage. He gives you HM06, Rock Smash. In the original Nintendo DS game, HM moves must be taught to a Pokémon before they can be used, and a Gym Badge is also required before the move works outside battle.
You can teach Rock Smash immediately if you want a Pokémon to carry it, but you cannot break field rocks until Roark has awarded the Coal Badge. Do not confuse this with Brilliant Diamond and Shining Pearl, where Hidden Moves are handled through the Pokétch rather than by permanently teaching the HM to a party member.
Continue east through Oreburgh Gate and enter Oreburgh City. Heal at the Pokémon Center before exploring. The Poké Mart is nearby, so buy a few Potions and Poké Balls if your supplies are low. Visit the Gym entrance in the northern part of town; a local NPC explains that Roark is working in Oreburgh Mine. Save before heading to the mine so a failed attempt does not force you to repeat your preparation.
- Receive HM06 Rock Smash from the Hiker in Oreburgh Gate.
- Teach Rock Smash to a compatible Pokémon if you want to carry it now.
- Heal at the Oreburgh City Pokémon Center and save before entering the mine.
Navigate Oreburgh Mine and find Roark
Oreburgh Mine is in the southeastern part of Oreburgh City. Enter through the city entrance and follow the open passage toward the lower section. The mine is small, so use the stairway leading downward and continue through the worker-filled area. You do not need Rock Smash to reach Roark; the boulders that block optional sections can wait until after the Gym.
The mine’s original Diamond and Pearl encounters are Geodude, Zubat, and the less-common Onix. Geodude is especially useful for training because it takes reduced damage from many early physical attacks and can contribute Ground-type damage. Onix is also a possible catch, but its offensive stats are modest, so treat it as support rather than your only answer to Roark.
Battle mine Workers if your team needs experience, but heal in Oreburgh City rather than spending every Potion while exploring. At the lower end of the mine, look for the miner wearing a red hat near a rock. Speak to him to trigger the short demonstration involving Rock Smash. He is Roark, the missing Gym Leader. After the conversation, Roark returns to his Gym.
Leave through the same route, return to the Pokémon Center, and heal before challenging the Gym. The mine does not contain a healing station, so returning to town is the reliable way to restore HP and PP.
- Reach the lower section of Oreburgh Mine without relying on Rock Smash.
- Speak to Roark near the bottom of the mine.
- Return to town and fully heal before entering the Gym.
Prepare two counters for Roark
Roark’s original Pokémon Pearl team is Geodude at level 12, Onix at level 12, and Cranidos at level 14. Bring at least two Pokémon that can use Water-, Grass-, Fighting-, or Ground-type attacks. Do not plan to win with one weakened Pokémon merely because it has a type advantage.
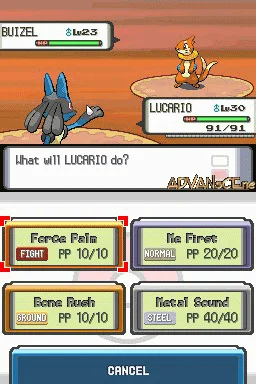
Piplup has the simplest matchup because Water Gun is super effective against all three of Roark’s Pokémon. Turtwig can use Absorb effectively, and Budew from the early routes can also contribute Grass-type damage. If you chose Chimchar, the battle is more difficult before evolution. Train Chimchar to level 14 so it evolves into Monferno and gains Mach Punch, a reliable super-effective attack for this Gym.
Machop from Route 207 is another practical counter if you want a Fighting-type specialist. Geodude from Oreburgh Mine can help absorb physical hits, although its Rock/Ground typing does not give it super-effective damage by itself. Starly and Zubat are useful team members later, but their Flying-type attacks are not super effective against Rock Pokémon, so do not rely on them as your main attackers here.
Aim for your principal counters to be around levels 13 or 14. The exact level is less important than having two healthy Pokémon with suitable moves. Carry ordinary Potions and a few extra Poké Balls. There is no reason to use Ethers, Elixirs, or other rare PP-restoring items for this short Gym.
- Bring two or more Pokémon with Water, Grass, Fighting, or Ground attacks.
- Train the main counters to approximately levels 13–14.
- Carry Potions and save before starting the Gym battles.
Clear the Oreburgh Gym
The Gym contains two trainers: Youngster Jonathon has one level 10 Geodude, while Youngster Darius has a level 8 Geodude and a level 8 Onix. The Gym has a raised route that lets you bypass them, but fighting them provides useful experience. Battle them if your team is not yet prepared; otherwise, use the upper path to preserve HP and PP for Roark.
Lead with your most dependable super-effective attacker. Water Gun, Absorb, Mach Punch, and Ground-type attacks are the preferred options. Avoid making weak Normal- or Flying-type moves your primary plan because Rock Pokémon resist them. Roark’s Geodude and Onix are both level 12, but they can use Rock Throw and set Stealth Rock. Stealth Rock is not dangerous if you never switch, but it punishes repeated switching during the battle.
Cranidos is level 14 and is the main threat. It has high Attack for this point in the game and carries Pursuit, which can punish a switch. Keep your second counter healthy and switch before your lead is in danger of being knocked out. If your starter has the wrong matchup, open with the counter and preserve the starter for an emergency finish or experience.
Use a Potion when it prevents a likely knockout, but do not spend several turns healing a Pokémon that cannot win the matchup. If multiple party members are damaged before the leader battle, leave the Gym, heal at the Pokémon Center, and return; the Gym trainers remain defeated.
- Defeat or bypass Youngster Jonathon and Youngster Darius.
- Use super-effective Water, Grass, Fighting, or Ground attacks.
- Keep a second healthy counter available for Cranidos and avoid unnecessary switching.
Claim the Coal Badge and recover after a loss
After defeating Roark, he awards the Coal Badge and TM76, Stealth Rock. The Coal Badge allows Rock Smash to be used outside battle. If you have not already done so, teach HM06 to a compatible Pokémon, then interact with a breakable rock to confirm that the field move is active. The badge also raises the obedience limit for traded Pokémon to level 20.
If you lose, return to the Pokémon Center and rebuild the team rather than immediately repeating the battle. Train a second counter in Oreburgh Mine or on the nearby routes. Practical choices include Geodude, Machop, Budew, or a starter with Water, Grass, Fighting, or Ground coverage. Put the best matchup in the lead position, give the second counter enough HP to survive Cranidos’s attack, and remove unnecessary weak Pokémon from the active party if they are only providing experience.
Ordinary Potions are sufficient for this section. Preserve PP-restoring items for longer caves and later boss sequences. After healing, save again before leaving Oreburgh City and continue back toward Jubilife City and Route 204.
- Receive the Coal Badge and TM76 Stealth Rock.
- Teach HM06 to a Pokémon and confirm Rock Smash works on a breakable field rock.
- Heal and save before continuing toward Jubilife City.
Before you move on
- The Trainer Card shows the Coal Badge.
- Roark has awarded TM76, Stealth Rock.
- At least one party Pokémon knows HM06 Rock Smash.
- Rock Smash can be used on an accessible breakable rock outside battle.
- The party has been healed and the game has been saved before leaving Oreburgh City.
References for this chapter
- Pokémon Diamond and Pearl Instruction Booklet — Nintendo
- Oreburgh Gym — Bulbapedia
- Walkthrough: Pokémon Diamond and Pearl/Part 4 — Bulbapedia
- Pokéarth: Oreburgh Mine — Serebii.net
- Pokémon Pearl Version Guide and Walkthrough — GameFAQs
- Pokémon Pearl Version — Guide and Walkthrough — Marriland/GameFAQs
Eterna City, Eterna Forest and Gardenia — Second Gym (Grass)
Complete the Floaroma Meadow and Valley Windworks sequence, defeat Commander Mars, cross Route 205 and Eterna Forest with Cheryl, earn the Forest Badge from Gardenia, then use Cut to defeat Commander Jupiter in the Eterna Galactic Building and collect the Bicycle. This chapter covers the original Nintendo DS Pokémon Pearl Version route, not Platinum or Brilliant Diamond and Shining Pearl.
Start the Valley Windworks sequence from Floaroma Town
From Floaroma Town, leave through the eastern entrance onto Route 205 and follow the path east toward Valley Windworks. A Team Galactic Grunt is blocking the building entrance. Speak to him and defeat his Pokémon. After the battle, he retreats into the building and locks the door, so do not waste time trying to enter immediately.
Return west to Floaroma Town, then enter the northwestern flower-filled area where Team Galactic members were previously standing. Walk between the trees to enter Floaroma Meadow. Two Galactic Grunts are threatening the Honey seller. Defeat them in their consecutive battles.
After both Grunts are defeated, speak with the rescued Honey seller. He gives you the Works Key and Honey. The Works Key is required to open the Valley Windworks door; Honey is optional for attracting Pokémon to Honey Trees and is not needed for the story.
Return to Valley Windworks on Route 205. Use the Works Key at the locked entrance and enter the building. Battle or avoid the Galactic Grunts inside as you move toward the back of the facility. Commander Mars is waiting at the far end. Defeat her to clear the obstruction and rescue the worker’s father. The northern Route 205 bridge remains blocked until this battle is complete.
- Defeat the first Galactic Grunt outside Valley Windworks.
- Return to Floaroma Meadow through the northwestern part of Floaroma Town.
- Defeat both Grunts threatening the Honey seller.
- Speak with the Honey seller and receive the Works Key.
- Unlock Valley Windworks and defeat Commander Mars.
- Confirm that the northern Route 205 path is open.
Prepare for Route 205 and Eterna Forest
After Mars is defeated, return to the western side of Route 205 and cross the bridge that was previously guarded by Team Galactic. The route contains several trainers and useful item pickups. Continue north rather than turning toward optional detours. A house near the forest entrance can restore your party, making it the safest recovery point before entering Eterna Forest.
Use the healing house if your party is damaged, then check your supplies. Potions or Super Potions are useful for topping off between trainer battles, while Antidotes and Parlyz Heals cover the poison and paralysis that can appear in the forest and during Gardenia’s battle. Carry Poké Balls if you plan to catch forest Pokémon.
Ponyta is a practical Fire-type option available on Route 205 and can provide the clearest answer to Gardenia if your starter lacks Fire coverage. Starly or Staravia can use Flying-type attacks against Grass Pokémon. Chimchar or Monferno has a natural advantage, but Piplup and Turtwig should add another attacker instead of relying only on their starter. A second usable Pokémon is especially important because Gardenia’s Roserade is several levels higher than her first two Pokémon.
The forest is not a required place to capture a new team member. If you enter with a balanced party, focus on reaching Eterna City and use the automatic healing to gain experience along the way.
- Heal at the Route 205 house before entering the forest if needed.
- Carry Potions, Poké Balls, Antidotes, and Parlyz Heals.
- Bring at least two Pokémon capable of contributing against Gardenia.
- Use Ponyta, Staravia, Monferno, or another Pokémon with reliable Fire or Flying damage if available.
Cross Eterna Forest with Cheryl
At the southern entrance to Eterna Forest, Cheryl asks you to accompany her because she is worried about Team Galactic. Accept. While she travels with you, wild encounters are Double Battles and battles that would normally be Double Battles become Multi Battles. Cheryl’s Level 15 Chansey participates beside you, and she fully heals your party after every battle.
Follow the main route north through the forest. The path includes tall grass, bridges, small ledges, and side branches containing items. You can fight the trainers for experience, then continue toward the northeastern exit. Because Cheryl restores the party after battles, this is an efficient place to train without spending your healing items.
If you want to catch a Pokémon, remember that wild encounters are Double Battles while Cheryl is present. You cannot safely use an ordinary single-target capture routine when two wild Pokémon appear, and Chansey may damage the Pokémon you want. You can leave through the southern entrance and return later, or postpone captures until Cheryl has departed at the northeastern exit.
In original Pearl, Misdreavus is the version-specific nighttime encounter in Eterna Forest. Murkrow is the corresponding original Diamond encounter. This distinction does not affect the route or Gardenia’s battle, and the Old Chateau is optional rather than a story requirement.
At the northeastern exit, Cheryl leaves. Continue east across the northern section of Route 205, then follow the route south into Eterna City. There is no need to detour to the Old Chateau before challenging Gardenia.
- Accept Cheryl’s escort at the southern forest entrance.
- Use the automatic healing after battles to conserve items and gain experience.
- Remember that wild encounters become Double Battles while Cheryl is present.
- Distinguish Pearl’s nighttime Misdreavus from Diamond’s Murkrow.
- Reach the northeastern forest exit and continue to Eterna City.
Clear the original Pearl Eterna Gym
Heal at Eterna City’s Pokémon Center before entering the Gym. In original Diamond and Pearl, the Gym is an indoor forest maze with hidden trainers. It does not use Platinum’s rotating clock and hand puzzle. Gardenia will not battle until all four Gym Trainers have been defeated.
Enter the forest section and use the trainers’ hints to locate the next opponent. The sequence is Lass Caroline, Aroma Lady Jenna, Aroma Lady Angela, and Beauty Lindsay. Caroline uses Cherubi and Roselia at Level 15. Jenna uses three Budew at Levels 14, 13, and 15. Angela uses a Level 17 Turtwig, and Lindsay uses a Level 17 Roselia.
Use the battles to gain experience, but return to the Pokémon Center if your lead is poisoned, paralyzed, or low on PP. The Gym is close to the Pokémon Center, so conserving status medicine is less important than beginning Gardenia’s battle with a healthy team.
Once all four trainers are defeated, speak with Gardenia. She uses Cherubi at Level 19, Turtwig at Level 19, and Roserade at Level 22. Her Cherubi knows Grass Knot, Leech Seed, Safeguard, and Growth. Turtwig knows Razor Leaf, Grass Knot, Withdraw, and Reflect. Roserade knows Magical Leaf, Grass Knot, Stun Spore, and Poison Sting and holds a Sitrus Berry.
Lead with a Fire- or Flying-capable Pokémon and use the strongest reliable super-effective move available. Defeat Cherubi promptly if it uses Leech Seed. If Turtwig sets Reflect, a special Fire attack avoids much of Reflect’s physical-damage reduction. Roserade is the main threat because it is higher level, carries a Sitrus Berry, and can inflict paralysis with Stun Spore. Keep a second attacker ready rather than allowing one paralyzed Pokémon to carry the entire battle.
If Gardenia defeats you, heal in Eterna City, train Ponyta, Staravia, Monferno, or another suitable counter on Route 205 and nearby areas, then return with two or more reliable attackers. The battle is not dependent on a single starter choice.
- Defeat Caroline, Jenna, Angela, and Lindsay.
- Use the original Pearl indoor forest layout, not Platinum’s clock puzzle.
- Restore HP, status, and PP before challenging Gardenia.
- Defeat Cherubi, Turtwig, and Roserade.
- Receive the Forest Badge and TM86 Grass Knot.
Use Cut and finish the Eterna Galactic event
After Gardenia is defeated, leave the Gym. Cynthia meets you outside the Team Galactic building in northwestern Eterna City and gives you HM01 Cut. The badge is required before Cut can be used outside battle, so both Gardenia’s defeat and Cynthia’s handoff are necessary.
Teach Cut to a Pokémon that can carry a field move without disrupting your main battle plan if possible. Walk to the small trees blocking the entrance of the Team Galactic Eterna Building and use Cut. Enter the building and work through its trainers and stairways until you reach Commander Jupiter.
Defeat Jupiter to complete the required Eterna City Team Galactic event. This releases the Cycle Shop owner, Rad Rickshaw, who returns to his shop in the southern part of Eterna City. The Old Chateau remains optional; it contains optional items and encounters but is not needed for the badge, Galactic event, or Bicycle.
Return to the Cycle Shop after Jupiter’s defeat and speak with Rad Rickshaw. He gives you the Bicycle. Save in Eterna City after receiving it. The Bicycle is required for efficient travel through the upcoming routes, while the Old Chateau can be visited later if you want its optional contents.
- Receive HM01 Cut from Cynthia outside the Galactic building.
- Use Cut to enter the Eterna Galactic Building.
- Defeat Commander Jupiter.
- Confirm that Rad Rickshaw has returned to the Cycle Shop.
- Receive the Bicycle.
- Save after the Bicycle event before leaving Eterna City.
Before you move on
- The Works Key is in the Bag and was used to open Valley Windworks.
- Commander Mars has been defeated inside Valley Windworks.
- The northern Route 205 bridge is no longer blocked by Team Galactic.
- The Forest Badge is displayed on the Trainer Card.
- TM86 Grass Knot is in the Bag.
- Cynthia has given the player HM01 Cut outside the Eterna Galactic Building.
- Commander Jupiter has been defeated inside the Eterna Galactic Building.
- Rad Rickshaw has returned to the Cycle Shop and given the player the Bicycle.
- The Old Chateau has been left optional rather than treated as required progress.
- The game has been saved in Eterna City after the Galactic and Bicycle events.
Veilstone City Preparation and Optional Services
From the completed Eterna City sequence, travel south through Route 206 and Cycling Road, cross Route 207 and Mt. Coronet, and enter Hearthome City through Route 208. Speak with Fantina outside the Super Contest Hall so Route 209 opens, then continue through Solaceon Town, the southern part of Route 210, and Route 215 to reach Veilstone City. Use Veilstone as a shopping and organization stop before Maylene. The detailed Gym puzzle, Maylene battle, Pokédex recovery, and first Galactic Warehouse sequence belong to Chapter 05. The Storage Key is not available during this first city visit; it is obtained later from the fleeing Galactic Grunt outside the Galactic Veilstone Building after the Lake Acuity event.
Leave Eterna City and reach the first Hearthome City visit
Begin in Eterna City after completing the Team Galactic building sequence and receiving the Bicycle. Leave through the southern gate onto Route 206. Ride south along Cycling Road, dismount when you reach the lower exit, and continue east onto Route 207. The route contains ordinary Trainer battles and wild Pokémon, so heal in Eterna before departing if your team is already worn down.
From Route 207, enter the southern passage of Mt. Coronet. Follow the cave path through the mountain rather than trying to explore every branch. The exit on the eastern side leads to Route 208. Continue east across Route 208, passing the Berry Master's house and the nearby berry soil if you want the daily Berry or the optional Berry Searcher Pokétch application. The eastern gate leads into Hearthome City.
Heal at the Hearthome Pokémon Center and treat the city as a required story stop, not as the place for your next Gym battle. In original Pokémon Pearl, Fantina cannot yet be challenged here. The city’s Gym is a later objective after the story provides access to Surf.
When you first approach the northern Super Contest Hall, Fantina is standing outside the entrance. Speak with her. She identifies herself as Hearthome’s Gym Leader and explains that you are not yet strong enough to challenge her. This conversation is a progression landmark. After it, enter the Super Contest Hall if you want to complete the associated optional interactions, then leave through the eastern side of the city toward Route 209. The Contest itself is optional, but visiting the hall is required before Route 209 becomes available.
Inside the Super Contest Hall, Keira gives a Glitter Powder accessory, and the protagonist’s mother gives a Tuxedo or Dress. These rewards affect the Super Contest system only. The Pokémon Fan Club can also give the Poffin Case, and the hotel has an optional Shell Bell gift, but neither is needed to reach Veilstone City.
- Leave Eterna through Route 206, not through Route 205.
- Use the Bicycle on Cycling Road and continue through Route 207.
- Cross the southern Mt. Coronet passage to Route 208.
- Speak with Fantina outside the Hearthome Super Contest Hall.
- Enter the hall before attempting to use Route 209.
- Do not attempt the Hearthome Gym yet.
Cross Route 209 and choose the useful Solaceon stops
From Hearthome City, take the eastern exit onto Route 209. The route contains tall grass, Trainers, berry soil, and the Lost Tower. Follow the main path east toward Solaceon Town. Lost Tower is optional at this point. It contains Ghost-type encounters, Trainer battles, and useful items, but it is not required for the main route to Veilstone City.
Solaceon Town is the next required landmark. Heal at the Pokémon Center and organize your team before continuing. The Pokémon Day Care is available here if you want to leave Pokémon for breeding or leveling, but using it is optional. The Solaceon Ruins are also optional. They contain Unown encounters and side rewards, but exploring them is not necessary for story progression.
If you enter Lost Tower, the fifth floor contains two elderly caretakers. One gives the Cleanse Tag, and the other gives HM04 Strength. You can collect these rewards before continuing, but do not confuse obtaining Strength with being able to use it outside battle immediately. The required badge condition and later story route determine when field moves become usable.
Solaceon is a good place to heal and review the active party before Route 210. Keep several Pokémon available rather than relying on one lead. The next routes contain a mixture of Normal-, Fighting-, Bug-, and Flying-type opponents, and the approach to Maylene benefits from having both Flying- or Psychic-type attacks and a separate answer for Lucario later.
- Heal in Solaceon Town.
- Use the Pokémon Day Care only if you want its optional service.
- Treat Lost Tower and Solaceon Ruins as optional detours.
- Collect HM04 Strength from Lost Tower only if you want the early field-move item.
- Keep the party balanced before Route 210.
Continue through southern Route 210 and Route 215
Leave Solaceon Town through the southern exit onto Route 210. Stay on the lower, southern section of the route and follow the path west before turning south toward Route 215. The northern portion of Route 210 is blocked by a group of Psyduck until a later story event, so do not try to force a route through that obstruction during this chapter.
Route 210 South contains Trainers, grass, and ordinary wild encounters. Battle enough Trainers to keep your team near the local level range, but return to Solaceon or use healing items if several members are becoming weakened. You do not need Defog for the southern section used here; the dense fog and related progression belong to the later northern Route 210 sequence.
Enter Route 215 from the western side of Route 210 and travel east. Route 215 is a rainy route with raised ledges, bridges, tall grass, and several Trainer battles. Follow the main eastbound path, using the ledges to keep moving toward the eastern gate. Pick up visible items only when doing so does not pull the party away from the main route. A Repel can reduce encounters during the final stretch if your team is already at the level you want.
The eastern gate of Route 215 leads directly into Veilstone City. This is the intended first arrival route for the chapter. Route 214 to the south connects to Veilstone later, but it is not the route you need to reach the city from Solaceon.
- Use the southern part of Route 210 and do not attempt the blocked northern section.
- Heal before Route 215 if several Pokémon have lost significant HP or PP.
- Follow Route 215 east through the rain and ledges.
- Enter Veilstone City through the eastern end of Route 215.
Establish Veilstone landmarks and organize the party
Upon entering Veilstone City, go to the Pokémon Center first. Heal, save, and use the PC to remove duplicate or unused team members. Veilstone lies between Route 215 to the west and Route 214 to the south. The Pokémon Center is near the middle of the city and is the best starting landmark for shopping and later returns.
The Veilstone Department Store stands west of the Pokémon Center. The Veilstone Gym is on the southwest hill. The Game Corner and Prize Exchange are on the southeast hill. The Galactic Veilstone Building occupies the northeast hill, while the Galactic Warehouse is in the northwest section of town. The public lobby of the Galactic building can be inspected, but the deeper interior is locked. Two Grunts block the Warehouse during this first arrival.
Organize the active party with Maylene in mind, but do not duplicate the detailed Gym solution here. A Staravia with a Flying-type attack or a Kadabra with a Psychic-type attack can be useful against Fighting-type opponents. Keep a second answer available because Maylene’s Lucario is Fighting/Steel and should not be treated as an ordinary Fighting-type target. Fire-, Ground-, or Fighting-type coverage can help against Lucario, depending on the Pokémon available to you.
Aim for several reliable Pokémon in the upper twenties rather than one heavily overleveled lead. Check move PP, held items, status conditions, and available healing items. Save after finishing your preparation. Chapter 05 handles the Gym’s sliding-panel route, trainer order, Maylene’s full battle, the Pokédex recovery event, and the first Warehouse sequence.
- Heal and save at the Veilstone Pokémon Center.
- Organize the active party and PC boxes.
- Prepare at least two useful contributors against Fighting-type opponents.
- Include a separate Fire-, Ground-, or Fighting-type answer for Lucario.
- Do not enter the Gym expecting this chapter to provide the full puzzle or battle route.
Shop efficiently at the Veilstone Department Store
The original Pokémon Pearl Department Store has five floors. On the first floor, the left cashier sells Poké Balls, Great Balls, Ultra Balls, Escape Ropes, Poké Dolls, Repels, and Mail. The right cashier sells Potions through Max Potions, Revives, and individual status cures. Buy healing items and capture supplies before spending money on optional goods. The Socialite near the entrance gives a starter-related mask based on the first partner Pokémon with a type disadvantage to your chosen starter; this is a Super Contest accessory with no battle effect.
The second floor is the Battle Collection. One cashier sells temporary battle items such as X Attack, X Defense, X Speed, Guard Spec., Dire Hit, X Accuracy, X Sp. Atk, and X Sp. Def. Another sells vitamins. The southernmost clerk gives the Counter Pokétch application. Counter records taps and has no story or battle effect. It is safe to collect, but it is not a required progression item.
The third floor is the TM Corner. In the original Pearl inventory, it includes TMs such as Protect, False Swipe, Safeguard, Reflect, Light Screen, Flash, Fire Blast, Thunder, Blizzard, SolarBeam, Focus Blast, and Hyper Beam. Check compatibility before purchasing. False Swipe can be useful for future capture plans, while the expensive elemental TMs should be bought only when a current team member can use one effectively.
The fourth floor sells Secret Base decorations. These are optional Underground purchases. The fifth-floor Rooftop Plaza has vending machines selling Fresh Water, Soda Pop, and Lemonade. The right-most of the two men near the escalator gives a Sticky Barb. The drinks may be a cheap supplement for route healing, but buy stronger recovery items first.
- Prioritize Potions, Super Potions, Hyper Potions, Revives, and status cures.
- Restock Great Balls or Ultra Balls if your supply is low.
- Collect the Counter application on the second floor if desired.
- Check TM compatibility before buying expensive attacks.
- Treat Secret Base decorations, vitamins, and the Sticky Barb as optional.
Collect optional city rewards and record the later Galactic objective
On the southwest hill, enter the eastern house and speak with the Clown to receive the Coin Case. This key item is required for using the Veilstone Game Corner, but the Game Corner is optional. On the southeast hill, the Game Corner allows Coin purchases and prize exchanges. The Prize Exchange is east of the Game Corner. None of these activities is required for Maylene, the Cobble Badge, or the next story area, so set aside money for healing supplies before buying coins.
Optional city items include a hidden Revive west of the Department Store, a hidden PP Up on the northeast hill near the west side of the Galactic Veilstone Building, and TM63 Embargo from the Roughneck near the Gym. Collect them if you are sweeping the city, but do not delay required progression or overspend to obtain them.
The Galactic Warehouse is not your immediate dungeon. Its first story sequence occurs after the Veilstone Gym event and includes the Pokédex-recovery objective covered in Chapter 05. During the initial visit, the Grunts outside prevent entry. Likewise, the main Galactic building only permits access to its public lobby until the proper key is obtained later.
After the Lake Acuity confrontation, the story sends you back to Veilstone City. At that time, speak with the fleeing Galactic Grunt outside the Galactic Veilstone Building on the northeast hill. He drops the Storage Key. The key opens the locked Warehouse door on the later return and leads to the Galactic Key and the deeper Headquarters route. Do not search for this key during the current shopping visit.
- Obtain the Coin Case if you want to use the Game Corner.
- Keep Game Corner spending separate from Gym and healing money.
- Collect the optional Revive, PP Up, or TM63 if desired.
- Remember that the first Warehouse sequence follows the Veilstone Gym event.
- Return for the Storage Key only after the Lake Acuity scene.
- Do not treat the Storage Key, Galactic Warehouse dungeon, or Headquarters interior as current objectives.
Before you move on
- You left Eterna City through Route 206 and reached Hearthome through Route 207, Mt. Coronet, and Route 208.
- You spoke with Fantina outside the Hearthome Super Contest Hall and entered the hall before using Route 209.
- You crossed Route 209, reached Solaceon Town, and continued through southern Route 210 and Route 215.
- You healed and saved at the Veilstone Pokémon Center.
- Your party and PC boxes are organized, with at least two possible Fighting-type answers and a separate plan for Lucario.
- You purchased sufficient recovery items and Poké Balls for the next section.
- You know the locations and purposes of the five Department Store floors.
- You obtained the Coin Case if you want to use the Game Corner.
- You understand that Chapter 05 contains the detailed Maylene Gym route, Maylene battle, Pokédex recovery, and first Warehouse sequence.
- You understand that the Storage Key is a later post-Lake Acuity objective.
Veilstone Gym — Maylene (Fighting) and Rival Encounters
Defeat Maylene in Veilstone Gym, earn the Cobble Badge and TM60 Drain Punch, then help Dawn or Lucas recover the stolen Pokédex outside the Galactic Warehouse. After the double battle, enter the Warehouse and collect HM02 Fly. This chapter covers the original Nintendo DS Pokémon Pearl Version, whose Gym uses sliding wall panels rather than Pokémon Platinum’s punching-bag puzzle. There is no required rival battle immediately after Maylene; Barry’s next major encounter occurs later in the Pastoria sequence.
1. Prepare in Veilstone City
Heal at the Veilstone City Pokémon Center before entering the Gym. Maylene’s Diamond and Pearl team is Meditite at level 27, Machoke at level 27, and Lucario at level 30. Bring at least two Pokémon that can contribute rather than relying on one fragile attacker. A party with several Pokémon around levels 26–30 is a practical target, although a lower-level team can succeed with favorable matchups and good move selection.
Buy Super Potions or stronger healing items and carry Parlyz Heals or Full Heals. Lucario’s Force Palm can cause paralysis, and Meditite’s Confusion can punish a counter that cannot take Psychic-type damage. Save before entering the Gym so a failed attempt does not force you to repeat preparation.
Fairy typing does not exist in Pokémon Pearl Version. Do not plan around Fairy attacks, Fairy immunities, or later-generation matchup advice. Fighting Pokémon are weak to Flying and Psychic attacks, but Lucario is Fighting/Steel and must be handled separately because Steel resists both Flying and Psychic damage. Its Steel typing also resists Grass attacks, so Grass is not a special answer to this battle.
- Heal at the Veilstone Pokémon Center.
- Bring healing items and at least one paralysis cure.
- Prepare two usable counters instead of one overleveled attacker.
- Save before entering the Gym.
2. Build a counter plan
Staravia is a convenient answer to Meditite and Machoke if it knows Wing Attack or another reliable Flying move. Zubat or Golbat can also help with Flying attacks. These Pokémon are not automatic answers to Lucario: its Steel typing resists Flying, and Bone Rush gives it Ground-type coverage against some otherwise useful counters.
Psychic attacks work well against Meditite and Machoke. Abra or Kadabra can deal heavy damage, but protect them from physical attacks because their defenses are often poor. Gastly or Haunter can avoid ordinary Fighting-type attacks, yet they should not be treated as a complete solution. Meditite carries Confusion, and Lucario has coverage that can strike a Ghost-type Pokémon.
Lucario is best handled with Fire-, Ground-, or Fighting-type damage when you have it available. A strong Water-type attack can also deal neutral damage, provided the user can survive Drain Punch. Do not use Grass as though it were neutral: Lucario’s Steel typing resists Grass. A sturdy neutral attacker is another option, but avoid giving Lucario repeated turns to heal with Drain Punch.
Paralysis support can help slow Lucario or create safe switching opportunities, but status alone is not a battle plan. Keep a second attacker ready in case your first counter is paralyzed, hit by a critical hit, or weakened by Rock Tomb.
- Have a dependable Flying or Psychic attack for Meditite and Machoke.
- Reserve Fire, Ground, Fighting, or strong neutral damage for Lucario.
- Keep a second counter available if the first is paralyzed or knocked out.
- Check your chosen Pokémon’s actual moves before entering.
3. Navigate the original Veilstone Gym
Pokémon Pearl uses sliding wall panels in the Veilstone Gym. The dojo is divided into smaller rooms, with yellow mobile walls creating or blocking passages. Push the panels so the openings line up, then walk through the cleared route. The goal is to reach the upper sections of both sides of the Gym and open the central approach to Maylene.
Do not use a Pokémon Platinum Gym walkthrough for this section. Platinum replaces the mobile-wall layout with punching bags and tire obstacles, but Pearl retains the original sliding-wall puzzle.
The four Black Belt trainers are Darren, Jeffery, Rafael, and Colby. In Pearl, their teams range from level 25 to level 28 and include Machoke, Machop, and Meditite. They are useful experience before Maylene, especially if your team is below the recommended range, but you do not need to defeat every trainer in one trip if your party is running low on HP or PP.
If your Flying or Psychic attacker has taken too much damage, leave the Gym, heal at the Pokémon Center, and return. The solved wall arrangement remains in place. This is safer than spending several healing items before the leader battle.
- Move the yellow wall panels rather than looking for punching bags.
- Reach the upper sections on both sides of the Gym.
- Battle the Black Belt trainers that block your route or provide useful experience.
- Heal before Maylene if your counters have lost substantial HP or PP.
4. Defeat Maylene
Maylene leads with Meditite. Use Wing Attack, another reliable Flying move, or a strong Psychic attack. Meditite is Fighting/Psychic, and Flying attacks are especially convenient because they exploit its Fighting weakness without being reduced by its Psychic typing. If Confusion leaves your counter in danger, switch rather than hoping to survive another hit.
Machoke is also weak to Flying and Psychic attacks. Watch for Rock Tomb, which can damage a Flying counter and lower its Speed. A Pokémon that begins the battle faster can lose that advantage after Rock Tomb, so keep a backup counter available.
Lucario is Maylene’s final Pokémon. In Pearl it is level 30, Fighting/Steel, has the Steadfast ability, holds a Sitrus Berry, and knows Drain Punch, Metal Claw, Bone Rush, and Force Palm. Use Fire, Ground, or Fighting damage when possible, or wear it down with a sturdy neutral attacker. Psychic and Flying attacks are not super effective against Lucario, and Grass attacks are resisted by its Steel typing.
Force Palm can paralyze, Drain Punch restores Lucario’s HP when it deals damage, Metal Claw can raise Lucario’s Attack, and Bone Rush supplies Ground-type coverage. Heal before Lucario if your intended answer is already badly injured. If paralysis stops that Pokémon from acting, use a status-healing item or switch to your second counter.
After the victory, Maylene awards the Cobble Badge and TM60, Drain Punch. The Cobble Badge permits the use of Fly outside battle once HM02 has been obtained and taught to a compatible Pokémon.
- Defeat Meditite with Flying or Psychic damage.
- Handle Machoke with the same counters while watching for Rock Tomb.
- Use Fire, Ground, Fighting, or strong neutral damage against Lucario.
- Receive the Cobble Badge and TM60 Drain Punch.
5. Recover the stolen Pokédex
Leave the Gym after defeating Maylene. Dawn or Lucas will approach and explain that Team Galactic has taken the Pokédex. Go to the Galactic Warehouse in the northwestern part of Veilstone City. The confrontation takes place outside the Warehouse entrance, not inside the locked deeper sections of the headquarters route.
Speak to Dawn or Lucas and agree to help. You then enter a double battle against the two Team Galactic Grunts. In the original Diamond and Pearl versions, the four opposing Pokémon are Dustox, Beautifly, Croagunk, and Stunky, all at level 25. Your partner fights beside you with a temporary team, so target the opponent threatening your active Pokémon and avoid careless attacks that also damage your partner.
Ground attacks are useful against Stunky and Croagunk. Psychic attacks are effective against Croagunk, while Flying or Fire attacks can handle the Bug types. Remember that double-battle moves such as Earthquake or Surf can affect allies in this generation, so use them only when the resulting damage is acceptable.
After both Grunts are defeated, the Pokédex is returned. The Grunts retreat into the Warehouse, revealing that the item Team Galactic moved onward is connected to the next Pastoria sequence. There is no required rival battle immediately after Maylene. Barry’s next important encounter in this part of the story occurs later around Pastoria, so do not search Veilstone for a rival event that is not present here.
- Go to the Galactic Warehouse after leaving the Gym.
- Speak to Dawn or Lucas to begin the double battle.
- Defeat both level 25 Galactic Grunts.
- Confirm that the Pokédex has been returned.
6. Collect HM02 Fly
Enter the Galactic Warehouse after the double battle. On the first floor, move toward the eastern side and examine the item on the ground to collect HM02 Fly. The Warehouse is accessible at this stage only on the first floor; the deeper passage connecting it to the Galactic Headquarters requires a later key.
Teach Fly only to a Pokémon that can learn it and that you are willing to keep in your travel party. In this generation, HM moves occupy one of a Pokémon’s four move slots, so consider whether the move will remain useful before teaching it. You cannot use Fly outside battle merely by owning HM02; the Cobble Badge is also required.
After obtaining Fly, heal if necessary and save in or near Veilstone City. The next normal route after this chapter leads south through Route 214 toward Pastoria City. You can use the Department Store, organize your PC, or collect optional city items before leaving, but none of those activities replaces the required Warehouse objective.
- Enter the Galactic Warehouse after the double battle.
- Pick up HM02 Fly on the first floor’s eastern side.
- Do not attempt to clear the locked deeper route yet.
- Save before continuing south toward Route 214 and Pastoria.
7. Recover from a failed attempt
If Maylene defeats you, heal at the Pokémon Center and identify the failed matchup. If Meditite and Machoke caused the problem, train a Flying or Psychic counter rather than raising every party member equally. Staravia, Golbat, Kadabra, and other Pokémon with suitable attacks can fill this role, but confirm their current moves before returning.
If Lucario caused the loss, add Fire-, Ground-, or Fighting-type damage to your plan. A Pokémon that can survive Force Palm and Drain Punch is valuable, but do not allow Lucario several free turns to restore health. If paralysis repeatedly prevents your counter from acting, bring status-healing items and use a second attacker instead of depending on one Pokémon.
Train on the remaining trainers around Veilstone and Route 215, then return with two or more counters near Maylene’s level range. After earning the Cobble Badge, save again. Repeat the save after recovering the Pokédex and collecting HM02 Fly. The next major story route is south toward Pastoria, where the rival encounter and Crasher Wake’s Gym become relevant.
- Rebuild around effective moves and resistances, not levels alone.
- Train a second counter if the first is overwhelmed.
- Prepare a specific answer for Lucario’s Fighting/Steel typing.
- Save after obtaining the badge, TM60, recovered Pokédex, and HM02 Fly.
Before you move on
- The Cobble Badge appears on the Trainer Card.
- Maylene has awarded TM60 Drain Punch.
- Dawn or Lucas has recovered the stolen Pokédex after the Warehouse double battle.
- HM02 Fly has been collected from the first floor of the Veilstone Galactic Warehouse.
- The deeper Warehouse route remains locked for the later Galactic Key sequence.
- The game is saved in or near Veilstone City before continuing south toward Route 214 and Pastoria.
Pastoria City and Crasher Wake — Water Gym
Reach Pastoria City through Route 214, Valor Lakefront, and Route 213; prepare Electric- and Grass-type answers for Crasher Wake; solve the original Nintendo DS Gym’s three-level water puzzle; defeat Wake for the Fen Badge and TM55 Brine; then chase the Team Galactic Grunt through Route 213 and Valor Lakefront to receive Cynthia’s SecretPotion. Surf is not obtained in Pastoria. HM03 Surf comes from Celestic Town, and the Relic Badge from Hearthome Gym is required before Surf can be used outside battle.
Travel from Veilstone City to Pastoria City
Leave Veilstone City through the southern exit and follow Route 214. Continue south into Valor Lakefront, then use the route toward Route 213 and travel west along the beach and roads until Pastoria City. Route 214 and Route 213 contain trainers and wild Pokémon in the low-to-mid twenties, so this is a good point to have most of the active party in the upper twenties rather than relying on one heavily overleveled Pokémon.
Heal at Pastoria’s Pokémon Center as soon as you arrive. The Poké Mart sells useful supplies for this section, including Great Balls, Super Repels, and healing items. Buy enough Potions or Super Potions to recover between battles, a few Paralyze Heals or Full Heals if your team lacks status recovery, and additional Poké Balls if you plan to use the Great Marsh.
The Great Marsh is optional for the main story. Entering a Safari Game gives you HM05 Defog from the attendant area, and the Fen Badge later permits Defog to be used outside battle. You do not need to complete a Great Marsh capture session to challenge Wake. If you want an additional recovery point while traveling around Route 213, the police officer inside Hotel Grand Lake can heal the party.
- Reach Pastoria through Route 214, Valor Lakefront, and Route 213.
- Heal at Pastoria’s Pokémon Center.
- Stock healing items, status recovery, and Poké Balls.
- Visit the Great Marsh only if you want Defog or optional captures.
- Save before entering the Gym.
Prepare Electric and Grass counters
Crasher Wake’s original Diamond and Pearl team is Gyarados at level 27, Quagsire at level 27, and Floatzel at level 30. Electric attacks are effective against Gyarados and Floatzel, but Quagsire’s Water/Ground typing makes it immune to Electric attacks. A reliable Grass attack is therefore the key preparation for this Gym.
A Shinx or Luxio with a usable Electric move is a practical answer to Gyarados and Floatzel. Budew or Roselia can handle Quagsire if trained well, and a Grass-capable starter or another team member can fill the same role. Rock attacks also work well against Gyarados because it is part Flying type, but do not make a Rock-type your only answer: Water attacks are dangerous to Rock Pokémon.
Floatzel carries Ice Fang, so do not leave a fragile Grass Pokémon in against it simply because Grass is super effective. Switch to an Electric Pokémon when possible. Gyarados has Intimidate, which lowers the Attack of the Pokémon entering battle; special Electric or Grass attacks avoid losing physical damage from that ability. Keep a second counter available in case your main Electric or Grass Pokémon is defeated.
- Bring a dependable Electric attack for Gyarados and Floatzel.
- Bring a Grass attack for Quagsire.
- Keep a backup counter in the party.
- Avoid relying on Fire-, Ground-, or Rock-type Pokémon as the team’s only answer.
- Aim for a balanced party around the high twenties before Wake.
Solve the original Pastoria Gym water puzzle
The Pastoria Gym contains three water levels controlled by colored floor switches. Yellow switches lower the water to its lowest level, green switches raise it to the middle level, and blue switches raise it to the highest level. Trainer battles along the route provide useful experience, but heal before speaking to Wake rather than entering his room with a damaged party.
From the entrance, move north and then west to the yellow switch. Step on it to lower the water completely. Take the nearby stairs down and travel across the lowest level. Climb the two central stairways near Fisherman Walter, then go east and step on the green switch to raise the water to the middle level.
Move southwest through the newly opened route and battle Sailor Damian. Step on the nearby blue switch to raise the water to its highest level. Move south, pass the area near Tuber Jacky, and continue east. Battle Tuber Caitlyn, then move north and press the green switch near Fisherman Erick.
Use the nearby stairs to go down and travel south to the yellow switch. Press it to lower the water again. Turn around and go north over the three stairways, then follow the route toward the northeast corner. Climb toward Sailor Samson, battle him, and press the blue switch beside him. The water rises to its highest level again. Move east across the wooden bridge, then turn north to reach Crasher Wake.
If a switch seems to send you away from the leader, check which staircases and bridges changed rather than repeatedly pressing buttons at random. The required original-game sequence is yellow, green, blue, green, yellow, blue.
- Press yellow to lower the water first.
- Press green, then blue, to reach the middle and highest routes.
- Press green near Fisherman Erick.
- Press the southern yellow switch.
- Press the final blue switch near Sailor Samson.
- Heal before challenging Wake.
Defeat Crasher Wake
Wake leads with level 27 Gyarados. Use an Electric attack if your Pokémon can withstand a hit, or use a strong Rock attack. Gyarados knows Brine, Dragon Rage, Bite, and Swagger in this version, so avoid allowing it to remain at low health if Brine can finish your Pokémon. If Intimidate reduces a physical attacker’s power, switch to a special move or use another Pokémon rather than wasting turns.
When level 27 Quagsire enters, switch to the Grass user immediately. Electric attacks have no effect because of Quagsire’s Ground typing. Quagsire’s Mud Bomb can damage Electric Pokémon and may reduce their accuracy, so do not attempt to force an Electric matchup. A strong Grass move is the safest way to remove it.
Wake’s final Pokémon is level 30 Floatzel, holding a Sitrus Berry. Use Electric or Grass damage, but account for Ice Fang if using a Grass Pokémon. Floatzel also has Brine, Pursuit, and Swift, and its Sitrus Berry can restore health when its HP becomes low. Keep your strongest healthy counter available for this final exchange rather than spending it on a weak Gym trainer.
After winning, Wake gives you the Fen Badge and TM55 Brine. The Fen Badge allows Defog to be used outside battle and raises the obedience limit for traded Pokémon to level 50. Brine is a Water-type move that becomes more powerful against a target at half health or less; teach it only after checking whether it improves your current moveset.
- Use Electric or Rock attacks on Gyarados.
- Use Grass attacks on Quagsire.
- Use Electric or Grass attacks on Floatzel while watching for Ice Fang.
- Claim the Fen Badge.
- Collect TM55 Brine.
Chase Team Galactic and obtain the SecretPotion
After the Gym battle, heal at the Pokémon Center. Move northeast in Pastoria and speak to the Team Galactic Grunt near the Great Marsh entrance. He talks about the package delivered from the Veilstone warehouse, notices you, and runs away. Follow him east toward the Route 213 gate and speak to him again when he stops near the entrance.
The Grunt runs through the gate without battling you. Before you can continue, Barry approaches from the west and begins the mandatory rival battle. His team includes Starly at level 26, Roselia and a Water- or Fire-type selection at level 25, plus a level 28 evolved starter chosen to have a type advantage over your starter. Heal before initiating this sequence if you have not already done so. Defeat Barry, then continue east along Route 213 and into Valor Lakefront.
Keep following the Grunt through the route until he finally battles you near Valor Lakefront. After you win, Cynthia appears and gives you the SecretPotion. This item is the required solution for the Psyduck blocking the northern part of Route 210.
The next progression route is to return to Solaceon Town or otherwise reach Route 210, use the SecretPotion on the group of Psyduck, and travel north toward Celestic Town. In Celestic Town, defeat the Team Galactic Grunt blocking the ruins and speak with the town elder. She gives you HM03 Surf. Surf cannot be used outside battle yet: in the original Pearl Version, the Hearthome Gym’s Relic Badge is required for field use. The Fen Badge grants Defog, not Surf.
- Speak to the Grunt near the Great Marsh after defeating Wake.
- Speak to him again near the Route 213 gate.
- Defeat Barry in the mandatory rival battle.
- Follow the Grunt through Route 213 to Valor Lakefront.
- Defeat the Grunt and receive the SecretPotion from Cynthia.
- Use the SecretPotion on Route 210’s Psyduck.
- Reach Celestic Town and obtain HM03 Surf.
- Do not expect field Surf until the Relic Badge is registered.
Before you move on
- Pastoria City has been reached and the party has been healed.
- Crasher Wake has been defeated.
- The Fen Badge is visible on the Trainer Card.
- TM55 Brine has been received.
- Defog can now be used outside battle after HM05 has been obtained from the Great Marsh.
- The Grunt near the Great Marsh has been chased through Route 213 and defeated near Valor Lakefront.
- Barry’s rival battle has been completed.
- Cynthia has given the SecretPotion.
- The Route 210 Psyduck can be cleared, opening the way toward Celestic Town and HM03 Surf.
Hearthome City, Contest Hall and Fantina — Ghost Gym
Following the normal route from Chapter 06, you should already have defeated Maylene and Crasher Wake, cured the Psyduck on Route 210, delivered Cynthia’s Old Charm in Celestic Town, examined the mural in the Celestic Ruins, and received HM03 Surf. Return to Hearthome City and challenge Fantina for the Relic Badge. The Super Contest, Poffins, accessories, Amity Square, and city gifts are optional. In original Pokémon Pearl, Fantina is the fifth Gym Leader and her Gym uses arithmetic questions rather than Pokémon Platinum’s dark maze.
Confirm the Celestic prerequisite before returning to Hearthome
If you are following the intended route, fly or travel back to Hearthome City after receiving HM03 Surf. You do not need to repeat the Celestic Town event. Fantina should now be inside the Hearthome Gym and ready to battle. Heal at the Pokémon Center before entering.
If Fantina is still standing outside the Contest Hall or the Gym is unavailable, use this recovery route. From Hearthome, travel east through Route 209 to Solaceon Town, then continue north on Route 210. At the Psyduck blockade, use the SecretPotion Cynthia gave you at Valor Lakefront. After the Psyduck leave, Cynthia appears and gives you the Old Charm for her grandmother in Celestic Town. Continue north through the foggy section of Route 210; Defog improves visibility but is not required to reach town.
In Celestic Town, approach the ruins on the north side. Defeat the Galactic Grunt blocking the entrance, then speak with Cynthia’s grandmother and give her the Old Charm. Enter the ruins and examine the mural at the back. The elder then gives you HM03 Surf. Return to Hearthome after this conversation. Surf cannot be used outside battle until you win the Relic Badge, so receiving HM03 alone does not replace the Gym battle.
- Confirm that HM03 Surf is already in the Bag if continuing from Chapter 06.
- If Fantina is absent, cure the Route 210 Psyduck and obtain the Old Charm from Cynthia.
- Defeat the Galactic Grunt outside the Celestic Ruins if the prerequisite is incomplete.
- Give the Old Charm to Cynthia’s grandmother and examine the mural.
- Receive HM03 Surf, then return to Hearthome City.
Handle Hearthome’s optional activities
On the first visit to Hearthome, the player normally speaks with Fantina outside the Super Contest Hall before continuing through Sinnoh. On the return visit, the Contest Hall is available, but contests are not required for Fantina, the Relic Badge, or the main story. The Hall uses the original Diamond and Pearl Super Contest structure: Visual, Dance, and Acting rounds. These are separate from ordinary Pokémon battles.
If you want to enter a contest, collect the Poffin Case from the Pokémon Fan Club chairman and make Poffins in the Poffin House. Poffins raise a Pokémon’s condition for contests, while accessories affect the Visual round. Keira can give an accessory after the Buneary event, and the protagonist’s mother can provide contest clothing. These rewards are optional and do not improve battle statistics.
Amity Square is another optional stop. Eligible small Pokémon can accompany you there and may find items or accessories. You can also visit Bebe’s house, the Hearthome Hotel, and the Fan Club for optional conversations or items. Complete these activities before the Gym only if you want them; otherwise, heal and go directly to Fantina.
Do not use the remake’s Super Contest Shows as a guide for this game. Pokémon Pearl on Nintendo DS uses the original contest rounds and presentation.
- Treat the Contest Hall and Amity Square as optional.
- Obtain the Poffin Case only if you intend to make Poffins.
- Use Visual, Dance, and Acting rounds for original Pearl contests.
- Do not spend contest items expecting them to affect Fantina’s battle.
- Heal at the Pokémon Center before entering the Gym.
Prepare a balanced answer to Fantina’s team
Fantina’s original Pearl team is Drifblim at level 32, Gengar at level 34, and Mismagius at level 36. All three are Ghost types. Dark- and Ghost-type attacks are super effective, while Normal- and Fighting-type attacks cannot hit them unless another effect changes the interaction. Bring at least two Pokémon that can deal reliable damage instead of depending on one fragile attacker.
Drifblim is Ghost/Flying and has Aftermath. Its moves are Ominous Wind, Minimize, Gust, and Astonish. Attack it promptly so it cannot spend several turns raising its evasion with Minimize. Electric, Ice, Rock, Dark, and Ghost attacks are effective against it. Aftermath can damage the Pokémon that knocks it out if the finishing move makes contact, so use a noncontact attack when practical, especially if your attacker is already near fainting.
Gengar is Ghost/Poison and has Levitate. Its moves are Shadow Claw, Poison Jab, Spite, and Confuse Ray. Ground attacks do not work because of Levitate. Psychic attacks are super effective against Gengar because of its Poison typing, but a Psychic-type Pokémon is not automatically safe because Ghost attacks can hit Psychic types super effectively. Dark attacks are a dependable general answer if the user can withstand Gengar’s physical attacks.
Mismagius is a pure Ghost type with Levitate and holds a Sitrus Berry. Its moves are Shadow Ball, Psybeam, Magical Leaf, and Confuse Ray. Ground attacks again fail because of Levitate. Magical Leaf threatens Water-, Ground-, and Rock-type counters, so do not assume a bulky Pokémon from one of those groups is safe. Preserve a healthy Dark- or Ghost-type reserve for the final matchup, and expect the Sitrus Berry to restore some of Mismagius’s HP.
- Bring at least two usable Dark- or Ghost-type attackers or moves.
- Use accurate attacks against Drifblim before Minimize becomes a problem.
- Do not use Ground attacks against Gengar or Mismagius.
- Treat Psychic attacks as an offensive option against Gengar, not a defensive solution.
- Keep a healthy reserve for Mismagius and its Sitrus Berry.
Clear the original Hearthome Gym puzzle
The original Pearl Gym contains a series of arithmetic questions posted on signs. Three doors display possible answers. Choosing the correct door carries you to the next question without a trainer battle. Choosing an incorrect door sends you to a Gym Trainer; after that battle, continue through the room and return to the puzzle route.
The answers are 15, 40, 39, and 15 in that order. For the first question, choose the door marked 15. For the second, choose 40. For the third, choose 39. The final question asks for the first room’s answer, so choose 15 again. The Pokétch Calculator can check the arithmetic if needed.
Wrong doors are not a failure state. They provide extra experience and prize money through trainer battles, which can help if your team is below the low-to-mid 30s. If you need training, deliberately take one or two wrong doors, heal outside if necessary, and then continue. If you want the shortest route to Fantina, use the four correct answers.
This layout belongs to Diamond and Pearl. Pokémon Platinum uses a different Gym design and should not be used for navigation here.
- Choose 15 for the first question.
- Choose 40 for the second question.
- Choose 39 for the third question.
- Choose 15 for the final question.
- Battle optional Gym Trainers if your team needs experience.
- Do not follow Pokémon Platinum’s dark-maze directions.
Defeat Fantina and recover from a failed attempt
Lead with an accurate Dark- or Ghost-type move if you have one. Against Drifblim, deal damage immediately and avoid giving Minimize several turns. If an accuracy drop or evasion boost makes your usual attack unreliable, switch to a dependable move rather than repeatedly gambling on a low-accuracy option. Remember Aftermath before finishing Drifblim with a contact attack.
Against Gengar, Confuse Ray can waste turns and Spite can reduce the PP of the move you just used. If your lead becomes confused or its main attack is running low, switch to a backup rather than making the entire battle depend on one Pokémon. Do not send a Ground-type attack into Gengar because Levitate blocks it.
Before Mismagius appears, heal any Pokémon that you expect to use against it. Shadow Ball can reduce Special Defense, Psybeam can cause confusion, Magical Leaf covers several common counters, and Confuse Ray can turn a favorable matchup into a losing sequence. Use a Full Heal or switch when confusion is costing too many turns. Retain enough healing items to restore the final attacker instead of spending every Super Potion early.
If you lose, the story does not reset. Return to the Pokémon Center, restore HP and PP, buy Super Potions or stronger healing items, and carry Full Heals and a few Revives. Review which Pokémon failed against which opponent. Catch or train a second Dark-type or another Pokémon with a reliable super-effective move, then retry with a healthier and more varied party. Extra Gym Trainer battles, Route 212, and other accessible routes can provide additional experience without changing the required story order.
After defeating Fantina, receive the Relic Badge and TM65 Shadow Claw. The badge authorizes Surf outside battle. Heal, save, and prepare for the next route. Leave Hearthome through the west exit to Jubilife City. From Jubilife, go west on Route 218 and use Surf at the water crossing to reach Canalave City. This is the correct post-Gym handoff; do not head to Canalave directly from an unconnected Hearthome exit.
- Defeat Drifblim, Gengar, and Mismagius.
- Manage Minimize, Aftermath, Confuse Ray, Spite, and Mismagius’s Sitrus Berry.
- Receive the Relic Badge.
- Receive TM65 Shadow Claw.
- Confirm that Surf works outside battle.
- Heal and save after the Gym victory.
- Travel from Hearthome to Jubilife City, then west on Route 218 toward Canalave City.
Before you move on
- The Celestic prerequisite is complete, or the recovery route has been completed.
- HM03 Surf is in the Bag.
- Fantina has been defeated in Hearthome Gym.
- The Relic Badge appears on the Trainer Card.
- TM65 Shadow Claw has been received.
- Surf can be used outside battle after selecting a compatible Pokémon.
- The party has been healed and the game has been saved.
- The player is in position to travel through Jubilife City and west across Route 218 to Canalave City.
- Contest activities have either been completed as optional goals or postponed.
References for this chapter
- Walkthrough: Pokémon Diamond and Pearl/Part 8 — Bulbapedia
- Walkthrough: Pokémon Diamond and Pearl/Part 12 — Bulbapedia
- Walkthrough: Pokémon Diamond and Pearl/Part 13 — Bulbapedia
- Fantina — Bulbapedia
- TM065 — Bulbapedia
- Serebii.net Pokédex Trainer Pokémon — Mismagius
- Pokémon Diamond and Pearl — Gyms & Gym Leaders — Serebii.net
- Pokémon Diamond and Pearl/Celestic Town — StrategyWiki
- Pokémon Pearl Version — Nintendo DS Instruction Booklet
Canalave City and Byron — Steel Gym
Travel from Hearthome City through Jubilife City and Route 218 to Canalave City, handle Barry’s rival battle, complete the optional Iron Island event if desired, defeat Byron for the Mine Badge, and then attend the Canalave Library meeting that sends you to Lake Valor. This chapter follows the original Nintendo DS Pokémon Pearl route and Byron’s Pearl team: Bronzor, Steelix, and Bastiodon.
Travel from Hearthome City through Jubilife City to Canalave
After completing the required Hearthome City events and obtaining access to Surf, leave Hearthome City and return to Jubilife City. From Jubilife, go west past the Pokétch Company and enter the western gatehouse leading to Route 218. This is the required approach to Canalave City; do not attempt to reach Canalave directly from Hearthome by another route.
On Route 218, use Surf to cross the water and continue west. You can battle the Fishermen, Sailor, and Guitarist along the route for experience, but the critical path is simply to cross the water and follow the land west to the Canalave gate. Wild encounters include water Pokémon such as Tentacool, Wingull, Shellos, and Floatzel, depending on whether you are walking, surfing, or fishing.
At the western Route 218 gate, Dawn or Lucas’s father is waiting on Professor Rowan’s instructions. Speak with him to update the Pokédex so it can display gender differences. After this conversation, continue west into Canalave City. Heal at the Pokémon Center before crossing the city’s central bridge.
- Leave Hearthome City after Surf is available.
- Return to Jubilife City and take the western exit to Route 218.
- Use Surf to cross Route 218 and enter Canalave City.
- Speak to Dawn or Lucas’s father at the western gate for the Pokédex update.
- Heal before crossing Canalave’s bridge.
Handle Canalave City services and Barry’s rival battle
Canalave’s Pokémon Center is near the city entrance. The Move Deleter lives in a house in the northeastern part of town, and Sailor Eldritch operates the ferry from the southwestern dock to Iron Island. These services are useful but are not required before Byron’s Gym.
When you cross the central bridge, Barry challenges you. His team changes according to the starter you chose, so prepare for a full rival battle rather than expecting only a fixed small group. His lineup includes Staravia, Heracross, and several Pokémon selected according to your starter choice, including an evolved starter around level 35. Keep a strong Electric, Rock, Ice, or Fighting answer available for the appropriate matchups, and remember that Staravia’s Intimidate can weaken physical attackers.
Heal after the battle. The rival fight is not the Canalave Library scene; the Library meeting only occurs after Byron is defeated and you leave the Gym.
- Heal before crossing the bridge.
- Prepare for Barry’s complete starter-dependent team.
- Use special attacks or status effects if Staravia’s Intimidate reduces your physical damage.
- Heal again after the rival battle.
Optional Iron Island visit with Riley
Iron Island is optional for the main story, but it provides experience and the opportunity to receive a Riolu Egg. Speak with Sailor Eldritch at the southwestern Canalave dock and travel to the island. There is no Pokémon Center on Iron Island, so bring healing items and leave at least one empty party slot if you want the Egg immediately.
Enter the mine and work through the connected floors using the staircases and lifts. In the western section of the lower floor, Riley offers to accompany you. Accept his help. Battles become double battles when appropriate, and Riley restores the party after battles while he is traveling with you.
Follow Riley through the remaining mine until you reach the Team Galactic Grunts at the end of the event. Defeat them with Riley, then speak with him near the exit. If you have an empty party slot, he gives you the Riolu Egg. If the party is full, place a Pokémon in the PC and return to Riley before leaving the island. Use the lift near the exit to return to the entrance, then sail back to Canalave City.
- Bring healing items because Iron Island has no Pokémon Center.
- Keep an empty party slot for the Riolu Egg.
- Accept Riley’s help in the western lower section.
- Defeat the Team Galactic Grunts with Riley.
- Return to Canalave before challenging Byron if you need to heal or reorganize.
Build a reliable answer to Byron’s Steel team
Byron’s Pokémon are weak to Fire-, Fighting-, and Ground-type attacks. Ground moves are useful against Steelix and Bastiodon, but Byron’s Bronzor has Levitate, so Ground attacks do not affect it. A trained Ponyta or Rapidash is a practical Fire option. Monferno or Infernape can use both Fire- and Fighting-type attacks, and other team members with dependable Fighting coverage can handle Bastiodon.
Do not rely on one physical attacker. Steelix and Bastiodon have high physical Defense, and Bastiodon also has strong special Defense. A strong super-effective attack is more important than trying to exploit a single defensive weakness. In Generation IV, move category is determined by the individual move, so check whether a Fire, Fighting, or Ground attack is physical or special rather than assuming the entire type uses one category.
Byron’s Bronzor can cause trouble with Confuse Ray and Hypnosis. Steelix carries Ice Fang, which can punish many Ground-type counters, and Bastiodon knows Iron Defense and Rest. Carry status recovery and keep a healthy backup available.
- Bring at least two Pokémon capable of damaging Byron’s team effectively.
- Use Fire or Fighting against Bronzor and Bastiodon.
- Use Ground attacks only after Bronzor is defeated or against targets without Levitate.
- Prepare for Hypnosis, confusion, Ice Fang, Sandstorm, and Rest.
Navigate the Canalave Gym
Enter the Gym from the southern entrance. Battle Black Belt Ricky, then use the easternmost yellow lift near Worker Gary. On the next floor, move southeast and take the lift down to the first floor. Battle Ace Trainer Cesar, then use the western lift to return upward.
Ride the moving platform west to the next lift. Continue to the upper floor, ride the platform north, and battle Worker Gerardo. Cross the platforms toward the east and battle Black Belt David. Continue across the lower platforms toward the lift on the eastern side, then take the next lift and battle Ace Trainer Breanna. The final lift returns you to the first floor and places you on the route to Byron.
Defeated Gym trainers remain defeated if you leave, so you can return to the Pokémon Center at any time. Before stepping onto the final lift, heal the party, restore important move PP, and save the game.
- Take the easternmost yellow lift first.
- Use the moving platforms to reach the upper sections.
- Leave and heal if your main counters are weakened.
- Restore PP and save before Byron.
Defeat Byron and claim the Mine Badge
Byron leads with Bronzor at level 36. Its Levitate ability blocks Ground attacks. Use a strong Fire- or Fighting-type move, and switch if Hypnosis or Confuse Ray makes your lead unreliable.
Steelix is level 36 and knows Gyro Ball, DragonBreath, Ice Fang, and Sandstorm. Fire, Fighting, and Ground attacks are super effective. A Fire-type is often safer than a Ground-type because Ice Fang can punish some Ground Pokémon, but do not send a Pokémon into the fight if Steelix can exploit its weaknesses.
Bastiodon is level 39 and holds a Chesto Berry. It knows Flash Cannon, AncientPower, Iron Defense, and Rest. Use a powerful super-effective attack and do not give it several turns to raise its Defense. If Bastiodon uses Rest, its Chesto Berry can wake it immediately, so continue applying pressure rather than expecting sleep to last.
After the victory, Byron gives you the Mine Badge and TM91, Flash Cannon. The sixth badge allows Strength to be used outside battle and raises the obedience limit for traded Pokémon to level 70. Follow the Gym’s platforms clockwise if you want the direct route back to the entrance.
- Defeat Bronzor, Steelix, and Bastiodon.
- Do not use Ground attacks against Bronzor.
- Prevent Bastiodon from accumulating multiple Iron Defense boosts.
- Receive the Mine Badge and TM91.
- Confirm that Strength is now usable outside battle.
Attend the Canalave Library meeting and receive the Lake assignment
When you leave the Gym, Barry is waiting outside and tells you to meet him at the Canalave Library. Enter the Library in the northwestern part of Canalave City and go to the third floor. Speak with Barry, Professor Rowan, and Dawn or Lucas.
Rowan explains that the three lakes of Sinnoh may be connected to the legendary Pokémon he is studying. Dawn or Lucas is sent to Lake Verity, Barry is sent to Lake Acuity, and you are assigned to investigate Lake Valor. An earthquake then shakes Canalave City, and a sailor reports an explosion at Lake Valor.
After the scene, travel to Valor Lakefront. You can use Fly to reach Veilstone City and go south, or Pastoria City and go east. The next chapter begins by resolving the Lake Valor event, then traveling to Lake Verity before continuing north through Route 211 and Mt. Coronet toward Routes 216, 217, and Snowpoint City.
- Defeat Byron before expecting the Library meeting.
- Speak with the group on the Library’s third floor.
- Receive the assignment to investigate Lake Valor.
- Travel to Valor Lakefront after the earthquake.
- Begin the next chapter with Lake Valor and Lake Verity before the northern Mt. Coronet route.
Before you move on
- The Route 218 Pokédex update has occurred.
- Barry’s Canalave rival battle is complete.
- Byron’s Bronzor, Steelix, and Bastiodon are defeated.
- The Mine Badge and TM91, Flash Cannon, are in the save file.
- Strength is usable outside battle, and traded Pokémon up to level 70 obey.
- The third-floor Canalave Library meeting and earthquake have occurred.
- The player has been assigned to investigate Lake Valor.
- If taking the optional route, Riley’s Iron Island event is complete and the Riolu Egg has been received.
- The next objective is Lake Valor, followed by Lake Verity and the northern Mt. Coronet route.
Snowpoint City and Candice — Ice Gym, Lake Acuity and the Galactic Handoff
After Canalave’s Library event, resolve Team Galactic’s operations at Lake Valor and Lake Verity, then travel through Route 211 and northern Mt. Coronet to reach the snowy Routes 216 and 217. Collect HM08 Rock Climb, cross the blizzard, enter Snowpoint City, and defeat Candice for the Icicle Badge. Return through Acuity Lakefront to Lake Acuity, witness Barry’s defeat by Commander Jupiter, then fly to Veilstone City and collect the Storage Key from the fleeing Galactic Grunt. This chapter ends before the Galactic Warehouse, Galactic Headquarters, Mt. Coronet summit, and Palkia sequence.
1. Finish the lake sequence after Canalave Library
When the Canalave Library earthquake sends you toward the lakes, go to Lake Valor first. Enter the crater and descend into Valor Cavern. Battle through the Galactic Grunts and speak to Commander Saturn at the cavern’s end. In original Pokémon Pearl, Saturn uses Kadabra at level 35, Bronzor at level 35, and Toxicroak at level 37. Psychic attacks are useful against Toxicroak, while Fire- or Ground-type attacks help against Bronzor; remember that Bronzor has Levitate, so Ground attacks will not hit it.
After defeating Saturn, leave Valor Cavern and Fly to Twinleaf Town. Heal at home or at the Pokémon Center in Sandgem Town, then go west to Lake Verity. Professor Rowan and his assistant are dealing with Team Galactic at the entrance. Defeat the Galactic Grunts inside the lake area. Some encounters are arranged as linked double battles, so begin with two Pokémon that can cover one another rather than leading with a fragile single target.
Continue north to the cavern and battle Commander Mars. Her original Pearl team is Golbat level 37, Bronzor level 37, and Purugly level 39. Electric- or Rock-type attacks are effective against Golbat, but avoid relying on Ground attacks against Bronzor because of Levitate. Purugly is fast and can use Fake Out, Slash, Faint Attack, and Hypnosis, so keep a healthy physical defender or a Pokémon that can safely absorb its opening attack.
After Mars is defeated, watch the conversation about the lake Pokémon. This scene completes the required Lake Verity objective and establishes that Team Galactic has taken the lake guardians toward its next operation. Heal before beginning the northern journey. The most convenient route is to Fly to Eterna City and travel east across Route 211, although you can also Fly to Celestic Town and travel west to the eastern side of Route 211.
- Commander Saturn was defeated at Lake Valor.
- Commander Mars was defeated at Lake Verity.
- The Lake Verity scene involving Professor Rowan and his assistant was completed.
- The party was healed before entering Route 211 and Mt. Coronet.
- Defog, Surf, Strength, and Rock Smash are available for the mountain route.
2. Cross Route 211 and northern Mt. Coronet
From Eterna City, travel east on Route 211 and enter Mt. Coronet. From Celestic Town, travel west on Route 211 and enter the same northern mountain area from the opposite side. The route is now passable because you have the required badges and field moves. Bring a Pokémon that knows Surf, Strength, Rock Smash, and Defog. Strength and Rock Smash handle the boulders and cracked rocks, Surf crosses the water, and Defog clears the dense fog in the lower section of the mountain.
If entering from Eterna City, move north through the first cavern section, push the Strength boulders out of the way, and break the cracked rocks that block the passage. If entering from Celestic Town, proceed through the corresponding eastern side and work toward the same central route. Use Defog when the underground section becomes obscured. Do not confuse this fog with the weather on Route 217: Defog clears the mountain’s battle-area fog, but it does not remove Route 217’s permanent blizzard.
The required route continues through the mountain and exits toward Route 216. Optional items in Mt. Coronet can be collected if you have the time and PP, but do not spend your healing supplies exploring every side passage before the long snow routes. The wild Pokémon and trainers in this section can leave a party worn down before the northern routes begin, so heal or use restorative items before leaving the mountain.
- Route 211 was crossed from Eterna City or Celestic Town.
- The northern Mt. Coronet route was opened with Strength and Rock Smash.
- Defog was used in the mountain’s foggy section.
- The mountain exit toward Route 216 was reached.
- The party is healthy before entering the snowfields.
3. Cross Route 216 and use Snowbound Lodge
Exit Mt. Coronet onto Route 216 and continue west through the snow. Battles in Route 216, Acuity Lakefront, and Snowpoint City can change the overworld snow into hail during battle. Hail damages non-Ice Pokémon at the end of each turn, so avoid leaving a badly weakened lead Pokémon active after a battle. The snow also slows movement in deep sections and prevents normal bicycling through the deepest patches.
Route 216 contains trainers in the mid-30s and wild Sneasel and Snover. Sneasel provides fast Dark and Ice coverage, while Snover provides Grass and Ice coverage, but neither is required for the story. Use Repels if you want to reduce encounters and conserve PP for the route trainers and Candice.
Near the western end of Route 216, enter Snowbound Lodge. Walk onto the bed and accept the prompt to rest. The lodge completely restores your party without charge. This is the important recovery point before Route 217, so use it even if only one or two Pokémon are weakened. You can battle the nearby trainers before healing again, but make sure the final visit to the lodge occurs immediately before entering the blizzard.
Rock Climb cannot be used outside battle yet. HM08 is found on Route 217, but the move becomes a usable field move only after Candice awards the Icicle Badge.
- Route 216 was crossed without confusing the snow with Route 217’s blizzard.
- The party was healed at Snowbound Lodge.
- Repels, medicine, and status cures are available for the next route.
- The party has reliable answers to Ice-, Grass-, and Dark-type Pokémon.
4. Find HM08 Rock Climb on Route 217
Enter Route 217 from the northern end of Route 216. The route has a permanent blizzard that severely limits visibility. It cannot be cleared with Defog and does not stop over time. Register the Town Map or keep it readily available, then check it whenever the trees and snowdrifts make your direction uncertain.
The main objective is the western cabin. Speak to the Hiker inside, who explains that he lost an HM in the blizzard. Leave the cabin and search the snow immediately northeast of it. Examine the Poké Ball there to obtain HM08 Rock Climb. Return to the same Hiker and speak to him again. He lets you keep the HM and gives you the optional Icicle Plate.
The Icicle Plate is not needed for the Gym, Lake Acuity, or the Team Galactic story. Collect it if you want the item; otherwise, continue after confirming that HM08 is in the Bag. Route 217 also has an eastern cabin where a woman gives you a Spell Tag. That gift is optional and can be skipped.
After collecting HM08, follow the northern route toward the northwest exit. Several trainers and hidden items are scattered through the snow, but none of them is required for progression. Do not use Rock Climb on the field yet. Candice’s badge is the prerequisite for using it outside battle.
- The Hiker in the western cabin was spoken to.
- HM08 Rock Climb was collected northeast of that cabin.
- The Hiker was spoken to again and the optional Icicle Plate was received or deliberately skipped.
- The optional Spell Tag was collected or skipped.
- The northwest exit to Acuity Lakefront was reached.
5. Reach Snowpoint City and prepare for Candice
At Acuity Lakefront, two Galactic Grunts block the entrance to Lake Acuity. This is expected. Before Candice is defeated, do not attempt to force your way through them. Take the southeastern exit into Snowpoint City and heal at the Pokémon Center.
Snowpoint City has a Poké Mart for medicines, status cures, Repels, and Poké Balls. Stock enough supplies for Candice and the return trip to Lake Acuity. A hidden Hyper Potion is located east of the Gym. The Snowpoint Temple entrance is blocked during this part of the original Pearl campaign and does not become available until the National Pokédex has been obtained, so it is not part of the required route.
Candice’s team in original Pokémon Pearl is Snover level 38, Sneasel level 38, Medicham level 40, and Abomasnow level 42. Pearl does not use Platinum’s Piloswine and Froslass roster. It also has no Fairy typing, so Fairy-type advice from later games does not apply.
Bring at least two answers rather than relying on one Pokémon. Fire- and Fighting-type attacks are strong against Snover and Abomasnow. Fighting attacks are especially effective against Sneasel. Medicham is Psychic/Fighting and is not an Ice type; use a Flying- or Ghost-type attack, or a strong neutral special attack, instead of treating it like the rest of the team. A Dark attack is neutral against Medicham because its Psychic weakness is offset by its Fighting resistance.
Abomasnow’s Snow Warning starts hail when it enters battle, and it holds a Sitrus Berry. Its Grass/Ice typing makes Fire and Fighting attacks particularly valuable, while Water-, Ground-, and Flying-type Pokémon can be punished by its Grass and Ice attacks. Keep a second healthy attacker available in case hail, a critical hit, or the Sitrus Berry prevents a clean sweep.
- The party was healed in Snowpoint City.
- The Snowpoint Temple restriction was noted as postgame content.
- A Fire- or Fighting-type answer is ready for Snover and Abomasnow.
- A separate Flying-, Ghost-, or strong neutral answer is ready for Medicham.
- Medicine and status cures were purchased before entering the Gym.
6. Clear the original Pearl Snowpoint Gym puzzle
The original Diamond and Pearl Snowpoint Gym is an ice-sliding puzzle with several connected levels. While standing on an ice tile, hold a direction to slide in a straight line until a wall, trainer, snow patch, ramp, or snowball stops you. The snowballs blocking the central approach must be destroyed by sliding into them with enough distance; walking into them does not clear them.
Begin by using the outer snow patches and ramps to reach the side sections of the Gym. The trainer platforms are useful stopping points, and battling the trainers gives experience before Candice. Work from one side of the Gym to the other, using the available ramps to change levels and lining up long slides across the snowball rows. Do not try to cross the central approach prematurely, because the remaining snowballs will stop the slide.
The puzzle’s reliable method is to clear the side and upper snowball rows first, then use the lower-right approach to remove the final obstruction in the central route. Once all central snowballs are gone, return to the entrance area. Stand on the middle snow patch at the top of the entrance section and slide north through the cleared passage. This carries you across the ramps toward Candice.
If you stop in an awkward position, use the surrounding walls, snow patches, and trainer platforms to reposition rather than attempting a diagonal correction. The original DS version does not have later remake movement features, so line up each slide with cardinal directions. The exact Gym trainer battles are optional, but clearing them is worthwhile if your party is below the high 30s.
- The side and upper snowball rows were cleared by sliding into them.
- The lower-right approach was used to remove the final central obstruction.
- The central route from the entrance to Candice is open.
- The entrance’s middle snow patch was used for the final slide.
- The party is healed or has enough HP and PP for Candice.
7. Defeat Candice and unlock Rock Climb
Candice sends out Snover level 38, Sneasel level 38, Medicham level 40, and Abomasnow level 42. Snover and Abomasnow are Grass/Ice, Sneasel is Dark/Ice, and Medicham is Psychic/Fighting. The team order is fixed, so plan to preserve the Pokémon that best handles Abomasnow rather than spending it early on a minor target.
Use Fire or Fighting against Snover when possible. Sneasel is vulnerable to Fighting, Fire, Rock, Steel, and Bug attacks, but its Speed and physical damage can punish a slow, weakened Pokémon. For Medicham, switch to a Flying- or Ghost-type attack user, or use a sturdy Pokémon with a strong neutral special move. Medicham can use Ice Punch, Force Palm, Bulk Up, and Rock Slide, so do not assume that a Flying-type is automatically safe without checking its HP and defenses.
When Abomasnow appears, hail begins through Snow Warning and remains active unless another weather effect replaces it. Fire and Fighting attacks are the most practical ways to exploit its weaknesses. Heal rather than gambling on a low-health sweep, especially because Abomasnow carries a Sitrus Berry and can deal heavy damage with its Grass and Ice moves.
Victory awards the Icicle Badge and TM72 Avalanche. The badge permits Rock Climb to be used outside battle. Teach HM08 to a party member only after checking the rest of that Pokémon’s moves; Rock Climb is now required for the route to Lake Acuity, but it may be better to use a field-move carrier if you have one available.
- Candice’s Pearl roster was defeated: Snover 38, Sneasel 38, Medicham 40, and Abomasnow 42.
- Medicham was handled as a Psychic/Fighting Pokémon rather than an Ice type.
- The Icicle Badge was received.
- TM72 Avalanche was received.
- Rock Climb can now be used outside battle.
8. Trigger Lake Acuity and collect the Storage Key
Heal in Snowpoint City, then leave through the southern route and return to Acuity Lakefront. The two Galactic Grunts who blocked the northern entrance have moved aside after Candice’s defeat. Approach the wall leading upward and use Rock Climb. Follow the upper path into Lake Acuity.
Lake Acuity is a story scene in original Pokémon Pearl. Barry has already challenged Commander Jupiter and lost when you arrive. Jupiter taunts him, explains that Team Galactic is returning to its headquarters in Veilstone City, warns you to stay out of the group’s way, and leaves. There is no required player battle against Jupiter at the lake. Barry then reacts to the defeat and Uxie’s suffering before leaving.
After the scene, Fly to Veilstone City. Go to the Galactic Headquarters building on the northeast rise and speak to the fleeing Galactic Grunt outside. He claims not to know anything about a Storage Key, then runs away and drops it. Pick up the Storage Key before leaving the area.
The Storage Key belongs to the next chapter. Do not begin the Galactic Warehouse, attempt to open the main Headquarters door, clear Team Galactic Headquarters, return to Mt. Coronet for the summit ascent, or start the Palkia encounter in this chapter. Stop with the Storage Key in the Bag.
- Candice was defeated and Rock Climb was enabled outside battle.
- The Acuity Lakefront blockade was cleared.
- The Lake Acuity scene with Barry and Commander Jupiter was completed.
- The player returned to Veilstone City.
- The fleeing Galactic Grunt outside Headquarters dropped the Storage Key.
- The Galactic Warehouse, Headquarters, Mt. Coronet summit, Spear Pillar, and Palkia encounter have not yet been started.
Before you move on
- Commander Saturn was defeated at Lake Valor.
- Commander Mars was defeated at Lake Verity.
- Route 211 and northern Mt. Coronet were crossed after the lake events.
- Defog was used or was available for Mt. Coronet’s foggy section.
- Route 216 and Route 217 were crossed.
- Snowbound Lodge was used as the northern recovery point.
- HM08 Rock Climb was collected on Route 217.
- The optional Icicle Plate was obtained or consciously skipped.
- Snowpoint Gym’s original Pearl sliding puzzle was cleared.
- Candice was defeated with the Pearl team of Snover, Sneasel, Medicham, and Abomasnow.
- The Icicle Badge and TM72 Avalanche were received.
- The Lake Acuity scene involving Barry and Commander Jupiter was completed.
- The player returned to Veilstone City and collected the Storage Key from the fleeing Galactic Grunt.
- The Warehouse, Headquarters, Mt. Coronet summit, Spear Pillar, and Palkia encounter have not yet been started.
Veilstone Galactic Headquarters, Mt. Coronet and Spear Pillar
After the Lake Acuity scene, the Storage Key should already be in your Bag from the fleeing Galactic Grunt outside Team Galactic Headquarters. Use it in the Galactic Warehouse, obtain the Galactic Key, clear the original Diamond and Pearl Headquarters route, and free the lake guardians. Then climb Mt. Coronet from Route 207, reach Spear Pillar, defeat the entrance Grunts, Mars and Jupiter with Barry’s help, and Cyrus. Stop after Cyrus’s defeat, immediately before the fixed level 47 Palkia encounter.
Confirm the Storage Key and reach the Galactic Warehouse
Begin this chapter after the Lake Acuity scene involving Barry and Commander Jupiter. Fly to Veilstone City and check the Bag for the Storage Key. If you followed the preceding chapter normally, you already have it and should not search for another key or repeat the Grunt event.
If you are continuing from an earlier checkpoint and the Storage Key is not in the Bag, go to the large Team Galactic Headquarters building on the northeastern hill. Speak to the lone Galactic Grunt outside. He runs away and drops the Storage Key; pick it up before leaving. This is the only time this chapter should direct you to obtain it.
The Storage Key does not open the electronic door in the main Headquarters lobby. Leave the Headquarters exterior and go west to the small Galactic Warehouse, the building associated with the earlier HM02 Fly visit. Use the Storage Key on the rust-covered door inside the Warehouse. The key breaks in the lock, which is normal, and the passage remains usable.
- Finish the Lake Acuity event.
- Verify that Storage Key is in the Bag.
- If it is missing because of an earlier checkpoint, speak to the fleeing Grunt outside Headquarters and pick up the dropped key.
- Go to the Galactic Warehouse west of Headquarters.
- Use the Storage Key on the Warehouse’s rusted door.
Clear the Galactic Warehouse and collect the Galactic Key
Take the Dusk Stone in the room beyond the opened door, then descend into the lower Warehouse sections. Follow the passage through the Grunts and storage rooms. The Warehouse opponents include a level 37 Golbat and a level 35 Dustox paired with a level 35 Bronzor. Fire, Electric, Rock, and other suitable coverage handle much of the area, but Bronzor has Levitate, so ordinary Ground attacks fail against it.
In the lower section, move west through the basement route. TM36 Sludge Bomb is optional and sits in a puddle area. Continue farther west to find the Galactic Key between the crates and the locked door. Take it before leaving; this key opens the electronic doors in Team Galactic Headquarters.
TM21 Frustration is also optional. After obtaining the Galactic Key, backtrack through the upper Warehouse route and use the key on the locked door in the western section if you want the item. Otherwise, use the opened shortcut to return to the Warehouse entrance, leave the building, and enter the main Headquarters through its accessible front doors.
- Collect the Dusk Stone.
- Pass through the lower Warehouse route.
- Collect the optional TM36 Sludge Bomb if desired.
- Take the Galactic Key.
- Return to the Headquarters building.
Raid Team Galactic Headquarters
Enter the Headquarters lobby and use the Galactic Key on the electronic doors on the first floor. Follow the warp-panel route through the northeast and northwest rooms, then climb to the second floor. Some Grunts can be fought as Multi Battles if you engage them together.
Continue through the Team Galactic TV Room. The northeast room on the second floor contains two beds that fully restore your party. Use them before climbing farther; this is the most useful recovery point in the building.
On the third floor, battle the paired Grunts and use the western warp panel to advance. The eastern warp is a dead end, while the central warp leads to an optional Elixir. Continue through the western interior and climb to the fourth-floor office.
Use the Galactic Key to enter Cyrus’s office. In original Pearl, Cyrus uses Murkrow at level 40, Golbat at level 40, and Sneasel at level 43. Rock or Electric attacks help against the Flying Pokémon, while Fighting attacks are the most direct answer to Sneasel. Do not rely on Psychic attacks against Sneasel because its Dark typing makes it immune to them. After the battle, Cyrus gives you the Master Ball and leaves for Mt. Coronet.
Continue through the fourth-floor hallway to the laboratory. Commander Saturn is waiting beside the machine holding Uxie, Mesprit, and Azelf. Saturn uses Kadabra level 38, Bronzor level 38, and Toxicroak level 40. Defeat him, then press the red button on the machine to free the three lake guardians. Use the shortcut warp to leave Headquarters and prepare for Mt. Coronet.
- Unlock the Headquarters first-floor doors with the Galactic Key.
- Use the beds in the second-floor northeast room.
- Defeat Cyrus in the fourth-floor office.
- Receive the Master Ball.
- Defeat Saturn in the laboratory.
- Press the machine’s red button and confirm that Uxie, Mesprit, and Azelf are free.
Climb Mt. Coronet from Route 207
Heal in Veilstone City and stock Hyper Potions, Full Heals, Revives, and Poké Balls before leaving. Fly to Oreburgh City, travel east onto Route 207, and enter Mt. Coronet through the southern Route 207 entrance. The summit route requires Surf, Strength, and Rock Climb. Rock Smash is needed for the rocky debris on the interior route and is useful for optional items. Wild Pokémon are in the upper 30s to low 40s, so a party around level 45 or higher is a practical target.
Inside the southern entrance, use Surf across the northern pool, then use Rock Climb on the wall beyond it. Climb the northeastern stairs. On the next floor, move northwest, cross the bridges, and use the northwestern doorway. Continue through the upper floors until you reach the snowy mountainside. Battles there are affected by hail.
Use Rock Climb on the snowy cliff and enter the western cave opening. Proceed north through the interior, defeat the Galactic Grunts, and return to the northern snowy exterior. Enter the northeast tunnel, defeat the Grunt inside, and use Rock Climb to descend. Follow the eastern wall north, defeat the next two Grunts, then go west and south through the stairways.
At the southern interior section, use Rock Smash to clear the rocky debris. Use Rock Climb in the southwest to return to the mountainside, then go north and climb the western cliff. Enter the northwestern cave. In the short tunnel, climb the eastern stairs. On the next floor, defeat the Grunts on both levels and take the western stairs. On the sixth floor, defeat the final Grunt and use the northern exit to reach Spear Pillar.
- Heal and restock before entering Mt. Coronet.
- Enter from Route 207.
- Bring Pokémon that know Surf, Strength, and Rock Climb.
- Use Rock Smash to clear the required interior debris.
- Reach the sixth floor and take the northern exit to Spear Pillar.
Defeat the Spear Pillar entrance Grunts and the two Commanders
At Spear Pillar, step onto the central platform and fight the two Galactic Grunts in a Double Battle. One side uses level 38 Dustox and Croagunk; the other uses level 38 Stunky and Glameow. Fire, Rock, and Fighting coverage are useful, but watch for Toxic, confusion, and other status effects.
After the battle, move toward the summit scene. Cyrus, Mars, and Jupiter begin the Red Chain sequence and summon Pearl’s legendary Pokémon. Do not interact with Palkia. Move north to confront Mars and Jupiter when the game allows you to continue.
Barry arrives and joins you in a Multi Battle. The commanders use two level 41 Bronzor, two level 42 Golbat, Mars’s level 45 Purugly, and Jupiter’s level 46 Skuntank. Use Electric or Rock attacks against the Golbat pair, Fighting attacks against Purugly, and strong neutral or suitable super-effective attacks against Skuntank. Ground attacks are useful against Skuntank, but they do not affect Bronzor because of Levitate. Focus one opponent at a time rather than spending several turns on setup while Barry’s team is attacking.
After Mars and Jupiter are defeated, Barry says his Pokémon cannot continue and restores your entire party to full health. Check your party order, remaining PP, held items, and status conditions after this automatic recovery. Save before approaching Cyrus if you want a retry point for the summit battle.
- Win the first Spear Pillar Double Battle.
- Do not interact with Palkia.
- Defeat Mars and Jupiter with Barry.
- Wait for Barry’s full-party healing.
- Save and review your party before approaching Cyrus.
Defeat Cyrus and stop before Palkia
In original Pokémon Pearl, Cyrus’s summit team is Honchkrow level 45, Gyarados level 45, Crobat level 46, and Weavile level 48. His team combines high speed, strong physical attacks, Flying coverage, and several moves that punish careless switching.
Use Rock or Electric attacks against Honchkrow and Crobat if the user can withstand their Flying attacks. Electric attacks are strong against Gyarados, but Cyrus’s Gyarados knows Earthquake, so protect a frail Electric-type from being knocked out immediately. Gyarados also carries Aqua Tail, Ice Fang, and Giga Impact. A bulky Pokémon or an Intimidate user can help, but do not assume Gyarados is safe to stall.
Use a sturdy Fighting-type against Weavile whenever possible. Weavile carries Night Slash, Ice Punch, Brick Break, and X-Scissor, so do not switch a weakened counter into it. Keep a second answer available in case the first Fighting-type is defeated or forced out by a critical hit.
Heal before a Pokémon enters knockout range. Cyrus’s Pokémon can end the battle quickly once a key counter falls, so use healing items proactively rather than waiting for a critical hit. If you lose, return to a Pokémon Center, restore the party, and climb Mt. Coronet again. Adjust the failed matchup with Fighting coverage for Weavile, Electric or Rock coverage for the Flying Pokémon, and a durable answer to Gyarados.
After Cyrus is defeated, the lake guardians disrupt the Red Chain and the immediate crisis ends. Walk toward the fixed Palkia scene, but stop before interacting with the legendary Pokémon. Chapter 11 covers saving, the level 47 encounter, capture preparation, and the post-encounter route.
- Defeat Honchkrow, Gyarados, Crobat, and Weavile.
- Account for Gyarados’s Earthquake before using an Electric-type.
- Keep a healthy Fighting-type or another reliable Weavile counter.
- Use healing items before critical-hit range.
- Stop immediately before interacting with Palkia.
Before you move on
- The Storage Key is verified in the Bag; it was obtained during the Lake Acuity handoff, or, only if entering from an earlier checkpoint, collected from the fleeing Grunt outside Headquarters.
- The Galactic Warehouse has been opened.
- The Galactic Key has been collected.
- Cyrus has been defeated inside Headquarters and the Master Ball received.
- Saturn has been defeated and the three lake guardians have been freed.
- The Mt. Coronet route from Route 207 has been completed.
- The two Spear Pillar entrance Grunts have been defeated.
- Mars and Jupiter have been defeated in the Multi Battle with Barry.
- Barry’s full-party healing scene has occurred.
- Cyrus has been defeated at Spear Pillar.
- The player is positioned immediately before the Palkia interaction, with the legendary encounter not yet started.
Spear Pillar and the Legendary Encounter — Palkia
After Cyrus is defeated at Spear Pillar in the original Nintendo DS Pokémon Pearl Version, prepare for the fixed level 47 Palkia encounter. Catching Palkia is optional for immediate story progress, but saving before the battle gives you a safe retry if it is defeated or if your capture attempt fails. After the encounter, leave Mt. Coronet, travel through Valor Lakefront and Route 222, and reach Sunyshore City for the final Gym sequence.
Finish the Cyrus battle and prepare at Spear Pillar
This chapter begins immediately after defeating Cyrus at the summit of Spear Pillar. Barry heals your party before the Cyrus battle during the Mars-and-Jupiter sequence; that healing does not occur again after Cyrus. Check your party as soon as control returns. Heal weakened Pokémon, cure confusion or other status problems, and restore PP before approaching Palkia.
Do not walk directly to Palkia until your team is ready. Bring a Pokémon that can survive Water Pulse, AncientPower, Dragon Claw, and Spacial Rend while you reduce Palkia’s HP. A second durable switch-in is useful if your lead becomes confused, takes a critical hit, or is weakened by repeated attacks.
Stock Poké Balls before this sequence whenever possible. Ultra Balls are dependable general-purpose choices. Net Balls receive a bonus against Water-type Pokémon, Dusk Balls receive a bonus in cave areas or at night, and Timer Balls become more useful as turns pass. These bonuses are available in the original Pearl mechanics and do not require remake features.
Save immediately before approaching Palkia. This is the safest recovery method if Palkia is knocked out, your status move misses repeatedly, or you use too many Poké Balls. A save made after the battle cannot restore the encounter.
- Defeat Cyrus at Spear Pillar.
- Confirm the party is healed after the earlier Cyrus battle.
- Restore PP and cure harmful status conditions.
- Bring controlled damage and a reliable status option if available.
- Carry an adequate supply of Poké Balls.
- Save before approaching Palkia.
Know the original Pearl Palkia battle
Palkia appears at level 47 in Pokémon Pearl. It is Water/Dragon type and has the Pressure ability. Its original Diamond and Pearl moves are Water Pulse, AncientPower, Dragon Claw, and Spacial Rend.
Water Pulse is a special Water attack that can confuse. AncientPower is a Rock-type special attack that can raise Palkia’s stats. Dragon Claw is a physical Dragon attack. Spacial Rend is Palkia’s powerful special Dragon attack and has an increased critical-hit ratio. Pressure causes moves used against Palkia to consume additional PP, so do not waste limited-use attacks when a weaker option will work.
In this Generation IV release, Palkia’s only type weakness is Dragon. Fairy typing does not exist in original Pokémon Pearl, so Fairy-type advice from later games is irrelevant. Ice attacks are neutral rather than super effective. Water resistance or immunity can help against Water Pulse, but no Pokémon is automatically safe from Palkia’s Dragon attacks or AncientPower.
- Palkia is level 47.
- Palkia is Water/Dragon type.
- Palkia has Pressure.
- Expect Water Pulse, AncientPower, Dragon Claw, and Spacial Rend.
- Do not use Fairy-type matchup advice.
- Remember that Palkia’s only type weakness is Dragon.
Lower Palkia’s HP safely
If you brought False Swipe, use it to reduce Palkia’s HP without taking it below 1 HP. If False Swipe is unavailable, use a weak neutral attack from a Pokémon with moderate offensive power. Watch the HP bar after every hit and stop attacking once Palkia is in the red unless you are certain another controlled hit will not knock it out.
Dragon attacks are super effective and can shorten the battle, but they are risky once Palkia is weakened. Do not repeatedly use a strong Dragon move against a red HP bar. Avoid high-power critical-hit moves and multi-hit attacks during the final damage phase. If AncientPower raises Palkia’s stats, switch to a sturdier Pokémon or heal instead of trying to finish the fight quickly.
Sleep is the strongest practical status option for a capture attempt because it prevents Palkia from acting while improving the capture chance. Paralysis is a useful alternative. Avoid poison, badly poisoned status, and burn during the final capture phase because residual damage can faint Palkia between turns. Confusion is not a controlled substitute for sleep or paralysis because its duration and self-damage are unpredictable.
When Palkia reaches low HP, stop attacking and throw Poké Balls. Heal your active Pokémon when necessary rather than risking a knockout. If a ball fails, continue throwing balls while monitoring Palkia’s remaining PP and your party’s condition. If its HP is still too high, use only a carefully tested weak attack, then return to capture attempts.
- Use False Swipe if available.
- Otherwise use weak, controlled attacks.
- Stop using strong Dragon attacks once Palkia is weakened.
- Apply sleep or paralysis when possible.
- Avoid poison and burn during the final capture phase.
- Heal rather than risk an accidental knockout.
- Throw Poké Balls once Palkia is in the red.
Handle capture, fleeing, and defeat correctly
Catching Palkia is optional for immediate story progress. The summit sequence can continue after the battle has ended, whether Palkia is caught, defeated, or fled from. If you catch it and your party is full, Palkia is sent to the Pokémon Storage System; otherwise it joins the current party.
If you flee from Palkia, leave the area and return to Spear Pillar. The level 47 encounter becomes available again after leaving the area, so fleeing does not permanently remove the legendary. This is useful if you need to restock supplies or decide that your current team is not suitable for the battle.
If Palkia is defeated, it is not captured and does not immediately reappear. Continue the campaign, enter the Hall of Fame, and then return to Spear Pillar for the later level 47 encounter. Save before that later attempt as well. If you want an immediate retry after a defeat, reset to the save made before approaching Palkia rather than continuing from the defeat.
If you caught Palkia successfully, save after the battle so the capture is recorded. If you are unhappy with the result, reset only if you deliberately want to discard the capture and repeat the encounter.
- A successful capture is optional for immediate story progress.
- A fled Palkia returns after leaving the area.
- A defeated Palkia is not captured.
- A defeated Palkia returns after Hall of Fame entry.
- Reset to the pre-battle save for an immediate retry.
- Save after a successful capture.
Leave Mt. Coronet and reach Sunyshore City
After the encounter and the following dialogue, leave Spear Pillar with Rowan and Dawn or Lucas. Before leaving the mountain, check the area north of Palkia’s former position for the Lustrous Orb, an optional Pearl item that boosts the power of Palkia’s Water- and Dragon-type moves. It is not required for story progression.
Continue back through the upper Mt. Coronet route until you are inside the mountain again. Only after returning to the Mt. Coronet interior should you use an Escape Rope if you want to shorten the trip. Otherwise, retrace the route on foot and exit normally. Do not use an Escape Rope directly from the summit sequence.
Once outside, Fly to Pastoria City if convenient. Travel east through Route 213 and Valor Lakefront. The previous obstruction at the eastern end of Valor Lakefront is gone after the Spear Pillar event. Enter Route 222 and follow it east to Sunyshore City.
Route 222 has upper and lower paths, optional trainers, fishing areas, and Water-type opponents. Electric- and Grass-type attacks are useful against the route’s Water Pokémon, including Gyarados. Heal in Pastoria before setting out if the Spear Pillar battles left your party weakened, or use the Pokémon Center after reaching Sunyshore.
Sunyshore City is the next required destination. The following chapter covers Sunyshore preparation and Volkner’s Gym. Do not head toward Route 223 and the Pokémon League yet: you still need the eighth Gym Badge and HM07 Waterfall before the League route is available.
- Leave Spear Pillar after the Palkia event concludes.
- Optionally collect the Lustrous Orb north of the encounter location.
- Return to the Mt. Coronet interior before using an Escape Rope.
- Travel through Route 213 and Valor Lakefront.
- Enter Route 222 and follow it east.
- Reach Sunyshore City.
- Do not attempt the Pokémon League route before earning the eighth Badge and obtaining Waterfall.
Before you move on
- Cyrus has been defeated at Spear Pillar.
- The level 47 Palkia encounter has been caught, fled from, or defeated.
- If Palkia was caught, it appears in the party or Pokémon Storage System.
- If Palkia was fled from, leaving and re-entering the area makes the encounter available again.
- If Palkia was defeated, the player understands that Hall of Fame entry is required before the later level 47 re-encounter.
- The player has left Spear Pillar and returned through the Mt. Coronet interior.
- The player has traveled through Valor Lakefront and Route 222.
- The player has entered Sunyshore City and is ready for the final Gym chapter.
Sunyshore City and Volkner — Final Gym (Electric)
After the completed Spear Pillar climax and the Palkia encounter, Route 222 becomes the next main-story route. Cross it east from Valor Lakefront to reach Sunyshore City, defeat Volkner in the eighth Gym, receive HM07 Waterfall from Jasmine, and begin the route toward Victory Road. This chapter covers the original Nintendo DS Pokémon Pearl Version, not Platinum or Brilliant Diamond and Shining Pearl.
Leave the Palkia sequence and reach Sunyshore City
Once the Spear Pillar events and the Palkia encounter are complete, return to the Valor Lakefront side of Sinnoh. Route 222 is now the next main-story route. Follow it east from Valor Lakefront to the gate leading into Sunyshore City. The route contains optional trainers, including several Water-type specialists, so heal before leaving and use the path as a final training opportunity if your party is below the mid-40s.
When you enter Sunyshore, Flint meets you near the gate and explains that Volkner has lost interest in Gym battles. Heal at the Pokémon Center, then travel to Vista Lighthouse in the southeastern part of the city. Take the elevator to the observation deck and speak with Volkner. He recognizes you as his next challenger and returns to the Gym. Go back to the Gym in the northwest section of Sunyshore and speak with Flint outside if he is still blocking the entrance; Flint confirms that Volkner has returned.
Prepare a balanced party before entering. A Ground-type attacker is the most direct answer to Raichu and Luxray, but it is not a complete solution because Volkner also uses Ambipom and Octillery. Bring a strong Fighting-type attack for Ambipom and Grass- or Electric-type damage for Octillery. Carry Parlyz Heals or Full Heals, plus ordinary healing items for the Gym trainers and leader battle.
- Finish the Palkia summit sequence before starting this chapter.
- Travel east from Valor Lakefront through Route 222.
- Speak with Volkner at Vista Lighthouse.
- Return to the Sunyshore Gym after Flint confirms Volkner has returned.
- Bring Ground, Fighting, and Grass or Electric coverage.
Solve the Sunyshore Gym puzzle
The original Pearl Gym uses rotating gears and colored floor buttons. Blue buttons rotate their gear 90 degrees clockwise, green buttons rotate theirs 90 degrees counterclockwise, and red buttons rotate theirs 180 degrees. The reliable button order is as follows.
In the first room, press the eastern green button once, then cross back and press the western green button once. The walkway will lead you toward School Kid Tiera and the entrance to the second room.
In the second room, reach the southern blue button and press it three times. Use the southwest stairway and cross the repositioned gear toward School Kid Forrest. After that battle, press the northern blue button once, then press the nearby green button. Continue across the newly aligned walkways, climb the eastern stairs, pass Poké Kid Meghan, and enter the third room.
In the third room, press the eastern red button once, then the western red button once. Follow the west-side route past Ace Trainer Destiny and Guitarist Preston. Near the upper-left section, press the green button twice, then move east and press the blue button once. Go down the eastern stairway, pass the lower trainers, and press the eastern red button once more. Backtrack up the eastern side and follow the raised walkways to Volkner.
The Gym trainers are optional, but they provide useful experience against Pokémon around the low-to-mid 40s. If your party is already damaged, leave and heal before solving the puzzle. Leaving the Gym resets the gear arrangement, so enter with a healthy party and enough battle supplies.
- First room: eastern green, then western green.
- Second room: southern blue three times, northern blue once, then green.
- Third room: eastern red, western red, green twice, blue once, eastern red again.
- Reach Volkner only after restoring the party’s HP and status.
Plan for Volkner’s original Pearl team
Volkner’s original Diamond and Pearl team is Raichu at level 46, Ambipom at level 47, Octillery at level 47, and Luxray at level 49. This differs from Platinum, where Ambipom and Octillery are replaced, and from later remake teams.
Raichu knows Charge Beam, Thunder Wave, Light Screen, and Brick Break. Lead with a Ground-type Pokémon if it can withstand Brick Break, then use a strong physical Ground attack. Defeat Raichu promptly so it cannot raise its Special Attack with Charge Beam or reduce special damage with Light Screen. Contact attacks can trigger Static, so use noncontact damage when practical.
Ambipom knows Baton Pass, Nasty Plot, Agility, and Shock Wave. Attack it immediately rather than allowing it to accumulate boosts. Ground Pokémon are immune to Shock Wave, but that does not stop Baton Pass or prevent Ambipom from passing Nasty Plot and Agility boosts. A reliable Fighting move is the cleanest answer.
Octillery knows Octazooka, Charge Beam, Bullet Seed, and Aurora Beam. Grass attacks are super effective, but a Grass Pokémon must survive Aurora Beam. Ground and Water/Ground Pokémon are especially vulnerable to Bullet Seed, so do not treat a Ground typing as automatic protection against this Pokémon. Electric attacks are also effective, but watch for Charge Beam boosts.
Luxray is level 49, holds a Sitrus Berry, and knows Thunder Fang, Charge Beam, Thunder Wave, and Crunch. Ground Pokémon avoid its Electric attacks but still take damage from Crunch. Luxray has Rivalry, not Intimidate. A player-owned Intimidate Pokémon can reduce its physical attack power, although Intimidate does not reduce Charge Beam or prevent Thunder Wave.
- Use physical Ground damage against Raichu and Luxray.
- Stop Ambipom before it uses multiple setup moves.
- Use Grass or Electric attacks against Octillery while respecting its coverage.
- Save a healthy backup attacker for Luxray’s Crunch and Sitrus Berry.
- Carry paralysis recovery.
Defeat Volkner and claim the eighth badge
Open with your Ground-type attacker against Raichu if the matchup is safe. Cure paralysis promptly if Thunder Wave lands, and do not allow repeated Charge Beam boosts. Against Ambipom, use Fighting damage immediately; if it has already used Nasty Plot or Agility, switch to a Pokémon that can withstand the boosted attack rather than trying to preserve a poor matchup.
Send a Grass-type attacker against Octillery only when it can survive Aurora Beam. If you use a Ground-type Pokémon, check its ability to withstand Bullet Seed first. Against Luxray, use your healthiest Ground-type or strongest reserve. Crunch is the main reason not to rely on a weakened Ground Pokémon, and the Sitrus Berry may force an additional attack.
Intimidate is useful against Luxray’s physical moves, while priority attacks can finish a weakened opponent. Speed-control moves can help against Raichu, Ambipom, or Luxray, but do not rely on Electric-type Thunder Wave against Ground Pokémon. Use a Parlyz Heal or Full Heal before a decisive turn if paralysis is slowing your main counter.
After the battle, Volkner awards the Beacon Badge and TM57, Charge Beam. The Beacon Badge permits the field use of Waterfall and completes the eight-badge obedience requirement for traded Pokémon. The HM must still be obtained separately from Jasmine.
- Defeat Raichu before it gains multiple boosts.
- Prevent Ambipom from passing setup boosts.
- Use a safe Grass or Electric answer against Octillery.
- Finish Luxray after accounting for Crunch and its Sitrus Berry.
- Receive the Beacon Badge and TM57.
Get HM07 Waterfall and begin the League route
Heal at the Sunyshore Pokémon Center after the Gym battle. Then go to the northern beach of Sunyshore City and speak with Jasmine, the former Olivine City Gym Leader. After seeing your Beacon Badge, she gives you HM07, Waterfall. In original Pearl, Waterfall is still an HM; do not substitute the remake’s TM99 or Hidden Moves system.
Teach Waterfall to a compatible Pokémon if you intend to continue immediately. You also need a Pokémon that knows Surf. Leave Sunyshore through the northern exit and use Surf on Route 223. Follow the water route north, working around the rocks and sandbars and battling or avoiding the Swimmers. At the northern end, use Waterfall to climb to the Pokémon League approach and the Victory Road entrance. Route 223 and the League approach are the next progression area after Sunyshore.
Before entering Victory Road, buy Hyper Potions or stronger healing items, Revives, status cures, and Repels. The Beacon Badge is the final Gym milestone, but the campaign still requires Victory Road, the Elite Four, and Champion Cynthia.
- Speak with Jasmine on Sunyshore’s northern beach.
- Receive HM07, Waterfall.
- Teach Waterfall to a compatible Pokémon.
- Confirm that a usable Pokémon knows Surf.
- Cross Route 223 and climb the final waterfall toward Victory Road.
Before you move on
- Volkner has been defeated.
- The Beacon Badge is visible among the eight Gym Badges.
- TM57, Charge Beam, has been received.
- Jasmine has given HM07, Waterfall, on Sunyshore’s northern beach.
- A compatible Pokémon knows Waterfall and another usable Pokémon knows Surf.
- The player can cross Route 223 and reach the Victory Road entrance.
Victory Road and Final Preparations for the Pokémon League
Cross Route 223 and the original Diamond and Pearl Victory Road, then prepare for the final rival battle and the consecutive Pokémon League battles. Victory Road requires Pokémon that know Rock Smash, Strength, Surf, Waterfall, and Rock Climb. You also need the Bicycle for its ramp section. Defog is not required to complete this original Pearl route.
1. Prepare in Sunyshore City and cross Route 223
Heal at the Sunyshore City Pokémon Center before leaving. Confirm that your active party can use Rock Smash, Strength, Surf, Waterfall, and Rock Climb. These field moves may be distributed among utility Pokémon, but at least one Pokémon in the active party must be able to perform each required action. Bring the Bicycle as well; Victory Road’s second-floor ramps cannot be crossed on foot.
Before heading north, speak with Jasmine near the northern entrance to Route 223 if you have not already done so. She provides HM07 Waterfall after Volkner has been defeated. Surf north along Route 223, battling swimmers for experience or using Repels if you want to conserve HP and PP. Use Waterfall at the route’s northern end to reach the Pokémon League’s southern island.
Use the Pokémon Center immediately outside Victory Road before entering the cave. This is the most useful recovery point during the route. If your team is below the general low-to-mid-50s range or has several weak members, train on Route 223 and Victory Road trainers rather than relying on one overleveled Pokémon.
- Eight Gym Badges are recorded on the Trainer Card.
- Rock Smash, Strength, Surf, Waterfall, and Rock Climb are available in the active party.
- The Bicycle is in the Key Items pocket.
- The party is healed at the Pokémon Center outside Victory Road.
2. Clear the first Victory Road floor
From the entrance, cross the first bridge and use Rock Climb to descend to the lower level on the right. Go west to pass Psychic Bryce; the nearby TM41 Torment is optional. Use Rock Climb again to return to the upper level, then cross the next bridge and go down the stairs.
Head north to the Bird Keeper and the Full Heal, then return up the stairs and cross the third bridge. Use Rock Climb to descend again. Continue west between the ledges, climb the stairs, and go north past Ace Trainer Mariah. The stairs nearby lead to the second floor.
Do not jump ledges simply because they are available. Several ledges are one-way and can force a return trip if taken too early. Keep your party’s main attackers near full health before moving on, because the next section combines Rock Smash, Strength, and bicycle movement with several trainer battles.
- The first Rock Climb descent and return have been completed.
- You reached the second floor by passing Ace Trainer Mariah.
- The Full Heal has been collected or deliberately left behind.
3. Solve the second-floor boulder and bicycle section
On the second floor, go west and use Rock Smash to clear the debris. Move the first boulder west and the second boulder east. Mount the Bicycle and switch to fourth gear to jump the first ramp. Clear the next breakable rock, switch to third gear for the next ramp, then travel north toward the Max Ether if you want the item.
Use the ramps and ledges to return to the stairs leading back toward the first floor. After descending, turn south and clear the next rocks with Rock Smash. At the group of three boulders, move the eastern boulder south, the western boulder west, and the southwest boulder south. Continue west past Ace Trainer Omar.
Near the next pair of boulders, push the western boulder south, break the rock below it, and then move the boulder back so the route opens. Continue east and move the northern boulder in the final three-boulder group to the east. This opens the path north to Veteran Clayton and the stairs down. The Stone Edge, Full Restores, and other items in this section are optional; collect them only if your team can spare the extra battles and PP.
- The Bicycle has been used to cross the ramp section.
- The three-boulder group has been moved in the correct order.
- The route to Veteran Clayton and the stairs downward is open.
4. Cross the lower section with Surf and Waterfall
After the stairs, continue downward and use Surf across the first pool to reach Psychic Valencia. Surf around the pool and cross toward the southeast, then battle the Double Team trainers if you want the experience. Cross the southern pool and climb the stairs on the west side to reach a short first-floor detour. The Rare Candy there is optional; return to the lower floor afterward.
Cross the southern pool again and descend the next stairs. At the branching water section, either Surf north across the large pool or take the eastern path and battle Ace Trainer Henry. Continue to the waterfall and use Waterfall to climb upward. Sail west across the upper water, then descend the western waterfall if you want TM59 Dragon Pulse. Climb back up afterward.
After the water section, battle Dragon Tamer Ondrej and climb the stairs. Keep an Electric- or Grass-type attack available for Water Pokémon and a reliable Ice- or Dragon-type answer for Gabite. Avoid exhausting your strongest moves on wild encounters; Elixirs and Ethers are limited, and the League battles follow soon.
- Surf has been used to cross the lower pools.
- The required Waterfall climb has been completed.
- You have returned from the optional Dragon Pulse detour or intentionally skipped it.
5. Take the final Victory Road route to the exit
Back on the first floor, go west and south to reach the Razor Claw if desired. Return toward Veteran Edgar, cross the bridge, and note the blocked opening toward Route 224. That blocked route is postgame-related and is not the way to the Pokémon League.
At the nearby split, take the western path first. Use Rock Climb to scale the wall, cross the western bridge, and climb the stairs to the northern second-floor section. Use Strength to move the boulders aside, collect TM79 Dark Pulse if useful, and return to the first floor.
At the earlier split, take the eastern path this time. Use Rock Climb to continue north, defeat Dragon Tamer Clinton, and cross the northern bridge to leave Victory Road. Outside, use Surf and then Waterfall to climb to the Pokémon League entrance. The hidden Sky Plate beneath the waterfall is optional.
- The blocked Route 224 opening has not been mistaken for the League exit.
- The northern second-floor boulders have been moved enough to open the return path.
- Dragon Tamer Clinton has been passed and Victory Road has been exited.
6. Rebuild the party and inventory at the Pokémon League
The Pokémon League building contains a Pokémon Center, PC, and Poké Mart. Heal immediately, then use the PC to remove unnecessary HM carriers or duplicate weaknesses. Your final six should include both physical and special damage, a sturdy switch-in, a dependable answer to Steel Pokémon, a way to pressure fast Psychic Pokémon, and a reliable method for damaging Dragon Pokémon.
The League is not the first battle after entering the building. When you approach the guarded entrance, Barry appears and challenges you. His final team is around levels 48 to 53, with the exact starter-dependent final evolution changing between Infernape, Empoleon, and Torterra. Be ready for Staraptor, Heracross, Snorlax, and his remaining varied team before committing to the Elite Four.
Buy Full Restores, Max Potions, Revives, and status cures. Full Restores are available from the Poké Mart after earning all eight Badges. Use Full Restores when both HP and status need attention; reserve ordinary healing items for smaller injuries where practical. The Elite Four and Champion battles are consecutive, so supplies must cover the entire attempt.
- The final rival battle is included in the preparation plan.
- The party contains answers for Psychic, Ice, Dragon, Water, Ground, Flying, and Steel threats.
- Full Restores or Max Potions, Revives, and status cures are stocked.
7. Review moves, held items, and save before the League
Replace obsolete early-game attacks with stronger learned moves or appropriate TMs. TM59 Dragon Pulse from Victory Road can help a compatible special attacker, while TM71 Stone Edge and TM79 Dark Pulse are optional coverage choices. Do not force a move onto a Pokémon merely because the TM is available; preserve accuracy and type coverage that your team actually needs.
Give Leftovers to a bulky Pokémon that expects to remain in battle or make repeated resisted switches. Leftovers can be found in Victory Road. Type-boosting items such as Magnet, Soft Sand, Charcoal, Plates, or NeverMeltIce are useful when the boosted move is central to a matchup. A Sitrus Berry or defensive item can be better for a Pokémon that needs one emergency recovery turn.
After healing, restoring PP, equipping items, and checking the party order, save in the Pokémon League building before approaching the guarded entrance. If the lowest-level core member cannot safely handle Victory Road trainers or Barry’s team, return to Victory Road for additional experience. Perfect effort values and breeding are unnecessary for the story campaign, but an evenly developed team and deliberate movesets are important.
- All six intended Pokémon are healed and have useful held items or an intentional empty slot.
- Important moves have sufficient PP.
- The final save is made before approaching the League entrance and triggering Barry’s battle.
Before you move on
- Route 223 has been crossed from Sunyshore City and Waterfall has been used to reach Victory Road.
- The original Pearl Victory Road has been completed using Rock Smash, Strength, Surf, Waterfall, Rock Climb, and the Bicycle where required.
- The Pokémon League Pokémon Center and Poké Mart have been reached.
- The party has balanced physical and special damage, defensive options, and coverage for Psychic, Ice, Dragon, Water, Ground, Flying, and Steel opponents.
- The team is healed, its important moves have adequate PP, and useful held items are equipped.
- Full Restores or Max Potions, Revives, and status cures are available for the rival, Elite Four, and Champion battles.
- A manual save exists before approaching the guarded League entrance and triggering Barry’s final rival battle.
Sinnoh Elite Four — Overview and Room-by-Room Strategy
In the original Nintendo DS Pokémon Pearl Version, the Pokémon League challenge begins after the entrance battle with Barry and proceeds through Aaron, Bertha, Flint, Lucian, and then Champion Cynthia. The League lobby has a Pokémon Center and Poké Mart, but once you pass through the central gate there is no healing station between rooms. Prepare in the lobby, save before entering the challenge, and use the Bag between battles to keep your party ready for the next room.
Finish the entrance battle and prepare in the lobby
When you first reach the Pokémon League building, Barry challenges you before you can proceed through the central gate. Defeat him, then use the Pokémon Center in the lobby to heal the entire party. The guard opens the gate only after you have all eight Sinnoh Gym Badges and have completed the required entrance events.
Use the Poké Mart before entering the first Elite Four room. Prioritize Full Restores, Max Potions or Hyper Potions, Revives, and a few Full Heals or individual status cures. Full Restores heal HP and remove poison, paralysis, sleep, burn, and freeze; they do not cure confusion. Restore the PP of your most important attacks before entering and give useful held items to the Pokémon you expect to use most.
Save in the lobby before speaking to Aaron. A balanced party is safer than one overleveled attacker supported by weak reserves. Aaron’s strongest Pokémon is level 57, while Lucian’s strongest is level 63, so a party clustered around the mid-to-high 50s is a practical target, though the exact level needed depends on moves, type matchups, and training.
- Defeat Barry when he challenges you at the League entrance.
- Heal and restore PP at the lobby Pokémon Center.
- Buy HP recovery, status cures, and Revives before entering.
- Save in the lobby immediately before starting the Elite Four.
Room 1: Aaron’s Bug team
Aaron uses Dustox at level 53, Beautifly at level 53, Vespiquen at level 54, Heracross at level 54, and Drapion at level 57. Fire, Flying, and Rock attacks cover most of the first four Pokémon. A strong Fire or Flying attacker can clear the opening portion, but do not leave a frail Pokémon exposed to Heracross’s powerful Megahorn, Close Combat, or Stone Edge.
Vespiquen can raise its defenses with Defend Order and restore HP with Heal Order. Attack it with a strong super-effective move before it has time to build up. Dustox may use Toxic and Double Team, so cure Toxic promptly if it lands. Do not waste several turns making inaccurate attacks into evasion boosts when you can switch to a more reliable move or use a Full Restore at a safe moment.
Drapion is Poison/Dark rather than Bug type, so Psychic attacks are ineffective. In Pearl, it carries Battle Armor and a Sitrus Berry, along with X-Scissor, Cross Poison, Ice Fang, and Aerial Ace. Ground attacks are its clearest weakness. Keep a Ground-type move or a sturdy neutral attacker available, and avoid sending a fragile Ground Pokémon into Ice Fang without checking whether it can survive.
- Use Fire, Flying, or Rock attacks on Aaron’s Bug/Flying Pokémon.
- Save a Ground-type attack for Drapion.
- Cure Toxic before poison damage forces unnecessary item use.
- After winning, restore only the HP, status, and PP that the next rooms require.
Room 2: Bertha’s Ground team
Bertha uses Quagsire at level 55, Whiscash at level 55, Sudowoodo at level 56, Golem at level 56, and Hippowdon at level 59. Grass attacks are especially valuable because Quagsire and Whiscash are both Water/Ground and take quadruple damage from Grass. Electric attacks do nothing to either Pokémon because their Ground typing grants Electric immunity.
Use Grass attacks on Quagsire and Whiscash, and use Water or Grass attacks against Sudowoodo and Golem. Quagsire can use Protect, Double Team, and Sandstorm, so do not repeatedly burn turns into Protect or allow evasion boosts to make the fight longer than necessary. Golem’s Earthquake and Rock attacks can punish Fire-, Flying-, and fragile Electric Pokémon.
Whiscash can use Fissure, so remove it efficiently rather than allowing a long battle to create more opportunities for a one-hit knockout. Hippowdon is Bertha’s highest-level Pokémon and starts a sandstorm through Sand Stream. Keep your best Grass or Water attacker healthy for it, and remember that sandstorm damage affects most Pokémon at the end of each turn. If Hippowdon begins setting up, favor immediate damage over unnecessary team changes.
- Use Grass attacks on Quagsire and Whiscash.
- Do not use Electric attacks against the Water/Ground Pokémon.
- Watch for Protect, Double Team, Fissure, Sandstorm, and Hippowdon’s high physical durability.
- Heal the Pokémon needed for Flint before leaving the room.
Room 3: Flint’s mixed Fire team
In the original Pearl roster, Flint uses Rapidash at level 58, Steelix at level 57, Drifblim at level 58, Lopunny at level 57, and Infernape at level 61. Only Rapidash and Infernape are Fire type, so do not enter with a plan that covers Fire Pokémon but ignores the other three.
Water- or Ground-type attacks are strong choices against Rapidash, Steelix, and Infernape. Steelix has very high physical Defense, so a strong special Water attack is preferable when available. Sunny Day can strengthen Flint’s Fire attacks and weaken Water attacks, so do not assume every Water move will score the same damage throughout the battle. Infernape is the most dangerous target in this room: preserve a healthy Water- or Ground-type answer, and remember that ThunderPunch and Earthquake can punish predictable switches.
Drifblim is a disruption threat rather than a simple type matchup. Will-O-Wisp cripples physical attackers, Double Team reduces accuracy, and Baton Pass can transfer stat changes to another Pokémon. Use a reliable attack and remove it before it accumulates evasion or passes a boost. Because Drifblim has Aftermath, avoid finishing it with a contact move when your attacker is already at dangerously low HP.
Lopunny can use Charm, Mirror Coat, Fire Punch, and Sunny Day. Physical attackers may become weak after Charm, while weak special attackers risk taking heavy damage from Mirror Coat. Switch or use a different attack rather than repeatedly attacking into the wrong defense.
- Prepare answers for Steelix, Drifblim, and Lopunny as well as the Fire types.
- Keep a strong Water or Ground attacker available for Infernape.
- Defeat Drifblim quickly before Baton Pass or Double Team extends the fight.
- Avoid using a weakened physical attacker into Will-O-Wisp or a weak special move into Mirror Coat.
Room 4: Lucian’s Psychic team
Lucian uses Mr. Mime at level 59, Girafarig at level 59, Medicham at level 60, Alakazam at level 60, and Bronzong at level 63. Dark, Ghost, and Bug attacks are useful, but select the attacker for the individual matchup rather than leaving one Dark type exposed to every Pokémon.
Mr. Mime may establish Reflect or Light Screen, reducing the damage taken from one side of your team’s attacks. Remove it quickly with a strong super-effective hit if possible. Girafarig is Normal/Psychic and can use Dark-type coverage, so a Dark Pokémon is not automatically safe. Medicham has Pure Power and can carry elemental punches, making it dangerous for a Dark or Flying counter that switches in without checking its health.
Alakazam is fast and has high Special Attack but is comparatively frail. A strong physical Dark, Ghost, or Bug attack can often remove it before it acts, provided your Pokémon can survive the switch-in. Bronzong is Lucian’s level 63 ace and has Levitate in this game, so Ground attacks fail. Use Fire, Dark, Ghost, or strong neutral attacks instead. Keep a sturdy Pokémon available because Bronzong can combine durable defenses with damaging Psychic- and Steel-type attacks or setup turns.
Use the hallway after Lucian’s room to restore the party before entering Cynthia’s room. The game does not automatically provide a full recovery between the Elite Four and Champion battles, so heal manually and check PP before proceeding.
- Bring Dark, Ghost, Bug, or Fire coverage, not only one Dark Pokémon.
- Expect Medicham to punish careless switches with elemental coverage.
- Do not use Ground attacks against Bronzong while Levitate is active.
- Fully heal and restore important PP before entering the Champion’s room.
Manage items, PP, and failed attempts
You may open the Bag between battles, but there is no Pokémon Center inside the Elite Four sequence. Use the lobby Pokémon Center and Poké Mart before entering, then ration items across all four rooms and Cynthia’s battle. Hyper Potions or Max Potions are appropriate for ordinary damage; reserve Full Restores for a serious status condition combined with significant HP loss. Revive the Pokémon assigned to the next matchup first instead of automatically reviving the entire party.
Do not spend most of your Full Restores and Revives against Aaron or Bertha. Those rooms are the best opportunities to finish with limited item use, leaving more resources for Flint’s mixed coverage, Lucian’s fast Psychic Pokémon, and Cynthia’s high-level team. If a Pokémon is badly poisoned, burned, or paralyzed and can no longer perform its role, cure it before the next room rather than hoping it survives several more battles.
If you lose, the game returns you to the last Pokémon Center and the League attempt resets. Heal and restock in the lobby, then change the underlying problem: add a Grass attack for Bertha, a Ground or Water answer for Flint, a Fire or Dark answer for Bronzong, or a sturdier reserve if one sweeper is being overwhelmed. Reconsider move PP and held items as well as levels. A second reliable attacker, a status-resistant switch, or a Pokémon that can absorb a neutral hit is more useful than simply buying more potions.
- Use the lobby for all healing and restocking after a failed run.
- Track PP on your main Fire, Water, Grass, Ground, Dark, Ghost, and Bug attacks.
- Keep enough Full Restores and Revives for Lucian and Cynthia.
- After a loss, change the team or moveset that failed instead of repeating the same plan.
Before you move on
- Barry has been defeated at the Pokémon League entrance and the eight-badge guard has allowed access through the central gate.
- Aaron, Bertha, Flint, and Lucian have been defeated in that order.
- The connecting hallway after Lucian has been reached and the Champion’s room is available.
- The party has been manually healed and important PP has been restored before entering Cynthia’s room.
- The game proceeds to the Champion battle, confirming that the four-member Elite Four sequence is complete.
Champion Cynthia — Final Boss Strategy
In the original North American Nintendo DS Pokémon Pearl Version, Champion Cynthia is the final battle of the Pokémon League. Her team is Spiritomb at level 61, Roserade at level 60, Gastrodon at level 60, Lucario at level 63, Milotic at level 63, and Garchomp at level 66. The team has no single shared weakness, so prepare separate answers for Water, Grass, Fighting, Steel, and Dragon/Ground threats. The most valuable coverage is Grass for Gastrodon and Milotic, Fire or Ground for Lucario, and Ice for Garchomp. This guide applies to the original Diamond and Pearl release, not Platinum or Brilliant Diamond and Shining Pearl.
1. Prepare outside the Champion’s room
After defeating Lucian, do not walk directly into Cynthia’s room unless your party is ready. The Pokémon Center is outside the Pokémon League entrance, so use it before beginning the Elite Four run. Once you are inside the League, you must rely on your carried items and move-restoration supplies between battles. Before entering Cynthia’s room, restore the HP and PP of every Pokémon you expect to use, remove harmful status conditions, and save manually.
Bring a substantial supply of Hyper Potions, Max Potions, or Full Restores, plus Revives. Full Heals are useful for clearing paralysis, poison, burn, or sleep, but do not spend them unnecessarily in the early League battles. If a Pokémon can safely switch out while only moderately injured, preserve Full Restores for the final battle instead of healing every small amount of damage immediately.
Cynthia’s battle starts almost as soon as you enter the Champion’s room. Save before crossing the entrance so a failed attempt can be restarted without repeating the entire League run.
- Heal and restore PP at the Pokémon Center before entering the League.
- Save immediately before entering Cynthia’s room.
- Carry enough healing items and Revives for a six-Pokémon battle.
2. Build the party around roles and coverage
Cynthia’s original Pearl team is Spiritomb, Roserade, Gastrodon, Lucario, Milotic, and Garchomp. Their types and move coverage prevent a simple one-Pokémon sweep from being dependable. Bring at least one strong physical attacker and one strong special attacker. You should also have a Grass or Electric attack for her Water Pokémon, a Fire, Fighting, or Ground attack for Lucario, and a reliable Ice attack for Garchomp.
Ice Beam is often the easiest Garchomp answer because several Water-type Pokémon can learn it. An Ice Fang user or another Pokémon with a strong Ice attack can also work, provided it is fast or durable enough to survive Garchomp’s first strike. Keep that Pokémon healthy throughout the earlier battles rather than exposing it needlessly.
The original Diamond and Pearl games use the Generation IV type chart. Fairy typing does not exist, so do not use later-game advice claiming that Fairy attacks are super effective against Spiritomb or Garchomp.
- Bring both physical and special damage.
- Reserve a healthy Ice attacker for Garchomp.
- Prepare Grass or Electric coverage for Milotic and Grass coverage for Gastrodon.
- Do not apply Fairy-type advice from later Pokémon games.
3. Defeat Spiritomb with strong neutral damage
Cynthia leads with Spiritomb at level 61. Spiritomb is Ghost/Dark, and in this original release it has no type-based weakness. Normal, Fighting, and Psychic attacks are ineffective or fail to damage it, so do not waste turns trying to exploit those types.
Spiritomb knows Dark Pulse, Psychic, Silver Wind, and Embargo. Use a strong neutral attack from a Pokémon that can tolerate its special attacks. Avoid fragile setup strategies unless you are certain Spiritomb cannot punish the setup turn. The goal is to defeat it without using several high-value healing items or revealing your Garchomp counter too early.
If Spiritomb damages your lead heavily, switch to a durable neutral matchup and heal only when you can do so safely. Keep track of which Pokémon can still answer Garchomp later; Spiritomb is the opening battle, not the point at which to sacrifice your most important counter.
- Use strong neutral attacks.
- Do not use Normal, Fighting, or Psychic attacks as your main damage plan.
- Preserve the Pokémon carrying your best Ice move.
4. Use targeted answers for Roserade and Gastrodon
Roserade is level 60 and is Grass/Poison. Fire, Flying, Ice, and Psychic attacks are super effective. Its moves are Energy Ball, Sludge Bomb, Shadow Ball, and Extrasensory, so a Fire- or Flying-type switch is only safe if that Pokémon can withstand the incoming attack. A Steel-type Pokémon can also be useful defensively against Roserade’s listed attacks, but make sure it has enough power to finish the battle before repeated special damage wears it down.
Gastrodon is level 60 and is Water/Ground. Electric attacks do not work because its Ground typing grants immunity. Use a Grass attack instead. Gastrodon knows Muddy Water, Earthquake, Stone Edge, and Sludge Bomb, so send in a Grass-type or a Pokémon with strong Grass coverage that can survive a possible Sludge Bomb. If your Grass move is weak, a powerful physical neutral attack is preferable to repeatedly using ineffective Electric moves.
After either Pokémon falls, heal the next intended counter if its HP is low. Do not spend turns setting up if Cynthia’s next Pokémon can immediately threaten the active Pokémon with super-effective coverage.
- Use Fire, Flying, Ice, or Psychic attacks against Roserade.
- Use Grass attacks against Gastrodon.
- Never rely on Electric attacks against Gastrodon.
- Watch for Sludge Bomb when using a Grass-type counter.
5. Control Lucario and Milotic carefully
Lucario is level 63 and is Fighting/Steel. Fire, Fighting, and Ground attacks are effective, but Lucario’s Aura Sphere is a powerful special Fighting move that does not miss. It also carries Dragon Pulse, Psychic, and Earthquake. A Pokémon that merely resists one of these attacks may still take severe damage, so choose a sturdy counter and attack rather than assuming a resistance guarantees safety.
Milotic is level 63 and knows Surf, Ice Beam, Mirror Coat, and Aqua Ring. Grass and Electric attacks are super effective. Milotic’s Mirror Coat returns heavy special damage, so avoid firing a weak or moderate special attack into a healthy Milotic when a physical option is available. A physical Grass attack, physical Electric attack, or powerful physical neutral move is safer when you have one.
Do not inflict a status condition on Milotic casually. Its Marvel Scale ability raises its Defense when it has a status condition, making physical attacks less effective. If Milotic uses Aqua Ring, keep applying consistent damage rather than wasting turns on unnecessary setup. Heal your intended Garchomp counter before Milotic is defeated if it has taken significant damage.
- Use Fire, Fighting, or Ground attacks against Lucario.
- Respect Aura Sphere, Psychic, Dragon Pulse, and Earthquake.
- Use Grass or Electric attacks against Milotic.
- Avoid careless special attacks because of Mirror Coat.
- Do not give Milotic a free Defense boost through Marvel Scale.
6. Finish with a dedicated Garchomp plan
Garchomp is Cynthia’s level 66 ace and is Dragon/Ground. It holds a Sitrus Berry and knows Dragon Rush, Earthquake, Brick Break, and Giga Impact. Ice attacks are the most direct way to exploit its weakness. Bring out your Ice attacker only when it is healthy enough to survive a possible Dragon Rush, Earthquake, or Brick Break.
If your first Ice attack does not knock Garchomp out, account for the Sitrus Berry before choosing your next action. Garchomp may recover a significant portion of its HP once, so be prepared to use a second attack. Do not automatically switch a Ground-immune Pokémon into it, because Dragon Rush, Brick Break, and Giga Impact can still damage that Pokémon.
If Garchomp uses Giga Impact and remains in battle, it must recharge on the next turn. Use that opening to attack or heal if your Pokémon can survive the original hit. A reliable Ice attack is preferable to relying on this recharge mechanic, but the recharge turn can rescue a weakened team when used carefully. Avoid sacrificing your last Garchomp counter without first checking whether another Pokémon can finish the battle.
- Keep your strongest Ice user alive until Garchomp appears.
- Expect Garchomp’s Sitrus Berry.
- Prepare for a second Ice attack if the first does not knock it out.
- Exploit Giga Impact’s recharge turn when it occurs.
7. Recover after a failed attempt
If all of your Pokémon faint, the game does not rewind to your manual save automatically. You are sent to the last Pokémon Center, and the League challenge must be repeated. If you saved before entering Cynthia’s room, reset the game instead of accepting the defeat, then adjust your plan and retry from that save.
Before another attempt, identify the specific failure: a counter may have been too frail, a move may have run out of PP, Milotic may have punished a special attacker with Mirror Coat, or Garchomp may have survived the first Ice attack because of its Sitrus Berry. Change the problem rather than leveling every Pokémon without a plan.
Train in Victory Road and other accessible high-level areas, and replace weak or redundant moves before returning. A balanced team around the upper-50s to mid-60s can succeed with good coverage and item use, but Pokémon that are substantially below the League’s level range will require more careful switching and healing. The Pokémon Center outside the League lets you restock before beginning the full sequence again.
- Use a pre-battle save to retry without repeating the League.
- Review the exact Pokémon or move that caused the loss.
- Retrain or replace the failed counter instead of leveling the entire party blindly.
- Restock at the Pokémon Center before starting another run.
Before you move on
- Cynthia’s original Pearl team has been defeated in sequence: Spiritomb, Roserade, Gastrodon, Lucario, Milotic, and Garchomp.
- After the battle, take the lift and follow Cynthia into the Hall of Fame room with Professor Rowan.
- The Hall of Fame registers your Trainer and party, the game saves during the registration sequence, and the credits begin. This confirms the canonical main-game ending.
Postgame: Returning to Mt. Coronet and Optional Lakes
After entering the Hall of Fame in the original Nintendo DS Pokémon Pearl Version, upgrade the Pokédex to National Mode, revisit the three lake caverns, begin the Mesprit and Cresselia roaming encounters, and complete the Stark Mountain sequence that makes Heatran available. Mt. Coronet remains useful for optional exploration, but it does not begin a new postgame Team Galactic story in this edition. Do not substitute Platinum, Brilliant Diamond, or Shining Pearl mechanics such as the Distortion World, Ramanas Park, or the expanded Grand Underground.
1. Enter the Hall of Fame and receive the National Pokédex
After defeating Champion Cynthia and being registered in the Hall of Fame, return to Sandgem Town and review the Sinnoh Pokédex. In the original Diamond and Pearl games, Professor Rowan must confirm that you have seen the required Sinnoh Pokémon entries. You do not need to catch every entry, and Manaphy is not needed for this regional completion check.
If Rowan’s assistant does not direct you to the laboratory, look for missing entries by battling trainers whose teams you skipped. Useful places to check include Solaceon Ruins for Unown, the Iron Island storyline or nearby trainer battles for Riolu, and Celestic Town, where the book in the elder’s house records the opposite version’s legendary entry. Pearl records Dialga by reading the book; you do not need to trade for or catch Dialga merely to complete the seen-data requirement.
Enter Professor Rowan’s laboratory once the required entries are recorded. Rowan confirms the regional Pokédex data, and Professor Oak then upgrades the device to National Mode. Oak’s upgrade also enables Rowan to provide the Poké Radar. This upgrade is required for several broader postgame objectives, including Fullmoon Island and the Battle Zone route to Stark Mountain, but it is not the condition that first makes Azelf, Uxie, and Mesprit available. Those three lake guardians are made available by the Spear Pillar climax and the Palkia event.
- Enter the Hall of Fame.
- Record the required Sinnoh Pokédex entries as seen.
- Visit Rowan’s laboratory in Sandgem Town.
- Receive the National Pokédex upgrade from Professor Oak.
2. Revisit the three lakes and handle the lake guardians
Return to Lake Valor and enter Valor Cavern to find Azelf. Then travel to Lake Acuity and enter Acuity Cavern to find Uxie. In Pearl, both are level 50 stationary encounters. They are available after the Team Galactic events at Spear Pillar and the confrontation with Palkia; the National Pokédex is not required to start these encounters.
Save immediately before speaking to each Pokémon. Use a status condition such as sleep or paralysis, lower its HP carefully, and carry a large supply of Poké Balls. Avoid powerful critical-hit-prone attacks when the guardian is already near defeat. If you accidentally knock out a stationary guardian, the safest procedure is to reload the save made before the encounter rather than relying on uncertain recovery conditions.
At Lake Verity, enter Verity Cavern and approach Mesprit. It leaves immediately and becomes a level 50 roaming Pokémon. Open the Pokétch Marking Map to see its current route, then move between adjoining routes to make its position change. A lead Pokémon with Mean Look, Block, Spider Web, or the Shadow Tag ability can help prevent escape once Mesprit is encountered. Sleep or paralysis makes the capture attempt easier, but use a durable Pokémon because Mesprit can survive for only a short time against repeated attacks.
If Mesprit flees, do not return to Verity Cavern expecting another stationary battle. Continue tracking it through Sinnoh with the Marking Map. Preserve a save before beginning a serious capture attempt if you want the option to retry the process.
- Save before entering the Azelf encounter.
- Save before entering the Uxie encounter.
- Capture or deliberately postpone Azelf and Uxie with a protected save.
- Trigger Mesprit’s departure at Verity Cavern.
- Track Mesprit with the Pokétch Marking Map.
3. Unlock Fullmoon Island and begin Cresselia’s roaming encounter
Fly to Canalave City after entering the Hall of Fame and receiving the National Pokédex. Visit the house near the southwest pier and speak with the boy suffering from nightmares and with his mother. Then speak with Sailor Eldritch near the boat. When both prerequisites are complete, Eldritch offers to take you to Fullmoon Island.
Follow the short path across Fullmoon Island until you reach the clearing containing Cresselia. Approach it to trigger the event. Cresselia does not remain for a normal stationary battle in the original Pearl release. It flees, leaves the Lunar Wing behind, and becomes a level 50 roaming Pokémon in Sinnoh.
Pick up the Lunar Wing and return to Canalave City. Give it to the sleeping boy to resolve the nightmare event. Cresselia must then be tracked with the Pokétch Marking Map in the same general manner as Mesprit. Save before beginning the island event if you want a clean recovery point, but do not waste time searching Fullmoon Island’s grass for a stationary Cresselia; the island encounter is only the trigger for its roaming status.
- Speak with the sleeping boy and his mother in Canalave City.
- Speak with Sailor Eldritch.
- Travel to Fullmoon Island.
- Collect the Lunar Wing after Cresselia flees.
- Give the Lunar Wing to the boy in Canalave City.
- Track Cresselia as a roaming Pokémon.
4. Revisit Mt. Coronet for exploration only
Mt. Coronet remains open after the main story and is useful for optional items, wild Pokémon, training, and alternate travel between Sinnoh routes. However, returning to the summit does not start another Cyrus or Team Galactic sequence in the original Pearl version. The Spear Pillar climax is a main-story event, not a repeatable postgame story scene.
Bring the field moves required by the particular section you plan to explore, especially Strength and Rock Smash. Some deeper routes may also require other field moves depending on the entrance used. Heal before entering because there is no Pokémon Center inside Mt. Coronet, and carry Escape Ropes if you want to leave after collecting items.
The significant optional legendary quest after the League is not in Mt. Coronet. It begins in the Battle Zone and continues through Routes 225, 226, and 227 to Stark Mountain. Do not import remake-only locations or systems into this route: the original DS game has no Ramanas Park and does not use the Brilliant Diamond and Shining Pearl Grand Underground structure.
- Use Mt. Coronet for optional exploration or training.
- Bring the field moves required for the selected route.
- Do not expect a new postgame Cyrus or Team Galactic event at the summit.
5. Reach Stark Mountain and complete Buck’s Magma Stone sequence
After entering the Hall of Fame, take the ferry from Snowpoint City to the Fight Area. From there, travel through Route 225, Route 226, and Route 227 toward Stark Mountain. Bring Strength and Rock Smash, a balanced party, and enough healing items for a long route. A house near the Stark Mountain approach can restore your party before the final exterior section, but there is no Pokémon Center inside the mountain.
Enter Stark Mountain and follow the cavern route through the boulders and breakable rocks. At the deeper interior section, meet Buck and agree to cooperate. While Buck travels with you, he restores the party after battles. Continue through the mountain until you reach the deepest chamber containing the Magma Stone. Buck takes the stone and leaves.
Do not go directly back to Heatran at this point. Retrace your way out of Stark Mountain and return through Routes 227, 226, and 225 to the Survival Area. Enter the house west of the Pokémon Center and speak with Buck’s grandfather. He explains the danger created by removing the Magma Stone. After that conversation, speak with Buck in the same area. Buck realizes that the stone must be returned and leaves to put it back.
Now retrace the route to Stark Mountain. Re-enter the mountain, pass through the main cavern, and return to the deepest chamber where Buck originally took the Magma Stone. Buck and the stone are no longer there, but Heatran has appeared. Examine Heatran to begin the fixed encounter. In original Pearl, Heatran is level 70 and is Fire/Steel type.
Save immediately before interacting with Heatran. Water-, Ground-, and Fighting-type attacks are effective, but stop attacking once its HP is low enough for capture. Sleep or paralysis is useful; Heatran cannot be burned or poisoned because of its typing. Ultra Balls are reliable general-purpose choices, and Dusk Balls receive their best use inside the cave. If Heatran is defeated or the attempt is otherwise unacceptable, reload the prepared save. Do not overwrite that save until you are satisfied with the result.
- Enter the Battle Zone after the Hall of Fame.
- Cross Routes 225, 226, and 227.
- Reach the deepest chamber of Stark Mountain with Buck.
- Allow Buck to take the Magma Stone.
- Return to the Survival Area.
- Speak with Buck’s grandfather.
- Speak with Buck and let him leave to return the stone.
- Retrace the route to Stark Mountain’s deepest chamber.
- Save before battling level 70 Heatran.
- Capture Heatran or preserve the save for a later attempt.
6. Recover safely from failed legendary attempts
For Azelf, Uxie, and Heatran, save before initiating the encounter. If you accidentally defeat one or use too many resources, reload that save rather than assuming the Pokémon will automatically return in every situation. This is especially important when playing from a single original Pearl save with no backup.
Mesprit and Cresselia require a different recovery plan because their introductory events create roaming encounters. If either Pokémon flees, use the Pokétch Marking Map and continue changing routes until it appears again. A trapping move or ability can prevent the escape once battle begins, while a status move improves the odds of completing the capture.
Before attempting any fixed legendary, heal the party, organize the bag, carry status support, and keep several Pokémon capable of surviving a neutral hit. Keep a separate save before completing major optional events so that a failed capture does not force you to repeat unrelated story work. The game’s original Pearl postgame should be judged by its own systems, not by features later introduced in Platinum or the Switch remakes.
- Keep a pre-battle save for every fixed legendary.
- Reload after an accidental knockout when the result is unacceptable.
- Track Mesprit and Cresselia instead of repeatedly searching their introductory locations.
- Keep a protected save before completing remaining optional events.
- Do not overwrite a successful capture save until the file has been checked.
Before you move on
- The save has entered the Hall of Fame.
- Professor Oak has upgraded the Pokédex to National Mode in Rowan’s laboratory.
- Azelf and Uxie have been captured, intentionally postponed, or protected by a pre-battle save.
- Mesprit’s event at Verity Cavern has been triggered and its roaming status is confirmed.
- The Canalave nightmare event is complete and the Lunar Wing has been delivered.
- Cresselia is roaming through Sinnoh or has been captured.
- Buck’s Stark Mountain sequence is complete: the Magma Stone was taken, Buck’s grandfather was consulted, Buck was spoken to in the Survival Area, and the route back to the deepest chamber was completed.
- Heatran has appeared in the deepest Stark Mountain chamber or remains available behind a preserved pre-encounter save.
- Any remaining fixed legendary encounter is protected by a pre-battle save.
- All postgame progress was completed in the original Pokémon Pearl Version for Nintendo DS rather than through remake-only locations or mechanics.
References for this chapter
Optional 100% Checklist: Pokédex, Trades and Version Exclusives
Use this chapter as a method-based collection plan for the original Nintendo DS Pokémon Pearl Version. First complete the Sinnoh Pokédex and unlock National Mode. Then maintain separate records for ordinary Diamond and Pearl encounters, Poké Radar and swarm species, GBA dual-slot encounters, fossil revivals, trade evolutions, breeding results, Pal Park imports, fixed encounters, roaming Pokémon, and historical events. This prevents a traded Pokémon or special-condition species from being mislabeled as a normal Pearl encounter.
Complete the Sinnoh Pokédex and unlock National Mode
Enter the Hall of Fame, then check the Sinnoh Pokédex Seen list. In original Pearl, Professor Rowan requires entries 001 through 150 to be marked seen; the game evaluates species seen rather than species caught. Manaphy is entry 151 and is not required for the National Pokédex upgrade.
Pearl records Palkia at Spear Pillar during the story. To register the counterpart entry, visit Celestic Town after the Galactic storyline and enter the large house in the northwest. Speak with Cynthia's grandmother and examine the ancient book when she directs you to it. In Pearl, this registers Dialga as seen; it does not create a Dialga encounter.
Check the frequently missed entries before arranging trades. Unown is found in Solaceon Ruins, and Riolu can be obtained from Riley's Egg on Iron Island or seen in a trainer battle in Oreburgh Gate. Also check optional trainers, the Old Chateau, Great Marsh, Honey Trees, fishing areas, and evolution lines.
Return to Professor Rowan's laboratory in Sandgem Town after all 150 required entries are seen. Professor Oak upgrades the Pokédex to National Mode. Speak with Rowan after the upgrade to receive the Poké Radar. Professor Oak then makes Pal Park available at the eastern end of Route 221.
- Enter the Hall of Fame.
- Mark Sinnoh Pokédex entries 001 through 150 as seen.
- See Palkia at Spear Pillar.
- Register Dialga from the Celestic Town book.
- Receive the National Pokédex upgrade from Professor Oak.
- Receive the Poké Radar from Professor Rowan.
- Visit Pal Park on Route 221 if migration is planned.
Record ordinary Diamond and Pearl source species separately
Reserve this category for Pokémon available through ordinary game data in Diamond or Pearl without a Poké Radar chain, swarm, GBA cartridge, fossil revival, event, breeding requirement, or trade-evolution item. Useful Diamond-source examples include Stunky, Murkrow, and Scyther. Useful ordinary Pearl examples include Glameow, Misdreavus, and Pinsir.
Do not place Slowpoke in this category. In Pearl, Slowpoke is obtained through the Poké Radar on the northern section of Route 205 after National Mode is unlocked. Slowbro should be recorded with the Slowpoke evolution line, not as an independent ordinary encounter. Slowking requires a separate trade-evolution entry: trade Slowpoke while it holds a King's Rock.
Do not treat Palkia as a route-exclusive Pokémon. It is Pearl's fixed story legendary and belongs under fixed encounters. Dialga is the counterpart species whose Sinnoh Pokédex entry is registered from the Celestic Town book in Pearl.
A normal Diamond-to-Pearl trade can provide Diamond's ordinary counterpart species, but it does not change Pearl's native encounter table. Write the source game and acquisition method beside every entry. Exclude Platinum and Brilliant Diamond and Shining Pearl encounter systems, including Grand Underground and Ramanas Park methods.
- Keep ordinary Pearl species separate from Diamond-source species.
- List Stunky, Murkrow, and Scyther as Diamond-source examples.
- List Glameow, Misdreavus, and Pinsir as ordinary Pearl examples.
- Record Slowpoke under Pearl Poké Radar encounters, not ordinary local encounters.
- Record Slowbro with the Slowpoke evolution line.
- Record Slowking as a King's Rock trade evolution.
- Track Palkia under fixed legendary encounters.
- Exclude Platinum and remake encounter tables.
Create a special-local category for Poké Radar and swarm species
After receiving the National Pokédex, use a separate page for Pokémon requiring the Poké Radar, a daily swarm, or another special local condition. The Poké Radar's battery recharges after 50 steps. It creates shaking patches but does not guarantee that every patch contains the target species, so carry Super Repels and plan a chain rather than treating the hunt as an ordinary route encounter.
Examples for this category include Larvitar, Stantler, Bagon, Poochyena, Mightyena, Aron, Kecleon, and the Spheal line. Record each route and method from the original Diamond and Pearl encounter data. Larvitar and Stantler are associated with Route 207 Radar encounters, while Bagon is associated with the northern section of Route 210's Radar encounters.
Slowpoke also belongs here: in Pearl, use the Poké Radar on northern Route 205. Slowbro is not a second wild-entry requirement; evolve Slowpoke normally. Houndoom is likewise special-local rather than GBA dual-slot, appearing through Pearl's Poké Radar data on Routes 214 and 215. Breed a compatible Houndoom pairing, such as Houndoom with Ditto, when you need Houndour.
For swarms, check the daily television report or speak with Dawn or Lucas's sister in Sandgem Town to identify the current species and location. Swarms last for the current daily cycle. If a Pokémon is later traded to another save, retain its original method in your records.
- Create a separate Poké Radar and swarm page.
- Place Larvitar, Stantler, Bagon, Poochyena, Mightyena, Aron, Kecleon, and the Spheal line in the special-local section.
- Place Slowpoke under Pearl's Route 205 Poké Radar method.
- Place Houndoom under Pearl's Routes 214 and 215 Poké Radar methods.
- Record Houndour as a breeding result from Houndoom.
- Use Super Repels and recharge the Radar by walking.
- Check Sandgem Town's daily swarm report.
- Do not label special-condition Pokémon as ordinary route exclusives.
Separate GBA dual-slot encounters by cartridge
GBA dual-slot encounters require National Mode and a compatible Ruby, Sapphire, Emerald, FireRed, or LeafGreen cartridge in the Nintendo DS's Game Boy Advance slot before the Pearl title screen loads. This is separate from Pal Park migration. Inserting or removing the cartridge after the title screen has loaded does not change the active encounter table.
Record the cartridge beside every dual-slot species. Ruby provides examples such as Seedot, Nuzleaf, Mawile, Zangoose, and Solrock. Sapphire provides Lotad, Lombre, Sableye, Seviper, and Lunatone. FireRed provides Growlithe and Elekid, among others. LeafGreen provides species such as Weedle, Sandshrew, Vulpix, and Magby. Emerald provides examples such as Pineco, Gligar, Shuckle, Teddiursa, and Ursaring.
The location still matters. Examples include Seedot on selected routes and in Eterna Forest with Ruby inserted, Mawile on Iron Island with Ruby inserted, Growlithe on Routes 201 and 202 with FireRed inserted, and Elekid on southern Route 205 and at Valley Windworks with FireRed inserted.
Do not put Houndour, Houndoom, Slowpoke, Larvitar, Stantler, Spheal, Bagon, Poochyena, or Mightyena here. Their methods are breeding, Poké Radar, swarm, or other special-local data, not GBA dual-slot encounters.
- Unlock National Mode first.
- Insert the required GBA cartridge before loading Pearl's title screen.
- Write Ruby, Sapphire, FireRed, LeafGreen, or Emerald beside each dual-slot entry.
- Keep Growlithe and Elekid under FireRed dual-slot encounters.
- Keep Seedot, Mawile, Zangoose, and Solrock under Ruby dual-slot encounters.
- Keep Houndour and Houndoom out of this category.
- Do not confuse dual-slot wild encounters with Pal Park transfers.
Track fossils and trade evolutions independently
Cranidos and Shieldon come from fossil revivals, not wild encounters. Diamond is associated with the Skull Fossil and Cranidos, while Pearl is associated with the Armor Fossil and Shieldon. Fossils can be held by a Pokémon and traded before revival. Take the fossil to the Oreburgh Mining Museum, where the scientist revives it into a level 20 Pokémon. Record Rampardos and Bastiodon as evolved fossil lines rather than wild species.
Keep trade evolutions on a separate page. Slowpoke holding a King's Rock becomes Slowking when traded. Scyther is the Diamond-source species, but Scizor is not a wild Diamond encounter; Scyther becomes Scizor when traded while holding a Metal Coat.
Other Generation IV trade evolutions include Kadabra to Alakazam, Machoke to Machamp, Graveler to Golem, Haunter to Gengar, Onix with Metal Coat to Steelix, Rhydon with Protector to Rhyperior, Electabuzz with Electirizer to Electivire, Magmar with Magmarizer to Magmortar, Dusclops with Reaper Cloth to Dusknoir, Seadra with Dragon Scale to Kingdra, Poliwhirl with King's Rock to Politoed, Clamperl with DeepSeaTooth or DeepSeaScale to Huntail or Gorebyss, Porygon with Upgrade to Porygon2, and Porygon2 with Dubious Disc to Porygon-Z.
Before using the Union Room, verify the held item and agree whether the trade is permanent or a tradeback. The held evolution item is consumed. Trading the evolved Pokémon back preserves that individual's nickname, Original Trainer, and history.
- Record Cranidos and Shieldon under fossil revivals.
- Record Skull Fossil as Diamond-associated and Armor Fossil as Pearl-associated.
- Revive fossils at the Oreburgh Mining Museum.
- Record Slowking as a King's Rock trade evolution.
- Record Scyther as the Diamond source species.
- Record Scizor as a Metal Coat trade evolution.
- Keep all other trade evolutions separate from version exclusives.
- Confirm held items before trading.
Keep breeding and Pal Park migration separate
Breeding is its own acquisition method. Use the Solaceon Town Day-Care when a baby Pokémon, pre-evolution, or egg move is required. For Pearl's Houndour line, obtain Houndoom through the Poké Radar, then breed Houndoom with Ditto or another compatible partner to produce Houndour. Do not record Houndour as an ordinary route encounter or a GBA dual-slot species.
Pal Park is at the eastern end of Route 221 and becomes available after National Mode is unlocked. Place a compatible Generation III game in the DS's second slot, load Pearl, and choose the migration option from the title screen. The Generation III and Pearl games normally must use the same language.
Each migration transfers exactly six Pokémon. Pokémon knowing a move that is an HM in the origin game cannot be selected. After confirmation, enter the Pal Park Catching Show and catch all six with the supplied Park Balls. The migration is permanent through normal play.
In Diamond, Pearl, and Platinum, a specific Generation III save file can send one group of six per 24-hour period. All six Pokémon from that migration must be caught before another migration can proceed from that save. Changing the DS clock or using another Nintendo DS can impose another delay, so keep a written record of migration batches and avoid moving irreplaceable Pokémon until the receiving save and language requirements are confirmed.
- Maintain a separate breeding list.
- Breed Houndour from a Pearl-obtained Houndoom when needed.
- Unlock National Mode before using Pal Park.
- Prepare exactly six eligible Pokémon per migration.
- Remove origin-game HM moves before migration.
- Catch all six Pokémon in the Catching Show.
- Treat Pal Park transfers as permanent.
- Keep migration batches and source saves documented.
- Use local wireless trading rather than the discontinued original GTS.
Finish fixed, roaming, event, and external entries last
Create separate pages for fixed encounters, roaming Pokémon, events, and external-game requirements. Palkia at Spear Pillar and Heatran after the Stark Mountain sequence are fixed encounters. Cresselia becomes a roaming Pokémon after its Fullmoon Island event. Save before every fixed legendary encounter, and begin a roaming event only after preparing a status move, a weakening strategy, and the Pokétch marking map.
Spiritomb belongs under the Hallowed Tower and Underground requirement. It is not a normal route encounter and cannot be obtained simply by trading between Diamond and Pearl. Record the Underground interactions and Hallowed Tower activation separately.
Event-limited Mythical Pokémon and gifts from other games need their own entries. Mark whether the historical method was an event distribution, Pokémon Ranger transfer, gift, trade, or another external title. Do not promise that a discontinued Nintendo DS event is currently available without present-day verification.
The original Diamond and Pearl generation contains 493 National Pokédex species, but a Diamond-to-Pearl trade alone cannot supply every entry. It cannot replace a required GBA cartridge, Pal Park migration, fossil source, breeding parent, Poké Radar or swarm condition, fixed encounter, roaming event, or historical distribution. Nintendo's original Wi-Fi Connection and Global Trade Station functionality for Nintendo DS software was discontinued on May 20, 2014, so use local wireless trading or other currently available methods instead.
- Separate fixed encounters from roaming encounters.
- Save before Heatran and before beginning Cresselia's roaming sequence.
- Track Spiritomb under Hallowed Tower and Underground requirements.
- Record event and external-game requirements separately.
- Do not promise current access to discontinued events.
- Do not treat ordinary trading as a substitute for GBA dual-slot, Pal Park, Radar, swarm, fossil, breeding, fixed, roaming, or event methods.
- Exclude original Nintendo Wi-Fi Connection and GTS from the current completion plan.
Before you move on
- The Hall of Fame record exists.
- Sinnoh Pokédex entries 001 through 150 are marked seen.
- Palkia was seen at Spear Pillar.
- Dialga was registered from the Celestic Town book.
- Professor Oak upgraded the Pokédex to National Mode.
- Professor Rowan supplied the Poké Radar.
- Ordinary Pearl encounters and Diamond-source encounters are listed separately.
- Slowpoke is categorized as a Pearl Poké Radar encounter on northern Route 205.
- Slowbro is recorded with the Slowpoke evolution line.
- Slowking is recorded as a King's Rock trade evolution.
- Houndoom is categorized as a Pearl Poké Radar species on Routes 214 and 215.
- Houndour is categorized as a breeding result from Houndoom.
- Larvitar, Stantler, Bagon, Poochyena, Mightyena, Aron, Kecleon, and Spheal-family entries are categorized under Radar, swarm, or another verified special-local method.
- GBA dual-slot entries identify Ruby, Sapphire, FireRed, LeafGreen, or Emerald as required.
- Scyther is recorded as the Diamond source species, while Scizor is recorded as a Metal Coat trade evolution.
- Cranidos and Shieldon are recorded as fossil revivals rather than wild encounters.
- Breeding results, Pal Park imports, fixed encounters, roaming Pokémon, and event-limited entries each have separate categories.
- Pal Park language compatibility, HM restrictions, six-Pokémon batches, Catching Show completion, and the 24-hour migration limit are recorded.
- The discontinued Nintendo Wi-Fi Connection and original GTS are excluded from the current completion plan.
- No Brilliant Diamond, Shining Pearl, or Platinum-only method has been used.
References for this chapter
Wrap-up: Verifying Campaign Completion and Save Hygiene
In the original North American Nintendo DS release of Pokémon Pearl Version, the main campaign is complete when the player resolves the required Spear Pillar events, defeats the Elite Four and Champion Cynthia, registers the winning party in the Hall of Fame, watches the ending sequence and credits, and regains control in Twinleaf Town. Capturing Palkia is optional, but the Palkia encounter and its story resolution at Spear Pillar are part of the required campaign sequence. The Hall of Fame entry is the decisive completion record. The eight Sinnoh Badges, the Elite Four victory date on the Trainer Card, and the post-credits save provide additional checks. National Pokédex work, the Battle Zone, Battle Tower, Pal Park, legendary captures, trades, and collection goals are optional postgame objectives.
1. Finish the required story sequence and Hall of Fame registration
Before treating the file as complete, confirm that you resolved the Spear Pillar climax in Pearl. After Team Galactic’s summit events, you must reach the Palkia encounter and complete the battle sequence so the story can proceed. You do not have to capture Palkia to finish the campaign; defeating it or otherwise resolving the encounter is sufficient for story progress. Do not describe the entire Palkia sequence as optional, because the summit events lead directly into the ending route.
Continue through the Pokémon League and defeat the Elite Four in order, then defeat Champion Cynthia. When the game begins recording your team in the Hall of Fame, let the registration finish. Continue through the ending sequence and credits without powering down. Original Diamond and Pearl return control to the player in Twinleaf Town after the credits.
When you regain control at home, open the menu and choose SAVE. Saving is available from the overworld but not during a battle or Contest. Wait for the save process to finish before turning off the Nintendo DS or removing the Game Card. The instruction booklet states that CONTINUE appears on the title screen after the first save and warns against switching off while the game is saving.
- The Spear Pillar Palkia encounter and story resolution are complete.
- Elite Four members are defeated in sequence.
- Champion Cynthia is defeated.
- The winning party is registered in the Hall of Fame.
- The ending sequence and credits finish.
- Control returns to Twinleaf Town.
- A normal overworld save is completed after returning home.
2. Verify the Hall of Fame record, victory date, and badges
Open the Trainer Card and inspect both sides. In Generation IV, the card records the date and time associated with the Elite Four victory. Entering the Hall of Fame also places a star on the Trainer Card and changes its color. These are useful confirmation markers, but the Hall of Fame registration itself remains the strongest proof that the League was cleared.
Open the separate Badge Case from the Trainer Case and inspect the badge display. In Pokémon Pearl, the badges are displayed separately from the Trainer Card and can be polished with the stylus. Confirm that all eight Sinnoh Badges are present: Coal, Forest, Cobble, Fen, Relic, Mine, Icicle, and Beacon. Badge polishing is optional and has no bearing on campaign completion.
Use the Trainer name, Trainer ID, character, play time, money, Pokédex totals, and current party as identity checks. They help confirm that you are viewing the intended save, but they do not replace the Hall of Fame record. The Trainer Card’s badge information and the Badge Case should not be treated as two different sets of badges; the Badge Case is the separate display used by the original Nintendo DS interface.
- The Trainer Card shows the Elite Four victory date.
- The Trainer Card has the expected Hall of Fame star or color change.
- The separate Badge Case displays all eight Sinnoh Badges.
- The Trainer name and character match the completed run.
- The party, play time, and Trainer ID match the file being preserved.
3. Confirm the post-credits state without confusing it with completion requirements
After saving in Twinleaf Town, walk through the town and visit Sandgem Town if you want a practical post-credits check. The Sinnoh map, Pokémon Centers, routes, Professor Rowan’s laboratory, and ordinary facilities remain available. This confirms that the file has returned from the ending sequence and is ready for postgame play.
There is no need to complete the National Pokédex to validate the campaign. In original Pearl, National Mode is an optional upgrade obtained after all 150 required Sinnoh Pokédex species have been registered as seen and the player speaks with Professor Rowan. Capturing every one is not required for that upgrade. Manaphy is not required for the 150-entry Sinnoh completion check.
For Pearl’s missing version mascot entry, visit Cynthia’s grandmother in Celestic Town after the relevant story progress. The book in her home can register Palkia as seen without requiring the player to capture it. This is a Pokédex task, not an additional condition for Hall of Fame completion. If Palkia was already encountered at Spear Pillar, the entry may already be recorded.
- The player can move normally after the credits.
- Twinleaf Town and Sandgem Town are accessible.
- Professor Rowan’s laboratory remains accessible.
- National Mode is treated as a separate optional objective.
- Palkia’s Pokédex entry is checked separately from the required Spear Pillar story resolution.
- Manaphy is not incorrectly treated as one of the 150 required Sinnoh entries.
4. Record and preserve the completed save
Write down the Trainer name, Trainer ID, completion date, approximate play time, Hall of Fame party, and the status of important encounters. Include whether Palkia was captured, defeated, or left for a later encounter, along with the status of other fixed or roaming Pokémon such as Giratina and Cresselia. This record helps identify the file after later trading, training, or postgame captures change the party and Pokédex totals.
Save in a safe overworld location, return to the title screen, and verify that CONTINUE is displayed. Select CONTINUE and confirm the Trainer name and starting location after loading. This simple check helps catch accidental use of a different Game Card, emulator save, or hardware save before postgame work begins.
Pokémon Pearl has one ordinary campaign save file. The official booklet explains that selecting NEW GAME while a save exists will not preserve the old file. To delete the existing save, go to the title screen and simultaneously press Up on the Control Pad, SELECT, and the B Button. The deletion removes the saved Pokémon and items and cannot be restored. Do not test this combination on a file you intend to keep.
If you want an archive, use only a legitimate hardware or preservation method that you understand and that is appropriate for your equipment. The game itself does not provide a second normal save slot.
- The Trainer name, Trainer ID, completion date, and Hall of Fame party are recorded.
- The title screen displays CONTINUE.
- The file loads at the expected post-credits location.
- The Trainer name is checked again after loading.
- The completed file is preserved before starting a new game or deleting anything.
5. Separate original Pearl postgame goals from the campaign ending
After Hall of Fame entry, travel to Snowpoint City and board the S.S. Sinnoh to reach the Battle Zone. In original Pearl, the Fight Area leads to the Battle Park, where the Battle Tower is located. This is not Platinum’s Battle Frontier and does not replace the Hall of Fame as the campaign completion record.
Optional postgame objectives include completing the National Pokédex, using the Poké Radar, visiting Pal Park when compatible hardware and cartridges are available, catching Giratina, Cresselia, Heatran, and other legendary Pokémon, exploring Turnback Cave, completing trades, and building Battle Tower streaks. Check the prerequisite for each objective before traveling, because some require National Mode, a particular event, an item, or another compatible game.
Do not import Brilliant Diamond and Shining Pearl’s daily Gym Leader rematches into the Nintendo DS release. Original Diamond and Pearl do not provide the later remake-style Gym Leader rematch system. You can replay the Pokémon League and challenge the Battle Tower, but those are optional records after the first Hall of Fame entry. The original game’s Vs. Seeker and other trainer-rematch options should not be confused with Gym Leader rematches.
- The Battle Zone is reached after Hall of Fame entry.
- The Fight Area, Battle Park, and Battle Tower are identified as original Pearl locations.
- The Battle Tower is not called the Battle Frontier.
- National Pokédex and legendary goals are tracked separately.
- No Brilliant Diamond and Shining Pearl Gym Leader rematch feature is expected.
6. Continue the completed file or begin a new challenge deliberately
For normal continuation, keep the completed save and use it for National Pokédex work, Battle Zone exploration, Battle Tower attempts, trades, legendary encounters, and repeat Pokémon League runs. Later changes to the party, inventory, location, or Pokédex do not remove the original Hall of Fame record.
For a Nuzlocke-style replay, write the rules before restarting. Decide in advance how gift Pokémon, eggs, fishing locations, static encounters, trades, duplicate encounters, and fainted Pokémon will be handled. These rules govern the new run and do not alter the completed file’s Hall of Fame status.
Restart only after confirming that the completed file is no longer needed. Record the Trainer details and important captures first, then make a deliberate decision about deletion. Because the original Pearl deletion command is permanent, do not press Up, SELECT, and B together at the title screen unless you are certain that the save can be discarded.
- The completed save is preserved before any restart.
- Challenge rules are written before beginning a replay.
- Postgame progress is recorded separately from replay progress.
- The irreversible deletion command is used only after a deliberate decision.
Before you move on
- The required Spear Pillar Palkia encounter and story resolution are complete.
- Champion Cynthia is defeated.
- The winning party is registered in the Hall of Fame.
- The credits finish and control returns to Twinleaf Town.
- The Trainer Card shows the Elite Four victory date and expected Hall of Fame star or color change.
- The separate Badge Case displays all eight Sinnoh Badges: Coal, Forest, Cobble, Fen, Relic, Mine, Icicle, and Beacon.
- The title screen shows CONTINUE after a normal postgame save.
- The Trainer name, Trainer ID, completion date, Hall of Fame party, and important encounter statuses are recorded before any restart or deletion.
- Professor Rowan’s laboratory remains accessible, while National Pokédex progress is checked separately as an optional postgame objective.
- The player understands that original Pearl offers the Battle Tower and repeat League clears, but not the later Gym Leader rematch system.
References for this chapter
- Pokémon Pearl Version — Nintendo DS Instruction Booklet
- Pokémon Diamond and Pearl — Hall of Fame
- Pokémon Diamond and Pearl — Trainer Card and Badge Case
- Pokémon Diamond and Pearl Walkthrough — Original Nintendo DS Edition
- Pokémon Diamond and Pearl Walkthrough — National Pokédex Completion
- Pokémon Diamond and Pearl Walkthrough — Battle Zone and Battle Tower
- Pokémon Diamond and Pearl — Trainer Rematches
- Pokémon Diamond and Pearl — Gym Leader Rematches
Finishing up
The separate Badge Case shows all eight Sinnoh Gym Badges, and the player can enter the Pokémon League.
The Elite Four and Champion Cynthia have been defeated, the winning party has been registered in the Hall of Fame, the credits have finished, and control has returned to Twinleaf Town.
The Team Galactic main-story sequence is complete, including the Veilstone Headquarters events, the Mt. Coronet ascent, the Spear Pillar battles, Cyrus’s defeat, and the required resolution of the Palkia summit event. Capturing Palkia is optional for campaign completion.
The lake guardians, National Pokédex upgrade, Battle Zone, Heatran, and other postgame objectives are optional unless separately chosen as collection goals.
The completed save has been healed, saved after returning from the Hall of Fame, and preserved before beginning optional postgame activities.
Choose your next gameScreenshots & video
Game imagery for reference. Follow the written chapters above for the route and strategies.
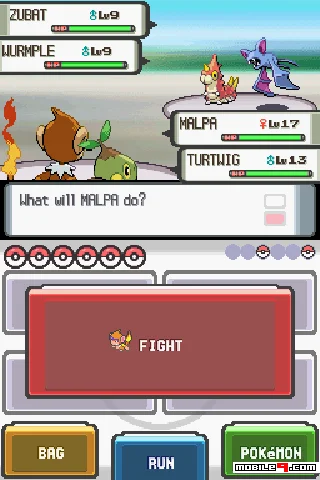
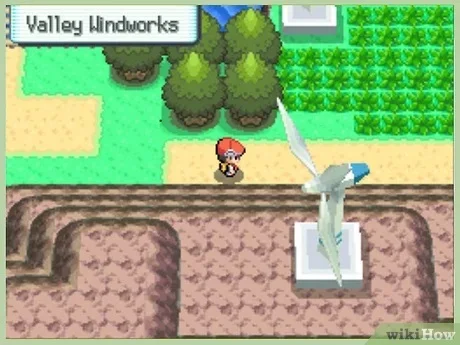
Sources & references
Our original guide draws on the references below. Check the edition at the top of this page before following controls or unlock requirements.
- Pokémon Diamond and Pearl — Walkthrough: Jubilife City, Pokétch Company, Route 203, Oreburgh Gate — Bulbapedia
- Pokémon Diamond and Pearl — Lake Verity — StrategyWiki
- Pokémon Diamond and Pearl — Route 203 — StrategyWiki
- Pokémon Pearl Version — Guide and Walkthrough
- Pokémon Pearl Version — Guide and Walkthrough — Marriland/GameFAQs
- Nintendo of America Pokémon Pearl Version Instruction Booklet
- Pokémon Diamond and Pearl Instruction Booklet — Nintendo
- Oreburgh Gym — Bulbapedia
- Walkthrough: Pokémon Diamond and Pearl/Part 4 — Bulbapedia
- Pokéarth: Oreburgh Mine — Serebii.net
- Pokémon Pearl Version Guide and Walkthrough — GameFAQs
- Pokémon Diamond and Pearl Walkthrough: Floaroma Town, Floaroma Meadow, Valley Windworks, and Eterna Forest — PokeDream
- Eterna Gym — Bulbapedia
- Eterna Forest — Bulbapedia
- Misdreavus — Bulbapedia
- Pokémon Diamond and Pearl Eterna City Guide — StrategyWiki
- Walkthrough: Pokémon Diamond and Pearl/Part 7
- Walkthrough: Pokémon Diamond and Pearl/Part 10 — Bulbapedia
- Walkthrough: Pokémon Diamond and Pearl/Part 17
- Veilstone Department Store
- Veilstone Gym — Bulbapedia
- Pokémon Diamond and Pearl — Veilstone City — StrategyWiki
- Walkthrough: Pokémon Diamond and Pearl/Part 12 — Bulbapedia
- Pokemon Pearl Version - Guide and Walkthrough - DS - By 257Loner
- Pokémon Diamond and Pearl Walkthrough - Azurilland Wiki archive
- Walkthrough: Pokémon Diamond and Pearl/Part 8 — Bulbapedia
- Walkthrough: Pokémon Diamond and Pearl/Part 13 — Bulbapedia
- Fantina — Bulbapedia
- TM065 — Bulbapedia
- Serebii.net Pokédex Trainer Pokémon — Mismagius
- Pokémon Diamond and Pearl — Gyms & Gym Leaders — Serebii.net
- Pokémon Diamond and Pearl/Celestic Town — StrategyWiki
- Pokémon Pearl Version — Nintendo DS Instruction Booklet
- Walkthrough: Pokémon Diamond and Pearl/Part 14 — Bulbapedia
- Pokémon Diamond/Pearl — Gyms and Gym Leaders
- Pokémon Diamond and Pearl/Route 218 — StrategyWiki
- Pokémon Diamond and Pearl Walkthrough — PokeDream
- Walkthrough: Pokémon Diamond and Pearl/Part 15
- Walkthrough: Pokémon Diamond and Pearl/Part 16
- Pokémon Diamond and Pearl/Route 217
- Walkthrough: Pokémon Diamond and Pearl/Part 18
- Team Galactic HQ - original Diamond and Pearl access and story sequence
- Pokéarth - Sinnoh - Mt. Coronet
- Pokéarth - Sinnoh - Spear Pillar
- Spear Pillar — Bulbapedia
- Walkthrough: Pokémon Diamond and Pearl/Part 19 — Bulbapedia
- Pokémon Diamond and Pearl/Route 222 — StrategyWiki
- Volkner — Bulbapedia
- Pokémon Sunyshore Gym Map — Pokémon Database
- Pokémon Diamond and Pearl Version Instruction Manual
- Walkthrough: Pokémon Diamond and Pearl/Part 20 — Bulbapedia
- Pokémon Diamond and Pearl/Victory Road — StrategyWiki
- Pokémon Diamond Version Guide and Walkthrough — GameFAQs
- Pokémon Diamond/Pearl Item List — Serebii.net
- Pokémon Diamond and Pearl/Route 223 — StrategyWiki
- Walkthrough: Pokémon Diamond and Pearl/Part 21 — Bulbapedia
- Pokémon League (Sinnoh)
- Pokémon Pearl Version — Elite 4 FAQ
- Pokémon Diamond/Pearl — The Elite Four — Serebii.net
- Walkthrough: Pokémon Diamond and Pearl, Part 25
- Pokémon Diamond and Pearl — Stark Mountain
- Stark Mountain
- Pokémon Diamond and Pearl Walkthrough — National Pokédex Completion
- National Pokédex
- Fullmoon Island
- Roaming Pokémon
- Poké Radar
- Slowpoke
- Houndoom
- Dual-slot mode
- Pal Park migration mechanics
- Pokémon Diamond and Pearl Versions
- Trade Evolution
- Fossil Pokémon
- National Pokédex
- Celestic Town
- Service Discontinuation: Nintendo Wi-Fi Connection Service
- Pokémon Diamond and Pearl — Hall of Fame
- Pokémon Diamond and Pearl — Trainer Card and Badge Case
- Pokémon Diamond and Pearl Walkthrough — Original Nintendo DS Edition
- Pokémon Diamond and Pearl Walkthrough — Battle Zone and Battle Tower
- Pokémon Diamond and Pearl — Trainer Rematches
- Pokémon Diamond and Pearl — Gym Leader Rematches
About the game & collecting notes
- Platform
- Nintendo DS
Complete this project in clearly separated categories. First finish the Sinnoh Pokédex and unlock National Mode. Then distinguish ordinary local Diamond/Pearl encounters from Poké Radar species, swarm species, Trophy Garden and Great Marsh encounters, trade evolutions, fossils, breeding results, GBA dual-slot encounters, Pal Park transfers, fixed or roaming legendaries, and event-limited species. Do not list Larvitar, Stantler, Bagon, Spheal, Slowpoke, or comparable special-condition species as ordinary route exclusives, and do not treat GBA dual-slot species such as Growlithe or Elekid as obtainable through a normal Pearl encounter or an ordinary Diamond-to-Pearl trade. Houndour and Houndoom must remain in their verified special-local and breeding categories, not the GBA dual-slot category.
Darryl Polo
Darryl Polo loves tinkering with emulation and revisiting retro games. He enjoys exploring how old favorites play on different setups and sharing what he learns along the way. At Joking Joystick, he writes about the games, hardware, and small discoveries that keep the hobby fun.
Our editorial standardsFound a step that needs another look? Help us improve this guide.