
Pokémon LeafGreen Version — Complete Walkthrough (Game Boy Advance, North America)
Step-by-step walkthrough to finish Pokémon LeafGreen's Kanto campaign on the Game Boy Advance: pick a starter, get all eight Gym badges, clear Victory Road, beat the Elite Four and Champion, and tackle the Sevii Islands postgame including Cerulean Cave. Includes route objectives, boss tactics, HM/TM guidance, and a postgame completion checklist.

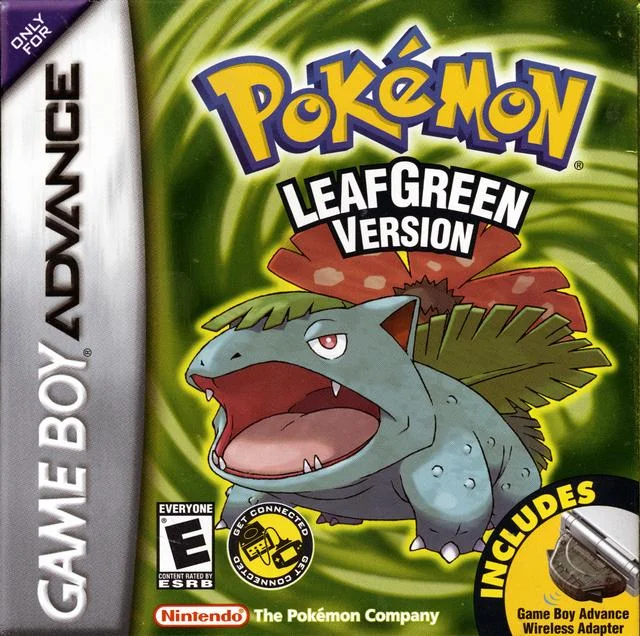
Find a copy
Pokémon LeafGreen Version Game Boy Advance
We may earn a commission if you buy through these links, at no extra cost to you. As an Amazon Associate I earn from qualifying purchases.
Opens retailer search results. Check the model, edition, seller, availability and current price before buying.
Before you begin
You are starting Pokémon LeafGreen on the Game Boy Advance.
This guide walks you from Pallet Town through every required objective to finish the primary Kanto story: collect eight Gym badges, clear Victory Road, defeat the Elite Four and Champion, and access the major postgame content that follows the credits.
Expect routing advice, which Pokémon to prioritise early, how to approach each Gym and major trainer fight, and how to recover from setbacks without excessive grinding.
Follow the chapters in order for a smooth run.
Optional sections show how to unlock the Sevii Islands postgame, visit Cerulean Cave for Mewtwo, and work toward Pokédex/National objectives.
Where necessary the guide flags version-exclusive Pokémon and trade requirements; it assumes you are playing LeafGreen (the Kanto campaign is shared with FireRed but some species are version-exclusive).
Set yourself up for the run
Hardware and saves: play on a working Game Boy Advance or compatible system and save often (use in-game Save from the menu before major battles).
Starter choice: Bulbasaur favors a gentler early route through Rock and Water trainers; Charmander gives a harder early game but scales well into late game; Squirtle provides strong neutral performance.
Choose a starter that suits how you want to play—no starter locks completion.
Build an early core: capture a reliable lead for the first Gyms and add coverage for Rock, Water, and Electric matchups as the route opens.
Prioritise a mixed team that covers Rock, Water and Electric weaknesses with at least one solid attacker, one special attacker, and one status or support-capable Pokémon.
HMs and progression: Surf is required for mid- and late-game travel and access. Fly is optional but highly useful for fast travel after it becomes available.
Obtain Cut, Surf and Strength at the points noted in the walkthrough; do not waste HM slots early—plan which team member will carry each HM.
Items and money: early-game purchases should prioritise Potions and Repels only as needed.
Save for vital TMs and the Bicycle if you plan faster routing.
Key held items and rare TMs will be covered where they appear.
Trading and version exclusives: some Pokémon required for the complete Pokédex and a few evolutions depend on version or trading.
If you want the National Pokédex or to fill the regional dex, plan trades with FireRed or another compatible copy.
Basic mechanics reminders: battle mechanics in LeafGreen use Generation III rules, including natures, EVs, and separate Special Attack and Special Defense stats.
You can complete the main campaign without deep knowledge of EV or IV minutiae; the guide mentions these only for optional postgame optimisation.
Save before single-encounter captures and other irreversible choices; reload the pre-battle save after a failed attempt when you want the safest retry.
Pallet Town and the First Steps: Choosing a Starter and Early Route Objectives
Begin in Pallet Town, choose a level 5 starter, deliver Oak’s Parcel from Viridian City, receive the Pokédex and Poké Balls, then build a small team on Routes 1 and 22. The optional Route 22 rival battle is available after the Parcel sequence and remains available until you trigger the rival battle in Cerulean City.
1. Take the Potion and choose your starter
After naming yourself and your rival, check the PC in your bedroom and withdraw the Potion. Leave the house and walk toward the tall grass on the north side of Pallet Town. Professor Oak will stop you before you can enter the grass and take you to his laboratory.
At Oak’s Laboratory, choose Bulbasaur, Charmander, or Squirtle from the three Poké Balls on the table. Bulbasaur gives the smoothest opening because its Grass typing is effective against Brock’s Rock- and Ground-type Pokémon and later helps against Misty’s Water-types. Squirtle also has a comfortable early game and remains useful throughout the campaign. Charmander has the most difficult start because it lacks a type advantage against Brock, so plan to catch a teammate with Fighting, Water, or Grass coverage before reaching Pewter City.
Your rival immediately chooses the starter with a type advantage over yours and challenges you to a level 5 battle. Both Pokémon mainly use basic Normal-type attacks at this point. Attack normally, use the Potion if necessary, and remember that losing this battle does not end the game.
- Withdraw the Potion from the PC.
- Choose Bulbasaur, Charmander, or Squirtle.
- Complete the level 5 rival battle or continue after a loss.
2. Cross Route 1 and collect Oak’s Parcel
Leave the laboratory and travel north through Route 1. Before you receive Poké Balls, wild Pokémon cannot be caught, but battling a few encounters gives useful experience. Route 1 contains Pidgey and Rattata at low levels. Fight enough wild Pokémon to keep your starter healthy and gaining levels, but do not repeatedly grind the grass for a large advantage.
Pidgey is a useful early Flying-type for ordinary trainers, while Rattata offers strong early Normal-type damage and can serve as a temporary team member. Neither is required. Continue north until you reach Viridian City, then heal at the Pokémon Center.
The Poké Mart is near the Pokémon Center. Speak to the clerk to receive Oak’s Parcel. Return south through Route 1 to Pallet Town and deliver it to Professor Oak. The old man at Viridian City’s northern exit will not let you proceed toward Route 2 until this Parcel sequence has been completed.
- Battle a few Route 1 wild Pokémon without excessive grinding.
- Reach Viridian City and heal.
- Receive Oak’s Parcel from the Poké Mart clerk.
- Return to Pallet Town and deliver the Parcel to Professor Oak.
3. Receive the Pokédex, Poké Balls, and Town Map
After you deliver the Parcel, Professor Oak gives you and your rival a Pokédex. He also gives you five Poké Balls, which is the first point at which you can catch wild Pokémon.
Before leaving Pallet Town, visit your rival’s house and speak with Daisy. She gives you the Town Map after the Pokédex sequence. The map is optional but useful for checking route connections.
Return to Viridian City and heal. Buy a modest supply of Poké Balls, several Potions, and a few Antidotes. Avoid spending heavily on early TMs or large item stockpiles; route trainers will provide more money, and later shops offer more useful purchases.
- Deliver Oak’s Parcel.
- Receive the Pokédex and five Poké Balls.
- Collect the Town Map from Daisy if desired.
- Restock modestly in Viridian City.
4. Catch early teammates on Routes 1 and 22
When you first head from Viridian City toward Route 2 after delivering the Parcel, the old man demonstrates how to catch a Pokémon and gives you the Teachy TV afterward. This demonstration does not consume your Poké Balls or change your party.
You can now catch Pokémon on Route 1. Add Pidgey or Rattata if you want a second team member, but a starter plus one or two developing teammates is enough for the next areas. Avoid filling the party with Pokémon you do not intend to train.
Route 22 is west of Viridian City. In LeafGreen, its wild grass contains Rattata, Mankey, and Spearow. Mankey is especially valuable for a Charmander run because its Fighting attacks provide a direct answer to Brock’s Rock-types. Spearow has stronger immediate Flying attacks than Pidgey, while Rattata is a practical temporary attacker.
After catching a teammate, return to Viridian City whenever several Pokémon are weakened. Route 22 is close enough to the Pokémon Center that there is no reason to spend many healing items during early training.
- Complete the Viridian catching demonstration.
- Catch only teammates you intend to develop.
- Check Route 22 for Mankey or Spearow if they suit your party.
- Heal in Viridian City before optional battles or the trip north.
5. Fight the optional Route 22 rival before Cerulean City
The optional rival battle is near the first grass patch on Route 22, just west of Viridian City. In LeafGreen, the rival uses a level 9 Pidgey and a level 9 starter with a type advantage over yours. Heal before approaching and bring at least one backup Pokémon so Sand-Attack or an unfavorable matchup does not end the attempt.
Use your starter’s strongest reliable attack against the opposing starter. Spearow can pressure Pidgey, and Mankey is useful against the rival’s early Normal-oriented team. If Pidgey lowers your accuracy, switch to another attacker rather than wasting several turns with a weakened lead.
The timing matters in the Game Boy Advance release: this optional Route 22 battle becomes unavailable when you battle the rival in Cerulean City, regardless of whether you win or lose that later battle. It does not disappear merely because you earned the Boulder Badge; you can defeat Brock first, return to Viridian, and still fight the Route 22 rival before triggering the Cerulean encounter.
You may postpone the battle, but if you want its experience and money, complete it before crossing Nugget Bridge and starting the Cerulean City rival battle. Once finished, heal in Viridian City and proceed north through Route 2 toward Viridian Forest.
- Heal before entering the Route 22 rival battle.
- Defeat the level 9 Pidgey and level 9 starter, or deliberately postpone the fight.
- Remember that the battle disappears after the Cerulean rival battle, not after earning the Boulder Badge.
- Leave Viridian with a healthy starter and at least one practical backup.
- Continue north to Route 2 and Viridian Forest.
Before you move on
- Professor Oak has received Oak’s Parcel and has given you the Pokédex and five Poké Balls.
- The Town Map has been collected from Daisy if you chose to obtain it.
- The Viridian City catching demonstration has been completed and the Teachy TV is available.
- Your party contains the starter and at least one optional teammate if your starter needs coverage.
- The Route 22 rival battle has been completed, or you have deliberately postponed it before triggering the Cerulean City rival battle.
- You are healed in Viridian City and ready to enter Route 2 and Viridian Forest.
References for this chapter
Pewter City, Mt. Moon and Brock (Gym 1)
Defeat Brock in Pewter City, cross Route 3 and Mt. Moon while dealing with Team Rocket, choose one fossil, and exit onto Route 4 toward Cerulean City.
Prepare in Pewter City and challenge Brock
Pewter City is reached after clearing Viridian Forest. Heal at the Pokémon Center, buy a few Potions and Antidotes if your supply is low, and visit the Gym before continuing east. Brock must be defeated before Route 3 opens, so Mt. Moon is not the next destination until you have earned the Boulder Badge.
The Pewter Gym contains one trainer before Brock. That trainer uses Diglett and Sandshrew, both Ground types, so Water- and Grass-type attacks are effective. You can battle this trainer for experience or walk around him, but heal before speaking to Brock.
- Heal in Pewter City.
- Carry a few Potions and Antidotes.
- Put a Water-, Grass-, or Fighting-capable Pokémon near the front of the party.
Use the best counter for Brock
In the North American Game Boy Advance release, Brock uses Geodude at level 12 and Onix at level 14. Both are Rock/Ground Pokémon, making them especially vulnerable to Water- and Grass-type attacks. Fighting-type moves are also effective, although they are usually less convenient to obtain this early.
Bulbasaur has the easiest matchup because Grass attacks exploit both of Brock’s types. Squirtle can use Water Gun for reliable super-effective damage. Charmander should not be sent into the Gym alone: support it with a Mankey, Nidoran that knows a suitable Fighting move, or another Pokémon with Water or Grass coverage. Charmander’s Metal Claw can help, but it does not replace a proper counter.
Onix may use Rock Tomb, which damages the target and lowers its Speed. If your lead takes heavy damage or loses the Speed advantage, switch to a healthier counter rather than trying to win with repeated weak attacks. Potions are appropriate if a critical hit leaves your main counter in danger.
- Defeat Geodude before Onix.
- Use Water, Grass, or Fighting attacks whenever available.
- Switch or heal if Rock Tomb places your lead in danger.
Claim the Boulder Badge and TM39
After Brock is defeated, you receive the Boulder Badge and TM39, Rock Tomb. The badge allows Flash to be used outside battle later in the game; it does not need to be used for the immediate trip through Mt. Moon. Save after the battle and heal before leaving Pewter City.
Head east from Pewter City onto Route 3. This route contains several trainers and is the natural place to bring weaker party members into battle for experience. Keep a few Poké Balls available if you want to catch a Route 3 Pokémon such as Pidgey, Spearow, Nidoran, or Jigglypuff, but there is no need to delay the cave solely for optional encounters.
- The Boulder Badge is recorded in your case.
- TM39 Rock Tomb has been received.
- Your party is healed before Route 3.
Cross Route 3 and use the Pokémon Center
Follow Route 3 east through the trainer battles until you reach the Pokémon Center near Mt. Moon. This is the last convenient healing point before the cave. Heal here, restock Poké Balls and basic healing items if necessary, and consider depositing a temporary team member if your party is full.
Mt. Moon contains wild Zubat, Geodude, Paras, and Clefairy among other encounters. Geodude can provide useful early Ground-type coverage, while Paras can offer status support, but neither is required. Avoid unnecessary wild battles if several Pokémon are already low on HP; the cave has Team Rocket battles and a fossil-room battle still ahead.
- Battle Route 3 trainers for steady experience if needed.
- Heal at the Pokémon Center beside Mt. Moon.
- Enter the cave with enough Poké Balls and healing items.
Navigate Mt. Moon toward the fossil room
Enter Mt. Moon from Route 3 and follow the connected corridors and ladders toward the lower levels. When a passage ends, look for the next ladder rather than circling the same room. Pick up visible items when they are close to the route, but do not make a long detour if your team is already worn down.
Team Rocket members occupy the cave and use Pokémon such as Rattata, Zubat, and Sandshrew. Water- and Grass-type moves handle Sandshrew safely; do not leave an Electric-type in battle against a Ground-type opponent, because Ground Pokémon are immune to Electric attacks. Keep Antidotes ready for Poison damage from attacks such as Poison Sting or Smog.
- Use ladders to descend through the cave.
- Switch away from Electric Pokémon against Ground types.
- Use Potions between major battles instead of allowing key team members to faint.
Defeat Super Nerd Miguel and choose a fossil
Near the end of Mt. Moon, continue through the Team Rocket area until Super Nerd Miguel blocks the fossil chamber. He uses a level 12 Grimer, level 12 Voltorb, and level 12 Koffing. Ground-type attacks are useful against Voltorb and effective against the Poison types, while Psychic attacks are also effective against Grimer and Koffing if you have them. Avoid relying on Electric attacks against Voltorb, since Electric does not hit it super effectively.
After winning, choose one of the two fossils. The Dome Fossil is revived as Kabuto, while the Helix Fossil is revived as Omanyte. The choice has no effect on the main campaign, and the selected fossil cannot be revived until you reach the Pokémon Lab on Cinnabar Island much later. You cannot take both fossils during this visit, so choose according to your preferred Pokémon or Pokédex goals.
- Miguel’s Grimer, Voltorb, and Koffing are defeated.
- Choose either the Dome Fossil or the Helix Fossil.
- Do not expect the fossil Pokémon immediately.
Exit Mt. Moon onto Route 4
After taking the fossil, follow the remaining corridor and climb the final ladder toward the eastern exit. Pick up nearby items if your party is healthy, then leave Mt. Moon onto Route 4. The Route 4 Pokémon Center is on the western side near the cave entrance; use it before continuing if your team needs healing.
Continue east along Route 4 toward Cerulean City. The next major objectives are Nugget Bridge, the rival battle, Bill’s house on Route 25, and Misty’s Water-type Gym. Because Fire-type attacks will be less useful against Misty, begin planning for Electric- or Grass-type coverage now.
- The selected fossil is in your Bag.
- You have exited Mt. Moon onto Route 4.
- You are healed and ready to continue toward Cerulean City.
Before you move on
- Brock’s level 12 Geodude and level 14 Onix have been defeated.
- The Boulder Badge and TM39 Rock Tomb have been received.
- Route 3 is open east of Pewter City.
- One fossil has been selected after defeating Super Nerd Miguel.
- You have exited Mt. Moon onto Route 4 and can continue toward Cerulean City.
Cerulean City, Nugget Bridge and Misty (Gym 2)
Reach Cerulean City, cross Nugget Bridge, defeat the rival and the Team Rocket Grunt, travel along Routes 24 and 25 to help Bill, then return to challenge Misty. Grass- and Electric-type attacks are the most dependable answers to her Water Pokémon.
Enter Cerulean City and prepare for the northern routes
From Route 4, enter Cerulean City and heal at the Pokémon Center near the western entrance. Check your team before heading north, and buy a few Potions, Antidotes, and Poké Balls if your supplies are low. The northern route contains several consecutive trainer battles, so do not begin with a heavily damaged lead Pokémon.
Bulbasaur or Ivysaur is already well suited to this chapter. If you chose Charmander or Squirtle, obtain another answer before Misty if your team lacks Grass- or Electric-type attacks. Pikachu from Viridian Forest is useful against both of Misty’s Pokémon. Bellsprout is available on Routes 24 and 25 in LeafGreen and provides Grass coverage. Oddish is the corresponding encounter in FireRed, not LeafGreen.
You can challenge Misty immediately, but clearing the northern routes first gives useful experience and money. It also lets you complete Bill’s event and obtain the S.S. Ticket before moving on with the story.
- Heal at the Cerulean City Pokémon Center.
- Carry basic healing and status-curing items.
- Prepare at least one reliable Grass- or Electric-type attack.
Cross Nugget Bridge and defeat the rival
Leave Cerulean City through the north exit and enter Route 24, whose long bridge is known as Nugget Bridge. Your rival waits on the bridge. In LeafGreen, his team includes Pidgeotto, Abra, Rattata, and the unevolved starter Pokémon with a type advantage over your chosen starter. His Pokémon are in the mid-to-high teens, with the starter at level 18.
Defeat Pidgeotto with a dependable Electric-, Rock-, or neutral attack, and do not allow it to wear down the Pokémon you intend to use against Misty. Abra is weak offensively because it normally knows only Teleport. In a trainer battle, Teleport does not end the fight; it simply wastes Abra’s turn. Defeat it with a reliable physical or neutral attack, or use the free turn to heal or switch. Rattata is usually manageable with a strong neutral attack.
Continue across the bridge and defeat all five Nugget Bridge trainers. Their teams include low-level Bug, Flying, Grass, and Poison Pokémon, so a balanced party is preferable to a single narrow counter. After the fifth trainer, speak to the Team Rocket Grunt. Reject his recruitment offer, defeat him, and collect the Nugget he gives you afterward. Sell it at a Poké Mart when you need funds, but prioritize Poké Balls, Potions, and status cures over unnecessary purchases.
- Defeat the rival on Route 24.
- Beat all five Nugget Bridge trainers.
- Defeat the Team Rocket Grunt and collect the Nugget.
Travel through Routes 24 and 25 to Bill’s Sea Cottage
After Nugget Bridge, continue through the remaining section of Route 24 and then east along Route 25. Battle the route trainers for experience and money, but return to the Cerulean Pokémon Center when your team is too damaged rather than spending every Potion. The grass on these routes is a practical place to catch Bellsprout in LeafGreen if you need Grass coverage.
Abra can also appear in the grass. It commonly uses Teleport on its first turn, which ends a wild battle, so throw a Poké Ball immediately rather than trying to weaken it with a normal attack. This is different from the rival’s Abra: Teleport ends wild encounters but does not end trainer battles.
Follow Route 25’s winding path to the Sea Cottage. Inside, interact with the Pokémon-like figure and use the computer when prompted. Bill returns to human form, and speaking with him afterward gives you the S.S. Ticket. This item is required for the next major story sequence at the S.S. Anne, although it is not required to enter Cerulean Gym or earn the Cascade Badge.
- Train or catch a Grass-type Pokémon if your party needs one.
- Reach the Sea Cottage at the end of Route 25.
- Help Bill and receive the S.S. Ticket.
Return to Cerulean Gym
Walk back through Route 25 and Route 24 to Cerulean City, healing at the Pokémon Center before entering the Gym. Cerulean Gym is built around a pool. Two Gym trainers stand on the route to Misty: one can be avoided by taking the alternate path, while the other blocks the direct route and must be fought.
Use the Gym trainers for final experience rather than repeatedly battling wild Pokémon. Grass- and Electric-type attacks are super effective against Misty’s team. A Water Pokémon can still contribute through neutral damage, but do not rely on one without a backup plan because Misty’s Water Pulse is a special Water-type attack that can cause confusion and deal meaningful damage at this point in the game.
Status moves can make the battle safer. Sleep Powder, Stun Spore, or Thunder Wave can reduce the chance of losing several turns to Misty’s faster Pokémon. If confusion causes repeated self-hits, switch or use an appropriate status-curing item instead of continuing automatically.
- Heal before entering the Gym.
- Defeat the unavoidable Gym trainer and bypass the optional one if desired.
- Lead with a healthy Grass- or Electric-type Pokémon.
Defeat Misty and earn the Cascade Badge
Misty uses Staryu at level 18 and Starmie at level 21. Both are Water type, while Starmie is also Psychic type. Their moves include Water Pulse, which can deal strong damage at this point in the game and may confuse your Pokémon. Starmie can also use Recover, so attack decisively instead of allowing it repeated free turns.
Electric attacks are super effective against both Pokémon. Grass attacks are also super effective and are especially useful because they resist Water-type damage. If your counter is fragile, use a status move first or switch into a sturdier Pokémon after Staryu is defeated. Keep the counter healthy with Potions between targets when necessary, and use an Awakening or Full Heal if confusion or another status prevents reliable attacks.
After winning, Misty awards the Cascade Badge and TM03, Water Pulse. The badge allows traded Pokémon up to level 30 to obey you and permits the use of Cut outside battle. Heal afterward and save. Keep the S.S. Ticket in your Key Items; the next required progression runs through the robbed house in Cerulean City, Route 5 or Route 6, and the S.S. Anne.
- Defeat Misty’s level 18 Staryu.
- Defeat Misty’s level 21 Starmie.
- Receive the Cascade Badge and TM03 Water Pulse.
- Heal and save before leaving Cerulean City.
Before you move on
- The Cascade Badge is displayed on the Trainer Card.
- TM03 Water Pulse is in the Bag.
- The S.S. Ticket is in the Key Items pocket.
- Bill has returned to human form at the Sea Cottage.
- Misty has been defeated and the Cerulean Gym objective is complete.
Vermilion City, the S.S. Anne and Lt. Surge (Gym 3)
Travel from Cerulean City to Vermilion, clear the S.S. Anne before accepting HM01 Cut, then use Cut to enter Vermilion Gym. Defeat your rival aboard the ship and Lt. Surge in the Gym to earn the Thunder Badge.
Reach Vermilion City and prepare for the S.S. Anne
From Cerulean City, travel south on Route 5. Enter the Underground Path at the southern gatehouse, walk through it, and emerge on Route 6. Continue south to Vermilion City, then heal at the Pokémon Center.
You need the S.S. Ticket received from Bill after completing the event at Sea Cottage on Route 25. The S.S. Anne is docked at the harbor in the southwest of Vermilion City. Speak to the sailor at the entrance to board.
Buy a few Potions or Super Potions, several Poké Balls if you still need team members, and at least one Paralyze Heal. The ship contains many battles, but you can also heal without leaving: a woman in a first-floor room restores your entire party. Use her service whenever your team is weakened.
- Have the S.S. Ticket in the Key Items pocket.
- Heal before boarding and carry basic recovery items.
- Use the ship's healing room instead of wasting items between groups of trainers.
Search the S.S. Anne before taking HM01
Explore the first-floor cabins, kitchen, lower deck, and second-floor rooms before entering the captain's quarters. The ship is optional apart from the rival battle and HM01, but its trainers provide useful experience and its items are worth collecting before the ship leaves.
Important FireRed and LeafGreen rewards include TM31 Brick Break in a first-floor cabin, TM44 Rest on the lower deck, a Great Ball in the kitchen, Stardust and an X Attack on the second floor, plus healing items and Ether-type items on the lower deck. The kitchen also has several berries in trash cans. You do not need every item, but collect any TM or recovery item that fits your party.
The lower deck is reached from the first floor. Search the rooms and corridors systematically, and return to the first-floor healing room when necessary. Do not go straight to the captain if you want the ship's optional experience and items; after you receive Cut and leave, the S.S. Anne normally departs permanently.
- Collect TM31 Brick Break if a physical attacker can use it.
- Collect TM44 Rest if you want a recovery move for a bulky Pokémon.
- Search the kitchen, lower deck, first-floor cabins, and second-floor rooms before leaving.
Defeat your rival on the upper deck
From the first floor, take the stairs to the second floor and follow the corridor toward the upper deck. Your rival is waiting near the front of the ship. Heal first if earlier trainers have reduced your party's health.
In LeafGreen, the battle is against Pidgeotto at level 19, Raticate at level 16, Kadabra at level 18, and a level 20 Wartortle if you chose Charmander, a level 20 Charmeleon if you chose Bulbasaur, or a level 20 Ivysaur if you chose Squirtle.
Use Electric or Rock coverage against Pidgeotto when available. Raticate's Hyper Fang can deal heavy damage to frailer Pokémon. Kadabra is fast and has low physical Defense, so a strong physical attack is usually safer than a prolonged special exchange. For the starter, use a type advantage or a sturdy neutral attacker rather than matching it with your own starter unless the matchup is favorable.
- Heal before approaching the rival.
- Keep a strong physical attacker ready for Kadabra.
- Prepare a separate answer for the rival's evolved starter.
Help the captain and receive HM01 Cut
After defeating the rival, use the nearby stairs to reach the captain's quarters. Speak to the seasick Captain and interact with him to help him recover. He gives you HM01 Cut.
Teach Cut from the Bag's TMs & HMs pocket to a compatible Pokémon. Cut is needed to remove the tree blocking the Vermilion Gym entrance. Because the move is mainly required for overworld progress, place it on a Pokémon whose battle moveset can spare the slot.
Before exiting the ship, make one final circuit of the cabins and lower deck. The S.S. Anne leaves when you disembark after receiving HM01, so remaining ship trainers and items will normally be unavailable afterward.
- Receive HM01 from the Captain.
- Teach Cut to a suitable party member or temporary utility Pokémon.
- Finish desired battles and item collection before leaving the ship.
Open Vermilion Gym's electric-lock door
Heal after leaving the ship, then stand beside the small tree blocking the Gym and use Cut. Enter the Gym and defeat its trainers if you want the experience, or avoid some of them while solving the puzzle.
Search the trash cans until you find the first electric-lock switch. The second switch is in one of the cans immediately adjacent to the first. If you select the wrong can, both switches reset, so search again for the first switch and then check its neighboring cans. Save before searching if you want a convenient retry point.
A Ground-type is the safest answer for the Gym trainers and Lt. Surge. Diglett from Diglett's Cave, reached through the eastern exit of Vermilion City, is especially useful because Electric attacks do not affect Ground-type Pokémon. Do not rely on a Water-type alone.
- Use Cut on the tree outside the Gym.
- Find the first switch, then check the adjacent cans for the second.
- Bring a Ground-type or another reliable plan for Electric attacks.
Defeat Lt. Surge and claim the Thunder Badge
Lt. Surge uses Voltorb at level 21, Pikachu at level 18, and Raichu at level 24. Voltorb knows Shock Wave, Tackle, Screech, and SonicBoom. Pikachu can use Shock Wave, Thunder Wave, Quick Attack, and Double Team. Raichu also uses Shock Wave and can reduce the reliability of physical attacks with Double Team-related evasion pressure in the battle's broader strategy.
Lead with a healthy Ground-type when possible. Ground attacks are super effective against all three Pokémon, and Electric attacks cannot hit a Ground-type. Keep the Ground-type healthy for Raichu, the strongest opponent. If you lack Ground coverage, use a strong physical attacker or a Grass-type that can withstand Electric moves, and switch carefully rather than sending out a Water-type without a safe partner.
Carry Paralyze Heals or Full Heals because Pikachu can inflict paralysis. Use Potions during the battle when a Pokémon is in danger of being knocked out, especially before facing Raichu. After the victory, Lt. Surge awards the Thunder Badge and TM34 Shock Wave. The badge also permits use of Fly outside battle once you obtain HM02 later in the story.
- Defeat Voltorb, Pikachu, and Raichu.
- Use Ground-type immunity or carefully planned switches.
- Collect the Thunder Badge and TM34 Shock Wave.
- Confirm that Fly is now permitted outside battle after HM02 is obtained.
Before you move on
- HM01 Cut is in the Bag and a party Pokémon can use Cut outside battle.
- The rival on the S.S. Anne has been defeated.
- The S.S. Anne has departed after desired ship exploration is complete.
- Lt. Surge's level 21 Voltorb, level 18 Pikachu, and level 24 Raichu have been defeated.
- The Thunder Badge and TM34 Shock Wave have been awarded.
- The tree blocking Vermilion Gym has been cleared and the Gym is accessible.
Celadon City, Erika, and the Rocket Hideout
Use Celadon City’s services, collect Tea and the gift Eevee, defeat Erika for the Rainbow Badge, and dismantle Team Rocket’s underground base beneath the Game Corner. The chapter ends when Giovanni is defeated in the Rocket Hideout and the Silph Scope is collected. Pokémon Tower, Saffron City, and Silph Co. belong to the next chapter.
Arrive in Celadon and collect the important gifts
Enter Celadon City from Route 7 and heal at the Pokémon Center. Before challenging the Gym, visit Celadon Mansion, the tall building beside the Pokémon Center. Speak with the elderly woman in the first-floor manager’s suite to receive Tea. Keep it in the Key Items pocket; giving it to a thirsty guard at any Saffron City gate will open access to Saffron from every direction. Tea is the required FireRed and LeafGreen replacement for the drinks used in the older Kanto games.
To collect the optional gift Eevee, leave an empty party slot, exit the mansion, and walk behind the Pokémon Center to the gap in the trees. Enter the mansion through its rear entrance, climb to the top floor, and take the Poké Ball in the room. The Eevee is level 25. If your party is full, deposit a Pokémon before returning. Eevee can later evolve with a Fire Stone, Water Stone, or Thunderstone, all sold in the Department Store.
The Coin Case is optional. Enter the restaurant on the southern side of Celadon and speak with the man near the back wall to receive it. The Game Corner’s Prize Corner is also optional; do not spend time or money on coins unless you specifically want a prize Pokémon, a TM, or a held item. The Department Store is more useful for campaign preparation: buy Poké Balls, healing items, status cures, and any evolution stone needed for your team. Its rooftop vending machines also provide drinks that can be exchanged for three optional defensive TMs.
- Tea collected from the elderly woman in Celadon Mansion.
- Optional level 25 Eevee collected with an open party slot.
- Coin Case collected only if you intend to use the Game Corner.
- Healing items and Poké Balls replenished.
Defeat Erika for the Rainbow Badge
Celadon Gym is in the southwest part of the city. The entrance path is blocked by a small tree, so bring a Pokémon that knows Cut. Cut the tree, enter the greenhouse, and follow the paths through the Grass-type trainers. You can fight the trainers for experience, but you do not need to defeat every one before reaching Erika. Bring Antidotes, Parlyz Heals, and Awakenings because the Gym’s Pokémon use poison, paralysis, and sleep attacks.
In the North American LeafGreen release, Erika uses Victreebel at level 29, Tangela at level 24, and Vileplume at level 29. Fire, Flying, Ice, Bug, Poison, and Psychic attacks are effective choices. A Fire-type such as the Route 7 Vulpix available in LeafGreen is useful, but it is not required; a strong Flying attacker, a Psychic-type move, or a Pokémon with reliable neutral damage can also win. Avoid leading with Water-, Rock-, or Ground-types because Grass attacks target them effectively.
Erika’s team is built around status disruption. If a Pokémon is put to sleep, paralyzed, or poisoned, cure it immediately when doing so prevents a knockout or lets you keep attacking. Defeat her three Pokémon, then accept the Rainbow Badge and TM19 Giga Drain. The badge raises the obedience limit for traded Pokémon to level 50 and permits Strength to be used outside battle. Strength itself is not needed to complete the Rocket Hideout, so do not delay this chapter to search for it.
- Cut used to enter the Gym’s inner area.
- A Fire, Flying, Psychic, Ice, Bug, Poison, or strong neutral attacker prepared.
- Status-curing items carried.
- Rainbow Badge and TM19 Giga Drain obtained.
Open the Rocket Hideout beneath the Game Corner
Enter the larger Game Corner building in southeastern Celadon and walk to the back wall. Challenge the Team Rocket Grunt standing in front of the poster. After defeating his Raticate and Zubat, inspect the poster and press the hidden switch. A staircase opens immediately to the right; use it to enter the Rocket Hideout. You do not need to play the slot machines or visit the Prize Corner to activate this route.
Heal before entering and bring a few Super Potions, Antidotes, and Parlyz Heals. Rocket Grunts commonly use Rattata, Raticate, Zubat, Koffing, Grimer, and other Poison- or Normal-type Pokémon. Ground, Psychic, Fire, Fighting, and strong neutral attacks cover most encounters. Watch for Magnemite or other targets with unusual resistances when fighting Scientists, and switch rather than leaving a weakened lead in front of an unfavorable matchup.
- Poster Grunt defeated.
- Hidden switch activated.
- Staircase to the Rocket Hideout opened.
- Party healed before entering.
Navigate the first floors and obtain the Lift Key
From the Hideout entrance on B1F, take the nearby stairs down to B2F, then continue to B3F. On B3F, move south and west into the first spinner-tile maze. The arrows carry you automatically until a yellow stopper tile ends the movement. Follow the maze toward the southeast staircase and descend to B4F. Pick up optional items only if you can do so without losing your position; the required objective is reaching the northwest section of B4F.
On B4F, go north to the Rocket Grunt in the northwest room. Defeat him and collect the Lift Key he drops. This key is mandatory because Giovanni’s office is reached through the elevator. If you want the nearby TM49 Snatch or Max Ether, collect them before leaving, but neither item is required.
Return through the stairs to B2F. Use the second spinner maze to reach the elevator in the southeast area. The safest method is to identify the yellow stopper tiles first, then step onto the arrow pads one at a time and avoid wandering onto an arrow that sends you back across the room. The B2F maze contains optional TM12 Taunt, Moon Stone, X Speed, and Super Potion pickups. Use the elevator after reaching the red elevator door and select B4F.
- B4F Rocket Grunt defeated.
- Lift Key collected.
- B2F spinner maze crossed a second time.
- Elevator reached and ready to use.
Defeat Giovanni and claim the Silph Scope
After taking the elevator to B4F, leave the elevator and travel north toward the two Rocket Grunts guarding the final red gate. Defeat both Grunts; the gate opens afterward. Walk through the doorway and speak with Giovanni to begin the boss battle.
Giovanni uses Onix at level 25, Rhyhorn at level 24, and Kangaskhan at level 29. Water and Grass attacks defeat Onix and Rhyhorn efficiently. Fighting attacks are the best answer to Kangaskhan, while strong neutral attacks work if you lack Fighting coverage. Onix can use Rage, which increases its Attack when it takes damage, so finish it promptly rather than repeatedly using weak attacks. Keep a Ground-immune or physically sturdy switch available if Kangaskhan begins dealing heavy damage.
When Giovanni is defeated, Team Rocket withdraws and he leaves the Silph Scope behind. Pick it up before leaving the room. Then use the elevator and exit the Hideout. The Silph Scope is the required item for identifying the ghosts in Pokémon Tower, which is the next chapter’s objective. Do not go to Pokémon Tower before collecting it.
- Two Grunts at Giovanni’s gate defeated.
- Giovanni defeated in the Rocket Hideout.
- Silph Scope collected from the floor.
- Rocket Hideout exited successfully.
Save the correct stopping point
Heal at the Celadon Pokémon Center and save after leaving the Hideout. Tea, the Rainbow Badge, and the Silph Scope should now be in your inventory or badge case, and the Lift Key should remain among your Key Items. The next required sequence is to travel to Lavender Town, use the Silph Scope in Pokémon Tower, rescue Mr. Fuji, and receive the Poké Flute. Saffron City access is already available because Tea was collected, but Pokémon Tower and Silph Co. should not be treated as part of this chapter.
- Party healed after the Hideout.
- Save created outside the Hideout.
- Next objective clearly set as Pokémon Tower with the Silph Scope.
Before you move on
- Tea is in the Key Items pocket and has been used to open Saffron City access, or is ready to be given to a gate guard.
- Erika has been defeated.
- The Rainbow Badge and TM19 Giga Drain have been obtained.
- The poster Grunt in the Game Corner has been defeated and the hidden staircase is open.
- The Lift Key has been collected from the B4F Rocket Grunt.
- The two Grunts guarding Giovanni have been defeated.
- Giovanni has been defeated in the Rocket Hideout.
- The Silph Scope has been collected from the floor after Giovanni leaves.
- The party has exited the Hideout, healed, and saved before proceeding to Pokémon Tower.
References for this chapter
- Walkthrough: Pokémon FireRed and LeafGreen, Part 9 - Bulbapedia
- Celadon Gym - Bulbapedia
- Celadon Condominiums - Bulbapedia
- Tea - Bulbapedia
- Team Rocket Hideout - Bulbapedia
- Lift Key - Bulbapedia
- Celadon City + Rocket Game Corner: Pokémon FRLG Walkthrough Part 8 - Guide Strats
- Pokémon FireRed and LeafGreen/Rocket Hideout - StrategyWiki
Lavender Town, Pokémon Tower, and Saffron City Access
Use the Silph Scope from the Celadon Rocket Hideout to complete Pokémon Tower, defeat the ghost Marowak, and rescue Mr. Fuji. Receive the Poké Flute from Mr. Fuji in Lavender Town, collect Tea from Celadon Mansion, and enter Saffron City. This chapter ends at Saffron City access; Silph Co., Giovanni, Lapras, the Master Ball, and Sabrina are handled later, after the Koga sequence.
Return to Lavender Town with the Silph Scope
Begin this route after defeating Giovanni in the Celadon Rocket Hideout and obtaining the Silph Scope. Travel to Lavender Town and enter Pokémon Tower. Without the Silph Scope, the unidentified ghosts in the upper floors cannot be properly confronted, so do not try to force progress through the tower before completing the Celadon Hideout.
Battle the rival on the second floor if he is still present. This encounter blocks the direct route farther up the tower, and his team is more developed than the trainers encountered around Lavender Town. Use the Pokémon Center before entering if your party is damaged, and carry a few healing items for the Channelers and other trainers inside.
With the Silph Scope in your Bag, the tower's ghost encounters are identified as Pokémon such as Gastly and Haunter. You may battle the Channelers for experience or avoid some of them, but keep Antidotes, Awakening, and Paralyze Heals available because status conditions are common in this area.
- Giovanni has been defeated in the Celadon Rocket Hideout.
- The Silph Scope is in the Bag.
- The rival battle on Pokémon Tower's second floor has been completed if it was still active.
Climb Pokémon Tower and use the healing square
Continue upward through the tower, following the staircases and battling the trainers that block the route. On the fifth floor, step onto the marked healing area to restore the party. This is the safest recovery point before the upper-floor encounters, so use it before continuing if several Pokémon have lost HP or PP.
After healing, continue toward the upper floors. The Silph Scope allows the previously unidentified ghosts to be challenged normally. Bring at least one Pokémon with dependable Water-, Grass-, or Ice-type damage for the required encounter ahead, and avoid relying only on fragile Pokémon that may be worn down by repeated status moves.
- The fifth-floor healing area has been used when necessary.
- The party has a reliable answer to a Ground-type opponent.
- The Silph Scope remains in the Bag.
Defeat the ghost Marowak
At the staircase leading toward the top floor, the Silph Scope reveals the blocking ghost as Marowak. This is a required battle, and the Marowak cannot be captured. Once revealed, it is fought as a Ground-type Pokémon, so Water-, Grass-, and Ice-type attacks are especially effective. Normal- and Fighting-type moves are not prevented by Ghost-type immunity in this battle, although they do not receive a super-effective bonus.
Marowak can deal serious damage with Ground-type attacks, particularly against Pokémon that are weak to them. Switch out Fire-, Electric-, Poison-, and Rock-type Pokémon unless they can safely withstand the attack. If the battle begins to go badly, use healing items during the fight rather than allowing your best counter to be knocked out; the tower's fifth-floor healing area is available if you need to retreat and recover before trying again.
- The ghost has been revealed with the Silph Scope.
- The uncapturable Marowak has been defeated.
- The staircase to the top floor is no longer blocked.
Rescue Mr. Fuji and receive the Poké Flute
After Marowak disappears, continue to the top floor. Team Rocket Grunts are holding Mr. Fuji there; defeat the Grunts in sequence to clear the area. Their Pokémon are generally in the mid-20s and include Poison-oriented team members, so Ground- and Psychic-type attacks can help, while a strong neutral attacker is also sufficient if it is properly leveled.
Speak to Mr. Fuji after the battles. He returns to his Volunteer Pokémon House at the base of Pokémon Tower. Leave the tower, enter his house in Lavender Town, and speak to him again to receive the Poké Flute. The item wakes the two Snorlax blocking Routes 12 and 16, opening the southern and western approaches toward Fuchsia City.
- The Team Rocket Grunts at the top of Pokémon Tower have been defeated.
- Mr. Fuji has been spoken to inside the tower.
- Mr. Fuji has been spoken to again at his house.
- The Poké Flute has been received.
Collect Tea and enter Saffron City
Travel to Celadon City and enter Celadon Mansion through the main entrance. Speak to the elderly woman on the first floor to receive Tea. It is placed among the Key Items and is the item the gate guards require; you do not need to deliver separate cups to every gatehouse.
Take Tea to any gatehouse connected to Saffron City. The guard accepts it and allows passage through the Saffron gates from Celadon, Lavender, Cerulean, or Vermilion. Enter Saffron City and heal at the Pokémon Center to establish the city as an accessible travel point.
Do not continue this chapter into Silph Co. or Sabrina's Gym. Entering Saffron is possible once Tea has been obtained, but the later Team Rocket occupation, Silph Co. route, and Saffron Gym sequence belong after Koga in the ordered campaign. Pokémon Tower completion is useful because it provides the Poké Flute and opens the Snorlax routes, but it is not the gate for Saffron entry or a claim that Mr. Fuji must be rescued before the later Silph Co. objective.
- Tea has been collected from the elderly woman in Celadon Mansion.
- A Saffron gate guard has accepted Tea.
- Saffron City has been entered.
- The party has been healed at the Saffron Pokémon Center.
Before you move on
- The Silph Scope was obtained from Giovanni in the Celadon Rocket Hideout.
- The rival battle in Pokémon Tower was completed when required.
- The ghost Marowak was defeated and the upper tower route was opened.
- Mr. Fuji was rescued from Team Rocket.
- Mr. Fuji was visited at his Lavender Town house.
- The Poké Flute was received.
- Tea was collected from Celadon Mansion.
- A gate guard accepted Tea and Saffron City was entered.
- Silph Co., Giovanni, Lapras, the Master Ball, and Sabrina remain for the later post-Koga Saffron chapter.
References for this chapter
Fuchsia City, Safari Zone and Koga (Gym 5)
Use Fuchsia City as your base to collect HM03 Surf and the Gold Teeth from the Safari Zone, return the teeth to the Warden for HM04 Strength, and then defeat Koga for the Soul Badge. Safari Zone captures are optional, so secure the required items before spending time on rare encounters. After Koga, continue to Saffron City for Silph Co. and Sabrina; Cinnabar Island comes afterward.
1. Prepare in Fuchsia City
Heal at the Pokémon Center and carry Antidotes or Full Heals, several healing items, and at least 500 Poké Dollars for the Safari Zone entrance fee. The Safari Zone is the large building in northern Fuchsia City. Paying the fee starts the Safari Game, gives you 30 Safari Balls, and allows 600 steps in Pokémon LeafGreen.
You cannot battle Safari Zone Pokémon with your party. Instead, throw Safari Balls, use Bait, use Rocks, or leave the area. Bait reduces the chance that a Pokémon flees but makes it harder to catch; Rocks improve the catch chance while making fleeing more likely. Rare encounters are optional, so prioritize the story items if a target escapes.
- Heal before entering the Safari Zone.
- Carry at least 500 Poké Dollars for the entrance fee.
- Plan to collect HM03 Surf and the Gold Teeth before hunting rare Pokémon.
- Remember that Safari Zone encounters cannot be weakened by your party.
2. Choose useful optional encounters
The Safari Zone offers several useful coverage options. Rhyhorn can become a Ground- and Rock-type team member, while Exeggcute can eventually provide Grass- and Psychic-type coverage. Pinsir is a LeafGreen-exclusive Safari Zone encounter and can fill a physical Bug-type role. These captures are optional and are not required to defeat Koga.
Kangaskhan, Chansey, Tauros, and Dratini are valuable but uncommon targets. Dratini is a long-term investment rather than an immediate answer to Koga. If a target flees, continue toward the required items instead of repeatedly restarting the same search. You can return later for additional Safari attempts.
- Choose a Safari Zone target only if it fills a genuine team need.
- Treat Pinsir, Kangaskhan, Chansey, Tauros, and Dratini as optional hunts.
- Do not sacrifice the Gold Teeth or Surf route for a rare encounter.
3. Reach Area 3 and collect the Gold Teeth
From the entrance, travel northeast through the Center Area to Area 1. Follow Area 1's northwest exit into Area 2, then take Area 2's southwest exit into Area 3. Use the area transitions, rocky ridges, ponds, and rest houses as landmarks.
In Area 3, head south to find the visible Gold Teeth northeast of the rocky ridge. Pick them up before leaving. Then move west to collect TM32 Double Team if desired and enter the Secret House. Strength is not needed to reach the Gold Teeth.
- Use the Center Area, Area 1, Area 2, and Area 3 transitions for orientation.
- Enter Area 3 before searching for the Gold Teeth.
- Collect the Gold Teeth northeast of the rocky ridge.
- Do not search for a Strength puzzle in the Safari Zone.
4. Claim HM03 Surf from the Secret House
Enter the Secret House in Area 3 and speak to the safari official inside. He gives you HM03 Surf as the reward for reaching the deepest part of the Safari Zone. This objective requires no battle or separate puzzle.
Once Surf and the Gold Teeth are secured, leave if your step count is low. You can use the exit, retire from the Safari Game, or let the counter expire. The optional items across the southern pond can wait until after Surf is available.
- Speak to the official in the Secret House.
- Confirm that HM03 Surf is in your Bag.
- Leave promptly if the Safari Game is nearly over.
- Do not confuse the Secret House reward with the Gold Teeth quest.
5. Return the Gold Teeth and obtain HM04 Strength
Leave the Safari Zone and enter the Safari Zone Warden's house in southeastern Fuchsia City, east of the Pokémon Center. Speak to the Warden while the Gold Teeth are in your Bag. He takes them and gives you HM04 Strength.
Teach Strength to a compatible Pokémon if you have a planned user. Strength is not required for Koga's Gym, but it becomes important for later boulder puzzles, including Victory Road. Because you already earned the Rainbow Badge earlier in the campaign, Strength can be used outside battle. Push the boulder inside the Warden's house to reach the optional Rare Candy.
- Return the Gold Teeth to the Warden.
- Receive HM04 Strength.
- Keep a compatible Strength user available for later routes.
- Collect the Rare Candy behind the Warden's house boulder if desired.
6. Navigate the Fuchsia Gym
Koga's Gym is in southwestern Fuchsia City. Its maze uses nearly invisible walls, but the wall boundaries can be recognized by the faint markings on the floor. Follow the open lanes, defeat trainers for experience if needed, and leave to heal before the Leader battle if your party has taken substantial damage.
The Gym trainers use a mixture of Poison- and Psychic-type Pokémon, including Drowzee, Kadabra, Hypno, Arbok, and Sandslash. Psychic attacks are useful against the Poison Pokémon. Ground attacks work against the Gym's Arbok and Sandslash, and they also work against Koga's Muk, but they do not affect Koga's Koffing or Weezing because those Pokémon have Levitate.
- Follow the floor markings through the invisible-wall maze.
- Heal before Koga if your team has taken substantial damage.
- Use Psychic attacks where practical.
- Bring a second plan besides Ground-type attacks.
7. Defeat Koga and unlock Surf outside battle
Save before speaking to Koga. His LeafGreen team is Koffing at level 37, Muk at level 39, Koffing at level 37, and Weezing at level 43. The two Koffing and the Weezing have Levitate; Muk has Sticky Hold instead and can be hit by Ground-type attacks.
The Koffing use Selfdestruct, Sludge, SmokeScreen, and Toxic. Muk uses Minimize, Sludge, Acid Armor, and Toxic. Weezing uses Tackle, Sludge, SmokeScreen, and Toxic. A reliable Psychic attacker is the cleanest general answer, and strong special attacks are preferable because Muk can raise its Defense with Acid Armor while Minimize can make physical attacks miss. Ground attacks remain useful specifically against Muk, but do not build the entire strategy around them.
Cure badly poisoned Pokémon promptly and be cautious when a weakened Koffing may use Selfdestruct. Koga uses two Hyper Potions and a Full Heal, so do not assume that a nearly defeated Pokémon will remain at low health. Defeating him awards the Soul Badge and TM06 Toxic. The Soul Badge allows Surf to be used outside battle.
- Save before the Leader battle.
- Defeat Koffing, Muk, Koffing, and Weezing at levels 37, 39, 37, and 43.
- Use Psychic or strong special attacks as the main strategy.
- Use Ground attacks against Muk only; Levitate protects both Koffing and Weezing.
- Carry Antidotes or Full Heals for Toxic and Sludge poison.
- Watch for Selfdestruct from the Koffing.
- Confirm that the Soul Badge and TM06 Toxic were awarded.
- Verify that a compatible Pokémon can use Surf outside battle.
8. Continue to Saffron City, not Cinnabar Island
Once Koga is defeated, the next ordered story destination is Saffron City. Use the Tea obtained earlier from the elderly woman in Celadon Mansion to pass through a gatehouse and enter the city. Continue with the post-Koga Silph Co. sequence, obtain the Card Key, clear Team Rocket from the building, and then challenge Sabrina.
Do not treat Cinnabar Island as the immediate endpoint of this chapter. Travel there after the Saffron objectives are complete, using Surf to reach the island and the Pokémon Mansion to obtain the Secret Key for Blaine's Gym.
- Leave Fuchsia with Surf and Strength prepared.
- Enter Saffron City using Tea.
- Complete Silph Co. and then challenge Sabrina in the next chapter.
- Save the Cinnabar Island and Blaine route for afterward.
Before you move on
- HM03 Surf is in your Bag after speaking to the official in the Secret House.
- The Gold Teeth were collected in Area 3 and returned to the Safari Zone Warden.
- HM04 Strength was received from the Warden.
- Koga's Koffing, Muk, Koffing, and Weezing were defeated.
- The Soul Badge and TM06 Toxic are in your possession.
- A compatible Pokémon knows Surf, and Surf works outside battle.
- You are ready to continue to Saffron City for Silph Co. and Sabrina, with Cinnabar Island deliberately postponed until after those objectives.
Saffron City, Silph Co., Sabrina, Cinnabar Island and Blaine
After defeating Koga, use Tea from Celadon Mansion to enter Saffron City, clear Team Rocket from Silph Co., and defeat Sabrina. Collect the Card Key, receive the gift Lapras and Master Ball, then travel to Cinnabar Island. Recover the Secret Key from Pokémon Mansion, defeat Blaine for the Volcano Badge, and prepare for the final Viridian Gym and later Sevii Islands travel.
Enter Saffron City after Koga
After defeating Koga in Fuchsia City, travel to Saffron City through any gate connected to Celadon, Lavender, Cerulean, or Vermilion. The guards allow entry after you have obtained Tea from the elderly woman in Celadon Mansion. Mr. Fuji’s rescue and the Poké Flute are not prerequisites for entering Saffron or progressing through Silph Co.
Heal at the Saffron Pokémon Center, then prepare a party around the level range of the local Team Rocket and rival battles. Psychic, Ground, Fighting, Water, Electric, and Ice coverage is useful because Silph Co. contains Poison-, Fighting-, Ground-, Flying-, and Electric-type opponents. Bring healing items and a few status cures before entering the company headquarters.
Silph Co. is the required objective in this chapter’s Saffron sequence. The Fighting Dojo is optional and does not award a badge, although it offers a choice between a level 25 Hitmonlee and Hitmonchan after its Karate Master is defeated.
- Confirm Tea is in the Key Items pocket or that the Saffron guards already permit entry.
- Heal at the Saffron Pokémon Center.
- Carry healing items and useful Psychic, Ground, Water, Fighting, Electric, or Ice attacks.
- Treat the Fighting Dojo as optional.
- Enter Silph Co. from the large office building in central Saffron City.
Get the Card Key in Silph Co.
Enter Silph Co. and use the elevator or stairs to reach the upper floors. The building’s diamond-shaped warp panels connect otherwise separated rooms, while the Card Key opens the locked doors. You do not need to defeat every Rocket Grunt or Scientist, but several battles are useful for experience and some routes require passing nearby trainers.
A practical route is to work upward until reaching the ninth floor, use the teleporter route there to return to the fifth floor, and then take the Card Key from the narrow passage on 5F. Once the key is obtained, locked doors throughout the building become usable. If you become disoriented, return to the elevator and use the floor list rather than repeatedly taking unknown warp panels.
From 5F, use the newly opened doors and the teleporter route leading toward 3F. On 3F, take the appropriate central teleporter to reach the rival encounter on 7F. Save before stepping into the rival’s path if you want a clean retry point. His exact team depends on your starter, but it includes Pidgeot, Alakazam, Exeggcute, and a starter-evolution lineup. Use Electric or Ice attacks for Pidgeot, strong physical or super-effective attacks for Alakazam, and Fire, Ice, Bug, or Flying coverage for Exeggcute.
- Reach 5F and collect the Card Key.
- Use the Card Key to open the required doors.
- Use the teleporter route from 3F toward 7F.
- Heal or save before the rival battle.
- Keep coverage for Pidgeot, Alakazam, Exeggcute, and the rival’s starter evolution.
Defeat the rival, receive Lapras, and reach Giovanni
After defeating the rival on 7F, speak to the Silph employee in the same area to receive Lapras at level 25. Make room in the party if you want to take it immediately; if the party is full, arrange the transfer before leaving the building. Lapras is optional for the campaign, but its Water and Ice typing can provide useful coverage for later routes and the Elite Four.
Use the paired teleporter in the rival’s room to reach the upper floors. Continue to 11F, where a Rocket Grunt blocks the approach to Giovanni. Use the Card Key on the final locked door and challenge Giovanni. His Silph Co. team is Nidorino, Rhyhorn, Kangaskhan, and Nidoqueen, with levels ranging from 35 to 41.
Water and Grass attacks are effective against Rhyhorn and Nidoqueen, Psychic attacks handle the Poison-types, and Fighting attacks are useful against Kangaskhan. Avoid relying on a single low-defense attacker: Kangaskhan can take neutral hits and punish an unsafe setup, while Giovanni’s Ground-types can threaten Electric Pokémon. After the battle, speak with the Silph Co. president in the executive office to receive the Master Ball. Reserve it for a capture you specifically do not want to risk; it is not required for any remaining Kanto badge.
- Defeat the rival on 7F.
- Receive Lapras from the nearby Silph employee.
- Reach 11F using the teleporter and Card Key doors.
- Defeat Giovanni’s Nidorino, Rhyhorn, Kangaskhan, and Nidoqueen.
- Talk to the president and receive the Master Ball.
Defeat Sabrina in Saffron Gym
Once Giovanni is defeated and Team Rocket leaves Silph Co., Saffron Gym becomes accessible. Enter the northeast gym and use the warp panels to cross its teleport maze. Most gym trainers are optional, but some battles can provide useful experience. If you take damage while testing routes, leave through the entrance and heal before returning; the gym remains open.
Sabrina uses Kadabra at level 38, Mr. Mime at level 37, Venomoth at level 38, and Alakazam at level 43. Psychic attacks are dangerous because Kadabra and Alakazam have high Special Attack, while Alakazam can also use Recover and Future Sight. Dark- and Bug-type attacks are effective against her Psychic Pokémon, and strong physical attacks are useful because Kadabra and Alakazam have poor physical defenses. Venomoth is also vulnerable to Fire and Flying attacks.
Do not rely on Fighting attacks, since Psychic Pokémon resist them and can retaliate heavily. Keep a second answer available if your first counter is put to sleep, confused, or weakened. Defeating Sabrina awards the Marsh Badge and TM04 Calm Mind. The badge also permits the use of Rock Smash outside battle, although Rock Smash is not needed for the immediate Cinnabar route.
- Confirm Team Rocket has been removed from Silph Co.
- Navigate the warp panels to Sabrina.
- Use physical, Dark, Bug, Fire, or Flying coverage where appropriate.
- Defeat Kadabra, Mr. Mime, Venomoth, and Alakazam.
- Receive the Marsh Badge and TM04 Calm Mind.
Travel to Cinnabar Island
After Sabrina, travel to Cinnabar Island by Surfing south from Pallet Town along Route 21, or by taking the longer water route from Fuchsia City through Routes 19 and 20. Route 21 contains Water-type trainers, so Electric or Grass attacks can shorten the journey. Heal at the Cinnabar Pokémon Center before entering the Pokémon Mansion.
Cinnabar’s Gym is locked when you first arrive. The Pokémon Lab is optional for this chapter, although it can revive the Helix or Dome Fossil if you have carried one from Mt. Moon. The required destination is the Pokémon Mansion west of the Pokémon Center.
- Keep a Pokémon with Surf available.
- Travel to Cinnabar Island from Pallet Town or Fuchsia City.
- Heal and restock at the Cinnabar Pokémon Center.
- Enter the Pokémon Mansion west of town.
Find the Secret Key in Pokémon Mansion
The Pokémon Mansion contains four playable levels: 1F, 2F, 3F, and B1F. Statues with glowing eyes toggle doors elsewhere in the building. Activate the statues, use the upper-floor staircases, and drop through the correct 3F hole to reach the lower portion of 1F and the basement route. The journals are optional story material and do not affect progression.
On B1F, activate the basement statue and work through the opened corridors toward the northwest room. The Secret Key is on a table there. TM14 Blizzard, TM22 SolarBeam, and several restorative or stat-boosting items are available in the Mansion, but none is required to open Blaine’s Gym. Wild encounters and Scientists or Burglars can drain resources, so use Repels if you want a faster route and cure poison or burns before they accumulate.
After collecting the Secret Key, leave through the opened route. An Escape Rope is also a practical way to return to the entrance. Confirm that the Secret Key appears in the Key Items pocket before leaving the island.
- Activate the Mansion’s statue switches.
- Use the 3F drop route to reach the lower floors.
- Reach B1F and activate the basement statue.
- Take the Secret Key from the northwest B1F room.
- Exit the Mansion and return to Cinnabar’s Gym.
Open Cinnabar Gym and defeat Blaine
Use the Secret Key on the locked Cinnabar Gym entrance. Each room contains a quiz machine. A correct answer opens the door without a battle; a wrong answer, or declining the quiz, starts a battle with the trainer guarding that room. Fight selected trainers if you need experience, but answer the quizzes correctly if your team is already prepared and you want to preserve HP and PP.
Blaine’s LeafGreen team is Growlithe at level 42, Ponyta at level 40, Rapidash at level 42, and Arcanine at level 47. Water, Ground, and Rock attacks are super effective against all four. Surf is especially reliable, while Dig, Earthquake, Rock Slide, and other strong attacks can also work. Keep a second counter healthy because Fire Blast can deal heavy special damage, and Fire Spin can trap a Pokémon for several turns. Ponyta and Rapidash can also use Bounce, while Growlithe and Arcanine may use Roar to disrupt setup strategies.
Heal before speaking to Blaine and carry Burn Heals or Full Heals. Defeating him awards the Volcano Badge and TM38 Fire Blast. The Volcano Badge permits the use of Waterfall outside battle, but Waterfall itself is obtained later on Four Island, so this reward does not immediately provide the HM.
- Use the Secret Key to open the Gym.
- Answer quiz machines correctly or fight the optional trainers for experience.
- Bring Water, Ground, or Rock attacks and a backup counter.
- Defeat Growlithe, Ponyta, Rapidash, and Arcanine.
- Receive the Volcano Badge and TM38 Fire Blast.
Leave Cinnabar and prepare for the final Kanto route
After Blaine’s defeat, heal and restock. Bill can offer transportation to One Island, beginning the Sevii Islands sequence. This trip is useful for postgame preparation and island story objectives, but the immediate Kanto objective after the Cinnabar chapter is to return toward Viridian City and complete the final Gym chapter according to the campaign route.
Keep Surf available for travel and confirm that HM04 Strength was obtained from the Safari Zone Warden in Fuchsia City. Strength is not required inside the Pokémon Mansion or Cinnabar Gym, but it is required later in Victory Road. Preserve the Master Ball unless you have a deliberate target, and retain a balanced party with Water, Ice, Electric, Psychic, Ground, or Fighting coverage for the remaining campaign.
- Heal after defeating Blaine.
- Choose whether to accept Bill’s One Island trip immediately.
- Confirm Surf remains assigned to an available party member.
- Confirm HM04 Strength is available for Victory Road.
- Return toward Viridian City when ready for the final Gym chapter.
Before you move on
- Saffron City can be entered through its gates.
- The Card Key is in the Bag after being collected from Silph Co. 5F.
- The rival on Silph Co. 7F is defeated.
- Lapras has been received or sent to the PC.
- Giovanni is defeated on Silph Co. 11F.
- The president has given the Master Ball.
- Team Rocket has left Silph Co. and Sabrina’s Gym is open.
- Sabrina’s Kadabra, Mr. Mime, Venomoth, and Alakazam are defeated.
- The Marsh Badge and TM04 Calm Mind are in the Bag.
- The Secret Key is in the Key Items pocket.
- Blaine’s Growlithe, Ponyta, Rapidash, and Arcanine are defeated.
- The Volcano Badge and TM38 Fire Blast are in the Bag.
- The party is healed and prepared to return toward Viridian City or begin the available Sevii Islands sequence.
- Surf remains available, and HM04 Strength is secured for Victory Road.
Viridian City, Giovanni (Gym 8) and the Final Gym Badge
After earning the Volcano Badge from Blaine, return to Viridian City for the final Kanto Gym. Once the other seven badges are recorded, the Gym is open and Giovanni is waiting inside. Defeat his Ground-focused five-Pokémon team to earn the Earth Badge and TM26 Earthquake. This chapter ends immediately after the badge battle, with optional item collection and preparation for the League route handled before moving on.
1. Return to Viridian City after Blaine
After defeating Blaine on Cinnabar Island and receiving the Volcano Badge, travel back to Viridian City. Heal at the Pokémon Center before entering the Gym. If Bill offers to take you to the Sevii Islands, you may accept or decline. That trip is optional at this point and is not required to challenge Giovanni in Viridian Gym.
Check your Trainer Card to confirm that you have the Boulder, Cascade, Thunder, Rainbow, Soul, Marsh, and Volcano Badges. With all seven earlier Kanto badges obtained, Viridian Gym is available for the eighth challenge. Buy several Super Potions or Hyper Potions and a few Full Heals if your supply is low, but keep valuable Revives and other recovery items for the Elite Four preparation that follows this chapter.
- Volcano Badge obtained.
- The other seven Kanto badges are recorded.
- Viridian Gym is open.
- The party is healed and supplied with basic recovery items.
2. Prepare counters for Giovanni’s LeafGreen team
Giovanni uses Rhyhorn at level 45, Dugtrio at level 42, Nidoqueen at level 44, Nidoking at level 45, and a second Rhyhorn at level 50. Rhyhorn and Dugtrio are Ground-type Pokémon, while Nidoqueen and Nidoking are Poison/Ground types. This is a stronger late-game roster than the teams Giovanni used earlier as the leader of Team Rocket.
A dependable Water attack is the most broadly useful answer because every Pokémon on Giovanni’s team is vulnerable to Water. Grass attacks are especially effective against Rhyhorn and Dugtrio, while Ice attacks also work well against the Rhyhorn. Grass is only normally effective against Nidoqueen and Nidoking because their Poison typing offsets the Ground weakness.
Bring a backup counter rather than relying on one Pokémon. Dugtrio is fast and can use Earthquake, Slash, Sand Tomb, and Mud-Slap. The Rhyhorn can use Rock Blast, so a Flying-type switch is not automatically safe. Keep your main attacker healthy enough to handle the level 50 Rhyhorn at the end.
- A strong Water, Grass, or Ice attack is available.
- A second Pokémon can answer Dugtrio or the final Rhyhorn.
- The main counter is near full health before the battle.
3. Cross the Viridian Gym spinner maze
Viridian Gym contains directional spinner tiles. The fastest route is built around the central trainer area and the spinner paths leading toward Giovanni. You may battle the Gym’s trainers for experience and money, but you do not need to fight every trainer to reach the Leader.
From the entrance, move into the central section and inspect the trainer positions before stepping onto the spinner tiles. If a trainer blocks the direct route, defeat that trainer and use the nearby spinner path to move toward the northern and western side of the Gym. The maze is easier to manage if you walk slowly and check where each tile will send you before committing to it.
A Revive can be collected inside the Gym. It is optional, so leave the Gym and heal at the Pokémon Center if several party members are weakened. Returning resets the maze’s trainer positions, but you can repeat the same central route without losing story progress.
- The spinner maze has been crossed.
- The party is healed before speaking to Giovanni.
- Any optional Revive has been collected if desired.
4. Defeat Giovanni and claim the Earth Badge
Lead with your strongest reliable Water, Grass, or Ice attacker and use its type advantage immediately against the opening Rhyhorn. When Dugtrio appears, do not leave a fragile Pokémon in battle merely to preserve a switch. Its speed and Earthquake can quickly remove an underleveled or weakened team member.
Use special Water or Grass attacks when possible against Nidoqueen and Nidoking. Both can use Earthquake, and their Poison/Ground typing means Grass attacks do not receive the same advantage they have against the Rhyhorn and Dugtrio. Heal before your active Pokémon reaches knockout range rather than waiting for a critical hit or a high-damage Earthquake to finish it.
Use your healthiest suitable counter against the final level 50 Rhyhorn. If Giovanni inflicts a status condition, cure it when the condition prevents reliable attacks or safe switching; do not spend every Full Heal during one battle if the affected Pokémon can still finish its matchup. After the fifth Pokémon falls, Giovanni awards the Earth Badge and TM26 Earthquake.
- Giovanni’s five Pokémon have been defeated.
- The Earth Badge has been received.
- TM26 Earthquake has been received.
- At least one useful recovery item remains for later preparation.
5. Collect the optional reward and organize the League party
After Giovanni leaves, use the Itemfinder on the spot where he stood to find the optional Macho Brace. It is not required for the story or for Victory Road, so skip it if you are not interested in its training effect.
Before leaving Viridian City, review the party you intend to take toward the Pokémon League. Keep Surf available for the route beyond the League Reception Gate and keep Strength available for Victory Road’s boulder puzzles. Preserve broad coverage where possible: Water or Ice for Ground and Dragon threats, Electric or Grass for Water Pokémon, and strong physical or special attacks for the Elite Four’s varied defenses.
Heal the party at the Pokémon Center and stop the chapter here. The next progression step is Route 22 and the final rival battle, followed by Route 23 and Victory Road.
- The optional Macho Brace has been collected or deliberately skipped.
- Surf is available for the upcoming route.
- Strength is available for Victory Road.
- The intended League party has been healed and reviewed.
- The save is ready for the next chapter.
Before you move on
- All eight Kanto Gym badges are displayed on the Trainer Card.
- Giovanni has been defeated in Viridian Gym.
- The Earth Badge has been obtained.
- TM26 Earthquake has been obtained.
- The optional Macho Brace has been collected or intentionally skipped.
- Surf and Strength are available for the upcoming League route.
- The party is healed and prepared to begin the next chapter at Route 22.
Victory Road and Final League Preparation
Defeat the final Route 22 rival, pass Route 23’s eight Badge checks, clear the three-floor Victory Road cave, and reach Indigo Plateau ready for LeafGreen’s consecutive Elite Four battles. A balanced party around levels 50 to 55 is a practical starting point, but reliable type coverage, healing, and a plan for the Champion matter more than making one Pokémon dramatically stronger than the rest.
Defeat the final rival and pass Route 23
Heal in Viridian City, then leave through the western gate and enter Route 22. The rival appears near the western side of the route when you approach him. This battle is required before the guards on Route 23 will allow you to continue toward Victory Road.
His team always includes Pidgeot, Rhyhorn, and Alakazam. The remaining Pokémon depend on your starter and include combinations of Gyarados, Growlithe, Exeggcute, and the fully evolved starter that has a type advantage over yours. In LeafGreen, Exeggcute is the Grass/Psychic member; it is not Exeggutor. Use Electric or Rock coverage against Pidgeot, Water, Grass, or Ice coverage against Rhyhorn, and keep a planned answer for the rival’s starter evolution. A Dark, Bug, or strong physical attacker can help remove Alakazam before it uses Psychic or Calm Mind. Rhyhorn has Ground/Rock typing and Lightning Rod, so do not rely on Electric attacks against it.
Continue west after the battle and enter the Pokémon League Reception Gate. On Route 23, the guards inspect the Boulder, Cascade, Thunder, Rainbow, Soul, Marsh, Volcano, and Earth Badges in order. The route contains grass and water sections, so Surf is required before you can reach the Victory Road entrance. Enter Victory Road only after confirming that a party member can use Strength as well as Surf.
- The final Route 22 rival battle has been won
- All eight Gym Badges are registered
- A party member can use Surf outside battle
- A party member can use Strength outside battle
- The party is healed before entering Victory Road
Clear Victory Road 1F
Near the entrance, find the boulder west of the pressure switch. Use Strength and move it down one space, right five spaces, up two spaces, right seven spaces, up two spaces, right one space, and down one space onto the switch. This removes the barrier on the rocky ridge and opens the main route across the floor.
In the northeast area, a second boulder arrangement lets you collect one of two visible items at a time. TM02 Dragon Claw and a Rare Candy are both available, but the narrow layout forces the boulder to block one while you reach the other. Take the item you want, then leave and re-enter Victory Road to reset the arrangement if you want the second item. A hidden Full Restore is on a nearby rock, and a hidden Ultra Ball can be found elsewhere on 1F.
Go west past the two Cooltrainers and climb the northwest ladder to 2F. Wild Pokémon are strong, and the trainers include Cooltrainers, Tamers, Jugglers, Black Belts, and PokéManiacs. Battles are optional, but selected fights provide useful experience if the party is below the League range. Repels can conserve time and PP, while Flash improves visibility but is not required.
- The 1F entrance boulder is on its switch
- The rocky ridge route is open
- Any desired 1F item has been collected
- The northwest ladder to 2F has been reached
- The party has enough HP and PP to continue
Solve the 2F switch and reach 3F
On 2F, locate the boulder in the southern section. Push it left two spaces, down two spaces, and left two spaces onto the switch. This clears the next barrier and opens the route along the rocky ridge.
Follow the opened path and descend the first stairway if you want TM37 Sandstorm. Continue northeast for the Full Heal and TM07 Hail, then climb the northeast ladder to 3F. Trainers on this floor use Fighting, Psychic, Normal, and Water Pokémon. Psychic or Flying attacks are useful against Fighting types, while Electric or Grass coverage helps against Golduck. Do not spend valuable healing items after every minor battle if the party can safely reach the Pokémon Center at Indigo Plateau.
- The 2F boulder is on its switch
- The central platform route is open
- The northeast ladder to 3F has been located
- Important attacks retain adequate PP
Complete the 3F and lower-floor boulder sequence
On 3F, first go northeast to the Cooltrainer and collect the Max Revive if desired. Then reach the northwest area and activate the switch there. Take the ladder down to the separate 2F section, defeat PokéManiac Dawson if necessary, collect the Guard Spec. if desired, and return to 3F.
Back on 3F, return to the northeast boulder. Push it up two spaces, left twenty-two spaces, down one space, left four spaces, down three spaces, and right one space onto the switch. This removes the barrier leading to the southern area. The sequence is up 2, left 22, down 1, left 4, down 3, right 1.
Cross the newly opened ridge, travel south past the additional Cooltrainer battles, and go east to the next boulder. Push this boulder down the hole, then jump down after it. On the lower 2F section, push the boulder all the way west onto the lower-floor switch. The barrier near the landing point will open.
Climb onto the ridge and take the ladder back up. Follow the southeastern route, use the next ladder down to the eastern 2F section, and take the eastern exit back to Route 23. Leaving Victory Road resets the boulder positions, so if a boulder is misplaced, exit and re-enter rather than trying to force it out of a corner. A Cooltrainer in the final area can teach Double-Edge to a compatible Pokémon.
- The northwest 3F switch has been activated
- The northeast boulder was moved up 2, left 22, down 1, left 4, down 3, and right 1
- The southern boulder was pushed down the hole
- The lower-floor boulder was moved west onto its switch
- The eastern exit route is open
Reach Indigo Plateau and heal
Victory Road exits onto the northern part of Route 23. Follow the tiled path north through the final stone maze and enter Indigo Plateau. Use the Pokémon Center immediately, then restock at the Poké Mart before entering the League rooms.
The first-run Elite Four Pokémon range from level 51 through level 60: the lowest opposing Pokémon include level 51 members, while Lance’s Dragonite reaches level 60. The Champion is a separate battle whose highest Pokémon reaches level 63. A party broadly around levels 50 to 55 can succeed with good matchups, but a team with several members below the high 40s will have little margin for missed attacks, critical hits, or status problems. Train selected members in Victory Road or through rematches rather than relying on one overleveled Pokémon.
- Victory Road has been cleared
- The final Route 23 maze has been crossed
- The entire party is healed at Indigo Plateau
- The team is broadly prepared for opponents from levels 51 through 63
- The game has been saved before entering the League
Prepare coverage for the Elite Four
Lorelei uses Water and Ice Pokémon, including Dewgong, Cloyster, Slowbro, Jynx, and Lapras. Bring a dependable Electric or Grass attacker; a strong Rock or Fighting move is also useful against several targets. Slowbro and Lapras can survive unprepared attacks, so do not assume that a Fire-only plan will sweep the battle. Carry Full Heals for sleep, confusion, and other status effects.
Bruno’s two Onix are vulnerable to Water, Grass, and Ice, while Psychic or Flying attacks are effective against his Fighting Pokémon. Be careful with Hitmonchan’s Counter: use special attacks or safe super-effective moves rather than repeatedly striking it with strong physical attacks. Agatha’s Ghost and Poison Pokémon use status, confusion, and evasive tactics, so carry Full Heals and use strong neutral or Dark attacks. Ground attacks do not affect her Gengar and Golbat because of their Levitate and Flying traits.
Lance’s Gyarados, Aerodactyl, Dragonair, and Dragonite make Electric and Ice coverage especially valuable. Ice moves are the most direct answer to the Dragonair and Dragonite pair, while Electric attacks handle Gyarados. Keep a sturdy switch-in for physical attacks and a fast finisher for weakened targets. Do not allow Hyper Beam users to remain active if a reliable knockout is available.
The Champion always uses Pidgeot, Alakazam, Rhydon, and Gyarados, then fills the final two positions according to your starter. Prepare answers for Flying, Psychic, Ground, Water, and the appropriate Fire, Grass, or Water combination. Rhydon is the Champion’s Ground/Rock Pokémon; it is distinct from the Rhyhorn used in the preceding Route 22 rival battle. Do not plan on one frail sweeper defeating the entire roster without support.
- Electric or Grass coverage is ready for Lorelei and Gyarados
- Ice coverage is ready for Lance
- Water or Grass coverage is ready for Rhydon
- Psychic, Flying, or strong neutral damage is ready for Bruno
- Reliable damage and status recovery are ready for Agatha
- The Champion’s starter-dependent final two Pokémon have been considered
Stock items and save before entering
Buy a substantial supply of Hyper Potions, Max Potions, or Full Restores, several Revives, and Full Heals. Around 15 to 20 strong healing items, 5 to 10 Revives, and several status cures are reasonable preparation targets for a first attempt, but these quantities are not requirements. Carry Ether or Elixir items if available, prioritizing PP restoration for attacks that are essential to your matchup plan.
The Elite Four is a consecutive battle sequence. You may use items between battles, but you cannot return to the Pokémon Center until the run ends. Heal the party, restore important PP, check held items, arrange the lead Pokémon, and save immediately before entering. If the run fails, reload the save, identify whether the problem was a level gap, missing coverage, status loss, or poor item timing, then adjust the party before trying again.
- Healing items are stocked
- Revives and status cures are stocked
- Available PP-restoring items are in the bag
- Party order and held items are finalized
- The game is saved immediately before the Elite Four entrance
Before you move on
- The final Route 22 rival has been defeated.
- All eight Badges have passed the Route 23 guard checks.
- Victory Road has been cleared and the Indigo Plateau has been reached.
- The party has been healed at the Indigo Plateau Pokémon Center.
- The team has workable answers for Lorelei, Bruno, Agatha, Lance, and the starter-dependent Champion roster.
- Healing items, Revives, status cures, and available PP restorers are in the bag.
- The game has been saved immediately before entering the Elite Four.
The Elite Four and Champion — Hall of Fame
Prepare for the continuous Indigo Plateau challenge, defeat Lorelei, Bruno, Agatha, Lance, and the starter-dependent Champion, then complete the Hall of Fame sequence. The first victory finishes the main Kanto campaign. Cerulean Cave requires additional postgame progress through Celio’s Network Machine quest.
Prepare at the Indigo Plateau
Heal at the Pokémon Center outside the League rooms, check every move’s remaining PP, and save before entering the first chamber. The Elite Four must be fought in succession, but you can use items between battles. You cannot return to the Pokémon Center until the challenge ends.
A practical team is usually in the mid-to-upper 50s, with at least one Pokémon capable of fighting near Lance’s level 60 Dragonite. A lower-level team can still win with strong type matchups, but it will require more careful switching and more recovery items.
Carry Full Restores for combined HP and status problems, along with Max Potions or Hyper Potions for ordinary damage. Bring Revives for emergencies and Full Heals if you want to preserve Full Restores. Save PP-restoring items for limited-use attacks that are central to your plan. Between rooms, heal the Pokémon needed for the next opponent instead of distributing items evenly across the party.
- A reliable Ice attack for Lance’s Dragonair and Dragonite.
- Electric or Grass coverage for Water Pokémon.
- Psychic, Flying, or another strong answer to Bruno’s Fighting types.
- A dependable answer to Agatha’s Poison Pokémon that does not rely only on Ground moves.
- Enough healing items for five consecutive battles.
Defeat Lorelei first
Lorelei’s first team is Dewgong, Cloyster, Slowbro, Jynx, and Lapras, ranging from level 51 to level 54. Electric attacks are useful against her Water Pokémon. Grass attacks can help against Slowbro and Lapras, but both opponents may use Ice attacks, so do not expose a fragile Grass Pokémon unnecessarily.
Rock and Fighting attacks are effective against Jynx and the Ice types. Cloyster has very high Defense, so weak physical attacks may perform poorly. Use a strong special attack or a powerful super-effective move instead.
Keep your best Electric attacker healthy for Lance’s Gyarados and for the Champion’s Pidgeot or Gyarados, depending on the rival’s team. If a key Pokémon is put to sleep, confused, or otherwise disabled, use a Full Restore when that Pokémon is still needed for a later room. Do not spend your only dependable Ice specialist recklessly here.
- Use Electric attacks on Dewgong, Cloyster, and Lapras when safe.
- Use Grass or Electric coverage against Slowbro.
- Use Rock, Fire, or Fighting coverage against Jynx when available.
- Preserve a strong Ice user for Lance.
Break through Bruno’s Fighting and Rock teams
Bruno uses two Onix, Hitmonchan, Hitmonlee, and Machamp. Defeat the Onix with Water, Grass, or Ice attacks. Psychic attacks are the most direct answer to the Fighting types, while Flying attacks are also effective.
Hitmonlee and Machamp can punish a slow Pokémon that is weak to Fighting attacks. Switch deliberately rather than leaving a poor matchup in place. If an Onix is unable to threaten your active Pokémon, it can provide a controlled opportunity to heal or restore PP.
Before leaving the room, restore the HP and PP of the Psychic or Flying attacker you expect to use against Agatha’s Poison-heavy team.
- Water, Grass, or Ice coverage for both Onix.
- Psychic or Flying coverage for Hitmonchan, Hitmonlee, and Machamp.
- A healed primary answer to Agatha.
Control Agatha’s status-heavy team
Agatha’s team is Gengar, Golbat, Haunter, Arbok, and a second Gengar, with levels from 53 to 58. Her Gengar and Haunter have Levitate, so Ground moves fail against them. Use Psychic, Dark, Ghost, or strong neutral attacks instead.
Ground attacks are appropriate for Arbok. Electric, Ice, or Rock attacks work well against Golbat, although a strong neutral move may be safer if your coverage is limited.
Agatha’s team can disrupt you with confusion, poison, sleep, and evasion moves. If your main attacker is confused or poisoned and must continue, use a Full Restore rather than repeatedly gambling on a failed turn. Do not switch without a purpose, because every extra turn gives Agatha another chance to inflict status or raise evasion. Preserve Ice and Electric PP for Lance and the Champion.
- Do not use Ground attacks against Gengar or Haunter.
- Use Psychic, Dark, Ghost, or strong neutral attacks on the levitating Ghosts.
- Use Ground attacks on Arbok when convenient.
- Keep a Full Restore available for confusion or poison.
Stop Lance’s dragons
Lance’s first-run team is Gyarados at level 56, two Dragonair at level 54, Aerodactyl at level 58, and Dragonite at level 60. His team therefore ranges from level 54 through level 60, with Dragonite as the highest-level opponent.
Use Electric attacks against Gyarados, then use your Ice specialist against the two Dragonair and Dragonite. Ice attacks also deal super-effective damage to Aerodactyl, although Water, Electric, or Rock attacks are alternatives. Lance’s Pokémon can hit hard, so do not leave a frail Ice attacker exposed after it has completed its target.
If your Ice move has limited PP, prioritize the two Dragonair and especially Dragonite. Heal before the final switch into the Champion, and keep one healthy reserve Pokémon rather than using every surviving member as a disposable counter.
- A trained Pokémon with a dependable Ice move.
- An Electric answer for Gyarados.
- A separate plan for Aerodactyl.
- A healthy reserve before the Champion battle.
Defeat the LeafGreen Champion
The Champion is your rival. His fixed core is Pidgeot, Alakazam, and Rhydon. The other three Pokémon depend on your starter. If you chose Bulbasaur, he uses Exeggutor, Gyarados, and Charizard. If you chose Charmander, he uses Arcanine, Exeggutor, and Blastoise. If you chose Squirtle, he uses Arcanine, Gyarados, and Venusaur.
Use Electric attacks against Pidgeot and Gyarados. Water, Grass, or Ice attacks handle Rhydon. Exeggutor can be answered with Fire, Bug, Dark, Ghost, Ice, or strong physical attacks, depending on your team. Alakazam is fast and fragile, so use a Dark, Bug, Ghost, or strong physical attacker that can survive its first hit.
Against Charizard, use Water, Rock, or Electric attacks. Against Blastoise, use Electric or Grass attacks. Against Venusaur, use Fire, Ice, Flying, or Bug attacks. Against Arcanine, Water, Ground, or Rock is the safer choice.
Heal between knockouts when a key attacker is in danger, but do not waste a Full Restore on a Pokémon with no useful remaining matchup. Keep at least one healthy Pokémon in reserve for the final exchange instead of committing every resource to an early sweep.
- A dedicated answer to Alakazam.
- Electric coverage for Pidgeot or Gyarados when present.
- Water, Ground, or Rock coverage for Arcanine when present.
- A specific counter for the rival’s starter.
- At least one usable reserve Pokémon for the final exchange.
Complete the Hall of Fame and begin the postgame route
After the Champion is defeated, the game records your current party in the Hall of Fame and runs the ending sequence. Let the registration and credits finish. When control resumes in Pallet Town, save before changing your party or beginning postgame errands. This victory completes the main Kanto campaign, but it does not by itself open Cerulean Cave.
To begin the postgame route, visit One Island. If you did not complete the earlier Bill and Celio trip after Blaine, speak with Bill at the Pokémon Center on Cinnabar Island so he can take you there. After the Hall of Fame entry, register at least 60 different Kanto species as caught, not merely seen, then return to Professor Oak’s laboratory in Pallet Town. Oak upgrades the Pokédex to National Mode when the Hall of Fame, One Island visit, and 60-caught requirement have been satisfied.
After receiving the National Pokédex, return to One Island and speak with Celio. Recover the Ruby from the Team Rocket area inside Mt. Ember and give it to Celio to receive the Rainbow Pass. Continue through Four Island’s Icefall Cave rescue, the Dotted Hole on Six Island, and the Team Rocket Warehouse on Five Island to recover the stolen Sapphire. Give the Sapphire to Celio. Once both gems have been delivered and the Network Machine quest is complete, the guard leaves the Cerulean Cave entrance. Surf from Route 24 to enter the cave and prepare for the level 70 Mewtwo encounter.
- All four Elite Four members and the Champion were defeated in one continuous challenge.
- The party was registered in the Hall of Fame.
- The credits finished and the game returned control to Pallet Town.
- A new save was made after control resumed.
- One Island was visited after the Hall of Fame or during the earlier Bill and Celio trip.
- At least 60 Kanto species are recorded as caught.
- Oak upgraded the Pokédex to National Mode.
- Celio received both the Ruby and Sapphire.
- Cerulean Cave is accessible from Route 24 by Surf.
Before you move on
- The Hall of Fame has registered the current party.
- The credits have completed and the save resumes in Pallet Town.
- The starter-dependent Champion team was defeated with the correct counters.
- One Island has been visited after the Hall of Fame or during the earlier Bill and Celio trip.
- Professor Oak has upgraded the Pokédex to National Mode after the Hall of Fame, One Island visit, and 60 caught-species requirements are met.
- Celio has received both the Ruby and Sapphire after the Sevii Islands quest.
- Cerulean Cave is accessible from Route 24 by Surf.
Sevii Islands — How to Unlock Postgame Access
In the original Game Boy Advance Pokémon LeafGreen Version, the Cerulean Cave route begins after the Hall of Fame and the National Pokédex upgrade. You must have entered the Hall of Fame, registered at least 60 different Pokémon as caught in the Kanto Pokédex, and visited One Island. Professor Oak then upgrades your Pokédex in Pallet Town. Afterward, help Celio complete the Pokémon Network Machine by recovering the Ruby from Mt. Ember and the Sapphire from Dotted Hole and the Rocket Warehouse. Returning both stones to Celio opens the remaining Sevii Islands features and makes Cerulean Cave accessible.
1. Enter the Hall of Fame and receive the National Pokédex
Defeat the Elite Four and Champion, then allow the Hall of Fame sequence to finish. The National Pokédex cannot be obtained before your first Hall of Fame entry.
Register at least 60 different Pokémon as caught in the Kanto Pokédex. Seen entries do not count, and duplicates do not increase the total. Evolving or catching common species is usually enough; you do not need to complete the Kanto Pokédex.
Visit One Island after meeting the Hall of Fame and Pokédex requirements. Travel from Vermilion City on the Seagallop Ferry, then return to Pallet Town and speak with Professor Oak in his laboratory. Oak upgrades your Pokédex to National Mode when all three conditions are satisfied.
If Oak does not perform the upgrade, check the Pokédex’s owned count, confirm that you have actually entered the Hall of Fame, and make sure you have visited One Island.
- Enter the Hall of Fame.
- Register at least 60 different Kanto Pokémon as caught.
- Visit One Island after the League.
- Return to Professor Oak’s Laboratory.
- Receive the National Pokédex.
2. Start Celio’s quest and collect HM06 Rock Smash
Return to One Island and enter the Pokémon Network Center. Speak with Celio beside the Network Machine. After the National Pokédex is available, Celio explains that he needs the Ruby and Sapphire to complete the machine’s connection to the Hoenn games.
Travel north from One Island along Kindle Road and enter Ember Spa. Speak with the old man between the waterfalls to receive HM06 Rock Smash. Teach it to a compatible Pokémon before entering Mt. Ember’s Ruby Path.
Rock Smash can be used outside battle only after you have the Marsh Badge from Sabrina. You also need Surf to reach Mt. Ember and Strength to move the boulders inside the Ruby Path. Strength requires the Rainbow Badge, so do not attempt this section while missing the necessary Kanto badges.
- Speak with Celio after obtaining the National Pokédex.
- Reach Ember Spa on Kindle Road.
- Receive HM06 Rock Smash from the old man.
- Have a Pokémon that knows Rock Smash.
- Bring Surf and Strength users.
3. Recover the Ruby from Mt. Ember
From Ember Spa, continue north along Kindle Road and Surf across the water toward Mt. Ember. Near the mountain entrance, go east from the nearby Hiker to find the Team Rocket Grunts who have opened a passage.
Enter the opened cave and follow the Ruby Path downward. Use Rock Smash on breakable rocks and Strength on the movable boulders. If a boulder is placed incorrectly, leave the room and return to reset the puzzle.
Continue to the lowest chamber, where the Ruby rests on a pedestal on B5F. Take it to trigger the password event. Team Rocket’s first warehouse password is revealed during the Mt. Ember sequence; record it before leaving.
- Reach Mt. Ember through Kindle Road.
- Defeat the Team Rocket Grunts near the entrance.
- Follow the Ruby Path underground.
- Use Rock Smash and Strength to clear the route.
- Take the Ruby from B5F.
- Record the first Rocket Warehouse password.
4. Give Celio the Ruby and receive the Rainbow Pass
Return to the Pokémon Network Center on One Island and give the Ruby to Celio. He installs it into the Network Machine and replaces your Tri-Pass with the Rainbow Pass.
The Rainbow Pass permits Seagallop Ferry travel among Islands One through Seven. You do not need to complete Trainer Tower, Tanoby Ruins, Lost Cave, Berry Forest exploration, or every optional island item before continuing the main Ruby-and-Sapphire quest.
- Give Celio the Ruby.
- Receive the Rainbow Pass.
- Confirm that ferry travel to Islands Four through Seven is available.
5. Rescue Lorelei at Icefall Cave
Take the ferry to Four Island and travel east to Icefall Cave. Explore the cave until you find HM07 Waterfall. Obtain it and teach it to a compatible Pokémon if necessary.
Return to the cave entrance and use Waterfall to climb to the upper section. Follow the passage into the Back Cave, where Lorelei is confronting Team Rocket members. Defeat the Grunt assigned to you, then allow the scene to finish. Lorelei explains that the stolen Pokémon are being held at the Rocket Warehouse on Five Island.
This rescue is required before the Dotted Hole sequence can proceed. Heal at the Four Island Pokémon Center before leaving, because the next stages involve wild Pokémon, water routes, Team Rocket battles, and the Dotted Hole puzzle.
- Reach Four Island with the Rainbow Pass.
- Enter Icefall Cave.
- Obtain HM07 Waterfall.
- Use Waterfall to reach Lorelei’s location.
- Defeat the Team Rocket Grunt and complete the rescue.
6. Reach Dotted Hole and recover the Sapphire’s password
Travel to Six Island and follow Water Path and Green Path toward Ruin Valley. Continue south to Dotted Hole. The entrance is sealed by a Braille message instructing you to use Cut, so interact with the door while a Pokémon that knows Cut is in your party.
After entering Dotted Hole, drop through the initial hole on the ground floor to reach B1F. On each of the next four floors, use the holes in this exact order: on B1F, Up; on B2F, Left; on B3F, Right; on B4F, Down. The final drop takes you to B5F.
Approach the Sapphire in the lowest chamber. Scientist Gideon steals it before you can take it and gives you the second Rocket Warehouse password. Leave Dotted Hole after the event and travel to Five Island. The two passwords, one learned at Mt. Ember and one learned here, are required to enter the Rocket Warehouse.
- Reach Dotted Hole in Ruin Valley.
- Use Cut to open the entrance.
- Drop through the initial ground-floor hole.
- Use the B1F-B4F hole order Up, Left, Right, Down.
- Trigger Gideon’s Sapphire theft.
- Record the second Rocket Warehouse password.
7. Clear the Rocket Warehouse and return the Sapphire
On Five Island, travel through Five Isle Meadow to the Rocket Warehouse. Enter using both passwords. The warehouse contains warp-panel puzzles, Rocket Grunts, two Rocket Admin battles, and Scientist Gideon.
Move through the spinner and warp-panel rooms carefully. If you become disoriented, use the fixed walls and room boundaries to identify each panel route rather than walking randomly. Heal before the later battles if necessary, and bring Ground-, Fire-, Fighting-, or Water-type attacks for the varied Rocket teams.
Reach Gideon in the northeast section, defeat him, and take the Sapphire. Return to One Island and give it to Celio. With both stones installed, the Network Machine becomes operational for the relevant Generation III trade connections.
- Travel to Five Isle Meadow.
- Enter the Rocket Warehouse with both passwords.
- Navigate the warp-panel rooms.
- Defeat the Rocket Admins and Gideon.
- Recover the Sapphire.
- Give the Sapphire to Celio on One Island.
8. Confirm Cerulean Cave access
After Celio receives both the Ruby and Sapphire, return to Cerulean City. Cross Nugget Bridge and Surf along the water behind the city to reach Cerulean Cave. The guard who previously blocked the entrance is gone.
Cerulean Cave contains high-level wild Pokémon and the Mewtwo encounter. Save before approaching Mewtwo, and bring a team with reliable status moves, strong but controlled damage, healing items, and an adequate supply of Poké Balls.
Trainer Tower, Tanoby Ruins, Lost Cave, ordinary island encounters, and most optional Sevii Islands rewards are not required to open Cerulean Cave. They can be completed afterward.
- Celio has received both stones.
- The Network Machine is operational.
- Reach Cerulean Cave from behind Cerulean City.
- Confirm that the entrance is open.
- Save before attempting the Mewtwo encounter.
Before you move on
- The Hall of Fame is recorded.
- At least 60 different Kanto Pokémon are registered as caught.
- Professor Oak has upgraded the Pokédex to National Mode.
- The Rainbow Pass is available.
- Celio has received the Ruby and Sapphire.
- The Network Machine is operational.
- Ferry travel among the Sevii Islands is available.
- Cerulean Cave is open and reachable from Cerulean City.
References for this chapter
Sevii Islands — Major Quests and Island-by-Island Route
After entering the Hall of Fame and receiving the National Pokédex, complete Celio’s Ruby-and-Sapphire quest to restore the Network Machine. The required order is One Island and Mt. Ember, Four Island and Icefall Cave, Five Island Meadow, Six Island and Dotted Hole, then Five Island’s Rocket Warehouse before returning to One Island. Seven Island is optional for this quest. Rock Smash is useful and required for the intended Mt. Ember route, but it is not required to reach Mewtwo in Cerulean Cave; Surf is the important field move for the cave’s direct route.
1. Unlock the postgame quest and prepare for One Island
After defeating the Champion and entering the Hall of Fame, return to Professor Oak’s laboratory in Pallet Town. Oak upgrades the Pokédex when you have registered at least 60 different Pokémon as caught. Seeing 60 species is not enough, so catch or evolve additional Pokémon if the caught total is below the requirement.
Take the ferry from Vermilion City to One Island and enter the Pokémon Network Center. Speak with Celio to begin the Ruby-and-Sapphire quest. Before visiting Mt. Ember, make sure your party includes Pokémon that can use Surf, Strength, and Rock Smash outside battle. HM06 Rock Smash is obtained from the old man inside Ember Spa on Kindle Road. The Marsh Badge is required to use it outside battle.
Rock Smash is needed for the intended Mt. Ember route because breakable rocks block part of the approach. Strength is also required for the boulder puzzles leading through the mountain. Carry healing items and Repels, and heal at the One Island Pokémon Center before entering the mountain.
- Enter the Hall of Fame.
- Register at least 60 different Pokémon as caught.
- Receive the National Pokédex from Professor Oak.
- Speak with Celio on One Island.
- Collect HM06 Rock Smash from Ember Spa.
- Confirm that Surf, Strength, and Rock Smash can be used outside battle.
2. Recover the Ruby at Mt. Ember
From One Island, travel north along Kindle Road toward Mt. Ember. Follow the mountain approach until you reach the Team Rocket members near the summit entrance. Defeat the two Grunts. One of them reveals the first Rocket Warehouse password: Goldeen need log.
Enter the mountain and use Strength to move the boulders. Use Rock Smash on the breakable rocks blocking the intended route through the Mt. Ember area. Continue through the lower cave sections, choosing the route that descends deeper rather than the ladder loop that returns toward the entrance.
At the deepest chamber, take the Ruby from its pedestal. Return to One Island and give it to Celio in the Network Center. Celio takes the Tri-Pass and gives you the Rainbow Pass, which unlocks ferry travel to Islands Four through Seven.
- Defeat the Team Rocket members at Mt. Ember.
- Record the password Goldeen need log.
- Use Strength and Rock Smash to clear the Mt. Ember route.
- Take the Ruby from the deepest chamber.
- Give the Ruby to Celio and receive the Rainbow Pass.
3. Resolve the Team Rocket incident at Icefall Cave
Take the ferry to Four Island and travel east to Icefall Cave. Enter the cave and work through the ice-floor puzzle. Ice tiles break after repeated steps, so plan each crossing instead of walking randomly. Collect HM07 Waterfall during the cave route.
Return to the cave’s rear section and use Waterfall to reach the area where Lorelei is confronting Team Rocket. Defeat the Rocket members there, then speak with Lorelei after the battle. This confrontation must be completed before the Dotted Hole and Rocket Warehouse stages can progress.
Leave Icefall Cave after the event and heal on Four Island. Waterfall is not needed for the direct Cerulean Cave route later, but it is required to reach Lorelei’s confrontation area in Icefall Cave.
- Enter Icefall Cave on Four Island.
- Collect HM07 Waterfall.
- Use Waterfall to reach the rear section.
- Defeat the Rocket members near Lorelei.
- Speak with Lorelei after the battle.
4. Visit Five Island, then obtain the second password on Six Island
Travel to Five Island and head east through Resort Gorgeous, then south through Water Labyrinth to Five Isle Meadow. Approach the Rocket Warehouse. The first password works, but the entrance remains closed because you do not yet have the second password. Leave the warehouse and continue to Six Island.
On Six Island, travel south through Ruin Valley to Dotted Hole. Use Cut on the sealed entrance. Inside, drop through the first hole, then use the directional holes in this order: up, left, right, down. This reaches the chamber containing the Sapphire.
When you try to take the Sapphire, Scientist Gideon steals it. He then gives you the second password: Yes, nah, Chansey. The theft is required; do not expect to return to Celio with the Sapphire at this stage.
- Visit the Rocket Warehouse entrance on Five Island.
- Confirm that Goldeen need log is accepted.
- Use Cut to enter Dotted Hole.
- Follow the up, left, right, down hole sequence.
- Trigger Gideon’s theft and receive Yes, nah, Chansey.
5. Clear the Rocket Warehouse on Five Island
Return to Five Isle Meadow and enter the Rocket Warehouse using both passwords. The warehouse contains warp panels and spin-floor sections. Move carefully, checking each destination before stepping onto another panel. Heal before entering and carry enough healing items for several battles.
Fight through the warehouse until you reach the first Rocket Admin. Continue through the route that opens after the battle, then defeat the second Admin. Ground attacks are useful against many Poison- and Electric-type Pokémon, but Weezing has Levitate in this generation, so use Psychic or another reliable attack against it rather than depending entirely on Ground moves.
Continue to the final room and battle Scientist Gideon. Defeat him to reclaim the Sapphire. The Rocket Warehouse is complete when Gideon has been defeated and the Sapphire is back in your possession.
- Enter the Rocket Warehouse with both passwords.
- Navigate the warp-panel and spin-floor sections.
- Defeat both Rocket Admins.
- Defeat Scientist Gideon.
- Recover the Sapphire.
6. Return the Sapphire to Celio and verify Cerulean Cave access
Take the ferry back to One Island and give the Sapphire to Celio. The Network Machine becomes operational, completing the required Ruby-and-Sapphire quest and enabling compatible trading with Pokémon Ruby, Sapphire, and Emerald. Save after Celio confirms that the machine is working.
Cerulean Cave becomes available after the Hall of Fame, the National Pokédex requirement, and completion of Celio’s gemstone quest. Rock Smash is not required for the direct route to Mewtwo. It only opens optional item detours and breakable-rock areas inside the cave. Keep Surf available because you must Surf from Route 24 to reach the cave entrance and cross the water on the route to Mewtwo.
Return to Kanto, travel to Cerulean City, go north to Route 24, and Surf south toward the cave entrance. The guard should no longer block the entrance. If the guard remains, verify that Oak upgraded your Pokédex and that Celio received both the Ruby and Sapphire.
- Give the Sapphire to Celio.
- Confirm that the Network Machine is operational.
- Keep Surf available for the Cerulean Cave entrance and route.
- Treat Rock Smash as optional for Cerulean Cave item detours.
- Confirm that the Cerulean Cave guard has left.
7. Optional Seven Island activities
Seven Island is not required to recover the Ruby and Sapphire or open Cerulean Cave. Visit it for optional content such as Trainer Tower, Sevault Canyon, Tanoby Key, and the Tanoby Ruins. These areas contain additional battles, items, and post-National-Dex encounters.
Tanoby Key must be solved before the Tanoby Chambers become accessible. Carry suitable Poké Balls and status moves if you plan to capture rare or limited encounters, and save before stationary encounters or other battles that you do not want to repeat.
Do not substitute Seven Island activities for the required Icefall Cave, Dotted Hole, or Rocket Warehouse objectives. The required quest is complete only after Celio receives both gemstones and confirms that the Network Machine has been restored.
- Treat Seven Island as optional for the Ruby-and-Sapphire quest.
- Visit Trainer Tower, Sevault Canyon, or Tanoby Ruins only if desired.
- Solve Tanoby Key before exploring the Tanoby Chambers.
- Save before difficult or limited encounters.
Before you move on
- The Hall of Fame was entered.
- At least 60 species were registered as caught and Professor Oak supplied the National Pokédex.
- HM06 Rock Smash was collected from Ember Spa.
- Celio received the Ruby and issued the Rainbow Pass.
- The Icefall Cave Rocket incident was resolved and Lorelei was contacted afterward.
- The first and second Rocket Warehouse passwords were obtained.
- The Rocket Warehouse was cleared and Gideon surrendered the Sapphire.
- Celio received both gemstones and the Network Machine confirmed completion.
- A Pokémon with Surf is available before entering Cerulean Cave.
- Cerulean Cave can be entered from Route 24 and its direct water route to Mewtwo can be navigated.
- Rock Smash is not being treated as a requirement for reaching Mewtwo.
- Seven Island activities remain optional rather than being mistaken for required story progress.
Cerulean Cave and Mewtwo (Postgame)
In the original North American Game Boy Advance release of Pokémon LeafGreen Version, Cerulean Cave becomes accessible after you enter the Hall of Fame, obtain the National Pokédex, and complete Celio’s Ruby-and-Sapphire Network Machine quest. The required route to Mewtwo uses Surf and a sequence of ladders. Rock Smash is useful only for optional item detours, and Strength is not required to reach the encounter.
1. Complete the access requirements
Defeat the Elite Four and Champion first. Then make sure at least 60 different Pokémon species are recorded as caught, return to Professor Oak’s Laboratory in Pallet Town, and speak to Oak to receive the National Pokédex upgrade.
With the National Pokédex obtained, return to One Island and speak with Celio in the Pokémon Network Center. Complete the Sevii Islands quest by recovering the Ruby from Mt. Ember, returning it to Celio, finding the Sapphire in the Dotted Hole on Six Island, and recovering it from Team Rocket’s Warehouse on Five Island. Give the Sapphire to Celio after clearing the warehouse.
Once the Champion has been defeated, the National Pokédex has been awarded, and Celio has received both gems, the guard leaves the entrance to Cerulean Cave. If the guard remains, verify those three conditions before trying the cave again.
- The Elite Four and Champion are defeated.
- At least 60 different species are caught.
- Professor Oak has awarded the National Pokédex.
- Celio has received both the Ruby and Sapphire.
- The Cerulean Cave guard has left.
2. Prepare the party and supplies
Bring a Pokémon that knows Surf. Surf is the field move needed to reach the cave from Route 24 and to cross the water inside the cave. Rock Smash is optional: it opens a few item detours, but it is not needed for the direct route to Mewtwo. Strength is also unnecessary for reaching the encounter.
Mewtwo is level 70 and knows Swift, Recover, Safeguard, and Psychic. A practical team should include several Pokémon in roughly the level 55–65 range or higher, with at least one member that can survive repeated Psychic attacks. Dark-type Pokémon are immune to Psychic in this generation, although Mewtwo can still wear them down with other attacks and prolonged battles are risky.
Bring a reliable status move. Sleep gives the best opportunity to throw ordinary Poké Balls, while paralysis is a dependable alternative. Avoid poison, burn, and confusion because continuing damage or uncontrolled turns can accidentally defeat Mewtwo. Stock Ultra Balls, Full Restores or Max Potions, and status-curing items. The Master Ball is an immediate guaranteed option if you prefer not to risk the encounter.
- Surf is available for field use.
- The party is healed and has a safe switch-in for Psychic.
- A sleep or paralysis move is ready.
- Ultra Balls and healing items are stocked.
- The game is saved before approaching Mewtwo.
3. Reach Cerulean Cave
Fly to Cerulean City and leave through the north side. Cross Nugget Bridge on Route 24, then continue north until you reach the water. Surf south along the shoreline beside Cerulean City and enter the cave from the northwest side.
Wild Pokémon inside the cave are high level, so use Repels if you want to conserve time and resources. Keep an Escape Rope available for the return trip, although you can also walk back through the cave after the capture.
- The cave is entered from the Route 24 waterway.
- Repels are active if desired.
- An Escape Rope is available.
4. Follow the ladder-and-Surf route to B1F
From the entrance, follow the initial path to the first ladder and climb to 2F. On 2F, use the branching paths to reach the next ladder back to 1F. Do not worry if the route appears to loop between floors; Cerulean Cave is built around several short ladder connections rather than a single straight staircase.
On 1F, Surf across the first water section and use the nearby landings to reach the next ladder. Continue through the upper-floor passage, then return to 1F and follow the later water section toward the eastern side of the map. The visible item platforms and ladders serve as landmarks; optional items such as Full Restores, a Max Elixir, a Nugget, and an Ultra Ball can be collected without using Strength.
Continue taking the connected ladder route until you reach the final ladder from 1F to B1F. On B1F, move northeast along the land, follow the path around the central plateau, and Surf through the southern water section. Continue around the water and climb onto the final platform at the back of the floor. Mewtwo is waiting there.
Rock Smash may be used for optional item detours if you brought it, but skip those rocks if your only goal is Mewtwo. The direct route does not require Rock Smash or Strength.
- The first ladder to 2F has been reached.
- The connected ladder route through 1F and 2F has been followed.
- The final ladder to B1F has been reached.
- The B1F water route leads to Mewtwo’s platform.
5. Weaken and capture Mewtwo
Save immediately before interacting with Mewtwo. Lead with the Pokémon that can apply sleep or paralysis, but do not leave it in battle if Psychic is likely to knock it out. If Mewtwo uses Safeguard, new status conditions are blocked while the effect lasts, so switch tactics rather than repeatedly wasting turns on status attempts.
False Swipe is the safest way to lower Mewtwo’s HP because it leaves the target with at least 1 HP. If False Swipe is unavailable, use weak neutral attacks and stop when Mewtwo reaches the red portion of its HP bar. Avoid strong super-effective attacks and damaging status effects.
Throw Ultra Balls while Mewtwo is at low HP and asleep or paralyzed. Mewtwo may use Recover, so be prepared to lower its HP again. Pressure increases the PP consumed by your moves, making a long battle more resource-intensive. Heal or switch before the active Pokémon reaches knockout range, and reapply status when it is safe.
- Mewtwo is asleep or paralyzed whenever possible.
- Its HP is low without poison or burn damage.
- The party still has healing items and capture balls.
- The pre-battle save remains available.
6. Recover from failure and confirm completion
If Mewtwo is defeated, the battle is ended accidentally, or the party is knocked out, reload the save made before the encounter for the safest retry. Avoid saving after an unsuccessful attempt if you want to preserve that retry point.
After the capture succeeds, confirm that Mewtwo is registered as caught in the Pokédex and appears in the party or Pokémon Storage System. Save immediately. You can then use an Escape Rope or retrace the route to leave the cave and heal in Cerulean City.
- Mewtwo is registered as caught.
- Mewtwo appears in the party or PC.
- The game is saved after the successful capture.
- The Cerulean Cave objective is complete.
Before you move on
- The Cerulean Cave guard has left.
- The player has Surf and can reach the cave from Route 24.
- The player has followed the ladder route to B1F.
- The level 70 Mewtwo encounter has been reached.
- Mewtwo has been captured and registered in the Pokédex.
- The save has been made after the capture.
References for this chapter
National Pokédex, Version Exclusives and Trading
Upgrade LeafGreen’s Pokédex after the League, identify the Pokémon unavailable in LeafGreen without trading, and organize safe Generation III trades without losing important team members, held items, or HM coverage.
Receive the National Pokédex
First enter the Hall of Fame by defeating the Elite Four and Champion. Then register at least 60 Pokémon as caught in the Kanto Pokédex. Seeing a Pokémon in battle does not count; its entry must be recorded as caught. You do not need to complete the entire Kanto Pokédex. Wild encounters, evolutions, fossils, gifts, and in-game trades can provide most of the required total.
You must also visit One Island. After all three conditions are satisfied, return to Professor Oak’s laboratory in Pallet Town and speak with him. Oak upgrades your Pokédex to National Mode. If he does not perform the upgrade, check the Pokédex’s owned total, confirm that the Hall of Fame has been recorded, and make sure you have actually reached One Island.
The National Pokédex permits Generation II and III Pokémon to be received through trade and allows cross-generational evolutions that are blocked earlier. For example, Golbat can become Crobat and Onix can become Steelix only after the National Pokédex is active. Before then, the evolution attempt is interrupted.
- Entered the Hall of Fame.
- Registered at least 60 Pokémon as caught.
- Visited One Island.
- Spoke with Professor Oak in Pallet Town.
- Confirmed that the Pokédex displays National Mode.
Identify LeafGreen’s version exclusives
The principal LeafGreen-exclusive families are Sandshrew and Sandslash; Vulpix and Ninetales; Bellsprout, Weepinbell, and Victreebel; Slowpoke, Slowbro, and Slowking; Staryu and Starmie; Magmar and Magby; Pinsir; Azurill, Marill, and Azumarill; Misdreavus; Sneasel; Remoraid and Octillery; and Mantine. Several of these appear in the Sevii Islands rather than during the early Kanto route.
FireRed supplies the opposing groups: Ekans and Arbok; Oddish, Gloom, Vileplume, and Bellossom; Psyduck and Golduck; Growlithe and Arcanine; Shellder and Cloyster; Scyther and Scizor; Electabuzz and Elekid; Wooper and Quagsire; Murkrow; Qwilfish; Delibird; and Skarmory. Trade with FireRed or another compatible Generation III source when you need these families.
This is a representative list of the major normal-game differences, not a complete list of every encounter-table distinction. Wild Muk and Kingler are LeafGreen-only, while wild Weezing and Seadra are FireRed-only, even though their unevolved counterparts can be obtained in both games. Do not treat event Pokémon as ordinary version exchanges: on the original North American Game Boy Advance release, Deoxys required an event item, with Attack Forme associated with FireRed and Defense Forme associated with LeafGreen.
Keep separate notes for species that are unavailable in your cartridge and species that are available but require a trade evolution. For instance, Slowking requires a traded Slowpoke holding a King’s Rock; it is not simply a second wild LeafGreen encounter.
- Trade for FireRed-exclusive families rather than assuming every Kanto species appears in LeafGreen.
- Include Marill, Azurill, and Azumarill on the LeafGreen side.
- Keep Wooper and Quagsire on the FireRed side.
- Track Sevii Islands exclusives separately from Kanto encounters.
- Handle Deoxys and other event Pokémon as separate collection goals.
Trade safely between FireRed and LeafGreen
On the original Game Boy Advance release, connect two compatible systems with a Game Link Cable or the official Game Boy Advance Wireless Adapter. Each player needs a compatible Generation III cartridge, a Pokédex, and at least two Pokémon in the party. Pokémon stored in the PC cannot be selected directly for a trade, so place the intended Pokémon in the party first.
Early FireRed-to-LeafGreen trades are limited. Before the National Pokédex, trades involving Eggs or Pokémon outside the Kanto Pokédex are blocked, and trade evolutions that produce a species outside the Kanto listing are stopped. After Oak upgrades the Pokédex, these Kanto-versus-LeafGreen restrictions are lifted for FireRed and LeafGreen exchanges.
For a permanent exchange, catch duplicates of your LeafGreen exclusives and store them in a PC box before connecting. Keep one copy of each family for your own collection. If you are borrowing a FireRed-exclusive only to register it, agree on a trade-back order before starting and return it during the same session.
Generation III trades can include Pokémon that know HM moves. The game does not impose a general ban on trading HM users between FireRed and LeafGreen, but losing your only user of Cut, Surf, Strength, Flash, Rock Smash, or another required field move can leave your save unable to reach certain areas. Put a replacement in the party or PC before trading away an HM carrier.
- Use two compatible Generation III systems and cartridges.
- Give each player at least two Pokémon before entering the trade facility.
- Use duplicates for permanent version-exclusive exchanges.
- Check held items, moves, nicknames, and party space before confirming.
- Keep replacement HM coverage on the active save.
Unlock trading with Ruby, Sapphire, and Emerald
LeafGreen cannot immediately make unrestricted post-Kanto trades with the Hoenn games. After the Hall of Fame and National Pokédex requirements are complete, speak with Celio in the Pokémon Network Center on One Island. His Network Machine quest begins with the Ruby at Mt. Ember.
Retrieve the Ruby from Mt. Ember and deliver it to Celio. Continue the quest to Six Island, enter Dotted Hole, and discover that the Sapphire has been taken. Follow the resulting Team Rocket objective to the Five Island Rocket Warehouse, recover the Sapphire, and return it to Celio on One Island.
When Celio completes the Network Machine upgrade, LeafGreen can make the permitted Generation III connections with Ruby, Sapphire, and Emerald, as well as compatible GameCube Pokémon titles. This quest is not required for a basic FireRed-to-LeafGreen exchange of Kanto Pokémon, but it is required for Hoenn-game connectivity and the expanded Sevii Islands postgame.
Use a Game Link Cable for Ruby and Sapphire because those cartridges do not support the Game Boy Advance Wireless Adapter. Emerald can connect with FireRed and LeafGreen by cable and, where supported by the hardware and configuration, through the wireless adapter. The other cartridge must also satisfy its own trade restrictions.
- National Pokédex obtained in LeafGreen.
- Ruby recovered from Mt. Ember and delivered to Celio.
- Sapphire recovered through Dotted Hole and the Five Island Rocket Warehouse.
- Celio has completed the Network Machine upgrade.
- Both cartridges satisfy their own trade restrictions.
- Use a cable when connecting Ruby or Sapphire.
Complete trade evolutions
The standard no-item trade evolutions are Kadabra to Alakazam, Machoke to Machamp, Haunter to Gengar, and Graveler to Golem. Trade the Pokémon from the required stage and let the evolution animation finish. If you want to preserve the original Trainer and ownership history, trade the evolved Pokémon back immediately.
Held items create additional trade evolutions. Trade Onix holding Metal Coat for Steelix, Scyther holding Metal Coat for Scizor, Poliwhirl holding King’s Rock for Politoed, Slowpoke holding King’s Rock for Slowking, Seadra holding Dragon Scale for Kingdra, and Porygon holding Upgrade for Porygon2. Clamperl evolves into Huntail with Deep Sea Tooth or Gorebyss with Deep Sea Scale while traded.
The National Pokédex must be active before a trade evolution produces a species outside the Kanto Pokédex. This includes Steelix, Scizor, Politoed, Slowking, Kingdra, and Porygon2. Some of the required base Pokémon or items may also require a Hoenn connection or a trade from the other version.
Before saving, inspect the returned Pokémon. Confirm its species, nickname, held item, moves, level, Original Trainer information, and Pokédex registration. If the evolution used or changed a held item, arrange the return trade before ending the session.
- Attach the correct held item before opening the trade.
- Activate the National Pokédex before producing post-Kanto evolutions.
- Wait for the evolution to finish.
- Trade back immediately when retaining the Pokémon matters.
- Verify the species, held item, moves, and ownership before saving.
Handle modern or emulated setups separately
The original North American Game Boy Advance cartridge has no online trading service. Its documented methods are local communication through a Game Link Cable or compatible Wireless Adapter. A modern re-release, emulator, flash cartridge, or unofficial accessory may use a different connection process and should not be treated as part of the original GBA workflow.
If you are using an emulator, identify its exact local-link implementation and test it with an expendable Pokémon before committing a rare exclusive or trade-evolution candidate. Keep a separate save backup only when the hardware or emulator provides a reliable and appropriate method for doing so.
Do not assume that a current online service, Nintendo Switch application, or marketplace can connect directly to an original LeafGreen save. If the goal is a genuine Generation III Pokédex, use compatible Generation III cartridges and local hardware, or verify the exact supported transfer path before moving valuable Pokémon.
Before transferring a Generation III Pokémon to a later-generation game through a supported process, remove its HM moves. That restriction is separate from local Game Boy Advance trading and should not be used to claim that FireRed and LeafGreen prohibit trading HM users.
- Identify the exact cartridge, hardware, or emulator in use.
- Do not assume online services connect directly to the original GBA game.
- Test an inexpensive local trade first.
- Keep a safe save backup when the platform supports one.
- Remove HM moves before supported transfers to later generations.
Before you move on
- Professor Oak has upgraded the Kanto Pokédex to National Mode.
- The desired FireRed-exclusive species are registered after trading.
- Every planned trade evolution has completed with the correct held item.
- The active party or PC still contains suitable users for required HMs.
- Celio has completed the Network Machine upgrade if Hoenn trading is planned.
- All valuable exchanges have been checked for species, nickname, held item, moves, level, and ownership before saving.
- Any Pokémon intended for later-generation transfer has had its HM moves removed.
TM/HM and Move Tutor Locations, Useful Movesets
Plan Hidden Machines around the original Game Boy Advance mechanics, reserve important one-time TMs for long-term team members, and build coverage suited to Generation III’s physical and special move split.
Build an HM plan before teaching anything
The story provides seven HMs. HM01 Cut comes from the S.S. Anne captain and is needed to clear trees around Kanto, including the route toward Rock Tunnel and several optional or progression paths. HM02 Fly is optional for completion but extremely useful for travel. HM03 Surf is required for the route to Cinnabar Island and later island travel. HM04 Strength is needed for boulder puzzles, especially Victory Road. HM05 Flash is optional because Rock Tunnel can be crossed in darkness, but it makes that dungeon much easier to navigate. HM06 Rock Smash and HM07 Waterfall are primarily postgame tools in LeafGreen; neither is required to defeat the Champion.
- Have a Cut user ready after reaching Vermilion City.
- Reserve a compatible Pokémon for Surf and Strength before or during the Fuchsia portion of the story.
- Keep Surf on a dependable Water-type whenever possible because it is both field utility and a strong battle move.
Collect the HMs in practical story order
HM01 Cut is given by the captain in the S.S. Anne after you reach his cabin and help him. You do not need Cut simply to exit the ship, but you should obtain it because Vermilion’s Gym and later routes use Cut trees. HM02 Fly is in the house on Route 16, west of Celadon City. Reach the house by clearing or bypassing the Snorlax that blocks the western route, then speak to the girl inside. HM03 Surf is in the Safari Zone’s Secret House. HM04 Strength is obtained from the Fuchsia City Safari Zone Warden after you return his Gold Teeth, which are found in Area 3 of the Safari Zone.
- HM02 requires the Thunder Badge before it can be used outside battle.
- HM03 requires the Soul Badge for field use.
- HM04 requires the Rainbow Badge for field use.
Collect Flash and the postgame HMs when needed
HM05 Flash is given by Professor Oak’s aide in the Route 2 gatehouse once you have registered at least 10 Pokémon in the Pokédex. The aide is reached through the building south of Diglett’s Cave; Cut is needed to reach that side of Route 2. HM06 Rock Smash is obtained from the man at Ember Spa on One Island after the main campaign, and HM07 Waterfall is found in Icefall Cave on Four Island during the postgame island quest. Rock Smash requires the Marsh Badge for field use, while Waterfall requires the Volcano Badge.
- Do not spend a valuable final moveset slot on Rock Smash before the postgame unless that Pokémon is also your utility carrier.
- Obtain Waterfall before attempting to finish the Four Island and later Sevii Islands objectives.
- Use the Move Deleter in Fuchsia City if an HM must be removed later.
Take the highest-value campaign TMs
TM03 Water Pulse is Misty’s reward and is a useful early Water attack. TM13 Ice Beam, TM24 Thunderbolt, TM30 Shadow Ball, and TM35 Flamethrower are available as repeatable prizes at the Celadon Game Corner, although they require substantial coins. TM29 Psychic is found in Mr. Psychic’s house in Saffron City and is a strong one-time special attack for compatible Pokémon.
TM26 Earthquake is the reward for defeating Giovanni in the Viridian Gym, not an item in Silph Co. It is one of the best physical Ground attacks for Nidoking, Nidoqueen, Rhydon, and other compatible Pokémon, so save it for a team member you will keep. TM38 Fire Blast is Blaine’s Gym reward; it is not a Game Corner exchange. TM28 Dig is obtained from the Route 2 house and can serve as an interim Ground attack before Earthquake.
Other useful pickups include TM06 Toxic from Koga, TM08 Bulk Up in Silph Co., TM10 Hidden Power in Silph Co., TM31 Brick Break on the S.S. Anne or from the Celadon Department Store, TM36 Sludge Bomb in the Rocket Warehouse on Five Island, TM40 Aerial Ace on Route 9, and TM47 Steel Wing in the Safari Zone. TM47 is not found in Rock Tunnel.
- Treat Gym rewards and field pickups as one-time allocations.
- Game Corner TMs can be purchased again, but their coin cost still makes careless spending inefficient.
- Check compatibility before committing a rare TM, especially Earthquake, Psychic, Ice Beam, or Thunderbolt.
Use the one-time move tutors deliberately
Generation III’s ordinary FireRed and LeafGreen tutors teach each selected move only once. Rock Slide is taught by the tutor in Rock Tunnel, not on One Island. Other useful tutors include Body Slam on Four Island, Double-Edge in Victory Road, Softboiled in Celadon City, Counter in the Celadon Department Store, Seismic Toss in the Pewter Museum, Substitute in Fuchsia City, and Dream Eater in Viridian City. These tutors are optional, so reserve them for Pokémon that will remain in the party or have a clear long-term role.
After the relevant Sevii Islands postgame access is available, the tutor at Cape Brink on Two Island can teach Frenzy Plant to Venusaur, Hydro Cannon to Blastoise, or Blast Burn to Charizard. The fully evolved starter must have maximum friendship, and each move can be taught only once. These attacks are powerful but require a recharge turn after use, so reliable moves are often better for ordinary trainer battles.
- Save before using a one-time tutor if two long-term candidates can learn the move.
- Do not assume modern remake tutors or elemental-punch tutors are present in the original LeafGreen release.
- Prefer Rock Slide, Body Slam, or Double-Edge only when the recipient benefits from the move’s type and physical damage.
Configure practical late-game movesets
Venusaur can use Giga Drain or Razor Leaf, Sleep Powder, Sludge Bomb, and Leech Seed or Return. Charizard benefits from Flamethrower, Fly or Aerial Ace, Brick Break, and a flexible coverage move such as Dragon Claw. Blastoise can use Surf, Ice Beam, Bite, and a defensive or utility option; give it Strength only if no better carrier is available.
Nidoking and Nidoqueen work well with Earthquake, Rock Slide, Brick Break or Strength, and a coverage move such as Thunderbolt or Ice Beam. Jolteon should prioritise Thunderbolt, then use Bite, Double Kick, or a utility move. Lapras is a strong League option with Surf, Ice Beam, Thunderbolt, and a flexible fourth move. Kadabra or Alakazam can centre on Psychic with Calm Mind and utility or coverage that the individual Pokémon can legally learn in LeafGreen.
- Keep at least one Ice attack for Lance’s Dragon-types.
- Carry Electric or Grass coverage for Water-heavy opponents.
- Use a dedicated utility Pokémon where practical so principal battlers retain useful four-move sets.
- Remember that in LeafGreen, move type determines physical or special damage: Fire, Water, Electric, Ice, Psychic, Grass, and Dark moves are special, while Ground, Rock, Fighting, Flying, Normal, Poison, Bug, and Steel moves are physical.
Before you move on
- Your travel setup includes access to Cut, Surf, Strength, and, when beginning the relevant postgame quests, Rock Smash and Waterfall.
- Before the Elite Four, at least one team member knows Surf, one has Ice coverage, and the party has a reliable physical Ground or Fighting option.
- You have obtained the key TMs you intend to use and have reserved Earthquake, Psychic, and other one-time rewards for permanent team members.
- Your principal battlers are not overloaded with low-power utility HMs, and the Move Deleter plan is clear if an HM must later be removed.
Reliable Strategies for Tough Battles: Boss Patterns and Recovery
LeafGreen’s difficult battles are controlled by type matchups, known moves, status effects, and resource management rather than advanced opponent behavior. Build around safe switch-ins, preserve recovery items for the battles that need them, and reset a failed League attempt when its essential answers or attack PP are gone.
Build a matchup plan before each boss
Before entering a Gym or Elite Four room, identify one Pokémon that can switch into the opponent’s expected attack and one backup answer. Do not simply lead with your strongest attacker. Lt. Surge is best approached with a Ground-type switch because Electric attacks cannot affect it, while Giovanni’s Ground team is vulnerable to Water, Grass, and Ice attacks. Against Lance, keep Ice coverage available for his Dragonair and Dragonite, and use Electric attacks for Gyarados when a safe opportunity appears.
Do not assume every Pokémon on a specialist team shares the same practical weakness. Koga’s two Koffing and his Weezing have Levitate, so Ground attacks fail against them; his Muk does not have that ability and can be hit by Ground attacks. Agatha’s Ghost/Poison Pokémon are immune to Normal- and Fighting-type moves, while Psychic attacks are especially useful against them. Check the target’s ability before committing to a supposedly super-effective move.
- Identify a primary switch-in and a backup answer before each major battle.
- Keep more than one Pokémon capable of dealing with the next opponent.
- Check abilities such as Levitate before using Ground attacks.
Punish status, disruption, and recovery turns
Status effects are often more dangerous than raw damage. Agatha’s Gengar can use Confuse Ray and Hypnosis, and her Ghost Pokémon can make Normal- and Fighting-type attacks useless. Switch to a suitable attacker, cure confusion or sleep when a knockout is likely, and favor reliable damage over a long setup plan. Against Koga, remove Poison promptly if Toxic damage is beginning to overtake your healing options.
When an opposing Pokémon uses Protect, a defensive move, or a recovery move, use the turn to make a safe switch, apply your own status, or deliver dependable damage. Do not spend several turns boosting against an opponent that can confuse, poison, or critically hit you. In ordinary story battles, a reliable two-hit knockout is usually safer than an elaborate sweep.
Lorelei’s first team is Water/Ice focused. Electric attacks are useful against most of her team, while Grass attacks must be used carefully because Ice moves threaten Grass types. Her first-battle Cloyster uses Spikes, Dive, Hail, and Protect; it does not use the Rain Dance strategy associated with her later rematch team. Remove it efficiently rather than allowing repeated Protect turns and residual damage to wear down the party.
- Cure confusion, sleep, or poison before it creates a likely knockout.
- Do not give a recovering or protecting opponent repeated free turns.
- Prefer accurate, repeatable attacks over low-accuracy finishing moves.
Manage the five consecutive League battles
The first League sequence is Lorelei, Bruno, Agatha, Lance, and then the Champion. You may use items between battles, but you cannot return to a Pokémon Center without ending the attempt. Heal the Pokémon needed for the next matchup instead of automatically restoring every team member after every fight. Preserve Full Restores for serious status combinations or for a key Pokémon that must remain healthy for a later battle.
Use Electric coverage against Lorelei’s Water types, Psychic or Flying coverage against Bruno’s Fighting types, and Water or Grass attacks against Bruno’s Onix. Psychic attacks are generally strong against Agatha’s Poison team, but remember that her Ghost types ignore Normal- and Fighting-type attacks. Lance demands Ice coverage, while his Aerodactyl can also be handled with Water attacks and his Gyarados is highly vulnerable to Electric attacks.
Before entering the Champion’s room, restore the moves that answer the rival’s Pidgeot, Alakazam, Rhydon, and starter-dependent final team members. A physical attack can help finish Alakazam because its Defense is low, while Water coverage is useful against Rhydon and Arcanine or Charizard. Electric attacks threaten Pidgeot and Gyarados, but do not rely on one damaged attacker to cover every role.
- Restore PP on Ice, Electric, Psychic, and Water attacks before the League.
- Keep one healthy Pokémon available to absorb or answer status moves.
- Use Full Heals or Full Restores when switching repeatedly would cost more resources.
Decide whether to continue or reset
Continue a League attempt when your main counters are healthy, their important moves still have PP, and the next opponent can be handled without sacrificing several Pokémon. A weakened team can still succeed if you have healing items and a favorable reserve matchup.
Reset or leave the attempt when the only reliable answer to the next major opponent has fainted, a required attack has run out of PP, or you are spending several expensive items before reaching Lance or the Champion. Treat the failed run as a diagnosis. If Lorelei exhausted your Electric attacker, improve that matchup; if Lance defeated the team because Ice coverage was too weak, replace a redundant move or retrain the relevant Pokémon. Do not consume every rare item merely to delay a team change that is already necessary.
- Reset after losing the only dependable counter to an upcoming opponent.
- Identify the exact battle and resource failure before retraining.
- Do not use Rare Candies or rare healing items to postpone a clear moveset or matchup correction.
Use held items and battle items as support
Assign held items according to a Pokémon’s job. Leftovers can support a bulky member between attacks, type-boosting items can strengthen a specialist’s main move, and Quick Claw can occasionally help a slow Pokémon act first. These effects are useful safety nets, not substitutes for a type advantage or a sound switch plan.
X Attack and X Special can help in a single battle when the boosted Pokémon can defeat several targets without switching. Use them only after creating a safe turn, because spending a turn boosting is risky if the opponent can inflict status or score a critical hit. Keep ordinary healing, status cures, and PP recovery as the priority. At the League entrance, purchase enough Full Restores, Revives, Max Potions, Full Heals, and Max Ethers or Elixirs for your intended strategy rather than filling the bag with battle boosts.
- Assign held items before entering the Pokémon League.
- Use X items only when the boosted Pokémon has a safe route through multiple targets.
- Prioritize healing, status cures, and PP recovery over optional battle boosts.
Before you move on
- You can name a safe switch-in and a backup answer for each Gym Leader, every first-run Elite Four member, and the Champion.
- Your League team has dependable answers for Water, Ice, Electric, Psychic, Ground, and Dragon-related threats.
- Your key attacks retain enough PP for consecutive battles, and you have tested the planned switches outside the League.
- After a failed attempt, you can identify the exact matchup, status problem, or resource shortage that must be corrected.
Completion Checklist, Extras and Next Steps
Pokémon LeafGreen’s required Kanto campaign ends after all eight Gym badges are earned, the Elite Four and Champion are defeated, and the party is registered in the Hall of Fame. The National Pokédex, Rainbow Pass, extended Sevii Islands quest, Cerulean Cave, Mewtwo, roaming Legendary, trading, and collection targets are postgame objectives. Confirm the core ending first, then complete the optional content in its correct order.
Confirm the core campaign is complete
Check your Trainer Card for the Boulder, Cascade, Thunder, Rainbow, Soul, Marsh, Volcano, and Earth Badges. With all eight badges, the Kanto badge requirement is complete and Victory Road and the Pokémon League can be cleared. Defeat Lorelei, Bruno, Agatha, Lance, and your rival in the Champion battle.
Allow the Hall of Fame registration and credits to finish. When the game returns you to Pallet Town, save manually. This is the completion point for the main Kanto campaign. You do not need the National Pokédex, Celio’s gemstone quest, Cerulean Cave, Mewtwo, or trade-exclusive Pokémon to finish the story.
- All eight Kanto Gym badges are recorded.
- The Elite Four and Champion are defeated.
- The party is registered in the Hall of Fame.
- A post-credits save has been created.
Unlock the National Pokédex and Rainbow Pass
For the original Game Boy Advance LeafGreen release, register at least 60 Pokémon as owned in the Kanto Pokédex, enter the Hall of Fame, and visit One Island. Then return to Professor Oak’s laboratory in Pallet Town and speak with him. He upgrades the Pokédex to National Mode. If Oak does not offer the upgrade, check all three conditions rather than only the number shown in the Pokédex.
After obtaining the National Pokédex, return to One Island and talk with Celio in the Pokémon Network Center. He asks for help completing the Network Machine. Follow his Ruby objective at Mt. Ember. When you deliver the Ruby, Celio replaces the Tri-Pass with the Rainbow Pass, opening ferry travel to Four, Five, Six, and Seven Islands.
- At least 60 Kanto Pokémon are owned.
- The Hall of Fame has been entered.
- One Island has been visited.
- Professor Oak has awarded the National Pokédex.
- Celio has issued the Rainbow Pass.
Complete Celio’s Ruby-and-Sapphire quest
Travel to Mt. Ember on One Island. Follow the Team Rocket activity near the mountain, enter the cave they were guarding, and use Rock Smash and Strength where the route requires them. Reach the deepest chamber, take the Ruby, and return it to Celio on One Island.
Go to Four Island and enter Icefall Cave. Obtain HM07 Waterfall inside the cave, use it to reach the blocked rear section, and defeat the Team Rocket members harassing Lorelei. This resolves the Icefall Cave crisis and allows the later Sapphire objective to proceed.
Travel to Six Island and use Cut on the Dotted Hole entrance in Ruin Valley. Once inside, drop through the initial hole on the ground floor. On the successive floors, use the holes in this order: Up, Left, Right, Down. This takes you to the lowest floor, where the Scientist steals the Sapphire and gives you the second Rocket Warehouse password.
Go to Five Island, enter Five Isle Meadow, and open the Rocket Warehouse with both passwords: “Goldeen need log” and “Yes, nah, Chansey.” Work through the warp-panel rooms, defeat the Rocket personnel and administrators, then defeat Gideon to recover the Sapphire. Return to One Island and give it to Celio. The Network Machine is restored, completing the main Sevii Islands gemstone quest and enabling Generation III trade functions under the original hardware and game-link requirements.
- The Ruby is delivered to Celio.
- Lorelei’s Icefall Cave problem is resolved.
- The Dotted Hole is cleared using the initial drop followed by Up, Left, Right, Down.
- The Sapphire is recovered from the Rocket Warehouse.
- The Sapphire is delivered to Celio and the Network Machine is restored.
Open Cerulean Cave and capture Mewtwo
Cerulean Cave becomes available after you have entered the Hall of Fame, obtained the National Pokédex, and restored Celio’s Network Machine by completing the Ruby-and-Sapphire quest. Return to Cerulean City, cross Nugget Bridge, and Surf south from Route 24 to the cave entrance. The guard will have moved.
Bring a Pokémon that knows Surf. Surf is required to reach the cave from Route 24 and to follow the direct route toward Mewtwo. Rock Smash is optional for breakable-rock detours and additional encounters or items; it is not required for the direct Mewtwo route. Strength is not needed for the direct route.
Mewtwo is on the deepest floor at level 70. Save immediately before interacting with it. Use sleep or paralysis if available, lower its HP carefully, and avoid uncontrolled critical-hit damage. Ultra Balls are the ordinary choice, while the Master Ball is also valid. If Mewtwo is knocked out or the capture attempt fails, reset to the pre-battle save. Save again only after the capture succeeds.
- Cerulean Cave is open.
- Surf is available for the approach and direct route.
- Rock Smash is treated as optional rather than a cave-completion requirement.
- Mewtwo is captured or deliberately reserved for a later attempt.
- The game is saved after a successful capture.
Choose optional collection goals
Quick optional goals include capturing Mewtwo, catching the stationary Legendary birds, exploring remaining Sevii Island routes, and registering skipped Kanto species. None is required for the first Hall of Fame entry or for receiving the National Pokédex.
LeafGreen provides one starter-dependent roaming Legendary per save after the relevant Sevii Islands Team Rocket events are cleared: Bulbasaur leads to Entei, Charmander leads to Suicune, and Squirtle leads to Raikou. The roaming Pokémon changes routes and can flee immediately, so use the Pokédex area function and prepare a reliable status or trapping strategy. In the original Game Boy Advance release, Entei and Raikou can permanently disappear if they use Roar because of the Generation III roaming glitch. Consider saving the Master Ball for this encounter if you want the safest capture method.
Longer goals include completing the Kanto Pokédex, completing the National Pokédex, obtaining version exclusives, raising trade evolutions, and training a competitive team. LeafGreen alone cannot provide every Generation III species. FireRed, Ruby, Sapphire, Emerald, compatible link hardware, and in some cases event distributions are needed for a full collection. Mew, Celebi, Deoxys, and ticket-exclusive island encounters should be tracked separately from ordinary in-game objectives.
- Your target is defined as Kanto Pokédex, National Pokédex, or full Generation III collection.
- Version exclusives and trade evolutions are listed before arranging trades.
- Event-only species are separated from standard LeafGreen objectives.
- The starter-dependent roaming Legendary is treated as optional and save-specific.
Prepare the save for trading or long-term storage
Before trading, organize important Pokémon in PC boxes and record which Pokémon are being exchanged, which are expected back, and which held items must accompany them. Do not trade away a unique story Pokémon or your only practical HM user without preparing a replacement. On original Game Boy Advance hardware, use compatible Generation III games and an appropriate Game Link cable or Wireless Adapter. Confirm the return plan before starting a long trade session.
Power-cycle the system and reload the save before beginning a long trade session. The original cartridge has no normal in-game save-copy function. For archival purposes, use a legitimate cartridge-compatible preservation or backup method, follow that device’s documentation, and verify that the backup can be read before altering the original save. Store the original cartridge separately and keep a written record of the save’s Trainer, badges, Pokédex, and collection status.
- The save reloads correctly after a power cycle.
- Trade targets and return arrangements are documented.
- Important Pokémon and held items are recorded safely.
- Any backup has been verified before the original save is changed.
Before you move on
- Core campaign: all eight Kanto badges, the Elite Four and Champion defeated, Hall of Fame registration completed, and a post-credits save created.
- Postgame access: the National Pokédex obtained and the Rainbow Pass received.
- Celio’s quest: Ruby and Sapphire delivered and the Network Machine restored.
- Major optional objective: Cerulean Cave opened using the postgame prerequisites and Surf route; Mewtwo captured if desired.
- Legendary objective: the stationary Legendary birds and the one starter-dependent roaming Legendary are handled if desired.
- Collection objective: the selected Kanto, National, or Generation III target is complete, or remaining version-exclusive, trade, and event limitations are documented.
References for this chapter
- National Pokédex - Bulbapedia
- Walkthrough: Pokémon FireRed and LeafGreen/Part 18 - Bulbapedia
- Walkthrough: Pokémon FireRed and LeafGreen/Part 20 - Bulbapedia
- Cerulean Cave - Bulbapedia
- Pokémon FireRed & LeafGreen - Legendary Pokémon - Serebii
- Pokémon FireRed & LeafGreen - Team Rocket - Serebii
- Pokémon FireRed Version/Pokémon LeafGreen Version FAQ - Nintendo Support
Finishing up
Core completion requires all eight Kanto Badges, Victory Road, the Elite Four, the Champion, and the Hall of Fame sequence. Postgame completion is separate: obtain the National Pokédex, complete Celio’s Ruby-and-Sapphire quest, and open Cerulean Cave. Capturing Mewtwo and other legendaries, completing trades, and building a practice team are optional goals; do not claim that ordinary Gym Leader rematches are available.
Choose your next gameScreenshots & video
Game imagery for reference. Follow the written chapters above for the route and strategies.

Sources & references
Our original guide draws on the references below. Check the edition at the top of this page before following controls or unlock requirements.
- Pokémon FireRed & LeafGreen Rival Battles
- Pokéarth: Kanto Route 22, Generation III
- Walkthrough: Pokémon FireRed and LeafGreen/Part 3
- Pokémon FireRed & LeafGreen - Gym Leaders
- Pokémon FireRed & LeafGreen - Team Rocket - Serebii
- Pokemon LeafGreen Version - Guide and Walkthrough
- Pewter Gym - Bulbapedia
- Pokémon Leaf Green Version - Guide and Walkthrough
- Cerulean City & Route 25: Bill - Pokémon FireRed and LeafGreen Walkthrough
- S.S. Anne - Bulbapedia
- Blue (game)/FireRed and LeafGreen - Bulbapedia
- Lt. Surge - Bulbapedia
- Pokémon FireRed & LeafGreen — TMs & HMs — Serebii
- Walkthrough: Pokémon FireRed and LeafGreen, Part 9 - Bulbapedia
- Celadon Gym - Bulbapedia
- Celadon Condominiums - Bulbapedia
- Tea - Bulbapedia
- Team Rocket Hideout - Bulbapedia
- Lift Key - Bulbapedia
- Celadon City + Rocket Game Corner: Pokémon FRLG Walkthrough Part 8 - Guide Strats
- Pokémon FireRed and LeafGreen/Rocket Hideout - StrategyWiki
- Pokémon FireRed and LeafGreen Versions
- Pokémon Tower - Bulbapedia
- How to Get the Poké Flute - Game8
- Pokémon FireRed and LeafGreen/Pokémon Tower - StrategyWiki
- Walkthrough: Pokémon FireRed and LeafGreen/Part 10
- Kanto Safari Zone
- Fuchsia Gym
- Walkthrough: Pokémon FireRed and LeafGreen/Part 11 - Bulbapedia
- Pokémon Mansion (Kanto) - Bulbapedia
- Secret Key (Kanto) - Bulbapedia
- Viridian Gym - Bulbapedia
- Pokémon FireRed and LeafGreen/Viridian Gym - StrategyWiki
- Pokéarth - Kanto - Viridian City
- Walkthrough: Pokémon FireRed and LeafGreen/Part 15
- Walkthrough: Pokémon FireRed and LeafGreen/Part 16
- Walkthrough: Pokémon FireRed and LeafGreen/Part 17
- Walkthrough: Pokémon FireRed and LeafGreen/Part 17
- Walkthrough: Pokémon FireRed and LeafGreen/Part 18 - Bulbapedia
- Cerulean Cave - Bulbapedia
- National Pokédex - Bulbapedia
- Walkthrough: Pokémon FireRed and LeafGreen/Part 19 — Bulbapedia
- HM06 — Bulbapedia
- Rock Smash — Bulbapedia
- Walkthrough: Pokémon FireRed and LeafGreen/Part 14
- Walkthrough: Pokémon FireRed and LeafGreen/Part 20 - Bulbapedia
- Walkthrough: Pokémon FireRed and LeafGreen/Part 12
- Pokémon FireRed & LeafGreen - Legendary Pokémon - Serebii
- Pokémon FireRed and LeafGreen/Cerulean Cave - StrategyWiki
- How to Get Mew & Mewtwo in Pokemon FireRed and LeafGreen
- Version-exclusive Pokémon - Bulbapedia
- Trade - Bulbapedia
- Trade Evolution - Bulbapedia
- Pokémon FireRed & Pokémon LeafGreen - Version Exclusives - Serebii
- Pokémon FireRed & Pokémon LeafGreen - Ruby & Sapphire Compatibility - Serebii
- List of TM and HM locations in Generation III — Bulbapedia
- Move Tutor — Bulbapedia
- Pokémon FireRed Version — TM/HM List — GameFAQs
- Pokémon FireRed & LeafGreen - Elite Four
- Pokémon FireRed Version/Pokémon LeafGreen Version FAQ - Nintendo Support
About the game & collecting notes
- Platform
- Game Boy Advance
Step-by-step walkthrough to finish Pokémon LeafGreen's Kanto campaign on the Game Boy Advance: pick a starter, get all eight Gym badges, clear Victory Road, beat the Elite Four and Champion, and tackle the Sevii Islands postgame including Cerulean Cave. Includes route objectives, boss tactics, HM/TM guidance, and a postgame completion checklist.
Darryl Polo
Darryl Polo loves tinkering with emulation and revisiting retro games. He enjoys exploring how old favorites play on different setups and sharing what he learns along the way. At Joking Joystick, he writes about the games, hardware, and small discoveries that keep the hobby fun.
Our editorial standardsFound a step that needs another look? Help us improve this guide.