
Pokémon Diamond Version — Nintendo DS (North America) Complete Campaign Walkthrough
Step-by-step coverage of Pokémon Diamond (original Nintendo DS release), from Twinleaf Town to the Sinnoh League Hall of Fame, plus postgame access to Sendoff Spring and Turnback Cave to encounter Giratina. Practical badge order, Gym strategies, Elite Four/Champion Cynthia counters, team-building advice, and clear postgame prerequisites to reach Giratina.

Find a copy
Pokémon Diamond Version Nintendo DS
We may earn a commission if you buy through these links, at no extra cost to you. As an Amazon Associate I earn from qualifying purchases.
Opens retailer search results. Check the model, edition, seller, availability and current price before buying.
Before you begin
This walkthrough is written for the original Pokémon Diamond Version on Nintendo DS (the Generation IV original, not the later remakes).
It guides you through required progression: choosing your starter, the eight Gyms in their canonical order, the main Team Galactic story beats, and Elite Four/Champion Cynthia.
Where necessary it highlights the Diamond-specific behaviour of late-game encounters so you do not mix up remake or Platinum differences.
Follow the chapters in order for a clear playthrough.
If you only want a specific section, skip to that chapter; each chapter begins with precise objectives and lists what must be done before moving on.
This guide assumes you want to finish the main campaign, obtain the National Pokédex, and then reach the postgame Turnback Cave to resolve the level 70 Giratina encounter as it exists in Diamond.
Set yourself up for the run
Save often, especially before Gym Leaders, the Elite Four, Dialga, lake guardians, and Giratina.
Aim to keep a balanced core team: a Grass or Water answer for Roark, reliable Fighting or Fire coverage for Steel and Ice opponents, and a dependable Ice-based plan for Cynthia’s Garchomp.
Keep suitable HM users available for Surf, Strength, Rock Smash, Rock Climb and Waterfall. Rock Climb is required for the original Diamond/Pearl Victory Road route.
Carry status-healing items, including Ice Heals or Full Heals for freeze, and strong recovery items before the Pokémon League.
After entering the Hall of Fame and seeing the required Sinnoh Pokédex entries, obtain the National Pokédex before checking Route 214 for Spring Path. In original Diamond, Spring Path access requires both the Hall of Fame flag and the National Pokédex flag; the National Pokédex is the practical confirmation that the normal postgame prerequisites have been completed.
If catching Legendary Pokémon, carry Ultra Balls and cave-appropriate balls, use controlled HP reduction and status support where possible, and save immediately before each encounter.
Giratina’s original Diamond encounter is in Turnback Cave at level 70; Platinum’s Origin Forme and Distortion World mechanics do not apply.
Getting Started — Twinleaf Town, choosing your starter and first steps
Set up the original Nintendo DS adventure, choose a starter with a practical long-term team plan, complete the Lake Verity and Sandgem Town opening sequence, receive your first Poké Balls on Route 202, and finish the essential first tasks in Jubilife City.
1. Set your Trainer information and game options
Start Pokémon Diamond Version on Nintendo DS and enter your Trainer name. The name remains attached to this save, so choose one you will recognize in battle records and traded-Pokémon data. Before leaving the opening screen, open the Options menu and set the text speed and battle style. Shift battle style is the more forgiving choice for a first playthrough because the game asks whether you want to switch after an opponent’s Pokémon faints; Set removes that warning and sends the next opponent out immediately.
Leave your bedroom and speak with your mother downstairs. Enter Barry’s house in the northwest part of Twinleaf Town, go upstairs, and speak with him. After Barry runs ahead, leave town through the northern exit and follow Route 201 west toward Verity Lakefront. You do not have Poké Balls yet, so wild Pokémon cannot be captured during this first trip.
- Enter and confirm your Trainer name.
- Set text speed and choose Shift or Set battle style.
- Speak with your mother and meet Barry at his house.
- Travel west along Route 201 to Verity Lakefront.
2. Reach Lake Verity and choose your starter
Follow Barry through Verity Lakefront and into Lake Verity. After Professor Rowan and Dawn or Lucas leave the briefcase behind, examine it and choose Turtwig, Chimchar, or Piplup. In the original Diamond and Pearl opening, the starter is selected at Lake Verity; do not follow Platinum’s different opening arrangement.
Turtwig is the sturdy, slower option. Its Grass typing gives it a comfortable matchup against Oreburgh’s Rock Gym, and its final Grass/Ground form supplies strong physical attacks and useful Ground coverage. It works well as a durable tank, although its additional Ground typing increases its exposure to Ice and Water attacks later.
Chimchar gives the fastest offensive start and eventually becomes Fire/Fighting. In Diamond, reliable Fire coverage is less common than in many other Pokémon games, so Chimchar’s final typing is especially valuable. The tradeoff is that the opening Oreburgh Gym is less comfortable until Chimchar evolves or gains suitable Fighting coverage. Add a Water-, Grass-, or Ground-capable partner rather than relying on Chimchar alone.
Piplup is the balanced Water choice. It handles Roark naturally, develops into the Water/Steel Empoleon line, and brings useful resistances and special-attack potential to the middle and late game. It is less explosively offensive than Chimchar, but it remains dependable and can serve as a strong Surf user later. None of the three starters is mandatory. Save before making the selection only if you want the option to reset and choose a different one.
- Choose Turtwig for durability, Grass damage, and later Ground coverage.
- Choose Chimchar for speed, offense, and rare early-to-midgame Fire/Fighting coverage.
- Choose Piplup for a comfortable opening, Water utility, and Empoleon’s Steel resistances.
- Do not expect the starter to be chosen on Route 201 in this original release.
3. Finish the Lake Verity sequence and return home
After choosing a starter, a wild Starly attacks at the lake. Defeat it with your new Pokémon to gain the opening experience. This is not the first rival battle; Barry’s first battle against you occurs later, after the story has opened Route 203.
Walk back through Verity Lakefront and Route 201 with Barry. Professor Rowan and Dawn or Lucas meet you on the return trip, and the game sends you back to Twinleaf Town. Speak with your mother at home. She gives you the Running Shoes and tells you to visit Professor Rowan in Sandgem Town. The Running Shoes are used by holding the B Button while moving, provided you are not using the bicycle, which you will not have yet.
- Defeat the wild Starly at Lake Verity.
- Return to Twinleaf Town after Rowan’s meeting on Route 201.
- Receive the Running Shoes from your mother.
- Prepare to travel east toward Sandgem Town.
4. Visit Sandgem Town and receive the Pokédex
Take Route 201 east from Twinleaf Town. Wild Pokémon can now be battled for experience, but you still cannot catch them. Continue through the grass and enter Sandgem Town. Professor Rowan’s assistant directs you to the Pokémon Research Lab, where Rowan examines the starter you selected and gives you the Pokédex.
After leaving the laboratory, the assistant shows you the Pokémon Center and Poké Mart. Heal before departing. Return to Twinleaf Town as instructed and speak with your mother again. In the original North American release, she gives you the Journal, not a Guidebook. Barry’s mother then gives you the Parcel that Barry forgot; keep it in your Bag for delivery at Jubilife City’s Trainer School.
Return to Sandgem Town and head north toward Route 202. You may use the Pokémon Center whenever necessary. The early game does not require a particular capture, so do not risk a faint simply to train a new partner.
- Receive the Pokédex from Professor Rowan.
- Return home and receive the Journal from your mother.
- Collect Barry’s Parcel from Barry’s mother.
- Heal in Sandgem Town before taking Route 202 north.
5. Receive Poké Balls and build an early team
On your first trip along Route 202, Dawn or Lucas leads you into the tall grass and demonstrates how to catch a Pokémon. After the demonstration, the assistant gives you five Poké Balls. This is the point at which you can begin capturing wild Pokémon. Afterward, use your own Poké Balls rather than relying on the demonstration encounter.
Route 201 and Route 202 provide useful early options. Starly is a fast Flying-type attacker that later becomes a strong physical team member. Bidoof is modest in battle but evolves into Bibarel, a convenient field-move Pokémon for later Water and Strength duties. Shinx supplies Electric coverage for Water- and Flying-types and can become a useful physical attacker. Kricketot is available on Route 202 in Diamond, but it is more of an optional early Bug choice than a central team recommendation.
If you chose Chimchar, prioritize a Water-, Grass-, or Ground-capable partner to make Rock-, Water-, and Ground-based matchups easier. If you chose Turtwig or Piplup, Starly or Shinx can add speed and coverage. Geodude can be found in Oreburgh Gate before the first Gym and gives early Rock/Ground utility. Budew becomes available on Route 204 after Jubilife City, so it is a realistic follow-up capture rather than an immediate Twinleaf option.
After the tutorial, continue north to Jubilife City. Buy extra Poké Balls and Potions at the Poké Mart instead of spending your whole supply on optional captures. Keep one team slot available for a utility Pokémon such as Bidoof or Bibarel. You cannot soft-lock the story by missing a particular early capture, but retaining a Pokémon that can eventually carry Surf and Strength will reduce field-move inconvenience later.
- Complete Dawn or Lucas’s Route 202 catching demonstration.
- Receive the five free Poké Balls.
- Consider Starly, Bidoof, Shinx, or Kricketot for early team roles.
- Continue north from Route 202 to Jubilife City.
- Restock Poké Balls and Potions at the Jubilife Poké Mart.
6. Complete the first Jubilife City tasks
Enter Jubilife City and visit the Trainer School. Speak with Barry inside and deliver the Parcel from his mother. Barry gives you a Town Map, which is useful for checking routes and identifying your next destination. This delivery is required to move the early story forward; do not leave Jubilife without completing it.
Jubilife’s Pokémon Center is the safest place to heal before exploring. The Poké Mart supplies basic healing items and capture supplies. The city also contains the Pokétch campaign: speak with the Pokétch Company representative and find the three clowns around Jubilife, answering their questions to receive coupons. Return the coupons to the representative to obtain the Pokétch. Its early applications are optional, but the step counter and map-related tools are useful over a full playthrough.
The south exit returns to Route 202 and Sandgem Town. The west exit leads toward Route 218 but is blocked until later progress. Your next required route is Route 203 to the east, where Barry’s first proper rival battle takes place before Oreburgh City. Heal, save, and make sure your active team contains more than just the starter before entering Route 203.
- Deliver Barry’s Parcel at the Jubilife Trainer School.
- Receive the Town Map from Barry.
- Obtain the Pokétch by answering the three clown questions, if desired.
- Buy extra Poké Balls and Potions in Jubilife City.
- Heal and save before heading east onto Route 203.
Before you move on
- Your Trainer name, text speed, and battle style are confirmed.
- You chose Turtwig, Chimchar, or Piplup at Lake Verity and defeated the wild Starly there.
- Professor Rowan gave you the Pokédex, your mother gave you the Running Shoes and Journal, and Barry’s mother gave you the Parcel.
- You completed the Route 202 catching demonstration and received five Poké Balls.
- You have reached Jubilife City, delivered the Parcel at the Trainer School, and received the Town Map.
- Your team is healed, you have a practical capture plan, and you are ready to enter Route 203 toward Oreburgh City.
Early Routes to Oreburgh City — Route capture priorities and Roark Gym strategy
Travel from Sandgem Town through Routes 201–203 to Oreburgh City, obtain HM06 Rock Smash in Oreburgh Gate, find Roark in Oreburgh Mine, and defeat him at the Oreburgh Gym. In the original Nintendo DS Pokémon Diamond Version, Roark uses Rock/Ground Pokémon: Geodude, Onix, and Cranidos. Water, Grass, Fighting, and Ground attacks are the most reliable answers.
Build a useful early team on Routes 201 and 202
After receiving your starter in Sandgem Town, return west through Route 201 and continue east toward Jubilife City. Route 201 and the Verity Lakefront provide early opportunities to catch Starly. Starly is a useful fast physical attacker for the next several routes and remains valuable later against Grass- and Fighting-type opponents, although its Flying typing makes it a poor direct answer to Rock attacks.
On Route 202, Shinx is a practical long-term Electric-type choice, Bidoof is a durable utility option for later field moves, and Starly remains a good offensive partner. These captures are optional; your starter can handle the first Gym if it has the appropriate attacks. Keep at least one party slot available for a temporary field-move Pokémon if you do not want to place several HMs on your main team.
Once you reach Jubilife City, heal at the Pokémon Center and restock Poké Balls and Potions. If you chose Chimchar and want an additional answer to Roark, you can later detour through the southern part of Route 204 to look for Budew. Players who chose Turtwig or Piplup already have a natural advantage against Roark. Machop on Route 207, north of Oreburgh City, is another strong Fighting-type option and can be caught before the Gym.
- Catch at least one Pokémon besides your starter if you want more type coverage.
- Keep a Water-, Grass-, Fighting-, or Ground-type attack available before challenging Roark.
- Heal in Jubilife City and carry enough Potions for Route 203 and Oreburgh Mine.
Cross Route 203 and obtain Rock Smash
Leave Jubilife City through the eastern exit to enter Route 203. Heal before departing because your rival challenges you near the start of the route. His exact team depends on your starter, but the battle is still early in the game; lead with the Pokémon you want to train and use your starter as the dependable fallback.
Battle the route Trainers when possible. Their experience is useful, and Route 203 provides better training than repeatedly fighting the weakest encounters on Route 201. Continue east through the route and enter Oreburgh Gate.
Speak to the Hiker inside Oreburgh Gate to receive HM06 Rock Smash. You cannot use Rock Smash outside battle until you have the Coal Badge, but keep the HM available. The cave has routes leading into Oreburgh City, and the lower section contains optional items and wild Pokémon that can be reached later after Rock Smash is usable.
- Defeat the rival on Route 203.
- Receive HM06 Rock Smash from the Hiker in Oreburgh Gate.
- Heal at the Oreburgh City Pokémon Center before entering the mine.
Prepare in Oreburgh City
Oreburgh City is east of Oreburgh Gate. Visit the Pokémon Center first, then use the Poké Mart to buy Potions and at least one status-healing item. Roark is not initially in the Gym. Speak with the person near the Gym if necessary, then go to Oreburgh Mine in the southern part of the city.
Route 207 begins north of Oreburgh City and can be entered before earning the Coal Badge. Machop found there is a reliable Fighting-type counter. Inside Oreburgh Mine, Geodude and Onix can also be caught. They resist Roark's physical attacks and are useful defensive backups, although Water, Grass, Fighting, and Ground attacks are generally better for ending the Gym battle quickly.
The Oreburgh Mining Museum is optional for immediate progress. It is also the city's Fossil-related landmark, but Fossil revival is not required to reach or defeat Roark. Do not delay the Gym to collect optional items or complete side activities.
- Heal before entering Oreburgh Mine.
- Buy several Potions and a status-healing item.
- Use a Water, Grass, Fighting, or Ground attacker as your main Roark counter.
Find Roark in Oreburgh Mine and return to the Gym
Enter Oreburgh Mine from the southern side of Oreburgh City. Follow the main path into the mine, battling Workers and wild Pokémon if you need experience. Geodude and Onix are common enough to provide useful training, and Zubat is also available. You do not need to clear every side path or collect every item to advance.
Continue toward the southern end of the mine. Roark is standing there near the workers. Speak with him and he will demonstrate Rock Smash before returning to the Oreburgh Gym. This conversation is the required trigger for the Gym battle.
After speaking with Roark, retrace your path to the mine entrance. Oreburgh Mine is not one-way, so leave immediately if your party is weakened. Return to the Pokémon Center, restore your party, and save before entering the Gym.
- Speak with Roark at the southern end of Oreburgh Mine.
- Return safely to Oreburgh City.
- Heal and save before entering the Oreburgh Gym.
Cross the Oreburgh Gym and defeat Roark
The original Diamond and Pearl Oreburgh Gym has two routes toward Roark. The middle route passes the Gym's two Trainers, while the raised route lets you avoid them. Battling them is optional but provides useful experience and prize money. The Gym has no complicated puzzle; use whichever route suits your team, then approach Roark on the raised area at the back.
Roark's original Diamond team is Geodude at level 12, Onix at level 12, and Cranidos at level 14. Geodude and Onix are both Rock/Ground types, while Cranidos is pure Rock. Water, Grass, Fighting, and Ground attacks are super effective against the whole team. Turtwig's Grass attacks and Piplup's Water attacks are especially efficient. Chimchar should use a Fighting attack if available; after evolving into Monferno, Mach Punch is a strong option. Budew, Machop, Psyduck, Geodude with a Ground attack, and other Pokémon with suitable moves can also contribute.
Geodude knows Rock Throw and Stealth Rock. Onix can use Rock Throw, Screech, and Stealth Rock. Cranidos relies on strong physical attacks including Headbutt and can use Pursuit or Leer. If Roark sets Stealth Rock, switching becomes more costly, so try to defeat each Pokémon without unnecessary changes. Onix's Screech lowers Defense; switch only when needed, and avoid allowing a weakened Pokémon to remain in after its Defense has been reduced.
Cranidos is the main danger because Headbutt is powerful for this point in the game. Use your strongest super-effective move immediately rather than giving it several turns to attack. If you lack a super-effective attack, lower its Attack with moves such as Growl, use defensive support or status effects when available, and heal before your active Pokémon reaches critical HP. Ice attacks are not generally recommended: Ice is not super effective against Rock, and its advantage against Onix comes only from Onix's secondary Ground typing.
- Defeat Geodude, Onix, and Cranidos.
- Receive the Coal Badge and TM76, Stealth Rock.
- Confirm that Rock Smash can now be used outside battle.
- Heal before leaving Oreburgh City and prepare to return through Oreburgh Gate.
Before you move on
- The Trainer Card shows the Coal Badge.
- Rock Smash works outside battle when used by a compatible Pokémon.
- Roark's Geodude, Onix, and Cranidos have been defeated.
- TM76, Stealth Rock, is in the Bag.
- Your party is healed and ready to return through Oreburgh Gate toward Jubilife City and the next story route.
Eterna City and Gym — Team Galactic’s first major encounter
After leaving Oreburgh City, return through Jubilife City and travel north through Route 204 to Floaroma Town. Clear Team Galactic from Valley Windworks by obtaining the Works Key in Floaroma Meadow and defeating Commander Mars. Then follow Route 205 through Eterna Forest with Cheryl, enter Eterna City, receive HM01 Cut from Cynthia, defeat Gardenia for the Forest Badge, and use Cut to rescue Rad Rickshaw from the Team Galactic Eterna Building. Collect the Bicycle afterward and prepare to leave toward Route 206.
Return from Oreburgh City to Jubilife and Route 204
After defeating Roark and leaving Oreburgh City, travel east through Route 203 and return to Jubilife City. From Jubilife, take the northern exit onto Route 204. Battle or avoid the trainers along the route, then continue north through the short Ravaged Path passage and emerge on the other side of Route 204.
Follow Route 204 north until you reach Floaroma Town. This is the required route to the next Team Galactic event. Do not try to reach Eterna City directly from Oreburgh; the northern Route 205 and Eterna Forest progression is not available until the Valley Windworks incident has been resolved.
Heal in Floaroma Town and restock basic status medicine if needed. Poison is common on the upcoming routes, so Antidotes are useful, but no special key item is required before entering Valley Windworks.
- Leave Oreburgh City after the Coal Badge sequence.
- Return through Route 203 to Jubilife City.
- Travel north through Route 204 and the Ravaged Path.
- Reach and heal in Floaroma Town.
Go to Valley Windworks and defeat the blocking Grunt
From Floaroma Town, leave through the eastern exit and follow the lower section of Route 205. Continue east until you reach Valley Windworks, the building surrounded by wind turbines.
A Team Galactic Grunt is standing outside the entrance. Speak to him to begin the battle. In original Diamond, he uses a level 11 Glameow. Defeat him, and he will retreat inside the building and lock the door. The door cannot be opened yet, so do not waste time searching the exterior for another entrance.
After the battle, return west to Floaroma Town. The two Galactic Grunts who previously blocked the northwestern entrance are now gone. Enter Floaroma Meadow through that opening to pursue them.
- Reach Valley Windworks from eastern Route 205.
- Defeat the outside Galactic Grunt.
- Confirm that the Windworks door is locked.
- Return to Floaroma Town and enter the newly opened northwestern path.
Obtain the Works Key in Floaroma Meadow
Inside Floaroma Meadow, approach the Honey seller being confronted by two Galactic Grunts. Battle the Grunts in succession. Their original Diamond teams are low-level Bug- and Poison-type Pokémon, so a dependable Fire-, Flying-, or Rock-type attack can handle them efficiently.
After the battles, one Grunt leaves behind the Works Key. The Honey seller picks it up and gives it to you, along with Honey as thanks. The Works Key is a Key Item and is required to unlock Valley Windworks.
Return through Floaroma Town to Route 205, then follow the route east to Valley Windworks again. Use the Works Key on the locked entrance. The earlier Grunt will flee inside, leaving the way open to the building’s interior.
- Defeat both Galactic Grunts in Floaroma Meadow.
- Receive the Works Key from the Honey seller.
- Return to Valley Windworks.
- Use the Works Key to open the building.
Clear Valley Windworks and defeat Commander Mars
Inside Valley Windworks, defeat the Galactic Grunts who guard the machinery. The interior battles are straightforward, but heal before entering if your team was worn down on Route 205. Continue through the building until you reach Commander Mars.
In original Diamond, Mars uses a level 14 Zubat and a level 16 Purugly. Zubat is vulnerable to Electric-, Ice-, Psychic-, and Rock-type attacks, while Purugly is a Normal-type Pokémon. Fighting-type attacks are effective against Purugly; otherwise, use your strongest reliable neutral attack and avoid letting a weakened Pokémon remain in against repeated physical hits.
Defeating Mars ends the takeover. The trapped worker is released, the building is cleared, and the route-opening consequences allow you to continue north along Route 205. Return to the route outside the building and follow it north. The small girl who was asking for help can now proceed, and the northern path toward Eterna Forest is available.
- Defeat the interior Galactic Grunts.
- Defeat Commander Mars.
- Confirm that Valley Windworks is no longer under Team Galactic control.
- Continue north on Route 205.
Cross Route 205 and enter Eterna Forest with Cheryl
Follow the northern section of Route 205 until you reach the entrance to Eterna Forest. Cheryl is waiting there and asks you to accompany her because she is concerned about Team Galactic activity in the forest. Accept her request to begin the required escort sequence.
While Cheryl travels with you, wild encounters become Double Battles with her Chansey as your partner. Trainer battles that would normally be Double Battles become Multi Battles. Cheryl restores your party after each battle, making the forest a useful place to gain experience without spending healing items. You cannot freely use the forest as a normal solo route until the escort ends.
For the most direct route, move east from the southern entrance through the tall grass, then continue north toward the gap leading to the northeastern section. In the larger middle area, follow the paths generally northeast and north. Avoid wandering into the western side unless you want optional items or the Old Chateau area; neither is required for Eterna City.
The Old Chateau is an optional side area in this chapter. It requires Cut to enter its grounds, but it is not needed for Gardenia, the Galactic building, or the Bicycle. Continue toward the forest’s northeastern exit instead.
- Meet Cheryl at the southern Eterna Forest entrance.
- Accept her temporary partnership.
- Use the northeastern route through the forest.
- Reach the eastern exit without treating the Old Chateau as mandatory.
Enter Eterna City and receive HM01 Cut
Exit Eterna Forest onto the eastern portion of Route 205 and continue east into Eterna City. Heal at the Pokémon Center before beginning the city events.
Near the northern part of town, Cynthia approaches you and gives you HM01 Cut. Cut may be taught before earning the second badge, but the move cannot be used outside battle until Gardenia is defeated. Keep a Pokémon that can learn Cut in your party if you want to use it immediately after the Gym battle.
The Underground Man’s house near the Pokémon Center can provide the Explorer Kit. The Underground is optional and has no bearing on the Forest Badge, the Team Galactic building, or the Bicycle. The Eterna History Museum is also optional; its displays and Fossil-revival service are not required for progression.
- Enter Eterna City from the eastern Eterna Forest exit.
- Receive HM01 Cut from Cynthia.
- Keep a Cut-capable Pokémon available.
- Treat the Explorer Kit and museum as optional activities.
Prepare for Gardenia’s original Diamond Gym battle
Gardenia’s Gym is in the southeastern part of Eterna City. Her original Diamond team is Cherubi at level 19, Turtwig at level 19, and Roserade at level 22. All three are Grass type, with Roserade being the main threat because it is faster, can inflict status, and carries a Sitrus Berry.
Fire-, Flying-, Ice-, Bug-, and Poison-type attacks are super effective. Staravia is a dependable choice if you raised Starly, and Chimchar or its evolution is especially useful. Players using Turtwig or Piplup can consider Ponyta from Route 211, while Zubat, Golbat, Beautifly, or Kricketune can provide Flying- or Bug-type coverage.
Do not rely on Water-, Ground-, or Rock-type Pokémon unless they have a strong neutral attack and enough durability to withstand Grass moves. Bring Parlyz Heals for Stun Spore and Antidotes for Poison Sting. Keep your best counter healthy for Roserade rather than spending it recklessly on the first two Pokémon.
- Bring a reliable Fire-, Flying-, Bug-, Ice-, or Poison-type attacker.
- Carry Parlyz Heals and Antidotes.
- Reserve a healthy counter for level 22 Roserade.
Solve the original Diamond Gym puzzle and defeat Gardenia
Enter the Gym and speak with the trainers as you move through the forest-themed layout. Gardenia will not battle until all four Gym Trainers hidden around the Gym have been defeated. The trainers provide clues to the locations of the others, so search the clearings and paths instead of leaving after the first battle.
Defeat all four trainers, then approach Gardenia. Lead with your Fire- or Flying-type attacker against Cherubi and Turtwig, but preserve enough health for Roserade. If Roserade uses Stun Spore, cure paralysis or switch to a Pokémon that can finish the battle safely. Continue attacking rather than giving Roserade several turns to benefit from its Sitrus Berry.
Victory awards the Forest Badge and TM86 Grass Knot. The badge also unlocks the use of Cut outside battle. Heal at the Pokémon Center before entering the Team Galactic Eterna Building.
- Defeat all four Gym Trainers.
- Battle Gardenia after the route opens.
- Defeat Cherubi, Turtwig, and Roserade.
- Receive the Forest Badge and TM86 Grass Knot.
- Confirm that Cut can now be used outside battle.
Use Cut to enter the Team Galactic Eterna Building
Travel to the Team Galactic building in northern Eterna City. Small trees block the approach, so use Cut on them and enter. A second tree near the building can be cut for an optional item, but it is not needed to reach Commander Jupiter.
Climb through the building by defeating the Galactic Grunts and taking the usable stairways. The original Diamond building is simpler than the altered Platinum layout, but some stairways lead to side areas or items. Continue upward after each battle and do not confuse optional item rooms with the required route.
You may leave to heal and return; defeated Grunts remain defeated. When you reach the top floor, challenge Commander Jupiter. In original Diamond, her team is a level 18 Zubat and a level 20 Skuntank. Use a strong Electric-, Ice-, Psychic-, or Rock-type attack against Zubat. Skuntank is vulnerable to Ground-type attacks, although a durable neutral attacker can also defeat it if Ground coverage is unavailable.
After Jupiter is defeated, Team Galactic withdraws and Rad Rickshaw, the Cycle Shop owner, is freed. This completes the required Eterna Team Galactic event.
- Use Cut to clear the entrance trees.
- Defeat the required Galactic Grunts.
- Reach the top floor of the original Diamond building.
- Defeat Commander Jupiter.
- Confirm that Rad Rickshaw has been freed.
Collect the Bicycle and finish the chapter
Leave the Galactic building and visit the Cycle Shop south of the Pokémon Center. Speak with Rad Rickshaw to receive the Bicycle. The Bicycle is required for the Cycling Road route south of Eterna and is the next major travel upgrade.
Heal and restock before leaving town. Keep HM01 Cut available because it remains useful for later field obstacles. The next progression route is south from Eterna toward Route 206 and Cycling Road. The chapter ends once the Bicycle has been collected and the route out of Eterna is accessible.
The museum, Underground, Old Chateau, optional items, Honey trees, and Eterna’s other facilities can be explored later or ignored. They are not required to complete the Valley Windworks, Gardenia, Jupiter, or Bicycle objectives.
- Receive the Bicycle from Rad Rickshaw.
- Heal and restock in Eterna City.
- Keep a Cut-capable Pokémon available.
- Reach the southern route toward Route 206 and Cycling Road.
Before you move on
- The Forest Badge is displayed on the Trainer Card.
- Cut works outside battle.
- The Valley Windworks outside Grunt, Floaroma Meadow Grunts, and Commander Mars have all been defeated.
- The Works Key was obtained and used to open Valley Windworks.
- Cheryl’s escort through Eterna Forest is complete and Eterna City has been reached from the eastern forest exit.
- Cynthia has given HM01 Cut.
- Gardenia has been defeated and TM86 Grass Knot is in the Bag.
- Commander Jupiter has been defeated inside the Team Galactic Eterna Building.
- Rad Rickshaw has been freed.
- The Bicycle has been collected from the Cycle Shop.
- The southern exit toward Route 206 and Cycling Road is available.
References for this chapter
- Pokémon Diamond and Pearl Versions — Bulbapedia
- Walkthrough: Pokémon Diamond and Pearl/Part 5 — Bulbapedia
- Walkthrough: Pokémon Diamond and Pearl/Part 6 — Bulbapedia
- Valley Windworks — Bulbapedia
- Eterna Forest — Bulbapedia
- Pokémon Diamond and Pearl/Route 205 and Valley Windworks — StrategyWiki
- Pokémon Diamond and Pearl/Eterna City — StrategyWiki
- Pokémon Diamond/Pearl — Gyms and Gym Leaders — Serebii
Mt. Coronet — Early Crossing to Hearthome City
After completing the Eterna City objectives, leave Eterna through Route 206 and ride south along Cycling Road. Continue through Route 207, enter the southern Mt. Coronet passage, speak with Cyrus, and exit onto Route 208. Follow Route 208 east to Hearthome City. This first crossing is a short required transition and does not include a Cyrus battle or any required field move. The upper Mt. Coronet ascent, the Veilstone Galactic Headquarters raid, Spear Pillar, and Dialga remain later objectives.
Leave Eterna City through Route 206
Begin this chapter in Eterna City, not Oreburgh City. Use Eterna’s southern exit to enter Route 206. The route is the long strip beneath Cycling Road, and the Cycling Road entrance is reached from the southern side of Eterna.
Ride south through Cycling Road until you reach its lower exit. Cycling Road is the required route connection here, so make sure you have the Bicycle obtained during the Eterna City sequence. You can battle the cyclists for experience or pass them when possible; neither option changes the story route.
At the bottom of Cycling Road, continue into the Route 206 area and follow the path toward Route 207. This is a travel section rather than a dungeon, but wild Pokémon and route trainers can wear down a party that has not healed since the Eterna events. Use the Eterna Pokémon Center before leaving if your team is missing significant health or move PP.
- Start in Eterna City after the Chapter 3 objectives are complete.
- Leave through the southern gate onto Route 206.
- Use the Bicycle to travel south along Cycling Road.
- Reach Route 207 at the southern end of the route.
Cross Route 207 to the Mt. Coronet entrance
On Route 207, continue east toward the Mt. Coronet entrance. This is the short route linking the lower end of Cycling Road with the mountain passage and Oreburgh City. Do not turn west toward Oreburgh unless you need to heal, shop, or handle an optional errand; Oreburgh is not the required starting point for this chapter.
Route 207 contains trainers and ledges, so follow the walkable route rather than trying to cross ledges from the wrong side. The main objective is the cave entrance on the eastern side of Route 207. Enter Mt. Coronet there.
If you have not already received the Dowsing Machine and VS Seeker during the earlier Route 206 and Route 207 sequence, those items are optional conveniences rather than requirements for crossing the mountain. No special team composition is needed for this visit, and you do not need to prepare for a boss fight.
- Travel east across Route 207 from the Cycling Road side.
- Use Oreburgh only as an optional detour, not as the chapter’s starting point.
- Enter Mt. Coronet through the Route 207 entrance.
- Keep the party reasonably healthy before entering.
Cross the southern Mt. Coronet passage
The first-visit section of Mt. Coronet is short. Follow the accessible corridor through the southern 1F area, using the stairs and open walkways that lead toward the opposite exit. The route is linear enough that you should continue toward the far side instead of exploring every side space.
Surf, Strength, Rock Smash, and Rock Climb are not required for this first crossing. If you encounter water, climbable walls, or blocked passages, leave them for a later visit. Those obstacles are connected with optional items or the later ascent toward the mountain’s upper areas.
Wild Pokémon can appear inside the cave, and optional items may be collected if you want them, but none is necessary to reach Hearthome City. Repels are useful if you want to move quickly, although using them is not required.
- Follow the accessible southern 1F route.
- Use the stairs and open corridors leading toward the opposite exit.
- Do not search for an HM route during this visit.
- Treat side items and additional encounters as optional.
Complete the first Cyrus conversation
While crossing the mountain, you meet Cyrus, the leader of Team Galactic. In the original Nintendo DS Pokémon Diamond Version, this first encounter is a conversation. Cyrus does not challenge you to a Pokémon battle here.
Speak with Cyrus and allow the dialogue to finish. There is no key item to obtain from him, no switch to activate, and no Team Galactic battle that must be cleared before you can continue. After the conversation, return to the main passage and proceed toward the exit.
Do not confuse this scene with Cyrus’s later appearances. His later battles and the major Team Galactic mountain events occur after the Lake Acuity sequence and the Veilstone Galactic Headquarters raid.
- Find Cyrus inside the first Mt. Coronet passage.
- Complete the conversation.
- Do not expect a battle at this location.
- Continue toward the Route 208 exit after the dialogue.
Exit onto Route 208 and reach Hearthome City
Leave Mt. Coronet on the eastern side onto Route 208. Route 208 is the correct destination after this first crossing. From the mountain exit, follow the route east through its bridges, ledges, grass, and trainer encounters until you reach the Hearthome City entrance.
Keep moving east. Hearthome City is not reached by returning west toward Oreburgh, and there is no Evertree destination in this part of Sinnoh. If you are following a direction that names Evertree, it is from another game, another region, or an incorrect guide.
Enter Hearthome City to finish this chapter. Heal at the Pokémon Center before beginning the next city sequence. Hearthome’s initial story events, including the Buneary encounter and the Contest Hall meeting, belong to the following progression rather than this mountain crossing.
- Exit Mt. Coronet onto Route 208.
- Travel east across Route 208.
- Enter Hearthome City.
- Heal at the Hearthome Pokémon Center before continuing.
Deferred reference: the later Mt. Coronet ascent
Do not attempt the full Mt. Coronet ascent during this chapter. The later mountain route becomes relevant after the Lake Acuity events and the Veilstone Galactic Warehouse and Headquarters sequence. That return trip leads through the upper mountain, the snowy exterior sections, Team Galactic battles, Spear Pillar, Cyrus’s summit plan, and the Diamond-version Dialga sequence.
When the main story sends you back, use the appropriate southern Mt. Coronet entrance and bring the required field-move access for the route available at that point, including Surf and Rock Climb. The later trip is a long dungeon sequence and should be approached with a healed party, recovery items, and space for story battles.
For the present chapter, reaching Hearthome City is the only required Mt. Coronet objective. The fact that large parts of the mountain remain inaccessible now is intentional and does not indicate a missed switch or blocked story event.
- Postpone the upper Mt. Coronet route until after Lake Acuity and Veilstone Galactic Headquarters.
- Do not attempt to reach Spear Pillar during this first crossing.
- Treat Surf, Strength, Rock Smash, and Rock Climb as unnecessary for the current passage.
- End the chapter after entering Hearthome City.
Before you move on
- You began in Eterna City after completing the Eterna sequence.
- You left through Route 206 and traveled south along Cycling Road.
- You continued east across Route 207 and entered Mt. Coronet from that route.
- You completed the first non-battle conversation with Cyrus.
- You crossed the accessible southern passage without needing a field move.
- You exited onto Route 208 and continued east into Hearthome City.
- You have not attempted the later upper-mountain, Veilstone Headquarters, Spear Pillar, or Dialga sequence.
- The chapter is complete once Hearthome City has been entered; the full Mt. Coronet ascent remains deferred.
Veilstone City and Galactic HQ — breakthrough and the third badge (Maylene)
In the original Nintendo DS version of Pokémon Diamond, the route to Veilstone City begins in Hearthome City and passes through Route 209, Solaceon Town, southern Route 210, and rainy Route 215. Maylene is the third Gym Leader, and her Cobble Badge allows Fly outside battle once HM02 has been obtained. After the Gym, help Dawn or Lucas recover the Pokédex at the Galactic Warehouse and collect HM02 Fly from the warehouse first floor. The Storage Key, Galactic Key, full Galactic HQ raid, and Spear Pillar operation are later objectives that occur after the Lake Acuity events; they are not part of the first Veilstone visit.
Leave Hearthome City through Route 209
From Hearthome City, take the eastern gate to Route 209. Follow the main path east across the bridges and streams, then continue north toward Solaceon Town. Battle the trainers along the route or use the tall grass to gain experience before the next Gym. The route contains several Berry patches and optional item detours, but none is required for progress.
The Lost Tower stands near the northern part of Route 209. Entering it is optional for reaching Veilstone, but climbing to the top is worthwhile because the elderly women there provide the Cleanse Tag and HM04 Strength. Strength is not required for Maylene’s Gym, but it becomes useful for later routes and dungeons. If you do not want to clear the tower now, continue north to Solaceon Town and return later.
The Hallowed Tower sits near the water on Route 209. It is optional and is connected to the Spiritomb side quest, so do not mistake it for a required story objective.
- Leave Hearthome City through the eastern Route 209 gate.
- Continue north toward Solaceon Town.
- Optionally clear Lost Tower and obtain HM04 Strength.
- Treat Hallowed Tower and its side quest as optional.
Explore Solaceon Town and prepare for the eastern route
Enter Solaceon Town from Route 209 and heal at the Pokémon Center. The town contains the Pokémon Day Care, Solaceon Ruins, and several optional services. None of these is required to reach Maylene, although the Day Care can be useful if you want to raise an additional team member while traveling.
Solaceon Ruins is an optional detour east of town. Its deeper rooms contain Unown encounters and item rewards, but the ruins are not part of the main route to Veilstone. Save before exploring if you intend to search every chamber, because the layout is easy to traverse incorrectly and the encounters can consume time and healing supplies.
When ready, leave Solaceon Town through the northern exit onto Route 210. At this stage, travel only through the southern section. The Psyduck blocking the northern path cannot be moved until a later SecretPotion event, so do not try to force a route toward Celestic Town yet.
- Heal in Solaceon Town.
- Use the Day Care or Solaceon Ruins only if desired.
- Leave through the northern gate to southern Route 210.
- Do not attempt to pass the Psyduck roadblock.
Cross southern Route 210 and turn east onto Route 215
Follow the narrow path north from Solaceon Town through southern Route 210. The Café Cabin is near the junction with Route 215 and is an optional stop where you can battle the customers and buy Moomoo Milk. Moomoo Milk is a useful healing item if your supplies are low, but the café is not required.
Because the Psyduck block the northern section, turn east at the Route 215 junction. Do not continue looking for a way through the roadblock. Route 210 will later become the path to Celestic Town after Cynthia’s SecretPotion clears the Psyduck, but that happens after the Veilstone and Pastoria portions of the story.
Route 210 trainers use a mixture of common early Sinnoh Pokémon. Keep a balanced lead Pokémon available rather than relying on a single type, and heal before entering Route 215 if several team members are already damaged.
- Travel through southern Route 210.
- Stop at the Café Cabin if you want Moomoo Milk or extra experience.
- Turn east onto Route 215.
- Leave the Psyduck event for the later Celestic Town sequence.
Cross rainy Route 215 and enter Veilstone City
Route 215 is continuously rainy and connects Route 210 with Veilstone City. Follow the main eastern path across the bridges and raised ground. The rain weakens Fire-type attacks and strengthens Water-type attacks, so do not depend exclusively on a Fire attacker for trainer battles here. Grass, Electric, Flying, and neutral physical or special attacks provide more consistent coverage.
Use the route’s ledges and bridges to stay on the main path. A Black Belt before one of the bridges gives TM66 Payback, an optional Dark-type move that becomes stronger when its user moves after the target. Pick up the Ether near the early bridge if you pass it, but do not wander far from the route if your party needs healing.
The eastern gate leads directly into Veilstone City. Heal immediately at the Pokémon Center before visiting the Gym. The Veilstone Department Store is the best local place to restock Poké Balls, Super Potions, Revives, Repels, and status cures. Full Heals and Ice Heals are available there, although freeze is not a major threat in this chapter.
- Cross Route 215 toward the eastern gate.
- Consider collecting TM66 Payback and the Ether.
- Enter Veilstone City through the eastern end of Route 215.
- Heal and restock before challenging Maylene.
Prepare for Maylene’s Fighting-type Gym
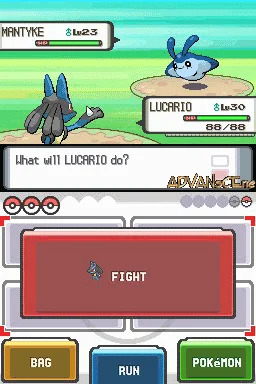
Maylene’s Gym is in the southwestern part of Veilstone City. Her Diamond team is Meditite at level 27, Machoke at level 27, and Lucario at level 30. Flying- and Psychic-type attacks are effective against Meditite and Machoke, but their moves make careless switching dangerous. Meditite can use Confusion against a Ghost switch-in, and Machoke carries Rock Tomb, which can punish a Flying-type Pokémon.
Lucario is Fighting and Steel, so Psychic and Flying attacks are resisted rather than super effective. Fire, Ground, and Fighting attacks are better answers. Lucario also knows Drain Punch, which can restore its health, and carries a Sitrus Berry. Bone Rush can threaten Fire- and Flying-type Pokémon, while Force Palm can inflict paralysis. Use a strong super-effective attack instead of allowing Lucario several turns to recover or boost itself.
A Ghost Pokémon can block Fighting-type moves, but do not send one into Meditite without checking its ability to survive Confusion. If your team lacks a direct counter, use a fast Pokémon with strong neutral damage, lower Lucario’s health carefully, and heal before its Sitrus Berry activates if possible.
- Bring a reliable Flying or Psychic attack for Meditite and Machoke.
- Prepare Fire, Ground, or Fighting coverage for Lucario.
- Do not assume a Flying Pokémon is safe from Rock Tomb or Bone Rush.
- Carry healing items before entering the Gym.
Solve Diamond’s yellow-wall Gym puzzle and defeat Maylene
Pokémon Diamond uses sliding yellow wall panels in Veilstone Gym. This is different from Pokémon Platinum’s punching-bag puzzle. Push the panels to open passages through the small rooms, then use the ramps and stairs to move around the barriers and approach them from their other sides. Several panels must be shifted more than once because the useful opening is often on the far side of the room.
Start by opening the southeastern route, then work through the eastern and central rooms. Defeat the Black Belt trainers as you advance so they do not block the corridors later. When a panel appears to trap you, look for a side passage or ramp that lets you circle around it; repeatedly pushing from the same side will not create the complete route.
Continue through the central and western rooms until the northern passage to Maylene is open. If the arrangement becomes difficult to follow, leave the Gym and re-enter to reset the movable panels. Heal before speaking to Maylene.
Maylene opens with Meditite, followed by Machoke and Lucario. Use Flying or Psychic attacks against the first two while watching for Confusion and Rock Tomb. Switch to Fire, Ground, or Fighting coverage for Lucario, and keep attacking its weakness after the Sitrus Berry activates. Defeating Maylene awards the Cobble Badge and TM60 Drain Punch. The badge permits Fly outside battle once HM02 has been collected.
- Use Diamond’s sliding yellow panels, not Platinum’s punching bags.
- Circle around panels and approach them from different sides.
- Reset the puzzle by leaving and re-entering if necessary.
- Defeat Meditite, Machoke, and Lucario.
- Receive the Cobble Badge and TM60 Drain Punch.
Recover the Pokédex and collect HM02 Fly
After leaving the Gym, Dawn or Lucas is waiting outside and asks for help. Follow the character to the Galactic Warehouse in the northwest part of Veilstone City. Two Team Galactic Grunts are holding the Pokédex, so speak to Dawn or Lucas to begin the Multi Battle.
Your ally uses Clefairy, Kadabra, and the second-stage evolution of the starter associated with the selected player character. The two Galactic Grunts use level 25 Pokémon, including Beautifly, Stunky, Dustox, and Croagunk. Focus on one opponent at a time and avoid using moves that can damage your ally’s Pokémon unless you are certain of the targeting rules.
After both Grunts are defeated, the Pokédex is returned. Enter the Galactic Warehouse and examine the item on the east side of the first floor to receive HM02 Fly. The Cobble Badge allows the field use of Fly, but you still need to teach the HM to a compatible Pokémon before using it from the Pokétch or menu.
Only the warehouse first floor is available during this visit. The locked basement passage cannot be opened yet because the Storage Key has not appeared.
- Meet Dawn or Lucas outside the Gym.
- Win the Multi Battle outside the Galactic Warehouse.
- Confirm that the Pokédex has been returned.
- Collect HM02 Fly east of the warehouse entrance.
- Teach Fly to a compatible Pokémon before attempting to use it.
End the chapter and defer the Galactic HQ raid
The first Veilstone visit is complete after Maylene has been defeated, the Pokédex has been recovered, and HM02 Fly has been collected. From Veilstone, leave through Route 214 toward Valor Lakefront and Pastoria City. The Great Marsh is an optional destination in Pastoria, not a requirement for this chapter.
Do not search for the Storage Key during the initial Veilstone visit. In original Diamond, the Storage Key is obtained only after the Lake Acuity confrontation later in the story. The Galactic Warehouse basement, Galactic Key, full Galactic HQ raid, Cyrus encounter, Commander Saturn sequence, and the route toward Spear Pillar belong after Chapter 9’s Lake Acuity events.
When that later return becomes available, the Storage Key opens the locked Warehouse route and leads to the Galactic Key. Those events should be handled as a separate Veilstone objective rather than combined with Maylene’s Gym chapter.
- Maylene has been defeated.
- The Cobble Badge and TM60 Drain Punch have been received.
- The Pokédex has been recovered in the Warehouse entrance battle.
- HM02 Fly has been collected from the Warehouse first floor.
- Leave through Route 214 toward Pastoria.
- Defer Storage Key, Galactic Key, Galactic HQ, and Spear Pillar events until after Lake Acuity.
Before you move on
- The route from Hearthome City through Route 209, Solaceon Town, southern Route 210, and Route 215 has been completed.
- Maylene has been defeated and the Cobble Badge appears on the Trainer Card.
- TM60 Drain Punch has been received.
- The Multi Battle outside the Galactic Warehouse has been won with Dawn or Lucas.
- The Pokédex has been returned.
- HM02 Fly has been collected from the east side of the Galactic Warehouse first floor.
- The player has left Veilstone through Route 214 toward the Pastoria sequence.
- The Storage Key and Galactic HQ raid have not been incorrectly treated as first-visit objectives.
References for this chapter
- Walkthrough: Pokémon Diamond and Pearl
- Walkthrough: Pokémon Diamond and Pearl/Part 8 — Bulbapedia
- Walkthrough: Pokémon Diamond and Pearl/Part 9 — Bulbapedia
- Walkthrough: Pokémon Diamond and Pearl/Part 10 — Bulbapedia
- Walkthrough: Pokémon Diamond and Pearl/Part 17
- Veilstone Gym — Bulbapedia
- Sinnoh Route 209 — Bulbapedia
- Sinnoh Route 210 — Bulbapedia
- Sinnoh Route 215 — Bulbapedia
- Pokémon Diamond and Pearl Nintendo DS Manual
Pastoria City and Great Marsh — Water training, Crasher Wake, and the Great Marsh tips
Reach Pastoria City through Route 213, prepare for Crasher Wake’s Water-type Gym, optionally search the Great Marsh for useful Pokémon, collect HM05 Defog, and pursue the Team Galactic Grunt who appears after the Gym battle. This chapter covers the original Nintendo DS Pokémon Diamond Version sequence, not Brilliant Diamond or Shining Pearl.
Enter Pastoria City and prepare for Crasher Wake
Arrive in Pastoria City through Route 213 and heal at the Pokémon Center. The Great Marsh lies directly north of the city, but it is optional: you can complete the story without catching anything there. Visit it before or after the Gym if you want a marsh-exclusive Pokémon, Defog, or extra experience.
Build your preparation around Grass coverage first. Crasher Wake’s Quagsire is Water/Ground, so Electric attacks do not affect it, while Grass attacks are super effective. Budew, Roselia, Grotle, and other dependable Grass attackers are suitable choices. An Electric-type or a Pokémon with Rock coverage is useful against Gyarados, while a bulky Pokémon that can survive Floatzel’s attacks gives you a safer final switch-in.
Heal before entering the Gym and carry Potions or Super Potions along with status-healing items. Wake’s team is around the high twenties, so a party that has kept pace with the surrounding routes should be ready without excessive grinding.
- Heal at the Pastoria Pokémon Center.
- Bring reliable Grass attacks for Quagsire.
- Prepare Electric or Rock coverage for Gyarados.
- Keep a healthy answer to Floatzel’s speed and Ice Fang.
Solve the Pastoria Gym water puzzle
Pastoria Gym uses yellow, green, and blue switches to change the water level and open different walkways. From the entrance, go toward the southwest section and press the yellow switch. Go down the stairs, move north, and press the green switch on the upper route.
From there, travel southwest toward the blue switch beside the Sailor. Press it, then go south and northeast to the green switch near the trainer wearing a red hat. Use the stairs on the right and follow the lower path south to the next yellow switch.
Press the yellow switch, then go north and west. Climb the stairs on the left and press the blue switch to raise the water. Cross the bridge on the eastern side and walk north to reach Crasher Wake.
The exact route can include Gym Trainer battles, so use them for experience if your party is healthy. If your main Grass or Electric counter is weakened, leave through the entrance, heal, and return; the switch puzzle does not require you to defeat every trainer in one attempt.
- Press the southwest yellow switch.
- Press the upper green switch.
- Press the blue switch near the Sailor.
- Press the green switch near the red-hatted trainer.
- Press the lower yellow switch.
- Press the final blue switch and cross the eastern bridge.
Defeat Crasher Wake’s Water-type team
In the original Diamond version, Crasher Wake uses Gyarados at level 27, Quagsire at level 27, and Floatzel at level 30. Gyarados is vulnerable to Electric and Rock attacks. If it uses Swagger, switching to another Pokémon is usually safer than risking confusion with your best attacker. Do not use Electric attacks against Quagsire; its Ground typing makes them ineffective.
Use a strong Grass attack on Quagsire. It is vulnerable to Grass because both its Water and Ground typings are weak to that type. Avoid relying on a very frail Grass Pokémon if it cannot finish the battle, since Quagsire can survive a weak hit and retaliate with moves such as Mud Bomb or Slam.
Floatzel is fast and carries Ice Fang, so sending a fragile Grass Pokémon against it can backfire even though Grass attacks are effective. A healthy Electric-type, a bulky Grass-type, or a Pokémon that can take Ice Fang and respond with a strong attack is more dependable. Cure confusion or other disabling effects rather than gambling on a low-accuracy move.
After the victory, Wake awards the Fen Badge and TM55, Brine. The badge permits Defog to be used outside battle. Defog is needed to make foggy areas easier to navigate, although the field effect can technically be crossed without clearing it.
- Use Electric or Rock attacks on Gyarados.
- Use Grass attacks on Quagsire.
- Avoid Electric attacks against Quagsire.
- Reserve a healthy switch for Floatzel.
- Collect the Fen Badge and TM55, Brine.
Search the Great Marsh as an optional Safari Game
The Great Marsh entrance is the large building north of Pastoria City. Pay 500 Poké Dollars to enter the Safari Game and receive 30 Safari Balls. The session ends after 500 steps or when the Safari Balls are used, and you can leave early if you have finished searching.
The observation deck’s binoculars show which daily Pokémon are appearing in the different marsh areas. Check them before walking deep into the marsh, especially if you are looking for a particular species. The available Pokémon change by day, and the exact encounter table differs between Diamond and Pearl, so use the Diamond encounters shown by the binoculars rather than assuming every marsh species is available today.
You cannot battle wild Pokémon in the Great Marsh. When you encounter a target, you can throw a Safari Ball, throw bait, throw mud, or run. Throwing bait makes the Pokémon easier to catch but more likely to flee. Throwing mud makes it less likely to flee but harder to catch. Because both effects carry risk, repeatedly throwing Safari Balls is a sensible general method when you want the most consistent attempt without changing the encounter’s rates.
The marsh contains mud that can slow or trap your movement temporarily. Use the internal train when it helps you change areas without spending as many steps, and keep track of your route back to the entrance. Do not treat the Great Marsh as mandatory: leave and continue the main story if your team already has suitable Water, Grass, or utility Pokémon.
- Pay 500 Poké Dollars and receive 30 Safari Balls.
- Check the binoculars before committing to a target.
- Use Safari Balls directly for a low-risk general strategy.
- Remember that bait and mud trade capture chance against fleeing chance.
- Leave the Great Marsh when your capture goal is complete.
Collect HM05 Defog and advance the Pastoria story
To obtain HM05 Defog in original Diamond, enter the Great Marsh and reach Area 6, northeast of the entrance. Speak to the Ace Trainer near the entrance to that area. You do not need to catch a Pokémon or finish the Safari Game to receive Defog. Keep the HM available for later foggy routes and teach it only to a Pokémon you are willing to use for field utility.
After defeating Crasher Wake, go to the area near the Great Marsh entrance. A Team Galactic Grunt will run away when you approach him. Follow him east along Route 213 toward Valor Lakefront and battle him when the route forces the encounter. Afterward, Cynthia appears and gives you the SecretPotion.
The SecretPotion is used on the Psyduck blocking Route 210 near the northern route from Solaceon Town. It does not give you Surf. In Diamond and Pearl, HM03 Surf is obtained later in Celestic Town from Cynthia’s grandmother after you deal with the Galactic Grunt outside the ruins and enter the shrine. Do not search Pastoria or the Great Marsh for Surf.
- Obtain HM05 Defog from the Ace Trainer in Great Marsh Area 6.
- Defeat the Team Galactic Grunt near the Great Marsh after Wake’s battle.
- Follow him toward Valor Lakefront and win the required battle.
- Receive the SecretPotion from Cynthia.
- Remember that HM03 Surf comes later from Cynthia’s grandmother in Celestic Town.
Before you move on
- The Fen Badge is displayed on your Trainer Card.
- Crasher Wake has awarded TM55, Brine.
- HM05 Defog has been collected from the Ace Trainer in Great Marsh Area 6.
- The Great Marsh has been treated as optional, with any desired capture attempt completed or abandoned safely.
- The Team Galactic Grunt near the Great Marsh has been chased toward Valor Lakefront and defeated.
- Cynthia has given you the SecretPotion for the Psyduck on Route 210.
References for this chapter
- Walkthrough: Pokémon Diamond and Pearl/Part 12 — Bulbapedia
- Great Marsh — Bulbapedia
- Pokémon Diamond/Pearl/Platinum HM chart — Pokémon Database
- DP TM/HM Location Guide — Smogon University
- Pokémon Diamond/Pearl/Platinum Great Marsh — StrategyWiki
- Pokémon Diamond/Pearl — Gyms & Gym Leaders
- Pokémon Diamond Version location and route guide — GameFAQs
Hearthome City — contests, the Pokétch, and sweeping training options
The first Hearthome City visit and its contests, facilities, and Buneary event are optional. The required route for this chapter begins with the SecretPotion already obtained in Chapter 6. Return to Route 210, use the medicine on the Psyduck blocking the northern road, cross the foggy route to Celestic Town, defeat the Team Galactic Grunt outside the ruins, deliver Cynthia’s Old Charm to her grandmother, and receive HM03 Surf. Return to Hearthome City afterward and challenge Fantina in the original Diamond five-story arithmetic-door Gym. Defeat her to earn the Relic Badge, TM65 Shadow Claw, and permission to use Surf outside battle.
1. Treat first-arrival Hearthome activities as optional
If you have not fully explored Hearthome City, the western entrance from Route 208 can trigger the Buneary event. Follow the Buneary to the Super Contest Hall if you want to complete this scene. Keira gives you the Glitter Powder accessory, and your mother gives you a Tuxedo or Dress. None of these rewards is required for Fantina’s Gym or the main story.
The Super Contest Hall, Poffin House, Pokémon Fan Club, Pokémon Hotel, Amity Square, and Lost Tower are optional. They offer accessories, ribbons, items, and side activities, but they do not replace any required story step. Use Hearthome’s Pokémon Center and PC as a convenient recovery and party-management hub.
Fantina is not available during the first Hearthome visit in original Diamond. The Gym opens after the Celestic Town event and HM03 Surf handoff. Do not use Pokémon Platinum’s progression, where Fantina is fought much earlier.
- Treat the Buneary and Contest Hall sequence as optional.
- Do not expect Fantina’s Gym to open before the Celestic Town event.
- Use Hearthome’s Pokémon Center and PC when preparing for the return trip.
2. Check the Pokétch and distinguish its maps
The Pokétch was obtained in Jubilife City by finding the three clowns, answering their questions, collecting their Coupons, and showing the Coupons to the Pokétch Company president. If you skipped that earlier step, return to Jubilife and complete it before relying on Pokétch applications.
The Calculator and Step Counter are available early. The Calculator is especially useful in Fantina’s Gym because each floor presents an arithmetic question. The Step Counter is useful for tracking travel and Egg-hatching progress, but neither application is required for the story.
After receiving the third Gym Badge, speak with the Pokétch Company president in Jubilife City to obtain the Marking Map. This is a Pokétch application that lets you place markers and shows the current route locations of roaming Pokémon such as Mesprit after its roaming event. It is not the Town Map.
The Town Map is a separate key item used to inspect Sinnoh’s cities and routes. If you have three badges but do not see the Marking Map, return to the Pokétch Company president before continuing.
- Have the Pokétch available.
- Use the Calculator for Fantina’s arithmetic questions if necessary.
- Claim the Marking Map after earning the third badge if it is missing.
- Keep the Marking Map and Town Map clearly distinguished.
3. Begin with the Chapter 6 SecretPotion handoff
Chapter 6 already covers the post-Wake Team Galactic Grunt chase through Route 213 and Valor Lakefront, Cynthia’s appearance, and receipt of the SecretPotion. Do not repeat that chase here. Start from the current travel point with the SecretPotion already in your Bag.
Travel to Route 210 through the cleared route network. The northern road is blocked by a group of Psyduck near the route’s central section. Approach the Psyduck and use the SecretPotion when the game prompts you. They leave the road, opening the way north.
The northern section of Route 210 is covered by thick fog. HM05 Defog, obtained in the Great Marsh, makes the route easier to see, but completing every Great Marsh activity is not required for this chapter. Heal in Solaceon Town or at another convenient Pokémon Center before continuing if your party is worn down.
- Begin with the SecretPotion already obtained in Chapter 6.
- Use the SecretPotion on the Psyduck blocking northern Route 210.
- Use Defog if the fog makes the route difficult to navigate.
- Continue north toward Celestic Town.
4. Cross northern Route 210 and complete Celestic Town
Follow the opened path north through Route 210. Battle or avoid the trainers according to your team’s condition, collect accessible items, and continue through the foggy section until the route reaches Celestic Town.
A Team Galactic Grunt stands near the western side of Celestic Town and blocks the entrance to the ancient ruins. Battle and defeat him. After the fight, enter the ruins and speak with Cynthia’s grandmother.
Give Cynthia’s Old Charm to her grandmother. This is the story-critical delivery that resolves the Celestic Town event. Cynthia’s grandmother then gives you HM03 Surf.
Surf may be received here before it can be used outside battle. The Relic Badge from Fantina is still required before Surf works outside battle, so do not assume that merely obtaining the HM unlocks field use.
The resident who gives the Analog Clock Pokétch application is optional. After receiving Surf, heal and prepare to return to Hearthome through Route 211 and Route 208, or use Fly if Hearthome has already been registered.
- Reach Celestic Town through northern Route 210.
- Defeat the Team Galactic Grunt outside the ruins.
- Deliver the Old Charm to Cynthia’s grandmother.
- Receive HM03 Surf.
- Return toward Hearthome after the event is complete.
5. Prepare for Fantina’s original Diamond Gym
Return to Hearthome after the Celestic Town event. Fantina’s Gym is now open, and Hearthome is the fifth Gym in original Diamond and Pearl. The Gym uses a five-story arithmetic-door puzzle rather than Pokémon Platinum’s dark flashlight-style layout.
Fantina specializes in Ghost-type Pokémon. Bring dependable Dark- or Ghost-type attacks and keep a second attacker ready in case confusion, accuracy disruption, or reduced move usage interferes with your first choice. A physical attacker with a strong Dark move can perform well, but do not rely on one fragile Pokémon.
A Normal-type Pokémon can switch into Ghost-type attacks because Ghost moves do not affect it. However, Normal-type attacks cannot damage Fantina’s Ghost Pokémon, so Normal types are defensive pivots rather than primary attackers. Dark-type attacks are usually the most straightforward offensive option.
Heal at the Pokémon Center before entering. Carry healing items and, if possible, a way to cure confusion. Confusion is not treated by Antidotes; use an appropriate status-healing item or return to the Pokémon Center.
- Bring reliable Dark- or Ghost-type damage.
- Keep a backup attacker ready.
- Use Normal types defensively rather than offensively.
- Heal before entering the Gym.
6. Solve the five-story arithmetic-door puzzle
Read the arithmetic sign on each Gym floor. Three doors display possible answers. Enter the door whose number matches the result of the displayed expression. The Pokétch Calculator can solve the equations if you do not want to calculate them mentally.
A wrong door does not permanently block progress. It leads to a Trainer battle and a detour. Defeat the Trainer, return to the puzzle area, and try again. These battles can also provide useful experience before Fantina.
The correct answer changes with the question, so do not rely on a fixed door sequence. Read the full expression, including subtraction and multiplication, before choosing. Continue upward until you reach the fifth floor and Fantina’s room.
- Read each complete arithmetic expression.
- Use the Calculator if needed.
- Treat incorrect doors as Trainer-battle detours rather than failures.
- Reach Fantina on the fifth floor.
7. Defeat Fantina and finish the chapter
In original Diamond, Fantina’s team is Drifblim at level 32, Gengar at level 34, and Mismagius at level 36. Drifblim is Ghost/Flying, Gengar is Ghost/Poison, and Mismagius is pure Ghost. Mismagius holds a Sitrus Berry.
Drifblim can be damaged effectively by Electric-, Ice-, Rock-, Dark-, or Ghost-type attacks. Be cautious with contact attacks because its Aftermath ability can damage a Pokémon that knocks it out. Its Minimize can also make it harder to hit, so use a reliable move rather than wasting turns with weak attacks.
Against Gengar, Dark-type damage is useful, but account for Confuse Ray, Poison Jab, and Shadow Claw. If your active Pokémon is weakened or confused, switch to a healthy team member rather than allowing Gengar several uninterrupted turns.
Mismagius is vulnerable to Dark- and Ghost-type attacks. It carries Confuse Ray, Psybeam, Shadow Ball, and Magical Leaf, so avoid leaving a weakened Pokémon in place. Use your strongest dependable attacker, cure confusion when practical, and preserve enough healing for this final opponent.
Winning awards the Relic Badge and TM65, Shadow Claw. The Relic Badge allows Surf to be used outside battle. Teach Surf to a suitable Water-type or utility Pokémon after checking your team’s moves. Surf now opens additional routes, items, and optional areas throughout Sinnoh.
Return to the Pokémon Center, restore HP and PP, save the game, and reorganize the party before continuing. Contests, Amity Square, Poffins, Lost Tower, and other Hearthome facilities remain optional unless you specifically want their rewards.
- Defeat Drifblim, Gengar, and Mismagius.
- Receive the Relic Badge.
- Receive TM65, Shadow Claw.
- Confirm that Surf can be used outside battle.
- Heal, save, and prepare for the next Surf-accessible route.
Before you move on
- The Chapter 6 handoff is confirmed: the SecretPotion was already obtained after the post-Wake Galactic sequence.
- The SecretPotion was used on the Psyduck blocking northern Route 210.
- The northern Route 210 path was crossed and the Team Galactic Grunt outside the Celestic Town ruins was defeated.
- The Old Charm was delivered to Cynthia’s grandmother.
- HM03 Surf was received in Celestic Town.
- Fantina was defeated in the original Diamond five-story arithmetic-door Gym.
- The Relic Badge and TM65, Shadow Claw, were received.
- Surf can be used outside battle.
- The party has been healed and the game has been saved before continuing.
Canalave City and Iron Island — Byron, Steel-type control and important equipment
Leave Hearthome City after Chapter 7, return to Jubilife City, and cross Route 218 with Surf to reach Canalave City. Defeat Barry on the bridge, optionally explore Iron Island with Riley for experience, useful items, and the Riolu Egg, then defeat Byron for the Mine Badge. Finish the chapter at the Canalave Library briefing, where Lake Valor becomes the next objective.
Return from Hearthome City to Jubilife City
Begin in Hearthome City after completing the northern Route 210 and Celestic Town events and defeating Fantina. If Jubilife City is available as a Fly destination, use Fly and land there directly. Otherwise, leave Hearthome through Route 208, cross the southern Mt. Coronet passage toward Route 207 and Oreburgh City, then travel west through Route 203 to Jubilife City.
You need HM03 Surf to cross Route 218. Surf can be used outside battle after earning the Fen Badge in Pastoria, so confirm that a party Pokémon knows Surf before leaving Jubilife. Heal, restock Poké Balls and healing items, and make room in your party if you want to accept Riley’s Egg later.
- Finish Chapter 7 in Hearthome City.
- Return to Jubilife City by Fly or through the cleared route network.
- Bring a Pokémon that knows Surf.
- Leave an open party slot if you want Riley’s Egg immediately.
- Heal and restock in Jubilife City.
Cross Route 218 and enter Canalave City
Leave Jubilife City through the western gate to Route 218. Follow the path west, then use Surf across the water and continue toward the Canalave gatehouse. At the gate, Dawn or Lucas’s father updates the Pokédex so it can display gender differences.
Continue into Canalave City and heal at the Pokémon Center. When you cross the raised bridge, Barry approaches and starts a rival battle. His team changes according to your starter, but he always uses Staravia and Heracross along with a starter-dependent selection that may include Roselia, Buizel, Ponyta, or the evolved form of his chosen starter. Prepare for mixed coverage instead of relying on one type.
After the battle, heal and restock. You may challenge Canalave Gym immediately, but Iron Island is a useful optional detour. It supplies experience, several items, automatic healing while Riley travels with you, and the Riolu Egg.
- Surf west across Route 218.
- Complete the Canalave gatehouse Pokédex update.
- Defeat Barry on the bridge.
- Heal and restock in Canalave City.
- Decide whether to visit optional Iron Island.
Travel to Iron Island
Speak with Sailor Eldritch at the southwestern Canalave docks and choose Iron Island. The island has no Pokémon Center, so carry Potions, status cures, and at least one stronger healing item if you intend to clear the mine before returning.
Iron Island is a good place to train Fire-, Fighting-, Water-, and Ground-type attackers. These roles work well against the island’s Steel-, Rock-, and Ground-related opponents and also prepare you for Byron. Golbat is a practical fast utility capture, while Graveler or Onix can provide Ground coverage, but no capture is required for the story.
Iron Island is optional. Skipping it does not prevent the Canalave Gym, Byron’s badge, or the Canalave Library briefing.
- Speak with Sailor Eldritch at the Canalave docks.
- Bring healing items because Iron Island has no Pokémon Center.
- Consider Fire, Fighting, Water, or Ground coverage.
- Remember that Iron Island is optional.
Navigate Iron Island and find Riley
Enter the mine and take the left staircase from the first floor to reach B1F West. Move south to the Iron Ball if desired, then return to the first floor and take the eastern staircase.
On B1F East, go south to the Escape Rope, climb to the upper level, and move east for the Super Repel. Take the northeastern stairs, pass Picnicker Summer, and use the lift to reach the lower level. Continue through the eastern stairs to B2F East.
On B2F East, move east past Worker Willy to reach the Max Ether. Backtrack and go south past Worker Braden to the southern pit, where TM23 Iron Tail is on the western side. The hidden item on the eastern side of this same pit is an Iron. Return to the northwest stairs, go back to B1F, and take the western stairs to B2F West.
In B2F West, Riley is near the northeast stairs. Agree to travel with him. His level 34 Lucario joins your side in battles. While Riley accompanies you, wild encounters become Double Battles and trainer encounters that would normally be Double Battles become Multi Battles. Riley restores your party after battles, including HP, status, and PP, so this is the safest time to train through the mine without consuming your own supplies.
- Take the left staircase from the first floor.
- Collect the Iron Ball on B1F West if desired.
- Collect the Escape Rope and Super Repel on B1F East if useful.
- Reach B2F East and collect the Max Ether.
- Collect TM23 Iron Tail from the western side of the southern pit.
- Check the eastern side of that pit for the hidden Iron.
- Return to B2F West and meet Riley.
- Accept Riley’s offer to accompany you.
- Use Riley’s automatic healing to conserve supplies.
Defeat Team Galactic and receive the Riolu Egg
Move west through B2F West with Riley. Fight or avoid the Hikers, Workers, martial artists, and Ace Trainers according to your party’s condition. Fire- and Fighting-type attacks are effective against many Steel-related opponents, while Water and Ground attacks handle Rock and Ground Pokémon. Focus attacks on one opponent at a time during Double Battles so Riley’s Lucario is not left dealing with both enemies alone.
Continue south and then through the western route until Riley encounters two Team Galactic Grunts. You and Riley battle them together. Defeat both Grunts, then speak with Riley after they flee. He offers a Pokémon Egg containing Riolu in the original Diamond and Pearl release.
Keep an open party slot before speaking with Riley if you want to receive the Egg during this visit. If your party is full, make room and return to Riley before leaving the island. Riolu is optional and does not need to hatch before Byron. If you use it, carry the Egg in your party while traveling; after it hatches, Riolu evolves into Lucario through high friendship when it gains a level during the day.
Take the lift down and use the western exit. In B3F West, ride the lift to the upper level, collect the Shiny Stone east of the lift if desired, and leave through the western exit to return to the ferry.
- Defeat the two Team Galactic Grunts with Riley.
- Speak with Riley after the battle.
- Receive the Riolu Egg with an open party slot.
- Return to Riley after making room if necessary.
- Collect the Shiny Stone in B3F West if desired.
- Take the western exit and sail back to Canalave City.
Collect optional Iron Island items
The optional Iron Island items are spread across several floors. B1F West contains the Iron Ball. B1F East contains the Escape Rope and Super Repel, along with a hidden TinyMushroom. B2F East contains the Max Ether, TM23 Iron Tail on the western side of the southern pit, and a hidden Iron on the eastern side of that pit.
B2F West contains an Ultra Ball, Full Restore, Max Potion, Revive, HP Up, Magnet, and a separate hidden Iron Plate in the small southeastern pit. The Full Restore and Revive are hidden on barrels. B3F West contains a Shiny Stone east of the exit lift.
These items are optional. The Iron, Iron Plate, Iron Ball, TM23 Iron Tail, and Shiny Stone are not required for Byron, the Canalave Library briefing, Snowpoint City, or the northern lakes. Do not confuse the B2F East hidden Iron with the B2F West hidden Iron Plate. The Metal Coat found later outside Iron Island is a separate post-National Pokédex reward from Byron.
- Collect the Iron Ball if desired.
- Collect the Escape Rope and Super Repel if useful.
- Collect the Max Ether and TM23 Iron Tail.
- Check the B2F East southern pit for the hidden Iron.
- Check the B2F West southeastern pit for the hidden Iron Plate.
- Collect the Shiny Stone if desired.
- Do not confuse Iron with Iron Plate or Metal Coat.
Navigate Canalave Gym
Return to Canalave City and heal before entering the Gym. The original Diamond and Pearl puzzle uses four disconnected floors, steel platforms, and lifts.
On the first floor, pass Black Belt Ricky and reach the four yellow lifts. Take the easternmost lift near Worker Gary. On the next floor, go southeast and use the lift down. You return to the first floor; pass Ace Trainer Cesar and take the western lift upward.
On the second floor, ride the moving platform west to the next lift. On the third floor, ride the moving platform north and pass Worker Gerardo. Cross east over two more platforms, pass Black Belt David, and move south across two additional platforms to the lift near the east wall.
The next lift returns you to the second floor. Pass Ace Trainer Breanna and take the following lift down. On the first floor, move west and use the red lift to reach Byron. If your main counters are weakened, leave and heal; the puzzle can be repeated.
- Take the easternmost yellow lift from the entrance.
- Use the southeast lift to descend.
- Take the western lift and follow the moving platforms upward.
- Cross the third-floor platforms toward the east.
- Use the east-side lift to return toward the first floor.
- Take the red lift to Byron.
- Heal before the Leader battle if necessary.
Defeat Byron and complete the Canalave Library briefing
Byron uses Bronzor at level 36, Steelix at level 36, and Bastiodon at level 39 in original Diamond. Bronzor is Steel and Psychic with Levitate, so ordinary Ground attacks fail. Use Fire, Fighting, or a strong neutral special attack. Its Flash Cannon, Extrasensory, Confuse Ray, and Hypnosis can disrupt the fight, so bring Full Heals or another way to recover from confusion and sleep.
Steelix is Steel and Ground with high physical Defense. Water- and Ground-type attacks are dependable, but watch for Gyro Ball, DragonBreath, Ice Fang, and Sandstorm. Ice Fang makes an unprepared Ground-type less safe than it first appears. Bastiodon is Rock and Steel with high defenses and Sturdy. Fighting- and Ground-type attacks are the most reliable answers. It can use Flash Cannon, AncientPower, Iron Defense, and Rest, so do not rely on weak neutral attacks after it raises its Defense; status effects can help wear it down.
Defeating Byron awards the Mine Badge and TM91, Flash Cannon. The Mine Badge allows Strength to be used outside battle. HM04 Strength comes from Lost Tower on Route 209, not from Riley or Byron.
Leave the Gym and speak with Barry outside. Enter the Canalave Library in the northwest part of the city and go to the third floor. Speak with Professor Rowan, Barry, and Dawn or Lucas. Rowan assigns you to Lake Valor, Barry to Lake Acuity, and Dawn or Lucas to Lake Verity. An earthquake shakes the city, and a Sailor reports an explosion at Lake Valor.
Stop after this scene. Lake Valor, Lake Verity, the northern Mt. Coronet route, the snowy routes, Snowpoint City, and Lake Acuity belong to Chapter 9.
- Defeat Bronzor level 36, Steelix level 36, and Bastiodon level 39.
- Use Fire, Fighting, or special attacks against Bronzor because it has Levitate.
- Use Water or Ground coverage against Steelix while watching for Ice Fang.
- Use Fighting or Ground coverage against Bastiodon.
- Receive the Mine Badge and TM91, Flash Cannon.
- Confirm that HM04 Strength came from Lost Tower.
- Complete the third-floor Canalave Library briefing.
- End with Lake Valor as the next objective.
Before you move on
- The chapter began in Hearthome City after Chapter 7 and reached Jubilife City by Fly or the cleared route network.
- Jubilife City was used as the departure point for Route 218.
- Surf was used west across Route 218 to reach Canalave City.
- The Canalave gatehouse Pokédex update was completed.
- Barry’s Canalave bridge battle was defeated.
- Iron Island was either completed or deliberately skipped.
- If Iron Island was attempted, Riley was found in B2F West and the Team Galactic Grunts were defeated.
- The Riolu Egg was received, or the player deliberately left it for later after making room in the party.
- The B2F East hidden Iron was collected or consciously skipped.
- The B2F West hidden Iron Plate was collected or consciously skipped.
- Desired Iron Island items were collected or consciously skipped.
- Byron’s original Diamond team was defeated.
- The Mine Badge and TM91, Flash Cannon, were obtained.
- HM04 Strength was confirmed as coming from Lost Tower if needed later.
- The upper-floor Canalave Library briefing with Professor Rowan, Barry, and Dawn or Lucas was completed.
- The next objective is Lake Valor in Chapter 9.
Snowpoint City and the Ice Gym — Candice and cold-weather survival
After the Canalave Library meeting, investigate Lake Valor and Lake Verity in that order, cross northern Mt. Coronet, and travel through Routes 216 and 217 to Snowpoint City. Collect HM08 Rock Climb, defeat Candice’s original Pokémon Diamond team, then enter Lake Acuity. Continue immediately through the Veilstone Galactic Warehouse and Headquarters, return to Mt. Coronet for the Spear Pillar confrontation and Dialga encounter, and finish by reaching Route 222. This chapter covers the original Nintendo DS release, not Pokémon Platinum or Brilliant Diamond and Shining Pearl.
Leave Canalave Library and clear Lake Valor, then Lake Verity
After defeating Byron, go to the third floor of Canalave Library and speak with Professor Rowan, Dawn or Lucas, and your rival. The meeting is interrupted by news of an explosion at Lake Valor. Leave the library and follow the conversation outside, then begin the lake investigation.
Travel to Valor Lakefront by Flying to Veilstone City or Pastoria City and walking to the lake entrance. Enter the drained lakebed, defeat the Galactic Grunts, and enter the cavern in the center. Battle Commander Saturn. After the battle, the story directs you to Lake Verity.
Fly to Twinleaf Town and walk northwest to Lake Verity. Professor Rowan and Dawn or Lucas are waiting there. Enter the cavern and defeat Commander Mars. This completes the two southern lake events. Do not proceed directly to Snowpoint City; the required northern route begins from Eterna City or Celestic Town and passes through the northern section of Mt. Coronet.
- Complete the third-floor Canalave Library scene.
- Defeat Commander Saturn in the Valor Cavern.
- Defeat Commander Mars in the Verity Cavern.
- Keep Surf, Strength, Rock Smash, and Defog available for the northern mountain passage.
Cross northern Mt. Coronet and reach Route 216
Fly to Eterna City and leave through the eastern gate onto Route 211, or approach the same northern Mt. Coronet entrance from Celestic Town. Enter the mountain and follow the passage north. Use Strength to move the necessary boulders, Rock Smash when it blocks a side path, and Defog when the interior fog obscures the route.
Continue through the northern cavern until you emerge on Route 216. This is the correct transition into the snowy section. The later summit route through Mt. Coronet is a separate return trip after the Veilstone Galactic Headquarters operation, so do not attempt that ascent now.
The weather on Route 216 and Acuity Lakefront is snow, while Route 217 has a blizzard. Battles in these areas produce hail, which damages most Pokémon at the end of each turn. Carry healing items before entering the snow routes.
- Enter Mt. Coronet from the Route 211 side.
- Use Strength and Rock Smash to clear the passage.
- Use Defog if the mountain fog prevents you from seeing the path.
- Exit onto Route 216.
Cross Routes 216 and 217
On Route 216, follow the bridges and raised walkways westward. Deep snow slows movement and prevents normal running in the deepest patches. Battle only the trainers you can handle without exhausting your main counters. The route contains an Ice Heal, and the Snowbound Lodge on the western side has a bed that restores the party completely. Use the lodge as a recovery checkpoint before continuing.
Enter Route 217 and use the cabins, fences, trees, and skier positions as landmarks because the blizzard limits visibility. The overworld blizzard cannot be removed with Defog. Continue generally north and west toward Acuity Lakefront rather than trying to cross every open snowfield directly.
The western Hiker’s cabin is the key landmark. HM08 Rock Climb is in the snow northeast of that house. Pick up the item, then return to the Hiker in the nearby cabin. In Diamond and Pearl, he gives you an Icicle Plate after you obtain HM08. The plate is optional; HM08 is the required reward. The northern house can also provide a Spell Tag, and TM07 Hail is optional.
Continue to the northwest side of Route 217 and exit onto Acuity Lakefront. Two Galactic Grunts block the entrance to Lake Acuity. This is expected. Turn east and enter Snowpoint City from the southeastern path.
- Rest at Snowbound Lodge when the party needs recovery.
- Reach Route 217 and navigate through the blizzard.
- Collect HM08 Rock Climb northeast of the western Hiker’s house.
- Return to the Hiker if you want the optional Icicle Plate.
- Reach Acuity Lakefront and confirm that Lake Acuity is blocked.
- Enter Snowpoint City.
Prepare for and defeat Candice
Heal at the Snowpoint City Pokémon Center and buy Ice Heals or Full Heals. Ice Heal cures freeze, Full Heal cures freeze and other ordinary status conditions, and a Pokémon Center removes freeze. Antidotes cure poison only and do not cure freeze.
Candice’s original Diamond team is Snover at level 38, Sneasel at level 38, Medicham at level 40, and Abomasnow at level 42. Snover and Abomasnow activate hail with Snow Warning. Abomasnow also holds a Sitrus Berry. Prepare at least two answers rather than relying on one Pokémon.
Fire, Fighting, Rock, and Steel attacks are effective against Snover and Abomasnow. Fighting attacks are particularly useful against Sneasel, but Sneasel is fast and can punish a weakened target. Medicham is Fighting and Psychic, so do not treat Candice’s party as a pure Ice matchup. Use a sturdy Pokémon against Force Palm, or answer it with a strong Flying or Ghost attack if your team has one.
Against Abomasnow, Fire is the safest general plan. Attack promptly because GrassWhistle can put a counter to sleep, Swagger can cause confusion, and hail chips away at the party. If the first counter is disabled, switch to a healthy reserve instead of allowing hail and repeated status attempts to decide the fight.
A team with several Pokémon around the upper 30s to approximately level 40 is practical. Your main Abomasnow answer should preferably be close to level 42, but a lower-level team can succeed with type advantage, healing, and a backup plan.
- Carry Ice Heals or Full Heals.
- Prepare Fire, Fighting, Rock, or Steel attacks.
- Bring a separate answer to Medicham.
- Heal and save before entering the Gym.
- Defeat Snover level 38, Sneasel level 38, Medicham level 40, and Abomasnow level 42.
- Receive the Icicle Badge and TM72 Avalanche.
- Confirm that Rock Climb works outside battle.
Solve the original Snowpoint Gym puzzle
The original Diamond and Pearl Snowpoint Gym uses slippery ice lanes and snowballs. Once you step onto an ice lane, you slide until you reach a wall, snow-free floor, trainer, or other obstruction. Snowballs break only when you hit them with enough sliding distance and momentum.
Use the lower-left stairway as your main reset point. From the entrance area, move onto the snow patches and line up long slides across the ice. Clear the first barriers before attempting the upper lanes. If you stop on the wrong side of a snowball or wall, return to the lower-left stairway and approach the lane again rather than trying to force a short slide.
Work through the puzzle by repeatedly moving from the lower-left stairway to the upper snow patches, then sliding horizontally into each row of snowballs. Stand as far back as the available snow allows before entering an ice lane; walking directly into a snowball is not enough. Once the central rows are destroyed, use the cleared route to cross toward Candice.
The puzzle uses the original Nintendo DS layout. Do not substitute directions from Brilliant Diamond and Shining Pearl, whose presentation and movement behavior differ.
- Use long slides instead of walking into snowballs.
- Treat the lower-left stairway as the safe reset point.
- Set up each slide from a snow patch with enough distance.
- Clear the central snowball rows before approaching Candice.
- Return to the stairway if a slide leaves you in a bad position.
Enter Lake Acuity after the badge
After defeating Candice, heal in Snowpoint City and return west to Acuity Lakefront. The Galactic Grunts who blocked the northern entrance are gone. Enter Lake Acuity and watch the scene with Commander Jupiter and your rival. Jupiter has already defeated your rival and leaves for Veilstone City. This is the required trigger for the next Team Galactic operation.
Fly or walk to Veilstone City. A Galactic Grunt outside the northeast side of the Galactic Headquarters drops the Storage Key. The electronic door in the main Headquarters building does not accept this key, so leave the Headquarters and go west to the Galactic Warehouse.
Use the Storage Key on the rust-covered warehouse door. Take the stairs into the basement, follow the eastern route, and climb to the lower floor. Continue through the warehouse until you find the Galactic Key on the lower basement floor. The Dusk Stone near the entrance and the Zinc in the storage area are optional but useful.
Return to Galactic Headquarters and use the Galactic Key on the locked electronic doors. Work through the warp panels and stairs, using the bed on the second floor if you need to restore the party. Continue to the fourth-floor office and defeat Cyrus. His original Diamond team is Murkrow level 40, Golbat level 40, and Sneasel level 43. Afterward, he gives you the Master Ball.
Use the warp panel beyond Cyrus to reach the room containing Uxie, Mesprit, and Azelf. Speak with Commander Saturn and defeat him to release the lake guardians. Cyrus then announces that he is going to Mt. Coronet. Leave Veilstone and prepare for the final mountain ascent with Surf, Strength, Rock Smash, Rock Climb, and plenty of healing items.
- Trigger the Lake Acuity scene with Jupiter and the rival.
- Obtain the Storage Key outside the Veilstone Headquarters.
- Use it at the Galactic Warehouse.
- Collect the Galactic Key in the warehouse basement.
- Use the Galactic Key to enter the main Headquarters route.
- Defeat Cyrus in the fourth-floor office.
- Release the lake guardians after defeating Commander Saturn.
Climb Mt. Coronet, stop Cyrus, and encounter Dialga
Return to Mt. Coronet from the Oreburgh City or Hearthome City side. This time follow the southern and upper mountain route toward the summit. Surf across the water sections, use Strength on boulders, Rock Smash on breakable rocks, and Rock Climb on the cliff faces. Rock Smash is not always mandatory for the main route, but it helps clear obstacles and reach useful items.
The mountain is long and contains wild Pokémon in the upper 30s and low 40s, so heal before entering and carry Hyper Potions, Revives, Full Heals, and PP-restoring items. Continue upward through the cavern and mountainside sections until you reach Spear Pillar.
At Spear Pillar, defeat the Galactic Grunts and approach Cyrus. Mars and Jupiter challenge you together, producing a Multi Battle in which your rival joins you. After the commanders are defeated, your rival restores your party before the battle with Cyrus. Defeat Cyrus to stop the immediate Team Galactic threat.
Continue through the story scene and approach Dialga. Save before interacting with the Legendary Pokémon if you intend to capture it. Dialga is level 47 in original Diamond. Fighting- and Ground-type attacks are effective for lowering its health, but use weaker attacks once its HP is low. Sleep or paralysis improves the capture chance. Use Dusk Balls in the cave at night or Ultra Balls, and do not spend the Master Ball unless you specifically want a guaranteed capture.
If Dialga is defeated or you run from the encounter, it can be encountered again after the appropriate later progression. Capturing it now is the safest way to secure the encounter without relying on a later reset.
- Bring Surf, Strength, Rock Smash, and Rock Climb.
- Reach Spear Pillar through the upper Mt. Coronet route.
- Defeat the Mars and Jupiter Multi Battle with your rival.
- Defeat Cyrus at Spear Pillar.
- Save before interacting with Dialga.
- Capture or defeat the level 47 Dialga encounter.
Leave the summit and reach Route 222
After the Spear Pillar events, leave Mt. Coronet and return to the eastern side of Sinnoh. The next required destination is Route 222, which runs east from Valor Lakefront to Sunyshore City.
Use Fly to reach Valor Lakefront if available, then follow Route 222 east. Battle or avoid the fishermen, sailors, and other trainers according to your party’s condition. The route includes both upper and lower paths, so choose the path that avoids unnecessary battles if you need to preserve healing items.
Continue through the gate into Sunyshore City. The chapter ends when you arrive there. Chapter 10 begins with the Sunyshore Gym sequence, including finding Volkner at Vista Lighthouse and solving the original Diamond electrical gear puzzle.
- Leave Mt. Coronet after the Dialga sequence.
- Reach Valor Lakefront or its Route 222 entrance.
- Travel east across Route 222.
- Enter Sunyshore City.
- Heal and save before beginning the Volkner chapter.
Before you move on
- The third-floor Canalave Library event is complete.
- Commander Saturn was defeated at Lake Valor.
- Commander Mars was defeated at Lake Verity.
- Northern Mt. Coronet was crossed and Route 216 was reached.
- Routes 216 and 217 were crossed.
- HM08 Rock Climb is in the Bag.
- The Icicle Badge and TM72 Avalanche were received from Candice.
- Rock Climb works outside battle.
- The Galactic blockade at Acuity Lakefront disappeared.
- The Lake Acuity scene with Commander Jupiter and the rival was triggered.
- The Storage Key and Galactic Key were obtained.
- Cyrus was defeated in the Veilstone Galactic Headquarters.
- Commander Saturn was defeated in the Headquarters and the lake guardians were released.
- The Mars and Jupiter Multi Battle at Spear Pillar was completed.
- Cyrus was defeated at Spear Pillar.
- The level 47 Dialga encounter was captured or defeated.
- Route 222 was crossed and Sunyshore City was reached.
- The party is healed and the game is saved before beginning Chapter 10.
Sunyshore City and Volkner — final Gym strategy and electrical puzzles
Begin this chapter only after the Lake Acuity aftermath, the Veilstone Galactic Warehouse and Headquarters operation, the Mt. Coronet and Spear Pillar sequence, Dialga’s encounter, and the Route 222 transition are complete. Do not treat Sunyshore as the immediate continuation of Snowpoint City. Once Route 222 delivers you to Sunyshore City, return Volkner to his Gym, solve the original Diamond and Pearl gear puzzle, defeat his mixed team for the Beacon Badge, receive HM07 Waterfall from Jasmine, and prepare every field move required for the original Diamond Victory Road route.
Arrive in Sunyshore and bring Volkner back
After the events at Lake Acuity, Team Galactic Headquarters, Spear Pillar and Dialga, travel east across Route 222 to Sunyshore City. Flint is waiting outside the Gym in the northwest part of town. Speak to him to learn that Volkner is away from the Gym and that you must find him before the final badge battle can begin.
Go to Vista Lighthouse on Sunyshore’s southeast side. Enter the lighthouse and use the elevator to reach the observation deck. Speak to Volkner beside the binoculars. He agrees to return to the Gym. Leave the lighthouse, return to the Gym, and speak to Flint outside if he is still present. The Gym entrance will now be open.
Heal at the Pokémon Center before entering. A practical team includes a Ground-type attacker for Raichu and Luxray, a Fighting-type move for Ambipom, and a sturdy Grass-type or another dependable answer to Octillery. Do not rely on one fragile Ground Pokémon for the entire battle: Octillery carries Grass and Ice coverage, while Raichu carries Brick Break. A party around the upper 40s is a reasonable preparation range, but survivability and coverage matter more than an exact level target.
- Confirm that Lake Acuity, the Galactic Headquarters raid, Spear Pillar, Dialga and Route 222 are complete.
- Speak to Volkner at the top of Vista Lighthouse.
- Return to the Gym in northwestern Sunyshore.
- Heal, restore move PP and carry Parlyz Heals or Full Heals.
Clear the first and second gear rooms
The original Sunyshore Gym has three rooms of rotating gears and suspended walkways. Blue buttons rotate their gear 90 degrees clockwise, green buttons rotate their gear 90 degrees counterclockwise, and red buttons rotate their gear 180 degrees. Use the stairs, trainer platforms and visible bridges as landmarks. The goal is to align the next walkway, not to activate every switch.
In the first room, walk to the eastern side and press the eastern green button once. Return toward the entrance, cross to the western side and press the western green button once. This creates the route to School Kid Tiera and the doorway into the second room. Battle Tiera or pass her if the walkway permits, then continue through the upper exit.
In the second room, reach the southern blue button and press it three times. Use the southwest stairway and cross the large gear toward School Kid Forrest in the northeast section. After reaching Forrest’s area, press the northern blue button once. Then press the green button beside the next route and continue to Guitarist Jerry.
Continue through the eastern stairway and pass Poké Kid Meghan’s platform to reach the doorway to the final room. If you become disoriented, return to the last switch you used and inspect the bridge attached to that gear instead of pressing switches randomly. The useful sequence through the first two rooms is eastern green, western green, southern blue three times, northern blue once, then green.
- First room: press the eastern green button, then the western green button.
- Second room: press the southern blue button three times.
- After reaching Forrest, press the northern blue button once.
- Press the green button after the northern blue switch.
- Use trainer platforms and stairways to confirm your position.
Complete the final gear room
When you enter the third room, press the eastern red button first, then travel across the room and press the western red button. This is the correct opening alignment for the west-side route. Continue through the trainer platforms and battle Ace Trainer Destiny if she blocks your path.
Follow the west wall to reach Guitarist Preston in the northwest area. From there, press the northwest green button twice. Move to the blue button to the east and press it once. Use the stairway to reach Ace Trainer Zachery, then pass back by Guitarist Lonnie’s area.
Finally, press the eastern red button once. Retrace the eastern side of the room and follow the aligned walkway to Volkner’s platform. Heal before speaking to him. Saving immediately before the battle provides a clean retry point if paralysis, critical hits or an unexpected Octillery attack ruins the attempt.
- Press the eastern red button, then the western red button.
- Reach the northwest green button and press it twice.
- Press the blue button east of the northwest switch.
- Press the eastern red button once near the lower eastern route.
- Follow the eastern walkway to Volkner.
Defeat Volkner’s original Diamond team
Volkner’s original Diamond and Pearl team is Raichu level 46, Ambipom level 47, Octillery level 47 and Luxray level 49. This is not the Platinum roster and not the Brilliant Diamond and Shining Pearl remake roster.
Raichu knows Charge Beam, Thunder Wave, Light Screen and Brick Break. A Ground-type Pokémon can ignore Charge Beam and apply super-effective damage, but Brick Break threatens some Rock types and Light Screen reduces special damage. If Raichu uses Light Screen, use a strong physical Ground attack when safe rather than wasting turns on weak special moves. Cure Thunder Wave immediately if your main attacker is paralyzed.
Ambipom is Normal type and carries Baton Pass, Nasty Plot, Agility and Shock Wave. Use a Fighting-type move as soon as possible. Do not give it repeated setup turns: Nasty Plot and Agility can be passed through Baton Pass, while Shock Wave does not miss. A strong physical Fighting attacker is the cleanest answer.
Octillery is Water type and knows Octazooka, Charge Beam, Bullet Seed and Aurora Beam. It is the main reason not to depend on a single Ground-type sweep. A sturdy Grass Pokémon can attack its Water typing, but Aurora Beam is super effective against Grass and Bullet Seed threatens Water- and Ground-type switches. Use a bulky Grass type, a strong neutral physical attacker, or an Electric-type Pokémon that can withstand its coverage. If Charge Beam raises Octillery’s Special Attack, switch carefully rather than leaving a weakened counter in place.
Luxray is level 49, holds a Sitrus Berry and knows Thunder Fang, Charge Beam, Thunder Wave and Crunch. Its Rivalry ability can alter damage based on the opponent’s gender. A sturdy Ground-type attacker is still the preferred answer because Ground moves exploit Luxray’s weakness and avoid its Electric attacks, but Crunch threatens frail Psychic- and Ghost-type Pokémon. Expect the Sitrus Berry to restore health once and continue attacking after it activates.
- Use Ground attacks against Raichu and Luxray when the attacker can survive their coverage.
- Use Fighting-type damage against Ambipom and stop it before it passes boosts.
- Use a sturdy Grass-type or another reliable answer for Octillery.
- Prepare for Thunder Wave from Raichu and Luxray.
- Do not use Platinum or remake-only Volkner data.
- Remember that Octillery is level 47 in the original Diamond release.
Claim the Beacon Badge, obtain Waterfall and prepare for Victory Road
Defeating Volkner gives you the Beacon Badge and TM57 Charge Beam. The badge permits Waterfall to be used outside battle, but it does not place HM07 in your Bag. Leave the Gym and speak to Jasmine on the northern beach of Sunyshore City. After Volkner is defeated, she gives you HM07 Waterfall.
Teach Surf and Waterfall to Pokémon that can use them, then travel north from Sunyshore onto Route 223. Surf is needed across the route, and Waterfall is needed for the final cascade leading to the Pokémon League entrance. Route 223 is a one-way progression route with water, rocks and Swimmers, so restore PP and healing supplies before leaving the city.
Before entering Victory Road, ensure that your party has field access to Surf, Strength, Rock Smash, Waterfall and Rock Climb. Rock Climb is required inside the original Diamond and Pearl Victory Road to ascend climbable walls and continue through the route; it is not optional. The Icicle Badge permits Rock Climb outside battle, but you must also have obtained HM08 on Route 217 and taught it to a compatible Pokémon.
Buy stronger healing items, Full Heals, Revives and Repels if desired. Restore the PP of your main attacks at the Sunyshore Pokémon Center, save the game, and only then begin Route 223. If you lack an HM user or discover that Rock Climb has not been taught, return to town before committing to the League route.
- Receive the Beacon Badge and TM57 Charge Beam from Volkner.
- Speak to Jasmine on Sunyshore’s northern beach and receive HM07 Waterfall.
- Confirm that Surf and Waterfall can be used outside battle.
- Confirm access to Strength, Rock Smash and Rock Climb before entering Victory Road.
- Heal, restore PP, stock recovery items and save before Route 223.
Before you move on
- The Beacon Badge is displayed as the eighth Gym Badge.
- TM57 Charge Beam is in the Bag.
- Jasmine has given HM07 Waterfall on Sunyshore’s northern beach.
- A party member can use Surf and Waterfall outside battle.
- The party has access to Strength, Rock Smash and Rock Climb before Victory Road.
- The team is healed, important move PP is restored, recovery items are stocked and the game is saved before Route 223.
Victory Road — final dungeon prep, itemization and team checks
In the original Nintendo DS version of Pokémon Diamond, Victory Road is the final cave before the Pokémon League. The pre-League route uses Surf, Strength, Rock Smash, Waterfall, and Rock Climb, and the Pokémon League Pokémon Center provides a safe place to heal, restock, save, and retry. The eastern back section containing Marley is postgame content and is not part of the route to the Elite Four.
Prepare at the Pokémon League entrance
Travel north along Route 223, climb the waterfall after earning the Beacon Badge, and heal at the Pokémon Center outside Victory Road. This Center is the best preparation point for the final dungeon and the Elite Four attempt that follows. Buy Hyper Potions or Full Restores, Revives, status cures, and several Repels if you want to reduce wild encounters. Carry Ice Heals or Full Heals for freeze and other status problems; ordinary Antidotes do not cure freeze.
Confirm that your party collectively has Surf, Strength, Rock Smash, Waterfall, and Rock Climb. All five field moves are required to get through the original Diamond and Pearl Victory Road layout. Because a Pokémon can know only four moves and field HMs cannot be deleted during the journey, use at least two HM-capable Pokémon rather than forcing one Pokémon to carry every required move. Keep the HM users battle-capable if possible, because the cave contains trainers in the mid-40s to low-50s.
Restore move PP, remove harmful status conditions, set held items, and save outside the cave. If you are using a temporary HM user, decide which battle moves you are willing to replace before entering rather than changing the team after resources have been spent inside.
- Heal at the Pokémon League entrance Pokémon Center.
- Carry Surf, Strength, Rock Smash, Waterfall, and Rock Climb across the party.
- Buy healing items, Revives, status cures, and optional Repels.
- Restore PP, set held items, and save before entering.
Cross the first Victory Road floor
Enter Victory Road, cross the opening bridge, and use Rock Climb on the wall to reach the lower path. Move west beneath the bridge, climb the stairs, and cross east over the raised route. The initial section uses bridges, staircases, and Rock Climb walls as its main landmarks, so do not treat the first visible corridor as the whole route.
Psychic Bryce stands near TM41, Torment. The TM is optional and is useful mainly for a Pokémon built around disruption or defensive play. Continue through the opening trainer area, then pass Bird Keeper Hana and the nearby Full Heal. The hidden Ultra Ball is on a rock southeast of Hana. Farther along, Ace Trainer Mariah marks the approach to the stairs leading upward.
The original Diamond wild encounters in the first section include Golbat, Machoke, Graveler, Onix, Steelix, and Medicham, generally around levels 44–46. These Pokémon can provide experience, but fighting every encounter may consume the PP needed for the trainer battles ahead. Use Repels when the party is already adequately trained, especially if you are returning to the entrance to heal before the League.
- Use Rock Climb immediately after the opening bridge.
- Treat TM41 as optional.
- Pick up the Full Heal if convenient.
- Use Repels when conserving PP matters more than extra experience.
Use the 2F bike ramps and collect useful items
Take the stairs to the 2F bike-ramp section. Ride across the ramps to reach the upper paths, then use Strength on the boulders that block the southern route. The ramp sequences lead to a Full Restore, a Max Ether, another Full Restore, and TM71, Stone Edge. Some of these items are hidden or positioned behind the ramps, so inspect the nearby spaces when you are already passing through rather than making a separate trip while weakened.
Stone Edge is optional. It can help a physical Rock user, but its imperfect accuracy makes it a poor automatic choice for every team. Teach it only when the intended Pokémon has a clear use for Rock coverage and does not need one of its current moves more urgently.
TM79, Dark Pulse, is in an isolated room reached from the northwest stairs on 1F. It is also optional and is most useful for a compatible special attacker that lacks reliable Dark coverage. The cave contains several valuable recovery and support items, including Max Ether, Max Elixir, Max Revive, Zinc, Razor Claw, and Rare Candy. Prioritize the recovery items and Max Revive during a League preparation run; do not risk a weakened party for low-value pickups.
- Ride the bike ramps carefully and use Strength only where required.
- Collect Full Restores and the Max Ether if the route is safe.
- Teach Stone Edge or Dark Pulse only for a defined team role.
- Prioritize recovery items over optional treasure when resources are low.
Descend to B1F and use the waterfall
Continue through the stairs to B1F. This lower section contains additional trainers, Strength obstacles, and the water route that leads to TM59, Dragon Pulse. Use Surf when the path requires water travel, then use Waterfall near Psychic Valencia to reach the TM. Dragon Pulse is optional and should be reserved for a special Dragon-capable Pokémon with a reason to use it.
Original Diamond’s B1F item list includes a hidden Pearl and the TM59 area, along with hidden items such as a Big Mushroom. The cave’s late pre-League encounters can be stronger than those near the entrance, so heal before taking on multiple trainers in succession. Do not rely on wild Pokémon here as a replacement for deliberate team training; use the area mainly for safe experience, route progress, and selected items.
If a key attacker has lost too much PP or a defensive member is below a safe amount of HP, turn around before the party becomes dependent on Revives. The Pokémon Center is close enough that a controlled retreat is usually better than trying to force the final rooms with a damaged team.
- Use Surf to cross the required water sections.
- Use Waterfall near Psychic Valencia to reach TM59.
- Collect Dragon Pulse only if a specific special attacker benefits from it.
- Retreat to the entrance Pokémon Center before the party becomes fragile.
Do not enter the postgame Marley area before the League
The eastern opening inside Victory Road is blocked during the first trip. In original Diamond, that side area becomes available only after entering the Hall of Fame and obtaining the National Pokédex. Marley’s Arcanine escort, the foggy eastern maze, the Dusk Stone and Elixir choice, and the optional Surf items in that area are postgame content. They are not required to reach the Pokémon League and should not be included in the pre-League route.
For the first completion, continue through the main pre-League path after the B1F and 2F sections. If you encounter the blocked opening, leave it alone and follow the accessible stairs and bridges toward the western exit. This prevents confusion between the original game’s pre-League route and the later Victory Road back area.
- Leave the blocked eastern opening alone on the first visit.
- Do not expect Marley before Hall of Fame and National Pokédex progress.
- Do not treat the eastern Dusk Stone, Elixir, Leftovers, or maze as League prerequisites.
Set the final team plan before the Elite Four
The original Diamond and Pearl Elite Four teams range from levels 53 to 63: Aaron’s team reaches level 57, Bertha’s reaches level 59, Flint’s reaches level 61, and Lucian’s reaches level 63. Cynthia’s first team ranges from level 60 to 66, with Garchomp at level 66. A practical target is a balanced party in the mid-to-upper 50s, with the Pokémon assigned to Cynthia’s most dangerous matchups trained as close to the upper end of that range as your team allows. This is guidance rather than an absolute level requirement.
Prepare a dependable answer for each specialist. Aaron is vulnerable to strong Fire-, Flying-, and Rock-type attacks, though Drapion does not share the same Bug weakness as most of his team. Bertha’s Ground team is best handled with strong Water- or Grass-type attacks, while a Levitate user or a Pokémon immune to Ground moves can create safe openings. Flint’s Diamond team includes Rapidash, Infernape, Steelix, Lopunny, and Drifblim, so Water- and Ground-type coverage is more useful than assuming every opponent will be pure Fire. Lucian’s Psychic team rewards Dark, Ghost, or strong neutral physical attacks, but avoid exposing fragile attackers to powerful Psychic moves.
Save a reliable Ice attack or Ice-type Pokémon for Cynthia’s Garchomp. Ice is its primary practical weakness because Garchomp is Dragon/Ground. Dragon attacks can work but involve dangerous exchanges, and Rock attacks are not a dependable answer. Also prepare a plan for Milotic, whose bulk and recovery can punish weak physical attacks, and keep a strong answer for Lucario and Roserade.
- Aim for a balanced mid-to-upper-50s party rather than one overleveled sweeper.
- Prepare Water or Grass coverage for Bertha.
- Prepare Ground or Water coverage for Flint.
- Keep Dark, Ghost, or strong neutral damage for Lucian.
- Reserve a dependable Ice answer for Cynthia’s level 66 Garchomp.
Reach the League and establish the retry loop
Follow the final stairs and bridges to leave Victory Road at the Pokémon League approach. The pre-League route is complete when you reach the League exterior and can enter the large building. Before challenging the Elite Four, heal at the Pokémon League Pokémon Center, restore every important move’s PP, cure status conditions, replace any field-move arrangement that weakened a battler, set held items, and save again.
Use ordinary Potions or Super Potions where they are sufficient inside Victory Road. Keep Full Restores, Revives, Max Revives, Max Ethers, and Max Elixirs for the five consecutive League battles whenever possible. The Elite Four and Champion do not automatically restore your party between fights, so enter with enough healing to recover both HP and status conditions.
If an attempt fails, return to the Pokémon League Pokémon Center, restock, adjust moves or held items, and save again. If the team is close but lacks one matchup, train briefly in Victory Road after healing rather than repeatedly entering the League with the same weakness. A safe retry loop is: heal at the Center, restock, adjust the party, save, enter the League, and restart the loop after a defeat.
- Reach the Pokémon League building after leaving Victory Road.
- Heal and restore PP at the League Pokémon Center.
- Set final moves, held items, and status conditions.
- Keep strong recovery and PP-restoration items for the League.
- Save at the League Pokémon Center before challenging the Elite Four.
Before you move on
- Victory Road’s accessible pre-League route has been crossed and the Pokémon League building is reachable.
- The party collectively has Surf, Strength, Rock Smash, Waterfall, and Rock Climb available.
- The Pokémon League Pokémon Center has been used to heal the team and restore PP.
- The team has practical answers for Aaron, Bertha, Flint, Lucian, and Cynthia’s level 66 Garchomp.
- A reliable Ice answer for Garchomp has been preserved rather than spent on earlier routine battles.
- Healing items, Revives, status cures, held items, and PP-restoration items have been checked.
- A save exists at the Pokémon League Pokémon Center.
- The blocked eastern Victory Road opening and Marley’s postgame section have not been mistaken for pre-League requirements.
Sinnoh Elite Four — member-by-member tactics
After Victory Road, heal at the Pokémon League Pokémon Center, restock at the League Poké Mart, and save in the lobby before entering Aaron’s room. In the original Nintendo DS Pokémon Diamond Version, the challenge proceeds through Aaron, Bertha, Flint, and Lucian without automatic healing between battles. You may use items and change party members between victories, but you cannot return to the lobby until the challenge attempt ends. Your objective in this chapter is to defeat all four Elite Four members, restore the party as far as possible, and stop immediately before Cynthia’s room with your remaining counters, recovery supplies, and PP ready for the next chapter.
1. Prepare before entering the Pokémon League
Heal the entire party at the Pokémon Center beside the Pokémon League entrance. Use the Poké Mart to buy Hyper Potions or Max Potions, Full Restores, Revives, and status cures. Full Restores heal all HP and remove major status conditions; Full Heals remove status without restoring HP. Ice Heals, Burn Heals, Awakenings, Antidotes, and Parlyz Heals are cheaper alternatives when you want to conserve Full Restores.
Restore the PP of the moves your team relies on most. Give priority to reliable Fire, Flying, Rock, Water, Grass, Ground, Dark, Ghost, Fighting, and Ice coverage. You do not need every type represented, but you should have dependable answers for Aaron’s Drapion, Bertha’s Water/Ground Pokémon, Flint’s Drifblim, Lucian’s Bronzong, and the Champion battle that follows this chapter.
A balanced party in the upper 50s to low 60s can complete the original Diamond League, although lower-level teams need stronger type advantages and more careful healing. Aaron’s highest-level Pokémon is level 57, Bertha’s is level 59, Flint’s is level 61, and Lucian’s is level 63. Put your most reliable lead or opening switch near the front of the party, then save in the lobby before speaking to the guard and entering the first room.
Do not bring Reviver Seeds as a planned recovery item. Reviver Seed is not a normal Diamond battle-recovery mechanic. Use ordinary Revives and Max Revives instead, and remember that neither item restores PP.
- Heal the whole party before entering.
- Buy healing, status-curing, and revival items.
- Restore the PP of important coverage moves.
- Keep a Ground move for Drapion.
- Keep Grass or strong Water coverage for Bertha.
- Keep Fire coverage for Bronzong.
- Save in the lobby before entering Aaron’s room.
2. Defeat Aaron’s Bug team
Aaron’s team is Dustox at level 53, Beautifly at level 53, Vespiquen at level 54, Heracross at level 54, and Drapion at level 57. The battle order is Dustox, Beautifly, Vespiquen, Heracross, and Drapion.
Lead with a strong Fire-, Flying-, or Rock-type attack against Dustox and Beautifly. Dustox can use Toxic, Double Team, and Light Screen, so attack instead of spending several turns setting up. Beautifly is more offensively threatening and can use Energy Ball, Bug Buzz, Psychic, and Shadow Ball, so avoid leaving a vulnerable Fighting- or Grass-type in front of it.
Vespiquen can use Defend Order and Heal Order to prolong the fight. Use your strongest accurate super-effective attack rather than weak repeated hits. Its Power Gem is dangerous to Fire- and Flying-type Pokémon, so do not assume every Bug Pokémon is safe for those switch-ins.
Heracross is Bug/Fighting and should usually be attacked with a strong Flying move. Its Stone Edge can heavily damage or defeat a Fire- or Flying-type that switches in carelessly, while Close Combat punishes Rock-types. If your Flying attacker cannot survive Stone Edge, weaken Heracross with a safer Pokémon first or use another reliable super-effective attack.
Drapion is Poison/Dark and has only one weakness in this battle: Ground. Psychic attacks do not work because Drapion’s Dark typing makes it immune to them. Use an accurate Ground move, but do not assume a Ground-type is automatically safe. Drapion carries Ice Fang, along with X-Scissor, Cross Poison, and Aerial Ace, so heal or switch if your Ground attacker is already damaged.
- Use Fire, Flying, or Rock attacks on Dustox and Beautifly.
- Attack Vespiquen decisively before it uses repeated defensive or healing moves.
- Use Flying coverage on Heracross when the switch is safe.
- Use Ground attacks on Drapion.
- Do not use Psychic attacks on Drapion.
- Heal and restore key PP before speaking to Bertha.
3. Defeat Bertha’s Ground team
Bertha’s team is Quagsire at level 55, Sudowoodo at level 56, Golem at level 56, Whiscash at level 55, and Hippowdon at level 59. The battle order is Quagsire, Sudowoodo, Golem, Whiscash, and Hippowdon.
Open with Grass coverage if you have it. Quagsire and Whiscash are both Water/Ground, making them four times weak to Grass. Electric attacks do not work against either Pokémon because their Ground typing grants immunity. Remove Quagsire early if it begins using Double Team, Protect, and Sandstorm, since repeated evasion and stalling can waste PP and healing resources.
Sudowoodo is a Rock-type Pokémon with Earthquake, Sucker Punch, Hammer Arm, and Sandstorm. Golem is Rock/Ground and carries Earthquake, Gyro Ball, Brick Break, and Sandstorm. Water and Grass attacks are effective against both. Keep Fire- and Flying-types away unless they can safely finish the target, because Rock and Ground attacks can punish them heavily.
Whiscash is another four-times Grass weakness, but it carries Fissure, Aqua Tail, Zen Headbutt, and Rock Slide. Use a fast, accurate Grass attack rather than giving it several chances to land a damaging move. If your Grass attacker is fragile, attack directly instead of spending turns on unnecessary setup.
Hippowdon is Bertha’s level 59 ace. Its Sand Stream ability starts a sandstorm when it enters battle, and its moves are Earthquake, Stone Edge, Crunch, and Curse. Use a strong Grass or Water attack before Curse increases its power and defenses. Special Water attacks are useful because Hippowdon’s physical Defense is high, but do not rely on a weakened Water move while the sandstorm is active if a Grass or Ice option is safer.
- Use Grass attacks against Quagsire and Whiscash.
- Do not use Electric attacks on either Water/Ground Pokémon.
- Use Water or Grass attacks against Sudowoodo and Golem.
- Watch for Rock attacks when using Fire- or Flying-types.
- Defeat Hippowdon before Curse turns it into a longer fight.
- Keep a healthy Water, Ground, or other reliable answer for Flint.
4. Defeat Flint’s mixed Fire roster
Flint’s team is Rapidash at level 58, Steelix at level 57, Drifblim at level 58, Lopunny at level 57, and Infernape at level 61. The battle order is Rapidash, Steelix, Drifblim, Lopunny, and Infernape. Only Rapidash and Infernape are Fire-type in this original Diamond battle, so prepare for the entire roster rather than bringing only one Fire counter.
Rapidash knows Flare Blitz, SolarBeam, Bounce, and Sunny Day. Sunny Day strengthens its Fire move and removes SolarBeam’s charge turn. A fast Ground- or Rock-type attack can defeat it before the weather becomes a problem. If sunlight is active, Ground coverage is often preferable to a weaker Water move because sunlight reduces Water damage.
Steelix is Steel/Ground and is weak to Water, Ground, Fighting, and Fire. Use a strong special Water attack when possible because Steelix’s physical Defense is high. Its Fire Fang, Rock Tomb, Screech, and Sunny Day can punish careless Fire- or Flying-type switches, so do not treat it as a passive target.
Drifblim is Ghost/Flying and is immune to Ground attacks. Use Electric, Ice, Rock, Dark, or Ghost coverage. Its Will-O-Wisp can cripple a physical attacker, Double Team can make it harder to hit, and Baton Pass may transfer its evasion changes to a later Pokémon. Do not waste Ground attacks against it.
Lopunny is Normal-type and knows Fire Punch, Charm, Mirror Coat, and Sunny Day. A physical Fighting move is effective, but avoid using a special attack if Mirror Coat could return the damage. A strong neutral physical move also works if your Fighting coverage is unsafe.
Infernape is Flint’s level 61 ace. It has Flare Blitz, ThunderPunch, Mach Punch, and Earthquake. Water, Ground, Flying, and Psychic attacks can exploit its weaknesses, but ThunderPunch makes some Water- or Flying-type switch-ins dangerous, while Mach Punch can finish a weakened faster Pokémon. Use a healthy attacker that can survive one hit and answer immediately.
- Follow Flint’s actual order: Rapidash, Steelix, Drifblim, Lopunny, Infernape.
- Use Ground or Rock coverage on Rapidash, watching for Sunny Day.
- Use special Water or Ground attacks on Steelix.
- Do not use Ground attacks on Drifblim.
- Use Electric, Ice, Rock, Dark, or Ghost coverage on Drifblim.
- Use Fighting or strong physical neutral damage on Lopunny.
- Prepare a safe Water, Ground, Flying, or Psychic answer for Infernape.
- Cure status before entering Lucian’s room.
5. Defeat Lucian’s Psychic team
Lucian uses Mr. Mime at level 59, Girafarig at level 59, Medicham at level 60, Alakazam at level 60, and Bronzong at level 63. The battle order is Mr. Mime, Girafarig, Medicham, Alakazam, and Bronzong.
Mr. Mime can use Reflect and Light Screen, so attack immediately or use the damage category that is not currently reduced. It also carries Psychic and Thunderbolt. A strong Dark-, Bug-, or Ghost-type attack is effective, but do not allow the screens to remain active while repeatedly making weak attacks.
Girafarig is Psychic/Normal and is immune to Ghost attacks. Use Dark or Bug coverage, or strong neutral damage. Its Psychic, Shadow Ball, Double Hit, and Crunch give it answers against several common switch-ins, so avoid sending in a frail Ghost-type expecting an easy knockout.
Medicham is Psychic/Fighting with the Pure Power ability, which greatly increases its physical Attack. It carries Drain Punch, Fire Punch, ThunderPunch, and Ice Punch. Ghost attacks are effective, but a Dark-type switch is risky because Fighting coverage can defeat it. Use a sturdy Ghost-type or a faster attacker that can knock it out without taking a super-effective hit.
Alakazam is frail but has high Special Attack and Speed. Its Psychic, Energy Ball, Focus Blast, and Recover can quickly turn a poor switch into a loss. Use a fast Dark-, Bug-, or Ghost-type attack, or a Pokémon that can survive its special attacks and defeat it before Recover extends the fight.
Bronzong is Psychic/Steel and has Levitate in the original Diamond battle, so Ground attacks fail. Fire is its cleanest weakness. It carries Psychic, Gyro Ball, Earthquake, and Calm Mind. A strong Fire attack should be your first choice; otherwise use consistent neutral damage and do not spend turns on Ground moves. If Bronzong uses Calm Mind, finish it quickly rather than allowing its special offenses to grow.
- Use Dark, Bug, or Ghost coverage against Mr. Mime and Alakazam.
- Use Dark or Bug attacks against Girafarig.
- Remember that Girafarig is immune to Ghost attacks.
- Use Ghost attacks against Medicham when the switch is safe.
- Do not send a fragile Dark-type into Medicham without accounting for Fighting coverage.
- Use Fire attacks against Bronzong.
- Do not use Ground attacks on Bronzong because of Levitate.
- After Lucian falls, restore the party before entering Cynthia’s room.
6. Manage recovery items and retry attempts
The game does not automatically heal the party between Elite Four battles. After every victory, open the Bag and heal deliberately before speaking to the next member. Use Hyper Potions, Max Potions, or Full Restores to restore HP. Use Full Restores when a Pokémon has both serious damage and a major status condition; use a cheaper status cure when HP is already full or nearly full.
A Revive restores a fainted Pokémon to half of its maximum HP. A Max Revive restores a fainted Pokémon to full HP. Revive a Pokémon only when it still has a clear role in the remaining battles. For example, bring back a Ground attacker if Drapion or Bronzong remains, or restore a Grass attacker if Bertha’s Water/Ground Pokémon are still causing trouble. Do not spend a Max Revive simply to refill a Pokémon that has no useful matchup remaining.
Healing items do not restore PP. Track the uses left on your only Ground, Grass, Fire, Water, Dark, Ghost, Fighting, or Ice move. Use secondary attacks when they are safe, but preserve your strongest answers for the later rooms. Pressure from Drapion, Vespiquen, or other abilities can also reduce PP faster than expected.
You can save before starting the League challenge, but you cannot create a new save between Elite Four victories. If the party is defeated, return to the Pokémon Center, revise the team or move coverage, retrain in Victory Road if necessary, restock the Bag, and save again before entering. A failed attempt is a reason to change the plan rather than repeatedly spending the same supplies on the same sequence.
- Heal after every Elite Four victory.
- Use Revives only when the restored Pokémon still has a job.
- Reserve Max Revives for essential counters.
- Use Full Restores for combined HP and status problems.
- Track PP throughout the four battles.
- If defeated, restock and revise the plan before retrying.
7. Stop immediately before Cynthia’s room
After defeating Lucian, do not enter the next room yet. Open the Bag and restore the party as far as possible. Heal every surviving Pokémon, revive essential fainted counters, cure status conditions, and check the PP of your strongest attacks. This is the final preparation point before the Champion battle described in the next chapter.
Keep at least one dependable answer for Cynthia’s varied team, especially a reliable Ice attack or another carefully tested plan for Garchomp. Also preserve a strong answer for Milotic and a Grass, Electric, or similarly effective answer for Gastrodon. These are preparation requirements for the next chapter, not additional battles to complete here.
Walk through the doorway after Lucian’s room only far enough to reach the area immediately before Cynthia’s room. Stop there. Do not speak to Cynthia or begin the Champion battle as part of this chapter.
- Aaron, Bertha, Flint, and Lucian have been defeated in order.
- The party has been healed as far as current supplies allow.
- Essential counters have been revived.
- Important status conditions have been removed.
- Key offensive moves have useful PP remaining.
- A dependable Ice or Garchomp answer is still available.
- The player is standing immediately before Cynthia’s room.
Before you move on
- Aaron has been defeated.
- Bertha has been defeated after Aaron.
- Flint has been defeated after Bertha.
- Lucian has been defeated after Flint.
- The party has been restored as far as possible with available items.
- Important coverage moves have usable PP remaining.
- Essential counters have been revived and status conditions have been treated.
- The player is immediately before Cynthia’s room and has not yet started the Champion battle.
Champion Cynthia — how to beat Cynthia and the Hall of Fame checklist
Champion Cynthia is the final battle of the original North American Nintendo DS release of Pokémon Diamond Version. Her first-time Champion team is Spiritomb at level 61, Roserade and Gastrodon at level 60, Lucario and Milotic at level 63, and Garchomp at level 66. Prepare a reliable answer for each member, especially a healthy Ice user for Garchomp, then complete the Hall of Fame registration and allow the automatic save to finish. Afterward, complete the Sinnoh Pokédex requirement and obtain the National Pokédex. Spring Path access is handled in Chapter 14; this chapter verifies the prerequisites without repeating that physical route.
Prepare before entering Cynthia’s room
Heal at the Pokémon League Pokémon Center and restore the PP of every move you expect to use. Cynthia’s original Diamond team is Spiritomb at level 61, Roserade at level 60, Gastrodon at level 60, Lucario at level 63, Milotic at level 63, and Garchomp at level 66. This is the original Diamond team, not the higher-level rematch data from Brilliant Diamond and Shining Pearl.
You cannot visit a Pokémon Center between Elite Four battles or before Cynthia, so bring Full Restores, Revives, and status cures. Preserve the Pokémon that answer Milotic and Garchomp during the earlier battles. A dependable Ice attack is especially valuable for the final matchup.
Plan a response to each type before entering. Fire, Flying, Ice, or Psychic attacks are useful against Roserade; Grass attacks are the cleanest answer to Gastrodon; Grass or Electric attacks threaten Milotic; Ground, Fire, or Fighting attacks work against Lucario; and Ice is the primary answer to Garchomp. Save before speaking to Cynthia if you want a fixed retry point for the Champion battle.
- Heal the party and restore important move PP.
- Buy Full Restores, Revives, and status cures before entering the League.
- Keep a healthy Pokémon with a reliable Ice move.
- Preserve answers for Milotic and Garchomp.
- Save before speaking to Cynthia if you want a retry point.
Defeat Spiritomb with strong neutral damage
Cynthia leads with Spiritomb at level 61. In original Diamond, the Fairy type does not exist, and Spiritomb’s Ghost/Dark combination has no ordinary type weakness. Use strong, reliable neutral damage rather than Fairy-type advice from later games or remakes.
Spiritomb knows Dark Pulse, Psychic, Silver Wind, and Embargo, and its Pressure ability reduces the remaining uses of moves that target it. Avoid wasting limited high-power attacks if a lower-cost move can finish the battle. Its attacks are special, so a Pokémon with good special durability is useful.
Do not spend your only Ice user or your most important healing items unnecessarily against the lead. If Spiritomb damages the Pokémon intended for Milotic or Garchomp, switch to a less important party member and recover only when doing so prevents a later knockout.
- Use strong neutral damage against Spiritomb.
- Do not use Fairy-type strategy from later games or remakes.
- Account for Pressure reducing move PP.
- Preserve the Pokémon needed for Milotic and Garchomp.
Use Fire, Flying, Ice, or Psychic attacks against Roserade
Roserade is level 60, Grass and Poison type, and has Natural Cure. Fire, Flying, Ice, and Psychic attacks are super effective. A Fire-type attacker can also help against Lucario, but switch out if Roserade survives and threatens it with coverage damage.
Roserade knows Energy Ball, Sludge Bomb, Shadow Ball, and Extrasensory. A Flying or Psychic attacker can work, but it must be healthy enough to tolerate Shadow Ball or Extrasensory if the first hit does not defeat Roserade. Direct damage is more dependable than trying to win through poison or another status condition.
Natural Cure removes status when Roserade leaves battle. Do not build the entire plan around poison or paralysis. If your Ice user is also your safest Roserade answer, weigh the damage it may take against the need to keep it available for Garchomp.
- Use Fire, Flying, Ice, or Psychic attacks.
- Respect Shadow Ball and Extrasensory coverage.
- Prefer direct damage over poison-based plans.
- Keep your main Garchomp answer healthy when possible.
Use Grass against Gastrodon
Gastrodon is level 60 and has Water and Ground typing, making Grass its clear weakness. Cynthia’s original Diamond Gastrodon has Sticky Hold, not Storm Drain, so it does not nullify Water attacks. Grass remains the cleanest answer because it exploits the typing directly.
Gastrodon knows Muddy Water, Earthquake, Stone Edge, and Sludge Bomb. Send in a Grass Pokémon that can survive one of these attacks or defeat Gastrodon immediately. Do not rely on a frail Grass attacker if it was already damaged by the Elite Four.
A Water-type is not a preferred switch-in. Gastrodon’s Water and Ground typing makes that exchange inefficient even though Sticky Hold does not block Water attacks. If your Grass Pokémon has fainted, use durable neutral damage and revive the appropriate counter when you have a safe opportunity.
- Use Grass attacks against Gastrodon.
- Do not assume it has Storm Drain in original Diamond.
- Watch for Earthquake, Stone Edge, and Sludge Bomb.
- Avoid sending a weakened Water-type into this matchup.
Handle Lucario and Milotic carefully
Lucario is level 63 and has Fighting and Steel typing. Ground, Fire, and Fighting attacks are super effective. Its moves are Aura Sphere, Dragon Pulse, Psychic, and Earthquake. A frail Fire or Psychic Pokémon can be punished if it fails to knock Lucario out, so use a Pokémon that can survive one of these attacks or switch in after a safe knockout.
Ground coverage is useful, but do not leave a Ground attacker in automatically. Aura Sphere and Psychic are special attacks, while Earthquake punishes many Pokémon that rely only on Steel resistance. Hit decisively and switch if Lucario survives in a dangerous range.
Milotic is level 63 and knows Surf, Ice Beam, Mirror Coat, and Aqua Ring. Grass and Electric attacks are super effective. Mirror Coat can return heavy damage from a special attack, so a physical attacker with suitable coverage is safer than repeatedly using weak special moves. If you must use a special attacker, ensure it can survive the reflected damage.
Aqua Ring restores Milotic’s HP each turn. Use consistent damage rather than spending several turns on unnecessary setup, and do not exhaust all healing or revival resources during a prolonged fight.
- Use Ground, Fire, or Fighting attacks against Lucario.
- Respect Lucario’s Aura Sphere, Psychic, Dragon Pulse, and Earthquake.
- Be cautious with special attacks against Milotic because of Mirror Coat.
- Defeat Milotic efficiently if Aqua Ring is active.
Defeat Garchomp with an Ice-based plan
Garchomp is Cynthia’s final Pokémon at level 66. Its Dragon and Ground typing makes Ice the primary weakness to exploit. It has Sand Veil, holds a Sitrus Berry, and knows Dragon Rush, Earthquake, Brick Break, and Giga Impact.
Bring Garchomp into battle with your Ice attacker healthy whenever possible. Ice Beam, Ice Fang, or another reliable Ice move is preferred. If the first Ice attack does not defeat Garchomp, account for the Sitrus Berry and decide whether your Pokémon can survive another attack before healing or attacking again.
A Dragon attack can damage Garchomp, but this is risky because Garchomp is fast and can retaliate with Dragon Rush. A Steel Pokémon may resist Dragon Rush, but Steel typing alone is not a complete counter because Earthquake and Brick Break threaten it. Rock attacks are not dependable: Rock is not super effective against Garchomp and does not exploit its principal weakness.
If your Ice user faints, use a controlled sacrifice, a Revive, or a durable switch to create a safe opportunity to restore it. Once Garchomp faints, Cynthia is defeated.
- Use Ice damage as the primary Garchomp plan.
- Account for Sand Veil, the Sitrus Berry, Earthquake, and Brick Break.
- Keep a backup Pokémon capable of surviving an attack.
- Treat Steel or Dragon answers as situational backups.
- Do not rely on Rock as a Garchomp counter.
Complete the Hall of Fame registration
After Cynthia’s final Pokémon faints, continue through the post-battle sequence. Cynthia and Professor Rowan lead you to the Hall of Fame room, where the Pokémon currently in your party are registered with your Trainer record.
Follow the prompts and allow the Hall of Fame registration and save to finish completely. Do not power off or reset during this sequence. The game saves after the party is registered, and the ending credits follow.
When control returns afterward, create another manual save. This produces a secure post-victory file before you complete the Pokédex requirements for the National Pokédex upgrade.
- Follow Cynthia and Professor Rowan to the Hall of Fame room.
- Register the party when prompted.
- Allow the registration and save to finish.
- Create a manual save after control returns.
Obtain and verify the National Pokédex prerequisites
Original Diamond requires both Hall of Fame completion and the National Pokédex before the postgame Spring Path route becomes available. These are separate conditions. In normal progression, entering the Hall of Fame comes first; after the required Sinnoh entries have been seen, Professor Oak upgrades the Pokédex. The National Pokédex does not replace the Hall of Fame requirement.
You do not need to catch every required species. You need to record the 150 required Sinnoh Pokédex entries as seen; Manaphy is outside this requirement. If an entry is missing, battle the relevant Trainer or visit the appropriate location before returning to Sandgem Town.
Diamond players can record the opposite-version mascot entry without catching it. After the Celestic Town story event, examine the book in the town’s historical building to register Palkia as seen. This avoids treating Palkia as a required trade or capture for the regional Pokédex upgrade.
Return to Professor Rowan’s laboratory in Sandgem Town after all 150 required entries are recorded. Professor Oak appears and upgrades the Pokédex to National Mode. After the upgrade, speak with Rowan again to receive the Poké Radar. Confirm that the National Pokédex has actually been awarded before moving on to Chapter 14, which covers the physical route to Spring Path, Sendoff Spring, and Turnback Cave.
If the National Pokédex has not been awarded, check the regional Pokédex for missing seen entries rather than assuming that Hall of Fame completion alone is sufficient. The chapter is complete when Cynthia has been defeated, the Hall of Fame registration save has finished, and the National Pokédex has been obtained or the remaining seen-entry requirement has been clearly identified.
- Finish the Hall of Fame registration and its save.
- See all 150 required Sinnoh Pokédex species, with Manaphy excluded.
- Use the Celestic Town book to register Palkia if its entry is missing.
- Return to Professor Rowan’s laboratory in Sandgem Town.
- Receive the National Pokédex upgrade from Professor Oak.
- Receive the Poké Radar from Professor Rowan.
- Confirm that both Hall of Fame completion and National Pokédex acquisition are active.
- Continue to Chapter 14 for the physical route to Spring Path and Turnback Cave.
Before you move on
- Cynthia’s Spiritomb, Roserade, Gastrodon, Lucario, Milotic, and level 66 Garchomp have all been defeated.
- The Hall of Fame registration sequence has finished and its save has completed.
- A post-victory manual save has been created after control returns.
- All 150 required Sinnoh Pokédex species have been seen, with Manaphy excluded from the requirement, or the remaining missing entry has been identified for immediate completion.
- Professor Oak has upgraded the Pokédex to National Mode in Professor Rowan’s Sandgem Town laboratory.
- Professor Rowan has provided the Poké Radar after the National Pokédex upgrade.
- The Hall of Fame condition and National Pokédex condition are both active.
- The player is ready to follow Chapter 14 for the physical route to Spring Path, Sendoff Spring, and Turnback Cave.
References for this chapter
- Walkthrough: Pokémon Diamond and Pearl/Part 21
- Walkthrough: Pokémon Diamond and Pearl/Part 24 — National Pokédex upgrade and postgame activities
- Elite Four - Pokemon Diamond Version Walkthrough & Guide
- Pokémon Diamond and Pearl/The Elite Four
- Pokémon Diamond/Pearl — National Pokédex
- Pokemon Diamond Unofficial guide
Spring Path and Sendoff Spring — postgame travel to Turnback Cave
In the original North American Nintendo DS release of Pokémon Diamond, reach Turnback Cave only after both postgame conditions are active: the game must contain a Hall of Fame record, and Professor Oak must have upgraded your Pokédex to the National Pokédex after you have seen the required Sinnoh Pokédex entries. Once both conditions are satisfied, Spring Path opens from southern Route 214. Follow it into Sendoff Spring, use Rock Climb to reach the cave entrance, prepare your capture supplies, and save outside Turnback Cave. Giratina is not handled in this chapter; the next chapter covers the cave maze and encounter.
Confirm the two required postgame conditions
Do not assume that defeating Champion Cynthia alone opens Spring Path. First, complete the Elite Four and Champion sequence so the game has recorded your Hall of Fame entry. Then confirm that you have seen the required Sinnoh Pokédex entries and received Professor Oak’s National Pokédex upgrade. You do not need to catch every Pokémon in the Sinnoh Pokédex; the upgrade is based on registering the required entries as seen.
For this route, treat the Hall of Fame record and National Pokédex as separate checklist items. In normal progression, the Hall of Fame comes first and makes the National Pokédex upgrade available after the regional Pokédex requirement is met, but neither condition should be omitted. If Spring Path is missing, recheck both conditions instead of assuming the route is permanently inaccessible.
Put a Pokémon with Rock Climb in your party before leaving. Rock Climb is required in Sendoff Spring to reach Turnback Cave. Surf is not required for this approach from Route 214, though it remains useful for general postgame travel. Heal at a Pokémon Center before starting the trip.
- A Hall of Fame record exists on the save file.
- The required Sinnoh Pokédex entries have been registered as seen.
- Professor Oak has granted the National Pokédex.
- A party Pokémon knows Rock Climb.
- The party is healed.
Travel from Veilstone City to southern Route 214
Fly to Veilstone City and leave through the southern gate to enter Route 214. Follow the main route south, passing the fences, ledges, trainers, and grass until you reach the southern section near Valor Lakefront.
Spring Path is a short eastern-side opening from Route 214. It is located before the route reaches Valor Lakefront, near the route’s eastern side and a Honey Tree. The passage is unavailable during the main story and appears after both the Hall of Fame and National Pokédex conditions have been met.
Do not enter the western Maniac Tunnel by mistake. That tunnel is a separate Route 214 passage associated with the Ruin Maniac. If you reach the wrong tunnel or continue into Valor Lakefront, return north slightly and inspect the eastern side of Route 214 near the Honey Tree.
If the opening is absent, stop and check the two requirements again. Confirm that the save contains a Hall of Fame entry, that the Pokédex display is the National version, and that the upgrade was actually received from Professor Oak. Then return to southern Route 214.
- You are on Route 214 south of Veilstone City.
- You have reached the southern portion before Valor Lakefront.
- You are searching the eastern side near the Honey Tree.
- You have not confused Spring Path with the Maniac Tunnel.
- Both postgame access conditions are complete.
Cross Spring Path into Sendoff Spring
Enter the newly opened eastern passage to reach Spring Path. This is a brief connector rather than a full dungeon. Continue through it until the area changes to Sendoff Spring.
Spring Path has no wild Pokémon encounters in the original Diamond and Pearl release, so you can cross it without spending health or PP. No Platinum Distortion World sequence is involved, and no remake-specific event is required to open this route.
Once you arrive in Sendoff Spring, the environment becomes a larger outdoor area surrounding Sinnoh’s hidden fourth lake. Wild encounters can occur here, so use Repels if you want to preserve your party’s health and move PP for Turnback Cave.
- The eastern Route 214 opening was entered.
- Spring Path was crossed.
- The area changed to Sendoff Spring.
- No Distortion World event was used.
- Repels are available if you want to avoid wild encounters.
Cross Sendoff Spring and locate Turnback Cave
From the Spring Path exit, move through Sendoff Spring toward the rocky area surrounding the lake. Do not remain only on the lowest shoreline; the route to the cave uses the elevated rocky section.
Follow the land toward the eastern side and use Rock Climb to reach the higher ground. Continue around the upper section, following the available path toward the far side of the rocky area. When the route brings you back down toward the cave-side entrance, use Rock Climb again where necessary and continue to the cave opening.
Turnback Cave is located within Sendoff Spring, at the northern part of the area. The cave entrance is the stopping point for this chapter. You do not need to enter the cave yet, and you should not treat reaching Sendoff Spring alone as completion.
Defog can improve visibility if the fog makes the area difficult to read, but it is not the access requirement. Rock Climb is the important field move for this approach. If you fight several wild Pokémon or trainers on the way, heal before beginning the next chapter.
- Sendoff Spring has been entered.
- The elevated rocky route has been reached with Rock Climb.
- The upper section has been crossed.
- The descent toward the cave has been completed.
- The Turnback Cave entrance is visible.
Prepare, restock, and save outside Turnback Cave
Turnback Cave contains the level 70 Giratina encounter in original Diamond, so make the final approach only after preparing for a Legendary capture. If your team is injured or your key moves have low PP, return to a Pokémon Center in Veilstone City or another convenient town and travel back through Route 214 and Spring Path.
Bring Poké Balls, preferably Ultra Balls, along with Revives or Max Revives and strong healing items such as Full Restores. A move such as False Swipe is useful for lowering Giratina without knocking it out. Sleep or Paralysis can make capture attempts more reliable. Avoid poison and burn when weakening the target because residual damage can defeat it during repeated capture attempts.
Remember that Giratina is a Ghost-type Pokémon. Normal- and Fighting-type moves cannot damage it, so use a move that can affect Ghost types when reducing its HP. Do not prepare for Origin Forme mechanics: Origin Forme was not part of the original Diamond encounter. The next chapter handles the maze, the three-pillar route condition, and Giratina itself.
Save directly outside Turnback Cave. This provides a safe retry point before entering the randomized cave layout and prevents an avoidable loss of preparation. Do not enter merely to check the first room if you still need supplies or a healed party.
- The party is healed.
- Revives or Max Revives are stocked.
- Full Restores or comparable healing items are stocked.
- Poké Balls are ready for a level 70 Legendary encounter.
- A safe weakening move is prepared if available.
- A sleep or paralysis option is prepared if available.
- The game is saved outside Turnback Cave.
Completion check
This chapter is complete only when both postgame requirements are active: the Hall of Fame record exists and the National Pokédex has been obtained. You must also have found the eastern Spring Path opening on southern Route 214, crossed into Sendoff Spring, used Rock Climb to follow the elevated approach, and located Turnback Cave.
The correct handoff point is outside Turnback Cave with the party healed, capture supplies ready, and the game saved. Champion victory alone, National Pokédex possession alone, or arrival at Sendoff Spring alone does not satisfy the full chapter objective.
If Spring Path is unavailable, verify the requirements in this order: confirm the Hall of Fame entry, confirm that all required Sinnoh entries have been seen, confirm that Professor Oak granted the National Pokédex, and then revisit southern Route 214 near the eastern Honey Tree. Giratina remains inside Turnback Cave and belongs to the next chapter.
- The Hall of Fame record is present.
- The National Pokédex has been obtained.
- The eastern Spring Path entrance is visible on southern Route 214.
- Spring Path has been crossed.
- Sendoff Spring has been reached.
- The elevated Sendoff Spring approach has been crossed with Rock Climb.
- The Turnback Cave entrance is visible.
- The party is healed and capture supplies are ready.
- The game is saved outside Turnback Cave.
Before you move on
- The save contains a Hall of Fame record.
- The National Pokédex has been obtained after the required Sinnoh entries were seen.
- The eastern Spring Path entrance is visible on southern Route 214.
- Spring Path has been crossed.
- Sendoff Spring has been reached.
- The elevated approach has been crossed with Rock Climb.
- The Turnback Cave entrance is visible.
- The party is healed and capture supplies are ready.
- The game is saved outside Turnback Cave.
Turnback Cave — maze behaviour, safe routing and the Giratina encounter
Begin this chapter at the Turnback Cave entrance in Sendoff Spring, with the Hall of Fame and National Pokédex requirements already completed and a save file made outside the cave. Turnback Cave’s intermediate rooms are randomized, but the objective is consistent: find three pillar rooms before entering 30 rooms, then take the chamber immediately beyond the third pillar to reach the level 70 Giratina encounter. The entrance room is not included in the room count. In original Pokémon Diamond, saving and reloading from an intermediate room sends every door in that room back to the fixed entrance, providing a reliable recovery method if you become lost. Escape Rope and Dig do not function as normal exits. The chapter is complete when the Giratina encounter has been captured or defeated, you have returned to the cave entrance and then Sendoff Spring, and the game has been saved.
Prepare at the Turnback Cave entrance
Begin at the Turnback Cave entrance, assuming the preceding chapter has already confirmed access and brought you through Sendoff Spring. Heal your party before entering and save outside the cave. Keep this save separate from the battle save you will make before confronting Giratina.
Bring a good supply of Ultra Balls and other available Poké Balls, along with healing items for the maze and battle. A Pokémon with False Swipe is useful for reducing Giratina to 1 HP without knocking it out. If False Swipe is unavailable, use controlled damage and stop attacking once Giratina’s HP is low. Sleep or paralysis makes the capture attempt more manageable. Avoid poison and burn, because residual damage can defeat Giratina while you are throwing balls.
Rock Smash can be used inside the cave and may help clear obstructing rocks, but it is not required for understanding the maze. Defog can improve visibility if you have access to it, although the randomized layout and pillar inscriptions remain the important parts of the puzzle. Do not enter expecting a fixed map that can be memorized from one attempt to the next.
- The party is healed.
- Poké Balls and healing items are stocked.
- A damage-control option such as False Swipe is available if possible.
- The game is saved outside Turnback Cave.
- The battle save will be kept separate from the entrance save.
Read the entrance inscription and start the counter
The first chamber is the fixed entrance room. Its inscription describes the objective: pass three pillars and reach the sleeping Pokémon before 30 rooms have been crossed. Do not count this entrance room. The counter begins when you leave it and increases each time you enter another chamber.
Once you pass through a door from the entrance, you are in an intermediate room. Most intermediate rooms contain rocks and several exits; some contain a single pillar in the center. The layout generated for the next room is random, so there is no permanent compass direction or universal sequence of doors.
When you find a pillar room, examine the inscription at the base of the pillar. It displays two numbers. The first number tells you which pillar room you have found: first, second, or third. The second number tells you how many rooms you have entered since leaving the entrance, including the current pillar room. For example, an inscription showing 2 and 12 means that you have found the second pillar and have entered 12 rooms since leaving the entrance.
- The entrance room is excluded from the count.
- The count begins after leaving the entrance.
- Every intermediate chamber entered is counted.
- The first inscription number identifies the pillar order.
- The second inscription number identifies the current room count.
Search the randomized rooms for three pillars
Leave the entrance and inspect each chamber as you go. In an ordinary room, the door you used to enter is the return route to the fixed entrance. Choosing that door ends the current search and places you back at the beginning. To continue searching, choose one of the other doors.
The other doors do not form a fixed route. Each has a chance of leading toward the next pillar, while the remaining choices generate another intermediate room. Some rooms contain an unusual arrangement of rocks that hints at the forward route, but this is only a visual guide and not a guaranteed map. Continue checking rooms and pillar inscriptions rather than relying on a route from a previous attempt.
Count every chamber entered after the entrance, including pillar rooms. You must find the first, second, and third pillars before the total reaches 30. If the 30-room limit is reached before you reach Giratina’s chamber, the next door returns you to the entrance and you can begin another attempt. Giratina is not permanently lost merely because an attempt fails.
The pillar inscriptions are the safest way to track progress. If you find a pillar showing the first number 1, 2, or 3, record the second number as well. After the third pillar is confirmed, stop searching immediately; the next chamber is the final room.
- The entry door is recognized as the route back to the entrance.
- A different door is used when continuing the search.
- Rock arrangements are treated as hints rather than a fixed solution.
- All rooms entered after the entrance are counted.
- The first, second, and third pillars are found in order.
- A failed attempt before the third pillar is restarted from the entrance.
Recover safely if you become lost
If you are unsure where you are in an ordinary intermediate room, save the game while standing in that room and reload. In original Diamond and Pearl, reloading a save made in an intermediate room causes all doors in that room to lead back to the fixed entrance. This is the practical recovery method when you no longer know which exit is the entry door.
Use this technique only when you are trying to abandon the current maze attempt. It is not a way to preserve a favorable route after you have already found the third pillar. Keep the entrance save and the later battle save distinct so that a recovery save does not overwrite the position you want to use for Giratina.
Do not depend on Dig or Escape Rope. Neither works as a normal exit from Turnback Cave in the original Diamond release. If you do not reload from an intermediate room, your other reliable options are to choose the correct return door, reach the 30-room limit, or continue until you reach the final room and leave from there.
- A lost intermediate room is handled with save-and-reload.
- The recovery save is not allowed to overwrite the battle save.
- Dig is not treated as an exit.
- Escape Rope is not treated as an exit.
- The player understands that reloading abandons the current room attempt.
Enter Giratina’s chamber after the third pillar
When the pillar inscription confirms that you have found the third pillar, stop looking for another pillar. In the third pillar room, use an exit other than the door used to enter. The chamber immediately beyond the third pillar room is guaranteed to be Giratina’s room, provided the 30-room limit has not already returned you to the entrance.
The final room is larger than the ordinary maze chambers and contains stairs leading to a central platform. Walk down to the platform, but do not interact with Giratina until your battle preparation is complete. Check your active Pokémon, healing supplies, status moves, and capture balls first.
Giratina is level 70 in original Diamond. It is a Ghost- and Dragon-type Pokémon with the Pressure Ability. This is the original Diamond encounter in Turnback Cave, not Platinum’s Distortion World sequence. Diamond does not use Giratina’s Origin Forme for this encounter; Origin Forme was introduced with Platinum’s mechanics.
- The third pillar has been confirmed by its inscription.
- The search stops immediately after the third pillar.
- An exit other than the entry door is used from the third pillar room.
- The final chamber is reached before the 30-room limit ends the attempt.
- The encounter is identified as the level 70 original Diamond Giratina.
Save before the battle and capture or defeat Giratina
Save immediately before interacting with Giratina. This is the important battle save. If you want to preserve the opportunity to capture Giratina, reload this save after an accidental knockout or an unsuccessful attempt rather than overwriting it.
In original Diamond, Giratina knows Shadow Force, Heal Block, Earth Power, and Slash. Shadow Force removes Giratina from the field for one turn before striking. Heal Block prevents healing moves for a period of time, Earth Power is a special Ground-type attack, and Slash is a physical Normal-type attack with an increased critical-hit rate. Pressure causes your moves to use additional PP.
Open with a status move if you have one. Sleep is generally the most helpful condition for catching Giratina, while paralysis is a useful alternative. Reduce its HP carefully with False Swipe or controlled attacks. Avoid poison and burn during the final capture attempt because damage at the end of a turn can knock Giratina out before the capture succeeds.
Throw Ultra Balls once Giratina’s HP is low and it is affected by a status condition. Heal your active Pokémon when necessary, especially after Earth Power or Slash. Shadow Force’s disappearing turn can give you a brief opportunity to use an item, but do not assume every turn is safe if Giratina is already under pressure from critical hits or low party HP.
Capturing Giratina completes the encounter and adds it to the Pokédex as caught. If you deliberately or accidentally defeat it, the encounter objective is also resolved for this chapter. Reload the battle save instead if your goal is specifically to preserve the capture opportunity.
- A battle save exists immediately before interacting with Giratina.
- The party has a controlled damage plan.
- Sleep or paralysis is available if possible.
- Poison and burn are avoided during the final capture attempt.
- Giratina is captured or defeated.
- The desired battle result is preserved before the save is overwritten.
Exit Turnback Cave and finish the chapter
After the encounter, use any available door in Giratina’s room. The final chamber returns you to the fixed entrance room. From the entrance, take the southern exit to return to Sendoff Spring.
Save after you are back in Sendoff Spring or after you have safely returned to the surrounding route network. Do not overwrite the battle save until you are satisfied with the result. Keeping that file temporarily is useful if you captured Giratina and later discover that you want to revise your post-battle party or item arrangement.
If a maze attempt failed before the third pillar, repeat the process from the entrance. If you are lost in an ordinary room, use the original Diamond save-and-reload recovery behavior instead of wasting time testing items that cannot function there. If the third pillar has already been found, take the next chamber rather than continuing to search.
The chapter is complete when the level 70 Giratina encounter has been captured or defeated, the player has exited to the fixed entrance, Sendoff Spring has been reached, and the game has been saved.
- The final chamber has been exited.
- The fixed entrance room has been reached.
- Sendoff Spring has been reached.
- The game has been saved after leaving the cave.
- The Giratina encounter has been resolved.
Before you move on
- The player began at the Turnback Cave entrance with the required postgame access already verified.
- The player had a save file outside the cave before entering.
- Three pillar rooms were found before the 30-room limit.
- The chamber immediately beyond the third pillar was entered.
- The level 70 original Diamond Giratina encounter was captured or defeated.
- The player returned to the fixed entrance and then Sendoff Spring.
- The game was saved after leaving Turnback Cave.
References for this chapter
- Turnback Cave — Bulbapedia
- Spring Path — Bulbapedia
- Walkthrough: Pokémon Diamond and Pearl/Part 28 — Turnback Cave
- Pokéarth Sinnoh: Turnback Cave — Serebii
- Giratina Diamond and Pearl location data — Serebii
- Giratina Pokédex data and Diamond and Pearl moves — Serebii
- Pokémon Diamond and Pearl/Turnback Cave — StrategyWiki
- Pokémon Diamond Version location and route guide — GameFAQs
After Giratina — finishing the main campaign checklist and recommended postgame goals
Complete the original Nintendo DS Pokémon Diamond postgame route by confirming the Hall of Fame record, obtaining the National Pokédex, resolving the level 70 Giratina encounter in Turnback Cave, and then choosing optional goals such as capturing the lake guardians, filling version-exclusive Pokédex gaps, visiting the Battle Zone, using Pal Park, breeding, or building a Battle Tower team. These directions apply to the original North American Pokémon Diamond Version, not Pokémon Platinum or the Nintendo Switch remakes.
Confirm the required milestones and separate them from optional captures
Defeating Champion Cynthia and entering the Hall of Fame completes the main story. Diamond’s story legendary is Dialga, encountered at the Spear Pillar sequence before the Pokémon League. The lake guardians and Giratina are separate post-story objectives, although the lake encounters become available before the League once the Spear Pillar crisis has been resolved.
For this guide’s assigned completion route, track three separate milestones: a Hall of Fame record, acquisition of the National Pokédex, and a resolved Giratina encounter in Turnback Cave. The access check for the Spring Path and Turnback Cave route must include both Hall of Fame completion and National Pokédex acquisition. In normal progression, the Hall of Fame record comes first, Professor Rowan and Professor Oak then upgrade the Pokédex after the Sinnoh entries have been seen, and the player uses that National Pokédex status to proceed through Spring Path.
Do not count merely reaching Sendoff Spring, entering Turnback Cave, or postponing the legendary battle as completion. After both postgame conditions are active, travel from southern Route 214 through Spring Path and Sendoff Spring, find the third pillar sequence in Turnback Cave, and battle the level 70 Giratina in the room immediately after the third pillar room. Capture it or defeat it according to the guide’s assigned result; leaving the encounter unresolved is unfinished. Turnback Cave contains Giratina in its original Diamond/Pearl form, not Platinum’s Origin Forme.
- Cynthia has been defeated and the player has entered the Hall of Fame.
- The National Pokédex has been issued in Sandgem Town.
- Both the Hall of Fame and National Pokédex conditions are confirmed before using Spring Path.
- Giratina in Turnback Cave has been captured or defeated.
- Dialga’s Sinnoh Pokédex entry is present.
- Uxie, Mesprit, and Azelf are captured or listed as optional captures after their entries have been seen.
Obtain the National Pokédex in Sandgem Town
Return to Professor Rowan’s laboratory in Sandgem Town after entering the Hall of Fame and seeing Sinnoh Pokédex entries 1 through 150. The game checks entries as seen, not as caught. Trainer battles, story encounters, and examining the book in Celestic Town can register missing entries, so you do not need to catch every Sinnoh species or trade for every version-exclusive Pokémon.
Manaphy is entry 151 and is not required for this upgrade. Common missing entries include Unown in Solaceon Ruins and Riolu. Riolu can be registered from the egg received from Riley on Iron Island or from an appropriate Trainer battle in Oreburgh Gate’s basement. Check the Pokédex’s unseen entries before searching for new captures.
In Diamond, Palkia is the opposite-version mascot and occupies Sinnoh entry 150. To register it without trading, travel to Celestic Town after the main story, enter Cynthia’s grandmother’s house, and examine the book that describes Palkia. If Palkia has already been seen through a battle or trade, the book is unnecessary. The same book can register the opposite mascot’s entry in the other version, which is why it is important to inspect it when completing Diamond’s regional list.
When all first 150 entries are seen, return to Rowan’s laboratory. Professor Oak upgrades the Pokédex to National Mode and gives access to National Pokédex activities, including the Poké Radar and Pal Park. Treat this upgrade as a separate checkpoint from entering the Hall of Fame: the ordinary route uses the Hall of Fame record to reach the evaluation, but the completion checklist should record both milestones explicitly.
- The Hall of Fame record exists.
- Sinnoh entries 1 through 150 are marked as seen.
- Palkia’s entry has been registered through the Celestic Town book, battle, or trade.
- Manaphy has not been treated as a required entry.
- Professor Oak has upgraded the Pokédex in Sandgem Town.
- National Mode and the Poké Radar are available.
- The National Pokédex and Hall of Fame conditions are both recorded before entering Spring Path.
Capture Uxie and Azelf at their lake caverns
Uxie waits in Acuity Cavern at the center of Lake Acuity, while Azelf waits in Valor Cavern at the center of Lake Valor. In original Diamond, both are stationary level 50 Psychic-type encounters. They do not roam around Sinnoh. They become available after the Spear Pillar events and the Dialga sequence; they do not require the National Pokédex.
To register the entries needed for the National Pokédex, see the encounters even if you do not intend to capture them. For an actual capture, save immediately before interacting with each guardian. If the battle ends badly, reset to that save rather than overwriting it. False Swipe is the safest way to reduce HP because it cannot lower the target below 1 HP. If False Swipe is unavailable, use a weak neutral attack and avoid critical-hit risks, recoil, poison, burn, confusion damage, and damaging weather.
Sleep is the strongest general status condition for capture attempts, while paralysis is a dependable alternative. Carry Ultra Balls and healing items. Dusk Balls are useful inside the caverns, and Timer Balls become more effective in prolonged battles. Use a sturdy switch-in if the guardian begins pressuring a fragile Pokémon with Psychic-type attacks.
Capturing Uxie and Azelf is optional once their entries have been seen. Do not spend the Master Ball on either one unless guaranteed convenience is more important to you than preserving it for a roaming target.
- Uxie’s entry has been seen for the Sinnoh Pokédex.
- Azelf’s entry has been seen for the Sinnoh Pokédex.
- A save exists immediately before each stationary encounter if capture is attempted.
- False Swipe or another controlled-damage move is available.
- Status support, healing items, and suitable capture balls are ready.
- Uxie and Azelf are captured or explicitly postponed as optional captures.
Release and pursue Mesprit
Travel to Verity Cavern in the center of Lake Verity and interact with Mesprit. It flees instead of starting a normal stationary battle. This registers the required encounter information and begins Mesprit’s roaming behavior. Its current area is shown by the Pokétch Marking Map, and it can appear in tall grass on routes around Sinnoh.
Prepare before starting the event. A Pokémon with Mean Look, Block, or another effective anti-escape method can stop Mesprit from fleeing after the battle begins. Pair that with a sleep or paralysis user and a controlled-damage attacker. A fast Pokémon helps, but speed alone is not a reliable plan because Mesprit may escape before you establish control.
Use the Marking Map to identify Mesprit’s route. Move between a grass route and an adjacent town, gate, or route boundary to update its position, then return to grass when the marker is in the area you want to search. Mesprit changes locations as you cross area boundaries, so it will not necessarily remain where it was last encountered.
When Mesprit appears, apply the anti-escape effect immediately if possible. Lower its HP carefully, inflict sleep or paralysis, and continue with Ultra Balls or Timer Balls. The Master Ball is not mandatory, but Mesprit is the most convenient lake guardian target for it because it roams and can flee. Its entry must be seen for the National Pokédex, but capturing it is optional for the assigned completion route.
- Mesprit has been released from Verity Cavern.
- Mesprit’s entry has been seen for the Sinnoh Pokédex.
- The Marking Map displays Mesprit’s roaming location.
- An anti-escape plan is prepared.
- Sleep or paralysis and controlled damage are available.
- Mesprit is captured or the roaming hunt is explicitly documented as unfinished optional content.
Choose practical postgame goals
After entering the Hall of Fame, board the ship at Snowpoint City to reach the Fight Area in the Battle Zone. In original Diamond, the Fight Area contains the Pokémon Center, Poké Mart, and access to the Battle Park, including the Battle Tower. The Route 225 gate and the broader Battle Zone routes remain restricted until the National Pokédex is obtained. Reaching the Fight Area is therefore not the same as completing every Battle Zone activity.
For Pokédex work, prioritize Diamond’s version exclusives, trade evolutions, species connected to Poké Radar encounters, swarms, Honey Trees, the Trophy Garden, and National Pokédex routes. Make a written target list before trading so you do not repeat the same searches. Local wireless trading with nearby compatible systems remains the relevant original-release method for exchanging Pokémon; Nintendo Wi-Fi Connection online features for Nintendo DS software were discontinued on May 20, 2014.
After obtaining the National Pokédex, visit Route 221 and enter Pal Park. In the original Nintendo DS release, Pal Park supports migration from Pokémon Ruby, Sapphire, Emerald, FireRed, or LeafGreen inserted in the Nintendo DS’s Game Boy Advance slot. This is optional and is not needed for the Hall of Fame, National Pokédex upgrade, Spring Path, Turnback Cave, Giratina, or the lake guardian entries.
Other worthwhile targets include Heatran, Cresselia, and Regigigas, each of which has its own requirements. Dialga is Diamond’s version mascot; Palkia is normally a trade target after its Pokédex entry has been registered. Event-distributed Pokémon such as Darkrai, Shaymin, and Arceus are separate from ordinary cartridge progression and should not be presented as required completion goals.
The Battle Tower is useful for testing a focused team, but a story party is not automatically suited to long streaks. Before breeding or advanced training, assign each chosen Pokémon a role, check its type coverage, and decide whether the team is intended for singles, doubles, or general experimentation.
- The Fight Area and Battle Tower have been reached or added to the next-goal list.
- Diamond version exclusives and trade evolutions have been identified.
- Pal Park is understood as an optional Generation III transfer feature after the National Pokédex.
- Optional legendary requirements have been separated from required progression.
- A next goal has been selected: Pokédex completion, Battle Tower, breeding, Pal Park, trading, or optional legendary encounters.
Preserve rare capture resources and close the campaign record
Save immediately before every legendary encounter and remove avoidable risks from the battle plan. Do not rely on poison, burn, recoil, damaging weather, or confusion if those effects could knock the target out after your turn. Carry enough healing items for a long battle and reset if the result is unusable rather than overwriting the pre-battle save.
For Uxie and Azelf, repeated attempts from a pre-battle save make the Master Ball unnecessary. Mesprit is the most practical lake guardian target for the Master Ball because it roams, but trapping, status, controlled damage, and repeated Ultra or Timer Ball attempts can also succeed. Keep at least one reliable capture plan available before spending the ball.
The assigned guide route is complete only when the player has entered the Hall of Fame, received the National Pokédex, satisfied both postgame access conditions, and captured or defeated Giratina in Turnback Cave. The lake guardians are optional captures, but their entries must have been seen during the Sinnoh Pokédex process. A player who has the National Pokédex but has not resolved Giratina has not completed this chapter’s assigned route.
Official Nintendo DS Nintendo Wi-Fi Connection features ended on May 20, 2014. Local wireless trading and compatible hardware-based Generation III migration are the relevant original-release options. Do not instruct the player to rely on the original online trading or battling service today.
- The Hall of Fame record is present.
- The National Pokédex has been issued in Sandgem Town.
- The player has separately confirmed the Hall of Fame and National Pokédex conditions before using Spring Path.
- Spring Path and Sendoff Spring have been reached.
- Giratina has been captured or defeated in Turnback Cave.
- Uxie, Mesprit, and Azelf have been seen for the Sinnoh Pokédex and are captured or documented as optional unfinished captures.
- Version-exclusive, trade, Battle Tower, breeding, Pal Park, and optional legendary goals are written down.
- Rare capture items have been preserved or spent deliberately.
- The player understands that Nintendo Wi-Fi Connection ended on May 20, 2014, while local wireless and compatible transfer methods remain relevant.
Before you move on
- The player has entered the Hall of Fame.
- Professor Oak has issued the National Pokédex in Sandgem Town after the first 150 Sinnoh entries were seen.
- The player has confirmed both the Hall of Fame record and National Pokédex before attempting Spring Path and Turnback Cave.
- The player has accessed Spring Path and reached Sendoff Spring.
- The Turnback Cave Giratina objective has been resolved by capturing or defeating Giratina; postponement does not count.
- Uxie, Mesprit, and Azelf have been seen for Pokédex purposes and are captured or explicitly documented as optional unfinished captures.
- The player has a practical list of version exclusives, trade evolutions, Battle Tower goals, Pal Park plans, and optional legendary targets.
- The player understands that official Nintendo DS Nintendo Wi-Fi Connection features ended on May 20, 2014, while local wireless and compatible hardware-based options remain relevant to the original release.
References for this chapter
- Walkthrough: Pokémon Diamond and Pearl/Part 22 — Sinnoh Pokédex completion, Palkia entry, National Pokédex, and Pal Park
- Walkthrough: Pokémon Diamond and Pearl/Part 24 — National Pokédex upgrade and postgame activities
- Walkthrough: Pokémon Diamond and Pearl/Part 28 — Turnback Cave
- Turnback Cave — Bulbapedia
- Pokémon Diamond/Pearl — Legendary Pokémon
- Pokémon Diamond/Pearl Pokédex
- National Pokédex — Bulbapedia
- Gate and Battle Zone access — Bulbapedia
- Pal Park — Bulbapedia
- Nintendo Wi-Fi Termination — Nintendo Support
Finishing up
You have defeated all eight Gym Leaders in Diamond’s standard order and collected the required badges.
You have defeated Aaron, Bertha, Flint, Lucian and Champion Cynthia, and the game has recorded your party in the Hall of Fame.
You have obtained the National Pokédex after seeing the required Sinnoh entries.
You have used the postgame Spring Path route to reach Sendoff Spring and Turnback Cave, then captured or defeated the original Diamond Giratina encounter.
You followed the original North American Nintendo DS Diamond version rather than Platinum or Brilliant Diamond/Shining Pearl mechanics.
Choose your next gameScreenshots & video
Game imagery for reference. Follow the written chapters above for the route and strategies.
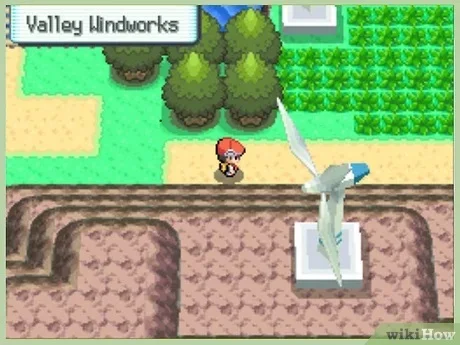
Sources & references
Our original guide draws on the references below. Check the edition at the top of this page before following controls or unlock requirements.
- Walkthrough: Pokémon Diamond and Pearl/Part 1 — Bulbapedia
- Pokémon Diamond Version Instruction Booklet — Nintendo
- Pokéarth — Sinnoh Route 202 — Serebii
- Pokémon Diamond and Pearl/Route 202 — StrategyWiki
- Pokémon Diamond Version Guide and Walkthrough — GameFAQs
- Walkthrough: Pokémon Diamond and Pearl/Part 4, Bulbapedia
- Oreburgh Mine, Bulbapedia
- Oreburgh Gym, Bulbapedia
- Pokémon Diamond/Pearl — Gyms & Gym Leaders
- Pokémon Diamond Version Instruction Booklet — Nintendo
- Pokémon Diamond and Pearl Versions — Bulbapedia
- Walkthrough: Pokémon Diamond and Pearl/Part 5 — Bulbapedia
- Walkthrough: Pokémon Diamond and Pearl/Part 6 — Bulbapedia
- Valley Windworks — Bulbapedia
- Eterna Forest — Bulbapedia
- Pokémon Diamond and Pearl/Route 205 and Valley Windworks — StrategyWiki
- Pokémon Diamond and Pearl/Eterna City — StrategyWiki
- Pokémon Diamond/Pearl — Gyms and Gym Leaders — Serebii
- Walkthrough: Pokémon Diamond and Pearl/Part 7 — Bulbapedia
- Pokémon Diamond and Pearl/Route 207 — StrategyWiki
- Pokémon Diamond and Pearl/Route 206 — StrategyWiki
- Pokémon Diamond and Pearl Walkthrough — Pokémon Wiki
- Walkthrough: Pokémon Diamond and Pearl
- Walkthrough: Pokémon Diamond and Pearl/Part 8 — Bulbapedia
- Walkthrough: Pokémon Diamond and Pearl/Part 9 — Bulbapedia
- Walkthrough: Pokémon Diamond and Pearl/Part 10 — Bulbapedia
- Walkthrough: Pokémon Diamond and Pearl/Part 17
- Veilstone Gym — Bulbapedia
- Sinnoh Route 209 — Bulbapedia
- Sinnoh Route 210 — Bulbapedia
- Sinnoh Route 215 — Bulbapedia
- Pokémon Diamond and Pearl Nintendo DS Manual
- Walkthrough: Pokémon Diamond and Pearl/Part 12 — Bulbapedia
- Great Marsh — Bulbapedia
- Pokémon Diamond/Pearl/Platinum HM chart — Pokémon Database
- DP TM/HM Location Guide — Smogon University
- Pokémon Diamond/Pearl/Platinum Great Marsh — StrategyWiki
- Pokémon Diamond Version location and route guide — GameFAQs
- Hearthome City Gym — Bulbapedia
- Pokémon Diamond/Pearl — The Pokétch — Serebii
- Pokémon Diamond /Pearl FAQ/Walkthrough v1.02 — Neoseeker Walkthroughs
- Pokémon Diamond/Pearl Instruction Booklet — Nintendo
- Walkthrough: Pokémon Diamond and Pearl/Part 14
- Pokémon Diamond and Pearl/Canalave City
- Pokémon Diamond and Pearl/Route 218
- Walkthrough: Pokémon Diamond and Pearl/Part 16
- Sinnoh Route 217
- Walkthrough: Pokémon Diamond and Pearl, Part 19
- Serebii Trainer Pokémon — Octillery, Diamond and Pearl Volkner data
- Victory Road (Sinnoh) — Bulbapedia
- Walkthrough: Pokémon Diamond and Pearl/Part 30 — Bulbapedia
- Pokémon Diamond and Pearl/Victory Road — StrategyWiki
- Pokémon Diamond and Pearl — The Elite Four
- Walkthrough: Pokémon Diamond and Pearl/Part 21
- Walkthrough: Pokémon Diamond and Pearl/Part 24 — National Pokédex upgrade and postgame activities
- Elite Four - Pokemon Diamond Version Walkthrough & Guide
- Pokémon Diamond and Pearl/The Elite Four
- Pokémon Diamond/Pearl — National Pokédex
- Pokemon Diamond Unofficial guide
- Spring Path — Bulbapedia
- Sinnoh Route 214 — Bulbapedia
- Turnback Cave — Bulbapedia
- Pokémon Diamond and Pearl/Sendoff Spring — StrategyWiki
- Pokémon Diamond and Pearl — Full Walkthrough, Spring Path and Turnback Cave
- Pokémon Diamond Version — City/Route/Location FAQ
- Walkthrough: Pokémon Diamond and Pearl/Part 28 — Turnback Cave
- Pokéarth Sinnoh: Turnback Cave — Serebii
- Giratina Diamond and Pearl location data — Serebii
- Giratina Pokédex data and Diamond and Pearl moves — Serebii
- Pokémon Diamond and Pearl/Turnback Cave — StrategyWiki
- Walkthrough: Pokémon Diamond and Pearl/Part 22 — Sinnoh Pokédex completion, Palkia entry, National Pokédex, and Pal Park
- Pokémon Diamond/Pearl — Legendary Pokémon
- Pokémon Diamond/Pearl Pokédex
- National Pokédex — Bulbapedia
- Gate and Battle Zone access — Bulbapedia
- Pal Park — Bulbapedia
- Nintendo Wi-Fi Termination — Nintendo Support
About the game & collecting notes
- Platform
- Nintendo DS
Step-by-step coverage of Pokémon Diamond (original Nintendo DS release), from Twinleaf Town to the Sinnoh League Hall of Fame, plus postgame access to Sendoff Spring and Turnback Cave to encounter Giratina. Practical badge order, Gym strategies, Elite Four/Champion Cynthia counters, team-building advice, and clear postgame prerequisites to reach Giratina.
Darryl Polo
Darryl Polo loves tinkering with emulation and revisiting retro games. He enjoys exploring how old favorites play on different setups and sharing what he learns along the way. At Joking Joystick, he writes about the games, hardware, and small discoveries that keep the hobby fun.
Our editorial standardsFound a step that needs another look? Help us improve this guide.