
Pokémon Black Version (Nintendo DS) — Complete Campaign Walkthrough (Original 2010 Edition)
Continue the original Pokémon Black Version postgame from the already-completed Nuvema Town activation. Travel through Route 11, Village Bridge, Route 12 and Route 13, enter Giant Chasm, and optionally capture the level 75 Kyurem. End in Giant Chasm, Lacunosa Town or Undella Town ready for the required Undella Bay milestone and the optional Black City route.

Find a copy
Pokémon Black Version Nintendo DS
We may earn a commission if you buy through these links, at no extra cost to you. As an Amazon Associate I earn from qualifying purchases.
Opens retailer search results. Check the model, edition, seller, availability and current price before buying.
Before you begin
This walkthrough takes you from the first save in Nuvema Town through the first credits, then covers the immediate postgame route to Undella Bay, with Black City presented as an optional extension.
It assumes you are playing the original Pokémon Black Version cartridge for the Nintendo DS family, released as part of the 2010 Pokémon Black and White release. European distribution followed in 2011.
Follow the chapters in order. Each chapter identifies the required route, prerequisites, battles, hazards, recovery options and a concrete completion check.
You do not need external events or downloads to complete the main story.
Version-specific differences, including Black's Zekrom-and-Reshiram story arrangement, are identified where they affect progression.
Optional postgame content is separated from required access goals. Entering Undella Bay is the required postgame endpoint; Black City, legendary captures, all Sage arrests, trade-exclusive Pokémon and full collection completion are optional. In the normal final sequence, Reshiram is captured at N's Castle; the game also supports a rare full-party-and-full-PC exception that defers that capture to Dragonspiral Tower after the story.
Set yourself up for the run
Save to at least two different times before major scripted encounters (for example prior to the Dragonspiral/legendary sequence, prior to the Elite Four, and before the final Champion sequence).
Choose your starter (Snivy, Tepig, or Oshawott) and plan a six-Pokémon core that covers common types—bring counters for Grass, Water, Fire and Dragon across the campaign.
Expect evolving party members and midgame rebalancing.
Keep a steady stock of healing items and status cures; learn the location of the nearest Pokémon Center in each major city.
Carry a mix of Poké Balls for catches (Great/Ultra become available later).
Train a HM-capable Pokémon and keep an HM user available so you do not get blocked by field obstacles.
Level-grind moderately before Gym leaders if you are underleveled; use in-game rematches and wild areas for EXP.
Plan for version exclusives: Pokémon Black gives you access to Reshiram as the version legendary while White provides Zekrom.
Some trainers and minor area differences vary by version and are flagged in the chapters when relevant.
Familiarize yourself with the Unova Gym order and type variety so you can adjust your team ahead of each Gym: Striaton (Trio), Nacrene (Normal), Castelia (Bug), Nimbasa (Electric), Driftveil (Ground), Mistralton (Flying), Icirrus (Ice), Opelucid (Dragon).
Use held items and simple in-battle tactics—switching to resist or immune Pokémon, using status, and keeping a dedicated HM/user for surf-type field tasks.
Save before key scripted cutscenes that lead directly into major battles.
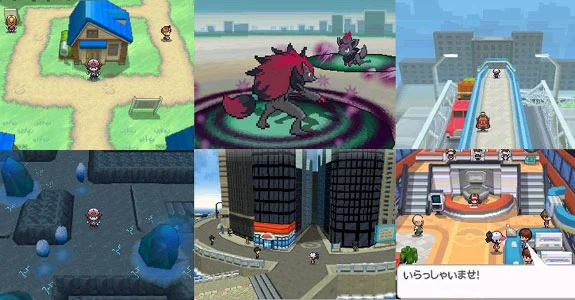
Nuvema Town & Professor Juniper — Choosing a Starter and Getting Started
Begin Pokémon Black in Nuvema Town, choose Snivy, Tepig, or Oshawott, complete the two opening rival battles, receive the Pokédex and Town Map, then travel through Route 1, Accumula Town, and Route 2 while building a small team for Striaton City.
Choose your starter in Nuvema Town
After the opening introduction and character setup, you begin in your bedroom with Bianca and Cheren. Open the gift box and choose one Level 5 Pokémon: Snivy, Tepig, or Oshawott. The choice is permanent for this save file, and the two unchosen starters normally require trading to obtain.
Snivy is Grass-type, Tepig is Fire-type, and Oshawott is Water-type. There is no universally correct choice for the story. Snivy has a more difficult early matchup against some opponents but remains useful with good support; Tepig gives you early Fire coverage; and Oshawott provides a dependable Water-type attack later. Choose the Pokémon you are most willing to train through the entire adventure.
- Choose Snivy, Tepig, or Oshawott from the gift box.
- Nickname the starter if desired.
- Confirm that the starter is Level 5 and ready for the opening battles.
Complete both opening rival battles
Bianca challenges you in the bedroom immediately after the starter selection. Her Pokémon is the starter with a type disadvantage to yours. Use your damaging move and avoid wasting turns on unnecessary setup. Cheren challenges you immediately afterward with the starter that has a type advantage over yours, so expect this battle to be less favorable. Use your damaging move, and accept that a critical hit or poor damage roll can make the fight close.
These two battles are scripted introductions rather than mandatory tests of skill. In Pokémon Black and White, losing to Bianca or Cheren does not cause a blackout, and the story continues. Winning is still useful because you receive money and gain early experience, but do not restart solely because one battle goes badly.
- Defeat Bianca if possible.
- Battle Cheren after Bianca’s fight.
- Use the mother’s healing service if either battle leaves your starter weakened.
Visit Bianca and Professor Juniper
After the bedroom battles, go downstairs and speak with your mother. Follow the game’s directions to Bianca’s house, then proceed to Professor Juniper’s laboratory. You do not need to explore Nuvema Town for hidden progress; the next required event is at the lab.
At the lab, speak with Professor Juniper and accept the Pokédex. This is a Key Item used to record information about Pokémon you encounter. After the lab scene, leave town through the northern exit. Your mother gives you the Town Map outside, allowing you to check the regional route layout from the Key Items pocket.
- Speak with your mother after the opening battles.
- Visit Bianca’s house when directed.
- Receive the Pokédex from Professor Juniper.
- Receive the Town Map before entering Route 1.
Use Route 1 to catch your first teammates
Meet Bianca and Cheren at the northern end of Nuvema Town and enter Route 1. Professor Juniper demonstrates the capture process by weakening a wild Pokémon, throwing a Poké Ball, and explaining the result. After the demonstration, she gives you five Poké Balls. Professor Juniper’s demonstration advances the story; the optional contest to catch more Pokémon is not required and gives no important reward.
Route 1 contains Patrat and Lillipup. Catch at least one of them, and preferably catch both if you want an immediate two-Pokémon support team. Lillipup is generally the stronger long-term early attacker, while Patrat is useful during the opening routes and can later provide field-move utility. Do not spend all five Poké Balls on repeated encounters. Keep several available for Route 2 and later areas.
Battle the route Trainers after catching your first teammate. Rotate the new Pokémon into battle so it gains experience instead of allowing the starter to handle everything. If a new Pokémon is too weak to fight safely, switch it in and out rather than risking a knockout.
- Complete Professor Juniper’s capture demonstration.
- Receive the five Poké Balls.
- Catch at least one Pokémon on Route 1.
- Battle Route 1 Trainers while keeping the party healthy.
Heal in Accumula Town and follow the first Team Plasma scene
Continue north on Route 1 to reach Accumula Town. Enter the Pokémon Center and heal before doing anything else. In this game, the Poké Mart is located inside the Pokémon Center, so buy a modest supply of Poké Balls and Potions without emptying your money.
Professor Juniper explains the Pokémon Center services when you first arrive. Team Plasma then holds its first public rally in town. Watch the scene involving Ghetsis and the crowd, then speak with the people blocking the western exit as the game directs. N appears in Accumula Town and challenges you to your first battle against him. His team includes a Level 7 Purrloin. Heal before engaging him, and use your strongest reliable attack rather than trying to set up.
- Heal at the Accumula Town Pokémon Center.
- Buy Poké Balls and a few Potions from the in-center Poké Mart.
- Watch the Team Plasma rally.
- Defeat N’s Level 7 Purrloin before heading west.
Train on Route 2 and defeat Bianca
Leave Accumula Town through the western exit to enter Route 2. Your mother calls shortly after you begin the route, and you receive the Running Shoes. Route 2 provides more Trainer battles and contains Patrat, Lillipup, and Purrloin in the grass. Catch a second or third teammate if your party still depends heavily on the starter.
Before reaching Striaton City, Bianca stops you for another battle. She uses a Level 6 Lillipup and a Level 7 copy of the starter with a type disadvantage to your chosen starter. The Lillipup is the physical threat, so do not assume the battle is harmless just because Bianca’s starter has the wrong type matchup. Heal in Accumula Town first if your party took damage on the route.
Once Bianca is defeated, continue north into Striaton City. The first Gym is not immediately available until you investigate the Dreamyard, where the story provides an elemental monkey that can cover the weakness associated with your starter. That Gym preparation belongs to the next section, so finish this chapter by healing in Striaton City and organizing the party.
- Receive the Running Shoes on Route 2.
- Catch another useful Pokémon if needed.
- Defeat Bianca’s Lillipup and disadvantaged starter.
- Reach Striaton City and heal before continuing.
Before you move on
- The party contains the chosen Level 5 starter, and the Pokédex is in the Key Items pocket.
- The opening Bianca and Cheren battles are complete, regardless of whether either battle was won or lost.
- Professor Juniper’s capture demonstration is complete, and the five Poké Balls have been received.
- The Town Map and Running Shoes have been obtained.
- At least one supplemental Pokémon has been caught, with several Poké Balls remaining.
- N’s Level 7 Purrloin in Accumula Town and Bianca’s Route 2 battle have been completed.
- The player is in Striaton City with a healed party and is ready to investigate the Dreamyard before challenging the Striaton Gym.
Routes 1–3 and Striaton City — The Trio Gym
Begin in Striaton City after the opening events covered in the previous chapter. Defeat Cheren at the Trainer School, receive the elemental monkey that counters your version of the Striaton Gym Leader, earn the Trio Badge, complete Fennel’s Dreamyard investigation, rescue a stolen Pokémon from Wellspring Cave with Cheren, and finish by entering Nacrene City.
1. Prepare in Striaton City and defeat Cheren
Start at the Striaton City Pokémon Center. Heal your party, check your available Potions, and make sure you have at least one usable Pokémon besides your starter. Cheren’s Pokémon is selected to have a type advantage over your starter, so a team consisting only of a weakened starter is an unnecessary risk.
Go to the Pokémon School in Striaton City and speak to Cheren near the blackboard. He challenges you to a battle. His team includes Purrloin and the starter with a type advantage over yours. Use a route Pokémon such as Lillipup, Patrat, or Purrloin against the opposing starter if your own starter cannot safely take its elemental attack. Defeat Cheren, then return to the Gym entrance.
The Gym Leader tells you that the Gym’s main Pokémon will counter your starter and recommends visiting the Dreamyard. Leave the city through the eastern exit and follow the path northeast to the accessible section of the Dreamyard. The deeper area is blocked by a small tree until you obtain Cut.
- Begin the chapter in Striaton City.
- Heal and stock basic recovery items.
- Defeat Cheren at the Pokémon School.
- Visit the accessible Dreamyard area east of the city.
2. Receive the elemental monkey in the Dreamyard
At the open section of the Dreamyard, speak to the person offering a Pokémon. The gift is chosen to have a type advantage against the elemental type used by the Gym Leader who counters your starter. Accept the gift and place it in your party if you have room.
The assignments are fixed: Snivy receives Panpour, Tepig receives Pansage, and Oshawott receives Pansear. These gifts are not merely collection rewards; their elemental attacks are the simplest way to answer the Gym Leader’s second Pokémon and also give you a strong option against Cheren’s advantaged starter.
Train the monkey through nearby wild Pokémon and trainers before entering the Gym. It does not need to carry the entire battle, but it should be healthy and strong enough to use its type advantage reliably. You can also train a Normal-type partner for the Gym’s Lillipup and keep your starter as a backup.
- Receive Panpour if you chose Snivy.
- Receive Pansage if you chose Tepig.
- Receive Pansear if you chose Oshawott.
- Train the gift Pokémon before challenging the Gym.
3. Solve the Striaton Gym puzzle and earn the Trio Badge
Return to the Striaton Gym and speak to Clyde near the entrance to receive a Fresh Water. The Gym contains curtains showing Fire, Water, or Grass symbols. In front of each curtain are three elemental floor panels. Step on the panel whose type is super effective against the type shown on the curtain: Water against Fire, Grass against Water, and Fire against Grass. Continue through the Gym trainers until the path to the Leader opens.
Your starter determines the Leader. Snivy faces Chili, the Fire-type specialist; Tepig faces Cress, the Water-type specialist; and Oshawott faces Cilan, the Grass-type specialist. Each Leader uses a level 12 Lillipup followed by a level 14 elemental monkey of the Leader’s type.
Use a sturdy partner against Lillipup, especially if it begins using Work Up. Do not spend several turns setting up while its Attack rises. When the Leader sends out the elemental monkey, switch to the gifted counter whenever it is safe and use its super-effective move. Keep Potions available because the Leader can heal a damaged Pokémon. After winning, receive the Trio Badge and TM83 Work Up.
- Use the correct super-effective panel for each curtain.
- Defeat Chili, Cress, or Cilan according to your starter.
- Earn the Trio Badge.
- Receive TM83 Work Up.
4. Use Cut and finish the Dreamyard investigation
After the Gym battle, Fennel appears and directs you to her home, the house south of the Gym. Go there and speak with her upstairs to receive HM01 Cut. Teach Cut to a compatible Pokémon. Cut is required for the story section of the Dreamyard, although you may later replace the move when it is no longer useful to your current team.
Return to the Dreamyard and use Cut on the small tree blocking the opening. Enter the fenced section with Bianca. Team Plasma Grunts are trying to obtain Dream Mist from Munna. Battle the Grunts and continue through the event until Musharna appears and the confrontation ends.
Fennel collects the remaining Dream Mist for her research. Return to her house in Striaton City and speak with her again. This completes the early Dreamyard storyline and gives you the C-Gear. Amanita’s Pal Pad conversation is optional and is not needed to complete the main route. The C-Gear itself is a story reward, not a separate requirement for entering Route 3.
- Receive HM01 Cut from Fennel.
- Cut the tree in the Dreamyard.
- Defeat the Team Plasma Grunts near Munna.
- Complete the Dream Mist event.
- Return to Fennel’s house and receive the C-Gear.
5. Cross Route 3 and defeat Cheren
Leave Striaton City through the western passage and continue onto Route 3. Battle the trainers along the route and heal before approaching the northern section. The route contains the Pokémon Day Care and additional wild encounters, but using the Day Care is optional and does not advance the story.
Continue through the route until Cheren challenges you. His team again includes Purrloin and the starter with a type advantage over your starter. Use the same approach as before: let a suitable partner handle the opposing starter rather than relying on a low-health starter. After the battle, continue along the route.
Bianca and a young girl then appear while pursuing Team Plasma. The Grunts have stolen the girl’s Pokémon and flee toward Wellspring Cave. Follow them west to the cave entrance, where Cheren is waiting. Heal your team before entering; the cave rescue contains both a single battle and a Double Battle.
- Travel from Striaton City onto Route 3.
- Defeat Cheren on Route 3.
- Follow Bianca and the girl toward Wellspring Cave.
- Heal before entering the cave.
6. Rescue the stolen Pokémon in Wellspring Cave and reach Nacrene City
Enter Wellspring Cave and approach the Team Plasma members with Cheren. The first Team Plasma Grunt battles you alone and uses a Patrat. Defeat this Grunt, then two more Grunts appear. You and Cheren fight them together in a Double Battle, with two Patrat on the opposing side.
In the Double Battle, focus attacks on one Patrat at a time instead of splitting damage unless you have a reliable move that can safely hit both targets. Keep both of your active Pokémon healthy, because Cheren’s Pokémon helps but cannot compensate for a fragile or underleveled partner. Fire-, Fighting-, or other strong neutral attacks are useful, but ordinary reliable attacks are sufficient for these opponents.
After the battles, Team Plasma returns the stolen Pokémon and leaves. Exit Wellspring Cave and speak with the girl on Route 3. She gives you Heal Balls as thanks. You may inspect the accessible part of Wellspring Cave for items and wild Pokémon such as Roggenrola or Woobat; the deeper sections cannot be fully explored until Surf is available later.
Return to Route 3 and continue south through the newly accessible section. Cross the bridge, battle or avoid the remaining trainers, and pass through the gate into Nacrene City. Heal at the Pokémon Center. The next chapter begins with Nacrene’s museum, the battle with N, and Lenora’s Gym.
- Defeat the first Team Plasma Grunt in a single battle.
- Win the Double Battle against the two arriving Grunts with Cheren.
- Recover the stolen Pokémon.
- Speak with the girl on Route 3 and receive the Heal Balls.
- Leave Wellspring Cave and enter Nacrene City.
Before you move on
- The Trio Badge is recorded in your badge case.
- You have received TM83 Work Up and HM01 Cut.
- You have received Panpour, Pansage, or Pansear matching your starter choice.
- The Dreamyard Munna and Dream Mist event is complete.
- Fennel has given you the C-Gear.
- Cheren has been defeated on Route 3.
- The single and Double Battle in Wellspring Cave are complete.
- The stolen Pokémon has been returned and the girl has given you Heal Balls.
- You have left Wellspring Cave, crossed the southern part of Route 3, and entered Nacrene City.
References for this chapter
- Walkthrough: Pokémon Black and White
- Walkthrough: Pokémon Black and White, Part 3 — Bulbapedia
- Striaton City — Pokémon Black and White Guide
- Getting the Trio Badge at the Striaton Gym — Pokémon Black and White Guide
- Getting the C-Gear from Fennel — Pokémon Black and White Guide
- Route 3 — Pokémon Black and White Guide
- Wellspring Cave — Bulbapedia
Nacrene City, Lenora and the Dragon Skull — Pinwheel Forest
Begin this chapter in Nacrene City after the Route 3 rescue has been completed. Defeat N outside the museum, solve the Nacrene Gym book puzzle, earn the Basic Badge from Lenora, then respond to Team Plasma's theft of the Dragon Skull. The chapter ends when Bianca gives you the Dowsing MCHN and you leave Nacrene City with Burgh for Pinwheel Forest.
Prepare in Nacrene City and challenge N
Heal at the Pokémon Center, check that your team has a mixture of physical and special attacks, and buy a few Potions, Poké Balls, and an Awakening or Chesto Berry. A Fighting-type Pokémon is especially useful for the Gym, so if you caught Timburr, Sawk, or another Pokémon with a Fighting-type move, place it in the party before entering the museum.
Approach the museum in the center of Nacrene City. N stops you outside and starts a mandatory battle. In Pokémon Black Version, his team is a level 13 Pidove, level 13 Tympole, and level 13 Timburr. Use Electric, Ice, or Rock attacks against Pidove when available. Tympole is vulnerable to Grass and Electric attacks. Timburr is weak to Flying and Psychic attacks, so do not waste Electric moves against it. Heal afterward if necessary, then enter the museum.
- Heal and restock before approaching the museum.
- Defeat N's level 13 Pidove, Tympole, and Timburr.
- Enter the museum after N leaves.
Follow Hawes into the Gym and solve the book puzzle
Hawes gives you a short museum tour. Continue through the exhibition area and into the Gym section at the back. Speak with the guide near the entrance to receive Fresh Water, then battle the Gym trainers if you want the additional experience. The trainers use Normal-type Pokémon, so Fighting-type moves are the most efficient choice.
The puzzle requires reading books and answering clues. Start with Nice to Meet You, Pokémon! on the left side of the room. Its answer is Patrat, directing you to The Biology of Patrat. The next clue asks about something with a flame inside its body and smoke coming from its head; the answer is Locomotive, so read The Structure of a Locomotive.
Continue to the book that asks what would be delicious when heated in a pot. Answer Poffin and read Sweets for Pokémon. The final clue leads to The Biology of Tepig. A School Kid blocks the relevant bookcase, so defeat her first, then read the book. The shelf moves and reveals the staircase to Lenora's basement room.
You can read the books in the required sequence without fighting every optional trainer, but defeating the trainers is useful if your party is below the high teens. Heal before descending the staircase and save before speaking to Lenora.
- Complete Hawes's museum tour and enter the Gym.
- Follow the clues through Patrat, Locomotive, Poffin, and Tepig.
- Defeat the School Kid blocking the final book.
- Activate the moving bookcase and reach the basement staircase.
Defeat Lenora and earn the Basic Badge
Lenora uses level 18 Herdier followed by level 20 Watchog. Herdier has Intimidate, which lowers the Attack of your active Pokémon when it enters battle. If this weakens your physical attacker, switch to a special attacker or use a Fighting move from another team member. Fighting-type damage is super effective against both of Lenora's Pokémon.
Herdier knows Take Down, Bite, Retaliate, and Leer. Watchog knows Leer, Crunch, Retaliate, and Hypnosis. Retaliate is particularly dangerous immediately after one of your Pokémon faints, so avoid sending in a weakened Pokémon and expecting it to survive a hit. Watchog's Hypnosis can disable your strongest Pokémon; use an Awakening, a Chesto Berry, or switch to another team member if necessary.
A Timburr, Sawk, or Throh from the Pinwheel Forest area can make this battle much easier, although any Pokémon with a reliable Fighting-type attack can contribute. If you lose, return to the Pokémon Center, replace a weak matchup, and train against available trainers or wild Pokémon before trying again.
After the battle, Lenora awards the Basic Badge and TM67 Retaliate. The badge makes traded Pokémon up to level 30 obey you consistently. Heal immediately because the next story event begins inside the museum.
- Defeat level 18 Herdier and level 20 Watchog.
- Manage Intimidate, Hypnosis, and Retaliate instead of relying on one physical attacker.
- Receive the Basic Badge and TM67 Retaliate.
Respond to the Dragon Skull theft
After Lenora's victory, Hawes reports trouble in the museum. Follow Lenora back to the main exhibition room. Team Plasma is gathered around the dragon skeleton, and a scripted scene shows them steal the Dragon Skull. You do not fight the grunts during this scene; watch the event and follow the characters outside.
Lenora introduces Burgh, the Gym Leader from Castelia City. Cheren and Bianca also arrive, and the group divides responsibilities. Bianca gives you the Dowsing MCHN, which detects hidden items when you activate it near their locations. This item is optional for the immediate route, but keep it in your Key Items because it can help locate concealed supplies.
Before leaving, heal at the Pokémon Center and replenish status cures. Speak to any NPC or collect optional city items now if you want to do so, but the required route is the western side of Nacrene City. Follow Burgh into Pinwheel Forest. The next chapter handles the forest search and the battles needed to recover the Dragon Skull.
- Witness Team Plasma steal the Dragon Skull from the museum.
- Receive the Dowsing MCHN from Bianca.
- Heal and leave Nacrene City with Burgh.
- Enter Pinwheel Forest to begin the recovery mission.
Before you move on
- The Basic Badge is displayed in your badge case and TM67 Retaliate has been received.
- Team Plasma has stolen the Dragon Skull from the Nacrene Museum.
- Bianca has given you the Dowsing MCHN.
- You have healed, left Nacrene City with Burgh, and entered Pinwheel Forest to pursue Team Plasma.
Pinwheel Forest, Skyarrow Bridge and Castelia City
Recover the stolen Dragon Skull in Pinwheel Forest, cross Skyarrow Bridge, resolve Team Plasma’s Castelia City incident, complete the required Bianca battle and defeat Burgh to earn the Insect Badge in the original Pokémon Black Version for Nintendo DS.
Trigger the Dragon Skull search in Nacrene City
After defeating Lenora and receiving the Basic Badge, leave the Nacrene Gym through the museum. Outside, Lenora meets Burgh, Bianca and Cheren. The Dragon Skull is reported stolen, and Burgh joins you in the search while Lenora returns toward the museum area.
Bianca gives you the Dowsing Machine during this sequence. Use it to locate hidden items when its indicator points toward a nearby square. Heal at the Pokémon Center and carry Poké Balls, Potions and Antidotes before entering Pinwheel Forest. Poison from wild Pokémon and trainers can otherwise force an unnecessary return trip.
- Defeat Lenora and receive the Basic Badge.
- Trigger the Dragon Skull theft scene outside the museum.
- Receive the Dowsing Machine from Bianca.
- Heal and carry Antidotes before entering Pinwheel Forest.
Enter Pinwheel Forest and use the optional Rock Smash item
Travel west from Nacrene City and enter the exterior section of Pinwheel Forest. If you have not already collected it, speak with the girl near the Nacrene-side entrance to receive TM94, Rock Smash. This item is optional for the main route through the chapter. You do not need Rock Smash to recover the Dragon Skull, cross Skyarrow Bridge or challenge Burgh.
The exterior area has trainers and wild Pokémon suitable for raising a developing team. Timburr is a useful catch because it can provide physical Fighting- and Rock-type coverage as it learns new moves. Pidove is also valuable against Burgh’s Bug Pokémon once it has a Flying-type attack. In Pokémon Black, Cottonee can be encountered in Pinwheel Forest; Petilil is the version-exclusive counterpart found in Pokémon White.
Continue into the forest after collecting any desired items. The Nurse near the forest route can restore your party for free, so use her as a recovery point rather than spending all your Potions.
- Collect TM94, Rock Smash only if you want the optional field move.
- Consider catching Timburr or Pidove for Burgh’s Gym.
- Remember that Cottonee is available in Pokémon Black, while Petilil is the Pokémon White counterpart.
- Use the forest Nurse for free healing.
Follow the winding path and recover the Dragon Skull
Burgh blocks the northern exit while you search the interior forest. Follow the accessible path through the trees and hollow logs, battling trainers and Team Plasma Grunts. You may explore side paths for experience and items, but the required objective is to reach the final Grunt in the western and central forest route.
The last Grunt uses two level 14 Patrat and a level 14 Sandile. Sandile is Ground and Dark, so Water-, Grass-, Fighting-, Bug- and Ice-type attacks are effective. Electric- and Psychic-type attacks do not affect it, and Poison-, Rock-, Ghost- and Dark-type attacks are poor choices because of its resistances or immunity.
After the battle, the Grunt gives up the Dragon Skull. Gorm appears, but he does not fight you here. Burgh and Lenora arrive, Team Plasma retreats, and Lenora takes back the skull. She rewards you with a Moon Stone.
Follow Lenora east and then head north to leave Pinwheel Forest. Use the Nurse before leaving if your team is damaged. The northern route leads to Skyarrow Bridge.
- Defeat the Team Plasma Grunts on the required forest route.
- Prepare a reliable answer to the final Grunt’s Sandile.
- Recover the Dragon Skull.
- Accept the Moon Stone from Lenora.
- Leave through the northern forest exit toward Skyarrow Bridge.
Cross Skyarrow Bridge and reach Castelia City
From the northern exit of Pinwheel Forest, continue to Skyarrow Bridge. Walk across the bridge and enter the eastern gatehouse to reach Castelia City. There are no required battles on the bridge itself.
Before entering the city, speak with the Hiker inside the eastern gatehouse to receive the optional Quick Claw. Then go to Castelia’s Pokémon Center and heal. Restock Poké Balls, healing items and status cures before exploring the city.
Castelia contains optional facilities including the Battle Company, Royal Unova, Studio Castelia, Passerby Analytics HQ, the Casteliacone stand and the city’s piers. The Battle Company is useful for experience and rewards, but none of these activities is required before Burgh’s Gym. You can also collect useful city items, such as the elemental stone offered by the scientist near the southern piers, depending on your needs.
- Cross Skyarrow Bridge.
- Collect the optional Quick Claw in the eastern gatehouse.
- Heal at Castelia City’s Pokémon Center.
- Restock supplies before the Team Plasma event and Gym battle.
- Do not mistake optional city facilities for required progression.
Resolve Team Plasma’s Castelia City incident
Go to Castelia Gym on the western street. Cheren appears, and Burgh says he cannot battle until Team Plasma is dealt with. Follow Burgh to Prime Pier, the pier reached by going south from the intersection near the Pokémon Center and Battle Company.
At Prime Pier, meet Bianca and Iris. Team Plasma has taken Bianca’s Munna. A Grunt runs away, so leave the pier and follow Burgh through the city. He eventually reaches the building across from the Gym, where several Team Plasma members are gathered.
Approach the group and accept the battle. The Grunt you fight uses two level 17 Sandile. Defeat both with Water-, Grass-, Fighting-, Bug- or Ice-type attacks. Afterward, enter the building. Ghetsis, Gorm and Bronius explain more of Team Plasma’s plans, then Team Plasma returns Bianca’s Munna and leaves. Iris gives you a Yache Berry, and a Smoke Ball remains on the floor for you to collect.
Once the scene ends, return to the Pokémon Center if necessary and enter Castelia Gym. Burgh is now available.
- Visit Castelia Gym and learn that Burgh is unavailable.
- Go to Prime Pier and meet Bianca and Iris.
- Follow Burgh to the Team Plasma building across from the Gym.
- Defeat the Grunt’s two level 17 Sandile.
- Complete the Sage scene and recover Bianca’s Munna.
- Collect the Yache Berry from Iris and the optional Smoke Ball.
- Return to Castelia Gym.
Prepare for Burgh’s Bug-type team
Burgh’s original Black Version team is Whirlipede at level 21, Dwebble at level 21 and Leavanny at level 23. Whirlipede and Leavanny are weak to Fire- and Flying-type attacks. Dwebble is Bug and Rock, so Fire is not a good primary answer against it; use Water-, Rock- or Steel-type attacks instead.
Roggenrola with Rock Blast or Tympole with Mud Shot can handle Whirlipede and Dwebble effectively. Pidove is useful against Leavanny, while Tepig, Pignite, Pansear or another Fire-type Pokémon can also deal with Leavanny. Timburr’s Rock Throw is a useful physical backup and avoids the problem of having Struggle Bug repeatedly lower a special attacker’s Special Attack.
Burgh’s Whirlipede can use Poison Tail, Struggle Bug, Pursuit and Screech. Dwebble uses Smack Down, Struggle Bug, Faint Attack and Sand-Attack. Leavanny uses Razor Leaf, Struggle Bug, String Shot and Protect. Smack Down can punish a Flying-type Pokémon during the Dwebble matchup, so keep a Water-, Rock- or sturdy neutral attacker available. Heal and cure poison before entering.
- Bring Fire or Flying coverage for Whirlipede and Leavanny.
- Bring Water, Rock or Steel coverage for Dwebble.
- Keep a physical attacker available in case Struggle Bug lowers Special Attack.
- Carry Antidotes or Full Heals.
- Enter with the party restored and the intended counters at roughly level 20 or above.
Solve the honeycomb Gym and defeat Burgh
Speak with the Gym Guide to receive a Fresh Water. Castelia Gym uses honey walls and gates. Walk into the center of a honey wall to pass through it; approaching from the side pushes you away. Step on the switches to illuminate the two posts associated with each gate. When both posts are lit, that gate lowers. Some switches cause a Harlequin trainer to emerge, so be ready for a battle.
Move from room to room through the honey passages, activating the switches and lowering the required gates. Defeating every Harlequin is optional, but their experience can help bring a team into the correct level range. Two Harlequins are hidden beneath the floor and appear when you approach their switches.
When the final gates are open, enter the purple section and climb the stairs to Burgh. Defeat Whirlipede with Fire, Flying or a strong neutral physical move. Switch to your Dwebble answer for the second Pokémon, remembering that Smack Down can hit Flying types. Finish Leavanny with Fire- or Flying-type attacks, while watching for Protect and the Special Attack reduction from Struggle Bug.
Victory earns the Insect Badge, which makes Pokémon up to level 40 obey you, and TM76, Struggle Bug. Save after the battle if desired, then heal before leaving the Gym.
- Receive the Fresh Water from the Gym Guide.
- Pass through honey walls from their center.
- Activate switches and lower the required gates.
- Defeat Whirlipede, Dwebble and Leavanny.
- Receive the Insect Badge.
- Receive TM76, Struggle Bug.
- Heal before continuing north.
Complete the required Bianca battle and leave for Route 4
After Burgh’s defeat, Bianca contacts you through the Xtransceiver and challenges you. Travel north from the Gym toward the city fountain and continue to the northern gate. Bianca battles you before you can continue toward Route 4.
Her team depends on your starter, but she uses Herdier, her elemental monkey and Munna at this point in the story. Use Fighting-type attacks against Herdier, a suitable type matchup against the elemental monkey and Bug-, Dark- or Ghost-type attacks against Munna. Heal afterward at the Pokémon Center if necessary.
Once Bianca’s battle and the gate dialogue are complete, the northern route from Castelia is open. This is the handoff to Route 4, the Desert Resort, Relic Castle and the next chapter.
- Receive Bianca’s post-Gym challenge.
- Travel north to the Castelia gate.
- Defeat Bianca.
- Confirm that the northern route to Route 4 is open.
- Heal and prepare for the Desert Resort chapter.
Before you move on
- The Dragon Skull has been recovered from Team Plasma in Pinwheel Forest.
- Lenora has taken back the Dragon Skull and given the player a Moon Stone.
- The player has crossed Skyarrow Bridge and entered Castelia City.
- The Castelia Team Plasma building event has been completed.
- Bianca’s Munna has been returned.
- Burgh is available inside Castelia Gym.
- Burgh’s level 21 Whirlipede, level 21 Dwebble and level 23 Leavanny have been defeated.
- The Insect Badge and TM76, Struggle Bug, have been received.
- Bianca’s post-Gym battle has been completed.
- The northern Castelia gate is open and Route 4 is accessible.
Route 4, Desert Resort, Relic Castle & Nimbasa City (Elesa — Electric Gym)
Leave Castelia City through Route 4, train in the Desert Resort, and continue to Nimbasa City. The early Relic Castle visit and Cover Fossil or Plume Fossil choice are optional rewards, not required story progression. The required route continues through the Day-Care rescue, the Ferris wheel scene with N, and Elesa’s Nimbasa Gym. Defeat Elesa to earn the Bolt Badge and open the way toward Route 5 and Driftveil City.
Cross Route 4 and defeat Cheren
Leave Castelia City through the northern gate to enter Route 4. Cheren is waiting near the route entrance and challenges you, so heal in Castelia City first if your party took damage against Burgh or the route trainers. His team is built around the starter matchup and includes Pokémon in the low twenties; use type advantages rather than attempting to win with one weakened lead.
After the battle, follow the paved road north. Route 4 has deep sand, construction areas and several trainers, so fight the available trainers for controlled experience before spending time on wild encounters. The western branch leads to the Desert Resort. You can visit that area before Nimbasa City, but the road north remains the required route.
In the northern rest house, speak to the Worker to receive TM28 Dig. Dig is especially useful against Elesa’s Zebstrika, although it cannot affect either Emolga because Emolga is Electric/Flying. Collect the route items you want, heal when necessary, and carry Potions, Paralyze Heals and Repels if you intend to explore the desert thoroughly.
- Defeat Cheren on Route 4.
- Receive TM28 Dig from the Worker in the northern rest house.
- Battle route trainers and prepare supplies before entering the Desert Resort.
Train in the Desert Resort
Take the western branch from Route 4 into the Desert Resort. A permanent sandstorm is active in the area, so most Pokémon take weather damage at the end of each turn unless they are protected by an ability or move. The sand also makes travel slower in some sections, so avoid entering the area with a party already close to fainting.
The original Pokémon Black version provides useful encounters here, including Sandile, Darumaka, Scraggy, Dwebble, Maractus and Sigilyph in the appropriate desert areas. Catch only what improves your team; Sandile supplies Ground coverage, Darumaka offers strong Fire attacks, and Sigilyph can provide Psychic and Flying damage. Route 4 and the Desert Resort are also good places to gain levels through trainer battles without relying on prolonged wild grinding.
Doctor Jerry can be found near the entrance. Defeat him, then speak with him again to restore your party for free. Use this recovery point while exploring rather than allowing sandstorm damage and repeated battles to drain your supplies. TM39 Rock Tomb is in the southern part of the Desert Resort, south of Pokémon Ranger Jaden. It is a useful answer to Elesa’s Emolga because Rock attacks hit them super effectively.
- Use Doctor Jerry as a free healing point after defeating him.
- Collect TM39 Rock Tomb if a team member can learn it.
- Keep the party healthy while sandstorm damage is active.
Optional early visit to Relic Castle
From the northern part of the Desert Resort, follow the solid-sand paths and the statues to the main Relic Castle entrance. This visit is optional. You do not need to enter Relic Castle to reach Nimbasa City, and the fossil choice is not a prerequisite for the fourth Gym.
The early section includes the upper floor and B1F route, but the deeper castle remains inaccessible until later story events. Quicksand drops you to the floor below when crossed in the wrong way, so walk across it carefully if you are trying to remain on the current floor. If you fall, use the lower passage to return toward the exit rather than searching for the later Team Plasma route.
On the west side of the first floor, speak with the Backpacker behind the quicksand area. She offers one fossil: the Cover Fossil, which becomes Tirtouga, or the Plume Fossil, which becomes Archen. Choose only one. Take the fossil to the Nacrene Museum and speak with the museum attendant to revive it. After collecting the fossil, leave the castle and return to Route 4. You may also skip this entire detour and proceed directly to Nimbasa City.
- Treat Relic Castle as optional at this point.
- Choose either the Cover Fossil or Plume Fossil if you enter.
- Do not attempt to complete the deeper castle before the later Team Plasma sequence.
Rescue the Day-Care Man in Nimbasa City
Continue north along Route 4 to reach Nimbasa City. Near the entrance, Team Plasma Grunts are confronting the Day-Care Man. Defeat the Grunt’s Watchog and Trubbish, both level 18, to resolve the incident. The Day-Care Man then gives you the Bicycle. After this event, the Day Care on Route 3 can raise two Pokémon instead of only one.
Bianca appears after the rescue and directs you toward the Pokémon Musical. Visit the Musical Theater if you want to complete the introduction and receive the Prop Case; the Musical itself is optional and is not needed to enter the Gym.
Before the Gym, visit the house northwest of the Pokémon Center and speak to the blue-haired man to receive HM04 Strength. Strength is not required for Elesa’s Gym, but it becomes useful for later exploration. The Battle Institute, Battle Subway, Big Stadium, Small Court and most other Nimbasa attractions are optional. Heal at the Pokémon Center and buy status cures before continuing.
- Defeat the Team Plasma Grunt near the Nimbasa entrance.
- Receive the Bicycle from the Day-Care Man.
- Collect HM04 Strength from the house northwest of the Pokémon Center.
- Heal and stock Paralyze Heals before the Gym.
Complete the Ferris wheel scene and battle N
Go to the amusement park on the eastern side of Nimbasa City. N meets you near the Rondez-View Ferris Wheel and asks you to ride with him. During the scene, he identifies himself as Team Plasma’s king and explains his intention to separate Pokémon from people.
After the ride, N challenges you. In the original Pokémon Black and White games, his team consists of level 22 Sandile, Darumaka, Scraggy and Sigilyph. Water attacks are useful against Sandile and Darumaka; Fighting or Flying attacks help against Scraggy; and Dark, Electric, Rock or strong neutral attacks can handle Sigilyph. Be careful with Sigilyph’s Flying-type attacks and Scraggy’s Fighting-type coverage.
This battle is required. Heal before entering the amusement park if the desert left your party weakened. After defeating N, proceed to the Nimbasa Gym.
- Ride the Ferris wheel with N.
- Defeat N’s level 22 Sandile, Darumaka, Scraggy and Sigilyph.
- Enter the Nimbasa Gym after the battle.
Navigate the roller-coaster Gym
Nimbasa Gym uses roller-coaster cars and track switches. Enter each available car, ride to the next platform, and activate the switch there to redirect the next car. Battle the Gym Trainers as you progress; their Electric Pokémon provide useful experience and help you identify the correct sequence of platforms.
Bring two answers to Elesa rather than relying entirely on Ground attacks. Ground moves are effective against ordinary Electric Pokémon and against Zebstrika, but they fail against Emolga because Emolga has the Flying type. Rock- and Ice-type attacks hit Emolga super effectively. TM39 Rock Tomb is a practical option, while TM28 Dig should be reserved for Zebstrika or other targets that are not airborne.
Avoid contact attacks when possible because Emolga’s Static can paralyze a Pokémon that makes contact. If a key attacker becomes paralyzed, use a Paralyze Heal before the battle escalates. Reach Elesa’s platform only after healing and confirming that your Ground and Rock or Ice options still have enough HP and PP.
- Use the switches to reach Elesa’s platform.
- Prepare Ground coverage for Zebstrika.
- Prepare Rock, Ice or another reliable answer to Emolga.
Defeat Elesa and open the next route
Elesa uses two level 25 Emolga followed by a level 27 Zebstrika in Pokémon Black. Each Emolga knows Volt Switch, Aerial Ace, Pursuit and Quick Attack. Volt Switch lets an Emolga damage your active Pokémon and return to Elesa’s party, so expect her to rotate between the two Emolga. A bulky Pokémon with Rock Tomb, another Rock attack or an Ice attack can limit this pattern.
Zebstrika knows Flame Charge, Spark, Volt Switch and Quick Attack. Its Lightningrod ability makes Electric attacks ineffective against it and can raise its Special Attack, so do not try to win by repeatedly using Electric moves. Use Dig or another dependable Ground attack. If Zebstrika uses Flame Charge and becomes faster, heal a sturdy teammate and finish it with a reliable Ground move rather than sacrificing your whole party to preserve a low-HP attacker.
After the victory, Elesa awards the Bolt Badge and TM72 Volt Switch. The badge makes Pokémon up to level 50 obey you. Heal at the Pokémon Center, then leave through the western exit toward Route 5. The next required progression eventually leads to Driftveil City and the drawbridge sequence; the Desert Resort and Relic Castle do not need to be revisited immediately.
- Defeat both level 25 Emolga and the level 27 Zebstrika.
- Receive the Bolt Badge and TM72 Volt Switch.
- Heal in Nimbasa City and confirm that Route 5 is open.
Before you move on
- Cheren has been defeated on Route 4 and TM28 Dig has been collected.
- The Desert Resort has been explored or deliberately skipped after stocking supplies.
- The optional Relic Castle fossil has been chosen and revived, or the detour has been skipped.
- The Day-Care incident is complete and the Bicycle is in the Bag.
- The Ferris wheel scene with N has occurred and N’s level 22 team has been defeated.
- Elesa has been defeated and the Bolt Badge and TM72 Volt Switch are in the Bag.
- The party is healed and the western exit from Nimbasa City toward Route 5 is available.
References for this chapter
- Walkthrough: Pokémon Black and White/Part 5 — Bulbapedia
- Appendix: Black and White walkthrough, Section 5 — Bulbapedia
- Unova Route 4 — Bulbapedia
- Desert Resort — Bulbapedia
- Relic Castle — Bulbapedia
- Nimbasa Gym — Bulbapedia
- Relic Castle walkthrough — Psypokes
- Pokémon Black and White walkthrough — Pokéball Insider
Driftveil City, Driftveil Gym (Clay — Ground) & Cold Storage
After crossing Driftveil Drawbridge from Route 5, enter Driftveil City, investigate Cold Storage, defeat the Team Plasma members hiding inside its rear container, and challenge Clay for the Quake Badge. After the Gym battle, defeat Bianca near the west exit, receive HM02 Fly, and follow Route 6 toward Chargestone Cave. This chapter covers the original Pokémon Black Version for Nintendo DS, not Black 2 or White 2.
Cross Driftveil Drawbridge and enter Driftveil City
After defeating Elesa in Nimbasa City, leave through the western gate and follow Route 5 toward Driftveil Drawbridge. Cheren meets you on the route, and Alder appears during the events leading to the bridge. Continue west across the drawbridge and enter Driftveil City from the far side.
When you arrive, Cheren and Clay are near the western side of town. Clay explains that Team Plasma members escaped while he was dealing with the drawbridge situation and asks you to search Cold Storage, which is south of Driftveil City. Heal at the Pokémon Center before leaving. Driftveil Market is optional, but checking the market can provide useful medicine and held items before the next series of battles.
- Cross Driftveil Drawbridge from Route 5.
- Enter Driftveil City and heal at the Pokémon Center.
- Speak with Clay and Cheren near the western side of town.
- Optionally check Driftveil Market for supplies and held items.
Prepare for Cold Storage
Leave Driftveil City through the south side and follow the path to Cold Storage. The grass around this area can provide useful additions such as Vanillite, Herdier, Minccino, and Timburr in the original Black and White games. Vanillite can eventually provide Ice-type coverage, while Timburr is a strong physical Fighting-type option, but catching either Pokémon is optional.
Bring a balanced party rather than relying on one Pokémon. Clay specializes in Ground types, so a dependable Water- or Grass-type attacker is valuable. A Fighting-type can also help against Excadrill, while Ice moves are useful against Krokorok. Ice is not super effective against Excadrill because its Steel typing removes the usual Ground weakness to Ice. Carry Potions, status cures, and stronger recovery items before entering the warehouse.
- Heal before entering Cold Storage.
- Consider catching Vanillite or Timburr outside the building.
- Keep a reliable Water or Grass attacker in the party.
- Carry enough healing items for several trainer battles.
Navigate the frozen warehouse
Enter the Cold Storage building and work across the frozen floor. Stepping onto an ice tile sends you sliding in a straight line until a wall, container, solid floor, or another stopping point interrupts the movement. Check the intended landing point before stepping onto each patch. If you slide beyond the position you wanted, walk around the storage containers and approach the puzzle from another side.
Battle the Workers as you move through the warehouse. These fights provide useful experience before Clay. The building contains several items, including an Ice Heal and a Hyper Potion. TM55 Scald is available in the first indoor ice-puzzle area near the entrance; collect it if you have a compatible Water Pokémon. Scald is a reliable Water attack with a chance to burn its target.
Continue through the warehouse until you reach the open container at the back. Cheren appears there, and entering the container begins the required confrontation with Team Plasma.
- Use the ice tiles to reach the far side of the warehouse.
- Battle the Workers for experience and money.
- Collect TM55 Scald if it benefits your team.
- Reach the open container where Cheren is waiting.
Defeat Team Plasma in the container
Inside the container, Cheren helps divide the Team Plasma group. You battle the Grunts assigned to you while Cheren handles the others. Their Pokémon are around the low-to-mid twenties and do not require a special strategy. Use ordinary type advantages, keep your party healthy, and avoid allowing one weakened Pokémon to absorb every battle.
After the Grunts are defeated, Clay arrives with his workers and takes Team Plasma into custody. This confrontation is required before Clay will permit you to challenge the Driftveil Gym. Before leaving, collect the item ball containing NeverMeltIce. It strengthens Ice-type moves when held by a Pokémon.
Exit Cold Storage and return north to Driftveil City. Heal before approaching the Gym. Team Plasma's later appearance outside the Gym is part of the continuing story sequence, so do not treat the Cold Storage battle as the end of the local plot.
- Defeat the Team Plasma Grunts assigned to you.
- Let Clay take the captured group into custody.
- Collect NeverMeltIce from the container.
- Return to Driftveil City and heal.
Enter the Driftveil Gym and cross the mine lifts
When you approach the Gym, Ghetsis and Zinzolin appear with Team Plasma members outside. After the conversation, enter the Gym and speak with the attendant to receive a Fresh Water.
The Driftveil Gym is a mine-shaft puzzle built around elevators, platforms, and narrow girders. Ride the accessible lifts between levels, cross the girders to reach the next platform, and use the central elevator when the route leads downward toward Clay. Several Workers are optional, so battle them if you need experience, but only some trainers block the route.
Plan around the Ground typing. Water and Grass attacks are super effective against Krokorok and Excadrill, while Grass is especially effective against Palpitoad because Palpitoad is Water/Ground. Electric attacks do not work against any of Clay's Pokémon. Fire and Fighting attacks are also useful against Excadrill, while Ice attacks should be treated as coverage rather than a direct weakness against it.
- Receive the Fresh Water at the Gym entrance.
- Ride the lifts and cross the girders toward the central elevator.
- Battle optional Workers if your team needs experience.
- Keep a Grass or Water attacker ready for Palpitoad.
Defeat Clay and claim the Quake Badge
In Pokémon Black Version, Clay uses Krokorok at level 29, Palpitoad at level 29, and Excadrill at level 31. Krokorok is Ground/Dark, Palpitoad is Water/Ground, and Excadrill is Ground/Steel. A strong Grass move can handle Krokorok and Palpitoad, but switch carefully before Excadrill if your Grass Pokémon cannot withstand its attacks. Water and Fighting attacks are dependable choices for Excadrill, and Fire or Ground attacks also work. Do not depend on Electric moves.
Excadrill can use Hone Claws before attacking, and Bulldoze lowers the target's Speed. Use healing items between turns when necessary, and switch instead of sacrificing your only Ground counter. If Clay restores a weakened Pokémon, continue applying safe damage rather than assuming the next hit will finish it.
Winning awards the Quake Badge and TM78 Bulldoze. The badge permits Strength to be used outside battle and raises the obedience limit for traded Pokémon. Bulldoze is a physical Ground attack that lowers the target's Speed, making it useful for a physical attacker even if you do not teach it immediately.
- Defeat Krokorok, Palpitoad, and Excadrill.
- Receive the Quake Badge from Clay.
- Accept TM78 Bulldoze.
- Confirm that Strength works outside battle.
Battle Bianca and follow Route 6 west toward Chargestone Cave
After the Gym battle, heal and leave Driftveil City through the west exit. Bianca stops you as you head toward Route 6 and challenges you to a battle. Her team includes Herdier, Musharna, the starter Pokémon that is weak to yours, and a Pansear, Panpour, or Pansage selected according to your starter choice. Use Fighting or another strong attack against Herdier, Dark, Bug, or Ghost attacks against Musharna, and type advantages against her remaining Pokémon.
Defeat Bianca to receive HM02 Fly. Teach it to a compatible Pokémon if you want faster travel between towns, though using Fly is not required to continue the story. Continue west onto Route 6, battling trainers and using the grass for experience if necessary. A house on the route can restore your party, so use it before entering the next cave section if your team is worn down.
Follow Route 6 north and west toward its far end and the southern entrance to Chargestone Cave. A Galvantula web blocks the entrance. Once you have earned the Quake Badge and completed the required events, Clay arrives and uses his Pokémon to clear the obstruction. Enter Chargestone Cave after the web is removed; this is the correct handoff to the next chapter.
- Leave Driftveil City through the west exit toward Route 6.
- Defeat Bianca near the Route 6 approach.
- Receive HM02 Fly from Bianca.
- Use the Route 6 healing house if necessary.
- Follow Route 6 toward the southern entrance to Chargestone Cave.
- Wait for Clay to remove the web, then enter the cave.
Before you move on
- Team Plasma has been defeated inside the Cold Storage container and Clay has taken the group away.
- NeverMeltIce has been collected from the container if desired, and TM55 Scald has been collected from the warehouse if desired.
- Clay has been defeated in Driftveil Gym, and the Quake Badge is displayed among your badges.
- TM78 Bulldoze has been awarded, and Strength works outside battle.
- Bianca has been defeated after leaving Driftveil City through the west exit, and HM02 Fly has been received.
- You are on Route 6 and have followed it toward the southern entrance to Chargestone Cave.
- Clay has cleared the web at the Chargestone Cave entrance, and you can enter the cave to continue the story.
Chargestone Cave, Mistralton City and Skyla
After defeating Clay, leave Driftveil City through its west exit and cross Route 6 to Chargestone Cave. Work through the cave’s floating-stone passages and Team Plasma battles, then defeat N near the exit. In Mistralton City, complete Skyla’s required Celestial Tower visit before entering the Gym. Defeat Skyla to earn the Jet Badge, then leave through northeastern Route 7 toward Twist Mountain.
Leave Driftveil City and cross Route 6
Heal in Driftveil City and stock Potions, status cures and Poké Balls. Leave through the west exit to enter Route 6. The route toward Chargestone Cave begins here; do not return east toward the Driftveil Drawbridge and earlier areas.
Follow Route 6 toward the Chargestone Cave entrance. Battle the route’s Trainers if your team needs experience, particularly if several Pokémon are still below the high twenties. Route 6 offers useful encounters such as Foongus, Deerling, Karrablast and Tranquill, while Audino can appear in rustling grass for optional experience training.
Explore the side paths, the Season Research Lab and the healing house near the cave approach if you want extra items or battles. These detours are optional. Before entering Chargestone Cave, make sure your lead Pokémon are healed and that you have a reliable answer to Steel-, Rock- and Electric-type opponents.
- Heal and restock in Driftveil City.
- Use Driftveil City’s west exit to reach Route 6.
- Battle Route 6 Trainers for experience if necessary.
- Heal at the nearby house before entering Chargestone Cave if required.
Navigate Chargestone Cave
Enter Chargestone Cave and follow the main passage through the cave. Its distinctive obstacle is the group of floating blue stones. Approach a stone from the side that lets you push it into another charged rock. The stones move when pushed into the correct adjacent rock, opening routes through the cave.
The cave has several connected areas, stairs and side passages. Team Plasma members occupy parts of the route, so defeat the Grunts blocking your way and continue toward the lower and eastern passages. Search side paths for items and optional battles if your party needs experience, but keep track of the main route so you do not repeatedly circle the same section.
Chargestone Cave does not continuously damage your party with electricity and has no general electrical floor hazard. Its dangers are ordinary wild encounters, Trainer battles and the possibility of entering the next battle with a weakened team. Useful encounters include Joltik, Klink, Ferroseed, Boldore and Tynamo. Drilbur can also appear in dust clouds. Ground-type moves are useful against Electric targets, while Fire-type attacks are especially valuable against Ferroseed and Klink. Remember that some opponents can survive a hit or use defensive moves, so do not rely on one attacker alone.
- Push the floating stones into the charged rocks to open passages.
- Defeat the Team Plasma Grunts along the main route.
- Search side passages for items or experience if needed.
- Keep Ground- and Fire-type coverage available.
- Do not expect environmental electrical damage in the cave.
Defeat N near the cave exit
Near the end of Chargestone Cave, N challenges you. In the original Pokémon Black Version, he uses Boldore, Ferroseed, Joltik and Klink, all at level 28. Fire attacks are effective against Ferroseed and Klink. Ground attacks are useful against Joltik and Klink, although choose moves carefully because some Ground attacks will not affect a target with an ability or typing that grants immunity.
Boldore has Sturdy, so a full-health one-hit knockout may leave it with 1 HP. Be ready to finish it with another attack. Ferroseed’s Iron Barbs can punish contact moves, and Klink’s Steel typing makes Fire- or Ground-type damage preferable to neutral physical attacks.
Heal before reaching N if earlier Team Plasma fights have left your party weakened. After the battle, Bianca and Professor Juniper appear for the story conversation. Continue through the remaining passage and leave the cave for Mistralton City.
- Restore your party before approaching N.
- Use Fire attacks against Ferroseed and Klink when possible.
- Use Ground coverage against Joltik and Klink when appropriate.
- Account for Boldore’s Sturdy ability.
- Defeat N and exit into Mistralton City.
Prepare in Mistralton City
Heal at the Mistralton City Pokémon Center after arriving. The Move Family lives in the house east of the Pokémon Center. The Move Deleter can remove any move, including an HM, while the Move Reminder can restore forgotten level-up moves in exchange for Heart Scales. Both services are optional and are not required to enter the Gym.
The Cargo Service building on the runway contains an optional Sharp Beak gift. TM58 Sky Drop is also available near the southern plane. These are not required for story progression, but the Sharp Beak can improve Flying-type damage and Sky Drop may provide an additional Flying-type option for a compatible Pokémon.
When you walk north past the Pokémon Center, Cedric Juniper introduces himself and upgrades the Pokédex with additional search and form-viewing functions. Skyla then explains that she is going to Celestial Tower to check on a sick Pokémon. The Gym is not ready for your challenge yet, so leave the city through its northern exit and enter Route 7.
- Heal in Mistralton City.
- Collect the optional Sharp Beak if desired.
- Collect the optional TM58 Sky Drop if desired.
- Speak with Cedric Juniper and Skyla.
- Leave north toward Route 7.
Visit Celestial Tower and ring the bell
Follow Route 7 from Mistralton City toward Celestial Tower. The route contains Trainers using several types, including Normal, Flying, Grass, Water, Psychic and Bug Pokémon. A house on the route can restore your party, so use it before entering the tower if necessary.
Enter Celestial Tower and climb to the summit. Fight the Trainers on the way for experience and explore side paths for items if you want them. Litwick and Elgyem are among the notable wild Pokémon found inside the tower.
At the summit, speak with Skyla, then interact with the large bell and confirm the command to ring it. This completes the required event and sends Skyla back to Mistralton City. Walk back down Route 7 and return to the city. If Fly is already available to a party member, you may use it to return more quickly.
- Reach Celestial Tower on Route 7.
- Climb to the summit.
- Speak with Skyla.
- Ring the bell.
- Return to Mistralton City and heal.
Cross the Mistralton Gym
Mistralton Gym is beside the airport runway. Its puzzle uses cannons that launch you between platforms. Enter each cannon from the side that lines up with the next platform, then use the stairs and walkways to reach the following cannon.
The route is largely linear. Enter the first cannon, move left to the next section, then descend and use the cannon sequence to travel across the gym. Continue through the upper platforms until the final cannon places you near Skyla. If you are sent to a side platform, battle the Gym Trainer there and use the stairs to return to the puzzle route.
The Gym Trainers use Flying Pokémon such as Tranquill, Ducklett, Woobat, Sigilyph, Unfezant and Swoobat. Electric- and Rock-type attacks are reliable choices, and Ice-type attacks can also help. Keep a second attacker ready because Flying Pokémon may use Air Slash, Acrobatics or other moves that can quickly punish a frail lead.
- Use the cannons from the correct approach directions.
- Battle Gym Trainers for experience if needed.
- Keep Electric-, Rock- or Ice-type coverage healthy.
- Reach Skyla’s platform.
Defeat Skyla and continue to Twist Mountain
Skyla uses Swoobat at level 33, Unfezant at level 33 and Swanna at level 35. Swoobat knows Heart Stamp, Amnesia, Acrobatics and Assurance. If it uses Amnesia, a physical Rock attack is preferable to relying only on special damage. Unfezant is vulnerable to Electric, Rock and Ice attacks.
Swanna is Water/Flying, so Electric attacks are especially effective. Rock attacks also work, but Swanna can use Water-type moves such as BubbleBeam, so keep a backup Pokémon ready rather than depending exclusively on a Rock-type attacker. Defeat all three Pokémon to finish the Gym battle.
Skyla awards the Jet Badge and TM62 Acrobatics. After the battle, you can obtain TM40 Aerial Ace by speaking with the required NPC in the house north of the Pokémon Center, then collecting it at the southern end of the runway. This reward is optional.
When you leave the Gym, N appears outside and discusses Ghetsis’s search for the Light Stone and Dark Stone and his intention to awaken one of the legendary dragons. After the conversation, leave Mistralton City through northeastern Route 7. Continue along the route toward Twist Mountain; that is the next required story destination.
- Defeat Skyla’s level 33 Swoobat.
- Defeat her level 33 Unfezant.
- Defeat her level 35 Swanna.
- Receive the Jet Badge and TM62 Acrobatics.
- Collect TM40 Aerial Ace if desired.
- Leave through northeastern Route 7 toward Twist Mountain.
Before you move on
- You left Driftveil City through the west exit and crossed Route 6.
- You pushed the floating stones through Chargestone Cave and defeated the Team Plasma members on the main route.
- You defeated N’s four level 28 Pokémon near the cave’s end.
- You reached Mistralton City and completed the Skyla conversation.
- You climbed Celestial Tower and rang the bell at the summit.
- You defeated Skyla’s level 33 Swoobat, level 33 Unfezant and level 35 Swanna.
- The Jet Badge and TM62 Acrobatics are in your possession.
- You completed the post-Gym N scene and exited Mistralton City through northeastern Route 7 toward Twist Mountain.
Routes, P2 Laboratory and Dragonspiral Tower Approach
After earning the Jet Badge, cross Route 7 and Twist Mountain, defeat Cheren, receive HM03 Surf from Alder, enter Icirrus City and defeat Brycen for the Freeze Badge. The post-Gym Shadow Triad scene sends you to Dragonspiral Tower. P2 Laboratory is an optional Surf detour in the original Pokémon Black Version and is not part of the required route.
Leave Mistralton City and defeat Cheren
Heal and restock in Mistralton City, then leave through the eastern gate to Route 7. Follow the route north, battling Trainers or using the grass and wild Pokémon to bring your main team into the low-to-mid 30s. Continue toward the Twist Mountain entrance. Cheren appears outside the entrance after you and Cheren have both earned the Jet Badge, so heal before climbing the staircase to the mountain.
Cheren always uses four Pokémon here. His team includes a level 33 Unfezant and a level 33 Liepard. His third Pokémon is the elemental monkey that has a type advantage over your starter: Simisage if you chose Snivy, Simisear if you chose Tepig, or Simipour if you chose Oshawott. His fourth Pokémon is the evolved form of the starter that is weak to your choice: Pignite against Snivy, Dewott against Tepig, or Servine against Oshawott. The monkey and Liepard are level 33, while the starter evolution is level 35.
Use a Fighting-type move against Liepard if you have one, but do not send a Fighting-only attacker against Unfezant. Unfezant is Normal/Flying, so Rock, Electric, or Ice attacks are safer choices. Plan separate answers for Cheren's elemental monkey and starter evolution; do not assume your starter can handle all four Pokémon. After the battle, Alder jumps down from the cliff and gives both you and Cheren HM03 Surf. Cheren then enters Twist Mountain.
- Heal before the Cheren battle outside Twist Mountain.
- Prepare for four Pokémon, including Unfezant, Liepard, a starter-dependent elemental monkey and a level 35 starter evolution.
- Receive HM03 Surf from Alder after winning.
Cross Twist Mountain
Enter Twist Mountain after the Surf event. The mountain has several connected mine and excavation chambers, and the accessible route changes with the in-game season. Winter snow blocks some passages and opens others, so do not treat the seasonal appearance as a different story route. If a tunnel is blocked, return to the previous chamber and use the other visible stairs, ramps, or mine passages.
Follow the main route through the mountain, taking stairs between floors and continuing through the open excavation areas until you reach the northern exit. Workers, Hikers, Ace Trainers, and other opponents provide useful experience, with many Rock-, Ground-, Fighting-, Steel-, and Psychic-type Pokémon appearing in the area. Water, Grass, Fighting, Ground, and Steel attacks cover much of the opposition. Carry healing items because the mountain has several battles and wild encounters before the next Pokémon Center.
The story conversation inside the mountain involves Cheren and Clay discussing Team Plasma and the Gym Leaders. Continue after the scene; no key item is needed to cross Twist Mountain. Explore side chambers only if you want extra items or experience, then keep following the connected passages toward Icirrus City.
- Use the open seasonal route rather than trying to cross blocked snow passages.
- Battle enough Trainers to keep pace with the upcoming Gym.
- Reach the northern exit and enter Icirrus City.
Prepare in Icirrus City
When you emerge from Twist Mountain, Cedric Juniper speaks to you about Dragonspiral Tower, the ancient structure north of the city. Let the conversation finish, then visit the Pokémon Center and heal. Buy Revives, Potions or Hyper Potions, and status-recovery items before entering the Gym. You can explore Icirrus City's wetlands and buildings for optional items, but the required objective is the Gym.
Icirrus Gym uses an ice-skating puzzle. The curved ice paths redirect you, and colored switches change the direction of the spinner-like sections. From the entrance, move through the curved paths and switches, crossing the jump sections when the route opens. Battle the Gym Trainers on the way rather than attempting to bypass the puzzle blindly. After defeating Brycen, an ice slide provides a shortcut back to the entrance.
- Heal and restock at the Icirrus City Pokémon Center.
- Enter the Icirrus Gym and follow the switches and curved skating paths.
- Keep Fire, Fighting, Rock, or Steel attacks available.
Defeat Brycen for the Freeze Badge
Brycen uses three pure Ice-type Pokémon in the original Pokémon Black Version: level 37 Vanillish, level 37 Cryogonal, and level 39 Beartic. Fire, Fighting, Rock, and Steel attacks are super effective against all three. Cryogonal has much stronger Special Defense than physical Defense, so a strong physical attacker can be particularly useful. Beartic knows Brine in addition to Ice- and Normal-type attacks, so do not leave a weakened Fire- or Rock-type Pokémon in front of it expecting an easy finish.
Defeat Vanillish first if it begins using Acid Armor and increasing its physical Defense. Cryogonal may use Reflect, which reduces physical damage for several turns, so a special Fire or Fighting move can be useful if you have one. Against Beartic, remove it quickly before Swagger or Brine creates an opening. Winning gives you the Freeze Badge and TM79, Frost Breath.
Leave the Gym after the battle. Cheren and Bianca are waiting outside. Brycen then confronts the Shadow Triad, who tell you that Ghetsis wants you to go to Dragonspiral Tower. This conversation is the required story trigger; you do not need to complete P2 Laboratory or any other Surf detour first.
- Defeat Vanillish, Cryogonal, and Beartic.
- Receive the Freeze Badge and TM79 after the battle.
- Watch the Shadow Triad scene outside the Gym.
Optional P2 Laboratory detour
P2 Laboratory is optional in the original Pokémon Black Version. After Alder gives you Surf, travel back toward Route 1, surf west onto Route 17, and follow the water route toward the island in its northern section. The laboratory is not on the route from Mistralton City through Twist Mountain, and nothing inside it is required to enter Icirrus City, defeat Brycen, or reach Dragonspiral Tower.
Inside the laboratory, you can pick up the Dubious Disc and inspect the desk for a partial research memo. TM24, Thunderbolt, is outside at the southwest corner of the island. In Black and White, Scientist Nathan is also outside in the grass. A separate optional event occurs if you have a fateful-encounter Genesect in your party; it is not part of the main story.
Do not import Plasma Frigate events, Colress encounters, or sequel-specific objectives from Pokémon Black 2 and White 2. Return to the main route whenever you are finished with the detour.
- Use Surf to reach Route 17 and the P2 Laboratory only if you want the optional rewards.
- Collect TM24 and the Dubious Disc if desired.
- Do not delay the main story for P2 Laboratory.
Follow the Shadow Triad to Dragonspiral Tower
Heal again after the Gym and leave Icirrus City through the northern path. Continue toward Dragonspiral Tower. At the tower entrance, Cedric Juniper and Bianca explain that Team Plasma has broken through the tower wall. Cedric gives you an Old Gateau before you enter. The Freeze Badge is what makes the interior route available; before the Gym battle, the tower's moat prevents access to the main interior.
Save with a healthy party before entering. The next chapter contains the required Team Plasma battles inside the tower and the climb toward the summit. Bring several healing items and status cures, and keep reliable answers for Dark-, Fighting-, Ground-, and Dragon-type opponents such as Liepard, Scraggy, Krokorok, and Druddigon. In Pokémon Black, the summit sequence involves N awakening and departing with Zekrom. You do not catch Reshiram at Dragonspiral Tower; the Light Stone and the player's Reshiram encounter occur later in N's Castle.
This chapter is complete once Cheren has been defeated, Alder has handed over Surf, Twist Mountain has been crossed, Brycen has awarded the Freeze Badge, the Shadow Triad has directed you to Dragonspiral Tower, and you have reached the tower entrance with a healed and saved party.
- Leave Icirrus City by the northern path after the Shadow Triad scene.
- Reach the Dragonspiral Tower entrance and receive Cedric's Old Gateau.
- Save before beginning the interior Team Plasma sequence.
- Do not expect Reshiram to appear at the tower summit.
Before you move on
- Cheren has been defeated outside Twist Mountain after earning the Jet Badge.
- Alder has given you HM03 Surf.
- You have crossed Twist Mountain and entered Icirrus City.
- Brycen has been defeated and the Freeze Badge is in your case.
- You have watched the Shadow Triad scene outside the Gym.
- You have reached the entrance to Dragonspiral Tower and saved with a battle-ready party.
- P2 Laboratory has been left optional rather than used as a story prerequisite.
Dragonspiral Tower, Legendary Sequence and the N Revelation
After defeating Brycen and receiving the Freeze Badge, follow Cheren and Brycen north from Icirrus City to Dragonspiral Tower. Team Plasma has broken through the tower wall, and you must climb through the damaged floors, defeat the required Plasma groups and reach the top. In the original Nintendo DS release of Pokémon Black Version, the summit scene shows N befriending and departing with Zekrom. This is not the player’s Reshiram encounter. After the tower scene, the group outside sends you to Relic Castle in the Desert Resort to search for the other dragon’s clue. Stop this chapter once that objective is established.
Heal in Icirrus City and enter Dragonspiral Tower
Begin after Brycen has been defeated in the Icirrus Gym and the Freeze Badge is in your case. Heal at the Icirrus City Pokémon Center, restore your party’s health and carry healing items, Revives and status cures. The tower has several battles without an internal Pokémon Center, so do not enter with important team members already weakened.
Leave Icirrus City through the northern route. Cheren and Brycen lead you toward Dragonspiral Tower after the Shadow Triad’s appearance outside the Gym. At the tower entrance, Cedric Juniper explains that Team Plasma has broken through the wall. Bianca is also present during the opening conversation, and Cedric gives you an Old Gateau before you enter. Save before going inside if you want a dependable checkpoint.
- Defeat Brycen and obtain the Freeze Badge.
- Heal in Icirrus City before leaving.
- Carry healing items, Revives and status cures.
- Enter Dragonspiral Tower after the entrance conversation is complete.
Cross the damaged lower floors
On the first floor, continue through the damaged entrance area. On the second floor, collapsed pillars form walkable bridges; Strength is not required to cross this section because the broken structures provide an alternate route. Follow the available path upward and collect items only if your party remains in good condition.
The third floor uses one-way launch ramps. Take the ramps south and west, then work north toward the Shiny Stone before returning to the route that leads to the stairs. The ramp layout is restrictive, so if you land in the wrong position, continue around the available platforms rather than trying to walk directly across the gaps.
On the fourth floor, Cheren and Brycen hold back part of Team Plasma while you proceed. Five Plasma Grunts challenge you on this floor. Defeat them in sequence, then take the northern exit. Their teams are around the low-to-mid 30s, so a balanced party with reliable Fighting-, Water-, Ground- or other appropriate coverage is more useful than depending on one damaged lead.
- Use the broken pillars and ramps to reach the upper floors.
- Solve the third-floor launch-ramp route.
- Defeat all five Plasma Grunts on the fourth floor.
- Heal before continuing if several Pokémon are below safe fighting condition.
Navigate the fifth floor and reach the sixth-floor blockade
The fifth floor is a series of circular paths around the central tower column. Move right across the platforms, then follow the outer paths around the column. The route takes you past the Stardust and Star Piece areas before leading to a Revive and the stairs. You do not need to collect every item to advance; prioritize reaching the stairs if your party is taking damage.
On the sixth floor, you hear the disturbance above and encounter Giallo, one of the Seven Sages, speaking with four Plasma Grunts. Giallo orders them to attack. The four Grunts must be defeated consecutively before the stairs to the top open. There is no normal healing break between these battles, so use a Potion or other recovery item before beginning if your lead is damaged.
The four battles include Pokémon such as Watchog, Krokorok, Trubbish and Liepard in the low-to-mid 30s. Fighting moves are useful against Watchog and Liepard, while Water- or Grass-type attacks can answer Krokorok. Do not leave a Pokémon vulnerable to Ground attacks facing Krokorok simply to preserve a preferred lead; switching is safer than allowing a key team member to fall.
- Follow the fifth-floor circular paths to the stairs.
- Prepare before speaking to or approaching Giallo’s group.
- Defeat all four Grunts without expecting a Pokémon Center between battles.
- Use appropriate coverage against Watchog, Liepard, Trubbish and Krokorok.
Reach the summit and watch N leave with Zekrom
After the four sixth-floor Grunts are defeated, continue to the stairs and climb to the seventh floor. N is waiting at the summit with the legendary dragon associated with the opposing version mascot. In Pokémon Black Version, the cutscene shows N befriending Zekrom. Zekrom recognizes N as its hero, and N leaves the tower with it.
This is a story scene, not a player-controlled legendary battle. You do not battle or capture Reshiram at Dragonspiral Tower in the normal Pokémon Black story sequence. Do not search the summit for a capture prompt or spend Poké Balls here. The player’s level 50 Reshiram encounter is later triggered in N’s Castle after the Light Stone has been obtained, which belongs to a later chapter.
After the cutscene, Cheren and Brycen join you as you return to the entrance. The tower portion is complete once N has departed and you regain control outside. You do not need to replay the upper floors or complete an additional legendary battle before proceeding.
- Reach Dragonspiral Tower’s seventh floor.
- Watch N awaken and leave with Zekrom.
- Do not expect a Reshiram battle or capture at the summit.
- Return to the tower entrance with Cheren and Brycen.
Finish the outside dialogue and accept the Relic Castle objective
Outside Dragonspiral Tower, speak through the full group conversation. Cheren, Brycen, Bianca, Cedric Juniper and Alder discuss N’s new alliance with Zekrom and the search for the other legendary dragon. Alder identifies Relic Castle in the Desert Resort as the next place to investigate.
The chapter ends here. The next destination is the Desert Resort near Route 4, reached by returning to Nimbasa City and traveling south through Route 4. The entrance to the newly accessible Relic Castle section is in the desert near the staircase surrounded by blue statues. Do not continue into that building as part of this chapter.
You do not receive the Light Stone in Dragonspiral Tower, and the tower does not contain the required Reshiram capture for Pokémon Black. The next chapter should cover the Relic Castle descent, the Alder and Ghetsis scene, the return to Nacrene Museum and Lenora’s Light Stone handoff. Save after the outside conversation if you want a clear checkpoint before beginning that sequence.
- Finish the complete conversation outside Dragonspiral Tower.
- Confirm that Relic Castle in the Desert Resort is the next objective.
- Return toward Nimbasa City and Route 4 when ready.
- Do not claim the Light Stone or begin the Reshiram encounter in this chapter.
Before you move on
- Brycen has been defeated and the Freeze Badge is in your possession.
- The Dragonspiral Tower entrance scene with Cedric Juniper has finished.
- All five Plasma Grunts on the fourth floor have been defeated.
- All four consecutive Plasma Grunts ordered forward by Giallo on the sixth floor have been defeated.
- You have reached the seventh-floor summit.
- The cutscene showing N awaken and leave with Zekrom has played.
- The outside discussion with Cheren, Brycen, Bianca, Cedric Juniper and Alder has finished.
- The game has directed you to investigate Relic Castle in the Desert Resort.
- You have not treated Dragonspiral Tower as the Reshiram capture location.
Relic Castle, Nacrene Museum Revisit & Final Midgame Tasks
After the Dragonspiral Tower sequence, investigate Relic Castle in the Desert Resort. The Light Stone is not inside the castle: after the Alder, Cheren and Ghetsis scene, Professor Juniper sends you to the Nacrene Museum, where Lenora gives you the Light Stone in Pokémon Black Version. Return to Icirrus City, use its eastern northeast-facing exit to reach Route 8, defeat Bianca before Tubeline Bridge, cross to Route 9 and enter Opelucid City.
1. Return to Relic Castle in the Desert Resort
After the Dragonspiral Tower events finish, follow Alder's instruction to investigate Relic Castle. The castle is in the Desert Resort, west of Nimbasa City and reached through Route 4. If Fly is available, fly to Nimbasa City, heal at the Pokémon Center and leave through the southern gate. Continue south on Route 4, then take the western road into the Desert Resort. You can also reach Route 4 from Castelia City if you prefer.
If you visited the Desert Resort earlier, use the eastern side of the desert as your landmark. Stay on the solid sand near the eastern wall and follow the slopes west until you see the statues surrounding Relic Castle's main entrance. Speak with Cheren outside before entering. The entrance that was blocked earlier is now open because the worker has cleared the sand.
The Desert Resort remains optional to explore beyond the route to the castle. Fight trainers if your party needs experience, but heal before entering Relic Castle and bring status cures and several healing items. Repels are useful if you want to focus on the story route.
- Dragonspiral Tower's summit sequence is complete.
- You have seven Badges and are ready for the next story sequence.
- You reached the Relic Castle entrance surrounded by statues.
- Your party is healed before descending.
2. Descend Relic Castle and view the Team Plasma scene
After speaking with Cheren, enter the castle and use the newly opened stairs on the first floor. The quicksand is the main navigation hazard. Walk across the upper sand instead of running; running can drop you into the wrong pits and force a detour. Use the intended sand traps by stepping into their centers when you need to descend.
On B1F, pass Ryoku, one of the Seven Sages, and defeat the Team Plasma Grunt. Step into the correct quicksand after the battle to reach B2F. On B2F, collect the Max Potion if desired, defeat the two Grunts, take TM30 Shadow Ball if you want it and use the southern quicksand to continue.
B3F requires a short loop rather than a direct drop. Defeat the nearby Grunt and use the quicksand on the left to reach B4F. The Sun Stone and hidden Super Potion are optional items in this lower detour. Take the stairs back up to B2F, then use the southern route to return to B3F. Collect the Max Revive if desired, defeat the other Grunt, circle around the quicksand, collect the PP Up and use the southwest patch to drop to B4F again.
Defeat the two Grunts on B4F and use the quicksand to reach B5F. At the bottom, Cheren joins you near Alder and Ghetsis. Watch the conversation. Ghetsis explains that the Light Stone or Dark Stone is not in Relic Castle and leaves after discussing Team Plasma's plan. There is no required legendary encounter and no boss battle here. When you leave the castle, Professor Juniper contacts you and urgently directs you to the Nacrene Museum.
- Speak with Cheren at the newly opened entrance.
- Walk across the quicksand and use the correct drops.
- Defeat the required Team Plasma Grunts on B1F through B4F.
- Complete the B3F detour if you want the optional items.
- Reach B5F and view the Alder, Cheren and Ghetsis scene.
- Leave the castle and receive Professor Juniper's call.
3. Visit the Nacrene Museum and receive the Light Stone
Fly to Nacrene City and go to the museum, which is attached to the Nacrene Gym. Professor Juniper, Cedric Juniper, Bianca and Alder are waiting outside. Speak with them and let the scene play out. Lenora then leaves the museum and gives you the version-specific stone.
In Pokémon Black Version, the reward is the Light Stone. Pokémon White Version receives the Dark Stone instead. The stone is not hidden in Relic Castle, and there is no additional castle puzzle required to obtain it. In the museum scene, Alder asks whether you are prepared to battle N if something happens to him; accept the dialogue and continue through the conversation.
Lenora and Alder identify Opelucid City as your next destination because its Gym specializes in Dragon-type Pokémon. Once the scene ends, return to Icirrus City with Fly if possible. You may travel back on foot, but Fly saves time and lets you heal before the next route.
- Reach the Nacrene Museum after the Relic Castle scene.
- Speak with the gathered characters and Lenora.
- Receive the Light Stone in Pokémon Black Version.
- Finish the dialogue directing you toward Opelucid City.
- Return to Icirrus City.
4. Leave Icirrus City through the eastern exit and cross Route 8
From Icirrus City, use the eastern, northeast-facing exit to enter Route 8. This is the route leading toward Tubeline Bridge. Follow the main path through the muddy marshes and water. Route 8 has several trainers and useful items, so battle enough opponents to keep your team prepared for the upcoming battles, but heal or use items if your party becomes worn down.
The Moor of Icirrus branches north from Route 8 and is optional for direct story progress. It contains additional trainers, items and encounters. A full exploration requires Strength for a blocked section, so skip the moor if you only want to continue toward Opelucid City. Return to Route 8 after exploring and follow the route toward the bridge.
When you try to enter Tubeline Bridge, Bianca stops you and begins a rival battle. Her party is around levels 38 to 40 and includes Stoutland, Musharna, a fully evolved elemental monkey and her fully evolved starter, with the exact choices depending on your earlier starter selections. Use a balanced party. Dark-, Bug- or Ghost-type attacks are useful against Musharna, while a sturdy Fighting- or Rock-resistant Pokémon helps against Stoutland and the elemental monkey. Bianca gives you a Full Restore after the battle.
- Use Icirrus City's eastern northeast-facing exit.
- Follow Route 8 toward Tubeline Bridge.
- Treat the Moor of Icirrus as optional for immediate progression.
- Heal before approaching the bridge entrance.
- Defeat Bianca and receive her Full Restore.
5. Cross Tubeline Bridge and watch the Ghetsis scene
Enter Tubeline Bridge after defeating Bianca. The bridge has no required maze or puzzle. Continue east across the bridge and battle the trainers if you need experience. A jogging Battle Girl gives you TM43 Flame Charge when you speak with her; this is an optional reward and is not required to continue.
At the eastern end of the bridge, Ghetsis and the Shadow Triad are waiting. Watch their conversation about the Light Stone and Team Plasma's plans. This is a required story scene, but it does not become a player-controlled battle. After Ghetsis and the Shadow Triad leave, continue east into Route 9.
- Enter Tubeline Bridge after Bianca's battle.
- Speak with the jogging Battle Girl if you want TM43 Flame Charge.
- Reach the eastern end of the bridge.
- Watch the Ghetsis and Shadow Triad scene.
- Continue into Route 9.
6. Cross Route 9 and reach Opelucid City
As you leave Tubeline Bridge, an Infielder gives you TM56 Fling near the gate. Route 9 is a short paved route with trainers using Pokémon such as Krokorok, Scraggy, Garbodor and Pawniard. Defeat trainers for experience, but heal your party if repeated battles leave you weakened.
Shopping Mall Nine is on the north side of Route 9. It is optional, but it is the best place in this section to restock healing items, Poké Balls and battle supplies before the final Gym stretch. Check the available shops and TMs if you have enough money. The main road continues east; there is no need to search for a second route or enter a blocked cave during this visit.
Leave Route 9 through the eastern gate to enter Opelucid City. Meet Alder and watch the Team Plasma-related dialogue near the entrance. In Pokémon Black Version, Drayden is the Opelucid Gym Leader; Iris holds that position in Pokémon White Version. Heal at the Pokémon Center, save the game and organize a party with reliable Ice- or Dragon-type attacks, along with a strong answer to Dragon Dance or other physical pressure. The next chapter begins with Drayden's Gym.
- Accept TM56 Fling near the Route 9 gate if desired.
- Battle or bypass Route 9 trainers according to your party's condition.
- Restock at Shopping Mall Nine if necessary.
- Leave Route 9 through the eastern gate.
- Reach Opelucid City and view the entrance dialogue.
- Heal, save and prepare to challenge Drayden.
Before you move on
- You reached B5F of Relic Castle and viewed the Alder, Cheren and Ghetsis scene.
- Professor Juniper contacted you after you left the castle.
- You visited the Nacrene Museum and received the Light Stone from Lenora.
- You returned to Icirrus City and used the eastern northeast-facing exit to Route 8.
- You defeated Bianca before crossing Tubeline Bridge.
- You viewed the Ghetsis and Shadow Triad scene at the eastern end of the bridge.
- You crossed Route 9 and entered Opelucid City.
- Your party is healed, stocked and ready for Drayden's Gym.
Opelucid City, Route 10 and Victory Road — Final Gym and League Access
In Pokémon Black Version, finish Opelucid City’s Team Plasma and legendary-dragon scenes, defeat Drayden for the eighth badge, cross Route 10 and its eight Badge Check Gates, then climb the original Nintendo DS Victory Road to the Pokémon League entrance.
Complete Opelucid City’s required story scenes
When you enter Opelucid City from Route 9 or Tubeline Bridge, Team Plasma’s speech must finish before the city’s final Gym can be used. In Pokémon Black, Opelucid has its futuristic appearance, and Drayden is the Gym Leader; Iris leads this Gym only in Pokémon White.
After the speech, follow Iris and Drayden into Drayden’s house. Listen to their explanation of Unova’s legendary dragons and the Light Stone or Dark Stone. When the conversation ends, Drayden leaves for the Gym. Heal at the Pokémon Center before entering. The Battle House and the city’s item-giving NPCs are optional, so use them only if you need extra training or supplies.
- The Team Plasma speech has ended.
- The legendary-dragon conversation in Drayden’s house is complete.
- The party is healed and has usable Dragon counters.
Navigate the Opelucid Gym
Enter the Gym and move across the dragon-shaped platforms. The platforms carry you between sections, and stepping on switches opens or changes the next route. Trainers stand along the path, so battle them when your party can safely handle the experience. If progress stops, look for an unused switch on a nearby platform; the intended route advances by activating the switches rather than by finding a hidden doorway.
The Gym’s Dragon specialization makes Ice-type attacks especially useful. Dragon-type attacks also work, but avoid relying on a single fragile Pokémon. Drayden’s Pokémon can survive a weak hit and punish an exposed counter, so keep a second answer ready and heal before the Leader battle.
- You have passed the Gym trainers or are prepared to battle them.
- At least two Pokémon can contribute against Dragon types.
- You have healing items available for the Leader fight.
Defeat Drayden and receive the eighth badge
Drayden uses Fraxure at level 41, Druddigon at level 41 and Haxorus at level 43. Haxorus knows Dragon Dance, which raises its Attack and Speed, so attack it promptly instead of giving it repeated free turns. Ice moves are effective, but do not assume one Ice user will win by itself. Use healing items, safe switches and any reliable status or stat-lowering options available to your team.
After the battle, you receive the Legend Badge and TM82, Dragon Tail. The Legend Badge is your eighth and final badge. Leave the Gym and Professor Juniper will meet you outside, give you the Master Ball, and direct you toward Route 10. Save after receiving it if you want a secure point before the final route.
- Drayden’s Fraxure, Druddigon and Haxorus are defeated.
- The Legend Badge is recorded as your eighth badge.
- You have received TM82 and the Master Ball.
Cross Route 10 and battle Cheren
Exit Opelucid City through the northern gate to enter Route 10. Battle the route Trainers for experience and collect items along the paths, but return to Opelucid City if your party is losing too much HP or PP. Route 10 is the last ordinary route before the League, so use it to check whether your team has answers for Normal, Flying, Fighting, Grass, Electric and other mixed opponents.
When you reach the bridge, Cheren and Bianca catch up with you. Cheren challenges you to test whether you are strong enough to face the dangers ahead. His team includes evolved Pokémon and the final evolution of the starter that counters your own starter, so use a dependable lead rather than an already weakened sweeper. After the battle, Bianca heals your party and gives you three Max Revives.
Continue through Route 10 to the Badge Check Gates. The eight rooms each verify one Gym Badge. Walk through every gate in sequence. If one does not open, check your Trainer Card and return to the appropriate Gym rather than searching for a secret alternate path.
- Cheren’s Route 10 battle is complete.
- Bianca has healed the party and provided the Max Revives.
- All eight Badge Check Gates have opened.
Climb the original Victory Road
The original Black and White Victory Road begins immediately north of the Badge Check Gates. It is a steep mountain divided between outdoor ledges, bridges and several cave sections. Progress by entering the available cave openings, climbing stairs, crossing bridges and using the slopes to reach higher sections. A slope can drop you to a lower level, so do not expect every descent to be reversible; look for the next cave entrance or staircase that continues upward.
Wild Pokémon and Trainers here are suitable for final experience adjustments. The area includes late-game species such as Fraxure, Heatmor, Durant and Deino, but catching them is optional and should not consume supplies needed for the League. Surf and Strength are useful for reaching optional items, including extra healing items and technical machines, but do not delay League access if you are only trying to reach the exit.
If HP, PP or status conditions become a problem, use the entrance route to retreat and heal. After the Cheren and Bianca sequence, the upper part of Victory Road provides a recovery point through Bianca’s healing, so take advantage of it before continuing into the final rooms.
- You have a balanced party rather than one overleveled Pokémon carrying the team.
- Healing items and PP are sufficient for the remaining climb.
- Optional Surf or Strength detours are not being mistaken for mandatory progression.
Reach the Pokémon League entrance
Continue upward through Victory Road’s connected cave and outdoor sections. The route eventually leads to the upper mountain and the exit toward the Pokémon League. Once outside, move north to the League entrance. This chapter ends when you have reached the League; beginning the Elite Four is covered in the next chapter.
Before entering the League, arrange a party that can answer Ghost, Dark, Psychic and Fighting specialists. Restore HP and PP, cure status conditions, purchase Revives, Full Heals and other recovery items, and save at the League entrance. You can Fly back to the League after reaching it, making this a useful staging point for final preparation.
- All eight badges are displayed on the Trainer Card.
- The character has reached the Pokémon League entrance after Victory Road.
- The party is healed, supplies are stocked and the game has been saved.
Before you move on
- Drayden has been defeated and the Legend Badge is your eighth badge.
- TM82, Dragon Tail, has been received from Drayden.
- Professor Juniper has given you the Master Ball outside the Gym.
- Cheren has been defeated on Route 10 and Bianca has completed the recovery sequence.
- All eight Badge Check Gates have been crossed.
- Your character is standing at the Pokémon League entrance after completing the original Victory Road.
The Pokémon League — Elite Four and the League Entrance
Bring a balanced party to the Pokémon League, defeat Shauntal, Grimsley, Caitlin and Marshal in any order, then enter the Champion’s Room. In the original Pokémon Black Version, the first-round Elite Four teams use four Pokémon each, with levels 48, 48, 48 and 50. There is no immediate Alder battle: N has already defeated him, and the Champion’s Room opens the N’s Castle sequence.
1. Prepare outside the League challenge
After reaching the Pokémon League through Victory Road and the Badge Check Gates, use the Pokémon Center in the League plaza before entering any Elite Four room. Buy healing supplies, including Hyper Potions or Full Restores, Revives and remedies for burn, paralysis, sleep, poison and confusion. Bring Poké Balls only if you need them for later story events; they are not useful against the Elite Four.
The four rooms open from the central plaza, and you may choose the order. A practical route is Shauntal, Grimsley, Caitlin, then Marshal, but no member becomes stronger because of the order you choose. Save after healing and before entering the first room. Aim for a party around the low-to-mid 50s if you want a safer run, because the battles immediately after the League include Pokémon from level 50 through level 54. The League itself is not the final battle of the story.
- Heal at the Pokémon Center in the League plaza.
- Buy enough healing items for four consecutive battles.
- Carry answers to Ghost, Dark, Psychic and Fighting types.
- Save before entering an Elite Four room.
2. Defeat Shauntal in the lower-left room
Enter the lower-left chamber from the plaza. The ghostly force carries you upward to Shauntal. Her first-round team is Cofagrigus at level 48, Jellicent at level 48, Golurk at level 48 and Chandelure at level 50.
Dark- and Ghost-type attacks are useful, but do not use one counter without checking the secondary typings. Jellicent is Water/Ghost, Golurk is Ground/Ghost and Chandelure is Fire/Ghost. Cofagrigus has Mummy, so a contact move can replace your Pokémon’s ability with Mummy, and Will-O-Wisp can cripple physical attackers. Jellicent can use Surf or Brine, while Golurk carries Earthquake and Chandelure has Fire Blast, Psychic and Shadow Ball.
Use a special attacker against Cofagrigus if possible, switch a burned physical attacker out rather than forcing it to continue, and keep a Water, Ground or Rock attack ready for Chandelure. Avoid relying on a single Dark type if it cannot safely handle Jellicent or Golurk.
- Use Dark or Ghost damage where the matchup is safe.
- Expect Will-O-Wisp and Mummy from Cofagrigus.
- Prepare separate answers for Jellicent, Golurk and Chandelure.
- Cure a burn if the affected Pokémon is needed for another room.
3. Defeat Grimsley in the upper-left room
Return to the central plaza, then enter the upper-left room. Conveyor belts carry you to Grimsley. His team is Scrafty at level 48, Liepard at level 48, Krookodile at level 48 and Bisharp at level 50.
Fighting-type attacks are the most direct answer, and Bug-type attacks also help. Do not use Psychic attacks: Dark Pokémon are immune to them. Liepard opens with disruptive options such as Fake Out and can use Aerial Ace. Krookodile has Intimidate and carries Ground-type attacks, so a special attacker or a Water, Grass or Ice move can be preferable to repeatedly switching physical attackers into it. Bisharp is particularly vulnerable to Fighting attacks, but it can use Night Slash, X-Scissor, Metal Claw and Aerial Ace.
Watch the order in which you send out physical attackers. Intimidate lowers Attack when Krookodile enters, while Scrafty’s Moxie can raise its Attack after it scores a knockout. Use healing items before a Pokémon becomes vulnerable to a second hit rather than trying to finish the room with a weakened team.
- Use Fighting or Bug attacks.
- Never depend on Psychic attacks against this team.
- Bring a Water, Grass or Ice answer for Krookodile.
- Be ready for Intimidate and Moxie.
4. Defeat Caitlin in the upper-right room
Enter the upper-right room from the central plaza. The floating platform carries you to Caitlin. Her first-round team is Reuniclus, Musharna and Sigilyph at level 48, followed by Gothitelle at level 50.
Dark- and Bug-type attacks are effective against the Psychic specialists. Reuniclus has Focus Blast, Energy Ball and Thunder, so do not assume every Dark type can switch in safely. Musharna can use Reflect, which reduces physical damage for the rest of the battle if you allow it to remain active. Sigilyph is Psychic/Flying and carries Ice Beam and Air Slash, so Ground attacks do not work against it. Gothitelle can use Calm Mind, Psychic, Thunderbolt and Shadow Ball.
If possible, remove Musharna before Reflect is established. Use a strong Dark or Bug attacker, or apply enough pressure that Caitlin does not get several free turns to boost. Keep an Electric, Rock, Ice or Dark option for Sigilyph, and do not leave a fragile attacker in front of Gothitelle after Calm Mind.
- Bring reliable Dark or Bug damage.
- Prevent Musharna from freely setting Reflect.
- Use non-Ground coverage against Sigilyph.
- Stop Gothitelle from accumulating Calm Mind boosts.
5. Defeat Marshal in the lower-right room
Enter the lower-right chamber after returning to the plaza. The conveyor platform carries you to Marshal. His team is Throh, Sawk and Conkeldurr at level 48, followed by Mienshao at level 50.
Psychic- and Flying-type moves are effective against Fighting types, but Marshal’s coverage makes careless Flying Pokémon risky. Throh has Storm Throw, Bulldoze, Stone Edge and Payback. Sawk has Sturdy, so a full-health Sawk survives an attack that would otherwise knock it out; account for the extra turn before relying on a one-hit knockout. Conkeldurr also carries Stone Edge, and Mienshao is fast with Jump Kick, U-turn, Rock Slide and Retaliate.
Use a durable Psychic attacker or a Pokémon that can deliver Flying damage without being vulnerable to Stone Edge or Rock Slide. A status move can help control Mienshao if your faster options are weakened. Keep your fastest healthy Pokémon available for the final fight rather than spending it early against a slower target.
- Use Psychic or Flying attacks with care.
- Expect Stone Edge and Rock Slide.
- Account for Sawk’s Sturdy ability.
- Preserve a fast, healthy answer for Mienshao.
6. Manage healing during the four-battle gauntlet
After each victory, the game returns you to the central plaza and lights that member’s tile. You may save and enter another room, but do not plan on returning to the Pokémon Center or using a PC between Elite Four battles. Heal with items, revive fainted Pokémon when their matchup is important, and cure status conditions before they decide the next fight. The League plaza’s Pokémon Center is for preparation before the challenge, not for resetting your party between rooms.
If the first room leaves several Pokémon fainted or out of useful PP, losing and restarting is usually more efficient than spending every item. If you do lose, rebuild the team at the League Pokémon Center, change the order of the rooms and lead with a different answer to the matchup that caused the failure. After all four victories, the central tiles activate and the statue becomes the route to the Champion’s Room.
- Use items rather than expecting a Pokémon Center between battles.
- Save after victories if you want to preserve progress.
- Restart and change the battle order if the party is badly depleted.
- Confirm that all four central tiles are lit.
7. Enter the Champion’s Room and begin N’s Castle
When Shauntal, Grimsley, Caitlin and Marshal have all been defeated, step onto the activated central lift and go to the Champion’s Room. In the original Pokémon Black Version, Alder is already defeated when you arrive. N has won the battle using Zekrom, and the game does not begin a normal Champion fight at this point.
Watch the scene as N summons Team Plasma’s castle and it rises around the Pokémon League. Enter the castle through the newly connected route. The Gym Leaders occupy the sages while you advance through the castle, so continue forward rather than searching for a fifth League opponent. This chapter ends when the castle sequence has started; the next chapter covers the castle route, the required level 50 Reshiram encounter, N’s battle and the immediate Ghetsis confrontation.
- All four first-round Elite Four members are defeated.
- The central lift carries you to the Champion’s Room.
- N’s victory over Alder is shown instead of an Alder battle.
- N’s Castle rises and connects to the League.
- The story has advanced into the castle sequence.
Before you move on
- Shauntal, Grimsley, Caitlin and Marshal have each been defeated once.
- The four Elite Four tiles in the central plaza are lit.
- The player has taken the central lift to the Champion’s Room.
- N’s defeat of Alder and the castle’s arrival have occurred.
- The player has entered the connected N’s Castle route, confirming completion of the League entrance chapter.
N's Castle — Reshiram, N and Ghetsis
After defeating the first-round Elite Four in the original Nintendo DS release of Pokémon Black Version, enter the Champion's room to trigger N's Castle. In Black, N controls Zekrom and the Light Stone awakens a level 50 Reshiram for you to capture. The normal story route requires this capture before N's battle can begin. If Reshiram is defeated or you flee, the encounter returns immediately in N's Castle as long as there is room in your party or PC Boxes. If both are completely full, the game allows the story to continue and moves the encounter to Dragonspiral Tower after Ghetsis is defeated and the Hall of Fame has been entered. N heals your party after the capture, then you fight N and Ghetsis in succession.
Enter N's Castle and prepare at the League
Defeat all four members of the first Pokémon League Elite Four, then return to the central plaza. Examine the statue in the middle and use it to reach the Champion's room. Alder has already lost to N, so there is no normal Champion battle against Alder at this point. N's Castle rises around the League, and a staircase from the Champion's room leads inside.
Heal at the Pokémon League before examining the statue and save your game. Bring Ultra Balls or other reliable Poké Balls, Revives, Full Restores, and status-curing items. A party around the Elite Four's level range is workable, but Ghetsis's level 54 Hydreigon is the strongest opponent in this sequence, so make sure you have a dependable answer for it.
Leave an open party slot if you want Reshiram to join without replacing a team member. A full party is still acceptable because the game can offer to send one of your Pokémon to the PC after the capture. Do not fill every PC Box unless you deliberately want to use the exceptional delayed-capture route.
- Defeat the first-round Elite Four.
- Heal and save at the Pokémon League.
- Use the central statue to reach the Champion's room.
- Carry capture and recovery items.
- Leave party or PC space unless deliberately using the delayed-capture exception.
Climb through the castle and use the healing room
When you enter the castle, six of the Seven Sages are confronted by the Unova Gym Leaders. The Gym Leaders hold them back, allowing you to continue without fighting that group. Follow the stairways and corridors upward.
On the second floor, a Shadow Triad member directs you to the central room. Speak with Anthea, the woman on the left, to fully heal your Pokémon. Concordia, beside her, provides story information but is not required for progression. This is the first recovery point inside the castle.
On the third floor, enter the first room to use the PC. Reorganize your party and choose the Pokémon you want available against N and Ghetsis. A Team Plasma Grunt in the west room gives you an Ultra Ball, and another Grunt can warp you back to the Pokémon Center in the Elite Four plaza. If you leave, the Grunt at the League can return you to the castle, so you do not need to replay the Elite Four.
Continue to the fourth floor. You may collect the Max Potion, Max Revive, Rare Candy and Full Restore found along the route, but they are optional. N's room is on this floor; the path to the throne room continues upstairs.
- Pass the opening Sage scene without stopping for battles.
- Heal with Anthea.
- Use the castle PC to finalize the party.
- Use the League warp if you need supplies or a different team.
- Continue to the fifth-floor throne room.
Capture Reshiram in Pokémon Black Version
Ghetsis stops you before the throne room and sends you inside. N calls Zekrom, then the Light Stone leaves your Bag and awakens Reshiram. The encounter is Reshiram at level 50, Dragon and Fire type, with the ability Turboblaze.
Save before triggering the encounter. You can try a Quick Ball on the first turn. If it fails, lower Reshiram's HP carefully and use sleep or paralysis before throwing Ultra Balls. Reshiram has a comparatively generous legendary catch rate, but avoid unnecessary critical-hit risks and do not use attacks that may cause recoil or uncontrolled damage.
On the normal route, the game will not let you proceed to N until Reshiram has been caught. If you knock it out or run away, it returns immediately in N's Castle for another attempt, provided there is space in your party or PC Boxes. This is not a one-chance encounter.
There is one storage exception. If your party and every PC Box are full when the encounter is resolved, the story can continue without placing Reshiram immediately. In that case, Reshiram becomes available at Dragonspiral Tower after Ghetsis is defeated and you later enter the Hall of Fame. This exception postpones the capture; it does not remove Reshiram from the game.
After catching Reshiram, decide whether to add it to the party or send it to the PC. If you add it, Reshiram is moved to the first party slot and will lead the following battle against N.
- Save before awakening Reshiram.
- Capture the level 50 Reshiram in N's Castle on the normal route.
- Retry immediately if you flee or knock it out.
- Use the Dragonspiral Tower delay only with a completely full party and full PC Boxes.
- Choose whether Reshiram enters the party or goes to storage.
Use N's healing and defeat N
After Reshiram is captured, N fully heals your party. You do not need to spend items recovering damage or status conditions from the capture battle. If Reshiram joined the party, it is placed first and opens the battle against N's level 52 Zekrom.
N's remaining Pokémon are level 50 Carracosta, Vanilluxe, Archeops, Zoroark and Klinklang. Ground or Dragon attacks are useful against Zekrom, while Ground and Fighting coverage help against Klinklang. Carracosta is vulnerable to Grass, Electric, Fighting and Ground attacks, but its Sturdy ability can leave it at one HP, after which Aqua Jet may finish a weakened Pokémon. Vanilluxe can set Hail and use Blizzard, so remove it promptly with Fire or Fighting damage.
Archeops is fast and can hit hard with Stone Edge, Acrobatics, Dragon Claw and Crunch. Its Defeatist ability reduces its offensive power below half health, so bringing it under that threshold makes it safer to handle. Zoroark uses Illusion and may initially look like another Pokémon, but it remains Dark type and is vulnerable to Fighting and Bug attacks. Klinklang uses Flash Cannon, Metal Sound, Hyper Beam and Thunderbolt, so a strong Fire, Fighting or Ground attacker is useful.
N can use Full Restores. Keep several Pokémon healthy rather than spending the entire party on one sweep. If Reshiram is in front, remember that N's Zekrom is level 52 and knows Fusion Bolt, Zen Headbutt, Giga Impact and Light Screen. Reshiram is helpful, but preserve backup answers for the battle immediately afterward.
- Use the automatic full recovery after Reshiram.
- Defeat N's level 52 Zekrom.
- Defeat Carracosta, Vanilluxe, Archeops, Zoroark and Klinklang at level 50.
- Account for Zoroark's Illusion and Archeops's Defeatist.
- Keep healthy Pokémon and recovery items for Ghetsis.
Defeat Ghetsis immediately after N
Ghetsis challenges you as soon as N is defeated. There is no ordinary Pokémon Center or full-party healing break between the two battles. Use Revives, Full Restores and other healing items during the fight whenever they preserve a key counter or prevent a likely knockout.
Ghetsis uses level 52 Cofagrigus, Bouffalant, Seismitoad, Bisharp and Eelektross, followed by a level 54 Hydreigon. Cofagrigus knows Toxic, Shadow Ball, Protect and Psychic. Avoid relying on contact abilities against it if Mummy would harm your strategy, and do not let Toxic damage accumulate while Protect stalls for turns.
Bouffalant is a powerful physical attacker with Head Charge, Wild Charge, Earthquake and Poison Jab. Use a physically sturdy answer or defeat it quickly. Seismitoad is Water and Ground type, making Grass attacks four times effective, but it also carries Sludge Wave, so do not assume every Grass-type can switch in safely.
Bisharp is Dark and Steel type and is four times weak to Fighting attacks. Its moves are Night Slash, Stone Edge, X-Scissor and Metal Burst. Metal Burst can punish a damaging attack if Bisharp survives, so use a move that reliably knocks it out or weaken it safely before committing to a strong hit.
Eelektross has Levitate, so ordinary Ground attacks do not hit it. It uses Crunch, Flamethrower, Acrobatics and Wild Charge. Use strong neutral or super-effective attacks from another type, apply status, or use a Ground attack from a Pokémon with an ability that bypasses Levitate.
Hydreigon is level 54 and knows Dragon Pulse, Fire Blast, Surf and Focus Blast. It has broad special coverage and Levitate. A sturdy Pokémon with high Special Defense is valuable; avoid sending a vulnerable Ice-type into Fire Blast, and do not rely on a single Dragon-type attacker that may lose to Dragon Pulse or Focus Blast.
If Ghetsis defeats you, you return to the Pokémon League without replaying the Elite Four. Heal and restock there, adjust your party at the PC, then use the Team Plasma member in the League Pokémon Center to return to N's Castle for another attempt.
- Defeat Ghetsis immediately after N.
- Handle five level 52 Pokémon and level 54 Hydreigon.
- Use Grass carefully against Seismitoad because of Sludge Wave.
- Do not depend on ordinary Ground attacks against Eelektross.
- Use healing items during the battle and preserve a Hydreigon answer.
- Return through the League warp if you lose.
Confirm the chapter endpoint
This chapter is complete when N and Ghetsis have both been defeated. On the normal route, Reshiram must have been captured in N's Castle before N's battle. If it was defeated or you fled, capture it during the immediate retry.
If the party and every PC Box were full, the delayed-capture exception is complete for this chapter once the story proceeds past Ghetsis. Reshiram is not required to be caught before the end of this chapter in that exceptional case; it will be waiting at Dragonspiral Tower after Ghetsis is defeated and after you later enter the Hall of Fame.
After Ghetsis falls, Alder and Cheren arrive and the closing sequence begins. N leaves with Zekrom, and the castle disappears after the ending sequence. Do not add a conventional battle against Alder, the first credits, the return to Nuvema Town, Looker's postgame investigation, the National Pokédex upgrade or eastern Unova travel here. Those belong to later chapters.
- Reshiram was captured at N's Castle, or the full-storage exception deferred it.
- N's level 52 Zekrom-led team was defeated.
- Ghetsis's five level 52 Pokémon and level 54 Hydreigon were defeated.
- The immediate closing scene has begun or finished.
- Do not repeat the credits or postgame activation in this chapter.
Before you move on
- Reshiram has been captured in N's Castle, unless the full-party-and-full-PC exception postponed the encounter.
- N's level 52 Zekrom-led team has been defeated.
- Ghetsis's five level 52 Pokémon and level 54 Hydreigon have been defeated.
- The immediate closing scene following Ghetsis's defeat has played or is in progress.
First Credits and Postgame Activation — Return to Nuvema Town
After Ghetsis is defeated at the end of the original Pokémon Black Version story, the first credits play instead of a normal Champion and Hall of Fame sequence. When the game resumes, control returns to Nuvema Town. Meet Looker, receive the Super Rod and begin the investigation into the remaining Seven Sages. Then leave the house so Cedric Juniper can upgrade the Pokédex to National Mode. Stop here with the postgame route network unlocked and the next chapter ready to begin.
Finish the closing scenes and first credits
This chapter begins after you have already defeated N and Ghetsis in N’s Castle. Do not return to the Pokémon League or repeat the Elite Four. Ghetsis’s defeat is the ending battle for the first story completion, and the game proceeds directly into its closing scenes.
Watch the scenes following the battle. Alder and Cheren deal with the immediate aftermath while N departs with Zekrom. The first credits then play. This is not the ordinary Champion sequence found in many other Pokémon games: you do not battle Alder before these credits, and the game does not place you in the Hall of Fame at this point. The later Alder battle and the stronger Elite Four rematches are optional postgame content.
Allow the credits and ending scenes to finish completely. When the save file resumes, the player character is back in the bedroom of the Nuvema Town home. This return is the handoff from the main story to the postgame.
- Ghetsis has already been defeated.
- The first credits have finished.
- Control has returned to the bedroom in Nuvema Town.
- No second Elite Four run has been started.
Meet Looker downstairs
Walk downstairs from the bedroom. Your mother’s apparent twin is waiting inside the house, but the visitor soon reveals himself as Looker, an officer of the International Police. This is Looker’s first postgame appearance in the original Black Version, not a scene from Black 2 or White 2.
Speak with Looker and listen to his explanation. Team Plasma has been defeated, but several of the Seven Sages remain at large across Unova. Looker asks for your help locating them so they can be brought to justice. The Sage investigation is a postgame objective and does not need to be completed for this chapter’s handoff.
Looker gives you the Super Rod during this visit. Keep it in your Key Items because it is useful for expanding the postgame Pokédex and finding aquatic species, but do not leave Nuvema Town to begin the eastern route tour yet. The route-by-route investigation and new wild encounters belong to the next chapters.
- Go downstairs in the Nuvema Town house.
- Allow the visitor to reveal himself as Looker.
- Accept Looker’s Seven Sages investigation.
- Receive the Super Rod.
Leave the house and receive National Mode
After Looker’s conversation is complete, leave the house and step outside in Nuvema Town. Cheren and Bianca are present for the immediate postgame discussion. Their conversation confirms that the crisis has ended and points toward the wider world now available after the story.
Once the Looker scene has been completed and you have gone outside, Cedric Juniper approaches. Cedric is Professor Juniper’s father and the researcher associated with the expanded Pokédex functions. Speak with him to upgrade the Pokédex to National Mode. The upgrade is automatic at this stage; it does not require you to complete the Unova Pokédex first.
National Mode records Pokémon from outside the original Unova regional listing and supports the broader postgame progression. It does not mean that the National Pokédex is complete, and it does not award completion prizes by itself. The immediate requirement is only to trigger Cedric’s upgrade after meeting Looker and exiting the house.
If Cedric does not approach, go back inside and confirm that Looker’s full conversation has finished, then leave the house again. The required order is: resume in Nuvema Town, meet Looker downstairs, exit the house and then speak with Cedric outside.
- Leave the house after Looker’s visit.
- Confirm that Cheren and Bianca’s postgame scene occurs.
- Speak with Cedric Juniper outside.
- Confirm that the Pokédex has changed to National Mode.
Save and stage the next postgame chapter
Save after Cedric finishes the upgrade. At this point, the first story completion and immediate postgame activation are complete. You should have the Super Rod, the Seven Sages investigation from Looker and National Mode in the Pokédex.
The eastern postgame network is now available for the following chapters. This includes the routes leading east from Opelucid City, Route 11, Village Bridge, Route 12, Route 13, Lacunosa Town, Undella Town, Undella Bay and the approaches to Giant Chasm. Marvelous Bridge and the route toward Black City are also part of the wider postgame travel network, but they are not walkthrough objectives here.
Do not begin the Route 11–13 journey, search Giant Chasm or enter Black City as part of this chapter. Those areas require their own directions for landmarks, trainers, optional captures and postgame encounters. End with the player outside or inside Nuvema Town after receiving National Mode, ready to travel toward the eastern routes in the next chapter.
- Save after receiving National Mode.
- Keep the Super Rod in your Key Items.
- Confirm that Looker’s Seven Sages investigation is active.
- Stop before beginning the Route 11–13 and Giant Chasm exploration.
- Leave Black City and the later Alder challenge for their assigned postgame chapters.
Before you move on
- The player has completed the N and Ghetsis battles in the previous chapter.
- The first credits have played.
- The game has returned the player to the bedroom in Nuvema Town.
- Looker has been identified downstairs in the player’s house.
- Looker has assigned the Seven Sages investigation.
- The Super Rod has been received.
- The player has left the house after Looker’s visit.
- Cedric Juniper has upgraded the Pokédex to National Mode.
- The game is saved after the upgrade.
- The chapter ends before Route 11–13, Giant Chasm, Black City or the later Alder challenge begins.
References for this chapter
Immediate Post-Champion: Routes 11–13, Giant Chasm and Mid-Postgame
Begin this chapter after the first credits, the return to Nuvema Town, the National Pokédex upgrade and Looker’s initial Seven Sages investigation. National Mode is already active. Travel from Opelucid City through Route 11, Village Bridge, Route 12 and Lacunosa Town, then use Route 13 to reach Giant Chasm. The Giant Chasm story event opens the cave containing the optional Level 75 Kyurem encounter. Finish in Giant Chasm, Lacunosa Town or Undella Town, ready to continue into the remaining eastern postgame areas.
Prepare in Nuvema Town and leave through Route 11
Start with the postgame Nuvema Town scenes already complete. You do not need to repeat Looker’s introduction, receive the Super Rod again or trigger Cedric Juniper’s National Pokédex upgrade. Heal your party, reorganize your team and buy recovery items before leaving. Surf is useful on later branches, while Strength opens optional item paths and a shortcut on Route 13. Waterfall is useful for optional rewards on Route 11, but it is not required to reach Village Bridge or continue the route.
Fly to Opelucid City and use the Pokémon Center if necessary. Leave through the eastern gate to enter Route 11. This is the correct starting point for this chapter. The route connects Opelucid City to Village Bridge in the original Black and White games, and its trainers provide useful experience for a team preparing for the stronger postgame areas.
- Begin with National Mode already active.
- Heal and restock before leaving Nuvema Town or Opelucid City.
- Prepare Surf and Strength if you want the optional item routes.
- Enter Route 11 through Opelucid City’s eastern exit.
Cross Route 11 and decide whether to use Waterfall
Follow the route east past the first trainers and bridges. The required path continues toward Village Bridge, so you can ignore the side paths if your party is already in good condition. Battle trainers for experience when your team can safely handle them, but avoid spending most of your healing items before reaching the next recovery point.
If you brought Waterfall, Surf north from the river and climb the northern waterfall. The western ledge contains a hidden Max Revive, and the eastern ledge contains TM50 Overheat. You can also Surf east and south, descend the southern waterfall and reach Pokémon Ranger Crofton and the Protector. These rewards are optional. Without Waterfall, remain on the main land route and continue east across the bridge toward Village Bridge.
- Continue east across Route 11.
- Collect TM50 Overheat and the hidden Max Revive only if you brought Waterfall.
- Treat the Protector and other side-route rewards as optional.
- Reach Village Bridge.
Use Village Bridge’s healing house
Village Bridge does not contain a Pokémon Center. The northeastern house has a woman who restores your party, so use her service before entering Route 12 if the route trainers have caused significant damage. This house is the most convenient recovery point between Opelucid City and Lacunosa Town.
The bridge’s residents, restaurant activity and local conversations are optional. The restaurant can provide extra battles and prize money, but it is not needed for the postgame route. Cross the bridge and take the eastern exit to Route 12 when you are ready.
- Confirm that your party is healed before leaving Village Bridge.
- Skip the restaurant and resident errands if you only want required progression.
- Enter Route 12 through the eastern exit.
Cross Route 12 and reach Lacunosa Town
Follow Route 12 east through the hills and tall grass. The route has trainers and optional items, including a Full Heal, TM53 Energy Ball and a Revive. Collect them if they are useful, but do not detour through every patch of grass if you are conserving time or supplies.
Continue east to Lacunosa Town. Heal at the Pokémon Center and purchase Ultra Balls, status cures, Revives and stronger healing items before heading toward Giant Chasm. The town’s residents explain the local story about the monster associated with Giant Chasm; these conversations add context but do not replace the route directions or unlock a separate mandatory task.
Lacunosa Town is a convenient staging point. If you intend to capture Kyurem immediately, place a Pokémon with Sleep or paralysis near the front of your party and keep a controlled-damage attacker available. If you are postponing the encounter, simply stock supplies and continue east through Route 13.
- Cross Route 12 and reach Lacunosa Town.
- Heal and restock at the Pokémon Center.
- Prepare status moves and capture supplies if attempting Kyurem.
- Do not treat the town’s monster-story dialogue as a required quest.
Enter Route 13 and reach the Giant Chasm entrance
Leave Lacunosa Town through the eastern gate to enter Route 13. The route connects Lacunosa Town and Undella Town and also provides access to Giant Chasm. Follow the main route north toward the Giant Chasm entrance. Route 13 has several branches, cliffs, beaches and Surf paths, so use the landmarks and signs rather than trying to collect every item on the first visit.
A Strength boulder near the central route can be pushed into a hole to create a useful shortcut for later trips. Open it if you expect to return between Lacunosa Town, Giant Chasm and Undella Town, but the shortcut is not required for the first traversal. Surf reaches additional items, including the Prism Scale and TM29 Psychic, while the western house can provide the Splash Plate and Draco Plate. These are optional and should not take priority over healing items and Ultra Balls.
Route 13 also contains the Wingull Gram errand. Speak with the girl near Wingull, collect the three Grams from the people she identifies around the route and return them to Wingull to receive TM89 U-turn. The errand is optional and can be completed before or after Giant Chasm.
- Leave Lacunosa Town through the eastern gate.
- Follow Route 13 north toward Giant Chasm.
- Open the Strength shortcut only if you want easier repeat access.
- Complete the Wingull Gram errand only if you want TM89 U-turn.
Cross the Giant Chasm entrance cave
Enter Giant Chasm from the northern part of Route 13. In the entrance cave, use Strength to move boulders and open optional paths to valuable items. Surf may also be used around obstructions. The required route continues through the cave toward the crater forest, so do not delay progress while searching for every Star Piece or Comet Shard.
Continue until you reach the open forested crater. The original Black and White layout is different from the Giant Chasm area in Black 2 and White 2. Do not follow directions involving the Plasma Frigate, Kyurem’s level 70 sequel encounter or the sequel’s deeper cave layout.
- Enter Giant Chasm from Route 13.
- Use Strength or Surf where needed to pass the entrance cave.
- Continue into the crater forest.
- Ignore Black 2 and White 2 instructions.
Cross the crater forest and trigger the freeze
In the crater forest, follow the tree-lined paths and ledges toward the central pit. The route contains optional items such as a Max Elixir, Max Potion, Revive, Carbos, TM13 Ice Beam, Full Heal, Max Revive and TM03 Psyshock. Collect them when convenient, but the important objective is reaching the center of the forest.
When you approach the central pit, the area flash-freezes. Snow covers the forest and opens the northeastern route to the inner cave. This freeze is the progression event that makes the original games’ Kyurem room accessible. If your party is worn down, leave through Route 13, heal in Lacunosa Town and return before entering the inner cave.
- Follow the forest paths to the central pit.
- Trigger the flash-freeze event.
- Use the newly opened northeastern path.
- Heal before the legendary encounter if necessary.
Capture Kyurem or postpone the optional battle
Enter the northeastern inner cave after the forest freezes. Kyurem appears as a Level 75 Dragon and Ice-type Pokémon in the original Pokémon Black Version. Capturing it is optional and does not block Undella Town, Black City or the remaining postgame route.
Save before interacting with Kyurem. Sleep or paralysis improves the capture attempt, and a controlled-damage move is safer than repeatedly using a strong super-effective attack. Fighting-, Rock- and Dragon-type attacks exploit weaknesses, but switch to weaker damage once Kyurem’s HP is low. Keep a Pokémon with sufficient HP available because Kyurem can punish weakened targets with Endeavor.
Use Ultra Balls or Dusk Balls in the cave. If Kyurem defeats the party or is knocked out accidentally, reset to the save made before the encounter. You may also leave the cave and return later with more supplies. After the encounter is resolved, explore the remaining forest items if desired and exit through the route you used to enter.
- Save before battling Kyurem.
- Use status and controlled damage to reduce capture risk.
- Capture the Level 75 Kyurem or deliberately postpone it.
- Reset if the encounter ends badly and you want another attempt.
Finish the chapter at a practical staging point
After Giant Chasm, return west through Route 13 to Lacunosa Town if you need healing, or continue south through Route 13 to Undella Town. The Route 13 Strength shortcut makes repeat travel easier, but opening it is not part of the required completion condition.
Before beginning the next chapter, heal, restock Full Restores or equivalent healing items, Revives, status cures and capture supplies, and keep Surf available for Undella Bay. Stronger trainers and optional legendary investigations are ahead, so use the new eastern routes for experience rather than entering the next area with a weakened party.
Black City is reached later through the eastern route network. It is not located on Route 13 and is not required to complete this chapter.
- Reach Giant Chasm and trigger the forest freeze.
- Capture Kyurem or postpone the optional encounter.
- Reach Lacunosa Town or continue to Undella Town.
- Heal, restock and save before starting the next postgame section.
Before you move on
- The previous chapter’s Nuvema Town sequence is complete.
- National Mode is already active and Looker’s investigation has already been accepted.
- You have entered Route 11 from Opelucid City.
- You have crossed Route 11, Village Bridge and Route 12 and reached Lacunosa Town.
- You have traveled through Route 13 and reached the Giant Chasm entrance.
- The Giant Chasm crater forest has flash-frozen and the northeastern inner cave is accessible.
- Kyurem has been captured or the optional encounter has intentionally been postponed.
- You are healed and positioned in Giant Chasm, Lacunosa Town or Undella Town for the next postgame section.
Undella Bay, Black City and Optional Postgame Milestones
After the first credits and the National Pokédex upgrade, travel through Route 13 to Undella Town and enter Undella Bay. This is the required endpoint for this chapter. The Abyssal Ruins, Black City, the remaining Seven Sage investigation, optional legendary Pokémon, Cynthia, the Riches family and the stronger Pokémon League are optional postgame activities. This chapter covers the original Pokémon Black Version for Nintendo DS, not Pokémon Black 2.
1. Reach Undella Town and enter Undella Bay
Start from Giant Chasm, Lacunosa Town or another location with Fly access. From Giant Chasm, leave through the southern exit to Route 13, then follow Route 13 south toward Undella Town. If you are in Lacunosa Town, leave through the eastern route connection and continue along Route 13. Heal at the Undella Town Pokémon Center before exploring the coast.
On the plateau near the easternmost villa, speak to the girl standing in front of Caitlin’s Villa. She gives you HM06 Dive in the original Pokémon Black and White games. This is the required correction for the Dive location: Cynthia stays inside Caitlin’s Villa, but the girl outside the villa is the NPC who hands over HM06.
Teach Dive to a compatible Pokémon if you want to explore the underwater ruins. Leave Undella Town through the beach on the eastern side and use Surf to enter Undella Bay. Reaching the bay completes the required milestone for this chapter; you do not need to enter the Abyssal Ruins or catch a legendary Pokémon.
Cynthia can be challenged inside Caitlin’s Villa after you have entered the Hall of Fame. Her battle is optional and is separate from collecting Dive. The Riches family’s villa also contains optional high-level battles and an item buyer who pays well for Relic items.
- Reach Undella Town through Route 13.
- Heal at the Pokémon Center.
- Collect HM06 Dive from the girl in front of Caitlin’s Villa.
- Surf east from town and enter Undella Bay.
- Treat Cynthia and the Riches family as optional activities.
2. Explore the Abyssal Ruins for optional treasures
The dark patches in Undella Bay are Dive entrances to the Abyssal Ruins. The ruins contain no wild Pokémon, Trainers or required boss battle. Their rewards include Relic items that can be sold to the buyer in Undella Town, along with Plates and other valuable items.
Each dive allows up to 500 steps before a current returns you to the surface. The game warns you as the limit approaches. Plan several short visits instead of trying to collect everything in one attempt.
To reach the second floor, follow the direct route from the entrance to the central pillar and interact with it before the first-floor movement limit is exceeded. The route is deliberately restrictive, so do not detour for every item if your priority is reaching the upper floors. On the second floor, use Flash at the marked purple pillar. On the third floor, use Strength at the marked purple pillar to open the route to the fourth floor.
Flash and Strength are needed for the upper-floor paths, but neither move is required merely to enter Undella Bay. If you mainly want money, collect Relic items from the route you can reach safely and leave before the warning becomes urgent.
- Use Dive at a dark patch in Undella Bay.
- Bring Pokémon that know Flash and Strength for the upper floors.
- Collect Relics and Plates as optional rewards.
- Leave and re-enter rather than risking the step limit.
3. Pursue the optional Swords of Justice
Cobalion is found in the Guidance Chamber of Mistralton Cave. Enter Mistralton Cave from Route 6, use Surf to cross the water and work through the boulder sections to reach the deeper chamber. After completing the Cobalion encounter, Virizion becomes available in the Rumination Field on the eastern side of Pinwheel Forest, and Terrakion becomes available in the Trial Chamber of Victory Road.
These encounters are optional and do not affect Undella Bay, Black City or the stronger Pokémon League. Save before each stationary encounter. Lower the target’s HP carefully, use sleep or paralysis if available and carry suitable Poké Balls. Avoid super-effective attacks that could cause an accidental knockout.
- Complete Cobalion in Mistralton Cave if desired.
- Visit Rumination Field in Pinwheel Forest for Virizion.
- Visit the Trial Chamber in Victory Road for Terrakion.
- Save before each capture attempt.
4. Activate and catch Tornadus
In Pokémon Black Version, Tornadus is the version-exclusive roaming member of the Forces of Nature. First earn the Legend Badge in Opelucid City. Then enter the Route 10 gate and speak to the female gatekeeper behind the counter; she tells you about the abnormal storm on Route 7.
Travel to Route 7 while the storm is active and approach the house near the middle of the route. The woman inside explains the story of the storm. When you leave, Tornadus appears briefly and begins roaming around Unova at level 40. Use the weather notices on gate bulletin boards and route transitions to track the storm. Weaken Tornadus and use status moves or suitable Poké Balls when you encounter it.
Landorus requires both Tornadus and Thundurus in the party at the Abundant Shrine on Route 14. Because Pokémon Black provides Tornadus while Pokémon White provides Thundurus, a Black cartridge needs a trade from Pokémon White to activate Landorus. These are collection goals, not story requirements.
- Earn the Legend Badge.
- Speak to the female gatekeeper in the Route 10 gate.
- Trigger the Route 7 storm and Tornadus encounter.
- Trade for Thundurus if you want to activate Landorus.
- Save and use status moves during capture attempts.
5. Return to Giant Chasm for Kyurem
If Kyurem was not caught earlier, Fly to Lacunosa Town and travel north through Route 13 to Giant Chasm. Enter the cave and follow the route into the deeper area where the stationary encounter waits. In the original Pokémon Black Version, Kyurem is level 75.
Save before interacting with Kyurem. Lower its HP with controlled attacks, use sleep or paralysis if available and avoid sending out a Pokémon whose strongest move could knock it out. If Kyurem is accidentally defeated, reset immediately if you want to preserve the encounter.
Kyurem is optional. Catching it does not unlock Black City, the Abyssal Ruins, the Seven Sage investigation or the stronger Pokémon League.
- Return to Giant Chasm only if Kyurem remains uncaught.
- Save before the level 75 encounter.
- Use controlled damage and status effects.
- Reset after an accidental knockout if you want to preserve the encounter.
6. Complete the remaining Seven Sage investigation
Looker’s postgame investigation covers the six remaining sages. Rood is on Route 18, Gorm is in the newly accessible Dreamyard basement, Ryoku is in the deeper part of Relic Castle, Zinzolin is in the Cold Storage container area, Bronius is in Chargestone Cave and Giallo is on Route 14.
Visit each location and approach the sage so Looker’s scene can finish. Each recovered sage gives the player a TM. The investigation does not open a mandatory route and is not required for Black City. Bring the field moves needed for the relevant revisit, especially Surf and Strength, and heal before facing the stronger postgame Trainers.
- Find Rood on Route 18.
- Find Gorm in the Dreamyard basement.
- Find Ryoku in Relic Castle.
- Find Zinzolin in Cold Storage.
- Find Bronius in Chargestone Cave.
- Find Giallo on Route 14.
7. Reach Black City as an optional extension
Fly to Nimbasa City and leave through the eastern gate onto Route 16. Follow Route 16 to Marvelous Bridge, cross the bridge and continue through Route 15. Route 15 contains optional Trainers, items, the Poké Transfer Lab and other activities, but none is required to enter Black City.
At the eastern end of Route 15, enter Black City. This is the original Pokémon Black location, not Black Tower from Pokémon Black 2. Black City has no ordinary wild Pokémon. Its main activities are battling residents and using the city market when the appropriate development state is present.
The city’s residents, available battles and market stock depend on its development state. Entralink interaction with a compatible Pokémon White Version save can affect the city’s population. Entering Black City is enough for this optional objective; a particular population level or market inventory is not required.
- Fly to Nimbasa City.
- Follow Route 16 to Marvelous Bridge.
- Cross Marvelous Bridge and continue through Route 15.
- Enter Black City if you want its battles and market.
- Do not substitute Black Tower instructions from Pokémon Black 2.
8. Attempt the stronger Pokémon League
The stronger League is available after you have entered the Hall of Fame. Travel to the top of Celestial Tower and speak with Alder. After his scene, return to the Pokémon League to challenge the stronger versions of the Elite Four and then Champion Alder.
Stock Full Restores, Revives and status cures before entering. This League run is separate from the original story sequence against N and Ghetsis and is not required for Undella Bay, Black City, the Abyssal Ruins, the Seven Sage investigation or the optional legendary encounters.
Use Black City battles, the Riches family, Route 15 Trainers and other postgame fights to strengthen your team before attempting the rematch. Save at the League entrance and arrange a balanced party that can answer Ghost, Fighting, Dark and Psychic opponents.
- Enter the Hall of Fame first.
- Visit Alder at the top of Celestial Tower.
- Return to the Pokémon League only for the optional stronger challenge.
- Do not treat Alder’s rematch as the chapter completion condition.
Before you move on
- The player has reached Undella Town through Route 13.
- HM06 Dive has been obtained from the girl in front of Caitlin’s Villa or is already in the Bag.
- The player has Surfed east from Undella Town and entered Undella Bay.
- Abyssal Ruins exploration has been completed as an optional activity or deliberately deferred.
- Optional legendary, Seven Sage, Cynthia and Riches family objectives are clearly separate from the required milestone.
- If pursuing Black City, the player has traveled from Nimbasa City through Route 16, crossed Marvelous Bridge, followed Route 15 and entered Black City.
- The player understands that Black City has no ordinary wild Pokémon and that its residents, battles and market depend on the city’s development state.
- Alder’s stronger Pokémon League challenge is understood to be optional and separate from chapter completion.
Finishing up
Main-story milestone: earn all eight Unova Badges, defeat the Elite Four, complete the N's Castle finale against N and Ghetsis, and finish the first credits. On the normal route this includes capturing Reshiram at N's Castle; if both the party and every PC Box are full, the game defers the Reshiram encounter to Dragonspiral Tower after the story. This unlocks National Mode and the eastern postgame route network.
Required postgame milestone: travel through Routes 11–13 and Giant Chasm, reach Undella Town, and enter Undella Bay. Exploring the Abyssal Ruins, entering Black City through Marvelous Bridge and Route 15, capturing Kyurem, completing the Swords of Justice and roaming-legendary quests, finding the remaining sages, battling Cynthia, and completing other collection goals remain optional.
Optional full-League milestone: after receiving the National Pokédex, defeat the stronger Elite Four teams and Alder, then use the Hall of Fame machine for the later Champion-room induction and second credits.
Choose your next gameScreenshots & video
Game imagery for reference. Follow the written chapters above for the route and strategies.
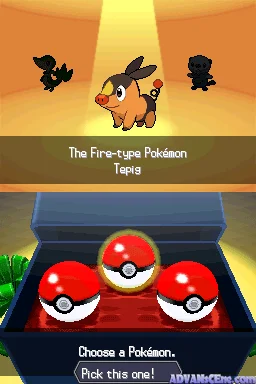
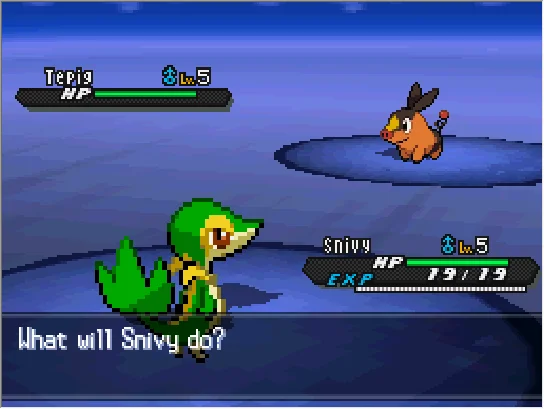
Sources & references
Our original guide draws on the references below. Check the edition at the top of this page before following controls or unlock requirements.
- Walkthrough: Pokémon Black and White/Part 1 — Bulbapedia
- Cheren — Bulbapedia
- Route 2 — Unova — Serebii Pokéarth
- Pokémon Black and White/Nuvema Town — StrategyWiki
- Pokémon Black and White/Route 2 — StrategyWiki
- Walkthrough: Pokémon Black and White
- Walkthrough: Pokémon Black and White, Part 3 — Bulbapedia
- Striaton City — Pokémon Black and White Guide
- Getting the Trio Badge at the Striaton Gym — Pokémon Black and White Guide
- Getting the C-Gear from Fennel — Pokémon Black and White Guide
- Route 3 — Pokémon Black and White Guide
- Wellspring Cave — Bulbapedia
- Pokémon Black & White — Gyms — Serebii
- Main Game Walkthrough - Pokémon Black Version - GameFAQs
- Pokémon Black Version — Guide and Walkthrough
- Walkthrough: Pokémon Black and White/Part 4 — Bulbapedia
- Castelia City — Pokémon Black and White Guide — Thonky
- Walkthrough: Pokémon Black and White/Part 5 — Bulbapedia
- Appendix: Black and White walkthrough, Section 5 — Bulbapedia
- Unova Route 4 — Bulbapedia
- Desert Resort — Bulbapedia
- Relic Castle — Bulbapedia
- Nimbasa Gym — Bulbapedia
- Relic Castle walkthrough — Psypokes
- Pokémon Black and White walkthrough — Pokéball Insider
- Unova Route 6 — Bulbapedia
- Pokémon Black and White — Driftveil City Strategy Guide
- Pokémon Black & White Rival Bianca — Serebii.net
- Pokémon Black & White — Driftveil City Story Walkthrough
- Walkthrough: Pokémon Black and White/Part 7 - Bulbapedia
- Pokémon Black & White - Team Plasma & N
- Pokémon Black and White/Chargestone Cave - StrategyWiki
- Walkthrough: Pokémon Black and White/Part 8 — Bulbapedia
- Walkthrough: Pokémon Black and White/Part 9
- Dragonspiral Tower — Bulbapedia
- P2 Laboratory — Bulbapedia
- Unova Route 17 — Bulbapedia
- Icirrus Gym — Bulbapedia
- Pokémon Black and White — Route 7, StrategyWiki
- Pokémon Black Version and Pokémon White Version — Official Pokémon Website
- Relic Castle - Pokémon Black and White Guide
- Walkthrough: Pokémon Black and White/Part 10 - Bulbapedia
- Pokemon Black and White Full Walkthrough - Psypokes
- Walkthrough: Pokémon Black and White/Part 11 — Bulbapedia
- Victory Road (Black and White) — Bulbapedia
- Pokémon Black Version — Guide and Walkthrough — GameFAQs
- Pokémon League (Unova)
- Walkthrough: Pokémon Black and White/Part 12 — Bulbapedia
- Pokémon Black & White - Elite Four
- Pokémon Black & White - Legendary Pokémon
- N's Castle — Bulbapedia
- N's Castle — Unova — Serebii.net Pokéarth
- Capturing BW Legendaries — Smogon University
- Walkthrough: Pokémon Black and White/Part 13
- Cedric Juniper — Bulbapedia
- Nuvema Town — Bulbapedia
- Post-Game Nuvema Town — Pokémon Black and White Guide
- Pokémon Black and White/N’s Castle — StrategyWiki
- Unova Route 11
- Unova Route 13
- Giant Chasm - Unova - Serebii.net Pokéarth
- Serebii.net Pokédex Locations - Kyurem
- Pokémon Black & White - TMs & HMs
- Undella Town
- Walkthrough: Pokémon Black and White/Part 17
- Abyssal Ruins map and mechanics
- Walkthrough: Pokémon Black and White/Part 18
- Unova Route 7
- Seven Sages
- Celestial Tower
- Pokémon Black Version postgame walkthrough
About the game & collecting notes
- Platform
- Nintendo DS
Continue the original Pokémon Black Version postgame from the already-completed Nuvema Town activation. Travel through Route 11, Village Bridge, Route 12 and Route 13, enter Giant Chasm, and optionally capture the level 75 Kyurem. End in Giant Chasm, Lacunosa Town or Undella Town ready for the required Undella Bay milestone and the optional Black City route.
Darryl Polo
Darryl Polo loves tinkering with emulation and revisiting retro games. He enjoys exploring how old favorites play on different setups and sharing what he learns along the way. At Joking Joystick, he writes about the games, hardware, and small discoveries that keep the hobby fun.
Our editorial standardsFound a step that needs another look? Help us improve this guide.