
Phoenix Wright: Ace Attorney (Nintendo DS) — Complete Campaign Walkthrough (North America / DS edition)
Step-by-step campaign walkthrough for the Nintendo DS release of Phoenix Wright: Ace Attorney, covering all five cases included in the DS/Western edition through the true ending. Includes investigation routing, courtroom strategies, use of DS-specific evidence tools, failure recovery and exact completion checks so you can reach the game’s final verdict without guesswork.

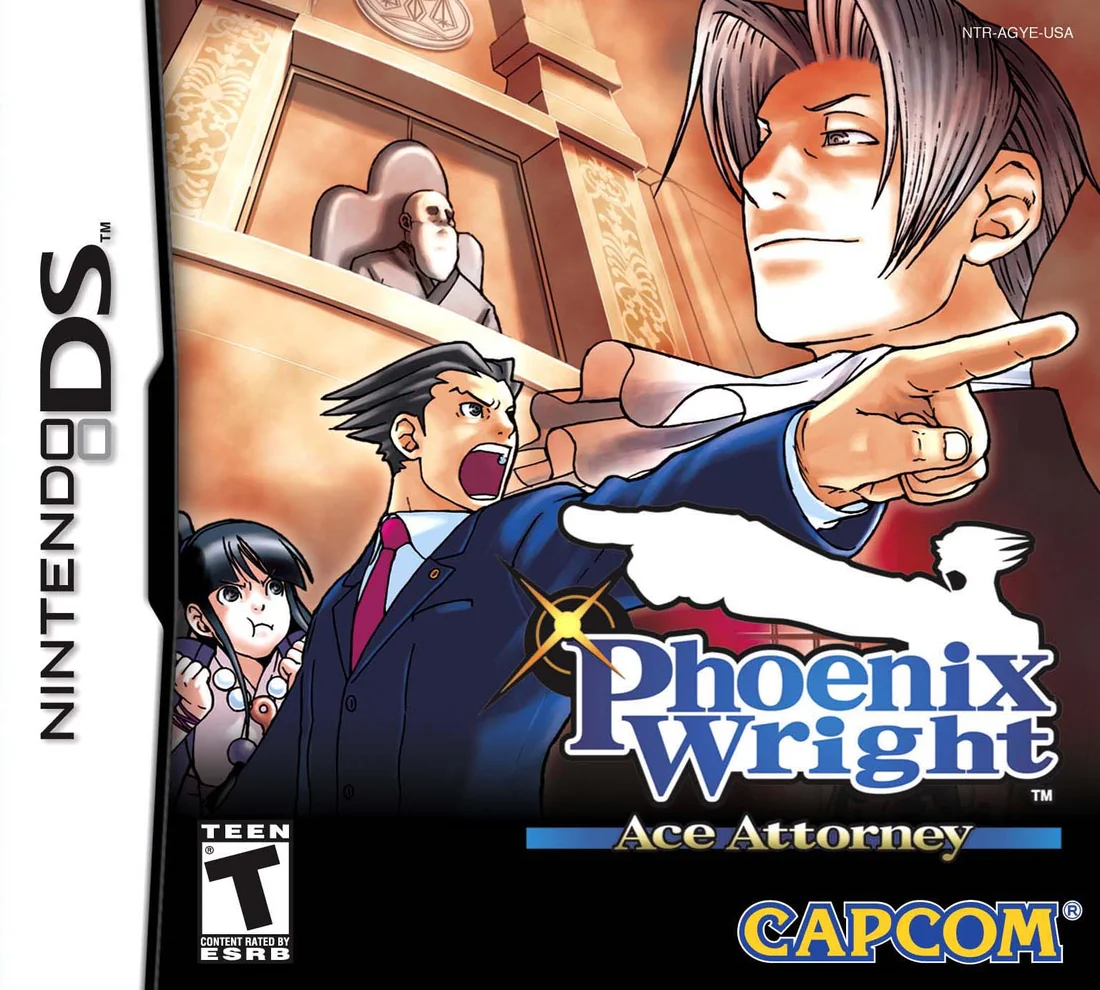
Before you begin
You are holding Phoenix Wright: Ace Attorney for the Nintendo DS — the localized DS port that brought the series to the West and added a fifth finale case (Rise from the Ashes).
This guide walks you case-by-case through every investigation and courtroom segment so you can complete the canonical DS campaign from the First Turnabout through Rise from the Ashes.
It focuses on routes that avoid dead-end confusion, clarifies when progress requires specific evidence or testimony, and explains how the DS features change the investigation flow compared with the original GBA release.
Play at a comfortable pace and treat each courtroom appearance as a puzzle: investigate thoroughly before court, keep the Court Record and witness profiles open on the lower screen during trials, and press statements with Hold It!/Objection!
when a line contradicts evidence.
If you get a penalty in court, the guide explains how to recover and which steps to repeat to continue toward the ending.
Set yourself up for the run
Familiarize yourself with the DS UI: top screen displays scenes and witnesses; bottom (touch) screen is used for the Court Record, examining evidence, and scene investigation.
Use the stylus to inspect photos and evidence where prompted.
Keep a notepad (physical or digital) for who said what — the series rewards noting repeated phrases and contradictions you can press in cross-examinations.
Before going to court each day, exhaust all investigation locations available for that case and speak to every character until their dialogue stops changing.
Unseen locations or unattended conversations will block trial progress.
Regularly open the Court Record to review Profiles and Evidence.
Some courtroom triggers require selecting a Profile rather than Evidence; check both if a reaction seems missing.
In the DS edition, the added Case 5 uses fingerprint dusting and luminol tests during investigation.
When you receive special forensic items, use them on photographic evidence and the crime scene via the touch screen before leaving the scene.
Save often.
Make separate saves before trial days and major decisions so you can return if you receive a penalty or miss a crucial line of questioning.
Expect more interrogation-style sections in later cases: press witnesses with Hold It!
and present concrete evidence when statements directly contradict something in the Record.
If you become stuck in a trial, review earlier statements: the correct evidence to present often comes from a seemingly minor detail mentioned during the investigation.
Treat courtroom penalties as learning tools: a wrong presentation will deduct the Penalty Bar but the trial continues; use the opportunity to retrace which evidence or testimony you missed.
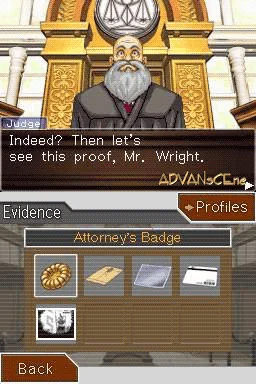
Controls, UI and DS Differences — How the DS Port Changes Investigation
The North American Nintendo DS edition of Phoenix Wright: Ace Attorney combines ordinary investigation and courtroom commands with touchscreen controls and optional button inputs. Its fifth episode, Rise from the Ashes, adds DS-specific forensic tasks, including luminol testing and fingerprint powder. These tools are not used in Cases 1 through 4. The DS cartridge uses one active save state, so saving before major trials is useful, but it is not a separate multi-slot backup system.
1. Navigate investigations
Investigation scenes display the current location and dialogue on the upper screen, while the lower screen presents the available commands. Choose Move to travel between unlocked locations, Talk to question a character, Present to show a Court Record item, or Examine to search the current scene.
The Move list contains only destinations currently available. A new destination can appear after a conversation, examination, or evidence update, so check Move again whenever an important discussion ends. If progress stops, return to earlier locations and complete every available Talk topic and required examination before trying to advance.
Examine changes the lower screen into a search view. Move the cursor across the scene with the stylus or directional controls, then select each interactive area. Search the entire visible scene rather than tapping only the obvious object. Wide locations can require moving the view left or right; the L Button can shift the view at locations that support horizontal scrolling.
Present is used during investigations when a character must react to a particular item or profile. It does not replace Talk or Examine. Complete the available conversation topics first, then present relevant evidence or profiles when the situation suggests a connection.
- Finish all currently available Talk topics before leaving a required location.
- Examine every clearly interactive part of an important crime scene.
- Check Move again after conversations, examinations, and evidence updates.
- Search wide scenes from both sides when the screen can scroll.
- Use Present when a character needs to react to a relevant item or profile.
2. Manage the Court Record
The Court Record is divided into Evidence and Profiles. Evidence includes reports, photographs, weapons, documents, recordings, and forensic results. Profiles contain people connected to the case. Open the record during investigations to read descriptions, or during cross-examination to choose a response to the highlighted statement.
Press R to open the Court Record during questioning. The touchscreen Court Record button performs the same function. Use the record controls to switch between Evidence and Profiles, highlight an entry, and read its complete description before confirming a presentation.
Use Evidence when the testimony conflicts with a physical fact, document, photograph, recording, weapon, or forensic result. Use a Profile when the contradiction concerns a person's identity, role, presence, or relationship. A generally relevant clue may still be wrong for the particular statement currently selected.
During a trial, presentation is statement-specific. Identify the exact claim in the highlighted sentence that must be disproved, then choose the item that contradicts that claim. In Rise from the Ashes, newly obtained forensic evidence may need to be examined again before it becomes useful in court.
- Switch between Evidence and Profiles before selecting a response.
- Read the complete description of new evidence.
- Match the selected item to the exact statement being challenged.
- Use R or the touchscreen Court Record control during questioning.
- Confirm that the selected evidence directly addresses the highlighted statement.
- Re-examine relevant Case 5 evidence after completing a forensic task.
3. Press, present, and use microphone commands
A cross-examination is divided into individual testimony statements. Highlight a statement and choose Press to question the witness about it. You can also press the L Button. Pressing may reveal an explanation, revise the testimony, or provide the wording needed to identify the actual contradiction.
Pressing is usually the safest first response when you do not yet know which statement matters. Some press choices can produce a warning or a follow-up decision, so read the displayed prompt rather than assuming every option is harmless.
Choose Present when the highlighted statement directly conflicts with a Court Record item. Open the record with R, select Evidence or Profiles, and press X to confirm the presentation. The touchscreen commands perform the same actions. Do not present an item merely because it relates generally to the case.
The Y Button activates the optional microphone commands when the game displays the relevant prompt. While holding Y, speak the phrase shown by the game, such as Hold it, Objection, or Take that. Voice commands are not required for ordinary play: use the touchscreen, L to press testimony, R to open the Court Record, and X to confirm evidence instead.
- Highlight the intended testimony statement before pressing it.
- Use the on-screen Press command or the L Button to press testimony.
- Press unexplored statements before making a risky presentation when appropriate.
- Open the Court Record with R during questioning.
- Select the correct Evidence or Profile and press X to confirm presentation.
- Use Y voice commands only when the game displays an available microphone prompt.
4. Protect the penalty bar and save deliberately
The courtroom display shows Phoenix's remaining penalty allowance. Incorrect presentations and some wrong answers remove part of it. If the allowance reaches zero, the current courtroom sequence ends in failure, so avoid guessing when the contradiction is not established.
Press Start to open the save function when saving is available. The game uses one active save state rather than separate simultaneous save slots. A later save can overwrite the earlier state, so save before a major trial or investigation-to-trial transition only when you are ready to make that state your current recovery point.
After an incorrect presentation, reread the highlighted statement and inspect the descriptions of plausible evidence. If the relationship is still unclear, reload the active save and press the relevant testimony statements first. Pressing may reveal the extra wording needed to identify the correct contradiction. If you save after losing penalties, the damaged state becomes the state you reload.
- Save before each major trial day or important courtroom transition.
- Treat the save as one active recovery point, not a separate backup.
- Check the remaining penalty allowance before answering an uncertain prompt.
- Reload the current save after a wrong presentation if you want to restore the earlier state.
- Do not overwrite a clean pre-trial state until you are ready to continue from it.
5. Complete Rise from the Ashes forensic examinations
Rise from the Ashes introduces luminol testing and fingerprint powder through touchscreen interfaces. Use these tools when the investigation identifies a particular scene, photograph, object, or surface. They are not ordinary requirements in Cases 1 through 4.
For luminol, select the requested scene or evidence and spray across the indicated area on the touchscreen. Cover the relevant region until the game registers the discovery, then continue through the resulting dialogue. Do not leave before the new result or clue has been added to the investigation record.
For fingerprint powder, select the requested surface or print and spread powder across the touchscreen as directed. When the game asks you to clear away the excess, blow into the microphone on the original DS hardware. Continue until a usable print appears, then complete the comparison or identification step presented by the game.
These examinations are required when the investigation specifically calls for them, but you do not need to dust or test every object in the episode. If a destination or conversation does not unlock, revisit the exact scene or evidence named by the current dialogue, finish the incomplete examination, and verify that the result has been recorded.
- Use luminol on the scene or evidence named by the investigation.
- Cover the requested luminol area until the game registers the result.
- Spread fingerprint powder across the indicated surface.
- Blow into the DS microphone when the fingerprint interface requests it.
- Complete the fingerprint comparison step after revealing a print.
- Confirm that each forensic result has been recorded before moving on.
Before you move on
- You can use Move, Talk, Present, and Examine during investigations.
- You can search an entire scene and reach destinations that unlock after conversations or examinations.
- You can open the Court Record with R and switch between Evidence and Profiles.
- You can read item descriptions and confirm selected evidence for presentation with X.
- You can press testimony with either the on-screen Press command or the L Button.
- You know that Present challenges the highlighted statement with a specific Evidence or Profile item.
- You can use Y for optional microphone commands without depending on voice input.
- You can save with Start and understand that the game maintains one active save state.
References for this chapter
- Phoenix Wright: Ace Attorney/Controls — StrategyWiki ↗
- Phoenix Wright: Ace Attorney/Gameplay — StrategyWiki ↗
- Phoenix Wright: Ace Attorney - Guide and Walkthrough - DS - By Deathborn_668 ↗
- Phoenix Wright: Ace Attorney — Guide and Walkthrough for Nintendo DS, by AjidoMarujido ↗
- Phoenix Wright: Ace Attorney/Episode 5: Rise from the Ashes/Day 2 - Investigation ↗
Case 1 — The First Turnabout: Investigation Routing
The First Turnabout does not contain a playable investigation phase in Phoenix Wright: Ace Attorney for Nintendo DS. The episode begins with a short opening scene and conversation at the District Court, then moves directly into a single trial day. There is no investigation map, no crime-scene route, no visit to Wright & Co. before court, and no witness conversation that must be triggered by moving between locations. All required evidence is either available at the beginning or added automatically during the courtroom sequence.
1. Start the episode and complete the opening conversation
Select The First Turnabout from the case menu. Watch the opening scene, then continue through the conversation with Mia Fey and Larry Butz. The game is teaching the basic courtroom format, so allow the dialogue and tutorial prompts to finish instead of trying to open an investigation menu.
When the case enters court, Phoenix is already defending Larry Butz. The fact that you begin in the courtroom is normal for this episode and is not evidence that you missed an earlier location. The North American DS version presents this tutorial case as a trial-only episode.
- Do not search for a separate investigation day.
- Do not attempt to return to Wright & Co. or Cindy Stone’s apartment; those locations are not playable in this case.
- Continue the opening dialogue until the Judge begins questioning Phoenix.
2. Answer the Judge’s opening questions
The Judge first asks who the defendant is. Choose Larry Butz. The next question concerns the victim; choose Cindy Stone. When asked how Cindy died, choose Hit with a blunt object.
Cindy’s Autopsy Report is available in the Court Record for reference. You do not need to discover it by examining a body or crime scene. Open the Court Record if you want to verify the report before selecting the cause of death.
These answers are the only required information-gathering steps before the prosecution begins presenting its case. An incorrect answer costs part of the Penalty Bar, but it does not create a hidden investigation route. If you make a mistake, continue if possible or reload a save rather than looking for a missing NPC.
- Answer Larry Butz for the defendant.
- Answer Cindy Stone for the victim.
- Answer Hit with a blunt object for the cause of death.
- Confirm that Cindy’s Autopsy Report is visible in the Evidence section.
3. Let the prosecution add the next evidence
After the opening questions, Winston Payne adds the Statue, representing The Thinker, to the Court Record. Cindy’s Passport is also added when the prosecution discusses Cindy’s recent trip. Inspect both entries so you recognize them later, but neither item is found through an investigation location.
The game then asks whether Larry should speak to Payne. Either available choice allows the episode to continue. This is a dialogue variation, not a progress gate. You do not need to restart the case based on that answer.
- Verify that the Statue is in Evidence.
- Verify that Cindy’s Passport is in Evidence.
- Treat the choice about Larry speaking to Payne as optional dialogue, not an investigation requirement.
4. Wait for Frank Sahwit’s testimony and the Blackout Record
Frank Sahwit is called as the witness. Let his first testimony play completely. After the initial testimony, Payne introduces the Blackout Record, which states that the building’s power was out from noon until 6:00 PM on the day of the murder. The record is added automatically during court.
This is the last piece of the initial evidence set. At this stage, the Court Record should contain the Attorney’s Badge, Cindy’s Autopsy Report, the Statue, Cindy’s Passport, and the Blackout Record. The Attorney’s Badge is not used to solve a contradiction, but it remains part of the record.
- Allow Sahwit’s first testimony to finish.
- Confirm that the Blackout Record has been added before trying to use it.
- Check the Court Record rather than searching for a new location.
5. Recognize the actual progression point
The episode’s evidence gathering is complete when the Blackout Record has been added and the first cross-examination is available. From here, the remaining progress is trial progress, not investigation progress.
If you need to proceed through the trial, press Sahwit’s statement that he remembers the time exactly, then present Cindy’s Autopsy Report on that statement. In the revised testimony, press the statement about hearing a voice announce the time and present the Blackout Record. In the next testimony, present the Statue against the statement referring to a table clock.
When the Judge asks whether there is a problem with Sahwit’s testimony, answer Yes and identify that he went into the apartment. Choose Try sounding the clock when prompted. When the court asks for the final proof that the clock was set to the wrong time, present Cindy’s Passport. This establishes the route to the verdict.
- Use the Autopsy Report against Sahwit’s exact-time claim.
- Use the Blackout Record against the claim that the television supplied the time.
- Use the Statue against the table-clock statement.
- Answer Yes when asked whether there is a problem with the testimony.
- Choose Went into the apartment.
- Choose Try sounding the clock.
- Present Cindy’s Passport for the final time-zone explanation.
Before you move on
- The episode began directly with the District Court sequence rather than an investigation map.
- The opening answers were Larry Butz, Cindy Stone, and Hit with a blunt object.
- The Court Record contains Cindy’s Autopsy Report, the Statue, Cindy’s Passport, and the Blackout Record.
- Sahwit’s first testimony was completed and the Blackout Record was added.
- The trial route has continued through the Statue presentation, the Went into the apartment conclusion, Try sounding the clock, and the final Cindy’s Passport presentation.
- The case proceeds to the verdict sequence without requiring a return to Wright & Co. or any crime-scene examination.
References for this chapter
Case 1 — The First Turnabout: Trial Walkthrough and Cross-Examination
The First Turnabout is the tutorial trial for Phoenix Wright: Ace Attorney. The case teaches the core courtroom loop: read every testimony carefully, press statements when you need more information, and present evidence only when it directly addresses the claim on screen. The decisive chain is Sahwit’s impossible discovery time, the building blackout, his knowledge that The Thinker is a clock, and Cindy Stone’s Passport. Save before entering court if possible so a mistaken presentation can be retried without restarting the case.
1. Prepare for Sahwit’s testimony
Phoenix begins court with Cindy Stone’s Autopsy Report in the Court Record. Check the report before the cross-examination. It records Cindy’s time of death as July 31, between 4:00 and 5:00 p.m., and lists blunt-force trauma as the cause of death.
Frank Sahwit claims to be the eyewitness who discovered Cindy’s body. During his first testimony, he describes seeing Larry Butz leave the apartment and insists that he remembers discovering the body at 1:00 p.m. Do not present evidence merely because a statement sounds suspicious. Wait for the statement that gives the precise discovery time, then compare it with the autopsy report.
- Confirm that Cindy’s Autopsy Report is in the Court Record.
- Remember that the report gives a time range, 4:00–5:00 p.m.
- Use the evidence description rather than relying on memory when comparing times.
2. Contradict the 1:00 p.m. discovery time
When Sahwit gives the statement that he remembers finding the body at 1:00 p.m., present Cindy’s Autopsy Report on that statement. The recorded time of death makes Sahwit’s original discovery time impossible.
The judge will ask Sahwit to explain the discrepancy. He changes his account and claims that he learned the time from a television or recorded program in the apartment. Pressing this revised testimony can reveal more context, but the important point is to read the new explanation before choosing evidence. The next contradiction concerns whether a television could have supplied the time at all.
- Present Cindy’s Autopsy Report against the 1:00 p.m. statement.
- Read Sahwit’s revised testimony in full after the contradiction is accepted.
- Do not use Larry’s profile for the time contradiction.
3. Disprove the television explanation
The prosecution adds the Blackout Record to the Court Record. It shows that electricity to Cindy’s apartment building was out from noon until 6:00 p.m. on the day of the murder.
Present the Blackout Record against Sahwit’s statement claiming that he heard the time from a television or recorded program. A television in the apartment could not have supplied that information during the documented outage. Present the record to the statement about the source of the time, not to an unrelated statement about Sahwit’s movements.
Once the court accepts the contradiction, Sahwit gives another testimony explaining how he supposedly knew the time. Read that testimony completely before selecting the next item.
- Verify that the Blackout Record has been added to the Court Record.
- Use it against the television or recorded-program explanation.
- Read the following testimony before presenting another item.
4. Expose Sahwit’s knowledge of The Thinker
Sahwit now claims that he saw a table clock in the apartment and identifies it as the murder weapon. Present the Statue, The Thinker, against the statement that calls the weapon a table clock.
The prosecution then reveals that The Thinker is also a clock. Its mechanism announces the time when the statue’s head is manipulated. Inspect the evidence again if you want to review the updated description.
The court will ask whether Phoenix sees a problem with Sahwit’s testimony. Choose Yes, then identify that Sahwit went into the apartment. Sahwit previously claimed that he never entered. Knowing that the statue was a clock and knowing how it functioned exposes that his account cannot be true.
- Present the Statue during the testimony about the table clock.
- Allow the evidence description to update when The Thinker’s clock function is revealed.
- Choose Yes when asked whether there is a problem with the testimony.
- Choose the conclusion that Sahwit went into the apartment.
5. Sound The Thinker in court
The court asks how Phoenix can prove the connection between Sahwit’s statement and The Thinker. Choose the option to try sounding the clock.
The clock announces a time that does not match the courtroom’s current time. This demonstrates why Sahwit could have obtained the time from the murder weapon, but the judge still needs an explanation for why the clock was showing that setting on the day of the murder.
Do not treat the clock demonstration as the final answer. When Mia asks whether there is a reason for the discrepancy, choose Yes. The case then asks for evidence explaining the clock’s unusual time setting.
- Choose “Try sounding the clock.”
- Observe the time announced by The Thinker.
- Choose Yes when Mia asks whether the clock’s condition can be explained.
6. Present Cindy’s Passport
When the court asks for evidence explaining the clock’s setting, present Cindy’s Passport. The Passport establishes that Cindy had recently returned from Paris. The Thinker had traveled with her and retained the time setting from that trip instead of being reset after she came home.
This is the concise explanation the court needs. The Passport accounts for the clock’s displayed time without requiring Phoenix to prove that the mechanism was defective. It completes the evidence chain: Sahwit knew details about The Thinker that he could not know from outside, his television explanation is impossible because of the blackout, and the clock could have announced the time he reported because of its retained setting.
After the Passport is accepted, let the concluding testimony and verdict sequence play out. Phoenix’s objective is to establish that Sahwit entered the apartment and lied about how he learned the time.
- Present Cindy’s Passport when the court asks why the clock had that setting.
- Do not add a separate time-zone calculation to the explanation.
- Allow the final confession and verdict sequence to continue after the evidence is accepted.
7. Manage penalties and recover from mistakes
A wrong presentation removes part of the Penalty Bar. If you lose a penalty, stop before trying another item and identify what the current statement is actually claiming. In this trial, the important subjects are the time of discovery, the television explanation, the murder weapon, Sahwit’s knowledge of The Thinker, and the clock’s time setting.
Pressing a statement can reveal useful context, but pressing alone does not always solve the contradiction. At the decisive moments, present the evidence that directly addresses the statement. If the Penalty Bar becomes dangerously low, reload the save made before court instead of testing unrelated profiles or documents.
The required evidence chain is short. Careful reading is safer than random presentations, especially after the Statue reveals that the testimony has moved from the murder weapon to the clock’s hidden function.
- Match each item to the specific claim it contradicts.
- Avoid presenting Larry’s profile for the clock deductions.
- Reload the pre-trial save if further mistakes would risk a game-over penalty.
Before you move on
- The court accepts Cindy’s Autopsy Report as proof that Sahwit’s 1:00 p.m. discovery time conflicts with the recorded time of death.
- The Blackout Record disproves Sahwit’s claim that he learned the time from a television or recorded program.
- The Statue establishes that Sahwit knows The Thinker is a clock despite claiming that he never entered the apartment.
- Phoenix chooses to sound The Thinker and confirms that its announced time does not match the courtroom time.
- Cindy’s Passport explains why The Thinker retained the time setting from her Paris trip.
- Frank Sahwit is exposed during the concluding sequence, Larry receives a Not Guilty verdict, and the game proceeds to the post-trial conversation before Episode 2 becomes available.
References for this chapter
- Phoenix Wright: Ace Attorney - Guide and Walkthrough - DS - By TIDQ ↗
- Phoenix Wright: Ace Attorney - Guide and Walkthrough - DS - By BWoodhouse ↗
- Phoenix Wright: Ace Attorney/Episode 1: The First Turnabout/Day 1 - Trial — StrategyWiki ↗
- Phoenix Wright: Ace Attorney walkthrough: spoiler-free guide solutions for every case ↗
Case 2 — Turnabout Sisters: Investigation — Finding the Breaks
Complete the investigation in three stages: establish Maya's defense at Fey & Co., uncover the Wiretap and the hotel witness's information, then connect Redd White, Marvin Grossberg, and the DL-6 Incident. The required progression depends on revisiting the Gatewater Hotel drawer, obtaining the correct DL-6 photograph, and examining Mia's files before confronting White at Bluecorp.
1. Begin at the crime scene and secure the initial evidence
After the opening scene, move to the Office and examine Mia's body. This adds The Thinker and Glass Shards to the Court Record. Examine the piece of paper beside Mia's right hand to obtain the Receipt, then pan to the right and examine the telephone. The phone examination establishes that someone was watching the office and records the witness's involvement.
Move to Fey & Co. Law Offices. Speak with Maya about what happened and about her relationship with Mia. Present the Receipt when the conversation calls for it. This identifies Maya from the writing on the back and triggers Detective Gumshoe's arrival and Maya's arrest.
- Examine Mia's body.
- Examine the paper beside her hand and obtain the Receipt.
- Examine the telephone.
- Talk to Maya about what happened and her relationship with Mia.
- Present the Receipt when prompted.
2. Question Maya and Detective Gumshoe
After Maya is detained, continue the investigation by speaking with her at the Detention Center. Agree to defend her. Ask about Maya, the day of the crime, her cell phone, and spirit mediums. The cell-phone conversation is the key topic: Maya gives Phoenix a memo explaining that a conversation with Mia is recorded on the phone, adding Maya's Memo to the Court Record. Discuss the day of the crime again after the new topic appears, then accept the request to seek help from Mia's mentor.
Move to Fey & Co. and speak with Detective Dick Gumshoe. Identify him when asked, then ask about Mia, Maya, and Miles Edgeworth. Present Maya's Memo to Gumshoe. He will exchange it for Maya's Cell Phone and provide Mia's Autopsy Report. If the game asks whether Phoenix knows Edgeworth, either answer advances the investigation; finish Gumshoe's available topics before leaving.
- Agree to defend Maya.
- Ask Maya about the day of the crime, her cell phone, and spirit mediums.
- Ask about the day of the crime again after the memo topic appears.
- Present Maya's Memo to Gumshoe.
- Receive Maya's Cell Phone and Mia's Autopsy Report.
3. Investigate the Gatewater Hotel and trigger the Wiretap
Move to the Gatewater Hotel. Examine the drawer in April May's room where the ornate screwdriver is protruding. The first examination reveals the object but does not yet add the decisive item to the Court Record. Talk to the bellboy about what he witnessed, Miss May, and the room. Then move to Grossberg Law Offices and ask about his refusal to defend Maya, Mia, and the painting.
Go to the Detention Center and ask Maya about her family, her mother, and her mother's enemy. Choose to defend Maya and reassure her that Phoenix cannot abandon her. Return to the Gatewater Hotel and examine the same drawer again. This second examination adds the Wiretap to the Court Record. Do not leave the hotel after only the first inspection.
- Examine the hotel-room drawer once.
- Question the bellboy about his observations, Miss May, and the room.
- Question Grossberg about his refusal, Mia, and the painting.
- Ask Maya about her family, mother, and mother's enemy.
- Return to the drawer and examine it a second time to obtain the Wiretap.
4. After the first trial day, identify the man with April May
When the next investigation begins, return to the Gatewater Hotel and question April May about the man who was with her, the night of the murder, and the hotel. The conversation gives Phoenix the lead needed to identify that man rather than treating May's testimony as the end of the trail.
Move to Grossberg Law Offices and examine the photographs on the corner of his desk. There are two DL-6 Incident photographs. Examine both, then choose the photograph showing the purple-haired man, identified in the Court Record as Photograph (DL-6 Incident — Exhibit B). The other photograph is not the one needed for this immediate investigation step.
- Question April May about the man with her, the night of the murder, and the hotel.
- Examine both photographs on Grossberg's desk.
- Select Photograph (DL-6 Incident — Exhibit B), the photograph of the man.
5. Obtain the Bellboy's Affidavit and expose White's identity
Return to the Gatewater Hotel and present Photograph (DL-6 Incident — Exhibit B) to the bellboy. He recognizes the man who checked into April May's room and offers to write an affidavit. Accept the offer so Bellboy's Affidavit is added to the Court Record.
Move to the Detention Center. Ask Maya about the man, then present the DL-6 photograph followed by Bellboy's Affidavit. When the game asks how firmly to question her, choose the option to push her hard. Maya identifies the man as Redd White, the president of Bluecorp, and provides the destination for the next investigation.
- Present the correct DL-6 photograph to the bellboy.
- Accept Bellboy's Affidavit.
- Present the photograph to Maya.
- Present Bellboy's Affidavit to Maya.
- Push Maya hard when the choice appears.
6. Follow the blackmail evidence through Bluecorp and Grossberg
Move to Bluecorp and speak with Redd White. Ask about Miss May, the night of the murder, Bluecorp, and the painting. When Phoenix recognizes the painting as the one formerly displayed in Grossberg's office, choose that he has seen it before. White will direct Phoenix back toward Grossberg's connection with the painting.
Return to Grossberg Law Offices. Ask about today's trial, his refusal to defend Maya, and Mr. White. When Phoenix identifies the troubling connection, select the large painting. When asked what connects White and Grossberg, identify blackmail. Then ask about the DL-6 Incident and the reason for the blackmail. Grossberg explains why White has leverage over him and directs Phoenix toward Mia's files.
- Question White about Miss May, the murder night, Bluecorp, and the painting.
- Confirm that Phoenix has seen the painting before.
- Question Grossberg about the trial, his refusal, and White.
- Identify the painting as the troubling connection.
- Identify blackmail as White's leverage.
- Ask about DL-6 and the reason for the blackmail.
7. Search Mia's files and return to Bluecorp
Move to Fey & Co. and examine the shelves behind Mia's desk. Open the A-I file and choose to read it. Examine the shelves again, open the J-S file, and choose to skim it; this produces the Newspaper Clipping. Examine the shelves a third time, choose to check the files, and inspect T-Z. The T-Z file confirms that the White material is missing, but the Newspaper Clipping is the item needed to continue.
Return to Bluecorp and present the Newspaper Clipping to White. Follow the prompts that identify White's blackmailing of the politician and reject his denial. The confrontation ends with White deciding to testify against Phoenix, which advances the game into the next courtroom sequence.
- Read the A-I file.
- Skim the J-S file and obtain the Newspaper Clipping.
- Check the T-Z file.
- Present the Newspaper Clipping to White.
- Identify blackmail when prompted.
- Reject White's denial and finish the confrontation.
Before you move on
- The Court Record contains The Thinker, Glass Shards, the Receipt, Maya's Cell Phone, Mia's Autopsy Report, the Wiretap, Photograph (DL-6 Incident — Exhibit B), Bellboy's Affidavit, and the Newspaper Clipping.
- Maya has identified Redd White after Phoenix presents both the correct photograph and Bellboy's Affidavit.
- Grossberg has discussed the painting, White's blackmail, the DL-6 Incident, and the reason for the blackmail.
- The A-I file has been read, the J-S file has been skimmed, and the T-Z file has been checked.
- The Newspaper Clipping has been presented to White, and the Bluecorp confrontation ends with White announcing that he will testify against Phoenix.
- The game has advanced from investigation into the next trial sequence.
References for this chapter
- Phoenix Wright: Ace Attorney - Guide and Walkthrough - DS - By BWoodhouse ↗
- Phoenix Wright: Ace Attorney - Guide and Walkthrough - DS - By TIDQ ↗
- Phoenix Wright: Ace Attorney — Episode 2: Turnabout Sisters, Day 2 Investigation, StrategyWiki ↗
- Phoenix Wright: Ace Attorney — Turnabout Sisters Walkthrough, Neoseeker ↗
Case 2 — Turnabout Sisters: Courtroom Strategy and Witness Handling
Turnabout Sisters teaches the core trial loop: press testimony to expose useful details, present evidence only against the statement it contradicts, and use Profiles when the contradiction concerns a person's identity or presence. The case is divided between April May's initial hearing, the Bellboy's testimony, the following investigation, and Redd White's final hearing. Save before each major testimony when possible. An incorrect presentation can reduce the Penalty Bar, but most forced-choice answers have no lasting effect.
1. Break the arrest testimony and challenge May's account
During Gumshoe's arrest testimony, press the statement claiming that Mia wrote Maya's name in blood. Present Mia's Autopsy Report against the claim that Mia wrote the name. The original report states that Mia died immediately, while Edgeworth introduces an updated report suggesting she may have survived briefly. When asked when the update was issued, choose the day after the murder.
When April May begins testifying, press her identification of Maya. When the game asks whether to challenge the testimony, choose the options that question the testimony and accuse May of lying. This produces a more detailed version of her account. Do not present May's Testimony during this first hearing; it is obtained after the Bellboy's testimony and is needed later against White.
- Press Gumshoe's blood-written-name statement.
- Present Mia's Autopsy Report against the claim that Mia wrote Maya's name.
- Press May's identification of Maya and challenge her account.
- Wait to use May's Testimony until White's direction-of-travel testimony.
2. Disprove May's clock and overheard-conversation claims
When May says she heard the Thinker announce the time, press the relevant statements. Choose the explanation that the clock could not have rung because it was empty. Present Maya's Cell Phone to prove that Mia had already said the clockwork was removed before the murder.
May then claims she recognized the object from seeing it in a store. Present The Thinker when the court asks for proof that she could not have seen it in a store. The Court Record description establishes that the statue was made by Larry Butz and had not been sold in stores. When asked how May knew the weapon was a clock, choose that she had heard about it. Present the Wiretap, then present Maya's Cell Phone again when the court asks for proof connecting the recorded conversation to the weapon.
When May gives an alibi involving an ice coffee delivered at 9:00 p.m., call the Bellboy and accept the condition for continuing.
- Present Maya's Cell Phone to establish that the clockwork was removed before the murder.
- Present The Thinker against May's store explanation.
- Choose that May heard about the weapon, then present the Wiretap.
- Present Maya's Cell Phone again when requested.
- Call the Bellboy and accept the condition.
3. Expose the second person in May's hotel room
During the Bellboy's testimony, press the statements about delivering the ice coffee at 9:00 p.m., including the claim that he delivered it to May herself. When the court is ready to dismiss the testimony, choose Protest. Select any of the available subjects, such as check-in, room service, or bed-making; each route reveals that another man was staying in May's room.
When Phoenix is asked who this creates as a possible suspect, choose The man with Miss May. The court session ends with May's Testimony added to the Court Record. Its useful point is that Mia ran to the right before being struck. The Photograph and Bellboy's Affidavit are obtained during the next investigation, not during this cross-examination.
- Press the Bellboy's delivery statements.
- Choose Protest instead of presenting random evidence.
- Ask about any offered hotel-service subject.
- Identify The man with Miss May.
- Confirm that May's Testimony has been added to the Court Record.
4. Identify Redd White during the investigation
Go to Grossberg Law Offices and examine the photographs on the corner of the desk. Examine both if necessary, then keep the photograph showing the man connected to the DL-6 incident. If you selected the other image first, swap photographs until the man is shown.
Take the photograph to the Gatewater Hotel and present it to the Bellboy. Accept his offer to write an affidavit, adding the Bellboy's Affidavit to the Court Record. At the Detention Center, present the Photograph to April May, then present the Bellboy's Affidavit. Choose Push her hard. May identifies the man as Redd White and gives you the lead to Bluecorp.
At Bluecorp, talk through the available topics and state that you have seen the painting before. Return to Grossberg's office, discuss White, and choose He's blackmailing you when that conclusion is offered. Examine the files at Wright & Co. Law Offices. In the J-S files, inspect the suicide material to obtain the Newspaper Clipping. Return to Bluecorp, present the Newspaper Clipping, accuse White of blackmailing the victim named in the clipping, and reject his denial. The next hearing begins after this sequence.
- Keep the photograph showing the man.
- Present it to the Bellboy and obtain the Bellboy's Affidavit.
- Present the Photograph and Affidavit to May.
- Choose Push her hard.
- Obtain the Newspaper Clipping from Mia's files and present it to White.
- Continue to the final hearing.
5. Contradict White's direction of movement
White initially describes Mia running away without specifying a direction. Press that statement. When his testimony changes to say that Mia ran to the left, present May's Testimony, which says that Mia ran to the right.
When asked how both accounts could be true, choose Both are right. The game then displays the office floor plan. Select the position marked K, representing the killer's position inside Fey & Co. Law Offices, and submit it. White could see Mia running left only from inside the office, not from his claimed hotel-window position.
- Press White's unspecific statement about Mia running away.
- Wait for the revised left-direction statement.
- Present May's Testimony against the revised statement.
- Choose Both are right.
- Select the K position inside Fey & Co. Law Offices on the floor plan.
6. Defeat the two-blow and light-stand explanations
White revises his story to claim that Mia was struck once, ran, and was then struck again. Present Mia's Autopsy Report against the statement claiming two blows. The report establishes a single fatal blunt-force injury.
White next mentions seeing something fall. Press that statement and pursue the detail until he identifies the object as a glass light stand. When his revised testimony says that a light stand was lying on the floor, present the Glass Shards. The stand broke when it fell, so White could not have seen an intact light stand lying on the floor. When he changes his explanation to seeing it before it fell, present the Office Floor Plans. The hotel window could not see the stand in that position.
- Present Mia's Autopsy Report against the two-blow statement.
- Press the statement about something falling.
- Present Glass Shards against the claim that an intact light stand was on the floor.
- Present the Office Floor Plans when White claims he saw the stand before it fell.
7. Finish the wiretapping sequence and use the correct final evidence
White then testifies that he entered the office during the week before the murder to place the wiretap and saw the light stand. Press all of the statements in this testimony. The court ultimately returns to the question of how White could have known about the light stand before the murder.
After Mia is channeled, the Receipt is updated to show that the light stand was purchased the day before the murder. When White's renewed testimony begins, present the revised Receipt on the first statement. This proves he could not have seen the stand a week earlier.
Edgeworth then asks for another day of investigation. Object to the request. The objection is denied, but Mia supplies a separate document: Mia's Memo. Present Mia's Memo when the court asks for the evidence that ends the delay. White is forced to confess, and both Phoenix and Maya are cleared of Mia's murder.
Do not call this final document Maya's Memo. Maya's Memo is the earlier note about the recorded phone conversation. Presenting it to Gumshoe changes that Court Record item into Maya's Cell Phone, so Maya's Memo is no longer the active evidence after the exchange. Mia's Memo appears later as new evidence and is the document used in the final objection sequence.
- Press all of White's wiretapping testimony.
- Present the revised Receipt when renewed testimony begins.
- Object to Edgeworth's request for another investigation day.
- Present Mia's Memo when the game asks for the evidence to end the delay.
- Confirm White's confession and the not-guilty result for Phoenix and Maya.
- Keep Maya's Memo, Maya's Cell Phone, and Mia's Memo distinguished by their exact Court Record names.
Before you move on
- The Bellboy's testimony establishes that another man was in May's room, and May's Testimony is added to the Court Record.
- The man photograph and Bellboy's Affidavit identify the man as Redd White.
- White's left-versus-right account is defeated with May's Testimony and the office floor plan.
- White's two-blow explanation is defeated with Mia's Autopsy Report.
- Glass Shards and the Office Floor Plans disprove his light-stand account.
- The revised Receipt defeats White's claim that he saw the light stand a week earlier.
- After Phoenix objects to another investigation day, Mia's Memo is presented, White confesses, and the court clears Phoenix and Maya of Mia Fey's murder.
Case 3 — Turnabout Samurai: Investigation — The Showbiz Angle
The investigation in Turnabout Samurai takes place around Global Studios. Progress depends on opening the studio areas, questioning the cast and crew, examining the correct objects, and completing Cody Hackins’s card exchange. Pressing every available conversation topic is useful because new topics often appear only after you return with another clue. This route covers the North American Nintendo DS edition and ends when the final investigation automatically transitions to court.
1. Day 1: Obtain permission to investigate Global Studios
Start at the Detention Center and talk to Will Powers about what happened, the Steel Samurai, and his alibi. Move to the Studio Main Gate and talk to Wendy Oldbag about the studios, Will Powers, Jack Hammer, and her reason for suspecting Powers.
Return to the Detention Center and ask Powers about his alibi and the security lady. Powers gives you Powers’s Letter. Go back to the Main Gate and present Powers’s Letter to Oldbag. Maya adds the Guidemap to the Court Record, allowing you to reach the rest of the studio grounds.
Move to Outside Studio One and talk to Detective Gumshoe about the investigation, Powers’s arrest, the security camera, and the evidence. Gumshoe gives you Jack Hammer’s Autopsy Report. Examine the Studio One door, the fallen mascot head, and the security camera.
Return to the Main Gate and talk to Oldbag again until you have discussed the automatic camera. Move to the Employee Area and examine the lunch plates and the opened grate. Then enter Will’s Dressing Room and examine Will’s bag to obtain the Cardkey.
- Talk to Powers about the case, the Steel Samurai, and his alibi.
- Obtain Powers’s Letter and present it to Oldbag.
- Receive the Guidemap and Jack Hammer’s Autopsy Report.
- Examine the Studio One door, mascot head, security camera, lunch plates, and grate.
- Examine Will’s bag and obtain the Cardkey.
2. Day 1: Open Studio One and inspect camera 307
Return to Outside Studio One and examine the Studio One door. The Cardkey opens it. Inside Studio One, examine the camera. This brings Penny Nichols into the scene. Talk to Penny about the day of the crime, Will Powers, and her suspicion that someone else may have been present. Continue through all available topics.
Go back to the Main Gate and tell Oldbag about Penny’s claim. After Oldbag leaves the guard station, examine the computer and enter camera number 307. The camera produces Powers’s (?) Photo, which is added to the Court Record. The investigation then ends automatically.
- Use the Cardkey on the Studio One door.
- Examine the camera inside Studio One.
- Complete Penny’s available conversations.
- Tell Oldbag about Penny’s claim.
- Use camera number 307 at the guard-station computer.
- Confirm that Powers’s (?) Photo is in the Court Record.
3. Day 2: Reopen the grate and question Cody
After the Oldbag trial, begin at the Main Gate and move to the Employee Area. Penny has finished repairing the broken grate. Wait until she leaves, examine the repaired grate, and choose to rip it open. This restores the route Cody Hackins used to enter the studio grounds.
Return to the Main Gate and talk to Penny about every available subject. Then move to Will’s Dressing Room and question Sal Manella about the day of the crime and the producer and bigwigs. His account places him in the Studio Two Trailer during the relevant period.
Return through the Employee Area. Cody appears after the grate has been reopened. Talk to him about the Steel Samurai and what happened. He runs away after saying that he saw everything. The Empty Bottle is added to the Court Record. Examine it so its description identifies the sleeping-pill label.
- Visit the Employee Area before trying to meet Cody.
- Examine the repaired grate and choose to rip it open.
- Talk to Penny at the Main Gate.
- Question Sal Manella about the available subjects.
- Talk to Cody and obtain the Empty Bottle.
- Examine the Empty Bottle in the Court Record.
4. Day 2: Enter Studio Two and obtain Mr. Monkey’s Head
Move to Outside Studio Two and examine the two empty plates, the locked trailer door, the sign marked 2, the studio van, the flowerbed, and the incinerator. These examinations establish the relevant layout and are required for the investigation to continue.
Return to the Main Gate and examine the abandoned guard station itself, not just the computer. You receive the Trailer Key. Use it on the trailer door at Outside Studio Two and enter the Studio Two Trailer.
Talk to Dee Vasquez through every available topic. She gives you Vasquez’s Memo and indicates that you need the script. Return to Will’s Dressing Room and present Vasquez’s Memo to Sal Manella. Then move to Inside Studio One and examine the director’s chair to obtain the Script.
Return to the Studio Two Trailer and present the Script to Vasquez. She explains the timing of the fallen Mr. Monkey head, and Mr. Monkey’s Head is added to the Court Record.
- Examine the required Studio Two exterior landmarks.
- Obtain the Trailer Key from the abandoned guard station.
- Use the key to enter the Studio Two Trailer.
- Question Vasquez and obtain Vasquez’s Memo.
- Present the memo to Sal Manella.
- Examine the director’s chair in Studio One and obtain the Script.
- Present the Script to Vasquez and receive Mr. Monkey’s Head.
5. Day 2: Complete the Steel Samurai card exchange
Return to the Main Gate and talk to Oldbag. She has Cody’s dropped card and wants to trade for the Cardkey. Present the Cardkey and choose to lend it to her. You receive the Steel Samurai Card.
Move to Will’s Dressing Room and present the Steel Samurai Card to Cody. Then go to the Studio Two Trailer and present the Steel Samurai Card to Penny. She gives you the URP Card. Return to Will’s Dressing Room and present the URP Card to Cody.
Talk to Cody through the available subjects. When he asks what you like about the Steel Samurai, choose His fighting skills. Cody gives you Path to Glory. Continue the conversation about what happened so that Cody gives his account of the incident.
When Mia asks whether Cody should be called to testify, choose Let’s not call him. Gumshoe then interrupts and takes Cody into police protection. Mia asks whether you believe Will Powers is innocent. Choose I believe. This exact sequence advances the game to the next trial.
- Trade the Cardkey to Oldbag for the Steel Samurai Card.
- Present the Steel Samurai Card to Cody.
- Present the Steel Samurai Card to Penny and obtain the URP Card.
- Present the URP Card to Cody.
- Choose His fighting skills.
- Obtain Path to Glory and complete Cody’s incident conversation.
- Choose Let’s not call him when Mia asks whether Cody should testify.
- Choose I believe when Mia asks whether Will Powers is innocent.
- Allow Gumshoe to trigger the transition to court.
6. Day 3: Obtain the Five-Year-Old Photo and begin the final trial
After Cody’s trial, talk to Will Powers at the Detention Center about Dee Vasquez, Sal Manella, and Jack Hammer. Move to the Main Gate, then to the Employee Area, and talk to Gumshoe. Ask about the plate; he examines it and adds the Steak Plate to the Court Record. Also ask about Prosecutor Edgeworth. After the fingerprint discussion, Gumshoe returns the Sleeping Pill Bottle.
Go to Will’s Dressing Room and question Penny about Jack Hammer, the last episode, studio policy, and five years ago as those topics become available. When Penny asks for proof that children care about the Steel Samurai, present Path to Glory.
Return to the Main Gate and talk to Oldbag about five years ago. When she demands proof, choose I have proof. Present the Steak Plate and Sleeping Pill Bottle when requested; either order works. This reveals the old accident and adds the Five-Year-Old Photo.
Move to Outside Studio Two and present the Five-Year-Old Photo to Vasquez. Follow her into the trailer. The confrontation and Gumshoe’s intervention end the investigation and automatically begin the final trial.
- Question Powers about Vasquez, Manella, and Hammer.
- Obtain the Steak Plate from Gumshoe.
- Discuss Edgeworth with Gumshoe and recover the Sleeping Pill Bottle.
- Question Penny and present Path to Glory.
- Choose I have proof when Oldbag asks for proof about five years ago.
- Present the Steak Plate and Sleeping Pill Bottle.
- Receive and present the Five-Year-Old Photo to Vasquez.
- Follow Vasquez into the trailer and allow the trial transition.
Before you move on
- Powers’s Letter, the Guidemap, Jack Hammer’s Autopsy Report, the Cardkey, and Powers’s (?) Photo are in the Court Record.
- Studio One was opened with the Cardkey, and camera number 307 produced Powers’s (?) Photo.
- The Studio Two exterior plates, trailer door, sign, van, flowerbed, and incinerator were examined.
- The grate was reopened, Cody was questioned, and the Trailer Key was obtained and used.
- Vasquez’s Memo was presented to Sal, the Script was taken from the director’s chair, and the Script was presented to Vasquez.
- Oldbag traded the Cardkey for the Steel Samurai Card.
- Cody received the Steel Samurai Card and URP Card, provided Path to Glory, completed his incident dialogue, and the exact Mia responses Let’s not call him and I believe were selected.
- The Steak Plate and Sleeping Pill Bottle were obtained and used to complete Oldbag’s proof exchange.
References for this chapter
- Phoenix Wright: Ace Attorney - Guide and Walkthrough - DS - By TIDQ ↗
- Phoenix Wright: Ace Attorney - Guide and Walkthrough - DS - By Deathborn_668 ↗
- Phoenix Wright: Ace Attorney/Episode 3: Turnabout Samurai/Day 2 - Investigation ↗
- Phoenix Wright: Ace Attorney/Episode 3: Turnabout Samurai/Day 3 - Investigation ↗
- Turnabout Samurai — Transcript — Part 3 ↗
Case 3 — Turnabout Samurai: In-Court Tactics
Turnabout Samurai’s courtroom progression depends on separating Will Powers from the Steel Samurai costume, proving what Cody Hackins actually saw, and reconstructing the events surrounding Jack Hammer’s death. Save before each court session and before major investigation transitions. If a presentation costs a penalty, reload and reread the revised testimony before trying again; later statements often contain the contradiction rather than the original version.
1. Day 2 Trial: Break Oldbag’s identification
Gumshoe adds the Samurai Spear at the beginning of the trial. During Wendy Oldbag’s first testimony, present Powers’s (?) Photo against the final statement identifying the person in the photograph as Will Powers. The image proves that the Steel Samurai costume passed the gate, but it does not show the actor’s face, so it cannot establish that Powers was inside the costume.
When Oldbag revises her account, press the statement about Will breaking a prop. The broken prop is identified as the Samurai Spear, and its evidence description is updated. Continue pressing the relevant statements about the rehearsal, the assistant, and the costume. When Edgeworth treats the costume’s presence as proof that Powers wore it, object to that conclusion instead of presenting unrelated evidence.
In Oldbag’s later identification testimony, present Powers’s (?) Photo against the statement that the person in the costume could only have been Powers. When the judge asks whom you should accuse, choose Oldbag. Choose to press further when prompted, then present the Samurai Spear. This connects the damaged prop with Powers’s injured ankle and undermines Oldbag’s identification. Press the required statement in the final Oldbag testimony and take the recess.
- Present Powers’s (?) Photo against Oldbag’s identification claim.
- Press the broken-prop statement so the Samurai Spear is updated.
- Object when Edgeworth treats the costume as proof of Powers’s identity.
- Accuse Oldbag when the court asks who is responsible for the faulty identification.
- Press further and present the Samurai Spear.
2. Day 2 Investigation: Prepare Cody’s testimony
Begin at Outside Studio Two. Examine the plates, trailer door, sign marked 2, studio van, flowerbed, and incinerator. Move to the Employee Area and complete the required conversations with Penny Nichols, Sal Manella, Oldbag, and Cody Hackins. The confrontation with Cody produces the Empty Bottle; examine it after receiving it.
Return to the Main Gate and examine the guard station to obtain the Trailer Key. Go back to Outside Studio Two, enter the trailer, and speak with Dee Vasquez to receive Vasquez’s Memo. Take the memo to Sal in Will’s Dressing Room. Then enter Studio One and examine the director’s chair to obtain the Script. Present the Script to Vasquez to receive Mr. Monkey’s Head.
Return to the Main Gate and present the Cardkey to Oldbag to receive the Steel Samurai Card. Give that card to Penny in the trailer to receive the URP Card. Take the URP Card to Cody in Will’s Dressing Room. When Cody asks what you like about the Steel Samurai, choose His fighting skills to receive Path to Glory. Talk through the incident and the remaining available topics.
After Cody describes seeing the Steel Samurai land a killing blow, Mia asks whether Cody should be called to the stand. Choose that Cody should not be called to testify. If that response does not advance the scene, use the alternate recovery response, I believe, when Mia asks whether you believe Will Powers is innocent. Gumshoe then overhears the conversation and takes Cody into police protection, leading to the next trial section. Do not skip this choice: it is the required end-of-investigation decision.
- Inspect the major landmarks around Studio Two and the Employee Area.
- Obtain the Empty Bottle, Trailer Key, Vasquez’s Memo, Script, Mr. Monkey’s Head, Steel Samurai Card, URP Card, and Path to Glory.
- Give the URP Card to Cody and choose His fighting skills.
- Finish Cody’s incident conversation and choose that Cody should not be called to testify.
- If necessary, choose I believe when Mia asks whether Will Powers is innocent.
3. Day 3 Trial: Establish what Cody actually saw
During Sal Manella’s first testimony, press the statement about skipping lunch. When Mia asks whether the testimony is contradictory, identify the contradiction using the meal plates examined outside the trailer. Press Sal’s statement that no one left their chairs and choose to press harder. This forces him to admit that the meeting included a break.
In Sal’s revised Break testimony, press the statements concerning the timing and the claimed lack of opportunity. When the judge asks whether someone could have gone from the trailer to Studio One, answer No, it’s impossible. The blocked route and Mr. Monkey’s Head prevent the court from accepting a simple walk between the studios.
Mia adds Cody’s Camera when Cody takes the stand. Present the camera against the final statement of Cody’s first testimony. Press the relevant statement in his next testimony and choose to press harder. When the judge asks whether you want to show evidence, choose to show it and present Cody’s Camera again. Press the final statement of the following testimony and press harder. When Cody revises that statement, present Path to Glory.
Path to Glory is the decisive response to Cody’s claim that he saw the Steel Samurai win. It is a collection of Cody’s photographs of the Steel Samurai’s victories, and it contains no victory photograph from the incident in question. When asked what this proves, state that the Steel Samurai did not win, then identify the Steel Samurai as the victim.
Examine Cody’s Photo when it appears. Point to the number 2 and present it. Next, point to Studio Two on the Guidemap and present it. State that the trailer was there. This redirects the court from the assumed Studio One location to the incident Cody witnessed near Studio Two.
When Edgeworth asks for proof that Hammer stole Powers’s costume, present the Empty Bottle and choose to fingerprint the bottle. The examination advances the case to the next investigation.
- Use the meal evidence against Sal’s skipped-lunch and no-break claims.
- Use Cody’s Camera in both required contradictions.
- Present Path to Glory after Cody revises his testimony.
- Identify the number 2 in Cody’s Photo and then Studio Two on the Guidemap.
- Present the Empty Bottle and choose to fingerprint the bottle.
4. Day 3 Investigation: Link Hammer to the sleeping pills
Speak with Will at the Detention Center, then visit Oldbag at the Main Gate. Move to the Employee Area and speak with Gumshoe about the plate, the investigation, and Edgeworth. Gumshoe adds the Steak Plate and returns the Empty Bottle as the Sleeping Pill Bottle after Jack Hammer’s fingerprints are identified. These are separate evidence items: the plate carries traces of the pills, while the bottle bears Hammer’s fingerprints.
Go to Will’s Dressing Room and speak with Penny. Present Path to Glory after the relevant conversation topics have been exhausted, then ask about the five-year-old incident. Return to the Main Gate and speak with Oldbag about five years ago. When she demands proof that Hammer stole Powers’s costume, choose I have proof.
Present the Sleeping Pill Bottle first, then the Steak Plate. Oldbag’s conversation can also advance with the two items in the reverse order, but the bottle-first route directly links Hammer to the sleeping pills before the plate demonstrates that the drug remained on the steak. Oldbag then gives you the Five-Year-Old Photo.
Go to Outside Studio Two and present the Five-Year-Old Photo to Vasquez. Follow Vasquez into the trailer and complete the conversation. This starts the final trial.
- Obtain the Steak Plate from Gumshoe.
- Obtain the Sleeping Pill Bottle after discussing Edgeworth with Gumshoe.
- Present Path to Glory to Penny before asking about the five-year-old incident.
- Choose I have proof with Oldbag and present the two pill-related items.
- Present the Five-Year-Old Photo to Vasquez outside Studio Two.
5. Final Trial: Defeat Vasquez’s alibi
Vasquez’s first testimony covers the meeting, the break, and the steak meal. The Studio Van is added to the Court Record. Present the Steak Plate against the statement claiming that Vasquez ate the steak, then choose that she did not eat it. When asked what she was doing during the break, identify that she met the Steel Samurai.
When Vasquez argues that a petite woman could not use the Samurai Spear, choose that she could not and present the Samurai Spear. The spear is damaged and duct-taped, so it was not the weapon that caused the fatal injury. When asked for the real weapon, present the Five-Year-Old Photo and identify the spiked fence beside the Studio Two trailer. When asked how the body could have been moved, state that Vasquez had another way and present the Studio Van. When asked whether Manella was a conspirator, answer that he was.
When Vasquez tries to leave, request another testimony. In After Finding the Body, press the statement about returning to the trailer for her script and direction notes, then choose to press harder. Her final statement changes to claim that Hammer was injured and unable to perform action scenes. Present Powers’s (?) Photo. State that Vasquez saw Hammer limping, then present the Five-Year-Old Photo when asked to prove her knowledge.
When Vasquez claims she had no motive, choose the response that lets you prove she had one and present the Five-Year-Old Photo. When asked for the final conclusion about her motive, choose She had no motive. The photo instead establishes Hammer’s earlier attack and explains why Vasquez killed him in self-defense before helping move the body.
Continue through Vasquez’s confession, Will Powers’s not-guilty verdict, and the post-trial conversation. If Will asks why Hammer framed him, choose Show evidence and present Powers’s (?) Photo. Hammer was jealous of Powers’s success as the Steel Samurai.
- Present the Steak Plate against Vasquez’s steak claim.
- Present the Samurai Spear, then the Five-Year-Old Photo, then the Studio Van.
- Use Powers’s (?) Photo against Vasquez’s revised claim about Hammer’s knowledge of Hammer’s injury.
- Use the Five-Year-Old Photo to explain the earlier accident and the spiked fence.
- Complete Vasquez’s confession, Powers’s not-guilty verdict, and the post-trial explanation.
Before you move on
- Oldbag’s identification has been undermined because the photograph does not identify the actor inside the costume.
- Sal’s lunch and break claims have been contradicted by pressing and the meal evidence.
- Cody’s Camera, Cody’s Photo, Path to Glory, Empty Bottle, and the fingerprint examination have been used in the required sequence.
- The post-investigation Cody decision has been completed, with the alternate I believe response used if necessary.
- Vasquez’s steak alibi has collapsed, the Samurai Spear has been rejected as the murder weapon, the spiked fence has been identified, and the Studio Van has explained the body’s movement.
- Vasquez’s revised testimony has been defeated with Powers’s (?) Photo, the Five-Year-Old Photo has explained the earlier incident, Will Powers has received a not-guilty verdict, and the post-trial conversation has concluded.
References for this chapter
- Phoenix Wright: Ace Attorney - Spoiler-Free Walkthrough - DS - By angeldeb82 ↗
- Phoenix Wright: Ace Attorney/Episode 3: Turnabout Samurai/Day 2 - Investigation ↗
- Phoenix Wright: Ace Attorney/Episode 3: Turnabout Samurai/Day 2 - Trial ↗
- Phoenix Wright: Ace Attorney/Episode 3: Turnabout Samurai/Day 3 - Investigation ↗
- Turnabout Samurai — Final Day Trial Walkthrough ↗
Case 4 — Turnabout Goodbyes: Investigation — Digging into DL-6
Turnabout Goodbyes has three investigation sections separated by courtroom sequences. The first investigation occurs on Day 1, before Edgeworth's initial trial. The second begins after the Day 2 trial and covers Lotta's second photograph, the boat rental shop, the caretaker, Polly, and the DL-6 records. The third begins after the Day 3 trial, after the caretaker's disappearance and the intervening courtroom revelations. It leads directly into the Day 4 final trial and produces the Letter From The Safe and the DL-6 Bullet.
1. Complete the Day 1 investigation opening
Begin at Wright & Co. Law Offices and let the opening conversation finish. Move to the Detention Center and speak with Miles Edgeworth. Present the Attorney's Badge, then use every available Talk topic concerning what happened, Gourd Lake, and whether he committed the murder. This establishes Phoenix as Edgeworth's attorney and opens the investigation route.
Move to the Gourd Lake Entrance and speak with Detective Gumshoe. Discuss what happened, Edgeworth, and the defense request. After the witness topic appears, select it and choose the autopsy report when Gumshoe asks what you want to know. Move to Gourd Lake Public Beach.
Examine the object on the bench and take the Popper. Move to Gourd Lake Woods and examine the camera. Use the Popper on the camera, then present the Attorney's Badge to Lotta Hart. Talk to Lotta to receive Lotta's Camera, then present that camera back to her. These actions are required before the later evidence-gathering route can proceed.
- Finish the opening conversation at Wright & Co. Law Offices.
- Present the Attorney's Badge to Edgeworth and exhaust the available topics.
- Question Gumshoe at the Gourd Lake Entrance and choose the autopsy-report option.
- Take the Popper from Gourd Lake Public Beach.
- Use the Popper on the camera at Gourd Lake Woods.
- Receive Lotta's Camera and present it back to Lotta.
2. Gather the remaining Day 1 evidence
From the Gourd Lake Entrance, move to Criminal Affairs and speak with Gumshoe. Discuss the victim, the meeting, and whether he trusts Edgeworth. This adds Robert Hammond's Autopsy Report to the Court Record.
Return to Gourd Lake Woods and speak with Lotta to receive the Lake Photo. Then visit Gourd Lake Public Beach and speak with Larry Butz. Use the Gourdy topic to receive the Gourdy Article. Return to Wright & Co. Law Offices and examine the Autopsy Report in the Court Record before continuing.
Move to Grossberg's Office and speak with Marvin Grossberg. Present Hammond's Autopsy Report, then talk about Hammond to receive Misty Fey's Photo. Return to the Detention Center and present Misty Fey's Photo to Edgeworth. Discuss the incident, then present the Lake Photo. Agree to defend him in court to receive Edgeworth's Request.
Take Edgeworth's Request to Gumshoe in Criminal Affairs and present it. Once the conversation ends, the game advances to the Day 2 trial. The evidence needed for this transition includes Hammond's Autopsy Report, the Popper, Lotta's Camera, the Lake Photo, the Gourdy Article, Misty Fey's Photo, and Edgeworth's Request.
- Obtain Hammond's Autopsy Report from Gumshoe.
- Receive the Lake Photo from Lotta.
- Question Larry about Gourdy and receive the Gourdy Article.
- Present Hammond's Autopsy Report to Grossberg.
- Receive Misty Fey's Photo.
- Present both required photos to Edgeworth and accept the defense request.
- Present Edgeworth's Request to Gumshoe.
- Confirm that the Day 2 trial begins.
3. Investigate Gourd Lake after the Day 2 trial
After the Day 2 trial ends, speak with Maya in the Detention Center. Move to Gourd Lake Woods and speak with Gumshoe. Return to the Detention Center, take Maya with you, and move to the Gourd Lake Entrance.
Speak with Lotta and agree to her deal. Visit Gourd Lake Public Beach and speak with Larry. Return to Criminal Affairs and question Gumshoe about the investigation and Gourdy. When he asks you to select a secret weapon, choose the Metal Detector. This selection is used in the final DL-6 evidence sequence.
Move to the Boat Rental Shop and obtain the Air Tank. Take it to Larry at Gourd Lake Public Beach. Present the Air Tank, confirm that it is Larry's when asked, and identify its use as inflating something. Continue the conversation about the tank until Larry finishes explaining it.
Return to Gourd Lake Woods. Tell Lotta that Gourdy does not exist and that you have proof, then present the Air Tank. Talk to Lotta again to receive the Second Lake Photo. Confirm that the photograph is in the Court Record before leaving the area.
- Speak with Maya after the Day 2 trial.
- Question Gumshoe and choose the Metal Detector.
- Obtain the Air Tank from the Boat Rental Shop.
- Present the Air Tank to Larry and complete the follow-up conversation.
- Present the Air Tank to Lotta after claiming Gourdy does not exist.
- Receive and confirm the Second Lake Photo.
4. Investigate the caretaker and obtain the DL-6 records
Return to the Boat Rental Shop and move to the Caretaker's Shack. Speak with the tipsy old man, identified as Uncle in the dialogue. Present the Attorney's Badge and agree to run the noodle shop when prompted. Present the Lake Photo afterward.
Examine Polly the parrot so she is added to the Court Record. Talk to Uncle about Polly. Return to Criminal Affairs and present Polly to Gumshoe. This opens the route to the Records Room.
In the Records Room, speak with Maya about the case summary, then discuss the victim data and suspect data. These conversations add the DL-6 Case File and DL-6 Incident Photo. Inspect both entries in the Court Record before leaving so you know they are present. They are separate pieces of evidence and are used for different revelations in the final trial.
This investigation ends with the case moving to the Day 3 trial. The later final investigation does not begin until that courtroom section has occurred.
- Present the Attorney's Badge to Uncle.
- Agree to run the noodle shop and present the Lake Photo.
- Examine Polly and discuss her with Uncle.
- Present Polly to Gumshoe.
- Discuss the case summary, victim data, and suspect data with Maya.
- Confirm that the DL-6 Case File and DL-6 Incident Photo are in the Court Record.
- Proceed into the Day 3 trial.
5. Complete the final investigation before the Day 4 trial
This section begins after the Day 3 trial, following the caretaker's disappearance and the intervening courtroom sequence. It is the final investigation of Turnabout Goodbyes and prepares the Day 4 trial. It does not follow a completed Polly or Yanni Yogi trial; those revelations occur during the final courtroom section.
Speak with Larry at Wright & Co. Law Offices, then go to the Detention Center and speak with Edgeworth. Move to the Gourd Lake Entrance to meet Gumshoe, then continue to the Boat Rental Shop, where Grossberg is waiting.
Move to the Caretaker's Shack and examine the green safe above the television. This adds the Letter From The Safe to the Court Record. Return to the Detention Center and present the letter to Edgeworth. Talk with him about Yanni Yogi.
Go to Grossberg's Office and discuss Gregory Edgeworth. Present the Letter From The Safe to Grossberg, then discuss von Karma. Finish the newly available topics before leaving.
Return to Criminal Affairs and enter the Records Room. Speak with Manfred von Karma about Edgeworth and then about the trial. Present the Letter From The Safe when the game permits it. After the resulting events, the DL-6 Bullet is added to the Court Record. Inspect the bullet and save before starting the Day 4 trial.
- Begin this section only after the Day 3 trial and its caretaker events are complete.
- Speak with Larry, Edgeworth, Gumshoe, and Grossberg in the required order.
- Examine the green safe in the Caretaker's Shack.
- Present the Letter From The Safe to Edgeworth and discuss Yanni Yogi.
- Discuss Gregory Edgeworth with Grossberg, present the letter, and discuss von Karma.
- Present the letter to von Karma in the Records Room.
- Receive and inspect the DL-6 Bullet.
- Save before entering the Day 4 final trial.
Before you move on
- The Day 1 Court Record contains Hammond's Autopsy Report, the Popper, Lotta's Camera, the Lake Photo, the Gourdy Article, Misty Fey's Photo, and Edgeworth's Request.
- The Day 2 trial has completed and the second investigation has begun.
- The Metal Detector was selected as Gumshoe's secret weapon.
- Larry received the Air Tank explanation, Lotta provided the Second Lake Photo, and the photo is in the Court Record.
- The Attorney's Badge and Lake Photo were presented to Uncle, Polly was examined, and Polly was presented to Gumshoe.
- The DL-6 Case File and DL-6 Incident Photo were obtained from the Records Room.
- The Day 3 trial has occurred, including the caretaker's disappearance and the intervening courtroom sequence.
- The Letter From The Safe was recovered from the safe and presented to Edgeworth, Grossberg, and von Karma.
References for this chapter
- Phoenix Wright: Ace Attorney - Spoiler-Free Walkthrough - DS - By angeldeb82 ↗
- Phoenix Wright: Ace Attorney - Guide and Walkthrough - DS - By TIDQ ↗
- Phoenix Wright: Ace Attorney/Episode 4: Turnabout Goodbyes/Day 1 - Investigation — StrategyWiki ↗
- Guide for Phoenix Wright: Ace Attorney Trilogy — Phoenix Wright: Ace Attorney Episode 4 ↗
Case 4 — Turnabout Goodbyes: Trial — Breaking a Legendary Reputation
Turnabout Goodbyes reaches its conclusion across three courtroom sections. The Day 2 trial breaks Lotta Hart’s identification and proves that her photograph captured the shooter’s hand. The intervening Day 3 trial begins with the boat-shop caretaker’s testimony, then uses Larry Butz’s recollection, Lotta’s Deposition, the Second Lake Photo, and the Pistol to establish that the murder occurred before midnight, involved three shots, and was staged at the Boat Shop. After the caretaker disappears, investigate the Letter From The Safe and obtain the DL-6 Bullet. The final Day 4 trial exposes the caretaker as Yanni Yogi through Polly’s name and the safe number 1228, then identifies Manfred von Karma as Gregory Edgeworth’s killer by proving the second shot struck the elevator and that the missing bullet remains in von Karma’s shoulder.
1. Day 2 trial — Break Lotta Hart’s identification
At the start of the Day 2 trial, obtain the Pistol Bullet by pressing Detective Gumshoe on the statement about finding the body. Press his final statement, then press the revised statement to add the Pistol to the Court Record. When Maya asks whether Phoenix still needs her, choose the response that keeps her at the defense bench.
During Lotta Hart’s first testimony, press every statement except the opening statement about the date. Use the additional press prompts even when von Karma warns that the testimony is already clear. When the court asks whether it should declare a verdict after Lotta insists she saw the shooter clearly, choose Wrong. This opens the identification testimony that must be challenged.
Present the Lake Photo against Lotta’s claim that she saw the man clearly. Press her statement about using binoculars, then press further when the game allows it. Present Lotta’s Camera against her claim that she was photographing a meteor shower. When asked why she aimed the camera at the lake, present the Gourdy Article. If Lotta demands proof that she was searching for Gourdy, present Lotta’s Camera again.
In the revised testimony, press the statement claiming that Lotta watched the boat continuously. Present the Gourdy Article to show that a person searching for Gourdy would have been scanning the lake. Choose Make her show the enlargement. When the enlarged photograph appears and the court is ready to accept it, choose to object to the enlargement. Point to the shooter’s hand holding the weapon and present that point. Then present the Pistol when the game asks for proof. Identify the victim himself as the person being shot at. This ends the Lotta portion and awards Lotta’s Deposition, which is required later.
- Obtain the Pistol Bullet and Pistol from Gumshoe’s testimony.
- Press Lotta’s testimony except the opening date statement.
- Use the Lake Photo, Lotta’s Camera, and Gourdy Article in the identification sequence.
- Object to the enlarged photograph and point to the shooter’s weapon hand.
- Present the Pistol and identify the victim as the target.
- Confirm that Lotta’s Deposition has been added before leaving this courtroom section.
2. Intervening courtroom section — Establish the staged murder
The next courtroom section begins with the boat-shop caretaker testifying about the night of the murder. Let the initial testimony proceed, then press the final statement about seeing a man walk past the shop window. When the caretaker adds that the man was Edgeworth, press the new identification statement as well. The testimony is designed to make the caretaker appear to be a reliable eyewitness while concealing how the shooting was staged.
When the caretaker’s explanation appears to support a guilty verdict, do not treat the apparent defeat as the end of the trial. Larry interrupts before the verdict can stand. The court then turns to Larry’s account of the gunshot he heard and the time announced on the radio.
Present Lotta’s Deposition against Larry’s statement that he remembers only one gunshot or that the timing was after midnight. Let Larry continue when prompted. Press the final statement of his revised testimony, choose We should care when the court asks whether the radio announcement matters, and present Lotta’s Deposition against the revised statement. When asked whether Larry is correct, choose Larry’s right.
Present the Second Lake Photo to establish that Lotta’s sound-sensitive camera recorded a gunshot at 11:50 p.m. When von Karma argues about the number of shots, present the Pistol to show that it was fired three times. The first shot was the actual murder shot; the other shots were part of the staging.
When asked who the two figures on the boat were, choose Edgeworth and the murderer. If asked for the murderer’s name, choose I don’t know. Point to the Boat Shop on the overhead map and present it. Identify the boat-shop caretaker as the person who fired the shots. When asked why he fired the additional shots, choose To create a witness. The court orders another day, but the caretaker disappears before he can be secured.
- Press the caretaker’s final statement and the added Edgeworth identification.
- Allow Larry’s interruption to reopen the case after the apparent guilty ruling.
- Use Lotta’s Deposition against Larry’s timing and one-shot claims.
- Use the Second Lake Photo to establish the 11:50 p.m. shot.
- Present the Pistol to establish three shots.
- Identify the Boat Shop, the caretaker, and the purpose of creating a witness.
- Confirm that the caretaker disappears and the court extends the proceedings.
3. Investigation before the final trial — Obtain the Letter From The Safe and DL-6 Bullet
After the intervening courtroom section, speak with Larry at Wright & Co., then speak with Edgeworth at the Detention Center. Continue through the Gourd Lake Entrance and Boat Rental Shop until Grossberg appears. At the Caretaker’s Shack, examine the green safe above the television to obtain the Letter From The Safe.
Return to the Detention Center and present the letter to Edgeworth. Speak with him about Yanni Yogi. Go to Grossberg’s Office, discuss Gregory Edgeworth, present the Letter From The Safe, and continue the conversation about von Karma. Then return to the Records Room at Criminal Affairs and speak with von Karma. Present the letter when prompted. After the ensuing events, the DL-6 Bullet is added to the Court Record.
Save before entering the final trial. The letter and bullet are not optional flavor evidence: the letter advances the DL-6 investigation, while the DL-6 Bullet is the final physical link between von Karma’s shoulder wound and Gregory Edgeworth’s murder weapon.
- Obtain the Letter From The Safe from the green safe above the television.
- Present the letter to Edgeworth and Grossberg as required.
- Present the letter to von Karma in the Records Room.
- Confirm that the DL-6 Bullet has been added before starting the final trial.
4. Final Day 4 trial — Expose Yanni Yogi and Manfred von Karma
The final trial first returns to the caretaker. Press his statements denying involvement and motive, including the final statement when the game allows it. When asked for his identity, choose Yanni Yogi. Agree to cross-examine Polly the parrot when von Karma challenges Phoenix.
Press Polly’s opening statement and ask what her name is. When asked whether the answer has anything to do with the case, choose the affirmative response. Present the DL-6 Case File and select Suspect Data. The name Polly matches Yanni Yogi’s former fiancée, establishing that the caretaker is Yogi.
Press Polly’s statement again and ask for the safe number. She answers 1228. When the judge asks whether this matters, choose the affirmative response. Present the DL-6 Case File again and select Case Summary. The date shown there matches December 28, completing the second identification link. Yogi then admits his identity and confesses to Robert Hammond’s murder, but the DL-6 Incident remains unresolved.
During Edgeworth’s DL-6 testimony, present the DL-6 Case File against the statement claiming that only one shot was fired. Select Victim Data. When the connection to the case is requested, establish that the second firing relates to DL-6. Present the DL-6 Incident Photo and point to the bullet hole in the elevator door or window area shown in the photograph. This proves that Gregory Edgeworth was not struck by the second bullet.
When the court asks what happened to the missing bullet, choose The murderer didn’t need it. When Phoenix is asked whether he can identify the culprit, choose the option to say it now and name Manfred von Karma. When asked for proof that von Karma was wounded, choose to show evidence and present the Metal Detector.
The detector reveals a bullet in von Karma’s right shoulder. Present the DL-6 Bullet afterward. The bullet links the shoulder wound to the weapon used in the DL-6 Incident and breaks von Karma’s timeline. Continue through his confession, Edgeworth’s Not Guilty verdict, and the closing scenes. After the trial, present the DL-6 Bullet to Maya when the game permits the final conversation.
- Identify the caretaker as Yanni Yogi before questioning Polly.
- Use Polly’s name with DL-6 Case File: Suspect Data.
- Use safe number 1228 with DL-6 Case File: Case Summary.
- Present DL-6 Case File at Edgeworth’s single-gunshot statement and select Victim Data.
- Point to the bullet hole in the DL-6 Incident Photo.
- Choose The murderer didn’t need it and name von Karma.
- Present Metal Detector, then DL-6 Bullet.
- Continue until Edgeworth’s Not Guilty verdict and the complete Case 4 ending scenes play.
5. Recovery after penalties and completion check
Pressing testimony is generally safe, but incorrect evidence presentations and wrong answers reduce the Penalty Bar. Save before each courtroom section and use the in-trial save option before the enlarged Lotta photograph, Larry’s revised testimony, the Second Lake Photo, the Polly evidence links, the DL-6 Incident Photo, the Metal Detector, and the DL-6 Bullet. If the bar is low, reload rather than risking a Game Over.
If the trial seems stuck, verify the chronology. The Lotta identification is only the first Day 2 section. The caretaker’s testimony and Larry’s timeline occur in the next courtroom section. The Letter From The Safe and DL-6 Bullet are obtained during the investigation before the final Day 4 trial. Yanni Yogi is exposed only during that final trial through Polly and the DL-6 Case File.
Case 4 is complete when the game has established the staged Boat Shop murder, identified Yanni Yogi, resolved the DL-6 second shot, found the bullet in von Karma’s shoulder, connected it with the DL-6 Bullet, delivered Edgeworth’s Not Guilty verdict, and played the full closing sequence.
- Reload after a serious penalty instead of continuing with a nearly empty Penalty Bar.
- Verify Lotta’s Deposition, Second Lake Photo, Pistol, Letter From The Safe, DL-6 Case File, DL-6 Incident Photo, Metal Detector, and DL-6 Bullet are available at their required stages.
- Confirm that Yanni Yogi’s identity is established in the final Day 4 trial.
- Confirm that von Karma is identified through the shoulder bullet and DL-6 Bullet.
- Watch the complete verdict and closing scenes.
Before you move on
- The Lotta section overturns her clear-identification claim and establishes that the photograph shows the shooter’s weapon hand.
- The intervening courtroom section establishes the 11:50 p.m. shot, three shots from the Pistol, the Boat Shop location, the caretaker as shooter, and the motive to create a witness.
- The caretaker disappears and the court orders another day.
- The Letter From The Safe has been obtained and shown to the required characters before the final trial.
- The DL-6 Bullet has been obtained before the final trial.
- The final Day 4 trial identifies the caretaker as Yanni Yogi through Polly’s name and safe number 1228.
- The DL-6 Case File and Victim Data establish two firings, and the DL-6 Incident Photo establishes the elevator bullet hole.
- The Metal Detector finds a bullet in von Karma’s right shoulder.
References for this chapter
- Phoenix Wright: Ace Attorney - Spoiler-Free Walkthrough - DS - By angeldeb82 ↗
- Phoenix Wright: Ace Attorney - Guide and Walkthrough - DS - By TIDQ ↗
- Phoenix Wright: Ace Attorney/Episode 4: Turnabout Goodbyes/Day 3 - Trial — StrategyWiki ↗
- Phoenix Wright: Ace Attorney/Episode 4: Turnabout Goodbyes/Day 4 - Trial — StrategyWiki ↗
- Phoenix Wright: Ace Attorney/Episode 4: Turnabout Goodbyes/Day 2 - Trial — StrategyWiki ↗
Case 5 — Rise from the Ashes: Investigation — Forensics and DS Tools
Follow Rise from the Ashes in three connected sections: Day 1 Investigation, the mandatory Day 2 Angel Starr trial, and the post-trial Day 2 Investigation. Do not attempt to enter the Evidence Room immediately after the first parking-lot investigation. That route becomes available only after the Angel Starr courtroom sequence. The note found in Edgeworth's car trunk is called Victim's Note in the North American Nintendo DS release.
Day 1 Investigation — Begin at the offices and inspect the parking lot
At Wright & Co. Law Offices, talk to Ema Skye about Ema, the case, scientific investigation and her relationship with Mia Fey. Move to the Detention Center and talk to Lana Skye about the case, the victim, Lana and her relationship to Mia. Return to the offices if the game directs you there, then move to the Prosecutor's Office Underground Parking Lot.
At the parking lot, examine the available crime-scene objects and speak with Jake Marshall when he appears. Examine the wallet in front of the locked door. Use the stylus to rotate it until the clasp or opening is visible, then inspect that point to obtain Goodman's ID.
Talk to Angel Starr about every available topic. Move to the High Prosecutor's Office and speak with Miles Edgeworth about the case, Edgeworth and Lana. Edgeworth's Knife is added to the Court Record. Examine the trophy in the office to obtain the Prosecutor Trophy, present it to Edgeworth, and discuss the day of the crime to receive Edgeworth's Parking Stub.
- Finish Ema's required conversations.
- Finish Lana's required conversations.
- Open the wallet and obtain Goodman's ID.
- Use every available talk topic with Angel Starr.
- Obtain Edgeworth's Knife, Prosecutor Trophy and Edgeworth's Parking Stub.
Day 1 Investigation — Get the authorization and finish the crime-scene route
Go to the Police Department Entrance and talk to Detective Gumshoe. Examine the Blue Badger display to obtain the Blue Badger Panel. Present Goodman's ID to Gumshoe, follow the newly available conversation and present the Prosecutor Trophy when requested. Complete the resulting rumors conversation to receive the Letter of Introduction.
Return to the Underground Parking Lot and present the Letter of Introduction to Jake Marshall. Talk to him about the victim to obtain Goodman's Autopsy Report, then complete his other available topics. Examine the locked door near the security area, the emergency phone and the nearby partition. Examine the cell phone on the ground, choose to check it, open it, press the blue button and select redial when prompted. This adds the Cell Phone to the Court Record and updates its information.
Examine Edgeworth's car and inspect the open trunk itself. This is the action that adds Victim's Note. Finish Jake's required conversations. When the route is complete, the game advances to the mandatory Day 2 trial.
- Obtain the Blue Badger Panel.
- Receive the Letter of Introduction from Gumshoe.
- Present the Letter of Introduction to Jake Marshall.
- Obtain Goodman's Autopsy Report.
- Complete the cell-phone redial sequence.
- Inspect the open trunk and obtain Victim's Note.
- Allow the game to advance to the Angel Starr trial.
Transition — Complete the mandatory Day 2 Angel Starr trial
The next section is a courtroom sequence, not another investigation. Complete the Angel Starr trial before trying to reach the Evidence Room. The trial adds or uses the Parking Lot Floor Plans, Crime Photo, Edgeworth's Knife, Goodman's Autopsy Report, the Cell Phone and the victim's shoe.
Follow the courtroom prompts until Angel's claimed viewpoint and the physical evidence are challenged. Damon Gant then introduces the Switchblade Knife and reveals that another incident involving the same victim was reported in the Evidence Room. The investigation route resumes only after this trial ends.
Do not return to the Evidence Room directly from Day 1. The post-trial Day 2 Investigation is the required bridge between Angel's trial and the later Meekins, Jake Marshall and Damon Gant courtroom sequence.
- Finish the entire Angel Starr trial.
- Confirm that the Switchblade Knife is in the Court Record.
- Confirm that the Evidence Room incident has been revealed.
- Continue into the post-trial Day 2 Investigation.
Post-trial Day 2 Investigation — Use luminol and question Angel
Return to the Underground Parking Lot. Ema introduces Luminol Testing Fluid. Select it and spray the ground around the footprints near Edgeworth's car, working back from the trunk until the trace registers. When the game asks what is unusual, choose the amount of blood. The Luminol Testing Fluid is added to the Court Record and the parking-lot floor plans are updated.
Talk to Angel about Today's trial and Detective Starr. To unlock the SL-9 discussion, present Victim's Note. When the next proof is requested, present Goodman's ID and then the Crime Photo. This opens the SL-9 Incident topic. Complete the newly available Angel and Detective Marshall conversations to receive the Steak Lunch.
Go to the Police Department Entrance. If the Security Guard Office is not yet available, enter and leave the relevant areas as prompted. At the Detention Center, speak with Mike Meekins about the day of the crime, the victim and his bandaged hand. Present Goodman's ID, then complete the Crime details and Reason for arrest topics.
Move to Criminal Affairs and speak with Damon Gant about Edgeworth and the Evidence Room incident. Examine the head detective's desk area to obtain Goodman's Lost Item Report. Talk to Gant again and receive permission to investigate the Evidence Room.
- Reveal the parking-lot blood trace with luminol.
- Choose the amount of blood.
- Present Victim's Note to Angel.
- Present Goodman's ID and then the Crime Photo when required.
- Complete Angel's SL-9 Incident conversation.
- Obtain the Steak Lunch.
- Complete Meekins's required conversations.
- Obtain Goodman's Lost Item Report.
- Receive Gant's permission for the Evidence Room.
Post-trial Day 2 Investigation — Enter the Evidence Room and process the scene
Return to the Security Guard Office and examine the Evidence Room entrance. Jake Marshall appears and the access sequence begins. Present the Steak Lunch to Jake, then complete his topics about the Guard Office, Marshall, the Security System and the Transferal. Present Goodman's ID when the identity list is discussed. This adds or updates the ID Card Record.
Enter the Evidence Room and talk to Gumshoe. Obtain the Evidence Room Floor Plans and discuss his locker and the Evidence safe to add Evidence Locker to the Court Record. Present Victim's Note to Gumshoe when the SL-9 conversation is required, then present the ID Card Record to update the list with another known entrant.
Examine the Rubber Glove hanging behind the yellow police tape. Examine the broken fragments near Goodman's locker and choose to inspect them closely. Assemble the numbered pieces in this order: 5, 4, 6, 1, 8, 3, 2, 7. Rotate each piece as needed to fit it. The completed object is added as the Unstable Jar.
Use Luminol Testing Fluid on each required Evidence Room trace. First process the locker with the cloth hanging out to reveal the handprint. Then spray the area where the Unstable Jar was found to reveal the large blood pool. Finally spray the bloody handprint on Gumshoe's locker. Do not leave until the scene has registered these traces and the game sends you to Edgeworth's office.
- Give Jake the Steak Lunch and complete his access conversations.
- Obtain the ID Card Record.
- Obtain the Evidence Room Floor Plans and Evidence Locker information.
- Examine the Rubber Glove.
- Assemble the Unstable Jar in the order 5, 4, 6, 1, 8, 3, 2, 7.
- Reveal the cloth-locker handprint with luminol.
- Reveal the blood pool beneath the jar location.
- Reveal the bloody handprint on Gumshoe's locker.
Post-trial Day 2 Investigation — Obtain the Fingerprinting Set and finish every print check
Go to the High Prosecutor's Office and speak with Edgeworth about the Inquiry Committee and tomorrow's trial. Present the ID Card Record to Edgeworth to obtain the Screwdriver. Present the Switchblade Knife and complete the resulting SL-9 conversation about the allegations of forgery. Ema's scientific investigation interest then leads Edgeworth to provide the Fingerprinting Set and the fingerprint files.
Return to the Evidence Room. The game first directs you to Gumshoe's bloody locker. Select a visible finger on the bloody handprint, spread aluminum powder over the touch screen, clear the excess by blowing into the DS microphone and compare the result. This first bloody print does not identify anyone because the hand was covered by a glove. Treat this as a required failed check, not as the final result.
Re-examine the same handprint and select the faint print just below and to the left of the bloody hand. Dust it separately. This print is clear and matches Dick Gumshoe's fingerprint file. Accept the Gumshoe comparison before moving on.
Next, examine the locker with the white cloth hanging from it. Use Luminol Testing Fluid if the handprint has not already been revealed, then choose the fingerprint check. Select the faint area just to the left of the middle-finger mark, dust it and blow away the powder. This is the usable print associated with Jake Marshall. Compare it with the fingerprint files and accept Jake Marshall's match.
After the Marshall comparison succeeds, Marshall's Prints is added to the Court Record. This evidence is the progression trigger. Verify that Marshall's Prints is present before leaving the Evidence Room; the game then ends the investigation automatically and advances to the Day 3 courtroom sequence involving Meekins, Marshall and Gant.
- Obtain the Screwdriver by presenting the ID Card Record to Edgeworth.
- Receive the Fingerprinting Set and fingerprint files.
- Test the glove-covered bloody print and confirm that it produces no identification.
- Test the faint print below and to the left of the bloody handprint.
- Match that faint print to Dick Gumshoe.
- Reveal and test the print on the locker with the white cloth.
- Match the usable locker print to Jake Marshall.
- Confirm that Marshall's Prints has been added to the Court Record.
- Wait for the automatic transition to the Meekins, Marshall and Gant trial.
Before you move on
- Day 1 Investigation is complete and the Court Record contains Goodman's ID, Edgeworth's Knife, Prosecutor Trophy, Edgeworth's Parking Stub, Blue Badger Panel, Letter of Introduction, Goodman's Autopsy Report, Cell Phone and Victim's Note.
- The mandatory Day 2 Angel Starr trial has been completed and the Switchblade Knife and Evidence Room incident have been introduced.
- The post-trial Day 2 Investigation has been completed in the correct order.
- The Court Record contains Luminol Testing Fluid, Steak Lunch, Goodman's Lost Item Report, ID Card Record, Evidence Room Floor Plans, Evidence Locker, Rubber Glove, Unstable Jar, Screwdriver and Fingerprinting Set.
- The parking-lot blood trace and the required Evidence Room luminol traces have registered successfully.
- The glove-covered print was tested and rejected as unusable.
- The faint print below the bloody handprint was matched to Dick Gumshoe.
- The usable print on the white-cloth locker was matched to Jake Marshall.
Case 5 — Rise from the Ashes: Trial — Tying Forensics to Testimony
Rise from the Ashes has three separate courtroom phases after the opening investigation. First complete the mandatory Day 2 Angel Starr trial. Then perform the Day 2 investigation and forensic work. The next court session is the Day 3 Meekins and Jake Marshall sequence. After the Day 3 investigation, complete the Day 4 courtroom sections involving Ema, Damon Gant and Lana Skye. The North American DS Court Record calls the note recovered from Edgeworth's trunk Victim's Note.
1. Complete the mandatory Day 2 Angel Starr trial
At the beginning of court, the Parking Lot Floor Plans are added to the Court Record. During Angel Starr's first testimony, press her first, second and fourth statements. This adds the Crime Photo. Present the Crime Photo against the later statement in which Angel describes the murder, then object when the game prompts you to stop her. When Angel changes her testimony to claim that the murder was planned, present Edgeworth's Knife.
During Angel's deduction testimony, present Goodman's Autopsy Report against the final statement. When she adds the claim about Lana's muffler, present the Crime Photo. For the apprehending-the-suspect testimony, press the statements about the emergency phone and continue pressing when the follow-up prompt appears. The Cell Phone is updated and additional testimony is added.
Present the Parking Lot Floor Plans against the revised phone statement. When asked what the plans prove, choose Where she saw it, point to the Security Room and identify the Distance to the crime when the court asks why Angel's account is impossible. Raise an Objection at the next prompt to keep the trial moving.
Angel then adds the Victim's Shoe. Press the final statement and choose that there is a problem with the shoe. Rotate the shoe and point to the blood on its heel. Present it. When the court asks for the contradiction, present the Crime Photo, then point to the object protruding from the car's muffler. Present Lana's Cell Phone when requested.
After the recess, the Switchblade Knife is admitted. Examine it and open it so its tag information is available. During Damon Gant's testimony, compare the number on the knife's tag with Victim's Note. Present Victim's Note against Gant's statement about the victim's identification. Press the revised statements, ask where the victim was found, then ask for the victim's ID number. Choose that the information tells you something and present Goodman's ID. This ends the Angel Starr courtroom section and begins the Day 2 investigation.
- Press Angel's required statements to obtain the Crime Photo.
- Use Edgeworth's Knife, Goodman's Autopsy Report, Crime Photo, Parking Lot Floor Plans, Victim's Shoe and Lana's Cell Phone at the indicated turning points.
- Inspect the Victim's Shoe and present the blood on its heel.
- Open the Switchblade Knife before Gant's testimony.
- Use Victim's Note and Goodman's ID during Gant's testimony.
2. Finish the Day 2 investigation and perform the forensic work
Return to the Underground Parking Garage with Ema. Use the blood-trace tool around the scene until you reveal the bloodstain. When Ema asks what is strange about it, choose the amount of blood. Luminol Testing Fluid is then added to the Court Record. Speak with Angel until her available topics are exhausted, then present the Switchblade Knife, Victim's Note, Goodman's ID and the Crime Photo as required. Discuss the newly available SL-9 and Jake topics to receive the Steak Lunch.
Visit the Evidence Room Guard Station and examine the Evidence Room entrance. Return to the garage and speak with Gumshoe. At the Detention Center, question Mike Meekins about his hand and present Goodman's ID to unlock his crime-related discussion. In Criminal Affairs, speak with Gant and examine the chief detective's desk to obtain Goodman's Lost Item Report. Ask Gant for permission to enter the Evidence Room and receive the guest access card.
At the Security Guard Office, examine the Evidence Room entrance. When Jake Marshall appears, give him the Steak Lunch and exhaust his topics. Present Goodman's ID to receive the ID Card Record. Enter the Evidence Room and obtain the Evidence Room Floor Plans and Evidence Locker. Present either the Switchblade Knife or Victim's Note to Gumshoe to unlock the SL-9 discussion, then present the ID Card Record so it is updated.
Examine the left-side locker flap, the bloody handprint and the glove hanging from the police tape. The glove becomes the Rubber Glove. Examine the broken pieces behind the tape, choose the closer inspection option and assemble them into the Unstable Jar. Apply Luminol Testing Fluid to the area behind the yellow tape, the bloody handprint and the suspicious locker near the exit. If a result does not appear, keep spraying the same blood mark until the game acknowledges it.
Go to Edgeworth's Office and exhaust his dialogue. Present the ID Card Record to receive the Screwdriver. Present Victim's Note or the Switchblade Knife to unlock the SL-9 and forgery discussion, then receive the Fingerprinting Set. Return to the Evidence Room. Use the set on Gumshoe's locker as the practice comparison, then examine the far-left locker. Select the remaining print near the ring-finger position and match it to obtain Marshall's Prints.
- Obtain Luminol Testing Fluid and complete the required Evidence Room luminol examinations.
- Obtain Goodman's Lost Item Report, ID Card Record, Evidence Room Floor Plans and Evidence Locker.
- Assemble the Unstable Jar.
- Obtain the Screwdriver and Fingerprinting Set from Edgeworth.
- Complete the fingerprint comparison and add Marshall's Prints.
3. Break Meekins's testimony and expose Marshall's disguise
On Day 3, press every statement in Meekins's Crime Report testimony. The Security Video is added to the Court Record. In the Mystery Man testimony, press the statement claiming that nobody else could have unlocked Goodman's locker and choose that there is a problem.
Inspect the video. At the opening, point out the light above Goodman's locker. When the locker opens and an object falls, pause at the falling object and present it. When prompted, present the Rubber Glove.
During the next Meekins testimony, present Goodman's Lost Item Report against a statement claiming that Goodman used his ID card. Object when the judge tries to continue and call Jake Marshall. The SL-9 Incident Files are added during the recess.
In Marshall's Day of the Crime testimony, present Marshall's Prints against the statement placing him at a street-side saloon. In Bloodstained Fingerprints, press the relevant statements so Marshall's Prints is updated, then press the statement in which he denies being the person in the video. Choose to show evidence and replay the Security Video.
Watch Marshall's locker. Pause when an object is hanging from it and present that detail. Present the Evidence Locker to prove that opening the locker required a fingerprint. Then present the victim's position, marked V, on the Evidence Room Floor Plans. Replay the video and pause immediately after the attack, when blood is visible on Marshall's shoulder. Present that image.
Press every statement in Marshall's confession. When he refers to the earlier incident, identify Neil Marshall and present the SL-9 Incident Files. Object when the court is about to accept his explanation, then present the Blue Badger Panel and finally the updated ID Card Record. The court adjourns and begins the Day 3 investigation.
- Add the Security Video by pressing Meekins's first testimony.
- Identify the locker light and falling object in the video.
- Use the Rubber Glove and Goodman's Lost Item Report.
- Use Marshall's Prints, Evidence Locker, Evidence Room Floor Plans and the blood on Marshall's shoulder.
- Identify Neil Marshall and finish with the Blue Badger Panel and updated ID Card Record.
4. Complete the Day 3 investigation before the final trial
Speak with Ema, then go to the Detention Center and exhaust Lana's topics. Visit the Police Department and question Jake Marshall about his scars, the investigation and his partnership with Gant and Skye. Visit the Chief's Office to obtain the Gant Team Picture.
In Criminal Affairs, speak with Gumshoe, present the Switchblade Knife and discuss the newly available murder-weapon topic. This updates the knife and adds Neil's Autopsy Report. At Edgeworth's Office, exhaust his dialogue, present the Gant Team Picture and inspect the paper beneath his desk to obtain the Letter of Resignation.
Visit Angel in the Underground Parking Lot and exhaust her conversation before returning to Criminal Affairs. Present the Letter of Resignation to Gumshoe and receive Gumshoe's ID. Take Gumshoe to the Chief's Office. Examine Gant's safe and enter 7777777. Examine it again, assemble the fragments and update the Unstable Jar.
Present the Fingerprinting Set to Gumshoe and examine the middle-finger print. Match it to obtain the Strip of Cloth. Examine Gant's desk to add the Evidence List. Return to the Detention Center, present Damon Gant's profile when requested and then present the Unstable Jar. Finish Lana's newly available topics before entering the final trial.
- Obtain the Gant Team Picture and Neil's Autopsy Report.
- Visit Angel before presenting the Letter of Resignation to Gumshoe.
- Use safe code 7777777 and reassemble the Unstable Jar.
- Use the Fingerprinting Set on the middle-finger print and obtain the Strip of Cloth.
- Examine Gant's desk for the Evidence List.
- Complete Lana's updated conversation.
5. Resolve the Day 4 trial and expose Gant
During Ema's first testimony, press the statement about Detective Goodman. Choose to hear more and ask about the picture. Examine and turn over the Evidence List, then present it against Ema's revised statement. In the next testimony, present Neil's Autopsy Report against the final statement. Point to the tip of the weapon, answer that there was another weapon and present the Gant Team Picture.
In Ema's recollection testimony, present the Unstable Jar. Rotate it until its outline resembles the Blue Badger, then present it. When asked, state that the location changed and later choose that the message is in the evidence. Present the jar again and connect the marks to spell E-M-A. During the recess, receive the Evidence Law book. Present Damon Gant's profile to call him as the next witness.
In Gant's first SL-9 testimony, present the Unstable Jar against the final statement. Press his revised testimony and identify Lana Skye as the accomplice. Present the ID Card Record to establish Gant's presence in the Evidence Room, then present Goodman's Lost Item Report when he challenges the timing of Goodman's meeting.
When the court asks how Goodman's body reached Edgeworth's trunk, present the Screwdriver as the clearest route through this deduction. The Parking Stub is also an accepted alternate presentation in this sequence, but the Screwdriver should be the guide's primary recommendation. When asked whether you have concrete proof of the murder, choose that you have no proof yet, then call Lana Skye.
Press Lana's testimony until she adds the explanation about breaking the knife and moving the body. Ask why she moved it, then present the Unstable Jar against the added statement about the fragments. In the Jar and Message in Blood testimony, present the Unstable Jar against the statement that every fragment was collected.
During Actual Crime Scene, turn over the Evidence Law book and inspect its back flap to obtain Lana's Picture. When Gant first demands the decisive evidence, choose that you cannot show evidence. After Gant admits that he cut the cloth from Neil Marshall's vest, choose to show evidence and present the Strip of Cloth. Identify the fingerprints as Ema Skye's, then present Lana's Picture. The picture shows Neil's vest soaked with blood while the cloth itself is bloodless, proving the cloth was removed before Neil received the fatal wound. When Gant argues that the cloth was illegally withheld, state that you did not violate the evidence rule and present Evidence Law.
The final resolution exposes Damon Gant as Bruce Goodman's murderer and as the official who manipulated the SL-9 evidence. Lana is not found guilty of Goodman's murder, but she still faces consequences for her separate evidence-fabrication and accomplice conduct.
- Turn over the Evidence List and use it during Ema's revised testimony.
- Use Neil's Autopsy Report and the Gant Team Picture.
- Shape the Unstable Jar into the Blue Badger and spell E-M-A.
- Use the Unstable Jar, Lana Skye's profile, ID Card Record, Goodman's Lost Item Report and the Screwdriver during Gant's testimony.
- Withhold the Strip of Cloth when Gant first demands it.
- After Gant admits cutting the cloth, present the Strip of Cloth, identify Ema Skye, then use Lana's Picture and Evidence Law.
Before you move on
- The Day 2 Angel Starr trial is complete, including the Switchblade Knife and Gant's ID-number testimony.
- The Day 2 investigation has produced the Rubber Glove, Unstable Jar, Screwdriver, Fingerprinting Set and Marshall's Prints.
- The Day 3 Meekins and Marshall courtroom sequence is complete, including the Security Video and SL-9 Incident Files.
- The Day 3 investigation has produced the Gant Team Picture, Neil's Autopsy Report, Strip of Cloth, Evidence List and completed Unstable Jar.
- Ema's drawing is resolved with the Evidence List, Gant Team Picture, Unstable Jar and Neil's Autopsy Report.
- Damon Gant is exposed as Bruce Goodman's murderer and as the official who manipulated the SL-9 evidence.
- Lana is found not guilty of Goodman's murder while still facing consequences for separate evidence-fabrication and accomplice conduct.
- After the final Edgeworth scene, present the Evidence List when asked for evidence that neither Edgeworth nor Phoenix could have found alone, then allow the ending sequence and credits to finish.
References for this chapter
- Phoenix Wright: Ace Attorney - Guide and Walkthrough - DS - By TIDQ ↗
- Phoenix Wright: Ace Attorney - Spoiler-Free Walkthrough - DS - By angeldeb82 ↗
- Phoenix Wright: Ace Attorney walkthrough: spoiler-free guide solutions for every case ↗
- Phoenix Wright: Ace Attorney/Episode 5: Rise from the Ashes/Day 2 - Trial Former ↗
- Phoenix Wright: Ace Attorney/Episode 5: Rise from the Ashes/Day 3 - Trial Former ↗
- Phoenix Wright: Ace Attorney/Episode 5: Rise from the Ashes/Day 3 - Trial Latter ↗
- Phoenix Wright: Ace Attorney/Episode 5: Rise from the Ashes/Day 4 - Trial Latter ↗
Final Verdict, Epilogues and Post-Game Checks
The North American Nintendo DS campaign is complete only after Turnabout Goodbyes reaches its DL-6 resolution and Rise from the Ashes finishes its full sequence. Case 5 is not finished after the first investigation or after the Angel Starr courtroom section. Follow the required order through the post-trial investigation, the Meekins and Jake Marshall trial, the final investigation, the Damon Gant trial, the closing scenes, and the separate Case 5 credits.
Save before major courtroom sequences
Use the save prompt before the final Turnabout Goodbyes trial, before the Day 2 Angel Starr trial in Rise from the Ashes, and before the final Damon Gant trial. These positions are useful if you make a damaging presentation or want to retry a sequence without replaying the preceding investigation.
For the final Case 5 trial, keep a save from before Damon Gant first asks about the Strip of Cloth. When that initial demand occurs, refuse to present it. The court must first establish why the cloth matters. Later, when the correct evidence prompt appears, present the cloth and continue the fingerprint and photograph sequence.
A verdict message is not the end of a case. Continue through the judge's ruling, the character dialogue, the closing scenes, and the credits before treating the episode as complete. Optional touch-screen interactions during the credits are not required for the story ending.
- Keep a pre-trial save before each late courtroom section.
- Preserve a save before Gant's first Strip of Cloth demand.
- Reload if a presentation sequence becomes unsalvageable.
- Continue past the verdict through the closing scenes and credits.
Finish Turnabout Goodbyes and its DL-6 ending
Complete the courtroom sequence involving the boat caretaker and Larry Butz. That section exposes the false account of the lake incident but does not finish the case.
When investigation resumes, return to the Caretaker's Shack and examine the green safe above the television. Obtain the Letter From The Safe, then show it to Edgeworth, Grossberg, and von Karma as the available conversations require. Continue until the DL-6 Bullet is added to the Court Record.
In the final trial, identify the caretaker as Yanni Yogi. Cross-examine Polly the parrot, examine the DL-6 Case File when prompted, select Suspect Data when the court asks which section matters, and later use the Case Summary page of the file. During Edgeworth's testimony, present the DL-6 Case File on the relevant victim-data statement, then use the DL-6 Incident Photo to point out the bullet hole in the elevator door.
At the concluding physical-evidence sequence, present the Metal Detector first. After the bullet is located in von Karma's shoulder, present the DL-6 Bullet to establish its connection to the DL-6 incident. Finish the ruling, Edgeworth's resolution, Maya's closing scenes, and the Turnabout Goodbyes credits.
- The boat caretaker and Larry sequence is complete.
- The Letter From The Safe was obtained and shown to the required characters.
- Yanni Yogi was identified.
- The DL-6 Case File and DL-6 Incident Photo were used.
- The Metal Detector was presented before the DL-6 Bullet.
- The closing scenes and Turnabout Goodbyes credits finished.
Complete Rise from the Ashes in the correct order
Begin with Day 1 Investigation. After examining the wallet and opening it to obtain Goodman's ID, follow the required conversations at the detention center, parking lot, High Prosecutor's Office, Police Department Entrance, and parking garage. Examine the cell phone and trunk of Edgeworth's car. In the North American DS release, the note obtained from the trunk is called Victim's Note.
The next courtroom section is the mandatory Day 2 Angel Starr trial. Obtain the Parking Lot Floor Plans, then work through Angel's testimony with the Crime Photo, Edgeworth's Knife, Goodman's Autopsy Report, the floor plans, the Victim's Shoe, the Crime Photo again, the object in the car muffler, and Lana's Cell Phone. When the knife can be opened, examine it to add the Switchblade Knife to the Court Record. During Damon Gant's testimony, use Victim's Note and Goodman's ID at the required points.
Only after that trial does the post-trial Day 2 Investigation begin. Follow Ema to the parking garage and use luminol to reveal the blood evidence. Speak with Angel, Meekins, Gant, Gumshoe, and Jake Marshall as new topics become available. Enter the Evidence Room, obtain the Evidence Locker, assemble the broken pieces into the Unstable Jar, use luminol on the relevant surfaces, and complete the fingerprint comparisons. Obtain Marshall's Prints and the Screwdriver before leaving this investigation.
The next courtroom section is the Day 3 Meekins and Jake Marshall trial. Complete the security-video examinations, present the Rubber Glove, Goodman's Lost Item Report, Marshall's Prints, the Evidence Locker, the SL-9 Incident Files, the Blue Badger Panel, the revised floor plan, and the ID Card Record as prompted.
After that trial, complete the Day 3 Investigation. Obtain the Gant Team Picture, Neil's Autopsy Report, Letter of Resignation, Gumshoe's ID, the reconstructed Unstable Jar, the Strip of Cloth, and the Evidence List. Examine Gant's safe and desk, complete the fingerprint task, and finish Lana's newly available conversations before entering the final trial.
- Day 1 Investigation is complete.
- The Day 2 Angel Starr trial is complete.
- The post-trial Day 2 Investigation is complete.
- The Day 3 Meekins and Jake Marshall trial is complete.
- The Day 3 Investigation is complete.
- The forensic, luminol, fingerprint, video, rotation, and jar-assembly tasks are complete.
Finish the final Damon Gant trial
Resolve Ema's testimony using the Evidence List, Neil's Autopsy Report, the Gant Team Picture, and the Unstable Jar. Rotate the jar until it resembles the Blue Badger, then inspect the blood marks to reveal the E-M-A message. During the later testimony, use the Unstable Jar, Lana's profile, the ID Card Record, Goodman's Lost Item Report, and the Screwdriver. The Screwdriver is the decisive evidence for explaining how Goodman's body was transferred into Edgeworth's trunk; do not substitute the Parking Stub at this point.
When Lana testifies, press the relevant statements and use the Unstable Jar to challenge the account of the moved body and the blood message. After the third Lana testimony, examine the back flap of the Evidence Law book to obtain Lana's Picture.
When Gant first demands the Strip of Cloth, do not show it. After the court establishes its relevance, present the Strip of Cloth and identify the fingerprints as Ema Skye's. Present Lana's Picture to establish the timing contradiction. When the legality of the unregistered evidence is raised, use the Evidence Law book. Complete the final Evidence List presentation and the remaining courtroom dialogue.
- Ema's testimony is resolved.
- Gant's testimony is completed.
- Lana's testimony is completed.
- The first Strip of Cloth demand is declined.
- The Strip of Cloth is presented only after its relevance is established.
- Ema Skye's fingerprints are identified.
- Lana's Picture is used for the timing contradiction.
- Evidence Law is presented for the legality issue.
- The final Evidence List presentation is completed.
Confirm the true resolution and ending
The present-case murder victim is Bruce Goodman. Damon Gant is exposed as Goodman's murderer and as the official who manipulated the SL-9 evidence to control Lana and conceal the truth. Do not describe Gant as the murder victim.
Neil Marshall's death is a separate event. Ema's involvement is revealed as accidental, while Gant altered the evidence and circumstances to make her appear responsible. Lana helped conceal the truth under Gant's coercion and therefore remains responsible for separate accomplice and evidence-fabrication-related conduct.
The court finds Lana Skye not guilty of Bruce Goodman's murder. That verdict does not erase her separate legal consequences. Continue through Gant's defeat, the Judge's ruling, the Lana and Ema closing scenes, the final dialogue, and the Rise from the Ashes credits.
- Bruce Goodman is identified as the murder victim.
- Damon Gant is exposed as Goodman's murderer.
- Gant is exposed as the official who manipulated SL-9 evidence.
- Lana receives a not-guilty verdict for Goodman's murder.
- Lana's separate accomplice and evidence-fabrication consequences are acknowledged.
- Ema's accidental role in Neil Marshall's death is explained.
- The closing scenes and Rise from the Ashes credits finish.
Recover if progress appears to stall
If Turnabout Goodbyes does not advance, verify that the caretaker and Larry courtroom section is complete, then revisit the Caretaker's Shack for the Letter From The Safe. Show it to the required characters and continue until the DL-6 Bullet is obtained. Recheck the Yanni Yogi identification, Polly's testimony, the DL-6 Case File, the DL-6 Incident Photo, the Metal Detector, and the DL-6 Bullet.
If Rise from the Ashes stalls, do not skip the Day 2 Angel Starr trial or the post-trial Day 2 Investigation. Speak with every currently available character after obtaining a new item. Re-examine the Victim's Note, photographs, forensic results, the Unstable Jar, the Evidence List, locker evidence, and floor plans. Confirm that the Angel Starr trial, the Meekins and Marshall trial, and the final investigation are complete before expecting the Damon Gant trial.
If the cloth sequence fails, reload the save before Gant's first demand. Decline that first request, wait for the court to establish the cloth's relevance, then present the Strip of Cloth, identify Ema's fingerprints, use Lana's Picture, and present Evidence Law. After the correct verdict, closing scenes, and credits, the campaign is complete.
- The full Turnabout Goodbyes sequence is complete.
- The full Rise from the Ashes sequence is complete in order.
- The Day 2 Angel Starr trial was not skipped.
- The Screwdriver was used for the body-transfer explanation.
- The final Case 5 verdict, closing scenes, and credits finished.
Before you move on
- Turnabout Goodbyes reaches its final ruling, closing scenes, and credits.
- The Letter From The Safe and DL-6 Bullet were obtained and used.
- Rise from the Ashes Day 1 Investigation is complete.
- The mandatory Day 2 Angel Starr trial is complete.
- The post-trial Day 2 Investigation is complete.
- The Day 3 Meekins and Jake Marshall trial is complete.
- The Day 3 Investigation is complete.
- The Day 4 Damon Gant trial is complete.
References for this chapter
Optional Content, Tips, and Troubleshooting
Use a consistent investigation sweep, save cautiously from the Start menu, and match each courtroom presentation to the exact statement on screen. These habits uncover useful optional dialogue without confusing it with required progress, while giving you reliable ways to recover when an investigation appears stuck or a trial goes badly.
Complete the active investigation sweep before hunting for optional dialogue
At each location, examine the objects currently available, then use Talk on every topic listed for each character. Required progress usually comes from one particular examination or conversation, while other examinations and evidence reactions provide optional dialogue. Do not treat Present as a mandatory third pass over every character: some presentations are required, some only produce flavor text, and some can advance the scene or make a character leave.
Finish the current Talk topics before changing locations unless the walkthrough specifically tells you to present something first. New topics can appear after an examination, a location change, or a required presentation. If a location becomes available again later, return to it and check the Talk list again. A previously visited location may have changed even if you already exhausted it earlier in the case.
- Examine relevant objects before leaving.
- Complete every currently available Talk topic.
- Use Present when the objective or a known character reaction requires it, not automatically with every item.
Read and inspect Court Record entries sensibly
Open the Court Record whenever new evidence is added and read its description. Some DS evidence provides an interactive model that can be rotated or examined for a detail, but not every entry supports that function. If the item shows an examination or rotation prompt, inspect it fully. If it does not, reading the description is sufficient for normal progress.
Profiles are separate from physical evidence. Present a profile when the contradiction or conversation concerns a person's identity, relationship, role, or presence. Optional profile reactions can add dialogue, but a generic response does not mean the item is required. Return to that character only if a later investigation event changes the available topics.
- Read every newly added evidence description.
- Rotate or inspect only entries that visibly provide that function.
- Distinguish profile presentations from physical-evidence presentations.
Recover from a stalled investigation
If no new destination appears, return to the last location where a character or object changed. Speak to every available character again, examine newly relevant objects, and check whether a recent evidence entry has an updated description. Then revisit the immediately preceding location. Investigation sections do not normally punish methodical rechecking, so this is safer than presenting random evidence.
Rise from the Ashes contains several easily missed progression gates. During the SL-9 investigation, complete Angel Starr's available conversations and make the required evidence presentations as new topics appear. Present the Victim's Note or Switchblade Knife when prompted, then continue with Goodman's ID and the Crime Photo. Once the SL-9 Incident topic is available, discuss it and continue until Jake Marshall becomes the next lead.
When Angel gives Phoenix the Steak Lunch, take it to Jake Marshall at the Police Department's Security Guard Office. This advances the conversation and helps open the route toward the evidence-room investigation. If the next event does not occur, recheck the current Talk list and make sure the lunch was presented to Marshall rather than to another character.
Forensic actions in Case 5 are scene-specific. When Ema provides Luminol, spray the relevant investigation screen until the prompted bloodstain is revealed, then examine the result and continue the resulting dialogue. Later evidence-room scenes may require additional Luminol applications, examination of lockers or bloodstains, and fingerprint work. Fingerprint powder is used when the game presents an appropriate surface and asks you to compare the developed print with the available fingerprint data. Do not assume every photograph needs dusting or every room must be sprayed after obtaining a tool.
- Recheck the last two active locations and all current Talk topics.
- Complete Angel Starr's required evidence presentations before searching for the next SL-9 lead.
- Present the Steak Lunch to Jake Marshall when the investigation directs you to the guard office.
- Use Luminol and fingerprint examination at prompted Case 5 scenes, then follow the resulting dialogue.
Handle cross-examinations without wasting penalties
Pressing a testimony statement is normally the safest first action. It may make the witness elaborate, revise a statement, or add a new line. Read the response carefully before presenting evidence. Some situations warn that pressing further carries a penalty or changes the available choice; when that warning appears, stop unless you understand the consequence.
When presenting evidence, select the exact statement that the item contradicts. A thematically related item can still be wrong if it disproves a different claim. Compare dates, locations, object descriptions, identity details, and event order. Profiles are appropriate when the issue is who was present or who performed an action; photographs, reports, plans, weapons, and other physical items are used for material inconsistencies.
A wrong presentation costs one penalty, and five penalties during a court day end the sequence. If you lose a penalty, reread the complete testimony, including any line added after pressing, and inspect the descriptions of the newest evidence before trying again. Do not use unrelated evidence merely to test a theory.
- Press uncertain statements before presenting evidence unless the game gives a warning.
- Match the evidence to the highlighted statement rather than to the general subject.
- Reread revised testimony after pressing or after taking a penalty.
Use the DS save system conservatively
The Nintendo DS version lets you save from the Start menu during a chapter, and it also provides save opportunities between major sections. Treat the active mid-case save as a single working state rather than as a collection of independent manual slots. A later save can replace the earlier mid-case position, so saving in a new location or chapter may remove the state you intended to keep available.
Save from Start before a difficult cross-examination, before a major evidence presentation, and at the beginning of a new investigation day. This is useful for recovering from a Game Over or an unwanted result, but it is not a guaranteed separate pre-trial backup. Keep the current save at the last safe point you are willing to reload, and avoid overwriting it while experimenting with optional presentations.
After a case has been completed and saved, the title-screen replay option can be used for completed-case content. Use that replay function for optional reactions instead of deliberately replacing the active save during the main run. Do not assume that replaying a completed case preserves an unfinished mid-case position from another case.
- Treat the active mid-case save as one working save state.
- Save from Start before difficult testimony and risky-looking evidence presentations.
- Do not overwrite a useful investigation state while testing optional dialogue.
- Use completed-case replay only after the relevant case has been cleared and saved.
Confirm that the story, not just the current puzzle, is complete
Optional dialogue is complete enough when the current Talk topics are exhausted, no character has an obvious new reaction to the available evidence, and the investigation advances normally. It is not necessary to present every item to every character to finish the story.
For main-story completion, let each case continue through the judge's ruling, closing dialogue, and applicable credits or transition. After the original four cases and their ending sequence, the DS edition makes Rise from the Ashes available. In Case 5, continue through the final trial and allow the closing dialogue and credits to finish; stopping immediately after a successful cross-examination is not the same as completing the episode.
If the expected event does not occur, reload the latest useful save and check the last required testimony, examination, or evidence presentation. In Case 5, recheck Angel's SL-9 dialogue, the Steak Lunch presentation to Jake Marshall, the evidence-room examinations, and the prompted forensic actions before trying unrelated presentations.
- Each case reaches its final judicial ruling and closing dialogue.
- Rise from the Ashes unlocks after the first four cases and reaches its complete ending.
- The final Case 5 closing sequence and credits finish before you treat the game as complete.
- The active save is preserved until the ending has fully played.
Before you move on
- All currently required Talk topics and examinations have been completed in each investigation segment.
- The Angel Starr, SL-9, Steak Lunch, Jake Marshall, and evidence-room sequence in Rise from the Ashes advances normally when reached.
- Forensic tools have been used at the prompted Case 5 scenes, including the relevant Luminol and fingerprint examinations.
- Every case reaches its final judicial ruling, closing dialogue, and applicable credits or ending sequence.
- The final Case 5 ending has played completely before the active save is replaced or discarded.
References for this chapter
- Phoenix Wright: Ace Attorney - Guide and Walkthrough - DS - By TIDQ ↗
- Phoenix Wright: Ace Attorney - Guide and Walkthrough - DS - By Deathborn_668 ↗
- Phoenix Wright: Ace Attorney - Guide and Walkthrough - DS - By BWoodhouse ↗
- Phoenix Wright: Ace Attorney/Episode 5: Rise from the Ashes/Day 2 - Investigation ↗
- Rise from the Ashes - Ace Attorney Wiki ↗
Finishing up
Complete all five main episodes included in the DS edition in sequence: The First Turnabout, Turnabout Sisters, Turnabout Samurai, Turnabout Goodbyes, and Rise from the Ashes.
Obtain all required evidence and unlock any investigation-only interactions needed to trigger trial scenes (for Case 5 this includes using DS forensic items on-site).
Successfully reach a final guilty confession or court-ordered verdict for each case, resolve the central mystery of Case 5, and trigger the final on-screen ending sequence for the DS campaign.
Have at least one stable pre-trial save before each trial day so you can retry the trial or specific cross-examinations if you exhaust Penalty Bar health.
Optional completion: gather all optional dialogue and examine screens for hidden character details and extra flavor, but these are not required to reach the canonical ending.
Choose your next gameScreenshots & video
Game imagery for reference. Follow the written chapters above for the route and strategies.
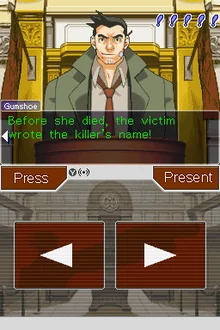
Sources & references
Our original guide draws on the references below. Check the edition at the top of this page before following controls or unlock requirements.
- Phoenix Wright: Ace Attorney/Controls — StrategyWiki ↗
- Phoenix Wright: Ace Attorney/Gameplay — StrategyWiki ↗
- Phoenix Wright: Ace Attorney - Guide and Walkthrough - DS - By Deathborn_668 ↗
- Phoenix Wright: Ace Attorney — Guide and Walkthrough for Nintendo DS, by AjidoMarujido ↗
- Phoenix Wright: Ace Attorney/Episode 5: Rise from the Ashes/Day 2 - Investigation ↗
- Phoenix Wright: Ace Attorney walkthrough: spoiler-free guide solutions for every case ↗
- Phoenix Wright: Ace Attorney - Guide and Walkthrough - DS - By TIDQ ↗
- Ace Attorney Trial 1 - The First Turnabout - Walkthrough Wizard ↗
- Phoenix Wright: Ace Attorney - Guide and Walkthrough - DS - By BWoodhouse ↗
- Phoenix Wright: Ace Attorney/Episode 1: The First Turnabout/Day 1 - Trial — StrategyWiki ↗
- Phoenix Wright: Ace Attorney — Episode 2: Turnabout Sisters, Day 2 Investigation, StrategyWiki ↗
- Phoenix Wright: Ace Attorney — Turnabout Sisters Walkthrough, Neoseeker ↗
- Phoenix Wright: Ace Attorney/Episode 3: Turnabout Samurai/Day 2 - Investigation ↗
- Phoenix Wright: Ace Attorney/Episode 3: Turnabout Samurai/Day 3 - Investigation ↗
- Turnabout Samurai — Transcript — Part 3 ↗
- Phoenix Wright: Ace Attorney - Spoiler-Free Walkthrough - DS - By angeldeb82 ↗
- Phoenix Wright: Ace Attorney/Episode 3: Turnabout Samurai/Day 2 - Trial ↗
- Turnabout Samurai — Final Day Trial Walkthrough ↗
- Phoenix Wright: Ace Attorney/Episode 4: Turnabout Goodbyes/Day 1 - Investigation — StrategyWiki ↗
- Guide for Phoenix Wright: Ace Attorney Trilogy — Phoenix Wright: Ace Attorney Episode 4 ↗
- Phoenix Wright: Ace Attorney/Episode 4: Turnabout Goodbyes/Day 3 - Trial — StrategyWiki ↗
- Phoenix Wright: Ace Attorney/Episode 4: Turnabout Goodbyes/Day 4 - Trial — StrategyWiki ↗
- Phoenix Wright: Ace Attorney/Episode 4: Turnabout Goodbyes/Day 2 - Trial — StrategyWiki ↗
- Phoenix Wright: Ace Attorney — Item Reaction FAQ — DS — Capri_chan ↗
- Rise from the Ashes - Ace Attorney Wiki ↗
- Phoenix Wright: Ace Attorney/Episode 5: Rise from the Ashes/Day 2 - Trial Former ↗
- Phoenix Wright: Ace Attorney/Episode 5: Rise from the Ashes/Day 3 - Trial Former ↗
- Phoenix Wright: Ace Attorney/Episode 5: Rise from the Ashes/Day 3 - Trial Latter ↗
- Phoenix Wright: Ace Attorney/Episode 5: Rise from the Ashes/Day 4 - Trial Latter ↗
About the game & collecting notes
- Platform
- Nintendo DS
Step-by-step campaign walkthrough for the Nintendo DS release of Phoenix Wright: Ace Attorney, covering all five cases included in the DS/Western edition through the true ending. Includes investigation routing, courtroom strategies, use of DS-specific evidence tools, failure recovery and exact completion checks so you can reach the game’s final verdict without guesswork.
Darryl Polo
Darryl Polo loves tinkering with emulation and revisiting retro games. He enjoys exploring how old favorites play on different setups and sharing what he learns along the way. At Joking Joystick, he writes about the games, hardware, and small discoveries that keep the hobby fun.
Our editorial standardsFound a step that needs another look? Help us improve this guide.