
Phoenix Wright: Ace Attorney — Justice for All (Nintendo DS, North America) Complete Walkthrough
Step-by-step walkthrough for the Nintendo DS release of Phoenix Wright: Ace Attorney — Justice for All. Covers every investigation and courtroom section across all four main episodes, plus the DS-specific interface, the Magatama / Psyche-Lock mechanic introduced in this title, failure recovery and clear completion checks so you can reach the game's true ending.

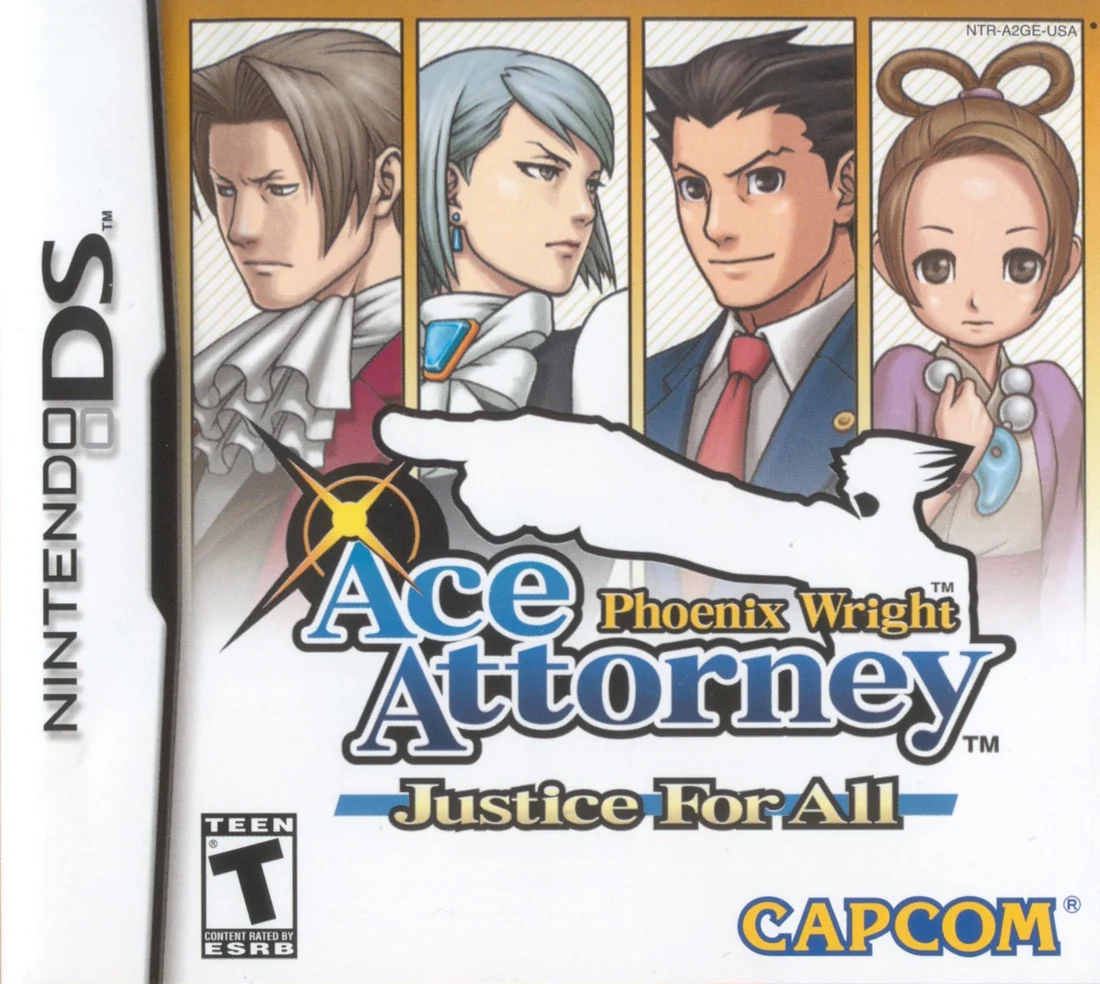
Find a copy
Phoenix Wright: Ace Attorney: Justice for All Nintendo DS
We may earn a commission if you buy through these links, at no extra cost to you. As an Amazon Associate I earn from qualifying purchases.
Opens retailer search results. Check the model, edition, seller, availability and current price before buying.
Before you begin
This guide is written for the Nintendo DS edition released in North America.
The DS release of Justice for All preserves the original game's four main episodes and adds the DS UI conveniences — it does not add a separate, new trial beyond the original case structure.
If you have a different region or a later compilation (Trilogy remaster, Switch/PS4/Xbox/PC ports), gameplay is the same for the core episodes but interface and quality-of-life features may differ.
Play at a comfortable pace and use frequent manual saves.
Each episode divides into investigation chapters (visit locations, gather evidence, interview witnesses) and courtroom chapters (cross-examine, press contradictions, present evidence).
Justice for All introduces the Magatama and Psyche-Lock system; this guide explains how and when to use it so you can break testimony seals, preserve your health gauge, and reliably reach the correct verdict.
Set yourself up for the run
Familiarize yourself with DS controls: the top screen shows courtroom or investigation content, while the bottom screen shows commands, destinations, Court Record controls, and dialogue choices.
Use the D-pad and face buttons or the touchscreen if preferred.
Press Start to open the manual Save Screen. The original North American DS release uses one normal manual save position, so each manual save replaces the previous one.
Use the single manual save deliberately: save with a healthy life gauge before a trial, before a difficult Psyche-Lock sequence, and after major investigation breakthroughs.
Remember that Continue may offer both the latest manual save and From chapter start after a failure. From chapter start is a built-in recovery checkpoint for the current investigation or courtroom segment, not a second manual save slot.
Update your play target: this guide follows the North American Nintendo DS retail release.
If you have the original GBA Japanese release or a later HD, Trilogy, or other port, expect interface and menu differences even when the core case sequence is similar.
Wrong evidence presentations and incorrect courtroom answers reduce the life gauge. If the gauge reaches zero during court, the current section ends in a game over.
Normal testimony pressing is generally safe, but read any prompt that warns about pressing further or making a risky choice.
When investigating, examine available hotspots, use Move to visit new locations, exhaust current Talk topics, and re-interview witnesses after new evidence appears.
The game progresses when required investigation triggers or courtroom events are completed; it does not require repeating every line of dialogue or presenting every item.
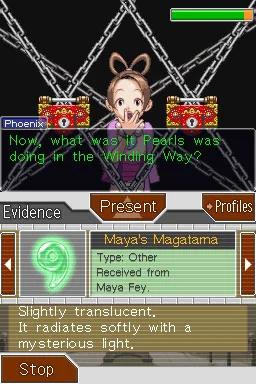
Justice for All introduces the Magatama and Psyche-Lock system in the second episode. Start a lock sequence with Maya's Magatama, then answer each lock with evidence or a profile that directly disproves the hidden claim.
Keep notes of testimony contradictions and the order of required presses, presentations, and multiple-choice answers.
Use the Court Record to review Evidence and Profiles. Read descriptions before presenting an item, especially when similar names or updated entries are involved.
If you make a costly mistake, reload the single healthy manual save or use From chapter start after a game over rather than overwriting the only reliable checkpoint.
The North American DS release does not require microphone input for completion, and it does not provide a modern chapter-select or Case Replay menu.
Getting Started: DS Interface, Save System and Gameflow
Learn the Nintendo DS controls, understand how investigations and trials connect, and establish a reliable single-save routine before beginning The Lost Turnabout. This chapter applies to the North American Nintendo DS retail release of Phoenix Wright: Ace Attorney: Justice for All.
Start the game and choose a control method
Choose New Game from the title screen and begin the campaign. The North American Nintendo DS release uses one normal manual save position for the game. Saving again overwrites the previous manual save, so treat each save as a deliberate checkpoint rather than assuming you can maintain several rotating in-game slots.
You can play with the buttons, the stylus, or a combination of both. The Control Pad moves the selection cursor. A confirms choices, advances dialogue, and selects commands. B cancels a selection or returns to the previous menu when the current screen permits it. L presses a highlighted testimony statement during cross-examination and pans across wide investigation scenes. R opens the Court Record and switches between its sections. X presents the currently selected evidence or profile during a presentation. Start opens the Save Screen. The microphone and voice commands are optional; they are not required to complete the game.
- Begin New Game from the title screen.
- Confirm that A, B, L, R, X, and Start perform the expected actions.
- Use the stylus only if it is more comfortable; no microphone input is required.
Understand the top and bottom screens
The top screen usually displays the current scene, character dialogue, testimony, or instructions. The lower screen contains the active controls and menus. During an investigation, it normally shows commands such as Examine, Move, Talk, and Present, along with the available destinations or conversation topics. During a trial, it shows testimony lines, cross-examination commands, and the Court Record controls.
Press R during normal play to open the Court Record. You can also tap the Court Record command on the lower screen when it is displayed. The record has separate Evidence and Profiles sections. Evidence includes objects, documents, photographs, reports, and other case facts. Profiles identify people connected with the case. Select an entry with the Control Pad or stylus, then confirm it to read its description.
Read each new entry when it is added. A description may specify a time, place, condition, or person that becomes important later. During a trial, select the relevant entry and press X to present it. Profiles can also be presented in Justice for All, so check both sections when a contradiction concerns someone’s identity, role, or relationship.
- Open the Court Record with R or its lower-screen command.
- Check both Evidence and Profiles whenever new information is added.
- Read item descriptions before attempting an important presentation.
- Use X to present the highlighted evidence or profile during court.
Play through investigation sections
Investigation sections take place outside the courtroom. Use Examine to inspect available objects or areas, Move to travel between listed locations, Talk to question characters about displayed topics, and Present when you need to show a character a particular item or profile. Progress is usually triggered by completing the required conversation, examination, or destination sequence rather than by finding every possible optional response.
If a new destination or conversation topic does not appear, review the current Move list and revisit locations connected to the latest clue. Speak to important characters again when new topics have appeared. Also inspect any newly available area. Do not assume that every line must be repeated, but do check for changed dialogue after a major discovery.
Some investigation scenes are wider than the visible view. When the game allows horizontal panning, use L or the touchscreen controls to look to the left or right. If an object or character is not visible in the initial view, pan before deciding that the area contains nothing else. Open the Court Record after acquiring new evidence or a profile so you know what fact the investigation has established.
- Use Examine, Move, Talk, and Present according to the current objective.
- Pan wide scenes with L or the touchscreen when the game permits it.
- If progress stops, revisit accessible locations and check for changed Talk topics.
- Read newly acquired evidence and profiles before continuing.
Recognize the investigation-to-trial transition
The main campaign alternates between investigations and courtroom sections. Investigations establish the timeline, gather evidence, and introduce the people whose statements will be tested. Trials use that information during testimony, cross-examination, evidence presentation, and judge or prosecutor prompts.
You do not choose a trial from a separate mode menu. The game moves to court automatically after the required investigation events are completed. The transition may follow a conversation, a discovery, or the end of a location sequence. If the expected transition has not occurred, check the Move list for a newly available destination and revisit the characters connected to the most recent clue.
Before the first trial of an episode, review both Evidence and Profiles. Look especially for names, times, locations, and physical descriptions. These details are the basis for contradictions. Save once the investigation has reached the point immediately before court, provided the game allows saving at that moment. This gives you a clean manual checkpoint before the health gauge can be reduced.
- Treat investigations as clue-gathering sections and trials as testimony-testing sections.
- Check Move and changed conversation topics if the next courtroom section has not started.
- Review Evidence and Profiles before entering court.
- Make a manual save before each trial when the Save Screen is available.
Use the single manual save correctly
Press Start during normal gameplay to open the Save Screen, then confirm the save. The manual save position is not an automatic history of your recent actions. Each new manual save replaces the previous one, so do not expect to load an earlier alternative checkpoint from the same cartridge.
Save before each trial, before a difficult Psyche-Lock sequence once the Magatama becomes available, and before a long courtroom section containing several presentations or decisions. Save after a major investigation breakthrough or after completing a trial segment when the game permits it. The goal is to preserve a healthy gauge and a practical restart point, not to maintain multiple in-game files.
If a wrong presentation or answer leaves the gauge damaged, reload the manual save rather than continuing with an avoidable penalty. After a game over, use Continue to return to the latest available save-related recovery point. If the current position is unusable or you need a safer restart, choose From chapter start when that option is offered. From chapter start is a built-in recovery choice, not a second manual save slot, and it may discard progress made later in the current chapter.
- Press Start and confirm that the manual save completes.
- Remember that the next manual save overwrites the previous one.
- Save before trials and difficult sequences while the gauge is healthy.
- After a game over, compare Continue with From chapter start before resuming.
Manage the health and penalty gauge
The green health gauge represents Phoenix’s remaining room for mistakes in courtroom sections. Wrong evidence presentations, incorrect answers, and some unsuccessful objections reduce it. The amount lost depends on the risk associated with the mistake. If the gauge is emptied, the courtroom sequence ends in a game over.
Pressing a testimony statement with L is normally a questioning action. It does not automatically mean that the statement is false or that you should present evidence immediately. Press the line when you need more information, then read the altered or expanded testimony. Present evidence only when a specific statement conflicts with a fact in the Court Record or when the judge explicitly asks for proof.
To find a contradiction, compare exact details rather than relying on a general impression. Check times against reports, locations against photographs or maps, objects against descriptions, and identities against Profiles. Avoid presenting items at random. If an incorrect objection or presentation reduces the gauge, reload the latest healthy manual save when possible. Do not rely on an assumed automatic save to preserve the attempt.
- Use L to press testimony statements and inspect their responses.
- Match a precise statement to the evidence or profile that disproves it.
- Treat wrong objections, wrong evidence, and wrong answers as health risks.
- Reload after a costly mistake instead of carrying unnecessary damage into later testimony.
Before you move on
- A manual save has been made and you have confirmed that it can be loaded from the title screen or Continue option.
- You can open the Court Record with R or the lower-screen Court Record command.
- You can switch between Evidence and Profiles and read entry descriptions.
- You know that X presents the highlighted evidence or profile during courtroom play.
- You have saved before beginning The Lost Turnabout’s first playable courtroom section.
- You understand that investigations gather leads and trials use testimony, evidence, profiles, and decisions to protect the health gauge.
- You know that Continue returns to the latest available recovery point and that From chapter start may restart the current chapter from its built-in beginning.
Case 1 — The Lost Turnabout: Opening Trial Section
The Lost Turnabout begins with Phoenix Wright suffering amnesia after being struck by Richard Wellington, then moves directly into the District Court trial of Maggey Byrde. The North American Nintendo DS release has no free-roaming investigation phase before this case's trial. There is no pretrial route through Wright & Co. Law Offices, Exposé Park, the police department, or another crime scene. Evidence and profiles are supplied as the courtroom tutorial progresses, so inspect the Court Record whenever the game announces a new entry. Follow the testimony order below to clear Maggey, expose Wellington, and finish the case through the verdict and post-trial dialogue.
1. Begin in the defendant lobby and proceed directly to court
After the opening dream and the attack with the fire extinguisher, Phoenix wakes in the District Court defendant lobby. Maggey Byrde explains that Phoenix promised to defend her, but he cannot remember her, the case, or even his own profession. The bailiff soon calls the trial. This sequence is the entire opening setup; there is no investigation map or preliminary evidence sweep in this episode.
On the Nintendo DS, use the lower screen for choices, testimony controls, Press, Present, and the Court Record button. The upper screen shows the current scene and dialogue. Open the Court Record with R or by tapping its lower-screen button. Evidence and Profiles are separate lists, and their descriptions provide the facts needed for the courtroom questions. Save from the in-game menu when a save prompt or suitable pause becomes available; do not expect an investigation checkpoint before the trial.
- Stay in the defendant lobby until the court session begins.
- Do not search for Wright & Co. Law Offices, Exposé Park, or the police department.
- Open and read the Court Record instead of guessing from the dialogue alone.
2. Answer the opening evidence question
Before the first testimony, review the initial Court Record. The important entries include the Attorney's Badge, Cell Phone, Glasses, and Dustin's Autopsy Report. The autopsy report identifies Dustin Prince's death as a broken neck and gives the recorded time of death as 6:28 p.m. The Glasses entry concerns the broken glasses found beneath Dustin's body.
When the judge asks what important item was found under the victim, choose Glasses. This is a multiple-choice courtroom question, not a Present action. The answer is accepted as part of the tutorial, and the court then proceeds to Detective Dick Gumshoe's testimony. If you want to understand the later contradiction, read the descriptions of Glasses and the autopsy report before continuing.
- Read Glasses and Dustin's Autopsy Report.
- Answer the judge's opening question with Glasses.
- Do not treat this question as a cross-examination presentation.
3. Resolve Gumshoe's first testimony
Gumshoe explains the murder at Exposé Park and describes Dustin Prince's body. During this portion, Crime Photo 1 is added to the Court Record. Continue reading until the court discusses the writing found near the body; Crime Photo 2 is then added as the image connected with that writing. Check the record after each addition rather than assuming all evidence is available from the start.
When Gumshoe claims that the writing clearly identifies Maggey as the killer, present Maggey Byrde's profile on the statement using the incorrect spelling “Maggie.” The profile uses “Maggey,” while the writing uses “Maggie.” This discrepancy undermines the claim that Dustin, who knew Maggey's name, wrote the message himself.
Gumshoe then testifies about Dustin and Maggey being a couple and about the birthday present Maggey gave Dustin. Press the statement describing the present and choose the option to press further. When the judge asks whether the item is relevant, select that it is relevant. The custom-made yellow Baseball Glove is added to the Court Record.
- Allow Crime Photo 1 to be added during the case explanation.
- Allow Crime Photo 2 to be added with the writing evidence.
- Present Maggey Byrde's profile against the incorrect “Maggie” spelling.
- Press the birthday-present statement and choose the relevant response to receive Baseball Glove.
4. Use Baseball Glove to disprove the writing theory
Gumshoe next relies on sand beneath Dustin's fingernail and scratches on a finger to argue that Dustin wrote Maggey's name on the ground. Present Baseball Glove on the final statement that draws this conclusion.
The glove's design shows that Dustin was left-handed: the glove is worn on the right hand so the left hand can throw. The court therefore has reason to reject the claim that Dustin made the writing with the hand indicated by the physical evidence. This contradiction ends Gumshoe's opening sequence and triggers a recess before the second part of the trial.
Use the recess as a checkpoint opportunity. If the game offers the save command at this point, save before continuing. The next section introduces new evidence and Richard Wellington, so a healthy gauge and a recent save are preferable to risking a long retry after an incorrect presentation.
- Present Baseball Glove against Gumshoe's conclusion that Dustin wrote the name.
- Use the glove's left-handed design to explain the contradiction.
- Save at the recess if the save command is available.
5. Review the new recess evidence
During the recess, Maggey explains the Cell Phone. Its owner called it, asked for Maggey's name, and arranged to meet her, but never appeared. Phoenix later found the phone in his own pocket. Phoenix's Business Card is added to the Court Record, and its reverse side displays Phoenix's phone number.
Maya also supplies the Names List, which contains names and phone numbers associated with a group of con artists. Names List is added during this recess conversation, not at the beginning of the case. Open the Court Record and read both new entries before court resumes. You will use them later against Wellington.
The game then returns to court for Richard Wellington's testimony. Continue to read every statement, because some contradictions require pressing a line before the related evidence can be presented.
- Read Phoenix's Business Card after it is added.
- Read Names List after Maya provides it.
- Confirm that the new evidence is present before Wellington's testimony begins.
6. Expose Wellington's false eyewitness account
In Wellington's first testimony, he describes seeing Maggey near Dustin and says he saw something fall with the victim. Present Baseball Glove on the statement where he identifies the object as a bunch of bananas. When the judge asks how Wellington could make that mistake, choose that Wellington has bad eyesight. The yellow glove was mistaken for bananas because Wellington was not wearing his glasses.
In Wellington's next testimony, press the statement in which he claims that he called the police immediately or explains that the call occurred around 6:45 p.m. Present Dustin's Autopsy Report against the timing claim. When offered a choice, choose to question further. Wellington then says he spent the missing time looking for a phone booth. Indicate that there is something else and present Crime Photo 1, which shows a phone booth beside Dustin's body.
When asked what Wellington was really doing during that interval, say that you have an idea and present Glasses. The glasses found beneath Dustin belonged to Wellington, and Dustin must have taken them during the struggle. Wellington was delayed because he was searching for his lost glasses rather than immediately reporting the crime.
Wellington next tries to rely on the written name. When the judge asks how he could have known the victim's killer's name, choose There was a way and present Cell Phone. The phone's owner had heard Maggey say her name, which explains how Wellington could mistake the sound of “Maggey” for “Maggie.”
- Present Baseball Glove against Wellington's bananas statement.
- Choose Has bad eyesight.
- Present Dustin's Autopsy Report against Wellington's timing claim.
- Choose to question further, then identify the phone booth with Crime Photo 1.
- Present Glasses when asked what Wellington was really doing.
- Choose There was a way and present Cell Phone.
7. Prove Wellington's motive and identify his phone
When the prosecution argues that Wellington had no motive, present Names List. Choose that Wellington was a member of that group. The list connects him to the con-artist syndicate and explains why recovering the phone mattered to him.
The next question concerns what Dustin had that made Wellington panic. Present Dustin Prince's profile. Dustin was a police officer, so Wellington feared that the lost phone and its contents could expose him. Continue through the discussion until Wellington challenges the connection between himself and the Cell Phone.
When the game asks how the phone's ownership could be checked, choose the fingerprint option. Phoenix explains that he wiped the fingerprints from the phone after finding sand on it. After Wellington refuses to explain the replacement phone he is carrying, raise the final objection when the judge gives you the opportunity to prove his identity as the attacker.
Present Phoenix's Business Card. When asked which part of the card matters, choose the back. Maya calls the number printed there, and the ringtone comes from Wellington's phone. This establishes that Wellington took the wrong phone after attacking Phoenix and that the phone he carries is the one linked to the case.
- Present Names List when the court asks for Wellington's motive.
- Choose that Wellington was a member of the group.
- Present Dustin Prince's profile when asked what Dustin had that caused Wellington to panic.
- Choose the fingerprint option when prompted.
- Raise the final objection and present Phoenix's Business Card.
- Choose the back of the card and allow Maya to call the number.
8. Finish the episode
After the phone reveal, continue through Wellington's exposure and arrest. The Judge's Business Card may be added as a humorous result of the final exchange, but it is not needed to solve the case. Continue the dialogue until Maggey receives her not-guilty verdict and the post-trial conversation plays in the defendant lobby.
The Lost Turnabout is complete when the verdict sequence and Phoenix's memory-recovery scene have finished. There is no separate investigation chapter to unlock afterward and no additional crime-scene sweep required for this episode. The next episode begins only after the case-ending dialogue has concluded.
- Continue through Wellington's arrest.
- Watch Maggey's not-guilty verdict dialogue.
- Finish the defendant-lobby post-trial conversation and Phoenix's memory-recovery scene.
Before you move on
- The player has confirmed that The Lost Turnabout has no free-roaming investigation phase in the North American Nintendo DS release.
- The opening Court Record has been reviewed, including Glasses and Dustin's Autopsy Report.
- Crime Photo 1 and Crime Photo 2 have been added during court.
- Maggey Byrde's profile has been used against the “Maggie” spelling.
- Baseball Glove has been obtained and used against both Gumshoe's writing theory and Wellington's bananas statement.
- Phoenix's Business Card and Names List have been added during the recess.
- Wellington's testimony has been resolved with Dustin's Autopsy Report, Crime Photo 1, Glasses, Cell Phone, Names List, Dustin Prince's profile, and Phoenix's Business Card.
- The back of Phoenix's Business Card has identified Wellington's phone and led to his arrest.
- Maggey has received a not-guilty verdict, and the post-trial dialogue and memory-recovery scene have finished.
References for this chapter
- Phoenix Wright: Ace Attorney - Justice For All/Episode 1: The Lost Turnabout/Part 1-1: Trial
- Phoenix Wright: Ace Attorney - Justice For All/Episode 1: The Lost Turnabout/Part 1-2: Trial
- Phoenix Wright: Ace Attorney: Justice for All — Guide and Walkthrough — GameFAQs
- Phoenix Wright: Justice for All walkthrough: Spoiler-free Ace Attorney 2 case guide
Case 1 — Trial Reference and Recovery: The Lost Turnabout
Use this chapter only as a reference after completing The Lost Turnabout’s verdict sequence in the preceding Case 1 chapter. It is not a second required playthrough. If you are already past the case, do not return to the opening question, present the Glasses again, or replay Gumshoe’s and Wellington’s testimony unless you deliberately reload an earlier save or begin a new game. The reference below lists the exact contradiction chain and the safest way to recover from a mistake.
How to use this reference
The Lost Turnabout begins directly in District Court and contains no free-roaming investigation phase. The opening answers, the Glasses presentation, and the first exchanges with Gumshoe are progression steps for the original trial route, not post-verdict tasks. If the case has already ended and the next episode is available, your Case 1 progress is complete.
If you are checking a missed step from an earlier save, use the testimony heading and statement description rather than presenting evidence at random. During a cross-examination, the top screen displays the dialogue and testimony while the lower screen provides the action controls. On the DS, the L Button presses a testimony statement, the R Button opens the Court Record, and the X Button presents the currently selected evidence or profile. The stylus can also select these commands on the touch screen.
- Treat this chapter as a lookup table, not a second required playthrough.
- Reload an earlier save only if you need to retry a failed trial section.
- Open and inspect the Court Record before choosing evidence.
Evidence and testimony order
The first decisive Gumshoe cross-examination is Decisive Evidence. Present Maggey Byrde’s profile on the fourth statement, the line beginning with his reluctance to say the victim’s name. This exposes the problem with the name recorded at the crime scene and causes Gumshoe to testify again.
In Dustin and Maggey, press the fifth statement about the item Maggey gave Dustin. When asked whether to press further, continue questioning and answer Of course it’s relevant. Gumshoe then adds the Baseball Glove to the Court Record. The new evidence is required for the next contradiction.
In Writing on the Ground, present the Baseball Glove on the sixth and final statement, the conclusion that Dustin could have written the name with his right hand. The glove was made for a left-handed player; it is worn on the right hand, leaving the left hand free to throw. That detail undermines the police conclusion about Dustin’s writing hand and advances the trial to Wellington’s testimony.
- Decisive Evidence, fourth statement: Maggey Byrde’s profile.
- Dustin and Maggey, fifth statement: press, press further, then choose Of course it’s relevant.
- Writing on the Ground, sixth statement: Baseball Glove.
- Remember that a glove made for a left-handed player is worn on the right hand.
Wellington’s first testimony
In What I Saw That Day, present the Baseball Glove on the sixth statement, the claim that the only other thing Wellington saw was a banana-shaped object that fell with the police officer. When the court asks what this implies, choose Has bad eyesight. The point is that Wellington mistook the yellow Baseball Glove for bananas, so his claimed visual certainty is unreliable.
Do not substitute the Glasses at this point. The Baseball Glove is the evidence that directly exposes the eyesight problem. The Glasses become relevant later in the final chain.
- What I Saw That Day, sixth statement: Baseball Glove.
- When prompted for the implication, choose Has bad eyesight.
- Do not use the Glasses for this particular contradiction.
Wellington’s final evidence chain
In What Happened Next, present Dustin’s Autopsy Report on the third statement, the line saying the police were called at about 6:45 p.m. Choose to question further, then select There is something. When the court requests proof, present Crime Photo 1.
Choose Yes, I have an idea and present the Glasses. When asked whether Wellington had a way to identify Maggey, choose There was a way and present the Cell Phone. Present the Names List when requested, then choose A member of that group.
Present Dustin Prince’s profile. When the prompt asks how the connection can be verified, choose Fingerprints on the phone? and raise an objection when directed. The final required item is Phoenix’s Business Card. Present it, then choose The back of the card. This completes the courtroom logic and leads into the verdict and case-ending dialogue.
The final chain is order-sensitive. The useful lookup sequence is Dustin’s Autopsy Report, Crime Photo 1, Glasses, Cell Phone, Names List, Dustin Prince’s profile, and Phoenix’s Business Card. These entries are not all presented against ordinary testimony statements; several are selected after the court asks a follow-up question.
- What Happened Next, third statement: Dustin’s Autopsy Report.
- Question further, choose There is something, then present Crime Photo 1.
- Choose Yes, I have an idea, then present the Glasses.
- Choose There was a way, then present the Cell Phone.
- Present the Names List and choose A member of that group.
- Present Dustin Prince’s profile and choose Fingerprints on the phone?.
- Raise the objection when instructed, then present Phoenix’s Business Card.
- Choose The back of the card.
Penalty recovery and saving
Wrong evidence presentations and incorrect courtroom choices reduce the life gauge. Pressing a statement is generally used to obtain more information, while Present submits a specific Court Record entry; do not confuse the two. If you are replaying from an earlier save and make an avoidable mistake, stop guessing and reload the most recent healthy save rather than spending the remaining gauge on random evidence.
On the DS retail release, pause with Start and use the in-game save option when it is available. A save made before a trial or before a difficult testimony block is more useful than one made after the gauge has already been damaged. If the game offers a later save opportunity during the trial, use it only when the gauge and progress are both satisfactory, because the manual save position is overwritten.
If you have already reached the verdict and saved afterward, there is no need to reproduce the Case 1 sequence. Continue to Reunion, and Turnabout. If an earlier save is loaded for practice, follow the testimony headings above and check the Court Record whenever new evidence is added.
- Reload after an avoidable penalty instead of brute-forcing later testimony.
- Keep a healthy trial checkpoint before difficult evidence chains.
- After the verdict sequence has completed, continue to Case 2 rather than replaying Case 1.
- Use an earlier save or a new playthrough only for deliberate practice.
Before you move on
- Case 1 has already reached the verdict and ending dialogue, or an earlier save has been used to verify the complete contradiction chain.
- The Gumshoe sequence is understood as Maggey Byrde’s profile, Baseball Glove acquisition, and Baseball Glove presentation.
- The Wellington sequence is understood as Baseball Glove, Dustin’s Autopsy Report, Crime Photo 1, Glasses, Cell Phone, Names List, Dustin Prince’s profile, and Phoenix’s Business Card.
- Any avoidable health loss has been handled by reloading an earlier healthy save rather than guessing through later testimony.
- The game has advanced to Reunion, and Turnabout, confirming that The Lost Turnabout is complete.
References for this chapter
- Phoenix Wright: Justice for All walkthrough: Spoiler-free Ace Attorney 2 case guide
- Phoenix Wright: Ace Attorney: Justice for All — Guide and Walkthrough — GameFAQs
- Phoenix Wright: Ace Attorney: Justice for All — Guide and Walkthrough — GameFAQs
- Phoenix Wright: Ace Attorney: Justice for All/Controls — StrategyWiki
Case 2 — Investigation: Reunion, and Turnabout (Magatama Intro)
Follow the first two investigation days of Reunion, and Turnabout through the moment the first trial begins. You will investigate Fey Manor, obtain Maya’s Magatama, have Pearl charge it, receive the Black Key, obtain Newspaper Clipping 2, and break Ini Miney’s first Psyche-Lock. The Sacred Urn is not obtainable before this trial transition in the North American Nintendo DS release; it is collected during the later investigation after the first trial.
1. Complete the opening investigation at Kurain Village
Begin in Kurain Village and talk to Maya. Exhaust every available conversation topic, including the channeling plans and her condition. Move to the Meditation Room. The Fey Manor Guidemap is added to the Court Record, and Dr. Turner Grey is available for several conversation topics. Talk to him until no new subjects remain.
Go to the Channeling Chamber and talk to Morgan Fey about all available topics. Move to the Winding Way, enter the Side Room, and then return to the Winding Way. When Lotta Heart questions Phoenix and asks him to identify her, choose Lotta Heart.
Return to the Meditation Room. When the game presents the choice involving the Channeling Chamber, choose the option to break in. Follow the resulting scenes through the Channeling Chamber and Kurain Village. Lotta will be involved in several conversations before the game allows Phoenix to enter the Channeling Chamber again.
When Detective Gumshoe is present in the Channeling Chamber, talk to him about every available topic. He provides the basic crime-scene information, including the victim’s injuries. Then go to the Side Room and talk to Ini Miney about all available subjects. Do not try to break her Psyche-Lock yet; the Magatama is not charged and the needed newspaper evidence is not available.
- Maya’s available conversation topics are exhausted.
- Fey Manor Guidemap is in the Court Record.
- Dr. Grey and Morgan Fey have been questioned.
- Lotta Heart is identified when prompted.
- Gumshoe and Ini Miney have been questioned after the murder scene.
2. Advance to the second investigation day
After speaking with Ini, move through the Winding Way and then to the Meditation Room as the game directs. The first investigation day ends through story progression rather than through a separate evidence sweep. If the day does not advance, revisit the Channeling Chamber, Side Room, Winding Way, and Meditation Room and select any newly available conversation topic.
The next investigation begins at the Detention Center with Maya. Talk to Maya about every available subject, including Channeling, What happened, and Dream. Once those topics are complete, Maya gives Phoenix her Magatama, which is added to the Court Record. At this point the Magatama is not yet charged and cannot properly break Psyche-Locks.
- The game has advanced to the second investigation day.
- Maya’s Detention Center conversation is complete.
- Maya’s Magatama has been added to the Court Record.
3. Obtain the first evidence and charge the Magatama
Move to the Wright & Co. Law Offices. Phoenix retrieves Newspaper Clipping 1, which is added to the Court Record. Then return to Fey Manor and enter the Channeling Chamber. Talk to Morgan Fey through all available topics.
Remain in the Channeling Chamber and use Examine on the folding screen at the right side of the room. Inspect the small hole near the lower portion of the screen. Folding Screen is added to the Court Record. This evidence is needed during the first trial, so do not leave without examining it.
Move to the Winding Way, where Pearl Fey is waiting. Present Maya’s Magatama to Pearl. Talk through the newly available subjects and accept the item she gives Phoenix. Black Key is added to the Court Record, and Pearl charges the Magatama. The Magatama is the tool used to start Psyche-Lock sequences; it is not presented as ordinary evidence until the game specifically requests it.
- Newspaper Clipping 1 has been obtained at Wright & Co. Law Offices.
- Folding Screen has been added by examining the hole in the Channeling Chamber.
- Maya’s Magatama has been presented to Pearl.
- Black Key has been received.
- The Magatama is charged.
4. Obtain Newspaper Clipping 2
Go to the Meditation Room and talk to Gumshoe about every available topic. When he discusses the newspaper article connected with Dr. Grey, present Newspaper Clipping 1. Gumshoe remembers additional information and adds Newspaper Clipping 2 to the Court Record.
Talk to Gumshoe again about the newly available subjects. Then save before returning to the Side Room. The save is useful because the next Psyche-Lock is the first place where an incorrect presentation can reduce the health gauge.
- Gumshoe has been questioned about the newspaper article.
- Newspaper Clipping 1 has been presented to Gumshoe.
- Newspaper Clipping 2 is in the Court Record.
- A recovery save has been made before attempting Ini’s lock.
5. Break Ini Miney’s first Psyche-Lock
Return to the Side Room and talk to Ini Miney about all available topics. Her conversation about the victim produces a Psyche-Lock. Choose Present while the locks are displayed and select Maya’s Magatama to begin the sequence.
When the game asks for evidence that disproves Ini’s claimed lack of connection to Dr. Grey, present Newspaper Clipping 2. The article names Mimi Miney and connects her with the Grey Surgical Clinic. That connection contradicts Ini’s attempt to deny knowledge of the victim and breaks the lock.
After the Psyche-Lock breaks, talk to Ini about the newly available victim topic and exhaust the conversation. Do not guess with unrelated evidence. Psyche-Locks require evidence that answers the hidden reason for the witness’s silence, and a wrong presentation reduces the health gauge.
- Ini’s Psyche-Lock appears on the victim topic.
- Maya’s Magatama starts the sequence.
- Newspaper Clipping 2 breaks the lock.
- Ini’s newly available conversation is complete.
6. Finish the pre-trial sequence
Move to Kurain Village and then go to the Detention Center. Maya is being channeled by Mia Fey. Talk to Mia through the available subjects. When she asks for the key evidence, present Black Key. This scene supplies the final information before court and leads into the first trial day.
Save when the game permits it. The investigation chapter is complete when the game leaves the Detention Center sequence and begins the District Court proceedings for Reunion, and Turnabout.
Do not search for Sacred Urn before this transition. In this DS release, the Sacred Urn is obtained later, during the investigation after the first trial. After that trial, return to the Winding Way, speak with Ini about the Sacred Urn, and examine the urn on the table to add Sacred Urn to the Court Record. Its later update is tied to Pearl’s Psyche-Lock sequence; it is not required to start this first trial.
- Mia’s Detention Center conversation is complete.
- Black Key has been presented when requested.
- The game advances to the District Court Defendant Lobby or first trial sequence.
- The first trial of Reunion, and Turnabout has begun.
- Sacred Urn is flagged for later collection in the post-trial investigation rather than incorrectly treated as a pre-trial requirement.
Before you move on
- Maya’s Magatama is in the Court Record and has been charged by Pearl.
- Fey Manor Guidemap, Newspaper Clipping 1, Folding Screen, and Black Key have been obtained.
- Newspaper Clipping 2 has been obtained from Gumshoe after presenting Newspaper Clipping 1.
- Ini Miney’s first Psyche-Lock on the victim topic has been broken with Newspaper Clipping 2.
- Ini’s newly unlocked conversation has been completed.
- Mia’s Detention Center sequence has been completed and Black Key has been presented.
- The game has advanced from investigation to the first trial day of Reunion, and Turnabout.
- For the later post-trial investigation, the Sacred Urn must be examined in the Winding Way after the relevant event; it is not part of the pre-first-trial Court Record requirement.
References for this chapter
- Phoenix Wright: Justice for All walkthrough: Spoiler-free Ace Attorney 2 case guide
- Phoenix Wright: Ace Attorney - Justice For All/Episode 2: Reunion, and Turnabout/Part 1: Investigation
- Phoenix Wright: Ace Attorney - Justice For All/Episode 2: Reunion, and Turnabout/Part 3: Investigation
- Phoenix Wright: Ace Attorney: Justice for All — Guide and Walkthrough — GameFAQs
Case 2 — Trial: Breaking Psyche-Locks and Court Strategy
Reunion, and Turnabout’s courtroom route is divided into the first trial session, a second investigation, and the final trial day. After the first trial, the existing Black Key leads Phoenix to the incinerator and the Cloth Strap. The investigation then establishes Pearl’s alibi, uncovers the accident involving Ini and Mimi Miney, and breaks Mia Fey’s final Psyche-Locks. The final trial proves that the witness known as Ini Miney is actually Mimi Miney, explains the Clothing Box route, identifies Morgan Fey’s role, and ends with Maya’s not-guilty verdict.
1. Complete the first trial session
At District Court, plead not guilty when Phoenix is asked for Maya’s plea. During Gumshoe’s Cause of Death testimony, press all five statements. Dr. Grey’s Autopsy Report, the Knife, and the Pistol are added during this sequence, so check the Court Record whenever the game announces new evidence.
During the testimony about the incriminating evidence, press the statement concerning the laboratory results on Maya’s costume and choose to press further. When asked whether there is a problem with the costume, select the response about one small detail, then point to the bullet hole in the sleeve. Maya’s Costume is added or updated in the Court Record.
Present Maya’s Costume against the statement claiming that Dr. Grey fired from close range. The missing close-range residue contradicts that claim. When the court asks what does not make sense, present the Folding Screen and follow the diagram prompt to identify the position associated with the bullet hole.
- Plead not guilty.
- Press all five of Gumshoe’s Cause of Death statements.
- Press further during the costume testimony.
- Point to the bullet hole in Maya’s Costume.
- Present Maya’s Costume against the close-range shooting claim.
- Present the Folding Screen when the court asks what does not fit.
2. Finish Lotta Hart’s courtroom sequence
Press all of Lotta Hart’s testimony. When the game asks whether to press harder on the statement about what was inside the room, choose Press harder, then answer Behind the folding screen when asked where the victim was.
Continue through Lotta’s later testimony. When the court asks whether to confront Franziska, either available continuation can advance the sequence. When Lotta’s Photo 2 is added or updated, identify the contradiction by pointing to the sleeve on the right side of the photograph. When asked what the contradiction means, choose that the shooter is someone else.
The first trial session ends after the court accepts this contradiction and returns to investigation. Save at the first safe opportunity. The next investigation begins with Pearl, but the Black Key is already in the Court Record from the earlier investigation; Pearl does not give it to Phoenix during this section.
- Press Lotta’s testimony statements.
- Choose Press harder when prompted.
- Choose Behind the folding screen.
- Use the sleeve in Lotta’s Photo 2.
- Choose that the shooter is someone else.
- Save after control returns to investigation.
3. Start the second investigation and use the existing Black Key
Begin in Kurain Village and speak with Pearl. Exhaust the available conversation topics until Pearl’s Alibi produces two Psyche-Locks. Present the existing Black Key to Pearl. Her explanation points Phoenix toward the incinerator in the Winding Way; this presentation is the required trigger for the next route.
Move to the Winding Way. Speak with Ini about the available topics, including the Sacred Urn and what happened. Her Traffic Accident Psyche-Locks cannot yet be broken, so leave them for later. Examine the incinerator first to obtain the Cloth Strap. Then examine the Sacred Urn to add it to the Court Record.
Move to the Channeling Chamber and speak with Morgan about the available topics. Then go to the Detention Center and talk to Maya about the case and Pearl’s alibi. Maya’s account directs Phoenix back through Kurain Village toward the Side Room.
- Speak with Pearl and trigger her Alibi Psyche-Locks.
- Present the existing Black Key to Pearl.
- Move to the Winding Way.
- Examine the incinerator and obtain the Cloth Strap.
- Examine the Sacred Urn.
- Speak with Ini, Morgan, and Maya about the available topics.
- Leave Ini’s Traffic Accident Psyche-Locks for later.
4. Obtain the Side Room evidence and break Pearl’s Alibi Psyche-Locks
Return to Kurain Village and follow Lotta as she moves through the Meditation Room and Winding Way toward the Side Room. In the Side Room, examine the ball on the floor first to add Pearl’s Ball to the Court Record. Then examine the large Clothing Box. The box is added to the Court Record after the scene involving Lotta.
Move to the Meditation Room and present Maya’s Magatama to Pearl. When asked where Pearl was during the murder, point to the Winding Way on the map and present it. Next present Pearl’s Ball.
Present the Sacred Urn for the following lock. The explanation is that Pearl’s ball caused the urn to break while she was playing near it. When the game asks for proof concerning the urn’s identity or condition, present Ami Fey’s Profile. The damaged inscription is written as I AM rather than AMI, showing that the pieces were reassembled incorrectly.
After the locks break, talk to Pearl about every newly unlocked topic. This conversation updates the Sacred Urn in the Court Record and is required before the investigation can advance.
- Follow Lotta to the Side Room.
- Examine the ball before the Clothing Box.
- Obtain Pearl’s Ball.
- Examine and obtain the Clothing Box.
- Start Pearl’s Alibi Psyche-Locks with Maya’s Magatama.
- Point to the Winding Way.
- Present Pearl’s Ball.
- Present the Sacred Urn.
- Present Ami Fey’s Profile.
- Complete Pearl’s newly unlocked Talk topics and confirm the Sacred Urn update.
5. Visit Hotti Clinic and update the accident evidence
Return to the main Kurain Village area and speak with Lotta about the newly available topics. After exhausting the conversation, present Ini Miney’s Profile when prompted. This opens the route to Hotti Clinic.
At Hotti Clinic, talk to Hotti about the clinic and Ini Miney. When the conversation stalls, present the Attorney’s Badge. Exhaust the new topics that appear. One topic adds the License Photo to the Court Record, and another updates Newspaper Clipping 2 with the accident information needed for Ini’s Psyche-Locks.
Return to Kurain Village and complete every newly available conversation before going back to the Winding Way. Keep Ini Miney’s Profile, Newspaper Clipping 2, License Photo, and Mimi Miney’s Profile available for the next sequence.
- Talk to Lotta about the new topics.
- Present Ini Miney’s Profile to Lotta.
- Visit Hotti Clinic.
- Present the Attorney’s Badge.
- Obtain the License Photo.
- Update Newspaper Clipping 2.
- Return to Kurain Village and exhaust the new conversations.
6. Break Ini Miney’s Traffic Accident Psyche-Locks
At the Winding Way, talk to Ini until the Traffic Accident topic produces Psyche-Locks. Present Maya’s Magatama to begin. Present Ini Miney’s Profile at the first evidence prompt, followed by Newspaper Clipping 2, then the License Photo. Present Mimi Miney’s Profile at the final prompt.
This sequence connects the accident record, the woman identified as Ini, and the deceased Mimi. After the locks break, talk to Ini about all newly unlocked topics. Do not leave immediately after the Psyche-Lock animation; the new conversations are required to advance the investigation.
Return to Kurain Village and complete the available conversation there. Then go to the Detention Center and speak with Maya. Exhaust her available topics before presenting the Magatama for the final investigation Psyche-Locks.
- Start Ini’s Traffic Accident Psyche-Locks.
- Present Ini Miney’s Profile.
- Present Newspaper Clipping 2.
- Present the License Photo.
- Present Mimi Miney’s Profile.
- Complete Ini’s newly unlocked Talk topics.
- Return to Kurain Village and complete the available conversation.
- Speak with Maya at the Detention Center and exhaust her topics.
7. Break Mia Fey’s Murderer Psyche-Locks
At the Detention Center, Maya channels Mia Fey. Ask Mia about the murderer, then present Maya’s Magatama to begin Mia Fey’s Murderer Psyche-Locks.
When Mia asks who is being protected, present Morgan Fey’s Profile. When she asks for evidence casting suspicion on Morgan, present the Cloth Strap. When she asks for proof that the Cloth Strap came from Maya’s costume, present the Black Key. The Black Key and the Cloth Strap were both found in the incinerator, connecting the cloth to Maya’s costume and showing that someone altered the scene after the channeling.
For the final lock, present Ini Miney’s Profile. This establishes that Morgan needed Ini, actually Mimi, to carry out the plan. After the locks break, talk to Mia about every newly unlocked topic. Save before starting the final trial day. If the health gauge is low, reload before attempting the sequence rather than guessing.
- Channel Mia at the Detention Center.
- Start Mia Fey’s Murderer Psyche-Locks with the Magatama.
- Present Morgan Fey’s Profile.
- Present the Cloth Strap.
- Present the Black Key.
- Present Ini Miney’s Profile.
- Complete Mia’s newly unlocked Talk topics.
- Save before the final trial day.
8. Complete the final trial day
During Morgan’s Maya’s Escape testimony, press every statement and choose Question further whenever offered. When Phoenix must identify where the witness was during the murder, present the Channeling Chamber on the map. When asked where behind the screen the witness was hidden, point to the space behind the Folding Screen. Present the Clothing Box to show what was used as the hiding place. When asked whether this can be proven, choose the affirmative response and present either the Clothing Box or the Folding Screen. When asked whether one person could have carried out the plan, choose that it was not possible, then present Morgan Fey’s Profile.
During Ini’s After the Murder testimony, press the statements concerning seeing Maya and choose Question further. When asked whether proving that Ini saw Maya is important, choose It’s very important. Press the added statement claiming that Maya’s costume looked normal, then present Maya’s Costume or Lotta’s Photo 2.
In the replacement testimony, press the statements about persuading the sister and taking her to the Channeling Chamber. Choose Were going to the crime scene, press harder, and choose It’s very important. Against the added claim that Ini saw nobody, present the Sacred Urn and Pearl Fey’s Profile. Choose There is no way, identify the contradiction as being in her testimony just now, point to the Channeling Chamber, and then identify the space behind the Folding Screen. Present the Clothing Box when prompted.
After the identity route continues, press the traffic-accident statement about Mimi being tired and press harder. Present the License Photo against the added statement about not having a driver’s license. In the later testimony, press the statement about Mimi’s new car, press harder, and present Newspaper Clipping 2 against the revised claim about the car. When asked who was driving, identify Mimi. Present Mimi Miney’s Profile when requested, then present Newspaper Clipping 1 to complete the accident and clinic history.
- Press all of Morgan’s Maya’s Escape testimony.
- Point to the Channeling Chamber.
- Point to the space behind the Folding Screen.
- Present the Clothing Box.
- Choose that one person could not have carried out the plan alone.
- Present Morgan Fey’s Profile.
- Press Ini’s After the Murder testimony and choose It’s very important.
- Present Maya’s Costume or Lotta’s Photo 2.
- Use the Sacred Urn and Pearl Fey’s Profile in the replacement testimony.
- Present the Clothing Box in the hidden-route sequence.
- Use the License Photo in the accident testimony.
- Use Newspaper Clipping 2 against the revised car statement.
- Identify Mimi as the driver.
- Present Mimi Miney’s Profile and Newspaper Clipping 1.
9. Confirm the verdict and case completion
The episode is complete when the court accepts that Ini Miney is actually Mimi Miney, recognizes Morgan Fey’s involvement in the plan, and accepts the traffic accident and clinic history as the motive chain. Continue through the judge’s final statements and Maya’s not-guilty verdict.
Allow the entire case-ending dialogue to play. Reaching a recess or seeing the final evidence accepted is not the completion point. Wait until control returns after the ending sequence, then make a new manual save before continuing to the next episode.
- Ini Miney’s identity as Mimi Miney is established.
- The Clothing Box route is accepted.
- Morgan Fey is identified as the accomplice.
- The License Photo and Newspaper Clipping 2 complete the accident chain.
- Mimi Miney’s Profile and Newspaper Clipping 1 complete the identity and motive explanation.
- Maya receives a not-guilty verdict.
- The full ending dialogue plays.
- Control returns and the game can be saved.
Before you move on
- The first trial session ends after Lotta’s later testimony and returns to investigation.
- The existing Black Key is presented to Pearl after the first trial.
- The incinerator is examined and the Cloth Strap is obtained.
- The Sacred Urn is examined.
- The Side Room ball and Clothing Box are examined.
- Pearl’s Alibi Psyche-Locks are broken with the Winding Way, Pearl’s Ball, Sacred Urn, and Ami Fey’s Profile.
- Pearl’s newly unlocked Talk topics are completed and the Sacred Urn updates.
- The Attorney’s Badge is presented at Hotti Clinic.
- License Photo is obtained and Newspaper Clipping 2 is updated.
- Ini’s Traffic Accident Psyche-Locks are broken with Ini Miney’s Profile, Newspaper Clipping 2, License Photo, and Mimi Miney’s Profile.
- Ini’s newly unlocked conversations are completed.
- Mia Fey’s Murderer Psyche-Locks are broken at the Detention Center with Morgan Fey’s Profile, Cloth Strap, Black Key, and Ini Miney’s Profile.
- Morgan’s courtroom testimony is pressed through to Ini’s testimony.
- The Channeling Chamber, space behind the Folding Screen, and Clothing Box establish the hidden route.
- Morgan Fey is identified as the accomplice.
- The License Photo, Newspaper Clipping 2, Mimi Miney’s Profile, and Newspaper Clipping 1 complete the accident and identity chain.
- Maya receives a not-guilty verdict.
- The full case-ending dialogue plays and control returns for a new manual save.
References for this chapter
- Phoenix Wright: Ace Attorney: Justice for All — Guide and Walkthrough — GameFAQs
- Phoenix Wright: Justice for All walkthrough: Spoiler-free Ace Attorney 2 case guide
- Phoenix Wright: Ace Attorney - Justice For All/Episode 2: Reunion, and Turnabout/Part 3: Investigation
- Phoenix Wright: Ace Attorney - Justice For All/Episode 2: Reunion, and Turnabout/Part 4-1: Trial
- Phoenix Wright: Ace Attorney - Justice For All/Episode 2: Reunion, and Turnabout/Part 4-2: Trial
Case 3 — Investigation: Turnabout Big Top
Complete the first investigation phase of Turnabout Big Top in the North American Nintendo DS release. Visit the circus locations in the required order, gather the evidence needed to break Max Galactica's Psyche-Locks, investigate Trilo Quist, and recover Phoenix's Attorney's Badge and the Ring from Acro's Room. Stop when the game sends you to the first trial; do not continue into the later investigation phase in this chapter.
1. Visit Max and open the circus route
From Wright & Co. Law Offices, move to the Detention Center and speak with Max Galactica. Talk about Max Galactica, Berry Big Circus, and What happened. The final subject, Meeting With Russell, creates three Psyche-Locks. Leave them unbroken because the necessary evidence is not available yet.
Present the Attorney's Badge to Max and agree to defend him. Then move to the Circus Entrance. This visit is required even though it initially provides little useful investigation. From the entrance, move into the Big Top.
- Talk through every available subject with Max.
- Leave the initial three Psyche-Locks intact.
- Present the Attorney's Badge to Max.
- Visit the Circus Entrance before entering the Big Top.
2. Speak with Regina and search the Ringmaster's Room
At the Big Top, talk to Regina Berry about the available subjects. Present Max's Profile to her, discuss the newly available topic, and then present Russell Berry's Profile. These conversations open the route to the Ringmaster's Room and establish the circus relationships that later testimony will use.
Enter the Ringmaster's Room. Examine the envelope on the desk to obtain Ringmaster's Papers, then examine the posters to obtain the Max G. Promo Poster. You may also examine the tailcoat now, but the paper in its pocket cannot yet be collected. Do not treat this early examination as the completion of the Note; the Note is assembled during the later investigation after the first trial.
- Talk to Regina about all currently available subjects.
- Present Max's Profile to Regina.
- Present Russell Berry's Profile to Regina.
- Examine the envelope for Ringmaster's Papers.
- Examine the posters for the Max G. Promo Poster.
- Do not expect the tailcoat to produce the completed Note yet.
3. Gather Gumshoe's, Ben's, and Moe's information
Move through the Circus Entrance to the Lodging House Plaza and speak with Detective Gumshoe. Talk through the available subjects; one conversation adds the Crime Photo to the Court Record. Present Max's Profile to Gumshoe and then discuss the newly available subject. This adds the Silk Hat.
Return to the Circus Entrance and speak with Benjamin Woodman about every available subject. Then move to Moe's Room through the Lodging House Plaza. Talk to Moe about all available subjects. After the normal conversation is exhausted, present Max's Profile to him and discuss the new topic; this adds the Circus Map.
Move to the Big Top Cafeteria and examine the broken bottle on the floor. This adds Broken Bottle to the Court Record. These items are not random optional clues: Ringmaster's Papers, Broken Bottle, and Ben's Profile are used to resolve Max's Psyche-Locks.
- Obtain Crime Photo from Gumshoe.
- Present Max's Profile to Gumshoe and obtain Silk Hat.
- Talk through all available subjects with Ben.
- Talk through Moe's available subjects.
- Present Max's Profile to Moe and obtain Circus Map.
- Examine the broken bottle to obtain Broken Bottle.
4. Break Max's Psyche-Locks
Return to the Detention Center and talk to Max about any newly available subjects. Present Maya's Magatama to begin the Meeting With Russell Psyche-Lock sequence.
For the first lock, present Ringmaster's Papers. Max's supposed salary negotiation cannot be the reason for the meeting because the papers show that the relevant contract arrangement predates the meeting. For the remaining locks, present Broken Bottle and Ben's Profile. Those two items can be accepted in either order, but using Broken Bottle followed by Ben's Profile is a straightforward route.
After the locks break, talk to Max about the new subjects. Read the information carefully even though it does not immediately add another required evidence item; it explains why Max was summoned and supplies the background needed for the next circus conversations.
- Present Maya's Magatama to Max.
- Use Ringmaster's Papers on the first lock.
- Use Broken Bottle and Ben's Profile on the remaining locks.
- Talk through Max's newly unlocked subjects.
5. Investigate Trilo and continue the circus conversations
Return to the Big Top and enter the Ringmaster's Room. Examine the trophy case to add Trilo Quist to the Court Record. Then move to the Big Top Cafeteria and speak with Ben. Talk through his available subjects first, then present Trilo Quist. Continue with every conversation topic that becomes available after this presentation.
When the game sends you back to the Big Top, speak with Regina about the newly available subjects. Optional dialogue can provide context, but do not leave the area until the required conversation has finished. The case is designed to make you revisit witnesses after new evidence or profiles become available, so a previously exhausted character may have new dialogue after the Trilo event.
- Examine the trophy case for Trilo Quist.
- Talk to Ben at the Cafeteria.
- Present Trilo Quist to Ben.
- Complete the newly available Ben and Trilo conversations.
- Return to Regina when the route directs you there.
6. Find Money and recover the Ring
After the Trilo sequence, return to Moe's Room and talk to Moe about the available subjects. When he offers to take you to Money the Monkey's owner, choose Go with Moe. This choice advances the investigation to Acro's Room.
At Acro's Room, Money the Monkey is added to the Court Record automatically. Examine the pile of shiny objects in the room. Phoenix recovers the Attorney's Badge, and the Ring is added to the Court Record. Examining Money himself is not the required action; inspect the shiny-object pile.
The Ring is the final progression item for this investigation phase. Save after obtaining it if you want a stable checkpoint before the first trial. The game then advances to court. Do not proceed into the later investigation route involving Grand Prix Photo, Max G. Bust, Note, Stage Costume, Leon, Moe's Psyche-Locks, or Acro's Psyche-Locks; those events belong in the subsequent chapter.
- Talk to Moe about Money the Monkey.
- Choose Go with Moe.
- Confirm that Money the Monkey is added automatically.
- Examine the shiny-object pile in Acro's Room.
- Recover the Attorney's Badge and obtain the Ring.
- Save before beginning the first trial if desired.
Before you move on
- Max's initial Psyche-Locks have been broken using Ringmaster's Papers, Broken Bottle, and Ben's Profile.
- Trilo Quist has been examined in the Ringmaster's Room and presented to Ben at the Big Top Cafeteria.
- Money the Monkey has been added to the Court Record in Acro's Room.
- The shiny-object pile has been examined, Phoenix's Attorney's Badge has been recovered, and the Ring has been added to the Court Record.
- The game advances from the Acro's Room sequence to the first trial of Turnabout Big Top.
- Grand Prix Photo, Max G. Bust, Note, Stage Costume, Leon, Bat's Profile, and the later Moe and Acro Psyche-Locks are not required for this chapter's completion check.
References for this chapter
- Phoenix Wright: Justice for All walkthrough: Spoiler-free Ace Attorney 2 case guide
- Phoenix Wright: Ace Attorney: Justice for All — Guide and Walkthrough — GameFAQs
- Phoenix Wright: Ace Attorney - Justice For All/Episode 3: Turnabout Big Top/Part 1: Investigation
- Phoenix Wright: Ace Attorney - Justice For All/Episode 3: Turnabout Big Top/Part 3: Investigation
Case 3 — Trial: Managing Theatrics and Witnesses
Turnabout Big Top’s route after the opening investigation consists of the first trial day, the second investigation, and the final trial day. The first trial day covers Gumshoe, Trilo Quist, and Moe. The second investigation begins when Max gives you Grand Prix Photo and ends after Moe’s and Acro’s Psyche-Locks are broken. The final trial day begins with Acro’s testimony and ends with Acro exposed, Max receiving a not-guilty verdict, and the story moving toward Farewell, My Turnabout. Save at each recess and before starting the final trial day. Press selectively during Moe’s testimony, and do not substitute Wooden Box for the required Crime Photo-first route described below.
1. Complete the first trial day: Gumshoe’s testimony
The opening courtroom route here is the first trial day, not Trial Day Two. Gumshoe’s Details of the Events testimony establishes the snow, rehearsal, time of death, wooden box, and blunt-force trauma. Press every statement. Pressing the statement about Russell Berry being found bent over a wooden box adds Wooden Box to the Court Record. When asked about the box, choose About the contents to add Small Seasoning Bottle. Russell Berry’s Autopsy Report is also added during this testimony. These items are needed later, so confirm that they appear in the Court Record before continuing.
- Press every statement in Gumshoe’s Details of the Events testimony.
- Choose About the contents when the court asks about the wooden box.
- Confirm Russell Berry’s Autopsy Report, Wooden Box, and Small Seasoning Bottle are present.
2. Resolve Trilo’s three testimonies
In What You Witnessed, press the fourth statement about Ben seeing only Max. Choose Ben only saw Max? and present Russell Berry’s Profile. Then press the fifth statement about the police arriving and present Regina Berry’s Profile when asked who Ben was waiting for. In About the Proposal, press the second statement about having something to give Regina and choose Push on anyway. After the testimony changes, present Ring against the fifth statement about still having the item. Choose Ben’s testimony has a flaw.
In Witnessing Max, press the fourth statement about saying good evening. Choose Trilo’s evening greeting, then present Broken Bottle against the revised fourth statement. Choose He saw a different person and present Russell Berry’s Profile when asked who that person was. The recess after this sequence is still part of the first trial day; save before Moe takes the stand.
- Present Russell Berry’s Profile after pressing Trilo’s fourth statement.
- Present Regina Berry’s Profile after pressing Trilo’s fifth statement.
- Press the second statement in About the Proposal and choose Push on anyway.
- Present Ring against the fifth statement and choose Ben’s testimony has a flaw.
- Present Broken Bottle in Witnessing Max, then identify Russell Berry.
- Save at the recess before Moe’s testimony.
3. Finish Moe’s testimony without wasting health
Moe’s first courtroom testimony includes a deliberately irrelevant opening section. In What You Witnessed, press the third statement about going straight to sleep and choose Keep pressing. Press the revised statement about hearing a huge noise, then press the later statement about continuing to watch the two figures and Max striking the Ringmaster. When asked whether you have a clear basis for believing Moe did not see the crime, choose Of course I do!
In The Silhouette, present Max G. Promo Poster against the third statement claiming that the silk hat, cloak, and roses were all present. In The Silhouette, Part 2, do not press any statement. Present Silk Hat against the fourth statement about the suspect wearing it throughout the incident. When asked for evidence showing how the criminal left the scene, present Crime Photo. The remaining revelation is postponed, and the judge ends the first trial day. Save when the game transitions to the second investigation.
- Press Moe’s third statement and choose Keep pressing.
- Press the revised huge-noise statement.
- Press the later statement about watching the figures and Max striking Russell.
- Choose Of course I do!
- Present Max G. Promo Poster.
- Do not press any statement in The Silhouette, Part 2.
- Present Silk Hat, then Crime Photo.
- Save when the first trial day ends.
4. Begin the second investigation and update the Note
The second investigation begins after the first trial day. At the Detention Center, talk to Max through every available topic and obtain Grand Prix Photo. Move through Circus Entrance to Lodging House - Plaza, then enter Big Top Cafeteria and present Grand Prix Photo to Moe. Exhaust the newly available topics to obtain Max G. Bust and Note. Return to the Detention Center and present Note to Max.
Go to the Ringmaster’s Room and examine the tailcoat beside the desk. The torn message inside updates Note. Return to Lodging House - Plaza and talk through every available topic with Gumshoe and Franziska von Karma. Then visit Acro’s Room and exhaust the available topics. Acro’s Psyche-Locks are visible, but they cannot yet be broken; leave and continue gathering the required evidence.
- Obtain Grand Prix Photo from Max.
- Present Grand Prix Photo to Moe.
- Obtain Max G. Bust and Note.
- Present Note to Max.
- Examine the tailcoat in the Ringmaster’s Room.
- Talk to Gumshoe, Franziska von Karma, and Acro about all available topics.
5. Complete Regina’s route and retrieve the Stage Costume
At the Big Top, talk to Regina through her available topics. Present the updated Note, then present Small Seasoning Bottle when prompted. Go to Moe’s Room and follow the money-related sequence to retrieve Stage Costume from Money the Monkey; either available response in the sequence is acceptable.
Return to the Big Top and present Stage Costume to Regina. Talk about the newly unlocked Leon topic, which adds Leon to the Court Record. Then go to Big Top Cafeteria and talk to Moe until Get Over It? is blocked by Psyche-Locks. Present Maya’s Magatama to begin the break sequence. Present Leon first, then Acro’s Profile. After the locks break, talk to Moe about the newly available topics before leaving.
- Present updated Note and Small Seasoning Bottle to Regina.
- Retrieve Stage Costume from Moe’s Room.
- Present Stage Costume to Regina.
- Open the Leon topic and confirm Leon is recorded.
- Break Moe’s Psyche-Locks with Leon, then Acro’s Profile.
- Read Moe’s newly available topics.
6. Break Acro’s Psyche-Locks and prepare for the final trial day
Return to Acro’s Room and present Maya’s Magatama. Break About the Wheelchair by presenting Leon, Bat’s Profile, Regina Berry’s Profile, and Note in that order. After the locks break, talk to Acro about Wheelchair and Regina and Bat. These conversations provide the motive and incident details needed for court. Save before the game returns you to the courtroom.
- Present Maya’s Magatama to Acro.
- Present Leon.
- Present Bat’s Profile.
- Present Regina Berry’s Profile.
- Present Note.
- Read the newly unlocked Wheelchair and Regina and Bat topics.
- Save before the final trial day.
7. Begin the final trial day and expose Acro’s method
The courtroom route beginning with Acro is the final trial day, not Trial Day Three. In What You Witnessed, press the fourth statement saying that Acro saw Max only from behind. Choose There is a contradiction and present Silk Hat. When asked what would cause Acro to commit perjury, choose Acro is the real culprit. When asked whether he had an accomplice, choose Of course he didn’t. On the Circus Map, point to Acro’s Room, labeled Acro (3F). When asked how the murder was committed, choose Present evidence and present Max G. Bust.
Acro then gives Physical State testimony. Use the Crime Photo-first route: present Crime Photo against the statement arguing that it was unrealistic for Acro to know the Ringmaster’s position. When asked about the box’s important feature, choose The weight of the box. When asked whether you remember the bust’s original location, choose I remember. Present Money the Monkey, then Max G. Bust, Russell Berry’s Profile, and Silk Hat as the later evidence chain requires. This route is supported by walkthroughs that accept Crime Photo at the relevant Physical State contradiction; other guides also document Wooden Box as an alternative presentation, but do not use it as the first item for this assigned DS route.
A recess follows. Gumshoe supplies Scarf during this break, so do not assume it should already be in the Court Record. Examine it if desired, then continue to the final testimony.
- Press Acro’s fourth statement.
- Choose There is a contradiction and present Silk Hat.
- Choose Acro is the real culprit.
- Choose Of course he didn’t.
- Point to Acro’s Room on the Circus Map.
- Present Max G. Bust.
- Present Crime Photo first in Physical State.
- Choose The weight of the box.
- Choose I remember.
- Present Money the Monkey.
- Present Max G. Bust.
- Present Russell Berry’s Profile.
- Present Silk Hat.
- Confirm Scarf is added during the recess.
8. Finish About the Ringmaster and reach Max’s verdict
In About the Ringmaster, choose No need to question him now. When asked for proof that Acro wanted to kill someone, choose I can’t provide one. Present Regina Berry’s Profile, then present Note. Choose I know all about it and present Small Seasoning Bottle. Present Bat’s Profile, choose It was more than that, and present Scarf.
When asked what to do next, choose See how things work out first. When asked where Max’s bust is, choose Somewhere in this courtroom, then The Witness’ Chair. The court exposes Acro’s method and the case’s motive. After the courtroom sequence, choose I don’t think so outside court and present Bat’s Profile. The verdict identifies Max as not guilty and the game transitions toward Episode 4, Farewell, My Turnabout. Save after the verdict sequence.
- Choose No need to question him now.
- Choose I can’t provide one.
- Present Regina Berry’s Profile.
- Present Note.
- Choose I know all about it and present Small Seasoning Bottle.
- Present Bat’s Profile.
- Choose It was more than that.
- Present Scarf.
- Choose See how things work out first.
- Choose Somewhere in this courtroom, then The Witness’ Chair.
- Choose I don’t think so and present Bat’s Profile.
- Confirm the not-guilty verdict and save.
Before you move on
- The first trial day has ended after Gumshoe, Trilo, and Moe’s courtroom sequences.
- The second investigation has been completed once, beginning with Grand Prix Photo.
- Moe’s Psyche-Locks have been broken with Leon and Acro’s Profile.
- Acro’s Psyche-Locks have been broken with Leon, Bat’s Profile, Regina Berry’s Profile, and Note.
- The final trial day has begun with Acro’s testimony.
- Acro’s Physical State has been cleared using Crime Photo first, followed by The weight of the box, I remember, Money the Monkey, Max G. Bust, Russell Berry’s Profile, and Silk Hat.
- Scarf has been added during the recess.
- Acro has been exposed through About the Ringmaster and the witness-chair sequence.
- The post-court Bat profile presentation is complete.
- Max has received a not-guilty verdict and the game transitions toward Farewell, My Turnabout.
- A post-verdict save is available.
References for this chapter
- Phoenix Wright: Justice for All walkthrough: Spoiler-free Ace Attorney 2 case guide
- Phoenix Wright: Ace Attorney: Justice for All — Guide and Walkthrough — GameFAQs
- Phoenix Wright: Ace Attorney - Justice for All - Guide and Walkthrough - DS, by BWoodhouse
- Phoenix Wright: Ace Attorney - Justice For All, Episode 3 Part 4-1 Trial — Wikibooks
- Phoenix Wright: Justice for All — Turnabout Big Top guide
Case 4 — Investigation Part 1: Setting the Stage for the Finale
Complete both pretrial investigation sections of Farewell, My Turnabout on the North American Nintendo DS route. You will investigate the Gatewater Hotel, learn that Maya has been kidnapped, accept Matt Engarde’s defense, gather the evidence connected to Juan Corrida and Celeste Inpax, and break the Psyche-Locks belonging to Wendy Oldbag, Lotta Hart, and Adrian Andrews. Matt Engarde’s five-lock sequence is not part of this chapter; it occurs during the later post-first-trial investigation. Finish when Maya’s Mysterious Location scene is complete and the game advances to the first trial day.
Part 1-1: Investigate Viola Hall and obtain the press ticket
Farewell, My Turnabout begins at the Gatewater Hotel in Viola Hall. Talk to Will Powers and exhaust every available topic. The opening Court Record includes the Attorney’s Badge, Maya’s Magatama, and The Nickel Samurai.
Move to the Hallway, then return to Viola Hall. Powers will explain that a press conference is planned after the awards ceremony and will give you the Press Conference Ticket. Confirm that the ticket appears in the Court Record before leaving the hall.
- Talk to Will Powers about every available topic.
- Move to the Hallway and return to Viola Hall.
- Obtain Press Conference Ticket.
- Check that Press Conference Ticket is in the Court Record.
Question Oldbag and Gumshoe
Move to the Hotel Lobby and talk to Wendy Oldbag. Continue through her available conversation until the hotel event sends Phoenix and the others back toward Viola Hall. Complete that scene, then move to the Hallway.
Speak with Detective Gumshoe about what happened, Lotta Hart, and the victim. Present Matt Engarde’s Profile when the conversation calls for it, then discuss the newly available Arrested? topic. This establishes that Juan Corrida has been murdered and Matt has been arrested.
- Complete Oldbag’s initial Hotel Lobby conversation.
- Finish the Viola Hall event.
- Discuss Gumshoe’s initial topics.
- Present Matt Engarde’s Profile to Gumshoe.
- Discuss Arrested?
Receive the kidnapping demand
Return to the Hotel Lobby and speak with Will Powers about Matt and Juan and the press conference. The Radio Transceiver is added to the Court Record during the scene. Continue until the transceiver activates and Shelly de Killer speaks through it.
Let the entire transmission play. De Killer demands that Phoenix defend Matt Engarde and obtain a complete not-guilty verdict. Maya is being held as leverage. After the call, return to the Hallway and speak with Gumshoe when prompted. The story then moves Phoenix and Pearl to Wright & Co. Law Offices.
- Receive Radio Transceiver.
- Discuss Matt and Juan with Powers.
- Discuss the press conference.
- Hear de Killer’s complete demand.
- Speak with Gumshoe after the call.
- Advance to Wright & Co. Law Offices.
Obtain Phoenix’s agreement to defend Engarde
At Wright & Co., talk to Pearl and exhaust the available conversation. Move to the Detention Center and speak with Matt Engarde. Discuss Matt Engarde and What happened, then present the Press Conference Ticket when the game asks for proof of the planned conference.
Mention de Killer when the conversation allows it. Matt then agrees to let Phoenix take the case. Continue through the newly available topics: Matt Engarde, What happened, The victim, and The charge of murder. Matt denies killing Juan, and the Magatama performs an automatic story check. This is not a normal player-directed Psyche-Lock sequence.
Save after the day advances if you want a checkpoint before the second investigation section.
- Talk to Pearl at Wright & Co.
- Talk to Engarde about the initial subjects.
- Present Press Conference Ticket.
- Mention de Killer when prompted.
- Discuss the newly available topics.
- Allow the automatic Magatama check to finish.
- Save after the investigation advances.
Part 1-2: Begin with Oldbag, Lotta, and Adrian
Return to the Hotel Lobby and talk to Oldbag about The victim and What happened. Ask about What you witnessed to produce her Psyche-Locks. You cannot break them yet, so leave them in place.
Move to the Hallway and talk to Lotta Hart. Exhaust her available topics so Lotta’s Camera is added or updated in the Court Record and her Big Scoop Psyche-Locks appear.
Move to Engarde’s Hotel Room and talk to Adrian Andrews. Discuss the night of the murder and her relation to Engarde. Present the Press Conference Ticket, then present Juan Corrida’s Profile. After this sequence, ask about Motive for Murder to reveal Adrian’s Psyche-Locks. Leave them unbroken for now and move to Juan Corrida’s Hotel Room.
- Trigger Oldbag’s Psyche-Locks.
- Obtain or update Lotta’s Camera.
- Discuss Adrian’s night of the murder.
- Discuss Adrian’s relation to Engarde.
- Present Press Conference Ticket to Adrian.
- Present Juan Corrida’s Profile to Adrian.
- Reveal Adrian’s Psyche-Locks.
Search Juan Corrida’s room
Talk to Gumshoe in Juan’s room. He gives you the Hotel Guidemap and adds Crime Photo after explaining the apparent cause of death. Examine the Guitar Case and the Wine Glass. The Wine Glass contains tomato juice and is added to the Court Record.
Present the Wine Glass to Gumshoe. After the resulting conversation, examine the paper left on the table to obtain Juan Corrida’s Autograph. The bears can be examined for optional dialogue, but they are not required for this chapter’s progression.
- Obtain Hotel Guidemap.
- Obtain Crime Photo.
- Examine Guitar Case.
- Examine Wine Glass.
- Present Wine Glass to Gumshoe.
- Examine the paper left on the table.
- Obtain Juan Corrida’s Autograph.
Obtain Newspaper Clipping and break Oldbag’s locks
Return to Viola Hall and speak with Will Powers. Present Adrian Andrews’s Profile, then ask about Gossip. Powers gives you Newspaper Clipping, which connects Adrian to Juan and is needed for the later Psyche-Lock sequences.
Return to the Hotel Lobby and use Maya’s Magatama on Oldbag. Present Juan Corrida’s Autograph. The autograph is addressed to Wendy, and it breaks Oldbag’s locks. The autograph is surrendered during the exchange. Talk to Oldbag about the newly available topics, especially What you witnessed.
- Present Adrian Andrews’s Profile to Powers.
- Obtain Newspaper Clipping.
- Use the Magatama on Oldbag.
- Present Juan Corrida’s Autograph.
- Finish Oldbag’s unlocked conversations.
Break Lotta’s Psyche-Locks and investigate Criminal Affairs
Return to the Hallway and use the Magatama on Lotta’s Big Scoop topic. Present Adrian Andrews’s Profile first. When the next proof is requested, present Newspaper Clipping. The locks break, and Lotta’s Camera is updated. Discuss Big Scoop afterward.
Move to the Criminal Affairs Department and talk to Gumshoe before presenting evidence. Then present Newspaper Clipping to him and continue the newly unlocked conversation about Celeste Inpax. When Edgeworth appears, speak with him and present Celeste Inpax’s Profile.
Ask about the missing suicide note. Edgeworth gives you Suicide Report. Present Suicide Report back to Edgeworth. Its second part concerns Adrian’s attempted suicide, so continue the conversation until Attempted Suicide Report is added to the Court Record.
- Break Lotta’s locks with Adrian Andrews’s Profile, then Newspaper Clipping.
- Discuss Big Scoop with Lotta.
- Talk to Gumshoe before presenting evidence.
- Present Newspaper Clipping to Gumshoe.
- Present Celeste Inpax’s Profile to Edgeworth.
- Receive Suicide Report.
- Present Suicide Report to Edgeworth.
- Obtain Attempted Suicide Report.
Break Adrian Andrews’s Psyche-Locks
Return to Engarde’s Hotel Room. Wait until Franziska finishes speaking with Adrian and leaves. Then use Maya’s Magatama on Adrian’s Motive for Murder locks.
Present the evidence in this order: Newspaper Clipping, Celeste Inpax’s Profile, Suicide Report, and Attempted Suicide Report. The final presentation breaks the last lock. Talk to Adrian about Motive for Murder after the sequence ends. This is Adrian’s Psyche-Lock sequence; do not confuse it with Matt Engarde’s later five-lock sequence.
- Wait for Franziska to leave.
- Use the Magatama on Adrian.
- Present Newspaper Clipping.
- Present Celeste Inpax’s Profile.
- Present Suicide Report.
- Present Attempted Suicide Report.
- Complete Adrian’s Motive for Murder conversation.
Complete the Mysterious Location scene
Return to Wright & Co. Law Offices and complete the available conversations about Maya’s situation and the kidnapper. The story then shifts to Maya in the Mysterious Location.
Examine the card at the bottom of the stairway. Then examine the door. These are the required progression examinations for the scene. Allow the escape sequence and the return to Phoenix to play out. Save when the scene ends. The game then advances to Farewell, My Turnabout’s first trial day.
- Complete the Wright & Co. conversation.
- Reach the Mysterious Location.
- Examine the card near the stairway.
- Examine the door.
- Allow the scene to finish.
- Save before the first trial.
Before you move on
- Press Conference Ticket and Radio Transceiver are in the Court Record.
- De Killer’s kidnapping demand has been heard in full.
- Phoenix has accepted Matt Engarde’s defense.
- The automatic Magatama check with Engarde has completed.
- Hotel Guidemap, Crime Photo, Guitar Case, Wine Glass, and Juan Corrida’s Autograph were obtained.
- Wine Glass was presented to Gumshoe and the paper was examined to obtain the autograph.
- Newspaper Clipping was obtained from Will Powers after presenting Adrian Andrews’s Profile.
- Oldbag’s Psyche-Locks were broken with Juan Corrida’s Autograph.
- Lotta’s Psyche-Locks were broken with Adrian Andrews’s Profile followed by Newspaper Clipping.
- Celeste Inpax’s Profile was presented to Edgeworth.
- Suicide Report was obtained and presented to Edgeworth.
- Attempted Suicide Report was added to the Court Record.
- Adrian’s Psyche-Locks were broken with Newspaper Clipping, Celeste Inpax’s Profile, Suicide Report, and Attempted Suicide Report.
- Adrian’s Motive for Murder conversation was completed.
- The Wright & Co. conversation about Maya and the kidnapper was completed.
- The card and door at the Mysterious Location were examined.
- The game has advanced to Farewell, My Turnabout’s first trial day.
- Matt Engarde’s Psyche-Locks have not been treated as part of this chapter.
Case 4 — Trial and Finale: Farewell, My Turnabout
This chapter begins after Farewell, My Turnabout’s complete pretrial investigation. Chapter 8 must already have covered both investigation sections, including Adrian Andrews’s Psyche-Locks, the Suicide Report, the Attempted Suicide Report, and the Mysterious Location card-and-door trigger. Matt Engarde’s Psyche-Locks belong to this chapter. Follow the order first trial day, one second investigation, and final trial day. The intended ending requires presenting Shelly de Killer’s profile, then the Video Tape, and explaining that Matt Engarde wanted blackmail on de Killer.
Start the first trial day
Before entering court, save with as much health as possible. The opening testimony is Gumshoe’s Bare Facts of the Case. Press the third statement to add Juan’s Autopsy Report, press the fourth statement to update the Guitar Case, and press the fifth statement to continue.
During Why Arrest Engarde?, present the Knife against the statement that Matt bought it. When asked whether you have another explanation, choose that you do, then present the Wine Glass. Choose the response that there is no way the conclusion can be correct. The Jammin’ Ninja’s Button is added during this sequence.
- Confirm that Chapter 8 already completed both pretrial investigations.
- Do not repeat Adrian’s earlier Psyche-Locks or the first Mysterious Location trigger.
- Save before court.
- Press Gumshoe’s third, fourth, and fifth statements.
- Use the Knife and Wine Glass in Why Arrest Engarde?.
Break Oldbag’s testimony and identify the photograph’s subject
In Oldbag’s What You Witnessed testimony, press the statement identifying Matt as the person leaving Juan’s room. When asked what was important about the person, choose the person’s clothes, then choose that the clothes were very important. Present the Jammin’ Ninja’s Button against the added statement about the flashy racing jacket.
In Who I Saw, present the Knife against the statement that the person must have worn the Nickel Samurai costume. State that there is a contradiction, present the Knife again, and identify the purpose as framing Matt Engarde. Present Adrian Andrews’s profile when asked who Oldbag was waiting for.
During Secret Information, press the fifth statement and choose to present evidence. Present Lotta’s Camera, choose to pile on more pressure, and present Lotta’s Camera again. Lotta’s Photo is added. Identify the strange feature by pointing to the feet of the Nickel Samurai costume, then present Adrian Andrews’s profile when asked who appears in the photograph.
- Use the Jammin’ Ninja’s Button against the clothing statement.
- Use the Knife twice in Who I Saw.
- Present Adrian Andrews’s profile to identify the person Oldbag expected.
- Use Lotta’s Camera twice.
- Point to the Nickel Samurai costume’s feet in Lotta’s Photo.
- Present Adrian Andrews’s profile after the photograph is examined.
Complete Adrian’s testimony and reach the half-day investigation
In Where I Found the Body, press Adrian’s third and fifth statements. When the added statement appears, press further and present the Guitar Case. In The Guitar Case, present the Guitar Case against any statement after the first, choose the response indicating that the testimony is strange, and present the Wine Glass.
When the costume is discussed, present Lotta’s Photo or the Nickel Samurai evidence and identify it as a spare costume. Present the Press Conference Ticket to continue. During Protecting Matt, press the statement about the evidence supporting Adrian’s conclusion. Present Juan’s Autopsy Report against the added button statement, choose that the evidence was intended to pin the crime on Engarde, and present Adrian’s profile.
In the later When I Found the Body testimony, present the Crime Photo against the statement describing what Adrian saw. During My ‘Crime’, press every statement. There is no evidence presentation in that testimony; pressing it through grants the half-day investigation. Save when control returns to investigation mode.
- Use the Guitar Case and Wine Glass in Adrian’s early testimony.
- Use Lotta’s Photo or Nickel Samurai evidence to identify the spare costume.
- Present the Press Conference Ticket.
- Use Juan’s Autopsy Report and Adrian’s profile in Protecting Matt.
- Present the Crime Photo in the later body testimony.
- Press every statement in My ‘Crime’.
Begin the single second investigation
Start at Wright & Co. Law Offices and talk to Gumshoe about every available topic. Move to Hotti Clinic and speak with Franziska von Karma first. After she leaves, talk to Miles Edgeworth and exhaust his topics. This produces the Picture Card and Letter of Introduction.
The story then takes you to the Mysterious Location. In the DS route, move into the room and examine the verified progression hotspots: the antenna or satellite dish, the framed picture on the table, the stuffed bear on the sofa, and the door. The picture reveals Celeste’s connection, the bear is damaged, and the door is locked. Do not leave before examining all four.
Return to the Detention Center to trigger the event that adds Matt’s Note. From the Hotel Lobby, enter Engarde’s Living Room and talk to John Doe about every available topic. Matt’s Note is removed during this event. Return to the Hotel Lobby and present the Letter of Introduction to Oldbag. Move to the Hallway and exhaust Lotta’s topics. Go to Juan Corrida’s Hotel Room and talk to Oldbag about all available subjects.
- Exhaust Gumshoe’s Wright & Co. topics.
- Talk to Franziska before Edgeworth at Hotti Clinic.
- Obtain the Picture Card and Letter of Introduction.
- Examine the antenna or satellite dish, framed picture, stuffed bear, and door in the Mysterious Location.
- Trigger Matt’s Note at the Detention Center.
- Present the Letter of Introduction to Oldbag.
- Talk to Lotta and then Oldbag in their later locations.
Recover the surveillance evidence and clear Matt’s Psyche-Locks
Return to Wright & Co. and present the Radio Transceiver to Gumshoe. Ask about the newly available electromagnetic-interference topic. Go back to Corrida’s Hotel Room and perform the bug sweep by examining the teddy bear’s head on the left side of the room. Return to Gumshoe as the story permits; he supplies the Spy Camera, Transmitter, and Stuffed Bear information.
Continue the required conversations in sequence. Talk to Pearl in Corrida’s room, exhaust Oldbag’s topics in Viola Hall, visit the Criminal Affairs Department to obtain permission to return to the Detention Center, then talk to Matt and Adrian about every available topic. Talk to Will Powers at the Criminal Affairs Department as well. Return to Wright & Co. and speak with Gumshoe to receive the Credit Card Receipt and the restored surveillance evidence.
At the Detention Center, use Maya’s Magatama on Matt’s Psyche-Locks. Present the Spy Camera, then the Stuffed Bear. When asked who supplied the bear, present Matt Engarde’s profile. Present the Credit Card Receipt as proof that Matt obtained it, then present the Picture Card. When asked about de Killer, choose the second option identifying Matt as the client. Talk to Matt about the newly unlocked secret and motive topics.
- Present the Radio Transceiver to Gumshoe.
- Sweep the teddy bear’s head in Corrida’s room.
- Obtain the Spy Camera, Transmitter, Stuffed Bear, and Credit Card Receipt.
- Complete the intervening Pearl, Oldbag, Powers, Matt, and Adrian conversations.
- Break Matt’s locks in the order Spy Camera, Stuffed Bear, Matt’s profile, Credit Card Receipt, and Picture Card.
- Choose the option identifying Matt as de Killer’s client.
Obtain the Figurine and Celeste’s Photo, then break Adrian’s locks
After Matt’s locks are cleared, return to the Criminal Affairs Department and exhaust Edgeworth’s client, assassin, and other available topics. Follow the story to Engarde’s Living Room and examine the damaged bear figurine beside the small pet door to obtain the Figurine. Move through the Private Lounge to the Wine Cellar and examine the picture frame at the foot of the stairs to obtain Celeste’s Photo.
At the Detention Center, use Maya’s Magatama on Adrian Andrews’s Psyche-Locks. Present the Suicide Report when the first lock asks why her explanation is connected to Celeste. Present Celeste’s Photo when the next lock asks what the report has to do with Adrian’s motive. Talk to Adrian about the newly opened motive, framing, and revenge topics.
Return to Wright & Co. and examine the card in the Mysterious Location, followed by the door. These examinations complete the second investigation and advance the game to the final trial day. Save before entering court.
- Complete Edgeworth’s required conversations.
- Obtain the Figurine from Engarde’s Living Room.
- Obtain Celeste’s Photo from the Wine Cellar.
- Use the Suicide Report and Celeste’s Photo on Adrian’s locks.
- Finish Adrian’s newly available conversations.
- Examine the Mysterious Location card and door.
- Save before the final trial day.
Final trial day: Powers and Adrian’s Bear Figurine testimony
In Powers’s Visit to Matt’s Room testimony, press the statement about watching the two people and the statement about Matt talking with someone. Press the revised statement about Matt giving the bellboy a tip, then ask for details about Engarde’s tip. When given the choice to object or wait, object to prolong the trial.
In The Second Time, press the fourth statement, choose that Powers tried to pull a fast one, then present the Crime Photo or Wine Glass against the added contradiction. In Their Second Meeting, press the statement about giving something to the person inside, ask about the person inside, press it again, and ask about the item. Present the Figurine against the revised statement. Ask about the person who received the bear and then the bear itself. Raise an objection and present Adrian Andrews’s profile.
Adrian then testifies about The Bear Figurine. Press every statement. The Figurine updates and Celeste’s Suicide Note is added. When asked which evidence to pursue, either available choice can continue; then choose to present evidence and present Celeste’s Suicide Note. During the recess, choose that there is a way and present Franziska von Karma’s profile. When asked how Matt could know the note’s contents, present the Spy Camera or Transmitter. This brings de Killer into court.
- Press Powers’s testimony in order.
- Ask about Engarde’s tip and object when prompted.
- Use the Crime Photo or Wine Glass in The Second Time.
- Use the Figurine in Their Second Meeting.
- Press every statement in The Bear Figurine.
- Present Celeste’s Suicide Note after it is revealed.
- Present Franziska’s profile during the recess.
- Use the Spy Camera or Transmitter when Matt’s knowledge is questioned.
Break de Killer’s testimony and reach the intended ending
In About My Client, press de Killer’s trust statement, the statement explaining why he is testifying, and the trust statement again after it returns. Press the new statement that identifies Adrian as the supposed client and choose to continue the trial.
In About My Client, Part 2, press the statement about Adrian knowing Juan was dead, then present the Wine Glass against the revised version. The fingerprints show that Adrian thought Juan was unconscious rather than knowingly entering a room containing a corpse.
In Request Taking, press the statement about meeting at a bar and press further. First choose that the detail was not important, then choose that it was very important when asked again. Present Adrian Andrews’s profile against the added statement about de Killer trusting the client.
In Request Taking, Part 2, press the statement about the murder request, choose press further twice, and press the added statement about finding the Figurine and handing it to Adrian. Present the Figurine against the revised claim. The Figurine still contained Celeste’s Suicide Note, so Adrian could not have been the client who received it immediately after the murder.
When de Killer threatens Maya, answer that Matt Engarde is guilty. Franziska then interrupts with the decisive evidence. Question her about the Pistol, Video Tape, and Bellboy’s Uniform so all three are added. At the final evidence choices, present Shelly de Killer’s profile first, then the Video Tape. Explain that Matt wanted blackmail on de Killer. Continue through the closing dialogue and the final plea choices. The good ending is reached when de Killer’s contract is terminated, Maya is released, Engarde receives the guilty outcome, and the ending sequence or credits begin.
- Use the Wine Glass in About My Client, Part 2.
- Use Adrian’s profile in Request Taking.
- Press further twice in Request Taking, Part 2.
- Present the Figurine against the final revised testimony.
- Choose that Engarde is guilty when Maya is threatened.
- Question Franziska about all three pieces of decisive evidence.
- Present Shelly de Killer’s profile first.
- Present the Video Tape second.
- Choose that Engarde wanted blackmail on de Killer.
- Continue through Maya’s release and the ending sequence.
Before you move on
- The first trial day has been cleared through Gumshoe, Oldbag, Lotta’s camera evidence, Adrian’s testimony, the Crime Photo, and the half-day investigation transition.
- The second investigation has been completed once through Wright & Co., Hotti Clinic, the verified Mysterious Location sweep, Matt’s Note, the required hotel conversations, the Radio Transceiver, the bear bug sweep, the surveillance evidence, Matt’s Psyche-Locks, the Figurine, Celeste’s Photo, Adrian’s Psyche-Locks, and the final Mysterious Location card and door.
- The final trial day has used the Figurine during Powers’s testimony and Celeste’s Suicide Note during Adrian’s Bear Figurine testimony.
- De Killer’s testimony has been broken with the Wine Glass, Adrian Andrews’s profile, and the Figurine.
- The Pistol, Video Tape, and Bellboy’s Uniform have been added through Franziska’s evidence scene.
- Shelly de Killer’s profile and then the Video Tape have been selected at the final prompt.
- The guilty response was given after de Killer threatened Maya, de Killer’s contract was terminated, Maya was released, Engarde received the guilty outcome, and the ending sequence or credits began.
References for this chapter
- Phoenix Wright: Justice for All walkthrough: Spoiler-free Ace Attorney 2 case guide
- Phoenix Wright: Ace Attorney: Justice for All — Guide and Walkthrough — GameFAQs
- Phoenix Wright: Ace Attorney - Justice For All/Episode 4: Farewell, My Turnabout/Part 1-2: Investigation
- Phoenix Wright: Ace Attorney - Justice For All/Episode 4: Farewell, My Turnabout/Part 3-2: Investigation
After the Credits: Evidence Audit and Replay Tips
Once Farewell, My Turnabout is resolved, verify the ending sequence, protect the save immediately before the final decision if you want to revisit the alternate outcome, and use ordinary DS saves for replay practice. The original North American Nintendo DS retail release does not provide the modern Case Replay or chapter-select workflow found in later versions. Its Court Record is case-specific, so it should not be treated as a permanent gallery containing every item from all four episodes.
1. Finish Farewell, My Turnabout and protect the final decision save
Continue the final trial until the game reaches the last decision involving Shelly de Killer, the Video Tape, and Matt Engarde's attempt to control the situation. If you want the intended resolution in which Phoenix exposes Engarde's betrayal and protects Maya, select Shelly de Killer's profile when asked whom to show the evidence to. When the game asks what you want to show him, present the Video Tape. When the follow-up question asks why Engarde wanted de Killer to protect the tape, choose the response that says Engarde wanted to blackmail him with it.
Make a manual save immediately before this decision if the game gives you the opportunity and you want to inspect the alternate outcome without replaying the preceding courtroom section. The save is a single overwriteable progress point, so do not save over it after choosing the ending branch unless you are finished with that comparison. A bad-ending route can result from presenting the wrong person or wrong evidence, including presenting the Video Tape before Shelly de Killer's profile.
For the main-campaign completion goal, advance through the resulting courtroom resolution and closing scenes. The case is complete when Farewell, My Turnabout has been resolved and the game has shown its ending sequence. Seeing the title screen again afterward is not a sign that the campaign failed; it is simply the normal point at which you can continue from the last save or begin another run.
- Save immediately before the final decision if you want to revisit the alternate outcome.
- For the intended resolution, select Shelly de Killer's profile first.
- Present the Video Tape second.
- Answer that Engarde wanted to blackmail de Killer with the tape.
- Continue through the closing scenes and ending sequence.
2. Check the active Case 4 Court Record
Load the Case 4 save you intend to keep and open the Court Record during a point when the game permits access. Check that the late-case evidence and profiles needed for the ending route are present. The Video Tape is the important final evidence item, and Shelly de Killer's profile is the profile selection used immediately before presenting it.
Do not use the Court Record as a test of whether you have retained every object from the entire campaign. Justice for All presents evidence and profiles for the active episode and its current progression. Earlier entries from The Lost Turnabout, Reunion, and Turnabout, or Turnabout Big Top are not expected to remain permanently assembled in the Case 4 record. Their absence does not mean that a previous case was skipped or completed incorrectly.
If you want to inspect evidence from an earlier episode, load a save from that episode. If no suitable save remains, begin another playthrough and advance to the relevant case. Do not waste time searching the completed Case 4 record for a permanent all-game evidence gallery that the original DS release does not provide.
- Inspect the Court Record on the Case 4 save you actually preserved.
- Confirm that the Video Tape and Shelly de Killer profile are available before the final decision sequence.
- Treat the record as active-case data, not a four-case archive.
- Use an earlier save or a new run to revisit evidence from Cases 1 through 3.
3. Replay through Continue or New Game
At the title screen, use Continue to return to the available manual save. This is the dependable way to resume a partially completed case or revisit a save made before the Case 4 ending decision. Remember that saving later overwrites the same normal save position, so a later practice save can remove your convenient pre-decision checkpoint.
Use New Game when you want to replay from the beginning rather than expecting a modern menu that jumps directly to any completed testimony or investigation chapter. The original North American DS retail release should not be approached as though it has the Case Replay and chapter-select tools found in later remastered collections. If you need to rehearse a particular courtroom section, preserve a save made near that section during a playthrough.
Keep one save for the final decision only if the alternate ending matters to you. Otherwise, use your normal checkpoint routine: save at major investigation breakthroughs, at the beginning of trial sections, and immediately before difficult Psyche-Lock or long testimony sequences when saving is available. Because the normal save position is overwritten, decide which checkpoint is more valuable before confirming a new save.
- Use Continue for the current manual save.
- Use New Game for a fresh replay.
- Do not expect a modern Case Replay or chapter-select menu on the original DS release.
- Protect the pre-decision save before making later practice saves.
- Save at useful trial and investigation checkpoints instead of relying on automatic preservation.
4. Practice the cases in a useful order
Start with Reunion, and Turnabout, Case 2, if your goal is to rehearse Psyche-Locks. The case introduces the Magatama system and gives you a compact way to practice reading the concealed topic, pressing the relevant statements, and presenting the evidence or profile that breaks the lock. Keep notes of the exact sequence only after confirming it in the game, because a Psyche-Lock is solved by the specific logic of that testimony rather than by presenting random related evidence.
Move to Farewell, My Turnabout, Case 4, for long cross-examinations, testimony changes, and the final decision sequence. A save before the Shelly de Killer and Video Tape exchange is especially useful because it allows repeated practice without replaying the entire episode. Turnabout Big Top, Case 3, is useful for reviewing contradictions involving several witnesses' timelines and physical details. The Lost Turnabout, Case 1, is the shortest place to refresh basic pressing and evidence presentation.
This order is a practice recommendation, not a requirement for completion. You do not need to replay all four episodes after the ending unless you want to refresh their courtroom logic or recover a lost checkpoint.
- Use Case 2 to practice Psyche-Locks.
- Use Case 4 to practice long testimony chains and the final decision.
- Use Case 3 to compare witness timelines and physical details.
- Use Case 1 to refresh basic pressing and contradiction matching.
5. Keep a compact personal reference
For future attempts, organize notes by case, trial day, witness, and testimony title. Record the exact evidence or profile name displayed by the game, the statement to press, and the presentation that advances the sequence. Mark whether the action occurs during a cross-examination, Psyche-Lock, multiple-choice prompt, or final decision. This prevents confusion between similar-looking evidence entries from different episodes.
Separate optional presses from required actions. Some presses provide extra dialogue without advancing the puzzle, while others expose the statement that must be contradicted. Record only the points that caused hesitation or that you are likely to forget after a long break. For Case 4, keep the ending note explicit: Shelly de Killer's profile first, Video Tape second, then the response explaining that Engarde wanted blackmail.
Do not treat personal notes as a replacement for checking the current Court Record. Evidence names, available profiles, and testimony state can change with the active case and the point reached in that case.
- Organize notes by case and trial day.
- Copy evidence and profile names exactly as displayed.
- Mark optional presses separately from required actions.
- Record the Case 4 ending order as profile first, Video Tape second.
- Check the active Court Record before relying on old notes.
Before you move on
- Farewell, My Turnabout has been resolved.
- The ending sequence has been shown after the final courtroom decision.
- The intended resolution used Shelly de Killer's profile followed by the Video Tape, then the blackmail explanation.
- A pre-decision save has been preserved if the alternate outcome is important to you.
- The active Case 4 Court Record has been checked without expecting an all-game evidence archive.
- Replay plans use Continue from an earlier save or New Game rather than a modern Case Replay menu.
References for this chapter
- Phoenix Wright: Ace Attorney: Justice for All — Guide and Walkthrough — GameFAQs
- Phoenix Wright: Ace Attorney: Justice for All — Guide and Walkthrough — GameFAQs
- Phoenix Wright: Justice for All walkthrough: Spoiler-free Ace Attorney 2 case guide
- Phoenix Wright: Ace Attorney - Justice for All Save Games for DS
- Whats the code to delete all data on this game? - Phoenix Wright: Ace Attorney - Justice for All Q&A for DS
- Video Tape (Farewell, My Turnabout)
Failure Recovery: Saves, Reloads and Clearing Stuck Sections
The North American Nintendo DS retail release of Phoenix Wright: Ace Attorney: Justice for All uses one ordinary manual save position. Each manual save overwrites the previous one, so the safest routine is to preserve a healthy checkpoint before trials, difficult Psyche-Locks, and major investigation transitions. Continue lets you resume through the latest manual save or use From chapter start, a separate built-in recovery point for the current chapter segment. From chapter start is not a second manual slot and should not be treated as a complete record of every recent conversation, examination, or item.
Understand the single manual save position
During normal gameplay, press Start to open the pause menu and select Save. The original Nintendo DS release provides one regular manual save position. Saving again replaces the previous manual save; you cannot rotate between two ordinary cartridge files to preserve both a safe checkpoint and a later experimental position.
At the title screen, select Continue to return to the active campaign. The recovery choices distinguish the latest manual save from From chapter start. The manual-save option returns to the location and state recorded when you last saved. From chapter start returns to the built-in recovery point for the current chapter or courtroom-investigation segment. It is useful when the manual save was made after a bad decision, but it is not a second manual file and may require repeating recent actions.
- Press Start to open the normal save menu.
- Assume every manual save overwrites the previous one.
- Use Continue when returning to the current campaign.
- Use the latest manual save for the exact position you recorded.
- Use From chapter start when the manual position has become unsafe.
- Do not describe From chapter start as a second save slot.
Build a reliable checkpoint routine
Save at meaningful milestones rather than overwriting the file after every short exchange. Good opportunities include the beginning of a new investigation or trial segment, the end of a substantial conversation route, the acquisition of important evidence or a profile, the opening of a new location, and the completion of a Psyche-Lock followed by its newly unlocked dialogue.
Before entering a courtroom segment, save whenever the normal menu is available. The useful goal is a healthy trial checkpoint containing the evidence and profiles the game expects you to use. If a transition temporarily prevents saving, continue until the next available opportunity instead of assuming the latest action has replaced your manual checkpoint.
- Save at the start of a new investigation or trial segment when possible.
- Save after major evidence, profile, location, or conversation changes.
- Save after breaking a Psyche-Lock and viewing its follow-up dialogue.
- Save before a courtroom session whenever the menu permits it.
- Do not overwrite a healthy checkpoint immediately after a costly mistake.
Protect the health gauge before courtroom risks
Justice for All uses a segmented health gauge. During courtroom play, an incorrect evidence presentation, wrong answer, or other failed decision removes part of the gauge. If the courtroom gauge reaches zero, the current courtroom sequence ends in a game over. An early penalty can therefore make a later section unnecessarily dangerous, even if you know the remaining answers.
Read the complete testimony before presenting evidence and inspect the relevant Court Record entries. If the contradiction is unclear, press the applicable statement when the game permits it, review the evidence description, or cancel the evidence list rather than guessing. Ordinary pressing is generally safe, but obey any explicit warning that pressing further could affect the available response.
- Keep a healthy manual checkpoint before court.
- Read testimony and review the Court Record before presenting evidence.
- Reload rather than continuing a trial with an unsafely depleted gauge.
- Treat warnings about pressing further as meaningful decisions.
- Use From chapter start if the manual position was overwritten after a damaging mistake.
Reload after a costly courtroom mistake
If you present the wrong item, select the wrong answer, or lose enough health that the remainder of the trial is unsafe, return to the title screen and choose Continue. Load the latest manual save if it predates the mistake. If you saved after the mistake, choose From chapter start and accept that you may need to repeat the current segment from its built-in checkpoint.
This matters most in Farewell, My Turnabout, where a long courtroom sequence can contain several penalties. The purpose of reloading is to preserve a usable health-gauge checkpoint, not to avoid every retry. Do not save over the healthy file merely to record a position after a failed presentation.
- Reload after a damaging courtroom error when the mistake can compromise the rest of the trial.
- Choose the latest manual save only if it predates the mistake.
- Use From chapter start if the manual save was overwritten afterward.
- Expect to repeat some recent dialogue or investigation actions when using the chapter-start recovery point.
Handle Psyche-Locks correctly
Psyche-Locks occur during investigation. Present Maya's Magatama when the locks appear, then answer each hidden question with the evidence or profile that explains why the witness is concealing the subject. An incorrect choice reduces the life meter. However, exhausting the meter during a Psyche-Lock does not produce the same courtroom-style game over caused by reaching zero during a trial. The sequence fails or closes, and the topic must be attempted again when the game allows it.
Do not use the lock sequence as a random guessing exercise. If no evidence or profile logically answers the current question, stop guessing and leave or postpone the sequence when the game permits. Move through the available locations, examine overlooked hotspots, talk to characters again, use relevant Present actions, and obtain the missing prerequisite. Then return to the locks, or reload a healthy checkpoint if the reduced meter leaves too little room for another attempt. Successfully breaking all locks on a topic restores part of the life meter, so completing a sequence is also a recovery opportunity.
- Save before a difficult Psyche-Lock when a manual save opportunity is available.
- Begin the sequence by presenting Maya's Magatama.
- Use evidence or profiles that answer the specific hidden question.
- Stop guessing when the Court Record lacks a plausible answer.
- Investigate for the missing prerequisite and return later when possible.
- Reload a healthy checkpoint if repeated errors have made the remaining margin unsafe.
Clear a stuck investigation methodically
When no new dialogue or location appears, start with Move. Revisit every currently available destination, including side rooms or branches reached through another area. In each location, choose Examine and inspect the full scene, including small or apparently decorative hotspots. Some progression items are collected only after selecting a particular object or checking a wider section of the background.
Next, talk to every available character and exhaust each currently listed subject. Revisit important witnesses after receiving new evidence, profiles, or information. Use Present with items that are logically connected to the current topic; a relevant presentation can unlock dialogue, evidence, or a Psyche-Lock. If the subject has locks, stop repeating ordinary Talk and begin the Magatama sequence.
If the case still does not advance, record the episode, investigation day, current location, available Talk subjects, latest evidence, profiles, and visible locks. Consult a walkthrough for that exact point and look for one missed action: an examination, re-interview, presentation, movement branch, or prerequisite item. Save as soon as the missing trigger advances the investigation.
- Sweep every location currently listed under Move.
- Check secondary rooms and branches reached through another location.
- Examine the whole visible scene and inspect small hotspots.
- Exhaust every available Talk subject.
- Re-interview witnesses after new evidence or profiles appear.
- Present relevant items and profiles instead of random evidence.
- Check whether a Psyche-Lock requires a missing prerequisite.
- Save once the investigation advances again.
Before you move on
- You know that Start opens the normal DS save menu.
- You understand that the game has one ordinary manual save position and each manual save overwrites it.
- You can select Continue and distinguish the latest manual save from From chapter start.
- You know that From chapter start is a built-in recovery checkpoint, not a second save slot or a full recent-action backup.
- You keep a healthy checkpoint before courtroom sessions and difficult Psyche-Locks.
- You know that a depleted courtroom gauge causes a game over, while a failed Psyche-Lock sequence is retried or postponed without the same courtroom game-over condition.
- When stuck, you have swept Move locations, examined full scenes, exhausted Talk subjects, revisited witnesses, used relevant Present actions, and checked Psyche-Lock prerequisites.
- After completing Farewell, My Turnabout, you leave the final save intact after the ending sequence has played.
References for this chapter
- Phoenix Wright: Ace Attorney: Justice for All — Guide and Walkthrough — GameFAQs
- Phoenix Wright: Ace Attorney: Justice for All — Guide and Walkthrough — GameFAQs
- Phoenix Wright: Ace Attorney - Justice for All - Guide and Walkthrough - DS, by BWoodhouse
- Phoenix Wright: Ace Attorney – Justice for All
- Phoenix Wright: Ace Attorney For All Gameplay
Optional Completion: Clean Runs and Speedrun Basics
After completing Phoenix Wright: Ace Attorney: Justice for All on the North American Nintendo DS retail release, you can improve consistency and speed by building verified routes for testimony, investigation transitions, and Psyche-Locks. Optimize only after learning the case logic. The original DS release has one normal in-game manual save position, so practice must use deliberate overwrites rather than assumed rotating save slots. Keep DS routes and controls separate from later Trilogy versions.
1. Complete a normal playthrough before timing anything
Finish all four episodes once before attempting a speed-focused replay. Justice for All requires you to recognize when an investigation conversation unlocks a location, when a new evidence or profile entry is added, and which statement changes after a press. Trying to optimize before learning those triggers usually creates larger delays through wrong presentations, missed conversations, and repeated dialogue.
The campaign ends with Farewell, My Turnabout. The North American Nintendo DS release does not add a fifth episode to route or optimize. During the first playthrough, read the testimony and investigation dialogue carefully enough to understand why each answer works. This is especially important for Psyche-Locks, because their solutions depend on the secret being concealed rather than merely on a visible contradiction.
After finishing the game, replay difficult sections and make notes in a consistent format: location or testimony name, required press, evidence or profile presented, and the result. Speedrun.com’s original-release guide is labeled as an NG+ route, so it is useful for replay planning but should not be treated as a first-playthrough replacement.
- Complete all four episodes before timing a route.
- Record investigation actions that unlock evidence, profiles, locations, or trial sections.
- For difficult courtroom segments, note the required press before the presentation.
- Keep notes for the original DS release separate from Trilogy notes.
2. Build routes for the original DS controls and Court Record
On the original Nintendo DS release, the D-pad moves the selection, A confirms or advances, B cancels, L presses a highlighted testimony statement in court, R opens the Court Record, and X presents the selected evidence from the Court Record. The touchscreen can perform the same general navigation, so choose one input method and practice with it consistently. The microphone commands are optional; use the button controls if voice input would be slower or unreliable.
Write each courtroom route as a sequence rather than as a list of evidence names. A useful entry looks like: testimony statement, press or no press, resulting testimony, evidence or profile, and consequence. If pressing a statement produces new testimony, record the new line separately. That changed line may be the one that must be contradicted, and skipping the required press can make an otherwise correct evidence item fail.
The original DS Court Record is not organized like the later Trilogy interface. Route notes for the DS release may identify evidence and profile positions by page and slot, but treat those positions as temporary references only. The evidence list can change after an investigation update. Before every presentation, confirm the item’s name and whether it is evidence or a profile. Memorizing a slot without checking the item is a common source of replay errors.
- Use one consistent control method during practice.
- Record presses that create revised testimony.
- Open the Court Record with R or the equivalent touchscreen control before presenting.
- Verify the item name and Evidence or Profiles category whenever the record changes.
- Do not copy cursor directions or slot assumptions from Trilogy routes.
3. Practice long courtroom sections in blocks
The most useful courtroom practice targets are extended testimony chains in Farewell, My Turnabout and any section where one correct presentation causes several follow-up exchanges. Start from a save immediately before the block when possible. First complete the entire block without a penalty. Only after that should you reduce hesitation, menu movement, and unnecessary text advancement.
Treat a changed testimony as a new decision point. When a witness revises the story, compare the revised statement with the evidence and profiles currently established in court. Your route is not reliable unless it includes the earlier press that caused the revised statement. A presentation that appears correct in isolation may be wrong if the testimony has not been changed first.
Practice one testimony at a time and mark the points where the game asks whether to press further, present evidence, or continue. Do not press every line automatically. Some presses are required for progression, while others add dialogue but do not help the route. Use verified notes rather than assuming that every highlighted sentence deserves a press.
- Practice the final case in separate testimony blocks.
- Mark every press that creates new testimony or an important choice.
- Record which presentation follows each changed statement.
- Achieve consistent correct runs before attempting faster input.
4. Rehearse Psyche-Locks as decision trees
Psyche-Locks deserve separate practice because the sequence combines dialogue, evidence selection, profiles, and sometimes several locks on one topic. For each sequence, write the concealed fact, the witness’s stated reason for silence, the proof that undermines that reason, and whether the answer is evidence or a profile. This is more dependable than memorizing only a Court Record position.
The first major Psyche-Lock practice appears in Reunion, and Turnabout, with later sequences in Turnabout Big Top and Farewell, My Turnabout. The original-release route notes show multi-step sequences in which the correct item changes from a profile to evidence or back again. Rehearse the entire dialogue path, including the required presses, rather than jumping straight to the final answer in your notes.
Save before a difficult Psyche-Lock when your current in-game checkpoint is useful. A wrong presentation reduces the penalty gauge, while a successfully completed Psyche-Lock restores health. If a practice attempt loses too much health, reload rather than carrying the mistake into a later courtroom section. A Psyche-Lock failure is not a reason to invent a new route; reread the secret and identify the fact the witness is trying to hide.
- Write the secret and the witness’s explanation for every practiced lock.
- Mark whether each answer requires evidence or a profile.
- Record all required presses before each presentation.
- Practice the full sequence, not only the final item selection.
5. Use the DS save system deliberately
The original North American Nintendo DS retail release has one normal in-game manual save position. Saving again overwrites that position; it does not create a second rotating slot for a clean trial checkpoint. Use Start to open the save menu, and save before a trial, before a difficult Psyche-Lock sequence, or after a major investigation breakthrough when you want a stable restart point.
Because there is only one normal in-game position, decide what your current checkpoint is protecting before saving. A save made after a failed presentation can overwrite the healthy checkpoint you wanted for practice. If you need separate practice states, use separate playthroughs or lawful, hardware-appropriate external backup methods only where your actual equipment supports them. Do not assume that a later Trilogy save menu, emulator save-state menu, or flash-cartridge feature exists on the original retail cartridge.
The game also provides chapter-start recovery in its continuation options. That recovery is not a second manual save and should not be treated as a precise duplicate of every recent investigation action. When a practice section goes badly, compare the available continuation choices before overwriting your useful checkpoint.
- Maintain one intentional in-game checkpoint at a time.
- Save while the penalty gauge is healthy, not after avoidable mistakes.
- Do not rely on assumed rotating DS cartridge save slots.
- Use only legitimate external backup options supported by your hardware, if any.
- Keep chapter-start recovery separate from the manual save position.
6. Set a repeatable clean-run standard
A practical clean run completes the campaign without avoidable penalty loss, unnecessary evidence presentations, or unexplained investigation detours. Decide before timing whether practice reloads are allowed. Reloading is useful while learning, but a formal attempt should state whether a reload invalidates the run. Apply that rule consistently instead of changing it after an error.
Use the same DS hardware and input method during practice. After each attempt, record wrong presentations, unnecessary presses, menu hesitation, and investigation backtracking. Improve one category at a time. The goal is a repeatable route, not a single unusually fast attempt that depended on guessing or an unverified memory of an evidence slot.
Do not begin a speedrun attempt on a first playthrough. Learn the cases, then use the verified press-and-present route and Psyche-Lock decision tree to reduce hesitation. After a long break, inspect the Court Record and confirm the item name rather than trusting muscle memory alone.
- Choose a fixed hardware and input setup.
- Define the reload rule before a formal attempt.
- Track wrong presentations, unnecessary presses, hesitation, and detours.
- Confirm evidence and profile names after long breaks.
- Finish the route repeatedly before treating it as optimized.
Before you move on
- You can complete all four episodes from a fresh save while following your own verified notes.
- Your route records required presses, changed testimony, answer items, and the reason each answer works.
- You can clear practiced Psyche-Lock sequences without guessing and can identify evidence versus profile answers.
- A clean attempt avoids unnecessary penalty loss, unnecessary evidence presentations, and unexplained backtracking.
- Your practice notes distinguish the original Nintendo DS Court Record layout from later Trilogy interfaces.
- You understand that the DS retail release has one normal manual save position and have not planned around assumed rotating in-game slots.
- You can resume after a break, inspect the Court Record, and confirm the correct evidence or profile before presenting it.
References for this chapter
- All Cases NG+ Route Notes — Phoenix Wright: Ace Attorney: Justice for All — Speedrun.com
- Phoenix Wright: Ace Attorney: Justice for All — Guide and Walkthrough — GameFAQs
- Phoenix Wright: Ace Attorney: Justice for All — Guide and Walkthrough — GameFAQs
- Phoenix Wright: Ace Attorney: Justice for All/Controls — StrategyWiki
- Phoenix Wright: Ace Attorney Justice for All — Nintendo DS — Nintendo
Finishing up
You have completed all four main episodes: The Lost Turnabout, Reunion, and Turnabout, Turnabout Big Top, and Farewell, My Turnabout.
You have resolved the final Case 4 courtroom sequence and watched the intended ending and credits for the North American Nintendo DS release.
You have preserved a useful final or pre-ending manual save without overwriting it with an avoidable low-health position.
You have completed the episode-specific requirements, including the necessary Magatama Psyche-Locks and courtroom contradictions.
For replay, use Continue with an earlier save or begin a new game; do not expect a permanent all-game Court Record archive or a modern Case Replay menu.
Choose your next gameScreenshots & video
Game imagery for reference. Follow the written chapters above for the route and strategies.
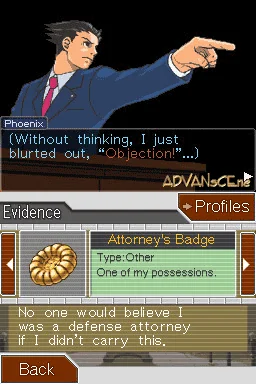
Sources & references
Our original guide draws on the references below. Check the edition at the top of this page before following controls or unlock requirements.
- Phoenix Wright: Ace Attorney: Justice for All/Controls — StrategyWiki
- Phoenix Wright: Ace Attorney For All Gameplay
- Phoenix Wright: Ace Attorney: Justice for All — Guide and Walkthrough — GameFAQs
- Phoenix Wright: Ace Attorney - Justice For All/Episode 1: The Lost Turnabout/Part 1-1: Trial
- Phoenix Wright: Ace Attorney - Justice For All/Episode 1: The Lost Turnabout/Part 1-2: Trial
- Phoenix Wright: Ace Attorney: Justice for All — Guide and Walkthrough — GameFAQs
- Phoenix Wright: Justice for All walkthrough: Spoiler-free Ace Attorney 2 case guide
- Phoenix Wright: Ace Attorney - Justice For All/Episode 2: Reunion, and Turnabout/Part 1: Investigation
- Phoenix Wright: Ace Attorney - Justice For All/Episode 2: Reunion, and Turnabout/Part 3: Investigation
- Phoenix Wright: Ace Attorney - Justice For All/Episode 2: Reunion, and Turnabout/Part 4-1: Trial
- Phoenix Wright: Ace Attorney - Justice For All/Episode 2: Reunion, and Turnabout/Part 4-2: Trial
- Phoenix Wright: Ace Attorney - Justice For All/Episode 3: Turnabout Big Top/Part 1: Investigation
- Phoenix Wright: Ace Attorney - Justice For All/Episode 3: Turnabout Big Top/Part 3: Investigation
- Phoenix Wright: Ace Attorney - Justice for All - Guide and Walkthrough - DS, by BWoodhouse
- Phoenix Wright: Ace Attorney - Justice For All, Episode 3 Part 4-1 Trial — Wikibooks
- Phoenix Wright: Justice for All — Turnabout Big Top guide
- Farewell, My Turnabout - Transcript - Part 1
- Phoenix Wright: Ace Attorney - Justice For All/Episode 4: Farewell, My Turnabout/Part 1-2: Investigation
- Phoenix Wright: Ace Attorney - Justice For All/Episode 4: Farewell, My Turnabout/Part 3-2: Investigation
- Phoenix Wright: Ace Attorney - Justice for All Save Games for DS
- Whats the code to delete all data on this game? - Phoenix Wright: Ace Attorney - Justice for All Q&A for DS
- Video Tape (Farewell, My Turnabout)
- Phoenix Wright: Ace Attorney – Justice for All
- All Cases NG+ Route Notes — Phoenix Wright: Ace Attorney: Justice for All — Speedrun.com
- Phoenix Wright: Ace Attorney Justice for All — Nintendo DS — Nintendo
About the game & collecting notes
- Platform
- Nintendo DS
Step-by-step walkthrough for the Nintendo DS release of Phoenix Wright: Ace Attorney — Justice for All. Covers every investigation and courtroom section across all four main episodes, plus the DS-specific interface, the Magatama / Psyche-Lock mechanic introduced in this title, failure recovery and clear completion checks so you can reach the game's true ending.
Darryl Polo
Darryl Polo loves tinkering with emulation and revisiting retro games. He enjoys exploring how old favorites play on different setups and sharing what he learns along the way. At Joking Joystick, he writes about the games, hardware, and small discoveries that keep the hobby fun.
Our editorial standardsFound a step that needs another look? Help us improve this guide.