
Parasite Eve — Complete Walkthrough for the North American PlayStation Release (Original two‑disc edition, SLUS-00662/00668)
Step-by-step campaign walkthrough for the original North American PlayStation release of Parasite Eve. This guide covers the required story route from Carnegie Hall through the normal Day 6 ending, explains the pausable real-time combat and Parasite Energy systems, identifies optional rewards without confusing them with required progress, and explains how the Clear Data save unlocks EX Game. The Chrysler Building and its optional EX-only final boss and additional ending are outside the main-campaign completion requirement.


Find a copy
Parasite Eve Sony PlayStation
We may earn a commission if you buy through these links, at no extra cost to you. As an Amazon Associate I earn from qualifying purchases.
Opens retailer search results. Check the model, edition, seller, availability and current price before buying.
Before you begin
You are playing the original North American PlayStation release of Parasite Eve.
The game mixes exploration of New York locations with a pausable real-time combat system using the Active Time Bar and Parasite Energy abilities.
This walkthrough assumes the original two-disc retail edition and guides you through the required story route to the normal Day 6 ending and EX Game unlock.
Follow the chapters in their listed chronological order. The optional Chrysler Building and its EX-only final boss and ending are covered separately after the normal ending.
Each chapter identifies required objectives, optional rewards, practical navigation, boss tactics, recovery from failure, and a concrete completion check.
Save at telephones, manage Wayne's storage carefully, and treat BP, tune-ups and final equipment engraving as separate progression decisions. The opening Carnegie Hall route continues through the second Eve encounter and the sewer boss before Aya reaches the police station; there is no early world-map hotspot in that sequence.
Set yourself up for the run
Confirm you own both retail discs (the North American release is a two‑disc set, SLUS‑00662 and SLUS‑00668).
Disc swaps are required as the campaign advances between the two discs.
Learn the core battle flow: fights occur in the environment with a pausable real‑time system governed by an Active Time Bar.
While the ATB fills you can move Aya to dodge and reposition; when you act the game briefly pauses to choose attacks, Parasite Energy (PE), items or equipment changes.
Stock up on healing and MP items early.
Keep a healthy supply of recovery items and ammunition so you can finish protracted encounters without backtracking to a save area.
Use tune‑up (weapon/armor customization) and distribute Bonus Points (BP) at level‑up screens to ATB speed, item capacity or weapon/armor attributes depending on your playstyle.
Weapon tuning and BP allocation are permanent advantages—plan upgrades for the mid‑ and late game.
Prioritize learning and upgrading a small set of Parasite Energy spells (PE) you actually use.
Offensive spells that cause ongoing damage or crowd control and a reliable healing PE are high‑value choices; PE recharges in battle but becomes slower the more it’s used, so timing matters.
Practice switching between ranged weapon attacks and PE: many encounters reward a mixed approach (knockdown with PE then close with firearms).
Learn to use weapon range markers when the game pauses to target; weapon effective range matters for safe damage.
Keep several save points’ worth of items in the police station storage.
As you progress you will be able to return to the station to retrieve items; use storage to carry rare items between disc swaps and to prepare for late‑game fights.
Read equipment descriptions before installing tune‑ups.
Some attributes (acid, poison, etc.) add status effects that matter in higher‑difficulty enemy encounters and some bosses.
Avoid installing effects you won’t use, since some tools are limited in quantity.
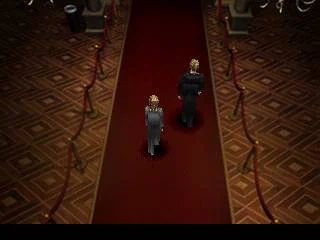
Core mechanics, controls and the Disc 1/Disc 2 structure
The original North American PlayStation release uses a pausable real-time battle system built around the Active Time Bar. Aya can move while the bar fills, then briefly pause the action to select a weapon attack, Parasite Energy, item, or other command. Learn the field and battle controls early, use telephones and the police station for safe preparation, and create a reliable Disc 1 save before the subway sequence that leads to the disc change.
1. Learn the Active Time Bar before attacking
When a battle begins, Aya and the enemies act in real time. The Active Time Bar fills while Aya moves, so the charging period is also the main defensive window. Keep repositioning Aya instead of waiting in one place. Circle an enemy, move away from contact attacks, and watch for projectiles while the bar charges.
When the Active Time Bar is full, the game pauses for command selection. Choose the weapon command, then use the directional controls to position the target cursor within the weapon's range area. Confirm only after the intended enemy is covered. If the target is outside the range area when the command executes, the attack can miss. Movement and enemy attacks resume after the command resolves, so begin repositioning immediately.
- Move Aya while the Active Time Bar fills.
- Wait for the bar to become available before selecting an attack or other battle command.
- Use the weapon range area to check whether the intended target is reachable.
- Resume movement as soon as the command finishes.
2. Verify the English North American controls
The directional controls move Aya in the field and battle, navigate menus, and move the target cursor after a weapon command is selected. Triangle opens Aya's status or main menu screen when the game permits it. Cross confirms menu choices, interacts with characters and objects, and executes the selected command. Pressing Circle cancels a selected command or closes the current menu.
Circle also controls Aya's field movement speed. With the directional controls held, hold Circle at the same time to make Aya run. Release Circle to return to normal walking. This is especially useful during escapes, long corridors, and other time-sensitive movement. Do not confuse holding Circle while moving with pressing Circle during command selection: the former makes Aya run, while the latter cancels or closes.
Square skips or ends the current battle command sequence, and Start pauses the game. The target cursor is positioned with the directional controls after selecting the relevant command. To use an item or Parasite Energy, wait until the battle command can be selected, open the appropriate menu with Triangle, choose Item or PE, select the entry with the directional controls, and confirm with Cross.
- Directional controls: move Aya, navigate menus, and position the battle target cursor.
- Triangle: open the status or main menu when available.
- Cross: confirm selections, interact, and execute the selected command.
- Circle: cancel a selected command or close the menu; hold Circle while moving to run in the field.
- Square: skip or end the current battle command sequence.
- Start: pause the game.
3. Practice with the first unavoidable encounter
Use the first battle after the opening sequence to learn the timing instead of rushing through it. Move Aya around the enemy while the Active Time Bar fills. When the bar is ready, select the weapon command, position the target cursor over the enemy, and press Cross to fire. After the attack resolves, move again while waiting for the next command opportunity.
Before leaving the early area, practice the field movement control as well. Walk with the directional controls, then hold Circle while continuing to move and confirm that Aya runs. Release Circle and compare the movement. During battle, do not hold Circle expecting it to change the target or attack command; its running function applies to field movement, while Circle cancels a selected battle command.
Open the Triangle menu when battle commands are available and enter the Item or PE section without immediately consuming anything. Press Circle to cancel and return to battle. This confirms the pause-and-command rhythm and the difference between confirming with Cross and canceling with Circle. If Aya takes substantial damage, select a recovery item before her HP becomes critical.
- Reposition Aya while the Active Time Bar charges.
- Move the weapon target cursor before confirming an attack.
- Hold Circle while walking in the field to practice running.
- Open and cancel the Item or PE menu safely.
- Finish the encounter without standing still for the entire charge period.
4. Use telephones and the police station correctly
The police station is an early safe hub with a telephone save point, equipment access, item storage, and weapon and armor tune-up functions. Save there whenever the story permits a return, especially before leaving for a new major location. Telephones in other areas also provide save opportunities; use them before dangerous bosses or long connected sequences.
Aya's carried inventory is limited. Deposit spare ammunition, duplicate equipment, and rare consumables rather than filling every available slot. Storage does not automatically prepare Aya for the next area. Before leaving the station, withdraw the healing items and ammunition you expect to need, equip the intended weapon and armor, and check that those supplies are in Aya's carried inventory. Saving records progress to the memory card but does not reorganize the items Aya is carrying.
Tune-up changes equipment according to the options available in the original system. Treat permanent equipment changes carefully, especially when transferring useful attributes or consuming limited tools. If you are uncertain whether an attachment or modification is worth using, preserve the item and make a separate memory-card save before committing it.
- Save at the police station or another telephone before a major objective.
- Store surplus items instead of discarding rare equipment.
- Withdraw the supplies needed for the next area.
- Confirm the currently equipped weapon and armor.
- Avoid irreversible tune-ups until you understand the result.
5. Prepare for the actual Disc 1 transition
The original North American retail release is a two-disc set. Disc 1 is identified as SLUS-00662 and Disc 2 as SLUS-00668. Disc 1 continues through the Chinatown sewer and subway route, including the Centipede encounter and the Gate Key sequence. Before committing to that route, use the available subway telephone to create a normal memory-card save. Keep an earlier police-station save as a second safety file rather than overwriting every slot with the same attempt.
Equip the strongest practical weapon and armor available, carry dependable healing items, and leave enough inventory space for items obtained during the subway sequence. Do not assume that the disc transition itself creates a save. The safest preparation is the normal save made before the Centipede route, followed by completing the immediate post-boss events carefully.
- Create a normal memory-card save at the subway telephone before the Centipede route.
- Keep an earlier safe-area save if possible.
- Equip the strongest practical weapon and armor available.
- Carry healing items and leave inventory space for the subway sequence.
6. Swap discs only at the in-game prompt
After the Centipede aftermath, continue through the immediate escape and Gate Key events until the game displays its disc-change instruction. Leave the game at that prompt, replace Disc 1 with the original North American Disc 2, and allow the console to read it. Keep the same memory card inserted. Do not press Reset, power off the console, or remove the disc during a save, loading operation, or disc-recognition process.
The disc swap does not create a new save file. Your protection is the subway save made before the boss. If the console rejects the disc, stop rather than repeatedly resetting during the transition. Confirm that Disc 2 is the correct original North American disc, leave the prompt active, and retry the physical change only when the game is waiting for the disc. Once Disc 2 is accepted, continue from the transition instead of starting Disc 2 as a new game.
- Leave the game running at the explicit change-disc prompt.
- Insert original North American Disc 2, SLUS-00668.
- Keep the memory card inserted.
- Do not reset or power off during saving, loading, or disc recognition.
- Use the pre-Centipede save if the transition must be attempted again.
Before you move on
- You can move Aya while the Active Time Bar fills and select a weapon command when it becomes available.
- You can position the weapon target cursor with the directional controls and confirm the attack with Cross.
- You can hold Circle while moving in the field to make Aya run, then release it to walk normally.
- You can open the Triangle menu, select Item or PE, cancel with Circle, and return to battle without consuming a resource accidentally.
- You know that Square skips or ends the current battle command sequence rather than toggling targets.
- You have organized Aya's carried inventory and know how to use the police station and telephone save points.
- You have a normal memory-card save before the Centipede route and understand that Disc 2 must be inserted only at the in-game change-disc prompt.
Opening: the opera and first objectives
Begin at Carnegie Hall on Christmas Eve, survive the Actress encounter, collect the free opening supplies, obtain the Theater Key and Rehearse Key, defeat Eve's second form, and clear the Carnegie Hall sewers. The first telephone is an important save point, but it is only an early stopping point. Day 1 ends automatically after the sewer Alligator is defeated, and the next chapter begins at N.Y.P.D. #17.
1. Enter Carnegie Hall and watch the opera
The game opens outside Carnegie Hall on Christmas Eve in 1997. When control begins, speak with the doormen if you want the introductory dialogue, then enter the building and continue north through the entrance hall. Pass through the double doors into the main hall and allow the opera scene to play out. These scenes establish Melissa Pearce, the performer appearing as Eve, and the event that begins Aya's campaign.
After the audience and cast begin to burn, move up either staircase onto the stage and approach the woman in red. The Actress battle begins immediately. There is no world-map destination during this opening route. The immediate objective is to survive Carnegie Hall and reach the later police-station transition.
- Enter Carnegie Hall and pass through the main hall doors.
- Watch the opera and transformation scenes before moving onto the stage.
- Approach the Actress to start the first battle.
2. Defeat the Actress and learn the combat rhythm
The Actress is the opening battle. Aya begins with her handgun, and the fight uses the original game's pausable real-time system. Wait for the Active Time Bar to fill, choose the attack command, aim at the Actress, and then resume moving while the bar charges again.
The Actress gathers energy before firing her beam. Move laterally or circle around the stage so Aya is not standing in its path. After Aya lands her first successful attack, she gains the Heal 1 Parasite Energy spell. Use Heal when necessary, but do not spend all of Aya's available recovery resources at once. The Club 1 is also a valid weapon for this encounter if you want to conserve handgun ammunition.
When the battle ends, the Actress identifies herself as Eve and retreats toward the backstage area. Follow her through the curtain and allow the memory sequence to finish before exploring the nearby room.
- Move while the Active Time Bar recharges.
- Avoid standing in the Actress's beam path.
- Obtain Heal 1 after the first successful attack.
- Defeat the Actress and follow her backstage.
3. Collect Medicine 1, then return outside for free supplies
In the backstage room, examine the blue chest east of the hole to obtain Medicine 1. Examine the hole afterward. When Aya hears the police arriving, choose Forget It instead of jumping down immediately. This keeps the entrance route available so you can collect the free support supplies first.
Return through the theater to the entrance. Speak with the paramedic beside the ambulance to restore Aya's condition. Then speak repeatedly with the officer who provides ammunition. Each conversation gives Ammo +6, and this early supply can be collected repeatedly before returning inside. The exact value of this stockpile matters less than taking advantage of the free ammunition before the next battles.
Return through Carnegie Hall to the backstage hole. Examine it again and choose Jump Down. The child below runs away; follow her route northeast into the basement dressing-room corridors.
- Take Medicine 1 from the backstage chest.
- Choose Forget It at the hole the first time.
- Use the paramedic for free healing.
- Collect the available Ammo +6 rewards.
- Return to the hole and choose Jump Down.
4. Defeat the Mutated Rat and search the first dressing rooms
Continue northeast and then north through the basement corridors. The nearby doors are locked, so do not waste time trying to open them. The intended route leads to a rat that mutates and attacks Aya.
The Mutated Rat uses a close bite and a fire attack. Keep enough space to avoid the bite, move out of the fire's path while the Active Time Bar fills, and fire when Aya has a clear line. The Club 1 remains a useful way to preserve ammunition. After the battle, enter the room on the left and search the third locker from the left for Medicine 1. Enter the room opposite it and search the second locker for Ammo +6.
Continue north to the last room on the left. Examine the burned body on the desk so it falls to the floor, then examine it again to receive the Theater Key. Search the nearby chest for another Medicine 1. Moving the clothing rack can trigger an optional parrot event; it is not needed for story progress.
- Reach and defeat the Mutated Rat.
- Collect Medicine 1 from the first dressing-room lockers.
- Collect Ammo +6 from the opposite room.
- Examine the burned body twice to obtain the Theater Key.
- Take the Medicine 1 chest item near the costumes.
5. Save, obtain the Rehearse Key, and collect useful equipment
Use the telephone in the burned-body room to save. This is the first dependable save point after the opening fights, but it is not the end of the Carnegie Hall route. Keep the Theater Key and at least one recovery item available before continuing.
Return to the main hallway and use the Theater Key on the previously locked room. Open the cabinet for Ammo +6, then examine the desk and read Melissa's diary. The diary provides the Rehearse Key. Search the room across the hall for another ammunition pickup, and deal with the parrot only if you want the optional encounter cleared.
Continue through the lower hallway. In the first room on the left, examine the cabinet to trigger a rat, defeat it, then search the cabinet again for the P220 handgun. Take the Defense +1 from the chest and examine the bare wall in the corner. The wall gives way, allowing Aya to crawl through and collect the N Protector. Equip the new weapon and armor if they suit your setup.
Enter the next room on the right and search the chest near its southern side. Leave through the lower exit, return to the main hall, and continue north through the double doors.
- Save at the backstage telephone.
- Use the Theater Key on the locked room.
- Read Melissa's diary and take the Rehearse Key.
- Collect the P220 and N Protector if desired.
- Equip improved early gear before the second Eve battle.
6. Defeat Eve at the piano
Use the Rehearse Key on the northern doors and enter the room where Eve is playing the piano. Approach her to trigger the transformation and the second Eve battle. Eve has more mobility and more dangerous attacks than the Actress, so keep moving instead of waiting in one place for the next ATB command.
If Eve advances toward Aya, run in the opposite direction to avoid the claw swipe. Her two-handed energy blast can initially pass on either side of Aya; stay calm, watch the direction of the projectiles, and move if she redirects them. Being relatively close can make the blast easier to read, but do not remain in front of Eve long enough to be caught by the claw. When the ATB fills, fire the P220 or your preferred weapon, then immediately resume repositioning.
Heal before Aya reaches critical health rather than waiting for a single large hit to decide the fight. After Eve's health is depleted, the scene and flashback play automatically. When control returns, examine the hole behind the piano and jump down into the Carnegie Hall sewers.
- Use the Rehearse Key on the northern doors.
- Approach Eve at the piano to begin the fight.
- Run away from the claw attack.
- Watch for the two-handed energy blast and its redirection.
- Defeat Eve and jump through the hole behind the piano.
7. Clear the Carnegie Hall sewers and defeat the Alligator
Move forward through the sewer until reaching the area with stairways on both sides. Search near the foot of the left stairs for the concealed chest containing the M1911A1 handgun. Going up the stairs leads to a short upper route with rat encounters; clear it if you want the chance to receive Revives, then return to the main tunnel.
Continue north on the ground level. The child appears again and runs away, opening the route on the left. Before following her, search the chests behind the pillars at the back of the area. The nearby side route also contains optional supplies, so explore it if Aya has enough inventory space and you are comfortable with the extra encounters.
Follow the child through the left passage until you reach the closed gate. The control panel beside it also contains an emergency telephone. Save here before activating the gate. Use the switch, enter the opened passage, and approach Eve. She will not begin another conventional fight; after the scene, she passes through the next gate and leaves Aya to face the sewer Alligator.
The Alligator has a tail section and a head section. At the beginning, stay at range and let it advance. When it swings its tail and sends energy beams across the area, move clear of the beams, close in during the recovery window, and fire at the tail. Once the tail is destroyed, the fight changes: the Alligator moves faster and uses a series of fire-breath attacks. Keep your distance, sidestep the fire, and only approach to attack after the pattern finishes. Avoid touching the body because the claw attack can cause heavy damage.
Use Heal or Medicine before Aya is in danger of being defeated. If ammunition becomes low, continue using the ATB to reposition and use the Club or Parasite Energy rather than standing still. When the Alligator falls, Aya receives the Kv Vest 1 and automatically leaves Carnegie Hall. The story then transitions to N.Y.P.D. #17, where the police-station hub chapter begins.
- Collect the M1911A1 from the concealed sewer chest.
- Clear the upper rat route if you want additional recovery chances.
- Search the sewer side areas before using the gate.
- Save at the emergency telephone beside the gate controls.
- Activate the gate and trigger the Alligator battle.
- Destroy the tail first, then fight the faster head phase.
- Defeat the Alligator and wait for the automatic transition to N.Y.P.D. #17.
Before you move on
- The Actress has been defeated and Aya has obtained Heal 1.
- Medicine 1 has been collected from the backstage chest.
- Aya has used the paramedic and collected the available early Ammo +6 rewards.
- The Mutated Rat has been defeated.
- The Theater Key is in the inventory and the backstage telephone save has been completed.
- The Rehearse Key has been obtained and used on the northern doors.
- The second Eve battle has been won.
- Aya has entered the Carnegie Hall sewers, obtained or passed the M1911A1 chest, and saved at the gate telephone.
- The sewer Alligator has been defeated and Aya has received the Kv Vest 1.
- The automatic transition has placed Aya at N.Y.P.D. #17, ready for the police-station hub chapter.
Police station hub: storage, tuning and BP management
The NYPD 17th Precinct is Aya’s main equipment-management hub. Wayne stores excess equipment, explains tune-ups, and lets you move useful parameters or additional effects between weapons and armor. BP improves Aya’s personal development or equipment, so spend it according to the problem you are actually encountering rather than following a single universal build.
Reach the Weapons Department and establish a routine
After the early events bring Aya back to the NYPD 17th Precinct, go downstairs to the Weapons Department. Speak with Torres and Wayne before leaving. Torres provides the M16A1 and explains the Mod Permit, while Wayne introduces the tune-up system and offers to hold excess equipment. The first visit is a tutorial and equipment-management stop, not a reason to assume every room in the precinct is already available.
Use the nearby telephone to save before changing your equipment. Saving is especially useful before experimenting with a rare weapon, armor piece, Mod Permit, or Tool. The station is a safe hub, but the game still allows you to make permanent equipment decisions there, so inspect the item screens before confirming anything.
- Find the downstairs Weapons Department.
- Speak with Torres and Wayne to unlock the equipment-management functions.
- Save at the precinct before major tune-ups or equipment decisions.
Store surplus equipment with Wayne
Wayne’s storage keeps weapons, armor, ammunition, medicine, keys, and other inventory items out of Aya’s active carrying space. Use it whenever the inventory begins filling with equipment from a story area. Keeping every weapon on Aya makes it harder to carry recovery items, ammunition, and key items, while storing spare equipment still allows it to be reviewed later through Wayne’s menus.
Do not discard a weapon or armor piece merely because its displayed attack or defense is lower than Aya’s current gear. An apparently weak item may have a useful Additional Effect, a parameter bonus, or empty slots that make it a valuable source or target for a later tune-up. Deposit unusual equipment with Wayne until you understand what you want your main weapon and armor to do.
The Weapons Department also contains recurring supplies during the story. When you return to the precinct, check the available medicine and ammunition containers, then save and organize your inventory before departing. These supplies are useful for resupply, but they do not replace a deliberate storage routine.
- Store spare weapons and armor instead of discarding them immediately.
- Keep enough medicine and ammunition on Aya for the next area.
- Review equipment attributes before deciding that an item is obsolete.
- Check the Weapons Department containers when returning to the precinct.
Spend BP on the problem you are facing
Aya receives Bonus Points when she gains levels. The BP menu can improve her Active Time, increase Item Capacity, or add parameter values to weapons and armor. Active Time controls how quickly Aya receives another action opportunity; Item Capacity determines how many inventory items she can carry. Equipment BP raises the selected weapon or armor parameter rather than functioning as a general weapon-damage pool.
Choose Active Time if Aya is repeatedly waiting for an action while enemies attack, or if you depend on frequent Parasite Energy and need turns quickly. Choose Item Capacity if you regularly leave medicine, ammunition, or equipment behind because Aya’s inventory is full. Use equipment BP when you have a weapon or armor piece that you expect to keep for a meaningful portion of the campaign and want to strengthen directly.
There is no mandatory early distribution. A player who values faster actions can favor Active Time, while a player who dislikes returning to storage can favor Item Capacity. Equipment upgrades become more attractive when you have settled on a primary weapon or armor piece. Reassess after several encounters instead of treating one early purchase as a permanent build commitment.
- Use Active Time when lost turns are your main weakness.
- Use Item Capacity when inventory pressure is the recurring problem.
- Use equipment BP on gear you intend to keep, not automatically on every new item.
- Remember that BP affects Aya and equipment through separate menu choices.
Perform a first ordinary Tool tune-up carefully
Wayne’s tune-up system lets you transfer selected parameter values or Additional Effects from one weapon to another weapon, or from one armor piece to another armor piece. First identify the target equipment, then identify the source equipment containing the bonus you want. Confirm that the target has an available slot or can accept the selected parameter before committing.
For a safe conceptual example, keep a weapon with the better base attack as the target and use a weaker weapon as the source if the weaker weapon carries a useful Additional Effect or parameter bonus. An ordinary Tool moves the selected benefit but consumes the source equipment. If you use the tune-up to remove the source’s remaining useful effects, that source weapon or armor disappears, so inspect its complete attribute list first.
Do not use a Tool simply because one is available. A small bonus on a temporary weapon may not justify destroying the source. Early in the campaign, a sensible tune-up is one that improves the equipment Aya is already using and preserves a benefit that will matter in several upcoming areas.
- Choose the target and source deliberately.
- Confirm that the two pieces are both weapons or both armor.
- Inspect every useful effect on the source before confirming.
- Remember that an ordinary Tool consumes the source equipment.
Treat Super Tools as preservation items
A Super Tool performs the same general transfer function while preserving the source equipment. That makes it valuable when the source has several useful effects, when you want to move a bonus without losing the original item, or when you are consolidating a long-term weapon and armor set. Super Tools are limited during normal progression, so do not spend one on a temporary item merely to gain a small improvement.
Keep unused Super Tools with Wayne if you do not need them immediately. Before using one, compare the target’s base statistics, current effects, available slots, and likely longevity. A Super Tool is most useful when the target is a serious long-term choice or when the source contains a bonus that would be difficult to replace.
The infinite Tool Kit and Super Tool Kit belong to EX-mode progression through Rare Trading Cards and should not be treated as ordinary first-run equipment. They are later rewards associated with Wayne’s Rare T-Card collection, so the first campaign should be planned around the limited Tools and Super Tools actually obtained during story progress.
- Reserve Super Tools for valuable source equipment or long-term targets.
- Compare base statistics, effects, and slots before confirming a transfer.
- Do not expect the infinite tool kits during the ordinary first campaign.
- Store unused tools safely with Wayne.
Complete every precinct visit before departure
Before leaving the NYPD, equip Aya with the weapon and armor you actually intend to use, withdraw only the recovery items and ammunition needed for the next objective, and return spare equipment to Wayne. Spend BP if you have identified a clear weakness, or leave it unspent if you are still comparing equipment. Then save again.
Repeat this routine whenever the story returns Aya to the precinct: save, check the Weapons Department supplies, organize Aya’s inventory, compare new equipment, review BP, and tune only after checking the source item. Wayne’s storage and tune-up menus are closely connected, so stored equipment can be managed without carrying every weapon and armor piece into the field.
- Aya has the intended weapon and armor equipped.
- Useful recovery items and ammunition are on Aya.
- Spare equipment and situational items are stored with Wayne.
- Any tune-up was confirmed only after checking the source item.
- A current save exists before leaving the precinct.
Before you move on
- You can reach the downstairs Weapons Department and identify Wayne’s storage and tune-up functions.
- You understand that BP can improve Active Time, Item Capacity, or weapon and armor parameter values.
- You have compared at least one source item and target item before deciding whether to tune them.
- You know that an ordinary Tool consumes the source equipment and that a Super Tool preserves it.
- You have saved at the precinct with practical supplies on Aya and valuable spare equipment stored with Wayne.
Day 2 Central Park: Zoo Key, optional branches and park encounters
Complete the Day 2 Central Park sequence by obtaining the Zoo Key, taking Sp Vest 1, searching the optional zoo and park branches, completing the amphitheater and backstage scenes, defeating the Giant Worms and then Eve in the horse-drawn carriage. Central Park is not complete after the worms: the carriage battle and its automatic aftermath must finish before Day 3 begins.
Enter Central Park and use the first telephone
After the Day 2 briefing at N.Y.P.D. #17, select Central Park on the world map. At the entrance, the opening scene leaves Aya to continue into the park alone. Follow the main route into the snowy grounds and move south to the police car and telephone.
Save at the telephone before exploring farther. Check the police car and nearby snow-covered search points for available recovery supplies, but do not rely on a fixed chest list: item contents can differ between guide records and playthroughs. Keep enough inventory space for ammunition, medicines and equipment found later.
The first encounters include snakes and poisonous snakes. Keep moving while the Active Time Bar fills, then stop briefly to aim and fire. Poison is more dangerous when carried through several encounters, so cure it promptly with Cure-P or another appropriate remedy rather than allowing Aya to fight while the status effect drains her.
- Enter Central Park from the Day 2 world map.
- Save at the telephone near the police car.
- Collect useful nearby recovery supplies if inventory space allows.
- Use movement and ranged attacks against the opening snake encounters.
Reach the zoo gates and locate the security station
Continue north from the first park section until the route opens toward three gates. Search the chests around this entrance area for the available supplies, then take the middle gate into the zoo section. Check the nearby weapon chest before leaving this area; the weapon is useful if it improves your current gun, but it is not required for story progression.
Proceed through the zoo paths and defeat the bird enemies without standing still for the entire ATB cycle. Short movement loops are safer than remaining in one place, especially when several enemies can approach from different directions.
Continue until you reach the area with two doors. The left door leads to the security station and should be entered first. The other door leads toward the zoo exhibit route, which becomes more useful after the required key is collected.
- Search the three-gate area.
- Check the nearby weapon chest before moving on.
- Reach the two-door area.
- Enter the left-hand security-station door first.
Take the Zoo Key and Sp Vest 1
Save at the telephone inside the security station. Examine the drawer beside the computer to obtain the Zoo Key. This key is required to open the locked zoo route.
Examine the hanging cabinet in the same room to obtain Sp Vest 1. Compare it with Aya’s current armor and equip it if its defensive value or available attributes make it the better choice. Keep the previous armor until you have checked its attributes; equipment bonuses and customization slots can matter more than the basic defense number.
The security station also contains an optional weapon route. If you want to pursue it, use the Zoo Key on the appropriate locked cabinet after moving the obstructing furniture. This reward is optional, so do not delay required progress if your inventory or equipment plan does not need it.
- Save inside the security station.
- Take the Zoo Key from the drawer beside the computer.
- Take Sp Vest 1 from the hanging cabinet.
- Compare and equip the armor if it improves Aya’s setup.
- Use the key on the optional weapon cabinet only if desired.
Search the zoo branches before the theater
Leave the security station and use the Zoo Key on the locked route into the rainforest exhibit. Defeat or bypass the snakes, then inspect the broken-glass opening. The area beyond it contains optional chests and useful supplies, including recovery items or equipment-related rewards depending on the item placement you encounter. Search thoroughly, but treat these rewards as optional.
Return to the main zoo route and inspect the paths around pillars, benches and other prominent scenery. Continue east through the park sections, checking accessible chests for ammunition, medicines and Tools. Landmark-based exploration is safer than assuming every guide lists identical contents.
At the path with the lion statue, take the bridge branch before proceeding toward the theater. Search the accessible side area for optional supplies, defeat the encounters there, then return to the fork. When you are ready to advance the story, take the route toward the gate and amphitheater.
- Unlock and inspect the rainforest exhibit route.
- Search the broken-glass side area for optional rewards.
- Check the paths around pillars, benches and the lion statue.
- Explore the bridge branch before taking the theater route.
- Return to the main fork with healing items available.
Trigger the amphitheater and backstage scenes
Enter the amphitheater through the main entrance and approach Eve on the stage. The audience scene is a story event, not the main Central Park boss fight. After the scene, leave the building and look for the ghostly child outside.
Follow the child to the backstage entrance. Continue through the backstage route until Aya confronts Eve again. Eve leaves without a conventional boss battle. Exit backstage and return to the park area.
The route that was previously blocked by a burned body is now open. This is the progression signal for the second half of Central Park. Follow the child into the newly accessible section, but search the optional branches before committing to the final encounters.
- Approach Eve on the amphitheater stage.
- Leave the amphitheater after the audience scene.
- Follow the ghost child to backstage.
- Complete the backstage confrontation with Eve.
- Return to the park and confirm that the blocked route has opened.
Explore the post-theater park and reach the Giant Worms
Search the newly opened park section, including the small rest-stop structure and areas partly hidden by its latticework. Optional chests may contain recovery items, ammunition, armor or Tools. Continue toward the later telephone and save before the boss route. A strong bear-type encounter guards part of this approach, so restore Aya’s HP and cure any status effects before continuing.
Follow the child through the maze-like park paths. If she briefly leaves the screen while changing areas, continue through the exits in the direction she was traveling rather than returning to the beginning. Inspect bridges, docks, alcoves and stairway bases for optional rewards, but do not let optional searching consume all of your healing items or inventory space.
Near the final telephone, heal Aya and save again. The next required encounter is the Giant Worms. Keep moving around the outer part of the arena while the ATB fills, then pause to fire and immediately reposition. Avoid being trapped against the edge. As worms are defeated, the remaining worms become more dangerous, so use recovery items or Heal 2 before Aya reaches critical HP. When only one remains, finish it promptly because its broad close-range attack can cover much of the arena.
- Search the post-theater rest-stop area if desired.
- Reach the later telephone and save.
- Restore HP and carry poison recovery.
- Follow the child through the maze while checking optional branches.
- Defeat the Giant Worms without exhausting all recovery resources.
Heal, board the carriage and defeat Eve
After the Giant Worms are defeated, do not treat the chapter as finished. Heal Aya immediately and use the nearby telephone to save if the game permits before moving to the next screen. Check Aya’s weapon, armor, ammunition and Parasite Energy, because the next required battle begins shortly afterward.
Move one screen onward to find Eve waiting on a horse-drawn carriage. The scene automatically places Aya in the carriage. This is the second Central Park boss battle against Eve and takes place in a narrow arena with very little room for evasion.
Keep Aya moving instead of standing directly in front of Eve. Avoid the claw swipe by changing position as the attack approaches. When Eve levitates, watch the direction and landing area of the beam before choosing where to move; do not run blindly into its path. Fire during the brief openings after her attacks, then resume movement while the ATB refills. Because the carriage is cramped, prioritize survival and use Heal 2 or a healing item as soon as Aya is in serious danger rather than waiting for a perfect attack window.
There is no need to preserve every round for a later fight in this chapter. Deal consistent damage whenever Eve is safely exposed, but do not trade repeated hits for avoidable claw or beam damage. Continue until the carriage battle is decisively won.
- Heal after the Giant Worms.
- Save at the nearby telephone if available.
- Check equipment, ammunition and Parasite Energy before boarding.
- Keep moving in the cramped carriage arena.
- Avoid Eve’s claw swipe.
- Watch the beam’s landing direction when Eve levitates.
- Attack during the recovery windows after Eve’s attacks.
- Defeat Eve in the carriage battle.
Finish the automatic aftermath and verify the Day 3 transition
After Eve is defeated, allow the story scenes and dialogue to play. The carriage sequence continues into an automatic aftermath, including the runaway carriage and the transition away from Central Park. Do not reset or leave the game assuming the chapter ended at the boss victory.
Central Park is complete only after control and the story progression move into the Day 3 sequence. Once Aya reaches the Day 3 transition, prepare for the next chapter at the apartment and subsequent investigation locations. Chinatown Sewers, Centipede, the Gate Key, the Warehouse and Disc 2 destinations are not part of this chapter.
- Let the post-battle cutscenes finish.
- Confirm the automatic Central Park aftermath has completed.
- Confirm the game has advanced to Day 3.
- Do not begin the Chinatown Sewers or Disc 2 route from this chapter.
Before you move on
- Aya has entered Central Park during Day 2.
- Aya has saved at the early park telephone and, when possible, at the later telephone before the boss sequence.
- The Zoo Key has been taken from the security-station drawer.
- Sp Vest 1 has been taken from the security-station cabinet and evaluated or equipped.
- The Zoo Key has opened the zoo route.
- The desired optional branches before and after the theater have been searched.
- The amphitheater and backstage scenes with Eve have been completed.
- The Giant Worms have been defeated.
- Aya has healed and saved if possible before boarding Eve’s carriage.
- Eve has been defeated in the required horse-drawn carriage battle.
- The automatic carriage aftermath and story scenes have finished.
- The game has advanced into the Day 3 sequence.
- No Chinatown Sewers, Centipede, Gate Key, Warehouse or Disc 2 objective has been incorrectly treated as part of Central Park.
Day 3 investigation: Soho, the museum and the damaged police station
The original North American PlayStation release has no church sequence in this part of the campaign. The early investigation begins after Aya leaves the apartment and leads through the Soho shops, a short visit to the American Museum of Natural History, and the damaged N.Y.P.D. station. The museum question panels, dinosaur battles and security-room route occur much later and should not be used here.
Leave the apartment and search Soho before entering the car
After the opening Day 3 scenes, open the chest in the apartment, then leave through the exit. Maeda is waiting outside, and Daniel soon arrives in the police car. Before using the car, search the two accessible Soho businesses on the street: the gun store on the left and the pharmacy on the right.
The gun store contains several optional supplies and equipment, including the M11, G19, Cr Vest 1, Club 2, ammunition, stat-boosting items and a Tool. Search the shelves, cabinets and wall displays rather than checking only the obvious chests. The pharmacy contains a telephone, medicines, armor-related boosters and another Tool. These items are useful but are not required story keys, so make room in Aya’s inventory before entering.
Use the pharmacy telephone to save if you want a safety file before continuing. Store duplicate medicines, ammunition or equipment later at the police station rather than discarding them. The exact value of an item depends on your current inventory and upgrade choices, but the two shops are the important optional search opportunity at this point.
- Open the apartment chest before leaving.
- Search both the gun store and pharmacy completely.
- Use the pharmacy telephone to save.
- Keep Tools and useful weapons; store excess supplies when the station becomes available.
Use the car to visit the American Museum of Natural History
Return to the car after searching Soho and use the passenger-side door to leave. Speak with Maeda near the vehicle if necessary; his interest in a research facility points Aya toward the American Museum of Natural History on the world map. Select the museum rather than searching for a church or another investigation site.
This first museum visit is mainly a story scene. Walk to the entrance, sign in as directed, go upstairs and follow Daniel. The game does not ask you to solve the later museum quiz panels during this visit. Do not spend time looking for the dinosaur exhibits, security controls, Klamp’s Key, or the museum boss equipment described in some full-game guides; those belong to a later return to the museum after the Warehouse sequence.
Allow the dialogue with Dr. Klamp and the accompanying scenes to finish. Aya is removed from the museum automatically after the investigation, and control returns to the city map. There is no required museum combat route or early museum puzzle to complete in this chapter.
- Choose the American Museum of Natural History from the world map.
- Sign in, go upstairs and follow Daniel.
- Do not search for church keys or the later museum quiz sequence.
- Wait for the Klamp scenes and automatic return to the city map.
Return to N.Y.P.D. #17 after the museum scenes
Select N.Y.P.D. #17 on the world map. Aya discovers that Eve has attacked the station while she was away. Daniel enters first, and Maeda gives Aya the Hamaya charm before she goes inside. The station is now a progression area and a resupply opportunity, so search bodies, lockers and rooms before rushing upstairs.
Speak with Warner in the south office, Cathy in the kennel and Wayne in the Weapons Department. These conversations are required to advance the station sequence. Cathy’s conversation establishes what happened to Ben, while the other conversations complete the immediate investigation. If a room appears to contain ammunition on a fallen officer, examine it; several station supplies are found through these bodies and lockers.
Go downstairs to the Weapons Department and speak with Wayne and the injured Torres. Aya receives the M92F there. The recurring station chests are also available with updated supplies. Check the locker room for the available ammunition and Medicine, but note the locked locker. Its contents cannot be claimed until you obtain the Locker Key later in the route.
- Select N.Y.P.D. #17 after leaving the museum.
- Receive the Hamaya from Maeda.
- Speak with Warner, Cathy and Wayne.
- Visit the Weapons Department and collect the M92F.
- Search fallen officers and accessible lockers.
Open the restricted station route and collect optional equipment
After the required conversations, a scene involving Ben and Sheeva directs Aya upstairs. On the second floor, speak with Nix when you find him down. Before going farther, enter the conference room and collect the Cm Vest 2. This armor is optional for story completion but is a useful upgrade if your current armor is weaker.
Continue into the newly accessible restricted area. The room above the entrance contains a battle after enemies break through the mirror. Defeat them, then examine the glowing object visible through the broken mirror to obtain the Storage Key. This key is optional for immediate story progress, but it opens the Weapons Storage room in the basement, where the MP5K can be collected. If your inventory is full, return to the station’s storage area after collecting or recording the item.
The side room to the left contains a telephone and a small chest with a Medicine. Use the telephone before advancing if you want another save. The north stairs are the required route, while the Storage Key and basement weapon are optional rewards.
- Collect the Cm Vest 2 from the conference room.
- Defeat the enemies behind the broken mirror.
- Take the Storage Key from the glowing spot.
- Optionally return to Weapons Storage for the MP5K.
- Save at the second-floor telephone when convenient.
Clear the upper floors and finish the station investigation
Go up to the third floor and inspect the first side room. A surviving lab technician can restore Aya’s condition, but this recovery opportunity is limited, so use it after taking damage rather than immediately if you are still healthy. The next room contains the required fight against the large dog creature that killed Torres. Keep moving while the Active Time Bar refills, fire from range and heal before Aya reaches critical health. The enemy has an attack that cannot be fully avoided and can remove a large portion of her health.
The battle rewards the SG550. Treat it as an optional equipment reward rather than a mandatory key. Search the room and inspect the upper-right duct to reach the room containing the N Jacket. Return to the hall afterward. A fallen officer nearby carries the Locker Key; take it and return to the station locker room if you want the previously inaccessible contents.
The right-side rooms contain another required group of enemies and additional recovery supplies. Continue north after clearing them to reach Sheeva. Defeat Sheeva to complete the station investigation and end this sequence. Save after the battle if a telephone is available, then reorganize Aya’s equipment and storage before selecting the next destination.
- Use the lab technician’s one-time recovery at an efficient moment.
- Defeat the dog creature and collect the SG550.
- Search the duct room for the N Jacket.
- Take the Locker Key from the fallen officer.
- Open the locked station locker if desired.
- Defeat Sheeva and save before leaving the station.
Before you move on
- The Soho gun store and pharmacy have been searched, with supplies stored or carried as inventory allows.
- Aya has completed the short American Museum of Natural History visit and returned to the world map.
- Aya has returned to N.Y.P.D. #17 and spoken with Warner, Cathy and Wayne.
- The Weapons Department sequence has provided the M92F.
- The station’s restricted area has been opened, and the Storage Key and Locker Key have been collected if optional equipment is being pursued.
- Sheeva has been defeated, confirming that this investigation sequence is complete.
Hospital, subway routes and mid-disc exploration
Day 4’s required progression takes Aya through St. Francis Hospital, where she restores power, searches the basement and research floors, and confronts Spiderwoman on the roof. The subway and Centipede are not part of this hospital chapter; they occur later during Day 5. Use the hospital’s phones, preserve rare recovery items, and return to the police station after the rooftop sequence before continuing the investigation.
Start at the police station and travel to St. Francis Hospital
Begin Day 4 in N.Y.P.D. #17. Speak with Daniel in Baker’s Office, then go to the Criminal ID Lab on the third floor to meet Maeda. After the conversation, choose Hospital on the world map. Daniel gives Aya additional ammunition before she leaves, and Maeda accompanies her to the hospital entrance.
At St. Francis Hospital, Maeda gives Aya the Mayoke and waits outside. Enter the hospital alone. Save at the phone in the lobby before exploring, then open the nearby chests if you have room. A Tool and ammunition are available early, and both are useful, but do not discard a key item or a valuable Tool just to carry a minor medicine item.
- Speak with Daniel in Baker’s Office.
- Visit Maeda in the Criminal ID Lab on the third floor.
- Choose Hospital from the world map.
- Save at the phone in the hospital lobby.
- Keep at least a few inventory spaces available for key items and Tools.
Reach the basement and collect the first fuse
From the lobby, move west to the elevator area. The green-card door is locked, so do not spend time trying to force it. Enter the left elevator and operate it. The cable breaks during the descent; examine the controls again to open the elevator doors and leave for the basement.
Eve then cuts the hospital’s main power. Move south through the basement and enter the upper-right storage room. Examine the shining object on the shelf to obtain Fuse 1. The room also contains an M79 and ammunition. These are optional for immediate progression, but the weapon or its ammunition can improve your ability to control enemies in narrow rooms.
- Use the left elevator to reach the basement.
- Leave the damaged elevator by examining its controls again.
- Enter the upper-right basement storage room.
- Take Fuse 1.
- Search the storage-room chests if your inventory has space.
Use the Morgue route to obtain the Autopsy Key and Fuse 2
Return to the basement junction and take the north door into the Morgue. Defeat the enemies, search the room for the available defense item, then continue through the curtain. Examine the right-hand desk drawer to obtain the Autopsy Key. A phone is available in this section, making it a good place to save before opening the next route.
Backtrack to the basement junction and use the Autopsy Key on the lower-right door. Continue east through the autopsy rooms. Search the chest for the Tool and the offensive upgrade, then examine the burned body near the cloth rack to obtain the Blue Cardkey. In the next area, take Fuse 2 from the shining object in the northeast corner.
The Blue Cardkey opens the blue-lit panel in the basement passage. Use it after collecting Fuse 2 to reach the remaining power-system rooms.
- Obtain the Autopsy Key from the Morgue desk drawer.
- Save at the Morgue phone before continuing if Aya is injured or low on supplies.
- Use the Autopsy Key on the lower-right basement door.
- Take the Blue Cardkey from the burned body.
- Collect Fuse 2.
Restore the hospital’s power and return to the lobby
Use the Blue Cardkey at the blue-lit panel, then enter the next basement section. Take the M10 and the nearby offensive upgrade if you can carry them. Enter the office to the east, defeat the Mixedman, and search the room for a Tool, Medicine 2 and Fuse 3.
Return to the fuse box. Examine the left side and choose REPAIR WIRES. Examine the right side and confirm each repair when prompted. After all three fuses have been installed, examine the left side again and choose TOGGLE POWER ON. The elevator route can now be used.
Go back to the elevator area, defeat the required enemy, and take the right elevator to the lobby. In the lobby, defeat the encounter and continue through the northern door that Maya opens. Rescue the remaining hospital occupants, then search behind the cabinet in the ward for a Trading Card. Speak with the nurse to receive the Green Cardkey, and take the Sp Jacket from the small box near the bed.
- Collect Fuse 3 from the office.
- Repair the wires at the fuse box.
- Install all three fuses.
- Toggle the main power on.
- Use the powered elevator to return to the lobby.
- Obtain the Green Cardkey from the nurse.
- Collect the optional Trading Card and Sp Jacket if desired.
Open the storage route and reach the 13th floor
Return to the elevator area and use the Green Cardkey on the green-lit panel. Enter the storage area and search the chest for the range upgrade. Continue into the oxygen-tank and liquid-nitrogen room. Defeat the Giant Bacterium, then move through the room to the valve and turn it off. The valve is required for the hospital’s story progression.
Return to the elevators and take the right elevator to the 13th floor. Search the 13th-floor research lab for the G3A3 and Medicine 3 if you have room. Push the box away from the large red button, press the button, and use the newly opened northern door.
In the research kennels, defeat the enemies and search the side rooms. A phone is available near the documents, so save before examining the records. Inspect the documents to trigger the investigation sequence and obtain the Elevator Key. Use that key on the elevator to reach the rooftop.
- Use the Green Cardkey at the elevator-area panel.
- Turn off the liquid-nitrogen valve.
- Travel to the 13th floor.
- Push the obstructing box and press the large red button.
- Search the document room and obtain the Elevator Key.
- Save before taking the rooftop elevator.
Clear the rooftop and defeat Spiderwoman
On the rooftop, move southwest to begin the Spiderwoman battle. Keep Aya moving around the arena while the Active Time Bar fills. Fire from a safe angle rather than standing directly in front of the boss. Spiderwoman uses close-range leg attacks, fire breath and web projectiles, so avoid the arena edge and do not allow Aya to become trapped against the boss.
When Spiderwoman relocates after taking substantial damage, follow the new arena and continue the same pattern: move during the ATB charge, use the action pause to aim, and fire only after creating enough distance. A damaging PE can shorten the dangerous portions of the fight, but retain healing or defensive PE for emergencies. Do not spend every MP point at the start if Aya enters the second section injured.
After Spiderwoman is defeated, the rooftop sequence continues. When the fighter jets threaten the roof, move immediately toward the southwest emergency elevator as the scene directs. Once Aya reaches safety and the follow-up enemy is defeated, the hospital sequence ends and Daniel and Maeda recover her.
- Enter the Spiderwoman encounter from the southwest rooftop route.
- Keep moving while the ATB refills.
- Avoid the boss’s front and the rooftop edges.
- Use PE to recover from a dangerous mistake rather than trading repeated contact damage.
- Reach the southwest emergency elevator during the rooftop escape.
- Defeat the enemy during the elevator sequence.
Return to N.Y.P.D. #17 and resupply
After the hospital escape, the story returns Aya, Daniel and Maeda to N.Y.P.D. #17. Save when control returns. Speak with Cathy if necessary, then visit Wayne in the basement to deposit excess equipment, use Trading Cards for tuning, and reorganize Aya’s inventory before the next destination.
This is the correct resupply point for the hospital chapter. Deposit rare recovery items only if you are confident you will not need them immediately, but remove the ammunition, armor and weapon you intend to use for the next story section. The subway and Centipede belong to the following Day 5 progression, so do not mark this chapter complete by looking for a subway entrance or Brooklyn Bridge after the hospital.
- Return to N.Y.P.D. #17 after the rooftop escape.
- Save at the station.
- Visit Wayne to tune equipment or organize storage.
- Keep the weapon, armor and recovery supplies intended for the next chapter.
- Continue to the next story objective from the police station.
Before you move on
- Aya has entered St. Francis Hospital and saved at the lobby or Morgue phone.
- Fuse 1, Fuse 2 and Fuse 3 have been collected and installed.
- The hospital’s wires have been repaired and the main power has been toggled on.
- Aya has obtained the Autopsy Key, Blue Cardkey, Green Cardkey and Elevator Key.
- The liquid-nitrogen valve has been turned off and the 13th-floor research sequence is complete.
- Spiderwoman has been defeated and Aya has escaped the rooftop.
- Aya has returned to N.Y.P.D. #17 and saved, with inventory and storage prepared for the next chapter.
Day 5 Chinatown Sewers, Pump Controls and Centipede
On Day 5, travel to Chinatown, meet Maeda, search the optional street and sewer branches, drain the sewer canal, and reach the Subway. Save before Centipede, defeat the boss, search the train car for its randomized Tool-class rewards, and examine the fallen officer to obtain the Gate Key. This chapter ends with the Gate Key and the pre-Disc 2 transition save. The Disc 2 Warehouse and Museum route belongs to the next chapter.
Prepare in Chinatown
After Day 5 begins at N.Y.P.D. #17, collect the available supplies from the Weapons Department and use Wayne before leaving. Store equipment and ammunition you do not need immediately, but keep your current weapon, armor, healing items, status cures, and useful Parasite Energy available. Then use the World Map to select Chinatown.
Save at the Chinatown telephone before entering the sewer. Explore the street screens and the antique shop if you want the optional rewards. The Chinatown street area can provide ammunition, Medicine, a Parasite Energy upgrade, a weapon or armor bonus, and the M79-2. The antique shop contains the M1911A2 and a Tool in a hidden room near the save point. These items are optional for story progress, but the Tool and extra equipment can improve your preparation for the sewer and Centipede.
Continue north and speak with Maeda. He gives Aya the Narita. Take the ammunition chest near him, then enter the manhole to begin the Chinatown Sewers route.
- Save at the Chinatown telephone.
- Use Wayne to clear unnecessary inventory before entering the sewer.
- Search the Chinatown street and antique shop for optional equipment and Tools.
- Speak with Maeda and receive the Narita.
- Take the ammunition near Maeda and enter the manhole.
Explore the Chinatown Sewers
The Chinatown Sewers are a branching area rather than a single straight corridor. Explore side passages before committing to the route toward the pump station. Use ladders, doors, elevated walkways, water channels, and chest locations as landmarks when retracing your path. Optional sewer rewards can include the M870, M203-3, Club 3, Cr Protector, ammunition, Medicine, Cure-D, offensive or defensive bonuses, an ordinary Tool, and a Super Tool. Chest contents can vary, so search the available chests rather than assuming every playthrough will produce the same bonus item.
Tools and Super Tools are valuable because they let you move useful attributes between equipment. A normal Tool consumes the source equipment during the transfer, while a Super Tool preserves the source item. Do not spend either item merely to move a minor bonus onto equipment you expect to replace. A player who relies on gunfire may prefer to transfer range, attack, or firing-related benefits onto a dependable primary weapon. A player who favors Parasite Energy or close-range burst damage may instead prioritize armor protection, recovery capacity, or a stronger shotgun or grenade launcher.
Sewer enemies can inflict status effects, including Darkness. Keep Aya moving while the Active Time Bar fills, avoid being trapped against walls, and use Cure-D or an appropriate Parasite Energy spell when a status effect interferes with combat. Preserve some MP for the alligator encounter, the pump-room approach, and Centipede.
- Search the sewer branches before taking the direct route onward.
- Check optional chests for weapons, armor, ammunition, bonuses, Tools, and the Super Tool.
- Decide whether an optional weapon is worth carrying before discarding equipment.
- Keep a response to Darkness available.
- Preserve HP, MP, and recovery items for the required fights.
Pass the reservoir and defeat the alligators
After exploring the branches, climb the large ladder and follow the upper walkway. Collect the optional Club 3 if you want it, then continue along the route toward the pump station. A story scene takes place at the reservoir before the slime mass enters the area.
Use the ladder on the right to descend and fight the two alligators. Do not stand directly in front of them longer than necessary. Move toward their sides or rear while the Active Time Bar fills, attack when they finish an approach, and reposition before the next command becomes available. Haste can make evasion easier, but do not spend all of your MP before the control room and Centipede.
After the fight, open the nearby chest for a Tool-class reward. Climb back up, collect the nearby Medicine, and follow the stairs and doorway to the control room. Heal before operating the machinery if the alligators dealt significant damage.
- Collect Club 3 if desired.
- Watch the reservoir story scene.
- Descend and defeat both alligators.
- Search the chest after the fight for the Tool-class reward.
- Collect the nearby Medicine and heal before the control room.
Operate the pump controls
Enter the control room and take the ammunition chest. The room contains a telephone, so make a manual save before using the control panel. This is the best recovery point for the pump sequence, the Subway approach, and the Centipede attempt.
Use the pump controls in this exact order: turn the master power on, activate Pump 1, activate Pump 2, and then turn the master power off. The pump sequence causes the required sewer event and leaves the canal route usable. The final master-power shutdown is necessary; do not leave the room with the power still on.
When the sequence is complete, leave through the upper route, cross the drained canal, and follow the stairs and doorway toward the Subway. This location is the Chinatown Sewers route. It is not a separate power-plant dungeon in the original North American PlayStation release.
- Save at the control-room telephone.
- Turn the master power on.
- Activate Pump 1.
- Activate Pump 2.
- Turn the master power off.
- Leave through the upper route and cross the drained canal.
Reach the Subway and save before Centipede
Follow the sewer exit into the Chinatown Subway. Search the station for the available chests, which can provide a Medicine, a Range bonus, and a CR Evade bonus. The exit gate is locked at this point, so do not expect to leave through it yet.
Use the station telephone to save after collecting the nearby items. Then return to the tracks and follow them north. Defeat the Mole in the next section and take the nearby Medicine before continuing into the Centipede area.
Before crossing into the boss arena, equip the weapon and armor you intend to use, check Aya's HP and MP, and confirm that healing items and status cures are accessible. Haste can help with repositioning. Healing or defensive Parasite Energy may be more useful than spending all available MP on damage.
- Search the Subway station chests.
- Save at the station telephone before going north.
- Defeat the Mole and collect the nearby Medicine.
- Check equipment, HP, MP, healing items, and status cures before Centipede.
Defeat Centipede
Centipede begins as one connected enemy. Keep Aya moving around the arena while the Active Time Bar fills, and avoid standing in front of a charge or in the path of the lightning-tail and poison attacks. Attack after the boss completes an approach or area attack, then move again instead of waiting in one position for the next command. Use Haste if it helps Aya escape danger, but retain enough MP for emergency healing and the divided phase.
After taking enough damage, Centipede separates into four targets: the head, two middle sections, and the tail. The middle sections have the least HP, so defeating them first usually reduces the number of attacks Aya must evade. The tail and head can be handled afterward, although survival takes priority over a rigid target order. Keep moving between attacks, wait for a section to pause before committing to a long weapon action, and heal before Aya reaches critical HP.
Once all four sections are destroyed, leave the battle area to the east. Follow the route around the tracks and enter the train car to the southeast. Search all three blue chests. One chest contains a B Protector. The other two contain Tool-class rewards; one is a Tool, while the other may also be a Tool or may be a Super Tool depending on the result. Search all three chests, but do not assume that both Tool-class chests will provide ordinary Tools.
- Use the Subway save before attempting Centipede.
- Keep moving during the connected-body phase.
- During the divided phase, prioritize the middle sections when practical, then handle the tail and head while maintaining safe positioning.
- Use healing before Aya reaches critical HP.
- Search all three post-boss train-car chests.
- Record whether the Tool-class rewards include a Super Tool before leaving.
Obtain the Gate Key and stop before Disc 2
Leave the train car and follow either track north. Continue across the bridge and examine the fallen police officer. Aya obtains the Gate Key from the body. This key is required for the locked Subway gate; it does not come from the pump room or from Centipede's defeat directly.
Make sure the Gate Key has been added to the inventory and keep the manual save from before Centipede until the boss, train-car chests, and Gate Key are safely completed. The Gate Key leads into the end of the Disc 1 route and the subsequent Disc 2 disc-change sequence.
At this point, stop this chapter. Change to Disc 2 only when the game displays its in-game request, and do not begin the Warehouse or later American Museum of Natural History route here. Those locations belong to the following Disc 2 chapter.
- Examine the fallen officer and obtain the Gate Key.
- Confirm that all three train-car chests were searched if the optional rewards are wanted.
- Keep the pre-Centipede save until the Gate Key is secured.
- Change to Disc 2 only at the game's disc-change request.
- Leave the Warehouse and Museum route for the next chapter.
Before you move on
- Aya has reached Chinatown on Day 5 and saved before entering the sewer.
- The optional Chinatown street and antique-shop areas have been searched if their equipment and Tools are wanted.
- Aya has entered the Chinatown Sewers and checked the optional branches for equipment, bonuses, ammunition, and Tools.
- The two alligators below the large ladder are defeated and the nearby reward chest has been checked.
- The pump controls were operated in this order: master power on, Pump 1, Pump 2, master power off.
- Aya has crossed the drained canal and reached the Subway.
- A manual save exists at the Subway station before Centipede.
- Centipede is defeated, with the middle sections prioritized when practical and the remaining sections handled without sacrificing survival.
- All three post-boss train-car chests have been searched. One contains a B Protector, while the other two contain Tool-class rewards; one of those rewards may be a Super Tool.
- Aya has examined the fallen officer and obtained the Gate Key.
- The pre-Centipede save is being retained until the Gate Key is confirmed.
- The player is ready for the Disc 1-to-Disc 2 transition, with the Warehouse and Museum reserved for the next chapter.
References for this chapter
Finishing Disc 1: set pieces and the transition to Disc 2
After the Centipede battle, complete the short Disc 1 conclusion: collect the Gate Key from the fallen officer, respond to the Disc 2 prompt, return to the subway station, unlock the exit gate, and reach the World Map. The Warehouse and Museum are Disc 2 objectives and are not covered here.
1. Use the pre-Centipede save if necessary
If you need another attempt, reload the telephone save made before entering the Centipede route. That is the important recovery point for this section because the game does not provide a separate save immediately before the disc-change request.
Once the Centipede has been defeated, do not repeat the sewer route or pump sequence. This chapter assumes that the battle is complete and Aya is back on the subway tracks. Keep your current weapon, armor, healing items, and Parasite Energy equipped until the transition is finished.
- Reload the pre-Centipede subway save only if necessary.
- Confirm that the Centipede has been defeated before continuing.
- Keep Aya’s current equipment and recovery supplies available.
2. Follow the tracks to the bridge
Leave the Centipede area and continue through the subway tracks toward the bridge. The available track routes converge, so follow the open route north rather than searching for another way through the sewer system.
At the end of the walkway, approach the fallen police officer and examine the body. Aya obtains the Gate Key. A story scene establishes that the slime is moving toward the Museum of Natural History; this is a plot transition, not a direction to enter the Museum yet.
- Leave the Centipede area through the available subway route.
- Reach the bridge at the end of the tracks.
- Examine the fallen police officer.
- Confirm that Aya has received the Gate Key.
3. Trigger the Disc 2 request
After taking the Gate Key, leave the bridge area through the available exit. The game then displays its request to insert Disc 2. The prompt is tied to leaving this section after the Gate Key scene; it does not appear merely because Aya examines the officer.
On an original North American PlayStation copy, keep the console powered on and change discs only when the game requests it. Remove Disc 1, insert Disc 2 from the same two-disc release, and close the lid. Do not restart the console during the transition. Wait for the game to recognize Disc 2 before pressing ahead.
If the game reports an incorrect disc, check that the inserted disc is the North American Disc 2 marked SLUS-00668 and that it belongs to the same retail set as Disc 1, SLUS-00662. If the transition fails, reload the earlier subway save and repeat the change when the prompt appears rather than loading a separate Disc 2 start.
- Leave the bridge screen after obtaining the Gate Key.
- Wait for the explicit Disc 2 request.
- Insert the original North American Disc 2 while the PlayStation remains powered on.
- Wait for the game to accept the disc before continuing.
4. Return to the subway station
After Disc 2 loads, Aya remains in the Chinatown subway route. Backtrack through the bridge and tracks toward the Subway Train Station. You are not being sent directly to the Museum; the locked subway gate must be opened first.
Use the same general route that led from the station to the Centipede area, moving through the now-accessible track screens until you reach the station with the locked gate. If you are unsure of the direction, continue toward the earlier telephone and station area rather than heading deeper into the tracks.
- Resume control after Disc 2 is accepted.
- Backtrack from the bridge through the subway tracks.
- Return to the Subway Train Station.
- Locate the locked gate encountered earlier.
5. Open the gate and reach the World Map
Stand at the locked subway gate and use the Gate Key. Aya opens the gate and climbs the stairs, returning to the World Map. The Gate Key is used automatically from the inventory; it does not need to be equipped, tuned, or deposited at the police station.
Stop this chapter as soon as the World Map is available. Select the Warehouse only when following the next Disc 2 chapter. The Warehouse and Museum routes, their enemies, their optional supplies, and their story objectives are outside this Disc 1 transition chapter.
- Use the Gate Key at the locked subway gate.
- Pass through the opened gate.
- Climb the stairs to the World Map.
- End the chapter before entering the Warehouse or Museum.
Before you move on
- The Centipede has already been defeated.
- Aya has examined the fallen police officer and obtained the Gate Key.
- The game has displayed the Disc 2 request after Aya leaves the bridge area.
- Disc 2 has been accepted without restarting the console.
- Aya has returned to the Subway Train Station.
- The locked subway gate has opened with the Gate Key.
- Aya has climbed the stairs and reached the World Map.
- The chapter ends before the Warehouse and Museum routes begin.
References for this chapter
- Day 5: Evolution (Part 1) - Parasite Eve Walkthrough & Guide
- Day 5: Evolution (Part 2) - Parasite Eve Walkthrough & Guide
- Parasite Eve - Day 5
- Parasite Eve - Walkthrough - PlayStation - By iamnothing
- Parasite Eve - Guide and Walkthrough - PlayStation - By Shotgunnova
- Parasite Eve - Guide and Walkthrough - PlayStation - By Exdeath_Mu
Disc 2: new zones, enemy escalation and re-balancing
After the subway gate opens, Aya returns to the World Map with two Disc 2 destinations available: the optional Warehouse and the required American Museum of Natural History. Re-equip at the Police Station if necessary, clear the Warehouse for extra equipment and a Crab boss reward, then enter the Museum and follow its opening route until you reach the Security Office telephone. Stop there. The alarm, hidden elevator, Klamp’s Research Lab, and later Museum bosses belong to the next chapters.
Start after the Disc 2 subway-gate transition
This chapter begins after Aya has obtained the Gate Key, changed to the original North American Disc 2 when prompted, opened the subway gate, and returned to the World Map. Do not repeat the Centipede fight, the Gate Key search, or the disc-change procedure here.
The World Map now provides access to the Warehouse and the Museum. The Warehouse is optional and contains equipment, Tools, ammunition, and a boss encounter. The Museum is required for the story. Disc 2 enemies are generally more dangerous than the earlier city encounters, so treat the first visit as a resupply and equipment check rather than rushing straight into the required route.
- The Disc 2 prompt has been completed.
- Aya is back on the World Map after opening the subway gate.
- The Warehouse is identified as optional.
- The Museum is identified as the required story destination.
Re-equip and manage supplies at the Police Station
Before leaving the World Map, return to the Police Station if Aya needs equipment, storage, or recovery items. Use Wayne’s storage to remove duplicate weapons, armor, ammunition, and ordinary consumables that are occupying space. Leave room for equipment and Tools found in both Disc 2 locations.
Equip the weapon and armor that currently provide the best practical performance for your playstyle. If Aya is taking too much damage, prioritize armor and recovery supplies. If encounters are taking too long, use the strongest dependable weapon already in storage rather than spending a rare Super Tool immediately on an item that may soon be replaced.
Use any unspent BP according to the problem you are actually experiencing. ATB improvement is useful when Aya is consistently waiting too long to act. Additional item capacity helps if valuable recovery items are being discarded. Weapon or armor improvements are reasonable when ordinary encounters are consuming too much ammunition or HP. BP already spent is permanent, so do not commit points simply because the Disc 2 transition has occurred.
Restock Medicine and MP recovery items before entering the Warehouse or Museum. The new areas provide telephones and supplies, but neither destination should be treated as a substitute for arriving prepared.
- The intended weapon and armor are equipped or available.
- Medicine and MP recovery items have been replenished.
- Unneeded equipment has been placed in storage.
- Inventory space is available for Disc 2 rewards.
- Unspent BP has been assigned only where it solves a current problem.
Clear the optional Warehouse
Select the Warehouse from the World Map if you want its optional equipment and the Crab encounter. A police officer outside explains that Eve was seen inside. Search the exterior carefully before entering. The area contains optional equipment and a Tool, and the items may require examining around the building rather than opening only the most obvious containers.
Inside the Warehouse, collect the Cm Protector and continue through the accessible rooms until you find the Warehouse Key near the barrels. Use the key to open the locked sections. Search the upper paths, rooms, scaffolding, and containers for the available weapons, armor, ammunition, and Tools, but do not let ordinary low-value items fill the inventory before you collect equipment.
Use the telephone before descending into the lower portion. This is the safest point to save before the optional boss. Follow the route involving the cable or wire to reach the lower area. If Aya is already struggling with the regular enemies, leave the Warehouse and improve her supplies before attempting the Crab; the boss is not required for story progress.
If you skip the Warehouse, leave from the World Map and select the Museum. Skipping this location does not block the campaign.
- The optional exterior items have been checked.
- The Cm Protector and Warehouse Key have been collected if you entered.
- Equipment has priority over ordinary inventory items.
- The telephone save has been used before the lower section.
- The Warehouse is either cleared or intentionally skipped.
Defeat the optional Warehouse Crab
The Crab is most dangerous when Aya remains directly in front of it. Keep moving while the ATB fills and work toward a side position whenever the arena allows. This reduces the time spent in front of its strongest attacks and gives Aya more reliable firing opportunities.
Concentrate on the claws when they are exposed. Removing them reduces the boss’s offensive pressure and makes the remaining portion of the battle easier to control. Continue repositioning instead of standing still to complete repeated attacks. Use a defensive or recovery PE when necessary, but preserve enough MP to recover from a mistake rather than spending the entire reserve on offense.
After the Crab is defeated, search the upper-left portion of the boss area for the sparkling Tool. Steam periodically sprays from nearby pipes. Wait until the steam has stopped before approaching the item; taking damage for an optional Tool is unnecessary. Return to the Warehouse entrance and leave for the World Map.
The Crab and its rewards are optional. If the fight consumes too many high-grade supplies, it is acceptable to leave the Warehouse without pursuing further optional improvements on a first campaign.
- Aya has remained mobile during the Crab battle.
- The claws have been targeted before prolonged attacks on the body.
- MP and healing supplies were reserved for emergencies.
- The post-battle Tool was collected only during a safe steam interval, or deliberately left behind.
- The Warehouse has been exited before proceeding to the Museum.
Enter the Museum and follow the opening route
From the World Map, enter the American Museum of Natural History. In the opening area, follow the man in white through the available doorway. The Museum initially restricts the route, so do not waste time repeatedly testing doors that have not yet been made available.
Search the first accessible exhibit rooms for optional supplies before continuing. Some items are placed in corners or just outside the most obvious walking line, so sweep each room while keeping enough inventory space for weapons, armor, ammunition, and Tools. The question terminals encountered along the route provide optional rewards; answer them only if you are comfortable spending time exploring, and do not consume valuable recovery items merely to search every side path.
Continue through the exhibit route and defeat the required early encounters, including the raptors and the scorpion. Keep moving while the ATB fills, especially when enemies can attack from the front or cover a narrow approach. If Aya takes heavy damage, retreat to a telephone when the route permits instead of pressing forward with low HP.
Proceed through the upper-floor and connecting exhibit areas until the route forces Aya through the broken-window section. Follow the ledges and connecting rooms after climbing outside. Examine accessible rooms and the Museum Shop for optional supplies, then continue through the hallways toward the Security Office. The broken-window route is part of the required approach; it is not a return to the earlier Museum entrance.
- The man in white has been followed through the opening Museum route.
- Optional early supplies have been checked without filling the inventory with low-value items.
- The required raptor and scorpion encounters have been completed.
- The broken-window ledge route has been followed.
- The Museum Shop and accessible side areas have been searched if desired.
Reach the Security Office and stop before disabling the alarm
Continue through the final hallway of this opening Museum section and enter the Security Office. Use the telephone as soon as Aya reaches the room. This is the required endpoint for this chapter and provides a safe opportunity to save before the next sequence.
The monitors, alarm controls, and nearby equipment are now present, but do not proceed with the alarm procedure in this chapter. Do not deactivate the alarm, use the hidden elevator, visit the fourth-floor storage room, enter Klamp’s Research Lab, obtain the Klamp Key, or begin the later dinosaur encounters. Those actions belong to the following progression chapters.
Before ending the session, confirm that the Warehouse has either been cleared or skipped, Aya has a usable weapon and armor set, and the Police Station has been used if further storage or resupply is needed. Saving at the Security Office gives a clean restart point for the next chapter.
- Aya has reached the Museum Security Office.
- The Security Office telephone has been used for a save.
- The alarm has not yet been disabled in this chapter.
- The hidden elevator and later Museum routes have not been treated as completed.
- The Warehouse was either cleared or intentionally skipped.
- Aya is equipped and ready for the next chapter.
Before you move on
- Aya is back on the World Map after the Disc 2 subway-gate transition.
- The Police Station has been used for storage and resupply if necessary.
- The optional Warehouse has either been cleared or deliberately skipped.
- If the Warehouse was entered, the Crab has been defeated or the player has intentionally abandoned the optional fight.
- The Museum opening route has been completed.
- Aya has passed through the broken-window section and reached the Security Office.
- A save exists at the Security Office telephone before the alarm is disabled.
- No later Museum content has been incorrectly counted as completed.
Laboratory sequences and story investigation
From the Museum security office, deactivate the alarm, use the concealed elevator to inspect the fourth-floor storage room, then return to the second-floor route and enter Klamp’s Research Lab. The scene with Maeda, Daniel and Klamp gives Aya Maeda’s Gun and the required Klamp Key. Use that key to reach the Triceratops exhibit, defeat the Triceratops in both stages, survive the fall into the T-Rex exhibit and defeat the T-Rex. Return to the Triceratops room and exit south to trigger the earthquake. Stop there; the optional broken-glass searches and the route toward Eve belong after this chapter.
Save in the security office and disable the alarm
Continue from the previously completed Museum route until Aya reaches the security office. The telephone in this room is the correct place to save before the next sequence. Use it before examining the monitors or the alarm controls so a failed boss attempt does not require repeating the preceding Museum route.
Search the northwest side of the room for the hidden chest and take the MP5PDW if you want it. Treat this as optional equipment. It may be useful as a backup, but it does not automatically replace a weapon that already has better modifications for your build.
Examine the security footage to advance the investigation and confirm that Eve is on the fourth floor. Then interact with the blinking alarm control and choose the option to deactivate it. The alarm must be disabled before the Museum’s elevator route can be used.
After the alarm is off, walk east from the alarm control and then move south into the concealed elevator entrance. This is not the ordinary elevator visible in the main Museum route. Use the hidden elevator and select the fourth floor.
- Reach the Museum security office.
- Save at the telephone.
- Take the optional MP5PDW if desired.
- Examine the security footage.
- Deactivate the alarm.
- Enter the concealed elevator east and south of the alarm control.
Search the fourth-floor storage room, then return to the second floor
The hidden fourth-floor room is a preparation area rather than the next story destination. Search its chests for the available optional supplies, including a Tool, M500, Cure-D and B Jacket 1. Take useful items if your inventory has room, but do not delay the required route for equipment you do not need.
Return to the concealed elevator after searching the room and select the second floor. The second-floor route is now accessible because the alarm has been deactivated. Keep the telephone save in mind: if you want a separate recovery point after collecting the storage items, return to the security office before continuing.
From the second-floor elevator area, follow the reopened Museum halls toward Klamp’s Research Lab. Do not try to reach Eve through the fourth-floor route yet. The story progression requires the research scene and Klamp Key before the dinosaur exhibit route can be opened.
- Search the hidden fourth-floor storage room if desired.
- Collect useful optional equipment without discarding needed recovery items.
- Return to the concealed elevator.
- Select the second floor.
- Follow the Museum route toward Klamp’s Research Lab.
Complete the Research Lab scene and obtain Klamp Key
Enter Klamp’s Research Lab from the second-floor Museum route. Maeda is inside, and the scene explains the connection between the serum, Maya’s cells and the research identified as EVE. Maeda gives Aya Maeda’s Gun during the conversation.
Allow the entire scene to play out. Daniel arrives, Klamp reveals the purpose of his research, and Eve attacks. Aya does not need to solve a separate laboratory puzzle here; the required progress comes from completing the story event.
When control returns after the fire and escape, Klamp Key has been added to Aya’s inventory. This is the required item for the next Museum route. Keep whichever weapon is best tuned for ordinary combat equipped; Maeda’s Gun is a story reward, not an instruction to abandon a stronger customized weapon.
Leave the lab and follow the connected halls west toward the locked dinosaur-route door. A nearby exhibit room contains ordinary enemies and optional supplies, so heal and check Aya’s equipment before using the key.
- Enter Klamp’s Research Lab.
- Receive Maeda’s Gun.
- Let the full Maeda, Daniel and Klamp scene finish.
- Confirm that Klamp Key is in the inventory.
- Return to the Museum halls and approach the locked dinosaur route.
Use Klamp Key and defeat the Triceratops
From the lab route, move west through the accessible exhibition rooms until you reach the locked northern door beside the dinosaur exhibits. Use Klamp Key on this door and continue through the opened route. Climb the stairs to reach the Triceratops exhibition room.
The Triceratops encounter begins when Aya approaches the center of the exhibit. Keep moving while the AT bar fills instead of standing directly in front of the boss. Its charge is easier to avoid when Aya is already moving before the attack begins. The lightning attack also punishes stationary play, so reposition after firing rather than waiting in place.
The battle has two stages. Continue attacking until the Triceratops loses its head; that does not end the encounter. The headless body remains active and is more difficult to read because its movement changes. Continue circling the arena, use a defensive or movement-supporting PE if it suits your loadout, and heal before Aya reaches critical HP.
After the Triceratops is defeated, move south as directed. The dinosaur forces Aya through a window and down into the T-Rex exhibition room. Aya is restored during this transition, but use the opportunity to confirm your weapon, PE and recovery-item selections before approaching the next boss.
- Unlock the northern dinosaur-route door with Klamp Key.
- Reach the Triceratops exhibit.
- Defeat the first stage and the headless second stage.
- Keep moving during ATB recovery.
- Confirm equipment after the forced fall.
Defeat the T-Rex and trigger the earthquake route
Move south in the T-Rex exhibition room to start the fight. The T-Rex uses a bite, fire breath and a tail energy blast. Circle the arena while the AT bar fills and attack from an angle whenever possible. Avoid remaining directly in front of the dinosaur, especially when it begins preparing a ranged attack.
The T-Rex has one main battle phase, but its attacks remain dangerous until the fight ends. If it jumps or repositions, do not rush directly into its path. Create distance, shift sideways and wait for a safe firing window. Use healing items promptly rather than trying to finish the fight while Aya is nearly defeated. Haste or Barrier can help, and Liberate is also available if Aya has learned it and you have enough MP for the encounter.
After victory, leave through the southwest exit and use the elevator to return to the third floor. From the elevator area, follow the Museum halls back toward the Triceratops exhibition room. The route requires backtracking through the upper Museum rooms; continue until you are back in the room where the first boss began.
Exit the Triceratops room through its southern door. The earthquake scene plays immediately and opens the late Museum route. Stop after the scene. Do not climb the slime-covered stairs or begin the optional broken-glass searches as part of this chapter; those actions belong to the next stage of the Museum and the approach toward Eve.
- Defeat the T-Rex using movement and side positioning.
- Collect the M8000 reward if desired and practical.
- Leave through the southwest exit.
- Use the elevator to return to the third floor.
- Backtrack to the Triceratops room.
- Exit through the southern door.
- Trigger the earthquake.
- Stop before the optional post-earthquake searches and Eve route.
Before you move on
- Aya has saved at the Museum security-office telephone.
- The Museum alarm has been deactivated.
- The concealed elevator has been used.
- The optional fourth-floor storage room has been searched if its supplies are wanted.
- Aya has entered Klamp’s Research Lab and received Maeda’s Gun.
- Klamp Key is present in the inventory.
- The Triceratops has been defeated in both stages.
- The T-Rex has been defeated.
- Aya has returned to the Triceratops exhibition room through the third-floor route.
- Aya has exited the Triceratops room through the southern door.
- The earthquake scene has played and opened the late Museum route.
- Aya has not yet proceeded to the optional post-earthquake searches or the slime-covered stairs toward Eve.
References for this chapter
Preparing for the endgame: statistics, BP finalization and PE loadout
Use the remaining late-game freedom to audit Aya’s equipment, spend BP according to your actual weaknesses, tune only equipment worth keeping, and assemble a compact Parasite Energy and recovery plan. This chapter stops before the Navy Cruiser preparation. The final weapon and armor engraving, inventory audit, and last save are handled in Approach to the Final Zone immediately before the Ultimate Being sequence.
Audit your late-game equipment without committing to the final carryover choice
If the story still allows access to the police station and Wayne, review the weapons and armor currently in storage before entering the final approach. Compare attack or defense, range, ammunition capacity, available slots, and additional effects. Your goal here is to identify equipment worth preserving or improving, not to complete the final engraving procedure yet.
Tune equipment only when the destination item is one you expect to keep for the ending or for EX Game. A Tool transfers a parameter or effect from one piece of equipment to another and consumes the source equipment. Super Tools are more flexible and limited, so reserve them for an item with a clear long-term purpose. Do not dismantle every spare weapon or armor piece for a small short-term increase; stored equipment and supplies can matter when preparing the EX Game file.
Keep ordinary consumables, equipment, and key items organized separately in your decisions. Key items are progression objects, not replacement ammunition or healing supplies, so do not discard them merely to make room.
- Identify a practical primary weapon rather than judging by attack alone.
- Compare armor effects as well as defense.
- Keep promising spare equipment in storage.
- Reserve Super Tools for equipment that is likely to remain useful.
Spend BP to solve your most common failure
Bonus Points can improve Active Time, Item Capacity, and weapon or armor parameters. Active Time increases the rate at which Aya’s action gauge fills, so it is the best response when you repeatedly lose turns before you can shoot, heal, or use Parasite Energy. Item Capacity is valuable when you survive encounters but run out of Medicines, ammunition, or MP restoratives. Weapon attack and armor defense are direct choices when battles last too long or incoming damage is the main threat.
There is no mandatory universal BP distribution for the normal campaign. Use your recorded experience: choose Active Time if Aya feels too slow, Item Capacity if supply limits are causing failures, and equipment parameters if your resources are adequate but enemies take too long to defeat. Do not spend the final points automatically. A small increase is worthwhile only when it addresses a problem you actually encounter.
Remember that ordinary BP spending and equipment improvement are different decisions. BP can strengthen Aya’s general statistics, while tuned parameters and effects remain attached to particular weapons or armor. If EX Game preparation is important, make deliberate equipment choices rather than assuming that every BP purchase will improve the next run’s carried gear.
- Use Active Time for delayed actions and missed healing windows.
- Use Item Capacity when supplies are the limiting factor.
- Use weapon attack when damage output is slowing every encounter.
- Use armor defense when incoming damage is the consistent problem.
- Leave unspent BP temporarily if you are unsure which weakness to address.
Choose a compact Parasite Energy loadout
Keep at least one dependable offensive option and one emergency option accessible. Energy Shot is a burst enhancement for Aya’s next weapon attack, so cast it when a target is exposed and Aya can fire immediately. Do not spend it while an enemy is moving away, invulnerable, or entering a scripted phase. If Liberate is available, treat it as another major offensive resource rather than something to cast casually.
Plasma can help control groups or create space when several enemies are close together. It is useful for managing pressure, but it does not replace movement during an enemy’s attack pattern. Heal is the straightforward recovery choice. Barrier can be worthwhile when a heavy incoming attack is more dangerous than Aya’s current HP total and protection will buy time to reposition.
Aya’s Parasite Energy regenerates during combat, but repeated casting can slow that recovery. Treat MP as a limited resource during a prolonged encounter: use offensive PE for a clear opening, then return to movement and weapon attacks. Carry MP-restoring items on Aya rather than leaving every restorative in storage. The final battle is not the place to discover that a preferred spell consumes more MP than your remaining supply can support.
- Keep Energy Shot or another reliable offensive PE available.
- Use Plasma when group control is useful.
- Keep Heal or Barrier accessible for emergencies.
- Avoid repeated casting without a clear tactical purpose.
- Carry MP restoratives before leaving the last resupply opportunity.
Reserve the final permanent decisions for the next chapter
Do not repeat the Navy Cruiser preparation here. The final equipment engraving and the final inventory audit occur aboard the Nimitz immediately before the Ultimate Being sequence, and those actions belong in Approach to the Final Zone. Until then, keep your likely weapon, armor, tools, ammunition, healing items, and MP restoratives organized so that the final choice can be made from a clear inventory.
Before moving on, confirm that your planned equipment can handle both sustained ordinary damage and the demands of a long boss encounter. Favor reliable attack range, useful ammunition capacity, and effects that help Aya act or survive consistently over a complicated setup you cannot maintain. The next chapter will tell you when to perform the permanent engraving, transfer the final supplies to Aya, and make the last save before the ending route begins.
- A likely primary weapon and armor have been identified.
- Tuning materials have not been wasted on disposable equipment.
- BP has been assigned according to a demonstrated weakness or deliberately held.
- The preferred offensive and defensive Parasite Energy spells are accessible.
- Healing items, ammunition, and MP restoratives are available for the final audit.
- The actual Nimitz engraving and final save have been deferred to Approach to the Final Zone.
Before you move on
- Aya has a deliberate late-game weapon and armor plan.
- BP has been spent, or intentionally reserved, based on action speed, carrying capacity, damage, or defense needs.
- A reliable offensive PE and an emergency recovery or protection PE are accessible.
- Enough healing items, ammunition, and MP restoratives remain available for the final preparation.
- Tuning materials have been reserved for equipment worth keeping.
- The player is ready to follow Approach to the Final Zone for the Nimitz engraving, final inventory audit, and last save.
Approach to the final zone and last preparation save
Complete any optional Museum searches, trigger the final military operation, defeat both forms of Eve on Liberty Island, and begin Day 6 aboard the Navy cruiser. On the cruiser, use Wayne, collect the Navy soldier’s supplies, restore and equip Aya, and make the final preparation save only after the inventory is complete. Returning to the deck starts the Ultimate Being sequence and removes the normal opportunity to reorganize before the final battle.
Finish the optional Museum search before the fourth-floor event
Continue through the post-earthquake American Museum of Natural History route until Aya reaches Exhibition Room (F). If you want the optional rewards, search the broken-glass room to the southwest before climbing the southern staircase. The chests there contain an M9-3 and a Tool. The M9-3 is optional and is not required for the normal ending, but it may be useful if Aya’s current gun is underpowered or has poor attributes.
Return toward the Triceratops area and inspect the additional hidden room if you want another Super Tool and Cr Vest 2. A Full Recover is also available from a chest reached through the elevator route to the fourth floor. These rewards are optional. Do not delay the story solely to collect them if Aya already has adequate equipment and recovery items.
Use the Museum telephone before entering the fourth-floor scene. This preserves a practical fallback for the optional search and lets you reorganize Aya’s carried items before the final Day 5 operation. Once the fourth-floor event begins, the Museum route closes as the story moves into the military response.
- Reach Exhibition Room (F) after the post-earthquake Museum route.
- Search the southwest hidden room for the optional M9-3 and Tool.
- Search the additional hidden room for the optional Super Tool and Cr Vest 2.
- Use the elevator route if you want the optional Full Recover.
- Save at the Museum telephone before starting the fourth-floor event.
Trigger the fourth-floor scene and complete the Liberty Island transition
When you are ready to leave the Museum, return to Exhibition Room (F), climb the staircase, and follow the fourth-floor route into the slime-covered area. Enter the room containing Eve to trigger the story scene. This is not the final Eve battle. The scene advances the pregnancy and spawn plot, after which the military operation begins.
Follow the automatic sequence involving Daniel, Maeda, the Navy attack, and the helicopter operation. Aya is taken toward the Statue of Liberty, where the military assault destroys the large spawn and exposes Eve. After the helicopter reaches the ruined battlefield, Aya parachutes down. The game provides a save opportunity before she advances into the required Eve encounter.
Do not expect Aya to reach the Navy cruiser immediately after the fourth-floor scene. The cruiser becomes available only after both forms of Eve on Liberty Island have been defeated. If the game offers the pre-battle save, use it before moving north.
- Enter the fourth-floor room only after collecting any optional Museum rewards you want.
- Follow the military and helicopter scenes to Liberty Island.
- Use the offered save opportunity after Aya lands and before the Eve battle.
- Do not treat this sequence as the start of Day 6 preparation.
Defeat both forms of Eve on the ruined battlefield
Move north after landing to begin the required Eve battle. The first form has three target sections: lower, middle, and upper. Destroy the lower section first, then the middle section, and finish with the upper section. Keep Aya moving while the Active Time Bar fills. Eve uses energy projectiles, circular blade attacks, close-range strikes, and attacks that can leave Aya confused or at dangerously low HP.
Stay away from Eve’s immediate attack range and fire after she completes an attack or finishes repositioning. When she launches repeated energy shots, keep moving rather than waiting for the next ATB action in one place. For circular blade patterns, move around the arena in the same general direction while closing distance only when the pattern allows it. A weapon with a Burst effect is useful because it can hit multiple sections, but it is not mandatory.
After the first form is defeated, Eve changes into a faster second form. This form can rush Aya, inflict paralysis, and call down an energy lance. Run away from the rush instead of trying to trade hits. When Eve rises for the lance attack, move toward one side of the arena and then away from the impact area after the attack is released. Use Cure items or the appropriate recovery option if Aya is disabled, and spend Liberate only when enough MP remains for the cruiser preparation and final sequence.
Defeating the second form ends Day 5. The story then moves Aya to Day 6 aboard the Navy cruiser. Only after this transition should you perform the final equipment and supply procedure.
- Move north after landing to start the Eve battle.
- Destroy Eve’s lower, middle, and upper sections.
- Keep moving while the ATB fills and attack after Eve’s patterns finish.
- Use recovery items promptly against confusion, paralysis, or severe damage.
- Defeat Eve’s second form before attempting Day 6 preparation.
- Confirm that Aya has reached the Navy cruiser on Day 6.
Use Wayne, organize equipment, and engrave the intended weapon and armor
On Day 6, enter the cruiser interior and speak with Wayne. Deposit obsolete weapons, spare armor, excess ammunition, and other items that are not useful for the final sequence. Keep Aya’s strongest practical equipment available rather than leaving it in storage after the organization step.
Wayne provides the opportunity to engrave Aya’s name on one weapon and one armor piece. Choose the weapon and armor you want associated with the completed file because the engraved pair is carried into EX Game. Engraving is separate from ordinary tuning, so complete the normal modifications you want before confirming the engraving choices.
Do not treat engraving as a requirement for the normal ending. It is important for EX Game, while the immediate campaign requirement is surviving the final sequence. Equip the selected primary weapon and armor after engraving, and leave enough inventory capacity for the supplies offered by the Navy soldier.
- Speak with Wayne inside the cruiser.
- Store unwanted equipment and obsolete items.
- Complete ordinary tuning before engraving if desired.
- Engrave one weapon and one armor piece for EX Game.
- Equip the intended final weapon and armor.
- Leave inventory capacity for the Navy soldier’s supplies.
Collect the Navy soldier’s supplies, restore Aya, and make the final preparation save
After finishing with Wayne, speak with the Navy soldier near the interior doorway. He provides free final supplies: Ammo +30, Medicine 3, Medicine 4, and the Cure items used for common status effects. The available supply includes three Ammo +30, four Medicine 3, two Medicine 4, and two each of Cure-M, Cure-P, Cure-D, and Cure-C. Inventory capacity limits what Aya can carry, so prioritize the healing and status recovery items you are most likely to use, then take ammunition if space remains.
Once the supplies are collected, organize Aya’s inventory. Restore HP and MP to full, equip the engraved or otherwise preferred weapon and armor, confirm that the ammunition matches the weapon, and place high-grade recovery items where they can be reached quickly. Keep a healing or defensive Parasite Energy available, but do not spend all MP before the Ultimate Being encounters. If BP remains unspent, use it only for a clear need such as ATB speed, weapon strength, armor defense, or item capacity.
Now use the telephone inside the cruiser to make the final preparation save. This save must be made after the Navy soldier’s supplies have been collected and after Aya’s equipment, inventory, HP, and MP have been checked. It is the reliable fallback for retrying the final sequence. If the battle goes badly, reload this save and revise the carried items or equipment before returning to the deck.
- Collect the Navy soldier’s Medicine, Cure items, and ammunition first.
- Restore Aya to full HP and MP.
- Equip the final weapon and armor.
- Confirm ammunition, recovery items, Parasite Energy, and remaining BP.
- Make the final Nimitz telephone save only after all supplies and equipment are organized.
- Reload this save if the Ultimate Being sequence fails.
Return to the deck and begin the point-of-no-return sequence
After making the final preparation save, return outside to the deck and continue the scripted conversations. The Ultimate Being then begins its attack, and the ordinary preparation window ends. Do not expect another normal use of Wayne, shopping, storage, or a dependable telephone checkpoint after leaving the interior.
The final sequence includes several Ultimate Being forms followed by a ship escape route. Begin with full HP and MP, the strongest practical equipment, sufficient recovery items, and enough ammunition. No additional key item is required from the Museum or cruiser to trigger the normal ending; the essential preparation is having Aya’s final equipment and supplies organized before the deck event.
If you still want to pursue optional Museum rewards, reload the earlier Museum save rather than entering the deck sequence. Once the deck event begins, proceed through the final battle and the engine-room escape. After the ending and credits, save the completed data when the game offers the final save. That Clear Data file is what enables EX Game on a subsequent run.
- Keep the completed Nimitz preparation save.
- Return to the deck only after the final audit.
- Do not expect normal storage, shopping, or preparation saves afterward.
- Begin the Ultimate Being sequence with full HP and MP.
- Complete the final battle and escape route.
- Save the completed data after the ending and credits to unlock EX Game.
Before you move on
- The optional post-earthquake Museum rooms have been searched, or their rewards have been deliberately skipped.
- The fourth-floor Eve scene, military operation, helicopter sequence, and Liberty Island landing are complete.
- Eve’s first form has been defeated by destroying the lower, middle, and upper sections.
- Eve’s second form has been defeated, ending Day 5.
- Aya is aboard the Navy cruiser on Day 6.
- Wayne has stored unwanted equipment and completed the chosen engraving of one weapon and one armor piece.
- The Navy soldier’s Medicine, Cure items, and ammunition have been collected according to inventory capacity.
- Aya has been restored to full HP and MP with the intended weapon, armor, ammunition, recovery items, and Parasite Energy available.
- The final Nimitz telephone save was made after collecting the Navy supplies and completing the equipment audit.
- Returning to the deck begins the Ultimate Being sequence, with no expectation of another ordinary preparation opportunity.
- The ending and credits have been viewed, the completed data has been saved, and EX Game is available when the next run is started from Disc 1.
References for this chapter
Final confrontation: early phase — positioning and attack windows
After collecting the Navy soldier’s recovery supplies and saving aboard the Nimitz, face the Ultimate Being’s infant and Child forms. The infant is primarily a positioning test. The connected Child form becomes more dangerous after separating into a crawling body and flying wings; focus on the crawling body, because the wings perish when the body is defeated. Preserve healing items and Parasite Energy for the mature and final forms that follow.
Complete the Nimitz preparation before going outside
Inside the Nimitz, speak with Wayne and finish the equipment preparation first. Store unneeded equipment, select the weapon and armor you want to carry into the battle, and keep Maeda’s Gun available. The officer or soldier near the blocked interior door provides the carrier’s recovery supplies, including ammunition, Medicine, and Cure items. Collect those supplies before saving; do not make the final Nimitz save and then assume the handout can still be collected afterward.
Once the supplies are in Aya’s inventory, use the phone to save. Begin the battle with full or near-full HP, a useful amount of Parasite Energy, and the primary weapon already equipped. The carrier fight proceeds through several forms without returning Aya to the police station, so avoid spending rare recovery items or most of your PE during ordinary preparation.
- Wayne’s equipment and storage tasks are complete.
- Maeda’s Gun is available for the later final form.
- The Navy soldier’s recovery supplies have been collected.
- The final Nimitz save was made after collecting those supplies.
- Aya begins with strong HP and a usable PE reserve.
Defeat the infant Ultimate Being
Go outside onto the carrier deck to trigger the opening battle. Keep the infant Ultimate Being at a comfortable distance and use the Active Time Bar for controlled weapon attacks. After firing, resume moving rather than waiting in place for the next attack. The deck gives Aya room to run, so use that space instead of trying to trade hits at close range.
The infant’s ordinary shockwave spreads outward from its position. When it begins preparing the attack, move toward the far side or a corner that places as much distance as possible between Aya and the boss. Return to attack range after the effect ends. Do not remain beside the boss while the shockwave is forming.
The infant also has an attack that can reduce Aya to 1 HP. Its drop toward the deck is the warning that this attack is coming. Move away as soon as the animation begins and be ready to heal immediately afterward. Barrier may reduce danger from surrounding attacks, but do not treat it as a guaranteed way to negate the fixed 1-HP effect. The important response is to recognize the animation, create distance, and restore HP before the next action.
Attack during the short period after the boss finishes an action. A few weapon shots are safer than standing still for a long sequence. Energyshot is optional here; use it only if its PE cost will not compromise later healing or defensive abilities. Continue until the infant form is defeated and the next transformation begins.
- Maintain distance from the infant form.
- Run toward the far side of the deck when the shockwave starts.
- Recognize the drop toward the deck as the 1-HP attack warning.
- Heal immediately after the 1-HP attack if it connects.
- Attack after the boss acts, then resume moving.
Handle the connected Child form
The next form initially appears as a connected body with wings. Keep Aya moving around the open deck and attack when the boss is committed to an animation. It can fire repeated energy bolts in a line. When those bolts travel across the battlefield, move in their direction while closing some distance; at a suitable angle, the shots can pass over Aya rather than following her original position.
The connected form can also release homing projectiles. Change direction as they approach instead of running in one straight line toward the edge. The goal is to prevent repeated hits and preserve a clear route around the deck. Use short movement-and-attack cycles: wait for the Active Time Bar, fire or cast, and immediately return to movement.
Energyshot can be used during a safe opening to improve weapon damage, but it is not required to clear this phase. Preserve PE for recovery, Barrier, or Haste if those abilities are part of your normal setup. After enough damage, the form separates into a crawling body and flying wings.
- Keep moving while the connected form fires energy bolts.
- Change direction against homing projectiles.
- Use short attack windows rather than remaining stationary.
- Spend Energyshot only if enough PE remains for survival.
- Wait for the separation before applying the body-and-wings strategy.
After separation, focus on the crawling body
When the Child separates, make the crawling body the primary target. This is the reliable completion route for the original PlayStation battle: defeating the crawling body causes the flying wings to perish. Do not waste time trying to finish the wings first or treating the two targets as independent mandatory kills. If the body is already badly damaged, continue attacking it until it falls.
The body can attack at close range, so do not stand directly beside it. It can also emit a broad purple beam that sweeps across the battlefield. When the beam begins moving, run in the same direction as the sweep while closing toward the body. This reduces the time Aya remains in the beam’s path and places her in a better position to attack after the animation ends.
The wings remain active while the body is alive and can fire strings of projectiles or rush Aya. Keep them in view while concentrating on the body, but do not abandon the body every time the wings move. If a wing attack forces Aya toward the edge, reposition through open space and resume targeting the crawling body. Heal only after creating enough distance to use an item safely.
- Target the crawling body after the separation.
- Use the body’s defeat as the condition that ends the separated phase.
- Move with the purple beam while closing toward the body.
- Avoid standing directly beside the crawling body.
- Monitor the wings without switching away from the body unnecessarily.
Finish the separated phase without draining resources
Continue firing at the crawling body whenever the Active Time Bar allows a safe shot. Haste can help Aya reposition and attack more frequently if it is already part of your loadout, while Barrier can provide useful protection against ordinary damage. Neither replaces movement: the body’s close-range attacks and the wings’ projectiles can still overwhelm Aya if she remains trapped against the edge.
If Aya is heavily injured, create distance first, then use a strong Medicine or Cure item. Do not spend the entire carrier supply to restore minor damage. The battle continues through the mature and final Ultimate Being forms, so retain enough recovery items and PE to survive those later phases.
Once the crawling body is defeated, the wings perish as part of the same phase. Confirm that both parts are gone before treating the encounter as complete. A new transformation follows immediately, so do not assume the campaign or the carrier battle is finished.
- The crawling body has been defeated.
- The wings have disappeared as a result of the body’s defeat.
- Aya still has useful healing items.
- Enough PE remains for the mature and final forms.
- The next Ultimate Being transformation has begun.
Recognize the chapter completion point
This chapter ends when the infant form and the Child form have been defeated and the next Ultimate Being transformation begins. The mature form is still ahead, followed by the final form that eventually requires Maeda’s special ammunition. Do not leave the battle area, attempt to save, or treat the defeat of the infant as the campaign ending.
Before the mature form becomes active, use any transition moment to check Aya’s HP, PE, and recovery stock mentally. If the early forms consumed most of the supplies, the safest response is to restart from the Nimitz save and handle the opening phases more economically. The Nimitz save is the meaningful recovery point for this sequence.
- The infant Ultimate Being is defeated.
- The connected Child form separated.
- The crawling body was targeted after separation.
- The wings perished when the body was defeated.
- The mature Ultimate Being transformation has begun.
- Aya retains recovery items and Parasite Energy for the remaining carrier battle.
Before you move on
- The Navy soldier’s supplies were collected before the final Nimitz save.
- The selected weapon and armor were equipped before leaving the interior area.
- The infant Ultimate Being was defeated.
- The connected Child form separated into the crawling body and wings.
- The crawling body was defeated as the primary target.
- The wings perished when the body was defeated.
- The next Ultimate Being transformation began while Aya retained useful recovery items and Parasite Energy.
Final confrontation: late phase — emergency recovery and finish
This chapter begins after the infant and winged forms covered in final-confrontation-part-1. Aya must defeat the third bluish humanoid form, survive the fourth gelatinous form until Daniel and Maeda deliver the special ammunition, then use Maeda’s Gun to finish the Ultimate Being. The fight is followed by a timed carrier escape. Aya must activate the engine-room destruction controls and reach the final exit; defeating the boss alone does not complete the normal campaign.
Defeat the third bluish humanoid form
The third form is a close-range threat with several attacks that punish Aya for standing directly in front of it. Keep moving while the Active Time Bar fills, then stop briefly to fire or use Parasite Energy before repositioning. Do not remain stationary after an attack, because the form can chain damaging contact attacks and can reduce Aya to 1 HP with a grab.
When it moves toward a corner and releases purple projectiles, stay close beneath or behind the form rather than retreating across the entire arena. This positioning can reduce the chance of being struck by the outward-firing projectiles. When it moves to the center and prepares its large blast, prioritize survival and create space instead of forcing an attack during the warning.
The form also uses a time-stop or confusion-inducing attack and a large explosion that severely reduces Aya’s health. Keep Cure items and a strong recovery option ready. If Aya is reduced to 1 HP, immediately move away before opening the item menu, then use a major Medicine, Cure spell, or Revive as appropriate. Do not treat the 1-HP result as a safe state; the next attack can end the attempt.
- Keep moving during every ATB charge.
- Attack briefly, then reposition instead of standing in front of the boss.
- Move beneath or behind the form when it fires purple projectiles from a corner.
- Heal immediately after a 1-HP grab or major blast.
- Reserve recovery items and some Parasite Energy for the next form.
Endure the fourth gelatinous form until the scripted delivery
The fourth form initially takes little or no meaningful damage from Aya’s ordinary weapon attacks. Continue firing whenever the ATB bar fills, but do not waste your entire stock of rare healing items or Parasite Energy trying to force a quick victory. The opening is scripted: your immediate objective is to survive while dealing enough normal attacks to advance the scene.
The form releases moving crystal-like hazards that fire low-damage lasers. Keep Aya circling the arena and avoid letting the hazards herd her against a wall. Heal before Aya reaches critical health, especially if the crystals and the boss’s own attacks overlap. Use a defensive Parasite Energy spell when a dangerous attack is developing, but keep enough MP for emergency recovery.
After sufficient progress, Daniel and Maeda appear in a helicopter. Maeda provides ammunition containing Aya’s cells, and Daniel throws it to Aya. The game then changes Aya’s equipment for the decisive phase. Do not assume the delivery scene itself defeats the boss; wait for control to return and check the weapon display before attacking again.
- Keep firing during the low-damage opening so the scripted scene can occur.
- Avoid being cornered by the moving crystal hazards.
- Use healing items before Aya reaches critical HP.
- Preserve enough MP for defense or recovery.
- Wait for Daniel and Maeda’s ammunition-delivery scene to finish.
Use Maeda’s Gun to finish the Ultimate Being
After the delivery scene, Maeda’s Gun and the special ammunition become the required tools for the final damage phase. Confirm that Maeda’s Gun is equipped before continuing. Ordinary weapons will not replace this ammunition for the intended finishing sequence.
Fire Maeda’s Gun whenever the ATB bar permits, then resume moving. The special ammunition produces the decisive damage that the previous weapon could not. Continue attacking through the boss’s remaining movements rather than stopping after one or two successful shots. Keep Aya away from direct contact and heal if an attack leaves her in danger.
Do not spend your last recovery item merely because the boss begins dissolving. The visible dissolution indicates that the battle is reaching its end, but control returns to a chase sequence in which contact with the pursuing Ultimate Being causes a game over. Treat the boss as fully cleared only when the game has returned control and Aya can run toward the carrier interior.
- Confirm Maeda’s Gun is equipped after the cutscene.
- Use the special ammunition for the final damage.
- Keep moving between shots.
- Heal if Aya is in danger, but do not waste the final recovery item during the dissolution scene.
- Wait for control to return before considering the boss fight finished.
Activate the engine-room self-destruct controls
When control returns, run west through the door immediately. Aya checks the ship’s structure map and identifies the engine room. Continue through the newly available interior route instead of searching the outer deck or attempting to fight the pursuing Ultimate Being.
Follow the route in order: go through the door to the left, continue west, then go north and take the doorway on the right. Descend the stairs and use the doorway on the left. Continue east and then north until you reach the ladder. Climb down and proceed south to the control machinery.
Examine the machine on the left. This activates the sequence explaining that the ship can be destroyed by raising the boiler pressure. The control interaction is the required story action; do not leave the engine room without examining the machinery. Once the warning begins and the Ultimate Being catches up, pass around it rather than attacking.
- Run west into the carrier as soon as control returns.
- Follow the map toward the engine room.
- Use the ladder after traveling east and north.
- Examine the control machinery to begin the self-destruct sequence.
- Do not stop to fight the pursuing Ultimate Being.
Escape the carrier and confirm completion
After activating the controls, move west and then south to the next ladder when the warning begins. Descend, use the southern door, continue south, and take the door on the left. Climb the stairs, take the doorway on the right, and continue west through the next doorway. Keep moving; contact with the Ultimate Being during this sequence causes a game over and requires repeating the preceding boss sequence.
Aya reaches the final escape route and leaves the carrier before it explodes. The normal ending then begins, followed by the credits. Allow the ending and credits to proceed until the game presents the completion-save prompt. Create the Clear Data save rather than turning off the console immediately after the credits.
Load or check the title screen after saving. EX Game should be available as the original PlayStation release’s New Game Plus option. The Chrysler Building and Maya-related material belong to EX Game and are not required for the normal campaign, ending, credits, or initial EX unlock.
- Reach the final escape route without being caught.
- Watch the normal ending and credits.
- Create the Clear Data save when prompted.
- Confirm that EX Game appears from the title menu.
- Do not attempt the Chrysler Building or Maya route as part of this normal-campaign chapter.
Before you move on
- The third bluish humanoid form is defeated.
- The fourth gelatinous form receives Maeda’s special ammunition and is defeated with Maeda’s Gun.
- Aya activates the carrier’s engine-room destruction controls.
- Aya escapes before the Ultimate Being catches her.
- The normal ending and credits finish.
- The Clear Data save is created.
- EX Game is available from the title menu.
References for this chapter
Ending, credits and unlocking EX (New Game+)
Defeat the Ultimate Being at the end of the normal campaign, allow the complete ending and credits sequence to finish, save the resulting Clear Data file, and verify that EX Game is available. EX Game is the original PlayStation release’s built-in replay mode: Aya returns to level 1, while the engraved weapon and armor and qualifying equipment stored with Wayne can be carried into the new run. The Chrysler Building and its EX-only final encounter are optional post-clear content and are not required to complete the normal campaign.
Defeat the Ultimate Being and finish the normal ending
Complete the final Day 6 sequence and defeat the Ultimate Being. Winning this battle completes the required combat portion of the normal campaign, but do not switch off the PlayStation or reset the game when the battle ends. The scripted aftermath still has to play.
Allow the post-battle scenes, normal ending presentation and credits to run to completion. Do not treat the Chrysler Building, EX Game or its later boss as part of the normal ending requirement. The required ending is the one reached by completing the ordinary six-day story and defeating the Ultimate Being.
The game does not create the usable EX unlock merely because the boss’s HP reaches zero. The ending sequence must proceed to the completion save stage. Keep the console powered and leave the game running until the game presents its post-clear save choice.
- The Ultimate Being has been defeated.
- The post-battle story scenes have played.
- The normal ending and credits have been allowed to finish.
- The PlayStation has not been reset during the ending sequence.
Save the Clear Data file
After the credits, the game awards the completion Bonus Points and presents the opportunity to save the completed game data. Select a free memory-card slot and wait until the save operation is fully finished before turning off the console or changing discs. The completed record is identified as Clear Data and is the file used to make EX Game available.
Keep a separate pre-final-battle save if you have room on the memory card. That earlier save is useful for replaying the final fight or changing the equipment you prepare for EX Game. Do not overwrite your only ordinary save unless you are certain you no longer need to return to the normal campaign before starting the replay.
If the completion save does not appear, reload the last ordinary save before the final sequence, defeat the Ultimate Being again and let the entire ending and credits sequence run. A battle victory without the completed save process is not a reliable completion check.
- The credits have finished.
- The completion Bonus Points have been awarded.
- The game has offered the completed-data save.
- A Clear Data file has been written successfully to the memory card.
- A separate pre-final-battle save has been preserved if desired.
Verify EX Game from the title screen
Return to the title screen after the Clear Data save finishes. EX Game should now be available as a separate mode. Select EX Game to begin the replay; do not expect the Clear Data file to place Aya directly at the final arena or to continue from the ending battle.
EX Game restarts the story from its opening events. Aya begins at level 1, so the completed campaign’s level, HP, MP and other level-dependent progress do not simply carry over. The mode is a replay with preserved preparation advantages, not a post-battle free-roam state.
Advance through the opening until the EX world map becomes available during Day 2. At that point, the Chrysler Building appears as an additional destination. It is optional: the ordinary story route remains available, and clearing the Chrysler Building is not necessary to confirm normal-campaign completion or to unlock EX Game itself.
- EX Game is selectable from the title screen.
- Starting EX Game begins the story again from the opening.
- Aya is level 1 at the start of the replay.
- The Chrysler Building appears after the required early Day 2 world-map progression.
- The normal story route remains available without entering the Chrysler Building.
Prepare the equipment that carries into EX Game
Before the final Day 6 sequence, speak with Wayne on the Nimitz and use the engraving opportunity on the weapon and armor you want to carry into EX Game. The engraved weapon and engraved armor are the guaranteed equipment foundation for the new run, so make this choice after considering your strongest practical setup rather than engraving disposable equipment.
Place useful guns, armor, ammunition, medicines, tools and other qualifying supplies in Wayne’s storage before completing the normal game. Stored equipment and supplies are available in EX Game according to the original EX carryover rules. Do not assume that items left only in Aya’s immediate inventory receive the same treatment.
Ordinary plot keys and Lucky Charms should not be treated as guaranteed carryover resources. Chrysler Keys are a special EX-related exception documented by specialist guides, so store them with Wayne if you are deliberately preserving them for a later Chrysler Building run. When in doubt, keep progression keys out of your carryover plan and focus on equipment, recovery items and modification materials.
Unused Bonus Points from the completed run remain useful in EX Game. Aya still begins at level 1, however, so do not enter the replay assuming that preserved equipment removes the need to rebuild levels, HP, MP and supplies.
- The preferred weapon has been engraved by Wayne.
- The preferred armor has been engraved by Wayne.
- Useful qualifying equipment and supplies have been placed in Wayne’s storage.
- You understand that Aya returns to level 1.
- You have preserved unused Bonus Points if you want them available in EX Game.
- You have not counted ordinary keys or Lucky Charms as guaranteed carryover items.
Treat the Chrysler Building as optional EX content
Once the Day 2 EX world map is available, the Chrysler Building can be selected as an additional destination. It is a long optional dungeon with stronger enemies, valuable equipment and boss encounters. Its availability confirms access to the EX route, but entering it immediately is not required and can be impractical while Aya is still at level 1.
Continue the normal replay first if you need more levels, Parasite Energy, recovery items or improved equipment. You can return to the Chrysler Building later during the EX run. The dungeon’s upper challenges and EX-only final encounter are separate objectives from the normal six-day campaign.
The required completion chain ends with the Ultimate Being defeated, the normal ending and credits viewed, the Clear Data file saved and EX Game confirmed from the title screen. Do not withhold completion credit because the Chrysler Building has not been cleared, and do not describe its optional ending as necessary for the normal campaign.
- The Chrysler Building is visible on the EX world map.
- The normal replay route is still available.
- Aya has been resupplied before entering the optional dungeon.
- The normal-campaign completion check has been recorded separately from Chrysler Building progress.
Before you move on
- The Ultimate Being has been defeated.
- The normal ending presentation and complete credits have been viewed.
- The completion Bonus Points have been awarded.
- A Clear Data file has been saved successfully.
- EX Game is selectable from the title screen.
- Starting EX Game demonstrates that Aya begins the replay at level 1.
- The engraved weapon and armor are available for the EX replay.
- Qualifying equipment and supplies stored with Wayne are available according to the original EX carryover rules.
- The Chrysler Building appears after the required early Day 2 EX world-map progression.
- The Chrysler Building and its EX-only final encounter have not been incorrectly treated as requirements for normal-campaign completion.
Optional objectives: side items, optional bosses and completionist notes
Parasite Eve’s original North American PlayStation campaign includes optional weapons, armor, Tools, Super Tools, stat improvements, Junk rewards, and Trading Cards. These can strengthen Aya and expand equipment modification, but none is required for the normal ending. Normal completion requires defeating the Ultimate Being, viewing the normal ending and credits, saving the completed campaign data, and confirming that EX Game is available from the title menu. The Chrysler Building and its EX-only final boss and additional ending are separate post-completion objectives.
Separate required progress from optional rewards
The normal campaign does not require every weapon, armor piece, accessory, card, stat upgrade, or side-area reward. Follow the required story route, defeat the mandatory bosses, defeat the Ultimate Being, watch the ending and credits, and save the completed data when the game allows it. After returning to the title screen, verify that EX Game can be selected. That is the required completion state for the original PlayStation campaign.
Optional rewards include additional weapons and armor, ammunition, Medicine, Tools, Super Tools, stat improvements, equipment-modification opportunities, Junk, and Trading Cards. When entering a story location, search accessible side rooms before triggering the next major event. Inspect lockers, desks, containers, dead ends, display areas, and rooms that open after a battle or scripted scene. If Aya’s inventory is full, use Wayne’s storage for valuable equipment instead of discarding it.
Do not delay a mandatory boss solely to obtain every optional item. If a detour consumes too many healing items or ammunition, return to the police station, restock, and continue the story. A missed ordinary reward can be recorded for a later EX run unless it is needed for immediate survival.
- Search side rooms before leaving a story location.
- Inspect lockers, containers, desks, display areas, and dead ends after major events.
- Deposit valuable optional equipment with Wayne when Aya’s inventory is full.
- Keep key items separate from optional combat rewards.
- Do not treat optional equipment as a requirement for the normal ending.
Prioritize Junk, Trading Cards, and equipment improvements
Junk is an optional long-term reward project. Give collected Junk to Wayne through the police-station weapon department instead of allowing it to fill Aya’s active inventory. Wayne can eventually offer special weapon rewards based on the Junk project and the weapon type you choose. These rewards can be powerful, but they are not needed to defeat the Ultimate Being or unlock EX Game.
Trading Cards support equipment development rather than story progression. Give ordinary cards to the appropriate police-station technician when you are ready to apply their modification benefit. Rare Trading Cards are associated with the Chrysler Building in EX Game and can lead to Tool Kit and Super Tool Kit rewards through Wayne. The available guides disagree about the exact number of cards or uses required for the first reward, so do not rely on a remembered threshold. Speak with Wayne, inspect the Rare Trading Card Collection option, and confirm the reward state directly.
Other worthwhile optional rewards include weapon and armor upgrades, ammunition, Medicine, stat-boosting items, and equipment with useful resistance or capacity properties. Collect them when they are close to the route and Aya is prepared for the surrounding encounters. Save Tools and Super Tools for equipment you expect to keep, because transferring an attribute or statistic changes the receiving equipment and may consume a limited resource.
- Give Junk to Wayne rather than carrying a large collection indefinitely.
- Use Trading Cards when you have a clear weapon or armor modification plan.
- Track Rare Trading Cards separately from ordinary campaign cards.
- Confirm Wayne’s Tool Kit or Super Tool Kit reward dialogue instead of relying on an exact disputed threshold.
- Treat optional stat upgrades and resistances as advantages, not progression requirements.
Use EX Game to recover or pursue optional rewards
After completing the normal campaign and saving the cleared data, choose EX Game from the title menu and load the completed file. EX Game functions as a New Game Plus-style mode for the original release. It provides access to carried-over or stored equipment and resources under the game’s transfer rules, while the campaign is replayed with tougher enemies. The Chrysler Building becomes available as an optional EX destination.
If you missed an ordinary weapon, armor piece, Tool, stat upgrade, or side-area reward during the first campaign, write down its location and continue toward the normal ending unless the item is essential. Before starting EX Game, inspect Aya’s equipment and Wayne’s storage so you know what you actually retained. Do not assume that every key item, consumable, or item carried in Aya’s personal inventory transfers in the same way as stored equipment.
Handle the final equipment and storage decisions carefully before completing a run. Keep valuable equipment with Wayne when the game’s transfer rules permit it, and preserve a separate save before selling, discarding, or permanently modifying rare equipment. EX Game is useful for pursuing optional rewards, but it is not a replacement for checking whether an item is still available in the current story state.
- Record the location of any ordinary optional item you missed.
- Finish the normal campaign if the missed item is not required for survival.
- Review Aya’s equipment and Wayne’s storage before starting EX Game.
- Preserve valuable equipment before selling, discarding, or modifying it.
- Use EX Game for optional recovery and further equipment development.
Treat the Chrysler Building as a separate EX objective
The Chrysler Building appears on the New York map after EX Game is unlocked. Its lower and middle sections use randomized layouts, while recurring boss milestones and the upper final section provide fixed progression landmarks. Defeating the required bosses provides the keys or progress needed to continue through the building’s elevator route. The upper final section leads to the EX-only final boss and the additional ending sequence.
The building is not part of the normal campaign completion route. Enter it only when you are deliberately pursuing EX completion and have enough ammunition, recovery items, Parasite Energy support, and equipment strength for a long challenge. A normal campaign save is complete even if Aya never enters the building.
Treat Chrysler loot differently from ordinary campaign pickups. Record which armories, boss milestones, Rare Trading Cards, weapons, armor, and upgrade items you have already collected. Store valuable rewards with Wayne when appropriate, and keep a separate save before selling, discarding, or permanently modifying rare equipment. Do not assume that returning to the building produces a completely fresh set of rewards or resets every cleared milestone.
- Enter the Chrysler Building only after EX Game is available.
- Prepare ammunition, healing items, Parasite Energy, and storage space first.
- Record searched armories and collected rewards.
- Track elevator keys and cleared boss milestones.
- Confirm Rare Trading Card rewards through Wayne.
- Do not confuse clearing the building with unlocking EX Game.
Check whether an optional objective is complete
For an ordinary campaign item, check Aya’s inventory and Wayne’s storage first. If the reward is absent, return to its location while the current story state still permits access. An unopened locker, unexplored side room, available container, or unchanged event state may indicate that the opportunity remains open. If the area has closed or its event state has permanently changed, record the reward for a future EX run instead of repeatedly searching an inaccessible route.
For equipment modification, verify the selected weapon or armor in its status information. The added property, statistic, or modification capacity should be visible there. For Junk and Trading Cards, use Wayne’s current collection and reward dialogue rather than memory. For Chrysler progress, track elevator keys, boss milestones, armories, Rare Trading Cards, and stored equipment separately. Reaching a higher section does not prove that every optional reward below it was collected.
If an optional puzzle door or event has permanently changed the area, treat that reward as potentially missed for the current run. Do not restart the entire campaign unless the item is essential to survival or your personal completion goal requires it in the current file.
- Check Aya’s inventory and Wayne’s storage before revisiting an area.
- Confirm that the relevant door, locker, container, or event remains available.
- Verify tune-ups and added properties in the weapon or armor status screen.
- Track Junk and Trading Cards through Wayne’s services.
- Track Chrysler keys, milestones, and armory rewards separately.
Confirm normal completion and optional EX completion
Normal completion has four concrete checks: the Ultimate Being is defeated; the normal ending and credits have played; the completed campaign data has been saved; and EX Game is selectable from the title menu. The Chrysler Building, Rare Trading Cards, Junk weapons, optional equipment, and the EX-only final boss are not prerequisites for this result.
Optional EX completion begins by loading EX Game and confirming that the Chrysler Building is present on the New York map. Prepare Aya, clear the building’s required progression, collect the rewards you intend to keep, reach the upper final section, defeat the EX-only final boss, and view the additional ending and credits. Record this as separate optional progress rather than adding it to the normal-campaign completion check.
- Defeat the Ultimate Being.
- View the normal ending and credits.
- Save the completed campaign data.
- Confirm that EX Game is selectable from the title menu.
- Confirm that the Chrysler Building is available in EX Game if pursuing optional content.
- For optional EX completion, clear the building, defeat its EX-only final boss, and view the additional ending and credits.
Before you move on
- The Ultimate Being has been defeated.
- The normal ending and credits have been viewed.
- The completed campaign data has been saved.
- EX Game is selectable from the title menu.
- If pursuing optional content, the Chrysler Building is present on the EX Game map.
- For optional EX completion, the Chrysler Building has been cleared, the EX-only final boss has been defeated, and the additional ending and credits have been viewed.
Finishing up
You have defeated the Ultimate Being, viewed the normal ending and credits, and completed the Clear Data save.
EX Game is selectable from the title screen after the Clear Data save.
This confirms completion of the normal campaign. The Chrysler Building and its optional EX-only final boss and ending are outside the normal-ending and initial EX-unlock requirement.
Choose your next gameScreenshots & video
Game imagery for reference. Follow the written chapters above for the route and strategies.
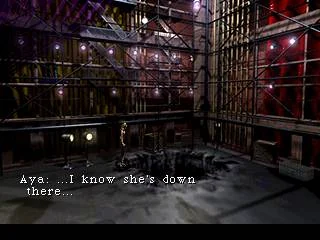
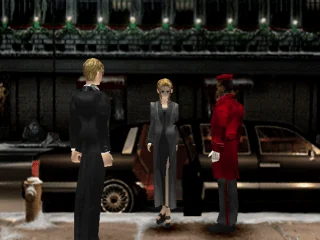
Sources & references
Our original guide draws on the references below. Check the edition at the top of this page before following controls or unlock requirements.
- Parasite Eve — Sony PlayStation manual
- Parasite Eve — Guide and Walkthrough, GameFAQs
- Parasite Eve — Complete Walkthrough, Day 4: Conception
- PARASITE EVE - NTSC-U PlayStation Disc Information
- Parasite Eve — North American PlayStation disc records, Redump
- Parasite Eve — Day 1 walkthrough
- Parasite Eve — Guide and Walkthrough, PlayStation, by taerm
- Parasite Eve - Walkthrough - PlayStation - By iamnothing
- Parasite Eve — Day 1: Resonance walkthrough
- Parasite Eve — Game Mechanic Guide by PrinceThrakhath
- Parasite Eve — EX Mode Guide by DKusama
- Day 2: Fusion - Parasite Eve Walkthrough and Guide
- Parasite Eve Day 2 Walkthrough
- Parasite Eve - Guide and Walkthrough - PlayStation - By Exdeath_Mu
- Parasite Eve - Day 2
- Parasite Eve — Day 3 walkthrough, RPGClassics Shrine
- Parasite Eve — Walkthrough & Guide, Day 4: Conception
- Parasite Eve — Day 4: Conception, Japanese walkthrough
- Parasite Eve - Guide and Walkthrough - PlayStation - By Shotgunnova
- Day 5: Evolution (Part 1) - Parasite Eve Walkthrough & Guide
- Parasite Eve - Day 5
- PlayStation Magazine Issue 13, September 1998
- Day 5: Evolution (Part 2) - Parasite Eve Walkthrough & Guide
- Parasite Eve Day 5 Walkthrough
- Parasite Eve - Warehouse
- Parasite Eve - Guide and Walkthrough - PlayStation - By NRokk
- Parasite Eve — EX Mode Guide by KWee
- Parasite Eve - Day 6
- Parasite Eve FAQ/Walkthrough: Final
- Day 6: Liberation - Parasite Eve Walkthrough & Guide - PlayStation
- Parasite Eve Walkthrough Final - Neoseeker Walkthroughs
- Parasite Eve – EX Game Walkthrough and Guide
- Parasite Eve — Chrysler Building Guide by Sop-sama
- Parasite Eve – EX Game
- Parasite Eve – Chrysler Building
About the game & collecting notes
- Platform
- Sony PlayStation
Step-by-step campaign walkthrough for the original North American PlayStation release of Parasite Eve. This guide covers the required story route from Carnegie Hall through the normal Day 6 ending, explains the pausable real-time combat and Parasite Energy systems, identifies optional rewards without confusing them with required progress, and explains how the Clear Data save unlocks EX Game. The Chrysler Building and its optional EX-only final boss and additional ending are outside the main-campaign completion requirement.
Darryl Polo
Darryl Polo loves tinkering with emulation and revisiting retro games. He enjoys exploring how old favorites play on different setups and sharing what he learns along the way. At Joking Joystick, he writes about the games, hardware, and small discoveries that keep the hobby fun.
Our editorial standardsFound a step that needs another look? Help us improve this guide.