
New Super Mario Bros. (Nintendo DS, USA) — Complete Campaign Walkthrough
Step-by-step coverage to finish New Super Mario Bros. (Nintendo DS, USA). Start-to-finish routes for every required world, how to handle Bowser Jr. towers and castle bosses, use Star Coins to open paths, and reliable recovery options when you lose progress. Includes optional routing for secrets and saving strategy to reach the true ending.

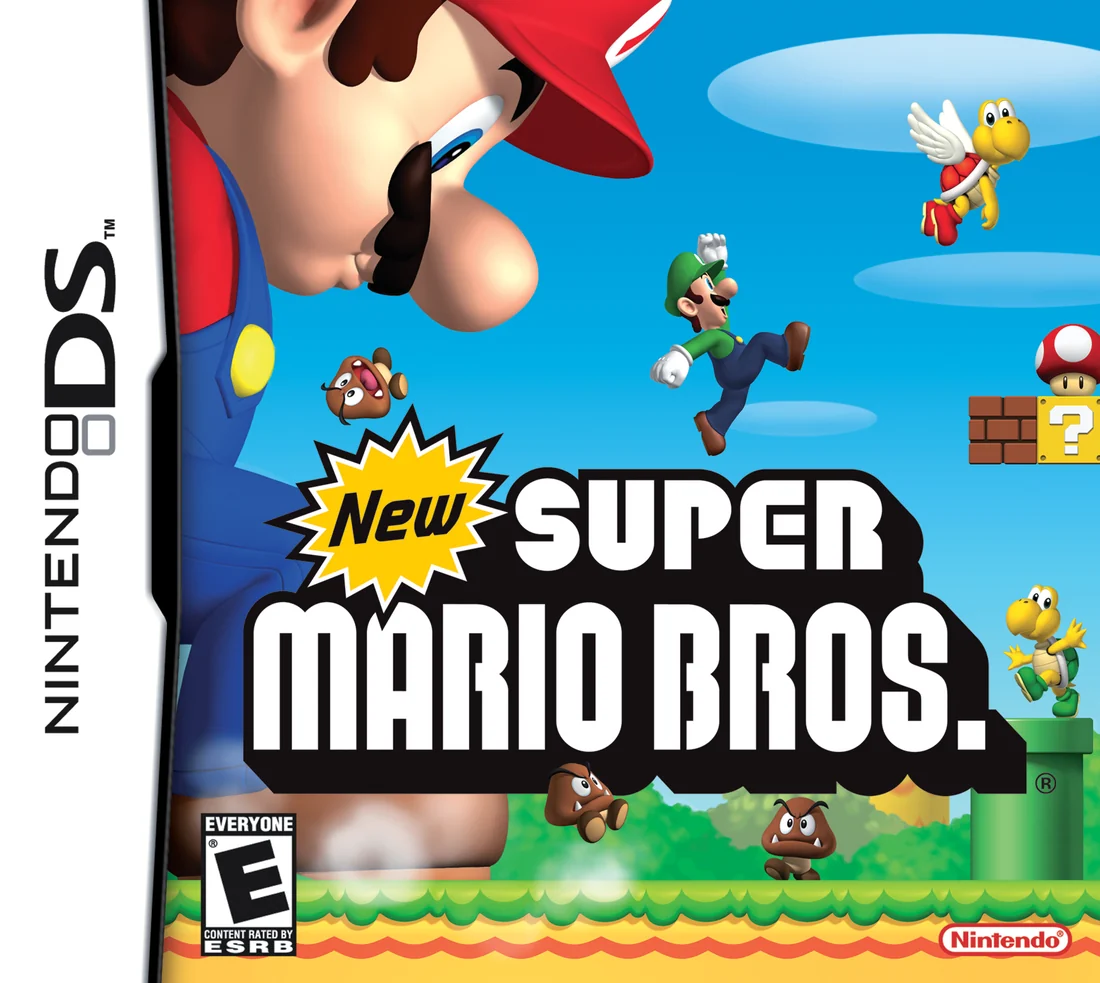
Find a copy
New Super Mario Bros. Nintendo DS
We may earn a commission if you buy through these links, at no extra cost to you. As an Amazon Associate I earn from qualifying purchases.
Opens retailer search results. Check the model, edition, seller, availability and current price before buying.
Before you begin
You are about to play the original New Super Mario Bros.
for Nintendo DS (USA, first-release edition).
This walkthrough takes you through the main campaign from World 1 to the final World 8 castle.
It focuses on required progression to reach the ending, explains recurring boss encounters, describes essential power-ups and moves, and notes where optional exits and Star Coin spending can alter the route.
Follow chapters in order for a straightforward completion.
The guide assumes you will use the game’s save points (towers/castles and Star Coin signs) and covers recovery from common failures (lost lives, missed star-coin purchases, and boss mistakes).
Optional chapters cover secrets, advanced movement (wall-jumping, shell-dashing, Mega/ Mini forms) and multiplayer/mini-game notes.
Set yourself up for the run
Read the in-game Options screen before starting. The original Nintendo DS release provides two preset control layouts: one assigns Jump to A/B and Dash to X/Y, while the other swaps those button groups.
Use the Control Pad for movement. On the Map Screen, move Mario between connected spaces with the Control Pad, press A to enter the course where Mario is standing, use the Touch Screen for supported world-selection and menu functions, and use L/R to scroll the visible map.
Understand the reliable campaign save events: the game offers saving after clearing a tower, clearing a castle, and paying a Star Coin Sign. Accept YES at those prompts.
Practice short and long jumps, dashing, wall-jumping, grabbing and throwing shells, Shell Mario’s dash, fence movement, and ground pounds in early courses.
Learn the main power-ups: Super Mushroom, Fire Flower, Mega Mushroom, Mini Mushroom, and Blue Shell. Special forms are useful but are not guaranteed before a particular tower or castle.
Use the stored item on the Touch Screen when needed, but do not assume a specific stored power-up is required for the ending.
Star Coins and Star Coin Signs are optional for the normal ending. Spend them only when you deliberately want the branch or support route they open.
If Mario loses all lives, resume from the latest normal save. A course midway point helps during a current attempt but is not a substitute for an overworld save.
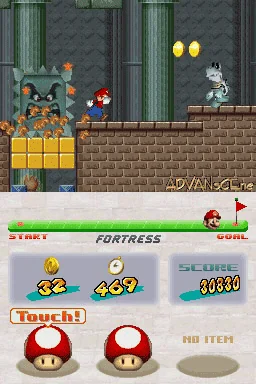
Preparation and Controls
Set up a new Mario Game file, choose one of the two available Jump/Dash layouts, and test the controls before leaving World 1. The Nintendo DS manual assigns movement to the Control Pad, Jump to either A/B or X/Y depending on the selected layout, and Dash to the other button pair. On the Map Screen, use the Control Pad to move Mario across open spaces, press A to enter the course where he is standing, and use the Touch Screen to choose an unlocked world. L and R scroll the visible map horizontally. Ordinary course clears are not dependable save points: the game offers saving after tower and castle courses and after paying Star Coins at a Star Coin Sign. Accept YES whenever that prompt appears. Practice short and long jumps, controlled dashes, wall jumps, and picking up and throwing a shelled enemy. These basics are enough for the opening campaign; advanced movement tricks can wait.
Create a single-player file and open Options
At the title menu, select Mario Game, then choose a file marked NEW. Confirm with A or select the file with the stylus. This starts the single-player campaign in which Mario clears courses to rescue Princess Peach. If you are continuing an existing file, select the file containing its saved data instead of choosing NEW.
To configure the controls before playing, select OPTIONS from the main menu. You can also press START on the Map Screen or during a course to open the Pause Menu, choose OPTIONS, and adjust the same settings. The Options screen contains sound settings and two control layouts. It does not provide unrestricted button-by-button remapping: one layout uses A/B for Jump and X/Y for Dash, while the other swaps those button groups. Select the layout you want, then press B or choose the on-screen OK control to confirm and return to the main menu or game.
- Choose Mario Game rather than Mario Vs. Luigi or Minigames.
- Select a file marked NEW, or select an existing file to continue.
- Choose one of the two available Jump/Dash layouts in OPTIONS.
- Confirm the setting with B or the on-screen OK control.
Test Jump and Dash in the opening course
Enter the first available course and test the selected Jump button with both a quick press and a held press. A quick press produces a shorter jump; holding the button produces a higher or longer jump. Jumping on an enemy from above is the safest basic attack. Do not try to run through enemies or cross pits by relying on invulnerability unless you are deliberately using a Starman.
Dash by holding the selected Dash button while pressing left or right on the Control Pad. Release Dash to reduce your speed before a landing or a narrow platform. Dashing allows Mario to cross a one-block-wide gap, but larger gaps still require a jump. For a normal gap, begin the jump while moving and keep enough horizontal momentum to reach the opposite platform. For a short hop, release Jump sooner rather than holding it through the entire arc.
Use the opening level to learn how far Mario travels at walking speed and while dashing. Make several safe jumps before attempting any high-risk route. If Mario takes a normal enemy hit while powered up, he may lose the power-up instead of a life, but falling into a pit or running out of time still costs a life.
- Test a short Jump press and a held Jump press.
- Dash, release Dash, and stop without running off a platform.
- Defeat an ordinary enemy by jumping on it.
- Cross a small gap with a running jump.
Move Mario on the Map Screen
The Map Screen is the campaign’s route selector. Use the Control Pad to move Mario from the space where he is standing to connected open map spaces. When Mario is standing on a course marker, press A to begin that course. You can also use the menu’s touch controls for ordinary menu confirmation, but do not treat the Touch Screen as a freehand replacement for moving Mario across individual map spaces.
The Touch Screen has a separate world-selection function. Use it to choose an unlocked world when the game permits world movement. Worlds shown in black are not available yet. The game normally opens the next route by clearing courses in order and then clearing the castle at the end of the current world. Use L and R to move the visible Map Screen left or right when the map is wider than the displayed area.
The bottom screen also displays useful campaign information, including the current map, available courses, the stored item, total Star Coins, and remaining lives. Before entering a course, check that Mario is standing on the intended marker and confirm the course name shown on-screen.
- Move Mario across connected map spaces with the Control Pad.
- Press A when Mario is standing on the intended course marker.
- Use the Touch Screen only for its supported world-selection and menu functions.
- Use L and R to scroll the visible map horizontally.
- Check the course name before confirming entry.
Perform a wall jump safely
When Mario is sliding down a usable vertical wall, press the Control Pad toward that wall and press Jump. He kicks away from the wall and gains height. To climb between two nearby walls, direct Mario toward the opposite wall and repeat the same input when he reaches it. The essential timing is contact with the wall while sliding; pressing Jump too early while Mario is still falling beside the wall will not produce the kick.
Not every surface supports wall jumps, and many early courses do not require one. Practice only where there is a safe lower platform or a retry-friendly shaft. If Mario misses the opposite wall, stop making blind corrections and aim for the nearest safe platform. Wall jumping is primarily a climbing and recovery technique here, not a requirement to use constantly.
- Find a suitable vertical wall.
- Hold toward the wall while Mario slides down it.
- Press Jump at contact to kick away.
- Use an opposite wall or safe platform to recover from a miss.
Pick up, throw, and shell-dash
To handle a shelled enemy, first make it withdraw into its shell by jumping on it or otherwise striking it. Stand beside the stationary shell, hold the Dash button, and press toward the shell to pick it up. Release Dash to throw it in the direction Mario is facing. Leave room between Mario and nearby walls or enemies: a thrown shell can rebound and hit Mario.
If Mario has the Shell power-up, holding Dash while moving makes him curl into the shell and dash along the ground. Use a short shell-dash on a flat, visible stretch to clear ordinary enemies or travel quickly. Release Dash well before an edge, pit, lava pool, or moving hazard. Shell Mario does not make a dangerous landing safe, and a dash that carries Mario off-screen or into a pit still costs a life.
The stored item on the Touch Screen is separate from these movement actions. If Mario collects an item while already powered up, it can be placed in reserve. Tap the stored item only when you want it to drop onto the Action Screen and make sure there is room for it.
- Make a shelled enemy withdraw into its shell.
- Pick up the shell with the Dash button and directional input.
- Throw it into an open area away from Mario.
- Perform a short Shell Mario dash and stop before a hazard.
- Identify the stored-item area on the Touch Screen.
Save at every available prompt
The original Nintendo DS release does not offer a normal save prompt after every ordinary course. The manual identifies three dependable campaign save events: completing a tower course, completing a castle course, and paying the displayed Star Coin cost at a Star Coin Sign on the Map Screen. After one of these events, choose YES when the game asks whether to save, then wait for the game to finish writing the progress.
Choosing QUIT from the Pause Menu returns to the title screen without saving current unsaved progress. If you have cleared ordinary courses since the last tower, castle, or Star Coin Sign save, quitting can make you replay them. If Mario loses all lives, the game returns him to the most recent saved point, so unsaved route progress may also be lost.
When a save prompt appears, accept it unless you have a specific reason not to. If you cannot shut the system down immediately, Nintendo’s manual recommends using Sleep Mode during single-player play, provided the DS remains powered. Sleep Mode is not a substitute for a completed save if the system loses power.
- Choose YES after every tower clear.
- Choose YES after every castle clear.
- Choose YES after paying a Star Coin Sign.
- Do not choose QUIT when you need to preserve unsaved course progress.
- Use Sleep Mode only as a temporary interruption method, not as a replacement for saving.
Before you move on
- A new or existing Mario Game file is selected.
- You have chosen and tested one of the two control layouts.
- You can move Mario across the Map Screen with the Control Pad and start a course with A.
- You can use the Touch Screen to select an unlocked world and L/R to scroll the visible map.
- You have successfully performed a short jump, a running jump, a wall jump, an object throw, and a short Shell Mario dash.
- You understand that tower clears, castle clears, and Star Coin Sign payments produce save prompts, and you will choose YES when they appear.
World 1 — Introductory courses, World 1-Tower and World 1-Castle
World 1 establishes the movement and enemy patterns used throughout New Super Mario Bros. The direct route is World 1-1, World 1-2, World 1-3, World 1-Tower, World 1-4, World 1-5, and World 1-Castle. World 1-2 has a secret exit leading to the World 1 Warp Cannon, while World 1-Tower has a Blue Shell route to the same cannon; neither is required for the normal campaign. World 1-Tower ends with Bowser Jr., who can be defeated by stomping him three times or by using fireballs. World 1-Castle ends with Bowser. Run beneath him or leap over him when he jumps, then activate the red switch to finish the battle and unlock World 2.
1. Clear World 1-1 and establish safe movement
Enter World 1-1 and move right at a controlled pace. Walk toward Goombas and Koopa Troopas until they are within jumping range, then press Jump while continuing forward. Hold the Dash button when you need extra speed for a gap or a long jump, but release it after landing so Mario does not run into the next enemy.
Use the early ? Blocks to obtain a Super Mushroom or Fire Flower when they are safely reachable. Super Mario can survive one damaging hit, while Fire Mario can defeat ordinary enemies from a distance. If a spare item is stored on the Touch Screen, there is no need to use it in this introductory course; preserving it for the tower or castle is safer.
The normal exit is the flagpole at the far right. Secret-exit hunting is unnecessary for the direct route, so finish the course normally and select World 1-2 from the map.
- Clear World 1-1 through its normal flagpole.
- Practice short and long jumps by varying how long Jump is held.
- Take a safe power-up if one is available.
2. Use the normal exit in World 1-2
World 1-2 moves through an underground area with pipes, platforms, and enemies. Keep moving right, but pause before low ceilings and narrow pipe passages. Use short jumps in confined spaces rather than holding Dash through every section. A kicked Koopa shell can defeat several enemies, but do not follow it into a wall or cramped corridor where it can rebound into Mario.
The normal route continues to World 1-3. The secret exit is optional: near the later part of the course, use the tilting platform to reach the upper side of the level, walk over the ceiling, and enter the pipe in the hidden area. That exit opens the World 1 Warp Cannon, which sends Mario to World 5. It does not replace the required tower and castle route for a normal World 2 progression, so use the ordinary flagpole if you are following this chapter's direct path.
- Use the normal flagpole to unlock World 1-3.
- Do not mistake the upper ceiling route for required progress.
- Leave the World 1 Warp Cannon unopened unless you specifically want the shortcut to World 5.
3. Finish World 1-3 and approach the tower
World 1-3 introduces wider gaps and moving platforms. Start jumps from stable ground, hold Right during the jump, and release Dash as Mario approaches the landing. When a Koopa is on a narrow platform, jumping over it is usually safer than kicking its shell unless the shell gives you a clear way to remove several enemies.
The three Star Coins are optional for campaign progress. Collect one when it lies directly on the safe route, but do not repeatedly risk lives for a coin while trying to reach the tower. Finish at the normal flagpole, return to the map, and select World 1-Tower.
- Clear World 1-3 through its standard exit.
- Confirm that World 1-Tower is available on the map.
- Keep any useful stored item for the tower or castle.
4. Climb World 1-Tower through the moving stone blocks
World 1-Tower is a vertical course containing Dry Bones and gray stone blocks that slide together and apart. At the beginning, allow the starting block formation to move so you can pass upward. Watch the full movement cycle before committing to a jump. If two blocks begin closing toward each other, move through the opening immediately; being caught between them is fatal.
Dry Bones can be jumped over, but a stomp does not permanently remove one. After a short delay it reforms, so continue moving instead of waiting beside its remains. A power-up is available near the early part of the tower. Take it if you can do so without landing in the path of the moving blocks.
As you climb, some formations create temporary stairways. Jump onto a block as it extends, then wait for the next block to form a safe landing. The route through the tower includes pipes and a small room containing a Star Coin; the normal exit continues upward toward the boss door. The midway point, if reached, only helps on a replay of that course. Leaving the tower and entering another course means a later attempt starts from the beginning.
- Pass the first moving-block formations without waiting between them.
- Treat Dry Bones as temporary obstacles rather than permanent kills.
- Reach the upper door and prepare for Bowser Jr.
5. Defeat Bowser Jr. in World 1-Tower
In this first Bowser Jr. battle, he mainly runs across the arena and tries to collide with Mario. Stand toward one side and watch his approach. Jump over him as he runs past, then turn around and prepare for the next pass. A normal stomp damages him, but after being hit he briefly ducks into his shell. During that brief red-flashing shell state, do not try to stomp him again because the shell can damage Mario.
Repeat the bait-and-jump pattern until Bowser Jr. has been stomped three times. Fire Mario can instead defeat him with repeated fireballs, but jumping is reliable and does not require a particular item. A ground pound can count as two stomps if you can perform it safely, though ordinary stomps are less risky for a first attempt.
After the third successful hit, Bowser Jr. retreats toward World 1-Castle with Princess Peach. The tower is complete. Return to the map and choose YES when the save screen appears; the manual identifies tower and castle clears as save opportunities.
- Damage Bowser Jr. three times, or defeat him with fireballs.
- Avoid stomping him while he is flashing in his shell.
- Accept the save after the tower clear.
6. Clear World 1-4 and World 1-5
World 1-4 is not the underwater stage. It is an outdoor hill course with slopes, Goombas, a Mini Mushroom route, an underground water section, and Koopa shells. Move down slopes carefully because enemies can stream from pipes. If you obtain the Mini Mushroom, you can use Mini Mario to enter the narrow passage and pipe leading to the underground water area; this route is useful for exploration and Star Coins but is not required for the normal exit.
Later, a Koopa shell can be used to break blocks and open a pipe route. If you are attempting the direct campaign, prioritize staying alive and continue to the flagpole rather than repeating the shell setup for optional collectibles. The normal exit unlocks World 1-5.
World 1-5 is the mushroom-platform course. Bounce across the springy platforms and use short jumps when platforms are close together. Hanging mushroom platforms shift according to Mario's weight, so move onto one only when the neighboring platform gives you a clear next landing. Continue right through the upper and lower platform sections until you reach the normal flagpole. World 1-5's normal exit opens World 1-Castle.
- Clear World 1-4 through its normal flagpole.
- Do not confuse World 1-4 with the separate underwater World 1-A.
- Cross World 1-5 by using controlled jumps on the mushroom platforms.
7. Cross World 1-Castle and defeat Bowser
World 1-Castle begins with tightropes, lava fireballs, rising and falling platforms, and a long section of moving spiked ceilings. On the ropes, wait for a safe moment before jumping to the next ledge. Over lava, let the moving platform approach rather than making an early jump. When the spiked ceilings descend, stay in a safe gap; when they rise, move right before the next ceiling closes the route.
The course contains a midway point in the spiked-ceiling section. Reaching it helps if Mario loses a life and re-enters the castle before playing another course. The Star Coins and hidden pipe rooms are optional. If your power-up state is weak, ignore them and concentrate on reaching the red door at the end of the course.
Bowser waits in the final room on a bridge above lava. He walks toward Mario, jumps periodically, and breathes fire. The safest completion method is to stay mobile and wait for him to jump. Run underneath him during the jump, or use the upper platform to leap over him, then continue right to the red switch. Activating the switch defeats Bowser; Mario does not need to damage him with jumps. Fire Mario can also attack him with fireballs, but the switch remains the dependable objective.
After the switch is activated, let the defeat sequence finish and return to the map. Choose YES at the castle save screen. World 2 is then unlocked for the campaign.
- Reach the midway point if you want a safer retry.
- Cross the lava and moving-ceiling sections without rushing early jumps.
- Run beneath or over Bowser and activate the red switch.
- Accept the castle save and confirm that World 2 is available.
Before you move on
- World 1-Tower is cleared and its save opportunity has been accepted.
- World 1-Castle is cleared by activating the red switch behind Bowser.
- The Bowser defeat sequence has finished and the game has returned to the overworld map.
- World 2 is available as the next campaign region.
- No Star Coins, secret exits, Warp Cannons, multiplayer modes, or minigames are required for this World 1 completion goal.
World 2 — Desert area, Tower pattern and Castle
World 2’s direct route runs through World 2-1, World 2-2, World 2-3 and World 2-4 before the World 2-Tower. After defeating Bowser Jr., continue through World 2-5 and World 2-6 to reach World 2-Castle and Mummipokey. Desert hazards include quicksand, Pokeys, falling or rolling spiked balls and enemies that emerge from the sand. Star Coin Signs and secret exits are optional for reaching World 3. Defeating Mummipokey normally opens World 3; defeating him while Mario remains Mini Mario opens the optional route to World 4. Accept every save screen after clearing the tower or castle and after paying a Star Coin Sign.
1. Follow the required route through the desert
On the World 2 map, take the connected main route through World 2-1, World 2-2, World 2-3 and World 2-4. The tower becomes available after the normal approach through World 2-4. You do not need to clear World 2-A or find secret exits to reach the tower, and you do not need to spend Star Coins on side branches for the direct World 2-to-World 3 campaign route.
Treat loose sand as a movement hazard rather than ordinary ground. It can slow Mario and make a jump harder to control, while Pokeys and other enemies may occupy the same narrow spaces. Approach suspicious sand with short hops, keep a clear running lane before attempting a long jump, and avoid stopping directly above a place where an enemy may emerge. Fire Mario is useful for clearing grouped enemies, while Shell Mario can clear a straight line if there is enough room to start and stop the shell dash safely.
- Clear World 2-1 through World 2-4 on the main route.
- Use short jumps near sand pits and concealed enemies.
- Ignore Star Coin Signs and secret branches unless you specifically want them.
2. Clear the rotating-platform route in World 2-Tower
World 2-Tower has a 300-second time limit, so make steady progress, but do not jump blindly from one rotating wheel to the next. At the start, jump onto the first large rotating platform and then the second. Above the second wheel are three Question Blocks; one contains a power-up. Use the blocks to reach the higher wheel, then ride that wheel until its platform lines up with the solid corridor before jumping off.
Continue through the tower’s vertical section. After the initial wheel sequence, climb past the stone wall and reach the midway point. The next area uses brightly colored rotating blocks over spikes. Wait until each block is level before landing, then strike the small red block to create or activate the next group of rotating platforms. Continue upward while avoiding Dry Bones and the spikes below. A second red block creates the platforms needed to reach the red pipe that leads toward Bowser Jr.’s room.
A side door leads to an optional N-shaped block section that moves along a rail. Wall-jump between its sides to travel with it. This route is useful for exploration and Star Coins, but it is not needed to finish the tower. If your priority is reaching the boss, return to the main route and take the red pipe when it becomes available. The tower’s rotating wheels, blocks and wall-jump sections are the main hazards; there is no separate alternating boss pattern to learn here.
- Enter with a stored or active power-up if possible.
- Ride each rotating wheel until the next landing is aligned.
- Use the midway point and avoid falling onto the spike bed.
- Skip the N-shaped optional route if you only need campaign progress.
3. Defeat Bowser Jr. above the quicksand
Bowser Jr.’s World 2-Tower fight uses the same basic pattern as the earlier tower encounter. He runs toward Mario and may jump while crossing the arena. Jump over him and land on his head, then move away while he hides in his shell. Wait for him to come out before attempting the next stomp. Three successful stomps defeat him.
The arena has quicksand below the main platform. Falling is dangerous, but it is not automatically a lost life: Mario can jump back onto the platform if he reacts quickly. Even so, avoid fighting at the extreme edges. Start near the center, let Bowser Jr. approach, and jump when his run or jump carries him across Mario’s position. Do not chase him toward a boundary after a hit. If you have Fire Mario, fireballs are an alternative; Shell Mario’s shell dash can also damage him.
- Let Bowser Jr. approach instead of pursuing him toward an edge.
- Stomp him three times, waiting through each shell phase.
- If you fall into the quicksand, jump back up immediately.
- Use fireballs or a shell dash only when the opportunity is safe.
4. Save, then take World 2-5 and World 2-6
After the tower is cleared, accept the save screen. The manual identifies tower and castle clears, along with Star Coin Sign payments, as points that produce a save screen; if Mario loses all lives, the game resumes from the last saved point. Saving here protects the tower clear before you attempt the remaining desert stages.
Return to the World 2 map and follow the newly opened main route through World 2-5 and World 2-6. These stages continue the desert theme and may combine sand, enemies and long jumps. If a course has a midway point, use it before attempting a difficult section; leaving the course does not preserve a halfway position for a later return. If you lose a life, identify the obstacle that caused the failure and approach it with a slower jump or a better power-up rather than repeating the same sprint.
Use a Toad House if one is available and you need an item before the castle. Star Coin Signs are not required for this route. If a branch appears because of a secret exit, check the map before taking it so you do not confuse an optional shortcut with the direct castle path.
- Choose the save option after the tower.
- Clear World 2-5 and World 2-6 on the direct route.
- Use a Toad House for preparation if available.
- Do not spend Star Coins unless you intentionally want the resulting branch.
5. Cross the outdoor approach in World 2-Castle
World 2-Castle begins outdoors. A Giant Spiked Ball destroys the brick structure near the opening, then rolls away, allowing Mario to cross the first gap. Continue right while watching the timing of the Giant Spiked Balls, smaller Spiked Balls and Bullet Bills. Let a large hazard pass before crossing instead of trying to outrun it through a narrow gap.
The castle’s outdoor layout includes elevated sections and dangerous recesses. Use wall jumps where the level provides two opposing surfaces, and keep Mario away from the edges of platforms when a spiked ball is approaching. A Bullet Bill can sometimes be used as a temporary bounce, but this is optional and riskier than waiting for a clear route. Near the end, follow the path to the ? Switch. Activating it lowers the ground and reveals the route to the double doors leading to Mummipokey.
A Mini Mushroom appears in the castle. It is not required for the normal World 3 route or for defeating Mummipokey. Keep it only if you deliberately want to unlock World 4, because Mario must still be Mini Mario when Mummipokey is defeated.
- Wait for Giant Spiked Balls and Spiked Balls to clear the next crossing.
- Use the ? Switch near the end of the outdoor route.
- Reach the boss doors with a power-up if one is available.
- Preserve Mini Mario only if you want the World 4 shortcut.
6. Defeat Mummipokey and select the overworld route
Mummipokey begins at full height and moves across the arena. Stay toward the side opposite the boss and watch for the rock it throws. Jump over the rock, then watch the sand and dirt to see where Mummipokey will resurface. When it emerges at reduced height, run beneath or beside the exposed body and jump on its head. Do not attempt a normal stomp while it is fully extended; that jump is harder to control and gives the boss more opportunity to hit Mario.
After taking a hit, Mummipokey dives again. Move away from the location marked by the rising dirt and repeat the rock-dodge and reduced-height attack cycle. Sometimes only the head appears briefly; wait for a clearer opening rather than jumping at a target that is already disappearing. Three successful head stomps defeat Mummipokey. Fireballs can help, but they are not required, so prioritize avoiding the thrown rocks and the boss’s resurfacing position.
The ending route depends on Mario’s form at the moment of victory. Defeat Mummipokey while Mario is Mini Mario to open the optional path to World 4. If Mario is any other form, the normal route to World 3 opens. If you want the standard campaign order, do not finish the fight as Mini Mario; if you want the shortcut, protect Mini Mario through the entire boss battle.
- Dodge the thrown rock before looking for an attack window.
- Attack only when Mummipokey resurfaces at reduced height.
- Repeat the pattern until three head stomps connect.
- Finish as Mini Mario only when intentionally opening World 4.
- Confirm that the World 2 map shows the intended route after the boss cutscene.
Before you move on
- World 2-Tower is cleared and its save screen was accepted.
- World 2-5 and World 2-6 are cleared, or the map shows an intentionally opened route to World 2-Castle.
- The ? Switch in World 2-Castle was activated and Mummipokey was defeated.
- The World 2 map opens the normal route to World 3, or the deliberate Mini Mario route to World 4.
- The post-boss cutscene finishes and the saved map records World 2-Castle as cleared.
References for this chapter
World 3 — Mid campaign: courses, alternate exits and World 3 tower/castle
World 3 is a water- and beach-themed region with underwater courses, tilting mushroom platforms, fences, Boos and Skewers. For the ordinary route, clear World 3-1 and World 3-2, defeat Bowser Jr. in World 3-Tower, then clear World 3-3, World 3-Ghost House and World 3-Castle. World 3-2 has a secret exit to World 3-B, and the Ghost House has a secret exit to the World 3 Warp Cannon leading to World 6. These shortcuts are optional. World 3-Castle’s normal completion opens World 5; it does not itself unlock World 4. Use visible midway flags when they appear, and do not assume every World 3 course has one.
Take the standard route through World 3-1 and World 3-2
From the World 3 starting point, enter World 3-1 and follow the underwater route to its normal goal. Swim in short controlled movements around Cheep-Cheeps, and use pipes and solid surfaces to reset your position before crossing a crowded section. Fire Mario is useful against fish, but do not wait for a specific power-up; careful swimming is enough to finish the course. World 3-1 has a visible midway flag, so touch it before taking risks in the later underwater section.
Continue to World 3-2 through its regular map path. The course uses wobbling mushroom platforms and elevator platforms. Stand near the center of a mushroom before jumping, and wait for an elevator platform to rise into a stable position instead of making a long jump from its edge. After the midway point, continue right while staying on the solid platforms whenever possible. The normal exit leads to World 3-Tower.
- Clear World 3-1 through its normal exit.
- Touch the World 3-1 midway flag when you reach it.
- Clear World 3-2 through its standard flagpole to open World 3-Tower.
Optional: take the World 3-2 secret exit to World 3-B
After the first Star Coin area in World 3-2, ride the large wobbling mushroom platform beneath the red, yellow and green pipes. Enter the green pipe, which is the rightmost of the three. The pipe leads to a separate section containing more wobbling platforms and the red secret flagpole for World 3-B. If the platform position is awkward, wait for it to travel back and try again rather than jumping from a poor angle. This route is optional and is not needed to reach World 3-Tower.
World 3-B is a pipe-filled bonus branch. Its completion leads onward to World 3-C, and World 3-C leads directly to the castle route. Treat this branch as an alternate approach, not as a replacement requirement for the tower, World 3-3 and Ghost House route. World 3-A is another optional branch reached from the World 3 map; it is not required for the ending.
- Use the green pipe above the large mushroom platform only if you want World 3-B.
- Return to the standard route if your goal is the quickest ordinary progression.
- Do not mistake World 3-B or World 3-C for required courses.
Climb World 3-Tower and defeat Bowser Jr.
The tower begins with three floor pipes; the middle pipe is the working launcher. Use it to reach the fence sections, then grab the fence at the appropriate height and climb left or right rather than trying to jump through every gap. Fence flip panels change Mario between the front and back sides, so if a platform seems unreachable, look for the next panel instead of forcing a jump. A shell can be used to break the block wall in the upper section, opening the route toward the later fences.
In the tall room near the top, hit the ! switch and move quickly across the temporary red blocks. Keep climbing while avoiding Koopa Troopas on the fences. After reaching the final room, enter the door to Bowser Jr. This is not the basic stomp-only tower fight. Jump over his charge. When he throws a green shell, avoid the shell or catch it if the approach is safe, then throw it back to flip him. Stomp his exposed belly while he is overturned. Repeat this sequence three times. Jumping directly onto Bowser Jr. while he is charging causes damage, so wait for the shell counterattack opportunity.
- Use the middle launcher pipe at the start of the tower.
- Look for fence flip panels when the route appears blocked.
- Defeat Bowser Jr. by returning his green shell and stomping him three times.
Clear World 3-3 and use the checkpoint safely
After the tower, follow the ordinary map route to World 3-3. Enter the underwater section through the green pipe and keep moving around Bloopers and Cheep-Cheeps. A deep pit near the early part of the course contains a hidden room and Star Coin, but the pit is also a useful landmark: do not rush into it unless you have checked where the exit is. Later, a ? switch temporarily stops the air currents from the pipes, giving you a short window to swim through the next section.
World 3-3 has a visible midway flag. Touch it before attempting the lower passages and current-heavy areas. The course does not require every Star Coin, so if a coin forces you into a dangerous current, continue toward the exit and preserve the life. When you reach the final upside-down pipe, use it to return to dry land, then jump across the pipes to the flagpole.
- Clear World 3-3 through the normal exit.
- Touch its midway flag before attempting the later underwater passages.
- Use the ? switch to reduce the air-current hazard temporarily.
Clear the Ghost House or claim its optional Warp Cannon exit
For the normal Ghost House exit, move right through the Boo-filled rooms and use the switches to create temporary stairs and platforms. Face Boos when you need them to stop advancing, then turn away only when you have enough space to move. Follow the ordinary doors and platform route until you reach the exit door leading back to the overworld. The normal exit opens World 3-Castle.
The secret exit is optional and leads to the World 3 Warp Cannon, which launches Mario to World 6. In the later right-hand section, activate the switch hidden inside a brick. This reveals a temporary door near the earlier switch. Move back quickly while the temporary stairs and door remain active, then enter the newly revealed door rather than the more obvious upper door. The room beyond leads to the red flagpole. If the door disappears, repeat the section and activate the hidden switch again. This exit does not require Mini Mario.
- Use the normal Ghost House exit to continue directly to World 3-Castle.
- For the optional cannon, activate the hidden switch in the brick and return quickly to the temporary door.
- Do not assume the Warp Cannon is required for campaign completion.
Cross World 3-Castle and reach Cheepskipper
World 3-Castle is built around large Skewers, Whomps, ropes and water. Wait for each Skewer to retract before crossing its lane. In the opening section, use the safe ledges between impacts rather than dashing continuously. After the first major hazard sequence, touch the castle's midway flag. The later rope and donut-block sections are safer when you wait for the water hazards to clear before swinging or jumping.
Near the boss door, do not enter immediately if the nearby Skewer blocks the upper route. Wait for it to retract, slide or swim through the safe space, and collect the high Star Coin only if the timing is comfortable. The coin is optional; reaching the boss door is the priority. Enter the door after the Skewer cycle gives you a clear passage.
- Wait out Skewer cycles instead of crossing while they are extended.
- Touch the World 3-Castle midway flag.
- Treat the final Star Coin as optional if it creates unnecessary risk.
Defeat Cheepskipper and confirm the correct world unlock
Cheepskipper fights in the water below a bridge while smaller Cheep-Cheeps periodically jump out. Keep moving along the bridge and watch the right side of the screen. When Cheepskipper jumps out and bounces across the bridge, jump on its body while it is above the bridge. Avoid standing directly beneath its launch path, and do not let the smaller fish trap you against an edge. Three successful stomps defeat the boss. Fireballs can also damage Cheepskipper if you have Fire Mario, but stomping is the dependable method.
After the final hit, collect the golden boss key and let the post-boss transition finish. A normal World 3-Castle clear opens World 5. World 4 is not the normal reward for this castle; it is a separate secret-world destination that can be unlocked earlier through the World 2 boss route or certain warp-cannon routes. Confirm the newly available World 5 path on the map before leaving the file.
- Stomp Cheepskipper three times while it is bouncing across the bridge.
- Collect the golden boss key.
- Confirm that World 5 is available on the overworld map; World 4 requires a separate unlock.
Before you move on
- World 3-Tower is cleared and Bowser Jr. has been defeated through the green-shell counterattack.
- World 3-3 and the normal World 3-Ghost House exit are cleared, or an intentional alternate route through World 3-B and World 3-C has been completed.
- World 3-Castle is cleared, Cheepskipper is defeated, and the golden boss key is collected.
- World 5 is visible and playable on the overworld map after the normal World 3-Castle completion.
- The World 3-B branch and World 3 Warp Cannon are optional and are not required to reach the game ending.
References for this chapter
- New Super Mario Bros. Official Nintendo DS Instruction Manual
- New Super Mario Bros./World 3 — Super Mario Wiki
- New Super Mario Bros. — Guide and Walkthrough, GameFAQs
- New Super Mario Bros. - Alternate Exits Guide - DS - GameFAQs
- New Super Mario Bros./World 3-Ghost — StrategyWiki
- New Super Mario Bros./World 3-Castle — StrategyWiki
World 4 — Navigating intermediate hazards and boss zones
World 4’s required route is World 4-1, World 4-2, World 4-3, World 4-Tower, World 4-4, World 4-Ghost House through its normal exit, World 4-5, World 4-6 and World 4-Castle. Poisonous water, Dorrie sections, seesaw mushrooms, Unagis, rising lava, Bob-ombs, swinging platforms and Thwomps make careful movement more reliable than constant dashing. Bowser Jr. must be hit with returned Koopa shells before he can be stomped, while Mega Goomba requires the central ? Block and three stomps from the rising green platforms. The Ghost House red-flag exit, World 4-A, Warp Cannon, Star Coin Signs and map encounters are optional for the direct route to World 5.
1. Follow the normal route through World 4-1, World 4-2 and World 4-3
Enter World 4-1 and use the blue Dorrie sections to cross the poisonous water. Stay near the middle of Dorrie and jump only toward clearly visible solid ledges, pipes or platforms. Do not treat the poison as ordinary water; falling into it costs a life. When vines, Paratroopas or web-hanging enemies appear, use them only when the route requires extra height. If a solid platform is available, it is the safer landing target.
World 4-2 uses mushroom platforms, including the purple seesaw-style platforms. Make short jumps and move back toward the center after landing so the platform does not tilt too far. Avoid holding Dash through every jump, because the extra speed makes it easier to slide off an edge. Continue along the upper route and use the visible blocks, pipes and platforms to reach the normal flagpole rather than attempting an unmarked gap.
World 4-3 is an underwater course. Swim in controlled bursts around Cheep-Cheeps and Unagis, and wait for large enemies or currents to move before entering a narrow passage. Use the course’s switches and pipes when they open the route, then continue through the ordinary exit. These three normal exits lead to World 4-Tower.
- Use Dorrie and solid platforms instead of landing in poisonous water.
- Control the purple seesaw platforms with short jumps.
- Swim patiently around Unagis and continue through World 4-3’s normal exit.
2. Leave optional branches until the required route is secure
World 4 includes optional branches. A secret exit in World 4-1 can open World 4-A, and the Ghost House red-flag exit opens the Warp Cannon route toward World 7. Neither branch is needed for the ordinary World 4-to-World 5 progression. Follow the normal flagpole or normal Ghost House exit when the goal is simply to complete the campaign.
Star Coin Signs permanently remove themselves after payment and open the route shown on the map. Do not spend Star Coins merely because a sign is available; first decide whether its branch is useful. Flying ? Blocks and Hammer Bro markers are also optional map encounters and do not replace the required courses.
A tower or castle clear provides a dependable save opportunity, and paying a Star Coin Sign also produces a save opportunity. Choose YES when the save screen appears. Ordinary course clears should not be treated as equivalent recovery points before a difficult section.
- Use normal exits when prioritizing World 5 access.
- Treat World 4-A and the Ghost House red exit as optional.
- Save after the tower, after the castle and after any Star Coin Sign purchase.
3. Climb World 4-Tower while the lava rises
World 4-Tower is a vertical escape course. Once the lava begins rising, keep moving upward and avoid stopping to fight enemies unless they block the route. Time jumps around sliding stone pillars and spiked pillars so Mario lands on a stable surface instead of jumping into a closing gap.
The upper sections add fence gates, Dry Bones and sliding blocks. Press Up while touching a fence to climb it, then jump away when the next platform is clear. In narrow shafts, use controlled wall-jumps by pressing toward the wall and pressing Jump at contact. Do not rely on continuous Dash near the lava; brief movement gives more control when platforms are close together.
A Koopa shell can help with a clear horizontal section, but do not shell-dash into an unknown landing. Start the dash on a level surface and release it before a wall, enemy group or edge. Continue upward to the red door at the top before the lava closes the lower route.
- Keep ascending after the lava starts rising.
- Use fences and controlled wall-jumps in narrow vertical sections.
- Release a shell dash before uncertain edges or walls.
4. Defeat Bowser Jr. and save the tower clear
Bowser Jr. is protected while he is inside his spiked shell, so jumping directly onto him is unsafe. Keep enough distance to see his movement and wait for him to throw a green Koopa shell. Avoid the shell, pick it up when safe and throw it back at Bowser Jr. A successful hit flips him onto his back.
When he is exposed, jump on him once. After the stomp, he recovers and resumes moving, so repeat the shell-counter method instead of trying to chain attacks. Three successful shell hits followed by three stomps defeat him. The shell throws become more difficult to manage as the fight continues, so stay patient and avoid standing directly beside him when releasing a shell.
After the fight, leave the tower and choose YES at the save screen. The tower clear opens the next required course and gives you a recovery point before the rest of World 4.
- Wait for Bowser Jr. to throw a green shell.
- Throw the shell back, then stomp him while he is flipped over.
- Defeat him three times and accept the tower save.
5. Clear World 4-4, the normal Ghost House exit, World 4-5 and World 4-6
World 4-4 uses Wigglers, timed platforms and elevated ledges. Avoid touching an angry Wiggler; go around it or use a shell when attacking is safer than jumping. Move across the platforms without committing to blind gaps, and use pipes or nearby walls to regain height after a drop.
Next enter World 4-Ghost House. At the start, jump to the upper ledge and hit the ? Block if you want the item. Move right across the platforms while avoiding the Boos until you reach the low doorway. Enter it and hit the ? Switch. Four hanging boxes fall from above. Stand on top of one before the timer expires; it carries Mario to the upper section.
From the upper section, go right across the ledges and the rotating cup-like platform. A large Boo follows this area. Face away from it to keep it small, then move when the path is clear. Continue to the upper area and go left to the ! Switch. Hit the switch to create red blocks, cross them to the door and enter. Hit the switch in the next room, then return to the lower area and activate the red blocks again as needed. Take the ordinary pipe and, after emerging, go left and up the ledges, then right through the door to reach the normal exit. Do not use the Mini Mario route to the high door unless you deliberately want the secret exit and Warp Cannon.
World 4-5 is the underground Bob-omb course. Let Bob-ombs destroy the cracked blue blocks that obstruct the route. When a bomb is available, place or throw it beside the cracked blocks and move away before it explodes. Drawbridges and raised platforms require waiting for a safe position before crossing. Continue through the ordinary pipe and flagpole exit.
World 4-6 returns to Dorrie and poisonous water. Stay on Dorrie or use solid islands and pipes as stepping points. Move past Piranha Plants when they retract, use the route’s switches when necessary, and avoid treating the poison as a shortcut. Take the normal exit to reach World 4-Castle.
- Clear World 4-4 before entering the Ghost House.
- In the Ghost House, use the falling boxes, red-block switches and ordinary pipe route to reach the normal exit.
- Keep the Ghost House red-flag exit optional unless you want the Warp Cannon.
- Use Bob-ombs to destroy cracked blocks in World 4-5.
- Stay on Dorrie or solid ground in World 4-6.
6. Cross World 4-Castle and defeat Mega Goomba
The castle begins with large swinging platforms over lava. Board each platform and wait until its swing creates a clear landing angle. Make one committed jump at a time, especially when Dry Bones or Podoboos are nearby. In the Thwomp sections, watch each Thwomp complete its downward movement before passing underneath. Where Super Thwomps break through blocks, let them clear the obstruction before following.
In the boss room, first hit the central ? Block. Green platforms rise on the left and right sides. Ride one upward until Mario can jump onto Mega Goomba’s head, then move away after the stomp. Repeat from a side platform when the boss becomes reachable again. Three successful stomps defeat Mega Goomba; do not wait on the floor and expect the boss to become vulnerable there.
After the third stomp, exit the castle and choose YES on the castle save screen. World 5 becomes available on the map. World 4-A, the Ghost House secret exit, the Warp Cannon, Star Coin Signs and remaining map encounters can be completed later without blocking the direct campaign route.
- Wait for swinging platforms and Thwomps to create safe openings.
- Activate the central ? Block in the Mega Goomba room.
- Use the rising green side platforms to stomp Mega Goomba three times.
- Accept the castle save and verify that World 5 is open.
Before you move on
- World 4-1, World 4-2 and World 4-3 are cleared through their normal exits.
- World 4-Tower is cleared, Bowser Jr. is defeated and the tower save is accepted.
- World 4-4 is cleared, followed by World 4-Ghost House through its normal exit.
- World 4-5 and World 4-6 are cleared through their normal exits.
- World 4-Castle is cleared by defeating Mega Goomba with three successful stomps.
- The castle save is accepted and World 5 appears on the map.
- World 4-A, the Ghost House red exit, the Warp Cannon, Star Coin Signs and map encounters may remain uncleared without preventing main-campaign progression.
References for this chapter
- New Super Mario Bros. Official Nintendo DS Instruction Manual
- New Super Mario Bros. — Guide and Walkthrough, GameFAQs
- New Super Mario Bros. - Guide and Walkthrough - DS - By DocsDeLorean
- The Mushroom Kingdom: New Super Mario Bros. (NDS) Secret Exits Guide
- New Super Mario Bros./World 4-Ghost — StrategyWiki
World 5 — Midway challenges, optional paths and Toad Houses
Use the normal World 5 route to reach the castle without spending lives on optional branches: clear World 5-1, World 5-2, World 5-Tower, World 5-3, World 5-Ghost House, World 5-C, World 5-4 and World 5-Castle. World 5-A can bypass World 5-2, while secret exits from World 5-2 and World 5-B create shortcuts; none is needed for ordinary progression. Toad Houses offer item or 1-Up minigames and are useful before the tower or castle, but they do not automatically refill Mario's supplies. Star Coin Signs permanently open map routes and allow a save, so pay only when the destination is useful. In World 5-Castle, manage the opposing conveyor belts, use the moving spring if collecting the second Star Coin, and wall-jump through the ceiling opening after the Super Piranha Plant if pursuing the third. Defeat Petey Piranha with three stomps for World 6, or finish him as Mini Mario with three Ground Pounds to unlock World 7 instead.
1. Follow the ordinary World 5 route
Start at World 5-1 and clear it normally. Snowy ground and ice reduce traction, so release Dash before a jump rather than carrying full speed into a gap. Use short jumps on narrow platforms and wait for enemies to move into a safe position instead of trying to pass them while sliding.
World 5-2 is the next important junction. Its normal exit unlocks World 5-Tower, which is the route to follow for standard progression. World 5-A is an optional course that can bypass World 5-2, and the secret exit in World 5-2 opens World 5-3 while skipping the tower. Do not take either shortcut unless you deliberately want to alter the route.
- World 5-1 is cleared.
- World 5-2 is cleared through its normal exit if you want the ordinary tower route.
- Leave World 5-A and the World 5-2 secret exit for optional exploration.
2. Use Toad Houses as planned support
A Toad House on the map opens a short item or life minigame. The house color determines the type of reward. Item houses let you hit blocks or panels for reserve power-ups, while the green Toad House offers a sequence of 1-Up attempts. In the green house, hitting the Bowser card ends the game, but the 1-Ups already won are kept.
Use an item house before World 5-Tower or World 5-Castle when your reserve slot is empty. Use the green house when repeated falls or failed boss attempts have reduced your lives and the detour is safe. A Toad House is optional support; it is not a replacement for clearing the next course, and entering one does not itself create a save point.
If you are carrying a useful reserve item, do not spend it merely to make World 5-1 or World 5-2 safer. Save it for the tower, the later castle route, or a recovery attempt after a Game Over.
- Use an item house when you need a reserve power-up.
- Use a green Toad House when extra lives are more valuable than another detour.
- Remember that the house gives a minigame reward; it does not permanently restore every item or life.
3. Clear World 5-Tower and secure the save
Enter World 5-Tower from the normal World 5-2 route. Treat the tower as a vertical platforming course: stop at each ledge, identify the next platform, and only then climb. Moving platforms and enemies can push Mario backward, so rushing upward often creates a second hazard immediately after the first.
Bowser Jr. is the tower boss. Keep enough distance to see his approach, then attack during the opening after his movement leaves him exposed. If you enter powered up, use that protection to survive an accidental contact, not as a reason to trade hits repeatedly. A patient stomp-based approach is safer than chasing him across the room.
After Bowser Jr. is defeated, choose YES at the save screen. The manual confirms that completing a tower or castle gives a save opportunity. If a later Game Over occurs, the game returns you to the last saved point, so accepting this save prevents a repeat of the earlier World 5 route.
- World 5-Tower is cleared.
- Bowser Jr. is defeated.
- The tower save is accepted before continuing.
4. Continue through World 5-3, the Ghost House and World 5-C
From the tower, use the open map route to reach World 5-3. Continue through its ordinary exit and then take the map path toward World 5-Ghost House, World 5-C and World 5-4. These courses contain the later World 5 hazards: slippery footing, narrow ledges, moving platforms and enemies that can appear from below or from the side.
World 5-B is an optional branch. Its secret exit opens a shortcut that leaves Mario near World 5-Castle, allowing several courses to be skipped. If your goal is the ending rather than map completion, ignore that branch and continue along the direct course markers. If you explore it, make sure the map destination is the castle-side path before committing to the shortcut.
Midway flags are course-specific. A flag lets you restart from that point only when replaying the same course; entering another course and returning later sends Mario back to the beginning. Therefore, after reaching a midway point, finish the course carefully instead of leaving to replenish supplies.
- World 5-3 is cleared through the route shown on your map.
- World 5-Ghost House and World 5-C are cleared on the ordinary path.
- World 5-B is treated as optional unless you intentionally want its castle shortcut.
- Do not assume every World 5 course has a midway point.
5. Spend Star Coins only when a sign improves your route
Star Coin Signs display the number of coins required to remove them and open a map path. The manual states that the sign disappears after payment and that the game offers a save opportunity. Because the purchase changes the map permanently and does not refund the coins, inspect the connected route before paying.
For a normal World 5 run, do not spend Star Coins merely because a sign is nearby. If the direct course markers already lead toward World 5-Castle, preserve your coins for a route you actually want. If a sign blocks the only visible course you need, replay accessible levels and collect enough coins before returning rather than spending blindly.
Accept YES on the save screen after a purchase. This is especially useful before attempting an optional branch or a difficult course, because a later Game Over will use the most recent saved point.
- Read the sign cost and identify the path it opens.
- Pay only when the route is useful or necessary.
- Accept the save opportunity after the purchase.
6. Cross World 5-Castle and defeat Petey Piranha
Enter World 5-Castle after World 5-4. The opening section uses conveyor belts that move opposite the direction Mario needs to travel. Walk or make short dashes so the belt does not carry you into Piranha Plants or Dry Bones. Fire Mario can clear some threats from a distance, but the castle is still manageable without Fire Flower if you wait for safe openings.
After the first Star Coin area, a spring travels along a conveyor belt. If you are collecting the second Star Coin, wait for the spring and use it to reach the high ledge rather than attempting a blind jump. After the midway point, continue carefully through the conveyor hazards. Following the Super Piranha Plant, look for the lone block beneath a small opening in the ceiling. Jump onto the block, then wall-jump through the opening to reach the upper route. Move right until you fall down, then travel left along the conveyor to reach the third Star Coin. This detour is optional for campaign completion.
At the double doors, Petey Piranha rises into the air and then drops toward Mario. Without Fire Flower, move away from the landing point and wait for Petey to hit the ice and become vulnerable. Stomp him once, retreat, and repeat until three stomps connect. If Mario is Mini Mario, use Ground Pounds instead; finishing the fight in Mini form opens World 7. For the ordinary route to World 6, finish as normal-size Mario or another non-Mini form. After the victory, accept the save screen and confirm the map has opened the intended next world.
- World 5-Castle is cleared.
- Petey Piranha is defeated with three stomps for the normal World 6 route.
- If intentionally unlocking World 7, all three hits are performed as Mini Mario with Ground Pounds.
- The castle save is accepted and the next world appears on the map.
Before you move on
- World 5-Tower is cleared and its save opportunity has been accepted.
- The ordinary map route through World 5-3, World 5-Ghost House, World 5-C and World 5-4 reaches World 5-Castle.
- Petey Piranha is defeated, with the destination matching the form used for the final hit: World 6 normally or World 7 when defeated as Mini Mario with Ground Pounds.
- The castle save is accepted and the next world is open on the map.
References for this chapter
- New Super Mario Bros. Official Nintendo DS Instruction Manual
- World 5-Castle (New Super Mario Bros.) — Super Mario Wiki
- World 5-2 (New Super Mario Bros.) — Super Mario Wiki
- New Super Mario Bros./World 5 — StrategyWiki
- New Super Mario Bros./World 5-Castle — StrategyWiki
- New Super Mario Bros. - Alternate Exits Guide - DS - GameFAQs
- New Super Mario Bros. DS — World 5 walkthrough reference
World 6 — Mountain and vertical sections
Take the direct World 6 route through World 6-1, World 6-2, World 6-Tower, World 6-3, World 6-4, World 6-Tower 2, World 6-5, World 6-6, and World 6-Castle. The first tower is built around Skewers and ends with Bowser Jr. on a tilting platform. The second tower uses conveyor belts, spikes, ropes, and a Bowser Jr. fight in which his thrown Koopa Shells must be returned before he can be stomped. World 6-Castle combines lava with moving stone blocks and ends with Monty Tank. World 6-B and World 6-A are optional map branches; neither is needed for the normal World 8 route. The game does not place a midway point in every course, so use the flag when it appears but do not assume a failed attempt will always resume near the end. Clearing each tower and the castle provides a save opportunity. Defeating Monty Tank opens World 8 directly, while World 7 is an optional world reached through separate routes.
1. Follow the required route through World 6-1 and World 6-2
Enter World 6-1 from the ordinary map path. This course introduces narrow mountain ledges and frequent Bullet Bills. Let a projectile pass before committing to a crossing, and release Dash near an edge so Mario can correct his landing. When several launchers cover one ledge, move forward after a shot instead of waiting beside a launcher where the next Bullet Bill can catch you. A controlled normal jump is usually safer than a maximum running leap on the narrowest sections.
World 6-2 is a beach course with rising water and Spinies. Check the water level before jumping because a route that is open at one height may become cramped when the water rises. Spinies cannot be stomped safely. Go around them, or use a shell or fireballs if you have a suitable power-up. In a narrow passage, do not throw a shell without leaving room for it to rebound. Continue to the tower marker. World 6-A is an optional branch and is not needed for the direct campaign route.
- Clear World 6-1 and World 6-2.
- Use an available power-up rather than taking unnecessary damage for an optional Star Coin.
- Reach the first World 6-Tower marker.
2. Cross the first tower and defeat Bowser Jr.
World 6-Tower is centered on horizontal Skewers. Watch a Skewer extend and retract before crossing its lane. Some sections provide a low recess where Mario can duck; use it rather than trying to outrun a trap across open floor. In vertical areas after the midway point, climb promptly after the Skewers retract because waiting below can leave Mario exposed to the next cycle. The midway flag, if reached, helps on a replay of that same attempt, but leaving the course and returning makes the course restart from the beginning.
The boss room has Bowser Jr. on a tilting platform above spikes. Unlike the second tower fight, Mario can stomp him directly here. Stay near the safer middle of the platform and avoid holding Dash while the platform is angled. When Bowser Jr. runs toward Mario, jump over him or onto him when the platform gives a stable landing. Re-center after each contact so the tilt does not carry Mario off the edge. Fireballs can also damage him if Fire Mario is available, but do not sacrifice a safe position for an extra shot. Three successful stomps defeat him. After the tower is cleared, accept the save prompt before continuing.
- Cross the Skewer sections after the traps retract.
- Use low recesses and stable platforms as safe waiting points.
- Defeat Bowser Jr. and choose the tower save option.
3. Clear World 6-3 and World 6-4
World 6-3 is a jungle course filled with pipes and Piranha Plants. Treat every pipe opening as a possible hazard until you see that it is safe. Wait for a Piranha Plant to withdraw before passing its mouth, and use short jumps around pipe clusters so Mario can retreat if a plant rises unexpectedly. Some pipes are part of the route and others lead to side areas, but no optional exploration is required to reach the second tower.
World 6-4 returns to thin mountain ledges and adds rotating Fire Bars. Watch a Fire Bar’s movement before stepping onto a narrow platform, then cross without holding Dash through the hazard. A normal jump is preferable for a small gap; a long running leap gives less room to correct the landing. Wall-jumping is useful elsewhere in the game, but World 6-3 and World 6-4 do not require treating every vertical surface as a wall-jump route. Use it only when the level clearly provides two reachable walls or when pursuing an optional Star Coin.
- Clear World 6-3 and World 6-4.
- Use the midway flag when one is present, without assuming every course has one.
- Reach World 6-Tower 2 with a stored item or power-up if possible.
4. Climb World 6-Tower 2 through the conveyor belts
The second tower is a vertical course built around conveyor belts, wall and floor spikes, narrow platforms, Dry Bones, Buzzy Beetles, and a rope near the upper section. On a belt, counter its movement with small directional taps instead of holding Dash continuously. When a belt carries Mario toward spikes, jump toward the next safe surface rather than trying to outrun the belt on the same strip. Use solid platforms to reset Mario’s position before entering another conveyor section.
The tower’s upper route leads to a cannon pipe and a rope near the boss doors. The rope is part of the normal approach; climb across it carefully and avoid dropping into the spike-lined spaces below. Shell Mario can make some enemy encounters easier when a shell is available, but Shell Mario is not required to clear this tower. If you begin a shell dash, release Dash before a cramped landing or drop so Mario does not slide beyond the next platform. Reach the double doors and prepare for the second Bowser Jr. battle.
- Counter conveyor movement with controlled taps.
- Avoid jumping into upward-pointing spikes and spike-lined walls.
- Reach the second Bowser Jr. arena and clear the tower save prompt afterward.
5. Defeat Bowser Jr. above the lava
The second Bowser Jr. arena resembles the first but replaces the spikes with lava and adds Podoboos rising from the sides. Falling is an immediate life loss, so keep Mario near the usable center of the hanging platform. Bowser Jr. uses his shell-protection strategy here: when Mario approaches, he can retreat into his shell, making a direct stomp unsafe. Jump over him when he charges and wait for him to throw a green Koopa Shell.
When the shell reaches Mario, jump on it to stop it, pick it up with the Dash button, and throw it back at Bowser Jr. The hit knocks him onto his back. Stomp him while he is vulnerable, then retreat toward the center and repeat the process. Do not attempt to stomp his protected shell, and do not chase him toward an edge while a Podoboo is rising. Three damage cycles defeat him. Fireballs are an alternative if Fire Mario is available, but the shell-return method is the dependable intended strategy. Clearing this tower opens World 6-5 and the optional World 6-B branch. Accept the save opportunity.
- Watch both the platform edges and the Podoboos.
- Return Bowser Jr.’s shells before attempting the stomp.
- Defeat him and save before moving on.
6. Finish World 6-5, World 6-6, and World 6-Castle
World 6-5 is underwater and features Deep-Cheeps. Swim in short bursts, leave room to change direction, and avoid committing to a narrow gap while a Deep-Cheep is approaching. The optional World 6-B branch is not required. Continue to World 6-6, the mountain course containing Chain Chomps. Keep distance from a Chain Chomp’s lunge. If you attack its post, wait for the area around it to be clear and use a ground pound rather than standing beside it during its rebound.
World 6-Castle uses lava, Podoboos, red Koopa Troopas, and moving stone blocks. Ride a moving block only when the next landing is visible. In the opening section, use the blocks as stepping stones and wait for their alignment instead of forcing a long Dash across lava. After the midway point, moving stone walls and crushing platforms form the main hazard. Let the walls descend or the platforms open a passage before proceeding; rushing can pin Mario against the ceiling or a wall. A door leads to a final room of horizontally moving platforms and then the boss door.
Monty Tank is vulnerable only when Monty Mole emerges from the tank to throw a Bob-omb. Do not attack while he is hidden inside the tank. Jump on Monty Mole while his head is exposed. After each stomp, the tank becomes taller and adds more cannon fire, so the next exposed-head window is harder to reach. Watch the Bullet Bills and Bob-ombs rather than standing directly beneath the tank. On the final cycle, use a Bullet Bill as a temporary stepping stone if the tank is too tall for a direct jump. Three stomps defeat Monty Tank. Choose the castle save option after the victory. The map then opens World 8 on the normal route; World 7 is not required.
- Clear World 6-5 and World 6-6; skip World 6-B unless you want its optional route.
- Reach the World 6-Castle midway point if the course provides it.
- Defeat Monty Tank by stomping Monty Mole only while he is exposed.
- Save after the castle and confirm that World 8 is available on the map.
Before you move on
- World 6-Tower and World 6-Tower 2 are cleared.
- World 6-5 and World 6-6 are cleared, with World 6-B skipped or completed as desired.
- World 6-Castle is cleared and Monty Tank has been defeated three times.
- The castle save prompt has been accepted and the map shows access to World 8.
References for this chapter
- New Super Mario Bros. Official Nintendo DS Instruction Manual
- World 6 (New Super Mario Bros.) — Super Mario Wiki
- World 6-Tower (New Super Mario Bros.) — Super Mario Wiki
- New Super Mario Bros. — World 6-Tower 2 — StrategyWiki
- New Super Mario Bros./World 6-Castle — StrategyWiki
- New Super Mario Bros. - Boss Guide - DS - By Wlokos
World 7 — Sky and Air Courses, Tower, and Castle
World 7 begins with elevated, moving-platform courses and ends with a castle built around Snake Blocks. Clear World 7-1, the Ghost House, World 7-2, and World 7-3 to reach World 7-Tower. After defeating Bowser Jr., the overworld requires a secret-exit route before the castle becomes reachable: use World 7-4's Mini Mario shortcut or World 7-6's beanstalk route to World 7-7. World 7-5 also has a secret exit leading to World 7-A, but that branch is optional for the ending. In World 7-Castle, stay with the Snake Blocks, avoid the spikes, Amps, Ball ’N’ Chains, and Burners, then defeat Lakithunder by stomping him during his swooping attacks. His defeat opens World 8.
1. Clear the opening World 7 courses and reach the tower
Follow the available route through World 7-1, the World 7 Ghost House, World 7-2, and World 7-3. The Ghost House has a secret exit, but it is not needed if the regular overworld route already leads you to the tower.
The later World 7 courses place Mario on moving platforms, flying blocks, and narrow elevated surfaces. Do not hold Dash constantly while standing on a small platform. Use short running bursts to adjust your position, then release Dash before landing. Make each jump toward the center of the next platform rather than its edge, and wait for an enemy or Bullet Bill to pass before committing to a long leap.
Keep a stored power-up if you have one. The tower and castle both contain hazards where taking one hit without immediately falling can save the attempt.
- World 7-1, the Ghost House, World 7-2, and World 7-3 are cleared.
- The World 7-Tower marker is available.
- A stored power-up is prepared if possible.
2. Cross World 7-Tower's moving stone blocks
World 7-Tower uses moving stone blocks and spike hazards. Watch the blocks' movement before jumping, because their motion changes Mario's momentum and can carry him farther than expected. Move in short stages: land, stabilize, then make the next jump instead of trying to cross the entire room in one leap.
When a block retracts into a wall or another block opens a passage, wait for the safe gap rather than squeezing through while spikes are still closing the route. In the later sections, several moving blocks form a crowded route above or beside spikes. Choose the block with the clearest next landing and avoid jumping simply because the current block begins to move.
Activate the midway checkpoint when you reach it. The tower includes a power-up opportunity around the checkpoint area, so take it before continuing if you are small. The third Star Coin is near the boss-door section; collect it only if the moving blocks leave a clear way back to solid ground.
- Reach the midway checkpoint.
- Use the moving blocks as controlled stepping platforms.
- Do not enter a spike gap until the blocks have opened a safe passage.
- Reach the boss door.
3. Defeat Bowser Jr. in World 7-Tower
The tower arena consists of moving stone blocks, so stand near the center of a stable block whenever possible. Bowser Jr. uses a Koopa-shell attack. When he throws a shell, avoid being struck, pick it up if it comes to rest within reach, and throw it back at him. The hit leaves him vulnerable; jump on him while he is down.
Repeat the shell-counter and stomp sequence three times. Fireballs can also damage him if you enter as Fire Mario, but the shell method is the dependable pattern to learn. Do not chase him across the arena while the blocks are shifting. Let him approach, keep a shell available, and prioritize staying on a safe block over taking a rushed attack.
After the battle, take the key and accept the save prompt. The next overworld route opens, but the castle is not immediately available through the ordinary exits alone.
- Counter Bowser Jr. with a Koopa shell.
- Stomp him while he is vulnerable.
- Repeat the sequence three times.
- Accept the save prompt after the tower.
4. Open the castle route through World 7-4 or World 7-6
World 7-4 has the most direct shortcut. Enter the course with a Mini Mushroom stored or obtain one during the level. Near the upper part of the stage, reach the flying ? Block on the left and use it as a platform. With Mini Mario active, enter the narrow passage, wall-jump upward and left, then reach the small pipe in the upper-left area. Continue to the red flagpole. This secret exit opens a direct route to World 7-Castle.
If you do not have Mini Mario, clear World 7-4 normally and continue through the available World 7 courses. World 7-6 provides another castle route. After the midway point, find the two rows of blocks. Break the third brick in the upper row, then hit the block directly beneath it to reveal a beanstalk. Climb into the bonus section, ride the moving mushroom platform, and enter the pipe at the end. The red flagpole there opens World 7-7, which provides the route onward toward the castle.
World 7-5 has a separate secret exit leading to World 7-A. It is optional for the main ending route, so do not delay the castle route to search for it unless you want the extra branch or its rewards.
- Use the World 7-4 secret exit with Mini Mario, or the World 7-6 secret exit to World 7-7.
- Do not assume the normal exit of World 7-4 or World 7-6 opens the castle immediately.
- Treat World 7-5's route to World 7-A as optional.
5. Handle moving platforms and optional Star Coins
In the airborne sections, keep Mario near the middle of moving mushrooms, clouds, and flying blocks. Use short hops to correct your position. If the next platform is moving toward you, wait for it to approach instead of forcing a long jump. Enemies are often placed at the landing point, so clear or avoid them before committing to the jump.
World 7-6's bonus section contains a Star Coin while you ride the moving mushroom platform. The course's other Star Coins are reached by returning to the main route after the midway point: one is below a thin floor, and another is obtained through the yellow-pipe section by using the flying Koopas to reach the red pipe. These coins are optional for campaign completion. If a coin requires a risky jump while you are low on lives, finish the level and return later.
World 7-Castle also contains three optional Star Coins. The first is above the early spike section, the second is around the final swinging Ball ’N’ Chain, and the third is just off the edge near the final Snake Block platform. Collect the last one only if you can immediately jump back to safety.
- Use brief movement corrections on airborne platforms.
- Do not hold Dash through every landing.
- Leave optional Star Coins for a replay if the route becomes unsafe.
6. Clear World 7-Castle and defeat Lakithunder
World 7-Castle is built around Snake Blocks crossing large gaps. Stay on the block and let its path carry you through the level. Jump over Amps and avoid jumping away from the Snake Block unless the next solid platform is clearly within reach. In the spiked sections, wait for the block to pass through a safe opening rather than trying to outrun its route.
After the checkpoint, continue through the Ball ’N’ Chains and Burners. Watch the direction of the next moving platform before jumping. The final Star Coin is near the end of the Snake Block route, just off the final platform; it is safer to skip it during the first clear if you are still learning the timing.
At the top of the castle, Bowser Jr. summons Lakithunder. Lakithunder flies above the arena, throws Spiny Eggs, calls down lightning, and periodically swoops toward the platform. Keep moving to avoid the lightning and stay clear of Spinies. When Lakithunder swoops low, jump on his head. After each stomp, return to moving around the arena rather than waiting beneath him. Three successful stomps defeat him.
Take the key after the battle and leave the castle. The overworld then opens World 8, confirming that World 7's required tower-and-castle progression is complete.
- Reach the castle checkpoint.
- Stay with the Snake Blocks through the large gaps.
- Avoid Amps, Ball ’N’ Chains, Burners, and spikes.
- Stomp Lakithunder during three low swoops.
- Confirm that World 8 opens on the overworld map.
Before you move on
- Bowser Jr. is defeated in World 7-Tower and the save prompt is accepted.
- A castle route is opened through the World 7-4 or World 7-6 secret exit, with World 7-5's World 7-A branch remaining optional.
- Lakithunder is defeated in World 7-Castle.
- World 8 appears as an accessible region on the overworld map.
World 8 — Valley of Bowser: routes through Bowser’s domain, towers, and final castle
World 8’s ordinary route is 8-1, 8-2, World 8-Tower, 8-3, 8-4, World 8-Castle, 8-5, 8-6, 8-7, 8-8, the second World 8-Tower, and World 8-Bowser’s Castle. The first castle is not the finale: Dry Bowser must be defeated to open the bridge to the second half of the world. In the final castle, use the ? Switches to change room layouts, pass the midway point, then take the bottom, top, and middle paths in that order. Bowser Jr. must be struck three times with returned shells before Bowser becomes vulnerable. When Bowser jumps, run beneath him and activate the skull switch. Watch the rescue scene and credits to confirm the campaign ending. The instruction booklet confirms that towers and castles provide save opportunities, that courses may lack midway points, and that the map’s tower and castle structure controls ordinary progression.
1. Follow the opening World 8 route
From the World 8 map, enter 8-1 and then 8-2. These courses use lava, fire hazards, narrow platforms, and enemies positioned around small landing areas. Make short controlled jumps near lava rather than holding Dash through every approach. If a jump looks uncertain, stop at the edge, wait for a fire hazard to pass, and then cross.
Clearing 8-2 opens the first World 8-Tower. Ignore optional Star Coin branches and secret exits if your goal is only the ending. You do not need to complete every World 8 course before taking the direct tower route. The instruction booklet states that clearing courses advances the map and that tower and castle courses are the major progression points.
- 8-1 is cleared.
- 8-2 is cleared.
- The first World 8-Tower is available.
2. Clear the first World 8-Tower
The tower’s boss room places Mario on a small central platform with moving platforms and fire hazards around it. Stay on the central platform whenever possible; the side platforms can make recovery harder if you jump toward them without checking the fire pattern.
Bowser Jr. charges, hides in his shell, and throws Koopa Shells. Jump over his charge or shell slide. When he throws a shell, jump on it to stop it, then send it back toward him. The returned shell flips him over, allowing Mario to stomp him. Repeat this counter three times. If Mario has Fire Mario, fireballs can also damage him, but the returned-shell method is the dependable route when the arena becomes crowded. Watch for a shell that rebounds from the wall and comes back toward Mario.
After Bowser Jr. is defeated, return to the map and take the route to 8-3. The tower is only the first boss gate in this section; it does not replace the castle later in World 8.
- Bowser Jr. is defeated in the first World 8-Tower.
- The route to 8-3 is open.
3. Clear 8-3, 8-4, and World 8-Castle
Clear 8-3 and 8-4 in map order. Treat each lava crossing as a separate jump and use solid platforms to reset Mario’s position before attempting the next hazard. If you carry a stored item, use it only when it prevents a likely hit or fall; do not assume the next room will provide another item.
World 8-Castle is the first castle of the region, not the final level. Its moving track platforms begin moving when Mario steps on them, and red-and-yellow blocks change the positions of nearby platforms. Dry Bones and Podoboos add pressure while you wait for a safe platform alignment. The midway point appears after a rope section, so use that checkpoint before taking unnecessary risks.
At Dry Bowser, avoid his fire and bones while waiting for a jump. The goal is to get past him and reach the switch on the far side. If Mario is powered up, taking one hit to cross can be safer than attempting a precise jump; if Mario is small, wait for Dry Bowser to jump, then run underneath or jump over him and continue to the switch. Dry Bowser is not defeated by ordinary Fire Mario fireballs in this encounter.
Once the switch is activated, Dry Bowser falls and the castle ends. Accept the save prompt. A bridge then appears on the map, opening the courses on the far side of World 8.
- 8-3 is cleared.
- 8-4 is cleared.
- Dry Bowser is defeated in World 8-Castle.
- The bridge to the second half of World 8 has appeared.
- The castle save prompt was accepted.
4. Cross the bridge through 8-5, 8-6, 8-7, and 8-8
Take the bridge route and clear 8-5, 8-6, 8-7, and 8-8. These courses form the second required stretch before the final tower. Moving platforms, fire, lava, and falling hazards make patience more valuable than continuous Dash. When a course has a midway point, use it before attempting a difficult final section; the manual warns that not every course has one, and a checkpoint applies only while replaying that course before leaving it.
Keep a stored item when possible, but do not treat a particular power-up as mandatory. A Super Mushroom gives a damage buffer, and Fire Mario helps against ordinary enemies, but the final castle can be completed through movement and timing without relying on a specific stored item.
After 8-8, the second World 8-Tower becomes available. Optional Star Coins and secret exits can be postponed because they are not required for the ordinary route to the ending.
- 8-5 is cleared.
- 8-6 is cleared.
- 8-7 is cleared.
- 8-8 is cleared.
- The second World 8-Tower is available.
5. Defeat Bowser Jr. in the second tower
The second tower uses a long moving green platform that travels through vertical spaces containing rotating fire hazards, spikes, and spiked balls. Stay with the platform instead of jumping ahead. When it turns or reverses direction, keep Mario near its safe center and jump only when a hazard approaches the platform itself.
At the top, Bowser Jr. cannot be stomped directly because of his spiked shell. He charges, slides in his shell, jumps, and throws a Koopa Shell. Jump over his movement, then stop and return the shell he throws. When the shell flips him onto his back, stomp his exposed underside. Repeat this process three times. Fireballs can damage him, but the shell counter is the most consistent method.
After this defeat, the final map route opens. Enter World 8-Bowser’s Castle rather than looking for another ordinary course. This level is the final level of the Nintendo DS game and contains both Bowser Jr. and Bowser.
- Bowser Jr. is defeated in the second World 8-Tower.
- World 8-Bowser’s Castle is available.
6. Work through the final castle’s switch rooms
In the opening room, cross the moving platforms from left to right while avoiding fireballs rising from the lava. Enter the door at the far right. In the next room, strike the central block to reveal a ? Switch and activate it. The room flips, making the next door accessible.
Continue through the burner room and enter the room containing the large Thwomp. Trigger it, wait for it to fall and rise, then use the opening to reach the next block and ? Switch. Activate that switch and continue through the altered room. You will need to move back through parts of the castle rather than treating every door as a one-way exit.
In the next section, go to the far-left side, avoid the burners, cross the spike gap, and strike the lone block to reveal another ? Switch. Activate it to create the moving platform in the adjacent room. Return right, use the upper ledge above the Dry Bones, and pass beneath the upside-down burner to reach the upper door. Trigger the Thwomps, climb the steps, and use the newly available route to reach the room with the moving platform.
Ride that platform to the upper-left door, then continue right through the next room to reach the midway point. Take the item from the ? Block if it is safe to do so. The castle’s first half is a switch-and-backtracking puzzle; if a door or room seems inaccessible, check whether an earlier ? Switch has changed the layout.
- The opening ? Switch has been activated.
- The burner and large-Thwomp rooms are complete.
- The moving platform has been created and used.
- The midway point has been reached.
7. Take the correct route and defeat Bowser Jr.
After the midway point, enter the room with three levels of platforms. The paths loop if taken in the wrong order. Use the bottom path first, then the top path, and finally the middle path. A positive chime confirms a correct choice; a duller failure sound means the route must be restarted from the branching area.
Continue through the final door to the combined Bowser Jr. and Bowser battle. Do not attempt to jump directly on Bowser Jr.; his shell is dangerous. Stay toward the left when practical, jump over his charges, and wait for him to throw a green Koopa Shell. Jump on the shell, throw it back, and stomp Bowser Jr. after it flips him. Repeat three times. During this phase, Bowser sends homing blue fireballs across the bridge, so avoid standing still and pass underneath a fireball when it travels overhead.
- The route order bottom, top, middle has been completed.
- Bowser Jr. has been defeated in the combined final battle.
8. Defeat Bowser and confirm the ending
After Bowser Jr. is defeated, focus on Bowser. He uses groups of orange or blue fireballs and may send attacks along the bridge. Stay far enough away to see the gaps between the fireballs, then move forward after an attack has spread out. Do not try to run through Bowser; contact damages Mario and pushes him back.
When Bowser begins his jump, run beneath him while he is airborne and continue to the skull switch on the far side. Activate the switch to break the bridge and send Bowser into the pit. The switch is the reliable required finish; fireballs can damage Bowser, but using them is slower and less dependable than waiting for the jump opening.
The rescue scene follows the battle, with Princess Peach reunited with Mario, and the credits begin. Watch through the rescue and credits instead of resetting immediately. The instruction booklet identifies castles as save points, so accept the post-castle save opportunity if one appears. The rescue scene and credits are the concrete proof that the requested single-player campaign ending has been reached; a special map icon is not required as a completion check.
- Bowser has been defeated by activating the skull switch.
- Princess Peach has been rescued.
- The ending and credits have played.
- The final save opportunity has been accepted if offered.
Before you move on
- World 8-Castle has been cleared and Dry Bowser has been defeated.
- The bridge route has been opened and 8-5, 8-6, 8-7, and 8-8 have been cleared.
- The second World 8-Tower has been cleared.
- World 8-Bowser’s Castle has been completed.
- Bowser Jr. has been defeated in the combined final battle.
- Bowser has been dropped into the pit by the skull switch.
- Princess Peach’s rescue scene and the end credits have played.
Towers and Bowser Jr. — Recognize the recurring patterns and counter them
Bowser Jr. is the boss at the end of every tower course in the original Nintendo DS version of New Super Mario Bros. His behavior is built from recurring actions rather than one fixed pattern that alternates identically from tower to tower. He may run toward Mario, retreat into his shell, slide across the arena, or throw a Koopa Shell. Later towers combine these actions with moving, tilting, or hazardous platforms. The reliable method is to identify the current arena, keep a safe landing space open, avoid attacking while Bowser Jr. is protected in his shell, and counter only after a clean opening. Tower courses may contain midway points, so check the progress bar and use any flag you reach. After defeating Bowser Jr., accept the save opportunity and continue along the required map route; the tower clear does not replace the castle.
Prepare before entering the tower
A tower is a required course with a Bowser Jr. fight at the end. Do not assume that every tower must be replayed from its entrance after a mistake: the instruction manual explains that midway points exist in some courses but not all, and World 6-Tower specifically includes one. If you reach a midway flag, it remains useful while you continue that course. Leaving to play another course can make you restart from the beginning when you return.
Before entering, check the lower screen for a stored item. If the map offers a Toad House or an accessible course with a power-up, it is reasonable to replenish your reserve before making repeated attempts. Entering as Super Mario, Fire Mario, or Shell Mario gives you more room for error, but no power-up replaces careful positioning. Do not spend lives on optional Star Coins or risky shortcuts if the tower itself is the immediate progression goal.
- Check whether the tower has a visible midway point during the course.
- Carry a stored item when one is available.
- Prioritize reaching the boss over optional collectibles.
Use the course layout and midway point safely
Tower hazards vary considerably. World 1-Tower introduces vertical movement and Dry Bones, while later towers use obstacles such as Skewers, tilting platforms, conveyor belts, or moving floors. Read the progress bar and the visible room before committing to a jump. When a platform is moving or tilting, make short jumps and land near its center instead of crossing the entire arena at full speed.
If you reach a midway flag, treat it as the recovery point for the current attempt. Continue cautiously afterward, because a midway point is not the same as a save. If you lose all lives, the game returns you to the last saved point; completing a tower or castle, or paying a Star Coin Sign, creates the save opportunity described in the manual. A midway flag helps during a course attempt but does not replace that map save.
- Look for the midway flag rather than assuming it is absent.
- Use short jumps on tilting or moving surfaces.
- Do not confuse a midway point with a saved map position.
Handle the direct running pattern
In the basic Bowser Jr. pattern, he moves or runs toward Mario and tries to make contact. Stand far enough away to see the approach, then jump over him after he commits to the run. Avoid jumping too early from close range, because Mario may land beside him or collide with him as he changes direction.
After Bowser Jr. passes, turn around only when Mario has landed safely. If Bowser Jr. is exposed, jump on him. He normally retreats into his shell after taking a hit, so do not continue trying to stomp him while he is enclosed. Wait for him to emerge and begin another approach. The usual tower strategy is to repeat clean jump attacks rather than trade damage. If the arena has a gap, spikes, or a tilting edge, prioritize landing safely over immediately turning for the next hit.
- Bait the run from a safe distance.
- Jump over Bowser Jr. after the charge begins.
- Attack only while he is exposed.
- Land securely before turning around.
Counter the shell phase and Koopa Shell throws
Bowser Jr. often hides inside his shell after being hit. While he is protected, a normal stomp is not a reliable attack and can cost Mario a life. Keep moving or hold a safe position until he exits the shell. In later tower encounters, he may also throw a Koopa Shell across the arena. Watch the shell rather than Bowser Jr.'s body, and jump over it if the route is clear.
Some later fights let Mario jump on the thrown shell and kick or throw it back at Bowser Jr. When that option is available, approach the shell only after confirming that Mario has a safe landing area. A returned shell can knock Bowser Jr. onto his back, creating the opening for a jump attack. Do not chase the shell across a narrow platform if doing so would carry Mario into a gap or side hazard. Survival is more important than forcing an immediate counter.
- Do not stomp Bowser Jr. while he is enclosed in his shell.
- Track thrown shells before attempting to use them.
- Return a shell only when the landing area is safe.
- Jump on Bowser Jr. after he becomes vulnerable.
Know when to wait and when to attack
Wait during an unsafe platform cycle. This includes a tilting platform that has carried Mario near an edge, a conveyor section that is moving him toward a hazard, or a room where Bowser Jr. and a shell occupy the only clear landing route. The boss repeats his behavior, so waiting for a stable position is safer than forcing a hit.
Attack after Bowser Jr. has passed Mario, after he emerges from the shell, or after a returned Koopa Shell knocks him down. Use controlled jumps instead of long running leaps. Fireballs can help when Mario is Fire Mario, but they are an option rather than a universal solution: the room may still force Mario to dodge, and later arenas can make standing still dangerous. Shell Mario can also provide a useful sliding or shell-based counter when the terrain allows it.
- Wait through dangerous platform movement.
- Counter after a clean pass or exposed state.
- Use Fire Mario or Shell Mario only when the arena supports that approach.
- Do not trade a safe position for a rushed hit.
Finish the tower and continue the route
Bowser Jr. is defeated after the required number of successful attacks for that encounter. The exact room and attack combination changes between towers, so confirm the defeat animation before moving on. When the game returns to the map and displays the save screen, choose YES. This records the tower completion and protects the progression if a later attempt ends in a Game Over.
A tower victory unlocks the next portion of the overworld route, but it does not remove the need to clear the associated castle or other required courses. If Bowser Jr. appears to retreat during the story transition, treat that as part of the map progression rather than a separate boss encounter. Select the newly available course or follow the open path toward the next required castle. Do not search the map for another Bowser Jr. fight unless a distinct course marker is actually present.
- Wait for the complete defeat and map transition.
- Choose YES on the save screen.
- Follow the newly opened required route.
- Clear the castle or other required courses that remain after the tower.
Before you move on
- Bowser Jr.'s defeat animation has finished and the game returns to the overworld.
- The tower is marked as cleared or the next required route is visibly open.
- The save screen appears after the tower clear and YES has been selected.
- The player has continued toward the next required course or castle rather than treating the tower victory as the end of the world.
Castle bosses — unique castles and reliable strategies
The original Nintendo DS campaign uses a different castle boss in each world. World 1 ends with Bowser, followed by Mummipokey, Cheepskipper, Mega Goomba, Petey Piranha, Monty Tank, Lakithunder and Dry Bowser. World 8 then has a separate final castle containing Bowser Jr. and Bowser. Most bosses require three successful stomps, but Bowser and Dry Bowser are defeated by reaching their skull switches. Prepare with Super Mario or another damage buffer when possible, use a midway point if the castle provides one, and accept the save prompt after victory. Fire Mario can help against ordinary enemies and some boss-related hazards, but it is not a universal answer. The World 4 fight has a specific solution: activate the central ? Block, ride the rising green platforms, jump onto Mega Goomba and stomp it three times.
Prepare for a castle
Before entering a castle, use a Toad House or replay an accessible course if you need extra lives or a reserve item. Entering as Super Mario is safer than entering as Small Mario because one mistake does not immediately end the attempt. Fire Mario can clear some enemies, while Blue Shell or Mega Mushroom can help with movement or survival, but no stored power-up replaces learning the boss arena.
If the course contains a midway point, reach it before taking unnecessary risks. A midway point helps with a failed attempt, but it does not preserve the boss fight itself. If Mario loses all lives, the game resumes from the latest dependable save rather than preserving progress inside an unfinished encounter. After defeating a castle boss, accept the save prompt before quitting or turning off the system. This locks in the cleared castle and the newly available map route.
- Enter as Super Mario or a stronger form when practical.
- Carry a reserve item, but do not depend on one specific transformation.
- Reach the midway point when the castle provides one.
- Accept the save prompt after the castle victory.
World 1-Castle: Bowser
Bowser walks across the chamber, breathes fire and jumps. Mario does not need to damage him. Use the raised area on the left to gain height, then wait for Bowser to approach. When there is enough room, jump over him and continue toward the right side of the arena. Avoid landing beneath him as he descends and watch for fireballs before committing to the jump.
Reach the skull switch behind Bowser and activate it. The switch, not stomps or fireballs, is the required finish. If Mario is Super Mario and a collision is unavoidable, the extra hit can preserve the attempt, but the safer plan is to wait for a wide opening rather than rushing through Bowser.
- Use the raised area to create jumping room.
- Jump over Bowser when he approaches.
- Reach the switch behind him.
- Activate the skull switch to finish the encounter.
World 2-Castle: Mummipokey
Keep enough distance from Mummipokey to react to the rocks it spits. Jump over each thrown rock, then watch the ground for the boss’s next emergence point. The useful attack window is when Mummipokey rises at a manageable height and exposes its head. Move in, stomp the head, and immediately retreat before the next section of the body appears.
Do not stand directly over the emerging dirt and do not treat every appearance as a safe target. After each hit, reset to one side of the room and repeat the rock-dodge and controlled stomp cycle. Fireballs can help with positioning and may damage the boss if Mario has Fire power, but spacing remains the more reliable defense.
- Stay far enough away to jump over every rock.
- Watch for the emergence point in the ground.
- Stomp the exposed head at a reachable height.
- Retreat after each hit and repeat the cycle.
World 3-Castle: Cheepskipper
Cheepskipper moves through the water and leaps toward the platform where Mario is standing. Remain on the platform whenever possible. Watch for the boss to dip or reposition before its leap, then jump into its rising path so Mario lands on its head. Return to the platform after the stomp instead of entering the water unnecessarily.
Small Cheep-Cheeps can also jump from the water and interfere with a poorly timed attack. Avoid making random jumps while waiting. The reliable rhythm is to stay still long enough to read Cheepskipper’s approach, make one committed jump, then prepare for the next leap from the platform.
- Stay on the upper platform between attacks.
- Read Cheepskipper’s dip before it leaps.
- Jump into the rising path and stomp its head.
- Avoid the smaller Cheep-Cheeps.
World 4-Castle: Mega Goomba
When the fight begins, activate the central ? Block in the floor. Green platforms rise on both sides of the arena. Use one of these platforms to climb above Mega Goomba, then jump onto the boss and stomp it. The goal is to land on its head from above; do not try to solve this encounter with the earlier wall-jump and Ground Pound method.
After the stomp, move away and let the arena settle before setting up the next attack. Activate the central ? Block again if the platforms have dropped and you need them for another approach. Repeat the side-platform ascent, jump onto Mega Goomba and stomp sequence three times. Because the boss is large and can pin Mario against a side of the room, begin moving toward a platform as it approaches rather than waiting until the last moment.
The castle approach contains swinging platforms, lava, Dry Bones, Podoboos and Thwomps. Clear each section patiently before entering the boss door. A power-up is useful for surviving an accidental contact, but the boss’s intended weakness is the raised-platform route and repeated stomps.
- Activate the central ? Block.
- Ride a rising green side platform.
- Jump onto Mega Goomba from above.
- Stomp it three times.
- Move away and reset after each hit.
World 5-Castle: Petey Piranha
Petey Piranha flies across the room and slams down. Keep away from its landing point and move toward the opposite side of the arena while it is airborne. When Petey lands and falls onto its back, jump on the exposed body. Do not attack during the descent; the landing can hurt Mario even if the boss is close to the ground.
After taking two hits, Petey changes its movement and begins jumping from wall to wall. During this section, stay near a wall and run underneath Petey while it is airborne instead of jumping into its body. When the ordinary flying-and-landing pattern returns, wait for Petey to fall onto its back and deliver the final stomp. Patience is safer than trying to attack every time it crosses the screen.
- Move opposite Petey’s airborne path.
- Avoid the landing point.
- Stomp only after Petey falls onto its back.
- Run underneath the wall-jumping phase.
World 6-Castle: Monty Tank
Monty is protected while inside the tank. Avoid the Bullet Bills and wait for the hatch to open. When Monty emerges to throw a Bomb-omb, jump onto his exposed head. After the hit, the tank spins and fires more projectiles, so concentrate on staying alive until Monty becomes vulnerable again.
Later phases add cannons and make the Bullet Bill patterns denser. Duck under shots that pass overhead and jump only when the projectile height requires it. Do not stand on the tank while Monty is inside; this can trigger the dangerous firing or spinning phase instead of giving Mario a safe attack. Repeat the exposed-head attack until Monty has been hit three times.
- Wait for Monty to emerge.
- Attack only the exposed head.
- Avoid the tank’s spinning and firing phases.
- Use ducking and short jumps to manage Bullet Bills.
- Repeat the exposed-head attack three times.
World 7-Castle: Lakithunder
Lakithunder flies above the arena, throws Spinies and calls down lightning. Keep moving so Mario is not trapped beneath the boss or against a wall. During a low swoop, jump onto Lakithunder’s head for a hit. The cloud is not the target; Mario must land on Lakithunder itself.
After a stomp, Spinies may remain on the floor. Move around them while watching for the next low pass. When lightning is about to strike, move sideways so Mario is not directly below the boss. Fireballs can remove Spinies if Mario has Fire power, but the boss still must be defeated by stomping it during its low swoops.
- Keep moving during airborne phases.
- Stomp Lakithunder during a low swoop.
- Avoid the lightning strike beneath the boss.
- Watch for Spinies left on the floor.
- Repeat the direct stomp until the boss is defeated.
World 8-Castle: Dry Bowser
Dry Bowser is a switch-based encounter rather than a normal stomp fight. Avoid the fire and thrown bones, then watch his movement for an opening. When he jumps, Mario can run beneath him if the gap is wide enough or jump over him when there is sufficient landing space. Continue to the right side of the chamber and activate the skull switch.
Do not waste time trying to defeat Dry Bowser with ordinary stomps or fireballs. If Mario is Super Mario, taking one unavoidable hit while passing may be safer than attempting a very narrow jump, but Small Mario must rely on clean timing. Wait for another jump if Dry Bowser’s fire or bones make the route unsafe. The skull switch is the objective that completes this encounter and opens the next part of World 8.
- Avoid fire and thrown bones.
- Wait for a jump opening.
- Run beneath Dry Bowser or jump over him.
- Reach the far side of the chamber.
- Activate the skull switch.
World 8 final castle: Bowser Jr. and Bowser
The final castle begins with Bowser Jr. while Bowser’s blue homing fire crosses the arena. Stay toward the left when possible and jump over Bowser Jr. when he slides in his shell. When he throws a Koopa shell, jump on the shell to stop it, pick it up and throw it back. Bowser Jr. falls onto his back; jump on him before he recovers. Repeat the shell-return and stomp sequence three times. Keep moving when the blue fire approaches instead of focusing only on Bowser Jr.
After Bowser Jr. is defeated, Bowser attacks with jumps and fire patterns. Mario does not defeat him by stomping. Read the fire pattern, approach without standing directly beneath him, and wait for Bowser to jump. Run underneath him toward the right side, then activate the skull switch behind him. If the fire pattern blocks the route, retreat, let the attack finish and wait for the next jump. The switch ends the battle and begins the rescue sequence and credits.
- Stop Bowser Jr.’s thrown shells by jumping on them.
- Throw the shells back at Bowser Jr.
- Stomp Bowser Jr. after he falls over.
- Dodge the blue homing fire.
- Wait for Bowser’s jump opening.
- Run beneath Bowser and activate the final skull switch.
- Watch the rescue sequence and end credits.
Before you move on
- The defeated castle marker is cleared on the World Map.
- The next required route becomes available.
- The post-victory save prompt appears and is accepted.
- For campaign completion, Dry Bowser and the final Bowser Jr. and Bowser encounter are defeated.
- The rescue sequence and end credits play after the final skull switch.
References for this chapter
Star Coins, Star Coin Signs and map branching — how to plan purchases
Every course in the original Nintendo DS release contains three Star Coins. Collected Star Coins are stored in your file after you finish the course, and they can be spent at Star Coin Signs on the World Map. Paying the amount shown makes the sign disappear and opens the path beyond it, usually toward a Toad House, an optional course, or another map branch. These purchases are not needed for the normal World 8 ending, so do not spend coins automatically. First inspect the destination and decide whether the branch helps your current plan. The game offers a save prompt after a Star Coin Sign purchase, as well as after clearing a tower or castle. Choose YES when you want the purchase and route change preserved immediately.
Check the map and destination before paying
Move Mario to the Star Coin Sign and examine the visible route around it. The sign displays the number of Star Coins required; in this game, the standard Star Coin Signs require five coins. Confirm that you have enough coins before selecting the sign, then read the confirmation screen instead of accepting automatically.
Use the D-pad to move Mario around the map, press A to enter the course Mario is standing on, and use the Touch Screen when selecting another world. Press L or R to move the map view horizontally when part of the route is off-screen. The path revealed after payment is the important information: follow it to see whether it reaches a Toad House, a normal course, or an optional branch.
- Read the number displayed on the sign.
- Inspect the destination beyond the sign before confirming.
- Pan the map with L or R if the destination is not fully visible.
Separate story progression from optional branches
For the standard campaign ending, Star Coin Signs are optional purchases. They open extra courses, item houses, and map branches, but they are not the same as the required tower and castle route. Do not assume that a black world marker means you must buy the nearest sign. World 4 and World 7 are reached through specific secret exits, while Star Coin payments do not replace those requirements.
A branch toward a Toad House can be useful before a difficult area because Toad Houses provide items or 1-Up opportunities. A branch toward an alternate course is useful if you want more levels, Star Coins, or secret exits, but it may add risk without helping you reach the ending faster. If the direct course leading toward the next tower or castle is open, you can continue without spending.
- Do not pay simply because a sign is nearby.
- Use signs for useful item access, optional courses, or deliberate map completion.
- Remember that secret exits, not Star Coin Signs, unlock the alternate World 4 and World 7 routes.
Collect and register Star Coins safely
Every course has three Star Coins. The course information on the Map Screen shows which of the three have been registered. During a run, a collected coin can flash on the course display; this means you have picked it up but have not yet reached the goal. Finish the course so the coin is recorded before leaving or deliberately restarting.
If you need more coins for a purchase, replay accessible courses and choose coins you can collect reliably. Start with familiar stages or coins located before a checkpoint. You do not need to collect every coin before advancing through the story, and risking several lives for one difficult coin is unnecessary when other completed courses remain available.
- Confirm the missing coin by checking the course display.
- Reach the goal after collecting a coin so it is registered.
- Use safe, familiar courses when you only need a few more coins.
Pay only when the opened path has a purpose
When you have decided to buy a route, move into the sign and confirm the payment. The sign disappears and the path becomes available. Spending subtracts the coins from your total, so a purchase cannot be undone by simply revisiting the location. The game does not refund coins for a branch you later decide not to use.
Prioritize purchases that provide a needed Toad House, an optional course you intend to clear, or access to a remaining map objective. If several signs are close together, keep enough coins for the branch you actually want instead of paying at the first available sign. For a direct story run, leave optional signs unopened until after the World 8 ending if you prefer to preserve a simple route.
- Know what the branch provides before paying.
- Treat spent Star Coins as permanently committed.
- Keep a reserve if several useful signs are nearby.
Accept the save prompt immediately
After a Star Coin Sign is opened, the game displays a save screen. Choose YES if you want the payment and route change written to the file. This is the safest time to save before trying an optional course or ending a play session.
The same save opportunity appears after completing a tower or castle. Normal course completion does not provide the same immediate save prompt, so do not rely on clearing an ordinary course to preserve every recent change. If you lose all lives, the game returns you to the last saved point; an unsaved sign purchase may need to be made again.
- Wait for the save screen after paying.
- Choose YES when the branch matters to your plan.
- Do not power off until saving has finished.
Plan full Star Coin spending separately from the ending
The original game contains 80 courses with three Star Coins each, for 240 Star Coins total. There are 32 Star Coin Signs, and opening all of them costs 160 coins when each sign requires five. After completing the game, the remaining coins can be spent at the Blue Toad House above World 1 on Touch Screen backgrounds; four of those purchases cost 20 coins each. The final background becomes available after all 32 signs have been opened.
This is a post-game completion objective, not a requirement for rescuing Princess Peach. If you are pursuing the complete save-file objectives, revisit every world, register all three coins in every course, open all 32 signs, and spend the remaining coins on the available backgrounds. If your only goal is the ending, stop spending once the route to the required castles remains open and continue the main campaign.
- For the ending, leave optional signs unopened if you do not need them.
- For full completion, track all 240 collected coins and all 32 opened signs.
- After the signs are complete, spend the remaining 80 coins on the four 20-coin backgrounds.
Before you move on
- For the main campaign, the direct course, tower, and castle route remains available and you have not spent coins on a branch you intended to postpone.
- After an important payment, the sign has disappeared, the path is visible, and the save prompt has been accepted.
- For Star Coin completion, every course shows all three coins registered after its goal was reached.
- For full spending completion, all 32 Star Coin Signs are open, the remaining 80 coins have been spent on four 20-coin backgrounds, and the file’s Star Coin status shows that the coins are fully spent.
Power-Ups, transformations and advanced moves
New Super Mario Bros. on Nintendo DS gives each major power-up a distinct purpose. Mega Mario temporarily destroys enemies, blocks and pipes while filling a meter based on the destruction caused. Mini Mario reaches tiny pipes and paths, runs across water and makes floating jumps, but an enemy hit defeats him immediately. Shell Mario uses the Blue Koopa Shell for a fast ground dash that can defeat enemies and rebound from walls. Wall jumps solve vertical shafts, while fences provide controlled climbing, attacks and side-switching through flip panels. Learn these moves in open areas before relying on them in a tower, castle or secret route, and remember that every course can still be completed through ordinary jumping if a preferred power-up is lost.
1. Identify power-up sources and reserve items
Mega Mushrooms can appear in ? Blocks, Flying ? Blocks and certain Toad Houses. Mini Mushrooms and Blue Koopa Shells are placed in particular courses or houses rather than being guaranteed before every difficult stage. Fire Flowers and Super Mushrooms provide the conventional backup forms, so do not enter a castle assuming that one special transformation will be available.
The item stored on the touch screen is separate from Mario’s current form. Use the reserve item when the route is safe or after taking damage, but avoid spending a rare Mini Mushroom or Blue Koopa Shell before the passage that needs it. If a course does not provide the transformation you wanted, continue with normal jumps, ground pounds, fireballs or careful enemy avoidance.
- Check the reserve item before entering a course.
- Save a Mini Mushroom or Blue Koopa Shell when the route ahead clearly needs it.
- Treat special power-ups as tools for particular obstacles, not as requirements for every stage.
2. Use Mega Mario to create destruction and earn rewards
Collect a Mega Mushroom to become Mega Mario for a short period. Running into enemies, blocks, bricks and pipes destroys them, allowing Mario to clear a dense stretch without stopping to stomp each enemy. Keep moving through open groups of objects so the transformation is used before its time expires.
The Mega Meter tracks the destruction Mega Mario causes to blocks, bricks and similar objects. It is not a health meter and does not measure damage Mario receives. When the Mega Mushroom wears off, the meter’s level determines how many 1-Up Mushrooms appear. Break as much reachable scenery as possible, but do not confuse temporary invulnerability with immunity to pits, crushing hazards or badly judged jumps.
Mega Mario is large, so narrow ledges and small passages can become awkward while the effect lasts. If the meter is nearly empty, stop attempting to force the giant form through a tight section and prepare to resume ordinary platforming when Mario returns to his previous state.
- Use open stretches to destroy groups of enemies and blocks.
- Watch the Mega Meter as a destruction gauge, not a damage gauge.
- Continue judging pits and moving hazards normally; Mega Mario can still fall or be crushed.
3. Protect Mini Mario while using his special movement
The Mini Mushroom shrinks Mario to micro size. Mini Mario can enter small pipes, travel through narrow paths, run across the surface of water and perform floating, low-gravity jumps. These abilities are commonly used for hidden rooms, alternate exits and platforms that normal-sized Mario cannot reach.
Mini Mario is defeated by an enemy hit instead of shrinking to a weaker form. His ordinary jump is also poor for defeating enemies; use a ground pound when an enemy must be attacked, or simply avoid it. Approach water crossings deliberately, keep moving across the surface, and leave enough room to adjust your landing rather than making long blind jumps.
If a secret route requires Mini Mario, protect the transformation until the entrance is visible. Do not spend it on optional coins or ordinary enemies immediately before a tiny pipe or narrow passage.
- Search for small pipes and low openings only while Mini Mario is active.
- Use floating jumps to correct your position instead of committing to blind leaps.
- Avoid enemies or ground-pound them; do not rely on ordinary stomps.
4. Control Shell Mario and the shell dash
Pick up the special Blue Koopa Shell to become Shell Mario. Hold the dash button and press Left or Right on the Control Pad to begin a shell dash. Mario travels rapidly along the ground and can hit enemies. Release the dash button to stop the shell dash before a pit, wall or narrow ledge.
If Mario hits a wall or block while shell-dashing, he rebounds in the opposite direction. Use this deliberately only when there is room to control the rebound. In a confined room, release Dash before contact rather than allowing the shell to ricochet into a hazard.
A stunned shelled enemy can be picked up by pressing the dash button, then thrown by releasing it. This gives Mario a ranged attack and is safer than charging through every enemy. If Mario is hit while he is not shell-dashing, he loses the shell and becomes Super Mario. The shell is therefore a useful offensive and defensive form, but it should not be treated as permanent protection.
- Begin a shell dash only when there is room to brake.
- Release Dash before pits, walls or low ceilings.
- Pick up and throw a stunned shelled enemy when distance is safer than a charge.
5. Perform wall jumps in vertical passages
To wall-jump, jump toward a wall and hold the Control Pad toward that wall while Mario slides down it. Press the Jump button during contact to kick away and gain height. In a narrow shaft, steer toward the opposite wall and repeat the same action on the other side.
The important input is the direction toward the wall followed by Jump while Mario is sliding against it. Pressing Jump too early, after Mario has moved away, or without holding toward the wall will not produce the kick. If Mario falls below the intended height, steer back toward the wall and try again instead of rushing the next jump.
Wall jumps are useful for vertical shafts, elevated ledges and some Mini Mario routes. Confirm that the surface is climbable before committing: decorative background walls and hazardous surfaces do not necessarily support the move.
- Jump toward the wall and hold toward it during the slide.
- Press Jump while Mario is touching the wall.
- Alternate sides in a narrow shaft and aim the final kick toward the destination ledge.
6. Climb fences, punch through them and use flip panels
Jump to a climbable fence and press Up on the Control Pad to grab it. Once attached, press Up, Down, Left or Right to move over the fence. Press Jump to let go toward a platform. Fences give Mario a controlled place to pause while watching an enemy, moving platform or opening on the opposite side.
Press the dash button while climbing to punch through the fence and attack enemies on the other side. Use this before crossing a dangerous enemy line when the fence itself provides protection. If the fence includes a rotating flip panel, press Dash while near the panel to turn it and move Mario to the opposite face. Check the landing area before flipping, because the other side may place Mario beside an enemy or above a drop.
Fence movement is separate from wall-jumping. Use Up to attach, the D-pad to climb, Dash to punch or rotate a panel, and Jump to release.
- Press Up when reaching a climbable fence.
- Use Dash to attack through the fence or rotate a flip panel.
- Look at the destination side before releasing or flipping.
7. Combine abilities without depending on one transformation
Match the ability to the obstacle ahead. Mega Mario is best for destruction-heavy stretches, Mini Mario for tiny routes and water surfaces, Shell Mario for open ground and enemy lines, wall jumps for vertical gaps, and fences for controlled climbing and attacks. Fire Mario remains a reliable alternative when enemies can be defeated from a distance.
If a transformation is lost, reset your plan immediately. Do not chase a dropped shell beside a pit, force Mini Mario through an enemy cluster, or wait for Mega Mario to solve a jump that still requires accurate movement. The dependable approach is the one that reaches the goal with any safe form.
- Choose the ability that solves the obstacle directly ahead.
- After taking damage, reassess instead of repeating the same risky move.
- Finish the course with Super Mario, Fire Mario or Small Mario if the special transformation is gone.
Before you move on
- You can use a stored touch-screen item without confusing it with Mario’s current form.
- You can activate Mega Mario, destroy nearby objects and understand that the Mega Meter reflects destruction.
- You can use Mini Mario to enter a small pipe, cross water and avoid taking an enemy hit.
- You can start and stop a Shell Mario dash, control a rebound and pick up or throw a stunned shelled enemy.
- You can climb a fence, punch through it, rotate a flip panel and release toward a platform.
- You can climb a narrow shaft by holding toward each wall and pressing Jump during contact.
Secrets, alternate exits and optional routing
The original Nintendo DS release has 18 total alternate or secret exits when counted broadly: 16 ordinary red-flag or alternate exits, plus the two special Mini Mario boss outcomes in World 2-Castle and World 5-Castle. The two castle outcomes are world-unlock routes rather than ordinary secret exits. Secret routes can open Mushroom Houses, side courses, branches and Warp Cannons, but none is required for the normal ending if the direct campaign route remains available. Look above the standard route, test suspicious pipes and doors, and watch for hidden blocks, Mini Mario passages and Shell Mario barriers. After using an alternate route, check the overworld map to confirm what opened. If the goal is only to rescue Peach, clear the required towers and castles first and return to optional branches later.
Recognize an alternate-exit setup
A course with an alternate exit often hides the route above, below or beyond the normal path. Check ceilings reached with moving platforms, isolated upper ledges, suspicious pipes, temporary doors and walls with openings that only Mini Mario can enter. In ghost houses, do not assume the first door is the secret one; switches can create a normal door and a hidden temporary door at different positions.
For this chapter, use 18 as the broad total of alternate or secret outcomes: 16 ordinary exits that normally finish at a red flagpole, plus the special Mini Mario outcomes in World 2-Castle and World 5-Castle. The two castle outcomes are counted separately in the game’s usual secret-exit terminology because they are triggered through boss completion rather than a standard alternate flagpole route.
After completing an unusual route, check the overworld map before moving on. A new branch, red course marker, Mushroom House or Warp Cannon confirms that the route registered. Many hidden rooms contain only a Star Coin or power-up, not an alternate exit.
- Search above and below the normal route.
- Test suspicious pipes and temporary doors.
- Check the overworld map after completing the course.
- Use 18 for the broad total, while keeping the 16 ordinary exits separate from the two special castle outcomes.
Open the World 1 shortcuts
In World 1-2, use the last moving platform to reach the ceiling instead of entering the normal exit pipe. Run right across the upper route and enter the hidden pipe near the end. This opens a route to the World 1 Mushroom House and the World 1-Tower area. Replay the course normally later if you still need its standard path.
The World 1-Tower alternate exit requires Shell Mario or a stored Shell power-up. After the checkpoint, enter the door beside the upward-launching pipe. In the room with the Star Coin and moving blocks, do not use the return door. Move to the upper-right gap and continue off the right edge into the next room. Shell-dash through the bricks blocking the red pipe, then enter it to finish at the alternate exit. This opens the Warp Cannon leading to World 5. The cannon is optional and does not permanently replace the tower or castle requirements; inspect the map before using it.
- Use the upper-ceiling route in World 1-2.
- Bring Shell Mario or a stored Shell to World 1-Tower.
- Walk through the upper-right gap rather than taking the return door.
- Use the red pipe after clearing its bricks.
Find the World 2 routes
World 2-3 has its alternate exit shortly after the checkpoint. When the ? Switch raises the water, swim upward through the ceiling opening instead of continuing along the lower route. In the coin-filled room, activate the second ? Switch while the first water effect is still active. Swim to the upper-right passage and follow it to the red flagpole, which opens the route to World 2-A.
In World 2-A, take the yellow pipe near the end of the first area instead of the normal green pipe. Reach it by using the last spinning launcher, bouncing from the red Koopa Troopa and landing on the upper platform. If you are Small Mario, the pipe can also be reached from the lower side. Its exit opens the World 2 Warp Cannon to World 5.
World 2-4 requires Mini Mario for its ordinary alternate exit. Carry a Mini Mushroom into the level, then go left when you reach the water section and enter the small pipe. It leads directly to the alternate red flagpole.
World 2-Castle is the first special boss-based outcome. Defeat the castle boss while Mario is still Mini. Mini Mario then enters the small passage after the fight and reaches World 4 instead of the normal World 3 destination. Count this as one of the two special outcomes in the broad total of 18, not as one of the 16 ordinary red-flag exits.
- Raise the water twice in World 2-3.
- Use the yellow pipe in World 2-A.
- Bring Mini Mario into World 2-4.
- Finish the World 2-Castle boss as Mini Mario for the World 4 route.
Use the World 3 and World 4 routes
In World 3-2, continue past the midway point and ride the moving mushroom platform beneath the group of red, yellow and green pipes. Jump into the green pipe to enter the coin room and reach the alternate red flagpole.
In World 3-Ghost House, reach the ? Switch hidden in the brick block. Activating it creates two doors. The upper door leads to the normal exit. Move quickly back down and left to the temporary door beside the staircase before it disappears. That door leads to the alternate exit and opens the Warp Cannon to World 6.
In World 4-1, while riding the blue dinosaur over the water, find the five-block platform with a ? Block at each end. Stand on the center brick and jump to reveal a hidden vine block. Climb the vine and enter the upper pipe for the alternate exit.
World 4-Ghost House requires Mini Mario. After reaching the second section, activate the switch to create the temporary blocks. Jump onto the pipe, then wall-jump upward through the narrow passage above it. Enter the door at the top to reach the alternate exit and open the Warp Cannon to World 7.
- Use the green pipe beneath the three colored pipes in World 3-2.
- Return to the lower temporary door in World 3-Ghost House.
- Reveal the vine from the center brick in World 4-1.
- Bring Mini Mario into World 4-Ghost House.
Take the World 5 routes and the World 8 cannon
In World 5-2, look between the midway point and the goal for an upside-down green pipe near a large brick formation. Reach it carefully because Spike Tops and a Piranha Plant guard the icy platform. Enter the pipe to reach the alternate exit.
World 5-B requires Shell Mario. After the third Star Coin and before the normal exit, wall-jump through the opening in the icy ceiling. Move onto the ceiling from the left and Shell-dash through the bricks blocking the green pipe. Enter that pipe for the alternate exit.
In World 5-Ghost House, continue up the staircases until you reach three brick blocks beside the left wall. Reveal the invisible blocks above them. Use the middle revealed block to expose the invisible vine block, then climb the vine and remain on it while the Broozer breaks through the wall. Enter the door it exposes, survive the haunted elevator section and finish through the alternate exit. This opens the Warp Cannon to World 8.
World 5-Castle is the second special boss-based outcome. Defeat the boss while Mario is Mini, then use the small passage after the fight to reach World 7 instead of World 6. Count this as the second special outcome in the broad total of 18, while keeping it separate from the 16 ordinary alternate exits.
- Enter the upside-down pipe in World 5-2.
- Bring Shell Mario to World 5-B.
- Stay on the vine while the Broozer opens the World 5-Ghost House door.
- Finish the World 5-Castle boss as Mini Mario for the World 7 route.
Complete the World 7 alternate routes
In World 7-Ghost House, hit the ? Switch in the first room and take the lower-right door. In the next room, the Boo-like hand indicators point toward a moving invisible block containing another switch. Hit that block, activate the switch and use the temporary platforms to reach the upper door. In the following room, activate the P-Switch and run left. Reveal the shining brick containing a vine, climb it and enter the door above for the alternate exit.
World 7-4 requires Mini Mario. After the midway point and Red-Coin Ring, stay toward the left until you see a Flying ? Block. Use it to jump into the gap in the wall, curve back left onto the upper platform and drop into the small pipe. The pipe leads to the alternate exit and provides a direct route toward the castle. World 7’s castle route requires either this exit or the one in World 7-6.
In World 7-5, near the end, clear the blocks covering the ground-level green pipe. Bob-ombs can break them, while a Mega Mushroom is a safer option when available. Enter the pipe for the alternate exit.
In World 7-6, immediately after the midway point, find the two rows of blocks. Break the center block in the upper row first. Then hit the center block in the lower row to grow the vine into the next area. Climb it, ride the moving mushroom platform and enter the green pipe for the alternate exit. This is the other route that can open access to the World 7 castle.
- Use the lower-right door first in World 7-Ghost House.
- Follow the hand clues to the invisible switch block.
- Bring Mini Mario to World 7-4.
- Clear the World 7-5 pipe with Bob-ombs or a Mega Mushroom.
- Break the upper center block before activating the vine in World 7-6.
Choose optional routing without blocking the ending
The 16 ordinary alternate exits are World 1-2, World 1-Tower, World 2-3, World 2-A, World 2-4, World 3-2, World 3-Ghost House, World 4-1, World 4-Ghost House, World 5-2, World 5-B, World 5-Ghost House, World 7-Ghost House, World 7-4, World 7-5 and World 7-6. Add the World 2-Castle Mini Mario outcome and the World 5-Castle Mini Mario outcome to describe the broad total of 18 alternate or secret outcomes. Keep those two castle outcomes labeled as special boss-based world unlocks rather than ordinary red-flag exits.
These routes open shortcuts, side courses, Mushroom Houses and Warp Cannons, but they do not automatically replace every required tower or castle. After using one, inspect the map and identify the next accessible course rather than assuming the new route leads directly to World 8. World 7-4 and World 7-6 are especially useful because one of them is needed to open World 7’s castle route when progressing through World 7 normally.
For a reliable campaign run, clear the required towers and castles first and return later to courses with unresolved branches. If an exit requires Mini Mario or Shell Mario, obtain the power-up from an accessible course, Toad House or stored item before attempting it. A failed alternate-exit attempt does not remove the normal route, so retreat and try again later instead of repeatedly risking lives.
If the main goal is the ending, you can ignore all 16 ordinary alternate exits and both special Mini Mario castle outcomes as long as the normal map progression remains available. Use the direct route through the required towers, castles and World 8 levels. The final completion check remains the World 8 final castle clear followed by the rescue and ending sequence.
- Use 18 for the broad total of alternate or secret outcomes.
- Keep the 16 ordinary exits separate from the two special Mini Mario castle outcomes.
- Confirm every new map marker after an alternate exit.
- Do not skip required towers or castles without checking the map.
- Store Mini or Shell power-ups before difficult attempts.
- Leave optional routes for later if the immediate goal is the ending.
Before you move on
- The game has 18 total alternate or secret outcomes when counted broadly: 16 ordinary exits plus the World 2-Castle and World 5-Castle Mini Mario boss outcomes.
- The 16 ordinary exits are World 1-2 and World 1-Tower; World 2-3, World 2-A and World 2-4; World 3-2 and World 3-Ghost House; World 4-1 and World 4-Ghost House; World 5-2, World 5-B and World 5-Ghost House; and World 7-Ghost House, World 7-4, World 7-5 and World 7-6.
- World 2-Castle and World 5-Castle are recorded separately as special Mini Mario boss-based unlocks to World 4 and World 7, not as ordinary red-flag exits.
- The map shows a new course, branch, Mushroom House or Warp Cannon after each ordinary alternate exit attempted.
- Required towers and castles remain cleared, and the campaign route to World 8 is still available after optional branches are opened.
- For the assigned campaign goal, the final proof remains the World 8 final castle clear and the ending sequence; alternate exits and special castle unlocks are optional routing tools rather than requirements.
Multiplayer, minigames and VS options — optional modes that do not alter campaign completion
New Super Mario Bros. for Nintendo DS has three separate play areas: the single-player Mario Game, the two-player Mario Vs. Luigi mode, and Minigames for one to four players. Wireless play uses local Nintendo DS communication through either DS Multi-Card Play or DS Download Play. These activities do not use the single-player course map and do not clear courses, defeat towers or castles, spend Star Coins, open overworld routes, or trigger the Princess Peach rescue ending. Use them for optional competition or practice, then return to Mario Game and load the adventure file when you want to continue the campaign.
1. Select the separate mode from the title screen
Turn on the Nintendo DS with the New Super Mario Bros. Game Card inserted. On the title screen, choose Mario Game for the campaign, Mario Vs. Luigi for two-player platforming, Minigames for solo or multiplayer activities, or Options for sound and control settings. The multiplayer choices are not submenus of the campaign map; they are separate modes selected before opening a single-player file.
Choose Mario Vs. Luigi when two players want to control Mario and Luigi in a direct platforming contest. Choose Minigames for stylus- and microphone-based activities. Minigames has two broad choices: 1 Player and VS. Battle. A score, victory, or completed activity in either optional mode does not alter the Mario Game save file.
- Choose Mario Game for story progression.
- Choose Mario Vs. Luigi for the two-player Big Star contest.
- Choose Minigames for one-player or up-to-four-player activities.
- Return to Mario Game for all required campaign progress.
2. Start Mario Vs. Luigi with two copies of the game
For DS Multi-Card Play, each participant needs a Nintendo DS system and a New Super Mario Bros. Game Card. Start the game on both systems and select Mario Vs. Luigi. The player who selects Mario becomes Player 1 and hosts the session; the player who selects Luigi becomes Player 2. The two players cannot choose the same character.
On the host system, choose the option to create a group. On the other system, choose the option to join a group, then select the host’s displayed name. When the connection succeeds, Player 1 proceeds to the rules screen and starts the match after the other player has been detected. Keep the systems nearby during the wireless session.
- Use one DS and one game card per player for Multi-Card Play.
- Host: select Mario and create a group.
- Second player: select Luigi, join the host’s group, and wait for the host to begin.
- Do not expect cooperative campaign play; this mode is competitive.
3. Use DS Download Play with one game card
If only one copy of the game is available, insert it into the host Nintendo DS and open Mario Vs. Luigi. On each guest system, turn on the DS and select DS Download Play from the system menu. Select the New Super Mario Bros. listing when it appears, confirm the download, and wait for the wireless connection to finish.
For Mario Vs. Luigi Download Play, the system with the single game card is Player 1 and controls the setup. The guest system is Player 2. The host chooses the rules and starts the match after the second player has connected. Download Play is local wireless communication; it is not internet multiplayer. If the game does not appear on a guest system, make sure the host has already opened the compatible multiplayer mode, then return to DS Download Play and scan the available titles again.
- Host: insert the only game card and open Mario Vs. Luigi.
- Guests: select DS Download Play from the DS menu.
- Guests: select New Super Mario Bros. and confirm the download.
- Let the host configure and start the match.
4. Configure and play the Mario Vs. Luigi match
Player 1 configures four match settings: Wins, Big Star, Mario’s lives, and Course. Wins determines how many rounds are needed to decide the competition. Big Star sets the number of Big Stars required to win a round. Mario’s lives determines how many lives each player receives, and Course can be set to Choose Each Time or Random. After confirming the rules, select a course when prompted or let the game choose one automatically.
During a round, collect the Big Stars that appear around the course. The progress display shows Mario, Luigi, and the Big Stars, while the counters show each player’s collected stars and remaining lives. Collecting eight coins causes an item to appear and resets the coin counter. You can make the opponent drop a Big Star by jumping on them, hitting them with a fireball or shell dash, or allowing an enemy, fall, or crushing hazard to defeat them. Either player can then collect the dropped star.
The goal is the selected Big Star total, not a normal course goal. A win or loss ends only the current wireless round or competition. It does not mark a story course complete or unlock anything on the single-player map.
- Set Wins, Big Star target, lives, and Course before starting.
- Collect Big Stars before the opponent.
- Use attacks and hazards to force the opponent to drop stars.
- Treat dropped stars as contested pickups.
- Do not count a wireless win as campaign progress.
5. Enter Minigames and choose the player arrangement
Select Minigames from the title screen, then choose 1 Player or VS. Battle. One-player activities can be played immediately by tapping an icon and reviewing its instructions. The game displays the activity’s controls and top scores before you begin. Minigames primarily use the stylus and microphone, so read the individual instructions instead of assuming that every activity uses the buttons.
For VS. Battle with multiple game cards, Player 1 chooses Create Group and waits for Players 2 through 4 to appear. The other systems choose Join Group and select Player 1’s displayed name. Player 1 then selects the minigame genre and activities, sets the number of games, and starts the session. Some activities allow difficulty or scoring settings to be adjusted.
For single-card Minigames Download Play, the host first opens New Super Mario Bros. and enters the Minigames wireless setup. Each guest selects DS Download Play from the DS menu, chooses the New Super Mario Bros. Minigames listing, confirms the download, and joins the host’s group. The game supports one to four players, but the specific activity and wireless setup determine which players can participate.
- Choose 1 Player for solo activities.
- Choose VS. Battle for wireless minigames.
- Host: create the group and configure genre, games, and available settings.
- Guests: join through Multi-Card Play or DS Download Play.
- Follow each activity’s stylus, microphone, or button instructions.
6. Keep optional-mode results separate from the campaign
Mario Vs. Luigi Big Stars, minigame points, top scores, and wireless victories do not become Star Coins and do not open Star Coin signs. They also do not provide Toad House items or lives for the adventure map. Toad Houses are single-player map locations and must be used from Mario Game, not earned through multiplayer.
When you finish playing, return to the title screen and select Mario Game. Load the campaign file and continue clearing normal courses, towers, and castles. If the goal is the ending, the only relevant completion check is the single-player sequence: progress through the required worlds, clear World 8 Castle, and watch the Princess Peach rescue ending and credits. Multiplayer can be enjoyed at any point, but it cannot substitute for any of those required clears.
- Do not treat Big Stars as campaign Star Coins.
- Do not expect minigame points to unlock overworld paths.
- Do not rely on wireless play to stock Toad House items or lives.
- Return to Mario Game to continue the saved adventure.
- Confirm campaign completion only after World 8 Castle and the ending credits.
Before you move on
- The wireless session ends without changing the single-player map’s course, tower, castle, or Star Coin-sign status.
- Mario Vs. Luigi results remain limited to that match or competition.
- Minigame scores and top scores remain within the Minigames mode.
- After returning to Mario Game, the campaign still requires normal course clears and tower or castle defeats.
- Campaign completion is confirmed only after World 8 Castle is cleared and the Princess Peach rescue ending and credits are shown.
References for this chapter
Endgame checklist, recovery from failure and reliable completion proof
World 8-Bowser’s Castle is the final level of the original Nintendo DS campaign. Enter with a stored item or damage-absorbing power-up if one is available, but do not delay the attempt because no particular item is mandatory. Work through the lava, Podoboos, burners, switches, Thwomps, spikes, and Dry Bones until you reach the midway point. From the checkpoint, the required platform sequence is bottom, top, then middle. In the final room, defeat Bowser Jr. by returning his green shell and stomping his exposed belly three times. Then avoid Bowser’s fire, wait for his high jump, run underneath him, and activate the skull switch. Watch the rescue sequence and credits. Afterward, confirm the first star on the save file and the unlocked ability to save from the world map. Star Coins, secret exits, and the other save-file stars are separate completion goals.
1. Prepare before entering World 8-Bowser’s Castle
Use the World Map to confirm that you are entering World 8-Bowser’s Castle, the final level of World 8 and the last level in the original Nintendo DS campaign. Do not confuse it with World 8-Castle, the earlier castle whose boss is Dry Bowser. The normal route reaches this final castle only after the World 8 courses, World 8-Castle, World 8-5 through World 8-8, and the second World 8-Tower have been cleared.
A stored item on the Touch Screen is useful because the castle combines lava, Podoboos, burners, Thwomps, spikes, Dry Bones, and narrow platforms. A Super Mushroom, Fire Flower, or other damage-absorbing power-up can provide more room for mistakes, but the game does not require a specific item to enter or finish the level. If you have no reserve item, proceed with a cautious attempt rather than waiting indefinitely.
The three Star Coins in this castle are optional for the stated campaign goal. Ignore them during a finishing attempt unless you already know the route and can collect them safely. No Star Coin, secret exit, or special transformation is required to reach or defeat the final bosses.
- Confirm that the map marker is World 8-Bowser’s Castle.
- Carry a stored item if one is available.
- Treat Star Coins and detours as optional.
- Do not assume a particular power-up is required.
2. Cross the opening rooms and use the switches
In the first room, move right across the platforms while watching the Podoboos rising from the lava. Cross after a fireball drops, and avoid stopping on small platforms longer than necessary. Enter the door at the far right.
In the next room, strike the appropriate block to reveal the ? Switch. Activate it to turn the room upside down, then use the new arrangement to reach the door. Continue through the burner-filled passage. Wait for the fire-shooting blocks to complete a cycle before passing them; rushing into a burner is more dangerous than losing a few seconds.
The following section contains a large Thwomp and another switch hidden among blocks. Approach the Thwomp so it drops, then move through after it rises. Hit the switch and follow the route that becomes accessible. The castle changes the room orientation, so an apparently blocked door usually means that another switch must be activated first.
Continue through the inverted burner and Thwomp sections. In the spike-area route, use the switch-created moving platform to reach the upper door. The exact hazards require controlled movement rather than a continuous dash: stop before burners, let Thwomps fall, and cross only when the opening is clear. Optional Star Coins can be collected on later attempts if they are costing lives.
- Wait for Podoboos and burners to complete safe cycles.
- Activate each required ? Switch before forcing a jump.
- Use the moving platform over the spike section to reach the upper route.
- Ignore optional coins during a serious finishing attempt.
3. Reach and use the midway point
After the switch rooms, continue through the Thwomp passages and take the upper route. The path leads through a door and into the section containing the midway point. Touch the checkpoint before attempting the final platform maze.
The midway point changes where Mario restarts after an ordinary death in this castle. It is not an overworld save and does not permanently replace the latest tower, castle, or Star Coin Sign save. If you receive a Game Over, the game returns you to the latest normal saved point, so treat the checkpoint as protection against individual mistakes rather than permanent campaign progress.
An item block appears near the checkpoint route. Take the item if doing so is safe, then proceed to the three-level platform puzzle. The route gives an affirmative sound when a correct level is chosen and a failure sound when the wrong level is chosen. A wrong choice loops you back through the puzzle rather than ending the level.
- Touch the midway point before entering the platform puzzle.
- Do not confuse the midpoint with an overworld save.
- Take a nearby item only when the area is safe.
- Use the sound cues to identify correct and incorrect choices.
4. Use the final platform sequence
At the first three-level platform choice, take the bottom path. Continue to the next choice instead of changing levels early. At the second choice, take the top path. At the third choice, take the middle path.
The required sequence is bottom, top, middle. A correct choice produces the positive sound cue and advances the route. If the failure sound plays and the area loops, repeat the sequence from the first available choice rather than trying to force Mario through a blocked route.
After the final correct choice, continue right across the small ledges and enter the large boss door. The third Star Coin is located in this general section, but it is not needed. Keep a reserve item available for the boss unless using it immediately is the only way to survive the approach.
- First choice: bottom.
- Second choice: top.
- Third choice: middle.
- Repeat the sequence after a wrong choice.
5. Defeat Bowser Jr. in the final boss room
The final encounter begins with Bowser Jr. and Bowser together. Bowser Jr.’s shell is spiked, so do not attempt to stomp him directly. Keep enough space to react to his charge, then wait for him to throw a green Koopa Shell.
When Bowser Jr. throws the shell, jump on it and toss it back at him. The returning shell flips him over and exposes his belly. Stomp the exposed belly to deal damage. Repeat the shell-return and belly-stomp sequence three times. The order matters: return the shell first, then jump on Bowser Jr. after he is overturned.
Bowser moves through the same room while you handle Bowser Jr., so avoid standing between both enemies. If Bowser’s fire or Bowser Jr.’s movement closes the space, retreat and wait for another shell opportunity. Taking a slower attempt is safer than trying to jump directly on Bowser Jr. or attacking while the shell is still moving.
- Do not stomp Bowser Jr. directly.
- Wait for him to throw a green shell.
- Jump on and throw the shell back at him.
- Stomp his exposed belly three times.
6. Defeat Bowser with the skull switch
After Bowser Jr. is defeated, focus on Bowser. He sends fire across the bridge, so stay mobile and keep away from the fire’s travel paths. Jump over low projectiles when necessary, and do not stand beside Bowser while waiting for an opening.
Bowser eventually performs a high jump. This is the safe opening for the finishing action. As he rises, dash underneath him to the far side of the bridge and activate the large skull switch. The switch breaks the bridge and sends Bowser into the gap. Bowser does not need to be damaged directly.
If you miss the opening, remain alive and wait for the next high jump. Do not try to pass underneath Bowser while he is standing on the bridge, and do not linger near the skull switch while fire is covering the route. The winning action is movement under Bowser followed by the switch, not an attack against him.
- Avoid Bowser’s fire and keep moving.
- Wait for Bowser’s high jump.
- Run underneath him while he is airborne.
- Activate the skull switch on the far side of the bridge.
7. Watch the ending and verify campaign completion
After the skull switch is activated, the rescue sequence begins and Princess Peach is reunited with Mario. Let the rescue scene and the full end credits play before turning off the Nintendo DS or resetting the game.
After the credits, return to the title screen and inspect the same save file. Defeating the game once awards the first star beside the file. That star is the appropriate save-file proof for the main single-player campaign. The second and third stars are tied to broader goals such as unlocking additional stages and completing the game’s secret and Star Coin requirements; they are not required for the ending.
The completed game also unlocks the ability to save from the world map at any time through the pause menu. Confirm that this option is available after returning to the map. This differs from the pre-ending campaign, when dependable save prompts are associated with clearing towers or castles and paying Star Coins at map signs.
- Princess Peach’s rescue scene has played.
- The end credits have finished.
- The save file displays the first star for beating the game.
- Saving from the world map is available after completion.
- Do not mistake the first star for 100-percent completion.
8. Recover after a failed attempt
If Mario loses a life before the boss room, use the midway point to restart in the later portion of the castle. Re-enter the platform sequence as bottom, top, middle, then repeat the Bowser Jr. shell strategy. The checkpoint reduces the amount of level you must replay after an ordinary death.
If Mario receives a Game Over, the castle midpoint is not retained as a separate overworld save. Resume from the latest normal save, which will normally be associated with a previously cleared tower or castle or a Star Coin Sign purchase. From the map, follow the cleared World 8 route back to World 8-Bowser’s Castle.
Before retrying, replay an accessible course or use an available Toad House to rebuild lives or obtain a stored item. Once the normal World 8 route is open, no optional shortcut is required to return to the final castle. If the boss is the problem, practice the sequence separately: avoid direct jumps on Bowser Jr., return his shell, stomp him three times, then wait for Bowser’s high jump and use the skull switch.
- Use the castle midpoint after ordinary deaths.
- After Game Over, resume from the latest normal save.
- Rebuild lives or obtain a reserve item if necessary.
- Repeat the shell-return strategy and skull-switch finish.
Before you move on
- World 8-Bowser’s Castle is cleared by activating the skull switch after defeating Bowser Jr.
- Princess Peach’s rescue scene and the end credits have played completely.
- The same save file displays the first star awarded for beating the game.
- Saving from the world map is available after campaign completion.
- No Star Coin, secret exit, or optional route is required for the main-campaign ending.
References for this chapter
- New Super Mario Bros. Official Nintendo DS Instruction Manual
- World 8-Bowser’s Castle (New Super Mario Bros.) — Super Mario Wiki
- New Super Mario Bros. — Guide and Walkthrough, GameFAQs
- How do you get past the last castle in world 8? — GameFAQs
- World 8-Tower 2 (New Super Mario Bros.) — Super Mario Wiki
Finishing up
You have completed a valid main-campaign route through the required progression and defeated Bowser in World 8-Bowser’s Castle.
The Princess Peach rescue scene and end credits have played, and the save file shows the post-game completion star.
The route may include or skip optional Worlds 4 and 7, provided the required route to World 8 and the final castle has been completed.
World 8-Castle, the second World 8-Tower, and World 8-Bowser’s Castle are distinct required stages when using the ordinary World 6-to-World 8 route; clearing World 8-Castle alone is not completion.
Star Coins, all secret exits, all map signs, and optional world branches are separate completion goals unless deliberately included.
Choose your next gameScreenshots & video
Game imagery for reference. Follow the written chapters above for the route and strategies.
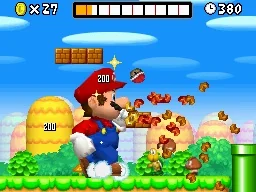
Sources & references
Our original guide draws on the references below. Check the edition at the top of this page before following controls or unlock requirements.
- New Super Mario Bros. Official Nintendo DS Instruction Manual
- New Super Mario Bros. — Controls
- New Super Mario Bros. — Gameplay and Map Information
- New Super Mario Bros. Guide and Walkthrough, GameFAQs
- New Super Mario Bros./World 1-Tower — StrategyWiki
- New Super Mario Bros. — Guide and Walkthrough, GameFAQs
- The Mushroom Kingdom: New Super Mario Bros. (NDS) Secret Exits Guide
- World 2-Tower (New Super Mario Bros.) — Super Mario Wiki
- World 2-Castle (New Super Mario Bros.) — Super Mario Wiki
- New Super Mario Bros./World 2-Tower — StrategyWiki
- New Super Mario Bros. - Boss Guide - DS - By Wlokos
- New Super Mario Bros./World 3 — Super Mario Wiki
- New Super Mario Bros. - Alternate Exits Guide - DS - GameFAQs
- New Super Mario Bros./World 3-Ghost — StrategyWiki
- New Super Mario Bros./World 3-Castle — StrategyWiki
- New Super Mario Bros. - Guide and Walkthrough - DS - By DocsDeLorean
- New Super Mario Bros./World 4-Ghost — StrategyWiki
- World 5-Castle (New Super Mario Bros.) — Super Mario Wiki
- World 5-2 (New Super Mario Bros.) — Super Mario Wiki
- New Super Mario Bros./World 5 — StrategyWiki
- New Super Mario Bros./World 5-Castle — StrategyWiki
- New Super Mario Bros. DS — World 5 walkthrough reference
- World 6 (New Super Mario Bros.) — Super Mario Wiki
- World 6-Tower (New Super Mario Bros.) — Super Mario Wiki
- New Super Mario Bros. — World 6-Tower 2 — StrategyWiki
- New Super Mario Bros./World 6-Castle — StrategyWiki
- New Super Mario Bros./World 7-Tower — StrategyWiki
- New Super Mario Bros./World 7-Castle — StrategyWiki
- New Super Mario Bros. Guide and Walkthrough, GameFAQs
- World 8-Castle - Super Mario Wiki
- World 8-Bowser’s Castle (New Super Mario Bros.) — Super Mario Wiki
- World 1-Tower (New Super Mario Bros.) — Super Mario Wiki
- New Super Mario Bros. Instruction Booklet, Nintendo DS, USA
- World 4-Castle (New Super Mario Bros.)
- New Super Mario Bros./World 4-Castle
- Nintendo DS - World 4
- New Super Mario Bros. — Super Mario Wiki overview
- New Super Mario Bros. DS — Complete Guide, Super Luigi Bros.
- How to Play Multiplayer with One Game Card — Nintendo Support
- How to Play a Single Card Multiplayer Download Game — Nintendo Support
- Mario Vs. Luigi — Super Mario Wiki
- How do you get past the last castle in world 8? — GameFAQs
- World 8-Tower 2 (New Super Mario Bros.) — Super Mario Wiki
About the game & collecting notes
- Platform
- Nintendo DS
Step-by-step coverage to finish New Super Mario Bros. (Nintendo DS, USA). Start-to-finish routes for every required world, how to handle Bowser Jr. towers and castle bosses, use Star Coins to open paths, and reliable recovery options when you lose progress. Includes optional routing for secrets and saving strategy to reach the true ending.
Darryl Polo
Darryl Polo loves tinkering with emulation and revisiting retro games. He enjoys exploring how old favorites play on different setups and sharing what he learns along the way. At Joking Joystick, he writes about the games, hardware, and small discoveries that keep the hobby fun.
Our editorial standardsFound a step that needs another look? Help us improve this guide.