
Monster Hunter: World — Iceborne Master Edition (PS4) — Complete Campaign Walkthrough
This guide walks you from installing the Master Edition through the Iceborne story, Seliana progression, Master Rank hunts and the Guiding Lands endgame. It explains new mechanics (Clutch Claw), Seliana hub usage, Master Rank gear progression, essential builds, multiplayer tips and concrete completion checks so you can finish Iceborne’s campaign and move into post‑story endgame reliably.


Find a copy
Monster Hunter: World — Iceborne Master Edition PlayStation 4
We may earn a commission if you buy through these links, at no extra cost to you. As an Amazon Associate I earn from qualifying purchases.
Opens retailer search results. Check the model, edition, seller, availability and current price before buying.
Before you begin
You are holding the Master Edition: the base Monster Hunter: World game plus the Iceborne expansion on PS4.
To play Iceborne’s story you must finish Monster Hunter: World through Hunter Rank 16, then start Iceborne to access the new hub Seliana, the Hoarfrost Reach, and Master Rank assignments.
This guide assumes you own the Master Edition on PS4 and will walk you step‑by‑step from installing and preparing to finishing Iceborne’s campaign and entering the Guiding Lands endgame.
Iceborne adds major new mechanics and difficulty (notably the Clutch Claw and Master Rank content) and a wealth of new monsters and Master Rank upgrades.
Follow the chapters in order: prepare your kit and online settings, complete the base game requirement, learn the Iceborne mechanics and Seliana systems, advance through Hoarfrost Reach and Master Rank assignments, then complete the final Iceborne assignments and unlock the Guiding Lands.
Each chapter lists concrete subgoals, recovery advice and a clear completion check so you always know what to do next.
Set yourself up for the run
Install the Master Edition and updates: ensure the PS4 has the latest patches and Iceborne expansion installed (Master Edition bundles the base game + Iceborne).
Confirm digital ownership or insert the Master Edition disc, then apply the Iceborne update and restart the game before attempting Iceborne quests.
(Master Edition contents are the base game plus Iceborne expansion; the PS Store lists separate Master Edition and Deluxe variants.)
Confirm base game progress: Iceborne story is only accessible after you complete Monster Hunter: World’s main story through Hunter Rank 16.
If you need to catch up, focus on urgent assignments and advancing HR to 16 before starting Iceborne.
Set up online and multiplayer: decide whether you’ll play solo or co-op.
For matchmaking, keep your game updated and use the PS4 network to join friends.
Many endgame activities (Guiding Lands region leveling, event and tempered hunts) are faster with cooperating teammates—coordinate which region you want to raise before starting a Guiding Lands expedition.
Prepare basic Iceborne gear: craft or carry a set of high-rank armor and a weapon you know well.
Iceborne adds Master Rank equipment but you still need strong High Rank gear to survive early Hoarfrost Reach encounters.
Pack Hot Drinks or appropriate cold-weather consumables for the Hoarfrost Reach to avoid environmental penalties.
Learn the new mechanics briefly before starting: Iceborne introduces the Clutch Claw, a Slinger extension that lets you latch onto monster parts for damage, part weakening, or repositioning, and a new hub, Seliana.
Read the in-game tutorial for the Clutch Claw, practice in the Training Area, and test weapon-specific Clutch Claw actions on the large training dummy.
Quality-of-life: set up quick loadouts at the Smithy and assign the Palico equipment and gadget you intend to use.
If you plan to farm in the Guiding Lands later, reserve inventory slots for rare materials and consider which charms and decorations you want to pursue.
Multiplayer etiquette and slots: if you intend to play with random players, bring an obvious team role such as focused support or damage, activate SOS flares for help, and ensure your armor and weapons are ready for the target.

Master Edition setup, installation and requirements
Set up the PS4 version before beginning Iceborne. Confirm that your purchase is the Master Edition bundle containing both Monster Hunter: World and the Iceborne expansion, or the Master Edition DDX with its additional cosmetic kit. Install the game, apply the latest game and PS4 system updates, and confirm that your hunter has completed the Monster Hunter: World story and reached Hunter Rank 16. That HR16 requirement is mandatory for the Iceborne campaign; optional quests, investigations, event quests, and post-story farming are not required. If Iceborne does not activate, check the account entitlement, installed content, updates, licences, and disc or Store region before reinstalling anything.
1. Identify the PS4 edition and its contents
From the PS4 home screen, highlight the game and open its PlayStation Store page or inspect the purchase in Library. The standard Monster Hunter World: Iceborne Master Edition is the bundle containing Monster Hunter: World and the MHW:I expansion. It is different from the standalone Iceborne add-on, which requires the base game. If you already own Monster Hunter: World, buying the standalone expansion is sufficient; if you need both products, choose the Master Edition bundle.
The Master Edition DDX, also called the Digital Deluxe edition on the Store, contains the same base game and expansion plus the MHW:I Deluxe Kit and the Monster Icon Pack avatar. The Deluxe Kit is cosmetic. It does not add campaign quests, a separate progression route, or gameplay power, so do not delay the story while trying to locate its items.
For a physical package, confirm that the disc is a PS4 copy of the Master Edition and retain the disc because the console may require it to launch the game. Downloadable content must match the PlayStation Store region associated with the disc. A region mismatch is not a gameplay requirement, but it can prevent add-ons or licences from being recognized.
- The product is identified as Master Edition or Master Edition DDX.
- The entitlement includes both Monster Hunter: World and MHW:I, unless you separately own the base game.
- You know whether the optional Deluxe Kit is included.
2. Install the base game and Iceborne entitlement
Install the game from the Master Edition disc or download the purchased Master Edition from Library. For a digital purchase, select the bundle entry rather than assuming that a separately listed add-on has installed automatically. Leave the PS4 connected to the internet until all queued game data has finished downloading.
To inspect the entitlement, highlight Monster Hunter: World on the PS4 home screen, press OPTIONS, and use the available information or add-on management screen. Menu wording can vary by PS4 system software and by whether the game is disc-based or digital, so do not rely on one exact menu label. The practical check is that the account owns the correct bundle or expansion and that the required game data has finished installing.
Start the game once after installation. The strongest functional confirmation is not merely the title-screen wording. It is that the game launches normally, the account recognizes the Iceborne content, and the Iceborne transition becomes available after the base-game story and HR16 requirement are complete.
- Monster Hunter: World launches from the PS4 home screen.
- The correct account owns the Master Edition or a compatible World-plus-Iceborne combination.
- No download, licence, or corrupted-data warning remains.
3. Update the game and PS4 system software
To update Monster Hunter: World, highlight its game icon on the PS4 home screen, press the OPTIONS button, and select Check for Update. Install the available patch and wait for the download and copy process to finish before launching the game. If the update fails, go to Settings, Network, Test Internet Connection, then restart the PS4 and try Check for Update again. PlayStation also lists deleting and reinstalling the game as a later troubleshooting step, not the first response to a normal download failure.
Check the PS4 firmware separately through Settings, System Software Update. If a system update is stuck, open Notifications, highlight the failed update file, press OPTIONS, choose Delete, and retry the system update. Do not delete the game merely because the console has a pending firmware update.
If the PS4 cannot update normally, start Safe Mode by turning the console off, then holding the power button until the second beep. Connect the DUALSHOCK 4 with a USB cable and choose Update System Software. For a USB update, use a FAT32 or exFAT drive with a PS4 folder containing an UPDATE folder and the official file named PS4UPDATE.PUP. This is for PS4 system software; it does not replace the Monster Hunter game update.
- The game reports no available update.
- PS4 system software has completed its update or is current.
- You have not used Initialize PS4 unless PlayStation Support specifically directs it after a backup.
4. Complete the exact base-game requirement
Iceborne does not begin for a new character immediately after installing the expansion. Capcom's access requirement is completion of the Monster Hunter: World base campaign and reaching Hunter Rank 16. HR16 is the entry milestone; it is not the same as Master Rank, which begins during Iceborne progression.
Load the character you intend to continue and check the hunter's current HR in the status or Hunter Info screens. If the base story is unfinished, continue the assigned story quests until the campaign reaches its conclusion and the hunter reaches HR16. You do not need to clear every optional quest, investigation, event quest, decoration farm, or post-story activity before starting Iceborne.
After the requirement is met, return to Astera and speak with the Feisty Fiver. That character starts the transition into the Iceborne story. If the prompt is absent, confirm the character's story status and HR, then quit and relaunch the game after verifying the expansion entitlement and updates.
- The Monster Hunter: World main story is complete.
- The continuing character is HR16 or higher.
- The Feisty Fiver in Astera offers the Iceborne transition.
5. Troubleshoot a missing Iceborne prompt
If the Feisty Fiver does not start the transition, first quit the game and confirm that the signed-in PSN account purchased the Master Edition or Iceborne expansion. Open the Store page and check that the product is marked as purchased. For digital content that is owned but not recognized, use Settings, Account Management, Restore Licences, then restart the PS4 and launch the game again.
Next, inspect Library and the game's available add-ons. If only Monster Hunter: World is installed, the base game is present but Iceborne may be missing or incomplete. Start the download from the correct Master Edition or expansion entry. Do not buy the standalone expansion again until you have checked the account that made the purchase and the console's download queue.
For a disc copy, compare the disc's region with the PlayStation Store region used for the downloadable entitlement. If the game reports that content is unavailable or an add-on cannot be used, a regional mismatch may be responsible. Once the licence, region, installation, updates, base-game completion, and HR16 checks all pass, return to Astera and speak with the Feisty Fiver again.
- The purchasing PSN account is signed in and the entitlement is visible.
- Restore Licences completes if digital content was not recognized.
- The physical disc and downloadable content use compatible regions.
- The Feisty Fiver activates Iceborne.
Before you move on
- The PS4 contains Monster Hunter: World and the Iceborne expansion through the Master Edition bundle or compatible separate licences.
- The game and PS4 system software are updated, and the game launches without licence or installation errors.
- The character has completed the Monster Hunter: World main story and is HR16 or higher.
- The Feisty Fiver in Astera offers the Iceborne transition, confirming that the campaign can begin.
References for this chapter
- Monster Hunter World: Iceborne Master Edition — PlayStation Store
- Monster Hunter World: Iceborne Master Edition Digital Deluxe — PlayStation Store
- Monster Hunter World: Iceborne - How do I access the Iceborne Campaign?
- How to check for updates on PS5 consoles and PS4 consoles – PlayStation Support
- How to update system software on a PS4 console – PlayStation Support
- How to update PS5 console and PS4 console system software in safe mode — PlayStation Support
Iceborne fundamentals: new region, hub, mechanics and early priorities
Iceborne moves the campaign into the frozen Hoarfrost Reach and makes Seliana your main base for Master Rank preparation. Use Seliana’s item box, canteen, Smithy, Resource Center and Gathering Hub before every hunt. Hoarfrost Reach drains stamina while you are exposed to the cold, so carry Hot Drinks and maintain a meal buff. The Iceborne Slinger also adds the Clutch Claw: on PS4, hold L2 and press Circle to grapple, then use the contextual attacks to turn a monster, soften a part, obtain Slinger ammunition or attempt a Flinch Shot. It is a powerful option, not a replacement for ordinary combat. Follow the early assignments in order, unlock camps as they become available, gather local materials and replace High Rank armor with a workable Master Rank set before pushing deeper into the story.
1. Establish Seliana as your working base
After the opening Hoarfrost Reach expedition, Seliana becomes the practical headquarters for Iceborne. Astera remains accessible, but you should normally prepare and depart from Seliana because its central area places the item box, canteen, Smithy, Resource Center, Botanical Research Center and quest counter close together. The Gathering Hub adds the Steamworks, Elder Melder, hot spring and multiplayer facilities as those services become available.
Walk through the central area after each major assignment and speak with NPCs displaying an interaction marker or exclamation mark. Some services are introduced in stages rather than appearing all at once. After completing Baptism by Ice, check the expanded item box and the Smithy. After Banbaro Blockade, use the newly available Steamworks, Elder Melder, Botanical Research Center and Argosy-related services. These are useful for maintaining supplies while the story continues, but optional activities should not delay the assigned quests.
Before leaving Seliana, open the item box, restock from a saved loadout, check weapon sharpness and visit the Smithy. Inspect every newly lit Master Rank weapon and armor branch, but do not spend materials on several competing weapons at once. Keep one primary weapon path current and save materials for an armor replacement when your High Rank defense starts making ordinary attacks dangerous.
- Use Seliana as the default preparation point.
- Check the item box and Smithy after every assigned quest.
- Visit the Resource Center and Botanical Research Center before departing.
- Return to Seliana when new NPC markers appear.
2. Prepare for the Hoarfrost Reach cold
Hoarfrost Reach causes a cold-weather stamina penalty. Without protection, your maximum stamina drains over time, reducing the stamina available for dodges, charges, sprinting and other weapon actions. Carry Hot Drinks in the item pouch, drink one at camp before entering the main route and use another when the effect expires. Hot Drinks can be made from Hot Pepper, so keep Hot Pepper in your item loadout if you expect a long expedition or several monster encounters.
The cold penalty is separate from elemental Iceblight. If the target can inflict Iceblight, bring Nulberries or use suitable elemental resistance and equipment. Also carry Mega Potions, regular Potions, an appropriate status cure and a Farcaster. A Farcaster is a recovery tool: use it to return to camp when supplies are low, the monster changes areas while you are badly hurt, or you need to change equipment before trying again.
Eat at the canteen before every assignment. Choose a meal that supports your weapon and current problem, such as extra stamina for stamina-dependent weapons or defensive food skills when surviving the next hit is more important than maximum damage. Take the supply box contents at camp, but do not rely on camp supplies to replace your own Hot Drinks and healing stock.
- Drink a Hot Drink before extended travel in Hoarfrost Reach.
- Carry Hot Pepper or enough Hot Drinks for the whole hunt.
- Pack healing items, status cures, Nulberries when relevant and a Farcaster.
- Eat a meal before accepting the assignment.
3. Learn the Clutch Claw in the Training Area
The Iceborne Slinger can fire the Clutch Claw while your weapon is drawn. With the default PS4 controls, hold L2 to aim and press Circle to grapple toward a reachable monster part. After attaching, use the on-screen contextual prompt to move between available parts. From the head, the claw attack turns the monster; the weapon attack either softens the attached part or produces Slinger ammunition, depending on the weapon class.
Enter your room in Seliana and speak with the Housekeeper to access the Training Area. Once inside, speak with the Housekeeper again and change the practice object to the large wagon-like target. The ordinary pole is useful for checking weapon damage, but the large target gives you a practical surface for practicing Clutch Claw attachment and movement.
Perform the drill in this order: aim at the target, grapple to the head area, move to a different section, perform the weapon attack, disengage and repeat from a new angle. Practice landing at a reachable part rather than firing from maximum distance every time. Your goal is to recognize when the claw connects and to return to normal combat without wasting time attached to an unsafe target.
- Enter the Training Area through the Seliana Housekeeper.
- Change the practice object to the large Clutch Claw target.
- Grapple, move between parts and perform the weapon attack.
- Practice disengaging instead of remaining attached automatically.
4. Use turning, softening and Flinch Shots selectively
When attached to a monster’s head, the claw attack can turn the monster in the direction indicated by the prompt. Use this only when the monster is in a state that permits the action and when the new facing will help your next attack. Turning the head repeatedly without a plan wastes stamina and can leave you in front of a bite, charge or roar.
A weapon attack from the Clutch Claw softens a body part for improved follow-up damage or drops Slinger ammunition, depending on the weapon. Soften a part that you or your group can attack consistently, such as the head, forelegs or another known weak area. Do not spend the entire hunt trying to maintain wounds if the monster is already giving you safe openings through normal attacks.
A Flinch Shot requires Slinger ammunition and a monster state that allows the action. Attach to the head, face the monster toward a wall, ledge or other valid collision point, then use the on-screen Flinch Shot command; on default PS4 controls this is R2 while aiming the Slinger. The attempt can fail against an enraged monster or when no valid collision point is behind it. If the monster begins an attack while you are attached, disengage rather than waiting to be thrown off. The Clutch Claw is an option that creates openings; ordinary positioning, part breaks, dodges and healing remain reliable ways to win.
- Use the claw during recovery windows, knockdowns or safe movement opportunities.
- Soften a part your weapon can attack consistently.
- Attempt Flinch Shots only with ammunition, a valid collision point and a suitable monster state.
- Disengage when the monster begins a dangerous attack.
5. Follow the early assignment route and unlock facilities
The first mandatory hunt is Baptism by Ice, which sends you into Hoarfrost Reach to hunt Beotodus. Explore the route while tracking the target, collect local materials and note the first camp area. Completing the quest establishes Seliana and unlocks the first Master Rank assignments. If Beotodus disappears beneath the snow, watch the snow movement, stay near solid ground when possible and avoid chasing directly across a hazardous route without stamina protection.
Next complete Banbaro Blockade. This hunt introduces Banbaro and unlocks additional Seliana facilities, including the Steamworks, Elder Melder, Botanical Research and Argosy-related services. Banbaro’s large charges and tree attacks reward lateral movement: leave the line of its charge instead of retreating directly backward, and attack after it finishes a committed swing or rush.
The next story progression sends you toward Ready to Strike, the Viper Tobi-Kadachi assignment. Before attempting it, inspect your armor skills and carry the appropriate poison cures or resistance. Viper Tobi-Kadachi is a good point to stop and craft or upgrade a Master Rank armor set if you are still wearing High Rank pieces. Continue following assigned quests rather than trying to clear every optional quest as soon as it appears; return later for optional rewards and investigations.
During the opening sequence, expeditions and assignments may introduce monsters or locations before the actual hunt appears on the board. If a story expedition asks you to locate or investigate a monster, complete the requested objective, then return to Seliana and accept the newly available assigned quest. The same pattern can occur later as the story moves between Hoarfrost Reach and older regions.
- Complete Baptism by Ice and return to Seliana.
- Complete Banbaro Blockade and use the newly opened facilities.
- Prepare poison cures or resistance before Ready to Strike.
- Replace High Rank armor before repeated failures against Master Rank monsters.
- Follow assigned quests when an expedition introduces a new target.
6. Unlock camps and build a repeatable early-hunt routine
Hoarfrost Reach has multiple camps, but they do not all unlock in the same way. Some become available through story progress or after the first expedition. Others require a delivery request at the Resource Center after you have discovered the location and gathered the listed materials. Whenever you pass a camp entrance or see a delivery request mentioning Hoarfrost Reach, complete it before pushing far into the next rank. Additional camps shorten travel, provide safer resupply points and make future investigations easier.
Use this routine for the first ten to fifteen assignments: at Seliana, restock and save an item loadout; eat at the canteen; check the Smithy; accept the assignment; drink a Hot Drink at camp; collect useful supply-box items; follow the scoutflies toward the target; gather Slinger ammunition only when doing so is safe; and return to camp or use a Farcaster when supplies or health become a problem.
After a faint, do not repeat the same exchange immediately. Heal and restock at camp, then approach from a different route. If the target continues to defeat you, capture it when the quest permits, gather materials for armor upgrades, add a defensive skill such as Health Boost if available, or bring a mantle suited to the monster’s hazards. A failed Flinch Shot is not a reason to abandon a hunt; simply resume normal combat and wait for the next safe opportunity.
- Unlock story camps and complete available Hoarfrost Reach camp deliveries.
- Use a Hot Drink before leaving each camp.
- Keep a current Master Rank weapon and armor loadout.
- Use the camp or a Farcaster to recover instead of fighting while depleted.
- Capture eligible targets when a faster, safer completion is more useful than a carve.
Before you move on
- Seliana is available as your regular base with access to the item box, canteen, Smithy, Resource Center and quest counter.
- You can enter Hoarfrost Reach with Hot Drinks, healing supplies, relevant status cures, a Farcaster and a meal buff.
- You have practiced Clutch Claw grappling, part attacks, turning and Flinch Shot positioning in the Training Area.
- You have completed Baptism by Ice and Banbaro Blockade and are following the assigned Master Rank route.
- The early available Hoarfrost Reach camps are unlocked, or their delivery requests are active with the required materials identified.
- You have crafted at least one workable Master Rank armor set and started a Master Rank upgrade path for your primary weapon.
- You can complete early assignments without relying on constant emergency returns to camp.
References for this chapter
- Monster Hunter World: Iceborne release date, new monsters, new story and features revealed — Capcom News
- Hunter’s Notes: 5 New Details About Monster Hunter World: Iceborne – PlayStation Blog
- MHW: ICEBORNE | Training Area Guide - What You Can Do – GameWith
- MHWI/Quests/Assignments — Monster Hunter Wiki
- How to Unlock Camps Guide - Monster Hunter World: Iceborne — SuperCheats
Finishing the base game and unlocking Iceborne
Complete Monster Hunter: World’s assigned main story and reach Hunter Rank 16 or higher before attempting Iceborne. HR16 alone is not enough if the base-game story is unfinished. Once both conditions are met, return to Astera and speak with the Feisty Fiver to begin the Iceborne transition. Before leaving, update the PS4, confirm that the installed Master Edition contains both World and Iceborne, prepare one dependable High Rank weapon and armor set, and back up your save if possible. Optional quests, investigations, tempered hunts, Arch-Tempered monsters, event quests, and cosmetic activities are not required. If the Feisty Fiver does not provide the prompt, check progression, updates, ownership, installation status, account licenses, and regional compatibility without deleting the existing save.
1. Finish the base-game story and confirm the real requirement
Iceborne’s campaign requires two progression conditions: you must complete the main Monster Hunter: World story, and your hunter must have reached Hunter Rank 16 or higher. Capcom describes these as the requirements for accessing the Iceborne campaign and quests. Reaching HR16 without completing the final base-game story progression does not replace that story requirement.
Use your Assigned quests and completed story progression as your practical check. Do not treat optional quests, investigations, event quests, tempered monsters, Arch-Tempered monsters, crossover content, or a particular decoration as an Iceborne gate. The expansion is designed to follow the completed World campaign, not a complete-clear checklist of every base-game activity.
- The main Monster Hunter: World story is complete.
- Your hunter is HR16 or higher.
- You have not mistaken optional or event content for a mandatory unlock condition.
2. Prepare one usable High Rank loadout
Before beginning the transition, upgrade one weapon you already understand and can use consistently. A fully perfected High Rank arsenal is unnecessary because Master Rank equipment will soon replace it, but entering Iceborne with an unfinished weapon path can make the first assignments harder than they need to be. Prioritize a weapon with serviceable sharpness, ammunition, coatings, or stamina demands for your play style rather than crafting every available branch.
Wear your strongest practical High Rank armor and spend available armor spheres if the set is under-upgraded. Health Boost and other survivability skills are sensible choices while learning the expansion. You do not need a specific High Rank armor set, rare decoration, mantle, or event weapon to start Iceborne.
Save an item loadout containing healing supplies, crafting materials for emergency recovery, your preferred traps and capture items, and weapon-specific ammunition or coatings. Restock before the departure sequence. Keep useful High Rank gear in storage; do not sell it simply because Master Rank is about to begin.
- One reliable High Rank weapon is upgraded as far as current materials reasonably allow.
- Your armor has been improved with available armor spheres.
- A saved item loadout contains healing and weapon-specific supplies.
3. Confirm the PS4 Master Edition and install the current update
The North American PlayStation Store listing identifies Monster Hunter World: Iceborne Master Edition as a PS4 package containing both Monster Hunter: World and the Iceborne expansion. This is different from purchasing the base game alone. The listing also separates the Master Edition from the Master Edition Digital Deluxe package, which adds the Deluxe Kit and special avatar content. Those cosmetic additions are not required for the campaign.
On the PS4 home screen, highlight Monster Hunter: World, press the OPTIONS button, and choose Check for Update. Install any available game update and wait for the download and installation to finish. PlayStation’s current support instructions use this exact PS4 path. Restart the game afterward if the update was installed while the application was closed or suspended.
For a digital purchase, use the PlayStation account that owns the Master Edition and confirm the download has completed. For a physical copy, make sure the disc and expansion content belong to the same regional release. Capcom specifically warns that the World game and Iceborne expansion should be the same region so the save data remains compatible.
- The installed or purchased edition includes both World and Iceborne.
- The PS4 reports no pending game update.
- The physical or digital game and expansion use compatible regions.
4. Protect the existing save before troubleshooting
Do not delete your Monster Hunter: World save while investigating a missing prompt. Capcom states that PS4 save data is stored locally on the console hard drive and, for PlayStation Plus users who enabled automatic upload, in the PlayStation Plus cloud. If you have a current cloud or USB backup, verify that it is recent before making major changes.
The Master Edition does not require a new character. Your existing PS4 save is the one you should continue using after the expansion is installed correctly. If the save is deleted without a usable backup, Capcom cannot recreate it, so save protection comes before reinstalling or changing accounts.
- Your existing save is still present on the PS4.
- A recent PlayStation Plus cloud or USB backup exists if available.
- You have not started a replacement character just to test the expansion.
5. Start Iceborne from Astera
Load the character who completed the base story and return to Astera. With the story and HR16 conditions satisfied, speak with the Feisty Fiver. Capcom identifies the Feisty Fiver as the NPC who starts the Iceborne campaign. Accept the dialogue prompt and follow the resulting departure sequence toward the expansion’s opening investigation.
This transition does not erase your hunter or require a separate Iceborne save. Continue with the character that owns your existing weapons, armor, items, decorations, Palico progress, and unlocked base-game facilities. You can return to earlier equipment and supplies later, so there is no reason to discard them before leaving Astera.
- The Feisty Fiver offers the Iceborne campaign transition.
- The departure sequence begins after accepting the prompt.
- The same PS4 character remains the active hunter.
6. Repair a missing Iceborne prompt in the correct order
If the Feisty Fiver has no Iceborne prompt, first recheck the progression conditions: the base-game main story must be complete and the hunter must be HR16 or higher. Next close the application, use the PS4 Check for Update command again, and confirm that the correct Master Edition or Iceborne add-on is owned and installed.
For digital content that is owned but unavailable, sign into the purchasing account and use Settings → Account Management → Restore Licenses → Restore. PlayStation lists license restoration as a remedy when a game or add-on cannot be located or recognized. Also check the game’s download status and available console storage before reinstalling anything.
For a physical copy, check that the disc region matches the account and expansion content. Capcom’s logistics guidance warns that World and Iceborne must be from the same region for save compatibility. If the license, installation, update, and regional checks all pass but the prompt remains absent, contact PlayStation Support or Capcom Support with the edition, region, account, and exact on-screen behavior. Do not delete the save as a first troubleshooting step.
- The base story and HR16 requirement are both satisfied.
- The Master Edition or Iceborne content is installed and recognized.
- The PS4 is updated and licenses have been restored if necessary.
- The Feisty Fiver starts the Iceborne departure sequence.
Before you move on
- Monster Hunter World: Iceborne Master Edition is confirmed as the PS4 edition containing both the base game and expansion.
- The Monster Hunter: World main story is complete.
- The hunter’s displayed Hunter Rank is HR16 or higher.
- The PS4 game is updated and the expansion is installed under the correct account and region.
- The Feisty Fiver in Astera provides the Iceborne campaign transition.
- The original hunter and save remain available after the transition begins.
References for this chapter
- Monster Hunter World: Iceborne - How do I access the Iceborne Campaign?
- Housekeeping – Monster Hunter: World and MHW: Iceborne Logistics
- Monster Hunter World: Iceborne Master Edition — PlayStation Store
- How to check for updates on PS5 consoles and PS4 consoles – PlayStation Support
- How to restore licenses on PlayStation console
- Monster Hunter World: Iceborne - Recovering Save Data - PS4
Seliana: your new base — uses, setup and early hub routines
Seliana is Iceborne’s main operational base, built around short routes between the quest counter, canteen, item box, Smithy, Resource Center, Botanical Research Center, Argosy and Gathering Hub. Astera remains available for base-game facilities and activities, so treat Seliana as your Master Rank headquarters rather than a replacement for the original base. Establish a repeatable routine: collect cultivated materials, check bounties and investigations, visit the Smithy for upgrades, manage Palico equipment, restore item and equipment loadouts, then eat before departing. The Gathering Hub adds multiplayer access, a hot spring and seasonal features. When unlocked, the Steamworks and Elder Melder provide additional resource and crafting services. Iceborne on PS4 has Palicoes, not Palamutes.
1. Make Seliana your default Master Rank headquarters
Once Iceborne establishes Seliana, return there after Master Rank hunts and use it as your normal preparation point. Its services are arranged to reduce the travel between accepting a quest, checking supplies, improving equipment and eating. Use the quest counter or quest board to select assignments, investigations, optional quests and events, then stop at the nearby Item Box before departing.
Seliana does not replace Astera. Astera remains accessible through the World Map and still contains its own facilities, Gathering Hub and base-game activities. Travel there when a quest, NPC request or facility specifically directs you to Astera; otherwise, Seliana is the more efficient headquarters for Iceborne progression. Do not abandon Astera-related cultivation, research or optional requests simply because Seliana is now available.
- Use Seliana as your normal return point for Master Rank preparation.
- Keep Astera available for base-game requests and facilities.
- Accept quests before beginning the rest of the preparation routine.
2. Learn the service order around Seliana
Begin at the Item Box. Use Manage Items to restock and organize the pouch, then use Manage Equipment to change weapons, armor, charms, decorations and specialized tools. The Smithy is for forging and upgrading hunter and Palico equipment, so visit it after important hunts to see whether newly obtained materials opened a stronger Master Rank upgrade.
Next, check the Resource Center for registered investigations, deliveries and limited bounties. Register useful bounties before hunting rather than waiting until after the objective is complete. At the Botanical Research Center, collect completed harvests, renew cultivation and apply fertilizer when you have a material shortage. The Seliana facility combines access to cultivation and provisions more conveniently than the older layout, but the functions remain the same.
Check the Argosy when it is present and review the Elder Melder when you need melding services or have unlocked recipes relevant to your equipment plan. The Steamworks becomes another useful Seliana stop as Iceborne progression opens it; it consumes stored fuel for reward items and is particularly useful when you have accumulated fuel from expeditions or endgame activities. These services are maintenance stops, not reasons to delay the next story assignment.
- Review investigations, deliveries and limited bounties.
- Collect and renew Botanical Research Center cultivation.
- Check the Argosy and Elder Melder when available.
- Use the Steamworks when it is unlocked and you have fuel.
3. Use the Gathering Hub for multiplayer and seasonal services
Enter the Seliana Gathering Hub when you want to create or search for an online session, meet squad members, answer multiplayer quests or organize a hunt with other players. Capcom designed this hub around quick access to the Smithy, Resource Center, Botanical Research Center and Argosy, so it is also a practical staging area when hunting alone. Use its Item Box and canteen rather than returning to the lower part of Seliana between every preparation task.
The Gathering Hub contains a hot spring and can change appearance during seasonal festivals. The hot spring is a social and recovery feature; it does not sharpen weapons, refill the Item Pouch, restore ammunition or replace eating at the canteen. Festival decorations, tickets and available activities can rotate, so check the current in-game notices before planning around a specific reward.
For online play, make the target and intended quest clear before posting or joining. If the hunt requires a particular resistance, capture objective or material, say so in the session message or chat. The Gathering Hub is most useful when everyone arrives with a prepared loadout instead of using the hub as a substitute for pre-hunt planning.
- Use the Gathering Hub for session management and multiplayer staging.
- Check seasonal notices without assuming rewards are permanently available.
- Treat the hot spring as a convenience, not as a replacement for food or supplies.
4. Save separate equipment and item loadouts
Prepare loadouts at an Item Box. First equip the weapon, armor pieces, charm, decorations and specialized tools you want, then open the equipment-loadout menu and register the setup with a clear name. Equipment loadouts are best organized by purpose: general hunt, elemental defense, poison resistance, capture or a particular weapon. After upgrading armor or changing decorations, overwrite the relevant preset so it does not continue using an outdated configuration.
Create a separate item loadout from Manage Items. Include your normal healing supplies, traps and capture tools, ammunition or coatings, buffs, Hot Drinks and crafting materials that your weapon requires. Item loadouts also preserve the item arrangement and can preserve radial-menu settings according to your current configuration, so test the preset once before relying on it in a difficult assignment.
Cold preparation and poison preparation are different jobs. For Hoarfrost Reach, carry Hot Drinks or use the Coldproof skill when your armor provides it; do not assume ordinary high defense prevents cold stamina penalties. For poison-focused hunts, consider Poison Resistance if your build can support it and carry Antidotes or Herbal Medicine. Save these as separate alternatives instead of forcing every resistance onto one inefficient armor set.
- Register one general equipment loadout.
- Register one item loadout with healing, capture and weapon-specific supplies.
- Keep a Hoarfrost Reach cold-preparation version available.
- Keep a poison-focused version with suitable resistance or cleansing items.
5. Perform the same routine before every hunt
At the Item Box, apply the intended equipment loadout and then the matching item loadout. Confirm that your weapon is the correct upgrade, armor decorations are present, specialized tools are charged or selected, and the pouch contains the ammunition, coatings, traps, mantles, boosters and Slinger supplies you actually intend to use. Pay special attention after a failed hunt: returning from a quest can leave consumables depleted even though your equipment is unchanged.
Check your Palico through the available equipment-management option near the Item Box or through the Palico management service. Give it suitable armor and a weapon, and select the gadget that supports your immediate plan. Healing or distraction tools are useful when learning a monster; gathering-oriented choices are better reserved for material runs. Monster Hunter: World — Iceborne on PS4 does not have Palamutes. The companion to prepare here is your Palico.
Eat at the canteen after the equipment and item checks are finished. Choose a meal that supplies the health and stamina values you need and select a useful food skill when the available ingredients allow it. If the target is in Hoarfrost Reach, consume a Hot Drink before leaving or immediately after arriving if the quest begins at camp. If you faint, restock and repeat this routine before attempting the hunt again rather than departing with missing supplies.
- Apply and verify the matching equipment and item loadouts.
- Confirm weapon, decorations, mantles, ammunition, Slinger supplies and capture tools.
- Set Palico armor, weapon and gadget.
- Eat immediately before departure and prepare for cold conditions when required.
Before you move on
- You can accept a Master Rank quest in Seliana, apply an equipment loadout at the Item Box, restore the matching item pouch and radial setup, eat, and depart without searching for each service.
- You have at least one general equipment loadout and one specialized loadout for cold, poison or capture preparation.
- Your Palico has current armor, a weapon and a selected gadget; you understand that Palamutes are not part of this PS4 edition.
- Botanical cultivation is active, useful bounties or investigations are registered, and you know where to check the Argosy, Elder Melder and Steamworks when available.
- You can enter the Seliana Gathering Hub, use its multiplayer facilities, identify the hot spring, and distinguish those conveniences from the Item Box and canteen.
References for this chapter
Early Hoarfrost Reach route: first hunts, camps and environmental survival
The Iceborne campaign begins with an expedition through Hoarfrost Reach, followed by the Beotodus and Banbaro assignments. Use this opening to learn cold-weather survival, establish the map’s camps, replace weak High Rank equipment with Master Rank gear, and prepare for the Viper Tobi-Kadachi, Nightshade Paolumu, Coral Pukei-Pukei, and Velkhana progression. Hot Drinks are the immediate cold countermeasure; Master Rank armor raises defense but does not itself remove the cold penalty. Unlock the story camps as they appear, complete the Central and Northeast delivery quests when their materials are available, and return to Seliana between assignments to restock, upgrade, and save loadouts.
1. Prepare in Seliana before entering the snow
Before departing for the first Hoarfrost Reach expedition, eat a meal, check the item box, and save a loadout containing Hot Drinks, Mega Potions, Antidotes or Herbal Medicine, Nulberries, a Farcaster, and at least one trap with Tranq Bombs if you plan to capture. The blue supply box at camp also provides Hot Drinks during story quests, but carry your own supply so you are not dependent on the starting camp.
Keep your best High Rank weapon for the opening expedition if you do not yet have a Master Rank branch. Once Beotodus or Banbaro materials become available, visit the smithy after every assignment and replace outdated armor pieces. Master Rank armor is valuable because of its higher defense and new skill combinations; it is not a substitute for Hot Drinks. If a piece has useful ice resistance or health-related skills, treat that as a bonus rather than assuming the whole set prevents cold exposure.
Place Hot Drinks, healing, and your Farcaster on the radial menu. If the stamina bar begins shrinking or your hunter starts shivering, drink another Hot Drink immediately. A hot spring can temporarily counter the cold effect and is useful when you pass one during an expedition, but it is not a replacement for carrying drinks during a hunt.
- Eat before departing from Seliana.
- Carry Hot Drinks, healing items, Nulberries, a Farcaster, and capture supplies.
- Plan to replace High Rank armor with Master Rank pieces after the first suitable hunts.
2. Explore the opening expedition and unlock the first camps
Follow the expedition objectives from the Southern Camp in Area 1. Use this trip to gather tracks, bones, ores, and plants, but do not spend the entire expedition farming. Your immediate route is to follow the scoutflies through the accessible upper areas and complete the story investigation. After the first Hoarfrost Reach expedition, the Western Camp in Area 5 becomes available through story progress. Confirm it on the map before leaving the region.
Hoarfrost Reach has five camps. Southern Camp in Area 1 is available when you first arrive. Western Camp in Area 5 opens through early story progress after the initial expedition. Central Camp is in Area 7 and requires the Resource Center delivery Setting Up Camp: Hoarfrost Reach I, which uses Research Points and one Tobi-Kadachi Membrane+. Northeast Camp is in Area 15 and requires Setting Up Camp: Hoarfrost Reach II, using Research Points and one Azure Rathalos Fellwing. The Shipwreck Camp is in Area 12 on the lower level and opens through story progression when you reach the relevant two-star Master Rank section.
Check the Resource Center whenever you return to Seliana. Complete the Central delivery as soon as you have the Tobi-Kadachi material and the required Research Points. Do not sell an Azure Rathalos Fellwing before checking whether the Northeast delivery is available. The delivery camps are optional for immediate story completion, but Central Camp substantially shortens travel to several later Hoarfrost Reach routes.
- Confirm Southern Camp and Western Camp on the map.
- Check the Resource Center for both Hoarfrost Reach camp deliveries.
- Keep Tobi-Kadachi Membrane+ and Azure Rathalos Fellwing until camp deliveries are checked.
3. Complete Baptism by Ice and build your first Master Rank equipment
The first assigned hunt is Baptism by Ice, which targets Beotodus. Follow the scoutflies through the snow and watch for the moving ridge that marks Beotodus while it is underground. When it surfaces, attack from the side or rear instead of standing in front of its head. Its burrowing charge can change distance quickly, so move laterally when the snow trail turns toward you rather than trying to roll straight backward at the last moment.
Use the Clutch Claw only after Beotodus commits to a long attack or becomes briefly stationary. Attach to a side or rear part that you can reach consistently, tenderize it if safe, then drop and continue grounded attacks. If the monster begins thrashing or burrowing, disengage instead of staying attached. The Clutch Claw is an option for creating better hit zones and repositioning, not a reason to remain on the monster during every opening.
Beotodus can inflict Iceblight. Use a Nulberry if the blight is disrupting your stamina, and keep your Hot Drink active because the environmental cold continues independently. If the fight becomes dangerous, retreat to camp, sharpen and heal, then use fast travel to approach from the nearest unlocked camp. After the hunt, craft a Master Rank weapon upgrade if available and replace at least the weakest High Rank armor pieces. A complete Beotodus set is optional; immediate defense and a reliable weapon matter more than collecting every piece.
- Complete Baptism by Ice.
- Use side and rear positioning against Beotodus.
- Craft an early Master Rank weapon or armor upgrade after the hunt.
4. Defeat Banbaro Blockade without fighting the charge head-on
Banbaro Blockade follows the Beotodus assignment. Banbaro’s charge is safest to avoid by moving diagonally into open ground and letting it pass rather than rolling directly through the antlers. After the charge, attack the hind legs or flank. When Banbaro carries a tree, boulder, or other debris, continue moving until the throw is finished; the projectile can reach farther than the initial charge suggests.
A missed charge is a good time to use the Clutch Claw on a side part. Tenderize the area your weapon can actually reach, or use the Clutch Claw to reposition before dropping. If Banbaro is enraged, do not force a wall-bang attempt. Wait for a safer opening, use a trap if the terrain permits, and take the controlled moment to heal, sharpen, or damage a selected part.
Capture is optional but useful when the monster is visibly weakened. Place a Shock Trap or Pitfall Trap only when Banbaro is moving predictably, then use Tranq Bombs. If it is not ready for capture, return to normal attacks rather than consuming multiple traps. Afterward, use Banbaro materials for armor pieces that improve defense or provide useful skills, but continue the assigned story instead of farming a complete set unless you are struggling.
- Complete Banbaro Blockade.
- Attack Banbaro from the side or rear after its charge ends.
- Use traps for controlled openings, not while it is actively charging.
5. Follow the early assignments and prepare for the Velkhana progression
The next story route sends you through Ready to Strike against Viper Tobi-Kadachi, No Time for Naps against Nightshade Paolumu, and Play Both Ends against Coral Pukei-Pukei. These hunts take place outside Hoarfrost Reach, so use the return to Seliana to restock and change equipment. For Viper Tobi-Kadachi, carry Antidotes or Herbal Medicine and avoid staying in front of its lunges; cleanly removing poison is more important than maintaining an attack string. Against Nightshade Paolumu, leave space when it begins filling the area with sleep gas and use an appropriate item to recover if the status takes effect. Coral Pukei-Pukei rewards side positioning and patience while it uses its ranged water attacks.
The story then leads into Velkhana investigations and encounters. Read the objective before departing: some early Velkhana quests are investigation or repel-style progression rather than a normal hunt requiring a full defeat. Do not burn every healing item trying to end an encounter that only asks you to survive, repel, or gather information. When the proper hunt becomes available later, return with upgraded Master Rank equipment, ice resistance if needed, Nulberries for Iceblight, and a Farcaster for emergency recovery.
Keep progressing through assigned quests rather than waiting for optional quests. Stop for optional hunts only when you need a specific weapon material, armor upgrade, or practice against a status effect.
- Complete Ready to Strike, No Time for Naps, and Play Both Ends as they appear.
- Carry poison recovery for Viper Tobi-Kadachi and manage sleep gas against Nightshade Paolumu.
- Check the Velkhana objective before assuming it is a full hunt.
6. Use camps, endemic life, and failure recovery efficiently
Hoarfrost Reach includes useful endemic life but none of it is required for the campaign route. Duffel Penguins and Pearlspring Macaques are available for optional research requests and collection goals; capture them only if you are already nearby and the monster is not pressuring you. Wulg and other small creatures can interfere with positioning, so clear them when they repeatedly interrupt a fight, but do not chase endemic life during a story hunt. Gather nearby Slinger ammunition when it is on your route, since it can support Clutch Claw openings and environmental interactions.
If you faint, use the return to camp as a reset rather than sprinting back immediately. Eat again if necessary, refill healing and capture supplies, sharpen, change armor or weapon loadouts, and fast-travel to the closest active camp. Use a Farcaster before a second faint when you are out of healing items, badly positioned, or carrying materials you do not want to risk while attempting a desperate finish. A failed capture attempt does not ruin the quest; continue weakening the monster and capture only when the next opening is safe.
Before every return to Hoarfrost Reach, confirm that Hot Drinks, Nulberries, traps, healing items, and the Farcaster are in the pouch. Continue unlocking camps as story progress exposes their areas, and complete the two delivery camps from Seliana when their materials and Research Points are ready.
- Use hot springs or Hot Drinks to manage cold exposure.
- After a faint, restock and change equipment before returning to the monster.
- Complete the Central and Northeast camp deliveries when available.
Before you move on
- Baptism by Ice and Banbaro Blockade are complete.
- Ready to Strike, No Time for Naps, and Play Both Ends have been completed as they appear in the assigned route.
- Your main weapon has a Master Rank upgrade available or crafted, and at least the weakest High Rank armor pieces have been replaced with Master Rank equipment.
- Southern Camp and Western Camp are active; the Central Camp delivery is complete or ready to submit, and the Northeast Camp delivery has been checked when available.
- You can depart for Hoarfrost Reach with Hot Drinks, healing items, Nulberries, traps, capture supplies, and a Farcaster.
- The assigned quest list has advanced beyond the opening hunts toward the Velkhana investigation and later Master Rank story progression.
References for this chapter
- Monster Hunter World: Iceborne Master Edition — PlayStation Store, PS4 edition contents
- 8 Cool Things You Can Do in the Monster Hunter World: Iceborne Beta for PS4 — PlayStation.Blog
- Monster Hunter World Iceborne: Hoarfrost Reach Camp Locations — PowerPyx
- MHW: ICEBORNE Hoarfrost Reach Map and Location — GameWith
- Deliveries — MH:World — Kiranico
- MH World quest order — HuntersBuild
- MHW: ICEBORNE How To Get Through Master Rank Fast — GameWith
Weapon progression and Master Rank upgrades
Iceborne raises the equipment ceiling from High Rank to Master Rank. Your High Rank weapon can carry you through the opening assignments, but Master Rank weapons and armor should replace it as soon as the Smithy offers sensible upgrades. Concentrate materials on one familiar primary weapon and keep one backup option for difficult matchups instead of crafting every branch. Use the Smithy tree, Wishlist, investigations, part breaks and targeted expeditions to identify exactly what you need. Master Rank augmentation is a later system unlocked through Iceborne’s post-story Guiding Lands, so do not spend campaign time chasing it before your weapon tree and armor are ready.
1. Enter Master Rank with one familiar weapon, then replace equipment deliberately
This chapter applies to the PS4 Master Edition, which includes both Monster Hunter: World and the Iceborne expansion. When Iceborne begins, your existing High Rank equipment remains usable, but it is a temporary bridge. Visit the Smithy in Seliana and select Upgrade Equipment to inspect the Master Rank branches connected to the weapon family you already use. These branches require Master Rank monster parts, ores, bones and other materials from Iceborne areas and hunts.
Upgrade the weapon you can use most confidently first. A familiar weapon with slightly lower theoretical performance is more useful than a stronger branch that you cannot operate safely. Replace High Rank armor more aggressively than weapons when incoming damage becomes a problem. Master Rank armor provides the defense needed for Iceborne’s damage curve, and a mixed set is acceptable while you assemble better skills and slots. Do not delay progress while waiting for a complete matching set.
- Choose one primary weapon before spending rare materials.
- Inspect its Master Rank tree at the Seliana Smithy.
- Replace High Rank armor pieces when their defense is no longer keeping pace with the story.
2. Read several nodes of the weapon tree before confirming an upgrade
At the Smithy, follow your current weapon through the upgrade tree and compare the next available branches. Check attack power, sharpness, affinity, element or status, slots and the materials required. A raw-damage branch may be convenient for general story use, while an elemental or status branch can be preferable when you already understand that weapon and can obtain the required monster parts efficiently.
Prioritize a route supported by monsters currently available in your assigned or optional quests. Do not spend a rare plate, gem or other limited material on a branch until you have checked whether the next node uses the same item. If you choose incorrectly, ordinary weapon upgrades can generally be rolled back through the Smithy, returning materials used on the downgraded stages. The game warns about upgrades that cannot be rolled back, so read the confirmation screen rather than accepting automatically. Augmented weapons cannot be downgraded in the usual way, which is another reason to postpone augmentation until you are sure the weapon is a long-term choice.
- Compare at least the next two visible branches before confirming.
- Favor a route you can support with current hunts and gathering areas.
- Read rollback warnings carefully before accepting a special upgrade.
3. Use the Wishlist to turn every hunt into a material objective
Register your chosen weapon and important armor pieces on the Wishlist from the Smithy. The Wishlist records the remaining materials and can notify you when a craft or upgrade becomes possible. Check it before departing from Seliana, then decide whether your next quest should be a monster hunt, an investigation or an expedition for gathering materials.
Keep the active list focused. One primary weapon, one backup weapon or backup loadout and the armor pieces you are genuinely preparing are enough during the campaign. Remove completed or abandoned entries so the list does not hide the item you actually need. This is more efficient than repeatedly returning to the Smithy and trying to remember which monster part was missing.
- Wishlist the primary weapon and its next meaningful upgrade.
- Keep one practical backup rather than several unfinished branches.
- Clear completed entries and check the list before each departure.
4. Farm monster parts through targeted hunts and investigations
When the Wishlist identifies a monster part, check the Available Quests and Investigations lists for that monster. Investigations are especially useful when they provide additional reward boxes, but use the quest that you can complete consistently rather than choosing a difficult investigation only for better-looking rewards. Break the body part associated with the material you need before finishing the hunt, because part breaks add relevant reward opportunities and can provide materials that are not common in ordinary carving results.
Capture the target when capture is permitted and you want to end the hunt quickly or obtain capture-related quest rewards. A capture is not a guarantee of a specific rare part, so continue using investigations and part breaks if the material does not appear. For bones and ores, gather in the Master Rank locale where the material is listed. If a required monster or resource has not appeared yet, continue the assigned story instead of assuming the item is bugged or missing from your inventory.
- Search assigned, optional and investigation quests for the target monster.
- Break the monster part linked to the desired material.
- Capture when practical, but do not treat capture as a guaranteed rare drop.
5. Build armor around defense, slots and the skills your weapon actually uses
Master Rank armor should be evaluated as equipment, not merely as a collection of set names. Compare defense, elemental resistances, decoration slots and skills before forging each piece. Keep the skills that support your weapon’s normal operation, then add survivability when a monster is causing repeated faints. Health Boost is a broadly useful defensive choice, but the best offensive or utility skills depend on the weapon class and your personal build.
Spend Armor Spheres on pieces that should last for several assignments. Early Master Rank armor will eventually be replaced, so do not empty your sphere supply by fully upgrading every temporary piece. If a monster is defeating you in one or two hits, stop pushing the story. Return to Seliana, upgrade armor, restock healing items, review elemental resistance and change the loadout before attempting the quest again.
- Compare defense, slots, skills and resistances before crafting.
- Use Armor Spheres on armor you expect to keep for multiple assignments.
- Maintain a defensive loadout for unfamiliar monsters and difficult matchups.
6. Treat High Rank augmentations and Master Rank augmentations as separate stages
High Rank weapon augmentations do not remain attached when the weapon is advanced into Master Rank. If you upgrade an augmented High Rank weapon into its Master Rank progression, the previous augment effects are removed; the spent augmentation materials are returned, but the effects themselves do not carry forward. This makes it reasonable to use a High Rank augment during the transition, but do not invest in a final High Rank build expecting it to remain unchanged in Iceborne.
Master Rank weapon augmentation is unlocked after the Iceborne story and uses materials from the Guiding Lands rather than relying on the High Rank Streamstone system. A Master Rank weapon must be fully upgraded along its tree before it can be augmented. Iceborne also uses augmentation slots: rarity 10, 11 and 12 weapons have different available slot capacity, and attack, health regeneration, affinity, extra slots, defense and element or status options consume different amounts of that capacity.
For a general-purpose weapon, Health Regeneration is often a strong first consideration because it reduces time spent stopping to heal. Affinity is useful when your build has room to improve critical-hit chance. Attack can be preferable when affinity is already high, while extra slots can solve a specific decoration problem. Treat these as build choices, not universal requirements, and inspect the exact Smithy material list before committing.
- Do not expect High Rank augments to carry into Master Rank.
- Finish the intended Master Rank weapon tree before augmenting it.
- Use Guiding Lands materials and augmentation slots to solve a specific build need.
7. Continue the campaign instead of overfarming early equipment
During the story, upgrade whenever a new Master Rank node gives a clear improvement, then return to the assigned quests. You do not need every weapon, every monster armor set or a complete decoration collection to finish Iceborne. One upgraded primary weapon, one useful backup option and one well-maintained Master Rank armor set are sufficient for steady campaign progress.
After the story opens the Guiding Lands, return to the Smithy and inspect the newly available weapon upgrades, custom upgrades and augmentation requirements. Guiding Lands region materials and tempered-monster materials are not interchangeable with ordinary hunt rewards, so note the exact region and monster connected to your target upgrade before starting a farming session. Raise only the region levels and hunt targets that support your chosen weapon rather than collecting materials without a plan.
- Finish the campaign with one reliable primary weapon.
- Use the Guiding Lands to target specific augmentation and upgrade materials.
- Check the Smithy after major story and Guiding Lands unlocks.
Before you move on
- You have selected a primary weapon that you can use confidently and upgraded it through a deliberate Master Rank branch.
- You have a practical backup weapon or backup loadout for a difficult matchup.
- Your active armor set is Master Rank equipment with upgraded defense, useful slots and skills appropriate to your weapon.
- The Wishlist or your quest notes identify the exact monster, investigation or gathering location needed for each remaining upgrade.
- After completing the Iceborne story, you have entered the Guiding Lands and checked the Smithy requirements for your intended Master Rank augmentation.
- Your primary weapon is fully upgraded before you commit Guiding Lands materials to augmentation.
References for this chapter
- Monster Hunter World: Iceborne Master Edition — PlayStation Store, PS4 edition contents
- MHW: ICEBORNE | What is the Wishlist & How To Use — GameWith
- MHW: ICEBORNE | Downgrade Equipment Guide — GameWith
- MHW: Iceborne — How To Augment Master Rank Weapons
- MHW: Iceborne — Guiding Lands Region Level and Appearing Monsters — GameWith
Master Rank combat: Clutch Claw advanced use and weapon-specific tactics
On the PS4 version of Iceborne, hold L2 and press Circle to fire the Clutch Claw, including while your weapon is drawn. Once attached, Circle attacks or turns the monster, Triangle performs the weapon-specific Clutch attack, and R2 fires compatible Slinger ammunition as a Flinch Shot. Use the Claw to soften a part, turn a non-enraged monster toward a wall, or create a knockdown for your team. Weapon classes do not all use the Claw in the same way: some attacks soften parts directly, while others deal damage and drop Slinger ammunition. Practice with the large dummy in the Training Area, then learn the timing on a low-risk Master Rank hunt. The Claw is a useful opening tool, not a reason to grapple through roars, charges, or active attacks.
1. Set up the Training Area and learn the three basic Clutch Claw actions
Travel to your room and speak with the Housekeeper to enter the Training Area. Once inside, use the Housekeeper’s area settings to replace the ordinary practice objects with the large wheeled dummy. This target reacts more like a monster and gives you a safer place to learn the Clutch Claw before taking it into Master Rank assignments.
Equip the weapon you actually use. Hold L2 to aim the Slinger, then press Circle to fire the Clutch Claw. The attack can be launched with your weapon drawn. Aim at several parts of the dummy and use the Left Stick to move around the attached body part. Press Circle while attached to perform a Claw attack or, when attached to the head, turn the monster. Press Triangle to use your weapon’s Clutch follow-up. Press R2 only when you intend to use compatible loaded Slinger ammunition for a Flinch Shot.
Repeat this sequence on the dummy: grapple to a foreleg, move to the top of the part, perform the weapon attack, drop safely, and resume ordinary attacks. Then grapple the head, turn the dummy, and practice firing the Flinch Shot toward the practice wall. Learn how long each animation keeps you committed and where your hunter lands afterward. Those recovery positions differ enough between weapons that memorizing another class’s timing can create mistakes.
- Enter the Training Area through the Housekeeper and select the large practice dummy.
- Use L2 plus Circle to grapple, Circle to perform a Claw action, and Triangle for the weapon follow-up.
- Practice dropping immediately after a grapple instead of forcing an attack every time.
2. Soften the part your weapon and party can reach
A successful weapon attack from the Clutch Claw can soften a monster part, improving that part’s hitzone for a limited period. The visual wound is your reminder that the effect is active. Pick a part that matches your normal position: a foreleg for hunters fighting at the front quarter, the head for Hammer or Hunting Horn users, or a wing or tail when your weapon can reach it consistently. Wounding the head is not automatically best if the fight will keep you at the legs.
The weapon categories do not all produce the same result. Great Sword, Hammer, Hunting Horn, Lance, Charge Blade, Switch Axe, and Heavy Bowgun have Clutch attacks that primarily soften the part they strike. Long Sword, Sword and Shield, Dual Blades, Gunlance, Insect Glaive, Bow, and Light Bowgun have Clutch attacks that primarily deal damage and make the monster drop Slinger ammunition rather than immediately softening the part. Because the follow-ups differ, check your weapon’s in-game move list and test the result on the dummy.
Do not spend a dangerous opening refreshing a wound that your party is not attacking. If the wound disappears during a safer phase of the hunt, reapply it then. Conventional attacks remain valid throughout Iceborne, and a bad grapple costs health, stamina, and positioning.
- Choose a part that your weapon can hit repeatedly.
- Confirm the wound is visible before committing to a damage sequence.
- Remember that different weapon classes have different Clutch attack effects.
3. Turn a non-enraged monster into a wall-bash opening
A Flinch Shot requires you to be attached to the monster’s head and have compatible Slinger ammunition loaded. After grappling to the head, press Circle to rotate the monster. Each turn changes the direction it faces, so line up the head with a nearby wall or drop-off before pressing R2. The Flinch Shot consumes the loaded Slinger ammunition and drives the monster forward. If it reaches a valid wall or ledge, the impact creates a knockdown and a strong opening for damage, healing, sharpening, reloading, or tenderizing.
Check the monster’s status before starting. A monster that is enraged cannot be steered normally and cannot be used for the standard Flinch Shot setup. Wait until the rage state ends instead of repeatedly grappling the head. Also check that the impact surface is close enough and that the monster is facing it; a badly angled launch can waste ammunition without producing a topple.
After a successful wall bash, do not scatter around the monster. Attack the wounded part if it is safe, or use the knockdown for your weapon’s highest reliable damage. If the team is not ready, use the opening to reload, sharpen, heal, or establish better positions rather than beginning a second risky grapple immediately.
- Confirm the monster is not enraged.
- Attach to the head, turn it toward a valid wall or drop-off, then press R2.
- Use only compatible loaded Slinger ammunition and expect it to be consumed.
4. Adjust the Claw routine to your weapon class
Great Sword and Hammer gain substantial value from deliberate knockdowns. Great Sword should use a wall bash or other long opening to prepare charged attacks rather than clutching during an active swing. Hammer should favor safe access to the head, where softened attacks can support both damage and stun pressure. Hunting Horn can use the same opening to reach the head while preserving enough time for its normal attack and song-management routine.
Lance can use its Iceborne Clutch option alongside its defensive playstyle, but do not abandon guard positioning without a clear opening. Sword and Shield can switch between Slinger actions and attacks while drawn, making it well suited to opportunistic grapples. Dual Blades, Long Sword, and Insect Glaive should use the Claw when the monster’s movement is predictable and avoid sacrificing Demon Mode, Spirit Gauge, or aerial positioning for a poor grapple.
Charge Blade and Switch Axe should protect their phials, gauges, and morphing positions. Gunlance should avoid a grapple that leaves it unable to guard or resume its shelling rhythm. Bow, Light Bowgun, and Heavy Bowgun should use the Claw when the monster is committed to a long recovery, then return to their firing range. Ranged hunters should not grapple simply because they are standing far away; the Claw is best used to create a safe reset or a team opening.
- Use long knockdowns for committed weapons such as Great Sword and Hammer.
- Preserve weapon-specific gauges, phials, coatings, shells, and ammunition when a grapple gains little.
- Return to your weapon’s normal spacing after the Clutch opportunity ends.
5. Recover from a failed grapple and coordinate the team
If the monster shakes you off or the Claw attaches to the wrong part, stop trying to force the sequence. Roll away from the attack line, sheath if you need to sprint, and heal before attempting another grapple. A Farcaster is a valid emergency reset when the hunt has become unstable or your supplies need replenishing. Rocksteady, Temporal, or other mantles can assist with particular openings, but they do not remove the need to watch the monster’s attack, roar, charge, and enraged states.
Before a multiplayer hunt, agree on the main wounded part. When one hunter softens a foreleg or head, teammates who can reach it should focus that area. If someone is turning the head toward a wall, stop attacking the head and prepare for the knockdown. If the Flinch Shot misses, spread out rather than clustering around the monster’s head, then resume ordinary positioning.
Only one hunter needs to create the opening. Other players can maintain damage, target a tail, protect a recovering teammate, reload, or prepare a trap when the quest permits it. This keeps the Clutch Claw useful without turning every hunt into simultaneous grappling attempts.
- After a failed grapple, disengage and survive before trying again.
- Tell teammates which part is wounded and whether a wall bash is being prepared.
- Return to conventional combat when the monster is enraged or the angle is unsafe.
Before you move on
- In the Training Area, you can grapple the large dummy, move to a chosen part, perform your weapon’s Clutch follow-up, and disengage safely.
- During a live Master Rank hunt, you can identify a non-enraged opening, attach to the head, turn the monster toward a valid wall or drop-off, and perform a Flinch Shot with compatible Slinger ammunition.
- You know whether your chosen weapon’s Clutch attack softens a part or primarily drops Slinger ammunition, and you have selected a wounded part that you can reach reliably.
- After a failed grapple, you can roll away, heal or Farcaster when necessary, and return to normal combat instead of repeatedly forcing the mechanic.
- In multiplayer, your team can identify one wounded part, prepare for a wall-bash knockdown, and avoid clustering if the attempt fails.
References for this chapter
- Hunter’s Notes: 5 New Details About Monster Hunter World: Iceborne – PlayStation Blog
- 8 Cool Things You Can Do in the Monster Hunter World: Iceborne Beta for PS4 – PlayStation Blog
- MHW: ICEBORNE | What Is The Clutch Claw - Guide & What You Can Do – GameWith
- MHW: ICEBORNE | Training Area Guide - What You Can Do – GameWith
- MHW: Iceborne Weapon Changes List – GameWith
Master Rank investigations, tempered monsters, and event quests
Investigations are repeatable quests with extra conditions, limited attempts and bonus reward slots. Use ordinary Master Rank investigations when you need parts from a named monster, and use tempered investigations primarily for decoration-oriented rewards. Generate them by collecting tracks, breaking parts, hunting, capturing and completing other research activity, but remember that a tempered track does not guarantee an investigation against that same species. Check the Smithy before farming augmentation materials because many Master Rank weapon augmentations require Guiding Lands materials rather than investigation rewards. Master Rank Event Quests are separate listings at the quest counter and require Iceborne. Their rank requirements, prerequisites and rewards vary, so read the complete listing in-game and compare it with Capcom’s current event schedule. Arch-tempered quests are special event content, not the next reward tier of ordinary tempered investigations. MR100 is the practical milestone for broad access to Arch-tempered elder-dragon events, although the individual event listing supplies the exact requirement. These quests are optional endgame content and are not required to finish the Iceborne story or first enter the Guiding Lands.
Register useful Master Rank investigations at the Resource Center
Return to Seliana or Astera after a hunt and open the Resource Center. Choose Manage Investigations to review the quests you have generated, then register the ones that support your immediate material goal. The entry identifies the target, locale, time limit, faint allowance, player limit and bonus reward slots. Register selectively so useful quests remain easy to find.
For ordinary Master Rank material farming, favor an investigation for the exact monster whose parts you need. Bronze, silver and gold bonus slots improve the reward opportunity, but they do not guarantee a mantle, gem, mantle-equivalent rare part or any other specific item. Keep several versions of the same target when possible, especially one with a comfortable faint allowance and another with better reward slots.
Check the remaining attempts before accepting the quest. Investigations are finite-use quests. A difficult hunt with one or two attempts remaining is a poor practice run, so learn the monster through an assignment, optional quest, expedition or less restrictive investigation first. If the investigation is lost, it disappears when its available attempts are exhausted.
- Open Manage Investigations after returning from hunts.
- Register quests that match a named material or decoration goal.
- Review reward slots, faint allowance, time limit and remaining attempts.
- Reserve restrictive investigations for a prepared build.
Generate investigations by collecting tracks and hunting normally
Investigations can be generated during quests and expeditions through activities such as collecting monster tracks, breaking parts, capturing or slaying monsters, and other research-related progress. During a hunt, gather tracks when the monster retreats or when the route is safe. You do not need to abandon the objective or spend an entire expedition collecting every trace; gather naturally, then check the Resource Center after returning to town.
Tempered investigations come from eligible tempered traces and related activity. Tempered tracks have the special visual treatment associated with tempered monsters, and the resulting investigation uses the appropriate tempered reward presentation. A track does not guarantee an investigation for that same species. The target can differ, while the type of trace influences the danger category of the investigation that is generated.
If you need more tempered investigations, use an expedition or a quest where you can safely follow the relevant tempered monster and collect its traces. Do not pursue high-threat tracks before your armor, weapon, healing supply and resistance plan are ready. A difficult investigation only helps if you can complete it consistently.
- Collect tracks during normal hunts and expeditions.
- Check the Resource Center after the activity ends.
- Do not assume the track species equals the investigation target.
- Treat high-threat tempered traces as preparation for endgame farming.
Use ordinary investigations for monster parts and tempered investigations for decorations
Choose the investigation type according to the resource you need. If the Smithy requests a normal Master Rank monster part, use an ordinary investigation for that monster and break the relevant body part during the hunt. Capturing can shorten the fight and adds a capture-reward route when the quest permits it, but capture does not guarantee the exact item.
Tempered investigations are especially useful because their special reward slots can produce feystones for decoration appraisal. Higher-end Master Rank tempered investigations provide better opportunities for building a decoration collection, but the result remains random. Select a target and quest condition your current build can defeat reliably instead of repeatedly failing a more dangerous quest for a theoretical improvement.
Do not treat tempered investigations as the universal source of weapon-augmentation materials. Master Rank augmentation paths commonly require materials from the Guiding Lands, including monster drops and gathering-point materials found there. Open the Smithy’s Augment Equipment menu first, identify the required material category, and then decide whether your next hunt should be an ordinary investigation, a tempered investigation or a Guiding Lands expedition.
- Use ordinary investigations for named monster parts.
- Use tempered investigations mainly for decoration-oriented rewards.
- Check the Smithy before farming augmentation materials.
- Do not promise a particular decoration or rare part from an investigation.
Prepare before spending restrictive tempered investigations
Begin with a tempered monster whose attack patterns, elemental weakness and status effects you understand. Have a complete Master Rank armor set and a weapon with an appropriate rarity and upgrade level before spending limited-faint investigations. Add Health Boost and the relevant resistance or status protection if the target repeatedly defeats you through one identifiable hazard.
Eat before departing, restock healing and curing items, and equip mantles or boosters that support the plan. Tempered attacks punish greedy combos, so preserve enough stamina and health to evade. Use openings after a knockdown, flinch or wall attack for damage, then disengage before the monster recovers.
Choose the target according to your actual objective. Farm a familiar tempered monster for general decoration improvement. Farm an ordinary investigation for a specific monster part. Move to a harder tempered target only when its reward category, material or event preparation directly supports your next equipment goal. One ordinary tempered clear does not unlock Arch-tempered content and does not by itself establish that you are ready for an Arch-tempered hunt.
- Use a stable Master Rank set before tempered farming.
- Bring cures for the target’s elemental and status hazards.
- Choose consistency over prestige when selecting a farming target.
- Upgrade your build before using restrictive investigations.
- Do not confuse completing a tempered investigation with unlocking Arch-tempered events.
Coordinate multiplayer tempered hunts and event runs
Before posting an SOS or joining a lobby, state the target and purpose of the hunt: monster parts, decorations, a ticket, a layered-equipment material or another event reward. The team should avoid scattering attacks without a reason. Focus on a useful break, then exploit knockdowns and wall attacks without creating unsafe congestion.
If one hunter is built for status, mounting or another setup role, let that player create the opening while the rest of the group attacks the selected part. Ranged hunters should communicate when they are controlling distance or applying status ammunition. Everyone should carry personal healing and curing supplies rather than assuming another hunter can rescue every mistake.
When a teammate faints, stop forcing damage and return to safe positioning. A limited-faint investigation can fail quickly after several careless carts. If the quest is lost, return to the hub, identify the cause of the faint, change the relevant skill or item loadout, and use a lower-risk hunt before attempting the same investigation again.
- Declare the target and farming objective before departure.
- Coordinate part breaks, status openings and wall attacks.
- Treat limited-faint investigations as shared resources.
- Adjust the build after failure instead of repeating the same plan unchanged.
Check Master Rank Event Quests and their prerequisites
Open the Event Quest tab at the quest counter and read the entire listing before accepting it. Master Rank events can provide decorations, tickets, layered-equipment materials, special monsters, armor materials, weapons or efficient farming opportunities. The displayed requirement may include a minimum Master Rank, a completed prerequisite, a platform-specific collaboration condition or another quest-specific restriction.
You must own Monster Hunter: World: Iceborne to play Master Rank Event Quests. The PS4 Master Edition is the package containing both Monster Hunter: World and the Iceborne expansion; the Deluxe or DDX versions add cosmetic extras, but those extras are not required for campaign or endgame progression. If Master Rank events do not appear, verify that Iceborne is installed and active on the account, then recheck the current in-game listing and Capcom’s event schedule.
Do not build a progression plan around an old calendar date. Use the current in-game Event Quest list as the immediate authority for what your PS4 account can accept, and use Capcom’s schedule to review the published rotation and quest requirements. Some events have platform, collaboration or availability restrictions. Run an event when its reward directly supports your present weapon, armor, decoration or cosmetic goal rather than treating every event as mandatory.
- Open the current Event Quest list at the quest counter.
- Read the event’s rank, prerequisite and success condition.
- Confirm Iceborne access if Master Rank events are missing.
- Check the current Capcom schedule without relying on an old date.
- Separate required equipment from optional tickets and cosmetics.
Treat Arch-tempered quests as separate optional endgame content
Arch-tempered monsters are special high-difficulty Event Quest targets. They are not simply ordinary tempered investigations with extra health, and completing an ordinary tempered investigation does not unlock them. Their event listings identify their own requirements and rewards, which may include gamma armor materials, layered armor materials or other endgame rewards.
MR100 is the practical milestone for broad access to Arch-tempered elder-dragon events in Iceborne. Individual listings remain authoritative: for example, Capcom’s Master Rank schedule lists Arch-tempered Namielle with an MR100 requirement, and other high-end events may display their own conditions. Read the exact listing before preparing for a hunt. MR100 is therefore an optional extended-endgame target, not a requirement for the Iceborne campaign, Paean of Guidance, initial Guiding Lands access or the MR49, MR69 and MR99 progression assignments.
Before attempting an Arch-tempered event, establish a completed Master Rank build, upgraded weapon, useful decorations, sufficient health and a reliable response to the target’s strongest mechanic. If the quest is available but your set is not ready, continue ordinary hunts, tempered investigations and Guiding Lands farming. For multiplayer, agree on status, part-break, support and damage roles before departure. The goal of the first attempt is to learn the event’s arena, hazards and enrage behavior; repeat it only when its reward supports a defined equipment objective.
- Open the Arch-tempered event listing and read its exact requirement.
- Use MR100 as the practical milestone for broad Arch-tempered elder-dragon access.
- Do not treat Arch-tempered events as ordinary tempered investigations.
- Do not claim that one tempered clear unlocks or prepares you for Arch-tempered content.
- Keep Arch-tempered hunts separate from required Iceborne campaign completion.
- Farm the event only when its reward supports a defined endgame goal.
Before you move on
- You can open Manage Investigations, register useful Master Rank quests and inspect their conditions before departure.
- You have completed at least one ordinary Master Rank investigation for a specific monster material.
- You have completed at least one manageable Master Rank tempered investigation and reviewed its decoration-oriented rewards.
- You have checked the Smithy and know whether your next upgrade needs normal monster parts, tempered investigation rewards or Guiding Lands materials.
- You have opened the current Master Rank Event Quest list at the quest counter and read the displayed requirement for at least one event.
- You can distinguish ordinary tempered investigations, Master Rank Event Quests and Arch-tempered Event Quests.
- You understand that MR100 is an optional extended-endgame milestone for broad Arch-tempered elder-dragon access, not a requirement for the Iceborne campaign or initial Guiding Lands unlock.
- You have selected a primary weapon goal and a farming route that supports it instead of grinding investigations without a defined purpose.
References for this chapter
- Monster Hunter World: Iceborne Master Edition — PlayStation Store
- Master Rank Event Quests — Monster Hunter: World — Capcom
- Event Quest Schedule — Monster Hunter: World — Capcom
- Monster Hunter World: Iceborne — Investigations Guide — Samurai Gamers
- MHW: Iceborne — How to Track Tempered Monsters and Investigations — GameWith
- MHW: Iceborne — Investigation Quests Guide — GameWith
- MHWI/Quests — Monster Hunter Wiki
Armor skills, decorations and augmentations: building functional endgame sets
Build one dependable Master Rank loadout before chasing maximum damage. Start with Master Rank armor, upgrade its defense, and use Health Boost or another deliberate defensive plan to prevent avoidable carts. Once the set is reliable, combine affinity skills with Weakness Exploit and Critical Boost when your weapon benefits from critical hits. Elemental, status, ranged and defensive weapons may need a different priority order. Use the Smithy to manage armor, decorations and augments, and the Elder Melder to recycle surplus decorations or pursue selected results without consuming materials needed for your primary weapon. Master Rank weapon augmentation becomes a post-story investment using Guiding Lands materials. For many melee weapons, Health Regen is a practical first choice; Affinity, Attack, Element or Status, Defense and extra slots are alternatives chosen according to the weapon and build. Finish one weapon path before augmenting it.
1. Replace High Rank armor and raise the defense of a long-term set
Do not keep High Rank armor simply because its skills are familiar. Master Rank armor has a much higher defense ceiling, and surviving one additional attack is usually more valuable than retaining a small offensive advantage. At the Smithy, use Upgrade Armor and spend Armor Spheres on the pieces you actually wear. Begin with a complete Master Rank set or a deliberate mixed set whose skills support your weapon.
When Upgrade Limit Removal becomes available for a piece, use it only on armor you expect to keep. Armor augmentation removes the normal upgrade limit, allowing further armor-level improvements and raising defense beyond the original cap. The Smithy shows the required materials and Research Points or zenny for the version available to you, so check there before farming. If resources are limited, prioritize pieces with useful skills and the largest immediate defensive benefit, then upgrade the remaining pieces before tackling difficult tempered hunts.
Do not armor-augment temporary equipment that you expect to replace after the next major monster. Master Rank armor augmentation is an endgame investment rather than a requirement for completing the early campaign.
- Equip Master Rank armor before beginning serious endgame farming.
- Raise the defense of the pieces used in your primary loadout.
- Use Upgrade Limit Removal only on armor you plan to keep.
2. Secure survivability skills before optimizing damage
Health Boost is the safest general-purpose defensive priority. Work toward Health Boost 3 through armor, charms or Vitality decorations whenever possible. It gives you a larger margin for error against Master Rank attacks and is often more valuable than a small attack increase when you are fainting. If you are carting repeatedly, improve defense and health first rather than copying a damage-focused set that assumes precise play.
Fortify is useful for solo progression because it strengthens the hunter after fainting, up to the skill’s normal activation limit. Treat it as recovery insurance, not as permission to spend carts carelessly. It can help turn a bad opening into a successful hunt, but Health Boost, improved armor and better positioning should remain your first answers to repeated failures.
Add defensive utility skills in response to a specific problem. Stun Resistance can stop a follow-up hit from becoming a cart. Blight Resistance, Bleed Resistance, Tremor Resistance, Earplugs, Guard, Guard Up, Evade Window or Evade Extender can be valuable against particular monsters or weapon requirements. Do not fill every slot with resistances that the target does not use. Take the skill that addresses the mechanic causing your failures.
- Use Health Boost 3 for a general hunting set whenever possible.
- Consider Fortify for solo hunts where recovery after a faint is valuable.
- Add resistance or weapon utility skills only when the target or weapon justifies them.
3. Build affinity and critical damage as a connected plan
After your set is safe, improve damage through a coherent affinity plan. Critical Eye raises affinity directly. Weakness Exploit rewards attacks aimed at vulnerable parts, with Iceborne’s wounded-part mechanics making Clutch Claw tenderizing relevant to how reliably the skill performs. Critical Boost increases the damage of critical hits, so it becomes more valuable after your build can produce critical hits consistently.
Check the weapon’s displayed affinity before adding more Critical Eye. A weapon with low or negative affinity benefits greatly from affinity skills. A weapon that already reaches reliable critical coverage may gain more from attack, sharpness, element, status or weapon-specific utility. Agitator can support an affinity plan when you regularly fight enraged monsters, but do not remove Health Boost or an essential weapon skill merely to add another damage skill.
The correct priority can change by weapon. Bow and Dual Blades may value stamina and elemental support, Gunlance may need shelling-related skills, Charge Blade may need skills supporting its phials and guard points, and ranged weapons may require shot or recoil support. Use the weapon’s actual mechanics as the deciding factor rather than forcing every set into the same Critical Eye, Weakness Exploit and Critical Boost template.
- Pair affinity skills with Critical Boost instead of stacking unrelated attack skills.
- Aim at vulnerable or wounded parts when relying on Weakness Exploit.
- Keep essential weapon skills ahead of marginal damage increases.
4. Manage decorations and the Elder Melder without wasting resources
At the Smithy, select Change Equipment and Manage Decorations to place jewels into armor, charms and weapons. Rank 4 decorations can combine two skill effects or provide a larger skill value, so inspect both skills before equipping, selling or melding one. Save multiple loadouts: a general set with Health Boost, a defensive or resistance set, and weapon-specific sets that use different stamina, guard, sharpness, shot or elemental requirements.
Use the Elder Melder to recycle surplus decorations and materials into available melding results or additional decoration opportunities. Keep jewels that complete your active builds, especially rare combinations that are difficult to replace. Meld duplicates or skills you genuinely will not use, and check the material cost before confirming. Some materials used by melding are also needed for charms, armor, weapons or augmentations.
Do not stop campaign or Guiding Lands progress while waiting for a perfect decoration. Continue with investigations and suitable event quests while gradually improving the set. The useful target is a loadout with Health Boost or another deliberate survival plan, the weapon’s required skills, several functional damage skills and open slots that can be upgraded later.
- Save general, defensive and weapon-specific loadouts.
- Inspect every Rank 4 decoration for both skills before melding it.
- Reserve rare materials needed for weapons, charms and augmentations.
- Continue progressing instead of waiting for a perfect decoration drop.
5. Augment one finished Master Rank weapon
Master Rank weapon augmentation becomes available after completing Iceborne’s main story and reaching the Guiding Lands endgame. It is separate from the High Rank augmentation system that uses Streamstones. At the Smithy, choose Augment Equipment and inspect the weapon’s available augment slots, upgrade status and material requirements. Master Rank augmentations use Guiding Lands materials and Research Points, and the available options depend on the weapon’s rarity and upgrade route.
Health Regen is a practical first choice for many melee hunters because successful attacks restore health. It is most useful when you can maintain safe contact with the monster and deal damage consistently, reducing the number of openings spent drinking potions. Choose Affinity Increase when the weapon still needs critical chance to support a Critical Eye, Weakness Exploit and Critical Boost plan. Choose Attack Increase when affinity is already well covered or when raw damage is the weapon’s main strength.
Element or Status Effect Up is appropriate when the build is deliberately centered on elemental or status output. Defense Increase and additional decoration slots are valid utility choices when they solve a clear equipment problem, but they are not automatic replacements for Health Regen, Affinity, Attack or Element/Status. Check the exact Smithy requirements because rarity, slot capacity and materials differ between weapons.
Finish the weapon’s upgrade-tree path before augmenting it. If you augment an intermediate weapon and later upgrade it, the augmentation may be removed during the upgrade process and require reapplication. Farm for one primary weapon first, confirm that it is the weapon you intend to use, then spend the rare Guiding Lands materials. Do not attempt to augment every weapon before establishing a reliable armor set and a focused farming route.
- Complete the weapon’s upgrade-tree path before spending augmentation materials.
- Use Health Regen as a practical first option for many melee weapons.
- Choose Affinity, Attack, Element or Status according to the weapon’s current weakness.
- Verify every requirement at the Smithy before spending rare materials.
- Remember that High Rank and Master Rank augmentation use different progression systems.
Before you move on
- You have one fully upgraded Master Rank armor set with Health Boost 3 or another deliberate defensive plan.
- Your primary weapon has a completed upgrade path, a saved loadout and decorations that support its actual mechanics.
- Your damage skills form a coherent affinity-critical plan or an intentional elemental, status, ranged or utility alternative.
- You have used the Smithy and Elder Melder without exhausting materials reserved for your primary weapon and endgame upgrades.
- Your primary Master Rank weapon has at least one augmentation chosen for its role, such as Health Regen, Affinity Increase, Attack Increase or Element/Status Effect Up.
- You can identify the Guiding Lands materials and Research Point cost shown by the Smithy for your next planned augmentation.
References for this chapter
- Monster Hunter World: Iceborne Master Edition — PlayStation Store PS4 listing
- MHW: Iceborne — How To Augment Master Rank Weapons
- MHW: Iceborne — How To Augment Weapons & Armor
- Augmentation — MH:World / Iceborne Database
- Skills — MH:World / Iceborne Database
- MHW: Iceborne — What To Do After Beating Iceborne Story Quests
Multiplayer tactics: matching, roles and Guiding Lands teaming
Use planned online sessions for material targets and SOS flares for quick assistance. Before departing, agree whether the hunt is for a kill, capture, part break, status setup or Guiding Lands region progress. Monster Hunter: World has no fixed tank or healer class: every hunter should contribute damage, avoid unnecessary faints and share tasks such as tenderizing, trapping and calling capture readiness. In the Guiding Lands, the host’s expedition determines the active map and available monsters. Check the region icon beside each monster, hunt targets that advance the agreed region, and remember that playing with a hunter whose relevant region level is lower can provide more region progress. Lock your personal region levels through the Guiding Lands selection at the quest board when helping others; the separate Fixed Region expedition label is only a search or objective setting.
1. Choose the correct multiplayer method
For a planned hunt, create or join an online session and meet at the Gathering Hub. Use the Quest Counter or quest board to post or join the assigned, optional, event or investigation quest. This is the best method when the party needs a particular material, a capture, a monster part or a specific Guiding Lands target.
For an unplanned hunt, choose Join a Quest and respond to an SOS flare. When hosting, post the quest and depart; once the hunt has started, open the menu and fire an SOS flare if you want other hunters to fill available slots. An SOS brings in assistance, but it does not tell newcomers whether you need a capture, a part break or a particular region target, so state the objective with a shout-out or message when they arrive.
On PS4, online play requires the appropriate PlayStation Network access and the game’s online requirements. The Iceborne PlayStation Store listing supports online play for up to four players. Confirm that every hunter is in the same Monster Hunter: World online environment before troubleshooting a missing quest.
- Confirm that the quest is Master Rank when appropriate.
- Check the target, time limit, faint limit and stated objective.
- Join the correct session before posting a quest or answering an SOS.
2. Prepare equipment and supplies before departure
Save a general Master Rank item and equipment loadout at the item box. Make target-specific versions for elemental resistance, status resistance or defensive skills, then select the correct loadout before departing. Carry normal healing supplies, a Farcaster, and the ammunition or coatings used by your weapon. Bring traps and tranq items only when the quest permits or requires capture; they are not a universal requirement for Guiding Lands expeditions.
Eat a meal before leaving and sharpen your weapon. Equip mantles and boosters that match the target, then check your Palico gadget and Palico equipment. Monster Hunter: World does not have Palamutes; the companion available in this game is your Palico. A Palico can create openings or provide utility, but it does not replace a human hunter’s damage or recovery responsibilities.
Fill the Slinger when the quest begins. Pick up useful environmental ammunition when available, but do not make the hunt depend on one specific pod. If the party is using sleep, paralysis, mounting or wall-bang openings, announce the setup so other hunters do not interrupt it with a badly timed attack.
- Eat and sharpen before departure.
- Select a Master Rank loadout suited to the target.
- Check your Palico gadget, mantles, healing items and Farcaster.
3. Use flexible roles instead of fixed classes
Monster Hunter: World does not require a permanent tank, healer or damage-dealer system. Every hunter should attack, avoid carting and help create openings. A shield user may hold a monster’s attention for a short period, a status-focused hunter may seek paralysis or sleep, and a support-minded hunter may carry Dust of Life or use Wide-Range. These are useful contributions, not exclusive jobs. If the support hunter faints, the party must still function.
Assign short, practical tasks at the start. One hunter can watch for capture readiness during a capture quest, another can focus on tenderizing a difficult part, another can prepare status ammunition, and everyone can attack the wounded area. A light weapon may wound parts efficiently with the Clutch Claw, while a heavy weapon may concentrate damage or exploit a topple. Change assignments if the monster moves, the target part breaks or a hunter needs to recover.
Call out sleep, paralysis, mounts, wall-bang attempts and capture readiness. If capturing, the caller should announce that the monster is ready, but every hunter should understand the process and carry suitable supplies. Do not trap or tranq an ineligible target merely because the group normally captures.
- Agree on kill, capture, part-break or status objectives.
- Share tenderizing and opening duties.
- Keep attacking instead of treating one hunter as a permanent healer.
4. Coordinate the host’s Guiding Lands expedition
Before entering the Guiding Lands, inspect the host’s region levels and the monsters currently available. Decide which region the group is raising: Forest, Wildspire, Coral, Rotten, Volcanic or Tundra. Check the region icon beside each monster in the map or Guiding Lands information. Some monsters are assigned to multiple regions, so never assume that the monster’s current position alone tells you which progress it will provide.
The host’s Guiding Lands are the practical objective for that expedition. Hunting, breaking parts, collecting tracks and using traps can contribute to regional progress, while the target monster’s assigned region determines where progress is directed. If the group wants Coral progress, do not repeatedly hunt a monster that advances Rotten or Wildspire unless everyone has agreed to that tradeoff.
GameWith reports that playing with a hunter whose relevant region level is lower can provide more region-level points. Use this as a coordination tool rather than a reason to join random expeditions: match a player who needs the same region, confirm the target, and then focus on monsters that advance it. A group with different priorities should split into separate expeditions instead of silently changing the host’s plan.
- Name the target region before the first hunt.
- Check each monster’s region assignment before attacking it.
- Use lures when the party needs a particular available monster.
5. Protect personal region levels while helping others
Raising one Guiding Lands region can lower progress in other regions after the combined progression reaches the applicable limit. If you want to help another hunter without changing your own region levels, open the Guiding Lands selection at the quest board and enable the setting that fixes your region levels before departing. Capcom states that fixed levels apply to your own regions even while you are joining another player’s multiplayer expedition.
Do not confuse that lock with the separate Fixed Region expedition objective or search parameter. The objective tells other players that you are exploring with fixed levels and lets hunters search for that type of expedition; it does not activate the lock by itself. Set the actual region-level lock first, then use the expedition label if you want the host or joining hunters to see the intention.
If the party wants two regions, alternate deliberately or prioritize monsters assigned to both regions. Keep the target visible on the map and confirm changes with the host before departing. Do not leave and rejoin merely to refresh progress; end the expedition only after the intended hunts and material collection are complete.
- Enable the actual region-level lock from the Guiding Lands selection.
- Use the Fixed Region expedition label only as a communication or search aid.
- Confirm the next target whenever the available monster list changes.
6. Recover from a faint and handle departures
A faint returns the hunter to camp; it does not remove that hunter from the multiplayer expedition. Restock at the item box, change equipment if necessary and return through the camp route or fast travel. If the same attack caused the faint, make a concrete adjustment: add Health Boost or Fortify, improve elemental resistance, equip a defensive mantle, use a safer position or wait for a clearer opening. Farcast when supplies are low or the current fight has become unsafe.
A player who leaves or disconnects is different from a player who faints. The departed hunter cannot be replaced automatically, but the host can fire an SOS flare if the quest or expedition still has an open slot. Do not describe this as replacing a fainted hunter. The fainted hunter can simply restock and rejoin.
If a newly joined hunter arrives late, let them reach the party and identify the target before forcing an aggressive opening. If someone is repeatedly carting, use traps and environmental openings, focus on safer part breaks and ask the player to adjust their build. In Guiding Lands multiplayer, a difficult hunt can still be productive even when the group chooses to withdraw, restock or change targets instead of spending the expedition’s time on repeated risky attacks.
- Restock and reassess after every faint.
- Use Fortify, Health Boost, resistance or defensive mantles when appropriate.
- Use an SOS to fill a slot only after a hunter has actually left and an opening remains.
Before you move on
- You can create or join a PS4 Master Rank online session, post or answer a quest, and use an SOS flare when an open slot needs assistance.
- Before a Guiding Lands expedition, the party can name the target region, inspect monster region assignments and explain whether personal region levels are locked.
- You can distinguish an actual fixed-region setting from the separate Fixed Region expedition objective or search label.
- You have completed a multiplayer hunt while sharing capture, tenderizing, status and damage duties instead of relying on one specialist.
- After a faint, you can restock, return to the active expedition and make a specific build or positioning adjustment.
- You understand that the host’s Guiding Lands determine the expedition’s active objective, while coordinated play with a hunter whose relevant region level is lower may provide more region progress.
References for this chapter
- Monster Hunter World: Iceborne Title Update 11.01 — Rajang, Guiding Lands, Layered Armor and more — Capcom News
- MHW: Iceborne — Guiding Lands Region Level and Appearing Monsters — GameWith
- MHW: ICEBORNE — How to Start and Join a Quest
- MHW: Iceborne — What Are SOS Flares and How to Use Them
- Monster Hunter World: Iceborne — PlayStation Store listing
- Monster Hunter World: Iceborne - Guiding Lands Endgame Walkthrough
The Guiding Lands: unlocking, leveling regions and farming essentials
The Guiding Lands becomes available after completing Paean of Guidance and returning to Seliana. The launch map contains Forest, Wildspire, Coral and Rotten regions. On the updated PS4 version, Volcanic is added through the Rajang special-assignment chain and Tundra through Across the Lost Path; title updates do not unlock both regions automatically. Region levels begin with a ceiling of 4. Sleep Now in the Fire at MR49 raises that ceiling to 5, Big Burly Bash at MR69 raises it to 6, and To the Very Ends with You at MR99 raises it to 7 after the displayed Guiding Lands prerequisite. The hunter may still be MR99 when level 7 unlocks. Choose a material goal before farming because raising one region can reduce progress in others. MR100 and broad Arch-Tempered elder-dragon access are optional extended endgame goals, not requirements for the campaign or level-7 access.
Unlock the Guiding Lands and complete the first expedition
Finish Paean of Guidance, including the Shara Ishvalda hunt. After the post-story dialogue in Seliana, speak with the relevant Commission personnel and select the Guiding Lands through the normal departure menu. It is an expedition-style destination, not a standard assigned hunt. The Guiding Lands is the post-story area used for regional progression, special materials and many Master Rank augmentation recipes.
Use the first visit to learn the map instead of trying to begin a long farming session. The launch layout contains four regions: Forest, Wildspire, Coral and Rotten. Open the map at camp and inspect the region information panel, current monster lineup, gathering points and available camps. Hunt or capture a manageable large monster, collect tracks, mine an outcrop and gather from a bonepile, then choose Return from Expedition at the menu when you are ready to leave.
Do not abandon the expedition if you have already gathered useful materials or made progress. Return normally through the menu, or use a Farcaster to restock and then travel back to camp. A faint does not erase all Guiding Lands development, but repeated carts reduce your available resources and can make the run inefficient. Restock before attempting another target rather than continuing with an empty pouch.
- Paean of Guidance and the Shara Ishvalda hunt are complete.
- The Guiding Lands can be selected from Seliana.
- You have identified the Forest, Wildspire, Coral and Rotten regions.
- You have hunted or captured one monster and gathered from an outcrop and a bonepile.
Unlock Volcanic and Tundra when their materials become relevant
The updated PS4 version contains two later Guiding Lands regions that are not present during the first visit. Volcanic is unlocked through the Rajang special-assignment chain. After the post-story requirements are met, complete Sterling Pride, then complete Reveal Thyself, Destroyer against Rajang. Finishing the Rajang assignment unlocks the Volcanic region and adds Rajang as a Guiding Lands target.
Tundra is unlocked through the Stygian Zinogre progression. Complete Reveal Thyself, Destroyer, then take Across the Lost Path and hunt Stygian Zinogre in the Guiding Lands. Completing Across the Lost Path unlocks the Tundra region. These additions require the relevant title-update content and assignments; installing updates alone does not make both regions immediately available.
Both chains are optional for the Iceborne story ending and for the first Guiding Lands expedition. Complete them before trying to farm a material that belongs specifically to Volcanic or Tundra. If a target does not appear in the original four regions, check the target’s entry in Hunter’s Notes and confirm which later region and level are required.
- Complete Sterling Pride when the Rajang chain becomes available.
- Complete Reveal Thyself, Destroyer to unlock Volcanic.
- Complete Across the Lost Path to unlock Tundra.
- Confirm a target’s region and level before farming its Guiding Lands material.
Raise the regional ceiling through the three assigned cap quests
When the Guiding Lands first opens, each region is capped at level 4. The cap does not rise merely because you gain Master Rank; you must reach the displayed rank and clear the corresponding assigned quest. Check the Assigned tab whenever your rank stops advancing.
At MR49, complete Sleep Now in the Fire. This assigned hunt removes the MR49 restriction and raises the Guiding Lands regional ceiling from level 4 to level 5. The quest involves tempered monsters, so upgrade your armor, carry sufficient healing items and consider Health Boost, Divine Blessing or Fortify if your build allows them.
At MR69, complete Big Burly Bash after meeting its displayed Guiding Lands requirement, including a region at level 5. The quest raises the regional ceiling from level 5 to level 6 and removes the next Master Rank restriction. Do not treat reaching MR69 alone as completion of this gate.
At MR99, complete To the Very Ends with You after meeting the displayed cumulative Guiding Lands requirement. The commonly listed requirement is a combined region level of 12. One region at level 6 by itself is not enough. The assignment is a Ruiner Nergigante hunt. Completing it raises the regional ceiling from level 6 to level 7. The hunter may still be MR99 immediately after this quest; MR100 is not required for level 7.
- Reach MR49 and complete Sleep Now in the Fire.
- Reach MR69 and meet the displayed Guiding Lands prerequisite before completing Big Burly Bash.
- Reach MR99 and meet the displayed cumulative prerequisite before completing To the Very Ends with You.
- Verify that the regional ceiling is level 7 after the MR99 assignment.
Choose a material goal before leveling a region
Before departing, visit the Smithy and inspect the exact augmentation, armor upgrade, weapon upgrade or charm recipe you want. Write down whether it requires a monster part, tempered monster part, region-specific ore, region-specific bone or a particular region level. This prevents spending time leveling an unrelated area.
Use Hunter’s Notes and the Guiding Lands map to identify the region associated with each available monster. Some monsters contribute to more than one region, so check the displayed region icon rather than relying on memory. The icon determines which regional progress is affected by the hunt.
Focus on one primary region and, if necessary, one secondary region. As regional research accumulates, progress in other regions can decrease. The updated game includes a region-level lock option; use it after establishing a useful spread, especially before joining multiplayer sessions. Locking prevents unwanted fluctuation but does not create access to monsters whose required region level or Master Rank gate has not been reached.
- Inspect the Smithy recipe before beginning a farming run.
- Choose one primary region and an optional secondary region.
- Confirm the target monster’s displayed region assignment.
- Use region lock after establishing a deliberate long-term plan.
Build regional progress through focused hunts, tracks and lures
Hunt large monsters assigned to the region you are raising. During each encounter, collect tracks, break parts and use traps when safe. These actions advance research and help produce analyses while the hunt contributes to regional development. Hunting, capturing, tracks, part breaks and other research actions all contribute to Guiding Lands progress.
Capture a weakened target when you want a safer finish or want to increase the chance of seeing that monster as a repeatable optional quest in Seliana. Capture is not automatically the best reward method for every material, so check the Smithy recipe and the target’s reward sources before choosing capture or slaying.
If the desired monster is absent, leave and re-enter the Guiding Lands to refresh the lineup, or use a completed special-track analysis to create a lure. Review the lure’s target and region before spending it. At higher region levels, the same lure can produce a tempered version when the region’s conditions allow it.
Use lures deliberately in multiplayer. Announce the intended target and region before activating one, because another hunter may be pursuing a different material or regional level.
- Hunt monsters assigned to the region you want to raise.
- Collect tracks and break parts during the hunt.
- Capture priority targets when you need safer completion or repeat access.
- Refresh the lineup or use a lure instead of repeatedly hunting unrelated monsters.
Gather ores and bones for augmentations
Mining outcrops and bonepiles provide Guiding Lands-exclusive materials used in Master Rank crafting, augmentations and other endgame recipes. Gather during monster hunts whenever the route passes through the region you are developing. If the recipe names a specific region, confirm that the gathering point is in that region before spending time there.
Gathering points develop as they are harvested. Continue checking the map for larger outcrops and bonepiles and collect them when they appear. For a dedicated gathering run, use a gathering loadout and return to camp before beginning an unnecessary fight.
Keep a short list of the materials still missing for your primary weapon and armor. Do not spend rare Guiding Lands materials on a secondary weapon until your main setup is functional. A practical target is one upgraded Master Rank weapon with a useful augmentation and one armor set with upgraded defense and the skills needed for your weapon.
- Gather ore and bone materials in the region named by the recipe.
- Harvest large or fully developed gathering points when available.
- Use a gathering loadout for material-only expeditions.
- Finish the primary weapon and armor plan before investing in secondary equipment.
Coordinate multiplayer and recover after a failed run
The host’s Guiding Lands session determines the active expedition, monster lineup and visible regional levels. Before joining, ask which region the party is raising and whether the objective is a monster part, tracks, lures, ore, bones or general Master Rank progress. Progress made while helping another hunter can affect your own development, so confirm your levels after returning to Seliana.
Playing with a hunter whose relevant region level is lower can provide increased progress in some situations, but it does not permanently copy that hunter’s unlocked monsters or regional layout to your save. Coordinate the target region and use the region-lock option when you need to protect an established arrangement.
After repeated carts, return to Seliana and rebuild. Upgrade armor, add Health Boost or Fortify when appropriate, adjust elemental resistance, change mantles and restock healing items, traps, ammunition and Farcasters. If a monster is preventing progress, switch from a damage-only plan to part breaks, captures or a safer multiplayer hunt so you can obtain the materials needed for the next equipment upgrade.
- Confirm the host’s target region before joining multiplayer.
- Agree on the monster, lure and gathering objective.
- Inspect your personal region levels after returning to Seliana.
- Change equipment and supplies after repeated failure.
Before you move on
- Paean of Guidance is complete and the Guiding Lands can be selected from Seliana.
- The first expedition has been completed with Forest, Wildspire, Coral and Rotten identified.
- Volcanic is unlocked through Sterling Pride and Reveal Thyself, Destroyer if its materials are needed.
- Tundra is unlocked through the Stygian Zinogre progression ending in Across the Lost Path if its materials are needed.
- Sleep Now in the Fire is complete at MR49.
- Big Burly Bash is complete at MR69 after meeting its displayed Guiding Lands prerequisite.
- To the Very Ends with You is complete at MR99 after meeting its displayed cumulative prerequisite.
- The regional ceiling is level 7, even if the hunter is still MR99.
- At least one region has reached the level required for a chosen monster or augmentation material.
- The required Guiding Lands monster parts, ores and bones for one primary weapon augmentation have been collected.
- One Master Rank weapon has been augmented and one Master Rank armor set has been upgraded into a functional endgame setup.
- MR100 and Arch-Tempered elder-dragon content remain optional extended-endgame goals.
References for this chapter
- Monster Hunter World: Iceborne - Guiding Lands Endgame Walkthrough
- MHW: Iceborne — Guiding Lands Region Level and Appearing Monsters — GameWith
- Across the Lost Path — Monster Hunter Wiki
- The Admiral - Monster Hunter Wiki
- Monster Hunter World: Iceborne Gets New Tundra Region, Stygian Zinogre
- Monster Hunter World: Iceborne Title Update 11.01 — Rajang, Guiding Lands, Layered Armor and more — Capcom News
- Quest - MH:World - Kiranico Monster Hunter World: Iceborne Database
Endgame weapon augmentations, boss counters and escalation targets
After the Iceborne story, use the Guiding Lands to improve one finished Master Rank weapon before spreading materials across other equipment. Check the Smithy recipe first, then raise the region that contains the monster or gathering material you need. Normal and tempered Guiding Lands monsters provide different material pools, and mining outcrops and bonepiles supply additional region-specific resources. Clear Sleep Now in the Fire at MR49, Big Burly Bash at MR69, and To the Very Ends with You at MR99 when their displayed requirements are met. These assignments raise the Guiding Lands region ceiling to levels 5, 6, and 7 respectively. MR100 is not required for level 7; it is an optional extended-endgame milestone for broader tempered elder-dragon access. Your first practical target is one completed, augmented primary weapon supported by an armor set with survivability and core offensive skills.
1. Finish the story and inspect the Master Rank augmentation menu
Complete Paean of Guidance, defeat Shara Ishvalda, and follow the post-story sequence until the Guiding Lands becomes available. The Guiding Lands is Iceborne’s post-story hunting area and supplies exclusive monster materials, mining resources, bonepile materials, and the regional drops used in Master Rank augmentations. Reaching a particular Master Rank by itself does not unlock the area; the Iceborne story must be complete.
Return to Seliana and visit the Smithy. Choose a finished Master Rank weapon and open Augment Equipment. Augmentation is tied to the weapon’s rarity and current upgrade path, so do not spend rare materials on a weapon you still expect to replace. The recipe displayed by the Smithy is the final authority for the required monster materials, Guiding Lands materials, resource points, and available augmentation slots.
Rarity 10, 11, and 12 weapons do not use identical recipes. The number of available slots and the materials required change with rarity, and Extra Slots can expand the weapon’s augmentation capacity. Before farming, write down the missing materials from the exact weapon you intend to keep. The Master Edition includes both Monster Hunter: World and the Iceborne expansion, so this procedure applies to the PS4 Master Edition content rather than the standalone expansion listing.
- Complete Paean of Guidance and unlock the Guiding Lands.
- Open the Master Rank augmentation menu at the Smithy.
- Choose a weapon at the end of its current upgrade tree.
- Record the exact recipe before beginning a material run.
2. Choose an augmentation that supports the weapon and build
Health Regen is a practical first augmentation for a weapon that connects frequently. It restores a small amount of health from successful damage and can reduce potion use during ordinary hunts, but it does not prevent large attacks from causing damage and offers less value when you spend much of a fight unable to attack. For high-rarity weapons, the recipe can require late Guiding Lands materials, so treat Health Regen as a target rather than an automatic early purchase.
Affinity Increase is useful when your weapon has low or moderate affinity and your armor already supports critical-hit skills. Attack Increase is a reasonable alternative when affinity is already high or when the build is deliberately focused on raw damage. Element or Status Effect Up is best reserved for a weapon whose damage plan already centers on that element or status. Slot Upgrade is valuable when one extra decoration slot completes a necessary skill combination. Defense Increase can help a developing set, but it is usually a lower priority than Health Regen, affinity, attack, or a slot that completes the build.
Augmentations consume capacity, and different choices occupy different amounts of that capacity. Plan the complete combination at the Smithy before selecting an upgrade. Concentrate scarce materials on one primary weapon first. A second weapon should come later, preferably for a different element, status, or matchup that fills a genuine gap in your equipment rather than merely duplicating the first weapon.
- Use Health Regen when the weapon reliably lands attacks.
- Choose Affinity or Attack according to the weapon’s existing affinity and skill plan.
- Use Element or Status augmentation only when the set is built around that damage type.
- Check capacity and recipe requirements before confirming the augmentation.
3. Farm the exact material category shown by the Smithy
Before entering the Guiding Lands, inspect the missing items and identify whether each one comes from a normal monster, a tempered monster, a region-specific gathering point, or a particular region level. Normal and tempered versions of the same monster do not provide interchangeable material pools. Tempered Guiding Lands monsters supply distinct materials, including Spiritvein materials used in later Master Rank equipment and augmentation recipes.
For example, the Rarity 12 Health Regen path can involve normal Zinogre material and tempered Namielle material. Zinogre’s relevant material is associated with the Forest region at the appropriate level, while tempered Namielle requires Coral level 7. Do not raise Forest beyond the level needed for the normal Zinogre material if you are specifically trying to avoid changing the available monster version. Keep Coral at level 7 when tempered Namielle is the target. These examples are useful planning landmarks, but the exact Smithy recipe for your weapon remains decisive.
During the hunt, break the target’s valuable parts, collect tracks, gather mining outcrops and bonepiles, and capture when practical. A capture or shiny drop does not guarantee the rare material you need. Report the hunt before leaving so the result is recorded, and use the Handler’s lure option when you have obtained a target lure and confirmed that the monster belongs to the region and level you are developing. Lures are single-use; do not spend one before checking the current map and Smithy requirement.
- Record whether each missing item is normal, tempered, monster-specific, or gathering-specific.
- Break parts and collect tracks during every focused hunt.
- Gather nearby regional outcrops and bonepiles.
- Capture when practical, but plan for repeat hunts because rare materials are chance-based.
- Confirm the region and level before using a lure.
4. Raise the region ceiling through the three progression assignments
When the Guiding Lands first opens, its regional levels are capped at 4. At MR49, the assigned quest Sleep Now in the Fire becomes available and raises the regional ceiling to 5 after completion. At MR69, Big Burly Bash raises the ceiling to 6. At MR99, To the Very Ends with You becomes available when its displayed Guiding Lands prerequisite is satisfied; clearing the quest against Ruiner Nergigante raises the regional ceiling to 7 and removes the MR99 cap. MR100 is not required for level 7.
Treat these assignments as preparation stages rather than barriers to rush. Use the Hunter’s Notes and the Guiding Lands map to identify which region and level can produce your next required material. Forest, Wildspire, Coral, Rotten, Volcanic, and Tundra do not share identical monster tables. Tempered elder dragons begin appearing in level-7 regions, but you do not need to reach MR100 merely to unlock the level-7 ceiling.
Increasing one region can reduce progress in another. Focus on one or two regions tied to a specific recipe instead of trying to level every region at once. If the required monster is not currently present, collect special tracks and use an appropriate lure. If an assignment has not appeared at MR49, MR69, or MR99, check the Assigned tab and continue the displayed Guiding Lands requirement rather than assuming the rank alone is sufficient.
- Clear Sleep Now in the Fire at MR49 to unlock region level 5.
- Clear Big Burly Bash at MR69 to unlock region level 6.
- At MR99, satisfy the displayed Guiding Lands prerequisite and clear To the Very Ends with You.
- Remember that MR100 is optional for the level-7 ceiling.
5. Prepare for Ruiner Nergigante and recover intelligently from failure
Before To the Very Ends with You, upgrade your armor to its current limit, carry a full healing supply, and use Health Boost if heavy attacks are causing repeated faints. Bring the resistances and defensive skills that address the attacks actually defeating you. Do not replace every piece of equipment after one failure; first identify whether the problem was insufficient defense, poor positioning, stamina management, or an avoidable healing window.
Ruiner Nergigante’s spikes harden and become dangerous as the hunt develops. Watch his forward lunges and spike attacks, avoid standing directly in front of him after a charge, and attack hardened spikes only when you have a safe opening. Wall slams and environmental openings can create useful early damage windows. If the hunt fails, return to Seliana or camp, restock, repair your loadout, and adjust one weakness at a time. Fortify may improve attack and defense after a faint, but it is not a substitute for preparation or learning the monster’s patterns.
The quest is a Guiding Lands assignment to slay Ruiner Nergigante, has an MR99 condition, and unlocks the MR cap limit when completed. Its completion also permits progression beyond MR99 and opens the level-7 Guiding Lands ceiling, provided the quest’s displayed prerequisite was met before acceptance.
- Upgrade armor before attempting Ruiner Nergigante.
- Carry healing items and prepare a survivability-focused loadout if needed.
- Use wall slams and safe environmental openings early in the hunt.
- After failure, restock and change the specific weakness that caused the cart.
6. Establish a repeatable augmentation route
After the first useful augmentation, return to the Smithy and choose the next concrete target. Keep a note of the region levels, monster versions, and gathering materials required for the next upgrade. This prevents accidental over-leveling of one region when the next recipe depends on another. If you need a tempered material, verify the region level that produces the tempered version rather than repeatedly hunting the normal monster.
For a focused Guiding Lands run, select the target region, check the current monster list, collect tracks and special tracks, break parts, gather nearby outcrops and bonepiles, and capture when appropriate. Report the hunt before leaving. For Master Rank progression, hunt monsters you can defeat consistently and collect tracks between fights; the area advances both equipment farming and Master Rank progress.
Your first endgame benchmark is one finished and augmented primary Master Rank weapon, armor upgraded to its current limit, and a set of decorations that supports the weapon’s core skills. After clearing To the Very Ends with You, MR100-plus progression is optional. Continue beyond MR100 when you specifically want broader tempered elder-dragon access, additional Spiritvein materials, custom upgrades, or more advanced augmentation combinations. Do not present that extended farming as part of the Iceborne campaign ending.
- Maintain one fully upgraded primary Master Rank weapon with a useful augmentation.
- Keep armor upgraded and retain a separate survivability loadout if needed.
- Record region levels and the next required monster material.
- Clear the MR99 assignment before pursuing MR100-plus content.
- Continue into tempered elder-dragon farming only for a defined equipment goal.
Before you move on
- Iceborne’s story is complete and the Guiding Lands is available.
- A finished primary Master Rank weapon has at least one augmentation suited to its build.
- Sleep Now in the Fire has been cleared and the level-5 regional ceiling is available.
- Big Burly Bash has been cleared and the level-6 regional ceiling is available.
- At MR99, the displayed Guiding Lands prerequisite has been met and To the Very Ends with You has been cleared against Ruiner Nergigante.
- The level-7 regional ceiling is available without requiring MR100.
- Armor is upgraded to its current limit, decorations support the chosen weapon, and the hunter has a repeatable route for the exact normal, tempered, Spiritvein, ore, and bonepile materials required by the next augmentation.
- MR100-plus tempered elder-dragon access is treated as optional extended endgame rather than required Iceborne campaign progress.
References for this chapter
- Monster Hunter World: Iceborne Master Edition — PlayStation Store
- Monster Hunter World: Iceborne — Guiding Lands Endgame Walkthrough — PowerPyx
- MHW: Iceborne — Guiding Lands Region Level and Appearing Monsters — GameWith
- MHW: Iceborne Weapon Augment Material Sources
- M★6 To the Very Ends with You — Kiranico Monster Hunter World: Iceborne Database
Optional hunts, layered armor, and cosmetics
Optional content should support your Iceborne progress rather than delay it. After each major assignment, check Seliana and Astera for new Optional quests, NPC requests, Resource Center deliveries, and event listings. Prioritize quests that unlock camps, mantles, boosters, Botanical Research Center improvements, specialized facilities, or materials for your current weapon and armor. Cosmetic-only hunts can wait until your combat equipment is strong enough to complete them efficiently. Layered armor changes your hunter’s appearance without replacing the defense, skills, slots, or resistances of the armor underneath. Depending on the design, acquisition may require a Smithy recipe, a Resource Center delivery, a festival ticket, a collaboration reward, or materials from the Guiding Lands. Seasonal festivals rotate, so check the active listings in both hubs and do not assume an inactive event is permanently available. After the Iceborne story unlocks the Guiding Lands, return to difficult layered-armor projects that require region materials or tempered-monster parts.
Prioritize optional quests that improve future hunts
After completing an Assigned quest, return to Seliana and check the Optional quest list, the Resource Center, and NPCs displaying speech bubbles. New requests can appear after story milestones, discoveries, or specific hunts. Your first priority is any quest or delivery that unlocks a camp, improves cultivation or harvesting, awards a mantle or booster, expands a useful facility, or provides materials for the weapon you are currently upgrading.
Do not treat the full Optional list as a second campaign that must be cleared before the next Assigned quest. If an entry only repeats a monster you do not currently need, offers a modest zenny or research-point reward, or exists mainly for a cosmetic delivery, leave it available and continue the story. You can return to it later with stronger Master Rank equipment, better decorations, and more efficient travel options.
When you do need an optional hunt, combine it with another objective. Use the Wishlist at the Smithy for weapon, armor, charm, and decoration materials, then choose an Optional quest or Investigation that contains the monster or resource you need. This prevents a separate cosmetic farming trip from becoming a needless detour.
- Check Optional quests, Resource Center requests, and speech-bubble NPCs after major assignments.
- Complete unlock quests for camps, cultivation, mantles, boosters, and facilities promptly.
- Use the Smithy Wishlist before farming a monster for equipment materials.
- Do not delay Assigned quests merely to clear repeat Optional hunts.
Apply layered armor without changing your combat equipment
Layered armor is an appearance overlay. It changes the visible design of your hunter while the normal armor underneath continues to supply its defense, elemental resistances, slots, and skills. To use it, open an Item Box in Seliana, Astera, or your room and choose the layered-armor equipment option. Select individual pieces or a complete set, then adjust the available color settings if the design supports them.
Keep the distinction between normal armor and layered armor clear. Forging a normal Master Rank armor piece changes your actual combat equipment. Equipping that piece as layered armor only changes your appearance. Before a difficult hunt, verify the equipment loadout separately so a fashion change has not replaced the armor skills or resistances you intended to use.
There is no single unlock method for every design. Some layered armor is made through Smithy recipes using monster, ticket, and Guiding Lands materials. Some designs first appear as Resource Center delivery requests. Festival sets commonly require seasonal tickets, while collaboration sets use materials from their associated Event quests. Certain designs are downloadable or paid content rather than hunt rewards. If a design is missing, check the Smithy, Resource Center, Item Box, Event quest details, and your installed downloadable content rather than assuming the monster has not been hunted enough.
The Iceborne updates expanded layered armor beyond the earlier limited selection and added recipes connected to Master Rank and Guiding Lands materials. That does not mean every normal armor set is immediately available as a layered version. Many late designs require the Iceborne story to be finished, a particular monster or variant to be unlocked, or a region material that cannot be obtained until the Guiding Lands is available.
- Use the Item Box to equip layered armor.
- Confirm that your intended normal Master Rank armor remains underneath it.
- Check the Smithy and Resource Center when a design is unavailable.
- Read the material and unlock requirements for each specific design.
Use a low-backtracking hunt order
Use this order whenever you are deciding whether to pursue an optional hunt: first, complete facility and equipment-unlock requests; second, farm parts for your current weapon; third, make armor pieces that solve a repeated survival problem; fourth, pursue charms, decorations, and cosmetic rewards. If you are repeatedly fainting, an armor upgrade or a useful defensive skill is usually a better investment than a layered set.
For a required material, capture the target when the quest rules and your objective allow it, break the body part associated with the item you need, and investigate whether an Investigation offers additional reward boxes. Do not assume capture is always superior for every material; use the in-game item description or your Hunter’s Notes when the distinction matters. The important practice is to select the quest around the specific material rather than repeatedly hunting the monster without a target.
Efficient optional quests include requests that unlock new camps, mantle or booster upgrades, cultivation improvements, and special facilities. They also include hunts against monsters that are already on your weapon’s next upgrade path. A cosmetic-only delivery can wait until the next time you are in the relevant locale or until you have the combat equipment needed to complete it comfortably.
Optional content does not block the Iceborne ending or the Guiding Lands. If a quest is not helping your current build, leave it in the list. Return after the campaign when investigations, stronger gear, and Guiding Lands materials make the cleanup faster.
- Use the Wishlist to define the reason for every material hunt.
- Break the part associated with the material you need when practical.
- Farm armor or defensive skills before cosmetics if story hunts are causing repeated faints.
- Leave duplicate hunts until they have a specific equipment or reward purpose.
Check festivals, tickets, and Event quests before farming cosmetics
When a seasonal festival is active, visit the Gathering Hub in Seliana and check the corresponding festival facilities, limited bounties, and Event quest list. Astera also retains its own Gathering Hub and festival-related listings. Festival content can provide normal armor, layered armor, Palico equipment, room decorations, gestures, tickets, and other cosmetic rewards. The exact reward pool and ticket names depend on the festival, so read the current in-game descriptions rather than relying on an old checklist.
Complete the available limited bounties if you want the festival’s standard tickets. Some layered sets require a fixed number of those tickets plus Research Points through a delivery or crafting request. Other festival layered sets use VIP tickets, which are obtained through quests with a chance-based reward system and may have improved odds while wearing the corresponding festival armor. Check the recipe before spending tickets because the same ticket type may be used for hunter armor, Palico equipment, room decorations, or layered versions.
For Event quests and collaborations, open the quest details before departing. Confirm the required Hunter Rank or Master Rank, target monsters, special delivery objective, and listed reward materials. Some collaborations are tied to platform-specific content or older event schedules, while others may be permanently available once the relevant update is installed. If the quest is not listed, first check the current Event tab and your installed updates; do not assume you have missed a story requirement.
Store unused tickets until you have checked the Smithy and Resource Center recipes that use them. Tickets are often more difficult to replace than ordinary monster parts, and spending one on a normal armor piece can delay the layered version you actually want.
- Check the active Event listings in both hubs.
- Complete relevant limited bounties for standard festival tickets.
- Read each Event quest’s reward details before investing time in it.
- Keep tickets until you have reviewed all recipes and delivery requests that use them.
Finish late cosmetic projects after unlocking the Guiding Lands
After completing the Iceborne story and unlocking the Guiding Lands, return to layered-armor projects that require late Master Rank materials. Many high-rarity layered designs use monster parts, tempered materials, Spiritvein materials, bones, ores, or region-specific drops from the Guiding Lands. Hunt the target monster in the region that provides the needed material and collect mining and bonepile resources while moving between encounters.
Raise only the regions needed for your current cosmetic or augmentation goal. Guiding Lands region levels affect which monsters and material tiers appear, and focusing on one or two regions is more efficient than trying to maintain every region at once. If you are playing online, agree with the host about which region and monster the group is farming before joining the expedition.
Save a reliable combat loadout before changing appearance. Your layered set can be changed independently, but a saved loadout makes it easier to restore the intended weapon, armor, decorations, mantles, and items before a difficult hunt. In multiplayer, state whether you are farming a region, completing an Event quest, or collecting tickets so the party understands the objective.
If a desired cosmetic is unavailable, record its exact source: normal hunt, delivery, festival ticket, collaboration Event quest, downloadable content, or Guiding Lands material. Then return to the main campaign or endgame route instead of repeatedly checking the wrong menu. This keeps cosmetic collection from interfering with the goals of completing Iceborne and building an augmented Master Rank weapon.
- Unlock the Guiding Lands before farming layered designs that require its materials.
- Focus Guiding Lands activity on the region and monster tied to the target recipe.
- Save a combat loadout before changing layered armor.
- Record the source of every remaining cosmetic item.
Before you move on
- You have completed the Optional quests and Resource Center requests that unlock useful camps, facilities, cultivation improvements, mantles, boosters, or equipment access.
- You can open an Item Box and apply layered armor while retaining the intended Master Rank weapon and normal armor underneath.
- You have checked the active Seliana and Astera Event listings, completed any desired limited bounties, and identified the tickets required for your chosen cosmetics.
- For every remaining layered or cosmetic item, you know whether its source is a normal hunt, Resource Center delivery, Smithy recipe, festival ticket, collaboration Event quest, downloadable content, or Guiding Lands material.
- After the Iceborne story, you have begun the Guiding Lands and can target its region-specific materials for late layered armor without abandoning your functional combat loadout.
References for this chapter
- Monster Hunter World: Iceborne Title Update 11.01 — Rajang, Guiding Lands, Layered Armor and more — Capcom News
- MHW: ICEBORNE | All Layered Armor Set List
- MHW: ICEBORNE | All Iceborne Master Rank Optional Quest List
- Monster Hunter World: Iceborne - Optional Quest List
- MHW: ICEBORNE | Holiday Joy Fest - Seasonal Event
Troubleshooting Major Obstacles and Recovering from Failure
When Master Rank progress stalls, change the cause of the failure instead of repeating the same hunt with the same loadout. Return to Seliana or camp, restock consumed items, upgrade or replace equipment, and add survivability skills when ordinary attacks are causing carts. Correct elemental resistance and status problems with armor, decorations, food, Nullberries, Antidotes, and the appropriate mantle or booster. If a monster is blocking progression, use a capture plan when capture is allowed, target specific breakable parts, and retreat with a Farcaster when the hunt stops producing useful progress. In the Guiding Lands, choose one region or material objective, report the expedition to secure gathered materials, and avoid abandoning the run. For missing Iceborne content, crashes, update failures, or connection errors on PS4, check the game update, system software, account license, network status, and Capcom support notices before deleting saved data or reinstalling.
1. Break the repeated-faint cycle in Seliana
After a failed assignment or repeated faint, return to Seliana before launching the same quest again. Open the item box and restock the loadout you actually intend to use: Mega Potions, Max Potions or their ingredients, status cures, Nullberries when elemental blights are likely, traps and Tranq Bombs for capturable targets, and a Farcaster for emergency withdrawal. Save the loadout after making changes so the next departure does not restore the old version.
Visit the Smithy and inspect the next available Master Rank weapon upgrade and armor pieces. Monster Hunter: World has no armor durability or repair system, so there is nothing to repair. If you are still wearing High Rank armor, replace it with a practical Master Rank set as soon as you can afford one. Higher defense and useful survival skills are more valuable than repeatedly spending carts while trying to preserve an outdated offensive set.
- Restock and save a dependable item loadout.
- Upgrade or replace equipment instead of trying to repair armor.
- Confirm that the weapon has the strongest affordable Master Rank upgrade.
2. Match skills, resistances, and mantles to the death pattern
If ordinary physical attacks are leaving you unable to heal, add Health Boost and consider Fortify. Health Boost gives you a larger health margin, while Fortify improves your hunter after a faint; neither replaces healing or careful positioning. If you are being defeated by elemental damage, raise the relevant elemental resistance with armor, decorations, food skills, or resistance items. Remove negative resistance when practical rather than adding only attack skills.
For status effects, carry the appropriate cure and use the mantle or booster you have actually unlocked for that encounter. Nullberries remove elemental blights, while Antidotes address poison. A cleansing option is not automatically a mantle, so check whether you own a Cleanser Booster or the required mantle before building the plan around it. Mantles should be saved for a deliberate opening or a known dangerous phase instead of being activated immediately after every cooldown.
- Use Health Boost when large attacks leave no recovery window.
- Fix the relevant resistance or status weakness.
- Use only mantles and boosters currently unlocked on your character.
3. Change from a kill plan to a progress plan
When a monster is blocking a story assignment, stop forcing a fast full-health-to-zero fight. Wait for a safe opening before using the Clutch Claw, target a reachable part, and disengage when the monster begins an attack. Use the Slinger and environmental tools to create space, but do not repeatedly clutch an enraged or highly active monster simply because the claw is available.
If the target is capturable, carry a Shock Trap or Pitfall Trap and Tranq Bombs. Watch for the monster’s weakened state, place the trap, and use the Tranq Bombs to finish the capture. This does not apply to monsters that cannot be captured, including Elder Dragons. If you need a particular material, prioritize the relevant breakable part and use an investigation or repeatable optional quest when available. A part-focused plan can produce the upgrade material you need without requiring a risky all-out hunt every time.
- Capture only monsters that the game allows you to capture.
- Focus damage on the part that supplies the needed material.
- Use a Farcaster when supplies are gone or the hunt has become unproductive.
4. Recover correctly after a faint
When you return to camp after fainting, heal fully and use the tent to replenish items or change equipment. You can select a new meal when the available meal skills support the revised setup. Check your health, stamina, ammunition, coatings, mantles, and status cures before leaving camp again. If the original loadout caused the faint, do not re-enter with the same equipment merely because the monster is nearby.
Sharpen, reload, and restore stamina before re-engaging. Approach from a safer angle rather than sprinting directly into the monster’s current attack. In multiplayer, regroup with the returning hunter and create distance if the monster is uncontrolled. If one player faints, maintaining pressure is useful only when the monster is safely occupied; otherwise, allow the player to heal and rejoin so one cart does not become a chain of carts.
- Heal and restock at camp before re-entering combat.
- Use the tent to change gear when the original setup is failing.
- Regroup after a faint instead of attempting an isolated rescue.
5. Rebuild a failed Guiding Lands expedition
Treat each Guiding Lands trip as a material or region project. Before departing, choose one target such as a specific region, monster material, mining resource, or bonepile tier. Hunt monsters associated with that region, gather tracks, mine and bone-pick while the area is safe, and use lures or captures when they support the target. Raising regions without a plan can make another region less accessible, so do not spread your activity randomly.
When you are ready to leave, report the expedition to the Handler or return from the expedition so gathered materials and completed activity are secured. Do not choose Abandon Quest when you intend to keep the run’s progress. If you cart repeatedly, change to a familiar lower-risk monster, improve your weapon or armor in Seliana, and return later. Capture tactics can shorten a hunt when the target is capturable, but do not assume every Guiding Lands monster can be captured.
- Choose one region or material objective before departing.
- Report or return from the expedition instead of abandoning it.
- Farm a safer target when the current monster is producing repeated carts.
6. Check PS4 updates, licenses, and official notices
For missing Iceborne content, highlight Monster Hunter: World in the PS4 Library, press the OPTIONS button, and select Check for Update. Also check Settings → System → System Information and update the PS4 system software if necessary. If Iceborne appears locked or is not recognized, sign in to the account that purchased the content and use Settings → Account Management → Restore Licenses. Confirm that the installed game and add-on belong to the same account and regional release before considering a reinstall.
For connection errors, first check PlayStation Network status, then test the PS4 connection under Settings → Network → Test Internet Connection. Capcom’s PS4 network guide also recommends restarting the console and networking equipment, checking NAT behavior, and using a wired connection when possible. If the issue concerns an error code, save-data behavior, crashes, or a title-update change, consult Capcom’s Monster Hunter: World support category and official update notices. Back up saved data before deleting the game or using any recovery procedure. Reinstalling is a later step, not the first response to a license or update problem.
- Run Check for Update from the PS4 Library.
- Restore licenses if the expansion is missing or locked.
- Check PlayStation and Capcom support before deleting or reinstalling the game.
Before you move on
- You can identify the cause of your most recent faint and have changed the relevant equipment, skill, resistance, supply, or tactic before repeating the assignment.
- Your prepared loadout contains healing, appropriate status or elemental cures, and a Farcaster, with traps and Tranq Bombs added when the target is capturable.
- You can recover at camp by healing, restocking, changing gear, and regrouping instead of immediately repeating the same failed approach.
- For a blocked hunt, you can switch to capture when permitted, target a required breakable part, or withdraw safely when the run is no longer productive.
- For the Guiding Lands, you can state one region or material objective and know to report or return from the expedition rather than abandon it.
- Your PS4 recognizes the Master Edition content, the game and system software have been checked for updates, licenses have been restored if necessary, and connection or error-code problems have been compared with official Capcom guidance.
References for this chapter
- Monster Hunter World: Iceborne - How do I access the Iceborne Campaign?
- Monster Hunter: World – Capcom Support and Troubleshooting
- Monster Hunter: World - Network/Connection Troubleshooting Guide - PS4 – Capcom Support
- How to check for updates on PS5 consoles and PS4 consoles – PlayStation Support
- How to update system software on a PS4 console – PlayStation Support
- How to troubleshoot game downloads from PlayStation Store – PlayStation Support
- Monster Hunter World: Iceborne Title Update 11.01 — Rajang, Guiding Lands, Layered Armor and more — Capcom News
Progress checklist and mid-to-late Master Rank roadmaps
Use the Assigned tab as the campaign checklist from Baptism by Ice through Paean of Guidance. Replace High Rank armor early, maintain one Master Rank weapon path, and farm only when defense, sharpness, resistances, or a required material is blocking progress. Blizzard Blitz against Barioth comes before the Nargacuga/Glavenus and Tigrex/Brachydios pairs. After Shara Ishvalda, enter the Guiding Lands, choose a focused regional farming plan, and complete the MR49, MR69, and MR99 cap assignments as their requirements appear. Clearing the MR99 assignment unlocks the level-7 regional ceiling; further level-7 region development, MR100, and Arch-Tempered elder-dragon events are optional extended endgame goals.
1. Establish a functional Master Rank baseline before chasing perfect gear
As soon as Iceborne begins, replace High Rank armor with a complete Master Rank set made from monsters you can hunt reliably. Upgrade its defense with the armor spheres you already have; do not wait for an ideal mixed set before continuing. Health Boost, elemental resistance, and resistance to the ailment causing repeated carts are worthwhile defensive priorities while learning the expansion.
Advance your preferred weapon into a Master Rank tree as soon as the Smithy offers a practical branch. Choose a route whose materials you can obtain without repeatedly failing a difficult monster. Maintain one primary weapon and save an equipment loadout, item loadout, and radial-menu setup for it. Carry healing items, their crafting materials, Farcasters, traps when useful, and the cures appropriate to the next target.
- Craft and upgrade one complete Master Rank armor set.
- Advance one primary weapon into a Master Rank tree.
- Save equipment and item loadouts at the item box.
- Add Health Boost or relevant resistance if survivability is the immediate problem.
2. Follow the complete assigned campaign sequence
Complete Baptism by Ice against Beotodus, then Banbaro Blockade against Banbaro. Continue with Ready to Strike against Viper Tobi-Kadachi. The next two-star assignments are No Time for Naps against Nightshade Paolumu and Play Both Ends against Coral Pukei-Pukei. Complete both before Blizzard Blitz becomes available; their order does not matter.
Complete Blizzard Blitz against Barioth next. This is the required three-star progression hunt that comes before the later three-star pairs. After Barioth, complete Ever-Present Shadow against Nargacuga and The Scorching Blade against Glavenus. Both are required, and their order is flexible.
Then complete Absolute Power against Tigrex and A Smashing Cross Counter against Brachydios. These are also three-star assignments and can be completed in either order. The assignment tiers describe the progression category; they do not mean that the hunter must be exactly MR3 or MR9.
Continue with A Tale of Ice and Fire, followed by When the Mist Taketh You and The Thunderous Troublemaker! Complete The Disintegrating Blade and Bad Friends, Great Enemies in either order. Both are needed for The Defense of Seliana. After that defense assignment, complete The Iceborne Wyvern, then The Second Coming.
The elder-dragon portion follows The Second Coming. Follow the Assigned tab and any required investigation or expedition until Under the Veil of Death appears. Complete that first elder-dragon investigation, then complete A Light From The Abyss after the second investigation becomes available. Finish with To The Guided, A Paean and Paean of Guidance. Paean of Guidance is the Shara Ishvalda assignment that concludes the Iceborne story route.
The game may place tracking, expedition, investigation, or story-transition objectives between the named hunts. Treat a task as required whenever it appears in Assigned or is necessary for the next named assignment. If a quest is missing, speak with characters marked by speech bubbles, check the Assigned tab again, and complete the displayed transition instead of substituting unrelated optional hunts.
- Baptism by Ice; Banbaro Blockade; Ready to Strike.
- No Time for Naps and Play Both Ends.
- Blizzard Blitz against Barioth.
- Ever-Present Shadow and The Scorching Blade.
- Absolute Power and A Smashing Cross Counter.
- A Tale of Ice and Fire; When the Mist Taketh You; The Thunderous Troublemaker!
- The Disintegrating Blade and Bad Friends, Great Enemies.
- The Defense of Seliana; The Iceborne Wyvern; The Second Coming.
- Under the Veil of Death; A Light From The Abyss; To The Guided, A Paean; Paean of Guidance.
3. Use Barioth and Velkhana as preparation breakpoints
Before Blizzard Blitz, raise your armor defense and verify that your weapon has dependable sharpness. Barioth rapidly changes position across the snow and punishes long recovery animations. Attack from the side or rear when possible, and use the Clutch Claw only during a safe opening. Wounding or breaking a foreleg can make the fight more manageable, but do not stay attached while Barioth is actively turning, leaping, or preparing a counterattack.
Before A Tale of Ice and Fire and the later Velkhana assignments, prepare for ice damage and bring the appropriate environmental drink for the Elder's Recess. Keep lateral escape space when facing Velkhana. Its breath and ice formations punish hunters who stand directly in front of it or commit to long attacks without a retreat route. The Defense of Seliana and The Iceborne Wyvern are separate assignments, so success in one does not complete the other.
After a faint, return to camp, restock, eat again if needed, and change the defense that actually failed. If repeated carts come from ice attacks, improve resistance or use a defensive Mantle; if they come from positioning, shorten attack commitments and stay beside rather than in front of the monster.
- Upgrade armor before Blizzard Blitz.
- Use side or rear positioning against Barioth.
- Prepare ice protection and environmental supplies for Velkhana assignments.
- Treat The Defense of Seliana and The Iceborne Wyvern as separate Velkhana objectives.
4. Prepare specifically for Seething Bazelgeuse, Blackveil Vaal Hazak, and Namielle
Before The Second Coming, prepare for Blast damage and scattered explosive scales. Watch the ground as closely as the monster: glowing scales can punish hunters who continue attacking beneath Seething Bazelgeuse. Create distance when the arena becomes covered, and use a Farcaster if you need to restock or reset the fight.
After The Second Coming, use the Assigned tab to follow the elder-dragon investigation sequence. Equip Effluvia Resistance if available for Under the Veil of Death against Blackveil Vaal Hazak. If you lack the skill, carry the available cures and keep enough healing capacity to recover from the reduced-health effect. Do not begin this sequence with armor that is still at an inadequate defense level.
For A Light From The Abyss against Namielle, Water and Thunder resistance are useful when practical. Watch the ground for electrified or water-covered areas and avoid long attacks when the arena itself becomes dangerous. If the fight is repeatedly failing because of environmental damage rather than ordinary hits, change resistance and positioning before spending time on decoration farming.
- Prepare Blast protection or a general defensive setup for Seething Bazelgeuse.
- Use Effluvia Resistance or cures for Blackveil Vaal Hazak.
- Consider Water and Thunder resistance for Namielle.
- Restock between each investigation or expedition transition.
5. Defeat Shara Ishvalda and verify the first Guiding Lands objective
Before To The Guided, A Paean, upgrade your primary weapon as far as its current materials allow and raise armor defense near the highest level currently available. Bring Max Potions or their ingredients, Farcasters, and a complete item loadout. Follow the assignment's displayed objectives on Origin Isle rather than leaving early when the first phase ends.
Paean of Guidance is the Shara Ishvalda assignment. Keep moving during long-range attacks, avoid standing in obvious attack lanes, and use safe openings instead of forcing damage during transitions. If Shara repeatedly defeats you, farm a manageable Master Rank investigation for armor spheres and weapon materials, then add Health Boost or the resistance linked to the attacks causing the most carts.
After Shara is defeated and the post-story dialogue has played, select the Guiding Lands from Seliana. On the first expedition, inspect the available camps, gather from bonepiles and mining outcrops, examine tracks, and hunt a manageable target. Collect exclusive materials before returning normally so the expedition serves as an introduction to the area's gathering and tracking systems. The initial regional level ceiling is 4 and is later raised by the three MR-cap assignments.
- Complete To The Guided, A Paean.
- Defeat Shara Ishvalda in Paean of Guidance.
- Confirm the post-story dialogue has played.
- Select the Guiding Lands from Seliana.
- Gather exclusive materials during the first Guiding Lands expedition.
6. Decide when to farm, investigate, or continue the story
Stop to farm when repeated failures show a clear problem: insufficient defense, poor sharpness, missing weapon materials, low elemental resistance, or an ailment that is repeatedly ending hunts. Farm a target you can defeat consistently and use optional quests or investigations with useful reward conditions. Capturing can be efficient when the objective allows it, but do not assume every capture immediately creates a repeatable optional quest.
If assignments are comfortable, continue pushing the Assigned tab. Use investigations for targeted monster parts and favorable reward conditions, and postpone dedicated decoration farming until your primary weapon and armor are reliable. In the Guiding Lands, gather tracks, bones, ores, and monster materials during ordinary hunts because these support later augmentations.
Choose one or two Guiding Lands regions for the current weapon or armor plan. Region progress is shared across the session and raising one area can reduce progress in another, so do not attempt to maximize every region at once. Coordinate with a multiplayer host before joining if a specific region or monster is the purpose of the hunt.
- Farm after repeated failures or an obvious equipment deficit.
- Use investigations for targeted materials.
- Continue the Assigned route when hunts are comfortable.
- Choose a focused Guiding Lands region plan.
7. Clear the MR49, MR69, and MR99 progression assignments
At MR49, raise at least one Guiding Lands region to level 4, then complete Sleep Now in the Fire when it appears in the Assigned list. This removes the MR49 progression cap, raises the Master Rank cap to MR69, and raises the Guiding Lands regional level ceiling from 4 to 5. If the assignment does not appear, verify both your rank and the displayed Guiding Lands requirement.
At MR69, raise at least one Guiding Lands region to level 5, then complete Big Burly Bash. It raises the Master Rank cap to MR99 and the Guiding Lands regional level ceiling to 6. Ordinary Master Rank hunts alone are not enough if the displayed regional prerequisite has not been met.
At MR99, build the required cumulative Guiding Lands regional progress, shown by the game as the relevant regional requirement, then complete To the Very Ends with You against Ruiner Nergigante. The commonly used requirement is cumulative region progress of 12. This assignment raises the Master Rank cap to MR999 and the Guiding Lands regional ceiling to 7, the maximum.
These assignments are mandatory for the chapter's full MR99 progression goal, but they are not part of the Iceborne story ending. A player can finish Paean of Guidance and initially enter the Guiding Lands without reaching MR49, MR69, or MR99.
- At MR49, meet the displayed regional requirement and clear Sleep Now in the Fire; confirm the ceiling is 5.
- At MR69, meet the displayed regional requirement and clear Big Burly Bash; confirm the ceiling is 6.
- At MR99, meet the displayed cumulative regional requirement and clear To the Very Ends with You; confirm the ceiling is 7.
- If an assignment is absent, check both the Assigned tab and the displayed Guiding Lands requirement.
8. Augment one primary weapon and keep the MR100 goal separate
After the Guiding Lands opens, select one primary Master Rank weapon and read its exact augmentation requirements at the Smithy. Raise only the regions and hunt only the monsters needed for the first useful augmentation. Health, affinity, attack, element, and additional upgrade capacity support different builds; choose the improvement that fits your current weapon and armor skills. Some weapon rarities require higher Guiding Lands levels, so the Smithy's material list is the authority for the path you selected.
A functional augmented weapon and a viable Master Rank armor set complete the required equipment goal. The set does not need to be a perfect meta build: it should have upgraded defense, the core skill or skills your weapon uses, Health Boost or another survival option when needed, and decorations that support reliable hunts.
MR100 is optional extended endgame. After To the Very Ends with You, continue raising Master Rank and improving Guiding Lands regions if you want the broadest late-game access. Arch-Tempered elder-dragon quests are separate event content. Their displayed requirements and availability belong to the individual event listings; they are not required for the Iceborne campaign, first Guiding Lands entry, or the MR49, MR69, and MR99 assignments.
- Choose one primary Master Rank weapon.
- Read its augmentation requirements at the Smithy.
- Complete at least one useful augmentation.
- Maintain one defensive, functional Master Rank armor set.
- Treat MR100 and Arch-Tempered content as optional extended endgame.
Before you move on
- The Assigned route from Baptism by Ice through Paean of Guidance is complete, including both quests in every paired assignment and any required investigations or expeditions inserted by the game.
- Shara Ishvalda has been defeated in Paean of Guidance and the post-story dialogue has played.
- The Guiding Lands can be selected as an expedition from Seliana.
- Sleep Now in the Fire is complete and the Guiding Lands regional ceiling is 5.
- Big Burly Bash is complete and the Guiding Lands regional ceiling is 6.
- To the Very Ends with You is complete and the Guiding Lands regional ceiling is 7.
- One primary Master Rank weapon has at least one useful augmentation.
- One Master Rank armor set has upgraded defense, essential survival skills, and decorations supporting the chosen weapon.
- Further development of level-7 regions, MR100, and Arch-Tempered elder-dragon access remain optional extended endgame goals.
References for this chapter
Final Iceborne assignments and moving into Guiding Lands endgame
Complete To The Guided, A Paean and Paean of Guidance to finish the Iceborne assigned campaign and defeat Ruiner Nergigante and Shara Ishvalda. After the ending scenes, finish the Seliana dialogue that opens the Guiding Lands. Your first expedition begins with Forest, Wildspire, Coral, and Rotten regions; Volcanic and Tundra require separate Special Assignments. Raise Guiding Lands progress while advancing Master Rank, then clear Sleep Now in the Fire at MR49, Big Burly Bash at MR69, and To the Very Ends with You at MR99. The MR99 assignment requires MR99 plus the displayed cumulative Guiding Lands prerequisite, commonly total region level 12. Clearing it raises the regional ceiling to level 7, and this can happen before MR100. Craft one dependable Master Rank armor set and apply at least one augmentation to a primary Master Rank weapon. MR100 and broad Arch-Tempered elder-dragon access are optional extended-endgame goals, not requirements for the campaign, initial Guiding Lands access, or level-7 regional progression.
Finish the assigned campaign and defeat Shara Ishvalda
Open the Assigned tab and follow To The Guided, A Paean. This assignment takes place on Origin Isle and requires you to hunt Ruiner Nergigante. After it is complete, Paean of Guidance becomes the final Iceborne story assignment. It sends you back to Origin Isle to slay Shara Ishvalda. If the game inserts a required conversation, investigation, or expedition between these quests, follow the Assigned tab rather than trying to force the next named assignment from a different quest list.
Before starting Paean of Guidance, use a complete Master Rank armor set and upgrade your primary weapon through the best branch currently available. Save a loadout with healing items, Max Potions or their crafting materials, a Farcaster, and the ammunition or coatings your weapon uses. Eat at the canteen before departing. Health Boost is a strong general-purpose survival choice if Shara's attacks are repeatedly carting you; otherwise use the resistances and defensive skills that address the attacks causing your failures.
In Shara's first phase, use environmental weapons when you can reach them without crossing an active attack. Do not remain exposed while setting up artillery. During the later phase, stay out of Shara's frontal lines and avoid lingering beneath its large ground effects. Use the Clutch Claw only during a safe opening, then disengage as soon as the monster begins an attack. If a clutch attempt fails, treat the failed opening as a repositioning signal rather than staying attached and hoping to finish the action.
After Shara falls, allow the ending scenes to finish and complete the required Seliana conversations. The Guiding Lands is unlocked by the post-story sequence, not merely by defeating Shara and immediately leaving the hub. Later Special Assignments involving Rajang, Safi'jiiva, Alatreon, or Fatalis are not required to finish the Iceborne assigned campaign.
- To The Guided, A Paean is complete.
- Paean of Guidance is complete and Shara Ishvalda is defeated.
- The ending scenes and required Seliana post-story dialogue have finished.
- The Guiding Lands is available as a destination.
Make the first Guiding Lands expedition count
From Seliana, select the Guiding Lands expedition through the Handler or the destination map. Save a loadout for your primary weapon, fill the pouch with healing supplies and Farcasters, and carry the traps, ammunition, or coatings you normally use. The initial map contains the Forest, Wildspire, Coral, and Rotten regions. Do not expect Volcanic or Tundra to appear simply because the PS4 installation has every title update installed.
At camp, open the map and identify the available camps, mining outcrops, bonepiles, monster icons, and tracks. Travel through the regions while gathering from nodes because Guiding Lands materials are used for Master Rank augmentations and other upgrades. Choose a manageable target rather than trying to challenge the strongest monster immediately. Collect tracks, break parts, and hunt or capture the monster. Capturing is useful when you want a safer finish and additional research progress, but it is not mandatory for initial access.
Restock at camp whenever your healing items or ammunition become low. When you have gathered materials and completed the hunt, use the normal return option to end the expedition. The first trip is successful if you learn the map routes, collect Guiding Lands-exclusive materials, and establish which region or monster supplies your next upgrade. You do not need to maximize every region during this visit.
- You entered the Guiding Lands from Seliana after completing the post-Shara dialogue.
- You confirmed that Forest, Wildspire, Coral, and Rotten are the initial regions.
- You inspected the map, camps, mining outcrops, and bonepiles.
- You hunted or captured one manageable target and returned normally.
- You have identified a material or region goal for the next expedition.
Unlock Volcanic and Tundra as separate post-story regions
To unlock Volcanic, complete the Rajang Special Assignment chain beginning with Reveal Thyself, Destroyer. Return to Seliana when the game directs you and finish the associated dialogue. Volcanic is a progression unlock tied to this Rajang content; it is not automatically present on the first Guiding Lands expedition.
To unlock Tundra, complete the Stygian Zinogre Special Assignment Across the Lost Path. Speak with the relevant Seliana NPC when the assignment becomes available, complete the Guiding Lands hunt, and finish the post-quest dialogue. Across the Lost Path unlocks the Tundra region. The later Safi'jiiva reconnaissance content is separate from the act of opening Tundra.
You can postpone either unlock while you improve basic post-story equipment, but complete the appropriate Special Assignment before farming materials exclusive to that region. Check the Special Assignments tab after returning from expeditions; title-update installation alone is not proof that either later region is accessible.
- Volcanic is unlocked through the Rajang Special Assignment chain if its materials are needed.
- Tundra is unlocked through Stygian Zinogre and Across the Lost Path if its materials are needed.
- You have not treated title-update installation as an automatic region unlock.
Raise Guiding Lands progress and clear the three cap assignments
Each Guiding Lands region has its own level, and the game also limits the combined regional progress available across the map. Before every expedition, inspect the region display and choose one concrete goal: a material, a monster, or an augmentation. Concentrate on one or two regions instead of attempting to level all regions equally. Hunting, capturing, breaking parts, collecting tracks, using traps, and gathering can advance regional research, but the available monsters depend on the displayed region levels and the current progression cap.
When you reach MR49, continue Guiding Lands activity until Sleep Now in the Fire appears and its displayed prerequisite is satisfied. This assignment pits you against Tempered Rathian and Tempered Nightshade Paolumu. Bring sleep resistance or prepare a reliable way to recover from Nightshade Paolumu's sleep clouds. Clearing the assignment removes the MR49 cap and raises the Guiding Lands regional ceiling from level 4 to level 5.
At MR69, continue developing the regions until Big Burly Bash appears. The assignment requires a hunt against Tempered Brachydios and Tempered Glavenus. Prepare for blast damage, avoid standing in active slime, and use the map and camp to restock between attempts if necessary. Clearing Big Burly Bash removes the MR69 cap and raises the regional ceiling to level 6.
At MR99, do not assume that one level-6 region is enough. You must have MR99 and meet the cumulative Guiding Lands requirement displayed by the game, commonly a total region level of 12 across the regions. A level-6 region can contribute to that total, but it is not the entire prerequisite by itself. Once the requirement is met, To the Very Ends with You becomes available. Hunt Ruiner Nergigante in the Guiding Lands, then return to Seliana and confirm that the MR restriction has been removed. Clearing this assignment raises the normal regional ceiling to level 7. This can occur before MR100; MR100 is not required for the level-7 unlock.
- Sleep Now in the Fire is cleared at MR49 after its displayed Guiding Lands prerequisite is met.
- Big Burly Bash is cleared at MR69 after its displayed Guiding Lands prerequisite is met.
- At MR99, both the rank requirement and the displayed cumulative Guiding Lands requirement are satisfied.
- To the Very Ends with You is cleared against Ruiner Nergigante.
- The Guiding Lands regional ceiling is level 7 before MR100 if the MR99 assignment has been completed.
Build one functional augmented weapon and armor set
Use the Smithy's Augment or Custom Upgrade menus to inspect the exact materials required for your primary Master Rank weapon. Available augmentation choices depend on the weapon's rarity and your installed content, so select from the options actually displayed rather than following a universal order. Focus your scarce Guiding Lands materials on one weapon you already use confidently. A single working augmented weapon satisfies the equipment objective more efficiently than partially upgrading several unfamiliar branches.
Maintain one complete Master Rank armor set as your baseline. Fully upgrade its defense with available armor spheres, then add Health Boost, Fortify, elemental resistance, or another survival skill if you are still learning the Guiding Lands. Replace skills that do nothing for your weapon with useful offensive, defensive, or utility skills. Save the weapon, armor, item, and mantle combination as a loadout.
If an augmentation material is unavailable, make it the next expedition's objective. Identify the required monster or region, unlock the relevant region if necessary, raise the displayed level, hunt or lure the target, gather the needed Guiding Lands materials, and return to the Smithy. The required equipment checkpoint is one primary Master Rank weapon with an augmentation applied and one viable, fully upgraded Master Rank armor set.
- One primary Master Rank weapon has at least one augmentation applied.
- One complete Master Rank armor set is fully upgraded and supports the chosen weapon or survival needs.
- Weapon, armor, item, and mantle loadouts are saved.
Optional MR100 and Arch-Tempered endgame
After clearing To the Very Ends with You, continue raising Master Rank through Guiding Lands hunts, investigations, event quests, and other available Master Rank content if you want the extended endgame. MR100 is not required for Paean of Guidance, Shara Ishvalda, initial Guiding Lands access, or the level-7 regional ceiling. It is an optional milestone for broader late-game access and is commonly treated as the practical point for the widest Arch-Tempered elder-dragon availability.
Arch-Tempered quests are separate event quests, not ordinary Tempered Guiding Lands investigations. Before accepting one, read the current in-game event listing for its exact requirement, then prepare a complete Master Rank build with suitable resistances, healing, decorations, and a weapon augmentation. Event rotations and individual entry requirements should be checked in the current Event Quest list rather than assumed from another Arch-Tempered quest.
If repeated carts stop your progress, return to Seliana, improve armor defense, add Health Boost or Fortify where appropriate, change mantles, and farm a safer target for the missing material. This recovery route supports the optional MR100 goal but does not replace any campaign or Guiding Lands cap assignment.
- MR100 is reached only if you are pursuing the optional extended endgame.
- The current event listing confirms the requirement for each Arch-Tempered quest you intend to enter.
- Your weapon augmentation, armor defense, decorations, resistances, and recovery items match the selected target.
Before you move on
- Scope 1 — Iceborne campaign: To The Guided, A Paean and Paean of Guidance are complete, Shara Ishvalda is defeated, and the ending dialogue has finished.
- Scope 2 — Initial Guiding Lands access: the Guiding Lands can be selected from Seliana, the first expedition has been completed, exclusive materials have been gathered, and the initial regions are confirmed as Forest, Wildspire, Coral, and Rotten.
- Scope 3 — Later-region access: Volcanic has been unlocked through the Rajang Special Assignment chain and Tundra through Stygian Zinogre and Across the Lost Path if those materials are needed; otherwise, both remain correctly identified as separate optional post-story unlocks.
- Scope 4 — Regional-cap progression: Sleep Now in the Fire and Big Burly Bash are complete at the MR49 and MR69 gates. At MR99, the player has met MR99 plus the displayed cumulative Guiding Lands requirement, commonly total region level 12, before clearing To the Very Ends with You against Ruiner Nergigante. The regional ceiling is level 7, and this completion can occur before MR100.
- Scope 5 — Equipment: one viable, fully upgraded Master Rank armor set is saved, and one primary Master Rank weapon has been augmented.
- Scope 6 — Optional extended endgame: MR100 and Arch-Tempered event access are pursued only after the required campaign and level-7 regional progression are complete.
References for this chapter
- MHWI/Quests/Assignments — Monster Hunter Wiki
- Monster Hunter World: Iceborne — Guiding Lands Endgame Walkthrough — PowerPyx
- M★6 To the Very Ends with You — Kiranico Monster Hunter World: Iceborne Database
- Across the Lost Path — Monster Hunter Wiki
- MHW: Iceborne — Guiding Lands Region Level and Appearing Monsters — GameWith
- Monster Hunter World: Iceborne Title Update 11.01 — Rajang, Guiding Lands, Layered Armor and more — Capcom News
- Master Rank Kulve Taroth and Arch-Tempered Namielle approach Monster Hunter World: Iceborne — Capcom News
Finishing up
Complete the full Iceborne assigned campaign in order through Paean of Guidance and the Shara Ishvalda ending.
Return to Seliana, complete the post-story introduction, and enter the Guiding Lands at least once.
Raise Master Rank and Guiding Lands progression through the MR49, MR69, and MR99 cap assignments, including their required regional progress, if pursuing the full Guiding Lands progression route.
Finish one deliberate Master Rank weapon tree, augment one primary weapon with Guiding Lands materials, and maintain one viable Master Rank armor set with appropriate skills and decorations.
Treat MR100 and Arch-Tempered elder-dragon access as an optional extended endgame target; the guide must provide the MR100 milestone and a concrete readiness check for that target rather than making it part of the basic Iceborne campaign completion.
Choose your next gameScreenshots & video
Game imagery for reference. Follow the written chapters above for the route and strategies.
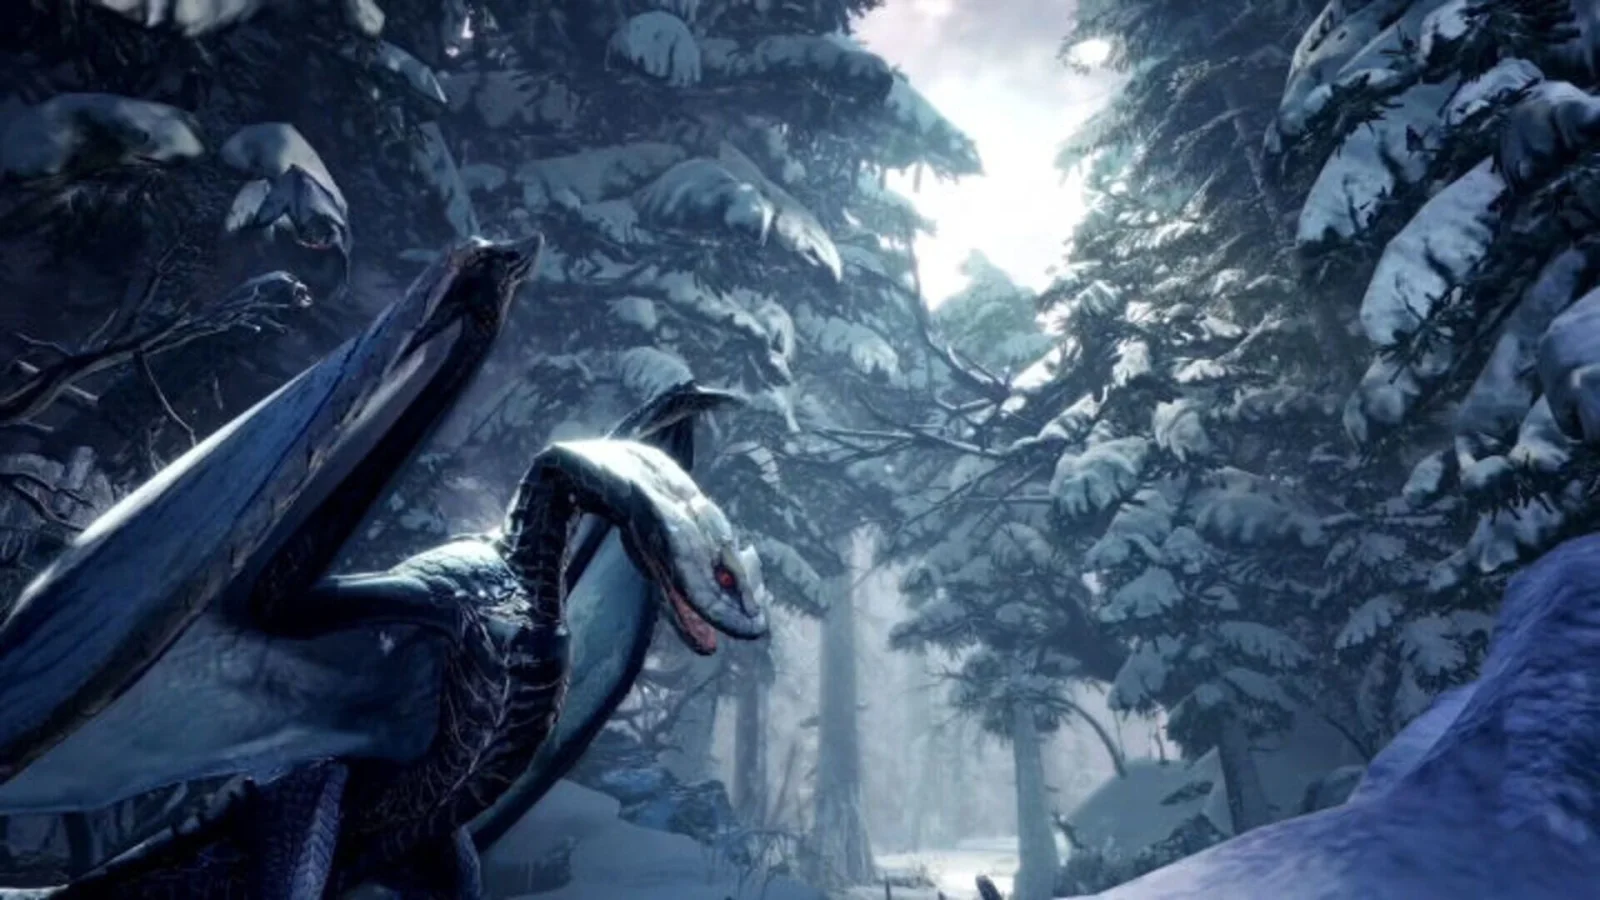
Sources & references
Our original guide draws on the references below. Check the edition at the top of this page before following controls or unlock requirements.
- Monster Hunter World: Iceborne Master Edition — PlayStation Store
- Monster Hunter World: Iceborne Master Edition Digital Deluxe — PlayStation Store
- Monster Hunter World: Iceborne - How do I access the Iceborne Campaign?
- How to check for updates on PS5 consoles and PS4 consoles – PlayStation Support
- How to update system software on a PS4 console – PlayStation Support
- How to update PS5 console and PS4 console system software in safe mode — PlayStation Support
- Monster Hunter World: Iceborne release date, new monsters, new story and features revealed — Capcom News
- Hunter’s Notes: 5 New Details About Monster Hunter World: Iceborne – PlayStation Blog
- MHW: ICEBORNE | Training Area Guide - What You Can Do – GameWith
- MHWI/Quests/Assignments — Monster Hunter Wiki
- How to Unlock Camps Guide - Monster Hunter World: Iceborne — SuperCheats
- Housekeeping – Monster Hunter: World and MHW: Iceborne Logistics
- Monster Hunter World: Iceborne Master Edition — PlayStation Store
- How to restore licenses on PlayStation console
- Monster Hunter World: Iceborne - Recovering Save Data - PS4
- Monster Hunter World: Iceborne Developer Diary 1 — New Gathering Hub features
- Monster Hunter World: Iceborne Master Edition — PlayStation Store
- MHW: Iceborne — Seliana Base Guide: Features and What You Can Do
- Monster Hunter: World — Essential Tips and Item Loadouts
- MHW: Iceborne Facilities
- Monster Hunter World: Iceborne Master Edition — PlayStation Store, PS4 edition contents
- 8 Cool Things You Can Do in the Monster Hunter World: Iceborne Beta for PS4 — PlayStation.Blog
- Monster Hunter World Iceborne: Hoarfrost Reach Camp Locations — PowerPyx
- MHW: ICEBORNE Hoarfrost Reach Map and Location — GameWith
- Deliveries — MH:World — Kiranico
- MH World quest order — HuntersBuild
- MHW: ICEBORNE How To Get Through Master Rank Fast — GameWith
- MHW: ICEBORNE | What is the Wishlist & How To Use — GameWith
- MHW: ICEBORNE | Downgrade Equipment Guide — GameWith
- MHW: Iceborne — How To Augment Master Rank Weapons
- MHW: Iceborne — Guiding Lands Region Level and Appearing Monsters — GameWith
- 8 Cool Things You Can Do in the Monster Hunter World: Iceborne Beta for PS4 – PlayStation Blog
- MHW: ICEBORNE | What Is The Clutch Claw - Guide & What You Can Do – GameWith
- MHW: Iceborne Weapon Changes List – GameWith
- Master Rank Event Quests — Monster Hunter: World — Capcom
- Event Quest Schedule — Monster Hunter: World — Capcom
- Monster Hunter World: Iceborne — Investigations Guide — Samurai Gamers
- MHW: Iceborne — How to Track Tempered Monsters and Investigations — GameWith
- MHW: Iceborne — Investigation Quests Guide — GameWith
- MHWI/Quests — Monster Hunter Wiki
- Monster Hunter World: Iceborne Master Edition — PlayStation Store PS4 listing
- MHW: Iceborne — How To Augment Weapons & Armor
- Augmentation — MH:World / Iceborne Database
- Skills — MH:World / Iceborne Database
- MHW: Iceborne — What To Do After Beating Iceborne Story Quests
- Monster Hunter World: Iceborne Title Update 11.01 — Rajang, Guiding Lands, Layered Armor and more — Capcom News
- MHW: ICEBORNE — How to Start and Join a Quest
- MHW: Iceborne — What Are SOS Flares and How to Use Them
- Monster Hunter World: Iceborne — PlayStation Store listing
- Monster Hunter World: Iceborne - Guiding Lands Endgame Walkthrough
- Across the Lost Path — Monster Hunter Wiki
- The Admiral - Monster Hunter Wiki
- Monster Hunter World: Iceborne Gets New Tundra Region, Stygian Zinogre
- Quest - MH:World - Kiranico Monster Hunter World: Iceborne Database
- Monster Hunter World: Iceborne — Guiding Lands Endgame Walkthrough — PowerPyx
- MHW: Iceborne Weapon Augment Material Sources
- M★6 To the Very Ends with You — Kiranico Monster Hunter World: Iceborne Database
- MHW: ICEBORNE | All Layered Armor Set List
- MHW: ICEBORNE | All Iceborne Master Rank Optional Quest List
- Monster Hunter World: Iceborne - Optional Quest List
- MHW: ICEBORNE | Holiday Joy Fest - Seasonal Event
- Monster Hunter: World – Capcom Support and Troubleshooting
- Monster Hunter: World - Network/Connection Troubleshooting Guide - PS4 – Capcom Support
- How to troubleshoot game downloads from PlayStation Store – PlayStation Support
- Monster Hunter World: Iceborne Assigned Quests List
- Monster Hunter World: Iceborne Quest Database
- Master Rank Kulve Taroth and Arch-Tempered Namielle approach Monster Hunter World: Iceborne — Capcom News
About the game & collecting notes
- Platform
- PlayStation 4
This guide walks you from installing the Master Edition through the Iceborne story, Seliana progression, Master Rank hunts and the Guiding Lands endgame. It explains new mechanics (Clutch Claw), Seliana hub usage, Master Rank gear progression, essential builds, multiplayer tips and concrete completion checks so you can finish Iceborne’s campaign and move into post‑story endgame reliably.
Darryl Polo
Darryl Polo writes about emulation and retro games. What changes when an old favorite moves to another setup? That question connects his interest in tinkering with the games that made the hardware worth keeping.
Our editorial standardsFound a step that needs another look? Help us improve this guide.