
Metroid: Zero Mission — Complete Campaign Walkthrough (Game Boy Advance, USA edition)
Step-by-step walkthrough for Metroid: Zero Mission (GBA, USA). This guide takes you from the crash site through Brinstar, Norfair, Crateria, Tourian, and the added Chozodia mothership sequence — including boss strategies, Zero Suit infiltration, recovery of your Power Suit, and the final escape. Optional 100% guidance and recovery tactics included.

Find a copy
Metroid: Zero Mission Game Boy Advance
We may earn a commission if you buy through these links, at no extra cost to you. As an Amazon Associate I earn from qualifying purchases.
Opens retailer search results. Check the model, edition, seller, availability and current price before buying.
Before you begin
You’re Samus Aran on planet Zebes.
Metroid: Zero Mission is the Game Boy Advance remake of Metroid with an added Chozodia and Space Pirate mothership campaign after Mother Brain.
This walkthrough follows one coherent main route and identifies optional expansions separately.
The campaign does not end at Mother Brain: the Zero Suit infiltration, Power Suit restoration, Mecha-Ridley and final mothership escape are required for the stated completion goal.
Use the map and Save Rooms as navigation and recovery aids, but do not assume every Chozo statue gives a direct objective hint.
The guide covers the original North American GBA release and avoids importing mechanics or routes from later versions.
Set yourself up for the run
Use the original GBA control layout or confirm your emulator mapping for shoot, jump, Morph Ball, Bombs, Missiles and beam switching.
Save at every available Save Room before bosses, timed escapes and difficult Shinespark sections.
Treat Energy, Missile, Super Missile and Power Bomb expansions as optional unless a step explicitly identifies one as required.
The recommended beginner route collects Morph Ball, Long Beam, the first Missile Tank, Bombs, Power Grip, Ice Beam, Speed Booster, Hi-Jump Boots and Spring Ball, Varia Suit, Wave Beam and Screw Attack in the main Zebes campaign. The Unknown Items collected in Crateria, Kraid and Ridley regions remain inactive until the Chozodia restoration sequence, where they become Plasma Beam, Space Jump and Gravity Suit.
This walkthrough follows the standard late-Chozodia route and collects the Power Bomb weapon before Mecha-Ridley. Alternate sequence-break routes that bypass Power Bombs are outside the main route and should not be used when following the final escape instructions.
If a death occurs, reload the most recent useful Save Room and repeat the failed section; preserve the final pre-Mecha-Ridley save if you want to pursue alternate ending conditions or 100% cleanup.
Opening Brinstar through Norfair to Crateria — Morph Ball, Long Beam, Missiles, Bombs and the First Unknown Item
Complete the intended opening route through Brinstar, use Norfair as the passage to Crateria, and collect the first Unknown Item before handing off to the separate Power Grip objective. The progression is Morph Ball, Long Beam, the first Missile Tank, the Deorem encounter, Bombs, the Brinstar Map Room, the Norfair elevator, and the Crateria Unknown Item. Long Beam is technically skippable with a sequence break, but it is the correct route for a first campaign. Deorem and Charge Beam are optional. The Crateria pickup is displayed only as an Unknown Item until the Legendary Power Suit is restored much later; its eventual identity is Plasma Beam. Save at the early Brinstar station, again before leaving the Bombs route, and do not spend time attempting Speed Booster, Shinespark, or Screw Attack techniques.
Collect Morph Ball and activate the first guidance statue
From Samus’s starting position in Brinstar, move left and jump over the rocky rise. Continue left to the glowing item resting on a stone pedestal and touch it to collect Morph Ball. Press Down twice while standing to transform, then roll through the low passage to the right.
Open the blue hatch with a beam shot and continue through the next rooms. Roll beneath the narrow obstruction, pass the enemies dropping from above, and enter the Chozo statue chamber. Stand on the statue’s hands and activate it in Morph Ball form. This statue provides guidance and restores energy; it does not contain Long Beam or Bombs.
- Morph Ball is in the inventory.
- Samus can enter Morph Ball form by pressing Down twice.
- The first guidance statue has been activated.
Reach Long Beam and use the early Save Room
Leave the guidance statue chamber through the opened route and continue right to the nearby Save Room. Save here before climbing farther. If Samus is damaged, the guidance statue can also restore energy when revisited.
Return to the tall vertical room and climb. Ignore the blocked right-side door for now; the starting beam cannot reach all the rocks obstructing it. At the upper section, take the left door, clear the blocks with crouching shots, and roll through the tunnel to the Chozo statue holding Long Beam. Shoot the statue’s egg, then touch the item to collect Long Beam.
Long Beam extends the reach of every beam shot and is the intended early upgrade. A sequence break can technically bypass it, but do not use that route for this campaign chapter. Leave through the right side and follow the next guidance statue’s displayed destination.
- The first Brinstar Save Room has been used.
- Long Beam has been collected.
- The upper Brinstar route is open.
Collect the first Missile Tank
From the second guidance statue, continue through the route it indicates and descend the tall room. Ignore the left-side door and take the right-side passage. Shoot the blocks so Morph Ball can pass through the tunnel, then continue toward the blue Save Room and use it if necessary.
At the bottom of the route, enter the room to the right. The floor shakes, but there is no need to react to it yet. Continue right until you reach the visible Missile Tank and touch it. This is the first Missile Tank and gives Samus a starting missile supply. Hold R while pressing B to fire missiles.
Return left after collecting it. The red hatch encountered on the way cannot be opened with the ordinary beam, so do not keep shooting it. The route back triggers the first Deorem encounter.
- The second guidance statue has been activated.
- The first Missile Tank has been collected.
- Samus can fire missiles and open red hatches.
Treat Deorem and Charge Beam as optional
When Deorem blocks the corridor, wait for its eye to open and fire missiles into it. Keep away from the descending head and from the side of its body when it shakes and releases damaging spikes. The spikes can provide missile refills if ammunition becomes low.
The first encounter is not required to continue: Deorem eventually withdraws, allowing Samus to proceed toward the red hatch. If you defeat it during the later encounter, the reward is Charge Beam. Charge Beam is useful but optional for the route, so retreating from the fight does not damage campaign progression.
After Deorem withdraws, go left and then climb to the red hatch on the right. Open it with a missile and continue through the Mellow and Parasite rooms. Do not linger in the Parasite rooms; leave through the right doors and continue to the Bombs route.
- Deorem has been defeated or postponed for later.
- Charge Beam has been collected only if the optional fight was completed.
- The red hatch toward the Bombs route has been opened.
Collect Bombs and clear the locked exit
Continue through the connected rooms until reaching the smaller vertical shaft leading to the Bombs chamber. Climb to the upper-left door, roll through the narrow tunnel, and open the red hatch. Shoot the egg held by the Chozo statue, then touch the item to collect Bombs.
Enter Morph Ball form and press B to place a bomb. Bomb the dotted blocks beneath the statue and roll into the practice chamber. Use bomb jumps to reach the optional Missile Tank if desired; it is not required for the story route.
Return to the Bombs chamber. The exit door is locked. Drop into the lower part of the room and place a bomb beside the block pillar. This breaks the obstruction and causes Parasites to fall into the chamber. Destroy the Parasites with additional bombs. Once they are gone, the exit door unlocks. The Parasites are the obstruction event; they are not a permanent enemy barrier that requires Charge Beam.
- Bombs are in the inventory.
- The optional Missile Tank beneath the Bombs statue has been collected or deliberately skipped.
- The Bombs-room obstruction has been cleared and the exit door is unlocked.
Download the Brinstar map and leave through Norfair
Go through the unlocked exit and continue right until you reach the tall room. Descend to its bottom and enter the red hatch leading to Brinstar’s Map Room. Activate the station to download the area map. The map identifies facilities and known item markers, but it does not reveal every hidden block or passage.
Leave the Map Room and backtrack only as far as the nearby Save Room if you want another checkpoint. Then follow the lower route to the elevator and press Down while standing on it to travel to Norfair. In Norfair, use bombs beside the metal barriers to open the passage toward the left side of the region. Continue left through the hidden Morph Ball tunnel, climb the shaft, and take the elevator up to Crateria.
In Crateria, move right from the Norfair elevator into the large water-filled cavern. Climb across the floating platforms toward the upper-left and use the opening in the ceiling to enter the Chozo Ruins. Follow the narrow Morph Ball tunnels to the blue door. Inside, shoot the egg held by the Chozo statue and touch the item to collect the first Unknown Item.
The pickup is displayed as Unknown Item at this stage. It does not function as Plasma Beam yet, although its eventual identity is Plasma Beam after the Legendary Power Suit restoration in Chozodia. The nearby Missile Tank revealed by the Unknown Item’s blocks is optional. The next required objective is Power Grip in Crateria, not another Brinstar item.
- Brinstar’s Map Room has been accessed.
- The Bombs-route Save Room has been used if a checkpoint was needed.
- Samus has left Brinstar through the Norfair elevator.
- Samus has reached Crateria from Norfair.
- The first Unknown Item has been collected in the Chozo Ruins area of Crateria.
- The nearby Unknown-Item Missile Tank has been treated as optional.
- The next required objective is Power Grip in Crateria.
Before you move on
- Morph Ball, Long Beam, Bombs, and the first Missile Tank are in Samus’s inventory.
- Deorem has been defeated or postponed, with Charge Beam treated as optional.
- The Bombs-area obstruction has been cleared.
- Brinstar’s Map Room has been downloaded.
- Samus has left Brinstar through Norfair and reached Crateria.
- The first Unknown Item has been collected in the Crateria Chozo Ruins.
- The nearby Unknown-Item Missile Tank has been collected only if desired.
- The next required objective is the Power Grip route in Crateria.
References for this chapter
- Metroid: Zero Mission - Guide and Walkthrough - GameFAQs
- Metroid: Zero Mission - Guide and Walkthrough - Game Boy Advance - By BakonBitz
- Brinstar — Metroid Zero Mission Walkthrough — Thonky
- Bombs in Brinstar — Metroid Zero Mission Walkthrough — Thonky
- Metroid: Zero Mission Official Game Boy Advance Manual
Crateria and Norfair Preparation — Power Grip and Ice Beam
After the opening Brinstar objectives, return through Norfair and take the elevator to Crateria. Follow the already-opened glowing-block route into the Chozo shrine, drop through the collapsing bridge room, and collect the Power Grip. Use it to escape the shrine, reach Samus’s ship, restore your reserves, and save. Return to Norfair, cross the ledge-and-platform route beyond the elevator, and collect the Ice Beam. Ice Beam lets Samus freeze Rippers and other suitable enemies for temporary platforms, but it does not protect against lava, acid, or super-heated rooms. After receiving the next destination from the Chozo Statue, descend through the safe lower Norfair route, return to Brinstar, and stop at the passage toward Kraid. The Unknown Item, Bombs, Map Room, opening Missile Tanks, and Deorum are not repeated here.
1. Take the Norfair elevator to Crateria
From the Norfair elevator reached after the opening Brinstar route, move through the accessible western passage and take the elevator upward to Crateria. Use the Norfair Save Room before the long route if your energy or missiles are low. The yellow-door detours and other blocked passages are not part of this visit.
In Crateria, enter the watery chamber to the right of the elevator. The water slows Samus but does not prevent progress. Climb through the platforms and bombable blocks at the upper-left side, then continue through the passage into the Chozo ruins. The glowing-block route from the preceding chapter should already be active; do not stop to collect or describe another Unknown Item here. The required objective in this chapter is the Power Grip.
- Start after the opening Brinstar progression is complete.
- Use the Norfair Save Room if needed.
- Ride the Norfair elevator to Crateria.
- Do not repeat the earlier Unknown Item, Bombs, Map Room, Missile, or Deorum sequence.
2. Reach the Power Grip chamber
Follow the opened glowing-block passage through the Chozo ruins. Enter the large room with the old Chozo structure and walk onto the bridge-like floor. The bridge collapses, dropping Samus into the lower part of the room. Do not try to climb out through the central shaft immediately.
At the bottom, shoot the left wall to reveal a passage. Enter it in Morph Ball form, bomb the blocks blocking the narrow tunnels, and stand beneath the vertical opening. Shoot upward to clear the route, then jump up and left. Roll into the final tunnel while holding left to enter the hidden Chozo chamber.
Collect the glowing item in the chamber to obtain the Power Grip. It lets Samus catch ledges and corners during jumps. While hanging, press up or jump to pull onto the ledge; continue holding toward a ledge during a jump when the landing looks slightly short. This upgrade is the required Crateria pickup and is not an Unknown Item.
- Cross the collapsing bridge room.
- Shoot open the lower-left passage.
- Bomb through the Morph Ball tunnels.
- Collect the Power Grip.
- Practice catching and climbing a ledge before leaving.
3. Escape the shrine and save at Samus’s ship
Leave the Power Grip chamber and return to the room with the central Chozo structure. The structure rises and creates platforms. Wait for it to finish moving, then climb the platforms using ledge grabs. Take the door at the upper-left.
In the next room, move left across the pillars and shoot the rocks above them. At the far-left pillar, use the platform to the right to jump and grab the pillar’s side. Hang from the edge and aim upward-left to destroy the rocks at the top. Quickly jump, grab the cleared top, climb onto it, and roll through the left doorway.
Continue left to Samus’s ship. Stand on it to restore energy and ammunition, then save. This is the best checkpoint before the return through Norfair. Leave through the right-side door and follow the surface route back to the elevator.
- Use the rising Chozo structure and temporary platforms.
- Clear the rocks above the pillars.
- Reach Samus’s ship.
- Restore energy and ammunition.
- Save before returning to Norfair.
4. Cross Norfair to the Ice Beam route
Descend to Norfair and leave the elevator through the right-hand door. Use the Power Grip to catch the ledge ahead, climb, and roll through the narrow passage. Continue right, bomb through the obstructing tunnel, and pass the optional Missile Tank if you do not want to spend time on it. Continue through the next door to the Save Room and recharge if necessary.
From the Save Room, cross the large platforming chamber. Use the ledges and stone platforms to work toward the far-right side, then climb through the bubbling room. Enter the upper-left route and cross the small platforms carefully. When a jump appears too long, use the Power Grip to catch the edge of the platform you are leaving or approaching.
Enter the Chozo room and shoot the statue’s egg. Touch the item to collect Ice Beam. It freezes suitable enemies, including Rippers, so they can be used as temporary platforms. Ice Beam does not protect Samus from lava, acid, or super-heated rooms.
- Use Power Grip ledges beyond the Norfair elevator.
- Save before the long platforming route.
- Cross the bubbling and suspended-platform rooms.
- Collect Ice Beam.
- Treat nearby Missile Tanks as optional.
5. Receive the Kraid destination and return safely
The exit door from the Ice Beam room is green and cannot be opened normally. Roll through the tunnel beneath the statue and bomb the obstruction. Freeze the Ripper in the next room, jump onto it, and use it to reach the exit. Save in the nearby Save Room.
Climb the following shaft by freezing the Rippers at useful heights. Freeze the creature that jumps from the acid and use it to reach the upper ledge. Continue right and freeze the next creature so Samus can enter the hands of the Chozo Statue. Activate the statue to receive the next destination: Kraid’s region.
Continue right through the rooms, freezing enemies when they block the platforms. After the upper route, descend through the tall Norfair room. Do not enter the super-heated door on the left; Samus’s current suit cannot safely withstand it. Continue downward to the bottom door, cross left to the Save Room, and use the Rippers above it to reach the elevator back to Brinstar.
- Use Ice Beam to freeze the first Ripper after the statue.
- Save after leaving the Ice Beam room.
- Activate the destination Chozo Statue.
- Avoid the super-heated side room.
- Return to the Brinstar elevator through the lower Norfair route.
6. Stop at the Kraid handoff
In Brinstar, leave the elevator and move left through the familiar passage. When the route is blocked, bomb through the obstruction, then use Power Grip to catch the ledges and climb. Continue through the upper-left passages until you reach the elevator and route leading into Kraid’s region.
Do not begin Mua, the Kraid-region Unknown Item, Kraid’s boss fight, or Speed Booster in this chapter. Those objectives belong to the next chapter. If you are low on energy or ammunition, use the Brinstar or Norfair Save Rooms and farm nearby enemies only as needed before proceeding.
- Return from Norfair to Brinstar.
- Use the Power Grip in the return climb.
- Reach the route toward Kraid.
- Leave Kraid-region progression for the next chapter.
Before you move on
- The earlier Unknown Item and opening Brinstar objectives are already complete and have not been repeated.
- Samus has collected the Power Grip in Crateria.
- Samus has reached her ship, restored energy and ammunition, and saved.
- Samus has collected Ice Beam in Norfair.
- The Chozo Statue after the Ice Beam platforming route has identified Kraid’s region.
- Samus has returned through the lower Norfair route without entering the pre-Varia super-heated room.
- Samus has reached the Brinstar passage and elevator leading toward Kraid.
- Mua, the Kraid-region Unknown Item, Kraid, and Speed Booster remain for the next chapter.
References for this chapter
Kraid Route — Unknown Item, Kraid and Speed Booster
After collecting Ice Beam in Norfair, return through Brinstar and descend to Kraid’s region. Cross the first rooms, activate the rail devices, defeat Mua, then follow the lower route to the second Unknown Item. This item is required for the standard progression and later becomes Space Jump after the Legendary Power Suit is restored. Continue to the Gadora and defeat Kraid. After the boss, collect Speed Booster and complete the required exit route through Kraid’s region before taking the elevator back to Brinstar. Optional tanks can be skipped. Hi-Jump Boots, Varia Suit and Wave Beam begin in chapter 4.
1. Leave Ice Beam and descend to Kraid’s region
From the Ice Beam area, freeze the Rippers in the exit route and use them as temporary platforms. Continue through the upper route without entering the superheated passage. Samus does not have Varia Suit yet, so do not remain in high-temperature rooms longer than necessary.
Return through Norfair to the Brinstar elevator. In Brinstar, follow the connected route toward the lower-left elevator. Use the Ice Beam to freeze enemies where needed, and bomb the marked floor obstruction that blocks the route. Recharge at a Chozo Statue if your energy or missiles are low, then take the elevator down to Kraid’s region.
Use the Kraid-region Save Room before exploring. The save room near the elevator has an optional hidden Missile Tank route, but it is not required. Skip it if you want to preserve the direct campaign route.
- Ice Beam is available and the superheated Norfair passage has been avoided.
- The elevator from Brinstar to Kraid’s region has been reached.
- The Kraid-region Save Room has been used or identified for recovery.
2. Activate the rail devices and reach Mua
Leave the Save Room through the right side and continue through the first Kraid-region rooms. Use charged shots or missiles on the Dessgeegas and other large enemies blocking narrow passages. In the room with the glass tube, shoot the floor and descend. Bomb the lower obstruction, enter the Morph Ball device and drop a bomb to launch Samus upward.
At the upper section, use the ledges and wall niches to climb. Shoot the blue blocks that block the upper route, then move to the left ledge and enter the next room. Cross the acid gap by jumping from the available ledge rather than dropping into the pool.
In the rail-device room, enter the Morph Ball socket to activate the mechanism. Shoot the red ceiling orb to call the rail across, then grab it. The rail carries Samus through the room and toward the next section. An Energy Tank can be collected along this route, but it is optional. Continue until the second rail section leads to Mua.
- The first rail device has been activated in Morph Ball form.
- The red ceiling orb has been shot to call the rail.
- Mua has been reached after the upper rail route.
3. Defeat Mua and take the lower Unknown Item route
Mua’s vulnerable area is the glowing neck segment. Stand on the lower platforms until Mua begins its charge, then jump onto the ceiling rail. Mua can catch on the side blocks during the charge. While the rail carries Samus past it, turn and fire at the glowing segment with missiles or charged shots. Do not stay on the low platforms when Mua is about to leap.
If the acid level rises during the fight, move to a higher block and wait for it to fall. Resume the rail pattern once the lower platforms are safe. When Mua is defeated, bomb the floor in the center of the room and descend.
The hidden Missile Tank below Mua is optional. To collect it, move left, shoot the highest block in the wall, roll through the tunnel and bomb the blocks in the way. Return to the Mua room afterward, go up through the middle opening and take the left door.
Use the bomb device to return to the upper part of the room. Call the rail again by shooting the red ceiling orb, then climb onto the top of the pillar and roll right. Follow the downward route past another optional tank and continue left. Use the Save Room if necessary before taking the blue door on the left.
- Mua has been defeated before the Unknown Item route begins.
- The acid-level change has been handled by moving to higher ground.
- The optional tank below Mua has not been mistaken for the required Unknown Item.
4. Collect Unknown Item #2 and reach Kraid
From the blue-door room, shoot the upper-left block, jump to the ledge and roll into the tunnel. Bomb through the passage while riding the rail. Fire toward the left as you travel so the blocks do not push Samus off. At the far side, defeat the large Sidehoppers with missiles or charged shots, then continue through the left tunnel and drop through the Pit Blocks.
At the bottom of the route, bomb the blocks above the apparent acid and descend. This pool is an illusion and does not damage Samus. Continue through the small rooms, bomb the cracked floor on the left and use the pipes to reach the lower passage. After the Save Room, leave and go right, but do not use the obvious door.
Instead, shoot the ceiling blocks and reveal the passage in the right wall. Jump to the ledge, enter the tunnel and roll through it. Shoot the Chozo egg and collect Unknown Item #2. It is intentionally unidentified at this point; after the Legendary Power Suit is restored later in the game, this item becomes Space Jump.
Use the nearby Chozo Statue to restore energy and ammunition. Shoot the block that becomes active after taking the item, then leave through the opened route. Go up into the ceiling tunnel on the left, bomb the obstruction and continue left through the upper door. Fight through the enemy room with charged shots or missiles, then save before the final approach.
- Unknown Item #2 has been collected from the hidden Chozo room.
- The item is recorded as the later Space Jump upgrade, not as a currently usable ability.
- The nearby Chozo Statue has been used before the Kraid approach.
5. Defeat Kraid
From the Save Room, leave through the right door. Bomb the floor slightly right of center and fall through the Pit Block. Move right, jump onto the left ledge and shoot through the two glowing blocks. Enter the passage and defeat the Gadora. Wait for its eye to open, then hit it with a missile or charged shot. Collect the dropped ammunition and energy, fire a missile at the door and enter Kraid’s chamber.
During the first phase, hit Kraid’s head with a missile or charged shot. When his mouth opens, fire missiles into it. Destroy incoming claws when practical because they can drop health or ammunition, but do not take unnecessary damage trying to collect every drop.
When Kraid fires the large projectiles from his body, avoid their direct paths. Projectiles that lodge in the walls become temporary platforms. As the lower platforms are destroyed, use the highest lodged projectile to jump toward Kraid’s head and mouth. If Kraid raises a claw for a swipe, move or jump away immediately. Repeat the head-opening and mouth-shot pattern until Kraid is defeated.
- The Gadora has been defeated before entering Kraid’s arena.
- Kraid’s head is struck before missiles are fired into his mouth.
- The lodged projectiles are being used as platforms after the lower floor is destroyed.
6. Collect Speed Booster and complete the exit to Brinstar
After Kraid disappears, move to the bottom-left of the arena and bomb through the blocks. Enter the room on the left and shoot the egg held by the Chozo Statue. Collect Speed Booster. This upgrade allows Samus to build running speed, destroy Boost Blocks marked with arrows and store a charge for later Shinespark movement.
To leave Kraid’s region, go below the statue and reach the left wall of the tall room. Run to the right and continue through the Boost Blocks. Keep firing toward the right as you run so the door in the route opens, then maintain the boost through the remaining blocks. If the charge ends early, return to the left side and repeat the run.
Climb the tall room by freezing Rippers and using the blue blocks and bomb-created ledges where necessary. Take the left door and continue through the rail section. While riding the rail, fire missiles toward the pursuing enemies so they do not knock Samus into the acid. At the far left, shoot the glowing block, roll through the tunnel and continue.
Drop through the blue floor blocks, defeat the Dessgeegas and reach the Kraid Map Room. Download the map if desired, then use the Morph Ball device to launch upward. Continue through the upper rooms and return to the tall shaft. An optional Energy Tank can be reached with a stored Speed Booster charge near the acid; skip it if the setup is unreliable.
Return to the upper Save Room, then take the elevator back to Brinstar. The transition cutscene plays after leaving Kraid’s region. Save on the Brinstar side if convenient. Chapter 4 begins with the route to Hi-Jump Boots in Norfair, followed later by Varia Suit and Wave Beam.
- Kraid has been defeated.
- Speed Booster has been collected from the Chozo Statue after the boss.
- The Boost-Block exit route and rail section have been completed.
- The elevator has returned Samus to Brinstar.
- Hi-Jump Boots, Varia Suit and Wave Beam remain for chapter 4.
Before you move on
- Samus reached Kraid’s region after collecting Ice Beam.
- Mua was defeated.
- Unknown Item #2 was collected from the hidden Chozo room.
- Kraid was defeated.
- Speed Booster was collected from the Chozo Statue behind Kraid’s arena.
- The required Boost-Block and rail exit route was completed.
- Samus returned to Brinstar by elevator and can begin the Hi-Jump route in chapter 4.
- Hi-Jump Boots, Varia Suit and Wave Beam were not incorrectly counted as completed in this chapter.
Hi-Jump Boots, Varia Suit and Wave Beam — Norfair and Brinstar Progression
After Speed Booster, return to Norfair and use two stored Speed Booster charges to break through the floors leading to the Hi-Jump Boots and Spring Ball. Use the new jump height to leave Norfair through the upper route and return to Brinstar. Follow the parasite-and-Tangle Vine passage to the Varia Suit, using the Spring Ball to cross the acid rooms. Varia Suit protects Samus from acid and superheated rooms and reduces damage, but ordinary lava remains dangerous. Return to Norfair, pass through the previously inaccessible heated tunnel beneath the Hi-Jump statue, and follow the long western route to Wave Beam. Wave Beam lets shots pass through solid terrain and is used to destroy the first larval Kiru Giru from the safe side of its barrier. Save after the larva is cleared; the Ensnared Kiru Giru encounter belongs to the next chapter.
Return to Norfair and collect Hi-Jump Boots
From the Brinstar elevator, enter Norfair and move right through the large room with magma along the lower route. At the far side, begin running while firing so the door opens without interrupting your Speed Booster. Continue through the long vertical passage until the floor breaks and drops you into the next section.
In the following room, move left and prepare another Speed Booster run. Turn around if necessary to obtain enough running distance, then fire while crossing the room. The boost will break another floor in the vertical shaft. Drop through the opening, enter the next room on the left, clear the enemies, and use the red blast door.
Shoot the Chozo statue to collect the Hi-Jump Boots and Spring Ball. Hi-Jump increases Samus’s normal jump height. Spring Ball allows her to jump while in Morph Ball form, which is needed for the Brinstar route. Do not try to roll through the heated passage beneath the statue yet; without Varia Suit, the heat drains energy.
- Speed Booster is already collected.
- Break the first Norfair floor with a rightward boost.
- Break the second floor with a leftward boost.
- Collect Hi-Jump Boots.
- Collect Spring Ball from the same Chozo statue.
- Do not enter the heated tunnel beneath the statue yet.
Leave Norfair and prepare the Brinstar route
Return to the vertical shaft and use Hi-Jump to reach the ledge that was previously too high. Continue upward through the shaft and take the upper route toward the Norfair elevator. A Chozo statue and nearby save facilities make this a good point to restore health and ammunition before crossing Brinstar.
Take the elevator to Brinstar. The required destination is the high Varia Suit passage in the eastern part of the area. Use the map room and Save Room when they are on your route, but do not detour into Kraid’s rooms or repeat the Kraid fight. The boss and Speed Booster are already complete.
In the tall Brinstar shaft, climb to the upper section and enter the route leading through stacked Morph Ball tunnels. Use the highest tunnel to cross the acid-filled gap. Spring Ball lets Samus jump in Morph Ball form, making the platforms beyond the tunnel much easier to cross. If you fall, return to the tunnel rather than trying to force a hazardous jump from the lower floor.
- Use Hi-Jump to leave the Norfair shaft.
- Return to Brinstar through the elevator.
- Reach the upper eastern Brinstar route.
- Use the highest Morph Ball tunnel over the acid.
- Use Spring Ball for Morph Ball jumps.
- Do not repeat Kraid or the Speed Booster pickup.
Cross the parasite rooms and collect Varia Suit
At the end of the upper tunnel, a Tangle Vine Fruit blocks the way. It cannot be destroyed directly. Shoot the cracked wall or blocks above and use the opening to enter the next room. A Save Room is nearby; use it if needed, then return to the parasite route.
In the next section, let the small parasites swarm the Tangle Vine Fruits. They gradually destroy the fruits and open the passage. Avoid killing or scattering the parasites before they reach the obstruction. Once the route is open, use Spring Ball to hop across the platforms above the acid. Release the next group of parasites so they can remove the following fruit, then enter the red blast door.
Shoot the Chozo statue and collect Varia Suit. This upgrade reduces damage from ordinary attacks and makes acid and superheated rooms safe to cross. It does not make Samus immune to ordinary lava, so do not treat every orange or red hazard as harmless. Use the statue’s refill before leaving if your health or ammunition is low.
- Use the upper Morph Ball tunnel to reach the parasite rooms.
- Let parasites destroy the Tangle Vine Fruits.
- Use Spring Ball over the acid platforms.
- Collect Varia Suit from the Chozo statue.
- Remember that lava still causes damage.
- Use the statue refill before backtracking.
Treat the Brinstar expansions as optional
After obtaining Varia Suit, the acid room below the statue can be explored safely. Bomb the floor near the rocky section to reveal the lower passage. A hidden Energy Tank is available in this area by opening the weak floor and rolling through the small passage. Collect it if you want the extra health; it is not required for Wave Beam, Ridley, Tourian, or the ending.
A Missile Tank is also available along the Brinstar return route. It is an optional expansion and should not delay the main progression if you are following a story-focused run. Mark any skipped tank on the map for a later 100% route.
Return to the Brinstar elevator after saving. Do not spend time on advanced Shinespark expansions here unless you are deliberately collecting optional items. The mandatory objective is to descend to Norfair with Varia Suit and continue through the heated route beneath the Hi-Jump statue.
- Optional Varia-area Energy Tank is collected or marked for later.
- Optional Brinstar Missile Tank is collected or marked for later.
- Save before returning to Norfair.
- Do not confuse optional Shinespark expansions with required progression.
Return to Norfair and reach Wave Beam
Descend to Norfair and return to the long vertical shaft where the Hi-Jump Boots were found. Move down to the statue room and roll through the heated tunnel beneath it. Varia Suit now protects Samus from the superheated room, allowing access to the route on the other side.
In the next room, clear removable blocks from the floor and make a running start up the slope. When Speed Booster activates, jump at the top to break through the Boost Blocks. Continue left through the rooms until you reach the Save Room. Save if necessary, then keep moving left through the heated passages. Freeze airborne enemies when they block a jump and use them as temporary platforms.
Continue to the far-left Norfair section and use the Map Room if it is available on your route. The following shaft contains a section of false lava that can be crossed by dropping through the disguised floor. Do not drop into the nearby real lava pools. Follow the rooms to the right, crossing pillars and avoiding the vines and enemies, until you reach the Save Room near the Wave Beam route.
From that Save Room, return to the adjacent room and bomb the floor on the left to reveal the lower passage. Descend through the false-lava section, defeat the armored enemy in the next room, and continue left through the red blast door. Shoot the Chozo statue to collect Wave Beam. Wave Beam shots pass through solid terrain, allowing Samus to hit enemies hidden behind walls.
After collecting Wave Beam, return toward the larval Kiru Giru passage. Use the beam through the separating wall to hit the first larva’s exposed underside. Do not waste missiles against its shell. Once the first larva is destroyed and the route opens, return to the Save Room. The next objective is the second larval Kiru Giru and then Ensnared Kiru Giru, which belong to the following chapter.
- Enter the heated tunnel beneath the Hi-Jump statue only after obtaining Varia Suit.
- Use Speed Booster to break the blocks at the top of the slope.
- Avoid real lava; Varia Suit does not protect against it.
- Use the Norfair Map Room and Save Room when available.
- Collect Wave Beam from the Chozo statue.
- Use Wave Beam through the barrier to destroy the first larval Kiru Giru.
- Save before beginning the Ensnared Kiru Giru progression.
Before you move on
- Hi-Jump Boots have been collected in Norfair.
- Spring Ball has been collected from the same Chozo statue.
- Samus has returned to Brinstar through the Norfair elevator.
- Varia Suit has been collected from the Brinstar Chozo statue.
- The optional Brinstar Energy Tank and Missile Tank have been collected or marked for later.
- Samus has returned to Norfair and crossed the heated tunnel beneath the Hi-Jump statue.
- Wave Beam has been collected.
- The first larval Kiru Giru has been destroyed by firing through the barrier with Wave Beam.
- Samus has saved before proceeding to the second larva and Ensnared Kiru Giru.
- Kraid and Speed Booster have not been repeated in this chapter.
References for this chapter
- Metroid Zero Mission Walkthrough — Main Progression and Item Order
- Wave Beam in Norfair — Metroid Zero Mission Walkthrough
- Metroid: Zero Mission Walkthrough — Powering Up
- Metroid: Zero Mission - Guide and Walkthrough - Game Boy Advance - By BakonBitz
- Metroid: Zero Mission Official Game Boy Advance Manual
Speed Booster Techniques — Required Skills and Optional Shinespark Expansions
This chapter begins after the Speed Booster is already in Samus’s inventory. It explains how to activate Speed Booster, store its charge, release vertical and horizontal Shinesparks, use slopes to rebuild momentum, and safely reset failed attempts. The Kraid-region acid-room expansion, Norfair magma shortcut, Ridley-region upper mesh-catwalk shortcut and Chozodia escape shortcut are optional. They can provide expansions or faster routes, but none is required for the standard campaign. Some later puzzles require Hi-Jump Boots, Gravity Suit, Screw Attack, Power Bombs, Morph Ball, Bombs, Wave Beam or other equipment. Practice in clear rooms, save before difficult attempts and return to solid ground when a setup fails.
1. Begin only after collecting the Speed Booster
Start this chapter with the Speed Booster already collected. Do not repeat Kraid, the post-boss route or the return to the elevator; those are part of the main progression. The objectives here are movement practice, optional expansions and shortcuts.
Save before attempting a difficult Shinespark puzzle, particularly in Norfair, Ridley’s Lair or Chozodia. Clear nearby enemies that can interrupt a running lane, but avoid wasting ammunition on optional fights when the actual objective is movement. A Save Room is also a reliable place to reset Samus after a failed attempt.
- The Speed Booster is already in the inventory.
- This chapter is being used for optional movement or cleanup.
- A Save Room is available before a difficult attempt.
2. Store and release a Shinespark
Run in one direction until Samus visibly enters the blue Speed Booster state. While the charge is active, press Down on the Control Pad to crouch and store it. Samus flashes while the stored charge remains available, giving you a short window to move into position.
Press the regular Jump button without a direction to launch a vertical Shinespark. To launch horizontally, hold Left or Right and press Jump. Use a normal jump rather than a somersault jump; the spinning jump does not release the stored Shinespark in the original Game Boy Advance version.
A horizontal Shinespark travels in a straight line, so check the destination before releasing it. It can break Speed Booster blocks and cross hazards, but it does not automatically correct Samus’s height. If the flashing ends before release, the charge is lost and must be rebuilt.
- You can recognize the Speed Booster state.
- You can store the charge with Down.
- You can release vertical and horizontal Shinesparks with a regular jump.
- You can distinguish a regular jump from a somersault jump.
3. Use slopes and reset failed attempts
Some routes send Samus into a slope after a Shinespark. Contact with the slope can restore the running Speed Booster state. When Samus begins running again, crouch to store another charge and continue the chain. Plan the next launch before touching the slope so the short storage window is not wasted.
If Samus hits a wall too early, falls into a hazard or lets the charge expire, stop repeating the attempt from the same position. Return to a solid floor, use a nearby door or Save Room if necessary, and rebuild the charge from the longest clear lane. A short lane may not be long enough to activate Speed Booster.
For a multi-slope puzzle, practice one transfer at a time. First make the initial run and launch reliable, then add the next slope. Clear enemies before practicing, and confirm that doors are open if the route requires Samus to cross a room transition while charged.
- A failed setup is restarted from solid ground.
- The longest available running lane is used.
- Each slope transfer is practiced before attempting the whole chain.
4. Optional Kraid-region acid-room expansion
In Kraid’s Lair, use the shaft near the acid-filled room containing the optional expansion. Build Speed Booster in the shaft and crouch just before the acid pool so Samus does not fall. Use the nearby slope to position the stored charge, then release a horizontal Shinespark across the room toward the opposite slope.
When Samus reaches the far slope, crouch again to restore the charge. The expansion is concealed behind a wall near the slope; shoot the lower part of that wall to reveal it, then collect it if the alignment was successful. The Shinespark route is not required to obtain the expansion, and the expansion itself is not required for the campaign.
If Samus is too high, she will hit the wall before reaching the slope. If she is too low, she may fall into the acid. Leave by the normal route, recover at a Save Room if needed and return later rather than forcing repeated attempts while damaged.
- The Kraid-region acid-room item is treated as optional.
- The charge is stored before the acid pool, not after falling into it.
- The wall is opened only after the far slope restores the setup.
5. Optional Norfair shortcut
Near the main Brinstar elevator in Norfair, a long room allows an optional Speed Booster shortcut across a magma section. Start from the clear hallway, run until Speed Booster activates, crouch before the drop into magma and release the Shinespark across the barrier.
After reaching the slope, continue through the opened route and fire at doors while moving. The shortcut bypasses part of the normal magma-side path and can also be used in reverse during later cleanup. It is not needed to reach the required story objectives.
Do not attempt this route if enemies are positioned to interrupt the running lane or if Samus cannot survive an accidental fall. Use the normal Norfair route instead and mark the shortcut for a later visit.
- The Norfair route is recognized as an optional shortcut.
- The Shinespark is released before the magma drop.
- The normal route remains available if the shortcut fails.
6. Optional Ridley-region upper catwalk shortcut
In Ridley’s Lair, reach the upper section of the mesh catwalk used for nearby optional expansions. Run across the catwalk in the direction that leads toward the right side, shoot the blocks at the end and crouch before dropping to the floor below.
Once on the lower floor, release the stored Shinespark to the right. The launch passes through the corridor around the optional expansion and can carry Samus to the end of the hallway. This is a shortcut and optional cleanup route, not a prerequisite for defeating Ridley or opening Tourian.
The route is easier after the surrounding enemies and obstacles are understood. If later versions of the puzzle require additional equipment, return after collecting it rather than attempting an early sequence break. Mark the catwalk and the destination on the map so the shortcut is not confused with the required Ridley route.
- The upper mesh catwalk is used as the landmark.
- The shortcut is kept separate from Ridley’s required progression.
- The expansion and shortcut are deferred if the setup is unsafe.
7. Leave advanced Chozodia puzzles for cleanup
Chozodia contains demanding Shinespark routes, including a late escape shortcut involving multiple slopes. These routes may require Missiles, Super Missiles, Speed Booster, Morph Ball and Hi-Jump Boots, and the final escape version offers little or no opportunity to recover from a failed attempt.
For a multi-slope sequence, plan the whole chain before starting: run, crouch, launch to the first slope, regain Speed Booster, crouch again and repeat. Use normal somersault jumps for repositioning when you do not want to release the stored charge. Treat the Chozodia escape shortcut as an advanced optional challenge, not as part of the required escape method.
Optional expansions and shortcuts improve reserves or save time, but they are separate from story completion. If the goal is simply to finish the campaign, leave these marked locations for a dedicated cleanup run.
- Required Chozodia progression is not confused with optional Shinespark routes.
- The equipment requirements are checked before attempting a late puzzle.
- A failed escape shortcut is not treated as a broken campaign save.
Before you move on
- You can activate Speed Booster consistently.
- You can store a charge with Down.
- You can release vertical and horizontal Shinesparks with a regular jump.
- You can use a slope to restore Speed Booster momentum.
- You can safely reset a failed setup from solid ground or a Save Room.
- You have either completed an optional landmark route or deliberately marked it for cleanup.
- The Kraid, Norfair, Ridley and Chozodia routes are clearly separated from mandatory story progression.
- No boss, required escape, elevator return or story cutscene is counted as completion of this technique chapter.
Ridley Region — Screw Attack, Kiru Giru, Imago and Ridley
After Wave Beam, return to the Norfair room where the first larval Kiru Giru has already been cleared. The remaining second larva is the required blocker: push it backward with Wave Beam or Missiles, wait for its charge, and place Bombs beneath its exposed underside. Continue directly to Ensnared Kiru Giru, freezing a Ripper and using it as a platform to destroy the supporting vines. Enter Ridley Region, return to Norfair through the upper dead end, then use the hole left by Kiru Giru to reach Imago’s nest. Defeat Imago, collect the revealed Super Missile Tank, take the Ridley-region Unknown Item, and defeat Ridley on the return crossing. The Unknown Item is inactive until the later Chozodia restoration. After Ridley, return through Norfair to collect Screw Attack, save, and proceed toward Tourian. Kraid and Ridley are the gateway requirement; Screw Attack is the normal preparation pickup.
Clear the remaining second larval Kiru Giru
Return to the Norfair chamber where the larval Kiru Giru encounters occurred. The first larva from the earlier progression is already defeated; do not repeat that fight. The remaining second larva is the blocker that must be cleared before the route to Ensnared Kiru Giru opens.
Stand far enough away for the larva to move toward Samus, then fire Wave Beam or Missiles into its front to push it backward. When it pauses and prepares to charge, shift into Morph Ball form and place Bombs in its path. The charge exposes the underside, allowing the explosions to damage the vulnerable area. Retreat after placing the Bombs, then repeat the pattern of push-back, charge preparation, Bomb placement and retreat until the larva is defeated. Do not rely on ordinary standing shots against its underside; the reliable damage window is created during the charge.
Once the second larva is gone, follow the newly opened passage continuously. Run through the vegetation-filled corridor, use the Speed Booster opening where required, and continue to the Save Room before the next boss chamber. Nearby Energy or Missile Tanks can be collected if you need them, but they are optional and should not delay the required route.
- The first larval Kiru Giru remains cleared from the earlier chapter.
- The second larval Kiru Giru has been pushed backward with Wave Beam or Missiles.
- Bombs have been placed beneath its exposed underside during its charge.
- The second larva has been defeated.
- The passage toward Ensnared Kiru Giru and the nearby Save Room is open.
Defeat Ensnared Kiru Giru and enter Ridley Region
Ensnared Kiru Giru hangs from supporting vines near the ceiling. Rippers fly through the chamber and provide the temporary platforms needed to reach those vines. Freeze a Ripper when it is in the upper half of the room, jump onto it, and use the extra height to fire Missiles or charged shots into the vines above the creature. Keep refreezing the Ripper before the ice wears off if you are standing on it.
Destroy the supports on one side first, then cross to the other side and repeat the process. The central support is handled as the side supports are removed; continue attacking until all required vines are gone. Ensnared Kiru Giru releases small green objects that can be shot for health or ammunition, so use them for recovery when the room becomes safe enough. When the creature falls, it opens a hole in the floor. Drop through, move right, pass through the door and ride the elevator down to Ridley Region. Save at the station near the elevator before continuing.
- The second larval Kiru Giru was defeated first.
- A Ripper has been frozen and used as a platform.
- The supporting vines on both sides have been destroyed.
- Ensnared Kiru Giru has fallen through the floor.
- The Ridley Region elevator and nearby Save Room have been reached.
Return to Norfair and reach Imago’s nest
From the Ridley Region elevator, use the nearby Save Room, then travel left through the accessible rooms. The initial route reaches a dead end rather than taking you directly to Ridley. Return to the elevator and ride back up to Norfair; this return is required for the passage created by Kiru Giru.
Back in Norfair, go to the former larval area and enter the hole left behind by Kiru Giru. Follow the tunnel into the lower Ridley section and continue through the empty shell. Cross the egg-filled chamber, clearing the eggs that block the route, to trigger Imago. If your reserves are low, use nearby enemies for recovery before starting the encounter, but avoid an unnecessary detour.
- The initial Ridley Region route has been explored to its dead end.
- Samus has returned to Norfair using the elevator.
- The hole left by Kiru Giru has been entered.
- The empty shell and egg chamber have been crossed.
- Imago has been triggered.
Defeat Imago and collect the Super Missile Tank
Imago’s vulnerable target is the stinger or rear abdomen. Hold position near one end of the sloped chamber and fire Missiles or charged Beam shots as Imago passes. Avoid chasing it across the room. Morph Ball can reduce the chance of being struck as Imago swoops through, but keep enough space to respond to its later stinger projectiles.
When Imago begins firing stingers, shoot projectiles that block your movement and continue targeting the rear section. After the stinger is destroyed, Imago crashes through the egg pile and exposes the Super Missile Tank in the nest. Collect it before leaving. In the standard route, this Super Missile opens the green door used on the approach to Ridley, while other tanks in the region remain optional.
Return through the Ridley Region rooms and use a Save Room before the boss approach if you need to refill. Keep the Super Missile available for the green door rather than spending it casually on minor enemies.
- Imago’s rear stinger section is being targeted.
- Morph Ball or spacing is being used to avoid the main swoops.
- Imago has been defeated.
- The Super Missile Tank in the exposed nest has been collected.
- Samus has saved or restocked before the Ridley approach.
Collect the Unknown Item and defeat Ridley
Open the green door with a Super Missile and continue toward Ridley’s chamber. The first time you enter the large arena, it is empty. Cross the bridge and enter the room beyond it, then shoot the Chozo Statue’s egg and collect the Unknown Item. Return across the bridge; the Ridley encounter begins during that return. The item is not yet an active Gravity Suit. Its function is restored later during the Chozodia Chozo trial, so follow the environmental-damage limits of Samus’s currently active suit until then.
Ridley can be damaged by Missiles and charged shots, and the tail is not a useful target. Stay toward the end of the solid platform farthest from him when possible. Destroy or avoid the fireballs, crouch or roll beneath horizontal swoops, and use Morph Ball to pass behind him after the tail moves forward or during a safe opening. When Ridley performs the grab-and-fireball attack, the boss pauses in place; use that opportunity to land heavy shots if you can do so without exhausting the ammunition needed for the rest of the fight. If Super Missiles run low, regular Missiles and charged shots remain valid fallback damage.
After Ridley is defeated, leave the arena through the opened route and travel right through the region until you reach the vertical hallway. Climb out, pass through the upper route and return to Norfair. The Tourian gateway is opened by defeating both Kraid and Ridley; Screw Attack is not the sole trigger, but it is the normal preparation pickup for the next section.
- The Super Missile door has been opened.
- The Ridley-region Unknown Item has been collected before the boss encounter.
- The Unknown Item is understood to remain inactive until Chozodia.
- Ridley has been defeated.
- Kraid and Ridley have both been defeated, opening the Tourian gateway.
Return through Norfair and obtain Screw Attack
After leaving Ridley Region, follow the Norfair route until reaching the broken Chozo statue. Use the tunnel behind it and bomb through the lower passage. Continue through the narrow corridor and activate Speed Booster to break the blocks at the far end, revealing the Morph Ball Launcher. Use the launcher to reach the upper passage, then proceed left through the red door to the Chozo egg containing Screw Attack.
Collect Screw Attack and return through the preceding rooms. Its spinning jump destroys Screw Attack Blocks and damages many enemies, making the route toward Tourian safer. Use the nearby Save Room before leaving Norfair. From this point, the chapter is complete: the second larval Kiru Giru, Ensnared Kiru Giru, Imago and Ridley are defeated; the Ridley-region Unknown Item and Super Missile have been collected; Screw Attack is active; and Samus can proceed toward Tourian.
- The broken Chozo statue route has been entered.
- The bomb tunnel and Speed Booster passage have been cleared.
- The Morph Ball Launcher has been used.
- Screw Attack has been collected.
- A Save Room has been used before proceeding toward Tourian.
Before you move on
- The second larval Kiru Giru has been defeated without repeating the first-larva encounter.
- The route to Ensnared Kiru Giru opened after the second larva was cleared.
- Ensnared Kiru Giru has been defeated and its floor passage used.
- Imago has been defeated and the Super Missile Tank in its nest has been collected.
- The Ridley-region Unknown Item has been collected before the Ridley fight.
- The Unknown Item remains inactive until the later Chozodia restoration.
- Ridley has been defeated.
- The Tourian gateway is open because Kraid and Ridley are defeated.
- Screw Attack has been collected from the Norfair Chozo chamber after the Ridley sequence.
- Samus has used a Save Room before proceeding toward Tourian.
References for this chapter
- Metroid: Zero Mission Walkthrough – Ridley Region
- Ensnared Kiru Guru - Metroid Zero Mission Walkthrough
- Ridley Region Part 2 - Metroid Zero Mission Walkthrough
- Ridley Boss Strategy - Metroid Zero Mission Walkthrough
- Screw Attack in Norfair - Metroid Zero Mission Walkthrough
- Metroid: Zero Mission Walkthrough – Ridley’s Lair
- Metroid: Zero Mission - Guide and Walkthrough - GameFAQs
- Metroid: Zero Mission Official Game Boy Advance Manual
Tourian Entrance and Interior — Save Rooms, Metroid Threats and Layout
After defeating Kraid and Ridley, return to the upper-left Brinstar gateway. Their two statue heads open the passage into Tourian; Screw Attack is recommended for the conventional route but is not what unlocks the gateway. Save immediately after descending. Tourian is a mostly linear sequence of Metroid encounters. Freeze each Metroid with Ice Beam, then destroy it with missiles or charged shots. If one latches onto Samus, use a Bomb to force it away before creating distance and freezing it again. Use the intermediate Save Room, bomb both required floor sections, and save again at the final Save Room. In the last approach, destroy the spinning missile barriers and enter Mother Brain’s chamber. Power Bombs are not needed in this pre-Mother Brain section.
Open the Brinstar gateway and establish the first Tourian save point
Confirm that both Kraid and Ridley have been defeated. Those two victories open the matching statue heads in the upper-left Brinstar gateway. The gateway does not wait for Screw Attack: the bosses are the trigger. This chapter follows the conventional route with Screw Attack already collected because it makes the return trip and nearby traversal safer, but do not treat Screw Attack as the reason the gateway opens.
Use the map to return to the upper-left Brinstar area and enter the newly opened passage. Ride the elevator down into Tourian. Immediately take the door on the right and use the Save Unit. Confirm the save before continuing. This is the first Tourian recovery point and gives you a safe restart if the opening enemy rooms go badly.
If your energy or missiles are low, leave Tourian before committing to the Metroid route and restock at the ship or another reliable recovery point. Tourian has no required item pickup in this section, so prioritize ammunition, energy, and a clean save over optional exploration.
- Kraid has been defeated.
- Ridley has been defeated.
- The two Brinstar statue heads have opened.
- Screw Attack is collected for the conventional route, but is not being treated as the gateway trigger.
- The first Tourian Save Room has been used.
Cross the opening halls and defeat the first Metroid
Leave the Save Room through the right-hand door. Continue through the next passage, go past the dead Space Pirate, and take the next door on the right. In the following room, a wall turret fires circular Rinka projectiles. Shoot the rings when they obstruct your route or move around them while descending. Reach the bottom and take the door on the left.
The next room contains the first Metroid and the hatch closes behind you until the encounter is resolved. Keep Ice Beam available. Let the Metroid approach, freeze it, then fire missiles or a charged shot while it is immobilized. The freeze wears off quickly, so refreeze it before it reaches Samus again.
If the Metroid latches onto Samus, drop a Bomb immediately. The explosion forces it away. Move clear as soon as it releases, then freeze it again before attempting the finishing attack. Do not try to shoot through a latch; removing the Metroid first prevents unnecessary energy loss.
- The turret room has been crossed.
- Ice Beam is available.
- The first Metroid has been frozen and defeated.
- Bombs are ready for a latch recovery.
Follow the Metroid route and save at the intermediate station
After the first encounter, leave through the left side and continue down through the connected shafts and halls. More Metroids appear along this route. Fight them one at a time whenever the room layout allows it. Freeze the nearest target, destroy it, then reposition before engaging another. Avoid standing against a wall or in a narrow corner, where a latch leaves little space for recovery.
Some encounter rooms do not release their exits until the active Metroids are defeated. If a hatch appears unavailable, search the current room and clear the remaining enemies rather than turning around immediately. Keep track of open floors and doors so you do not accidentally climb back into a previously cleared shaft.
Continue until you reach the intermediate Save Room. Use the Save Unit and confirm the save. This is not a point of no return. It is safe to use this station as your main recovery point if the earlier Metroids consumed substantial energy or missiles.
- The first long Metroid section is cleared.
- Any encounter hatches encountered on the route have opened.
- The intermediate Save Room has been reached and used.
- The route beyond the station is understood as the continuation toward the lower bombable rooms.
Open both lower floors and reach the final Save Room
Leave the intermediate Save Room and shoot the floor outside it to reveal the lower passage. Drop through and take the door on the right. Continue downward through the shaft, defeating or bypassing enemies as appropriate, then open the door at the bottom.
In the next chamber, the left exit is unavailable at first. Bomb the floor to open the first lower section. Drop down and defeat the Metroids below. Once that section is clear, locate the next floor and bomb it as well. Enter the second lower section and clear the Metroids there. Falling through both openings at once can place several Metroids around Samus, so use the openings deliberately and avoid dropping farther than intended.
When the required encounters are cleared, the upper-left door unlocks. Take it to reach the final Tourian Save Room. Use the Save Unit and confirm the save. This is the most important recovery point before Mother Brain because the route forward includes missile barriers and hazardous projectiles.
- The floor outside the intermediate Save Room has been opened.
- The first lower bombable floor has been opened.
- The second lower bombable floor has been opened.
- The Metroids in both lower sections are defeated.
- The upper-left exit is unlocked.
- The final Tourian Save Room has been used.
Clear the missile barriers and enter Mother Brain’s chamber
Leave the final Save Room through the left door. Move across the approach corridor while avoiding the projectiles and platforms’ hazards. The spinning energy barriers blocking the route are destroyed with missiles. Fire only when positioned to hit a barrier so you do not waste ammunition on the surrounding room.
After clearing the barriers, you can retreat to the right and return to the final Save Room. The barriers remain destroyed after you leave, allowing you to recover energy and ammunition and save again before entering the boss chamber. Use this option if the approach cost you health or missiles.
When ready, cross the cleared corridor, continue left, and use a missile on the left door if necessary. Pass through the door to enter Mother Brain’s chamber. This completes the Tourian chapter. Do not search Tourian for Power Bombs; they are part of the later Chozodia and mothership progression, not a requirement for reaching Mother Brain here.
If you die after entering the chamber, reload the latest Tourian Save Room and repeat the approach. The open bomb passages and cleared missile barriers give you the established route back to the boss without restarting the campaign.
- The final Save Room save is confirmed.
- The spinning barriers have been destroyed with missiles.
- The approach has been restocked as far as practical.
- Samus has entered Mother Brain’s chamber.
Before you move on
- Kraid and Ridley are defeated.
- The Brinstar gateway is open because both statue heads have been activated.
- Screw Attack has been obtained for the conventional route, without treating it as the gateway trigger.
- The opening, intermediate, and final Tourian Save Rooms have been used.
- The Metroid rooms have been cleared with Ice Beam, missiles or charged shots, and Bombs used to break latches.
- Both required bombable floor sections have been opened.
- The spinning missile barriers in the final approach have been destroyed.
- Samus has entered Mother Brain’s chamber and is ready for the next chapter.
Mother Brain — Strategy, Phase Guidance and Recovery
Mother Brain is the end of the original Zebes assault, but not the end of Metroid: Zero Mission. Before entering her chamber, use the final Tourian Save Room and refill your Energy and ammunition in the nearby recovery route. Freeze Metroids with Ice Beam and destroy them with Missiles; use Bombs to remove a Metroid that latches on. In the Zebetite corridors, use regular Missiles where practical and keep Super Missiles for the boss. Mother Brain’s battle begins with her brain sealed inside a glass tank. Break the tank while staying on the small platforms and managing Rinkas, turret fire and lava. After the glass breaks, watch for Mother Brain’s purple warning. Evade the energy projectile by moving or jumping to the opposite ledge, then strike the exposed eye while it remains open. Super Missiles are efficient, but no fixed hit count is required; regular Missiles work as a fallback. If Samus dies during the fight, reload the latest Tourian Save Room and repeat the approach. Defeating Mother Brain immediately starts the two-minute self-destruct countdown. Chapter 9 covers the escape itself, so end this chapter once the countdown appears.
1. Save, refill and prepare for the approach
Use the final Tourian Save Room before committing to the Mother Brain route. A nearby recovery section can replenish Energy and ammunition, so leave the save room, refill as much as practical, then return and save again. This gives you a reliable restart point without requiring a risky return from the boss chamber.
Keep Ice Beam available for the Metroids. Regular Missiles are needed for the barriers in the approach and can also damage Mother Brain’s glass tank and exposed eye. Super Missiles are valuable during the eye phase, so avoid spending them merely to shorten ordinary enemy encounters. Bombs remain important for removing a Metroid that attaches to Samus.
Do not treat every enemy as mandatory. Clear only what blocks a jump, narrow passage or safe firing position. Enter the boss room with enough Energy to survive mistakes and with a meaningful supply of both missile types.
- Save at the final Tourian Save Room.
- Refill Energy and ammunition before saving again.
- Keep Ice Beam, Missiles, Super Missiles and Bombs available.
- Avoid unnecessary fights before the boss.
2. Cross the Metroid corridors
Handle the Metroids one at a time whenever the room allows it. Freeze a Metroid with Ice Beam before it reaches Samus, then hit the frozen body with a Missile. If one latches on, immediately place Bombs to force it away; after it separates, freeze it again before attempting the finishing shot.
Do not remain in a room while waiting for every enemy to line up perfectly. The safest rhythm is freeze, missile, move through the opening. If multiple Metroids are active, retreat to a wider section rather than trying to fight them all in a confined passage.
If the approach leaves Samus badly damaged, retreat to the recovery route and save again. The protective barriers in the later corridor remain cleared after being destroyed, so a failed attempt does not necessarily require repeating every earlier shot from scratch.
- Freeze Metroids before they latch on.
- Use Bombs to break a latch immediately.
- Destroy Metroids with Missiles after freezing them.
- Return to the recovery route if Energy becomes unsafe.
3. Clear the Zebetite barriers
The later Tourian rooms place Samus on small platforms over lava while Rinkas, turret fire and Zebetites interfere with progress. Fire regular Missiles at each Zebetite and keep moving between stable platforms. The barriers can recover if you stop attacking, so use short, deliberate volleys rather than firing once and waiting.
Super Missiles can remove barriers more quickly, but regular Missiles preserve your stronger ammunition for Mother Brain’s exposed eye. Use a Super Missile only when the room position is becoming dangerous or when the faster damage meaningfully reduces your exposure.
Rinkas can be frozen with Ice Beam when they occupy the landing area or interrupt a firing position. Turrets cannot be removed normally, so avoid their firing lines and move during safe openings. Once a barrier is gone, continue through the next opening instead of lingering for drops.
- Use regular Missiles against Zebetites when safe.
- Reserve Super Missiles whenever possible.
- Freeze Rinkas that interfere with movement.
- Avoid lava while moving between platforms.
- Reach the boss chamber with ammunition intact.
4. Break the glass tank
Mother Brain begins sealed inside a glass tank. Stand on the available platforms and fire Missiles into the tank until it breaks completely. Regular Missiles are sufficient, although Super Missiles also damage the glass. Use the regular weapon first so the stronger ammunition remains available for the eye phase.
The room continues to threaten Samus with turret shots, Rinkas and the lava below. Freeze a Rinka if it blocks the platform where you need to land, but do not waste time trying to clear the entire screen. Your priorities are staying on solid footing, avoiding lava and keeping a clear line toward the tank.
Avoid careless platform changes. A fall can cost Energy and place Samus in a poor position just as the second phase begins. If you need to move, jump with a specific landing platform in mind rather than crossing the room repeatedly.
- Destroy the glass tank completely.
- Prefer regular Missiles during the glass phase.
- Remain on the platforms whenever possible.
- Keep a stable position for the exposed-eye phase.
5. Defeat the exposed eye
After the glass breaks, Mother Brain’s eye becomes the target. Watch Mother Brain instead of firing continuously. When she turns purple, she is preparing to launch the large energy projectile. Treat that color change as the warning to begin your dodge.
Move or jump to the opposite ledge, commonly the upper-right ledge when starting from the left side. The projectile can strike Samus on a platform or while she is hanging from a ledge, so do not simply crouch and wait through the warning. Clear the projectile without falling into the lava.
After the projectile passes, Mother Brain is briefly vulnerable with the eye open. Fire a Super Missile directly into the eye if one is available, then return to movement and watch for the next purple warning. Super Missiles deal damage efficiently, but do not rely on a fixed number of hits. If they run out, regular Missiles remain effective; use the same warning, dodge, eye shot and reposition cycle.
Rinkas remain active during this phase. Freeze one only when it threatens the dodge or occupies the platform needed for your attack. The safest fight is based on surviving each cycle first and dealing damage during the short opening second.
- Watch for Mother Brain to turn purple.
- Jump or move away before the energy projectile reaches Samus.
- Attack the eye only after the projectile passes.
- Use Super Missiles efficiently, with regular Missiles as a fallback.
- Do not depend on an exact hit count.
6. Recover from failure and confirm the chapter handoff
If Samus dies before Mother Brain is defeated, reload the latest Tourian Save Room. Repeat the final approach, using the cleared barriers and the nearby recovery route to restock before saving again. Partial damage to Mother Brain does not persist as a completed victory.
If Samus defeats Mother Brain but later fails during the escape, the boss must be defeated again after reloading the Tourian save. There is no separate chapter checkpoint that preserves the victory for a later escape attempt. Treat the save before the final approach as the recovery point for both the battle and the immediate sequence that follows.
Chapter 8 is complete when the glass tank has been destroyed, Mother Brain’s exposed eye has been defeated and the two-minute self-destruct countdown appears. Stop here and hand control of the escape route to Chapter 9. Do not count reaching Crateria, boarding Samus’s ship, the Space Pirate ambush or the Chozodia Zero Suit sequence as Chapter 8 completion.
- Reload the Tourian Save Room after a failed fight.
- Repeat the boss if the escape attempt fails.
- Confirm Mother Brain’s eye is defeated.
- Confirm the two-minute self-destruct countdown has appeared.
- Hand off the complete escape route to Chapter 9.
Before you move on
- The final Tourian Save Room was used before the boss approach.
- The Metroid and Zebetite corridors were cleared sufficiently to reach Mother Brain.
- Mother Brain’s glass tank is destroyed.
- Mother Brain’s exposed eye is defeated.
- The two-minute self-destruct countdown begins.
- The guide stops before the Tourian-to-Crateria escape and hands that sequence to Chapter 9.
References for this chapter
Escape Sequence — From Tourian to Chozodia
Defeating Mother Brain starts a timed escape from Tourian. On Normal, you have two minutes; Easy gives three minutes and Hard gives one. Leave through the door behind Mother Brain, climb the vertical shaft before the Pit Blocks collapse, and take the elevator to Crateria. Continue upward, break through the rock columns, cross the pit, and use a Speed Booster run to clear the final obstruction before entering Samus’s ship. If you do not have Speed Booster, the obstruction can be bypassed with bomb-jumping, but the Speed Booster route is the intended newcomer path. The ship escapes Zebes briefly before Space Pirates shoot it down. Samus crash-lands near Chozodia, loses the Power Suit, and begins the Zero Suit infiltration with only the chargeable pistol.
1. Leave Mother Brain’s room and start the escape
When Mother Brain is defeated, the self-destruct timer begins immediately. Leave through the door behind the place where Mother Brain was positioned. Do not return to the refill room or attempt to explore the boss chamber; if you fail the escape, you must reload your last save and defeat Mother Brain again.
The first room is the Tourian escape shaft. Its platforms are delayed Pit Blocks: they remain solid briefly, then collapse beneath Samus. The shaft is not a combat challenge, so prioritize climbing and only shoot when an enemy directly interferes with a jump. The exact time available depends on difficulty: three minutes on Easy, two minutes on Normal, and one minute on Hard.
- Exit through the door behind Mother Brain.
- Start climbing as soon as control returns.
- Remember the timer for your difficulty setting.
2. Climb the Tourian escape shaft
Use the platforms in the shaft as stepping stones rather than standing on them. Jump toward the next reachable block immediately after landing. The larger ledges attached to the sides are more stable than the temporary center platforms, so use them to correct your position or wait for the next opening, but do not stop there unnecessarily.
If you miss a jump, steer toward the nearest lower platform instead of trying to recover with a blind long jump. The shaft normally allows a controlled recovery, and falling only becomes dangerous when you continue missing platforms or spend too long on a collapsing block. Without High Jump Boots, the available route naturally limits which platforms you can reach; follow the reachable sequence instead of trying to jump to the highest ledges.
At the top, enter the elevator. The elevator takes Samus from Tourian back to Crateria, but the timer continues, so resume moving as soon as the elevator finishes.
- Jump off each Pit Block before it collapses.
- Use side ledges for brief corrections.
- Take the elevator at the top of the shaft.
3. Cross the Crateria escape rooms
After the elevator reaches Crateria, enter the nearby door and climb the second vertical section. This area is less cramped than the Tourian shaft, but the timer is still active. Continue upward, then move right when the route opens.
In the horizontal room, shoot through the breakable columns that block the passage. Cross the pit using the available platforms and continue through the right-hand door. Do not detour into optional item rooms or return toward the elevator; the only objective is reaching the ship.
Enemies are not worth fighting unless they occupy a landing point or doorway. Keep firing while moving if you need to clear a path, but preserve momentum and avoid stopping to collect ordinary drops. The escape route is short enough that deliberate movement is safer than frantic attacking.
- Climb the Crateria shaft after leaving the elevator.
- Break the columns blocking the rightward route.
- Jump across the pit and exit through the right-hand door.
4. Clear the final obstruction
In the next Crateria room, continue to the section where the route toward the ship is blocked. The standard route uses Speed Booster. Move to the left side of the available running space, then run to the right while firing. Keep the run continuous so Speed Booster activates before Samus reaches the obstruction. The boosted dash breaks through the blocking rocks or Speed Booster blocks and opens the way forward.
If you are playing a low-item route without Speed Booster, do not assume the game is unwinnable. The obstruction has a bomb-jump route: use the nearby opening and bomb-jump upward to reach the higher ledges, then continue right and drop through the Pit Blocks toward the ship. This alternative requires more precise movement and is not recommended for a first Normal-mode completion.
If the Speed Booster run fails, do not waste time attempting the jump from the wrong position. Return to the left side, make sure enemies are not interrupting the run, and build momentum again.
- Reach the final Crateria obstruction.
- Use the Speed Booster run from the left side when available.
- Use bomb-jumping only if you are following a low-item route without Speed Booster.
5. Enter the ship and begin Chozodia
After the obstruction is cleared, continue toward Samus’s ship. Enter the ship as soon as the route opens; there is no useful pickup or required side path during this escape. Reaching the ship completes the Tourian escape, but it does not complete the campaign.
A cutscene shows Samus leaving Zebes before Space Pirates attack and shoot down her ship. The crash occurs near Chozodia. When control returns, Samus is outside the Power Suit and can no longer use the normal beam, Morph Ball, bombs, or other suit equipment. Her only weapon is the automatically charging emergency pistol, which can briefly stun Space Pirates when fully charged.
The next playable objective is infiltration, not another timed escape. Move carefully through Chozodia, use the pistol to stun only when a Pirate blocks the route, and begin following the Zero Suit directions in the next chapter.
- Enter Samus’s ship after clearing the Crateria obstruction.
- Watch the crash sequence that leads to Chozodia.
- Confirm that control returns with Samus in the Zero Suit and equipped with the chargeable pistol.
Before you move on
- Mother Brain has been defeated and Samus has exited through the door behind the boss chamber.
- Samus has climbed the Tourian escape shaft, taken the elevator to Crateria, crossed the Crateria rooms, and entered her ship.
- The ship-crash cutscene has finished and control has returned in Chozodia with Samus wearing the Zero Suit and carrying the chargeable pistol.
Chozodia Zero Suit Infiltration — Reach the Chozo Trial
After the Tourian escape, Samus crash-lands in Chozodia without the Power Suit. She retains the Power Grip and carries only the Paralyzer, which stuns Space Pirates but does not defeat them. Enter the mothership through the crawlspace beneath its sealed entrance, download the map, and save before entering the guarded corridors. The route is built around hiding from patrols, breaking line of sight, using alcoves and blue blocks as cover, crossing security shutters before alarms close them, and moving quickly across crumbling platforms. If pirates detect Samus, stun the nearest pursuer only long enough to reach a door, tunnel, or safe corner; retreat to the previous Save Station if the pursuit becomes unmanageable. After crossing the mothership and a glass tunnel, continue through the Chozo Ruins, save at the final station, and enter the upper chamber where the Chozo Test cutscene begins. Stop there. The trial and all suit restoration belong to the next chapter.
Reach the hidden mothership entrance
When control returns at the crash site, leave the wrecked Gunship and travel toward the large mothership entrance. The main entrance is sealed, so do not waste time trying to open it. Samus still has the Power Grip, allowing her to grab ledges and climb some of the exterior platforms, but she no longer has the Morph Ball, Bombs, beams, missiles, or Screw Attack.
Drop to the lowest route beneath the entrance platform. Crouch and fire the Paralyzer at the blocks in the floor or wall. The shot opens the low crawlspace beneath the sealed door. Crawl through it and continue left into the ship. Pirates above this route cannot normally reach Samus, so keep moving instead of trying to engage them.
- Ignore the sealed main entrance.
- Use the lowest exterior route beneath it.
- Shoot the obstruction with the Paralyzer.
- Crawl into the mothership.
Download the map and use the first Save Station
Inside the ship, follow the narrow route until you reach the Map Station. Shoot the blocks above the station if necessary, then download the mothership map. Leave through the blue door and enter the nearby Save Station. Save immediately and restore energy before entering the first patrol section.
A red door near the Save Station cannot be opened with the Paralyzer. Instead, jump to the ledge above it and crawl through the passage. Drop behind the first Space Pirate and move toward the security shutter. If the pirate notices you, wait until the Paralyzer has charged, fire once to stun it, and use the brief opening to reach the shutter or the next door.
- Activate the mothership Map Station.
- Save before the first patrol.
- Do not try to open the nearby red door.
- Use the upper crawlspace to bypass it.
Cross the first patrols, shutters, and laser corridor
Move through the next corridor and use the narrow tunnel to stay below or behind the pursuing pirate. At the security shutter, hide in the alcove until the door opens. Do not remain in the open after an alarm begins; the safest response is to keep moving toward the next blue door or solid cover.
The following room contains green security lasers. Jump over the first beam using the platform above it, then crawl through the low passage. At the far end, shoot the obstructing block, grab the ledge, and enter the blue door. If the alarm has been triggered, do not attempt to clear the pirates. Run through the room, climb the platforms, and shoot the block blocking the next door.
Continue through the shaft and drop through the opening when the route descends. Security shutters may remain closed while pirates are actively pursuing Samus. If that happens, stun the nearest pirate, retreat behind a wall or into a side passage, and wait for the alarm state to clear before continuing.
- Hide in alcoves while shutters are closed.
- Jump over the first green laser.
- Shoot blocks that obstruct the upper doors.
- Run toward the next door if pirates are alerted.
- Break line of sight before waiting for a shutter.
Use the spotlight room and reach the next Save Station
After the shutter section, crawl beneath the overhead ship structure and descend through the route with crumbling floors. Shoot the weak floor sections when they block progress. If pirates are close behind, do not stop to fight; keep moving through the tunnel and drop toward the lower passage.
Enter the room with moving yellow spotlights. Stay outside the light beams while climbing the platforms toward the upper-right door. A wall-jump up the shaft near the door can reduce the time spent in the spotlight area, but the normal platform route also works if you move carefully. Wait for a light to pass before climbing into its path.
Continue through the upper door and shoot the crumbling blocks overhead. The next passage leads to a blue door and another Save Station. Save here before entering the more technical laser-platform section. This is a useful recovery point if an alarm or fall causes a death.
- Shoot crumbling floors while descending.
- Avoid the moving spotlights.
- Use the wall-jump shortcut only if comfortable.
- Save at the next station.
Cross the horizontal laser platforms
Leave the Save Station and drop into the room filled with horizontal laser tripwires. Move to the lower-left area, pull Samus onto the first laser emitter or adjacent platform, and make the short jump across the beam. Continue along the upper route, then return beneath the pillar as the temporary platforms begin to crumble.
The platforms are not safe places to wait. Cross each unstable surface decisively and aim for the next solid ledge. If a laser or pirate triggers an alarm, take the door on the left and keep running. The goal is to reach the upper-left exit rather than remain in the laser room trying to reset the patrols.
In the next room, use the upper-right alcove only as a temporary hiding place if a pirate is chasing you. Continue through the blue door, drop along the left side, and crawl through the low passage. Shoot the crumbling floor and descend the long shaft. Avoid the pirates by staying mobile, then run through the blue door at the bottom and enter the glass tunnel leading toward the Chozo Ruins.
- Use the emitters and ledges to cross the laser field.
- Do not stand on crumbling platforms.
- Run for the left exit if the alarm activates.
- Descend the shaft and enter the glass tunnel.
Enter the Chozo Ruins and reach the first ruins Save Station
At the far end of the glass tunnel, enter the Chozo Ruins. Drop from the left ledge and continue to the bottom-left crawlspace. Shoot the block above the route, jump over the pillar, and fire the wall and floor blocks that open the narrow passage. Move quickly into the next room; a pirate may be following closely.
If the pirate is pursuing Samus, jump into the shadowed alcove near the ceiling and wait for it to pass. Once the room is clear, go left into the Save Station. Save before continuing. This is the first dependable checkpoint inside the ruins.
- Use the bottom-left crawlspace in the ruins.
- Open the wall and floor route with the Paralyzer.
- Hide in the ceiling alcove if pursued.
- Save before the spotlight rooms.
Climb through the ruins’ patrols and laser-eye shafts
Leave the Save Station and cross the room with spotlights. The lower crawlspaces provide a safer route than the exposed upper platforms. Climb on the right side and reach the upper-right door while watching the pirate patrol on the left. Continue through the connected rooms until the route reaches a tall shaft with moving laser eyes.
The laser eyes sweep beams across the shaft. Blue or shaded sections of the blocks provide cover because the beams cannot see through them. Climb only after a beam has moved away. Do not hang from a block with Samus’s feet exposed; the beam can still detect her. Pull fully onto the block, then move to the next protected position.
At the top, go left into the narrow crawlspace. The floor blocks crumble once Samus enters, so keep crawling and shoot the obstructing blocks without stopping. Drop through the opening, descend to the lower-left route, and shoot the wall that hides the next passage. Climb through the following shaft and exit at the upper-right.
- Use the lower crawlspaces in the spotlight room.
- Hide inside blue block sections from laser eyes.
- Pull fully onto blocks so Samus’s feet are covered.
- Move quickly across crumbling crawlspaces.
- Open the hidden wall passage near the bottom.
Pass the stolen Power Bomb scene and the final patrol corridor
Continue through the upper passage and the next alcove. You will see a Chozo statue holding a Power Bomb, but the item is not available during this Zero Suit route. Do not search for a way to collect it. Drop through the crumbling blocks, climb the shaft, and use the Save Station revealed behind the left wall.
Leave the station and return to the statue room. The Power Bomb will now be gone, and a pirate will carry it away. Follow the route to the right rather than trying to recover the item. Descend through the laser-eye shafts, using the blue recesses as cover, then climb the next shaft and enter the long corridor containing several pirate patrols.
In the patrol corridor, move beneath the floating platforms while the pirates face away. For the higher patrols, wait until the enemies separate, then crawl or drop through the shadows. If one spots Samus, fire a charged Paralyzer shot and run right; do not stop to stun every pirate. The next tall shaft contains a narrow side opening that can help break pursuit. Continue through the dark corridor and the large chamber beyond it until you reach the passage on the upper-right.
- Do not attempt to collect the displayed Power Bomb.
- Save before following the pirate that steals it.
- Use blue recesses to cross the laser shafts.
- Move beneath patrol platforms when enemies look away.
- Use a charged stun only to escape detection.
Save at the final station and enter the Chozo Test chamber
In the large chamber, stay low while the pirates patrol the ceiling alcoves. Move left to the narrow shaft with floating blocks, climb it, and cross the thin bridge toward the right. Pass through the open shutter and enter the final Save Station. Save here; this is the last checkpoint before the story sequence at the end of the infiltration.
Leave the station through the right side and enter the quieter Chozo Ruins chamber. The water-filled portion is not the route forward yet. Climb the narrow shaft, cross the upper corridor, and go through the open door at the top. The cutscene begins as Samus reaches the Chozo chamber and the mural depicting her childhood.
Stop when the Chozo Test introduction begins. Do not fire at the mirror target or attempt the trial in this chapter. The next chapter covers the trial itself and everything that happens after it.
- Reach the final Save Station through the upper-right route.
- Save before entering the Chozo chamber.
- Climb the shaft beside the water-filled room.
- Enter the upper door and wait for the cutscene.
- End the chapter when the Chozo Test introduction begins.
Before you move on
- Samus has entered the mothership through the hidden crawlspace beneath the sealed entrance.
- The mothership map has been downloaded and the available Save Stations have been used.
- Samus has crossed the mothership’s patrol, spotlight, shutter, laser, and glass-tunnel sections.
- Samus has entered the Chozo Ruins and passed the stolen Power Bomb sequence.
- The final Save Station has been reached before the Chozo chamber.
- The childhood-memory cutscene and Chozo Test introduction have begun.
- The Chozo Test has not yet been completed; Power Suit restoration belongs to the next chapter.
Chozo Warrior Engraving and Legendary Power Suit Restoration
After the Zero Suit infiltration, Samus reaches the Chozo Warrior Engraving in the upper Chozodia ruins. Complete the single trial with the Paralyzer: wait for the mirror to display a glowing Chozo symbol, charge the pistol, and fire before the image changes back to Samus’s reflection. Each successful hit fills one of the four circles around the room. After the fourth hit, the Legendary Power Suit appears. Collecting it activates the three previously collected Unknown Items: the Crateria Unknown Item becomes Plasma Beam, the Kraid-region Unknown Item becomes Space Jump, and the Ridley-region Unknown Item becomes Gravity Suit. Leave the trial chamber and return to the nearby Save Room before beginning the later mothership route. Power Bombs, Power Bomb expansions, glass-tube destruction, and Mecha-Ridley belong to later chapters.
Reach the Chozo Warrior Engraving
Follow the Zero Suit route through Chozodia until you reach the high Chozo ruins chamber containing the large warrior engraving and the mirror held in its hands. Samus still has only the Paralyzer at this point. Her normal beam, missiles, Bombs, and Power Suit equipment are unavailable, so treat the preceding rooms as an evasion section rather than a combat route.
Use the Save Station immediately before the engraving chamber. If your energy is low, retreat and refill before entering the trial room. The encounter begins after the room’s introductory sequence, and the Paralyzer is the only weapon required. Do not leave to search for later upgrades; the intended progression is to complete this trial first.
- Samus is still wearing the Zero Suit.
- The Paralyzer is equipped and usable.
- The nearby Save Station has been used.
- You have entered the chamber with the Chozo Warrior Engraving.
Land the first three charged Paralyzer shots
At the start of the encounter, the mirror displays Samus’s reflection. Wait until that image changes into the glowing Chozo symbol. Charge the Paralyzer, aim at the mirror, and release the shot while the symbol is visible. A successful charged shot sends the symbol into one of the empty circles at a corner of the room.
Do not fire while the mirror shows Samus. Hitting the reflection damages Samus and does not advance the trial. If you miss the symbol, keep moving and wait for the next opening instead of firing repeatedly at the mirror.
After the first successful shot, the warrior image leaves the wall and carries the mirror around the room. Keep your distance from the moving engraving and watch for its lightning warning. When the wall engraving flashes, move away from the threatened area; remaining in place can cause a lightning strike. Wait for the mirror to display the symbol again, then use another charged Paralyzer shot.
Repeat this process for the second and third circles. The moving engraving can damage Samus on contact, while the mirror can also hurt her if she shoots the reflection. Use the open floor and platforms to keep moving without losing sight of the mirror.
- The Paralyzer is charged before each attempt.
- Shots are aimed at the glowing symbol, not Samus’s reflection.
- The moving engraving is kept at a safe distance.
- Three corner circles have been filled.
Survive the final pattern and complete the trial
The fourth opening is shorter, and the engraving moves more quickly and less predictably. Continue circling the room while watching both the mirror and the wall engraving. When the mirror changes to the symbol, release the charged Paralyzer shot immediately; there is no need to attack the engraving itself.
The final lightning pattern can strike the center of the room and then spread across the floor. When the wall flashes repeatedly, move away from the center and jump over the ground-level lightning as it travels across the floor. Do not stand beneath the moving mirror or try to trade contact damage for a faster shot.
The encounter ends after the fourth successful symbol hit. All four corner circles will be filled, and the engraving returns to the wall. If Samus is defeated, reload the Save Station immediately before the chamber and repeat the same pattern: wait for the symbol, fire a charged Paralyzer shot, keep moving during lightning warnings, and avoid contact with the moving engraving.
- The fourth symbol is hit with a charged Paralyzer shot.
- The center lightning attack is avoided by moving and jumping over the spreading floor attack.
- All four corner circles contain symbols.
- The Chozo Warrior Engraving has returned to the wall.
Receive the Legendary Power Suit
After the fourth hit, move to the middle of the chamber and look up at the mirror when the trial transition finishes. The mirror displays Samus in the restored suit, and the Legendary Power Suit becomes available. Collecting it returns Samus to her normal armored form and restores compatibility with the advanced equipment that her earlier suit could not use.
The restoration changes the three earlier Unknown Items into their actual upgrades at this exact point. The Unknown Item collected in Crateria becomes the Plasma Beam. The Unknown Item collected in the Kraid region becomes the Space Jump. The Unknown Item collected in the Ridley region becomes the Gravity Suit. These are activated by the Legendary Power Suit; they are not three additional pickups hidden in the trial chamber.
Plasma Beam lets shots pass through multiple enemies. Space Jump allows repeated midair somersaults when the jump input is timed during the somersault. Gravity Suit removes the usual movement penalty in water and protects Samus from lava damage. Check the status screen after the restoration sequence so you can confirm that all three abilities are active. The suit restores access to equipment, but it should not be treated as an automatic refill of energy, missiles, or other ammunition. If your reserves are low, use the recovery Save Room and refill through normal pickups or recharge points before continuing.
- The Legendary Power Suit is equipped.
- The Crateria Unknown Item reads as Plasma Beam.
- The Kraid-region Unknown Item reads as Space Jump.
- The Ridley-region Unknown Item reads as Gravity Suit.
- The three restored abilities appear in the status screen.
- Energy and ammunition have been checked rather than assumed to be full.
Leave the chamber and make a recovery save
Exit the trial chamber through the route opened by the restored suit and retrace the nearby Chozo ruins rooms toward the Save Station used before the encounter. You no longer need to hide from the Space Pirates, so use the Plasma Beam and other restored weapons to clear enemies blocking the return path. Space Jump makes the vertical passages easier than they were during the Zero Suit infiltration.
Return to the nearby Save Station and save immediately. This is the handoff point for the next chapter. From here, the later route covers Power Bomb acquisition, Power Bomb barriers, expansion pickups, the glass tube, and the approach to Mecha-Ridley. Do not fold those objectives into this restoration chapter, and do not assume that collecting the Legendary Power Suit has already completed any of them.
If you are short on energy or ammunition, restock before leaving the Save Station area. The trial is complete once the Legendary Power Suit is active, the three Unknown Items have been identified, Samus has exited the chamber, and the recovery save has been made.
- The sealed trial chamber has been exited.
- Samus can use the Legendary Power Suit normally.
- The Crateria, Kraid-region, and Ridley-region Unknown Items have become Plasma Beam, Space Jump, and Gravity Suit.
- The nearby recovery Save Station has been used.
- Power Bomb and Mecha-Ridley progression has not yet begun.
Before you move on
- The Chozo Warrior Engraving has been defeated with four successful charged Paralyzer shots.
- The Legendary Power Suit is equipped.
- The Crateria Unknown Item is active as Plasma Beam.
- The Kraid-region Unknown Item is active as Space Jump.
- The Ridley-region Unknown Item is active as Gravity Suit.
- Samus has left the trial chamber.
- Energy and ammunition have been checked or replenished as needed.
- The nearby recovery Save Station has been used.
- The chapter ends before the Power Bomb and Mecha-Ridley route.
References for this chapter
Mothership Final Approach — Save, Power Bomb Doors and Mecha-Ridley Access
After the Chozo Warrior Engraving trial, the Legendary Power Suit restores the three Unknown Items collected earlier: Plasma Beam, Space Jump and Gravity Suit. Return through Chozodia to the crashed Space Pirate Mothership, reach the bridge, and drop through its lower-left passage to recover the Power Bomb weapon. Collect the first nearby Power Bomb Tank in the laser-tripwire room, open the yellow hatch with a Power Bomb, then collect the second tank above the next room. Return to the bridge and save in the upper-right Save Room. From there, leave through the upper-right bridge route, use a Power Bomb to open the hidden tunnel beyond the dead-end room, pass the corridor containing an optional Energy Tank, then use another Power Bomb to open the divided-wall tunnel. Cross the Pit Blocks, reach the red door and stop there. The Power Bomb bypass, glass-tube destruction and remaining expansions are optional sequence-break or 100% routes, not part of this standard approach.
1. Leave the restoration area and re-enter the Mothership
The Chozo trial is complete and the Legendary Power Suit is active. The Plasma Beam, Space Jump and Gravity Suit are now functional because the three earlier Unknown Items were identified during restoration. There are no separate replacement pickups for those upgrades in this chapter.
Leave the restoration chamber and follow the powered-suit route through the Chozo ruins toward the large glass passage joining the ruins to the crashed Space Pirate Mothership. Cross the passage and enter the ship. Use Screw Attack against ordinary Pirates when the room layout allows it, and use Space Jump to climb shafts and ledges.
The ship corridors loop in places, so use the map if a door returns you to a familiar room. Your destination is the bridge or command-center room near the upper part of the Mothership.
- Legendary Power Suit restored.
- Plasma Beam, Space Jump and Gravity Suit active.
- Mothership re-entered through the glass connection.
2. Reach the bridge and drop into the lower route
Continue through the Mothership until you reach the bridge. From the bridge, move to the lower-left corner and look for the opening along the wall. Drop through it and follow the narrow passage downward. Entering this section disables the alarm and places you on the standard route to the Power Bombs.
The lower route passes through rooms with Space Pirates and familiar security hazards. Clear Pirates from ledges before jumping through them. You are heading toward the room where the Pirate carrying the earlier Power Bomb Tank can finally be confronted.
Do not use the hidden upper passage above the Power Bomb statue as the main route. Experienced players can use that passage to bypass the Power Bomb sequence, but it is a sequence break and is outside this chapter’s standard path.
- Bridge reached.
- Lower-left bridge opening entered.
- Standard Power Bomb route started.
3. Collect the Power Bomb weapon
Follow the lower corridors until you reach the area near the earlier searchlight and laser sections. Continue through the route to the Chozo statue associated with the Power Bomb pickup. The tank seen during the Zero Suit infiltration was carried away at that time; after restoration, the Power Bomb pickup is available here.
Collect the Power Bomb weapon from the statue. This enables Power Bomb use and places the Power Bomb icon on the HUD. On the original Game Boy Advance controls, enter Morph Ball form, hold R to select Power Bombs, and press B to deploy one. A Power Bomb affects the entire visible room, so avoid placing one casually near hazards or before confirming the intended target.
Continue to the room containing the laser trip wires and the first nearby Power Bomb Tank. You no longer need to remain hidden, so defeat the nearby Pirates if they make the platforming unsafe.
- Power Bomb weapon collected.
- Power Bomb selection confirmed on the HUD.
- Laser-tripwire room reached.
4. Collect the first nearby tank and open the yellow hatch
Enter the laser-tripwire room and collect the Power Bomb Tank. The trip wires can be crossed directly if necessary, but move decisively and avoid getting trapped between the beams and Pirates. On Easy and Normal difficulty, a Power Bomb Tank adds two units to maximum capacity; on Hard, it adds one.
Return to the yellow hatch on the right side of the room. Enter Morph Ball form, hold R, press B, and let the Power Bomb clear the hatch. This is the required use of the first available Power Bomb after the weapon pickup.
Proceed into the next room. The route continues upward, but the ceiling is blocked by Power Bomb-sensitive sections. Place another Power Bomb beneath the obstructed ceiling. When the explosion clears the openings, use Space Jump to reach the upper section and collect the second nearby Power Bomb Tank. Defeat the two Pirates there before leaving if they are blocking your landing area.
- First nearby Power Bomb Tank collected.
- Yellow hatch opened with a Power Bomb.
- Second nearby Power Bomb Tank collected.
5. Return to the bridge-side Save Room
Retrace the route from the upper tank back through the laser room and up to the bridge. From the bridge, take the upper-right hatch that leads through a short connecting room to the Save Room. Use this Save Room immediately after collecting the two nearby tanks.
This is the last Save Room on the standard route before Mecha-Ridley. Saving here gives you a recovery point if you fail in the final approach or the next chapter’s boss fight. The station also restores energy and ammunition, so check your Missiles, Super Missiles and Power Bombs before leaving.
Do not detour for optional expansions unless you are deliberately pursuing 100 percent. The direct route does not require the glass-tube shortcut or every remaining Mothership item.
- Returned to the bridge.
- Bridge-side Save Room entered.
- Game saved after both nearby Power Bomb Tanks.
6. Leave through the upper-right bridge route
Exit the Save Room and return to the bridge. Take the upper-right route rather than dropping back into the lower Power Bomb collection area. Follow the corridor until you reach a dead-end-looking room with a narrow passage and Power Bomb-sensitive blocks blocking the continuation.
Place a Power Bomb in the corridor to open the hidden tunnel on the left side of the passage. Roll through the opening and continue into the next room. The route is not the earlier lower reinforced section; it is the upper-right post-save approach that leads toward the final red door.
Keep enough Power Bomb ammunition for the next required barrier. The first tunnel is mandatory on the standard route, so do not spend your remaining charges on ordinary enemies or walls.
- Save Room exit completed.
- Upper-right bridge route entered.
- First hidden Power Bomb tunnel opened.
7. Pass the corridor and clear the divided-wall tunnel
Continue through the corridor beyond the first Power Bomb tunnel. An Energy Tank can be reached in the intervening room by using the available running space, Speed Booster and Shinespark technique around the laser trip wires. This Energy Tank is optional for story completion. Skip it if you want the shortest safe route; collecting it requires resetting the room if the shutter or laser sequence is mishandled.
Proceed to the next room, where a wall divides the room from floor to ceiling. Use a Power Bomb on the Power Bomb-sensitive section of this divided wall to open the tunnel. Do not treat the entire wall as destructible; only the responsive blocks are part of the route.
Enter the opening into the wall and move through the Pit Blocks. The lower Pit Blocks fall more slowly, so keep moving rather than waiting in the passage. At the bottom of the wall, place a normal Bomb as required to open the exit, then leave onto the right side of the room.
- Optional Energy Tank identified separately from required progress.
- Second required Power Bomb tunnel opened in the divided wall.
- Pit Block passage crossed.
- Bomb exit from the wall reached.
8. Reach the red door and stop before Mecha-Ridley
After exiting the divided wall on the right, continue through the short final corridor. The red door is immediately ahead of the Mecha-Ridley arena. Confirm that you have saved in the bridge-side Save Room and are ready to begin the continuous boss encounter before opening it.
Shoot the red door with a Missile when you are ready. Opening this door starts Mecha-Ridley; there is no ordinary exploration section between the door and the fight. Stop this chapter at the unopened or newly accessible red door so the boss battle can be covered separately.
The glass tube between the Mothership and the Chozo ruins can be destroyed with a Power Bomb, and further item collection is possible afterward. Those actions are optional exploration and must not replace the standard Power Bomb-and-save route described here.
- Divided-wall route completed.
- Red door reached.
- Bridge-side Save Room used before the door.
- Mecha-Ridley reserved for the next chapter.
Before you move on
- The Legendary Power Suit is restored.
- Plasma Beam, Space Jump and Gravity Suit are active.
- The Power Bomb weapon has been collected.
- The first nearby Power Bomb Tank in the laser-tripwire room has been collected.
- The yellow hatch has been opened with a Power Bomb.
- The second nearby Power Bomb Tank above the next room has been collected.
- The bridge-side Save Room has been used after the collection route.
- The upper-right bridge route has been followed after saving.
- The first hidden Power Bomb tunnel has been opened.
- The optional Energy Tank corridor has been passed or completed without confusing it with required progress.
- The divided-wall Power Bomb tunnel has been opened.
- The Pit Block passage has been crossed and the Bomb exit used.
- The red door to Mecha-Ridley is accessible, with the boss fight left for the next chapter.
References for this chapter
Mecha-Ridley — Final Boss Preparation and Battle
Save in the final Mothership Save Room before entering Mecha-Ridley’s chamber. The robot’s vulnerable chest is covered by a casing, and the reliable firing window occurs during the claw-slam sequence: when Mecha-Ridley lashes out, its neck lifts clear of the chest. Fire Missiles or Super Missiles at the casing during that opening, then strike the exposed red core with Super Missiles. Stay on the left side of the arena, use Space Jump to avoid the claw, pass between the fireball streams, jump or morph under the eye lasers, and use Screw Attack against homing missiles when safe. Power Bombs are not part of the normal boss damage cycle. After the robot explodes, its eye flashes and the self-destruct timer begins: five minutes on the standard difficulty and three minutes on Hard. Leave immediately for the final escape.
Save and prepare before entering the boss chamber
Begin at the final Save Room from the preceding Mothership route. Save before opening the boss door, restore your energy and refill both regular Missiles and Super Missiles. Do not repeat the Power Bomb barriers, reactor route or optional rooms from the previous chapter.
Power Bombs are not required for Mecha-Ridley’s normal damage cycle. They are useful for reaching this section or clearing barriers elsewhere in the Mothership, but the boss is damaged with Missiles and Super Missiles. If your ammunition is low, return to the Save Room before starting. A failed escape returns you to the latest usable pre-boss save, so beginning with healthy reserves prevents an unnecessary repeat.
- Save at the final Mothership Save Room.
- Restore energy and refill Missiles and Super Missiles.
- Do not spend Power Bombs expecting them to damage the boss.
Hold the left side and learn the claw-slam opening
Stay on the left side of the room throughout the fight. Mecha-Ridley occupies the right side, and remaining left gives you room to Space Jump without moving beneath the robot. Avoid crossing underneath it to chase a shot.
The important attack opening is the claw slam. When Mecha-Ridley lashes out with its claw, begin Space Jumping up along the left side to avoid the strike. During this motion, its neck lifts clear of the chest and exposes the firing line. This is when you should shoot the glass chest casing with Missiles or Super Missiles. A simple head lift outside the claw-slam sequence is not the cue to fire; wait for the claw attack and the accompanying clear view of the chest.
- Remain on the left side of the arena.
- Watch for the claw slam rather than a generic head movement.
- Space Jump up as the claw attacks and fire while the neck clears the chest.
Break the chest casing without wasting Super Missiles
Use regular Missiles to break the glass casing whenever possible. Super Missiles also work, but saving them for the exposed core gives you the strongest damage plan. Fire only while the claw-slam opening has lifted the neck away from the chest; shots taken while the neck or claw blocks the target waste ammunition.
After enough successful shots, the casing breaks and the red core is exposed. The battle’s attack pattern becomes more demanding after this transition, so use any safe homing-missile refill opportunity before committing to the core phase. Do not stand still to force a shot. If Mecha-Ridley begins another attack, evade first and wait for the next claw-slam opening.
- Use regular Missiles on the casing when possible.
- Fire only when the neck has lifted clear during the claw attack.
- Save Super Missiles for the exposed red core.
Avoid fireballs, lasers and the claw
When Mecha-Ridley opens its mouth and sends fireballs toward the left, Space Jump through the gap between the upper and lower streams. The fireballs form separated paths, so adjust Samus’s height instead of hugging the floor or ceiling. Ignore the chest until the projectiles have passed and the next claw-slam opening appears.
A flashing eye signals the eye-laser attack. Jump or morph as needed to clear the laser’s line, especially if it overlaps another attack. The claw remains the most dangerous contact hazard: jump immediately when the arm begins its slam, keep Samus near the left wall, and do not try to fire until the claw sequence has lifted the neck away from the chest.
- Space Jump through the gap between the fireball streams.
- Jump or morph to avoid the eye laser.
- Prioritize surviving the claw slam over taking an unsafe shot.
Handle homing missiles and recover ammunition
Mecha-Ridley can open the hatch on its back and launch homing missiles. With Screw Attack, Space Jump into an approaching missile to destroy it and potentially receive energy or ammunition. Treat these drops as optional: only intercept a missile when no claw, laser or fireball threat will collide with Samus during the maneuver.
If the missiles arrive while several attacks overlap, avoid them instead of forcing a Screw Attack collision. If your reserves become dangerously low, concentrate on survival and use safe drops when available. If you enter the fight without enough ammunition to break the casing and damage the core, do not depend on ordinary beam fire; return to the Save Room after a death or restart from the latest save with better supplies.
- Use Screw Attack on homing missiles only during a safe opening.
- Collect energy or ammunition drops only when they are safely reachable.
- Do not rely on normal beam shots as the main damage method.
Damage the exposed red core
Once the casing is gone, continue using the claw-slam opening. Evade the current attack, wait for Mecha-Ridley to lash out, Space Jump along the left side, and fire Super Missiles into the exposed red core while the neck is raised. The core sits above floor level, so jump or aim upward to line up the shot.
After firing, return to the left and prepare for the next attack. Do not remain underneath the robot or keep firing while its head and neck block the target. Super Missiles are the efficient choice for the core; use regular Missiles as the fallback once Super Missiles are exhausted. The robot becomes more aggressive as the battle continues, and Hard mode or a high-item-completion file can make the fight more demanding, so safe openings matter more than constant fire.
- Attack the exposed core during the claw-slam opening.
- Use Super Missiles first and regular Missiles as the fallback.
- Return left after each firing opportunity and repeat the evade-and-fire cycle.
Confirm the defeat and begin the final escape
Mecha-Ridley is defeated when the robot visibly freezes or explodes and collapses. Refills appear after the battle; collect them only if they are directly reachable without delay. Do not linger to gather every drop.
The robot’s eye flashes after the defeat, activating the Mothership self-destruct sequence. The standard difficulty gives five minutes, while Hard mode gives three minutes. Exit the boss chamber immediately and continue into the final escape chapter. There is no additional preparation section between the boss and the escape.
If Samus dies during the escape, the latest usable recovery point is the pre-boss Save Room. Refill there, defeat Mecha-Ridley again using the same claw-slam damage window, and then take the final route without stopping for optional items.
- Confirm that Mecha-Ridley has frozen, exploded or collapsed.
- Take safe post-battle refills or leave them.
- Recognize the flashing eye as the start of the five-minute standard or three-minute Hard timer.
- Leave the chamber and enter the final Mothership escape.
Before you move on
- The chest casing was destroyed during a claw-slam opening.
- The exposed red core was damaged with Super Missiles or regular Missiles until Mecha-Ridley was defeated.
- The robot visibly froze, exploded or collapsed.
- The post-battle eye flash activated the self-destruct timer.
- Samus left the boss chamber and entered the final Mothership escape.
Final Escape Sequence — Timing, Platforms and the Last Stand
After Mecha-Ridley is defeated in the original North American Game Boy Advance release of Metroid: Zero Mission, the mothership begins its self-destruct sequence. The escape timer is five minutes on Easy or Normal and three minutes on Hard. Take the direct route back toward the bridge, using the hidden ceiling tunnel to bypass the shutter before entering the bridge room. Leave through the bridge’s lower-right door and descend toward the hangar. Most ordinary Space Pirates can be ignored, but two black Space Pirates are mandatory: the hangar door stays locked until both are defeated. Use the raised platform above the escape ships to separate them and attack from a safer height. After the door opens, defeat the Space Pirate that jumps from the escape ship, then enter the open cockpit. Boarding ends the countdown and begins the ending sequence. Completion is confirmed when the escape sequence plays and the ending credits appear.
1. Leave the Mecha-Ridley room immediately
When Mecha-Ridley collapses, the self-destruct warning follows after a short delay. Large energy and ammunition refills appear in the arena. Take them if they are directly above or beside you, but do not search the room or wait for a complete refill. The door unlocks after the warning, and the escape timer begins at five minutes on Easy or Normal or three minutes on Hard.
Leave through the available exit and keep moving toward the bridge. Ordinary Space Pirates are not worth stopping for unless one is physically blocking a narrow passage. Use Screw Attack, charged beam shots or a quick Missile only when an enemy prevents a jump or blocks a door. During this sequence, preserving momentum is usually more valuable than clearing every room.
- Take nearby refills without lingering.
- Leave as soon as the exit unlocks.
- Bypass ordinary enemies whenever the room permits.
2. Use the ceiling tunnel to bypass the shutter
Follow the mothership route back toward the bridge. You will reach a corridor where a security shutter blocks the direct passage. Do not waste time firing at the shutter. Aim upward and shoot the ceiling above the corridor to reveal a hidden tunnel.
Jump into the opening, change to Morph Ball form and roll through the upper passage. A crumbling section drops you into the room beyond the shutter. Continue through the exposed blocks and take the route that returns to the bridge room. This is the required shortcut for the escape; it is separate from the optional Power Bomb shortcut used later in the vertical shaft.
- Find the shutter corridor on the return route.
- Shoot the ceiling rather than attacking the shutter.
- Roll through the upper tunnel and emerge beyond the barrier.
3. Exit the bridge through the lower-right door
Once you re-enter the bridge room, cross downward rather than returning to the upper rooms. Take the door on the lower-right side. This begins the descent toward the hangar and the escape ships. Do not detour for tanks, map rooms or previously skipped rooms; the timer continues while you explore.
In the following shaft, descend through the platforms and deal only with enemies that occupy your landing areas. A section of the floor can be opened with a Power Bomb, creating a faster descent. Use that shortcut if the Power Bomb is already selected and you can place it immediately, but do not stop to search for ammunition or backtrack if you choose the normal route.
- Take the bridge’s lower-right exit.
- Descend without entering optional side rooms.
- Treat the Power Bomb floor opening as a shortcut, not a requirement.
4. Move the maintenance robot and continue toward the hangar
Continue through the lower mothership corridors. You will eventually reach a large room containing a slow maintenance robot that obstructs the route. Fire a Missile or Super Missile into it to push it forward, then move through the opening. If you do not want to spend ammunition, wait for the robot to walk aside; it moves slowly, but the escape timer allows this if you do not otherwise hesitate.
After passing the robot, continue through the next open room and locate the narrow Morph Ball tunnel leading toward the hangar. Roll through, drop into the hangar area and keep moving toward the locked hangar door. Do not confuse the robot with a required combat encounter: it only delays passage.
- Reach the room with the maintenance robot.
- Push it with a Missile or wait for it to move.
- Roll through the narrow tunnel into the hangar.
5. Defeat both black Space Pirates
Two black Space Pirates wait near the hangar door. These are mandatory enemies. The door remains closed until both are defeated, so running past them will not complete the escape. Move toward the raised platform above the escape ships instead of fighting in the lower center of the room.
Use the platform to separate the two Pirates. Let one climb toward you while you attack from the platform, then reposition when the other approaches. Charged beam shots are useful, but regular beam fire can be easier to land because the Pirates jump frequently. Watch their movement and avoid standing directly beneath them when they leap. On Hard, their damage is much more dangerous, so prioritize keeping height and space rather than trading contact damage.
If Samus is knocked down, retreat toward the platform and regain a controlled position before attacking again. Once both black Space Pirates are defeated, the hangar door opens. Do not attempt to enter the ship before this happens.
- Reach the raised platform above the ships.
- Separate the two black Space Pirates.
- Confirm that the hangar door opens after both are defeated.
6. Defeat the final ambush and board the ship
Run through the opened hangar door toward the escape ship. A Space Pirate jumps out of the ship as a final ambush. Attack it immediately with a charged beam shot, Screw Attack contact or another quick weapon. Do not jump into the cockpit while this Pirate is still active, because the boarding trigger occurs only after the ambush is cleared.
After the Pirate is defeated, jump into the open cockpit of the Space Pirate escape ship. This is the ship Samus uses to flee the mothership; it is not her destroyed gunship from the earlier Chozodia sequence. Boarding the ship ends the countdown and starts the escape cutscene.
- Defeat the Pirate emerging from the ship.
- Jump into the open cockpit.
- Confirm that Samus escapes from the mothership.
7. Verify campaign completion
The chapter is complete when the escape cutscene plays and the game proceeds to the ending credits. Let the credits run if you want the complete ending presentation, including the post-credits material. The artwork or ending image shown afterward can vary with difficulty, clear time and item percentage, but those conditions affect optional rewards rather than whether the campaign was completed.
If the timer expires or Samus dies during the escape, the latest usable save is before the Mecha-Ridley sequence. Reload it, defeat Mecha-Ridley again and repeat the route. There is no save station during the timed escape, and dying does not preserve progress made after the boss.
- Mecha-Ridley is defeated and the self-destruct timer starts.
- Samus returns through the bridge and reaches the hangar.
- Both black Space Pirates and the final ambush Pirate are defeated.
- Samus boards the escape ship and the ending credits appear.
Before you move on
- The Mecha-Ridley battle is finished and the self-destruct sequence begins with five minutes on Easy or Normal or three minutes on Hard.
- Samus reaches the bridge, exits through the lower-right route and descends toward the hangar.
- The two black Space Pirates guarding the hangar door are defeated and the door opens.
- The Space Pirate emerging from the escape ship is defeated.
- Samus boards the escape ship, the mothership escape cutscene plays and the ending credits appear.
References for this chapter
Post-Game and Optional 100% Route — Tanks, Shortcuts and Sequence Breaks
Load the completed North American Game Boy Advance file and clean up every missed expansion. A full item completion consists of the 14 named upgrades plus 86 expansion tanks: 12 Energy Tanks, 50 Missile Tanks, 15 Super Missile Tanks, and 9 Power Bomb Tanks. On Normal difficulty, the resulting maximums are 1299 energy, 250 missiles, 30 Super Missiles, and 18 Power Bombs. Use the regional maps and a written checklist rather than relying on memory. The restored Power Suit, Power Bombs, Space Jump, Gravity Suit, Screw Attack, Wave Beam, Hi-Jump Boots, and Speed Booster open the final cleanup routes. Tourian must be revisited for an expansion in the ruined Mother Brain chamber, and Chozodia contains several late-game tanks around the glass tunnel, Chozo Ruins, and Pirate Mother Ship. Shinespark and bomb-jump techniques can shorten the route, but they are optional; a standard ability-based sweep is safer for a first 100% file.
1. Start from the cleared file and record the correct completion target
Load the file that has completed the campaign, then open the status screen and record the current item percentage. Do not use the phrase “100 items” as your checklist: the original GBA game has 14 named upgrades and 86 expansion tanks. The expansion breakdown is 12 Energy Tanks, 50 Missile Tanks, 15 Super Missile Tanks, and 9 Power Bomb Tanks. Your percentage reaches 100 only when the named upgrades and all 86 tanks have been collected.
For a Normal-difficulty file, use the final resource totals as a second check: 1299 energy, 250 missiles, 30 Super Missiles, and 18 Power Bombs. The totals confirm that the inventory is complete, but they do not tell you where a missing expansion is located. Keep a paper list divided by region and cross off an item only after Samus has actually collected it.
- Load the completed campaign file.
- Record the current item percentage.
- Use the 14-upgrade and 86-expansion target.
- Write separate regional lists for Energy, Missile, Super Missile, and Power Bomb Tanks.
2. Reopen the route between Chozodia and the main map
After the Legendary Power Suit has been recovered, use a Power Bomb in the large glass tunnel connecting the Chozo Ruins side of Chozodia with the Pirate Mother Ship route. The blast breaks the glass and opens the post-game connection needed for backtracking. From there, use the established elevators and passages to revisit Crateria, Brinstar, Norfair, Kraid, Ridley, Tourian, and both halves of Chozodia.
A practical cleanup order is Crateria and Brinstar first, then Kraid and Norfair, followed by Ridley and Tourian, with Chozodia last. This is not a mandatory order, but it reduces repeated travel because the difficult Chozodia tanks depend on the late-game movement set. Save after completing each regional group. If a puzzle is difficult or leaves you low on health, mark it and return after restoring at a nearby Save Room instead of forcing the attempt.
- Break the Chozodia glass tunnel with a Power Bomb.
- Confirm that the main regional routes are available again.
- Save between regional cleanup sweeps.
- Leave difficult Chozodia puzzles until the late-game abilities are available.
3. Use the map to identify what remains, but inspect suspicious terrain
Open each regional map and compare its item markers with your written list. A room that has been visited is not necessarily empty. Tanks can be hidden behind bomb blocks, missile blocks, Super Missile blocks, Power Bomb blocks, false floors, concealed ceilings, or walls that open only after shooting or bombing. If the map shows no obvious marker, inspect the room's unusual terrain rather than assuming the expansion was already collected.
The 14 named upgrades are part of the complete item percentage, but Varia Suit does not become a second late-game pickup after the suit restoration event. The recovered Legendary Power Suit supplies the restored suit progression; do not search for a duplicate Varia Suit expansion. Treat any map or checklist entry referring to Varia as a progression requirement or an earlier route location.
- Compare map markers with a written list.
- Inspect false floors, ceilings, walls, and suspicious blocks.
- Do not count Varia Suit as a separate cleanup expansion.
- Separate named upgrades from expansion tanks.
4. Match the obstacle to the ability that opens it
Speed Booster is required for boost blocks and for Shinespark puzzles. Run until Samus begins boosting, crouch to store the charge, then jump or launch in the direction required by the room. Some puzzles require carrying the charge through a doorway, changing position before the launch, entering Morph Ball form, or using a horizontal or vertical spark. Clear enemies and open the destination door before charging whenever the room allows it.
Power Bombs are especially important in Chozodia and in the late Tourian cleanup. Use them on confirmed Power Bomb blocks and on the glass tunnel. Screw Attack opens the special blocks it affects, Wave Beam reaches targets through the appropriate terrain, Space Jump handles long aerial routes, Gravity Suit permits traversal through hazardous liquid passages, and Hi-Jump Boots improve vertical access. Do not spend Power Bombs casually if the map route identifies a required barrier ahead; restock at a Save Room before a difficult sweep.
- Identify the block type before using an ability.
- Have Speed Booster and Shinespark control ready for marked boost puzzles.
- Reserve Power Bombs for confirmed barriers and required glass routes.
- Use Gravity Suit, Space Jump, Screw Attack, Wave Beam, and Hi-Jump Boots for their relevant late-game obstacles.
5. Reset failed Shinespark setups safely
Before charging, inspect the room and identify the running lane, the crouch point, the route to the launch position, and the surface that must receive the spark. If the charge is lost, leave and re-enter the room when possible to restore the setup rather than improvising from a poor position. Some Chozodia and Ridley-area tanks require a horizontal spark followed by a vertical launch, a Morph Ball launch, or a direction change after passing through a door.
Save before practicing a difficult room. If Samus falls into a hazardous lower section or loses too much health, return to the nearest Save Room and refill before trying again. These puzzles are repeatable; sacrificing a secure file or continuing with depleted resources only makes the attempt less reliable.
- Identify the charge point and landing surface before running.
- Open required doors before storing the charge.
- Leave and re-enter after a failed setup when the room permits it.
- Restore health and ammunition before repeated attempts.
6. Treat bomb jumps and sequence breaks as optional shortcuts
A standard bomb jump uses Morph Ball Bombs to gain extra height. Repeated bomb jumps and related sequence breaks can reach ledges before the intended upgrade order, but they are not required for ordinary 100% collection. Practice in a safe room first, and confirm that the destination has a stable landing and a return route. Avoid experimenting near lava, alarms, one-way drops, or rooms where a failed jump strands Samus.
Early Varia Suit, early Ridley, early Super Missile, and early Screw Attack routes are useful for speedrunning and challenge runs, but they can complicate a first completion. If a shortcut fails, return to the standard route and obtain the ability in its intended progression. Save before testing an advanced technique and preserve a secure save that does not depend on the experiment.
- Practice bomb jumps away from lethal hazards.
- Confirm a return path before using a sequence break.
- Save before every experimental shortcut.
- Use the standard ability order for a first 100% file.
7. Check Tourian and Chozodia’s final expansion locations
Revisit the ruined Mother Brain chamber in Tourian after the campaign sequence. The aftermath contains an expansion that is unavailable during the original approach; inspect the ruined tank area and use the appropriate Super Missile and bombable route to reach it. Do not mark Tourian complete merely because all Metroid rooms and the Mother Brain path were cleared before the escape.
Then sweep Chozodia in both directions from the restored-suit area and the reopened glass tunnel. Check the Pirate Mother Ship’s upper and outer routes, the Chozo Ruins side, the glass-tube connection, hidden ceilings, and Power Bomb-blocked passages. Several of the last tanks require the restored suit and late movement abilities, so Chozodia is a sensible final region even if its map was explored earlier.
- Inspect the ruined Mother Brain chamber in Tourian.
- Use Super Missiles and Bombs where the post-battle route requires them.
- Recheck both the Pirate Mother Ship and Chozo Ruins halves of Chozodia.
- Inspect the glass-tunnel route and Power Bomb-blocked rooms.
8. Confirm 100% and preserve the finished file
After collecting the last tank, check the status screen for 100% item completion. Confirm the Normal-difficulty totals of 1299 energy, 250 missiles, 30 Super Missiles, and 18 Power Bombs. If the percentage is lower, compare the regional map markers against your written list, then inspect the known late-game locations before attempting sequence breaks.
Save after the final verification. Story completion, a cleared file, and 100% item completion are separate goals. A speedrun, low-percentage run, or sequence-break route should be treated as a separate file or challenge. The concrete completion check for this chapter is the 100% status result supported by the complete 14-upgrade inventory and all 86 expansion tanks.
- The status screen reports 100% item completion.
- The file has all 14 named upgrades.
- The file has 12 Energy Tanks, 50 Missile Tanks, 15 Super Missile Tanks, and 9 Power Bomb Tanks.
- Normal-difficulty totals are 1299 energy, 250 missiles, 30 Super Missiles, and 18 Power Bombs.
- Save after confirming the final percentage.
Before you move on
- The status screen reports 100% item completion.
- All 14 named upgrades are present.
- The expansion inventory contains 12 Energy Tanks, 50 Missile Tanks, 15 Super Missile Tanks, and 9 Power Bomb Tanks.
- The Normal-difficulty resource totals are 1299 energy, 250 missiles, 30 Super Missiles, and 18 Power Bombs.
- The Tourian aftermath and both Chozodia subregions have been checked.
- The completed file has been saved after the final verification.
References for this chapter
Checks, Troubleshooting and Recovery — If You Missed Something
Use separate checks for story completion, a cleared save file, and 100% item collection in the original North American Game Boy Advance release of Metroid: Zero Mission. The campaign is not complete when Mother Brain or Mecha-Ridley falls: Samus must finish the mothership escape, defeat the two black Space Pirates at the hangar shutter and the final pirate near the escape ship, board before the self-destruct timer expires, and watch the ending and credits. Completing the game places a Samus logo beside the file and unlocks additional map checklist information for a new game. The ending results record clear time and item percentage. Preserve the completed file, use map markers and an external checklist to track suspected missing items, and start a separate post-clear game only when you want the regional item checklist. A failed escape normally sends you back to the late-game save before Mecha-Ridley, so restock and repeat the final battle rather than treating the campaign as lost.
Confirm the campaign clear
After defeating Mecha-Ridley, do not stop in the boss room. His destruction starts the mothership self-destruct sequence, giving Samus five minutes on Easy or Normal and three minutes on Hard. Leave immediately and follow the available route back toward the docking bay. Use Speed Booster, Space Jump, and Screw Attack to preserve momentum, but do not detour for optional rooms while the timer is active.
At the hangar shutter, defeat both black Space Pirates. They are mandatory: the shutter does not open until both enemies are gone. Continue through the opened passage to the Space Pirate escape ship. A final pirate appears near the ship; defeat it, then enter the open cockpit. Boarding the ship ends the escape sequence and begins the ending. If the timer reaches zero, the escape fails with a Game Over rather than proceeding to the ending.
Watch the complete ending sequence and credits. The definitive story check is not Mother Brain's defeat, Mecha-Ridley's defeat, or reaching the ship's room. It is successful boarding followed by the ending. After the credits, record the clear time and item percentage shown by the results screen. The game also returns to the Chozo Warrior room for its post-ending presentation.
- Mother Brain and Mecha-Ridley are defeated.
- Both black Space Pirates at the hangar shutter are defeated.
- The final pirate near the escape ship is defeated.
- Samus boards the escape ship before the timer expires.
- The ending sequence and credits appear.
- The results screen's clear time and item percentage are recorded.
Separate the cleared-file marker from item completion
After completing the game, return to the file-selection screen and confirm that the Samus logo appears beside the completed file. This marks that the campaign has been cleared at least once on that save. It does not mean that every expansion was collected. The ending's item percentage is the correct completion figure for that run.
Keep the cleared file intact. It is useful as a record of the difficulty, clear time, item percentage, and unlocked features. Do not overwrite it merely because you want to investigate missed items. If you want to begin another campaign, copy or preserve the completed file first, then use a separate slot or a deliberately separate new-game entry.
The post-clear checklist is a new-game aid, not a continuation of the old inventory. After the game has been completed, starting a new game causes the map screen to show additional item-checklist information for each area, along with total play time. This is useful for a later 100% run, but it does not restore your old upgrades or turn the completed file into a regional-counter audit screen.
- The Samus logo appears beside the completed file.
- The clear status is not being mistaken for 100% collection.
- The ending item percentage has been written down.
- The completed file is preserved before starting another campaign.
- The post-clear checklist is understood as a new-game feature.
Track missed expansions without promising unavailable counters
If the ending percentage is below 100%, first use the map's item markers and your own notes to identify rooms that may contain an uncollected expansion. A visible item marker or an unexplored-looking dead end is evidence to investigate, not proof that the room contains a specific tank. Ordinary corridors, map rooms, Chozo rooms, and alternate connections can make the map appear incomplete.
Use an external map or checklist to mark each confirmed Missile Tank, Super Missile Tank, Power Bomb Tank, and Energy Tank. Compare the ending percentage with the checklist rather than expecting the existing cleared file to display verified regional totals. If you want the game's built-in regional checklist, begin a separate new game after the clear has been registered, then use that new campaign's map screen as your tracking tool.
For likely late-game barriers, check the abilities associated with the room: Speed Booster and Shinespark for speed blocks and long gaps, Power Bombs for special blocks and glass-tube routes, Gravity Suit for submerged movement, Space Jump for vertical access, Screw Attack for dangerous enemy corridors, and beam upgrades for colored or resistant obstacles. Chozodia deserves a separate pass after the Legendary Power Suit is restored because some pickups are impractical during the Zero Suit section.
- The ending item percentage is recorded.
- Map markers and an external checklist are being used together.
- The existing cleared file is not being treated as a regional-counter screen.
- A separate post-clear new game is used if the built-in checklist is needed.
- Chozodia is checked again after full equipment restoration.
Recover after a death or low-resource attempt
After a death, reload the latest usable save and identify the cause: route error, enemy damage, ammunition waste, or a boss-pattern mistake. Clear only enemies that block movement. Use nearby drops, refill points, or Chozo statues before committing to another boss attempt. Do not spend missiles and Super Missiles on optional enemies when the next fight depends on heavy ammunition. Chozo statues restore health and ammunition when Samus uses them, making them useful preparation points.
For Mother Brain, separate the Tourian approach from the boss room. If Metroid rooms or missile barriers leave you weak, repeat the route more conservatively and save before entering the chamber. In the fight, remove barriers methodically, keep moving through the attack patterns, and fire during reliable openings rather than wasting ammunition on shots that do not advance the current phase.
For Mecha-Ridley, take the available health and weapon refills near the approach before entering. If the fight or the escape fails, expect to repeat the late-game sequence from the preceding save. There is no ordinary mid-escape checkpoint that preserves Mecha-Ridley's defeat while restarting the timer.
- The latest save is identified before retrying.
- Health and ammunition are restored before the boss attempt.
- Optional enemies are not consuming critical ammunition.
- A failed final escape is treated as a repeatable late-game attempt, not a broken file.
Fix Mecha-Ridley damage and movement errors
Stay toward the left side of the arena, but keep moving in response to the attack pattern. At the beginning, the red chest core is covered by glass. Fire at the chest covering until it breaks. After that, Mecha-Ridley's chest is vulnerable only during the claw-slam opening: when the leading claw strikes the floor and the neck rises, fire Missiles or Super Missiles at the exposed red core. Shots fired while the claw and neck remain in their guarded positions waste ammunition.
Jump over the claw attack and use Space Jump to pass between the fireball streams. When the eyes flash, prepare for the eye lasers and jump as needed. When the rear hatch opens, destroy the homing missiles with Screw Attack when it is safe; they can provide health and ammunition. The attacks become more frequent as the battle continues, so prioritize survival and wait for the next readable claw-slam window instead of forcing a shot.
If Mecha-Ridley closes the distance after a missed opening, retreat toward the left edge and reset your position. Do not spend Super Missiles outside the exposed-chest window. If ammunition becomes low, use the rear-hatch missiles for possible drops and continue attacking only when the weak point is open.
- The initial chest glass is destroyed.
- The red chest core is attacked during the claw slam while the neck is raised.
- Missiles or Super Missiles are aimed at the exposed weak point.
- Fireballs, eye lasers, claw attacks, and homing missiles are handled separately.
- Screw Attack is used against homing missiles when safe.
Complete the final escape in order
Mecha-Ridley's defeat starts the self-destruct countdown. Collect nearby health and weapon refills, then leave through the left side of the arena. Retrace the mothership route toward the docking bay, using Speed Booster through long corridors and Space Jump or Screw Attack in vertical sections. Once the timer is running, ignore optional exploration and follow the open route rather than trying to reproduce every room from the approach.
Use the bridge-side passages and the lower-right descent required by the escape layout. Enemies that do not block progress can usually be bypassed. If a jump fails, recover onto the nearest safe platform and continue; do not reverse direction unless the route requires it.
At the hangar, defeat both black Space Pirates at the emergency shutter. After it opens, move directly to the escape ship, defeat the final pirate that appears near the ship, and enter before the timer expires. Boarding ends the countdown and begins the ending. If the timer reaches zero, restart from the latest pre-escape save and repeat Mecha-Ridley and the escape.
- The Mecha-Ridley refills are collected.
- The correct difficulty timer is understood: five minutes on Easy or Normal, three on Hard.
- The bridge-side and lower-right route is followed without optional exploration.
- Both black Space Pirates at the shutter are defeated.
- The final pirate is defeated.
- Samus boards the escape ship before the timer expires.
Verify 100% and optional rewards
A 100% run requires the item percentage in the ending results to read 100%. The Samus logo beside a file proves that the campaign was cleared, not that every item was collected. If the percentage is lower, preserve the completed file, use map markers and an external checklist to plan the missing-item search, or begin a separate post-clear new game to use the added regional checklist.
Ending artwork and other rewards depend on the game's recorded completion conditions, including difficulty, clear time, and item percentage. Treat those rewards as optional. Do not claim a particular image or unlock unless the actual run satisfies its verified requirements. The official manual also documents the game's additional unlockable features, including the original NES Metroid and the Fusion connection feature.
The practical completion standard for this campaign is: the final escape succeeds, Samus boards the Space Pirate escape ship, the ending and credits appear, and the file receives its cleared marker. Add 100% only when the ending results confirm an item percentage of 100%.
- The ending and credits are complete.
- The file has the cleared Samus-logo marker.
- The ending item percentage has been recorded.
- The item percentage reads 100% if claiming full collection.
- Optional artwork and unlocks are checked against verified conditions.
Before you move on
- Mother Brain has been defeated.
- The Zero Suit Chozodia infiltration and Ruins Test are complete.
- The Legendary Power Suit has been restored.
- Mecha-Ridley has been defeated.
- Both black Space Pirates at the hangar shutter have been defeated.
- The final pirate near the escape ship has been defeated.
- Samus has boarded the Space Pirate escape ship before the timer expires.
- The complete ending sequence and credits have appeared.
- The file-selection screen shows the cleared Samus-logo marker.
- For 100% completion, the ending results show an item percentage of 100%.
References for this chapter
- Metroid: Zero Mission Official Game Boy Advance Manual
- Metroid: Zero Mission Secrets and Tips — Metroid Recon
- Metroid: Zero Mission Chapter 12: Final Run — Metroid Recon
- Metroid: Zero Mission Walkthrough — GameSpot
- Guide and Walkthrough — Metroid: Zero Mission — GameFAQs
- Mission's End — Escape the Mothership — PixelGuides
- Chozodia — The Space Pirate Mothership — PixelGuides
- Mecha Ridley — Metroid: Zero Mission Walkthrough — Thonky
- Power-up Locations — Metroid Recon
Finishing up
Defeat Mother Brain and complete the first timed escape to Samus’s ship.
Complete the Chozodia Zero Suit infiltration and the Chozo trial, restoring the Legendary Power Suit and activating the collected Unknown Items.
Reach and defeat Mecha-Ridley in the Space Pirate mothership.
Complete the final timed mothership escape, defeat the required hangar enemies, board the escape ship and watch the ending credits.
Optional 100% goal: collect all item expansions and verify the 100% item percentage shown in the ending results separately from story completion.
Choose your next gameScreenshots & video
Game imagery for reference. Follow the written chapters above for the route and strategies.
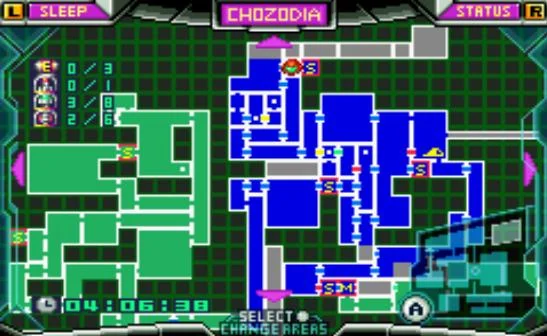
Sources & references
Our original guide draws on the references below. Check the edition at the top of this page before following controls or unlock requirements.
- Metroid: Zero Mission - Guide and Walkthrough - GameFAQs
- Metroid: Zero Mission - Guide and Walkthrough - Game Boy Advance - By BakonBitz
- Brinstar — Metroid Zero Mission Walkthrough — Thonky
- Bombs in Brinstar — Metroid Zero Mission Walkthrough — Thonky
- Metroid: Zero Mission Official Game Boy Advance Manual
- Crateria — Metroid Zero Mission Walkthrough
- Ice Beam in Norfair — Metroid Zero Mission Walkthrough
- Metroid: Zero Mission Walkthrough — GameSpot
- Unknown Item in Kraid - Metroid Zero Mission Walkthrough
- Speed Booster in Kraid - Metroid Zero Mission Walkthrough
- Metroid: Zero Mission - Guide and Walkthrough - GameFAQs
- Metroid Zero Mission Walkthrough — Main Progression and Item Order
- Wave Beam in Norfair — Metroid Zero Mission Walkthrough
- Metroid: Zero Mission Walkthrough — Powering Up
- Metroid: Zero Mission Walkthrough — Shinespark Puzzles & Shortcuts
- Metroid: Zero Mission - Guide and Walkthrough - Game Boy Advance - By acdcgamer316
- Guide and Walkthrough — Metroid: Zero Mission — GameFAQs
- Metroid: Zero Mission Walkthrough – Ridley Region
- Ensnared Kiru Guru - Metroid Zero Mission Walkthrough
- Ridley Region Part 2 - Metroid Zero Mission Walkthrough
- Ridley Boss Strategy - Metroid Zero Mission Walkthrough
- Screw Attack in Norfair - Metroid Zero Mission Walkthrough
- Metroid: Zero Mission Walkthrough – Ridley’s Lair
- Tourian - Metroid Zero Mission Walkthrough
- Metroid: Zero Mission — Official Nintendo Player’s Guide
- Metroid: Zero Mission - Guide and Walkthrough - TNEwebmaster
- Metroid: Zero Mission Walkthrough - Mother Brain
- Metroid: Zero Mission - Guide and Walkthrough - GameFAQs
- Metroid: Zero Mission Chapter 12: Final Run — Metroid Recon
- Metroid: Zero Mission - 9% Walkthrough - Game Boy Advance - By TreborSelBon
- Chozodia: Zero Suit Infiltration — Metroid: Zero Mission
- Chozo Warrior Engraving - Metroid Zero Mission Walkthrough
- Ruins Test - Metroid Wiki
- Legendary Power Suit - Metroid Wiki
- Metroid: Zero Mission Walkthrough – Zero Mission
- Metroid: Zero Mission Walkthrough — Mission’s End
- Chozodia — The Space Pirate Mothership — PixelGuides
- Mecha Ridley — Metroid: Zero Mission Walkthrough — Thonky
- Game Boy Advance games manuals — Metroid: Zero Mission Manual
- Metroid: Zero Mission - 100% Map - Omega Metroid
- Metroid: Zero Mission Secrets and Tips — Metroid Recon
- Mission's End — Escape the Mothership — PixelGuides
- Power-up Locations — Metroid Recon
About the game & collecting notes
- Platform
- Game Boy Advance
Step-by-step walkthrough for Metroid: Zero Mission (GBA, USA). This guide takes you from the crash site through Brinstar, Norfair, Crateria, Tourian, and the added Chozodia mothership sequence — including boss strategies, Zero Suit infiltration, recovery of your Power Suit, and the final escape. Optional 100% guidance and recovery tactics included.
Darryl Polo
Darryl Polo loves tinkering with emulation and revisiting retro games. He enjoys exploring how old favorites play on different setups and sharing what he learns along the way. At Joking Joystick, he writes about the games, hardware, and small discoveries that keep the hobby fun.
Our editorial standardsFound a step that needs another look? Help us improve this guide.