
Metroid Fusion — Game Boy Advance (USA / Australia) Full Campaign Walkthrough
Complete, step-oriented walkthrough for the original Game Boy Advance release of Metroid Fusion (USA / Australia).

Find a copy
Metroid Fusion Game Boy Advance
We may earn a commission if you buy through these links, at no extra cost to you. As an Amazon Associate I earn from qualifying purchases.
Opens retailer search results. Check the model, edition, seller, availability and current price before buying.
Before you begin
This walkthrough is written so you can play through Metroid Fusion on the original Game Boy Advance release and reach the official ending with minimal confusion.
Follow the chapter order for a direct, reliable route through the Biological Space Laboratory (B.S.L.).
Where a chapter describes a required ability or route, treat it as a progression gate — you’ll usually need the listed ability before the path will be available.
The guide assumes a single-player campaign playthrough on normal difficulty.
It explains where to go next, the immediate objectives needed to progress, the hazards to watch for, and boss-fight approaches that work on a console/handheld without relying on emulator-only exploits.
Optional 100% guidance is included as its own chapter so you can finish the main story first then collect remaining pickups and scenes.
Set yourself up for the run
Play on a properly functioning GBA or accurate emulator; confirm save functionality works before major fights.
Save frequently at Save Rooms and before boss rooms.
Familiarize yourself with your controls and how to fire, charge shots, use Missiles and Power Bombs, morph into the Morph Ball, and use the Speed Booster/Screw Attack when acquired.
If using an emulator, map inputs so you can reliably aim diagonally and hold charge shots.
Keep a notepad or screenshot tool for map checkpoints.
Metroid Fusion’s map and locked doors can be confusing; marking which doors require a specific ability helps prevent wasted backtracking.
Prioritize missile and power-bomb expansions and Energy Tanks where safe — they matter for survivability against SA-X and later fights.
If you prefer a steady playthrough, pick up nearby expanders as you encounter them; the 100% chapter shows a safe collection order.
Expect one or more scripted SA-X chases and sections where the station layout changes after major events.
Do not assume every open corridor on the map remains available later — some corridors collapse or lock once you trigger specific story events.
Be ready for 'ice' sections (frozen X variants) and rooms that force precision platforming.
If you struggle with these parts, practice the jump and saving rhythm in nearby safe rooms before attempting long runs.
If you want a more relaxed experience, collect extra Energy Tanks and Missile expansions before tackling Nightmare and SA-X confrontations.
The guide flags optional detours that materially reduce difficulty for those fights.
Preparation & Controls
Metroid Fusion on the original Game Boy Advance is a guided, event-driven adventure. Follow the current Navigation Room objective, check the map after every briefing or major upgrade, and treat inaccessible side rooms as future routes rather than immediate problems. Learn the default controls before leaving the first area: A jumps, B fires and charges the beam, L aims diagonally, R selects missile weapons, and Start opens the map and pause menu. Morph Ball, bombs, Speed Booster, shinespark movement, and later weapon functions become available through story progression. Save before bosses, scripted pursuits, long one-way routes, and events that change station access. Nearby Energy Tanks and Missile Tanks are worthwhile, but distant or ability-locked expansions should wait until the required objective is complete.
Confirm the original GBA controls
The original North American and Australian Game Boy Advance release uses a fixed control scheme. The Control Pad moves Samus, aims vertically, crouches, and handles ladders or special surfaces. Press A to jump. Press B to fire the beam; hold B to charge it and release B to fire the charged shot once Charge Beam has been obtained. Hold L to aim diagonally upward. While holding L, press Down to change to diagonal downward aim, then press Up to return to diagonal upward aim.
Hold R to enter missile mode, then press B while still holding R to fire a missile. R is not a separate fire button. Start opens the pause and map screen; from that screen, L activates the Game Boy Advance sleep function and R opens Samus's status display. Select is not the map button on this original release, and the game does not provide a general button-remapping menu.
- A jumps and B fires or charges the beam.
- L changes the arm cannon to diagonal aim.
- Hold R, then press B, to fire missiles.
- Start opens the map and pause screen.
- Do not rely on Select for map access or assume controls can be reassigned.
Practice beam, missile, and aiming habits
Before entering a boss room, practice charging a beam shot while standing still, then releasing it without walking into an enemy. Use ordinary beam shots for routine enemies and reserve missiles for missile hatches, armored targets, bosses, and obstacles that require them. Missile ammunition is replenished by collecting suitable X parasites or refill drops, so do not spend missiles casually when a beam attack will work.
Use the Control Pad to aim straight up or down when the room permits it, and use L for diagonal shots. Down while airborne aims the arm cannon downward; this is useful for shooting floor targets or enemies below a ledge. Keep the R button held until the missile is fired so that a beam shot is not released accidentally. During difficult encounters, choose a position where you can keep moving while charging rather than standing directly beneath the enemy.
- Charge and release a beam shot without stepping into danger.
- Practice diagonal, upward, and downward aiming.
- Confirm that R+B fires a missile before relying on the input in a boss fight.
- Use beam ammunition for ordinary enemies whenever practical.
Learn Morph Ball and bomb inputs correctly
At the beginning of the game, Samus cannot enter Morph Ball form or use bombs. After receiving Morph Ball, press Down while standing to crouch, then press Down again to roll into the ball. In midair, pressing Down twice can also transform Samus after the appropriate ability is available. Press Up while in Morph Ball form to return to normal height.
After Bomb data has been downloaded, press B while in Morph Ball form to place a normal bomb. Bombs can destroy bomb blocks, damage certain enemies, and reveal routes or hidden lifts. Later, hold R and press B while in Morph Ball form to deploy a Power Bomb, but do not expect that function before the Power Bomb ability and ammunition exist. If a low tunnel cannot be entered, check whether the obstacle is actually waiting for Morph Ball, Bombs, or a later ability instead of repeatedly attempting it.
- Enter Morph Ball by pressing Down while crouched.
- Use B in Morph Ball form for a normal bomb after Bomb data is obtained.
- Use R+B in Morph Ball form for Power Bombs only after that ability is available.
- Do not treat an inaccessible tunnel as an early missed route.
Understand running, Speed Booster, and shinespark preparation
There is no separate dash button at the start of Fusion. Samus builds Speed Booster speed by holding Left or Right and running across a sufficiently long uninterrupted surface after the Speed Booster has been acquired. When the ability activates, Samus flashes and leaves trailing images. This state can break designated Speed Booster blocks and supports later movement puzzles.
To store the charge, press Down while Samus is running at Speed Booster speed. The stored charge lasts only briefly. A shinespark is initiated by jumping out of the stored state and directing the resulting movement, so practice the basic sequence in a safe room before attempting a demanding item puzzle. Do not assume every long corridor is currently a Speed Booster challenge: many routes are intentionally designed for a later return after additional upgrades.
- Remember that Speed Booster activates through running, not by holding B.
- Recognize the flashing animation that confirms Speed Booster speed.
- Practice pressing Down to store a charge.
- Leave difficult shinespark expansions until the campaign route or a later cleanup sweep.
Use the map to follow the intended route
Press Start after every Navigation Room briefing, Data Room download, Security Room clearance, and major boss reward. The map shows explored rooms, doors, facilities, and the current sector layout, but it does not reveal every hidden passage. Use it to identify the next objective and the nearest known Save Room, Recharge Room, Navigation Room, Data Room, or Security Room.
When a route appears blocked, first inspect nearby rooms for a newly opened door, a hatch requiring missiles, a bombable floor, a transport connection, a security door, or a newly obtained ability. Fusion is deliberately more linear than the open-ended entries in the series. A locked door or visible expansion usually marks a future return point. Do not abandon the current mission to search distant sectors unless the Navigation Room explicitly redirects you there.
- Open the map after each major briefing or ability acquisition.
- Identify the next objective and nearest Save Room before taking a risky branch.
- Treat hidden passages as possibilities, not guaranteed map information.
- Use nearby facilities to understand whether a room is for saving, refilling, navigation, data, or security access.
Prioritize required progress and save deliberately
Required progression consists of story-directed abilities, weapon downloads, security clearances, and boss rewards that open the next assigned route. Early examples include missiles, Morph Ball, Bomb data, Charge Beam, and security access. Obtain these when instructed before making long detours for optional items.
Missile Tanks, Energy Tanks, and Power Bomb Tanks are optional expansions for the basic campaign, although nearby Energy Tanks and Missile Tanks are recommended when the detour is short and safe. Leave a pickup behind if it requires a later ability, a difficult shinespark, or a route that would carry you far from the current objective. For a first playthrough, collect natural-route expansions and return for the harder cleanup items after learning the sectors.
Save before every boss, before a long corridor where failure would repeat substantial movement, before a scripted SA-X appearance or chase, and before any story event that changes doors or station routing. Recharge Rooms restore health or ammunition, but they do not replace a Save Room. If an encounter goes badly, reload from the nearest save, change one part of the approach, and retry rather than spending all resources on an untested tactic. SA-X and later bosses reward learning their movement patterns; rushing them with a single plan is unreliable.
- Obtain the current mission's required data or ability before distant exploration.
- Collect nearby expansions when they do not interrupt the assigned route.
- Save before bosses, pursuits, long one-way sections, and station-layout changes.
- Use Recharge Rooms for resources and Save Rooms for dependable retry points.
Before you move on
- You can explain the functions of the Control Pad, A, B, L, R, Start, and Down on the original GBA release.
- You can open the map with Start and identify the next Navigation Room objective and nearest Save Room.
- You can charge and release a beam shot, aim diagonally, enter Morph Ball after crouching, and fire a missile with R+B.
- You understand that bombs, Speed Booster, shinespark movement, and Power Bombs are progression-dependent abilities.
- You are ready to begin the opening mission while treating distant expansions as optional future pickups.
Sector 1 — Atmospheric Interference: first rooms, Arachnus and the Morph Ball
The opening mission begins on the Main Deck, not in Sector 1. Follow the quarantine investigation to the Navigation Room, download Missiles from the Data Room, then use them to open the route toward Arachnus. Save and recharge before entering the boss chamber. Defeat Arachnus by attacking its exposed front and avoiding its fire, shockwave and rolling attacks. Destroy the following Core-X with Missiles and absorb it to obtain the Morph Ball. Use the new ability to leave through the low passage, reach the next Navigation Room and take the elevator to Sector 1. There, restore the five atmospheric stabilizers, collect the Charge Beam from the Eye-X in the Chozo room, and return to the Navigation Room for the next mission. Energy and Missile Tanks along this route are optional; the Missile Launcher, Morph Ball and Charge Beam are progression abilities.
1. Investigate the Quarantine Bay and download Missiles
At the beginning of the game, follow the only available route through the Main Deck to the first Navigation Room. Continue to the Quarantine Bay, defeat the creature inside with beam shots and absorb the released X. Return to the Navigation Room as instructed, then leave through the newly opened level-zero hatch. Save if needed before continuing upward and east toward the next Navigation Room.
From that Navigation Room, follow the objective to the Data Room. Use the elevator, enter the indicated Navigation Room and proceed to the Data Room beside it. Download the Missile Launcher. The download gives Samus a starting supply of Missiles and unlocks the attacks required for red hatches, tentacle barriers, eye gates and the first boss route. Return to the Navigation Room after the download so the next route update is registered.
- Investigate the Quarantine Bay.
- Absorb the first X parasite.
- Download the Missile Launcher in the Main Deck Data Room.
- Save before beginning the Missile-only route.
2. Open the Main Deck route to Arachnus
After the Data Room briefing, go back to the large Main Deck room and climb the ledges toward the right side. Fire a Missile at the metal plate covering the wall to reveal the passage. Continue through the dark vertical area, then use three Missiles on the tentacle barrier blocking the way. Drop through the fragile floors and cables, taking the first Missile Tank on the lower route if you want the extra ammunition capacity. In the side room reached from the bottom, shoot the platforms to uncover another optional Missile Tank.
Continue right through the connected rooms. A save room is available above the route; use it before the boss approach. Return to the lower path and attack the red eye gate only while its eye is open and not flashing. Three Missiles destroy it. If the eye glows, jump over its projectile instead of firing. Absorb the red X after the gate is gone if you need a full recovery, then enter the next room.
Climb the ledges in the tall chamber. The visible Energy Tank is optional but recommended because it raises your maximum energy. In the same general approach, firing upward at the ceiling from the correct platform reveals a hidden passage to another optional Energy Tank. After collecting either or both, return to the previous chamber and drop through the floor. That descent triggers the Arachnus fight.
- Break the metal wall plate with a Missile.
- Pass the tentacle barrier with three Missiles.
- Use the nearby save room before entering the boss approach.
- Defeat the red eye gate before entering Arachnus's chamber.
- Collect the Energy Tanks only if you can reach them safely.
3. Defeat Arachnus in the Main Deck chamber
Arachnus can be damaged when it faces Samus. Fire beam shots or Missiles into its front, then move away so you have room to react. Its rear carapace is protected, so shooting from behind is ineffective. Missiles end the fight faster, but ordinary beam shots remain useful if your ammunition is low. Preserve enough Missiles for the Core-X that follows.
When Arachnus raises or strikes with its claw, watch for the attack that follows. A blue shockwave travels across the floor; jump onto a nearby ledge or over the wave. Arachnus can also spread fire along the floor, so use the ledges and do not remain at ground level beside it. When it curls into a spiked ball and rolls across the chamber, jump over it just before it reaches Samus. Avoid clinging to a wall directly in its path, because the impact can knock Samus down.
Repeat the cycle of front-facing attacks and evasive jumps. If the fight becomes prolonged, collect small X parasites when they are safe to reach, but do not chase recovery items through Arachnus's body. The boss disappears when sufficiently damaged and leaves a large Core-X in the room.
- Attack only while Arachnus faces Samus.
- Jump over the blue shockwave and floor fire.
- Jump over the rolling ball form.
- Keep Missiles available for the Core-X phase.
4. Destroy the Core-X and obtain Morph Ball
The Core-X moves through the chamber and is dangerous to touch. Keep moving and jump past it rather than trying to stand beneath it. Fire a Missile when its central core is exposed and not flashing. Three successful Missile hits are enough according to the established boss route, but wait for a valid opening instead of firing into its protected shell. Small X parasites may appear during the sequence and can restore health or ammunition.
When the Core-X breaks apart, the large ability-bearing X remains. Touch it to absorb the parasite and recover Morph Ball. This is the required progression reward. Samus can enter ball form by pressing Down twice in quick succession, including while airborne when the inputs are timed closely. The ability is not an optional pickup and must be collected before the game can continue.
- Defeat Arachnus's Core-X.
- Use Missiles against the exposed core.
- Absorb the large X parasite.
- Confirm that Morph Ball has been recovered.
5. Leave the boss room and reach the Sector 1 mission
Immediately after absorbing Morph Ball, roll through the low opening on the left side of the boss room. In the following darkened rooms, use the new form to pass narrow gaps. When a ledge has only a small space above it, Samus can automatically curl into a ball while grabbing it. Climb the ladder where necessary, shoot the blocks obstructing the upper-left passage and continue toward the next Navigation Room.
A recharge room can be opened on the route by destroying the tentacle barrier in front of its door. Use it if your energy or Missiles are low, then continue down and left to the nearby save room. Save before leaving the Main Deck. From the vertical shaft, go to the Navigation Room and receive the next assignment: investigate the breeding environments in Sector 1. Return to the elevator shaft near the Quarantine Bay, use Morph Ball to pass the small opening on the left and take the elevator down to Sector 1, SRX.
One optional Missile Tank is hidden in the shaft on the way to the Main Elevator. It is not required for the mission, so do not risk a failed jump if you are still learning Morph Ball movement.
- Roll through the low exit left of the boss room.
- Open and use the recharge room if necessary.
- Save before taking the elevator to Sector 1.
- Reach the Sector 1 Navigation Room.
6. Restore the five atmospheric stabilizers
In Sector 1, speak with the Navigation Computer, then save in the room to the right and pass the recharge room. Descend to ground level and use the lower-right exit. Fire three Missiles at the tentacle barrier, then destroy the first stabilizer from the right with three Missiles. Continue through the corridor and use Morph Ball at the hidden low passage near the end if you want the optional Energy Tank.
Proceed through the next room, shooting obstructing walls and ceilings while climbing toward the upper area. Restore the second stabilizer from below. Return to the shaft, descend and take the first available door to the left. Continue down the next shaft, open the bottom door and travel right through the following rooms. Climb the ladder at the far right and shoot the third stabilizer.
Leave to the right and follow the route to the fourth stabilizer. Hang from the overhead railing to reach the correct firing position, then destroy the parasite blocking it. The upper-left room contains an optional Missile Tank. Take the lower-right exit afterward. In the watery corridor, hang from the railing and shoot the wall when you reach it to reveal the passage. A second eye gate blocks the way; destroy it with three Missiles, using the lower door to reach a save room if you need a checkpoint.
Enter the Chozo room and shoot the item sphere held by the statue. The statue becomes an Eye-X. Fire at its eye only while it is open, and avoid its shots. Four Missiles defeat it and reveal the Charge Beam. Absorb the Core-X reward, then leave through the upper-right exit. Use the Charge Beam or Missiles to clear the final obstruction and restore the fifth stabilizer. Save in the upper-right save room before returning to the Navigation Room. A hidden passage in or near that save-room route leads to an optional Missile Tank if you can perform the required jump and Morph Ball entry.
- Restore all five atmospheric stabilizers.
- Use the Sector 1 save and recharge rooms before the Eye-X encounter.
- Defeat the Eye-X with attacks aimed at its open eye.
- Absorb the Charge Beam ability.
- Return to the Sector 1 Navigation Room after the final stabilizer is restored.
Before you move on
- The Main Deck Missile Launcher has been downloaded.
- Arachnus and its Core-X have been defeated.
- Morph Ball has been absorbed and is available in Samus's equipment.
- Samus has reached Sector 1 and restored all five atmospheric stabilizers.
- The Eye-X in Sector 1 has been defeated and Charge Beam has been absorbed.
- Samus has returned to the Sector 1 Navigation Room and received the next mission to continue the campaign.
Sector 2 — Unknown Saboteur: exploration, Charge Beam, and early SA-X signs
Sector 2, the tropical TRO habitat, begins with Adam’s warning about the SA-X and an order to unlock Level 1 security hatches. The Charge Beam is not obtained here; it comes from the preceding SRX mission and should already be available. In TRO, activate the Security Room console, download Bomb data, escape the damaged Data Room route after the SA-X attack, and follow the newly opened bomb passages to Zazabi. Defeating Zazabi exposes its Core-X; absorb that Core-X to recover Hi-Jump and Jumpball. Afterward, survive the first direct SA-X sighting by waiting for it to leave, then use the new abilities to collect several nearby optional expansions before returning to the TRO Navigation Room. Adam’s next briefing sends Samus to Sector 4.
Confirm the Charge Beam and enter TRO
After completing the preceding Sector 1 mission, return to the Main Deck and use the elevator to Sector 2, labeled TRO. Confirm that Samus can charge her beam before leaving the Main Deck. The Charge Beam was recovered from the Charge Core-X in SRX; it is not a Sector 2 reward. It helps against the tougher enemies along this route, although missiles remain the important ammunition for Zazabi.
Enter the TRO Navigation Room and hear Adam’s briefing. He identifies the SA-X and orders Samus to unlock the Level 1 security hatches before downloading Bomb data. Save in the entrance Save Room before beginning the search. The blue doors are Level 1 hatches, but they remain locked until the Security Room console is activated.
- Charge Beam already available from the preceding SRX mission
- TRO Navigation Room briefing completed
- Game saved before searching for the Security Room
Unlock the Level 1 security hatches
Pass through the Save Room and Recharge Room into the first large room. Follow the lower route, shooting or bombing blocks that obstruct the descent. Ignore the first door encountered on the way down, continue lower, then climb toward the upper-right exit. In the next rooms, keep moving upward through the vertical passage and pass the blue hatch without trying to open it.
Take the upper door at the top of the route. You will drop into the Security Room. Walk to the console and activate it to release the Level 1 locks. All blue hatches in TRO are now active. Return through the route you used to reach the console; the security console is mandatory progression, so do not spend time searching for another way through the unopened blue doors before activating it.
- Security Room reached
- Level 1 security console activated
- Blue hatches opened in TRO
Download Bomb data and escape the damaged Data Room
From the Security Room, leave through the blue hatch on the right, descend the vertical room and use the lower-left exit. Return to the large room, then take its lower-left route toward the Data Room. In the corridor before the Data Room, deal with the crawling enemies and use the raised platform near the upper-left door. Kill the Reo there if it interferes with the jump, then enter the Data Room and activate the glowing terminal to download Bomb data.
When Samus exits, the SA-X destroys the door behind her. Do not attack it. On the upper-right ledge, bomb the suspicious blocks and roll through the opening to collect a Missile Expansion. Return to the main room, bomb the lower-left corner and drop through the revealed tunnel. Roll right, fall into the corridor below and enter the Save Room on the right. Save here before exploring the new bomb route.
- Bomb data downloaded
- SA-X treated as an escape hazard rather than a boss
- Missile Expansion above the damaged Data Room collected if desired
- Save made after entering the lower corridor
Use the bomb passages and collect the early expansions
Leave the Save Room and enter the vertical hallway. First take the upper route: wall-jump to the raised platform, shoot the breakable block in the wall, grab the ledge and bomb through. In the large room beyond, bomb the floor beside the raised block to make a metal spire rise. Use it to reach the Missile Expansion above, then return to the vertical hallway.
Use Morph Ball bombs to descend through the narrow passage. At the bottom, leave through the left door and continue into the plant-filled room. Work downward, avoiding the Dessgeega’s horizontal projectiles. At the bottom, clear or bypass the blue crawler and bomb the lower-right floor beneath the ledge to reveal another Missile Expansion. Leave through the lower-right door and bomb the floor between the large platforms in the steel room. The rising spire opens the way into the long plant shaft.
- First post-Data Room Missile Expansion collected
- Bomb route through the vertical hallway completed
- Plant-room Missile Expansion collected
- Rising spire in the steel room activated
Collect the Energy Tank and defeat Zazabi
From the plant shaft, use the nearby Save Room if needed. Take the right-side door located behind the pillar and continue through the long vertical hallway. A Save Room is directly along this route; use it before proceeding through the next rooms. Continue to the Energy Tank, then bomb the floor in the lower portion of the same area to reach the Gadora. Save before opening the Gadora door if you want a clean attempt at the boss.
Zazabi is invulnerable while its mouth is closed. It bounces around the room and, on its slower descending jump, opens its mouth. Move underneath only during that opening and fire missiles straight upward into the exposed weak point. Fire a short burst, then move away before Zazabi lands or closes its mouth. As it takes damage, it moves faster and opens its mouth more often, so keep using hit-and-run attacks rather than standing beneath it. If you are caught close to the mouth, morphing and dropping bombs can help force space.
After Zazabi is defeated, destroy the exposed Core-X while its membrane is vulnerable. Absorb Zazabi’s Core-X to recover Hi-Jump and Jumpball. These abilities are required for the next part of the TRO route.
- Energy Tank collected if desired
- Save made before the Gadora
- Missiles fired into Zazabi’s open mouth
- Zazabi defeated
- Zazabi’s Core-X absorbed for Hi-Jump and Jumpball
Survive the SA-X sighting and return to the Navigation Room
Head back toward the plant shaft. The SA-X has destroyed the door on the route, so bomb the floor immediately beneath the damaged doorway and drop into the lower room. The SA-X is visible below. Stay still and wait for its footsteps to fade. Do not shoot at it or drop down while it is nearby; Samus cannot defeat it during this encounter. Once it has left, drop through and continue.
In the plant shaft, use Hi-Jump to reach the overhead bars in the water room and cross to the Missile Expansion. Return to the shaft and climb using the insect sacs. At the top, use Jumpball and a bomb to pass the obstructing block, then enter the mossy corridor. Bomb the wall from the upper-right ledge to reach another Missile Expansion.
Return to the main TRO room and use Jumpball to reach the Missile Expansion behind the upper-right blue hatch. Then enter the small room below the Recharge Room and jump over the large enemies to collect its Missile Expansion. These tanks are optional. When finished, use the Recharge Room and Save Room, then enter the TRO Navigation Room. Adam reports that SA-X has entered Sector 4 through the newly opened blue hatches and orders Samus to proceed to AQA.
- SA-X allowed to leave before dropping through the floor
- Water-room Missile Expansion collected if desired
- Mossy-corridor Missile Expansion collected if desired
- Upper-right blue-hatch Missile Expansion collected if desired
- Missile Expansion below the Recharge Room collected if desired
- TRO Navigation Room briefing directs Samus to Sector 4
Before you move on
- Level 1 security hatches are unlocked in TRO.
- Bomb data has been downloaded.
- The damaged Data Room route has been escaped.
- Zazabi has been defeated.
- Zazabi’s Core-X has been absorbed, granting Hi-Jump and Jumpball.
- The direct SA-X sighting has been survived without attempting to fight it.
- The TRO Navigation Room briefing sends Samus to Sector 4.
Sector 4 (AQA) — Serris and the Speed Booster
Sector 4 sends Samus through electrified-water rooms to Serris's breeding tank. Follow the lower-left route from the Navigation Room, use Bombs and hidden passages to climb the shaft, then save before the boss. Serris's head is vulnerable to Missiles and the Charge Beam; after each hit, wait out its glowing high-speed phase before attacking again. Defeat the resulting Core-X to regain the Speed Booster. Use it to break the blocks below the boss room, reach the Pump Control Room, lower the water, and open the route back to the Navigation Room. Several Missile Expansions are available during this detour but are optional. The next mandatory destination is Sector 3, where the Speed Booster opens the path to the Security Room and Super Missile Data Room.
1. Follow the lower route to Serris's breeding tank
After Adam sends you to Sector 4, go left through the Save Room and Recharge Room. In the large room beyond, take the lower-left door. In the next room, move upward and use Bombs to open the wall, then cross the room without falling into the electrified water. Leave through the upper exit and follow the passage until you reach the obstructed Energy Tank route. The Energy Tank is optional; continue back to the previous room when you cannot proceed.
Return to that room and use the lower-left exit this time. Shoot the ceiling above the door to expose a passage, climb up, and Bomb the obstruction so you can grab the ceiling rail. Move left along the rail, jump through the opening, and climb the ladder. Morph into the tunnel at the top and collect the Missile Expansion if desired, then return to the previous room and Bomb through the wall to continue.
Climb the tall shaft. Shoot the ceiling above the door to reveal the way upward, and watch for fragile floors as you reach the top. Save in the Save Room. In the room after it, morph and Bomb the right wall to reveal a hidden passage. Follow it through the narrow tunnel, Bomb the obstruction, and defeat the Living Door before entering the breeding tank.
- Use the lower-left route after the AQA Recharge Room.
- Avoid electrified water until the water level is changed later.
- Save immediately before entering the Serris area.
- Treat the Energy Tank and first Missile Expansion as optional.
2. Defeat Serris
In the breeding tank, cross to the right and climb upward. Drop to the Living Door and destroy it, then collect the red X it releases. Enter the boss room and jump onto the platform above the water. Stand on one of the middle platforms; the cracked blocks will crumble and summon Serris.
Serris's head is the only vulnerable target. Missiles and fully charged Beam shots can damage it. Watch its movement and fire when the head approaches your platform. Immediately jump away or grab the ceiling rungs after a successful hit, because Serris becomes invulnerable and moves much faster while glowing. Do not waste ammunition on the armored body.
The platform method is generally easier because Samus moves normally above the water. If you have trouble reading the movement, stay in the water and watch for the dirt cloud that marks where Serris's head will emerge. Fire as the head appears, then move away. Underwater movement is slower, so do not remain there longer than necessary.
After enough successful hits, Serris breaks apart and becomes a Core-X. Move onto a platform or other dry ground before attacking it. Fire Missiles when the Core-X opens, avoid contact, and absorb it after the membrane is destroyed. The Core-X restores the Speed Booster, which is required for the rest of this mission.
- Target Serris's head.
- Attack only when it is not glowing.
- Move immediately after each hit.
- Defeat and absorb the Core-X to regain Speed Booster.
3. Break through the route below the boss room
Leave the boss room through the upper-right hatch. Move right across the next area, then descend at the far-right side and Bomb the left wall. Enter the lower passage and clear the Owtches if necessary. Stand at the far-left end of the lower area and run right. After Samus reaches top speed, she will break through the two yellow-arrow Speed Booster blocks in the floor.
Fall through the opening while steering so you do not drop straight down into the lower section. In the next area, morph and Bomb the long thin block on the left. Bomb the narrow block against the wall to expose the ladder, then Bomb the small niche to reveal a Missile Expansion. This pickup is optional but useful for later fights.
Climb the ladder and fire two Missiles at the indicated section of the left wall to open a passage. Follow it downward and move right until you can shoot the hidden opening above the small ledge. Enter the passage to collect another Missile Expansion, then return left and descend toward the large water room. A Save Room is available on this route; use it before continuing.
- Build speed in an open lower corridor, not beside an obstacle.
- Break the yellow-arrow blocks with a normal Speed Booster run.
- Use Morph Ball and Bombs to reveal the first optional Missile Expansion.
- Use two Missiles to open the hidden passage to the second optional Missile Expansion.
- Save before attempting the Pump Control route.
4. Lower the water and return to the Navigation Room
From the large water room, go left and take the lower exit. Continue left until you reach the tall shaft near Serris's arena. Use the left-side route and run left through the next room; the Speed Booster will break through the obstruction and open the way to the Pump Control Room.
In the Pump Control Room, run left until Samus activates Speed Booster and breaks through the blocks. Continue to the console and stand on the control pad to lower the water level. As the water drains, climb partway down the ladder and jump right to collect the Missile Expansion in the room if you want it.
Leave the control room through the newly opened route and return to the large room that previously held electrified water. Clear the enemies from the lower section, then run from the left toward the right to break through the Speed Booster blocks. Continue through the corridor and collect the Missile Expansion above if desired. Use the Speed Booster route to break through the wall on the right and proceed to the next chamber.
In the next room, defeat the Scizor. It changes into a Golden Scizor, which must be destroyed with the Charge Beam or Missiles before the doors reopen. Exit to the right, then use the upper-right route through the large room to reach the Recharge Room, Save Room, and Navigation Room. Adam will send you to Sector 3 for the next mission.
- Activate the Pump Control console.
- Do not touch the exposed electrical conduits while crossing the drained area.
- Defeat the Golden Scizor to unlock the exit.
- Recharge and save before leaving AQA.
- Confirm that the next mission directs you to Sector 3.
Before you move on
- Serris has been defeated.
- The Core-X has been destroyed and absorbed.
- Speed Booster is displayed as regained.
- The Pump Control console has lowered the water level.
- The Golden Scizor has been defeated and the exit doors have reopened.
- Samus has saved and received the Sector 3 objective.
References for this chapter
Sector 3 — Rogue Security: Super Missiles and the first B.O.X. encounter
After defeating Serris in Sector 4, Adam sends Samus to Sector 3 (PYR) to recover Super Missile data. Reach the Level 2 Security Room, unlock the green hatches, cross the heated sector, and collect the Missile Tank that blocks the route to the Data Room. Save and recharge before downloading the Super Missiles. The download triggers an explosion that destroys the direct return hatch and forces Samus through the altered lower route. After the Save and Recharge Rooms, confront the first Security Robot B.O.X. encounter. Stay on the ceiling rungs, fire Super Missiles downward after its fire-bomb settles, and avoid standing directly over the robot while it releases the bomb. B.O.X. retreats through the ceiling rather than producing a Core-X in this encounter. Follow the debris upward, return to the PYR Navigation Room, and report to Adam. The next mandatory objective is Sector 6, where the later B.O.X. rematch awards the Wave Beam.
1. Travel from AQA to Sector 3
After defeating Serris in Sector 4 (AQA), return to the AQA Navigation Room and speak with Adam. The new order is to recover the Super Missile ability in Sector 3 (PYR). Take the elevator back to the Main Deck, cross to the Sector 3 elevator, and enter PYR.
Once inside Sector 3, use the Save Room and Recharge Room near the Navigation Room before beginning the security-room route. The sector contains heated rooms that damage Samus without the Varia Suit, so do not linger in areas marked by extreme heat. Your objective is the Level 2 Security Room and then the Data Room, not a complete item sweep.
- Serris has been defeated.
- Adam has assigned the Sector 3 Super Missile mission.
- The game has been saved before entering the deeper PYR route.
- Energy and missile supplies have been refilled where possible.
2. Reach and unlock the Level 2 Security Room
In the first large PYR room, use the map to identify the lower-right passage. If you entered the room with a Speed Boost run, the boost blocks and pit blocks can drop you near that passage. If not, descend through the lower part of the room, shoot the floor near the blocked route, and work around to the same lower-right door.
Stand near the lower-right door and run left while firing your beam. This opens the lower-left route and lets you build a Speed Boost through the next room. When the run ends at a raised section, bomb the floor a short distance to the left of the bump to open the downward passage. Let the cracked blocks return, then run from the far right toward the left and jump as you cross the bump. This breaks the boost blocks above the green hatch.
Morph into a ball, jump into the small upper-left niche, and drop a bomb. Roll left through the opening to enter the Security Room. Activate the console to unlock Level 2 security. The green hatches are now available, but the change also allows more X-infected enemies into the area, so clear enemies before attempting long runs.
- The Level 2 Security Room has been entered.
- The console has unlocked the green hatches.
- The map shows a green-hatch route toward the Data Room.
3. Cross PYR and collect the required Missile Tank
Leave the Security Room through the green door and continue through the newly opened route. In the next room, kill the Side-Hoppers or use charged shots to create room for a Speed Boost. Run from the far left toward the right and jump over the bump to break the boost blocks above the exit.
Continue through the lower-right passage and keep firing while moving. In the next area, open the red light before approaching the door, then run across the room to break the boost blocks in the floor. Drop through the opening and continue into the tall vertical shaft.
The shaft contains Fune in the walls and flaming Novas. Keep away from the Fune mouths, descend carefully, and enter the green door at the bottom. In the room beyond, destroy the Owtches on the central platform and bomb the platform to reveal a Missile Tank. This tank is required for the route to the Super Missile Data Room, so collect it rather than treating it as an optional expansion.
Return to the tall shaft and climb to its upper section. Take the upper-left route into the adjoining room. Morph into a ball and bomb beside the central block to reveal the tunnel. Use the newly opened passages to reach the upper-right exit, then continue through the next rooms toward the green Data Room door.
- The required Missile Tank in the Owtch room has been collected.
- The Fune shaft has been crossed safely.
- The green door to the Data Room is visible on the map.
4. Save before downloading Super Missiles
Before entering the Data Room, use the nearby Save Room and Recharge Room. The next download changes the map state and begins the B.O.X. sequence, so this is the correct place to establish a retry point. Refill missiles if possible because Super Missiles replace the regular missile type and are needed for the robot encounter.
Enter the Data Room and activate the machine to download Super Missile data. Super Missiles use the missile weapon: hold R to select or charge the missile weapon, then press B to fire. In this part of the original GBA game, the downloaded Super Missiles replace the normal missiles rather than creating a separate selectable ammunition category.
- A save has been made immediately before the Data Room.
- Missile ammunition is sufficient for the return route and B.O.X.
- Super Missile data has been downloaded.
5. Follow the route created by the Data Room explosion
An explosion occurs immediately after the download. Do not try to return through the same upper corridor. The hatch and nearby floor have been destroyed, opening a large hole that leads down into the altered route.
Go left from the Data Room until you reach the hole, then descend and travel right through the Save Room and Recharge Room. Continue through the next room and defeat the Side-Hoppers blocking the passage. Use Super Missiles on the purple X-Barrier; the barrier requires multiple Super Missile hits. A Missile Tank is behind this barrier, but it is optional for campaign completion.
Return left through the route you came from. When you climb back through the floor opening, continue left to the dead end. Debris will fall and mechanical movement will signal that the B.O.X. encounter is about to begin. This corridor is the last safe warning point before the first robot battle.
- The destroyed Data Room hatch has been bypassed.
- The Save and Recharge Rooms have been passed on the return route.
- The optional Missile Tank behind the purple X-Barrier was collected or deliberately skipped.
- The debris event has occurred before entering the B.O.X. arena.
6. Defeat the first Security Robot B.O.X.
Move right until the Security Robot B.O.X. attacks. Immediately jump to the ceiling rungs and remain on them. B.O.X. moves below Samus and can fire homing missiles, so keep moving along the rungs rather than standing still. Beam shots or missiles can destroy the homing missiles before they reach you.
The robot periodically stops and crouches before releasing a fire-bomb. Do not remain directly above B.O.X. while it drops the bomb, because the impact can knock Samus off the rungs. Wait for the bomb to stop rolling, then position Samus directly above it and fire a Super Missile downward into the robot’s exposed central area. When the bomb detonates beneath Samus, the flame columns travel away from the explosion and should pass harmlessly if the timing and position are correct.
Repeat this cycle: stay mobile on the rungs, wait for the fire-bomb to settle, move above it, and fire downward. As B.O.X. takes damage, it moves faster and may place more pressure on the arena. If you are knocked down, prioritize reaching the rungs again instead of attacking from the floor. After enough hits, the robot flashes, crawls toward the right, and launches itself through the ceiling.
This first encounter does not produce a Core-X or grant a beam ability. Its reward is access to the altered exit route. The Wave Beam and its Core-X reward belong to the later infected B.O.X. encounter in Sector 6.
- Samus is on the ceiling rungs before attacking.
- B.O.X. has stopped and released its fire-bomb.
- The bomb has settled before the downward Super Missile is fired.
- B.O.X. has retreated through the ceiling.
7. Return to Adam and receive the Sector 6 order
After B.O.X. leaves, debris has formed a climbable route on the right side of the arena. Jump onto the debris and climb through the opening in the ceiling. Clear the enemies in the upper room, then use the available left-side route to return toward the first PYR room.
Some optional expansions can be collected here with Speed Booster and Shinespark techniques, including a Missile Tank and an Energy Tank, but they are not required for the mission. Skip them if the route is causing repeated falls or if your energy is low. The story path is to return to the Save, Recharge, and Navigation Rooms.
At the PYR Navigation Room, speak with Adam. He assigns the next mission: travel to Sector 6 (NOC) and use its Data Room. Save after the conversation. Do not search PYR for a Core-X reward or Wave Beam; neither belongs to this first B.O.X. encounter.
- The debris route above the B.O.X. arena has been used.
- The PYR Navigation Room has been reached.
- Adam has assigned the Sector 6 mission.
- The game has been saved before leaving for Sector 6.
Before you move on
- Sector 3 (PYR) has been entered after the Serris mission.
- Level 2 security has been unlocked.
- The required Missile Tank on the route to the Data Room has been collected.
- Super Missile data has been downloaded.
- The Data Room explosion has altered the return route.
- The first B.O.X. encounter has been completed and the robot has retreated.
- The PYR Navigation Room has been reached again.
- Adam has assigned the Sector 6 mission.
- The game has been saved before continuing to Sector 6.
Sector 6 — Frozen Parasites: Varia Suit and the first SA-X pursuit
After defeating the Sector 3 Security Robot, travel through the Main Deck to Sector 6 (NOC). Adam orders Samus to download Varia Suit data and avoid blue X parasites. Blue X can be stunned with the beam, but contact damages Samus until the Varia Suit is recovered. Save before the long approach to the Data Room and again before the final enemy-filled route. Use Super Missiles to remove the first X-Barrier, bombs to reveal concealed tunnels and careful movement to pass the blue-X rooms. The scripted SA-X encounter occurs shortly before the final approach: hiding in the narrow tunnel lets it fire a Power Bomb and leave without beginning a chase. The Data Room is guarded by a Core-X that has absorbed the Varia data. Defeat its Barrier Core-X form with fully charged shots, then destroy the exposed Core-X with missiles and absorb it to obtain the Varia Suit. The suit protects Samus from extreme cold and makes blue X restorative instead of harmful. Return to the Sector 6 Navigation Room; Adam then directs you to Sector 5 to download the Ice Missile data.
1. Enter Sector 6 and establish a safe retry point
From the Main Deck, take the elevator to Sector 6 (NOC). Go right to the Navigation Room and speak with Adam. The objective is to reach the Sector 6 Data Room and download Varia Suit data. Adam specifically warns you to avoid blue X parasites. They can be stunned by ordinary beam shots, but touching one costs energy while Samus lacks the Varia Suit.
Proceed right through the Save Room and Recharge Room. Use both before continuing, especially the Save Room: the route ahead contains concealed passages, blue X and a scripted SA-X sequence. In the next room, clear the small flying enemies before moving right. When you reach the darkened room, descend to the floor and use Morph Ball jumps and bombs against the lower-left wall to open a narrow tunnel. Roll through it and collect the Missile Tank inside, then return to the main room.
At the barrier ahead, fire a Super Missile to destroy the X-Barrier. This is required progress, not an optional detour. Move right and jump onto the ledge above the barrier.
- Reach the Sector 6 Navigation Room and receive the Varia Suit objective.
- Save and recharge before the long approach.
- Collect the Missile Tank in the first concealed lower-left tunnel if desired.
- Destroy the first X-Barrier with a Super Missile.
2. Search the first concealed rooms without rushing
After climbing onto the ledge beyond the Super Missile barrier, use Morph Ball form against the right wall and place a bomb between the protruding rocks. Roll into the hidden room. An Energy Tank is visible on the right, but the direct route is blocked by concealed passages. Bomb high on the right wall and use the uppermost tunnel, the one just below the ceiling, to reach the tank from above. Bomb at the end of that tunnel and collect the Energy Tank. This expansion is optional but useful for the pursuit and boss.
Return to the previous room and take the upper-right door. A blue X is suspended near the ceiling. Shoot it to stun it, then move through the next door quickly. Stun the next blue X near the upper-right side before descending. Keep moving toward the bottom door, watching the earlier parasite in case it resumes tracking you. If a blue X follows, shoot it again rather than trying to jump through it.
In the next room, fire at the upper blocks before moving right; one blue X is hidden in the lower block arrangement. Use the ladder on the right, climb down far enough to shoot through the thin wall on the left, then pass through the opening. Stun the blue Xs below and to the left, move as far left as possible, descend and exit through the lower-left door.
- Use the uppermost hidden tunnel to reach the Energy Tank.
- Stun blue X before crossing each exposed passage.
- Shoot thin walls from the right-side ladder route.
- Avoid absorbing or touching blue X before obtaining the Varia Suit.
3. Reach the SA-X encounter and survive it
Near the lower-left door, stay close to the doorway and shoot the blue X above you. Run left to break through the wall with a Speed Booster dash. Samus catches a ladder on the left side; aim right and fire at approaching blue X while climbing or dropping to the lower level. A Save Room is available through the right door after clearing the small flying enemies. Use it before continuing. If your energy is low, use the nearby Recharge Room as well.
Leave the Save Room and return to the room with the ladder near the entrance. Go left through the next door and collect the Energy Tank in that room. Bomb the floor just to the left of the tank, drop through the opening and roll right in the lower passage. Bomb the right wall in the following room and roll left into the narrow tunnel. This triggers the scripted SA-X appearance.
If the SA-X does not see you, remain inside the narrow tunnel on the left. The SA-X will use a Power Bomb; stay low and away from the blast’s center. Wait until you hear it fire its Ice Beam and leave the room, then exit the tunnel and continue right. Drop through the Pit Blocks without jumping if the path is clear, then move left into the next room.
If the SA-X detects Samus, do not attempt to fight it. Run right while avoiding its Ice Beam, Super Missiles and Power Bombs. In the next room, shoot the lower-left wall, jump into the exposed tunnel and roll through it to escape. The Varia Suit is not yet available, so any Ice Beam hit can freeze Samus and end the attempt quickly.
- Save before entering the SA-X section.
- Hide in the narrow tunnel after the second Energy Tank.
- Wait for the SA-X to fire its Ice Beam and leave if it has not spotted Samus.
- Run away immediately if the chase begins.
4. Make the final approach to the Data Room
After the SA-X room, continue through the enemy corridor. Shoot the lower-left wall and use the tunnel to reach the route toward the Save Room. In the room before the Save Room, shoot the block in the middle of the floor and descend. Several blue X are hidden in blocks here. Do not destroy every block unnecessarily; expose only the route you need and keep moving.
The lower-left side contains an optional Missile Tank route. If you want it, clear the relevant blue X, bomb the corner against the left wall and roll into the annex. Defeat the Zozoros, reach the ceiling tunnel and bomb the far-left side to reveal the tank. Return to the previous room afterward. Otherwise, use the safer upper route: stand on the block beneath the ceiling opening, bomb so that the floor opens without exposing the upper-right block, and take the door onward.
Clear the small flying enemies in the next room. The Living Door ahead requires a Super Missile. Destroy it, pass through the door and enter the Data Room. A Core-X is visibly downloading the Varia Suit data. Do not touch it. Wait for it to leave, then use the right-hand door to enter the boss arena. Save beforehand if you used the optional route and returned to the nearby Save Room.
- Pass the blue-X block room without exposing unnecessary parasites.
- Collect the optional Missile Tank only if the route is safe.
- Destroy the Living Door with a Super Missile.
- Enter the Data Room and let the downloading Core-X depart.
5. Defeat Barrier Core-X and recover the Varia Suit
In the arena, the Barrier Core-X is protected by smaller Core-X units orbiting its body. Only fully charged beam shots damage the main boss during this phase. Keep moving around the room, charge while repositioning and release the shot when the boss’s body is exposed. Do not waste ordinary missiles; they do not damage the Barrier Core-X while its barrier is active.
The orbiting smaller units are hazards as well as protection. Charged shots can destroy them, reducing the number of objects that can collide with Samus and making the boss easier to read. Favor shots at the main body when you have a clear line, then keep moving so the boss cannot ram you. If the boss crosses your path, jump over it or move to the opposite side rather than trying to stand underneath it.
After enough charged shots, the barrier disappears and the enemy becomes a regular Core-X. At this point, switch to missiles. Fire repeatedly when its central eye opens, then jump or move away from its counterattack. Once the thorny membrane is destroyed, absorb the Core-X. Samus recovers the Varia Suit.
The Varia Suit protects Samus from Sector 6’s extreme cold and makes blue X safe to absorb. Blue X now restore energy instead of damaging Samus, although they eventually flee when Samus approaches. The upgrade also prevents the SA-X’s Ice Beam from freezing her in later encounters.
- Use fully charged beam shots against the Barrier Core-X.
- Destroy orbiting smaller Core-X units when they interfere with movement.
- Use missiles only after the barrier has disappeared.
- Absorb the defeated Core-X and confirm the Varia Suit is active.
6. Leave Sector 6 and receive the Ice Missile objective
Exit the boss arena through the right door. Continue right through the next room and use the Save Room there. Blue X can now be absorbed for health, so take advantage of them if you need recovery, but do not assume every hazard has become harmless. Continue upward through the ladder route and use the doors shown on the map to return toward the Navigation Room.
Several optional expansions are now reachable on the return path. A Missile Tank lies in a room near the upper ladder; jump over the Pit Block beside it rather than walking directly onto the square. After falling through the following Pit Blocks, hold left to catch the ledge below and roll into the small annex. Shoot the ceiling to reveal another Missile Tank. These items are optional and can be collected now or during a later cleanup sweep.
Continue through the upper rooms. In one passage, kill the Owtch blocking the tunnel, roll through and drop through the Pit Block to reach the upper-left exit. Climb the tall room, ignore the dead-end door on the left and take the upper-right route. At the far-right room, approach the visible Missile Tank carefully: it is a mimic. Destroy the winged enemy with a missile, then bomb the lower-right corner to open the passage to the real Missile Tank.
Return to the Sector 6 Navigation Room and speak with Adam. He reports that the Varia Suit prevents the SA-X from freezing Samus and orders her to Sector 5 (ARC). Travel back through the Main Deck, take the Sector 5 elevator and begin the Ice Missile mission.
- Use a Save Room after recovering the Varia Suit.
- Collect the nearby optional Missile Tanks or mark them for cleanup.
- Return to the Sector 6 Navigation Room.
- Receive Adam’s instruction to download Ice Missile data in Sector 5.
Before you move on
- Samus has entered Sector 6 (NOC) and received the instruction to download Varia Suit data.
- The first Super Missile barrier has been destroyed and the Data Room route has been opened.
- The scripted SA-X encounter has been passed without requiring a fight.
- Barrier Core-X has been defeated with charged shots, its exposed Core-X has been destroyed with missiles and the Varia Suit has been absorbed.
- Blue X no longer damage Samus and extreme cold no longer harms her.
- Samus has returned to the Sector 6 Navigation Room and received the Sector 5 Ice Missile objective.
Sector 5 — Cold Arsenal: Ice Missiles and frozen-enemy platforming
After recovering the Varia Suit in Sector 6, travel to Sector 5 (ARC) to unlock Level 3 security and download the Ice Missile data. The route begins through a hidden passage in the entrance shaft, crosses two large frozen rooms, and uses a Speed Booster run to reach the Security Room. After activating the yellow hatches, return through the upper route to the Data Room. The Ice Missiles let Samus freeze enemies and use them as temporary platforms, which is required for the return path. Several optional Missile and Energy Tanks are available, including a fake Energy Tank and a fake Missile Tank. The first Sector 5 visit does not contain a direct SA-X chase; the ominous background silhouette is a story warning, while the major SA-X encounter in this sector occurs later during the Power Bomb mission. Return to the Navigation Room after collecting or skipping the optional items. Adam then assigns the timed Sector 3 boiler emergency, with six minutes to reach the Control Room.
1. Enter Sector 5 and reach the Level 3 security route
Travel from the Main Deck to Sector 5 (ARC), enter the Navigation Room, and accept Adam’s mission to unlock Level 3 security hatches and download the Ice Missile data. Save and recharge before leaving. You already possess the Varia Suit from Sector 6, so the cold rooms will not damage Samus.
Move right through the early rooms to the vertical entrance shaft. Do not simply drop to the bottom. Climb the monkey bars on the left near the top and fire at the wall to reveal a concealed opening. Jump across, roll through the passage, and enter the next room. Continue into the large freezer, then use its accessible lower-right exit to reach the narrower freezer room.
- Confirm that the Varia Suit is active before entering the cold area.
- Save and recharge near the entrance.
- Use the hidden passage at the top-left side of the entrance shaft.
- Reach the narrow freezer room through the large freezer.
2. Use the Speed Booster to reach the Security Room
In the narrow freezer, descend until the map shows a Save Room to the left. The door is not usable yet, so continue toward it until you reach the locked barrier, then turn around and run back across the room. Your Speed Booster will charge and break through the floor.
Drop through the opened floor and continue toward the lower-right exit. In the following room, keep moving until you reach the lower section, then bomb the floor instead of entering the first door in front of you. Follow the lower passage left to a Save Room and save before proceeding.
Leave the Save Room and continue left through the corridor to the Security Room. Activate the terminal. This releases Security Level 3 and opens the yellow hatches throughout the station. The Security Room is the mandatory progression point; the nearby expansions can wait.
- Charge the Speed Booster by running away from the blocked Save Room.
- Break through the floor in the narrow freezer.
- Bomb the lower floor after the drop.
- Save before entering the Security Room.
- Activate the Level 3 security terminal.
3. Return through the upper route to the Ice Missile Data Room
Leave the Security Room through the left side and climb the long vertical shaft. Shoot the ceiling at the top to open the exit, then move right to the Save Room and save again. From there, return to the familiar freezer route and use the newly active yellow hatch on the upper-right side of the large frozen area.
Continue through the yellow hatch and the adjacent rooms until you reach the Data Room. A second security barrier blocks the final approach, but the Level 3 terminal has already released it. Enter the Data Room and download the Ice Missile data. Ice Missiles freeze enemies on contact, allowing Samus to stand on some frozen enemies briefly or use them as platforms.
- Climb the shaft after leaving the Security Room.
- Open the upper-right yellow hatch in the freezer route.
- Save before the final approach if needed.
- Download the Ice Missile data in the Data Room.
4. Practice frozen-enemy platforming after the download
After the download, leave through the right side and bomb the floor in the next cold room. You will fall down a tall shaft containing flying Rippers. Do not drop all the way to the bottom if you want the optional Energy Tank. While falling, stay near the right wall and grab the monkey bars. Climb to the upper section, freeze the Ripper with an Ice Missile, and use it as a temporary platform to reach the door on the left.
The next room contains a fake Energy Tank that is actually an enemy. Shoot it, then bomb the left wall to reveal the real Energy Tank. This pickup is optional. If you are low on health or missiles, skip it and continue downward; the mandatory route does not require it.
- Use an Ice Missile on the upper Ripper.
- Jump from the frozen Ripper to the left door.
- Destroy the fake Energy Tank.
- Bomb the left wall for the optional real Energy Tank.
5. Use infected enemies to open the Speed Booster return path
Return to the tall shaft and descend. In the hidden side rooms, some enemies must be allowed to reform or mutate before they become useful. When an enemy releases an X, avoid absorbing it if the next mutation is needed. Let the X infect the nearby host, then freeze the resulting tall Kago or flying enemy and use it as a platform to reach higher ledges.
In the room with the Kago beneath a gap, shoot the Zeela and let the released X infect the Kago. Once the Kago becomes tall, freeze it and stand on it. Run left to charge the Speed Booster and break through the wall in the next room. Use the openings above the broken wall to return to the large freezer.
This is the main frozen-enemy lesson for the chapter: the Ice Missiles are not only combat weapons. Preserve the correct X parasite when a room clearly requires a mutation, and freeze the resulting enemy only after it reaches the position needed for the jump.
- Do not absorb every released X immediately.
- Allow the X to infect the required host enemy.
- Freeze mutated enemies before using them as platforms.
- Charge the Speed Booster from the raised platform and break the wall.
6. Collect optional expansions and avoid mistaking the background shadow for a chase
Back in the large freezer, use the jumping enemies near the upper-left side as temporary platforms. Freeze one at the top of its jump, climb onto it, and repeat with the next enemy to reach the upper-left door. The Missile Tank inside is optional.
Return to the large freezer and take the lower-left yellow-door route. Defeat the enemy near the upper part of the room, then use a Spring Ball jump and bomb the upper-right ceiling to reveal another optional Missile Tank. Do not bomb the floor automatically in this room; the useful hidden passage is above.
A dark silhouette moving in the background may appear during this section. It is an atmospheric story event, not the start of a direct SA-X chase. The major Sector 5 SA-X pursuit occurs later, during the Power Bomb mission. If an actual SA-X encounter begins in a later visit, freeze it briefly with an Ice Missile and use the opening to escape rather than trying to fight it.
- Freeze jumping enemies to reach the upper-left Missile Tank.
- Use a Spring Ball jump to find the ceiling-hidden Missile Tank.
- Do not treat the background silhouette as a combat encounter.
- Save before leaving if your route has been difficult.
7. Return to the Navigation Room and respond to the Sector 3 emergency
Leave the expansion rooms and head back toward the Sector 5 Navigation Room. The return path is opened by the Ice Missile platforming and the Speed Booster wall you broke earlier. Use frozen enemies to cross raised sections, and destroy or bypass enemies instead of spending missiles on every target. The optional tanks are not required for the mission.
When you reach the Navigation Room, Adam reports an emergency in Sector 3 (PYR). The Main Boiler cooling unit is malfunctioning, and the station has approximately six minutes before the boiler’s auto-destruct sequence triggers. The next objective is no longer in Sector 5: leave through the elevator route, travel to Sector 3, and reach the Control Room beside the Main Boiler.
Save at the Navigation Room before beginning the timed assignment. The Sector 3 route is the completion point for this chapter; do not remain in Sector 5 trying to finish later optional items.
- Return to the Sector 5 Navigation Room.
- Save after the Ice Missile mission is complete.
- Confirm Adam’s Sector 3 emergency briefing.
- Begin the six-minute route to the Main Boiler Control Room.
Before you move on
- Level 3 security has been activated in the Sector 5 Security Room.
- The Ice Missile icon appears in Samus’s weapon upgrades.
- Samus has used frozen enemies to complete the post-download return route.
- The optional Energy and Missile Tanks have either been collected or deliberately skipped.
- Samus has returned to the Sector 5 Navigation Room and saved.
- Adam has assigned the Sector 3 Main Boiler emergency and the six-minute Control Room objective.
References for this chapter
Sector 3 Meltdown and Habitation Deck rescue
After the Ice Missile mission, Adam reports that Sector 3’s cooling system is failing. The Navigation Room starts a six-minute emergency timer. Take the Main Deck elevator to Sector 3, follow the direct route to the Main Boiler Control Room, defeat the Wide Core-X and shut down the malfunctioning cooling unit. Return to Sector 3’s Navigation Room, save and recharge, then go back through the Main Deck to the Habitation Deck. Save before the Fune and Namihe climb, free the Etecoons and Dachoras through the hidden route, and report back to Adam. The next required objective is the Sector 5 Data Room, where Samus downloads Power Bomb data. The Main Deck and Habitation Missile Tanks are optional; Power Bomb expansions are not part of the rescue mission and should be postponed until Samus has the Power Bomb ability.
1. Start the Sector 3 emergency and leave immediately
Before using the Navigation Room console, recharge and save in the nearby rooms. Adam will report that Sector 3’s cooling system has been sabotaged and that the station is in danger. After the briefing ends, a six-minute timer begins. Do not detour for items during this timed section. The route is generous enough for a normal playthrough, but stopping to explore can cost the attempt.
Take the elevator up to the Main Deck, cross to the Sector 3 elevator and descend into PYR. Move right through the first three rooms. In the first large room, drop to the bottom-right corner and enter the next room. Jump to the ledge with the enemy, defeat it, and let the disintegrating floor carry you downward. Hit the switch, then move left and run right through the next room to break the Speed Booster blocks in the floor.
Drop through the opened floor and continue down the tall shaft. At the bottom, take the door on the left. Cross the lava gaps by using the walls and platforms, shooting enemies before they can knock Samus into the lava. Continue right through the following rooms, freezing or defeating the wall enemies as necessary. In the vertical shaft, freeze the Fune enemies and use them as temporary platforms rather than trying to jump through the entire shaft without support.
- The six-minute Sector 3 timer has started.
- You have reached the lower PYR route without taking an optional detour.
- The Speed Booster blocks and lava-crossing rooms have been cleared.
2. Reach the Main Boiler Control Room
From the vertical shaft, continue through the upper rooms and follow the platforms toward the upper-left route. Freeze the wall enemies when they block a jump, then use them as stepping stones. In the next room, cross the ledges, defeat the wall enemy on the upper ledge and continue right, then up and left. Watch for thin floor sections; jump across them instead of dropping through.
Proceed through the room with the central platform and enter the next large room. Climb its ledges toward the upper-left side, defeating the hopping enemies with Missiles if they block your path. The eye-like enemy guarding the next door can be destroyed with standard shots or Missiles. Enter the Main Boiler Control Room and move down and left to the control panel.
A scientist appears to be operating the controls. Shoot him until the disguise breaks and the Wide Core-X appears. The Core-X opens its eye before attacking. Fire Missiles into the eye during that opening, then jump over or away from its movement. Four successful Missile hits are enough. Avoid standing directly beneath it when it moves across the room, because contact damage can leave you too weak for the return trip.
- The Main Boiler Control Room has been reached.
- The disguised scientist has transformed into the Wide Core-X.
- The Wide Core-X has been defeated.
3. Shut down the cooling failure and return to the Navigation Room
Absorb the Core-X to recover the Wide Beam. Then use the control panel to stabilize the cooling system. The emergency objective is complete only after the cooling unit has been activated; defeating the Core-X by itself is not the end of the mission.
Retrace the route through the boiler area. In the tall room with two green doors, take the right-hand door for an optional Missile Tank. Defeat the rotating spiky enemies around the central structure, climb to the top and bomb the structure to reveal the tank. This expansion is optional and can be skipped if your health is low or you are trying to reach the Navigation Room quickly.
Return through the sector to the Recharge Room, Save Room and Navigation Room. Recharge and save before speaking to Adam. The next briefing directs Samus to the Main Deck and then to the Habitation Deck to investigate life signs. This is the correct recovery point if the Habitation platforming section causes a death.
- The cooling system has been stabilized.
- The Wide Beam has been recovered.
- You have returned to the Sector 3 Navigation Room and saved.
4. Cross the Main Deck toward Habitation
Take the elevator up from Sector 3 to the Main Deck. If you want the optional Main Deck Missile Tank, go up the Main Elevator to the area where the SA-X previously damaged a wall. Enter the room on the right, reach its far-right side, then run left to start a Speed Boost. Samus will break through Boost Blocks and reach the Missile Tank. Skip it if you are prioritizing the rescue; it is not needed for progression.
Afterward, run right while firing to break through the damaged wall ahead. Continue through the tall room and follow the map to the Navigation Room area. You do not need to activate the Navigation Room console again. Climb to the top of the following tall room, enter the green door on the left and take the elevator to the Habitation Deck.
Do not search Medical or Research rooms during this mission. Their locked or inaccessible branches are not missing objectives. The required destination is the Habitation Deck elevator route.
- You have returned to the Main Deck after the meltdown.
- The optional Main Deck Missile Tank has been collected or skipped.
- You have reached the Habitation Deck elevator.
5. Save and climb using frozen Fune and Namihe
On the Habitation Deck, enter the Save Room to the right of the elevator and save. Leave the Save Room and take the door on the left. In the tall shaft, free-floating X will form into a Fune and a Namihe. Lure each enemy out of its wall opening, then hit it with an Ice Missile to freeze it. Jump onto the frozen enemy and use it as a platform to reach the next ledge.
The Fune is used for the first rise and the Namihe for the next section. Do not rush the jump while the enemy is still moving. If it drifts too far from the ledge, wait for another X to form or reposition yourself before freezing it. Contact with these enemies can cause enough damage to make the next room unsafe.
At the top, enter the habitat room. The Etecoons and Dachoras are visible behind the glass. The control panel is reached from below, so do not leave the room looking for another upper door.
- The Habitation Save Room has been used.
- The Fune and Namihe climb has been completed.
- You have entered the habitat room containing the trapped creatures.
6. Open the lower route and collect the optional Habitation Missile Tank
Go left inside the habitat room and bomb the large floor block near the window. Drop through the Pit Blocks beneath it. On the lower level, shoot the left wall to open the passage. Continue left until you reach the section where the Speed Booster route is prepared.
Bomb the large floor block farther left to expose Boost Blocks. Open the shutter, then return to the right-side door. From that doorway, run left at full speed. Samus will break through the Boost Blocks and fall into the lower section. Open the shutter on the right and take the Habitation Missile Tank if desired.
The Habitation Missile Tank is optional. If the Speed Boost fails, return to the doorway and repeat the run. Do not spend time searching for Power Bomb blocks: Samus does not yet have Power Bombs, and no Power Bomb expansion is required for this rescue. The Main Deck Power Bomb Tank is a later cleanup item after the Sector 5 Power Bomb-data download.
- The Pit Block route beneath the habitat has been opened.
- The Habitation Missile Tank has been collected or intentionally skipped.
- You have returned to the lower-left side of the habitat room.
7. Reach the control panel and free the survivors
From the lower-left side of the habitat room, jump against the far-left wall to reveal a hidden passage. Enter it and climb the dark vertical room. Freeze the Fune enemies as they emerge and use them as platforms. Continue upward through the available ledges and ladders until you reach the exit at the top-right.
The exit returns Samus to the upper habitat room. Walk right to the control panel and activate it. The enclosure opens, and the Etecoons and Dachoras escape. This completes the Habitation Deck objective; there is no boss fight or equipment download here.
After the creatures leave, follow the right-hand exit and retrace the elevator route to the Main Deck. Use the Save and Recharge Rooms before the next sector mission. The rescue is not complete until Adam receives the report in the Navigation Room.
- The hidden left-wall passage has been found.
- The upper control panel has been activated.
- The Etecoons and Dachoras have escaped.
8. Report back and begin the Power Bomb mission
Ride the Habitation elevator down and follow the Main Deck route back to the Navigation Room. Adam will acknowledge the survivors and assign the next objective: return to Sector 5 and download Power Bomb data from its Data Room.
Save before leaving the Main Deck. The Sector 5 mission includes a scripted SA-X encounter and several Power Bomb-dependent routes, so do not confuse the optional Missile Tanks from this chapter with required progress. The story route now continues through Sector 5, not Medical or Research.
For a 100 percent run, record which of the two Missile Tanks you collected and postpone every Power Bomb expansion until Power Bomb data is installed. Some later Main Deck and sector expansions are tied to story changes, while the tanks in the emergency and Habitation routes are simply optional pickups.
- You have returned to the Main Deck Navigation Room.
- Adam has assigned the Sector 5 Power Bomb-data mission.
- You have saved before proceeding to Sector 5.
Before you move on
- The Sector 3 cooling system has been stabilized.
- The Wide Core-X has been defeated and the Wide Beam has been recovered.
- The Etecoons and Dachoras have escaped from the Habitation enclosure.
- Adam has assigned the Sector 5 Power Bomb-data mission.
- The optional Main Deck and Habitation Missile Tanks have been collected or deliberately skipped.
- No Power Bomb expansion has been attempted before the Power Bomb data download.
References for this chapter
Power Bombs, Main Deck power failure and Sector 2 vegetation
This chapter covers three linked missions in the original Game Boy Advance release. First, return to Sector 5 (ARC), unlock the Data Room and download Power Bomb data. The new weapon opens the hidden route back to the Main Deck, where the Main Elevator fails and forces Samus through the frozen Ridley-containment detour. After returning to the ship, use the concealed Central Reactor Core route to defeat Yakuza, absorb its Core-X and recover Space Jump. Activate the Auxiliary Power Station, then save and recharge before entering Sector 2 (TRO). An unavoidable SA-X pursuit leads to the overgrown section of Sector 2. Reach Nettori, defeat it and its Core-X, and absorb Plasma Beam. Auxiliary power restores basic stations first; defeating Nettori restores the main reactor and reactivates the station’s normal doors and elevators. This chapter ends after the Sector 2 report, before the later Nightmare mission.
1. Download the Power Bomb data in Sector 5
After the Habitation Deck mission, report to the Navigation Room and accept Adam’s order to download Power Bomb data in Sector 5 (ARC). Leave the Main Deck through the Main Elevator and take the Sector 5 elevator. At the Sector 5 Navigation Room, check in, then move right through the Save Room and Recharge Room to the large shaft. Drop down and follow the route toward the Data Room. The Data Room is reached through the lower-right portion of the sector, beyond the large icy rooms and a Level 3 security barrier.
Use the map to distinguish the required Data Room route from optional expansion rooms. You do not need to collect every Power Bomb Tank before continuing. In the Data Room, use the terminal to download the Power Bomb data. Samus now has Power Bombs, which are required for the hidden route out of Sector 5 and for several later obstructions. Enter Morph Ball form, hold R and press B to use a Power Bomb under the original GBA control layout. Confirm the Power Bomb icon and ammunition count before leaving the room.
- Reach the Sector 5 Data Room through the Level 3 route.
- Download Power Bomb data.
- Confirm that Power Bomb ammunition is available before returning to the Navigation Room.
2. Escape Sector 5 and survive the Main Elevator failure
From the Data Room, return toward the Sector 5 Navigation Room and report in. Adam will order you to return to the ship. Take the Main Elevator toward the Main Deck. During the ascent, the elevator loses power and stops. Follow the alternate passage until you reach the frozen containment room holding Ridley’s remains. Approach the remains to trigger the X-related scene, then drop through the opening that appears.
In the hidden corridor below, place a Power Bomb to expose the passage on the left. Roll through it, continue to the end and use another Power Bomb where the route is blocked to open the upward passage. Return to the main side of the detour and run through the lower corridor. A Speed Booster passage allows you to break through the obstructing blocks and return to the Main Deck near the ship. The Power Bomb Tank and Missile Tank in this detour are optional; collect them only if doing so does not leave you short on ammunition for the next route. Board the ship and speak with Adam. The next order is to activate the Auxiliary Power Station.
- Use Power Bombs in the frozen Ridley detour instead of searching for a functioning elevator.
- Reach the Main Deck and return to the ship.
- Save at the ship before accepting the next mission when the save interaction is available.
3. Reach the Central Reactor Core and defeat Yakuza
Leave the ship and follow the Main Deck corridor to the first vertical hallway. A Kihunter now occupies the route. Defeat or bypass it, then place a Power Bomb against the left side of the hallway. The blast exposes the concealed passage. Enter it and descend through the narrow hidden route. Shoot suspicious scaffolding and floors when the path appears to stop; the concealed Main Deck route uses breakable sections rather than a normal elevator connection.
This route leads to the Central Reactor Core. Because the station is still without main power, most doors and transport systems are unavailable. Take the upper-right exit from the large reactor chamber. The next scaffolding rooms contain X-infected Space Pirates. Their beam attacks cause heavy damage, so use missiles or charged shots while keeping enough distance to avoid contact. An Energy Tank and a Missile expansion are available in this approach, but both are optional. Continue downward, defeat the Gadora guarding the boss door and enter the Yakuza arena. Save or recharge beforehand whenever the route permits; the fight is immediately beyond this security guardian.
Yakuza has two practical phases. At the start, avoid standing directly beneath the falling fireballs. The spider-like body moves around the room and attempts to catch Samus with its claws. Staying in Morph Ball form near a corner makes many grabs pass overhead, but move away when the boss’s path clearly intersects your position. When Yakuza opens its mouth to release fireballs, stand underneath it briefly and fire missiles upward, then move before the fireballs descend. If you are grabbed, rapidly alternate left and right to escape sooner rather than waiting for the full slam.
After the body is damaged enough, its legs are destroyed and the exposed body bounces around the arena. The mouth remains the target. Keep moving across the floor, aim upward and fire missiles whenever the opening is aligned with Samus. Do not stop to trade contact damage for extra shots. Once Yakuza is destroyed, defeat the Core-X with beam fire and absorb it. This recovers Space Jump. Use Space Jump to reach the vent above the arena and roll left to the Auxiliary Power Station terminal. Activate the terminal, then enter the Navigation Room and report to Adam.
- Use the hidden Power Bomb passage from the first Main Deck vertical hallway.
- Clear the Space Pirate ambushes without exhausting missiles.
- Defeat the Gadora before Yakuza.
- Absorb Yakuza’s Core-X and confirm that Space Jump is available.
- Activate the Auxiliary Power Station terminal.
4. Understand the first power restoration and prepare for Sector 2
Auxiliary power restores basic facilities, including Save Rooms, Recharge Rooms and Navigation Rooms. It does not yet restore every door, hatch or elevator. Do not waste time searching for a second Main Deck power switch at this stage. Instead, save and recharge in the Central Reactor area, then follow Adam’s new order to find the source of the vegetation and destroy it.
Return to the Central Reactor Core and move toward its upper-left side. Vegetation blocks the passage into Sector 2. Use beam fire to clear the growth, then use Space Jump to reach the narrow opening. Morph through the passage and bomb the obstructing roots as needed. This is the required route into Sector 2; the normal sector elevator network is still not the intended way forward.
- Confirm that Save, Recharge and Navigation Rooms are operational.
- Do not expect normal elevators and hatches to be fully restored yet.
- Save and refill energy before entering the Sector 2 pursuit route.
- Use Space Jump and Power Bombs to open the vegetation-blocked passage.
5. Survive the required SA-X pursuit in Sector 2
The Sector 2 entry triggers an unavoidable SA-X sequence. Drop into the first pursuit area and hit the SA-X with an Ice Missile to freeze it briefly. Continue left immediately and use a Power Bomb where the route requires the floor and obstructions to be cleared. Keep moving between Ice Missile shots; the freeze lasts only briefly, so one shot is not enough to create a permanent opening.
When you reach the rooms with multiple barrier gates, freeze the SA-X and open the gates one at a time. The goal is not to defeat it. Keep the SA-X behind Samus while opening the locks, then reach the dead-end alcove and roll into the hiding position. The SA-X enters, searches briefly and leaves, allowing the pursuit to end. If the SA-X catches up, retreat toward the previous gate rather than attempting to exchange damage; Samus cannot win this encounter with the weapons currently available.
After the SA-X leaves, return to the previous room and bomb through the floor. A missile is required to destroy one obstructing block near the vegetation. Continue through the bug-filled rooms and use a Power Bomb on the upper ledge to reveal the downward route. The nearby inactive Save Room cannot yet be used, so continue through the metallic section until you reach the functional Sector 2 Save Room. Save there before approaching Nettori. A Power Bomb expansion is available during this route, but it is optional and should not take priority over reaching the save point.
- Freeze the SA-X repeatedly with Ice Missiles.
- Use Power Bombs to clear the required pursuit obstructions.
- Hide in the alcove after opening the barrier gates.
- Reach and use the functional Sector 2 Save Room.
- Treat the nearby Power Bomb Tank as optional.
6. Defeat Nettori and restore the main reactor
From the Sector 2 Save Room, go right through the long room. Shoot the unusual ceiling blocks and jump into the upper passage. Continue through the vegetation, defeat the Gadora with missiles and enter the boss room. Nettori is stationary, but the arena is dangerous: two platforms are surrounded by water and plants that grab Samus if she falls.
During the first phase, stand on a platform and fire missiles into Nettori while watching the falling spores. Spores can knock Samus from a platform, so destroy them when they threaten your footing or keep moving between the two platforms. If a plant catches Samus, press Jump once and hold it rather than repeatedly tapping the button; the sustained jump is the reliable escape method. Continue attacking until the boss changes phase.
In the second phase, Nettori fires horizontal Plasma Beams at either torso or leg height. Crouch beneath a torso-height beam and jump over a leg-height beam while continuing to attack between shots. Missiles are effective, but a missile can be deflected if it meets an incoming beam, so do not fire blindly into an active beam. Charged shots are useful when you need to time an attack around the beam pattern. After Nettori is destroyed, defeat the Plasma Core-X with beam fire and absorb it to recover Plasma Beam. The new beam is a required progression upgrade and also makes later enemies and vegetation easier to clear.
Leave the arena and follow the now-open route back toward the Sector 2 Navigation Room. Defeating Nettori restores the main reactor. The previously disabled station doors, hatches and elevators become functional again, so the full transport network is restored. Save and report to Adam. The next mission sends Samus to Sector 5 for Nightmare; the later Operations Deck and final station-power progression are not completed in this chapter.
- Use the Sector 2 Save Room immediately before the boss approach.
- Hold Jump to escape the floor plants.
- Crouch under torso-height Plasma Beams and jump over leg-height beams.
- Defeat Nettori and absorb the Plasma Core-X.
- Confirm that Plasma Beam is in Samus’s inventory.
- Verify that normal doors, hatches and elevators function again.
Before you move on
- Power Bomb data has been downloaded in the Sector 5 Data Room.
- Samus has returned to the ship after the Main Elevator failure and accepted the Auxiliary Power Station mission.
- Yakuza has been defeated and its Core-X absorbed.
- Space Jump is available and the Auxiliary Power Station terminal has been activated.
- Save, Recharge and Navigation Rooms are functioning again, but the full door and elevator network was not assumed to be restored prematurely.
- The Sector 2 SA-X pursuit has been cleared and the functional Sector 2 Save Room has been reached.
- Nettori and its Plasma Core-X have been defeated.
- Plasma Beam has been absorbed.
- The main reactor is online and normal station doors, hatches and elevators function again.
- Adam has issued the next mission from the Sector 2 Navigation Room; the later Operations Deck progression remains for a subsequent chapter.
References for this chapter
- Metroid Fusion — Game Manual
- Nintendo UK Game Boy Advance Manuals – Metroid Fusion
- Metroid Fusion Walkthrough – Main Deck: Power Failure
- Metroid Fusion Walkthrough – Sector 2: Overgrown With Vegetation
- Metroid Fusion – Guide and Walkthrough by BakonBitz
- Metroid Fusion – Guide and Walkthrough by TNEwebmaster
Sector 5 — Nightmare mission and Gravity Suit
After restoring the reactor, travel to Sector 5 and report to its Navigation Room. Follow the damaged cold-storage route to Nightmare’s chamber, using the nearby Recharge Room and Save Room before the boss. Nightmare has three practical phases: attack the round gravity device with charged shots or missiles, continue using charged shots when its gravity field makes missiles fall short, then strike its exposed face while avoiding its faster charges. Destroy the Core-X with missiles to recover the Gravity Suit. The suit removes water’s movement penalty, permits normal Space Jump and Speed Booster movement underwater, and protects Samus from lava. Sector 5’s direct return is blocked, so use the newly opened underwater route into Sector 4. Save there, reach the Level 4 Security Room, download Diffusion Missile data, then return to a Navigation Room. Adam assigns the next mission: return to Sector 6 and destroy the rogue Security Robot.
1. Reach Sector 5 and accept the Nightmare mission
From the Main Deck, take the Sector 5 elevator and enter the Sector 5 Navigation Room. Adam reports that Nightmare, a bio-medical weapon capable of manipulating gravity, has caused the damage in the sector. Accept the mission to find and destroy it.
Go right through the Save Room and Recharge Room, then continue into the tall shaft. Drop to the bottom, use the right-hand door and continue right through the next small room. You will enter a large ruined chamber. The room is open enough for Space Jump movement, but its enemies and damaged platforms can drain energy, so do not rush past the nearby recovery rooms if your reserves are low.
- Enter the Sector 5 Navigation Room.
- Accept Adam’s Nightmare mission.
- Use the nearby Save Room and Recharge Room before the long approach.
- Reach the large damaged chamber beyond the first shaft.
2. Cross the damaged cold-storage rooms
In the large chamber, Space Jump to the upper-left door and open it without entering. Move to the far right, destroy the Chute Leeches on the floor, then run left. Before reaching the gap, crouch to store a Speed Booster charge. Jump and press left to Shinespark through the opened door and the Boost Blocks beyond it. This detour is optional and leads to a Power Bomb expansion; skip it if you are following the mandatory route.
Return to the large chamber and drop to its lower-right exit. In the damaged freezer area, take the upper-right door, shoot the ceiling and climb through the opened passages. Continue through the rooms with Space Pirates, Gerutas and water until you reach the corridor containing the Save Room and Recharge Room. Several hidden Power Bomb expansions and an Energy Tank are available on this approach, but none is required to reach Nightmare. The Energy Tank before the boss is deceptive: reveal the safer tunnel above it with a bomb or Power Bomb before collecting it, rather than dropping directly through the Pit Blocks.
- Use the upper-left Speed Booster route only if taking the optional Power Bomb expansion.
- Follow the upper passages through the ruined freezer.
- Use the Save Room and Recharge Room before the boss approach.
- Reveal the safe tunnel to the pre-boss Energy Tank if collecting it.
3. Enter Nightmare’s chamber
From the Save Room, return to the large room and use the middle-right door. Climb to the upper area and destroy the Door Guardian with missiles. In the next small room, do not roll directly toward the visible Energy Tank; that route drops through Pit Blocks into the boss arena. Instead, place a Power Bomb or bomb the hanging wall to reveal a higher passage, then roll through it to collect the Energy Tank safely if desired.
After preparing, roll left and let Samus fall into Nightmare’s room. The boss fight begins immediately. If you need another attempt, the Save Room outside the arena is the practical retry point.
- Defeat the Door Guardian with missiles.
- Use the hidden upper passage for the optional Energy Tank.
- Save before entering the boss room.
- Enter Nightmare’s arena from the left side.
4. Destroy Nightmare’s gravity device
Nightmare rises with a round device between its arms. That device is the first target. Its arm-mounted weapons fire sets of energy beams across the room. Jump over the beams, then use the height of the jump to make Nightmare float upward into a position where the device can be hit. Charged beam shots are reliable because they remain useful when the boss changes the room’s gravity; missiles also work while their trajectory remains practical.
After taking enough damage, Nightmare activates the gravity device. Samus becomes slow, as if underwater, and ordinary missiles fall to the floor instead of traveling upward normally. Switch to charged beam shots and fire whenever the device is close enough or Nightmare floats high enough for a direct hit. Stay mobile, jump early over low beams and duck beams that pass overhead. Do not stand directly beneath Nightmare longer than necessary; move around its arm while waiting for the next opening.
Continue striking the device until it breaks. The gravity effect ends and Nightmare’s faceplate falls away, exposing the organic face beneath.
- Target the round device between Nightmare’s arms.
- Jump over each beam volley before attacking.
- Use charged shots during the gravity-field phase.
- Avoid relying on missiles when the altered gravity makes them fall short.
- Break the gravity device and begin the exposed-face phase.
5. Attack the exposed face and defeat the Core-X
Once the face is exposed, missiles are the most direct damage option, but they must strike the face cleanly. Missiles that hit the wrong angle can bounce away. Climb onto the ladder on the left and fire across the room while Nightmare approaches slowly. When it begins flying around the room or charging toward Samus, use Space Jump to clear it and create distance instead of trying to stand underneath it.
Nightmare may settle on the right and then resume a slower approach. Use those pauses to return to the ladder and fire repeated missiles into the face. Keep enough room to escape; the boss can cross the arena quickly after its movement pattern changes. Continue until Nightmare collapses and becomes a Core-X.
The Core-X releases free-floating X and opens its shell for attack. Shoot the exposed core with missiles, then collect the Core-X when it is defeated. Samus receives the Gravity Suit. This is mandatory progression, not an optional item.
- Use the left ladder for controlled face-level missile shots.
- Space Jump away when Nightmare begins flying or charging.
- Aim missiles directly into the exposed face.
- Destroy and absorb the Core-X.
- Recover the Gravity Suit.
6. Leave Sector 5 with the Gravity Suit
The Gravity Suit removes the underwater movement penalty. Samus can now Space Jump and Speed Boost in water, and lava no longer slows or damages her. Before leaving the boss area, open the hatch and run from the far right toward the left. Continue through the Boost Blocks and take the left route back toward the submerged rooms.
Optional items can be collected now. In the vertical water shaft, use the ledge and missile block on the opposite wall to reach a hidden room containing an Energy Tank. In the following large room, run through the Boost Blocks, stop between the broken pillars and Shinespark upward for a Power Bomb expansion. These rewards are useful for a 100% run but are not required for the next mission.
Continue running right through the underwater corridor into Sector 4. At the end of the next ramp, jump while Speed Boosting to break through the elevated Boost Blocks. If the jump fails, return to the previous room and rebuild the charge; no special boss ability is needed beyond the existing Speed Booster.
- Use the Gravity Suit to move normally through water.
- Collect the post-boss Energy Tank only if desired.
- Collect the post-boss Power Bomb expansion only if desired.
- Speed Boost from Sector 5 into Sector 4.
- Break through the elevated Boost Blocks at the end of the route.
7. Download Diffusion Missiles and receive the next assignment
After entering Sector 4, use the nearby Save Room before descending into the underwater route. Follow the open passages to the Level 4 Security Room. The route requires bombs and missiles to expose tunnels through the underwater maze; watch the Skultera and aquatic Space Pirates, because X from destroyed fish can merge with Pirates and create faster aquatic enemies.
At the Security Room, activate the console to unlock Level 4 red hatches. Continue through the newly accessible route to the Sector 4 Data Room and download Diffusion Missile data. Hold R to charge a missile, then fire it to freeze nearby enemies around the impact point. This upgrade is required for the next progression sequence.
Return to a Navigation Room after obtaining the data. Adam orders Samus to return to Sector 6 and destroy the rogue Security Robot previously encountered in Sector 3. The chapter is complete when the Diffusion Missile data has been downloaded and Adam has issued that Sector 6 mission.
- Save in Sector 4 before the underwater route.
- Activate the Level 4 Security Room console.
- Reach the Sector 4 Data Room.
- Download Diffusion Missile data.
- Return to a Navigation Room.
- Receive Adam’s Sector 6 rogue Security Robot assignment.
Before you move on
- Nightmare’s gravity device has been destroyed.
- Nightmare’s exposed face has been defeated.
- The Core-X has been destroyed and absorbed.
- Samus has recovered the Gravity Suit.
- Samus has reached Sector 4 through the underwater route.
- Level 4 hatches have been unlocked.
- Diffusion Missile data has been downloaded.
- Adam has assigned the Sector 6 rogue Security Robot mission.
Sector 4 Diffusion and Sector 6 revelations
After the Sector 5 Nightmare mission, return to Sector 4 and follow the newly accessible Level 4 route to the Data Room. Download Diffusion Missiles, use their charged shockwave to freeze the inflated enemies blocking the return path, and report back to the Navigation Room. Adam then sends Samus to Sector 6, where the infected Security Robot B.O.X. is waiting. The rematch takes place over electrified water: use a Power Bomb to reveal ceiling rungs, hang above the arena, destroy B.O.X.’s missile volleys and fire downward into its head after each hop. Defeat the robot, destroy the Wave Core-X and absorb it to recover the Wave Beam. Use the Wave Beam to activate the shutter from the wrong side, collect the nearby optional Missile Tank if desired, and roll through the newly opened passage into the Restricted Zone. Save before entering the restricted route; the next sequence begins the late-game laboratory emergency.
1. Reach Sector 4’s Level 4 Data Room
From the Main Deck, take the elevator to Sector 4. Follow the newly opened route toward the far side of the sector. In the tall shaft near the end of the route, Space Jump upward while avoiding the X that become inflated puffer enemies. At the top, fire missiles into the floor and crawl through the opening.
The next room contains Owtches and barriers. Use a Power Bomb to clear the room and remove the obstruction, then pass through the red hatch into Sector 4’s Data Room. Download the Diffusion Missile upgrade. This is mandatory progression, not an optional weapon enhancement: the inflated enemies in the return route cannot be safely passed by the normal route until the charged missile’s freezing shockwave is available.
- Sector 4 has been entered after the Sector 5 mission.
- The Level 4 route to the Data Room is open.
- The Power Bomb barrier has been cleared.
- Diffusion Missiles have been downloaded.
2. Use Diffusion Missiles to open the correct return route
Leave the Data Room and return to the room with the inflated puffer enemies. Charge a Diffusion Missile, then fire it across the room. The expanding blast freezes the puffer instead of requiring you to fight it at close range. Roll through the low passage on the left and continue through the grates.
Use missiles on the X-barrier blocking the next section. If you want the optional Missile Tank, bomb beneath the frayed electrical wiring, collect the tank and shoot the nearby shutter. The tank is not required for the mission, so skip it if your energy or ammunition is low.
Backtrack to the previous room and climb the ladder to the upper door. Follow the upper passage around to the left, morph into a ball and bomb the wall or floor where the tunnel is concealed. This is the intended return obstruction: the direct lower route remains blocked by the inflatable enemies, so do not keep trying to force the lower passage after obtaining the upgrade.
In the lower chamber, use a Power Bomb if you want the optional Power Bomb Tank. Then retrace the opened route to Sector 4’s Navigation Room. Adam will comment on the unauthorized Level 4 access and immediately assign the Sector 6 B.O.X. mission.
- A charged Diffusion Missile has frozen the puffer blocking the route.
- The left-side grates and X-barrier have been crossed.
- The optional Missile Tank has been collected or skipped.
- The upper return route has been used instead of the blocked lower path.
- The Sector 4 Navigation Room briefing has been received.
3. Travel to Sector 6 and prepare for B.O.X. II
Leave Sector 4 and use the Main Deck elevator to reach Sector 6. Speak with Adam in the Navigation Room. He warns that the SA-X is tracking Samus and orders her to leave Sector 6 immediately after destroying B.O.X., so use the Save Room and Recharge Room on the way if needed, but do not detour for a full item sweep yet.
Continue right through the sector and descend the large vertical shaft. Take the middle door on the left, enter the corridor filled with frozen X and use a Power Bomb at the far-left dead end. The blast removes the obstruction and opens the route toward the restricted-looking area.
Continue through the red hatch, drop through the rooms below and follow the corridor to the left. Use the Save Room reached after the descent before proceeding. Bomb the floor outside the Save Room to reach the lower passage, then enter the red hatch at the base. Walk left until the warning voice and shutter identify the Restricted Zone entrance. The shutter cannot be opened yet, so turn around and return toward the water-filled corridor. B.O.X. crashes into the area and starts the rematch.
- Adam’s Sector 6 briefing has been heard.
- The Power Bomb obstruction has been destroyed.
- The Save Room before the boss has been used.
- The Restricted Zone shutter has been reached and found inaccessible.
- B.O.X. II has appeared.
4. Defeat B.O.X. II above the electrified water
Do not stand in the water. B.O.X.’s damaged organic components electrify the pool, turning a fall into severe damage. Immediately place a Power Bomb in the arena. When the blast clears, ceiling rungs appear above the water. Jump up and hang from them rather than fighting from the floor.
B.O.X.’s vulnerable target is the head or central brain area; its arms are not useful targets. Stay on the rungs and watch for the five small missiles it launches. Shoot the missiles with the Beam before they reach Samus, then reposition along the ceiling so B.O.X. cannot jump into her. Its jumps are higher and more dangerous than during the first encounter, so do not remain directly above it when it is moving upward.
After the missile volley, B.O.X. usually hops and briefly pauses while recovering from the landing. Move above its head during this opening and fire two Missiles straight down. Move away immediately afterward because another volley is coming. Repeat the missile-clearing and two-shot cycle rather than trying to fire continuously from an unsafe angle. Diagonal shots are possible but are less reliable and can waste ammunition.
Continue until the robot is destroyed. Keep enough Missiles for the Core-X phase; do not spend the entire reserve on speculative shots. The arena becomes safe once B.O.X. is gone, but the Core-X still has to be defeated before the Wave Beam is recovered.
- Samus is hanging from the ceiling rungs.
- The electrified water is being avoided.
- The five flying missiles are being shot down or dodged safely.
- Missiles are fired downward into B.O.X.’s head after its landing pause.
- B.O.X. II has been destroyed.
5. Defeat the Wave Core-X and recover the Wave Beam
The destroyed robot releases a Wave Core-X. Keep your distance while it moves around the room. When its eye opens, fire an Ice Missile into it, then jump immediately to avoid the Wave Beam it returns. Repeat this attack pattern until the Core-X’s outer membrane breaks.
Absorb the released X parasite to recover the Wave Beam. This ability lets Samus’ beam pass through walls and hit switches on the far side of shutters. Do not leave the room before the absorption occurs; defeating B.O.X. without taking the Core-X does not complete the mission.
- The Wave Core-X has been exposed.
- An Ice Missile is fired when its eye opens.
- The retaliatory Wave Beam is avoided by jumping.
- The Core-X has been destroyed and absorbed.
- The Wave Beam has been recovered.
6. Open the shutter and enter the Restricted Zone route
Leave the boss room through the right door. In the long corridor, shoot through the shutter and aim at the flashing switch beyond it. The Wave Beam passes through the barrier and activates the switch. The gate opens, revealing an optional Missile Tank; collect it if desired, then return to the corridor.
Go back to the shutter that was previously watched by the security camera. Fire through it with the Wave Beam to activate its switch, then roll through the narrow passage on the left. This is the required entrance into the Restricted Zone route.
Drop through the Pit Blocks and enter the Save Room below. Save before continuing left. The next rooms contain the forbidden laboratory displays and trigger the late-game story sequence, including the SA-X confrontation and the laboratory’s emergency escape. This chapter ends at the safe entry point; the subsequent laboratory escape and Sector 1 mission belong to the next chapter.
- The optional Missile Tank has been collected or skipped.
- The Wave Beam has activated the shutter switch from the opposite side.
- The security-camera shutter has been opened.
- The narrow left passage into the Restricted Zone has been entered.
- The Restricted Zone Save Room has been used.
Before you move on
- Diffusion Missiles have been downloaded in Sector 4.
- The charged Diffusion Missile route has been used to return to the Sector 4 Navigation Room.
- The Sector 6 B.O.X. rematch has been completed without relying on the electrified water.
- The Wave Core-X has been destroyed and absorbed.
- The Wave Beam is active.
- The shutter switch beside the B.O.X. arena has been opened through the barrier.
- The security-camera shutter has been opened with the Wave Beam.
- Samus has entered the Restricted Zone and saved there.
References for this chapter
- Metroid Fusion — Guide and Walkthrough, GameFAQs, Sector 4 Diffusion and Sector 6 route
- Metroid Fusion – Guide and Walkthrough by AstroBlue
- Metroid Fusion Walkthrough — Sector 6: Revelations, Omega Metroid
- Metroid Fusion/Any% — Speed Demos Archive Knowledge Base
- Metroid Fusion — Official Nintendo Player’s Guide
Restricted Zone and Sector 1 — Ridley-X and Screw Attack
After defeating the second B.O.X. in Sector 6 and recovering the Wave Beam, return to the previously blocked route and enter the Restricted Zone. Save before entering the Restricted Laboratory. When the SA-X attacks the Metroid specimens and the laboratory begins detaching, escape through the upper route before the one-minute countdown expires. After the laboratory is destroyed, use the Navigation Room briefing to open the route to Sector 1, SRX. Cross SRX’s frozen-enemy rooms, clear the golden Space Pirates blocking the lower route, and reach the boss chamber. Defeat Ridley-X with charged Wave Beam shots, destroy the Core-X that follows, and absorb it to restore the Screw Attack. Return to the Navigation Room afterward. This chapter ends before the final Operations Deck mission: do not treat the evacuation sequence as part of this route. If you intend to collect missed items, explore before using a Navigation Room after obtaining the Screw Attack, because the following briefing advances the endgame route.
1. Enter the Restricted Zone and prepare for the laboratory event
From the Sector 6 route opened by the Wave Beam, return to the room with the previously inaccessible gate and open it with a Wave Beam shot. Enter the Restricted Zone, roll left through the opening in the ceiling, and pass through the red hatch. Save in the Save Room immediately ahead before continuing toward the Restricted Laboratory.
Follow the rooms to the left until you reach the laboratory area. Continue into the upper-right dead-end room to trigger the alarm, then retreat to the room below. The scene reveals the SA-X attacking the Metroid research facility. A one-minute escape sequence begins when the laboratory starts to detach, so do not stop for optional pickups during this event.
- The Wave Beam has opened the Restricted Zone route.
- The game has been saved before entering the Restricted Laboratory.
- The SA-X and Metroid containment sequence has started.
2. Escape the Restricted Laboratory
When control returns, move back toward the upper part of the laboratory room. Jump to the upper ledge and enter the door on the right. This is the required escape route. Keep moving rather than fighting every enemy; the objective is to reach the exit before the laboratory separates from the B.S.L.
The escape ends with the Restricted Laboratory being jettisoned. After the cutscene, continue through the right-hand door into the Navigation Room. Adam explains that the Federation intends to capture the SA-X and that multiple SA-X specimens exist. Accept the new objective, then use the elevator beyond the Navigation Room to reach Sector 1, SRX.
- The upper-right exit was reached before the timer expired.
- The Restricted Laboratory was jettisoned successfully.
- The elevator to Sector 1 is available after the Navigation Room briefing.
3. Cross Sector 1 and open the route to Ridley-X
At the SRX elevator room, Space Jump to the upper-left side and use a charged Diffusion Missile against the wall to freeze the Rippers below. Enter the revealed passage for an optional Energy Tank, then drop down and continue through the upper-left door. Avoid the green liquid in the next room; it drains energy. Cross to the right and proceed through the following rooms.
Shoot the floor in the broad room to drop into the lower passage. Defeat the enclosed enemy and allow its released X to transform rather than absorbing it immediately. The resulting enemies include a golden Space Pirate whose back is vulnerable. Bait it into jumping over Samus, then turn and fire Missiles into its back. When the hatch on the right opens, take the optional Power Bomb Tank and return to the main route.
Space Jump back upward and enter the Save Room near the upper part of the next section. From there, use a Power Bomb where the map shows the blocked central route, then clear the enemies in the adjoining room. The golden Space Pirates must be defeated from behind before the left hatch opens. Continue through the frozen-enemy room, destroy the Living Door with a Missile to its eye, collect the red X if needed, and enter the boss chamber.
- The optional Energy Tank was collected or deliberately skipped.
- The right-side hatch after the golden Space Pirate encounter is open.
- The Living Door has been destroyed before entering Ridley-X’s room.
4. Defeat Ridley-X
Ridley-X is vulnerable to charged beam shots and Missiles, but charged Wave Beam shots are the efficient choice because the Wave Beam continues damaging Ridley as it passes through the body. Hold L to aim diagonally upward and fire whenever Ridley is within the shot path. Keep moving across the lower floor so the fireballs do not corner you.
If Ridley grabs Samus and begins carrying her upward, fire Missiles straight up until he releases her. Later, Ridley adds tail attacks: it can sweep across the floor or stab downward while moving back and forth. Retreat from the tail’s reach, then resume charged shots when the body is exposed. Do not stand directly beneath Ridley when the tail is active.
When Ridley-X is defeated, it changes into a Core-X. Destroy the Core-X while its eye is open, avoiding its attacks between openings. After the Core-X breaks apart, absorb it immediately to restore the Screw Attack. The Screw Attack is the required reward and is not a separate item sitting elsewhere in SRX.
- Ridley-X has been defeated with charged Wave Beam shots and/or Missiles.
- The Ridley-X Core-X has been destroyed.
- The Core-X has been absorbed and the Screw Attack restored.
5. Return from SRX and stop before the final mission
After obtaining the Screw Attack, leave the boss room through the upper route. Use Screw Attack jumps to break the marked blocks and defeat enemies blocking the return path. Follow the connected rooms back toward the SRX elevator and enter the Navigation Room after the route is clear.
The Navigation Room briefing after Ridley-X begins the next endgame stage, but the final Operations Deck mission and its evacuation timer do not start during this chapter. If you want to pursue missed Energy Tanks, Missile Tanks or Power Bomb Tanks, do so before using a Navigation Room computer after obtaining the Screw Attack. The Screw Attack opens many previously inaccessible blocks, allowing a station-wide cleanup. For a straightforward campaign, proceed to the Navigation Room and follow Adam’s next instructions; the next chapter covers the Operations Deck mission and final escape.
- The route from the Ridley-X chamber back to the SRX elevator is complete.
- The Screw Attack has been tested on Screw Attack blocks or enemies.
- You have either completed optional exploration or are ready to begin the next Navigation Room briefing.
Before you move on
- The Restricted Laboratory was evacuated before it detached from the station.
- The Navigation Room briefing opened the elevator route to Sector 1, SRX.
- Ridley-X was defeated in the SRX boss chamber.
- The Ridley-X Core-X was destroyed and absorbed.
- The Screw Attack is restored and usable for breaking Screw Attack blocks.
- Samus returned to the Navigation Room after the boss.
- The final Operations Deck evacuation has not yet been treated as part of this chapter; it begins in the following mission.
Omega Metroid fight and escape: defeating the final boss and surviving the exit
The last mission begins with the final SA-X confrontation on the Operations Deck. Save before entering, refill energy and ammunition, defeat the SA-X and its mutated form, then destroy the Ice Core-X before it escapes. Use the Operations Room controls to change the B.S.L.’s orbit toward SR388; this starts a three-minute impact countdown. Take the elevator to the Main Deck, descend toward the Docking Bays, and avoid detours. In the damaged bay, the Omega Metroid initially cannot be harmed. Let its opening slash reduce Samus to one energy unit, then wait for the SA-X to reform and attack. Absorb the exposed Core-X to regain the Ice Beam and restore Samus’s suit and energy. Attack the Omega’s exposed underside with diagonal-up Ice Beam shots, retreat whenever it raises an arm, and continue firing after a recoil. When it dies, board the arriving ship immediately. The ending and credits confirm main-campaign completion.
Reach the final save and prepare for the Operations Deck
Complete all optional exploration before entering the final approach. After the last conversation with Adam, follow the route to the Operations Deck and use the Save Room before the large confrontation area. This is the last save opportunity before the final SA-X fight, the escape timer, and the Omega Metroid battle. Save, then use the nearby Recharge Room if Samus needs energy or ammunition.
Once you leave this preparation area, the game funnels you through the ending sequence. Do not begin the encounter while planning to return for missed expansions. A failed attempt sends you back to the pre-confrontation save, so entering with full reserves makes practice much easier.
- Save immediately before the final Operations Deck confrontation.
- Recharge energy and ammunition before entering the arena.
- Finish optional item collection before starting the sequence.
Defeat the normal SA-X
Enter the large room near the Operations Room and move toward the upper section. A crash signals the SA-X’s arrival, and the room becomes a mandatory battle arena. The SA-X uses its Ice Beam and Screw Attack, so avoid standing directly in front of it and do not try to trade contact damage.
A reliable pattern is to charge the beam while the SA-X approaches, fire when it is not performing a Screw Attack, then jump over it immediately. Land behind it, turn around, and begin charging again while it finishes its movement. Repeat this close-range cycle. Your Screw Attack lets you pass through Ice Beam shots during a jump, but mistimed contact with the SA-X still causes heavy damage. If the pattern breaks, prioritize survival and create distance before charging another shot.
Missiles can freeze the SA-X temporarily, but charged beam shots are the practical damage method. Continue until it collapses and changes form.
- Fire charged shots only while the SA-X is vulnerable.
- Jump over it after each attack instead of standing in its path.
- Use Screw Attack jumps to avoid Ice Beam shots and contact damage.
- Keep enough energy for the mutated form and Ice Core-X.
Finish the mutation and destroy the Ice Core-X
The defeated SA-X becomes a larger mutant with slower movement. Stay away from its landing position and fire charged shots at its upper body or head while it is exposed. Its size makes it easier to avoid than the normal SA-X, but do not stand underneath it when it jumps.
When the mutant falls, an Ice Core-X appears. Wait for its eye to open, fire a missile, and jump immediately to avoid the returning Ice Beam. Continue the normal Core-X cycle until its outer membrane is destroyed. The exposed X will not remain available for absorption; it escapes into the station before Samus can collect it. This is expected and is not a failed objective.
After the Core-X leaves, move through the upper door into the Operations Room. Do not search the arena for recovery items or wait for the escaping X.
- Defeat the large mutated SA-X.
- Damage the Ice Core-X with missiles when its eye opens.
- Jump after each missile to avoid the Ice Beam counterattack.
- Accept that this Core-X escapes instead of being absorbed.
Change the orbit and begin the three-minute evacuation
In the Operations Room, stand at the control station and activate the orbit-change sequence. The computer announces that the B.S.L. is being directed toward SR388 and gives Samus three minutes until impact. The countdown begins here, after the SA-X encounter, not when the SA-X first appears.
Leave the room immediately, take the elevator down to the Main Deck, and move toward the Docking Bays. Follow the main route rather than checking side rooms. From the Main Deck, travel left and downward until you reach the Save Room area, then descend the shaft beside it. At the bottom, use the right-hand door and continue through the damaged corridor toward the Docking Bays.
A Recharge Room is available along the route. Use it if the SA-X battle left Samus dangerously low, but do not linger if energy is already sufficient. The timer continues while you recover, and there is no save point between the pre-SA-X save and the ending.
- Activate the orbit controls in the Operations Room.
- Confirm that the three-minute impact countdown has started.
- Take the elevator to the Main Deck immediately.
- Use the Recharge Room only when recovery is necessary.
- Follow the direct route to the Docking Bays.
Cross the damaged Docking Bay and trigger the Omega sequence
Near the Docking Bays, use a Spin Jump with the Screw Attack to break through the small platforms below the shaft. Pass through the bottom door and cross the damaged corridor. Enter the Docking Bay and approach the location where Samus’s ship should be. The ship is absent, and an opened Metroid shell occupies the berth.
An Omega Metroid bursts into the area. At this stage Samus’s attacks cannot damage it. Move close enough to allow the scripted opening slash instead of wasting ammunition or repeatedly trying to attack. The slash knocks Samus down and leaves her with one energy unit. This is required for the rescue sequence, not an indication that the attempt has gone wrong.
The Ice Core-X then returns and reforms into the SA-X. The SA-X fires its Ice Beam at the Omega Metroid, but the Omega destroys it with one attack. When the Core-X is exposed, jump up and absorb it without touching the Omega.
- Break through the lower platforms with the Screw Attack.
- Enter the Docking Bay before the countdown expires.
- Allow the opening Omega slash to occur.
- Wait for the SA-X to be destroyed.
- Absorb the exposed Core-X without contacting the Omega.
Recover the Ice Beam and defeat the Omega Metroid
Absorbing the Core-X restores the Ice Beam, repairs Samus’s damaged suit functions, and refills her energy. Only now can the Omega Metroid be harmed. Position Samus near the Omega’s feet and hold the aim control to fire diagonally upward into its exposed underside. Fire one or two Ice Beam shots, then retreat before the Omega’s slash reaches you.
The clearest warning is the arm nearest Samus rising for a strike. Turn away and move out of range immediately. The slash causes heavy damage and stuns Samus long enough to waste valuable countdown time. After the attack passes, approach again and repeat the diagonal-up shots. If the Omega steps backward or recoils, continue firing during that opening instead of retreating automatically; this is a useful damage window.
Keep the fight controlled rather than attempting to stand underneath the boss and fire continuously. Continue the approach, attack, retreat cycle until the Omega turns bright red and explodes. Do not wait for another reward or recovery item after the explosion.
- Confirm that the Ice Beam has returned before attacking.
- Aim diagonally upward at the Omega’s exposed underside.
- Retreat whenever its nearby arm rises.
- Continue firing during a clear recoil or stagger.
- Defeat the Omega before the impact countdown expires.
Board the ship and confirm campaign completion
After the Omega Metroid dies, Samus’s ship arrives in the Docking Bay. Move directly to the ship’s entrance and board it. The ending sequence begins after Samus escapes, followed by the credits and the closing scenes. This is the canonical main-campaign completion condition: the Omega Metroid must be defeated and Samus must board the ship before the station impacts SR388.
If Samus dies during the final SA-X battle, the timed route, or the Omega fight, reload the save made before the Operations Deck confrontation. Refill again and repeat the entire sequence. There is no checkpoint after the SA-X, after the orbit change, or during the Omega encounter, so conserve energy during the first fight and use the direct route during the evacuation.
- Reach the ship immediately after the Omega Metroid explodes.
- Board before the B.S.L. impacts SR388.
- Watch the ending and credits.
- Treat the ending sequence as the completion check for the main campaign.
Before you move on
- The final SA-X and its mutated form have been defeated.
- The Ice Core-X in the Operations Deck has been destroyed and allowed to escape.
- The Operations Room orbit controls have been activated.
- Samus has reached the Docking Bay during the three-minute evacuation.
- The returning SA-X has attacked the Omega Metroid and left an absorbable Core-X.
- Samus has absorbed that Core-X and regained the Ice Beam.
- The Omega Metroid has been destroyed with Ice Beam attacks to its exposed underside.
- Samus has boarded the arriving ship before the B.S.L. impacts SR388.
- The ending and credits have played.
Optional: 100% completion checklist — Energy Tanks, Missile and Power Bomb expansions, hidden scenes
The original North American and Australian Game Boy Advance release has 48 Missile expansions, 20 Energy Tanks and 32 Power Bomb expansions. Collecting all 100 expansions produces a 100% item result; the named abilities and Data Room downloads are separate progression upgrades. The safest plan is to finish the campaign first, reload the save marked with a Metroid symbol, and use the newly displayed global and sector item counters to find anything missing. If you want 100% before the first ending, complete the sweep before entering the final Navigation Room conversation after the Screw Attack mission, because that conversation commits Samus to the endgame route and restricts ordinary travel. The optional Sector 4 secret conversation is separate from item completion. It requires Level 4 hatches to be open and must be triggered before Diffusion Missiles are downloaded.
Step 1: Choose the cleanup point
For a first completion, finish the main campaign and allow the ending sequence to finish saving. Reload the same file rather than starting a new game. The completed save places a Metroid symbol beside the file, reopens the station for ordinary exploration and adds completion time, global item totals and area item checks to the map. This is the most forgiving route because you can return to sectors without being forced directly toward the final escape.
If you are collecting everything before the first ending, make a separate save before the last Navigation Room conversation. Do not enter that Navigation Room while items remain unless you are ready to begin the final mission. After the conversation, the station's doors and route progression funnel Samus toward the SA-X encounter, Docking Bay and Omega Metroid. A completed save removes that restriction after the ending, so missing items are not permanently lost.
- Keep a backup save before the final Navigation Room conversation.
- For easy cleanup, defeat Omega Metroid first and reload the completed file.
- For a pre-ending 100% run, finish every expansion before accepting the final mission.
- Do not mistake the Metroid symbol on the file for a new difficulty mode; it marks a completed save.
Step 2: Confirm the 100% target
The counted inventory consists of 48 Missile expansions, 20 Energy Tanks and 32 Power Bomb expansions. The initial Missile and Power Bomb Data Room downloads are not expansion pickups, and neither are Morph Ball, Charge Beam, Bombs, suits, beam upgrades, Speed Booster, Space Jump, Screw Attack or the other named abilities.
A complete normal-mode file reaches 250 missiles, 20 Energy Tanks and 74 Power Bombs. Check the totals on the completed save instead of relying only on the percentage shown after the ending. The sector counters identify which item types remain in the current area, while the global totals confirm that the entire station is complete.
- 48 Missile expansions collected.
- 20 Energy Tanks collected.
- 32 Power Bomb expansions collected.
- Capacity reaches 250 missiles, 20 Energy Tanks and 74 Power Bombs.
- No sector counter shows a missing item type.
Step 3: Sweep the station in a practical order
Begin at the Main Deck, then inspect the sector elevators and the rooms around Operations Deck, the Habitation Deck and Restricted Zone access. Clear Main Deck items first because several routes connect to the ship and late-game corridors. If a room contains an uncollected item marker, do not leave it merely because the item is not visible from the entrance; shoot suspicious walls, bomb floors and inspect the ceiling above the apparent dead end.
Next sweep Sector 1 SRX, Sector 2 TRO, Sector 3 PYR, Sector 4 AQA, Sector 5 ARC and Sector 6 NOC. The order is convenient rather than mandatory. Finish one sector before moving to the next, using its map counter to confirm that its Missile, Energy and Power Bomb categories are complete. Late-game abilities open the most important cleanup routes: Gravity Suit removes underwater restrictions, Space Jump reaches isolated shafts, Screw Attack destroys its special blocks, and Power Bombs expose or remove several false barriers.
Use the complete item list as a room-by-room audit when the map shows an incomplete sector. In Sector 1, recheck the vertical shafts and early rooms that were visited before the late beam upgrades. In Sector 2, revisit plant-filled side paths and rooms with Power Bomb blocks. In Sector 3, inspect the long Speed Booster corridors and floors beneath runways after the meltdown route has changed access. In Sector 4, return to underwater rooms with Gravity Suit and Space Jump. In Sector 5, search frozen side rooms after the final beam and movement upgrades. In Sector 6, check dark corners, ceilings and walls around the restricted paths instead of searching only the central floor.
- Main Deck and ship-side rooms checked.
- Sector 1 SRX counter complete.
- Sector 2 TRO counter complete.
- Sector 3 PYR counter complete.
- Sector 4 AQA counter complete.
- Sector 5 ARC counter complete.
- Sector 6 NOC counter complete.
Step 4: Handle hidden and movement-based expansions
For any uncollected item behind a solid-looking wall, test the surrounding tiles rather than assuming the route is blocked. Bomb floors and corners, shoot ceilings and use Power Bombs in rooms with unexplained dead ends, unusual block patterns or a large empty chamber. Some passages are entered from an adjacent room or exposed only after approaching from the opposite side.
For Speed Booster and Shinespark pickups, clear enemies before attempting the setup. Find the longest straight runway, activate Speed Booster, crouch to store the charge and launch toward the target. If the target is above or across a gap, the required runway may begin in the previous room. Save nearby before repeated attempts. When the route requires Power Bombs, preserve at least one charge until the exit is confirmed; a puzzle can be solved correctly but still leave Samus trapped if the return barrier is not opened.
- Test floors, ceilings and wall corners in every incomplete room.
- Use Power Bombs on suspicious barriers and unexplained dead ends.
- Reattempt Shinespark puzzles from the nearest Save Room.
- Check the previous room when an item cannot be reached from its own room.
- Confirm the exit before spending the last Power Bomb in a puzzle sequence.
Step 5: Attempt the optional Sector 4 conversation
The Sector 4 secret conversation is an easter egg and is not required for the campaign, item percentage or any normal ending. To make it available, first open the Level 4 security hatches in Sector 4. Then reach the Sector 4 Navigation Room before downloading Diffusion Missiles. The intended progression normally sends Samus to the Diffusion Missile Data Room, so reaching the Navigation Room first requires an advanced sequence of Speed Booster and Shinespark maneuvers.
Because the route is difficult and the conversation does not improve the 100% result, attempt it only on a separate save. If Diffusion Missiles have already been downloaded, do not count on the message appearing. After witnessing it, return to the normal route and collect Diffusion Missiles before continuing the campaign. Do not treat this scene as a hidden item, ending requirement or substitute for a missing expansion.
- Level 4 security hatches are open.
- Diffusion Missiles have not yet been downloaded.
- The Sector 4 Navigation Room is reached through the optional sequence-break route.
- The conversation is treated as optional rather than part of the 100% total.
Step 6: Finish the campaign and verify the file
When all counters are complete, enter the final Navigation Room and follow the assigned route. Defeat the SA-X, continue through the Operations Deck and Docking Bay, absorb the Ice Beam from the SA-X's Core-X sequence, defeat the Omega Metroid and board the waiting ship during the escape. The completion goal is not satisfied by defeating Omega alone; the escape must finish and the ending portrait must appear.
The original GBA release has five ending portraits based on item percentage and completion time. Three apply below 100% at different time ranges, while two apply to 100% completion depending on whether the clear is above or below the faster time threshold. After the ending, reload the Metroid-marked save and verify the counters again. A complete file should show 48 Missile expansions, 20 Energy Tanks and 32 Power Bomb expansions, with capacities of 250 missiles and 74 Power Bombs.
- All counted items are collected before the final mission, or on the completed save afterward.
- Omega Metroid is defeated.
- The B.S.L. escape reaches the waiting ship.
- The ending portrait appears.
- The reloaded save shows 48 Missile expansions, 20 Energy Tanks and 32 Power Bomb expansions.
- The file reaches 250 missiles, 20 Energy Tanks and 74 Power Bombs.
Before you move on
- Global totals show 48 Missile expansions, 20 Energy Tanks and 32 Power Bomb expansions.
- The final capacities are 250 missiles, 20 Energy Tanks and 74 Power Bombs.
- Every sector and the Main Deck show complete item categories on the completed save.
- The optional Sector 4 conversation was attempted only before Diffusion Missiles, if included in the goal.
- Omega Metroid was defeated and the escape reached the waiting ship.
- The ending portrait appeared and the completed save retained the final totals.
References for this chapter
- Metroid Fusion — Item List: 100% Missile, Energy Tank, Power Bomb Upgrade Locations
- Metroid Fusion — Guide and Walkthrough by Zauron
- Metroid Fusion — The Final Showdown
- Sector 4 conversation — Wikitroid
- Metroid Fusion — Endings List
- Metroid Fusion — Official Nintendo Player’s Guide
- Metroid Fusion — Game Manual
Finishing up
Campaign completion means defeating the Omega Metroid, boarding the arriving ship, and reaching the ending sequence and credits. Optional 100% cleanup is separate: verify 48 Missile expansions, 20 Energy Tanks, and 32 Power Bomb expansions on the completed save if desired. The original GBA release can mark a completed save and provide item counters after the ending, but those are optional cleanup aids rather than the basic campaign completion condition.
Choose your next gameScreenshots & video
Game imagery for reference. Follow the written chapters above for the route and strategies.
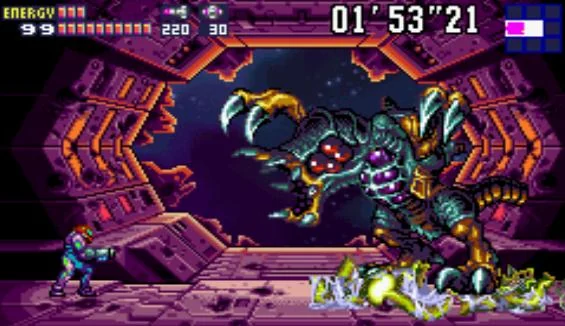
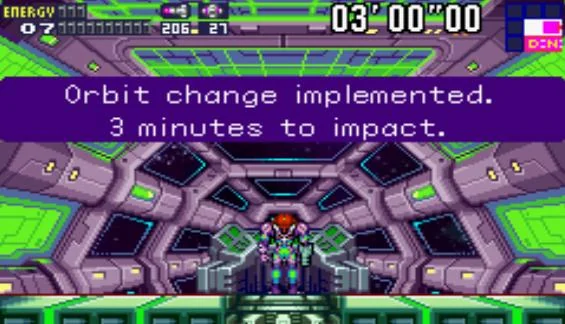
Sources & references
Our original guide draws on the references below. Check the edition at the top of this page before following controls or unlock requirements.
- Metroid Fusion Instruction Manual
- Metroid Fusion — Guide and Walkthrough by Zauron
- Metroid Fusion Controls — StrategyWiki
- Metroid Fusion - Guide and Walkthrough, Chapter 4: To Serris
- Metroid Fusion – Guide and Walkthrough by Dev
- Metroid Fusion — Boss Guide by nd9k
- Metroid Fusion — Game Manual
- Metroid Fusion — Bosses reference
- Investigate TRO - Metroid Fusion Walkthrough
- Metroid Fusion Walkthrough – Sector 2: Unknown Saboteur
- Metroid Fusion — Official Nintendo Player’s Guide
- Metroid Fusion — Guide and Walkthrough by ultrasilver64
- Investigate AQA - Metroid Fusion Walkthrough
- Metroid Fusion — Guide and Walkthrough, GameFAQs, Sector 4 Diffusion and Sector 6 route
- List of rooms in Metroid Fusion/Sector 4 (AQA)
- Regain Your Super Missile Ability - Metroid Fusion Walkthrough
- Metroid Fusion – Guide and Walkthrough by AstroBlue
- Metroid Fusion Boss FAQ v6.0
- Obtain the Varia Suit — Metroid Fusion Walkthrough
- Chapter 8: Dive into the Freezer — Metroid Fusion Walkthrough
- Metroid Fusion Walkthrough – Sector 5: Cold Arsenal
- Metroid Fusion – Guide and Walkthrough by TNEwebmaster
- Sector 5 (ARC): Visit 1 — Metroid Fusion Walkthrough and Guide
- Survivors? – Metroid Fusion Walkthrough
- Emergency in Sector 3 – Metroid Fusion Walkthrough
- Metroid Fusion Main Deck – StrategyWiki
- Nintendo UK Game Boy Advance Manuals – Metroid Fusion
- Metroid Fusion Walkthrough – Main Deck: Power Failure
- Metroid Fusion Walkthrough – Sector 2: Overgrown With Vegetation
- Metroid Fusion – Guide and Walkthrough by BakonBitz
- Trouble in Sector 5 — Metroid Fusion Walkthrough
- Bosses Guide — Metroid Fusion
- Metroid Fusion Walkthrough — Sector 5: The Nightmare Awakens
- Metroid Fusion Walkthrough — Sector 6: Revelations, Omega Metroid
- Metroid Fusion/Any% — Speed Demos Archive Knowledge Base
- Metroid Fusion Walkthrough – Escape the Station
- Metroid Fusion – Sector 1 (SRX): Visit 2 Script
- Metroid Fusion Walkthrough – The Final Confrontation
- Main Area: Visit 4 – Metroid Fusion Walkthrough & Guide
- Metroid Fusion — Item List: 100% Missile, Energy Tank, Power Bomb Upgrade Locations
- Metroid Fusion — The Final Showdown
- Sector 4 conversation — Wikitroid
- Metroid Fusion — Endings List
About the game & collecting notes
- Platform
- Game Boy Advance
Complete, step-oriented walkthrough for the original Game Boy Advance release of Metroid Fusion (USA / Australia).
Darryl Polo
Darryl Polo loves tinkering with emulation and revisiting retro games. He enjoys exploring how old favorites play on different setups and sharing what he learns along the way. At Joking Joystick, he writes about the games, hardware, and small discoveries that keep the hobby fun.
Our editorial standardsFound a step that needs another look? Help us improve this guide.