
Metal Gear Solid Walkthrough - Original North American PlayStation
A full route through the original North American PlayStation release of Metal Gear Solid, from the dock infiltration to the final jeep escape.

Before you begin
You are playing the original North American PlayStation version of Metal Gear Solid, so this route should follow the 1998 campaign exactly.
Expect radar-based stealth, shoulder-button equipment management, the physical CD-case codec puzzle, a controller-port trick during one boss fight, and a real disc swap when the game asks for Disc 2.
This walkthrough will focus on reliable progression instead of exhausting every optional pickup.
You will collect the weapons and tools the story truly depends on, learn where deliberate backtracking is part of the design, and get clear guidance for the torture choice so you can finish with either ending without mixing in later-remake mechanics or Integral-only extras.
Set yourself up for the run
Use the original control logic before you start.
Learn how to quick-equip and unequip weapons and items, how to enter first-person view, and how to use the Codec without fumbling during alerts.
Save with Mei Ling often, especially before boss fights, long backtracks, and the torture sequence.
The game can punish missed saves with a lot of repeated cutscenes and traversal.
Treat the radar as your main stealth tool whenever the game allows it, but do not depend on it in jams and boss rooms.
Learn enemy facing, camera arcs, and safe wall-hugging habits early.
Keep at least one Ration in reserve whenever possible.
You do not need to hoard every item box, but you do want a safety buffer before Ocelot, Mantis, the tower climb, both Sniper Wolf duels, Raven, and REX.
Pick up mandatory weapons as soon as the route expects them.
Missing the SOCOM, C4, Nikita, PSG1, Stinger, and PAL key steps is what usually creates confusion in a first playthrough.
Be ready for the game to expect real-world interaction.
One radio frequency is hidden on the retail package, and one boss is easiest if you move the controller from port 1 to port 2 on original hardware.
Decide before the torture scene whether you want the Meryl ending reward or the Otacon ending reward.
Resisting every round leads to one ending, while submitting changes the ending and unlock item for the next run.
Have Disc 2 available before you reach the late-middle portion of the story.
Dock Infiltration and the Heliport Approach
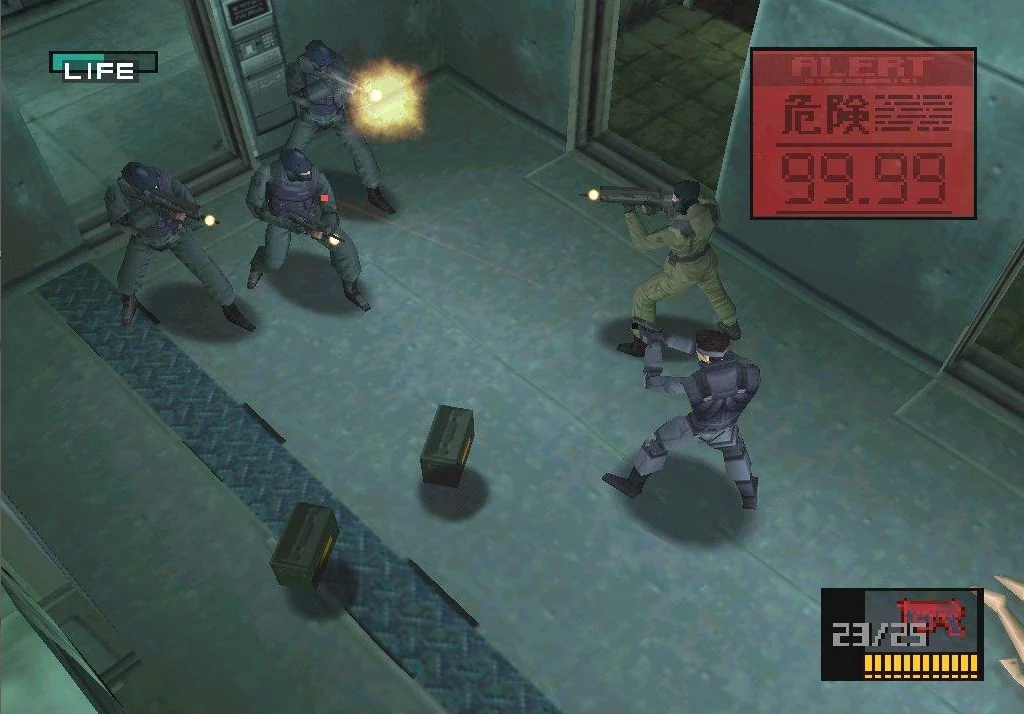
Enter Shadow Moses through the underground dock, cross the heliport without turning the opening into a firefight, collect the SOCOM from the cargo truck, and use a ventilation duct to enter the Tank Hangar. This route applies to the original North American PlayStation release of Metal Gear Solid, including the SLUS-00594 and SLUS-00776 disc set.
Leave the dock and observe the first patrol
After the opening briefing, swim toward the dock and climb the ladder. Snake enters a snowy loading area without a weapon. The guard here is meant to be avoided, so do not try to fight him. Your objective is the elevator at the north end of the area.
Pause near the edge of the open ground and watch the guard's route before moving. When he walks away, stay low and use the loading structures, crates and raised edges to block his view. Follow behind him only far enough to reach the elevator. Do not sprint across the whole snowfield as soon as the guard turns; he can reverse direction before Snake reaches safety.
A Ration is available near the elevator area. Take it if Snake has lost health, but do not search for extra items while the patrol is returning. When the route is clear, enter the elevator and ride it to the heliport.
- Climb out of the water and enter the snowy dock.
- Watch the first guard before crossing the open area.
- Use the north elevator to reach the heliport.
Cross the heliport using searchlight gaps
When Snake reaches the heliport, stop near the short steps and study the searchlight pattern. Let a beam pass before moving. Travel around the outer edge of the landing area and use containers, walls and the edge of the pad as visual cover. The goal is to reach the western side and then work toward the cargo truck; the center of the helipad is the most exposed route.
Chaff Grenades are available on the heliport, but they are not required for this opening crossing. Collect them only if the searchlights and guards give you a safe opportunity. Do not enter a beam merely to obtain them.
The western side room contains a surveillance camera and Stun Grenades. If you want the grenades, wait until the camera turns away, move close to the wall and crawl across its coverage. Take the grenades and leave before the camera sweeps back. They are useful emergency equipment, but they are not a substitute for reaching the truck and collecting the SOCOM.
- Wait for a searchlight gap before crossing.
- Stay near the outer edge of the heliport.
- Pass the western camera by crawling or hugging the wall.
- Treat the Stun Grenades as optional support equipment.
Collect the SOCOM from the cargo truck
Move toward the cargo truck on the north side of the heliport, watching the nearby guard before approaching. When the truck is clear, climb into its rear and collect the SOCOM pistol. Make this a required route step for this walkthrough. Snake has no handgun before this pickup, and carrying the SOCOM forward gives you the practical emergency option assumed by later cell-block, alert-recovery and Ocelot instructions.
The SOCOM is unsuppressed in the original PlayStation game. Do not use it to clear the heliport unless a mistake has already created an alert. A shot can bring other soldiers into the search and make the area harder than it needs to be. Collect the weapon, confirm that it is available in the weapon inventory, then leave the truck when the nearby patrol is moving away.
The truck is not the end of the route. Snake still needs to reach a ventilation shaft. Keep to the facility walls, containers and stair structures rather than running across the open helipad.
- Enter the cargo truck.
- Collect the SOCOM pistol from inside it.
- Confirm that the SOCOM is available before leaving the heliport.
- Keep the pistol for emergencies instead of firing it to clear guards.
Reach a ventilation shaft and enter the Tank Hangar
From the truck, move toward the facility's eastern side and watch the surveillance camera covering the stair approach. Wait until the camera points away, then stay close to the wall and climb the stairs. If a guard is on the upper walkway, stop behind the stair structure or another obstruction until he turns away.
The raised ventilation shaft is on the upper walkway. Follow the balcony carefully and look for the open duct in the wall or floor-level recess. Crawl inside once the camera and guard no longer cover the approach. This route places Snake on the Tank Hangar's upper floor.
The original heliport also provides a ground-level duct route. If the upper walkway is unsafe, use the lower duct instead; it still advances the game into the Tank Hangar. The important progression is to enter one of the available ventilation shafts after obtaining the SOCOM, not to clear the heliport by force.
- Time the camera before climbing the eastern stairs.
- Wait for the upper guard to turn away.
- Enter the raised ventilation shaft when possible.
- Use the ground-level duct if the upper approach is compromised.
- Reach the Tank Hangar through a ventilation shaft.
Recover safely if an alert starts
If a guard spots Snake, do not remain in the open trading punches or pistol shots. Break line of sight immediately by turning behind a container, wall, truck or stair structure. Hide while the soldiers search, then resume the route during a fresh patrol cycle once the alert state has cleared.
If Snake is already near a ventilation shaft, move through it instead of waiting at the entrance. Soldiers can throw grenades into the duct during an alert, so continue crawling toward the Tank Hangar and do not linger in the first section. The duct removes the immediate line of fire, but it is not a safe place to stop indefinitely.
Use a Ration from cover if health is low. If the attempt becomes too costly, allow the search to end, reposition and try the crossing again. The chapter is complete when Snake has entered the Tank Hangar with the SOCOM secured; eliminating every heliport guard is neither required nor advisable.
- Break line of sight immediately after detection.
- Hide until the search ends, or move decisively through a nearby duct.
- Use a Ration from cover if needed.
- Restart the crossing rather than forcing a prolonged firefight.
- Enter the Tank Hangar with the SOCOM in the inventory.
Before you move on
- Snake has left the underground dock by elevator and reached the heliport.
- Snake has entered the cargo truck and collected the SOCOM pistol.
- The SOCOM is available in the weapon inventory before Snake leaves the heliport.
- Snake has crossed the searchlight area and passed the camera-covered approach.
- Snake has entered either the raised or ground-level ventilation duct.
- Snake has reached the Tank Hangar without needing to clear the heliport by force.
References for this chapter
- Metal Gear Solid - Guide and Walkthrough - PlayStation - By Nemesis - GameFAQs ↗
- Metal Gear Solid - Walkthrough - PlayStation - By AstroBlue ↗
- Metal Gear Solid - Guide and Walkthrough - PlayStation - By Crazyreyn - GameFAQs ↗
- Metal Gear Solid Walkthrough/Tank Hangar ↗
- Metal Gear Solid Release Information for PlayStation ↗
- Metal Gear Solid Release Information for PlayStation ↗
Tank Hangar Descent, Duct Route, and the DARPA Chief
Descend from the Tank Hangar into the cell block, use the duct network to locate the DARPA Chief, receive the Level 1 security card, and survive the mandatory guard assault after Meryl escapes.
Ride the elevator to the cell block
After reaching the Tank Hangar, go to the elevator and press the action button to call it. Enter when it arrives and select the lower cell-block floor. This descent is required progression; you cannot reach the DARPA Chief's cell through the locked doors on the upper Tank Hangar floors yet.
When the elevator opens, answer the Codec call. Move through the corridor and check the cells along the wall. The DARPA Chief is visible behind one of them, but the door cannot be opened because Snake does not yet have a security card. Do not keep trying the door. Continue toward the ladder at the far end of the corridor. A small opening near this route contains an optional ration, which is useful if your health is already reduced but is not required.
- Call and ride the elevator to the cell-block floor.
- Confirm that the DARPA Chief is behind a locked cell door.
- Ignore the locked cell door and continue toward the ladder.
- Take the nearby ration only if you need it.
Enter the ducts and follow the main route
Climb the ladder and crawl into the air duct. At the first junction, continue along the main path. One branch leads to SOCOM ammunition and a dead end, so use it only if you need the bullets. The main route continues through the duct and eventually passes over several grates.
Some grates show guards or prisoners and are optional observations. You do not need to stop at every opening, and the vent jokes are not part of the objective. Keep crawling forward until the duct reaches the cell-block section above the DARPA Chief's cell.
At the required grate, use the action button to look down. The view identifies the DARPA Chief below. Once Snake has triggered this scene, the game drops him into the cell automatically. There is no second vent exit to find and no alternate route needed after the drop. If you crawl past the correct opening without activating it, turn around and inspect the grates near the end of the main duct rather than searching the upper Tank Hangar again.
- Take the main duct path at the first junction.
- Collect SOCOM ammunition only if it will help the next defense.
- Inspect the required grate above the DARPA Chief's cell.
- Allow the automatic drop and story scene to begin.
Complete the DARPA Chief scene and receive the card
The DARPA Chief explains the Metal Gear REX situation and provides Snake with the Level 1 security card during the conversation. He then dies suddenly. This is scripted and does not mean the sequence has failed. Open the item menu after the scene if you want to verify that the card has been added.
Snake is temporarily trapped in the cell with the Chief's body. There is no switch, vent, or hidden door that opens this section. If necessary, crawl under the bed and collect the ration, then wait for the next story event. Meryl escapes from the neighboring cell, incapacitates the guard, and opens the Chief's cell from outside.
Once Meryl has opened the door, follow the scene rather than attempting to leave immediately. The guards gathering outside are the next required encounter.
- Let the DARPA Chief conversation finish.
- Verify that the Level 1 security card is in the item inventory.
- Take the ration beneath the bed if necessary.
- Wait for Meryl to open the cell.
Defend the cell block with Meryl
When Snake and Meryl leave the cell, Genome Soldiers begin entering the cell-block area. This is a mandatory defense sequence. Equip the SOCOM and concentrate on the soldiers coming through the entrance. Meryl initially does not handle the first attackers reliably, so Snake must eliminate the opening group himself before depending on her assistance.
Stay inside the room and use its width to avoid being surrounded. Aim toward the entrance, fire in short bursts, and reposition across the open area when soldiers get too close. You do not need to chase enemies into the corridor. Keeping the fight near the cell area gives you more time to see each arrival and reduces the chance of being attacked from behind.
The soldiers arrive in successive groups. During the later part of the defense, grenades may be thrown into the room. When you see or hear a grenade arrive, move away from the entrance and use the room's corners or upper side as cover until the blast ends. Do not remain directly beside the doorway, where the explosion can trap Snake against the incoming soldiers. After the blast, return your aim to the entrance and finish the remaining attackers.
Use rations from the item menu if your health becomes critical rather than trying to win while one hit from death. If you die, reload the most recent save and begin the defense by immediately controlling the first group; waiting for Meryl to clear the room is unreliable.
- Equip the SOCOM before the soldiers close in.
- Eliminate the first group yourself.
- Hold the fight inside the cell-block room instead of pursuing enemies into the corridor.
- Move away from the entrance when grenades are thrown.
- Use a ration before your health becomes critical.
Leave the cell block and continue to the armory
After the final group is defeated, the story and Codec calls continue automatically. Do not return to the ducts. Move out through the cell-block area and use the elevator to return to the Tank Hangar's upper basement level. The newly acquired Level 1 card opens the appropriate electronic doors and begins the route toward the armory and Kenneth Baker.
If you want a small resupply before leaving, check the cell-block area for available SOCOM ammunition, but do not turn this into a full collection sweep. The next chapter requires backtracking through the Tank Hangar and locating the armory's destructible walls, so preserving health and ammunition is more valuable than searching every optional room.
Security cards are cumulative for access: when Snake obtains a higher-level card later, it replaces the practical need for the lower card. Do not worry about carrying separate copies of Level 1, Level 2, and later cards. At the end of this chapter, the required markers are the completed DARPA Chief scene, the Level 1 card, Meryl's escape, and the cleared cell-block defense.
- Finish the guard defense and follow the resulting story sequence.
- Leave through the cell-block route rather than the duct network.
- Use the elevator to return toward the Tank Hangar armory levels.
- Use the Level 1 card on newly accessible electronic doors.
- Prepare to locate C4 and continue toward Baker.
Before you move on
- Snake has descended to the cell block beneath the Tank Hangar.
- The DARPA Chief conversation and death scene are complete.
- The Level 1 security card is visible in the item inventory.
- Meryl has escaped and the Genome Soldier defense is finished.
- Snake has left the cell block and is ready to use Level 1 access on the route toward the armory and Baker.
Armory Backtrack, C4, Baker, and Revolver Ocelot
Return to the B2 Armory with the Level 1 card, collect C4, use it to open the concealed route to Kenneth Baker, and defeat Revolver Ocelot without touching the tripwires around the hostage. The Nikita launcher is not available in this section of the original PlayStation campaign; you obtain it later in the Nuclear Warhead Storage building, so do not search the Armory for it now.
Return to B2 and collect the available supplies
After the cell-block defense and the following cutscenes, return to the elevator and descend to B2, the Armory. This is the same room with the small storage blocks that you crossed earlier. You now have the Level 1 security card, which opens several of the previously locked rooms.
Move carefully through the Armory. Floor traps are positioned along parts of the central passages, so avoid running straight through unfamiliar lanes. Enter the middle storage room near the elevator and collect the C4. You can also take the available grenades and SOCOM ammunition if you need them, but these are optional supplies rather than progression requirements.
Do not search the Level 3 storage room for the Nikita yet. In the original North American PlayStation release, the launcher is obtained later, in the Nuclear Warhead Storage building, after the story provides the appropriate access. The Armory objective at this point is C4, not Nikita.
- Descend to B2, the Armory.
- Use the Level 1 card to enter the available storage rooms.
- Collect C4 before searching for the route to Baker.
- Do not waste time looking for the Nikita in the Level 1 Armory rooms.
Find the concealed walls
The Armory contains discolored wall sections that look different from the surrounding surfaces. Stand close to a suspicious wall and tap it. A hollow sound identifies a section that can be destroyed with C4. This is the intended puzzle for the area; the walls are not random decoration, and you should not place explosives on ordinary surfaces.
Two northern hidden rooms contain optional supplies. One provides items such as chaff and stun grenades, while another contains additional C4 and SOCOM ammunition. Visit them if you need to restore your supplies, but do not spend every charge on optional detours before opening the required route to Baker.
The required route begins at the discolored wall on the southwest side of the Armory. Place C4 against the hollow section, step away, and detonate it. Enter the passage behind the wall and continue through the corridor. Near the end, inspect the discolored wall on the right side and destroy it with another charge. Continue through the opening until you reach the next blocked section, then demolish the northern wall to open the approach to Baker.
- Tap walls to confirm that they are hollow before using C4.
- Open the southwest wall first.
- Destroy the discolored wall in the passage.
- Destroy the northern wall that leads toward Baker.
- Keep enough C4 for the required route before taking optional supply detours.
Enter Baker's room carefully
The passage eventually opens into the room where Kenneth Baker is tied to a support structure. The area around him is covered by C4 tripwires. These wires are lethal: crossing one causes the explosives to detonate and results in a Game Over.
Do not run toward Baker, shoot him, fire explosives, or throw grenades in this room. The hostage is not rescued by approaching him manually. The story advances through the encounter that begins when you enter the room, so remain on the outside perimeter and wait for control to return after the scene.
Equip the SOCOM before entering. The fight uses the outer portion of the room because Baker and the tripwires make the center inaccessible. Keep the center of your movement path outside the visible wires.
- Equip the SOCOM before entering.
- Stay outside the tripwire pattern.
- Do not fire explosives or grenades in Baker's room.
- Do not touch Baker or the C4 wires.
Defeat Revolver Ocelot without damaging the hostage
Ocelot circles the room and fires his revolver while moving. The safest approach is to keep Snake moving around the outer edge, using the room's structures to interrupt Ocelot's line of fire. Do not chase him through the center, even if he crosses near Baker; the direct route is the easiest way to clip a wire.
Aim at Ocelot when he pauses to fire or when he stops to reload. The original PlayStation controls allow Snake to move while aiming, which is useful here: keep circling while lined up, fire controlled shots, and continue moving instead of standing in the open. If aiming while moving feels difficult, break the fight into short cycles. Evade his shots, wait for his reload, step into a clear firing lane, and retreat after several shots.
Ocelot's reload is the most reliable opening. He is temporarily unable to fire while replenishing his revolver, so use that moment to land several SOCOM rounds. Do not use C4, grenades, or other explosives as a substitute for gunfire. The room's explosive setup makes experimentation unnecessarily dangerous, and the original encounter is designed to be won with the pistol.
If Snake's health falls, continue circling until there is space to use a ration. Trading damage in the middle of the arena is less reliable than waiting for clean openings. The battle ends through a scripted interruption after Ocelot has taken enough damage; Snake does not personally finish him.
- Circle the outer edge of the arena.
- Use the SOCOM rather than explosives.
- Punish Ocelot while he reloads or pauses.
- Keep all shots away from Baker and the wires.
- Use a ration only after creating distance.
Complete Baker's briefing and leave the Armory
After the duel, allow the cutscene and conversation to finish. Baker explains the Metal Gear project, gives Snake the Metal Gear data disc, and provides information connected to the PAL card and Meryl's role in the operation. He also hands over the Level 2 security card before the sequence ends.
The new card replaces the practical need for the old Level 1 card when opening lower-level security doors, so do not worry about managing separate copies. Check the inventory after control returns and confirm that the Level 2 card and data disc are present.
The next objective is to contact Meryl and continue through the Tank Hangar route. Baker's briefing is not optional flavor: it supplies the information that directs the next stage of the operation. Leave through the opened route and return to the Armory proper. If you want to restock, do so before going upstairs, but do not continue searching for the Nikita here. That launcher belongs to a later section of the campaign.
- Finish Baker's entire post-battle conversation.
- Confirm the Level 2 card is in the inventory.
- Confirm the Metal Gear data disc has been received.
- Leave B2 and proceed toward the Meryl contact objective.
- Remember that the Nikita is a later Nuclear Warhead Storage pickup.
Before you move on
- Snake has returned to B2 with the Level 1 card.
- C4 has been collected from the accessible Armory storage room.
- The required southwest, passage, and northern concealed walls have been opened.
- Kenneth Baker has been reached without detonating the tripwires.
- Revolver Ocelot has been driven from the arena without a hostage Game Over.
- Baker's briefing has finished and the Level 2 card and Metal Gear data disc are in the inventory.
- Snake can leave the Armory and continue toward Meryl.
- The Nikita has not been incorrectly treated as an Armory pickup; it remains a later Nuclear Warhead Storage objective.
References for this chapter
The CD-Case Codec Clue and Meeting Meryl
Use Baker's packaging clue to contact Meryl, open the Tank Hangar route, cross the infrared sensor passage and Canyon minefield, defeat the M1 Tank, and receive the Level 3 security card. Stop at the end of the tank sequence; the Nuclear Warhead Storage Building begins the next chapter.
Return to the Armory and contact Meryl
After the Revolver Ocelot battle and Baker's briefing, leave the room and return to the Armory on B2 of the Tank Hangar. Baker's clue points to the back of the Metal Gear Solid package. In the original North American PlayStation release, Meryl's Codec frequency is 140.15.
If you are playing without the original case, open the Codec and enter 140.15 manually. Make the call while Snake is in a safe position, then let the conversation finish. This is required progress; searching the Armory for another in-game note will not open the route.
This call is not the later meeting in the women's restroom. Meryl is first arranging access to the cargo passage that leads from the Tank Hangar toward the Canyon. Do not return to the Nuclear Warhead Storage Building looking for her yet, and do not expect the Level 5 card or PAL Key at this stage.
- Return to the B2 Armory after Baker's briefing.
- Call Meryl at 140.15.
- Finish the Codec conversation before leaving the Armory.
Open the Tank Hangar cargo route
Take the elevator to Floor 1 of the Tank Hangar. Meryl will contact Snake again after opening the large cargo door. If the door is still closed, remain in the Hangar and allow the follow-up conversation and scripted exchange to finish rather than searching for another switch.
Use this pause to collect only practical support if you need it. Chaff Grenades are especially useful against the M1 Tank's electronics, while Thermal Goggles or the Mine Detector make the next outdoor section easier to read. The suppressor and extra ammunition can help, but neither requires a full sweep of the Hangar.
When the northern cargo route is open, go through it. Keep the SOCOM available for ordinary guards, but do not try to clear every room before advancing. The objective is to reach the sensor passage and then the Canyon, not to turn the Tank Hangar into a combat arena.
- Return to Floor 1 of the Tank Hangar.
- Wait for Meryl's cargo-door confirmation.
- Take Chaff Grenades or detection equipment if needed.
- Enter the opened cargo passage.
Cross the infrared sensor passage
Stop before the infrared beams and equip Thermal Goggles. In the original PlayStation version, Cigarettes can also reveal the beams, but they steadily drain Snake's health, making the goggles the safer choice whenever available.
Crawl and move in short, deliberate sections. Watch the height and spacing of each beam before advancing; do not sprint simply because the first part of the corridor is clear. Pause after each safe section and line up the next crawl rather than relying on momentum.
Touching a beam triggers the security response and fills the passage with gas. If you set off the sensors, keep moving toward the exit instead of freezing in place. Once you reach the far end, continue through the door into the Canyon.
- Equip Thermal Goggles, or use Cigarettes only as a last resort.
- Crawl beneath the infrared beams.
- If the alarm activates, move decisively toward the exit.
- Reach the Canyon.
Cross the Canyon minefield
The Canyon contains Claymore mines hidden beneath the snow. Equip the Mine Detector or Thermal Goggles and study the radar before walking forward. Do not run blindly across the open ground. You can take a route around the visible mine pattern, or crawl over Claymores to disarm and collect them if you are comfortable judging the spacing.
Stay alert for the warning Codec call and continue north through the minefield. Pick up nearby Grenades or Chaff Grenades only if you can do so without losing track of the safe route. The M1 Tank encounter begins once you advance far enough, so arrive with ordinary Grenades equipped or readily available.
- Use the Mine Detector or Thermal Goggles.
- Avoid the Claymores or crawl over them to disarm them.
- Continue north until the M1 Tank encounter starts.
- Keep ordinary Grenades ready.
Defeat the M1 Tank
At the beginning of the battle, throw a Chaff Grenade before moving into the open. The interference disrupts the tank's electronic targeting and prevents the main cannon from tracking Snake for a limited time. If the effect ends while you are far away, use another Chaff Grenade before crossing the arena. Stay close to the tank whenever possible; the cannon is most dangerous when Snake is at a distance.
Circle around the tank instead of standing in front of it. The machine gun remains a threat at close range, and the treads can run Snake over. Move laterally around the vehicle, watch the gunner's position, and avoid getting trapped against the arena boundary. If Snake is knocked down, crawl or move away before the tank can pass over him again.
When the gunner's hatch opens, throw an ordinary Grenade into the opening. Grenades that land against the outside armor do little, so aim for the hatch and wait for a clear opening rather than throwing continuously. The first successful gunner phase does not finish the fight: a second gunner takes over, requiring the same Chaff, circling, and hatch-grenade method.
Do not waste SOCOM or FAMAS ammunition against the tank's armored body. Claymores can be used as a supplementary way to hinder the tank's movement, but they are not necessary for the basic strategy. Preserve a Ration if you have one, and collect arena supplies only when the tank is positioned far enough away that you will not be exposed to a cannon shot.
- Use Chaff to disrupt the tank before closing in.
- Stay mobile and avoid the treads and machine gun.
- Throw ordinary Grenades through the open hatch.
- Defeat both gunner phases.
- Wait for the battle and following scene to finish completely.
Receive the Level 3 card and stop at the chapter boundary
After the second gunner is defeated, the story sequence awards Snake the Level 3 security card from the defeated gunner. Let the scene finish and confirm that the new card is in the inventory before attempting to move on.
This is the completion point for this chapter. Do not enter the Nuclear Warhead Storage Building yet. The next chapter begins with the post-tank Canyon transition and the building entrance, where the route changes from the outdoor tank operation to the nuclear-storage interior.
- The M1 Tank and both gunners are defeated.
- Snake has received the Level 3 security card.
- The tank sequence is complete.
- Stop before entering the Nuclear Warhead Storage Building.
Before you move on
- Snake has called Meryl at 140.15.
- Meryl has opened the northern Tank Hangar cargo route.
- Snake has crossed the infrared sensor passage.
- Snake has crossed the Canyon minefield and triggered the M1 Tank encounter.
- Both tank gunners have been defeated with Grenades thrown through the hatch.
- Snake has received the Level 3 security card.
- Snake has not yet entered the Nuclear Warhead Storage Building.
Canyon Push, Nuclear Warhead Storage, the Cyborg Ninja, and Otacon
After the M1 Tank battle, Snake crosses the mined canyon and enters the Nuclear Warhead Storage Building. The required route goes from B1 to the Nikita launcher, then to B2, where a remote missile destroys the electrical switchboard blocking access to Hal Emmerich's laboratory. Snake crosses the gas-filled section, defeats the Cyborg Ninja, meets Otacon, and receives the Level 4 card. Return to B1, identify Meryl in disguise, follow her into the women's restroom, receive the Level 5 card and PAL Key, then leave with her toward the Commander's Room.
Leave the M1 Tank area and cross the canyon
After defeating the M1 Tank, take the Level 3 card from the defeated gunner before leaving the arena. Follow the route toward the Nuclear Warhead Storage Building. Meryl is no longer traveling with Snake, so the canyon must be crossed alone.
The canyon contains Claymore mines and surveillance cameras. Equip the Mine Detector if you have it, then move along the edge of the area and watch the radar before committing to each opening. Crawl over Claymores rather than walking or running through them. Crawling safely disarms a mine when Snake passes directly over it, and the mine can then be collected if you need the ammunition.
Use the canyon walls, raised ground, and gaps in the camera coverage to advance. Chaff Grenades can disrupt surveillance equipment temporarily, but they are a support option rather than a requirement. If a camera raises an alert, break its line of sight behind terrain and continue toward the building instead of standing in the open to fight.
Enter the large door at the far end of the canyon. Rations and ammunition along the approach can stabilize a damaged run, but the only required objective here is reaching the Nuclear Warhead Storage Building.
- Take the Level 3 card after the tank battle.
- Use the Mine Detector if available.
- Crawl over Claymore mines.
- Pass cameras with terrain, timing, or Chaff Grenades.
- Enter the Nuclear Warhead Storage Building.
Reach B1 and collect the Nikita
Inside the storage building, ordinary firearms cannot be used because of the nuclear warheads. Move through the main storage area without trying to clear the guards. Stay near the container stacks and use the walkways and corners to avoid patrols.
Reach the elevator on the raised section and select B1. On B1, leave the elevator and enter the accessible computer-room area. Use the Level 3 card to open the room containing the Nikita launcher and missiles. This pickup is mandatory for the route ahead; without the Nikita, Snake cannot disable the electrical obstruction on B2.
Wait behind doorways or around corners if a guard is covering the route. Once the launcher is collected, return to the elevator and select B2. Do not waste time searching for a way across the electrified section before getting the Nikita. The switchboard can only be destroyed with the remote missile.
- Avoid firearm use in the nuclear storage area.
- Take the elevator to B1.
- Open the Level 3 door leading to the Nikita room.
- Collect the Nikita launcher and missiles.
- Return to the elevator and select B2.
Destroy the B2 electrical switchboard
On B2, use the Level 3 card to pass through the accessible doors and reach the blocked section. Snake will receive guidance explaining that the electrical current is preventing access to the laboratory. The switchboard is in the camera-covered office area beyond the gas-filled route.
Stand at the safe end of the corridor, equip the Nikita, and launch a missile. Guide it through the corridor and into the office area. Follow the open route rather than scraping the walls, and make controlled turns around the camera positions. The missile must reach the electrical switchboard, identifiable as the large powered unit in the office area. When it is destroyed, the current shuts off.
The remote missile has limited travel time, so avoid unnecessary loops. If Snake's health or oxygen becomes dangerously low while the missile is in flight, return to a clean area and recover before trying again. The missile's route can be restarted if it is destroyed or runs out of fuel.
Once the switchboard is destroyed, cross the formerly electrified floor. The gas hazard remains active, so do not linger. The Gas Mask can reduce the danger and is useful if you have it, but it does not disable the electricity and does not make the gas harmless. Move from one clean section to the next and use a ration if the damage becomes severe.
- Reach the electrified B2 section.
- Launch the Nikita from a safe position.
- Guide the missile through the camera-covered office area.
- Destroy the electrical switchboard.
- Confirm that the electrical floor is no longer active.
- Cross the gas-filled section without stopping unnecessarily.
Reach the laboratory and fight the Cyborg Ninja
Continue beyond the disabled floor and follow the route toward the laboratory. A cutscene shows the aftermath of the Ninja's attack on the Genome soldiers. Enter the laboratory to begin the Cyborg Ninja fight.
Do not use ordinary firearms during the opening phases. The Ninja deflects bullets with his sword, so equip no weapon and use Snake's standard close-range punch-punch-kick attack. Stay in the open part of the room, let the Ninja approach, and attack after his sword movement finishes. Short combinations are safer than trying to maintain constant contact.
When the Ninja abandons his sword, continue with melee attacks while circling. Watch for his jumps, spinning kicks, and other close-range attacks, then punish the recovery after he lands or finishes an approach. Avoid getting trapped against a wall or laboratory equipment, because limited space makes his attacks harder to evade.
The Ninja later uses stealth camouflage. Thermal Goggles can make him easier to track if you collected them, but they are not required; keep moving and watch for the distortion and attack sounds. During the teleporting-punch phase, move away from Snake's previous position as the Ninja disappears. After the punch misses, use the brief opening for a short combo, then retreat before he repeats the sequence.
Near the end of the fight, the Ninja becomes unstable and emits a damaging energy effect while moving erratically. Do not run into the effect to continue punching. Back away, equip the FAMAS, and fire controlled bursts when he is exposed. Chaff Grenades can create breathing room, but they are not the primary way to win the fight.
After the battle, allow the Gray Fox reveal and Otacon laboratory scene to finish. This conversation is required progress and establishes the next route.
- Enter the laboratory after crossing the disabled floor.
- Use melee attacks while the Ninja deflects bullets.
- Stay mobile and avoid being pinned against a wall.
- Move away from the teleporting punch.
- Use controlled FAMAS bursts during the unstable final phase.
- Complete the Gray Fox and Otacon scenes.
Receive the Level 4 card and return to B1
During the laboratory sequence, Hal Emmerich explains his connection to Metal Gear and agrees to help Snake. When the conversation ends, Otacon gives Snake the Level 4 security card. This is the correct card handoff for this section.
Optional rooms can provide ammunition, rations, Thermal Goggles, or other support items, but do not turn the return trip into a full sweep unless Snake needs supplies. Retrace the route to the elevator and select B1.
The Level 4 card replaces the lower cards for ordinary access; Snake does not need to manage separate Level 3 and Level 4 cards as competing inventory items. Do not expect Otacon to provide the Level 5 card or PAL Key. Those come from Meryl in the next sequence.
- Finish Otacon's laboratory conversation.
- Receive the Level 4 card from Otacon.
- Return to the elevator.
- Take the elevator to B1.
Identify Meryl and follow her to the women's restroom
On B1, enter the room near the elevator and observe the guards. One guard has a distinctive feminine walking animation. This is Meryl in disguise. Let her notice Snake, but do not attack her. Shooting, punching, or choking the disguised guard can kill Meryl and end the attempt.
Meryl runs toward the women's restroom. Follow her immediately and enter the last stall to trigger the required conversation. The scene confirms her identity and advances the story; it is not an optional joke or side event.
When the conversation ends, Meryl gives Snake the Level 5 security card and the PAL Key. Confirm that both progression items are present before leaving the restroom. The PAL Key is not used here and should be saved for the later underground-base sequence.
Exit the restroom and rejoin Meryl. She waits for Snake outside. Continue with her through the B1 corridor toward the Commander's Room. Do not begin the next chapter by repeating the elevator, B1 disguise, or restroom sequence.
- Return to B1 after the Otacon sequence.
- Watch for the guard with the feminine walking animation.
- Do not attack the disguised Meryl.
- Follow her into the women's restroom.
- Enter the last stall.
- Receive the Level 5 card and PAL Key from Meryl.
- Leave the restroom and rejoin Meryl.
Complete the chapter at the Commander's Room approach
Before leaving B1, verify the complete progression state: the Level 4 card came from Otacon, the Level 5 card and PAL Key came from Meryl, and Meryl is accompanying Snake toward the Commander's Room. Optional ammunition, rations, Diazepam, and grenades may be collected if needed, but none is required to establish the chapter's completion.
Proceed with Meryl through the corridor toward the Commander's Room. The chapter ends only after the Ninja and Otacon sequence is complete, Snake has returned to B1, the disguised Meryl has been identified without being attacked, the restroom conversation has occurred, and Snake has left with Meryl on the route toward the Commander's Room.
- Confirm the Level 4 card from Otacon.
- Return to B1.
- Identify disguised Meryl without attacking her.
- Follow Meryl into the women's restroom.
- Receive the Level 5 card and PAL Key from Meryl.
- Leave the restroom with Meryl.
- Reach the corridor or route toward the Commander's Room.
Before you move on
- Snake has taken the Level 3 card after defeating the M1 Tank.
- Snake has crossed the mined canyon and entered the Nuclear Warhead Storage Building.
- Snake has visited B1 and collected the Nikita launcher.
- Snake has returned to B2 and guided a Nikita missile into the electrical switchboard.
- The B2 electrical floor is disabled.
- Snake has crossed the gas-filled route and reached the laboratory.
- Snake has defeated the Cyborg Ninja.
- The Gray Fox reveal and Otacon laboratory scene are complete.
References for this chapter
- Metal Gear Solid Release Information for PlayStation ↗
- Metal Gear Solid Release Information for PlayStation ↗
- Metal Gear Solid Walkthrough/Nuclear Warhead Storage Building ↗
- Metal Gear Solid/Finding Meryl ↗
- Metal Gear Solid - Guide and Walkthrough - PlayStation - By ChandooG ↗
- Metal Gear Solid - Guide and Walkthrough - PlayStation - By Nemesis - GameFAQs ↗
The Command Path and Psycho Mantis
Begin after Chapter 5 has completed the B1 restroom sequence. Meryl has already given Snake the Level 5 Keycard and the PAL Key, which she received from Kenneth Baker earlier in the operation. Follow Meryl to the Commander's Room, protect her during Psycho Mantis's opening control sequence, defeat Mantis using the original PlayStation controller-port solution, and leave through the newly opened cave entrance. The Night Vision Goggles are an optional support pickup after the battle: collect them with the Level 4 Keycard if you want better visibility in the cave, but do not treat them as a story prerequisite.
Start from the completed restroom handoff
This chapter does not include the disguise sequence, the B1 restroom meeting, or the PAL Key handoff. Those events belong to the preceding route. Confirm that Snake already has the Level 5 Keycard and PAL Key before moving on. Baker originally gave the PAL Key to Meryl, and Meryl then passed it to Snake.
Leave the restroom and follow Meryl through the Nuclear Warhead Storage Building toward the Commander's Room. Stay with her instead of stopping to clear every side room. Meryl's dialogue and movement make this an escort-style transition, so the safest approach is to keep moving through the required doors and let the scripted sequence begin.
- The B1 restroom sequence is complete.
- Snake has the Level 5 Keycard and PAL Key.
- Meryl is accompanying Snake.
- Snake is moving toward the Commander's Room without repeating earlier events.
Protect Meryl during the opening sequence
Psycho Mantis takes control of Meryl and makes her aim the Desert Eagle first at Snake and then at herself. Do not shoot her with a lethal weapon. Equip a Stun Grenade and throw it when she is within the blast radius. If you do not have a Stun Grenade, unequip your weapon, approach her, and use Snake's grab-and-throw move to knock her down. Do not punch, kick, strangle, or fire ordinary weapons at her.
Meryl can rise and become controlled again during the fight. Each time she stands and begins aiming, stop attacking Mantis and disable her first. Keep Snake moving so Mantis's projectiles do not catch you while you deal with her. Meryl's survival here is required, but it is separate from the later torture decision that determines the ending branch and post-clear reward.
- Use a Stun Grenade or grab-and-throw on Meryl.
- Never use lethal gunfire against Meryl.
- Interrupt every later controlled appearance before attacking Mantis again.
- Keep moving while Meryl is recovering.
Break Mantis's input reading
Allow the opening Psycho Mantis scene to finish until control returns to Snake and Mantis begins reading the controller. On original PlayStation hardware, unplug Snake's controller from controller port 1 and connect it to controller port 2. Mantis can no longer predict the player's movement through the intended hardware gimmick, making the fight substantially more manageable.
Test movement after reconnecting the controller. If Snake does not respond, make sure the plug is fully seated. On an emulator, assign Snake's controller to virtual port 2; the exact menu differs by emulator and is not part of the original PlayStation release. Do not describe a later collection's controller-port menu as though it existed on the NTSC-U discs.
The fight can be completed without switching ports, but Mantis will continue interfering with your movement and attacks. For a first-time player, the port change is the reliable original-version solution. The alternate statue method may become available after repeated failed attempts and further Codec guidance, but its trigger is not a fixed early objective, so do not rely on it as the primary plan.
- Wait until control returns after Mantis's opening scene.
- Move the controller from port 1 to port 2.
- Confirm that Snake responds before attacking.
- Use the port switch as the main solution on original hardware.
Defeat Psycho Mantis
Use the FA-MAS for sustained damage or the SOCOM for more controlled shots. Circle the room instead of standing in the center. Mantis throws objects and launches psychic attacks, so leave yourself space to change direction. Fire during his vulnerable pauses, then resume moving rather than holding position and trading damage.
Thermal Goggles are useful if you collected them earlier because they make Mantis easier to track when he becomes difficult to see. They are not required for the port-switch solution. If you lack them, watch for Mantis's visible openings and attack during his pauses. Keep the weapon trained on him, but stop shooting whenever Meryl becomes active.
When Meryl rises, put away the lethal weapon and disable her with a Stun Grenade or grab-and-throw. Once she is down, return to the circle-and-fire pattern. Continue until the defeat scene begins, then let the dialogue and room transition finish before moving on.
- Use the FA-MAS or SOCOM for damage.
- Circle the room and avoid standing still.
- Use Thermal Goggles only as an optional aid.
- Disable Meryl before resuming attacks on Mantis.
- Wait for the complete defeat scene.
Optional: collect the Night Vision Goggles
After the battle, return to the elevator and go to B2 of the Nuclear Warhead Storage Building. Otacon's Level 4 Keycard opens the Level 4 doors in the B2 equipment area. Search the Level 4 rooms in that section for the Night Vision Goggles, while watching for gas and automated gun cameras. The Gas Mask can make the corridor safer, but it is not the key requirement for obtaining the goggles.
The goggles improve visibility in the cave, especially around the wolves, but collecting them is support preparation rather than required story progress. If you are low on health or supplies, you can leave them and continue; do not confuse this optional pickup with the mandatory Level 5 route that brought Snake and Meryl to the Commander's Room.
- Return to B2 after defeating Mantis if collecting the optional item.
- Use the Level 4 Keycard on the Level 4 doors.
- Collect the Night Vision Goggles if desired.
- Avoid gas exposure and gun-camera fire.
Leave through the cave entrance
Return to the Commander's Room after the battle and enter the passage Mantis opens. Stop at the cave entrance and save if a save point is available before committing to the next route. Equip the Night Vision Goggles if you collected them. The following chapter covers the cave, the wolves, the Underground Passage, Meryl's injury, and the first Sniper Wolf encounter.
Do not continue deep into the cave if this chapter is being used as a clean chapter break. The required completion state is Psycho Mantis defeated, the optional goggles collected or deliberately skipped, and Snake positioned at the newly opened cave route.
- Psycho Mantis is defeated.
- The optional Night Vision Goggles are collected or consciously skipped.
- Snake has returned to the Commander's Room area.
- Snake is positioned at the cave entrance without triggering the next chapter's Sniper Wolf sequence.
Before you move on
- Chapter begins after the completed B1 restroom handoff.
- Snake starts with the Level 5 Keycard and PAL Key.
- Snake reaches the Commander's Room without repeating the restroom sequence.
- Meryl survives every controlled appearance.
- Psycho Mantis is defeated with the controller-port solution, or with an available in-game fallback after the required guidance.
- The post-battle dialogue and room transition finish completely.
- Snake collects the Night Vision Goggles with the Level 4 Keycard, or deliberately skips this optional support item.
- Snake returns to the Commander's Room area and reaches the newly opened cave entrance.
References for this chapter
- Metal Gear Solid - Guide and Walkthrough - PlayStation - By Nemesis - GameFAQs ↗
- Metal Gear Solid - General Speed Guide - PlayStation - By MKim ↗
- Metal Gear Solid - Guide and Walkthrough - PlayStation - By RHendrawan ↗
- Metal Gear Solid Walkthrough/Nuclear Warhead Storage Building ↗
- Metal Gear Solid PSX Cheats and Tips ↗
- Metal Gear Solid Release Information for PlayStation ↗
Wolf Cave, the Underground Passage, and Sniper Wolf's Ambush
After Psycho Mantis, leave the commander-side area with Meryl and cross the wolf cave toward the Underground Passage. Follow Meryl through the Claymore minefield, trigger Sniper Wolf's ambush, and retreat as soon as the Codec calls explain that Snake needs a sniper rifle. This chapter ends at the mandatory route reversal, before the weapon retrieval and first proper Sniper Wolf duel.
Leave the Psycho Mantis area with Meryl
After the Psycho Mantis battle and its follow-up scenes, leave the commander-side area with Meryl. Follow the route through the adjoining rooms toward the cave entrance. Meryl is now accompanying Snake, so stay close enough to keep her in view and avoid taking unnecessary detours through side rooms.
This stretch is a transition into a slower, more hazardous route. Keep a ration available if your health is low, but do not spend time trying to refill every item before entering the cave. The immediate objective is to reach the Underground Passage with enough health and ammunition to survive the approach, not to clear the surrounding rooms.
- Confirm that Meryl is accompanying Snake.
- Leave the Psycho Mantis area through the intended route toward the cave.
- Keep a ration available if your health is already low.
- Avoid unnecessary fights and side-room detours.
Cross the wolf cave carefully
Move through the cave at a steady pace and keep advancing toward the far exit. Wolves can attack from close range, especially if Snake stops in a narrow section. Crouching can make the approach more controlled, but do not remain still while a wolf is already on top of you. If you take a hit, continue toward the exit instead of turning the cave into a prolonged firefight.
Use the walls and narrow passages to prevent the pack from surrounding Snake. Fire only when a wolf blocks the route or you need to create space. Spending large amounts of SOCOM or FAMAS ammunition here makes the later sniper sequence less comfortable without helping story progress.
The cardboard-box scent interaction is optional. If you previously caused a young wolf to soil an equipped cardboard box, that box can make the cave easier to cross. It is not required for progression. If you did not perform that interaction, simply move carefully through the cave and continue to the far side.
- Keep moving toward the far exit.
- Use crouching and narrow sections to limit wolf attacks.
- Fire only when a wolf blocks the route or creates immediate danger.
- Treat the scented cardboard box as optional, not as a required objective.
Use Meryl's path through the Claymore minefield
At the far side of the cave, follow Meryl toward the Underground Passage. The open snowfield contains Claymore mines. Let Meryl move ahead and follow the footprints she leaves behind. They provide the safest straightforward route for a first completion and prevent Snake from wandering across unmarked ground.
Do not sprint diagonally across the field or cut away from the footprints just to reach the door faster. A mine blast can remove a large amount of health and may leave Snake vulnerable before the next scripted sequence. If you prefer to use a mine detector or thermal goggles, they can help you recognize the hazard, but the footprints remain the simplest route.
Snake can also crawl across a Claymore field while prone, but this is an alternate technique rather than a reason to rush. If you crawl, keep the movement controlled and do not stand until you are clear of the suspected mine locations. Continue following Meryl until the passage approach triggers the next scene.
- Follow Meryl's footprints through the snowfield.
- Do not sprint diagonally across the minefield.
- Use a detector or thermal goggles only as optional support.
- If crawling, remain prone until Snake is safely beyond the mines.
Trigger Sniper Wolf's ambush
When Snake reaches Meryl near the Underground Passage, Sniper Wolf fires from concealment. Meryl is wounded and left in the open as bait. Allow the scene to play out rather than trying to force your way forward immediately. The ambush is a required story event, not a normal enemy encounter that can be solved by searching the surrounding snow for Wolf's position.
Once control returns, do not repeatedly run toward Meryl. Sniper Wolf's long-range position makes that approach unsafe, and the ordinary weapons currently available are not the intended solution for this encounter. The game is deliberately using Meryl's injury to force Snake away from the passage and into a weapon-retrieval objective.
The important progression change is that rescuing Meryl now requires a sniper rifle. Snake cannot simply continue through the Underground Passage or win the encounter by trading fire with standard weapons at close range.
- Reach Meryl at the Underground Passage approach.
- Let the ambush and wounded-Meryl scene finish.
- Do not attempt repeated rushes toward Meryl.
- Recognize that the next objective is obtaining a sniper rifle.
Retreat when the Codec calls finish
After the ambush, answer the Codec calls and listen until the Colonel and Naomi explain the situation. Their instructions establish the mandatory route reversal: Snake must withdraw from Meryl's position and locate a sniper rifle before he can save her. This is not optional exploration and it is not a sign that the game has failed to load the next objective.
Turn away from the Underground Passage and begin the retreat instead of waiting beside Meryl. Do not keep testing the area with grenades, automatic weapons, or blind shots. Those actions waste health and ammunition while leaving the actual objective unchanged.
At this point, the chapter's goal is complete when the calls have finished and Snake has committed to leaving the ambush area. The weapon search and the return for the proper duel belong after this route reversal; there is no need to describe or perform them before ending this section.
- Finish the post-ambush Codec calls.
- Understand that a sniper rifle is required for the rescue.
- Turn away from Meryl and leave the ambush area.
- Do not attempt to brute-force Sniper Wolf with ordinary weapons.
- End the section once the mandatory retreat has begun.
Before you move on
- Snake has left the Psycho Mantis area with Meryl.
- Snake and Meryl have crossed the wolf cave.
- Snake has followed Meryl through the Claymore minefield to the Underground Passage approach.
- Sniper Wolf has shot Meryl and the ambush scene has finished.
- The Colonel and Naomi's Codec calls have directed Snake to obtain a sniper rifle.
- Snake has turned away from the ambush area and begun the mandatory retreat.
References for this chapter
- Metal Gear Solid Release Information for PlayStation ↗
- Metal Gear Solid - Walkthrough - PlayStation - By AstroBlue ↗
- Metal Gear Solid Walkthrough/Nuclear Warhead Storage Building ↗
- Metal Gear Solid - Walkthrough - PlayStation - By RHarris - GameFAQs ↗
- Metal Gear Solid - Guide and Walkthrough - PlayStation - By Crazyreyn - GameFAQs ↗
PSG1 Retrieval and the First Sniper Wolf Duel
After Sniper Wolf shoots Meryl in the Underground Passage, Snake must retreat across Shadow Moses to the Tank Hangar Armory, retrieve the PSG1, and return for the first sniper duel. In the original North American PlayStation release, the PSG1 is the intended weapon for this battle. Thermal Goggles help locate Wolf, while Diazepam steadies the rifle's aim. The duel ends with Snake being captured and taken into the prison and torture sequence.
Leave the Underground Passage and begin the retreat
After Meryl is shot, listen to the Codec calls and accept the new objective: return to the Tank Hangar and retrieve a sniper rifle. The first Sniper Wolf encounter cannot be completed with the SOCOM or another ordinary weapon, so do not waste time searching the Underground Passage for an alternate solution.
Leave the passage and retrace the story route through the Cave, the Commander Room, the Nuclear Warhead Storage Building, the Canyon, and the Tank Hangar. This is a long backtrack, but it is required in the original PlayStation campaign. Keep your Level 5 security card available; it opens the Armory room containing the rifle.
- Meryl has been shot and the PSG1 objective is active.
- Snake still has the Level 5 security card.
- A Ration remains available if possible.
- You are moving back toward the Tank Hangar rather than trying to continue deeper into the passage.
Cross the Cave, Commander Room, and Canyon
Move through the Cave without trying to defeat every wolf. Otacon's handkerchief can be equipped to make the wolves treat Snake less aggressively, if you still have it. Without the handkerchief, keep moving, avoid stopping in the center of the cave, and use the exit rather than spending health and ammunition on a prolonged fight.
Continue through the Commander Room and the Nuclear Warhead Storage Building. On the return route, the Canyon again contains Claymore mines and camera coverage. Use the Mine Detector or Thermal Goggles to identify hazards, crawl through mined sections, and use Chaff Grenades only when they materially simplify a camera crossing. If an alert begins, prioritize reaching the next doorway instead of clearing every guard.
- Use Otacon's handkerchief in the wolf area if available.
- Check the Canyon floor for Claymore mines.
- Avoid unnecessary firefights in the Nuclear Warhead Storage Building.
- Preserve health and ammunition for the Armory and boss fight.
Retrieve the PSG1 from Tank Hangar B2F
Enter the Tank Hangar and use the elevator to reach B2F, the Armory level. The PSG1 is in the northwest room, shown as the upper-left room on the Armory layout. Open the room with the Level 5 card.
Infrared beams protect the weapon. Equip Thermal Goggles if available, or watch the beam pattern carefully and crawl beneath the sensors. Some beams are positioned at different heights, so crawling through the room at the correct angle is safer than walking directly toward the rifle. Collect the PSG1 and any nearby ammunition you can reach without creating an unnecessary fight with the surrounding guards.
- Take the Tank Hangar elevator to B2F.
- Open the northwest or upper-left Armory room with the Level 5 card.
- Avoid the infrared beams while crawling.
- Collect the PSG1 and nearby ammunition.
Restock and save before returning
Check Snake's health and PSG1 ammunition before leaving the Tank Hangar. If the return trip has left him badly injured, use a Ration. Diazepam is strongly recommended because it reduces the PSG1's aiming shake, although the duel remains possible without it. A Diazepam pickup is available in the southern portion of Nuclear Warhead Storage Building B1, along the general route back toward the Cave.
Thermal Goggles are useful during the duel because Wolf can become difficult to distinguish against the distant structure. If you are low on rifle ammunition, collect safe nearby supplies before beginning the return. Save through the Codec before re-entering the Underground Passage. Saving after obtaining the PSG1 gives you a reliable retry point without repeating the entire backtrack if the duel goes badly.
- Heal if Snake's health is low.
- Bring Diazepam if available.
- Keep Thermal Goggles ready.
- Save after obtaining the PSG1 and before committing to the duel.
Return to the Underground Passage and take cover
Retrace the route through the Canyon, Nuclear Warhead Storage Building, Commander Room, and Cave until you reach the passage where Meryl was shot. The mines from the first visit are no longer the main concern inside the boss arena, but Wolf's firing lane is dangerous.
As you enter, move toward one side of the passage instead of standing in the middle. Use the side structure as cover. Crawl or step out far enough to search the distant balcony and raised structure. Thermal Goggles can reveal Wolf when she is difficult to see. Equip the PSG1 before exposing Snake for long and use Diazepam before aiming if you brought it.
- Reach the Underground Passage again.
- Move to one side immediately upon entering.
- Locate Wolf from cover before firing.
- Equip the PSG1 and use Diazepam if available.
Defeat Sniper Wolf I
When Wolf is visible, wait for the PSG1 sight to settle and fire deliberate shots. Do not rush toward her position, switch to a close-range weapon, or trade damage in the open. Wolf may move between firing positions, so track the general direction of her movement and return to cover whenever she has a clear angle on Snake.
If Snake is hit, break line of sight and use a Ration before re-engaging if his health becomes unsafe. Thermal Goggles help with detection, but the PSG1 is what damages her. Continue taking controlled shots until her health is depleted. The battle is won through repeated accurate fire rather than a single special tactic.
- Fire only when the sight is reasonably steady.
- Use cover whenever Wolf has the advantage.
- Heal before re-engaging if necessary.
- Do not attempt to cross the passage toward Wolf.
- Deplete Wolf's health with the PSG1.
Allow the capture sequence to begin
After Sniper Wolf is defeated, the game takes over the next story transition. Snake advances into the aftermath, enemy soldiers arrive, and he is knocked out and taken into custody. Do not expect to return to Meryl or continue through the Underground Passage after the duel.
This capture is the intended end of the chapter and leads directly into the prison, torture, and ending-branch section. The next chapter begins with Snake in confinement, so keep the save made before the duel if you want an easy opportunity to retry the battle or prepare for the upcoming torture choice.
- Sniper Wolf's health is depleted.
- The post-battle scene begins automatically.
- Snake is knocked out and captured.
- The story transitions toward the prison and torture sequence.
Before you move on
- Snake has retrieved the PSG1 from the Tank Hangar B2F Armory.
- PSG1 ammunition is available in the inventory.
- Snake has returned to the Underground Passage after the backtrack.
- Sniper Wolf's health has been depleted with the PSG1.
- The capture scene begins and Snake is taken toward the prison and torture sequence.
References for this chapter
Capture After the First Sniper Wolf Duel, Torture, and the Prison Escape Branch
After the first proper Sniper Wolf duel in the snowfield, Snake is captured and taken to Ocelot's torture room. The torture decision determines the eventual companion and post-clear reward. Resisting every required torture session preserves the Meryl ending and awards the Bandana after the campaign is cleared. Submitting with Select leads to the Otacon ending and awards Stealth camouflage after the campaign is cleared. The prison escape and the remaining main route are otherwise shared.
Save before the capture sequence
After defeating Sniper Wolf in the snowfield, follow the passage away from the battlefield. This is the first proper Sniper Wolf duel, not the later rematch after the Communications Tower. The route soon forces Snake into capture, so save through the Codec at the last safe opportunity before entering the passage that leads onward.
Prepare for the torture scene before entering Ocelot's room. During each active shock, press Circle repeatedly to restore Snake's life while the torture gauge drains it. Failure can force a reload from before the sequence, so a fresh save is much more useful than relying on an ordinary combat checkpoint. The torture choice is also the point at which the ending branch becomes important.
- Save after the first Sniper Wolf duel if the game still permits it.
- Keep the PlayStation controller ready for rapid Circle presses.
- Choose the intended ending branch before the torture begins.
Choose the torture result deliberately
To keep the Meryl ending available, resist every torture session. Press Circle repeatedly until Ocelot stops the current shock sequence, even when Snake's life appears dangerously low. Do not press Select to submit. The game may return Snake to the cell and later call him back for another session; continue resisting each required session if you want Meryl to survive the ending sequence.
To choose the Otacon ending, press Select when the game offers the option to submit. This is not an immediate game over. It fixes the later story outcome and the post-clear reward for this save. Resisting a later session does not restore the Meryl route, so reload the pre-capture save if you decide to change branches.
The number and timing of torture returns can vary with the difficulty and with whether you escape at the first opportunity. Do not rely on a fixed shock count. The important rule is the final decision: resist all required sessions for Meryl, or submit for Otacon.
- Resist every required torture session for the Meryl route.
- Press Select to submit for the Otacon route.
- Reload the pre-capture save if you want to change the decision.
Wait for the correct prison escape opportunity
After torture, Snake is placed in the prison cell. Use the Codec when calls become available and let the prison scenes progress. Johnny Sasaki eventually leaves the cell block for the bathroom because of his stomach trouble. That bathroom break is the intended opening for the normal escape.
Otacon arrives during this sequence and gives Snake a ration, a bottle of ketchup, Sniper Wolf's handkerchief, and the Level 6 Key Card. The handkerchief is useful later when crossing the wolf area, while the Level 6 card opens the prison-sector route. The ketchup is the immediate escape tool.
Do not try to force the cell door while Johnny is still present. Wait for Johnny to leave, confirm that Otacon has delivered the supplies, and then choose one of the two normal methods: use the ketchup to fake Snake's death, or hide under the bed and let Johnny open the cell while investigating. If both attempts are missed, continue through the additional torture progression rather than assuming the game is stuck. Gray Fox eventually breaks the cell open as a later fallback.
- Wait for Johnny's bathroom break.
- Allow Otacon to deliver the ration, ketchup, handkerchief, and Level 6 card.
- Use ketchup or the bed after Johnny leaves.
- If both methods fail, continue until Gray Fox provides the later escape.
Escape with ketchup or the bed
The most direct method is ketchup. Equip it after Johnny leaves, lie down inside the cell, and use it so Snake appears to be dead. When Johnny returns and enters to investigate, wait until he is inside, then stand up and subdue him with close-range attacks. Choking him is safer than firing in the confined cell area. Once he is unconscious, leave the cell.
The alternate method is to crawl under the bed while Johnny is away. When he returns and sees that Snake appears to be missing, he opens the cell. Crawl out once the door is open and knock him out before moving into the corridor.
If you fail to use either method, do not abandon the run. The prison sequence can continue through further torture and eventually trigger Gray Fox's intervention. That is a valid fallback, but it takes longer and exposes Snake to additional torture. The intended first attempt is still Johnny's bathroom break followed by ketchup or the bed.
- Use ketchup while lying down, or hide under the bed.
- Let Johnny enter the cell before attacking him.
- Leave only after the guard is incapacitated.
- Use the Gray Fox escape only as a fallback if the normal methods are missed.
Recover the confiscated equipment and remove the bomb
After leaving the cell, use the Level 6 Key Card to move through the prison-sector doors and return toward the torture room. Do not take the elevator immediately. Enter the torture room and open the large red equipment container near the torture apparatus. This restores the weapons and supplies confiscated from Snake.
Immediately check the item inventory after opening the container. Ocelot may have planted a Time Bomb among Snake's recovered equipment. It can appear as an unidentified item until the inventory highlights it. If it is present, select it and discard it at once. Do not carry it toward the Communications Tower or wait for a later prompt; the bomb has a countdown and can end the run if it is left in the inventory too long.
The equipment container and the Level 6 card serve different purposes. The card came from Otacon and opens the prison route. The container restores Snake's weapons and supplies. Confirm both before leaving the sector.
- Return to the torture room after escaping.
- Open the large red confiscated-equipment container.
- Check the item inventory immediately.
- Discard Ocelot's Time Bomb immediately if it is present.
- Verify that Snake's main weapons and supplies are restored.
Leave the prison and rejoin the shared route
After the equipment check, avoid the mounted gun's firing lane near the exit and continue to the elevator. Use the Level 6 card where required, descend, and head toward the Communications Tower. Heal before beginning the tower section if the torture or escape left Snake damaged, and confirm that ammunition for the upcoming action sequence is available.
The campaign now converges regardless of the torture result. Both branches continue through the Communications Tower climb, Hind D battle, second Sniper Wolf encounter, Vulcan Raven, PAL Key sequence, Metal Gear REX, Liquid's duel, and the final jeep escape.
The branch remains fixed for this save. Resisting every torture session leads to the Meryl escape and the Bandana after clearing the game. Submitting leads to the Otacon escape and Stealth camouflage after clearing the game. Neither reward is required to finish the current campaign.
- Use the Level 6 card to leave the prison sector.
- Discard the Time Bomb before using the elevator if it appears.
- Recover health and confirm that equipment is restored.
- Reach the Communications Tower route.
- Remember that the selected companion and reward are fixed for this save.
Before you move on
- The torture branch was selected intentionally: all required torture resisted for Meryl, or Select used to submit for Otacon.
- Snake escaped after Johnny's bathroom break using ketchup, the bed, or the later Gray Fox fallback.
- Snake received the Level 6 Key Card from Otacon during the prison sequence.
- Snake returned to the torture room and opened the red confiscated-equipment container.
- The item inventory was checked and Ocelot's Time Bomb was discarded immediately if present.
- Snake's confiscated weapons and supplies are restored.
- Snake passed the mounted gun, used the elevator, and continued toward the Communications Tower.
- The Level 4 card is understood as the earlier Cyborg Ninja reward, not the prison escape card.
References for this chapter
- Metal Gear Solid - Guide and Walkthrough - PlayStation - By ThE_bLImP ↗
- Metal Gear Solid - Guide and Walkthrough - PlayStation - By Crazyreyn - GameFAQs ↗
- Metal Gear Solid - Guide and Walkthrough, PlayStation, by IRojas ↗
- Metal Gear Solid/Hunting the Wolf — StrategyWiki ↗
- Metal Gear Solid - Guide and Walkthrough, PlayStation, by El Greco ↗
Communications Tower Escape and the Long Climb
After escaping the prison and recovering Snake's confiscated equipment, return to Communications Tower A with the Level 6 Key Card. The tower route begins with a scripted alert and a forced climb while guards pursue Snake up the stairs. Collect the required Rope and nearby Stun Grenades, reach the roof, rappel down after Liquid destroys the route between the towers, defeat or bypass the three soldiers on the exposed walkway, and enter Communications Tower B. This chapter ends after Snake collects the Stinger launcher and nearby Stinger missiles, before the stalled elevator, Otacon's repair sequence, the upper climb, and the Hind D battle.
Return to Communications Tower A
After the prison escape, recover Snake's confiscated weapons and equipment from the torture-room area before leaving the cell-block route. You should now have the Level 6 Key Card. Return through the familiar base corridors and underground passage to the Communications Tower A entrance that was previously inaccessible.
Use the Level 6 Key Card to enter Tower A. Before opening the next interior door, stabilize your inventory. Keep Rations available, equip the FAMAS if you have ammunition, and place Stun Grenades where they can be selected quickly. This section is not a stealth test in the usual sense: the route deliberately creates an alert and then asks you to keep moving under pressure. Save before entering if your route allows it.
- Escape the prison.
- Recover Snake's confiscated equipment.
- Return to the Communications Tower A entrance.
- Use the Level 6 Key Card to enter Tower A.
- Prepare the FAMAS, Rations, and Stun Grenades.
- Save before entering the forced-action section if possible.
Trigger the alert and collect the Rope
Follow the hallway inside Tower A and enter the small room ahead. A security camera detects Snake and the alert begins as part of the intended sequence. Do not restart merely because the alarm sounds.
Two guards enter the room. Use Stun Grenades to clear space, shoot them if necessary, or move around them long enough to reach the exit. Before leaving, collect the Rope and the nearby Stun Grenades. The Rope is mandatory for the rooftop escape; it is not an optional convenience that can be replaced later.
Check the item inventory if you are unsure whether you picked it up. Do not begin the stair climb without confirming that the Rope is present.
- Enter the camera room.
- Allow the scripted alert to begin.
- Deal with or bypass the two guards.
- Collect the Rope.
- Collect the nearby Stun Grenades.
- Confirm the Rope is in the item inventory.
Climb Communications Tower A
Leave the alert room through the other door and begin the long stair climb. Guards pursue Snake from behind, and additional soldiers can occupy landings ahead. Your objective is to reach the top, not to eliminate every enemy in the tower.
Keep the FAMAS ready and fire short bursts only when a guard blocks the next section or is about to overwhelm you. If a landing becomes crowded, throw a Stun Grenade to create room, then continue upward. Do not stop in the middle of a landing to trade damage with the entire pursuing group. Move decisively through each turn and use a Ration during a brief opening if Snake's health falls dangerously low.
You will pass a Level 6 door during the ascent. Ignore it. It is frozen shut during this part of the operation and is not required for the route. Continue up the stairs, follow the upper catwalk, and climb the ladder at the top. Exit onto the roof of Communications Tower A.
- Keep moving up the stairwell.
- Use the FAMAS against enemies blocking progress.
- Use Stun Grenades to break up crowded landings.
- Ignore the frozen Level 6 door during the climb.
- Reach the upper catwalk.
- Climb the ladder and exit onto the roof.
Use the Rope after Liquid destroys the route
On the roof, move toward the northern side and trigger the scene with Liquid in the Hind D. Liquid destroys the connection between the towers. This is not yet the Hind D boss battle, and Snake cannot properly fight the helicopter with the weapons currently available.
When control returns, approach the northern rooftop railing and equip the Rope from the item menu. Use it at the railing to begin rappelling down the outside of Tower A. Follow the on-screen instructions for the descent. Move Snake between the tower supports to avoid the steam vents and incoming fire; taking a hit is possible, but do not linger in the exposed areas.
At the lower landing, collect the nearby Ration if you need it. The frozen Level 6 door and the C4 in this lower area are optional supplies and are not needed to complete the tower route. Continue toward the long exposed passage leading to the next tower.
- Trigger Liquid's rooftop attack.
- Move to the northern rooftop railing.
- Equip and use the Rope.
- Adjust Snake's position during the rappel.
- Reach the lower landing alive.
- Collect the nearby Ration if needed.
- Treat the lower frozen-door and C4 area as optional.
Cross the exposed walkway
Three armed Genome Soldiers cover the walkway between the towers. Equip the PSG1 and use the railing or other available cover to reduce the amount of Snake exposed at once. Pick off the soldiers one at a time rather than stepping into the open and exchanging damage with all three.
If you are low on PSG1 ammunition, the Nikita can be used from a protected position, but preserve missiles when possible. The important point is to attack from cover and avoid standing still in the center of the walkway. If a soldier retreats or briefly leaves view, hold your position and reacquire him rather than rushing forward into another firing lane.
Once the route is clear enough, cross the walkway without stopping in the middle. Liquid's Hind D may fire along the approach, but this appearance is still a transition hazard rather than the boss encounter. Keep moving toward the Tower B entrance and wait until you are behind cover before using a Ration.
- Identify the three Genome Soldiers.
- Use the PSG1 from cover when possible.
- Eliminate or bypass the soldiers without trading damage in the open.
- Cross the walkway decisively.
- Enter the Communications Tower B doorway.
- Recover health only after reaching cover.
Enter Tower B and collect the Stinger
Enter Communications Tower B through the door at the end of the walkway. In the room immediately ahead, collect the Stinger missile launcher and the nearby Stinger missiles. Confirm that both the launcher and ammunition appear in the inventory before continuing.
The Stinger is required for the Hind D battle, but do not begin that fight in this chapter. After collecting the weapon, you may use the safer room to restore health with a Ration if necessary. Avoid spending Stinger ammunition on unrelated targets.
Stop here. Do not investigate the stalled elevator, descend the damaged stair route, trigger Otacon's repair sequence, climb the upper Tower B stairwell, pass the gun cameras, or go to the roof. Those actions belong to the next chapter and begin from the state established here.
- Enter Communications Tower B.
- Collect the Stinger launcher.
- Collect the nearby Stinger missiles.
- Confirm the launcher and ammunition in the inventory.
- Restore health if necessary.
- Stop before the elevator-repair and upper-stair sequence.
Before you move on
- Snake has escaped the prison and recovered his confiscated equipment.
- Snake has returned to Communications Tower A and used the Level 6 Key Card at the entrance.
- The scripted alert has triggered in the Tower A ground-floor room.
- The Rope and nearby Stun Grenades have been collected.
- Snake has climbed Communications Tower A and reached the roof.
- Liquid's Hind D attack has destroyed the connection between the towers.
- Snake has used the Rope to rappel to the lower exterior route.
- Snake has crossed or cleared the exposed walkway guarded by the three Genome Soldiers.
References for this chapter
- Metal Gear Solid - Guide and Walkthrough - PlayStation - By DHernandez - GameFAQs ↗
- Metal Gear Solid - Guide and Walkthrough - PlayStation - By Bilboboy - GameFAQs ↗
- Metal Gear Solid - Guide and Walkthrough, PlayStation, by IRojas ↗
- Metal Gear Solid - Walkthrough - PlayStation - By RHarris - GameFAQs ↗
- Metal Gear Solid Walkthrough - PDF guide ↗
Hind D, the Exterior Descent, and the Snowfield Return
Starting inside Communications Tower B after collecting the Stinger, trigger Otacon's elevator repair, climb through the gun-camera stairwell, defeat Liquid's Hind D on the roof, descend through the repaired elevator, defeat the four stealth-camouflaged soldiers, and leave through the Level 6 exit toward the Snowfield. The Rope rappel, Communications Tower A route, walkway crossing, C4 door, and Stinger pickup belong to the preceding chapter.
Trigger Otacon's repair and climb Communications Tower B
This chapter begins inside Communications Tower B with the Stinger launcher and Stinger missiles already in Snake's inventory. From the entrance, go to the elevator area and take the stairs downward. Continue until the collapsed section stops you. The broken staircase is intentional; there is no jump, alternate stairwell, or hidden route that lets Snake continue downward.
After reaching the dead end, turn around and return toward the elevator. Otacon's repair sequence triggers as Snake comes back through this area. Wait for the conversation to finish and do not try to force the elevator before the scene has completed. Once Otacon has restored it, the route to the roof is the staircase to the right of the elevator.
Climb upward through the tower. Gun cameras are positioned at intervals on the stairwell, so equip Chaff Grenades before entering the camera sections. Throw one when a camera group blocks the stairs, then keep moving while the interference lasts. If the chaff timer is running down before you reach the next group, throw another rather than stopping in a firing lane. The objective is to reach the top, not to destroy every camera.
At the upper level, collect nearby Stinger missiles, Rations, and other supplies if you need them. Do not make a long detour for optional ammunition if your health and missiles are already comfortable. Climb the ladder on the upper side of the room and go through the roof door. The encounter with Liquid and the Hind D begins outside. Keep the Stinger equipped when control returns.
- Snake has reached the collapsed staircase.
- Otacon's elevator-repair sequence has triggered and finished.
- Snake is using Chaff Grenades to cross the camera-covered stairwell.
- Snake has reached the upper room and climbed the ladder to the roof.
- The Stinger and sufficient missiles are ready for the Hind D battle.
Defeat Liquid's Hind D from cover
Equip the Body Armor if you have it. On the roof, stay near the northern or entrance-side cover, such as the boxes and central roof structures. These objects protect Snake from the Hind's machine-gun passes, but they do not make him invulnerable to missiles. Keep the radar visible and listen for the helicopter's attack rhythm instead of running continuously around the roof.
When the Hind rises into a visible position, equip or aim the Stinger and wait for a lock. Step out only far enough to obtain a clear shot, fire one missile, and immediately retreat behind cover. On the original PlayStation version, this short exposure pattern is safer than remaining in the open while trying to line up several shots. Do not waste missiles when the Hind is hidden below the roofline or cannot be locked reliably.
After taking damage, the Hind changes position and may disappear below the roof. Wait for it to rise again, then reacquire the lock and fire. A red radar marker alone is not a reason to shoot; save ammunition for a visible, lockable target. The helicopter also launches missiles at rooftop positions. If a missile is aimed at the platform or cover where Snake is standing, move away before the impact and return to a protected position afterward.
Continue using single Stinger shots during the Hind's visible attack windows. Do not switch to the FAMAS, grenades, or C4 as your primary attack; those weapons are not the intended solution for this fight. When the Hind is destroyed, the battle ends in a cutscene. Afterward, Otacon contacts Snake and confirms that the Communications Tower B elevator is working again. Preserve any remaining Stinger ammunition rather than firing at the wreckage.
- The Body Armor is equipped if available.
- Snake fires only when the Hind can be locked and then retreats behind cover.
- Snake waits through the Hind's low, hidden movement instead of wasting missiles.
- Snake moves away when Liquid targets the roof with missiles.
- The Hind D has been destroyed.
Take the repaired elevator and defeat the stealth-camouflaged soldiers
Re-enter Communications Tower B after the Hind battle. Return through the upper stairwell to the elevator. The gun cameras are still active, so use Chaff Grenades to cross their firing lanes. Reaching the elevator matters more than clearing the tower, and an alert is recoverable as long as Snake keeps moving toward the lift.
Before activating the elevator, equip the FAMAS. Thermal Goggles are useful but not mandatory; they reveal the attackers more clearly, while movement, muzzle flashes, and the radar can also help you track them. Use the elevator controls and select Level 1. During the descent, Otacon warns Snake that four soldiers have taken his stealth-camouflage prototypes.
When the doors open, the four camouflaged soldiers attack inside the elevator. Keep moving around the car so Snake is not trapped against a wall. Fire controlled FAMAS bursts at each attacker and continue shooting until the soldier is clearly defeated. A knocked-down soldier may recover, so do not assume the encounter is over after one fall. Thermal Goggles make the targets easier to follow, but they are not required for progression.
After all four soldiers are defeated, search the elevator and nearby lower-floor area only as much as necessary for health or ammunition. The required route continues through the southeast exit. Do not return upstairs or wait for another boss encounter; the elevator ambush is the final mandatory fight inside Tower B.
- The repaired elevator has been reached after the Hind battle.
- Snake has equipped the FAMAS before opening the elevator.
- Snake has selected Level 1.
- All four stealth-camouflaged soldiers have been defeated.
- Snake has left the elevator through the southeast route.
Leave the tower and enter the Snowfield
From the lower Communications Tower B area, take the southeast exit and continue through the corridor. Gun cameras cover parts of this route. Throw a Chaff Grenade before crossing a camera's firing lane, or move through its blind spot without stopping. If an alert begins, keep advancing toward the outside door instead of trying to clear every camera and pursuing guard.
Use the Level 6 security card at the exterior door. This is the correct departure from Tower B; the Level 6 door that was encountered during the climb is not the route to use on the way up, but it is the exit after the elevator ambush. Once the door opens, Snake enters the Snowfield north of the communications towers.
Move forward into the Snowfield to trigger the scene that begins the second Sniper Wolf encounter. The next chapter covers that duel, so this chapter should end once the scene has begun. Have the PSG1 available and confirm that PSG1 ammunition remains. Diazepam can help steady the aim if you still have it, but the rifle and ammunition are the essential preparation.
If health or ammunition is low, take only nearby supplies on the route and avoid unnecessary fights. Do not go back toward Communications Tower A: the Rope descent, the damaged walkway crossing, the C4 door, the Stinger pickup, and the approach into Tower B have already been completed. The late-game sequence now begins in the Snowfield, and conserving health, PSG1 rounds, and heavy-weapon ammunition is more valuable than searching the towers.
- Snake has left the elevator area through the southeast exit.
- The remaining gun cameras have been bypassed with Chaff Grenades or careful movement.
- Snake has used the Level 6 card to leave Communications Tower B.
- Snake has entered the Snowfield and triggered the second Sniper Wolf scene.
- The PSG1 and PSG1 ammunition are available for the next chapter.
Before you move on
- Snake has triggered Otacon's repair sequence after reaching the collapsed staircase in Communications Tower B.
- Snake has climbed past the gun cameras and reached the Communications Tower B roof.
- Liquid's Hind D has been destroyed with the Stinger.
- Snake has taken the repaired elevator to Level 1.
- Snake has defeated all four stealth-camouflaged soldiers in the elevator.
- Snake has exited through the southeast route and used the Level 6 door to enter the Snowfield.
- Snake has triggered the second Sniper Wolf sequence with the PSG1 available.
References for this chapter
- Metal Gear Solid - Guide and Walkthrough, PlayStation, by IRojas ↗
- Metal Gear Solid - Guide and Walkthrough, PlayStation, by El Greco ↗
- Metal Gear Solid Walkthrough: Communications Towers ↗
- Metal Gear Solid - Guide and Walkthrough - PlayStation - By Crazyreyn - GameFAQs ↗
- Metal Gear Solid - Guide and Walkthrough - PlayStation - By DHernandez - GameFAQs ↗
- Metal Gear Solid Walkthrough - PDF guide ↗
Snowfield Advance and the Second Sniper Wolf Battle
Begin at the Snowfield after the Communications Tower sequence. Defeat Sniper Wolf in the original PlayStation's second long-range encounter, finish the required aftermath, collect useful supplies without getting trapped by mines or gun cameras, and leave through the upper-left route to trigger the Disc 2 transition and enter the Blast Furnace.
Enter the Snowfield and trigger the rematch
When Snake reaches the Snowfield, move forward toward the center of the area. Do not turn around toward the Communications Towers and do not search for another route first. The second Sniper Wolf encounter is triggered by advancing into the field. A Ration and PSG1 ammunition are available near the entry side, so collect them before going farther if your health or rifle supply is poor.
After Snake is shot at, the Codec conversation with Otacon identifies Sniper Wolf as the attacker. Wolf then contacts Snake and the battle begins. This is the final Sniper Wolf fight in the original North American PlayStation campaign, and the Snowfield itself is the required arena. Save before entering this section if you still have an earlier opportunity, because losing sends you back through the preceding action sequence.
- Enter the Snowfield from the Communications Tower route.
- Collect the nearby Ration or PSG1 ammunition if needed.
- Walk toward the center until the Wolf Codec sequence begins.
- Do not retreat to the tower after the fight has been triggered.
Set up behind cover
For the most reliable original-version approach, equip the PSG1 and move to the protected side of the Snowfield. A tree, snowbank, or the recessed area near the edge of the field can block much of Wolf's firing angle while you wait for her to appear. The exact camera view changes with Snake's position, so use cover to break line of sight rather than trying to memorize one fixed aiming location.
Use Diazepam or Pentazemin before sustained aiming if you have either item. These medicines make the rifle easier to control, but they are support options rather than requirements. The PSG1 is handled while Snake is prone, so settle into cover before aiming. If Wolf is hidden behind the trees or the central rise, lower the rifle and wait. Firing blindly wastes ammunition and can leave Snake exposed when Wolf relocates.
The second duel is not identical to the first. Wolf has more trees and uneven terrain to use as hiding places, while Snake can repeatedly reset the fight from protected positions. Do not chase her across the open snow. Let her expose herself, take the shot, and return to cover.
- Equip the PSG1 before committing to the duel.
- Use Diazepam or Pentazemin if available.
- Choose cover before entering the scope view.
- Wait for Wolf to become visible instead of firing into the trees.
Win the second Sniper Wolf battle
When Wolf's upper body is visible, aim carefully and fire one deliberate shot. After firing, lower the PSG1 and return behind cover while she relocates or lines up her own shot. If Snake is hit, the impact can disrupt his aim; reset the rifle and use a Ration before health becomes dangerous rather than trying to win while wounded.
Continue this pattern until Wolf's health is depleted: expose only enough of Snake to aim, fire when the target is unobstructed, then withdraw. The fight rewards patience more than speed. You do not need to follow Wolf's movement into the open, and you should not trade damage simply to force a faster finish.
The original PlayStation battle also permits alternatives from protected positions. The Nikita can be guided around the terrain toward Wolf's hiding place, and the Stinger can be used if you deliberately choose to spend that ammunition. These options are not required. The PSG1 is the clearest first-completion method because it preserves the intended long-range rhythm and avoids consuming late-game missile ammunition unnecessarily.
- Fire only when Wolf is visible and unobstructed.
- Break line of sight after every shot or return shot.
- Heal before Snake's health becomes critical.
- Continue until the boss health bar is empty and the defeat scene starts.
Complete the required aftermath
After Wolf falls, walk forward to her body and allow the full scene with Snake and Otacon to play. The encounter is not complete merely because the health bar disappears. Wolf's final conversation and Otacon's reaction are mandatory story progression, and control does not immediately return to a normal free-roaming objective.
Once the scene ends, you can move around the Snowfield and inspect the storage rooms around its outer edge. Some rooms contain Rations, PSG1 ammunition, FAMAS ammunition, SOCOM ammunition, grenades, Chaff Grenades, or Diazepam. Treat these as optional support pickups rather than a checklist. Several rooms contain mines or gun cameras, so use the Mine Detector where appropriate and throw a Chaff Grenade before crossing camera-covered entrances.
Prioritize health, PSG1 ammunition, and Chaff Grenades. Do not spend time clearing every guard or opening every room if your supplies are already adequate. The next section begins immediately after the Snowfield, and the industrial route is more demanding than the duel if Snake leaves without enough health or ammunition.
- Approach Wolf's body after the fight.
- Let the complete Wolf and Otacon scene finish.
- Restock Rations and ammunition only as needed.
- Use the Mine Detector and Chaff Grenades around trapped storage rooms.
Leave through the industrial exit and change discs
When you are ready to continue, go to the upper-left room on the Snowfield's perimeter. This is the route into the next facility, not one of the optional storage rooms on the east or west sides. A gun camera guards the passage, so throw a Chaff Grenade before moving through if you have one. Proceed across the room and descend the stairs at the far side.
The stairs lead into the Blast Furnace section. At this transition, the original North American PlayStation release prompts you to replace Disc 1 with Disc 2. Follow the on-screen instruction and continue with Disc 2. If the prompt does not appear, Snake has not yet reached the correct upper-left passage; return to the Snowfield and check that you used the room leading down rather than an outer storage room.
Once Disc 2 begins, the game has moved beyond the Snowfield chapter. The next objective is the Blast Furnace route, where moving machinery, heat hazards, guards, and a cargo-elevator sequence lead toward Vulcan Raven. Preserve whatever PSG1 ammunition, Rations, Chaff Grenades, and general ammunition remain, because the late-game encounters now arrive with little downtime.
- Finish any necessary restocking before leaving the Snowfield.
- Go to the upper-left perimeter room.
- Disable the gun cameras with Chaff if necessary.
- Cross the room and descend the stairs.
- Change to Disc 2 when the game prompts you.
Before you move on
- The second and final Sniper Wolf boss health bar is depleted.
- Snake has approached Wolf's body and the complete post-battle scene with Otacon has played.
- Snake has restocked essential health or ammunition where necessary.
- Snake has entered the upper-left Snowfield room, crossed the camera passage, and descended the stairs.
- The game has prompted for Disc 2 or has loaded the Blast Furnace section after the disc change.
References for this chapter
- Metal Gear Solid - Walkthrough - PlayStation - By AstroBlue ↗
- Metal Gear Solid - Guide and Walkthrough - PlayStation - By DHernandez - GameFAQs ↗
- Metal Gear Solid - Guide and Walkthrough - PlayStation - By Nemesis - GameFAQs ↗
- Metal Gear Solid/Hunting the Wolf — StrategyWiki ↗
- Metal Gear Solid Walkthrough - PDF guide ↗
Blast Furnace Route, Cargo Zones, and Vulcan Raven
Cross the Blast Furnace without falling into the machinery, survive both stages of the cargo-elevator descent, then defeat Vulcan Raven in the warehouse by keeping the crate rows between Snake and the minigun. The fight is a cover-and-positioning encounter, not a head-on exchange.
Cross the Blast Furnace
Enter the Blast Furnace and follow the metal walkway along the western side of the room. The route is mostly linear, but the moving machinery can knock Snake from the walkway into the furnace. Watch the moving section before committing to each crossing. If it is approaching the path, wait in a safe position or crouch as it passes rather than trying to force your way through. Touching the moving hazard can cause an immediate fall and game over, so patience matters more here than speed.
Continue toward the stairs and the cargo-elevator control area. The room contains ammunition and other supplies, but do not turn this section into a full search. Pick up a ration or ammunition if it is directly on your route, especially if Snake is already low on health. Your immediate objective is the cargo elevator that carries him down toward the underground warehouse. Save through the Codec before beginning the descent if you want a clean retry point.
- Follow the western metal walkway through the furnace.
- Wait for the moving machinery instead of crossing blindly.
- Reach the first cargo-elevator control panel with enough health to survive the descent.
Survive the first cargo elevator
Use the control panel to start the first cargo elevator. Guards enter during the descent and must be handled inside the confined lift. The FAMAS is the most practical choice for quickly stopping them, although conserving ammunition is still useful. Keep Snake near a position where he can see the attackers before they surround him. If a guard is close to the edge, a throw can remove the immediate threat, but do not risk stepping into the lift's danger zone while attempting it.
The elevator stops at a relay platform before reaching the warehouse level. Leave the lift and move toward the second cargo elevator. This platform contains a gun camera and Claymore mines. Use the Mine Detector if you have it, or move around the visible mine locations instead of sprinting across the center. A Chaff Grenade can help with the gun camera, but it is not necessary if you can cross without entering its firing line. Do not enter the second elevator until the platform is safe enough for Snake to reach the control panel.
- Defeat or evade the guards during the first elevator descent.
- At the relay platform, account for both the gun camera and Claymore mines.
- Reach and activate the second cargo elevator.
Reach the warehouse level
Ride the second elevator down to the cold storage level. Ravens circle the lift during the descent, signaling the encounter ahead, but they are not the boss itself. When the elevator reaches the bottom, step out and collect only the nearby supplies that improve your chances of surviving the next fight. Rations, missile ammunition, and explosives can be valuable; avoid spending time searching distant corners while your health and ammunition are already adequate.
Move through the crate-filled approach area and use the Level 6 door leading to the warehouse. The route is still part of the main story path, so if the door does not open, check that the correct card is equipped rather than wandering for another entrance. The large door triggers Vulcan Raven's scene. Let the dialogue and camera sequence finish before moving, then prepare for the boss encounter in the warehouse.
- Leave the second elevator at the underground storage level.
- Use the Level 6 door into the warehouse approach.
- Enter the warehouse only after confirming that your preferred boss weapon is equipped.
Set up the Vulcan Raven fight
The warehouse is arranged around rows of large crates. Vulcan Raven carries a minigun that is extremely dangerous in the open, and his broad view makes direct approaches unreliable. Do not stand in a central lane and trade shots. Your first task is to identify a crate row that can break his line of fire and give Snake a protected corner from which to attack.
The dependable offensive choices in the original PlayStation version are the Stinger, the Nikita, Claymore mines, and C4. The Stinger is useful when Raven is about to emerge from a corner or when Snake can briefly expose himself, fire, and immediately retreat. The Nikita can be guided around the crate rows from cover, but do not remain exposed while watching the missile. Claymores and C4 are useful for punishing the paths between crates. Place them away from Snake's own escape loop, and use the Mine Detector or thermal equipment to avoid stepping on your own traps.
- Keep a crate row between Snake and Raven whenever possible.
- Use Stinger or Nikita missiles for direct attacks from cover.
- Place Claymores or C4 only where Snake will not need to cross during his escape.
Defeat Raven without trading damage
Watch Raven's position on the radar and move around the crate blocks in a wide loop. When he passes a corner with his back turned or begins moving along a predictable lane, attack from the protected side. With the Stinger, fire as he comes into the opening, then immediately retreat behind the crate. With the Nikita, launch from cover and steer the missile around the boxes; if Raven turns toward Snake, abandon the missile and move rather than trying to finish the guidance sequence in the open.
If you are using explosives, lure Raven toward a mined crossing or a C4 charge placed beside a route he is likely to use. Clear the blast area before detonating. Do not place every mine in the same lane, because Snake needs room to circle when Raven changes direction. Raven can turn quickly and may begin checking angles that were safe earlier in the fight. When that happens, change to another crate corner instead of waiting for him to rediscover Snake's position.
Heal only behind solid cover. If the boss catches Snake in an open lane, prioritize reaching the nearest crate over returning fire. The fight becomes much safer once Snake stops trying to damage Raven continuously and instead attacks only after Raven's movement creates a protected opening.
- Use the radar to avoid walking into Raven's forward-facing minigun.
- Attack after Raven passes a corner or exposes himself along a crate lane.
- Relocate after every missile launch or explosive detonation.
- Heal behind a crate, never in an exposed central lane.
Collect the reward and prepare for the PAL-key route
After Raven is defeated, the story sequence awards the Level 7 Key Card and reveals that the person Snake encountered as the DARPA Chief was actually Decoy Octopus. The keycard comes through the scene, so do not search the warehouse expecting a dropped card. Let the full sequence finish before leaving.
Collect nearby rations, missile ammunition, or explosives only if Snake genuinely needs them. The next major objective is the PAL-key sequence, which requires repeated travel through the underground base, the cold warehouse area, and the Blast Furnace. Preserving health and useful heavy-weapon ammunition is more important than emptying every supply location. Save through the Codec after the scene, then leave with the Level 7 card equipped when the next locked door requires it.
- Confirm that the Level 7 Key Card has been awarded.
- Finish Raven's story sequence before moving away from the arena.
- Restore health or ammunition only as needed.
- Save before beginning the PAL-key backtracking route.
Before you move on
- Snake has crossed the Blast Furnace and reached the first cargo elevator.
- The relay platform has been crossed and the second cargo elevator has delivered Snake to the warehouse level.
- The warehouse scene has triggered and Vulcan Raven has been defeated.
- The post-battle sequence has awarded the Level 7 Key Card and revealed the DARPA Chief's identity.
- Snake is ready to begin the PAL-key route with restored health or ammunition where necessary.
References for this chapter
- Metal Gear Solid - Walkthrough - PlayStation - By AstroBlue ↗
- Metal Gear Solid - Guide and Walkthrough - PlayStation - By Crazyreyn - GameFAQs ↗
- Metal Gear Solid - Guide and Walkthrough - PlayStation - By ChandooG ↗
- Metal Gear Solid - Blast Furnace - Underground Warehouse Walkthrough ↗
- Metal Gear Solid - Walkthrough - PlayStation - By RHarris - GameFAQs ↗
Underground Base and the PAL Key Sequence
Reach the Underground Base, recover the PAL Key after Ocelot knocks it away, and use that same card at three terminals in the original PlayStation order: room temperature, cold, then hot. The third input activates Metal Gear REX instead of stopping it, leading directly into the final encounters.
Enter the Underground Base and reach the Command Room
After leaving the Warehouse through the Level 7 door, cross the security route into the Underground Base. Chaff Grenades are valuable here because the approach is covered by gun cameras and electronic defenses. Throw one before crossing a camera-heavy section, then keep moving across the bridge and up the ladders rather than stopping in the open.
Climb onto Metal Gear REX and follow the upper catwalk to the Command Room. A story sequence reveals that the terrorists have already entered the detonation information and that the PAL Key is needed to override it. Snake is then confronted and Ocelot shoots the PAL Key from his hand, sending it down to the lower level.
Leave the Command Room and descend around REX to the first-floor maintenance area. Search the drainage ditch surrounding the machine for the dropped card. The key normally appears in the water, but it can also be swallowed by a rat. If the ditch is empty, look for the moving rat in the drainage area and eliminate it, then search the ditch again until the PAL Key is recovered.
- Reach the Command Room above Metal Gear REX.
- Descend to the first-floor drainage ditch after the PAL Key is shot away.
- Search the ditch and deal with the rat if the card is not lying in the water.
- Recover the PAL Key before attempting any terminal.
Prepare for the three temperature inputs
The PAL Key is one card with three temperature-dependent codes. It does not require three separate cards. The original North American PlayStation sequence is room temperature first, cold second, and hot third.
Use a Codec save before beginning the backtracking if you want a recovery point. Save before inserting the room-temperature card, not after changing its temperature, because the next steps depend on returning promptly from the cold and hot areas. Keep enough health, ammunition, and Chaff Grenades for the repeated security crossings.
The three terminals are in the Command Room. Use them in order from left to right: the left terminal accepts the room-temperature card, the center terminal accepts the cold card, and the right terminal accepts the hot card. Do not insert the cold or hot version first.
- Remember the order: room temperature, cold, hot.
- Save through the Codec before starting the sequence if desired.
- Identify the terminals from left to right before leaving the Command Room.
Use the room-temperature PAL Key
Return to the Command Room with the card in its normal state. Approach the far-left terminal and use the PAL Key. Snake will enter the first PAL code and the terminal will confirm the input. If the terminal does not accept the card, make sure you are using the leftmost computer and that the card has not already been cooled or heated.
After the first code is accepted, leave the Command Room and retrace the route toward the Warehouse. The path through the Underground Base remains dangerous, so use Chaff Grenades on mandatory camera sections and avoid fighting every guard. Your objective is to change the card's temperature, not to clear the entire facility.
- Use the normal-temperature card at the far-left terminal.
- Wait for the confirmation before beginning the cold backtrack.
- Preserve Chaff Grenades for the security routes.
Cool the PAL Key in the Warehouse
Return through the Level 7 security route to the Warehouse, the same large room where Vulcan Raven was defeated. Cross the camera and trap sections carefully. Once inside the Warehouse, equip the PAL Key and remain there until its item image turns blue. The card must visibly change before you leave.
When the card is blue, unequip it and immediately retrace the route to the Underground Base. Do not detour for optional ammunition or exploration. The card can lose its special temperature state during the return, so the safest approach is to move directly through the familiar route and use Chaff Grenades only where the cameras block progress.
Back in the Command Room, use the blue card at the center terminal. The center computer is the second input in the original sequence. Wait for the confirmation before leaving again.
- Reach the Warehouse where Vulcan Raven was defeated.
- Equip the PAL Key and wait until its image turns blue.
- Return directly to the Underground Base.
- Use the blue card at the center terminal.
Heat the PAL Key in the Blast Furnace
After the cold input is accepted, retrace the route back toward the Blast Furnace. The return requires passing through the Warehouse and using the cargo-elevator route that leads to the furnace-side facility. Move through the industrial areas without wasting supplies on optional rooms.
In the Blast Furnace, enter the hot area near the furnace and equip the PAL Key. Remain in the hot section until the card's image turns red. Stay clear of machinery and ledges while waiting. The card is ready only when the red state is visible in the item menu.
Unequip the red card and begin the return immediately. Follow the familiar cargo-elevator and Warehouse route back to the Underground Base. Avoid unnecessary stops because the temperature state can revert during a prolonged trip. Once you reach the Command Room, use the red card at the rightmost terminal.
- Reach the Blast Furnace after the cold terminal is accepted.
- Equip the PAL Key and wait until its image turns red.
- Return directly through the cargo-elevator and Warehouse route.
- Use the red card at the rightmost terminal.
Escape the Command Room and continue to Metal Gear REX
The third terminal does not deactivate REX. Instead, the three inputs complete the launch sequence and reveal that Snake has been deceived. The Command Room becomes filled with gas and the doors lock, so do not wait passively for them to open.
Open the Codec and contact Otacon when the game allows it. Otacon responds and works on the door lock. Keep moving and conserve health while the gas drains Snake's life. When the door opens, leave the Command Room immediately and follow the route back toward REX.
This completes the PAL Key chapter when all three terminals have accepted the same card in the order room temperature, cold, and hot, the deception scene has played, and Otacon has opened the locked room. The next objective is the Metal Gear REX battle, so collect nearby essential supplies and make sure the Stinger, Stinger missiles, rations, and health are ready before advancing.
- The left, center, and right terminals have accepted the PAL Key in that order.
- The REX launch and deception scenes have played.
- Contact Otacon during the gas-room lock-in.
- Exit the Command Room and proceed toward the Metal Gear REX battle.
Before you move on
- Snake has entered the Underground Base Command Room.
- The PAL Key has been recovered from the drainage ditch or from the rat carrying it.
- The room-temperature PAL Key has been accepted by the left terminal.
- The cold PAL Key has been accepted by the center terminal after cooling in the Warehouse.
- The hot PAL Key has been accepted by the right terminal after heating in the Blast Furnace.
- The deception and Metal Gear REX launch sequence have played.
- Otacon has opened the locked, gas-filled Command Room and Snake has exited toward the REX encounter.
References for this chapter
Metal Gear REX
After the PAL-key sequence activates Metal Gear REX, leave the control room and enter the hangar for the final machine battle. The encounter has two phases. First, destroy the radome on REX's left shoulder with the Stinger. After the radome is destroyed, Liquid becomes exposed in the cockpit and must be hit with further Stinger missiles. Movement, target discipline, and choosing the correct defensive item matter more than firing continuously.
Leave the control room and prepare
When the PAL sequence finishes and the launch begins, leave the control booth and proceed into the hangar. The following cutscene reveals Liquid's deception and leads directly into the REX battle. Equip the Stinger before moving into position so you do not lose time changing weapons after REX begins attacking.
Equip Body Armor if it is still in your inventory. It reduces the damage from mistakes, but it does not make REX's stomp, laser, machine-gun fire, or missiles safe to absorb. Keep at least one ration ready if possible. The arena also contains useful supplies around its edges, so do not assume a failed attempt is unwinnable simply because you entered with low reserves.
REX's armor is not the target. The Stinger must be aimed at a specific vulnerable part, and that target changes during the fight. Keep moving while you look for an opening instead of standing in the center waiting for a lock-on.
- The Stinger is equipped or quickly accessible.
- Body Armor is equipped if available.
- A ration is ready for emergency recovery.
- Snake is moving before REX begins its next attack.
Phase one: destroy the radome
At the start of the first phase, target the circular radome mounted on REX's left shoulder. When Snake is facing REX, this target appears on Snake's right. Do not fire at the legs, torso, cannon, or other armored sections. Those shots waste Stinger ammunition and do not advance the battle.
Chaff Grenades disrupt REX's electronic targeting and are the safest way to create an opening during this phase. Throw a Chaff Grenade, switch to the Stinger, and aim at the radome while the disruption lasts. Fire as soon as you have a safe shot; do not wait indefinitely for a perfect lock if REX is already repositioning. After firing, immediately resume moving.
If REX launches its missiles while Snake is at long range, run toward the machine rather than retreating in a straight line. Closing the distance is the practical way to reduce the missiles' tracking danger. Once you are near the legs, reposition instead of staying directly beneath a foot. REX can stomp, and the impact can severely damage or kill Snake. If REX uses its laser or machine gun, move away from the attack path and circle back only after the attack ends.
Refresh the Chaff effect when it expires and repeat the Stinger attack on the radome. You do not need to spend missiles on any other part of REX.
- Every phase-one Stinger shot is aimed at the radome.
- Chaff Grenades are used to disrupt REX's targeting.
- Snake moves immediately after each shot.
- Snake avoids standing directly under a foot.
Recognize the phase change
After the radome has taken enough damage, it is destroyed during the story sequence. REX's cockpit then opens and Liquid becomes visible. This is the real phase transition: stop targeting the shoulder and retarget the exposed cockpit.
The battle remains active while the transition finishes. Re-establish your position before firing. If Snake's health is low, use a ration before making another approach. Do not rush into the center simply because the cockpit has opened; REX's attacks remain dangerous.
- The radome is visibly destroyed.
- The cockpit is open.
- Liquid is visible in the cockpit.
- The Stinger is aimed at the cockpit rather than the shoulder.
Phase two: hit Liquid in the cockpit
The second phase provides smaller openings. Move toward or underneath REX when it is safe to do so, using the machine's legs and body to break its line of sight. Watch for a stomp before crossing beneath it. If a foot begins descending or the camera signals the stomp, move out immediately and reposition.
When REX pauses, turns, or finishes an attack, equip the Stinger and fire at the exposed cockpit. A complete lock-on is helpful but not mandatory if you have a clear, safe angle. Fire one deliberate missile, then move again. Do not remain stationary to watch the missile travel or attempt to fire several missiles during one unsafe opening.
Stun Grenades are useful in this phase because they can briefly disrupt Liquid and give Snake time to move underneath REX or line up a cockpit shot. Chaff Grenades are primarily the phase-one solution; do not rely on them to blind Liquid once the cockpit is open. The dependable loop is to move under or around REX, avoid the stomp and laser, create an opening with movement or a Stun Grenade, fire at the cockpit, and immediately reposition.
When REX uses missiles, move toward it to reduce their tracking opportunity. When it uses the laser, retreat away from the machine and wait for the beam to finish before approaching again. Keep these responses separate instead of using the same evasive direction for every attack.
- The cockpit is the only target in phase two.
- Snake moves under or around REX only when the stomp is not active.
- Stun Grenades are used when extra time is needed.
- Snake fires one Stinger shot and then resumes moving.
- Snake moves toward REX against missiles and away from the laser.
Recover from a failed attempt
If Snake dies in phase two, simplify the next attempt rather than firing more aggressively. Preserve Chaff Grenades for phase one, spend Stinger ammunition only on the radome, and avoid taking damage while trying to force a second shot. In phase two, let REX turn, pass beneath it only when its current attack allows it, and wait for a clean cockpit opening.
If health, Chaff Grenades, Stun Grenades, or Stinger ammunition are low, check the edges of the hangar for available supplies before restarting. Do not waste missiles on armored sections. The encounter is designed around changing targets and repositioning, not a continuous damage race.
- Missiles are reserved for the radome and cockpit.
- The arena edges have been checked for useful supplies.
- A ration is used before a dangerous approach when necessary.
- The next attempt prioritizes survival over rapid firing.
Confirm the battle is complete
REX is defeated when the cockpit phase has taken enough Stinger damage and the machine collapses. A story sequence follows, but the campaign is not finished. Snake must then fight Liquid in a separate hand-to-hand duel on top of the wrecked REX.
The correct completion check for this chapter is therefore not merely that REX falls. Confirm that the game transitions into the Liquid confrontation. The remaining campaign clear requires winning that timed hand-to-hand fight and completing the escape afterward.
- The radome was destroyed in phase one.
- The exposed cockpit was hit enough times to defeat REX.
- REX collapses.
- The post-battle sequence begins.
- Liquid's separate hand-to-hand fight becomes active.
Before you move on
- The shoulder radome has been destroyed during phase one.
- The exposed cockpit has taken enough Stinger hits to defeat REX.
- REX collapses in the hangar.
- The game transitions to the Liquid hand-to-hand confrontation.
- The player understands that the REX victory is required but is not yet the final campaign clear.
References for this chapter
- Metal Gear Solid - Guide and Walkthrough - PlayStation - By ChandooG ↗
- Metal Gear Solid - Guide and Walkthrough - PlayStation - By IRojas ↗
- Metal Gear Solid - General Speed Guide - PlayStation - By MKim ↗
- Metal Gear Solid - Secrets Guide - PlayStation - By X-Treme ↗
- Metal Gear Solid game script and walkthrough PDF ↗
Liquid's Duel and the Final Jeep Escape
Defeat Liquid in the hand-to-hand fight on top of Metal Gear REX, survive the underground jeep escape, and confirm which ending reward your torture decision has earned.
1. Prepare for the final duel
Destroying Metal Gear REX does not complete the campaign. After the REX destruction sequence, Liquid challenges Snake on top of the wreckage and a timed hand-to-hand fight begins. The outcome of the torture sequence determines whether Snake is trying to save Meryl or Otacon, but the fight itself follows the same basic rules in either branch.
Your weapons are unavailable, so Snake must use punches, kicks, movement, and evasive positioning. Keep to the broader central sections of the wreckage whenever possible. The outer edge is dangerous because Liquid can knock Snake toward the drop, and recovering from a bad position wastes both health and time.
- Enter the duel with as much health as possible.
- Remember that the campaign continues after REX is destroyed.
- Stay near the center and avoid being trapped against the edge.
2. Fight Liquid with short, reliable attacks
The most dependable attack sequence is Snake's three-hit punch, punch, kick combination. Close the distance only when Liquid is within striking range, then use the combination once and reassess. Repeatedly mashing attacks can leave Snake recovering while Liquid is still able to counter.
Liquid retreats across the wreckage after taking damage. Follow him, but do not swing at empty space. When he stops retreating and is ready to engage again, move into range and use another short combination. This creates a simple rhythm: approach, land the combo, evade while he moves, then repeat.
When Liquid rushes forward, stop trying to trade hits. Move sideways or away from his path, let the charge finish, and attack during the recovery. If Snake is knocked down, regain a central position before attempting another combination. A safe reset is more valuable than chasing Liquid toward the edge.
- Use punch, punch, kick when Liquid is in range.
- Do not continue attacking after a missed opening.
- Evade the forward rush and counter after Liquid finishes it.
- Return toward the center after a knockdown.
3. Manage the five-minute limit
The duel has a five-minute limit, so every clear opening matters. However, rushing into attacks usually costs more time than it saves because Liquid can counter Snake or force him toward the edge. Keep the attacks compact and avoid long pursuits across unsafe sections of the wreckage.
If Snake's health becomes low, spend a moment concentrating on evasion rather than forcing another hit. Let Liquid miss, then close the distance for the next reliable combination. The timer creates pressure, but it does not require reckless button mashing.
When Liquid's health is depleted, the fight ends through a cutscene. Do not put the controller down afterward: the garage escape starts after the transition, and Snake has another combat sequence to complete.
- Keep the five-minute limit in view.
- Prioritize a safe attack angle over one risky extra hit.
- Wait for the defeat cutscene before moving on to the escape route.
4. Reach the garage and take the correct jeep
After the duel, follow Meryl or Otacon through the passage toward the garage. Snake has been separated from his normal equipment, so the immediate objective is to reach the vehicle and survive until the escape jeep is ready. Pick up the nearby Ration if needed; another Ration can be found near the garage area, including the space around the vehicle and stairs.
An alarm brings guards into the garage while your companion prepares the vehicle. Do not wait passively in the open. Use the jeep and nearby structure as cover, keep guards from surrounding Snake, and continue moving until your companion gives the signal to board.
The usable jeep is the vehicle on the far-left side of the garage. It has the keys and the mounted machine gun needed for the tunnel escape. Board it as soon as the preparation sequence finishes. This is not a stealth section; survival and getting into the correct vehicle are the priorities.
- Take a nearby Ration if your health is low.
- Protect the garage area while the vehicle is prepared.
- Board the far-left jeep with the mounted machine gun.
5. Break through the tunnel checkpoints
Once Snake is driving, use the mounted machine gun to clear the escape route. The gun can be used in first-person view on the original PlayStation release, which may make it easier to track targets, but the essential task is simply to remove guards and destroy the explosive barrels blocking the route.
At the first obstruction, aim at the barrels beside the gate. Destroying them opens the passage. At the next checkpoint, clear the guards and shoot the barrels blocking the exit. Keep firing until the obstruction is visibly gone; shooting only the guards can leave the jeep trapped while the checkpoint remains closed.
There is another brief guard encounter as the jeep continues. Focus on threats directly in front of the vehicle and do not waste time firing at enemies that have already fallen behind. The mounted gun has ample ammunition for this escape, so controlled sustained fire is preferable to trying to conserve bullets.
- Destroy the barrels at the first gate.
- Clear the guards and barrels at the next checkpoint.
- Keep firing until each blocked passage visibly opens.
- Prioritize enemies directly threatening the jeep.
6. Defeat Liquid's pursuing jeep
After the checkpoint sequence, Liquid returns in a second jeep and pursues Snake through the tunnel. Aim the mounted machine gun toward Liquid's vehicle and fire whenever it comes into view. Use first-person aiming if it helps maintain the reticle on him, but continue monitoring Snake's health rather than staring only at the target.
Liquid's jeep moves across the tunnel and may leave the center of the screen. Adjust your aim early and track the vehicle as it approaches instead of spraying at empty walls. There is no separate hidden target or special weapon requirement for this section: sustained accurate machine-gun fire is the intended solution.
Continue shooting until the chase reaches its scripted collision and the final cutscene begins. Liquid's pursuing jeep is the last combat obstacle, but the campaign is not considered fully cleared until the ending and credits have played.
- Track Liquid's jeep whenever it enters view.
- Fire in sustained, controlled bursts rather than at empty tunnel space.
- Continue until the collision and ending sequence begin.
7. Confirm the branch and preserve the reward
Your torture decision determines the companion in the ending. If you resisted and completed the torture sequence without submitting, Meryl survives and escapes with Snake. If you submitted, Meryl dies and Otacon accompanies Snake instead. Both branches complete the original campaign; the difference is the final companion, scenes, and next-playthrough item.
The Meryl branch awards the Bandana after the ending. Equip it in a subsequent game to obtain unlimited ammunition. The Otacon branch awards Stealth Camouflage after the ending. Equip it in a subsequent game to make Snake invisible to ordinary enemy detection, subject to the item's normal limitations against certain threats and encounters.
Watch through the ending and credits. After the completion results, save the cleared game data when prompted. Keep that completed save if you plan to replay for the opposite branch, because the reward is attached to the cleared game data and is intended for later playthroughs.
- Resisted torture: Meryl survives and the Bandana is awarded.
- Submitted to torture: Otacon accompanies Snake and Stealth Camouflage is awarded.
- Watch the ending and credits completely.
- Save the cleared game data before starting another run.
- Load the cleared save or begin the next playthrough to confirm the reward is available.
Before you move on
- Liquid is defeated in the timed hand-to-hand fight on top of Metal Gear REX.
- Snake reaches the garage and boards the far-left jeep with Meryl or Otacon.
- The tunnel checkpoints are cleared by destroying the blocking barrels and dealing with the guards.
- Liquid's pursuing jeep is defeated and the final escape cutscene begins.
- The ending and credits finish.
- The cleared game data is saved.
- The next-playthrough reward matches the branch: Bandana after the Meryl ending or Stealth Camouflage after the Otacon ending.
References for this chapter
- Metal Gear Solid - Guide and Walkthrough - PlayStation - By DHernandez - GameFAQs ↗
- Metal Gear Solid - Walkthrough - PlayStation - By RHarris - GameFAQs ↗
- Metal Gear Solid Walkthrough/Maintenance Facility - Metal Gear Wiki ↗
- Metal Gear Solid - Guide and Walkthrough - PlayStation - By Bilboboy - GameFAQs ↗
- Metal Gear Solid/Items - StrategyWiki ↗
Finishing up
You are done with the main campaign only after the REX fight, the Liquid hand-to-hand duel, and the jeep escape all end cleanly and the credits roll.
If you finished with Meryl, you resisted every torture round.
If you finished with Otacon, you submitted during torture at least once.
Record which branch you cleared, because the next-play reward depends on it.
Create or keep the clear save after the credits.
That file matters if you want to replay for the opposite ending reward or route through the game with bonus equipment.
If a late-game security door ever made you think you had missed an older card, remember that higher-level cards replace lower ones.
By the end of a clean run, your current card should cover every earlier lock level automatically.
Optional weapons, flavor scenes, and extra item stock are not required for completion.
Do not confuse them with the mandatory progression path listed in the chapters below.
For a fuller second run, use your clear reward to chase the opposite ending branch rather than trying to force both outcomes in one playthrough.
Choose your next gameScreenshots & video
Game imagery for reference. Follow the written chapters above for the route and strategies.
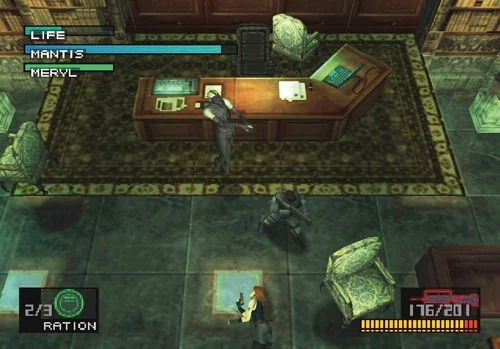
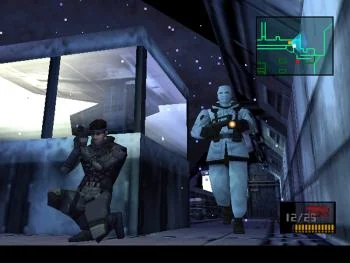
Sources & references
Our original guide draws on the references below. Check the edition at the top of this page before following controls or unlock requirements.
- Metal Gear Solid - Guide and Walkthrough - PlayStation - By Nemesis - GameFAQs ↗
- Metal Gear Solid - Walkthrough - PlayStation - By AstroBlue ↗
- Metal Gear Solid - Guide and Walkthrough - PlayStation - By Crazyreyn - GameFAQs ↗
- Metal Gear Solid Walkthrough/Tank Hangar ↗
- Metal Gear Solid Release Information for PlayStation ↗
- Metal Gear Solid Release Information for PlayStation ↗
- Metal Gear Solid - Guide and Walkthrough - PlayStation - By ChandooG ↗
- Metal Gear Solid - Sony PlayStation Manual ↗
- Metal Gear Solid - Guide and Walkthrough - PlayStation - By RHendrawan ↗
- Metal Gear Solid/Finding Meryl ↗
- Metal Gear Solid Walkthrough/Nuclear Warhead Storage Building ↗
- Metal Gear Solid - General Speed Guide - PlayStation - By MKim ↗
- Metal Gear Solid PSX Cheats and Tips ↗
- Metal Gear Solid - Walkthrough - PlayStation - By RHarris - GameFAQs ↗
- Metal Gear Solid - Guide and Walkthrough - PlayStation - By winnie_the_poop ↗
- Metal Gear Solid Walkthrough - Page 3 of 5 - Dayngls' Guides ↗
- PSG1 (MGS1) ↗
- Metal Gear Solid - Guide and Walkthrough - PlayStation - By ThE_bLImP ↗
- Metal Gear Solid - Guide and Walkthrough, PlayStation, by IRojas ↗
- Metal Gear Solid/Hunting the Wolf — StrategyWiki ↗
- Metal Gear Solid - Guide and Walkthrough, PlayStation, by El Greco ↗
- Metal Gear Solid - Guide and Walkthrough - PlayStation - By DHernandez - GameFAQs ↗
- Metal Gear Solid - Guide and Walkthrough - PlayStation - By Bilboboy - GameFAQs ↗
- Metal Gear Solid Walkthrough - PDF guide ↗
- Metal Gear Solid Walkthrough: Communications Towers ↗
- Metal Gear Solid - Blast Furnace - Underground Warehouse Walkthrough ↗
- Metal Gear Solid - Spoiler-Free Walkthrough - PlayStation - By Nemesis ↗
- Metal Gear Solid - Codec Transcript - PlayStation - By odaiba_memorial ↗
- Metal Gear Solid - Guide and Walkthrough - PlayStation - By IRojas ↗
- Metal Gear Solid - Secrets Guide - PlayStation - By X-Treme ↗
- Metal Gear Solid game script and walkthrough PDF ↗
- Metal Gear Solid Walkthrough/Maintenance Facility - Metal Gear Wiki ↗
- Metal Gear Solid/Items - StrategyWiki ↗
About the game & collecting notes
- Platform
- Sony PlayStation
A full route through the original North American PlayStation release of Metal Gear Solid, from the dock infiltration to the final jeep escape.
Darryl Polo
Darryl Polo loves tinkering with emulation and revisiting retro games. He enjoys exploring how old favorites play on different setups and sharing what he learns along the way. At Joking Joystick, he writes about the games, hardware, and small discoveries that keep the hobby fun.
Our editorial standardsFound a step that needs another look? Help us improve this guide.